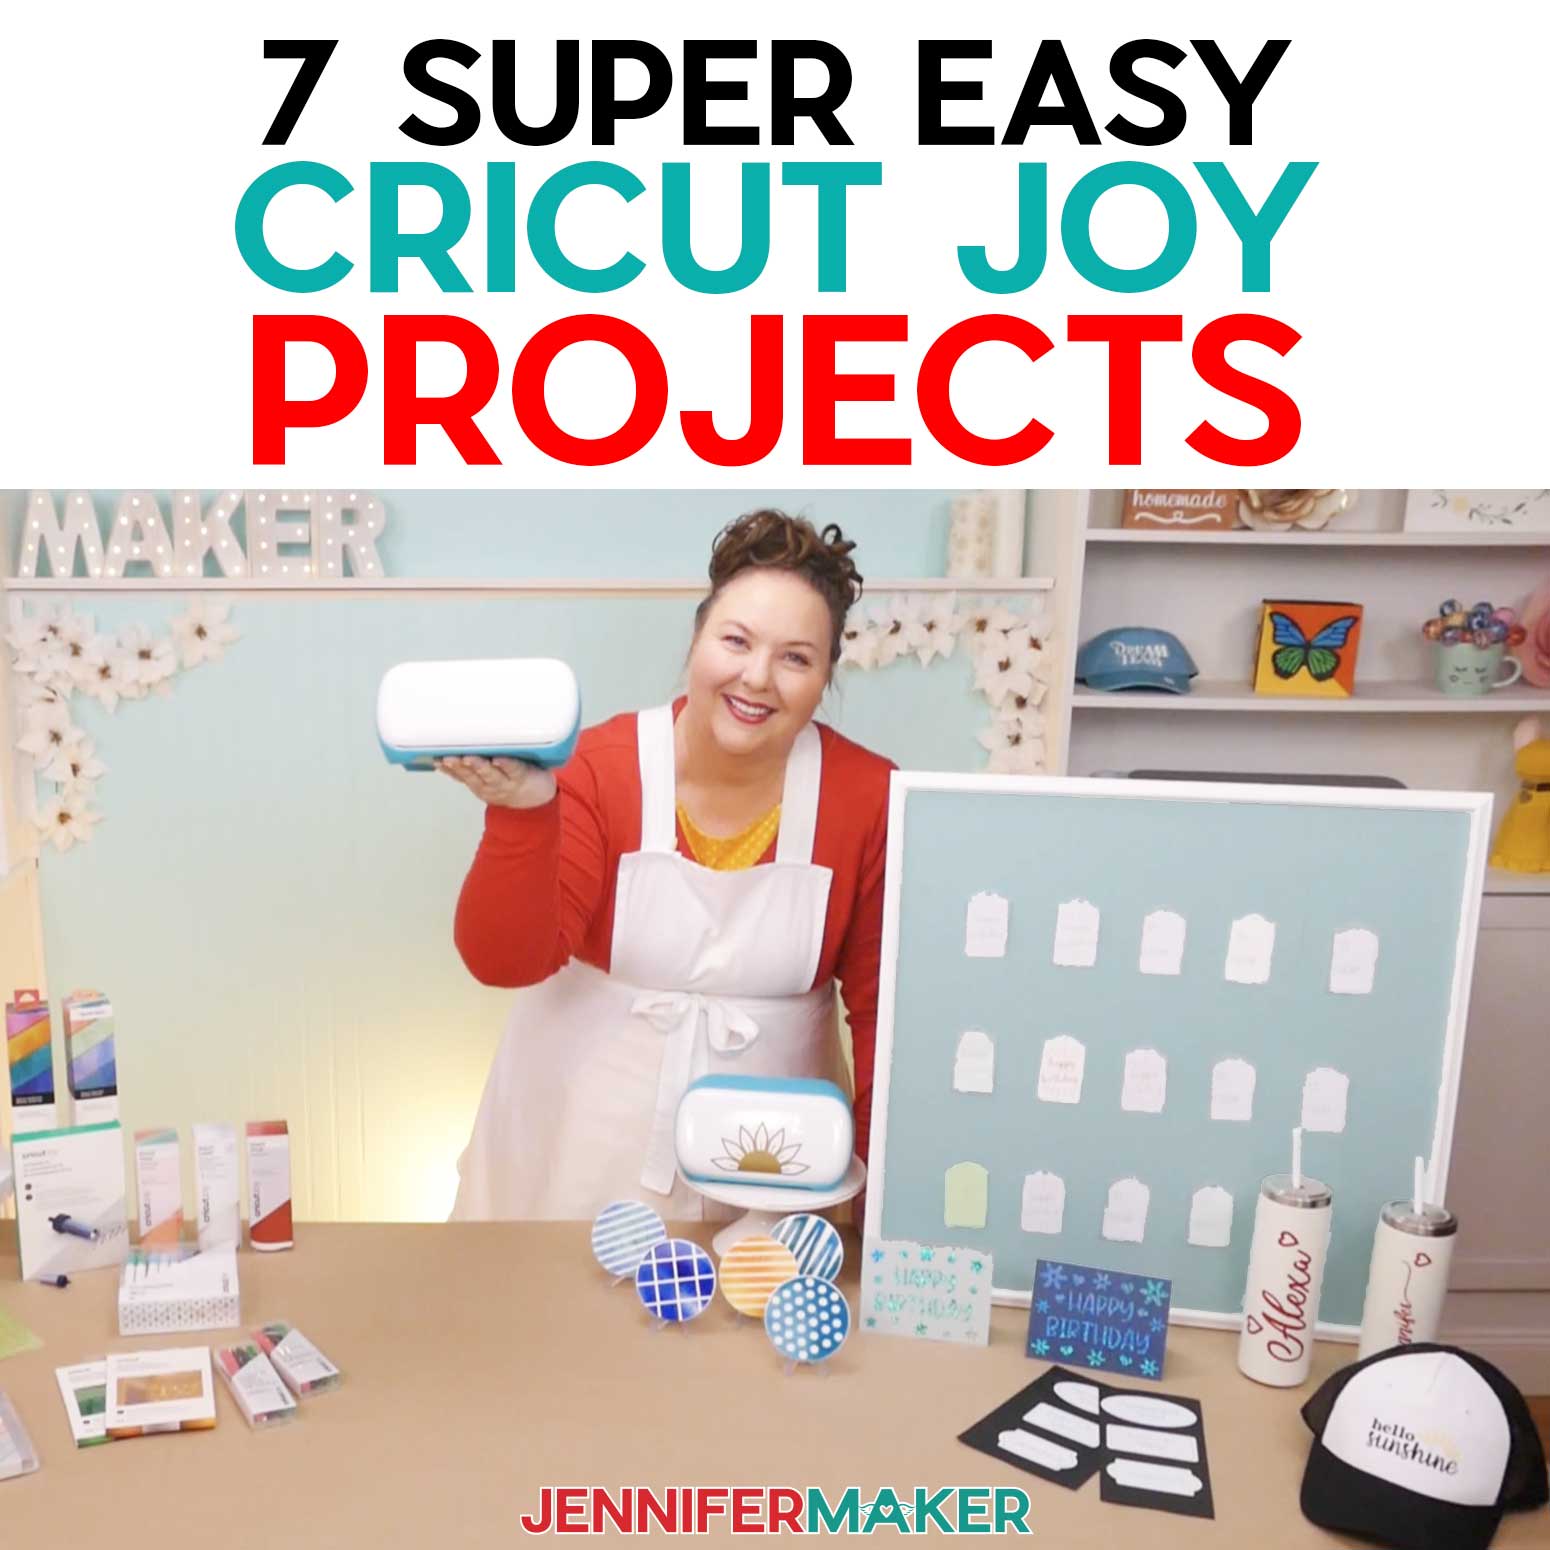

Learn how to make dozens of easy Cricut Joy projects!
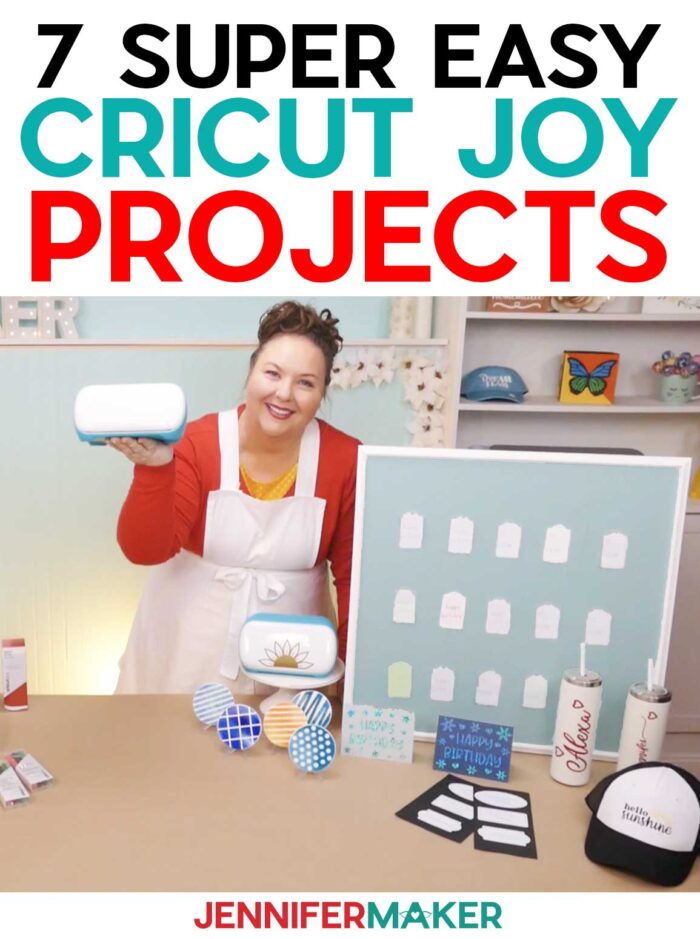
The Cricut Joy is a small but mighty crafting machine! It’s tools and accessories handle plenty of the most common materials and operations I use most often, and I love how portable it is! To showcase all the power in this tiny package, I’ve created several new designs made just for the Joy! This way, you can explore all the fun ways to use your Joy! I’ve also gathered more than a hundred of my favorite Joy projects for easy access in this post.
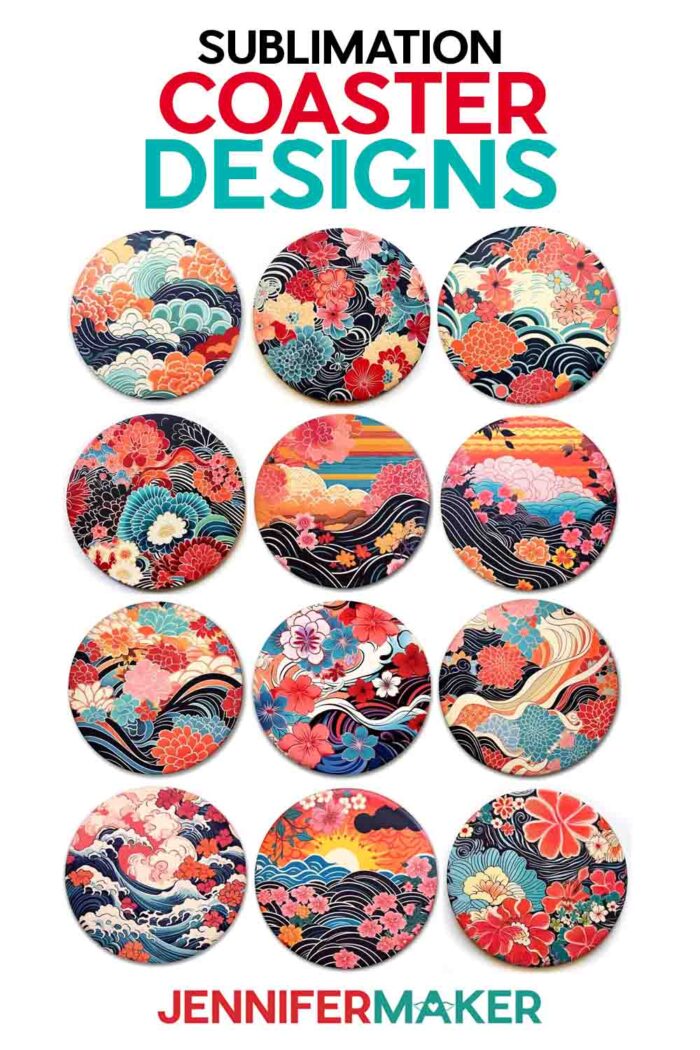
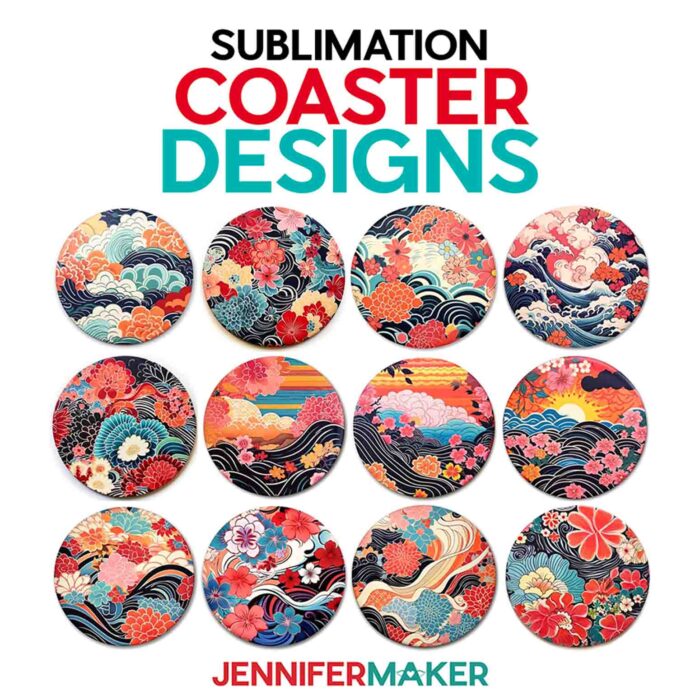
July 2023 Update: I’ve added bonus sublimation coaster designs made with an AI generator tool to the free download! Check them out below!
Watch my video showcasing the new Cricut Joy projects:

Ready to make Cricut Joy projects? You’re going to love them! This post contains some affiliate links for your convenience (which means if you make a purchase after clicking a link I will earn a small commission but it won’t cost you a penny more)! Read my full disclosure policy.
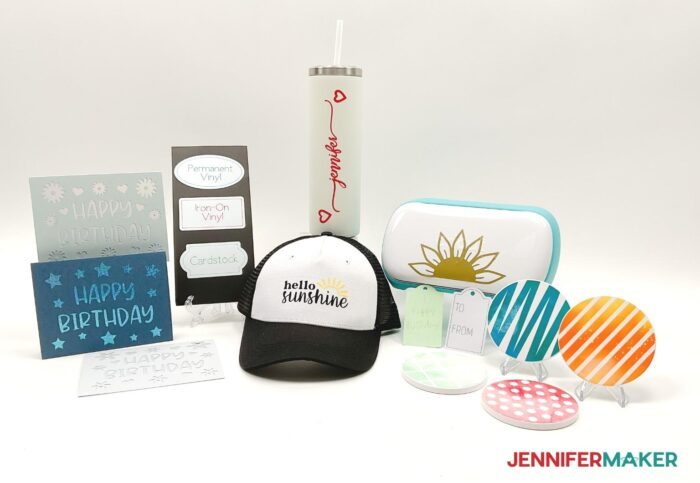
I had so much fun designing these easy projects for the Cricut Joy! I made cards, labels, a hat, a customized tumbler, foiled gift tags, Infusible Ink coasters, and even a design for the machine itself!
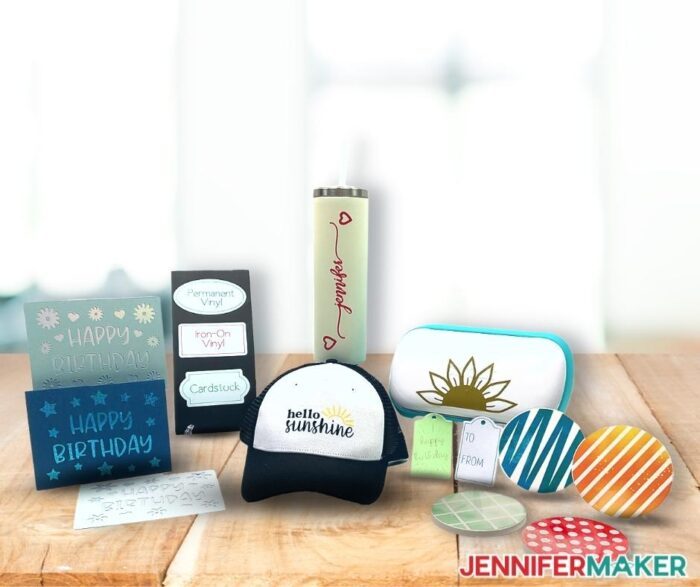
The projects are great introductions if you have a new Cricut Joy, but also share good tips for more experienced crafters. There’s always something new to learn! You can find the written tutorials with images below.
If you have a new machine, these are a great way to try your first project on a Joy. I’ll show you lots of fun items, like Cricut Joy pens, the portable trimmer (Joy’s perfect companion!), greeting cards, and Cricut Joy Smart Vinyl. Some may be new if you’re used to the Cricut Explore Air or another larger machine. I’ll also share a few tips for the Joy in the Cricut Design Space app.
Remember, most of the tools aren’t transferable between the Maker or Explore and the Joy. You’ll need the correct cutting mat, cutting blade, foil kit, and a few other tools.
Of course, you can make these designs on standard Cricut machines, too, if you have one in your craft room!
July 2023 Update: I’ve added 12 bonus sublimation coaster designs to the free download! You can sublimate them on the round blanks below, or car coasters.
And I did promise a roundup of other free projects for the Joy! Some are little projects ready for the smart cutting machine, and others are great projects for the big machines but you can resize them. Once you’ve learned more about the differences, you can make your own designs to fit whichever machine you have. The flexibility is the best part of having different size Cricut projects!
Easy Cricut Cards (four designs + customization tutorial)
Layered Cardinal SVG (one file perfect for the Joy!)
Layered Mandala Rose (resize it and use cardstock)
DIY Planner Clips (eight animal designs – skip the debossing and add the details you like)
DIY Puzzle Lamp (see the Q&A for resizing tips!)
Layered Sea Animals (three designs with resizing tips!)
Layered Intricate Hummingbird (yes, the Joy is detailed enough for the machine-specific file!)
Lace Paper Flower (you can make a 9″ version with the special file!)
3D Butterfly Wall Art (resizing tips included!)
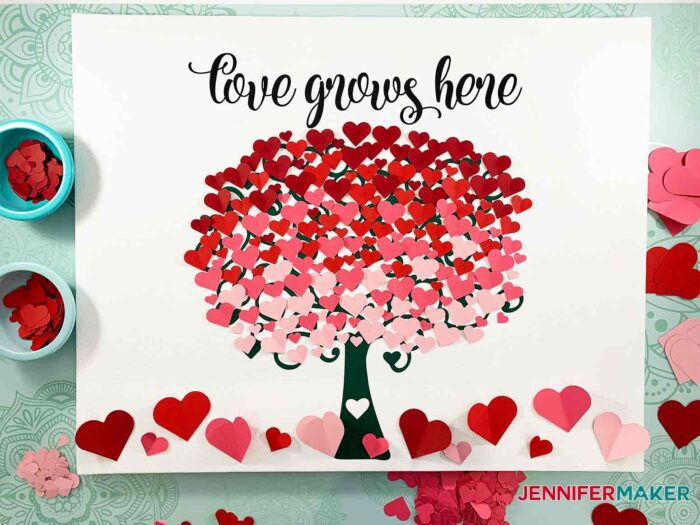
Tree with Hearts Canvas (the Joy file is pre-sliced for you)
Insert Card Designs (four designs and a customization tutorial, just use a normal Cricut Joy mat instead of the 2×2)
DIY Family Command Center (10 designs perfect for the Joy!)
Layered Vinyl Animal Cups (six adorable animal vinyl decals!)
Paper Dahlias (includes two versions for the Joy that are a hit at baby showers!)
Layered Cake Toppers (a bit of resizing and the two designs are perfect!)
Designer Paper Handbags and Purses (the Daisy Duke wallet is designed for the Joy!)
Easy Acrylic Keychains (14 designs, all the perfect size)
DIY Paper Succulents (all 18 designs have a Joy version!)
DIY Plant Pot Tiles (4 designs, just make sure to get the right size tiles!)
Christmas Luminaries (4 designs in the Joy file!)

Mug Design Ideas (25+ designs!)
Personalized Shoes with Iron-On Vinyl (3 designs!)
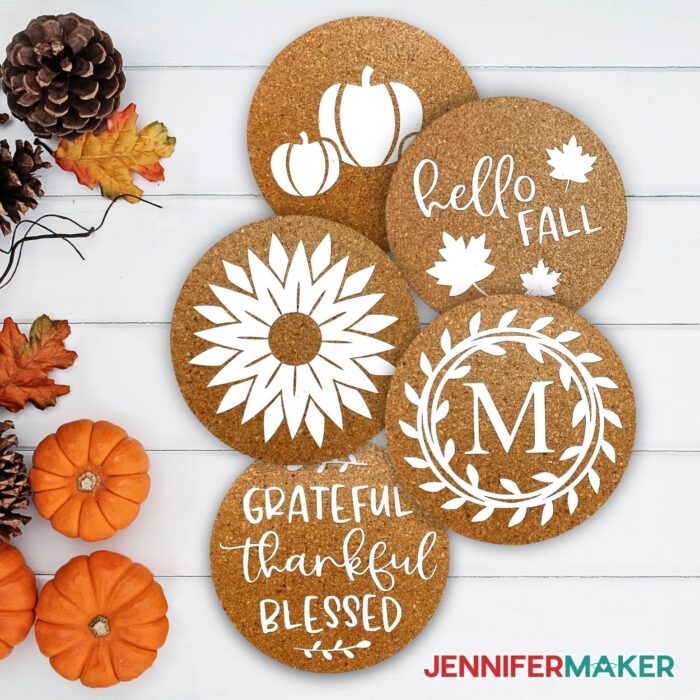
Custom Cork Coasters (12 designs for 4″ coasters, so they’re perfect on the Joy)
I can’t wait to see what you make with my Cricut Joy projects!
Materials to Make Cricut Joy Projects
View my Amazon shopping list with the exact items we used to make this project!
All of these Cricut Joy projects require:
- A Cricut Joy with the included standard blade and a Cricut Joy StandardGrip Mat 4.5″ x 6.5″
- A heat source, like a Cricut Autopress, Cricut Hat Press, or EasyPress with a heat resistant pressing mat, heat resistant tape white cardstock to protect your areas
- Cricut Portable Trimmer or scissors
- Brayer, Spatula, Scissors, and Weeding tool lint roller, butcher paper to protect your working area
- Design #403 – My free Cricut Joy Projects design collection (available in my free resource library—get the password at the bottom of this post)
If you’re making a Personalized Tumbler with a Cricut Joy, you’ll also need:
- A tumbler
- Cricut Smart Permanent Vinyl – I used red shimmer with Cricut StrongGrip Transfer Tape
- Tumbler personalization – Biosha / Free Alternative: Joseph Sophia
If you’re making Cricut Joy Cutaway Cards, you’ll also need:
- Cricut Joy Card Mat
- Cricut Cutaway Cards I used some from the Marina Sampler with envelopes and the Pastel Sampler with envelopes
If you’re making a Cricut Joy Hat with Iron-On Vinyl, you’ll also need:
- a Cricut Trucker Hat
- Cricut Joy Smart Iron-On Vinyl in Black and Yellow
If you’re making a Cricut Joy Machine Decoration, you’ll also need:
- Cricut Smart Vinyl – I used Permanent Gold with StandardGrip Transfer Tape
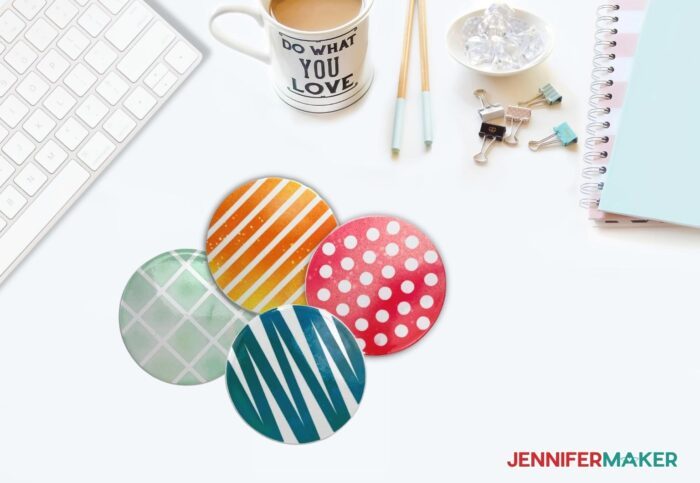
If you’re making Infusible Ink Coasters on a Cricut Joy, you’ll also need:
- Cricut Ceramic Coasters for Infusible Ink
- Cricut Infusible Ink Transfer Sheets in Splashpad or Watercolor Ink
If you’re making Foil Cricut Joy Gift Tags, you’ll also need:
- Cricut Joy Foil Transfer Kit
- Cricut Foil Transfer Sheets – I used gold and green and some from the Metallics Sampler
- 8.5″ x 11″ plain or shimmer Cardstock
If you’re making Smart Labels with Writable Vinyl on a Cricut Joy, you’ll also need:
- Cricut Smart Label Writable Vinyl and the Cricut Joy Ultimate Pen Set
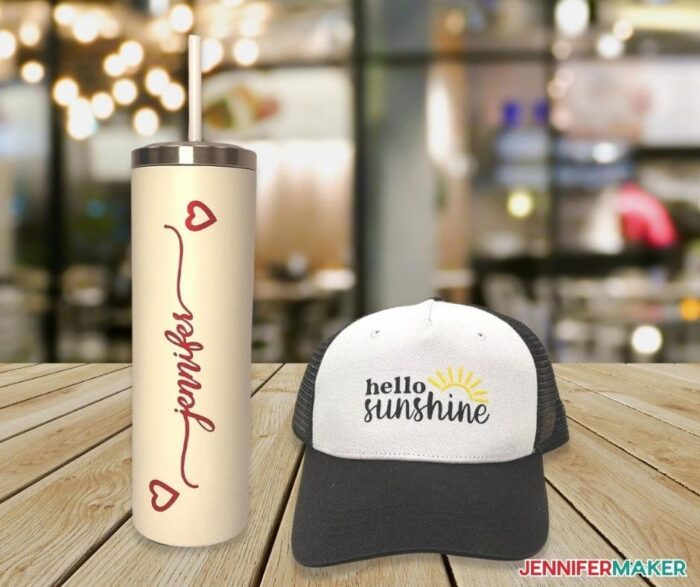
How to Make a Personalized Tumbler with a Cricut Joy
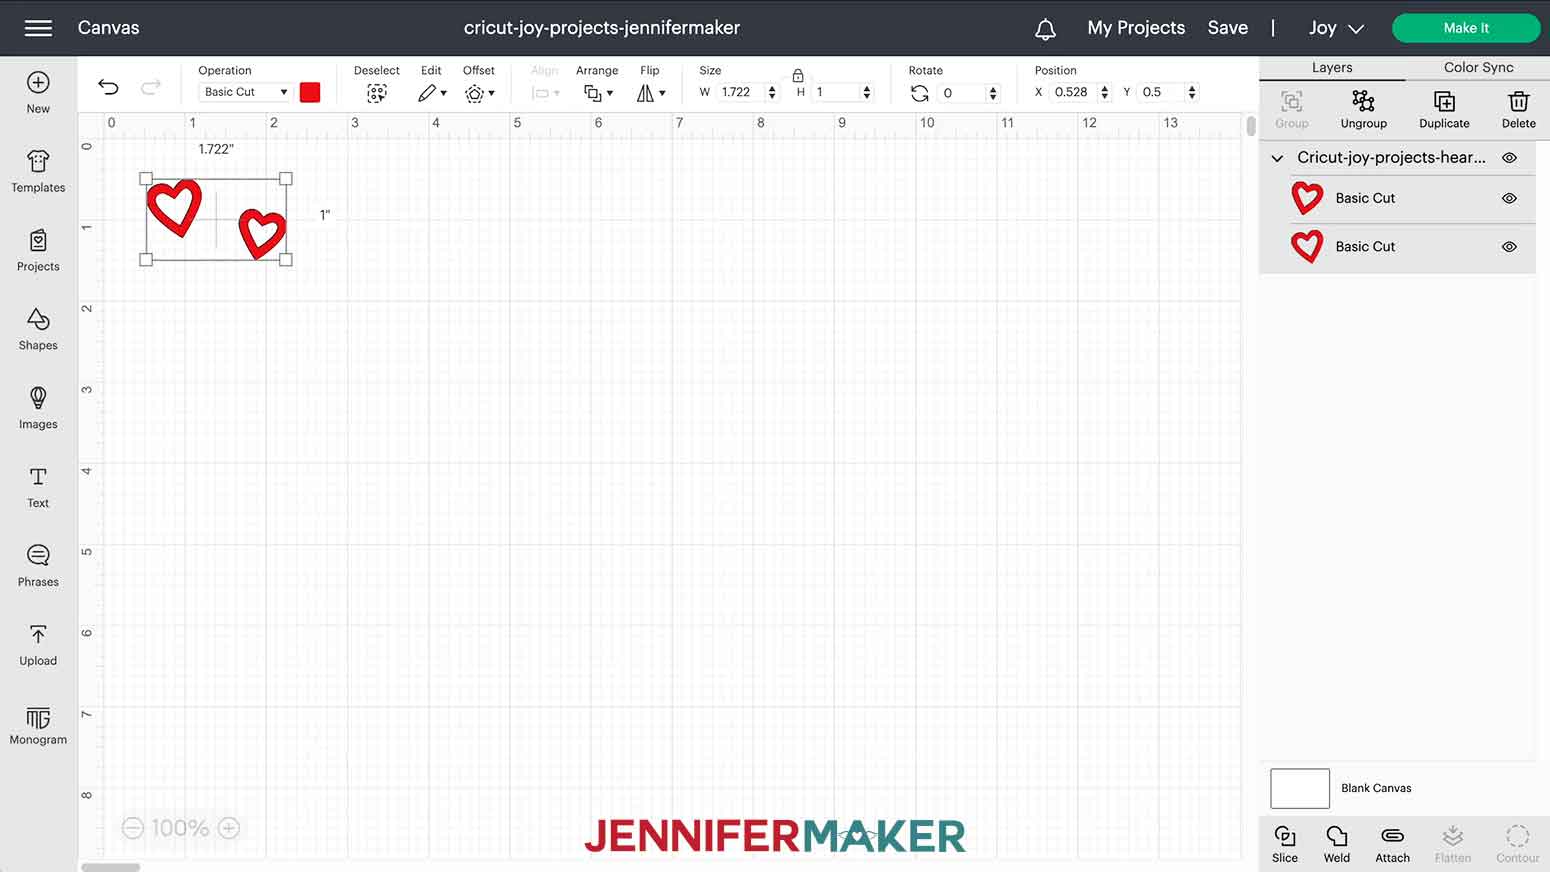
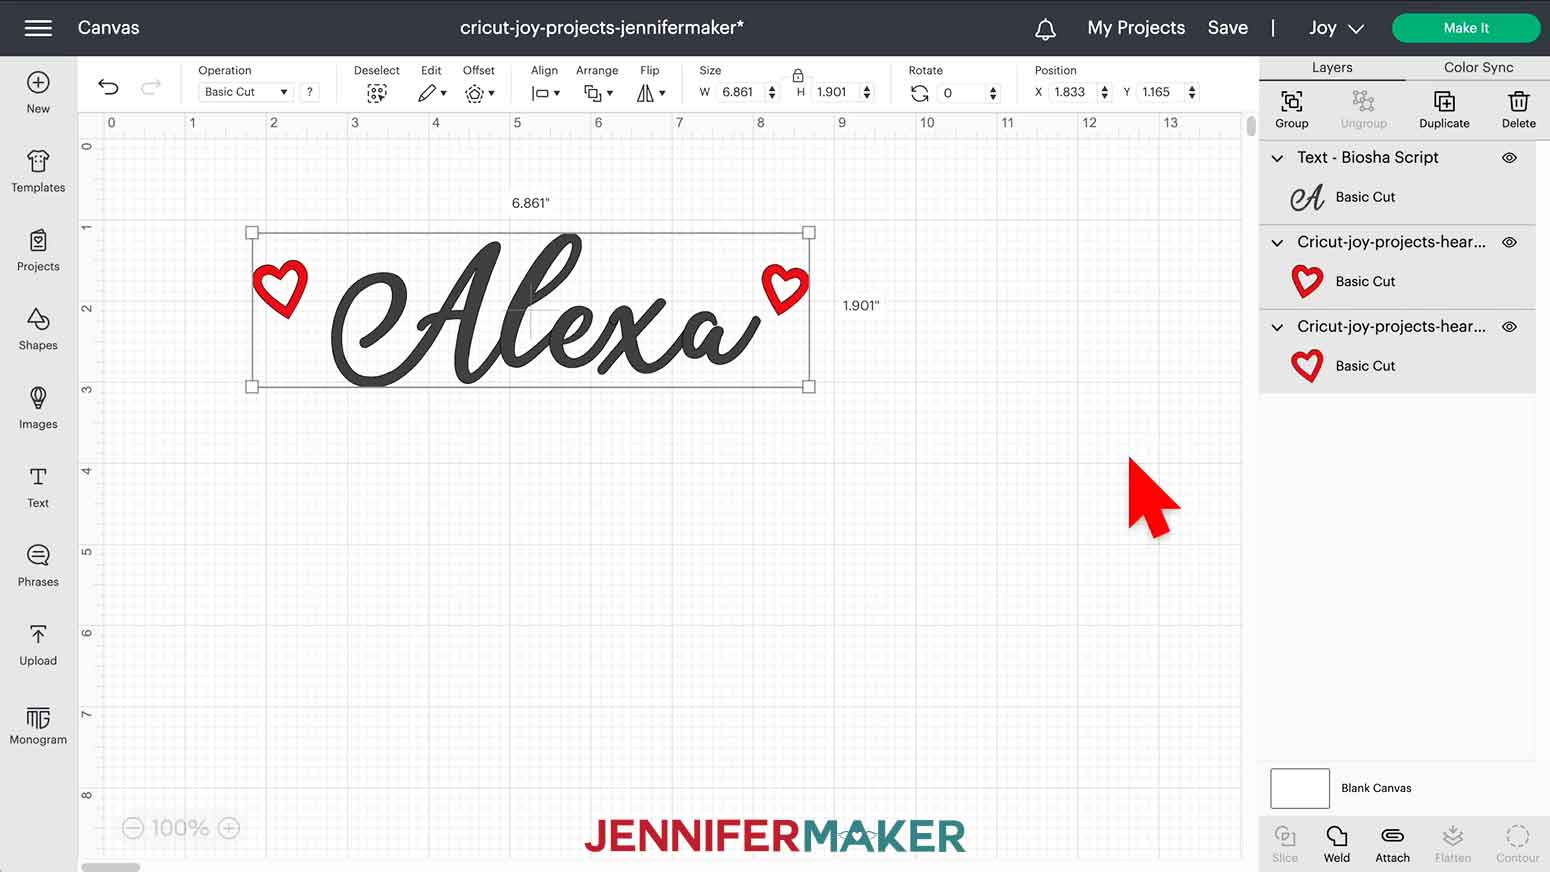
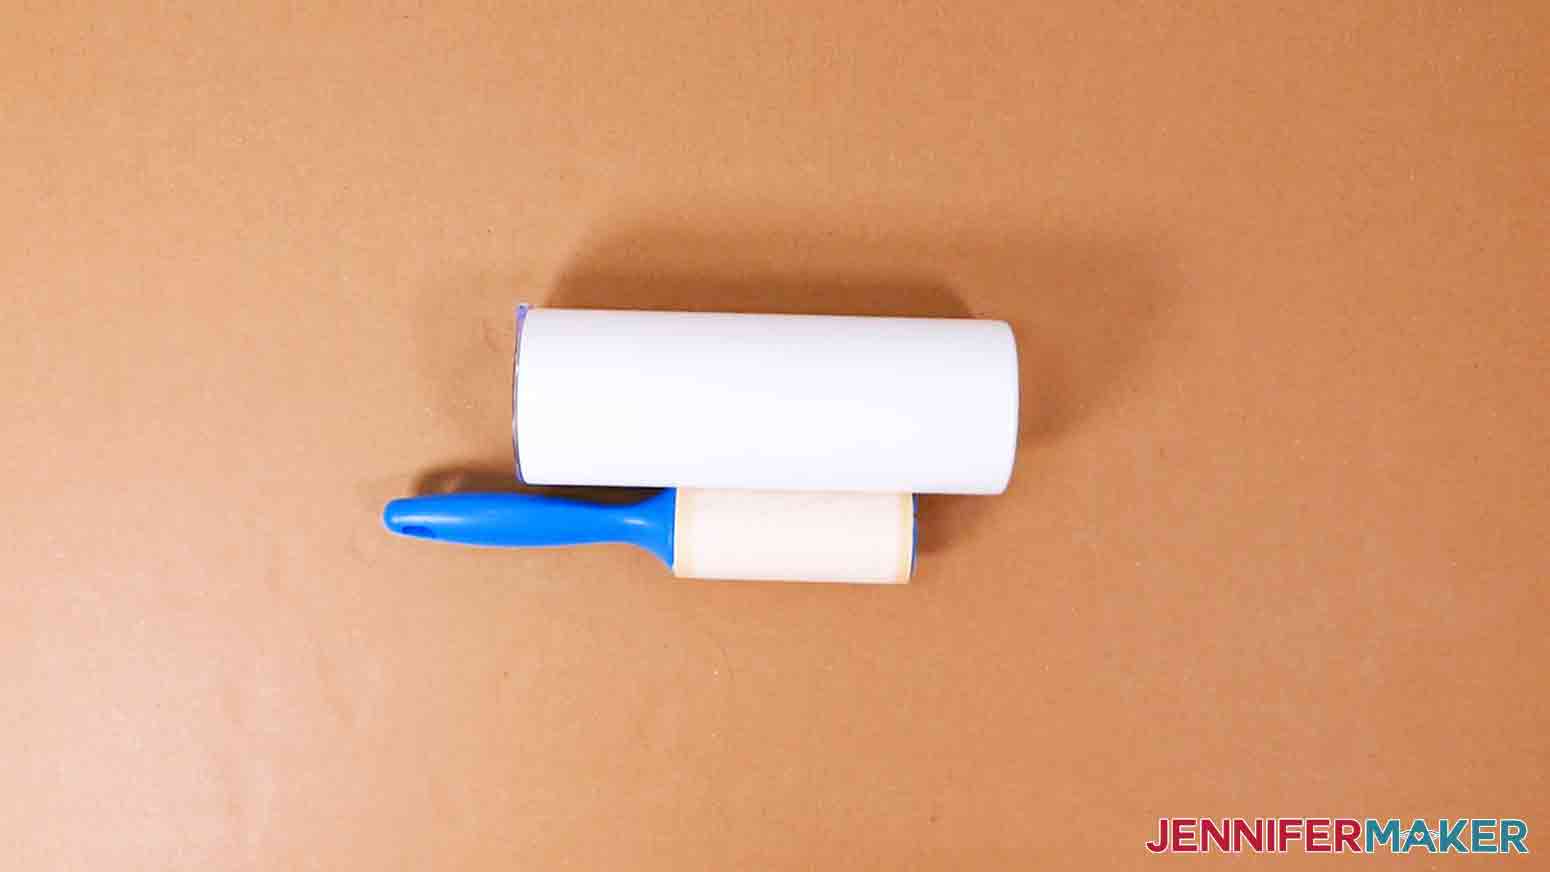
Learn to personalize a tumbler, one of the most popular Cricut Joy projects! First, download my Cricut Joy Projects SVG/DXF/PDF files, Design #403, from my free resource library. There are eight designs to choose from, including a customizable option with hearts. We'll use those to start our custom tumbler. I'll use the SVG and cut it using my Joy, but you can use any Cricut machine. Next, open Cricut Design Space and upload the SVG cut file. If you're not sure how to upload an SVG cut file to Cricut Design Space, watch this helpful video Made Simple training series I made. If you're on an iPhone or iPad, here's how to download and upload SVG files to the Cricut Design Space app. This is what my hearts file looks like on the Canvas. Set your machine in the top right so Design Space knows what settings and operations you’ll be able to use. I’ll set mine to my Joy. Click on the Text icon on the left of the Canvas. The word "Text" will appear on the canvas. Type your name, I'll use Alexa. Double click the name to select it. Click the Font menu and select your font. I used the script font Biosha, which you can purchase from FontBundles. TIP: If you want to add a little extra style to your design, see my tutorial on adding glyphs or special characters to your text elements! Select the hearts and click "UnGroup" to separate the two shapes. You can now click and drag the heart designs around your personalization. Measure the area you want to decorate on the tumbler. Click Select All to select the name and hearts, and resize the design to fit your measurements. Mine fit nicely at about 6" x 3". Once you have your personalization design as you'd like, select all of the elements and click Attach at the bottom of the layers panel. Now they'll cut together. Make sure the correct machine is selected in the top menu and click "Make It." A pop-up window might appear asking how you want to load your materials. Select "Without Mat" and click "Continue." Under Set Base Material, choose "Smart Vinyl - shimmer" and change the pressure to "More." Make sure your Joy's blade is clean and seated correctly in the clamp. Cut your vinyl to the length indicated on the screen. Place the vinyl face up under the rollers so the Joy pulls the material in. Click Go and the design will be cut. When the cut is complete, click "Unload." Use the Cricut Portable Trimmer to remove the excess vinyl from your design and weed it. Use a lint-free cloth and rubbing alcohol to clean the tumbler, which will help the vinyl adhere easier. Cut a piece of StrongGrip Transfer Tape a bit larger than your design. Place the tape sticky side down on the design and burnish it from both sides with your scraper. NOTE: StandardGrip Transfer Tape will not work with shimmer vinyl. If you have trouble, double check that you are using StrongGrip. Remove the backing paper. Place the tumbler on your work surface with the area to be decorated face up. Position the lint roller to its side so the sticky surface touches the tumbler and work surface. The lint roller will hold the tumbler in place! TIP: If you are using a different tumbler with a tapered surface, it may be helpful to cut small slits around the edge of the transfer tape for a more even application of vinyl. For more pointers on decorating curved surfaces, check out my mug tutorial! Curve the transfer tape with the decal so the center of the design is at the bottom of the U or taco shape. Lower the bottom to touch the tumbler where you want to place the design's center. Gently lower the sides of the decal and burnish them to the surface with your scraper. Remove the transfer tape. TIP: Go slowly and use your scraper to reburnish any area that holds to the transfer tape. You're all done! To make your project last, hand wash it with warm, soapy water. FONTS Tumbler personalization - Biosha / Free Alternative: Joseph Sophia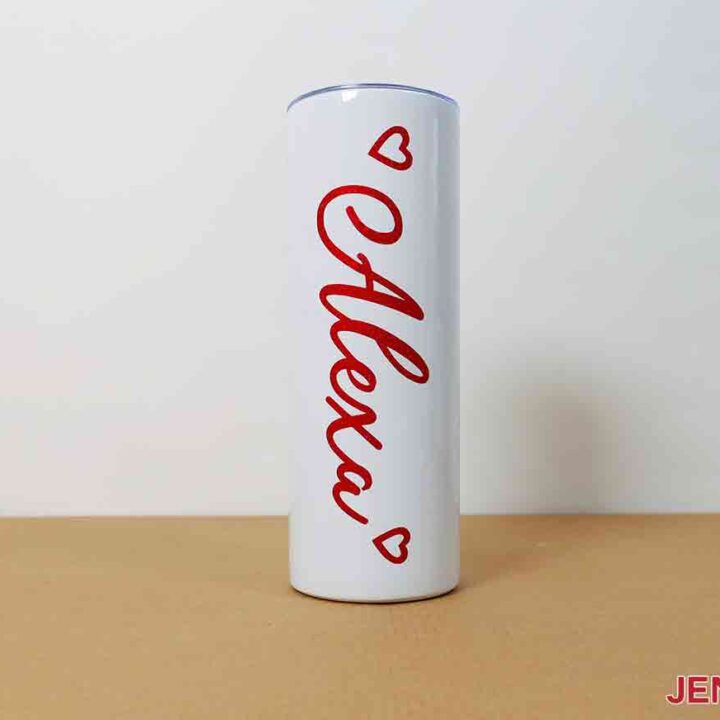
Personalized Tumbler with a Joy
Materials
Tools
Instructions
STEP 1: GET MY FREE CRICUT JOY PROJECTS SVG FILES
STEP 2: PREPARE AND PERSONALIZE YOUR DESIGN
STEP 3: CUT YOUR DESIGN
![]()
![]()
STEP 4: APPLY YOUR DESIGN
![]()
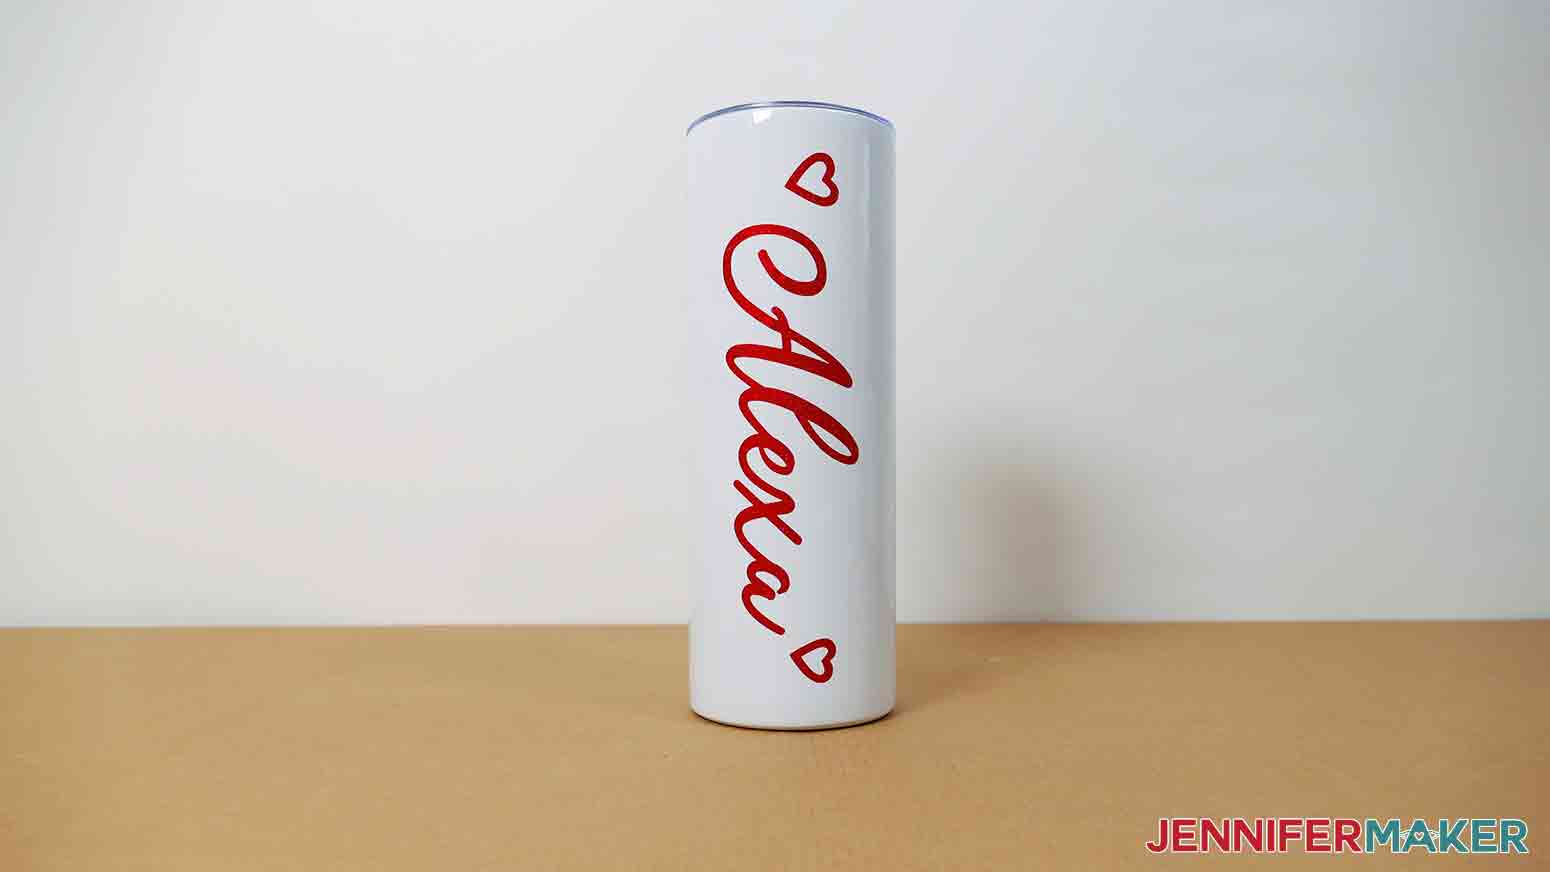
STEP 5: SHOW IT OFF
Notes
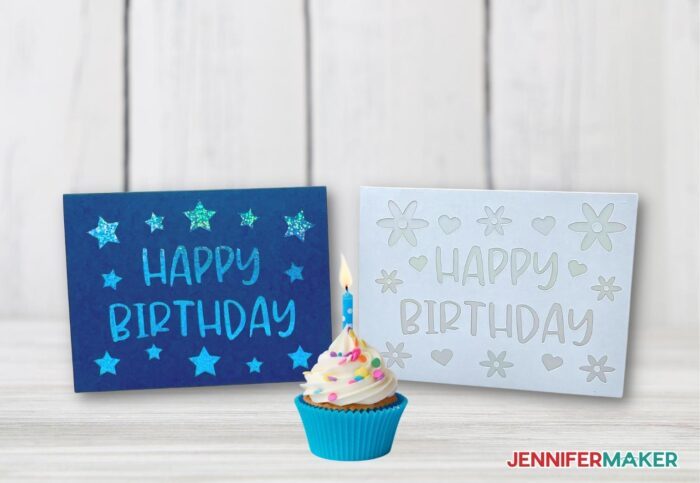
How to Make a Cricut Joy Cutaway Cards
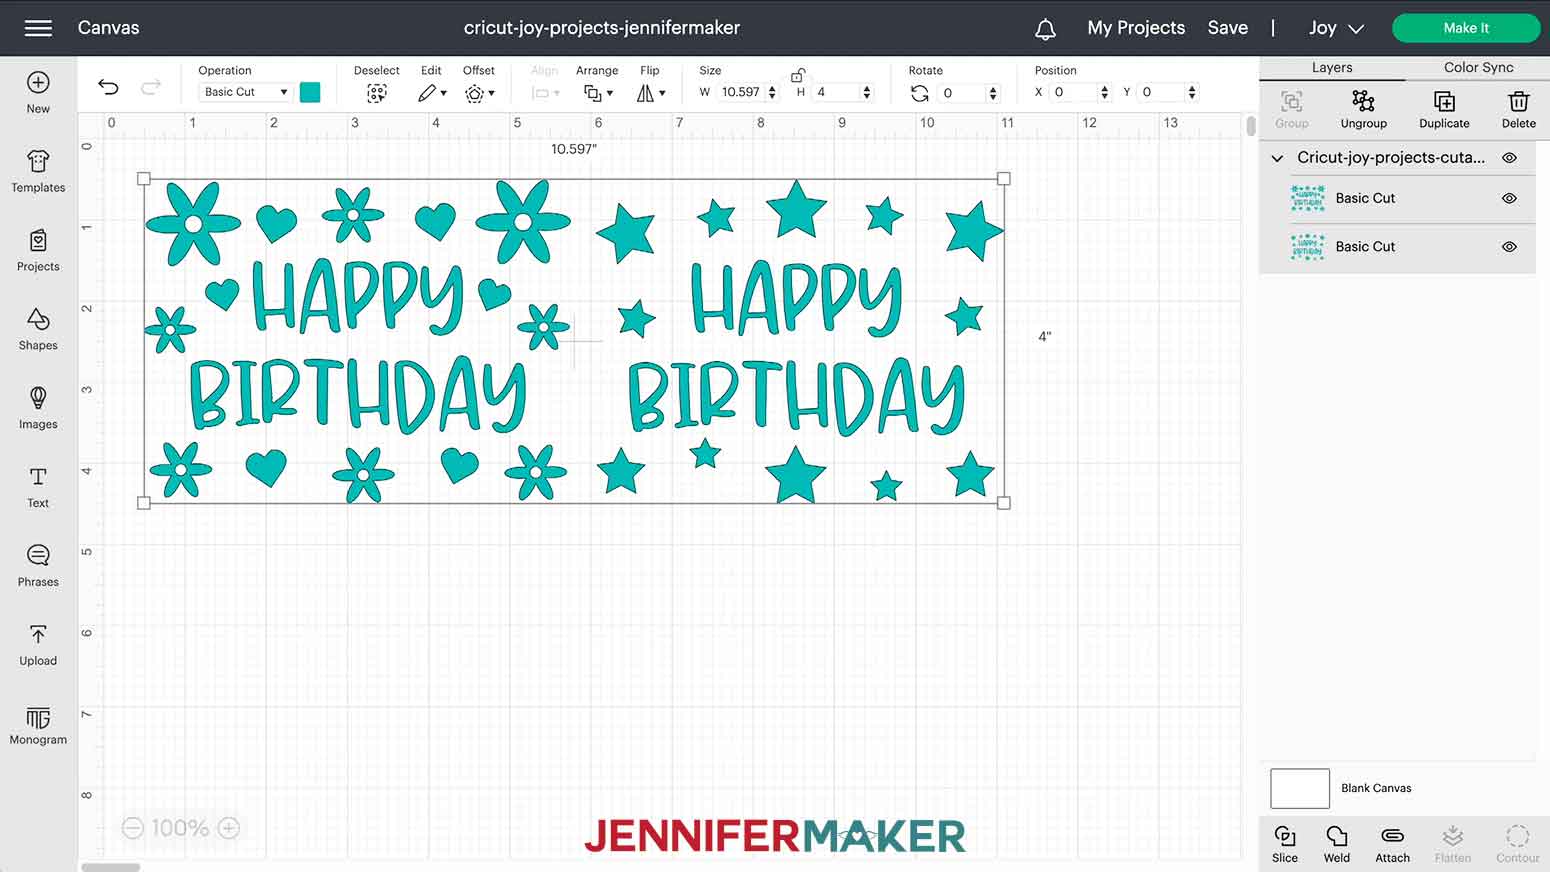
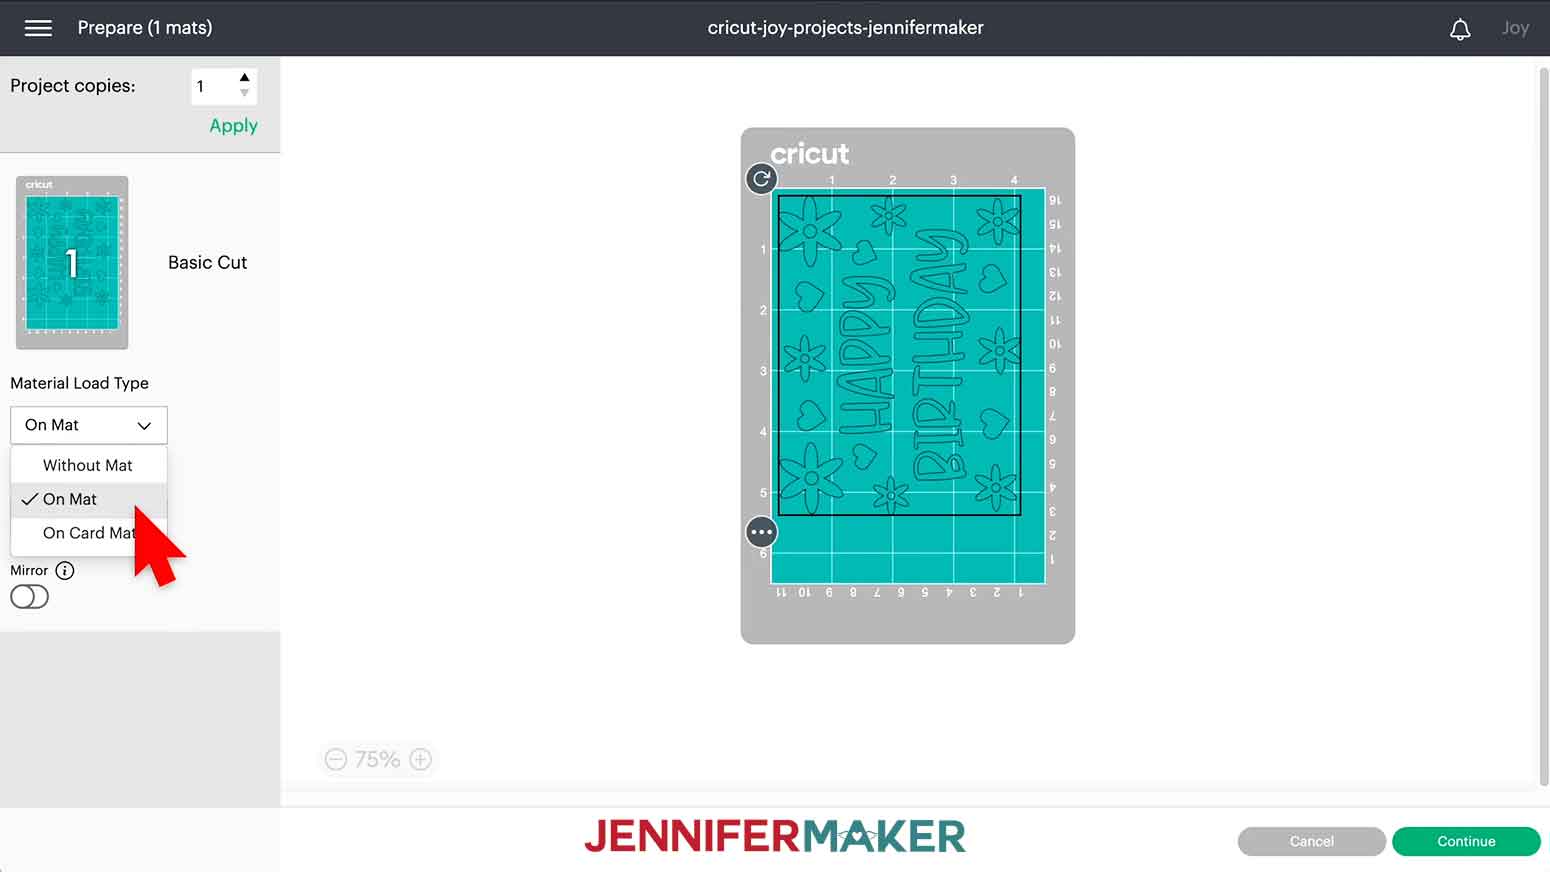
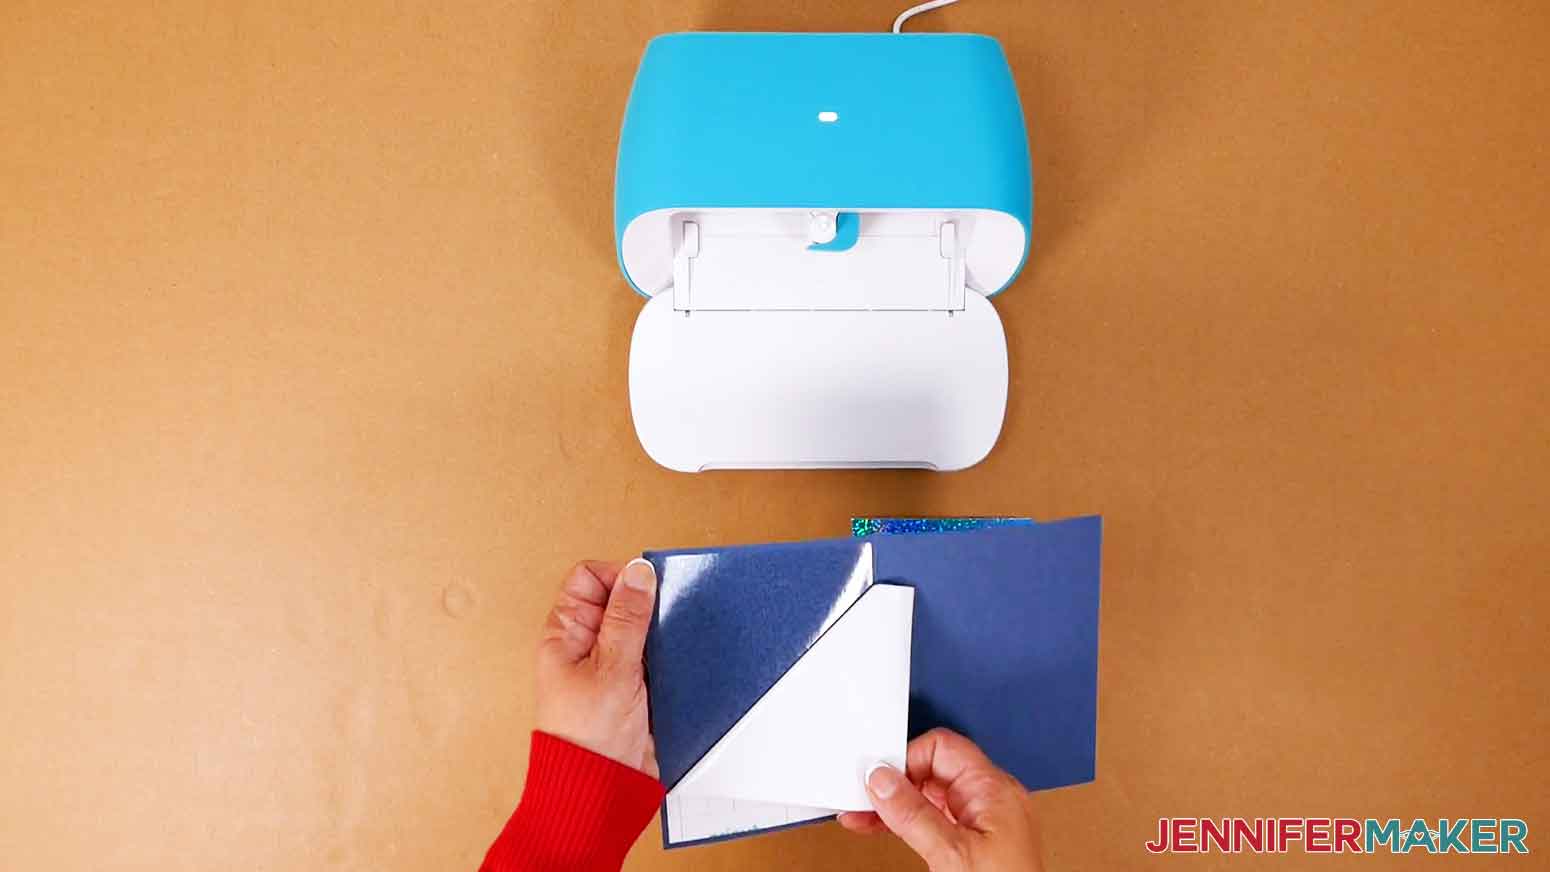
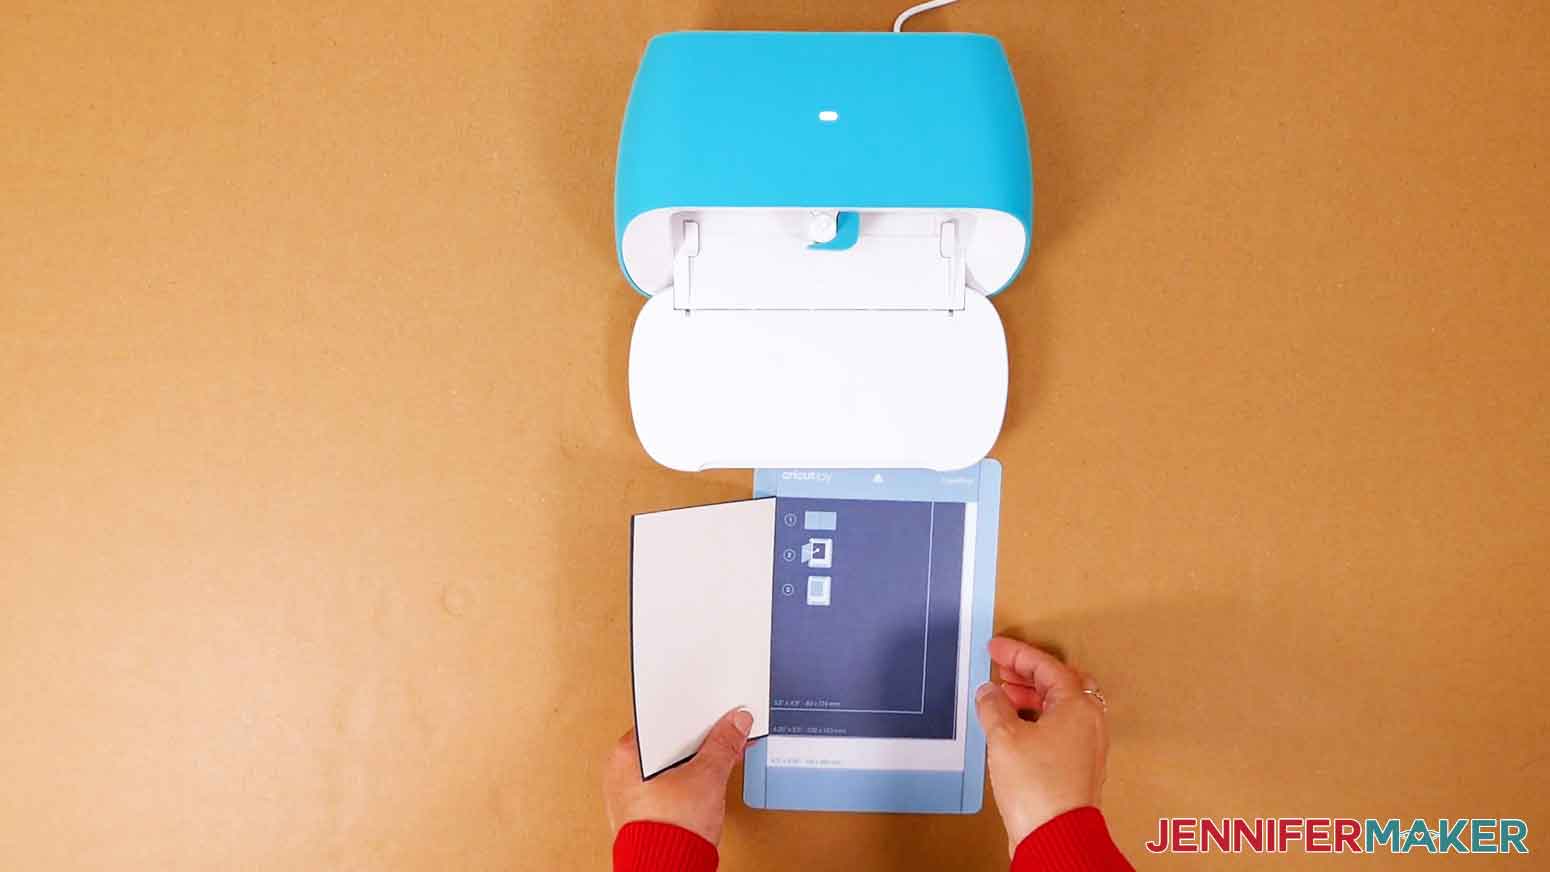
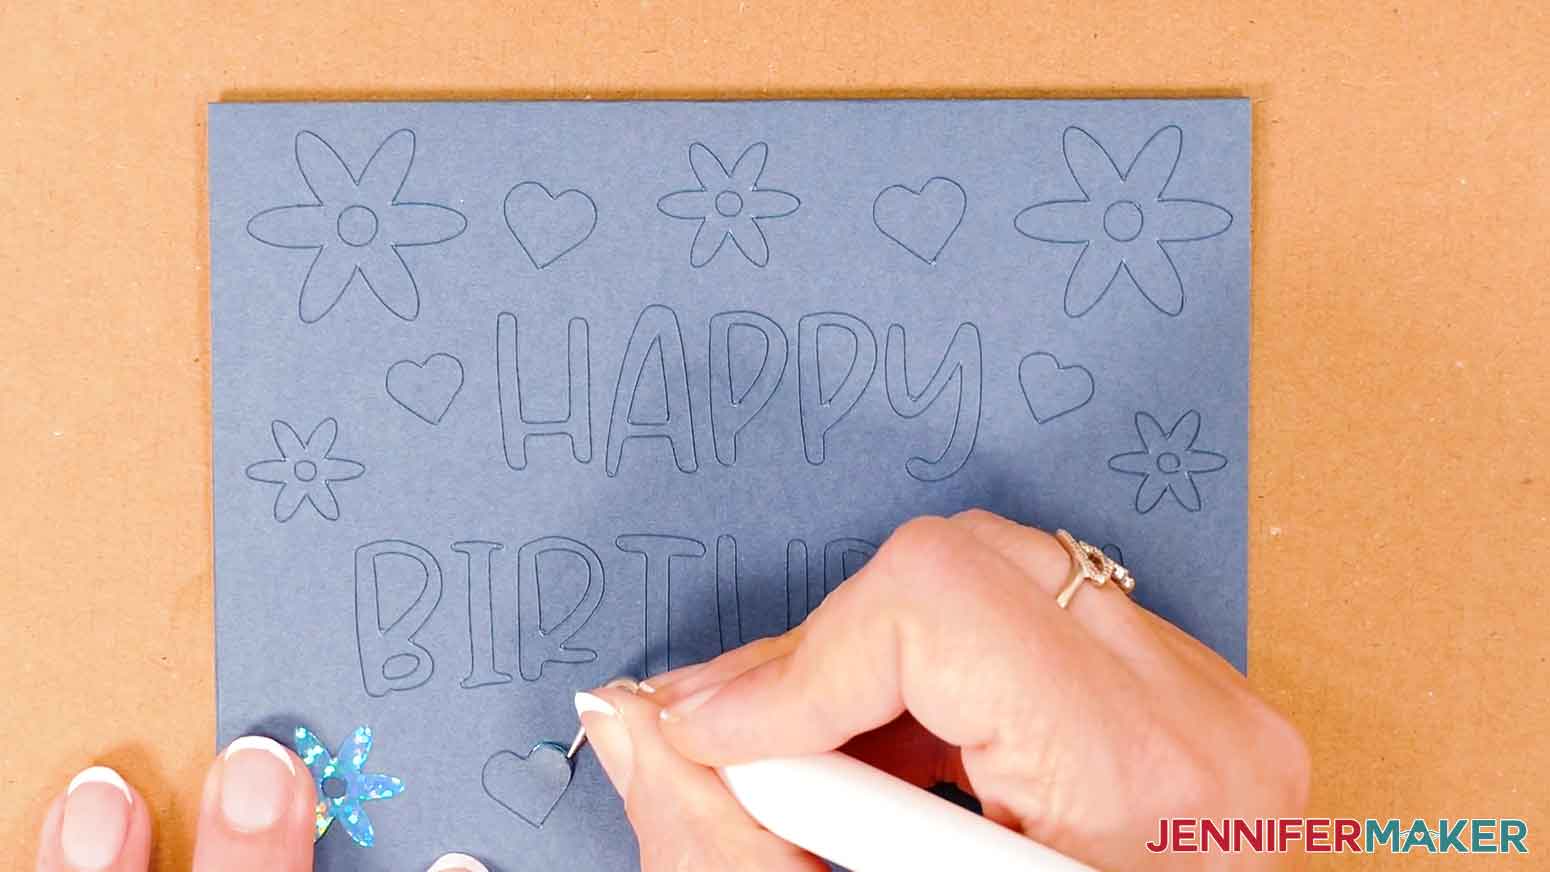
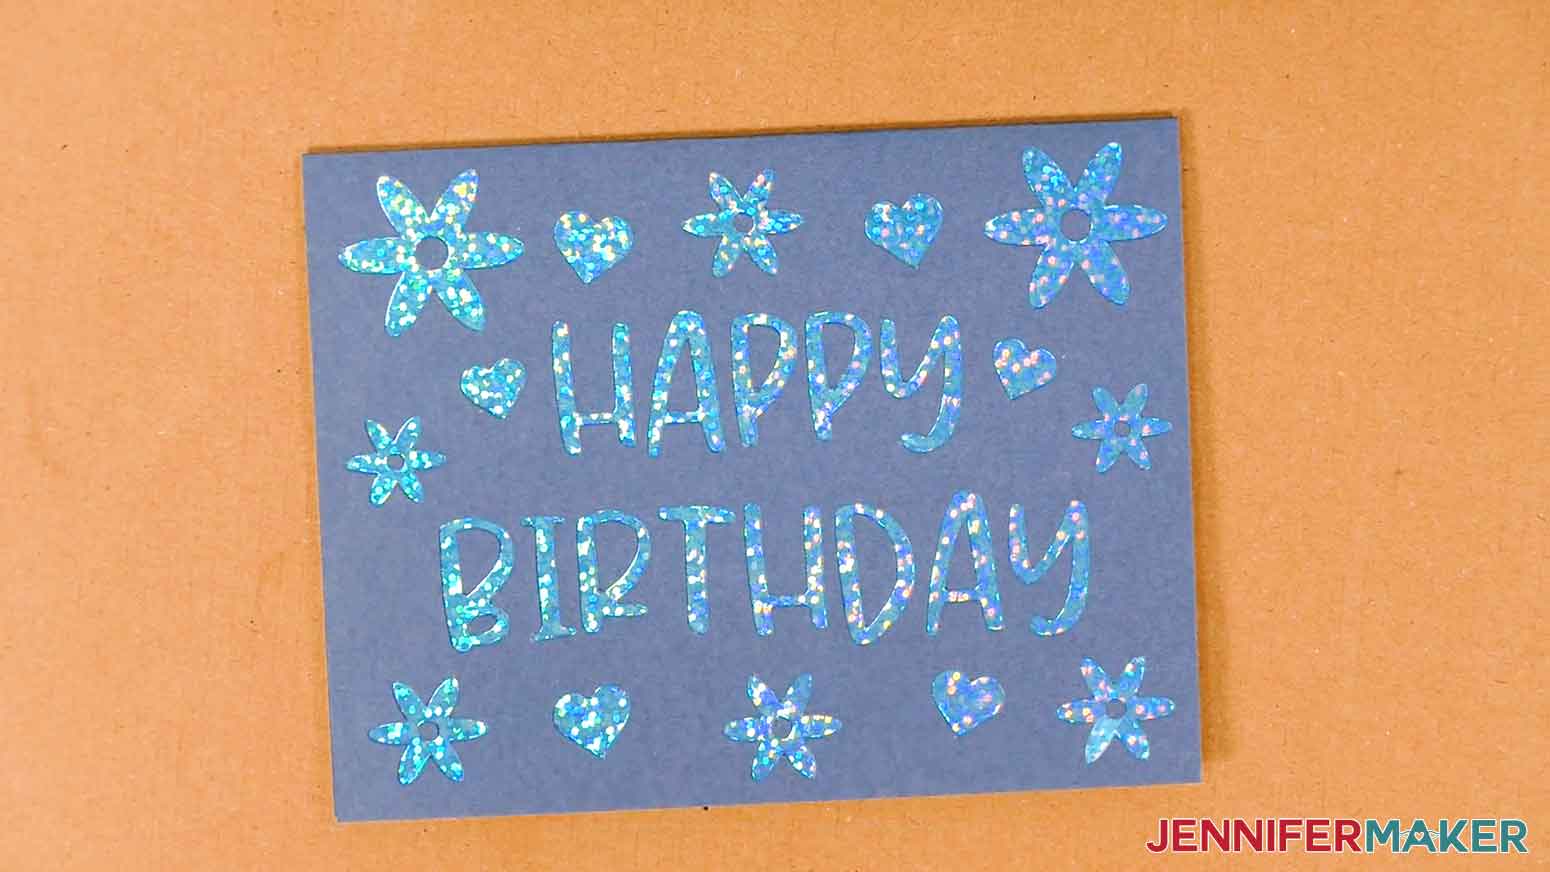
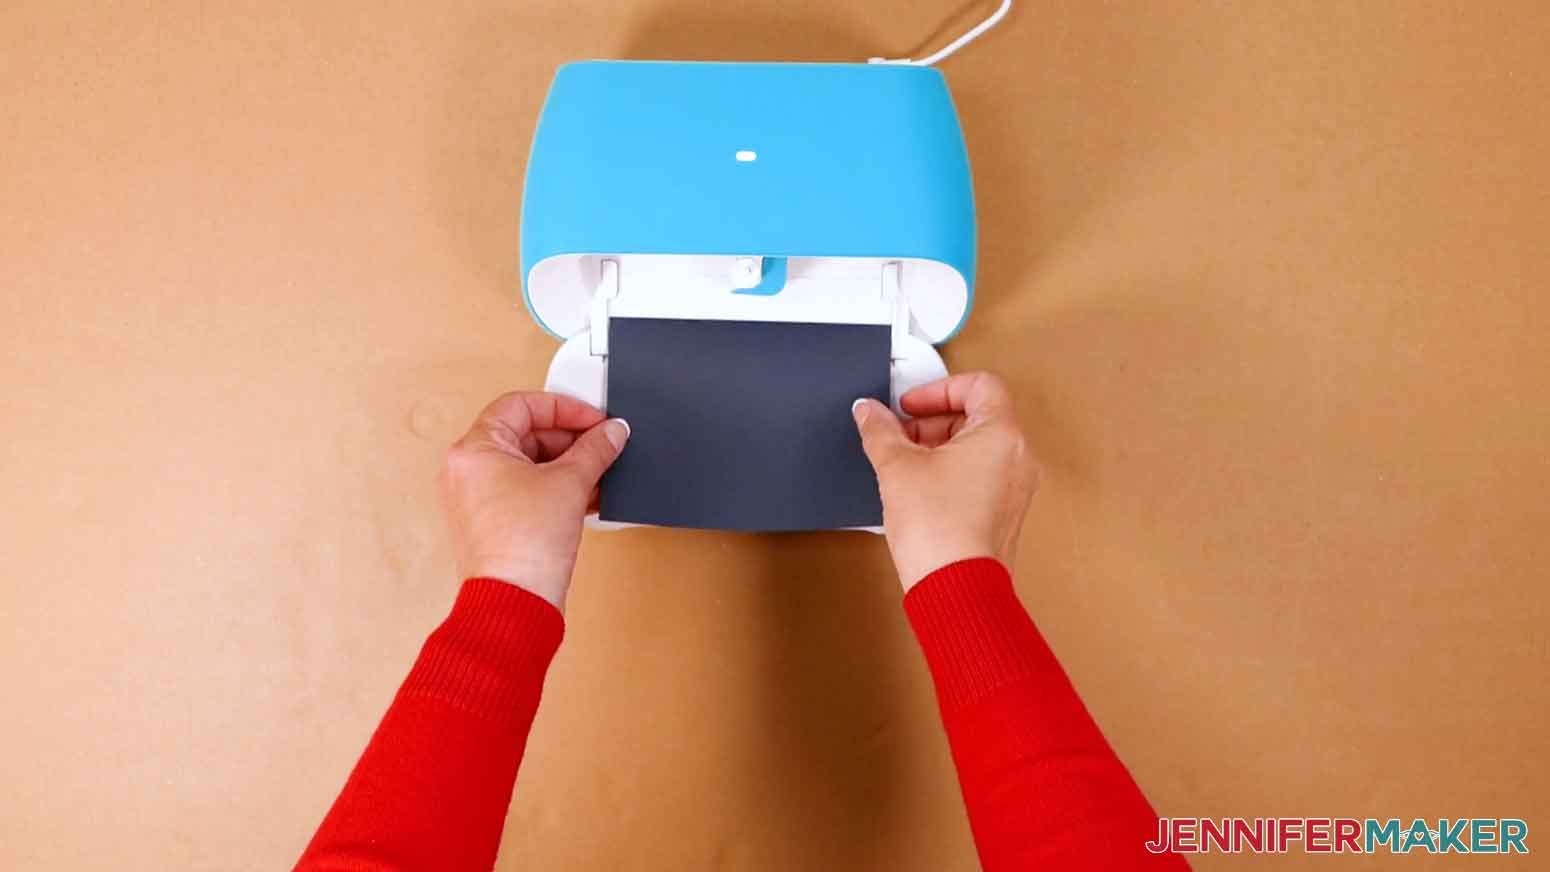
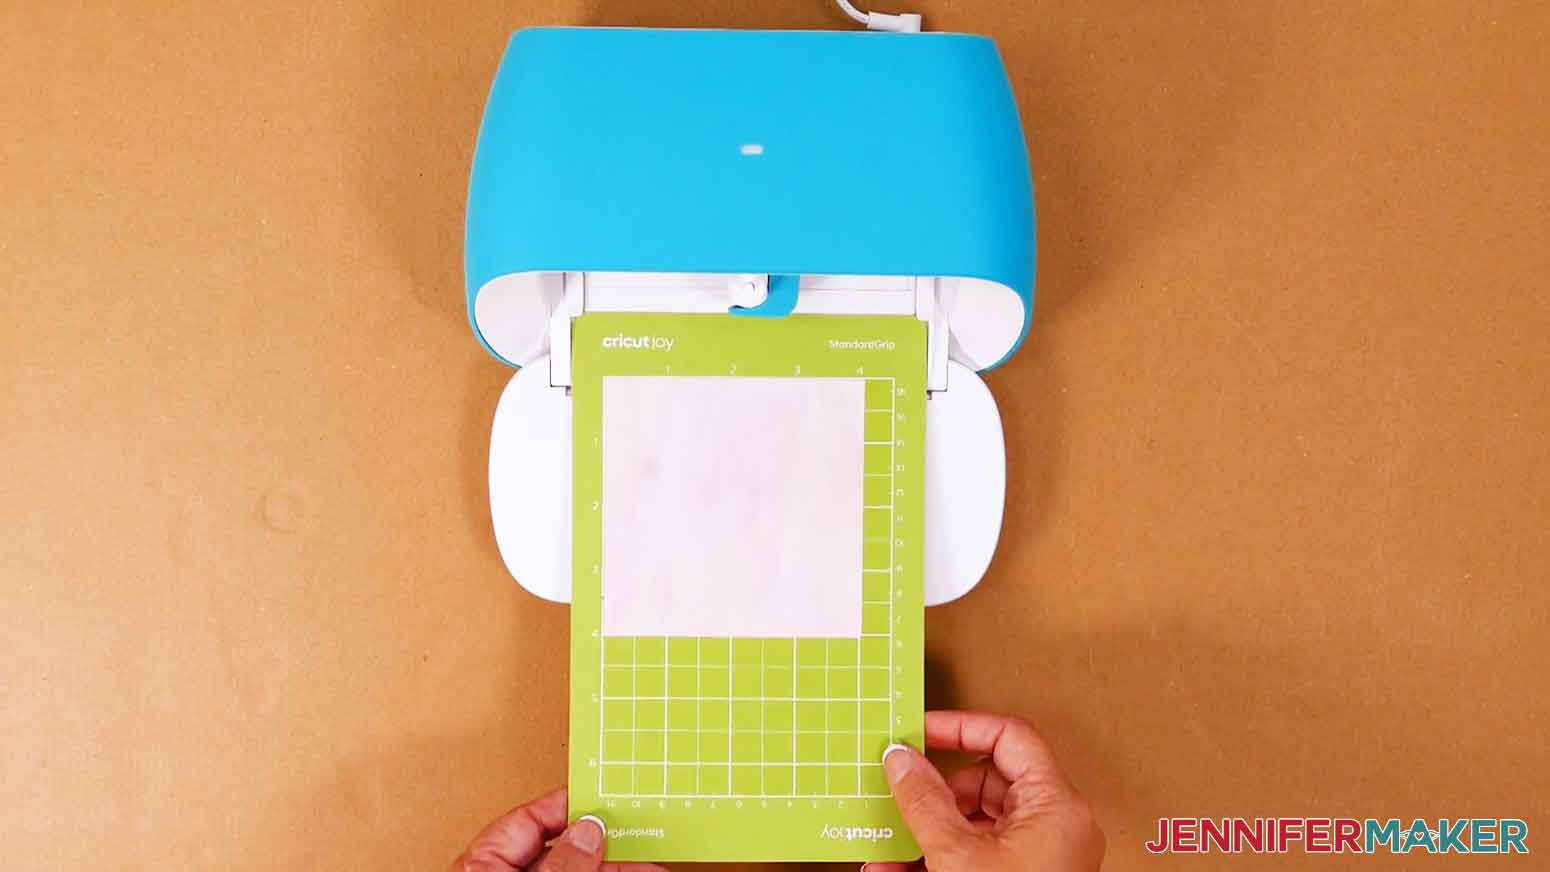
Learn how to make Cutaway Cards, popular Cricut Joy projects! First, download my Cricut Joy Projects SVG/DXF/PDF files, Design #403, from my free resource library. There are eight designs to choose from, including a a file with two Cutaway Card designs. I'll show you how to create the designs on a Joy but they can all be made on the Cricut Maker or Explore machines. Next, open Cricut Design Space and upload the SVG cut file. If you're not sure how to upload an SVG cut file to Cricut Design Space, watch this helpful video Made Simple training series I made. If you're on an iPhone or iPad, here's how to download and upload SVG files to the Cricut Design Space app. This is what my card designs look like on the Canvas. Set your machine in the top right so Design Space knows what settings and operations you’ll be able to use. I’ll set mine to my Joy. Click "UnGroup" to work with the designs separately. Select the design you don't want to make and click "Delete." I'll make the one with hearts and flowers. This file is sized for a 4.25" x 5.5" Cutaway Card. Make sure the correct machine is selected in the top menu and click "Make It." Select "On Card Mat" and click "Continue." Press "Continue" again on the next screen. Under Set Base Material, choose "Cutaway Card + Backer" and change the pressure to "More." Make sure your Joy's blade is clean and seated correctly in the clamp. Remove the backing from the inside of the cutaway card and attach the holographic cardstock. Place it on the card mat. The mat has guidelines so you can make sure the card is positioned correctly. It should be inserted as far as it will go and along the top of the mat, also as far up as it will go. Your card will be inside the 4.25" x 5.5" lines. Place the mat face up under the rollers so the Joy pulls the material in. Click "Go" and the design will be cut. When the cut is complete, click "Unload." Use a weeding tool to gently remove the cut bits of the cutaway card. Make sure any stand alone pieces stay in place, like the centers of the flowers. If they come up, gently put them back. Slow and steady for the best results! TIP: Be careful of the pressure of the weeding tool. If you press too hard, there may be visible marks from the point. Use the envelopes from the card pack to complete your project!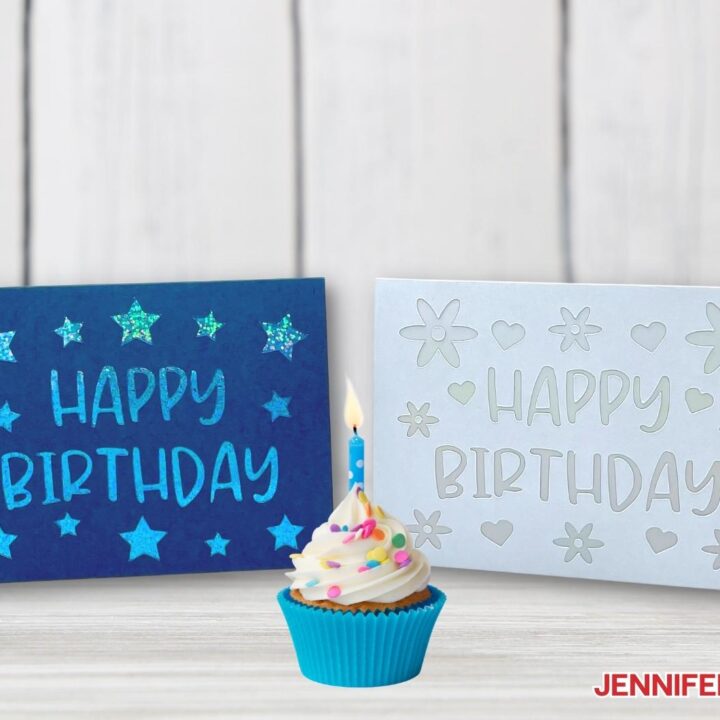
Cricut Joy Cutaway Cards
Materials
Tools
Instructions
STEP 1: GET MY FREE CRICUT JOY PROJECTS SVG FILES
STEP 2: PREPARE YOUR CARD
STEP 3: CUT YOUR DESIGN
STEP 4: ASSEMBLE THE CARD
STEP 5: SHOW IT OFF!
How to Make a Cricut Joy Hat with Iron-On Vinyl
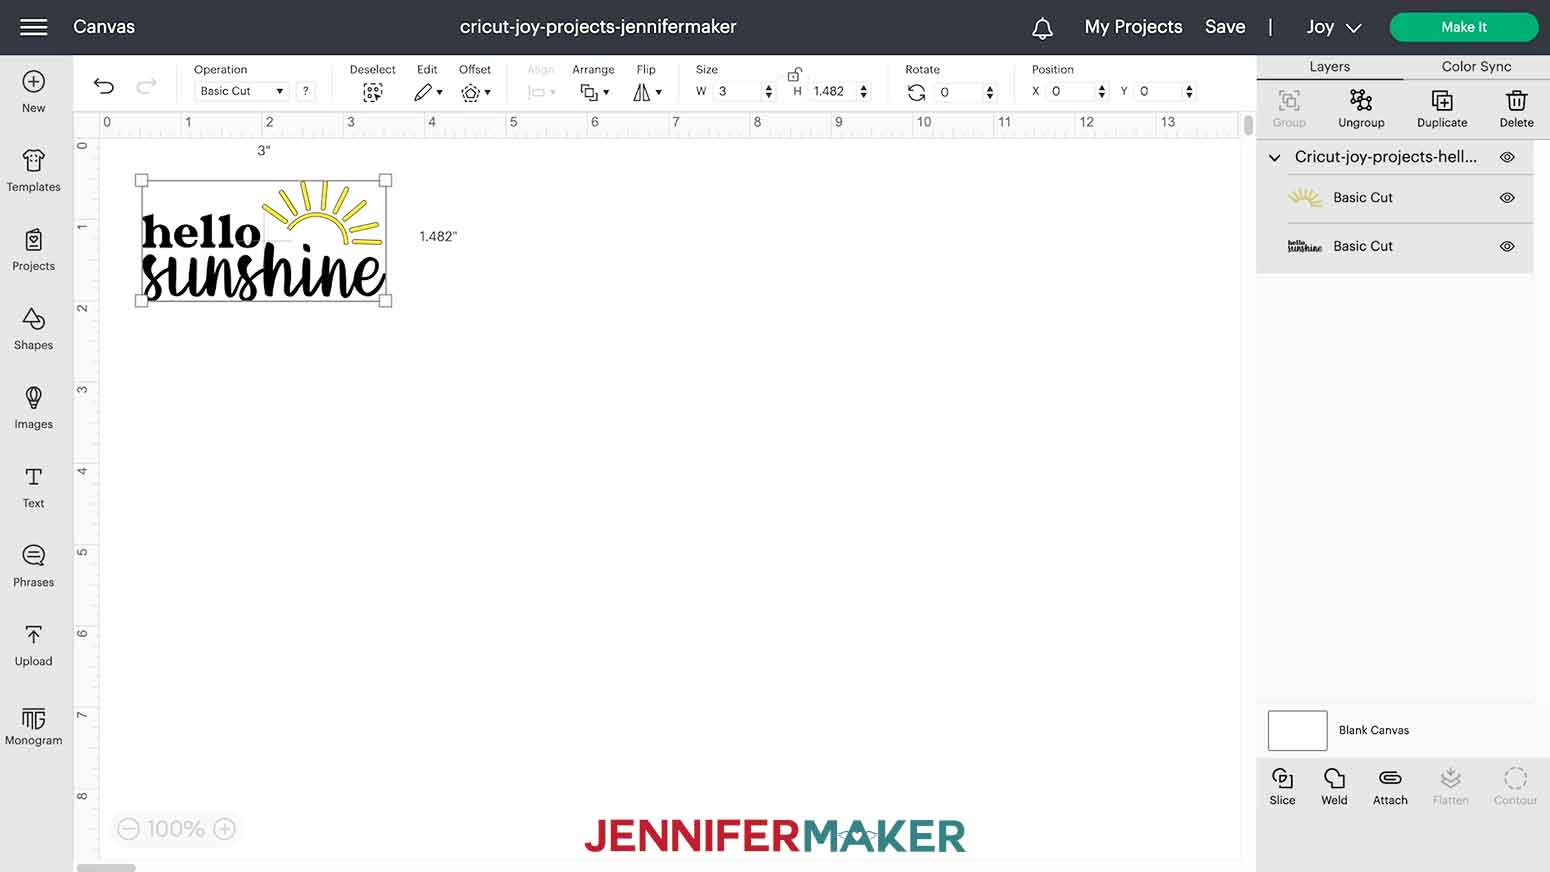
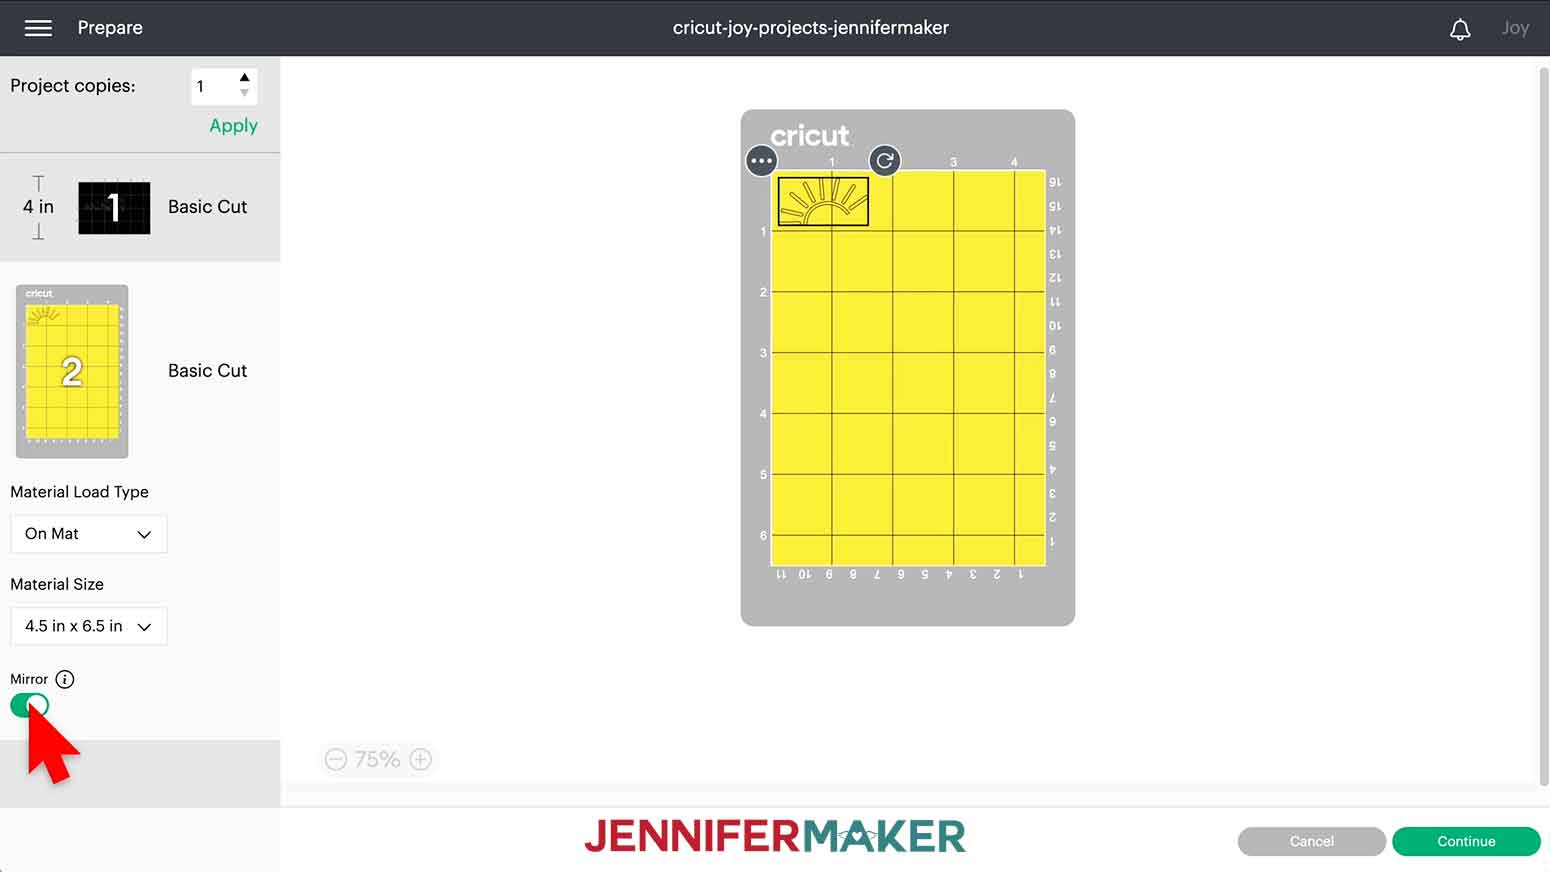
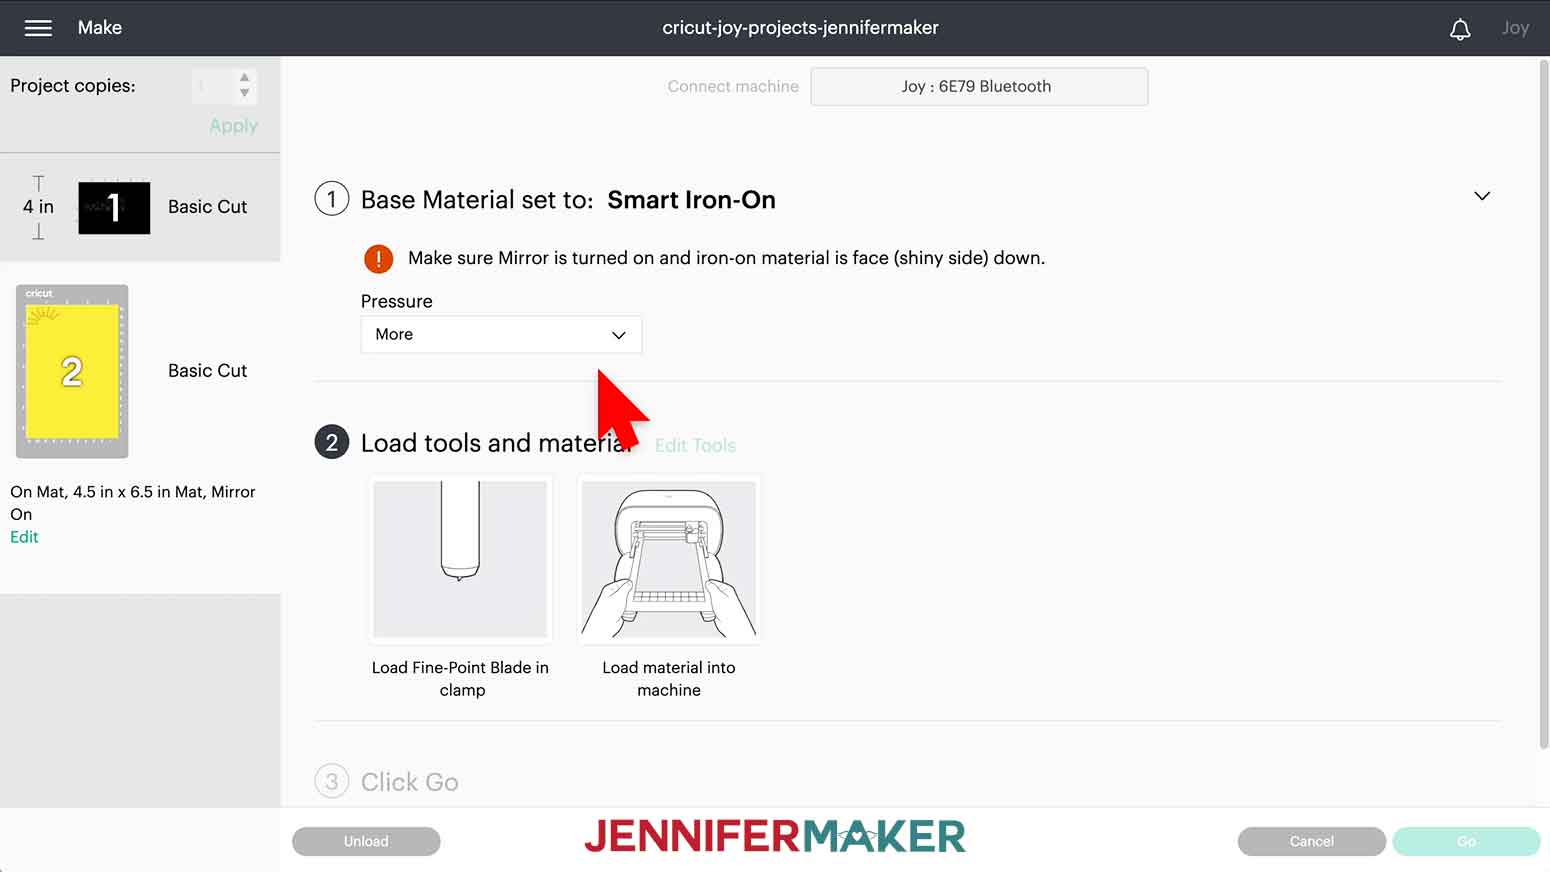
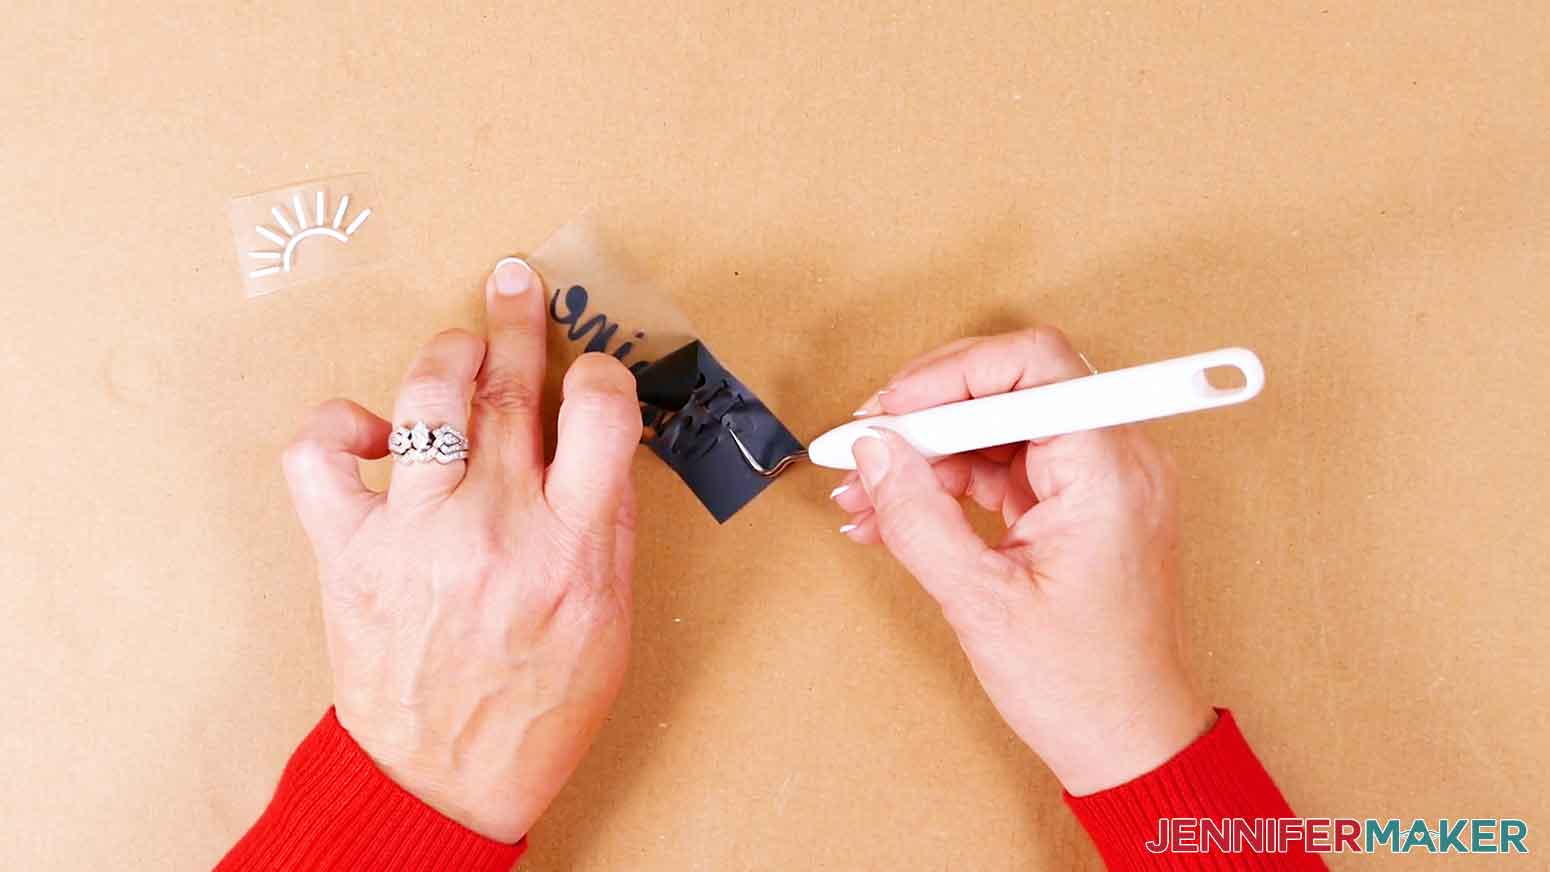
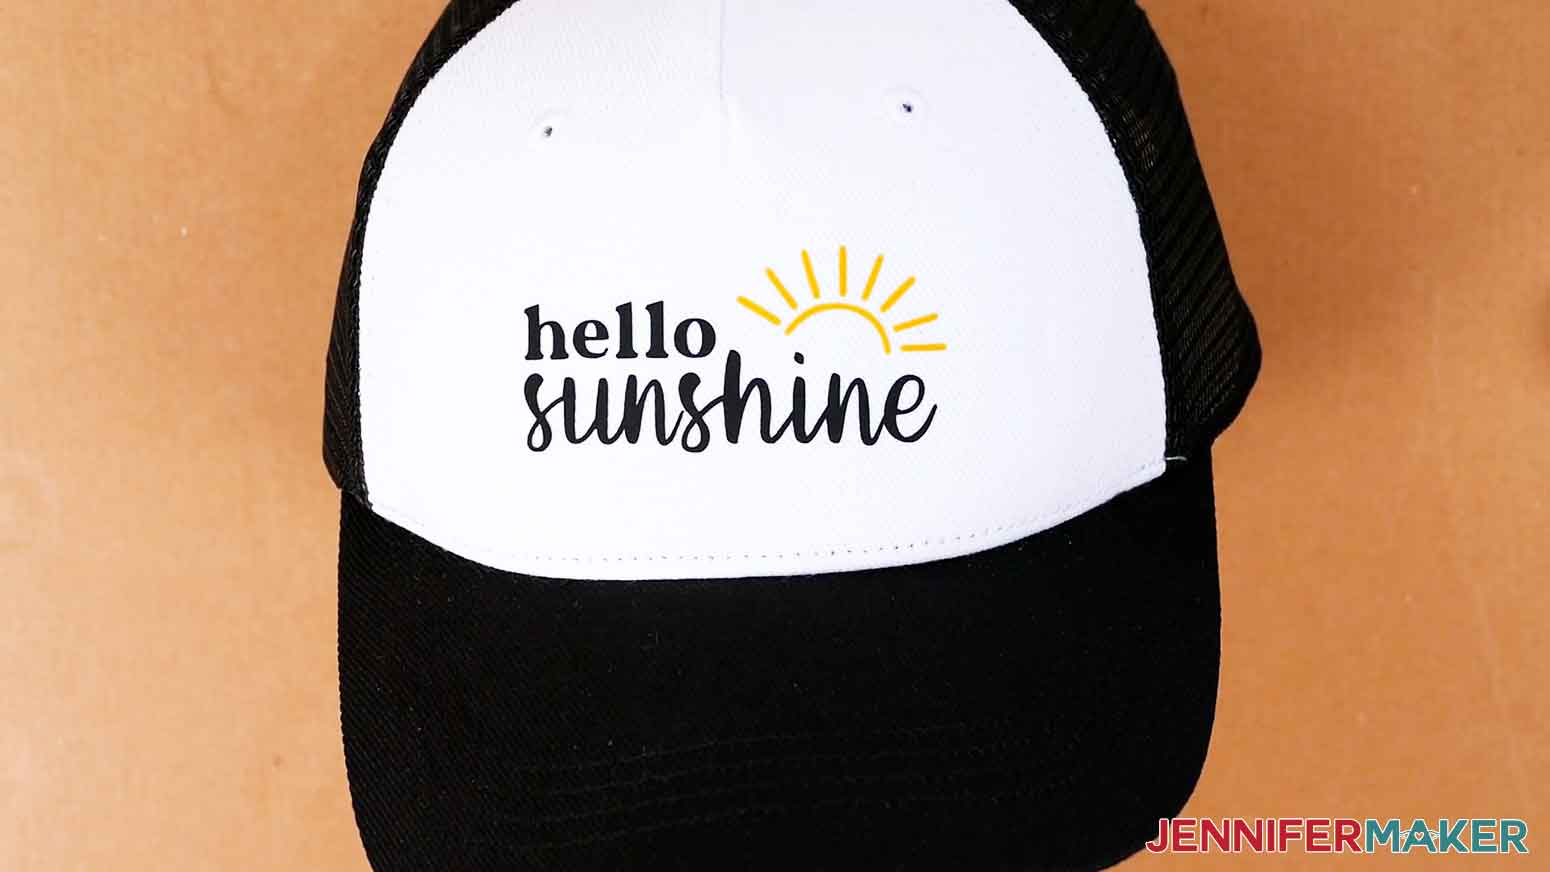
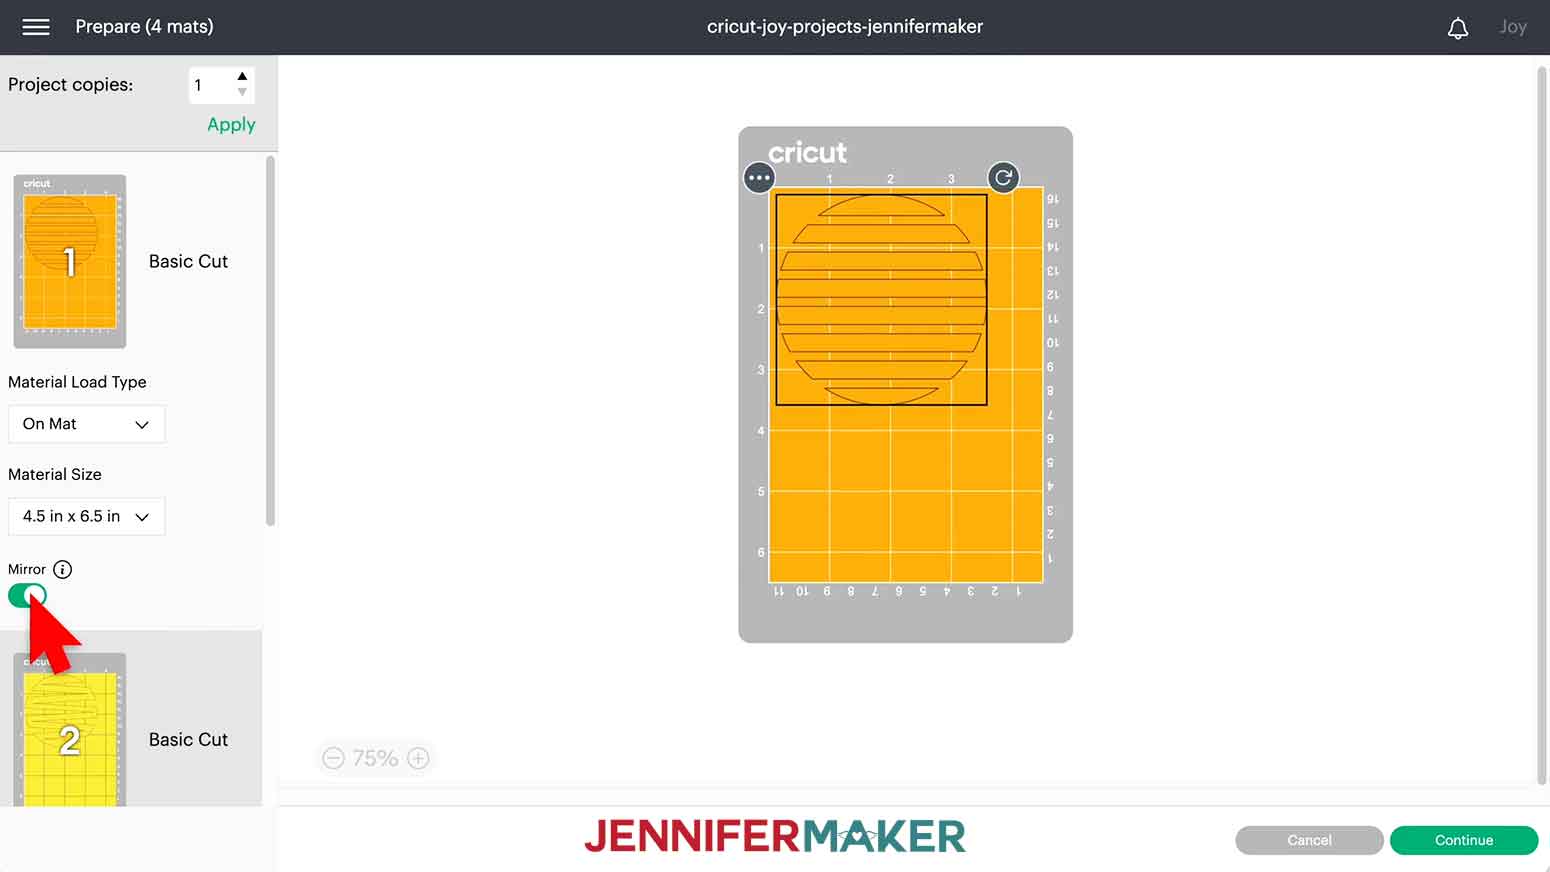
Learn how to decorate a hat, one of my favorite Cricut Joy projects! First, download my Cricut Joy Projects SVG/DXF/PDF files, Design #403, from my free resource library. There are eight designs to choose from, including a "Hello Sunshine" file that is sized to fit on the front of a Cricut Trucker Hat. I'll use the SVG and cut it using my Joy, but you can use any Cricut machine. Next, open Cricut Design Space and upload the SVG cut file. If you're not sure how to upload an SVG cut file to Cricut Design Space, watch this helpful video Made Simple training series I made. If you're on an iPhone or iPad, here's how to download and upload SVG files to the Cricut Design Space app. This is what my Hello Sunshine file looks like on the Canvas. Make sure the correct machine is selected in the top menu and click "Make It." Select "Multiple Ways" and click "Continue." Set the Black mat to "Without Mat" and set the Yellow mat to "On Mat" and make sure it matches the mat you're using. Toggle "Mirror" on for both mats. Click "Continue." Choose "Smart Iron-On" and change the pressure to "More." Make sure your Joy's blade is clean and seated correctly in the clamp. Place the smart iron-on vinyl shiny side down under the rollers so the Joy pulls the material in. Click Go to cut the design. When the cut is complete, click "Unload." Next, cut your regular iron on vinyl to the length indicated on the screen and place that shiny side down as well and repeat the cut. Trim the excess vinyl from your designs and weed them. Trim close to the designs so they can be pressed at the same time without the clear plastic interfering. Follow my Cricut Hat Press tutorial to apply the designs. You're all done! To make your project last, wait at least 24 hours before spot cleaning or washing the item. Hand wash the hat in cold water only and do not bleach. Line drying is your best option. If any vinyl lifts after washing, simply follow the complete application instructions to reapply it. FONTS Tumbler personalization - Biosha / Free Alternative: Joseph Sophia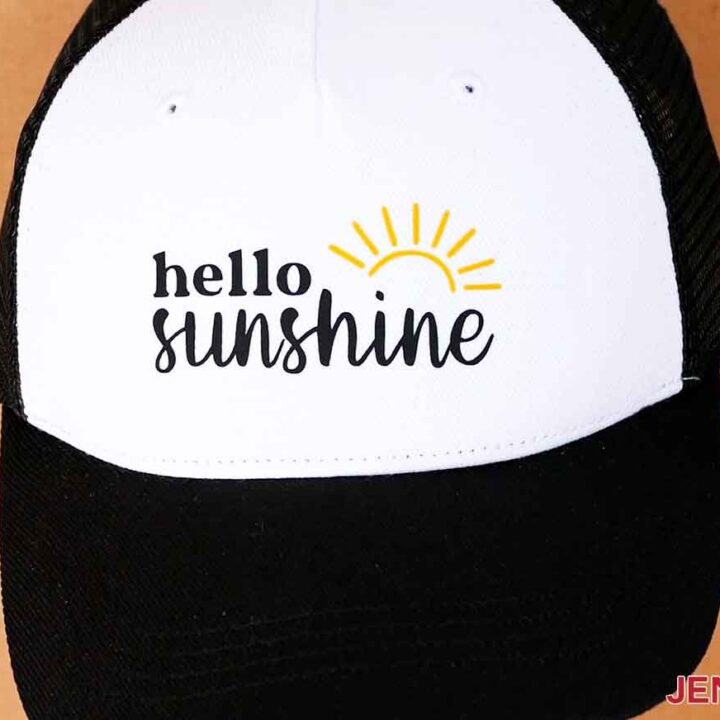
Cricut Joy Hat with Smart Iron-On Vinyl
Materials
Tools
Instructions
STEP 1: GET MY FREE CRICUT JOY PROJECTS SVG FILES
STEP 2: PREPARE YOUR DESIGN
STEP 3: CUT YOUR DESIGN
STEP 4: APPLY YOUR DESIGN

STEP 5: SHOW IT OFF
Notes
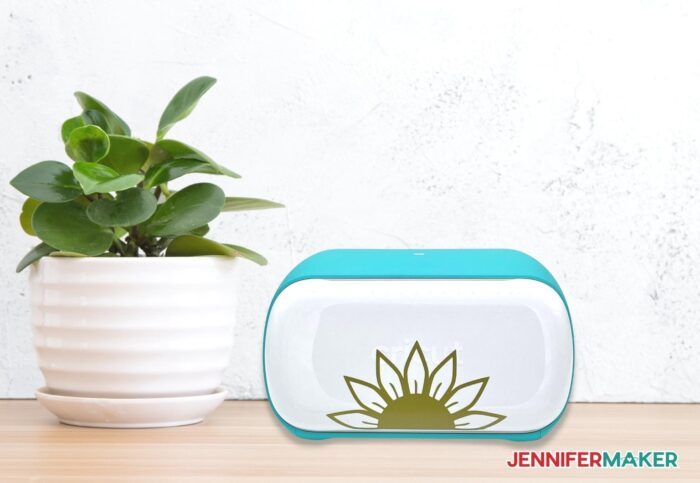
How to Make a Cricut Joy Machine Decoration
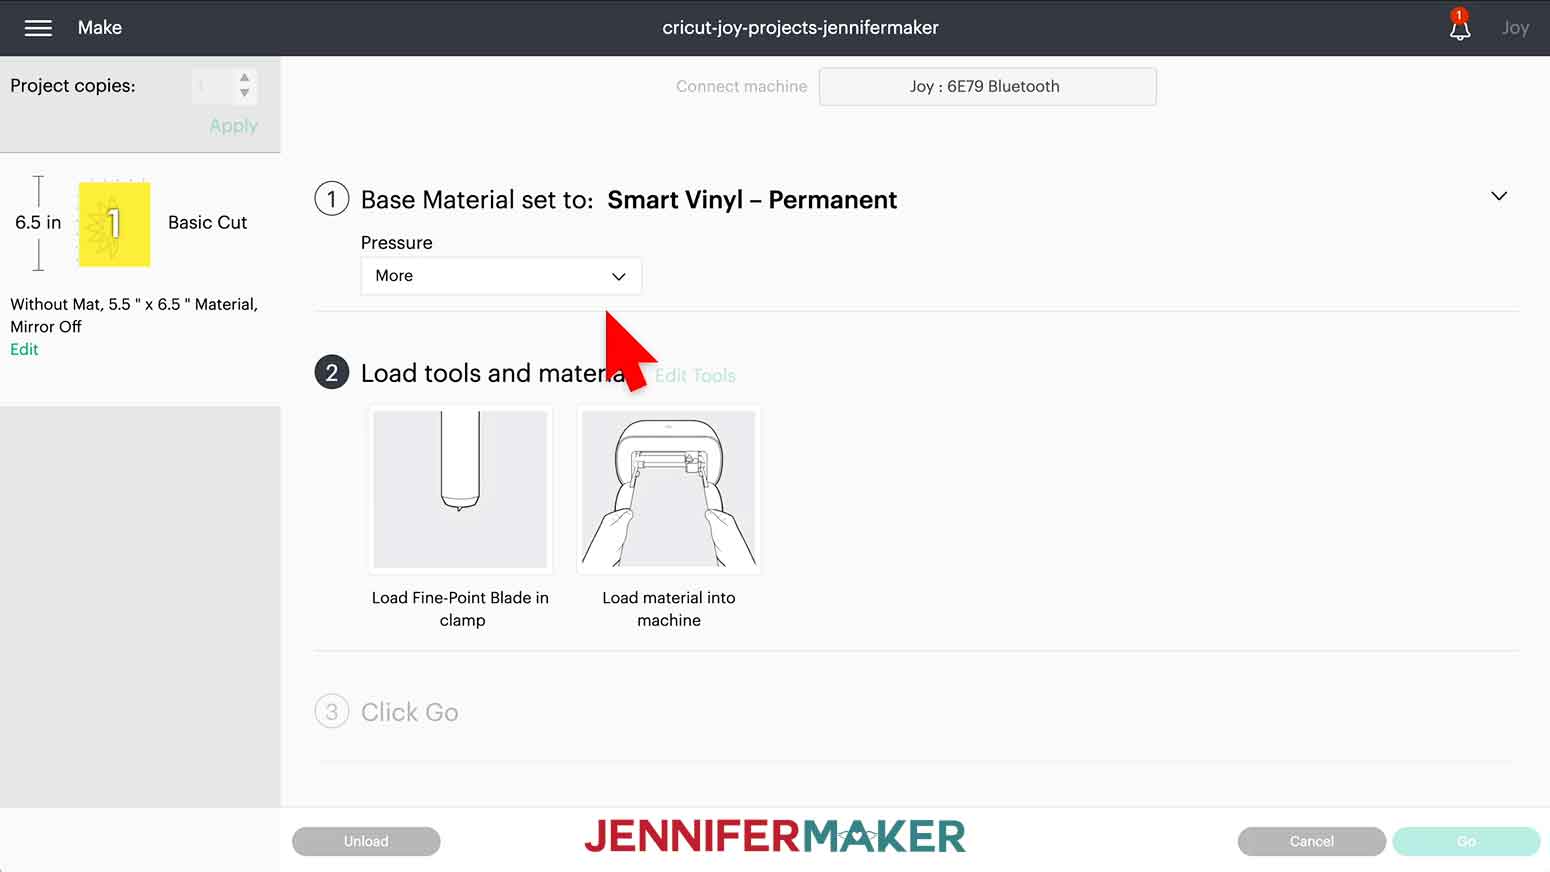
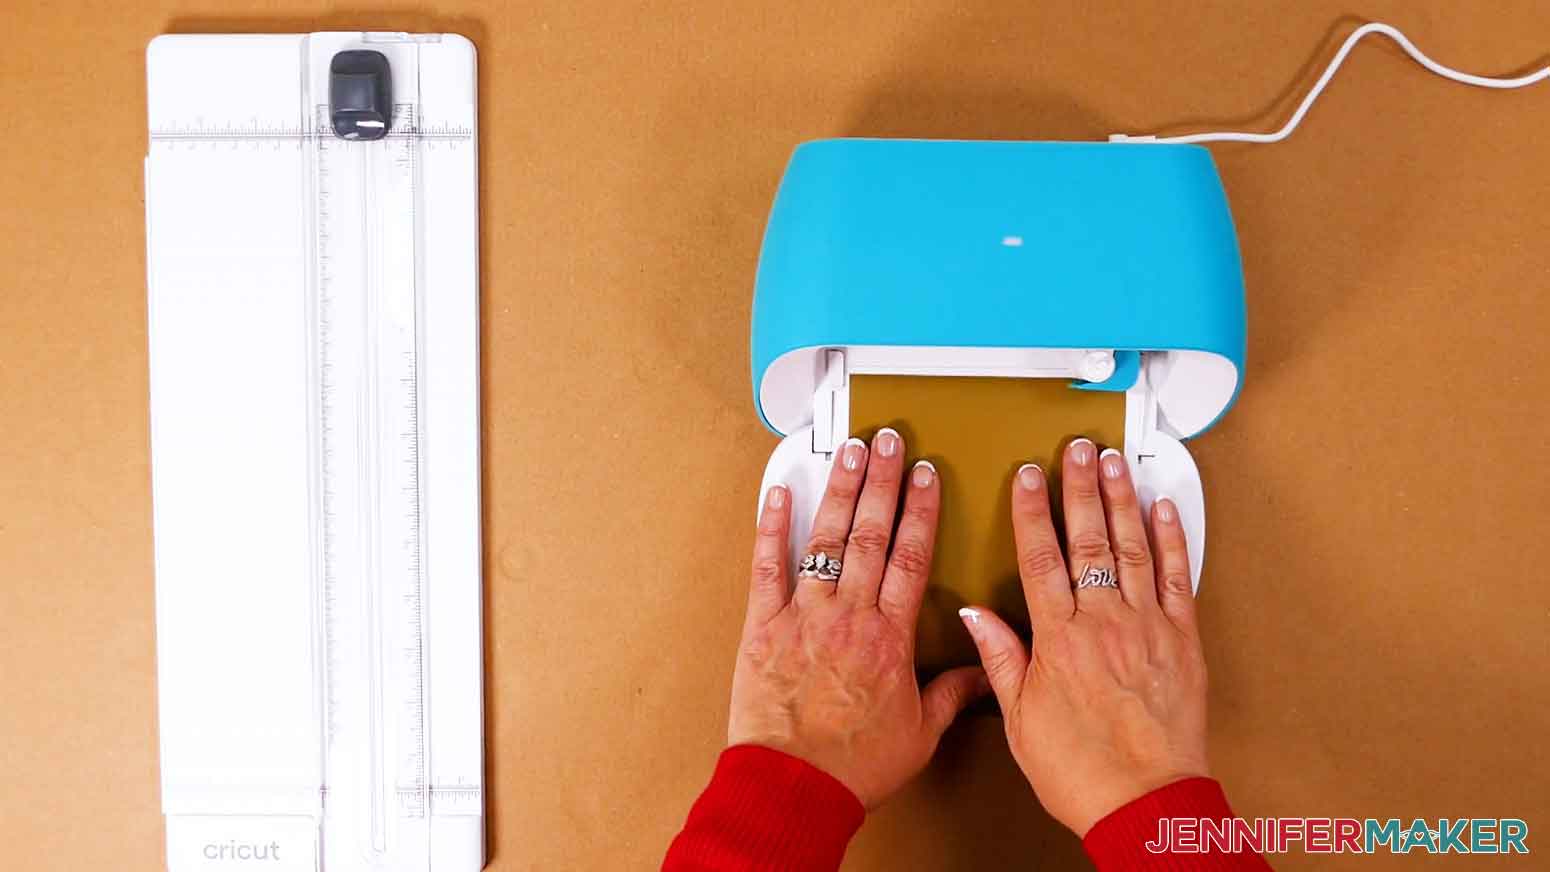
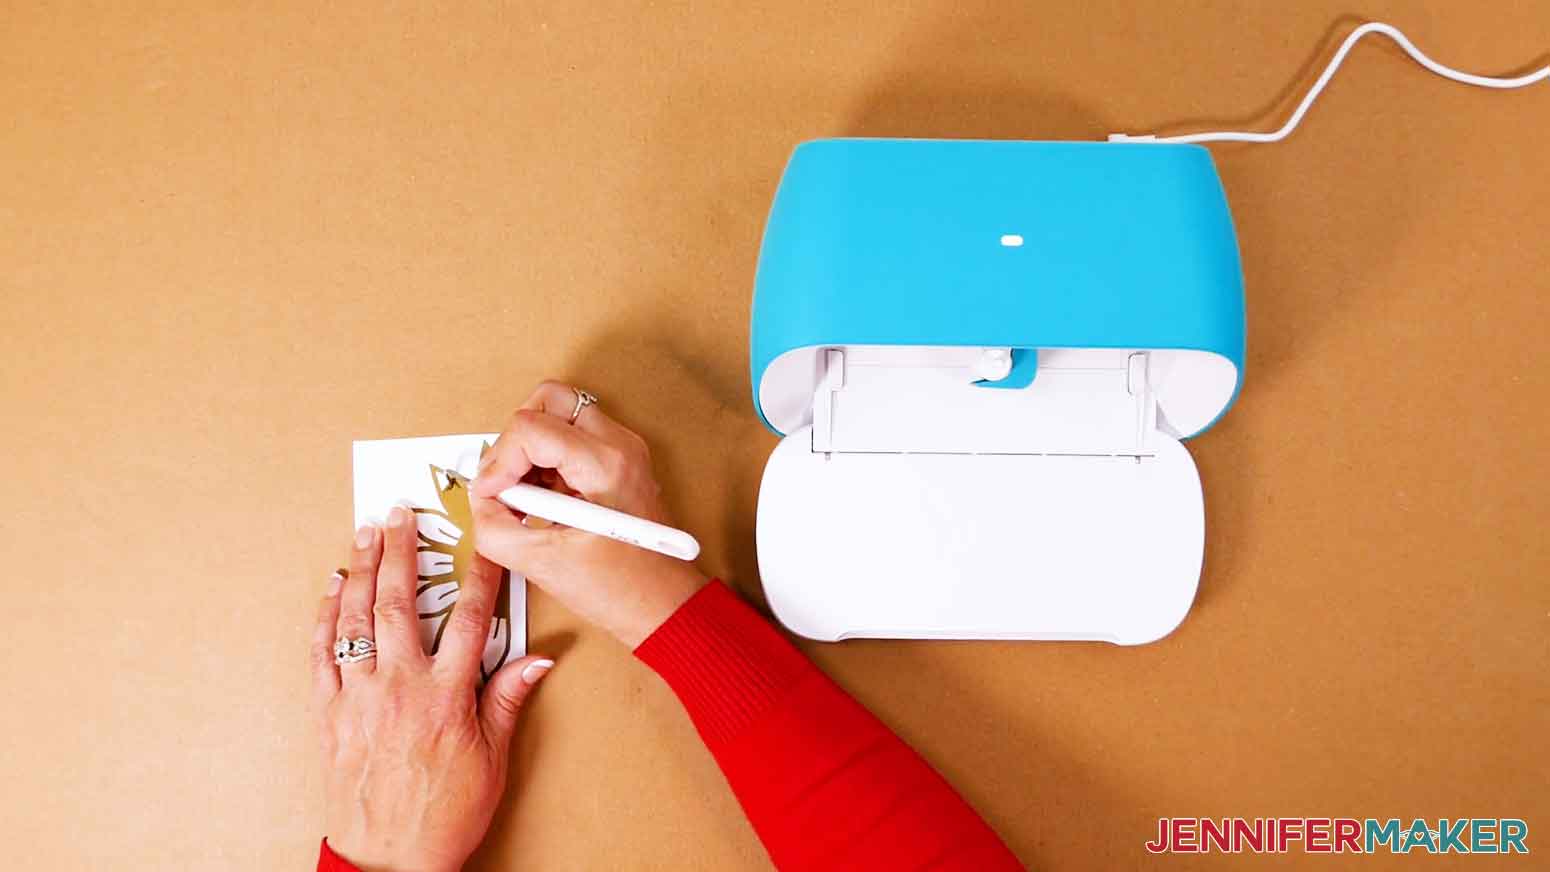
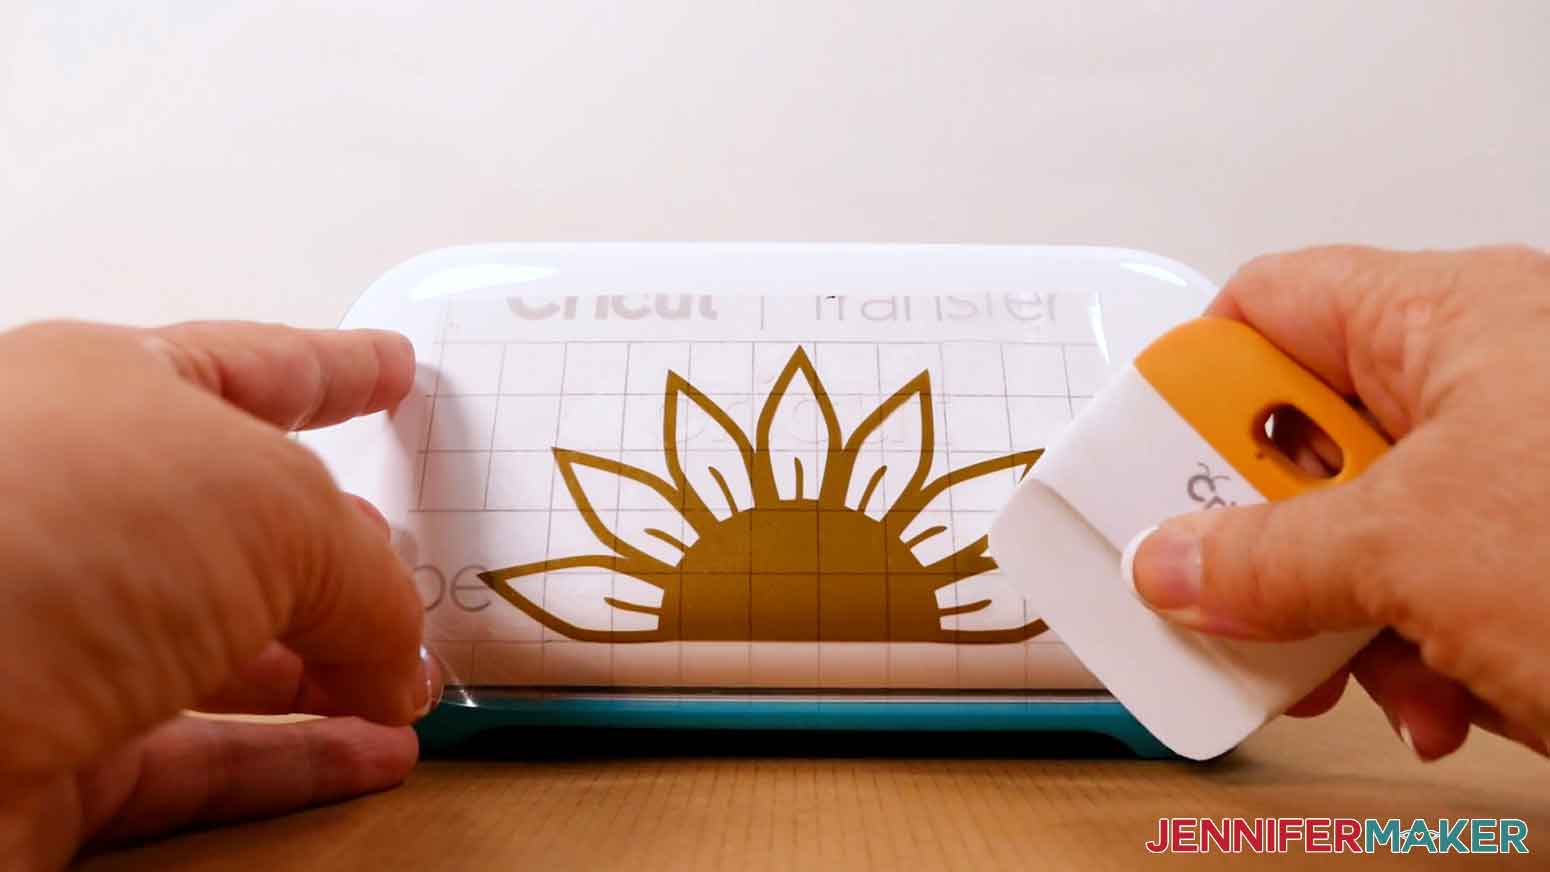
Learn how to decorate your machine with one of my easiest Cricut Joy projects! First, download my Cricut Joy Projects SVG/DXF/PDF files, Design #403, from my free resource library. There are eight designs to choose from, including a flower that is sized to fit on the front of a Joy. I'll use the SVG and cut it using my Joy, but you can use any Cricut machine. Next, open Cricut Design Space and upload the SVG cut file. If you're not sure how to upload an SVG cut file to Cricut Design Space, watch this helpful video Made Simple training series I made. If you're on an iPhone or iPad, here's how to download and upload SVG files to the Cricut Design Space app. Make sure the correct machine is selected in the top menu and click "Make It." Select "Without Mat" and click "Continue." Click "Continue" again on the next screen. Under Set Base Material, choose "Smart Vinyl - Permanent" and change the pressure to "More." Make sure your Joy's blade is clean and seated correctly in the clamp. Cut your vinyl to the length indicated on the screen. Place the vinyl face up under the rollers so the Joy pulls the material in. Click Go and the design will be cut. When the cut is complete, click "Unload." Trim the excess vinyl from your design and weed it. Use a lint-free cloth and rubbing alcohol to clean the Joy, which will help the vinyl adhere easier. Cut a piece of StandardGrip Transfer Tape a bit larger than your design. Place the tape sticky side down on the design and burnish it from both sides with your scraper. Remove the backing paper. Place the Joy so that you can easily reach the front door. I put it at the edge of a table so I could sit down and look at the door straight on while positioning the decal. Curve the transfer tape with the decal so the center of the design is at the bottom of the U or taco shape. Let the bottom touch the Joy where you want to place the design's center. I lined up the flower's edge just above the lower seam. Gently lower the sides of the decal and burnish them to the surface with your scraper. Remove the transfer tape. You're all done! cricut-joy-projects-flower-show-off FONTS Tumbler personalization - Biosha / Free Alternative: Joseph Sophia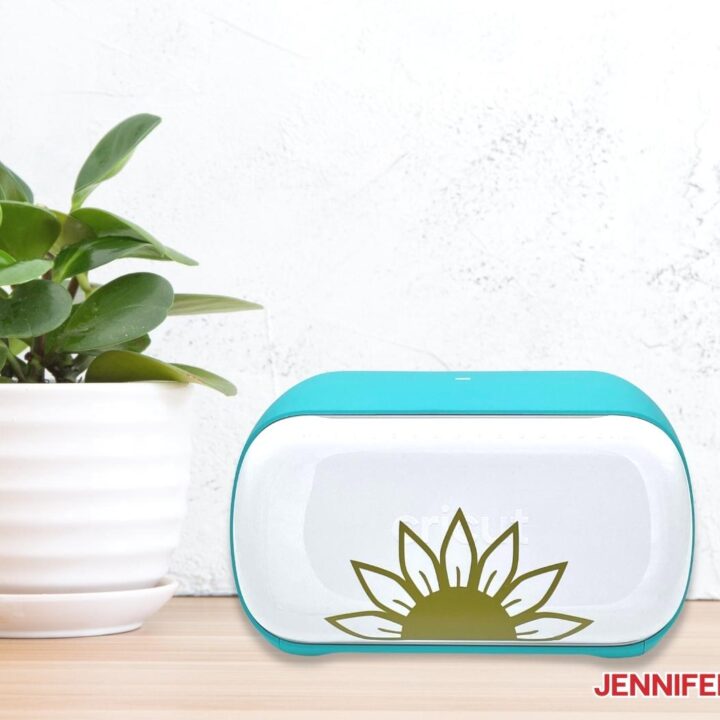
Cricut Joy Decoration
Materials
Tools
Instructions
STEP 1: GET MY FREE CRICUT JOY PROJECTS SVG FILES
STEP 2: PREPARE AND PERSONALIZE YOUR DESIGN
This is what my flower file looks like on the Canvas. 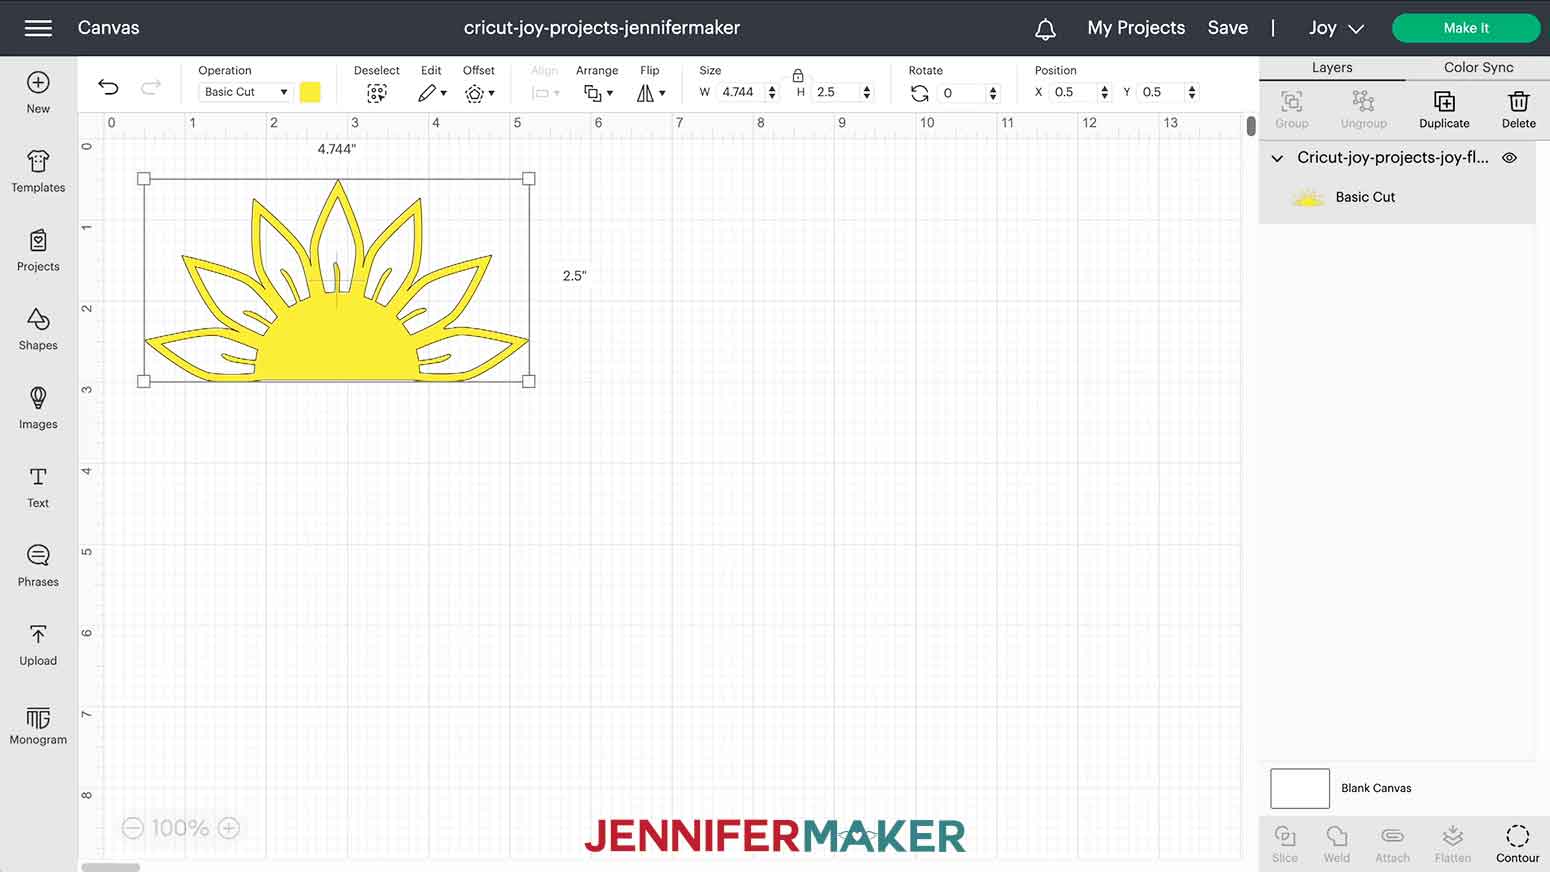
STEP 3: CUT YOUR DESIGN
STEP 4: APPLY YOUR DESIGN
![]()
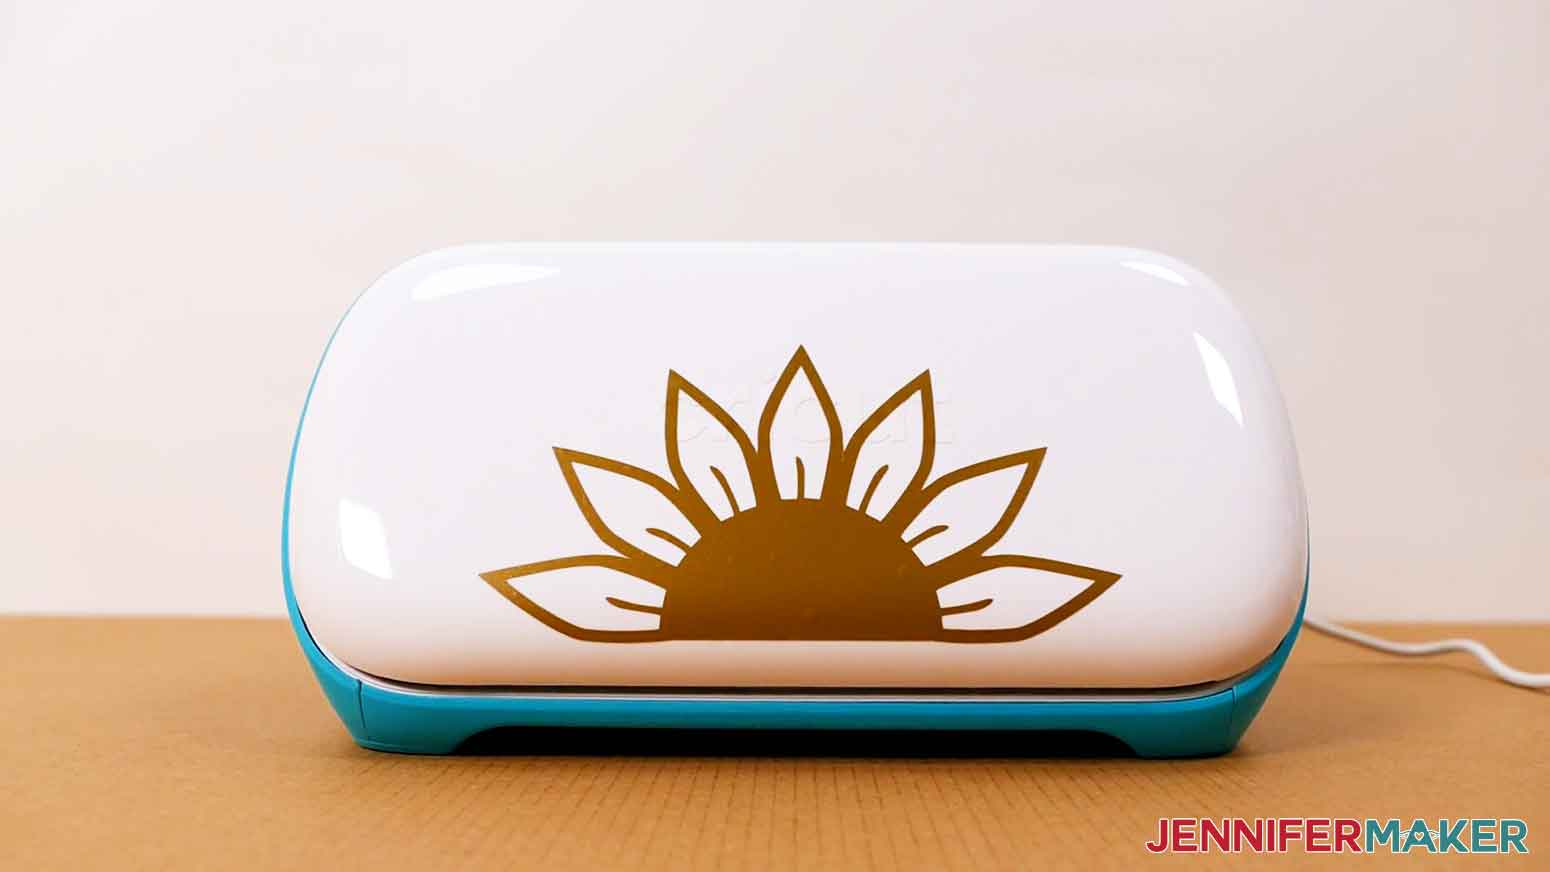
STEP 5: SHOW IT OFF
Notes
How to Make Infusible Ink Coasters on a Cricut Joy
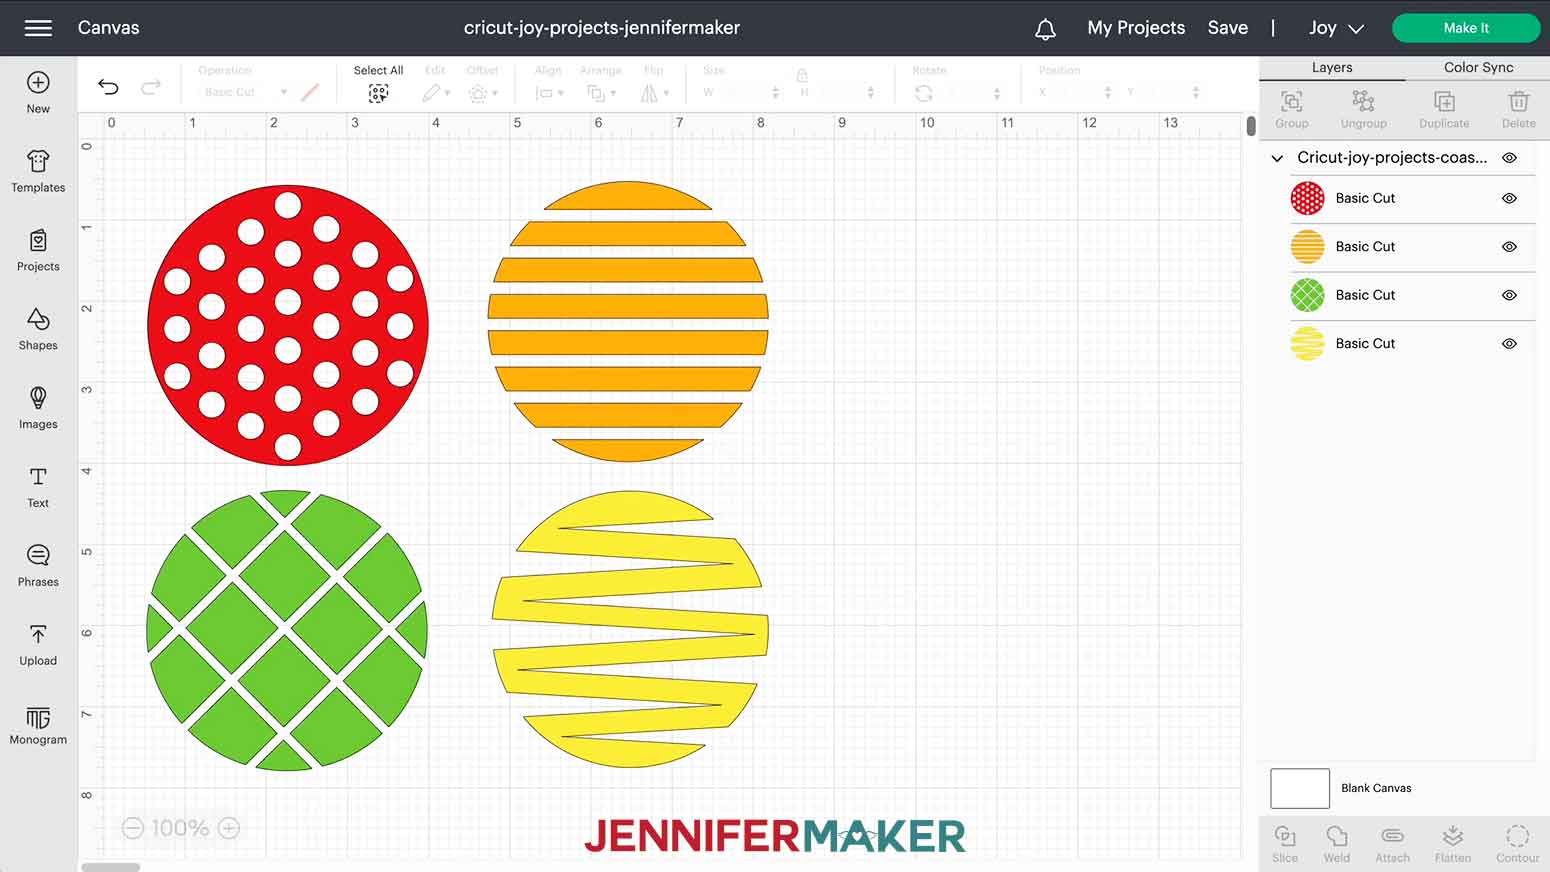
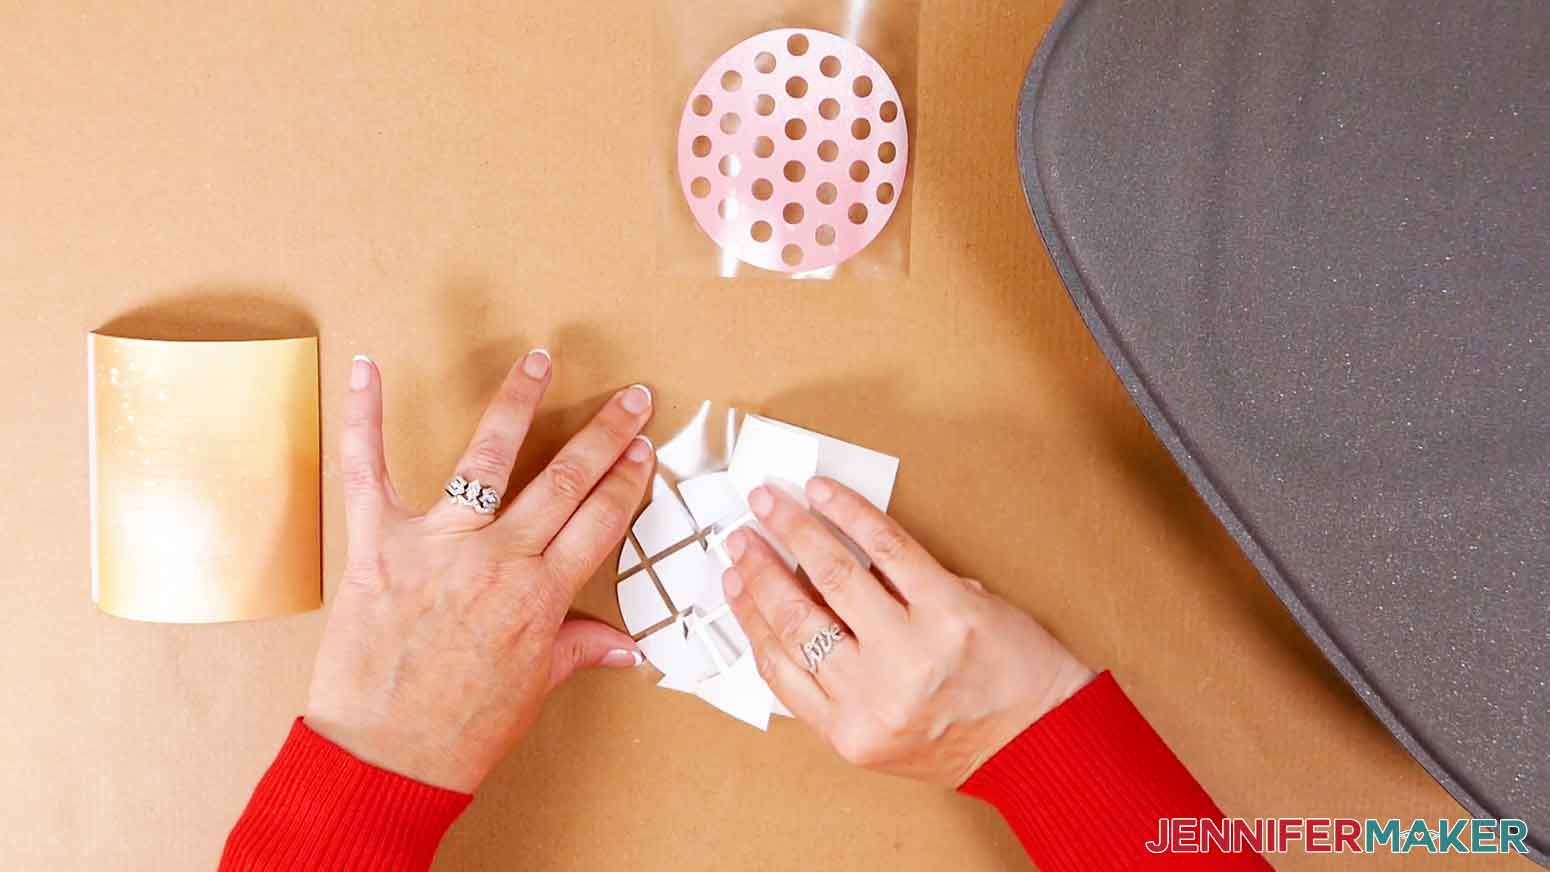
Learn how to make 7 fun and easy projects on your Cricut Joy! First, download my Cricut Joy Projects SVG/DXF/PDF files, Design #403, from my free resource library. There are eight designs to choose from, including one file with four coaster shapes. I'll show you how to create the designs on a Joy but they can all be made on the Cricut Maker or Explore machines. Next, open Cricut Design Space and upload the SVG cut file. If you're not sure how to upload an SVG cut file to Cricut Design Space, watch this helpful video Made Simple training series I made. If you're on an iPhone or iPad, here's how to download and upload SVG files to the Cricut Design Space app. This is what my Infusible Ink Coaster designs look like when they are uploaded to Cricut Design Space. NOTE: The coasters are sized to fit Cricut ceramic coasters. If you are using a different brand, double check the size of your coaster. These designs are ready, so check that the correct machine is selected and click "Make It." Select "On Mat" and toggle the "Mirror" option on for each mat. Click "Continue." Under Set Base Material, choose "Infusible Ink Transfer Sheets" and change the pressure to "More." Check the box next to "Remember material settings" since we're using the same materials and tool for each mat. Make sure your blade is seated correctly in the clamp. Set the butcher paper from one of your sheets aside. Trim your Infusible Ink sheets to 4" squares to cover the coaster designs. Place the material for the first mat ink-side up. The shiny plastic side goes against the mat. Place the mat face up under the rollers so the Joy pulls the material in. Click Go and the design will be start processing. When the cut is complete, click "Unload." Flip over the mat and peel it back to release the transfer ink sheet. Repeat for the other mats. To weed Infusible Ink Transfer Sheets, use the “cracking” method. Slightly bend and roll the cut paper until you hear a little cracking sound (which happens as the cuts separate). Don’t worry if your design lifts off the liner a bit. After you “crack” your cut design, just take away the excess paper and you’ll be left with just your design on the liner. TIP: If you have any issues getting teeny, tiny details, you can try using a weeding tool. I used my Autopress and was able to press them all at once! You can also use the 9" x 9" EasyPress 2 to press them all at once. Use a lint roller to remove dust from the coasters. Lay one of your weeded designs face down on each coaster and hold them in place with heat resistant tape. Place them face down on the cardstock within the area your press will cover. Put a piece of white butcher paper over the coasters to protect your press. Infusible Ink is a sublimation process, so you need good ventilation to heat the projects safely. Open a window and turn on a gentle fan if possible. Set the timer for 240 seconds. When it comes to temperature, close the press. When it chimes, open the Autopress and remove the butcher paper. Let the coasters cool for at least 15 minutes. Remove the tape and liners when they're cool. They can be washed with warm water and glass cleaner. Do not use steel wool, colored cleansing agents, or scrubbing pads. Materials: Ceramic coasters, infusible ink transfer sheets, heat resistant tape Dimensions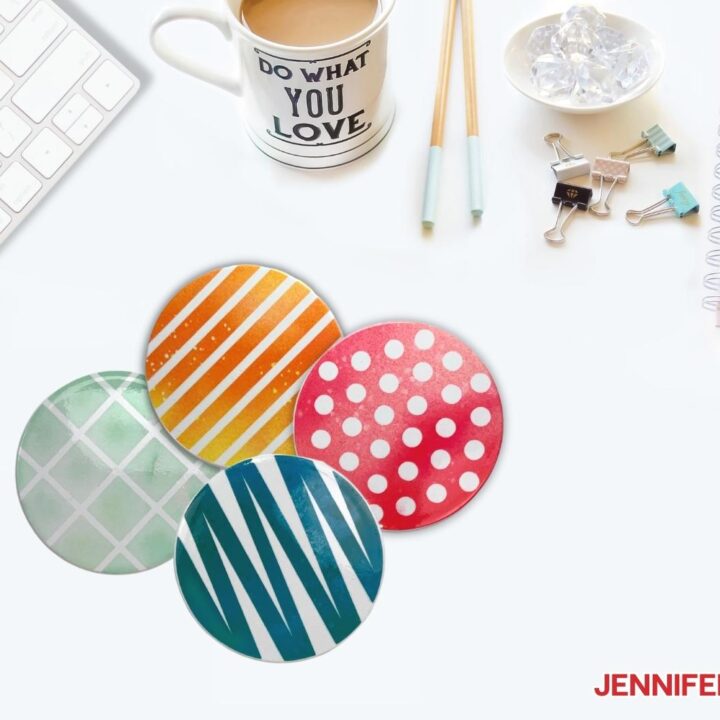
Infusible Ink Coasters on a Joy
Materials
Tools
Instructions
STEP 1: GET MY FREE CRICUT JOY PROJECTS SVG FILES
STEP 2: PREPARE YOUR DESIGNS
STEP 3: CUT YOUR DESIGNS
STEP 4: APPLY YOUR DESIGNS
Add a piece of white cardstock on top of the mat to protect it from ink transfer.
Heat your press to 400 °F. Reference the Cricut Heat Guide for details if you're using different materials or tools.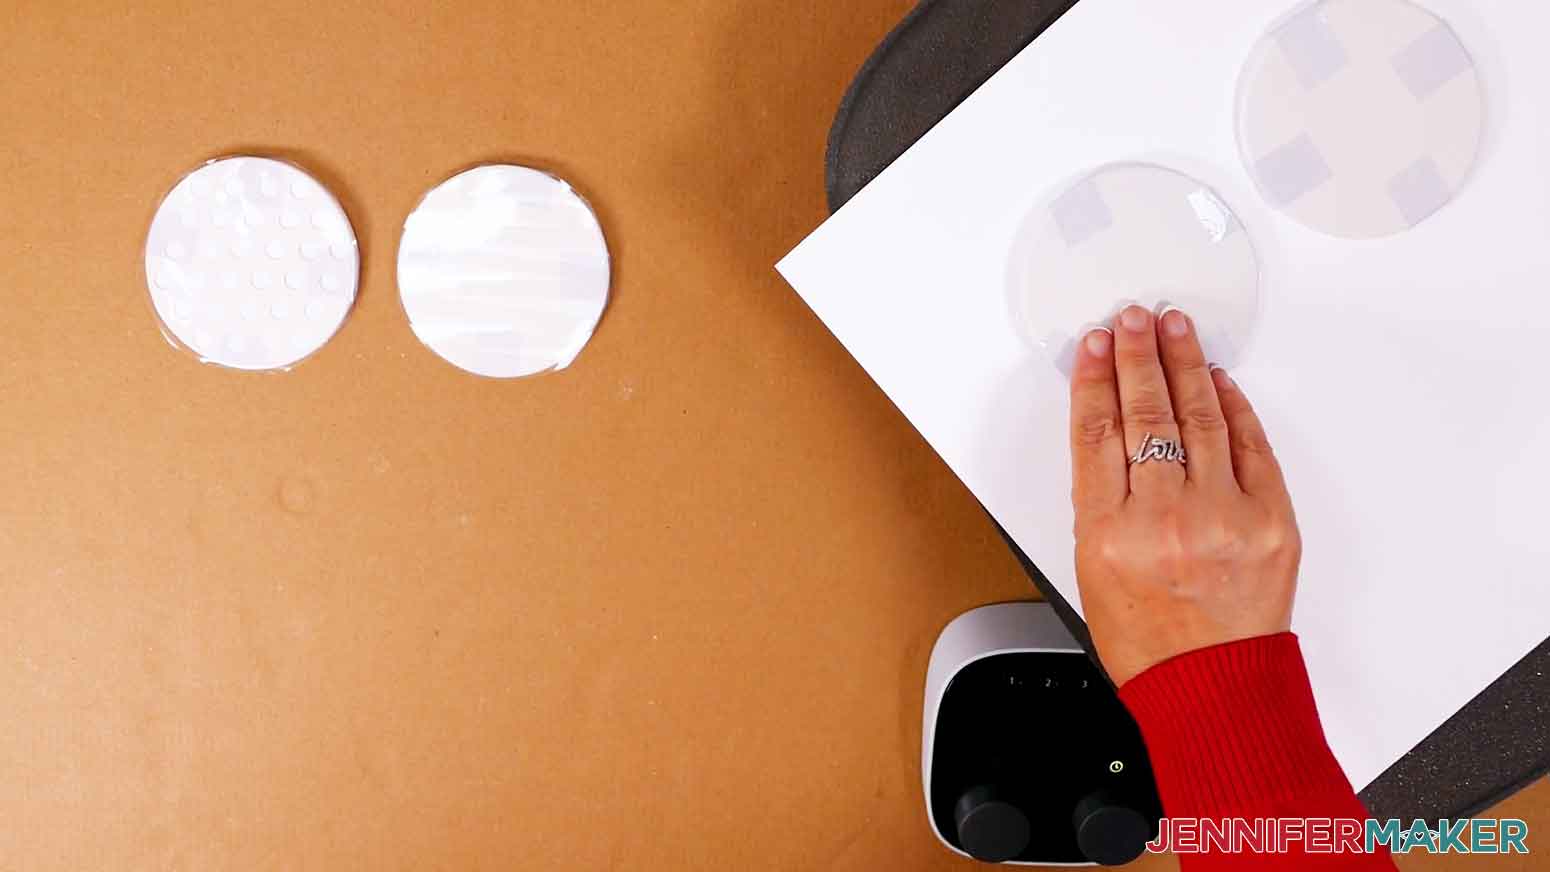
STEP 5: SHOW THEM OFF:

Mat type: Standard 4.5” x 6.5” mat
Dimensions at upload: 7.713” W x 7.292”H
DS Steps: Changes only needed if crafter wants to make coasters in the same color or a different sized coaster. Otherwise, they’re ready to Make It.
DS Notes: None
Material Load Type: On mat
Material Size: 4” square
Mirror: Yes
other Prepare notes: Some designs are symmetrical so they won’t notice a difference when turning mirror on. It is good practice to always mirror.
Material Settings, pressure: Infusible Ink Transfer Sheet, more pressure
Tool(s): Fine point blade, weeding tool, lint free cloth (included with infusible ink)
Any cutting or unloading notes:
Assembly technique: Weed designs. Wipe coasters with lint-free cloth. Place infusible ink sheet on coaster with ink against the shiny side of the coaster, the liner facing up. Secure infusible ink sheets with heat resistant tape. Place white cardstock on a heat-resistant mat and place coasters upside down on cardstock. All 4 can be pressed at the same time. Cover coasters with butcher paper (included in infusible ink box). Press at 400 degrees for 240 seconds. Lift press slowly and remove butcher paper. Allow coasters to cool completely, at least 15 minutes. They will be extremely hot. When cool to touch, remove liners and tape.
Show it Off ideas: All 4 on display
Variation ideas: Different on-brand colors
Important images for create card other than initial upload:
Anything else to be aware of: Here is the Cricut link for reference.Notes
How to Make Foil Cricut Joy Gift Tags
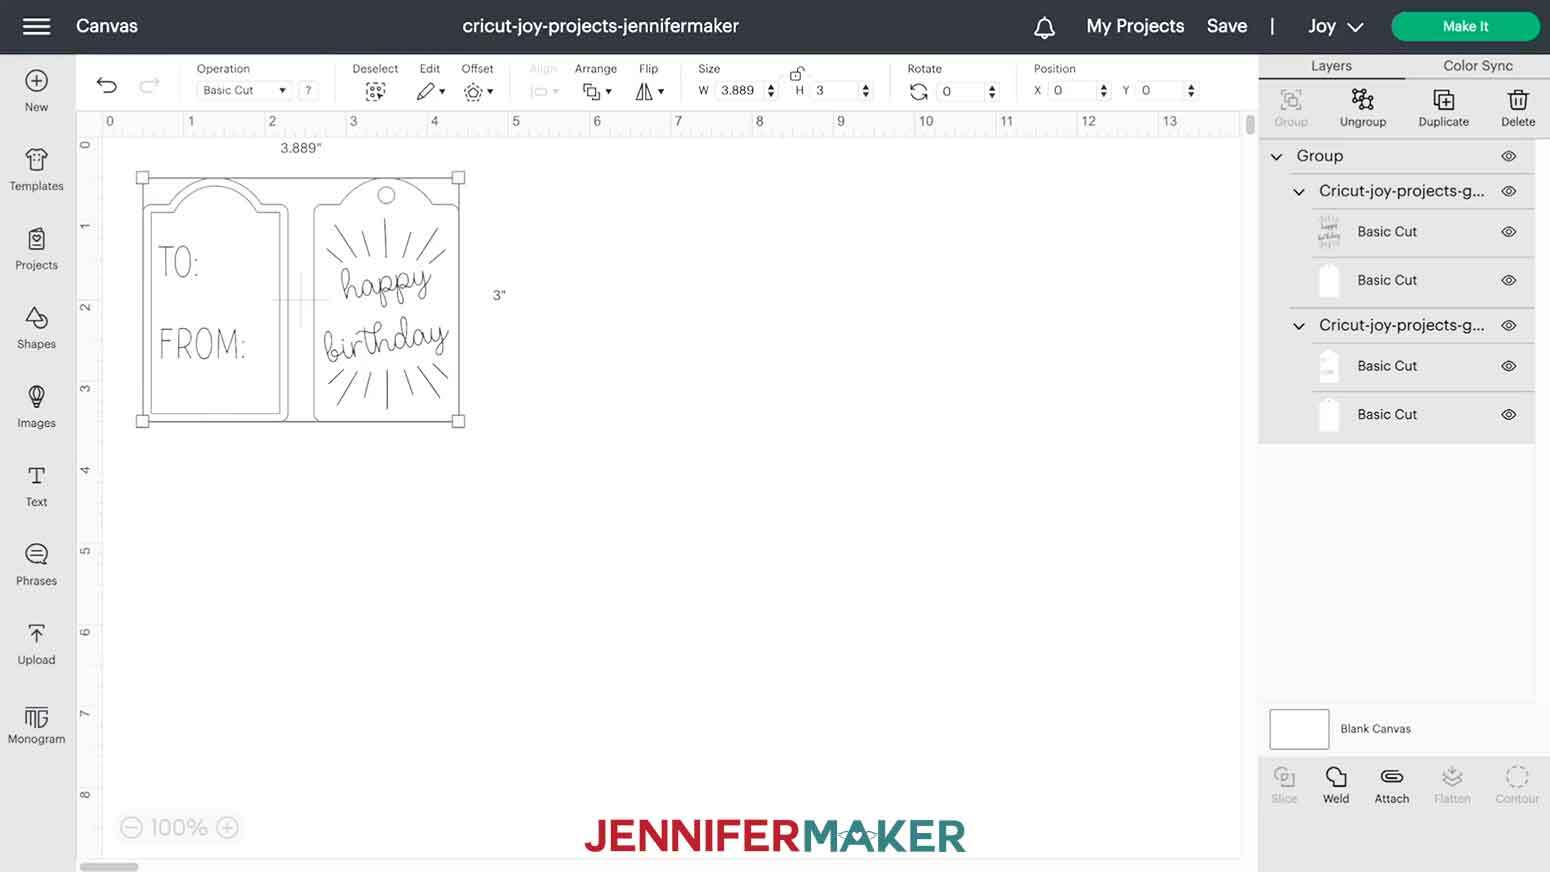
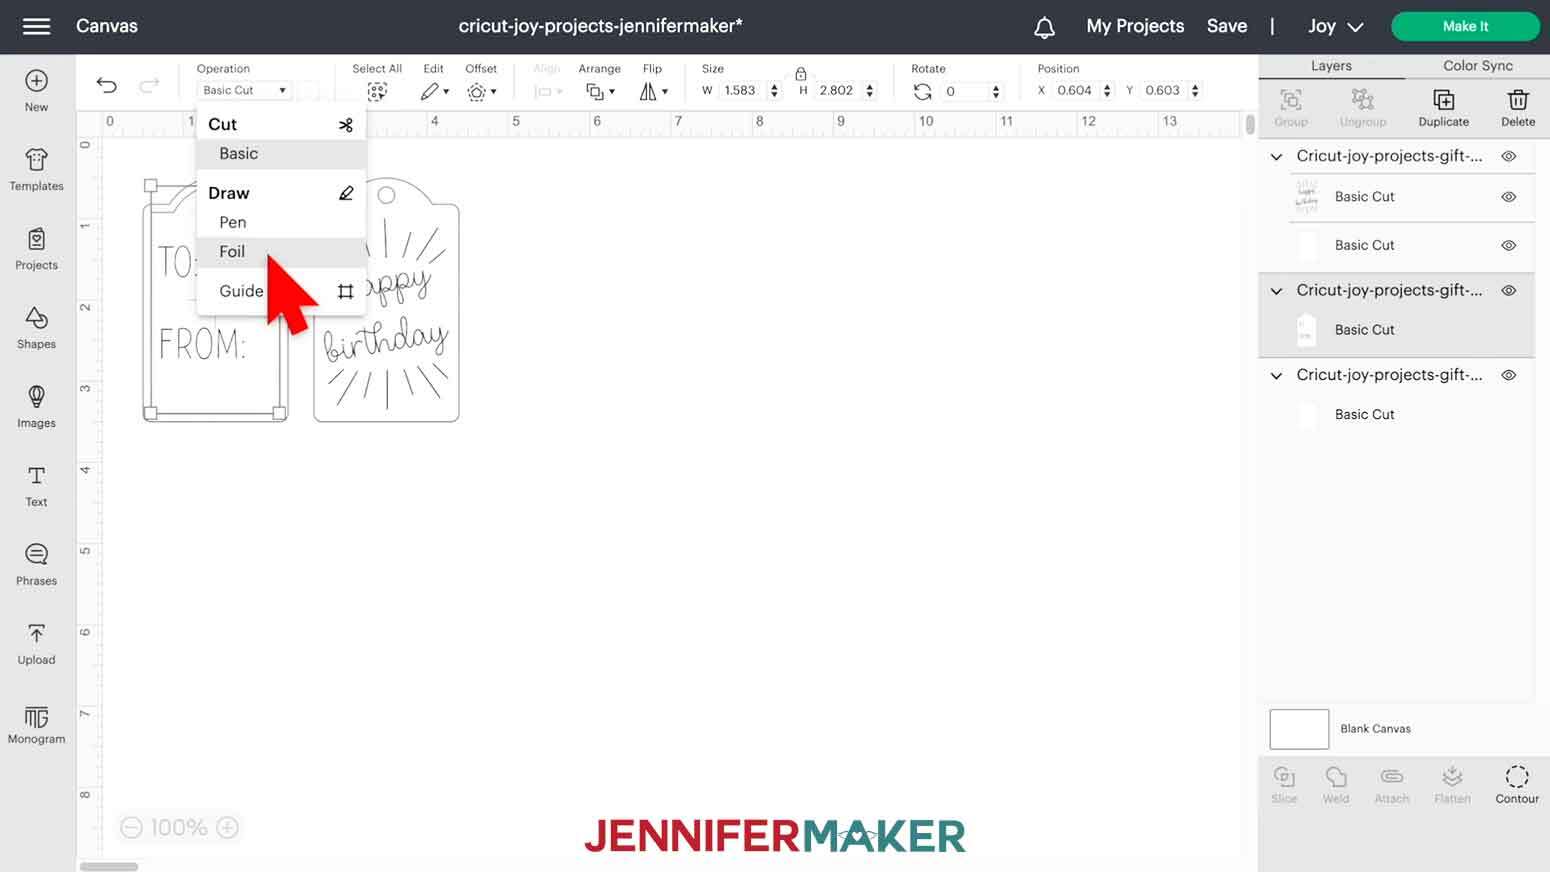
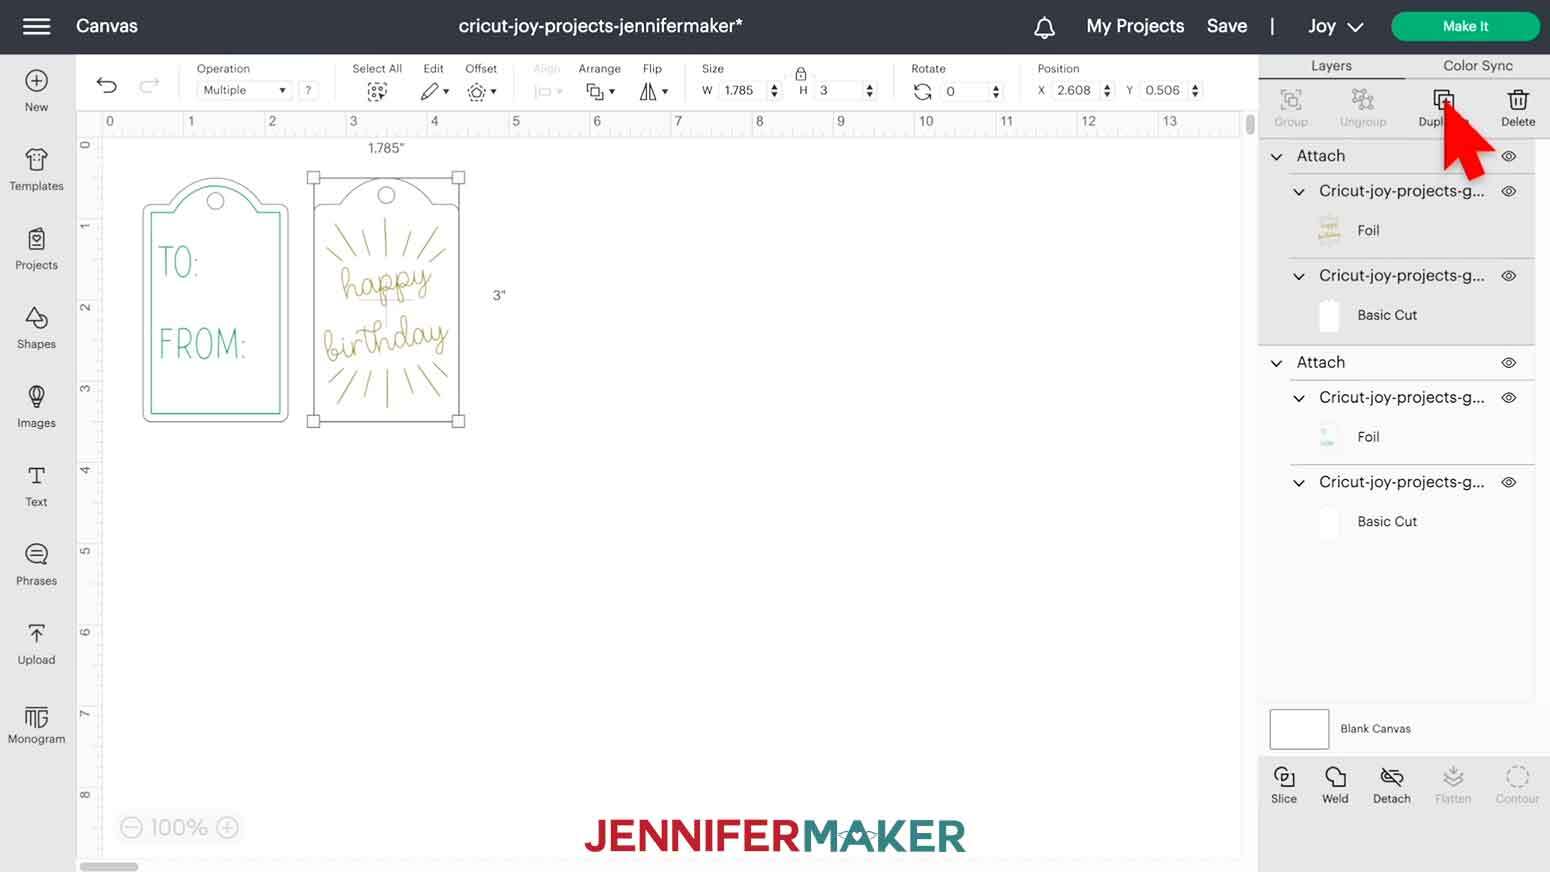
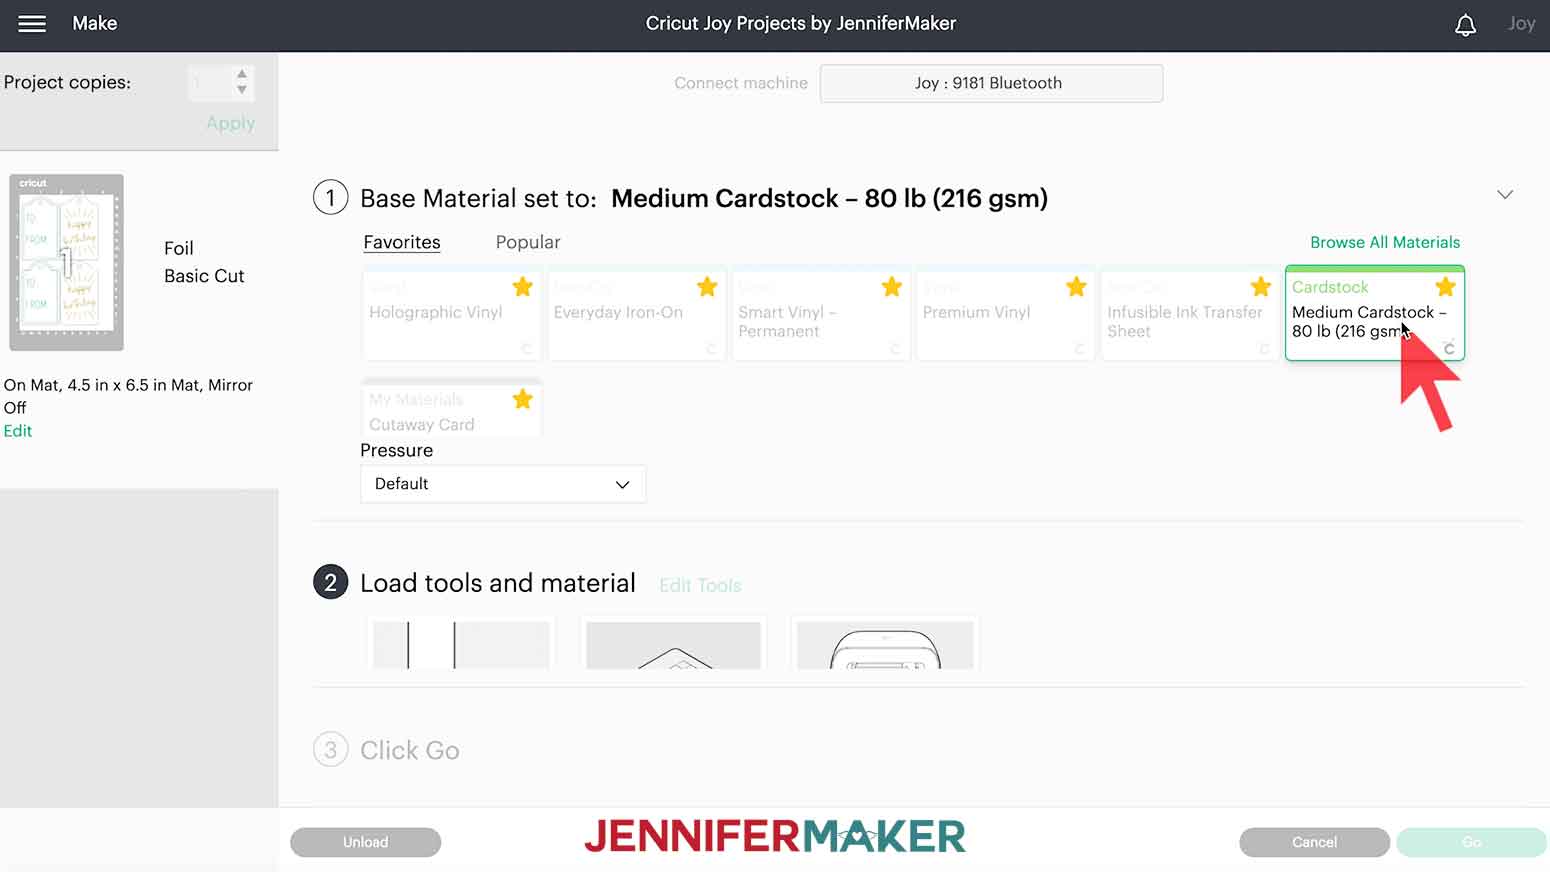
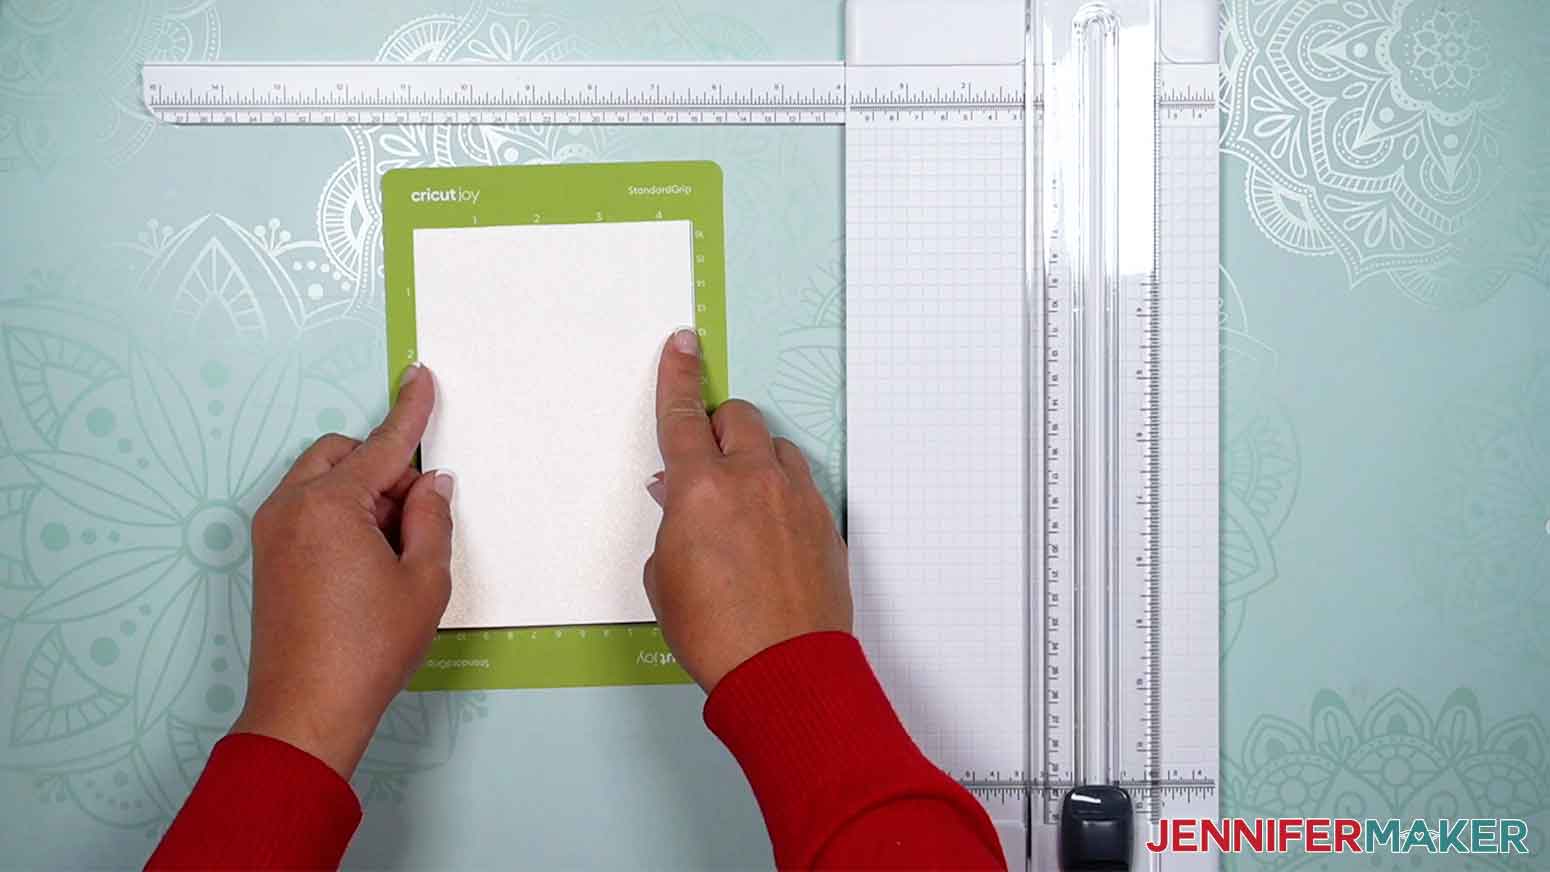
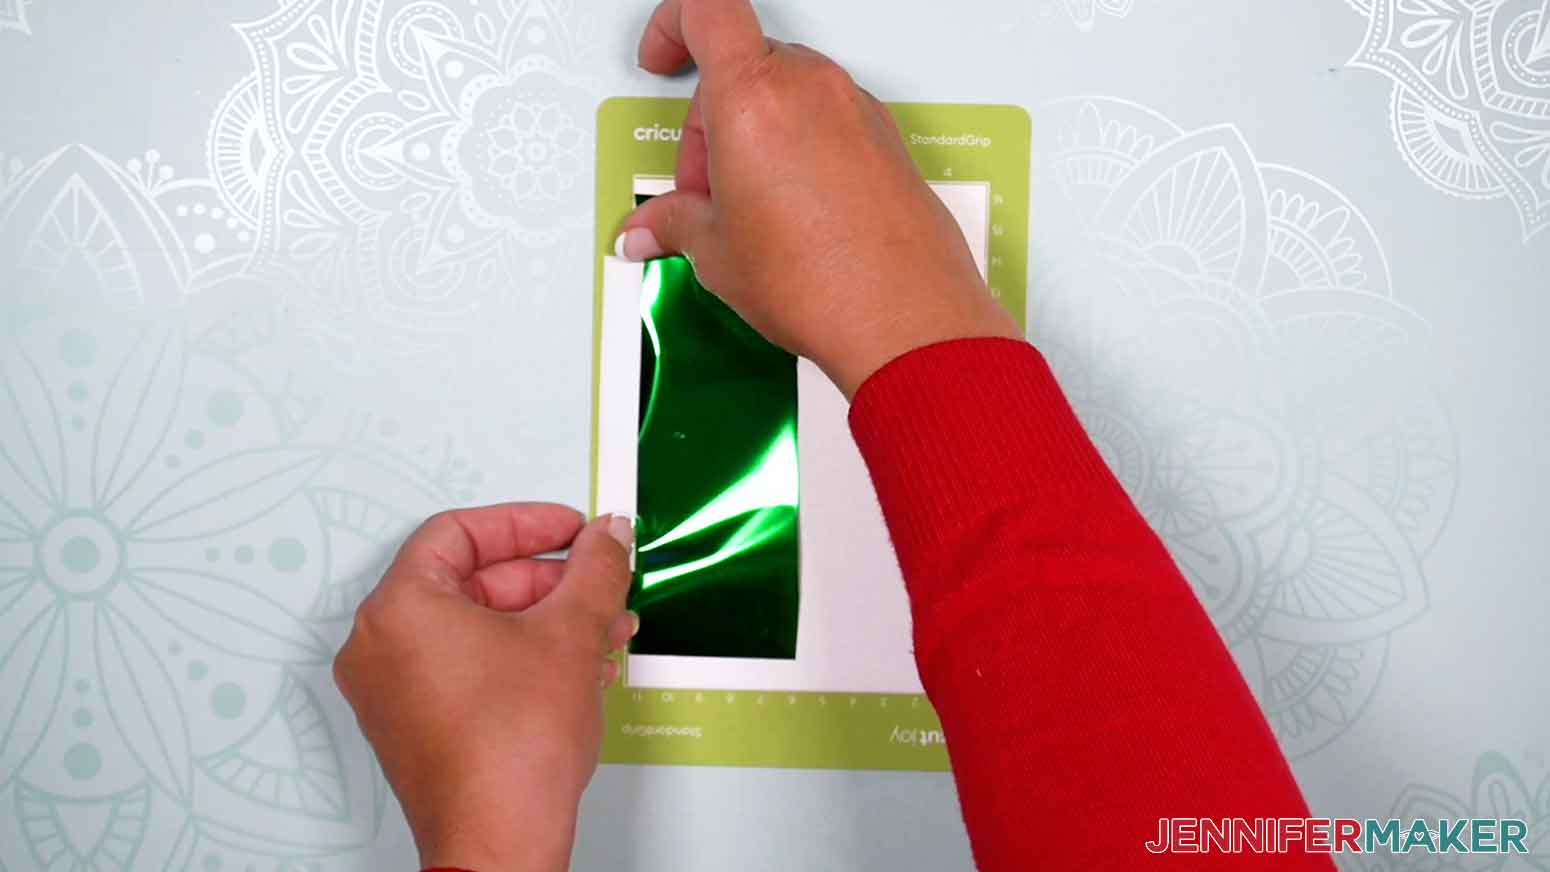
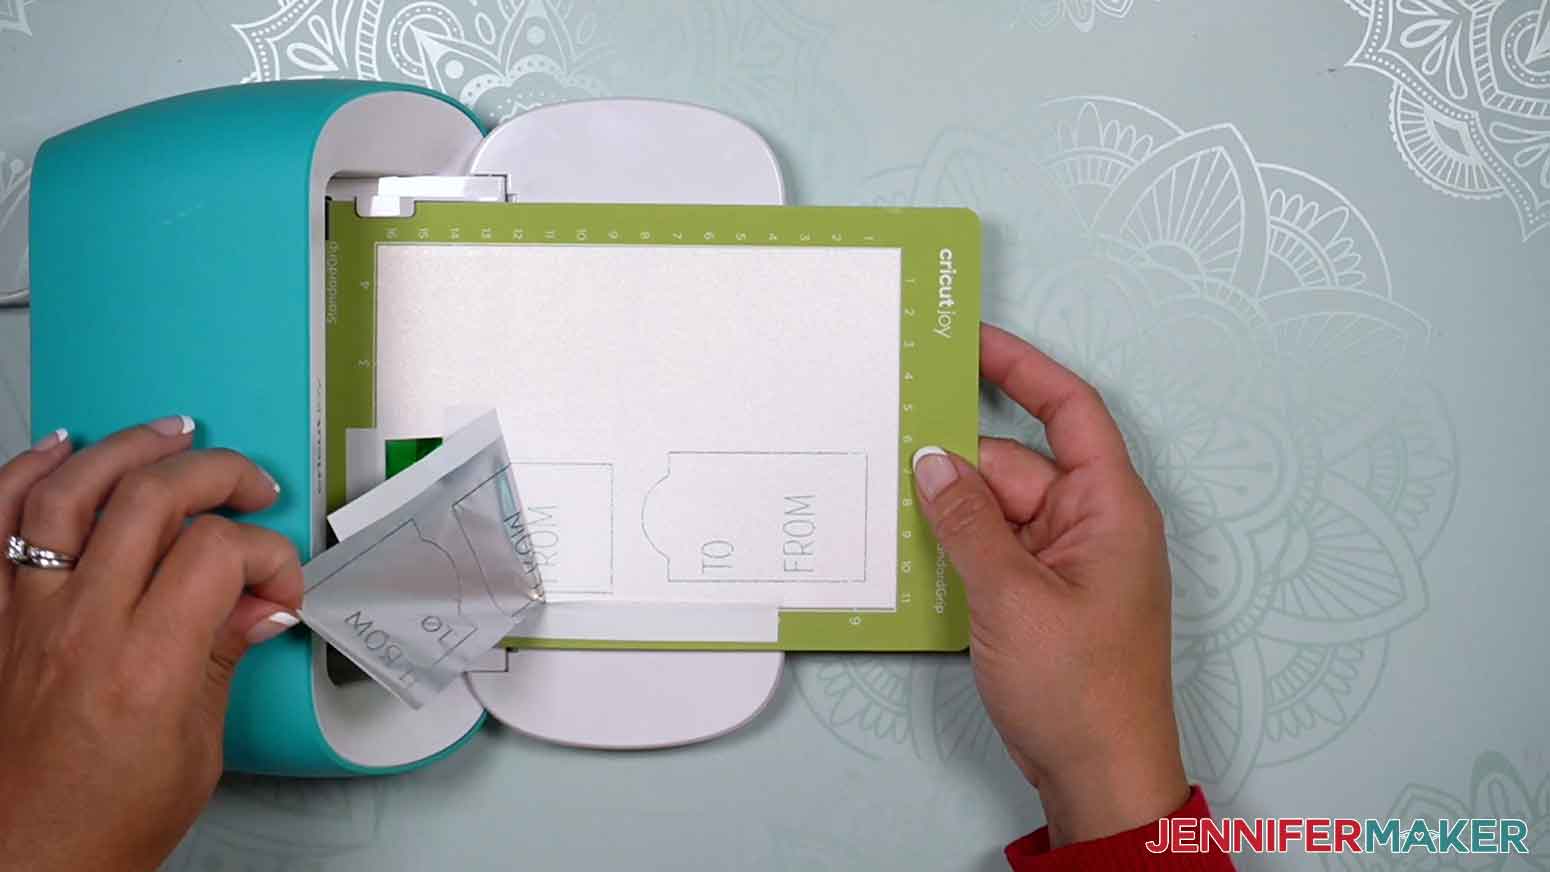
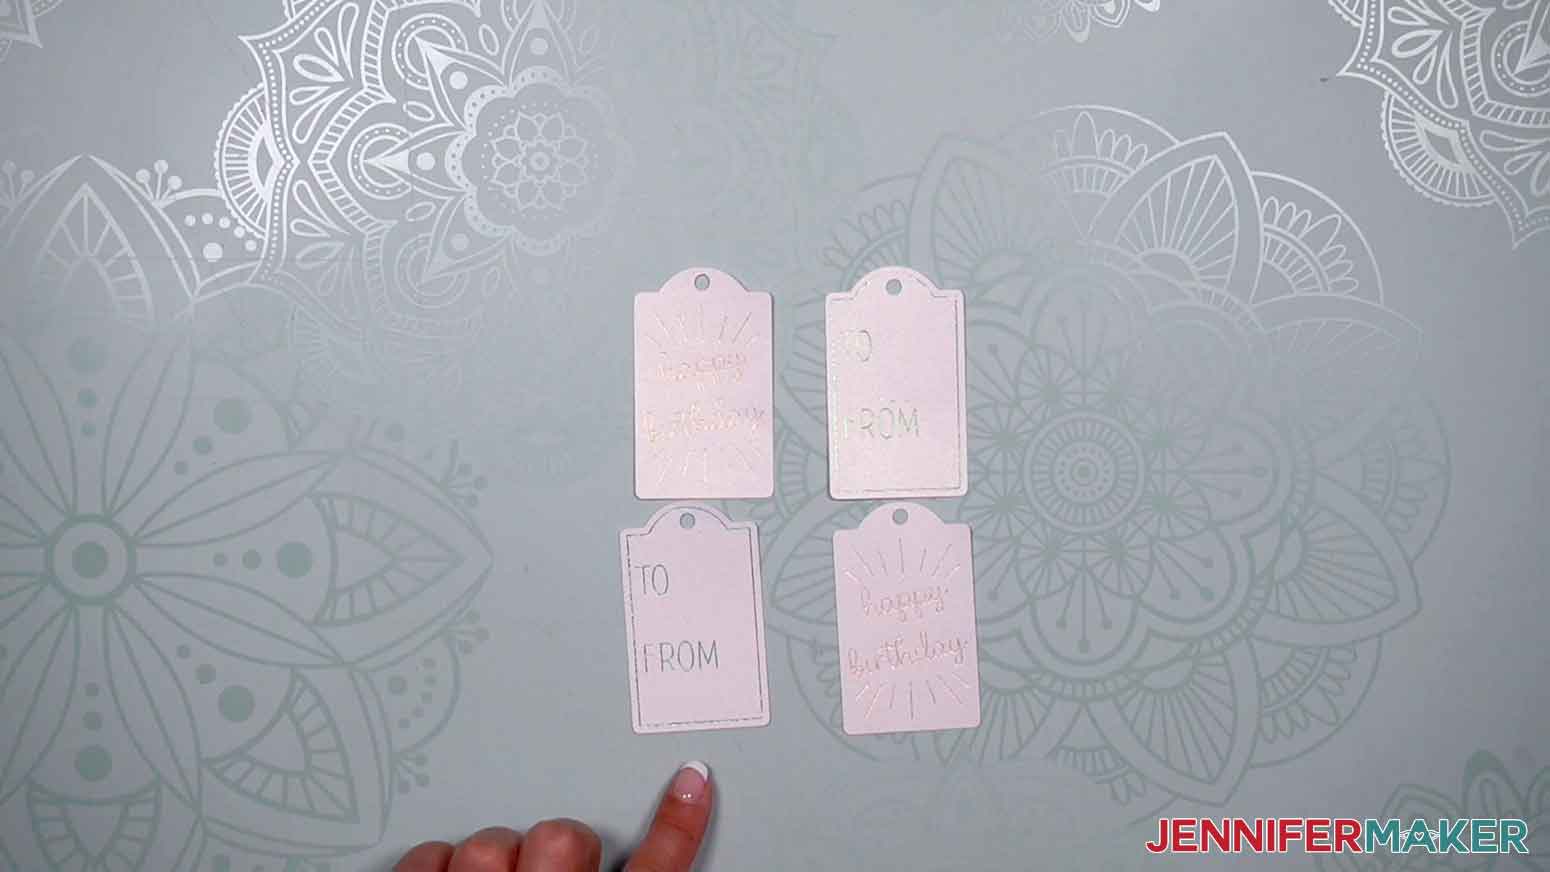
Learn how to make foiled gift tags, popular Cricut Joy projects! First, download my Cricut Joy Projects SVG/DXF/PDF files, Design #403, from my free resource library. There are eight designs to choose from, including gift tags. I'll show you how to create the designs on a Joy but they can all be made on the Cricut Maker or Explore machines. Next, open Cricut Design Space and upload the SVG cut file. If you're not sure how to upload an SVG cut file to Cricut Design Space, watch this helpful video Made Simple training series I made. If you're on an iPhone or iPad, here's how to download and upload SVG files to the Cricut Design Space app. This is what my gift tags look like on the Canvas. Set your machine in the top right so Design Space knows what settings and operations you’ll be able to use. I’ll set mine to my Joy. With the designs selected, click "UnGroup." If you don't want to make one of the tags, select it and click Delete. I'll make both. I'll start with the "To and From" design. Select your tag design and click "UnGroup" again so we can adjust the layers separately. In the Layers Panel, click the tag's text layer and change the Operation to "Foil Transfer." Use the nearby color box to set the foil to the color you want to use. I used "Emerald." Drag a bounding box over the tag to select both layers and click "Attach." Repeat for the other tag. I used Gold foil for that design. If you want to make more then one copy of a tag, select it and click "Duplicate" until you have the amount you want. I'll make a second copy of each tag. Make sure the right machine is selected and click "Make It." Select "On Mat" and click "Continue." Under Set Base Material, choose "Cardstock Medium" and change the pressure to "More." Make sure the foil tool listed is seated correctly in the clamp. Cut your cardstock to the length indicated on the screen. Place it face up on your Joy mat. Cut your first foil transfer sheets to cover the design area. Secure the first foil sheet shiny side up over the design with the tape strip provided. Don't let the foil stick to the mat! Place the mat face up under the rollers so the Joy pulls the material in. Click "Go" and the design will start processing. Once the foiling is finished, do NOT unload the mat. Keep it inserted and carefully remove the foil sheet and tape from the cardstock. Use the same process to tape down the second foil color and click "Go" again. Follow the screen prompts to swap your tool to the Fine-Point Blade. When the cut is complete, click "Unload." Flip the mat over to release the cardstock from the mat without curling it. Now you can write in the names and attach the tags with pretty ribbon! The designs were created using Dear Agatha.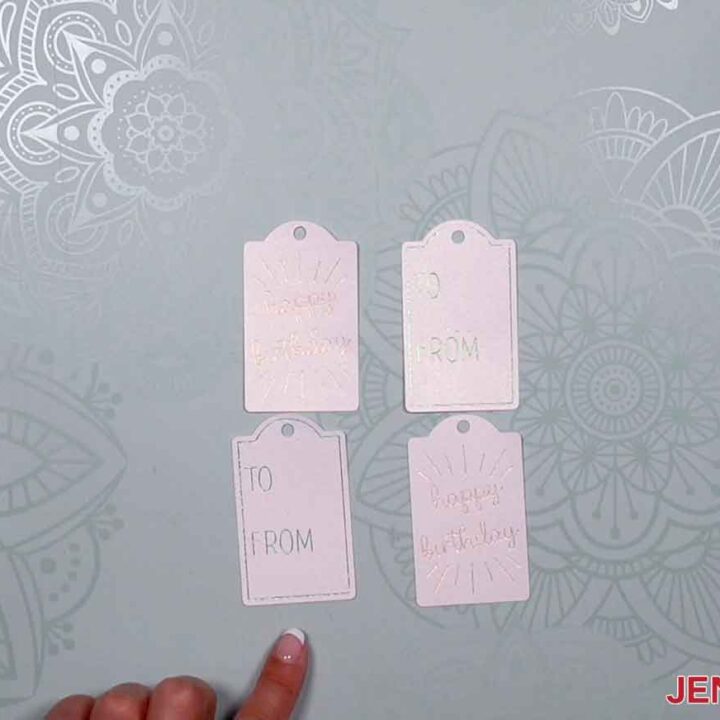
Cricut Joy Gift Tags
Materials
Tools
Instructions
STEP 1: GET MY FREE CRICUT JOY PROJECTS SVG FILES
STEP 2: PREPARE YOUR DESIGNS
STEP 3: MAKE YOUR DESIGNS
STEP 4: SHOW THEM OFF!
Notes
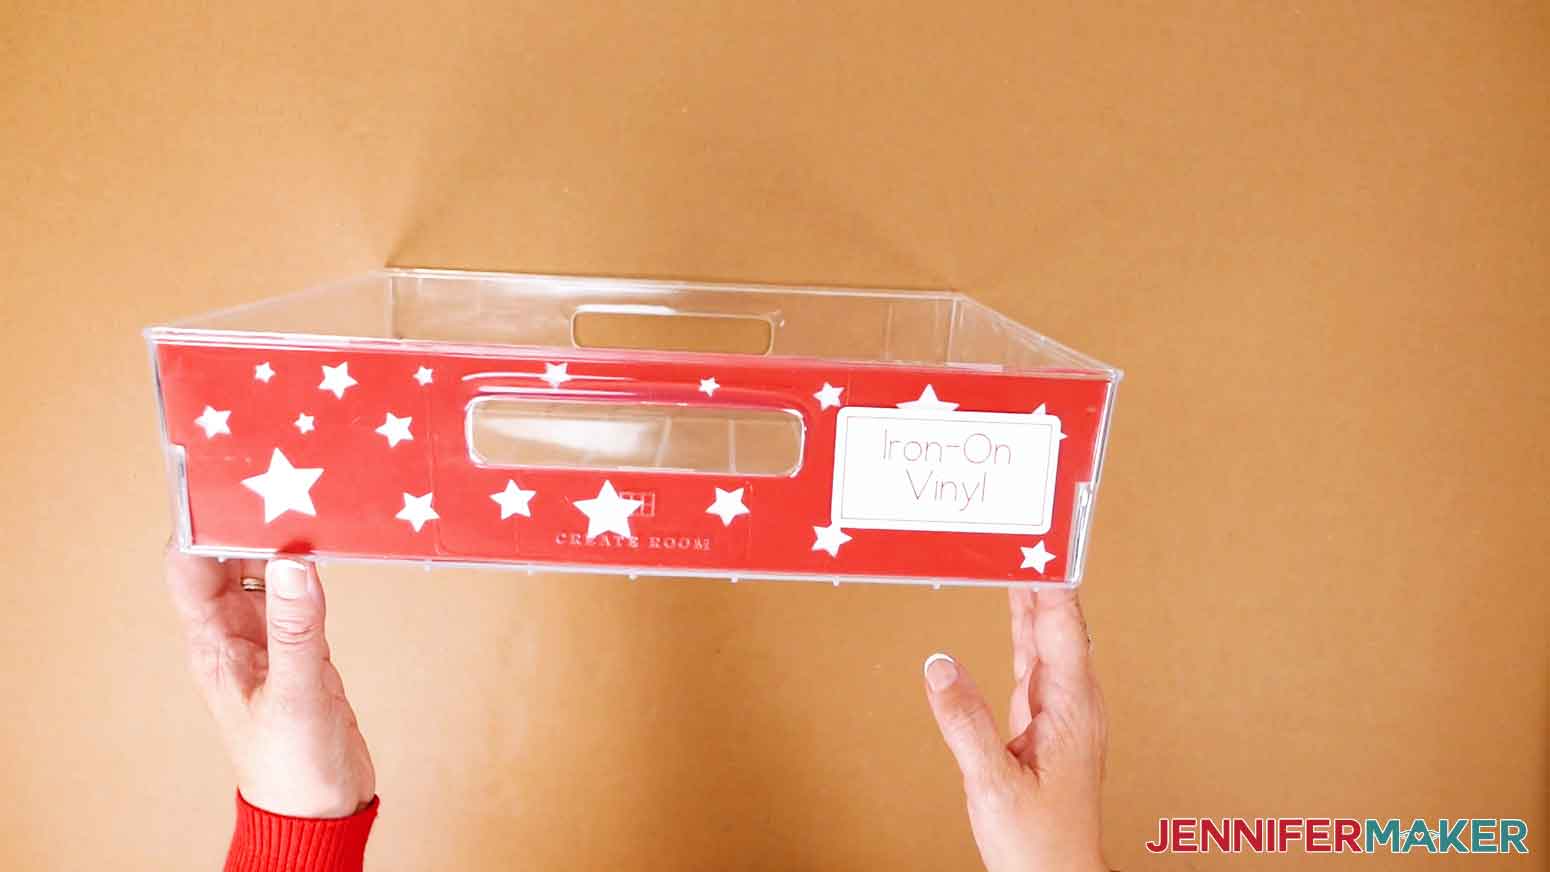
How to Make Smart Labels with Writable Vinyl on a Cricut Joy
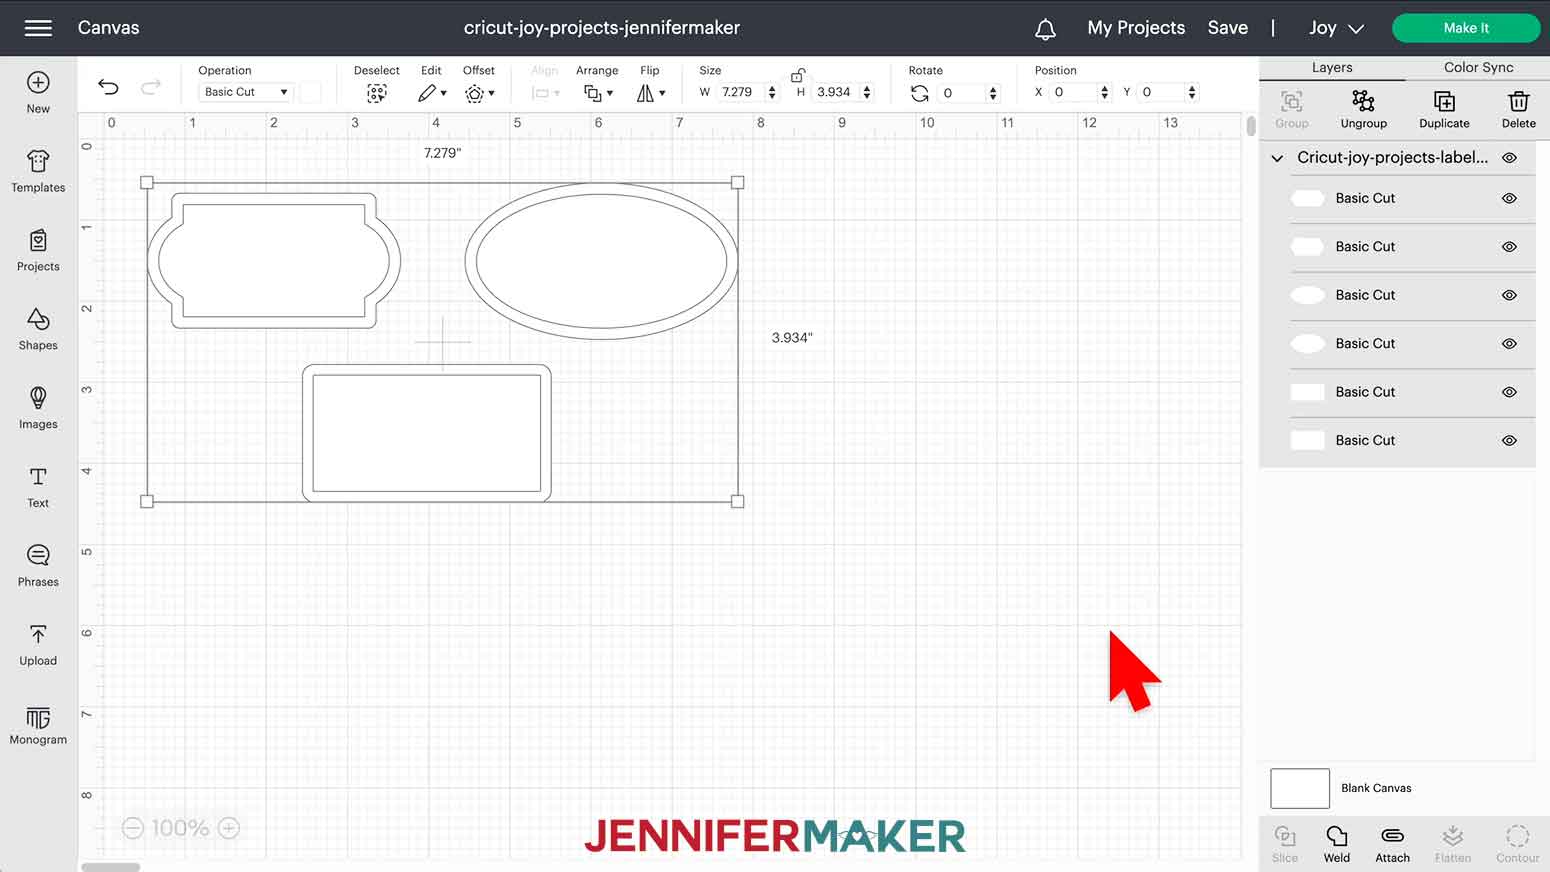
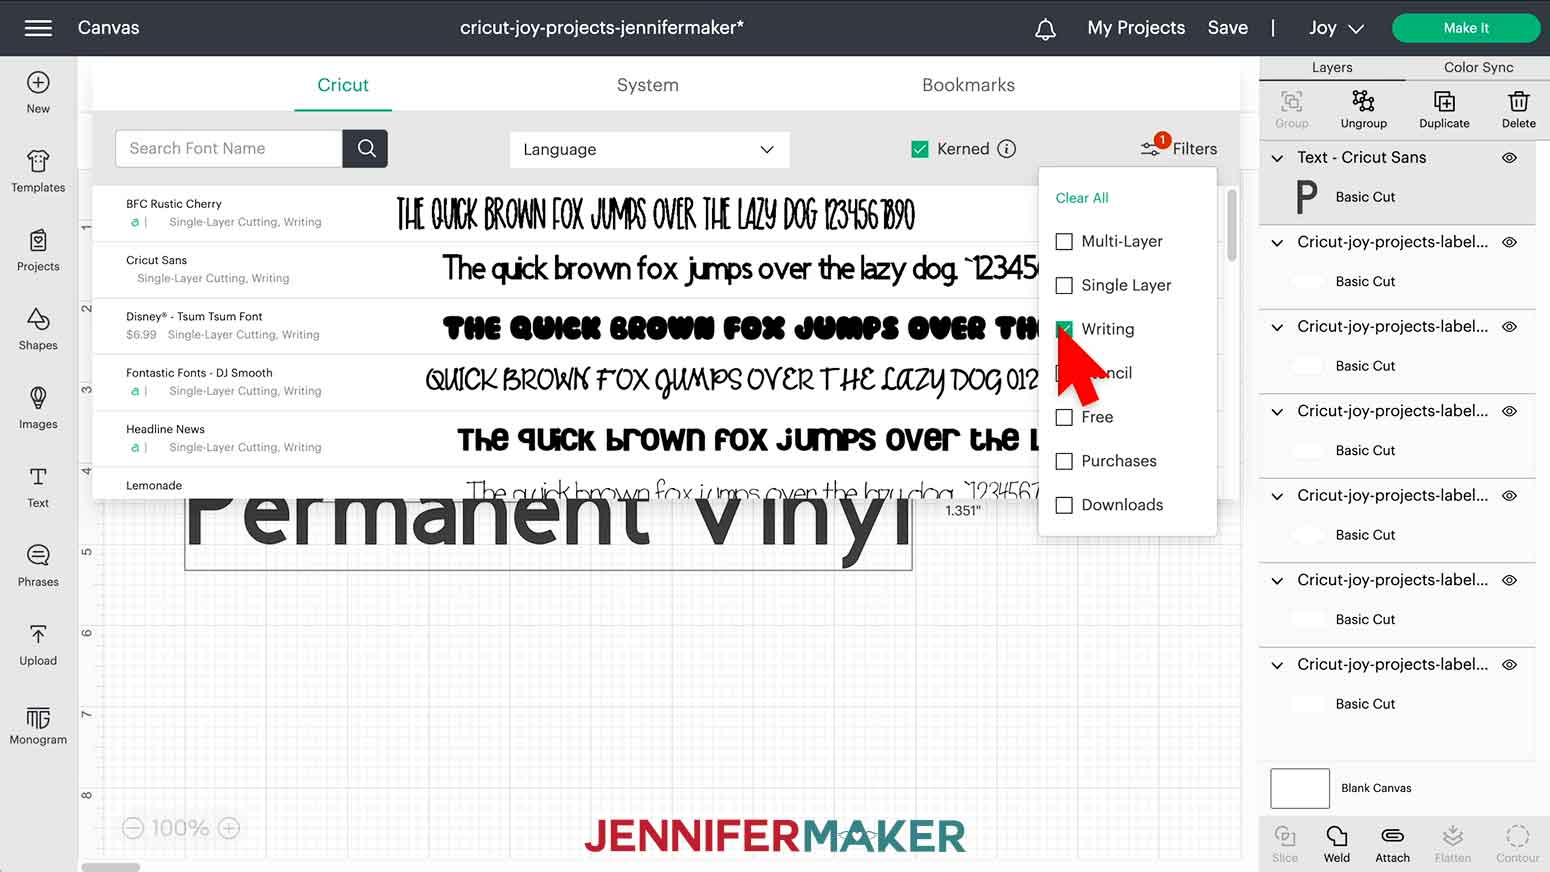
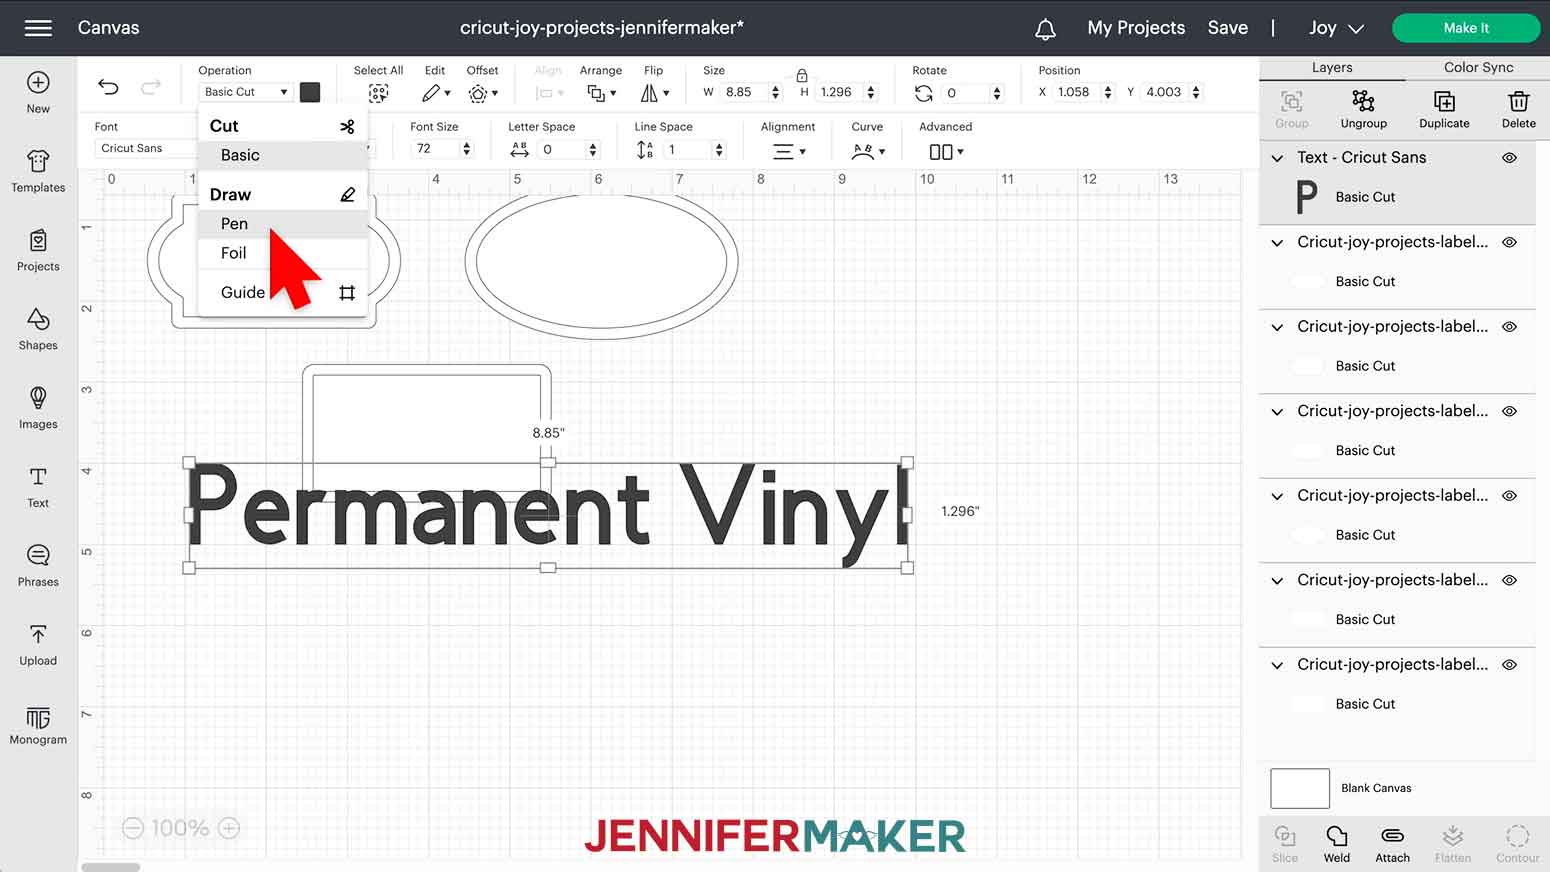
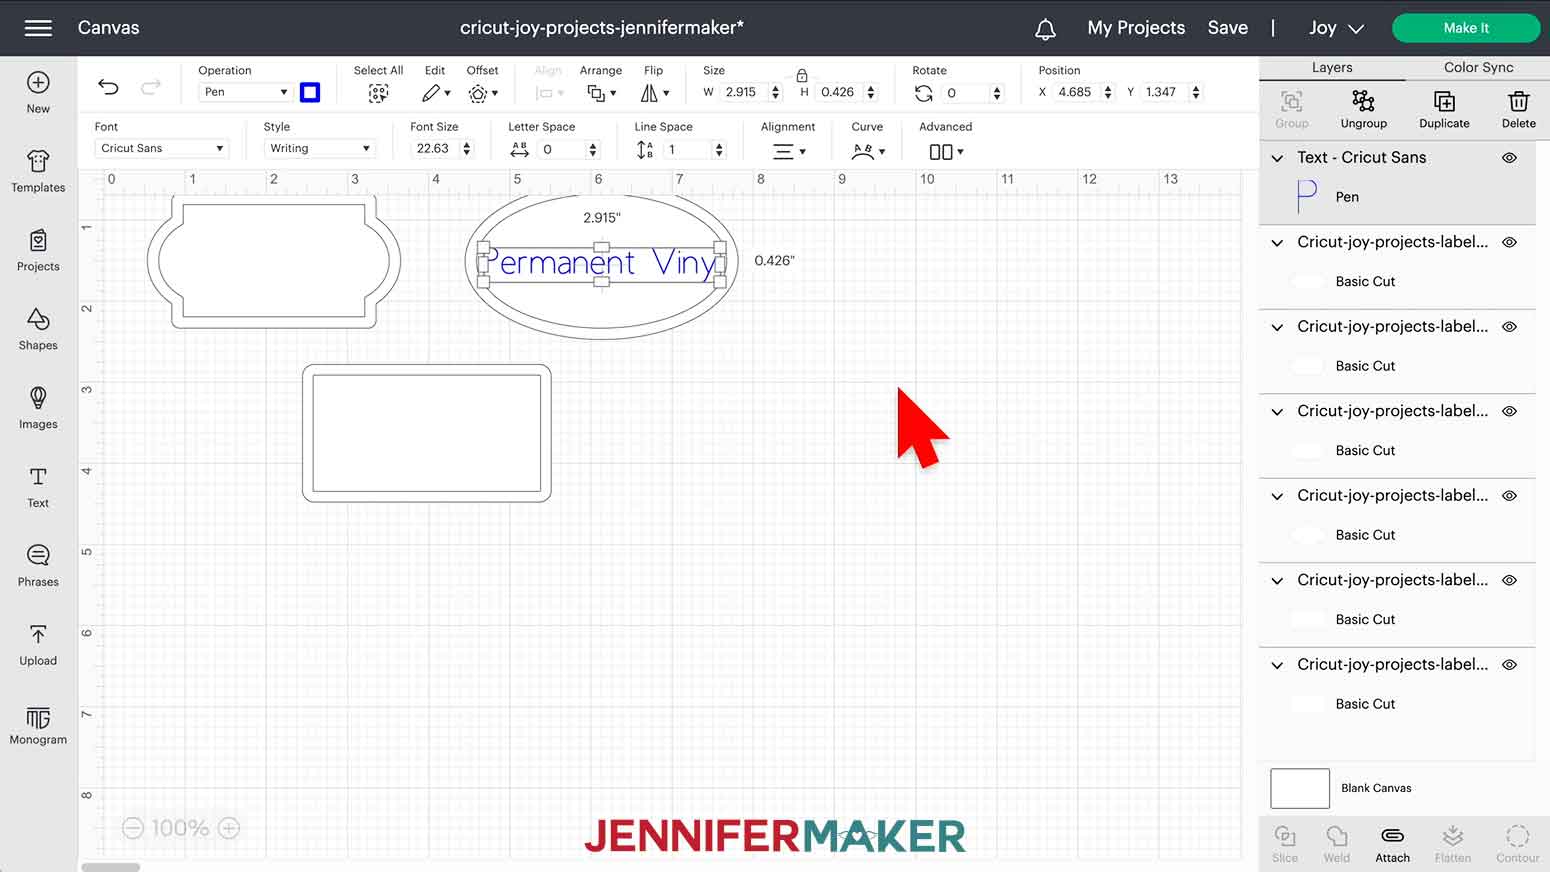
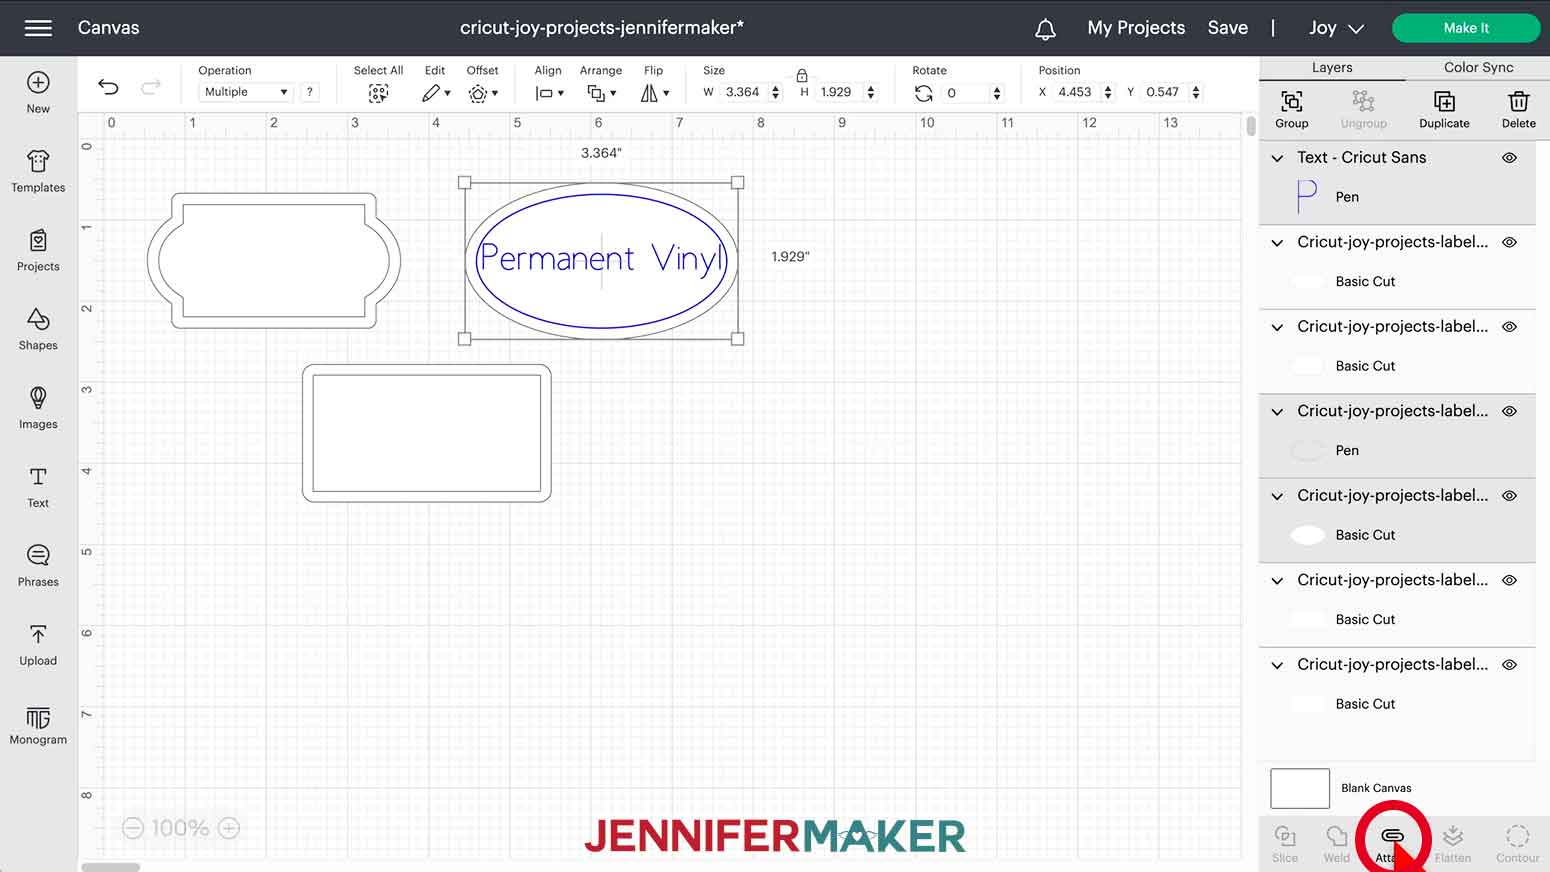
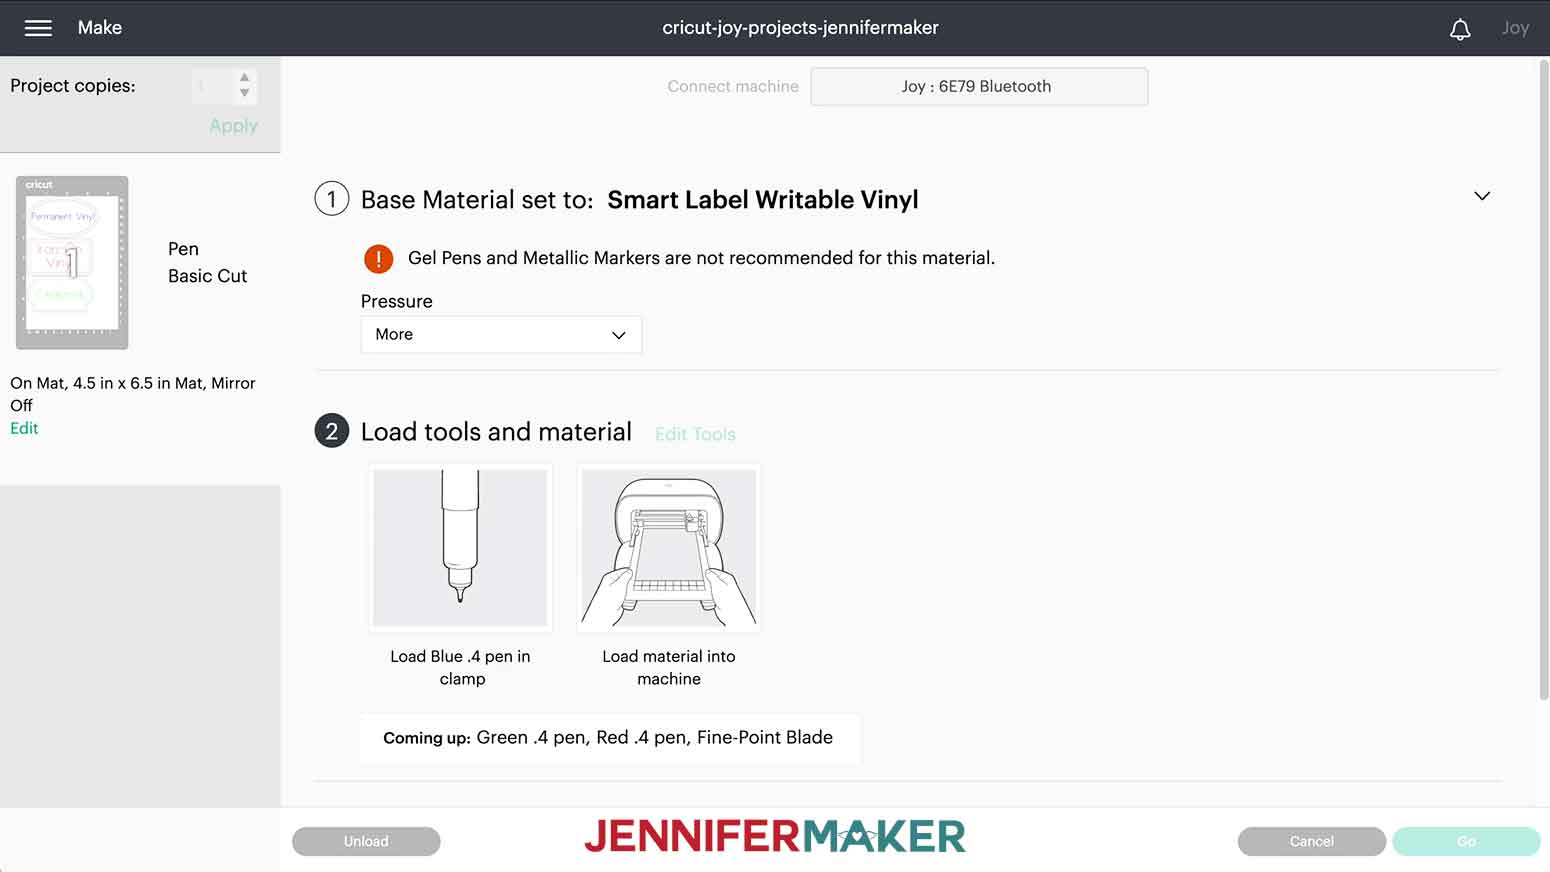
Learn how to make labels with writable vinyl, perfect Cricut Joy projects! First, download my Cricut Joy Projects SVG/DXF/PDF files, Design #403, from my free resource library. There are eight designs to choose from, including a set of labels. I'll show you how to create the designs on a Joy but they can all be made on the Cricut Maker or Explore machines. Next, open Cricut Design Space and upload the SVG cut file. If you're not sure how to upload an SVG cut file to Cricut Design Space, watch this helpful video Made Simple training series I made. If you're on an iPhone or iPad, here's how to download and upload SVG files to the Cricut Design Space app. This is what my labels files look like when they are uploaded to Cricut Design Space. Set your machine in the top right so Design Space knows what settings and operations you'll be able to use. I'll set mine to my Joy. With the designs selected, click "UnGroup." Click on the Text icon on the left of the Canvas. The word "Text" will appear on the Canvas. Type your first label name. I'll start with "Permanent Vinyl." Click the Font menu and select your font. You can use the filters to select "Writing" to narrow down your options. I used Cricut Sans. Under Operation, change this layer to "Pen." Under Style, select "Writing." Click the color box to change the text color to blue. NOTE: Smart labels are not compatible with Cricut Joy Gel Pens or Metallic Markers. Drag the text over the label you want to use it on. I'll place this on the oval. Adjust the text size so it fits within the inner shape's line. Hold the Shift key and select the text and both of the relevant shapes in the Layers Panel. Click Align and Select "Center." Select the inner shape and change the Operation to "Pen." Use the color box to select the same color as you used for the label text. Drag a bounding box around the label shapes and text, then click "Attach" to keep the operations together during cutting. Repeat for the other label. I added "Iron-On Vinyl" in red to the rectangle and "Cardstock" in green to the last shape. Make sure the correct machine is selected and click "Make It." Select "Without Mat" and click "Continue." Press "Continue" again on the next screen. Under Set Base Material, choose "Smart Label Writable Vinyl." You may need to click "Browse All Materials" to find it. Then change the pressure to "More." Make sure the first pen listed is seated correctly in the clamp. Cut your vinyl to the length indicated on the screen. Place the Smart Vinyl face up under the rollers so the Joy pulls the material in. Click Go and the design will start processing. Follow the screen prompts to swap your tools as needed. When the cut is complete, click "Unload." Don't touch the written lines until they're totally dry. Once you're ready to apply the labels, simply peel them off and stick them to your items! I used Cricut Sans for my font.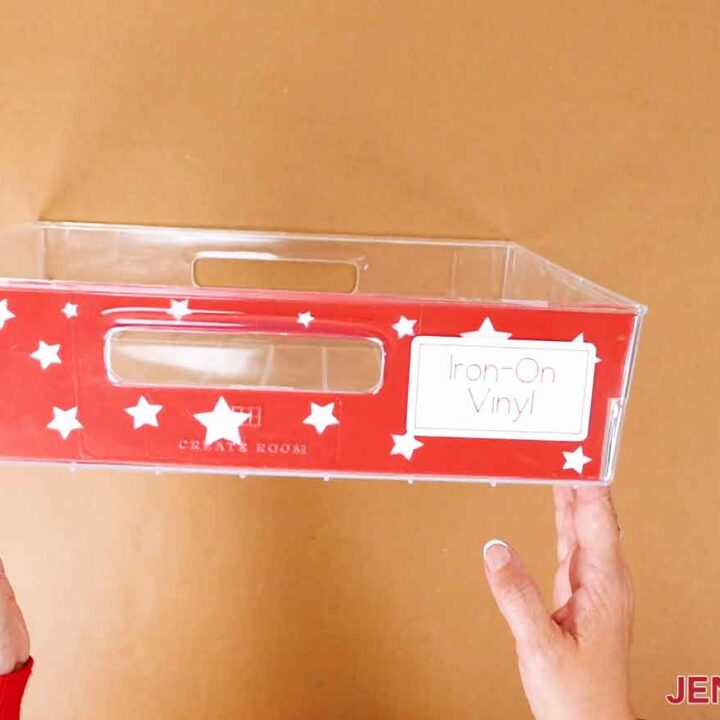
Smart Labels with Writable Vinyl on a Joy
Materials
Tools
Instructions
STEP 1: GET MY FREE CRICUT JOY PROJECTS SVG FILES
STEP 2: PREPARE AND PERSONALIZE YOUR DESIGNS
STEP 3: CUT YOUR DESIGNS
STEP 4: SHOW THEM OFF!
Notes
Questions About My Free Cricut Joy projects
Q: My cardstock keeps ripping on the intricate cuts. What can I do?
A: Be sure you’re using a clean and sticky machine mat, good-quality cardstock, and a clean blade. See my Cricut Cutting Problems post for all the tips I use to get clean cuts every time.
Q. What materials can the Cricut Joy cut?
A: Cricut Joy projects can include so many materials! My favorites are adhesive vinyl, cardstock, and Infusible Ink. You can learn more in my Cricut Joy materials and accessories recommendations post!
Q. What size projects can you make with Cricut Joy?
A: On the normal mat, Cricut Joy projects can be up to 4.5″ wide and up to 11.5″ tall depending on your machine mat. With Smart Materials, you can go up to 20 feet long!
Q. Can the Cricut Joy cut through wood?
A: No, Cricut Joys can’t cut wood.
Q. Are your free SVGs just for personal use or also commercial use?
A: Yes, you can sell completed projects using these designs, with the correct license. If you use them, please share photos with us! We love supporting small businesses!
Q: How can I use the sublimation coaster designs?
A: Follow my simple tutorial to print your chosen designs using a sublimation printer and compatible paper. Then use the appropriate heat press settings to apply the designs to sublimation coasters. For more details, check out my Sublimation Cookbook! You can also purchase a print edition!
Get my instant download digital files for my free Cricut Joy projects!
I’d love to see your Cricut Joy projects and hear which ones you liked the best! If you make a project with these designs, please share a photo in our Facebook group, email it to me at [email protected], or tag me on social media with #jennifermaker.
Love,

Want to remember this? Save the Free Cricut Joy projects Tutorials to your favorite Pinterest Board