
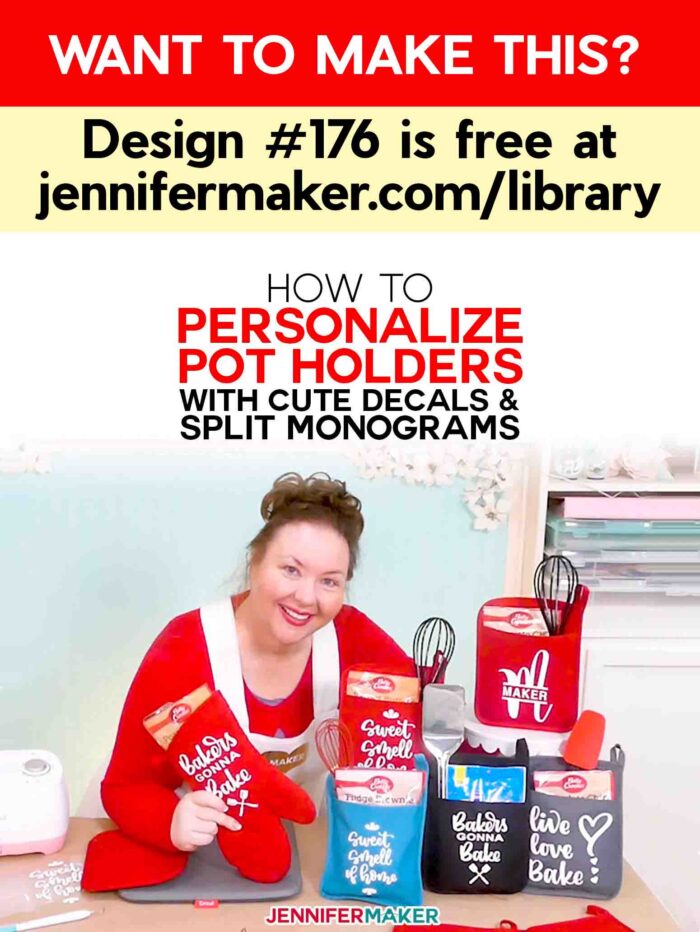
Learn how to personalize pot holders and oven mitts with cute sayings and elegant split monograms. Personalized pot holders filled with cookie mixes and serving utensils make sweet gift packages that you’ll want to give to everyone!
This year I have a lot of people I want to thank for helping me and my family. I am SO grateful, and I want to show my appreciation. I’ve got teachers, counselors, medical professionals, neighbors, friends, coworkers, and the list goes on and on. I need something special I can gift all of these important people in my life without having to resort to gift cards. So I’m gifting cookie making kits with personalized pot holders and oven mitts, whisks and spatulas, and a variety of cookie mixes! You just tuck a utensil and a baking mix into a potholder or oven mitt, and you have a fun and thoughtful gift that WILL get used. And I thought you might like to see how these go together, too! So for Day 10 of The Great Maker 25-Day Gift-Away Challenge, I am showing you how to make inexpensive cookie making kits with personalized pot holders and oven mitt gifts.
See exactly how to personalize pot holders and oven mitts in my tutorial video (or keep scrolling if you prefer a step-by-step photo tutorial):

Now, I could just toss the spatula or whisk in the pot holder along with a baking mix and call it a day, but I’m going one step further and personalizing these potholders and oven mitts with some iron-on vinyl (aka heat transfer vinyl, or HTV)l! For some pot holders, I’m putting on cute hand-lettered sayings like “Live Love Bake” “Sweet Smell of Home” and “Bakers Gonna Bake.” This will let me keep a stash of gifts on hand for anytime I need to give one away.
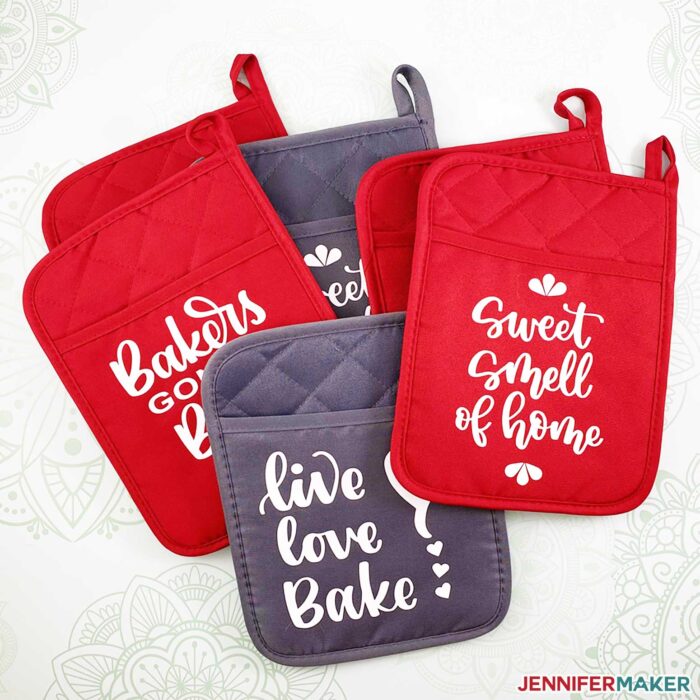
But for the other pot holders, I’m personalizing them with a person’s first name or family name in a split monogram… and I think they turned out really classy without breaking the bank.
The fun little sentiment designs are on my blog and are free for you to use, too! I’d also like to show you how to make the split monogram so you can personalize your pot holders for individuals and families, as well. Let let me show you how to create a personalized split monogram, and then we’ll iron on some heat transfer vinyl together so you see how it works!
In this tutorial, I will show you how to use my template to create custom pot holders with cute sayings (or just use a design I already made for you!) and then how to personalize pot holders and oven mitts with the iron on vinyl. This post contains some affiliate links for your convenience (which means if you make a purchase after clicking a link I will earn a small commission but it won’t cost you a penny more)! Read my full disclosure policy.
Materials to Make Personalized Pot Holders and Oven Mitts
View my Amazon shopping list with the exact items we used to make this project!
- Potholders with pockets like these I used from the Dollar Tree or these from Amazon
- Cricut EasyPress 2 or Heat Press
- Cricut EasyPress pressing mat
- Cricut Everyday Iron-On Heat-transfer Vinyl (HTV). I used white.
- Scissors, tweezers, weeding tools. I used this great weeding tool
- Parchment paper
- Lint roller
- A way to cut your iron on vinyl (I used the amazing Cricut cutting machine!)
- StandardGrip cutting mat (the 12″ x 12″ size)
- (Optional) A monogram font for split monograms, such as Original Split Font, Split Monogram Font or Reindeer Dust
- Design #176 – My free SVG sentiment design files and template (available in my free resource library—get the password by filling out the form at the bottom of this page)
How to Make Personalized Pot Holders with a Pre-Made Design or a Custom Name or Phrase in a Split Monogram!
Step 1: Get My Free Pot Holder Designs
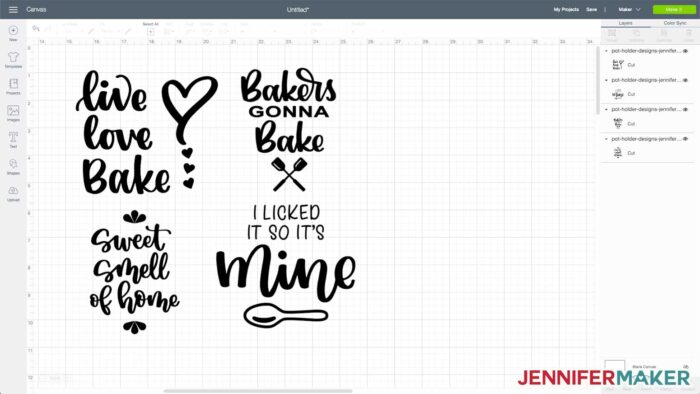
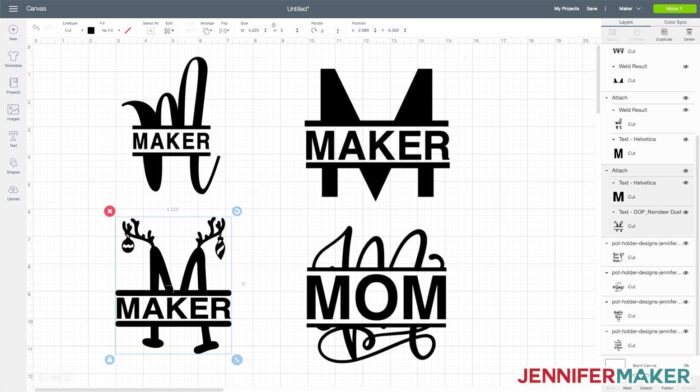
My free personalized pot holder SVG cut file contains four different designs to make your own potholders. Get the free pot holder designs and templates (Design #176) from my free resource library (get the password to the library in the form at the bottom of this post).
Watch my video to see this step in detail.
Step 2: Prepare Your Potholder Design File for Cutting.
Here is what the pot holder decal SVG cut file will look like when you upload it to Cricut Design Space:
Tip: If you’re not sure how to upload an SVG cut file to Cricut Design Space, watch this helpful video training series I made. If you’re on an iPhone or iPad, here’s how to download and upload SVG files to the Cricut Design Space app.
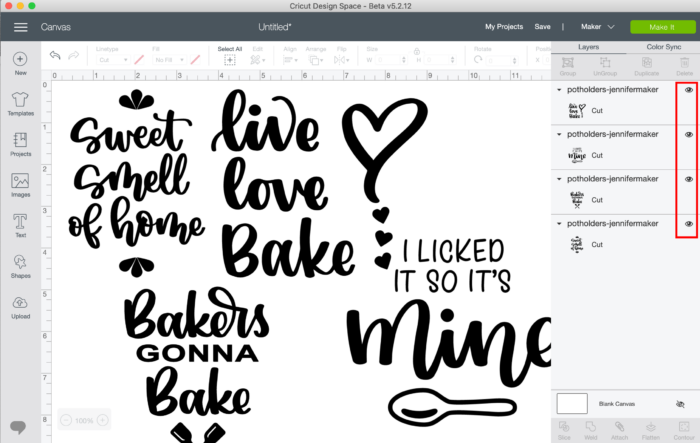
Once the file is uploaded, decide which of the designs you want to use and hide or delete the rest. To do this, first click Ungroup, then click to delete or hide the layers you do not want to cut.
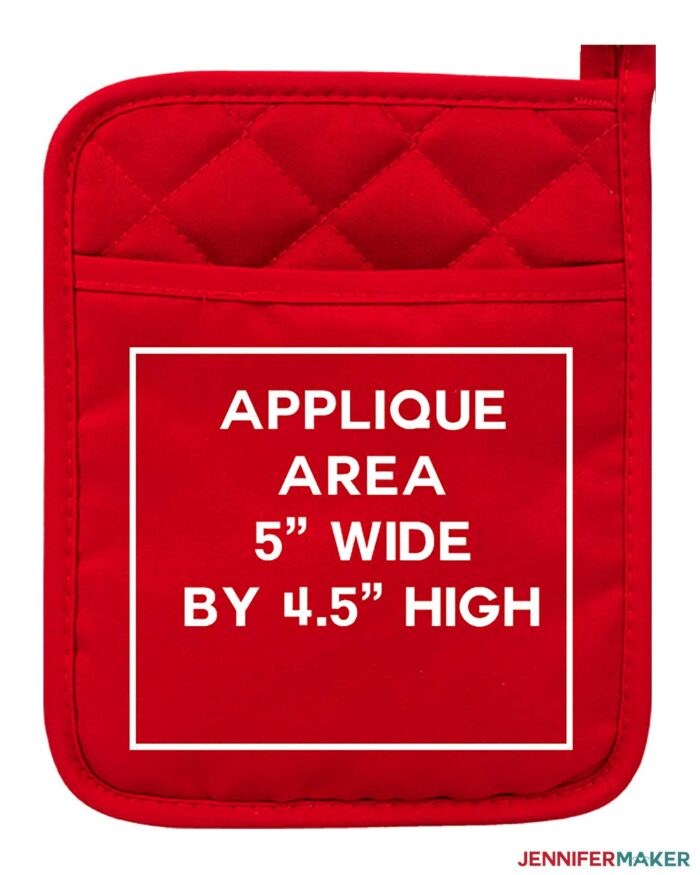
Resize the design (if needed) to fit the imprint area of the potholder you are using. They are currently sized to fit the imprint area of the potholders I used (which I got from the Dollar Tree).
Watch my video to see this step in detail.
Here’s what those look like:
You can also create your own custom split monograms! Watch the tutorial video for a full explanation of how to create beautiful split monograms.
Step 3: Cut Out Your Pot Holder Design
Using a green Standard Grip mat, place your iron-on heat-transfer vinyl with the shiny side face down on the cutting mat. Remember to mirror your design, select the proper cutting material, and load your fine-point blade into your Cricut machine.
Note: Not sure which side of the vinyl goes down on your mat? Read my guide here!
Watch my video to see this step in detail.
Step 4: Weed Your Cut Design
Carefully weed the excess vinyl from your cut vinyl using a weeding tool. Pay attention to any letters with centers so you don’t accidentally leave them in.
Watch my video to see this step in detail.
Step 5: Apply the Design to Your Pot Holders
Use a lint roller to clean off the imprint area. If you are using a Cricut EasyPress or EasyPress 2, consult the Cricut Heat Guide for temperature and time based on the vinyl you are using and your pot holder material. Using my EasyPress 2, the white heat transfer vinyl I am using called for 315 degrees for 30 seconds with a 5 second pre-heat and a warm peel after application. Here’s exactly what I did:
Turn on your Cricut EasyPress, set the temperature to 315 degrees, set the timer to 30 seconds, and pre-heat.
Now, first press your pot holder or oven mitt with a piece of parchment paper on top for 5 seconds to prepare it for the vinyl.
Next, position the iron-on vinyl decal on the potholder, and press for 30 seconds with FIRM pressure.
Finally, allow the liner to cool just a tad (so it is warm to the touch instead of hot) and then peel it off.
And that’s it! Now, just fill your pot holder or oven mitt with goodies! This is a really easy project, great for beginners!
Watch my video to see this step in detail.
Get my free personalized pot holder templates and cut files
I’d love to see your personalized pot holders and oven mitts, and all the other fun ideas you come up with to use these! If you make one, please share a photo in our Facebook group or tag me on social media with #jennifermaker..
Love,

Want to remember this? Save the Personalized Pot Holder & Split Monogram Tutorial to your favorite Pinterest board!
I love this project, I only had one concern about the art work washing off – probably best to hand wash my pot holders anyway.
I tried this and had some success with pot holders. But, some the letters did not come off the backing. What can I do differently????
Hi Margaret! This is usually always a pressure issue during the pressing process. Make sure you are pressing on an even surface.
I just bought the pot holders from the Dollar Tree to make these. My question is that I only have the easy press mini. What setting do I use (low, medium or high)? Do I still need to warm the mitt up before pressing the HTV.
Hi Elaine! I would heat the area up before applying. You will still go off the Cricut heat setting guide for the mini-press and the material you are using. You can find that here: https://www.cricut.com/heatguide
I bought the book online. However, I have to print it out to understand it.
Most of us do need to print it out, Riki! You don’t have to print the entire Playbook, though. Just print the section that applies to the computer system you are using – for the edition I use, the Windows information I want is from pages 4 – 44, so those are the only pages I print out! Saves on paper and ink and I can still look at the information I need! 🙂