
Learn how to personalize your shoes with iron-on vinyl, including glitter heat transfer vinyl (HTV)! It’s fun and easy!
We may all be stuck at home, but we can still go for walks out in the fresh air! So this is the perfect opportunity to take a pair of boring canvas shoes or sneakers and turn them into something amazing. With just a little iron-on vinyl (also known as heat transfer vinyl, or HTV), you can transform your sneakers and personalize your shoes with fun designs or even your name. These easy personalized shoes are part of our MAKE IT EASY Craftalong Challenge, filled with fun and EASY daily themed projects!

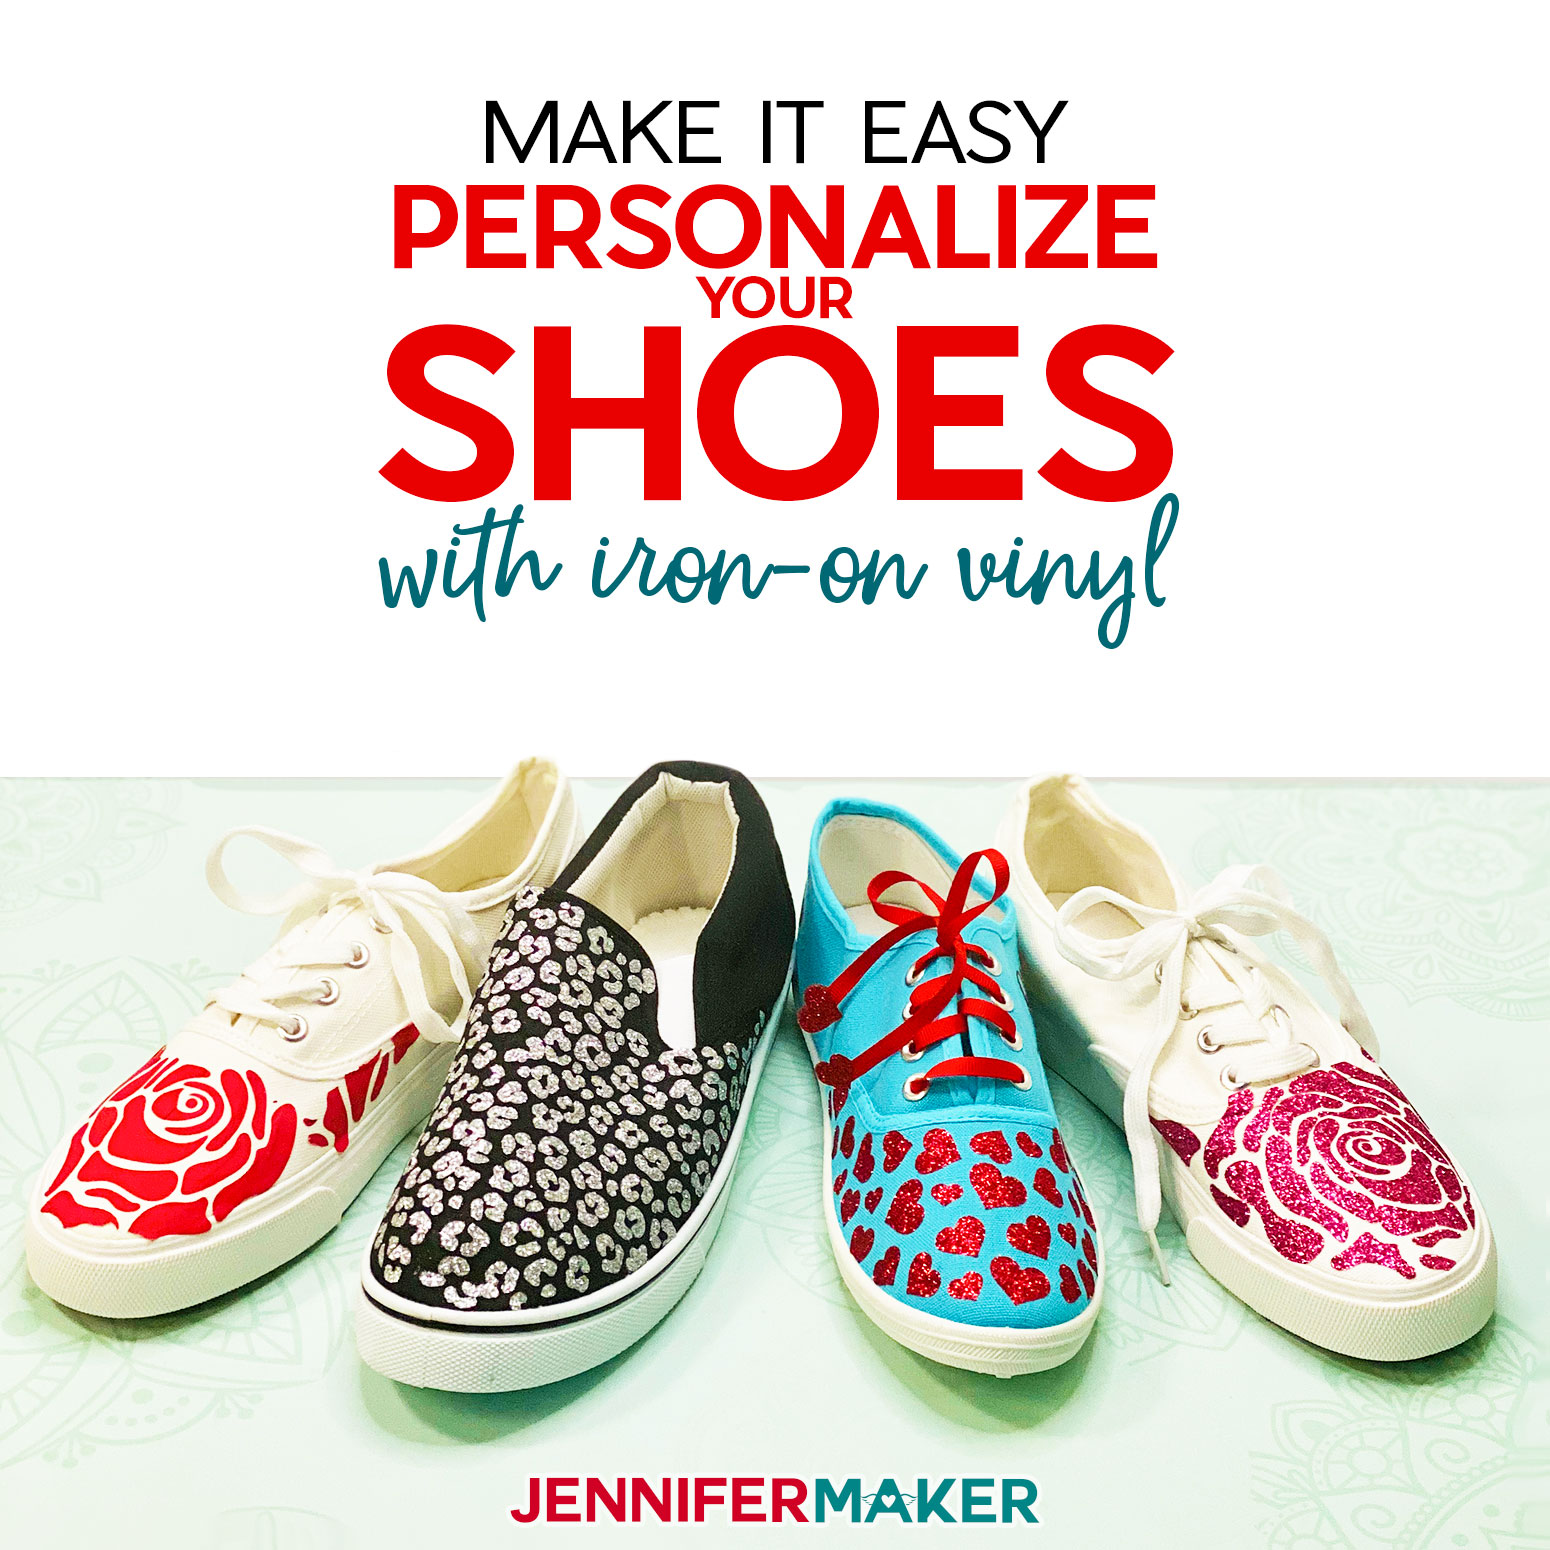
For this project, all you really need is a pair of canvas shoes you want to personalize, some iron-on vinyl/heat transfer vinyl (regular or glitter), a way to press your vinyl onto your shoes (like an EasyPress or iron), and the design itself! Here are some design ideas for how you can personalize your shoes:
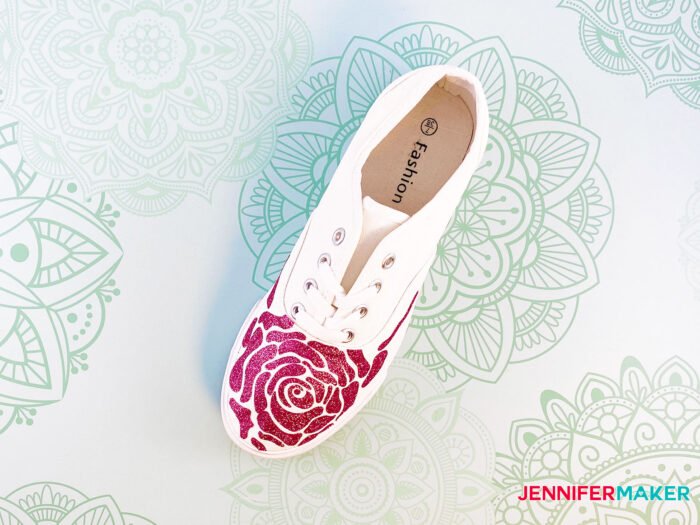
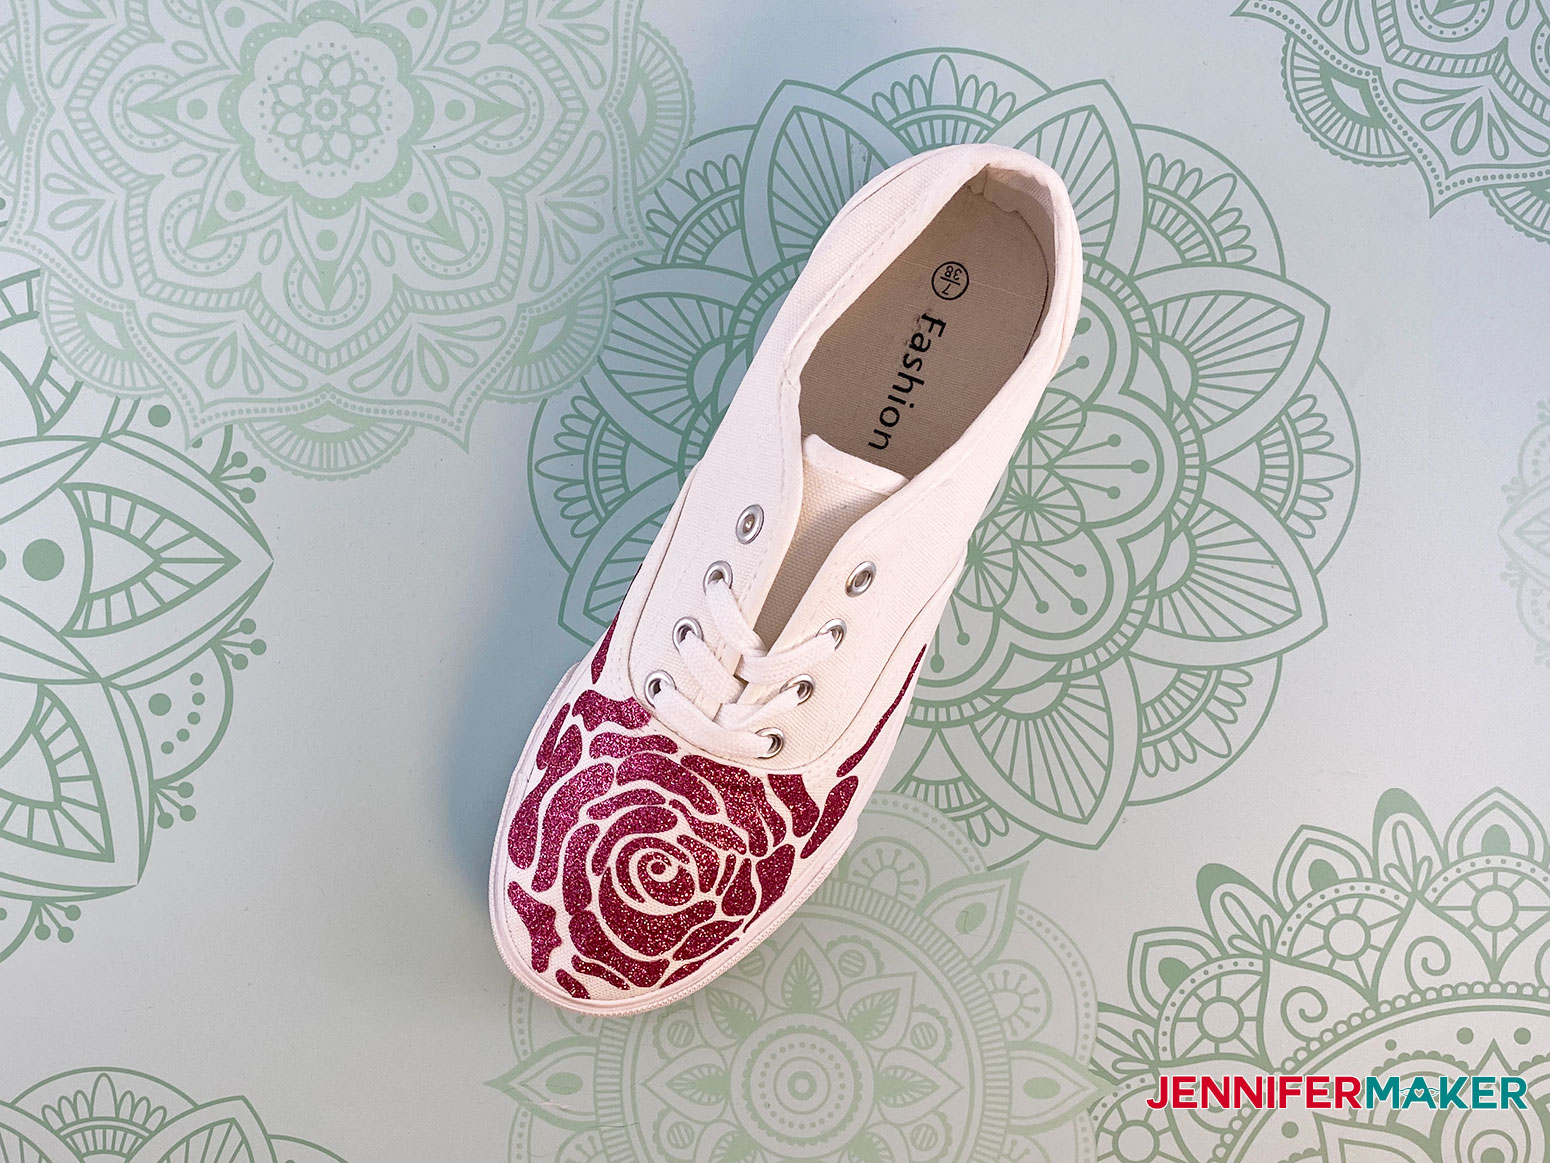
How about a pretty-in-pink glitter rose in iron-on vinyl on a white canvas shoe? You can add a name, too!
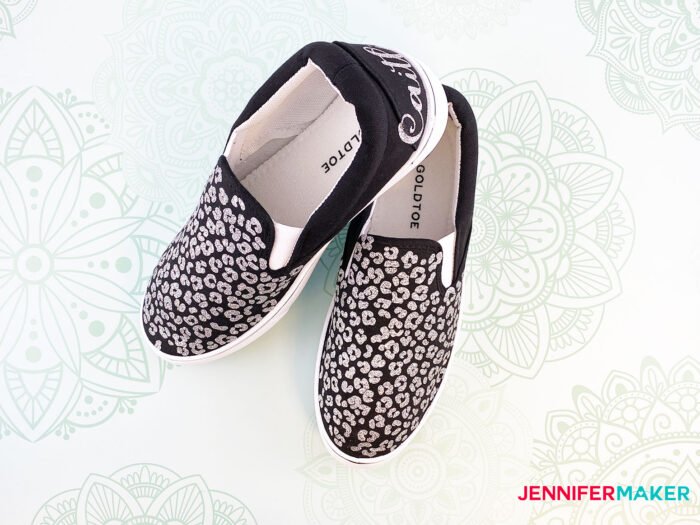
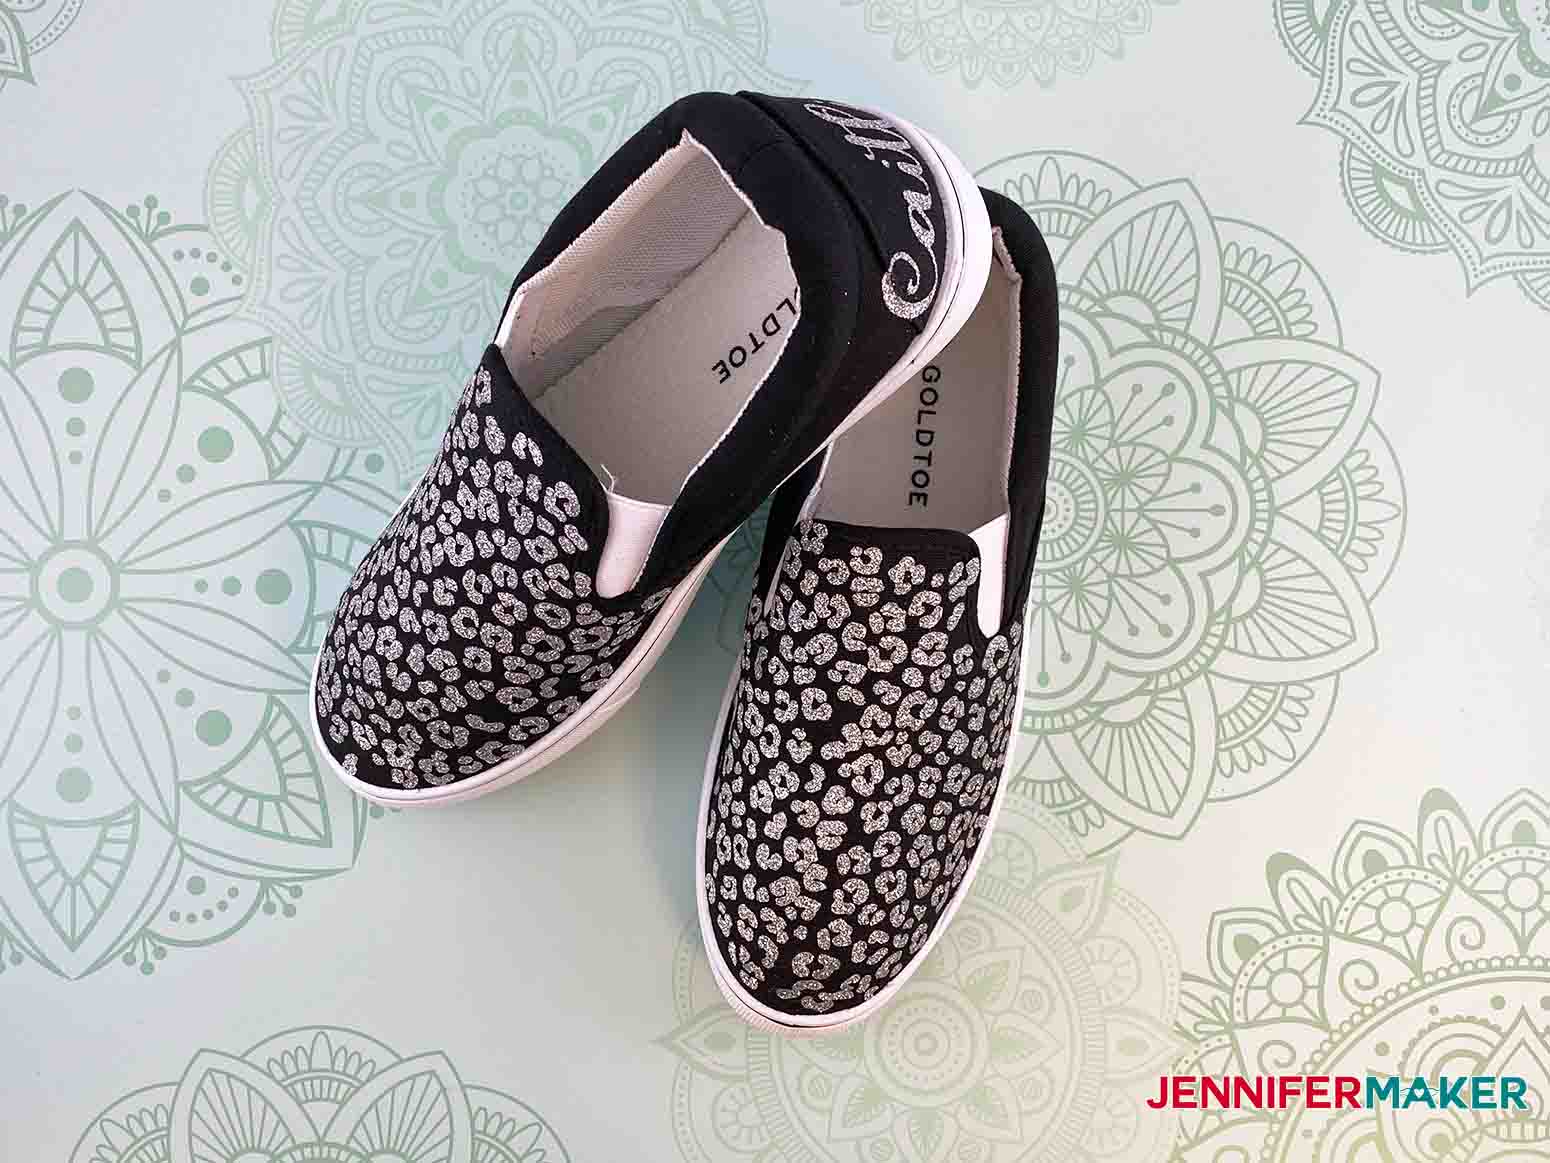
Or put some animal prints on your sneakers, like these black sneakers with silver iron-on vinyl!
The possibilities are limitless! Use iron-on vinyl to match every outfit you have and you’ll be stepping out in style!
Ready to personalize your shoes and sneakers! Let me show you how to put iron on vinyl on shoes! This post contains some affiliate links for your convenience (which means if you make a purchase after clicking a link I will earn a small commission but it won’t cost you a penny more)! Read my full disclosure policy.
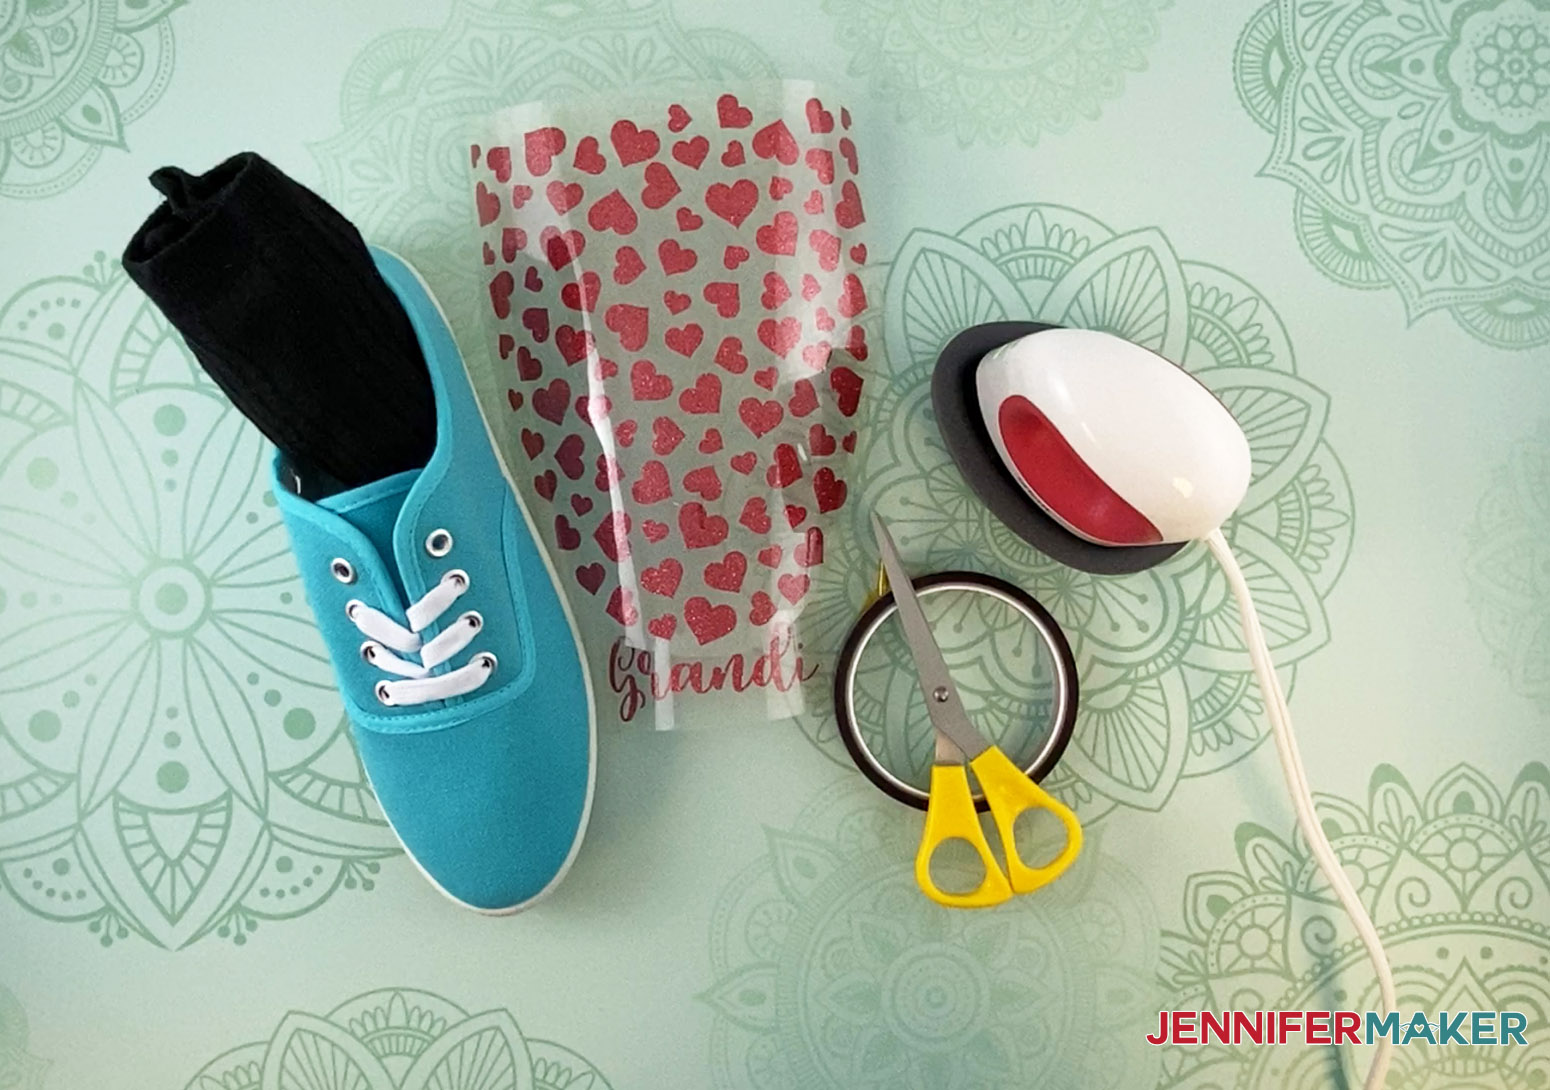
Materials to Make Easy Personalized Shows (Iron On Vinyl on Shoes)
View my Amazon shopping list with the exact items we used to make this project!
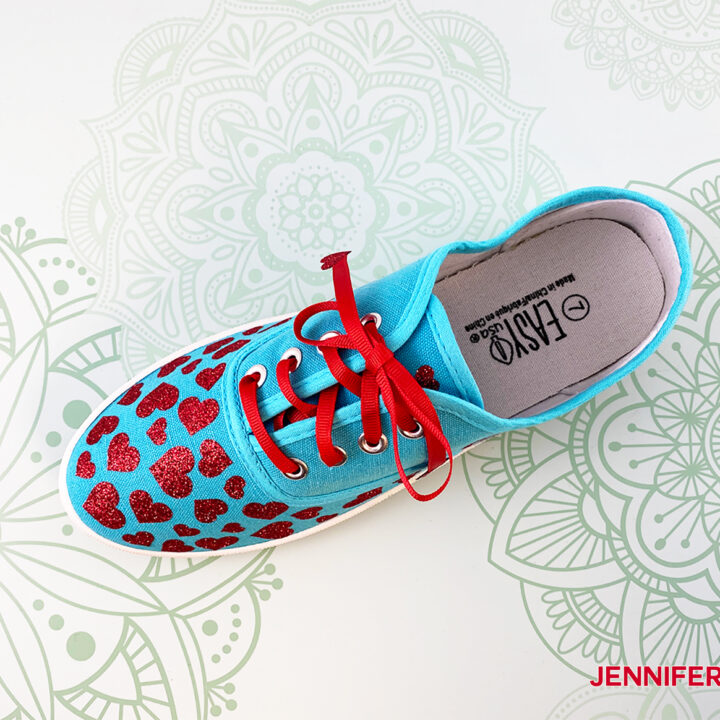
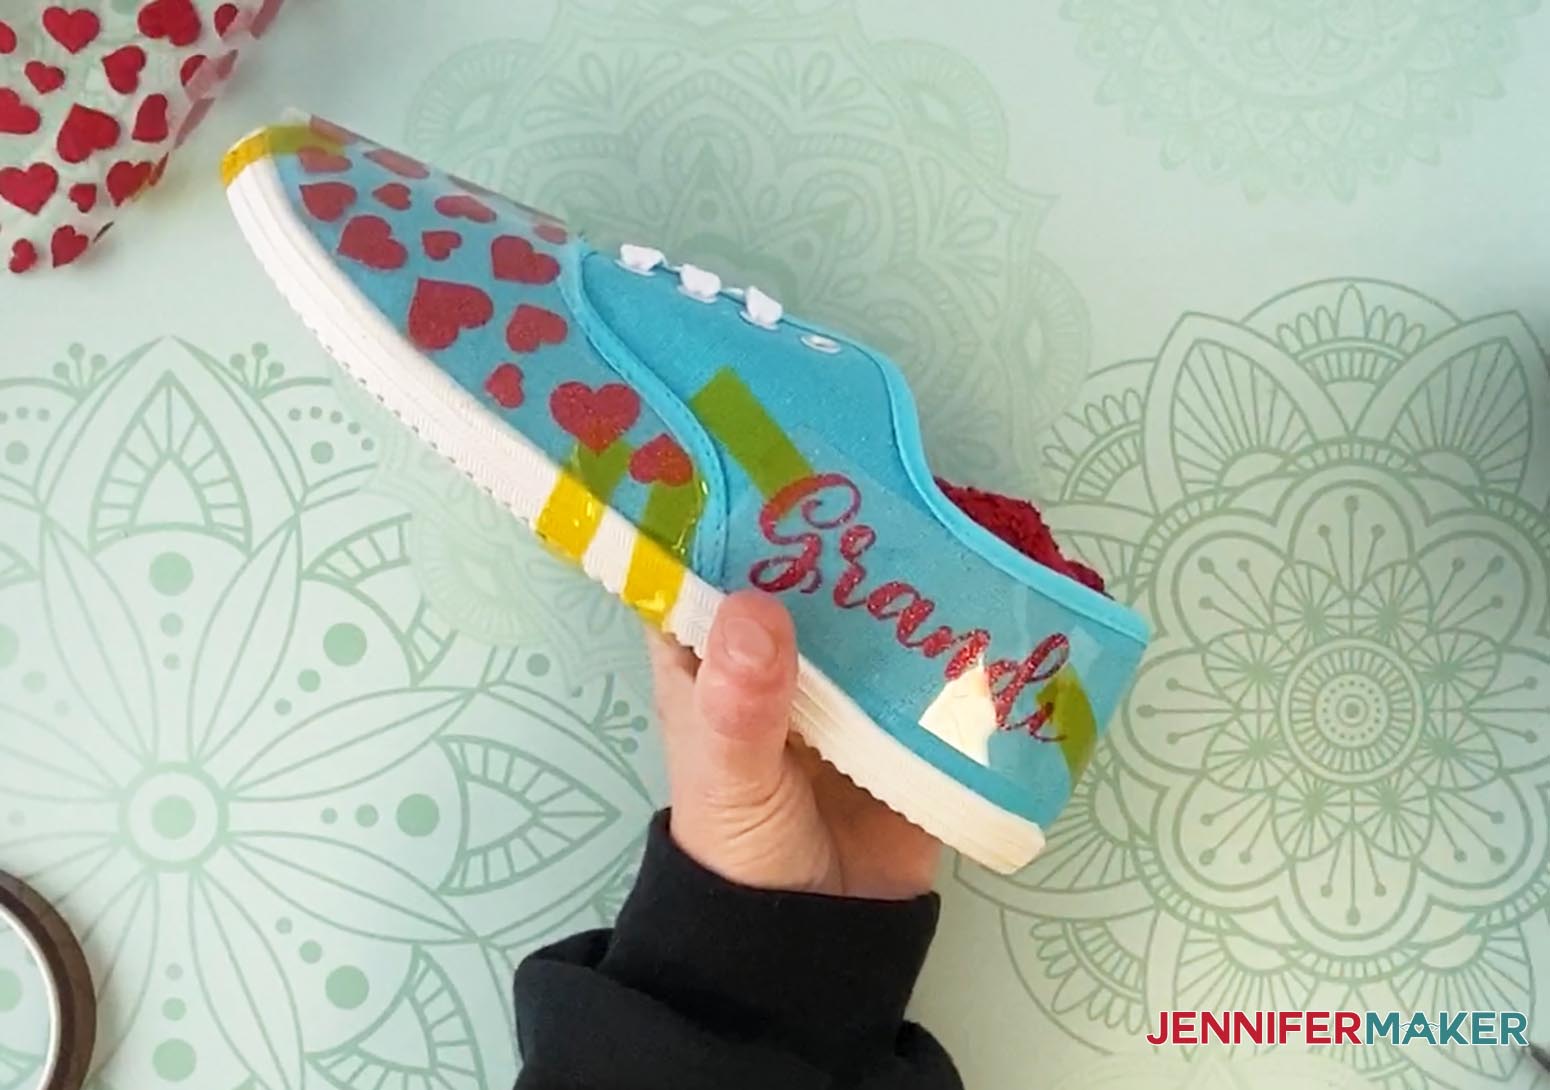
- Canvas shoes (I used white and aqua canvas lace-up sneakers and a pair of black canvas slip-on sneakers)
- Iron-on Vinyl / HTV (I used Cricut Glitter Iron-On in Silver, Red, and, Lipstick Pink)
- (Optional) Brayer
- A way to iron on your design to your shoes (I used the Cricut EasyPress Mini)
- Pressing mat
- Teflon sheet or parchment paper
- StandardGrip cutting mat
- Premium Fine-Point Blade
- Scissors
- Weeding tool
- Heat-resistant tape
- Socks or a towel to stuff inside your sneakers
- A way to cut your iron-on vinyl (I used the Cricut Explore cutting machine, but you can also use a Cricut Maker cutting machine, a Cricut Joy cutting machine, scissors, or a craft knife)
- Design #204 – The free SVG design files (available in my free resource library—get the password by filling out the form at the bottom of this page)
Personalize Your Shoes with Iron-On Vinyl
Upcycle those simple canvas sneakers with one of my three design. Choose from hearts, leopard print, or a rose and have fun.
Materials
- White canvas lace-up sneakers -or-
- Black canvas slip-on sneakers -or-
- Aqua canvas lace-up sneakers
- Cricut Silver Glitter Iron-On -or-
- Cricut Red Glitter Iron-On -or-
- Cricut Lipstick Glitter Iron-On
- Cricut Heat Resistant Tape
- Cricut Brayer (optional)
- Design #204 - My free personalized sneaker SVG/PDF/DXF designs from my free resource library
Tools
Instructions
STEP 1: GET MY IRON-ON VINYL SNEAKER DESIGNS
My fun sneaker designs for this project are free for you to use. You can get them either as a printable PDF or as an SVG cut file to use in a cutting machine like a Cricut. The pattern file contains the design to personalize your shoes. Download the sneaker designs (Design #204) from my free resource library (get the password to the library in the form at the bottom of this post).
Here’s what the uploaded SVG cut file will look like once uploaded to Cricut Design Space:
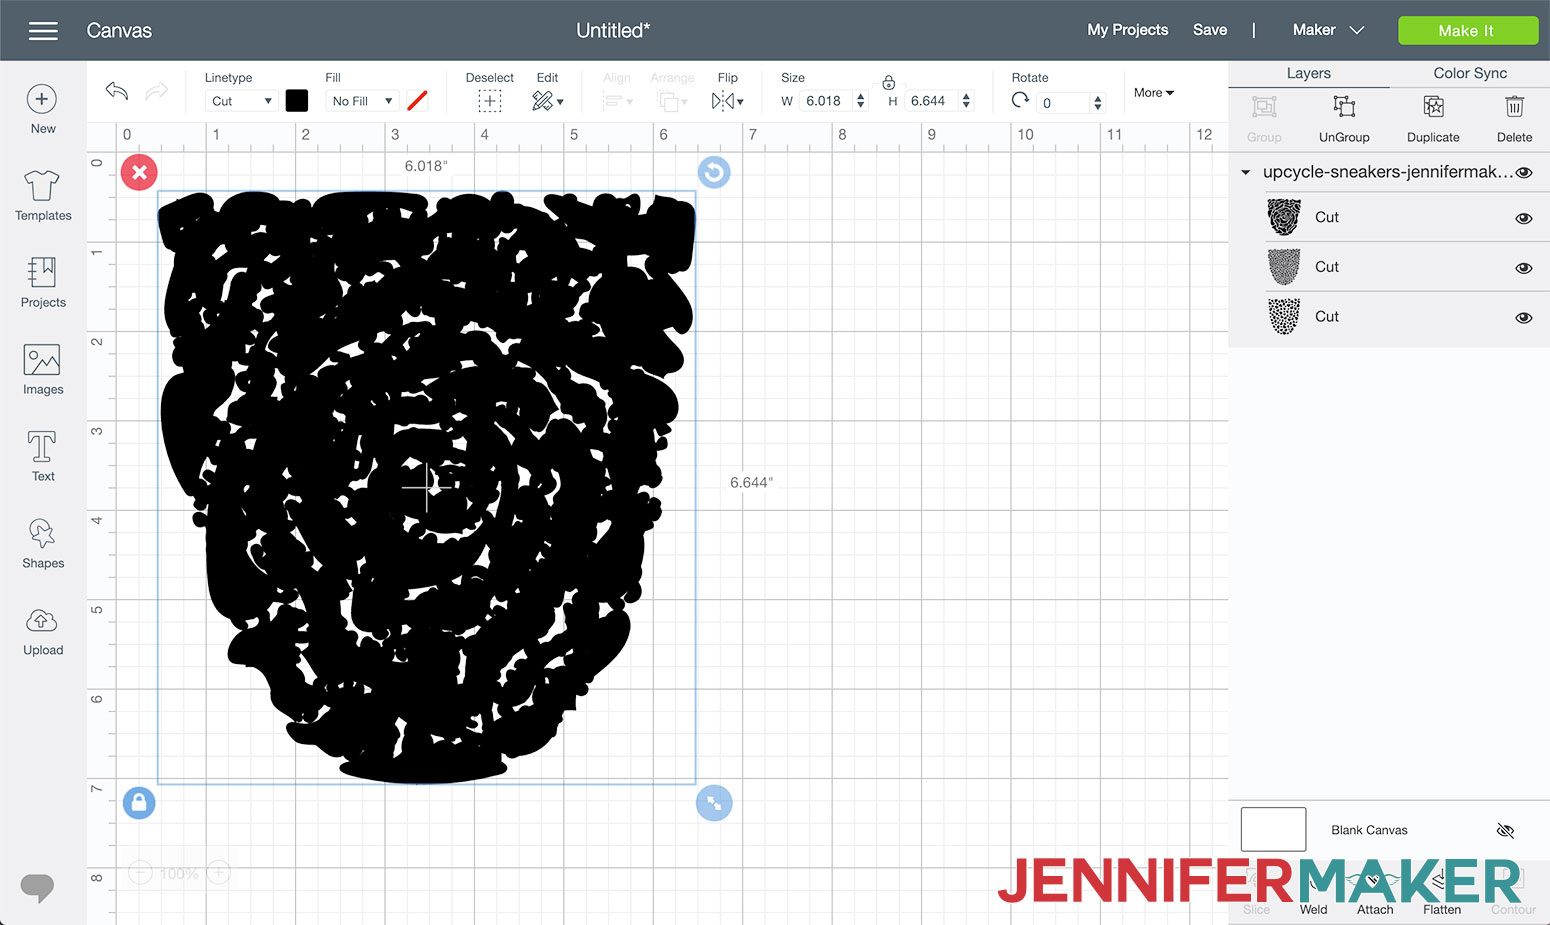
(The three designs are on top of each other when you first upload them to ensure they are sized properly -- just click Ungroup and move each design to a new spot on your canvas so you can see them all.)
Tip: If you’re not sure how to upload an SVG cut file to Cricut Design Space, watch this helpful video training series I made. If you’re on an iPhone or iPad, here’s how to download and upload SVG files to the Cricut Design Space app.
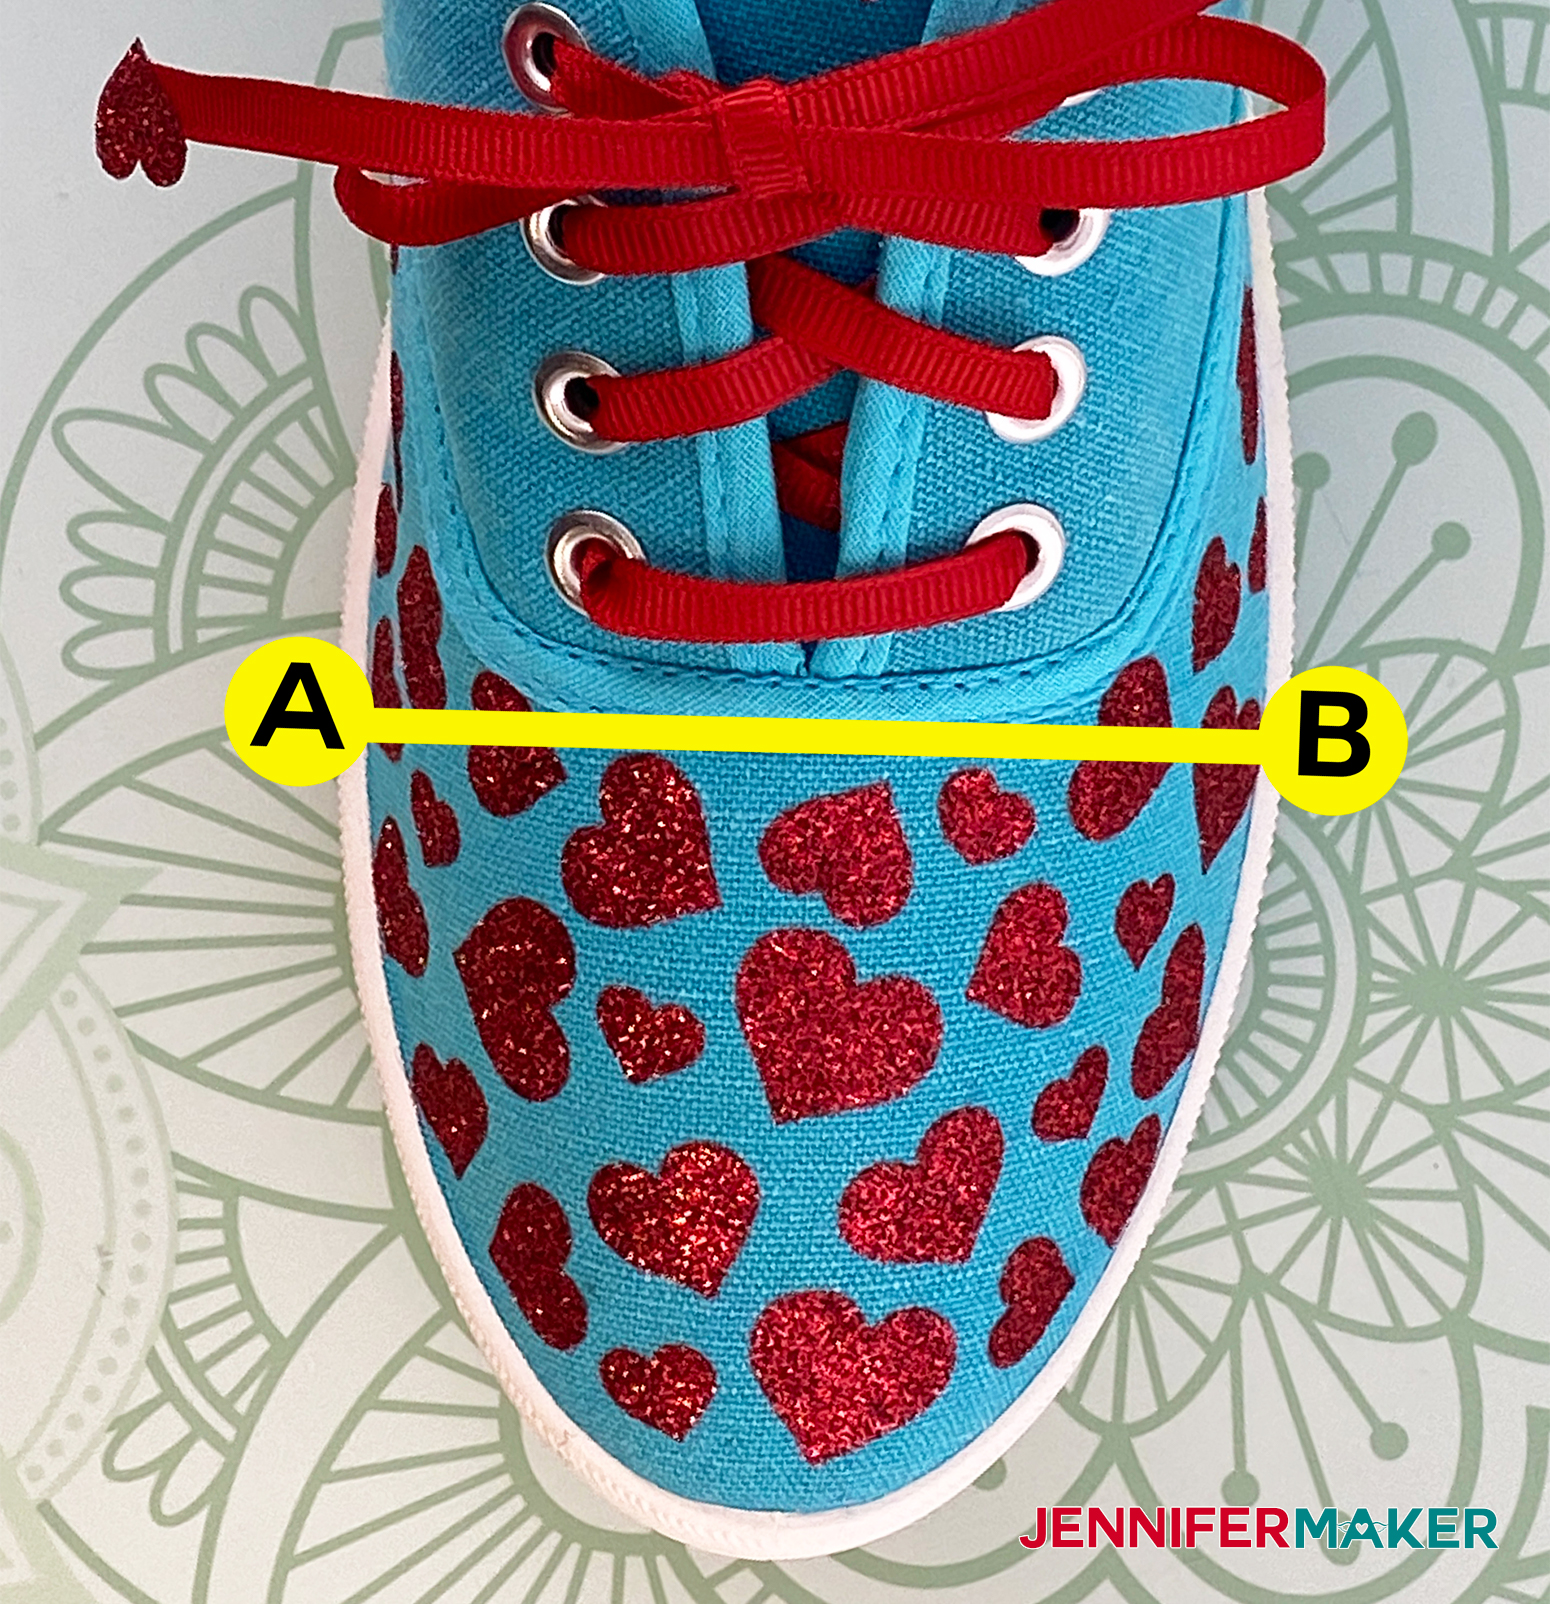
Measure the width of your sneaker from Point A to Point B (as illustrated below) then adjust your design, if necessary, so the design width matches the width of your sneaker measurement
Now that your design is sized to match your sneaker, copy (Crtl+C or Cmd+C) and paste (Ctrl+V or CMD+V) so you have two copies of your design. Select the copied design then flip horizontally.
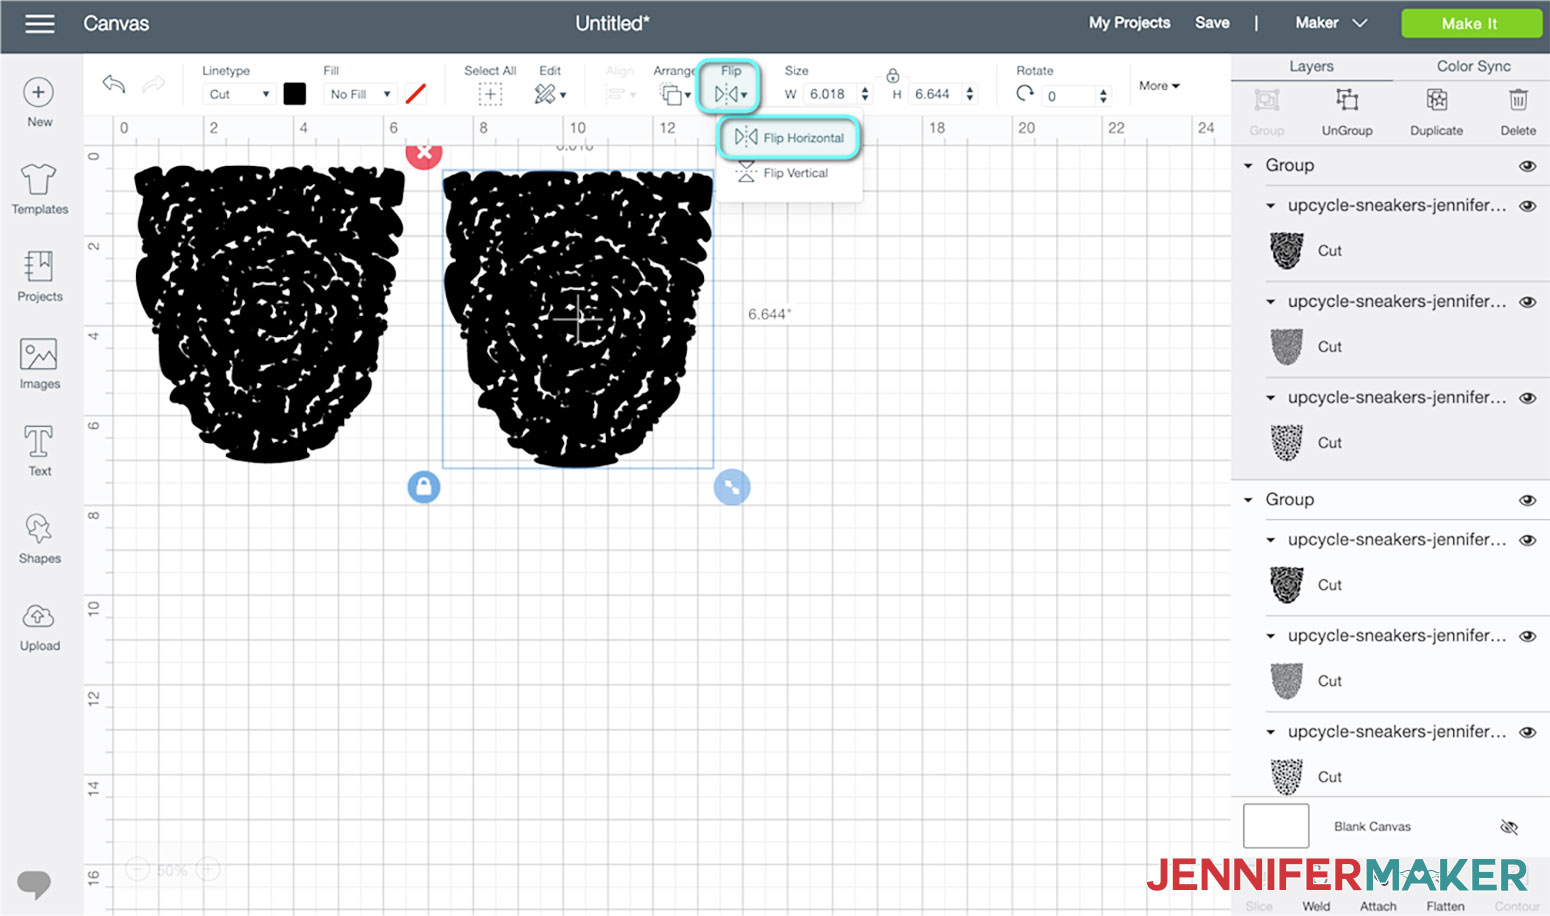
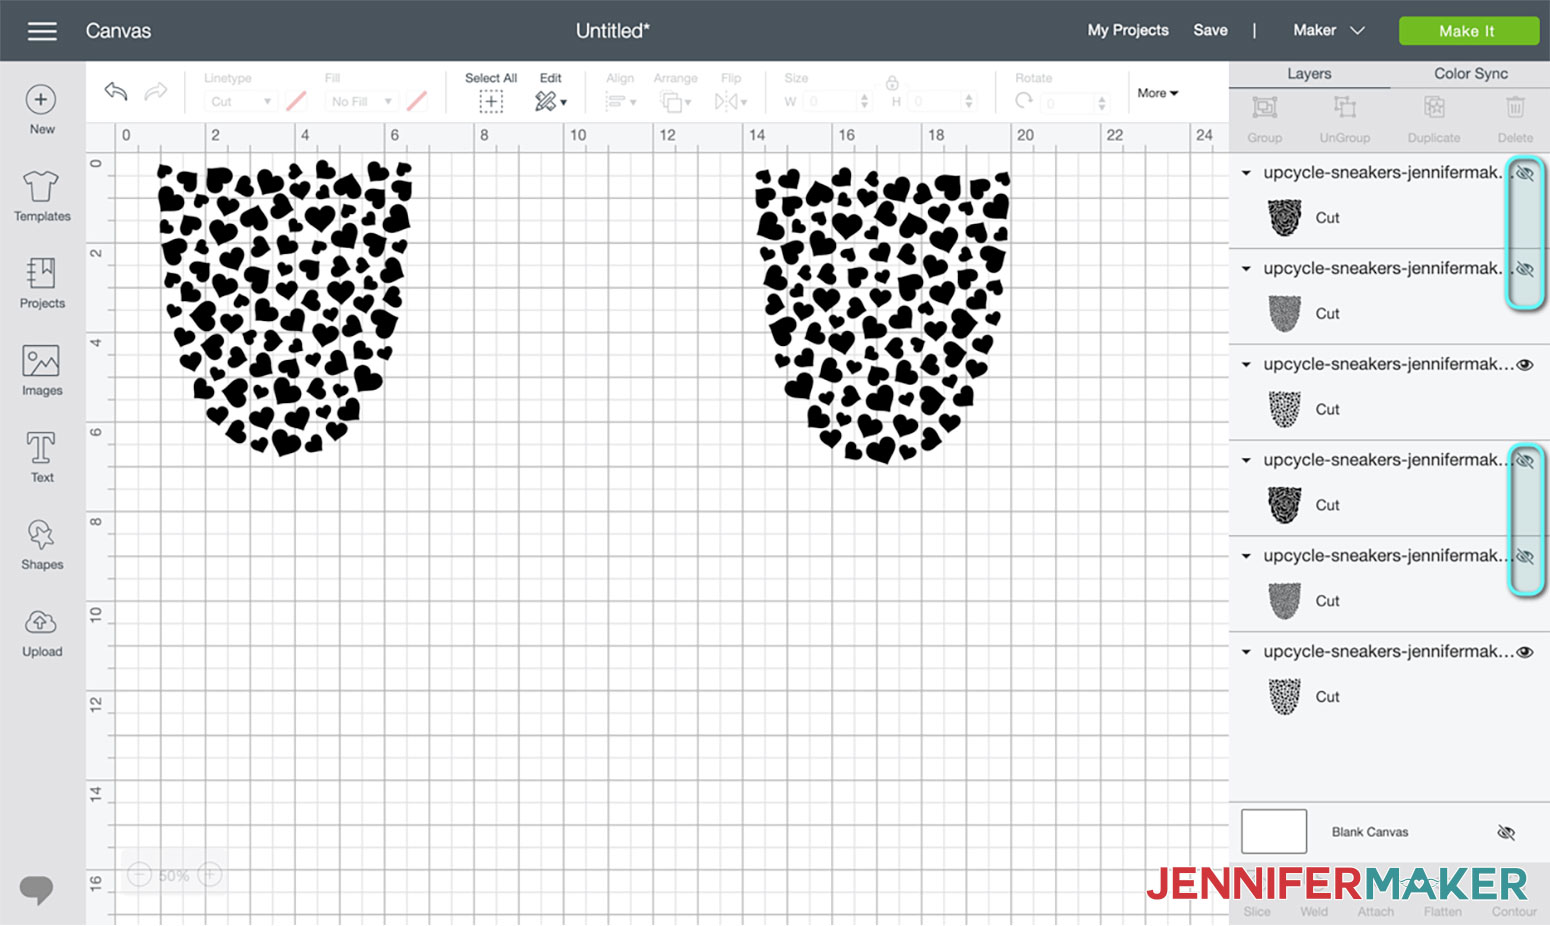
Hide or delete the designs you won't be cutting. When cutting this design it does not matter if the design is mirrored. I think it's a good idea to mirror iron-on designs anyway, just to get into the habit of doing it.
To add a name to your sneakers, measure your shoes to see how much space you have to work with. Then in Cricut Design Space, simply select the text tool and a font you like and type your name. Adjust the character spacing if needed. If you ungrouped the text, remember to select all the characters and Attach. If you use a font with touching letters, select all the characters and click Weld. And BE SURE YOU MIRROR your design before cutting.
STEP 2: CUT OUT YOUR IRON-ON VINYL TO PERSONALIZE YOUR SHOES
Before we begin, I wanted to mention that I found glitter heat-transfer vinyl (HTV) worked the best for my designs. Glitter HTV is more forgiving in the weeding and application of the design. This doesn't mean you cannot use other vinyl.
Once your design is ready to cut, click "Make It", then "Continue," then click "Browse All Materials" and choose "Glitter Iron-On."
Place your glitter heat-transfer vinyl pretty side down (so glitter side down) onto a green StandardGrip cutting mat.
Tip: Use a brayer to make sure the vinyl is stuck well to the StandardGrip cutting mat.
Load your cutting mat into your Cricut Explore, Maker, or Joy and begin cutting!
Once cut, unload your cutting mat and weed the excess vinyl away from your design.
After weeding, flip the mat over and carefully peel the mat away from your weeded glitter iron-on vinyl design!
STEP 3: ADD THE DESIGN TO YOUR SNEAKERS
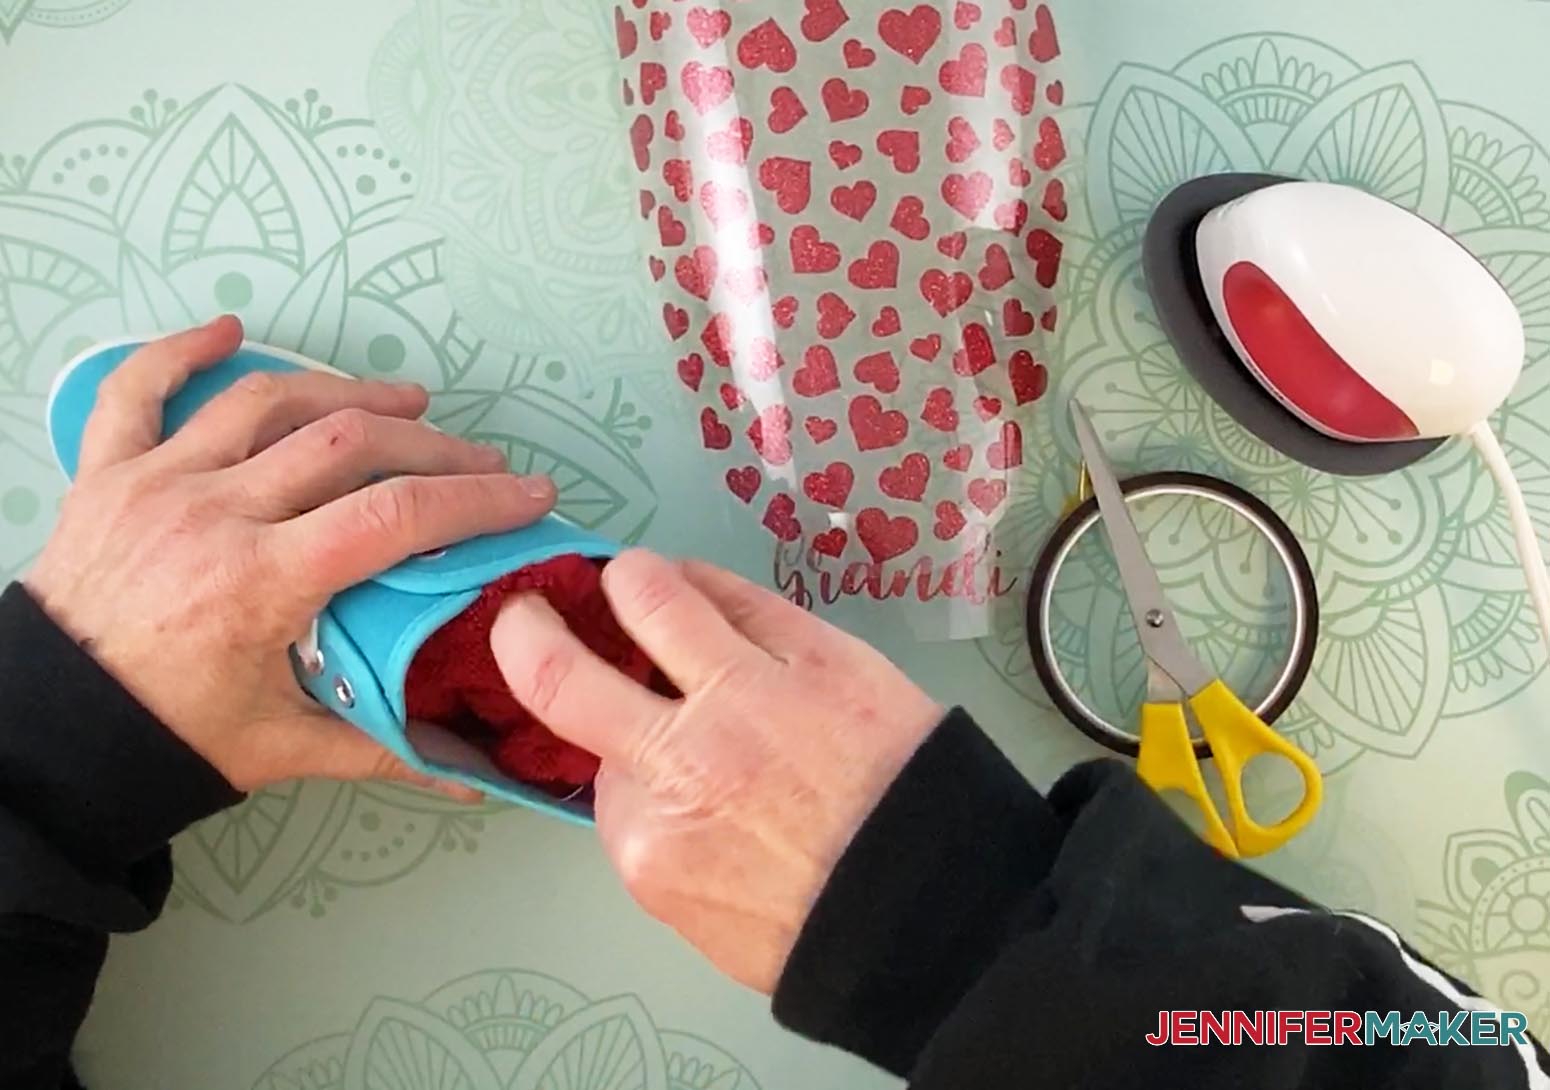
Grab your sneakers, a sock/washcloth, scissors, heat-transfer vinyl and EasyPress Mini (or another way to heat your vinyl).
Stuff your sneaker with a sock/washcloth to give the sneaker support when applying your vinyl.
Set your EasyPress Mini to medium, place a piece of Teflon or parchment paper on your shoes, and pre-heat your sneakers for about 5 seconds.
Tip: I got the iron-on vinyl time and temperature settings from the Cricut Heat Guide. (Choose 100% cotton as your base material.)
Using heat-resistant tape, begin taping the design on your sneaker.
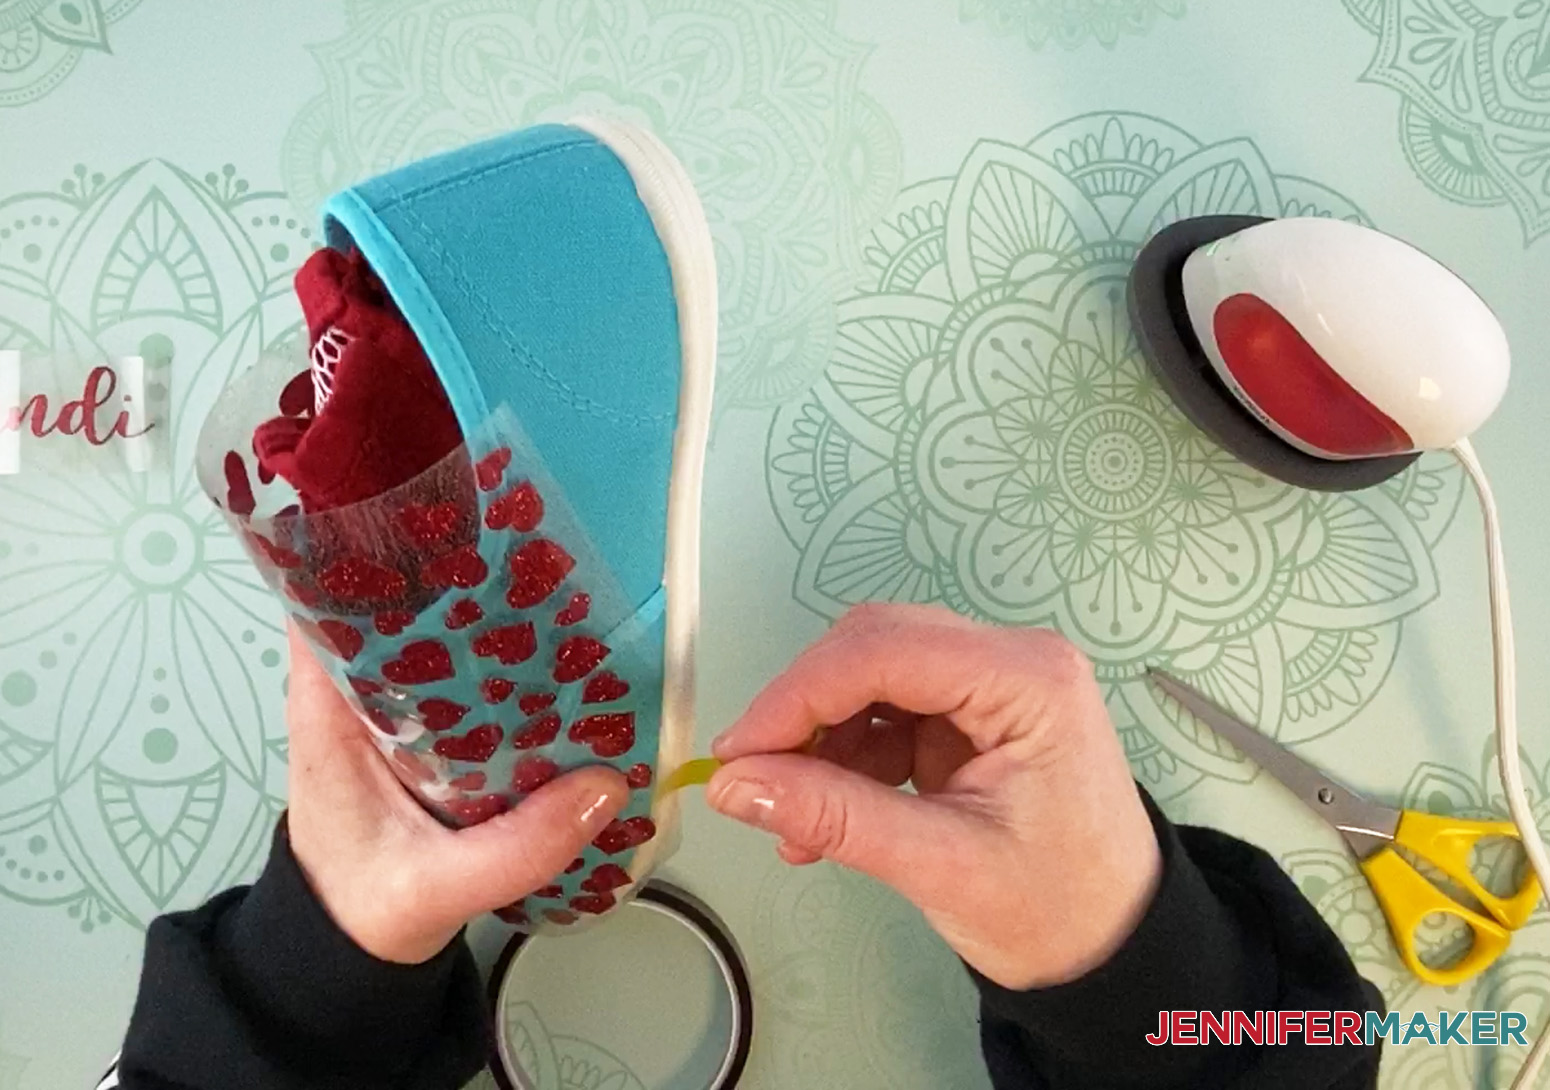
Cut off sections of the vinyl that you do not want on your sneaker. If using premium vinyl, I recommend cutting the design into small sections and piece together.
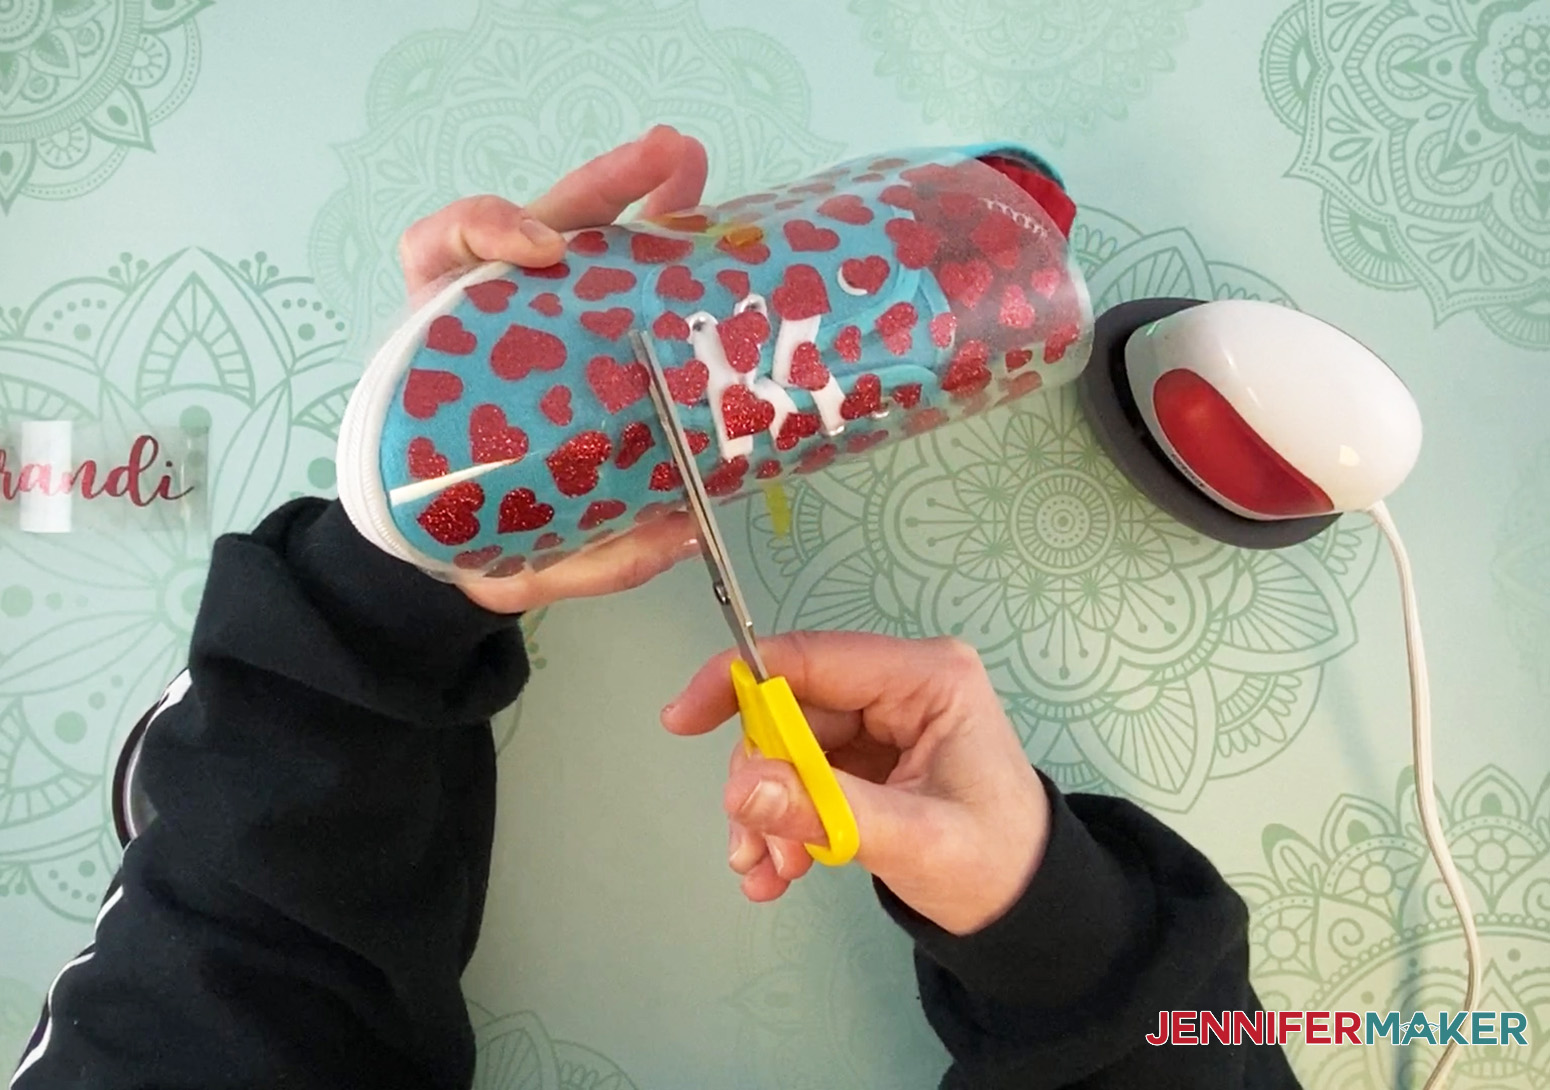
Below is an example of how I cut my vinyl to fit the sneaker. You can use extra pieces of the design to fill gaps and use on other parts of the shoe like the heel of your sneaker.
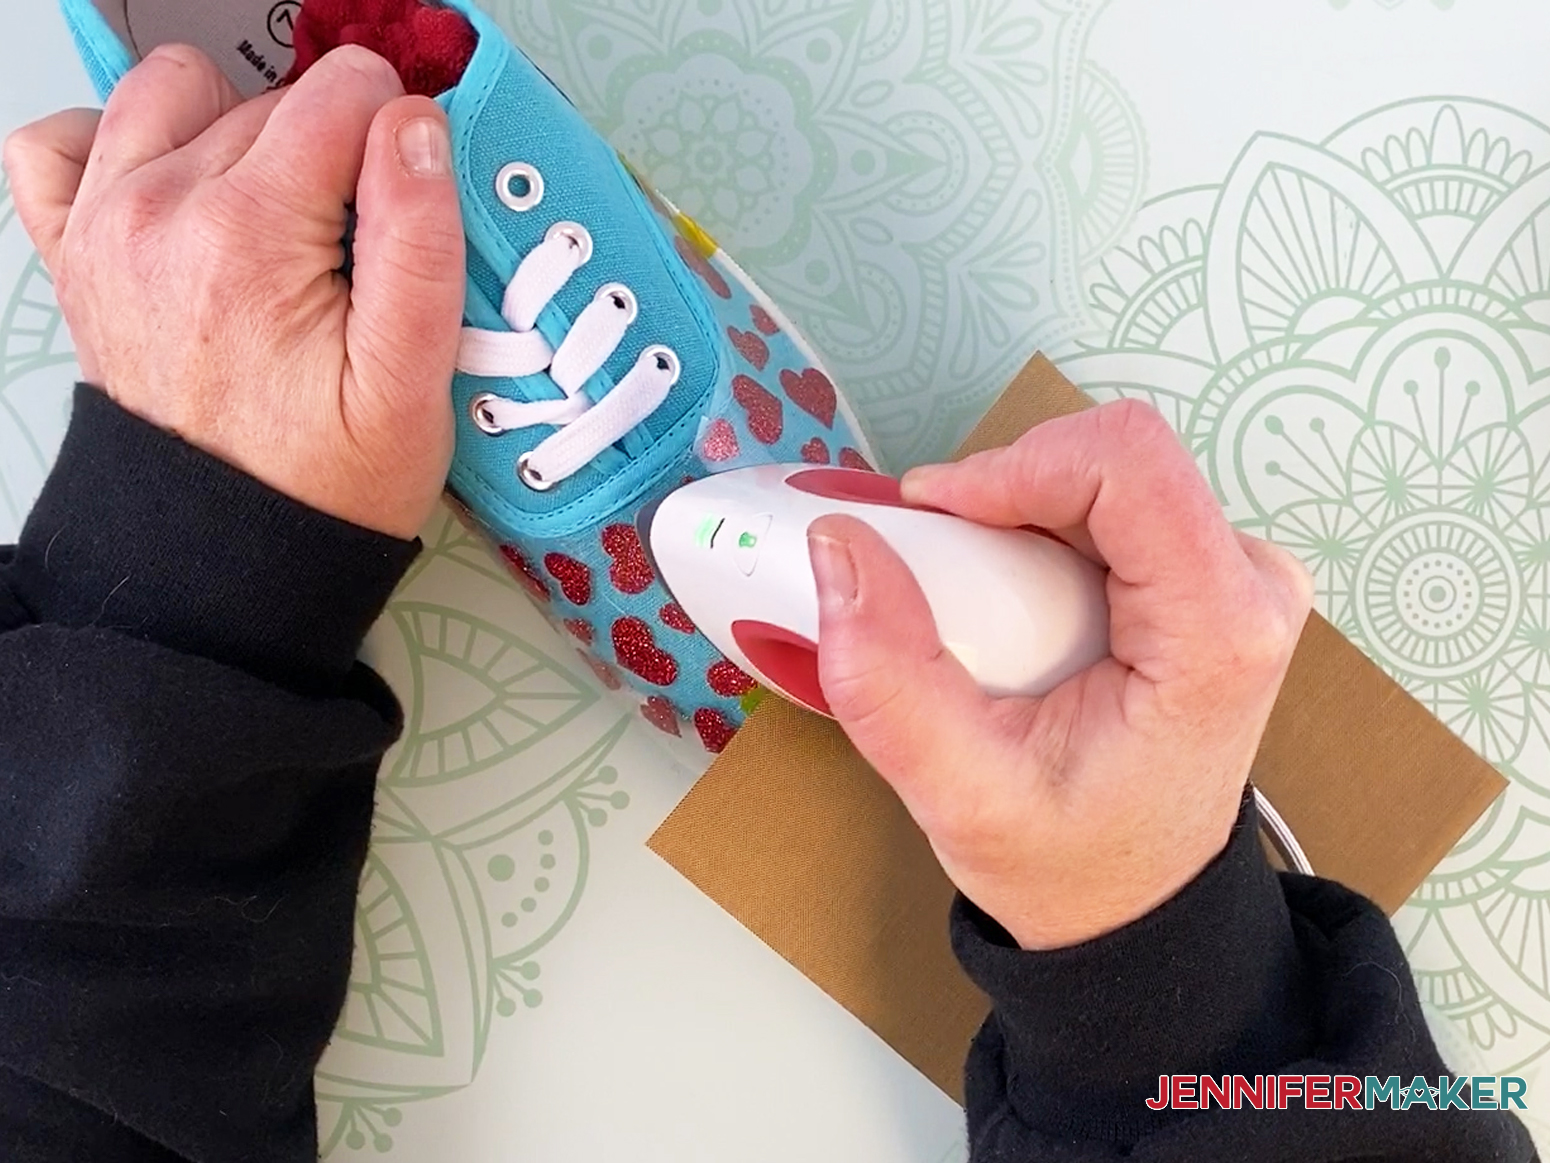
Using Cricut glitter vinyl, I used my EasyPress Mini set to high and heated the iron-on vinyl design on my shoe for 25 seconds using a circular motion.
Note: If you have problems getting your glitter vinyl to adhere at these settings, we also found that 30 seconds at high worked well.
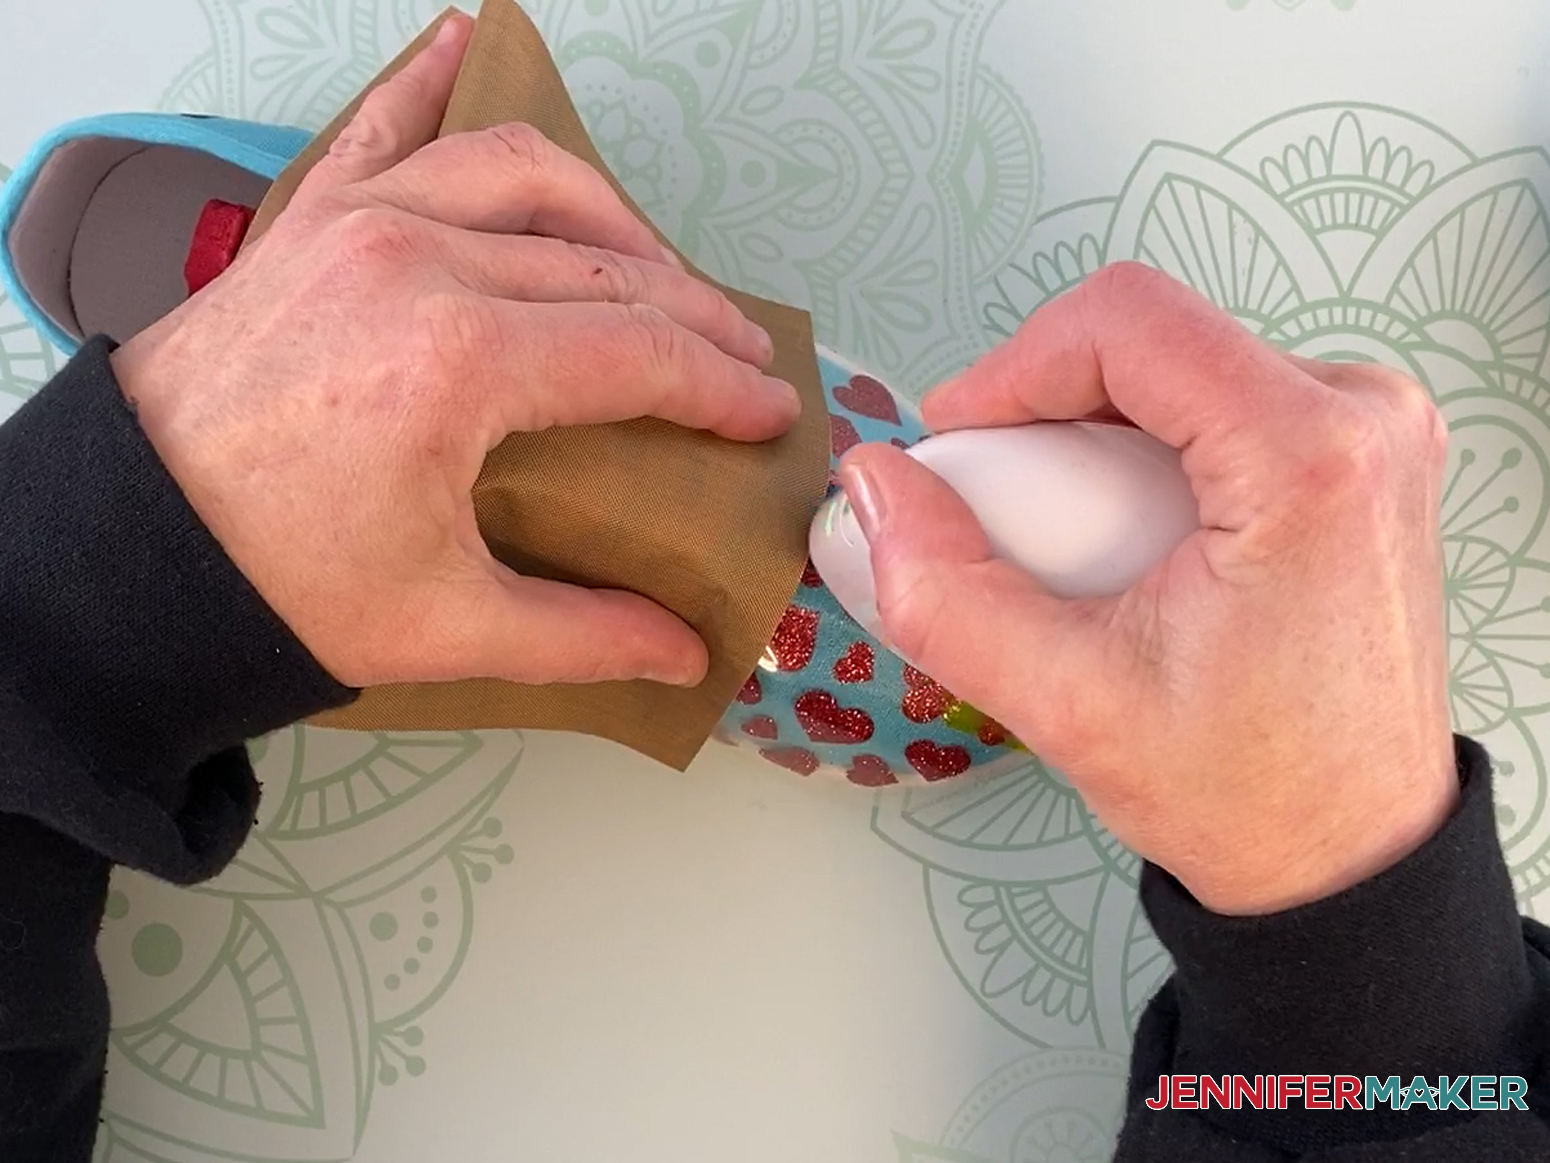
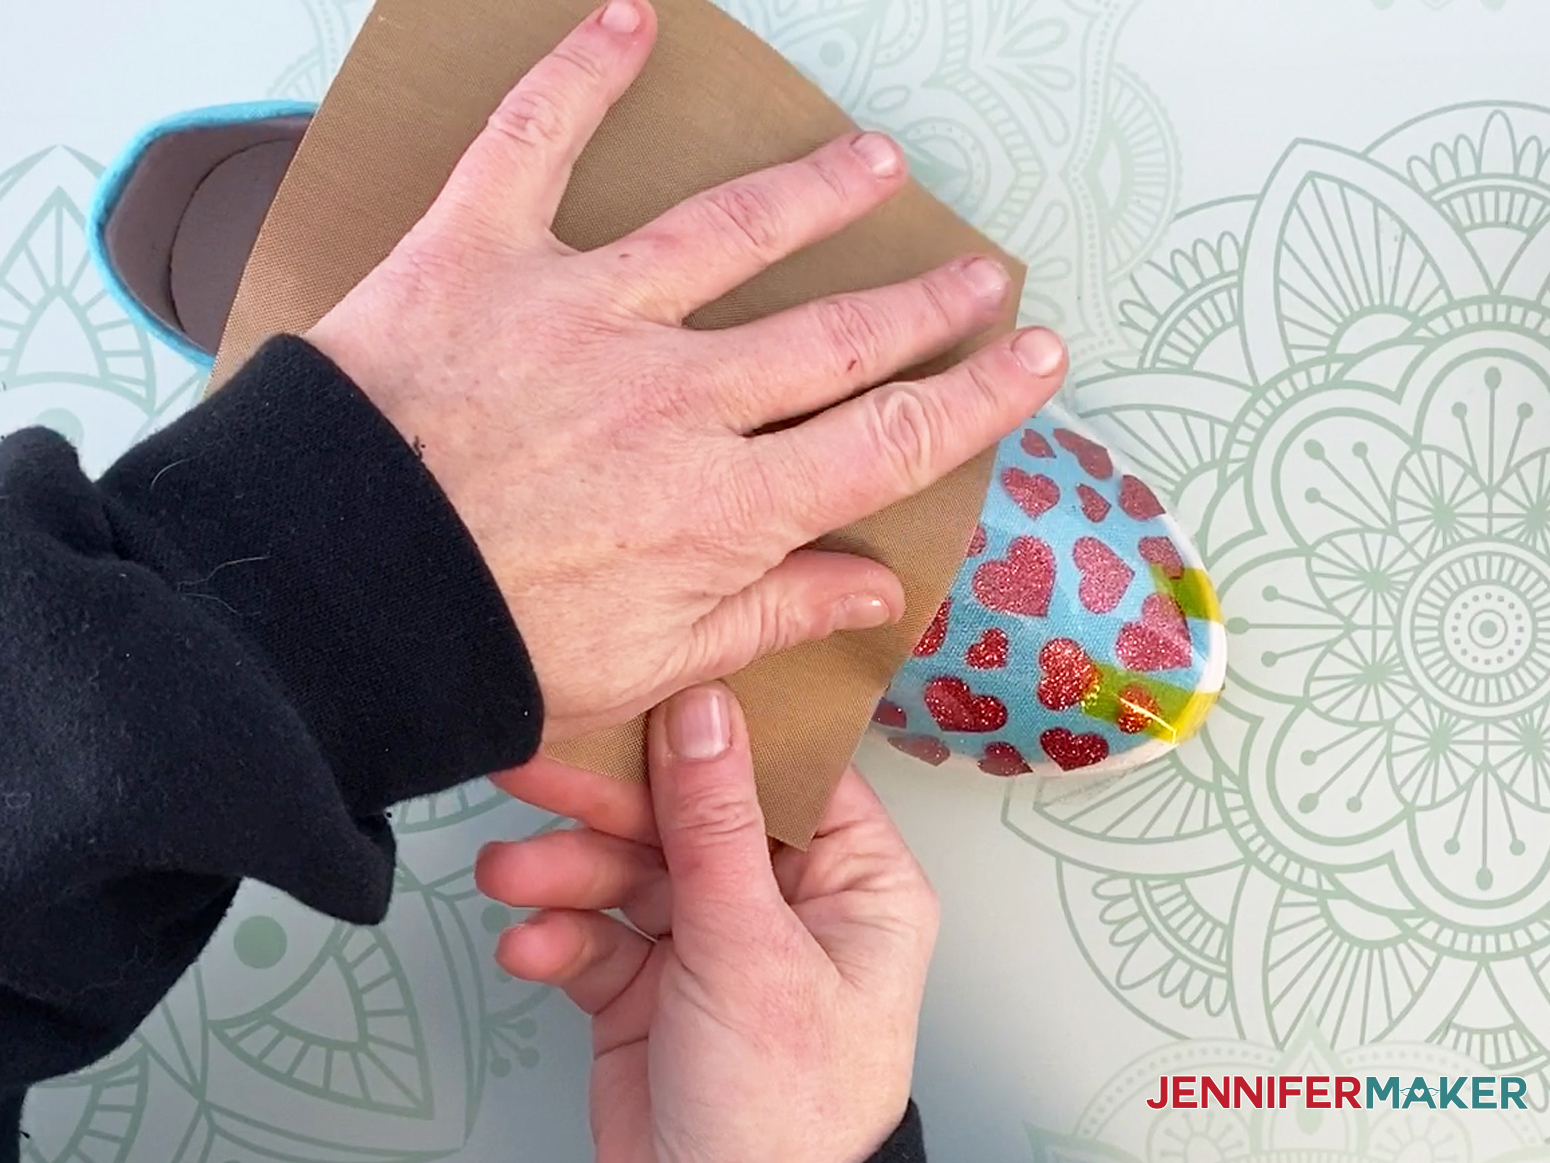
Use a small piece of teflon or parchment paper to protect other areas of your sneaker. The heat can burn or discolor unprotected canvas.
You'll especially want to protect the rubber sole of your sneakers.
Once you finish applying the vinyl, remove the the film on a warm peel. You will probably notice that the film starts to lift from the vinyl anyway. Fill in or add pieces of the design to other parts of the sneaker. If you add a piece to an area where there is already vinyl, make sure you cover up the entire area with the teflon sheet.
STEP 4: SHOW OFF YOUR PERSONALIZED SHOES
Below are the finished sneakers from my other two designs. Here is the rose design on my shoes:
And here is the leopard print design on my shoes:
Notes
ACKNOWLEDGMENTS
Special thanks to the JenniferMaker Design Fairy Team, specifically Design Fairy Caitlin, for helping me design and assemble these fun personalized shoes.
DESIGN SPACE NOTES
The SVG design file is W 6.018" x H 6.644" when it first opens in Design Space.
Need more projects for today’s craft challenge theme?
Today’s MAKE IT EASY Craftalong Challenge is to “Roll With It” by making something with a vinyl roll, personalized shoes, or something on a “roll!” If you are looking for other ideas, we have you covered!
- Iron-On T-Shirts
- How to Make Vinyl Decals- https://jennifermaker.com/make-vinyl-decals-instant-pot/
- How to put vinyl on mugs- https://jennifermaker.com/vinyl-on-mugs-cute-designs/
- How to Layer Iron On Vinyl- https://jennifermaker.com/layer-iron-on-vinyl-cricut-tote-bag/
- DIY Vinyl Decals for tumblers- https://jennifermaker.com/diy-vinyl-decals-tumblers/
- How to Use Vinyl Stencils to Paint Wood Signs Perfectly- https://jennifermaker.com/vinyl-stencils-painted-wood-signs/
- DIY Milestone Blanket for Baby- https://jennifermaker.com/diy-milestone-blanket-baby/
- Customized Serving Tray with Vinyl- https://jennifermaker.com/customized-serving-tray-food-safe/
- DIY Pantry Labels on a Cricut Joy, Explore or Maker!- https://jennifermaker.com/diy-pantry-labels/
We’d love to see YOUR personalized shoes and sneakers with iron on vinyl or heat transfer vinyl (HTV)! Please share a photo in our Facebook group or tag me on social media with #jennifermaker.
This project is a part of our MAKE IT EASY Craftalong Challenge with fun and EASY projects you can do to learn how to use your Cricut! You can share your photos in our daily challenge theme thread here!
Love,

Want to remember this? Save this Personalize Your Shoes tutorial to your favorite Pinterest Board


This is AWESOME! I am a Kindergarten teacher and we celebrate the 50th day of school by dressing up with outfits from the 1950’s. I have wanted to make saddle shoes using htv. Not sure how to create the design but THANK YOU for these tips to help me!!!
Jennifer, saddle shoes are such a great idea! That sounds like a fun day to celebrate. I hope you’ll share photos of them when you get them designed!
I am always looking for items to make for my young grand children – I have a mini easy press and vinyl – now to apply your steps to making these adorable shoes. thank you ever so much for making this tutorial!
Thank you for the tutorial! I do have a question – I know we wash our garments before applying a HTV, but is it recommended to wash the shoes ahead of time?
Most of us on the team, including Jennifer, actually don’t wash our garments before applying HTV, Abbey! That’s one of those things that each of us develops a personal preference for! So, no, we didn’t wash the shoes before applying the vinyl onto the shoes! 🙂
Have you ever tried infusable ink on canvas shoes? I don’t think it would be as vibrant because its not the special material but I was curious how it would hold up? Also do you seal the shoe with anything after? For weather protection?
We did not use infusible ink, Angela, because that process requires a high polyester count to work properly and canvas shoes don’t contain that. We also didn’t seal the shoes with anything because we didn’t want anything to detract from the glitter. Because these are mainly decorative, we tend to wear them to parties and such, and none of us have subjected them to very bad weather, but they have held up really well for a year now!! 🙂