
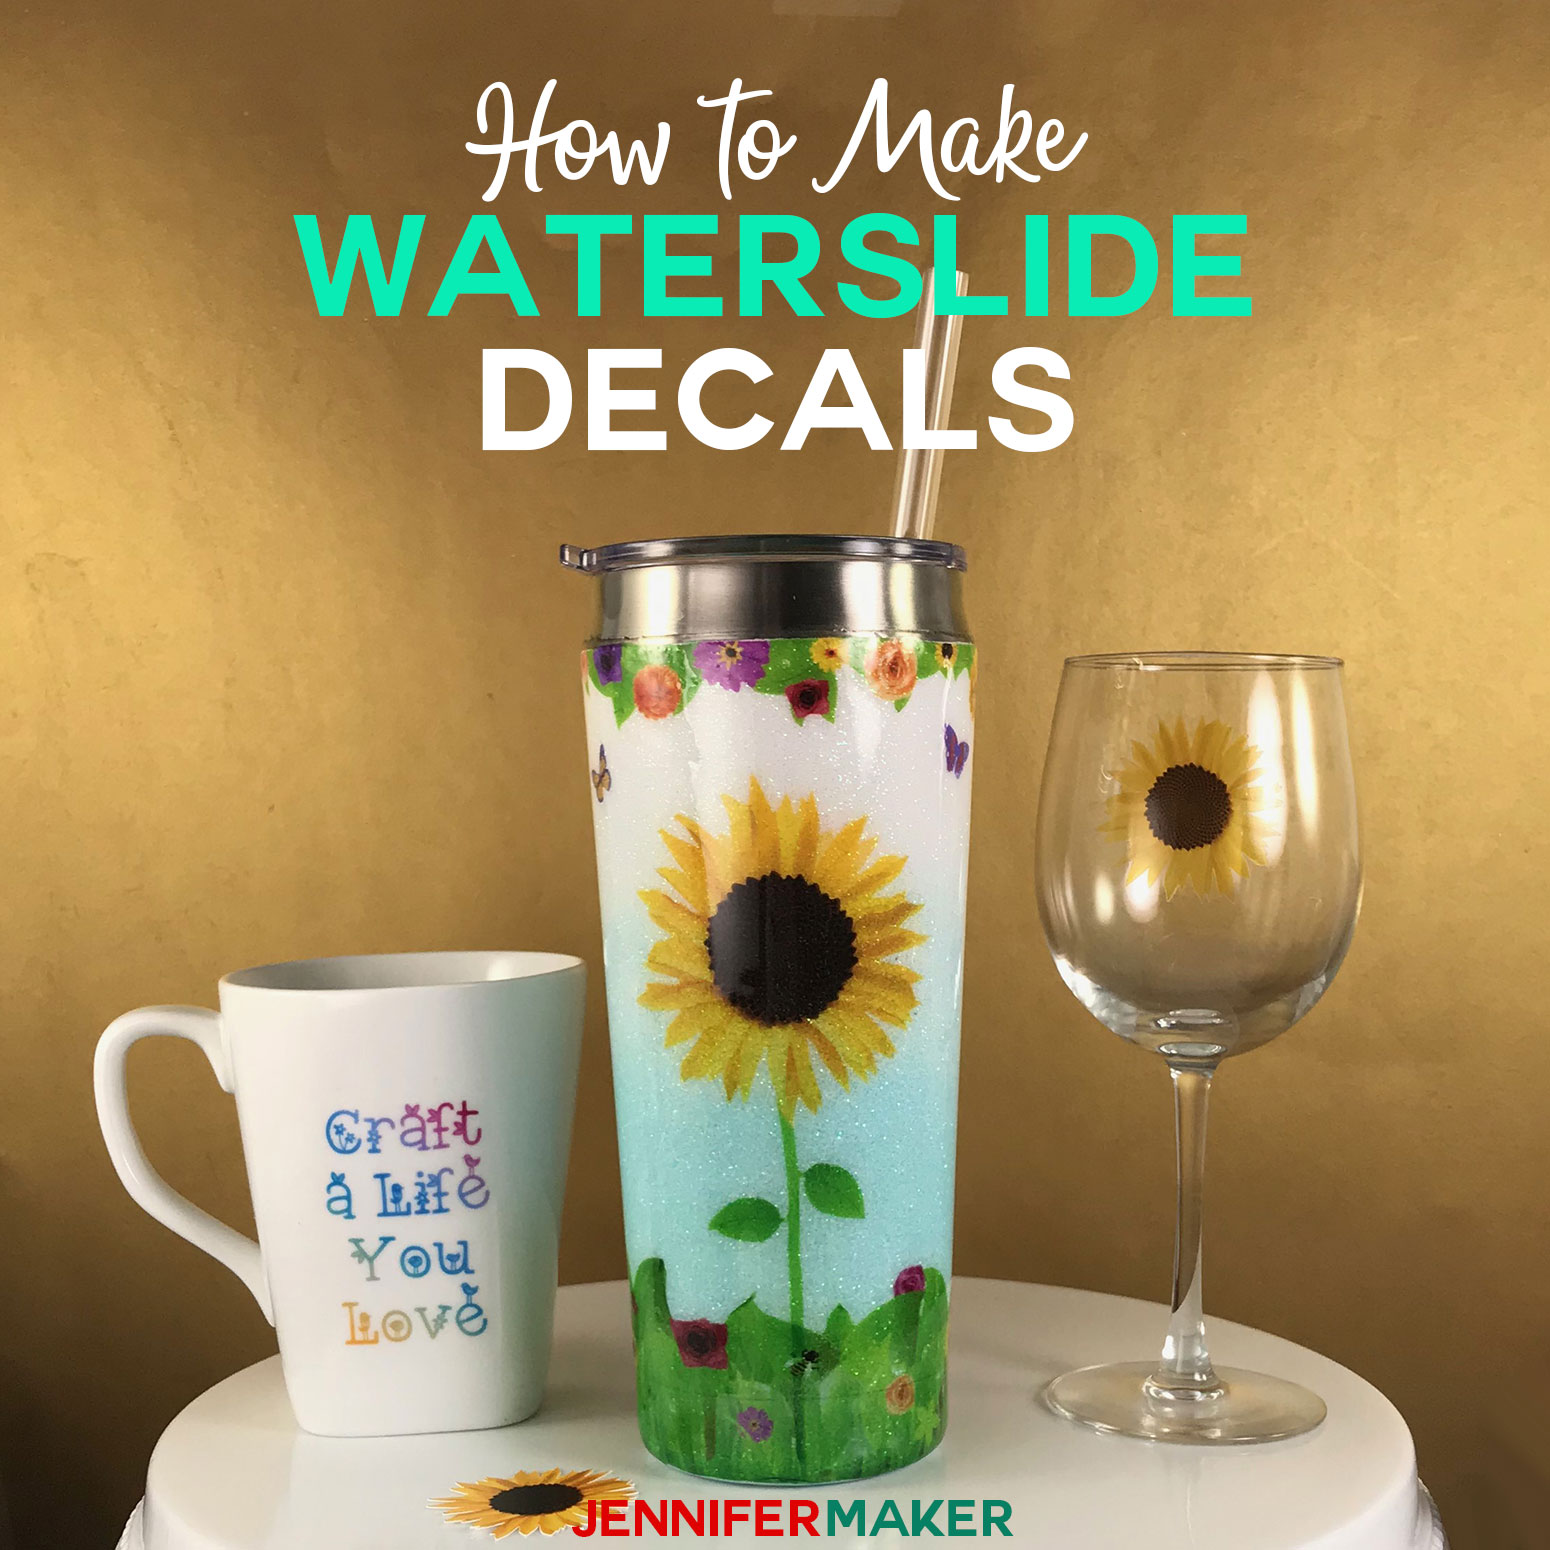
Learn how to print beautiful full-color waterslide decals at home, cut them on your Cricut, and apply them to tumblers, ceramics, and glass!
Last week I did a Print Then Cut project for a T-shirt… but how about one for a Cricut mug or tumbler? About a year or so ago, someone asked if I’d show them how to make a waterslide decal for a mug. And I remember thinking, water-what? So, if you were like me and not sure what a waterslide decal is, this is a really great way to get full-color designs onto smooth surfaces like tumblers, mugs, and glasses. It’s called waterslide because you soak the decal paper in water, which allows it to slide off the paper backing and onto your surface!

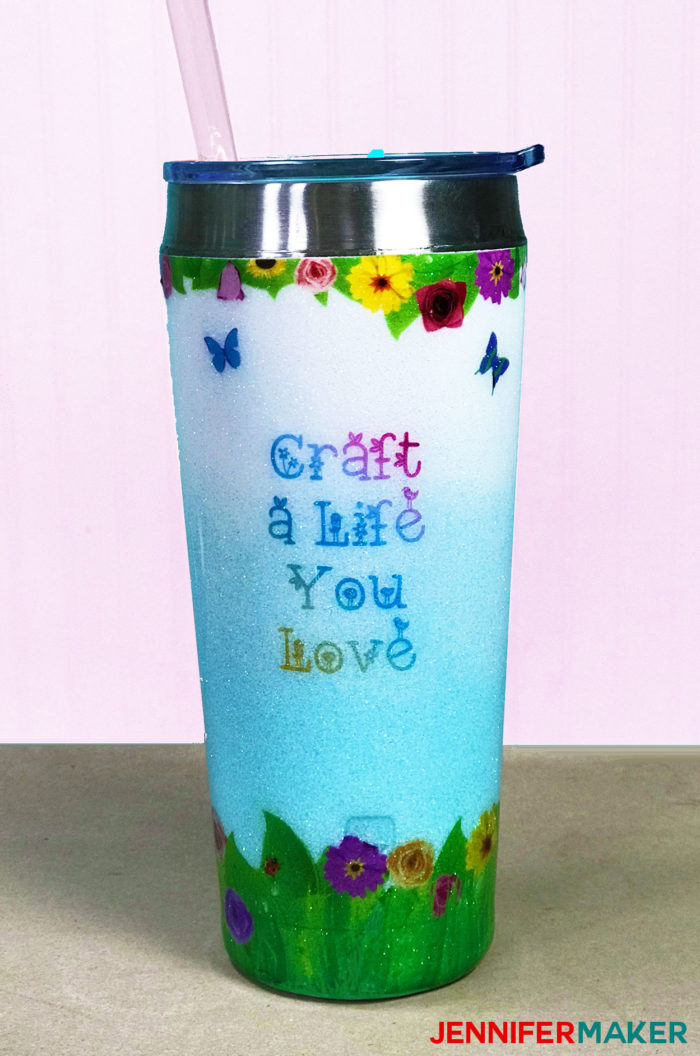
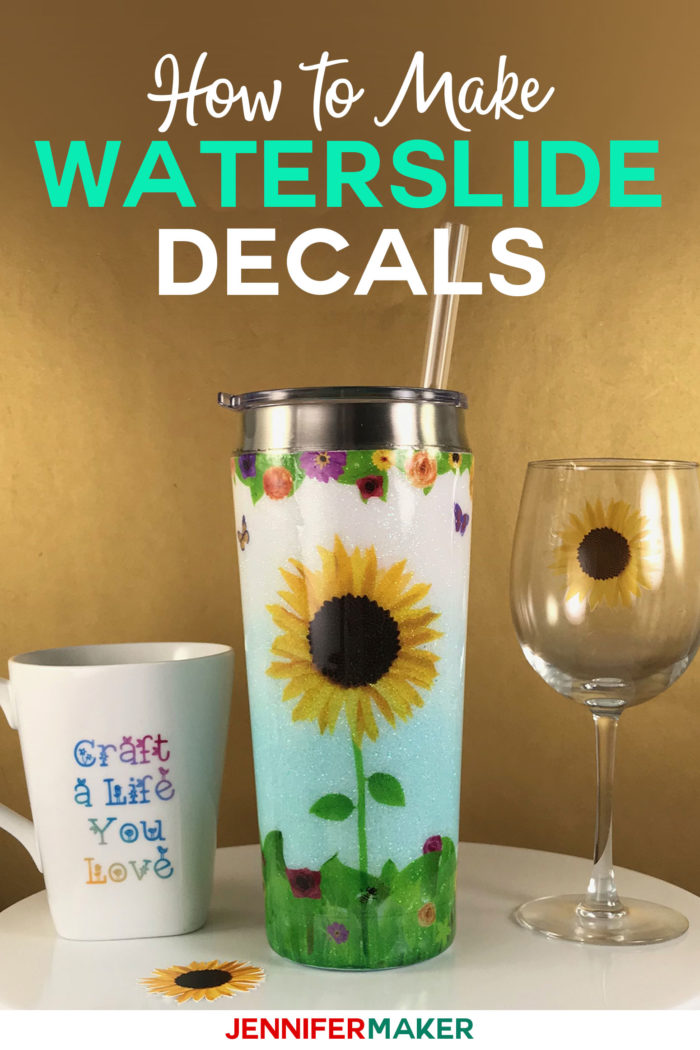
So here is a glitter tumbler with waterslide decals at the top and bottom, front and back. It’s vibrant and transparent — you can even see the glitter right through it.
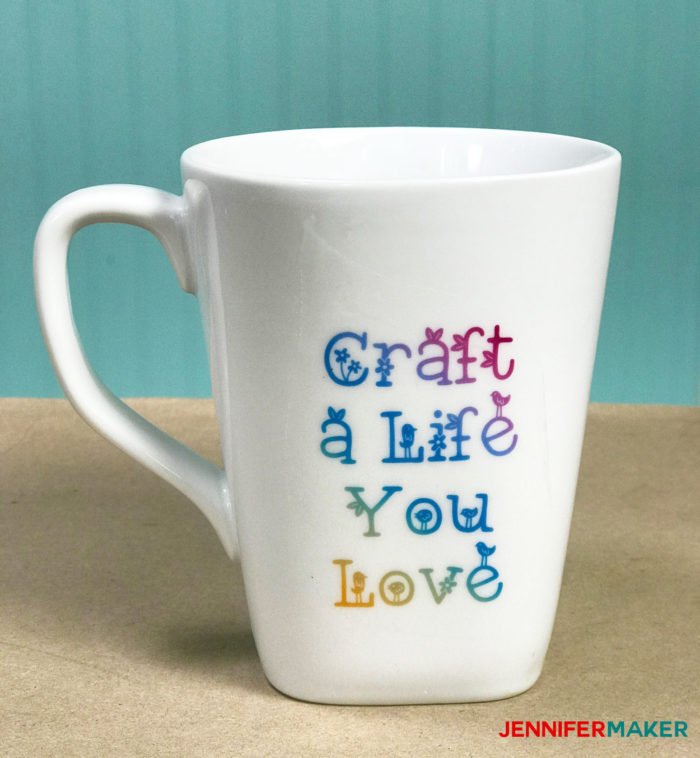
This is a white ceramic mug with a waterslide decal containing words on it.
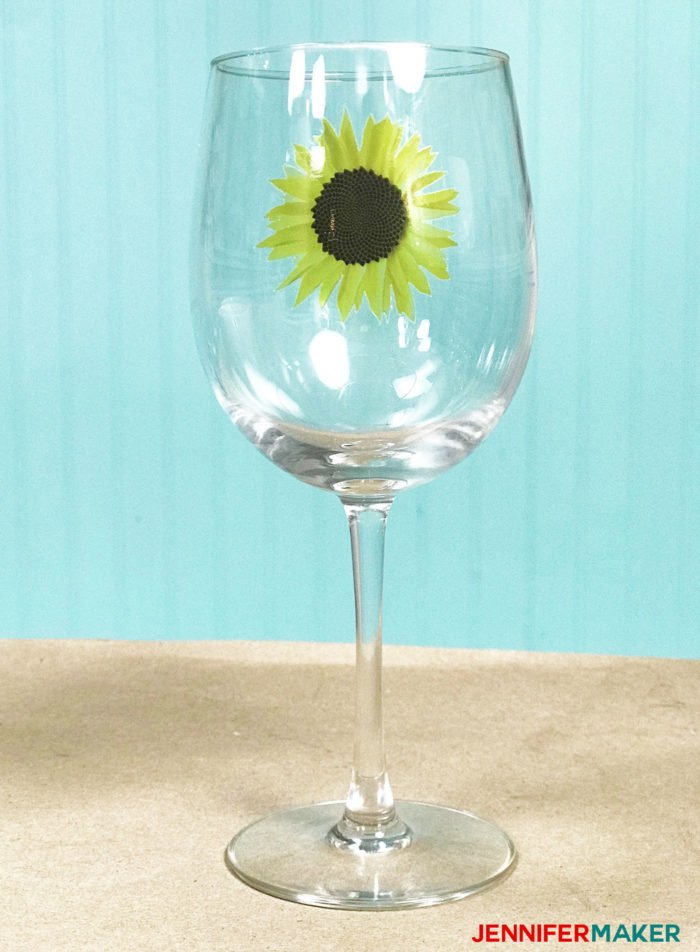
This is a wine glass with a waterslide decal sunflower.
I printed all of these decals at home on my inkjet printer and cut them on my Cricut. How cool is that? They look like something you’d buy in a store!
For this project, you’ll want to start with a smooth surface — you can use a glitter tumbler as I did. I have an entire tutorial on how to make glitter tumblers from start to finish. Or you could use a mug, glass, plastic, or even wood.
You’ll also need a printer — I made mine with an inkjet printer, but they also sell waterslide decal paper that works with a laser printer. I link to the printer I used in the materials list below.
And you’ll need the waterslide paper itself — I have links to the exact paper I used, as well as several other good ones, in the description. I recommend the transparent paper if you want to be able to see the surface through it, which is what I’m using. The exact waterslide paper I used for this tutorial is linked in the materials below.
Other supplies and tools you’ll want to have on hand are a can of acrylic sealer, a bowl of tap water and some paper towels.
Oh, and you’ll need a design! You can make your own, buy one, or use my flower garden design — the garden in this design is filled with images of my paper flowers and paper butterflies! I thought that would be fun! If you make your own, keep it simple — no little bits or thin lines. A rectangle or circle shape works best, but if you’re applying your shape on something like a wine glass, it’s better to go for a precise shape that conforms to the edges of your design.
This step-by-step video tutorial shows you how to make a waterslide decal and apply it to a tumbler, mug, or glass:
I’m so excited to teach you how to make waterslide decals for your tumblers, mugs, and glasses! This post contains some affiliate links for your convenience (which means if you make a purchase after clicking a link I will earn a small commission but it won’t cost you a penny more)! Read my full disclosure policy.
Materials for Waterslide Decals on Tumblers, Mugs, and Glasses
- Printable Inkjet Waterslide Decal Paper (Paper for inkjet printers, but you can also get this decal paper for laser printers if you have a laser printer instead)
- Acrylic Sealer Spray (Gloss) (I used this exact spray sealer)
- An inkjet printer (I used this exact printer)
- Something to put your decal on, such as a glitter tumbler, ceramic mug, or glass
- Rubbing alcohol (to clean your surface before applying the decal)
- A bowl of tap water large enough to completely submerge your largest decal
- Paper towels
- A way to cut your decals (I used the amazing Cricut)
- Design #143 – My flower garden design (available in my free resource library—get the password at the bottom of this post)
How to Make and Apply Waterslide Decals
Step 1: Find or Make a Waterslide Decal Design in Cricut Design Space
If you’d like to use my Flower Garden design (Design #143), you can get my free Flower Garden and Sunflower design in my resource library (get the password for it at the bottom of this page). Don’t forget to unzip it.
If you don’t have a Cricut, you can skip the next part. But if you DO have a Cricut, head on over to Cricut Design Space and upload the Flower Garden design. Click Upload, Upload Image, Browse, then locate the unzipped file you downloaded. You’ll note that inside there are several files — some are labelled smooth and some are labelled precise. If you intend to use the decal on a tumbler, use the smooth versions — these are easier to handle and apply, and you won’t be able to see the edges of your decal after you seal it. If you intend to use the decal on a wine glass, use the precise versions — that will minimize how much extra decal you see around the edges of your design. For mugs, you can use either one — if you are new to applying waterslide decals, go for the SMOOTH versions — they are a lot easier to apply.
So let’s go ahead and select a smooth version of the Flower Garden design. Click Open, then click Complex, and then click Continue. Make sure your image is set as a Print Then Cut, then click Save. Once the file finishes saving, select it and click Insert Images.
Now when your image first comes you, you’ll need to resize it. I have this image set to a higher resolution so it prints nicely, but that means it’s larger than it should be when first uploaded. So select the image and use the Size boxes at the top of the Cricut Design Space screen to change the height to 9.25 inches.
And that’s it! Your design is now ready to be printed from within Cricut Design Space. I’ll show you how to do that, but first let me just say that if you plan to make your own decal, I recommend you put a white box or circle behind the images just as I’ve done here. For example, let’s go find an image, click this sewing machine here. Select it and click Insert Images. Now click Shapes and select a square. Change the square to white, resize it so it is a bit bigger than the sewing machine — you can click the Unlock icon in the lower left corner to unlock it. Once it looks to be a good size, click Arrange then select Send to Back. Now select everything — the rectangle and the sewing machine and click Flatten in the lower right corner. And there you go — a decal ready for a waterslide!
So once you have your decals ready to go, click Make It and you’ll see your images appear on the mat preview screen. Note the black box around your image — that is necessary for the Cricut to locate and cut it precisely. So go ahead and click Continue.
Step 2. Print Your Waterslide Decal FROM WITHIN Cricut Design Space
Now it’s time to print!
To print your decal from within Cricut Design Space, click Send to Printer. In the box that appears, turn off Bleed and then click Advanced Settings.
If you’re not using a Cricut, just go ahead and open the PNG (or whatever design you’re using) in an image editor and send it to your printer.
Print your decal design on the waterslide paper with print settings on glossy photo paper with best quality print. Be sure you print on the glossy side of the paper.
Wait 5 minutes after printing your waterslide decal paper to allow it to dry before moving on to the next step.
Watch my video to see this process!
Note: If you have issues getting Print Then Cut to work, please check out Cricut’s Print Then Cut Troubleshooting Page.
Step 3: Seal Your Waterslide Decal
In a well-ventilated place, spray acrylic sealer over the entire surface of your now-dry printed sheet.
Wait several minutes and repeat with another coat of acrylic sealer. Then repeat one more time with one more coat of acrylic sealer.
When finished sealing, there will be three coats of acrylic sealer on your printed sheet.
Step 4: Cut Your Waterslide Decal
Now you can just use scissors to cut out your waterslide decals.
But if you have a Cricut, here’s how you do it. Go back to Cricut Design Space and click Browse All Materials, search on Medium Cardstock, and then set the pressure to More. You may want to do a test cut to make sure it cuts all the way through, as your waterslide decal paper might differ a bit from mine. These are the settings that worked best for me.
Put your decal on your cutting mat and load it into your Cricut.
Watch my video to see this process!
Step 5: Prepare Your Surface
Clean the surface you plan to put your waterslide decal on with alcohol.
Step 6: Apply Your Waterslide Decal
Get a bowl of water large enough for your decal to be completely submerged in. You can use regular tap water for this.
Submerge your decal in the water for 30-60 seconds. While you’re waiting, get the surface of your tumbler, mug, or glass wet (this will help it slide on easier).
Slide the decal off the backing and onto your surface.
Watch my video to see this process!
Step 7: Dry Your Waterslide Decal
Once you have the waterslide decal in position, gently wipe the excess water off with a dry paper towel. I recommend working from the center and lightly moving outward. This also helps eliminate wrinkles.
Wait at least three hours for your waterslide decal to dry before moving on to the next step. Keep your decal out of direct sunlight during this time.
Step 8: Set or Seal Your Decal
Once your decal has had a few hours to dry, you need to either set it (for ceramics and glass) or seal it (for tumblers).
To set ceramics or glass, follow the directions on your waterslide decal package. Mine said to bake it in an oven at 230 degrees for 10-15 minutes.
To seal a tumbler, do another coat of epoxy. You do not have to seal it again before putting on the epoxy, but you could if you really wanted. I did not.
Note: Even though your waterslide decal is now set or sealed, you must still gently handwash them — this does not make them dishwasher safe. You’re welcome to experiment with dishwasher-safe Mod Podge on ceramics, but I haven’t had a chance to try it yet to know how it will work. I will try it and update this post later if it seems to work!
Watch my video to see this process!
Answers to Your Questions About My Waterslide Decal Tutorial
Q: Can you print your own waterslide decals? Can you use a regular printer for waterslide decals?
A: You can print your own water slide decals using a home printer. Most waterslide decal paper is designed to be used with an inkjet printer, but there are some options for laser waterslide decal paper available as well.
Q: Do you have to seal a waterslide decal after applying?
A: Yes. If you don’t seal your waterslide decal after applying it to your tumbler, the ink may wash off when you clean the cup.
Q: How do you apply a waterslide decal?
A: This tutorial is a great place to start. One of the first things I recommend is to watch and read through the tutorial and check out the materials list — it will give you a step-by-step process and answer many of the questions you have.
Q: Should I use warm water when applying water slide decals?
A: Cool or room temperature water is usually recommended for soaking waterslide decals, though some crafters have success using warm water to help mould their decals onto more irregular surfaces.
Q: Why is my waterslide not sticking?
A: Some reasons why your waterslide decal won’t stay adhered to your surface are moving the decal around too much, soaking the detail too long, using too warm of water, not soaking the decal long enough, not using the right sealant (or not sealing it at all), or accidentally printing on the wrong side of the waterslide decal paper. If your waterslide decal isn’t sticking, print and prepare a new one following the directions in this tutorial and try again.
Q: How long do you leave water slide decals in water?
A: I recommend soaking your waterslide decal in water for 30-60 seconds. Waterslide decals only need to be submerged for a little bit of time to activate the adhesive.
Q: How long do waterslide decals need to dry?
A: Wait at least three hours for your waterslide decal to dry before moving on to the next step. Keep your decal out of direct sunlight during this time.
Get my Flower Garden Decals FREE!
Download my free flower garden decals by subscribing (free) below to get the password to my resource library.
Love,

Want to remember this? Save the Waterslide Decal Tutorial to Your Favorite DIY Pinterest Board!


The link for the acrylic spray just took me to the regular Amazon site, not a specific product. What is it?
Sorry, here’s the corrected link: https://amzn.to/2GZM7z2 — it’s Krylon Crystal Clear Acrylic Spray
Awesome project and tutorial. Once again, exquisitely done. Thanks Jennifer.
The video links all go back to your print-then-cut Maker tee shirt??
I have watched a lot of instructional videos and typically get discouraged by mindless chatter and useless information. But your videos are amazing – you have a great talent for sharing comprehensive, yet concise instructions, and useful information. I am a big fan! Thank you for sharing your talent.
Oh, thank you so much, Lori!!
Hello Jennifer! I am applying a waterslide decal on a piece of glass from a lantern. I was able to apply the decal onto the glass perfectly with the help of your instructios. However, I’m a little afraid to place the piece of glass in the oven as obviously it is not oven safe. It’s 230 low enough to not crack the glass? The instructions of my decal paper does not include baking it but I can still see the clear paper around my text / image.
Hi MaryAnn! I am glad my tutorial got you started! I would err on the side of caution baking your glass piece if your waterslide packaging does not say what time and temp to bake it at, mine gave specific times and temps, this is why I baked mine. Maybe reach out to the manufacture for more details on this.
Thank you for such a helpful video! Just wondering, in the video there is polycrylic sitting on the desk but you used krypton. Is there a reason for this switch?
Hi Jody! Either sealer is fine, I do prefer the Krylon that I have listed in the materials lists on the blog post.
Silly question but when you bake are you using fahrenheit or centigrade please
Thanks
Magsmags791
I am using Fahrenheit, thank you for asking!
What’s the purpose of making the box background white. I have the silhouette and I made a box or in some cases I offset the image to get a close cut. But I don’t fill the box with color is this so you can see the image better
Blessings
Mary
Yes, Mary. Just a personal preference to make it a color.
I tried this for the first time but my maker did not cut around the image but rather around the white box, I got nervous so I took it off, does the clear around the color image go away after baking it? How can I get it to be precise like the sunflower on the glass?
And thank you! Your tutorials are great!
Hi Trisha! If using clear waterslide paper on a white mug, you should be fine. The reason it didn’t cut around your image is because most likely your design is flattened to a shape.
I’ve recently seen that you should not have the mugs in your household oven if you will still cook food in it. Do you need a separate oven for heating the mugs?
Thanks
I have the same question. One crafter has said it’s fine, another has said it isn’t. Now I’m totally confused.
Hi Treniece, no, you do not need a separate oven.
Is the mug still microwave safe since you are using the Krylon acrylic coating? I’m just thinking if someone wants to reheat coffee, or heat up water for tea/hot cocoa.
I just tried this with the waterslide paper you recommended, but it disintegrated on me. I tried both 30 seconds soak and 60 seconds in soak. What do you think caused this? Could my krylon coats have been too thin?
Hi Lisa! This definitely sounds like not enough or too little of the acrylic spray coats. Give a thorough coat and then wait 20 minutes or so and spray again. Do this a couple of times. You want to see your waterslide super shiny and a little stiff.
I did everything with the sealing and waiting the time between all the points. Baked and waited. Mug was gifted and upon the first hand wash with hot water the decal came off. Is there some kind of additional sealant to spray after it’s been baked on?
Hi Jennifer. No, there isn’t that I have tried. Verify the bake time and temperature from your product packaging. You will also want to consider who it was hand-washed, it shouldn’t need scrubbing, just a gentle wash.
Jennifer,
If I was to make my own waterslide decal, how do I know what size to make it? Say I had a specific full wrap design I’d like to do on a 32 ounce tumbler. Then I wanted to use that same design on a 12 ounce wine tumbler. Is there some sort of cheat sheet out there somewhere that tells you what to resize it to? Thank you for all you do!
Hi Mendy! I don’t have a blog post on what you are looking for but it will involve taking measurements of your cup with a fabric tape measure and then recreating that shape in Design Space.
Have u had a chance to try the dishwasher modge podge with water slide yet?
No, I have not Candice. You can suggest that for me here: https://jennifermaker.com/projectrequests/
What type of epoxy to you use?
I like Amazing brand from Michael’s.
been trying to down load the sunflower design for the tumblers can not find it anywhere . thanks bev .
Hi Beverley! In all of my blog posts, in the materials list, you will find the design file number listed. For this design, the library file number is 143.
Do you recommend using a different oven then the one used to prepare food or is this non toxic and will be fine for food prep also? Love your tutorial!
Yes, Jen. I would use a different one if you can.
Jennifer, I have tried Googling an answer! I put the water slides onto my tumbler, but after an hour or so, the images are curling and peeling off the tumbler. I’m wondering if it’s maybe too much sealer. I’m new to this so really not sure and can’t find any common reasons. Any ideas? Thank you.
Hi Leanne! It could be a couple of things. Possibly too much sealer, try doing one less coat. Next would be making sure your base is wet as well when you apply your water slide paper. These things should help.
i have been trying to download the file for the sunflower waterslide tumbler, i have tried #143 like the video tutorial mentioned. I am still unable to find it. i really love this tumbler and your videos. Thank you!
You can find our library by clicking on the blue link, Michelle! If you haven’t been in the library before, you will need to give us your name and email so we can send you the password. (Don’t worry, we won’t spam you!) Once you are in the library, you can either scroll down to #143, or do a search by using one of the methods on the right side of your screen where it says “How to Search the Library.” If you are still having trouble, please feel free to email our Maker Experience team at “[email protected]” and they will be able to walk you through the steps you need to get that wonderful pattern!!! 🙂
Thank you for such a wonderful video.
Hoping you can help. I have done a waterslide image on a mug fine. I baked it for 15 mins at 150 as suggested by the instructions on the waterslide vinyl. How when the mug has been washed lightly in warm water for the first time, the waterslide has become slimey and peeled off as if it has only just been put on.
Any suggestions as to what it can be?
Oh, boy, Katrina, waterslide can be a finicky substance to work with and there are many, many things that could have gone wrong! Have you visited our Facebook group yet? They are a group of experienced crafters who love to help with projects and problems, and they’d be able to help you pin down exactly what happened. You can reach them right here: Cricut Crafters and Makers