Learn all about my sublimation mistakes and how to avoid them!
Sublimation mistakes? If you’ve sublimated, you’ve made them. Yes, even I have. Many times, to be exact! Whether you’ve got blurry sublimation image on your tumbler or a faded design on your T-shirt, some of the most frequent issues are due to user error. Looking back, I wish someone would have clued me in on some tips and tricks that could have built up my confidence and helped me avoid troubles. Instead, I learned by trial and error … but, as I say, I make the mistakes so you don’t have to. I’ll tell you how to recognize common sublimation mistakes — AND how I prevent them when sublimation crafting!
See the full live video replay on my sublimation mistakes (and their solutions):
Ready to learn about sublimation mistakes and solutions? This post contains some affiliate links for your convenience (which means if you make a purchase after clicking a link I will earn a small commission but it won’t cost you a penny more)! Read my full disclosure policy.
My Favorite Sublimation Tools & Materials
- Sublimation Printer (I have an Epson EcoTank 2800, EcoTank 4700, Epson F170, Epson Workforce, Sawgrass SG500 and SG1000).
- Heat Press – I often use my Cricut EasyPress with a 12″ x 12″ EasyPress mat or my Autopress
- HIIPOO Sublimation ink
- A-Sub 125g Sublimation paper 8.5″x11″
- White Cardstock 12″ x 12″ (blowout paper for the bottom of my “sublimation sandwich”)
- White, Uncoated Butcher Paper (favorite blowout paper for the top of my “sublimation sandwich”)
- Heat-Resistant Tape (I use Cricut blue tape, but also found that PYD Life blue tape and Zonon Clear Tape work great)
- Tape Dispensers (I use this dispenser for the smaller rolls like Cricut’s tape and this dispenser for the larger rolls)
- Lint Roller
My Sublimation Mistakes and Solutions
Avoiding My Sublimation Printer
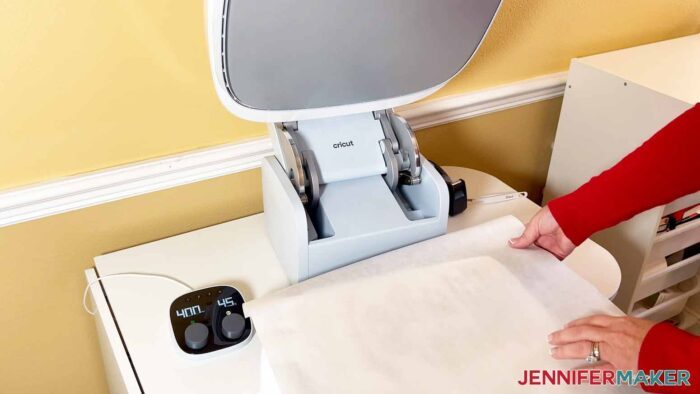
I got my first sublimation printer two years ago. I bought an Epson EcoTank and some sublimation ink, put it in my craft room on a counter, smiled at it, gave it a nice pat, and then gave it a sideways glance. I knew I had to “convert” it to sublimation by putting this other ink into it, but I’d never done it before. So I told myself I’d do it later. Later turned into nearly a YEAR. I let my awesome printer sit there without ink, without anything happening, for such a long time, because of what is probably my biggest mistake — I feared the unknown and uncertainty of this new thing. Imagine all the things I could have made in that wasted time!
It was actually the very first Sublimation Camp that got me motivated to put the sublimation ink into my printer and try it. And it was SO easy, I felt a little silly when I realized I’d built it up into some big deal. I think sometimes we all just read too many posts and watch too many videos, and think it’s going to be harder than it is… and it just is not.
So mistake #1 was not getting my sublimation printer set up right away. If you have a printer you got and it’s still sitting in the box, it’s time to get it out and set it up. Trust me — you can do this and it’s a mistake NOT to.
Why Does My Print LOOK Like That?!
My next big mistake was judging my prints before I pressed them. The first time you print from your printer, you might look at what comes out and be like, “uh, this is way too light. What’s wrong with this?!?” So, light prints are totally normal and to be expected — the sublimation ink doesn’t get activated until you heat it! So your sublimation prints will be light at first.
I remember my first prints, and I was really worried I had messed up. Thankfully, I tried pressing them and realized that everything was fine. But I know some folks in my Sublimation Group make this mistake too, but then stop and don’t press it. So just remember this — you have to press your print before you see the true colors!
Crooked Tumblers
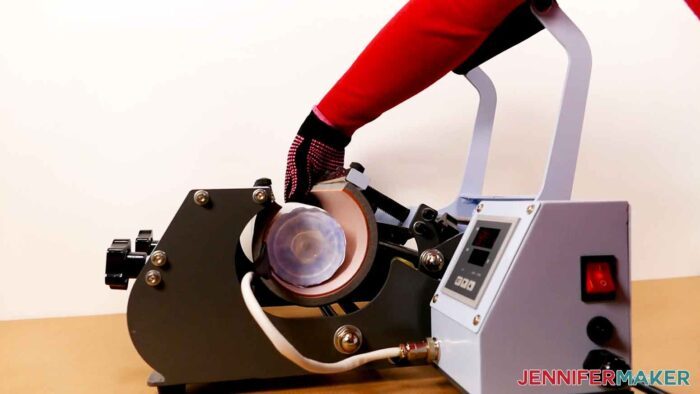
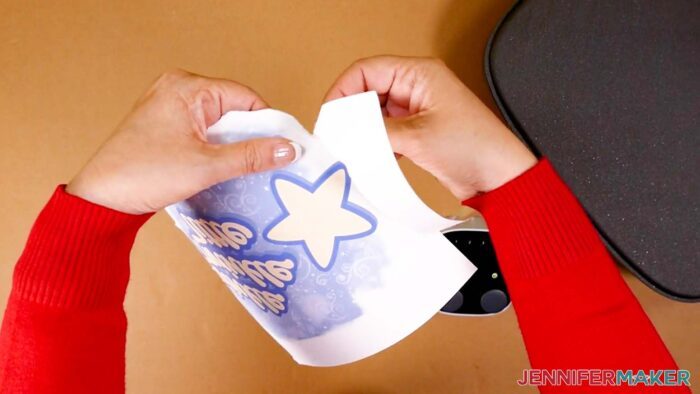
Are your sublimated tumblers looking a bit…off? If your tumblers are coming out with their designs looking tilted, it means your design wasn’t aligned correctly on the blank. I was so annoyed the first time I did this, because it’s such an easy mistake to avoid. But I did learn that since you need to wrap it so tight, sometimes sublimation transfer paper shifts when you’re wrapping it. The next time, after wrapping the sublimation paper around the tumbler, I gently tapped it on the table to make sure it was perfectly lined up at the edge. And nothing was crooked! Now it works like a charm every time.

Unsightly Seams
Have you ever had a sublimated tumbler turn out beautifully, and then you turn it and there’s a giant obnoxious seam up the back? Me too. Hiding seams is actually pretty challenging, and it can take a seasoned sublimation pro to have a well-camouflaged seam. My advice? Practice. But also, wrap the transfer paper around the tumbler as tightly as possible. Then tape the overlapped seam of the paper entirely, then use your fingernail to press along the seam line to help push as much ink directly onto the tumbler as possible. This can help make the appearance of the line less noticeable.

Ghosted Tumblers
Haunted by a blurry result? If your sublimation print moves at all while it’s warm, ghosting can occur. This is when your sublimated image looks fuzzy or like a double exposure. Once, I unwrapped a sublimated tumbler and thought my eyes were going bad! But turns out, the sublimation paper had somehow shifted while pressing (or right after pressing). This is one of the most frequent issues sublimation crafters have in the beginning. To avoid being surprised by this unwelcome effect, secure the wrap as tightly as possible around the tumbler, using plenty of tape and making sure there’s no air bubbles or space underneath the design. After you’ve pressed it, don’t move the tumbler more than you absolutely have to, and don’t remove the sublimation paper too early — wait for it to cool completely before touching the wrap. I find that for consistency and the least amount of ghosting, I get my best results with a tumbler press.
Wasted Materials
And these leads me to my next big mistake, which is wasting blanks while I was learning and testing. It’s really tempting to just want to put your sublimation print right onto your surface, but it’s so important to test first so you don’t waste stuff. I wasted a LOT of shirts, mousepads, and tumblers while I was learning.
So to avoid this mistake, get yourself a couple of yards of 100% polyester fabric at your local fabric store and use this to test your colors, your settings, and all the things you want BEFORE you press it onto your surface. Sublimation ink and paper is cheap — sublimation blanks are not. Always test first!
Is There a Reset Button?
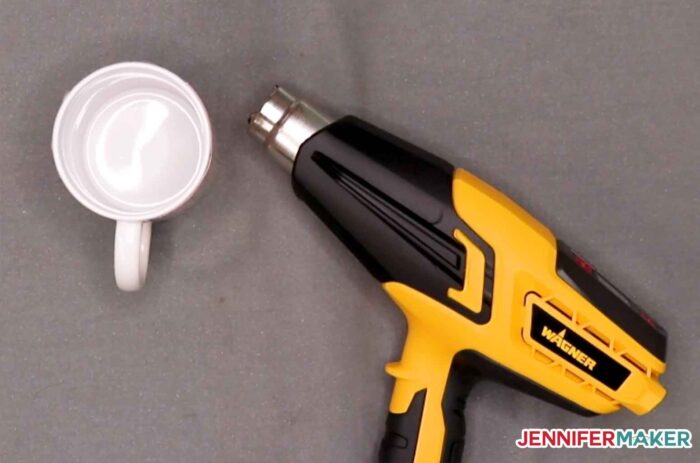
If you mess up your tumbler or mug, sometimes you can repress it! If you use a heat gun that gets hot enough, or a convection oven, you can reheat your tumbler and the ink will fade. It won’t go away completely, no, but you can usually get it to fade away enough that you can then re-press it with a darker design — like a design that is full coverage and uses lots of dark ink that will cover up the faded original design. Not all heat guns gets hot enough, though — this is the heat gun I use to do it.

Projects of a Feather
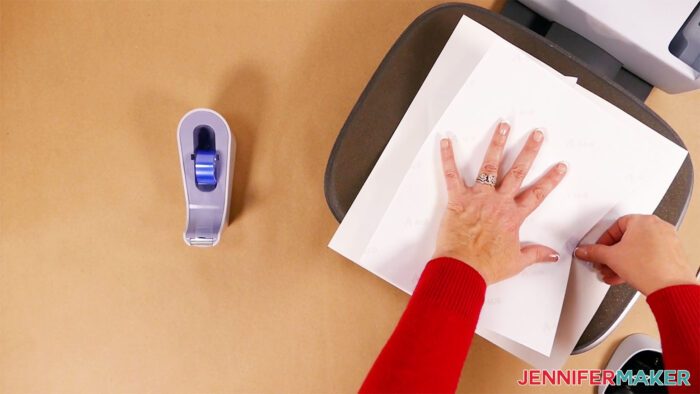
Another mistake I made early on was accidentally pressing lines into my soft surfaces, like T-shirts. The razor-straight edges of the sublimation paper can actually indent the polyester fibers when pressed and it ends up creating a box shape around your sublimation design.
The best way to avoid this mistake is to rip the edges of your paper carefully, which feathers them and removes those straight, hard edges. You can also cut around your design, again to remove the straight edges, but it can be more work and you can sometimes still see the edges (they just look better). So I usually use rip the edges.
ALSO, it’s actually important to remove the edges of your sublimation print before you press. Sometimes, on some printers, the edges can pick up a little ink as it is passing through the printer. You won’t even notice it … until you go to press, and you see there’s a little thin line of ink where the edge of your paper was. So always remove the edges, one way or another.
Getting Cut Lines to Show When Tiling Big Projects
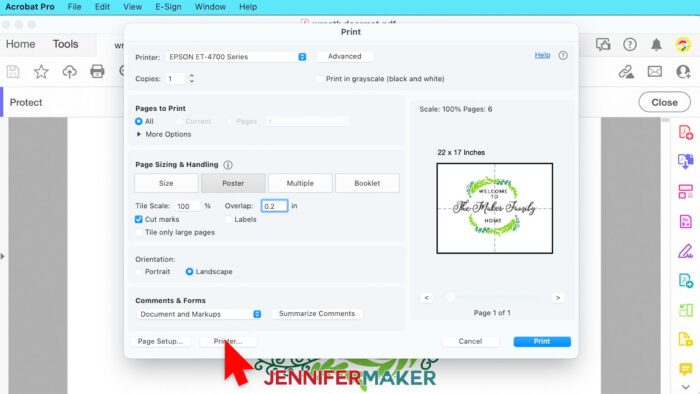
When you’re creating sublimation designs larger than your printer paper, tiling is often your best bet. But make sure to turn on the “Cut marks” option before you print! That will add helpful indicators to the sheets, which you can use to tile and cut the design correctly!
Sublimation Ink Smearing
There are few things that irk me more than a big smear right in the middle of a beautiful sublimation print I’m about to apply. First line of defense? Wait for the ink to dry completely before moving it out of the printer tray. However, if it seems as if your printer has gone rogue, there’s two reasons I know for this to happen, and I’ve had both. First, your printer rollers get dirty and transfer ink to your paper as it’s moving through the machine. You can usually tell that’s it because the smears are where your rollers are. If you think this is the issue, use a lint-free cloth and a little isopropyl alcohol to clean the rollers and belt inside your printer where extra ink may have accumulated. It’s not easy, but totally doable — just takes a little patience.
The other reason this can happen is when your paper is so thick and stiff that it hit parts of the printer with ink on them as it’s passing through. I had this happen. I switched to a thinner paper — I used ASUB 105 instead of ASUB 125 — and the problem went away!
White Line on the Sublimated Design
I’m a thorough kind of person. When I do things, I like to do them right, with full effort. Turns out, I was maybe putting a bit TOO much effort into my heat press in the beginning. Some of my first few projects came out with these weird white lines on them, sometimes in the shape of my EasyPress’s heat plate. Turns out I was using too much pressure, and pressing a little too long. Applying too much heat or pressure for too much time can create lines where it looks like the image has faded, sometimes completely. Sublimation only needs enough pressure to keep the paper underneath from curling. So really, with the weight of the press, you don’t need to press down much all. Just hold it on there. You may also want to try a lower temperature, and consult my Sublimation Cookbook for heat and time information for your specific material or blank, and Cricut’s different heat presses.
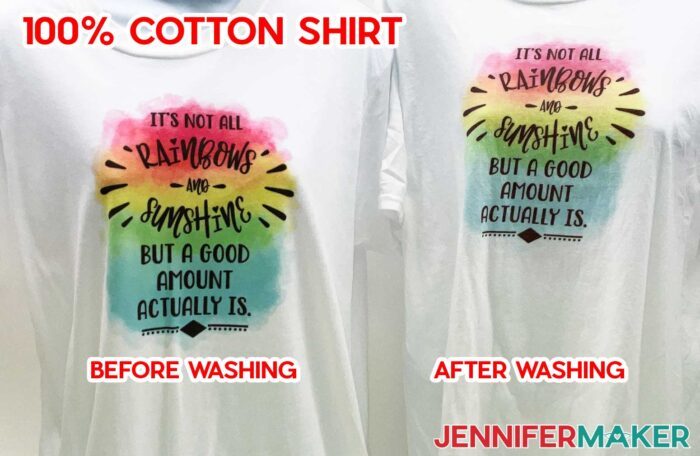
Sublimated Design Looks Faded
Another mistake I made early on was when I was experimenting on some white shirts I’d found on clearance. I went through all the steps to a T, and was shocked when it came out of the wash faded like a 25 year old, vintage look T-shirt. Turns out my clearance haul was a bunch of 100% cotton T-shirts. For the most vibrant results, use polyester shirts (or ones that are mostly polyester). Using material with a less than 75% polyester content will result in a faded look, with a cotton shirt being the most likely to fade. You don’t ever want to sublimate on any fabric that is less than 65% polyester, unless you want to use heat transfer vinyl to layer with sublimation paper. Bonus: you can also use this method on shirts in different colors than white! Other culprits for faded sublimation designs are too little heat or not enough time under the press. If you want to stop guessing at times and temperatures, check out my Sublimation Cookbook.
Did I Burn It?!
Revealing your beautiful new design only to find brown marks is never something a sublimation crafter wants to see. Is it a burn? No. Well, kinda. Sometimes polyester fabric is coated by chemicals, or the fabric is just heat-sensitive. The brown marks are a discoloration known as scorching. Use white uncoated butcher paper to protect your material, check to make sure you’re not using too high of heat, and consider switching brands if the garment doesn’t tolerate the heat required for sublimation. If you do scorch your material, this fix might help: Spray the affected area of the fabric with peroxide, cover with butcher paper, and press for 10-15 seconds.
Melting Materials
If it’s not a burn, sometimes it’s the coating. A lot of sublimation blanks, like metals and acrylics and ceramics, come with a layer on them to keep them from getting scratched and scuffed during shipping. Sometimes it’s so transparent that you don’t even realize it’s there. But when you go to sublimate onto it, it doesn’t work — it just sort of melts it and everything looks faded and fuzzy. I totally have done this many times. To avoid this mistake, always check any hard surface for a coating or liner or something that might need to be peeled off before you can sublimate onto it! And be sure to remove it from both sides so you don’t just melt it.
Issues Sizing the Sublimation Design Right
Measure twice, sublimate once. Believe me, I too know the frustration of going through the whole sublimation process and realizing the sizing is off. I still struggle with this one, because I am impatient. But this is a common issue that is easily solved by some quick measuring. Before you even print your sublimation design, double check that it’s the proper size for your blank. If it’s a full coverage design (where the image goes from edge to edge with no blank space around it) print it slightly larger than your blank so the image bleeds off the edges. Then measure it before you press it to make sure it printed at the size you think it did. Sometimes when we print, if we’re not careful with our print settings, things can be off and our print might be smaller by accident. When you print, be sure that you’re not on “Fit to Page” or “Scale to Fit” or anything like that. Make sure you’re printing actual size always!
Right Supplies, Right Results
The basic things we need for sublimation are sublimation paper (if you’re using a sublimation printer and ink), blowout paper, and heat resistant tape. These are consistent for all sublimation projects.
I got lucky with the sublimation paper and just got A-SUB paper — it works great and is still my favorite. But I goofed on my blowout paper in my early days. So blowout paper is used to protect your heat press, pressing pad, and sometimes other parts of your blank. Well, I knew to use white cardstock as a nice stiff blowout paper on the bottom, so that was fine. And I knew from using Cricut Infusible Ink transfer sheets — which are pre-printed sublimation sheets — that I should use butcher paper on the top of my projects when I pressed.
But the first time I went to press something, I accidentally used the wrong blowout paper. I used parchment paper instead of butcher paper. Hey, I know it’s hard to remember all the things! Now it did work, it wasn’t the end of the world, but parchment paper isn’t ideal because some brands are coated with silicone, which can trap moisture when you press. And moisture and sublimation don’t mix well. This is why we also don’t want to use Teflon sheets when we sublimate — they also trap moisture. So remember to use white, uncoated butcher paper. You can get a big roll and it’ll last you a long time!
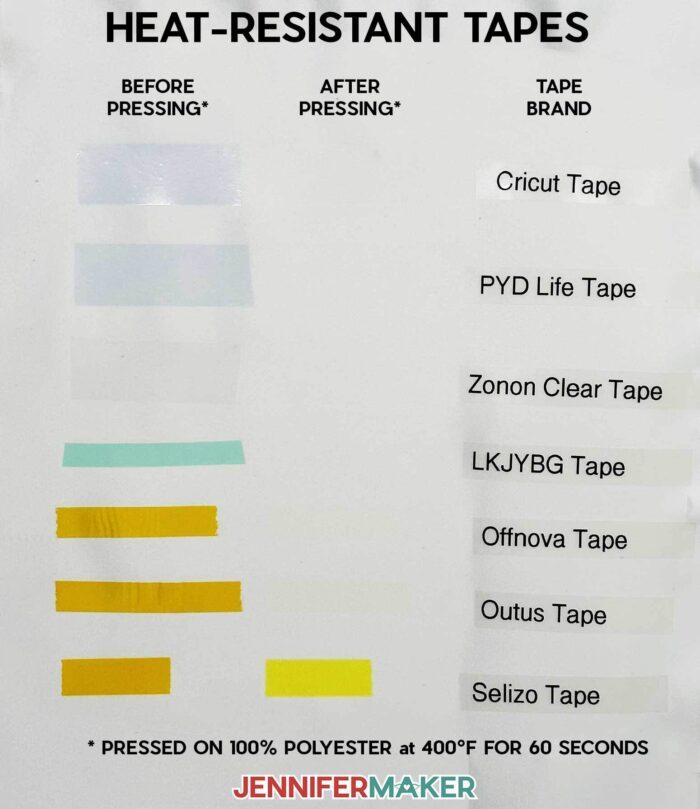
Yellow Tape…Yellow Stains?!
Speaking of supplies, we should talk about tape. We need heat-resistant tape to keep our sublimation paper in place and avoid ghosting. And we must use heat-resistant tape, or otherwise the adhesive will melt onto the surface and look icky. BUT… not all heat-resistant tape is the same!
That cheap heat resistant tape can leave yellow marks all over your sublimation blank, because some heat resistant tape is made for the lower temperatures of heat transfer vinyl, and was never intended for the higher temperatures of sublimation. The biggest culprit is the yellow tape – it can leave stains and residue on surfaces after pressing. And the worst part? There’s no getting yellow marks off your item once they’re transferred on. Note that not ALL yellow tape does this, but knowing which ones do and do not can be tricky.
Cricut heat-resistant tape is blue, however, and it has never left a mark on my sublimation projects. Plus, it fits in a regular tape dispenser, which is a handy bonus! Note that you can also buy clear heat resistant tape from other suppliers and that also works. My best advice to avoid this mistake is to TEST your tape in an inconspicuous spot before you sublimate with it, to be sure it’s not going to cause an issue.
Upside Down
Everything’s going great, your press went off without a hitch, and you’re about to reveal your final product. You remove the sublimation paper and…find out that you applied your design upside down. Yes, even I’ve committed this crime against sublimation a time or two. Now I know to always check it right before you apply the print to your blank! One of the easiest ways I’ve found to remember this is just to make a little pencil mark on the back of the sublimation transfer paper, on the top of the design. Then, even when it’s flipped over, you’ll know exactly which way is up — plus, your family won’t have to crane their necks to see what your shirt says.
Something else you can do if you use A-SUB sublimation paper like me is always load your paper in the same way so that the words “A-SUB” appear in the right way on the back. Then you can use those words to make sure your sublimation prnt is right way up everytime too.
Crooked Ways
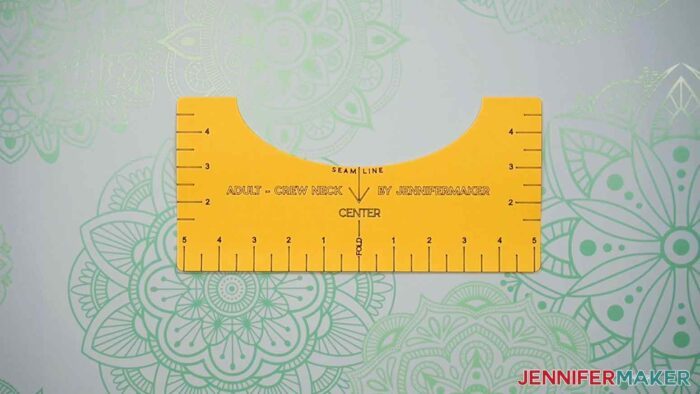
Speaking of upside down, how about getting things straight. Been there, done that, too. First, if you’re putting a design onto a T-shirt, use a T-shirt ruler — it helps a lot. You can also fold your designs in half lengthwise, creasing them at the top and bottom, and then line that up with a crease in your shirt, also top to bottom, and you’ll never have a crooked design on a shirt again!
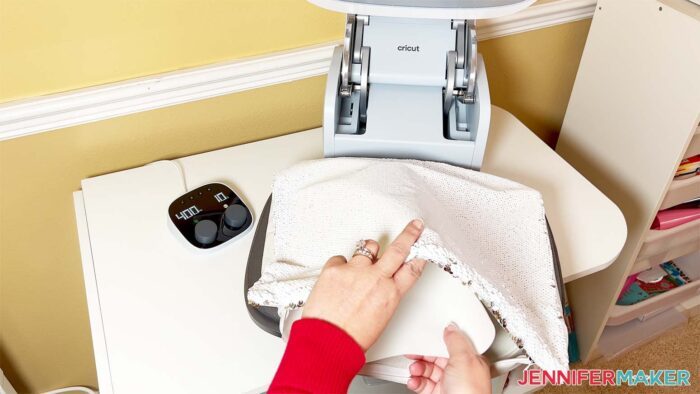
Uneven Heating of Zippers and Seams
When sublimating any item, you need to make sure the section you’re transferring onto is nice and flat. Anything that interferes with getting a good contact between your press and your surface. For example, if you’re sublimating a pillowcase with a zipper, keep that end off the pressing surface, like you can see in the image below. Or, a pressing pad can help even out your surface! These have saved me so much frustration since I learned about them. It will raise the material up off of the zipper or seam so you can better apply the pressure your blank needs to get a great quality sublimation transfer. They’re so useful, I learned how to make them — and you can find out how to make them too!
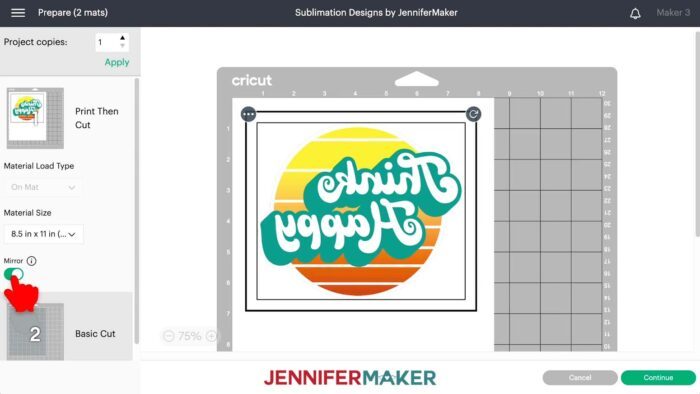
Not Mirroring
The Kryptonite of any Cricut crafter is remembering whether or not to toggle that Mirror switch in Cricut Design Space. While it’s not a real life or death decision, it does mean life or death for your project. The good news? Most of us have made this mistake at least once. And though the item may seem ruined, having a backwards mug of coffee on your workspace while you craft might just be a great reminder to mirror if needed! Like iron-on and HTV designs, you must always mirror a sublimation design before you press it. Follow this rule and you’ll never have backwards sublimations again. However, beware that turning on mirroring in Cricut Design Space AND turning on mirroring in your print dialogue window at the same time means your image will be mirrored twice and will show up backwards when pressed. Only mirror it once!
Printer Issues
When I first got my sublimation printer, it became apparent to me pretty quickly that it’s VERY different than working with an inkjet printer. There’s special sublimation ink, printer settings, regular maintenance, and what the heck was an ICC profile? The strangest was the spooky overlay of a design I’d created days before showing up on a freshly sublimated shirt (that was a completely different design).
In the midst of learning these new things about my sublimation printer, I sort of forgot to maintain it. I’m a little embarassed to share this one, but maybe it will help someone. So I knew from my research that the converted Epsons need to be printed from at least once a week to keep the sublimation ink from drying out. But, well, I kinda forgot to do it for a month once. Hey, I got busy! We all do! And, sure enough, my yellow ink line got clogged and wouldn’t print. To fix my mistake, I had to spend time and ink to print printer purge files, which is just a full sheet of ink designed to get the ink moving and flowing so the clog clears itself. By the way, I saved the purge files I made so you can use them if you also make this mistake.
I even made this mistake with my Sawgrass sublimation printer. The cool thing about the Sawgrass is that it will do maintenance FOR you to keep your ink from clogging. BUT, you have to keep your Sawgrass plugged in and turned on in order for that to happen. Well, guess who forgot that and unplugged it? Me! Hey, like I say, I make the mistakes so you don’t have to. So if you have a Sawgrass printer, keep it turned on so it will do the cool things it’s supposed to!
The big takeaway here is that sublimation printers need maintenance to keep working well. Do what you need to take care of them, even if it is just keeping them plugged in and turned on, or be prepared to fix your mistakes like I did.
These were issues I had no idea how to solve in the beginning, and had me questioning if sublimation was really all that worth it. But I kept at it and I’m so glad I did, because it’s become one of my all time favorite crafts. I overcame my printer issues (and learned all about using the right color profiles) but I still have new ones pop up from time to time — that’s just the nature of equipment like this. And now I have a whole post about solving sublimation printer problems to share with you!
Answers to Your Questions About Sublimation Mistakes
Q: How can I learn more about sublimation?
A: Can’t remember how long to press that sublimation blank? Not sure what order to stack your layers? Confused about how to get the best transfer? The Sublimation Cookbook guide can help, with step-by-step sublimation project recipes for over 150 different sublimation blanks. Each of these “recipes” show you exactly what to use, how long to press, how hot to press it, and how to take care of your sublimated project for long lasting results. Plus, it’s the best way to help you avoid common sublimation problems before they arise!

Check out my resource library for free sublimation design files!
(If you do not see the signup form above, click here.)
I’d love to see YOUR sublimation projects! Please share a photo in our Facebook group or tag me on social media with #jennifermaker.
Love,

Want to remember this? Save these Sublimation Mistakes and Solutions to your favorite Pinterest Board!