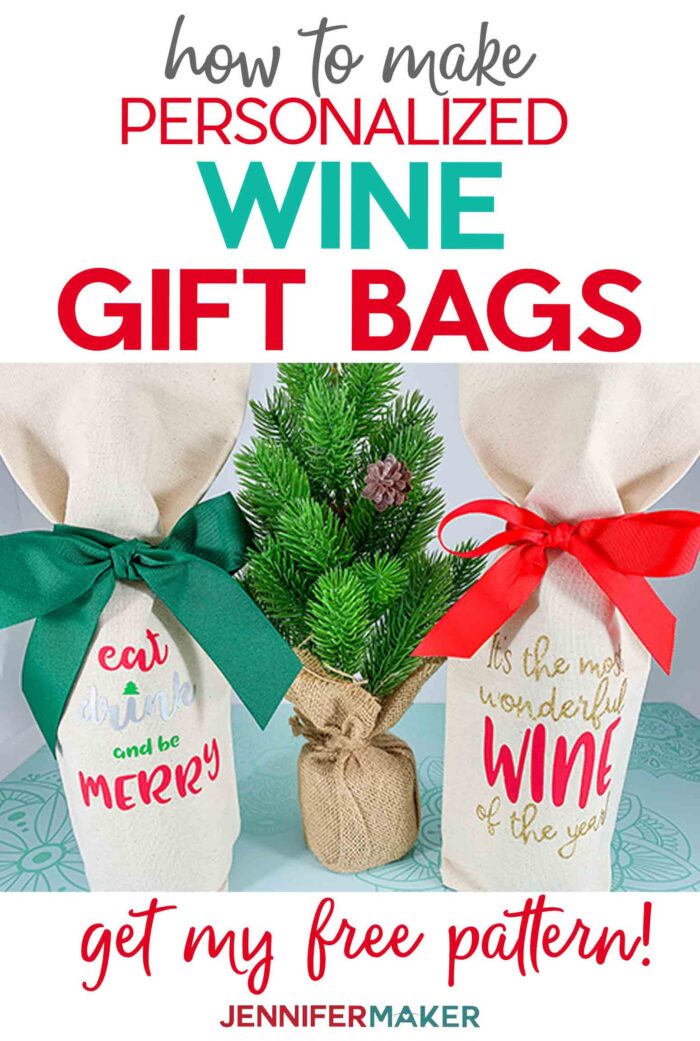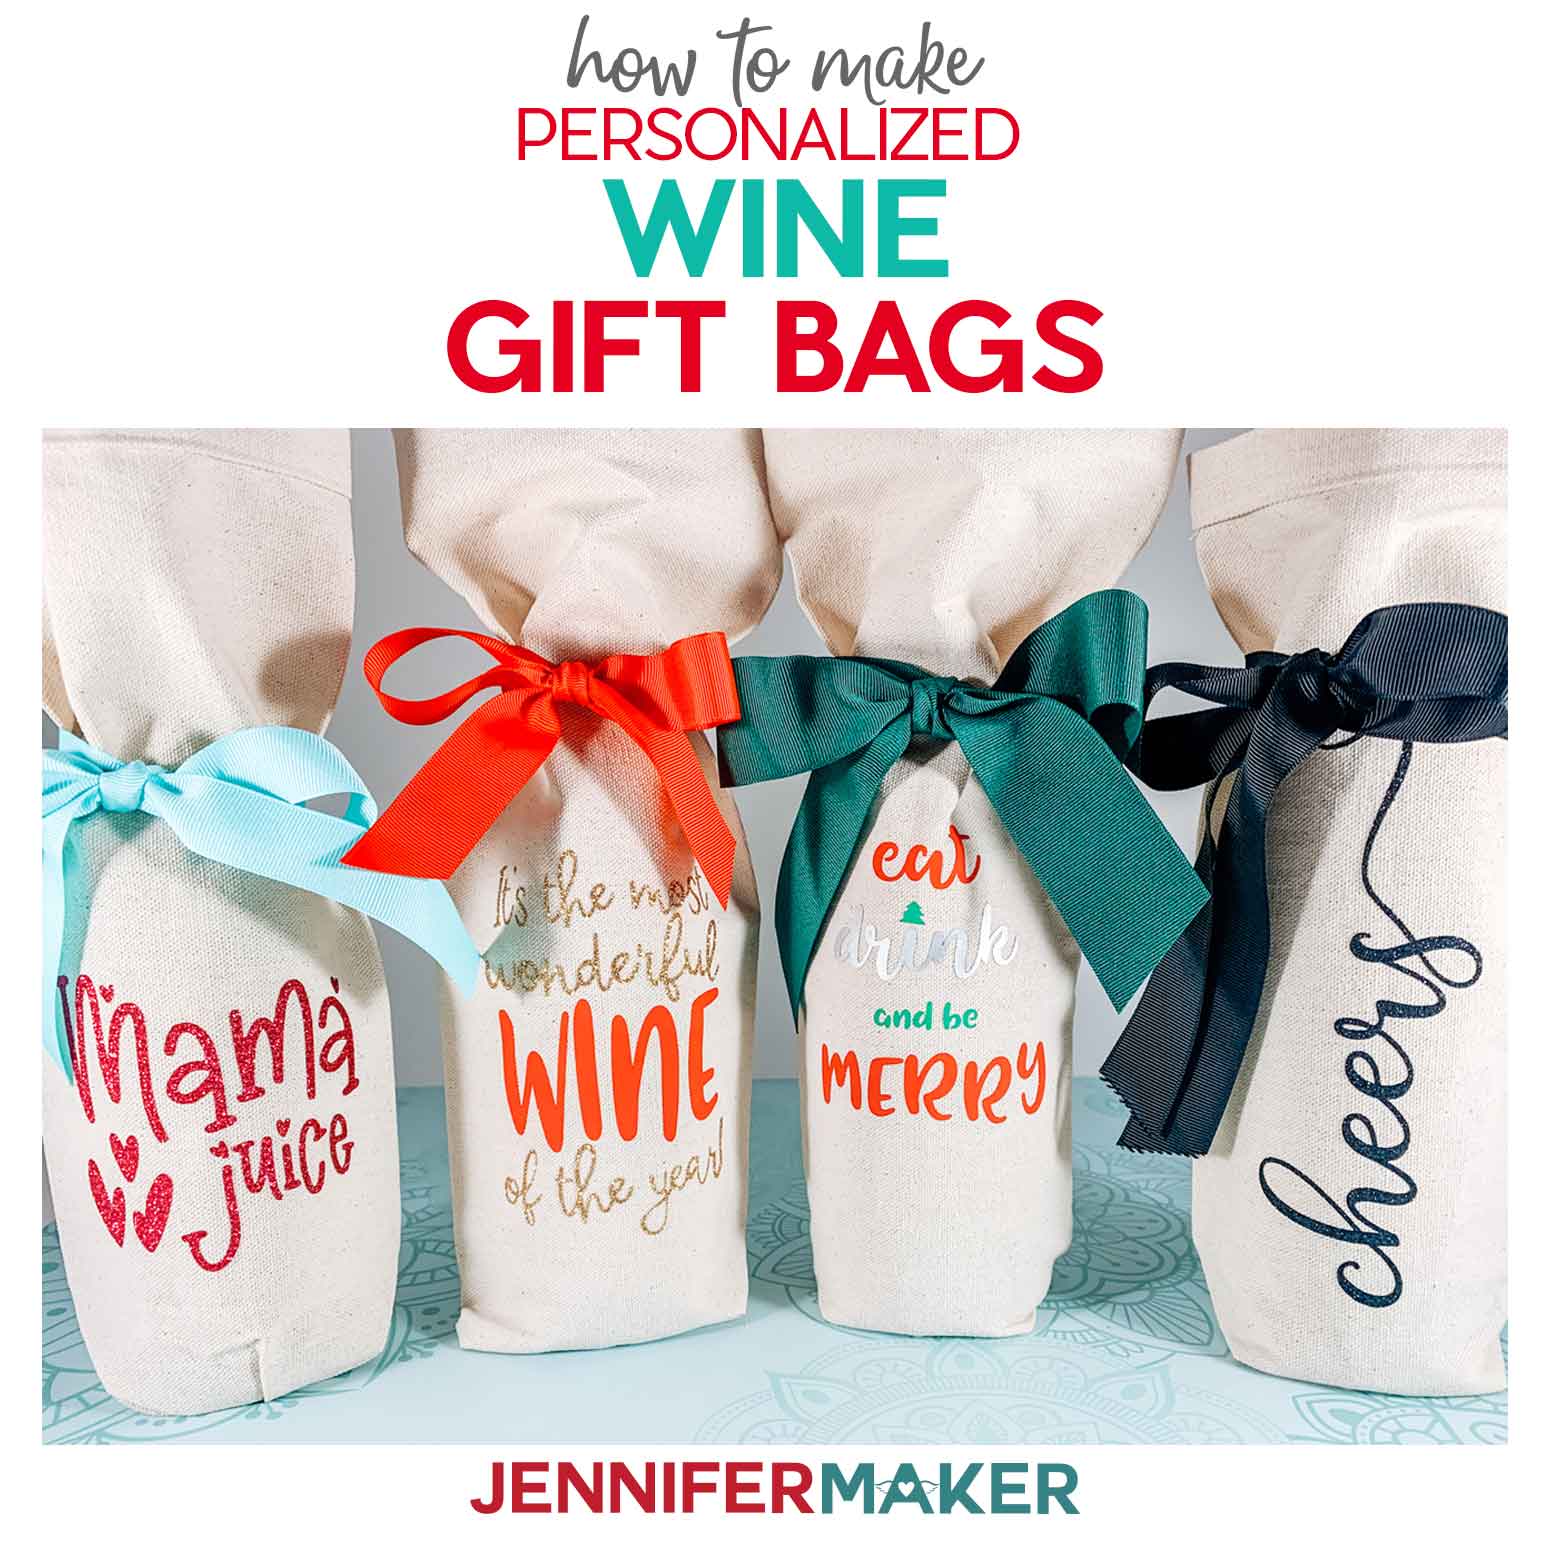
Let me show you how to make these fun wine gift bags that you can personalize.
Bottles of wine are like gift cards … they’re easy to give, but often don’t feel very personal or something as you’re giving them. That’s why I design so many gift card holders, so it’s high time we made a wine bottle holder, too! These wine bottle gift bags are simple to sew and decorate. You’ll be amazed at how easy it is to cut and sew these bags up quickly. Then you get to have fun with the iron-on designs. In fact, you can even personalize these with names! You can even etch wine glasses to go with them. So for Day 23 of The Great Maker 25-Day Gift-Away Challenge, I am showing you how to make wine gift bags!
Want to save this project? Enter your email below and we’ll send the project straight to your inbox.
See exactly how to sew and decorate wine gift bags in my tutorial video (or keep scrolling if you prefer a printable step-by-step photo tutorial):

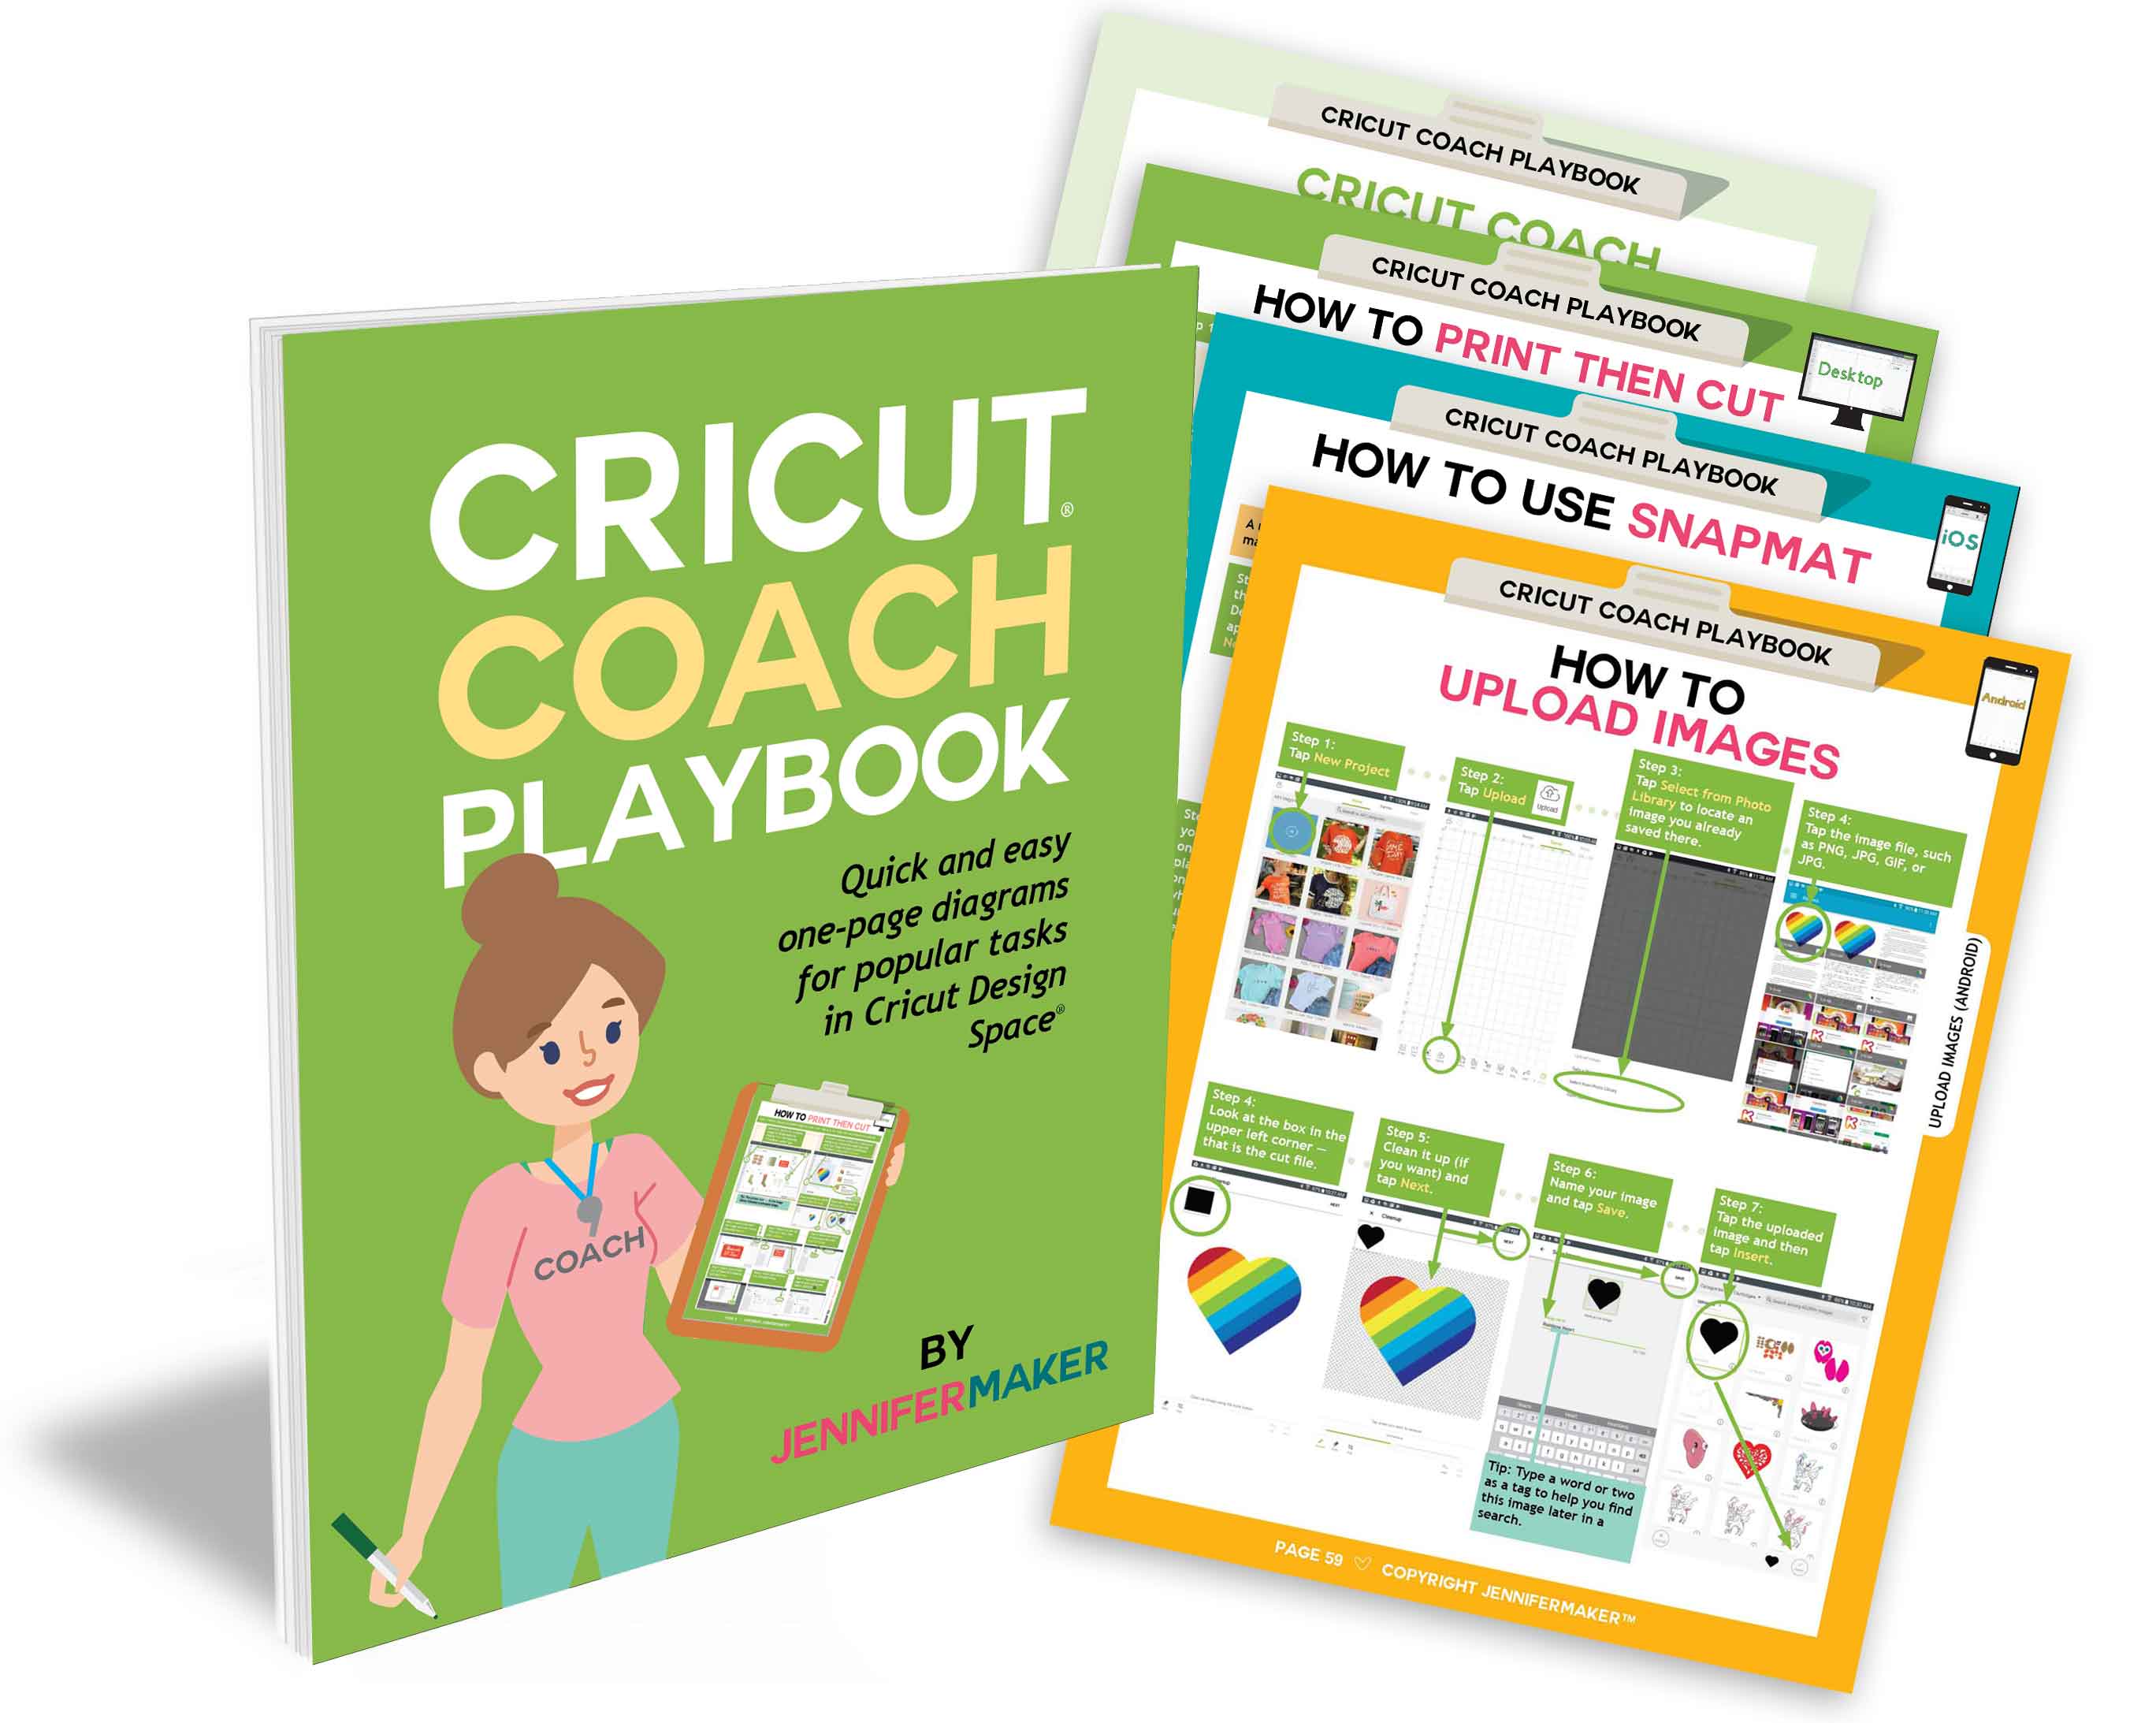
 What is The Great Maker 25-Day Gift-Away? This is an annual tradition here at JenniferMaker! Every day for the first 25 days of December we gift you with a brand new project, design, tutorial, and video. On top of that, we host a giveaway with 25 prizes. Some of the amazing prizes are Cricut cutting machines, sewing machines, gift cards, and beautiful print editions of our popular Cricut Coach Playbook. You can even earn bonus entries for sharing photos of the daily projects! Click here to learn more about The Great Maker 25-Day Gift-Away!
Now, you don’t have to sew these wine bottle bags, but it’s really pretty easy to do so I’m going to show you. If you’d rather just buy wine bags, I’ve got a link to some that are the right size below in the material list below.
To sew the wine bags, you need a 12″ x 16″ inch piece of white cotton duck canvas. Or go for a whole yard, which will make six gift bags!
You also need all-purpose thread and 28″ of ribbon — I’m using grosgrain ribbon here.
And you need a way to sew your wine gift bags. You can, of course, sew this bag by hand with needle and thread. Or you can use a sewing machine. I will show you how to sew it with this beginner sewing machine I love.
Other useful tools for sewing the wine bottle bags include a washable fabric pen, quilting pins, thread snips, and an iron.
Now to decorate the wine gift bags, we’re using iron-on vinyl, also known as heat transfer vinyl. I’m using red, green, silver, and black, as well as gold and silver glitter, but you can use any colors you wish!
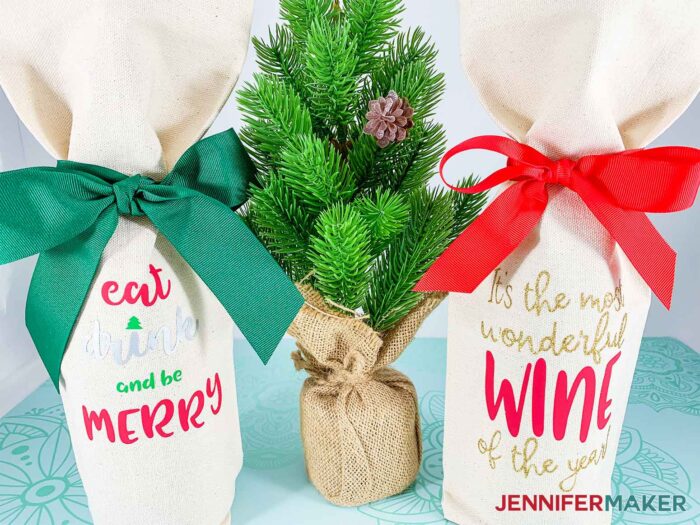
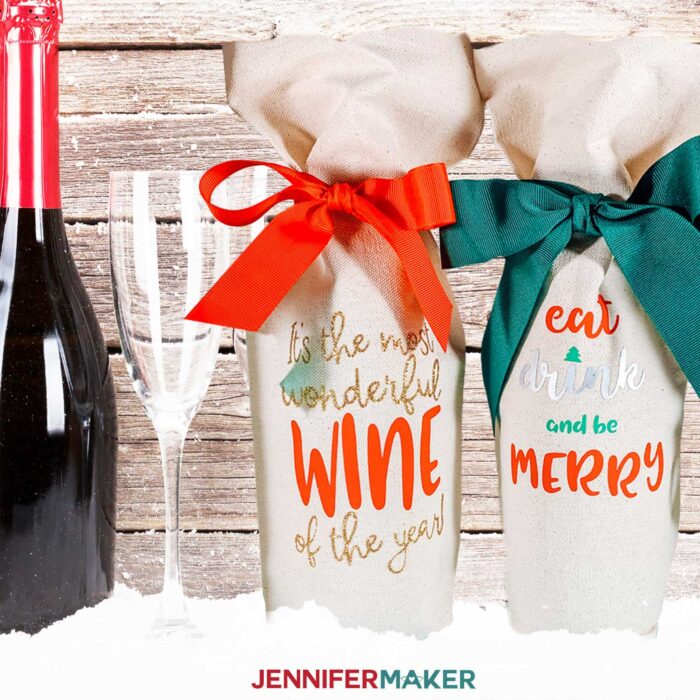
Last but not least, you need the sewing pattern and the fun bag sayings — I’ve prepared four designs for you to use (“Cheers” “Eat Drink and Be Merry!” “Mama Juice’ and “It’s the Most Wonderful WINE of the year!”)
So let me show you where to find the files, and then I’ll show you how to sew and apply the iron-on vinyl to your wine gift bags!
This post contains some affiliate links for your convenience (which means if you make a purchase after clicking a link I will earn a small commission but it won’t cost you a penny more)! Read my full disclosure policy.
Materials to Make Wine Gift Bags
View my Amazon shopping list with the exact items we used to make this project!
- Pre-made wine bottle bags -OR-
- Duck Canvas (1/2 yard, this makes three wine totes)
- Thread
- Ribbon
- HTV / Iron-on Vinyl (such as Cricut Everyday Iron-On Vinyl) – I used Cherry Red, Green, Silver, Black, and Gold & Silver Glitter, but you can customize to your preference
- Sewing Machine
- Quilting Pins
- Thread Snips
- Pressing Mat
- Pink FabricGrip or Purple StrongGrip Mat, 12″ x 24″ (alternative)(if you use the Cricut Maker)
- Cricut Green StandardGrip Mat (for vinyl)
- A way to heat your vinyl, such as a Cricut EasyPress, heat press, or household iron
- Weeding Tool
- (Optional) Fonts used: Oh juliya Script, Tingler Duo, PN Magnolia
- A way to cut your fabric and vinyl (I used the Cricut Maker cutting machine)
- Design #274 – My free SVG design files (available in my free resource library—get the password by filling out the form at the bottom of this page)
How to Make Wine Gift Bags
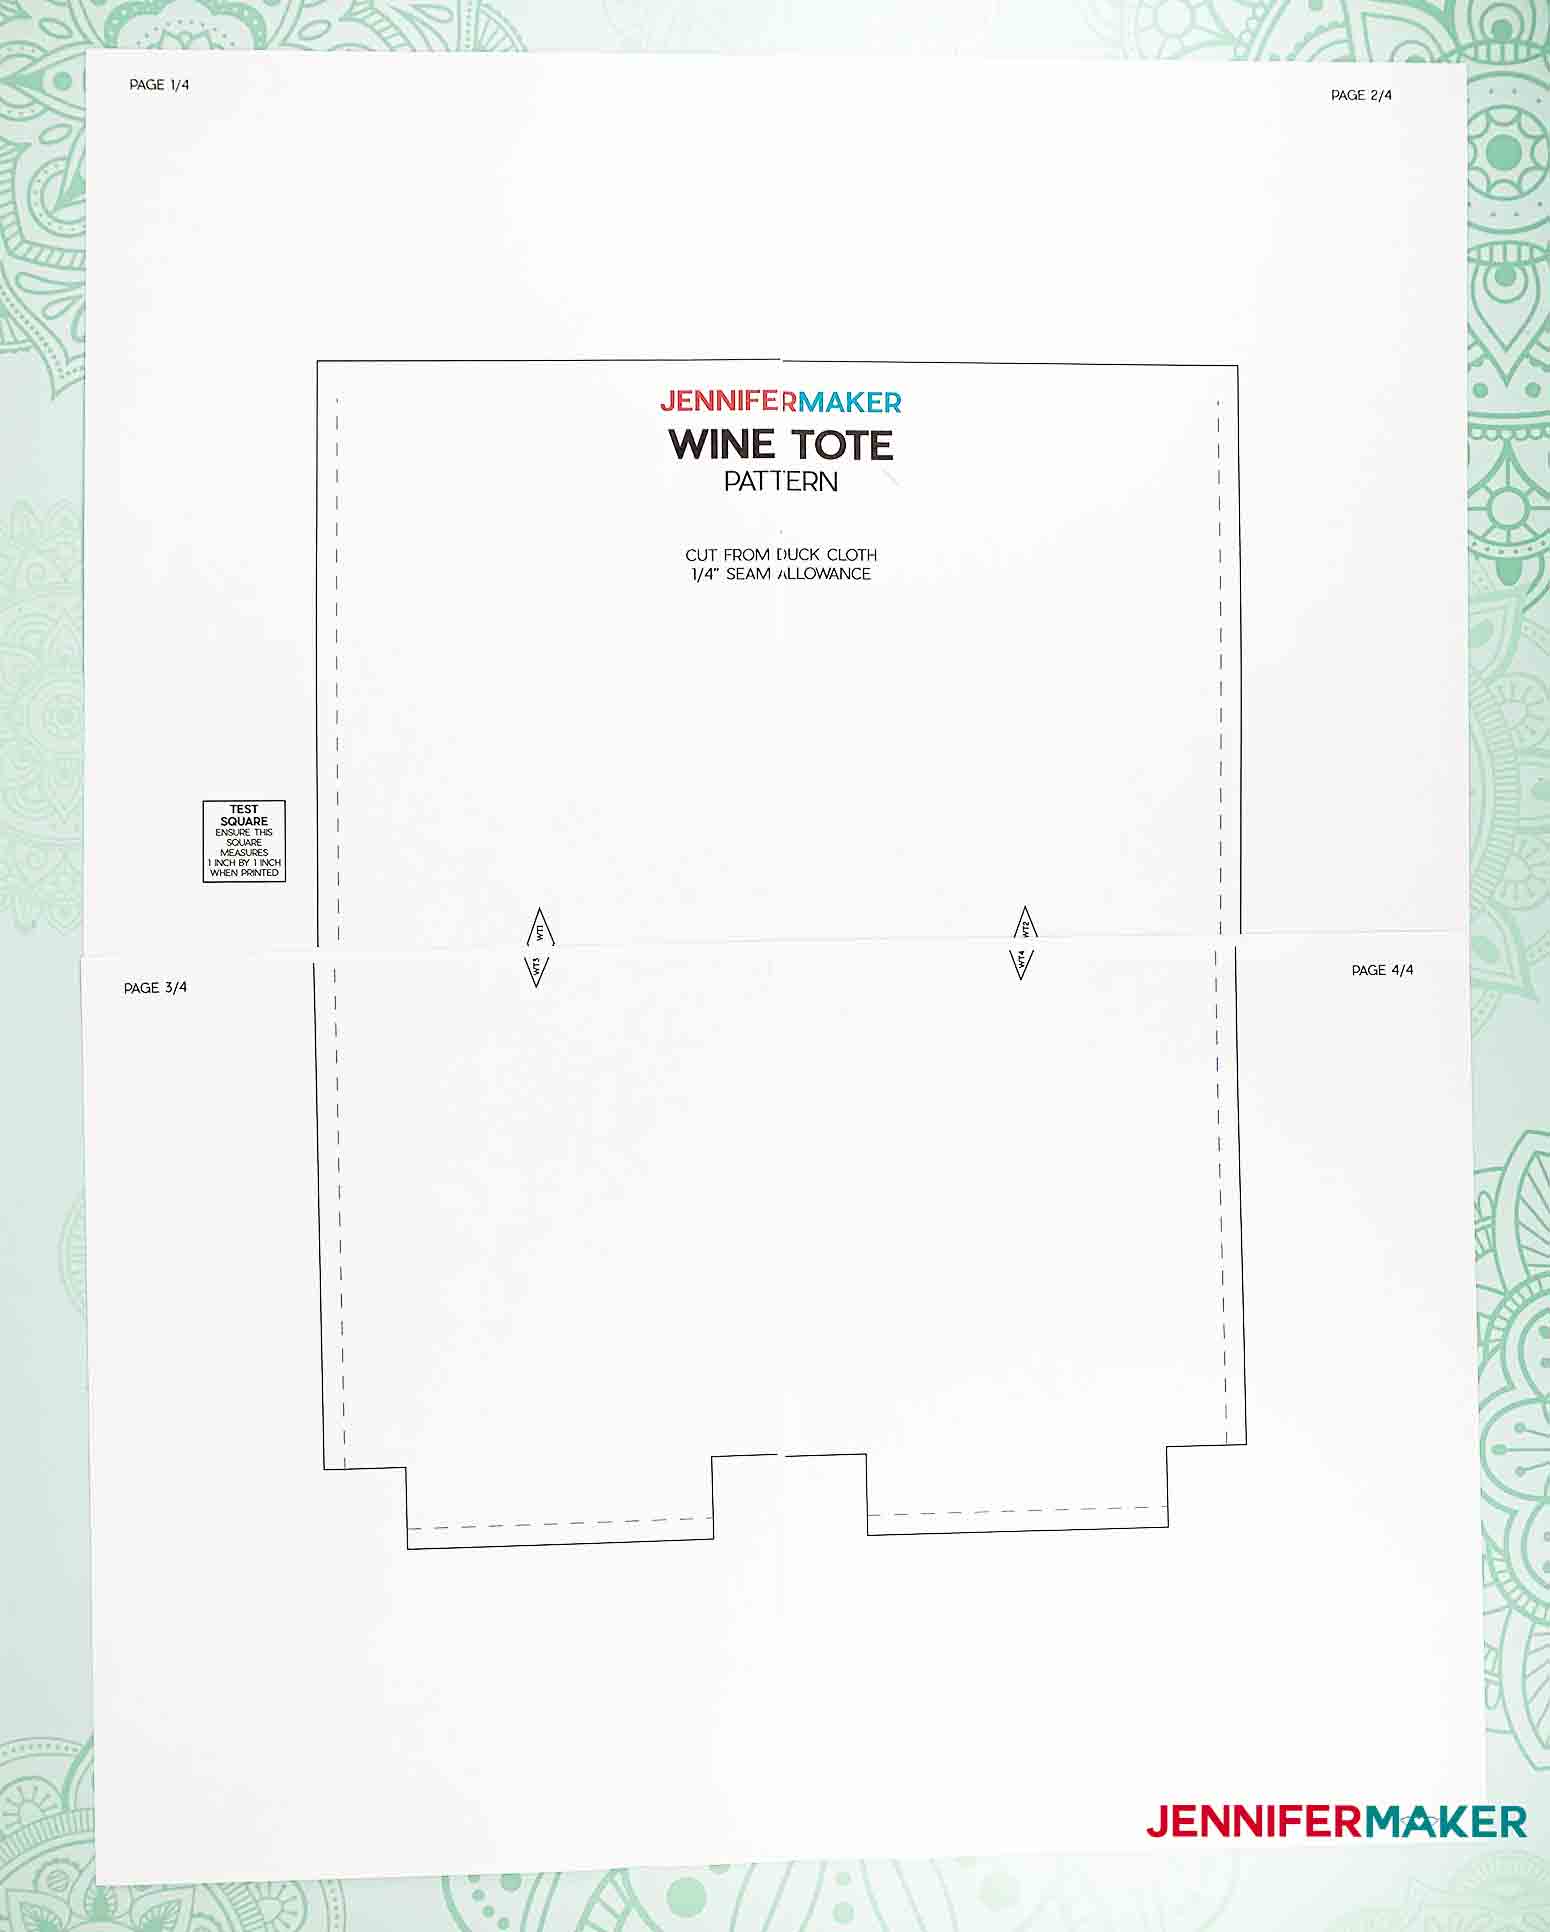
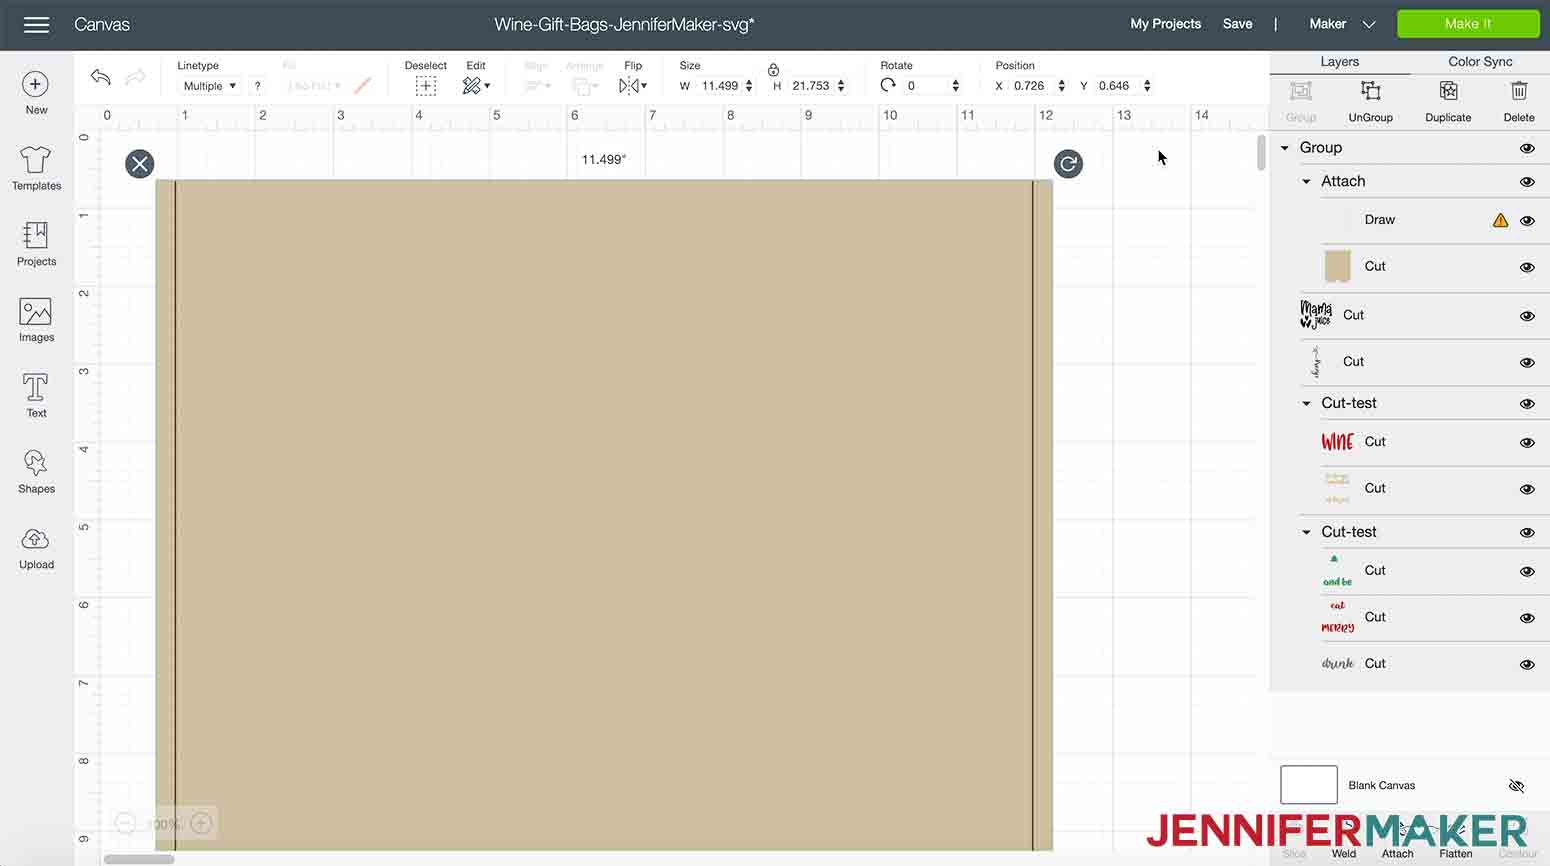
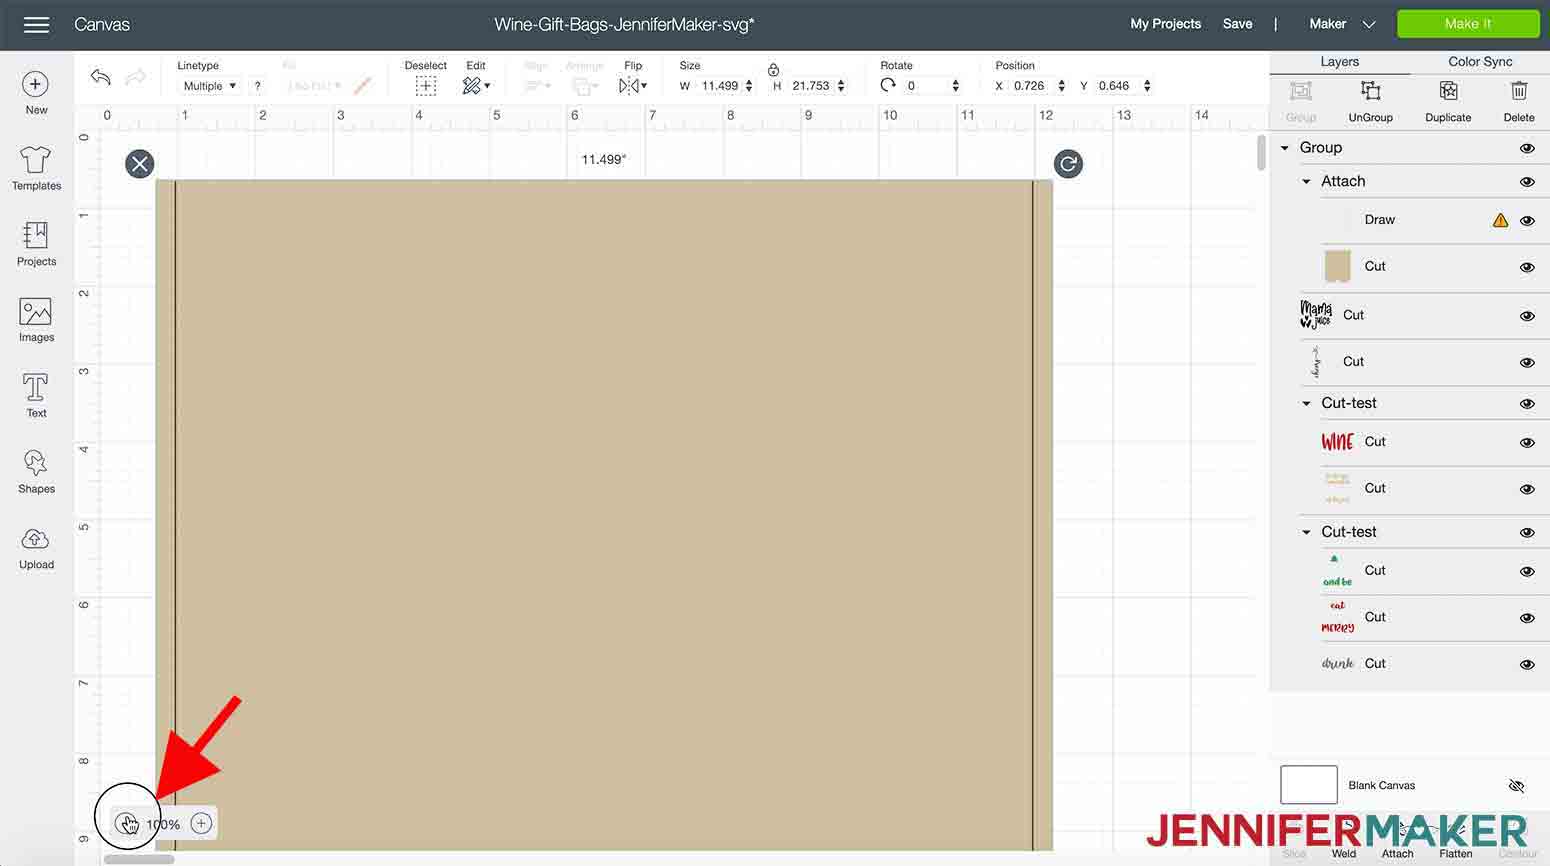
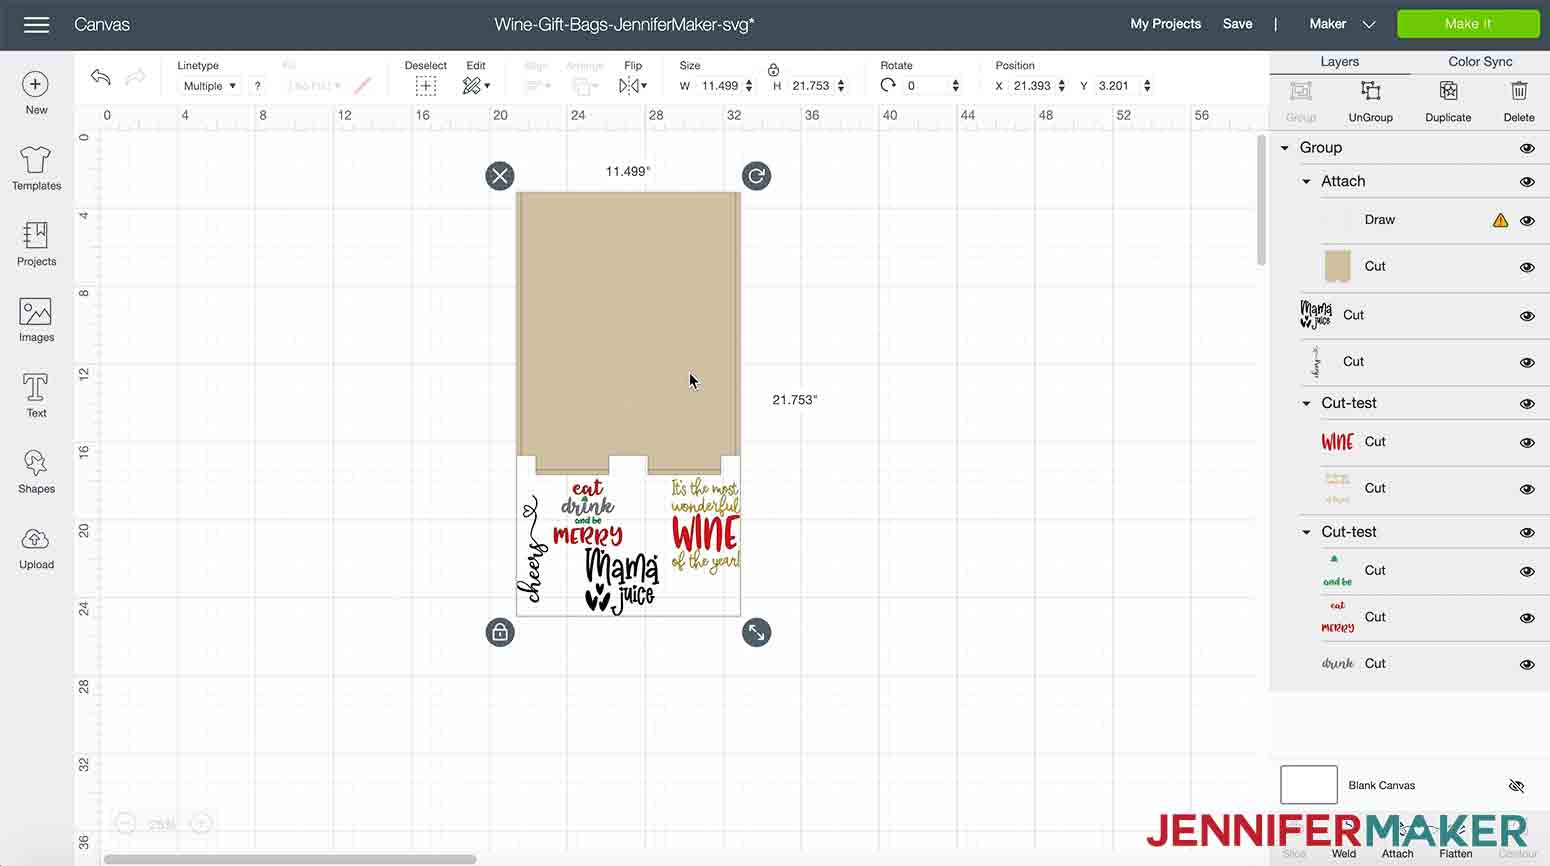
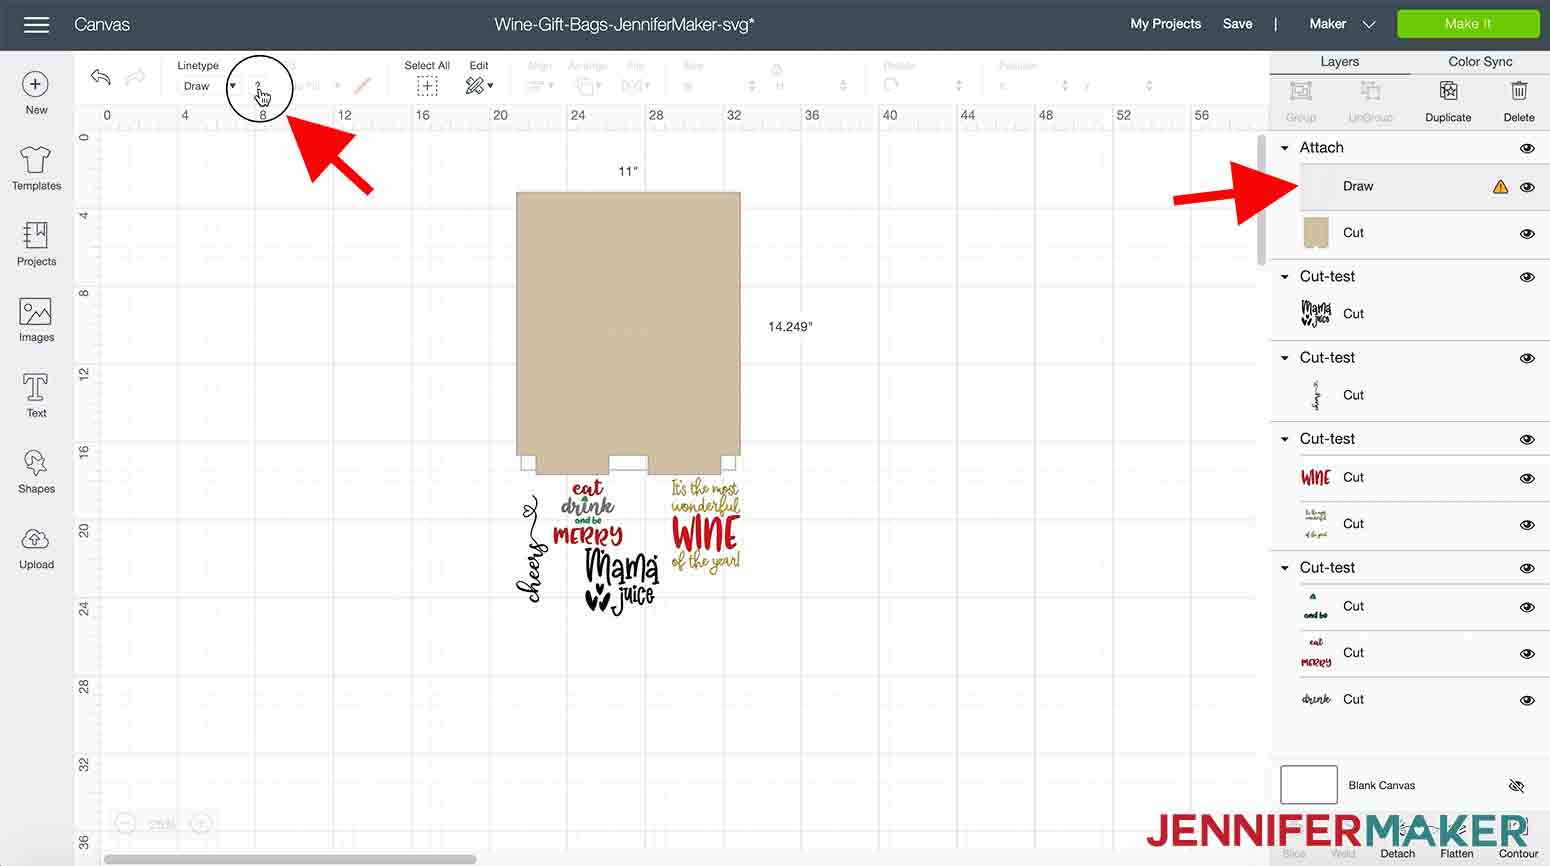
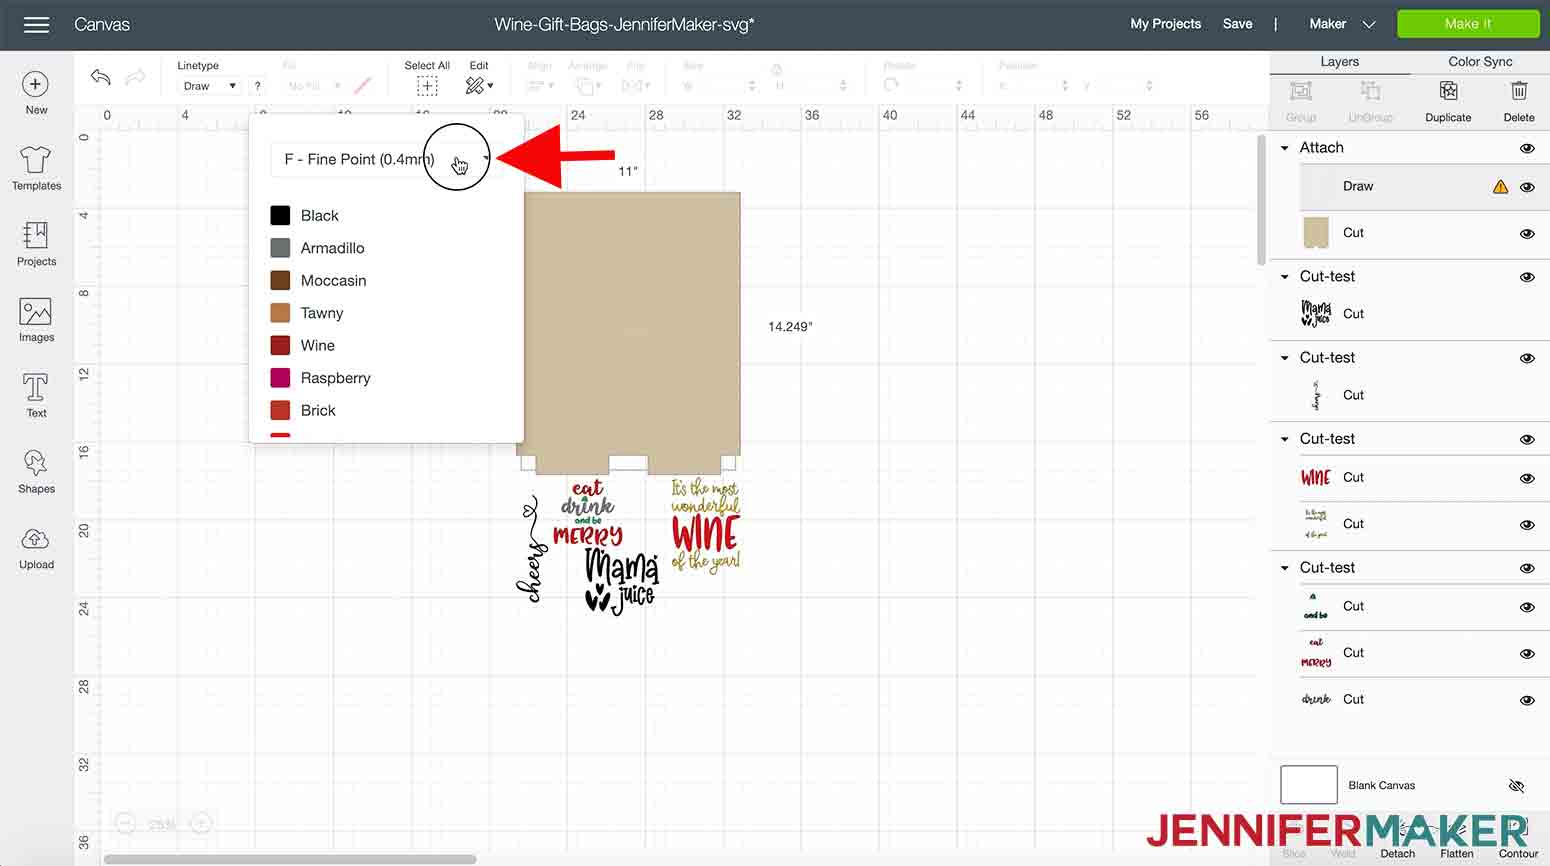
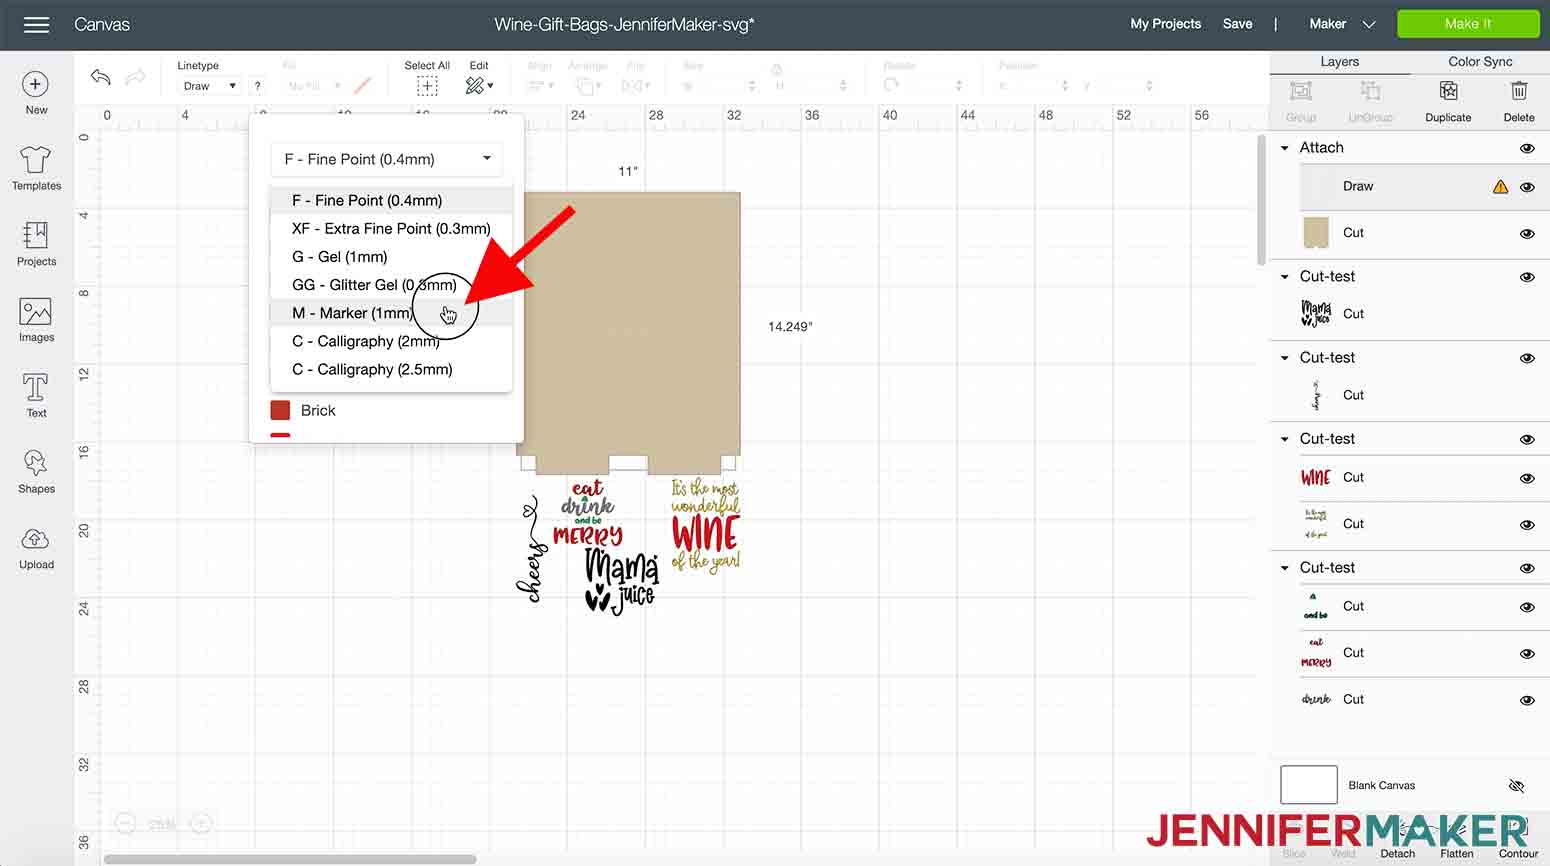
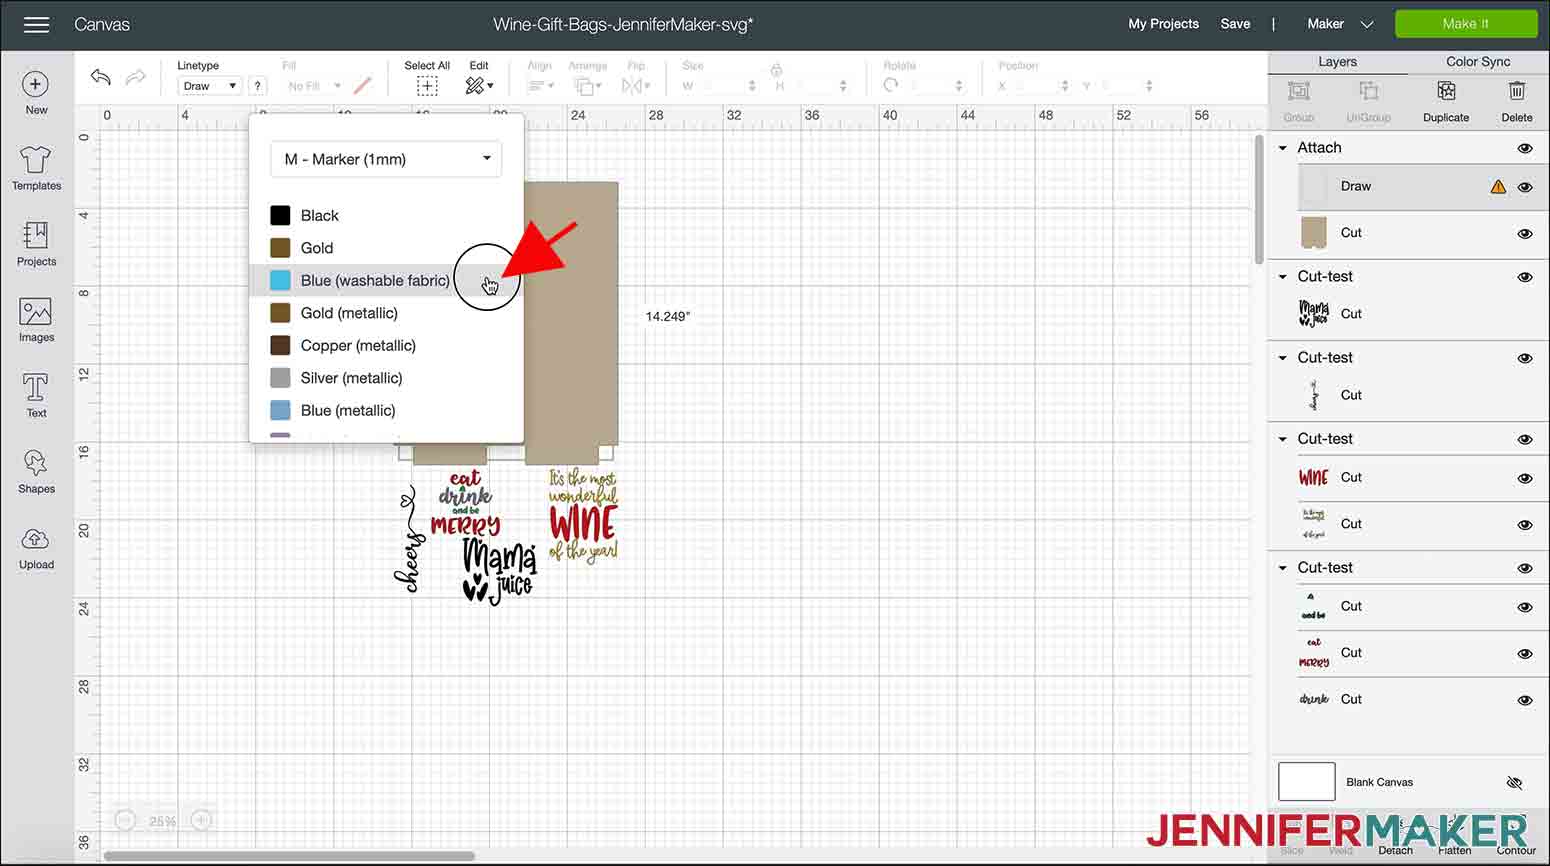
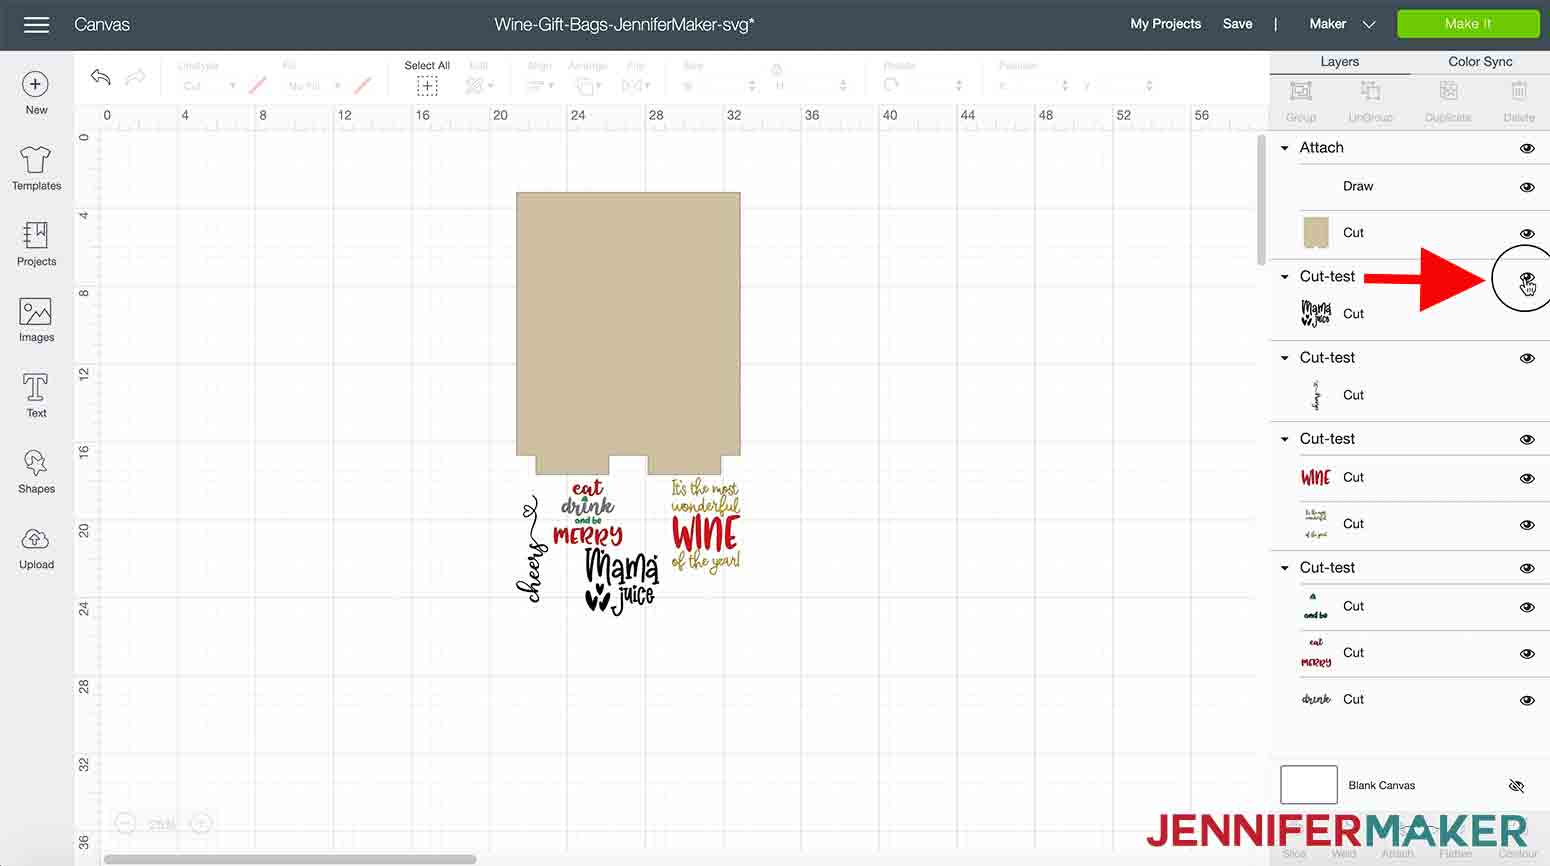
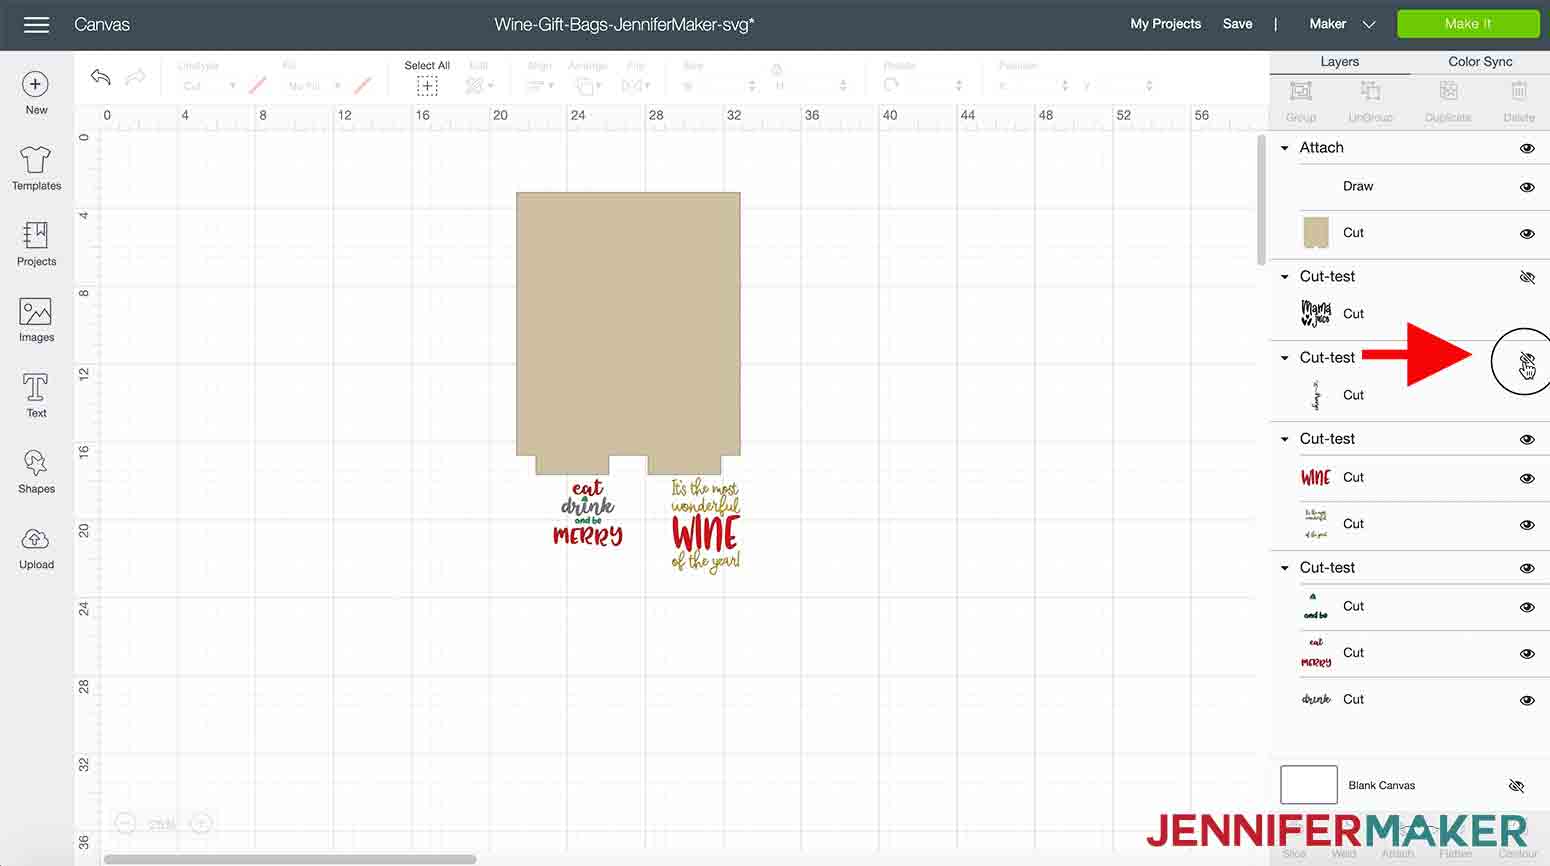
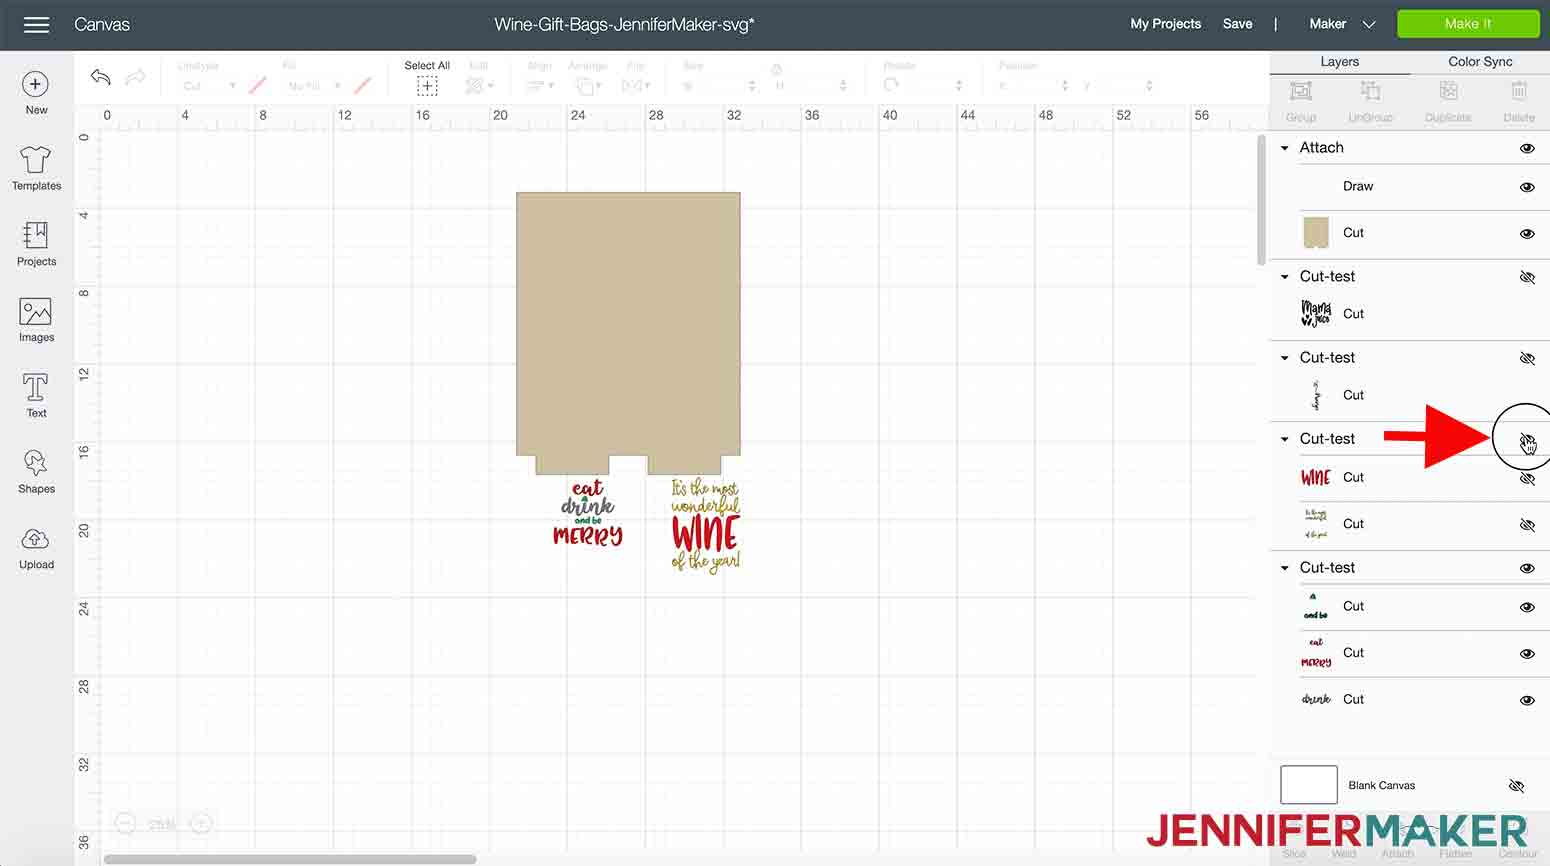
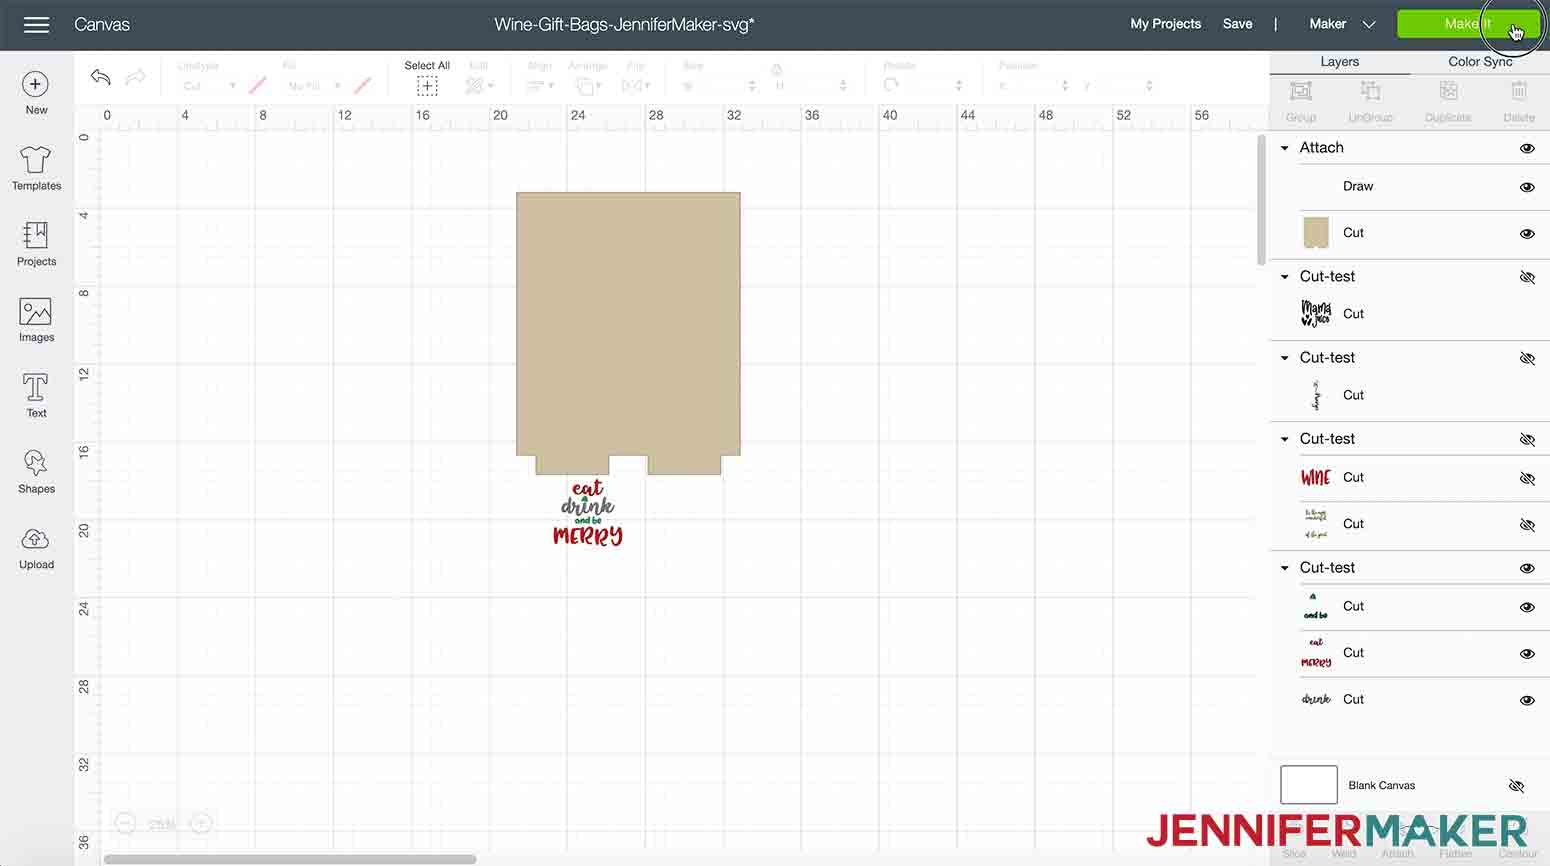
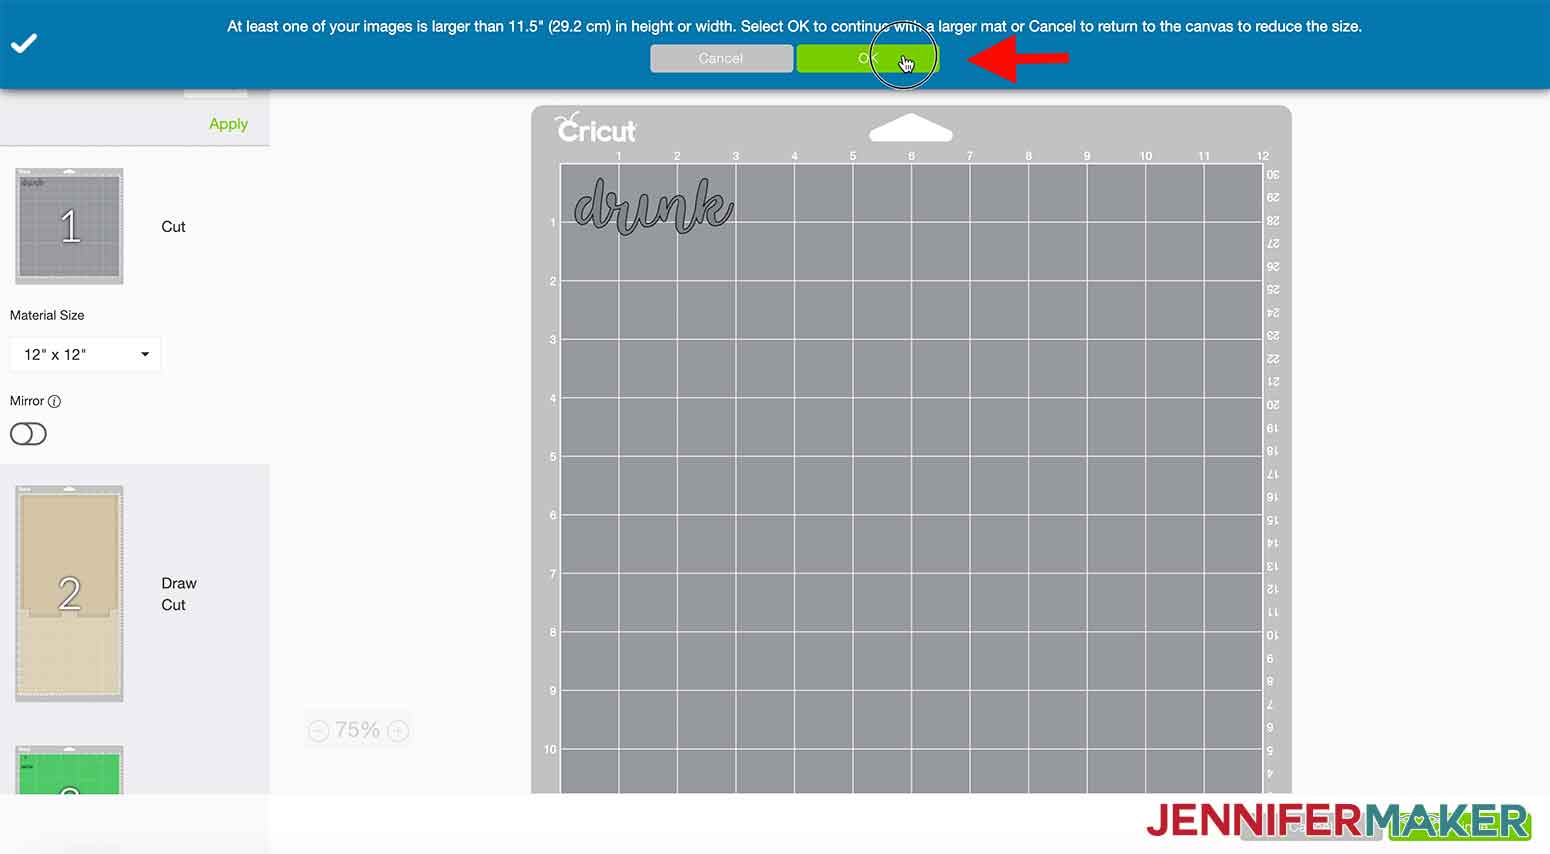
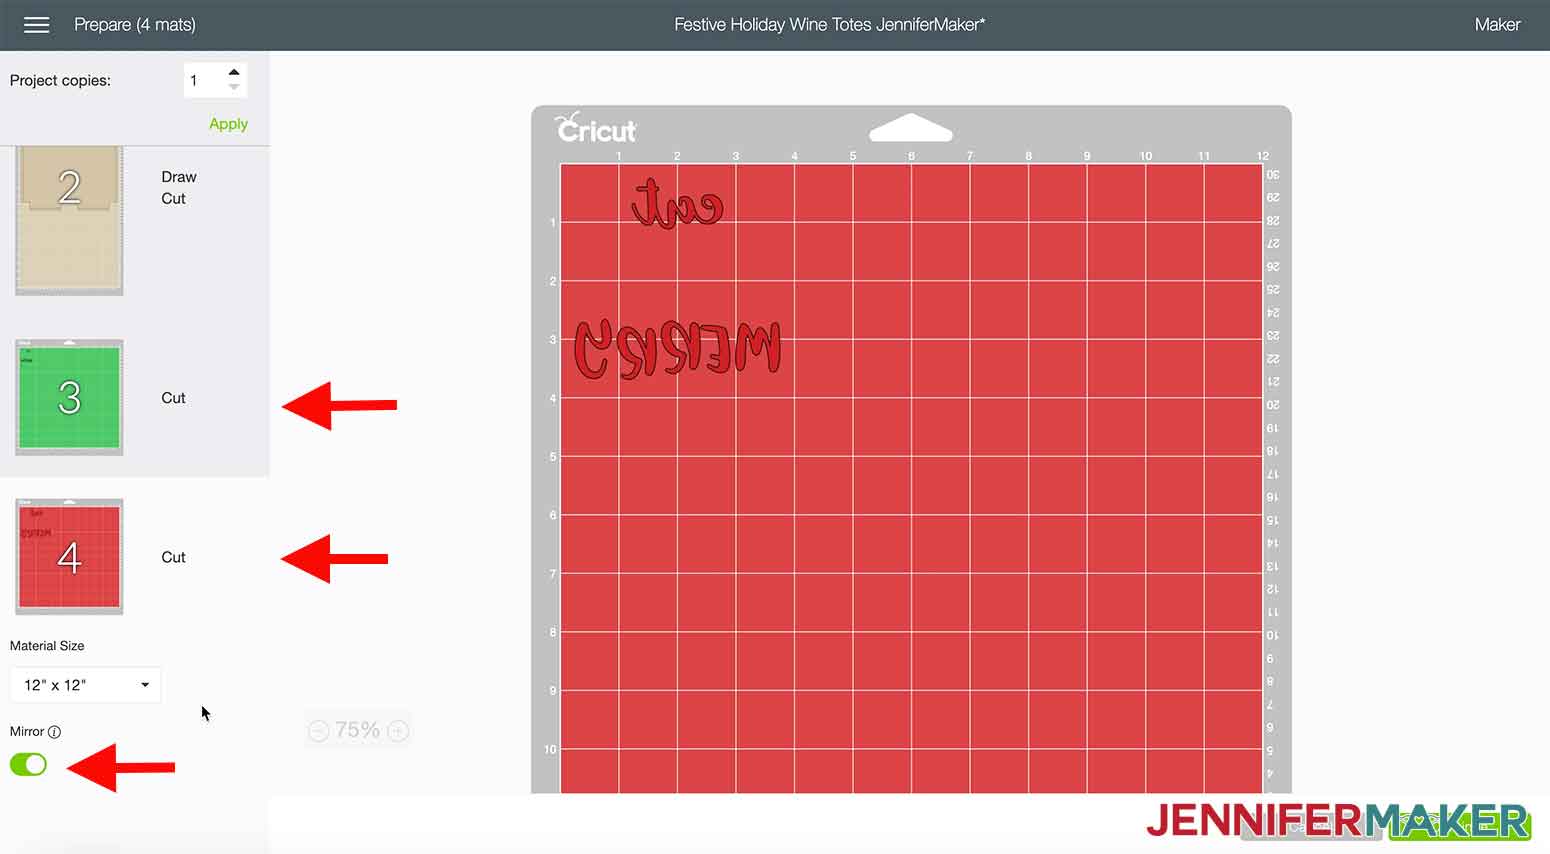
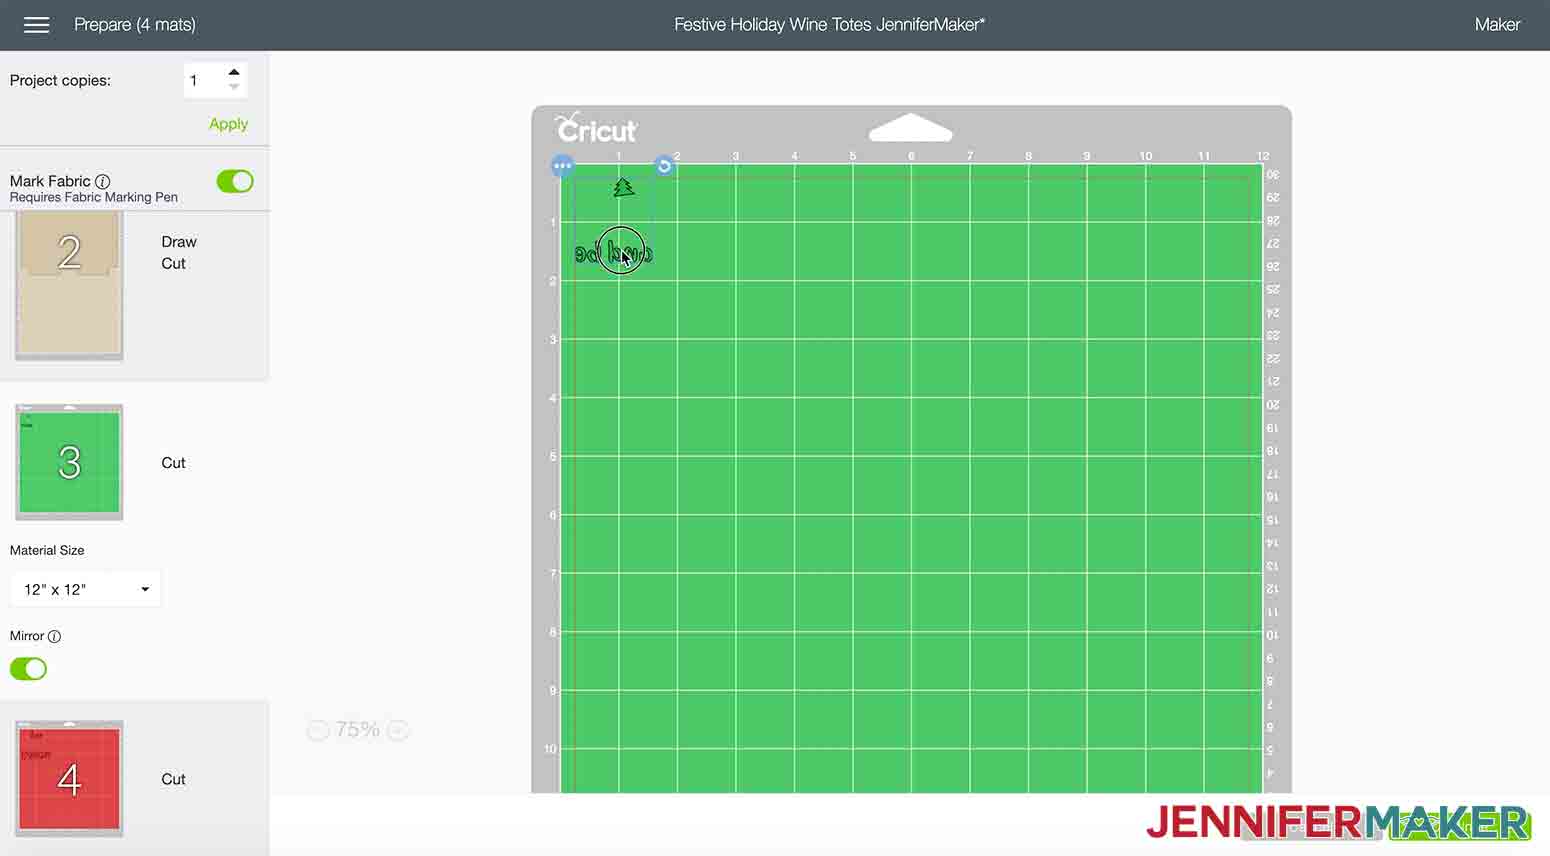
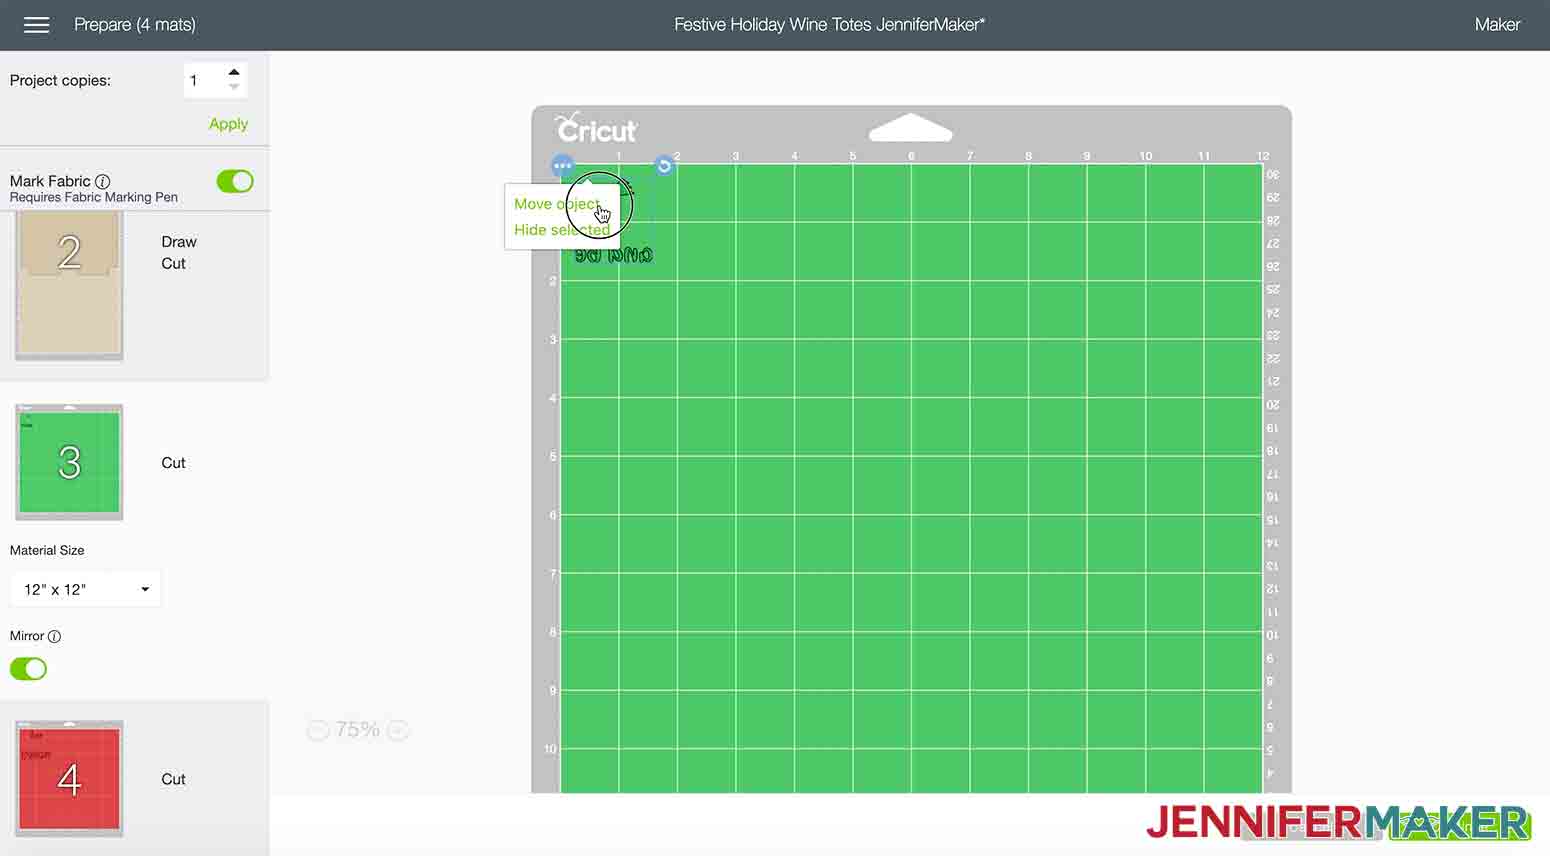
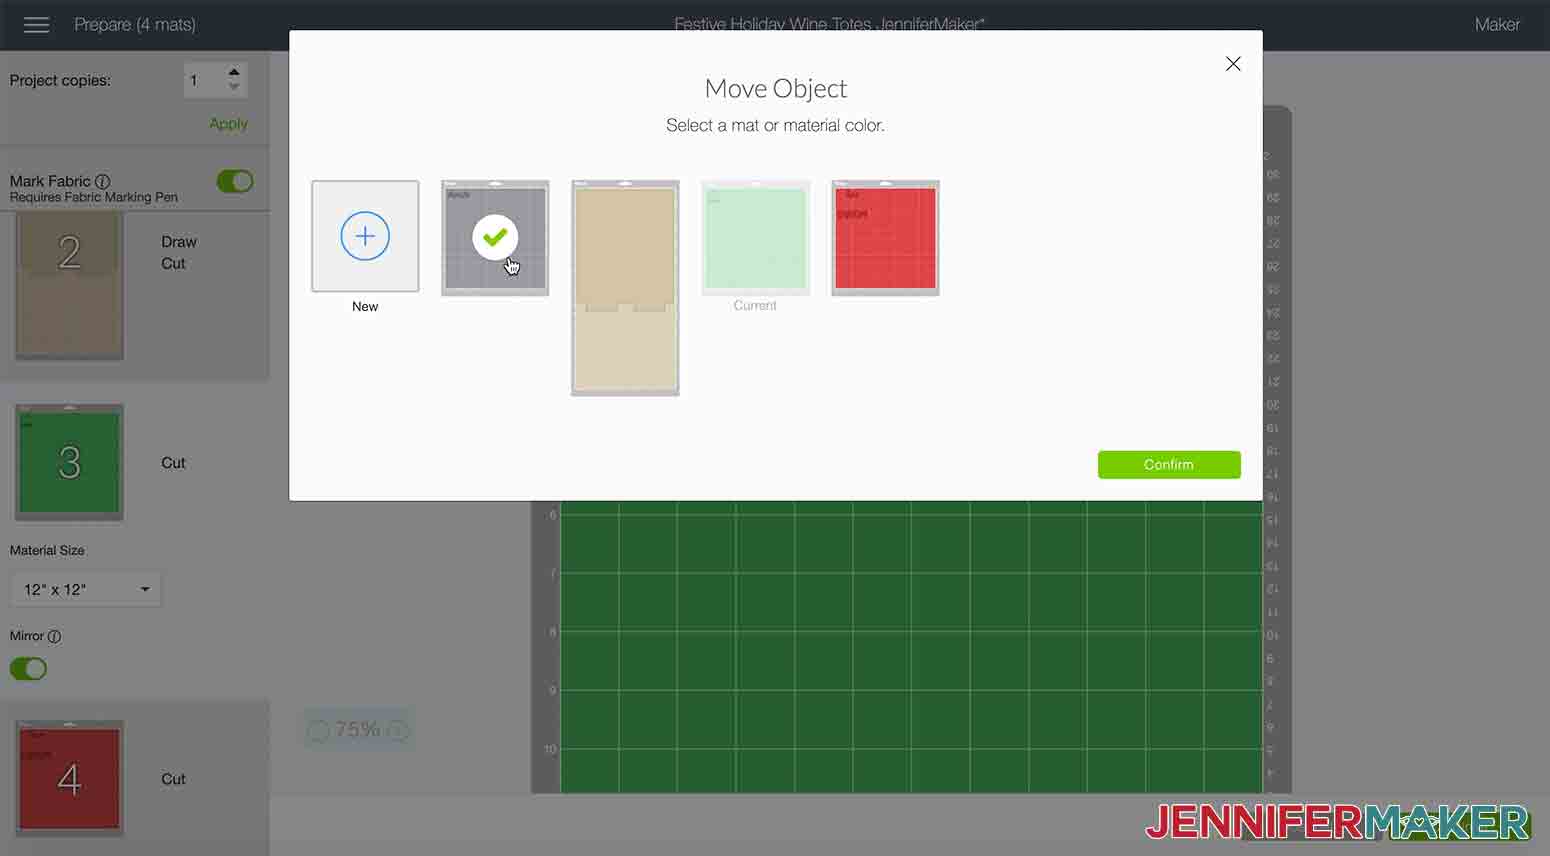
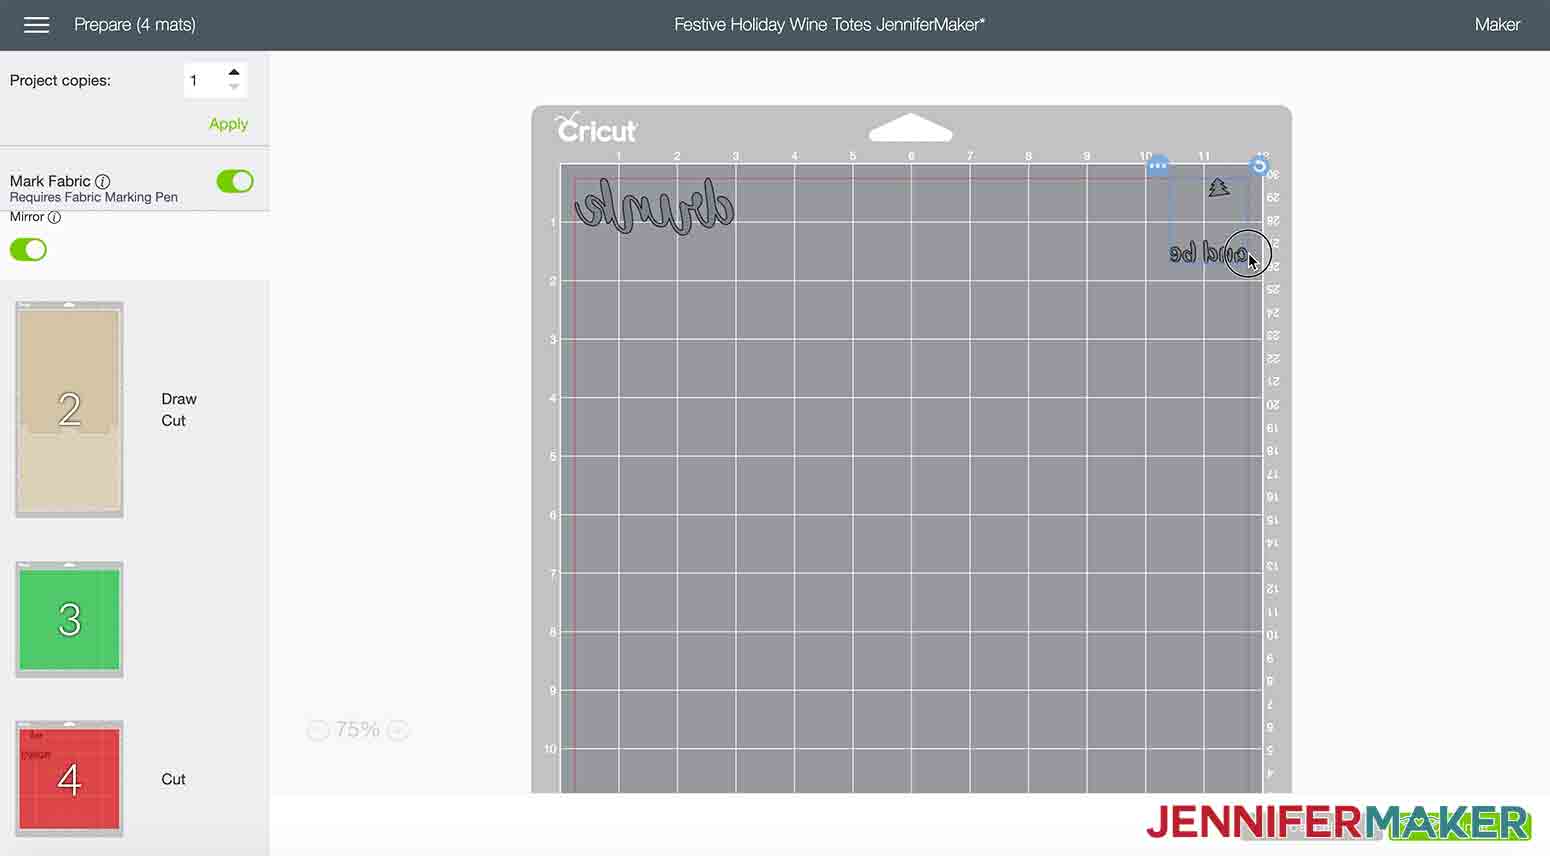
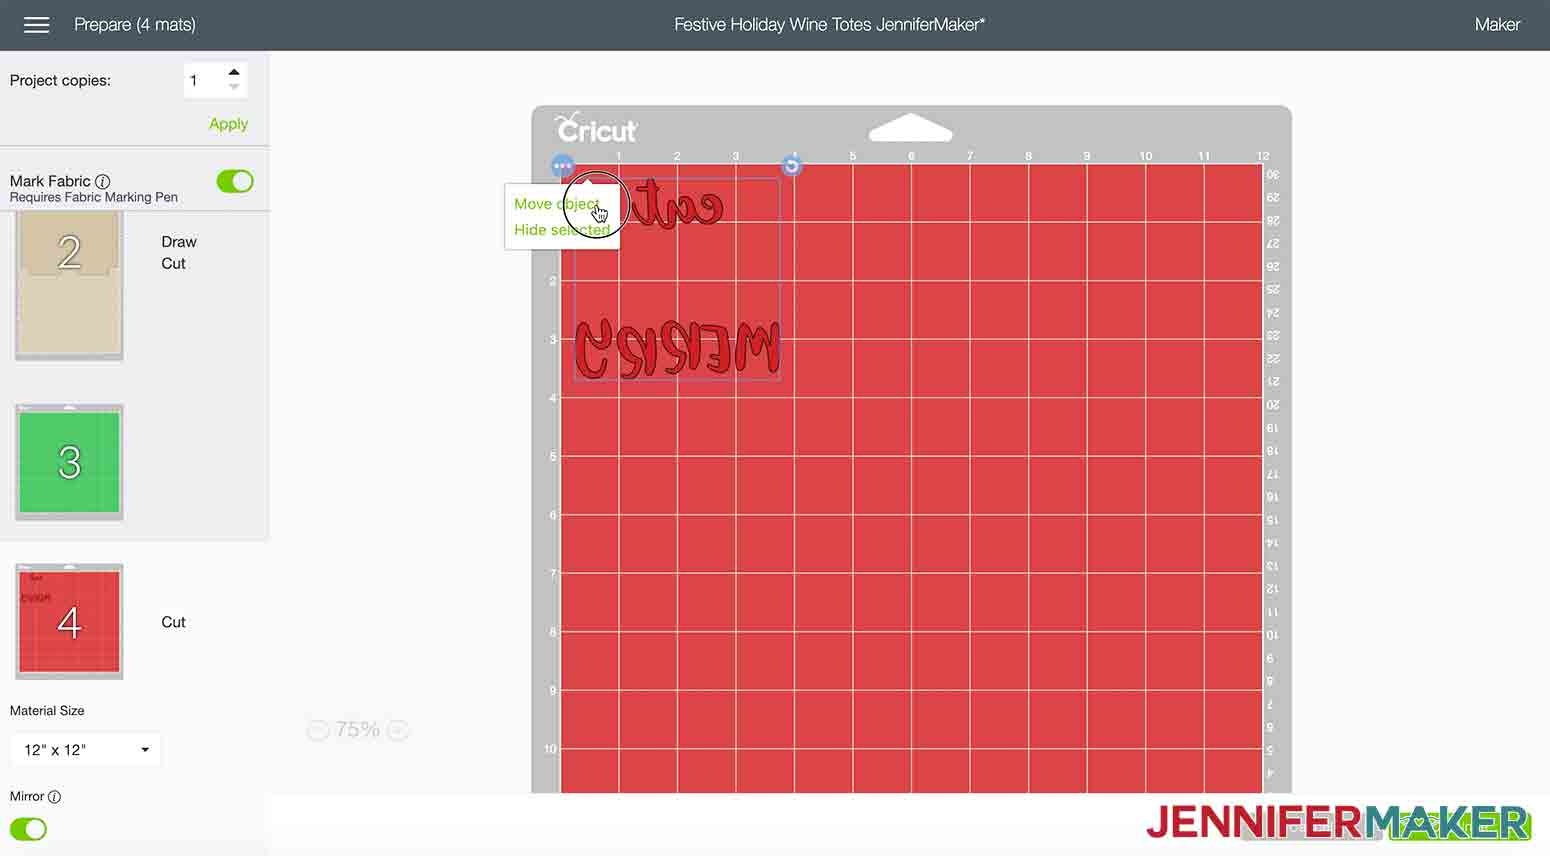
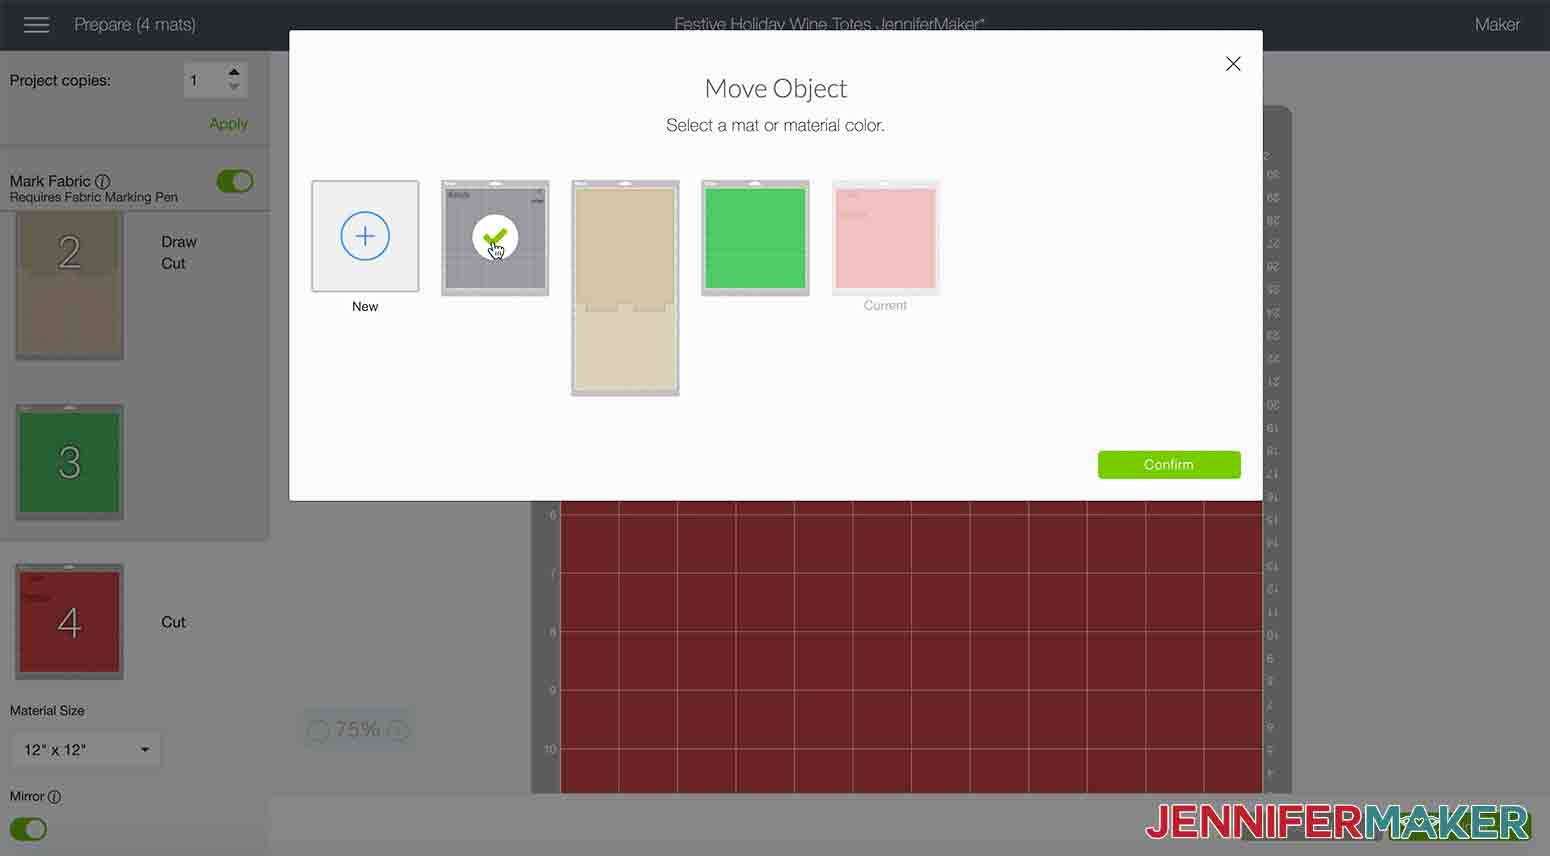
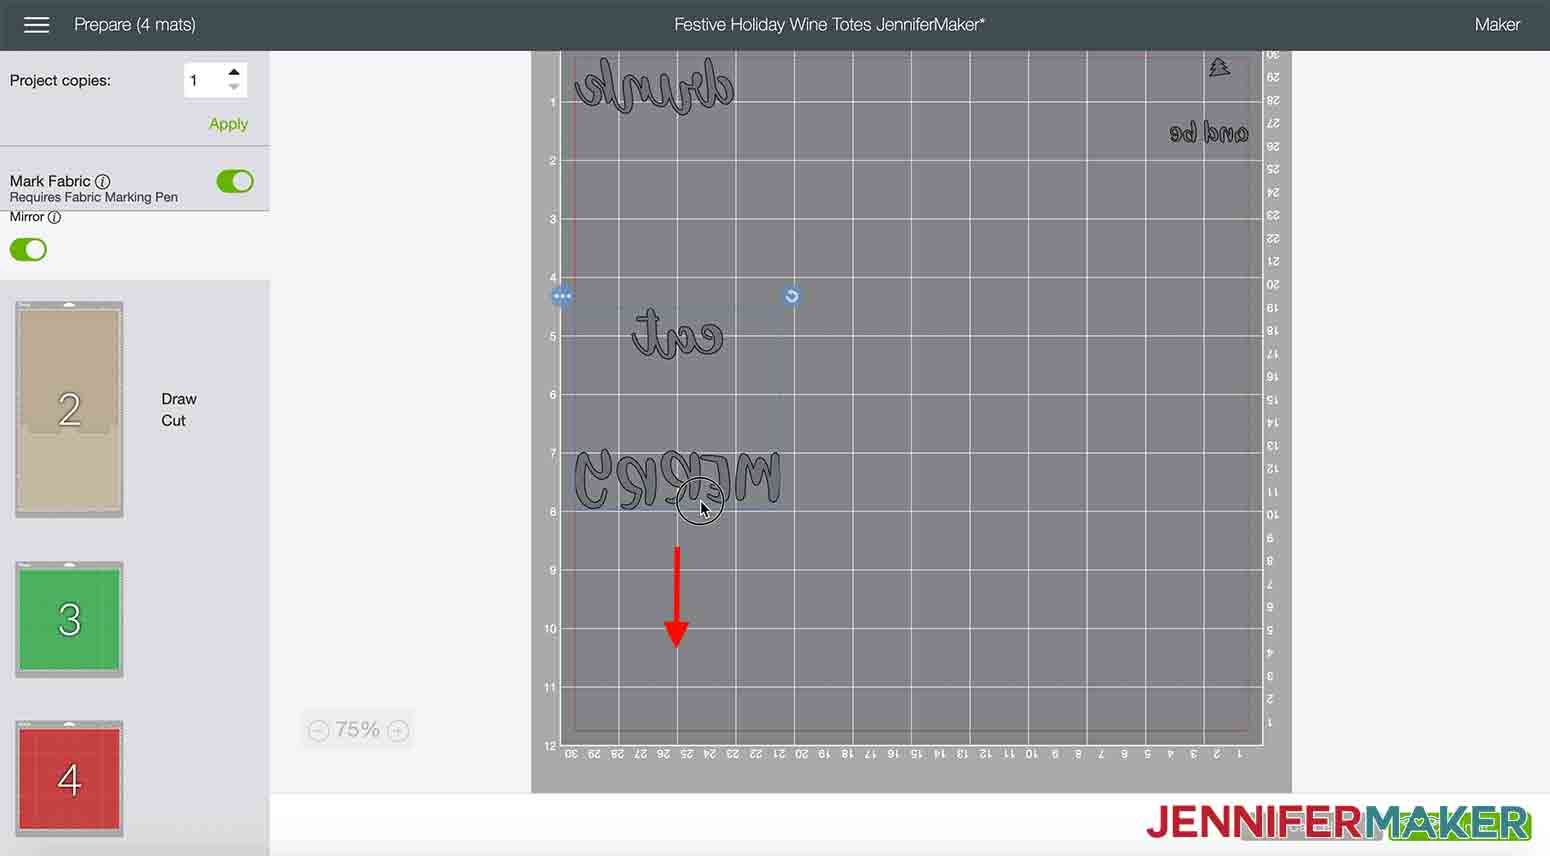
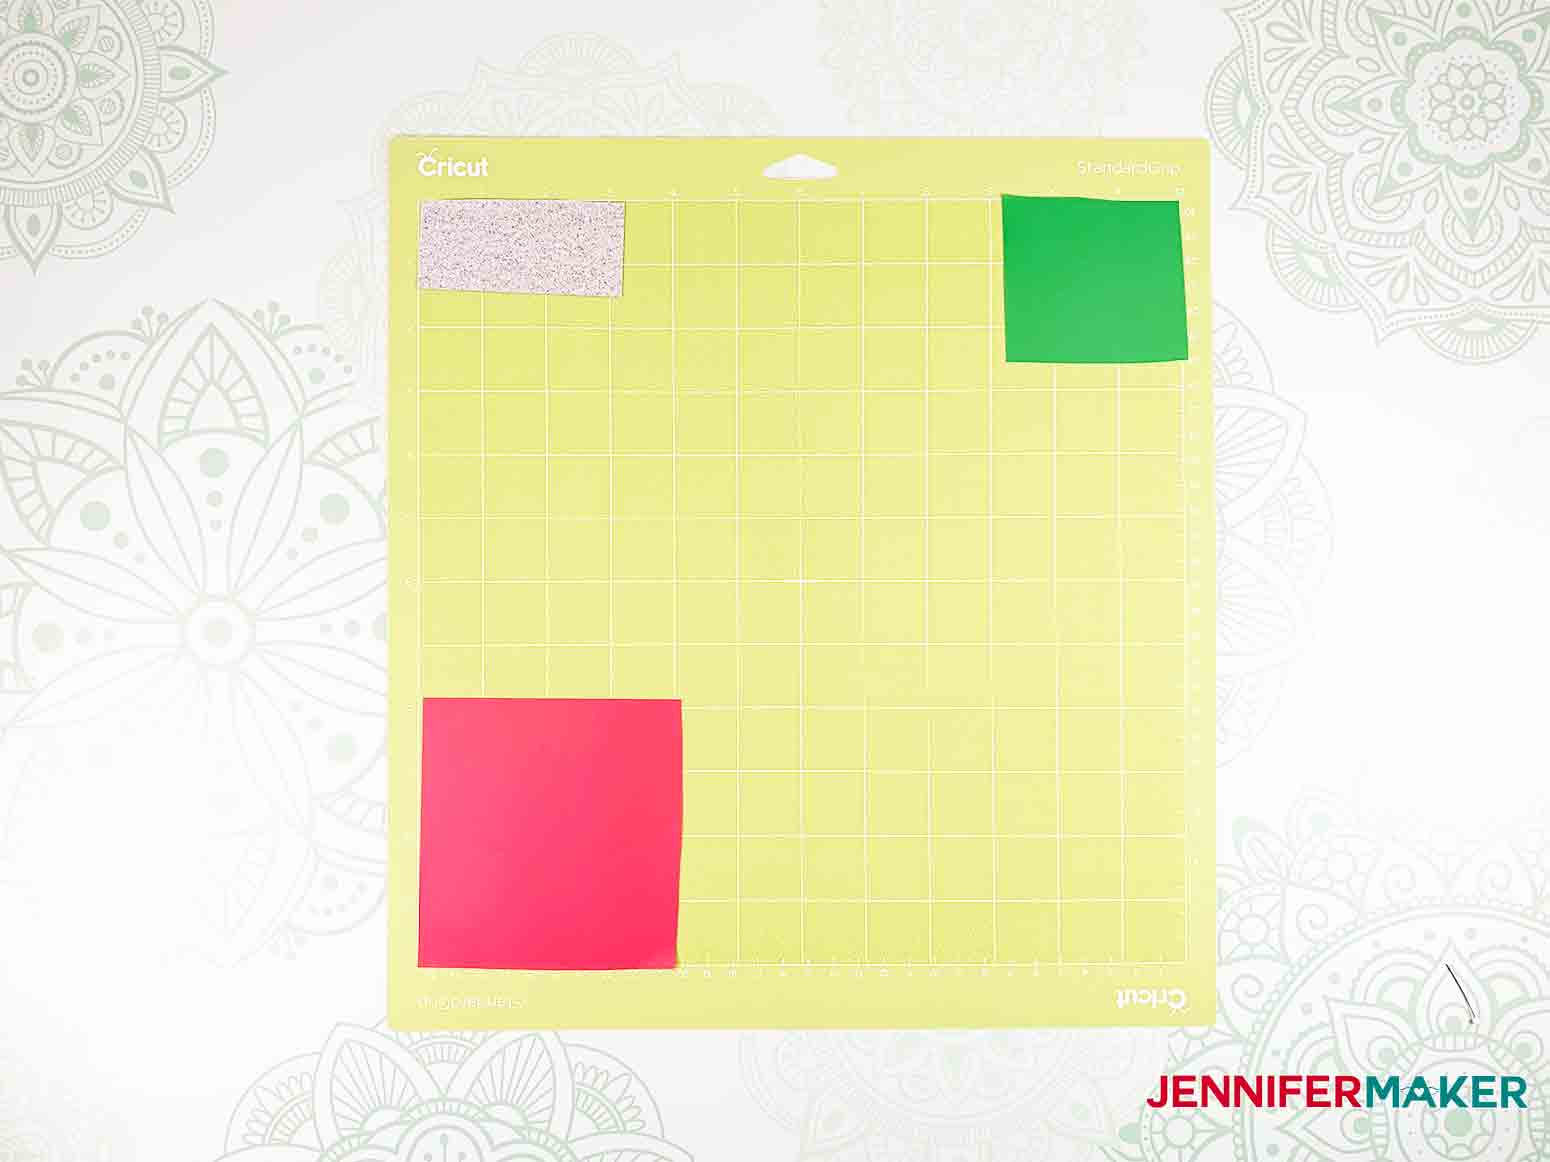
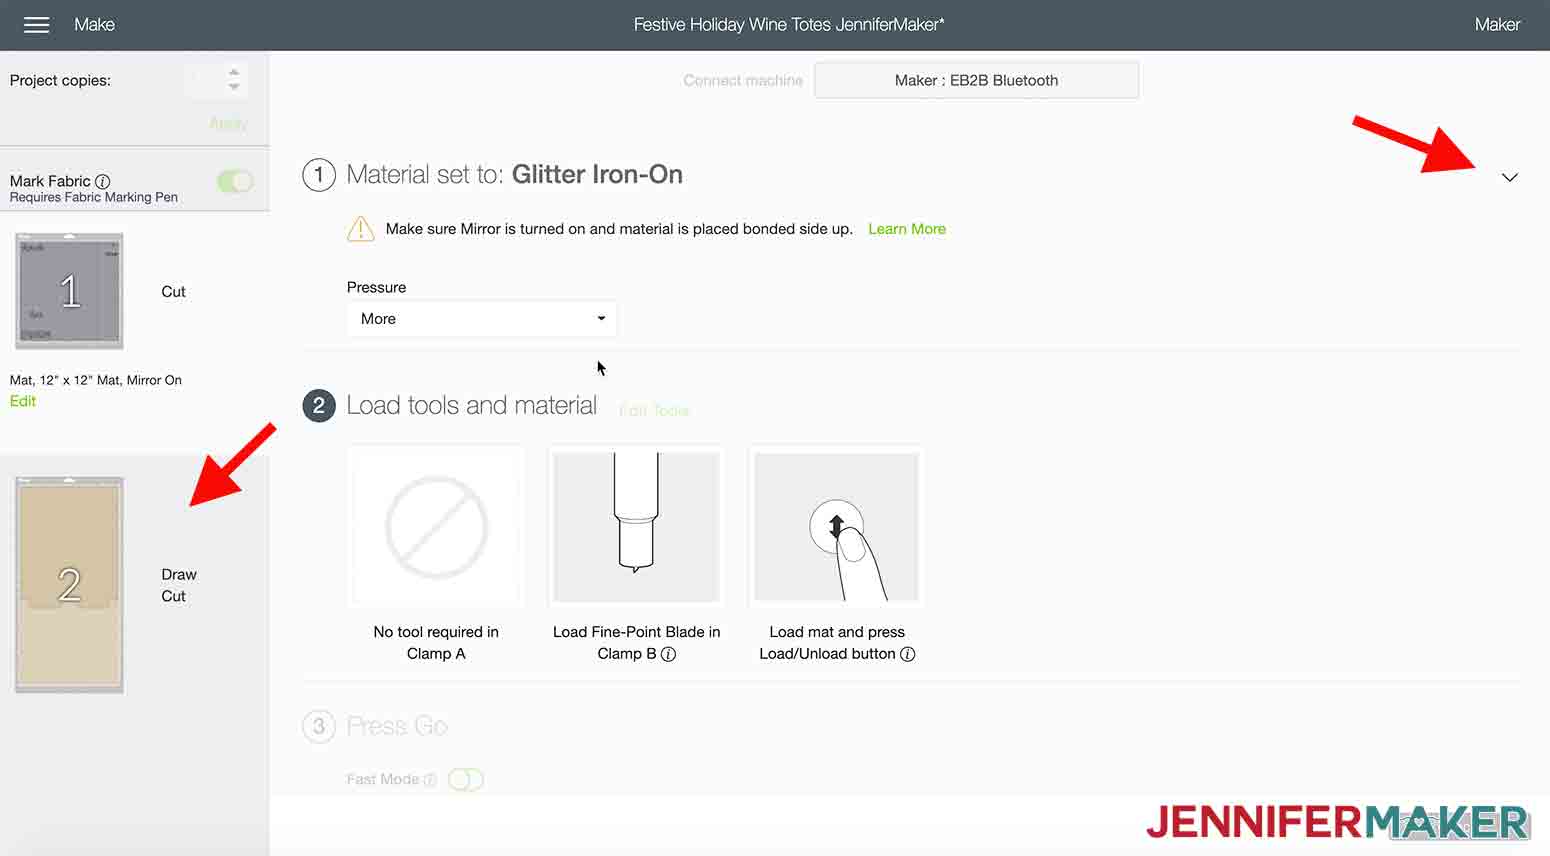
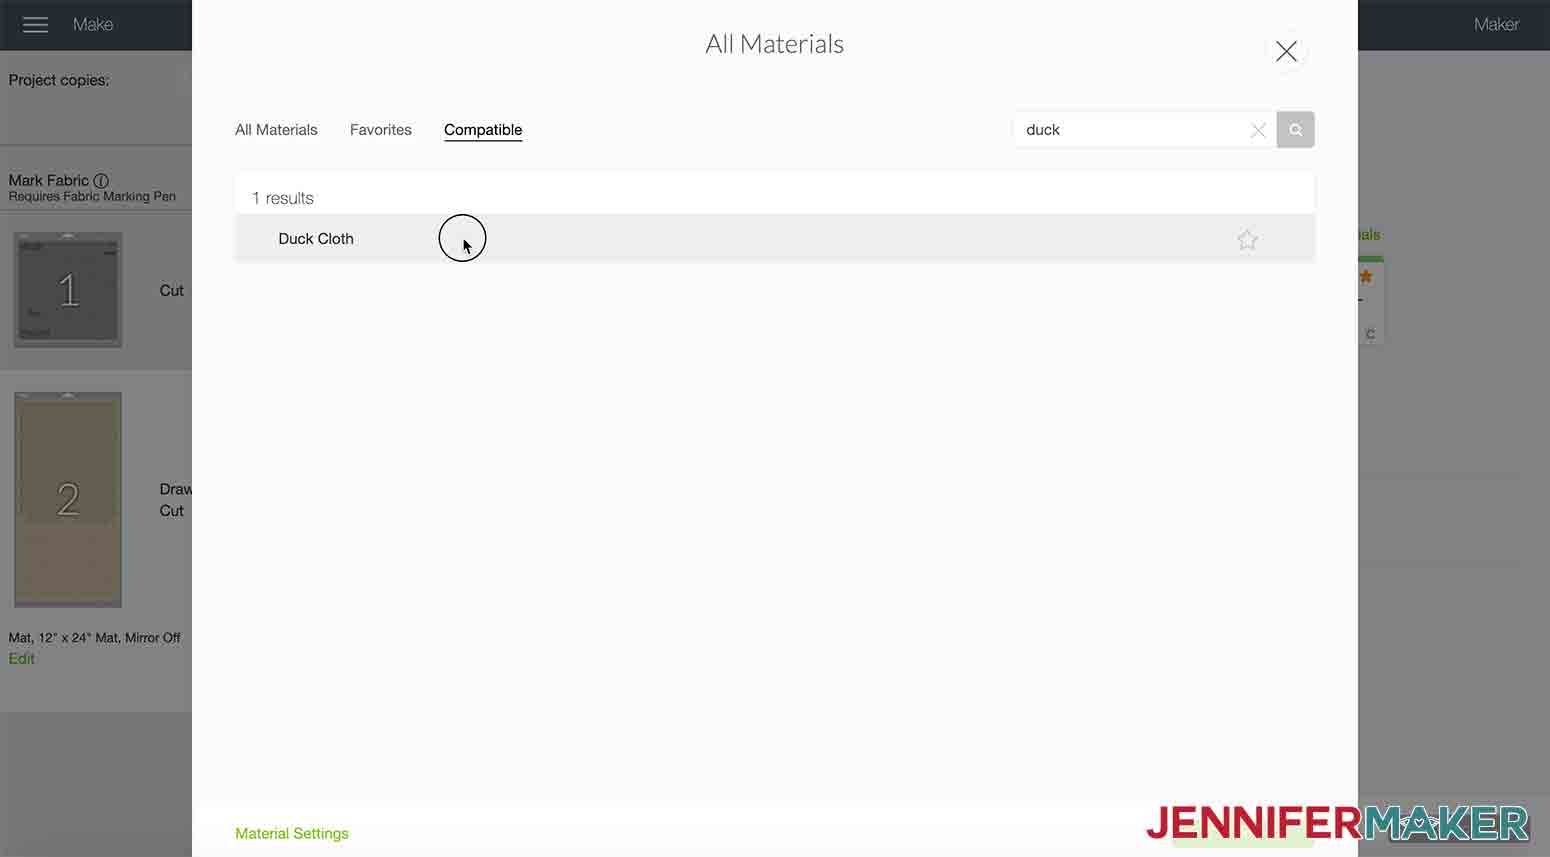
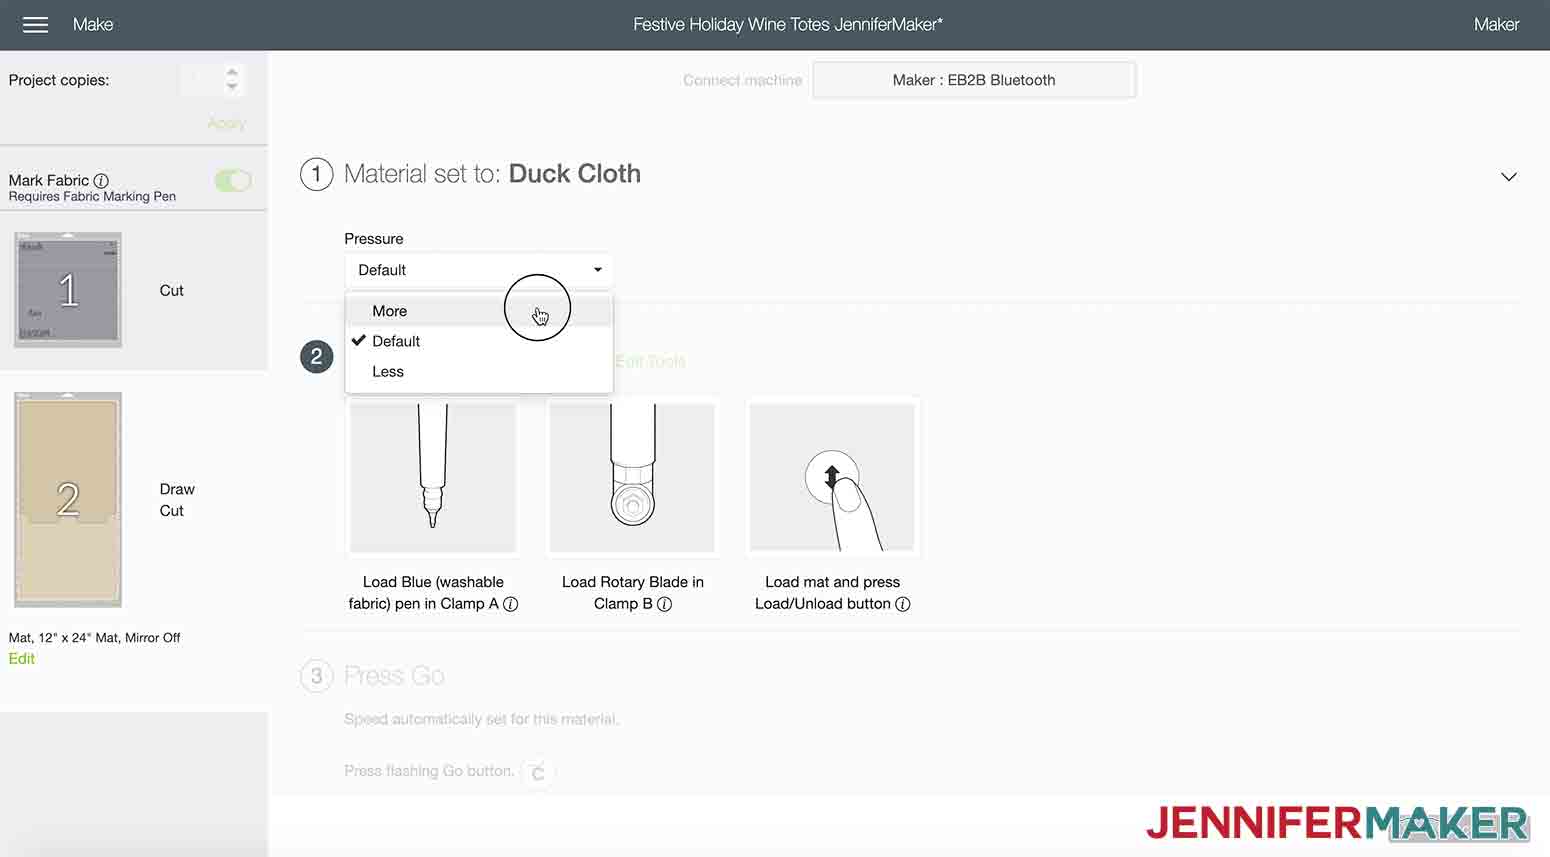
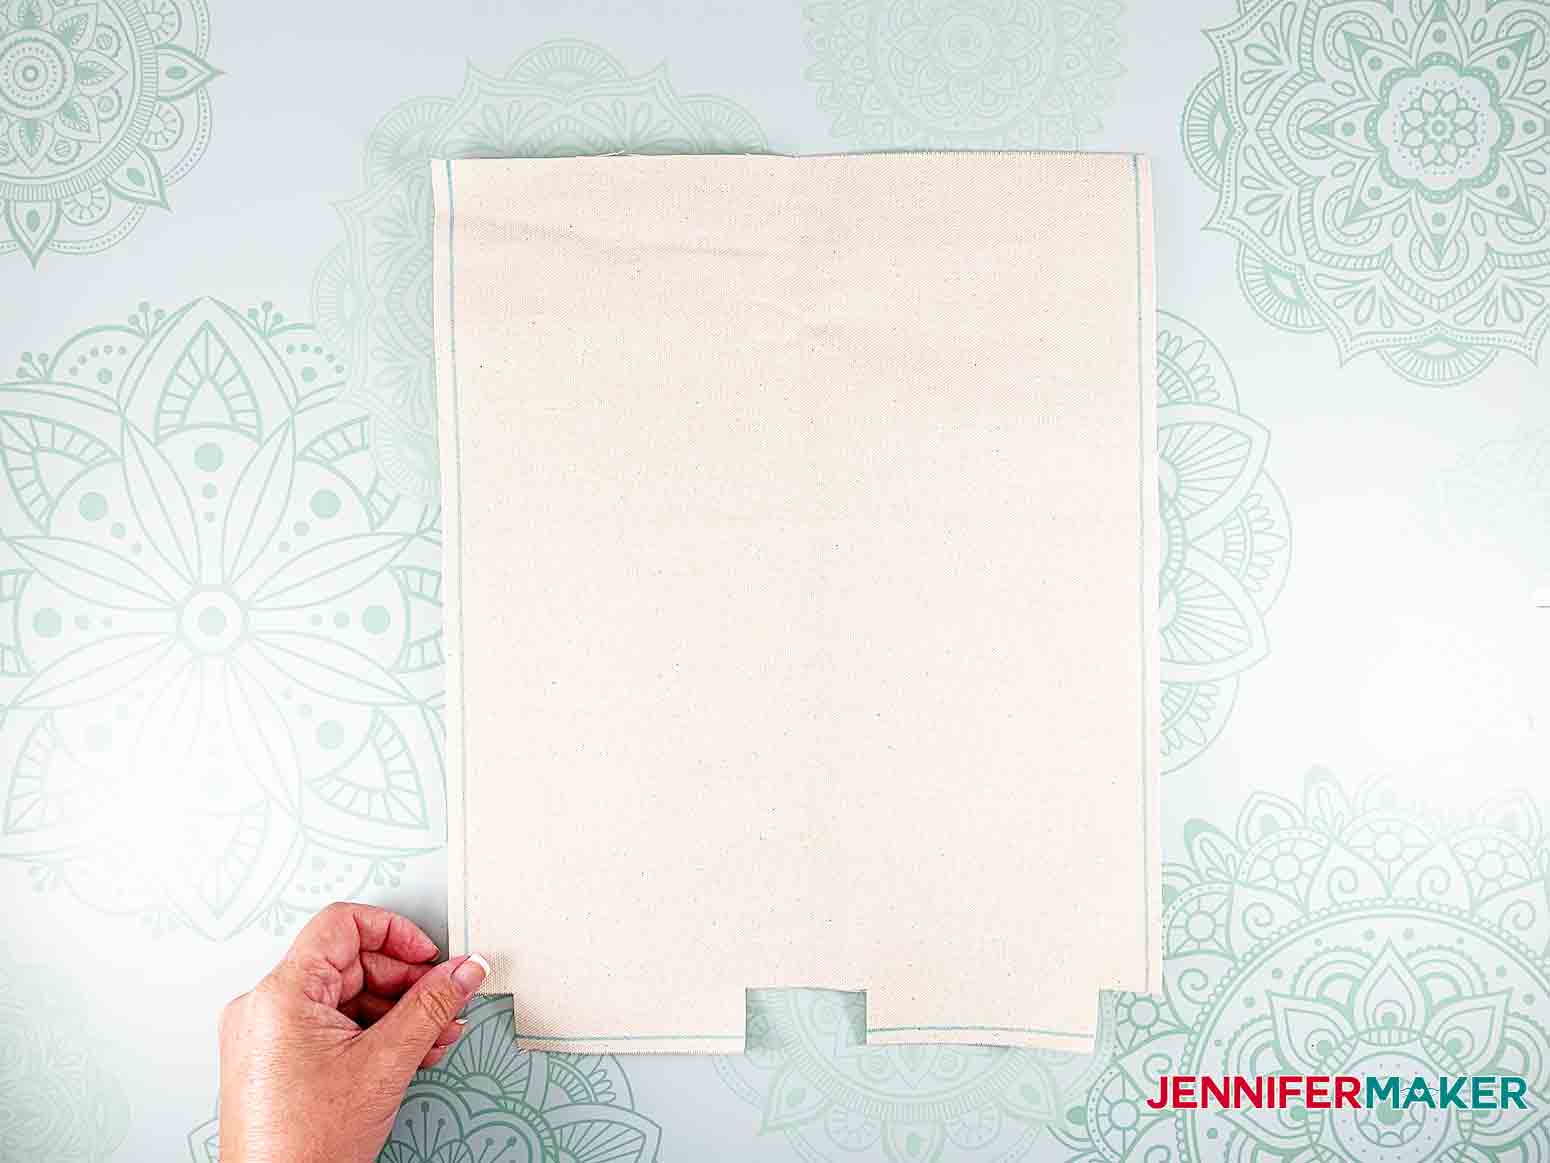
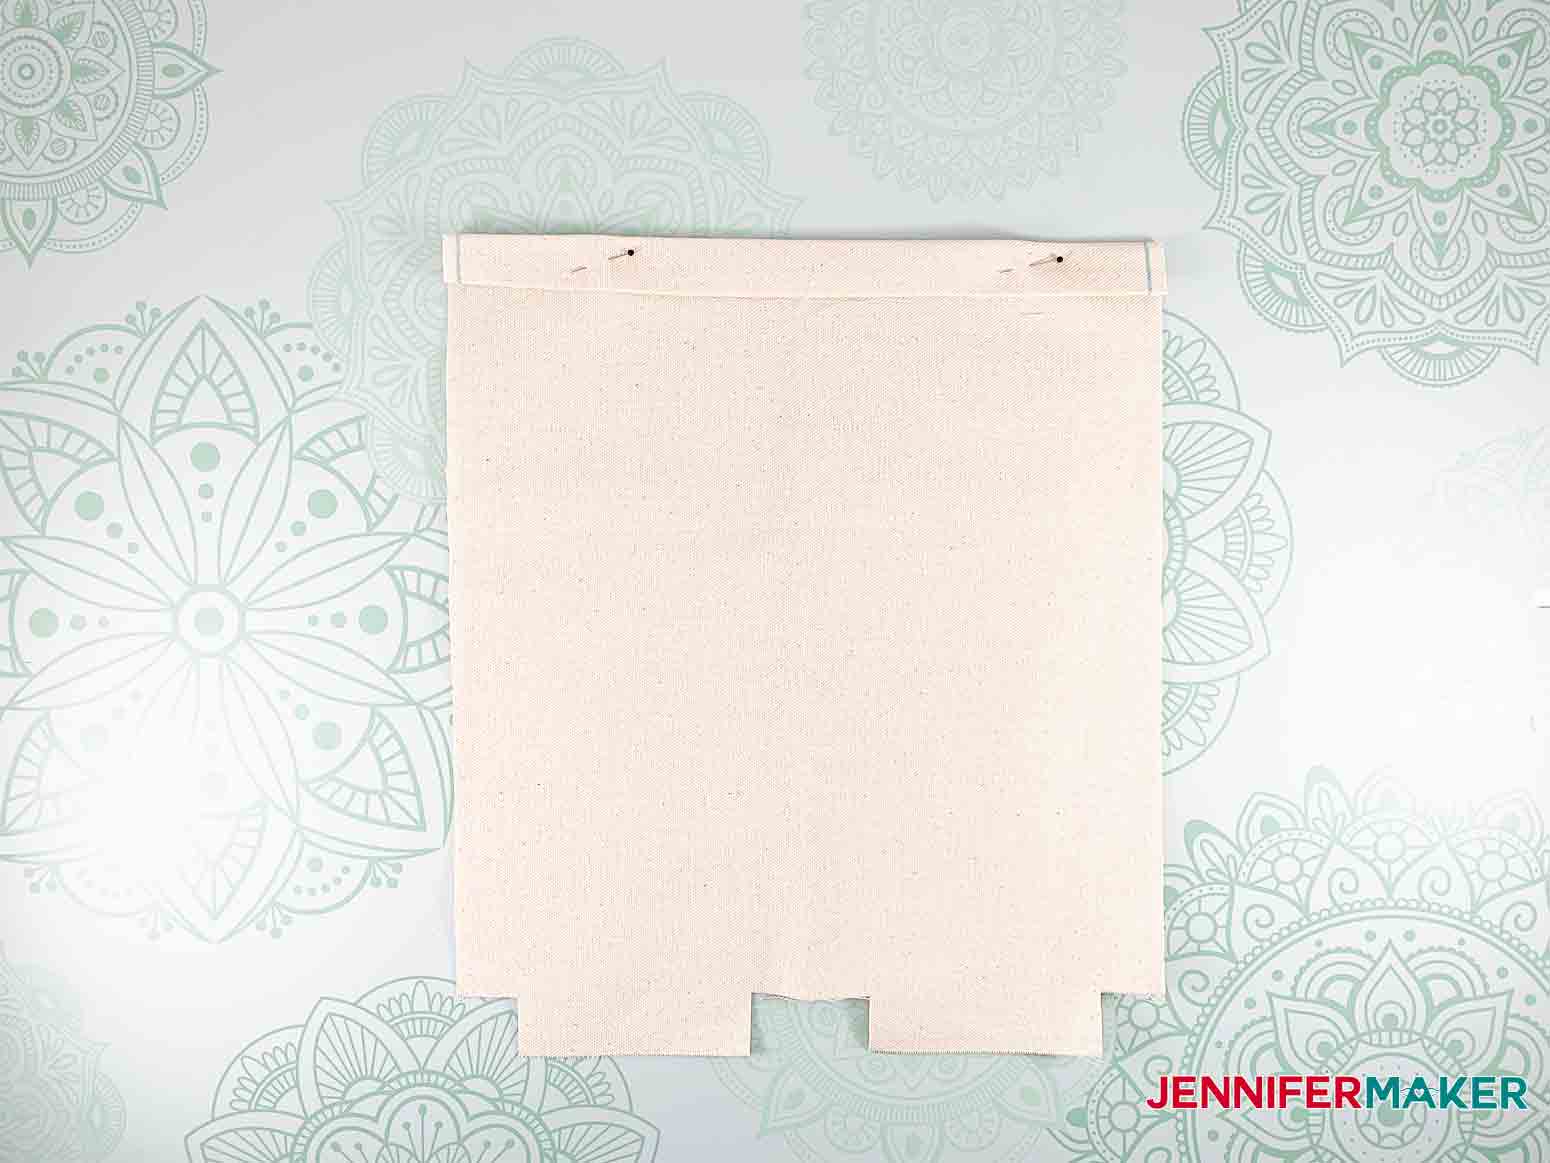
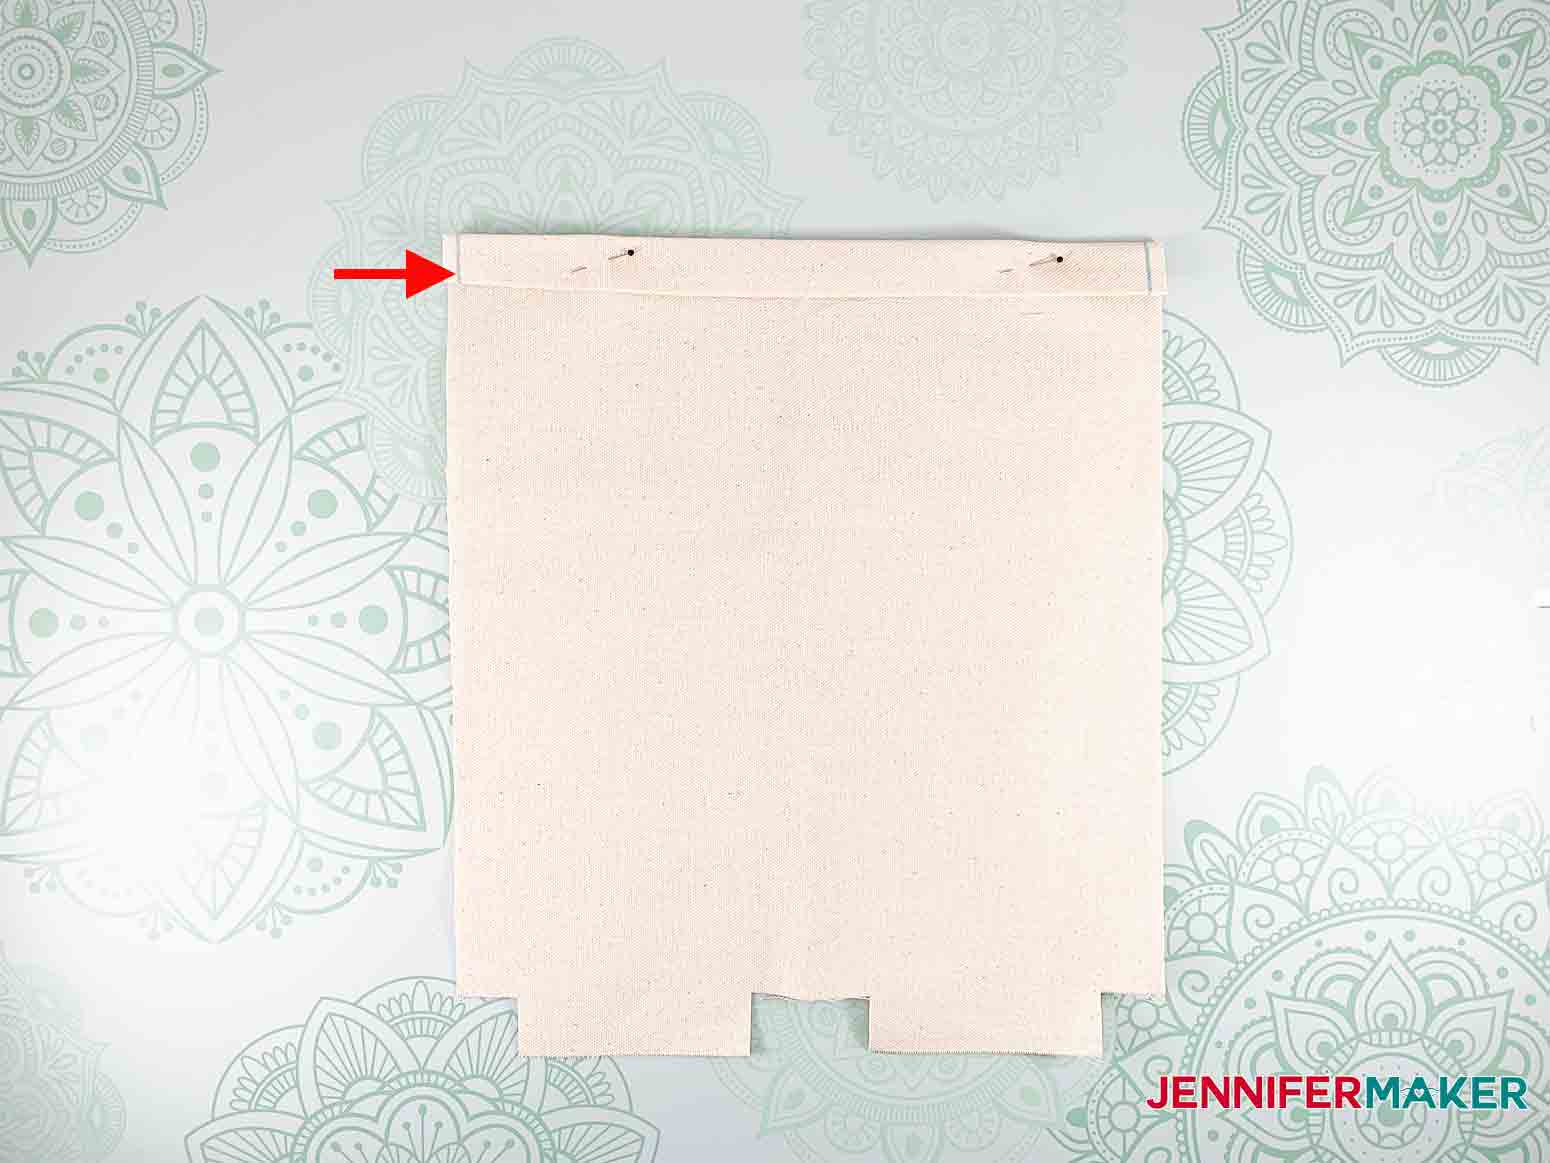
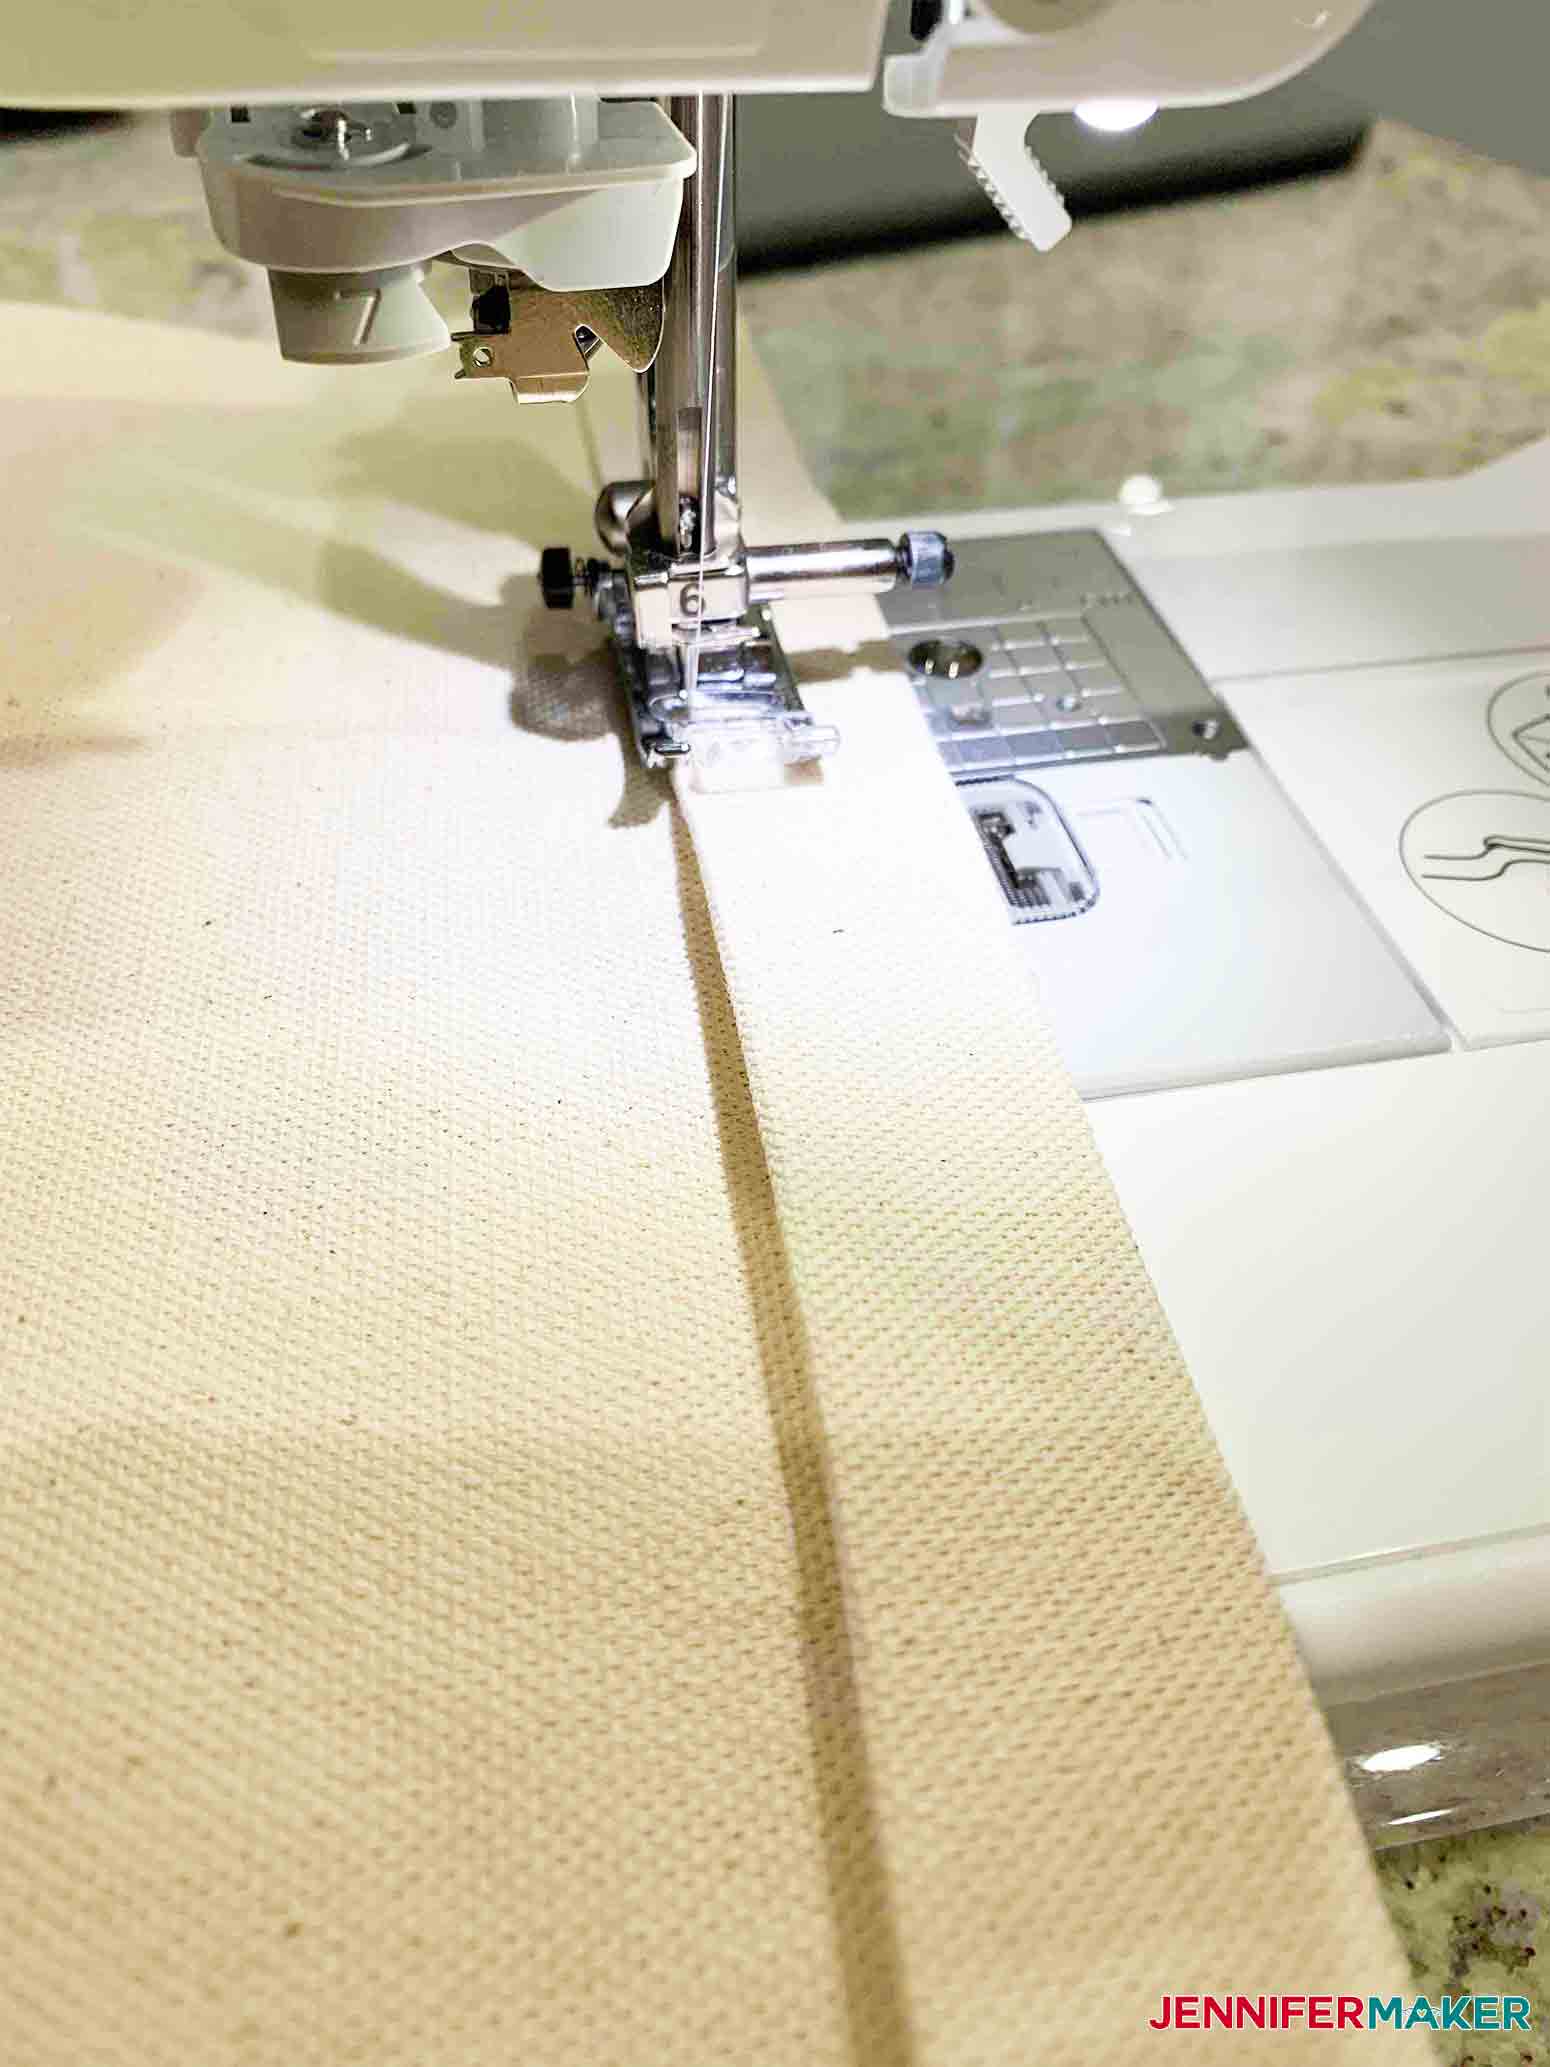
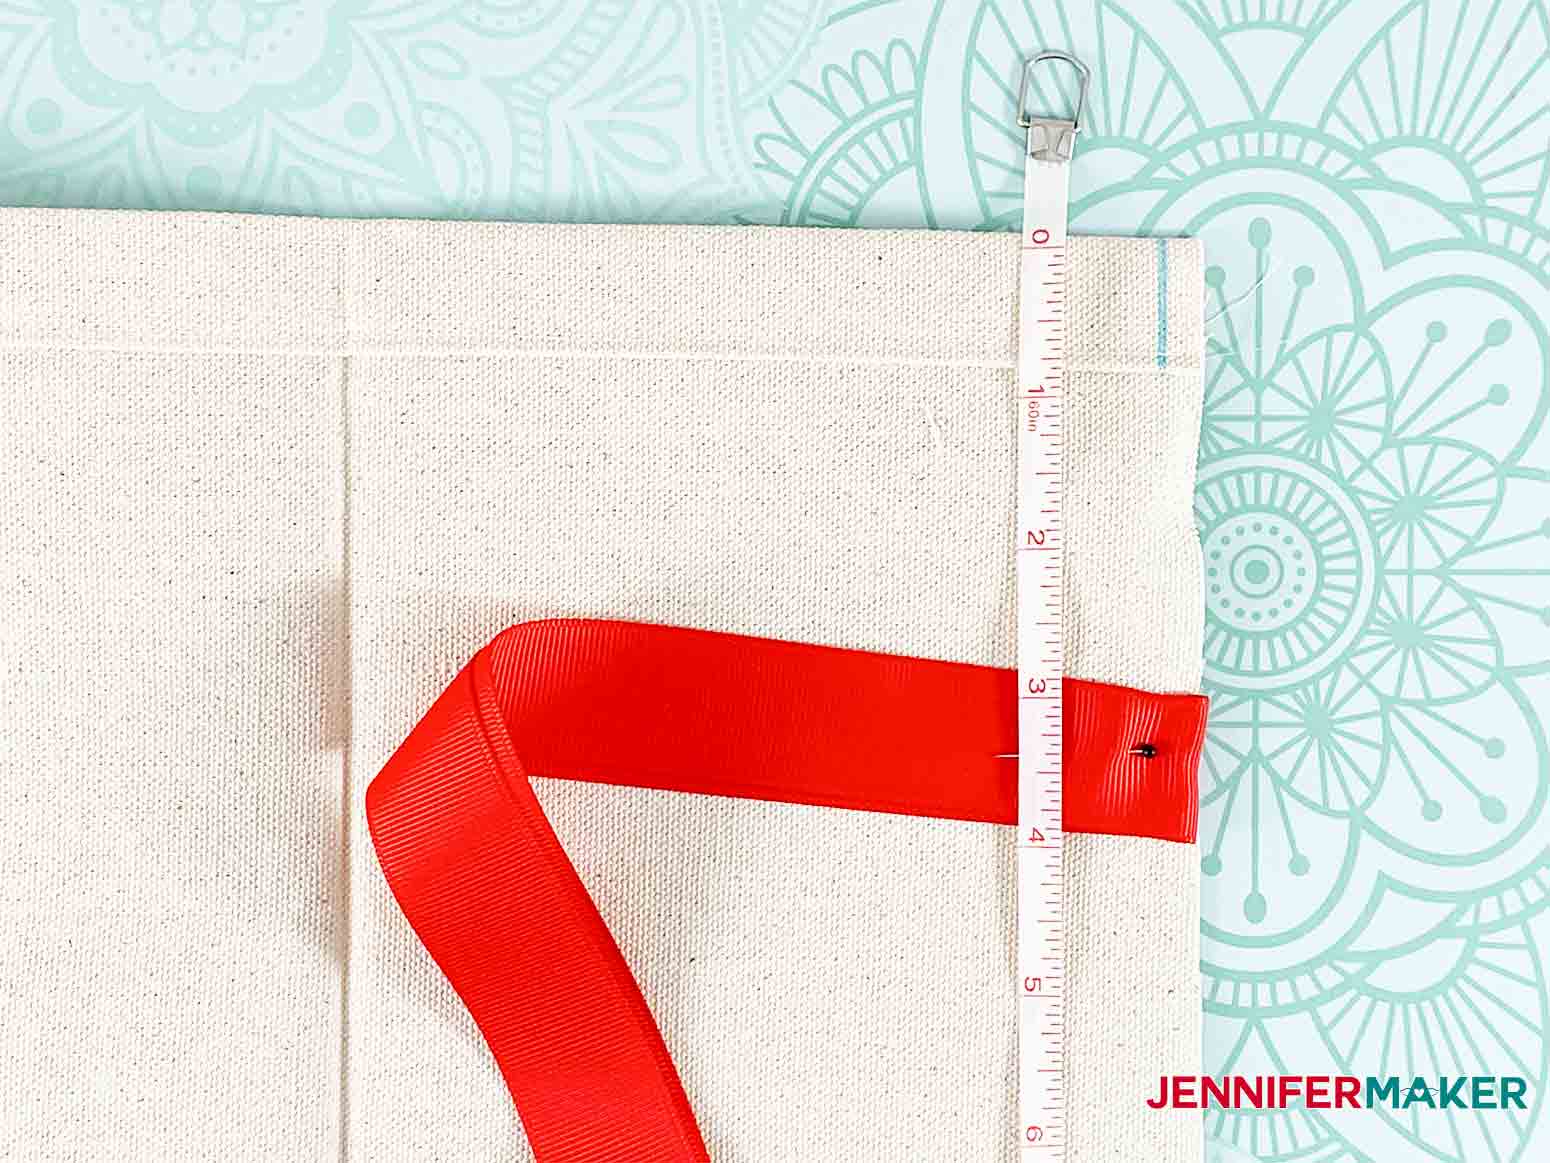
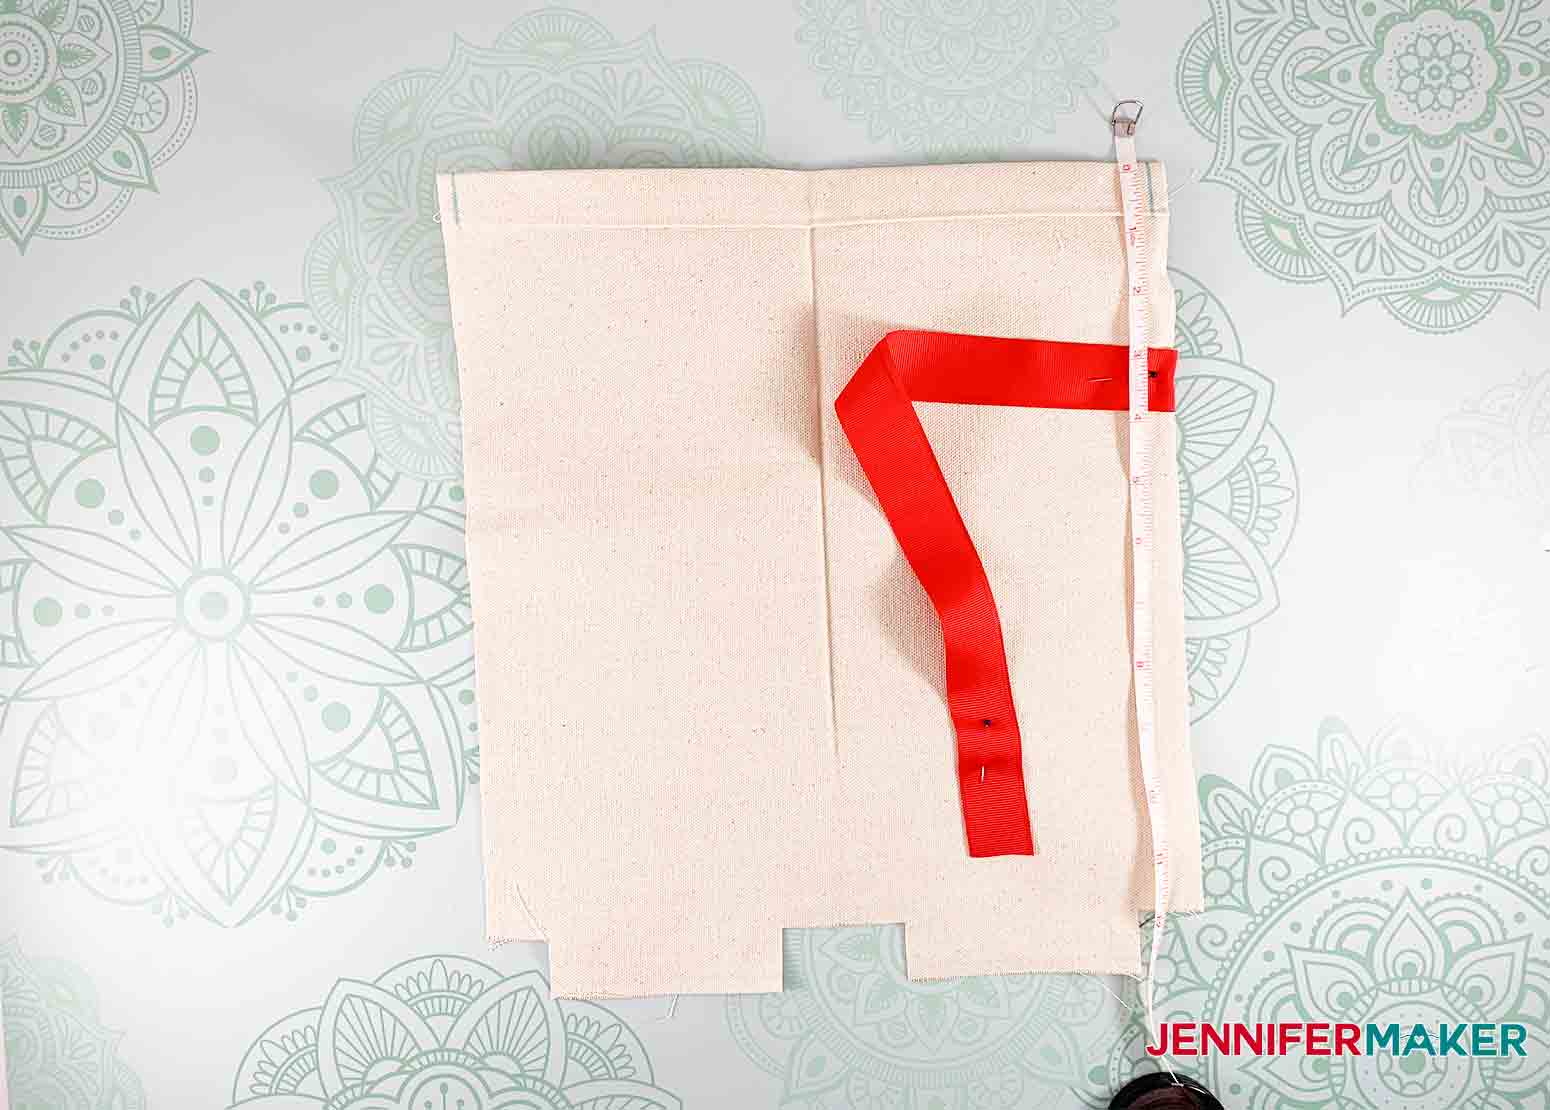
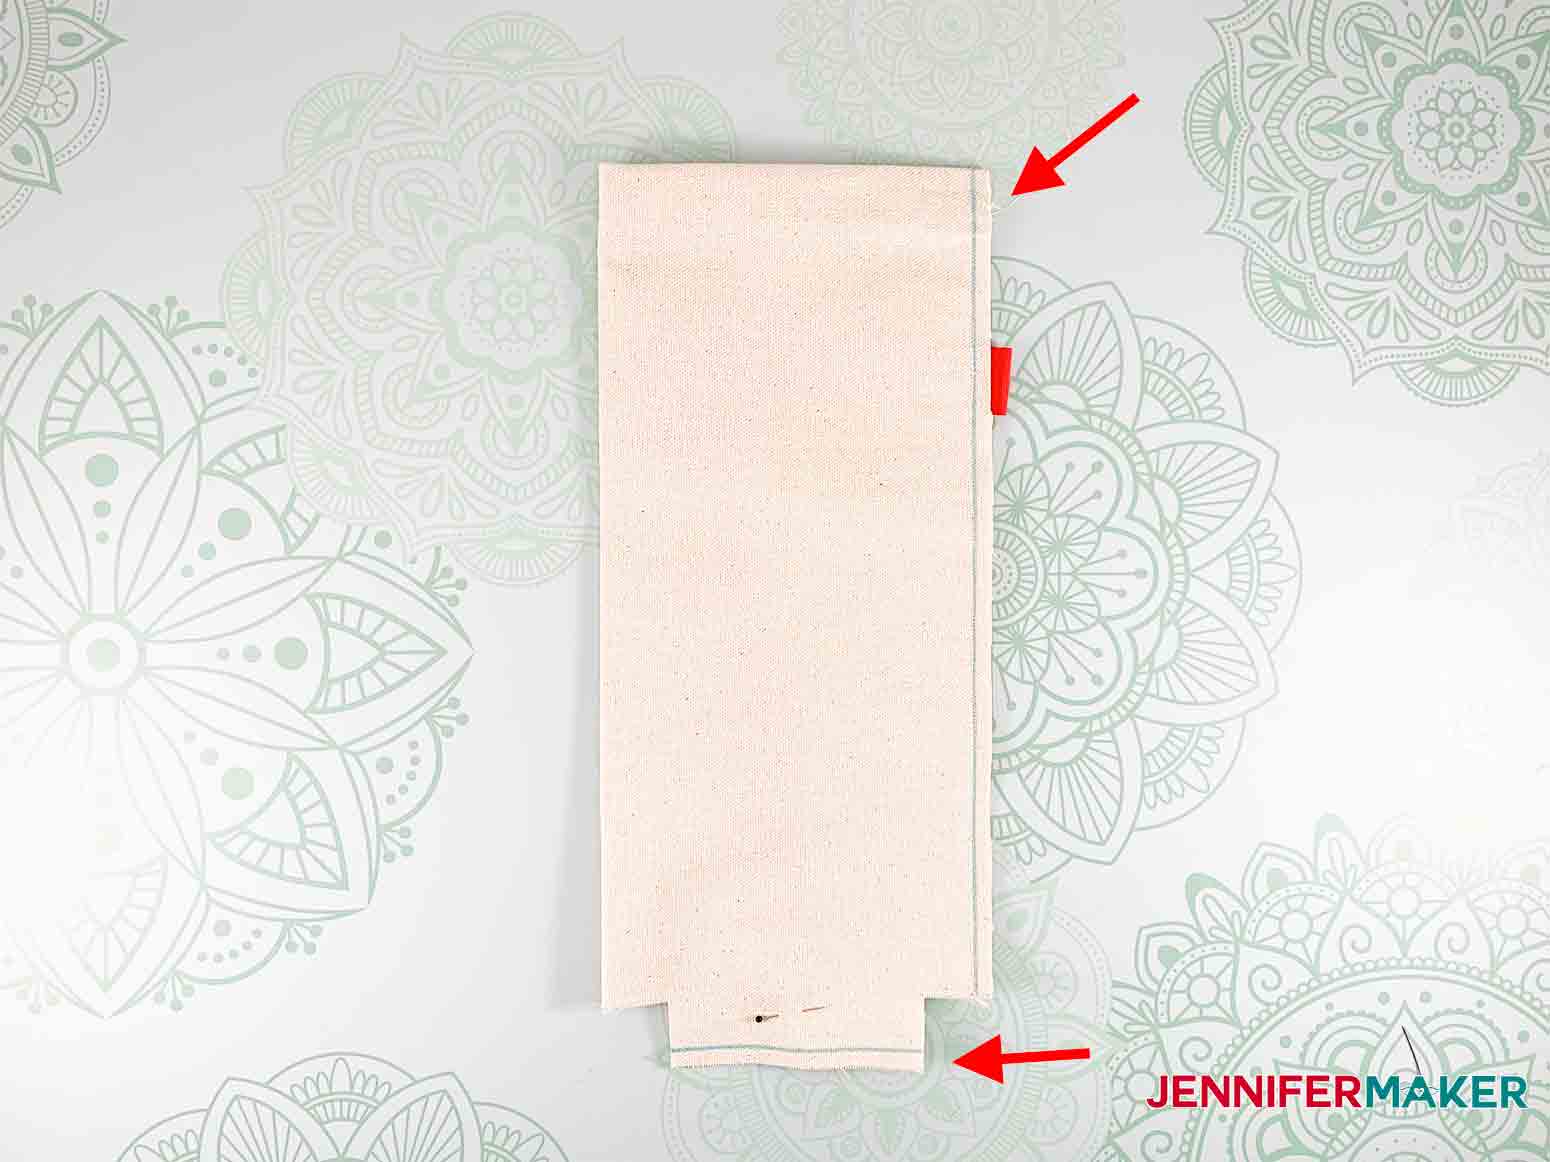
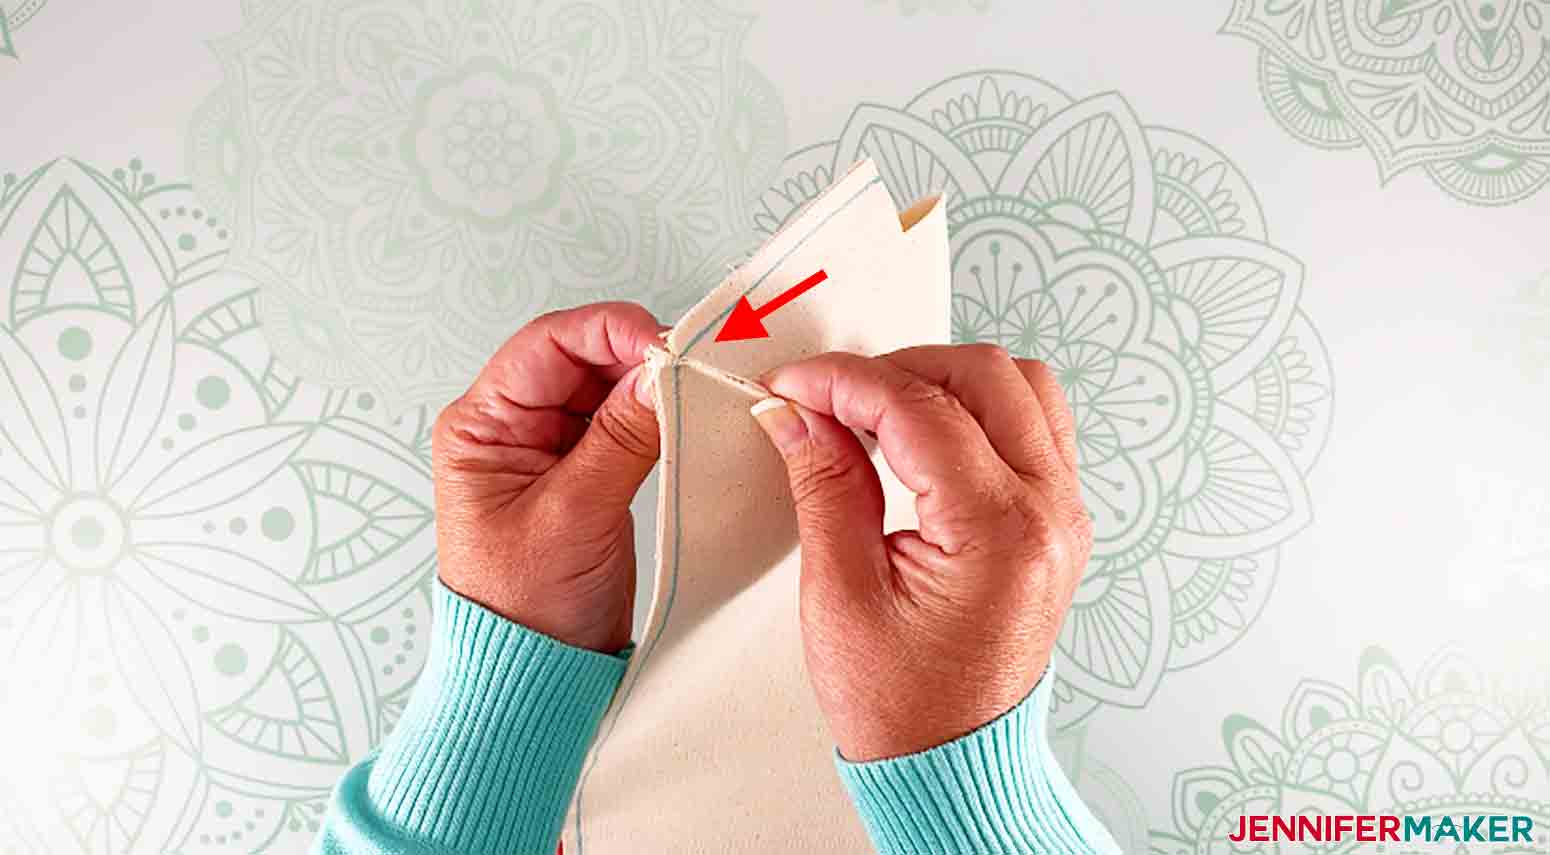
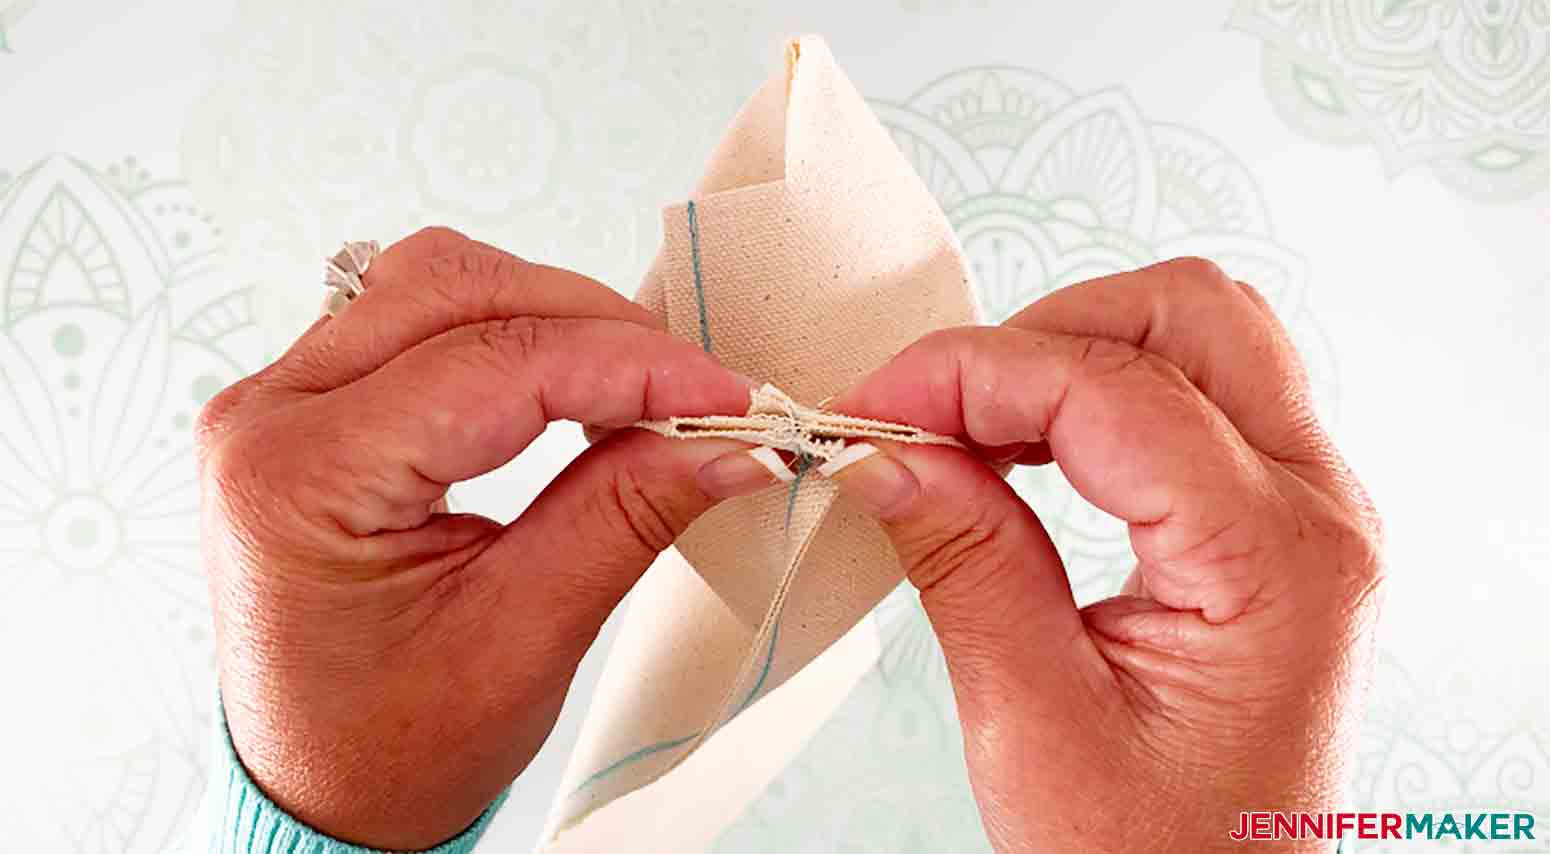
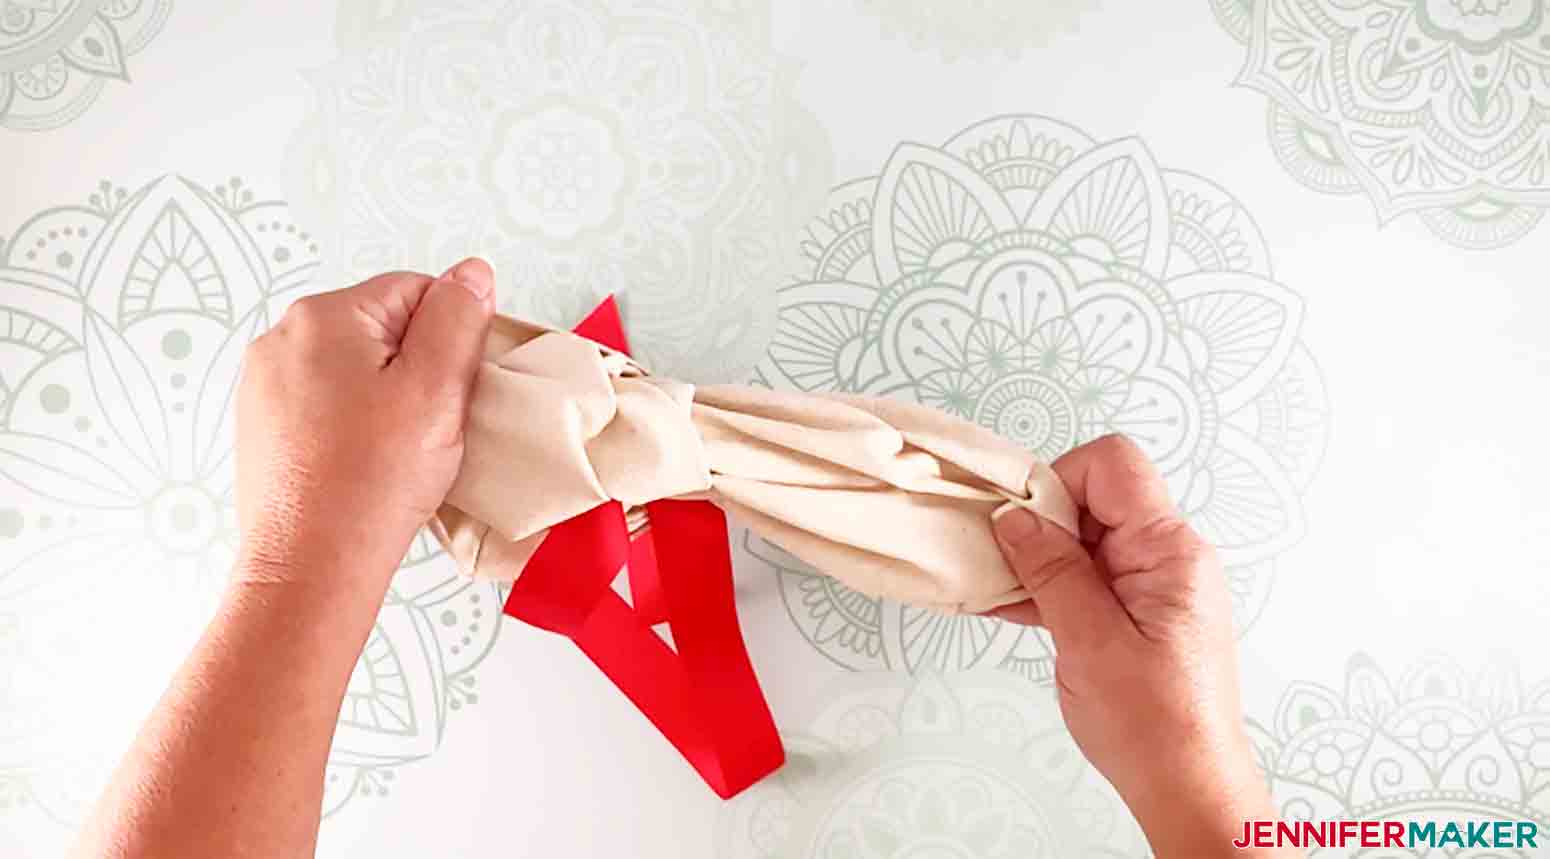
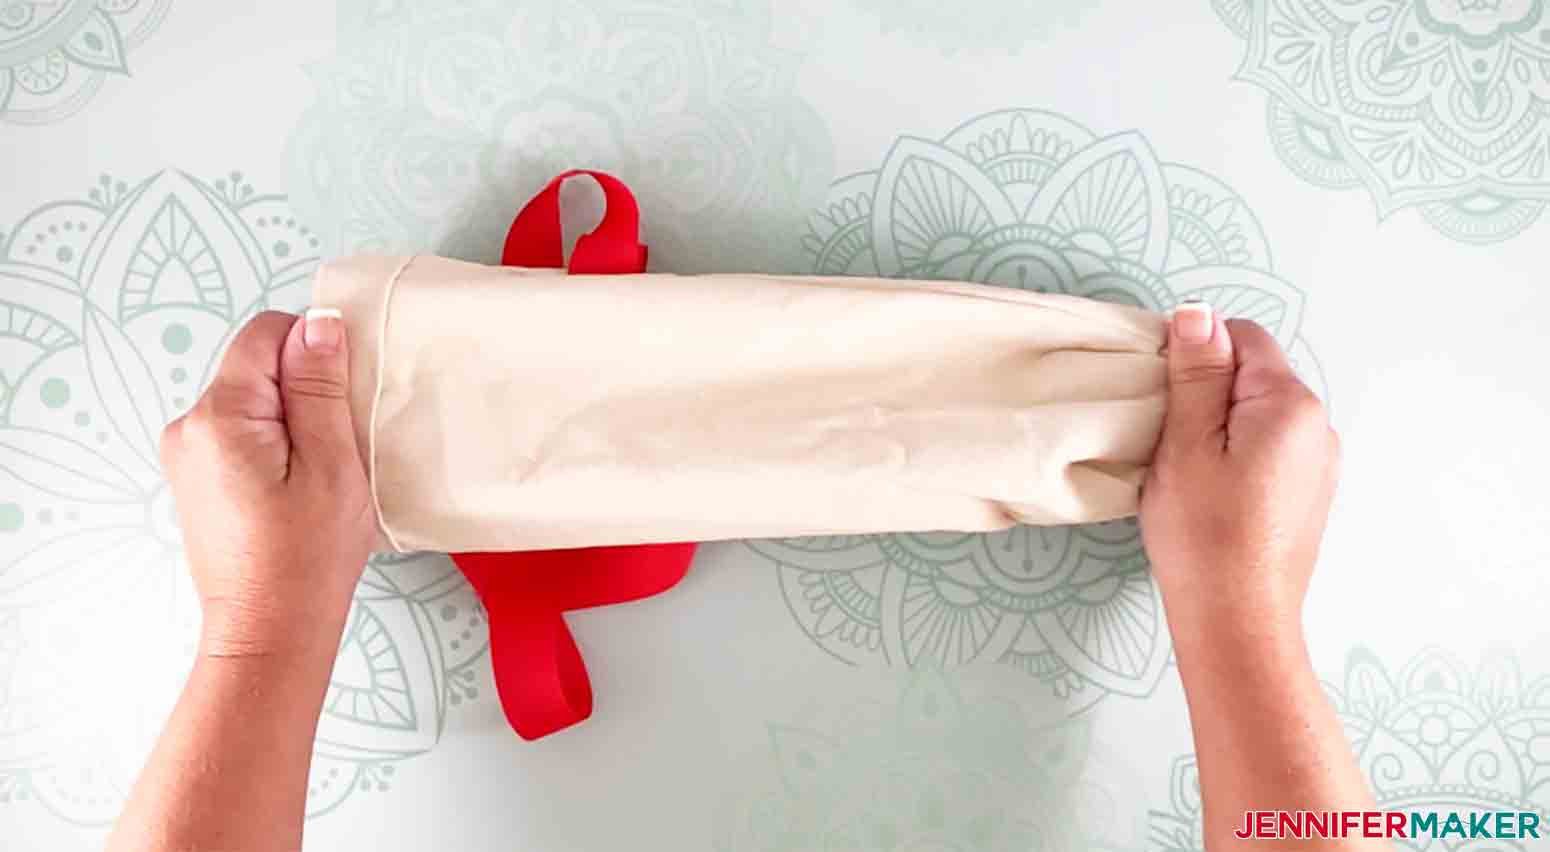
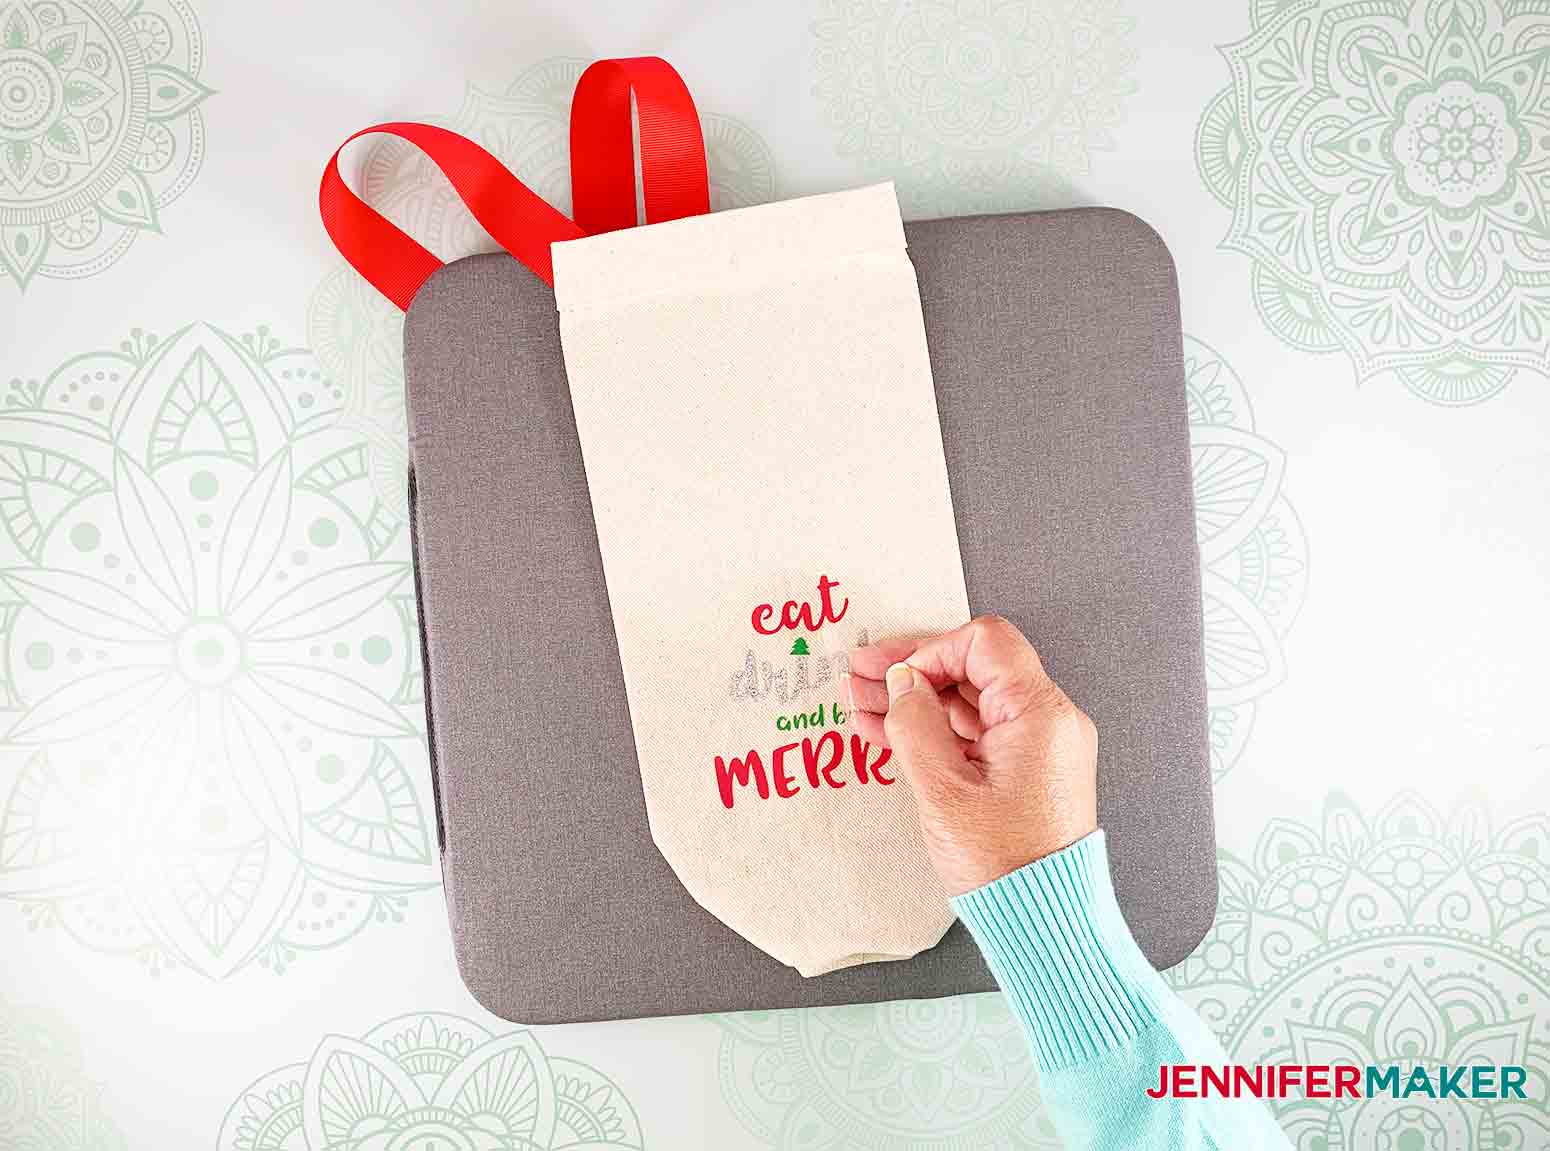
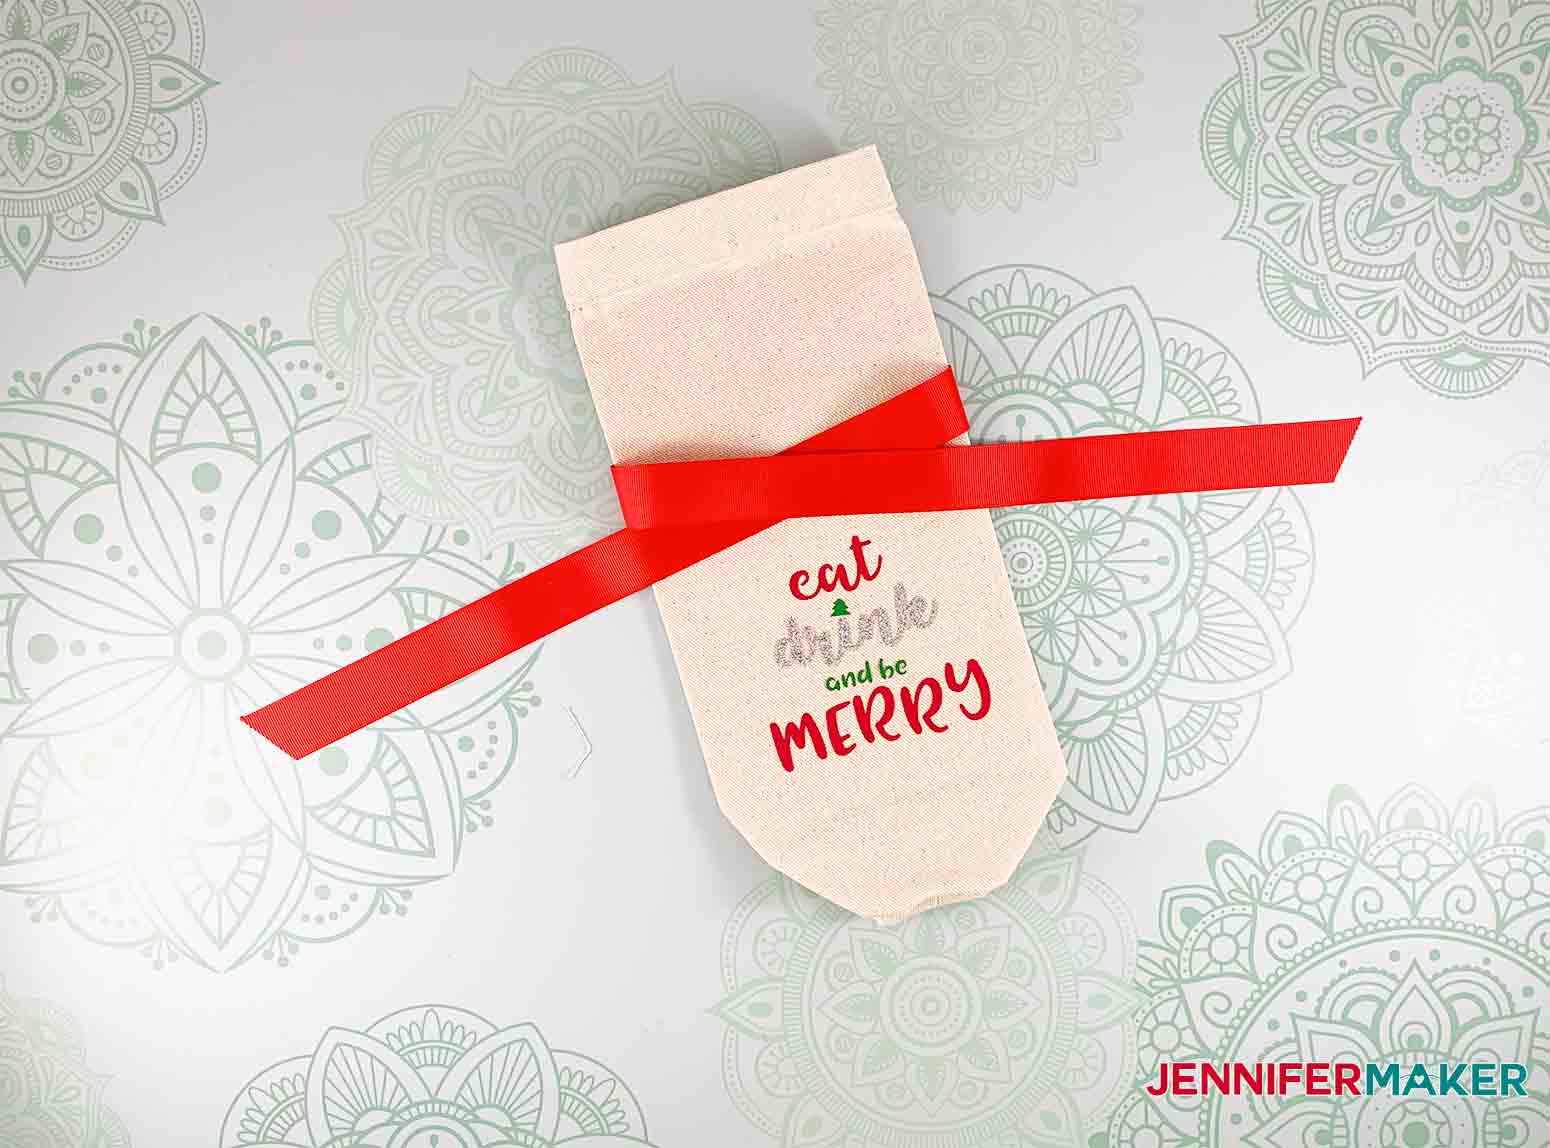
A step-by-step tutorial on how to sew and customize super cute wine gift bags to give as a gift or keep for yourself! My Wine Tote pattern comes in two different formats. You can get a printable PDF for cutting by hand or an SVG cut file for cutting with a cutting machine, like a Cricut Maker. Choose the one you want to download and be sure to unzip it to access the contents. For this project I've included 2 SVG patterns, one with seam allowance markings which works with the fabric pen and one without, use whichever you like. Here's what the printable PDF pattern looks like after you download and print it (this design includes 4 different SVG iron-ons which are optional/see pictures at the bottom of this post): If you want to cut the fabric on your Cricut (Explore or Maker), check out my guide on how to cut fabric with Cricut! Here’s what the SVG cut file for a cutting machine will look like once uploaded to Cricut Design Space: And here's what it looks like when you zoom out. Tip: If you’re not sure how to upload an SVG cut file to Cricut Design Space, watch this helpful video training series I made. If you're on an iPhone or iPad, here's how to download and upload SVG files to the Cricut Design Space app. If you're using the marked file with a fabric pen, here's what you need to do: First, Ungroup everything. Next, click on "Draw" under the Layers panel on the right side of the screen. Then click where you see a "question mark" next to the word "Draw" at the top of the screen. Now click on the arrow pointing down next to "Fine Point".. And scroll down and choose "Marker" Then select "Blue (washable fabric)". Now it's time to pick the SVG saying for your tote. For this tutorial, I'm going to use the "Eat Drink and be Merry" SVG. To hide the other SVGs, simply click on the eyeball icon next to each one. This will hide the layers so they won't cut. And here's what you should end up with, now click "Make It" Note: If you don't want to use the SVG that includes the marked pattern with the fabric pen, choose the "unmarked" pattern SVG. Just make sure when you sew to leave a seam allowance of 1/4" along the side and bottom. Here's what everything looks like on the next screen. First, click "OK" at the top to continue with a larger mat. This will be the pink mat used for the fabric. Next, select "Mirror" for all three mats with the words since this is an iron-on. Now, here's a great time-saving tip! Instead of using three separate mats to cut the vinyl, you can move all the cuts to the same mat and only cut once! Here's how: First, go to mat 3 and click on the design. Click on the 3 blue dots on the top left and select "move object". On the next screen, click on the first mat and confirm. The object you moved will be on top of the other design on mat 1 so click and drag the new object to the right top corner. Now on the left click on mat 4. Once again, click on "Move Object". On the next screen click on the first mat and confirm. And move that design down to the bottom left. And click continue. Here's how to place the vinyl on the mat. Make sure it's shiny-side down. Then click continue and choose your material and pressure setting. I used both Everyday Iron-on vinyl and Glitter Iron-on so I selected "Glitter Iron-on" and "More" pressure. Now make sure you have your "fine point blade" selected and loaded in clamp A, load your mat and hit the "C" button to cut. Now it's time to cut the fabric. First, you'll need to change your material in Design Space. Make sure the second mat is selected and click on the arrow down button on the right. On the next screen type "duck" into the search bar. Then select "duck cloth". And choose "more" pressure. Make sure you have the right tools in your machine before loading the mat. You want the blue fabric pen in clamp A and the Rotary blade in clamp B. Now load your fabric mat in your Cricut Maker to cut. After all the cuts are complete, remove all of your materials from the mats, weed your vinyl, and set aside. Now the fun part...time to sew! Here's what the cut fabric will look like if you used the fabric pen to mark the 1/4" seam allowance. First, fold the top down 1/4", then fold again about 1" and pin in place. You can iron this as well to get a crisp crease, then sew along the bottom of the fold. Now add your ribbon. I chose red, but you can choose whatever you like. My ribbon is approximately 28" long and an inch wide. Pinch it in half, then pin it in place 3" down from the top like this. Pin the other end down as well to keep it out of the way during sewing. Now fold your fabric in half so you can see the markings from the fabric pen and sew along the seam allowance which is 1/4" along the side and bottom. Do not sew the bottom corner cutouts. To create the bottom of the tote pinch the bottom cutouts together like this and sew each side together about 1/4" from the seam. Now reach inside and pull your wine tote right side out. Finally, use a Cricut Easy Press or iron to iron on the vinyl. Since I chose the "Eat Drink and be Merry" multi-colored SVG I will iron on one layer of vinyl at a time. Here's a blog post all about "How to Layer Iron-On Vinyl". You'll want to follow the Cricut heat guide for your specific material. You did it! So cute, right? Wine Tote Pattern measures 11.5" x 14.5" SVGs & Fonts used in this project Cheers: 1.623: x 5.5" font: Oh juliya script Eat, Drink and be Merry: 3.5" x 3.4385" Tingler Duo Mama Juice: 3.7942" x 3.5137" Madison's Tail Regular It's the Most Wonderful WINE of the year: 3.4992" x 5" Tingler Duo & PN Magnolia All fonts are from Fontbundles.net Thanks to the JenniferMaker Design Fairy Team, specifically Design Fairy Debbie, for helping me design and sew these Festive Holiday Wine Totes. As an Amazon Associate and member of other affiliate programs, I earn from qualifying purchases.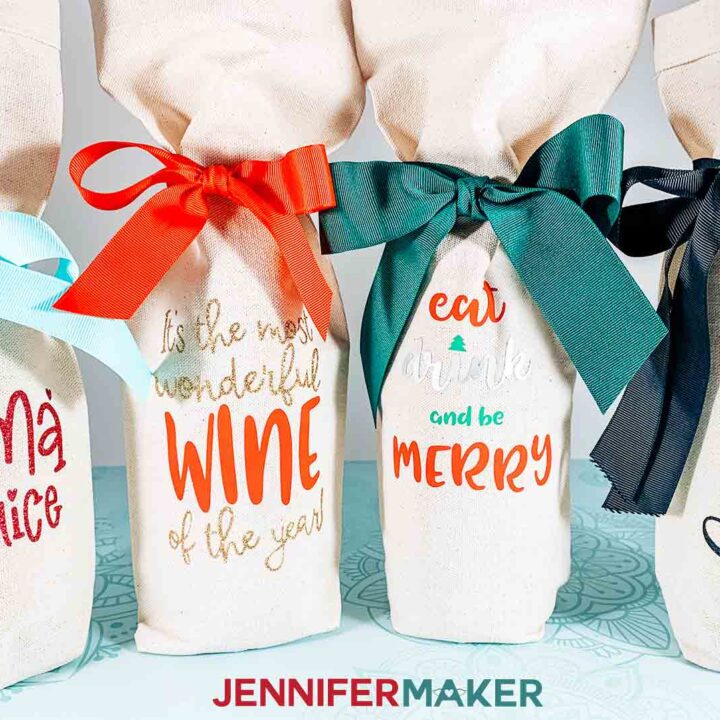
Wine Gift Bags
Materials
Tools
Instructions
Step 1: Get the Pattern
Step 2: Prepare to Cut in Design Space

Step 3: Cut out your Wine Gift Bags and Vinyl


Step 4: Assemble Your Design
 Then fold the fabric in half and press lengthwise, you can use an iron or Cricut Easy Press for this.
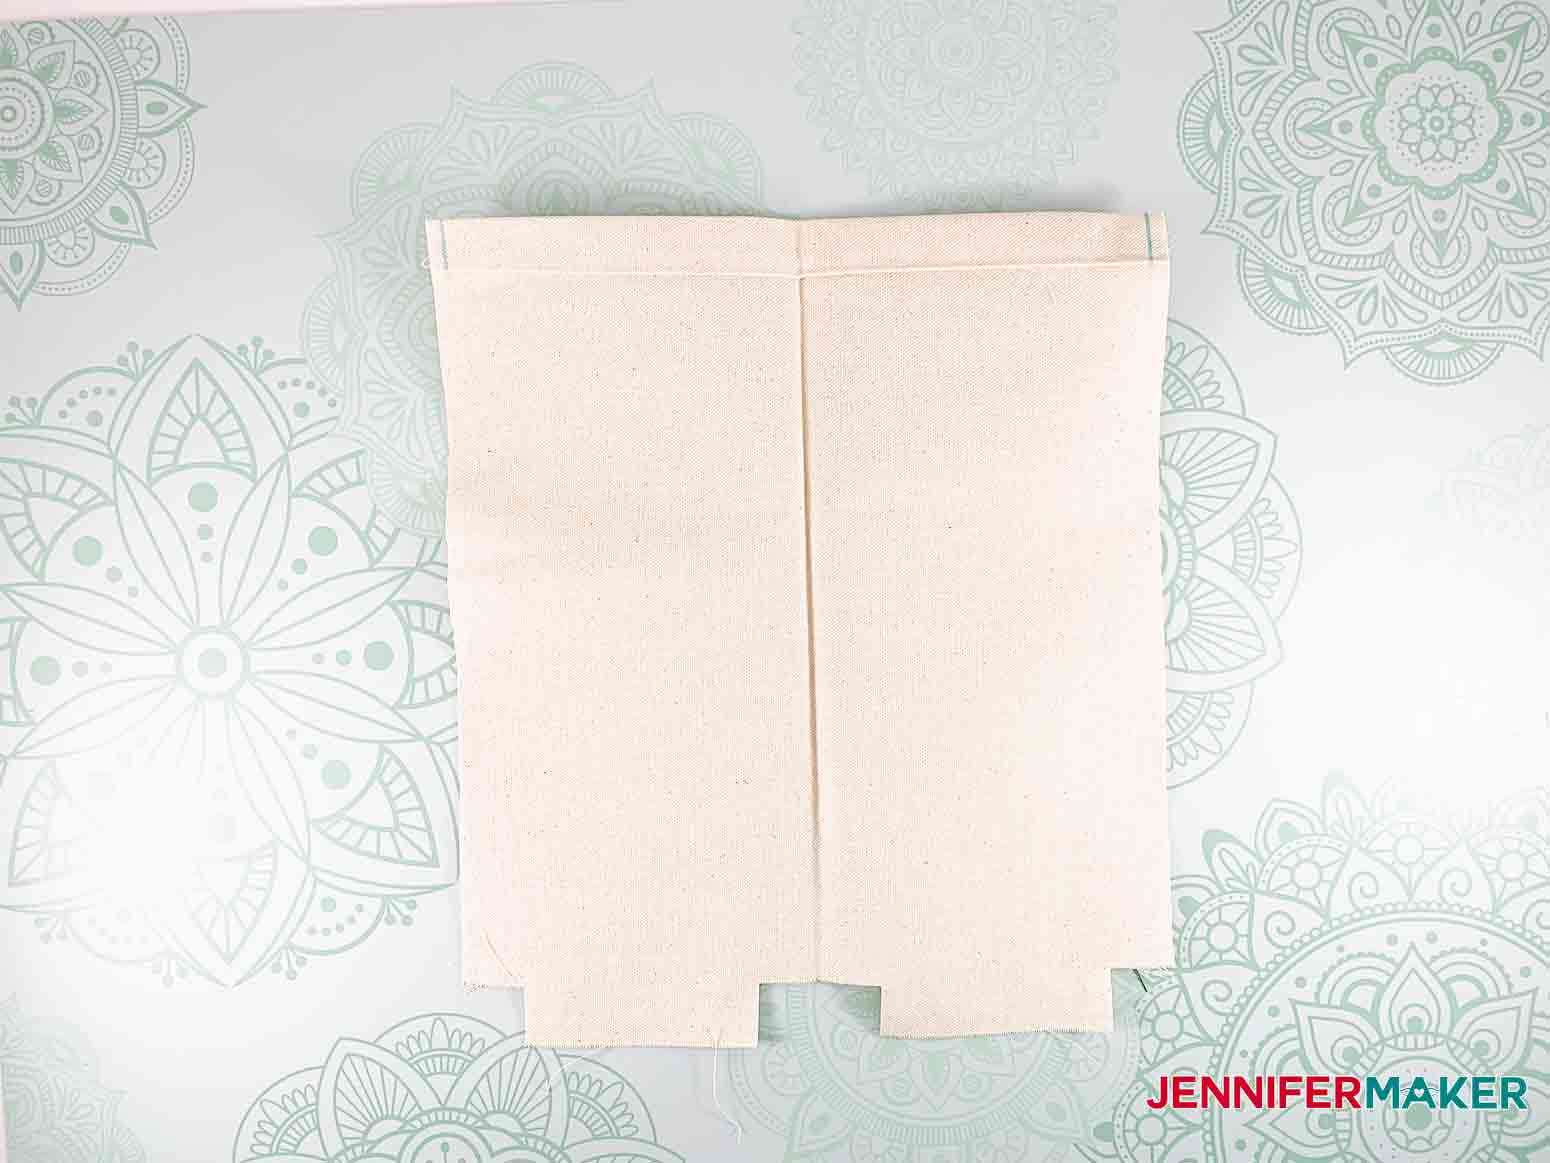

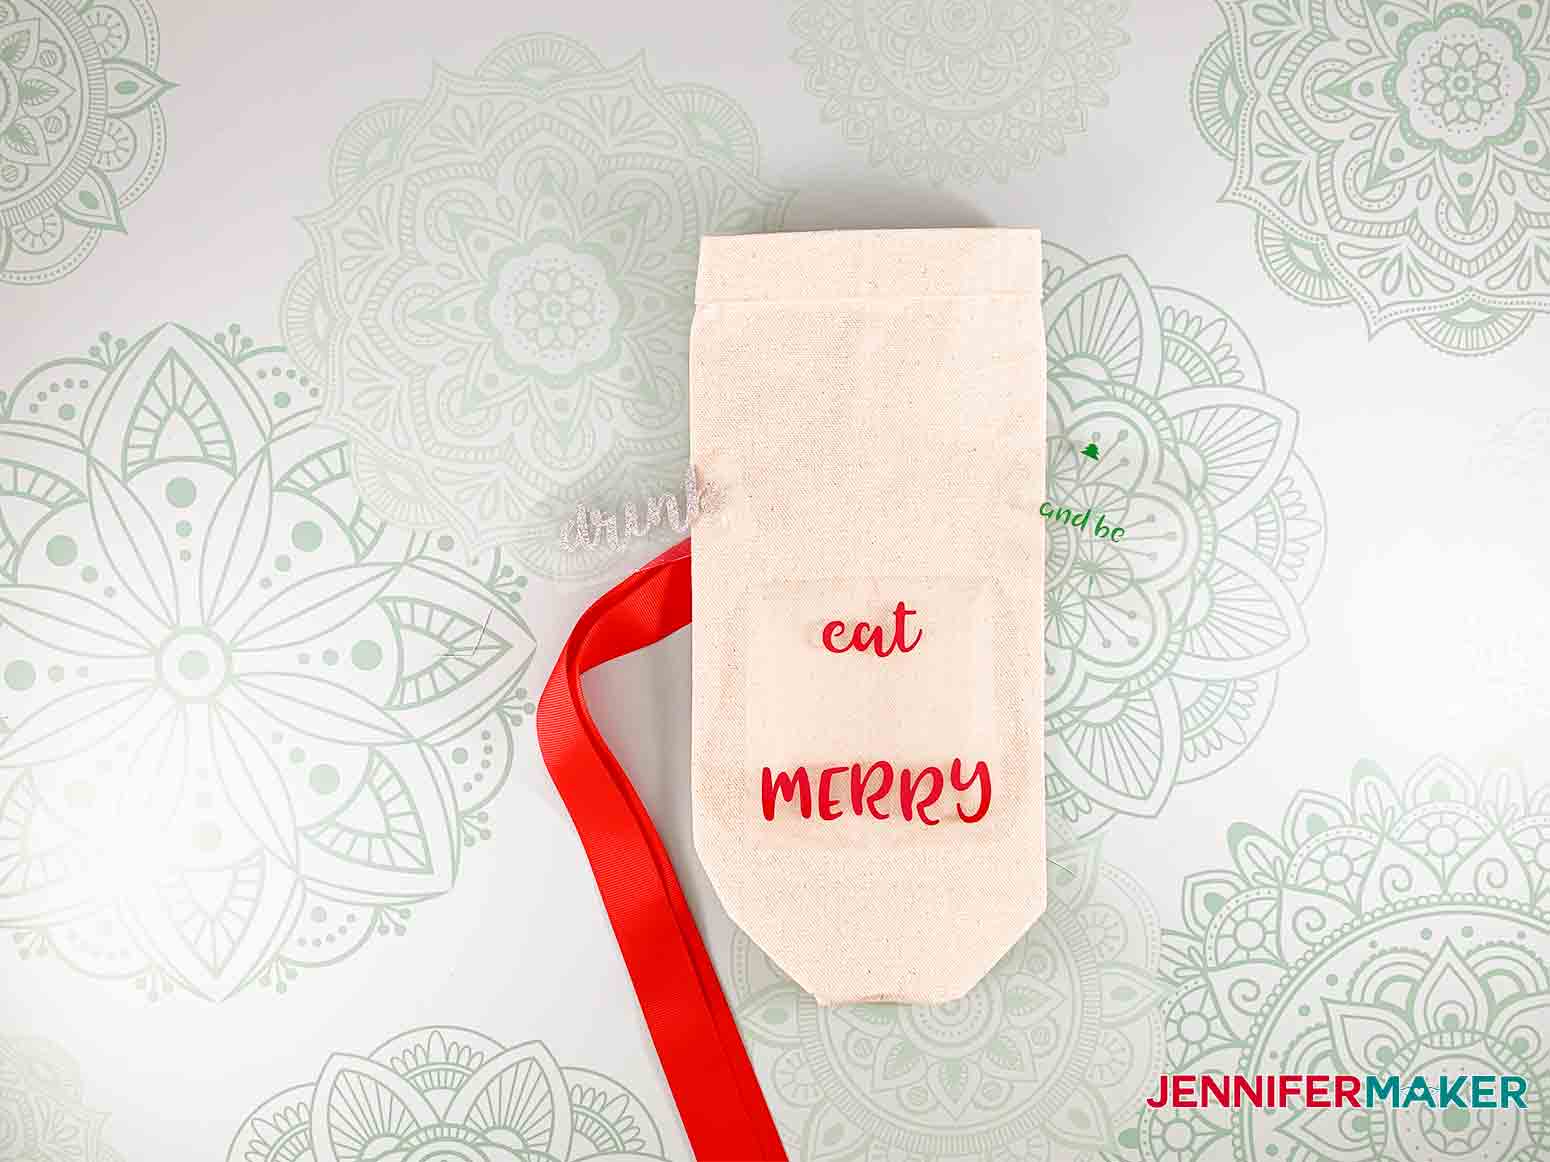
Step 5: Show it off!
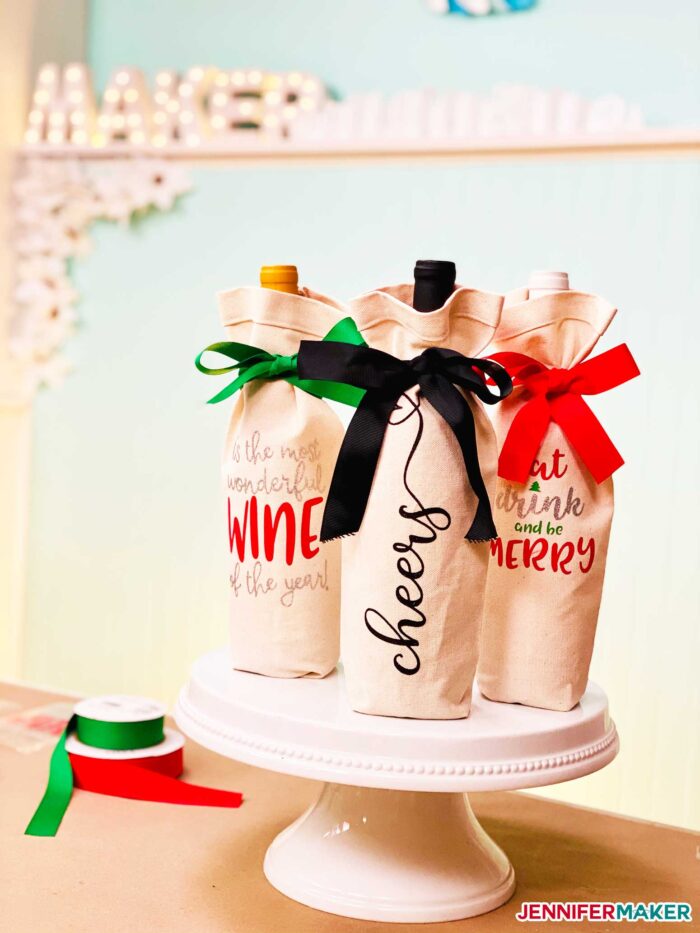
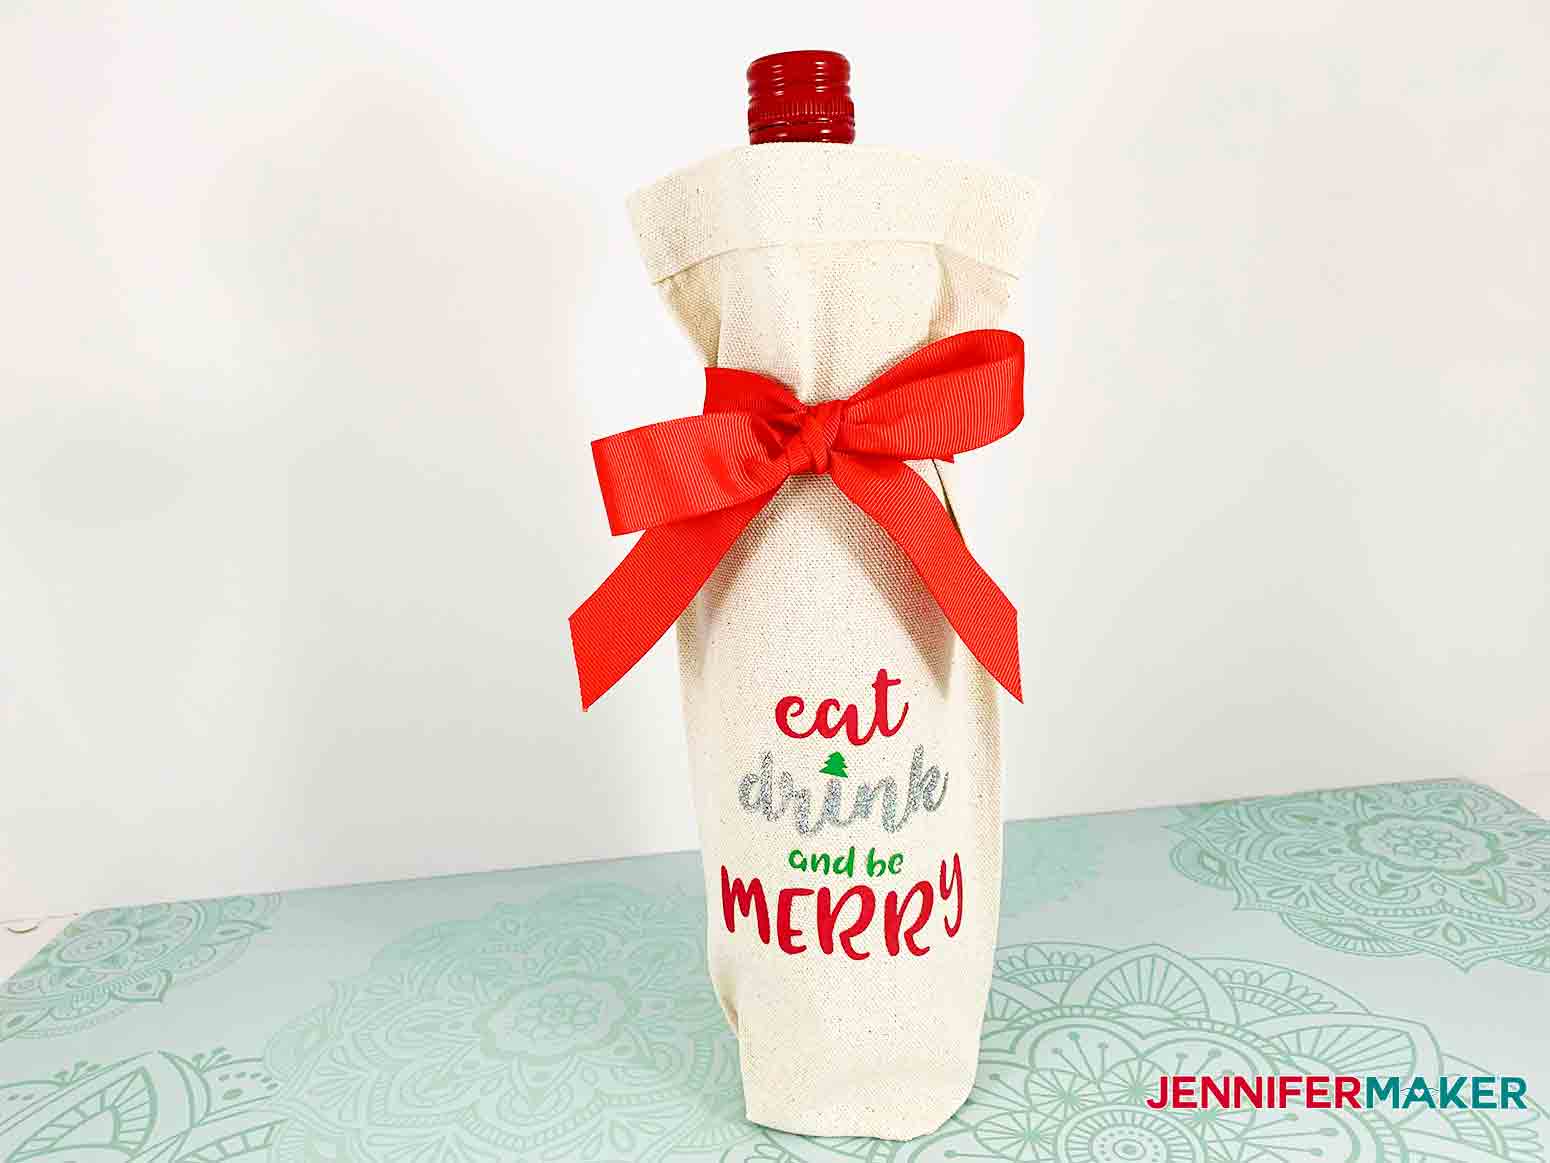 And it really wasn't that difficult. These adorable wine totes are the perfect pairing for a great bottle of wine and make a great gift for any occasion! Cheers!
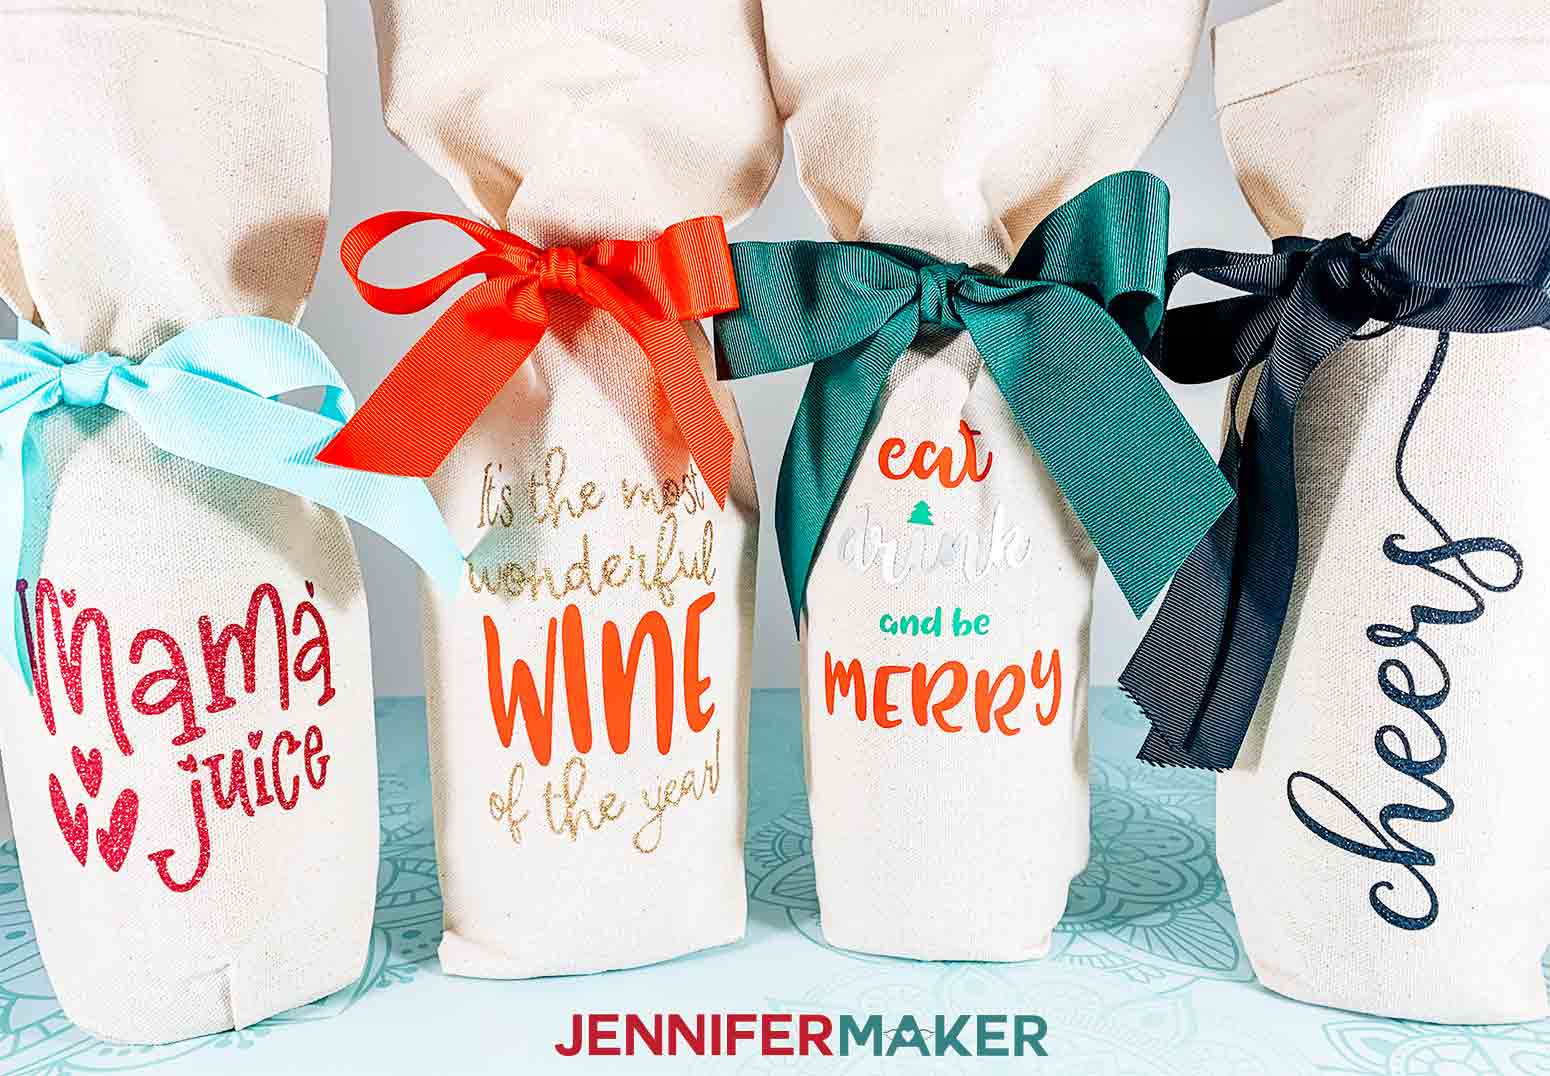
Notes
Recommended Products
Answers to Your Questions About The Wine Gift Bags
Q: Can you use fabric glue instead?
The primary concern would be the weight of the wine bottles. Fabric glue holds together fabric really well, but isn’t manufactured to hold a heavy weight like that of a wine bottle. I do think you can use a generous amount of a quality glue and it should be okay, but make sure to support the bottle with your hand when you pick it up, just to make sure!
Q: What other fabrics can you use?
Any strong material like upholstery fabric, denim, or outdoor fabric are just a few you can use to make these great wine bags!
Get my free printable pattern and SVG cut files to make Wine Gift Bags
I’d love to see your wine gift bags and all of the cute things I know you’ll put on them!! Please share a photo in our Facebook group or tag me on social media with #jennifermaker.
See all of the projects, tutorials, and free designs in The Great Maker 25-Day Gift-Away Challenge!
Love,

Want to remember this? Save this Wine Gift Bags tutorial to your favorite Pinterest Board!