
Hands up if your craft supplies are overtaking your house! -waves hand frantically- When I began working on this blog, my craft supplies were EVERYWHERE. I decided to re-do the other side of my office into a craft room (see my plans!), so I had been gathering things into boxes and dumping them in my office. The problem? It’s so hard to find things. I need to get better organized. I tackled one thing — my markers, pens, pencils, paint brushes, and scissors. I use these items often, so I needed a handy way to organize them. Then I remember I’d been saving paper towel cardboard rolls. All I needed now was a box, which I happened to have from my sister who gave it to me at Christmas. Voila — everything I needed to create a DIY craft organizer!
DIY Craft Organizer Materials
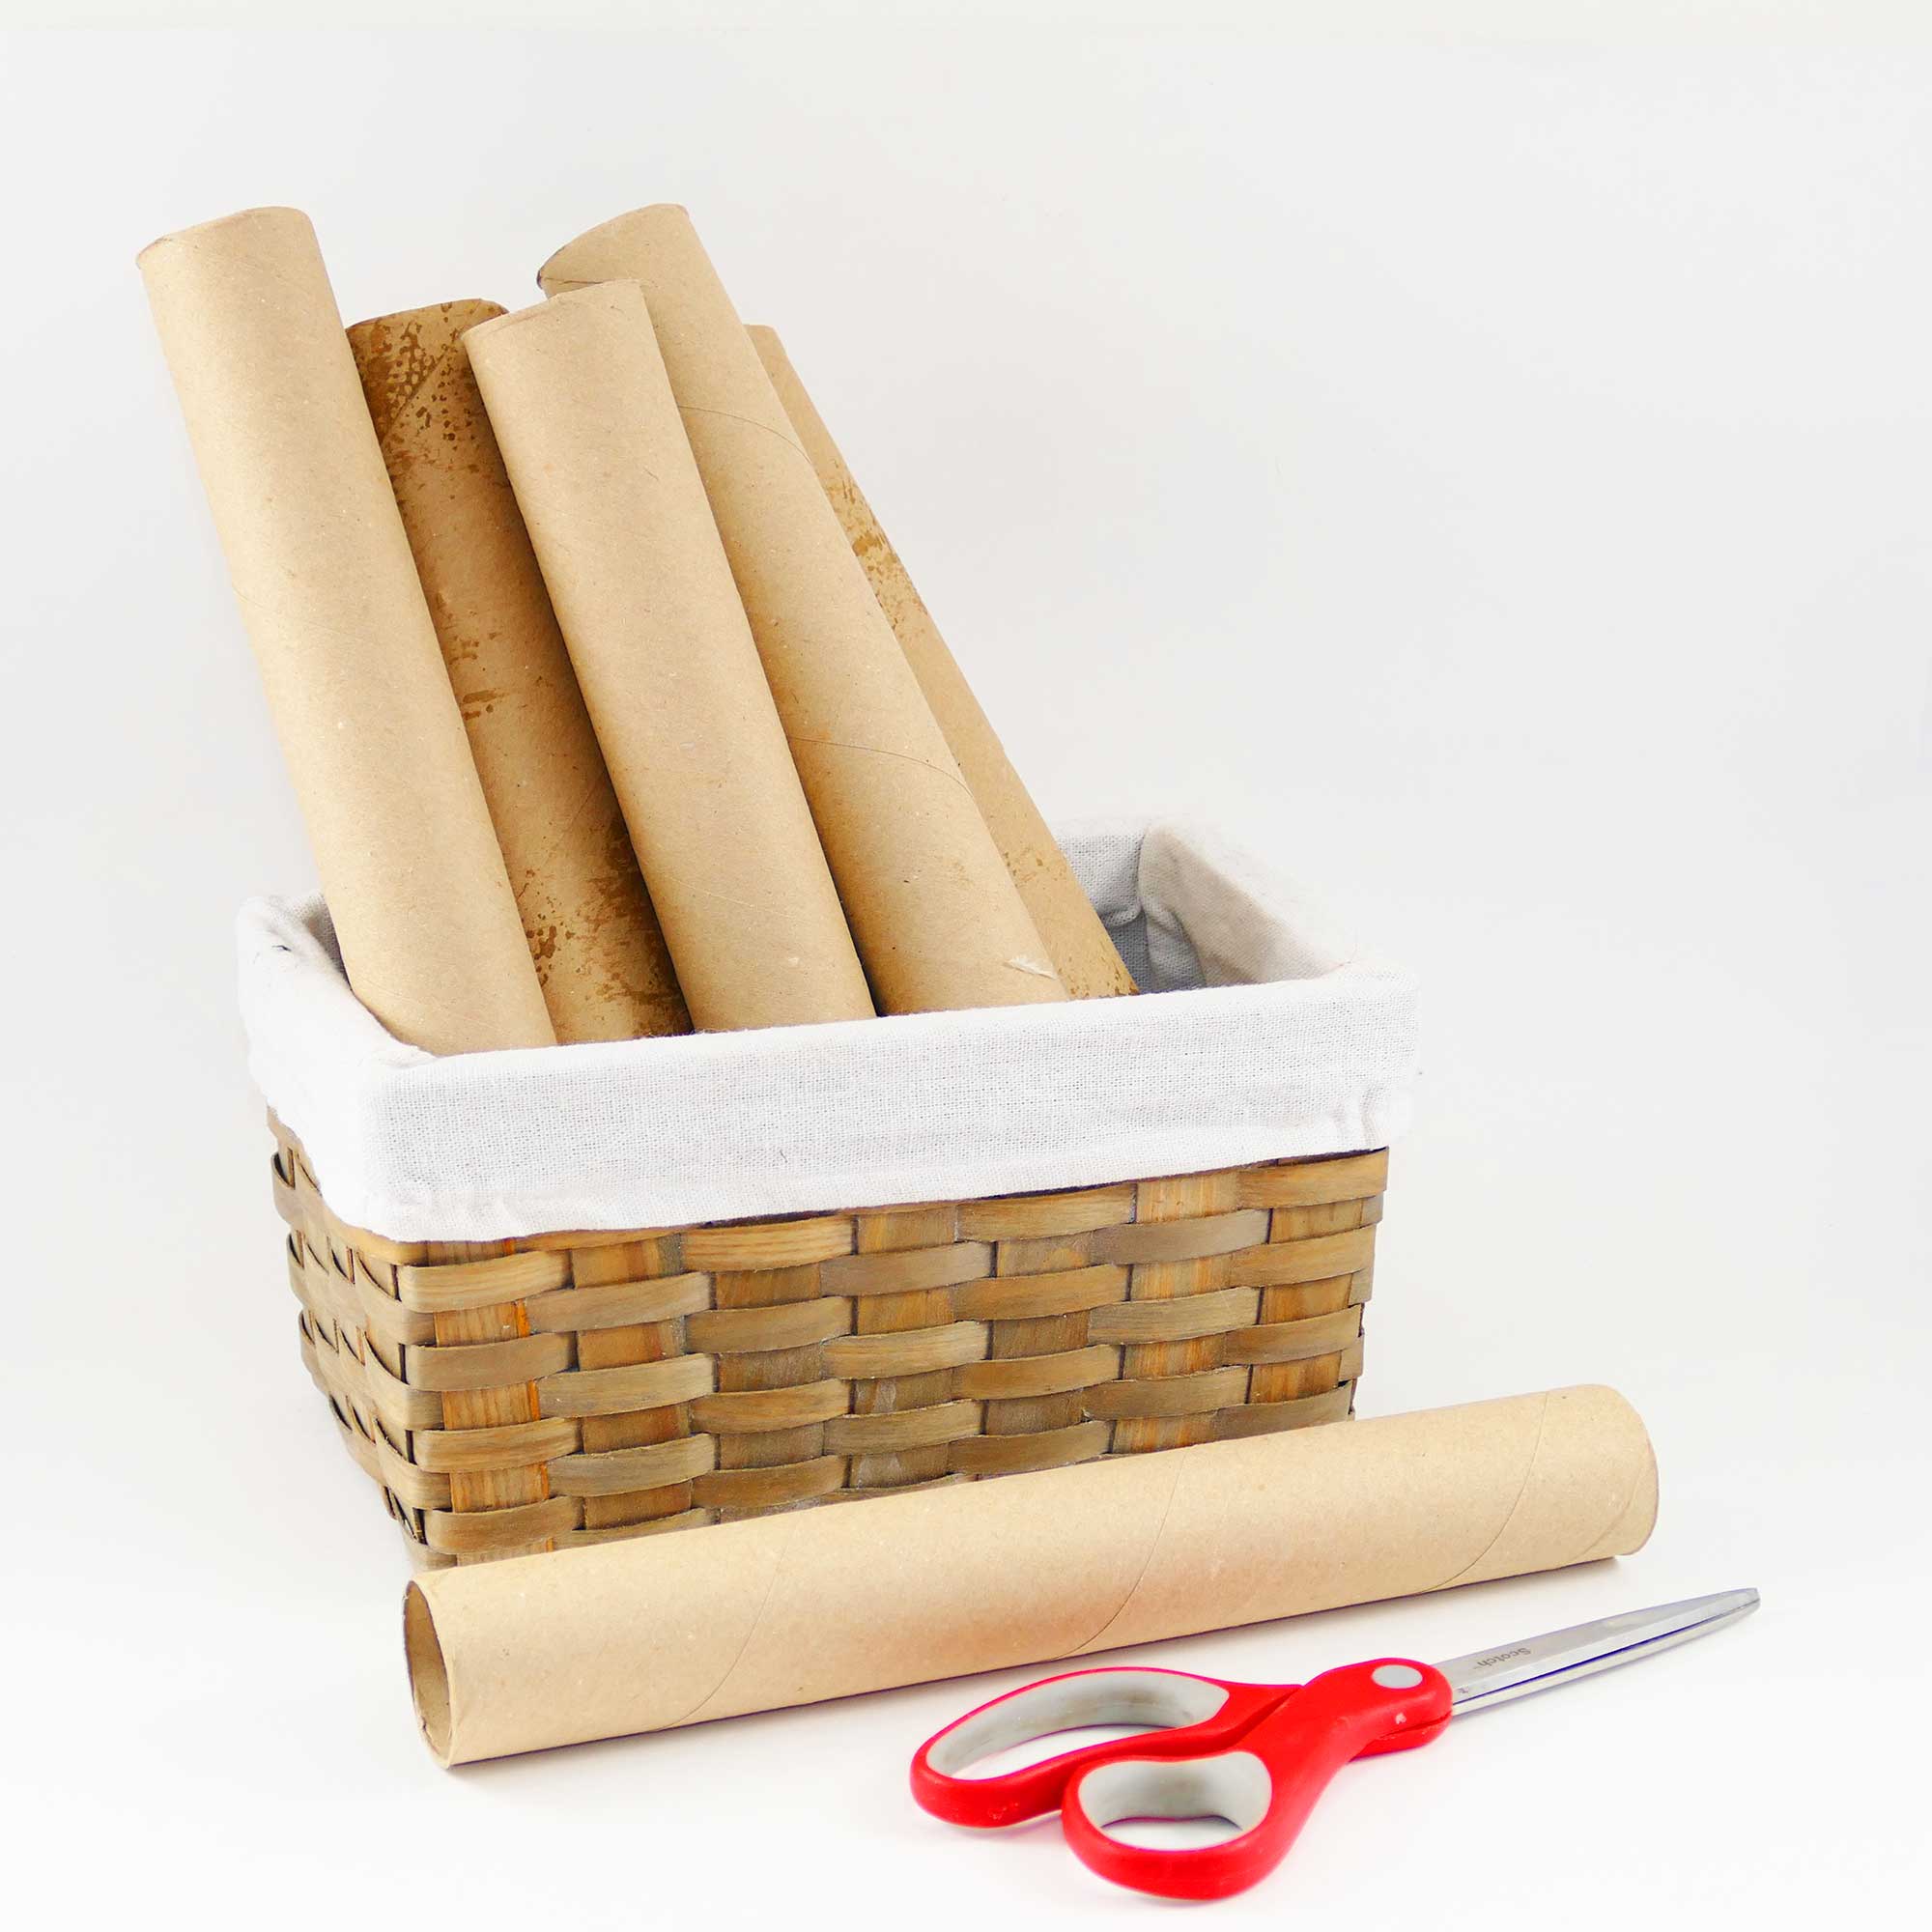
This is so easy, guys. Here’s what you need:
- A basket or box. I happened to have a pretty one on hand, but a shoe box would also work great. You want your box to be about 4-5″ high.
- Six* paper towel cardboard tubes (you know, the things you usually just recycle)
- Scissors
* If you have a larger box, you may need more tubes.
Yes, that’s it! I know, so easy, right?
DIY Craft Organizer Step-by-Step Tutorial
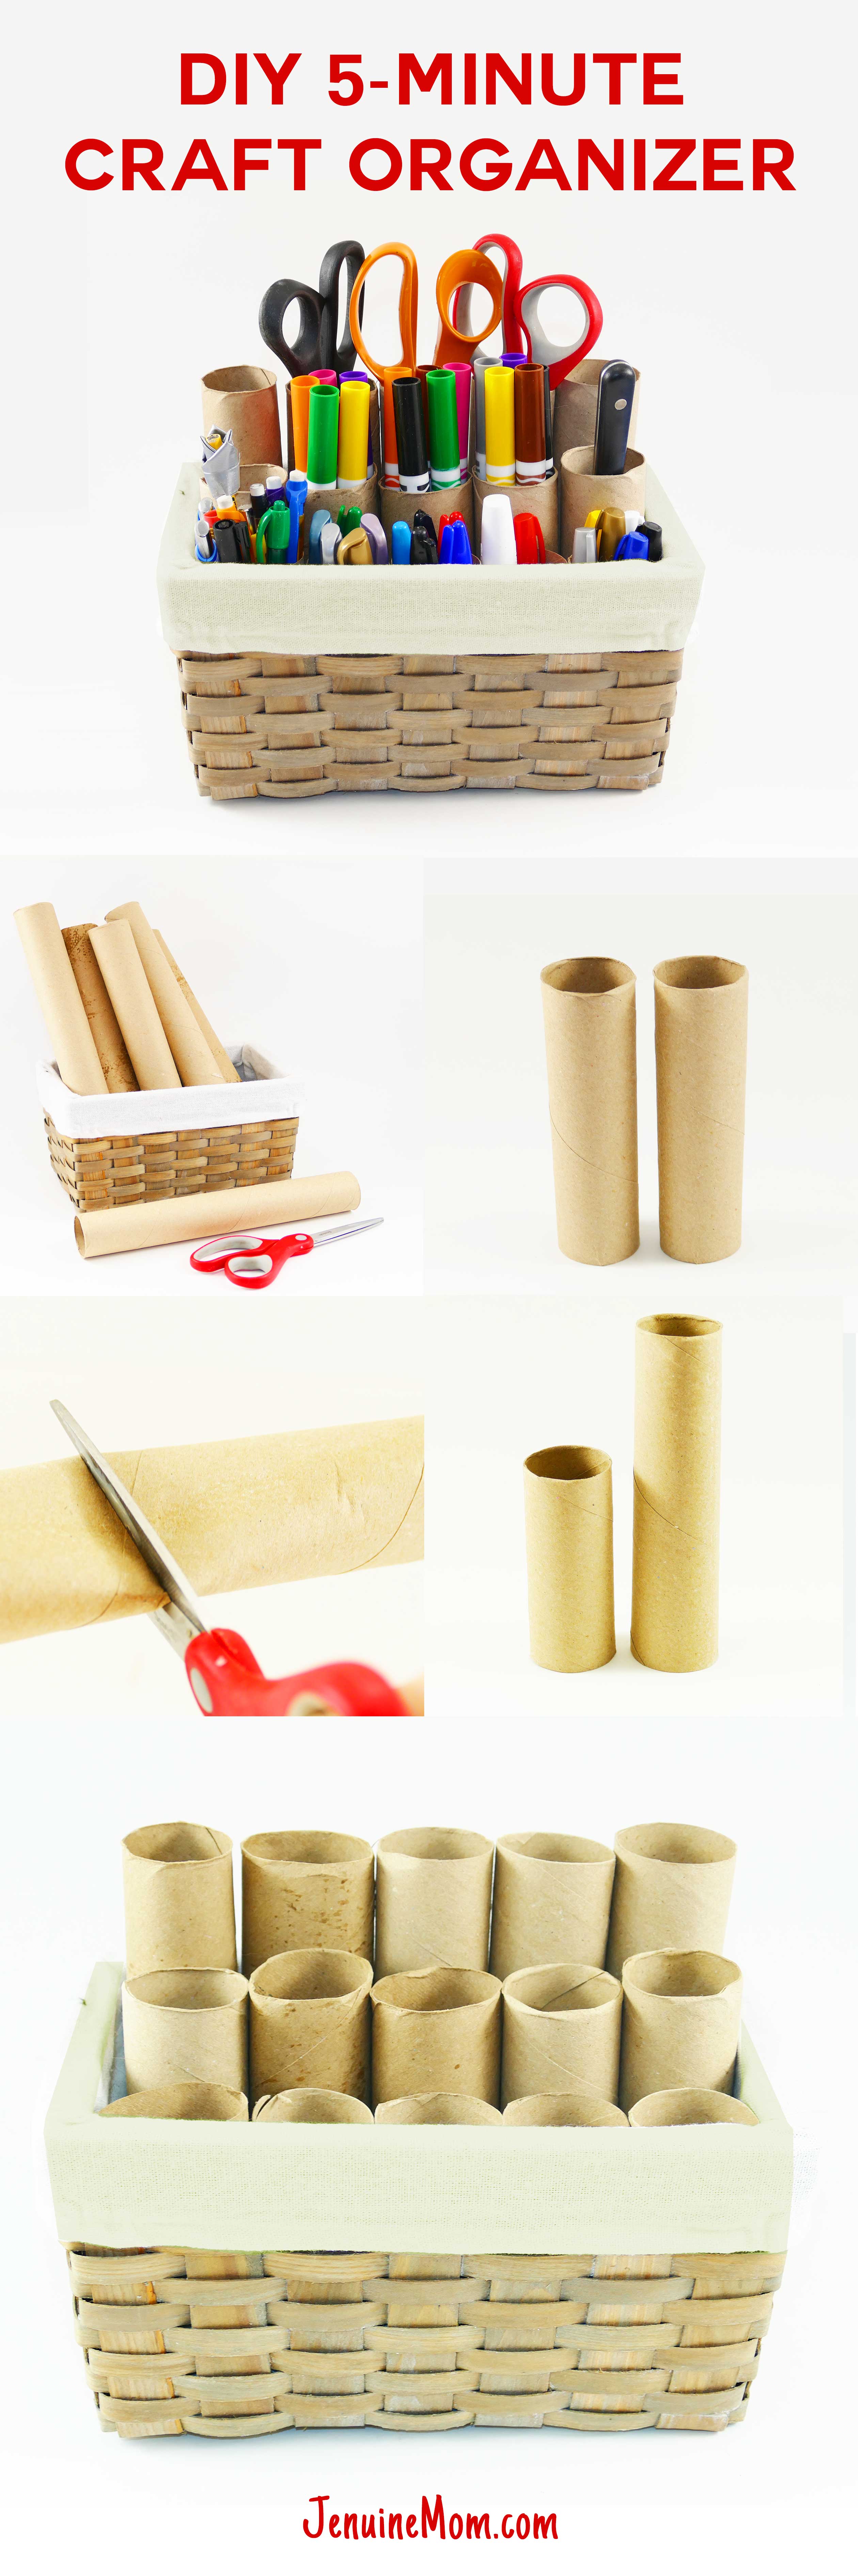
Step 1. Cut three of your tubes exactly in half to make six tubes. When you cut, try to cut the entire tube in one fell swoop, as it makes for smoother cuts.
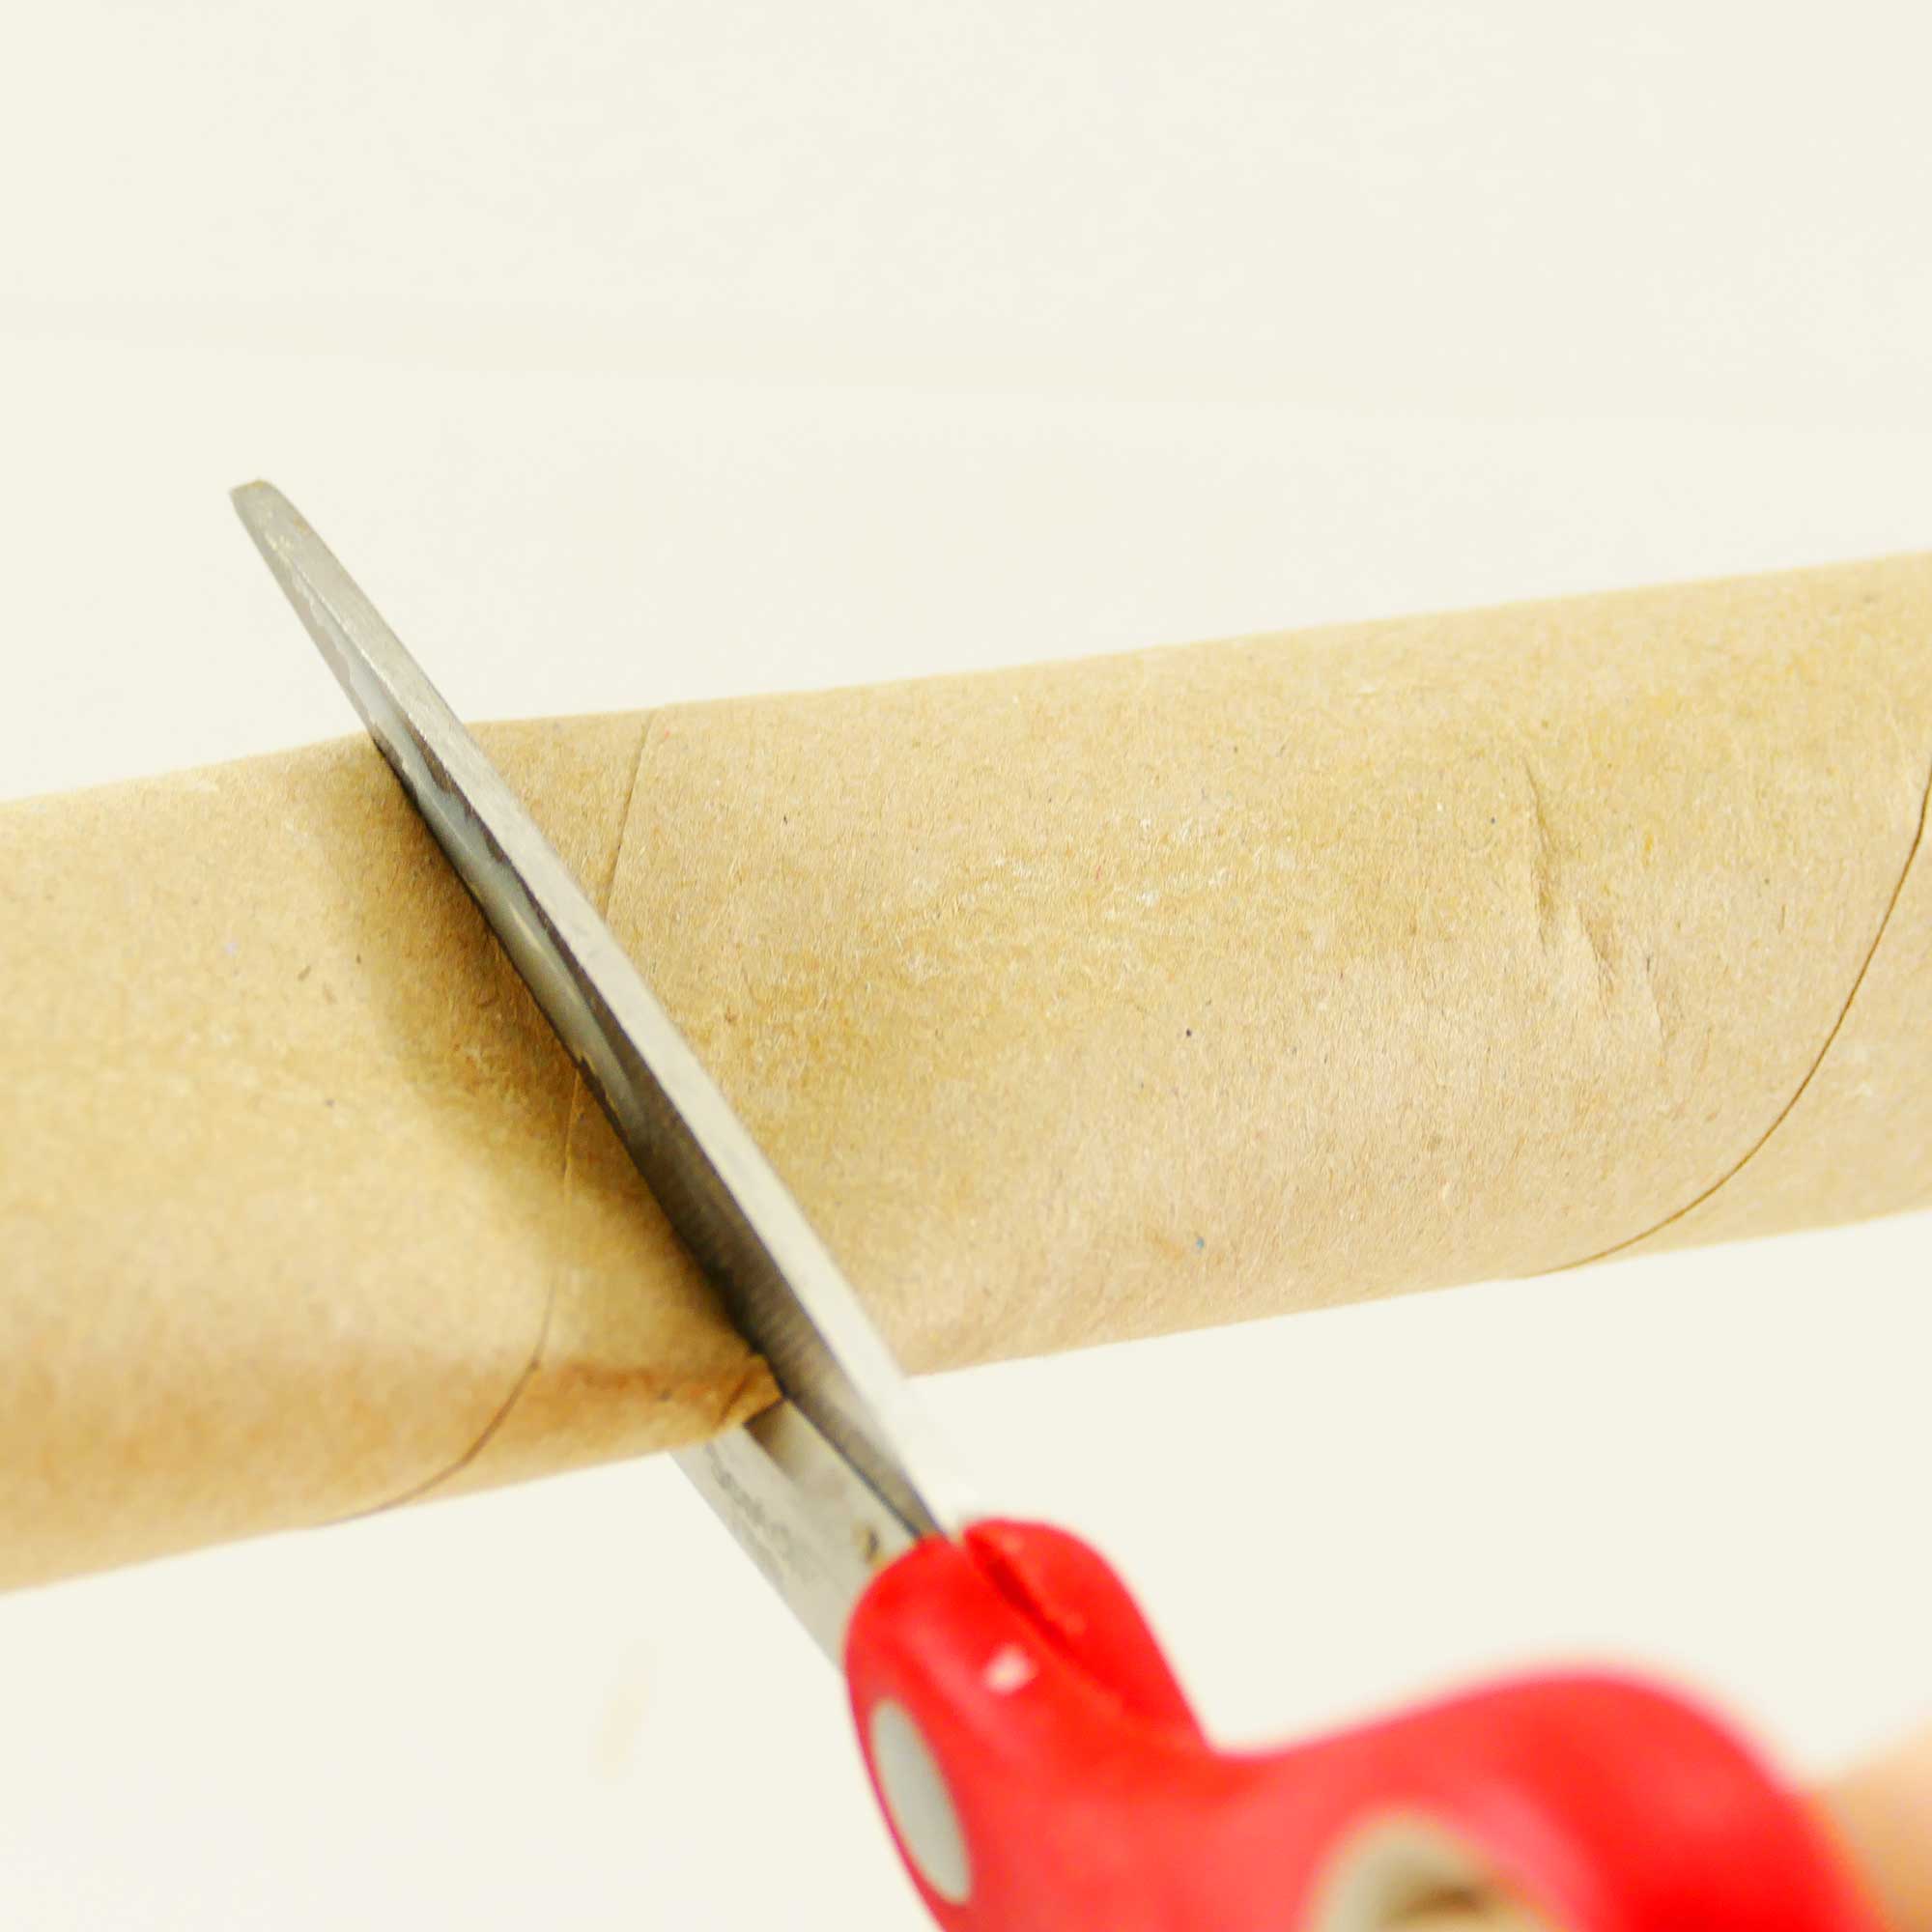
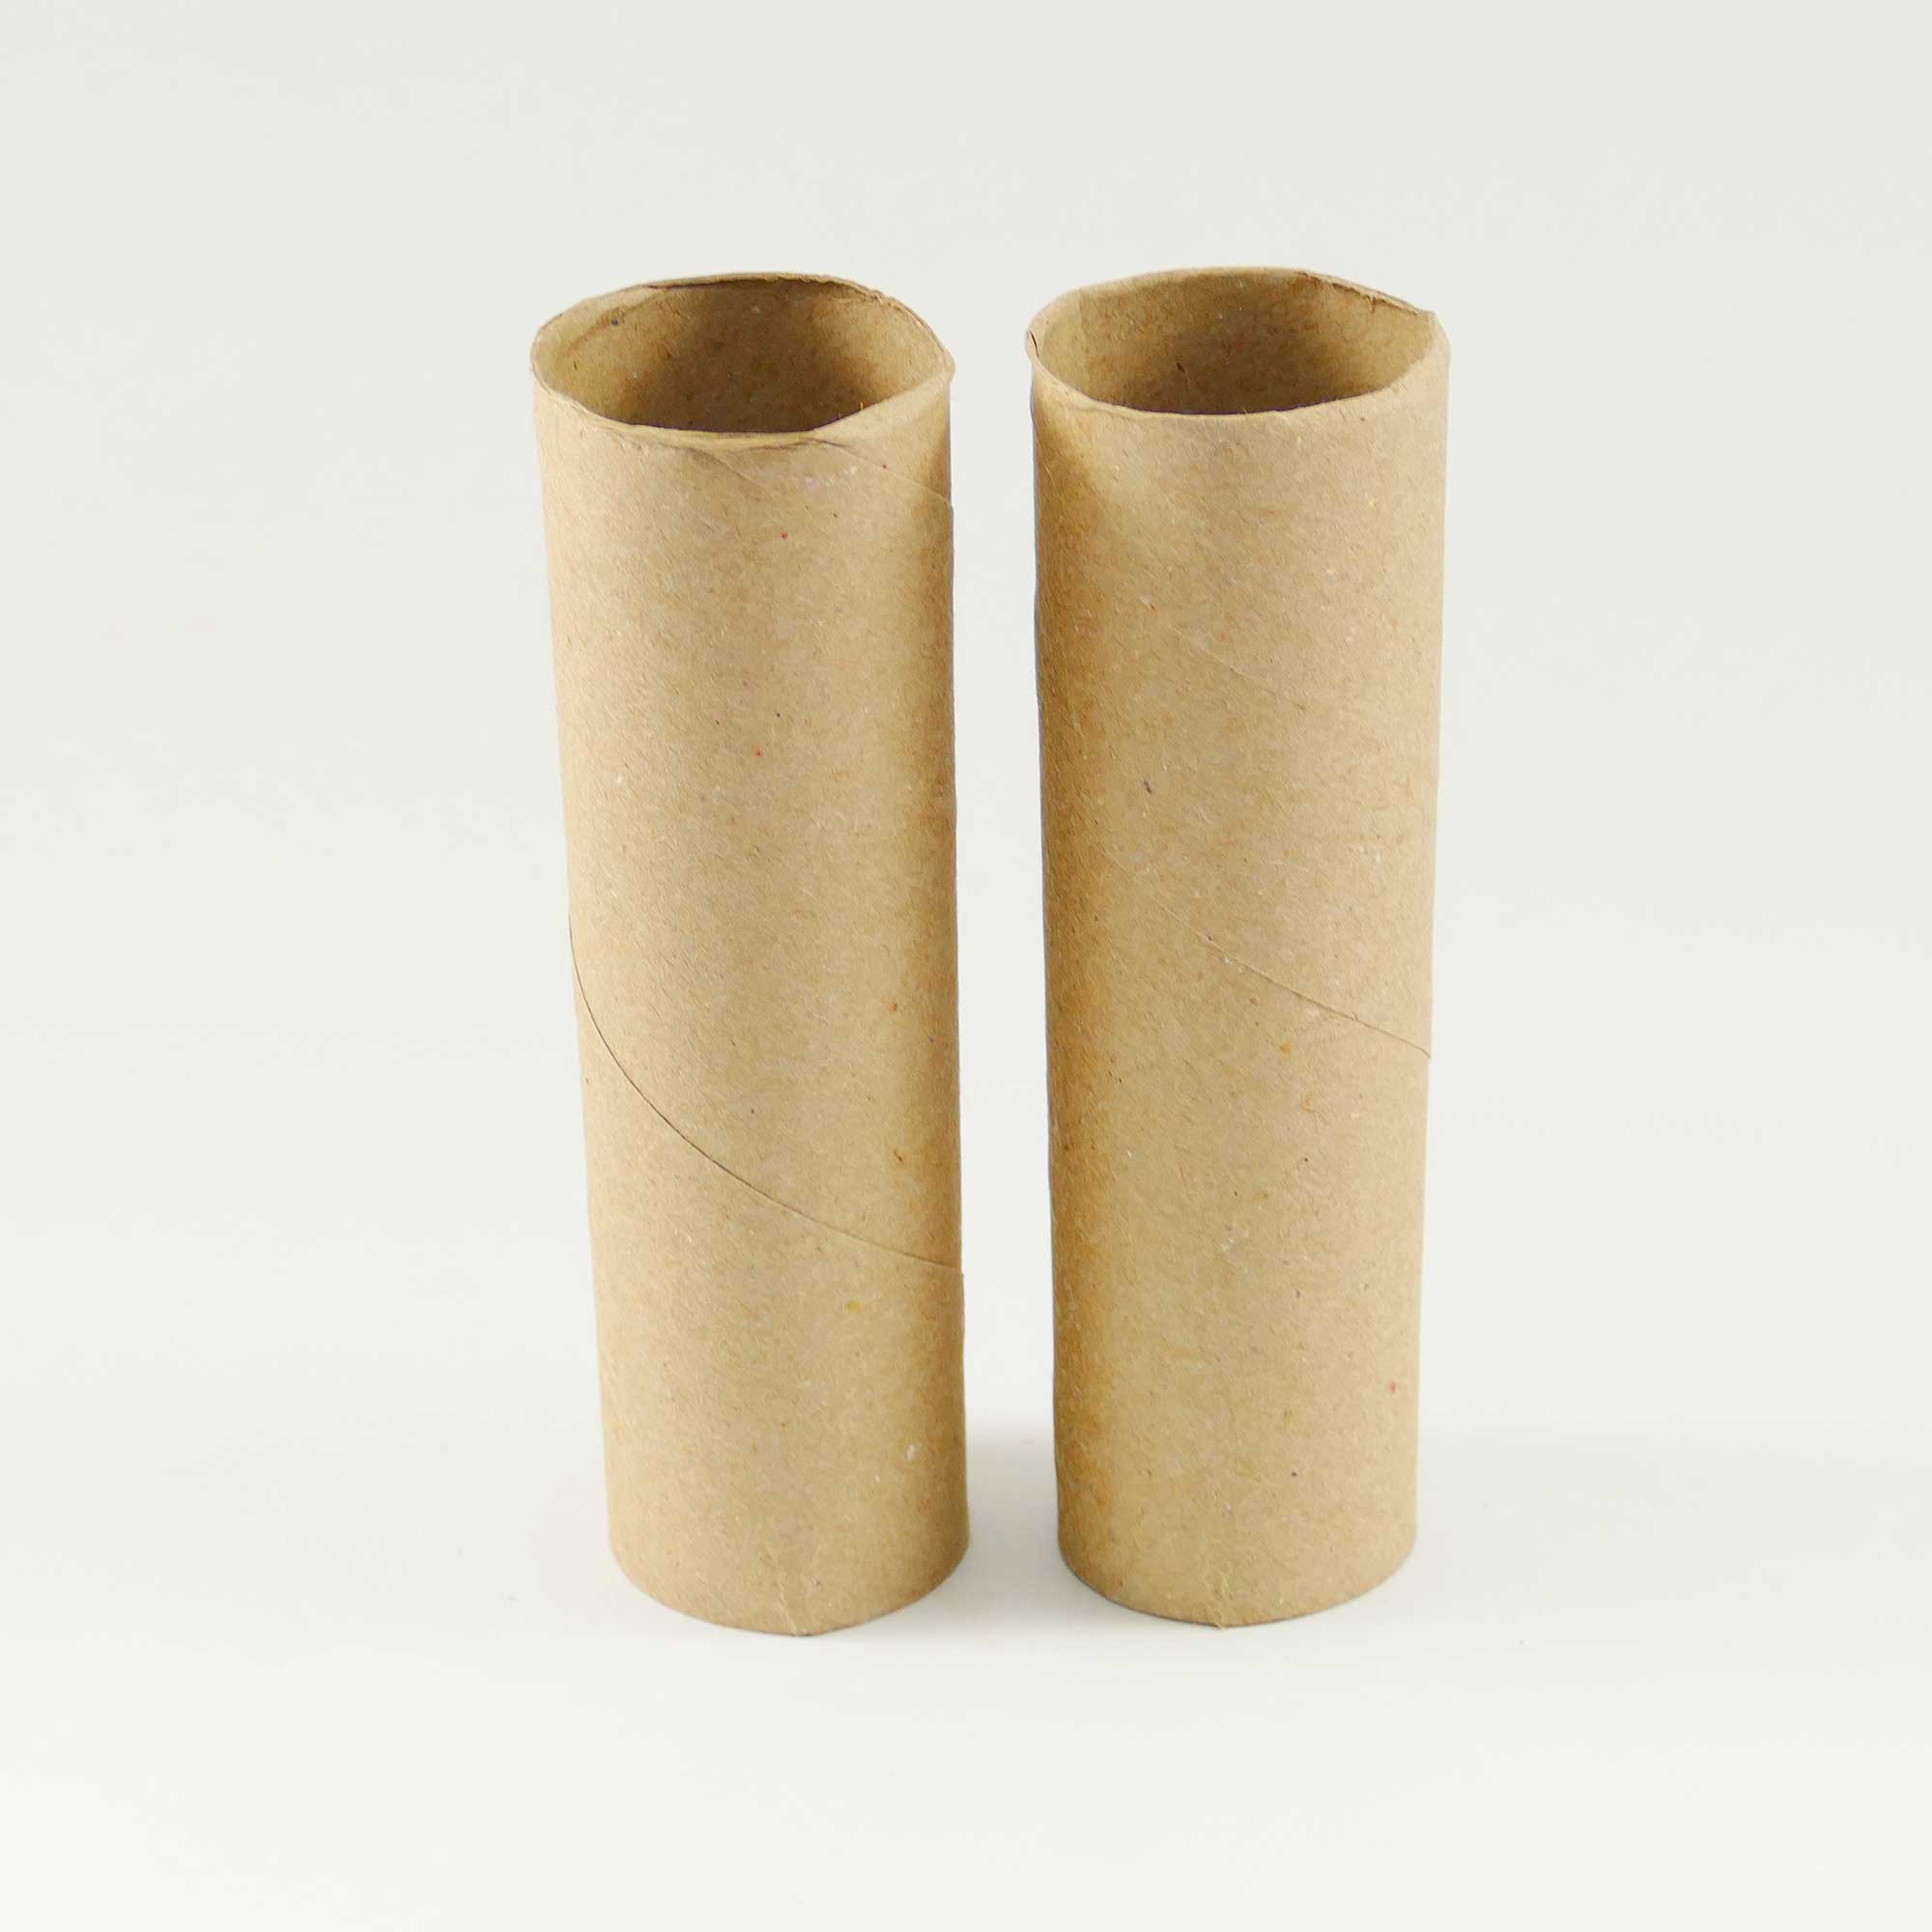
Step 2. Cut the other three tubes so that one is longer than the other by about 2 inches. Once you’ve cut the first tube, use it as a guide for the other two tubes so they’re all the same size.

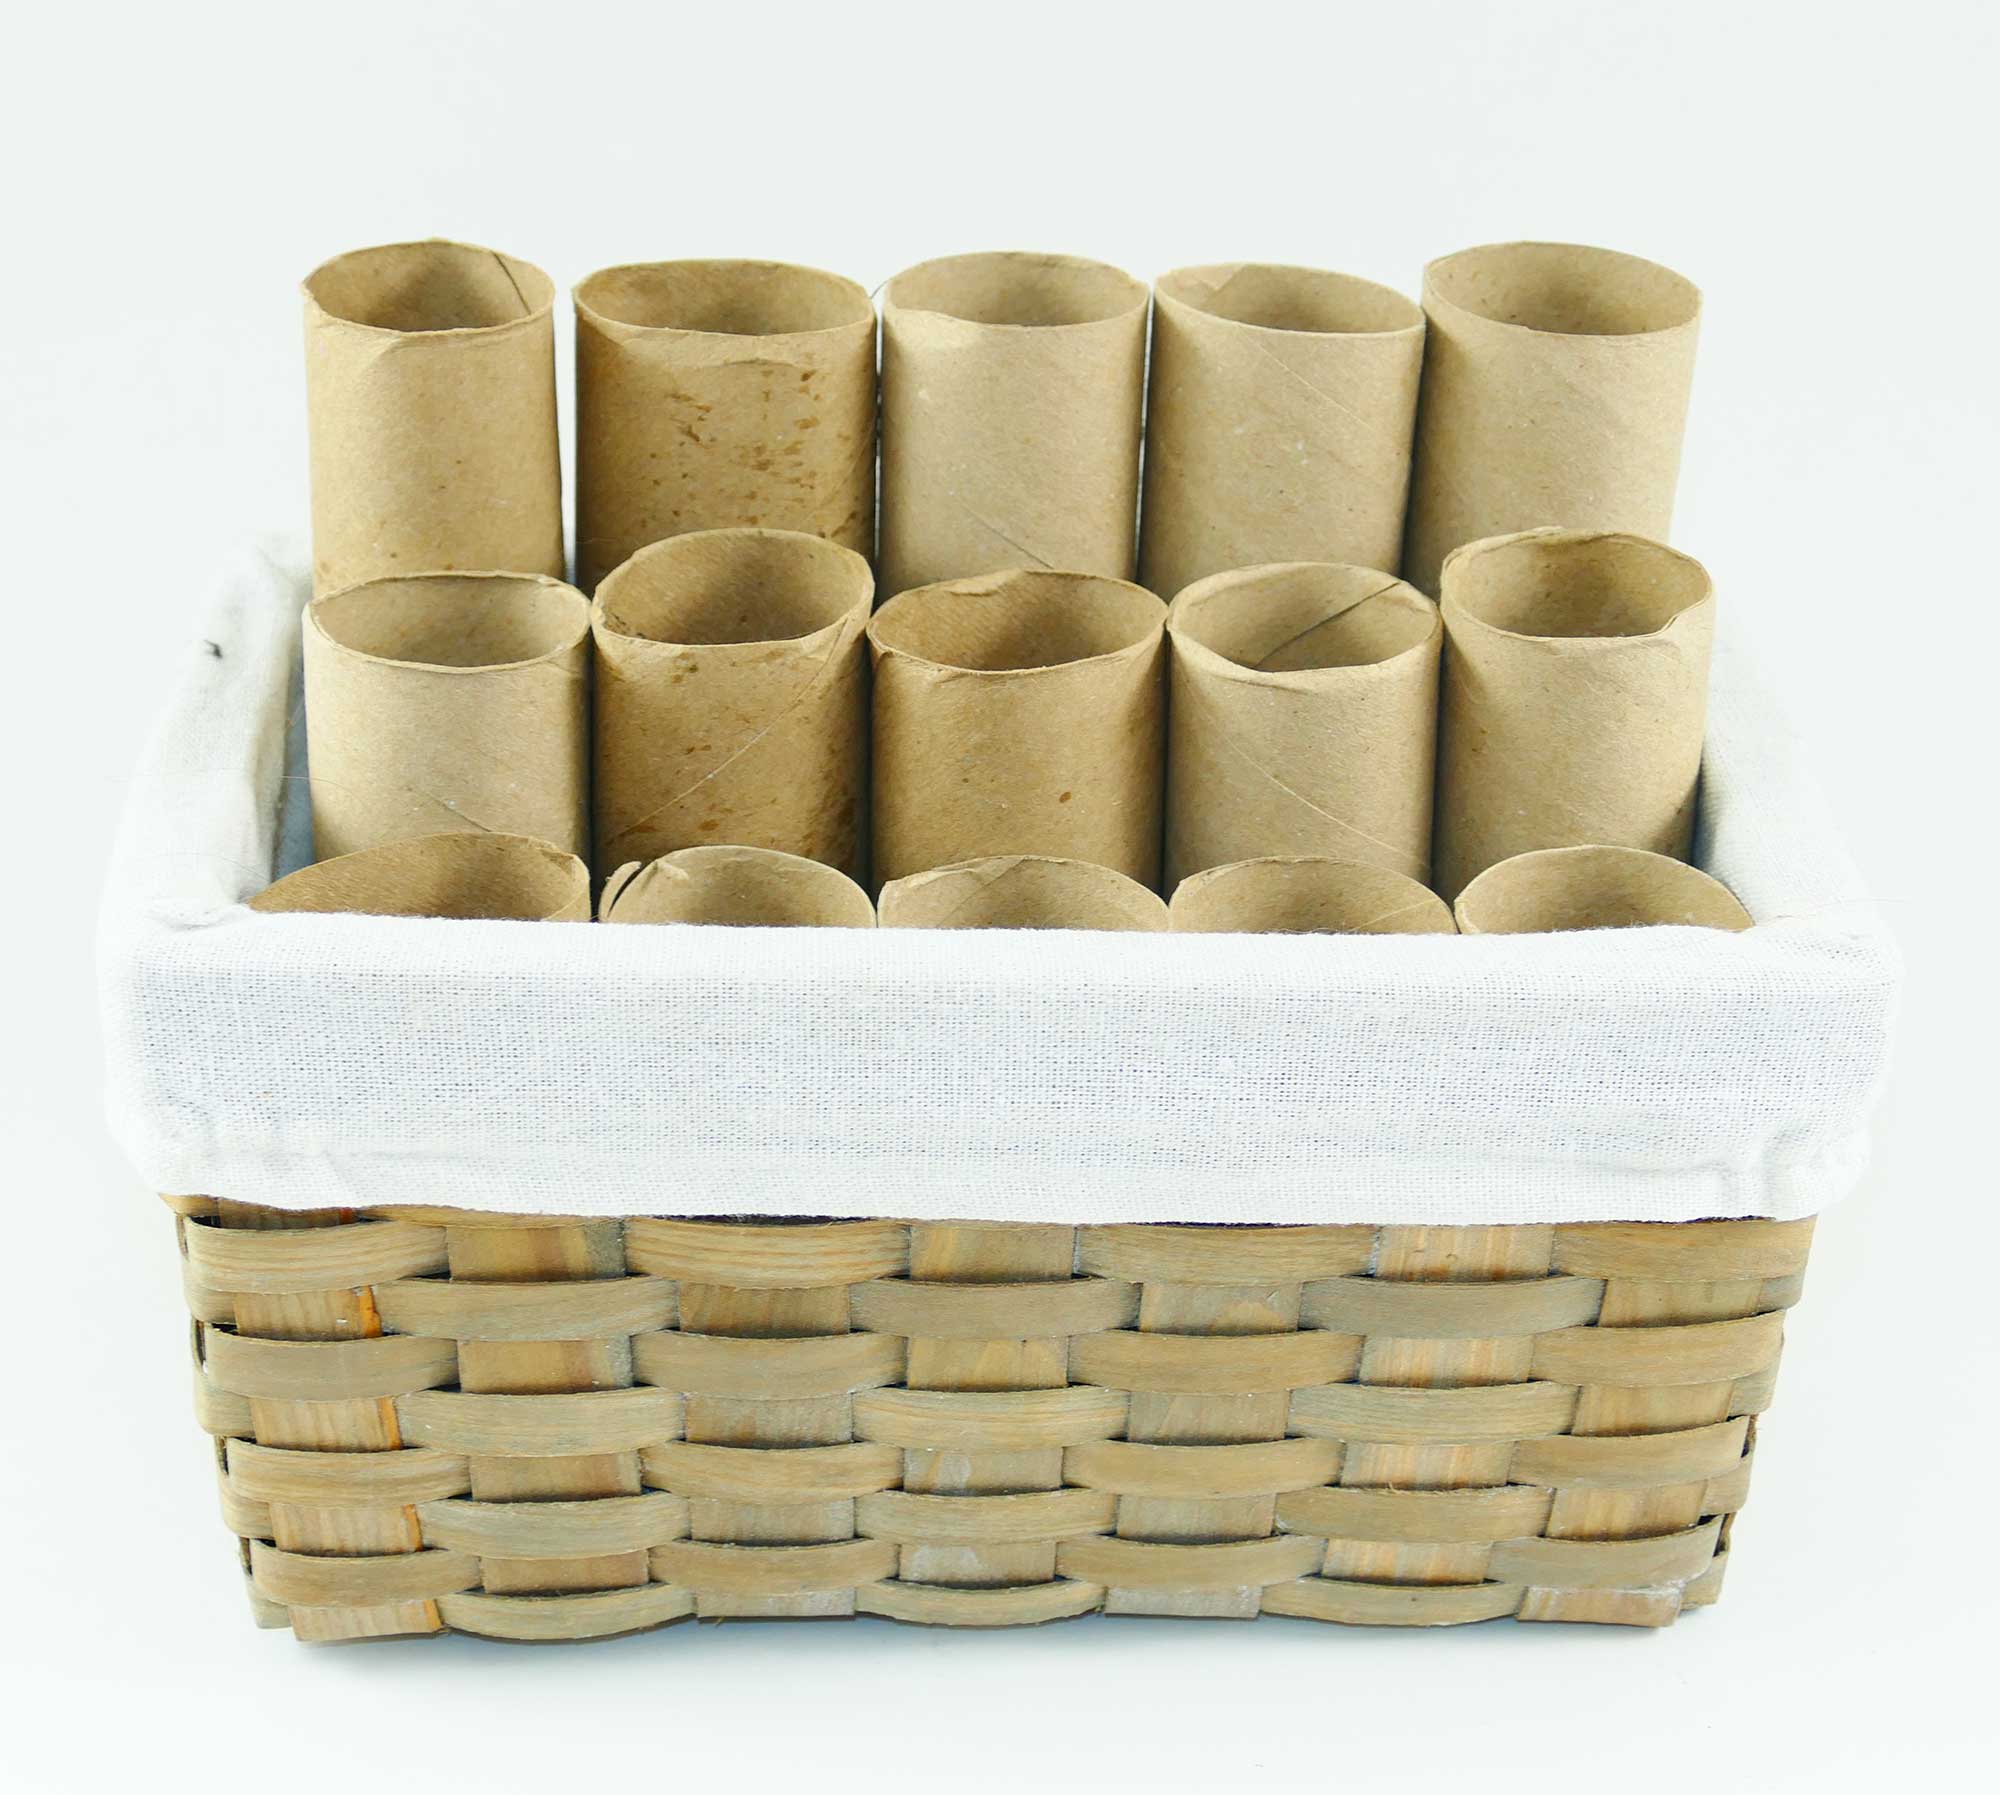
Step 3. Put your cut tubes into your box. They’ll squish together tightly to stay in place, thanks to the fact that they’re just cardboard tubes!
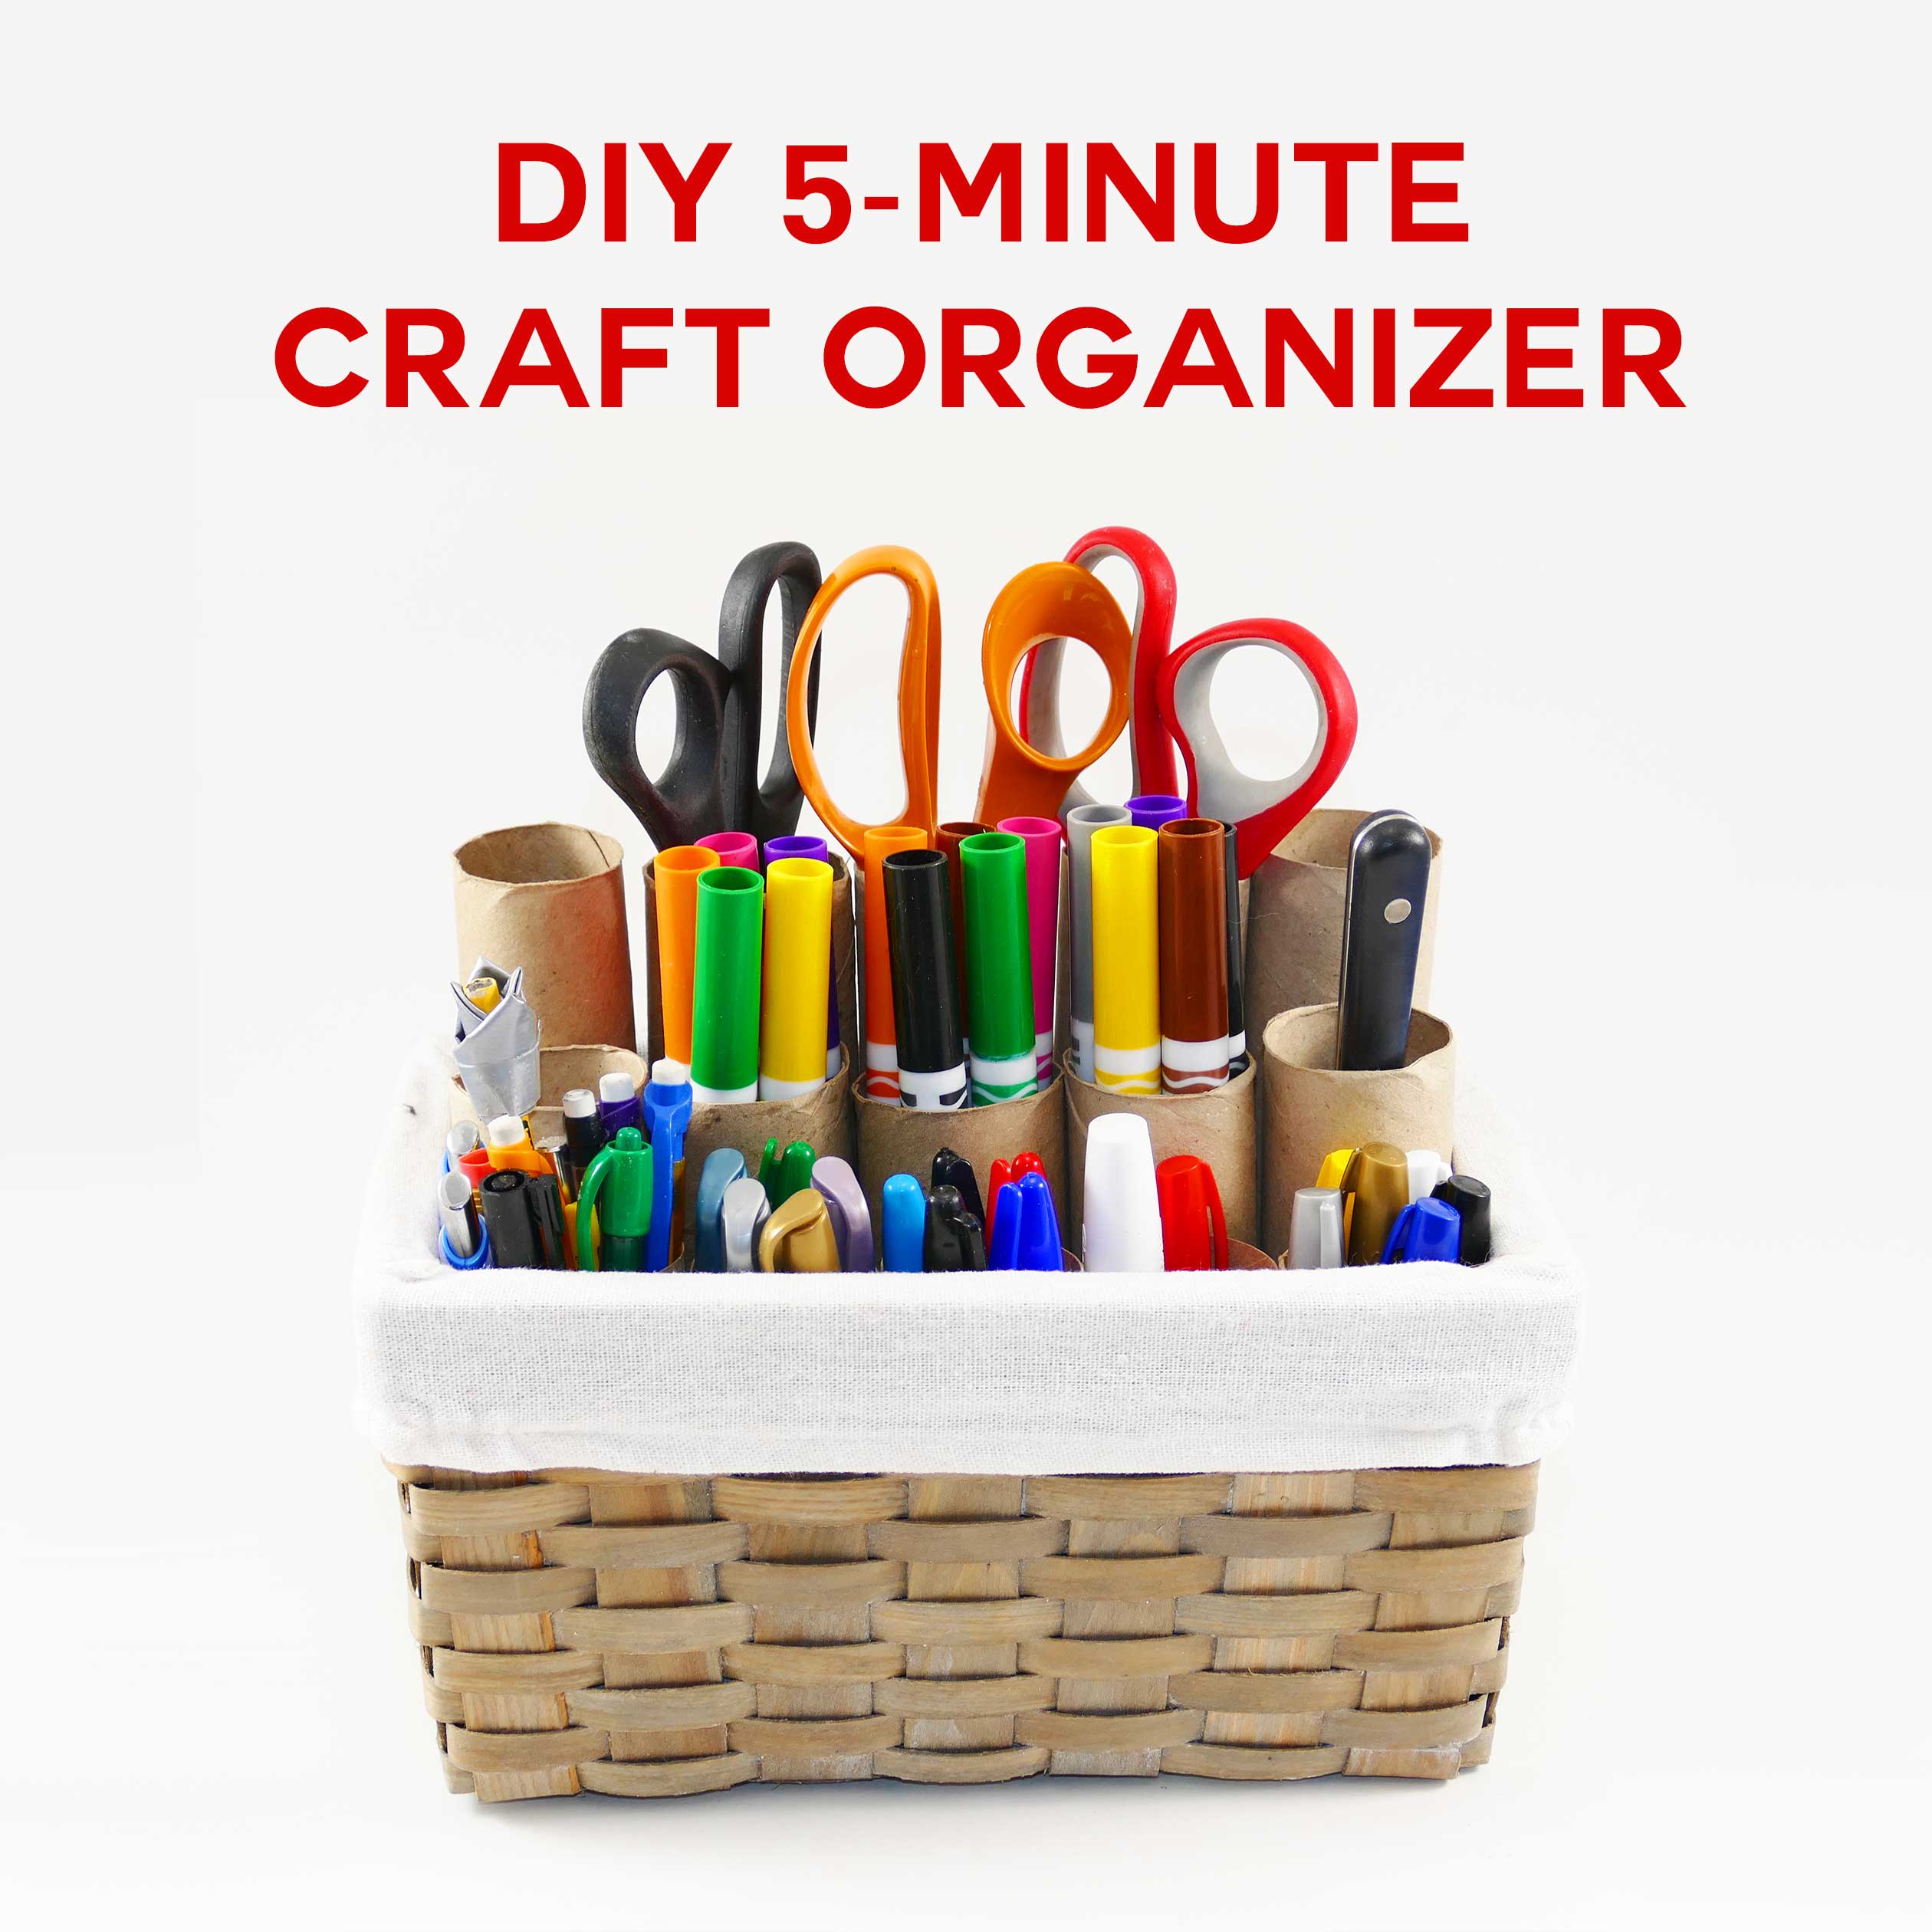
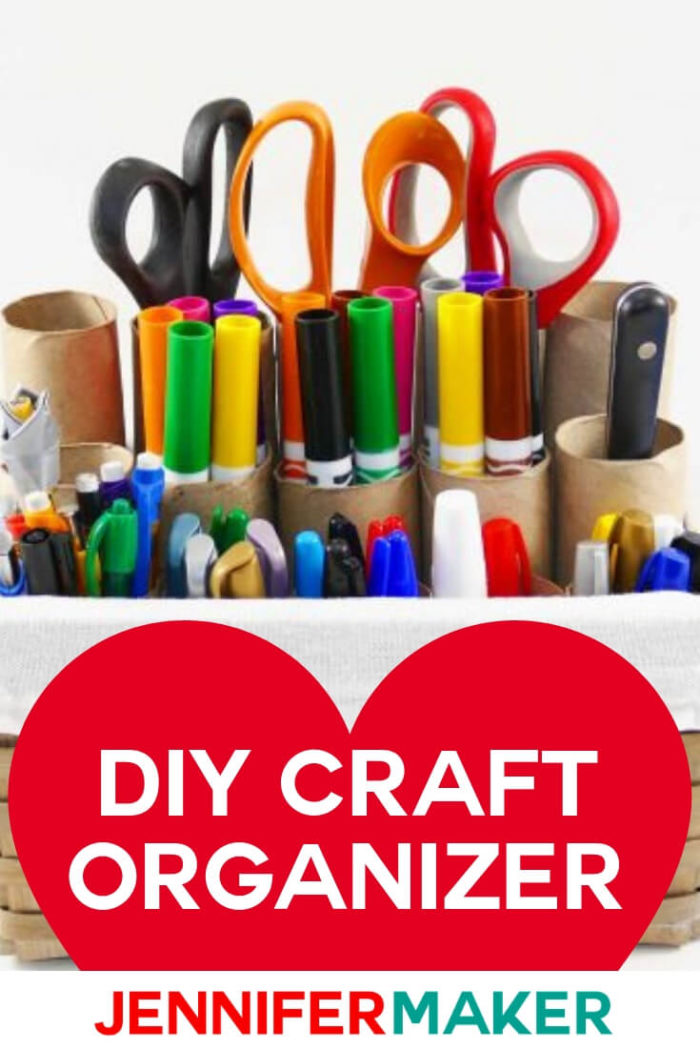
Step 4. Now fill it up with your craft supplies. I put my shorter items like pens and pencils in the front, medium sized items like markers and brushes in the middle, and bigger bulkier items like scissors in the back.
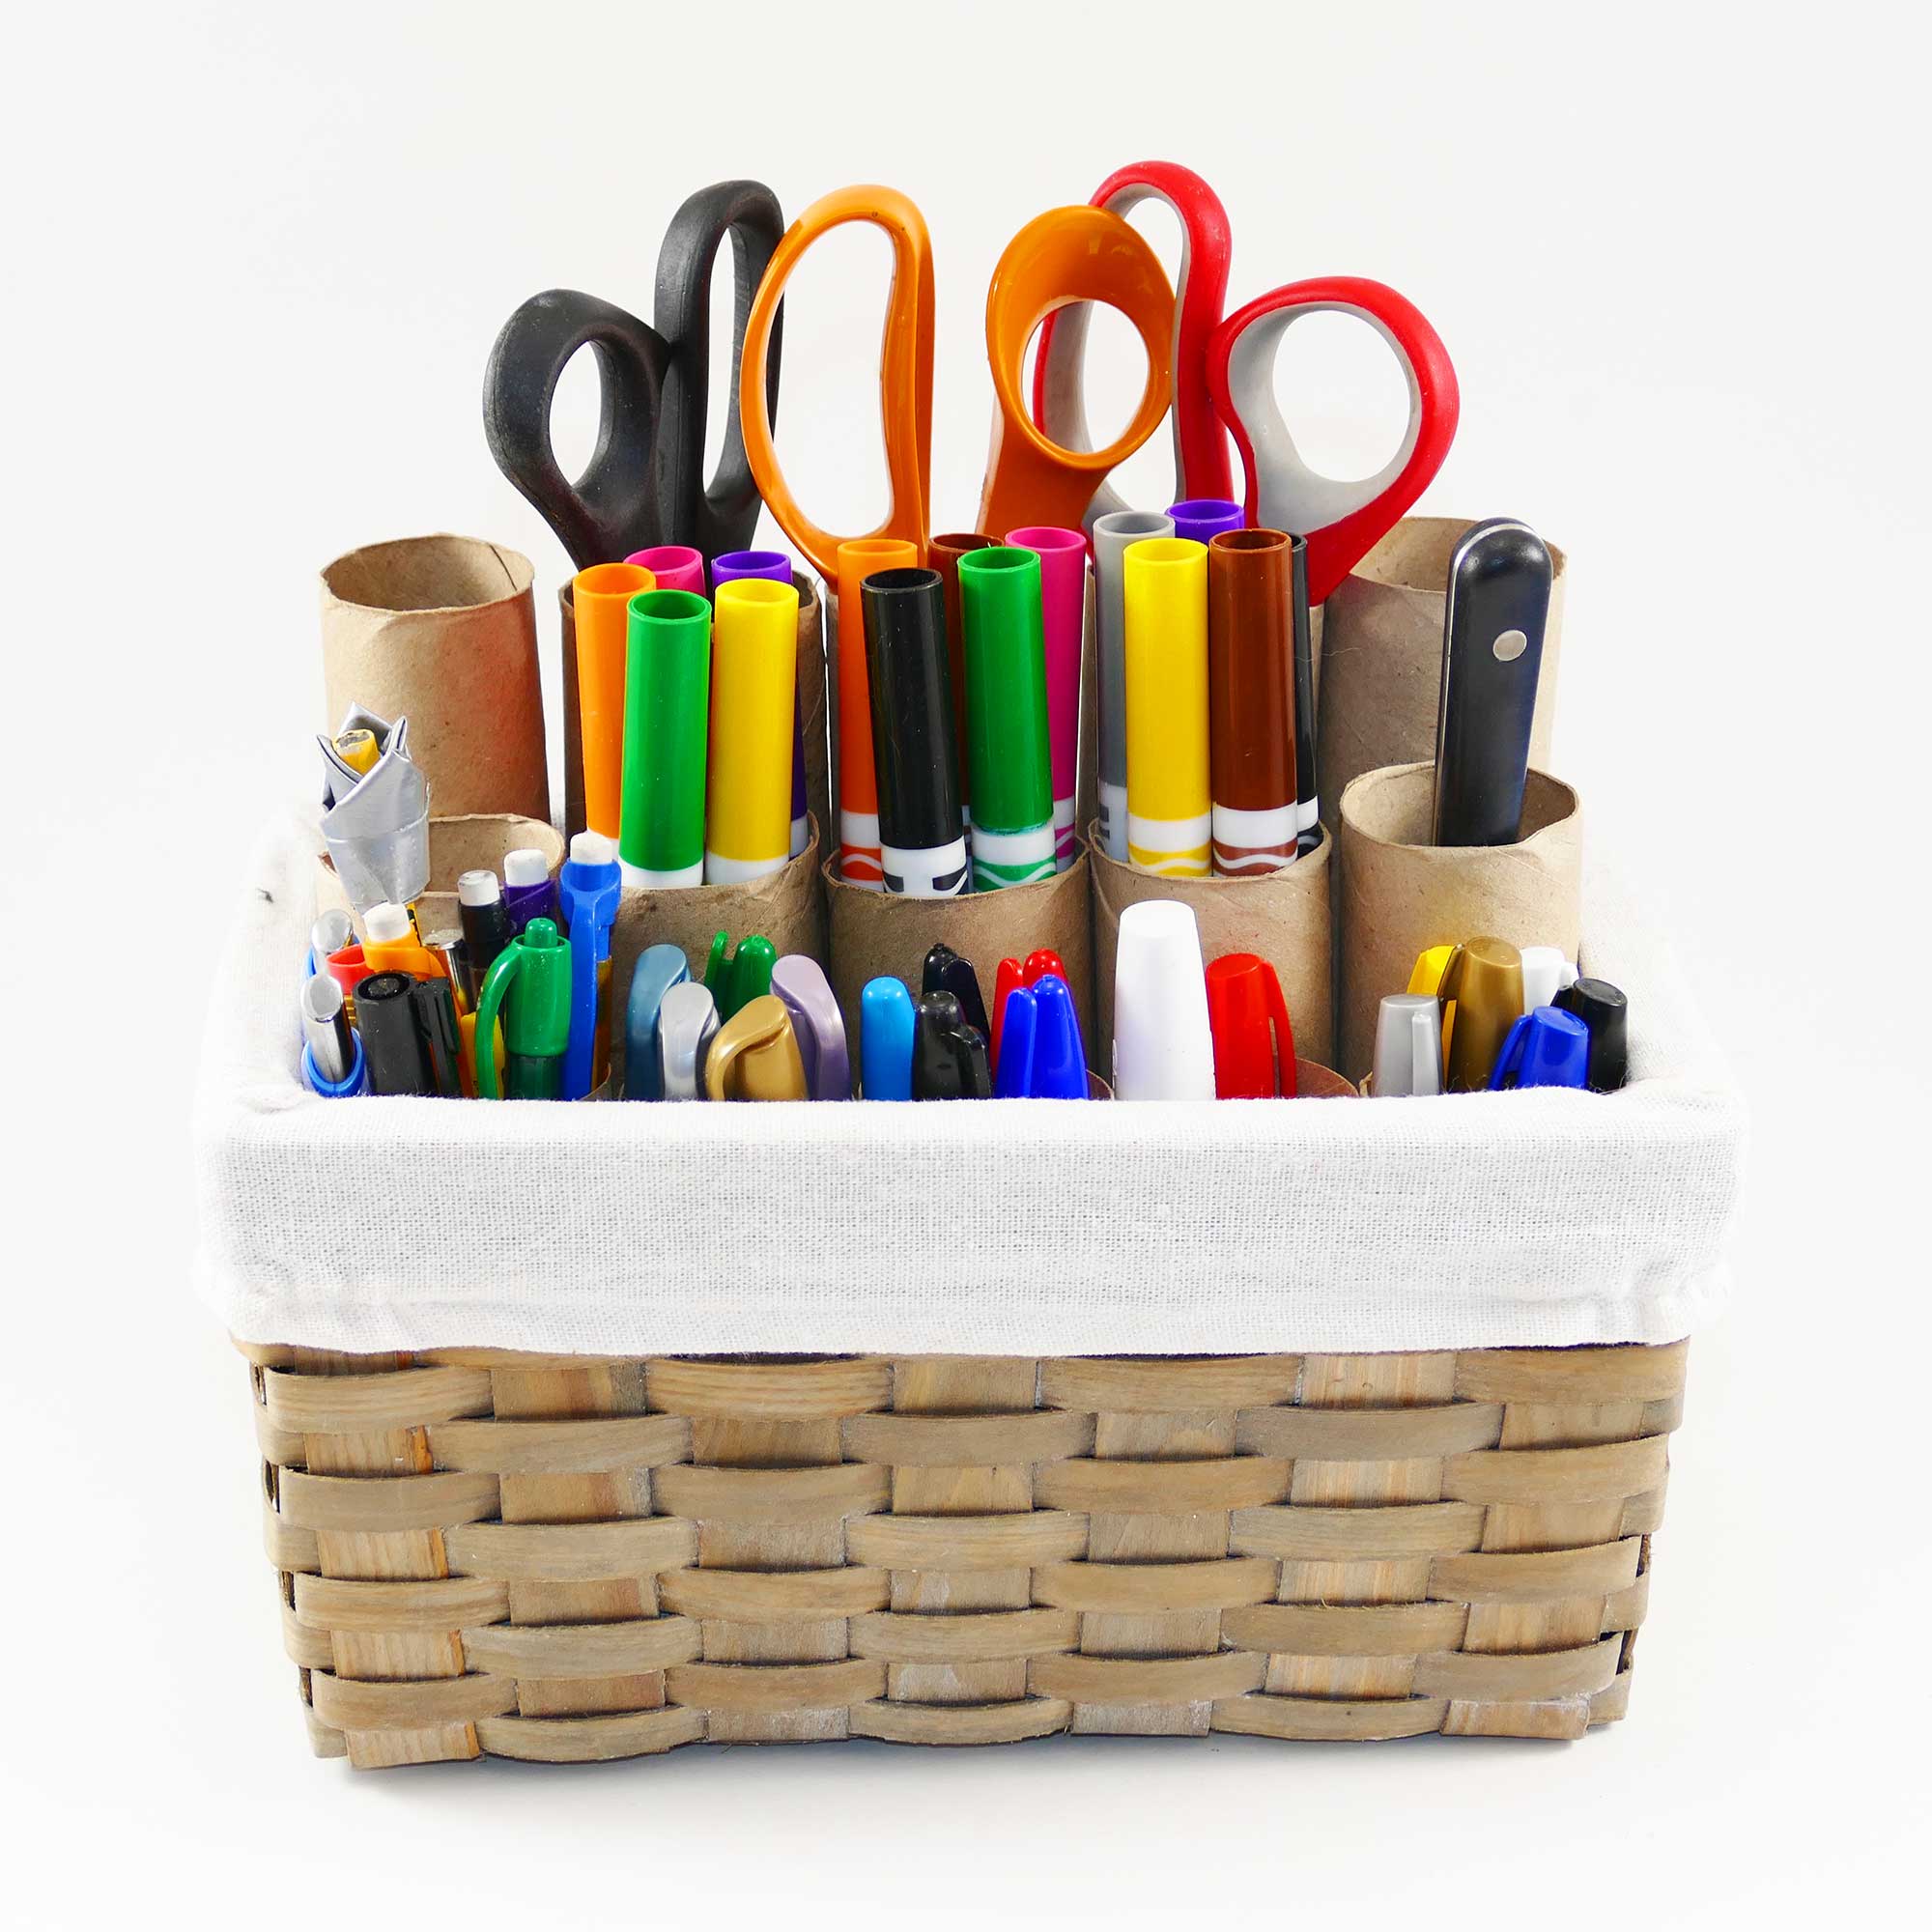
And – bonus! — I’ve still got room for more supplies. Woohoo!
Tip: If you try to put something in and the tube seems too deep for it, but all your smaller tubes are full, just stuff something in the bottom (like paper) to raise the “floor” a bit!
I hope you enjoyed this five-minute craft!
Love,

Like this tutorial? Pin it for later!
What a clever way to organize crafting (or any) materials! Love how you repurpose those cardboard rolls as part of this structure. And it looks so chic!
Thank you so much, Karen!
This is so cool! My little brother and sister would love this for all of their stationery and craft bits and bobs. I’m definitely going to make it with them 🙂
What a simple and creative idea. I actually have a bunch of extra paper towel tubes that I can try this with that i saved recently./
What a great way to recycle and save not only the planet but time and money! Super easy and now things are more accessible!
This is a great idea! I’m constantly looking for Sharpies in my house and this would make it so much easier!
THat is a really creative and useful ways to use the paper towel and toilet paper rolls. I could even get my kids involved in making this.
Very clever and creative DIY! Thanks for sharing! I love it when things are repurposed. I need to share this tutorial with my daughter so that she can do it too!
I seldom do crafts, but this would be a neat idea for my kids’ art and craft projects. Thank you for sharing!
What a brilliant idea. I’ve done this before but never thought about making it a 3 tier storage. It certainly makes it easier to see what you have.
I love how simple this is to make and so cost effective! I know I can get that basket at the dollar store and use paper towel rolls from around the house! Love this idea!
Oh what a clever idea! I really need to do this soon. We home school and all the supplies like that are everywhere is seems. In every drawer, box, jar, etc.
Ok can I just say that this is genius!!! What a great upcycle of all those cardboard tubes! Plus it looks super cute. WOuld make a great teacher gift too.
What a great DIY! I am so organized, I know where I put everything at all times. This would be a great affordable option!
What a good idea! And it seems so easy. I would love to try this out. Where do you usually store it?
Wow. That looks super easy &;cute. My tween daughter would love to make something like this. Thanks for sharing.
One of these would look great sitting on my desk, I love how easy it is too! Thanks for the idea!
Wow, this is so simple! I don’t craft much but even with my little bit of supplies I have stuff everywhere.
I love this, anything that can help me organise my craft cupboard is a win from me! The toilet roll holders is an awesome touch to keep everything in the basket but still seperated!
This is a really neat way to use those rolls! My kids could use something like this.
We have a crafting type corner and this would be perfect for that. We always just have things in boxes and this would be much better.
What an awesome and simple way to organize all of your craft items! This would be perfect for kids!
I did something similar to this a couple of years ago. It turned out pretty handy. I still use it today to store my craft supplies.
Oh my goodness i am doing this today! I really need a way to organize all my kids coloring stuff and nothing i have done so far has worked!
also sharing this!
This looks like a really neat idea! I like how easy and affordable it would be to make.
Love this organizer. Plus you get to recycle at the same time.
What a great way to repurpose those paper towel holders. This would be a fun and easy craft for kids to make.
Well that is incredibly smart! I would never think to use the cardboard tubes that way! I am definitely going to do this – and I know my kids will love it too.
This is a great way to use paper towel rolls. If only I could get my kids to keep it looking organized!
This is genius to me! I love it! I shared this to the local consignment group I work for. I need to start saving my empty tubes to do this!
That turned out so cool and it looks so easy! It would be great for the kids’ craft supplies!
This looks like such a fun craft! My kids would have a lot of fun making this for their arts and craft supplies! They’ve been obsessed with them lately.
Great idea! I always feel like I should be saving paper towel rolls but never know what to do with them!
I LOVE this idea! We have tons of craft stuff and it is never organized in the way that I want it. It is always all over the place.
I’m not much of a crafter, but I love this idea. I think it could also work really well for organizing kid’s supplies since they are always good a losing things.
As a military wife who could barely handle her busy schedule I am truly glad I came across your post. I love checking out new things and this is so cool and affordable. You don’t have to buy expensive organizers or box to store your art materials. Thanks for sharing!
What a creative way to use those tubes. I absolutely love this idea!
What a clever idea! I wish my kids were little again, because it would have made keeping their supplies so much easier. I don’t craft, but I know a few people that do. Definitely passing it on!!
DIY are always fun! I love that this is great for organizing and that it is a great way to recycle as well. This is something that I need to make to organize my daughters crayons and markers!
Yeah, I love recycling things. Feels great!
Jennifer, you could also dress up the cardboard with paper, Wasabi tape or paint around each tube, so you don’t look at the drab cardboard. Just another added idea.
What a clever idea! My grandkids would be able to pick out their supplies easily instead of asking me to look for them.
Thank you, Pat!
This is such a great idea! I need to reorganize my craft room.
Happy to hear you like it, Hannah!
This is a great, simple, craft project for this back-to-school time of year. Thank you for linking up at #BloggingGrandmothersLinkParty. I’m sharing your link on social media.
Carol (“Mimi”) from Home with Mimi
Such a creative idea. I love it!! Thanks for sharing with SYC.
Hugs,
Jann
This is such a great idea! Simple but effective. # Blogger’s Pit Stop
So clever!
Well I’ll be! This is so very creative and I could use this in my office 😀 Thank you so much for sharing this with us at Funtastic Friday. Pinned!
That is a great use of leftover cardboard tubes.
Thank you, Elise!
What a great idea to keep things handy & organized. I think you could take it one step further, buy wrapping paper from the Dollar store & wrap the tubes up for easy decoration. They could be same design or mix them up with multiple wrapping paper.
Thanks again for the great ideas!
I’m just starting out, and need every tip I can find. 🙂