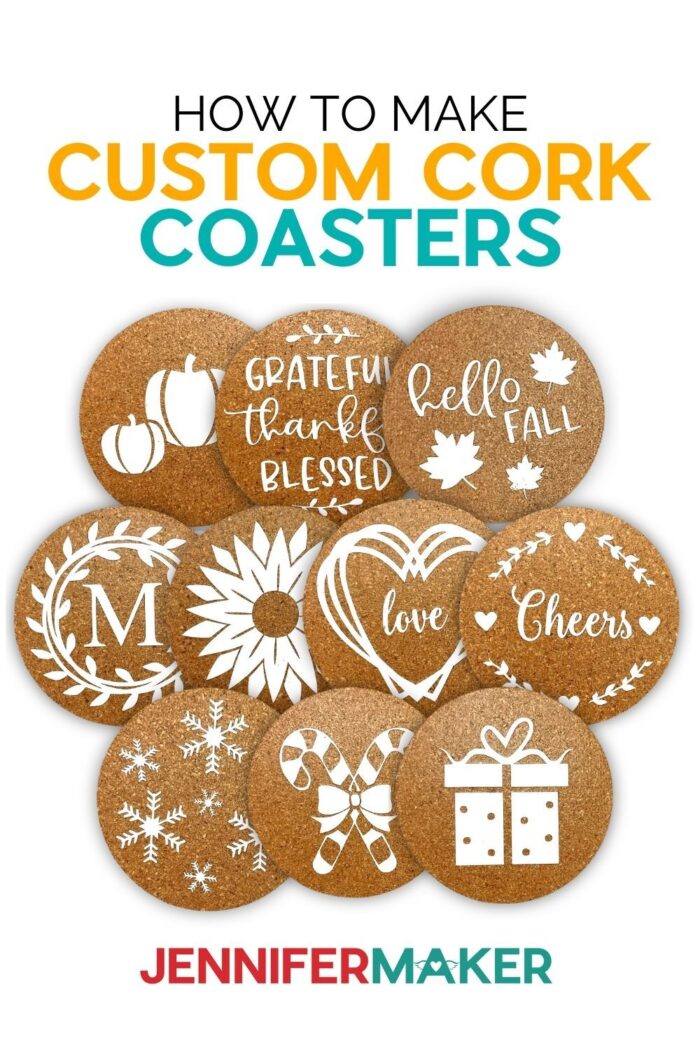
Learn how to make custom cork coasters with vinyl for everyday use and the holiday season!
I am a big fan of gifts that are fun and functional! And these custom cork coasters are exactly that! These are SO EASY TO MAKE and are great for parties around the holidays or any type of get together really. Oh, and they also make for a great gift! The possibilities are endless when it comes to making these fun coasters! Or, another fun part, you can make a bunch and give them out as holiday gifts or maybe housewarming gifts… so many possibilities!

Another thing I’m a big fan of are projects that don’t break the bank. I mean, don’t get me wrong, I like beautiful projects that create a big wow-factor, but every now and then it’s nice to get back to basics and work on something a little more simple.
With a fun project like this, you can create some handmade gifts, or even make them with friends and family members. There’s nothing better than creating memories that will last a lifetime!

There is no better gift than a handmade gift and it is even better when it’s a personalized gift! So here’s what we will need: cork coasters of course. These come in all shapes and sizes: round, square, hexagonal.
We’ll also need vinyl, I’m going to use both permanent vinyl and iron on vinyl, so we’ll need a heat source. I’m going to use the EasyPress mini along with a mat. And we’ll need transfer tape for the permanent vinyl.
We’ll use some Mod Podge as well as a paint brush for that. We’ll also need some scissors, a weeding tool, scraper tool and we’re going to use the Cricut BrightPad too, but this is optional! And of course, we’ll use our Cricut Cutting machine and a machine mat!
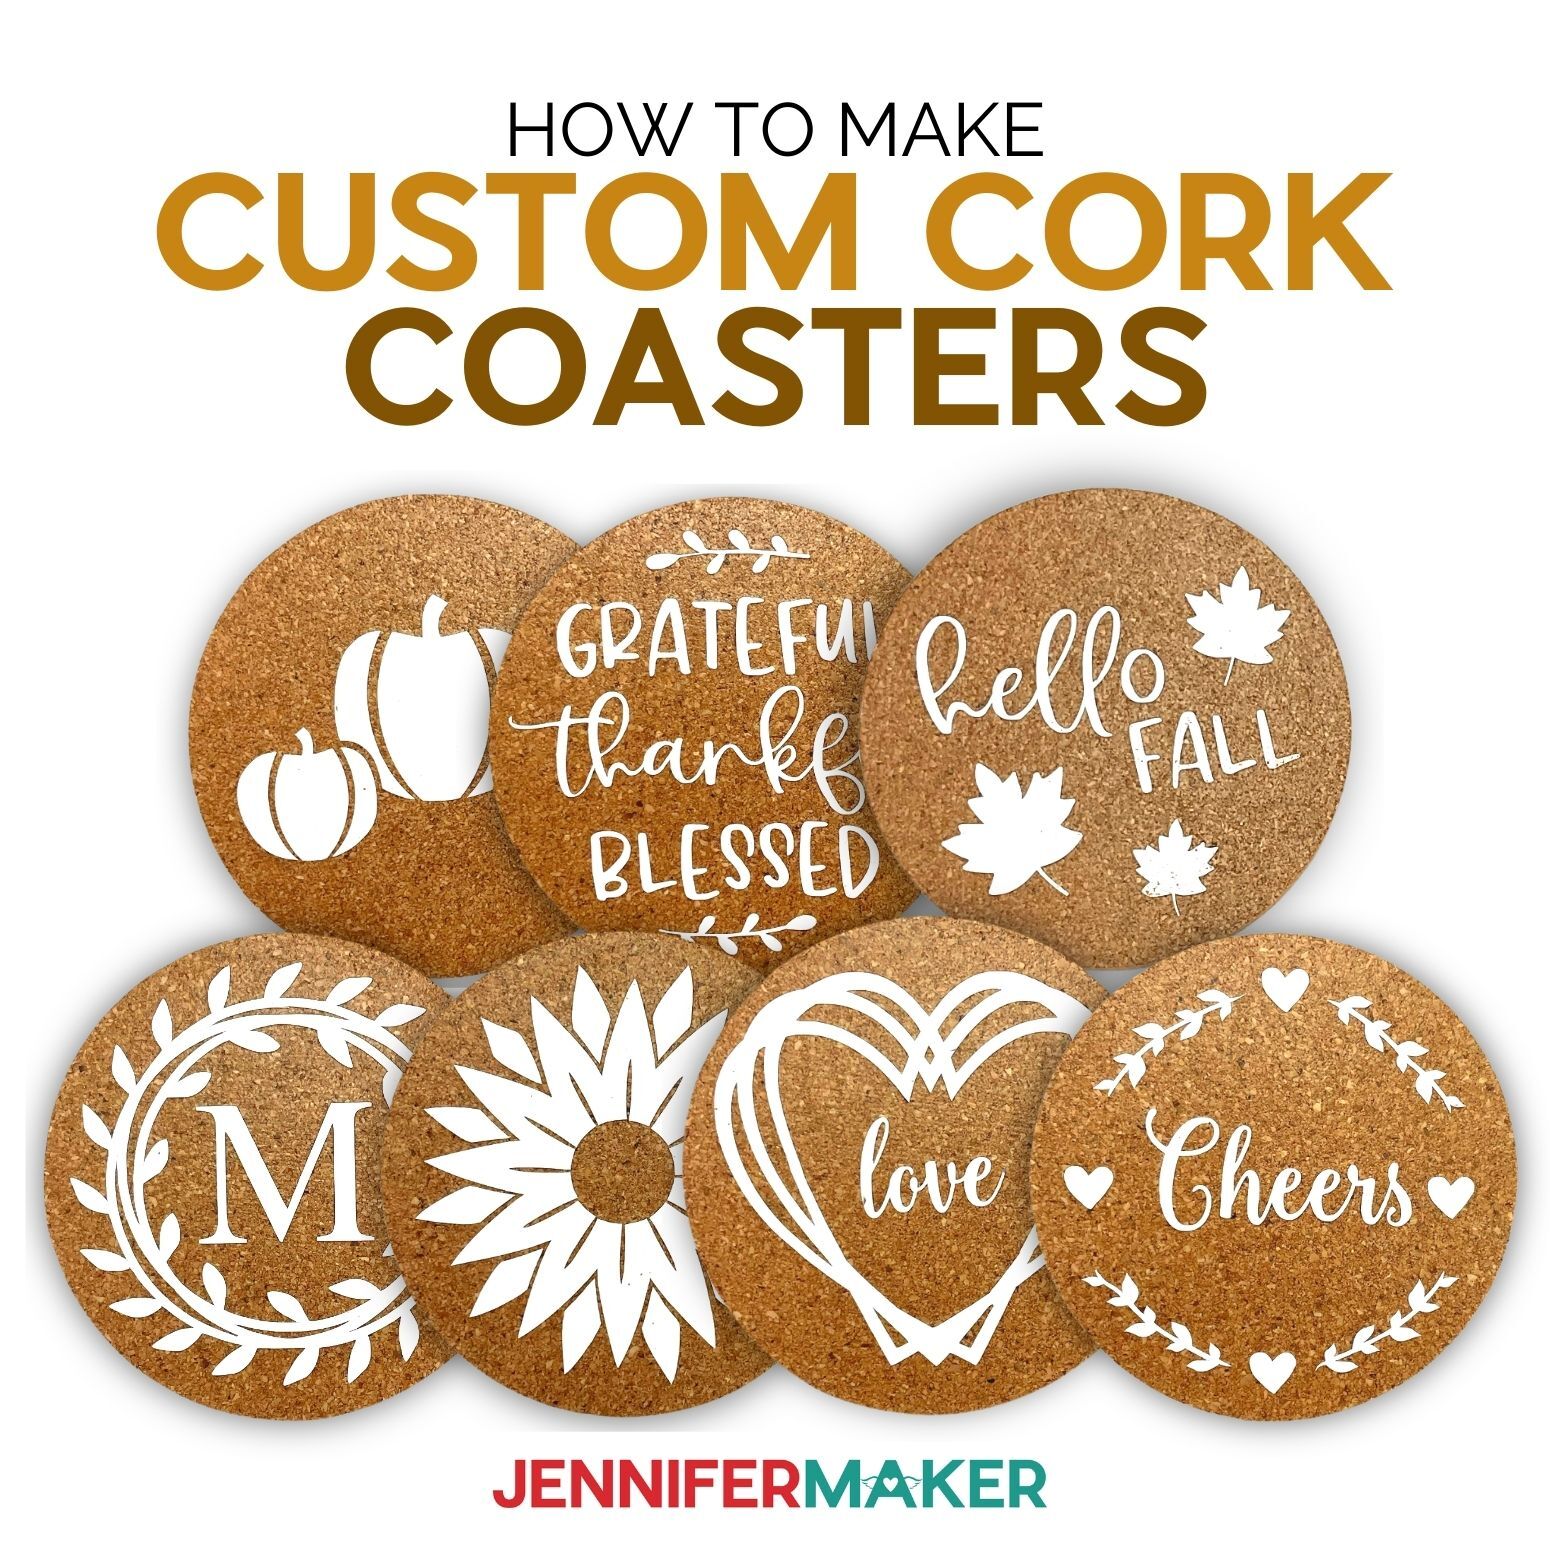
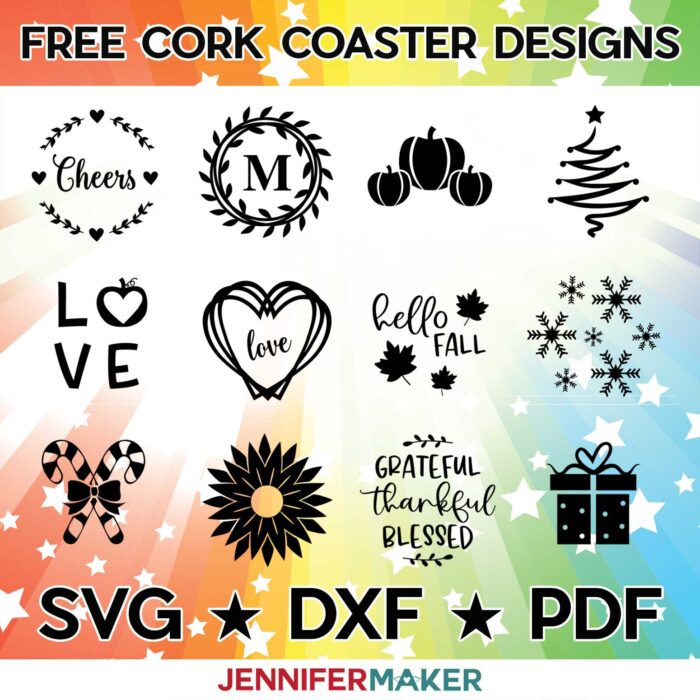
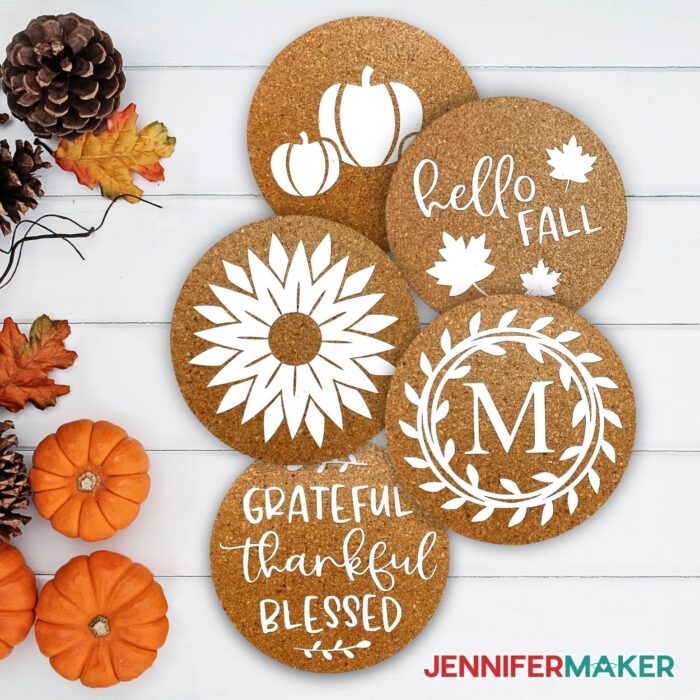
There are many different ways you can bring to life a plain cork coaster. I have provided you with 12 cute and fun designs to choose from with three different themes. There are four “everyday” designs, four fall designs, and four Christmas designs. You can never have too many coasters around your home!
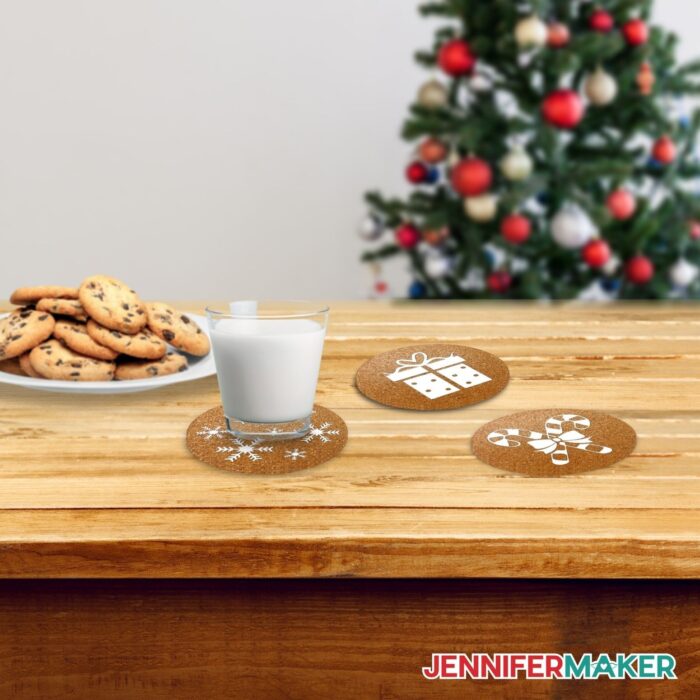
Here are some fun and decorative holiday coasters:
Here’s a supply list of what you need to make your custom coasters! This post contains some affiliate links for your convenience (which means if you make a purchase after clicking a link I will earn a small commission but it won’t cost you a penny more)! Read my full disclosure policy.
Materials to Make Custom Cork Coasters
View my Amazon shopping list with the exact items we used to make this project
- Cork Coasters(Round, Square, Hexagon)
- Permanent Vinyl (Such as Cricut Premium Vinyl or Cricut Smart Vinyl
- OR Iron on Vinyl (Such as Cricut Everyday Iron-On or Cricut Smart Iron-On)
- Transfer Tape (standard grip, used for permanent vinyl only)
- Mod Podge Matte
- (Optional) Fonts (I used Sweetness Font, Falling Leaves Font Duo, Allspice Font, Times Font)
- A method to cut your vinyl designs, (I used the amazing Cricut Maker 3 but you can also use the Cricut Maker, Cricut Explore Series, or Cricut Joy)
- Cricut Green StandardGrip Machine Mat 12″ x 12″
- Weeding Tool
- Foam Paint Brush
- Scissors
- Scraper Tool
- BrightPad Go (Optional)
- EasyPress Mini (if Using Iron-On Vinyl)
- Cricut EasyPress Mat (if Using Iron-On Vinyl)
- Butcher Paper (Optional)
- Design #336 – My free SVG/PDF/DXF design files are available in my free resource library (get the password by filling out the form at the bottom of this page)
Supplies for Custom Cork Coasters Part 2:
- Square Coasters
- Hexagon Coasters
- Cricut Premium Permanent Vinyl – Pearl Pastel Spring Sampler, Light Pink, Mint, Medium Yellow
- Transfer Tape
- Mod Podge Matte
- Cricut Green StandardGrip Machine Mat
- Weeding Tool
- Foam Paint Brush
- Scissors
- Scraper Tool
- Butcher Paper (Optional)
- A method to cut your vinyl designs, I used the amazing Cricut Maker 3 but you can also use the Cricut Maker, Cricut Explore Series, or Cricut Joy

How to Make Your Own Custom Cork Coasters
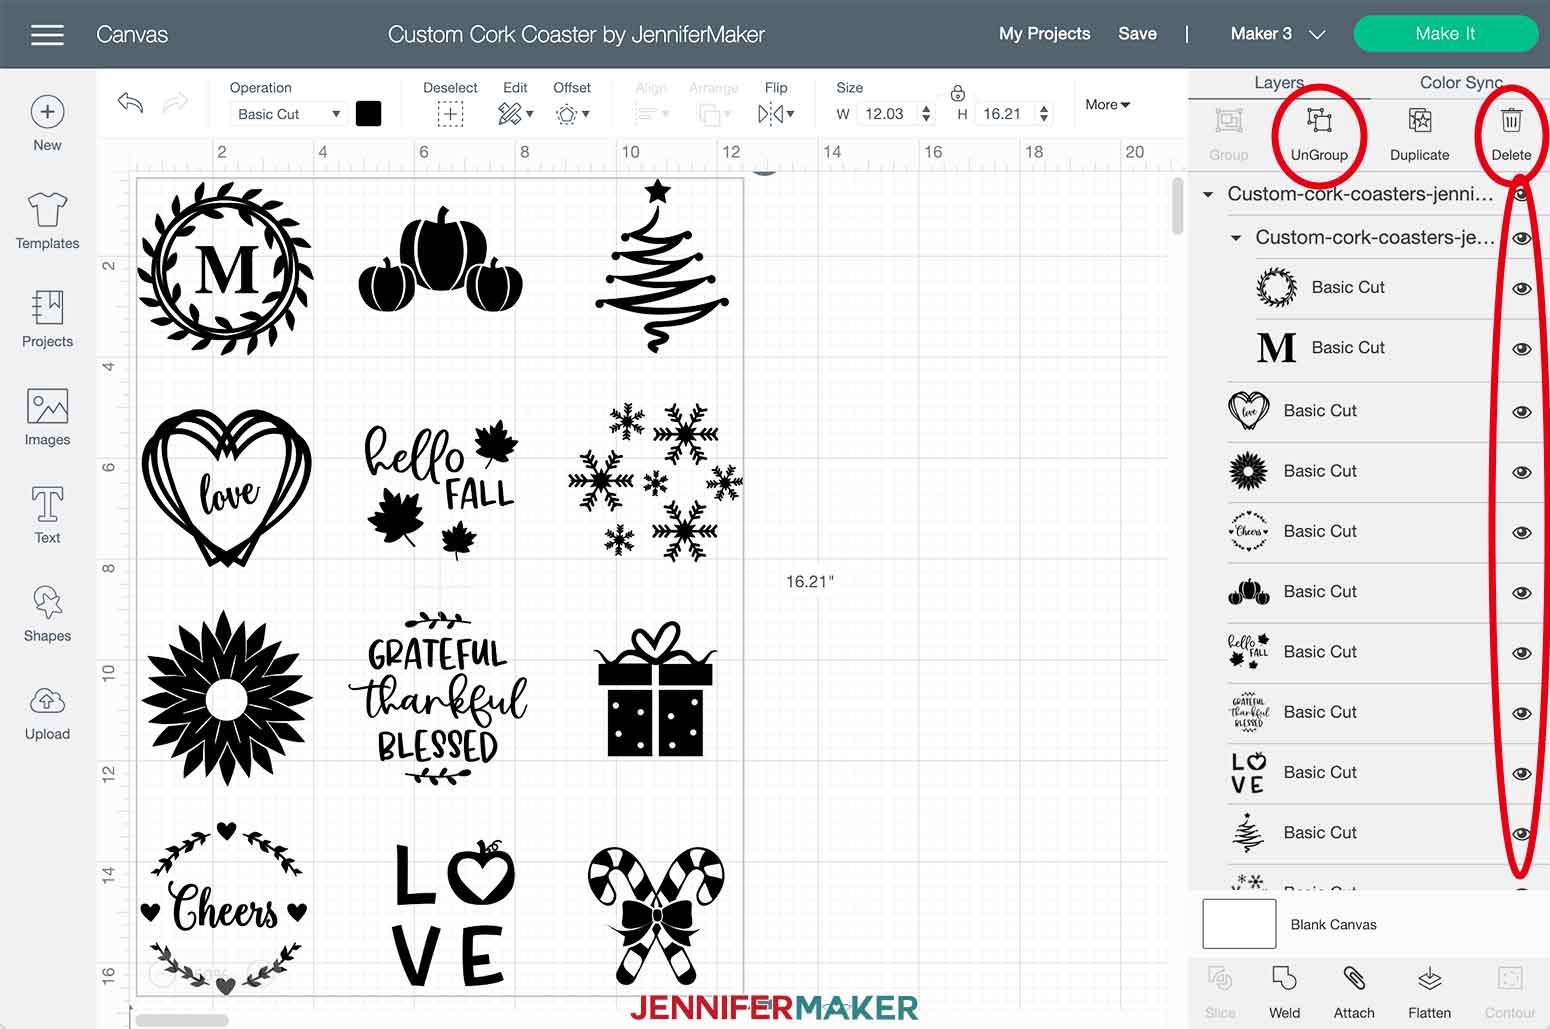
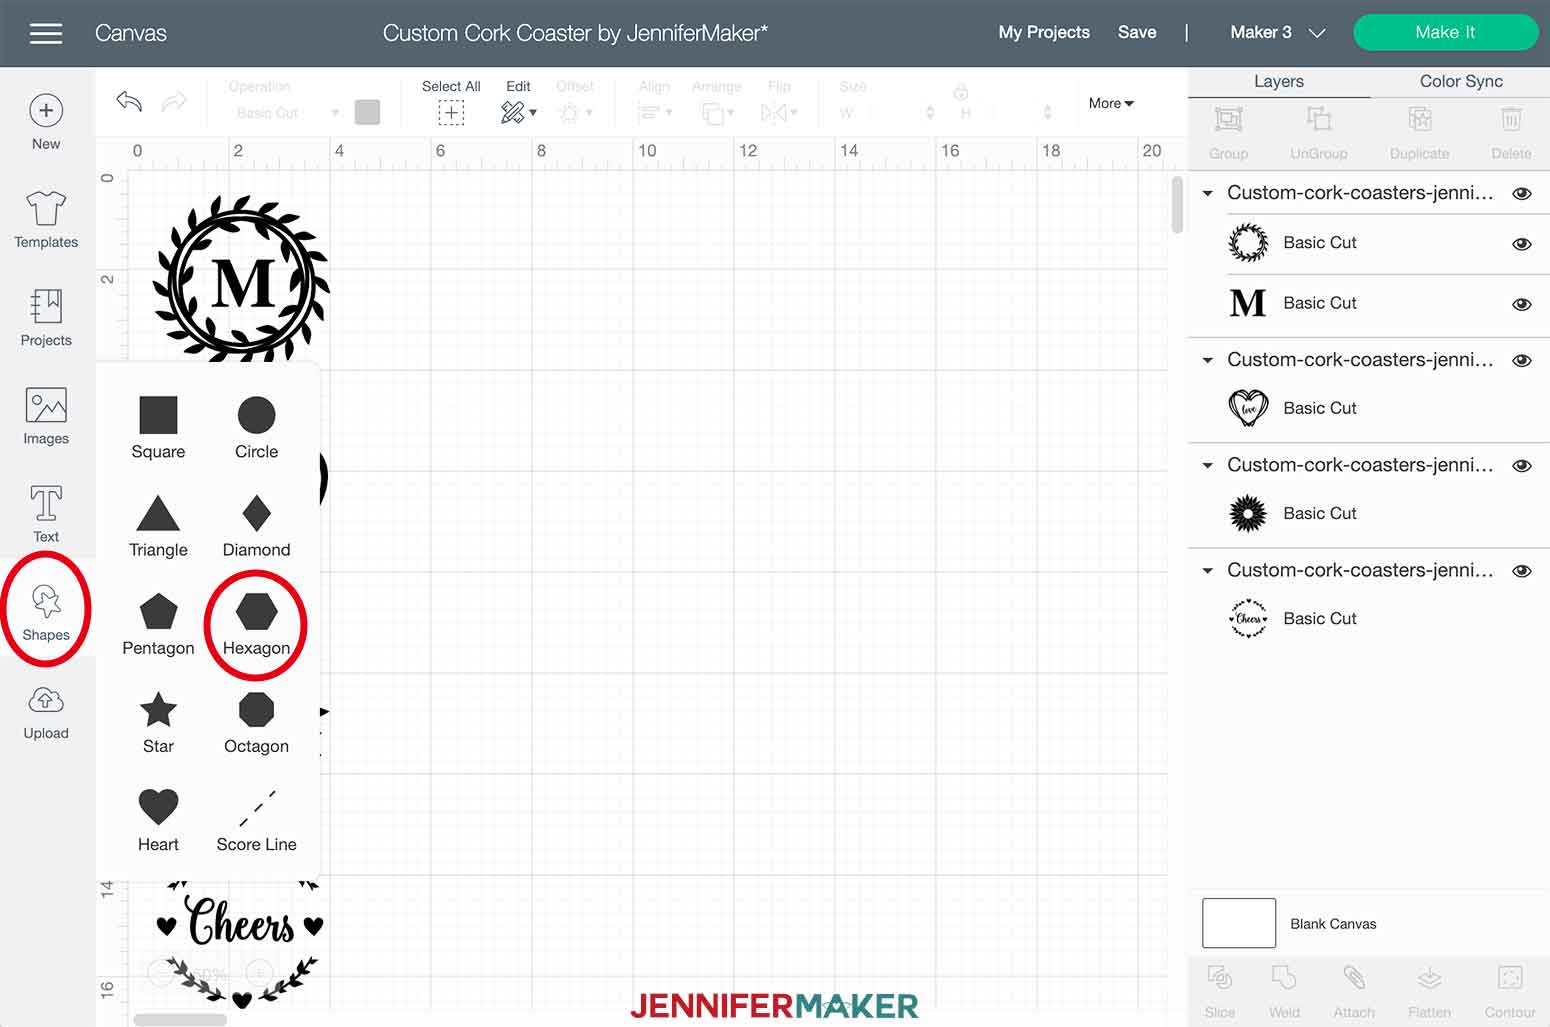
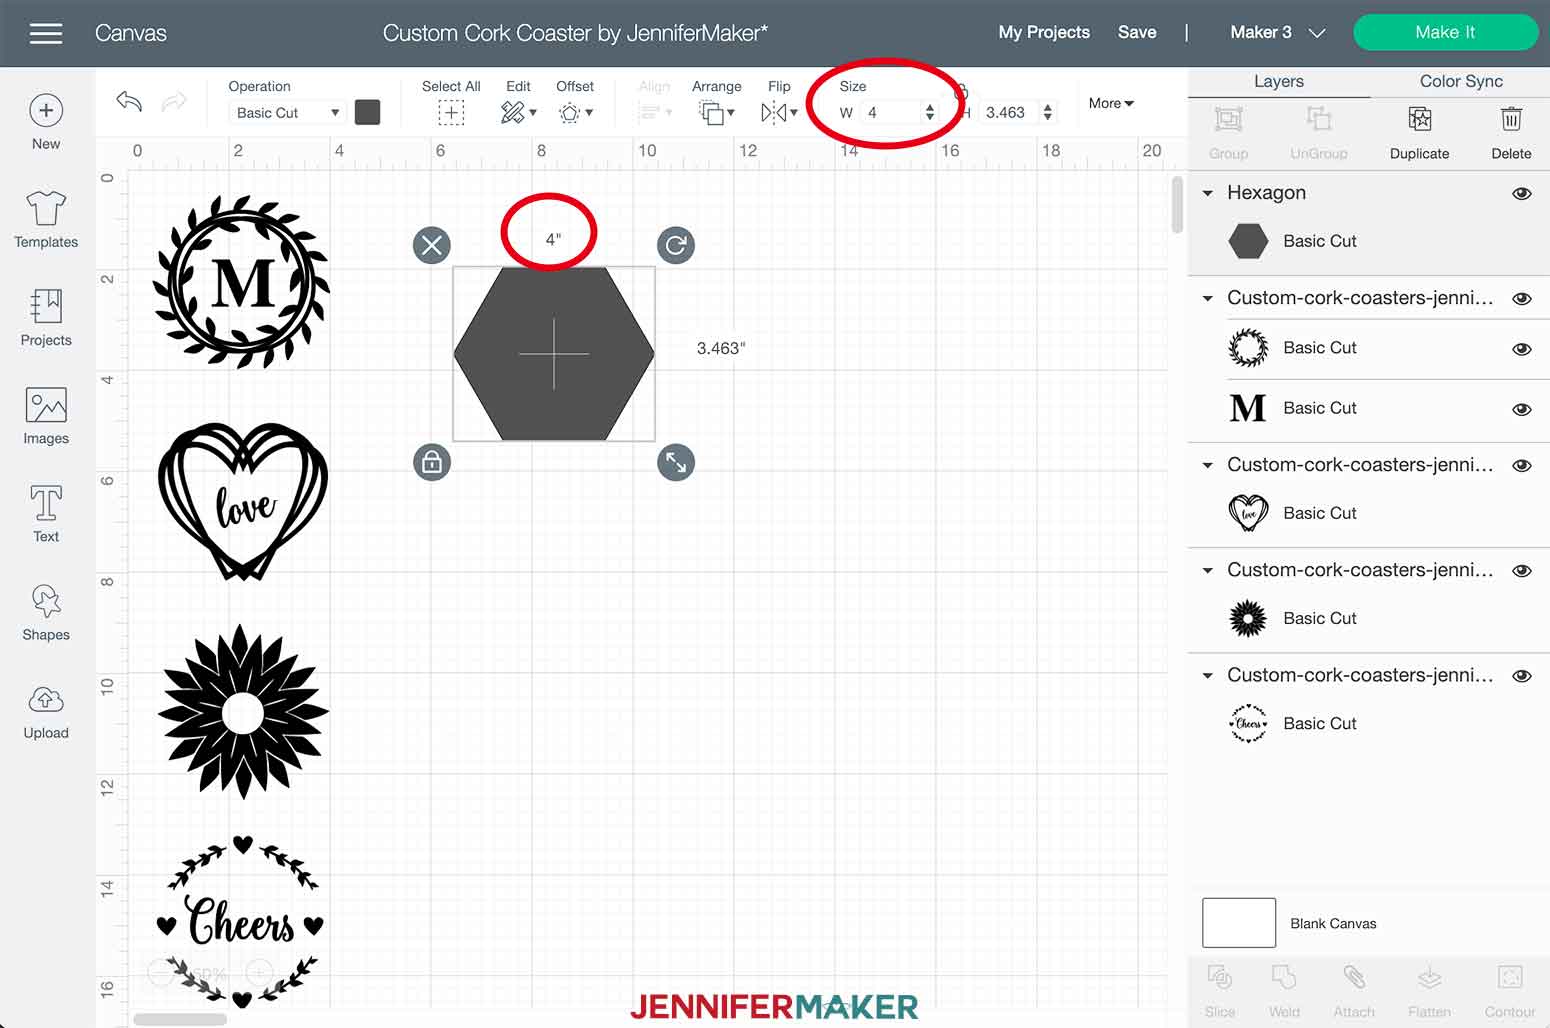
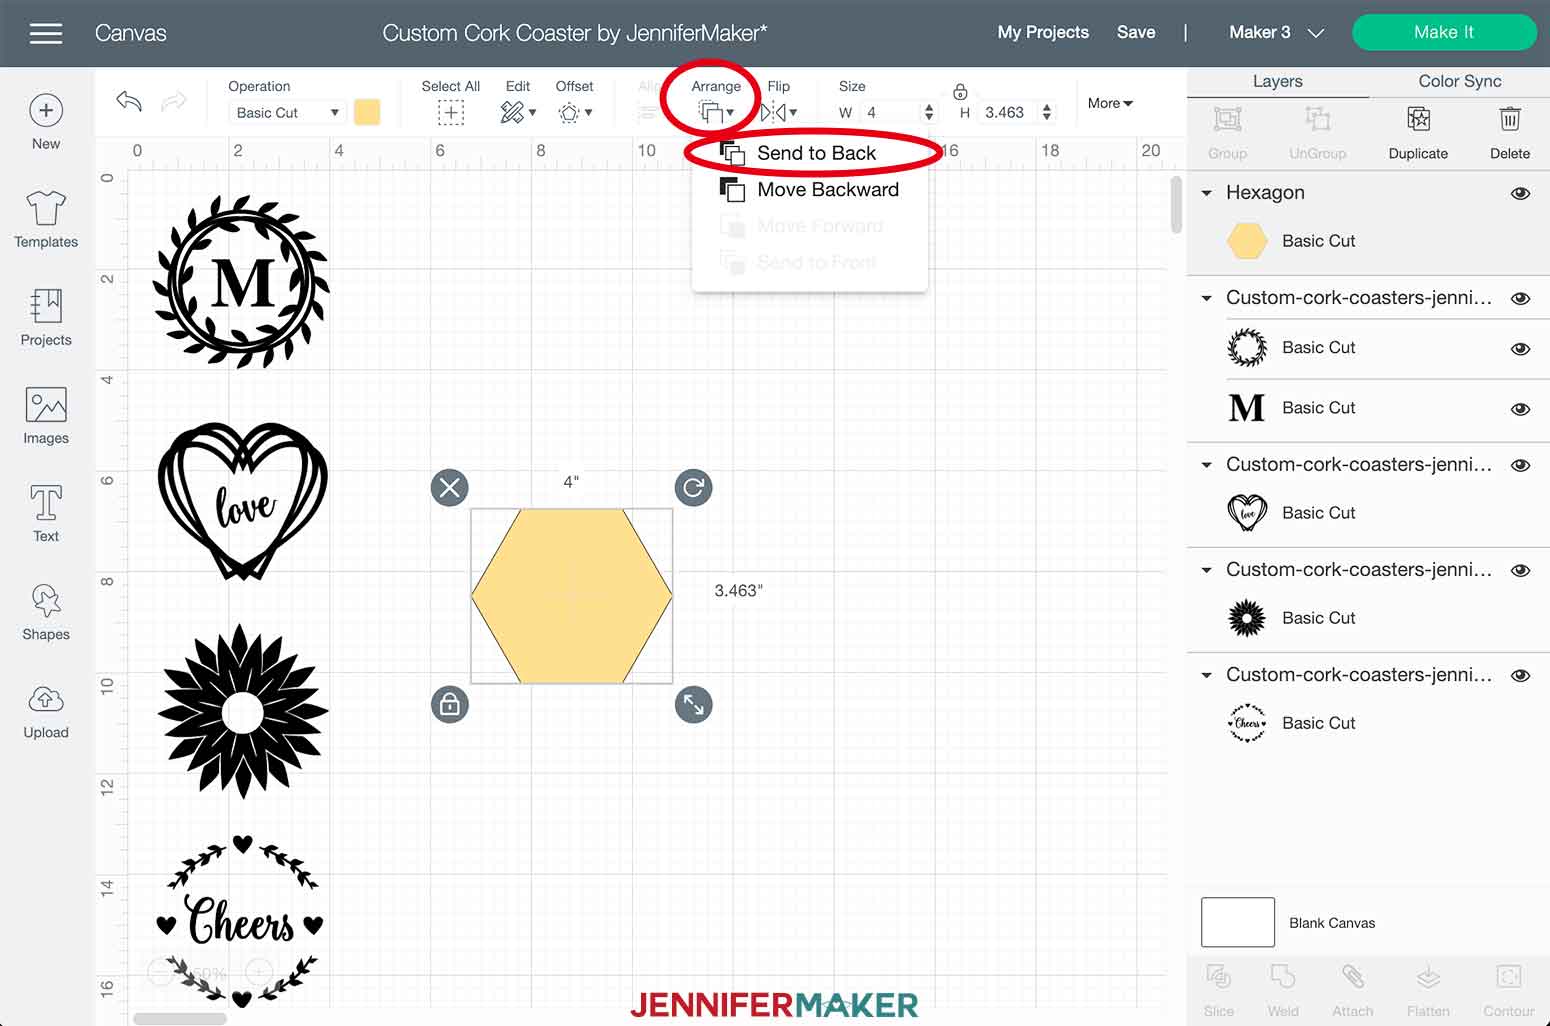
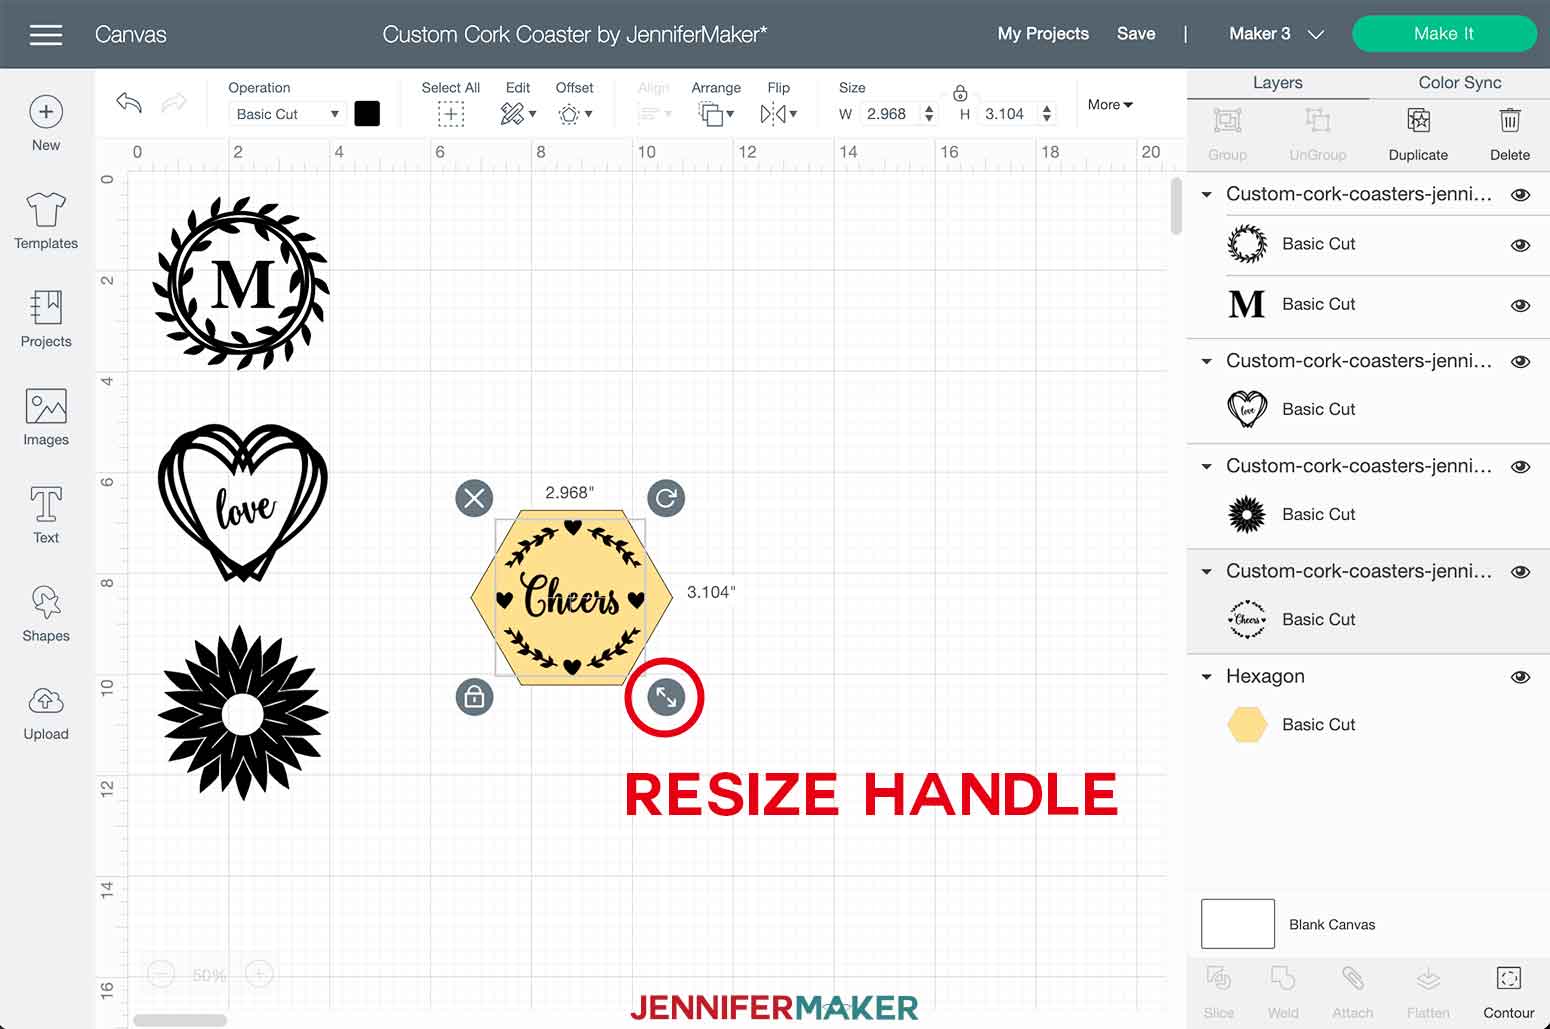
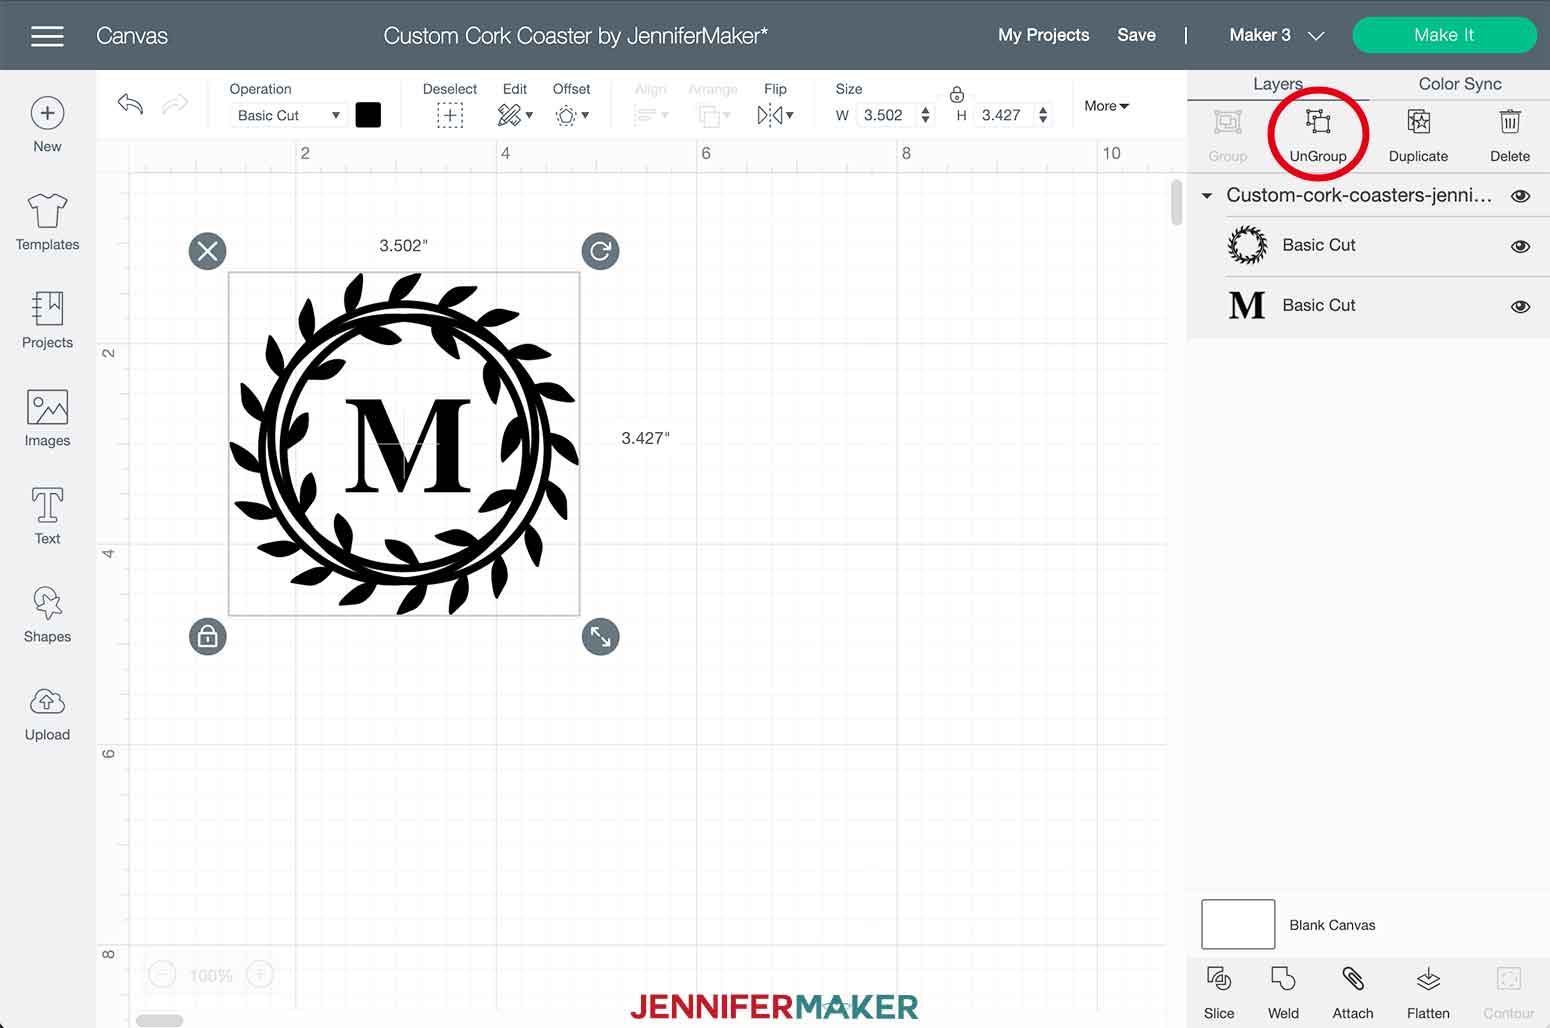
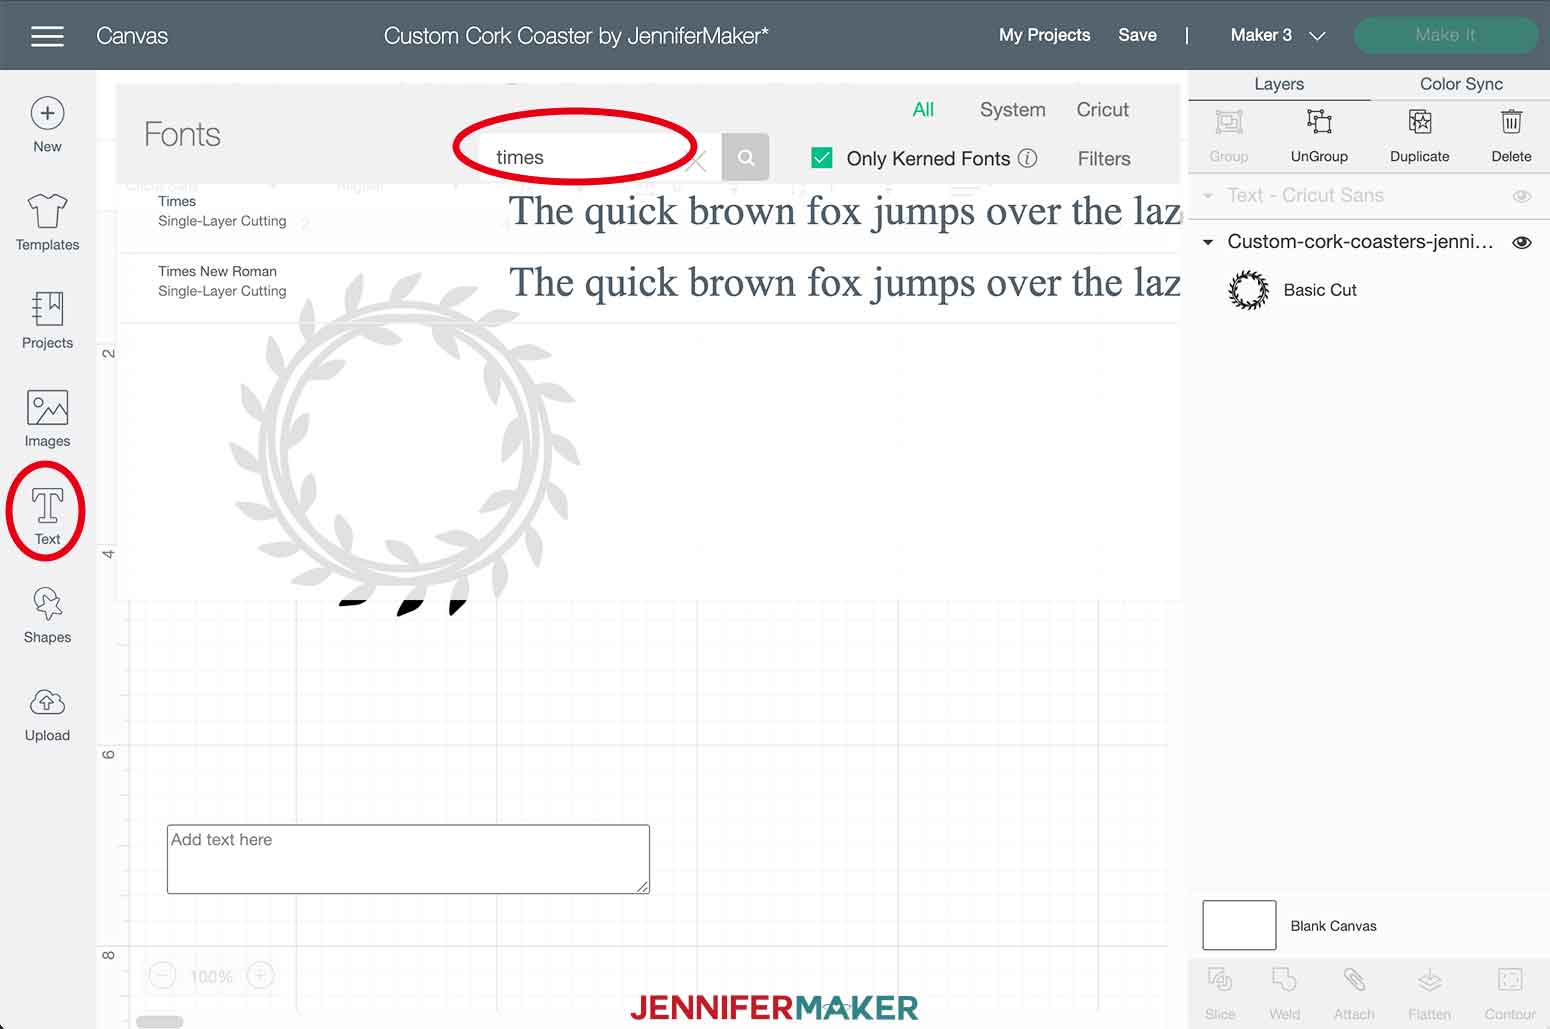
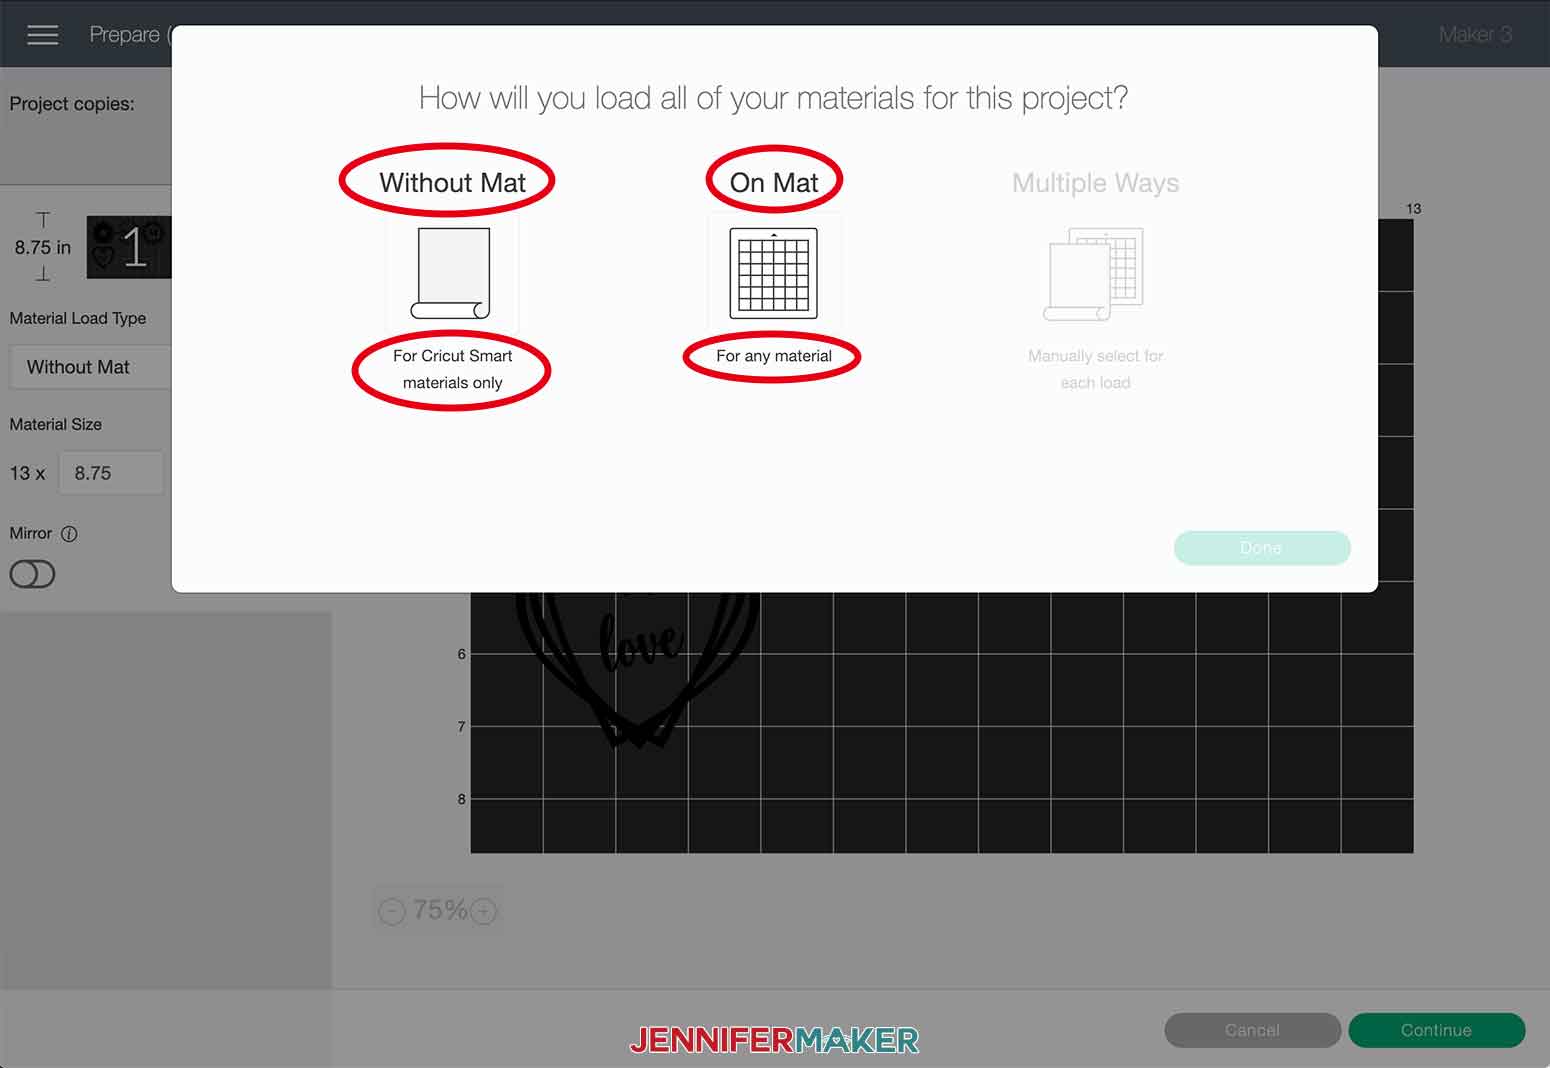
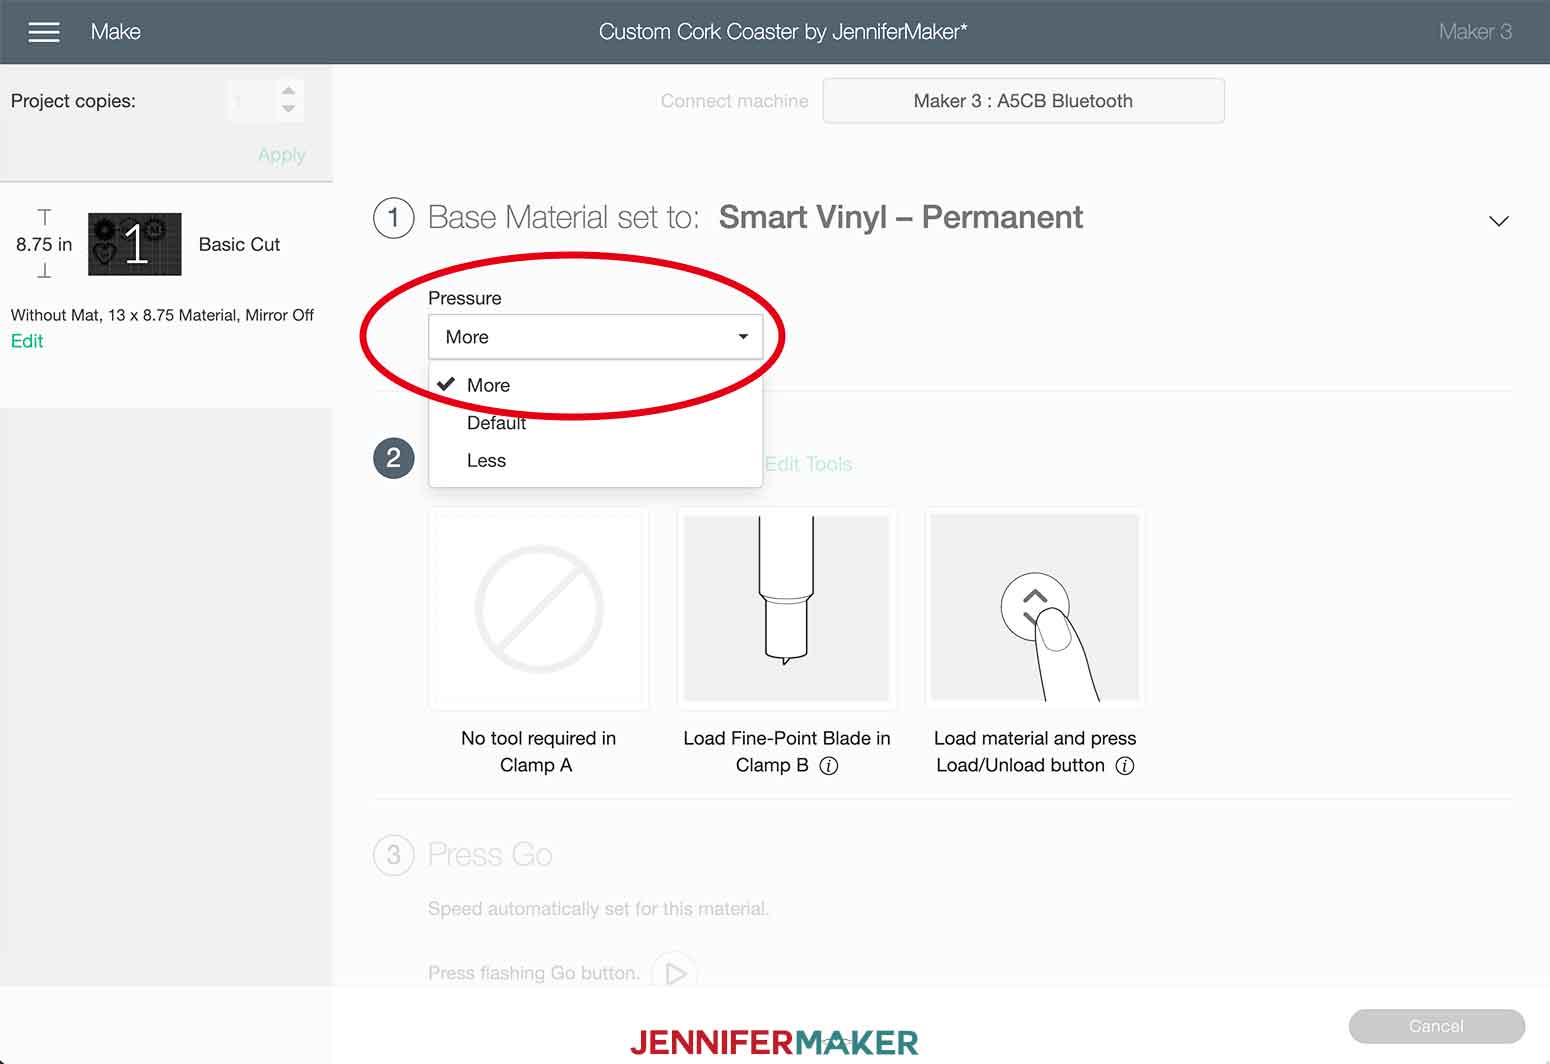
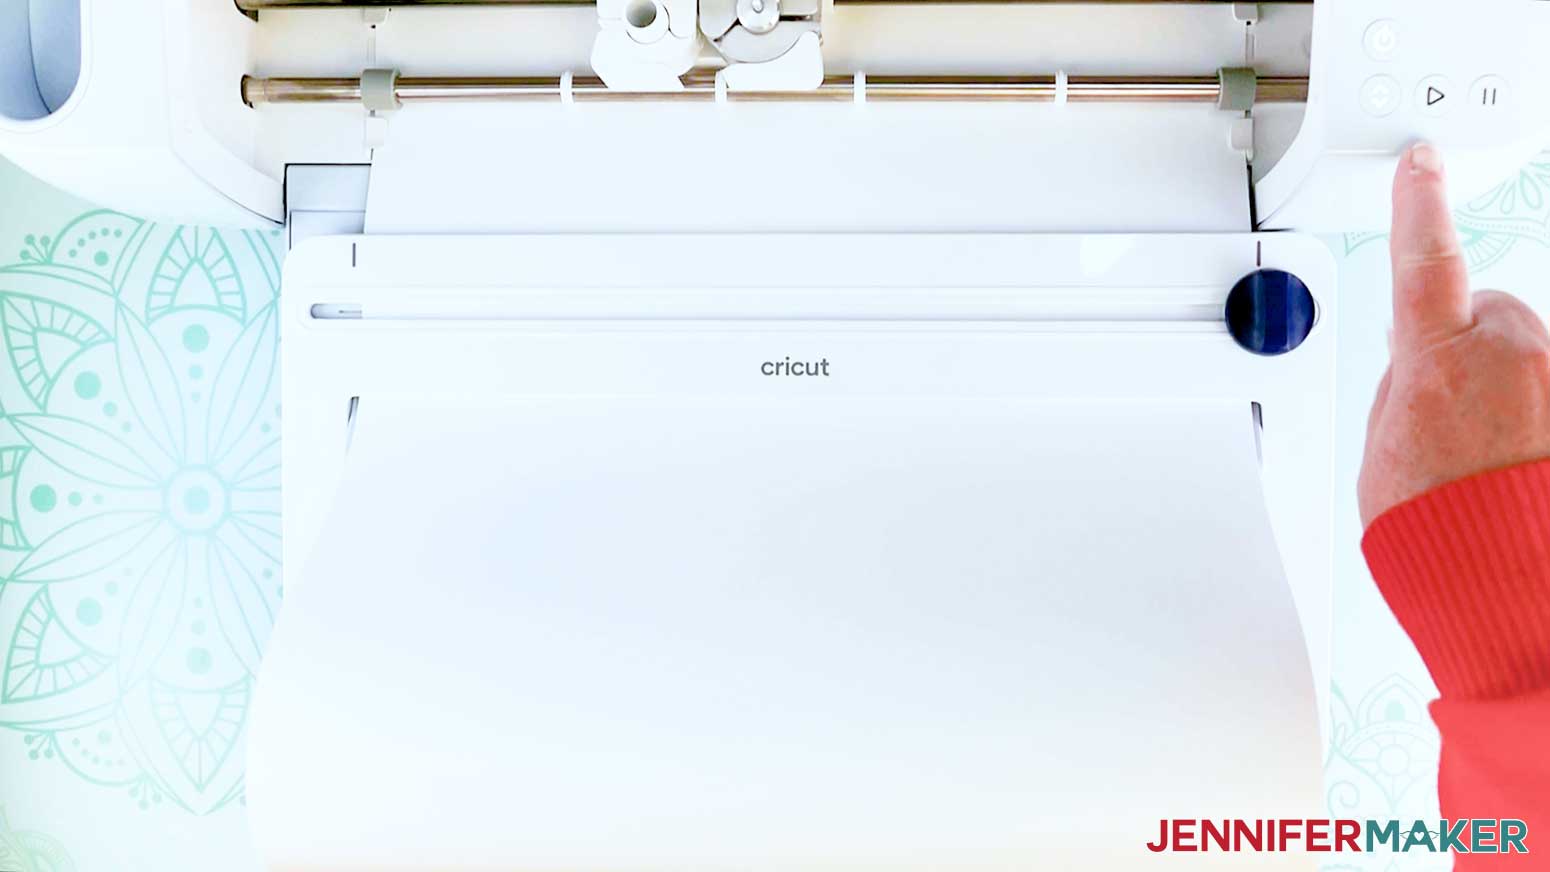
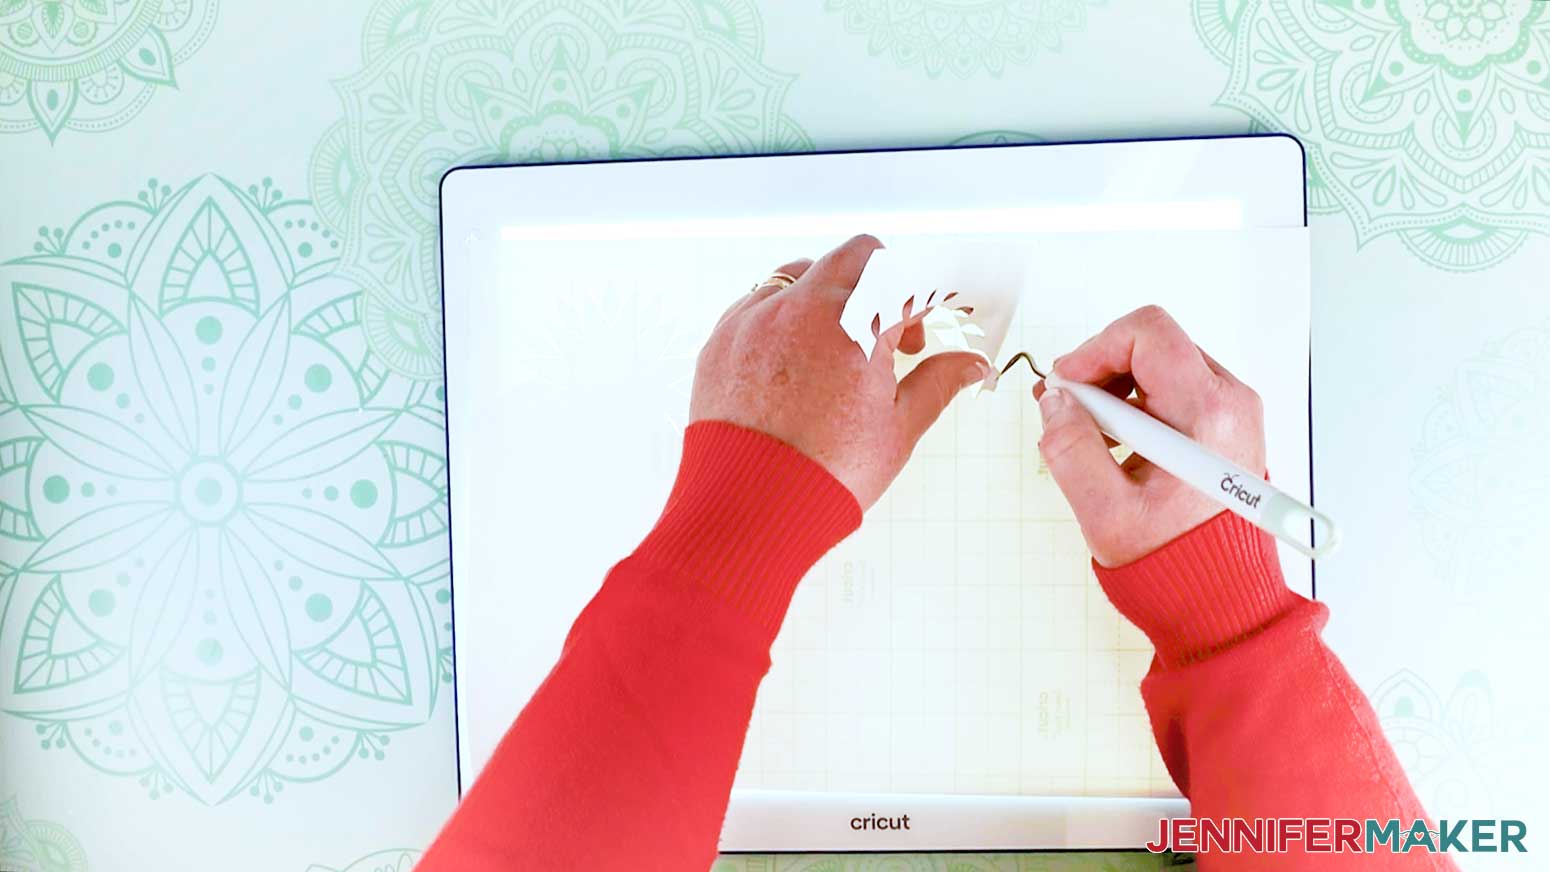
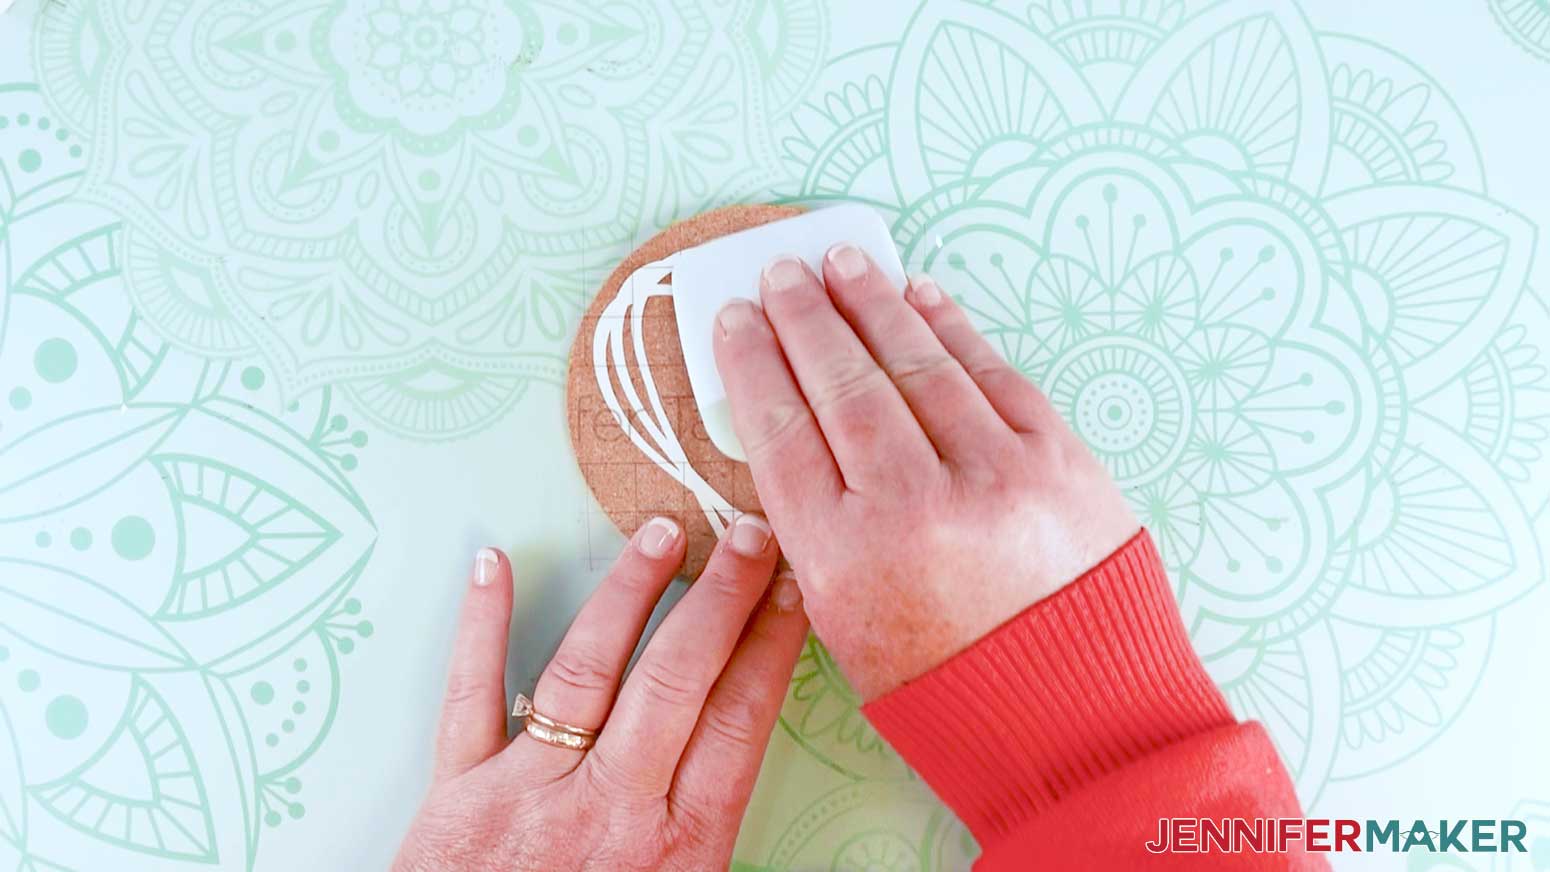
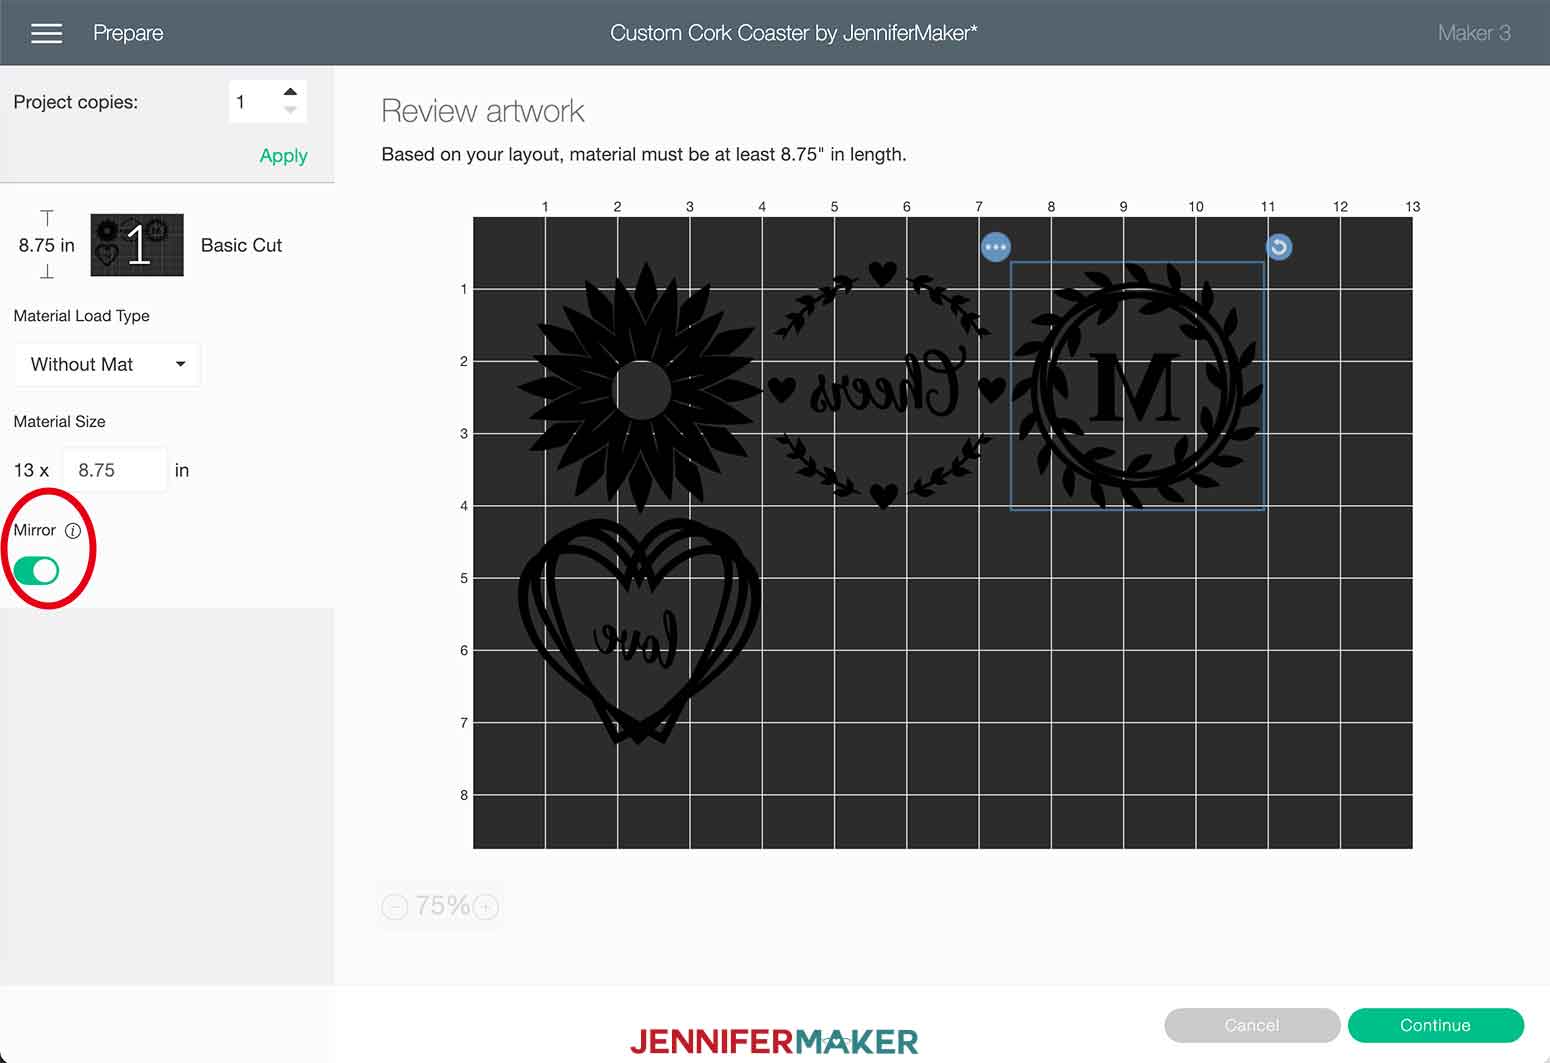
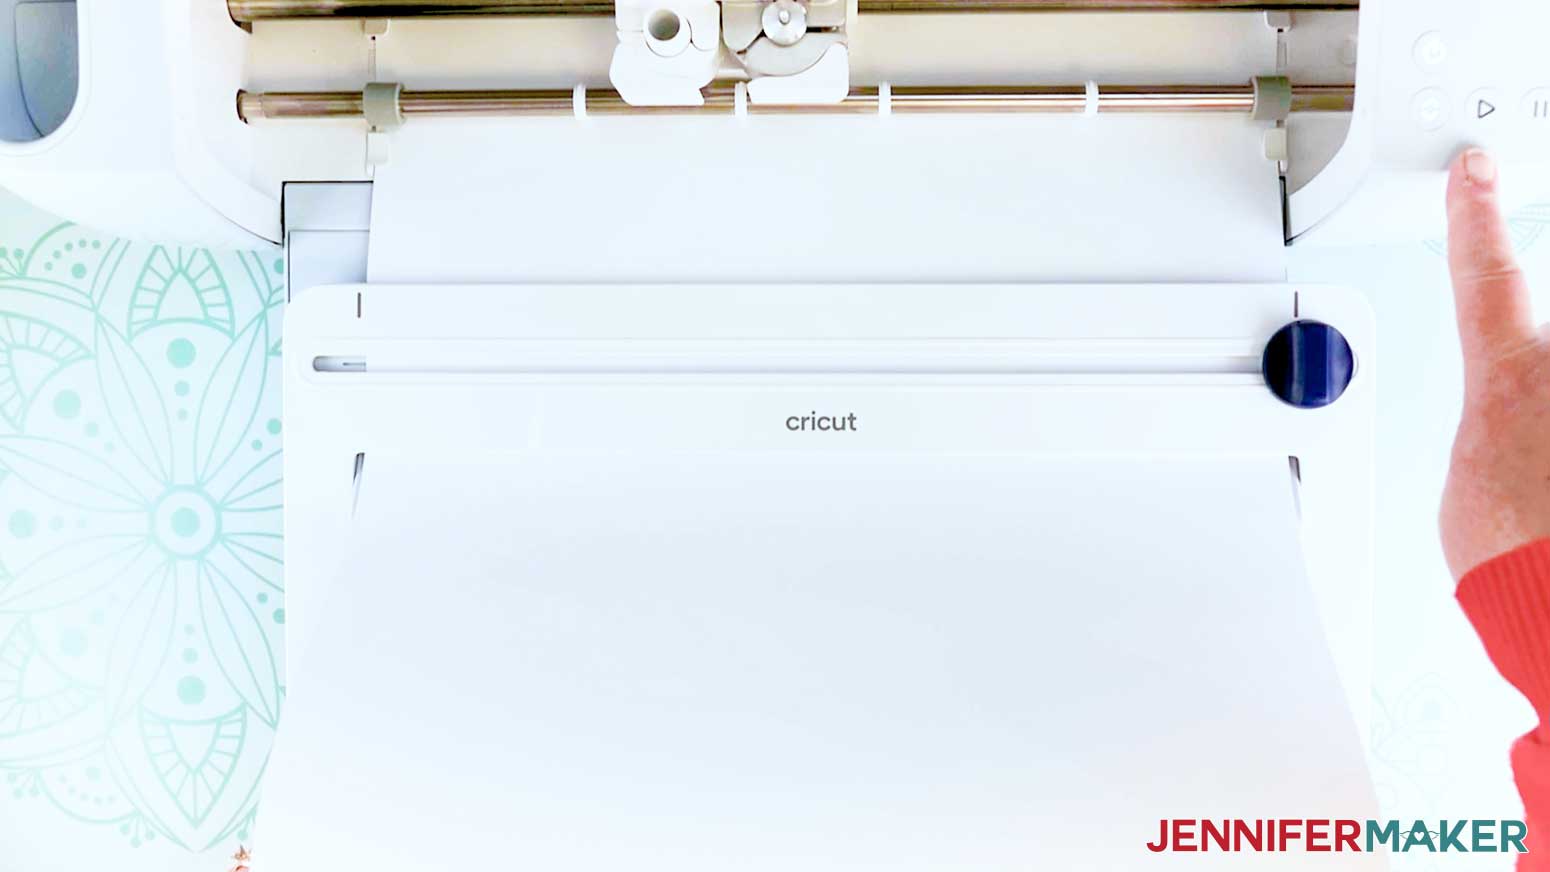
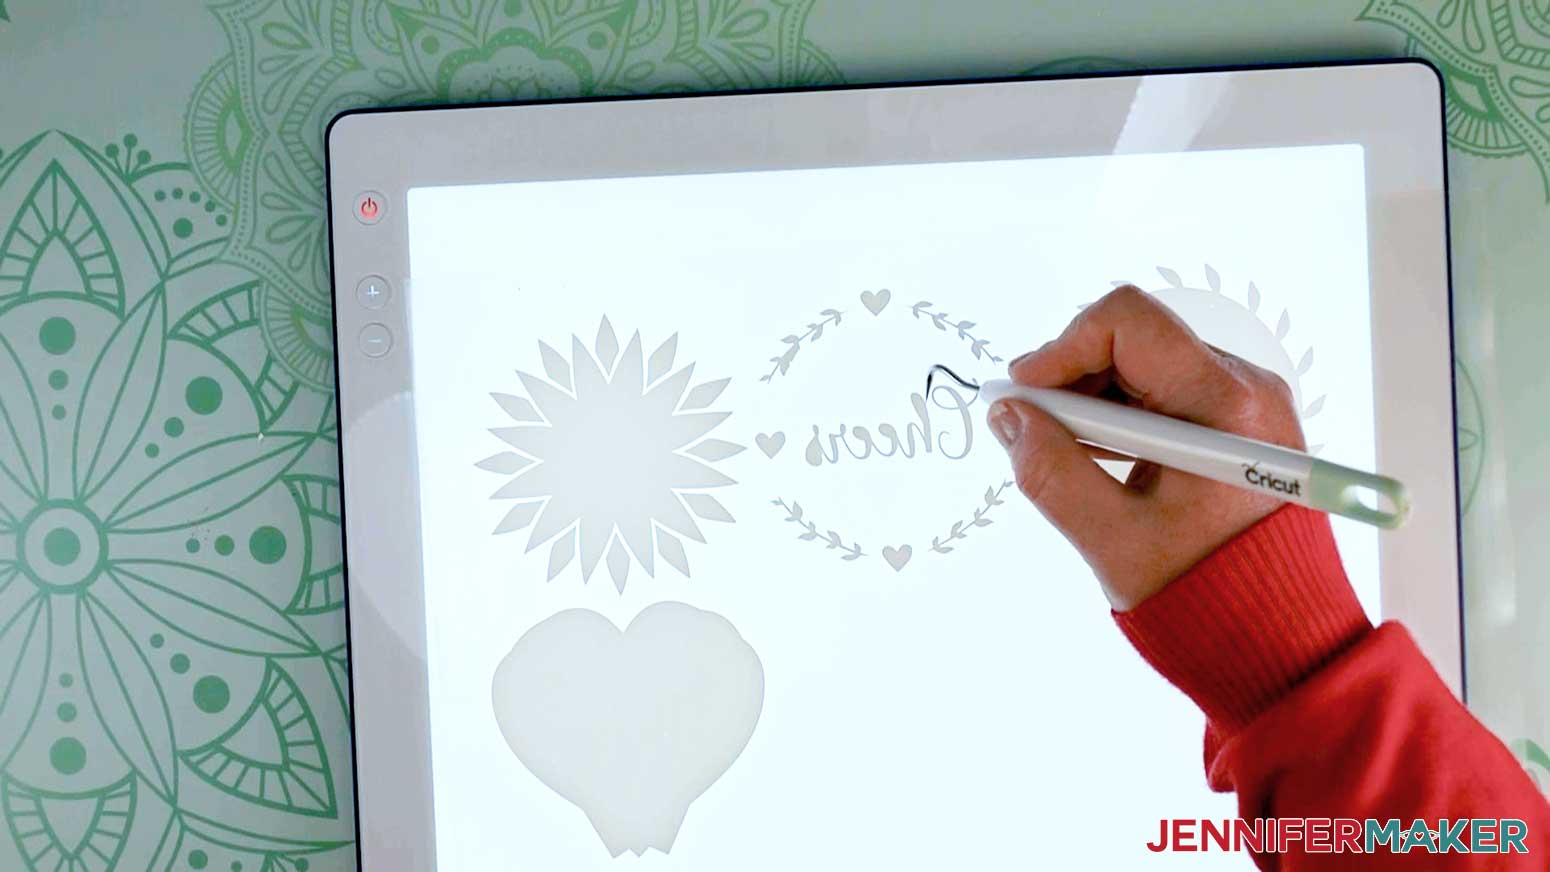
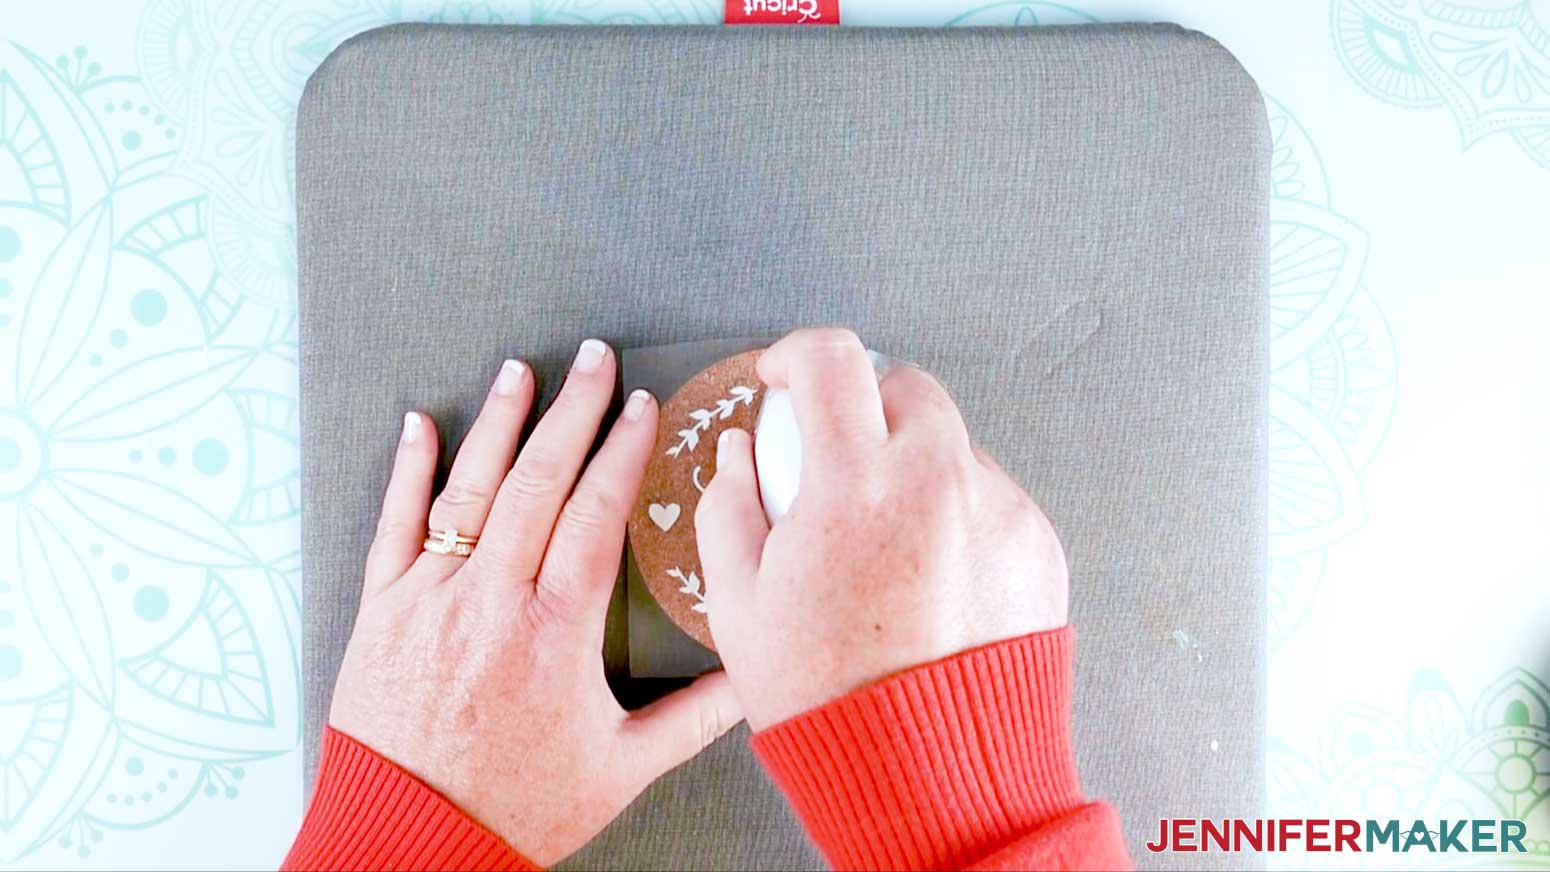
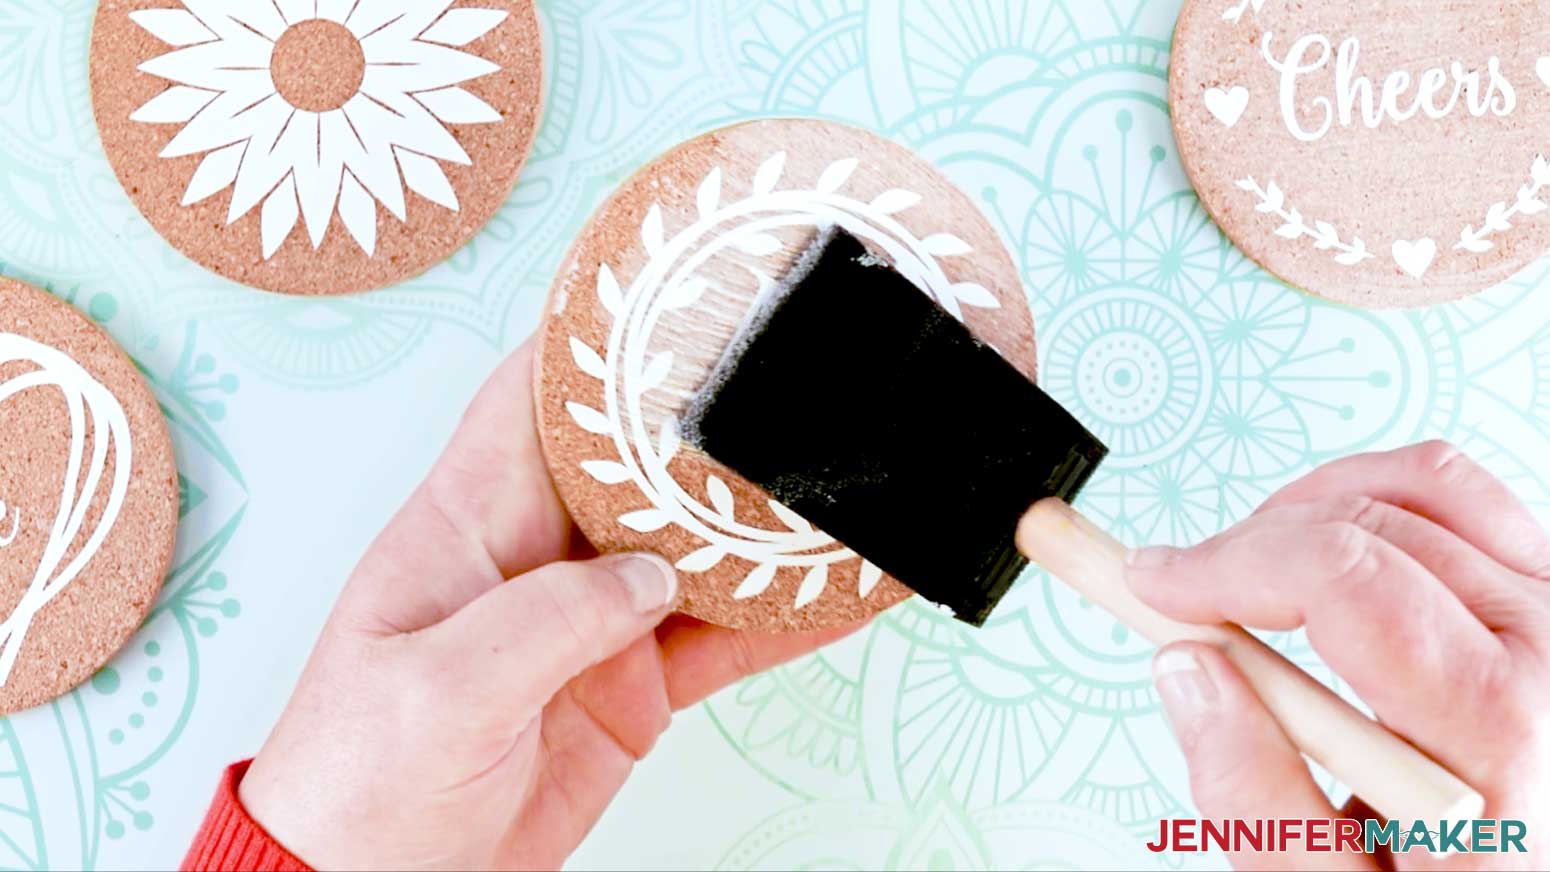
Learn how to make custom cork coasters for everyday use and the holiday season! First, download my Custom Cork Coasters designs from my library – look for Design #336. Here's what the designs look like in Cricut Design Space. You have 12 fun designs to choose from with three different themes. There are four "everyday" designs, four fall designs, and four Christmas designs. First, with the design still selected, click Ungroup. You can hide or delete any of the designs you do not want to make. The designs are sized for 4" round coasters. If you are using a different shape or size, you need to create a shape template to properly size the designs. For an example, I am going to show you how to resize the designs to fit 4" wide hexagon coasters. You can follow this method for any size or shape that you have. Click on Shapes and select the hexagon. My hexagon coaster is 4" wide. You can click and drag the resize handle or manually change the width at the top of the screen. TIP: Keep your shape locked to keep proportions the same. Next, you need to move the shape to the back by clicking "Arrange" and "Send to Back" so that you can size your designs on top of your template. I also changed the color by clicking on the "color picker" next to where it says "Basic Cut" under "Operation." This helped to see contrast against the designs. Now, click and drag one of the designs over the template you've just made. Use the resize handle to appropriately size your design over your coaster template. When you're happy with the resize, move your design off of the template and repeat these steps for all of the designs you need to resize. Once you're done, delete your template shape and click Make It! PERSONALIZE MONOGRAM DESIGN: I'm a big fan of making homemade gifts and I especially like to personalize them if I can. The monogram design with the "M" is perfect for that! To customize it, first select the design and then click Ungroup in the upper right corner. Select the M and click Delete. Click the Text icon and then select your font from the dropdown menu. I chose to use Times but you can use any font you'd like. Select your font and then type your monogram. Click and drag your monogram to the middle of your wreath design. Use the resize handle to resize the monogram to a smaller size. Once you're happy with the look, select both the letter and the wreath and click Attach. You're all set to click Make It in the top right corner! You can make these custom cork coasters with either permanent vinyl or iron-on vinyl. I will guide you through both techniques for beautiful coasters. TIP: These designs are small and intricate. To help me better see the lines for weeding, I used my BrightPad Go with both methods, but this is completely optional. PERMANENT VINYL: If you are using an Explore 3 or Maker 3, you will be asked if you are cutting Without Mat or On Mat. Remember, you can only cut without a mat if you are using Smart Materials. Select either Premium Vinyl - Permanent or Smart Vinyl Permanent. I am using my Maker 3 for this project so I will select Smart Vinyl Permanent. I always recommend you apply "More Pressure" to your cuts, especially with these more intricate designs. Click Continue in the bottom right corner. On your Cricut, press the arrows to load your vinyl, and click the flashing Go or Cricut symbol to cut your image. When it is done, unload your vinyl and weed away the excess vinyl from your designs. Once you have your designs weeded, you can cut them apart so you don't accidentally pull up part of another design with your transfer tape. Cut a piece of transfer tape slightly larger than your design. Peel off the transfer tape backing. Place the transfer tape on top of the vinyl using the taco method. To do this hold the transfer tape in the shape of a taco, then place the bottom of your “taco” onto the middle of your design. Smooth the transfer tape over the vinyl decal from the center outward using the scraper tool. Use your small scraper to burnish your design to the transfer tape. Peel away the backing of the permanent vinyl and then apply your design to your cork coaster. Again, use your small scraper to burnish the design onto the coaster. Peel away your transfer tape. Next, use a foam brush to apply a generous coat of Mod Podge Matte over your design. TIP: You can put some butcher paper underneath the coasters while you apply the Mod Podge to protect your work surface, but this is optional of course. Make sure to give your Mod Podge at least 24 hours to dry before using the coasters. IRON-ON VINYL: If you are using an Explore 3 or Maker 3, you will be asked if you are cutting Without Mat or On Mat. Remember, you can only cut without a mat if you are using Smart Materials. On the Review Artwork screen, remember to toggle on MIRROR. You want MIRROR ON for iron-on vinyl. NOTE: Your designs will appear backwards when mirrored. Select either Everyday Iron-On or Smart Iron-On. I am using my Maker 3 for this project so I will select Smart Iron On. I recommend you apply "More Pressure" to your cuts, especially with these more intricate designs. Click Continue in the bottom right corner. On your Cricut, press the arrows to load your vinyl, and click the flashing Go or Cricut symbol to cut your image. When it is done, unload your vinyl and weed away the excess vinyl from your designs. Once you have your designs weeded, cut them apart for an easier application. I used my EasyPress Mini to press my design. If using the same coasters and iron-on vinyl, preheat your EasyPress Mini to Medium heat. Place your coaster on your EasyPress Mat and center your design on the coaster. Press the design for 30 seconds with constant movement of the EasyPress Mini. Remove the carrier when cool to touch. NOTE: Refer to Cricut's Heat Guide here if you are using different materials. Use a foam brush to apply a generous coat of Mod Modge Matte over your design. TIP: You can put some butcher paper underneath the coasters while you apply the Mod Podge to protect your work surface, but this is optional of course. Allow your coasters 24+ hours to dry before use. The longer you can let them dry, the longer they will last. If you ever notice part of your design starting to come up, you can reapply Mod Podge to reseal for extended use. Both permanent and iron-on vinyl were applied to cork coasters with matte Mod Podge. Both dried for 36 hours followed by over 2 days of iced drinks resting on them. Both coasters held up equally well against the condensation. As an Amazon Associate and member of other affiliate programs, I earn from qualifying purchases.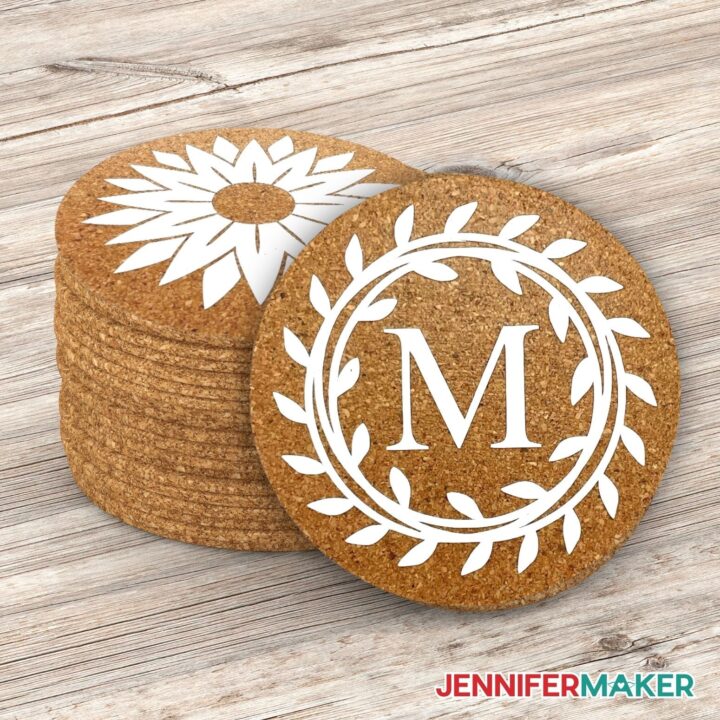
Custom Cork Coasters
Materials
Tools
Instructions
STEP 1: GET MY FREE CORK COASTER DESIGN FILES
TIP: If you are not sure how to upload an SVG cut file to Cricut Design Space, watch this helpful video training series I made. If you are on an iPad or iPhone, here is how to download and upload SVG files to the Cricut Design Space app. 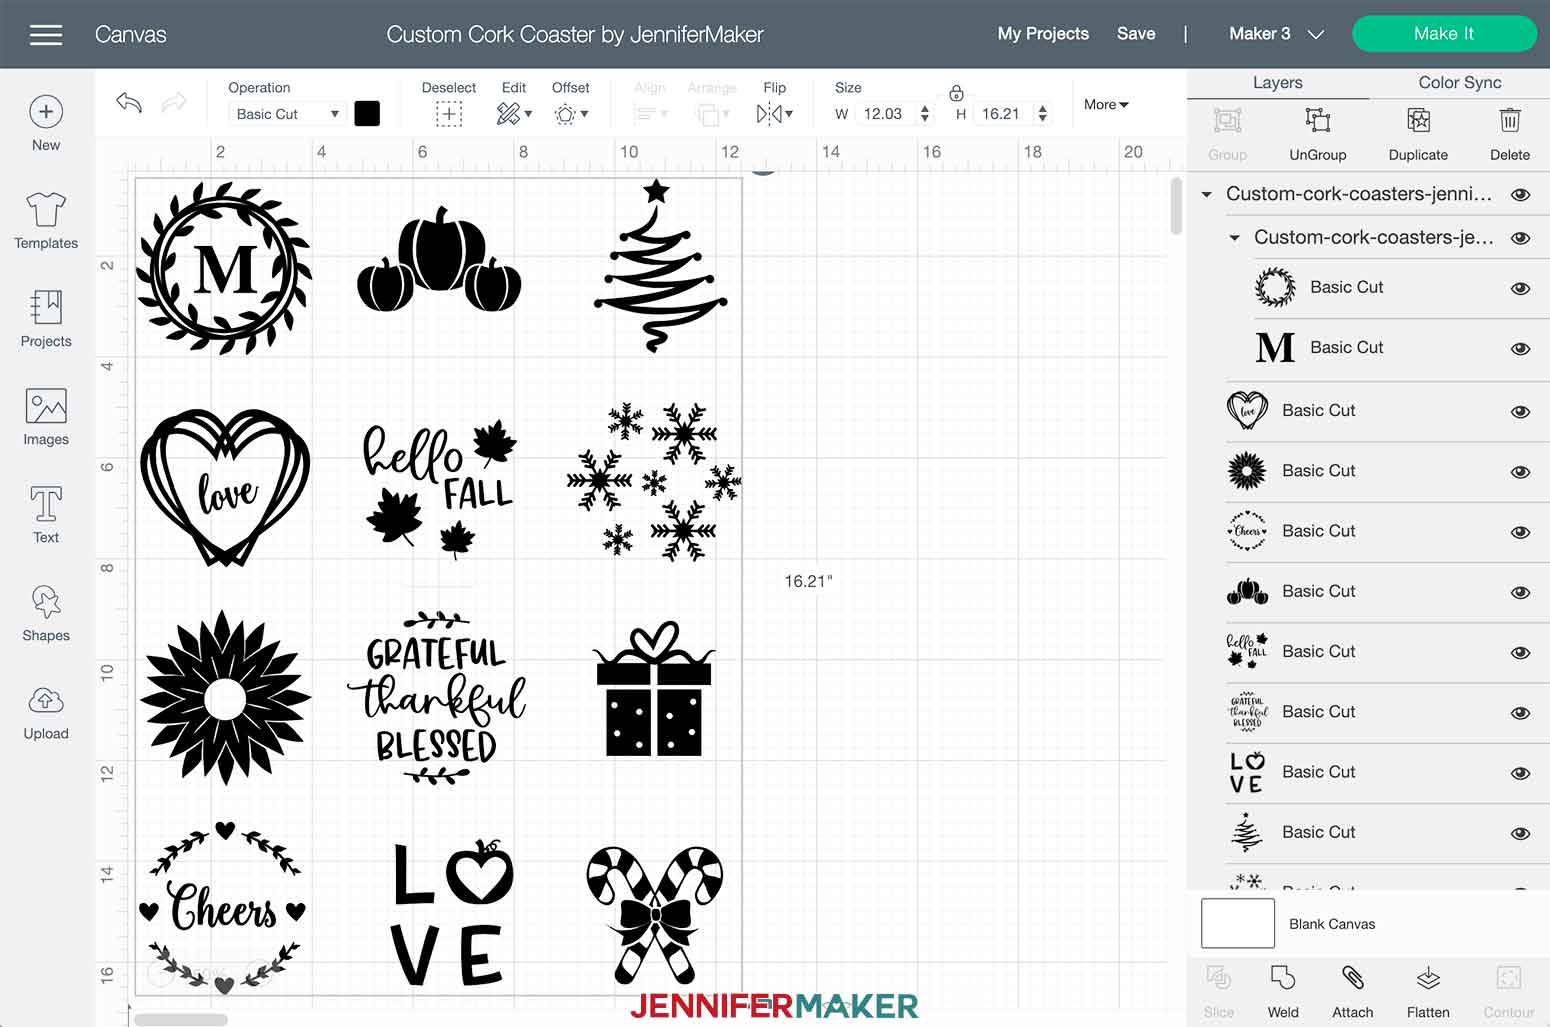
STEP 2: PREPARE YOUR DESIGNS

STEP 3: MAKE IT
![]()


STEP 4: DRYING TIME
Notes
FONTS USED
Recommended Products


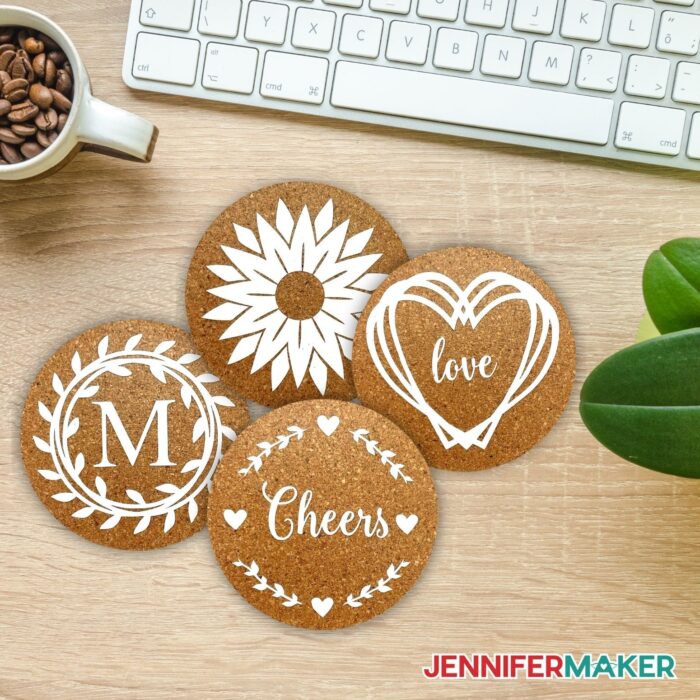
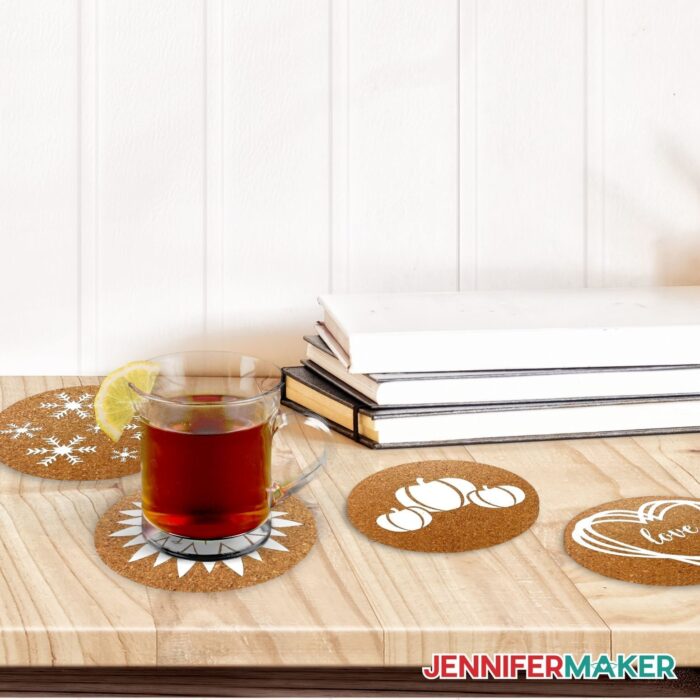
I just love how my custom cork coasters turned out — not only do they make great home decor, but they make great gifts that your loved ones will cherish!
Need last minute holiday decor ideas? These coasters got you covered! Want to spruce up your home? This simple project will wow your guests when they see what you’ve created! Plus, these handmade coasters protect your furniture from your yummy hot drinks!
Answers to Your Questions About How to Make Custom Cork Coasters
Q: Where is your tutorial for the cork coasters project?
This is a special project we made for our free Maker Academy Weekend event! A complete and detailed step-by-step video premiered during the event November 4-7, 2021. Get access to the workshop video and printable workbook with a VIP Pass to Maker Academy Weekend 2021, which comes with other perks and bonuses, too!
Q: Can you REALLY put vinyl on cork coasters?
Yes! Either permanent vinyl or iron on vinyl works great! If you want to use these coasters with drinks, you’ll want to also seal the vinyl with matte Mod Podge.
Q: How well does Cricut vinyl stick to cork?
Cricut vinyl sticks really well to cork! In addition to cork coasters, you can put vinyl on bulletin boards and anything else you might use cork for!
Q: My store doesn’t have any coasters! Where do I find them?
If you can’t find cork coasters at your local craft stores, try ordering them from Amazon. If that’s not an option, be sure to check out your local dollar store!
Q: Can I put drinks on these coasters? How do they hold up to condensation from cold drinks?
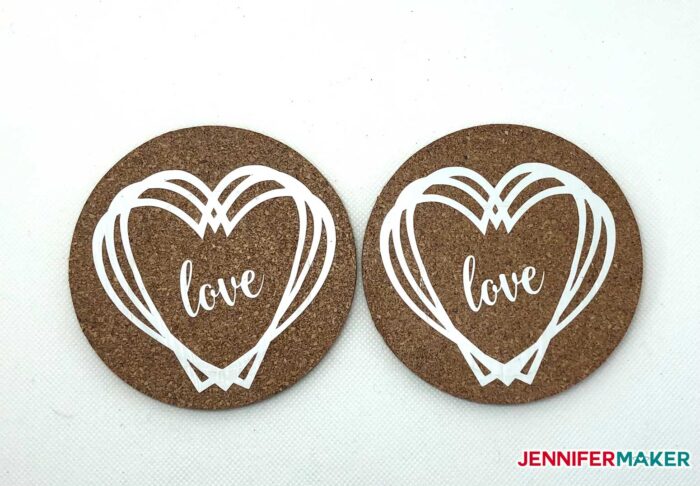
To test this out, we put cups with ice water on our sealed cork coasters for two straight days. There are some indentation marks from the cup but both the permanent vinyl and the iron on vinyl were unaffected. The only thing we noticed is that the cups were sticking a little to the coasters when we picked them up. So both types of vinyl worked well after sealing. Here’s what our custom cork coasters looked like after our two-day condensation test — the one on the left is iron on vinyl, and the one on the right is permanent vinyl.
Q: Can I put Infusible Ink on coasters?
Yes, but not the cork coasters we’re using in this tutorial. You’d want to get the Cricut cork-backed coasters or another sublimation-coated coaster for your Infusible Ink designs.
Get the free designs for the Custom Cork Coasters
I can’t wait to see what you make with my designs and how you use them! Please share a photo of your custom cork coasters in our Facebook group or tag me on social media with #jennifermaker.
Love,

Want to remember this? Save this Custom Cork Coasters Tutorial to your favorite Pinterest Board!