Learn common sublimation heat press settings with this handy guide!
Sublimation is SO fun, but can be confusing to remember all the times and temperatures, let’s be honest. Unlike heat transfer vinyl, dye sublimation is a popular method of printing images on a sublimation printer with sublimation ink and transferring them to various materials with high heat. The sublimation process creates a beautiful, vibrant, and long-lasting result. However, achieving the best results requires the right sublimation heat press settings. It’s easy to guess wrong and ruin your sublimation transfers. A lower heat press temperature can seem like a safe starting point, but can produce light colors. Higher temperatures can overcook your sublimation prints. So let’s talk about common sublimation heat press settings and how to determine times, temperatures, and pressures for different materials.
Tip: I’ve tested hundreds of sublimation blanks on various heat presses and ovens, and put all of my results into what I call the Sublimation Cookbook! Everything is in one place and SO easy to look up and use! Get your copy of Sublimation Cookbook now.
The correct sublimation heat press settings vary depending on the substrate (which is a fancy word for material or surface) and as well as the heat presses being used. The following are some common sublimation heat press settings for different materials. Note that I’m listing degrees Fahrenheit here.
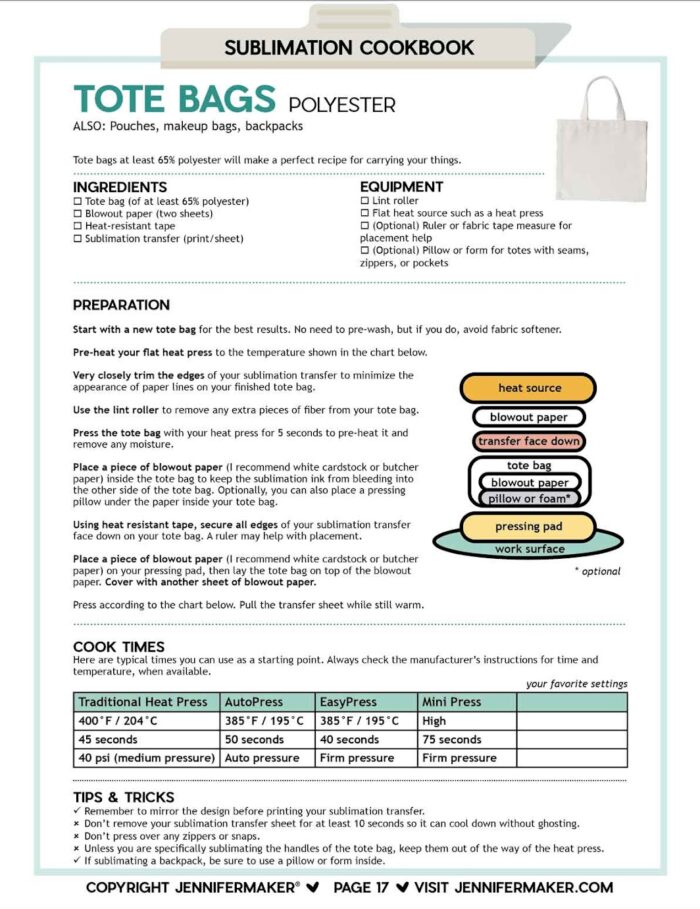
Sublimation Settings for Shirts and Polyester Fabric
Polyester fabric is the most common substrate for sublimation printing, as many of us love to make sublimation shirts. The following are the recommended sublimation heat press settings for polyester fabric. Note that times and temperatures vary by type of heat press — if you would like more specific recommendations for over 150 popular sublimation projects, consult my Sublimation Cookbook (you can get 12 free pages with specific sublimation settings, too).
- Temperature: 375°F to 400°F
- Time: 40 to 75 seconds
- Pressure: Light to medium pressure (35 to 50 psi)
Note: If you want to use cotton shirts instead, lower temperatures (and special layers or coatings) are recommended to avoid scorching. See my How to Sublimate on Cotton and Dark Colors tutorial for more details.

Get this design, and all designs you see on this page, totally free in my library!
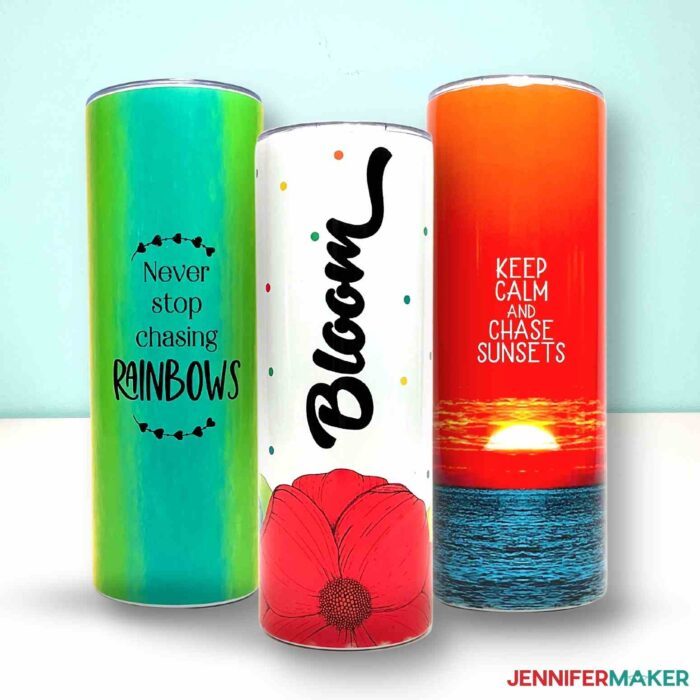
Stainless Steel Tumblers
Specially-coated tumblers are a very popular sublimation project and look really amazing when done properly! Here are the generic ranges of temperatures we use for stainless steel projects in a tumbler press:
- Temperature: 360°F to 385°F
- Time: 100+ seconds (times increase significantly when you move to a convection oven or air fryer)
- Pressure: Medium pressure (40 psi)
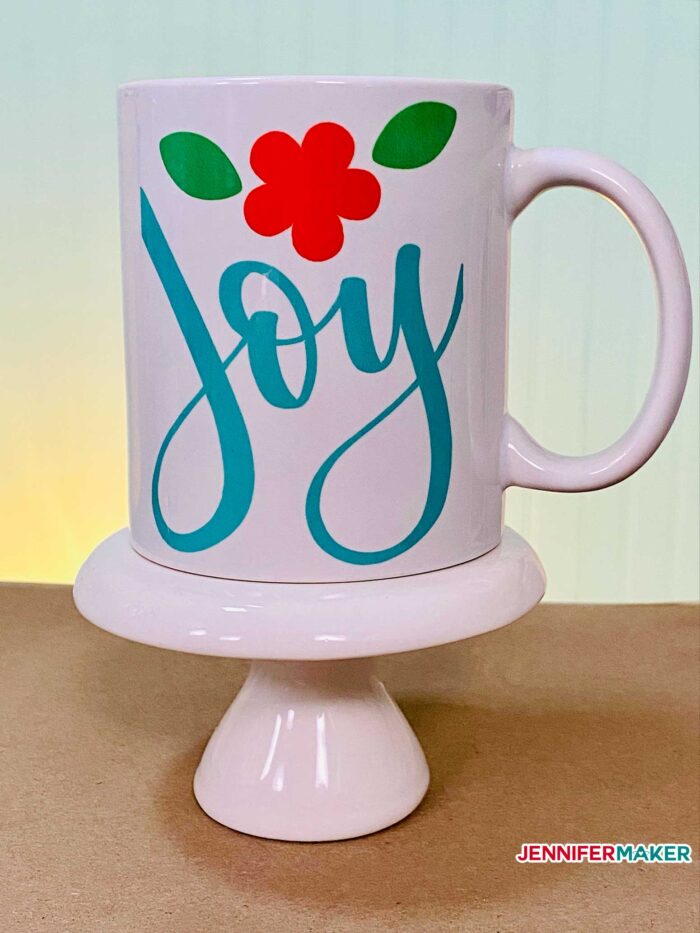
Ceramic Mugs
Ceramic mugs are another popular substrate for sublimation printing, but again they must have a special sublimation coating on them — regular ceramic mugs without the coating will not hold the sublimation ink. The following are the recommended sublimation heat press settings for ceramic mugs in a mug press (note that a convection oven takes quite a bit longer than this):
- Temperature: 350°F to 400°F
- Time: 60 to 80 seconds
- Pressure: Medium to high pressure (35 to 50 psi)
Tip: If you’re using the Cricut Mug Press, you don’t need to worry about temperature, time, or pressure! Be sure to check out my Ultimate Guide to the Cricut Mug Press.
Aluminum Panels
Aluminum panels are a popular substrate for sublimation printing. The following are the recommended sublimation heat press settings for aluminum panels:
- Temperature: 400°F to 425°F
- Time: 45 to 60 seconds
- Pressure: Medium pressure (35 psi)
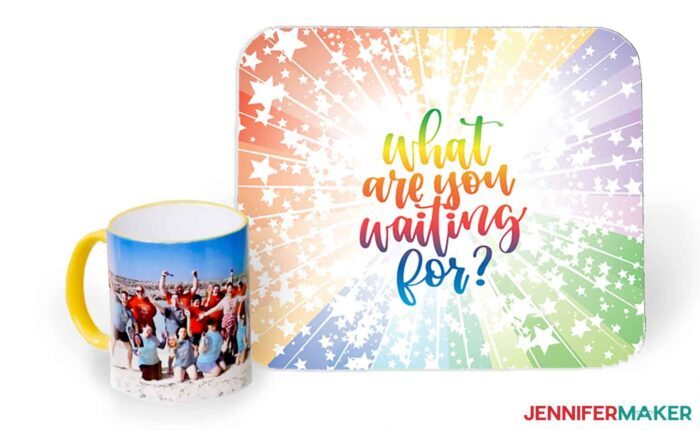
Mouse Pads
Mouse pads are a popular substrate for sublimation printing. The following are the recommended sublimation heat press settings for mouse pads:
- Temperature: 375°F to 400°F
- Time: 40 to 45 seconds
- Pressure: Medium pressure (35 psi)
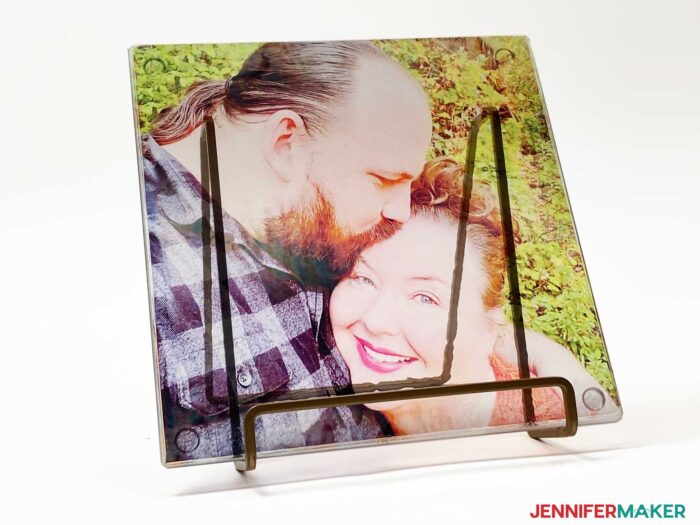
Glass
Glass is a popular substrate for sublimation printing, but again, they must be sublimation friendly or have a coating or layer applied that accepts the sublimation ink. The following are the recommended sublimation heat press settings for glass:
- Temperature: 400°F to 425°F
- Time: 45 to 60 seconds
- Pressure: Medium pressure (35 psi)
How to Determine the Best Sublimation Heat Press Settings
Sublimation heat press settings vary depending on the material being used — there’s a huge difference. Here are the steps I take to figure out the different settings:
Consult the Manufacturer’s Instructions
The first step is to consult the manufacturer’s instructions for the substrate you are using. The manufacturer’s instructions will provide you with the recommended sublimation heat press settings for the substrate.
Do a Test Print
The second step is to conduct a test print. This involves printing a small design on the substrate using a range of temperatures, times, and pressures. After the test print, inspect the substrate to determine the best sublimation heat press settings for the substrate.
Adjust the Settings
The third step is to adjust the settings based on the results of the test print. If the design is blurry, faded, or smudged, increase the temperature, pressure, or time. A little bit of experimentation goes a long way here. If the design is too dark or has ghosting, decrease the temperature, pressure, or time. And when you DO find the right settings, be sure to write them down!
Tips for Achieving the Best Sublimation Results
The following are some tips for achieving the best results when using sublimation heat press:
Use High-Quality Ink
High-quality ink is essential for achieving vibrant and long-lasting prints. Make sure to use sublimation ink that is compatible with your printer and substrate. I like to use Hiipoo ink in my Epson EcoTank and SubliJet in my Sawgrass.
Use High-Quality Sublimation Paper
High-quality sublimation paper is also essential for achieving the best results. Make sure to use sublimation paper that is compatible with your printer and substrate. I recommend A-Sub sublimation paper. Low-quality paper can result in poor quality prints, such as blurry or faded designs.
Use the Right Pressure
Using the right pressure is important for achieving a good transfer of the design onto the substrate. Too much pressure, or overly heavy pressure, can result in the design being pressed too hard into the substrate, causing distortion or damage. Too little pressure can result in the design not being transferred properly, resulting in a blurry or faded print. Usually, you only need medium pressure, but it does depend on what you’re doing. I prefer to use the pressure notes in my Sublimation Cookbook.
Use Heat-Resistant Tape
Using heat-resistant tape can help prevent the substrate from shifting during the transfer process. It can also help ensure that the design is aligned correctly on the substrate. Make sure to use tape that is heat resistant and safe to use with your material. I like to use Cricut blue heat-resistant tape.
Consider the Material Type
Different materials require different sublimation heat press settings. Make sure to consult the manufacturer’s instructions and conduct a test print to determine the best settings for the material you are using. Test, test, test!
Consider Fiber Content
Sublimation printing works best with synthetic materials that have a high polyester content. While it is possible to print on natural fibers such as cotton or rayon, the results won’t be as vibrant or long-lasting, and will eventually fade away. When printing on cotton fabric, it is important to use a pre-treatment spray or coating to help the ink bond with the fabric.
Find the Best Temperature
The temperature is one of the most important factors when determining sublimation heat press settings. It is important to find the best temperature for the material you are using. Too high of a temperature can cause damage to the substrate, while too low of a temperature can result in a blurry or faded design. I list all of the temperatures I’ve successfully used on all the blanks I’ve tried in my Sublimation Cookbook.

Sublimation heat press is a popular method of printing designs onto various substrates. However, achieving the best results requires the right sublimation heat press settings. It is important to consult the manufacturer’s instructions and conduct a test print to determine the best settings for the material you are using. Using high-quality ink and sublimation paper, using the right pressure, and considering the material type are all important factors in achieving the best results. And, consider taking a shortcut to all this by using my Sublimation Cookbook, which really makes a huge difference! With the right sublimation heat press settings and techniques, you can create vibrant and long-lasting designs on a wide range of substrates.
Exactly how long do I press my sublimation print on ______ ?
Can’t remember how long to press that particular sublimation blank? Not sure what order to stack your layers? Confused about how to get the best transfer? The Sublimation Cookbook guide can help, with step-by-step sublimation project recipes for over 150 different sublimation blanks. Each of these “recipes” show you exactly what to use, how long to press, how hot to press it, and how to take care of your sublimated project for long lasting results. Plus, it’s the best way to help you avoid common sublimation problems before they arise!
Get free sublimation designs for your projects
I’d love to see YOUR sublimation projects! Please share a photo in our sublimation craft group or tag me on social media with #jennifermaker.
Love,

Want to remember this? Save these Sublimation Heat Press Settings to your favorite Pinterest Board!