
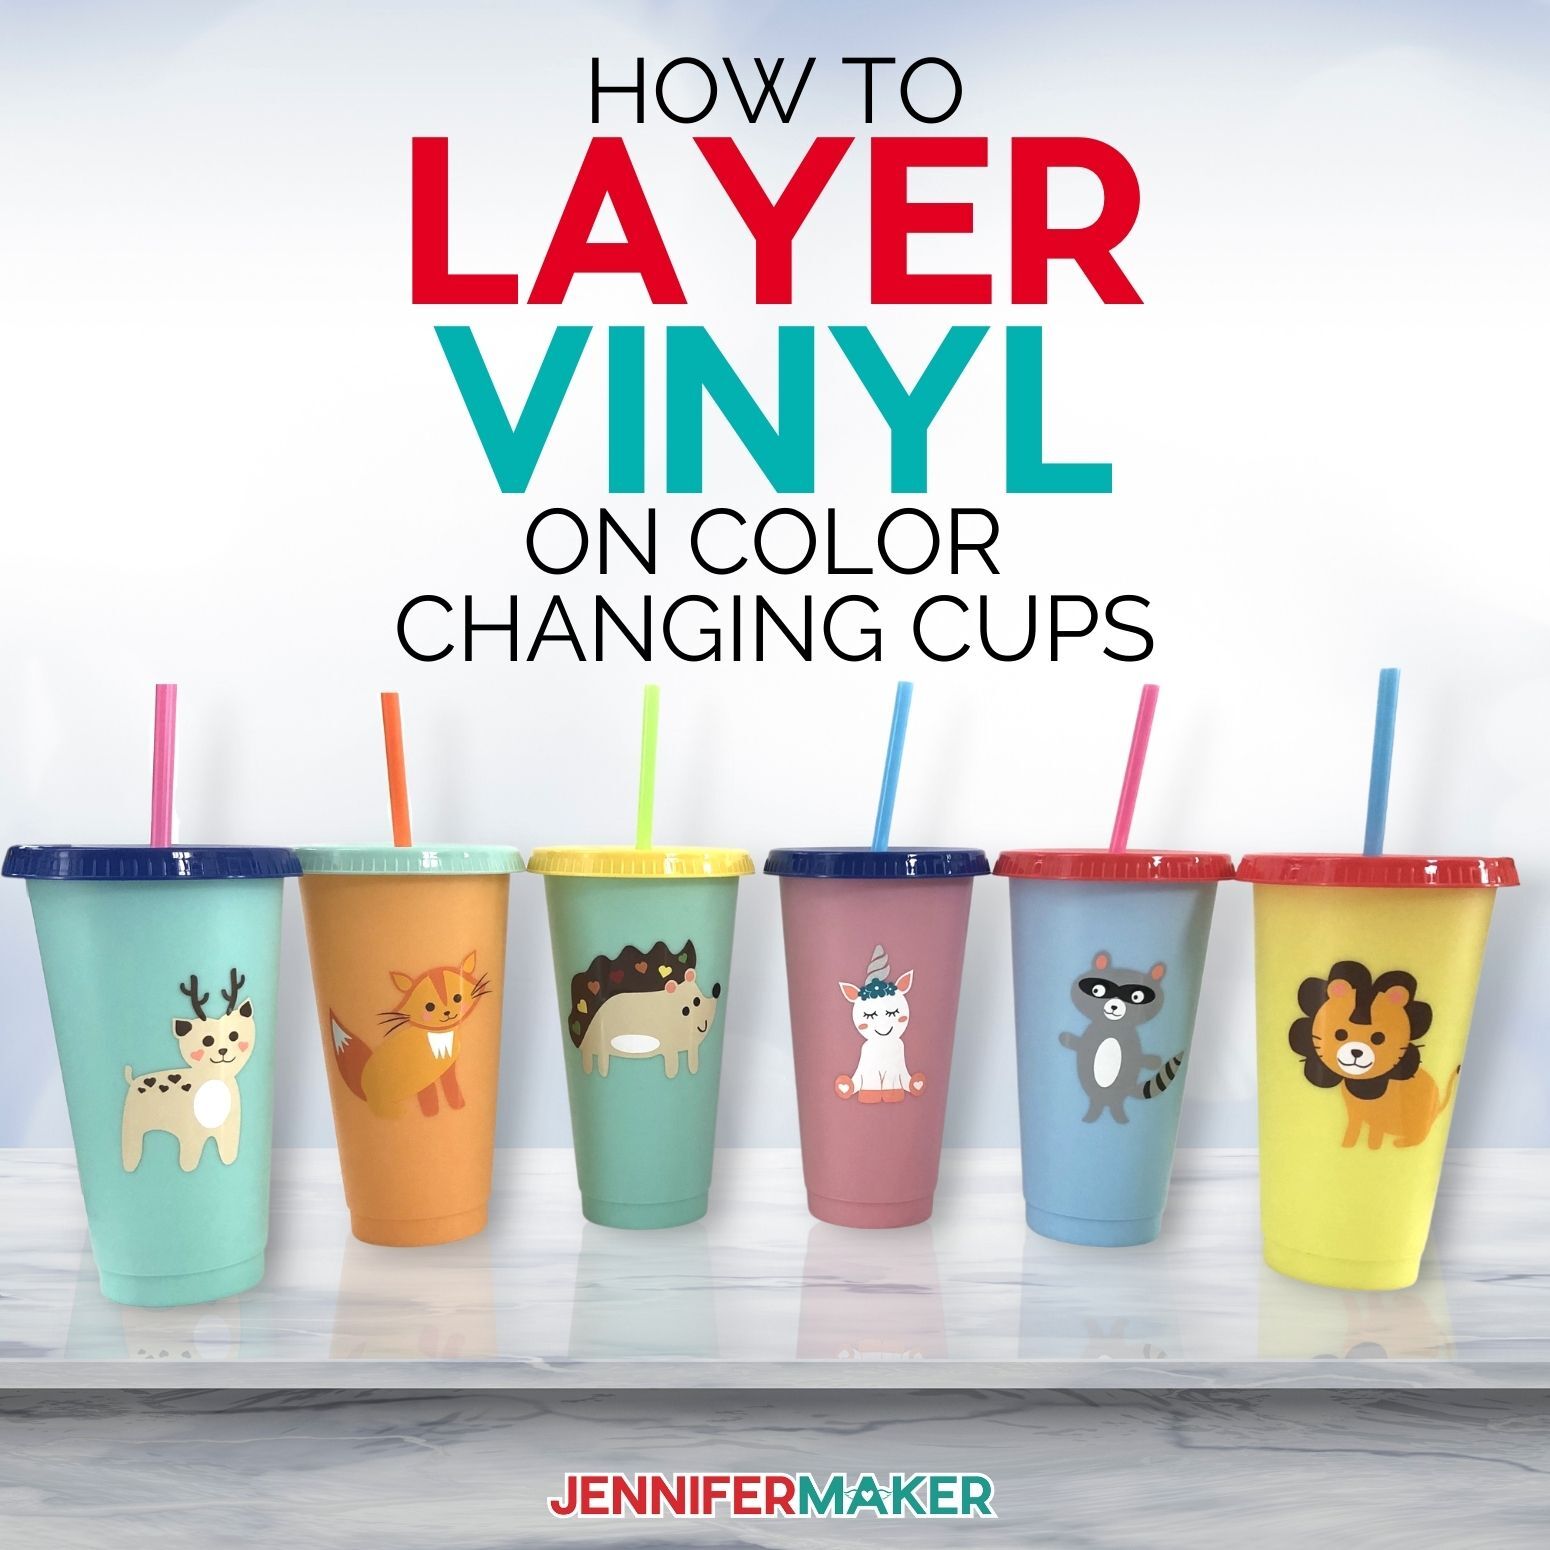
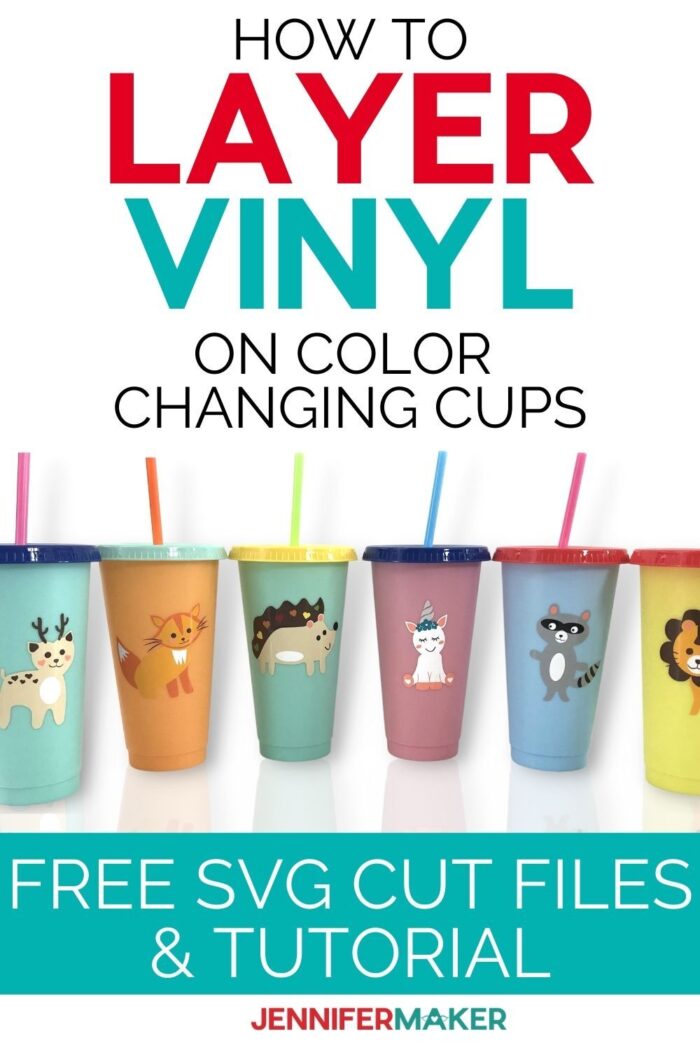
Learn how to layer vinyl on Cricut easily and apply it to a color changing cup!
I’m not sure how much vinyl you have layered or if you have ever layered vinyl, but what I’m about to show you is truly a game changer! Now before you say it, I know what you’re thinking. Layering adhesive vinyl on projects can be tough. I know, it was hard for me when I first started attempting layered vinyl projects. You try to line up everything just right, but it’s always off by just a hair and then before you can pull it back up and adjust it, the vinyl sticks and the design is ruined. It can be so frustrating. But, it doesn’t have to be that way! I can teach you how to layer vinyl on Cricut!
Watch my step-by-step video tutorial on how to layer vinyl on cups!

So there is a really cool hack that practically guarantees perfect placement every single time. That is exactly what I will show you. It’s actually a lot easier than you might think and it will save you so much time and material!
To start off, let’s talk about the vinyl — for this tutorial, we’re going to learn about adhesive vinyl, not iron on vinyl or heat transfer vinyl. So we need adhesive vinyl in an assortment of colors to make all the fun designs I’ve included for you. We will also need some standard grip transfer tape to transfer all of our designs. But you only need a little bit of a piece of transfer tape!
I cut my vinyl decal designs on a Cricut Maker 3, but you can cut these on any Cricut cutting machine including the Joy! A few other things you will need include the handy green standard grip machine mat, weeding tool, scraper and a brayer. Plus you’ll want to have some scissors handy!
Oh, and let’s not forget the material that makes the magic happen: parchment paper! I’m going to show you the easiest way to layer vinyl in this tutorial!
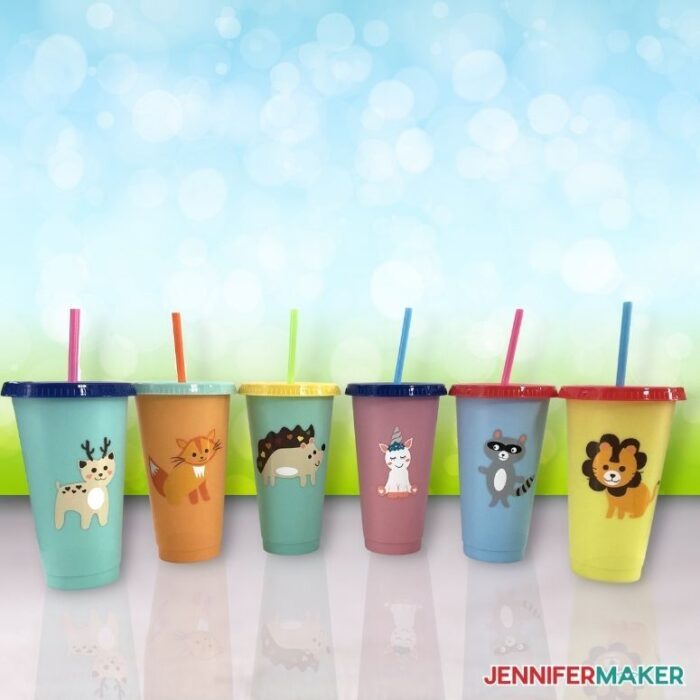
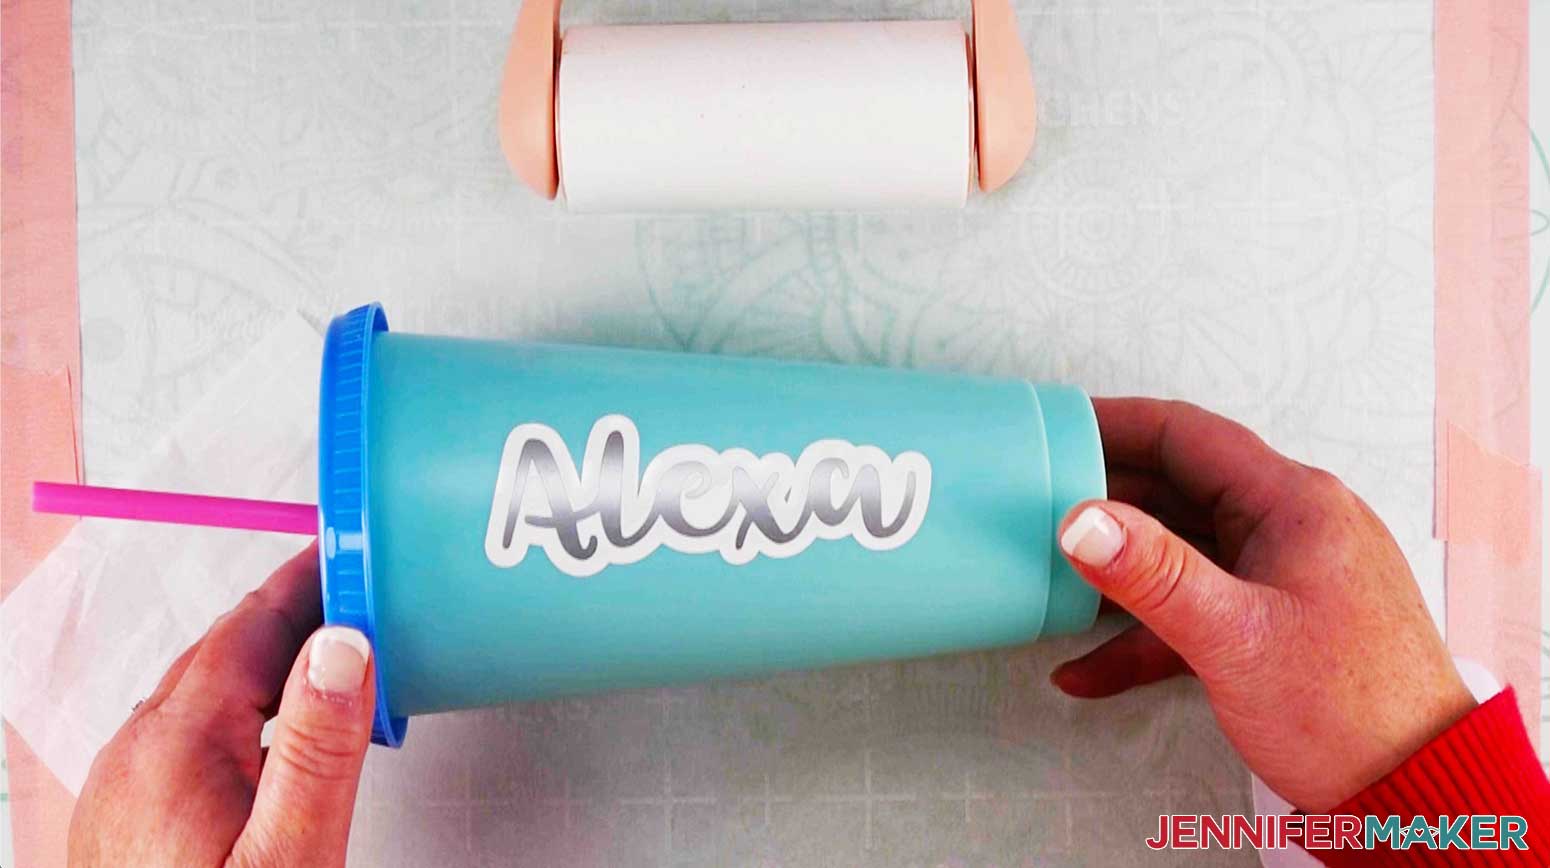
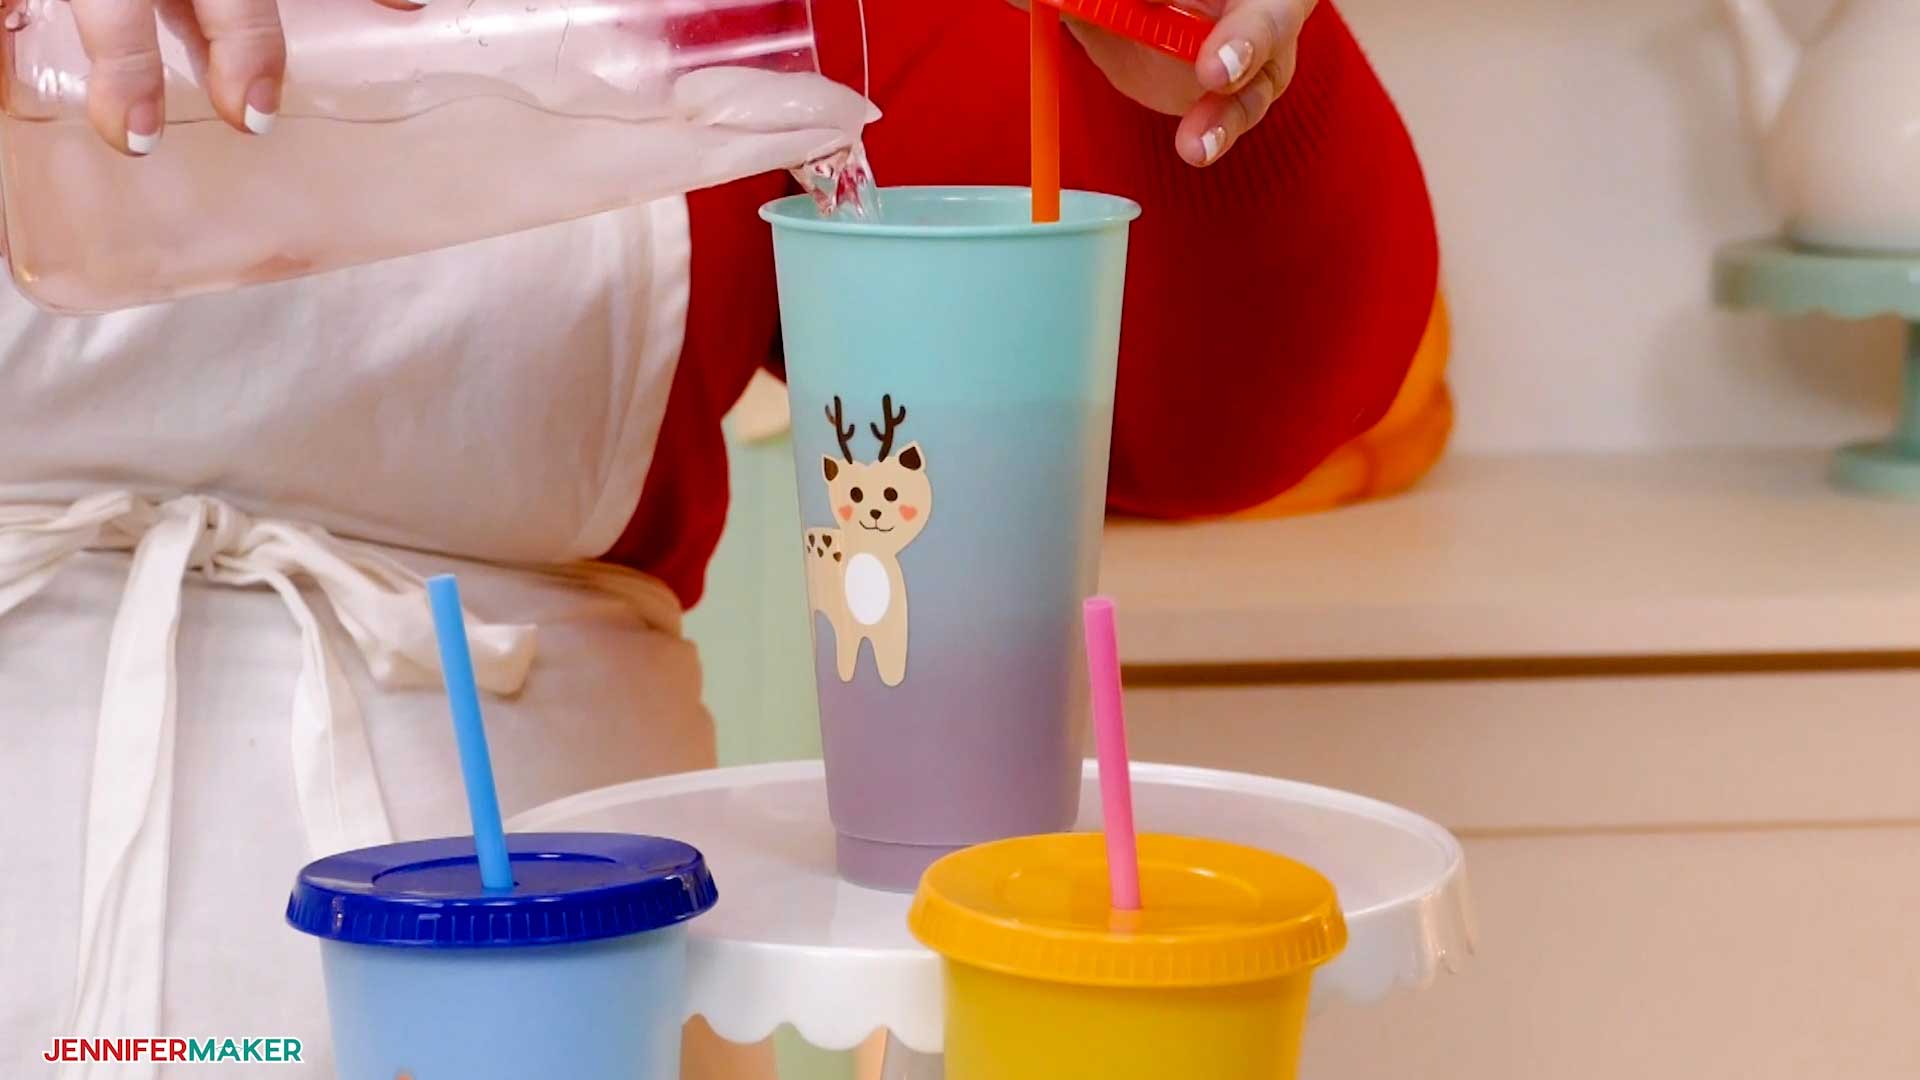
And of course we need something to put our layered vinyl decal on — how about some fun color-changing cups? I’m going to put my layered vinyl designs on these 24-ounce color-changing cups and they are seriously the coolest thing ever! Wait till you see what they look like when you add a cool drink and some ice!
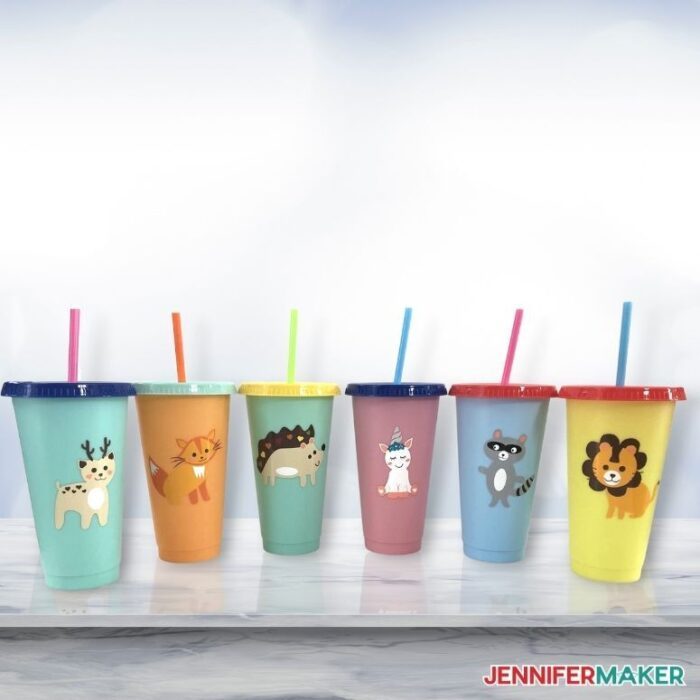
Didn’t they turn out so cute? As with most (if not all) of my projects, this would make a great gift for any occasion. You are also welcome to personalize your cup however you would like. You can add a name, change up the colors, and add any type of personalization you would like. The ideas are endless! Remember to hand-wash only so that your cup stays looking brand new for a very long time.
I can’t wait to see all of your adorable layered vinyl designs!
Let me show you how easy it is to make this cool layered vinyl project on a Cricut with my free designs and SVG file! This post contains some affiliate links for your convenience (which means if you make a purchase after clicking a link I will earn a small commission but it won’t cost you a penny more)! Read my full disclosure policy.
Materials to Make a Layered Vinyl Project
View my Amazon shopping list with the exact items we used to make this project
- Cricut Premium Vinyl Permanent – (I used Light Grey, Stone Yellow, Chocolate Brown, Coral, Rainbow Sampler, Basics Sampler, Aqua, White)
- Parchment Paper
- Color Changing Cold Drink Cup (One 24 oz)
- Standard Grip Transfer Tape (only use Strong Grip transfer tape if you use something textured like glitter vinyl )
- A way to cut your adhesive vinyl – I used the amazing Cricut machine, specifically the Maker 3 but you can also use the Cricut Maker, Cricut Explore 3, the Cricut Explore Air machines, or the Joy.
- Cricut Green Standard Grip Cutting Mat (12″ x 12″)
- Weeding Tool
- Scraper
- Scissors
- Lint Roller (To Help Position Cup)
- Design #355 – My free layered vinyl designs (available in my free resource library—get the password at the bottom of this post)
How to Layer Vinyl on Cricut
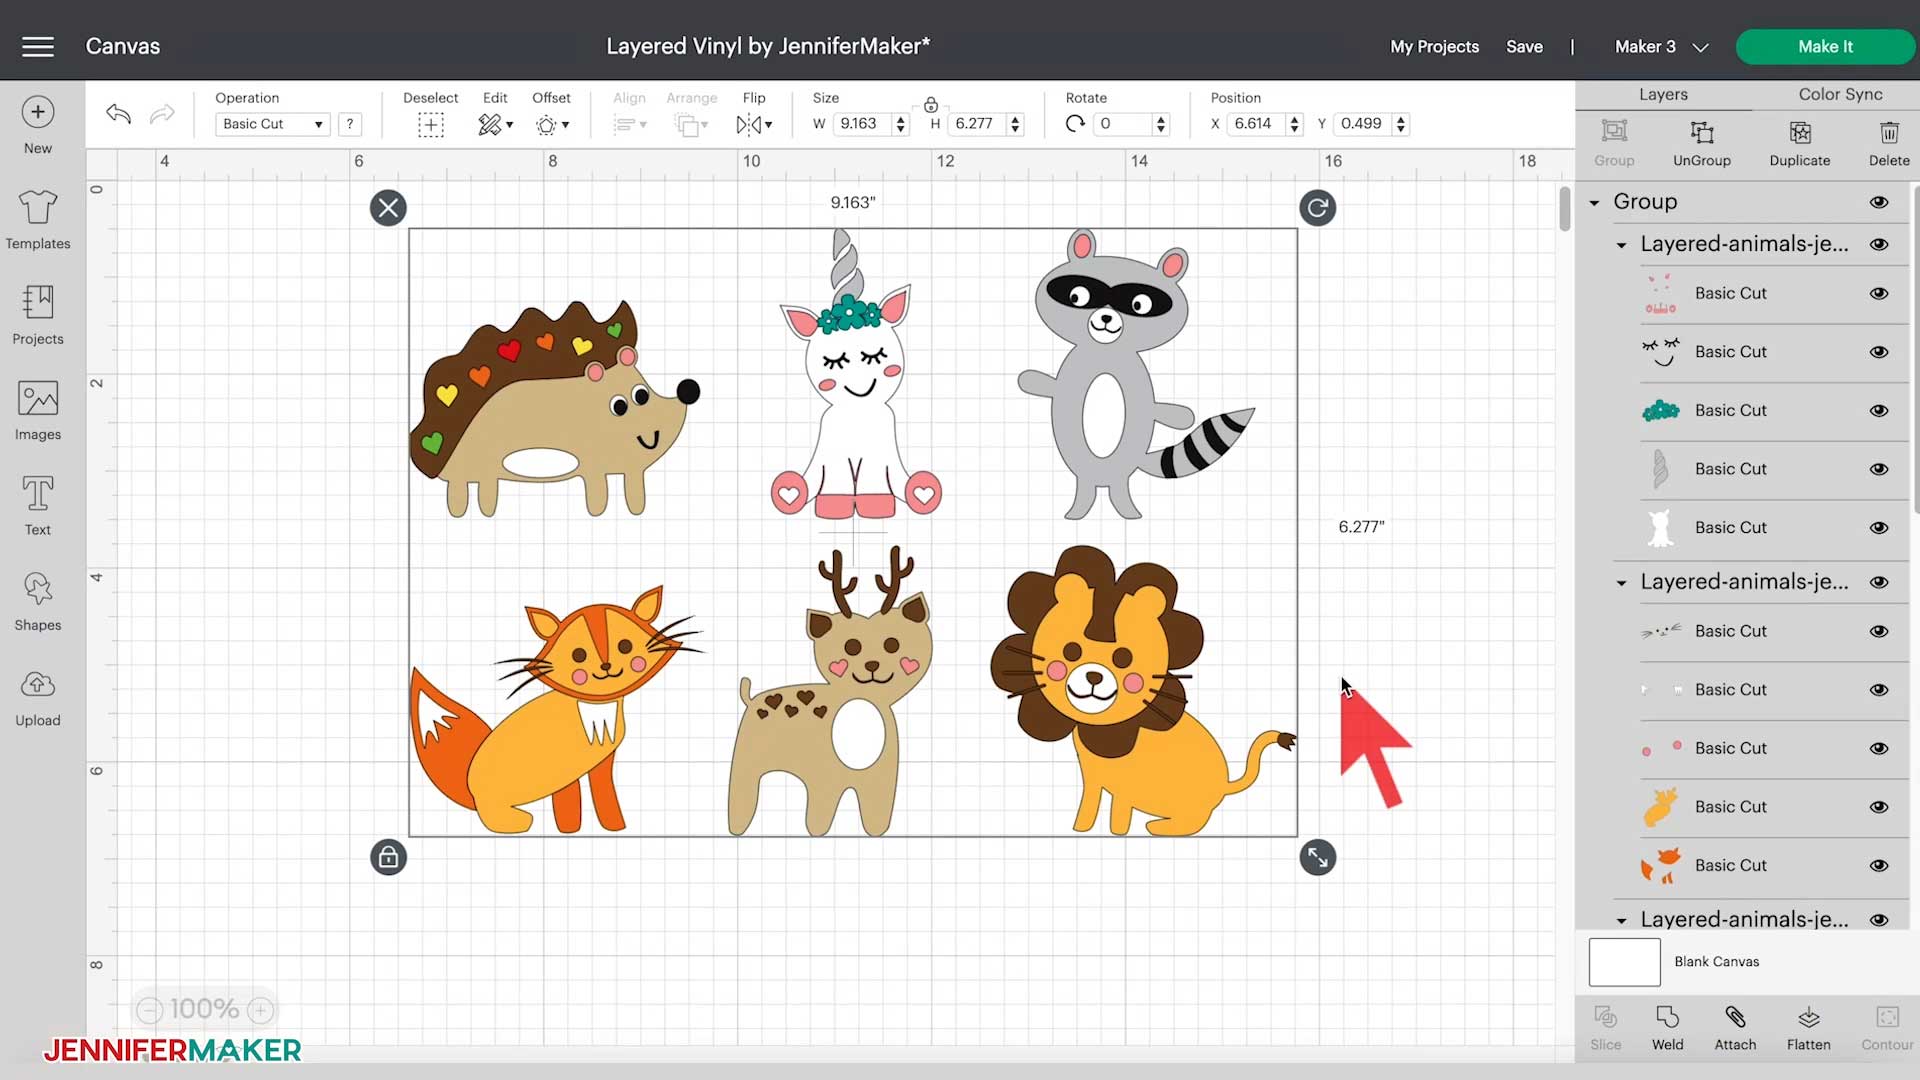
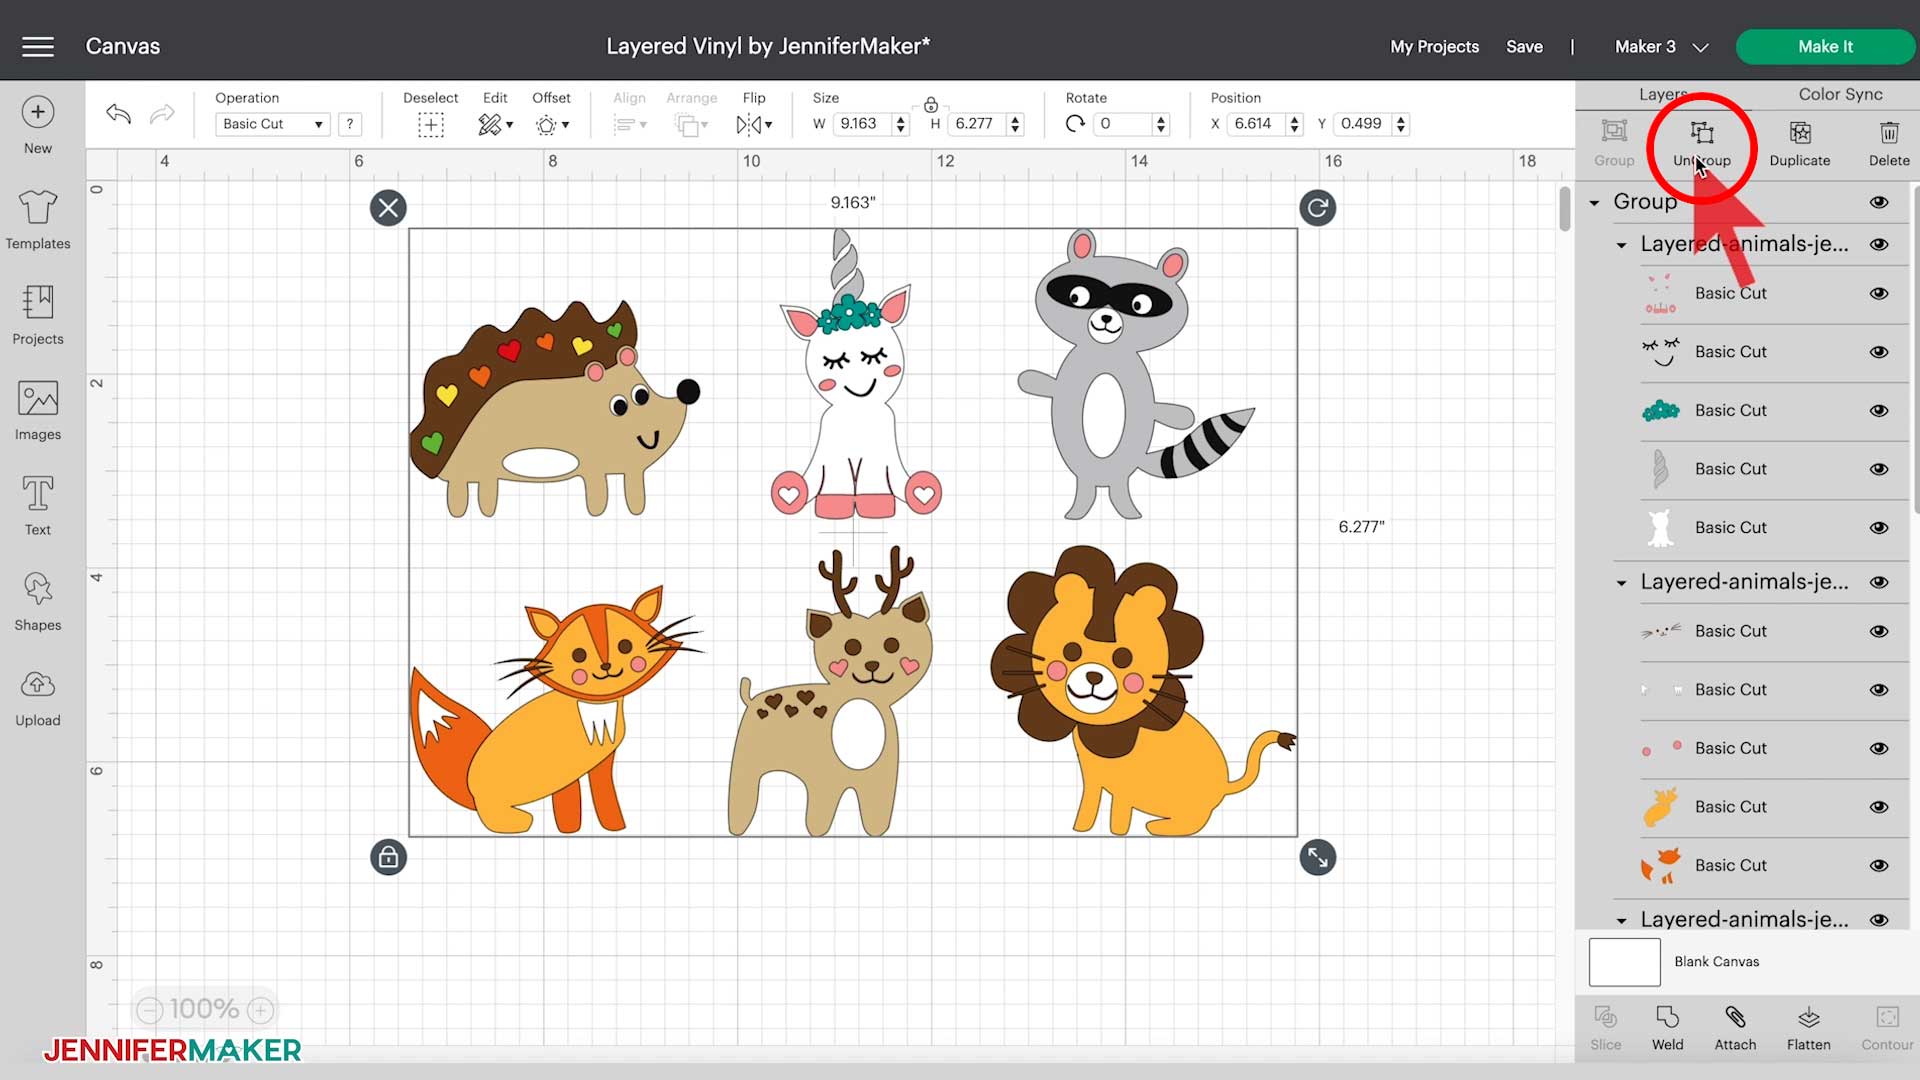
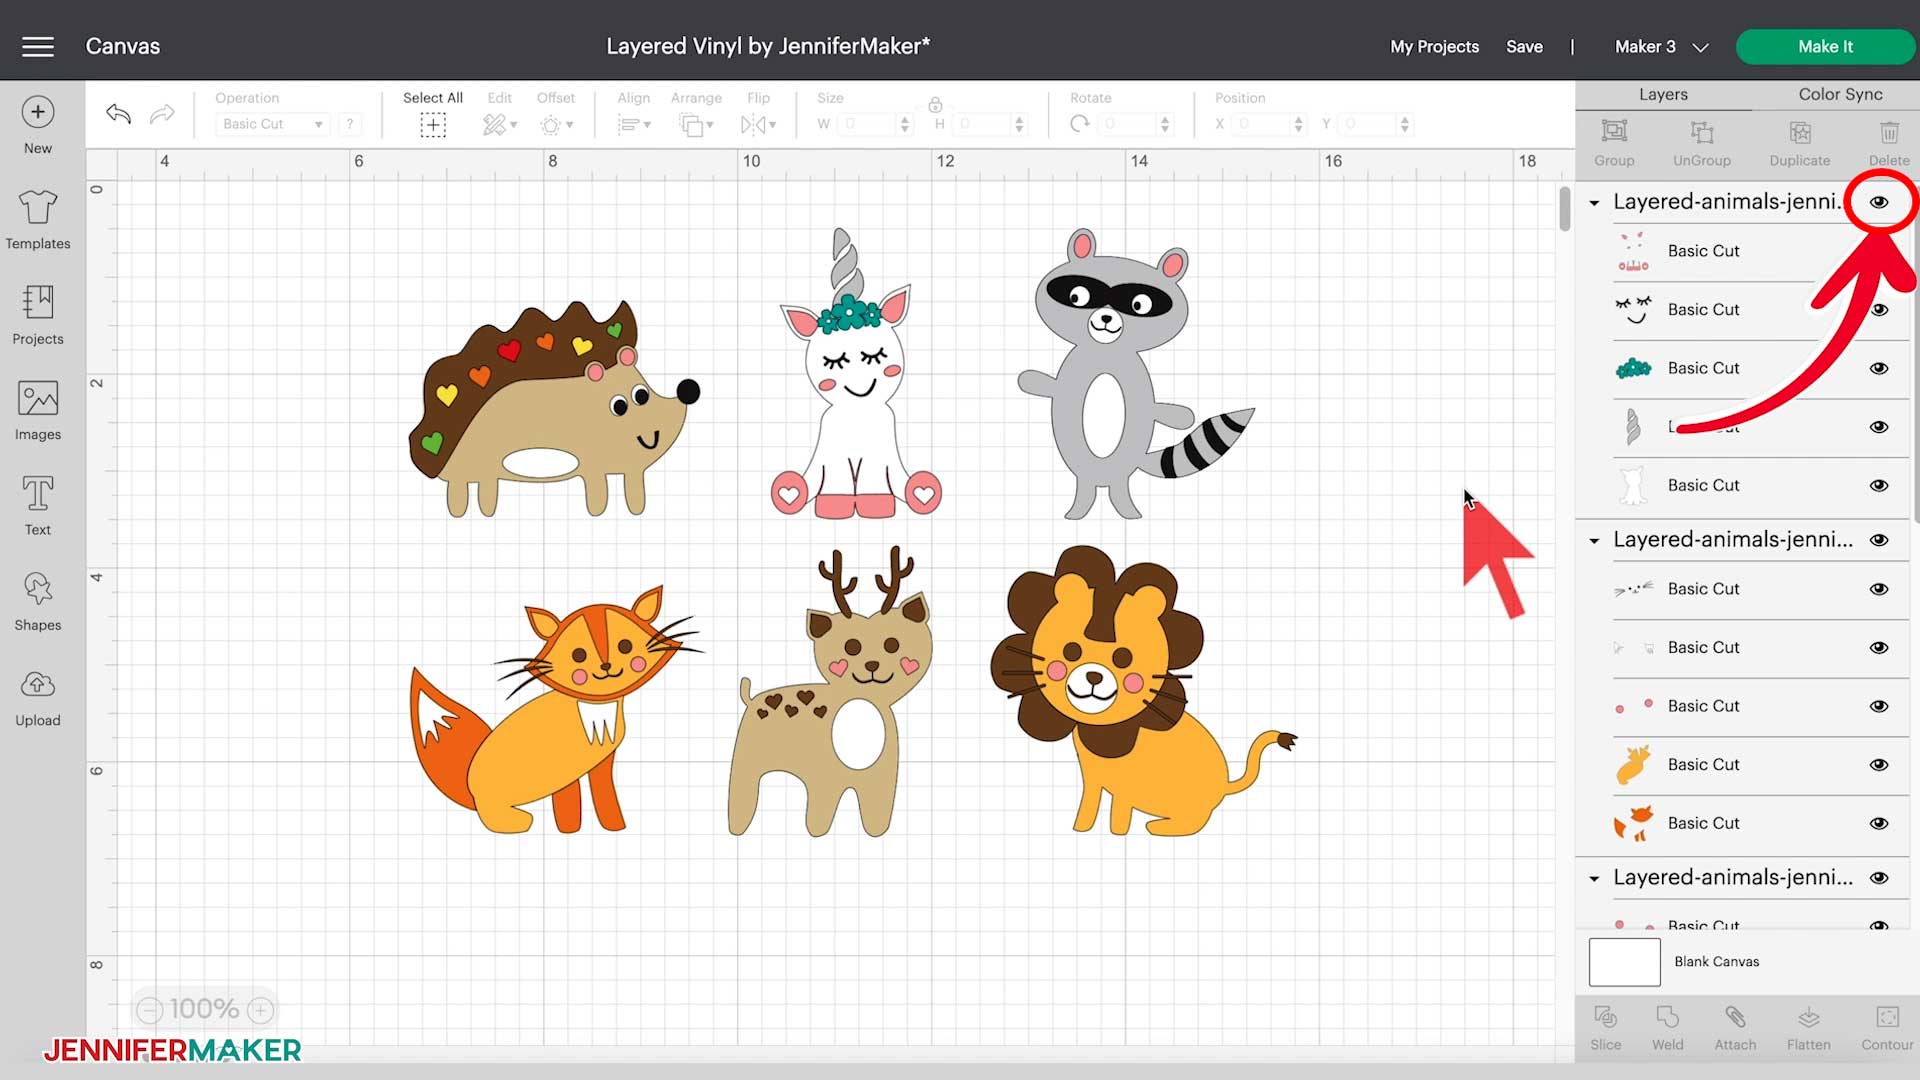
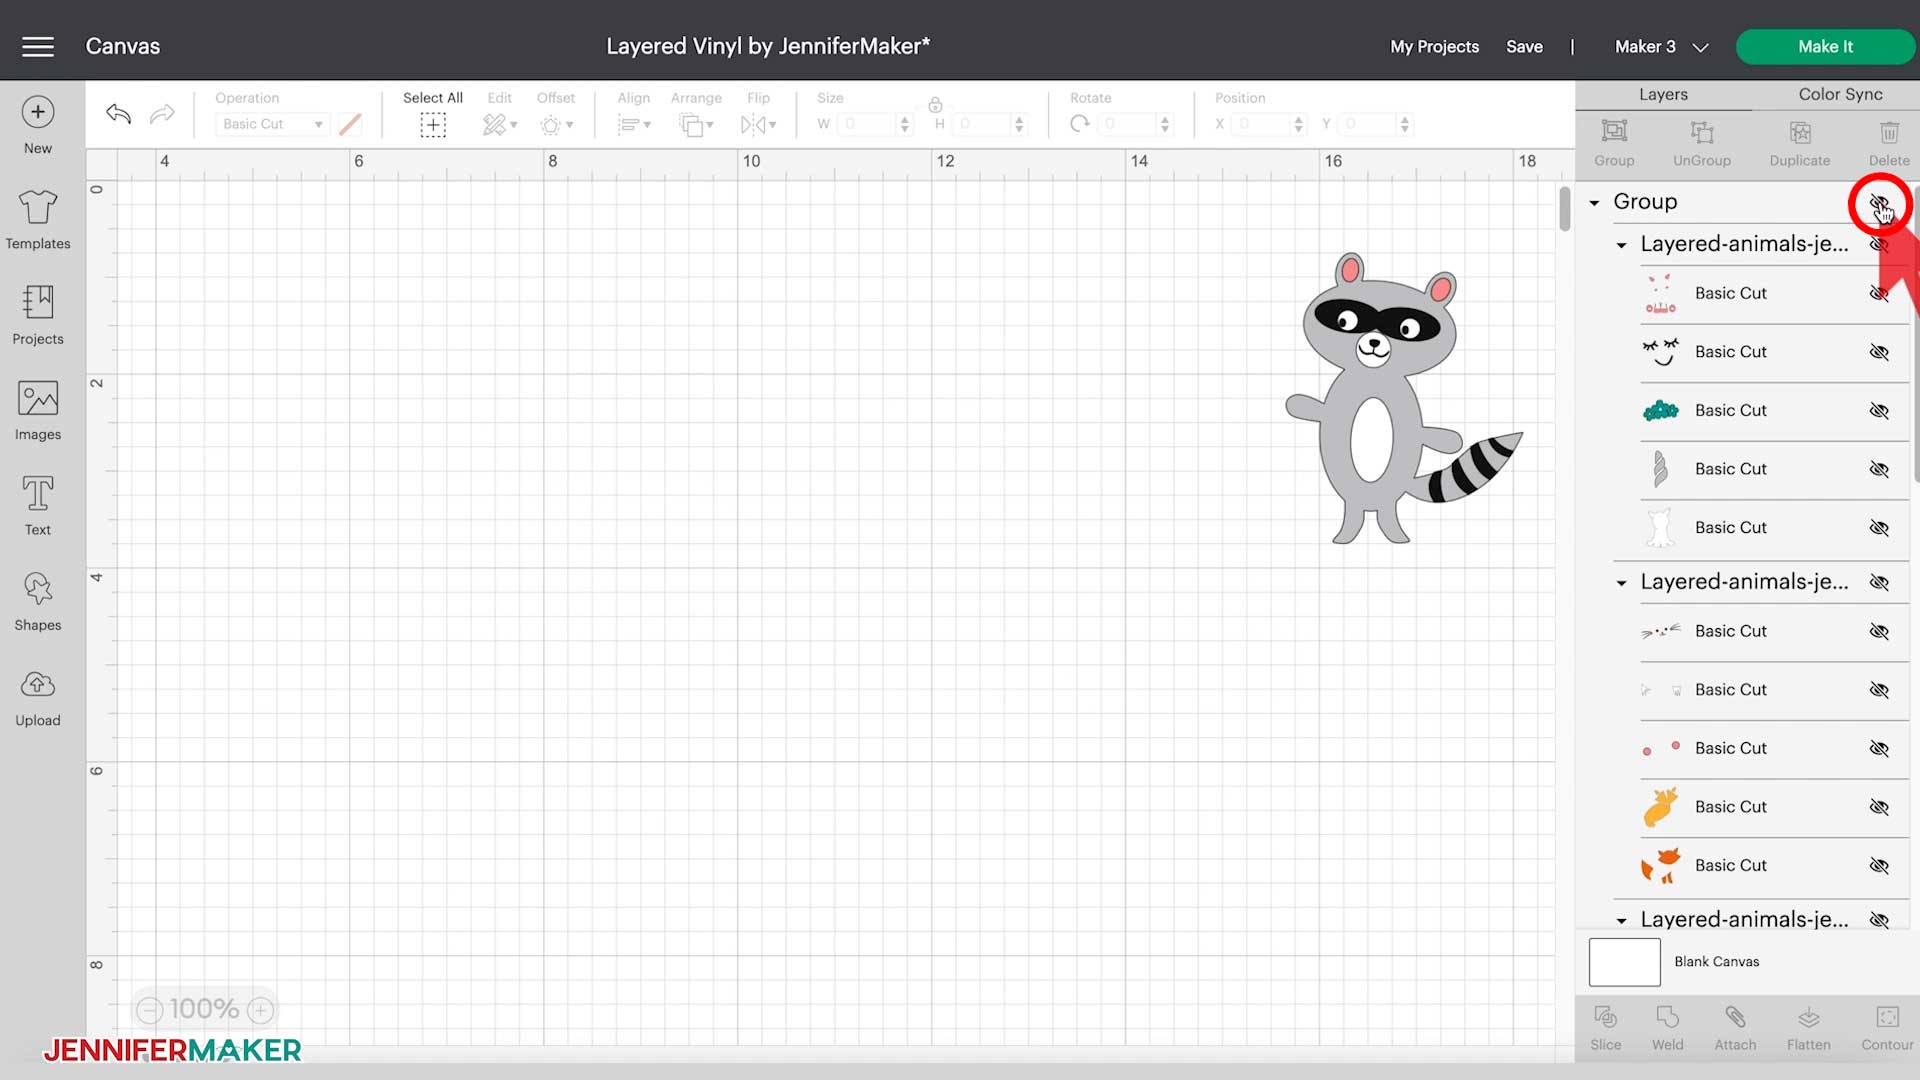
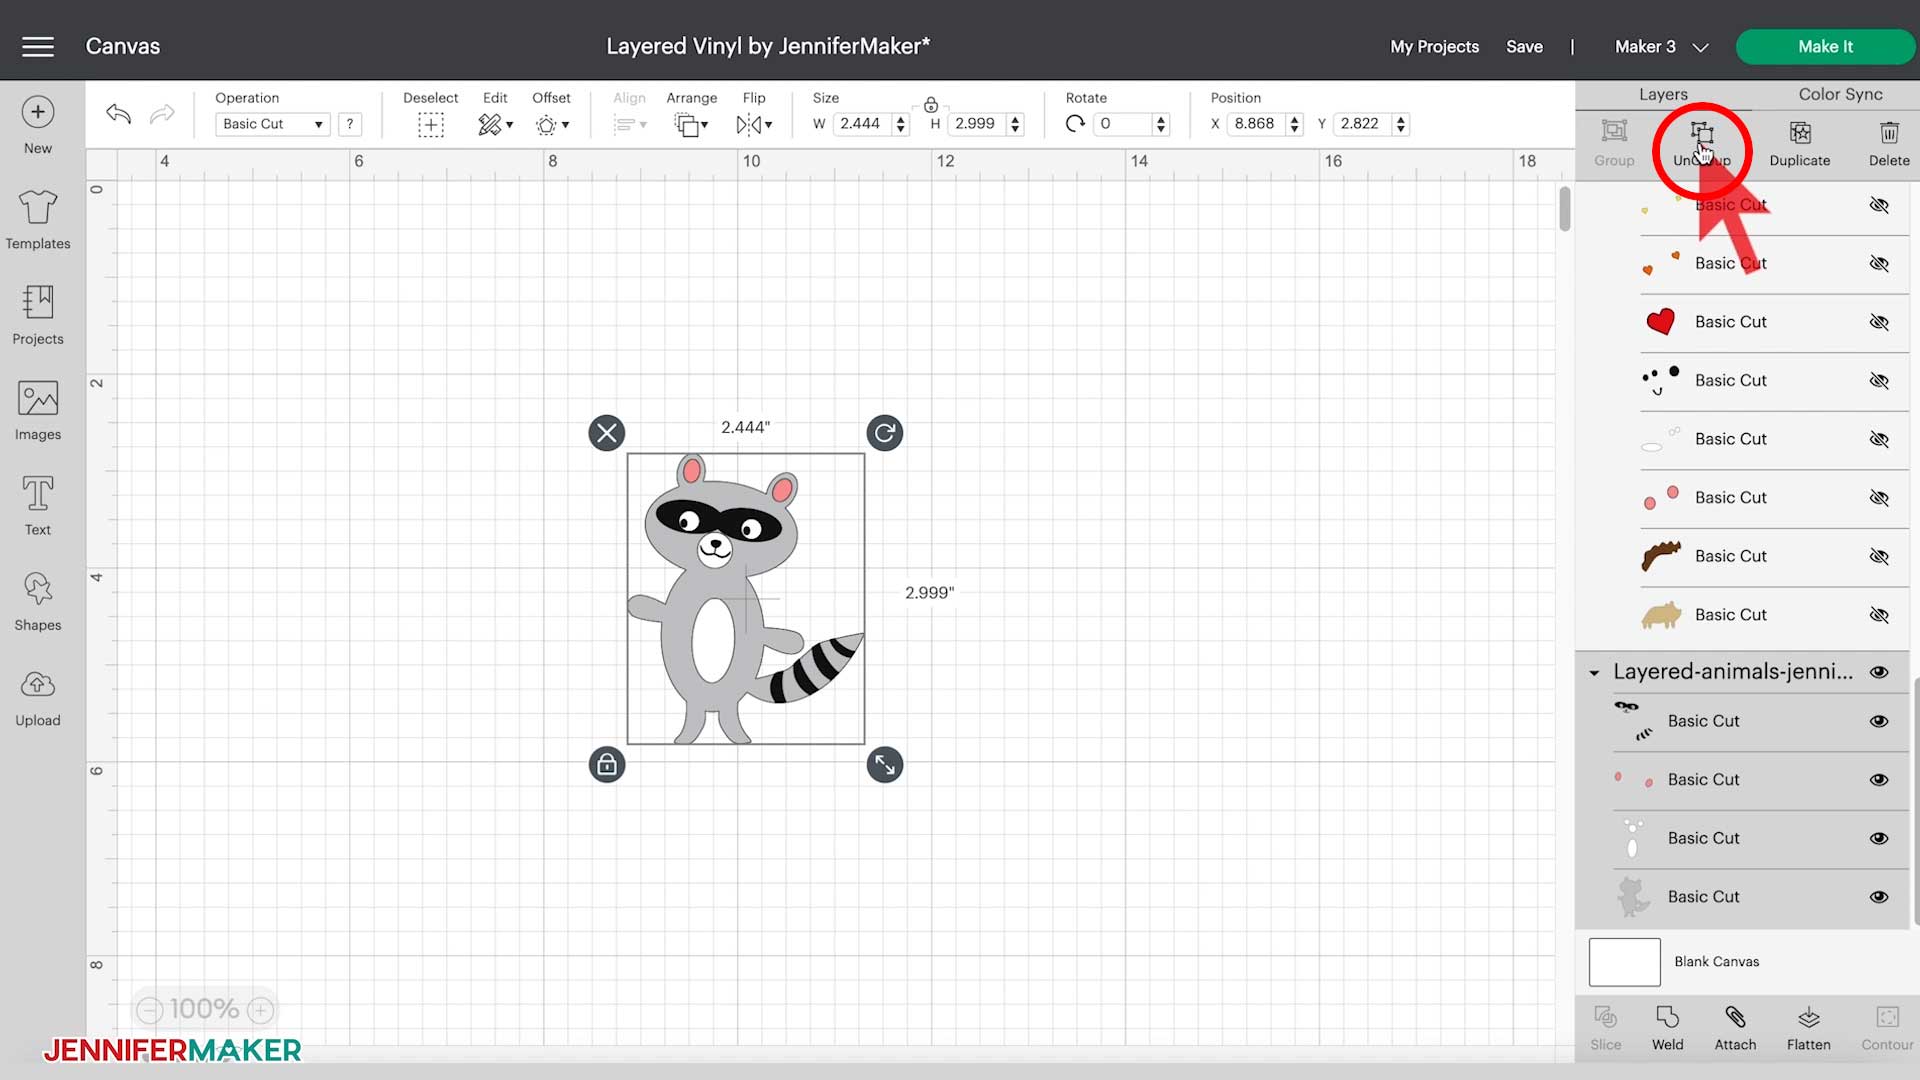
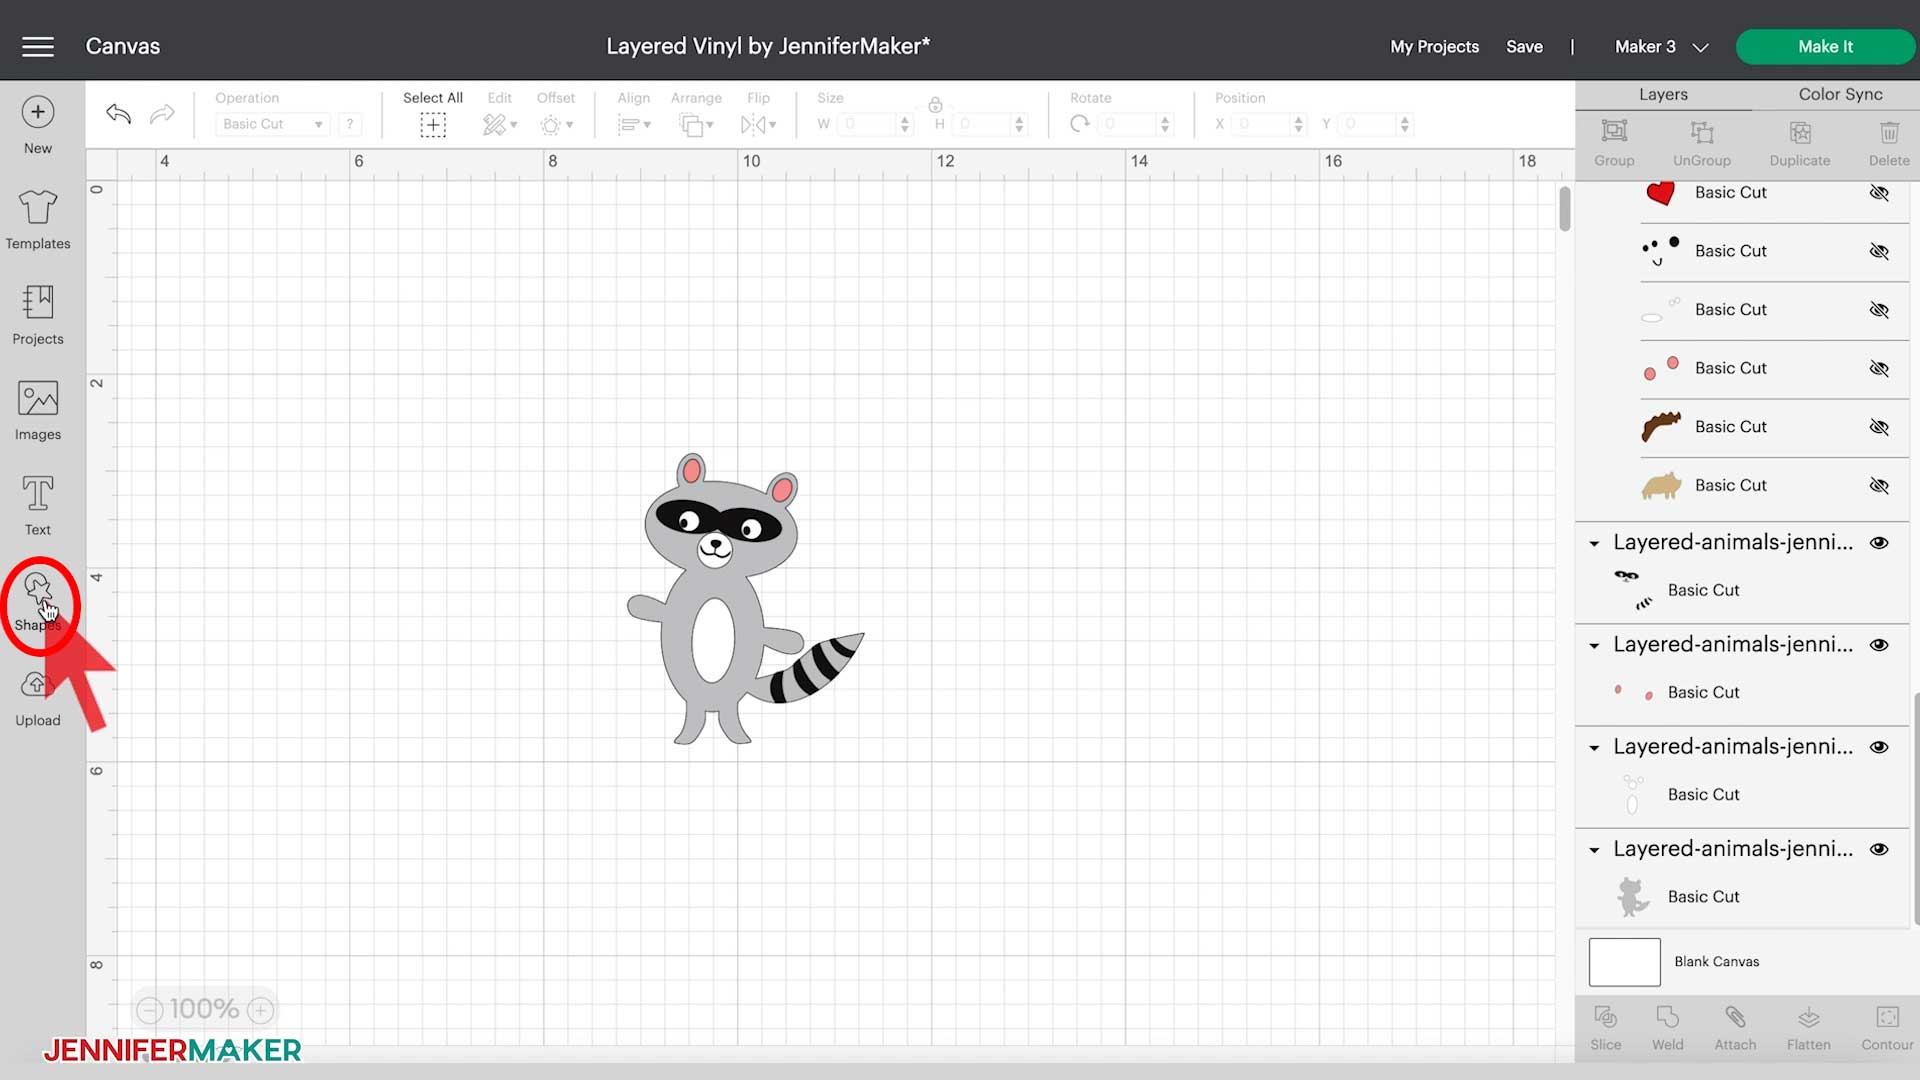
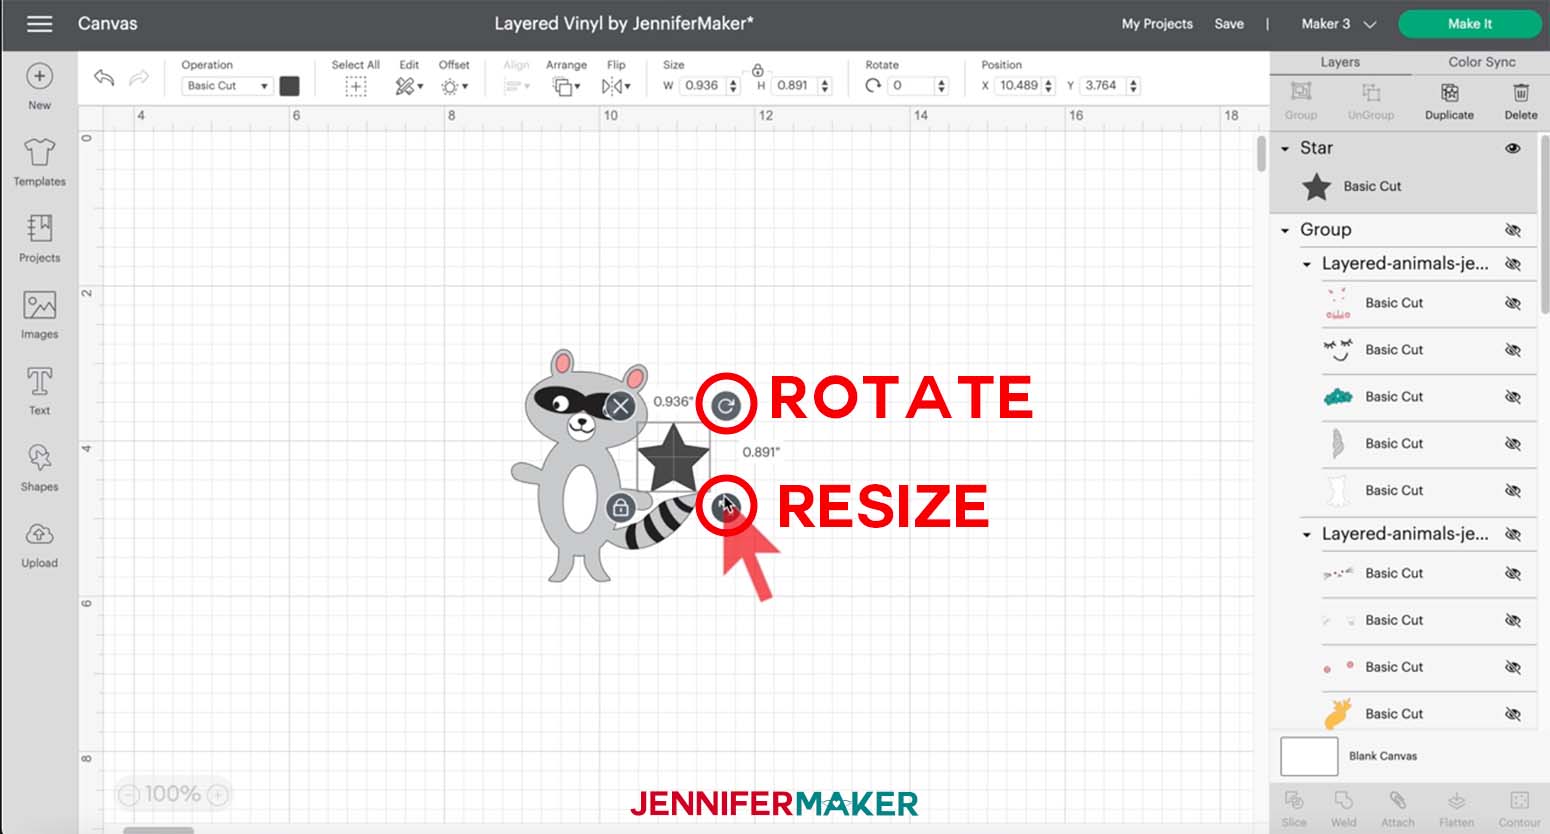
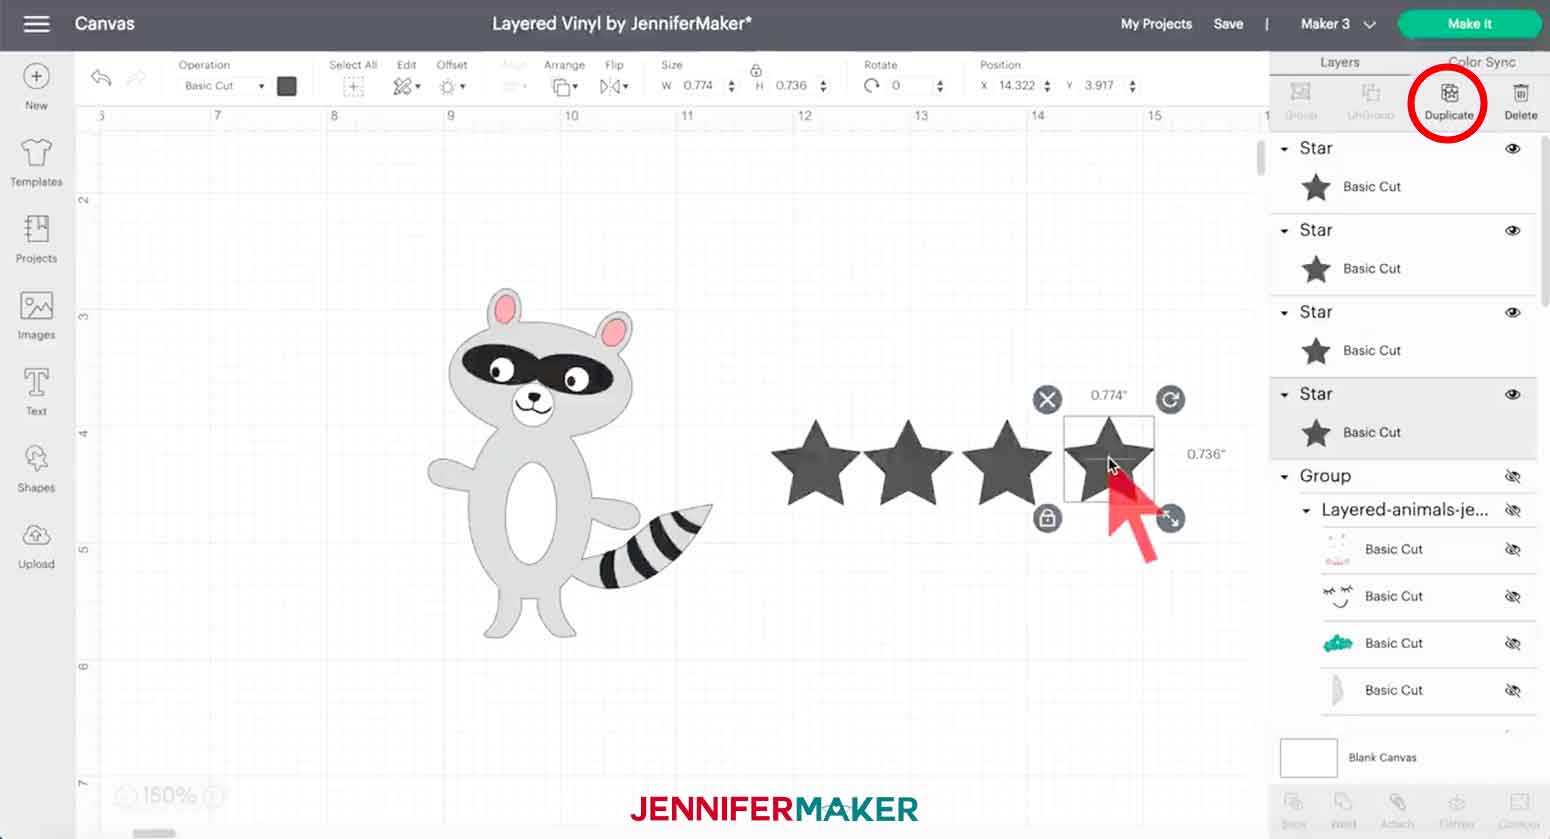
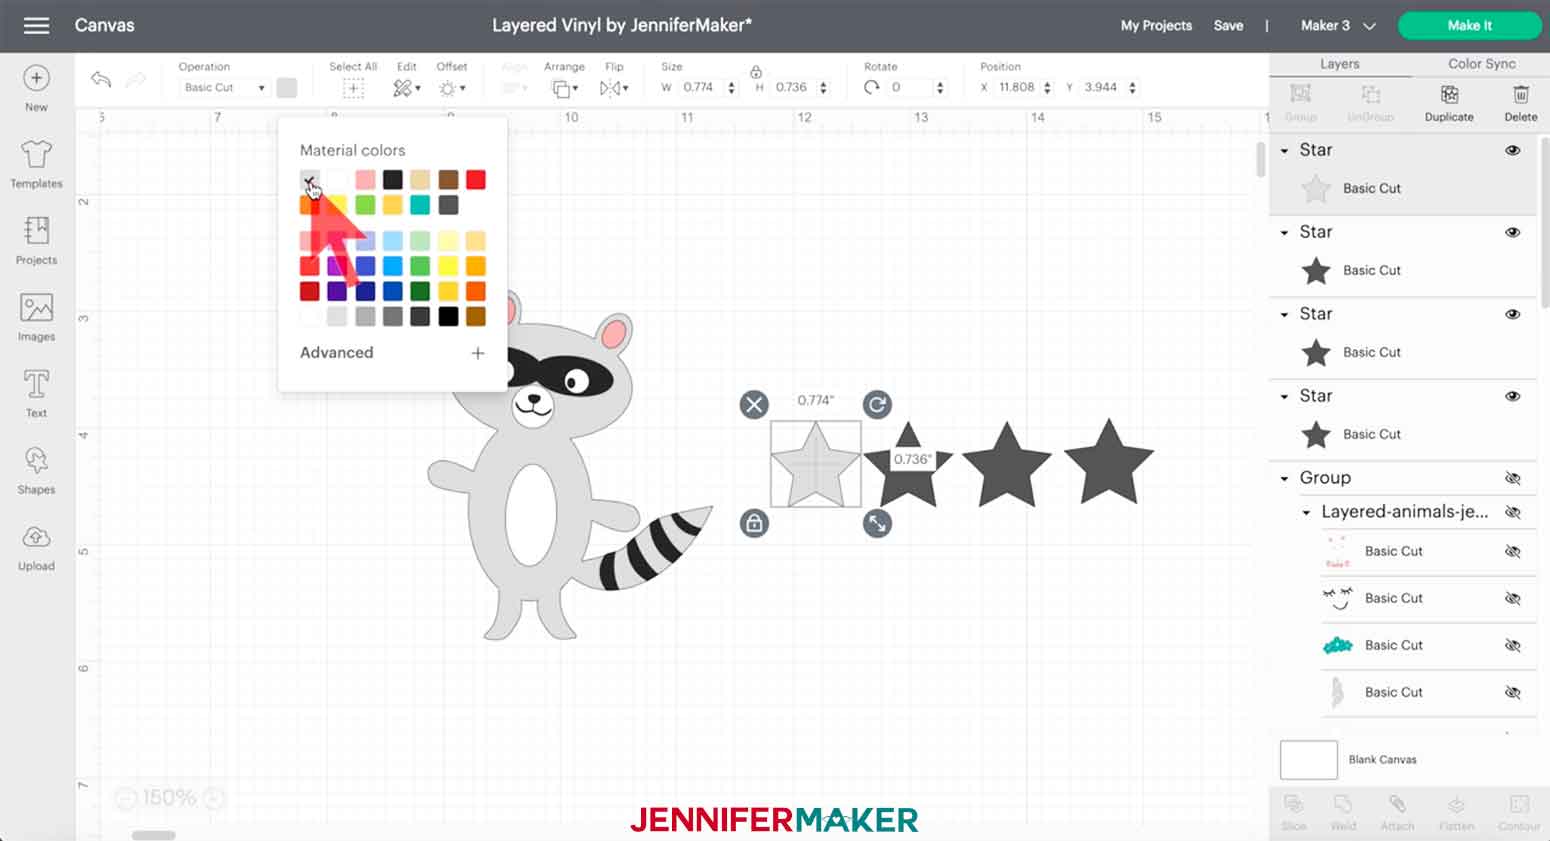
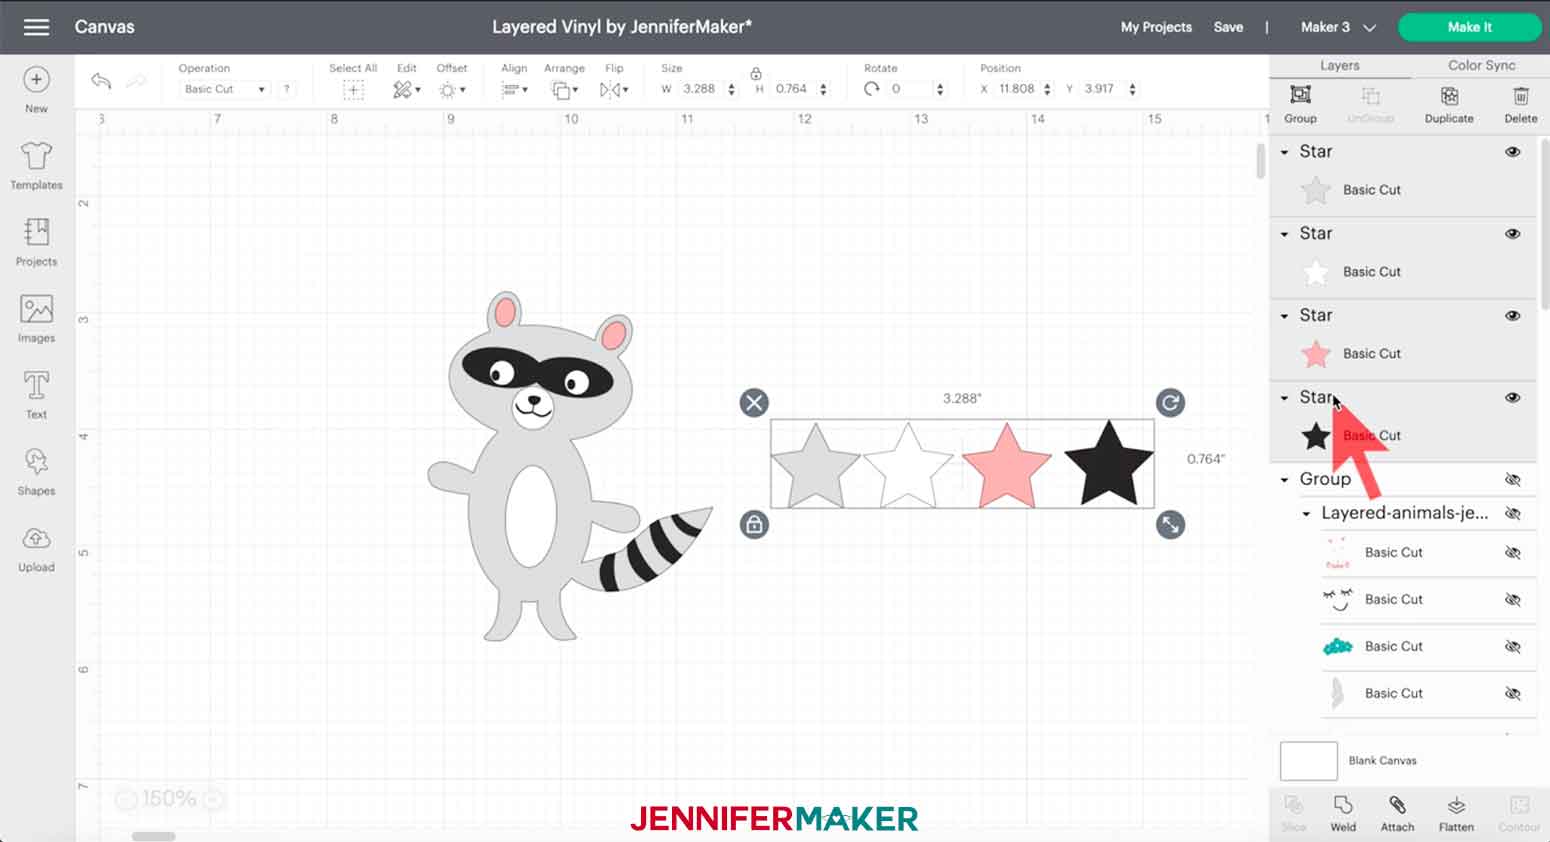
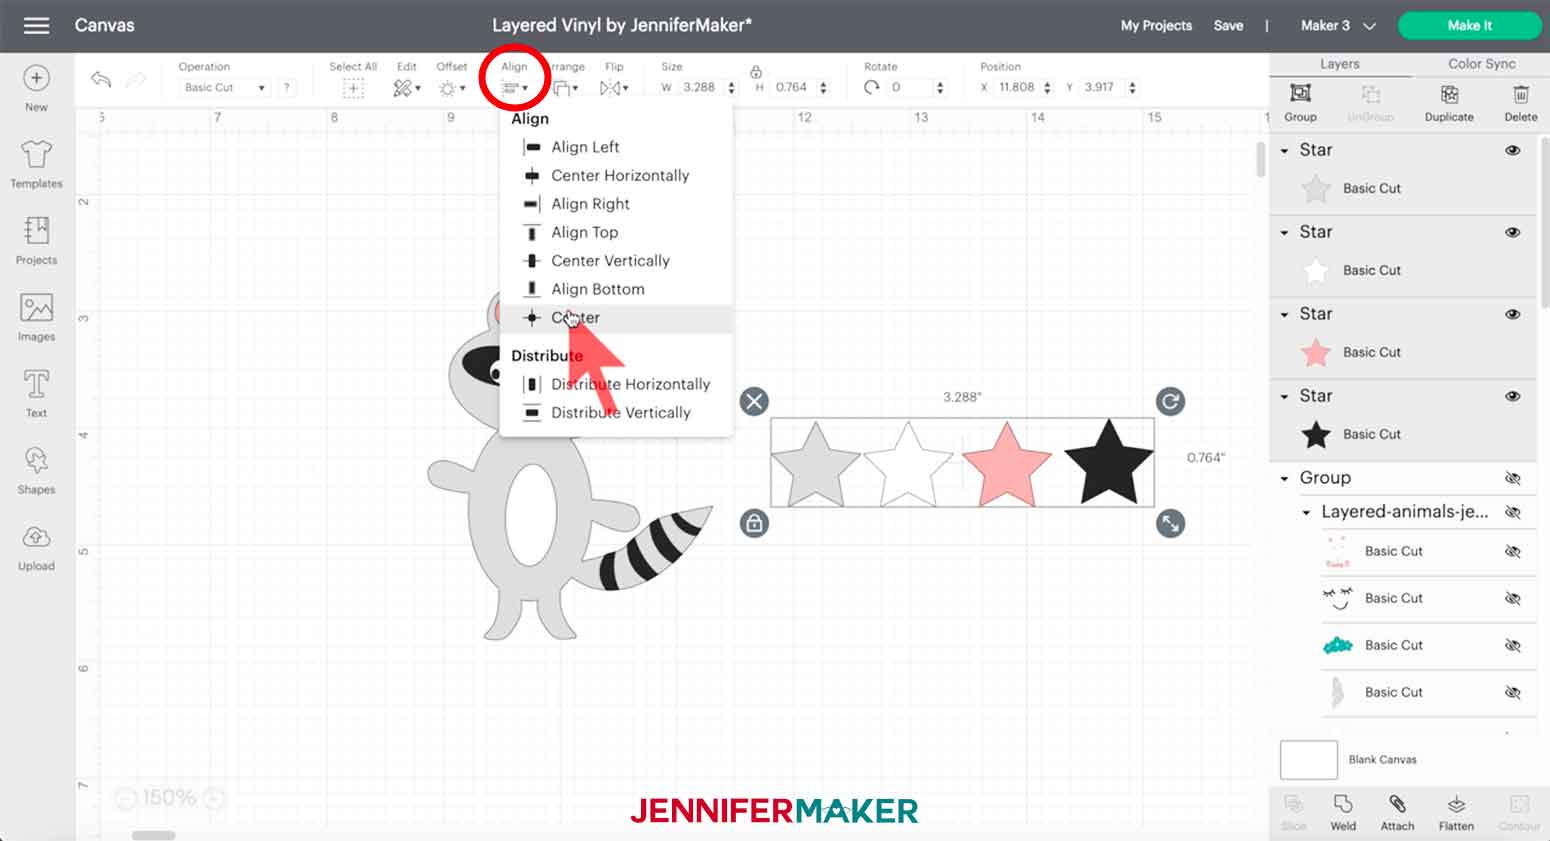
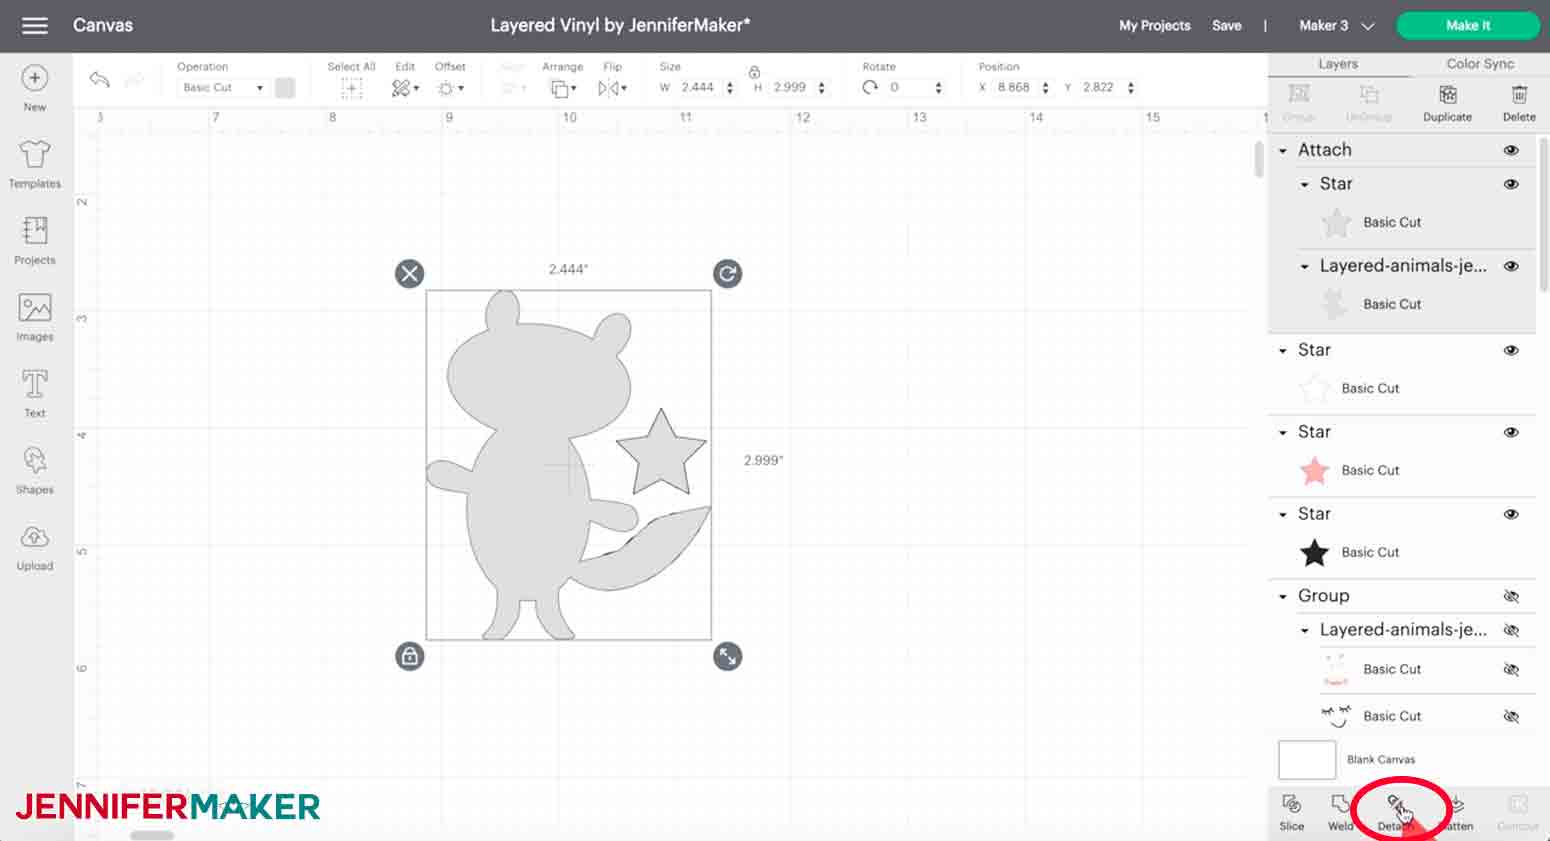
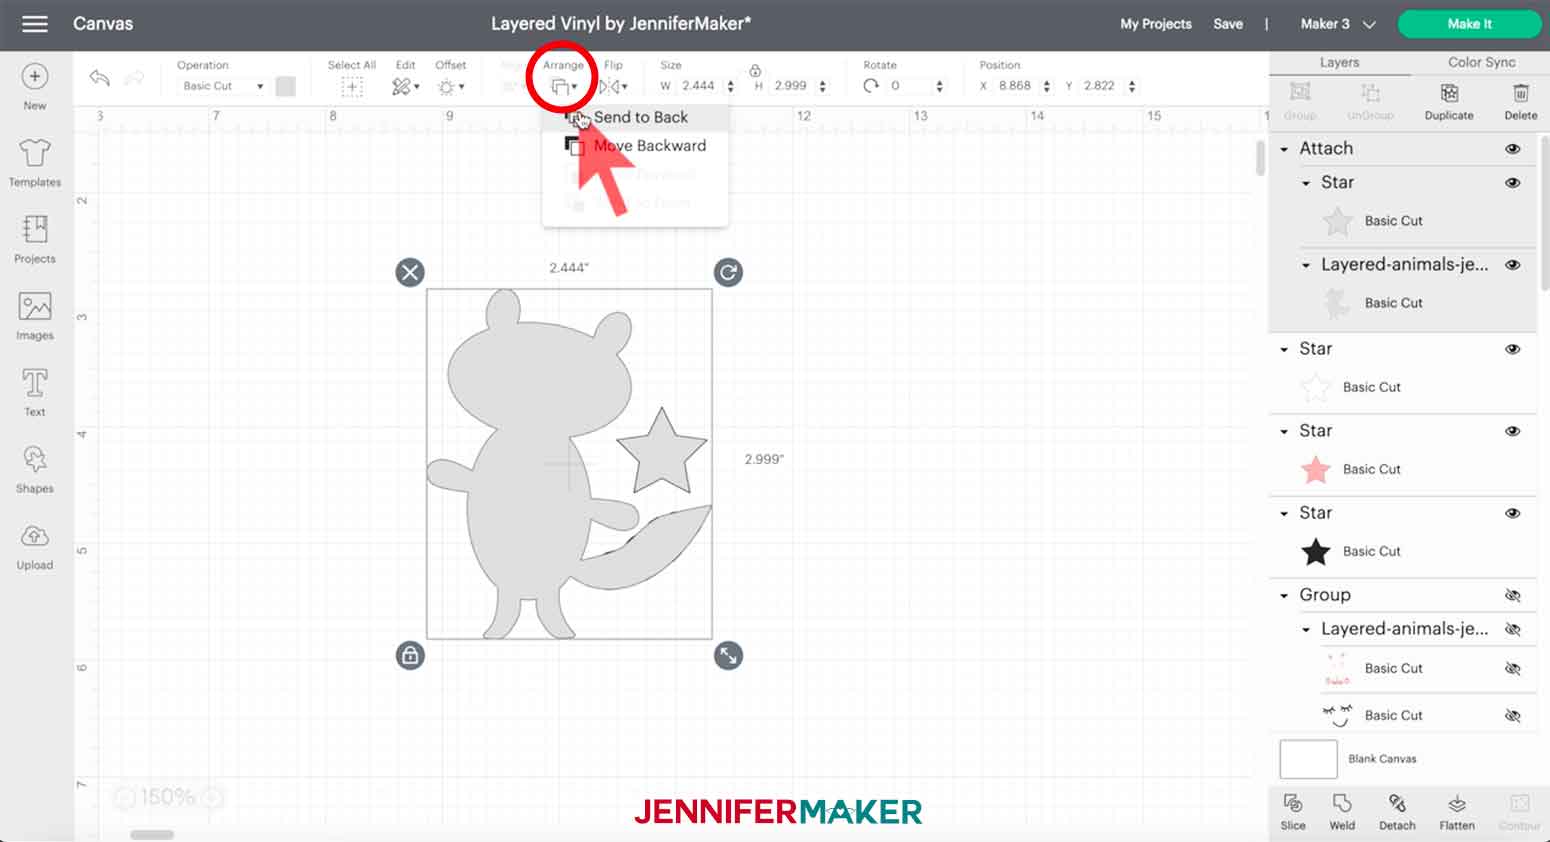
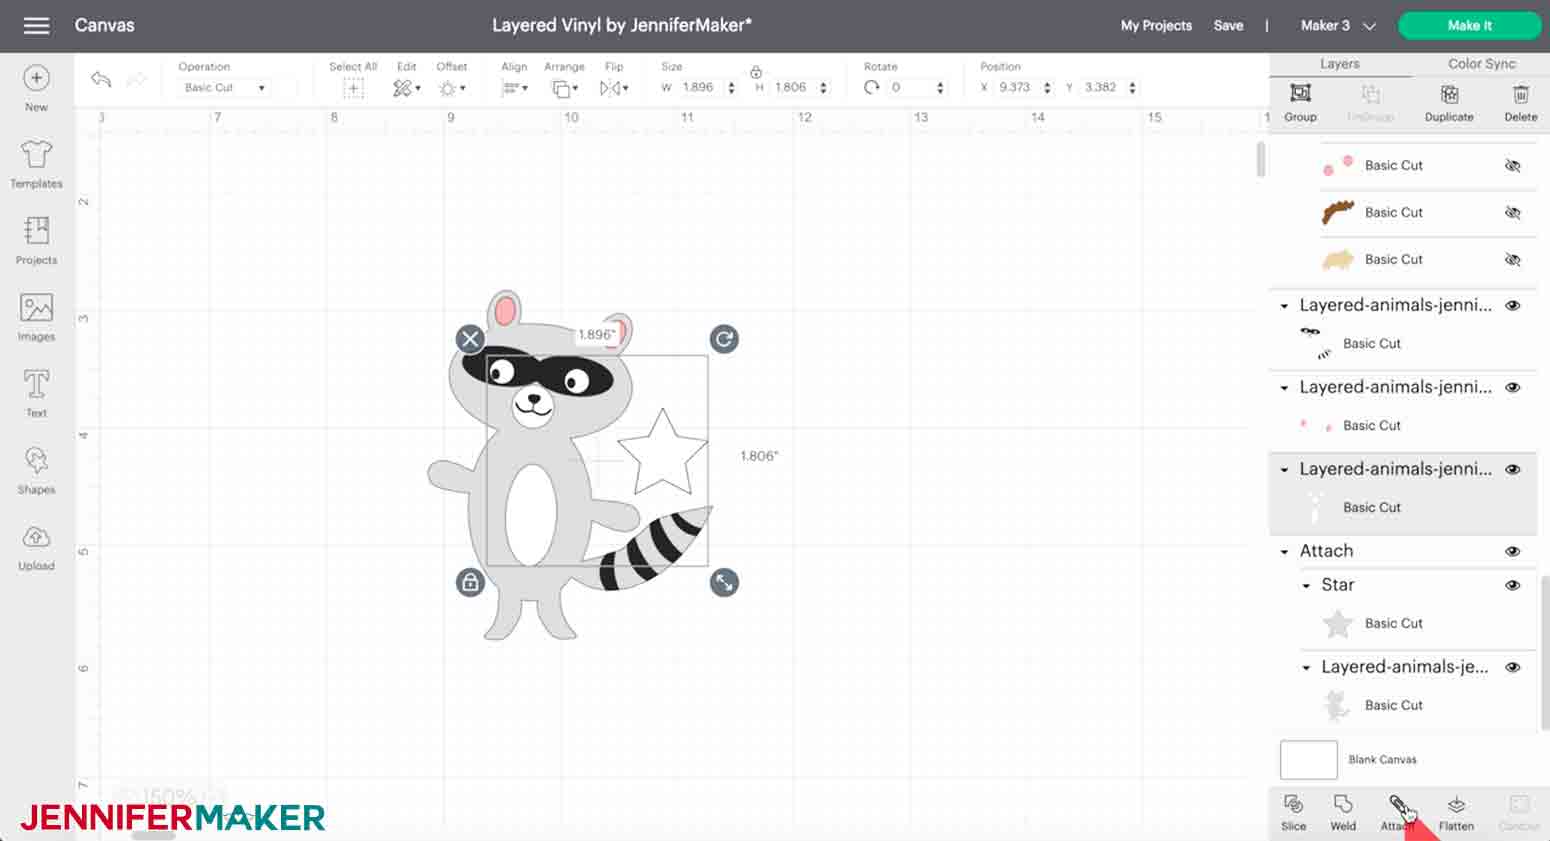
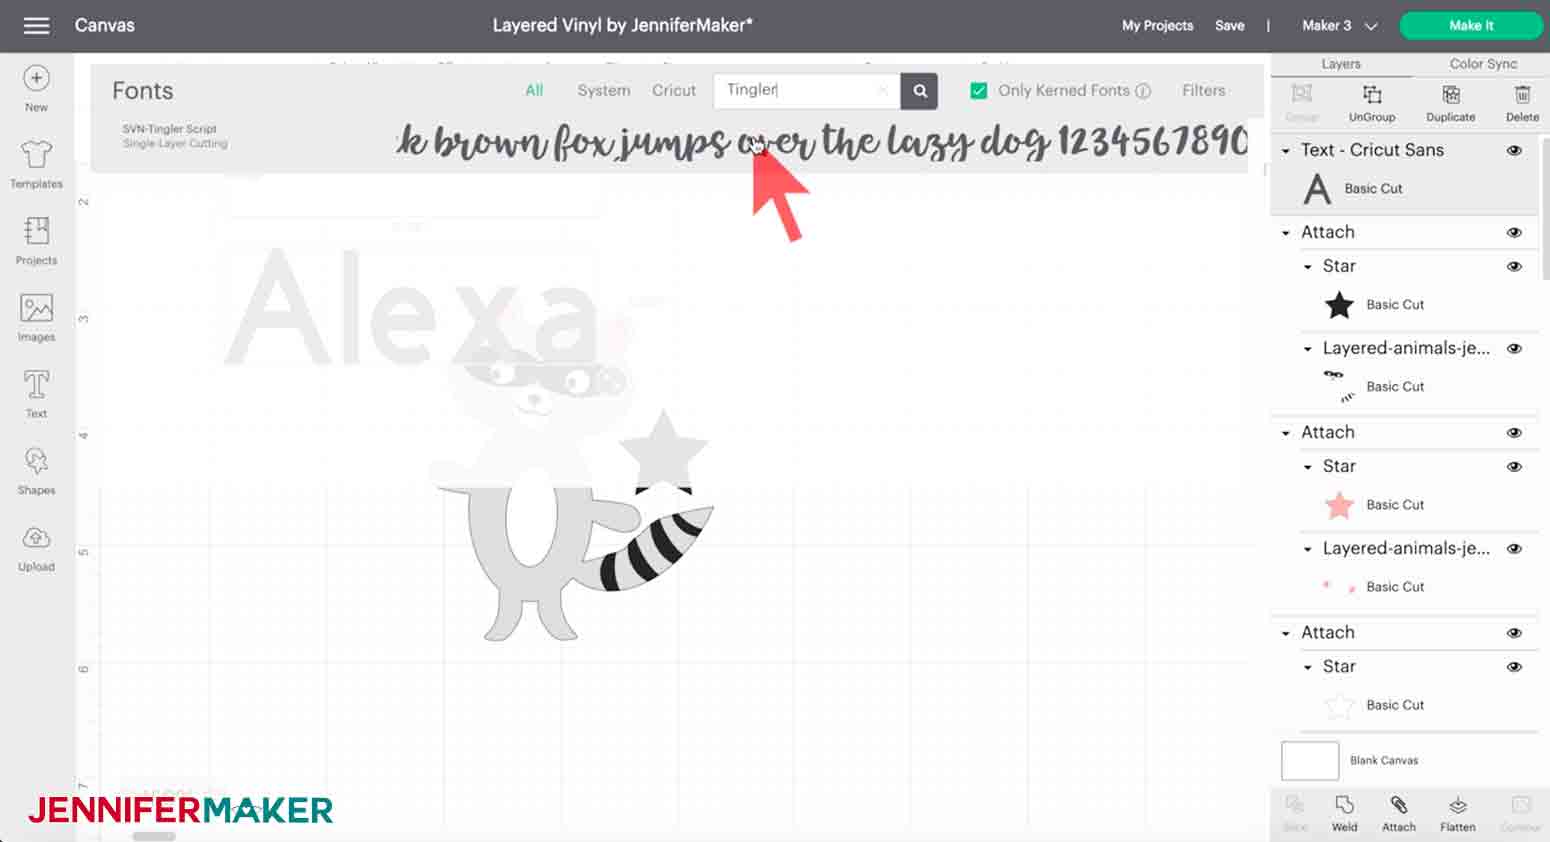
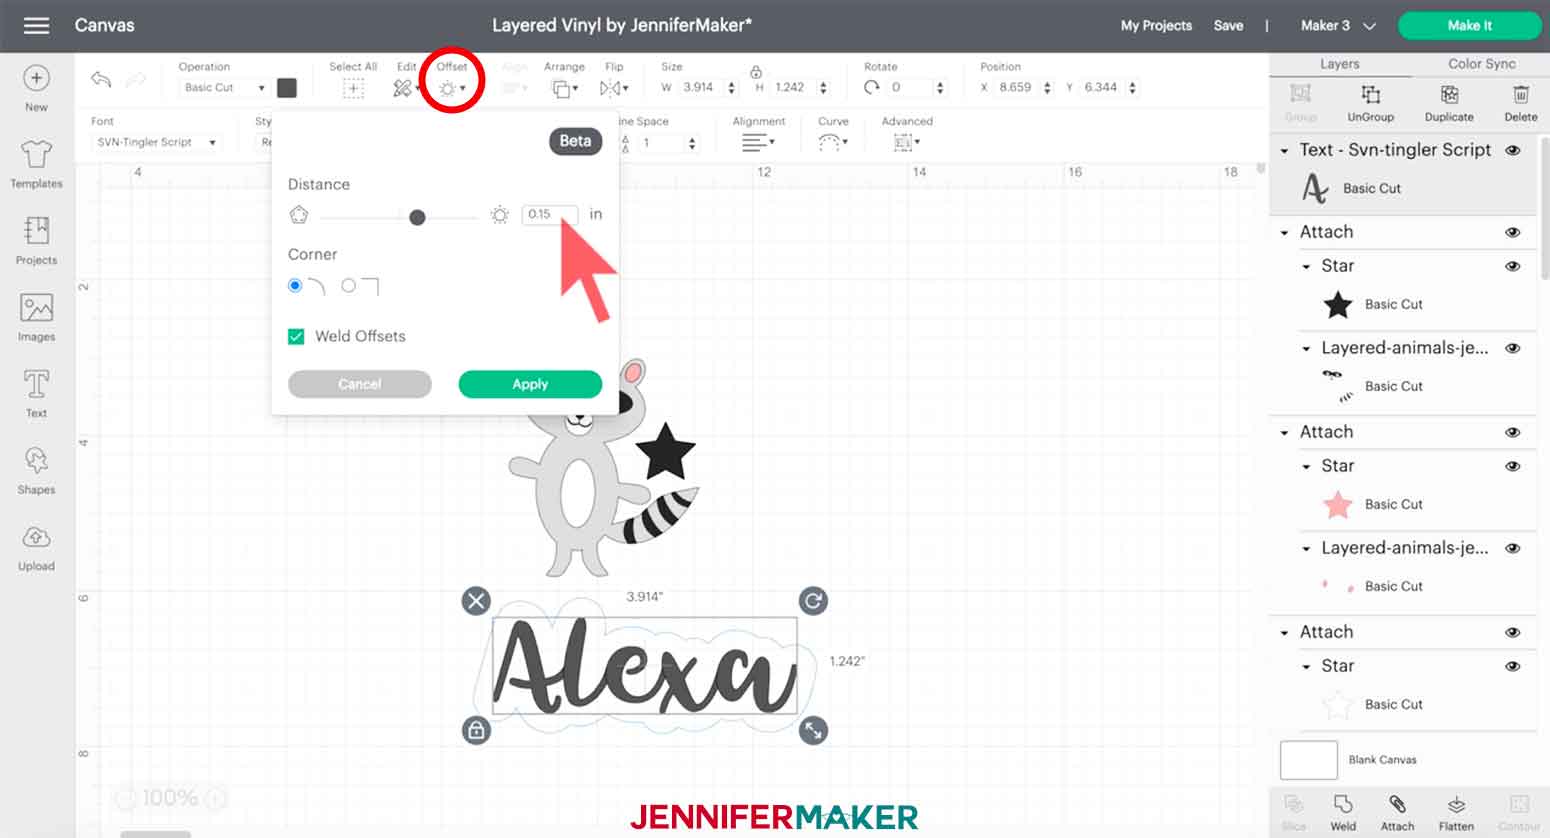
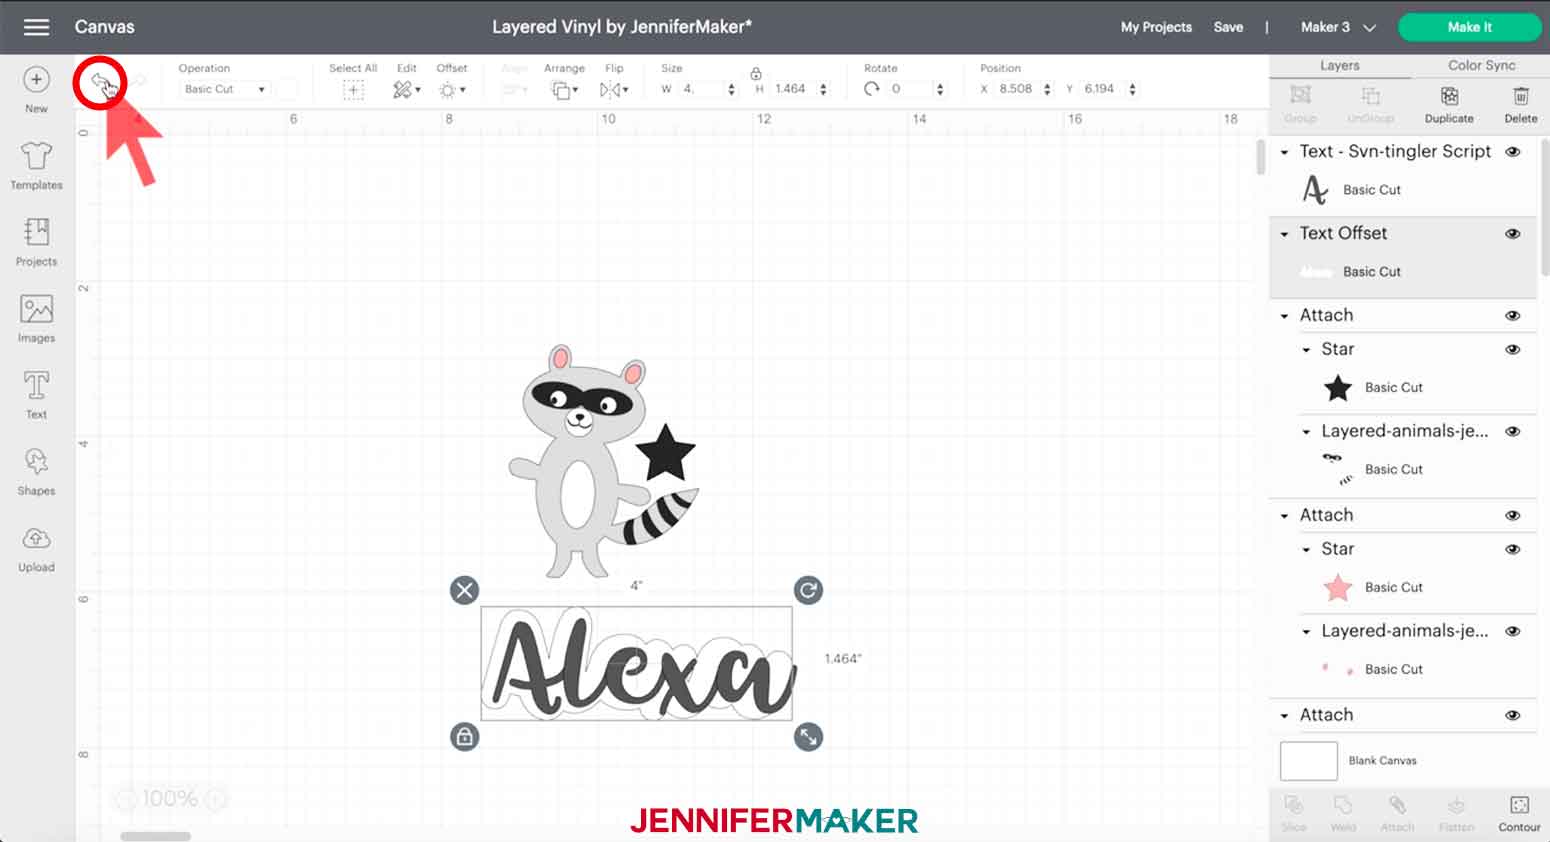
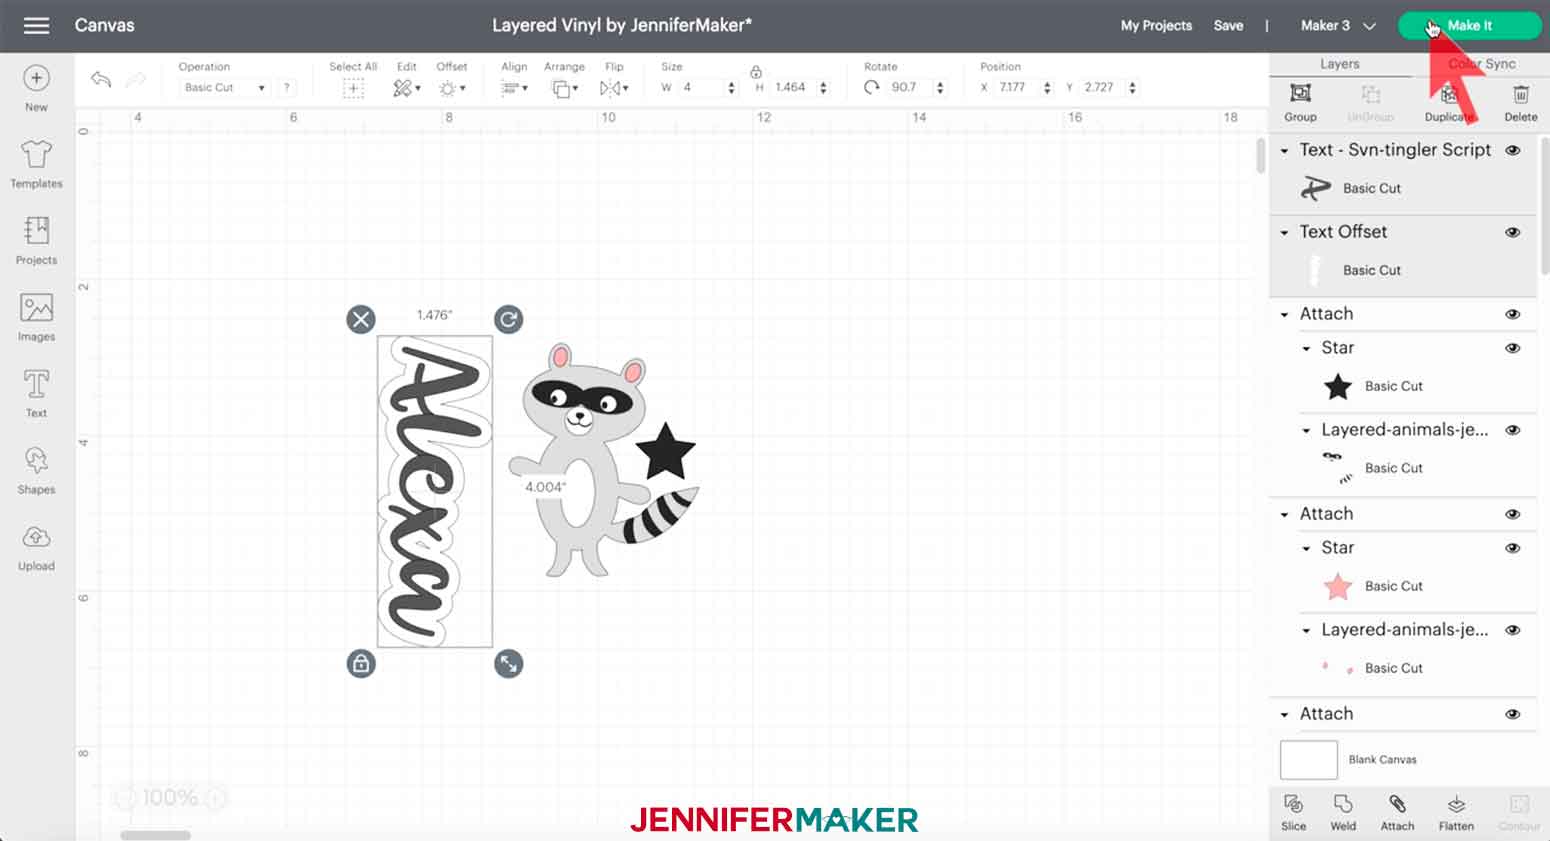
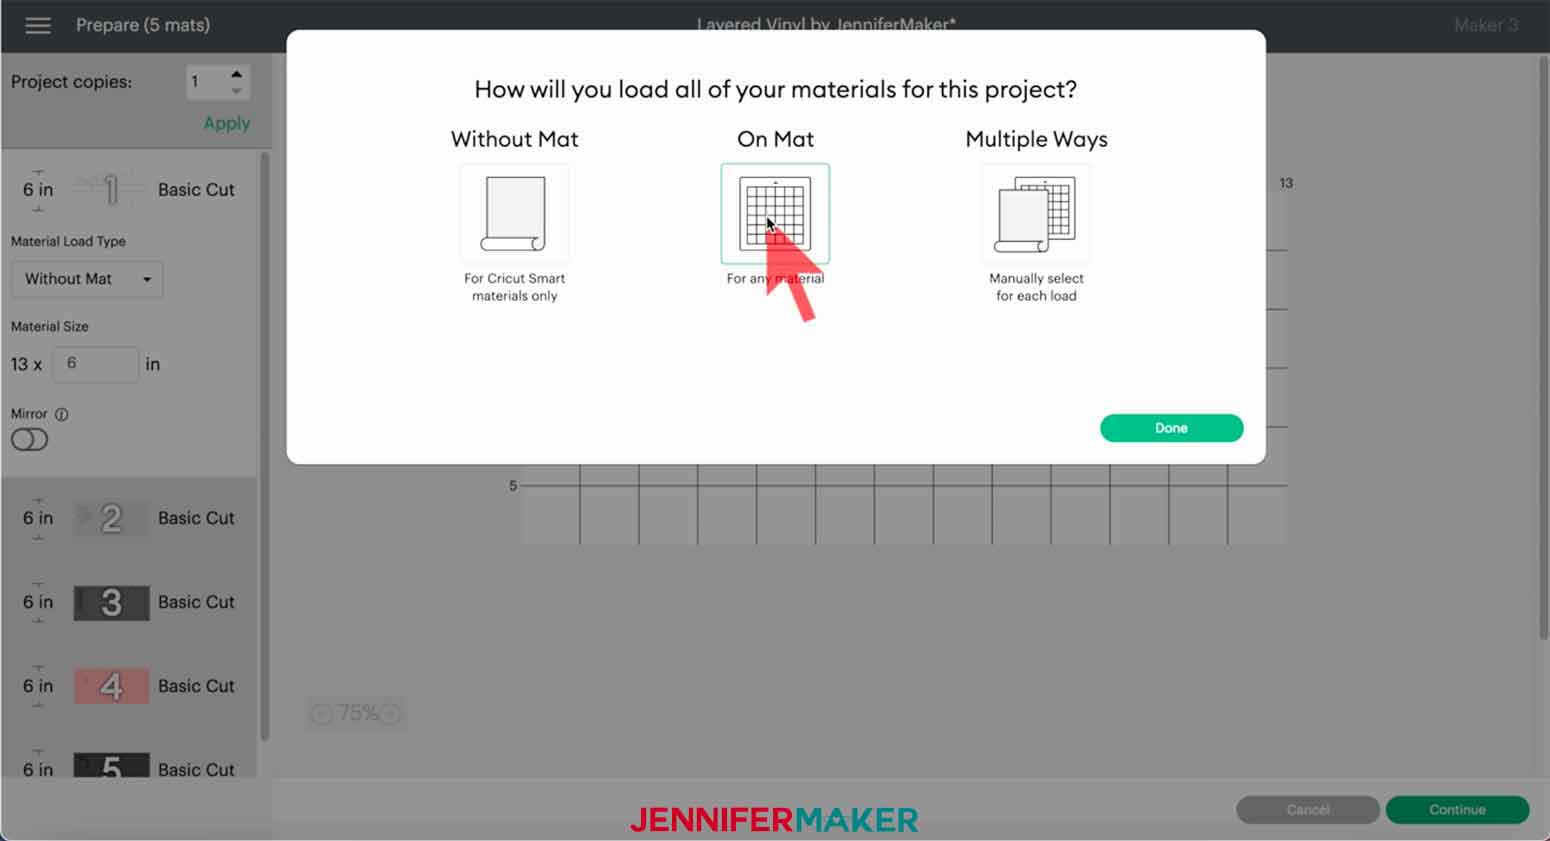
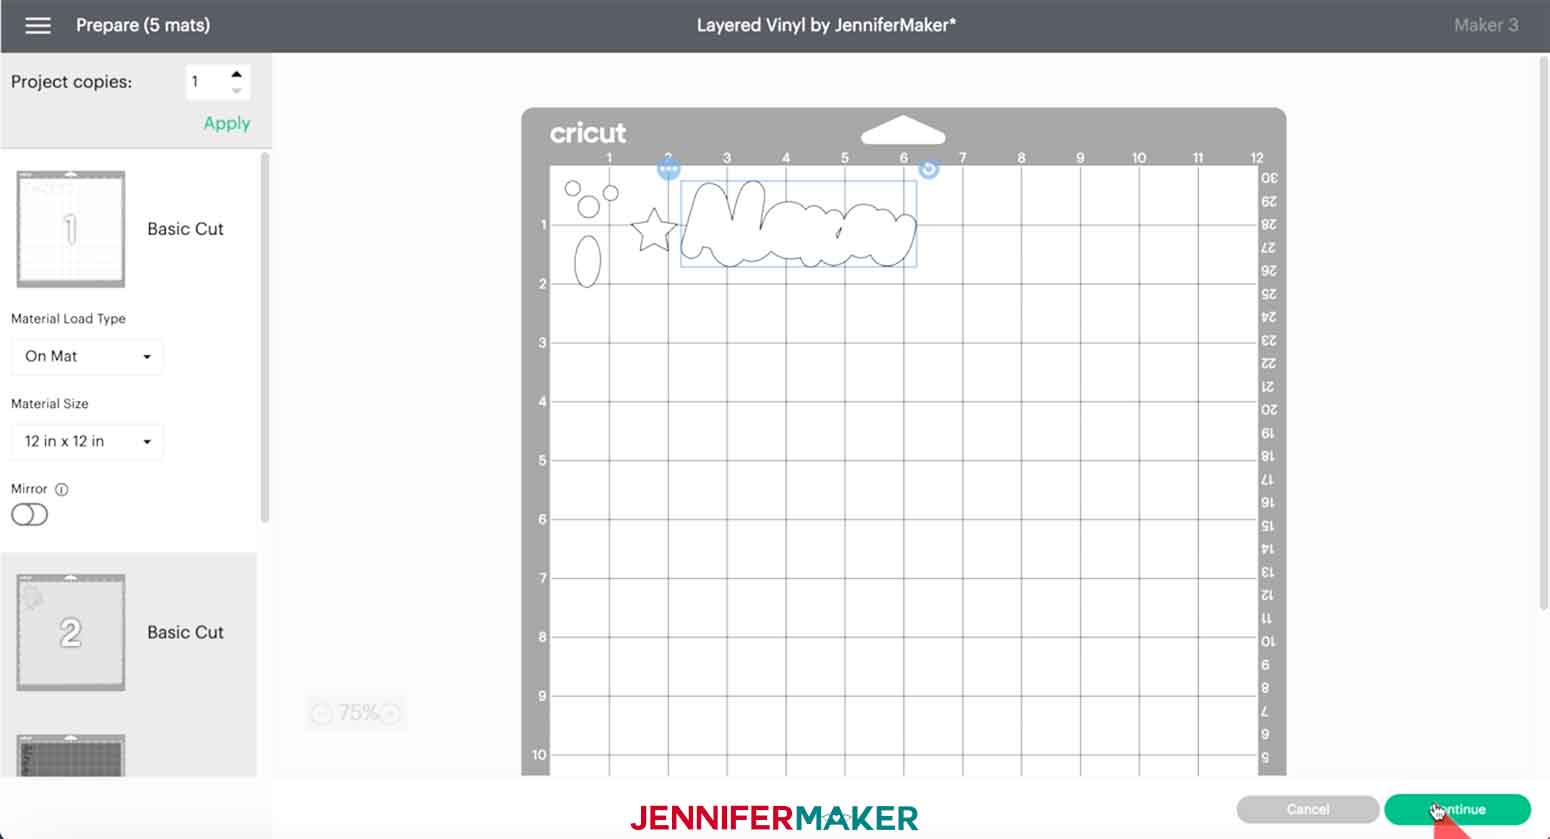
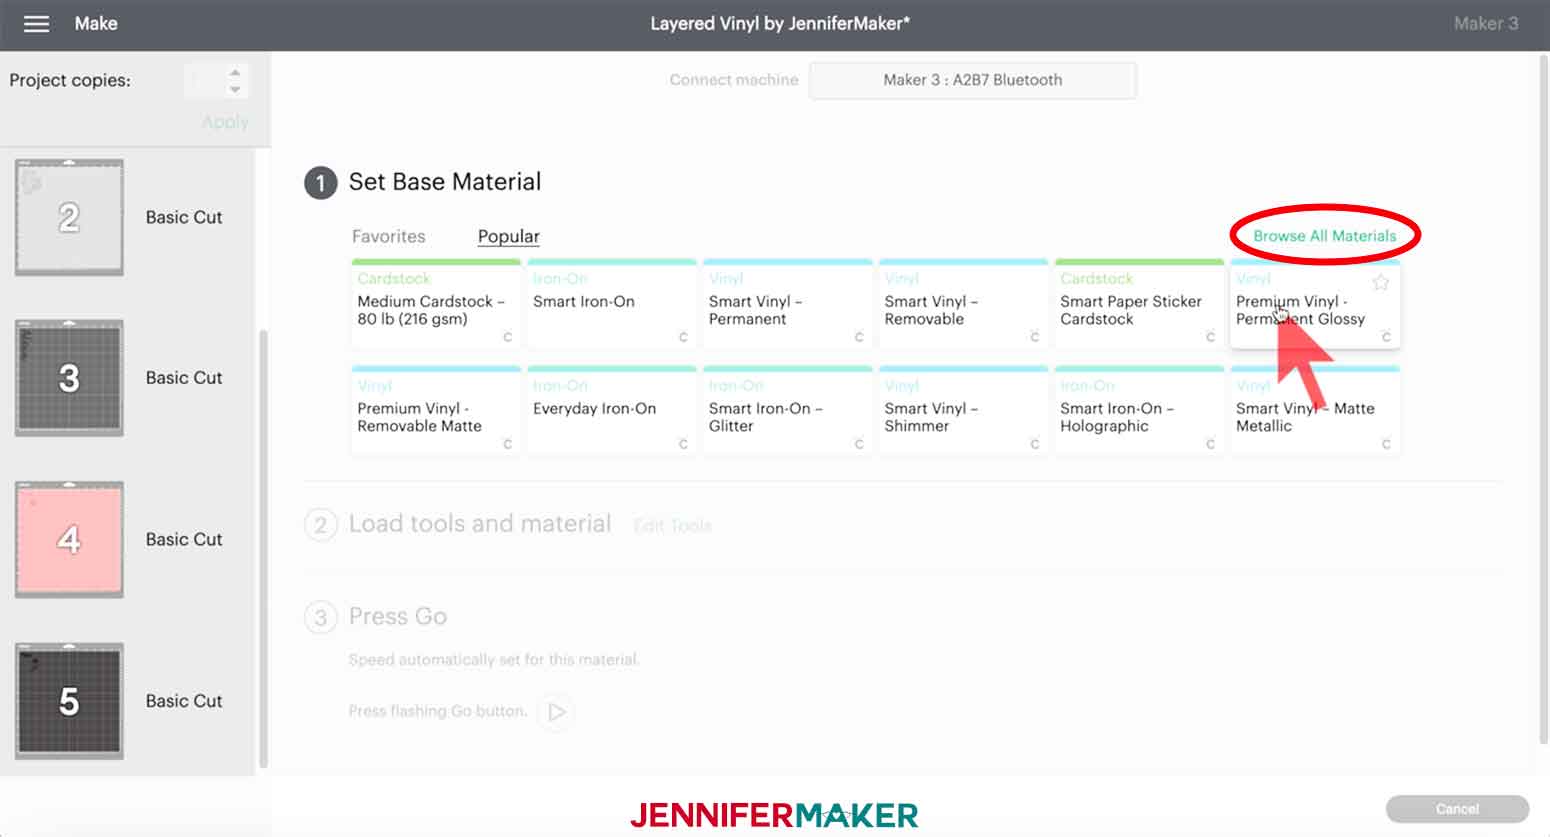
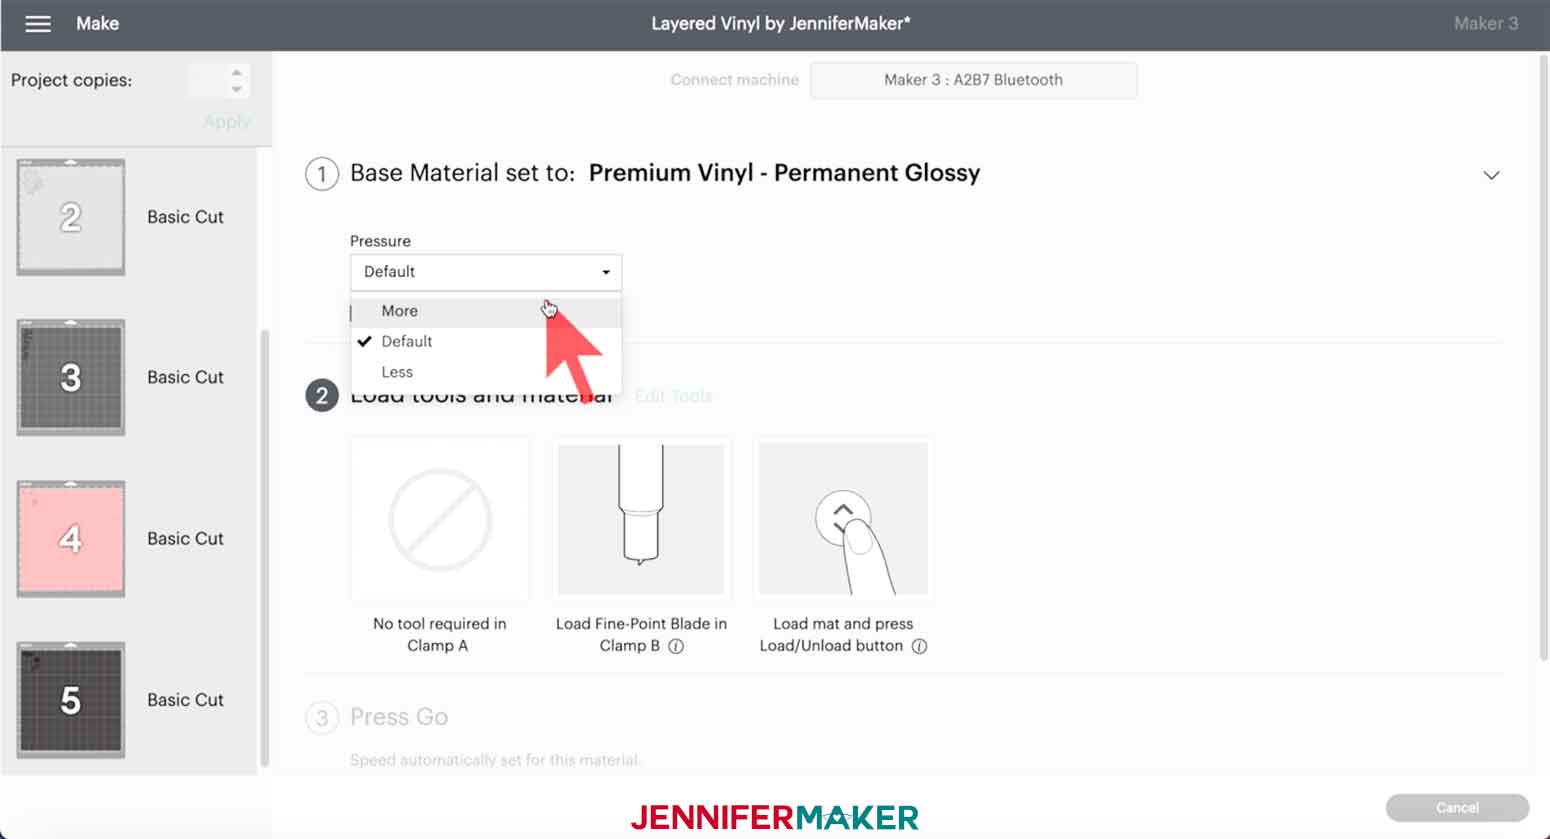
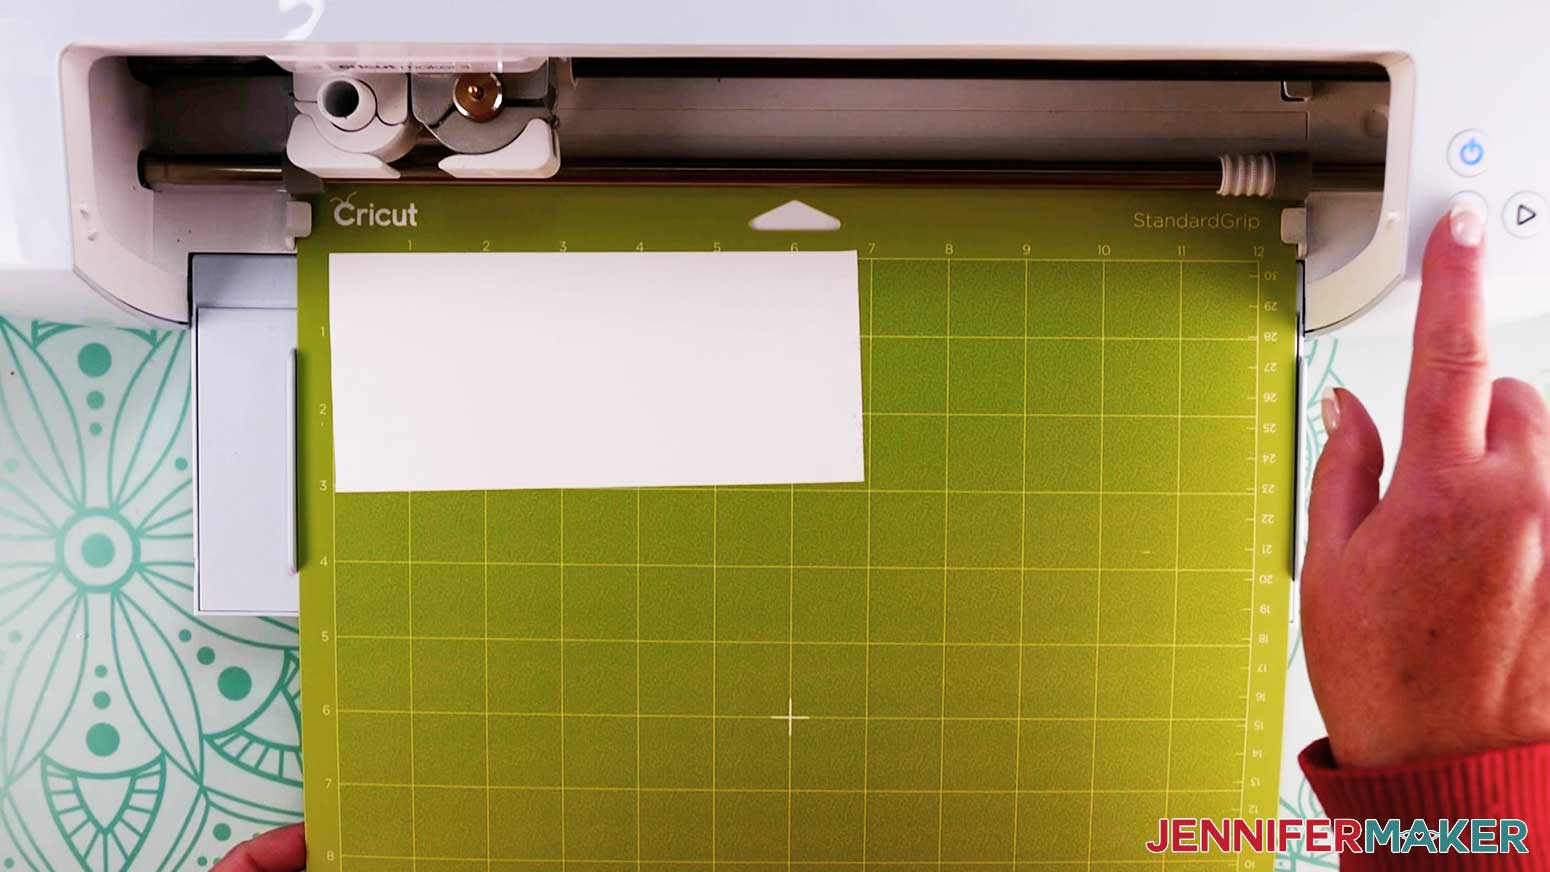
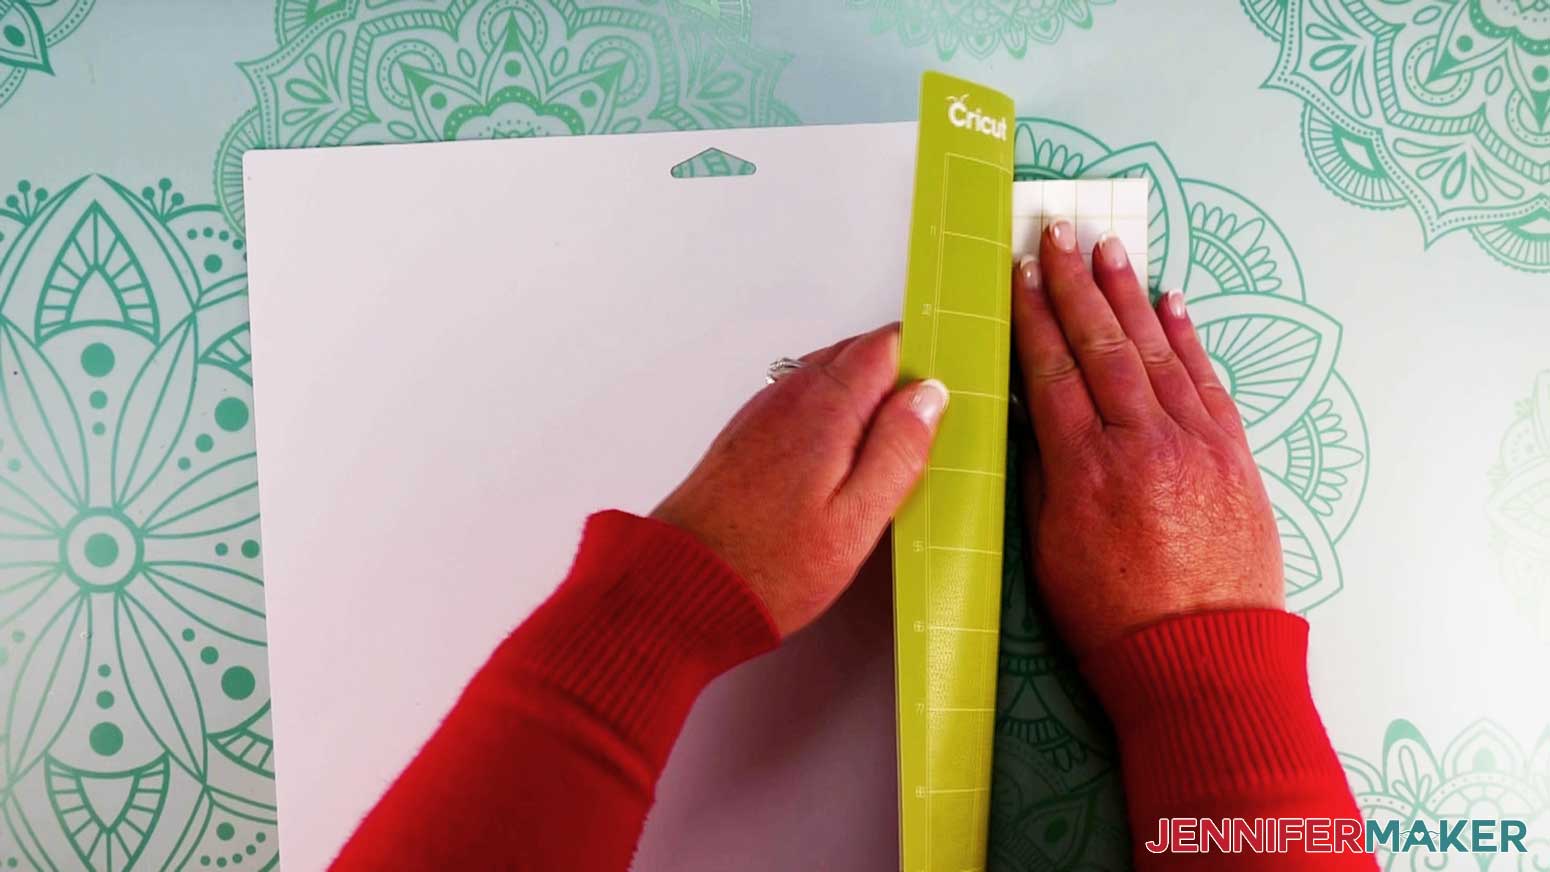
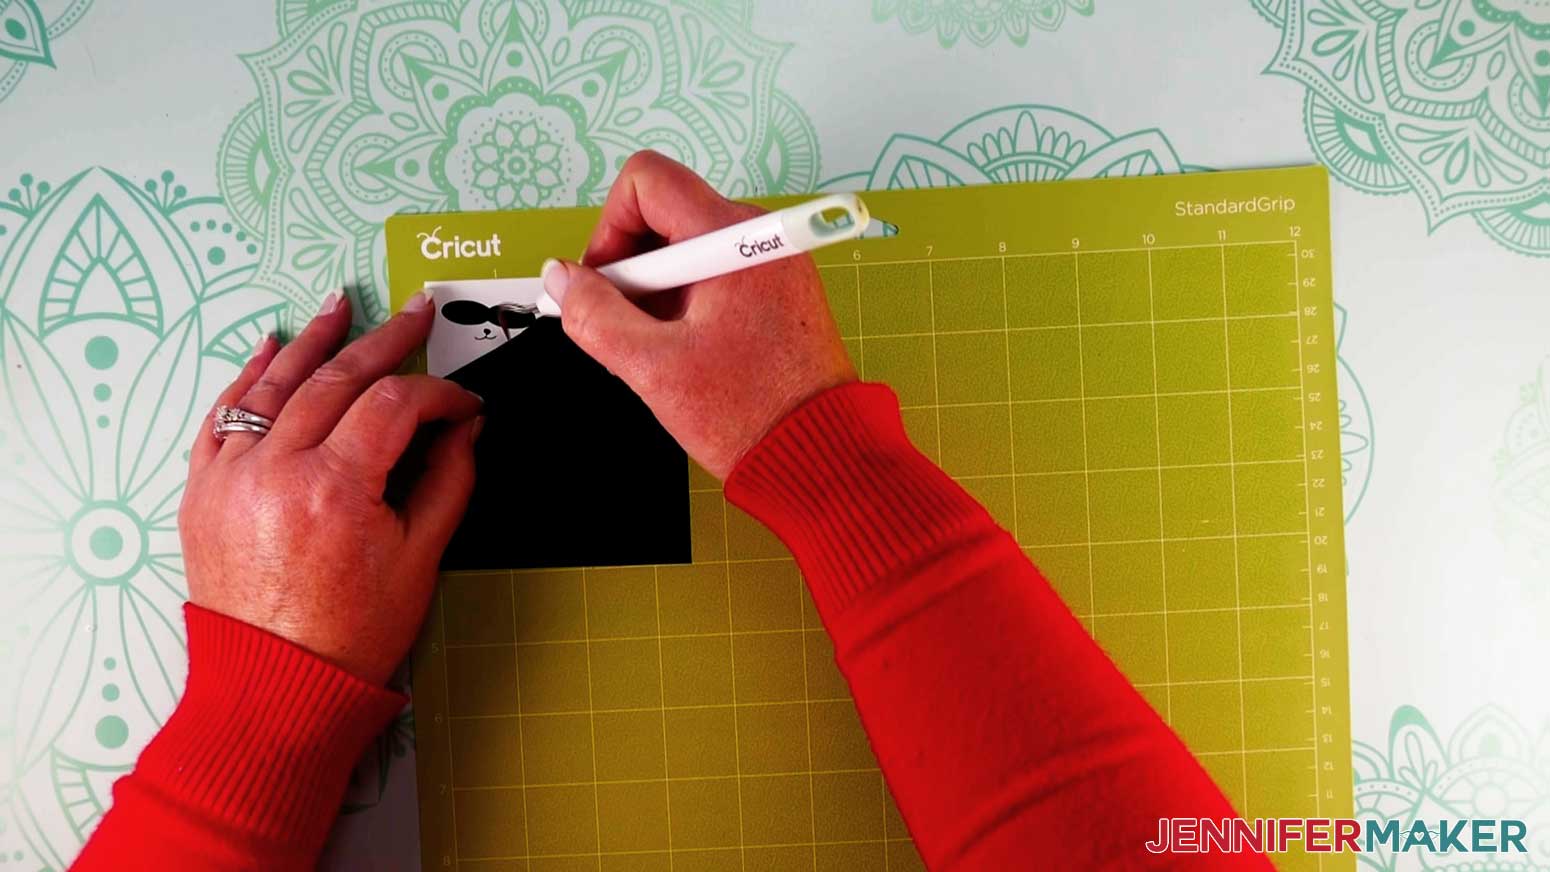
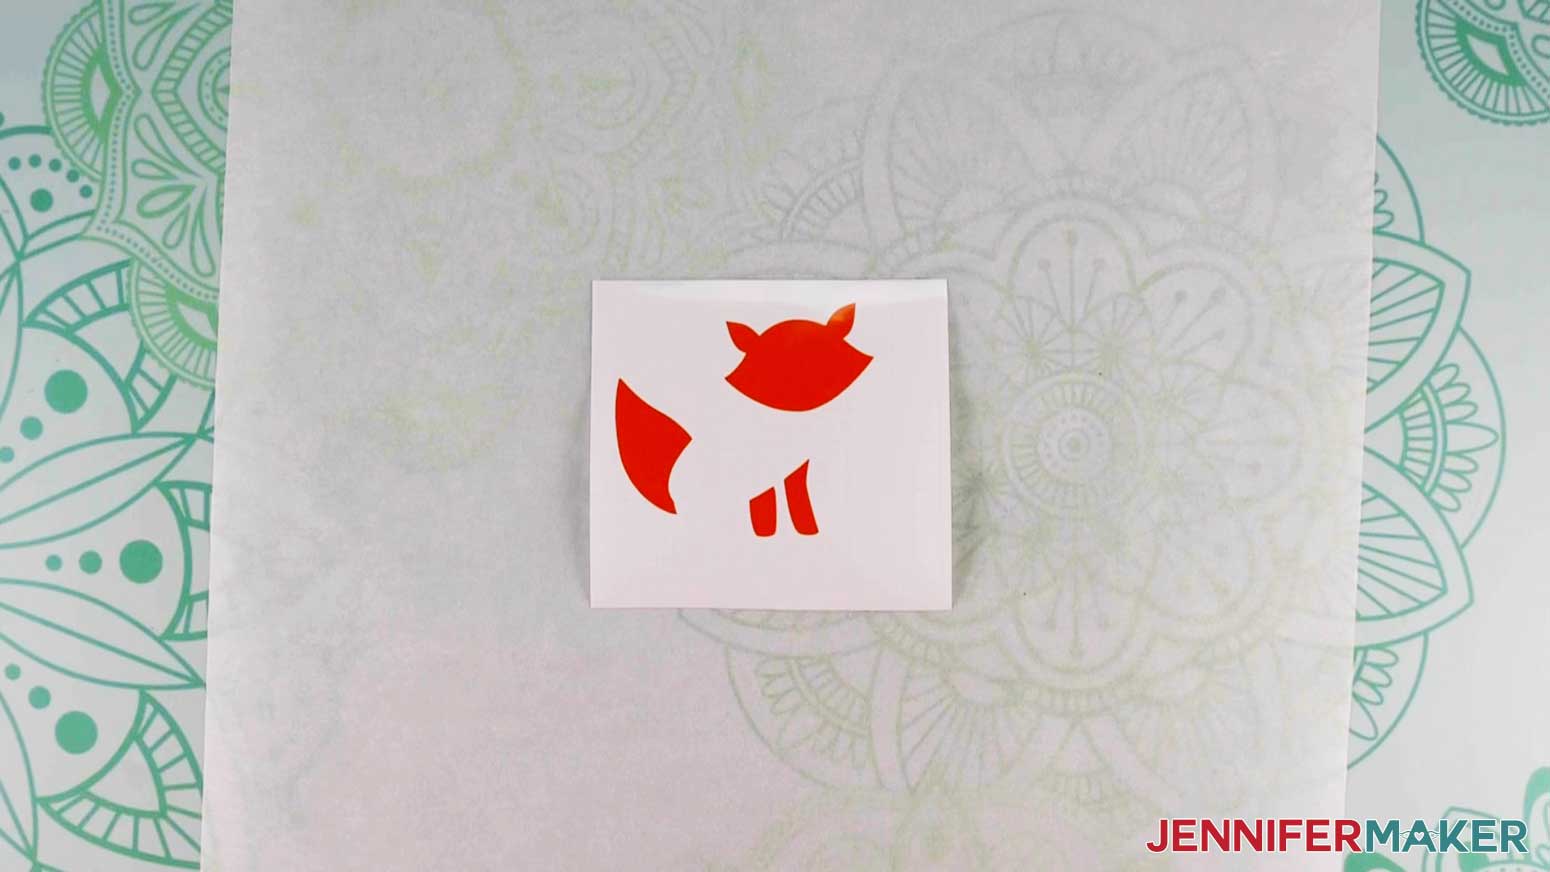
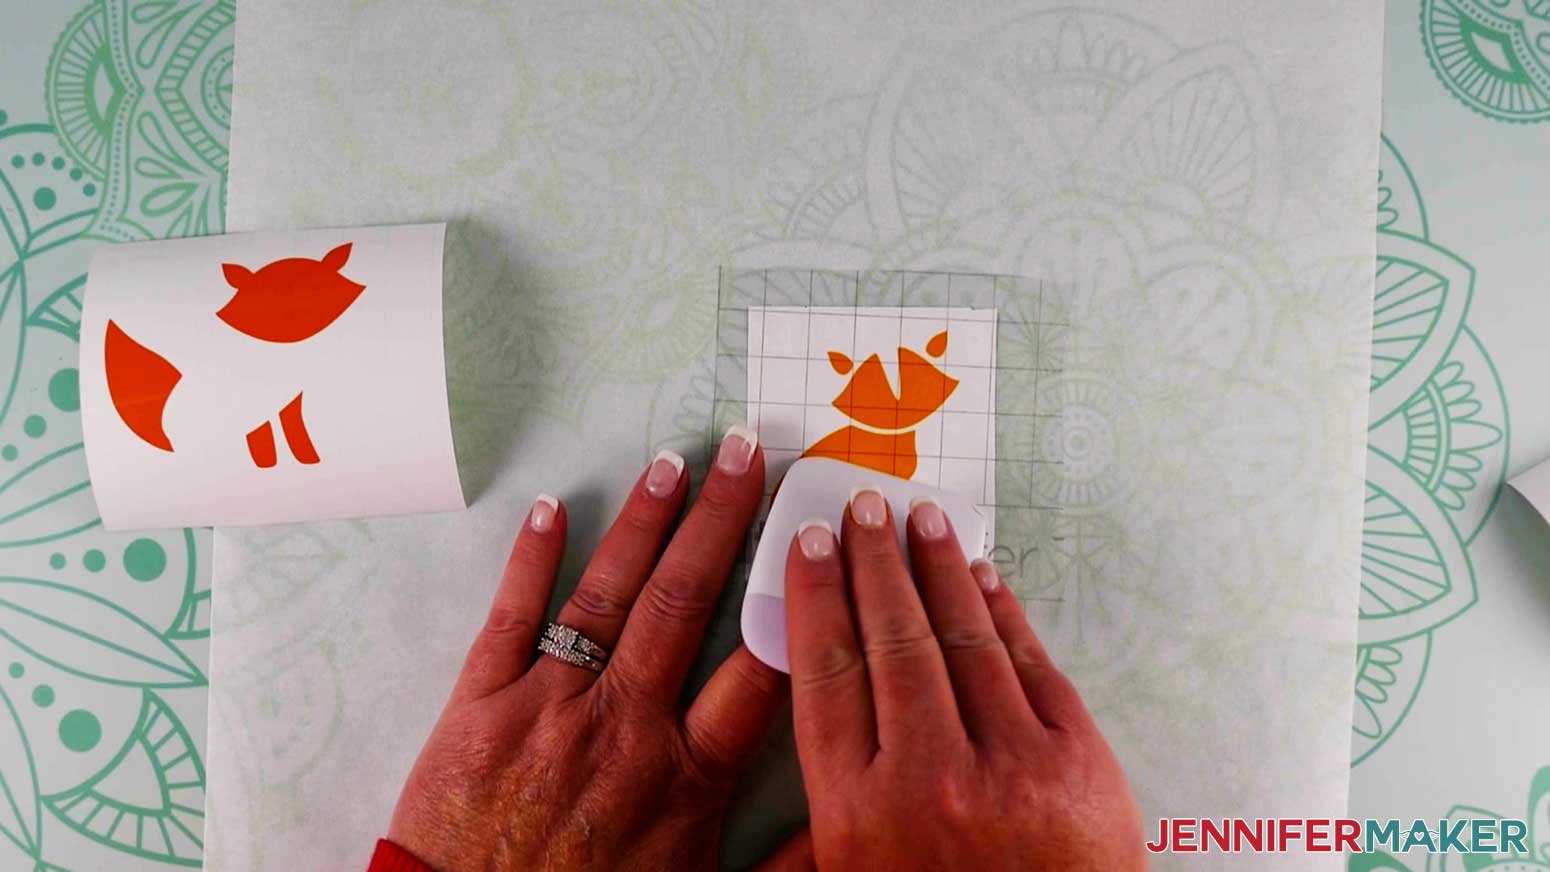
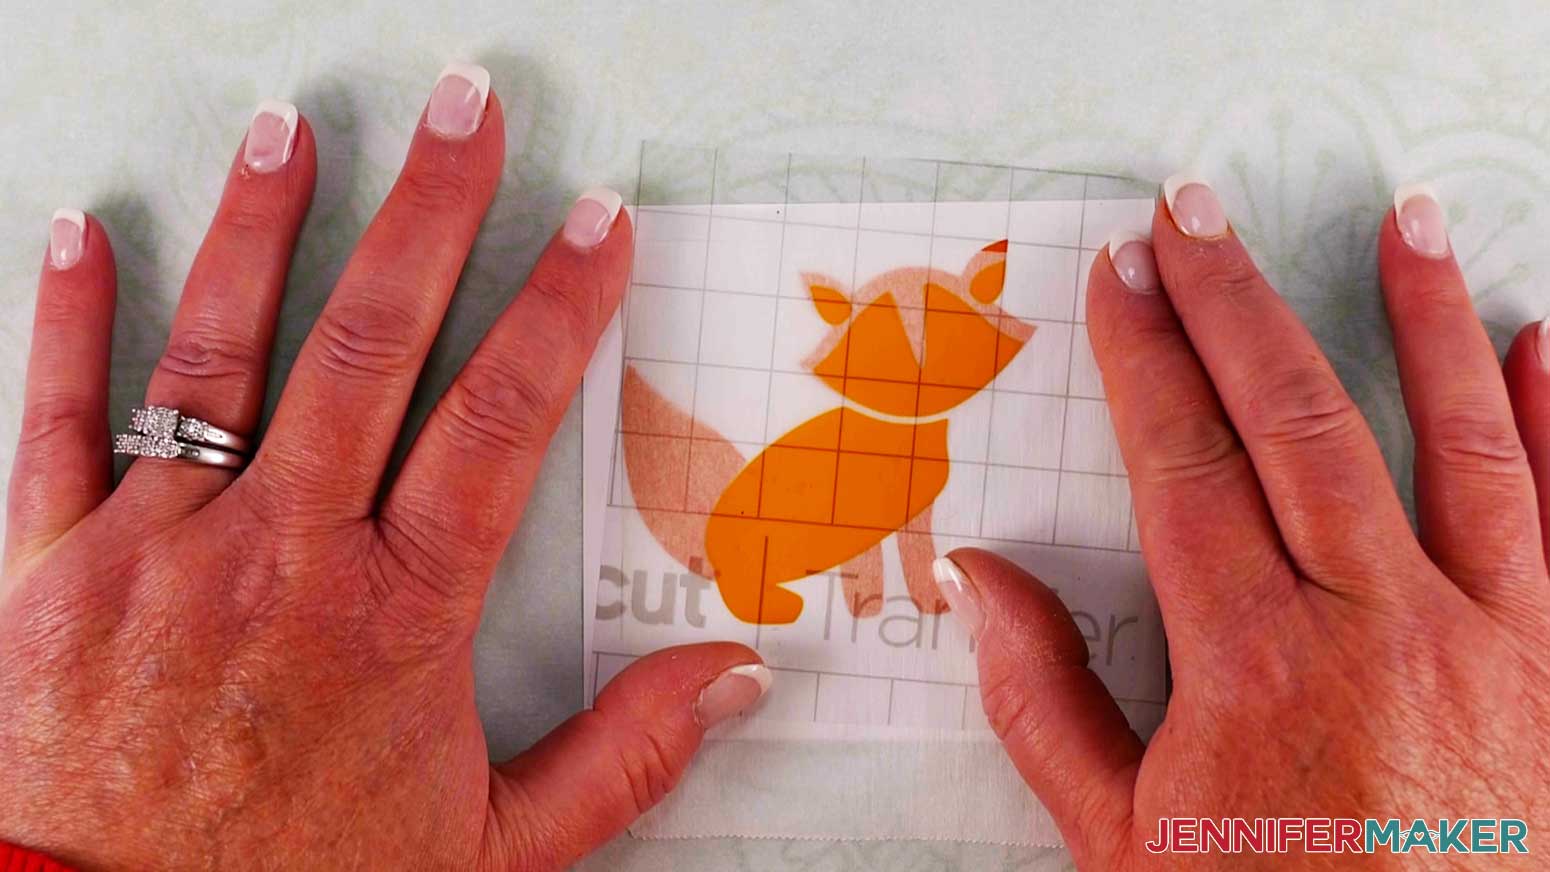
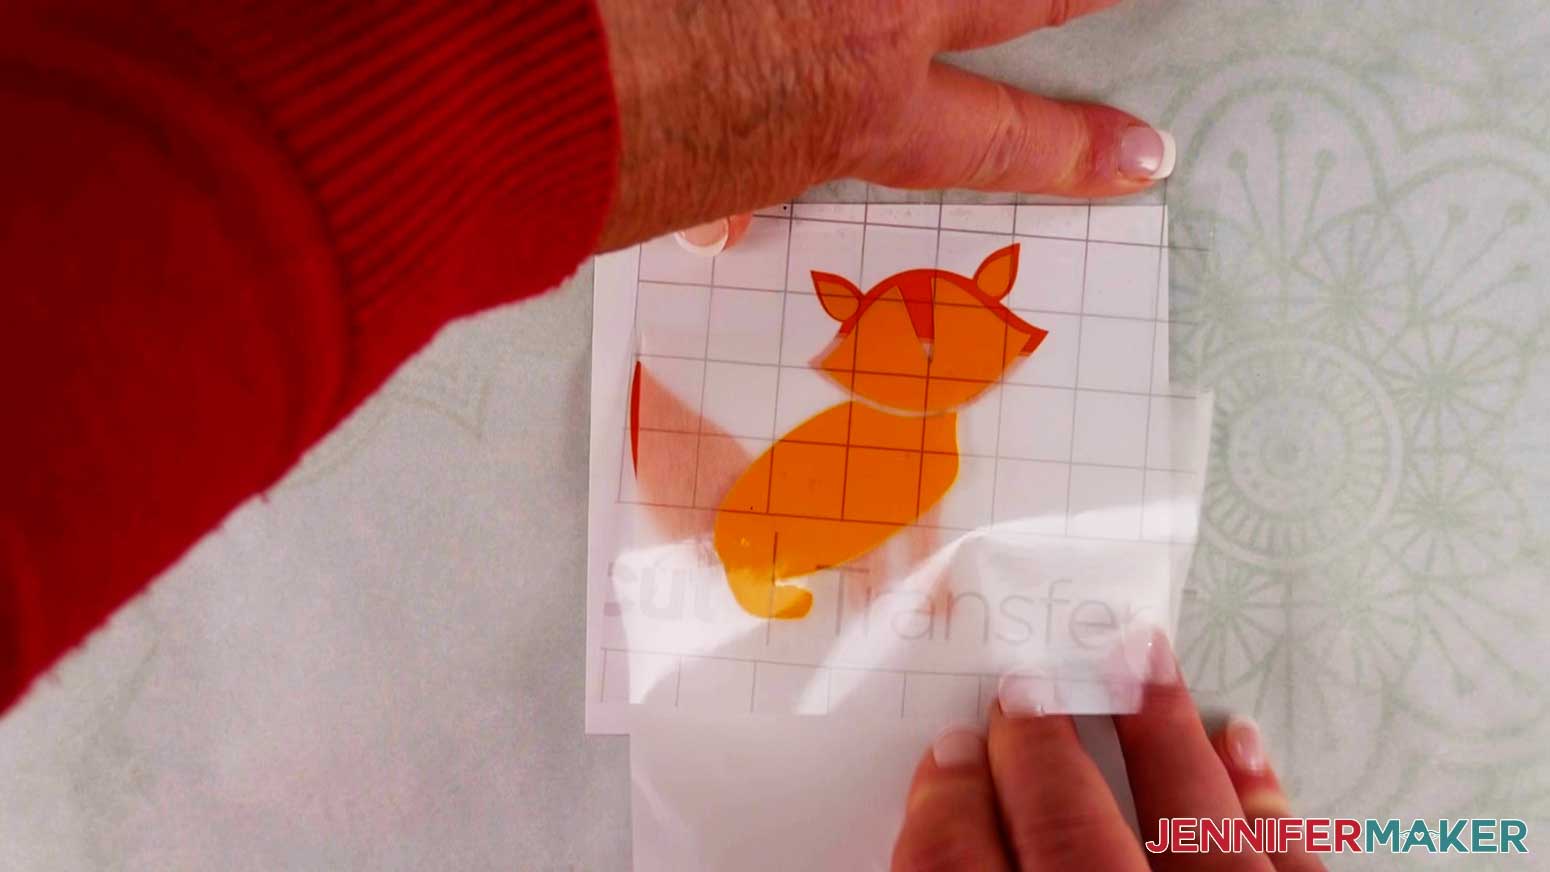
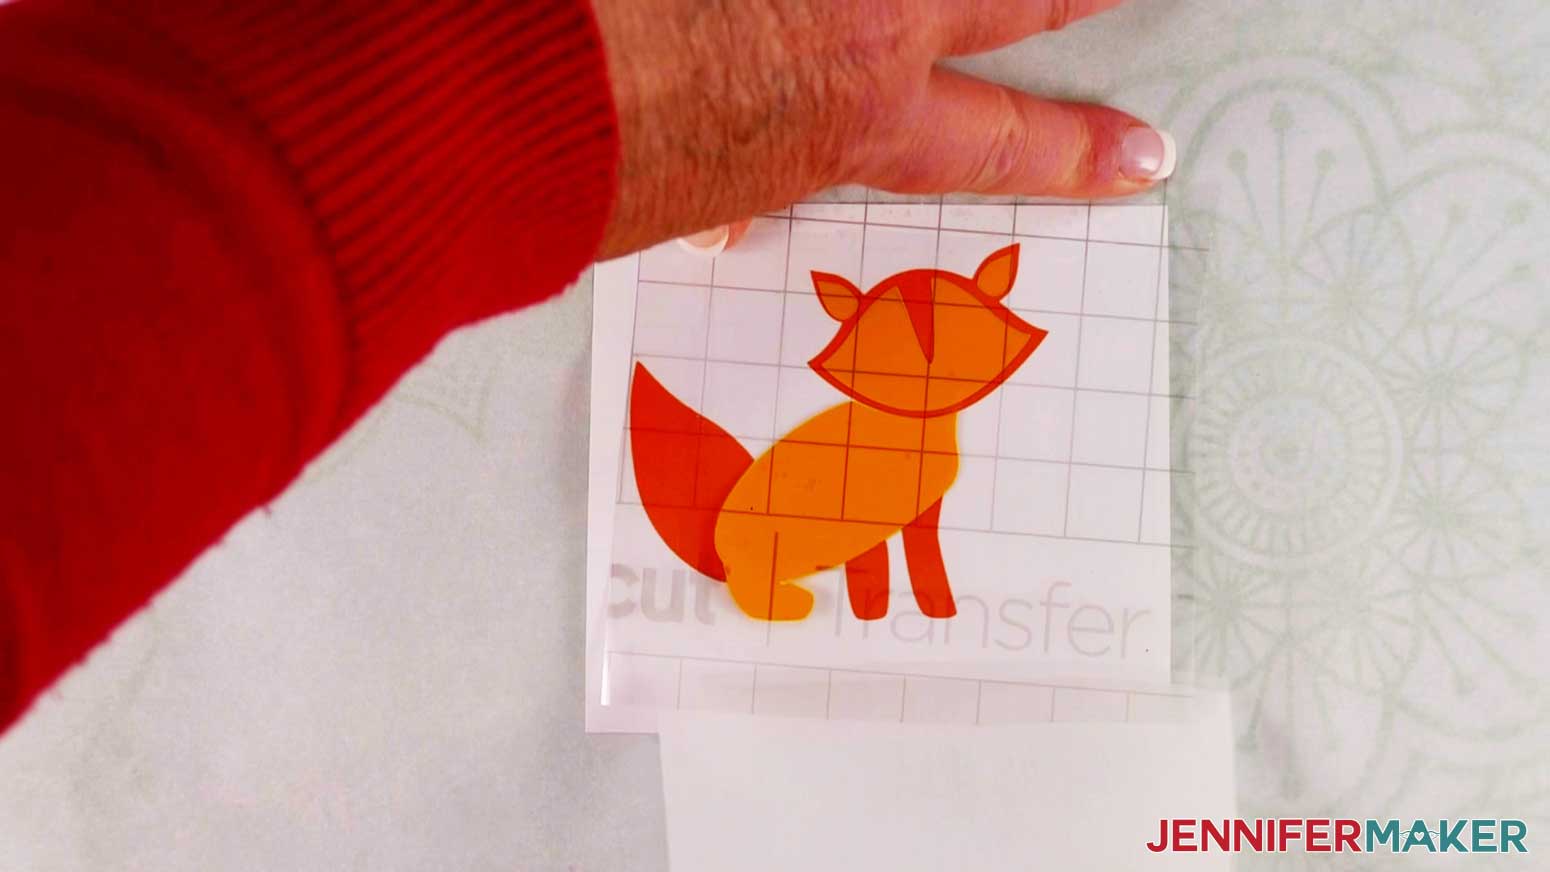
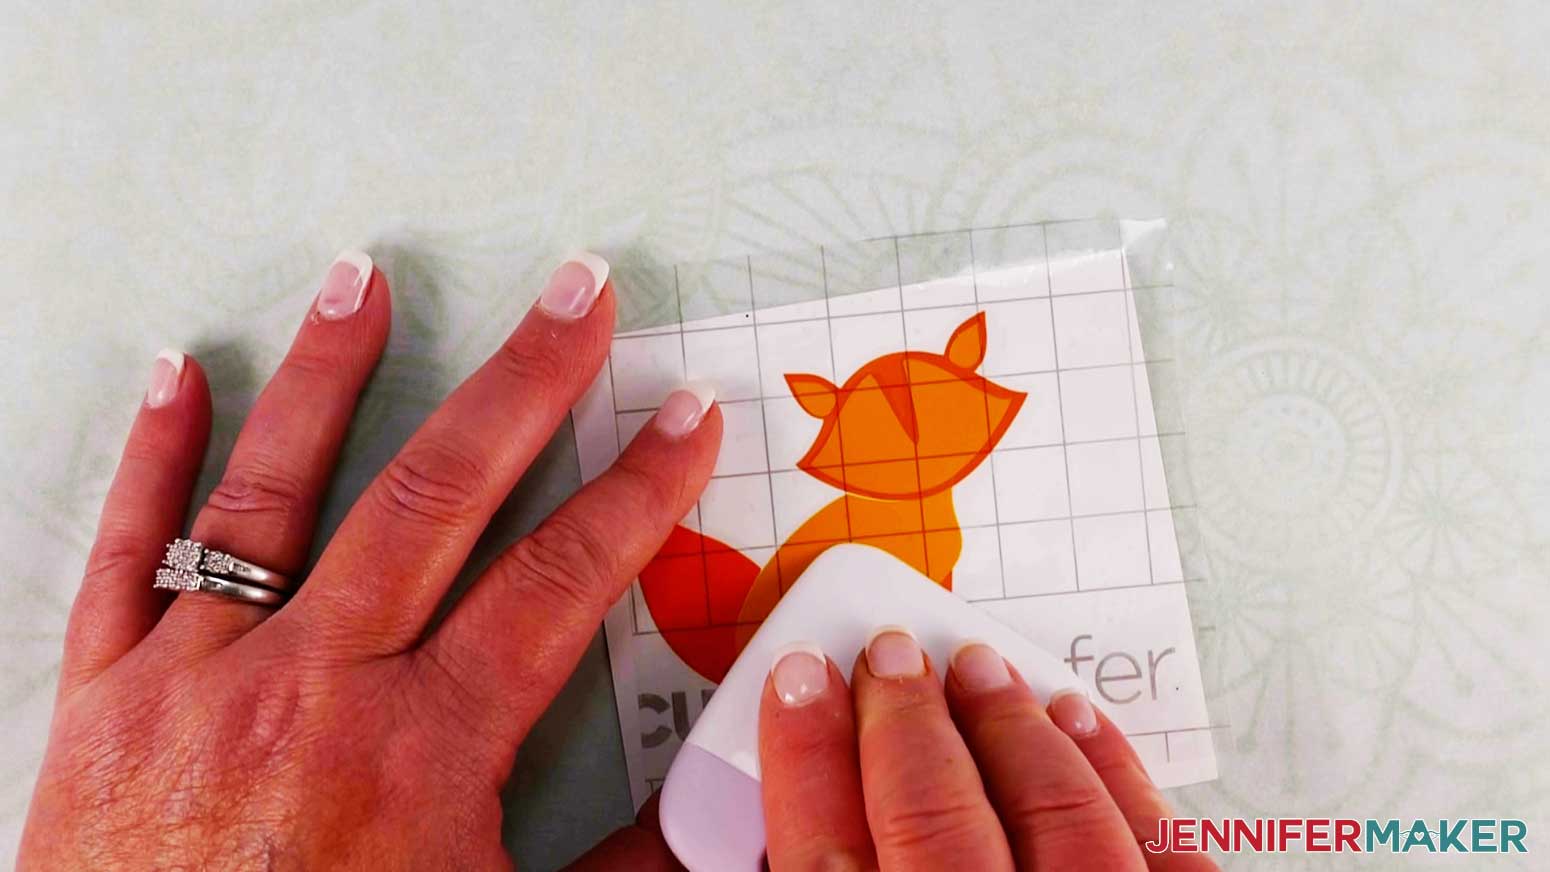
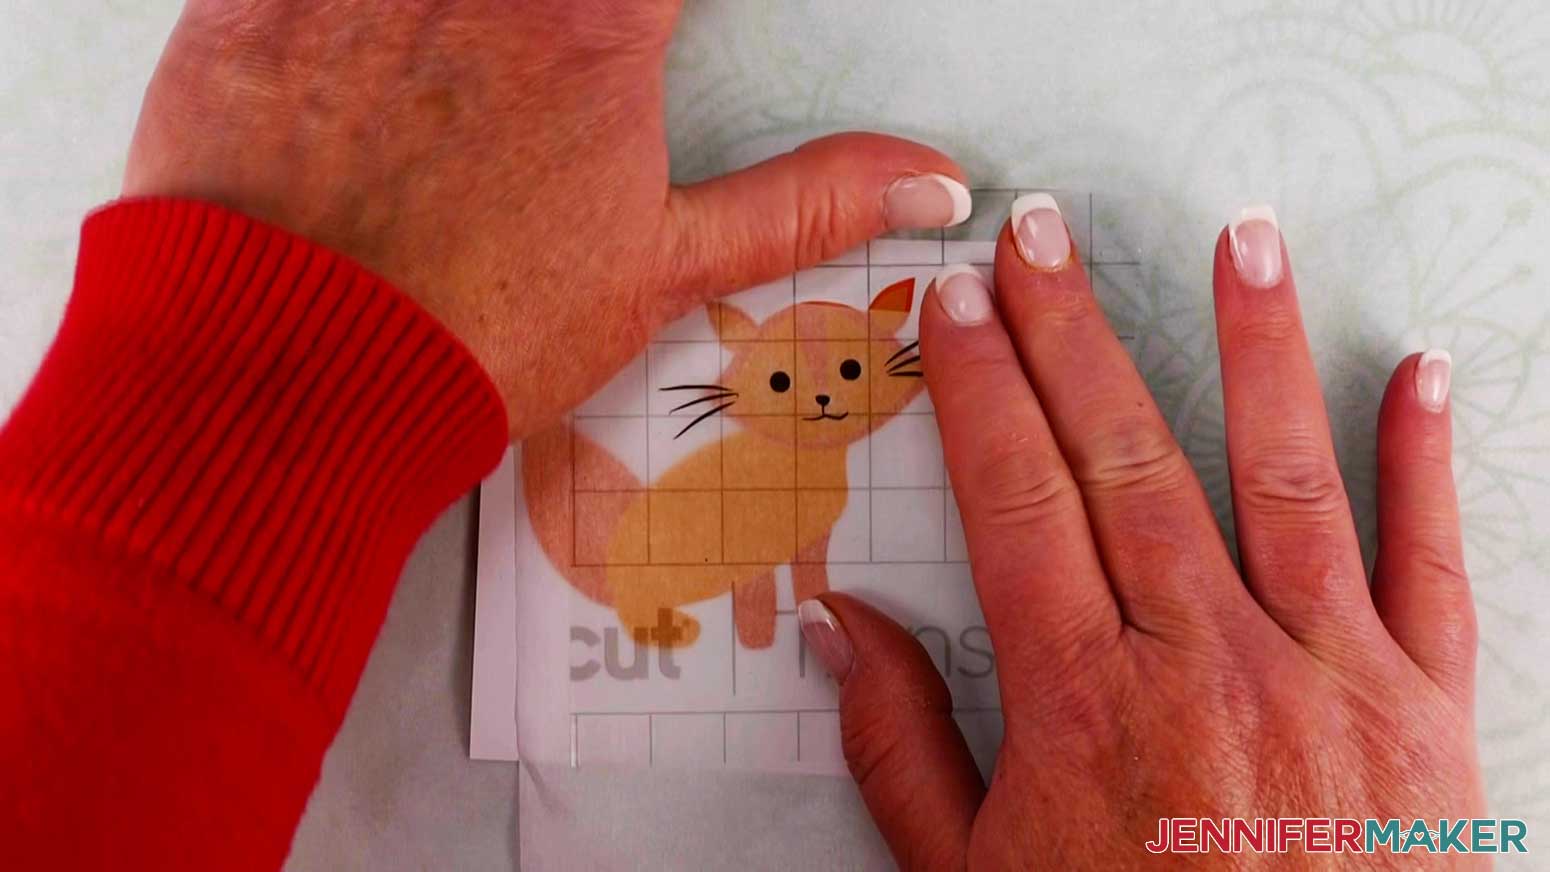
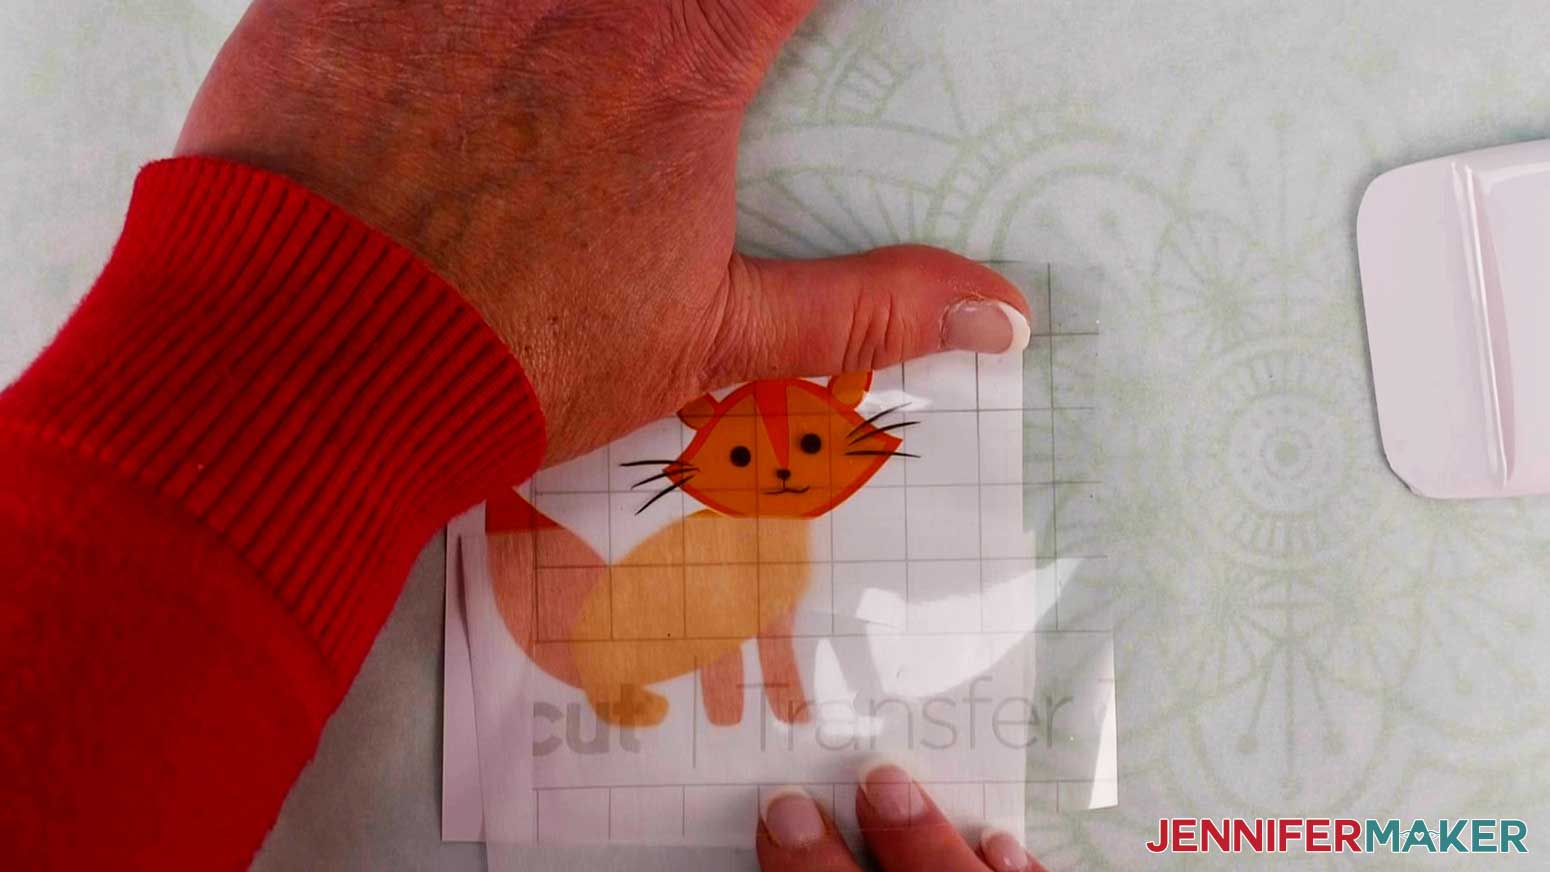
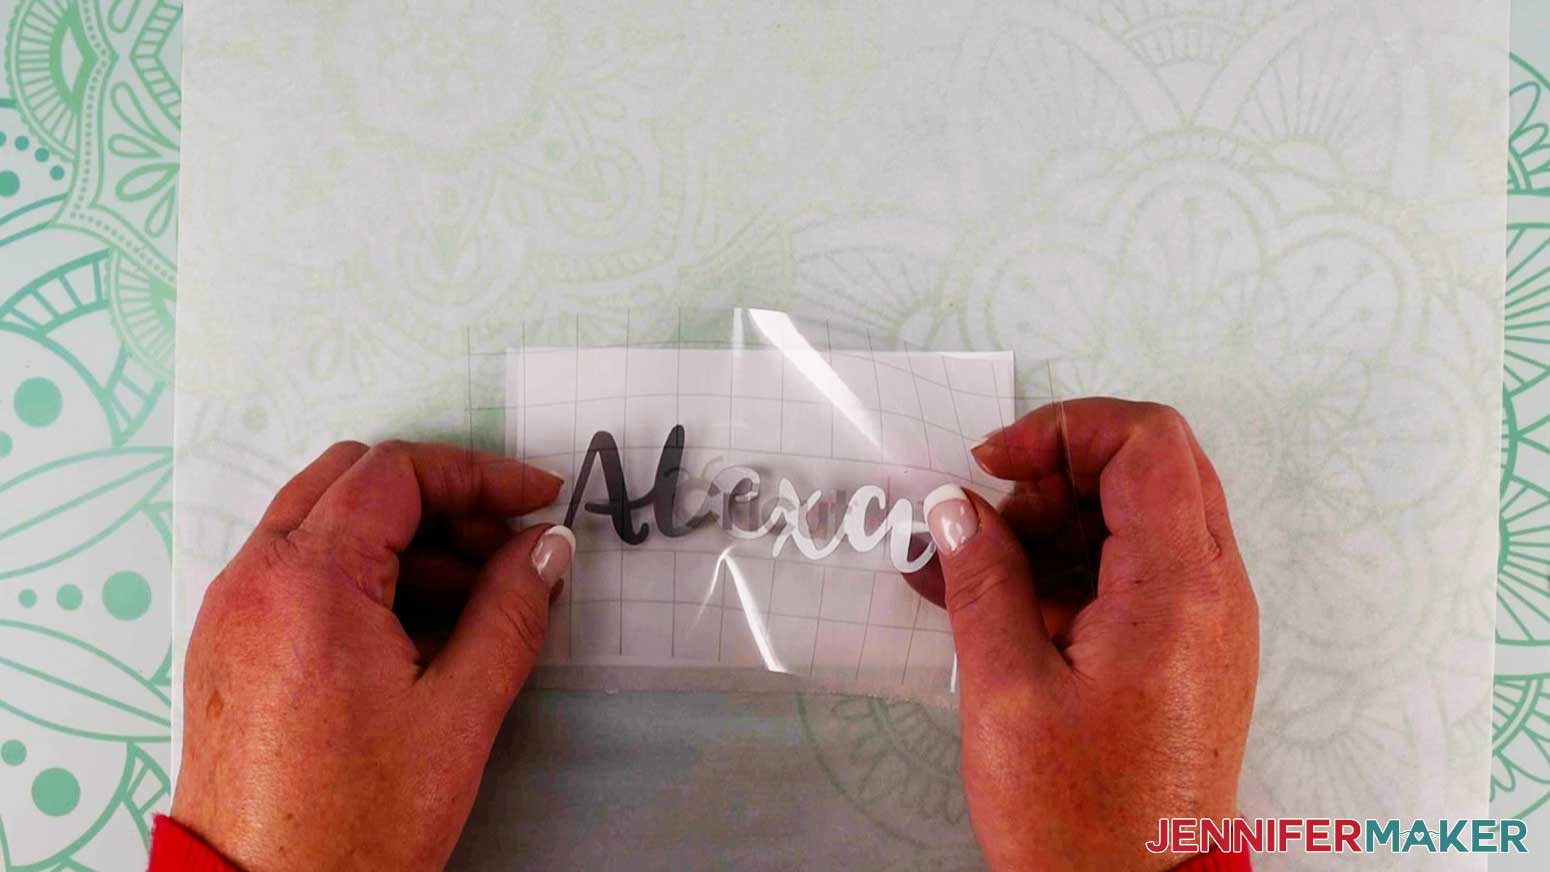
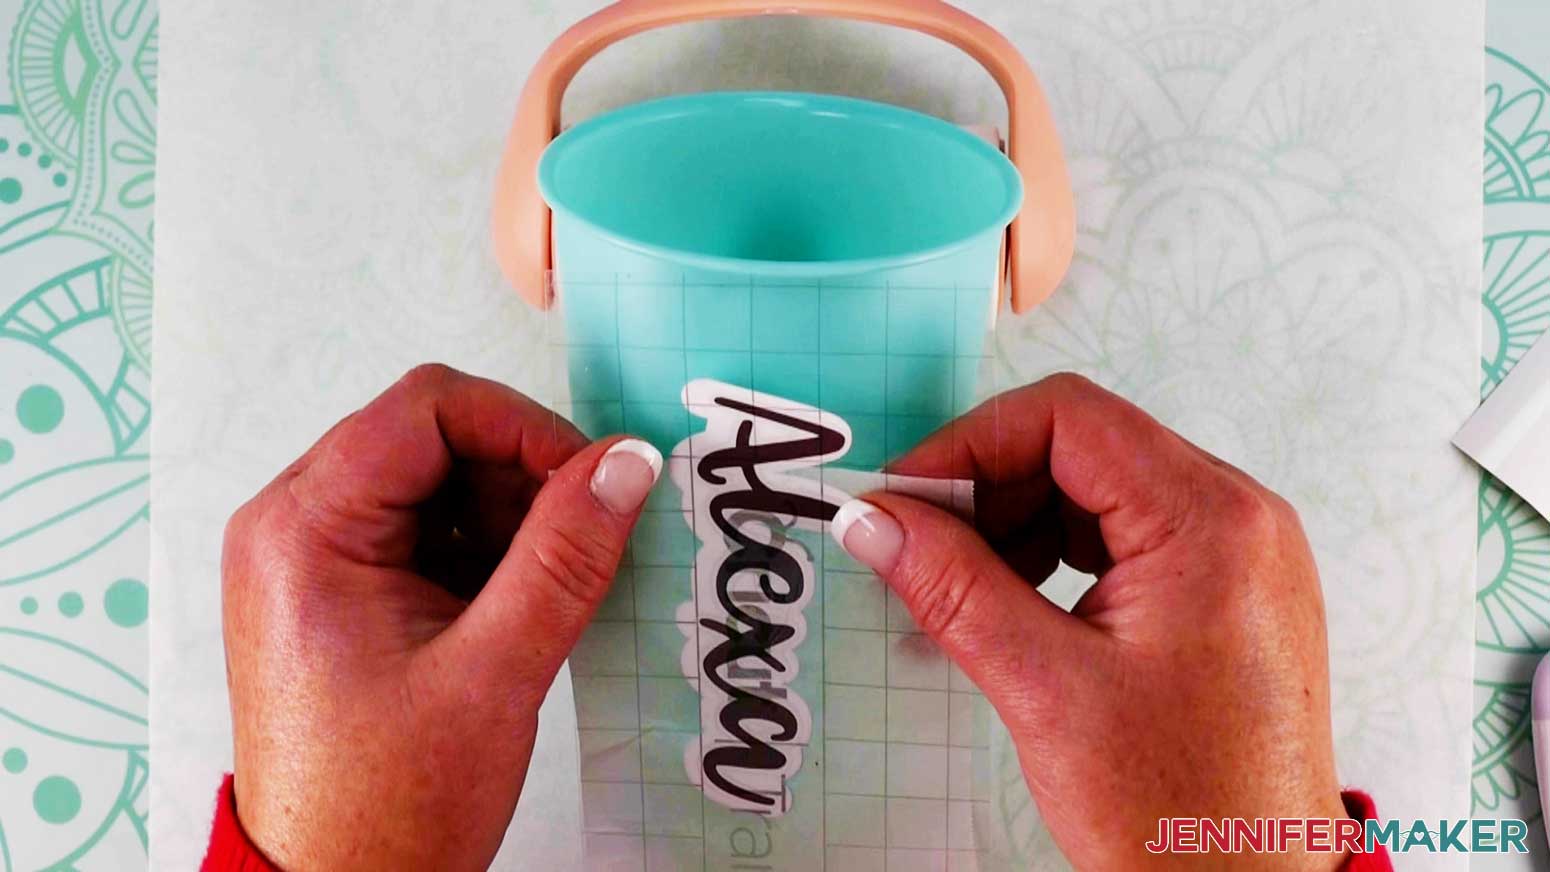
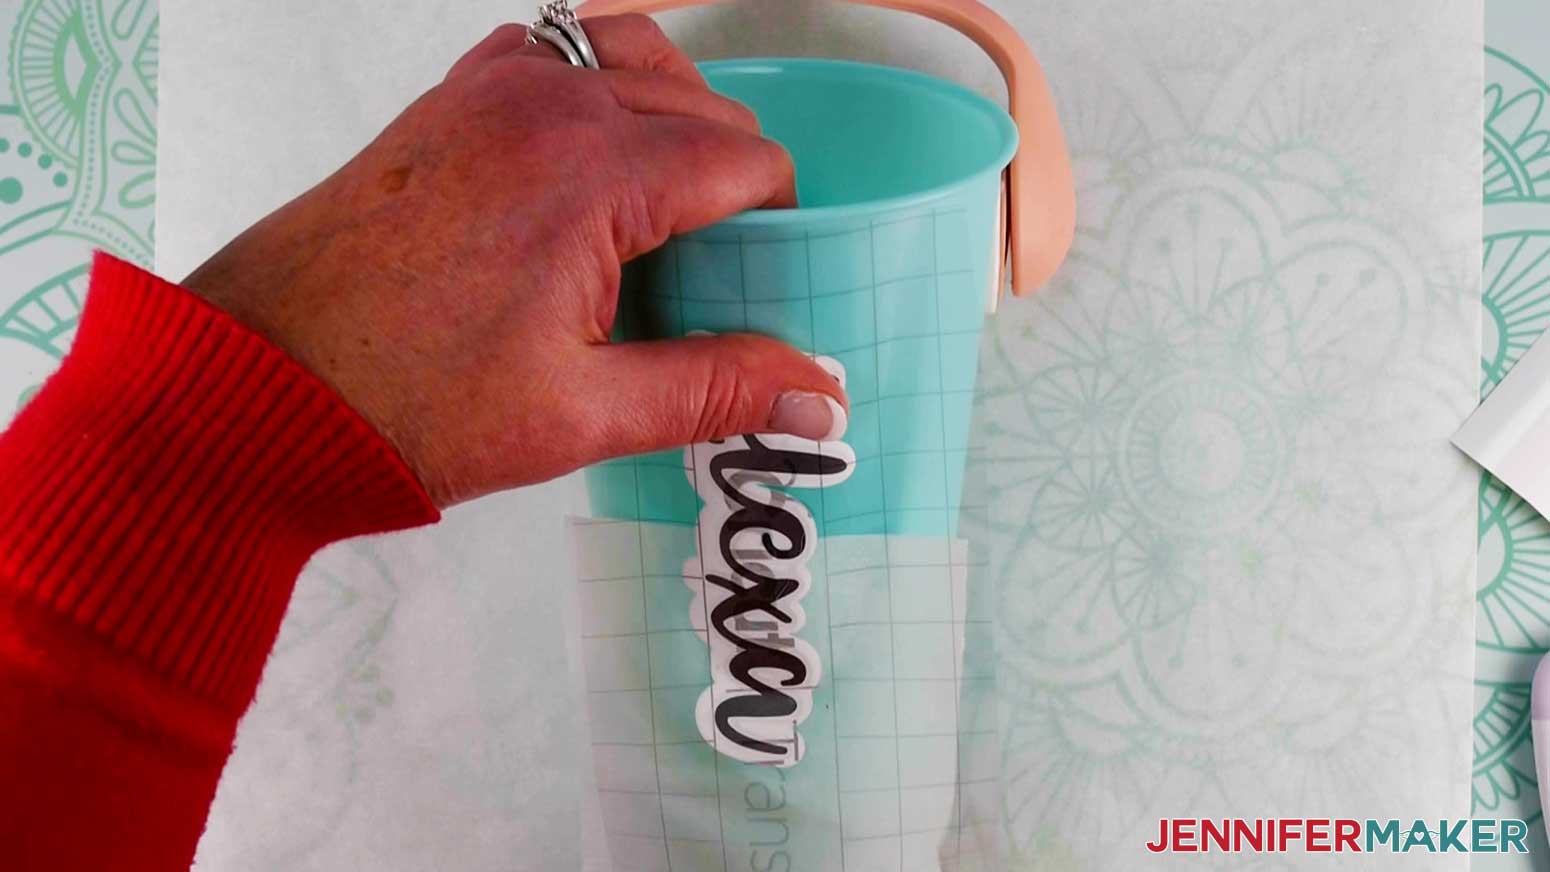
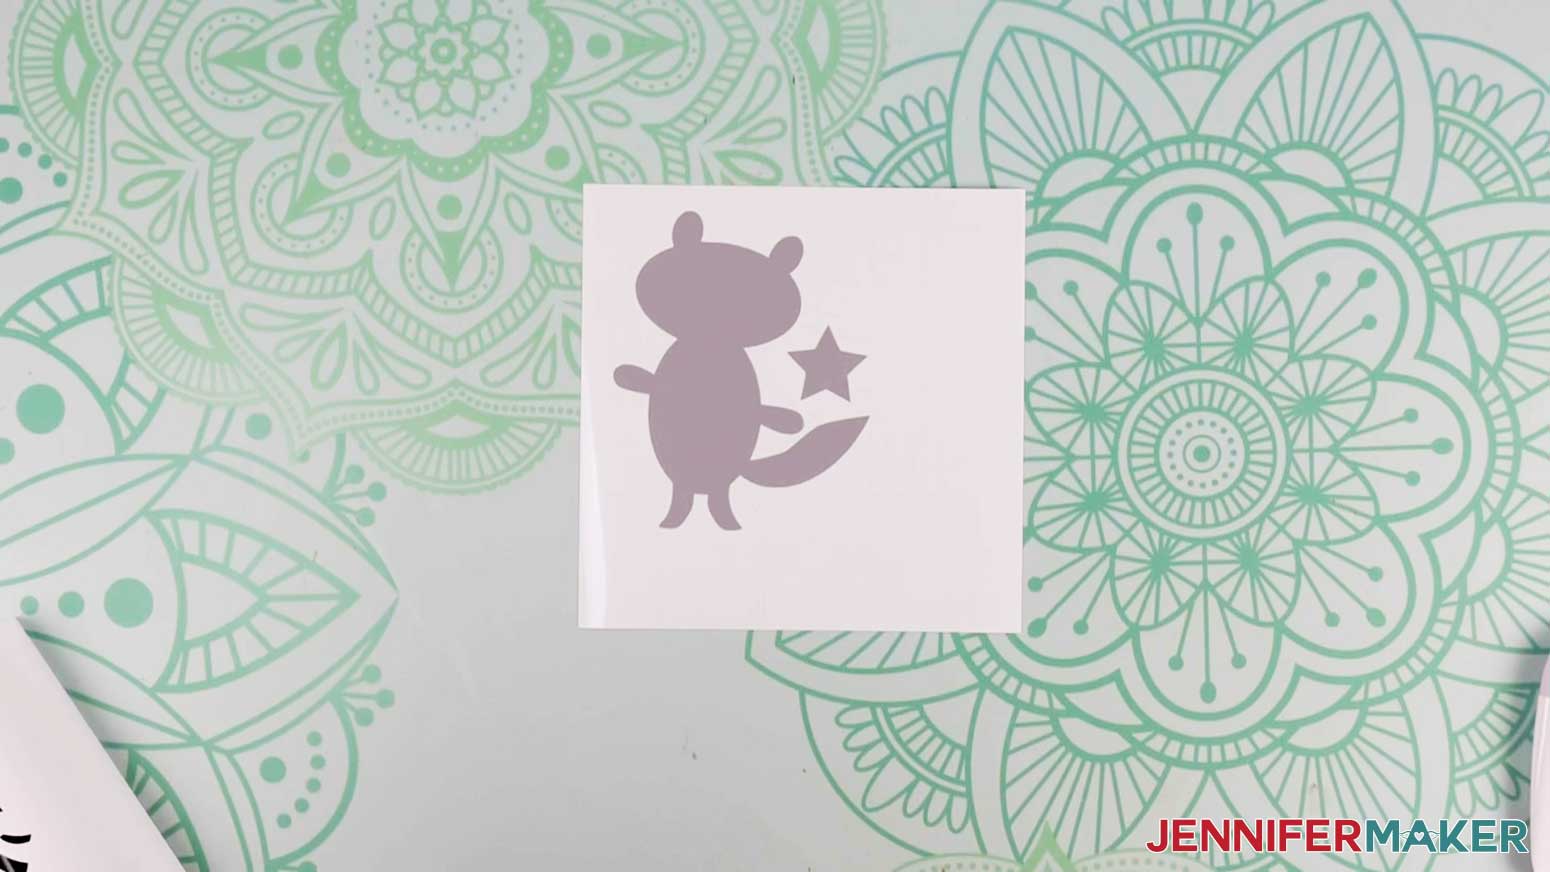
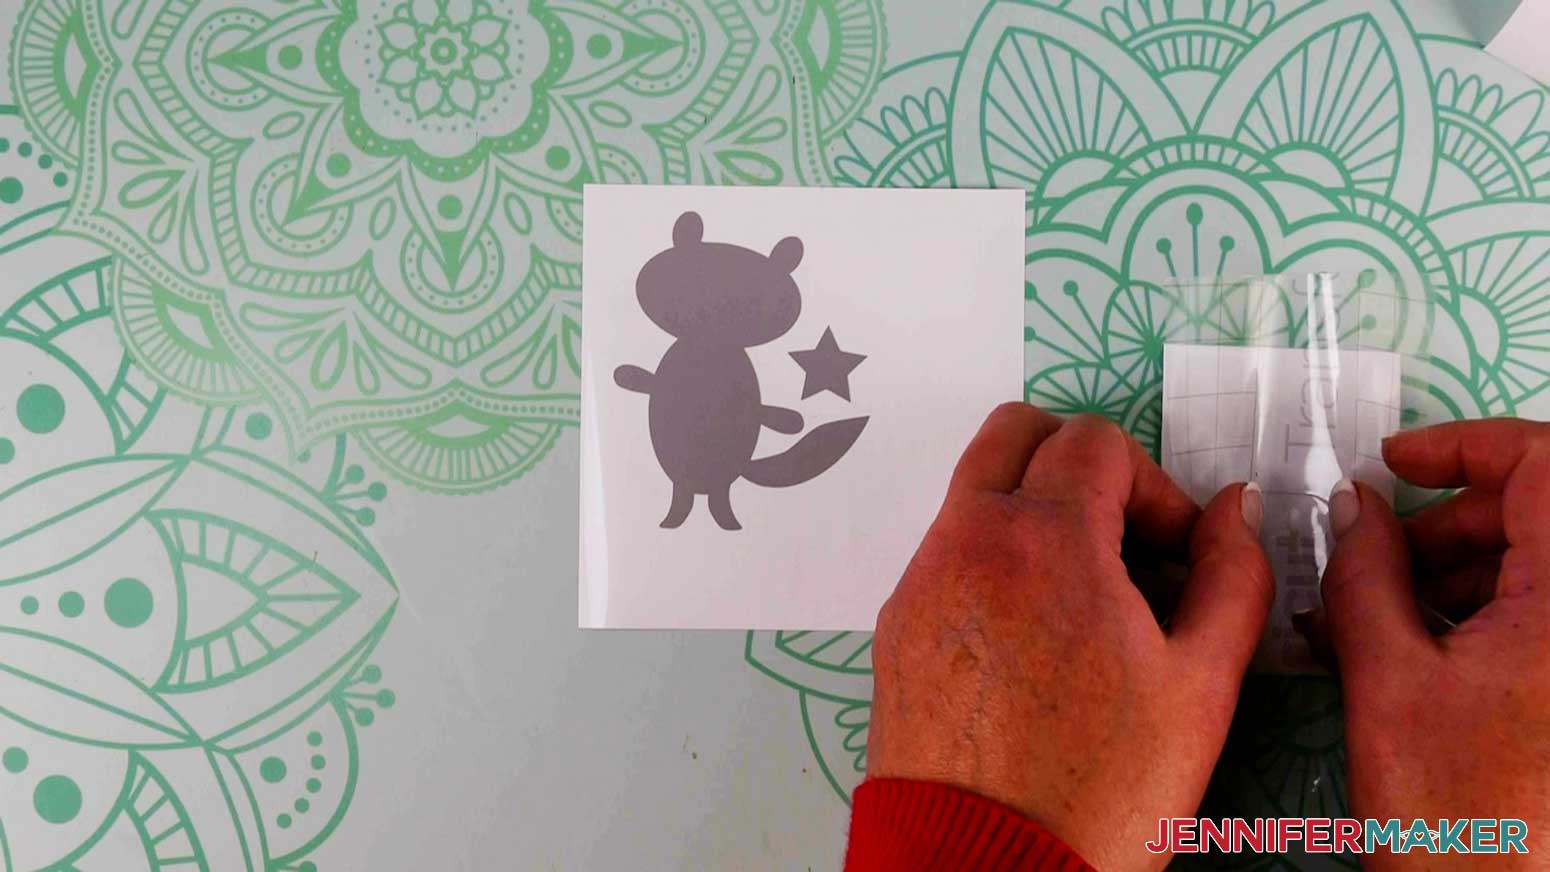
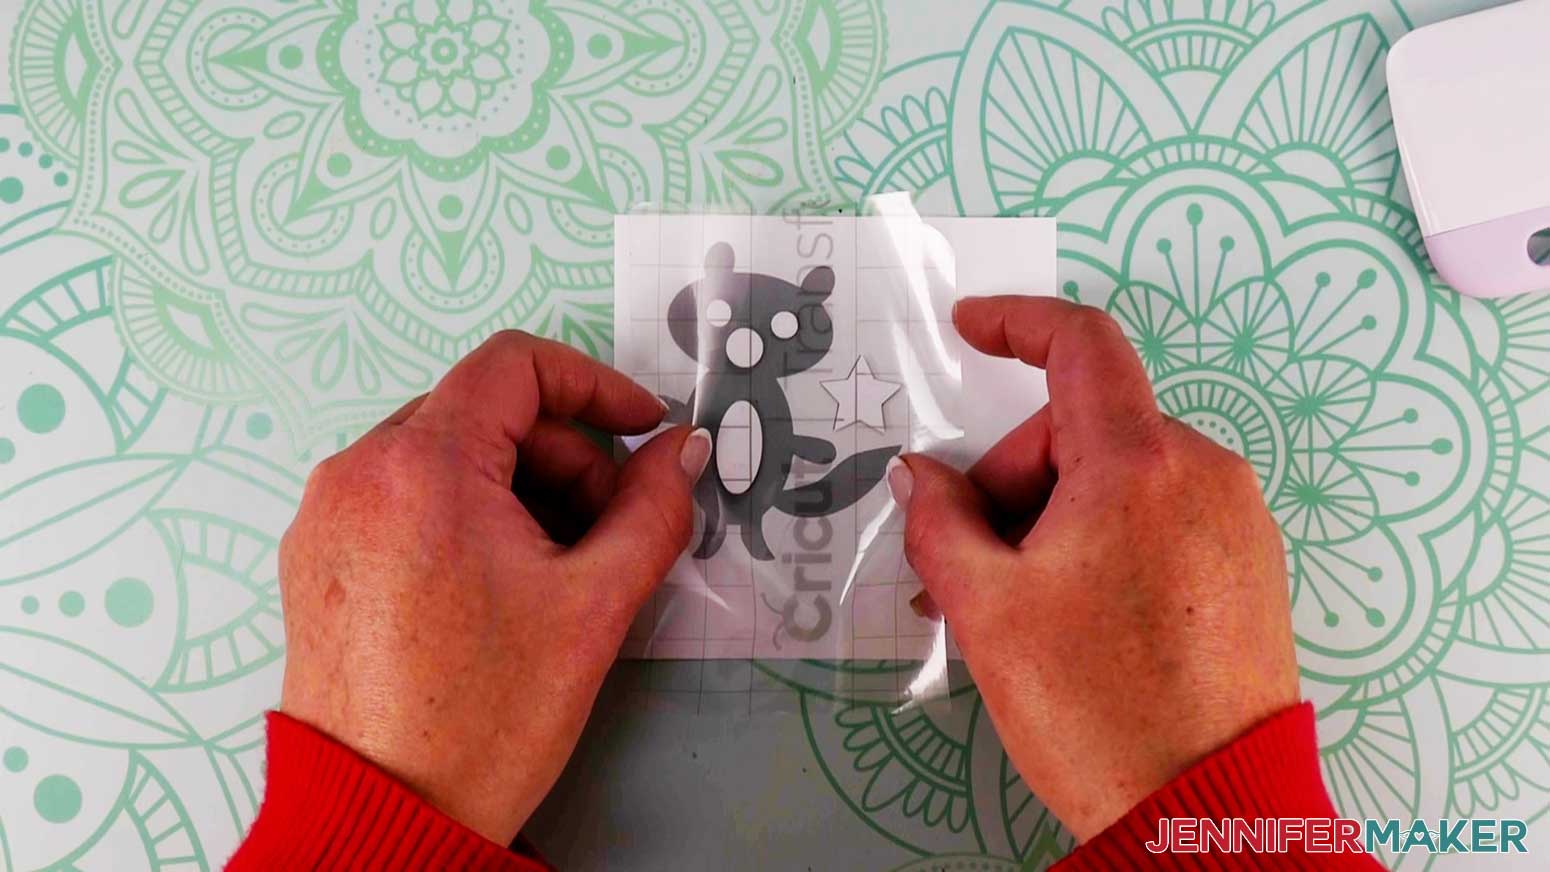
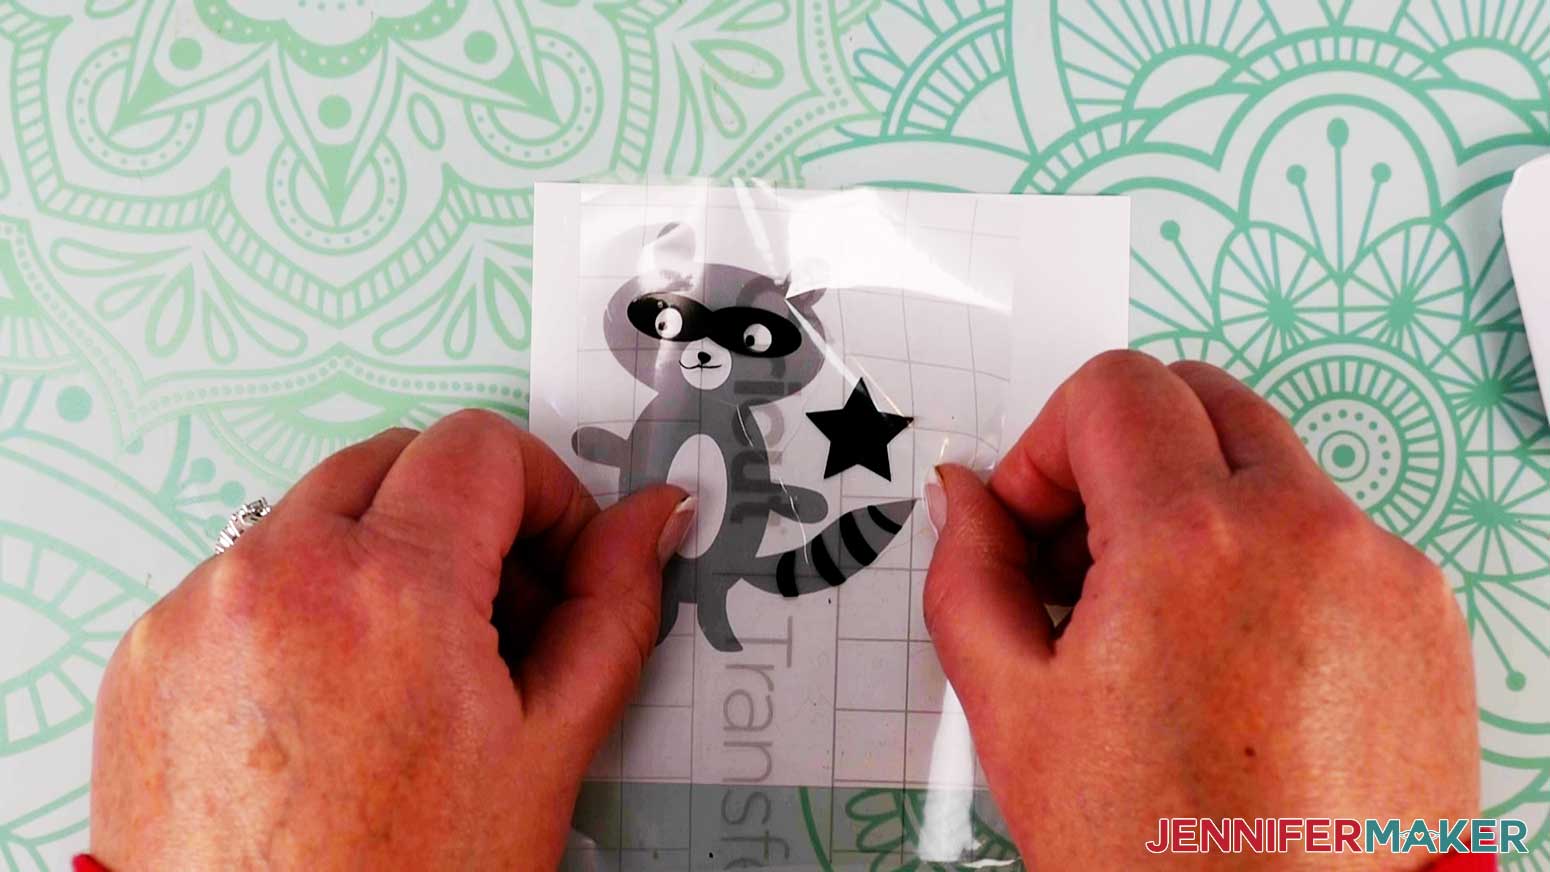
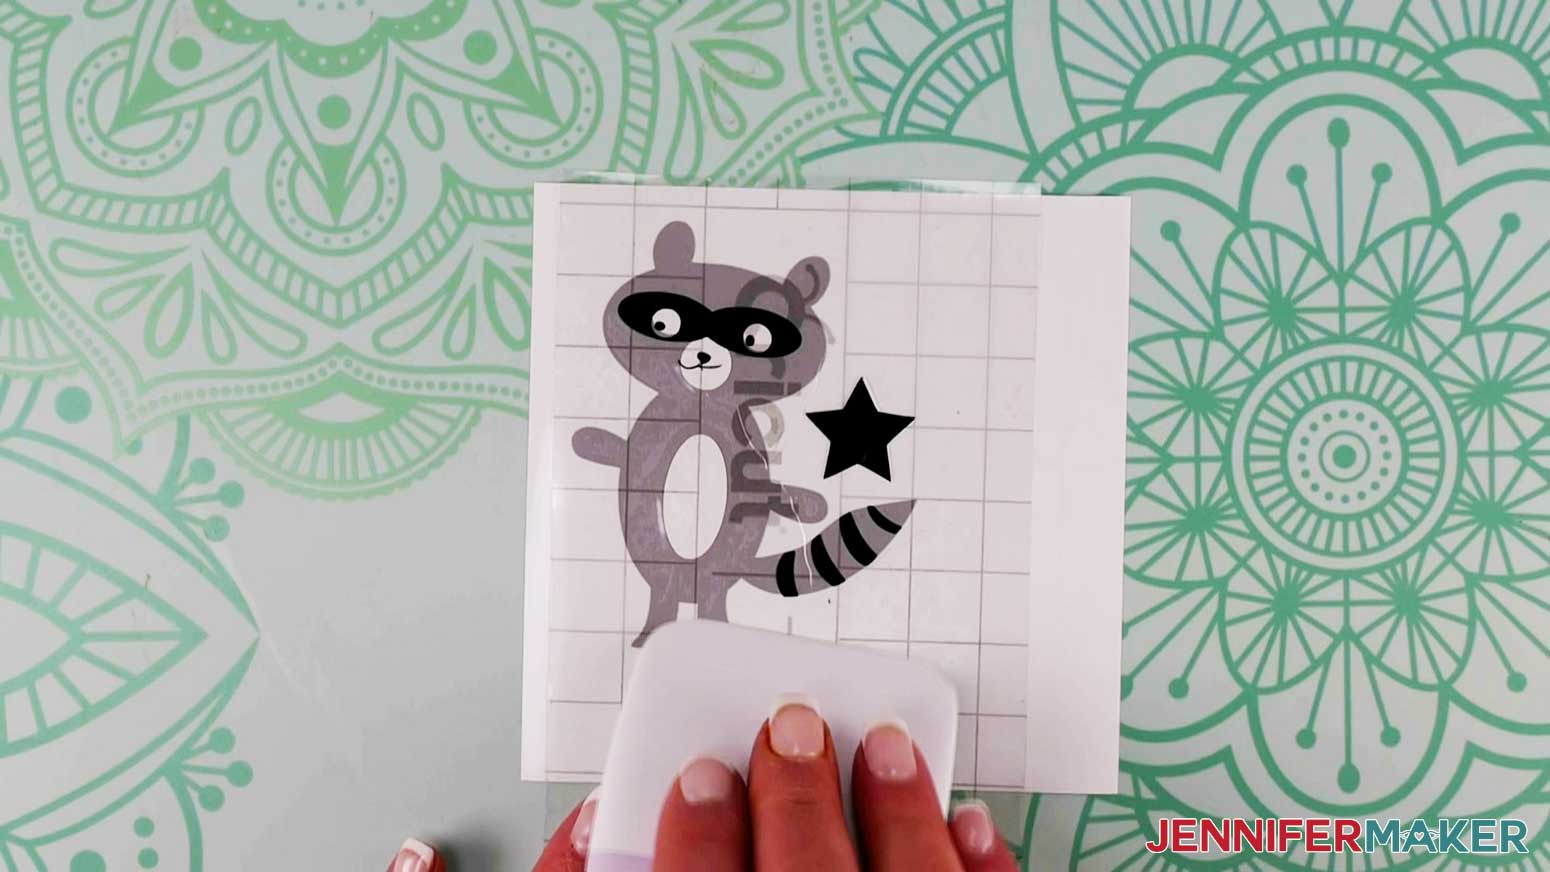
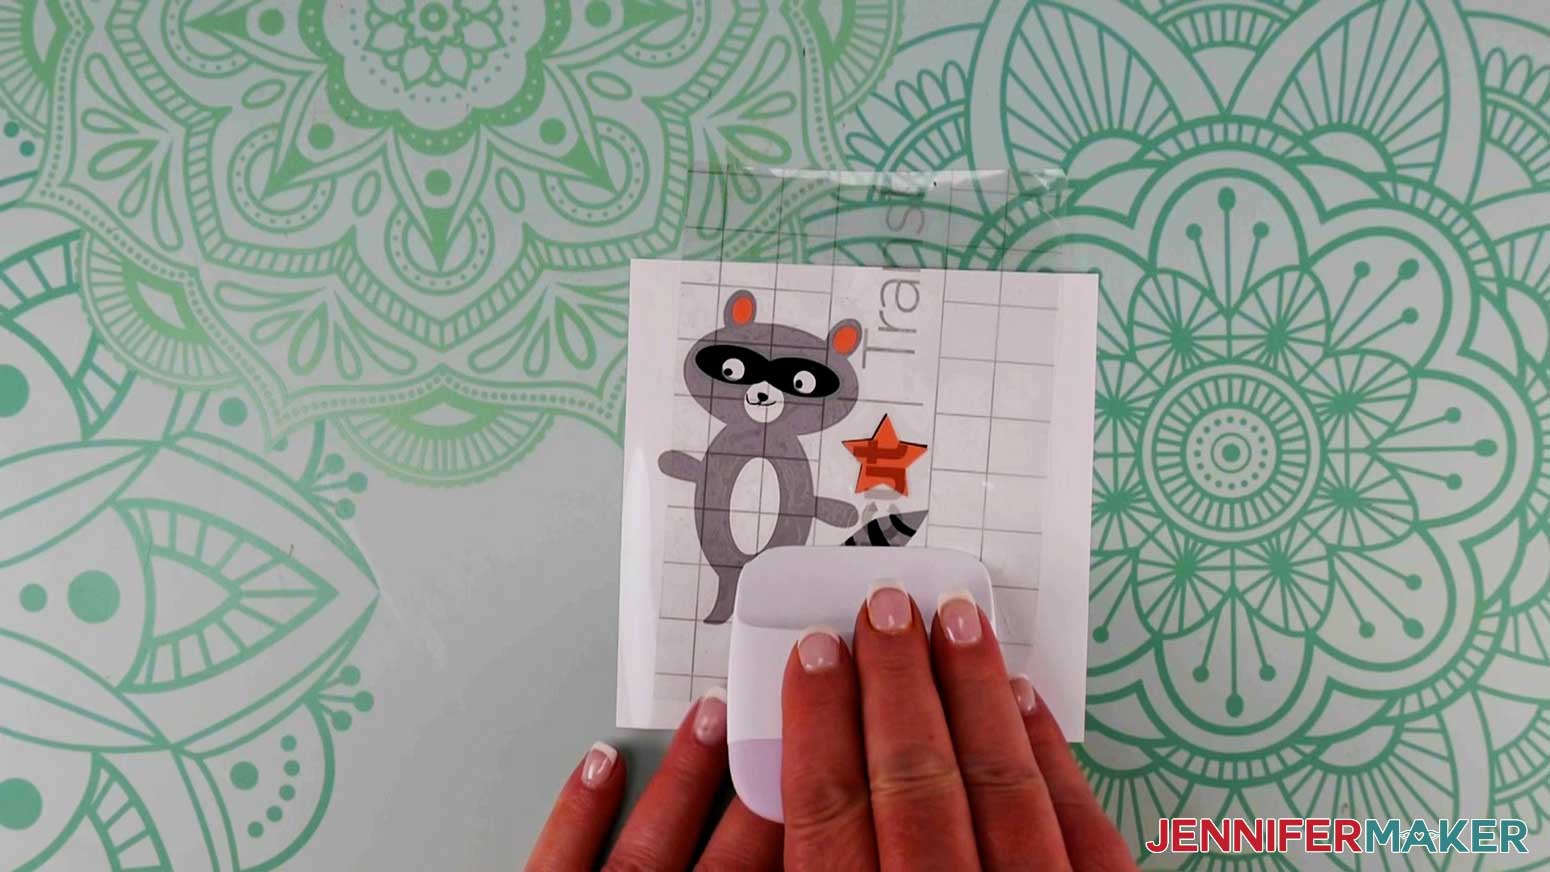
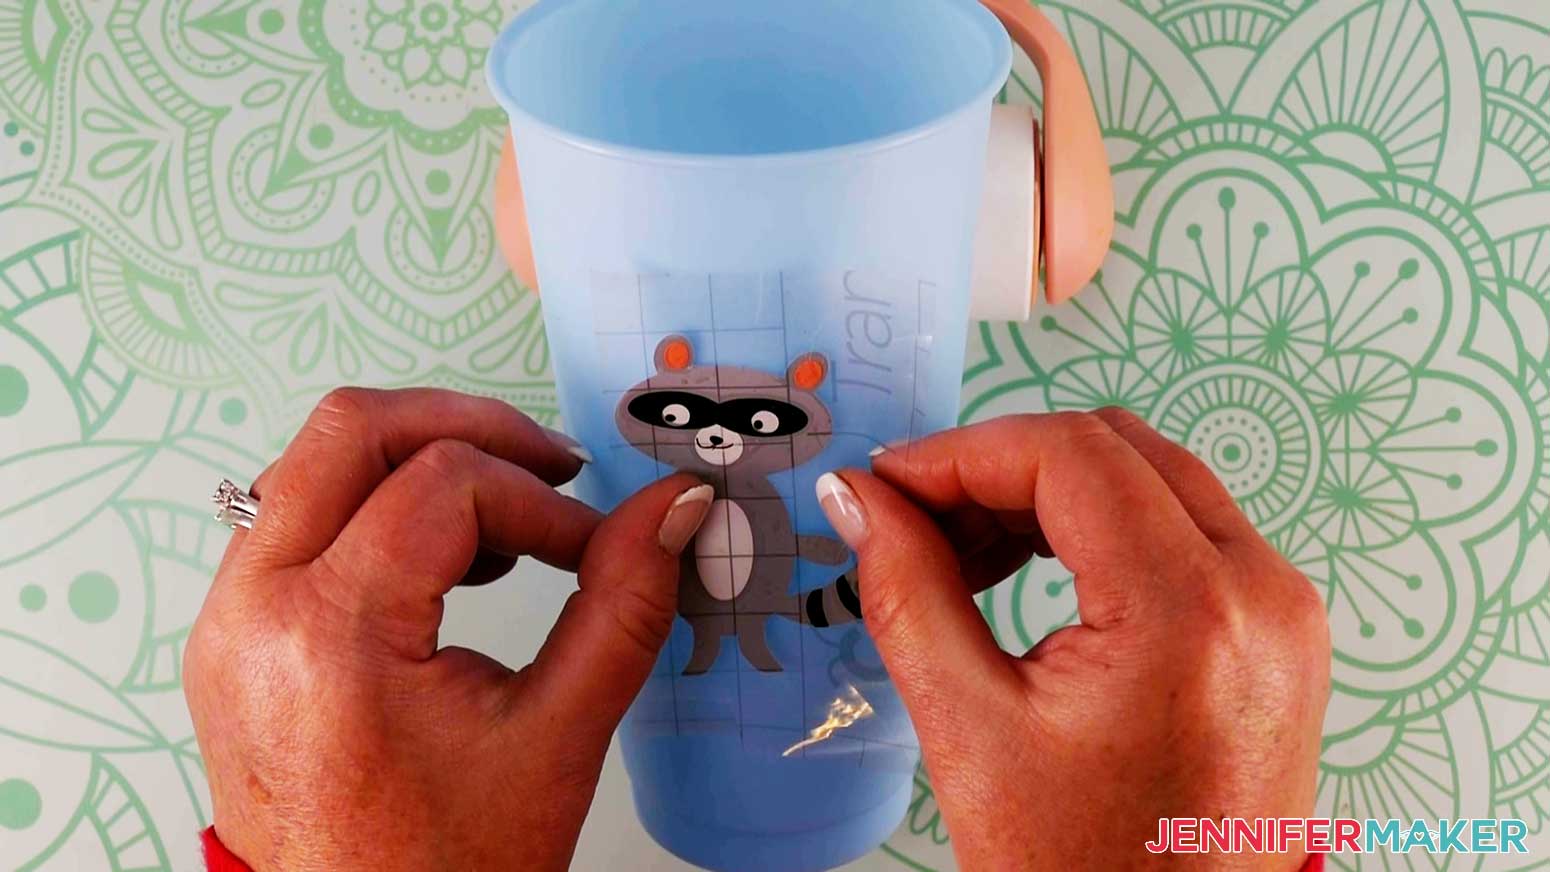
Learn how to layer adhesive vinyl easily and apply it to a color changing cup! First, download my Layered Vinyl animal designs from my free resource library -- it's design #355. TIP: If you are not sure how to upload an SVG cut file to Cricut Design Space, watch this helpful video training series I made. If you are on an iPad or iPhone, here is how to download and upload SVG files to the Cricut Design Space app. This is what my How to Layer Vinyl Animals SVG files looks like when it is uploaded to Cricut Design Space. My How to Layer Vinyl on Cricut animal decal designs are ready to make but I am including several options for you in the preparation steps. OPTIONS: 1. You can choose to make the layered animal designs just as they are and layer them with parchment paper (covered in step 4 below). Begin with the steps below under the options to ungroup and hide what you don't want and skip the rest of the optional preparations. 2. You can add registration marks in Cricut Design Space to assist with layering your vinyl designs. Follow the steps below and skip optional personalization if you'd like. 3. You can add a personalization to your cup, along with any of the cute designs. I'm going to show you how to design your own layered personalization with the Offset feature. Follow the steps below. OPTION 1 PREPARATION INSTRUCTIONS: PREPARE LAYERED ANIMAL DESIGNS ONLY If you don't want to make all of the designs, click on Ungroup above the layers panel. You can hide or delete any of the designs that you do not want to make by clicking on the "eye icon" next to that layer in the layers panel. If you are going with option one, the parchment paper method without personalization, you are ready to click “Make It.” We’ll go over that part in just a bit, but first I want to show you the other two options. OPTION 2 PREPARATION INSTRUCTIONS: HOW TO ADD REGISTRATION MARKS Just in case we've gotten this far and you aren't sure what a registration mark is, let me explain. A registration mark is an added shape to each layer of a design to help guide you in perfectly aligning multiple layers. It sounds a little complicated, but I promise it isn't. And remember, you don't have to add these for layering help. In step 4 below, I also show you how to use parchment paper to align each layer in your design! To show you how to add registration marks to layer your vinyl, I'm going to use the raccoon as an example. If you haven't already, I recommend clicking Ungroup and hide or delete any of the designs you are not going to make. TIP: If you plan to make more than one animal decal design, I recommend working with just one at a time. Hide the others so you don't confuse yourself. Now, with just one design on the canvas, select it and click Ungroup. For this cute little creature, we have four layers of vinyl to work with. I'm going to use a star as my registration mark and I think the best place to add the registration marks will be between the head and the tail. You can place yours wherever you think works best. Click on Shapes and select the Star. Now, click and drag the resize handle on the lower right of the bounding box to make the star smaller. Let’s also zoom in a little closer here so we can see everything a little better. To zoom in, look on the bottom left of the canvas where you should see 100% with a minus (-) sign to the left and a plus (+) sign to the right. Click on the plus sign until it’s zoomed in where you can see it better. Since we have four layers, we need to duplicate the star so we have one star for each layer. If the star isn't still selected, select it and click Duplicate above the layers panel. You can also right click and select Duplicate. Duplicate it three times so that you have four stars total. The stars may duplicate on top of each other. To check to make sure you have four, just look in the layers panel. Then click and drag them to separate them out so you can see all four on the canvas. Next, we need to change our stars so each one matches the color of one of the layers. Select one of the stars and click on the Color Menu at the top, it’s the box just next to where you see “Operation” on the top menu. You will notice that all of the colors in your designs, even the ones that are hidden, are included in the top layers here. That’s a very helpful feature in Cricut Design Space, so you can keep your colors consistent if you add anything to your design. Let’s select grey to match the raccoon's body. Repeat the steps to change the remaining stars to white, black, and pink. Once you have one star for each color of your layers, we need to align our stars. Click the first star, hold the shift key and select the rest of the stars. You can make sure all four stars are selected by looking at the Layers panel, they should all be highlighted. Click on Align and Center. If the stack of stars is a little out of place, click and drag it to the area you want it between the head and tail on the right. We now need to attach each star with the layer it goes with. Since you can only see one of them, we'll use the layers panel for this part. Select the grey star in the layers panel and the grey outline of the raccoon. With only those two layers selected, click Attach. Did the rest of your layers just disappear?? Don't worry! Your grey layer became the topmost layer and we just need to arrange our layers to see the rest of our design again. With the grey layer still selected, click Arrange and Send to Back. Voila! There is your cute little animal. It is important to note that this will happen with each layer we attach. Each layer that gets attached will automatically move to the topmost layer so if it doesn't bother you, you really don't even have to send it to the back. The other layers will move forward as we work through the attachments. Next, let's select both the white star and the white raccoon markings. Again, click Attach. We don't want to send it all the way to the back because then it would hide behind the grey layer. It is okay that it covered some of the black because we're going to select our next layers from the Layers panel. Remember, each layer that we attach will become the topmost layer. Black is up next. Just like before. select the black layer with the raccoon markings and the black star and click Attach. Lastly, select the pink layer and the pink star and click Attach. If you attached your layers in the same order I did, your raccoon should be layered correctly so that you see the design layered as it should be. If anything is hiding behind another layer, select the layer and use Arrange - Move Forward or Move Back to align everything correctly. Repeat these steps to add a shape to each layer for each animal design you are making. If you want to add a personalization, keep reading. If you're only making your animal(s), you can scroll down to Step 3. HOW TO ADD A PERSONALIZATION WITH OFFSET: Click the Text icon to open a text box. Type your desired personalization. I'm going to add my daughter's name to my cup. Once the name is typed click on the Font menu to change your font. NOTE: If you accidentally open the text editing again, try clicking out of the text box and select the text layer from the Layers panel. I'm going to use Tingler script, one of my favorite fonts I purchased from FontBundles.net, for this personalization. You can use any font you'd like! TIP: Need help installing a font in Cricut Design Space? Check out this video and blog post I made that explains everything step by step. NOTE: At the time of this tutorial, Offset is a beta feature and only available in Cricut Design Space for Desktop. Adding the offset is completely optional. You can choose to add just the personalization as a single layer. Once your font is selected, it is time to add the offset. With your text layer selected, click on Offset. You will see a preview outline of the offset layer. I am changing my distance measurement to 0.15. Feel free to slide the distance bar to preview and select your desired offset look. When you're happy with the preview, click Apply. You can now change the colors of your text and offset layers. If you aren't happy with the offset, you can always undo or delete the offset layer and try again. Lastly, we need to size our personalization so that it fits well on our cups. When I apply the name, I am going to place it vertically (that's up and down) on the side of the cup. If you are using the same cups as me, I am making the name 4" wide to leave a margin near the bottom and near the lid. Once you have the designs and personalizations you want to make, select your machine in the upper right corner and click Make It! NOTE: If you are using a Maker 3, Explore 3, or Joy, you will be asked if you will be cutting your designs without a mat, with a mat, or multiple ways. Just a reminder that only Cricut Smart Vinyl can be cut without a mat. I will be using Cricut Premium Permanent Vinyl on my Maker 3 so I will select On Mat and click Continue. There is nothing to change on the next screen so you can simply click Continue in the lower right corner. NOTE: If you are cutting multiple designs, you may have a lot of pieces for different animal designs on one mat. On this screen, you can click and drag elements to allow more spacing. Once your mats are set up as you'd like, click back on the first mat and click Continue. I am using Cricut Premium Permanent Vinyl for all of my designs. If you do not see it in your Favorites or Popular options, click on Browse All Materials and search for it. Once you have it selected, I always recommend applying More pressure for a cleaner cut. You are ready to place your vinyl on your mat with the pretty side or shiny side up. The liner goes against the mat. Insert your mat into your Cricut and press the load button. When the middle button is flashing, press it to begin cutting. When your first mat is finished, press Unload and remove the mat from your Cricut. Flip your mat over and carefully peel the mat away from your vinyl. Apply your next piece of vinyl to your mat, load it, and cut your next sheet. Again, when it is done, unload it, flip it over, and peel the mat away from the vinyl. This helps prevent from any possible curling. Repeat these steps until you've cut all of your layers of vinyl. Once all of your vinyl is cut, grab your weeding tool and carefully begin pulling away all of the excess vinyl from your designs. Remember to go slow and be careful with those small features. You will be amazed at how simple it is to layer your vinyl designs! There are two parts to the section. I will first show you how to layer your vinyl designs with parchment paper and also show you how to layer your vinyl designs using registration marks (if you chose to insert those in your design back in Step 2). LAYERING WITH PARCHMENT PAPER: If you have multiple layers on the same sheet of weeded vinyl for different designs, you'll want to use your scissors to cut the sections apart. In this example, I will show you how to layer vinyl with the fox design. Your bottom layer will be the outline of your animal. For the fox, the orange layer is the bottom most layer. We don't need to do anything with this since we're applying all layers on top of this one. Next comes the maize yellow layer. Cut a piece of transfer tape slightly larger than your design. Remove the backing from the transfer tape. Apply the transfer tape to your vinyl by holding the transfer tape in the shape of a taco, a "U" shape, then put the bottom of your “taco” onto the middle of your vinyl design. Use your scraper to smooth the tape over the decal from the center outward. This minimizes wrinkles and bubbles. With the transfer tape in place, use a scraper tool or other hard and flat-edged item (like a store loyalty card) to transfer the vinyl decal design to the transfer tape. It’s important to scrape it well to transfer the vinyl decal. Flip your vinyl over and gently peel away the backing from your vinyl. You can use your scraper tool to help with any difficult areas. Once the vinyl backing is removed, you'll need your parchment paper. Cut a piece about the same size as your layered design. Place your second layer of vinyl on to the parchment paper, with a small area of transfer tape still exposed. The beauty about parchment paper is that you can see through it to perfectly align your vinyl design. Line it up and press the exposed section of transfer tape onto the bottom layer of vinyl. With one hand applying a little pressure to keep the transfer tape in place, use your other hand to lift the second layer and gently remove the parchment paper. Once your parchment paper is removed, continue to press on the section of transfer tape that was exposed. This will help keep everything aligned. Gently lower your second layer, keeping the transfer in place. Use your small scraper to burnish the second layer on to the first layer. Gently peel away your transfer tape and admire your first two combined layers! Next, we'll apply our dark brown vinyl with the face and whiskers. Again, fold your transfer tape like a taco and align it over your next layer. Use your scraper to adhere the transfer tape to the vinyl. Gently peel away your vinyl backing and place your vinyl on to your parchment paper. Again, remember to leave a section of transfer tape exposed. Place the parchment paper on the first two layers to align the face and whiskers. When you have it just right, press and hold down on the exposed section of transfer tape. Continue to press and hold on the transfer tape. Gently lift the vinyl and remove the parchment paper. Continue with this same process until all layers of your animal are in place. For the fox. you'll need to add the white fur and pink cheeks. These two sections don't overlap so it does not matter which you apply next and which is last. Once your last layer is applied, you can leave the transfer tape in place to protect the vinyl until you're ready to apply it to your cup. APPLYING LAYERED NAME: You can use this same technique to perfectly layer your personalization. Remember to weed away all excess vinyl from your offset and personalized name. Fold your transfer tape like a taco and lay it on to your personalized name layer. Gently spread your transfer tape over the vinyl and use your small scraper to burnish the transfer tape onto the vinyl. Remove the backing from the vinyl and grab a piece of parchment paper. Place your personalized name on the parchment paper with a small section of the transfer tape still exposed. Remember, this little exposed section helps it stick to the next layer and the cup. Align your personalized layer over the offset layer. Once you have it right, pull away the parchment paper and press the personalization on to the offset layer. Burnish the personalization layer onto the offset layer. Gently remove the backing of the vinyl from the offset layer. If you are a little hesitant on your placement of the personalization, you can use parchment paper for this step too! Once the backing is removed, lay your design over a piece of parchment paper. Like before, leave a small section of transfer tape exposed to help you position the design. Align your design on your cup. Once you have your personalization in the perfect place, press down on the exposed section of transfer tape to hold the position. Gently remove the parchment paper. Use your small scraper to burnish your vinyl name to your cup. Gently remove the transfer tape. How fun and EASY was layering with parchment paper? This is definitely my go-to for all layered vinyl designs. If you're not ready for this technique and prefer to layer your vinyl with registration marks, I've got you covered. LAYERING WITH REGISTRATION MARKS: You already set yourself up for this in Step 2. If not, refer back to step to because you have to cut your vinyl with the registration marks in order for this method to work! In Step 2, we set up this technique with the adorable raccoon. Your bottom layer will be the grey outline of the raccoon. We don't need to do anything with this since we're applying all layers on top of this one. Next comes the white layer. Cut a piece of transfer tape slightly larger than your design. Remove the backing from the transfer tape. Apply the transfer tape to your vinyl by holding the transfer tape in the shape of a taco, a "U" shape, then put the bottom of your “taco” onto the middle of your vinyl design. Use your small scraper to smooth the tape over the decal from the center outward. This minimizes wrinkles and bubbles. With the transfer tape in place, use a scraper tool or other hard and flat-edged item (like a store loyalty card) to transfer the vinyl decal design to the transfer tape. It’s important to scrape it well to transfer the vinyl decal. Flip your vinyl over and gently peel away the backing from your vinyl. You can use your scraper tool to help with any difficult areas. Once the vinyl backing is removed, we will carefully line it up, focusing on our star registration mark alignment. With your stars aligned, gently press the white layer on to the grey layer of vinyl. Use your small scraper to burnish the second layer on to the first layer. Gently peel away your transfer tape and admire your first two combined layers! Next, we'll apply our black vinyl layer with the face and tail stripes. Again, fold your transfer tape like a taco and align it over your next layer. Use your scraper to adhere the transfer tape to the vinyl. Gently peel away your vinyl backing and align your black star with the white star from the second layer. When you have it just right, gently press the black layer in place. Use your small scraper to burnish the third layer. Lastly, we have to apply the pink ears. Just like before, apply your transfer tape onto your last layer. Use your small scraper to burnish the vinyl to your transfer tape. Flip your vinyl over and gently peel away the backing from your vinyl. You can use your scraper tool to help with any difficult areas. Once the vinyl backing is removed, carefully align the star on top of the others to help perfectly place your ears. Use your small scraper to burnish the last layer. When you have applied your last layer, you can leave your transfer tape in place until you're ready to apply your layered vinyl design to your cup! There you have it! A beautifully layered vinyl design with registration marks. If you didn't leave your transfer tape over your design, you'll want to reapply it. Use your small scraper to make sure it is well adhered. Gently pull away the backing of the vinyl and apply your design to your cup. I eyeballed my design placement near the center of the cup. Use your small scraper to burnish the design on to the cup. These awesome cups change color when a cold drink is added. How fun is that? These adorable cups will last the longest if you hand wash them. With permanent adhesive vinyl, there is no need to seal the design. I can't wait to see all of your adorable layered vinyl designs! If you don't have parchment paper, you can try the layering method with wax paper or freezer paper. As an Amazon Associate and member of other affiliate programs, I earn from qualifying purchases.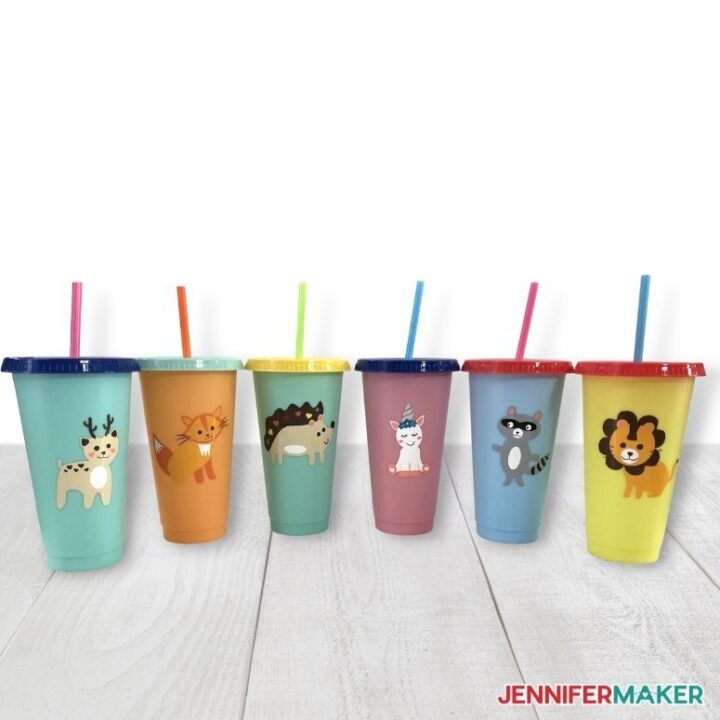
How To Layer Vinyl
Materials
Tools
Instructions
STEP 1: GET MY FREE HOW TO LAYER VINYL ANIMAL FILES
STEP 2: PREPARE YOUR DESIGNS
![]()
STEP 3: CUT AND PREPARE YOUR VINYL DESIGNS.
STEP 4: HOW TO LAYER YOUR VINYL DESIGN
![]()

![]()
![]()
![]()
STEP 5: APPLY YOUR DESIGN AND SHOW IT OFF
Notes
FONTS
Recommended Products


Answers to Your Questions About How to Layer Vinyl on Cricut
Q: Can I combine different types of vinyl?
Yes, you can … so long as you apply certain rules! Don’t try to put any layers over Glitter, Mesh, or Flocked Vinyl. Just keep in mind that if you blend vinyl layers, even properly, the combination may not be as strong as those made with only Permanent vinyl.
Q: Can I cut this project on a Cricut Joy?
Yes, you can cut the vinyl for your layered vinyl project on a Cricut Joy.
Q: Do I start with the bottom layer or top layer when I layer vinyl?
In this tutorial, I show you how to start with the bottom layer and build up the layers onto it.
Q: What kind of vinyl do you recommend?
I use and love Cricut vinyl. It cuts and layers wonderfully!
Q: What else can I put these layered vinyl decals on?
There’s many different projects you can make with these layered designs — try a water bottle, glass frame, acrylic keychain, or really any nice smooth surface!
Get my free SVG files to create beautiful Layered Vinyl Projects
I love seeing what you make with my designs and how you use them! Please share a photo of your layered vinyl project in our Facebook group or tag me on social media with #jennifermaker.
Love,

Want to remember this? Save this How to Layer Vinyl on Cricut Tutorial to your favorite Pinterest Board!


I just found this and layering with parchment paper is a game changer for me. I have previously used registration marks with mixed success. The parchment paper technique is far superior for me. Thank you!!
So happy to hear this helped you, Robin!