
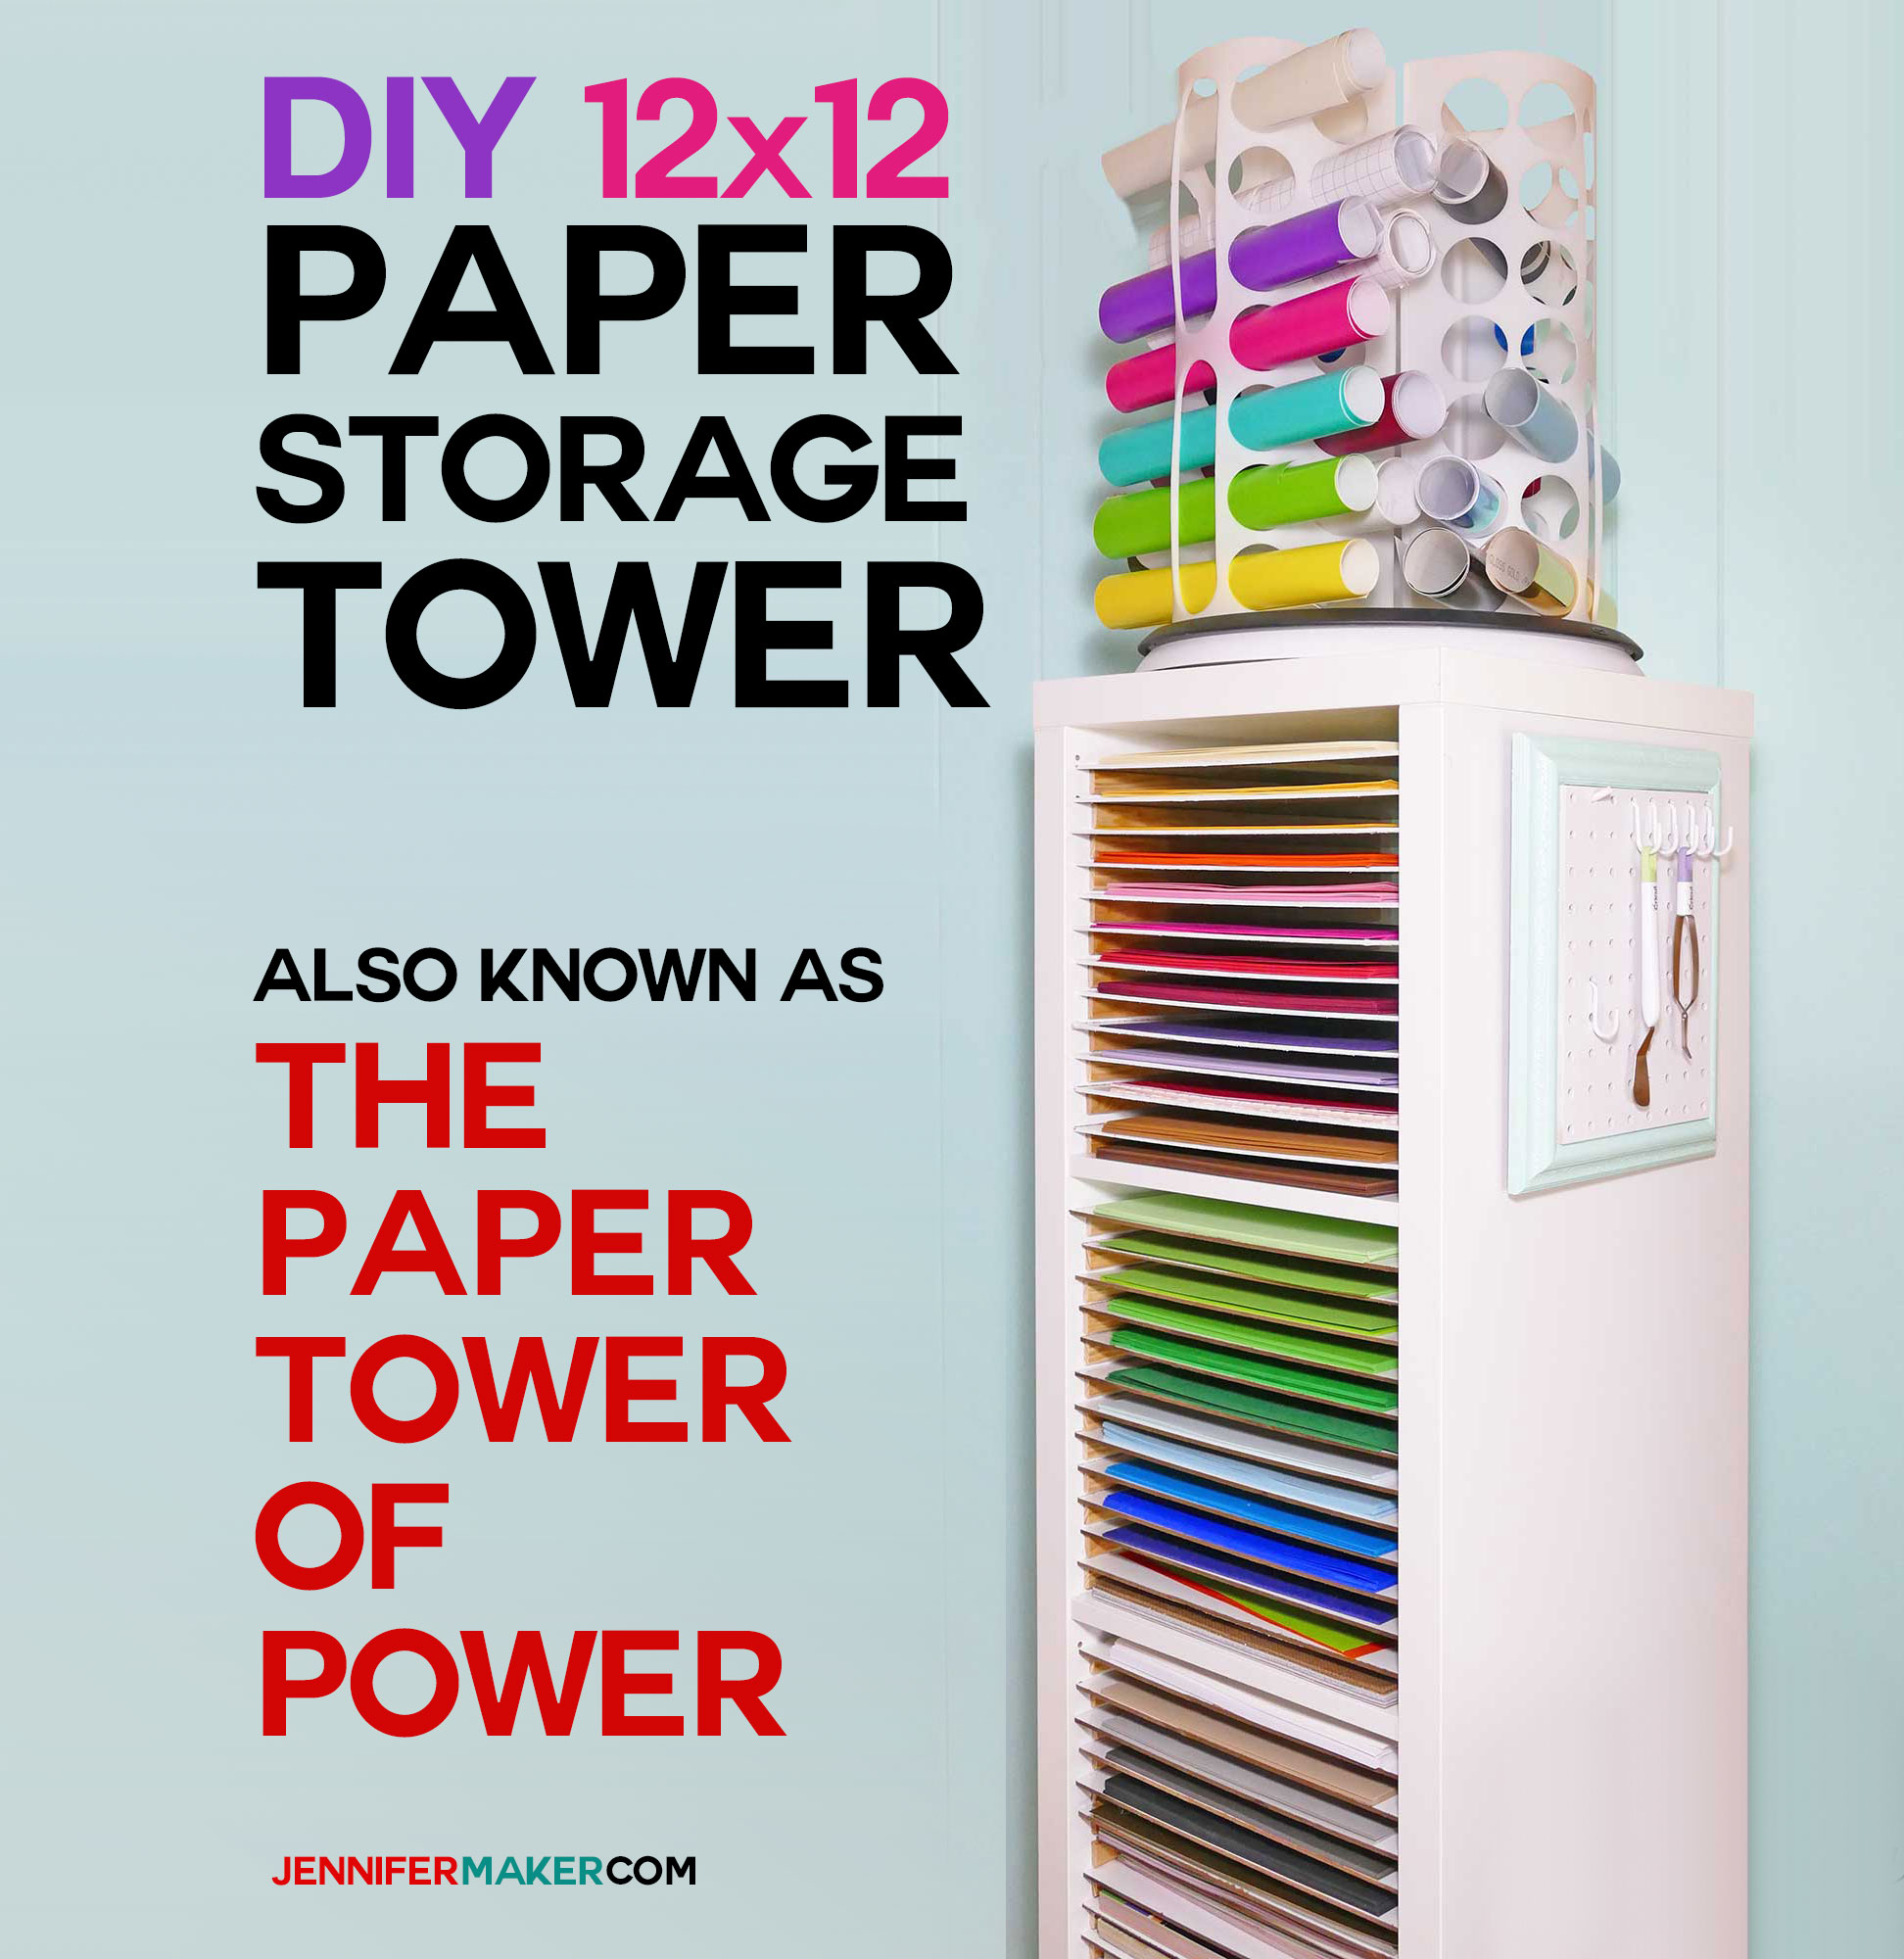
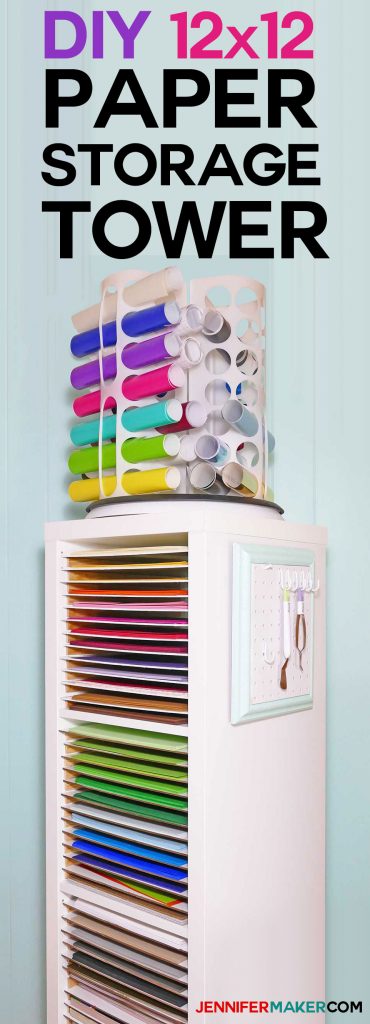
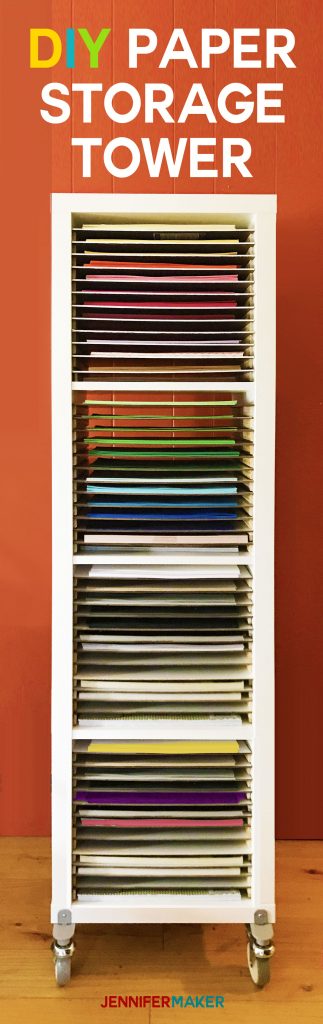
Thanks to my Cricut habit, I’m drowning in paper. Can you relate? We need to conquer this problem and organize our paper, especially our 12 x 12 scrapbook paper! I looked into some pre-built paper storage solutions, but … they are very pricey! DIY to the rescue! I came up what I’m calling my Paper Tower of Power, and you’re going to love this for your scrapbook paper. It’s a 12×12 Vertical Scrapbook Paper Storage Organizer that I put together myself from things that are easily obtained. It holds a LOT of paper, and fits both 12×12 scrapbook paper and regular letter size. And it’s amazing. I may need to build another one.
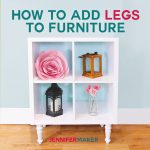
This is one my IKEA hacks. So it’s not very expensive, and you can customize it to your needs. I’ve even got a tutorial for a similar organizer that holds craft vinyl! If a vertical tower isn’t right for you, or you need more storage, the IKEA unit I use comes in many different sizes and configurations. Check out my tip on adding legs to IKEA furniture to really class it up! And if you’re making a trip to IKEA, check out my IKEA Shopping Tips & Tricks!
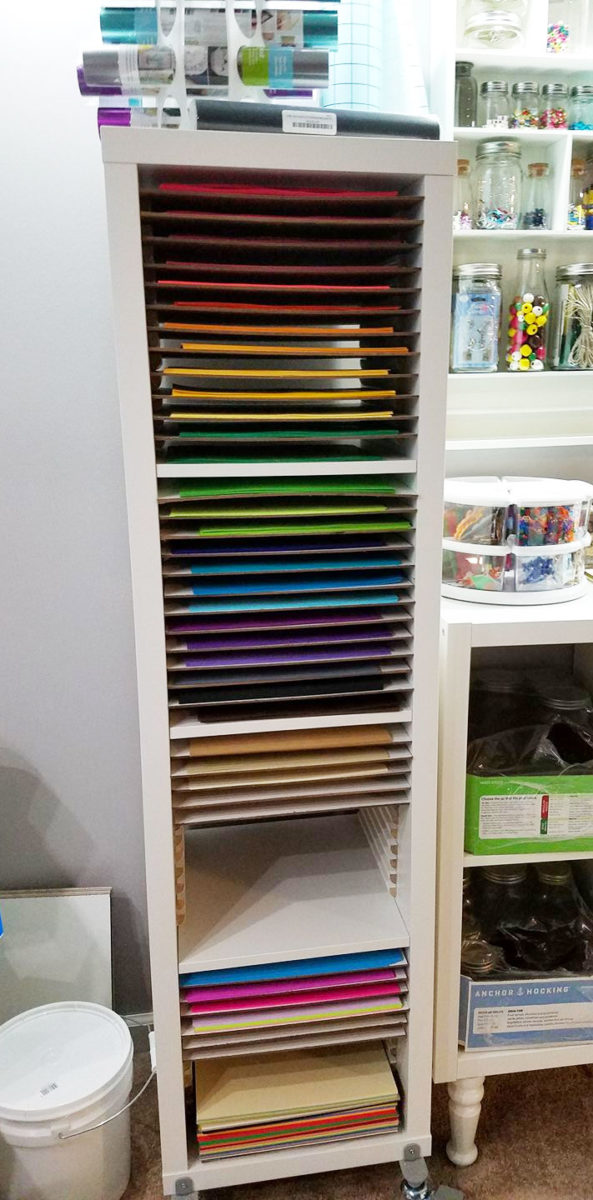
Reader Tracy Gooch made a paper storage tower following this tutorial:
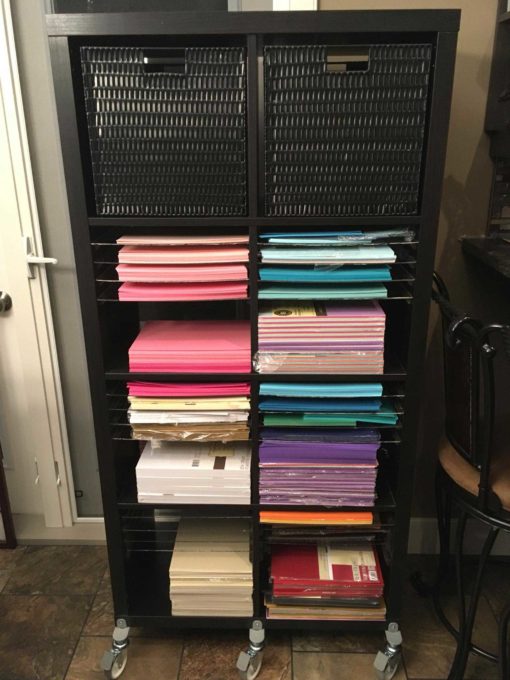
Here’s a great “double tower” version of this organizer made by reader Arlene from That Paper Flower Chick!
This post contains some affiliate links for your convenience (which means if you make a purchase after clicking a link I will earn a small commission but it won’t cost you a penny more)! Read my full disclosure policy.
What You Need to Make My 12×12 Paper Storage Vertical Unit
- IKEA Kallax storage unit (you can buy this on Amazon if you don’t live near an IKEA) – I bought one new at IKEA for $49
- Shoe Moulding strips, 1/2″ — you’ll need about 30 feet per cubbie. The link goes to a flexible product you can buy online; however, I used long pieces purchased at my local home improvement store. (I bought 12 10-foot lengths for my paper storage tower) — note that you could also use quarter-round strips, but they are more expensive
- White panelboard sheets – 1/8 in. x 4 ft. x 8 ft. (I bought two for $13 each at Lowes)
- Hot glue gun and glue sticks
- Design #51 – Template so you can mark your storage unit (available in my free resource library)
- Pencil
- Painter’s tape
- White acrylic paint (optional)
- A way to cut your strips and sheets, such as a handsaw, jigsaw, or table saw
How to Make the 12×12 Vertical Scrapbook Paper Storage
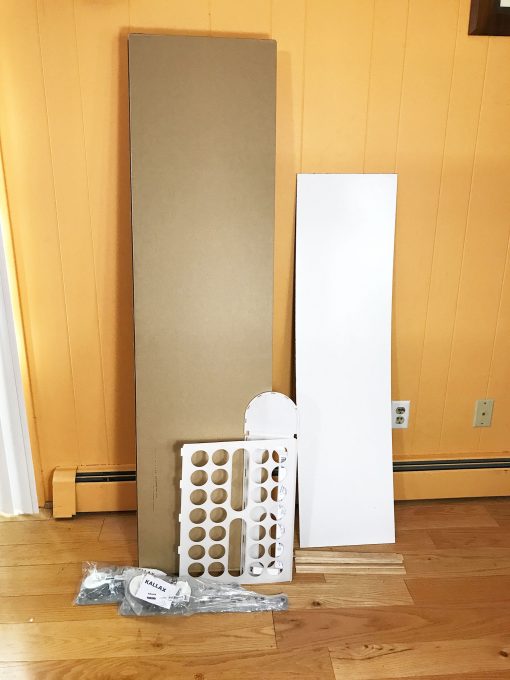
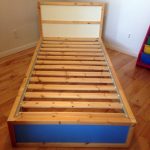
First, assemble your Kallax storage unit. I put mine together in about an hour, maybe a little less. It wasn’t difficult. Here are my boxes and other materials ready to go.
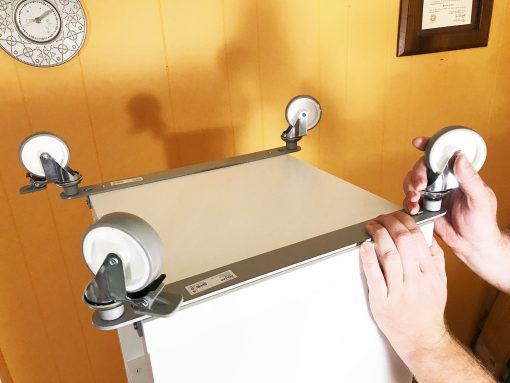
Optionally, you can put two caster rails on the bottom of your tower. I love them because now I can move my paper around the room with me as I work, but the ones I purchased from IKEA are now discontinued.
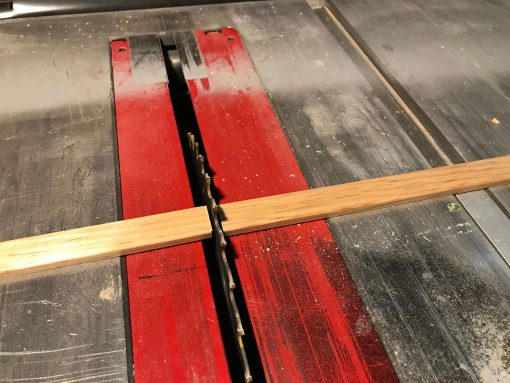
Prepare your moulding strips by cutting each strip into 10″ long sections. A handsaw will work fine for this. We used our table saw to make it faster.
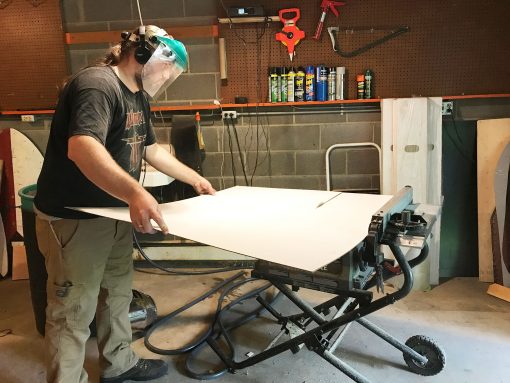
Cut your white panelboard down into shelves that are exactly 13.25 inches x 15 inches. I recommend you cut just one shelf and then make sure it fits perfectly in your storage unit. It should not be either too tight or too loose. Here is a diagram that shows the best way to cut it to get the maximum number of shelves.
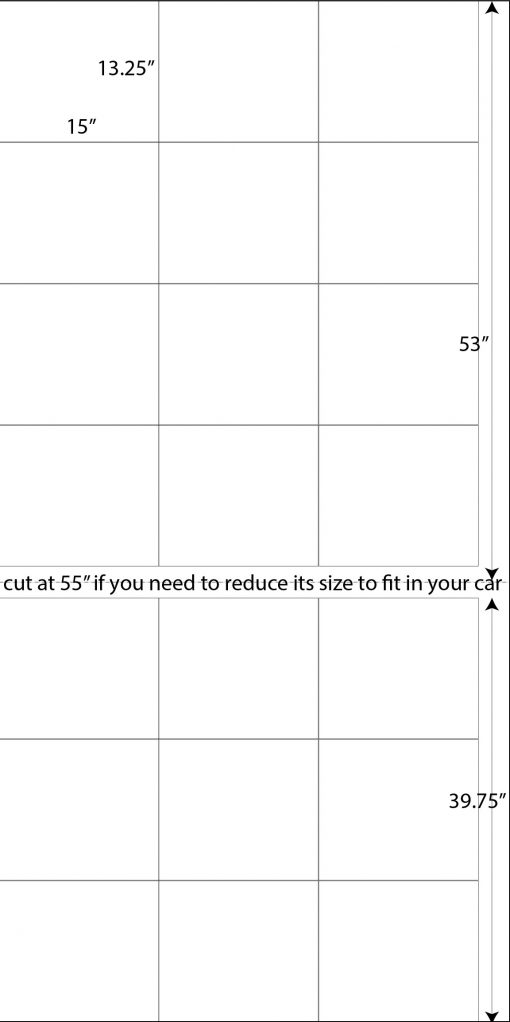
You should be able to get 21 shelves from each sheet (you need 48 shelves total if you want to fill every cubby). We used our table saw to cut these. You may be able to get your local home improvement store to cut this down to size for you, but be aware that they may not be as accurate as you wish.
Tip: You’ll likely want to cut your sheets down at the home improvement store so they fit in your car. If you do this, DO NOT have them simply cut in half. Ask them to cut each at 55″ — that way you can get the maximum number of shelves out of each one (see diagram above).

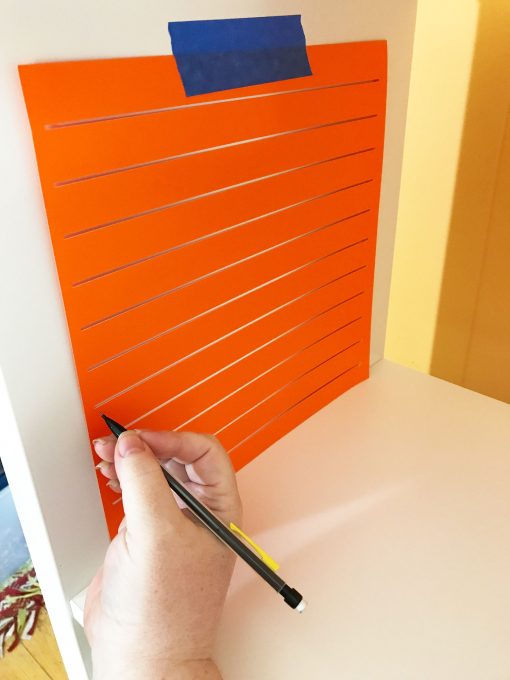
Now you want to mark the inside sides of your storage unit using my template. I recommend you center it inside the unit, flush with the bottom, and then tape it in place so it doesn’t move around. Mark both sides with the pencil. Note that you also want to use the top edge of the template to mark the top-most shelf. You should have 12 lines on each side to make 12 shelves per cubbie.
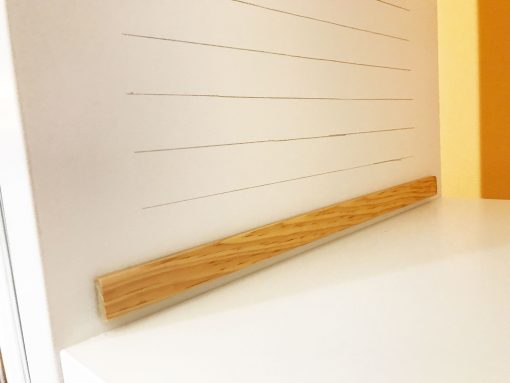
Apply a generous strip of hot glue to one of the flat sides of your cut moulding section. Press the moulding with the glue on it to the inside of your unit, lining up the top of the moulding with your pencil marks. Note that the glue will set quickly — you’ll have only a second or two to adjust if you get it slightly off.
Note: You could, of course, use a different glue for this. Hot glue is what I tried first and it worked great, so I didn’t bother with anything else.
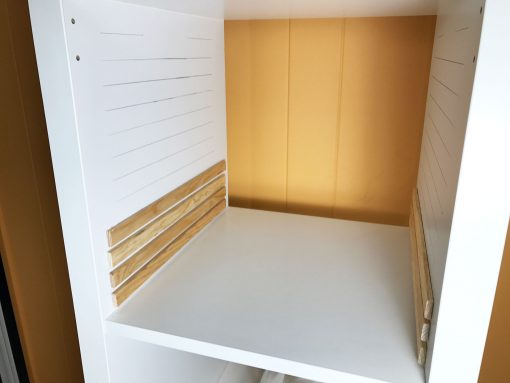
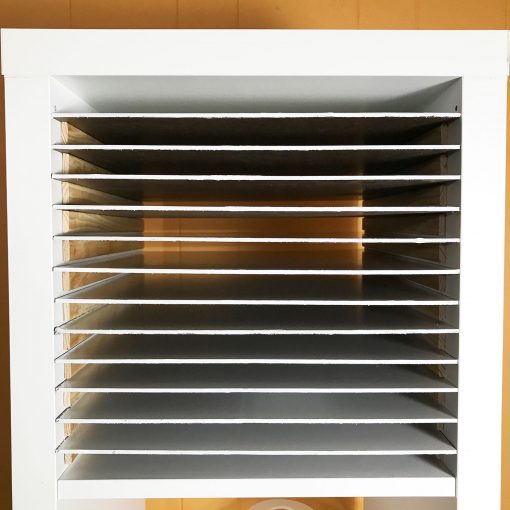
Continue applying the moulding sections as close as you can to your pencil marks until you have them all in place.
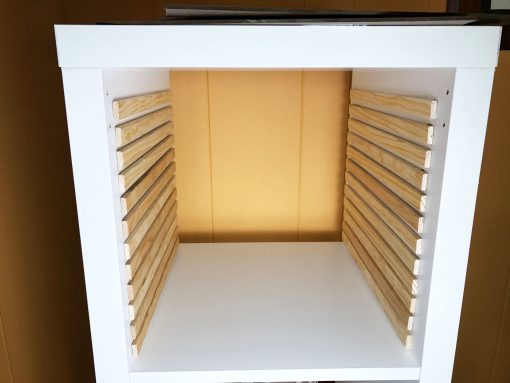
Slide in each shelf of your paper storage unit.
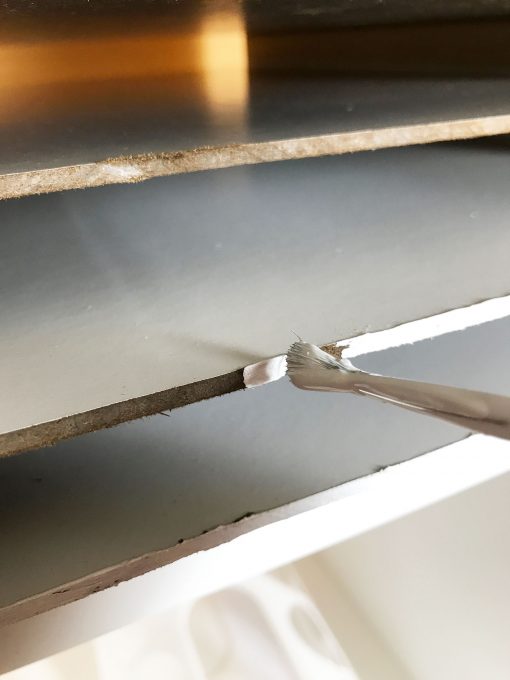
If the raw edges of the shelves bother you, paint them with white acrylic paint. I did this for one set of shelves on my 12×12 vertical scrapbook paper storage organizer, then decided it wasn’t such a big deal.
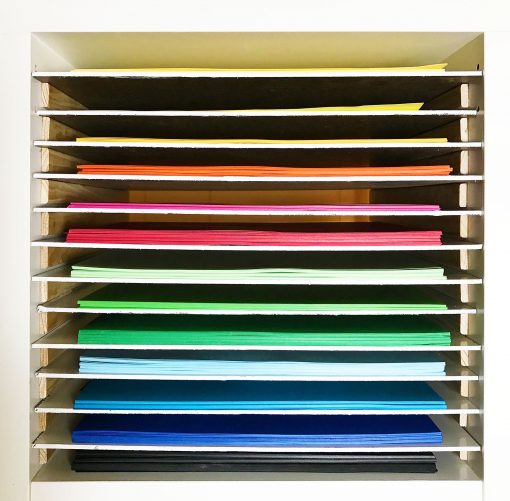
Load up your paper and enjoy your 12×12 vertical scrapbook paper storage organizer!
Notes on the 12×12 Vertical Paper Storage Organizer
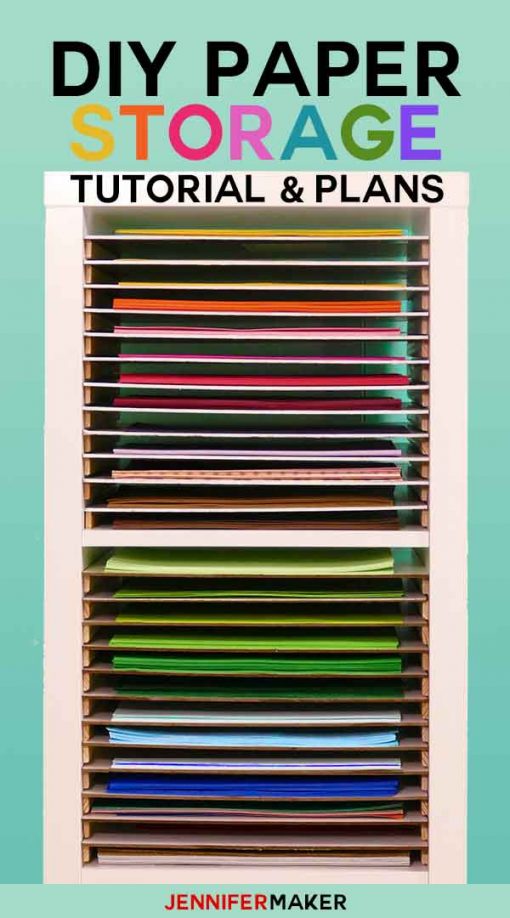
I mostly have 8.5 x 11 paper, so I put it on each shelf the long way, close to the edge, so I can see all of my paper easily.
Paper stacks fit great on the shelves, too!
You can slide the shelves out to get to your paper — they’ll stay in place thanks to the long moulding section on each side!
If you want a vertical solution for your shelf divider’s check out TopShelfDIY.com’s IKEA Kallax Shelf: DIY Shelf Dividers — she has a secret slot system!
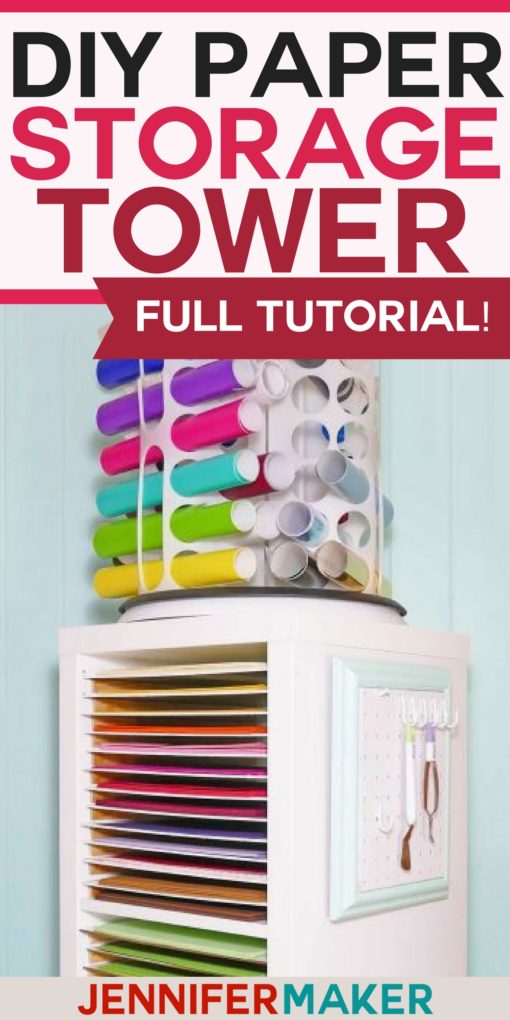
I used the top of my Paper Tower of Power to store vinyl. I put three IKEA paper bag dispensers (Variera) on a 16″ lazy Susan. I can fit 42 rolls on it and it turns so I can access it easily — great solution for me.
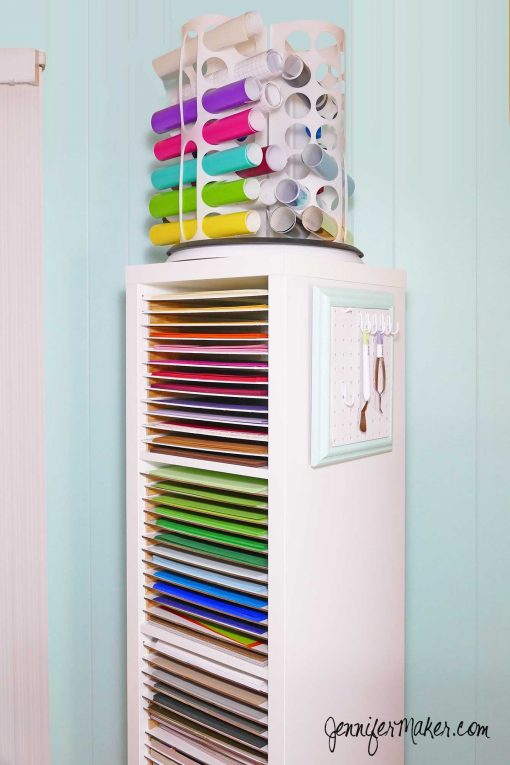
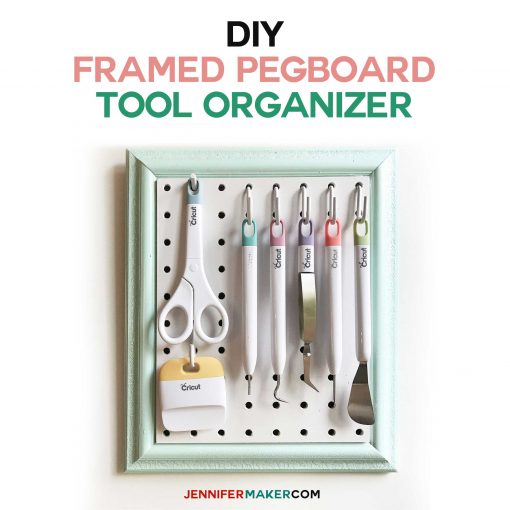
I hung my framed pegboard craft organizer on one side of my tower so I could keep my tools with my paper and vinyl.
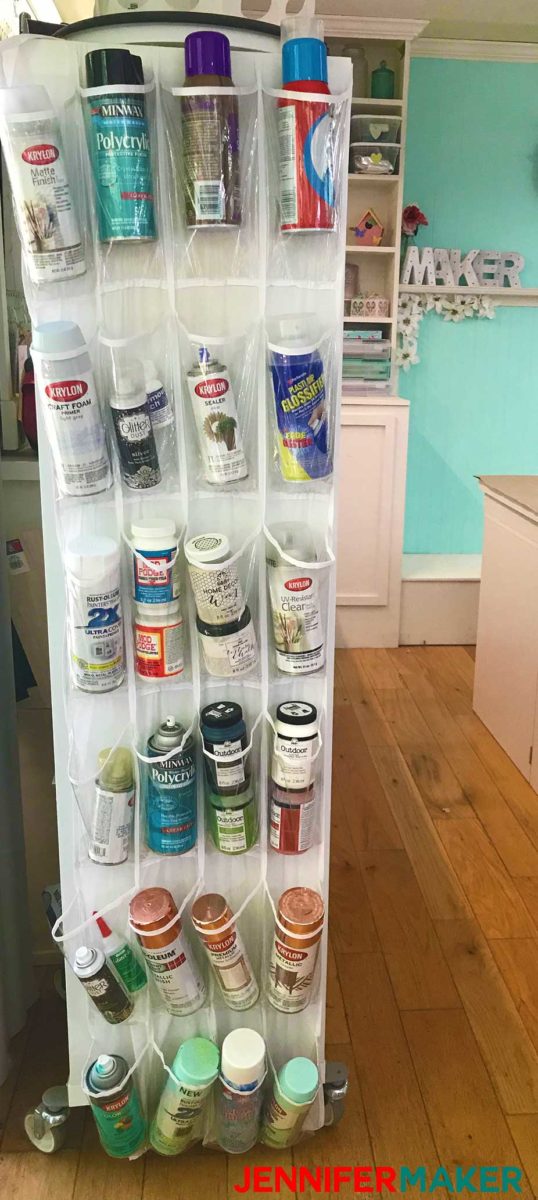
On the other side, I put an over-the-door shoe organizer that holds my cans of paint and adhesive:
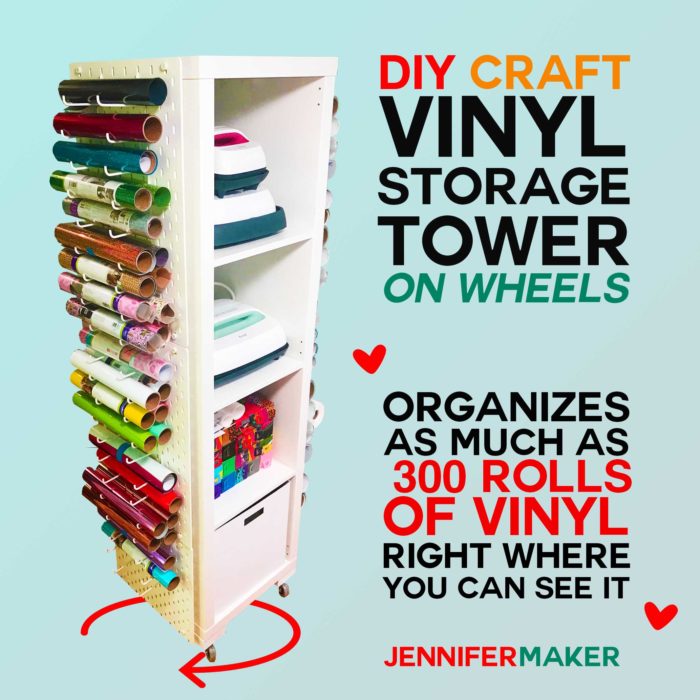
If you like this idea but need to store your craft vinyl, I made a matching storage organizer tower just for vinyl storage! Check out my craft vinyl storage tower tutorial here!
Answers to Your Questions About 12×12 Paper Storage
Q: How do you store paper in a craft room?
A: I’m a huge fan of a good vertical storage solution because it saves so much space and lets you see all of your sheets of 12 x 12 inch paper at once! No more digging through boxes, bins, drawers, or a giant stack of paper — everything is right there and easily accessible. You can store scrapbook paper, 12 x 12 sheets of paper and cardstock, and even sheets of vinyl. It’s a like your own personal crafting “candy store!”
Q: How do I organize my craft room?
A: Organizing a craft room, especially one that’s gotten out of control, is no small feat. I’ve been crafting for a long time, so I know the struggle! If your crafting space looks more like a chaotic craft store than a room in your home, I just so happen to have the perfect solution: My 30 day Craft Room Organization Challenge! Whether you have a dedicated craft room or just a collection of supplies you use at your kitchen table, this challenge is for you. Use it for tool, vinyl, and cardstock storage ideas, accountability, and tips for taming your craft stash!
Q: How do you maximize space in a small craft room?
A: Only have a little space to craft? If you can’t spread out, go up! Crafting in a small space can be burdensome, but there are better ways to make the most of your space. Vertical storage is a great way to maximize craft supplies storage in a small craft space, allowing you to maximize wall space for your materials and tools without needing extra square footage. There’s no perfect storage solution for everyone, because some have entire rooms dedicated to crafting and some folks have hardly any space at all — but everyone can use this tip!
Q: What is IKEA cube storage called?
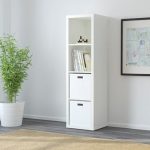
A: The current IKEA cube storage line I recommend using as a base for vertical paper and card stock storage is known by the name “KALLAX.” The shelves are the perfect size to store multiple sizes of paper like scrapbook paper, cardstock, craft paper, scrapbook projects, flat paper crafts, and more with easy access. They’re a great product with good quality and a reasonable price compared to other storage furniture options, and are my favorite IKEA units for vertical paper storage options.
Q: What was replaced by KALLAX?
A: In 2014, the IKEA EXPEDIT shelves were discontinued, and the similar KALLAX design was introduced.
Q: What size bins fit in IKEA KALLAX?
A: The shelf openings on the KALLAX are 13″ wide x 13″ high x 15 3/8″ deep, and will fit bins that size and smaller, along with 12×12″ scrapbook supplies, paper pads, paper and vinyl sheets, and more. Aside from my template, you can use clear drawers to see the contents inside, use paper storage box dividers, magazine holders, fill each shelf with smaller paper racks — there are so many different ways to get organized!
Get the Paper Storage Organizer Shelf Marking Template
I’m sharing the shelf marking template I made and used — it works perfectly for the IKEA Kallax shelves and ensures you mark straight centered guidelines. It’s Design #51 available in my free resource library — get the password to it by filling out this form:
I hope you also make a Paper Tower of Power to get your paper chaos under control, too! If you make one, send me a photo at [email protected] or tag me on social media with #jennifermaker so I can share it here with your permission.
Please let me know if you have any questions!
Love,

Like this tutorial? Please pin the Paper Storage Tower Tutorial to your favorite Pinterest craft board!

P.S. If you liked this post, you might also like my other IKEA Hacks:

Thank you for sharing, much appreciated.
Happy to share what I know. Thanks, Ruth!
I know I’m late, but this paper storage cabinet is just what I have been looking for! Thank you so much for sharing your craft and amazing talent!💕
So glad you love it, Mariessia!
Oh my gosh, Jennifer! More and more amazing creations from you! I am totally going to see if me and my hubby can make this tower. Thank you…thank you! I’ll say it again…you are amazing!
Thank you SO much, Sherrie! Let me know if you have any questions about making it.
OMGOSH!!! I can’t wait to try this!!!
Jennifer, you are amazing!! Also, you have a great big heart. Thank you so much for your sharing and caring.
Thank you, Lynn!
This is great. I a,lready have a Kalllax in my craft room but it’s a different piece. But I’m going to borrow your idea and add a few shelves to two of the cubbies to store some of my paper too! Thanks for the step by step!
Awesome! Would love to see a photo if you do it. 🙂
This is awesome! I noticed the thing on top of your paper organizer It is holding vinyl rolls where did you get that or did you diy that too. need to get one. very cool. Thanks for all the great tutorials..
The top of the storage tower has a Lazy Susan with three IKEA plastic bag dispensers, back to back. I made a note of it in the blog, along with a link on where to find them. It works really well! 🙂
Thank you Jennifer, you are amazing. I love people like you.
Thank you so much for posting such a great tutorial and especially for providing the links to Ikea and Amazon. I’ve been desperately trying to find an inexpensive way to store my paper and this is by far the best! 🙂
So happy to hear you like it, Ashley!
Thank you for this tutorial, this is exactly what I need as I redo my craft room. We don’t have an IKEA in AK, but I’m sure I could figure this out now with other brands of shelving, thanks to this post. Much appreciated!
Such a great idea! I am in the process of moving and creating a new craft room! This was just what I needed to find to organize ALL my paper – I have TONS! I’m thinking the side of the tower would also be a great place to put a hook and hang my Cricut cutting mats! Awesome idea! Thanks for sharing!
Happy you like this idea, Jamie! Mine is working great for me. 🙂
Great Idea, very well done, usefull and nice to see
congrats !
you make my day !
this is in my Pinterest
Marie
I can give you a big challenge! Trying to organize vinyl crafting in a 40′ motorhome. It was easier when we lived in a house….lol
I am trying to really learn to be creative now!!
Jennifer I am so so very happy I stumbled across one of your YouTube videos. You are amazing at everything you put together. I am absolutely going to make the paper tower and getting the vinyl holders. I just purchased the cricut maker and your mini course videos are fantastic, I felt absolutely overwhelmed before I watched those videos. I am following you forever! I also joined your FB group. I have never been so impressed by anyone as you.
Wow, I am humbled by your words. Thank you, Karen! I’m very happy I’ve been able to help you. 🙂
I love this idea!! thank you. But I used the password and entered your resource library and cannot find the template. for this. I even used the search feature , it just took me back to the main article. Help please.
(blushing..). I found it !! . And I found so many other wonderful things while I was looking . thank you, thank you!!!
Glad to hear it, Lois!
Wow I have been battling in my head on how to make one of these 12×12 holders and just by share luck I have come across your page, I want to thank you for making it so simple to follow, the penny dropped when the pictures made since as well as the instructions, I am now having a look at your other ideas.Great to know there are other people wanting to share their crafting skills.
You are amazing! Love all your ideas, so inspirational. And you live just down the road from me, GO BLUE!
Thank you, Rita!
You are a remarkable person so gifted and willing to share God Bless you in all you do and thank you for all the beautiful crafts
The Ikea garbage bag holders, genius! I am a quilter/sewer so I thought this could translate to rolls of interfacing!
Thank you!
Thank you for a wonderful idea for paper!!!! I’m going to maker a paper tower.
You’re welcome, Patty! 🙂
Wow, you are awesome Jennifer! Love reading all your news and your craft idea. It is hours on hours of learning and fun ,… along with laughs. Thank you so much for sharing! 🙂
I love my new book what a great price too! Love making flowers with from you!!!! Now if i could figure out this dang computer. lolll Thank you from the bottom of my heart. If ony you knew my story, you have played a part in helping me feel valid in world wind nightmare of the last 3 years, thank you keep doing you i love making your ideas! Cheers to you!
So happy to hear I am helping, Chastity!
oh Jennifer! seeing your name repeatedly on different cricut pages via FB, I had to check you out, and oh my, the best advise I’ve ever been given when it comes to anything cricut related! I bought your book, downloaded it, printed it out and it has become my cricut bible! Thank you! please keep the videos coming, I’m a newbie, 101 so your videos are vital to me, as I try to play catch up with everyone else! Thank you so much for being so very helpful to me and I’m sure millions of others!
So glad I ran across this paper storage hack for the IKEA Kallax. I’ve been redoing my craft room during the COVID-19 quarantine and this is exactly what I needed for paper storage! Everything else I found was soooo expensive. Also, I see you are from Ann Arbor. Hi from your northern neighbor in Brighton! 👋
Hi from Commerce MI! I just stumbled on this tutorial and I cannot wait to do this! Using this quarantine time to get organized ❤ I may try liquid nails lt E6000 glue for this project.
When printing your template, should I print it landscape or portrait? Also, is there a way to print it on something fancy like you did? I don’t think a sheet of paper is going to be as easy to place my lines. Thank you.
I have created the template to be cut/printed on 12×12 paper so it wouldn’t matter if it was landscape or portrait. It will be more difficult to use an 8.5×11 sheet of paper as the template because it won’t be able to fit the whole thing so you’ll have to move the paper repeatedly to get all the lines marked. I’d suggest maybe just using a ruler and a level to mark your lines.
Hi Jennifer, i am so excited to make one of these. You don’t specify how long the shoe molding strips should be or how many we need. Can you please provide that info? Thank you
Hi Amy! So glad you are looking forward to making one! I do mention in the materials list on the blog that they are 1/2″ and you will need 30 feet per cubbie.
I found that the Jonaxel series from Ikea is also a great customizable solution! Some of their baskets are also large enough to hold vinyl supplies.
That is good to know, Lisa! Thank you!
Thanks so much for sharing your talent! I just took a trip to IKEA on Monday and converted two of the cubbies to paper storage and I’m using the other two for my large rolls of vinyl/transfer paper and my easy press. I love it!! 😍 (a few fingers were harmed by the glue gun lol)
That’s wonderful!!
Jennifer, this is brilliant! I searched for months for affordable paper storage that would fit my ikea shelves exactly. I never thought to make this system, all the designs I tried to diy was so fussy and just as cost ineffective as store bought! So I ended up finding a beautiful wooden “file box” from Target that I use to store my paper vertically now. But I just miss seeing it and being inspired by all the colors of the card stock/paper. Maybe I’ll try this system! Thank you for the amazing idea!
Hooray! So happy to hear this is helpful, Darlene!