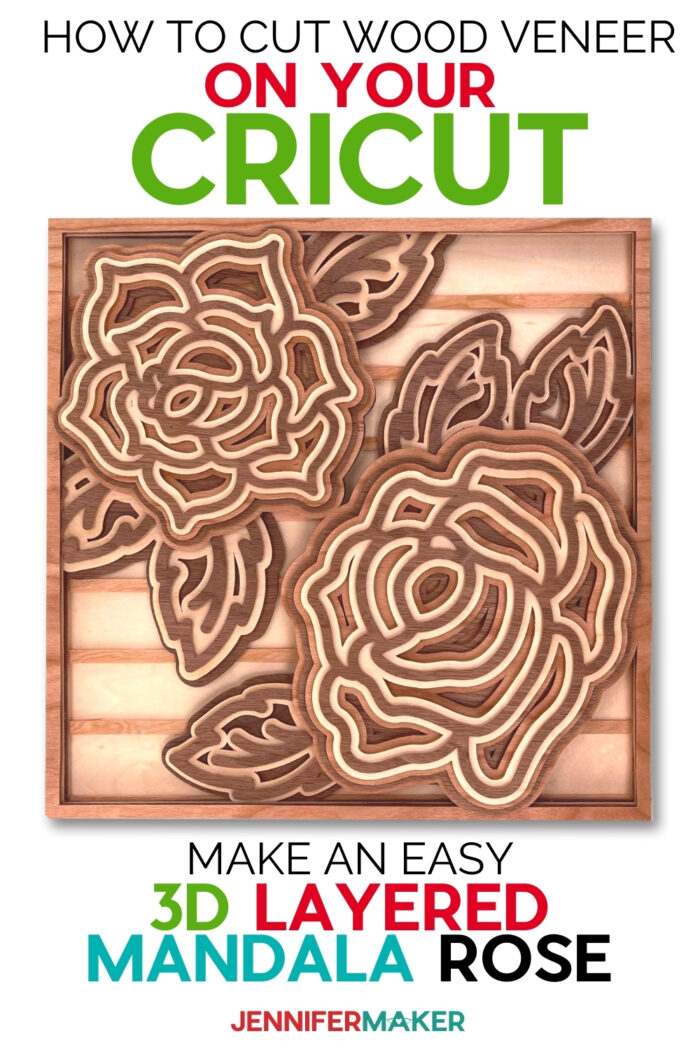
Add a fun and unique twist to this beautiful layered mandala rose 3D by using wood veneer! This pretty design can be given as thoughtful gift for a special person in your life!
Layered designs are really fun to make, and my 3D Layered Mandalas and 3D Paper Heart Mandala continue to be incredibly popular! This Layered Mandala Rose 3D design not only works great with the traditional cardstock layers, but can also be made with thin wood veneer to increase the wow factor! Have you tried to cut wood veneer yet? If not, I encourage you to jump on the bandwagon! I give you step by step directions on how to cut and use thin wood veneer in this tutorial, and once you make this beautiful mandala, you can try out some other amazing wood veneer projects, such as my Wood Veneer Earrings.
Watch the Easy Layered Mandala Rose 3D assembly video here:

Not only does this Layered Mandala Rose 3D project look amazing, but it can be easy or challenging, depending on the materials you choose to use! If you’re new, try cutting your rose out of cardstock first. Making a Layered Mandala Rose out of wood veneer requires a little more experience with your cutting machine, but you can make this beautiful design out of cardstock at almost any stage of your crafting journey. Looks can be deceiving and the mandala is a perfect example!
If you choose to make the Layered Mandala Rose 3D out of thin wood veneer, you need ten (10) 12″ x 12″ sheets of thin wood veneer. For this design, I chose to use Cricut Wood Veneer. I used three (3) sheets of the maple veneer, three (3) sheets of the cherry veneer, and four (4) sheets of the walnut veneer. If you are not familiar with wood veneer, it is a very thin sheet of wood that is made from real wood and can be cut on your Cricut Maker or Explore! One of the most unique things about wood veneer is that since it is made from real wood, the grain patterns will all be unique!
But you don’t have to make this great design just in wood veneer! It looks just as cool if you want to create one in cardstock! In that case, you will need ten (10) 12″ x 12″ sheets of cardstock in a variety of colors! I used 65 lb. cardstock but you can use heavier cardstock if you would like! I just prefer to use what I have on hand and really encourage you to do the same!
If you are making the thin wood veneer version of the Layered Mandala Rose 3D it will be helpful to have either sandpaper, or a nail file, to sand and smooth down any sharp edges of the wood pieces. A brayer is a good tool to use to make the Mandala Rose, as it helps to flatten the wood veneer to the Machine Mat in order to make sure that it is firmly adhered. And, speaking of Machine Mats, the Cricut purple StrongGrip Machine Mat is the one to use to make sure the Veneer will not move during cutting. Finally, you will want painter’s tape in order to tape the wood veneer onto your Cricut Machine Mat. This is important because the Mat itself is not strong enough to hold the veneer in place. The painter’s tape will give it that needed reinforcement.
For adhesive to keep the layers together with either wood veneer or cardstock, I recommend glue dots. Not only do they hold the layers, but they also give the depth to your Layered Mandala Rose 3D project that make it look so awesome!
I used my Cricut cutting machine to cut the thin wood veneer for my Layered Mandala Rose 3D in this tutorial. I just love how easy it is to cut on my Cricut! Either a Maker or any of the Explore family of Cricuts, with a Cricut Deep-Point Blade, can be used for wood projects. If you are making the cardstock version of the Mandala Rose, you can also use a Maker or Explore, and, in addition, have the choice of crafting with a Cricut Joy!
Let me show you how easy it is to make this Layered Mandala Rose 3D project! This post contains some affiliate links for your convenience (which means if you make a purchase after clicking a link I will earn a small commission but it won’t cost you a penny more)! Read my full disclosure policy.
Materials to Make a Layered Mandala Rose 3D
View my Amazon shopping list with the exact items we used to make this project!
- 10 (Ten) Sheets of 65 lb. Cardstock in Various Colors
- -OR- Ten (10) Sheets of 12″ x 12″ Cricut Wood Veneer: Three (3) sheets of Maple and Cherry and Four (4) sheets of Walnut
- Painter’s Tape
- One (1) Sheet Adhesive Foam Dots
- One (1) Sheet 220 Grit Sandpaper -OR- Nail File (veneer)
- Cricut Green StandardGrip Machine Mat (to cut cardstock)
- Cricut Purple StrongGrip Machine Mat (to cut veneer)
- Cricut Brayer
- Cricut Fine-Point Blade (to cut cardstock)
- Cricut Deep-Point Blade (to cut veneer)
- Scissors (to cut adhesive foam smaller)
- A method to cut your cardstock and/or veneer – I used the amazing Cricut Maker but you can also use the Cricut Explore and Cricut Joy (for cardstock only!)
- Design(s) for your Layered Mandala Rose 3D, Design #302 – (My free SVG/PDF/DXF design files are available in my free resource library – get the password by filling out the form at the bottom of this page)
How to Make a 3D Layered Mandala Rose

Layered Mandala Rose 3D
This project shows you how to make a Layered Mandala Rose 3D using thin wood veneer. This project can also be made using cardstock or a combination of both cardstock and veneer.
Materials
- 10 (Ten) Sheets of 65 lb. Cardstock in Various Colors OR
- Ten (10) Sheets of 12" x 12" Cricut Wood Veneer: Three (3) sheets of Maple and Cherry, Four (4) sheets of Walnut
- Painter's Tape
- One (1) Sheet Adhesive Foam Dots
- Design #302 (My free SVG/PDF/DXF design files are available in my free resource library - get the password by filling out the form at the bottom of this page)
Tools
- A method to cut your cardstock and/or veneer - I used the amazing Cricut Maker but you can also use the Cricut Explore and Joy (for cardstock only!)
- One (1) Sheet 220 Grit Sandpaper -OR- Nail File (veneer)
- Cricut Green StandardGrip Machine Mat (to cut cardstock)
- Cricut Purple StrongGrip Machine Mat (to cut veneer)
- Cricut Brayer
- Cricut Fine-Point Blade (to cut cardstock)
- Cricut Deep-Point Blade (to cut veneer)
- Scissors (to cut adhesive foam smaller)
Instructions
STEP 1: GET MY FREE LAYERED MANDALA ROSE 3D FILE
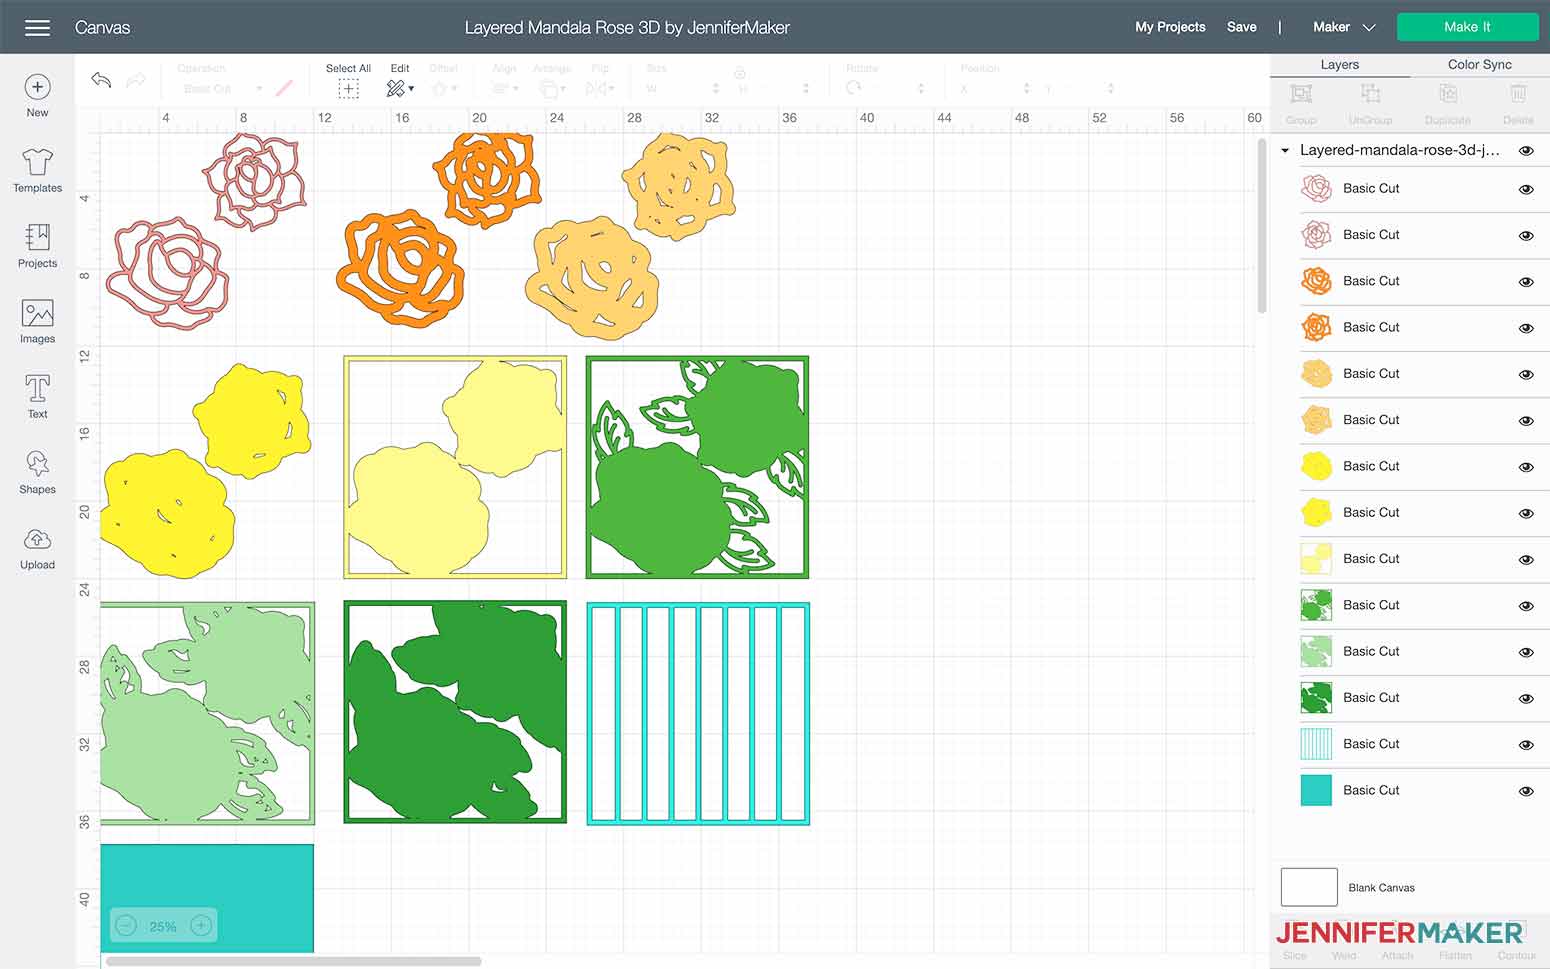
First, download my free Layered Mandala Rose 3D SVG/DXF/PDF, Design #302, from my free resource library. Upload the SVG file into Design Space. This is what my Layered Mandala Rose 3D design looks like in Design Space.
Tip: If you're not sure how to upload an SVG cut file to Cricut Design Space, watch this helpful video training series I made. If you're on an iPhone or iPad, here's how to download and upload SVG files to the Cricut Design Space app.
STEP 2: CUT YOUR MANDALA ROSE SVG
I am going to show you how to create this project using Cricut Wood Veneer, but you can make it with cardstock or even a combination of cardstock and thin wood veneer.
Once the file is uploaded, click "Make It."

The mats are set to cut in layer order for my Layered Mandala Rose 3D design.

Click "Continue" in the lower right corner of the screen.
Next we will select our base material. Click "Browse All Materials."
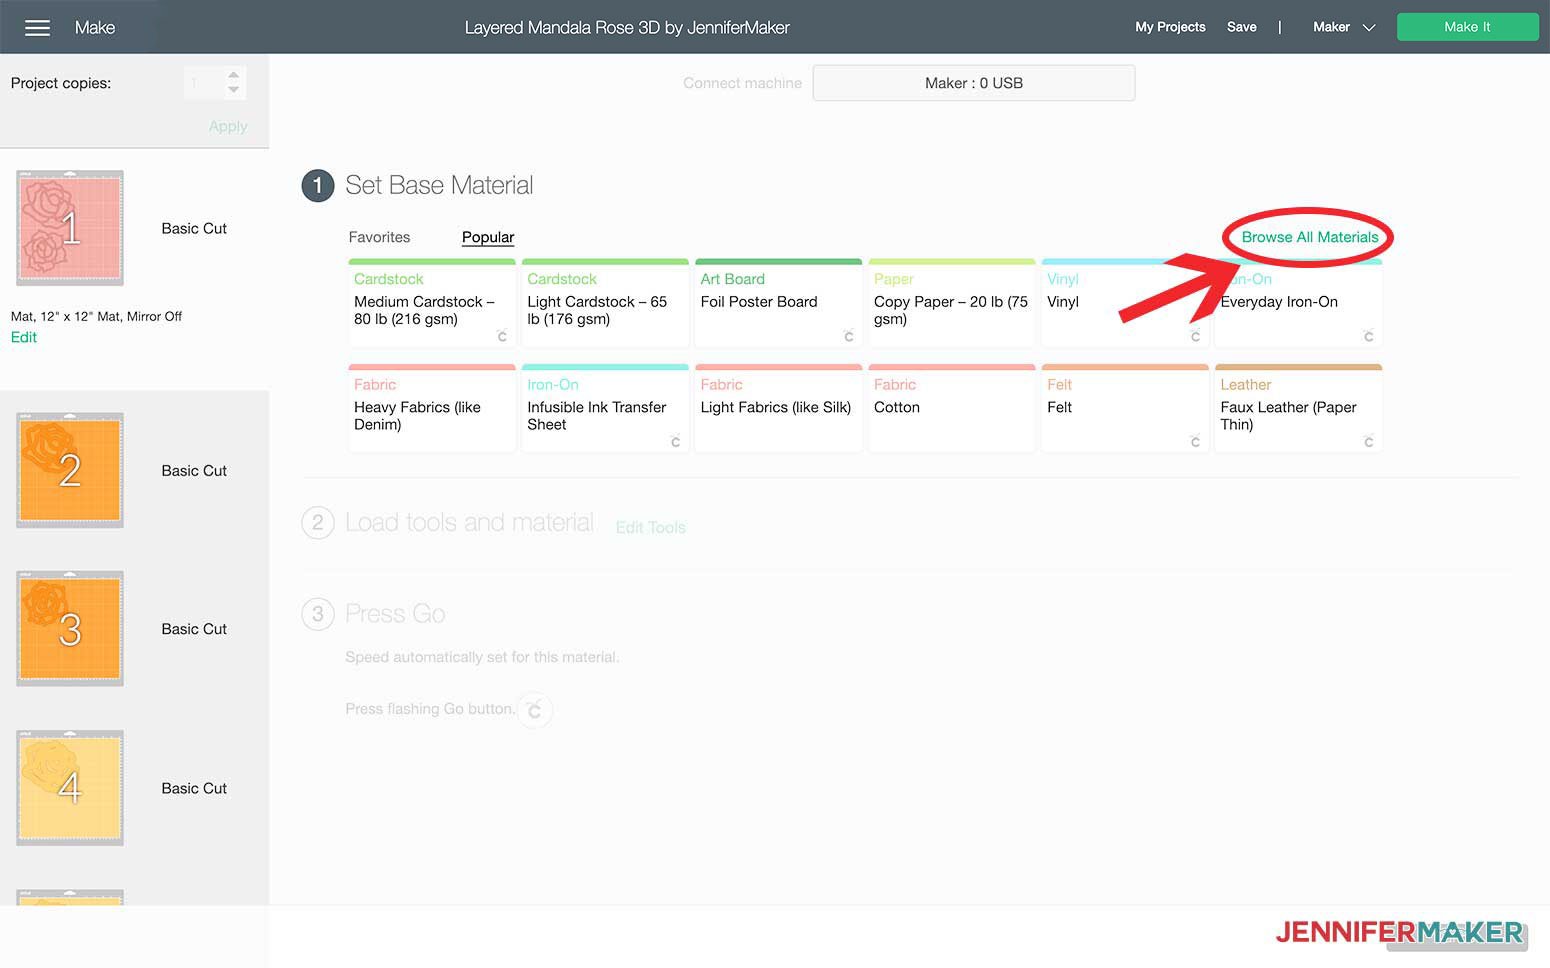
Search for "Veneer," select "Natural Wood Veneer," and click "Done."
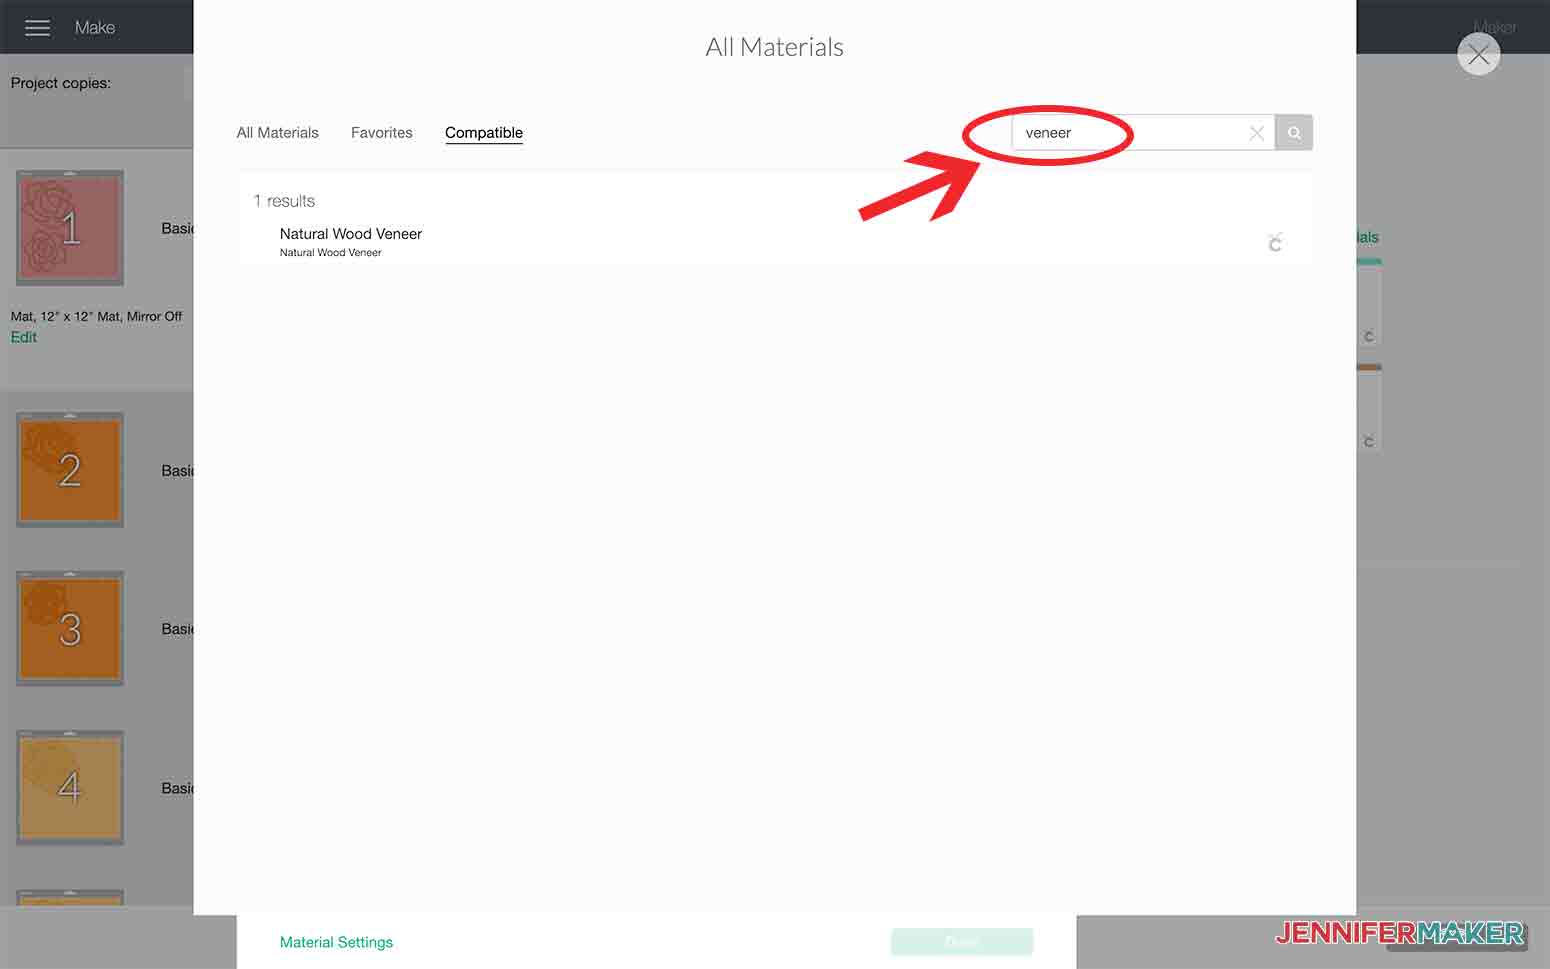
Change the pressure drop down from "Default" to "More."

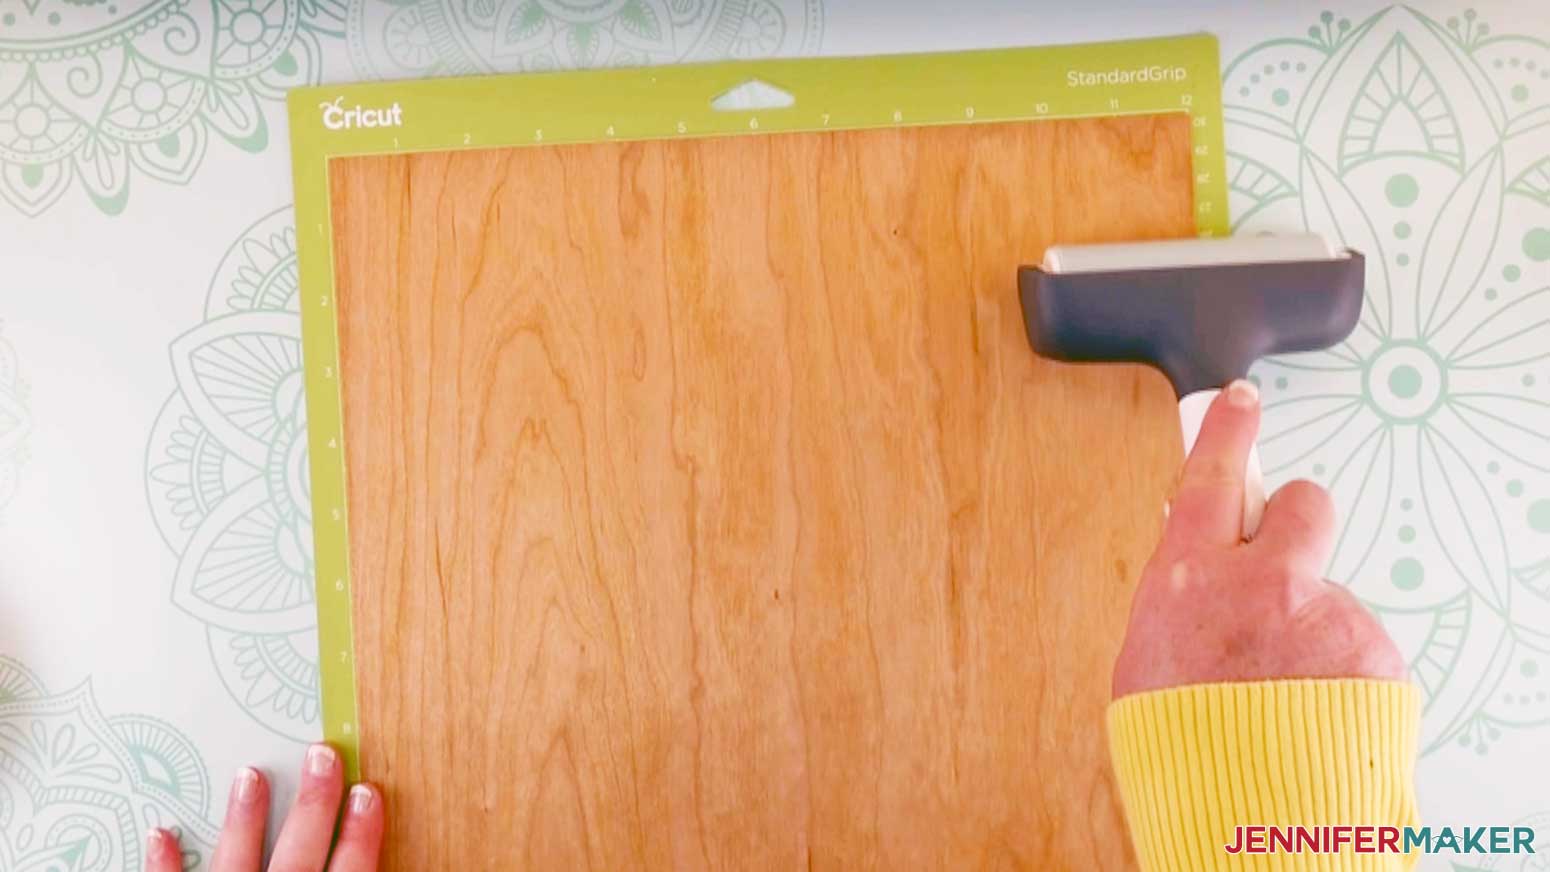
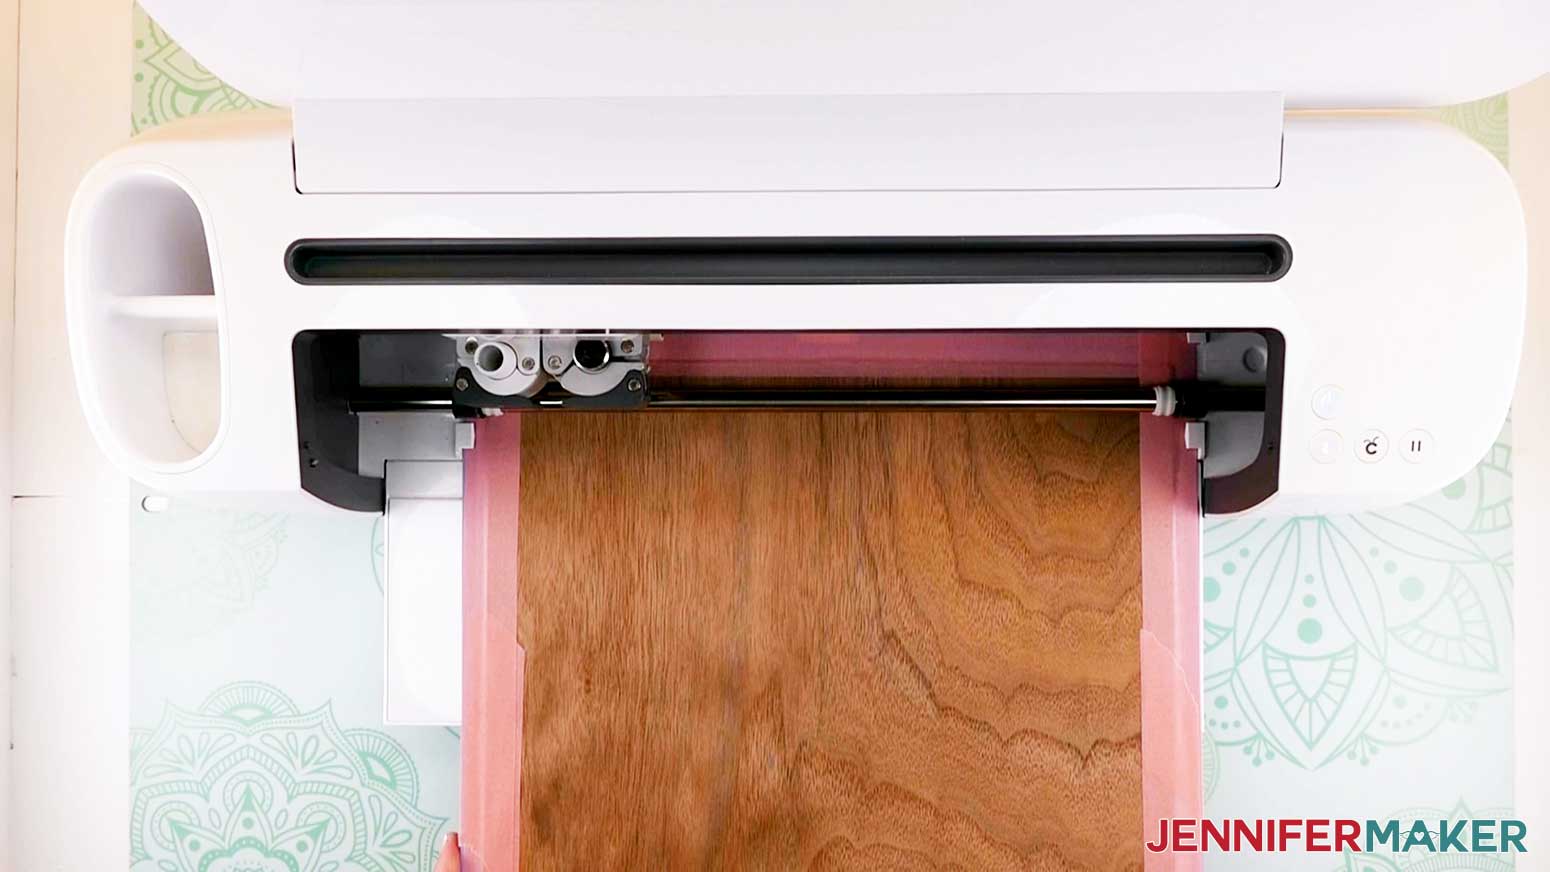
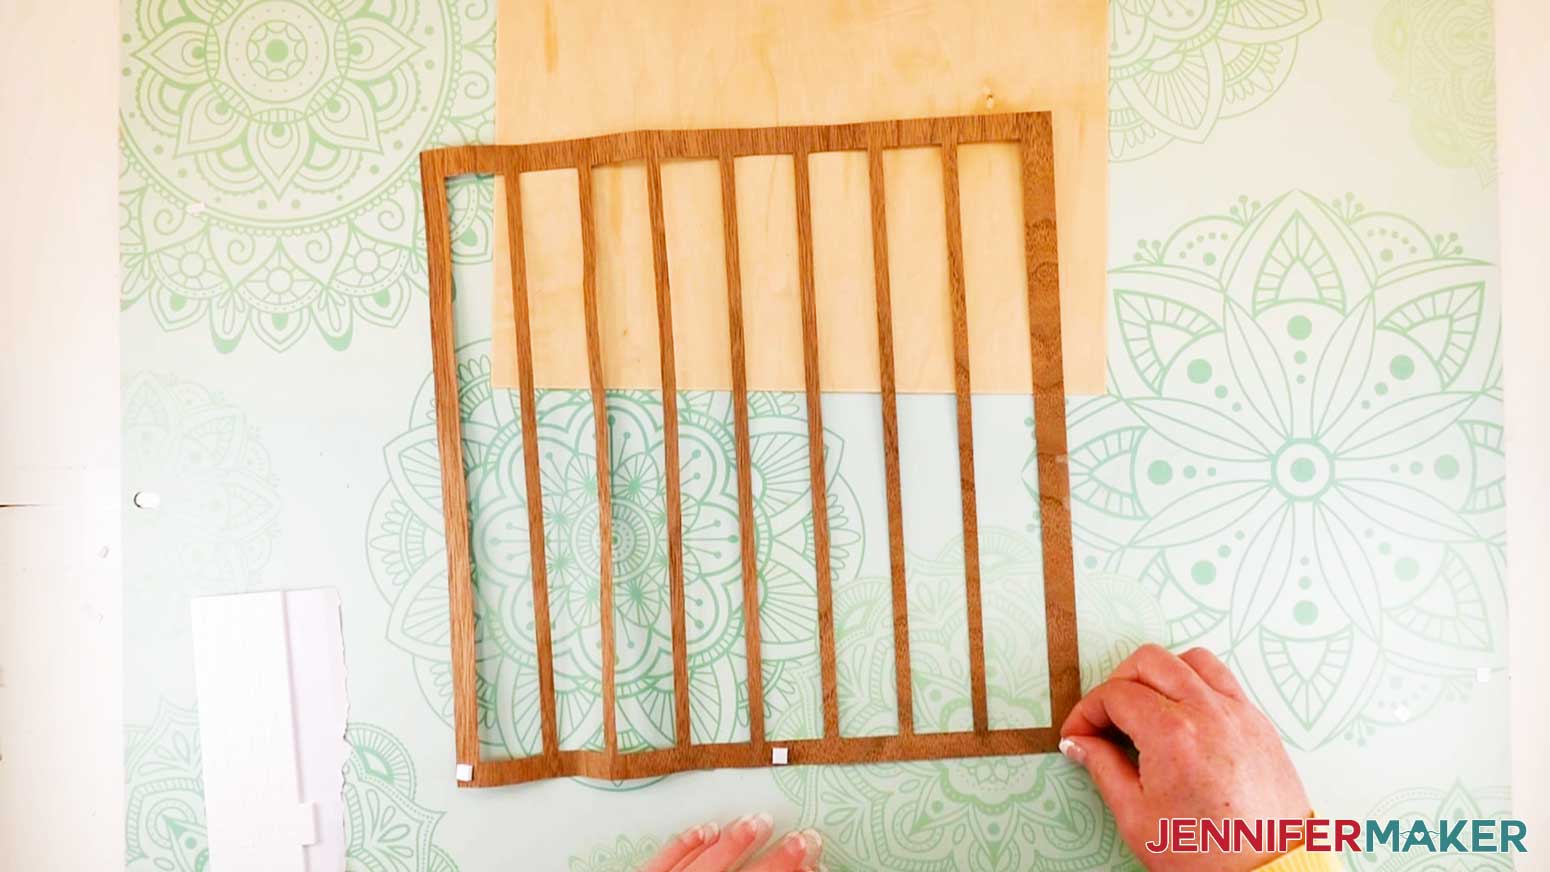
Place a sheet of wood veneer on your StrongGrip (purple) Machine Mat and flatten it to the Mat using a Cricut Brayer. Make sure the grain of the wood is vertical on the Mat and not horizontal.
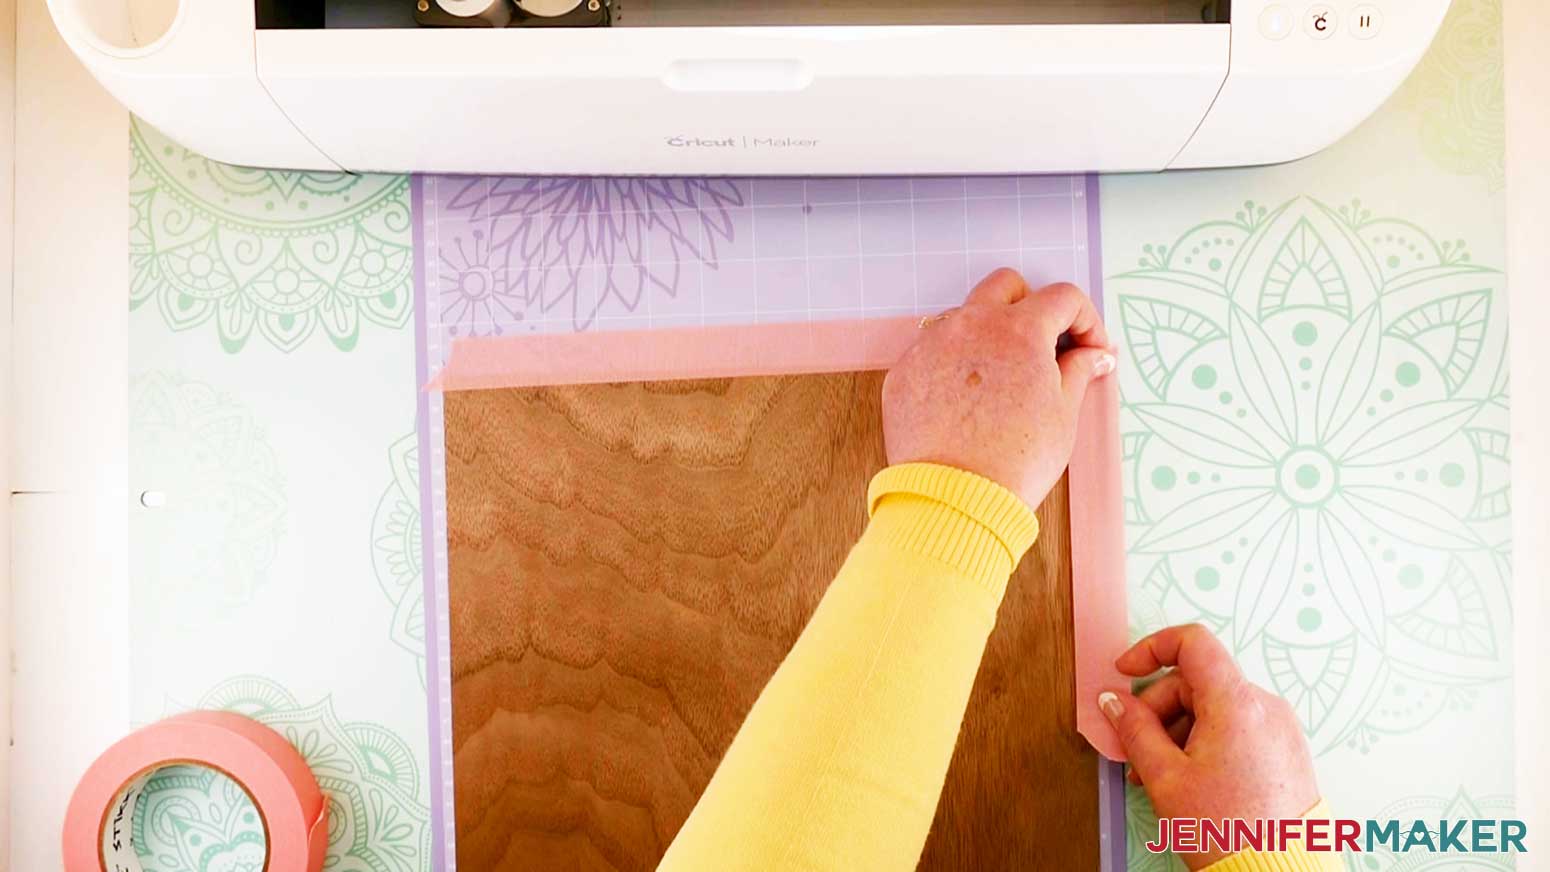
Secure all four sides of the wood veneer to the StrongGrip Machine Mat with painter's tape.
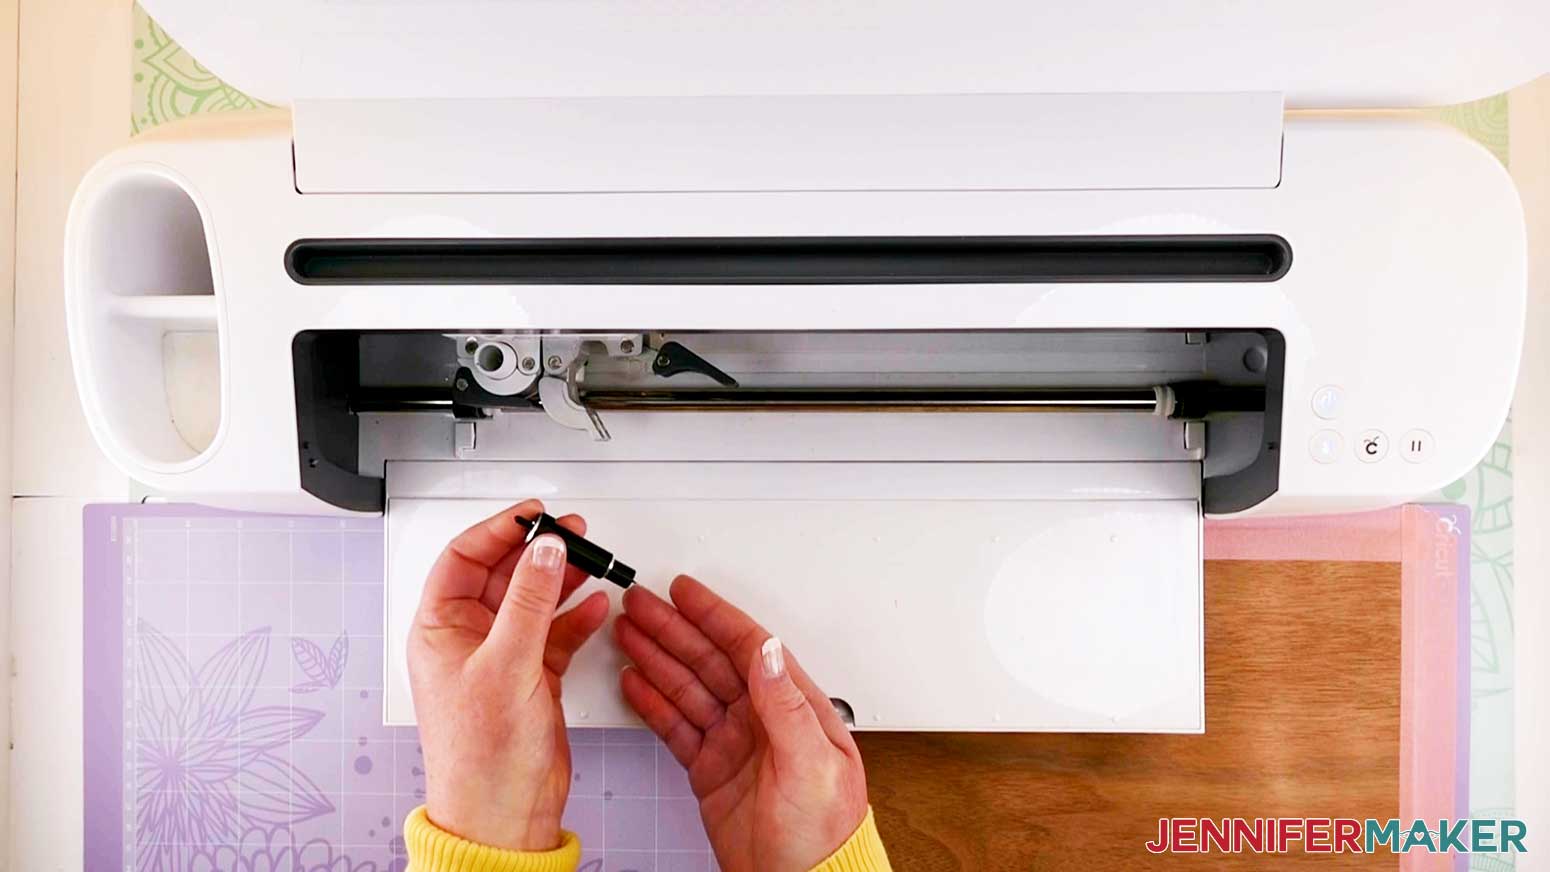
Insert your Deep-Point Blade into your machine. The Deep-Point Blade is best for this project because of the angle of the blade. You can use the same housing as your Fine-Point Blade for the Deep-Point Blade. I have used my Fine-Point Blade to cut wood veneer but it doesn't cut nearly as well as the Deep-Point Blade.
The sheets included in each package of Cricut Wood Veneer can vary slightly in thickness. Since I haven't tried other brands, I speak to what they are like, but when working with a unusual material like wood veneer, it's always a good idea to perform a test cut of a small shape, like a circle, prior to cutting the actual design.
Insert your StrongGrip Machine Mat into your Cricut then push the "Go" button to begin cutting.
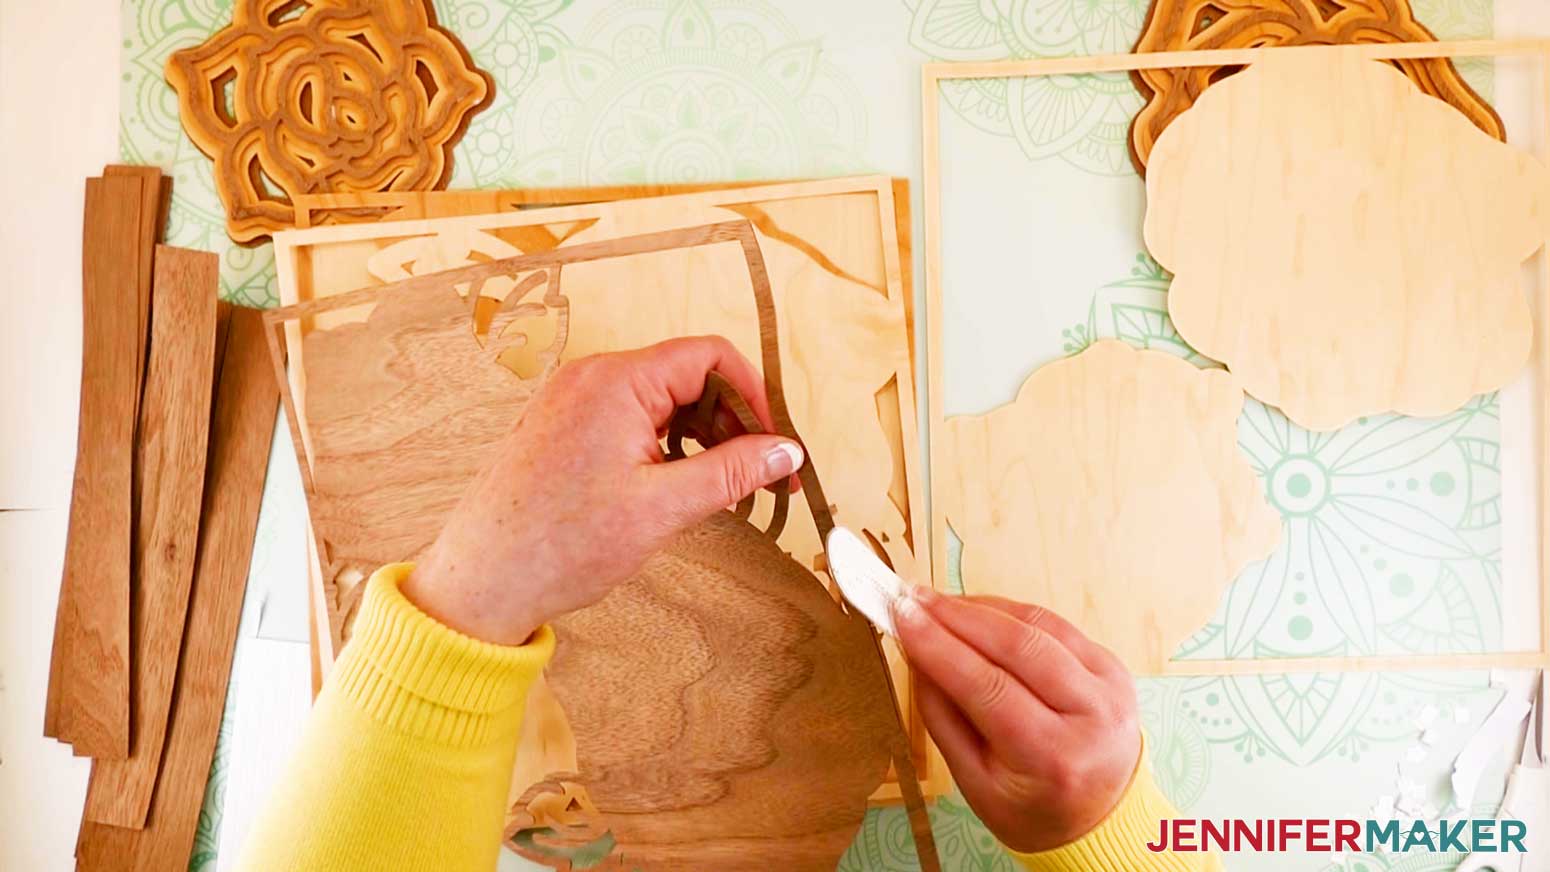
When your Cricut has finished cutting, remove the painter's tape from all four sides of the wood veneer. Flip the Machine Mat over on your work surface with the back side of the Mat facing up. Carefully peel back the Mat to release the wood veneer from the Mat.

STEP 3: ASSEMBLE YOUR LAYERED MANDALA ROSE 3D
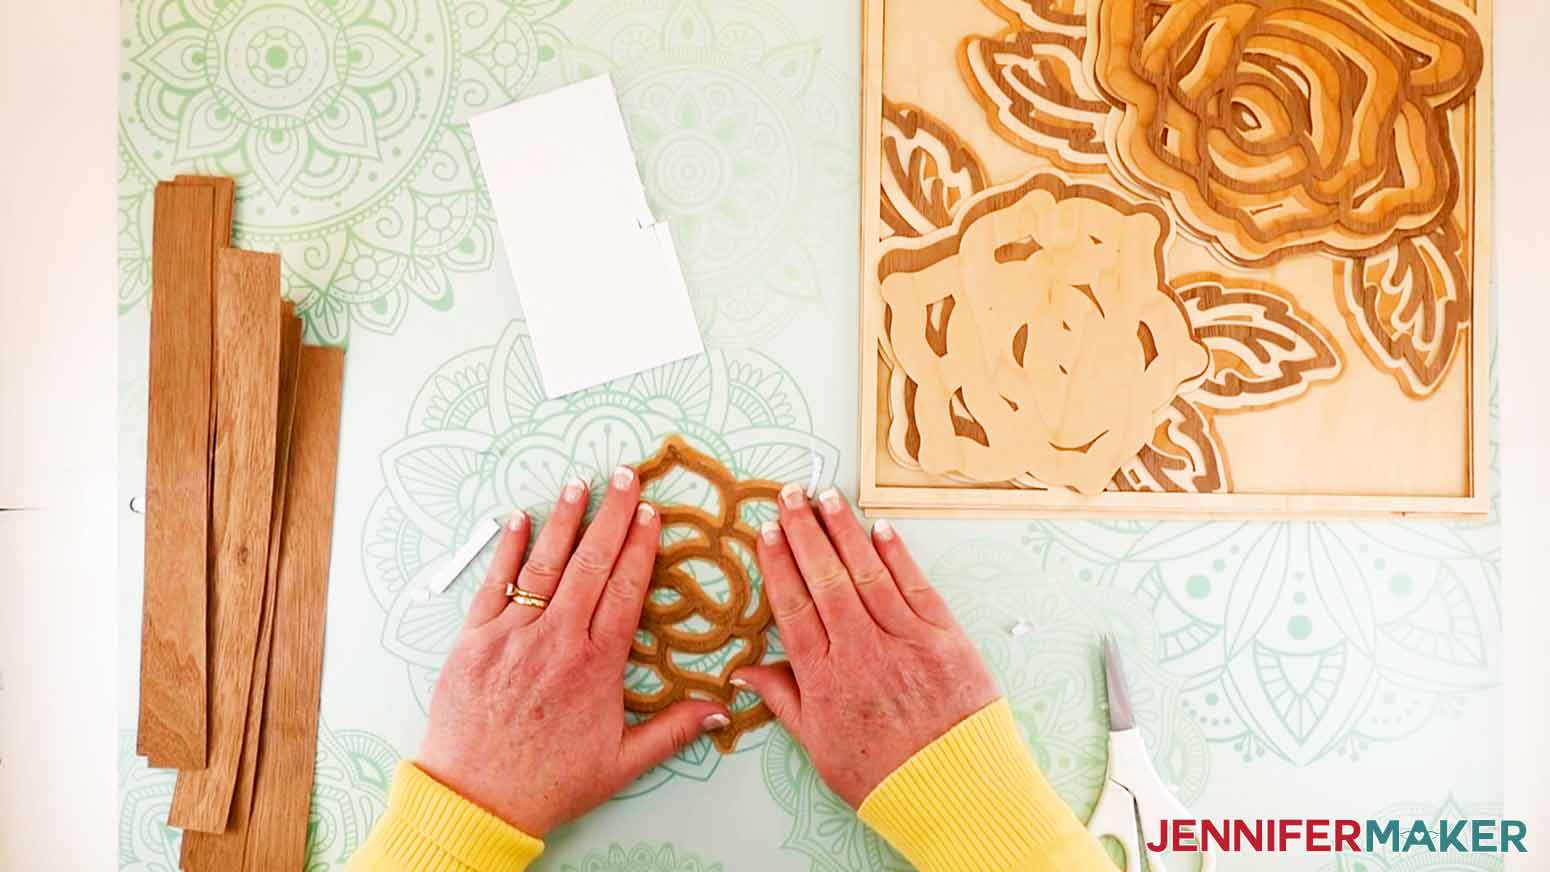
With all your pieces cut, it is time to begin assembling your Layered Mandala Rose 3D design! First, use 220 grit sandpaper or a nail file to remove any rough edges from the pieces.
For the first layer, you will want to cut your foam adhesive squares in half using a razor blade or scissors.
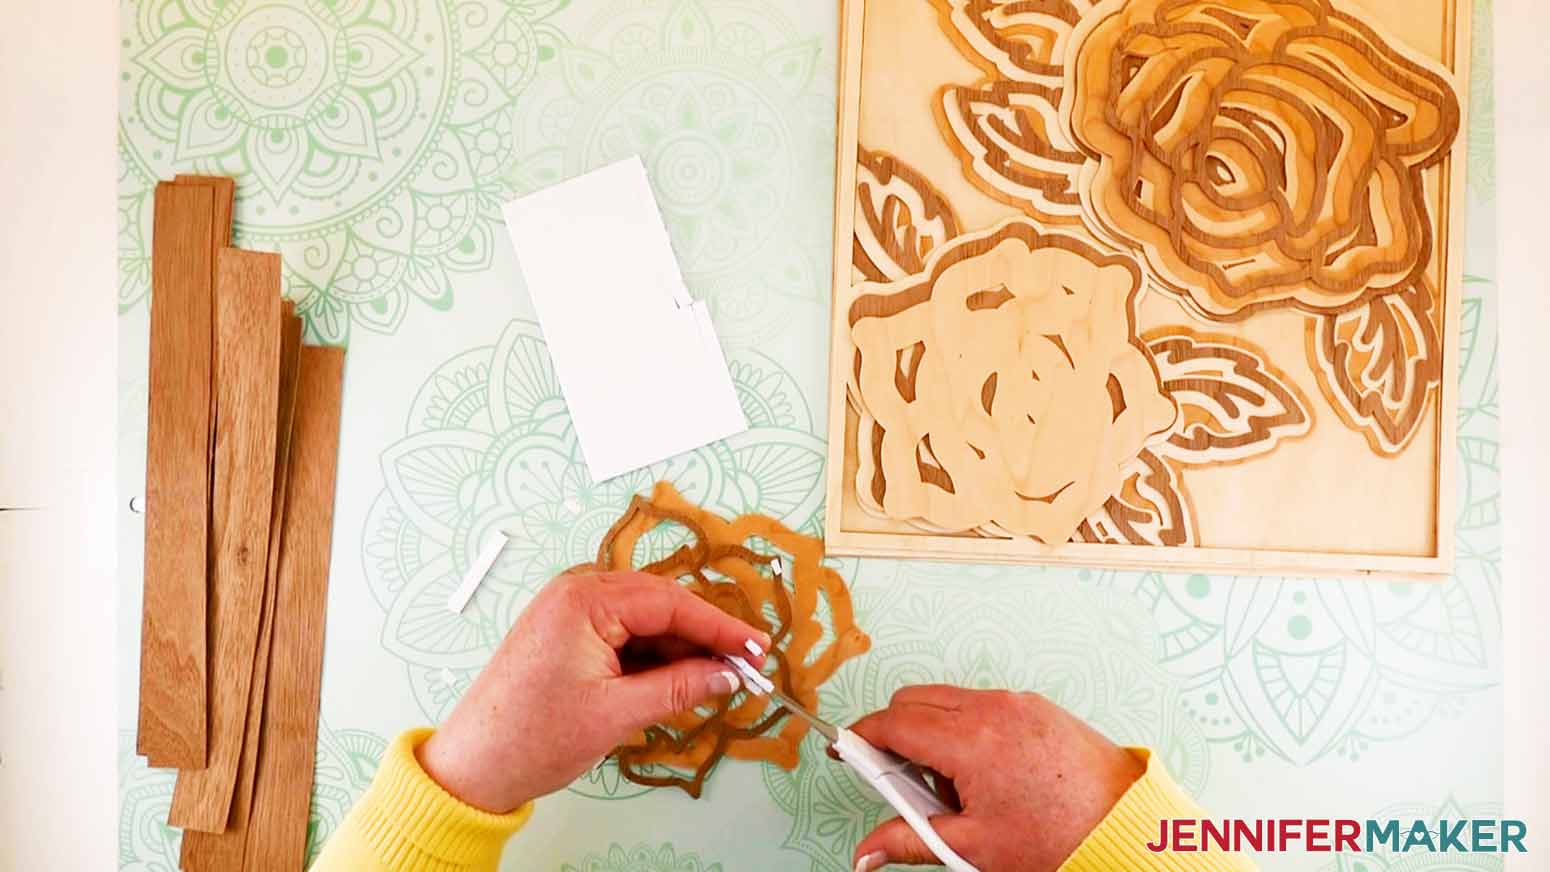
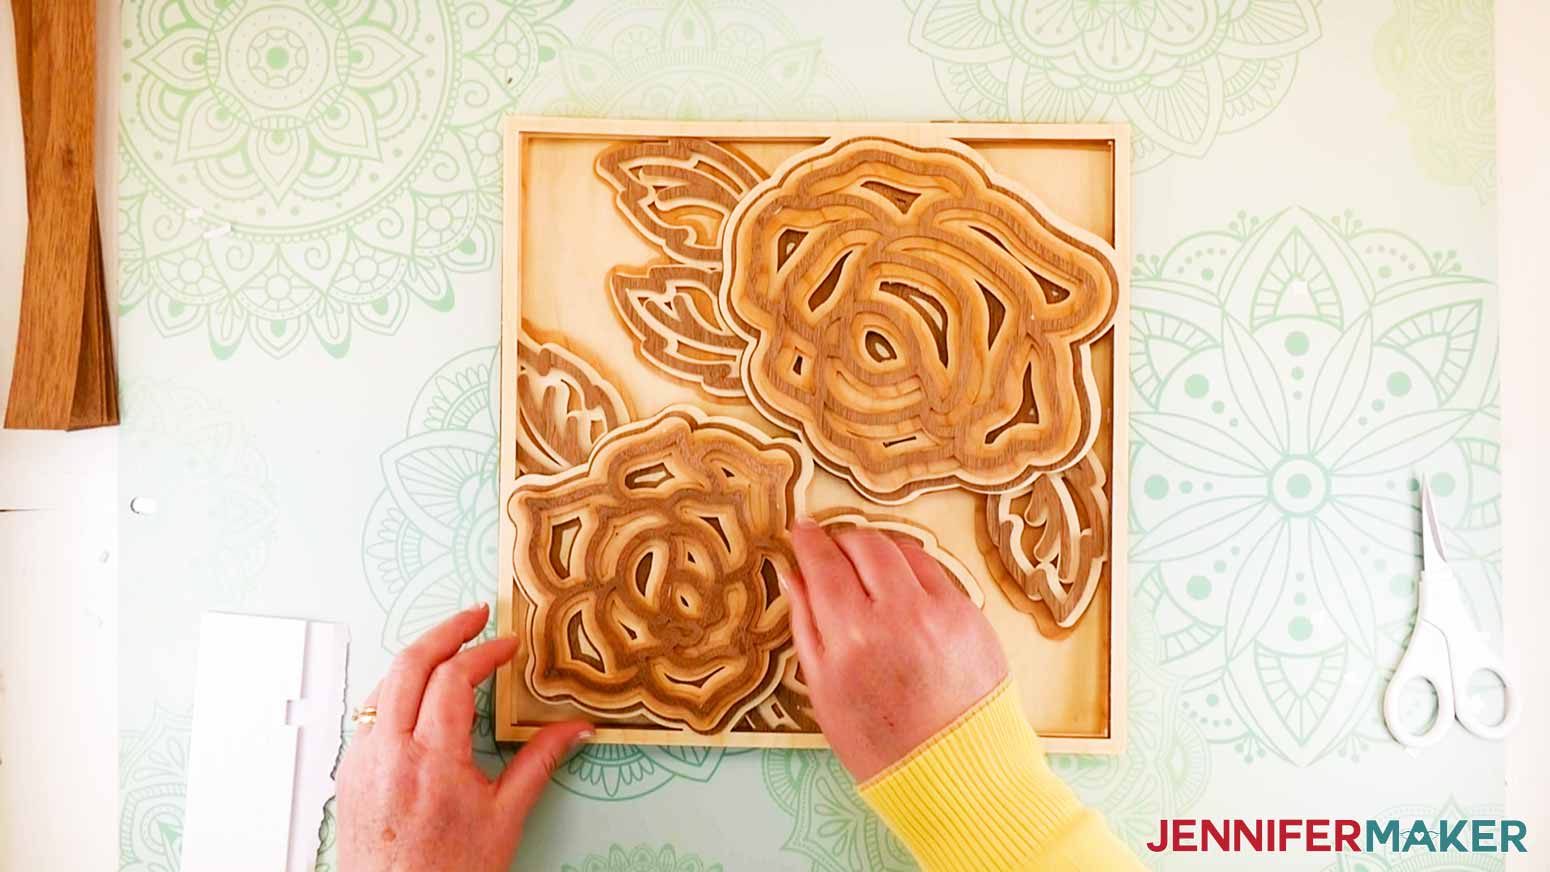
Begin by placing the foam adhesive squares you just cut in half to the back side of the two rose pieces that make up the first layer of the Layered Mandala Rose 3D design.
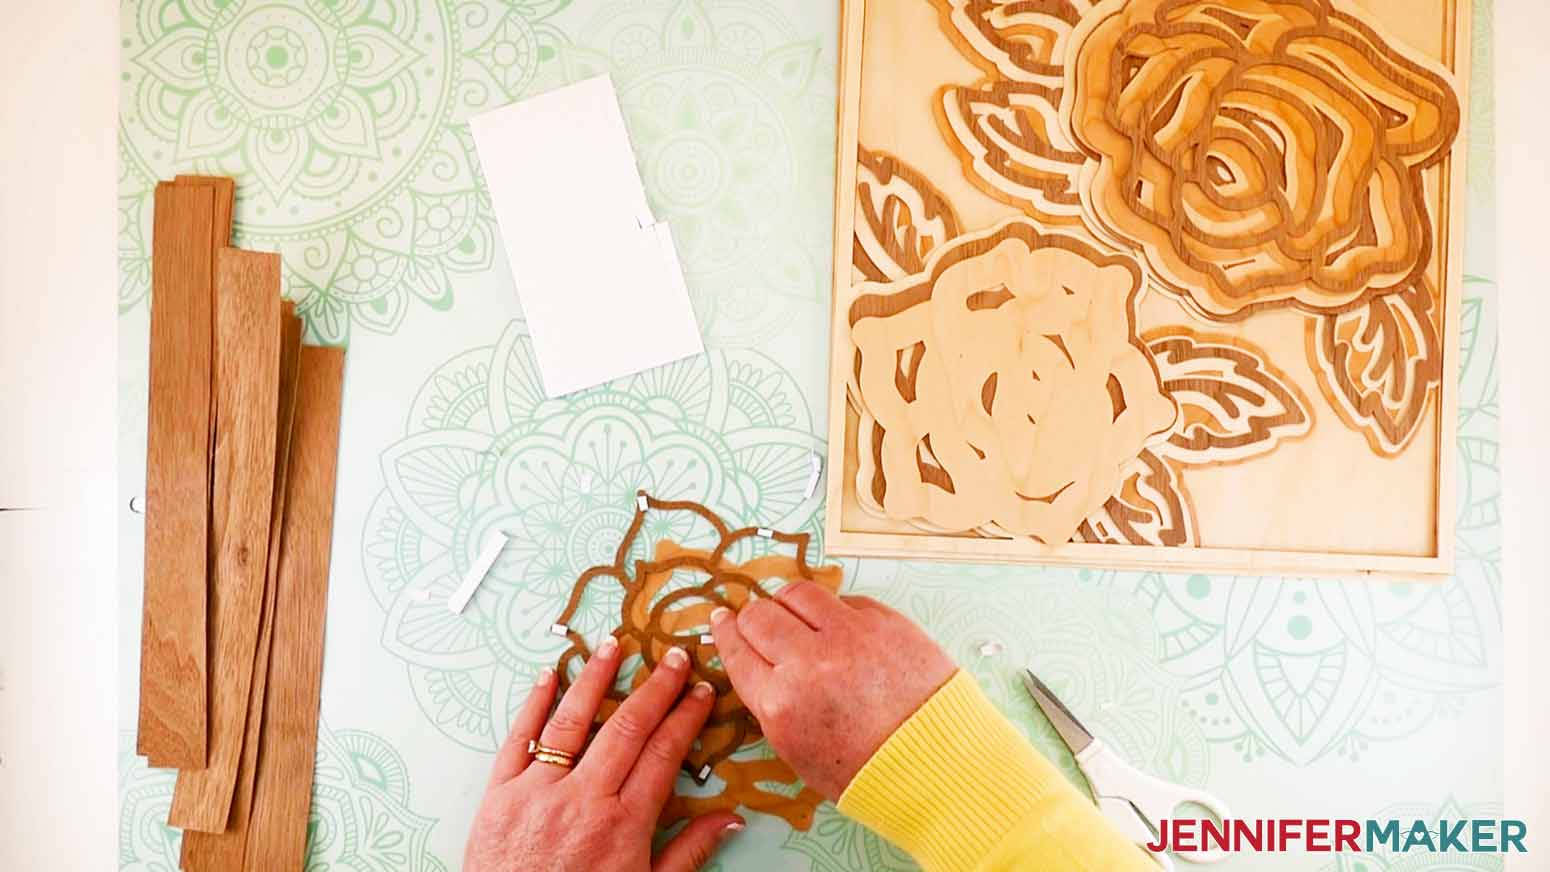
Center and place these two pieces onto the front side of the two rose pieces that are Layer 2.
Apply foam adhesive squares to the back side of the two-layer rose pieces that you just made. Center and place these rose pieces onto the front side of the two-rose piece that makes up Layer 3.
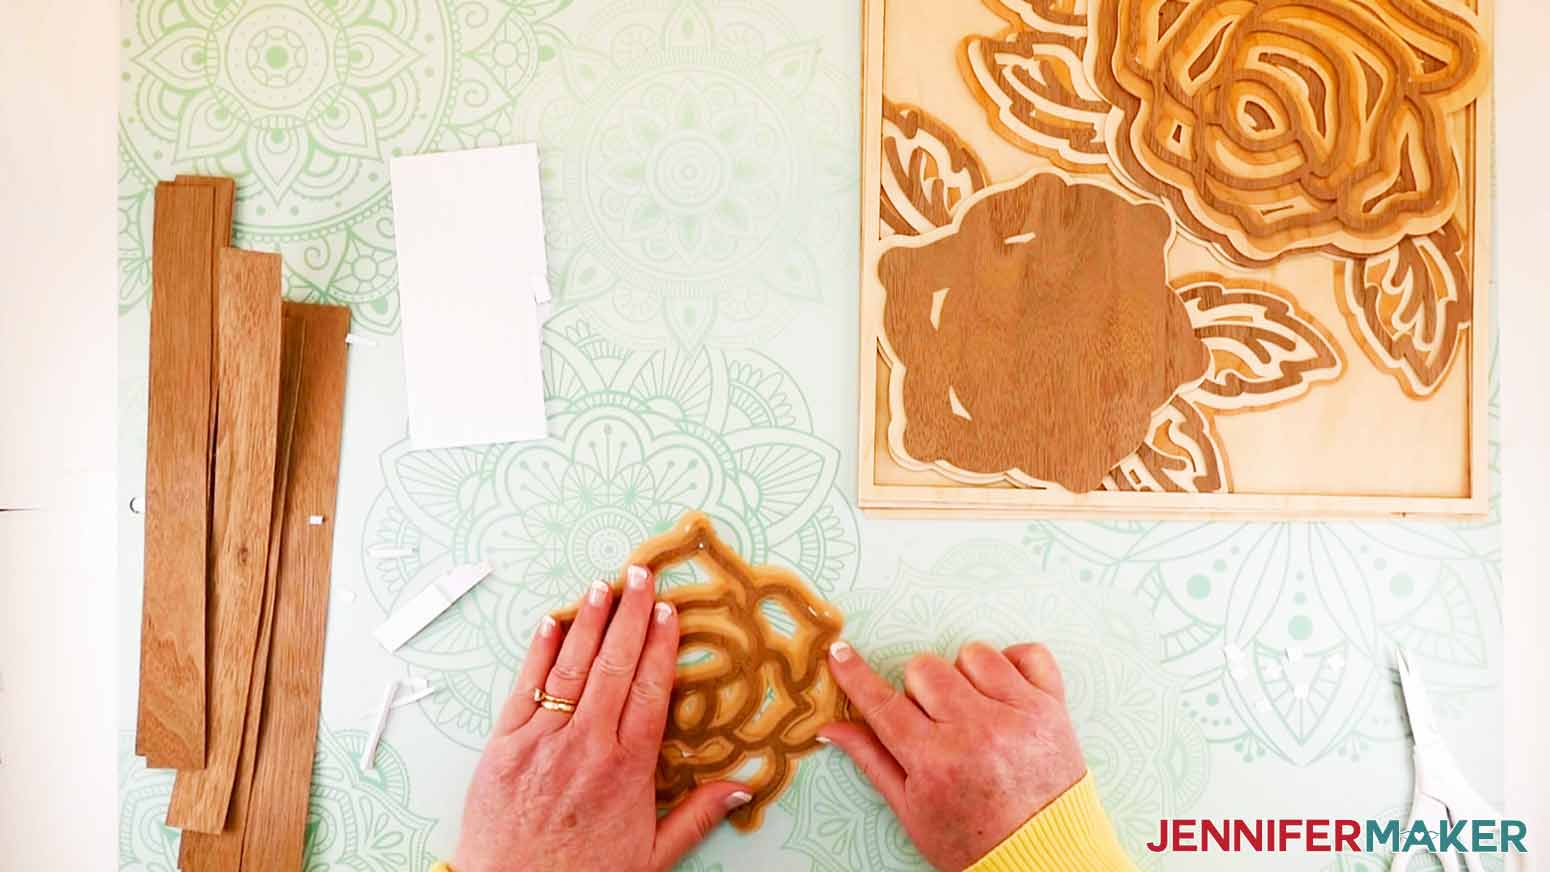
Now, place adhesive squares on the back of the Layer 3 rose piece that you made in the previous step, and center and place it on the front side of the two-rose piece that is Layer 4.
Your next step is to apply foam adhesive squares to the back side of Layer 5. Are you seeing a pattern to what we are doing here yet? Center and place Layer 5 to the front side of Layer 6.

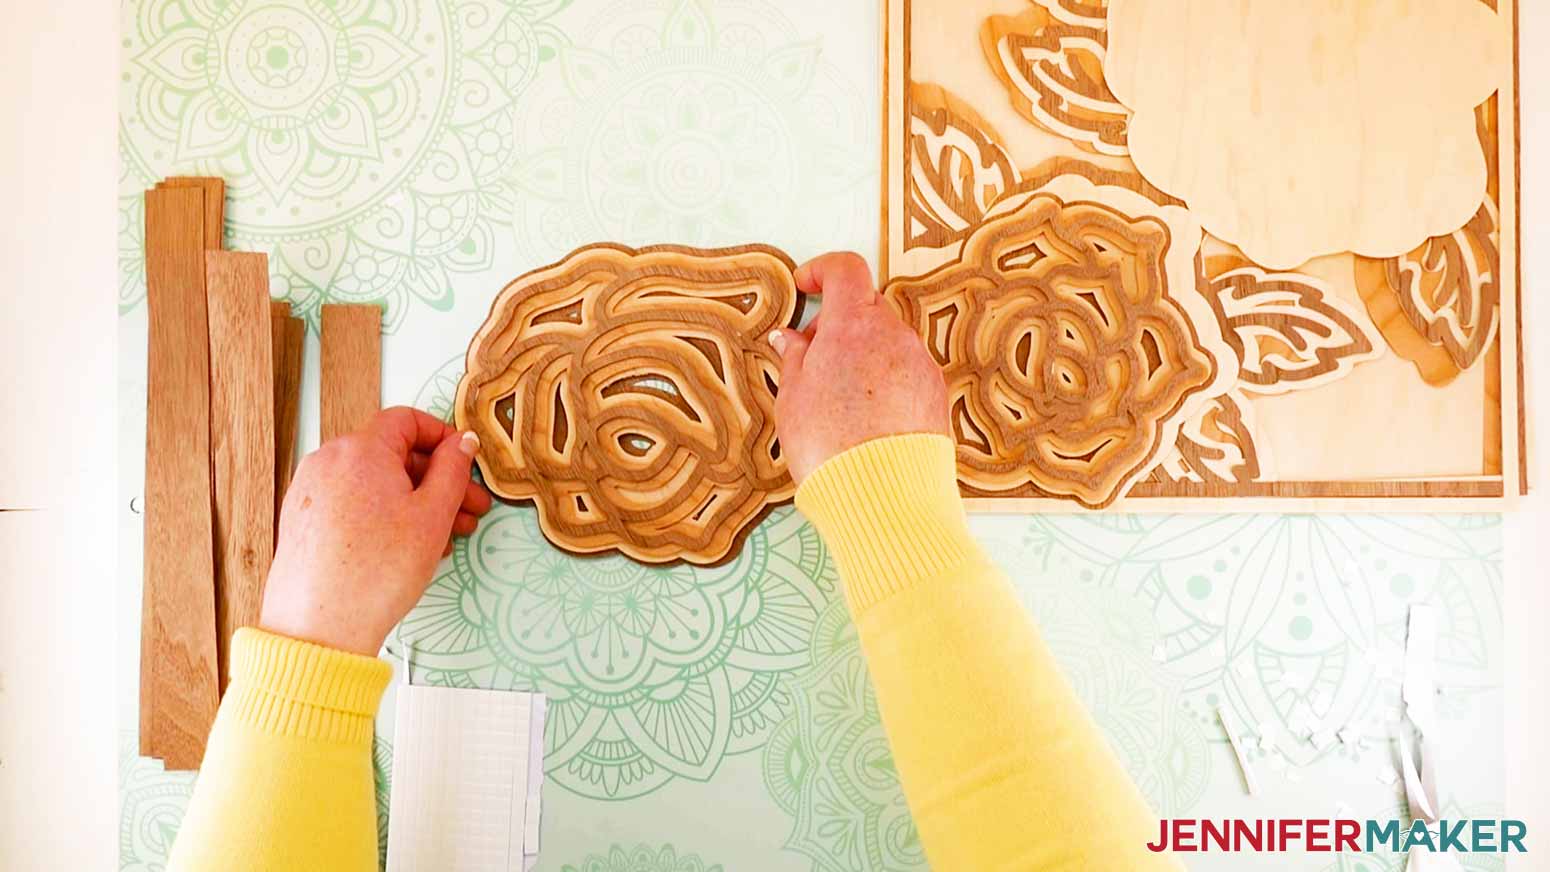
Apply the adhesive squares to the back of Layer 6, and center and place it on Layer 7.
Continue your assembly by applying foam adhesive squares to the back side of Layer 7, and centering and placing Layer 7 to the front side of Layer 8.
Now, apply your adhesive squares to the back side of the two Layer 4 rose pieces. Center and place the two Layer 4 rose pieces to the front side of Layer 5.
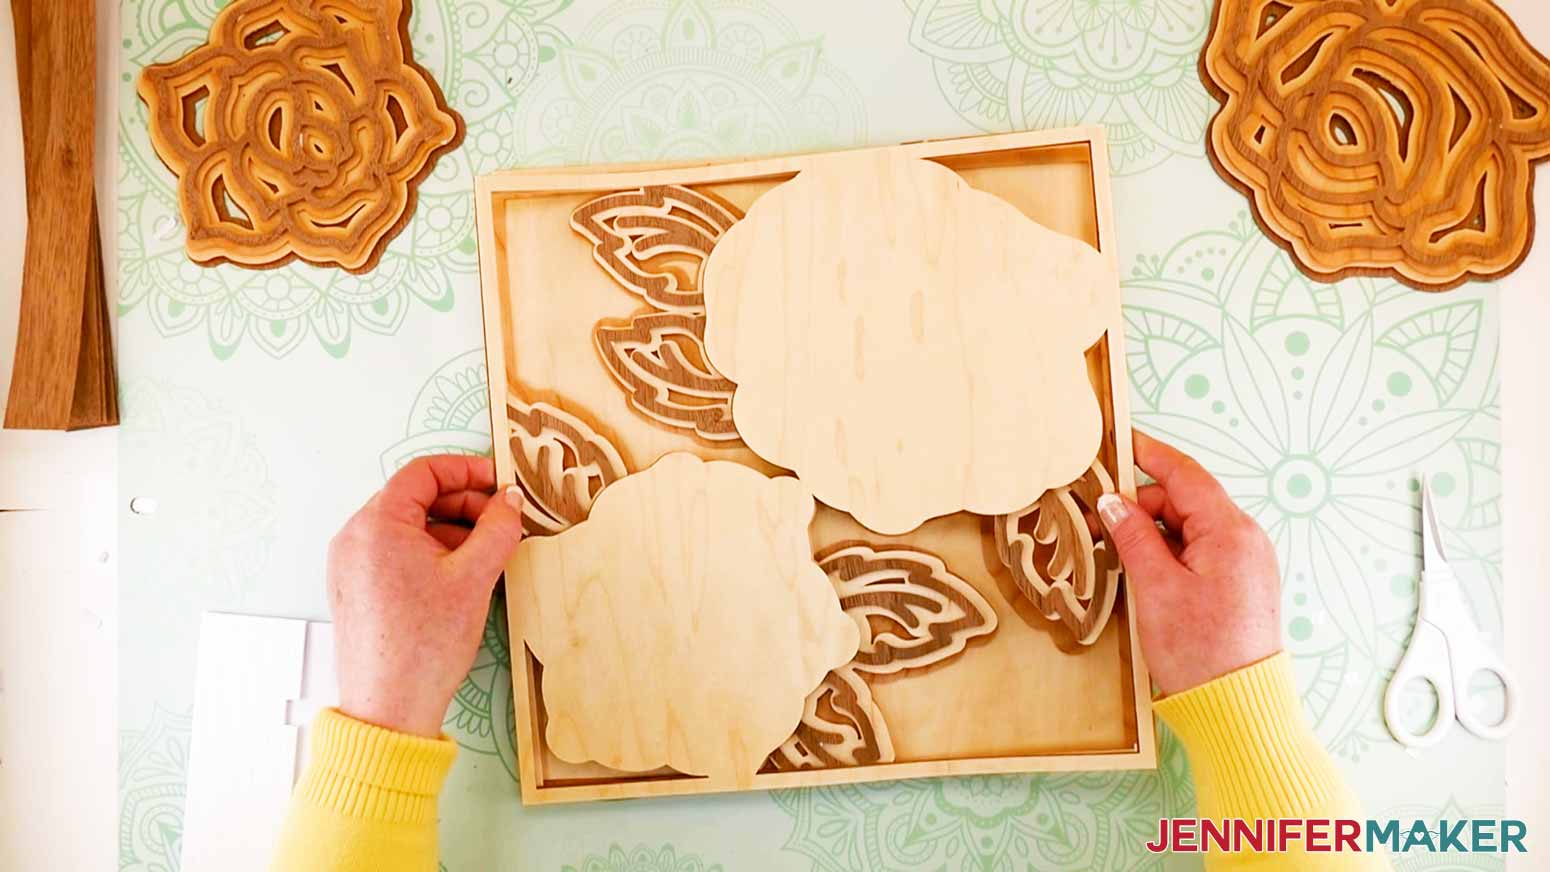
Cut foam adhesive squares in half as you did for Layer 1 and apply them to the back side of Layer 9, then place Layer 9 to the front side of Layer 10.
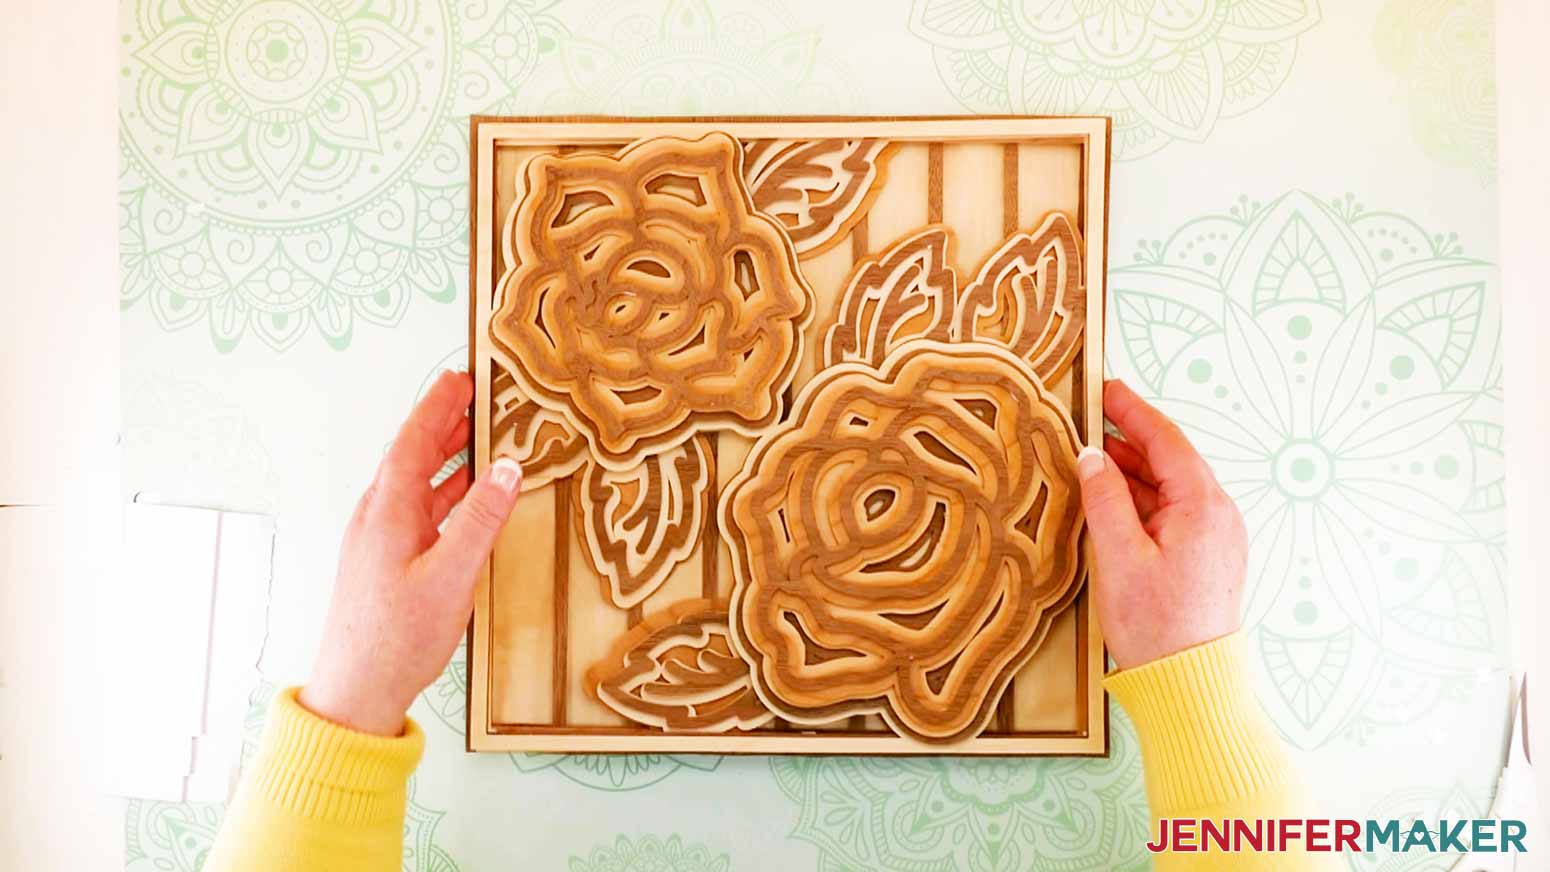
Next place foam adhesive squares on the back of Layer 8. Take this and adhere it to the top of Layer 9. Congratulations! You have completed a lovely Layered Mandala Rose 3D! Aren't you proud of yourself? I am proud of you!
STEP 4: SHOW IT OFF
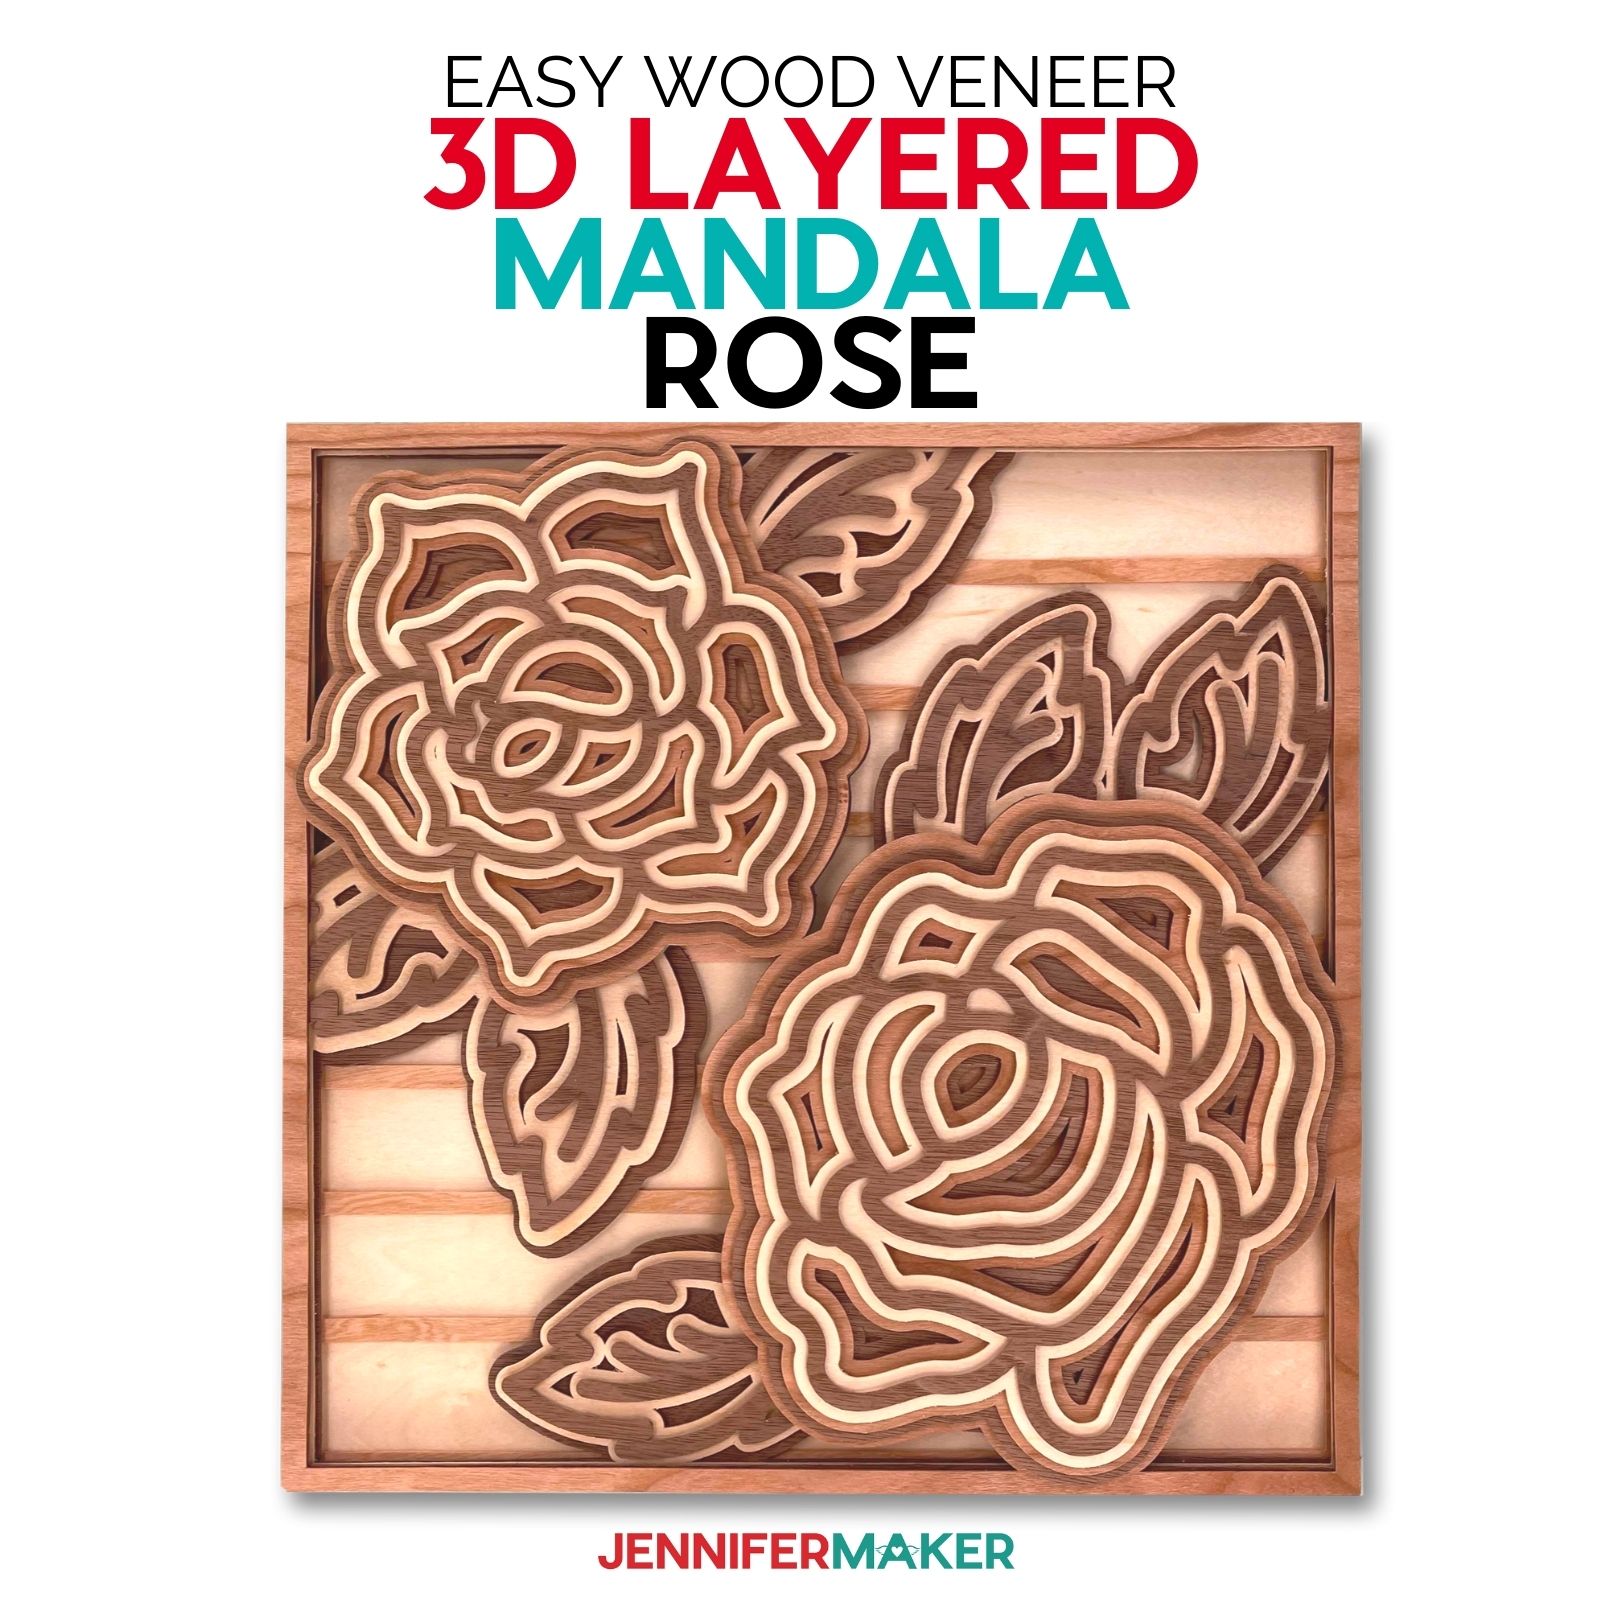
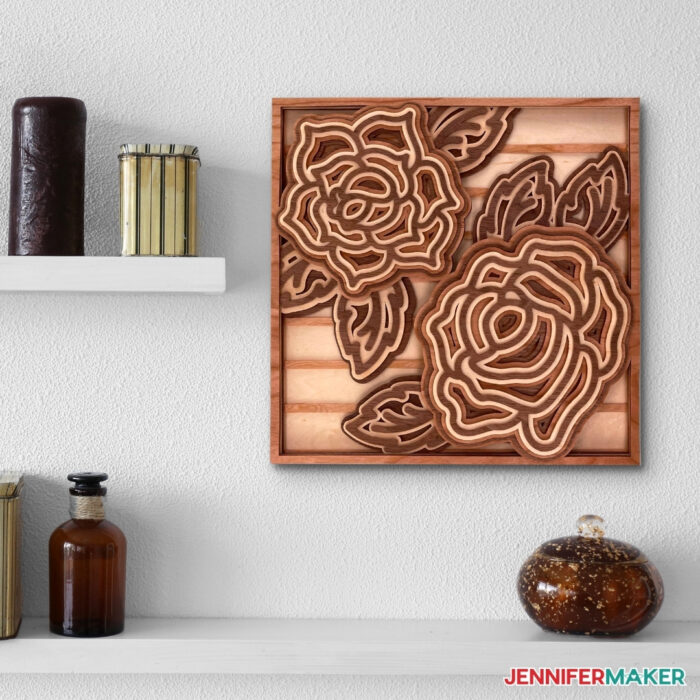
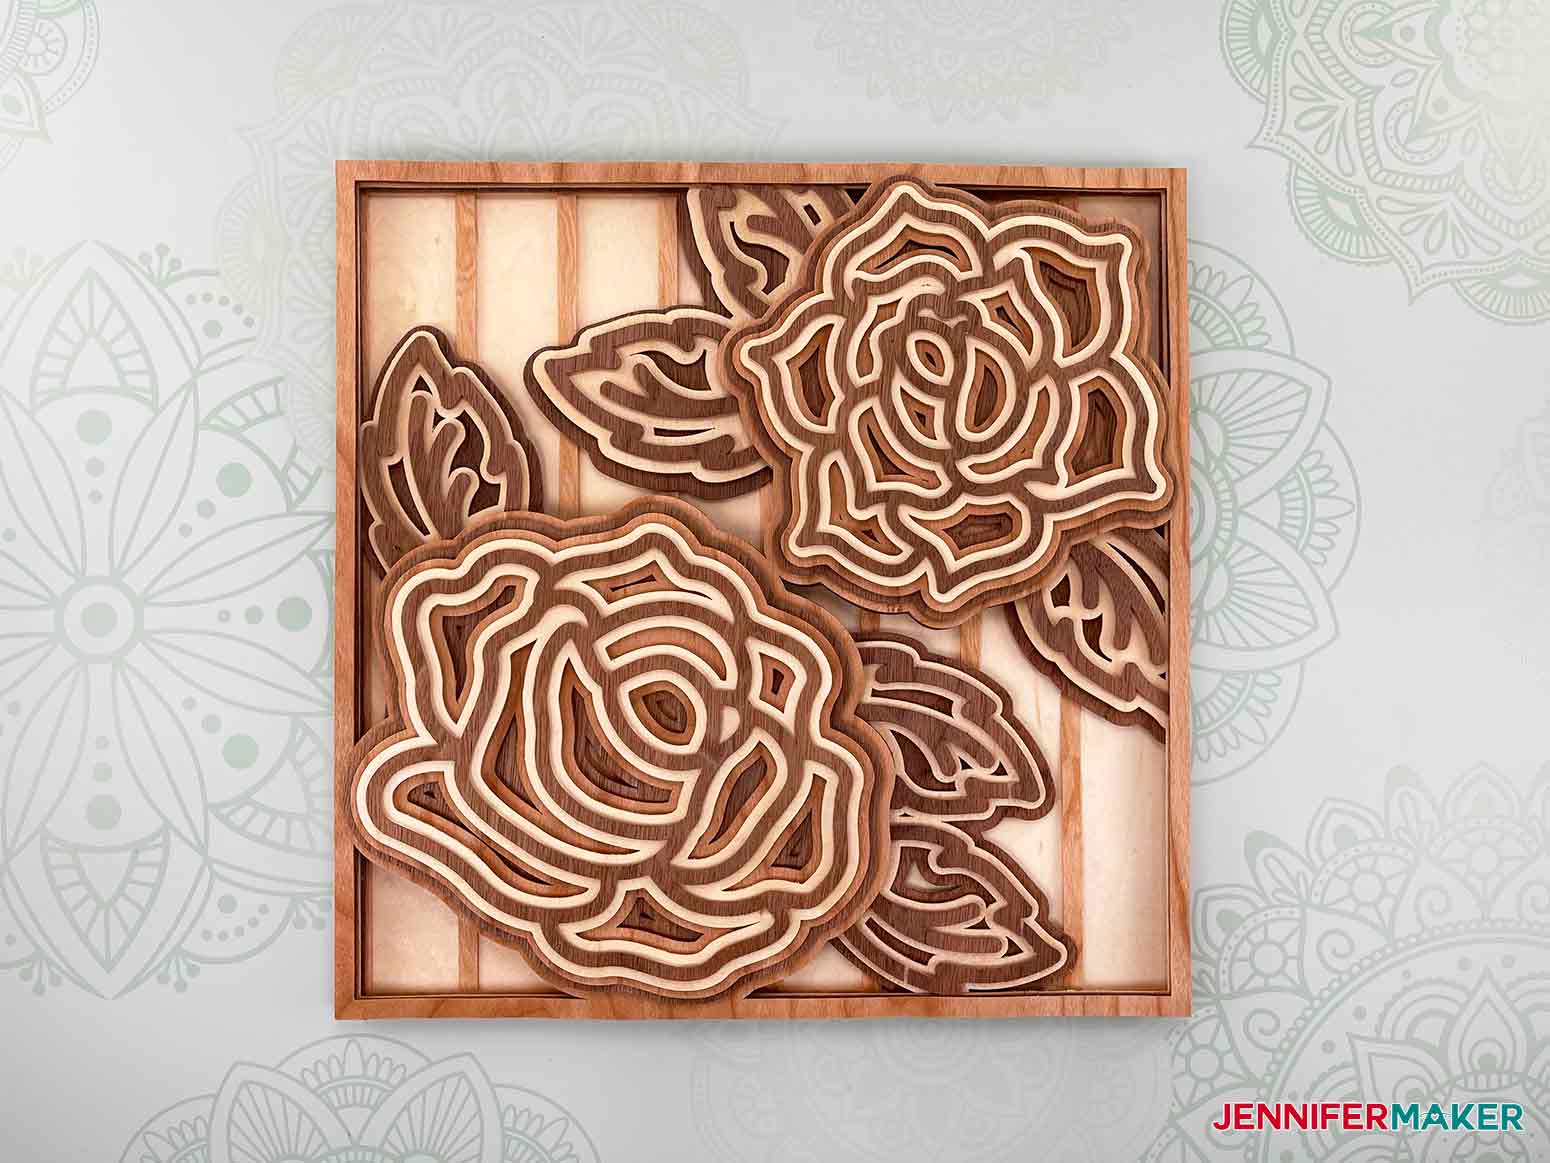
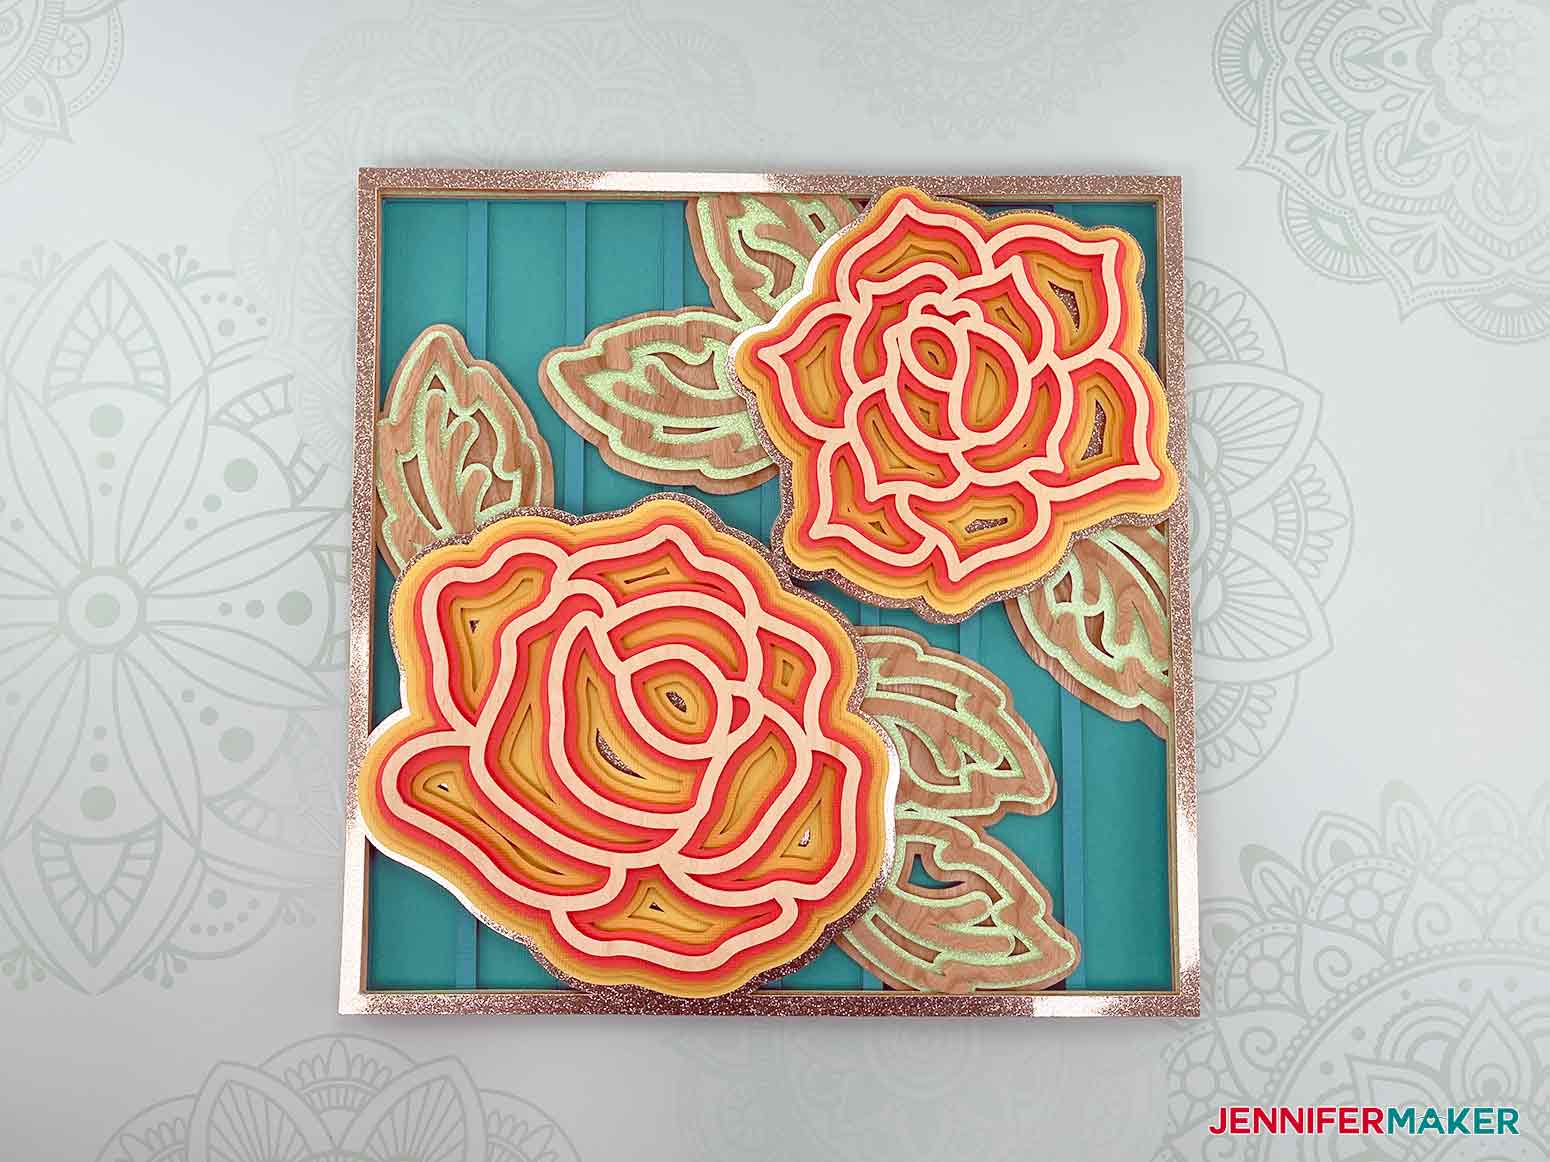
This is what my assembled Layered Mandala Rose 3D looks like! Isn't it beautiful? And what a great gift it would make! The assembled size of my Layered Mandala Rose 3D is 11.5" x 11.5".
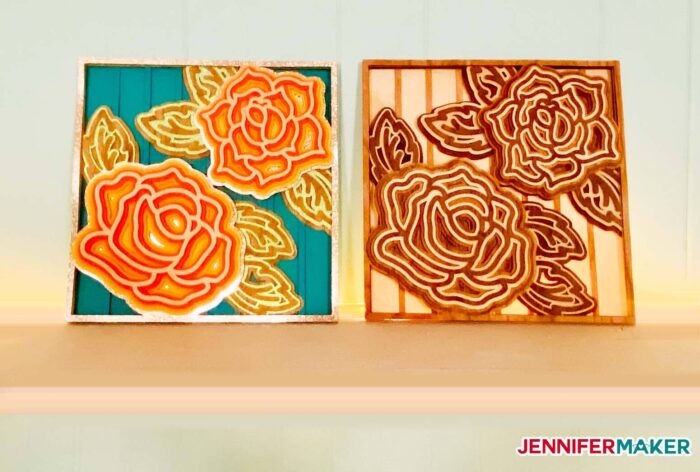
I also made a Layered Mandala Rose 3D using a combination of some left over cardstock and the Cricut Wood Veneer. I just love the way this version turned out!
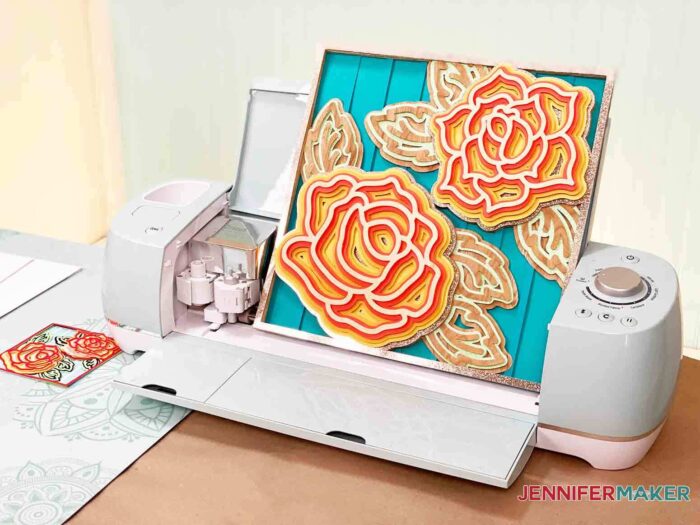
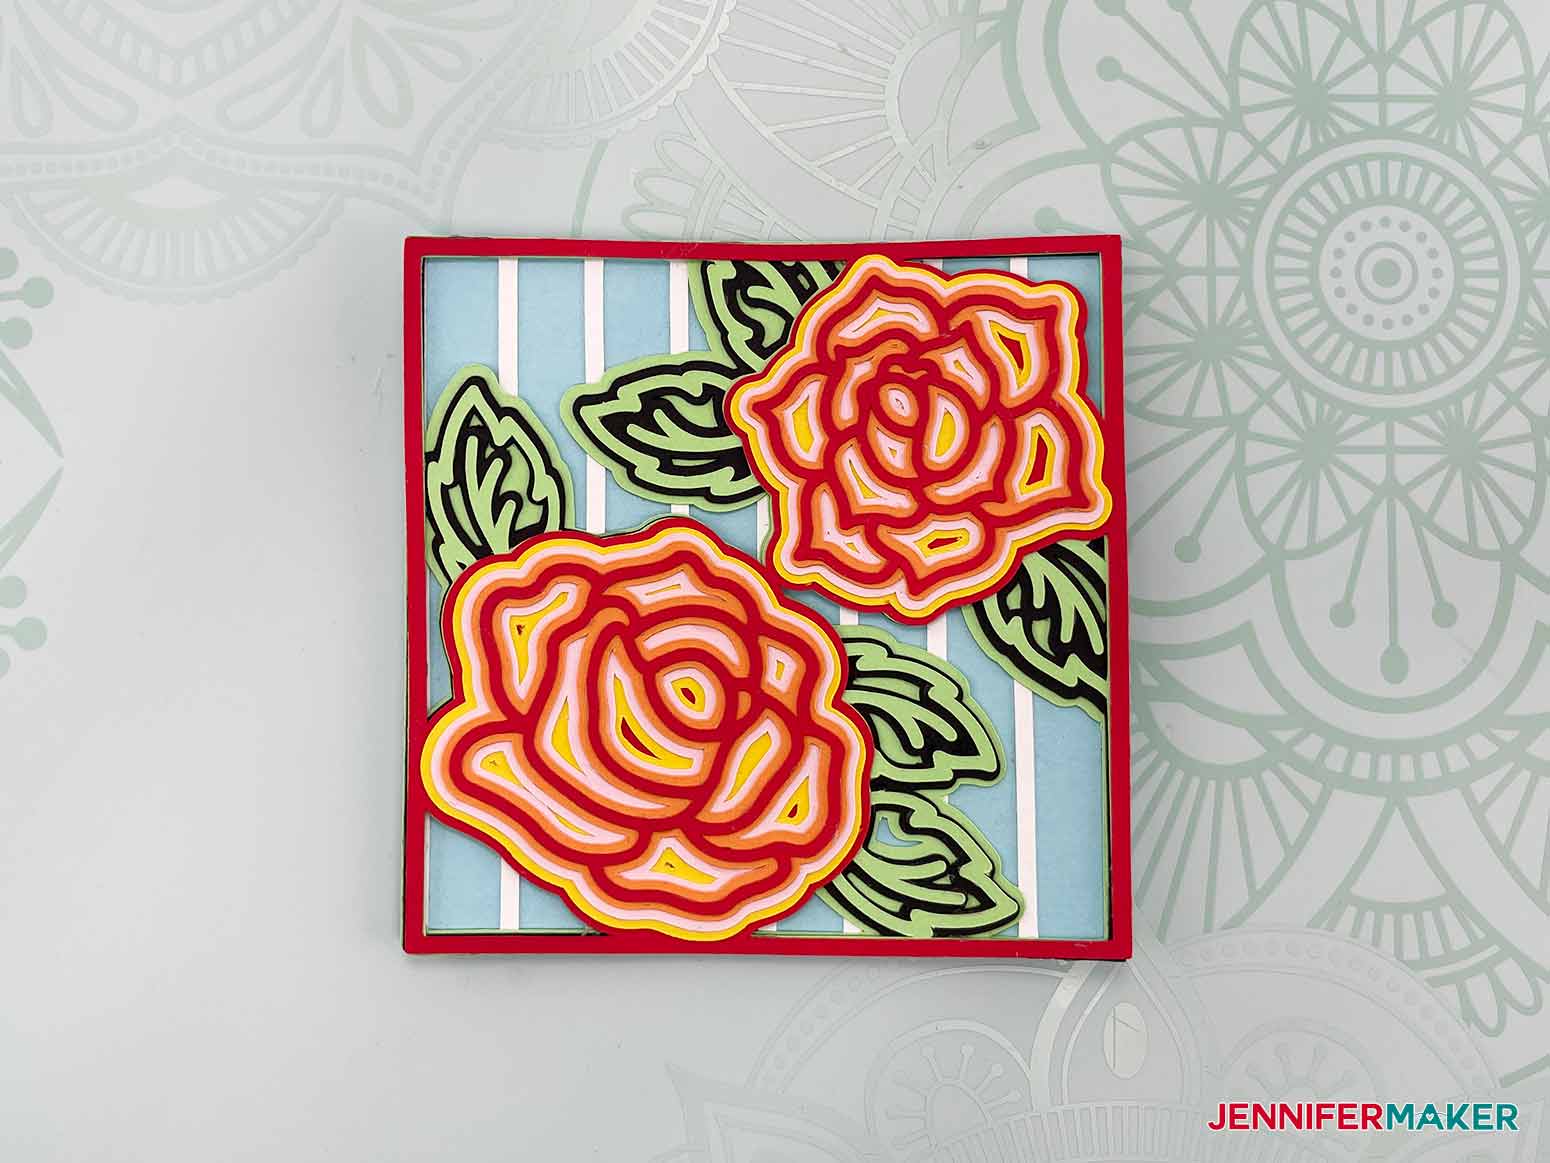
Here is what my Layered Mandala Rose 3D looks like cut on my Cricut Joy! It's so adorable at 4" x 4". You could also use this on the front of a greeting card! You don't have to use the colors I did - I would love to see how your creativity blossoms with YOUR choices!
If you cut my Layered Mandala Rose 3D design on the Joy, I recommend using glue to assemble the project versus foam adhesive because of the delicate nature of the pieces.

Notes
The finished size for my Layered Mandala Rose 3D design is 11.5" x 11.5". The finished size if you use my Joy-sized design for cutting on your Cricut Joy is 4" x 4".
Answers to Your Questions About How to Make a Layered Mandala Rose 3D
Q: Can I cut wood on my Joy?
Cricut doesn’t list wood or veneer as one of the materials suitable to cut on a Joy. You also can’t use a Deep-Point Blade with a Joy. But, they are wonderful for cardstock projects!
Q: How can I get my wood pattern to match?
Woodgrain patterns and colors will vary because these are made from real wood. But that means every project will be unique, so this is not a bad thing! The combination of three different kinds of wood varieties make the Layered Mandala Rose 3D especially pretty!
Q: My wood veneer cracked when I tried to use it! What happened?
Be very careful when handling your individual wood veneer sheets! Don’t bend them along their grain as they may very well crack or break! Also, keep in mind that the different woods vary in thickness and strength. Walnut is beautiful because it has more grain, but the amount of grain also makes it a bit more fragile.
Q: My veneer pieces keep cracking when I try to weed them! Help!
Make sure that the grain of the wood is vertical when you place it on the Machine Mat and not horizontal! Flip your Mat over on your work surface with the backside of the mat facing up and be very careful when peeling back the mat to release the veneer from the mat.
Q: Can I use my Cricut Fine-Point Blade with my Maker or Explore?
You can, but it doesn’t cut nearly as deep or as well as the Deep-Point blade. This is because of the angle of the Deep-Point blade. If you still want to use a Fine-Point Blade, I suggest performing a test cut of a small shape, like a circle, prior to cutting to see if you like the result.
Q: My Cricut is not cutting through the thin wood veneer!
It takes some patience with yourself to work with thin wood veneer! But, you will find it SO worth it when you look at your completed Layered Mandala Rose 3D! Make sure you have selected “Natural Wood Veneer” under “All Materials,” and that you changed your “Pressure” to “More.” Double-check that you have the Deep-Point Blade inserted and that your wood veneer has been firmly attached and flattened with a Brayer. All four sides of the veneer should be held by painter’s tape. If you are still not getting a good cut, you can cut again by NOT removing your Machine Mat but by pressing the “Cut” button (the one that looks like a “C”) on your Cricut again.
Q: My Joy isn’t very old, but it’s ripping up my cardstock when I try to cut out the Layered Mandala Rose 3D. Do I need a new blade already?
Probably not! Your Machine Mat needs to be pretty sticky in order to get good cuts! The first thing I try is either change my mat to a new one or clean up the one I’m using with non-alcohol baby wipes or gentle dishwashing soap and letting it dry. If that doesn’t help, I’ll clean my blade by taking a sheet of aluminum foil and balling it up. Then I remove the blade from its housing, depress the plunger, and stick it in and out of the aluminum ball CAREFULLY over and over. For more detail on these tips, plus other hints on getting cleaner cuts, you can take a look at how to solve cutting problems.
Q: My layers just don’t look like yours do in the pictures, and I don’t know how to put the Mandala Rose together!
Are you working with an iPad or iPhone? For some reason, Design Space rearranges the layers on SVGs. Just look at the pictures in my tutorial or YouTube, and match those up!
Q: I don’t have thin wood veneer. What can I use instead?
Just use cardstock! If you want the look of veneer like you see in our thin wood veneer version, use cardstock in shades of tan and brown. The assembly of the cardstock version is the exact same as the veneer version!
Q: What order should I place the wood veneer in if I want to make a Layered Mandala Rose 3D that looks just like yours?
Great question! The wood veneer goes in this order:
Mat #1 – Walnut
Mat #2 – Maple
Mat #3 – Cherry
Mat #4 – Walnut
Mat #5 – Cherry
Mat #6 – Walnut
Mat #7 – Maple
Mat #8 – Walnut
Mat #9 – Cherry
Mat # 10 – Maple
Get my free SVG files to create a Layered Mandala Rose 3D
I’d love to see YOUR Layered Mandala Rose 3D projects and how you choose to decorate them! Please share a photo in our Facebook group or tag me on social media with #jennifermaker.
Love,

Want to remember this? Save this Layered Mandala Rose 3D Tutorial to your favorite Pinterest Board!