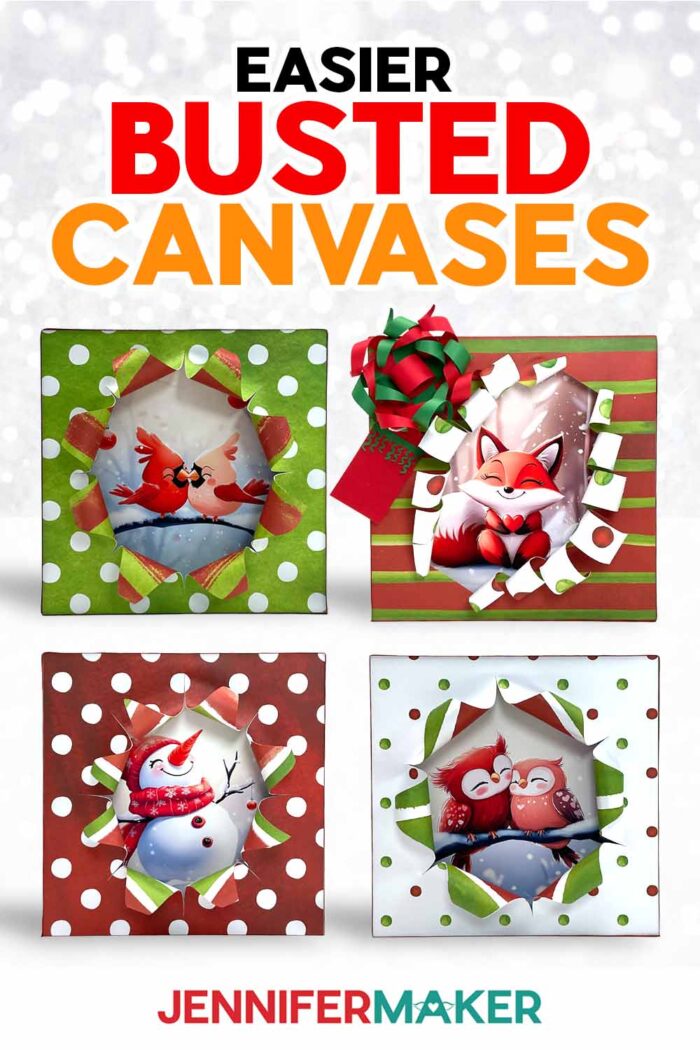
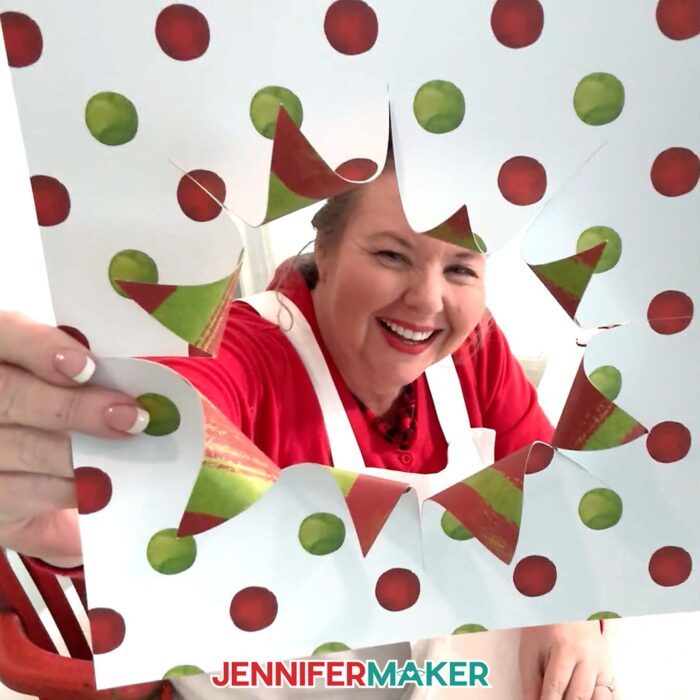
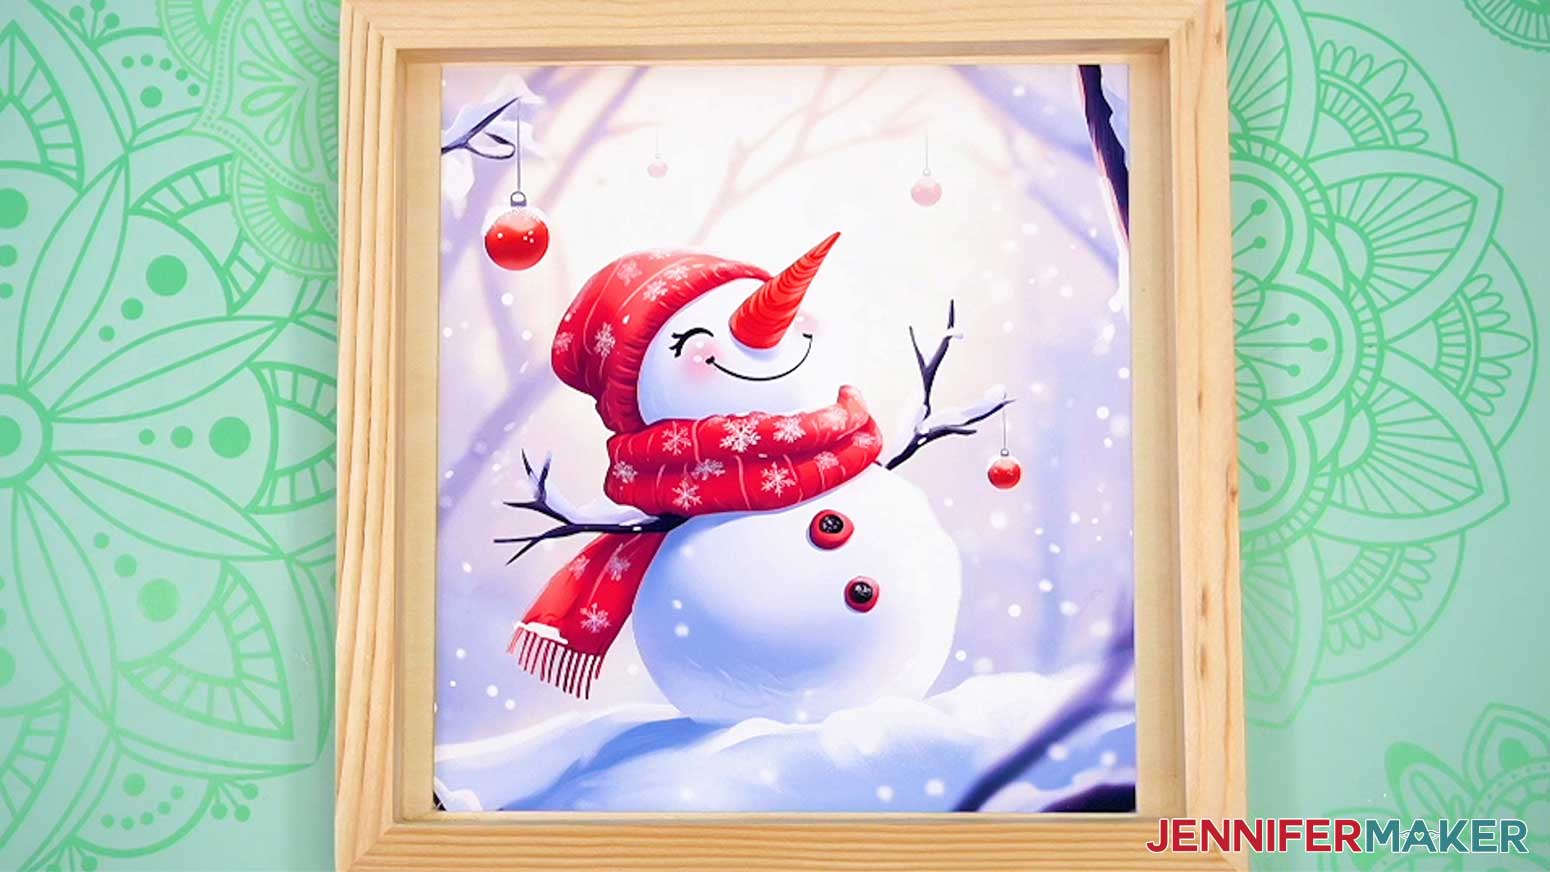
Learn how to make a “busted” canvas easier with your cutting machine!
Have you seen “busted canvas” projects trending and popping up in your online craft groups? Me too! A “busted” canvas looks like a canvas that has busted open to reveal a cool design underneath. It’s a fun and unique way to display artwork or a photo! These make wonderful holiday decorations as well as gifts! They look so cool, but I felt there must be a better way than using a sticky coat of sticky Mod Podge (although I do love crafting with Mod Podge sometimes!) and cutting a decoupaged canvas (I love a good canvas craft, too!. So, I played with ideas from other projects and came up with an easier, cleaner, and safer way to create a busted canvas that I’m excited to share with you!
Watch the full step-by-step video tutorial on making a busted canvas:

This is an easy busted canvas tutorial. You won’t need a hot glue gun to keep pieces together, or a rotary cutter if you have a cutting machine to help. And my favorite part: you don’t need to transfer a napkin design or tissue paper to the canvas, because there actually isn’t one!
The technique I’m sharing starts with an inexpensive wooden tray or frame with a solid backing. I’ll show you how to size and print an image to sit inside. And all you need are a pair of scissors and good-quality craft glue! I printed my cute winter images on photo paper, but you can also use an image you already have a physical copy of. Just make sure it’s smaller than the busted design so the frame’s back won’t show at the edges. I used an AI image generator and image editing software to make them. You can learn some of the process in my new AI Art Playbook!
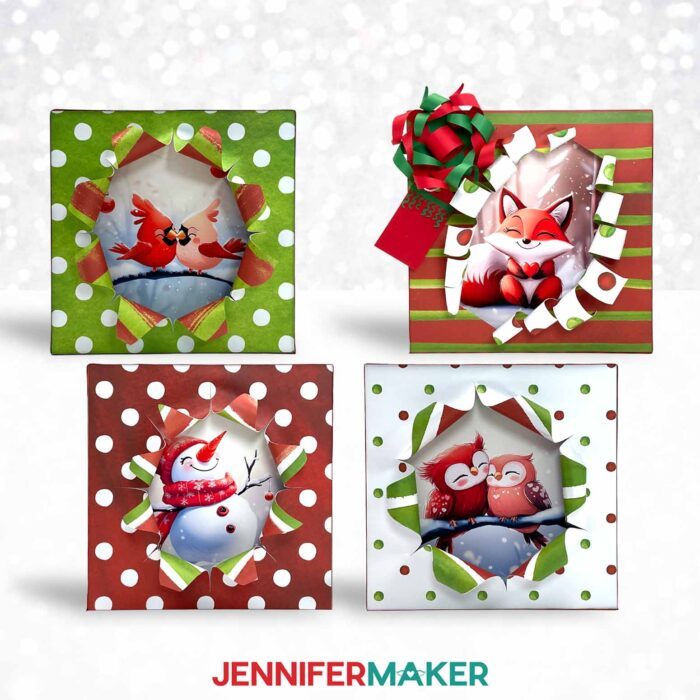
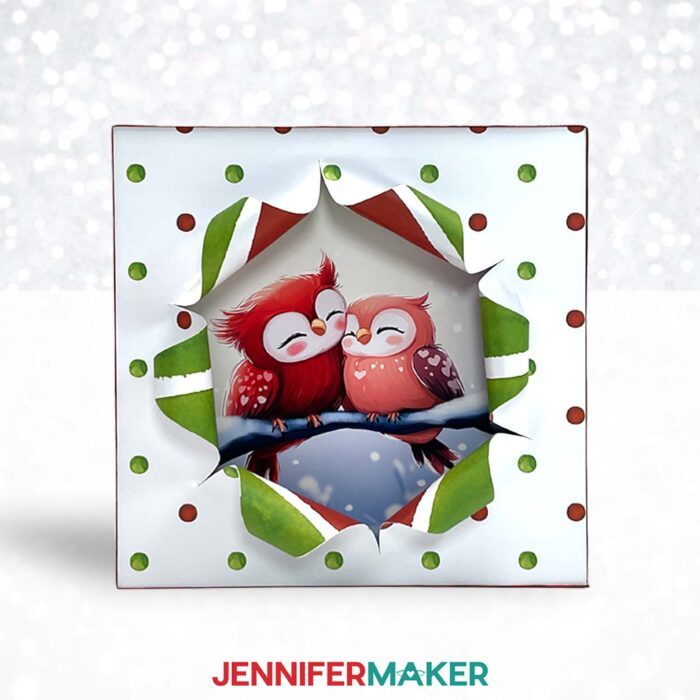
As for the busted effect, I really wanted to keep it clean and safe. After testing different approaches, I decided to layer pretty scrapbook paper using spray adhesive so I could have different patterns on each side. The result almost looks like the image is busting through fancy double-sided wrapping paper!
It’s really important to get the paper layers adhered well and very smoothly. That way, you can use my free patterns to cut the busted opening with a cutting machine and the layers won’t come apart, even when you curl them open.
I used my Cricut Maker 3 for safety, but you can print my PDFs as templates to cut the shapes by hand with a craft knife. Just remember to use a self-healing mat to protect your work surface and be very careful with the sharp tool.
Once the front is prepared and adhered to the frame (craft glue will do the trick!) I’ll show you how to finish the edges with pretty ribbon. I found this process much easier than working with a stretched canvas!
And if you want to make your busted canvas look even more like a gift, check out my Advance tutorial to learn how to create a 3D cardstock bow and gift tag embellishment! These are such a perfect Christmas project!
I’ll demonstrate how to cut the busted canvas pieces with my Cricut Maker 3, but you can also use an original Cricut Maker, a Cricut Explore series machine, or the Cricut Venture. I haven’t tried scaling the designs down to fit smaller frames, but they’re simple enough that it should work with a Cricut Joy Xtra or original Joy. Just make sure you can cut the front piece to the same dimensions as your frame.
Displaying a busted canvas of this kind is easy, because you’ll have a nice flat back to use. You can pick your preferred method, but I’ve linked to hanging hardware as well as simple Command Strip options in the material list below. You can also find links to the exact frame, papers, and tools I used!
Let me show you how to make a busted canvas! This post contains some affiliate links for your convenience (which means if you make a purchase after clicking a link I will earn a small commission but it won’t cost you a penny more, there is no additional cost)! Read my full disclosure policy.
Materials to Make A Busted Canvas
View my Amazon shopping list for the exact items I used!
- One (1) 10” x 10” Wood Box Frame
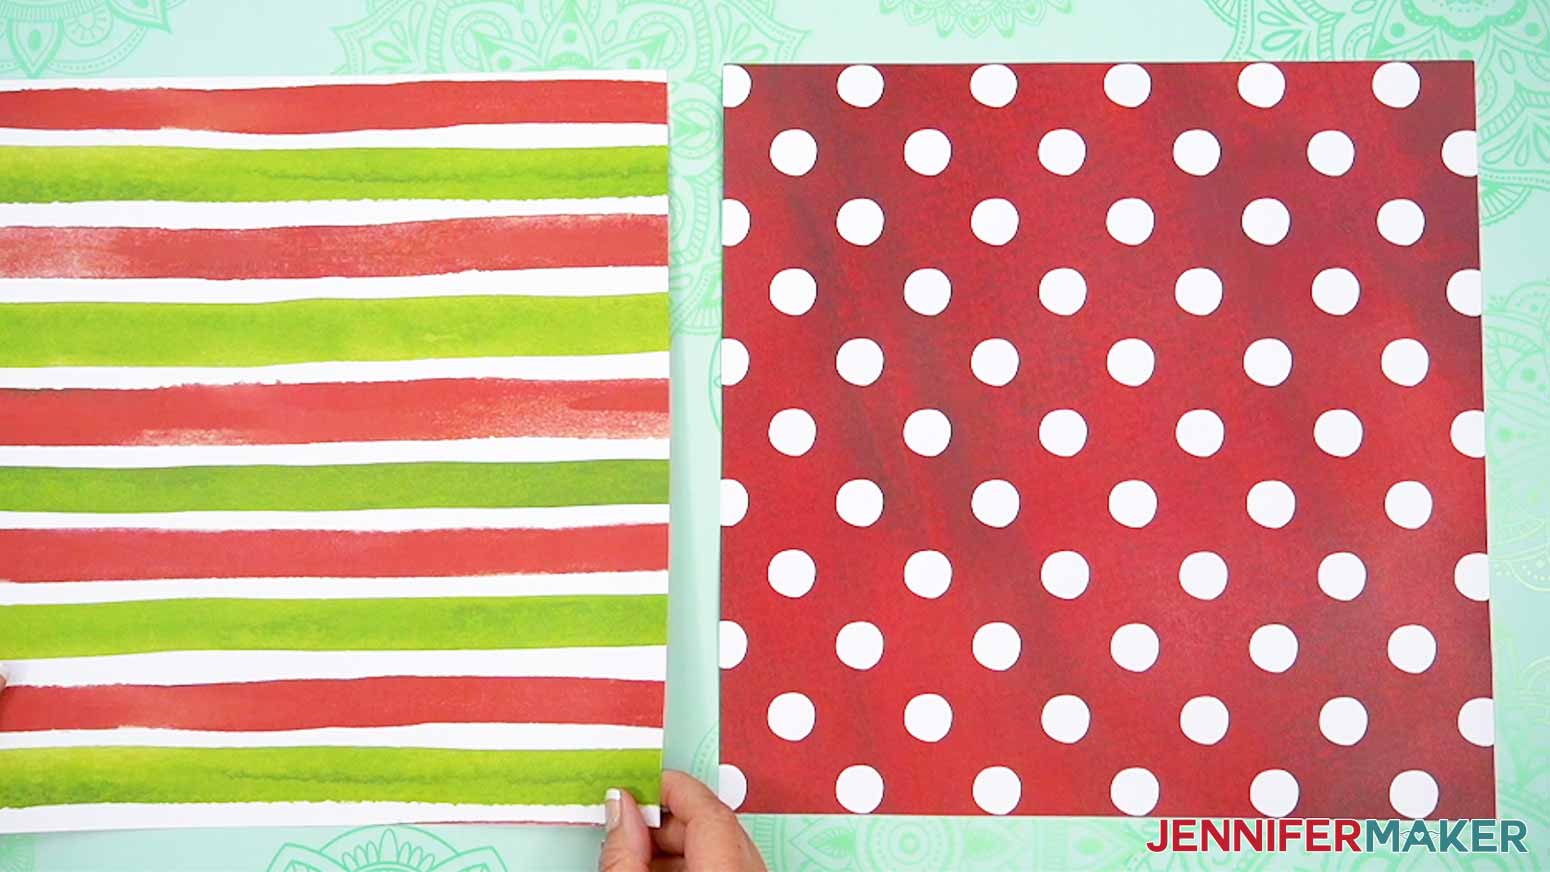
- Two (2) Sheets of 12” x 12” Double-Sided Patterned Scrapbook Paper (65 lb. equivalent)
- One (1) Sheet of 8.5″ x 11″ Heavyweight 61 lb. Matte Photo Paper
- About 45” of ⅞” Wide Ribbon (or slightly wider than the depth of your frame)
- A way to cut your materials – I’m using the Cricut Maker 3 but you could also use the Cricut Maker, an Explore Series machine, or a Venture
- Cricut Green StandardGrip Machine Mat 12” x 12”
- Bearly Art Glue
- A Color Inkjet Printer – I used my Epson EcoTank ET-4700 Inkjet Printer
- Paper Trimmer
- Scissors
- Ruler
- Lint Roller
- Spray Adhesive
- Fan (for ventilation when using spray adhesive – point away from spray)
- Goggles (for use when using spray adhesive)
- Disposable Gloves (for protecting skin when using spray adhesive)
- Newspaper or Butcher Paper (to protect work surface when spraying adhesive)
- OPTIONAL: Hanging Hardware -AND-
- OPTIONAL: Hammer -OR-
- OPTIONAL: Command Picture Hanging Strips, Medium
How to Make a Busted Canvas!

Busted Canvas
Learn how to make a busted canvas decoration!
Materials
- One (1) 10” x 10” Wood Box Frame
- Two (2) Sheets of 12” x 12” Double-Sided Patterned Scrapbook Paper (65 lb. equivalent)
- One (1) Sheet of 8.5" x 11" Heavyweight 61 lb. Matte Photo Paper
- About 45” of ⅞” Wide Ribbon (or slightly wider than the depth of your frame)
- Design #653 (My free SVG/PDF/DXF/PNG design files are available in my free resource library - get the password by filling out the form at the bottom of this page)
Tools
- A way to cut your cardstock - I’m using the Cricut Maker 3, but you can also use the Cricut Maker, a Cricut Explore Series machine, or the Cricut Venture
- A Color Inkjet Printer (I used my Epson EcoTank ET-4700 Inkjet Printer)
- Cricut Green StandardGrip Machine Mat 12" x 12"
- Craft Glue (I used Bearly Art Precision Glue)
- Spray Adhesive
- Brayer
- Paper Trimmer
- Scissors
- Ruler
- Lint Roller
- Fan (for ventilation when using spray adhesive - point away from spray)
- Goggles (for use when using spray adhesive)
- Disposable Gloves (for protecting skin when using spray adhesive)
- Newspaper or Butcher Paper (to protect work surface when spraying adhesive)
- OPTIONAL: Hanging Hardware -AND-
- OPTIONAL: Hammer -OR-
- OPTIONAL: Command Picture Hanging Strips, Medium
Instructions
STEP 1: GET MY BUSTED CANVAS DESIGNS
First, download my Busted Canvas files from my free library – look for Design #653. Alternatively, you can use the Save This Project form near the top of this post and the design link will be emailed to you.
In the SVG folder, you’ll find three options for the busting shape.
There is also a DXF folder with cut files, and a PDF folder with versions you can print and cut by hand.
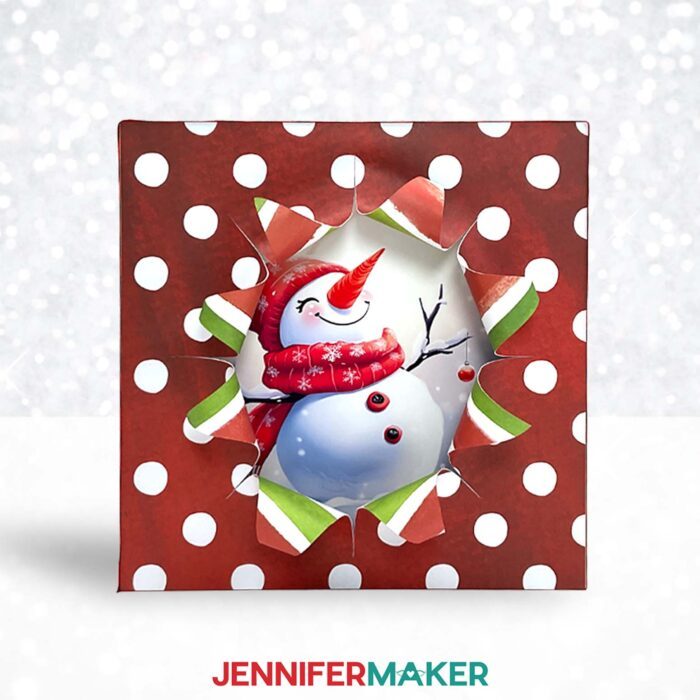
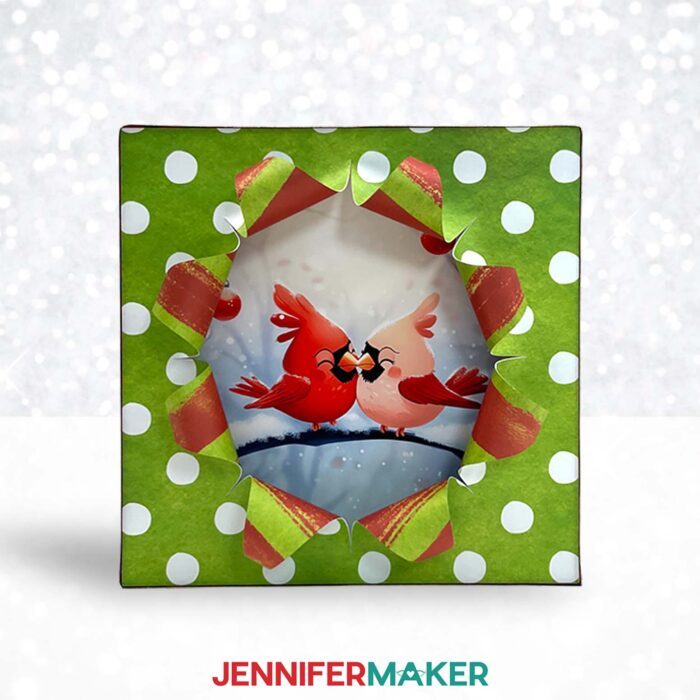
In the PNG folder, there are options you can use for the hidden image featuring cardinals, a fox, owls, or a snowman.
I used an AI art generator to create the designs, then made them even more fantastic with image editing software. If you want to learn more about the process, check out my workshop on creating and using AI-generated art in your crafts.
TIP: If you’re not sure how to upload, go to jennifermaker.com/svgs to learn how to unzip and upload SVG files.
STEP 2: PREPARE YOUR MATERIALS
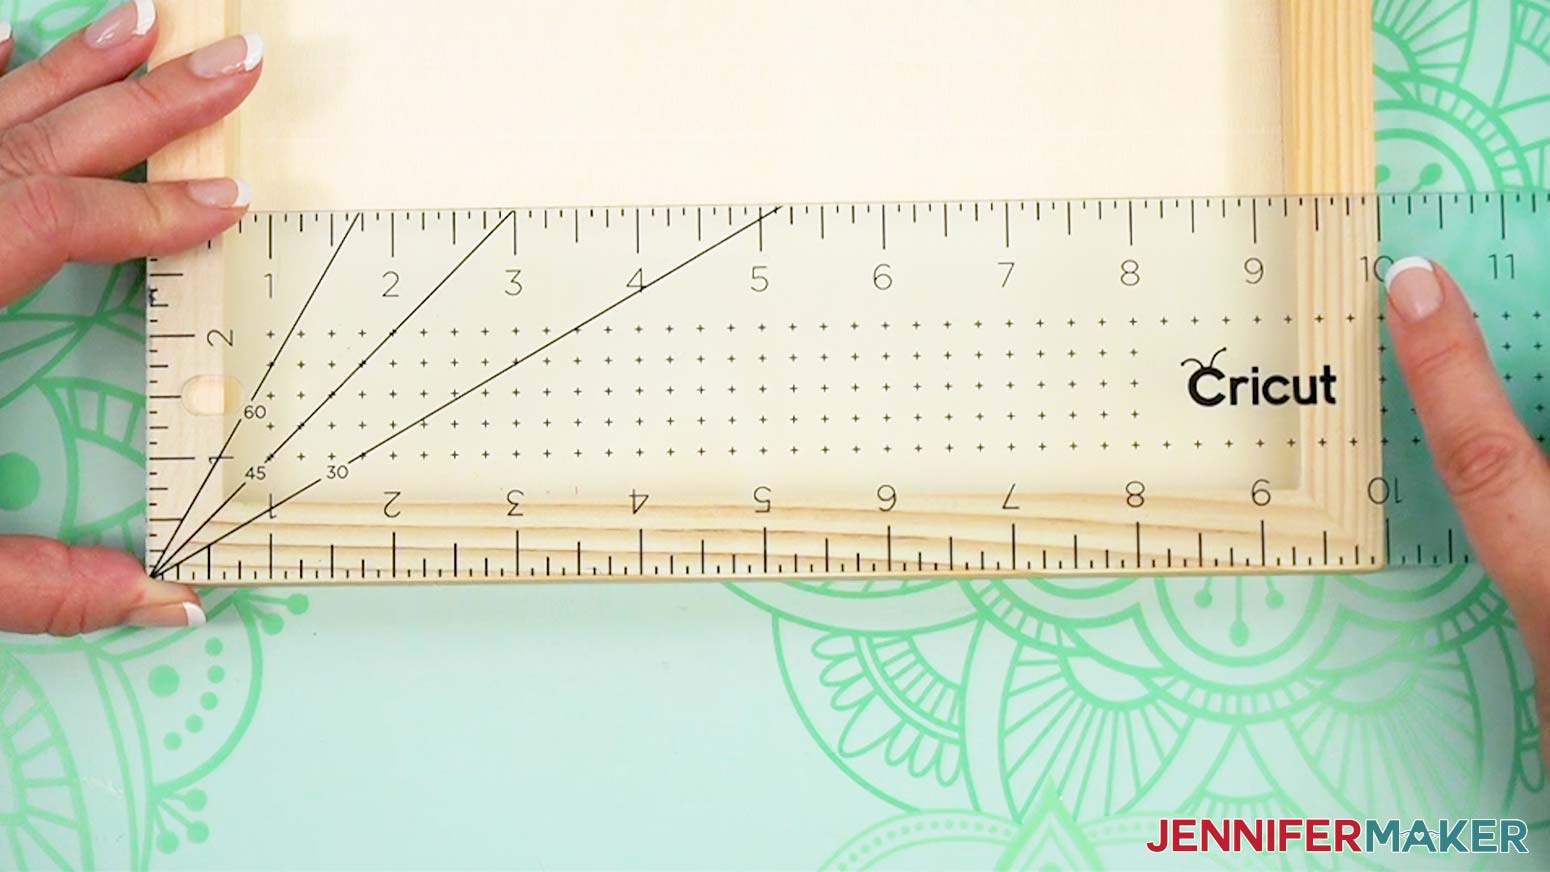
- Use a ruler or tape measure to check the height and width of the entire frame.
NOTE: This is the size you’ll make the cover piece. Mine is 10” x 10” square.
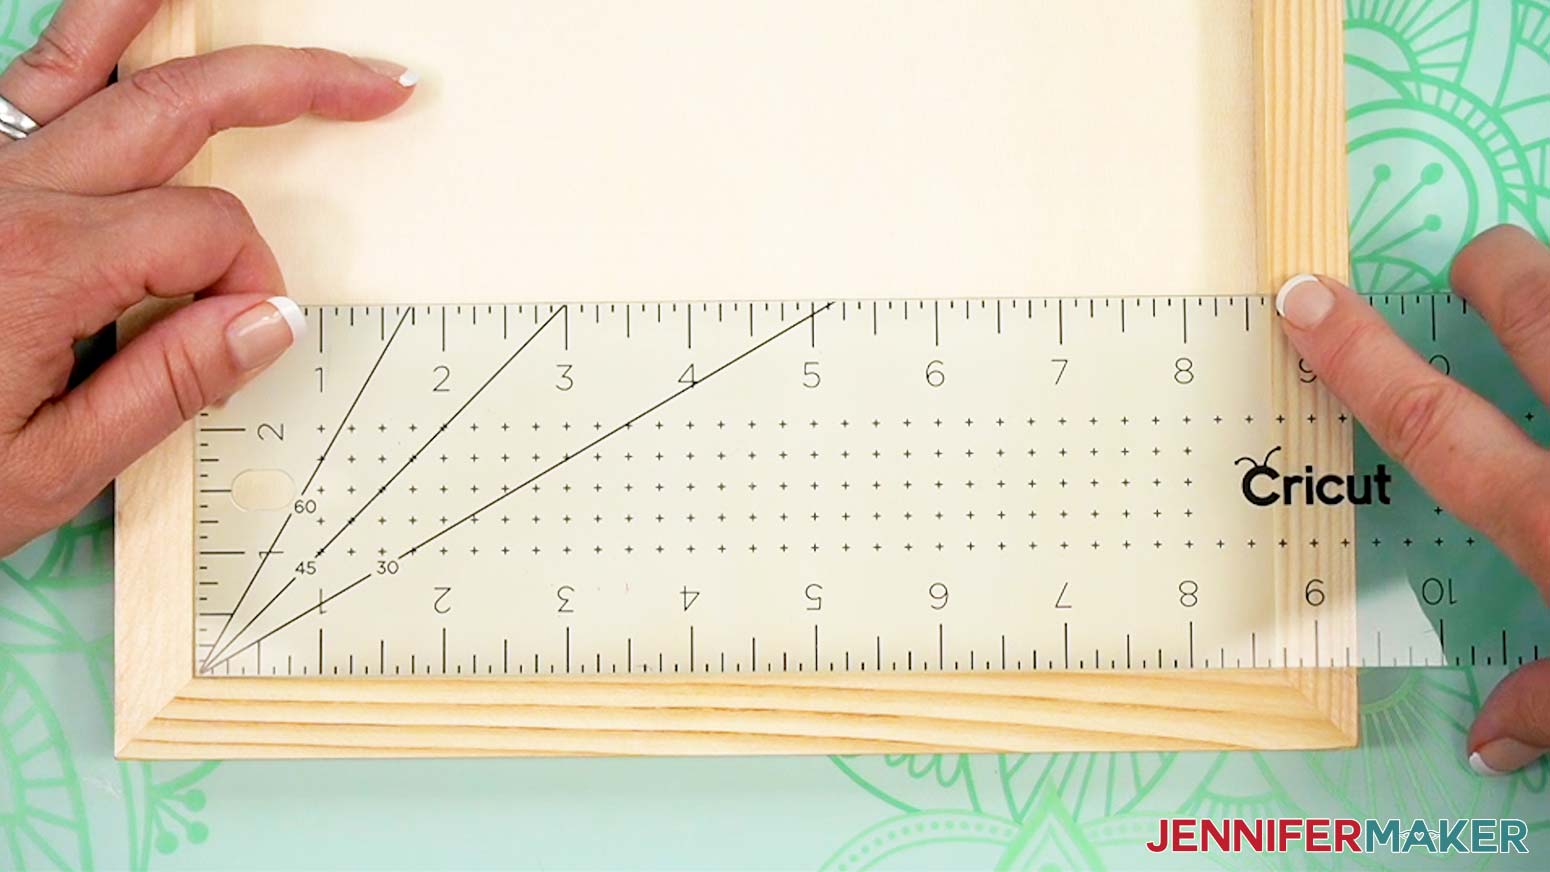
- With the frame’s open side face up, measure the flat inner area.
NOTE: This is the maximum size you’ll print the image. Mine is 8.625” square. - Outdoors, or in a well-ventilated and protected area (or a big cardboard box to catch overspray), place your chosen papers oriented the same way with the patterns you want to show face-down on scrap paper.
- Check the safety information and specific instructions for your spray adhesive, including putting on safety equipment such as goggles and disposable gloves.
- Apply the adhesive as described.
NOTE: The adhesive in my materials list should be applied in a light, even coat just on the back of one of the papers. - Make sure the outer designs are oriented the same way, then align the papers back to back and press them together.
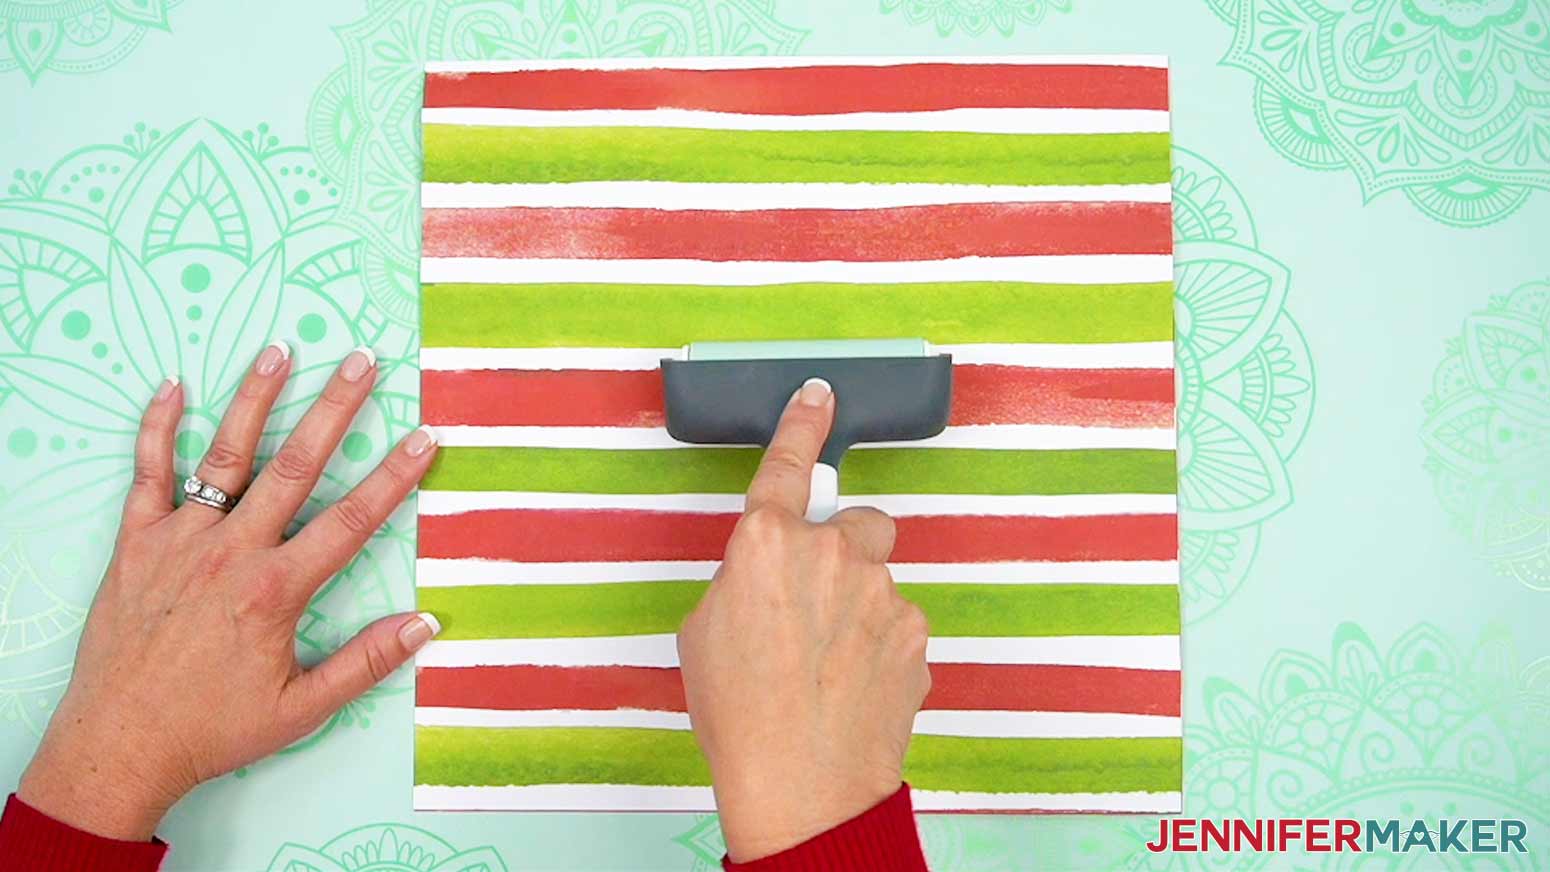
- Use a brayer to adhere the pieces well.
- Let the papers sit until they’re completely dry for the best cutting and shaping results.
NOTE: Mine dried in about one hour.
STEP 3: PREPARE AND CUT YOUR BUSTED CANVAS DESIGN
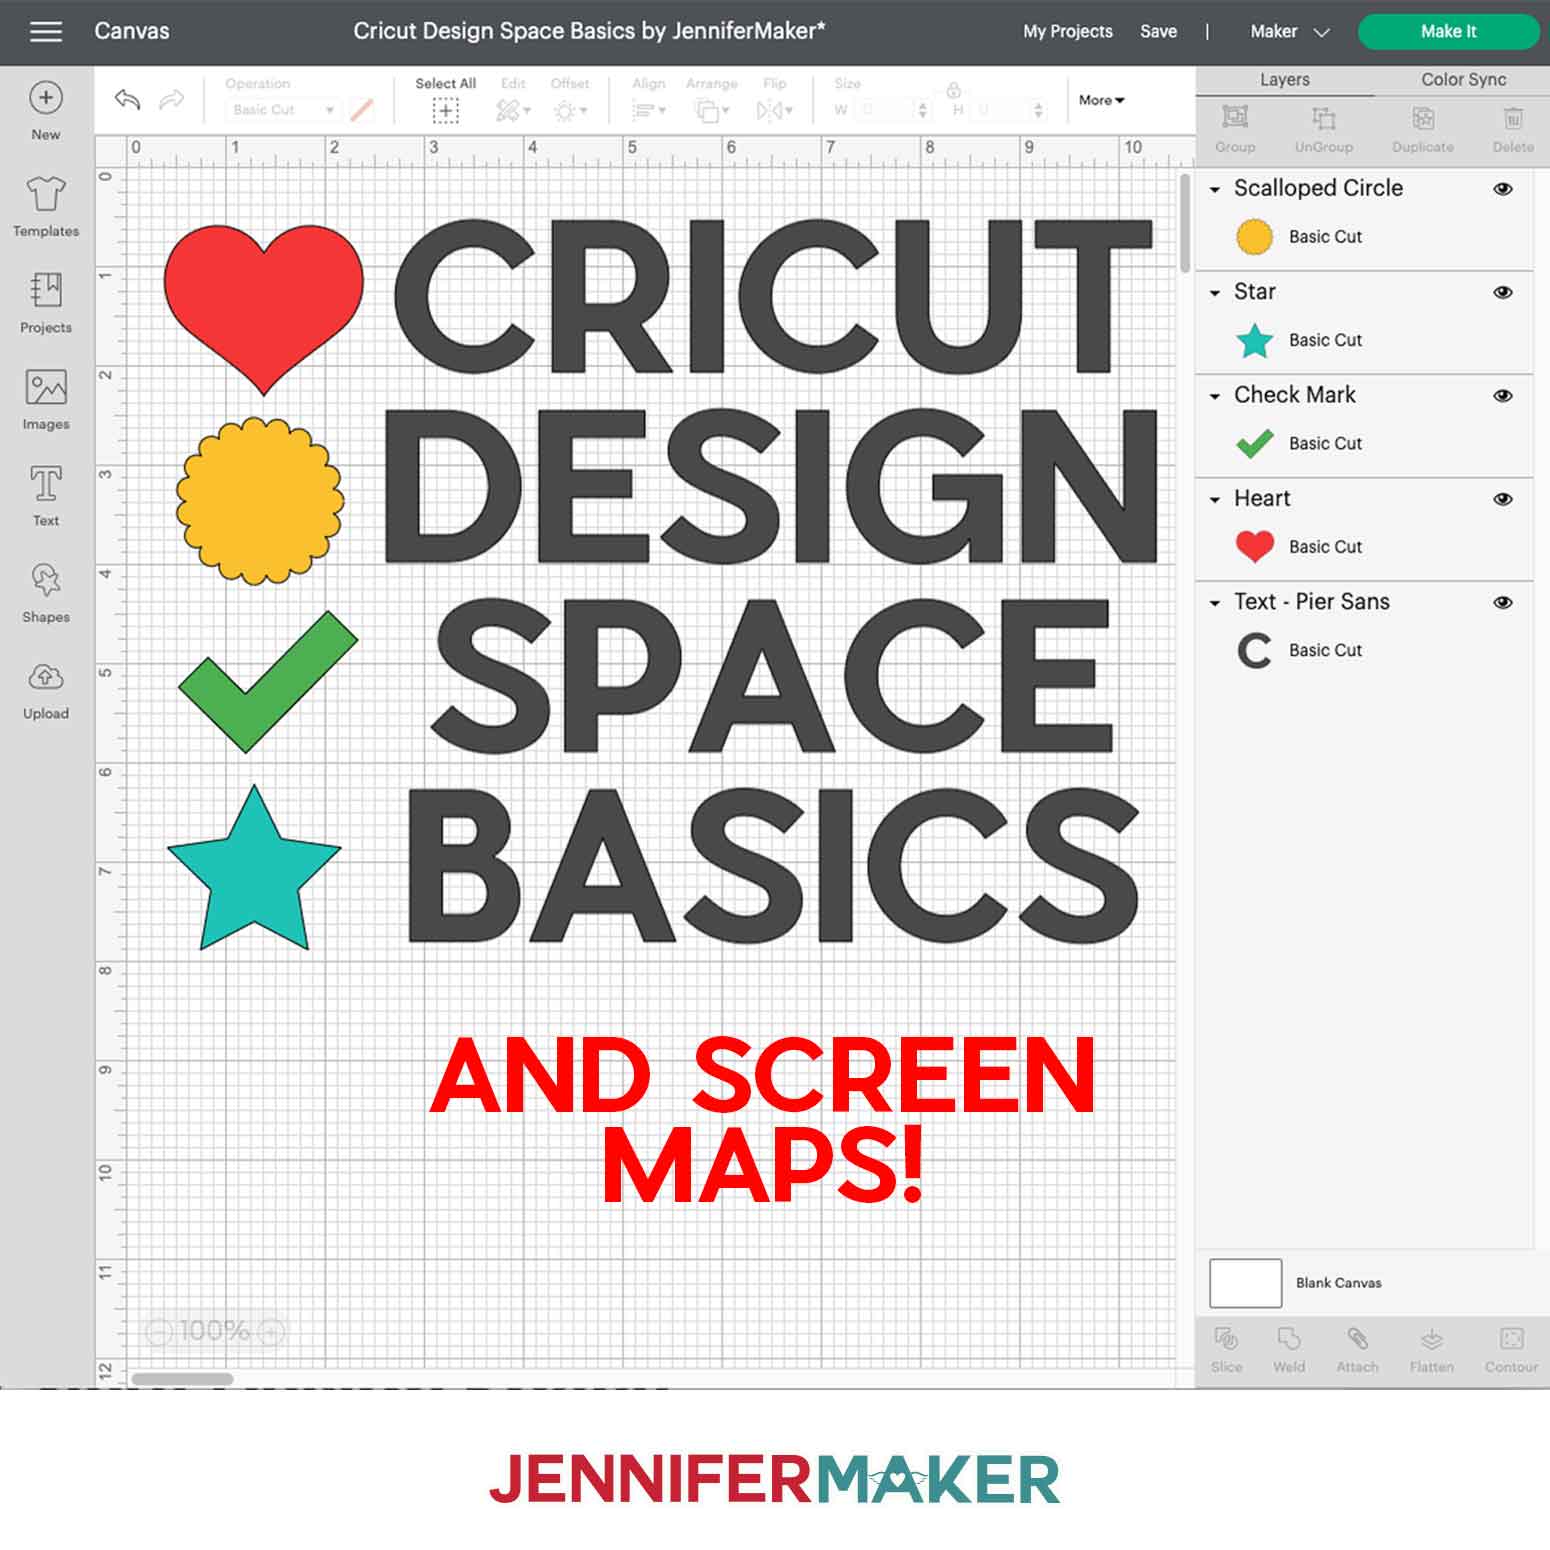
CRICUT DESIGN SPACE
- In Cricut Design Space, open a blank Canvas.
NOTE: If you’re new to using Cricut Design Space, go to cricutkickoff.com for my introductory tutorial on Design Space basics. - Click “Upload” and then “Upload Image.”
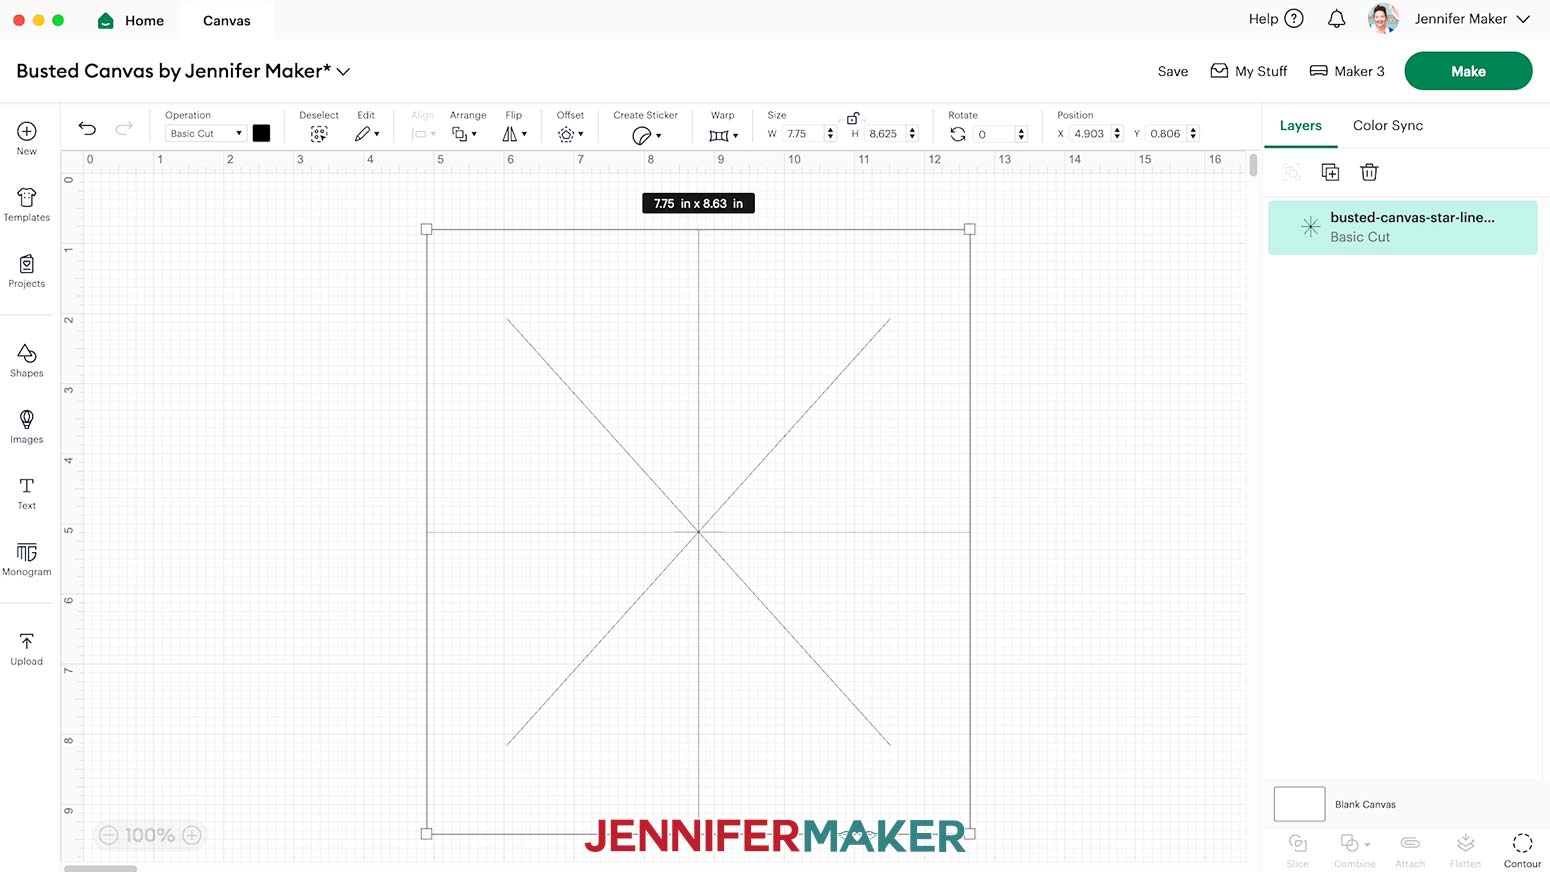
- Click “Browse” and select the SVG file you want to use.
NOTE: I’ll use the “star-lines” file. - Click “Open,” and then “Continue.”
- Click “Upload” to add the design to your Canvas.
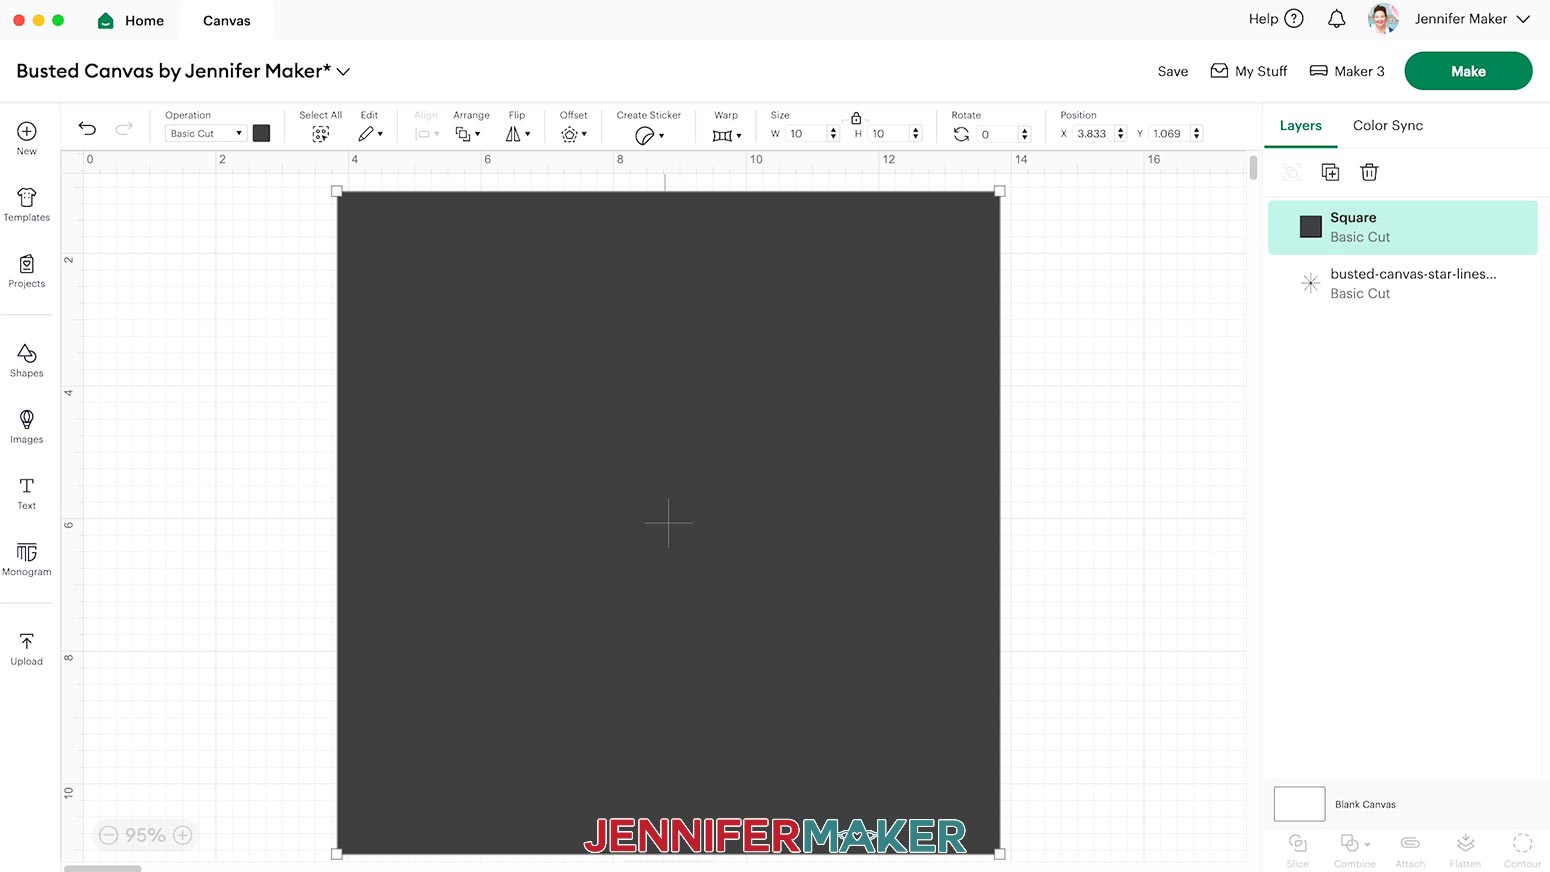
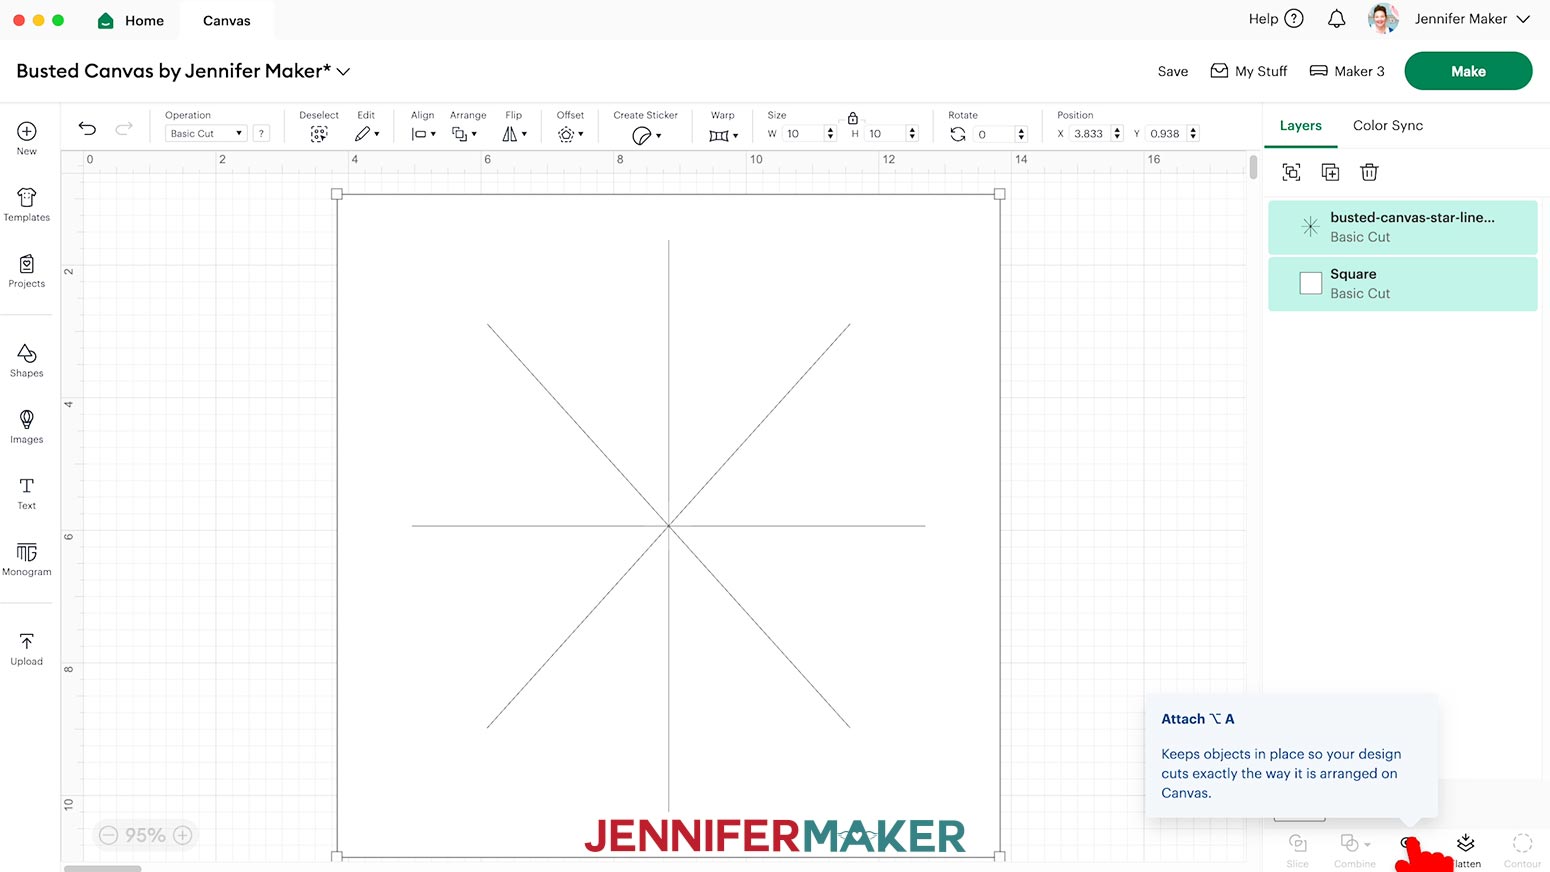
- Click the “Shapes” icon and select the free “Square” to add it to the Canvas.
- With the Lock icon closed, resize the Square to match the frame’s full measurement.
NOTE: Mine is 10” x 10” square. - To make the design easier to see, you can use the Color Box to change the result to White.
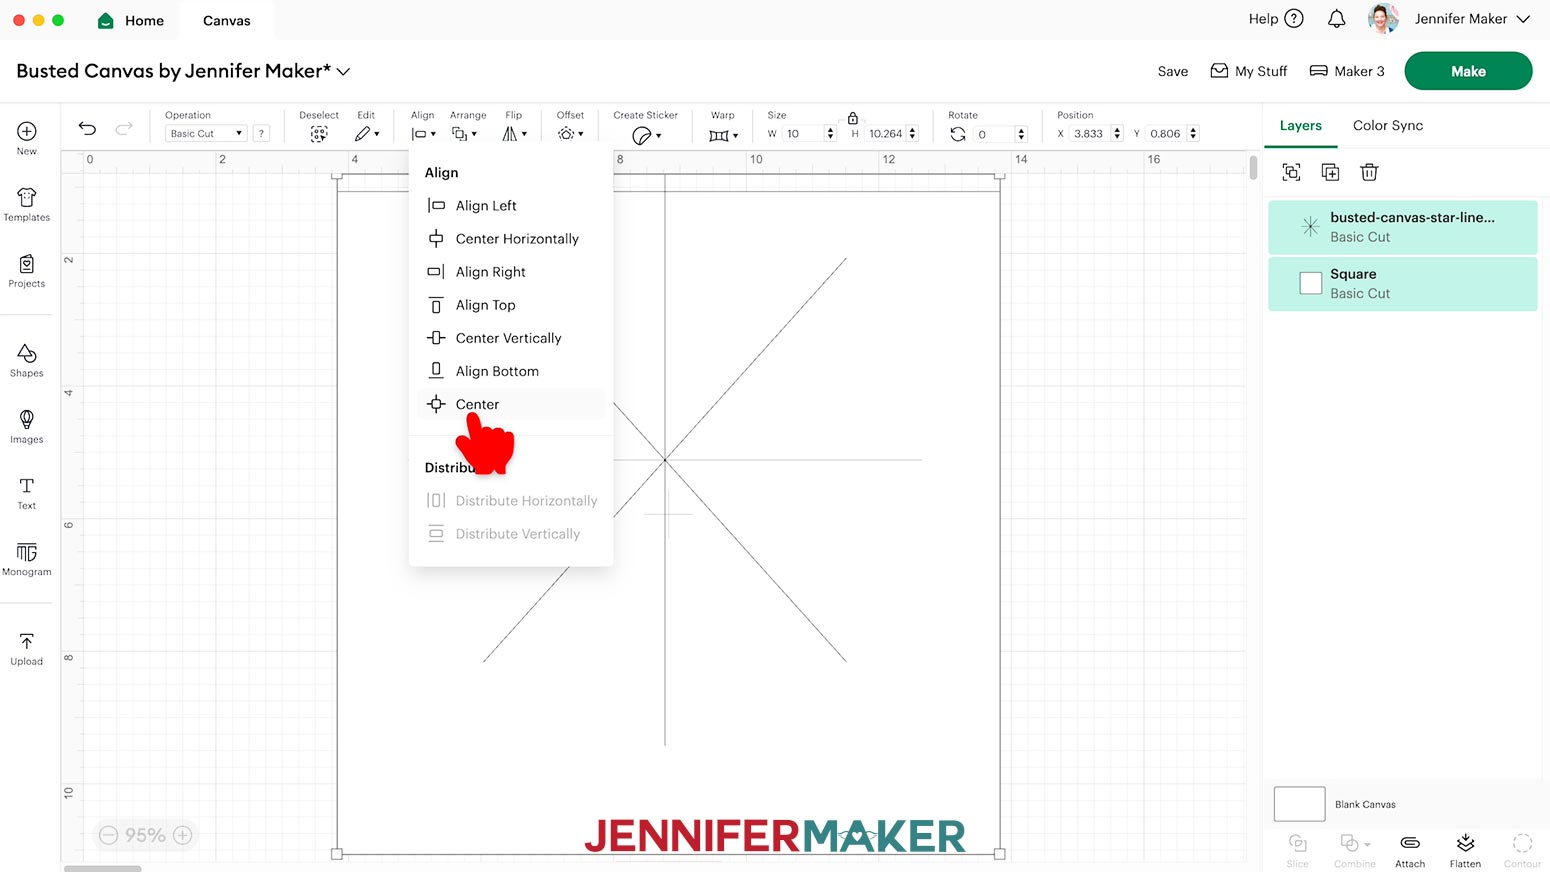
- Select both layers, then click “Align” and choose “Center.”
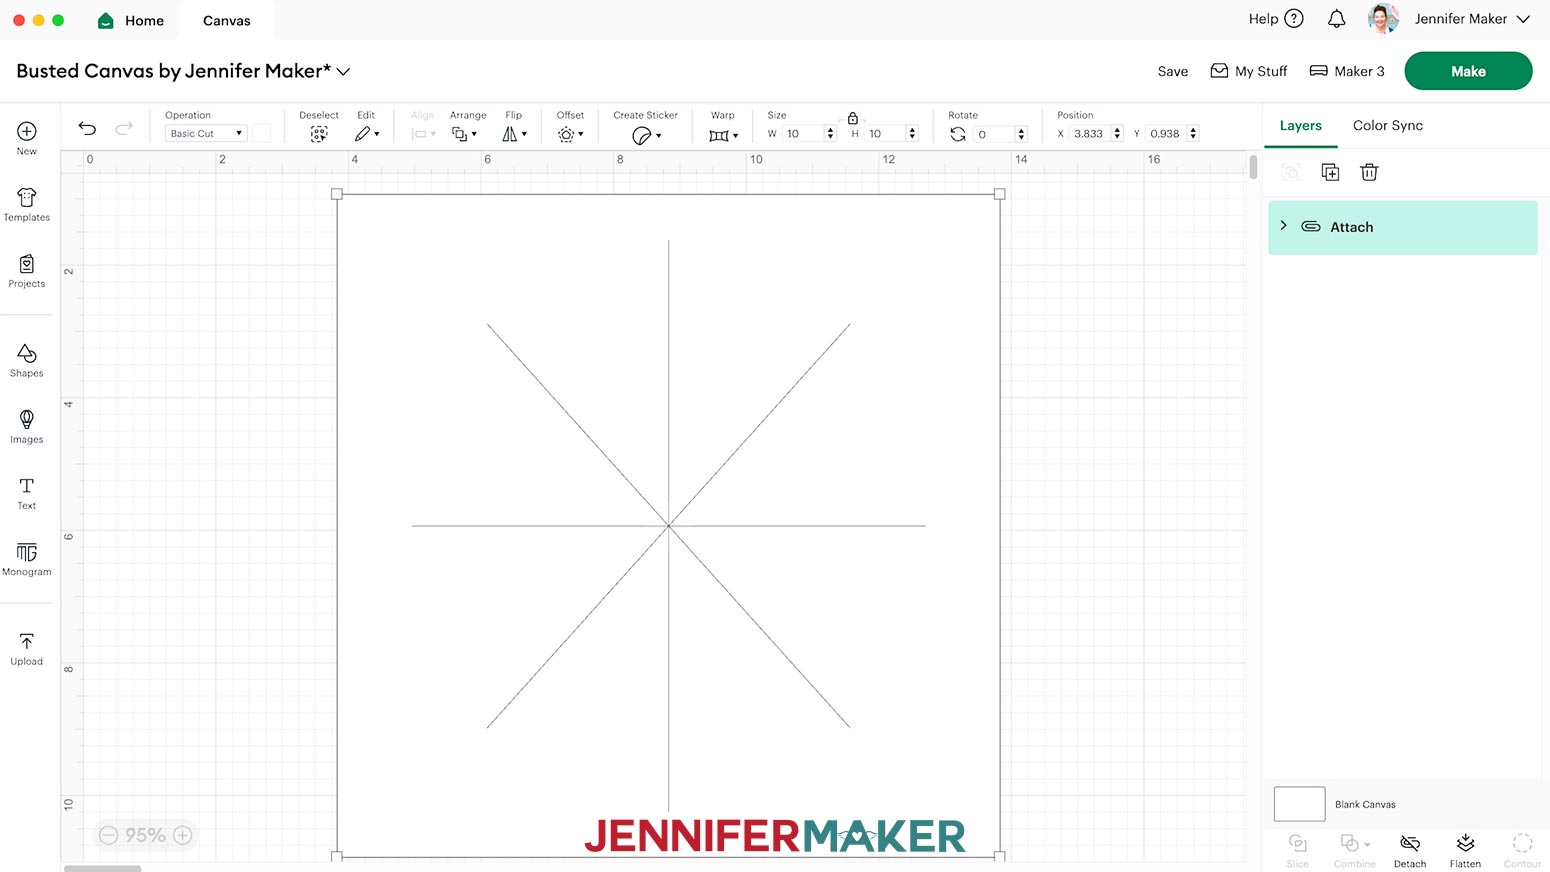
- With both layers still selected, click “Attach.”
- Your project is ready to cut!
CUTTING
- Make sure the correct machine is selected in the top right.
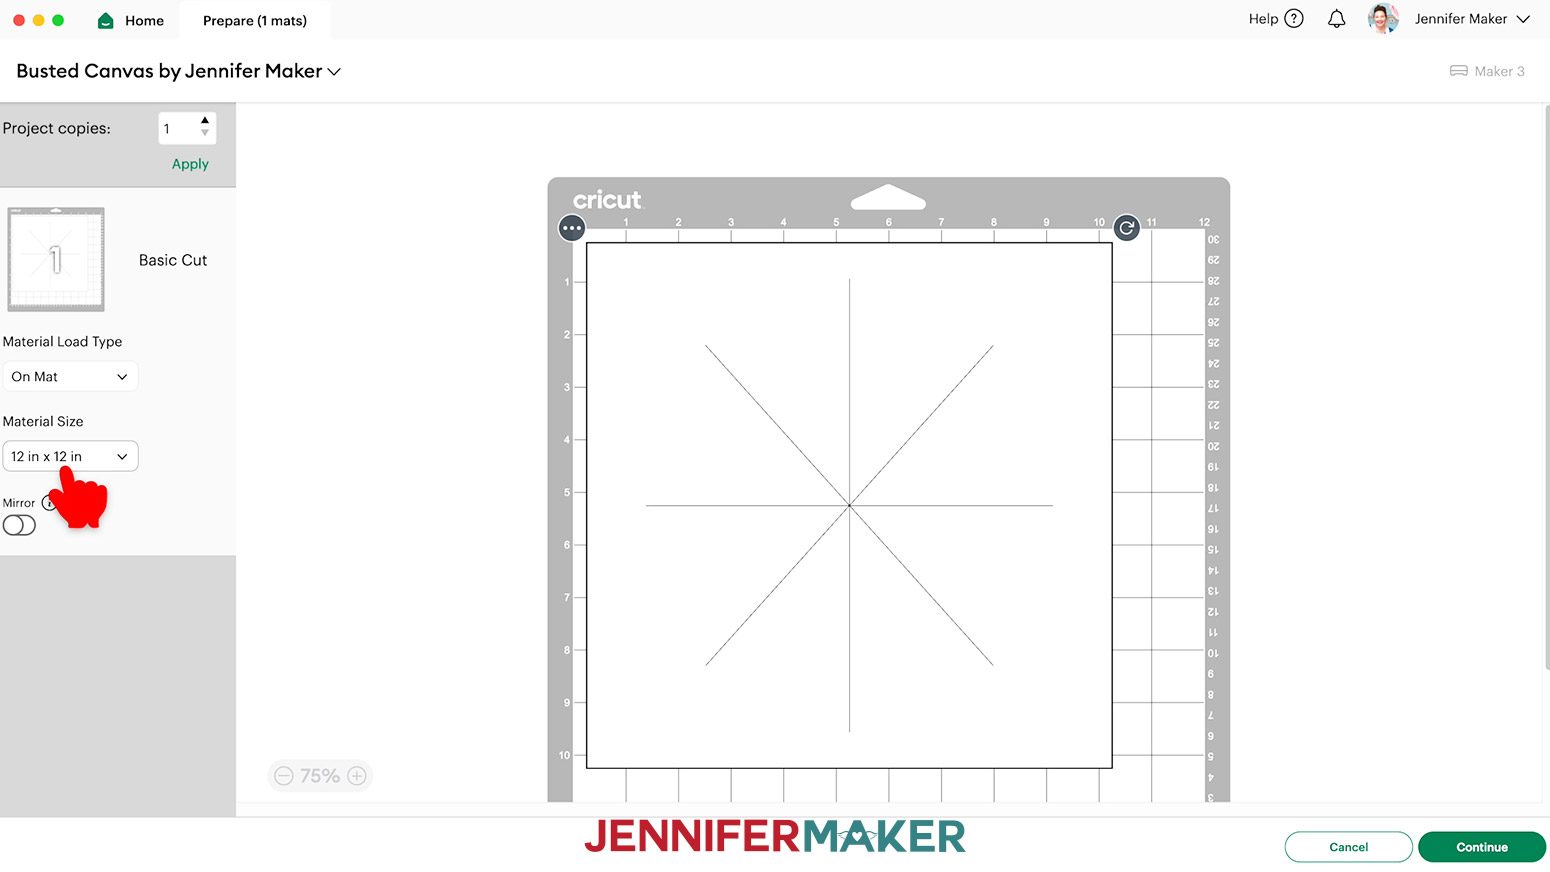
- Click “Make.”
- On the Prepare screen, make sure the correct Material Size is selected for your material.
- Click “Continue.”
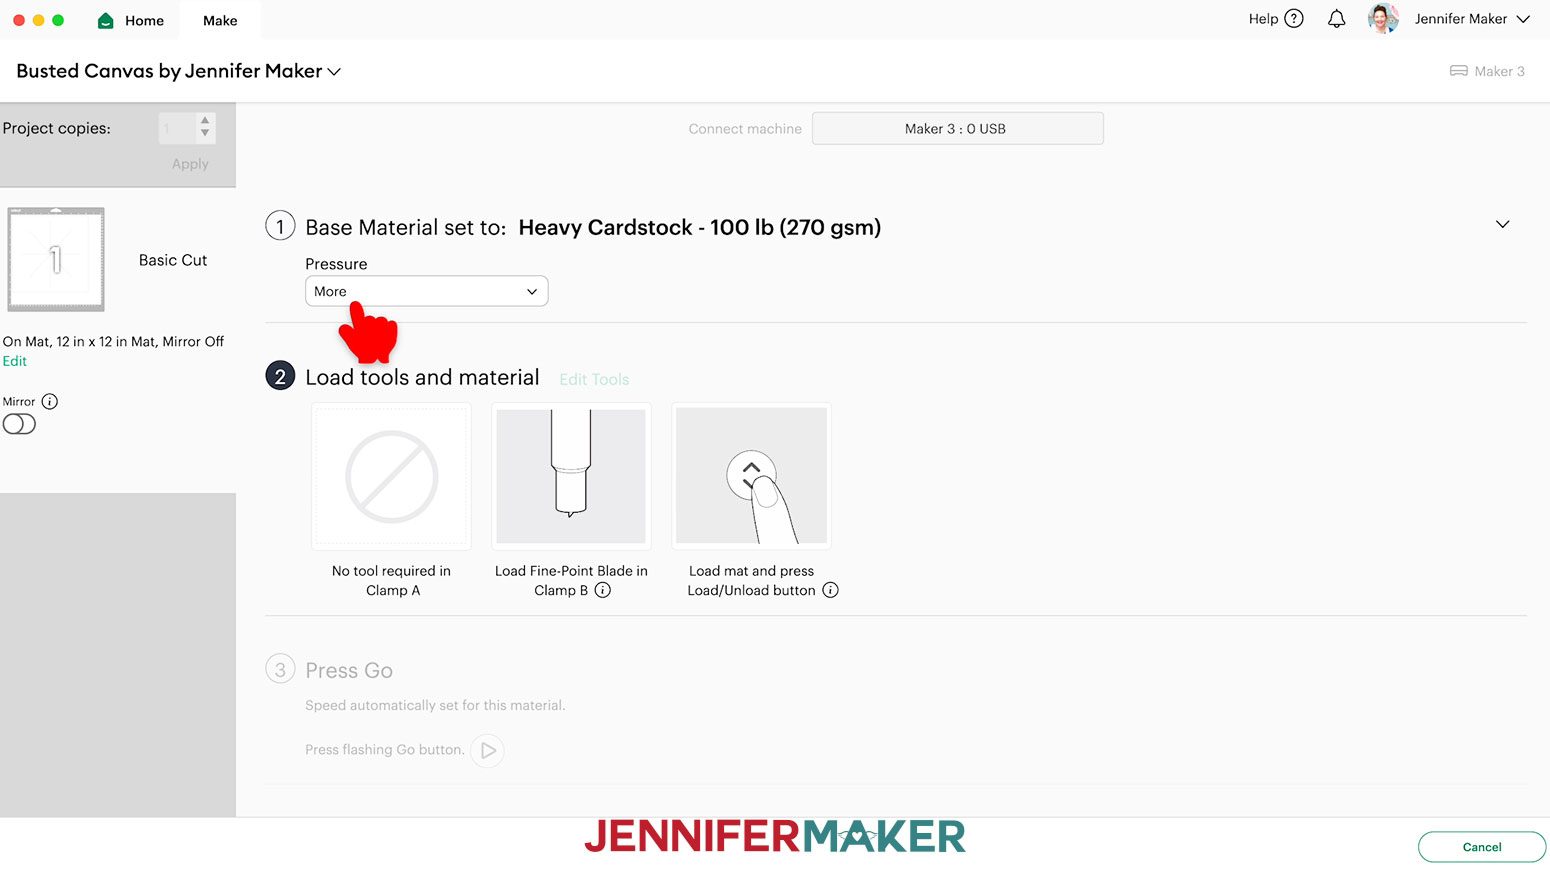
- On the Make screen, set the Base Material to the “Heavy Cardstock - 100 lb (270 gsm)” setting with “More” Pressure for the double-layered paper.
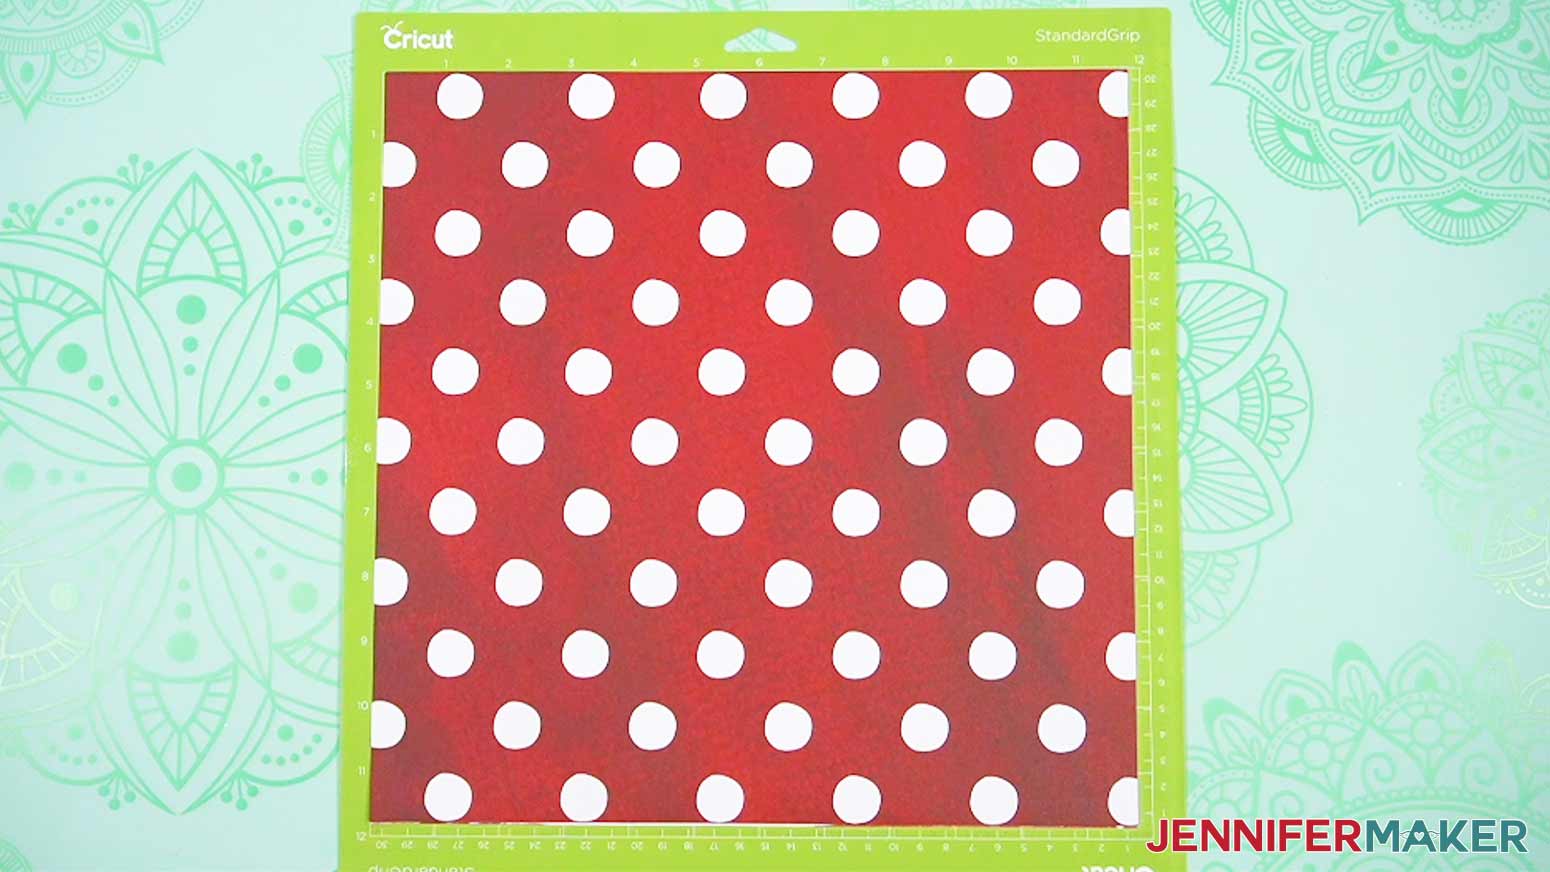
- Place your layered papers on a green StandardGrip machine mat with the pattern you want on the outside face-up and oriented correctly.
- Use a brayer to make sure it’s fully adhered.
- Check that your Premium Fine-Point Blade is clean and in the clamp.
- Press the flashing “Load/Unload” button to load the prepared mat into your Cricut.
- Press the flashing “Go” button to begin cutting.
- When it has finished cutting, don’t unload the mat right away. Instead, gently lift a corner to make sure the material is cut all the way. If not, press the “Go” button again to make the same cuts in the same spots.
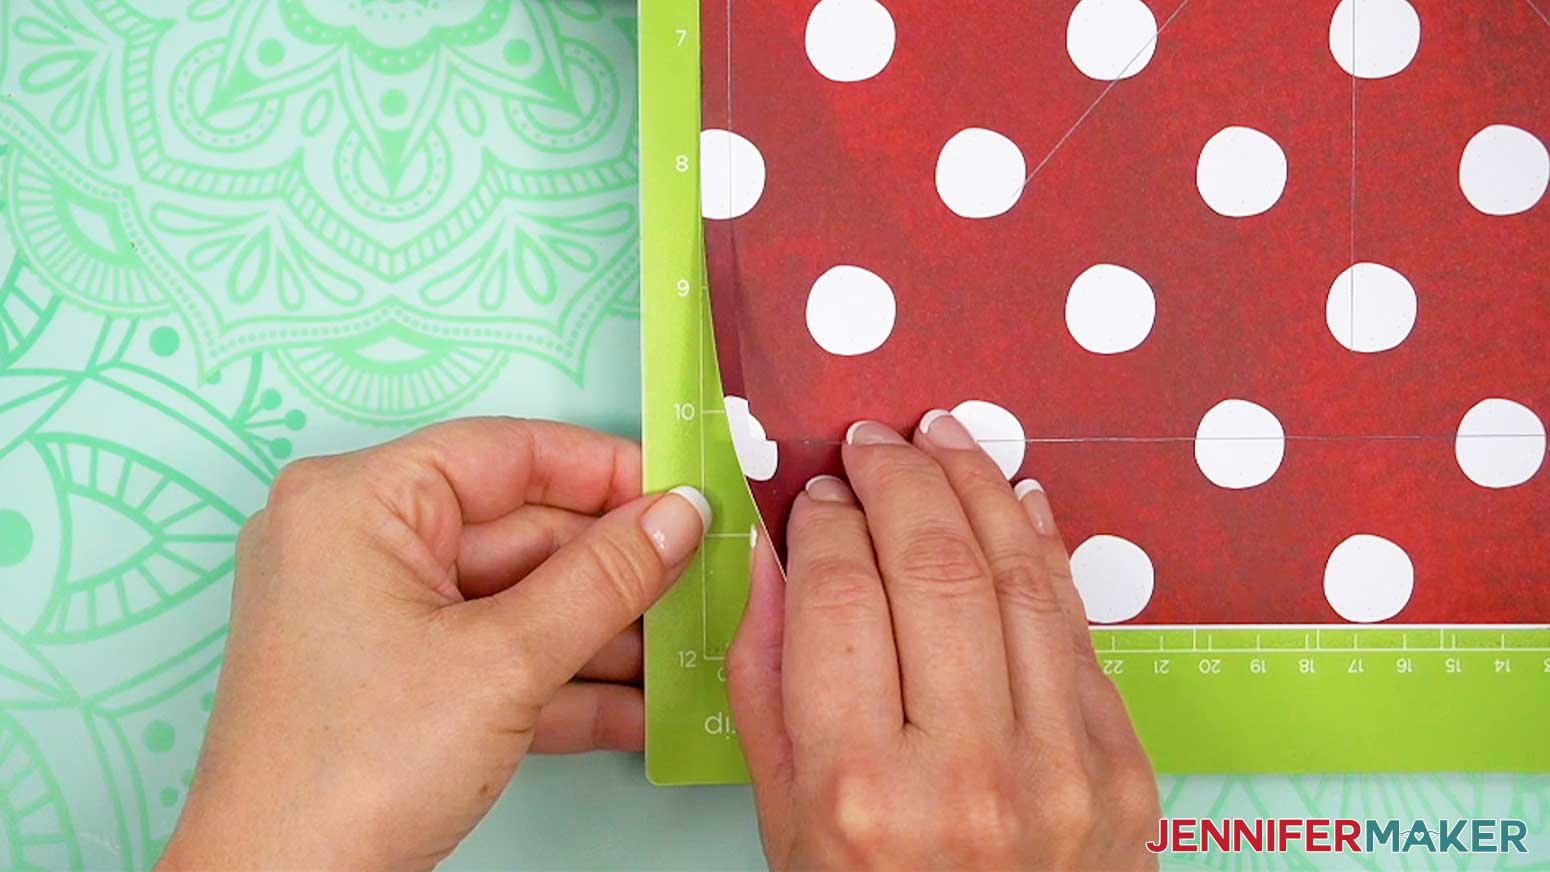
- When the cuts are complete, unload the mat, flip it over onto your work surface, and roll it back to release the material.
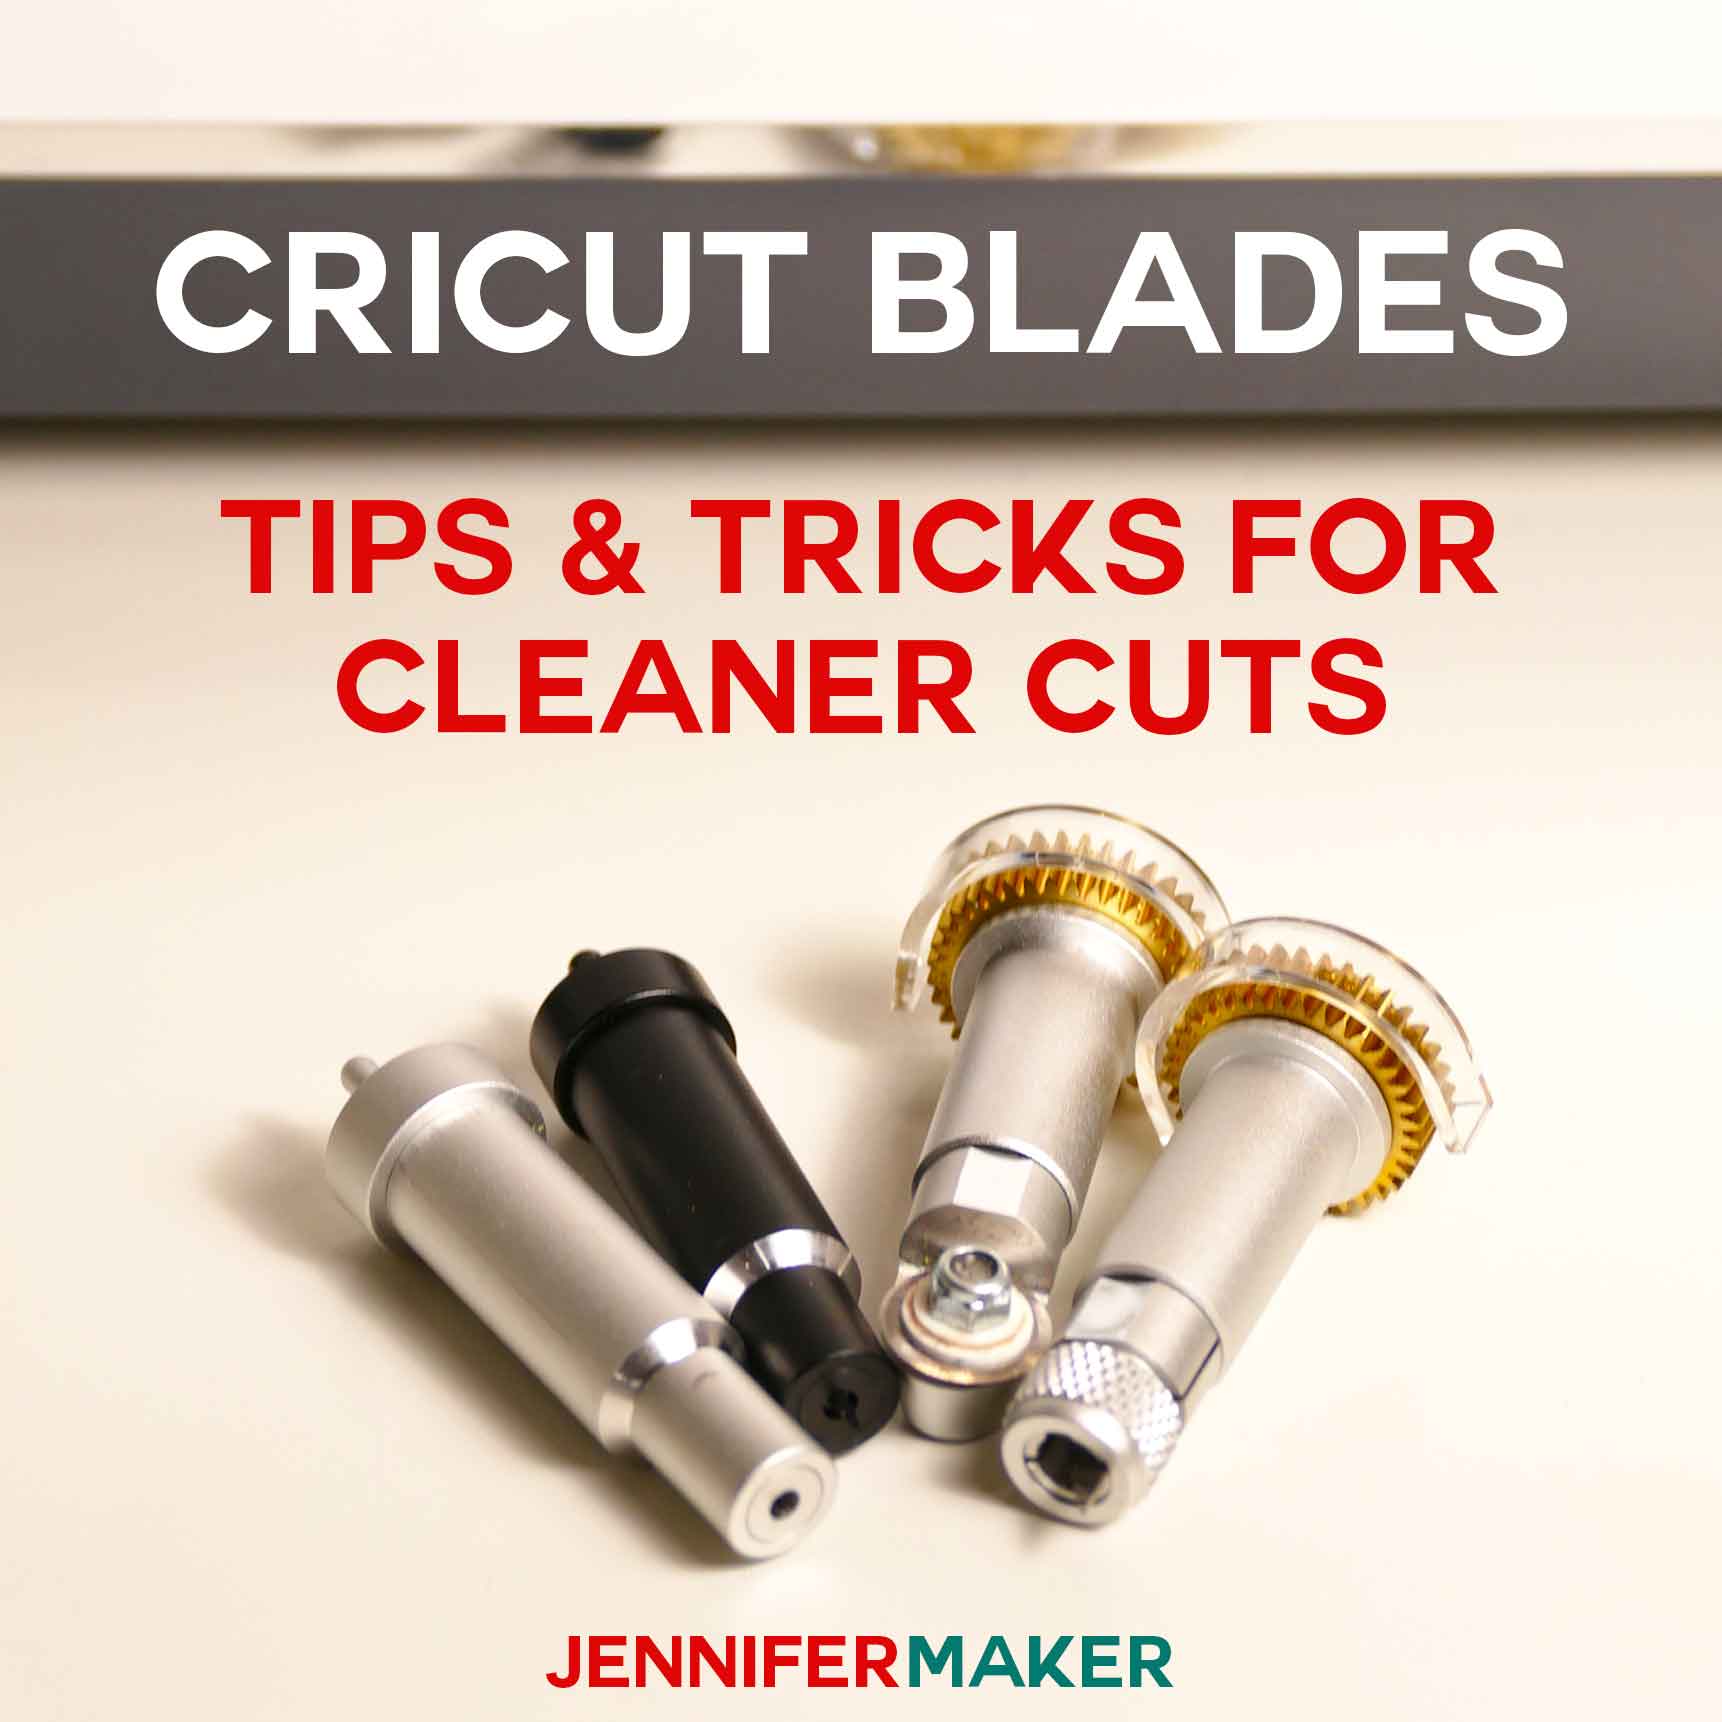
TIP: If you have any issues with your cuts, check out my Tips for Cleaner Cuts tutorial.
STEP 4: PRINT YOUR HIDDEN IMAGE
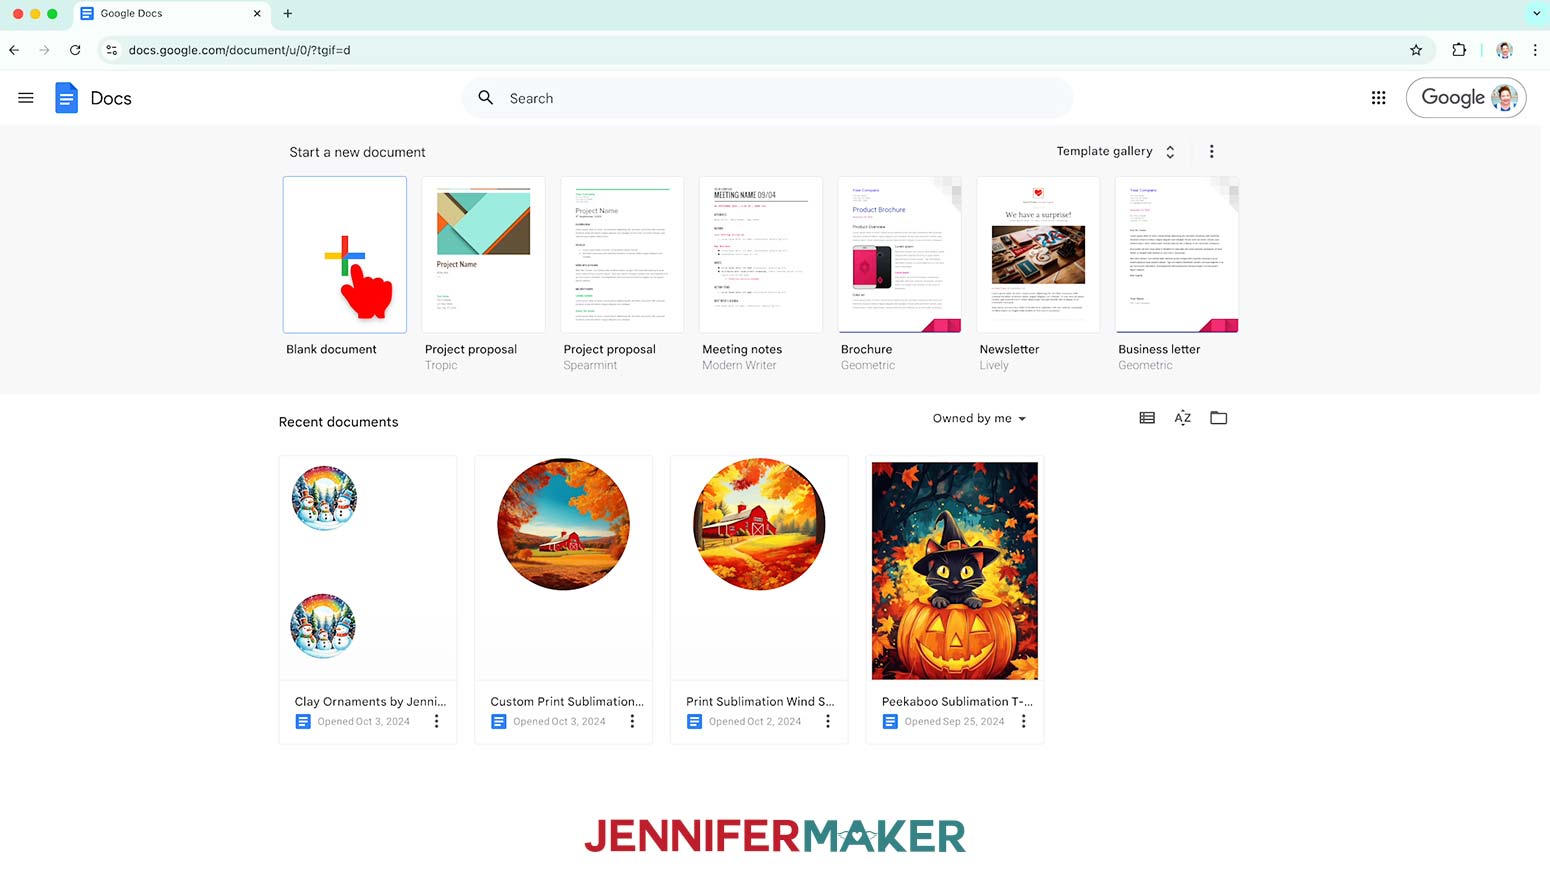
- Open Google Docs in the Google Chrome web browser on your computer.
NOTE: You will need a free Google account to use the free Google Docs software.
TIP: You can also download and open the Google Docs app, but you'll have limited access to features, so I do not recommend it on a mobile device. - Click “Blank document” at the top left to open a new document.
- Click the area that says “Untitled document” at the top and type a name for the file.
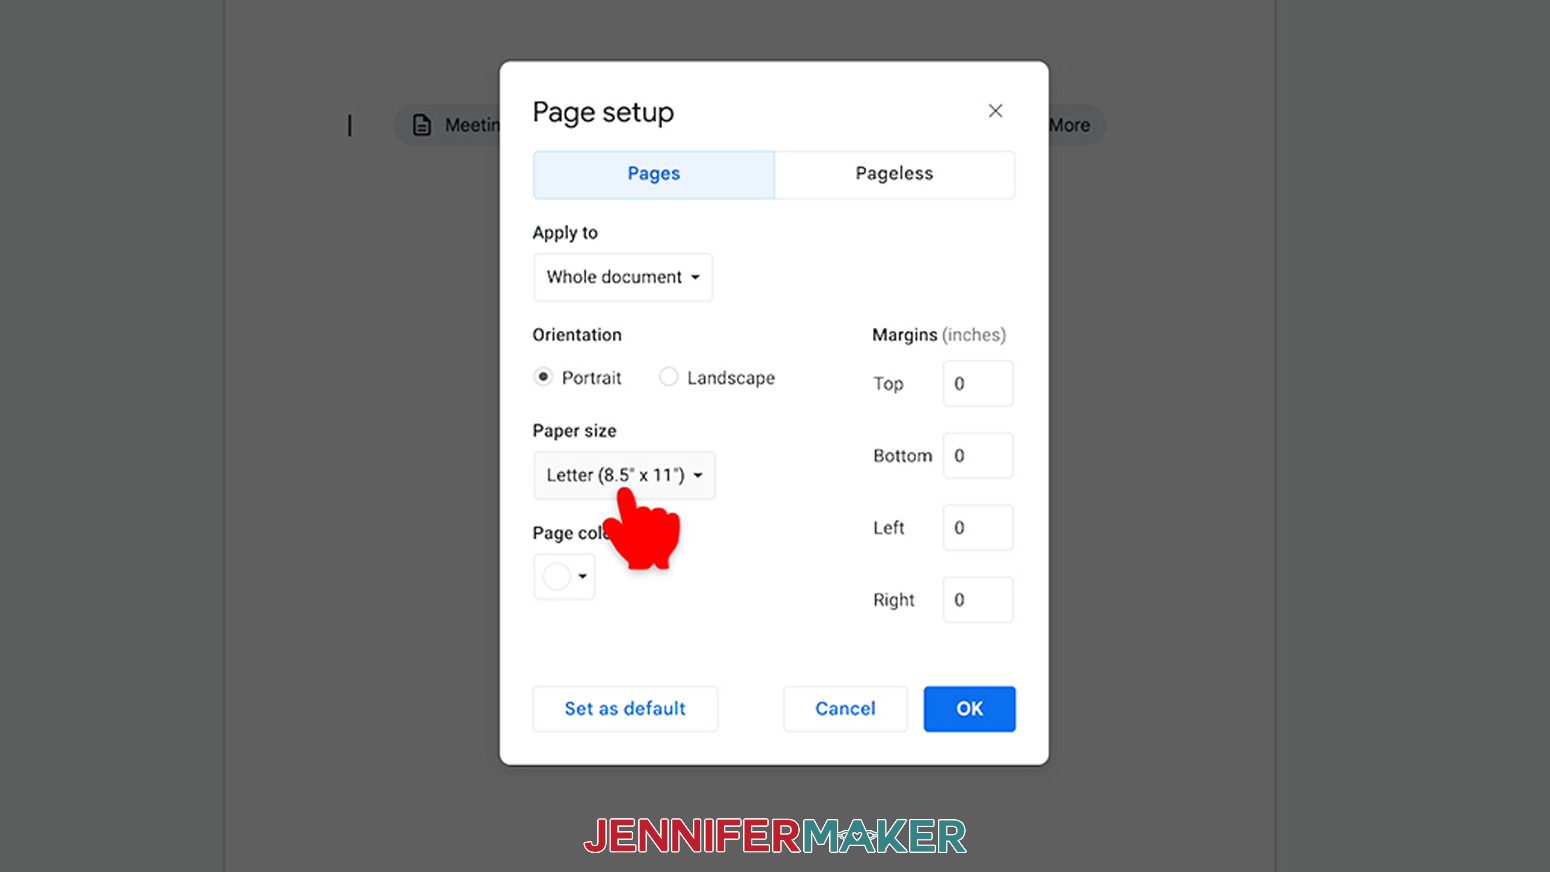
- Go to the File menu and select “Page setup.”
- Check the box next to “Portrait.”
- Change your margins to “0” to use more of the page.
- Change the "Paper size" to match your photo paper size. I’m using 8.5” x 11” or letter size paper.
- Click “OK” to apply the settings.
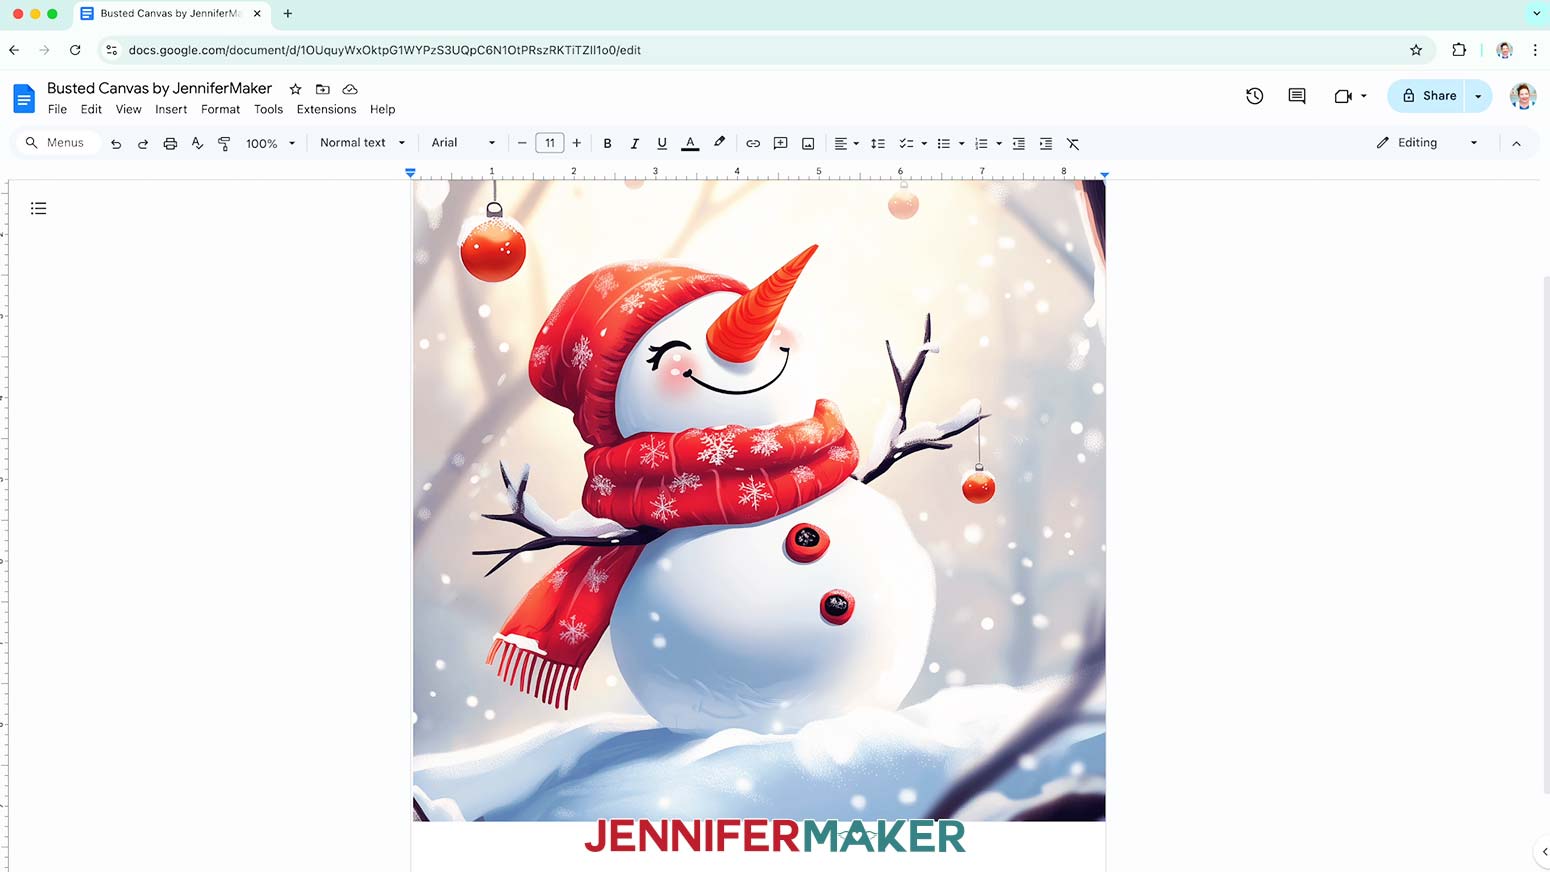
- Go to the Insert menu, select “Image,” and select “Upload from Computer.”
- Select the hidden image PNG you want to use.
NOTE: I’ll demonstrate with the "snowman" design.
TIP: You’ll most likely find it in your Downloads folder. - Click “Open.”
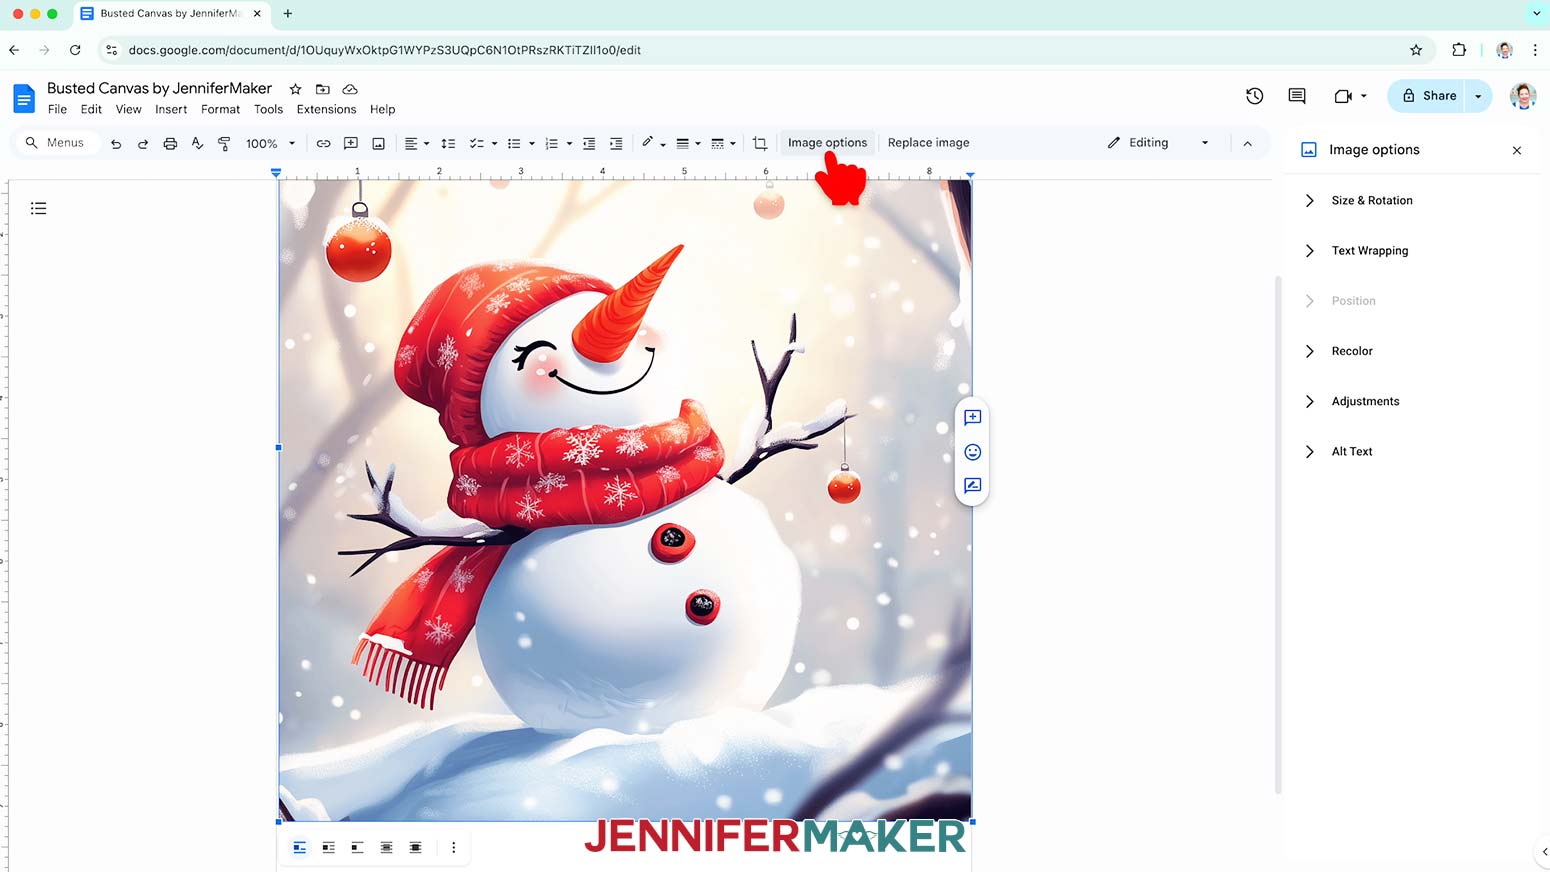
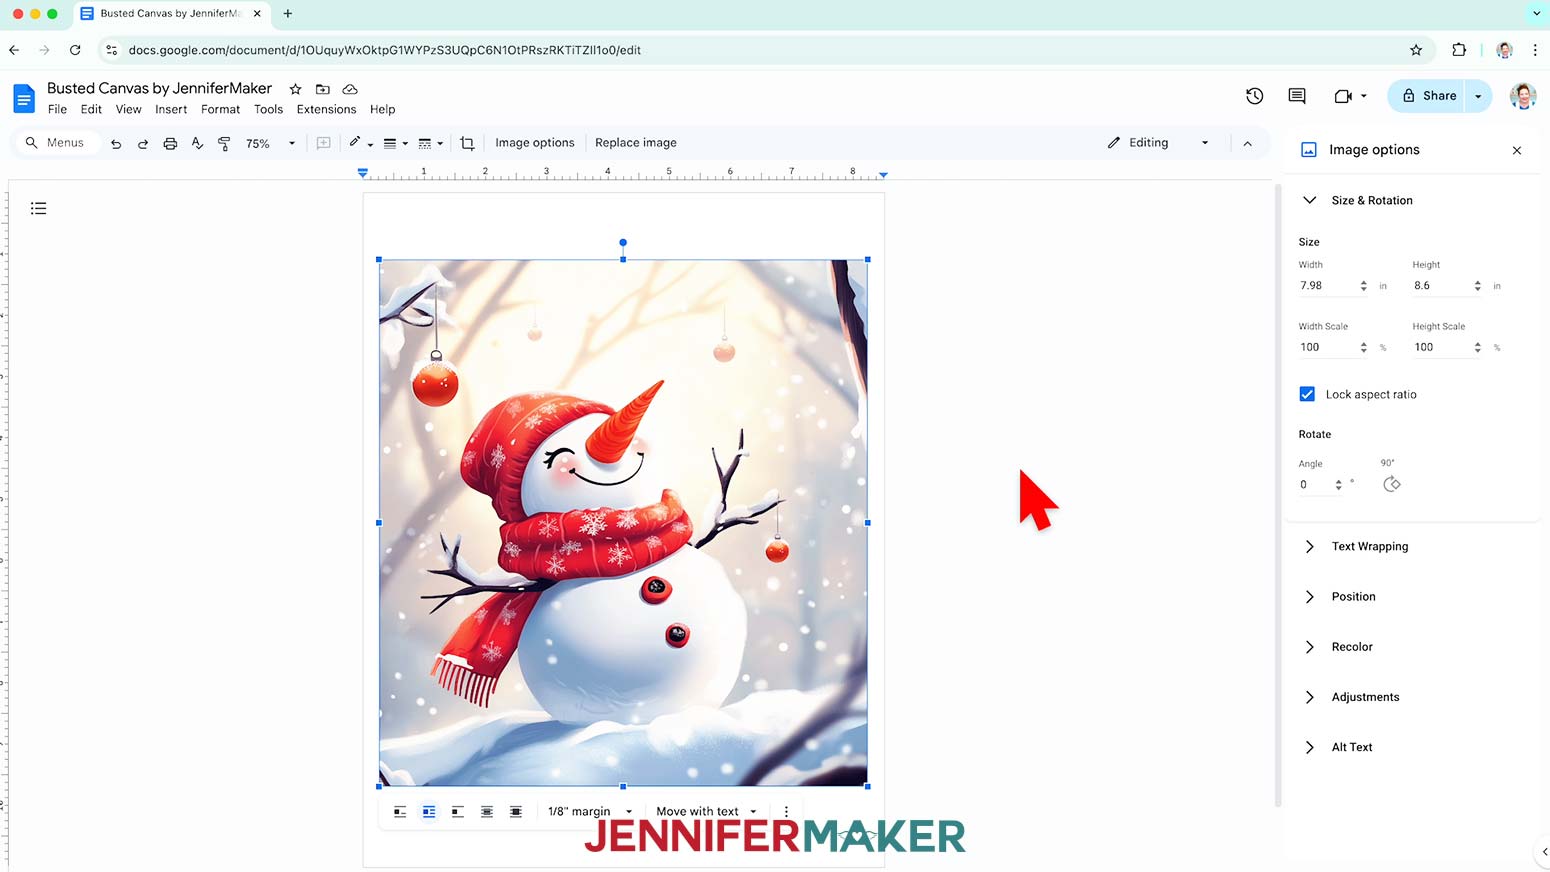
- To resize the design, click “Image Options” at the top of the canvas.
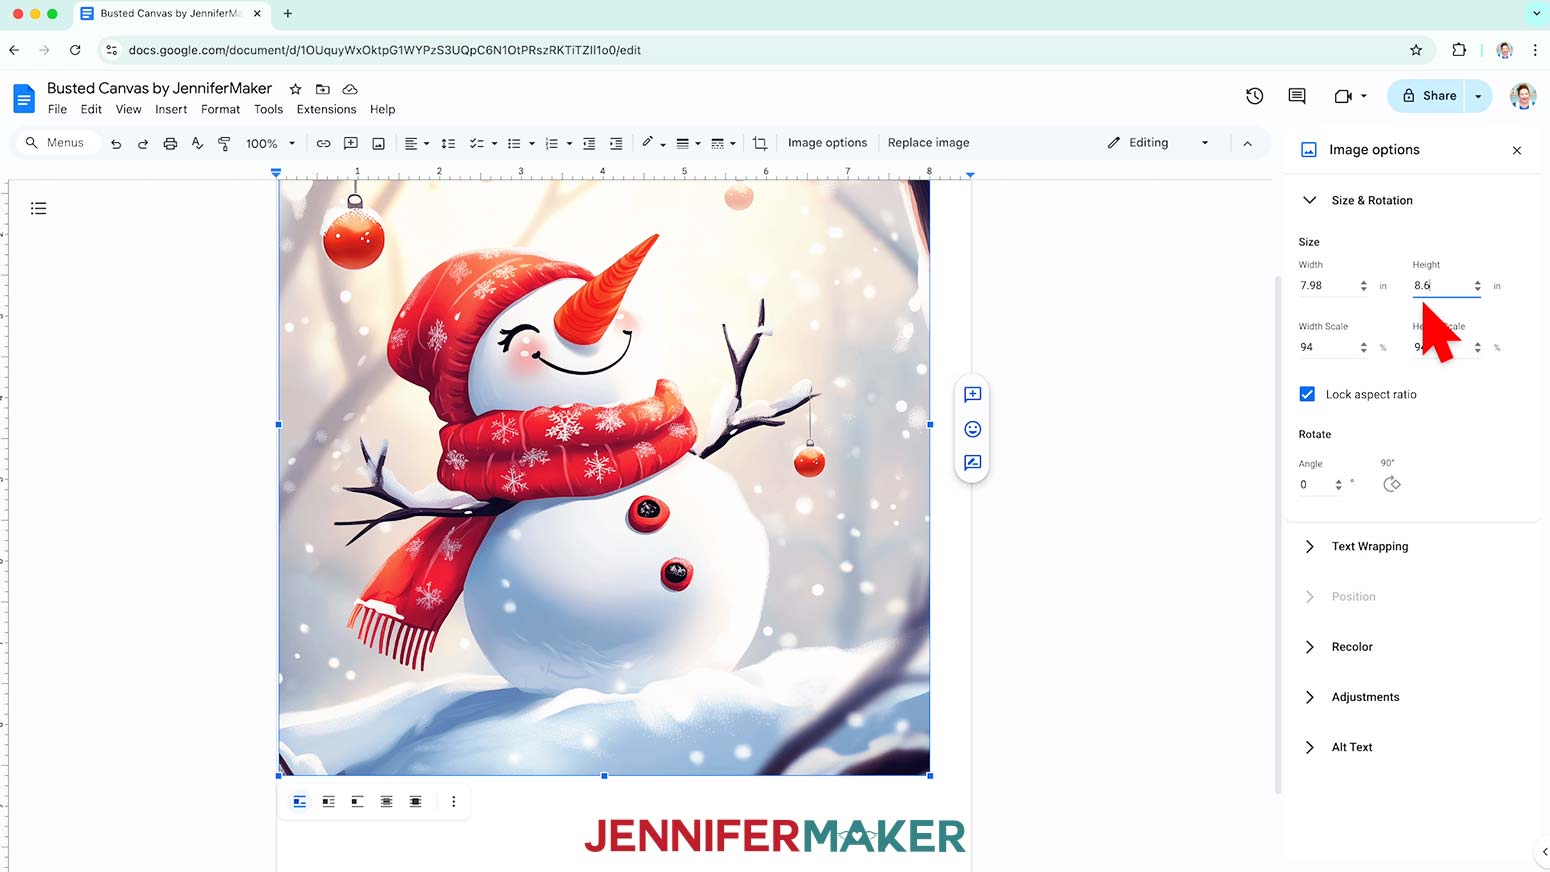
NOTE: You can also open the menu by going to “Format,” “Image,” and “Image Options.” - Select “Size & Rotation.”
- Keep the “Lock aspect ratio” box checked to maintain the design’s proportions.
- Change the “Height” field to the design area you want to create.
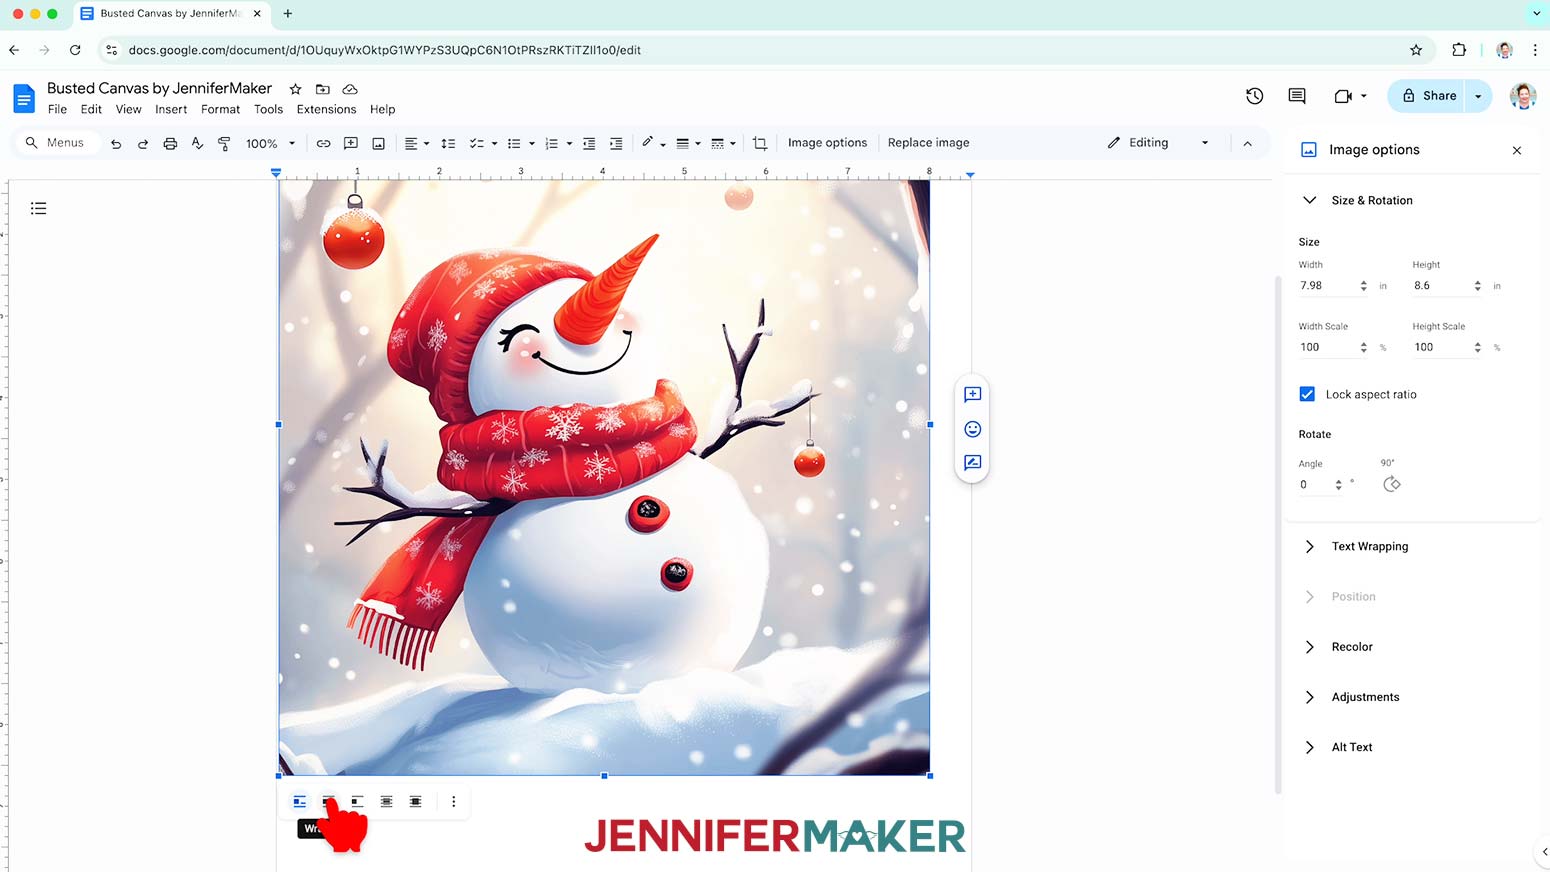
NOTE: I’ll make my design 8.6” tall to fit the frame, so the width will automatically change to about 8” and fit on the paper and in the frame. - Click the image and select the “Wrap text” icon from the menu that appears below it.
NOTE: This setting lets you move the design anywhere on the page. - Click and drag the image to the center of your page, as that ensures it won’t get cut off at the edges.
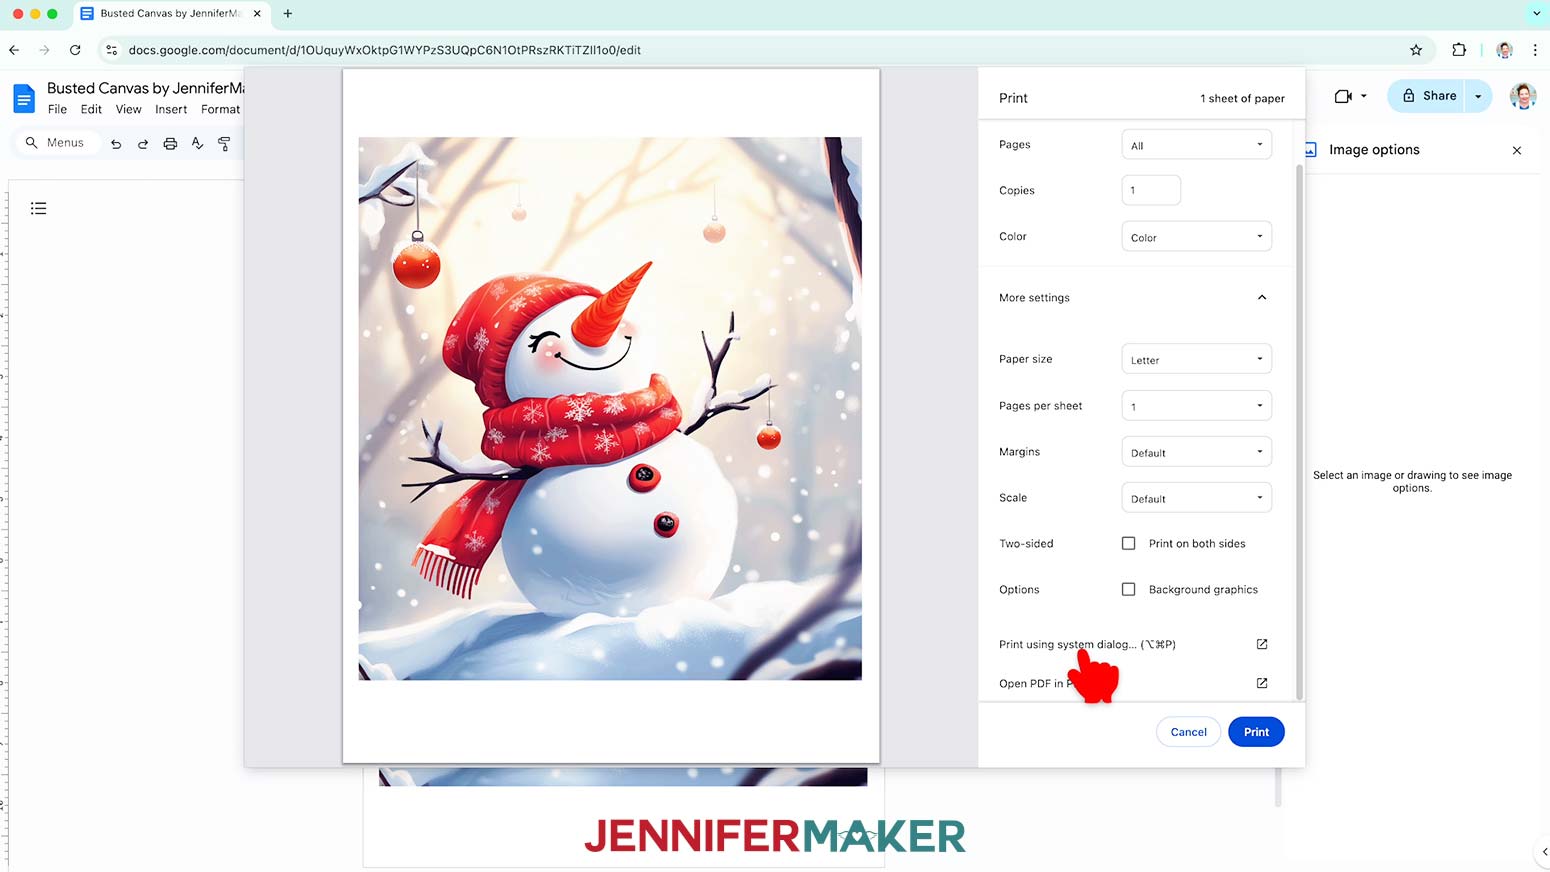
- Go to the File menu and choose “Print.”
- Select your inkjet printer under “Destination.”
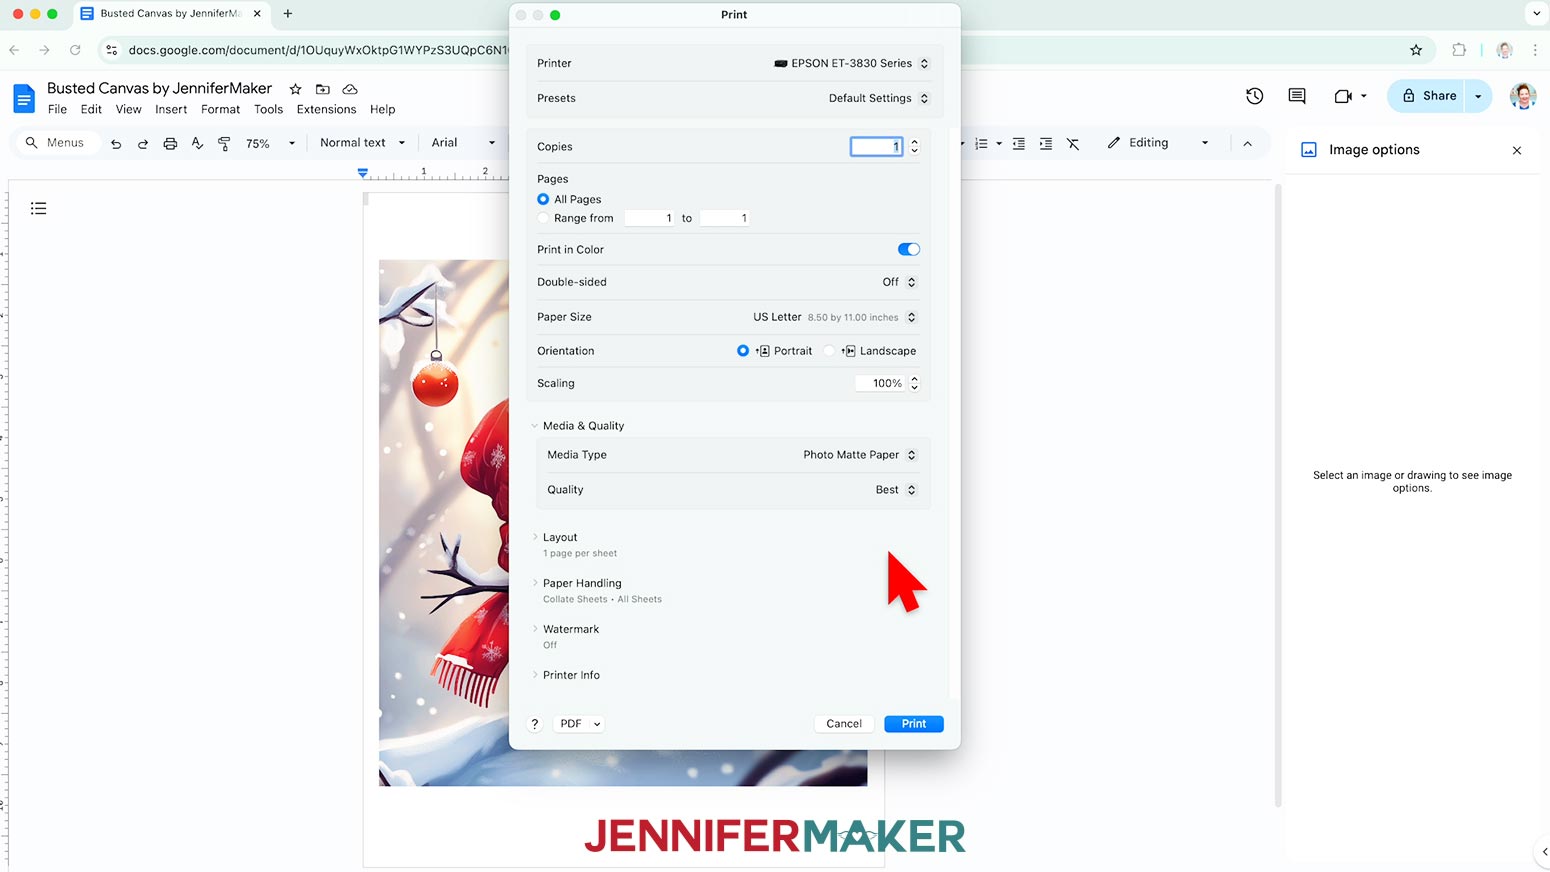
- Click the arrow beside “More Settings” to select “Print Using System Dialog.”
- Your print menu may look different - just make sure the correct printer is selected, and pick the highest quality photo paper setting.
- Load photo paper correctly into your printer.
NOTE: Check the packaging for information on how to load the paper. - Click “Print.”
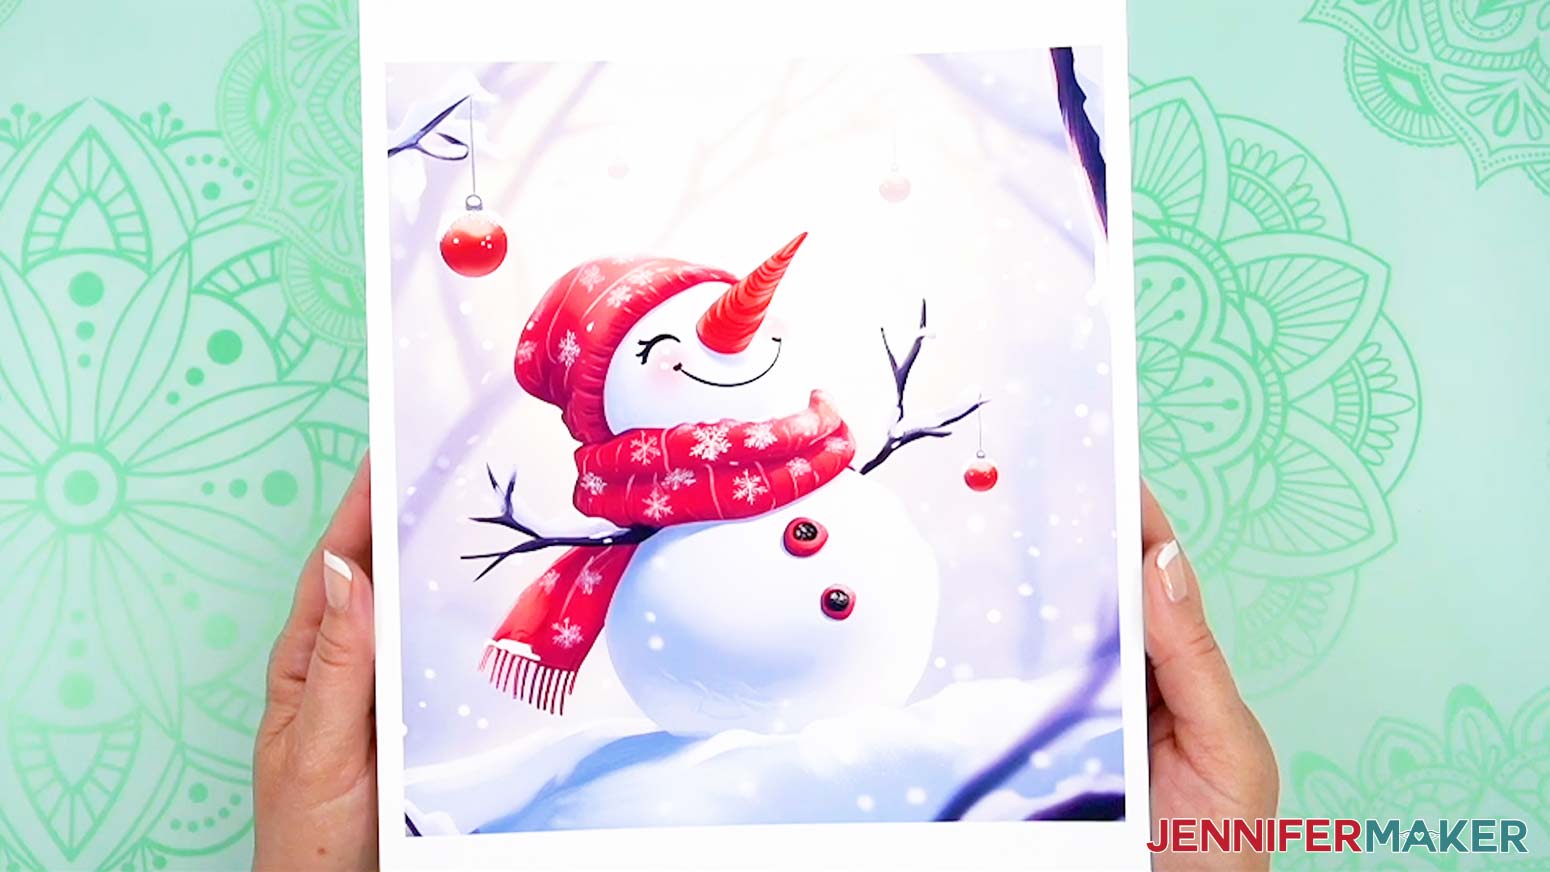
- Allow the print to dry before handling it, as the ink can smear.
- After the print is dry, use a paper trimmer or scissors to cut along the design’s edges.

STEP 5: ASSEMBLE YOUR BUSTED CANVAS
- Place your frame face-up and use a lint roller sheet to remove any debris from the surfaces.
- Add thin lines or dots of craft glue to the back edges and corners of the hidden image.
NOTE: The glue may make the photo paper ripple a little, so keep it away from the middle. That way, the subject will be smooth and the rest will be hidden by the front layer. - Center the image face-up inside the frame and gently press it in place without scratching the ink.
- Add craft glue to the front surfaces of the frame’s four sides.
- Hold the layered paper with the outside facing up and the cut lines oriented how you want them.
- Line up the edges with the frame, then gently press it down onto the glue on the wood.
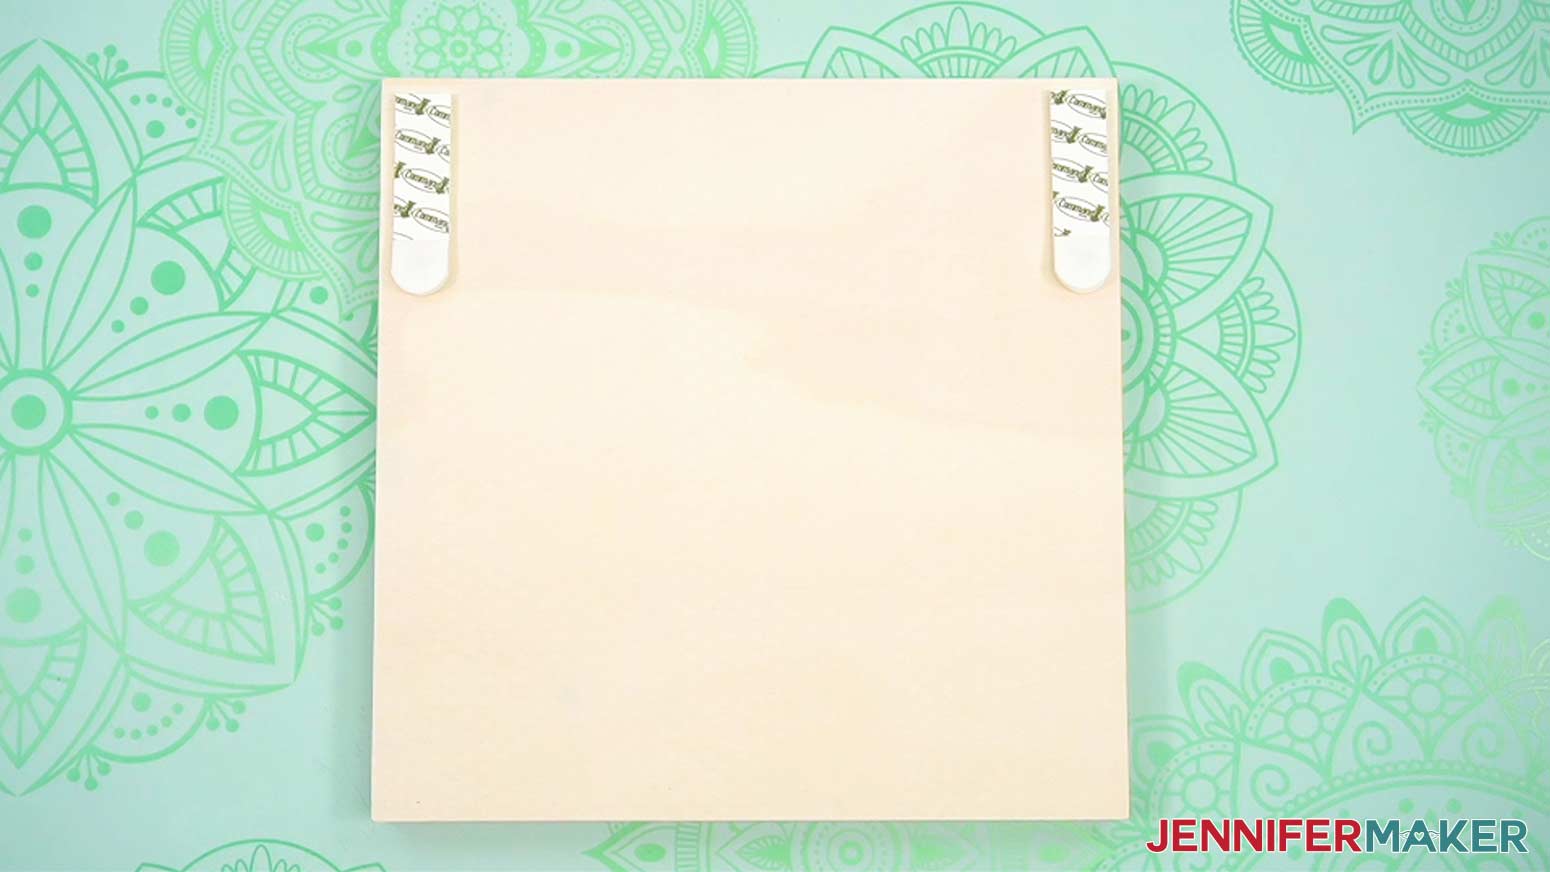
NOTE: Only press where the paper touches the wood so that the inner area doesn’t get damaged, and then let it dry for a few minutes. - The canvas can lean in on a shelf, but if you want to hang it, follow the directions from your favorite hanging supplies like 3M Command Strips or a sawtooth hanger before continuing.
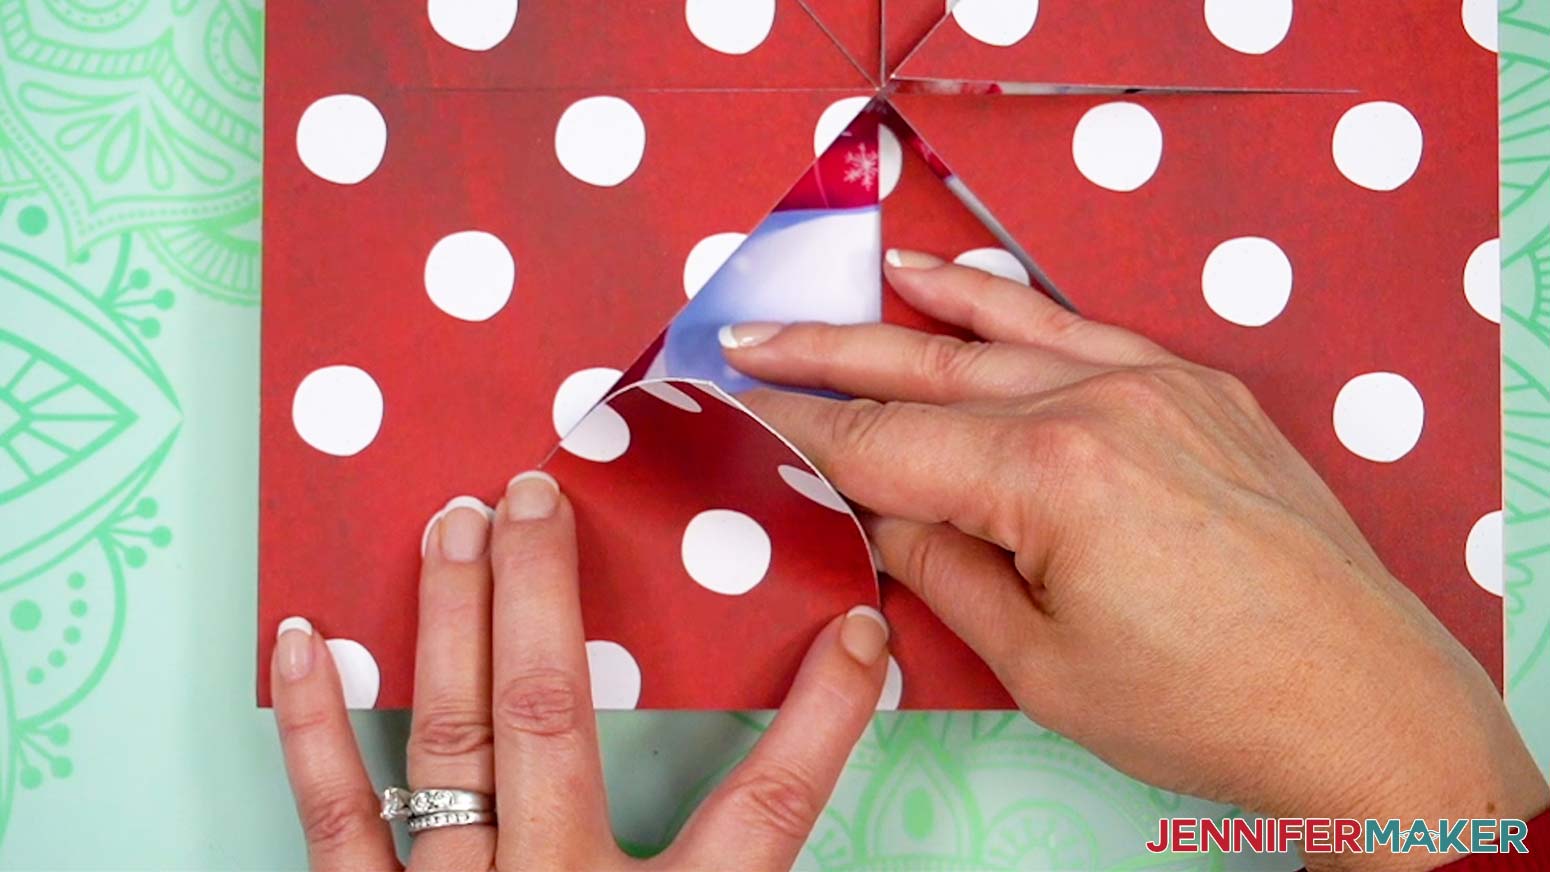
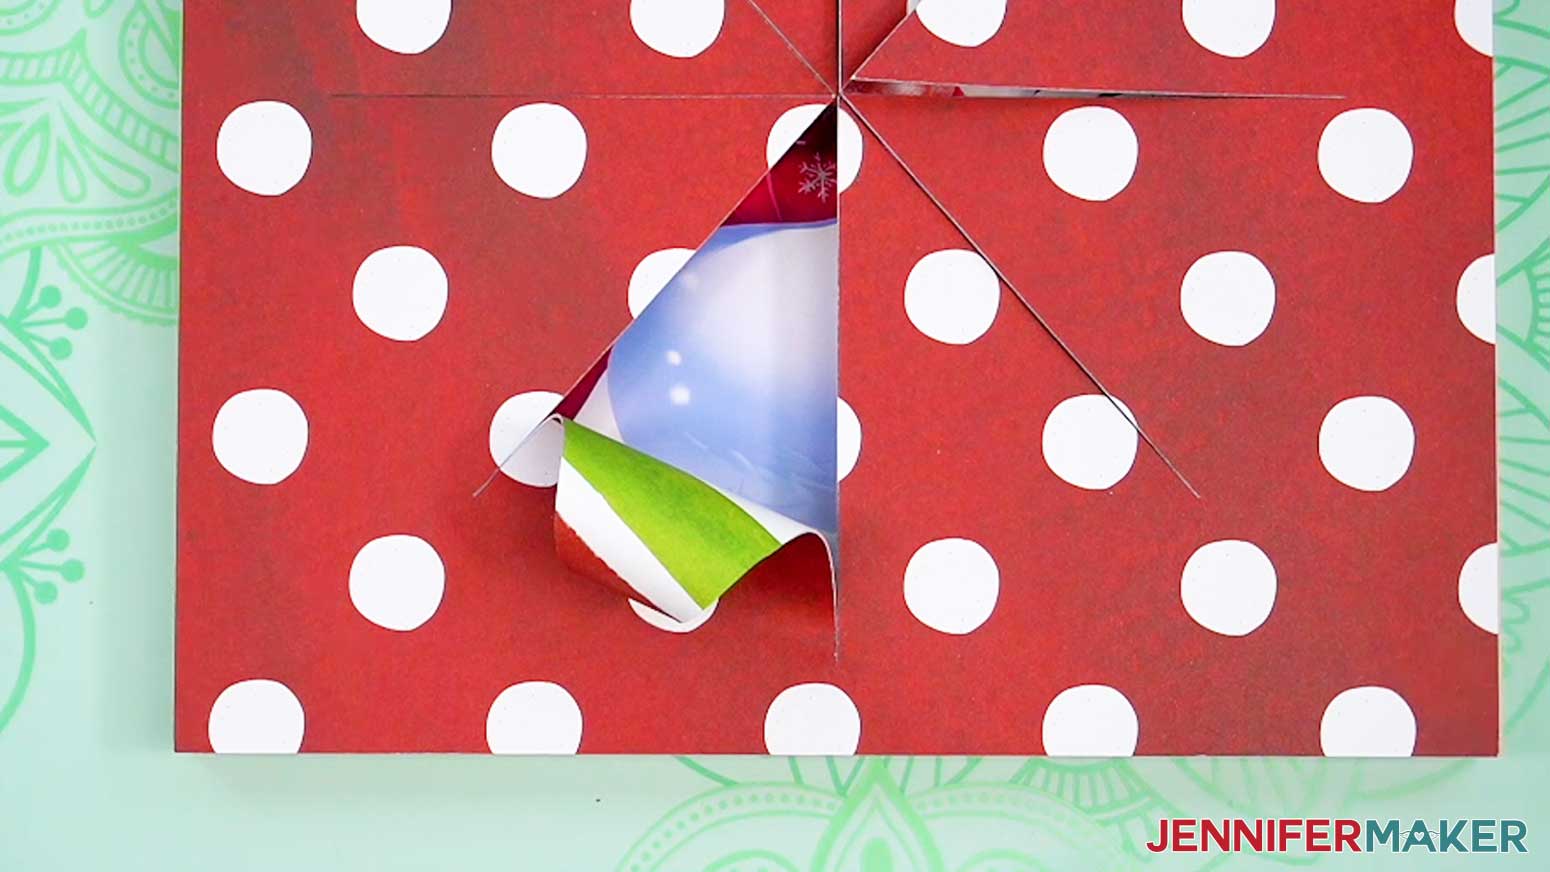
TIP: Keep the hangers’ position in mind while orienting and assembling your project! - Pick a wedge to start with and gently lift it while supporting the paper near the cuts to avoid tearing.
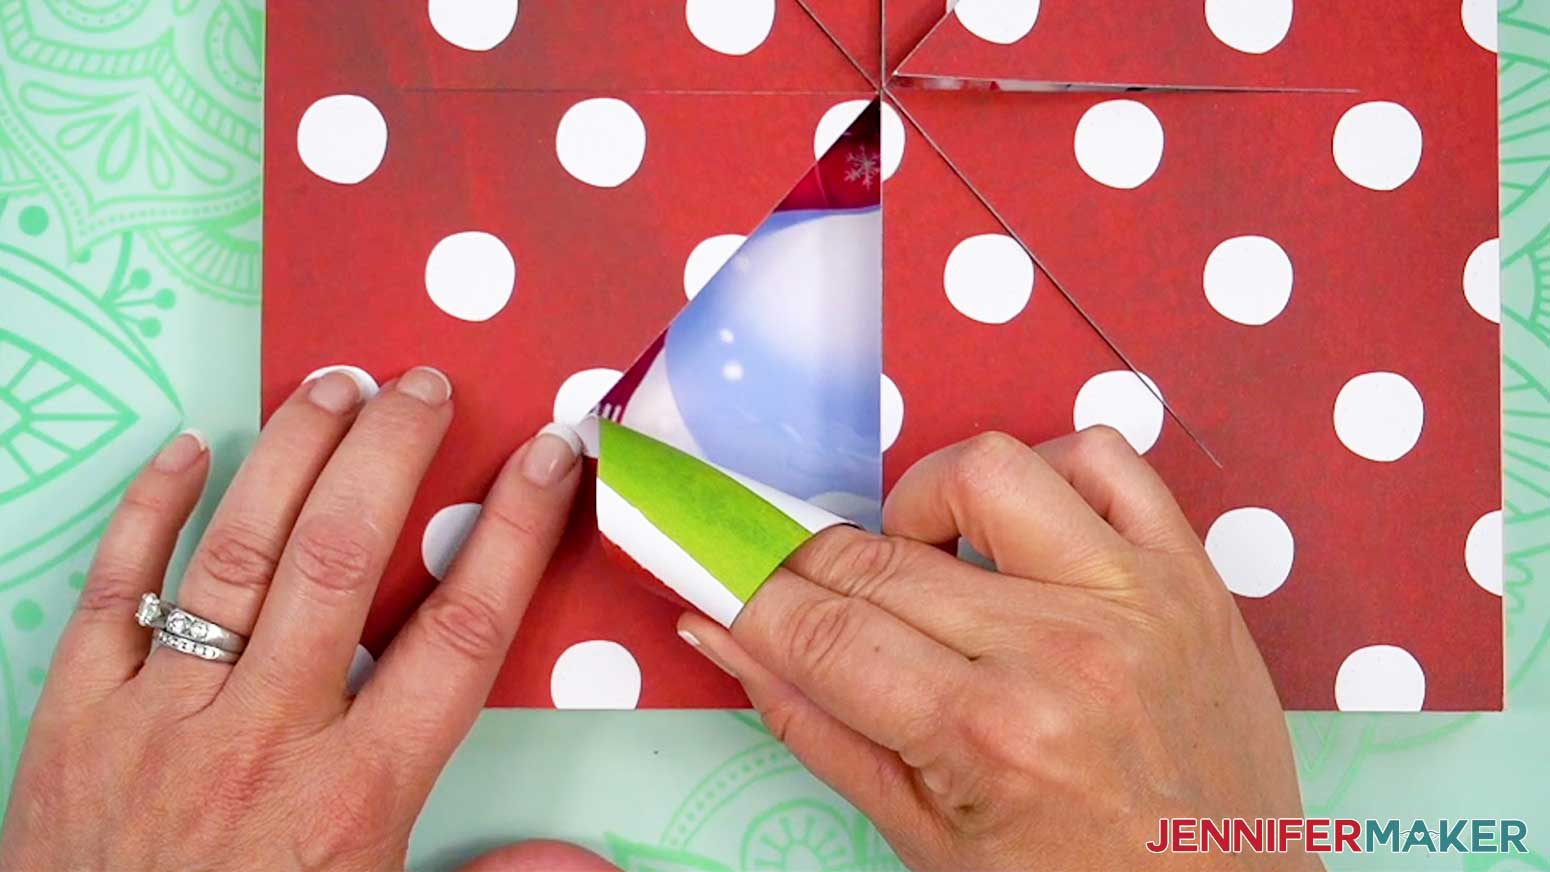
- Roll the wedge’s tip away from the center around your fingers or a round tool toward the thicker section, but stop before the cuts end.
- Hold the curl for about 30 seconds, then carefully release it to unfurl a little.
- Repeat Steps 8-10 with the rest of the wedges.
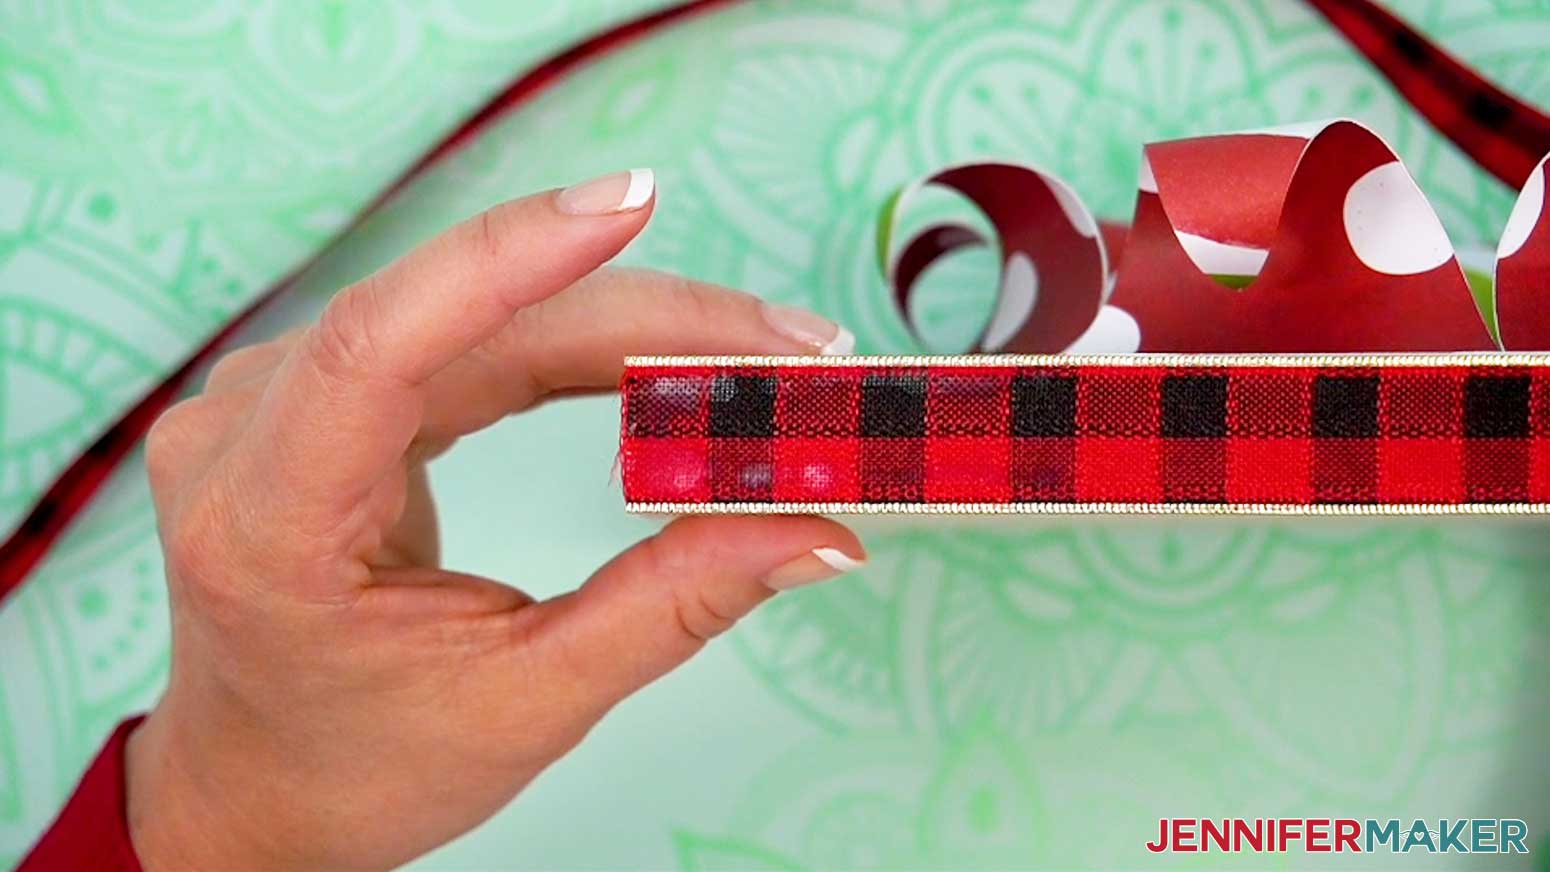
- Measure and cut a piece of ribbon long enough to go around the frame’s exterior with a few inches of overlap.
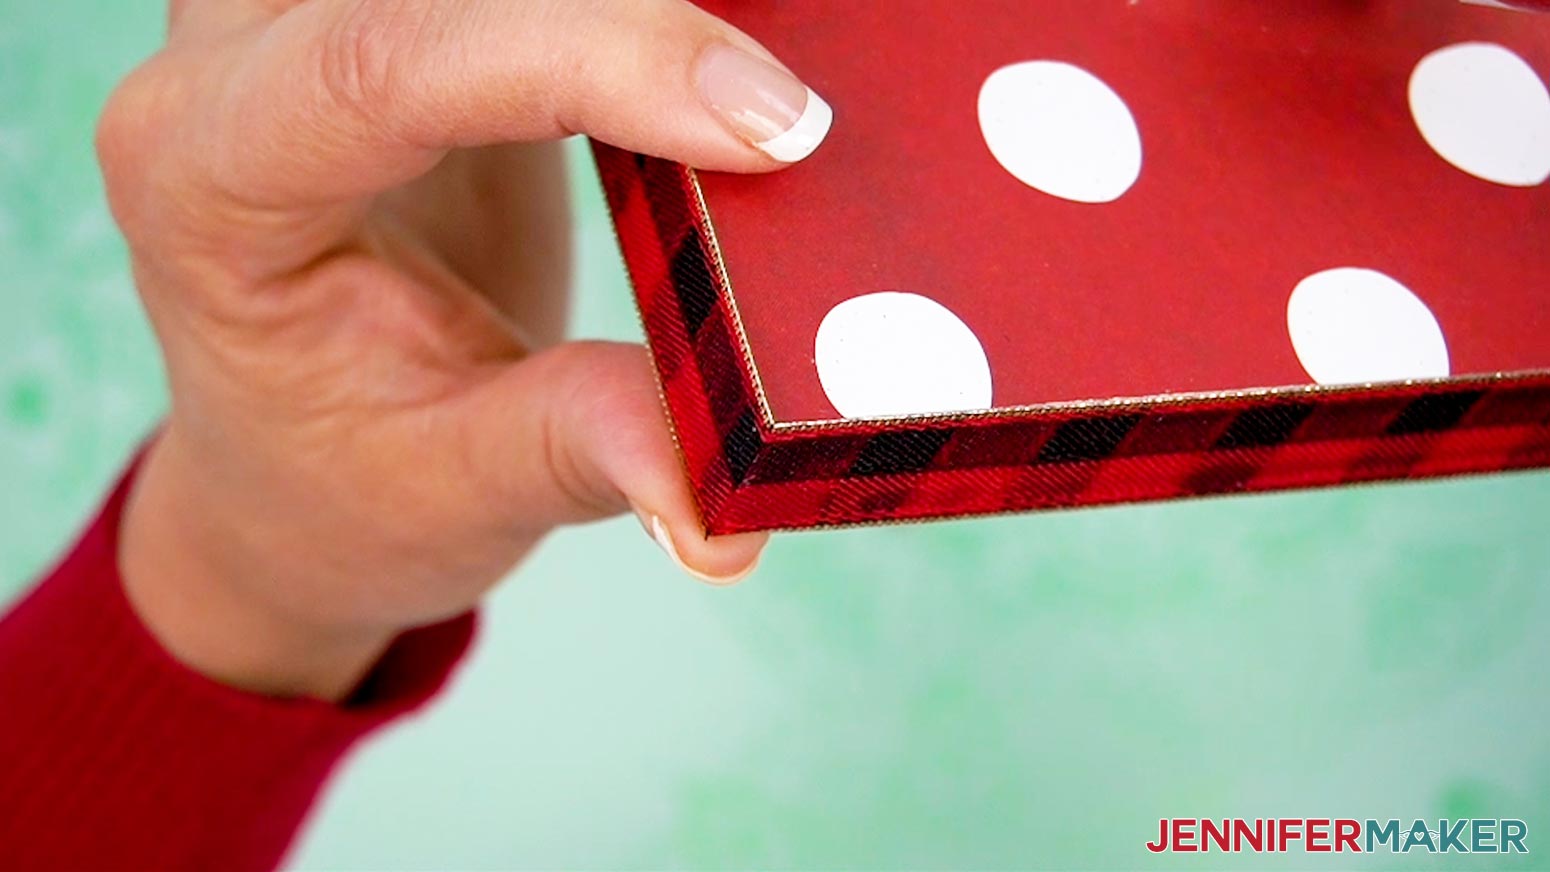
NOTE: My example used about 41” of ribbon for the 10” frame. - Adhere one edge of the ribbon with craft glue to a bottom corner of the frame so the ribbon hides where the layered paper meets the wood.
- Hold it to set.
- Wrap and glue the ribbon taut around the rest of the frame, then secure the other end at the same corner and trim the excess.

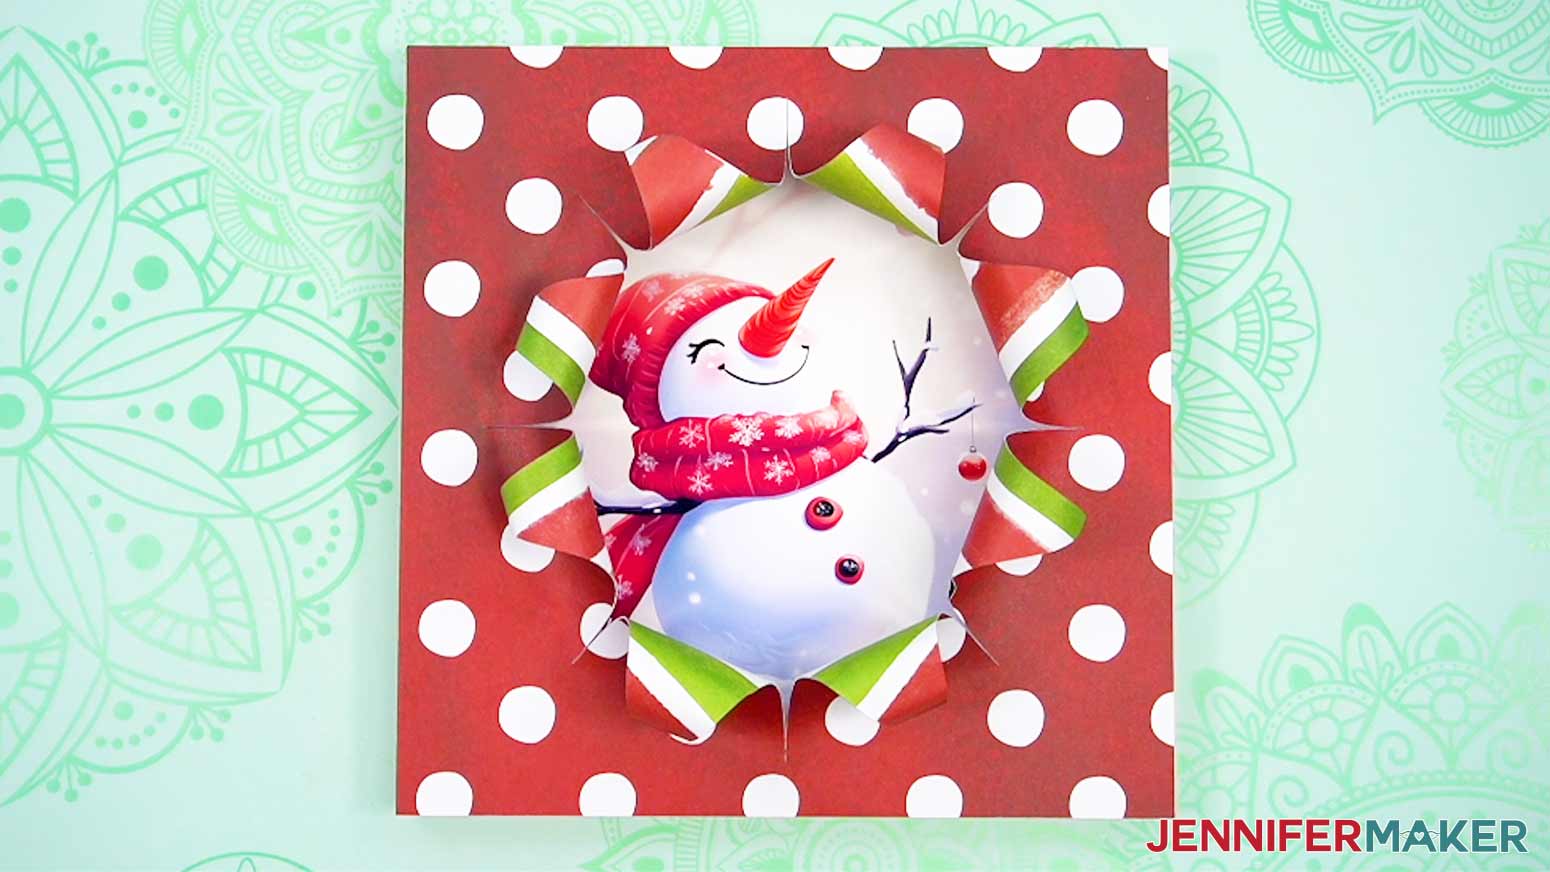
STEP 6: SHOW IT OFF
Your busted canvas is ready!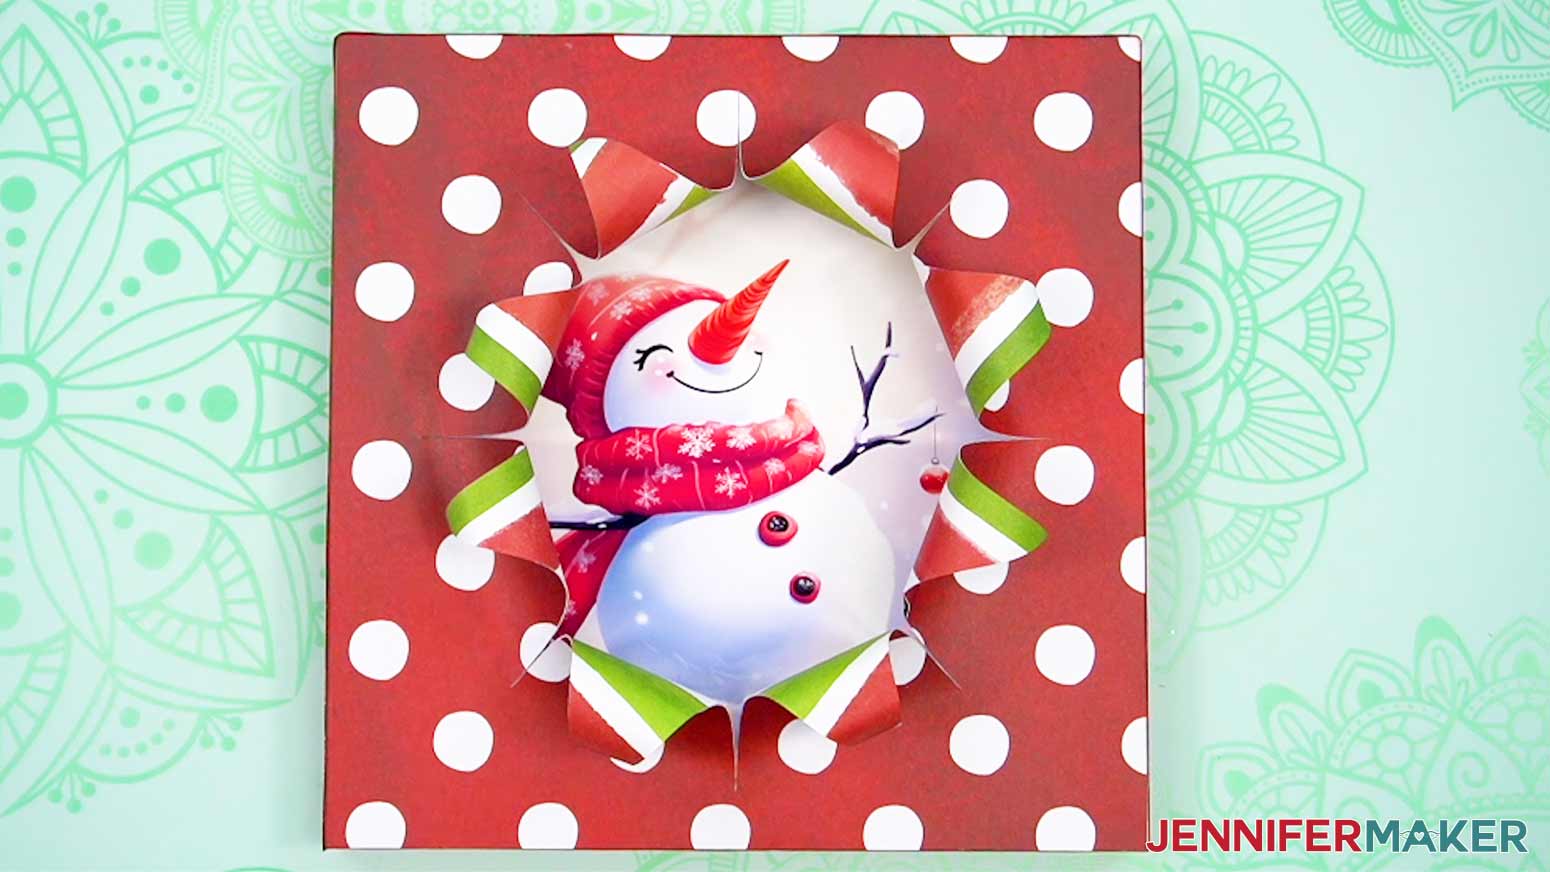
Notes
Finished Size:
10” x 10”
Answers to Your Questions About How to Make a Busted Canvas
Q: What can I add to my busted canvas?
A: You can learn how to add accessories like a gift bow and tag to your busted canvas in my ADVANCE program. Learn more about ADVANCE here!
Q: Can I cut these stacked busted canvas SVG pieces on a Cricut Joy Xtra or original Cricut Joy?
A: The designs are sized to fit the board in my materials list, which require a full size Cricut. If you have a smaller frame, you should be able to resize the SVG so the front piece has the same width and height as the front of your frame. If you need help resizing your design, please see our Resizing Guide.
Q: What supplies do you need to make a busted canvas?
A: Many busted canvas tutorials use a paintbrush and layers of Mod Podge to stick decorative paper to a canvas, and then a utility knife to cut the back of the stretched canvas. I wanted to use my printer, cutting machine, and simple craft glue to create the same look, and my tutorial can show you how I did it!
Q: Do I have to use a Cricut to cut my busted canvas SVG pieces?
A: No! You can make a busted canvas from paper or card stock that works with your equipment, or even just with scissors. We always include several versions of each free file in the free download ZIP file. If you have a Silhouette Cameo, which uses Silhouette Studio, you can use the DXF file in Silhouette Basic Edition. If you have upgraded to Silhouette Designer Edition, Designer Edition Plus, or Business, you can use the SVG format with your Silhouette machine to cut each intricate design. If you don’t have a cutting machine, you can print and then cut out my digital download PDF files, too! The ZIP archive in my resource library includes these file types and more!
Q: Help! My Cricut Design Space screen looks different than yours!
A: If you’re using the latest version of Cricut Design Space, your screen may have slight variations than the screen you see on the video tutorial. Good news: All of the same functions are there, they may just be in different spots or have new icons. Pause the video if you need, or follow along with the written tutorial. If you get stuck, ask for expert support in our Facebook group. Our group has become not just a help center, but also a vibrant community of real people and crafters! Plus, you can catch the latest news on JenniferMaker tutorials and more.
Q: Can I make and sell these busted canvas designs?
A: I love supporting creative entrepreneurs! If you want to use my designs and projects for commercial use, please familiarize yourself with my important licensing information before selling your crafts.
I do not permit sale of my digital items, but you can sell the creative goods you make with them — as long as you follow my licensing requirements. That means you cannot sell the busted canvas SVG files, but you can sell busted cavases that you made with the files with restrictions noted above. I love to see creative crafting businesses thrive with the help of my designs and inspiration!
Get my free SVG/PNG/DXF/PDF files to make a busted canvas!
(If you do not see the signup form above, click here.)
I love seeing what you make with my designs and how you use them! Please share a photo of your busted canvas in our Facebook group or tag me on social media with #jennifermaker.
Love,

Want to remember this? Save this Busted Canvas Tutorial to your favorite Pinterest Board!