
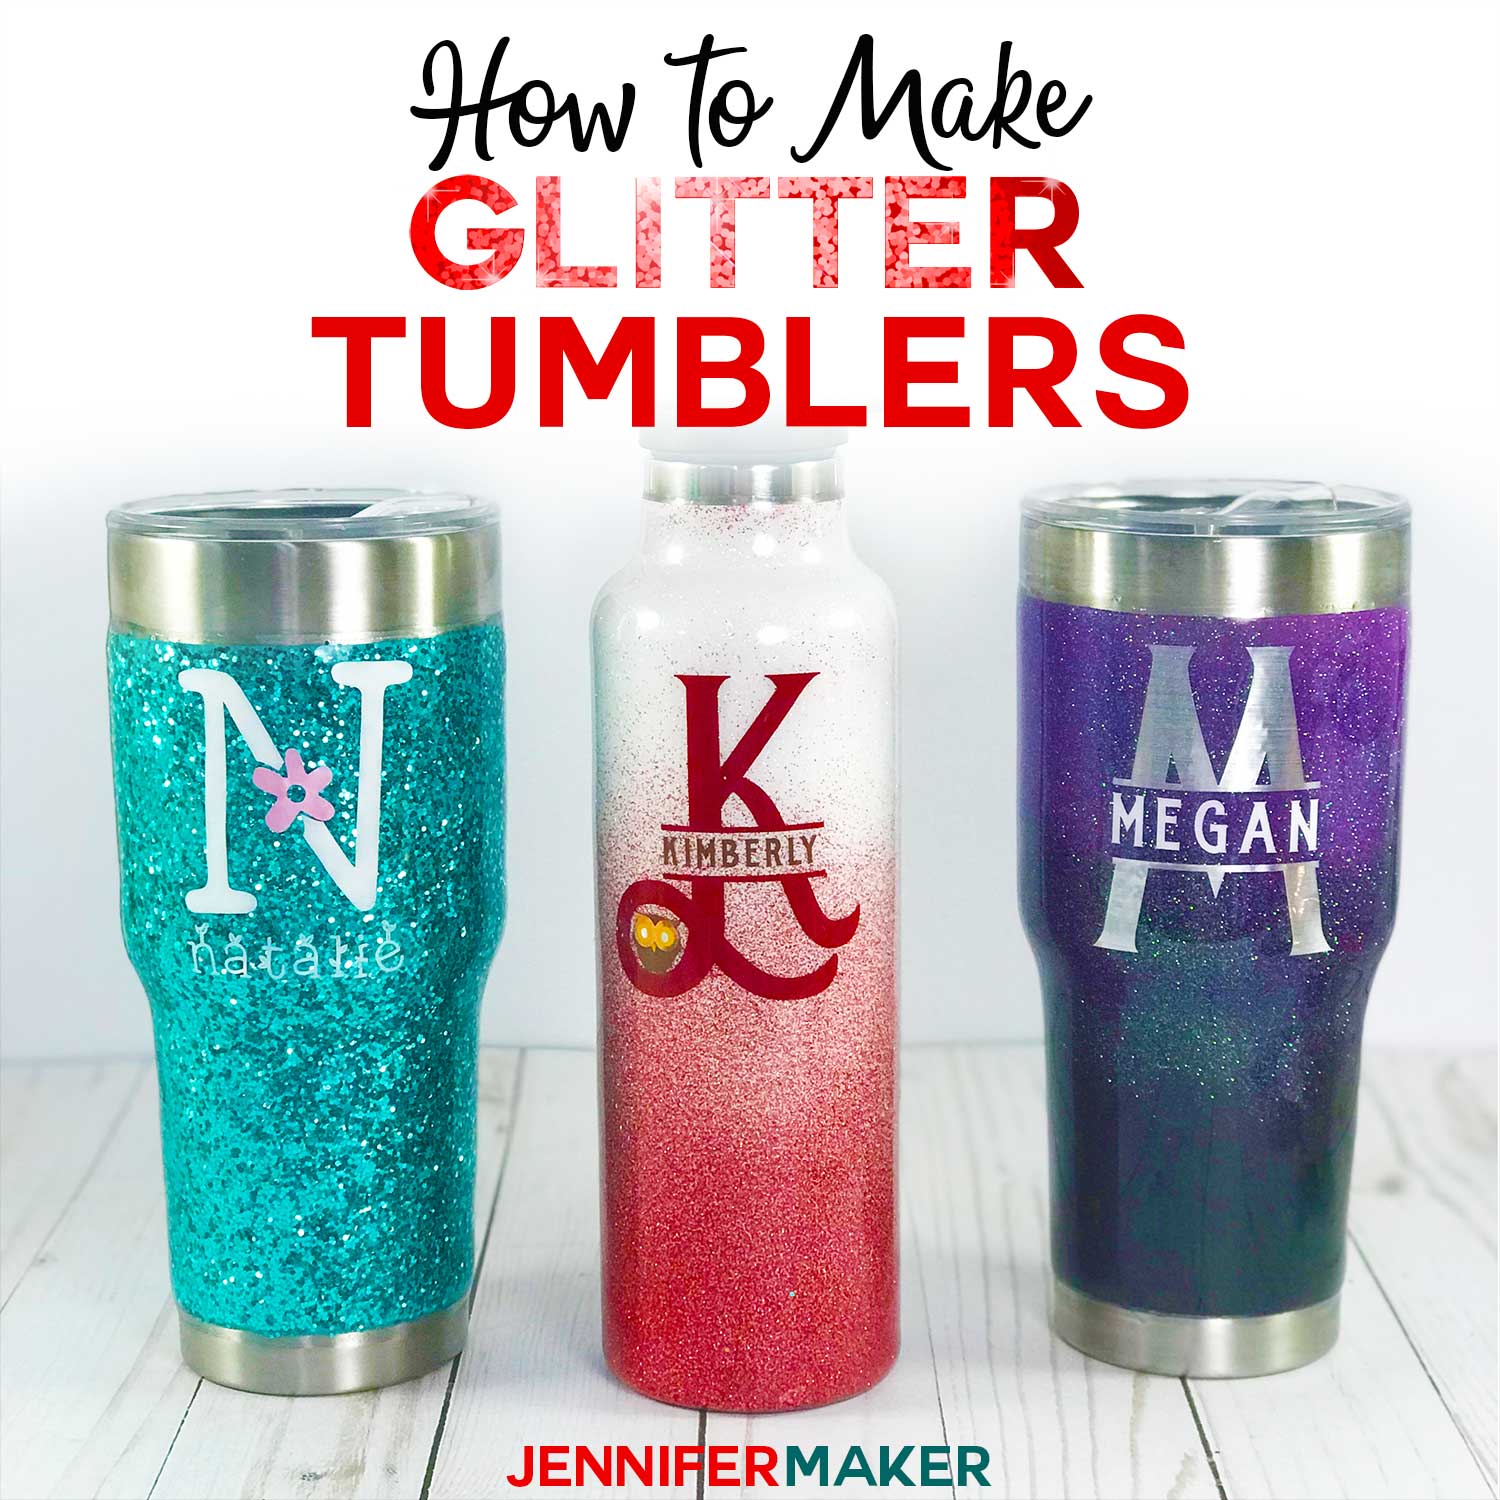
Learn the complete process of making DIY glitter tumblers, from selecting the right tumblers and adhesive to applying the glitter and epoxy resin to create a tumbling/curing rack to prevent drips! I break it down step by step to make it EASIER for you to have success!
A couple of weeks ago I showed you how to put vinyl on mugs (and shared some fun designs). Those were such a hit that today we’re making glitter tumblers with vinyl decals! Glitter tumblers are stainless steel insulated mugs and cups that you glitter, seal, and decorate! They are VERY popular because you can personalize them and they look FABULOUS when they are all done. Also, the sealing process completely protects the vinyl decal so you never need to worry about it coming off. These glitter tumblers are on trend and SO fun!

The process to make a glitter tumbler may seem complicated, but I’m going to take you through it step-by-step. Everything from selecting the right materials to creating a way to turn your freshly sealed tumblers so they don’t drip.
So, let’s start at the beginning! The materials you need for glitter tumblers are all listed below, but essentially you need a stainless steel tumbler or cup — I’m using a variety of brands and shapes so you can see how they look. Each type of tumbler/mug I’m using is linked below in my materials list.
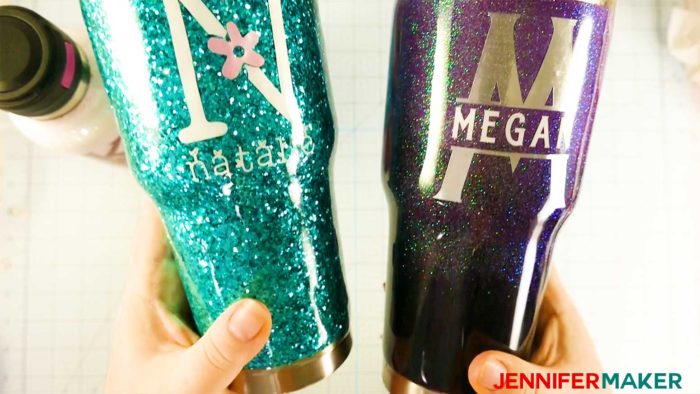
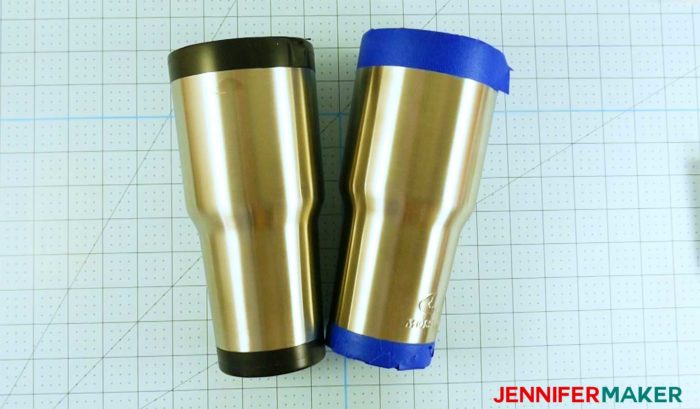
You also need glitter — I’m using both extra fine glitter and chunky glitter so we can see the differences in the finished tumblers. Again, check my materials list for the exact brands of glitter. In the photo below, the aqua tumbler on the left is chunky glitter and the purple/black tumbler on the right is extra fine glitter.
To apply the glitter, you need an adhesive. Some folks like Mod Podge, others like spray adhesive. I tested both to see what works best.
And, of course, you need the epoxy resin to seal your glitter tumblers. This is what will keep your glitter contained and protected on your tumbler!
IMPORTANT: Epoxy resin is toxic while it is curing, and safety precautions must be taken. Wear proper protective equipment (nitrile gloves, long sleeves, full-face respirator, and apron) and work outside or in a well-ventilated area. Do not allow epoxy resin to touch your skin or be inhaled through fumes or dust. If you get some on your skin, wash it twice well with soap and water. Always read the safety information!
Other things you’ll want to have are rubbing alcohol, painter’s tape, sandpaper, cups, popsicle sticks, freezer paper, and disposable gloves.
While the epoxy on your glitter tumblers is curing, you need a way to suspend your tumblers and keep them turning so they don’t drip. You can do it the low-tech way with a cardboard box, some PVC pipes, some dollar-store footballs, and duct tape, or you can step up your game with a tumbler turner we built from a rotisserie turner. I show you both up close in the video linked below.
Last but not least, you need your vinyl decal. So I’ll show you a couple of different ideas for decals you can put on your glitter tumblers.
Many thanks to the readers and viewers who requested I explain the glitter tumbler process!
Key concepts taught in the video tutorial include how to choose materials, how to tape your tumbler, the best adhesive to use, how to apply and seal your glitter, how to mix and apply your epoxy resin, how to put your decal on your tumbler, and how to get a smooth mirror-like finish on your tumbler!
See exactly how to make glitter tumblers in my step-by-step video.
Enough talk — let’s make some fabulous glitter tumblers! This post contains some affiliate links for your convenience (which means if you make a purchase after clicking a link I will earn a small commission but it won’t cost you a penny more)! Read my full disclosure policy.
Materials for DIY Glitter Tumblers
-
- Stainless steel tumblers, cups, and/or mugs — I used four of these Mossy Oak 30 oz. tumblers, this stemless wine tumbler, this powder coated pink water bottle, and an older powder coated water bottle I had lying about the house)
- Spray paint base coat — I tried Plutonium (my favorite), Krylon ColorMaxx (good enough), and Rustoleum 2X Ultra Coat (good for covering colors and powder coating)
- Glitter, extra fine or chunky — I used these chunky glitters (Teal, Copper, Pink) and these extra fine glitters (Purple, Black, Red, Pink, White)
- Epoxy resin (I recommend this EXACT brand which I used and loved)
- Spray adhesive (I recommend this EXACT brand which worked like a charm)
- Spray sealer (I recommend this EXACT brand)
- Wet/dry sandpaper (about 220 grit)
- 1″ wide Painter’s tape (I prefer painter’s tape if you painted your tumbler — it’s less likely to accidentally remove paint)
- Electrical tape (I prefer this for taping edges where epoxy will be because it forms such a nice, tight seal)
- 1/8″ wide double-sided tape (only needed if you want to make the fancy plaid pattern)
- 91% isopropyl alcohol
- Disposable nitrile gloves (I used four pairs)
- Respirator — this is the one I use!
- Apron and long sleeves
- Extra plastic cups (for epoxy and glitter mixing) — I think it’s better if they are bigger, like at least 8 fluid ounces
- Extra popsicle sticks (for mixing)
- Paper (used to capture your glitter and drips)
- Permanent adhesive vinyl and transfer tape
- A way to keep your glitter tumblers rotated (I used the We R Memory Keepers Spin It! and a little grip tape)
- A way to cut your vinyl (I used the amazing Cricut)
- Design #134 – My free SVG/DXF/PDF cut files/patterns for the vinyl decals (available in my free resource library—get the password at the bottom of this post)
How to Make Glitter Tumblers
Step 1: Prepare and tape your tumblers for the glitter.
Note: Details on these steps are in my step-by-step video!
Take off all of the labels and wash your tumblers. You may also wish to sand the outside of your tumbler, as may help any paint you apply stick to it better.
Once your labels are off, tape your tumbler however you wish. When you tape it, use a continuous piece of tape that goes all the way around the circumference of your tumbler, and you can decide how thick you want, how much of your tumbler you want showing, by how much tape you use. I think using a half an inch of tape works really well.
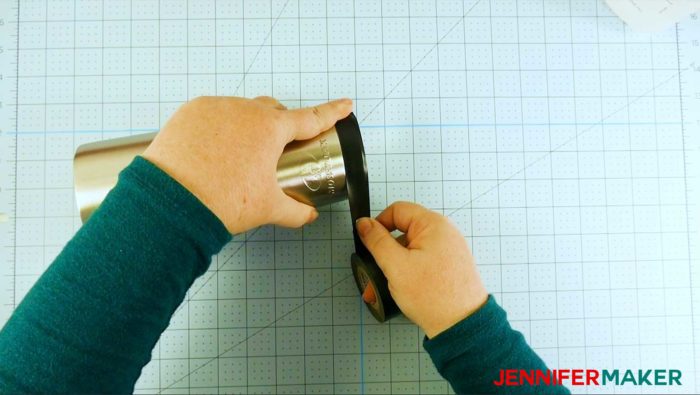
Tip: Some tumblers have a little line that you can use as a guide but I just use the width of my tape as a guide to keep it straight, and it actually worked out really well in that regard.
I taped both the bottom and the top of several of my tumblers. But you can also put glitter all over the bottom of your tumbler. I did one like that as well, so that you can see it. But I really like this method, because it leaves nice, clean lines. It just really looks really classy.
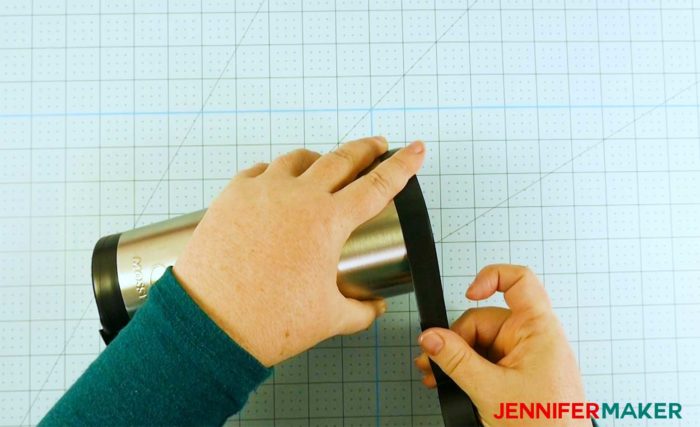
Tip: When you tape your tumblers, fold over the edge of your tape so that you can remove it later much easier.
Note: I experimented with using both electrical tape and painter’s tape, so we could see if there was a difference (there’s wasn’t).
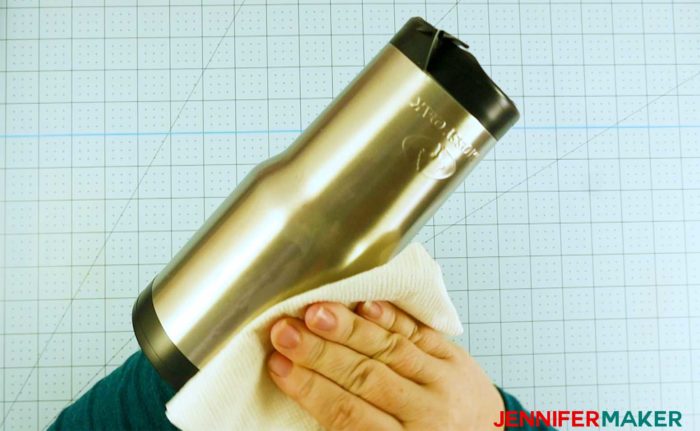
After you’ve taped everything, you need to wipe the surface of your tumbler down with alcohol. This is important to get any dust or impurities, especially the adhesive from the labels, off of your tumblers. You want everything to stick, and the cleaner the surface of your tumbler is, the more likely that is to happen.
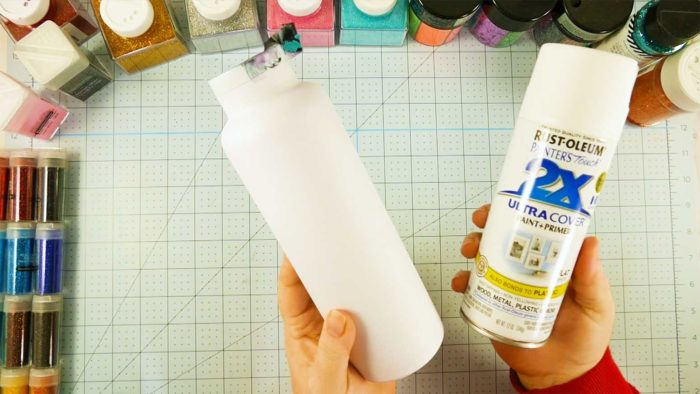
Step 2: (Optional) Spray paint your tumblers.
You can paint your tumblers, and I did this with three different kinds of paint. You don’t have to spray paint your tumblers first if you plan to use a lot of glitter, or extra chunky glitter. But if you use transparent or translucent glitter, you’ll want to paint first.
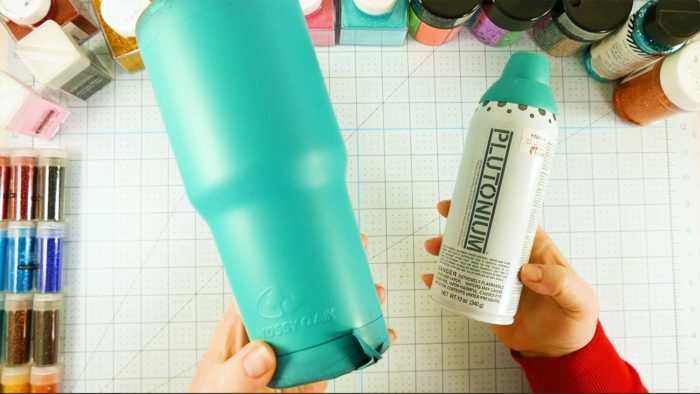
Tip: When spray painting, use short bursts like this, instead of just going all out and just holding down that button. These short bursts are the way to go.
Note: I used Plutonium spray paint, which is amazing. I love that spray paint. I also tried Krylon ColorMaxx. It also did an okay job. I also painted a powder-coated tumbler with the Rustoleum paint that had a primer in it.
Step 3: Put adhesive on your tumblers and glitter them.
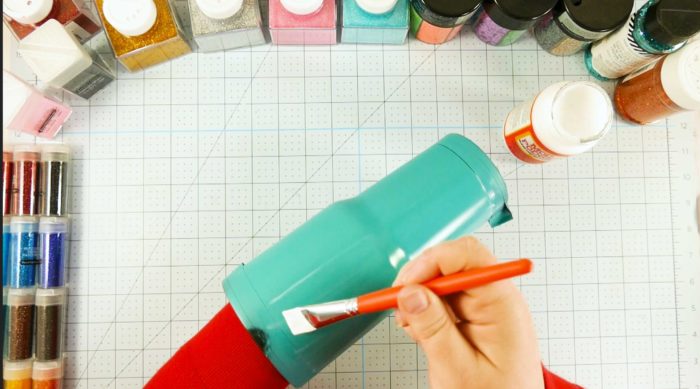
You have at least two choices. I tried two things for this tutorial: Mod Podge and spray adhesive (my preference is the spray adhesive).
To apply the Mod Podge, get a brush and put the Mod Podge on your tumbler in nice, even strokes. Make sure you don’t have too much globbed on in one section or the other.
Once the Mod Podge is applied, you must glitter it right away or it will dry. When glittering tumblers, I recommend you put something on your surface to collect the falling glitter. I used freezer paper and a little plastic bowl
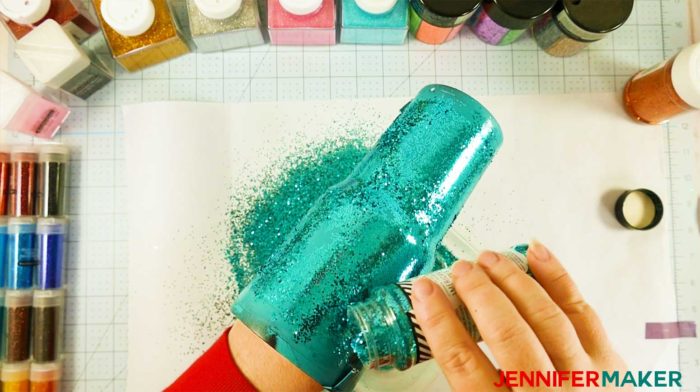
Sprinkle your glitter onto the tumbler on as evenly as you can.
Note: The Mod Podge did not adhere the glitter to the tumbler very well in my experiment. There are sections with no glitter. So I don’t know if I had my Mod Podge too late there, but I wasn’t particularly happy with the Mod Podge. And the tumbler made with Mod Podge required a second coat of glitter.
Tip: When you’re done glittering your tumbler, just pick up your freezer paper or whatever you had underneath, and pour the glitter back into a container, so you can use it again.
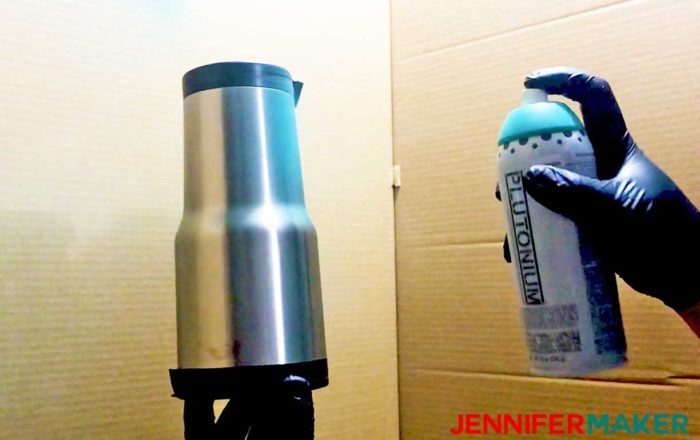
To use spray adhesive (100 Loctite spray adhesive, not the 300 Loctite spray adhesive), be sure you spray in a well-ventilated area (not your craft room). When you spray your tumbler, use short bursts, just as Greg is doing in the video. We sprayed out tumblers in a box to avoid getting the adhesive anywhere it didn’t belong.
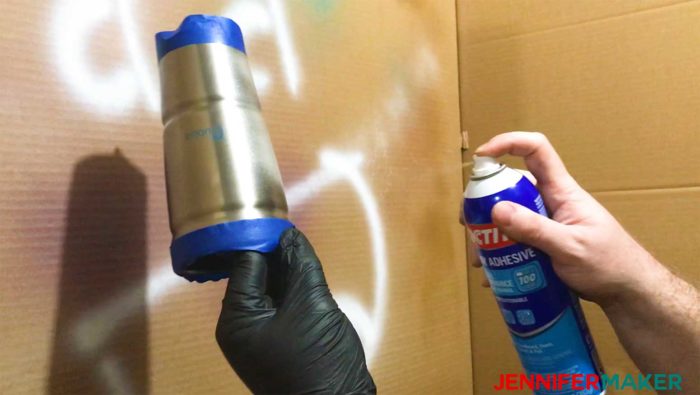
Once you have spray adhesive on your tumbler, glitter again right away just as described earlier. Your goal is to get glitter evenly on the surface of the tumbler.
Now let’s compare the tumblers — below is a photo of three tumblers made with Mod Podge and Loctite.

The Loctite and paint combination is the winner, but you don’t have to spray paint if you don’t want. If you don’t mind seeing just a tiny bit of the aluminum peeking through, just go with the no paint.
Step 4: Seal the glitter on your tumblers with a clear coat.
Seal your glitter with clear coat of sealer in a well-ventilated area. Why do this? Even though you’ve adhered the glitter to your tumbler, it still tends flake off. And when you put on your epoxy, you need to have things a bit more in control.
Wait about 30 minutes after applying sealer to your glitter tumbler before moving on to the next step.
Step 5: Prepare a way to rotate your tumblers while they cure.
While your sealer is drying on your glitter tumblers, get this part set up, or you can do it in advance, of course, because some of the ways are a little bit more complicated than others. There are two good methods of curing glitter tumblers.
The manual turning method is made with a cardboard box and PVC tubes. At the end of the PVC tubes are dollar store footballs that we’ve just duct taped to the ends, and they actually fit right in. Your soft little footballs fit right the glitter tumblers –they smoosh in and then they’re really stable. The cardboard method is a really inexpensive way, but you have to manually turn these, quite frequently in the beginning, to keep the epoxy from dripping down. So you need to have like several hours to sit and babysit your glitter tumblers when you do it this low-tech way.
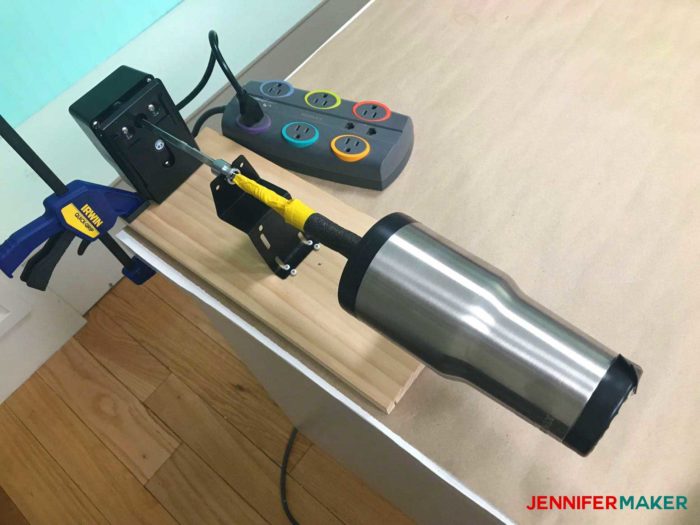
The power turning method involves building (or buying) a tumbler turner from a rotisserie turner, which I also did. We simply mounted a rotisserie turner to a board, and it turns the tumbler for you as you work. Here is my DIY Tumbler Turner tutorial to show you how to make one yourself.
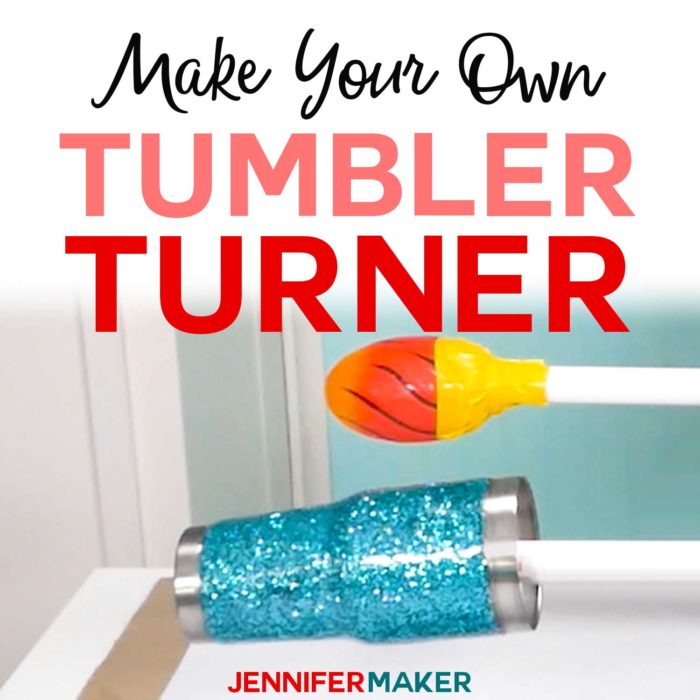
Between these two methods, I much prefer the motorized version, because it was easier to apply the epoxy. I didn’t have to babysit it, I could just let it do its thing, and I didn’t have to worry about the epoxy dripping down, the way that I did with the manual turning method.
Step 6: Mix and apply high gloss resin to your glitter tumblers.
Put on nitrile gloves, wear your respirator, and get out your high-gloss resin to your tumblers. I used this EXACT brand of resin and I did not experiment with anything else because I know that this works really, really well. It’s high-gloss, and the directions are on the back. I recommend you read everything through, because this is messy stuff.
IMPORTANT: Epoxy resin is toxic while it is curing, and safety precautions must be taken. Wear proper protective equipment (nitrile gloves, long sleeves, full-face respirator, and apron) and work outside or in a well-ventilated area. Do not allow epoxy resin to touch your skin or be inhaled through fumes or dust. If you get some on your skin, wash it twice well with soap and water. Always read the safety information!
For these big tumblers, I used 25 milliliters of the A bottle and the B bottle for my resin. If you have smaller ones, you could do less. Note that the A bottle is a lot thicker, so don’t be surprised by that. Make sure you have a good supply of plastic cups and Popsicle sticks on hand for mixing, because it’s really important that you mix your resin well.
Mix the A and the B individually for about one minute. Then combined them together and mix for three minutes. Make sure you get all the little liquid out when you combine them, because you don’t want it to be off — you don’t want to have more of A or more of B. I didn’t really have any issues with the air bubbles.
Once your resin in mixed, immediately head on over to where you prepared your tumbler turner and put your tumbler on it. Now put your epoxy resin onto your mugs — I just used poured it on and used my gloved fingers to spread it down the mug. I can tell through my gloved finger which sections had resin on them and which did not. So even if I couldn’t see the reflection, which usually I could, I could tell by the way it felt. And there’s no reason to waste a brush, or several brushes, really, because this stuff hardens and then your brush is ruined.
Be sure to rotate your tumbler as you go.
Keep rotating after you’ve applied it. So for the first five minutes, we rotated the tumblers constantly, and after that, we would do it every 10 to 15 seconds. Then we monitored it after that, based on drips that we saw forming, so for the first half hour we were sitting there tumbling our tumblers to keep them from dripping. But after the half hour, you can just do it every few minutes.
Step 7: Remove your tape after 30 minutes (and before 45 minutes)
It’s important you remove your tape between 30-45 minutes. Any later, and you won’t be able to clean up the edge of the glitter tumbler (which you can do with a little paper towel and rubbing alcohol)
Step 8: After at least five hours, tape your tumblers and sand them.
Be sure to wear a respirator and gloves when you sand your tumblers to avoid epoxy contact, buildup, and potential allergic reaction.
Step 9: (Optional) Apply your vinyl decal.
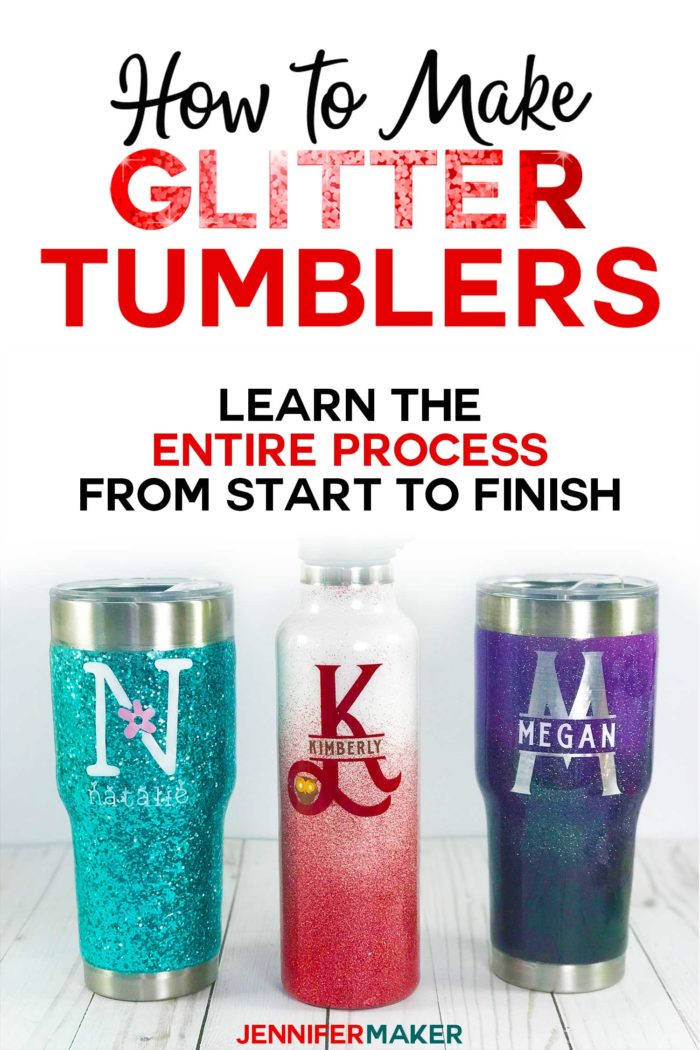
Note: If you’re curious about the fonts used for the decals, here is a list:
- N (Natalie) – Mother Nature
- M (Megan) – Roland Emerald
- K (Kimberly) – Black Django (for the initial) and Roland Emerald (for the name)
Step 10: Apply your second coat of resin.
Repeat everything in step 6.
Step 11: Remove your tape after 30 minutes (and before 45 minutes) and allow to cure for 24-48 hours.
Making Glitter Tumblers: What’s Best?
Glitter tumblers make amazing gifts, because they are perfect for personalization. There are really so many different variations you can have with the glitter and decals. You can make a really glam tumbler, or something more understated.
When you make your own glitter tumblers, I recommend you use the spray adhesive — it really worked quite a bit easier and drying time was considerably less than mod podge.
And I found no real difference between spray painting the tumblers first vs just glittering the tumblers as is. Perhaps if you were using less glitter it would be noticeable, but otherwise I think you can skip the spray painting step.
The difference between the extra fine glitter and chunk glitter really comes down to personal preference. The extra fine glitter is definitely more sleek and smooth, but not as sparkly. I think I prefer the chunky glitter. If I’m going to glitter something, I figure I should just go all out and be extra glittery.
I definitely preferred the automated tumbler turner we made from the rotisserie turner to the low-tech cardboard and PVC method. I didn’t have to worry about the tumblers when they were on the rotisserie turner. So if you’re serious about making more than one or two of these, I recommend you build a rotisserie tumbler turner.
Finally, when it comes to decals, the regular vinyl decals looked better than the foil vinyl decals. And you have to be careful about having too much detail in your decal when you do the chunky glitter tumblers, as they already have so much going on.
All in all, this was a SUPER fun project that I’m so glad I made! I’m giving most of these tumblers away to my family for Christmas, and I cannot wait to see what they think of them!
Get my free SVG cut files for the Glitter Tumbler Decals
You can use my Mama Bear decal, as well as my cute face decals for your glitter tumblers! Both are in my free resource library!
If you make your own glitter tumblers, please share a photo in our Amazing Cricut Facebook group, email it to me at [email protected], or tag me on social media with #makershowandtell.
See all of the projects, tutorials and free designs in The Great Maker Show and Tell Challenge! There is one for each day of the 25 Days of Christmas! This is my gift to you for the tremendous support, enthusiasm, and love you’ve shown to me and my little blog over the past two years. To “open” a gift, hover over the day’s image and click the download icon.
[ess_grid alias=”25days2″]
Love,

Want to remember this? Save the DIY Glitter Tumbler Step-by-Step Tutorial to Your Favorite DIY Pinterest Board!


These are so pretty! I particularly like the “Kimberly” tumbler, as I find the fading glitter look beautiful ?
I just watched your glitter tumbler video – kudo to you! Wonderful directions and step by step instructions and thank you for giving the details of the supplies used – this helps tremendously. I would like to see the ombre video as my daughter would like to have one made – I will also like to try this next step.
Jennifer–just watched the Glitter tumbler video and LOVE them!! You are so talented and share everything so freely–I really appreciate that!! Can you tell me where to get the letters/names that you have on the tumblers? I love that alphabet (or whatever it is). would love to be able to use those. Thanks so much!
Michelle
I know, I really think these fonts turned out so great! They are on step 9 of the blog post, but here they are!
N (Natalie) – Mother Nature
M (Megan) – Roland Emerald
K (Kimberly) – Black Django (for the initial) and Roland Emerald (for the name)
I just wanted to say, these tumbers are very pretty. Thank you for the very detailed tutorial on it. This is something I hope to try very soon.
Thank you so much, Tomika!
Would you mind sharing what you did or how you got the small pink water bottle on the turner, since the opening is much smaller? Thank you in advance
I removed the foam from the end of my tumbler turner, wrapped it in paper towels instead, taped the paper towels to the rod so they wouldn’t fall off, then put the pink tumbler onto the rod. The paper towels were enough to keep it from falling off.
Thank you. I’ve been trying to figure this out. You see such a talented lady. ?
Can you tell me how important it is to use a matte or satin spray paint over a gloss paint? I’ve been hearing that matte is the way to go. Any suggestions or reasonings(If that’s a word)
I don’t personally think it matters at all. I’ve used both and can’t tell the difference once the glitter is on. That said, if I were choosing, I’d go for matte.
I love every single one of your tutorials! Thank you for sharing your genius behind your crafts. On that note, I have a question. I have just started making the glitter tumblers, and I’m only doing it for my family, so I am very much an amateur. I made one with black glitter, and it basically looks like lava. It does not even remotely look like glitter. Did I do something wrong? Do you know if I can remove it from the tumbler now?
Thank you for any help with this!
Thank you, Desiree! Did it look like lava before or after you put the epoxy on? I noticed that black glitter is pretty black and light absorbing, too — that’s why I did mine with purple also (the “Megan” tumbler in this tutorial). And YES, you can remove it and start over — you just have to strip it off. Google YouTube for “how to strip a tumbler.” 🙂
Doo you buy your tumblers at a department store or do you have a provider for blanks.
I just buy them from Amazon at this point because I don’t need to buy in bulk, but there are places you can get them in bulk such as:
SaveaCup.com
DiscountMugs.com
Paraqraft.com
VinylCreationBlanks.com
TheStainlessDepotCompany.com (Hogg)
TheSteelMagnoliaCompany.com
RTICcoolers.com
Approx. How many tumblers will one box of the resin do?
It depends on how many coats you put on, but I’d say you can get 2-3 tumblers out of a regular size box of the Alumilite Clear Coat.
Do you recommend using a heat gun at all? I’ve read some tutorials for removing air bubbles?
I haven’t used one yet because I don’t have issues with air bubbles, but I plan to try it in the future. Keep an eye on my blog for more tumbler tutorials!
I tried it and it just heats the epoxy up and makes it drip, so I can’t say I’d recommend it.
Hi Lacey! You are applying the heat too closely and for too long. You will want to be constantly moving your heat gun back and forth just a couple of times over your cup.
thanks for doing not only a video but a written tutorial!! i am much better with the written word! you are great at teaching . keep up the great work!!!
You’re welcome! I am like you — I prefer written directions over videos. But I know people learn in different ways, so I do different approaches whenever possible.
Trying out glitter tumblers for the first time and I’m having a hard getting my glitter to stick even though I’m applying it as soon as I’m done with mod podge, any tips?
I find Mod Podge hard to use too. That’s why I prefer the Loctite spray method instead of Mod Podge. Have you tried that?
Hi Jennifer,
I’ve seen your video and online I see 3 types of Loctite adhesives and I see on your video to use the 100 Type and not the 300. There is a 200 so I was wondering if you knew the difference on these? I would appreciate it.
Thank you,
Ed
I do use the 100, but here is the link to their website so you can read the differences between their products!
I have a question. I know that Loctite 300 isn’t good, but what about Loctite 200? Would that be alright? I saw that it is good for wood, metal, acrylic, foam, polypropylene, and pvc. It says it is middle weight bonding. Would that work well?
I didn’t try with 200 so I wouldn’t be able to give you a definite answer, but you can always try it and see.
HI Jennifer, I loved this tutorial for the glitter tumblers, both the written and video. Just wondering how long it would take a beginner to make one tumbler using the loctite spray, rustoleum spray paint, fine glitter, and 2 coats of epoxy to complete?
Unfortunately, this can vary so dramatically from person to person! The best suggestion I have is to try it out because each step for each person will be different!
I got a tumbler turner for Christmas and your video has been so easy to follow.
I have two questions though before I jump in.
question #1 between steps 7 and 8 does it need to turn the whole 5 hours.
basically same question for step 11 to cure for 24 to 48 hours does it need to be turning this whole time.
It should spin for 5-8 hours for the best results between steps 7 and 8. But, it does not need to spin the entire time in step 11 while it cures.
Can you use tumblers that are already a cooler when you buy them or is it necessary to buy stainless steel and paint them yourself?
when you purchase tumblers that are already colored, that usually gives them a powder coat that epoxy has trouble adhering to, you will need to sand it really well for the epoxy to adhere to it.
These are so fun! Do you also have how to fill with floating glitter or even better yet…how to make a floating glitter airpod case???? hint hint
Thank you for so many great tutorials!
Hi Lauren, I think you are thinking of snowglobe tumblers. I do not at this time, do you mind suggesting it for me here? https://jennifermaker.com/projectrequests/
Love all of your videos!! Can you tell me what you do after it is done curing before you gift the tumbler to someone?
Hi Jamie! After the cup has cured, just give it a final hand wash and that is it!
These tumblers are beautiful. I’m going to try and make one for my sister.
Wonderful, Deborah!
Hi Jennifer
I recently made a tumbler based on your videos and it is BEAUTIFUL 😍 BUT my cup feels tacky/sticky and I’m not sure why. It’s second coat of resin dried for over 24 hours. Any advice??
Thank you!
The glitter tumblers ARE gorgeous, aren’t they, Courtney? But resin can be a finicky material to work with. You need to make sure to thoroughly mix both parts together, to work in a space that has a constant correct temperature and doesn’t have any drafts, and many other considerations. Your best bet is to google, “why is resin not hardening” and you will find all sorts of things to be aware of for your next tumbler! 🙂
was the template Ombre video ever made? i am really curious on how to make those
It sure was, Sharon! You can find find the Ombre Glitter Tumbler Tutorial right here! 😍
Hi Jennifer!. I wanted to try my hand at making the glitter tumblers. But Im confuse? Do they all have to be done with glitter? Or is there special ink base paint? or any paint to colorize them besides gliiter?
If you don’t want them to have glitter, Mary, go ahead and paint them as shown in the tutorial and just skip Steps 3 & 4 that talk about glitter! You will still want to apply epoxy, even without glitter, though, to protect your tumblers! 😊