
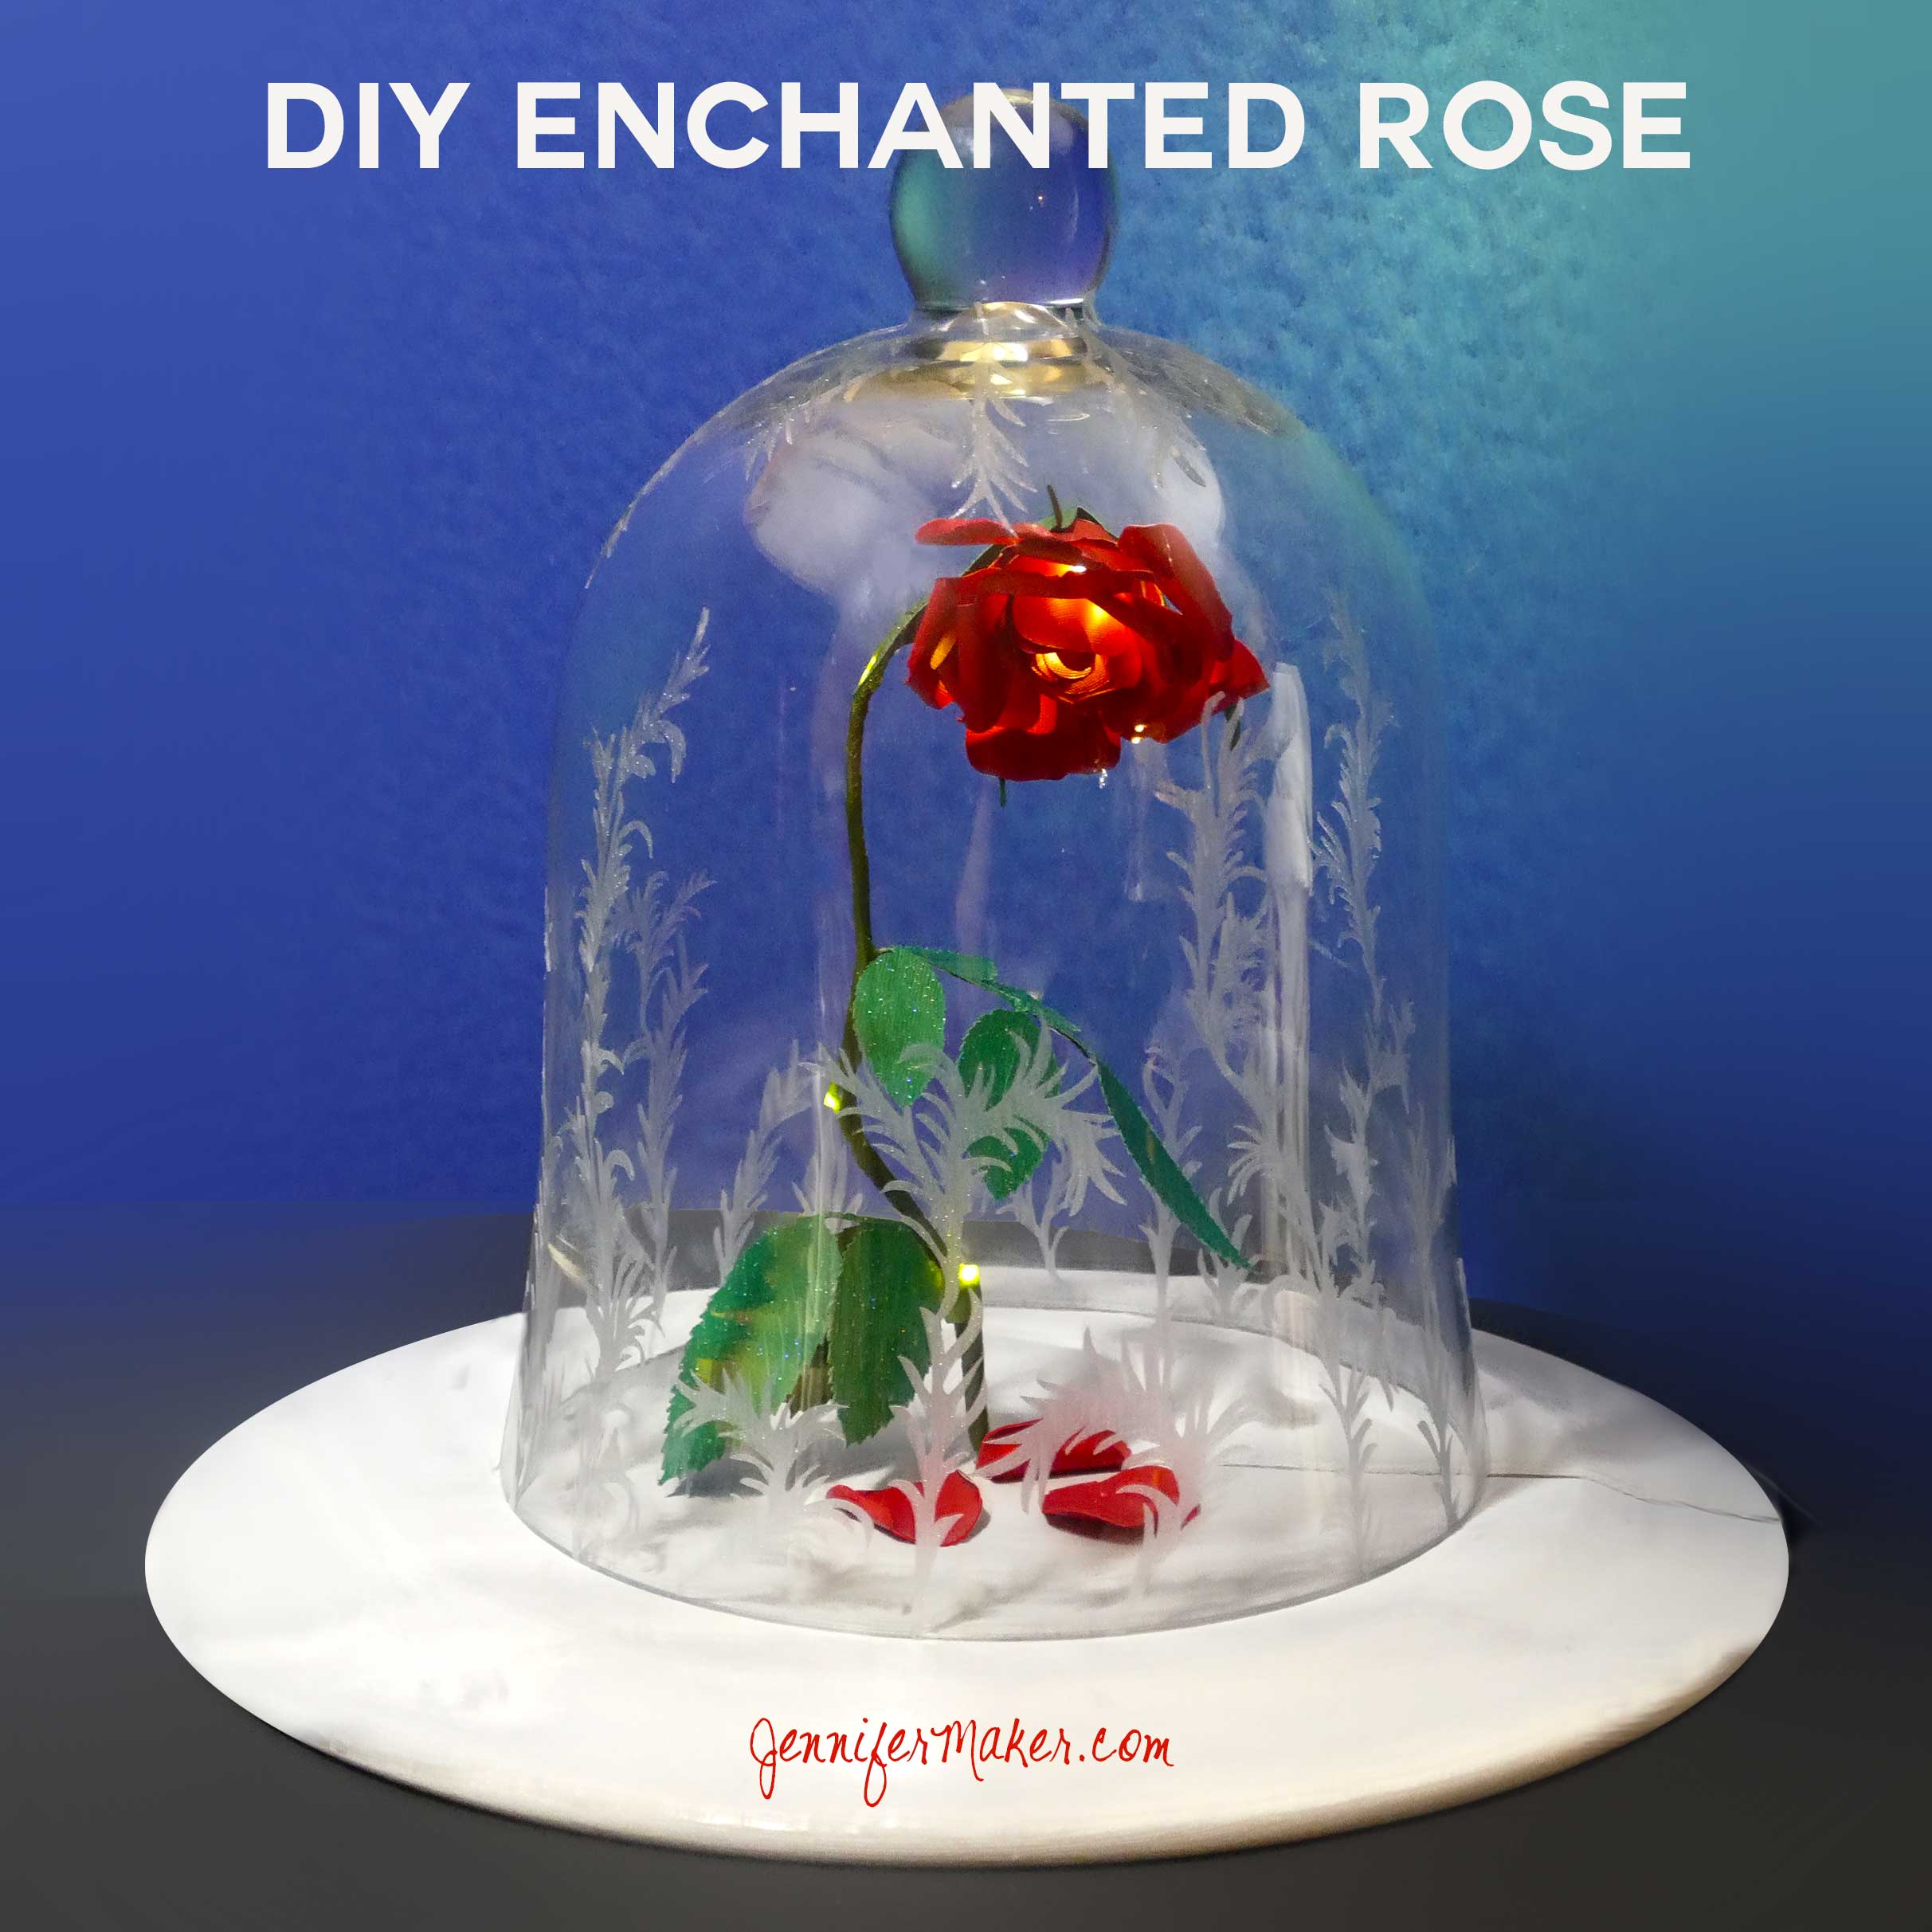
Did you see that breathtaking rose in Disney’s Beauty & the Beast live-action movie? Oh, it was amazing and a gorgeous upgrade from the animated movie. The enchanted rose looked realistic and the engraved bell jar was magnifique! As soon as I saw this enchanted rose, I knew I wanted to make it and show you how you, too, could have a movie set-worthy enchanted rose of your own. I’ve chosen to make my rose from paper, rather than purchase a silk rose because it made it a lot easier to incorporate the magical spell lights! So here’s what you need to get started with your own DIY Beauty and the Beast Rose and Jar!

Let me show you how easy it is to make this DIY Enchanted Rose! This post contains some affiliate links for your convenience (which means if you make a purchase after clicking a link I will earn a small commission but it won’t cost you a penny more)! Read my full disclosure policy.
DIY Enchanted Rose in a Bell Jar Materials
- Rose and cloche cut patterns/files (they are all located in my resource library — get the password for free by filling out the form at the very bottom of this page).
- Glass cloche bell jar (I used this 12″ glass cloche — if you get another, just make sure it is big enough for your rose)
- 14″ wide wood round plate) — you could also use a real marble plate
- White and black acrylic paint (to make the base look like marble)
- Clear gloss sealer to seal the base
- Frosted vinyl
- Red and green cardstock
- Red paint Sharpie
- Quilling tool
- Floral stem, 18″ long
- Floral tape
- Moon Lights, 12 warm white lights on a 4′ 5″ long wire strand.
- Glue
- Paper towel
- Sandpaper
- Paintbrushes
- A way to slot the base to hide your cord, such as a handsaw or table saw
- A way to cut your paper (I used the Cricut Maker cutting machine but they can also be cut on a Cricut Explore or Cricut Joy)
- Design #22 – My free SVG design files (available in my free resource library—get the password by filling out the form at the bottom of this page
How to Make an Enchanted Rose
I’ve broken down this tutorial into three parts to make it easier to follow along. Feel free to do only the parts you feel like.
Making the Lighted Paper Rose
I have a separate tutorial on how to create the rose that you may wish to review first. This rose is identical except for the addition of the lights. Here is a video of how to make the light-up paper rose — below that are the step-by-step photos.
Step 1: Cut out your rose and leaf shapes using my SVG cut files (Design #22) or patterns in my resource library.

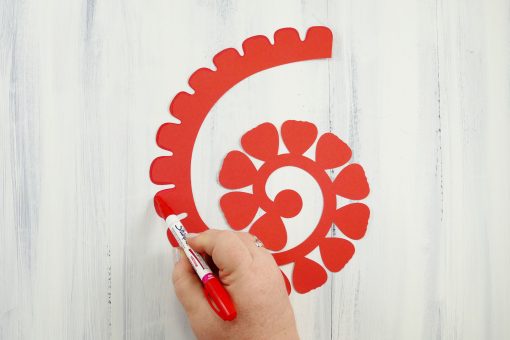
Step 2: Color the edges of your rose with the red paint marker.
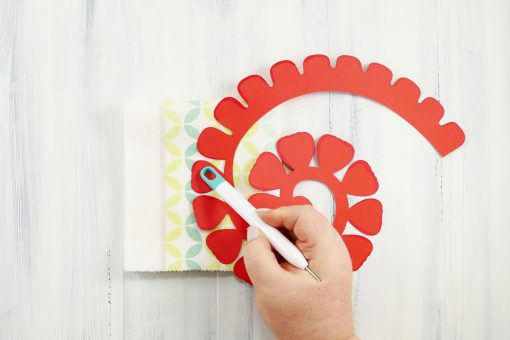
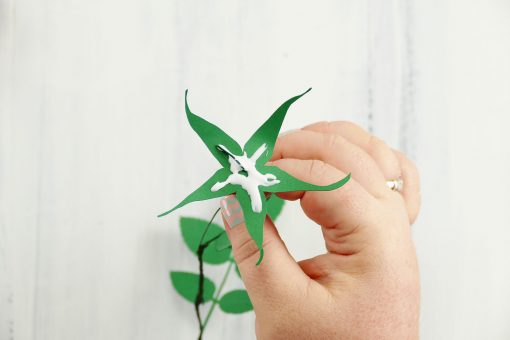
Step 3: Distress the rose petals with a rounded edge (I used the end of my quilling tool).
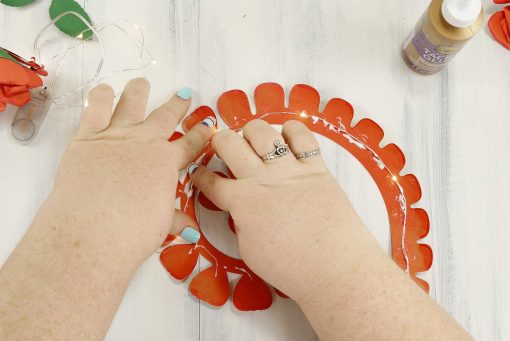
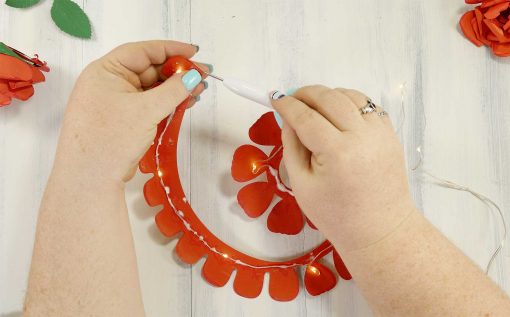
Step 4: Glue the floral lights to your rose petals as shown below. Allow the lights to peek up a bit from the base of the petals. Do not glue all lights to the petals — leave about four lights unattached (the four closest to the switch).
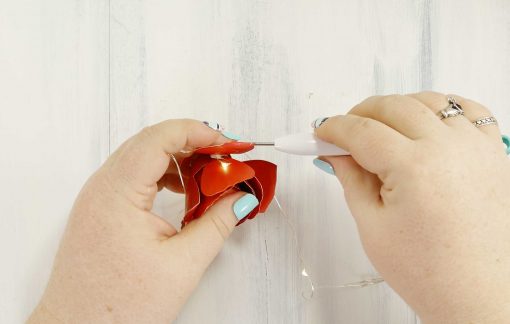
Step 5: Once the glue has dried and the lights are secured, place the loose end of your rose into your quilling tool and roll it up. The lights will roll up right with the paper.
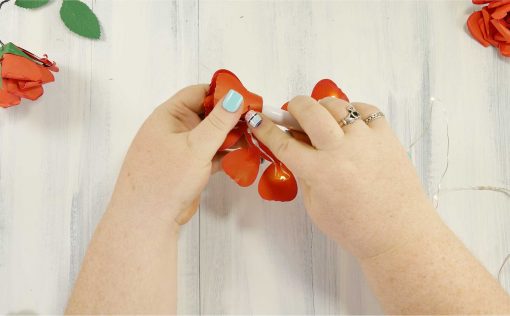
Step 6: When you’ve rolled up the rose, fold up the bottom circle and take out the quilling tool. The rose will open a bit in your hands, but not as much as the unlighted rose does. Feel free to open the rose the way you want it to look, gently separate petals if necessary. You can also unwind the center bed to open the rose up more. Beast’s rose is either in full bloom, or past bloom, so it’s open quite a bit.
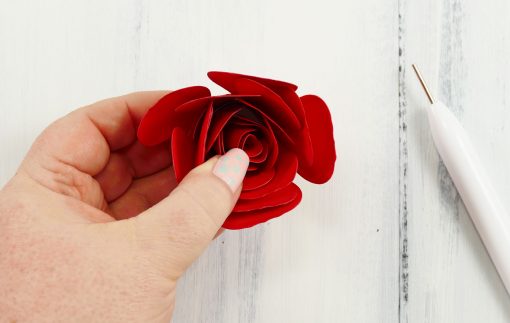
Step 7: Once you have your rose looking good, put glue on the bottom edges of the petals (be generous) and press them against the round circle. Press and hold.
Step 8: While the glue sets (and you’re still pressing the rose), use your quilling tool (or the edge of something long) to roll the petal edges. The rolled edges make your rose look much more realistic, and it also tends to fill in most of the gaps. When done, set aside.
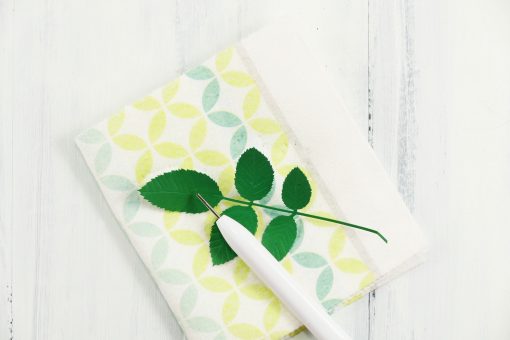
Step 9: Places the cut leaves on your paper towel and score leaf-like lines using your tip of your quilling tool. Put one long line in from top to bottom, then add lines radiating outward and upward from the center line to the leaf edge.
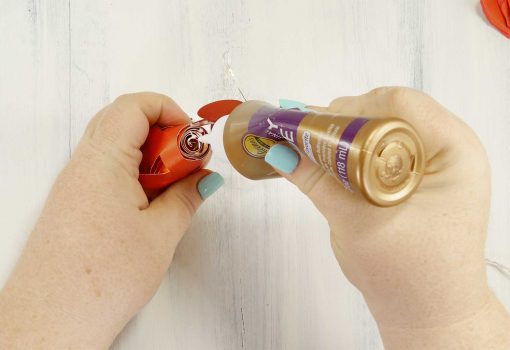
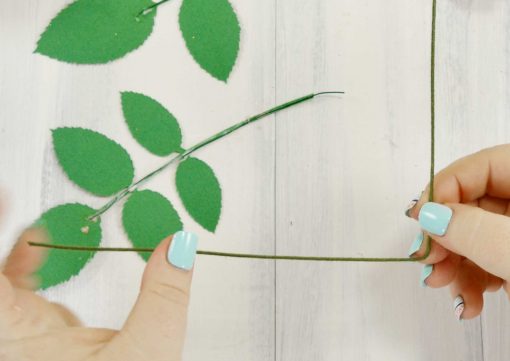
Step 10: Cut off a 4-5″ piece of floral wire and glue it to the BACK of each set of leaves.

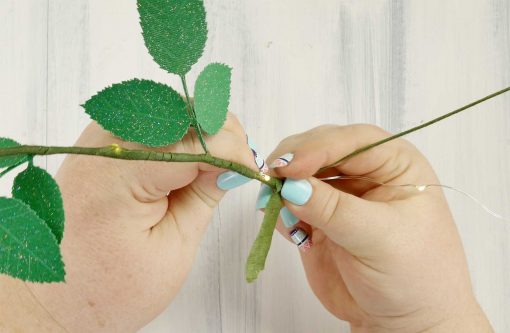
Step 11: Get an 18″ piece of stem wire (or cut an 18″ piece of floral wire and wrap it with floral tape). Bend up the bottom 6-7″. Next cut a 3-4″ piece of floral tape and begin wrapping it around one the stem, just above the bend. If you pull gently on the tape as you wrap, it is more likely to stick. Wrap several inches from the bottom (above the bend) upward.
Step 12: Place the larger set of leaves against your stem (the side of the leaves you want visible should be against the stem) and continue wrapping up and over it with your floral tape. Once you’re about 2/3 of the way up the stem, add the smaller set of leaves and finish wrapping all but the last 1/4″.

Step 13: Poke the unwrapped end of your stem wire into the bottom center of your sepal and fold over 1/4″ into a 90° angle.
Step 14: Spread glue generously on the sepal and put your rose in it bottom side down. Array the petals on the sepal up and onto the sides of the rose. Allow glue to set.

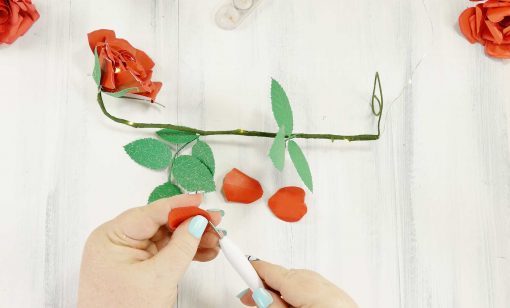
Step 15: Now it’s time to wrap and hide the wire lead from the rose down your stem. Line it up with your stem and begin wrapping it with floral tape. I chose to cover the lights with a layer or two of tape as I went, as I thought the LED lights were a bit bright and harsh, but you can just skip the lights if you want to keep them uncovered. Wrap all the way down to the bend.
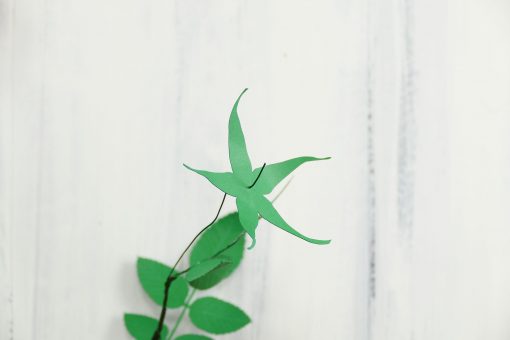
Step 16: Coil up the rest of the stem, beyond the bend, so it forms a sort of base. This will be helpful later when you insert it into the faux marble base. Step 17: Distress and curl the edges of the three single petals.
Making the Faux Marble Base
The rose and jar sits on a marble table in the movie, so we’re going to make a pretty faux marble base for it. This is totally optional, of course.
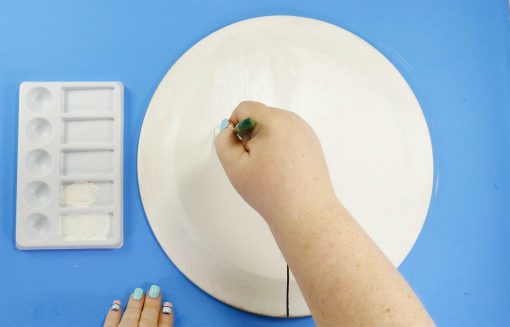
Step 1: Find the exact center of your plate and mark it. Now cut a slot in it from one side to the center. My slot is only about 1/4″ thick, which is all you need to fit the stem bottom and cord. I used a table saw to do this, but a hand saw would work, too. You can also skip this step if you don’t mind your cord showing.
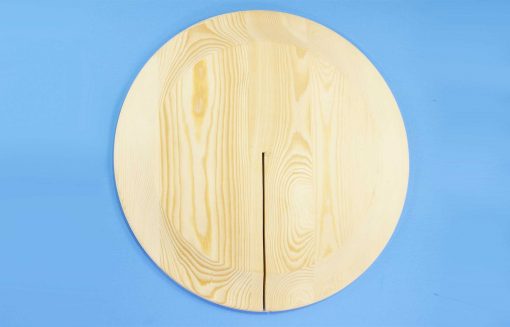
Step 2: Sand the bottom of the plate until it is smooth.
Step 3: Paint the plate white.
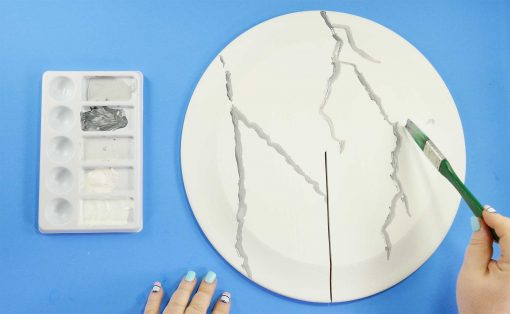
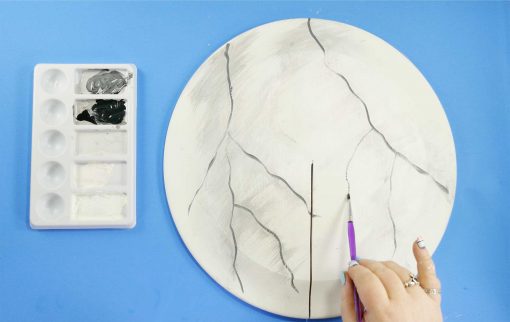
Step 4: Make various shades of gray, from just slightly darker than white to dark gray. Using the tip of your paintbrush, draw branching lines on your plate. All lines should go in the same direction.
Step 5: Use a dry brush to blend the painted line in.
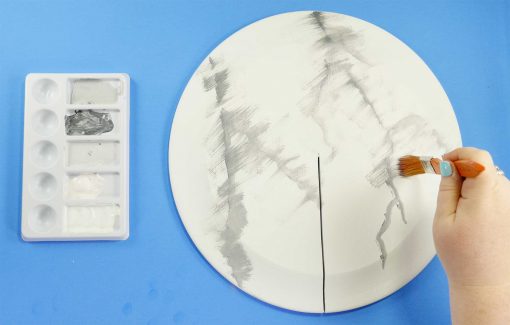
Step 6: Paint your plate again with a light coat of white, so it covers, but does not conceal the paint you applied in step 4.
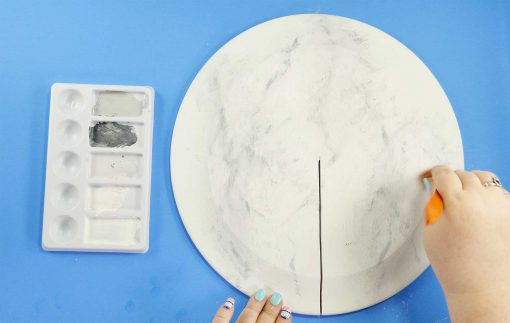
Step 7: Repeat steps 4-6 several times to build up the faux marble pattern. Re-paint the vein lines over the same ones you made initially, though you can add smaller branches. Keep repeating until you are happy with the marble design.
Step 8: Spray with gloss sealer and allow it to dry.

As you can see, I ended up with a very subtle marbling effect, which was my preference. More layers and lighter coats of white paint will produce a more dramatic effect. It’s your choice!
Making the Faux Engraved Bell Jar (aka Cloche)
The rose is covered by a very pretty glass cloche (bell jar) that appears to be engraved with many swirling lines. I’ve tried to mimic these same lines by carefully studying the movie images. We’re going to simulate this with our own jar. Step 1: Using the SVG cutting files in my resource library, cut out the swirling lines using frosted vinyl. Note that I prepared one sheet that is filled with various lines — it’s up to you whether you need one or two sheets. If you want to print out additional copies of only certain lines, I’ve included those individual files as well. Here’s what the lines look like all on one 9″ x 6″ sheet:
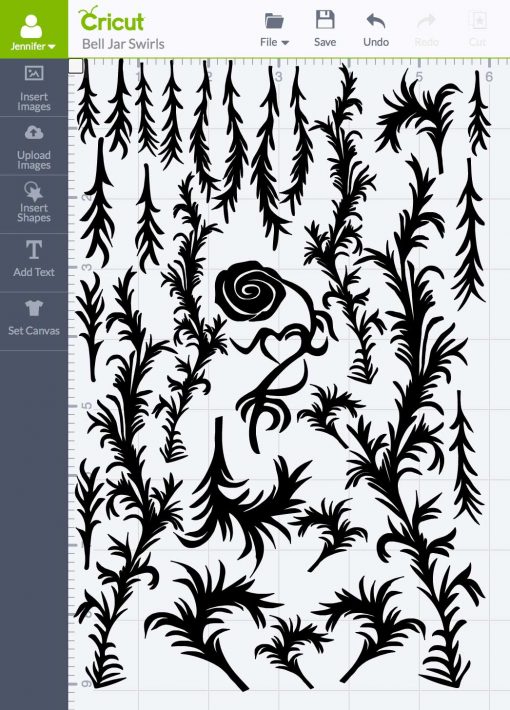
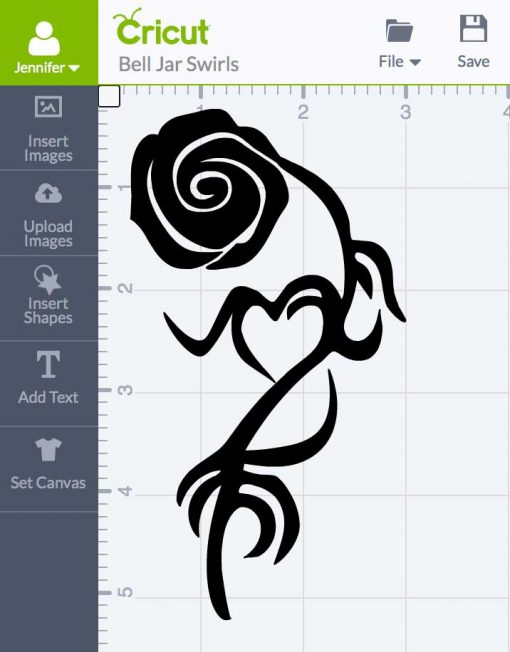
Note the rose with a heart in the same style. This is not on the movie version — I just thought it was a nice touch.
Step 2: Wash your glass cloche well to get off any residue.
Step 3: Carefully remove one line at a time. I didn’t have any luck using vinyl transfer tape on this frosted vinyl (mine transfer tape was either too sticky or not sticky enough), but you may have better luck.
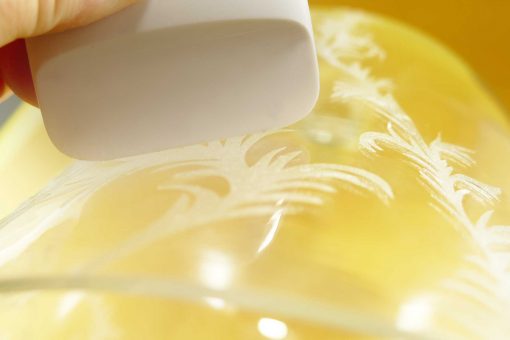
Step 4: Apply each design to your cloche. Bigger vines line up with the bottom and go up. Smaller vines line up with the top and go down. Feel free to cut vines and apply portions alone or in combinations to create patterns that fill the surface to your satisfaction.
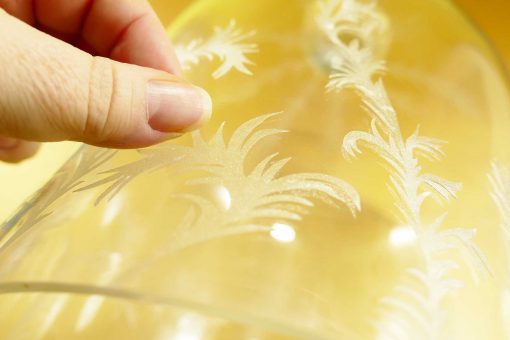
Step 5: Burnish all your vinyl down well. I usually use the back of my fingernail, but you can also use any flat tool, such as the Cricut scraper. Remember to move outward toward the edges.
Note: Optionally, you can use a white Sharpie marker to create the lines. It won’t have the same glittering effect when the lights are down and it’s hard to get a consistent paint spread, but it looks convincing otherwise. Here’s a sample I did to show you on a wine bottle:

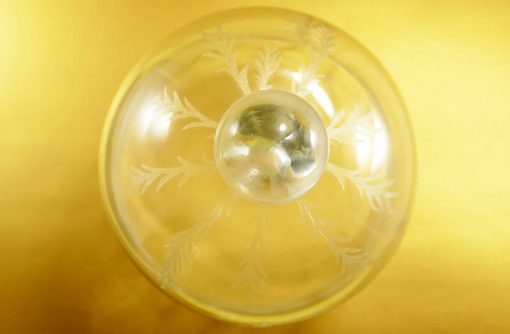
Here are some more shots of the vinyl applied to the cloche:

Putting It All Together
This is the easiest part!
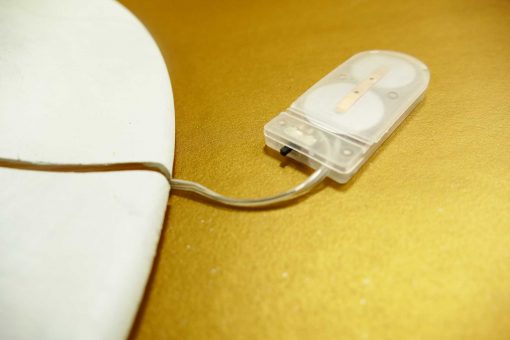
If you slotted your base, just slide the stem of your rose, right above the bend, into the slot on your base. The recess of the upside-down wooden plate you used for your base hides the bent stem and even the battery pack if you wish. You’ll probably want to leave the battery pack just at the outside edge of your base, however, so you can turn it on and off. Here’s what I mean:
Now just put your glass cloche over your rose and that’s it! It’s ready to enjoy.
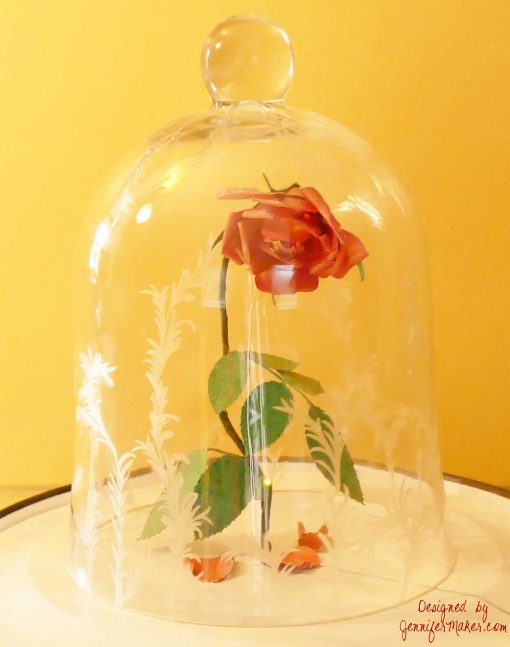
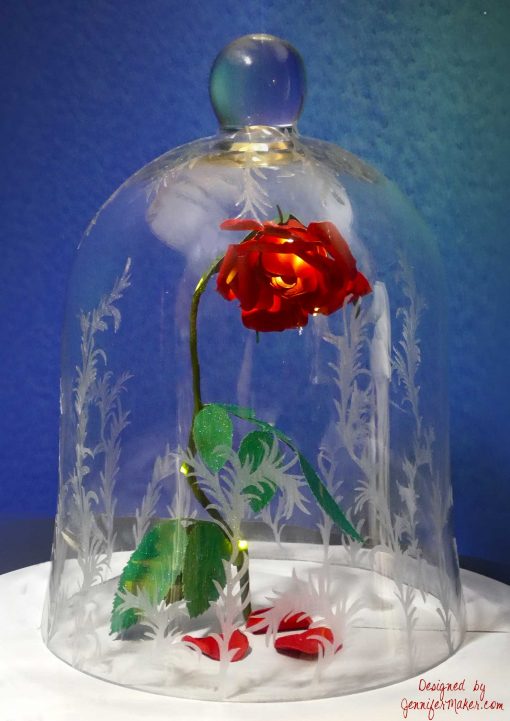
Here’s the enchanted rose in the daylight:
And here’s the enchanted rose with its lights on:
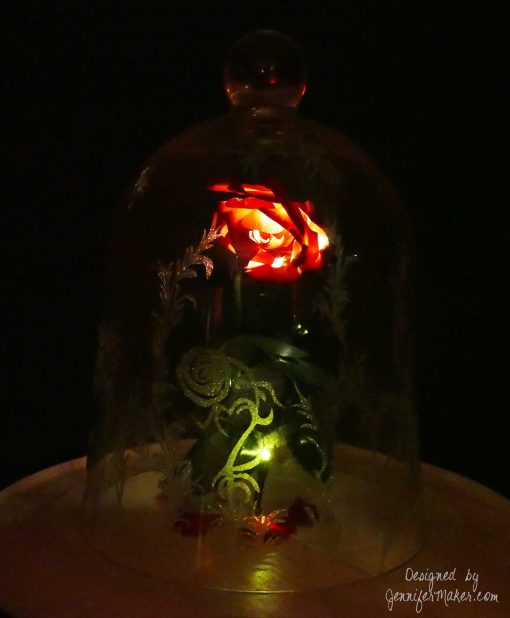
And here’s the enchanted rose in the dark (long exposure):
Get my free SVG files to make a DIY Enchanted Rose!
I really enjoyed making this, and I hope you do, too! This DIY enchanted rose will look beautiful in any home. It would also make a lovely centerpiece at a party or a wedding. And what a gift this would be for a Beauty & the Beast fan! I originally came up with this idea as a craft for my friend Sara, who adores Belle. So I will be sending her this enchanted rose, along with all the components so she can try her hand at making her own light-up rose and decorating the cloche herself. If you make this DIY Enchanted Rose, I’d love to see it! Please share a photo in our Facebook group or tag me on social media with #jennifermaker.
Love,

P.S. Here’s a version of the enchanted rose made by reader Jen Stout, who followed my directions. Didn’t it turn out beautiful?

Want to remember this? Save this DIY Enchanted Rose tutorial to your favorite Pinterest Board!


Hoping to get the password for the DIY Enchanted Beauty & The Beast flower
Hello, Amanda! I see you just subscribed — the password appears on the screen as soon as you do. It also shows up in your email a few minutes later. 🙂
I am attempting to make the rose and I have somehow screwed it up…lol When I uploaded to my cricut and cut them out My separate petals are HUGE! Like bigger than the palm of my hand… and my leaves are tiny…lol What are the dimensions so I can correct them in my file?
Thanks,
Jen
I cut the rose petal pattern set out at 8″ wide, the leave set at 7.5″ wide, and the individual petals at 1.5″ each.
This is just amazing.
Aw, thank you, Susan! <3
So awesome!
Thank you so much, Amy!
you are such an artist
Thank you, Joanne!
your flowers are great.
Thank you so much, Vicky!
This absolutely breathtaking. I am a huge Disney fan and I loved the new version of the movie. I am a new Cricut user and can’t wait until I have enough confidence to try to make this. Thank you for your vision and sharing your design files.
Oh, thank you so much, Anne! I have not had my Cricut for very long — only about two months. I would also call myself a new Cricut user. If I can do this, you can do this, too. Also, I had my family over and they all made roses — none of them have Circuits, and I taught them how to use mine. You can do this! 🙂
This is awesome! Instead of tacky glue I used hot glue which I believe works much better, but mine is turning out amazing thanks to this tutorial!
I LOVE YOUR SITE!!!!