
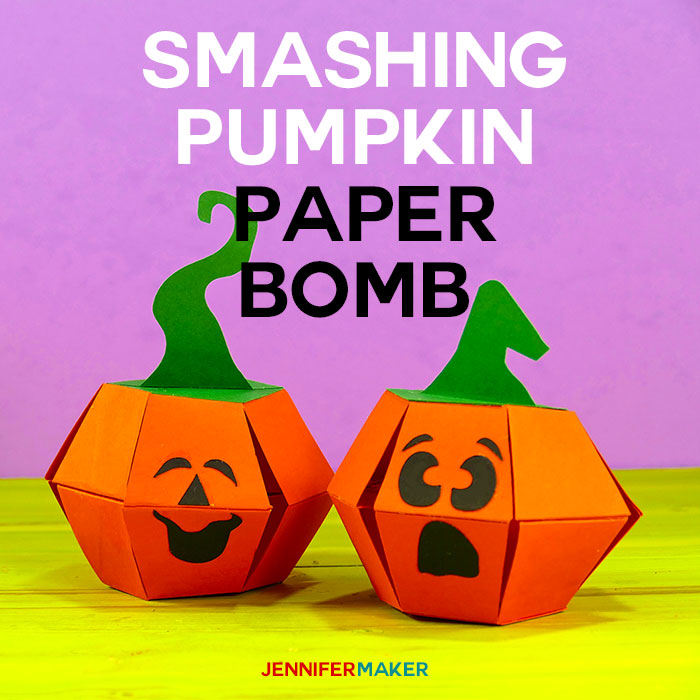

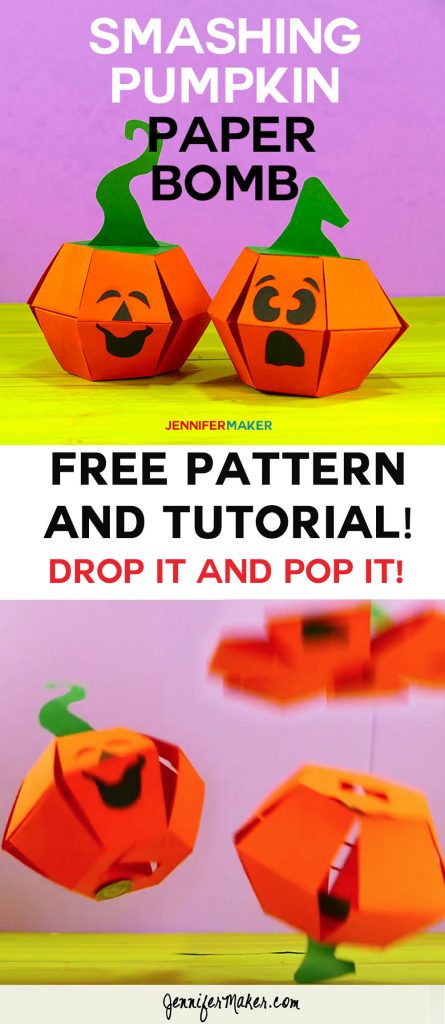
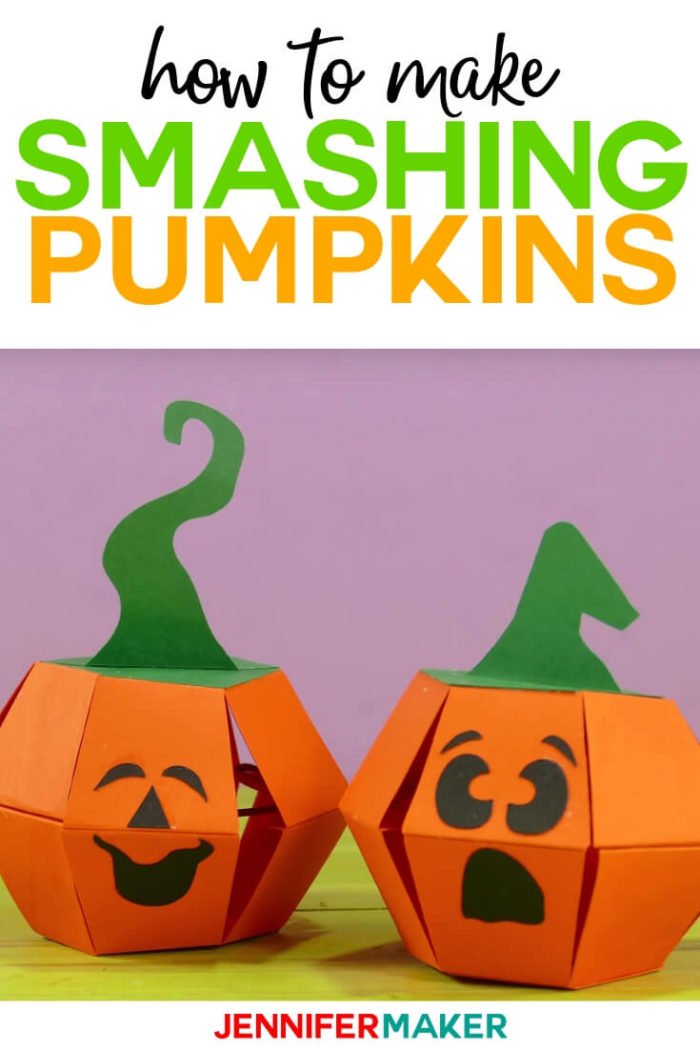
Want a fun papercraft to make this autumn? I have JUST the thing — a smashing pumpkin paper bomb! It’s similar to the extremely popular Penguin Paper Bomb, but this one is EASIER and FASTER to make! And, better yet, you can personalize the face and the pumpkin stalk to your liking, as I’ve included 16 different eyes/nose/mouth combinations and four different stalk shapes. So much fun!!
Watch the pumpkin paper bombs in ACTION with this video:
What is a paper bomb? It’s a papercraft that you can fold flat, then drop it on a surface to watch it POP UP into shape. It’s very fun and will make you the talk of your next party or family gathering. And you don’t know what sort of face the pumpkin will have until it pops up, so it’s rather fun. One of my pumpkin paper bombs is quite happy to be bouncing about, but the other one is definitely surprised!
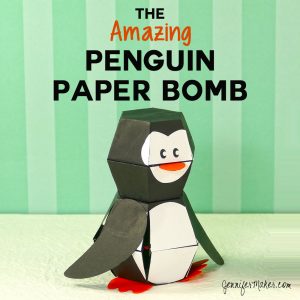
This paper craft was inspired by the Penguin Paper Bomb I made, which was in turn inspired by kamikara expert Hakuri Nakamura’s papercrafts. Kamikara is the Japanese word for trick papercraft!
I will walk you through the whole smashing pumpkin paper bomb papercraft, so let’s get started! This post contains some affiliate links for your convenience (which means if you make a purchase after clicking a link I will earn a small commission but it won’t cost you a penny more)! Read my full disclosure policy.
Smashing Pumpkin Paper Bomb Materials
- 65 lb. 8.5″ x 11″ cardstock (I used one sheet of orange, one sheet of black, and one sheet of dark green)
- One rubberband (size 18, 3 inches long)
- Tacky glue
- Toothpick (optional, used to spread the glue evenly)
- A crochet hook or a piece of wire bent into a hook (optional)
- Dimes or other small objects to use as weights (optional)
- Hot glue gun and glue sticks to attach the dimes (optional)
- A way to cut out your paper pieces (THIS is what I use that makes it fast and easy to cut out, but you can also cut it out with scissors)
- Design #53 – The pattern/cut files (available in my Free Resource Library—get the password to it by filling out the form at the bottom of this post)
How to Assemble the Smashing Pumpkin Paper Bomb
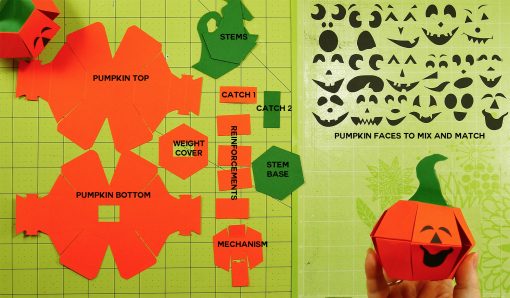
First, cut out all of your pumpkin paper pieces using my cut files or pattern.
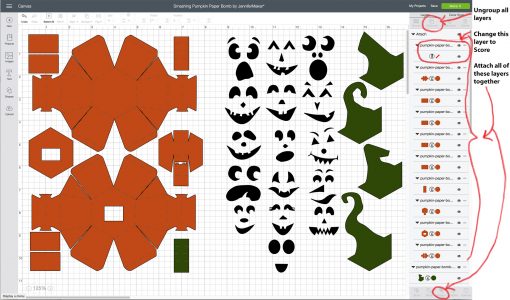
- If you cut with a Cricut, upload the SVG file to Cricut Design Space, place it on your Canvas, click Ungroup on all layers, change the one red layer with score lines to “Score,” then hold down the Shift key and select the red score layer and all of the orange layers and click Attach. You need to attach these layers together so that the score lines stay with the sections that need them.
- If you cut with scissors, print out the Paper Bomb PDF selecting the appropriate file either the pattern for solid color cardstock or the patterned design that you can print on white cardstock.
Tip: You can click the image above to see it at a larger size.
Here is each piece of cardstock you’ll cut out:
Next, watch my full-length assembly video — I show you the entire process to put this together:
This video will show you things that are hard to explain in this post. But this post has information not available in the video, so be sure to read it, too!
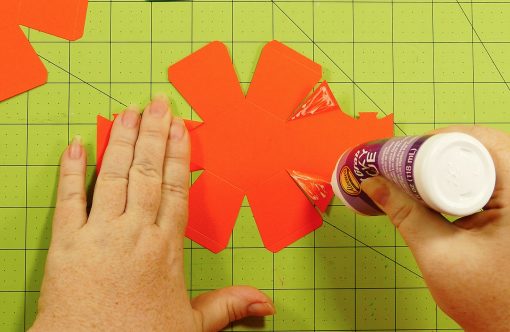
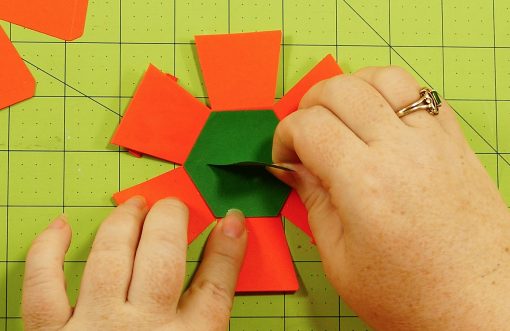
Your first step is to fold the top of the pumpkin piece (the roundish piece without a hole in the middle). Fold in the triangle pieces on each side.
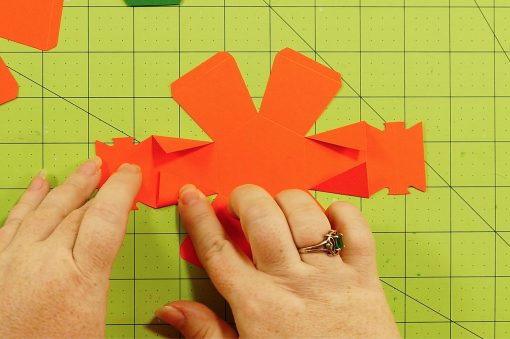
Glue down the triangle sides.
Then glue a reinforcement rectangle over each set of triangles:
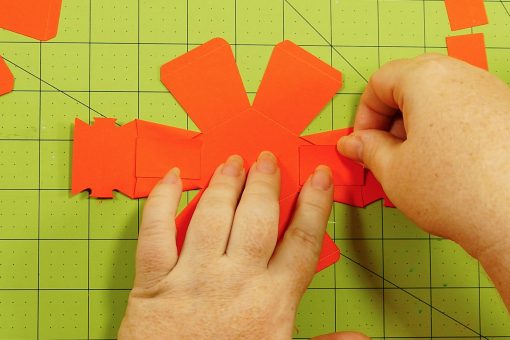
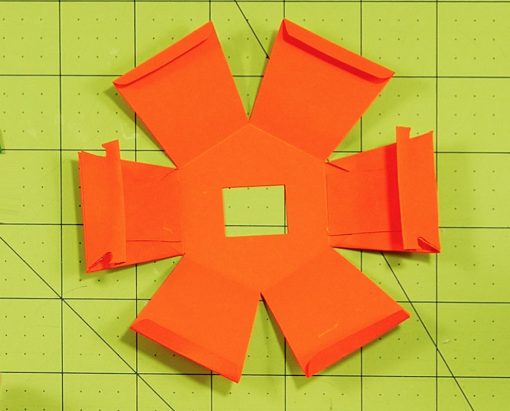
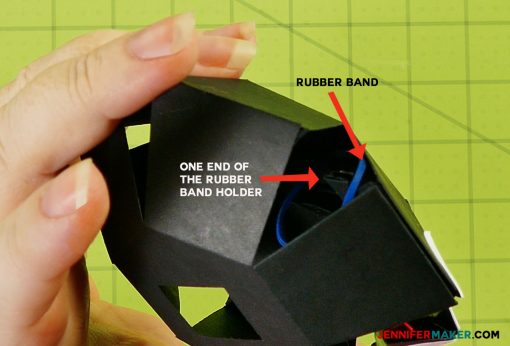
Fold the rubber band holders down and up, as shown below:
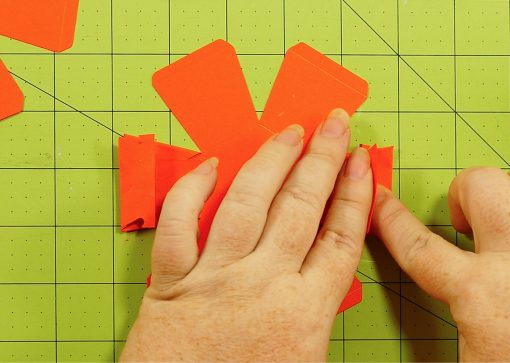
Now glue the rubber band holders:
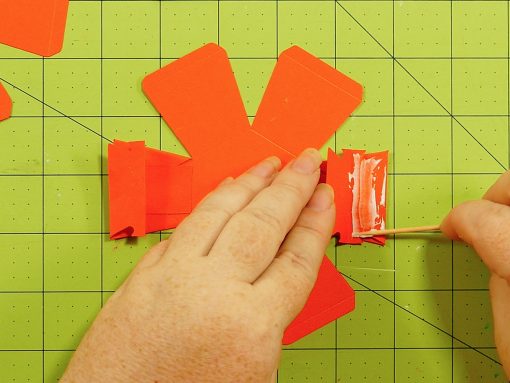
Now fold the remaining sides as tabs at the score lines.
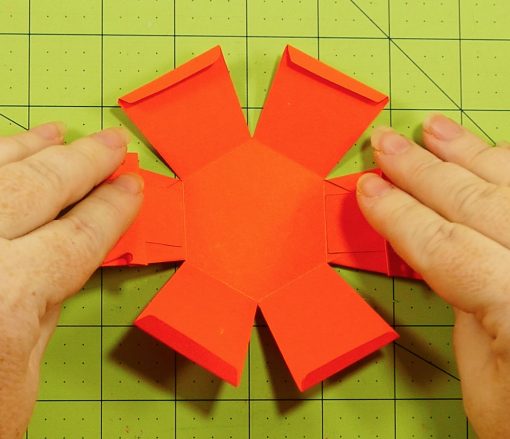
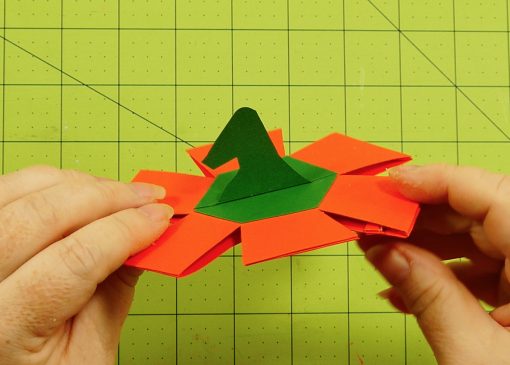
Turn the pumpkin top over and glue the stem base onto the top of it.

Pick a stem, fold it at the base, and glue it onto the stem base:
Do the same folding and gluing to the bottom of the pumpkin piece.
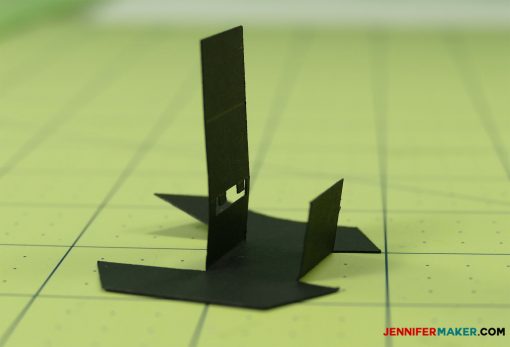
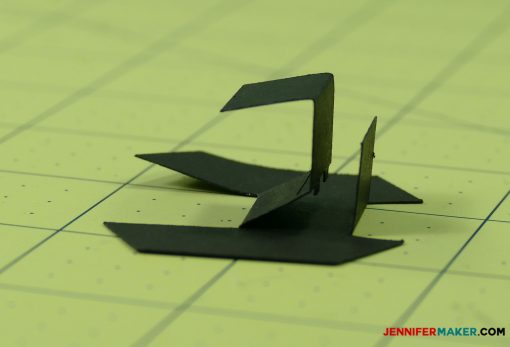
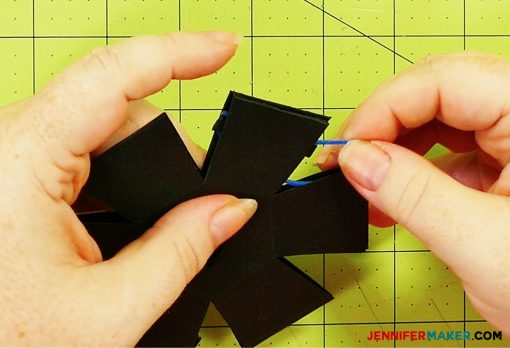
It’s time now to fold the paper spring mechanism, which comes in two parts. The first part, which looks like a rectangle with wings, gets its tabs folded up at the base. The section that is longer gets down again. Here are photos of how it is folded and glued. (Note: The pieces shown in the photos are black because they are from the penguin paper bomb tutorial and are higher quality images than the pumpkin images I took. They get folded and glued the same way!)

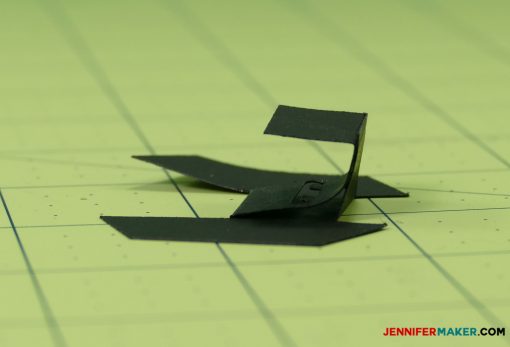

Tip: I included a second catch with this pumpkin paper bomb that you can use if you wish. It glues on top of the first catch to stick out a little more if you feel your pumpkin needs it. You can see how it is glued in my assembly video.
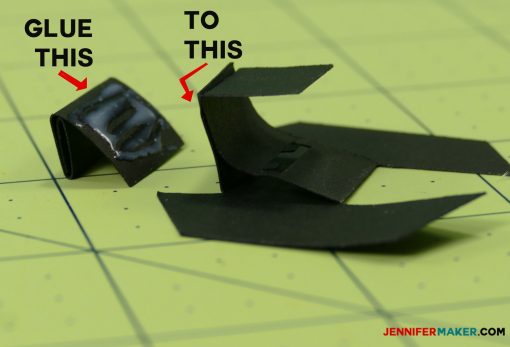
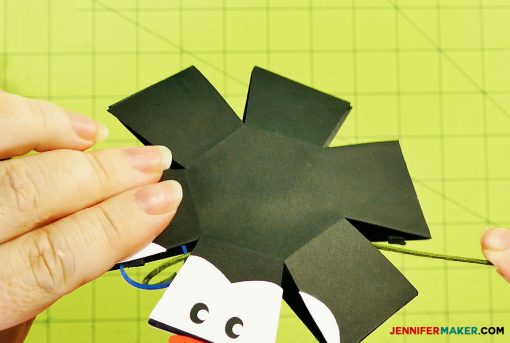
Now glue the mechanism and catch assembly into the top of the top pumpkin piece, in the same orientation as shown below. The orientation is important so the catch can work properly.

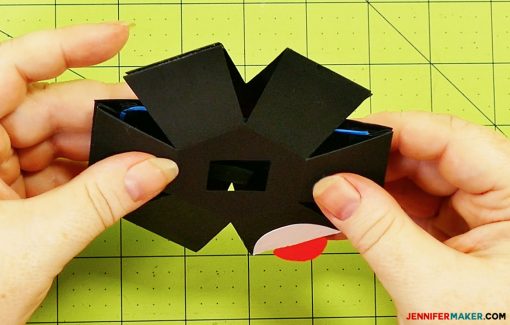
It’s time to glue these two pieces together, rubber band holder to rubber band holder.
Once the two of the rubber band holders are attached, you can fold it closed and glue the other rubber band holder and all the other tabs together, like this:
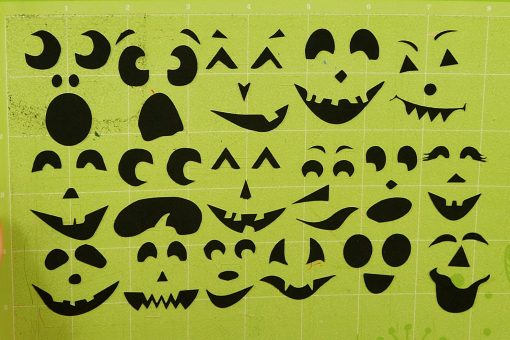
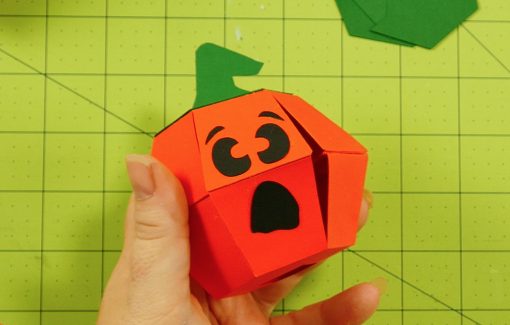
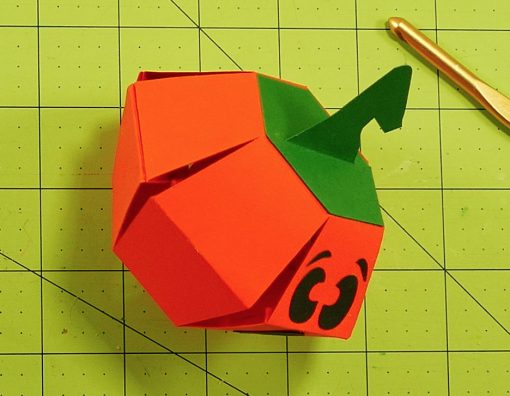
Now pick out eyes, a nose, and a mouth, and glue them on your pumpkin where you want them to appear. I think it looks best if the eyes and nose are on the top half, and the mouth on the bottom half.
Now let’s make it able to pop up! To do this, take your smaller rubber band (size 18 — about 3″ long when folded) and drop it into the pumpkin so one end of the rubber band loops around one end of a rubber band loop. (Again, I’m going to use my black penguin pieces to illustrate this because they are good quality — the technique is the same!)
Now reach into the head, grasp the rubber band, and hook it around the other end of the same rubber band holder.
If you have difficulties grasping the rubber band, use a crochet hook as I did, or make yourself a hook out of a piece of wire.

Using that hook, reach into the pumpkin from the opposite side of where your rubber band is currently hooked on, grasp the end of the rubber band, and carefully hook it around the rubber band holder directly across from the first one. This is tricky! It took me many tries to get the hang of this.
Lastly, reach inside with your hook from the other side, get the rubber band, and wrap it around the last end of the rubber band holders.
At this point, you should be able to let go and the pumpkin will pop into place!
Flatten the pumpkin again, turn it over, and make sure the tab mechanism is sticking out. (You may need to reach in with your hook and pull it out.) Allow the protruding side of the mechanism to catch on the bottom, which will keep it flat.
Now drop the smashing pumpkin on your work surface. mechanism side down. If you did it right, it will pop up! If it doesn’t work, check to make sure nothing is impeding the mechanism from being pushed in when it lands on the work surface.
Free Cut Files & Pattern for the Smashing Pumpkin Paper Bomb
Get the password for the library with the free smashing pumpkin paper bomb pattern and SVG/DXF/PDF files here by filling out this form:
Love,

If you enjoyed this tutorial, be sure to check out my Penguin Paper Bomb, too!
Save the Smashing Pumpkin Paper Bomb to Your Favorite Pinterest Board!
Check Out The Amazing Penguin Paper Bomb:
More Fun Pop-Up Papercraft Tutorials
- Pop-Up Apple Tree Card
- Pop-Up Butterfly Card
- Pop-Up Grill & Gift Card Holder
- Fairy House Card
- Pop-Up Game Controller Card
- Pop-Up Birthday Cake Card
Do you like to do craft projects, too? Share and leave a comment below!


UAU!!! thats amazing! LOVE LOVE LOVE!
Thanks