Learn sublimation basics for beginners and press your first project!
There’s nothing quite like lifting a sheet of paper and seeing a beautiful design burst from the surface of a project. I still remember the first time I did a sublimation heat transfer. I fully expected it to look like the dull print I had in my hands. Instead, the color came alive in seconds. That moment is exactly why I love teaching sublimation basics for beginners. Once you understand what’s happening, it stops feeling mysterious and starts feeling exciting. Before you know it, you’re transferring full-color, vibrant designs onto all sorts of blanks!
Watch the full step-by-step sublimation basics for beginners tutorial:

I know “sublimation” sounds like a confusing scientific concept, but there are really just three basic things you need to get started: the right blank (your surface), the right ink, and the right heat source. Once those three pieces click, everything else is just a handful of beginner-friendly best practices like measuring carefully, mirroring your design, and prepping your blank so your projects come out clean and colorful. Don’t worry, we cover all this and more in my video!
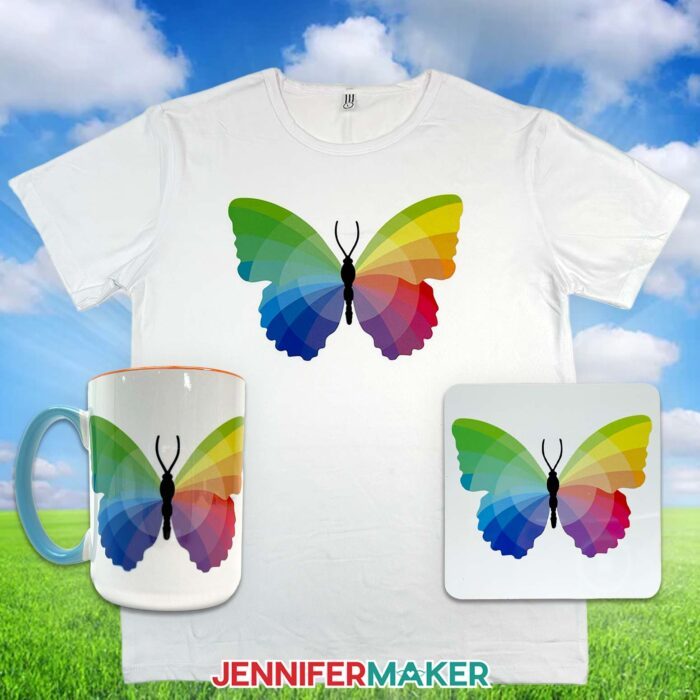
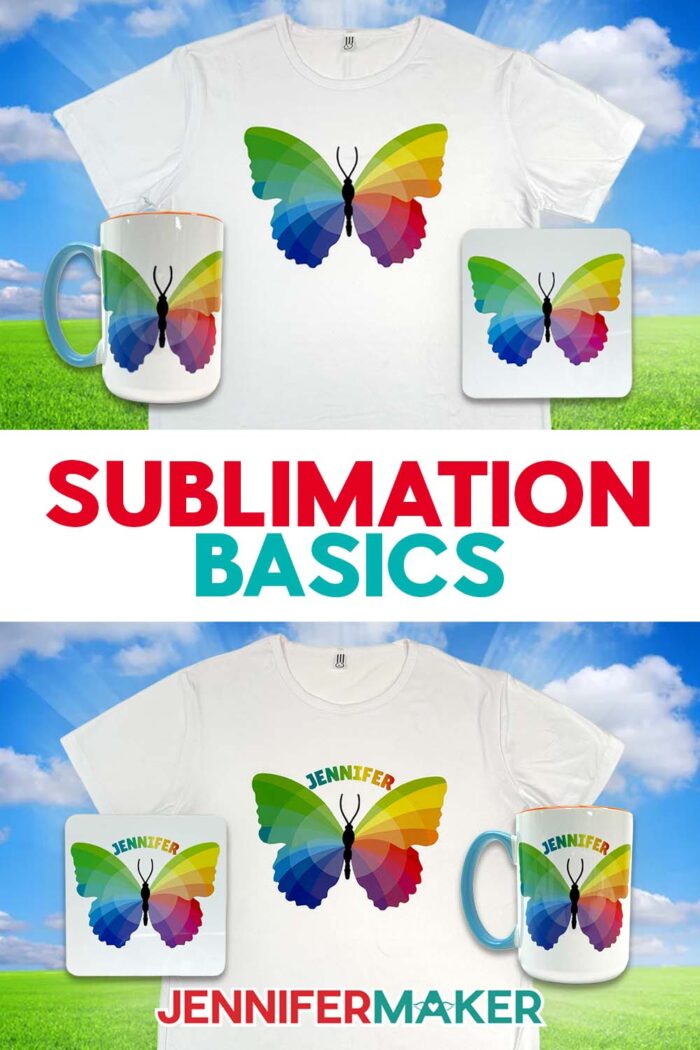
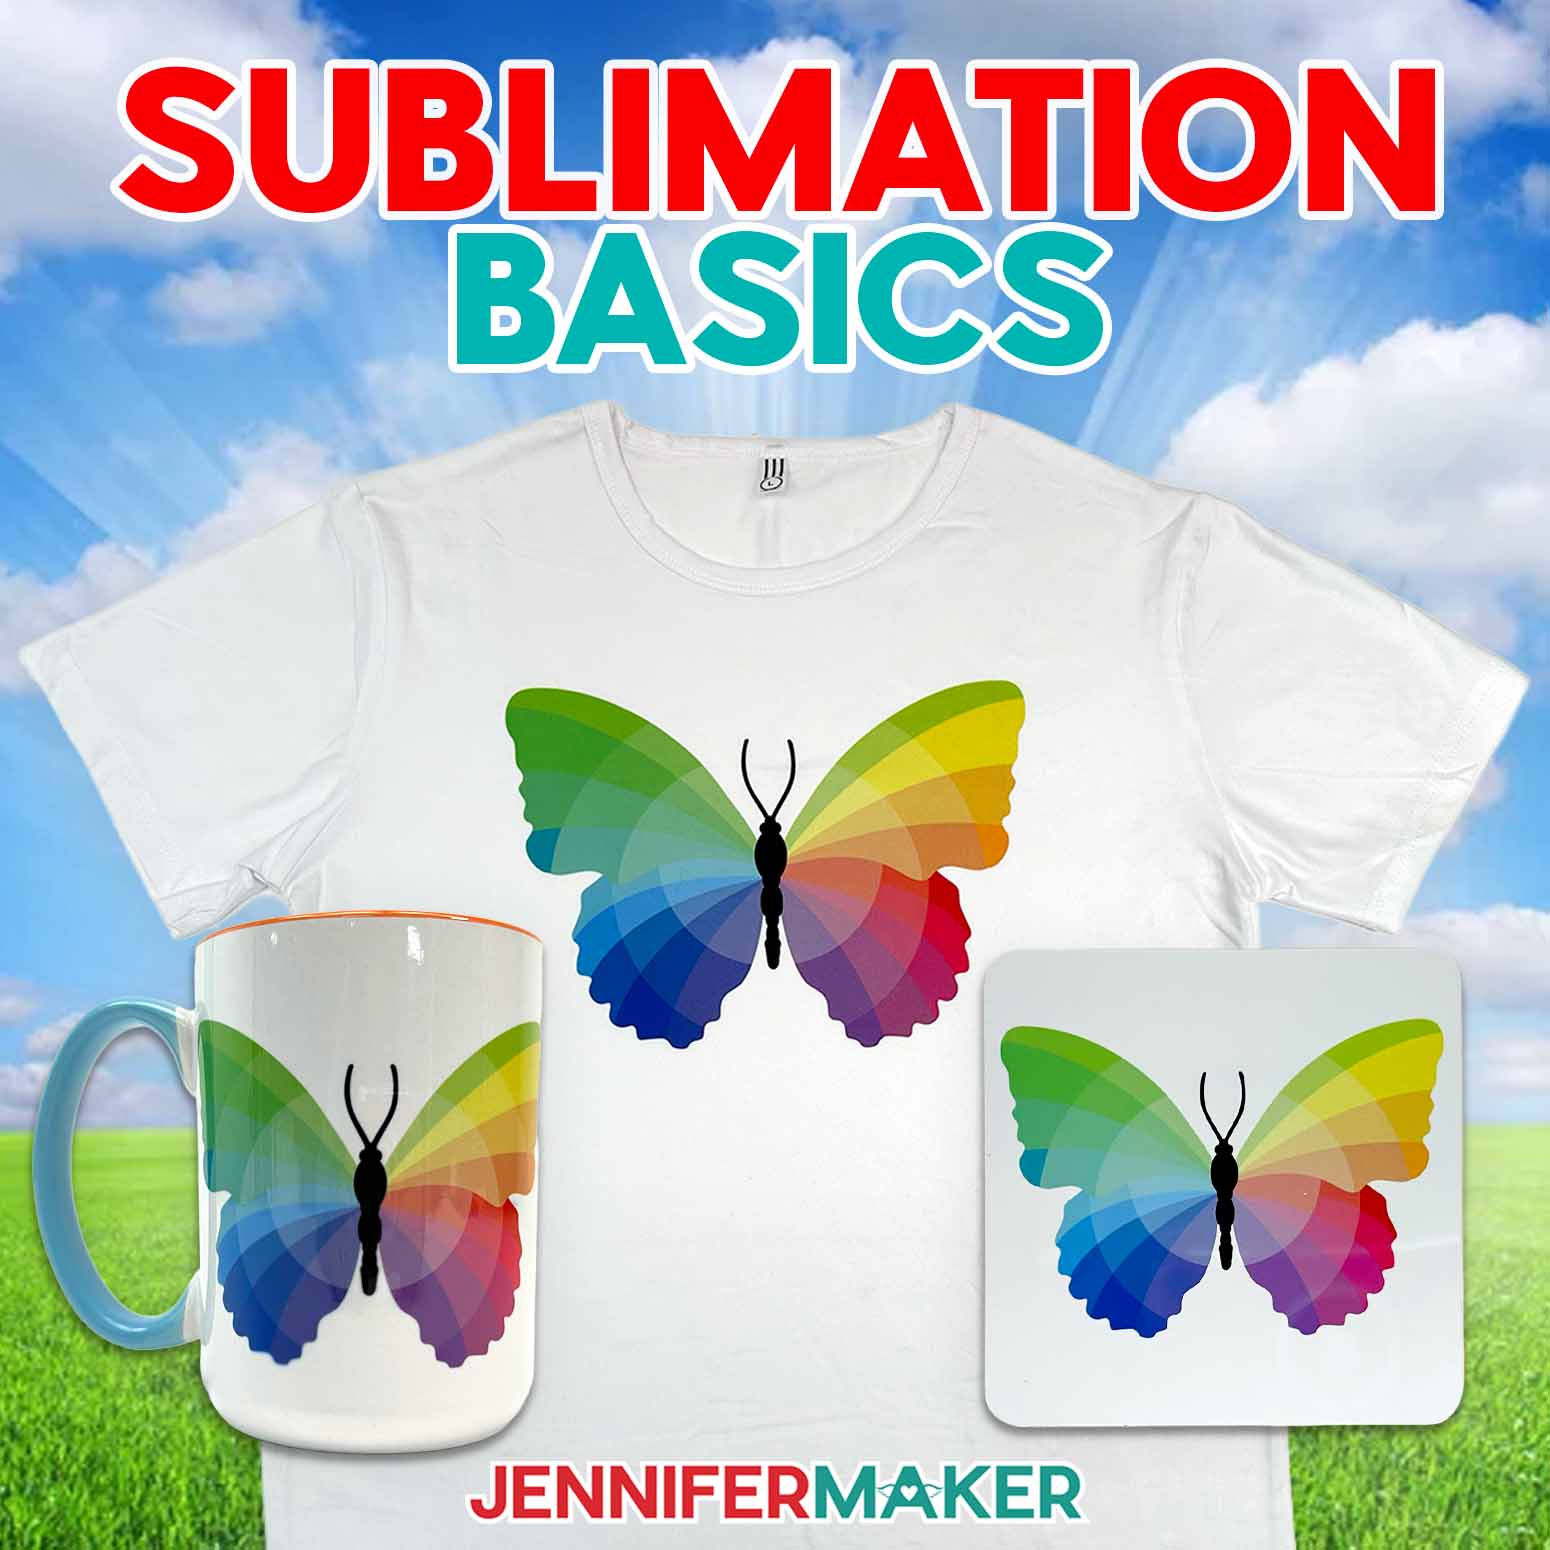
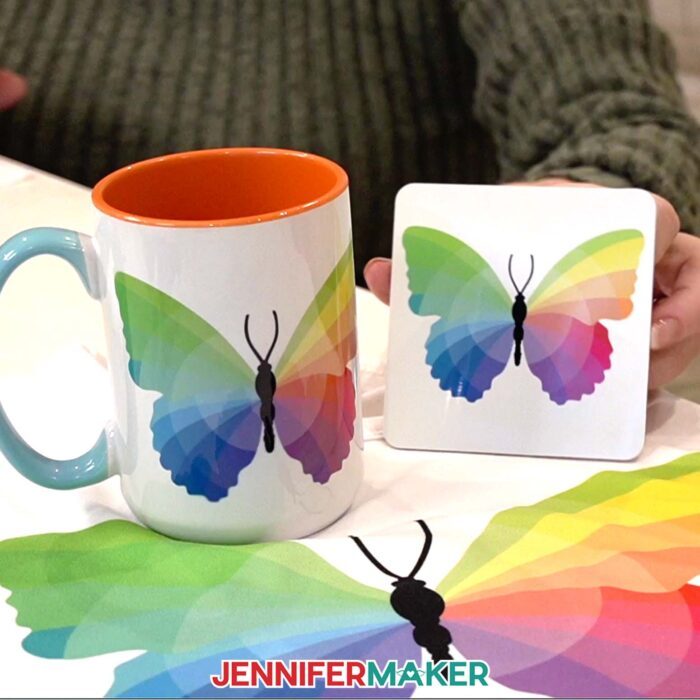
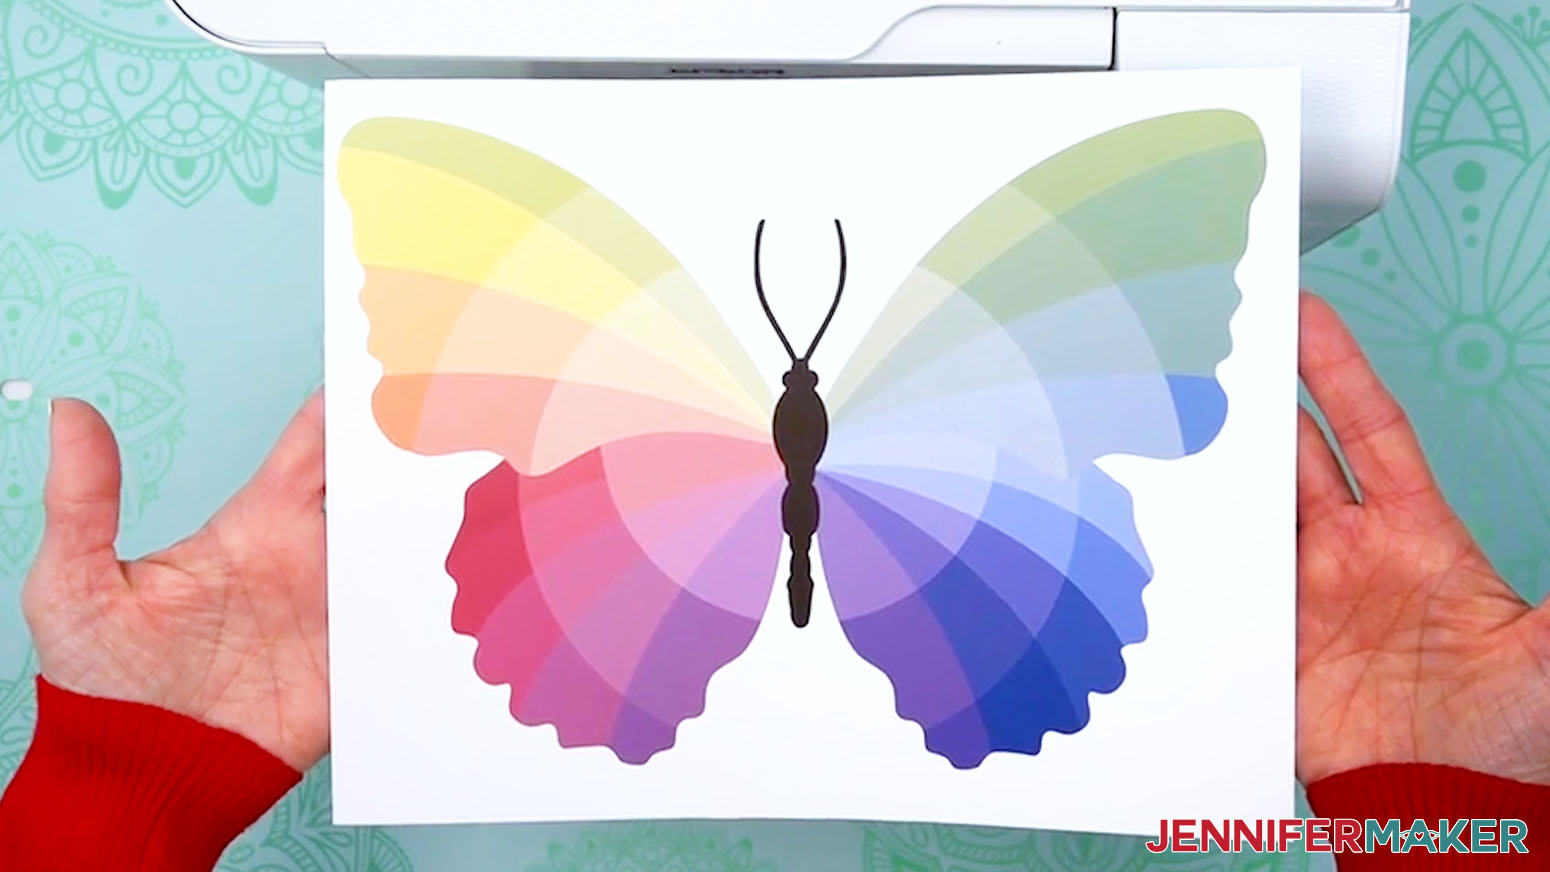
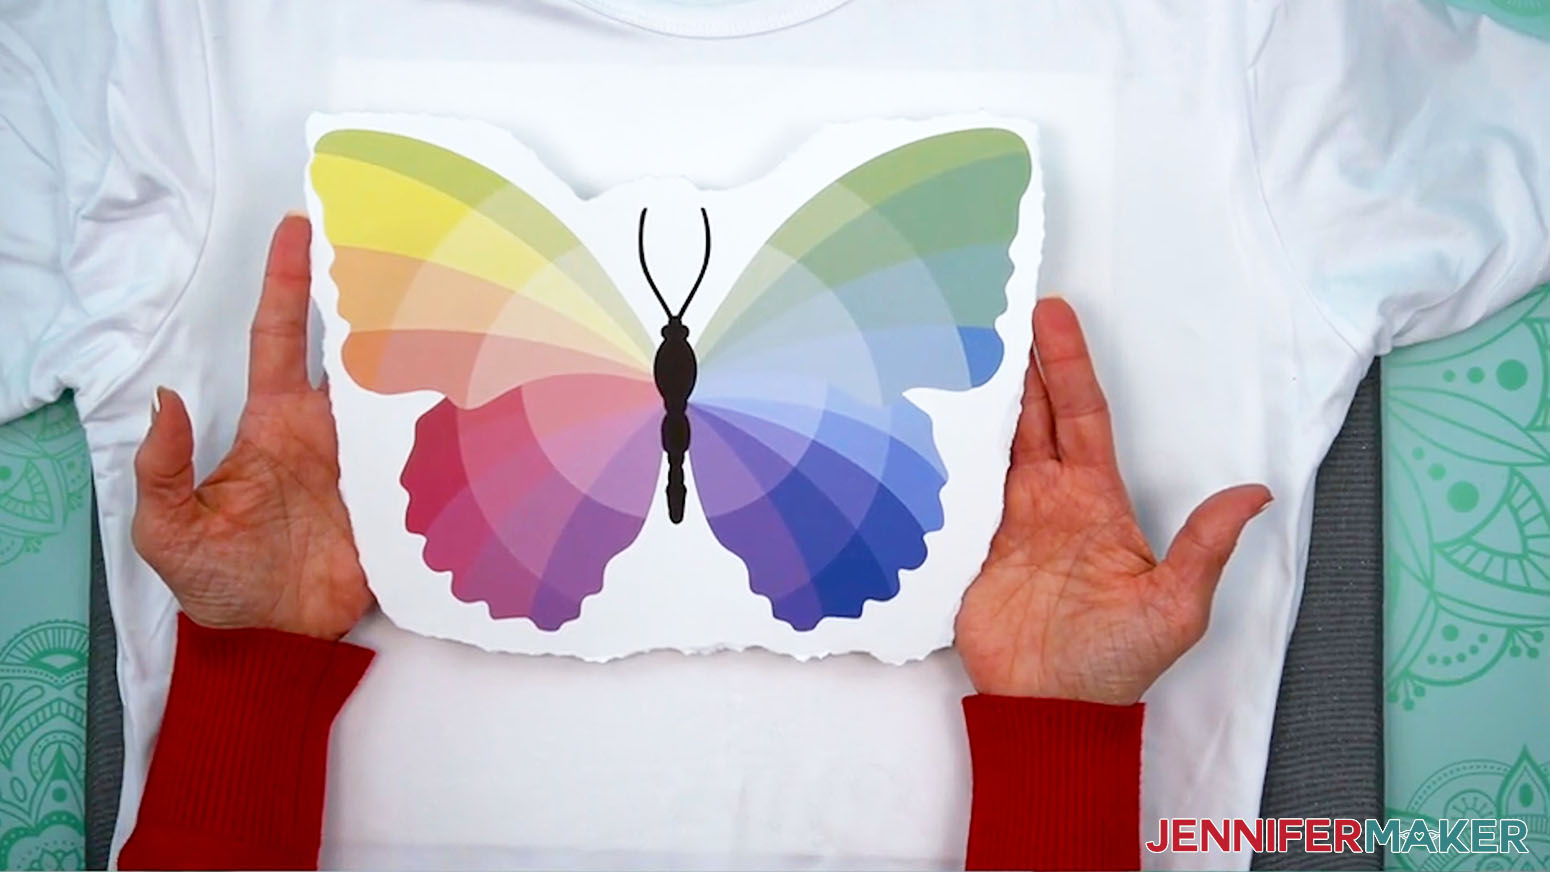
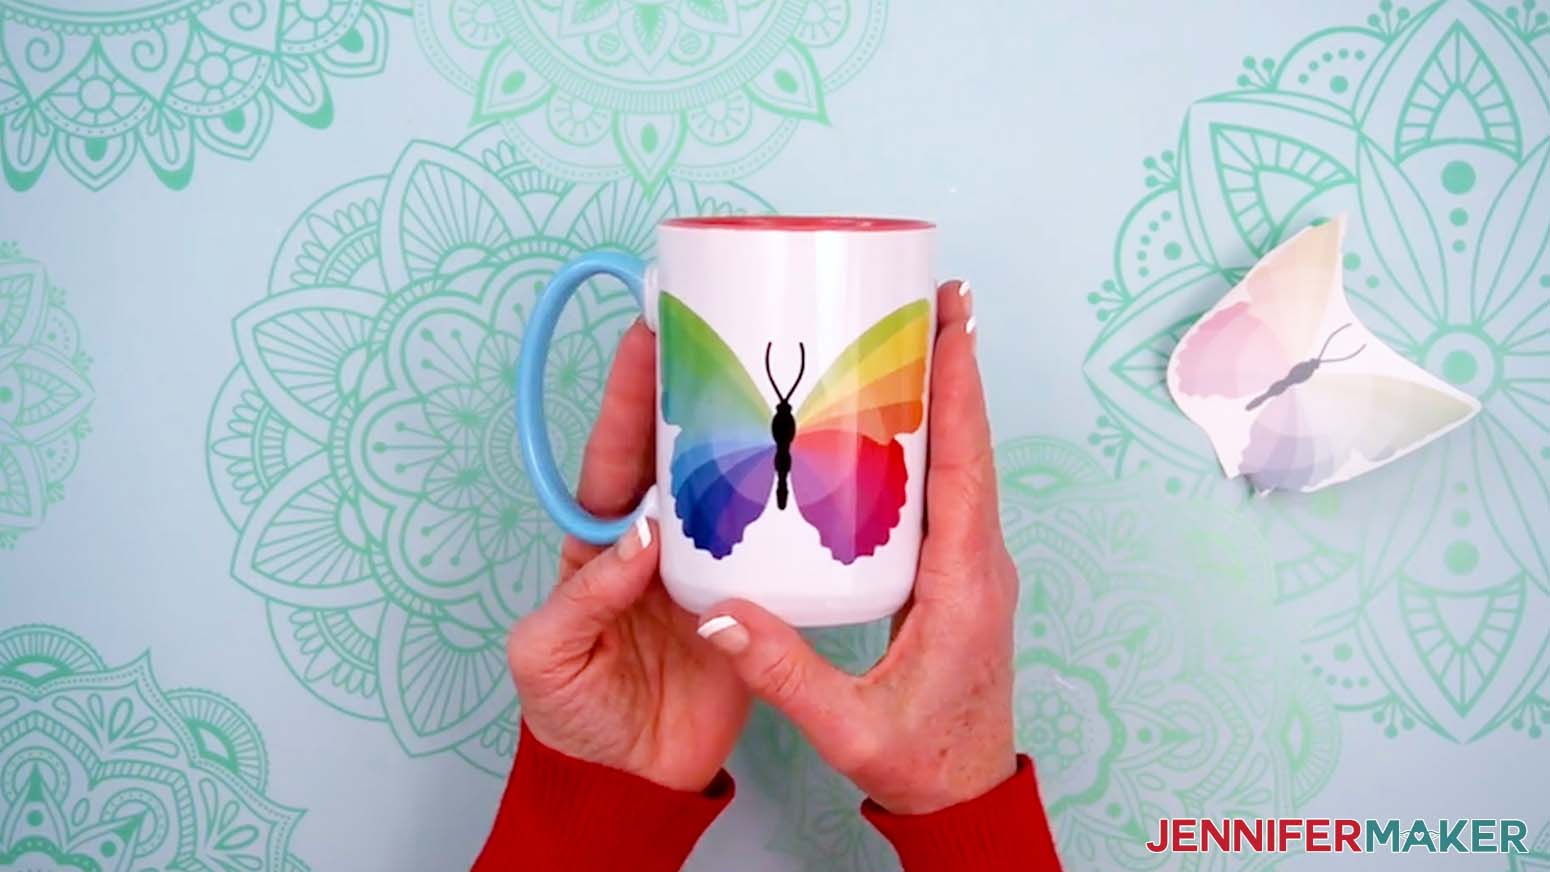
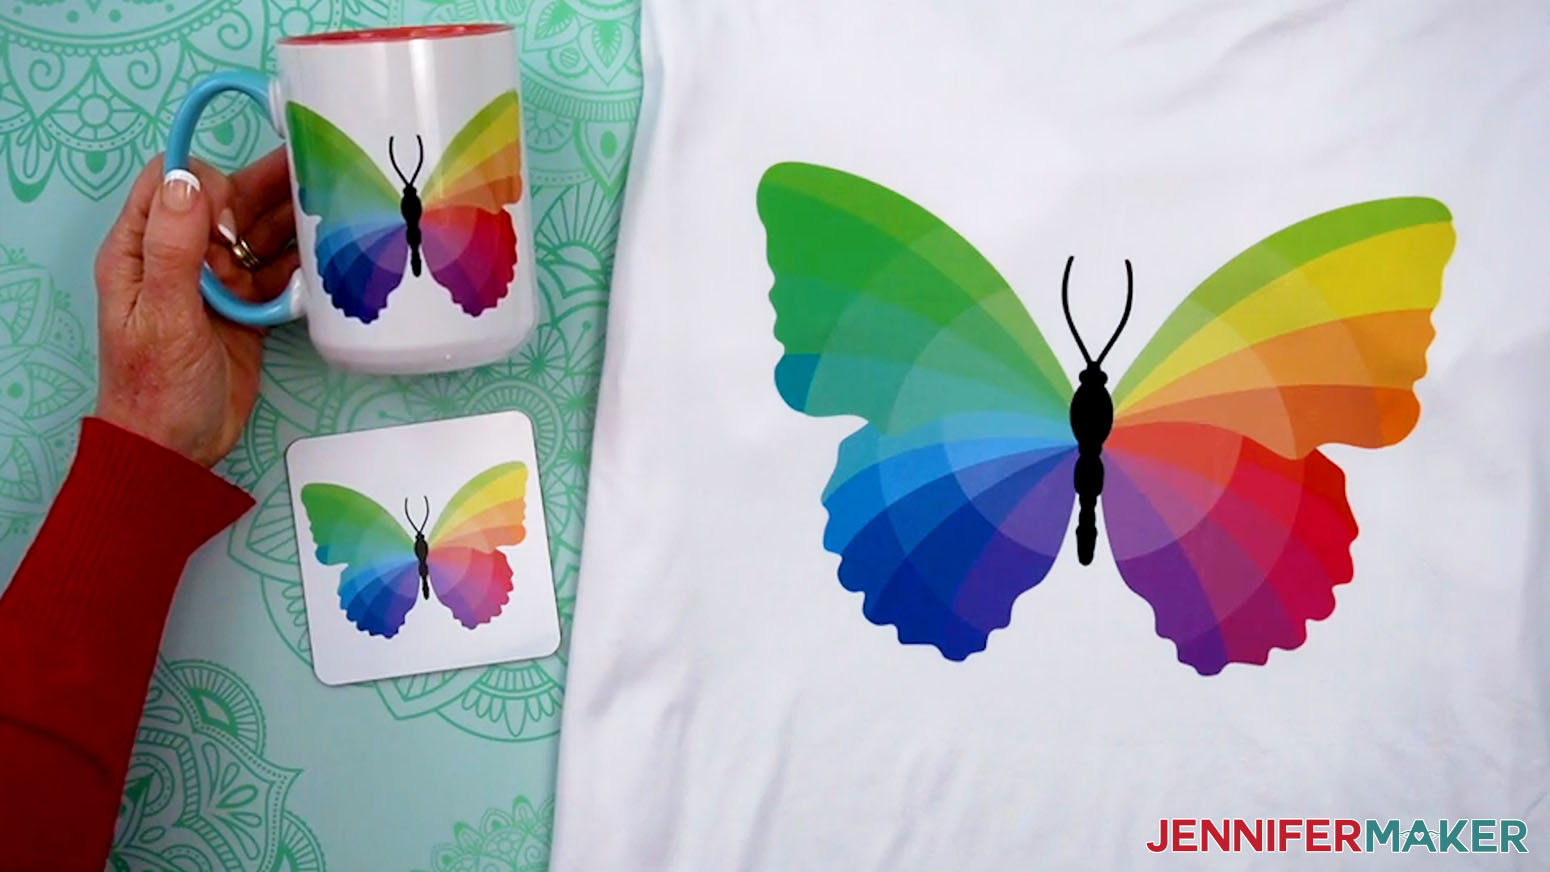
To demonstrate just how easy it is, I’m using my Sublifly PNG, which I designed specially for this project. It’s a neat color wheel in the shape of a butterfly to show you how hues shift after pressing, and the differences in color from screen to final project. When it comes off the printer, the colors look muted and washed out. But once we press, the colors brighten up beautifully!
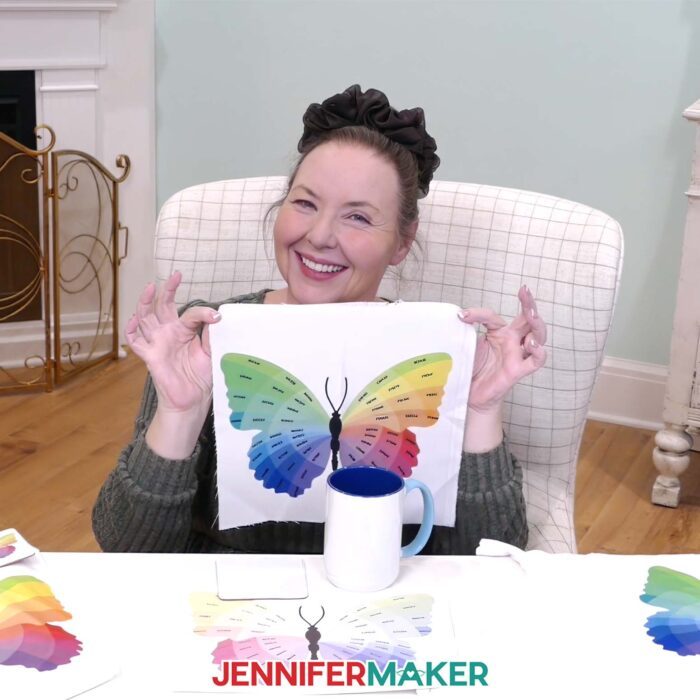
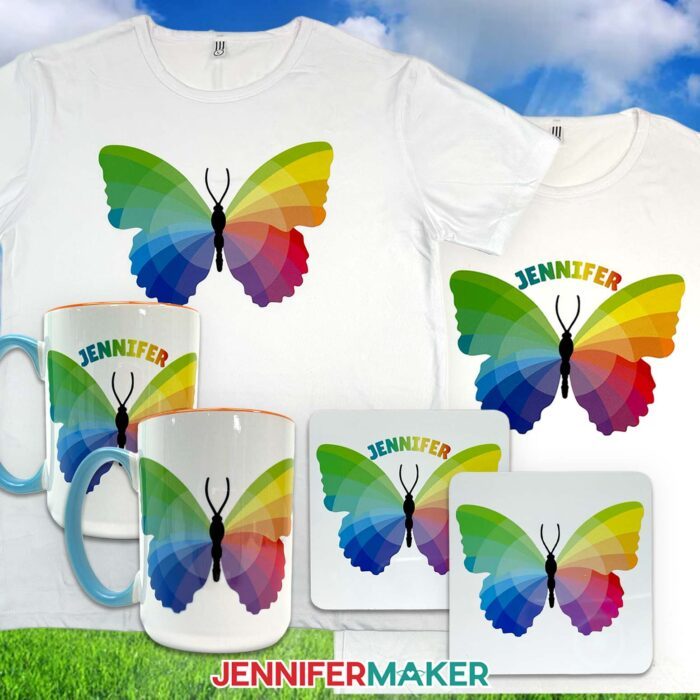
Inside my free download, you’ll find two versions of the Sublifly: one with just the artwork and one labeled with matching hex codes inside each color section. I’ll apply the same artwork to three popular sublimation blanks: a polyester t-shirt, a coaster, and a ceramic mug. That way you can see how the same artwork behaves on various surfaces, and then decide which one you like the best.
Sublimation works by printing a colorful design with sublimation ink onto sublimation paper, then applying consistent heat and pressure to transfer it from the paper to a sublimation-compatible surface. Under high temperatures, the ink goes through a chemical process, moving from a solid to a gaseous state, and bonds with a blank’s surface so the color becomes part of the final product. That’s how you get beautiful results with vibrant colors and long-lasting designs.
For successful sublimation prints, you need the right equipment. You’ll want a dedicated sublimation printer or a converted inkjet printer set up with sublimation compatible ink (never regular ink; it simply won’t work). To get the right amount of heat and pressure, I rely on my Cricut EasyPress for flat projects like coasters and T-shirts. For mugs, I prefer using shrink-wrap sleeves in a craft-only convection oven, but a mug press works beautifully too. The right heat and pressure lead to a final product that is smooth, bright, and incredibly durable.
If you want the best results, the prep steps are non-negotiable. I use a lint roller to remove dust and debris from fabric, and clean hard blanks thoroughly with isopropyl alcohol and a lint-free cloth. Trimming your print is important, too, and I share some of my favorite techniques for minimizing print lines in my video tutorial. Securing the print with heat-resistant tape so nothing shifts is also essential.

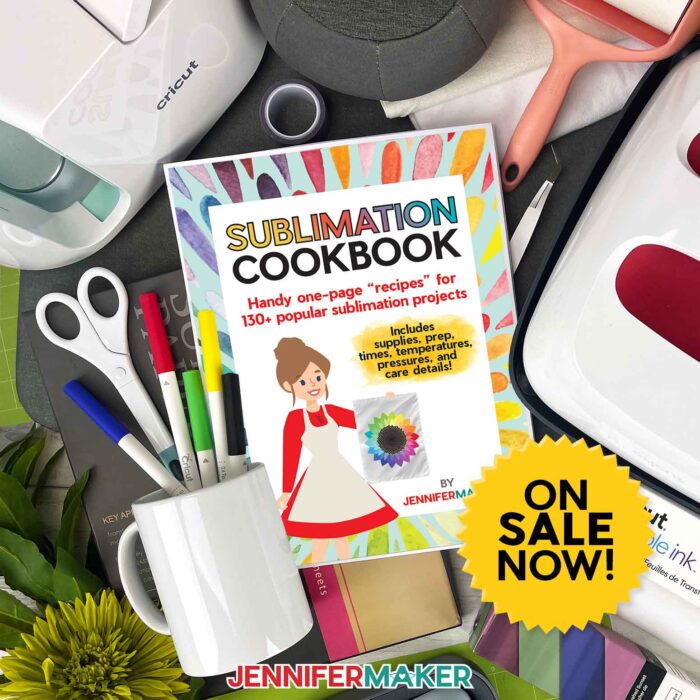
And once you’ve got that first successful press in hand, you’re ready to jump into all sorts of sublimation projects like garden flags, wind spinners, and tumblers. For tips and tricks for sublimation success, check out my Sublimation Cookbook. It’s packed with loads of information to help you achieve great results consistently, including recommended time, temperature, and heat press settings for tons of unique materials.
If you’re ready to go beyond beginner projects and start creating your own artwork, I have a special workshop inside my ADVANCE with JenniferMaker membership program just for you. You’ll learn how to design custom text with beautiful color gradients, and confidently expand into more personalized projects. Click here to learn more about ADVANCE!
Ready to learn sublimation basics for beginners and transfer your first design? Be sure to watch the full video tutorial as you make yours so you can follow along step by step!
Want to learn how to transfer a sublimation design? Let me show you how fun and easy it can be! This post contains some affiliate links for your convenience (which means if you make a purchase after clicking a link I will earn a small commission but it won’t cost you a penny more)! Read my full disclosure policy.
Materials to Transfer a Basic Sublimation Design
View my Amazon shopping list with the exact items I used.
- One (1) 100% Polyester White T-Shirt -OR-
- One (1) Cricut 15oz Mug -OR-
- One (1) Cricut Sublimation Square Coaster
- One (1) Sheet of 8.5” x 11” A-SUB Sublimation Paper 125g
- 12” x 12” White Cardstock
- White Uncoated Butcher Paper
- A Free Google Account
- Sublimation Printer (I used a converted Epson EcoTank ET-2800 Inkjet Printer)
- Sublimation Ink
- Heat Press (I used the 9” x 9” Cricut EasyPress 3, for T-shirt and coaster) -AND-
- Cricut EasyPress Mat -OR-
- Sublimation Convection Oven (for mug) -AND-
- Oven Thermometer -AND-
- Cooling Rack
- Lint Roller (for cleaning T-shirt) -OR-
- Isopropyl Alcohol -AND-
- Lint-Free Cloth (for cleaning mug/coaster)
- Heat-Resistant Tape
- Heat-Resistant Gloves (for handling mug/coaster)
- 8” x 12” Heat Shrink Wrap Tube -AND-
- Heat Gun
- Fan (for ventilation)
- Scissors -OR-
- Paper Trimmer
- Looped Tape Measure (for measuring mug)
- T-Shirt Ruler Guide (optional)
- Design #725 (My free PNG design files are available in my free library – get the password by filling out the form at the bottom of this page)
Sublimation Basics for Beginners

Sublimation Basics for Beginners
Learn sublimation basics for beginners with my beautiful Sublifly design!
Materials
- One (1) 100% Polyester White T-Shirt -OR-
- One (1) Cricut 15oz Mug -OR-
- One (1) Cricut Sublimation Square Coaster
- One (1) Sheet of 8.5” x 11” A-SUB Sublimation Paper 125g
- 12” x 12” White Cardstock
- White Uncoated Butcher Paper
- Design #725 (My free PNG/SVG/DXF/PDF design files are available in my free resource library - get the password by filling out the form at the bottom of this page)
Tools
- A Free Google Account
- Sublimation Printer (I used a converted Epson EcoTank ET-2800 Inkjet Printer)
- Sublimation Ink
- Heat Press (I used the 9” x 9” Cricut EasyPress 3, for T-shirt and coaster) -AND-
- Cricut EasyPress Mat -OR-
- Sublimation Convection Oven (for mug) -AND-
- Oven Thermometer -AND-
- Cooling Rack
- Lint Roller (for cleaning T-shirt) -OR-
- Isopropyl Alcohol -AND-
- Lint-Free Cloth (for cleaning mug/coaster)
- Heat-Resistant Tape
- Heat-Resistant Gloves (for handling mug/coaster)
- 8” x 12” Heat Shrink Wrap Tube -AND-
- Heat Gun
- Fan (for ventilation)
- Scissors -OR-
- Paper Trimmer
- Looped Tape Measure (for measuring mug)
- T-Shirt Ruler Guide (optional)
Instructions
STEP 1: GET MY FREE SUBLIMATION DESIGNS
First, download my Sublimation Basics for Beginners designs from my free library – look for Design #725. Alternatively, you can use the Save This Project form near the top of this post and the design link will be emailed to you.
In the PNG folder, you’ll find labeled and unlabeled versions of my special Sublifly design. I made these designs with the help of AI art generation and adjusted them with image editing software.
There is also an SVG folder with a silhouette of the Sublifly shape that you can use in Cricut Design Space, and a PDF folder with versions you can print and cut by hand.
TIP: If you’re not sure how to download ZIP files and upload designs, go to jennifermaker.com/svgs. The steps are similar for PNGs and Google Docs.
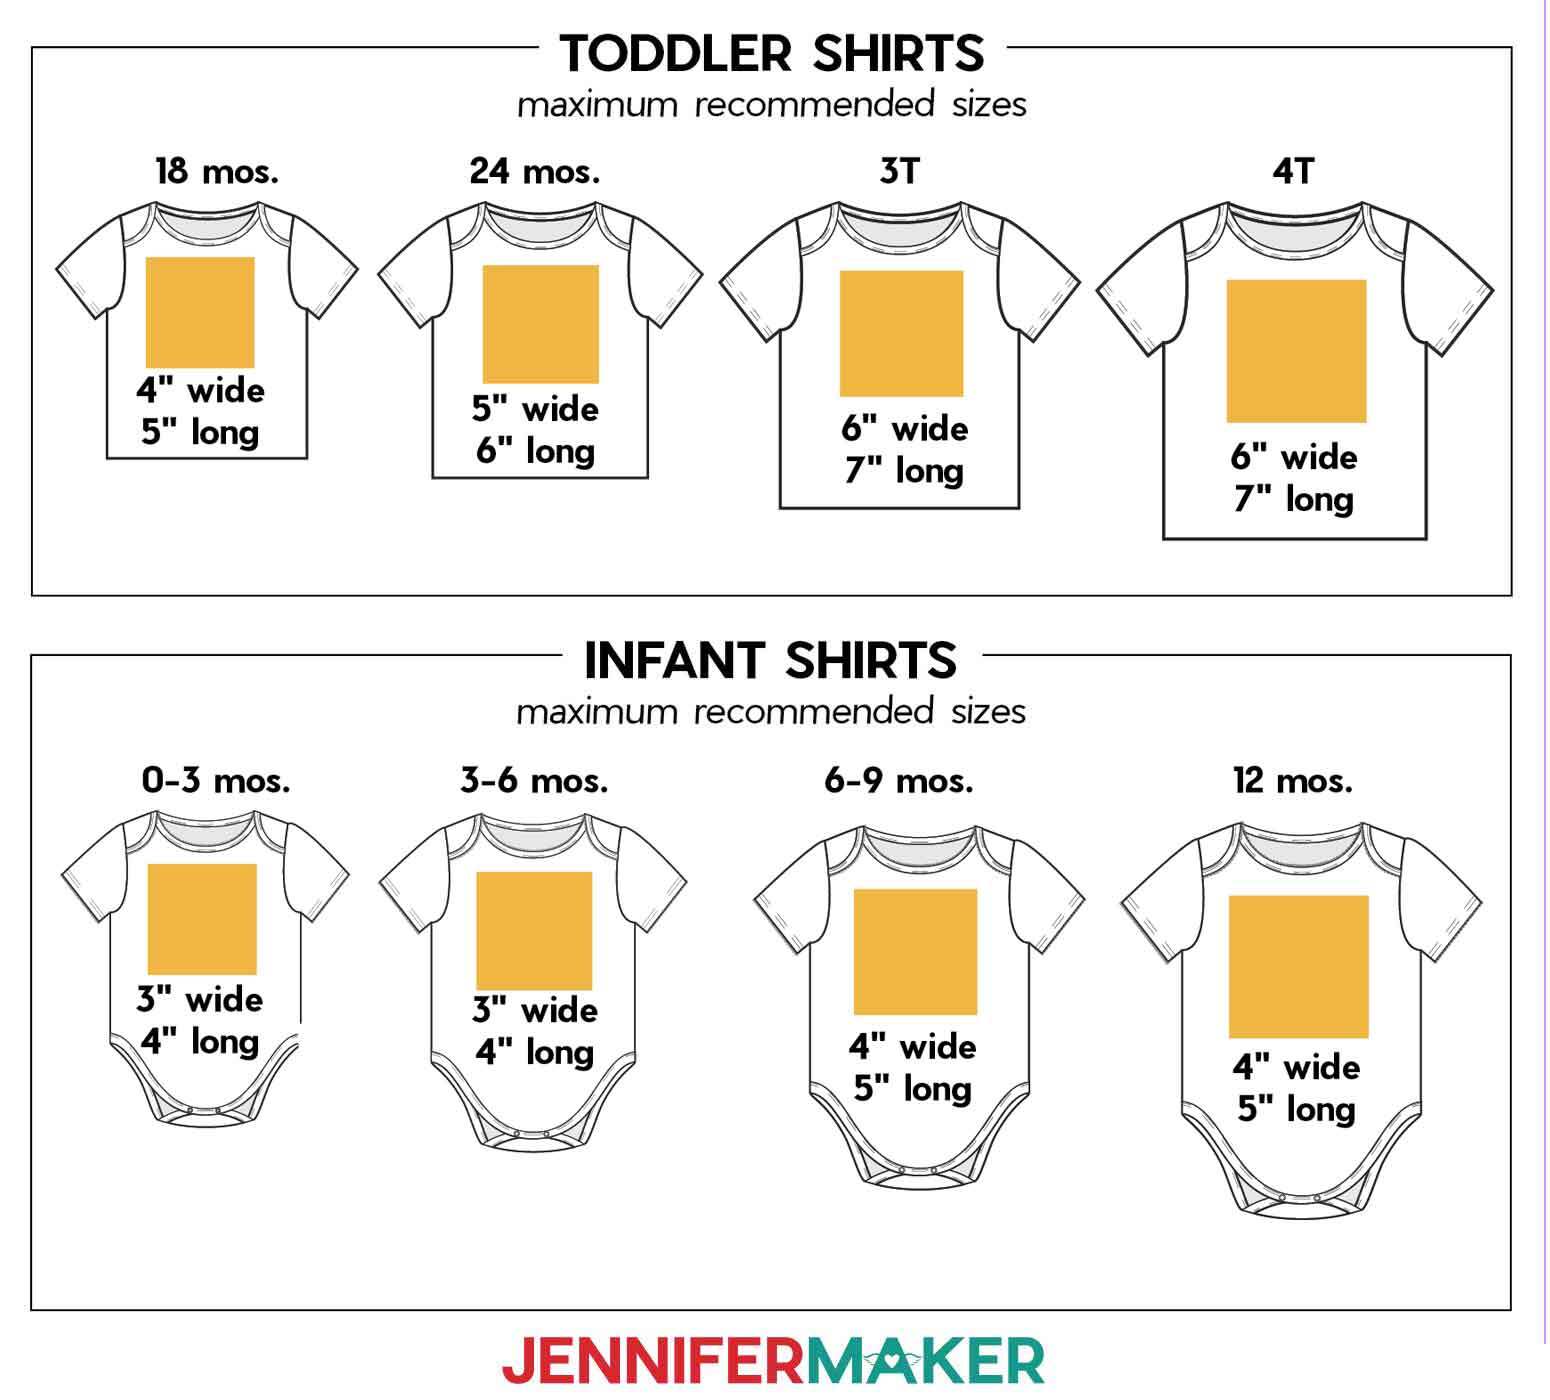
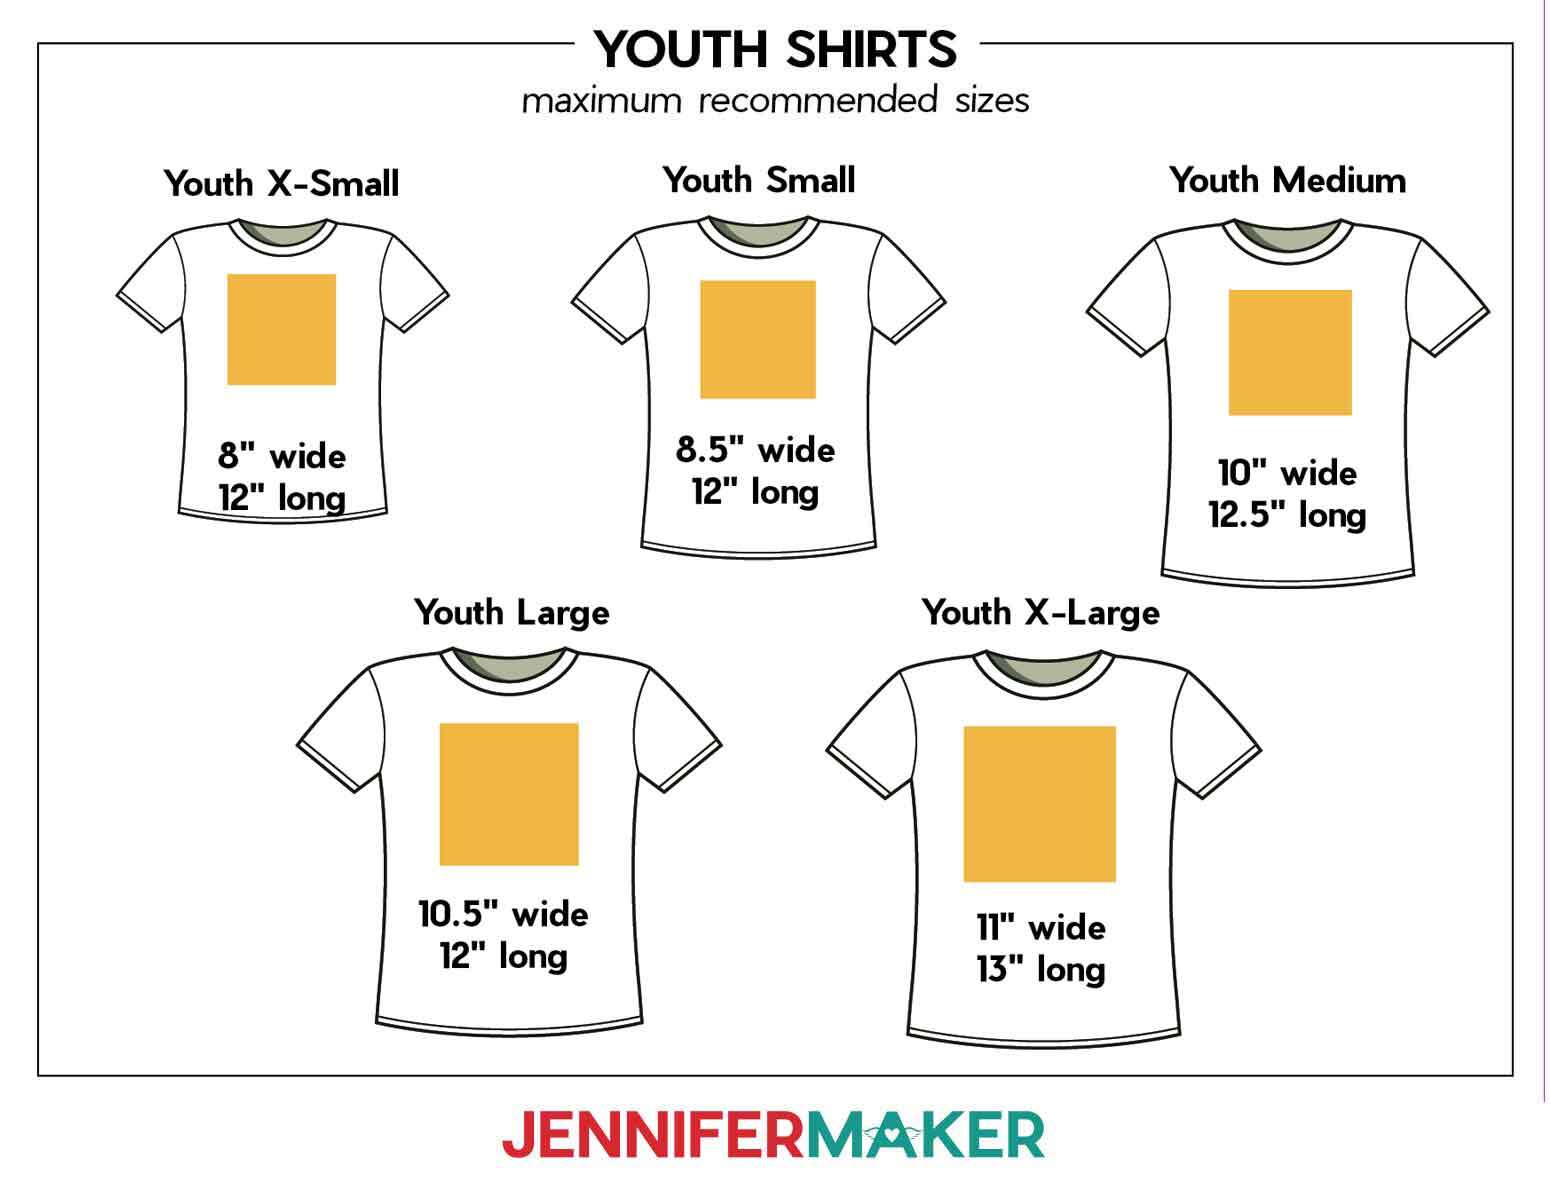
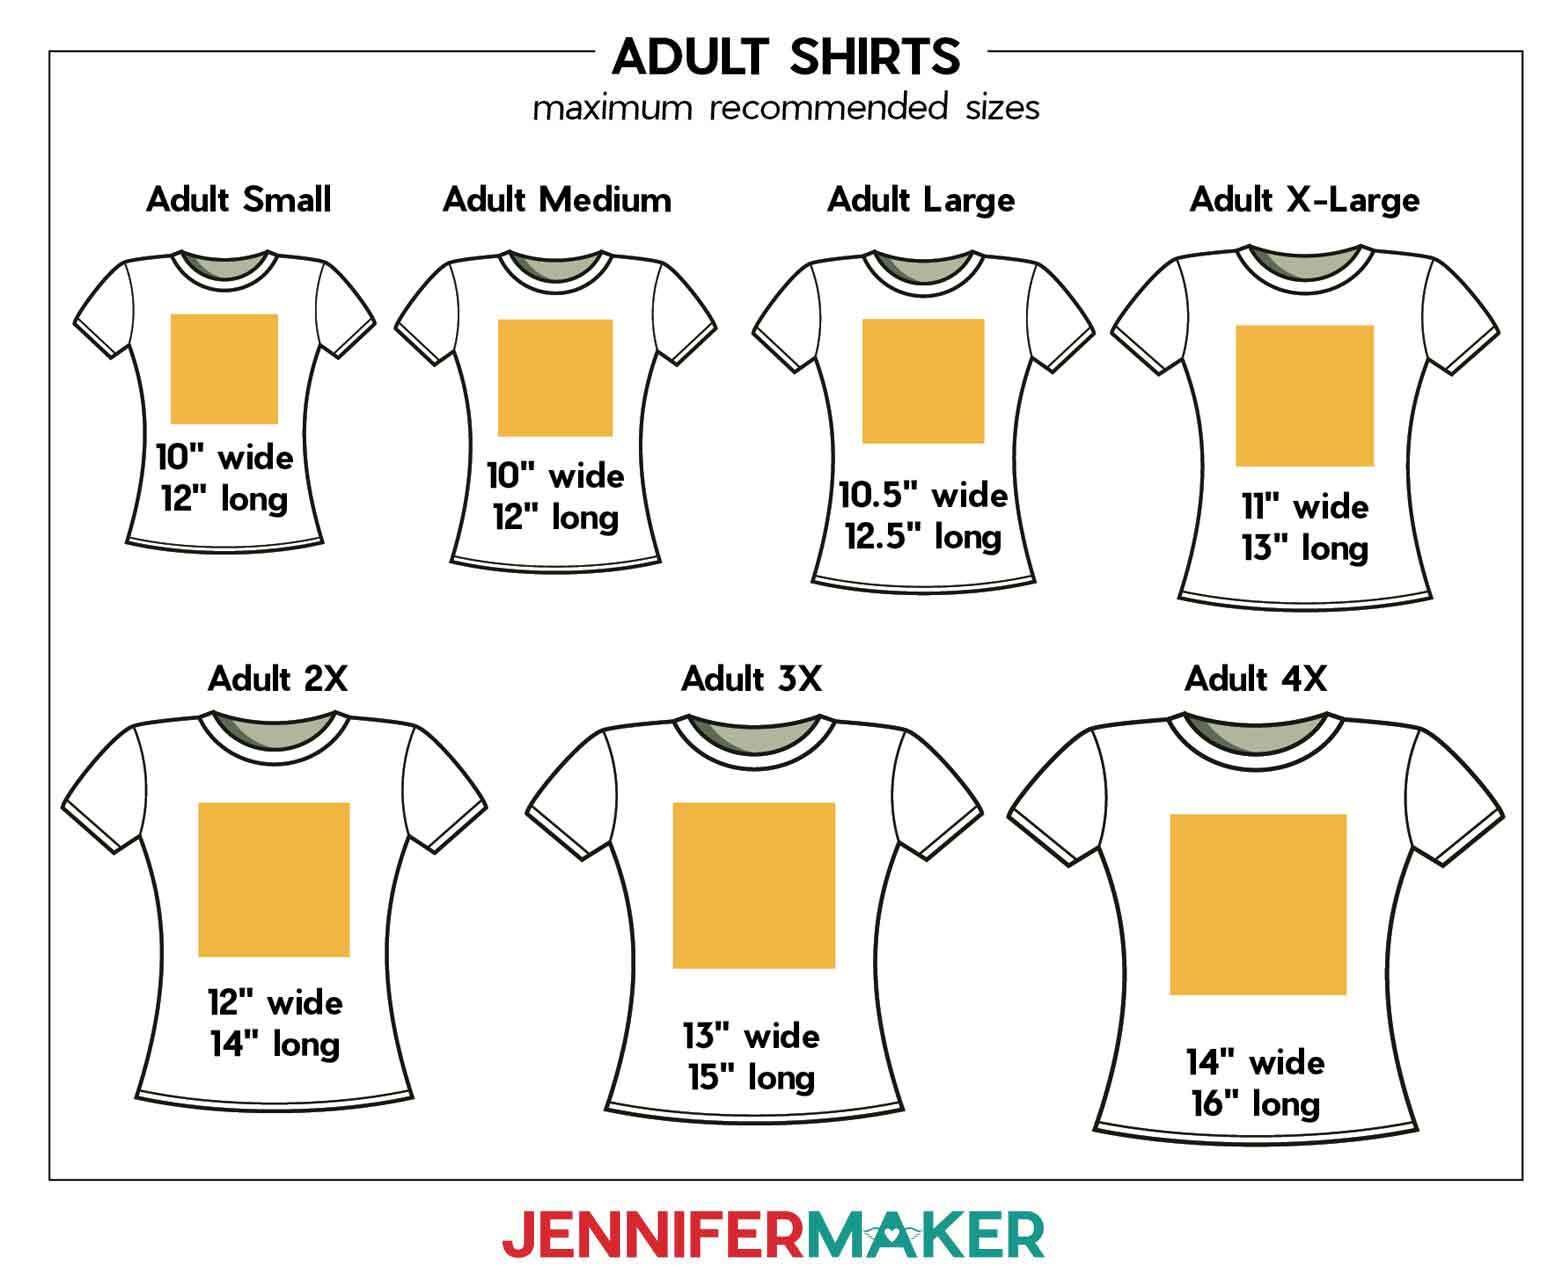
STEP 2: MEASURE YOUR BLANK
FOR T-SHIRTS
- Use a tape measure to measure the width across the chest, leaving empty space on both sides.
- Then measure about half the length of the shirt, starting a couple inches below the collar.
- Or, find the recommended maximum design size for your shirt using the guides below:


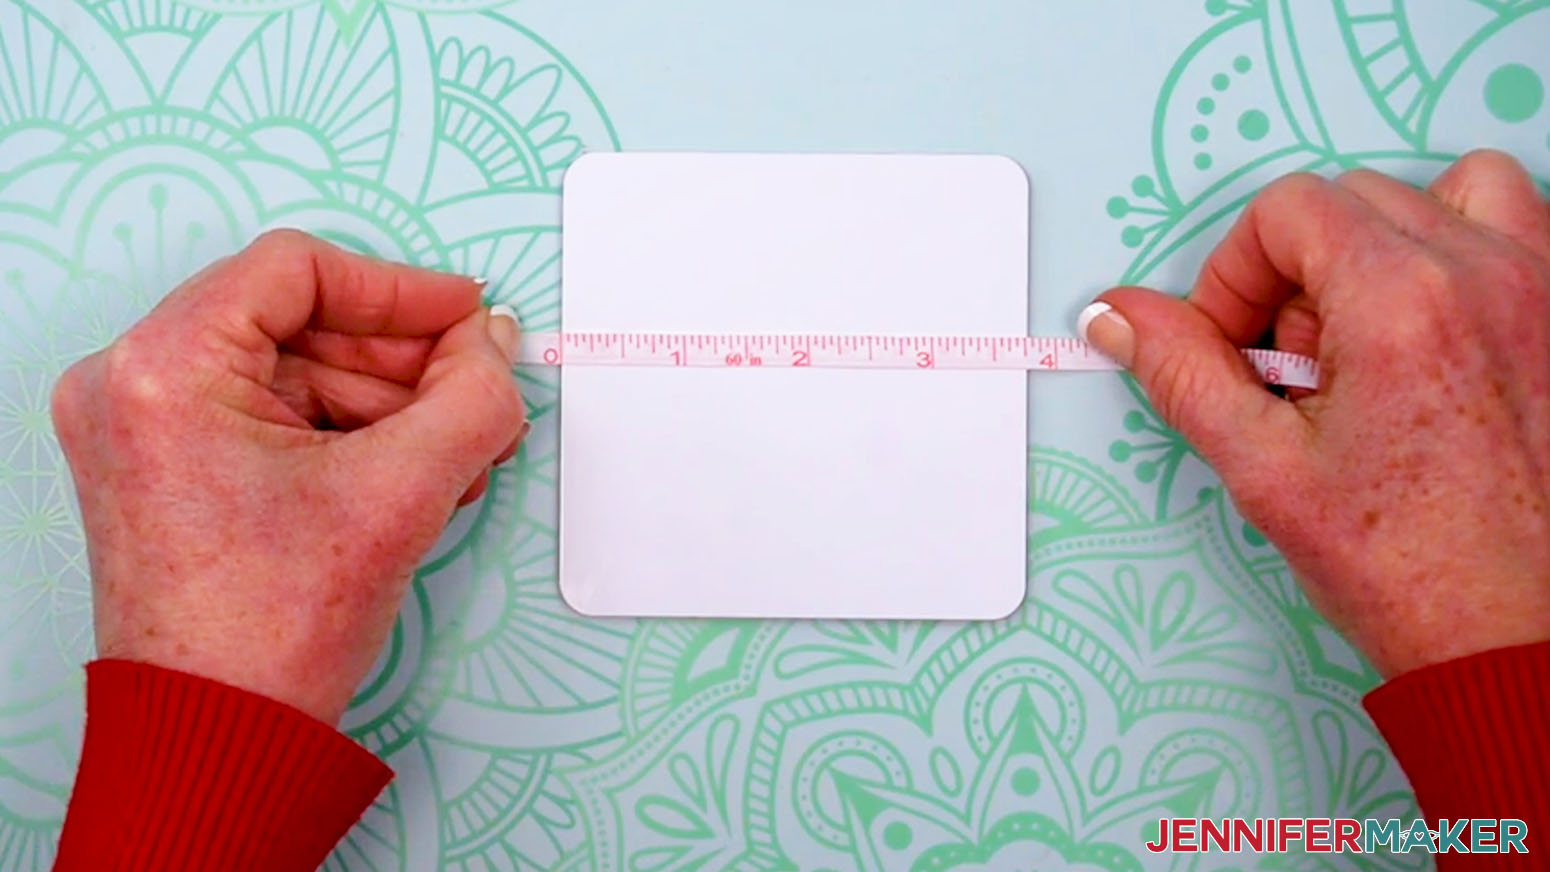
FOR COASTERS
- Lay your coaster face up on your work surface.
- With a ruler or tape measure, measure the coaster from the left edge to the right edge at the widest part and write down your measurement.
- Then measure the coaster from the top to the bottom at the highest part and write down your measurement.
NOTE: The coasters in my supplies list measure 3.75” x 3.75”. Your sizing might be different even if you use the blanks I recommend, so always be sure to measure.
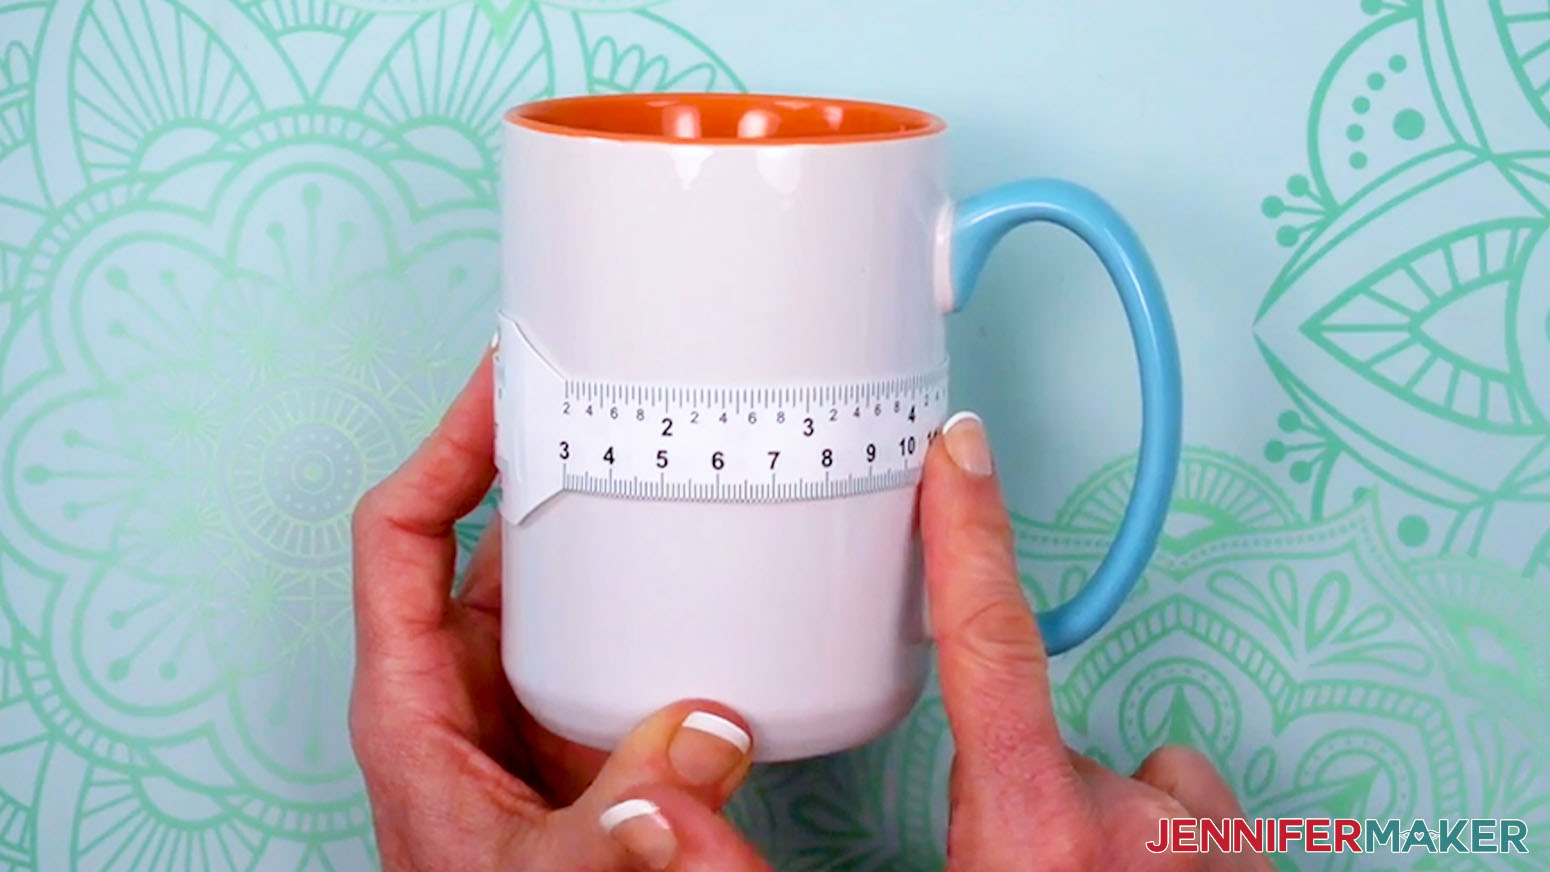
FOR MUGS
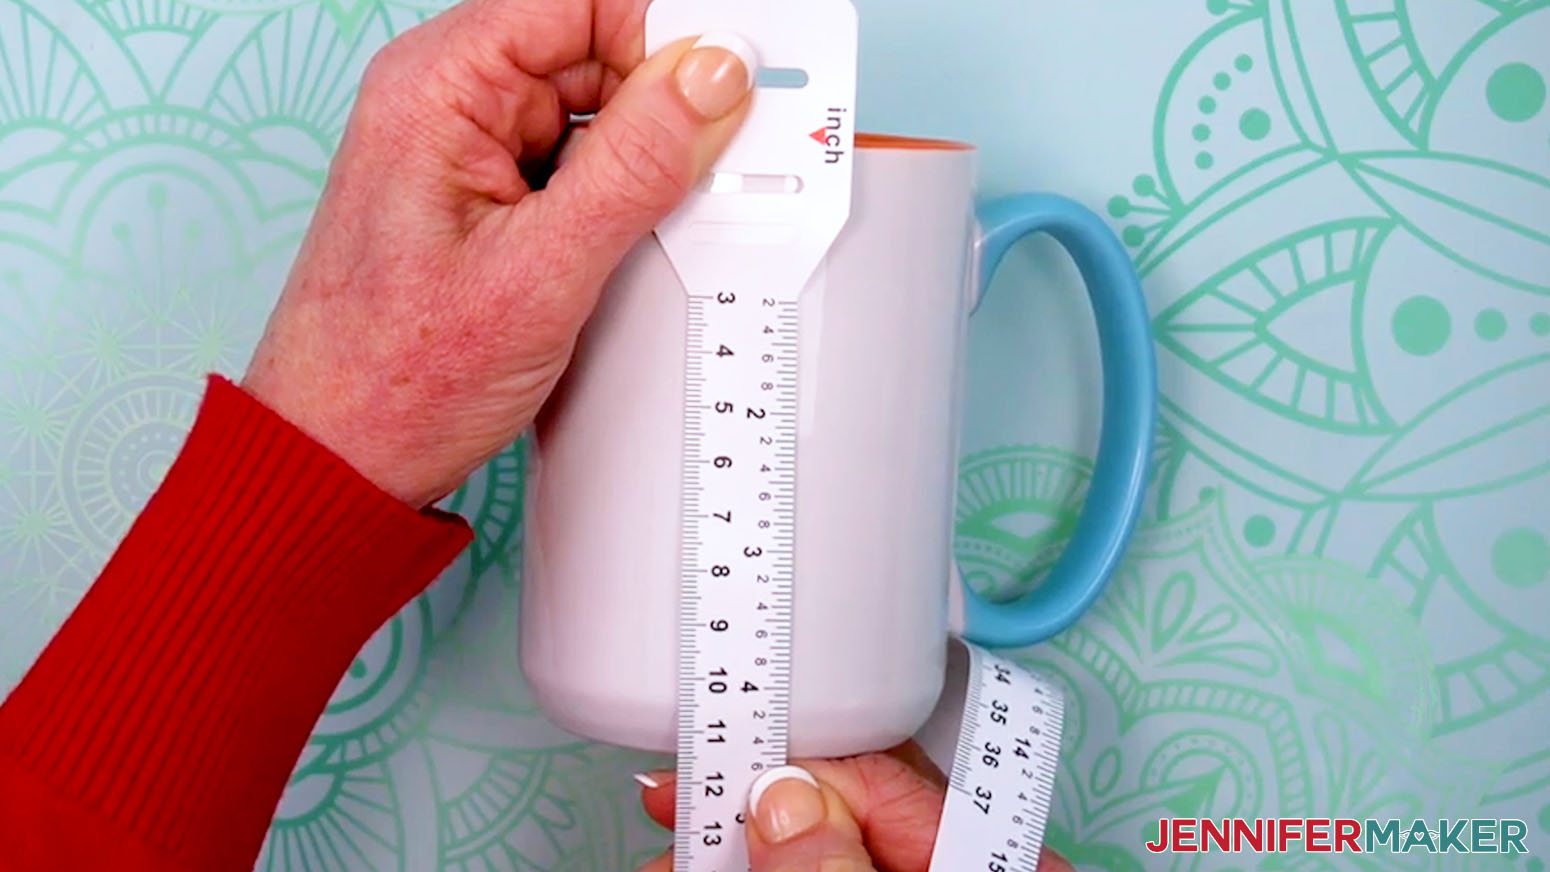
- Measure the mug’s height to find your design’s maximum height. Write down your measurement.
NOTE: The 15 oz. mug in my supplies list is 4.5” high. - Wrap a looped measuring tape around the mug under the handle. When the numbers start to distort, stop and note that measurement. That’s the widest your design can be without needing to turn the mug to see it.
NOTE: The maximum design width of the 15 oz. mug in my supplies list is about 4.25”.
STEP 3: PRINT YOUR DESIGN IN GOOGLE DOCS
- Open Google Docs in the Google Chrome web browser on your computer.
NOTE: You will need a free Google account to use the free Google Docs software.
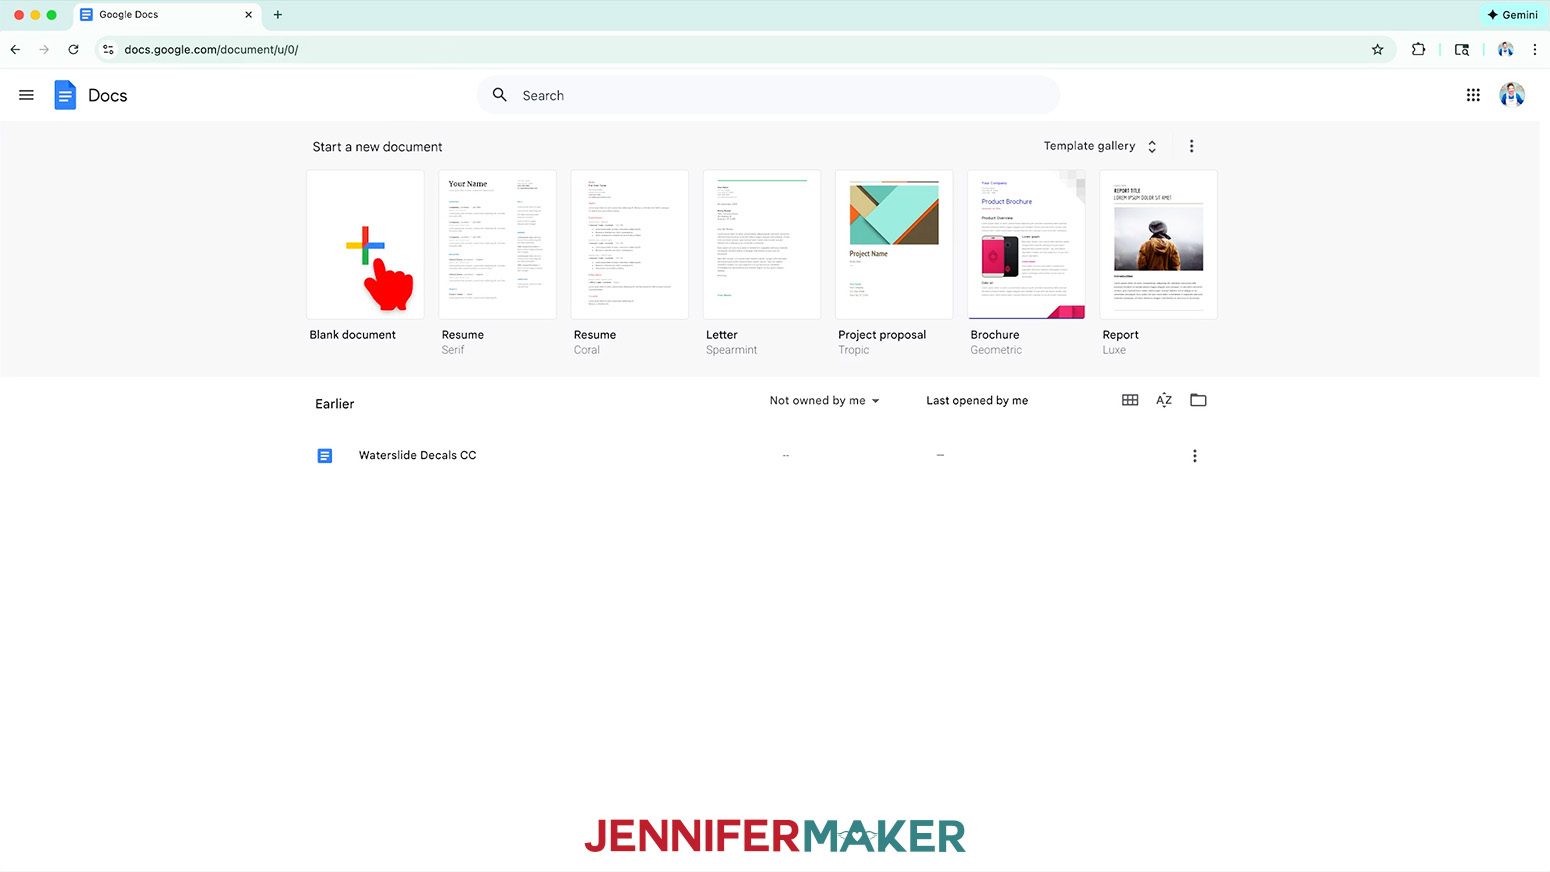
TIP: You can also download and open the Google Docs app, but you’ll have limited access to features, so I do not recommend it on a mobile device. - Click “Blank document” at the top left to open a new document.
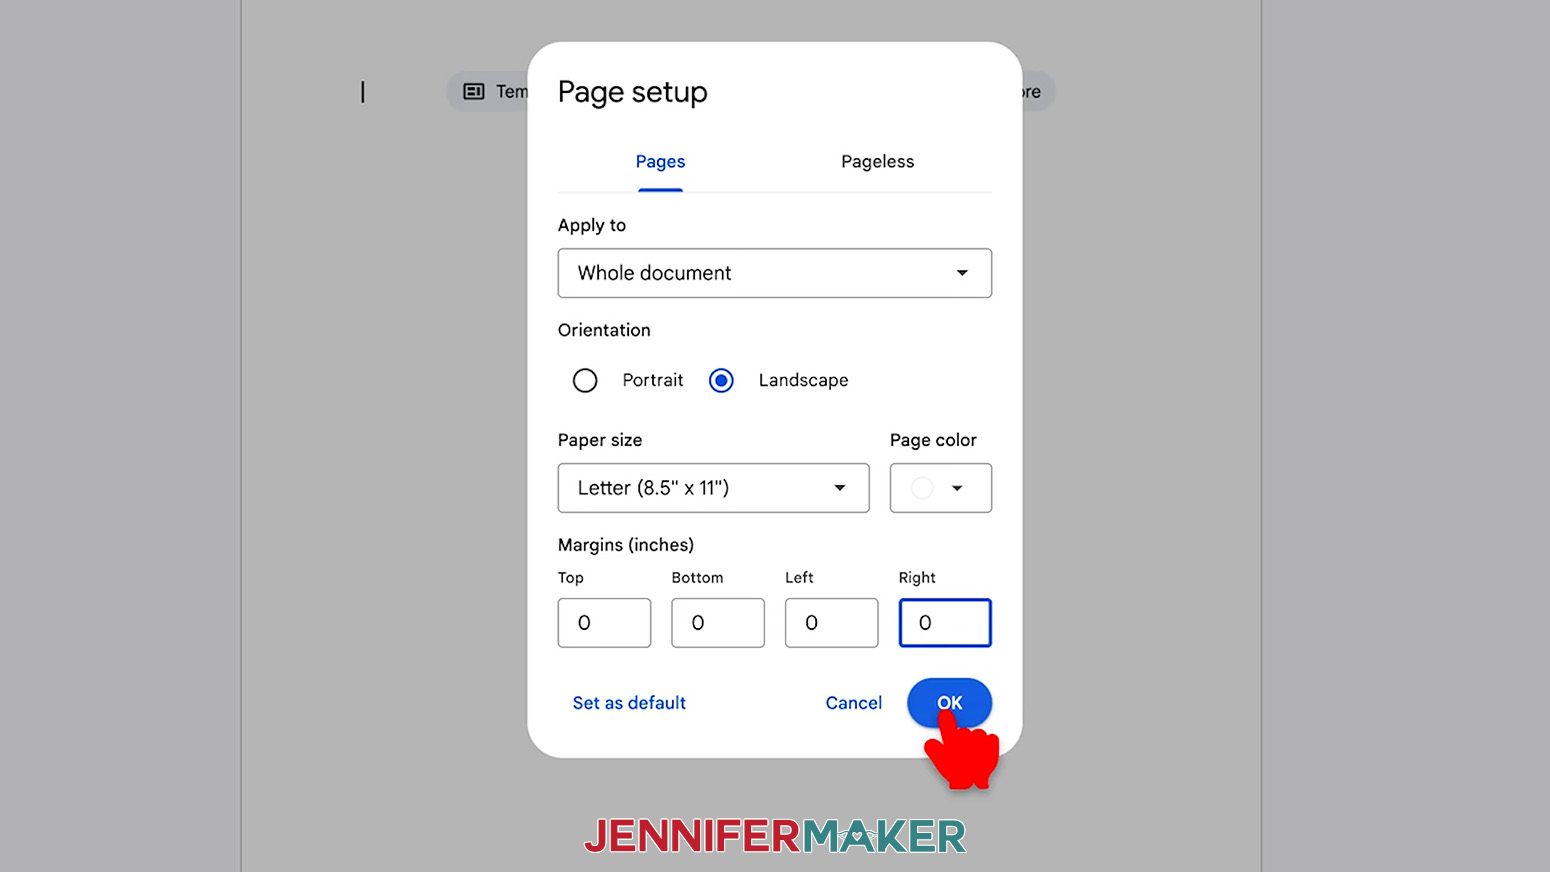
- Go to the “File” menu and select “Page setup.”
- Make sure the box next to “Landscape” is checked to match the design orientation.
- Change all of your Margins to “0” to use more of the page.
- Change your Paper Size to match your sublimation paper size.
NOTE: I’m using 8.5” x 11” or letter-size paper. - Click “OK” to apply the settings.
- Click the area that says “Untitled document” at the top and type a name for the file.
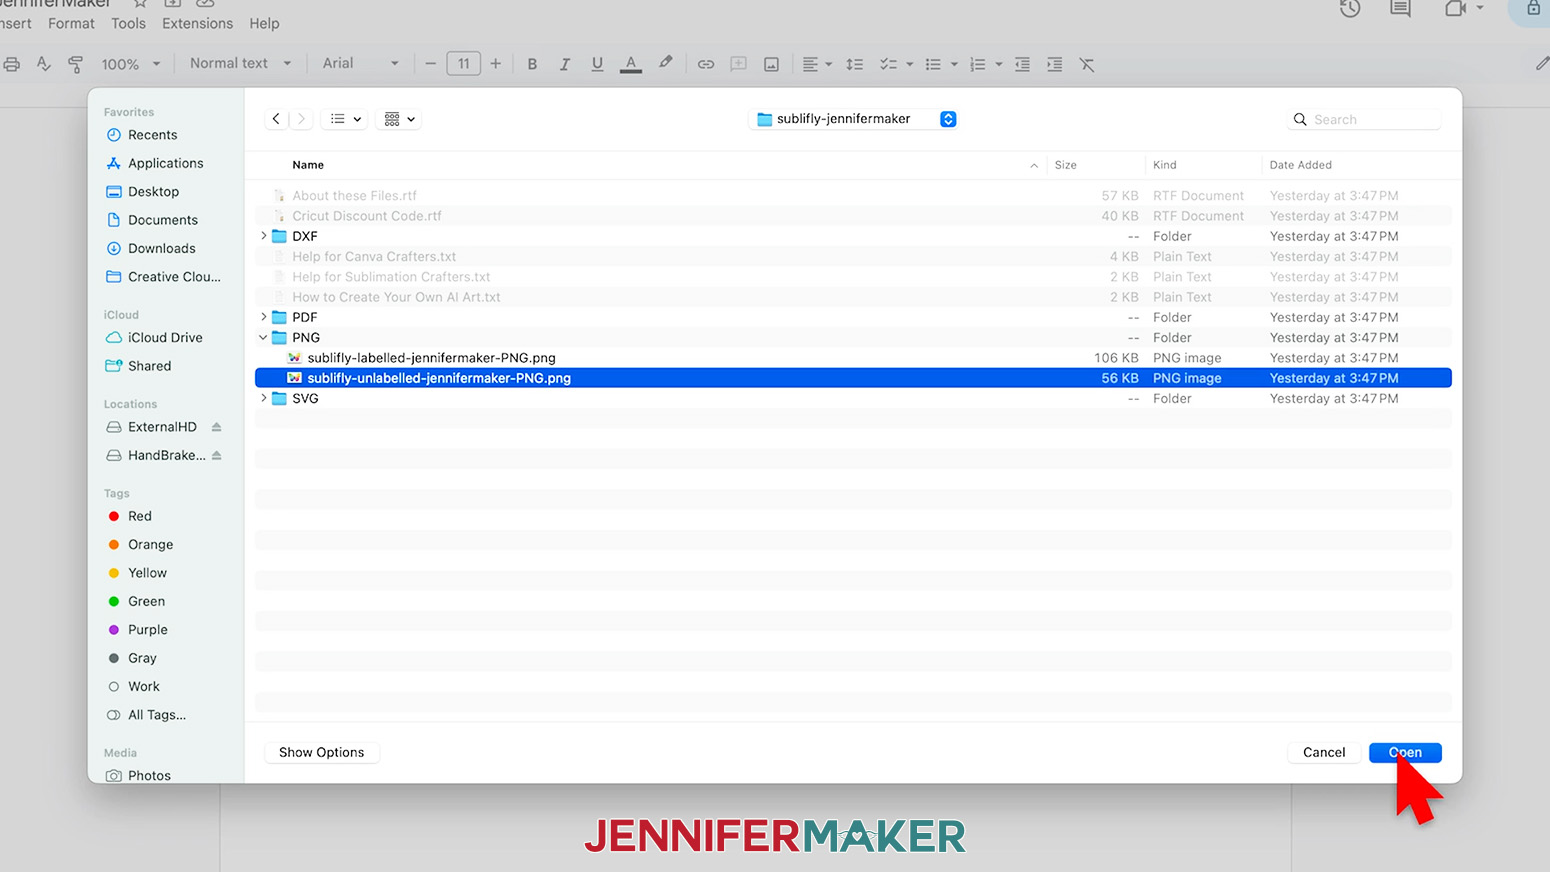
- Go to the “Insert” menu, select “Image,” and select “Upload from Computer.”
- Select one of the Sublifly PNG files.
TIP: You’ll most likely find it in your “Downloads” folder.
NOTE: I’ll choose the “unlabeled” version. - Click “Open.”
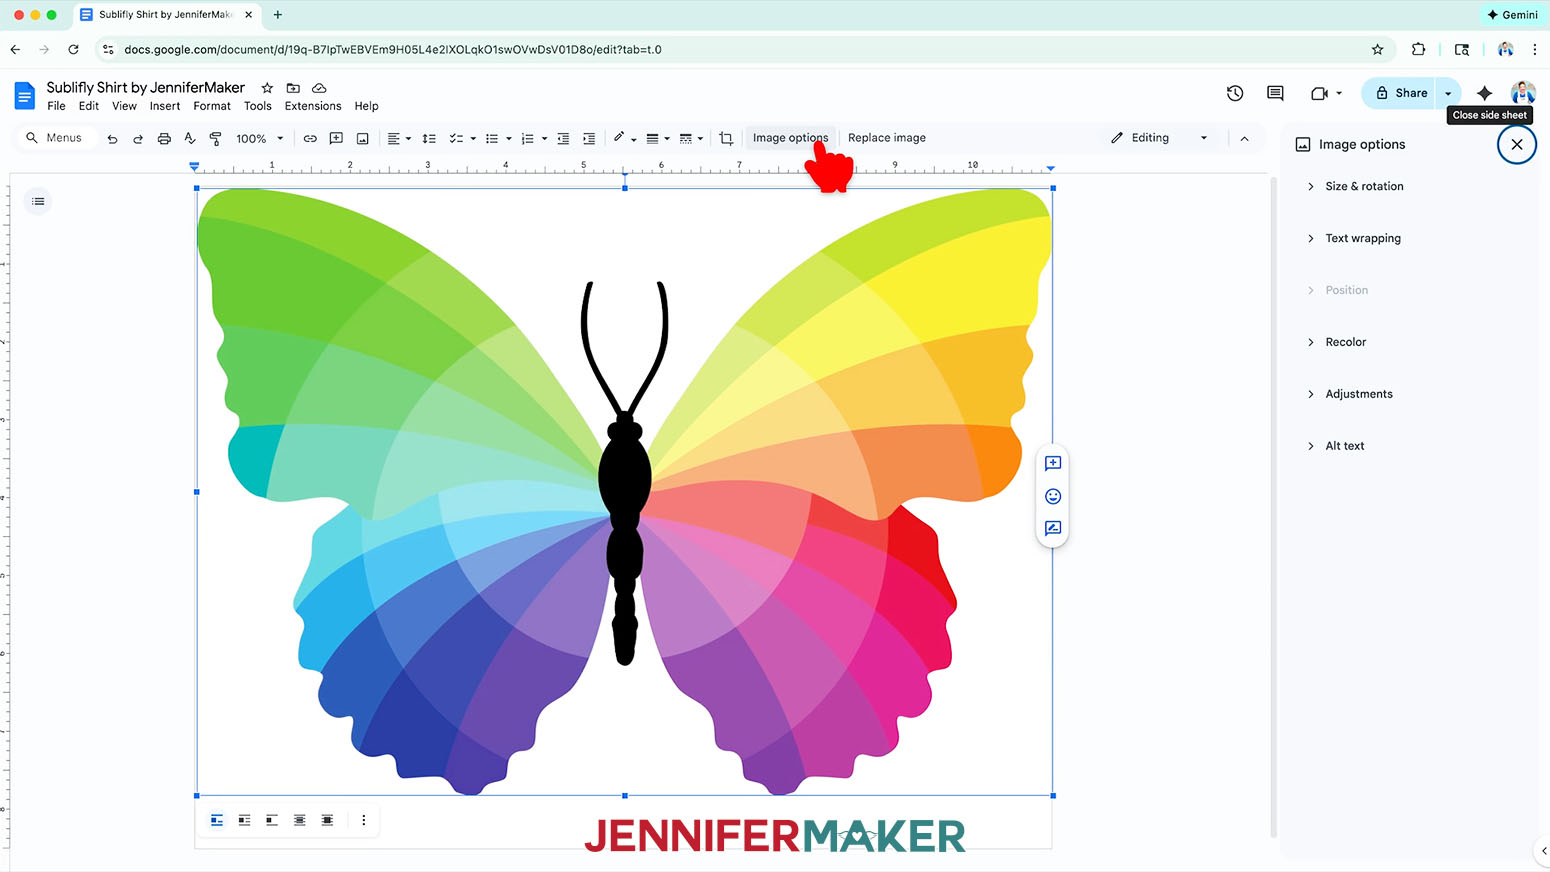
- To resize the design, click “Image Options” at the top of the page.
TIP: Keep your browser window full-size to find the options easily!
NOTE: You can also open the menu by going to “Format,” “Image,” and “Image Options.” - Select “Size & rotation.”
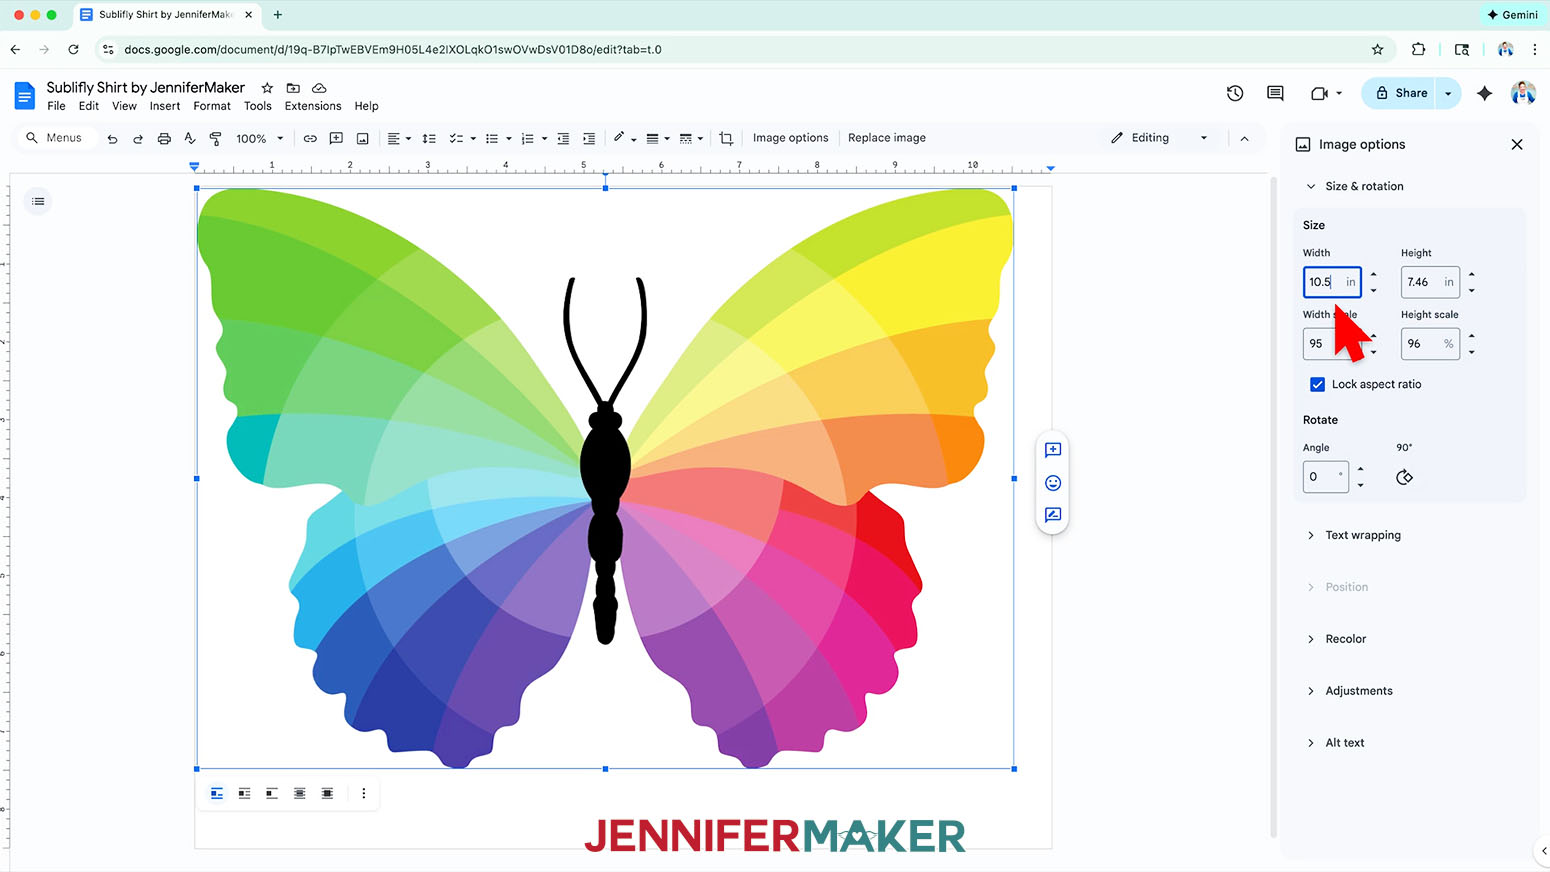
- Keep the “Lock aspect ratio” box checked to maintain the design’s proportions.
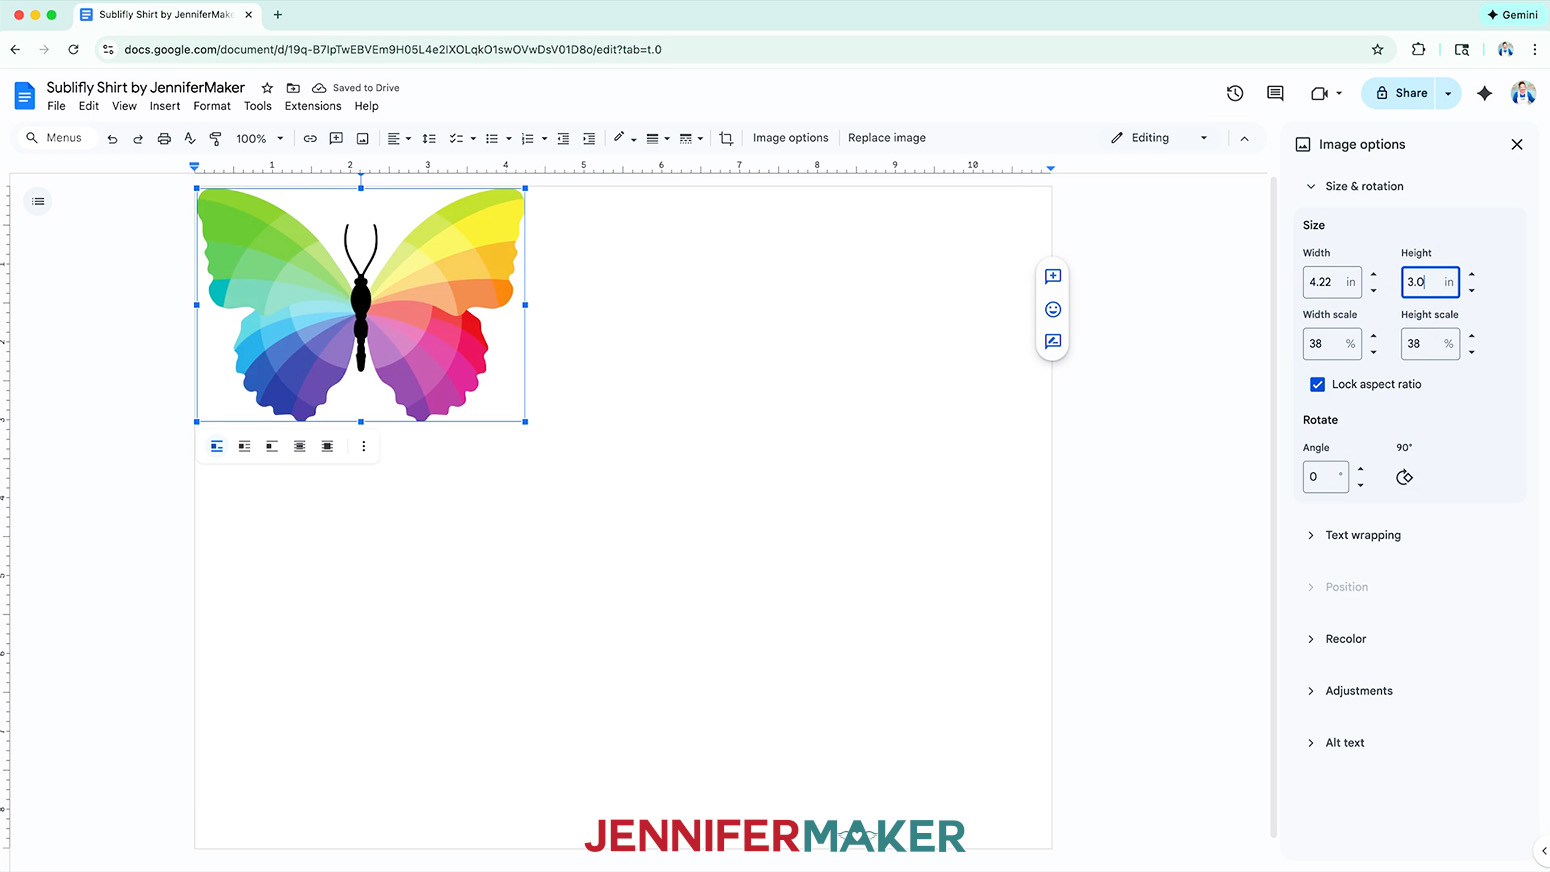
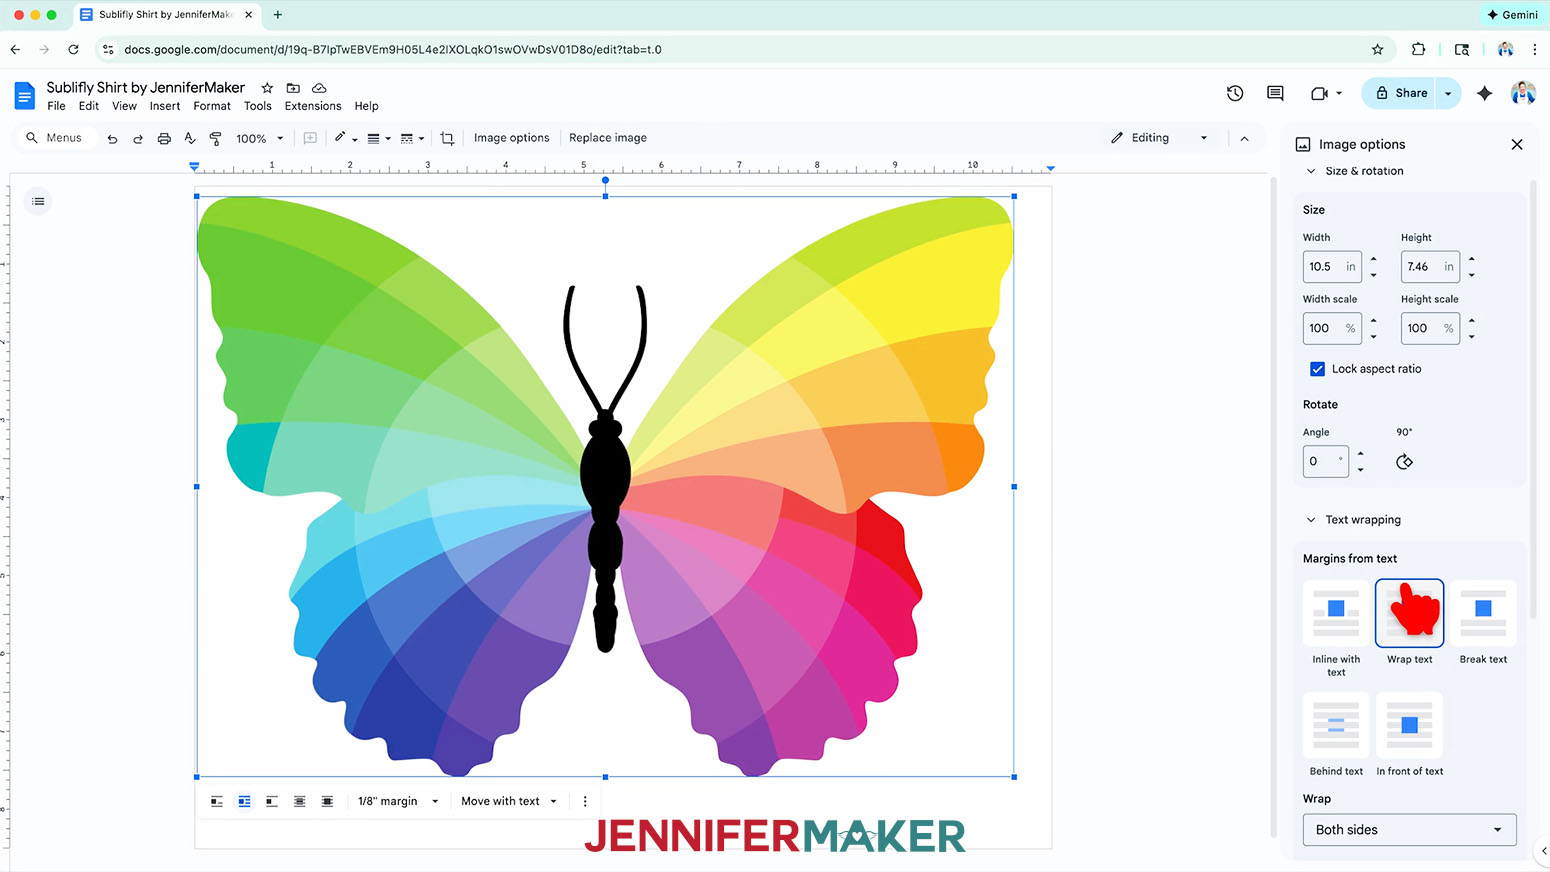
- For T-shirts, change the “Width” field to match the width of your blank’s design area. The “Height” field will automatically adjust proportionately.
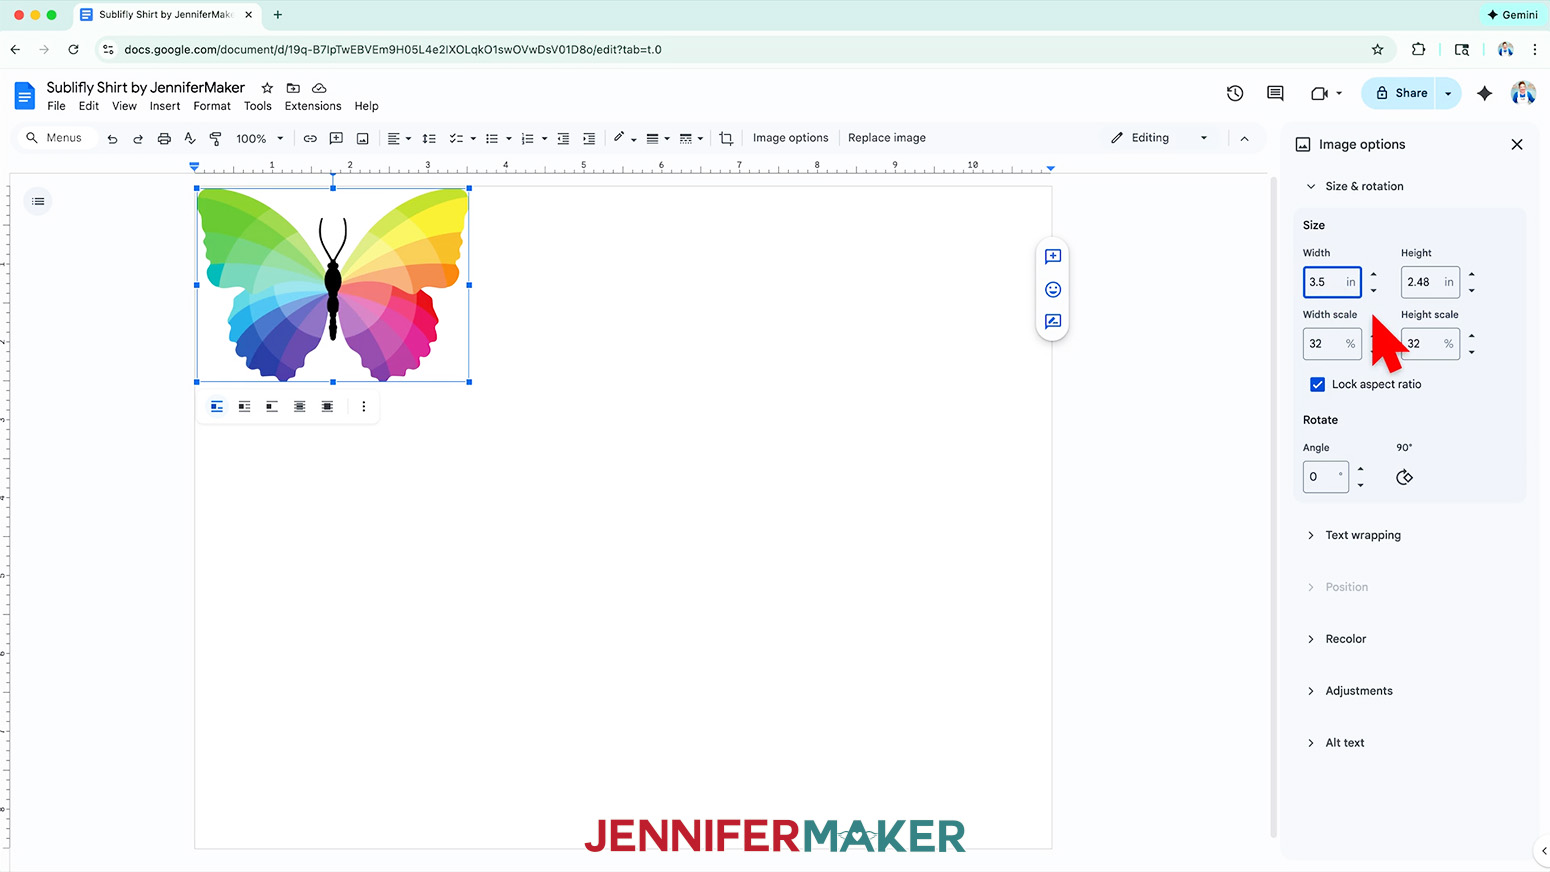
NOTE: I’ll make the design 10.5” wide for my Large Unisex shirt. If you’re making a different size shirt, you can adjust the design size to fit the area you want to fill, as long as it will fit your printer paper with at least a 0.25” margin around all sides of the design. - For coasters, change the “Width” field to match the width of your blank minus 0.25” to leave a margin around the design. The “Height” field will automatically adjust proportionately.
NOTE: I’ll make the design 3.5” wide for my coaster. - For mugs, subtract at least ½” from your height measurement to allow room at the top of the mug to drink without touching the design. The “Height” field will automatically adjust proportionately.
NOTE: I’ll make the design 3” high for my 15 oz. mug. - Once you’ve sized your design, click the “Text wrapping” heading on the “Image options” panel and select “Wrap text.”
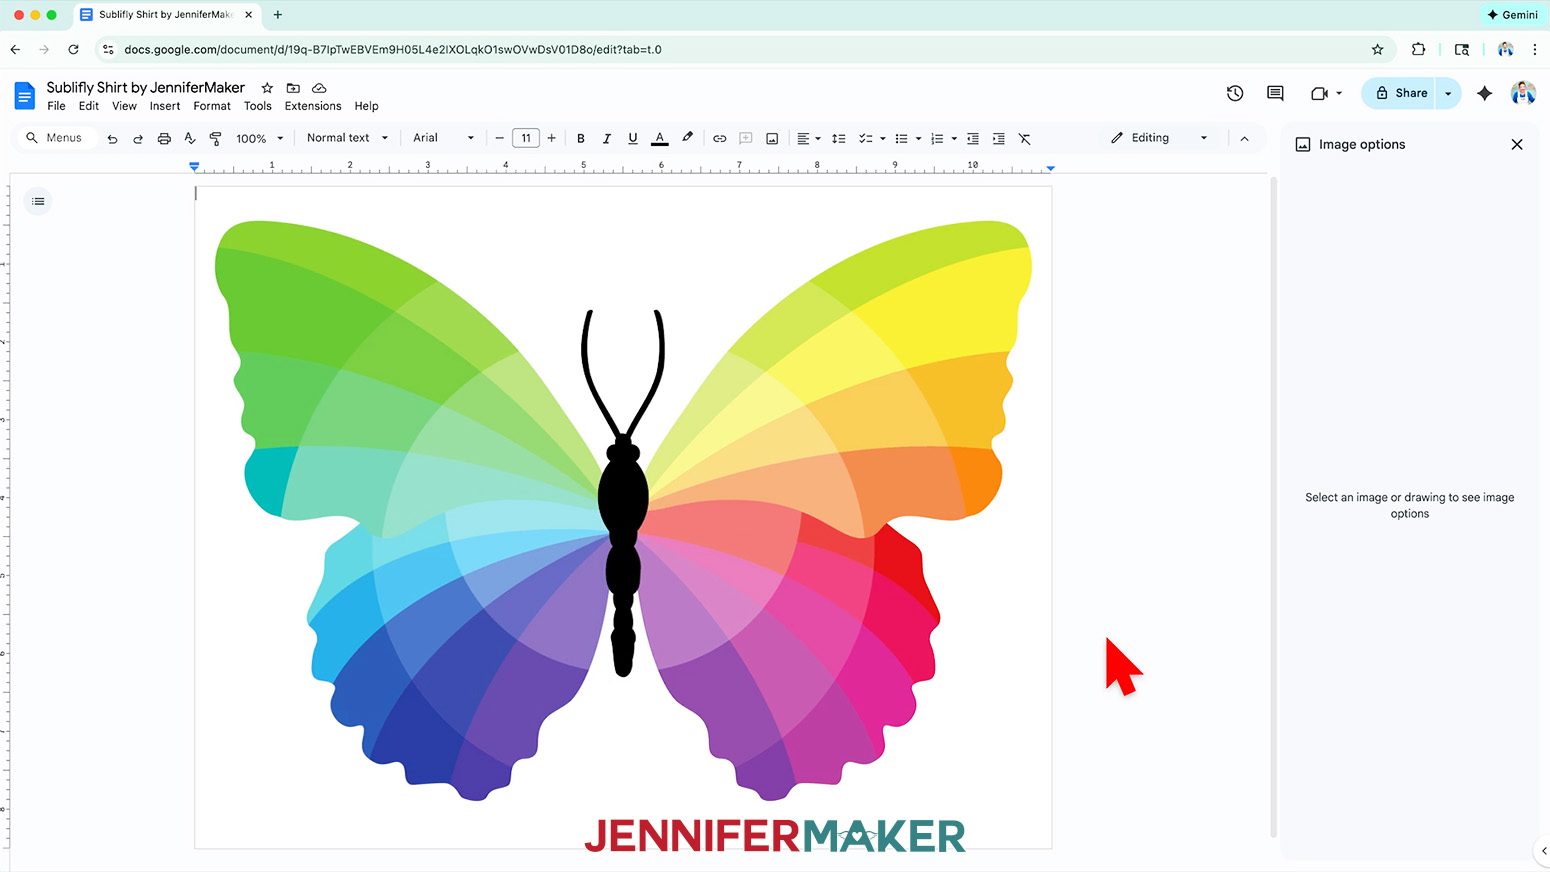
NOTE: This setting lets you move the design anywhere on the page. - Click and drag the image to the center of your page, as that ensures it won’t get cut off at the edges.
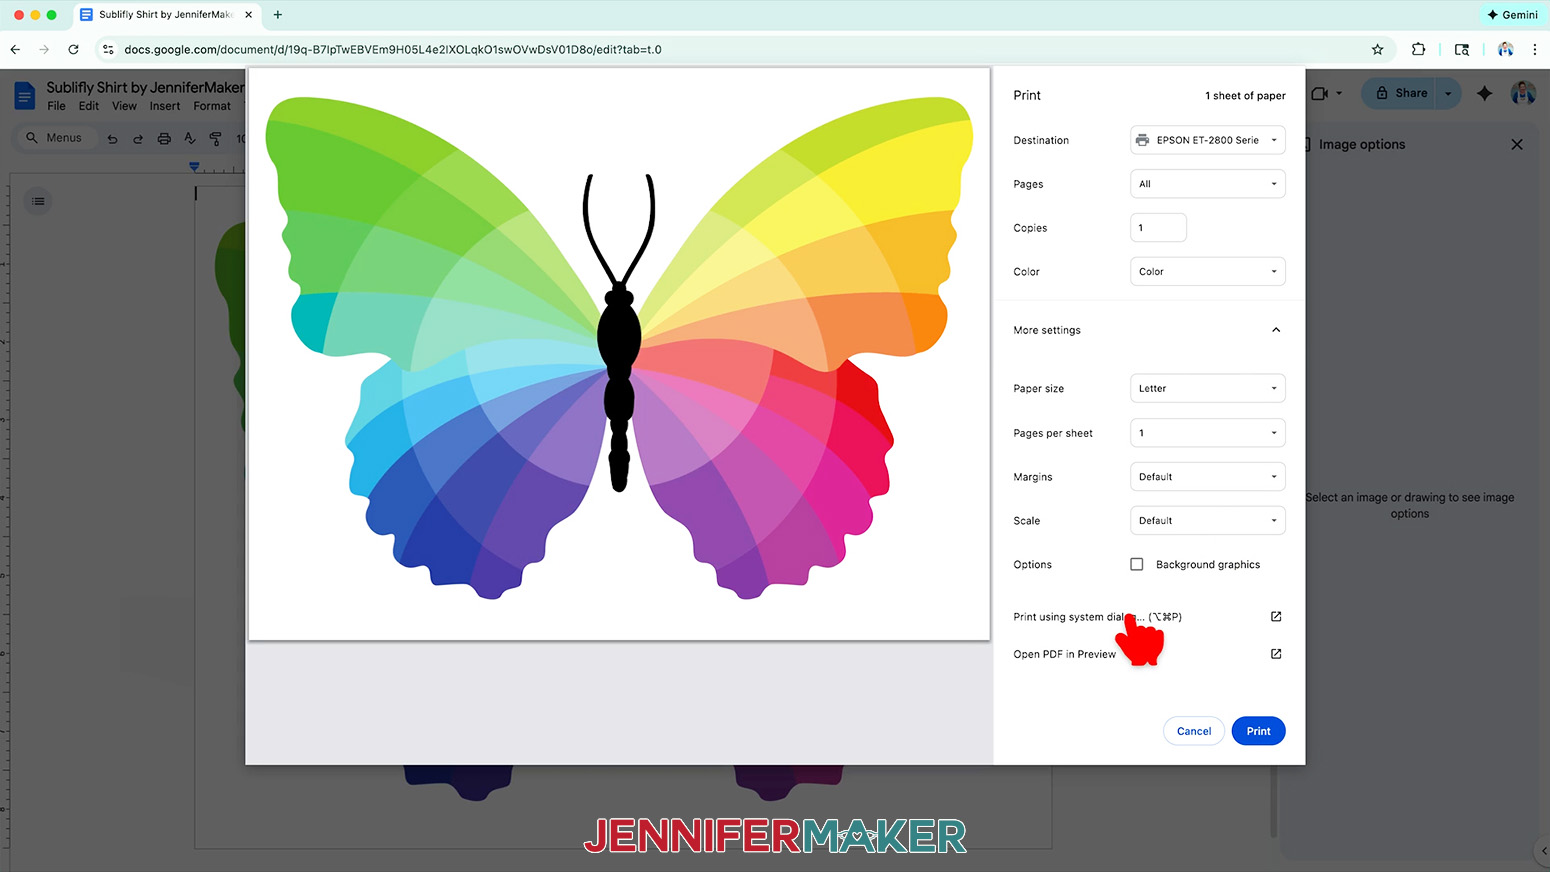
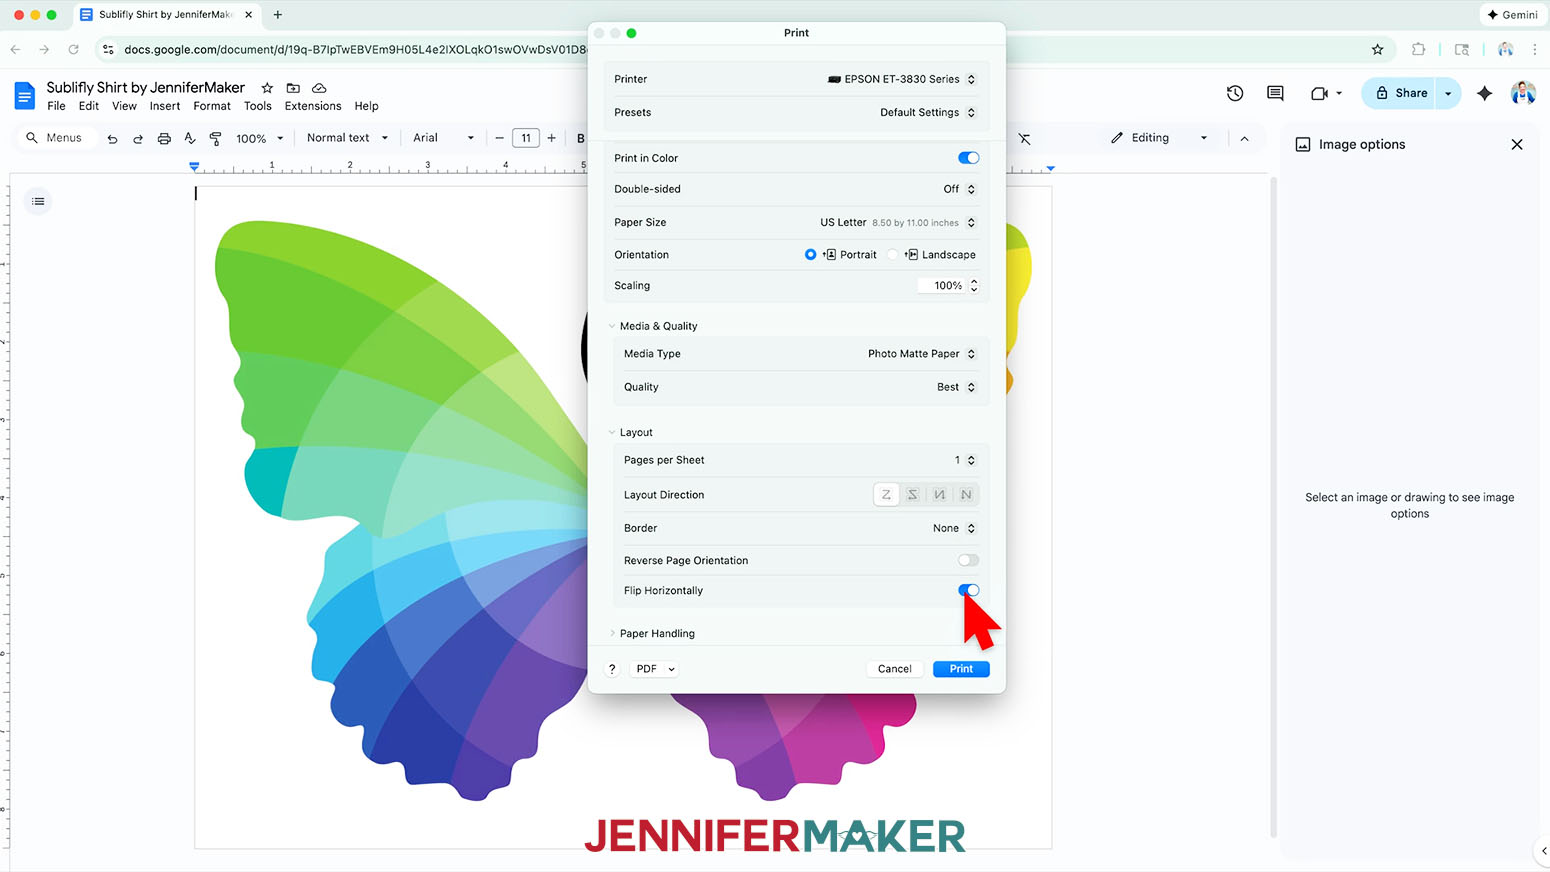
- Go to the “File” menu and choose “Print.”
- Select your sublimation printer under “Destination.”
- Click the arrow beside “More settings” to select “Print using system dialog.”
- Your print menu may look different from mine - just make sure that you “flip horizontally” to mirror the image and select the highest print quality and the best matte photo paper setting. Double-check the sublimation printer and paper size settings to make sure they’re still correct.
- Load a sheet of sublimation paper correctly into your sublimation printer.
NOTE: Check the packaging for information on how to load the paper. - Click “Print.”
- Allow the print to dry before handling it, as the ink can smear.
NOTE: The printed design will appear lighter before pressing. - Your image is ready to press!
STEP 4: TRANSFER YOUR DESIGN
IMPORTANT: As with all sublimation projects, open a window and turn on a fan to improve your ventilation before beginning.
ON A T-SHIRT, WITH A HEAT PRESS
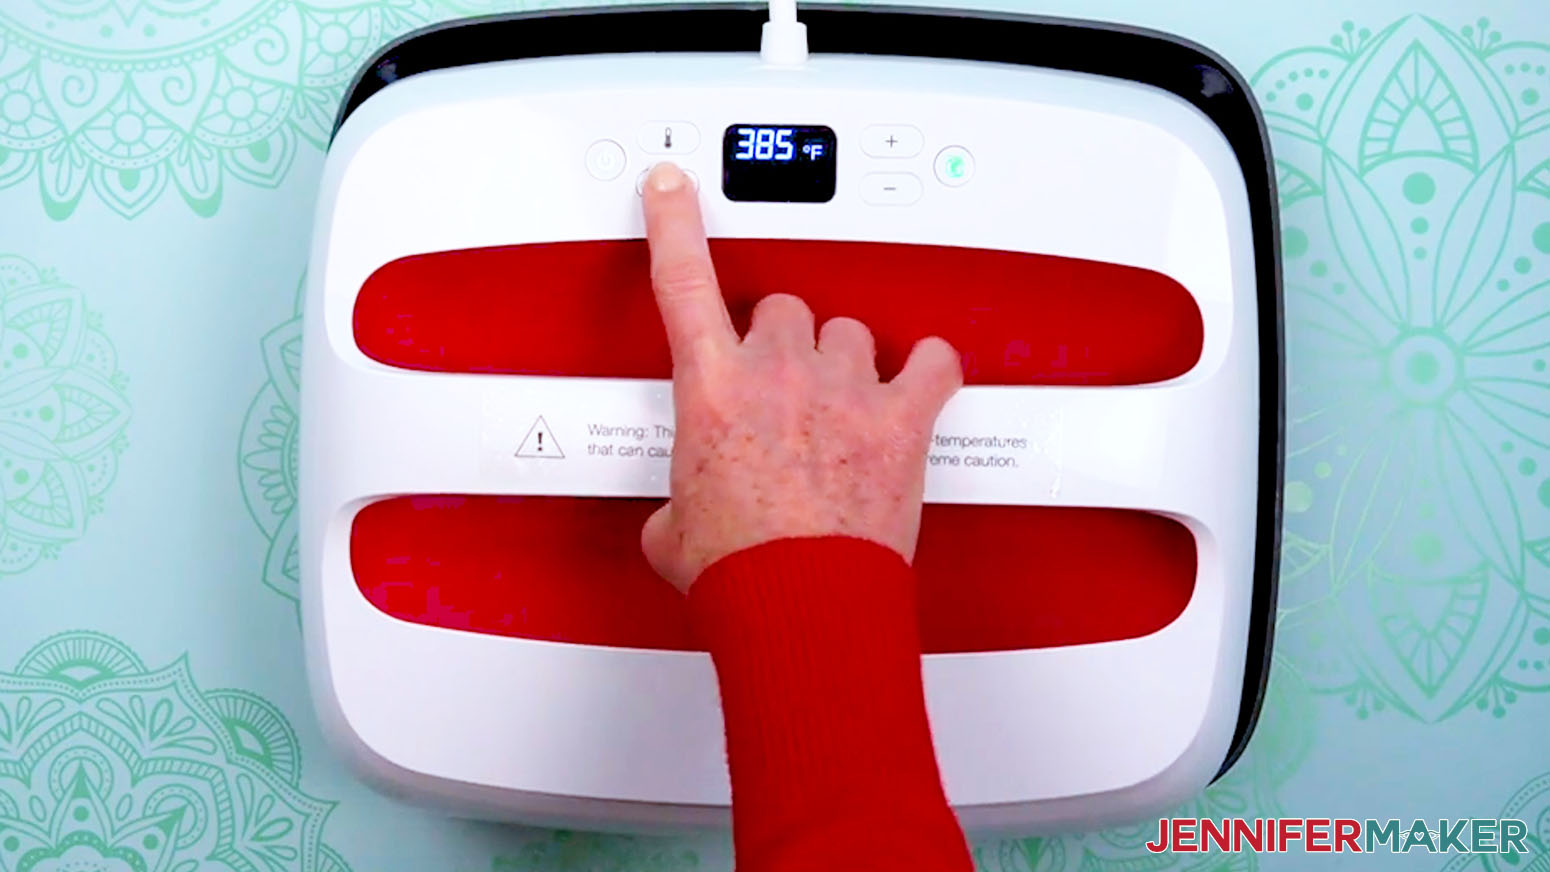
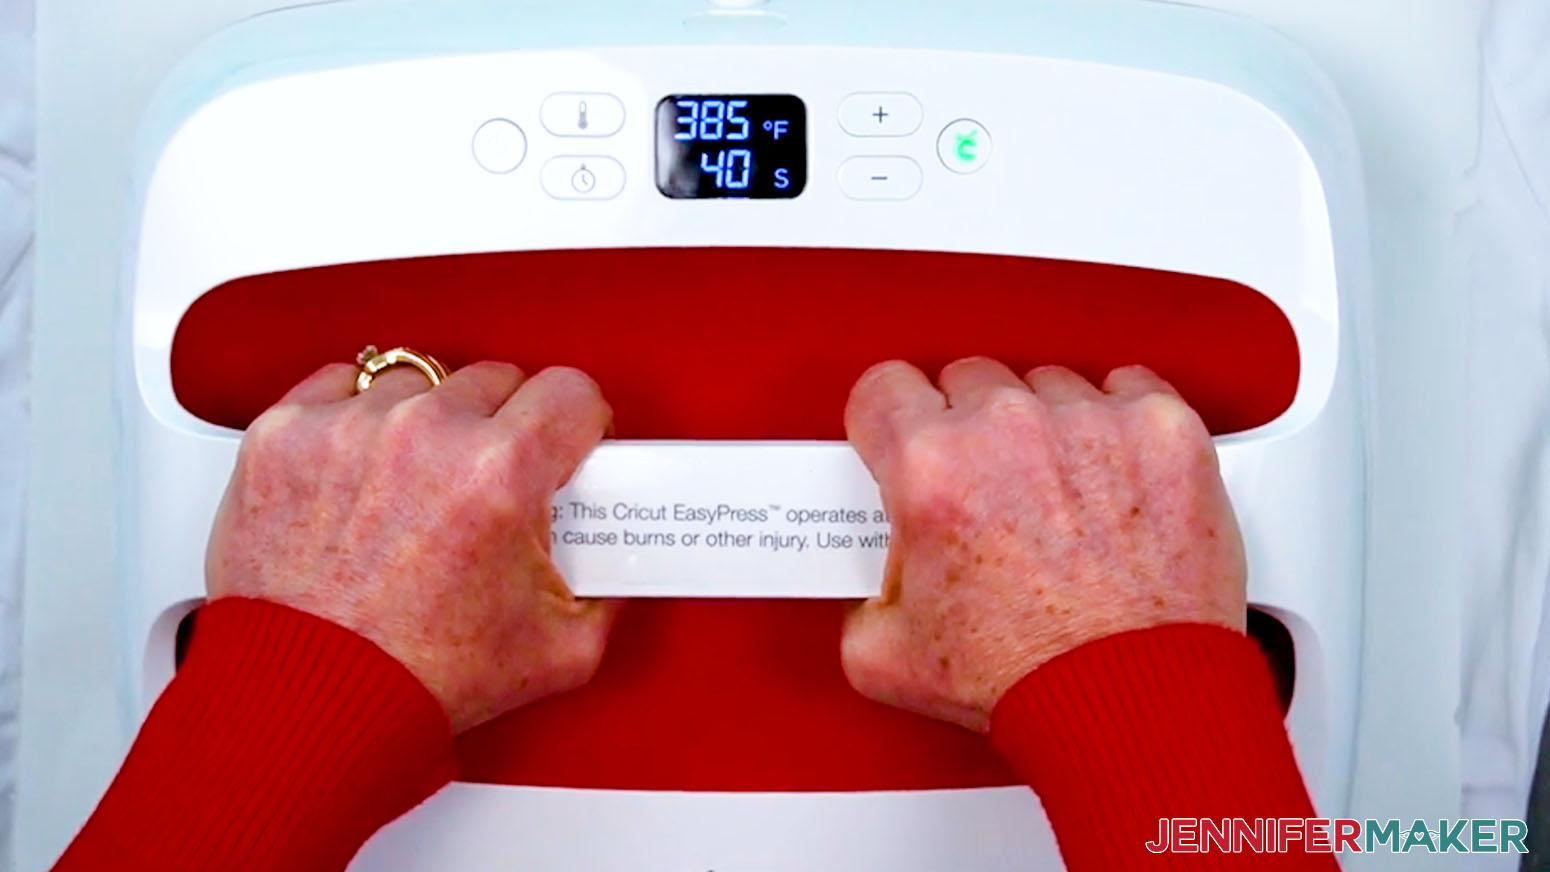
- Set the temperature of your EasyPress to 385℉ (196℃), and set the timer for 10 seconds.
TIP: I followed the time and temperature settings for 100% polyester T-shirts in my Sublimation Cookbook. Inside, you can find the settings for tons of other sublimation projects, too! - Place your pressing mat on your work surface.
- Use a lint roller to remove any excess lint or debris from your shirt.
- Fold your shirt in half vertically and press it for 10 seconds along the crease.
TIP: This makes a center line in the fabric to help align your design and pre-heats your shirt at the same time.
NOTE: Always remember to place your press back on the base after use. - Unfold your shirt and lay it face up on the pressing mat.
- Slide a piece of white cardstock inside the shirt under where your design will be to protect the back layer.
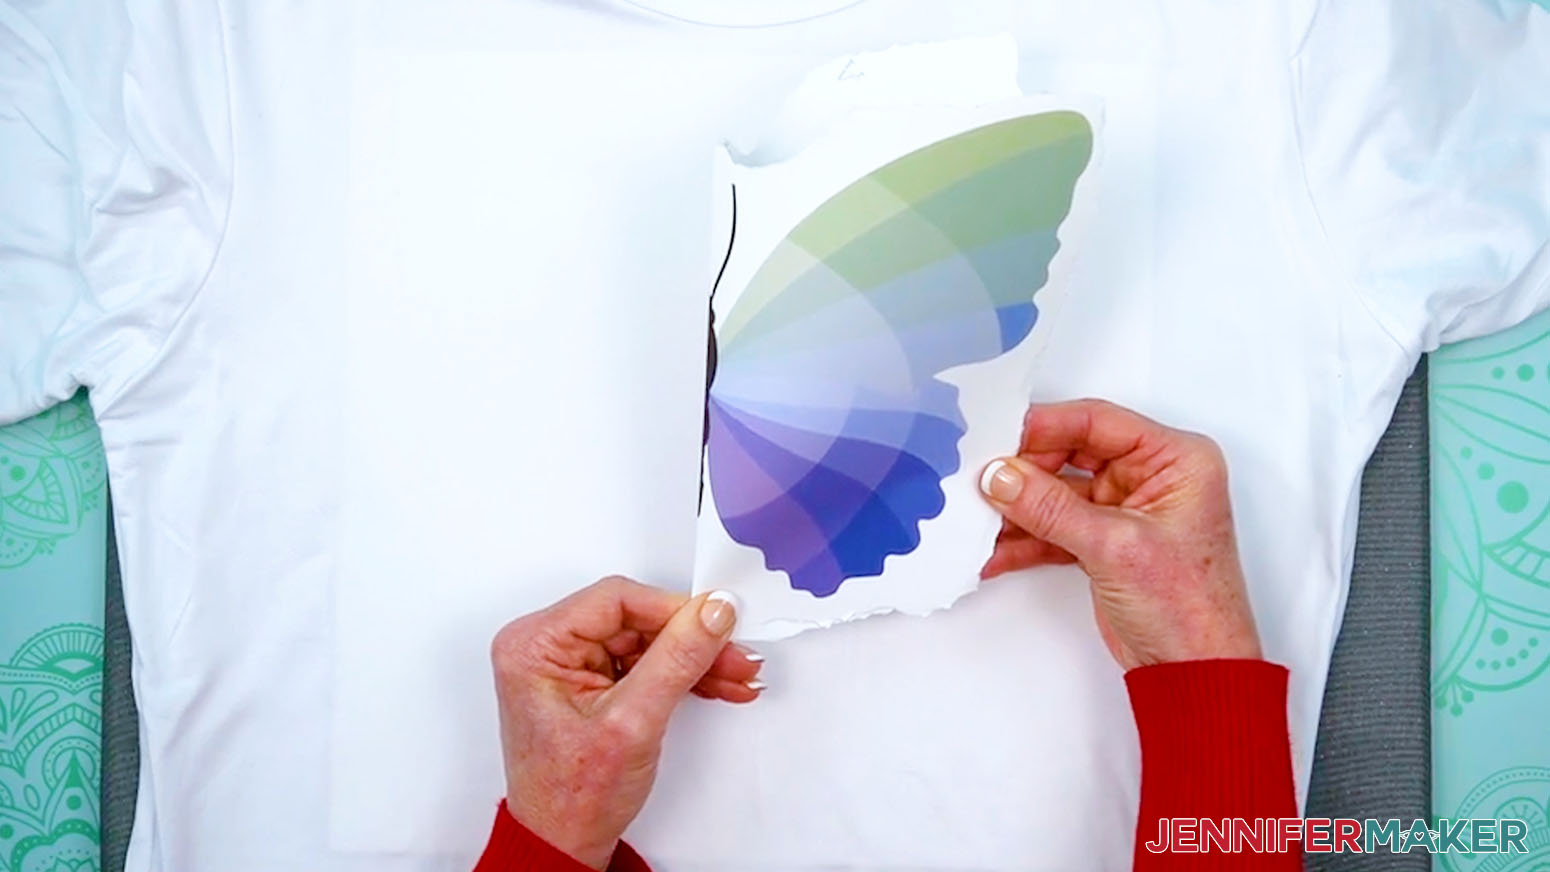
- Use scissors or a paper trimmer to trim the print close to the design, or gently tear the edges to smooth out the transition and minimize pressing lines at the edges of the paper.
- Gently curve your printed design along its vertical center, and crease it at the top and bottom of the paper. Don’t fold through any of the printed image!
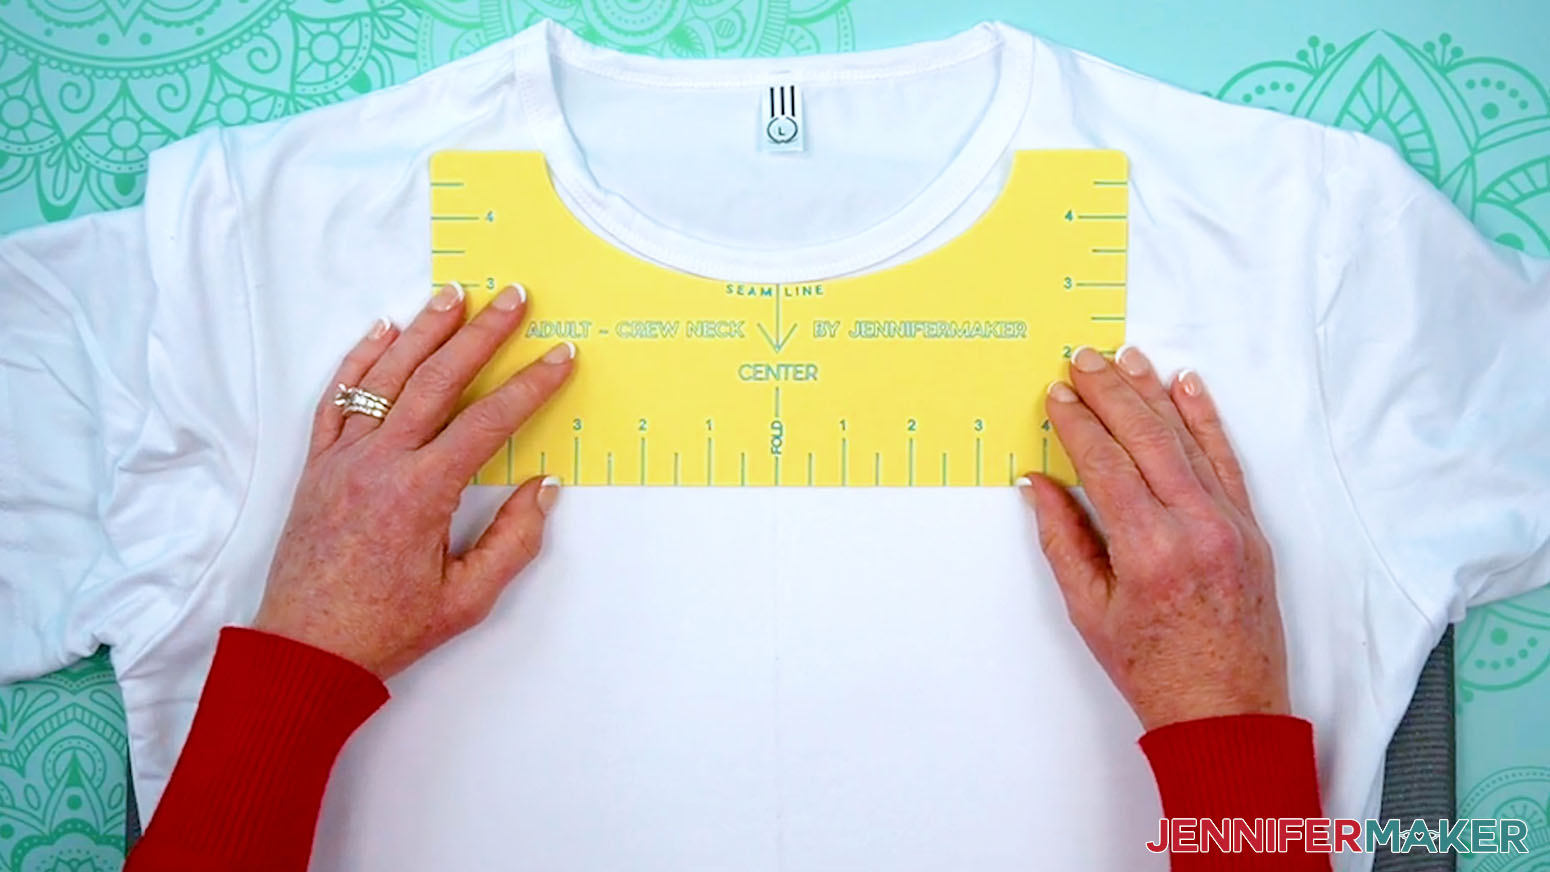
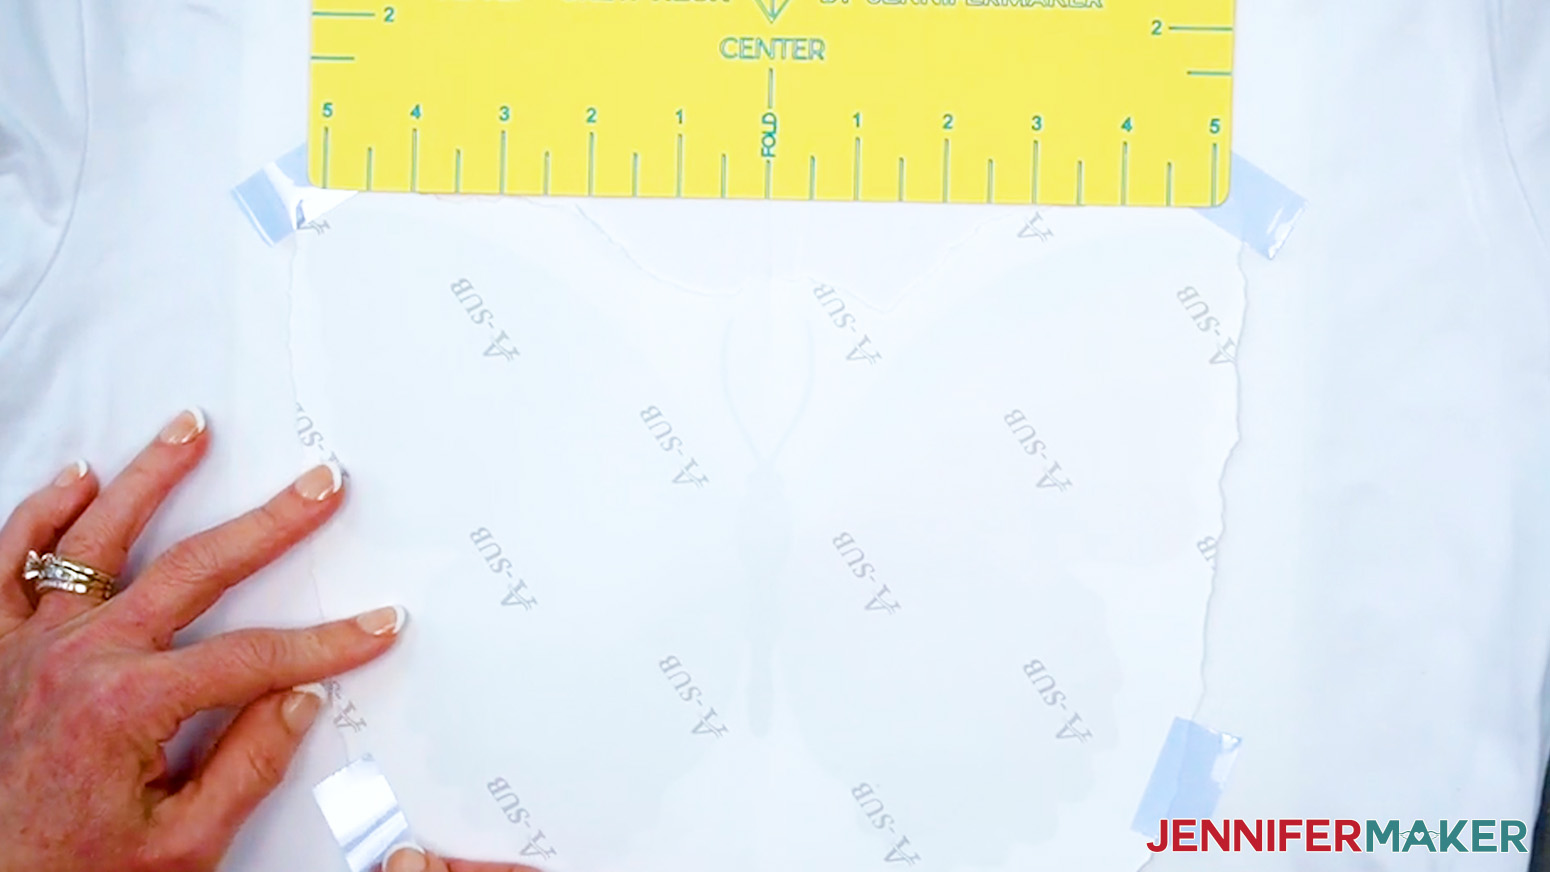
- Lightly place the design about 2-3” below the shirt’s collar, ink-side down, lining up the creases on the paper with the crease on the shirt.
NOTE: To get the best placement for your design, use one of my free T-Shirt Rulers. - Use heat-resistant tape on all four sides to secure the design to the fabric, making sure it’s smooth.
NOTE: Avoid placing tape over the design to prevent discoloration when pressing. - If you’re using the T-shirt ruler, remove it.
- Place a fresh piece of white uncoated butcher paper on top of the design. Make sure it’s larger than the design and the heat press.
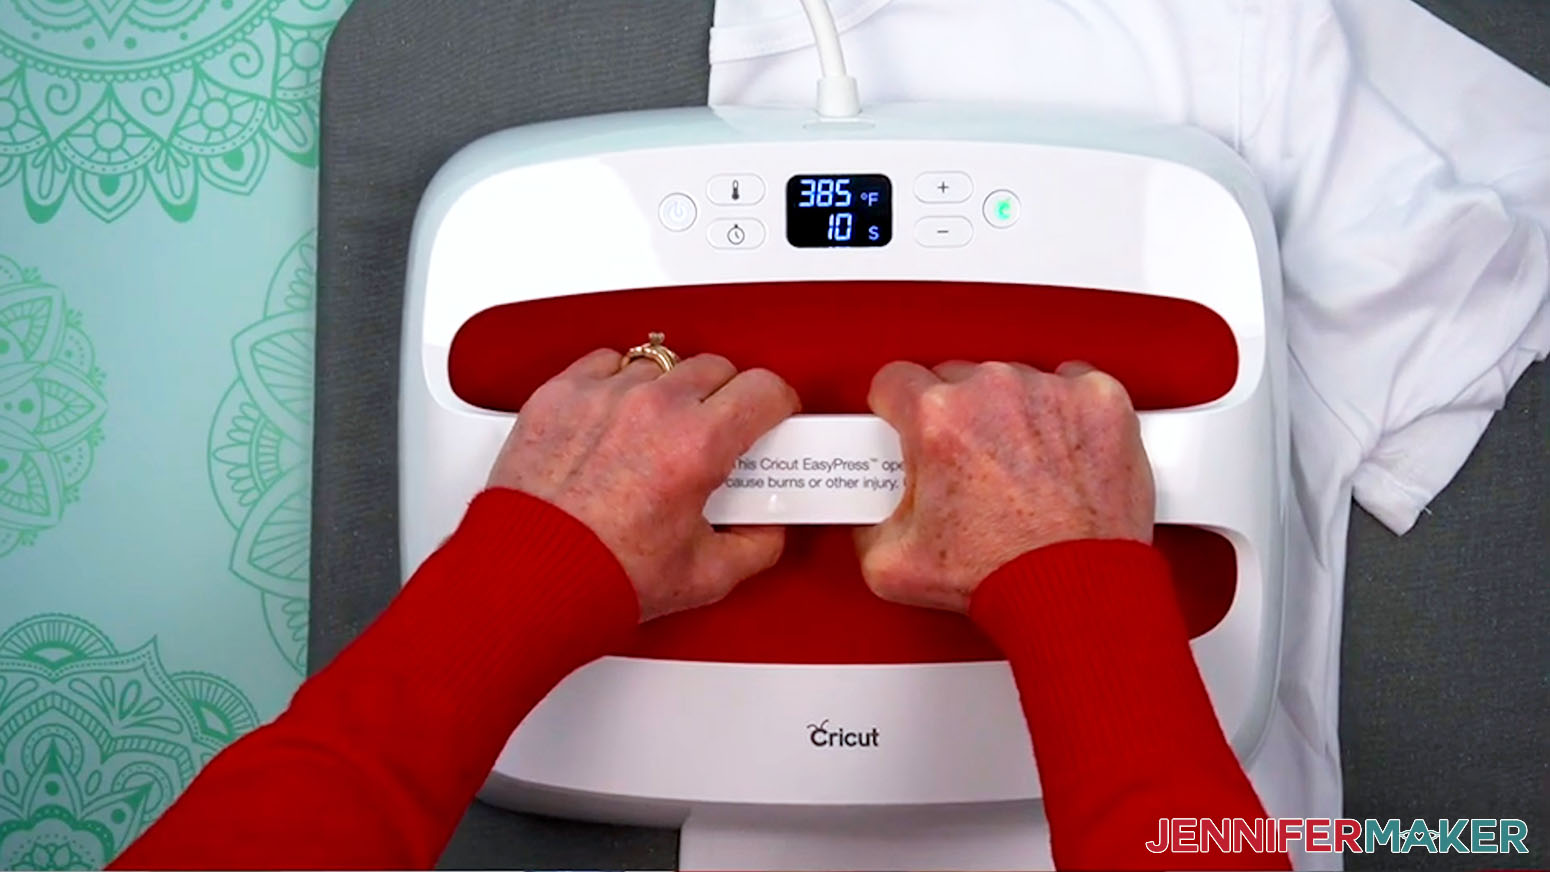
- Make sure the temperature of your EasyPress is at 385℉ (196℃), and the timer is set for 40 seconds.
- Cover the entire area of your design with the EasyPress and hold it in place. Press with even, light pressure for 40 seconds.
TIP: Keep pressure even on both sides of the press for the best results. - When the time is up, lift the EasyPress straight up to avoid ghosting.
- Let the project cool for about 10 seconds to let the ink settle and avoid ghosting, or a shadowy double image.
- Remove the butcher paper, tape, and print to reveal the design.
- Remove the cardstock inside the shirt.
- Your T-shirt is ready!

ON A COASTER, WITH A HEAT PRESS
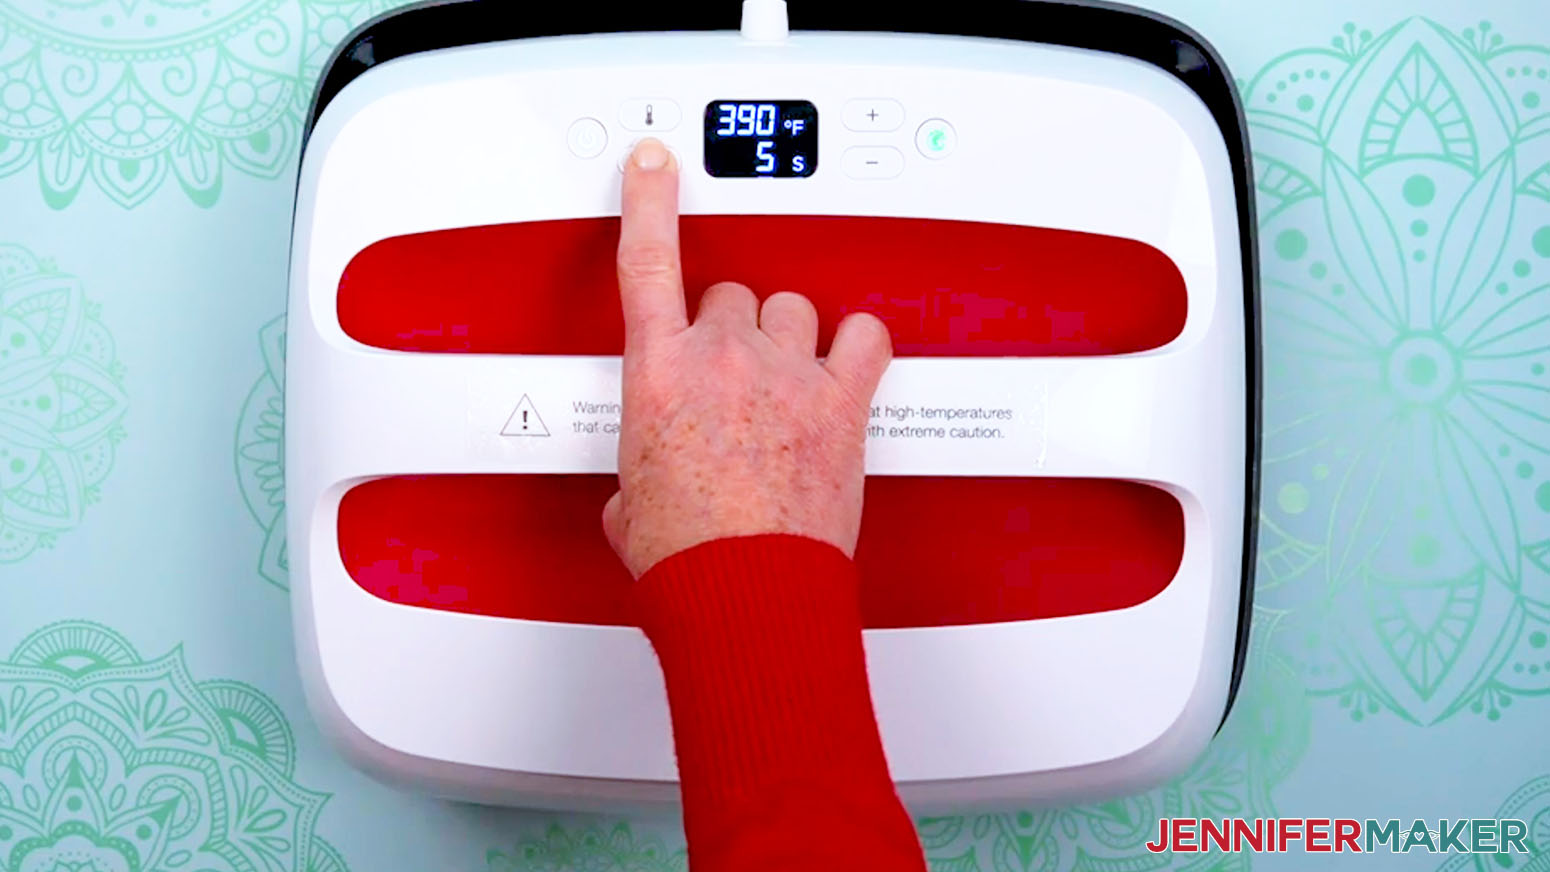
- Set the temperature of your EasyPress to 390℉ (198℃), and set the timer for 5 seconds.
TIP: I followed the time and temperature settings for MDF coasters in my Sublimation Cookbook. Inside, you can find the settings for tons of other sublimation projects, too! - Place your pressing mat on your work surface with a piece of protective white cardstock on top to protect it from any ink that may escape during the sublimation process.
TIP: Your cardstock should be clean and free of any ink or other marks that could transfer to your blank during sublimation. - Use a lint roller or isopropyl alcohol and a lint-free cloth to remove any dust or debris from the white sublimation side of the blank.
- Place the coaster sublimation-side up on your pressing mat, then cover it with a sheet of white, uncoated butcher paper.
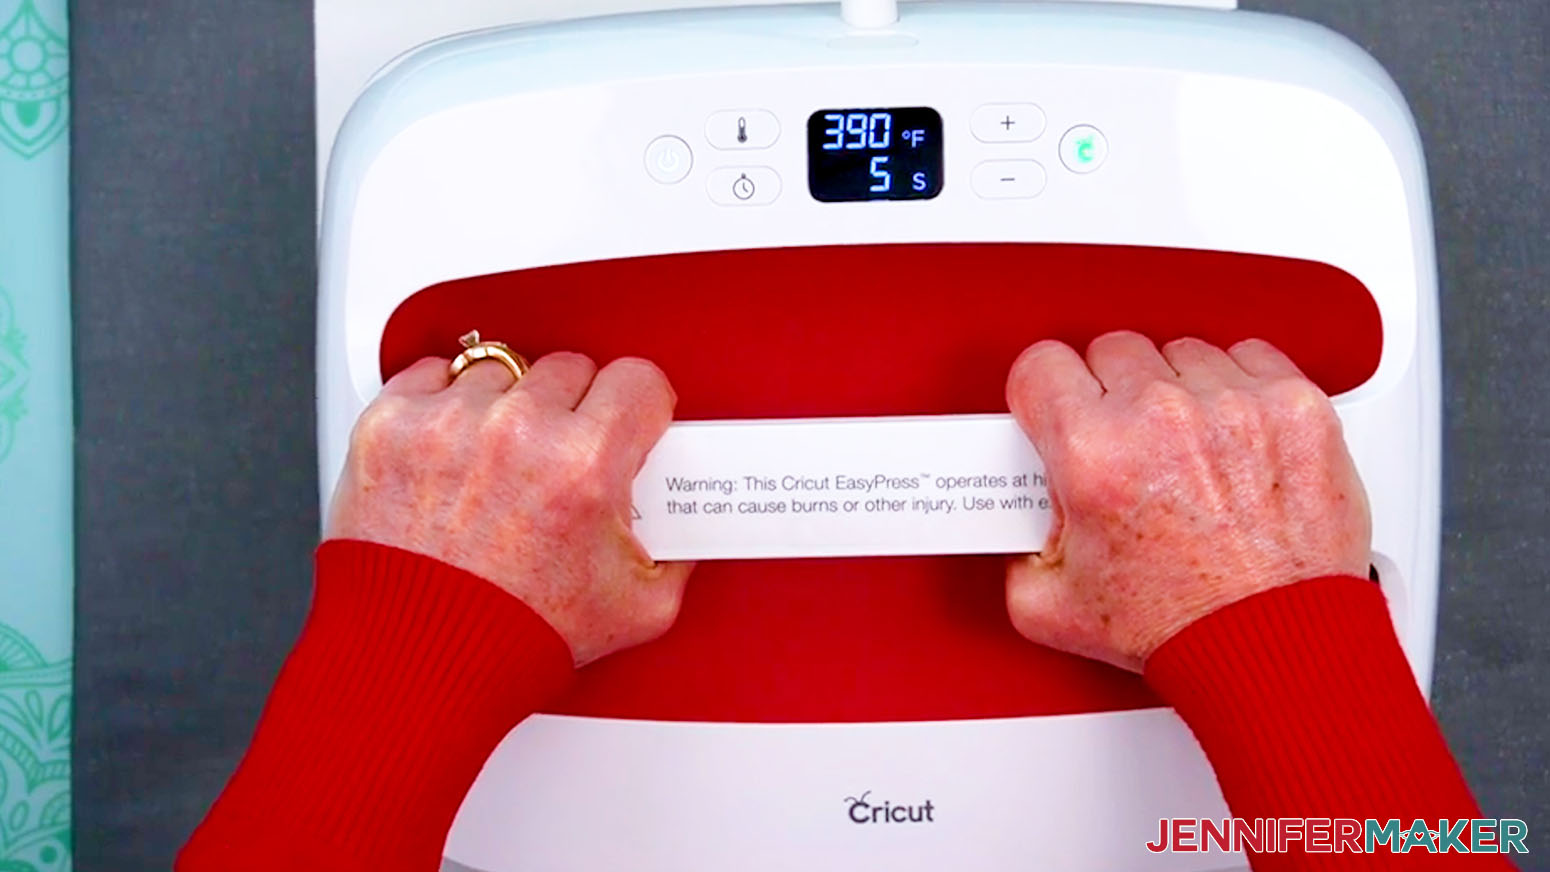
- Cover the entire area of your coaster with the EasyPress and preheat the blank with medium pressure for 5 seconds to remove moisture.
- Lift the EasyPress.
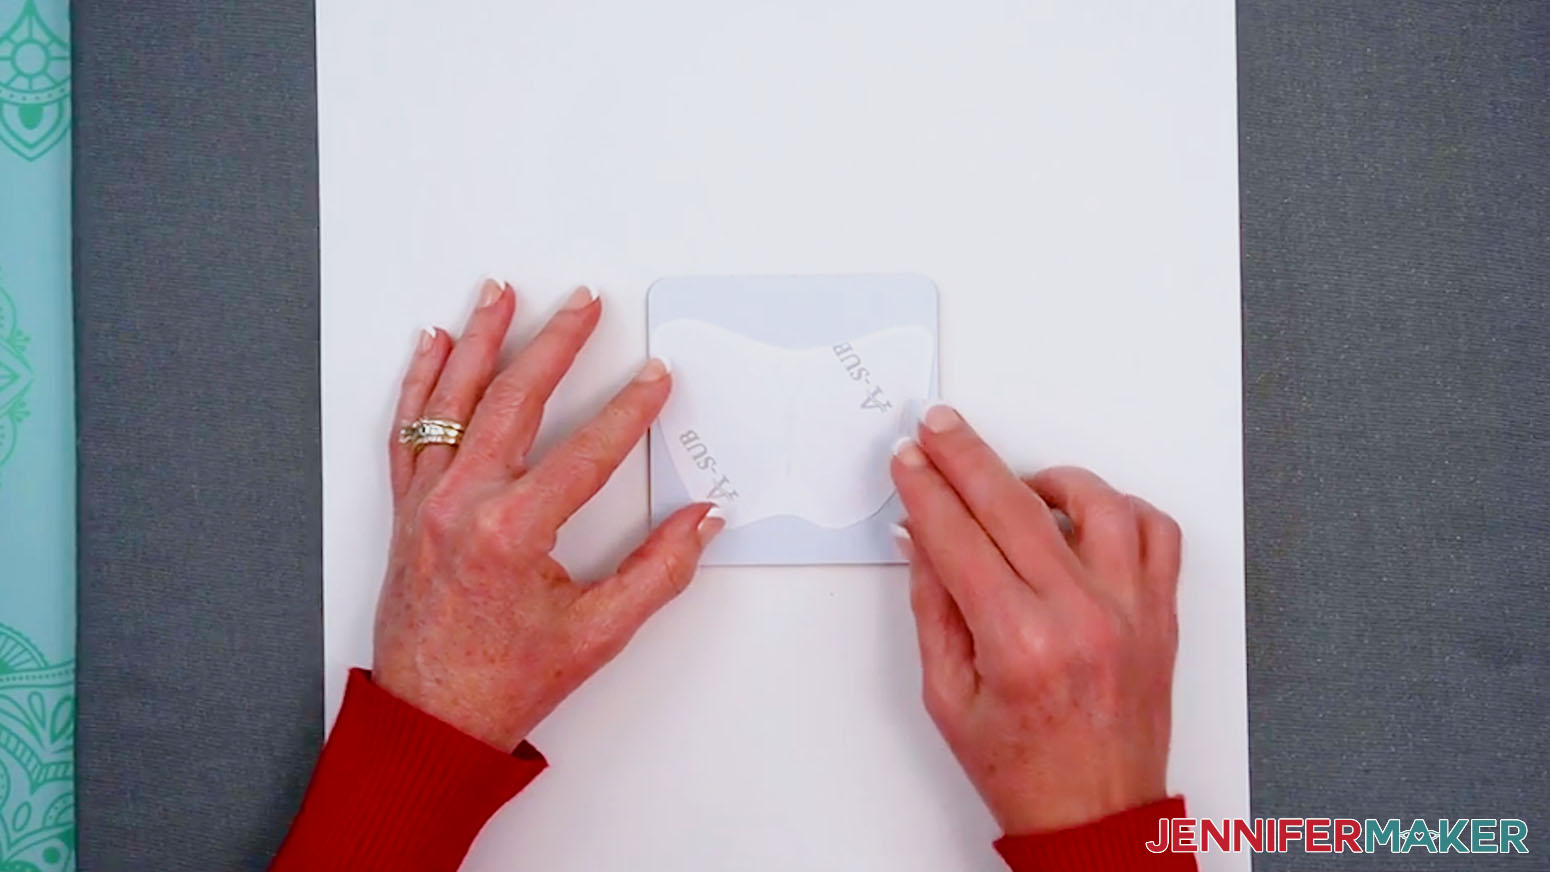
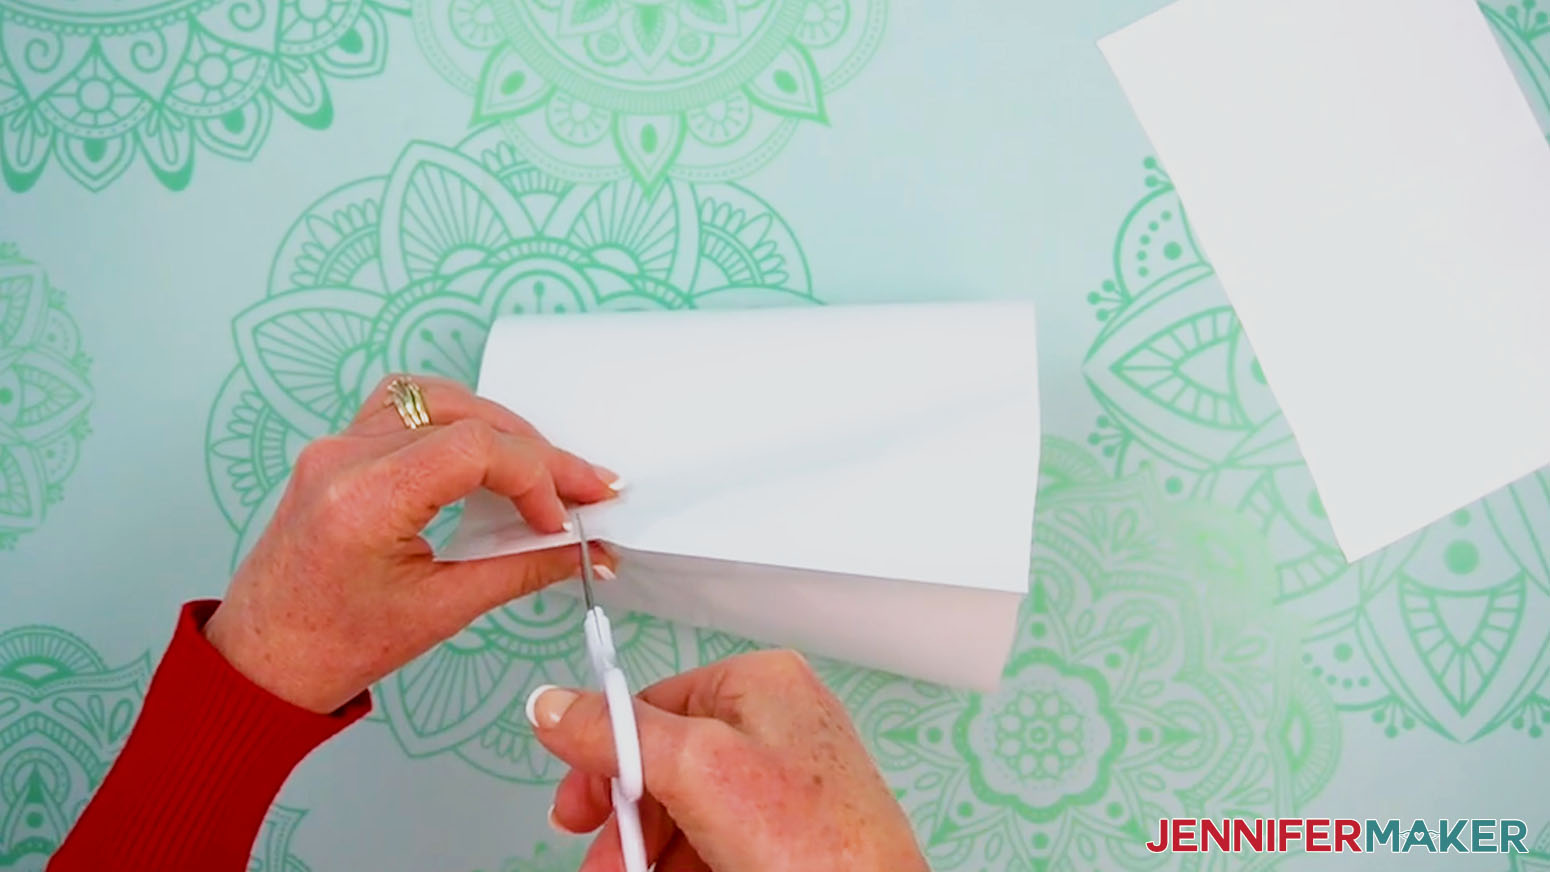
NOTE: Always remember to place your press back on the base after using. - Use scissors or a paper trimmer to trim around your print, leaving about 0.25” of blank paper on all four sides of the design.
- Place the coaster blank sublimation-side up on your work surface.
- Center the print face down on the coaster.
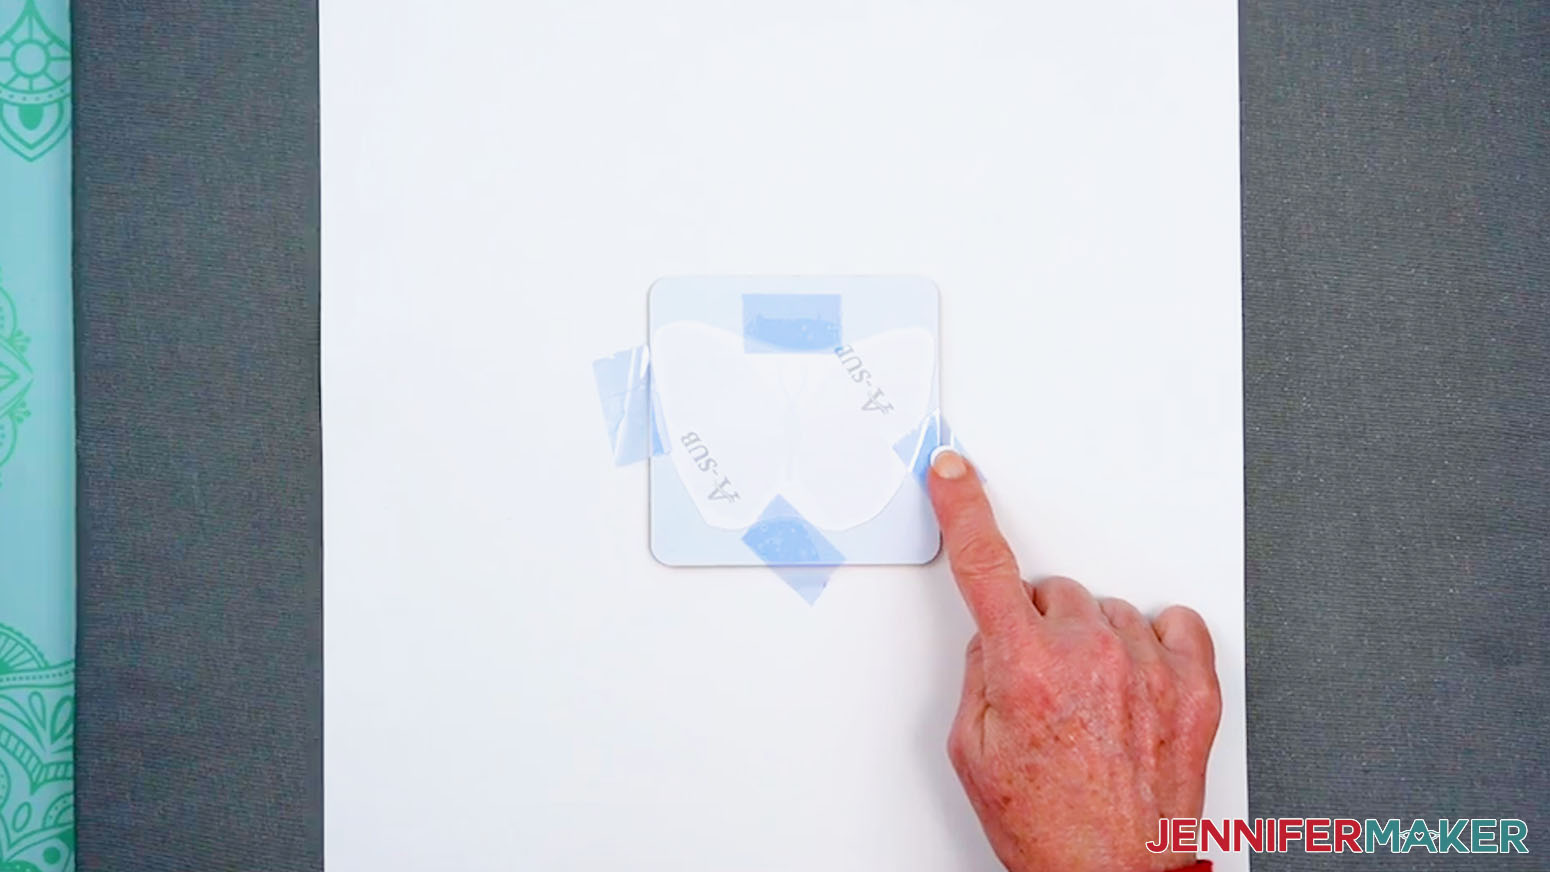
TIP: To help with alignment, note the center of the design on the back with a little pencil mark. Place your print face down on the prepared blank, then use a ruler to find the center of the blank and line up the pencil mark. - Use heat-resistant tape on all four sides of the print to tightly secure it to the coaster, keeping the tape away from the inked areas to avoid discoloration during the heating process.
- Place the coaster sublimation-side up on the cardstock with the print face down.
- Place a fresh piece of white uncoated butcher paper on your project to completely cover it.
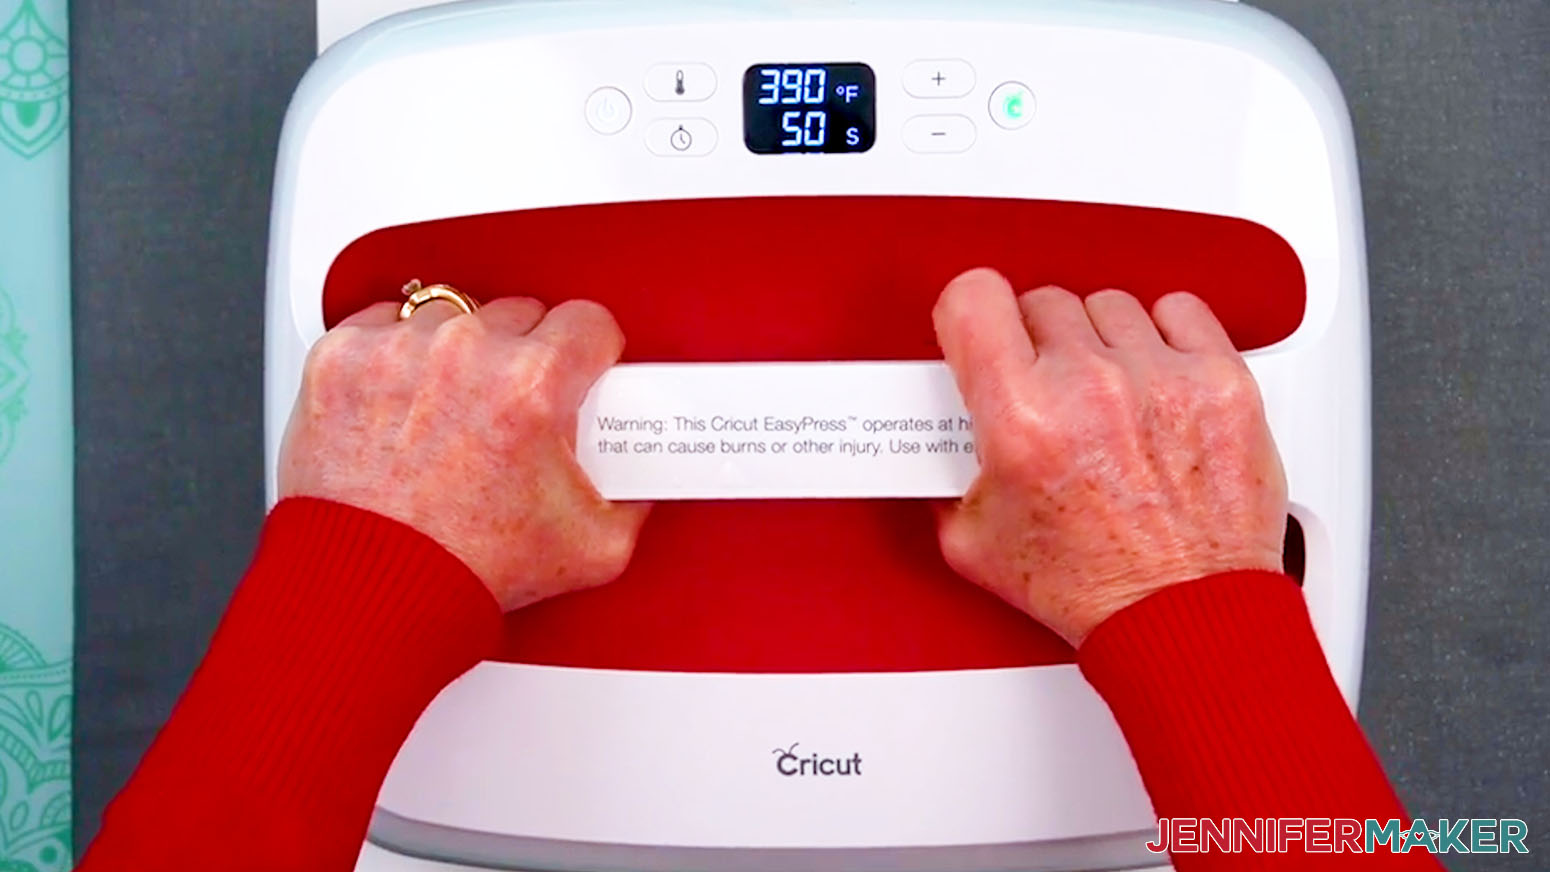
- Make sure the temperature of your EasyPress is at 390℉ (198℃), and the timer is set for 50 seconds.
- Cover the entire area of your coaster with the EasyPress and hold it in place with medium pressure for the entire length of the timer.
TIP: Keep pressure even on both sides of the press for the best results. - When the time is up, lift the EasyPress straight up to avoid ghosting.
- Let the project cool completely, then remove the butcher paper, the tape, and the design.
- Your coaster is ready!


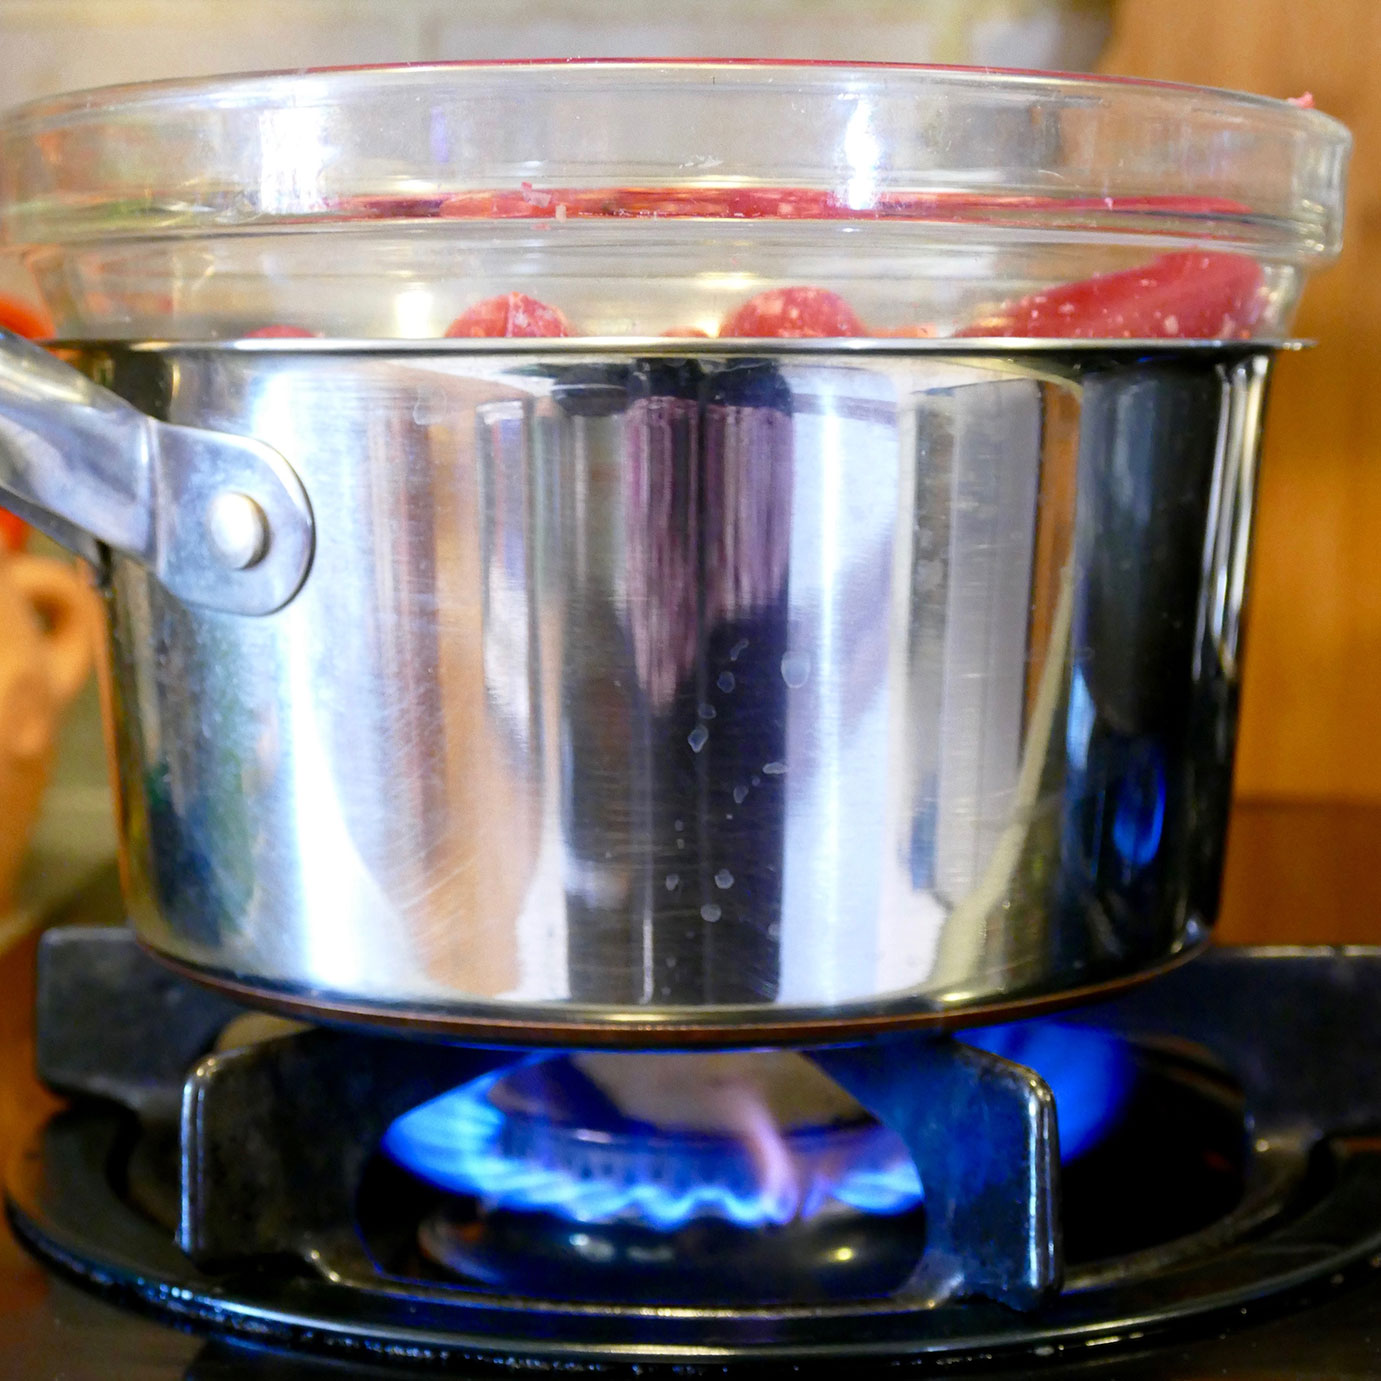
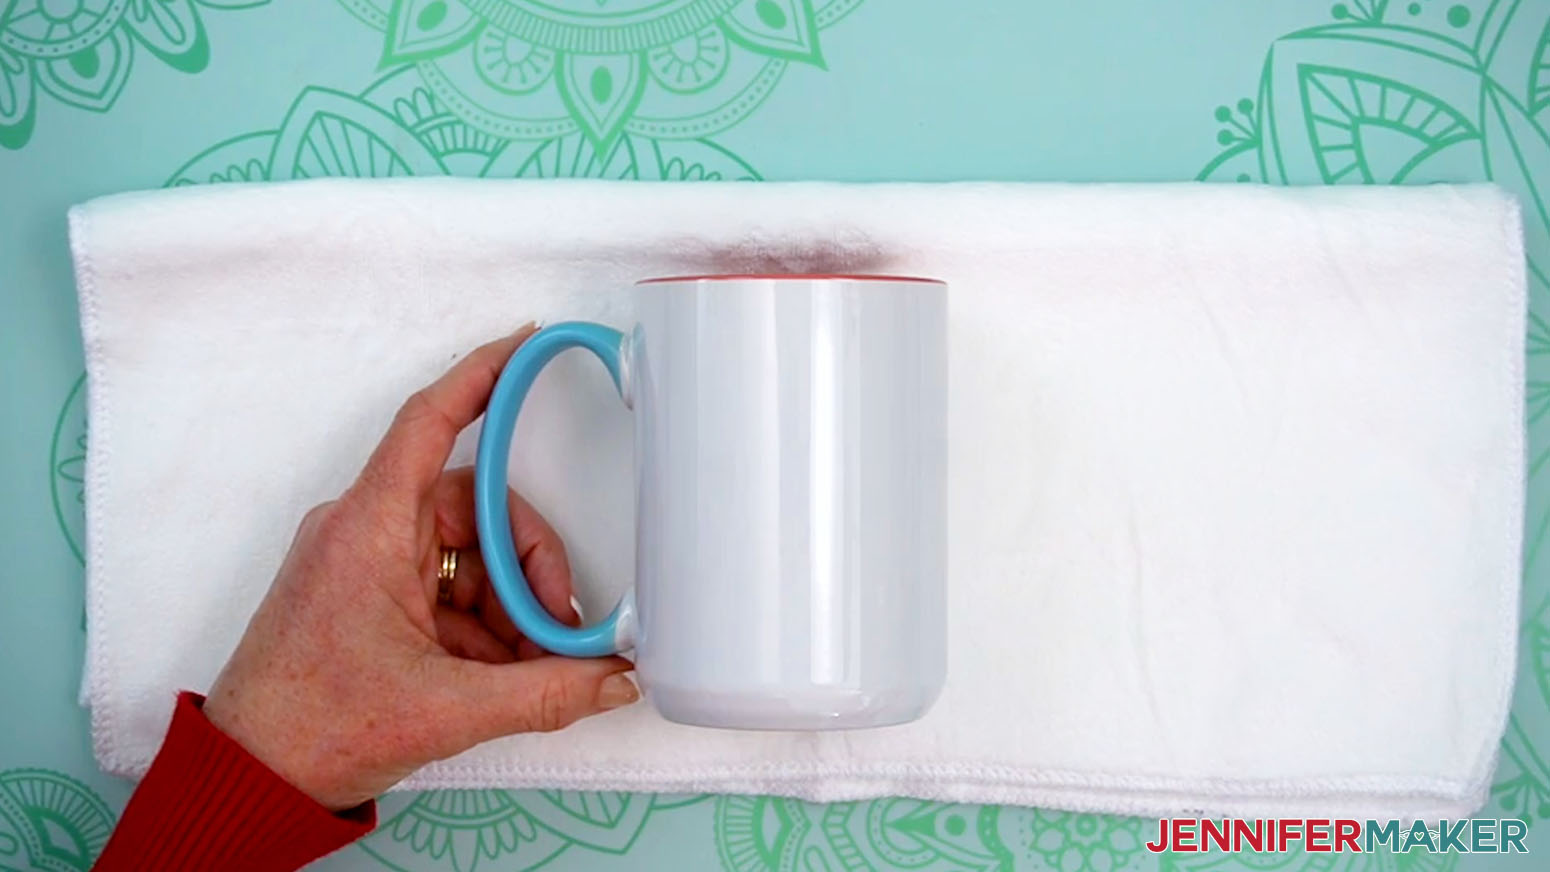
ON A MUG, WITH A CONVECTION OVEN
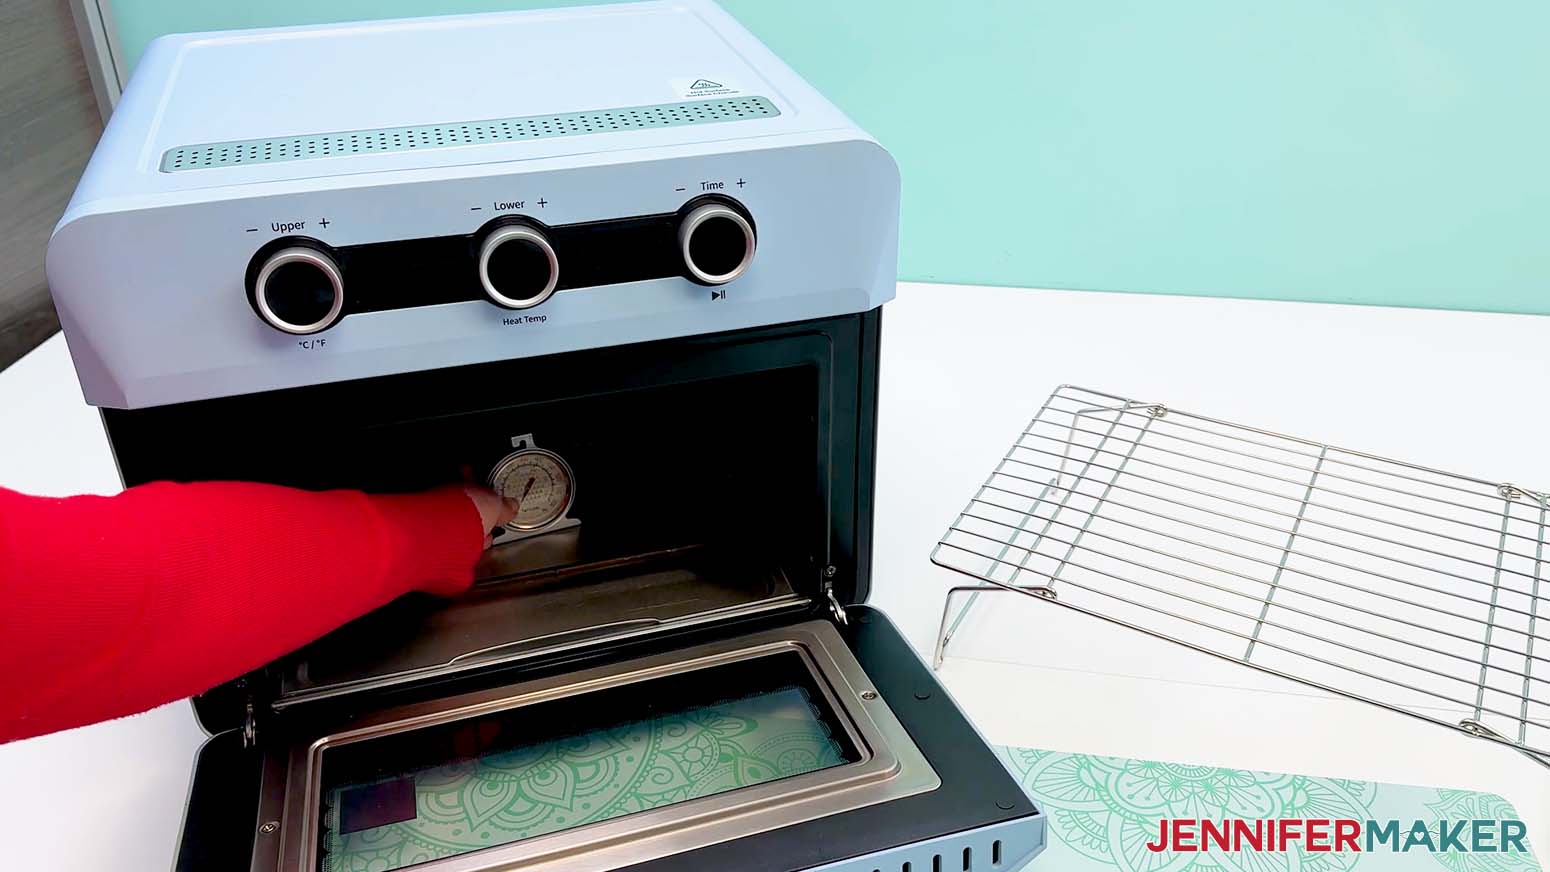
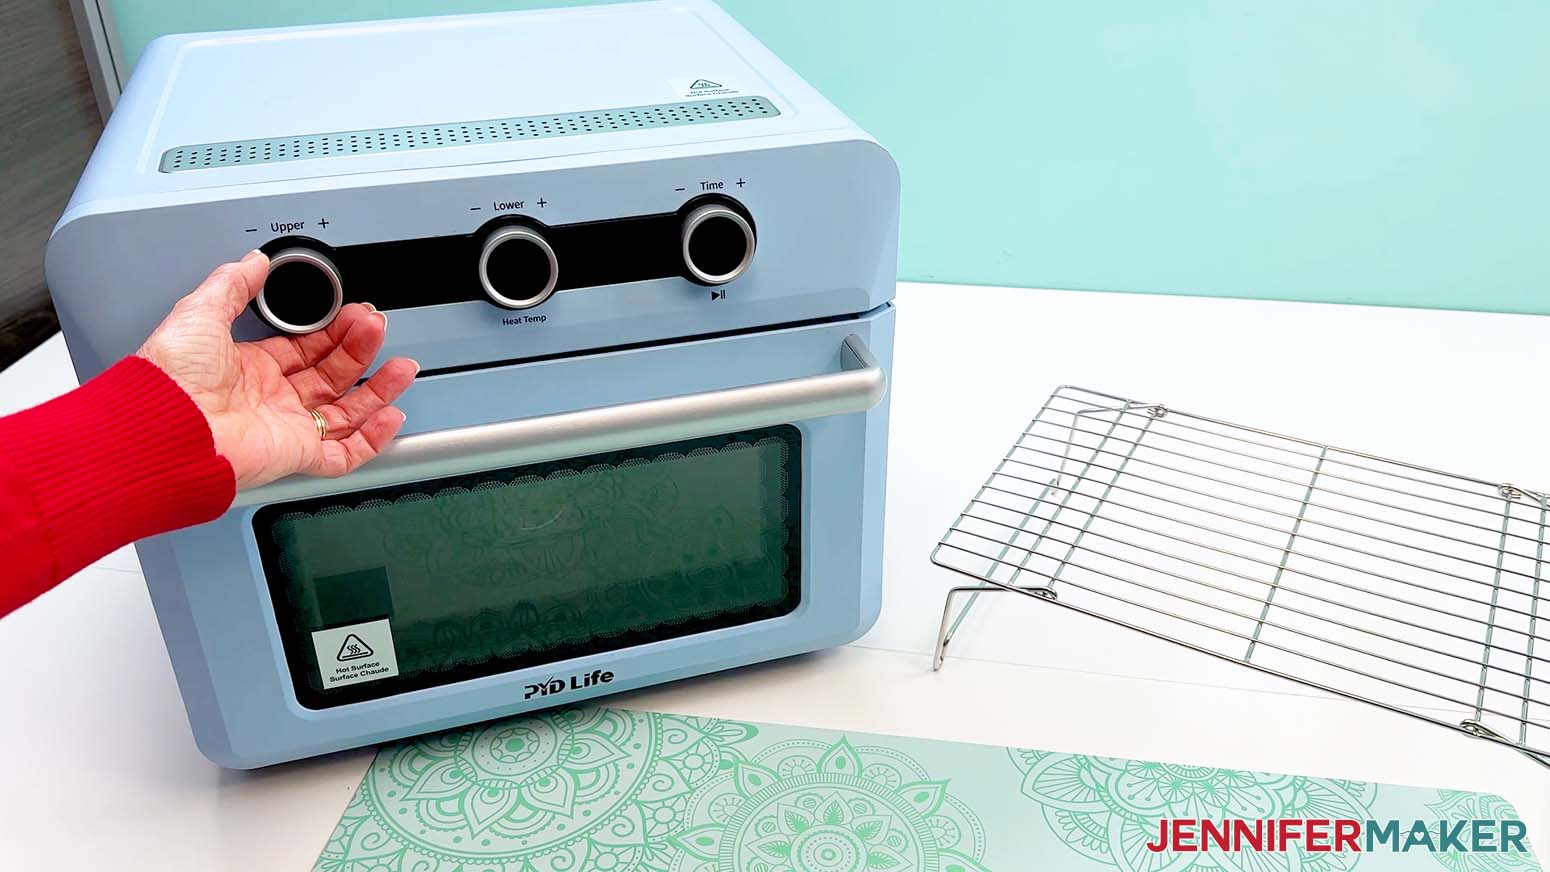
- Remove the wire tray from your convection oven and set it aside.
NOTE: This should be a craft-specific convection oven, only! Harmful fumes are released during transfer that can contaminate your food, making it unfit for consumption. - Place an oven thermometer in the center to make sure the temperature is correct.
- Preheat your convection oven to 400°F (204°C).
TIP: I followed the time and temperature settings for ceramic mugs (with handles) in my Sublimation Cookbook. Inside, you can find the settings for tons of other sublimation projects, too!
NOTE: If your mug is a different brand from the one in my list, check the manufacturer’s heating instructions to find the best temperature setting for your blank. - Use isopropyl alcohol and a lint-free cloth to clean the surface of your mug blank.
- Lay the blank on a towel with the top facing away from you and the handle on the opposite side from how you typically hold it (so your design is facing outward as you drink).
NOTE: I’ll lay mine with the handle to the left side since I usually hold my mug in my right hand.
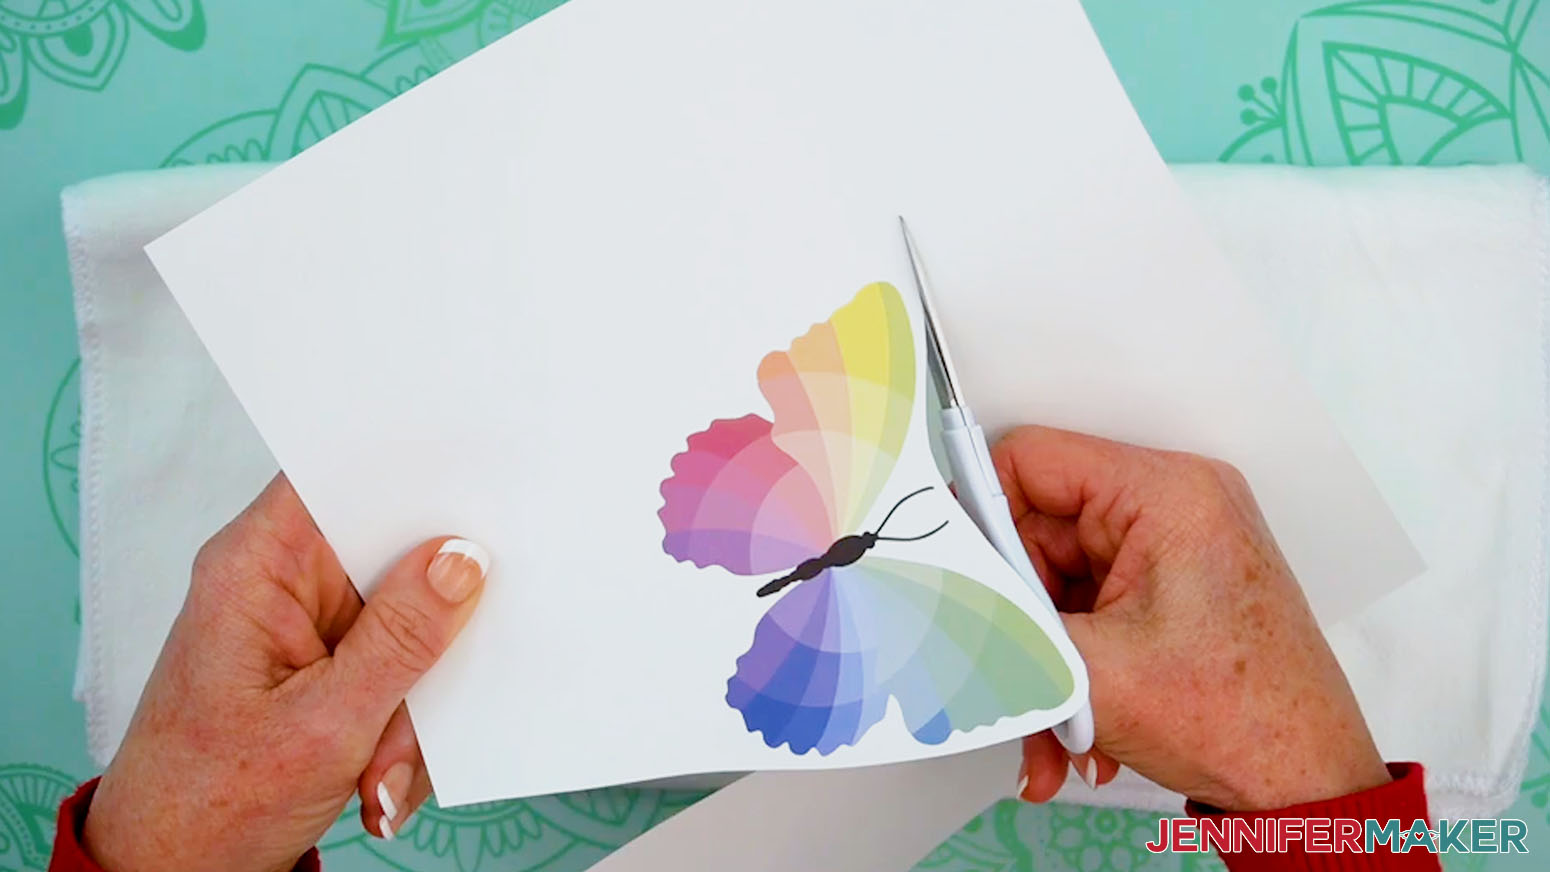
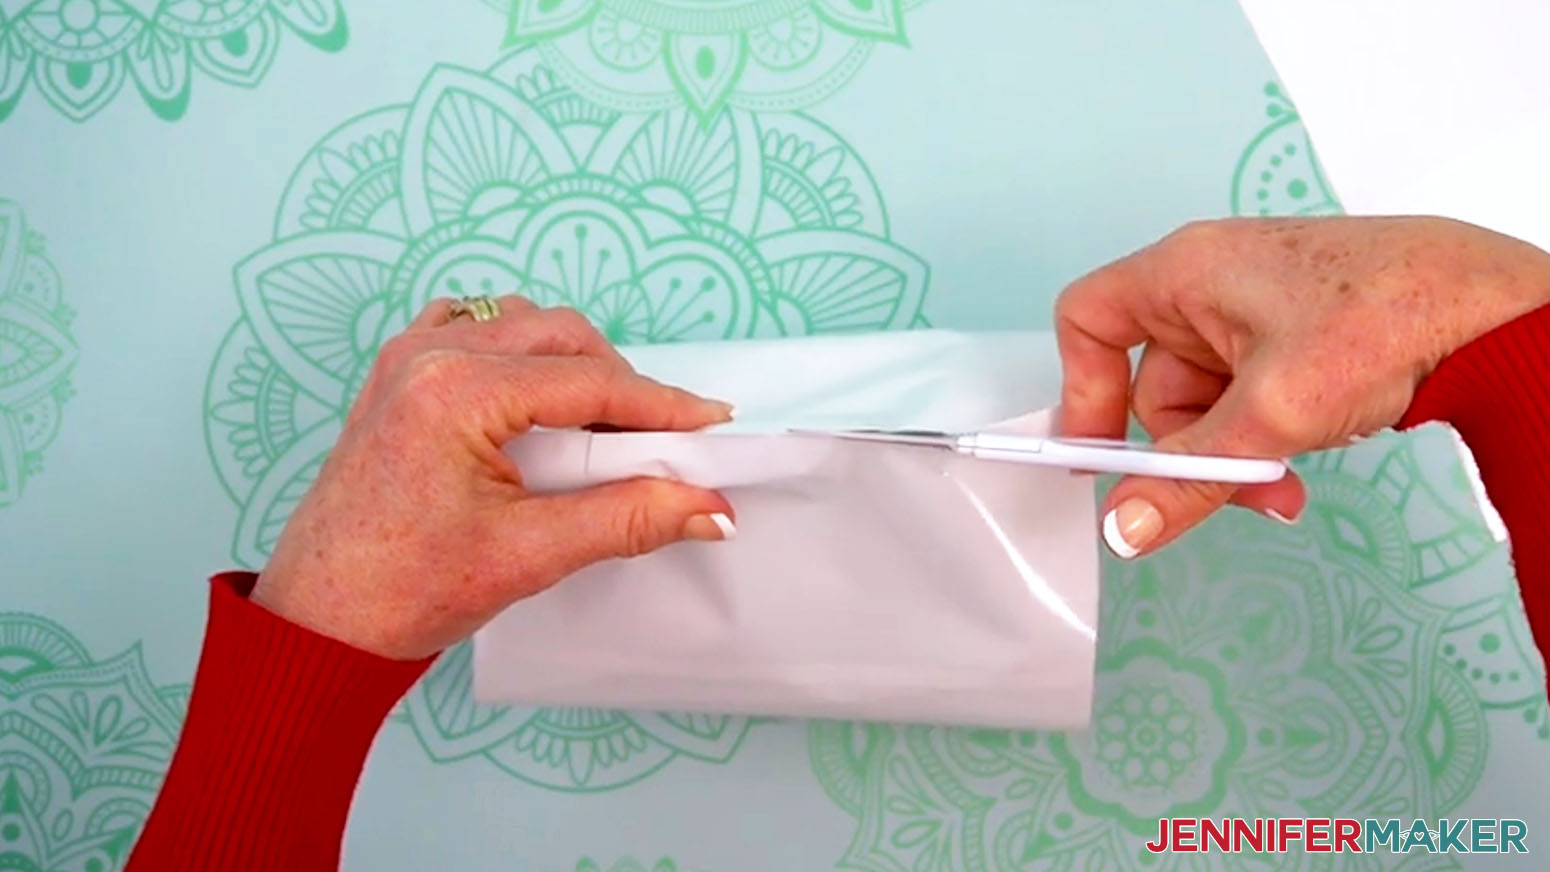
TIP: Using a towel stabilizes your mug and prevents scratches to the surface while applying your design. You can also use a mug cradle, instead. - Use scissors to trim around your print, leaving about 0.25” of white around the edges for securing the tape.
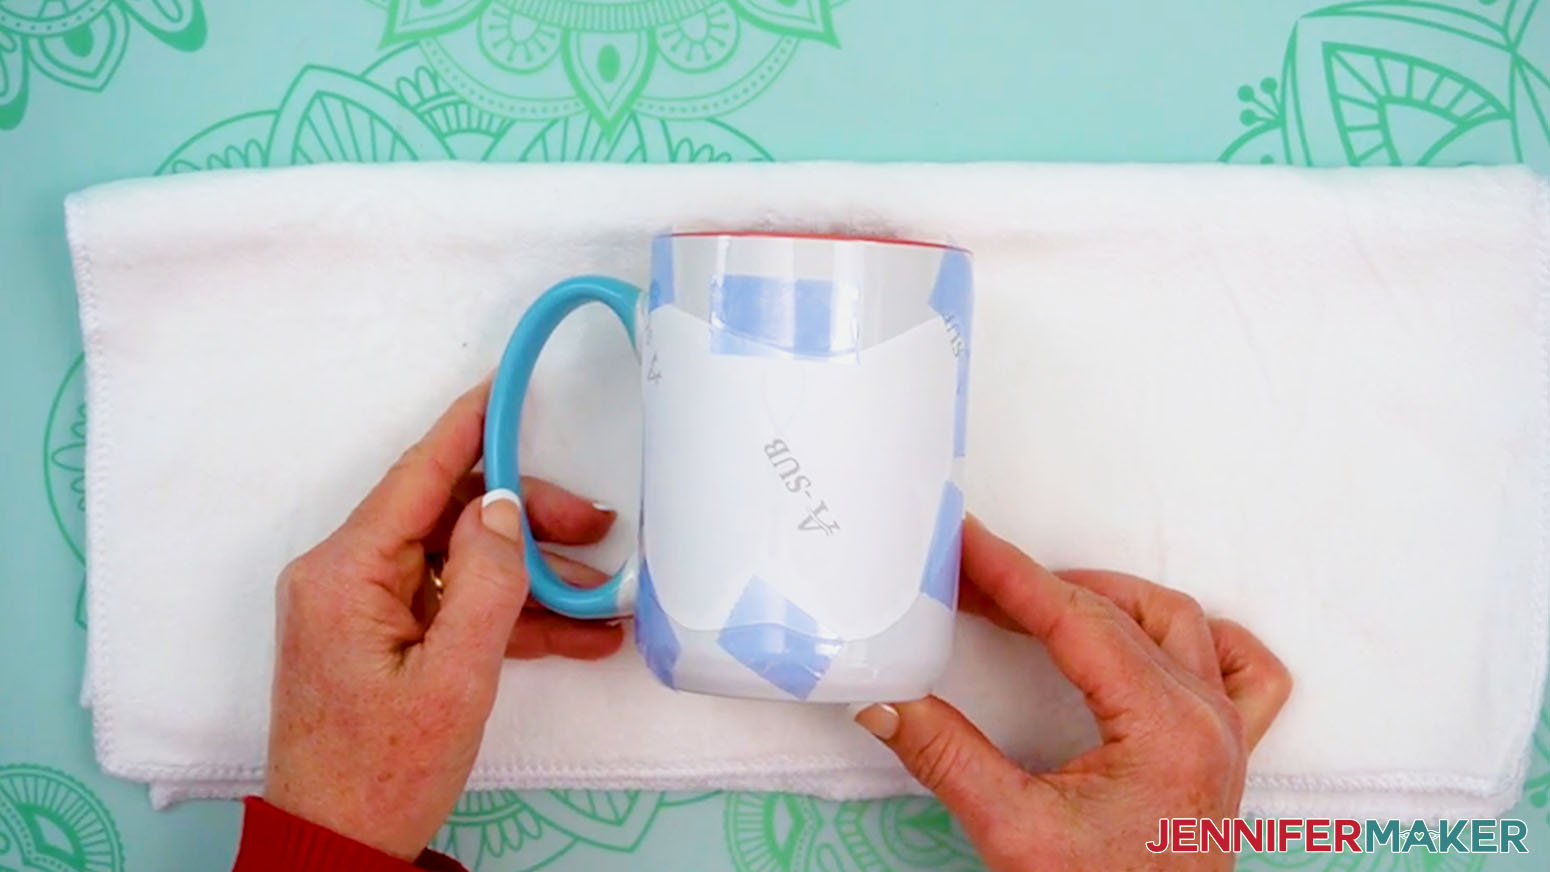
- Center your print face down on the side of the mug, making sure to keep the design away from the mug’s top edge so your lips don’t touch it while drinking.
- Use heat-resistant tape on all four sides of the print to tightly secure it to the coaster, keeping the tape away from the inked areas to avoid discoloration during the heating process.
- If any areas of your design lift from the mug’s surface, use heat-resistant tape to secure those spots, too.
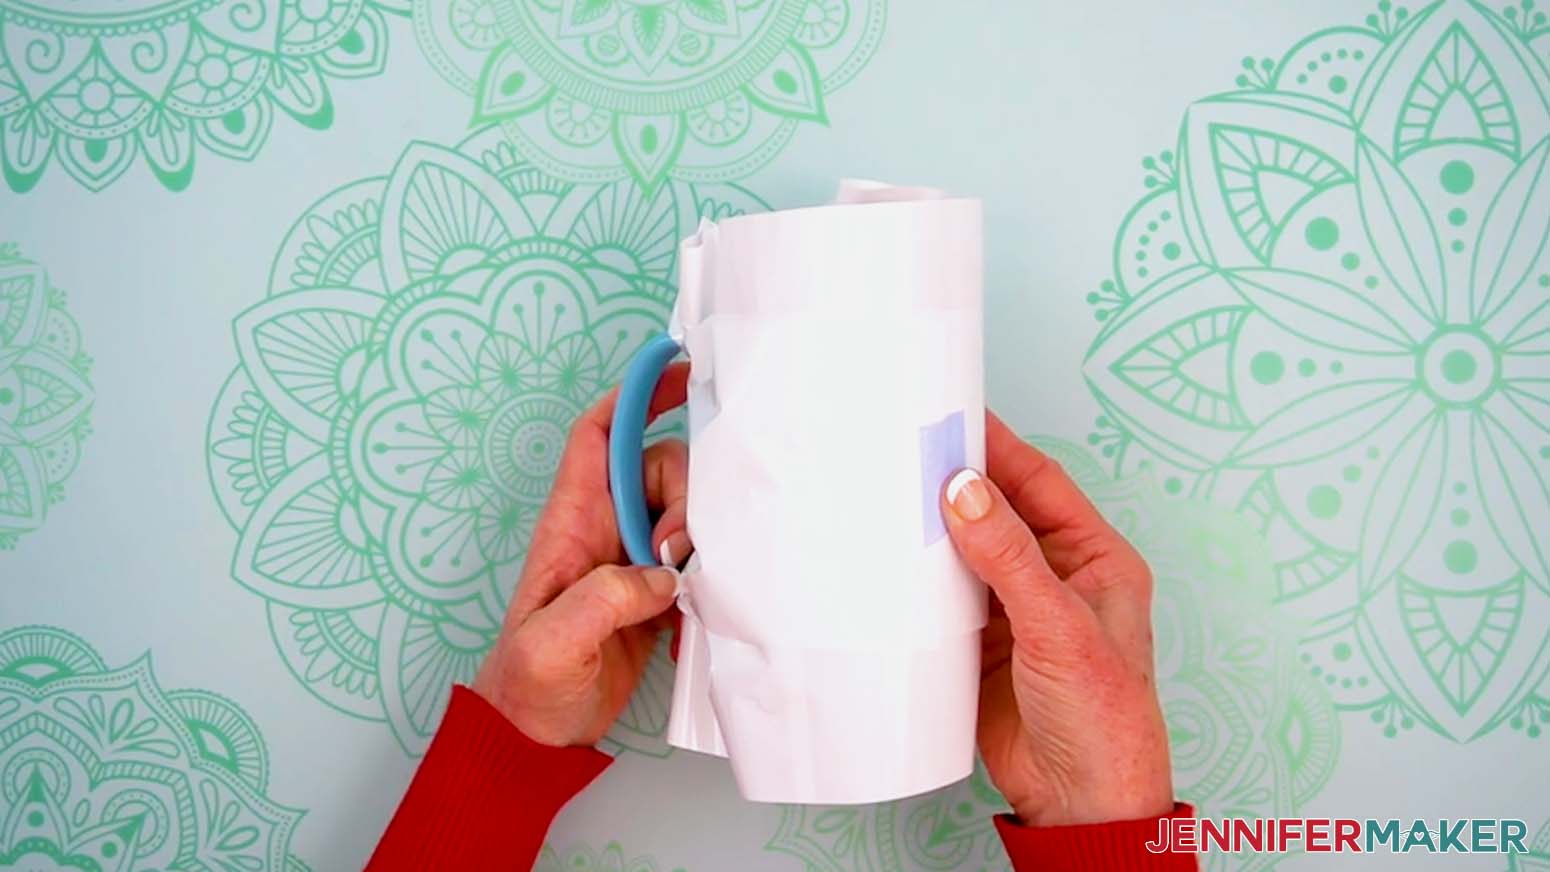
NOTE: I’ll tape down my corners, as well. - Lay the mug on a shrink-wrap sleeve about 1” from the bottom, with the folded edges of the sleeve on the left and right sides.
- Use scissors to trim 3” off the top of the wrap.
- Hold the wrap at one of the folded edges and slide the mug in, with the handle pointing up toward the folded edge.
- Hold the wrap in place over the handle, and use scissors to cut the wrap at the top and bottom of the handle.
- Cut along the edge to make a hole for the handle, and slide the handle through.
- Fold the wrap’s left tab under the mug’s handle and secure it with a piece of heat-resistant tape.
- Then pull the right tab under the handle and secure it to the left side with a piece of heat-resistant tape.
- Take the 3" of wrap you trimmed away earlier and cut along one of the folded edges.
- Pull the wrap under the handle and around the shrink-wrap sleeve like a belt, and secure it with heat-resistant tape on the opposite side of the mug.
- Put on your heat-resistant gloves.
- Set your wrapped mug inside the bottom of your convection oven.
- Heat the mug for 15 minutes, rotating once halfway through with your gloves on.
NOTE: This helps even out the heat on the mug. - After 15 minutes, the mug will be VERY hot. With your gloves on, carefully take it out of the oven and let it rest on a cooling rack for one to two minutes until it’s safer to handle.
- While the mug is still warm, carefully peel away the shrink-wrap sleeve, tape, and sublimation paper to reveal your design!

STEP 5: SHOW IT OFF
You now have a beautiful T-shirt, mug, or coaster bursting with vibrant colors!
Notes
Printed Sizes:
Shirt: 10.5" x 7.46"
Mug: 4.23" x 3"
Coaster: 3.5" x 2.48"
Blank Sizes:
Shirt: Large Unisex
Mug: 15oz, 4.5" Tall, 10.6" Circumference
Coaster: 3.75" x 3.75"
Care Instructions:
Shirt: Wait 24 hours before washing. Turn inside out, use cool water and gentle detergent. Line or tumble dry on low.
Mug: Hand wash with mild soap and water. Allow to dry.
Coaster: Wipe clean with a damp cloth.
Answers to Your Questions About Sublimation Basics for Beginners
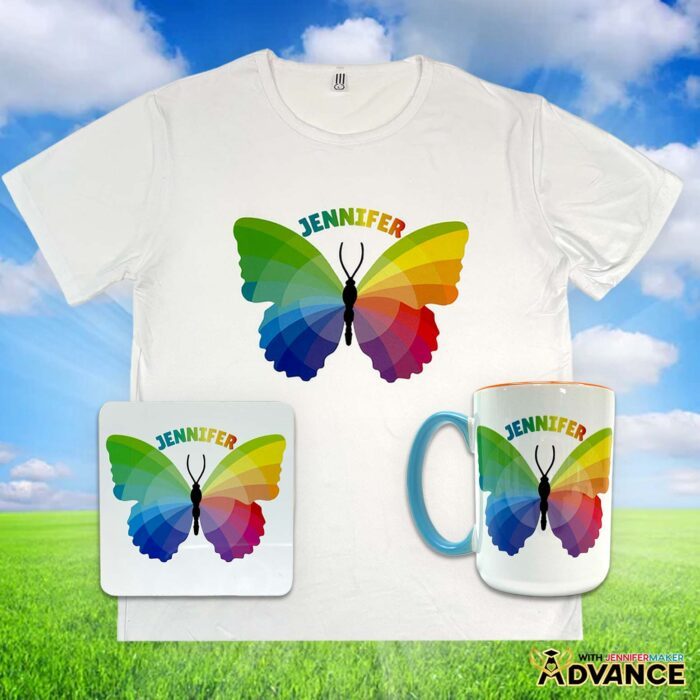
Q: How do I create a custom Sublifly design with a name or word?
A: You can learn how to create your own custom Sublifly design with a name or word like the design below in my ADVANCE program. Learn more about ADVANCE here!
Q. What is the difference between sublimation dye and other inks?
A. Think of sublimation dye as color that doesn’t want to “sit on top” of your project; it wants to become part of it instead. When you use the special ink made for sublimation transfer, the color absorbs into the blank during heating instead of forming a layer on the surface like paint or vinyl. That’s a big reason why the finished look feels smooth and professional, especially on polyester fabric and coated hard goods.
Q. Why do I need sublimation transfers, and how are they different from regular prints?
A. Sublimation transfers are the printed designs you place face-down on your blank for heat transfer. For this technique, the paper and ink combination is designed specifically to release color cleanly and evenly when heated. This is a key part of the overall sublimation process. A regular inkjet print on copy paper won’t transfer the design, even with added heat, so make sure you’re using the right ink and paper.
Q. What temperatures and tools matter most for crisp results?
A. My best tip: consistency beats “extra hot.” You want high temperatures (sublimation starts at 350 degrees Fahrenheit for most surfaces) that stay steady, plus even pressure and correct timing. For mugs, a mug press is great because it hugs the curve, but you can achieve the same effect with a shrink wrap sleeve in a sublimation oven like I show you in my video. For flat items, using a reliable press surface helps prevent patchy color or faded spots. Your goal is an even, controlled heat transfer from start to finish.
Q. How do I know which blanks will work on different materials?
A. Different materials behave differently. Polyester fabric and polymer-coated hard goods work because they can absorb the dye after it turns to gas during heating. If a blank isn’t made for this, you’ll get weak color because sublimation works only when the blank can accept that gas-phase dye. Generally, blanks that are compatible with sublimation will say so on the packaging.
Q. What is the best option for beginners who want successful results?
A. The best option is a simple, dedicated setup: a printer used only for sublimation, high-quality paper made for sublimation, and proven blanks. An Epson printer is a popular choice for many crafters because it can be dedicated to sublimation and yields consistently good results. Pair that with the best materials, and you’ll spend more time making and less time troubleshooting.
Q. What equipment is actually necessary to start?
A. Let’s keep it beginner-simple: the necessary equipment is a dedicated printer with compatible ink, the right paper, a proper heat source, and blanks that are truly made for this method. Add a few prep tools and you’ll avoid most beginner mistakes. Make sure your setup is solid, and then it will be much easier to get beautiful sublimation prints without frustration.
If you want to go even more bare bones with your setup, you can skip the sublimation printer, ink, and paper, and have your designs printed by a third-party service like Jiffy instead.
Q. What should I watch for in the printing process to avoid dull or wrong colors?
A. The printing process is where you set yourself up for success. Use high-quality ink and paper, make sure your settings are correct, and give the print time to dry before touching it. Your sheet might look unimpressive at first, but that’s normal. Once the heat transfer is done, you’ll see a vibrant print appear with cleaner edges and stronger color.
Q. How do I get sharper detail for complex artwork?
A. Start with high-resolution images (my Sublifly design is a PNG file) and don’t skimp on paper quality. Fine lines, tiny text, and gradients show best when your printer output is set correctly and the paper releases evenly. This matters a lot for detailed designs and full-color designs, because even small inconsistencies can show up when the artwork is intricate.
Q. Will the results last, and what makes the print durable?
A. Yes, when you use the right blank and correct temperature, time, and pressure settings, you get a durable print because the color becomes part of the material. That’s why this technique is so popular for gifts and everyday items. With proper care, you’ll get long-lasting prints that stay looking great instead of cracking or peeling.
Q. What can I make beyond shirts, mugs, and coasters?
A. The sky really is the limit! There are tons of sublimation-compatible blanks out there (and I’ve tested A LOT of them already!). Umbrellas, charcuterie boards, and earrings are some of my favorite special sublimation projects! Once you get the basics down, you can branch out into more sublimation crafts and keep building your skills with every new project.
Q: Can you use a regular desktop printer for sublimation?
A: You can only use an inkjet printer for sublimation if you can complete the steps necessary to convert it to a sublimation printer. A regular printer in its default form with regular ink won’t work for sublimation because sublimation requires a special ink that activates with heat. Not all printer models can be converted, but Epson EcoTank models with refillable ink tanks can. Check out my How to Convert an Epson Printer for Sublimation tutorial to learn more!
Q: Can you reuse a sublimation print?
A: Though it may look like there’s ink left on your sublimation transfer paper after pressing, there’s not actually enough to create another press. You can try to reuse your print, but your second attempt will probably look super faded.
Q: Can a Cricut do sublimation printing?
A: While a Cricut cutting machine can be useful in some sublimation projects, it does not sublimate or print sublimation ink. However, you can use a Cricut and Infusible Ink pens to draw designs onto paper, which can be sublimated. You can also use a Cricut to cut SVG designs out of Infusible Ink transfer sheets.
Q: Where do I find sublimation designs?
A: In addition to the free Sublifly image included in the design files folder for this project, you can find tons of other designs you can use for sublimation in my free resource library! You can also use your own photos and designs, and images created through AI generators as long as you follow the tool’s guidelines. Graphics from Canva, stock photos, or other online sources may also be available depending on usage permissions. If you want to take your designs further, I share online resources and best practices so you can get better results when designing and sublimating in my Advance program!
Get my free Sublifly PNG to press your first sublimation project!
(If you do not see the signup form above, click here.)
I love seeing your sublimation crafts, and how you use them! Once you’ve mastered the basics, inspire others and share a photo of your first Sublifly T-shirt, mug, or coaster in our Facebook group or tag me on social media with #jennifermaker.
Love,

Want to remember this? Save this Sublimation Basics for Beginners Tutorial to your favorite Pinterest Board!