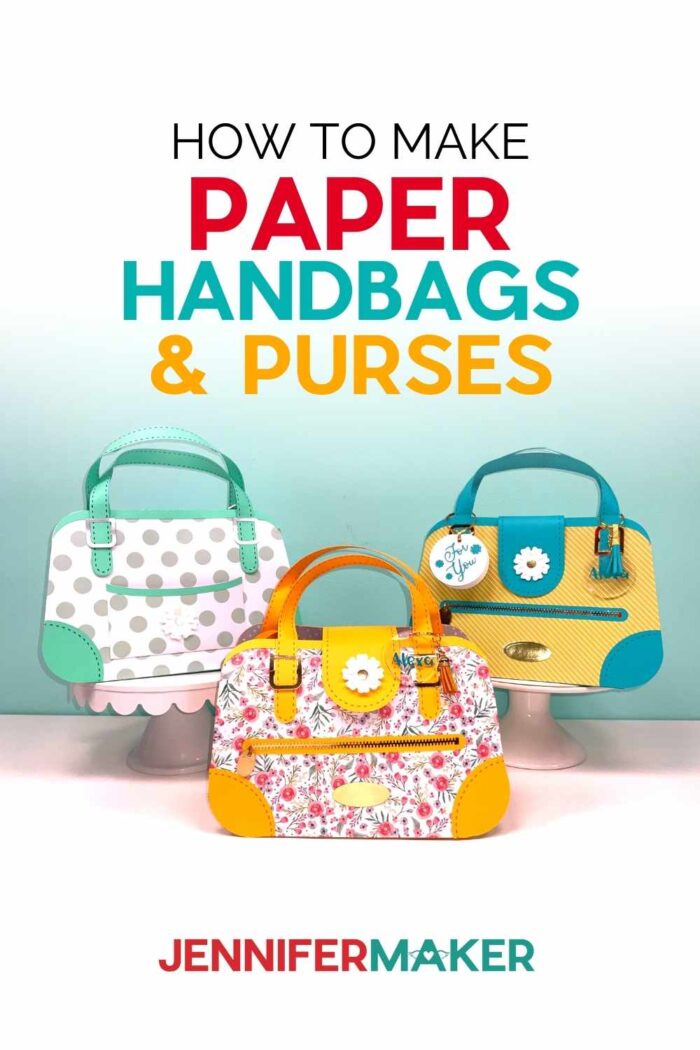
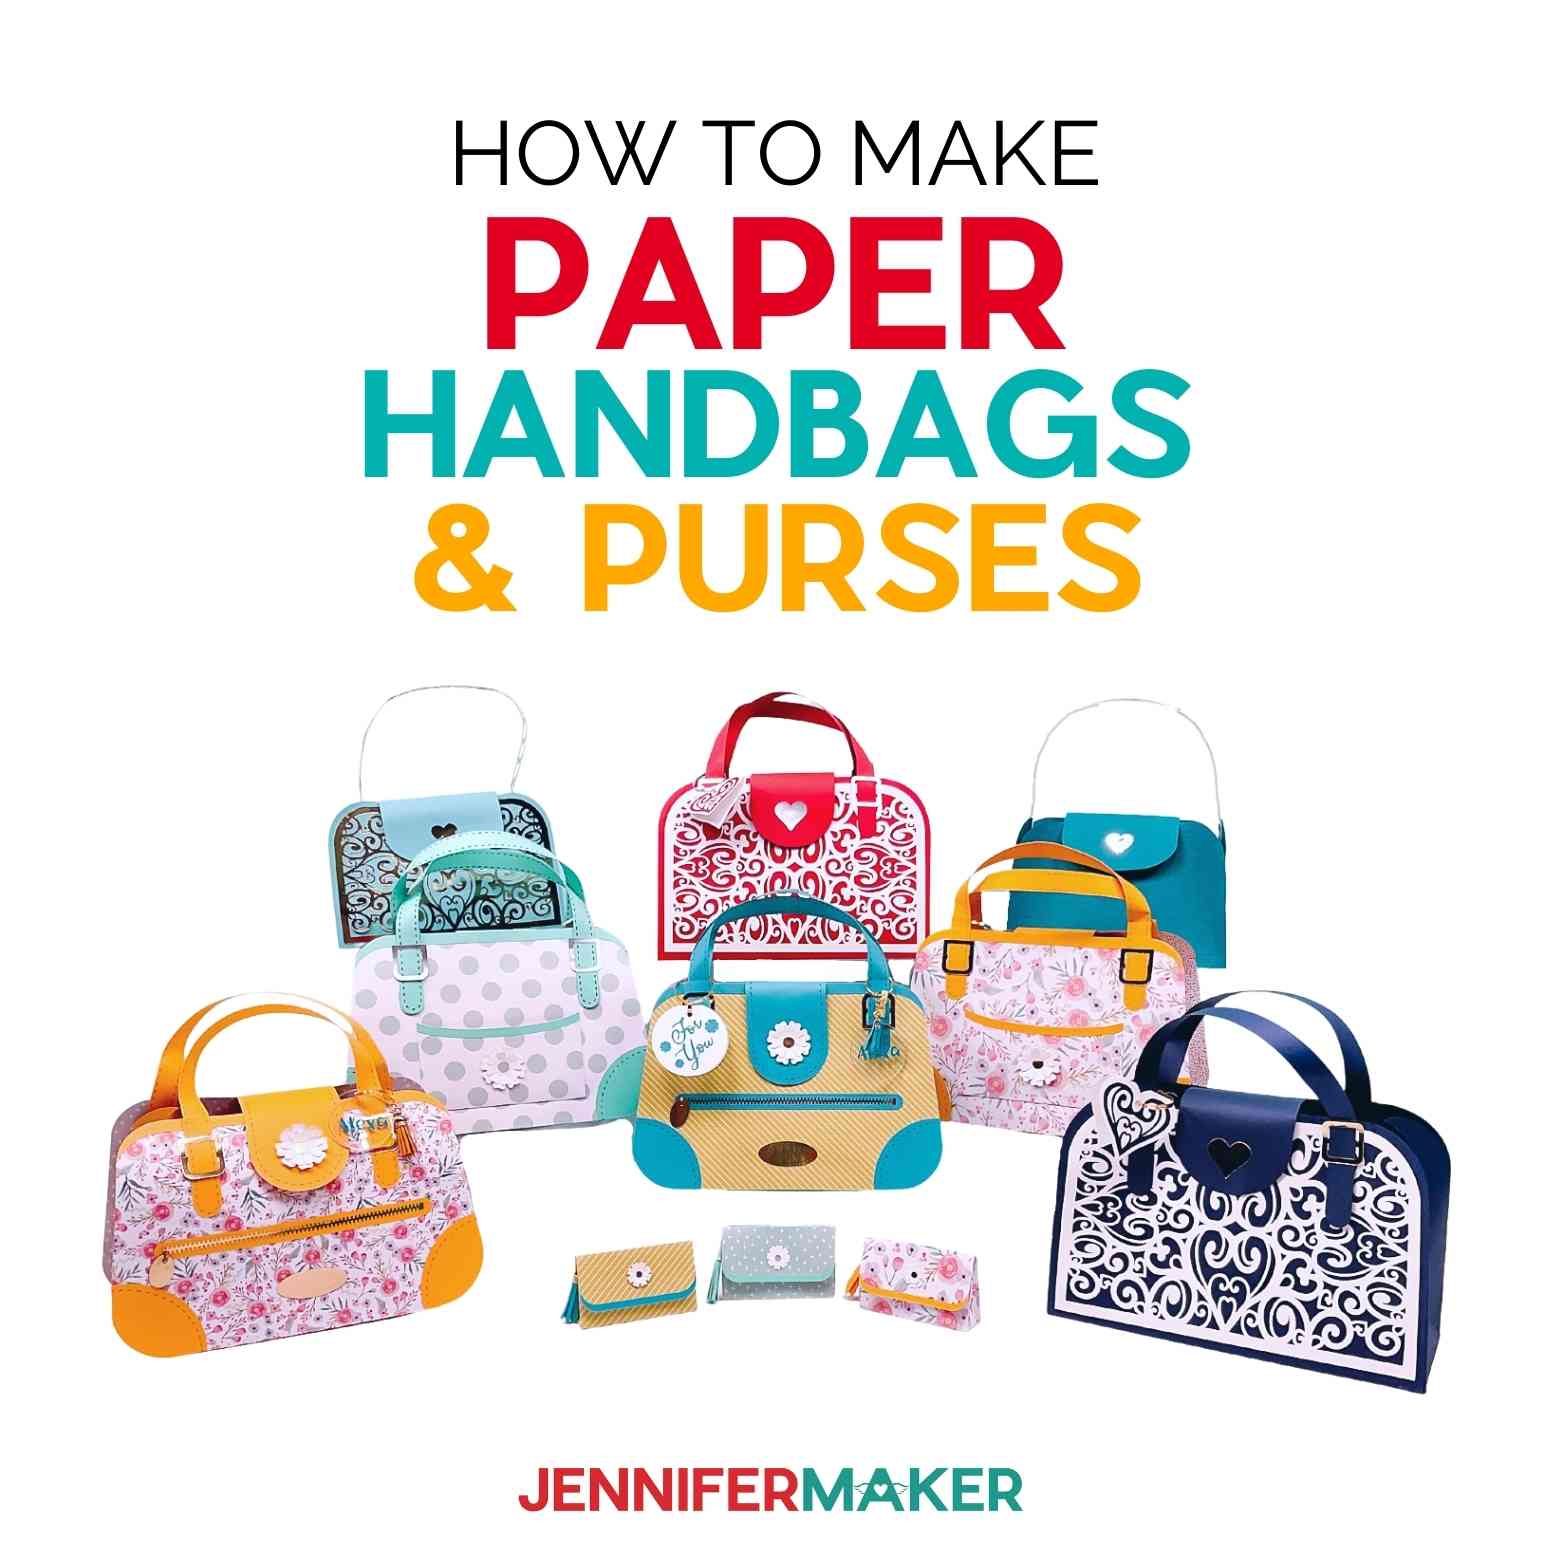
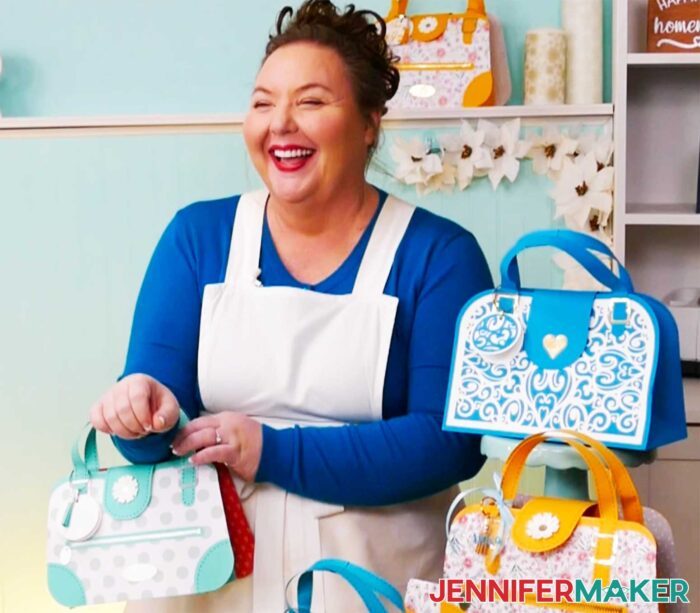
Learn how to make customizable paper handbags & purses that double as memorable gift bags!
Confession time. I really love purses! They’re such a fun way to finish an outfit. Bonus points if they fit the things I need while looking cute! So I thought it would be fun to make some PAPER purses that double as gift bags?!? We had form, function, and FUN in mind while designing our new paper handbags and purses and they’re ready for you! They’re a step higher in skill and style from my DIY Gift Bags but are so adorable. I try not to have favorites, but the Daisy Duke Wallet might be the winner. It’s perfect for gift cards and fits in well with so many of my small paper box patterns!
Want to save this project? Enter your email below and we’ll send the project straight to your inbox.
Watch the full step-by-step tutorial video on how to make Paper Handbags & Purses premiering on my YouTube channel:

These paper handbags may look intimidating, but we’ll go over the simple steps together! I’ve included lots of personalization options and even some special tool versions like a debossed purse!
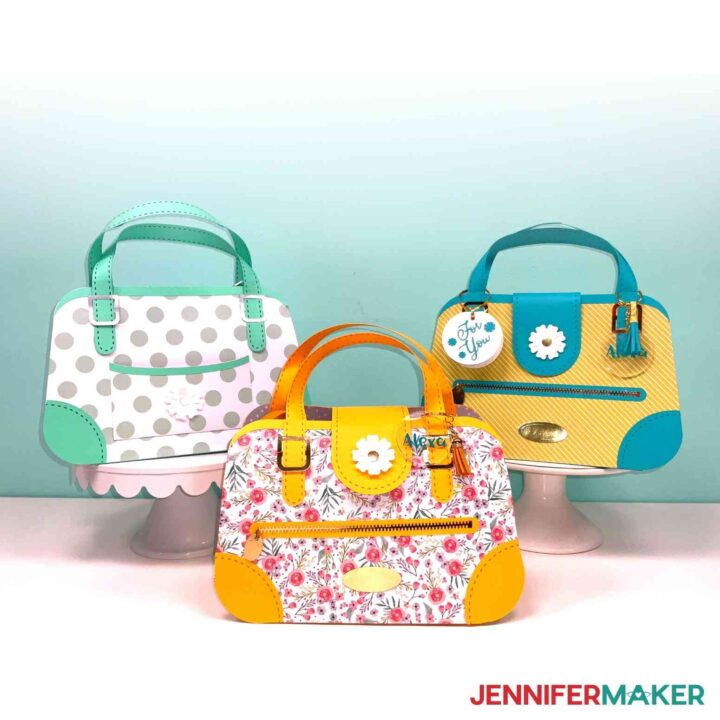
My collection includes four designer paper purse patterns. But good news, they cost a fraction of the price of a Birkin — at least from what I’ve heard. Which one do you want to make first?
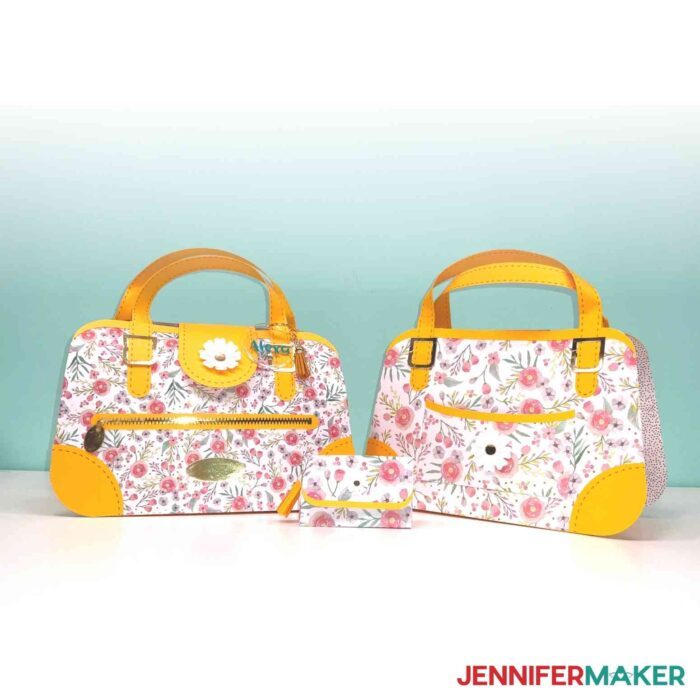
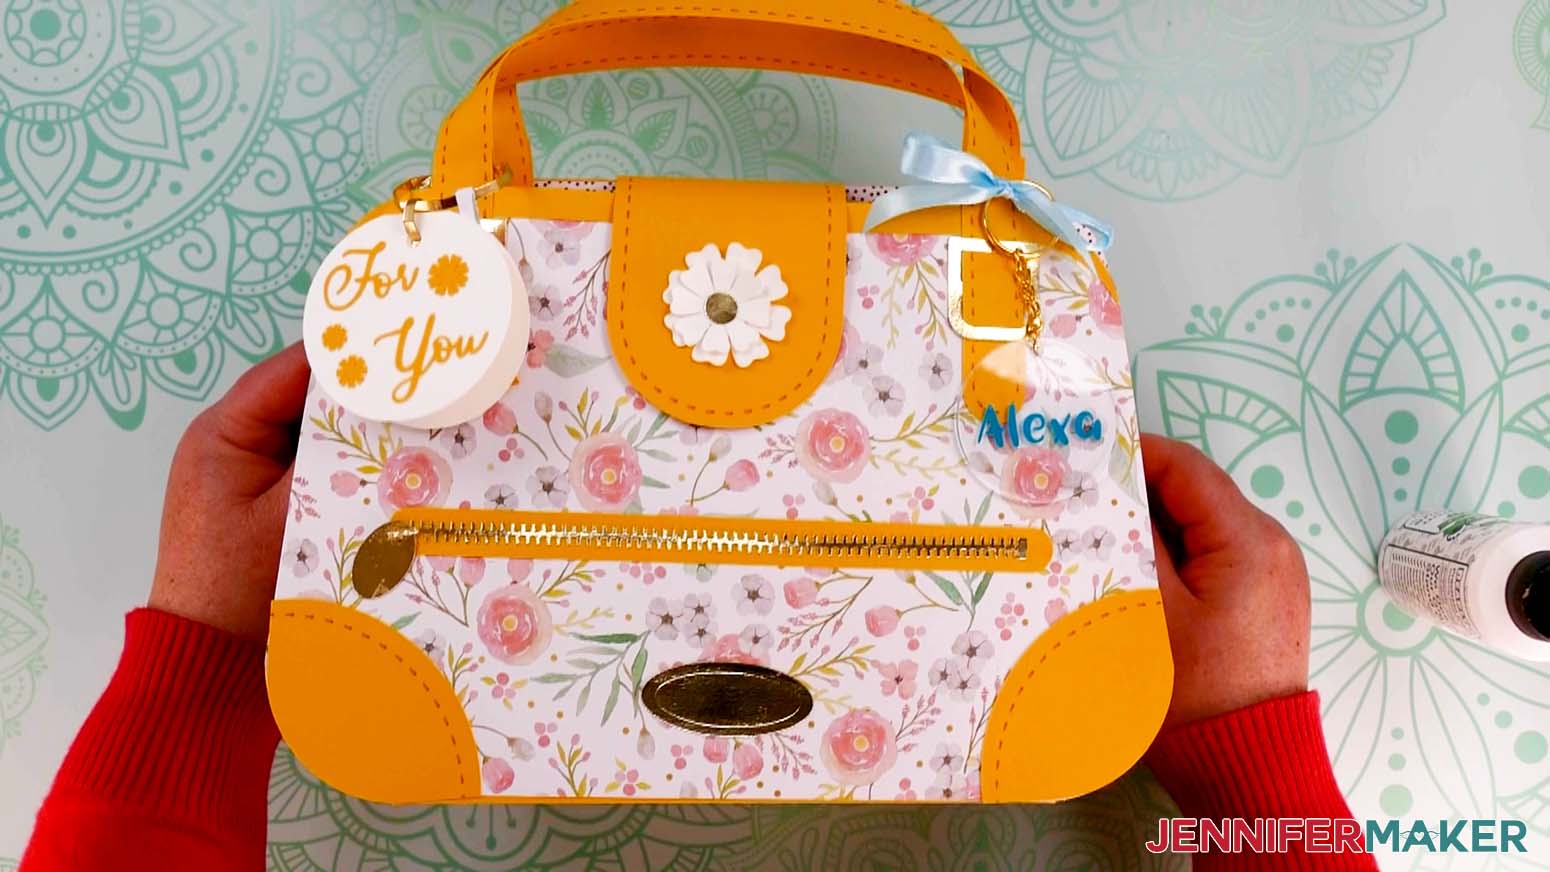
Flower Power Paper Handbag
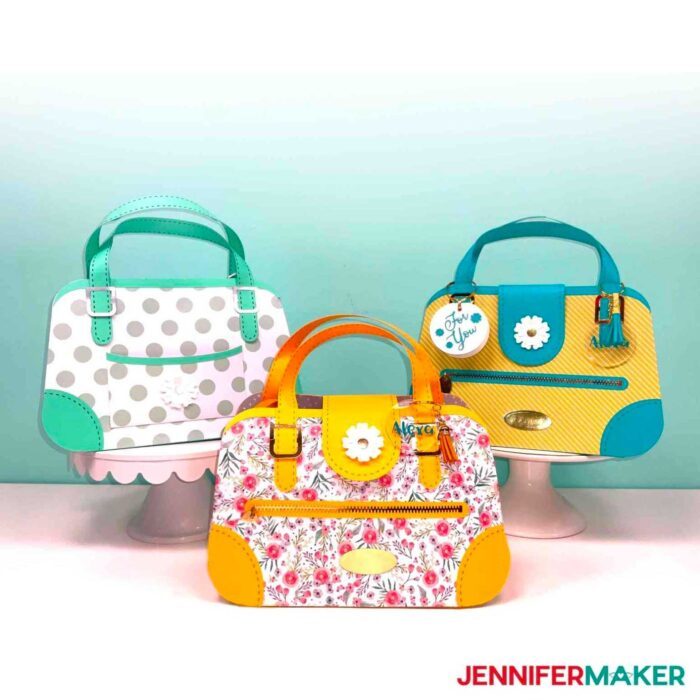
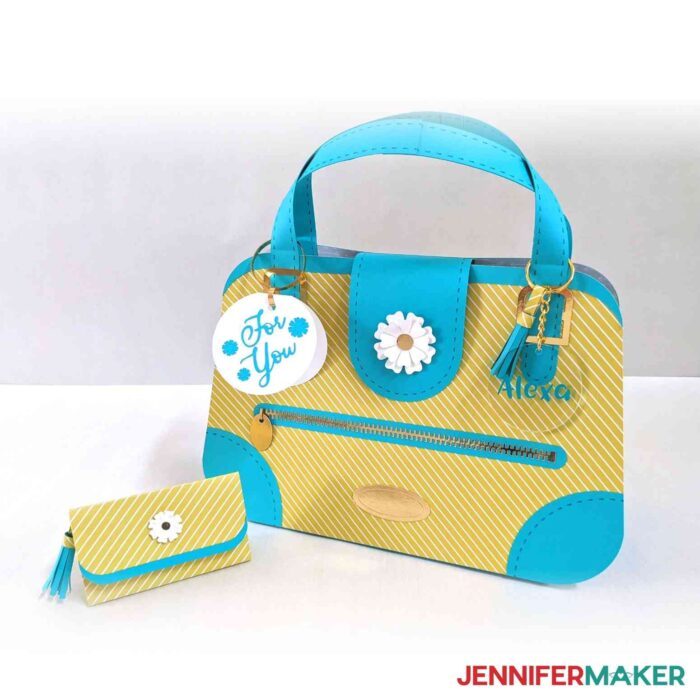
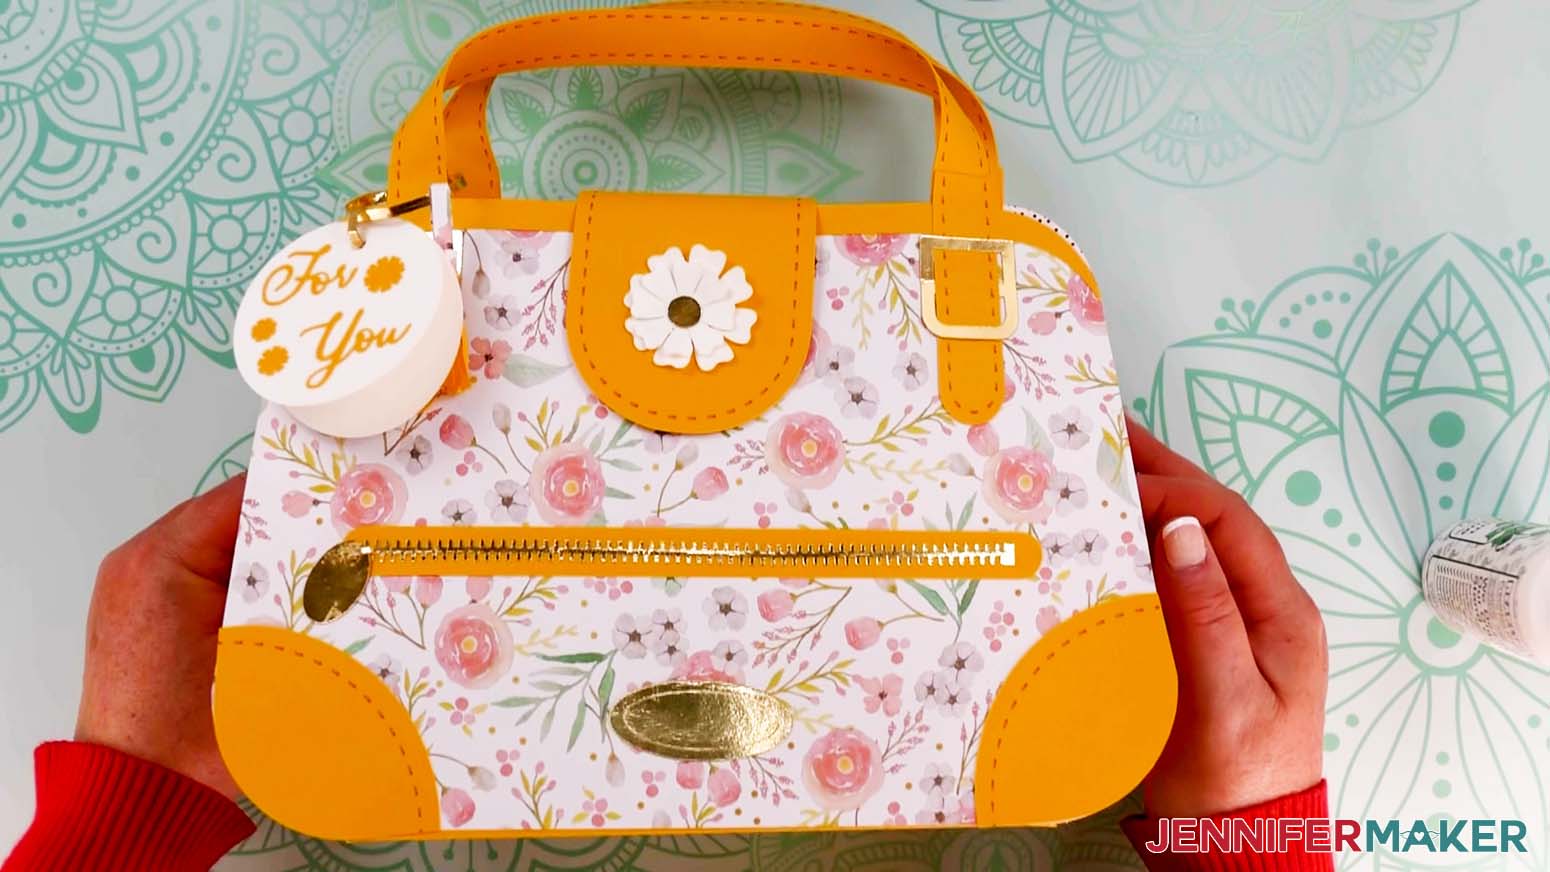
The Flower Power was the inspiration for the whole set! It has lots of details, like foil hardware and a functional yet decorative flap at the top just like a real purse. I’ll show you how to assemble this paper purse from start to finish, then you’ll be ready to make the rest! Make sure to watch my video for all my customization ideas in Cricut Design Space!
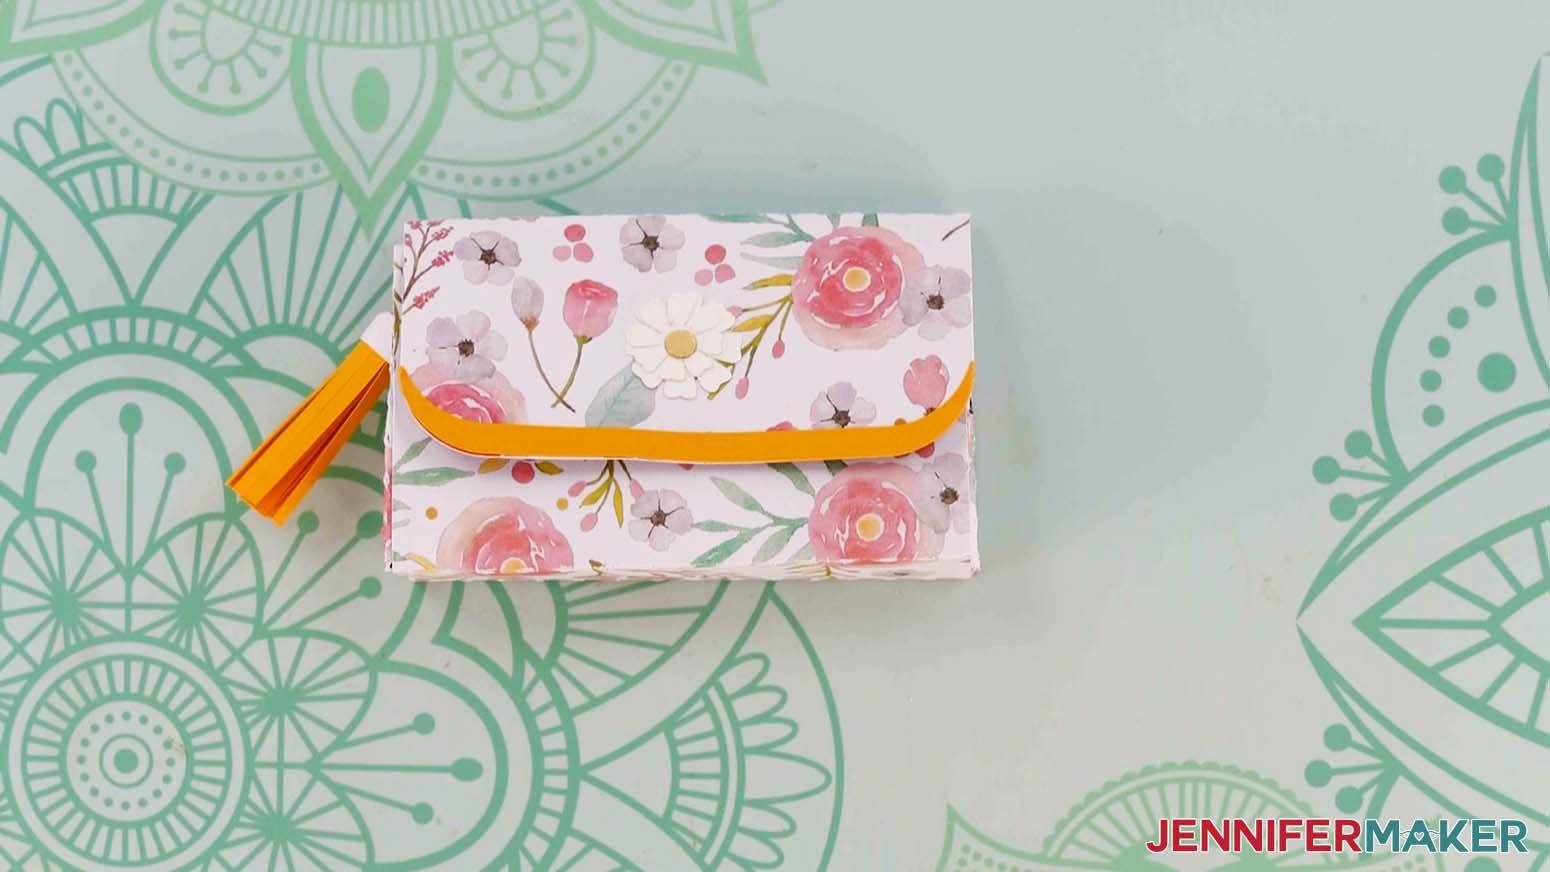
The Daisy Duke Paper Wallet
This mini paper wallet is a beautiful match for the Flower Power! I’ll show you how to save time and paper by making both at once in the video. The Daisy Duke is the perfect size for a gift card or other tiny gift. There are some narrow trim pieces, but I’ll show you the best glue and technique for the job!
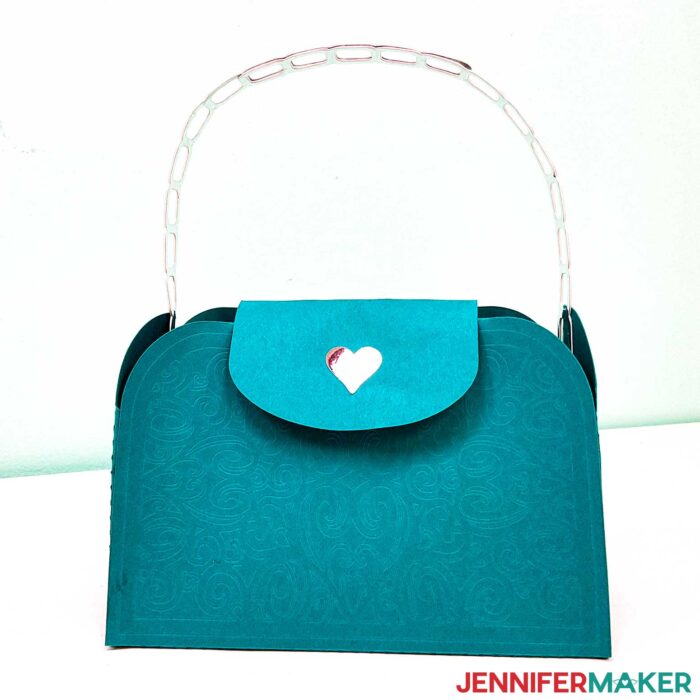
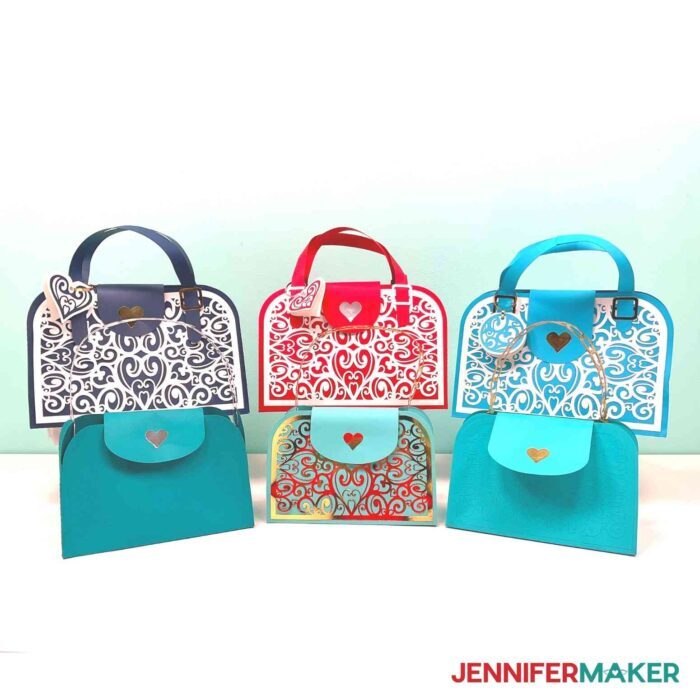
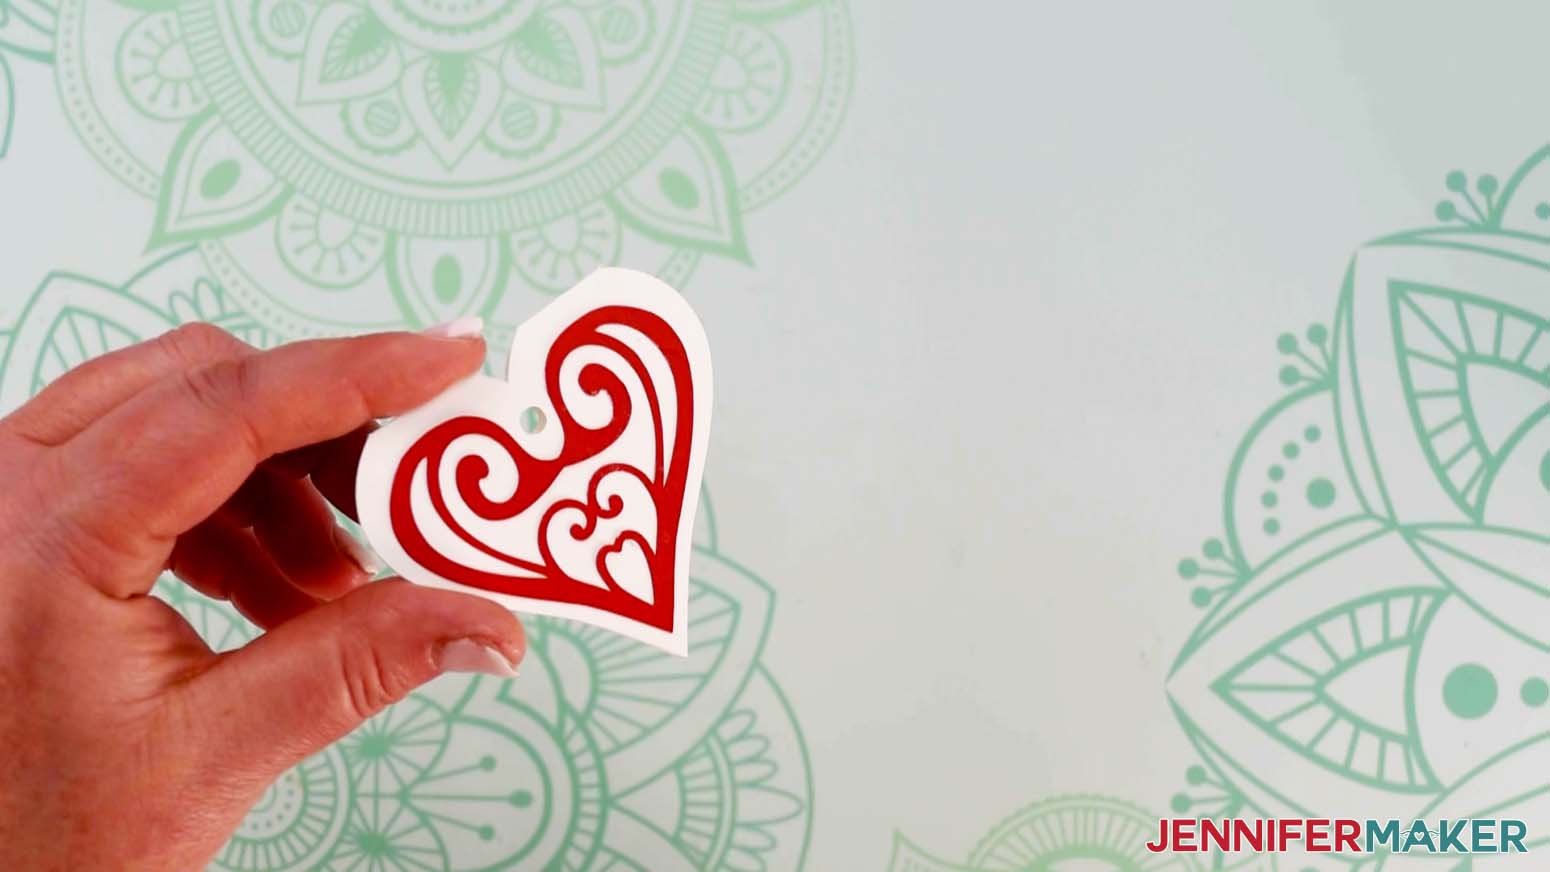
The Heartbreaker Handbag
The perfect heart details on the Heartbreaker make it one of my favorite custom paper bags ever! I had fun combining details from the Flower Power and Couture to create this sweet satchel. I really love the tooled leather look you can achieve on the front of the purse with the Debossing tool, too! Check out the steps for that bonus variation in the written instructions down below.
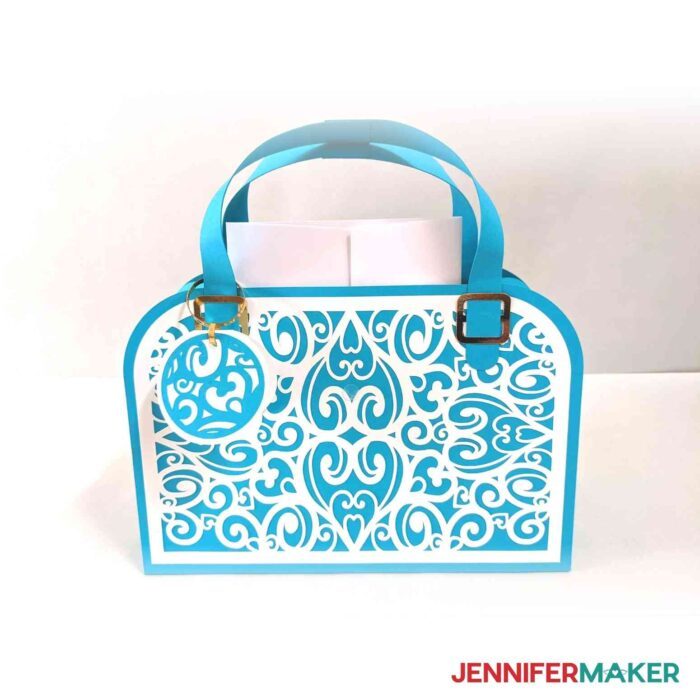
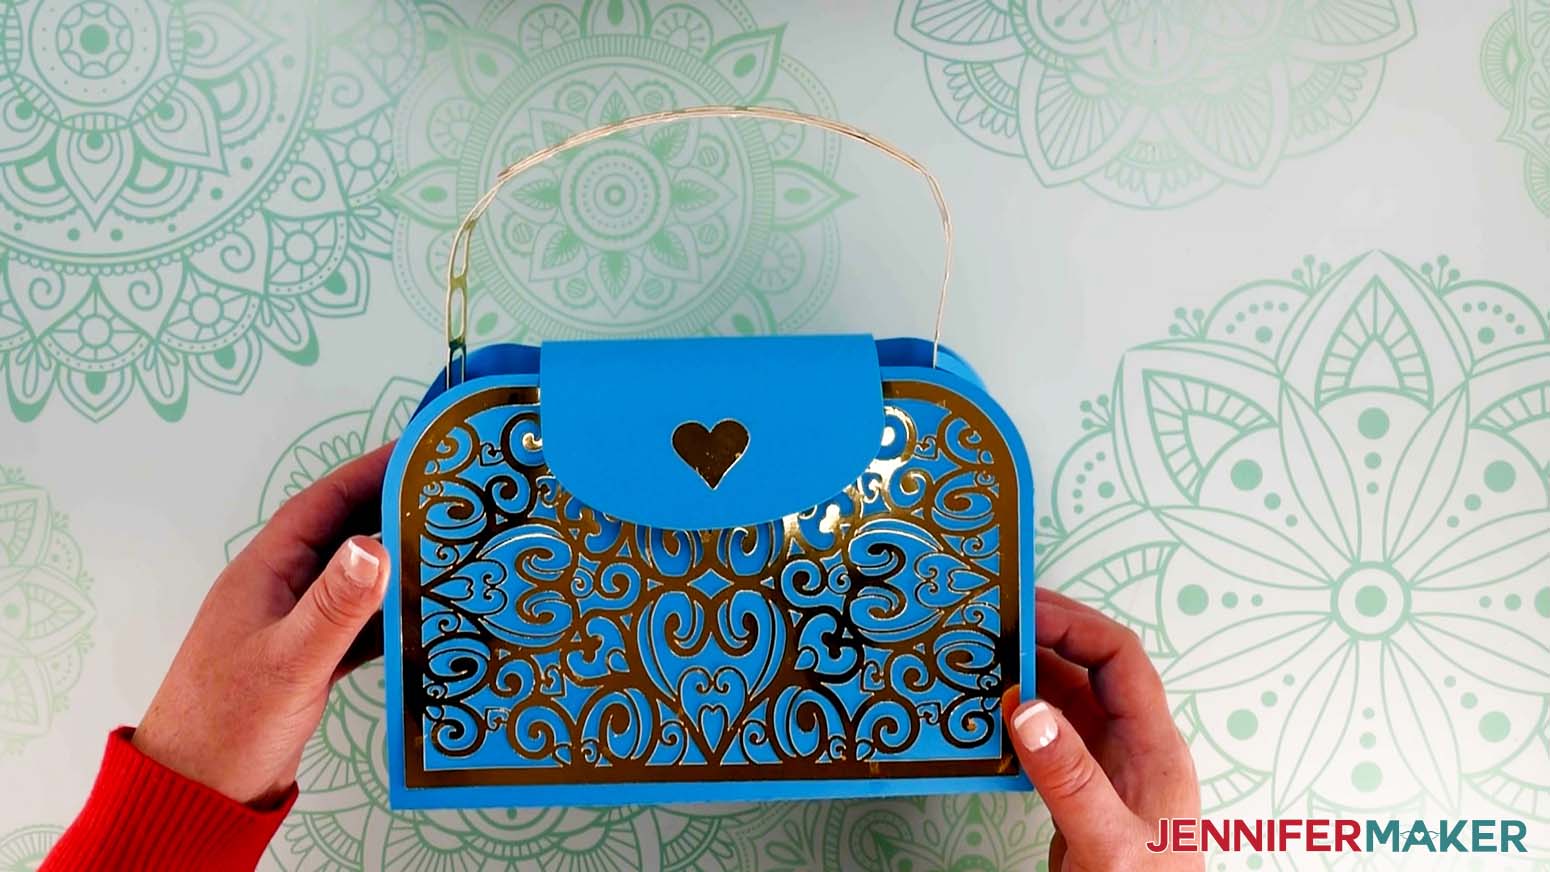
The Couture Handbag
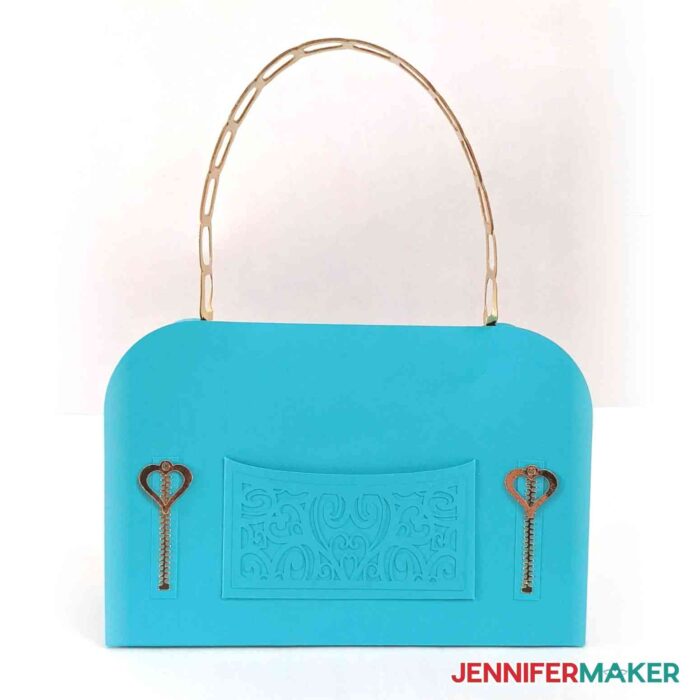
This timeless design is sleek and sophisticated thanks to the delicate metal foil hardware. I loved the look so much I added some extra pieces to the back of the purse. Assembling and attaching the chain side straps does take some patience, but you’ll just love the delicate (but sturdy!) result!
And check out the debossed effect on the Couture! It’s difficult to capture in a photo, but I hope you’ll try it out!
Plus, I’ll share some fun personal touches in the full video tutorial! I have some great options for a gift tag and pockets the perfect size for a gift card. Of course, you can also make a card to match your paper handbags & purses. And don’t forget to make a matching envelope!
Like I said, the materials and tools to make your own gift bags are simple! You really just need a few sheets of high-quality cardstock, good craft glue, and a way to cut your paper.
I used 65 and 80 lb cardstock in various patterns and textures. You can get really creative with different combinations and totally change the look of the paper purse!
I’ll also show you how to make detailed cardstock handles in two different ways and some cute tassels. And if you want to make the custom acrylic keychain, you’ll just need a bit of permanent vinyl, transfer tape, and ribbon!
I cut the paper handbag designs on my Cricut Maker 3, but you can use any machine with a Fine-Point Blade. The Daisy Duke can even be made on the Joy!
I’ll show you how to make the bags using dashed cut lines for the creases, but I’ve also included a SVG file version of each bag that uses a scoring tool if you prefer. I also added some stitched detail layers you can create with a Cricut Pen.
Get the free file set and see the full instructions down below for all my best tips and tricks!
Ready to make a paper handbags and purses? You’re going to love them! This post contains some affiliate links for your convenience (which means if you make a purchase after clicking a link I will earn a small commission but it won’t cost you a penny more)! Read my full disclosure policy.
Materials to Make Paper Handbags & Purses
View my Amazon shopping list with the exact items we used to make this project!
- One or Two (1-2) sheets of Simple Joy 12″ x 12″ Patterned Cardstock or Beach House 12″ x 12″ Patterned Cardstock — for the Flower Power Handbag and Daisy Duke Wallet
- One, Four, or Five (1, 4, or 5) sheets of 12″ x 12″ Solid-Core Cardstock — depending on the chosen design
- One (1) sheet of 12″ x 12″ White Cardstock — for accent pieces on all designs but the Couture Handbag
- One (1) sheet of 8.5″ x 11″ Gold Foil Cardstock — for accent pieces
- One (1) set of 3/8″ Clear VELCRO dots — optional, to fasten the flap closure
- A method to cut your material — I used the amazing Cricut Maker 3 but you can also use an original Maker or the Cricut Explore Series. You can even use the Cricut Joy for the Daisy Duke Wallet!
- Cricut StandardGrip Machine Mat 12″ x 12″
- Craft Glue – I used Bearly Art Precision Craft Glue
- Cricut tools including Brayer, Scraper, Spatula, Tweezers, Weeding Tool
- Cricut Fine Point Pen — optional, to draw stitching details on the Flower Power Handbag
- Scoring Stylus — optional, for the files with score lines
- One (1) Acrylic Keychain — optional
- Permanent Vinyl — optional, for customizing the keychain and/or gift tag
- Standard Grip Transfer Tape — optional, for applying vinyl to the keychain and/or gift tag
- Ribbon and Scissors to attach the optional acrylic keychain
- Thick Cardstock or Cardboard — optional, to reinforce the bag bottoms
- Quick Swap Housing with Debossing Tip or Debossing Tip if you have a QuickSwap Housing already – optional for debossing technique
- Biosha Script – optional
- Tingler Print – optional
- Design #393 (My free SVG/PDF/DXF design files are available in my free resource library – get the password by filling out the form at the bottom of this page)
How to Make Paper Handbags & Purses
Paper Handbags & Purses
Learn how to make cute paper handbags & purses that you can use as gift bags or fun decor!
Materials
- One or Two (1-2) sheets of Simple Joy 12" x 12" Patterned Cardstock — for the Flower Power Handbag and Daisy Duke Wallet -OR-
- One or Two (1-2) sheets of Beach House 12" x 12" Patterned Cardstock — for the Flower Power Handbag and Daisy Duke Wallet
- One, Four, or Five (1, 4, or 5) sheets of 12" x 12" Solid Core Cardstock — depending on the chosen design
- One (1) sheet of 12" x 12" White Cardstock — for accent pieces on all designs but the Couture Handbag
- One (1) sheet of 8.5" x 11" Gold Foil Cardstock — for accent pieces
- One (1) set of 3/8" Clear VELCRO dots — optional, to fasten the flap closure
- One (1) Acrylic Keychain — optional
- One or Two (1-2) 2" x 2" pieces of Permanent Vinyl — optional, for customizing the keychain and/or gift tag
- One (1) 2" x 2" piece of Standard Grip Transfer Tape — optional, for applying vinyl to the keychain and/or gift tag
- Ribbon to attach the acrylic keychain
- Thick cardstock or cardboard to reinforce the bottom (optional)
- Design #393 (My free SVG/PDF/DXF design files are available in my free resource library - get the password by filling out the form at the bottom of this page)
Tools
- A method to cut your material — I used the amazing Cricut Maker 3 but you can also use the Cricut Explore Series. You can even use the Cricut Joy for the Daisy Duke Wallet.
- Cricut StandardGrip Machine Mat 12" x 12"
- Cricut Fine Point Pen — optional, for drawing stitching details onto the Flower Power Handbag
- Craft Glue
- Scoring Stylus — optional, for the files with score lines
- Scraper
- Brayer
- Spatula
- Tweezers
- Weeding Tool
- Scissors - optional to cut the ribbon
- Quick Swap Housing with Debossing Tip (optional) -OR-
- Debossing Tip if you have a QuickSwap Housing (optional)
Instructions
STEP 1: GET MY FREE PAPER HANDBAGS DESIGN FILES
First, download my Paper Handbags & Purses SVG/DXF/PDF files from my It's Design #393.
There are four separate design files in the SVG folder:
- Flower Power Handbag: 10.5” wide by 10.5” tall by 4.5” deep
- Daisy Duke Wallet: 3.75" wide by 2.125" tall by 1" deep
- Heartbreaker Handbag: 10.5" wide by 11" tall by 4.5" deep
- Couture Handbag: 8.125" wide by 10" tall by 3.5" deep
Each folder includes a version with Score lines that requires a scoring wheel or stylus and a version with dashed cut lines that only needs the Fine-Point Blade. I'll show you how to make the second versions, which have "no-score-tool-needed" in the file names.
NOTE: If you want to make the Score versions, refer to my tutorial on How to Make Envelopes to learn how to adjust the files. All score layers in the files have a red color swatch, no color in the Layers Panel, and are grouped with their corresponding cut layers.
I'll show you how to make the Flower Power Handbag and mention changes for the other bags as we go.
Upload the SVG file to Cricut Design Space and add it to your Canvas.
If you are not sure how to upload an SVG cut file to Cricut Design Space, watch this helpful video training series I made. If you are on an iPad or iPhone, here is how to download and upload SVG files to the Cricut Design Space app.
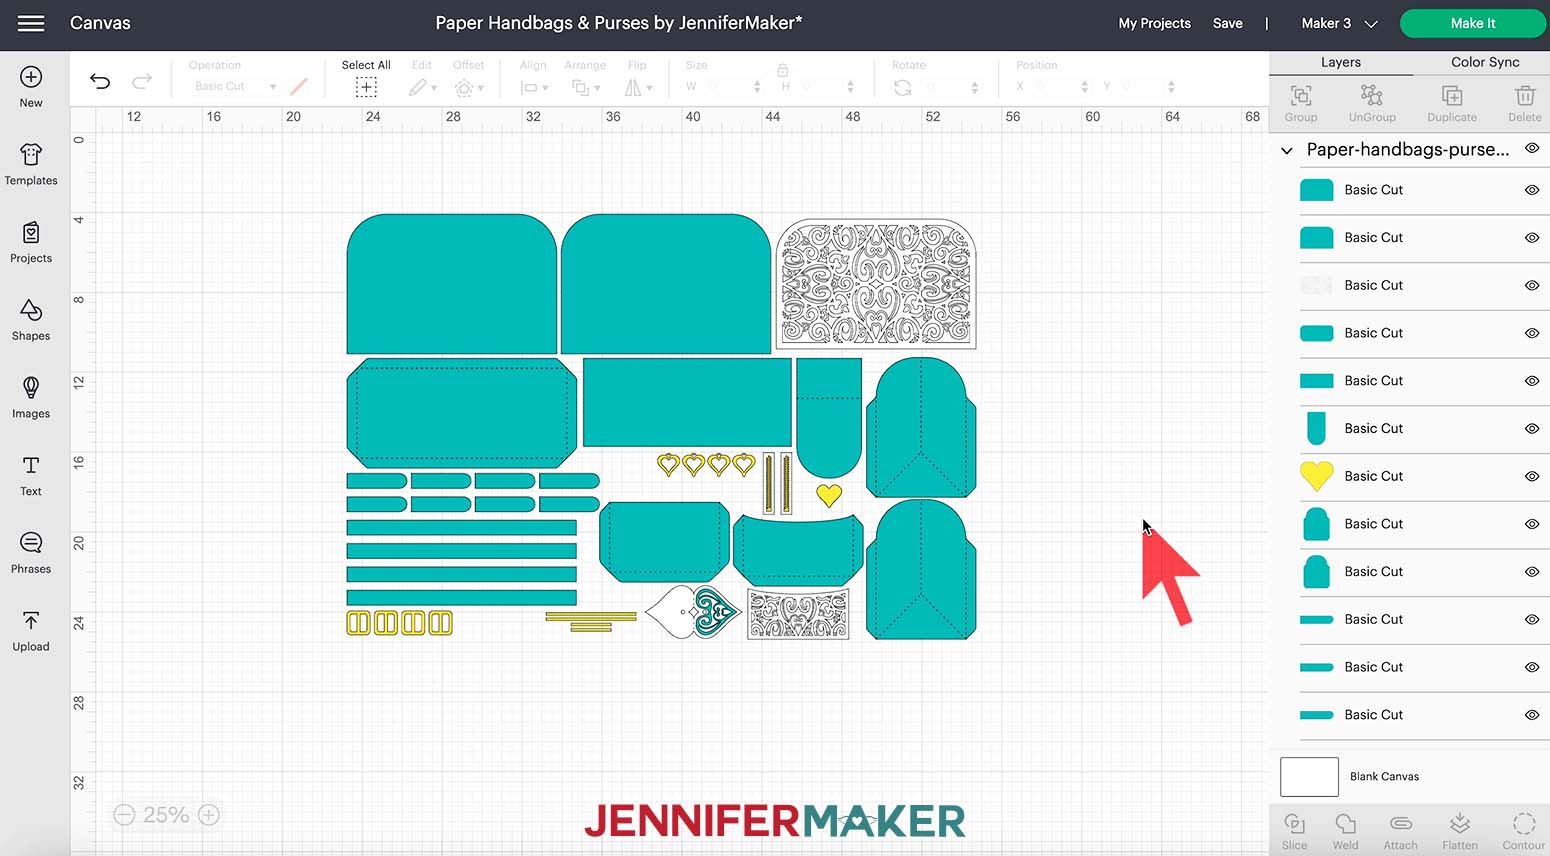
You can zoom out to see all of the design by clicking on the minus (-) sign on the lower left. This is what each of my Paper Handbag & Purse designs look like on my Canvas.
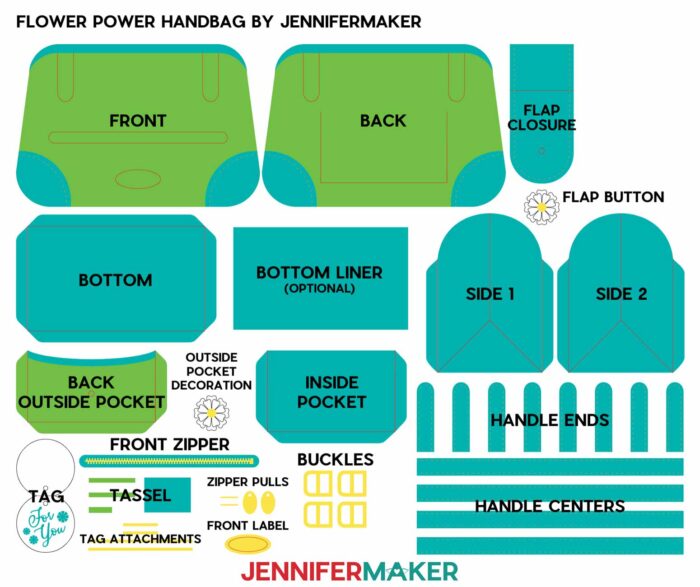
Flower Power Handbag
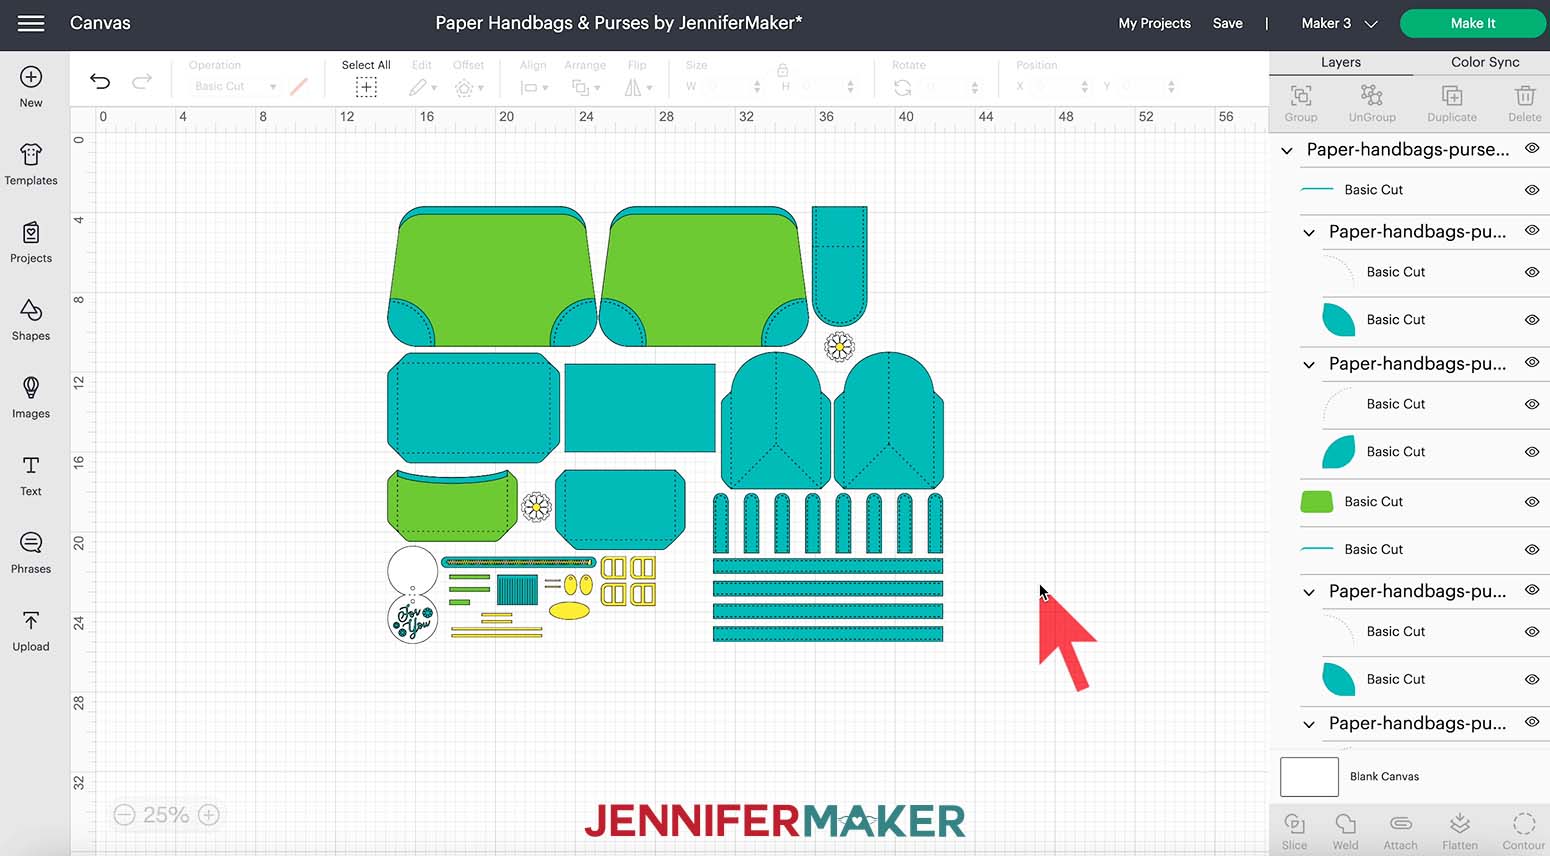
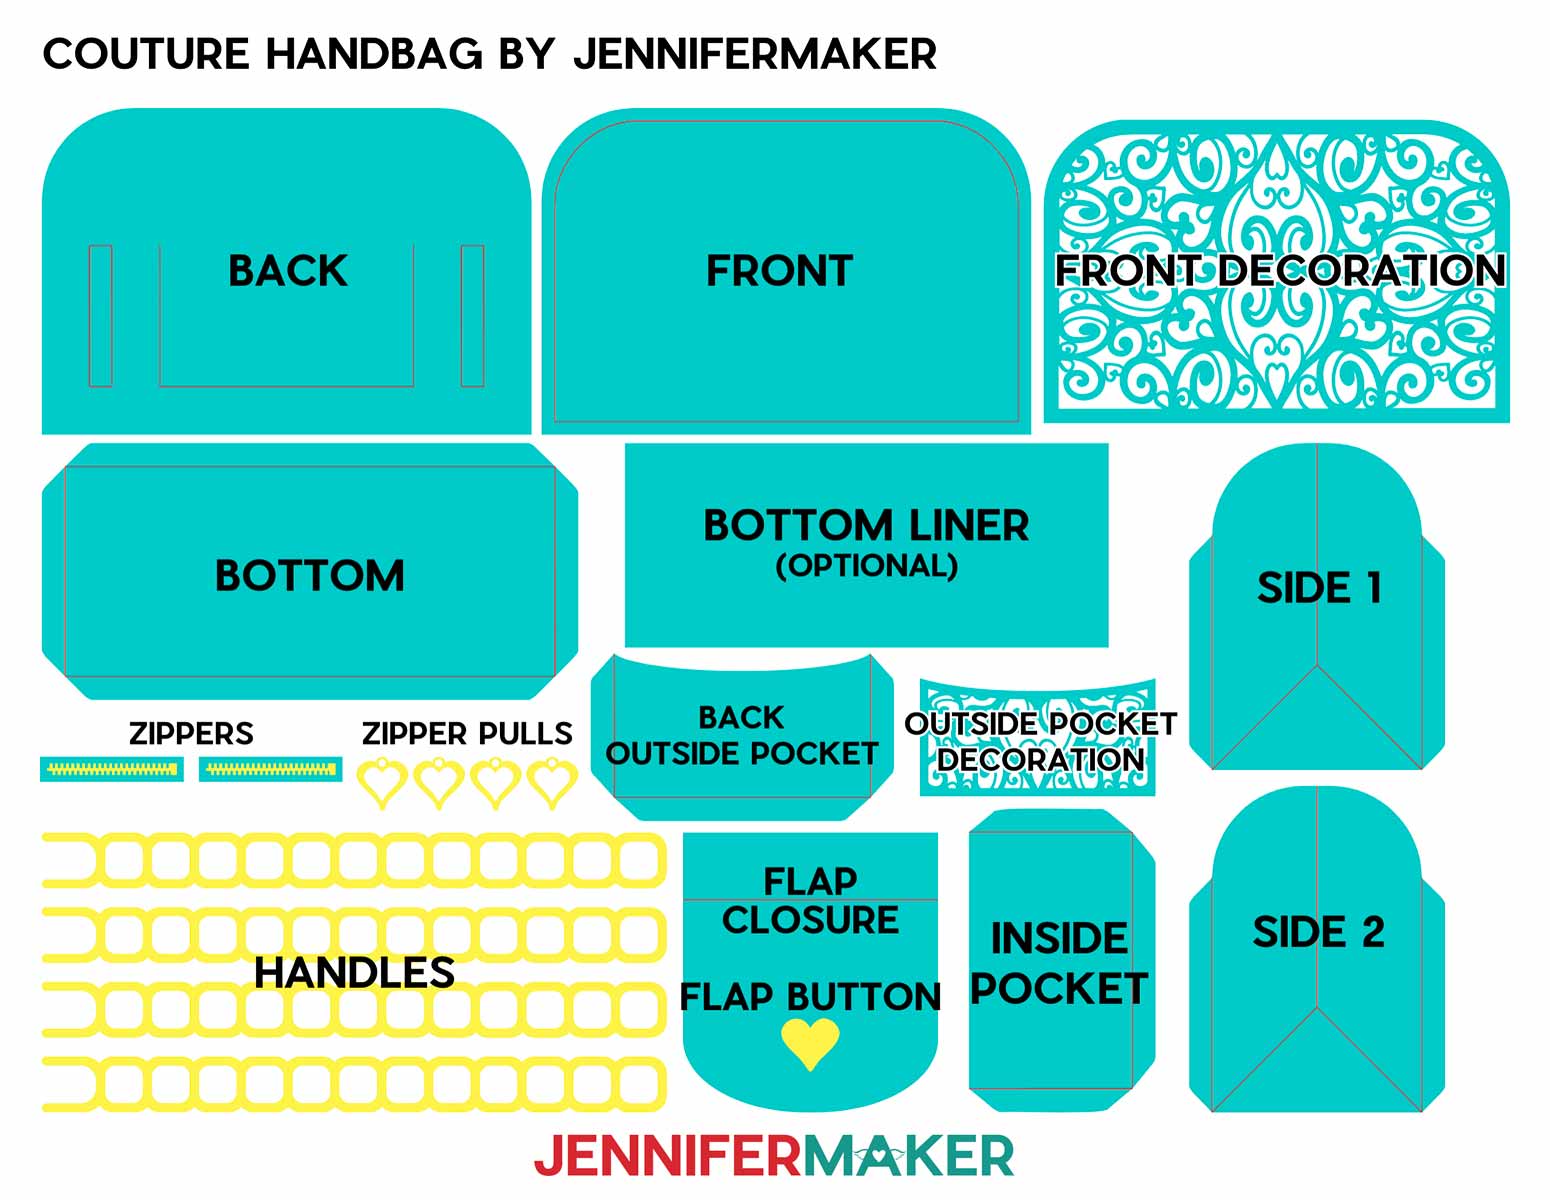
Here's what each piece is called:

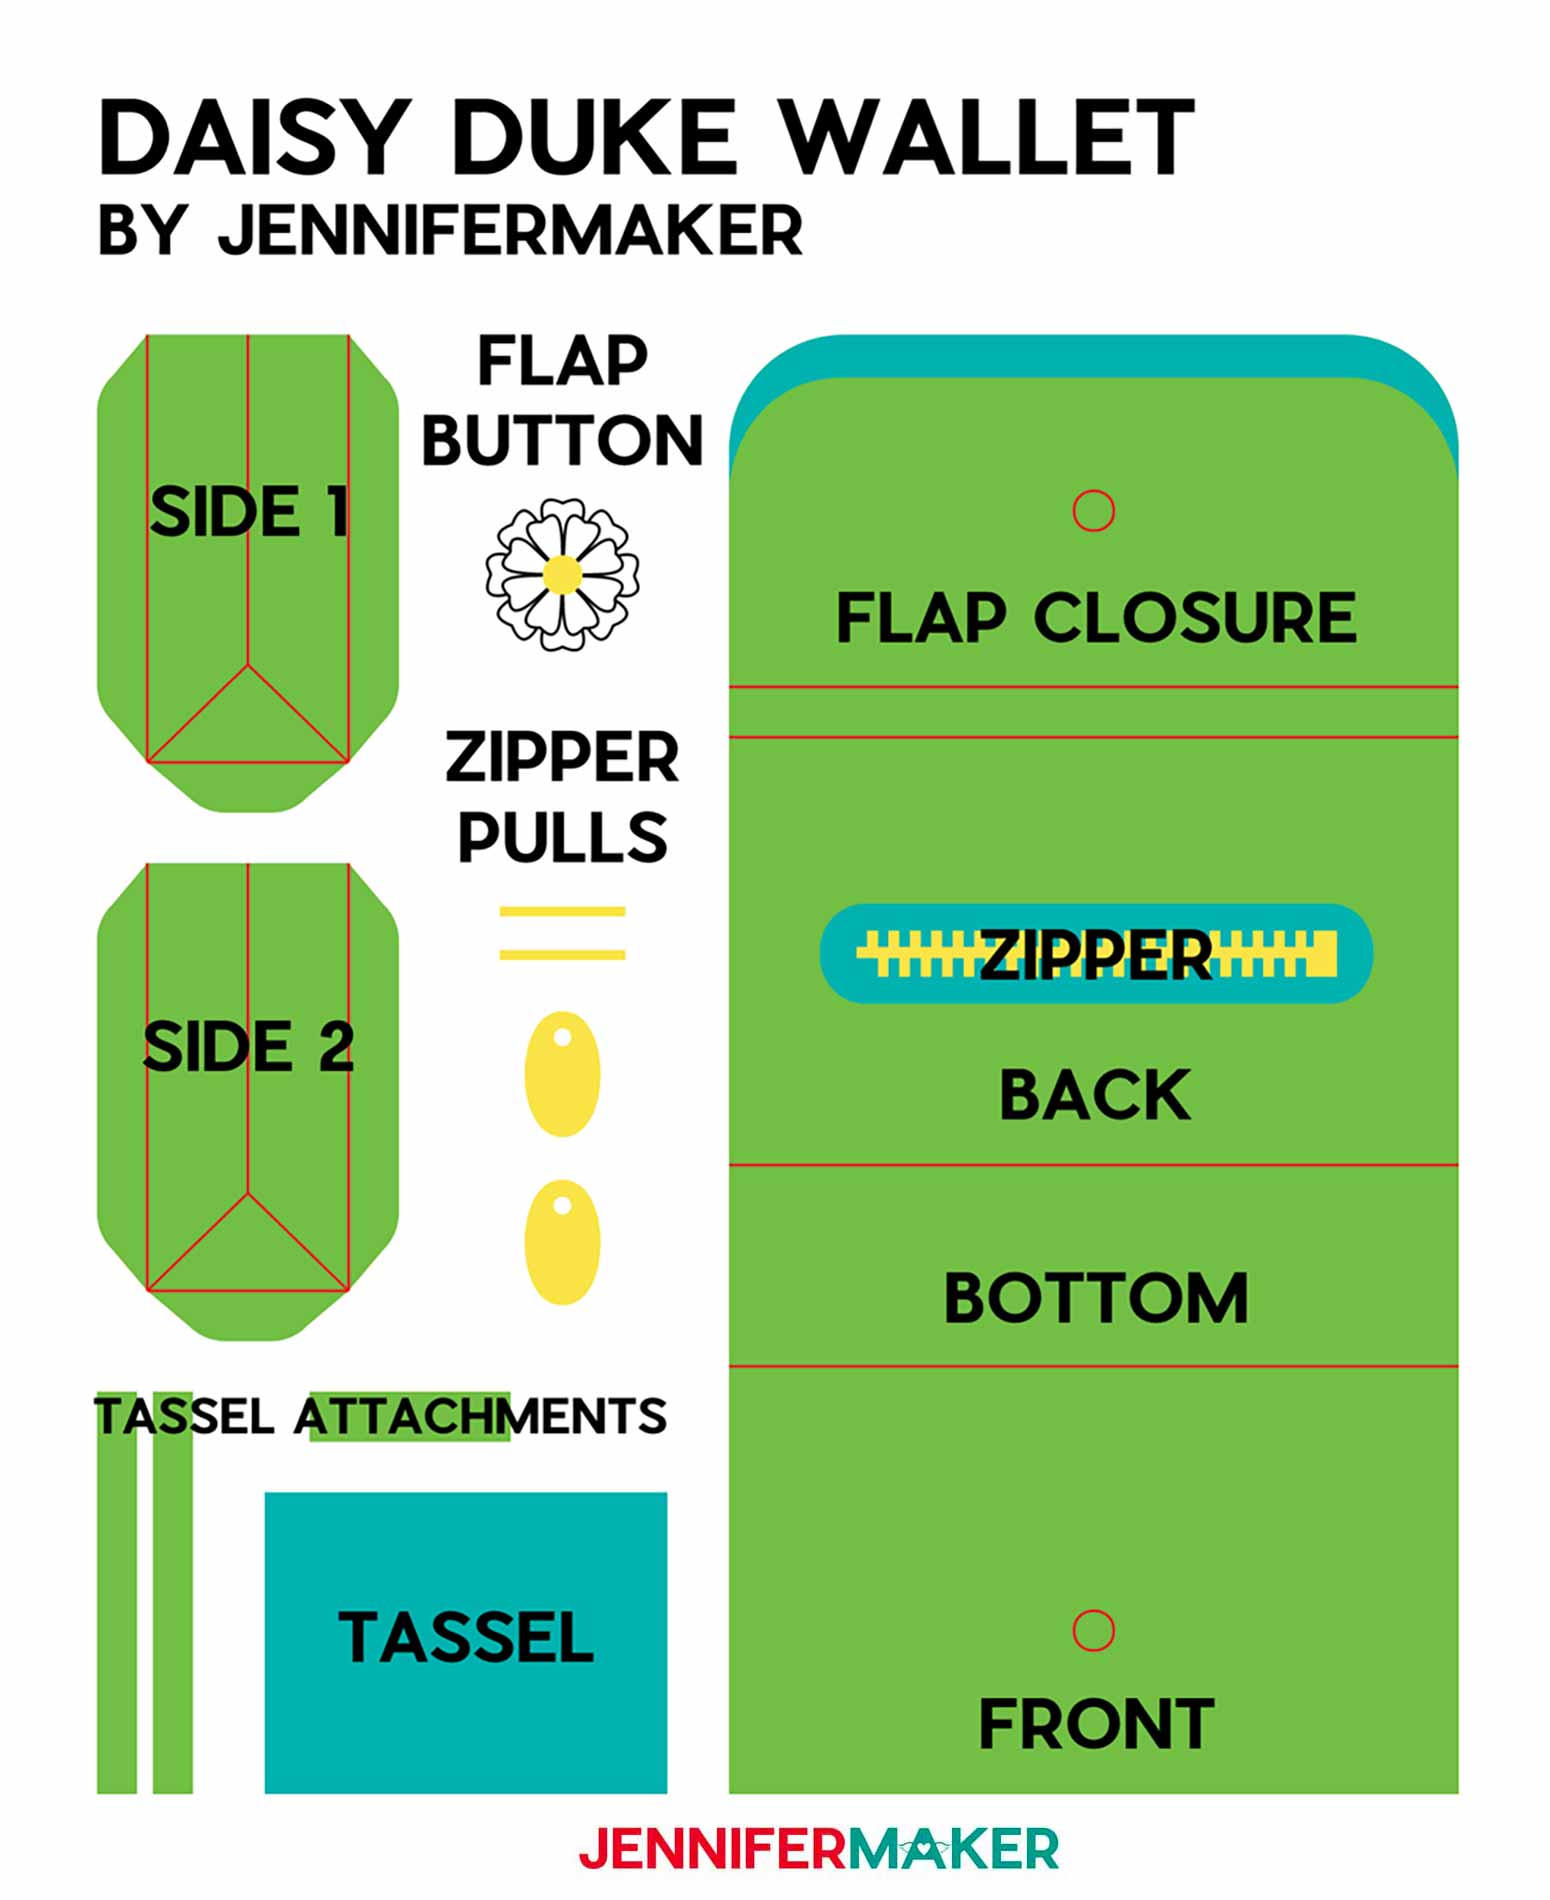
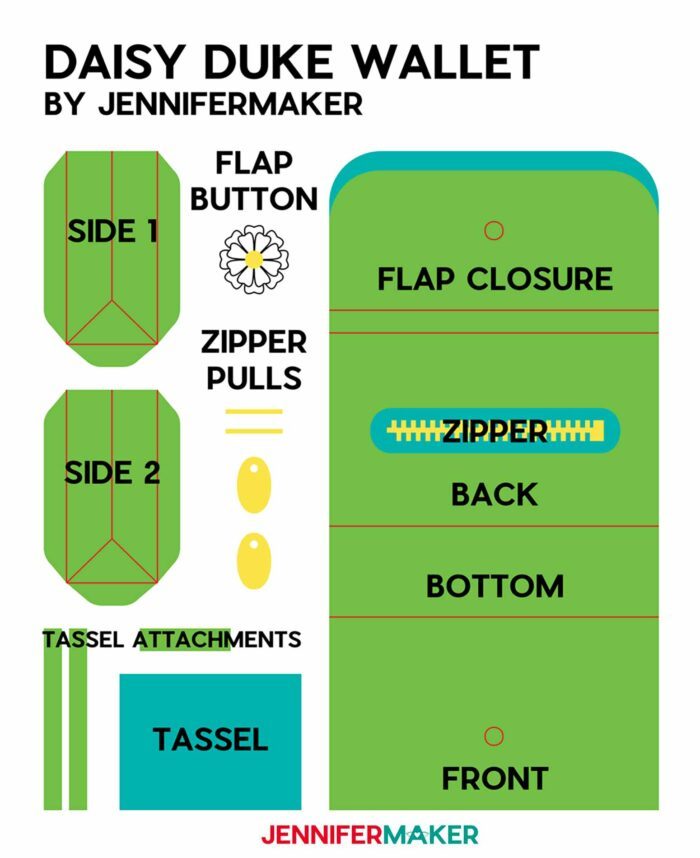
Daisy Duke Wallet
Here's what each piece is called:
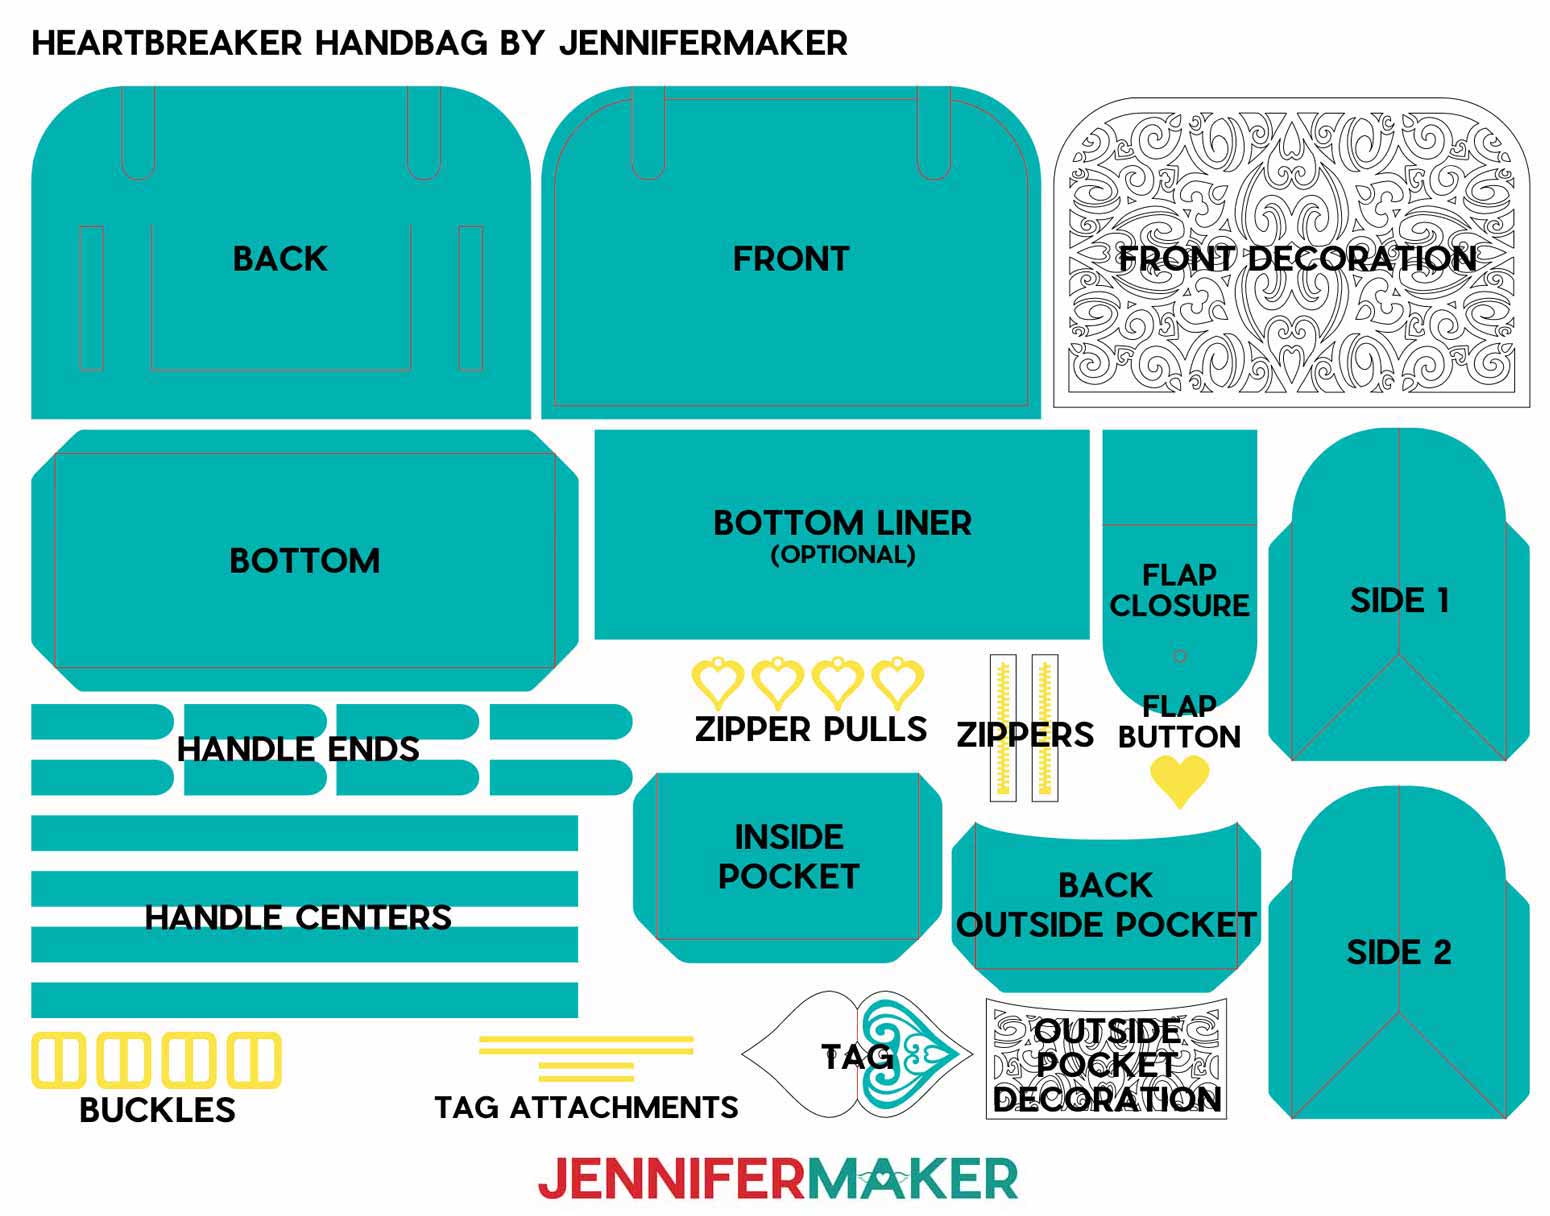
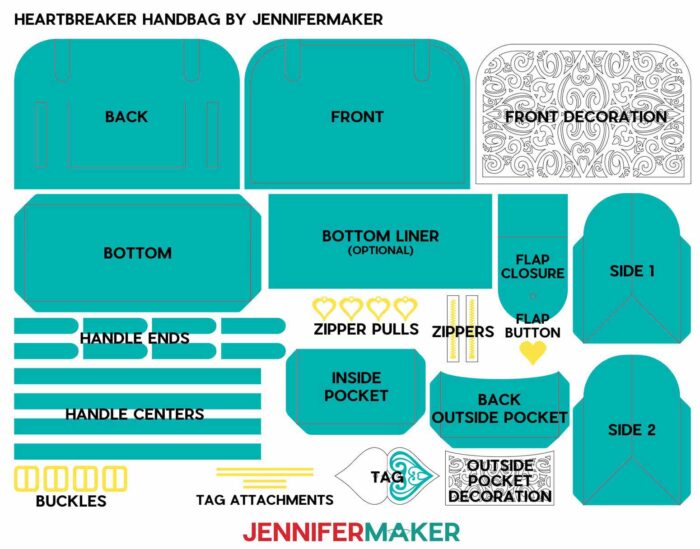
Heartbreaker Handbag
Here's what each piece is called:
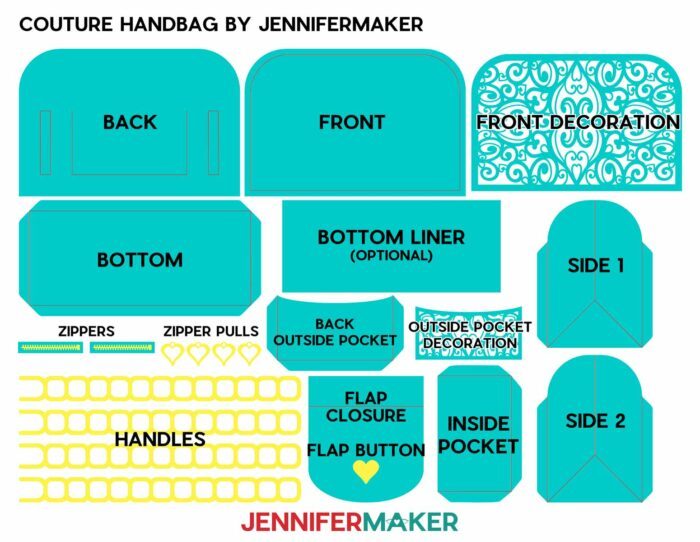
Couture Handbag
Here's what each piece is called:
STEP 2: PREPARE YOUR DESIGN FOR CUTTING
I don't recommend resizing these designs because many details are very precisely sized.
The Flower Power Handbag uses the Cricut Fine Point Pen to mimic stitching. So, there are six layers we need to set as Draw and thenAttach. The other bags are ready to cut.
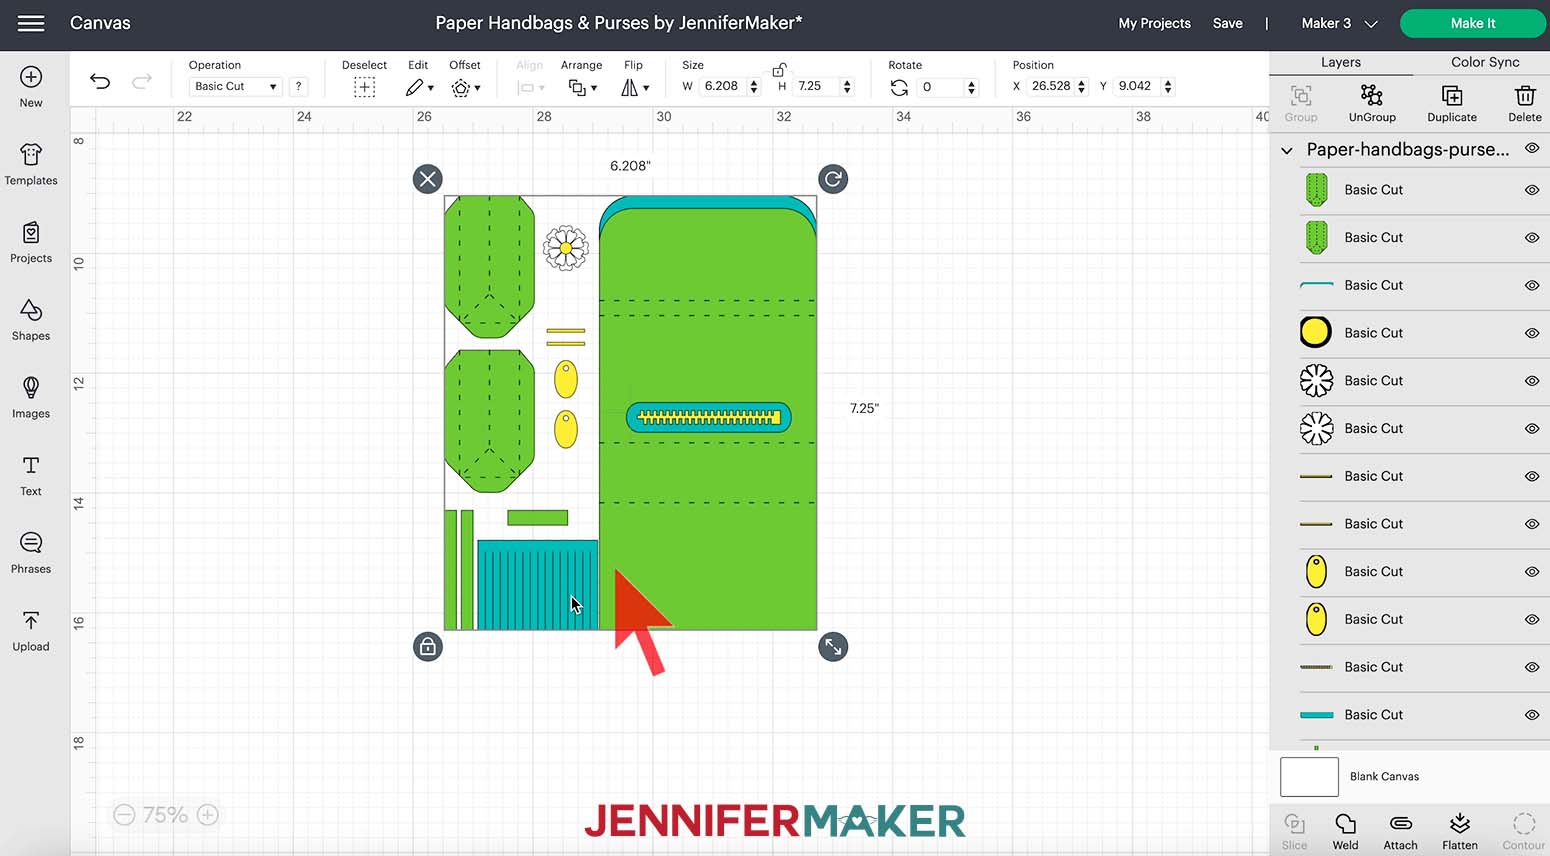
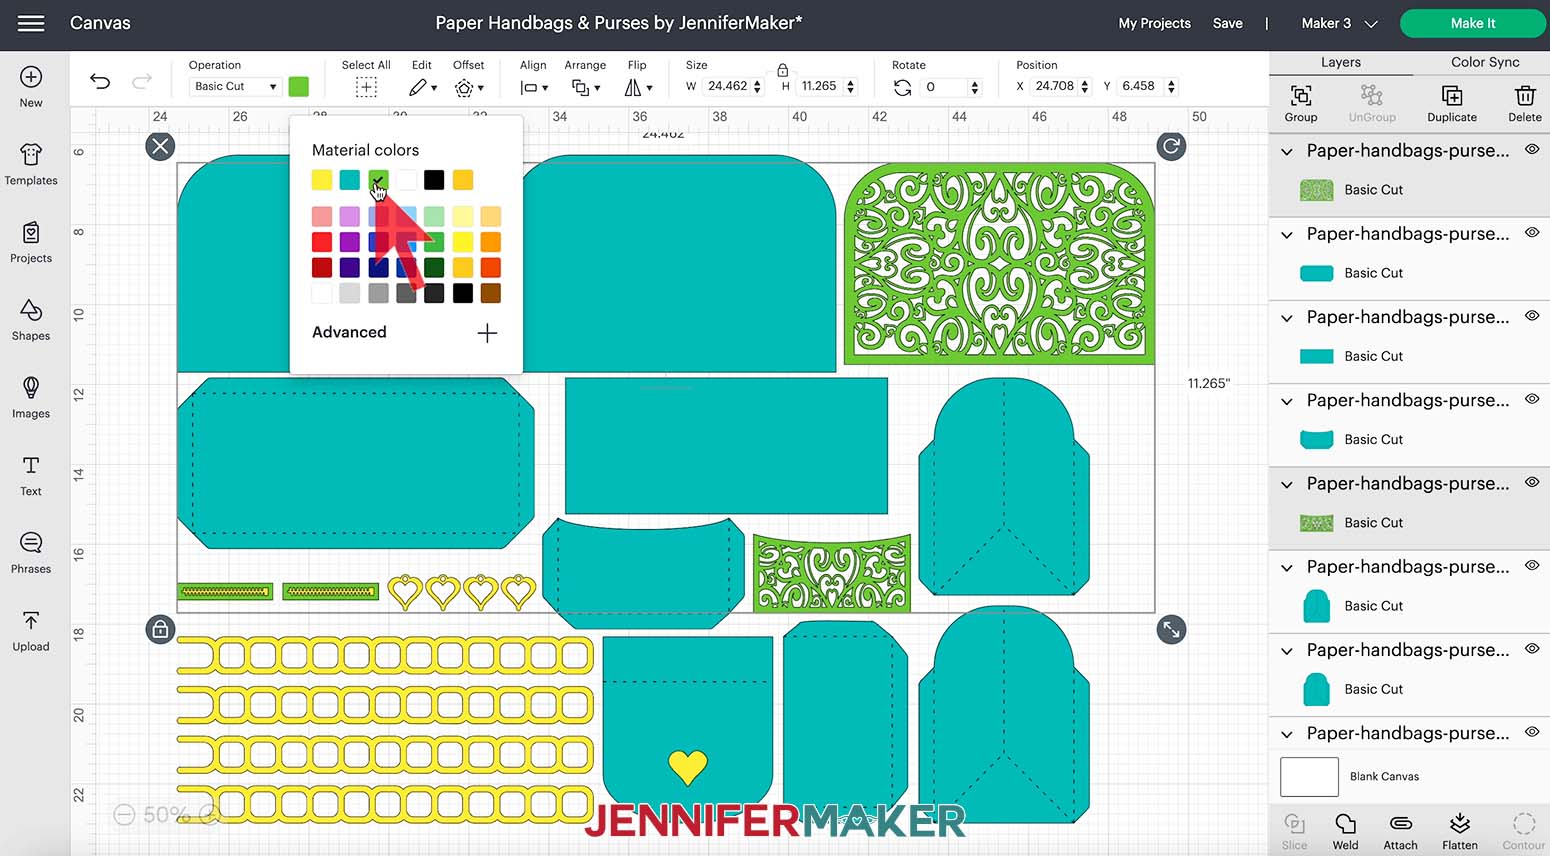
Select your design and click "UnGroup" at the top of the Layers panel.
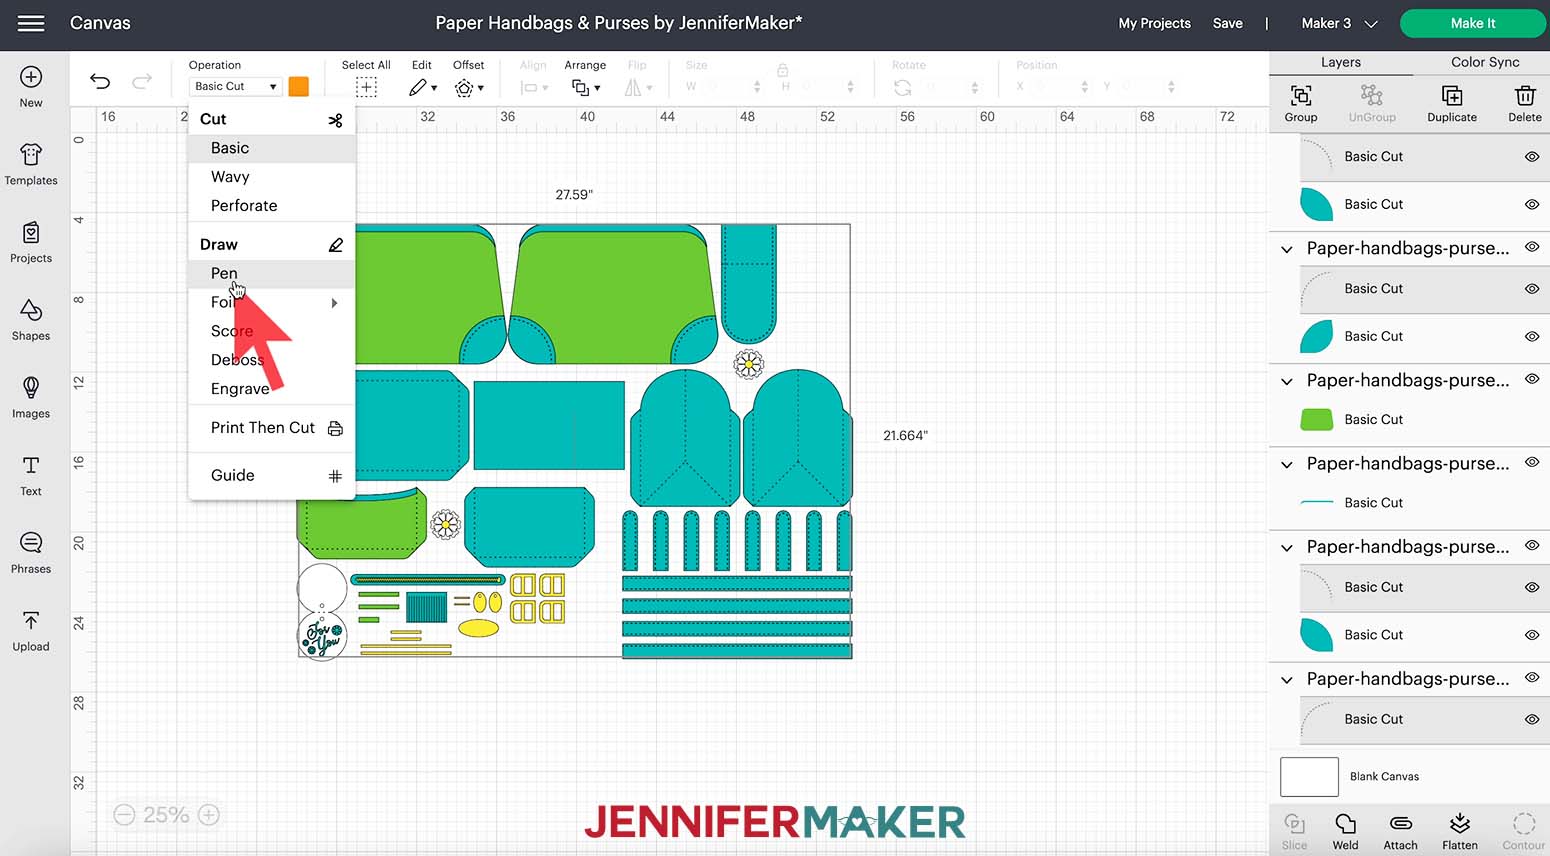
Find the layers with no color in their Layers Panel thumbnails. Each one is designated with an orange color color box in the top menu and is grouped with its corresponding cut layer in the Layers panel. There's one layer for all the blue handle pieces, four for the padding, and one for the flap. Hold Shift and click on all six layers, then change the Operation at the top from "Basic Cut" to "Pen." Then click off of the design.
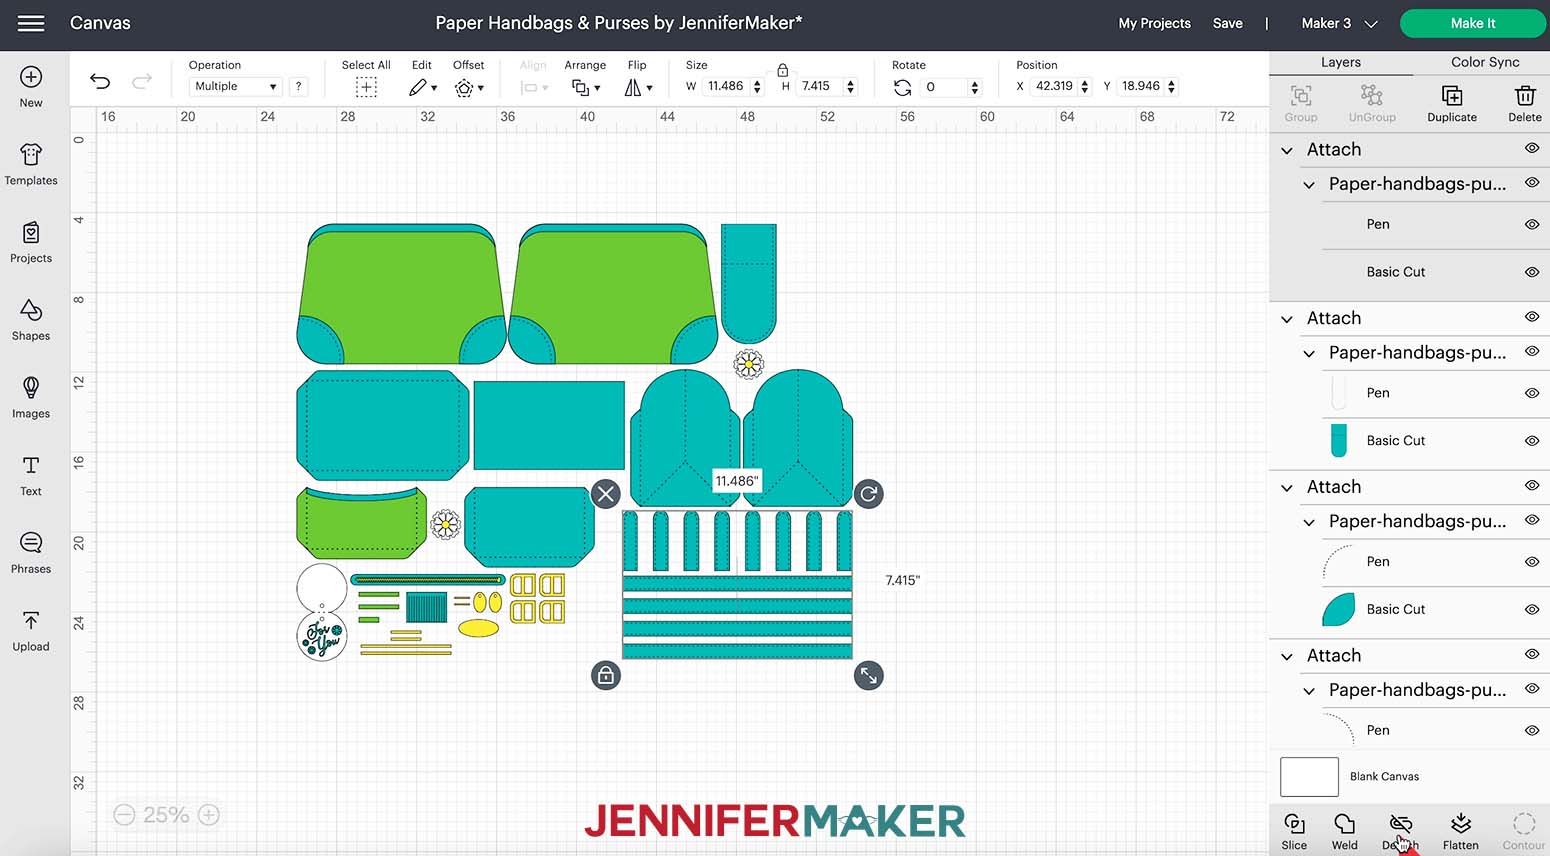
Now we need to tell the Cricut to make the pen marks on the correct layers. Find the first Pen Layer grouped with a Cut Layer in the Layers Panel and click the words above the pair. Click "Attach" at the bottom of the Layers Panel and repeat for the other five Pen Layers.
NOTE: The three large bags include a rectangle that is the same size as the bottom of the bag. This is a reinforcement for the bottom in case you want to put something a bit heavier in the bag. Currently, it will cut out on the same cardstock as the bags' exterior. If you want to make it from heavier material like cardboard, select it and use the color box to change it to an unused color.
While the bag is basically ready to cut, there are a few variations to consider:
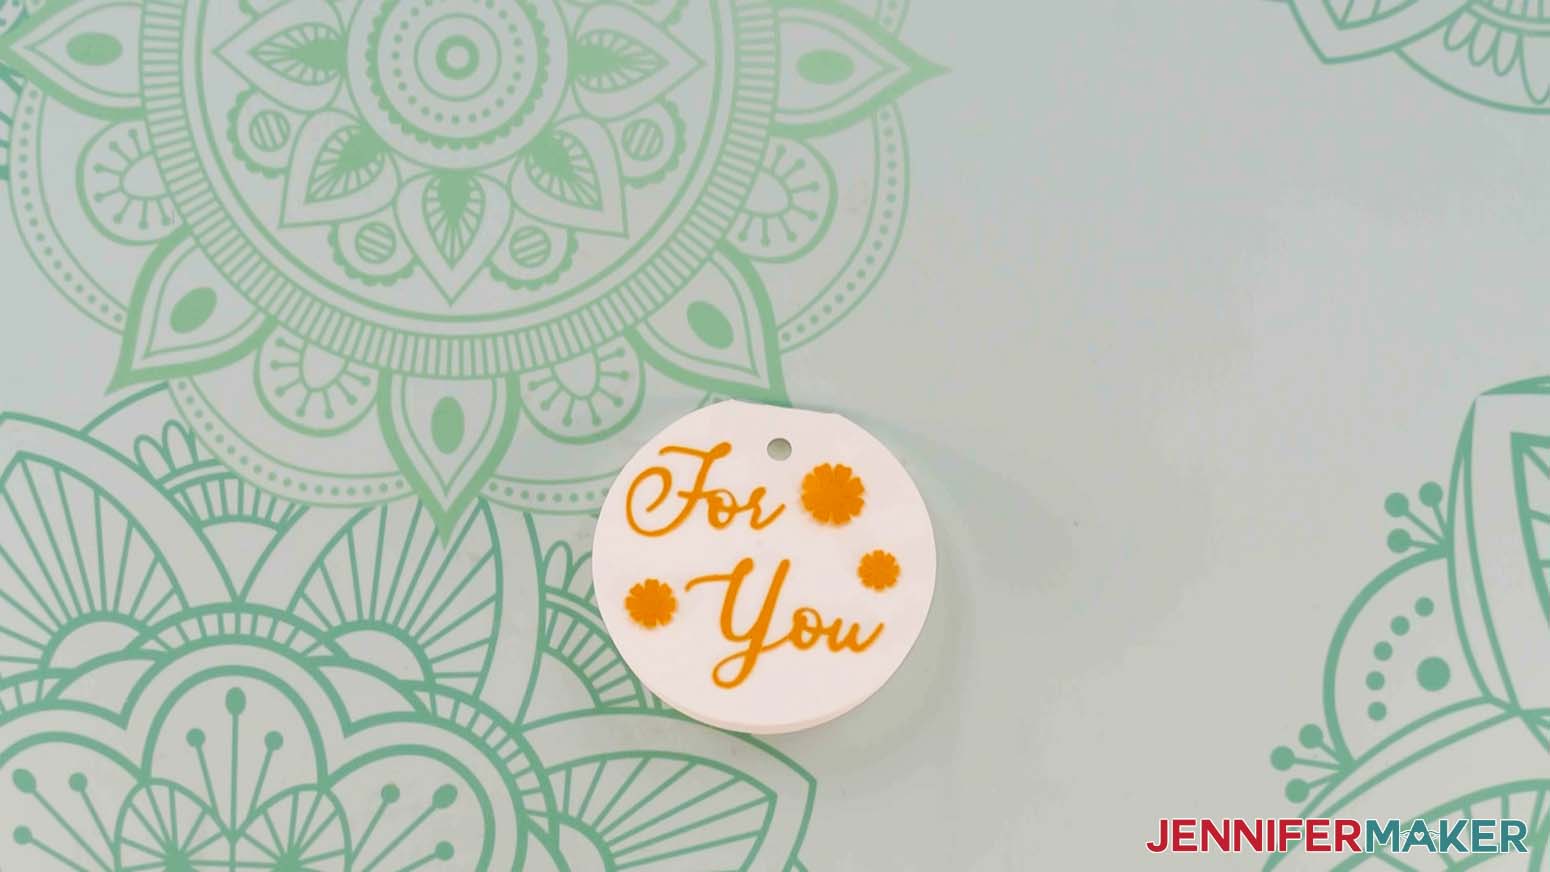
Circle Tag and Acrylic Keychain
The white circles and "For You" phrase will create a cardstock hang tag you can glue together and add to the bag. However, I've listed a clear acrylic tag in the materials list, which we can decorate with vinyl and use as well as or instead.
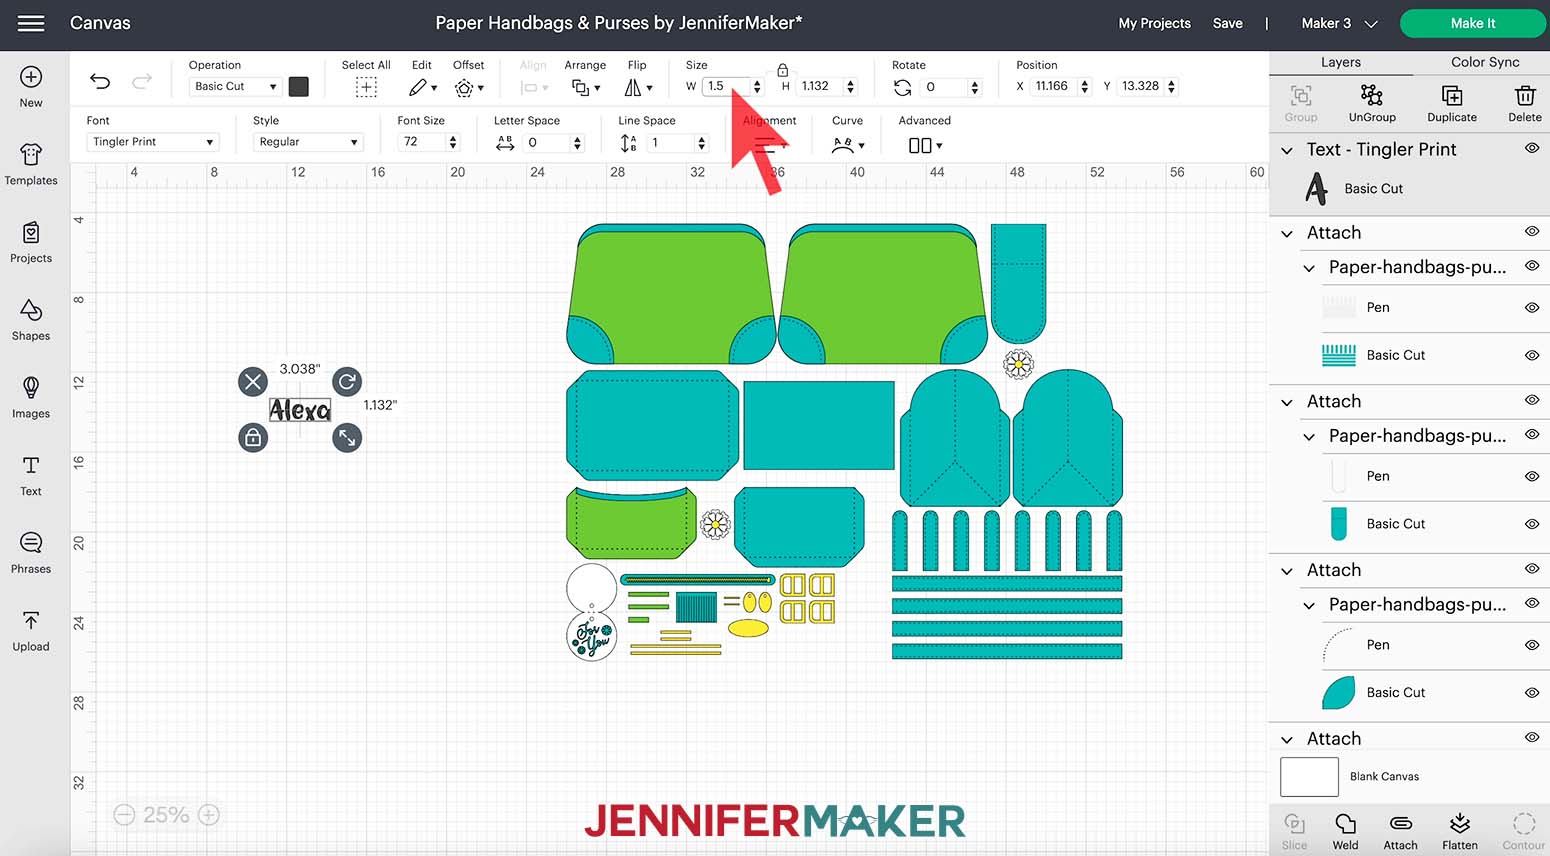
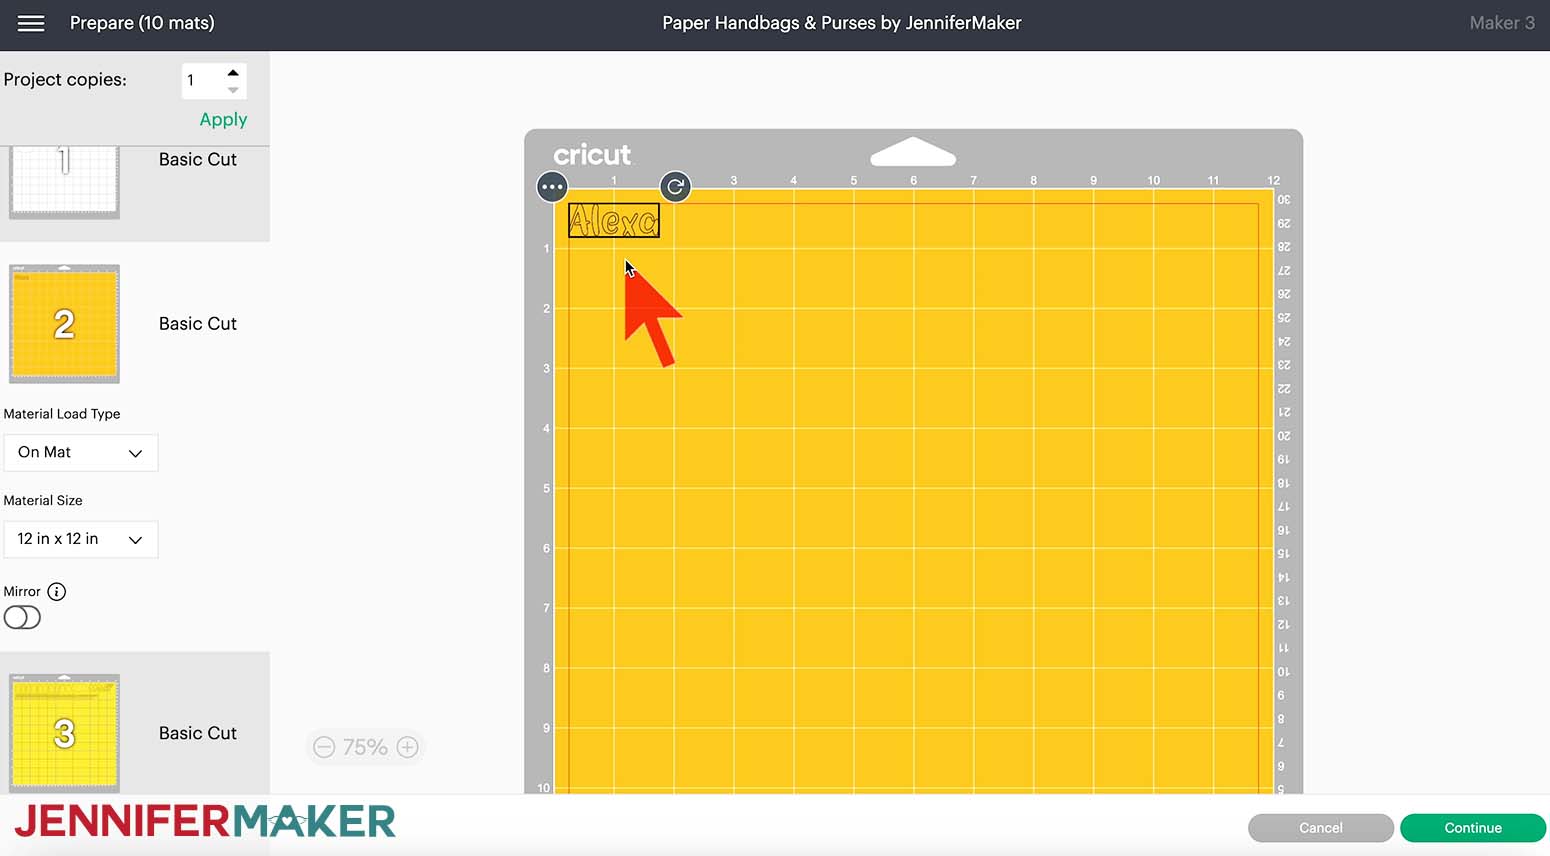
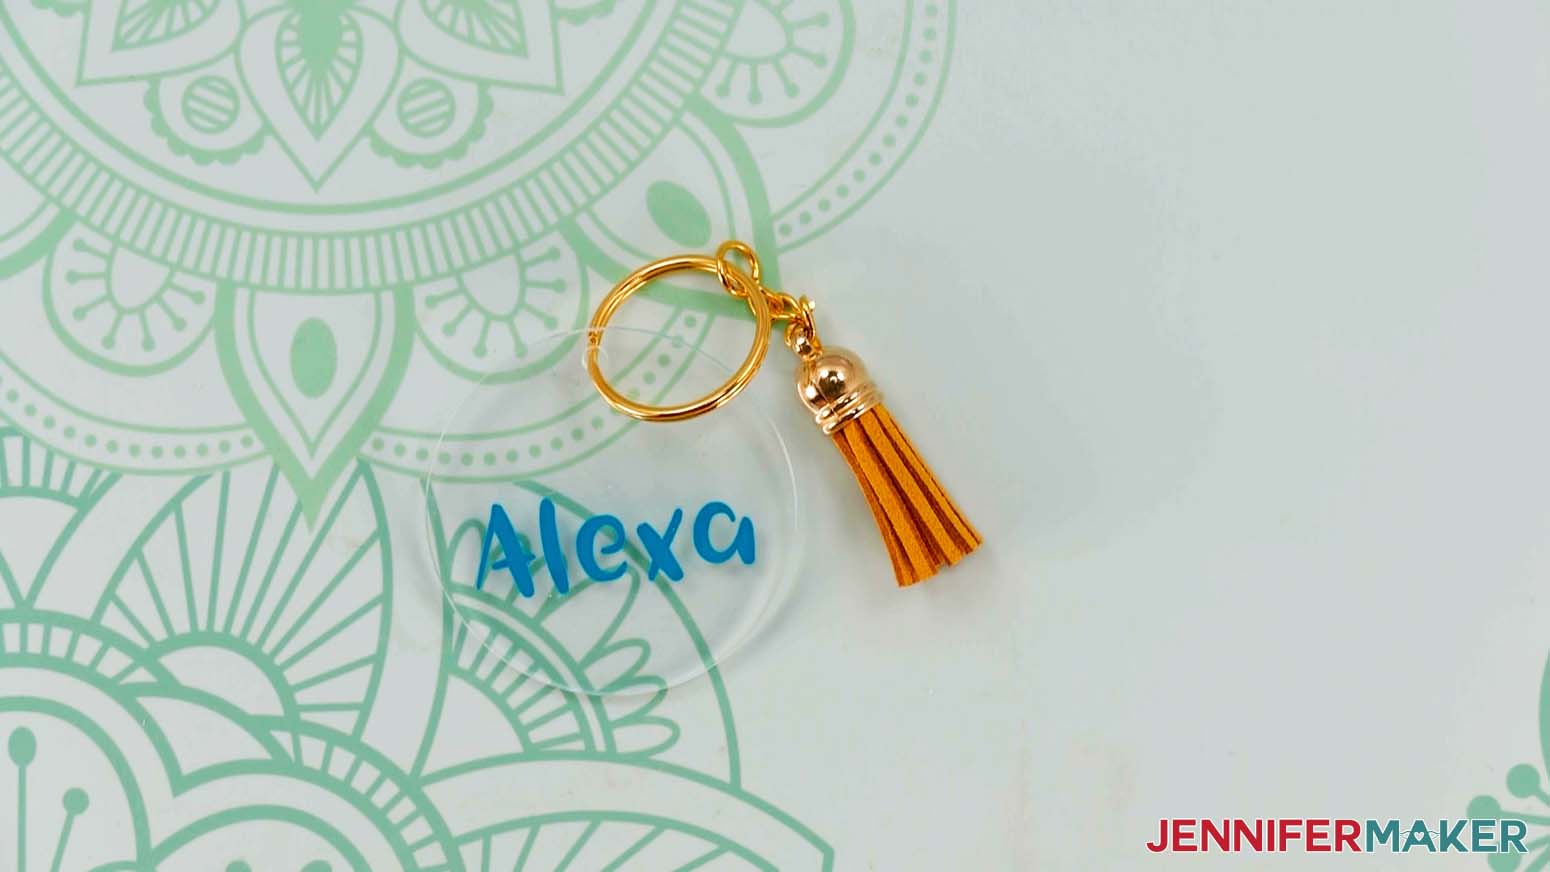
To create a custom name for the acrylic keychain, use the Text icon to add the name to your Canvas, then resize it to no larger than 1.5" wide or tall using the Size fields. I'm going to write "Alexa" in the font Tingler Print (available here) for my keychain.
TIP: If you need help filtering and finding the best fonts, get my Cricut Font Finder cheat sheet!
The Daisy Duke Wallet, Heartbreaker Handbag, and Couture Handbag don't require a pen and nothing needs to be set or attached. But here are a few adjustments you might like to try:
Daisy Duke Wallet
If you're making the Flower Power Handbag and Daisy Duke Wallet to match, you can save time and paper by adding both designs to your Canvas before cutting. Design Space will put the matching elements on the appropriate mats in the next step.

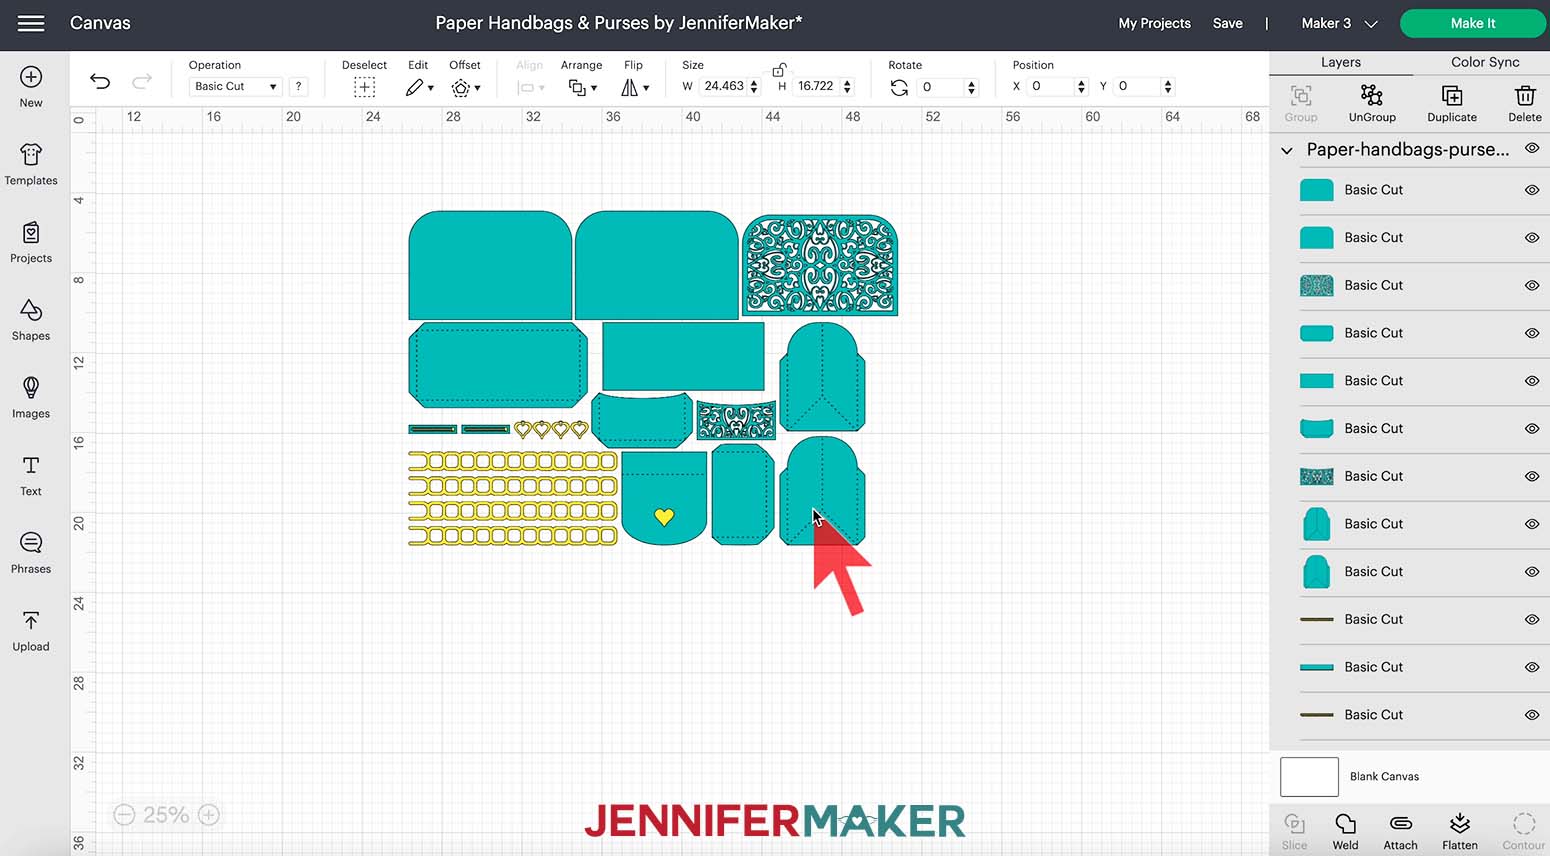
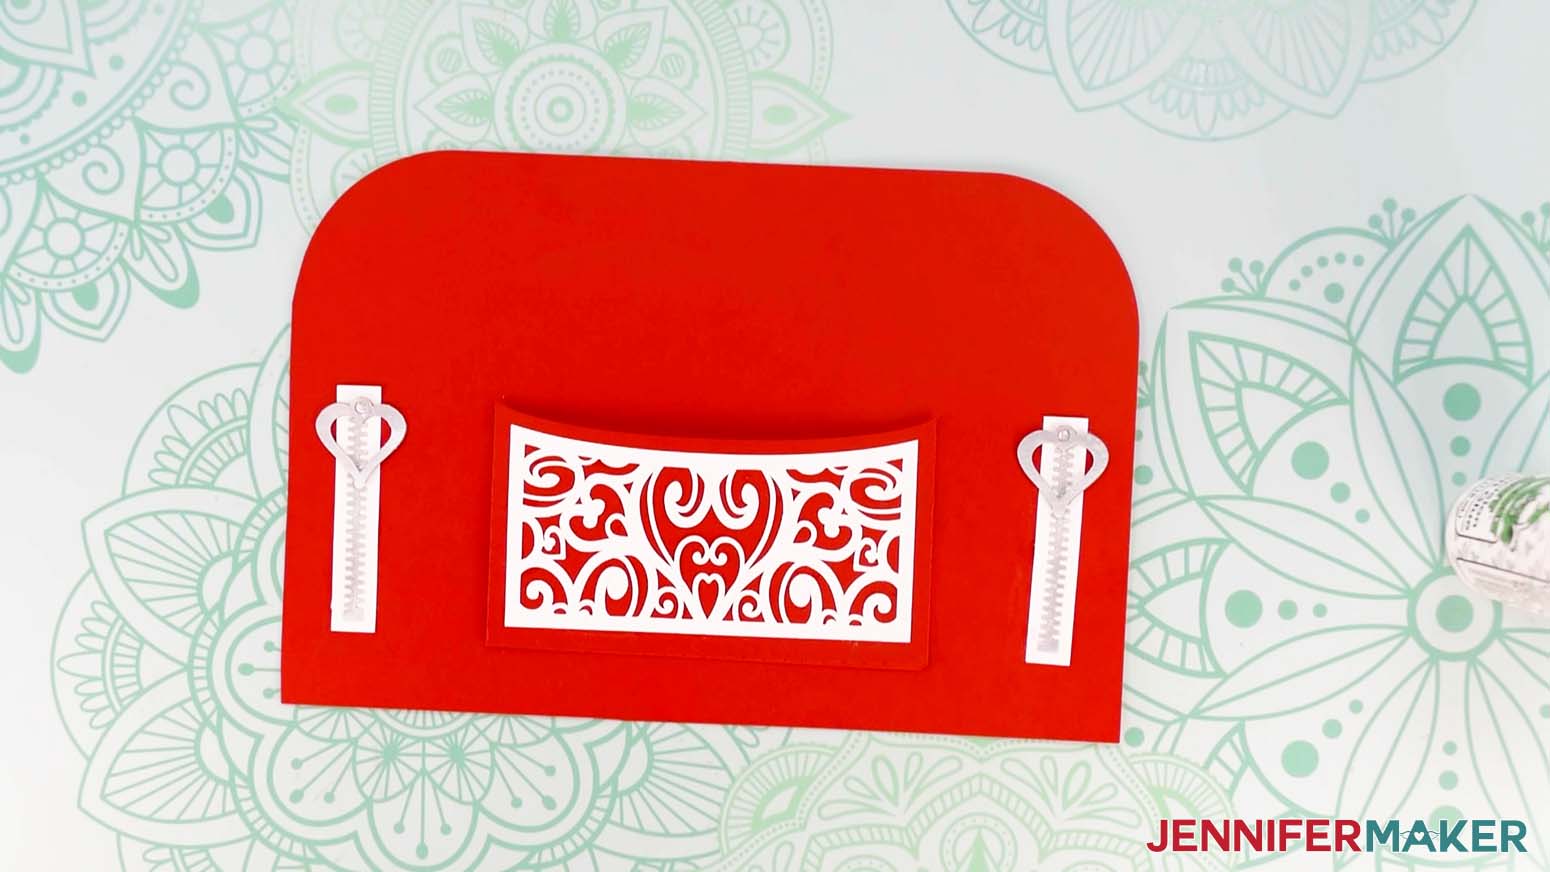
Couture Bag
If you want the Couture Handbag's filigree and zipper rectangles to stand out, hold Shift to select each Layer and change them to a new color using the color box in the top menu.
If you have a Debossing tool, you can give the Couture a tooled leather look!
Add the no score tool version of the purse to your Canvas and click "UnGroup" to work with the layers separately.
Select the large white filigree and a large side panel while holding the Shift key. Then, select Align at the top menu and click "Center." With the filigree selected, click Arrange and "Bring to Front" so you can see that it's in the correct spot.
Then under Operation, change it to "Deboss." That line will change to a thicker black style. Then select both layers holding Shift and click "Attach" below the Layers Panel to keep them together during cutting. Remember to swap in the Deboss tool when the Make screen prompts yo to do so!
You can also use this process on the filigree sections for the Heartbreaker!
After you've made any of these adjustments, we're ready to cut!
STEP 3: CUT YOUR PAPER HANDBAG DESIGN
Make sure you have the right machine selected and click "Make It."
If prompted, click "On Mat," "12 in x 12 in," and "Continue."
Normally, the Flower Power Handbag has eight mats on the Prepare screen: one white, one yellow, two green, and four blue. Since I'm making the acrylic hang tag with vinyl, there is a separate mat with just the name on it.
The Daisy Duke Wallet has four mats: one white, one yellow, one green, and one blue.
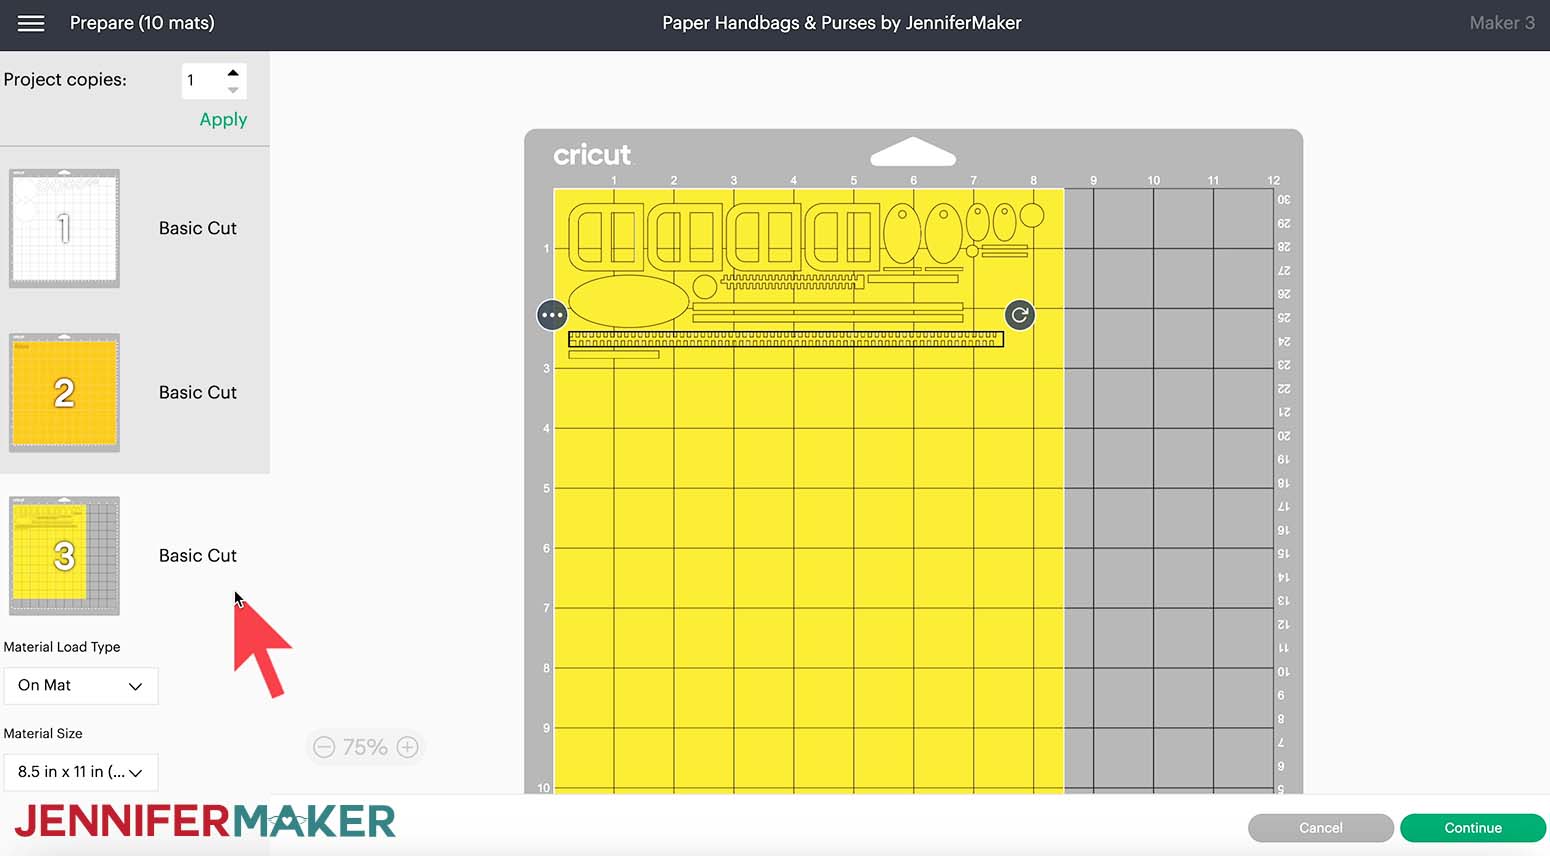
For both designs, I'm using plain solid-core cardstock for the white mats, foil cardstock for the yellow, patterned cardstock for the green, plain solid-core cardstock in a second color for the blue, and permanent adhesive vinyl for the name mat. If you're using the same, change the Material Size under the yellow mats to 8.5" x 11".
TIP: If you're making matching a Flower Power Handbag and Daisy Duke Wallet, you can combine and rearrange pieces of the same color on the mats. Just make sure you can tell them apart after cutting! For help combining mats, see Step 3 of my Paper Dahlia tutorial.
The Heartbreaker Handbag has seven mats: one white, one yellow, and five blue.
The Couture Handbag has five mats: one yellow/gold and four blue. This will be different if you changed the colors to stand out as I mentioned earlier.
For both bags, change the Material Sizes to fit your materials as needed
Then click "Continue" in the bottom right.
Design Space will choose the cut order of your mats, so make sure you know which pieces you're cutting on each mat and change your settings accordingly.
For the cardstock mats (except for the filigrees, see note below, and the reinforcement if you're using heavier cardstock) I'll select "Medium Cardstock - 80 lb (216 gsm),” change Pressure to "More," and click "Remember Material Settings" since I'm using the same weight of paper for each mat. Check your paper packaging and adjust your settings as needed, especially since some machines cut differently. A test cut is always good!
If you're making the reinforcement out of heavier cardstock, select "Heavy Cardstock" and use "More" pressure for that mat.
NOTE: For the Heartbreaker and Couture Handbags, I used "Cardstock (for intricate cuts)" for the mats with the filigree patterns. To find it, click "Browse All Materials" and type "Intricate" in the search bar. Then select the result, click Apply, and leave the Pressure at "Default."
If you're making the Flower Power Handbag, remember to follow the Design Space prompts to use the Pen correctly for your machine.
If you're making the vinyl decal like me, use the "Permanent Adhesive Vinyl" setting with "More Pressure."
TIP: If you run into any issues cutting your cardstock check out my Cricut Tips & Tricks for Cleaner Cuts.
Place your first mat's cardstock on a green Cricut StandardGrip Machine Mat. If you’re using double-sided or patterned cardstock, place the exterior face up and use a brayer to adhere it well. Load your mat and press your machine's Go button. Once the mat is finished, unload it, flip it over on your workspace, and gently roll a corner back to release the cardstock.
Complete the process for the rest of the mats, making sure to select the correct color and material for each mat according to the screen. Place the different bags and elements in organized piles so you don't get confused.
TIP: When removing smaller pieces from your mat--like the thin foil strips for the zipper pull and tag attachments--use the spatula to gently lift them so they don’t tear.

STEP 4: CREASE PIECES AND ATTACH EMBELLISHMENTS
Flower Power Handbag
First, let's prepare the Flower Power Handbag. This is the base for the other designs, so we'll cover most of the important techniques, but I'll note any changes.
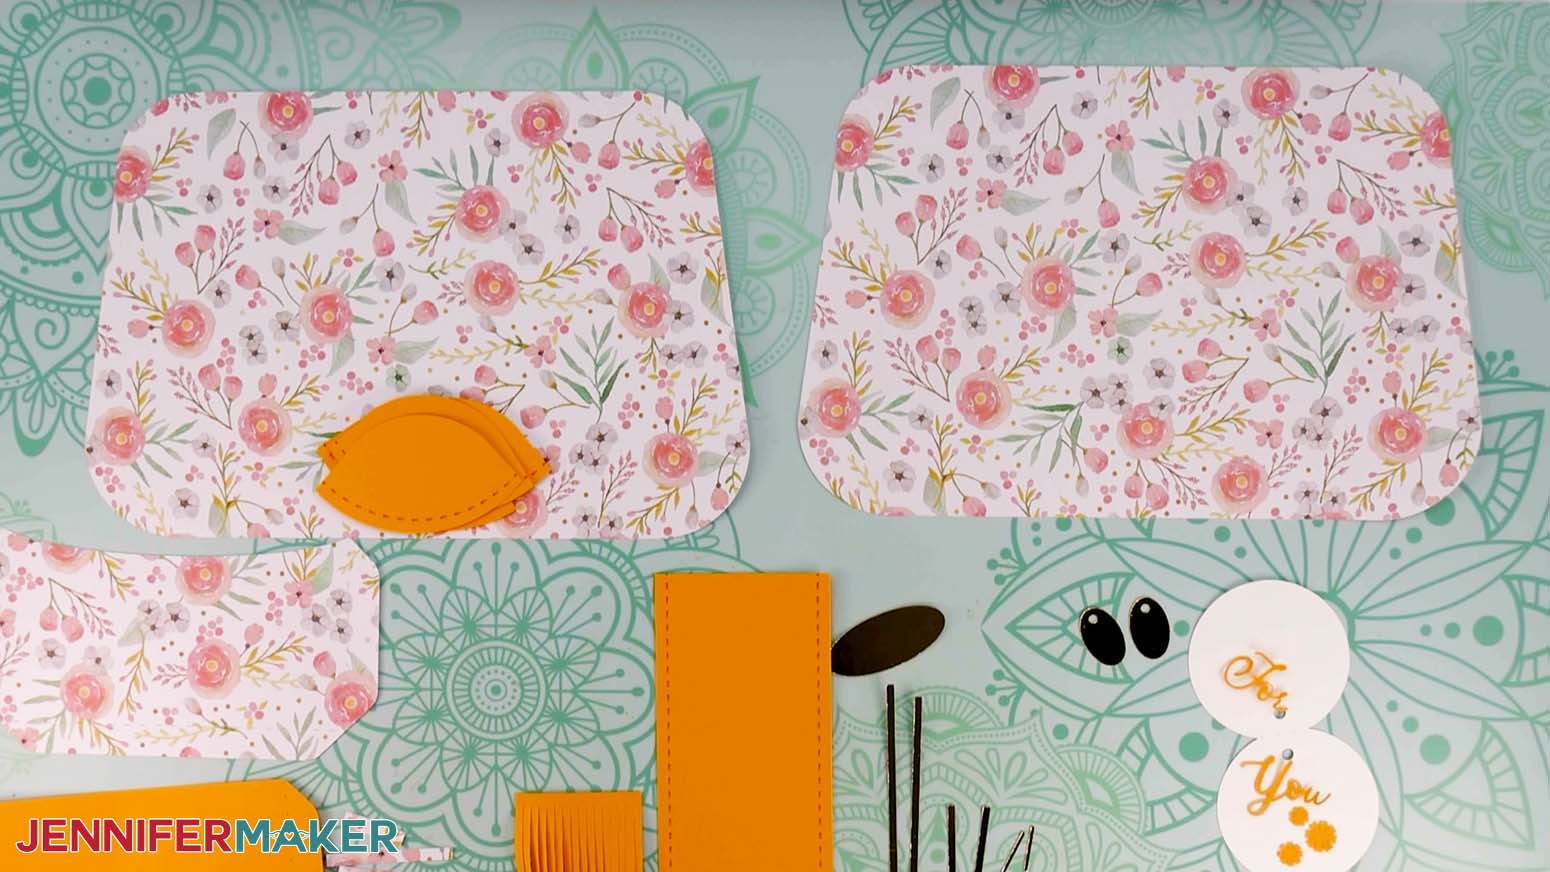
Here are most of my pieces for the bag.
Find the pieces with dashed cut lines and fold along each of them. Use a scraper tool if needed. The pieces are:
- one rectangular piece with a rounded end for the flap
- one rectangular piece with tabs along all sides for the bottom
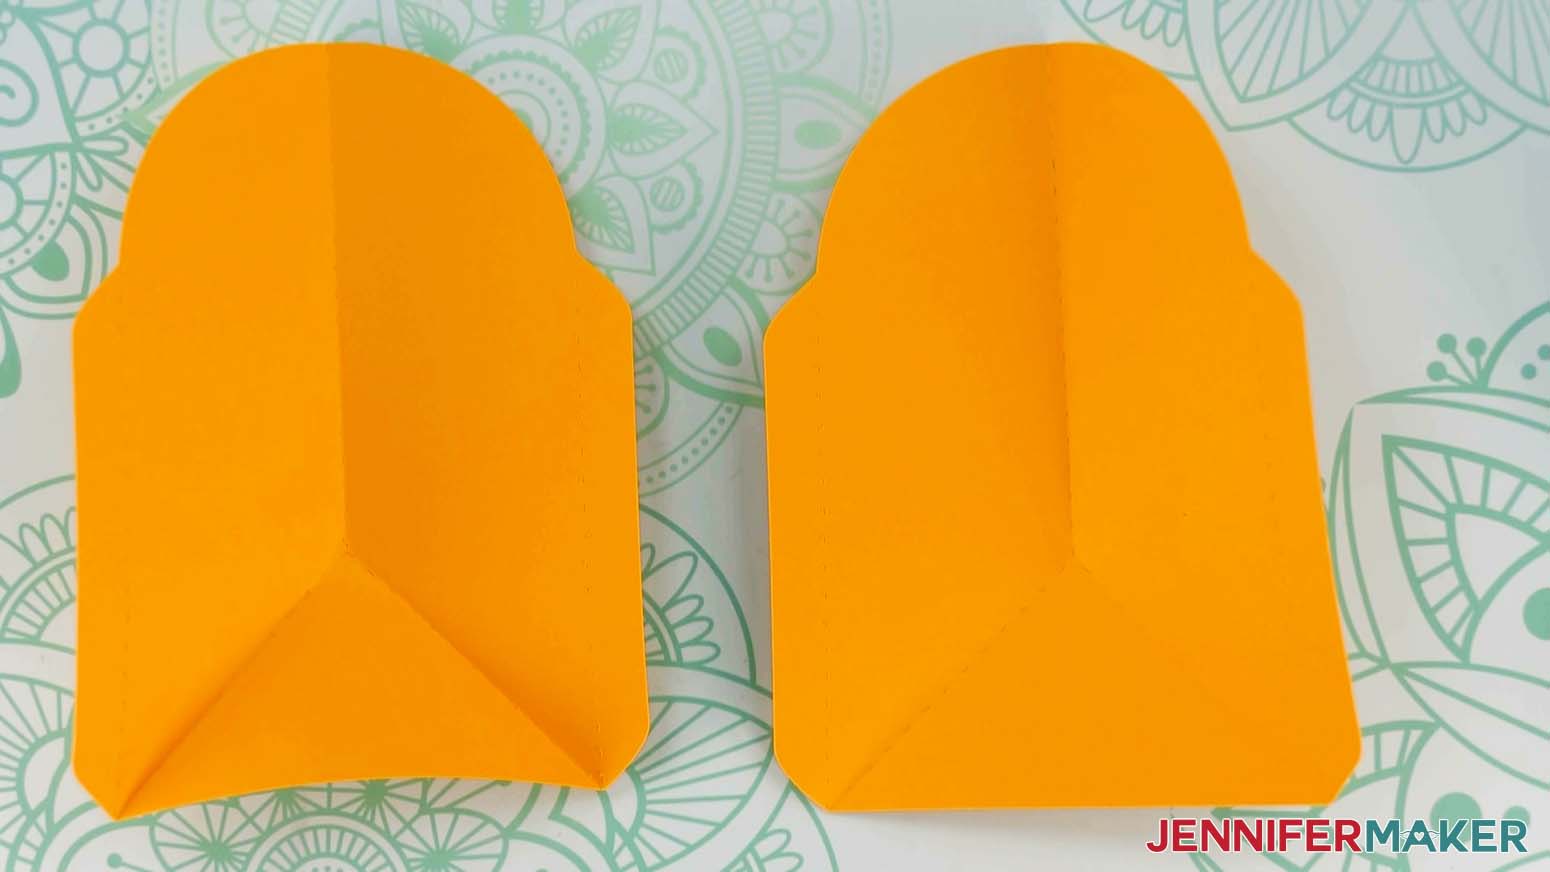
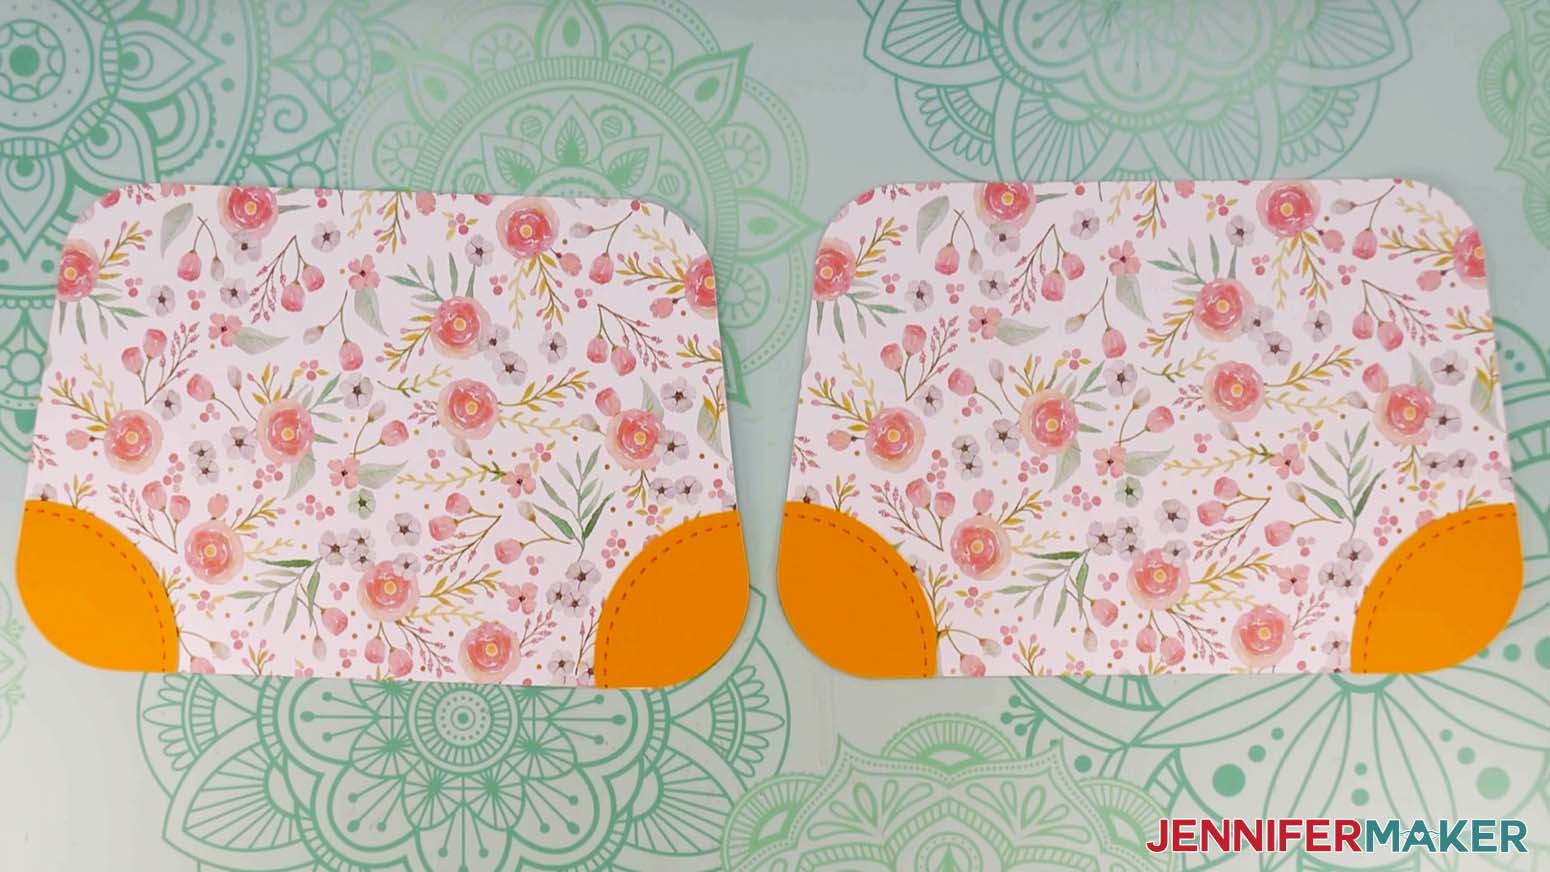
- two identical side pieces with rounded tops and triangular folds at the bottom
- two pocket pieces, one with a curved top for the outside and one with a straight top for the inside
TIP: To fold the side pieces, fold outward along the center dashed line first. Only fold down to the top of the triangle shape. Then fold outward along the left side of the triangle, stopping at the top of the triangle shape again. Finally, fold outward along the right side of the triangle, stopping at the top of the triangle. This type of fold will allow the finished bag to fold inward at the top while leaving the bottom flat.
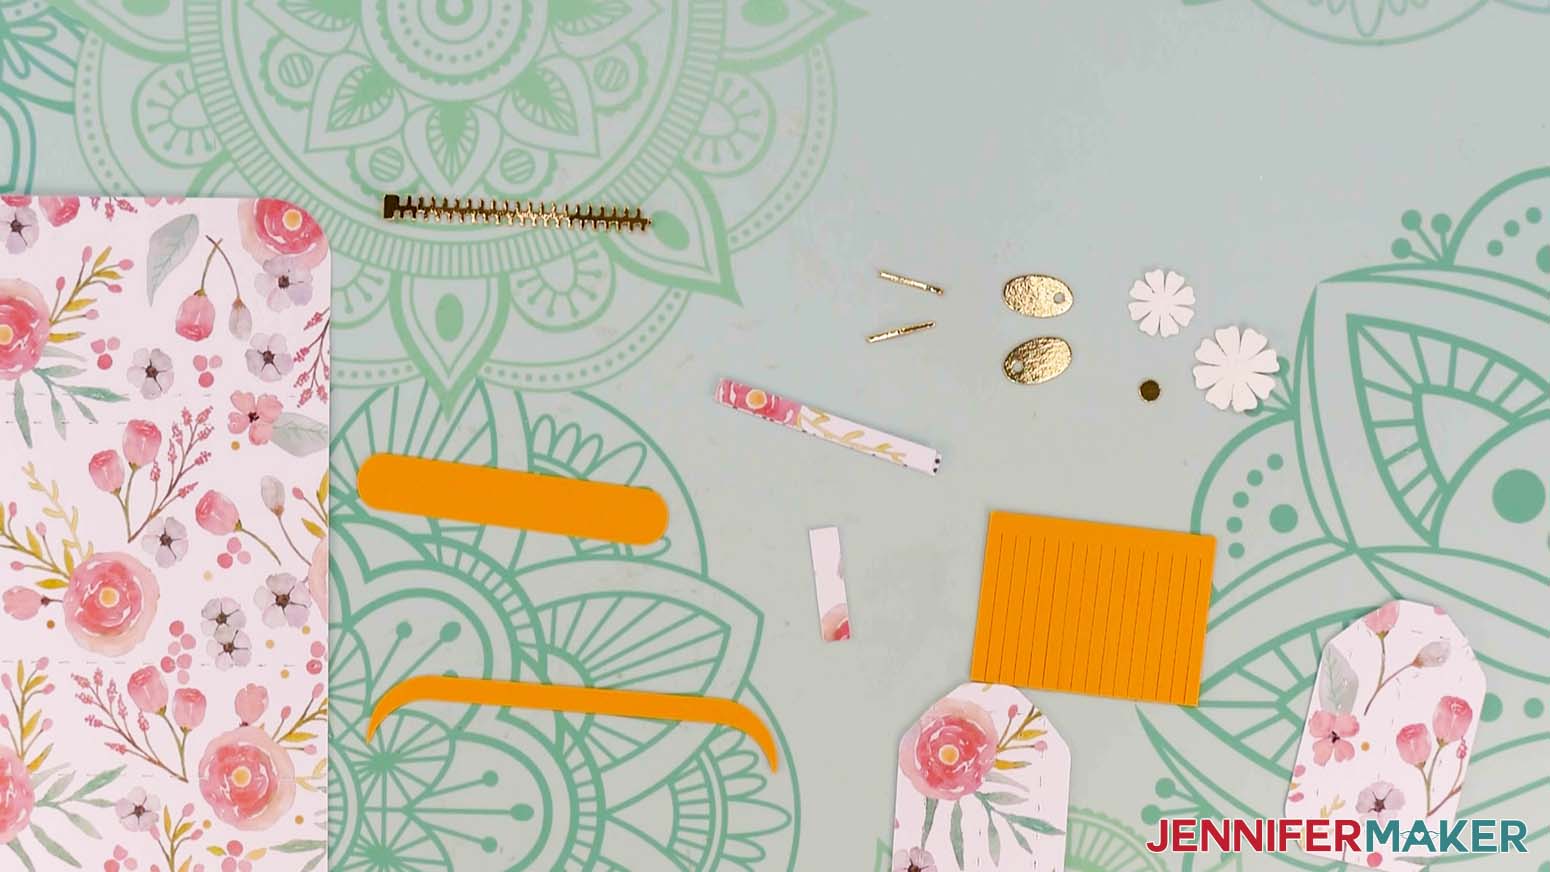
Now locate the embellishment pieces. Make sure you have everything straight and set them aside in the order we'll use them:
- four rounded padding pieces with stitching on one side for the bottom corners of the front and back
- two long trim pieces with curved ends for the top of the front and back
- one long arched trim piece for the top of the outside pocket
- four flower petal pieces (two small and two large)
- two flower center pieces, foil circles
- one foil zipper
- one zipper backing (long rounded rectangle on solid cardstock),
- two oval-shaped zipper pull pieces with small holes at the top
- one foil oval label
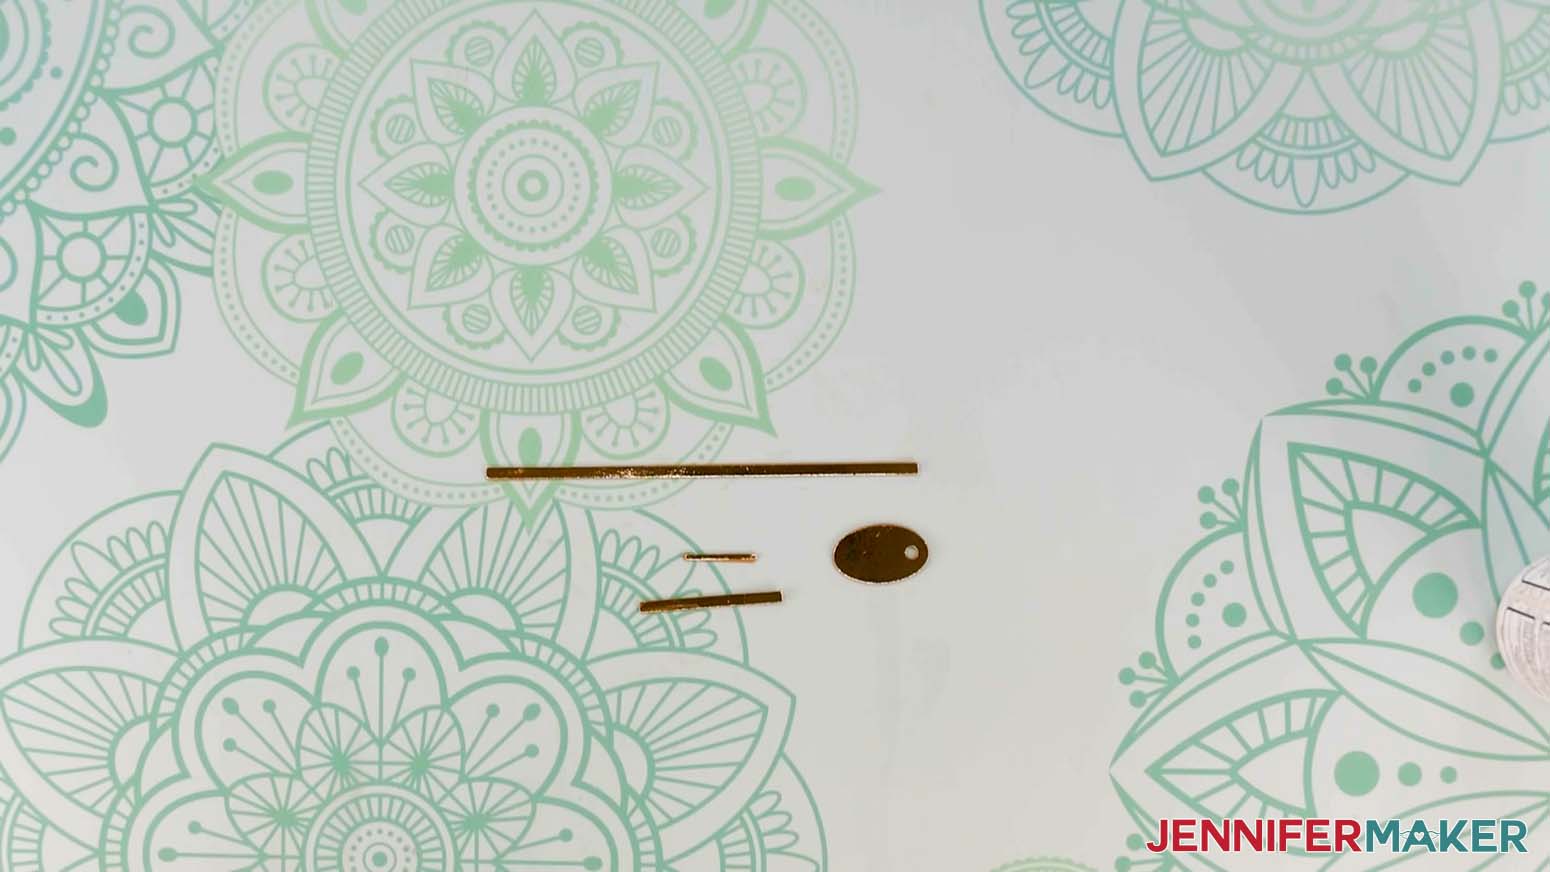
- six small foil strips for the tag and zipper attachments
- one tassel piece on solid cardstock
- three tassel attachment pieces on patterned cardstock (one short and two long rectangles)
- three small flowers for the gift tag
- your tag elements, cardstock and/or vinyl
Start with the front and back bag pieces face-up on your work surface. Add a bit of glue to the back of each padding piece and place them on the lower curved corners. When properly aligned, the stitched design on each pad will face inward.
Next, glue the two long trim pieces at the top of the front and back pieces, aligning the top edges.
Here are the main body pieces with their embellishments prepared.
Place your outside pocket face up and glue the arched trim piece at the top.
Find your flower petal and center pieces. Use small dots of glue to attach each smaller petal piece on top of a larger one. Then, glue a small foil circle in the middle of each small petal piece, completing the flower embellishments.
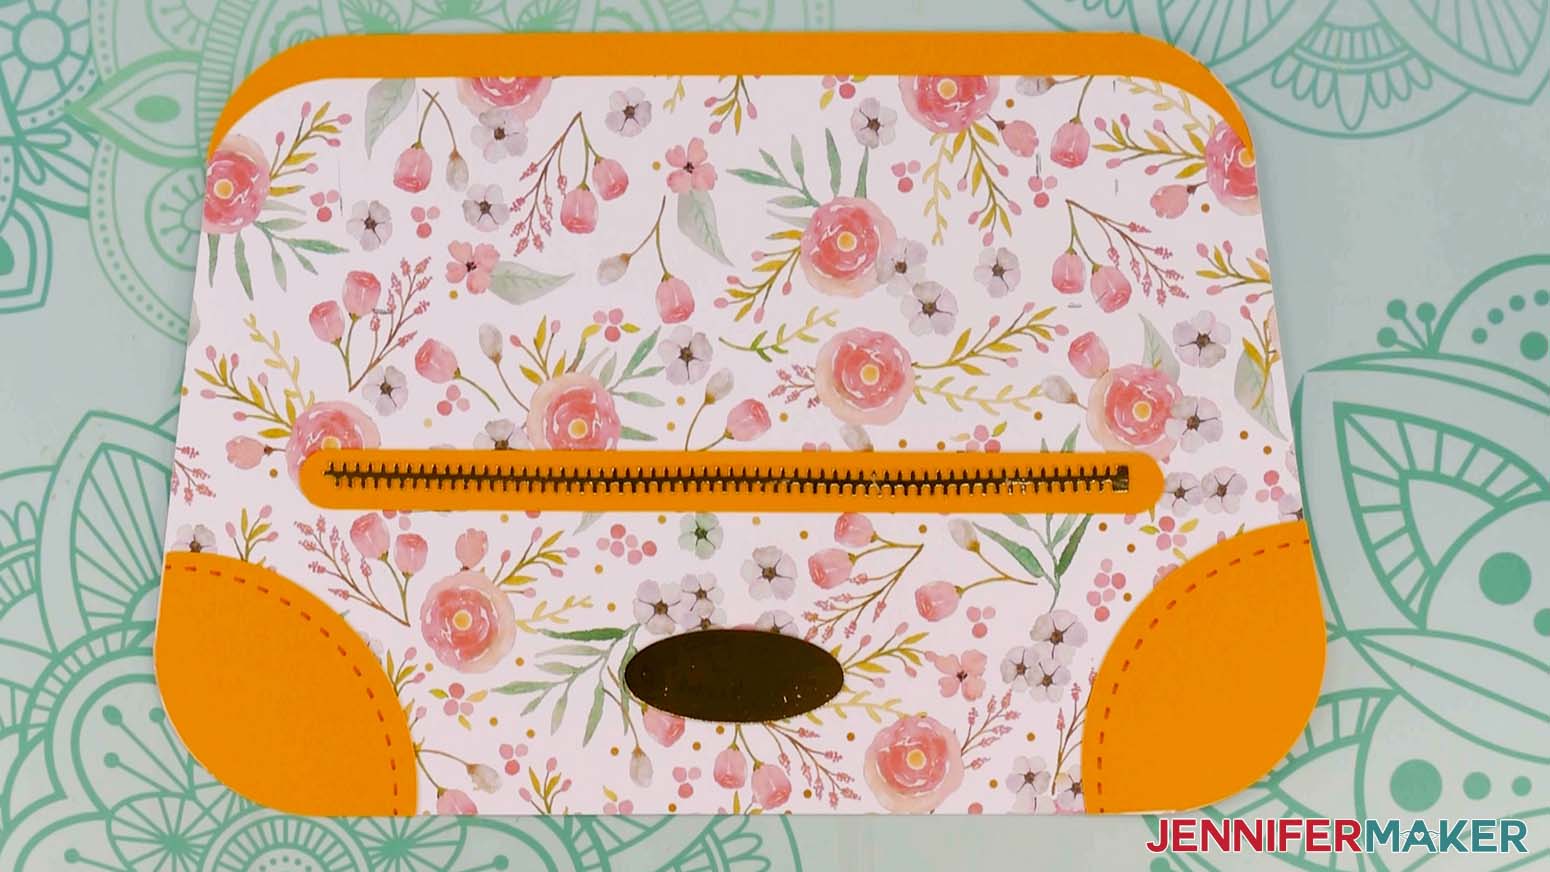
Grab your zipper and its backing piece. Place a thin line of glue along the back of the zipper's center and carefully center it on top of the backing.
Now, for the chain pieces. We'll make it shine from any view! Take the two longest foil strips and glue them back to back. Repeat for the other two pairs.
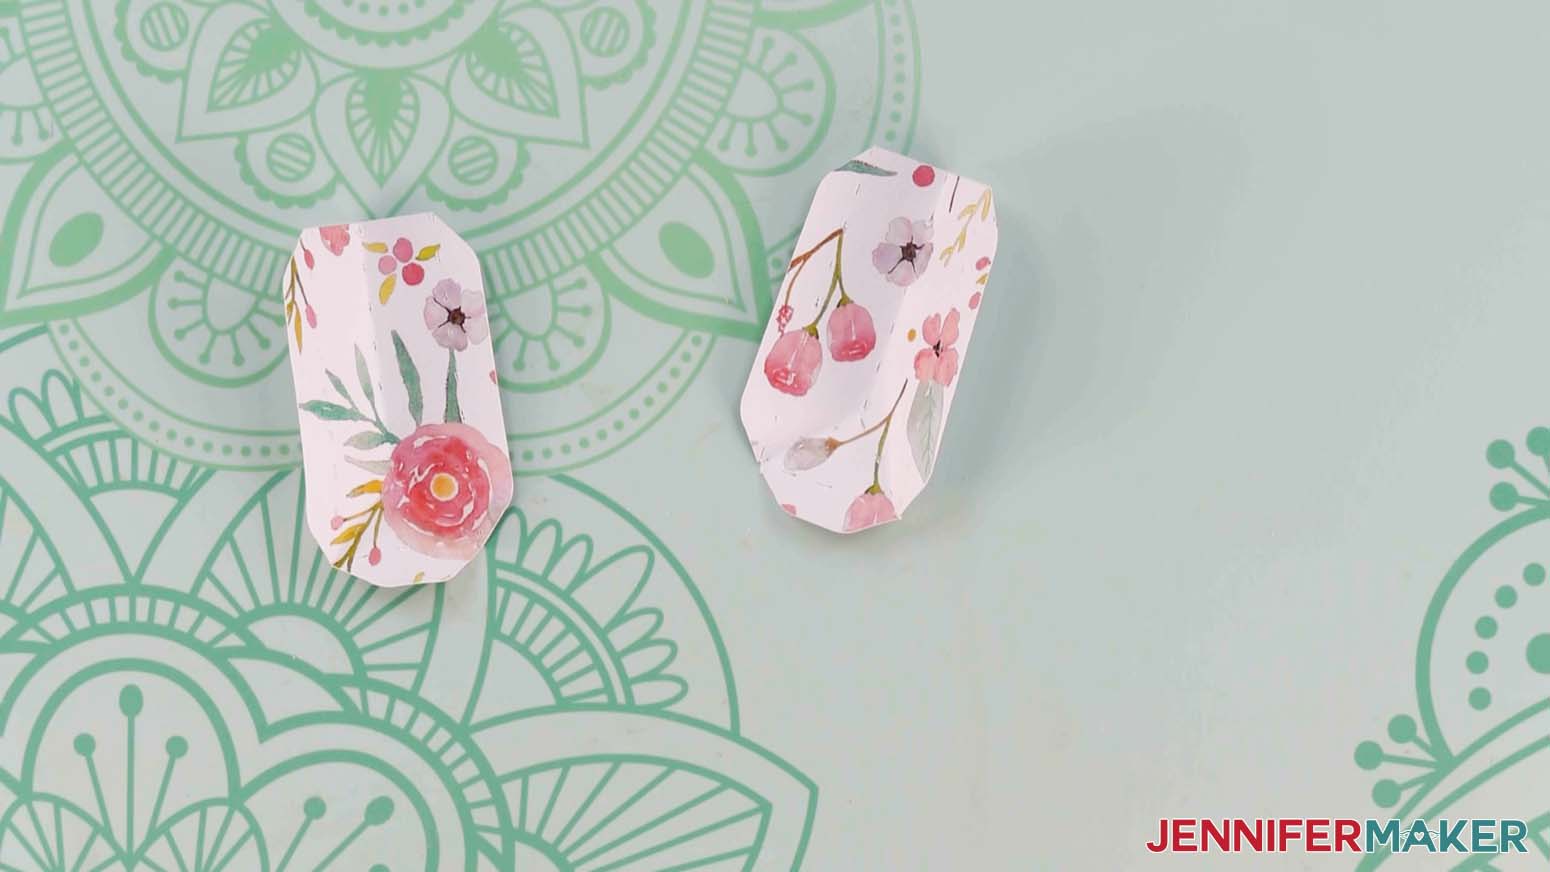
Take the two oval-shaped zipper pull pieces and glue them back to back, making sure the hole cutouts are aligned.
Here are the chain and zipper pull pieces assembled.
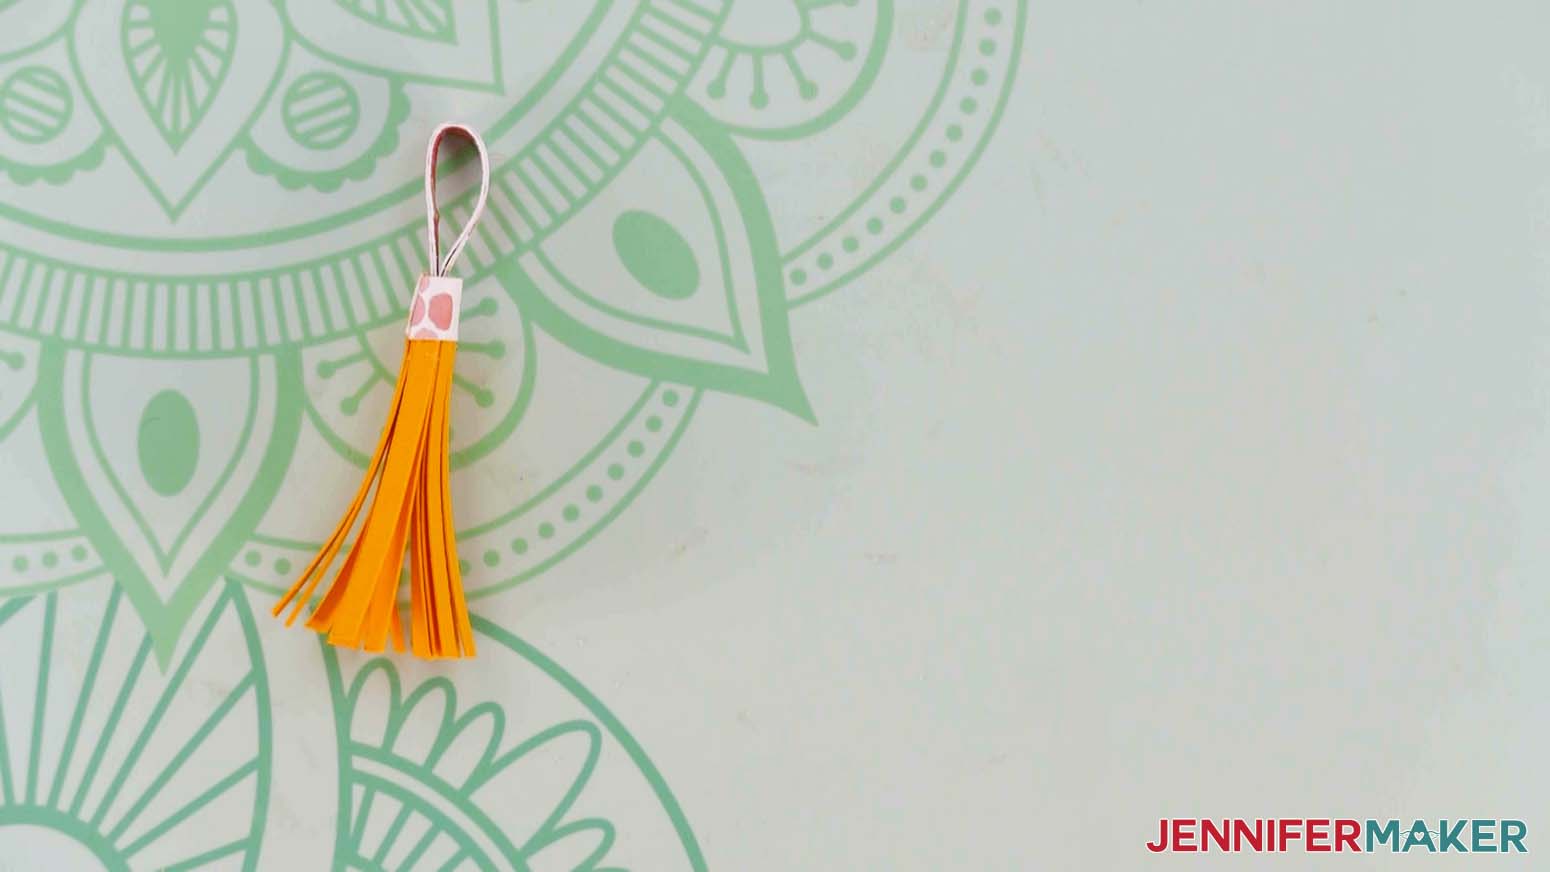
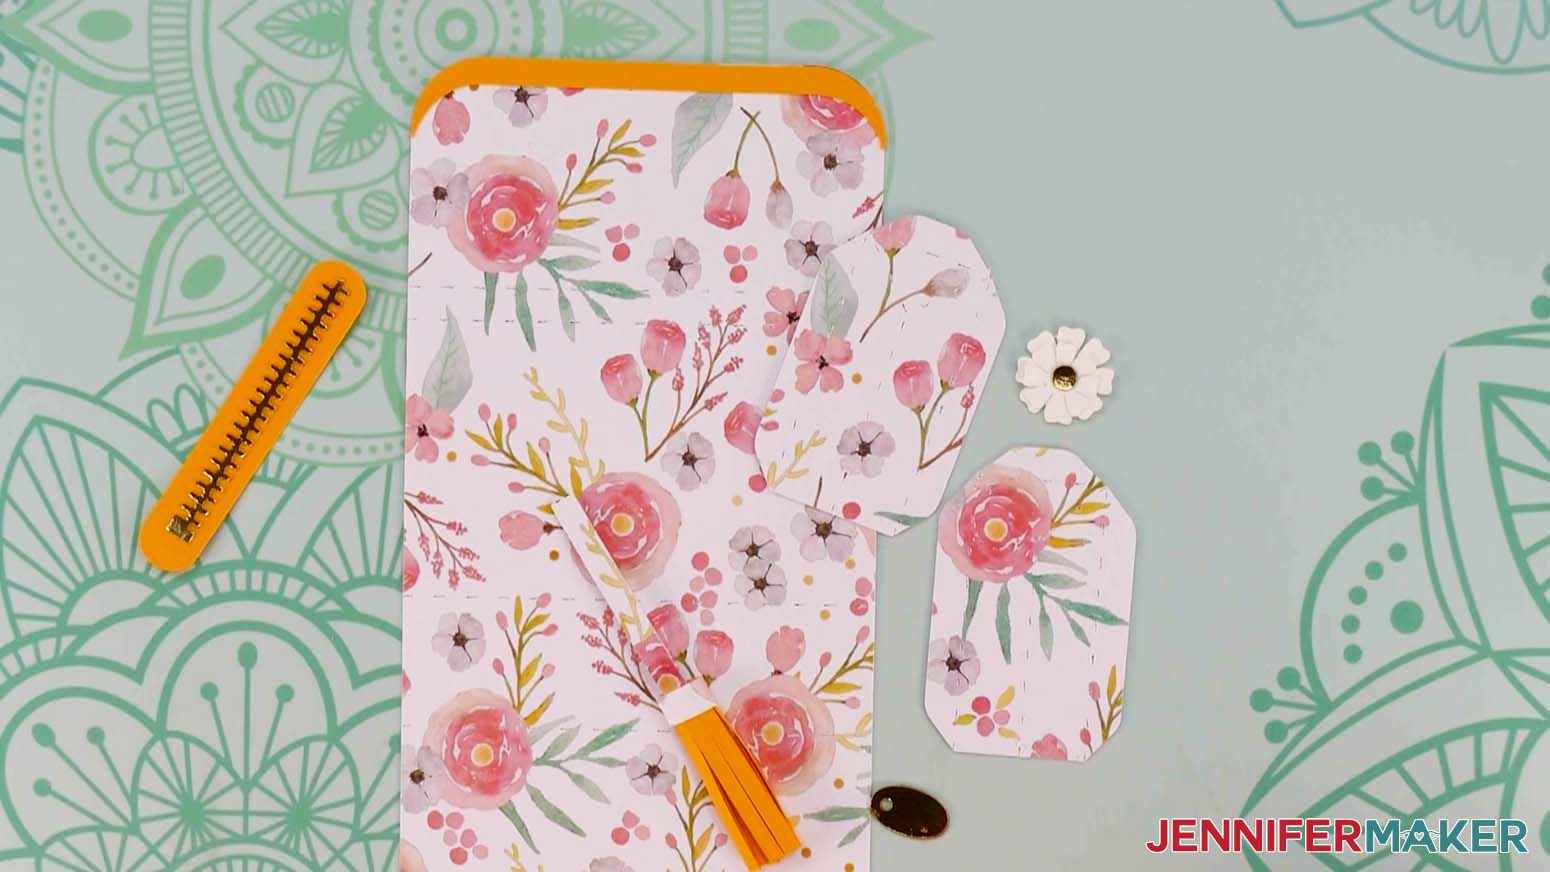
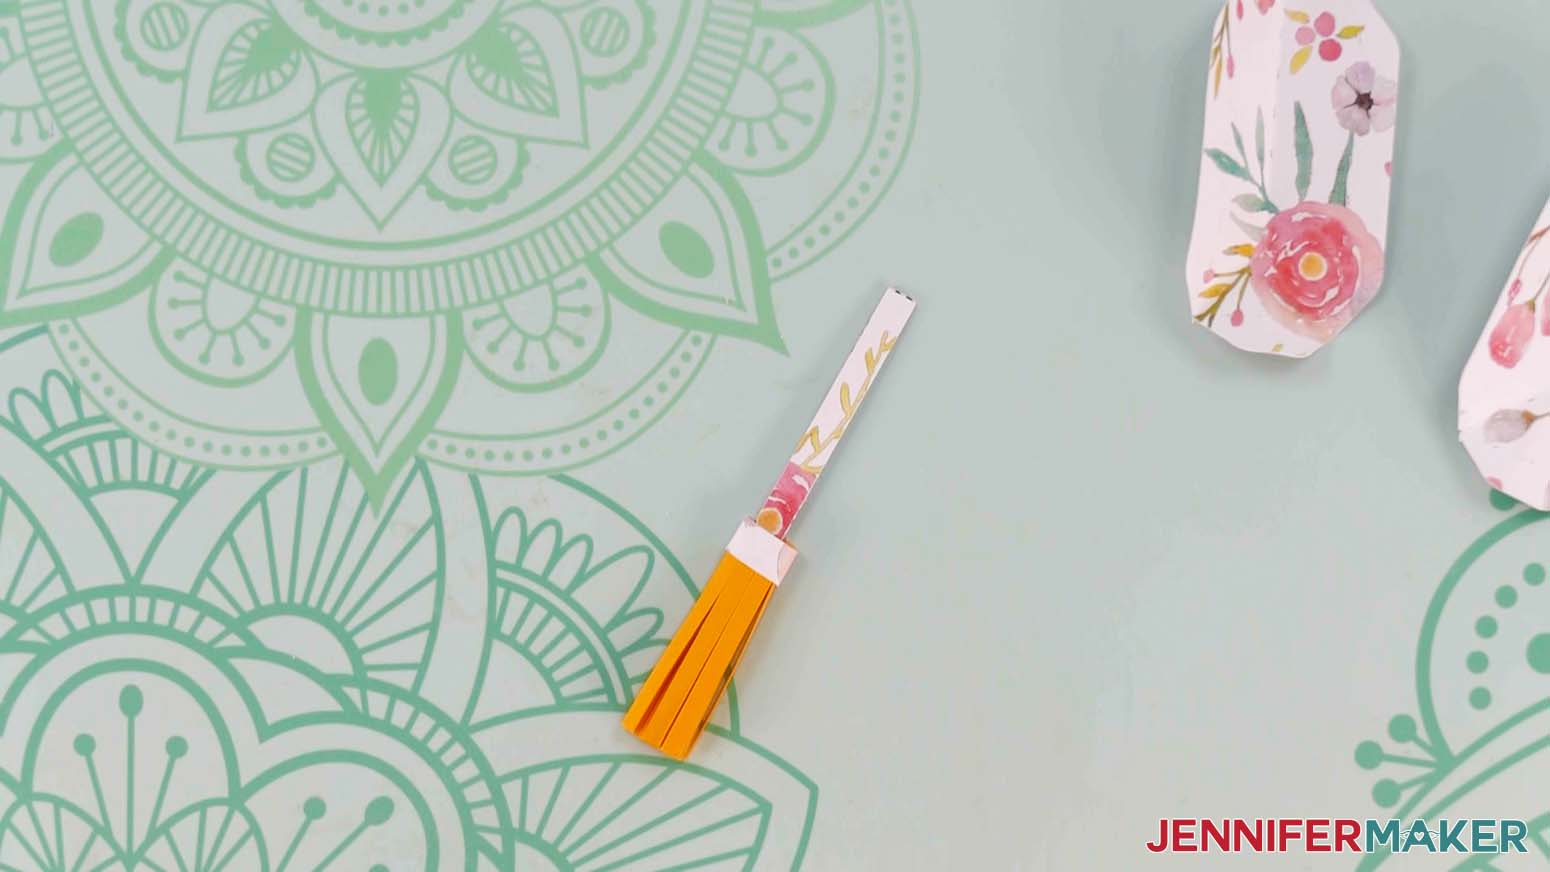
Take your tassel piece and curl it around a pencil. Remove it and roll it tight enough that the small rectangular trim piece can be wrapped around and glued to the top of it. Place a small line of glue along the top edge of the tassel and hold it until the glue sets. Glue the trim piece along the top and align its top edge with the tassel's top.
Glue the two remaining rectangular pieces on patterned cardstock back to back to make the tassel attachment. Once the glue is dry enough, make a U shape with the tassel attachment piece and glue it together at the bottom. Slide this bottom edge into the top center of the tassel and glue it in place. You may need to use your tweezers to press the edge with glue against the inside of the tassel. Fluff the tassel with your fingers.
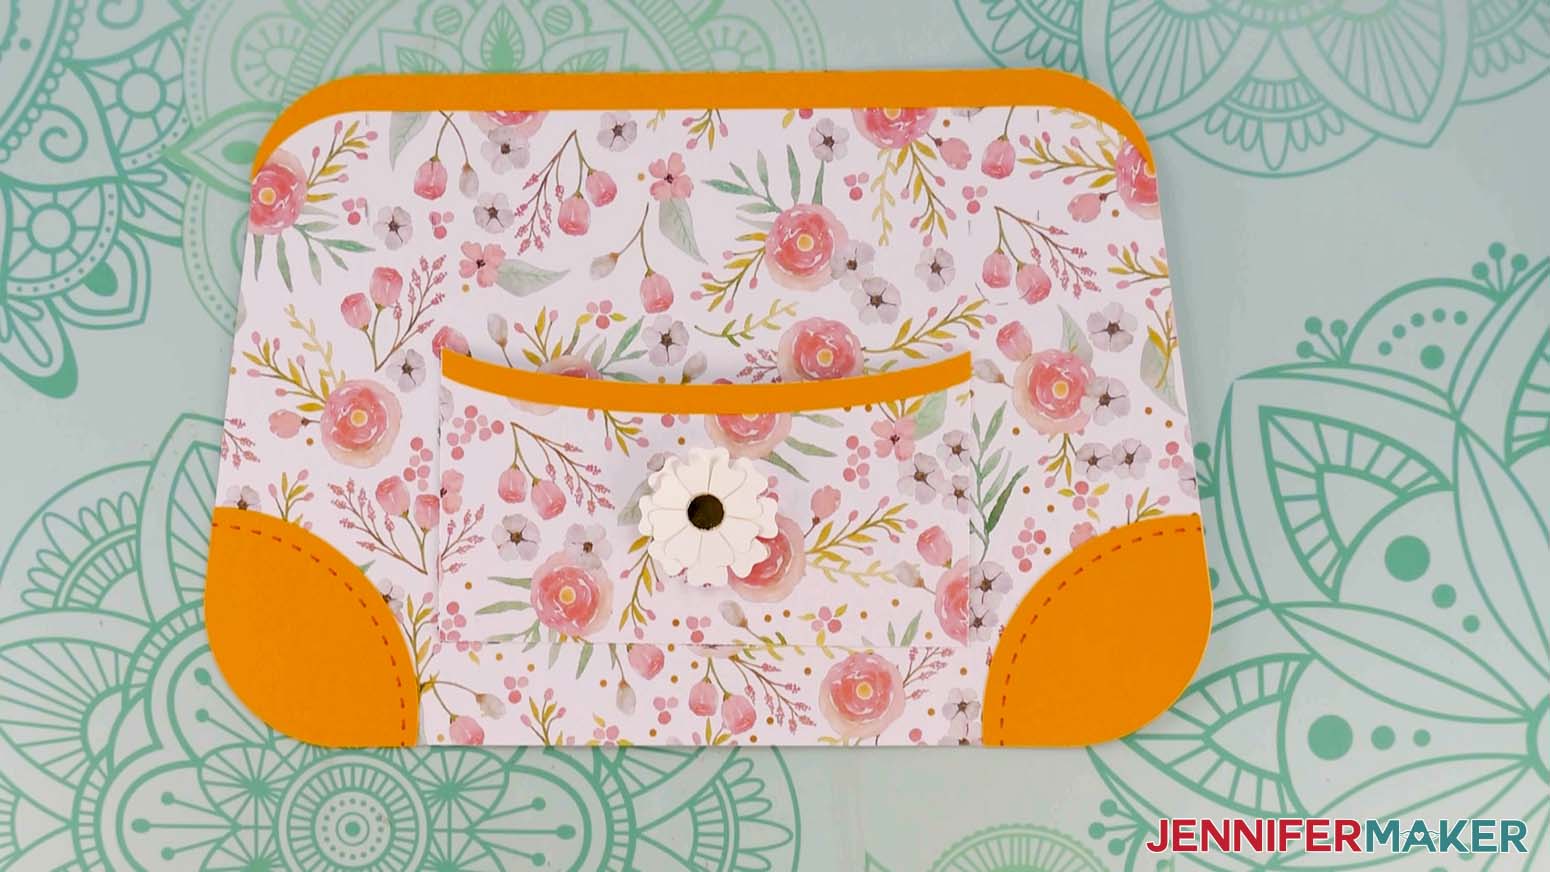
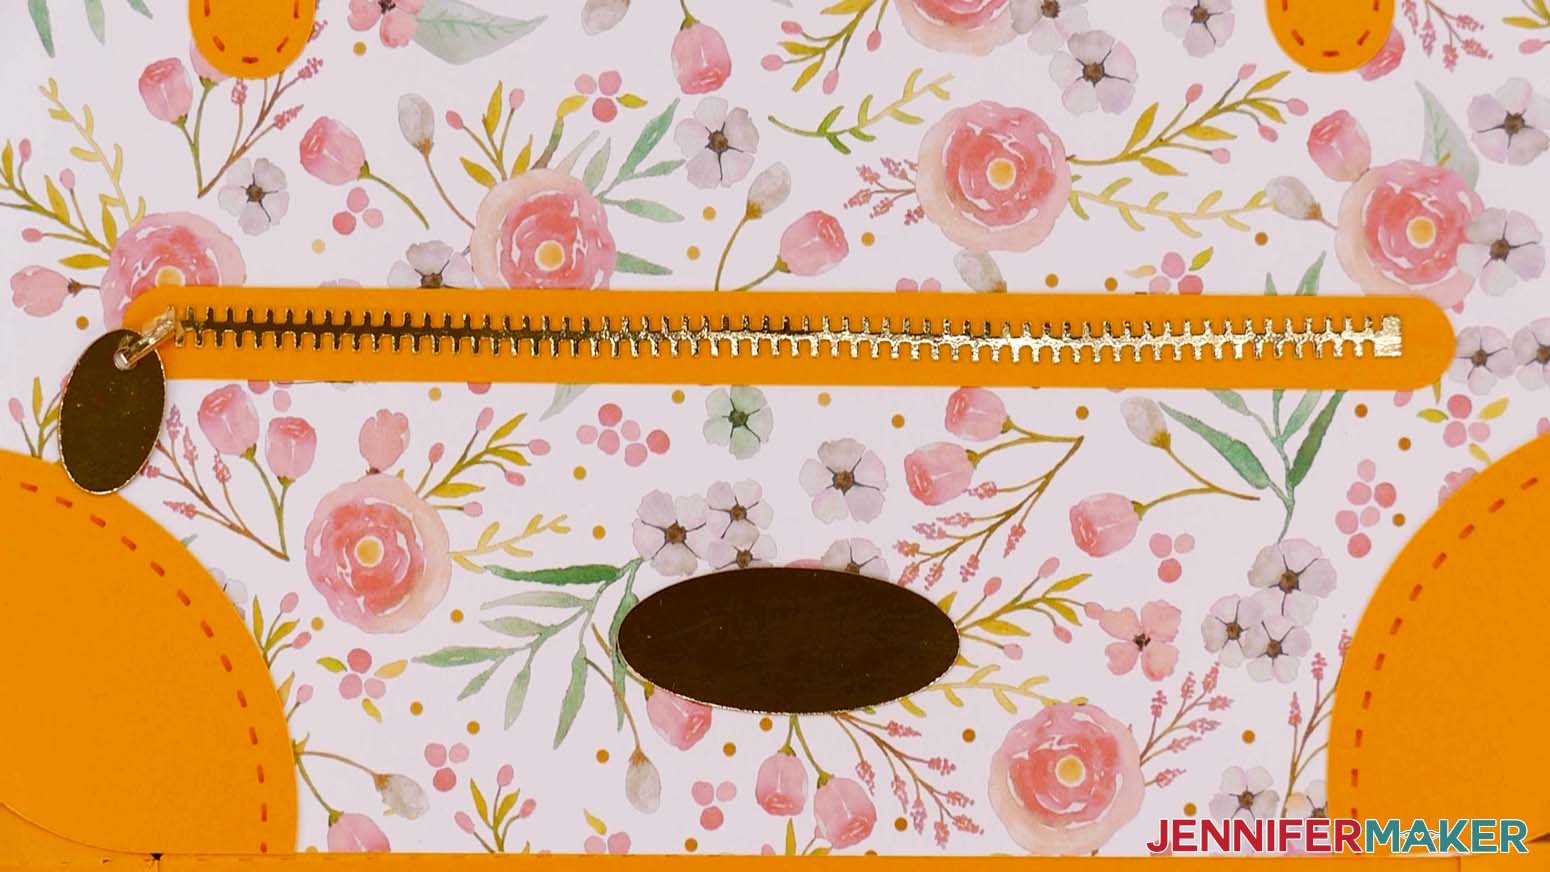
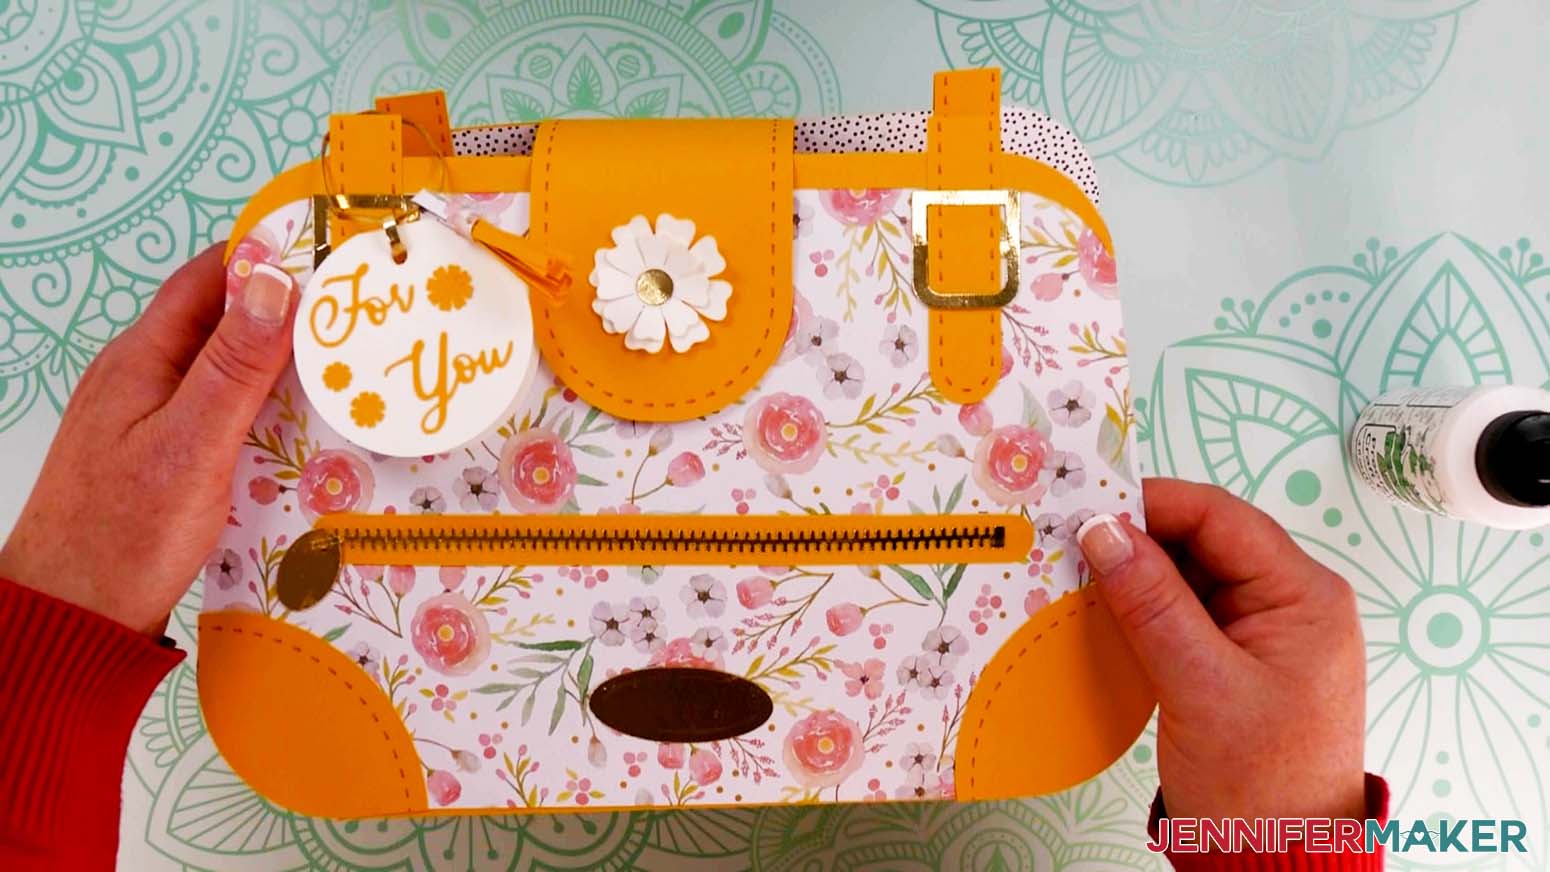
Glue the label to the front piece toward the bottom, centered in between the two pads. Glue the zipper and backing above this so you have roughly the same distance between the label and the bottom of the purse and the zipper and the label.
Glue one of the finished flowers to the center of the outside pocket. Using the tabs, glue the pocket to the back purse piece on the side with the matching pattern about an inch from the bottom, centered in between the two pads.
Here are how my pieces look at this point.
Daisy Duke Wallet
For the Daisy Duke Wallet, you will have one long rectangular piece for the main section of the wallet and two identical side pieces with tabs on the left, right, and bottom.
Fold the tabs.
Follow the Flower Power steps to assemble the wallet's embellishments.
For the tassel, follow the Flower Power steps up to the point of gluing the attachment pieces back to back. Glue one end of the attachment piece inside the center of the tassel.
Heartbreaker and Couture
For the Heartbreaker and Couture Handbags, you'll have the front and back, one flap, a bottom, two identical side pieces, and two pockets. Their shapes are similar to the Flower Power Handbag pieces and the placements are pretty much the same.
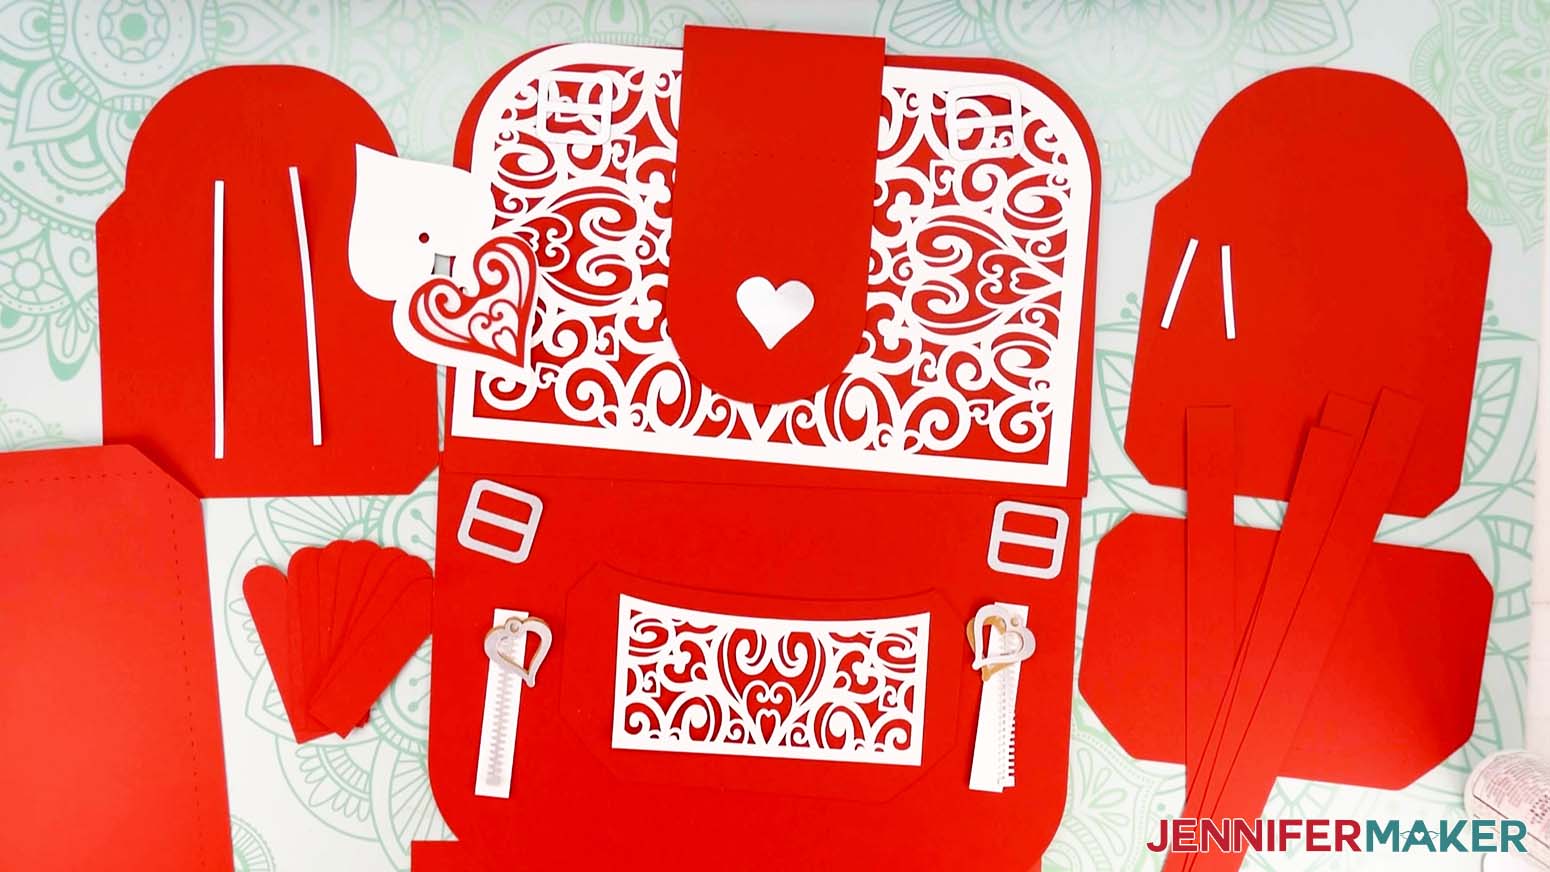
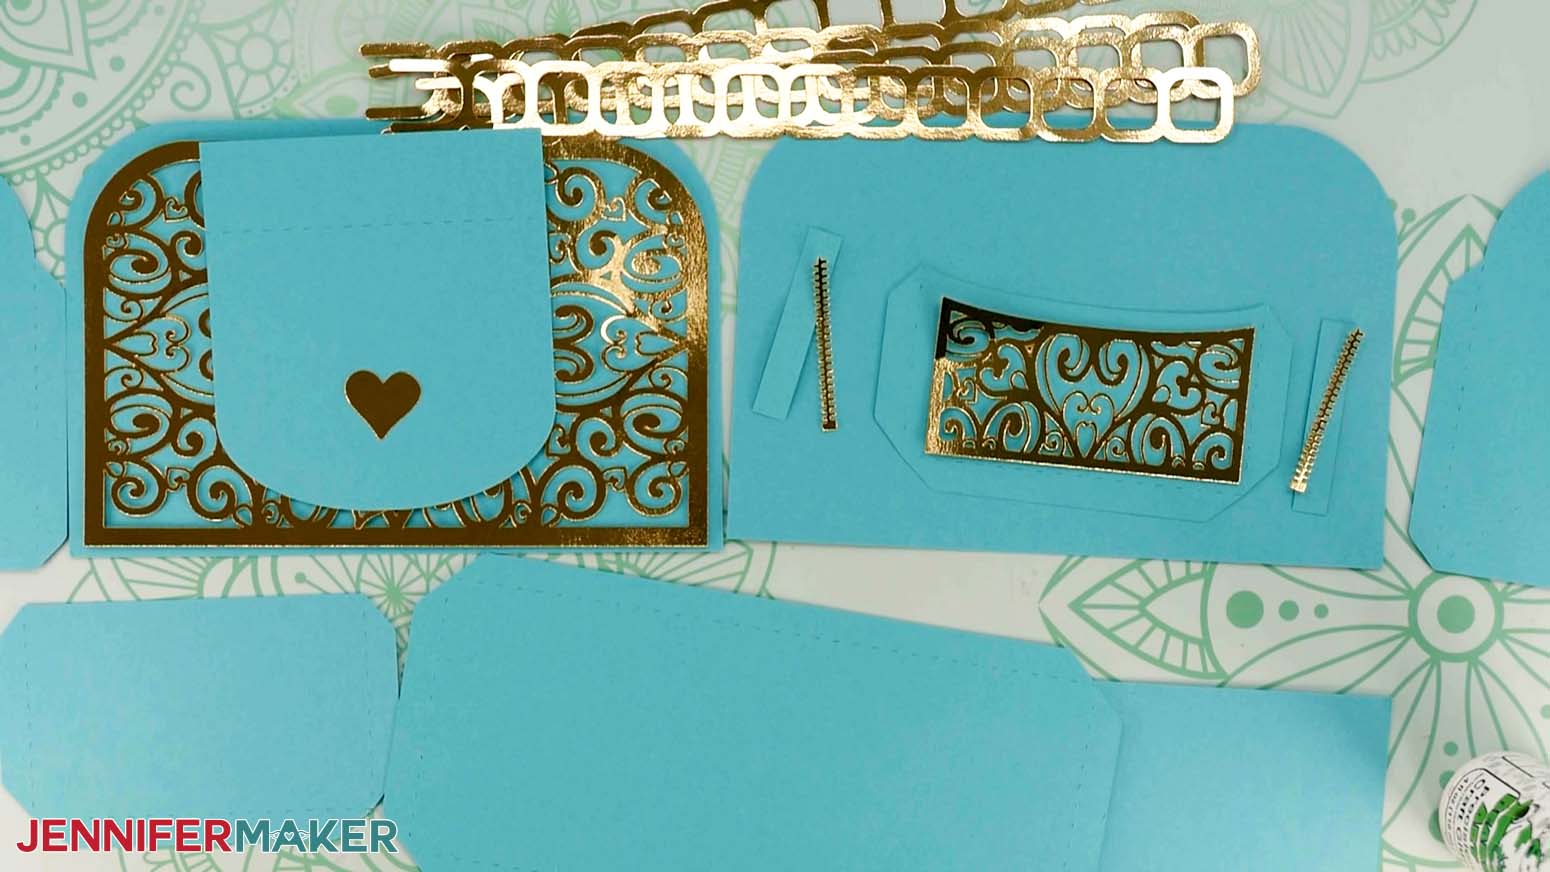
Fold the creases following the Flower Power techniques.
Follow the Flower Power steps to assemble the embellishments.

If you made the cardstock tag, fold it in half and glue the words to the front surface.
If you cut a name or phrase in vinyl for the Couture bag, remove any protective film from the keychain. Then, use my taco method to transfer the vinyl to the acrylic. First, cut a piece of transfer tape just larger than your vinyl decal. Remove the backing from the transfer tape. Apply the material to your vinyl decal by holding the transfer tape in the shape of a taco or “U” shape. Then, put the bottom of your “taco” onto the middle of your design.
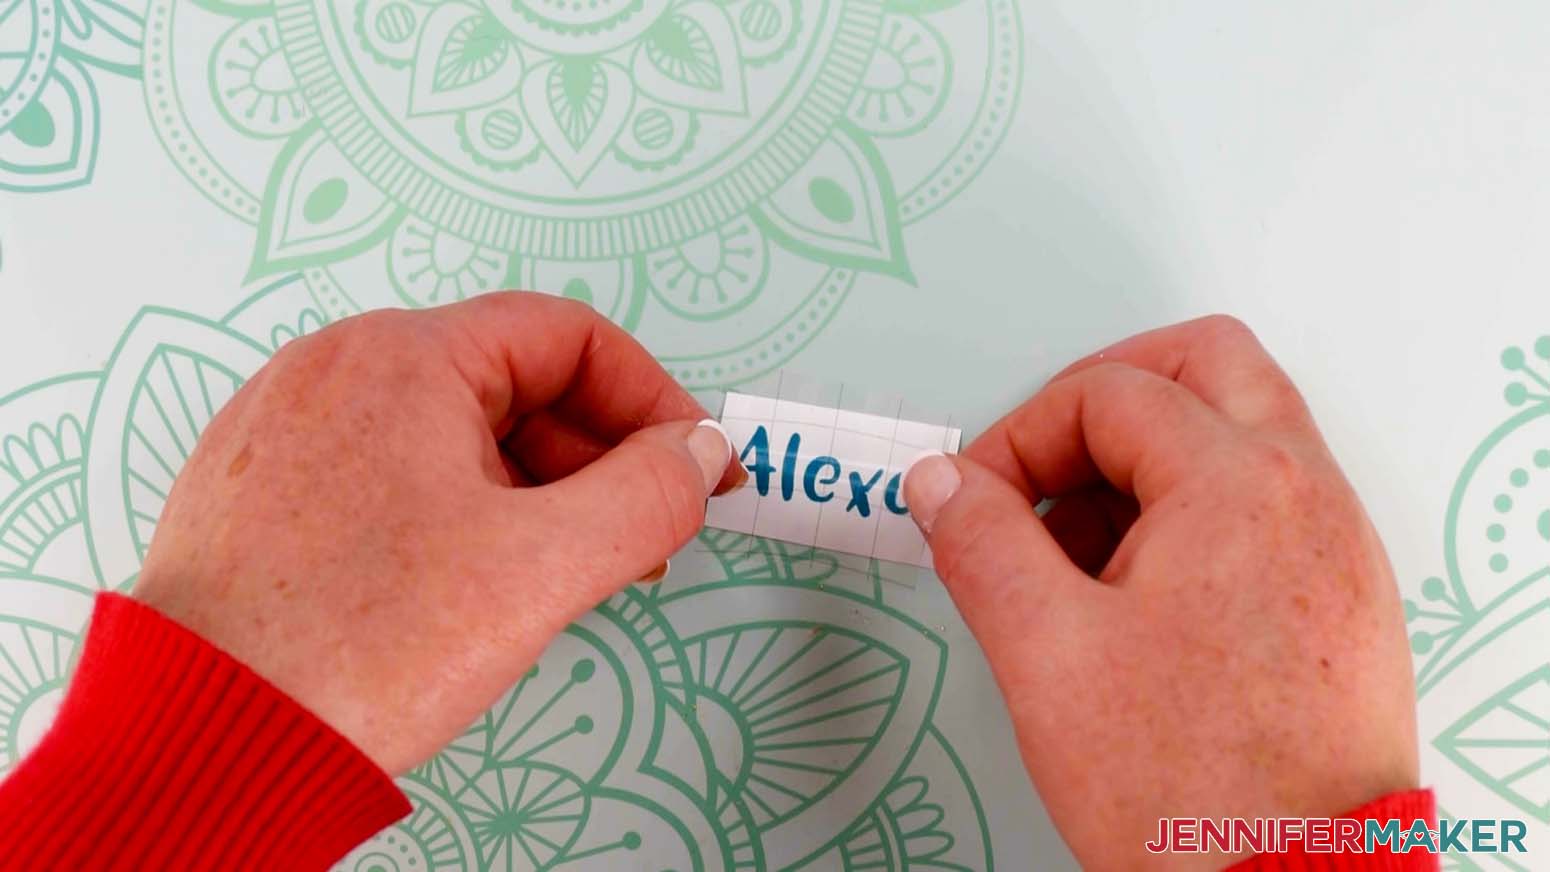
Smooth the tape over the decal from the center outward, making sure to press out and remove any bubbles. When the transfer tape is in place, use a scraper tool or other hard, flat-edged item (like a store loyalty card) to burnish the vinyl decal design to the transfer tape. It’s important to scrape it well to fully transfer the vinyl decal. Scraping the project from both the transfer tape side AND the carrier sheet side will help. Remove the backing.
Use the taco method again to transfer the decal to the acrylic keychain, removing the transfer tape once it's secure.
NOTE: For the Heartbreaker Handbag, the gift tag will have a filigree pattern that you can glue to the front instead of the "For You" design. When gluing it in place, make sure to leave the hole cutout unobstructed.
STEP 5: ASSEMBLE THE PURSE
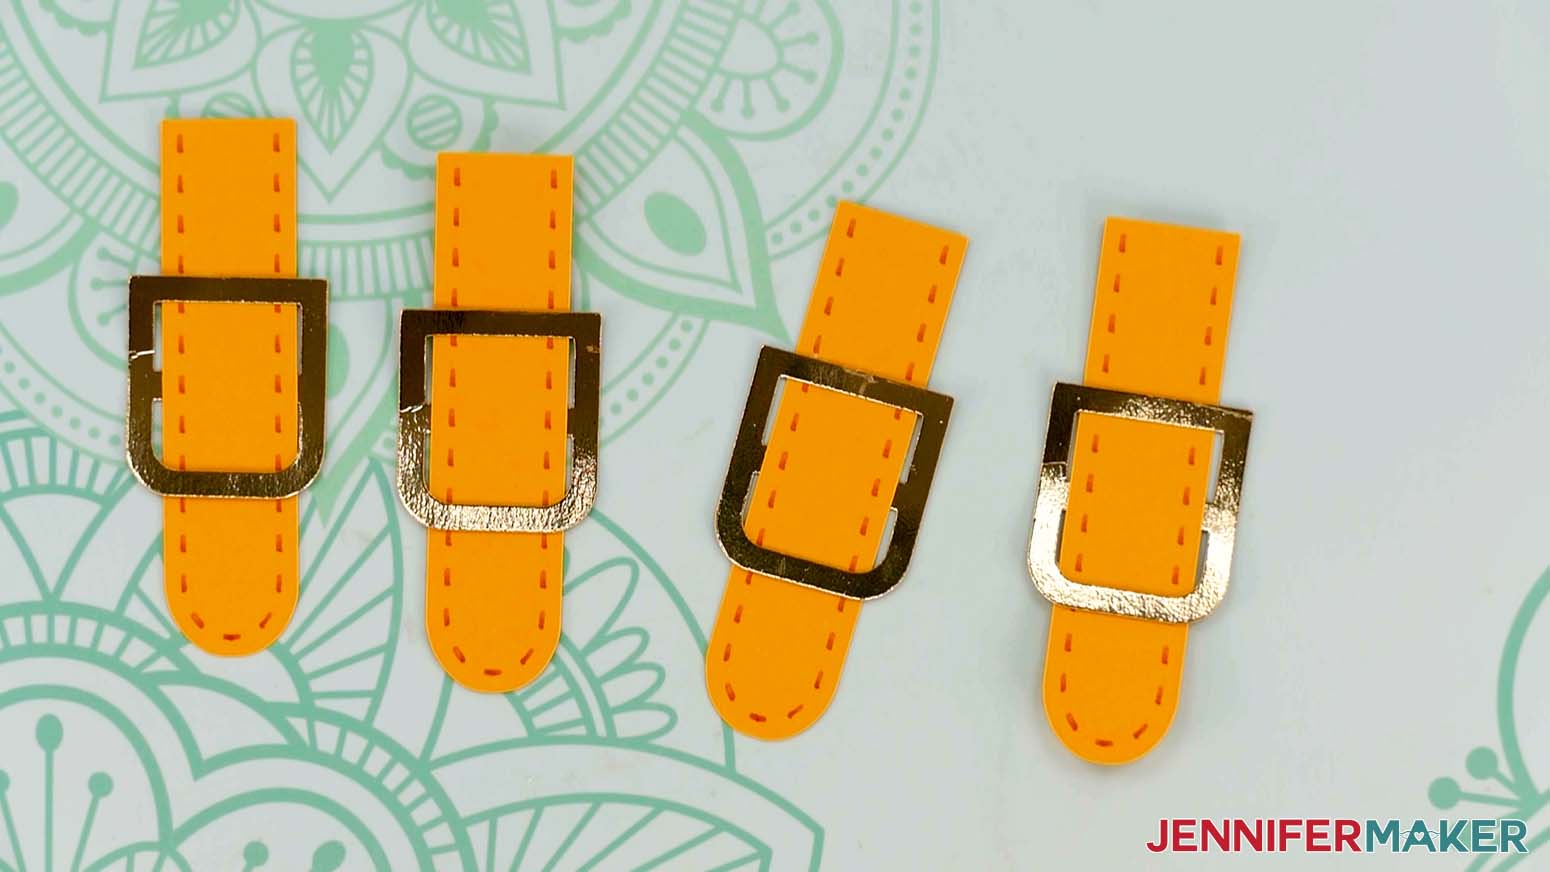
For the Flower Power handles, find the 12 pieces with stitching and the buckles. For each part of the double-sided handles, we'll glue two short pieces to either end of a long section, creating a long rectangle with rounded edges. We'll make the short sections now and add the longer parts once the bag is standing up.
Slide a buckle on to the rounded end of a short piece, stitching up. The handle will go under the top of the buckle, over the middle, and then under the bottom, just like a real purse. Slide the buckle up so about an inch of the handle extends out the bottom. Add a bit of glue to the buckle piece under the handle to keep everything in place. Repeat for three more short pieces and buckles, making sure they look as similar as possible.
Now place glue along the back of one strip and adhere it to the front bag piece, about 1.5" in from the left side. Before the glue sets, make sure the buckle is centered from left to right and you're happy with the overall placement. Now take a short strip without a buckle and glue it to the back, sandwiching the bag piece between them. Remember to have the stitching facing out!
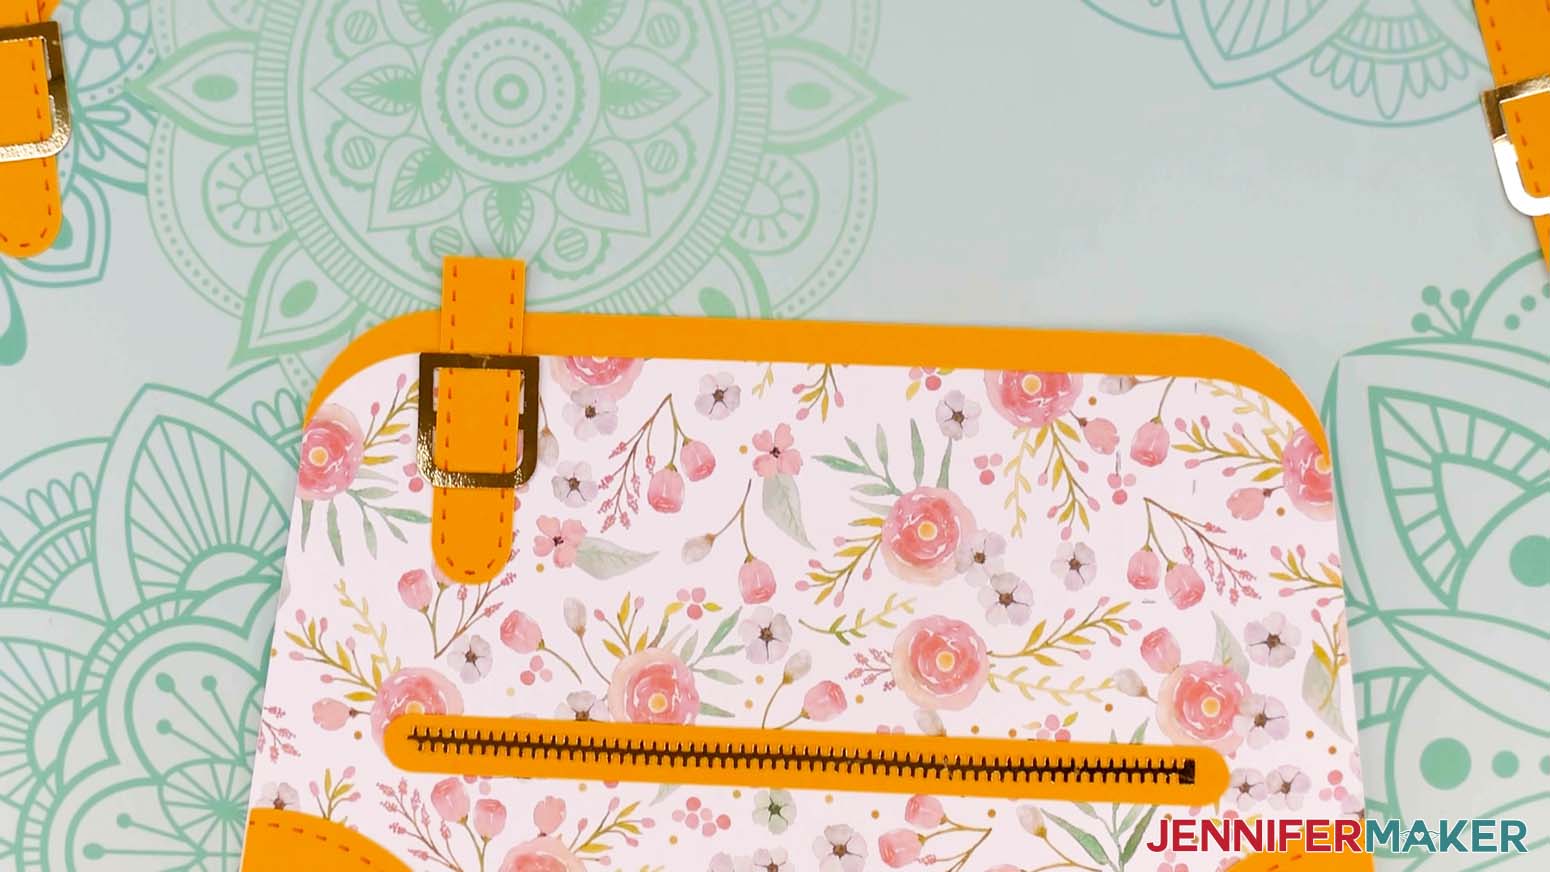
Repeat to attach the second handle and buckle set to the other end of the bag front. Then, add the second and third to the back of the bag, using the front for alignment. Make sure the buckles go on the exterior of the bag.
Glue two more handle pieces together and attach this piece to the right side of the front bag piece using the same process. Repeat this process for the four remaining pieces, gluing these two handles on the back bag piece in the same position as the ones on the front.
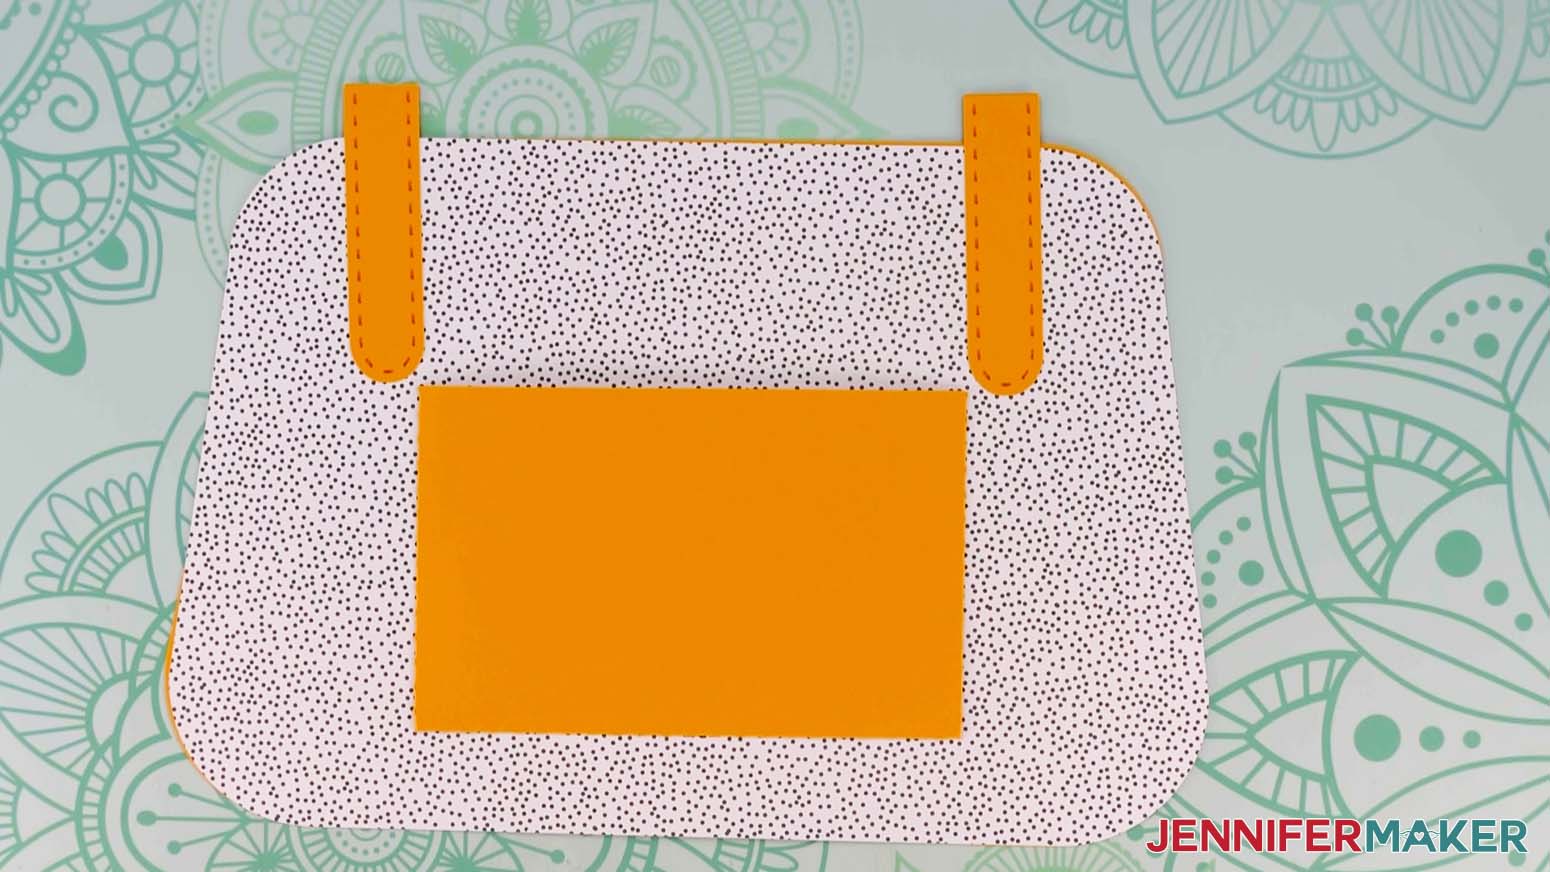
Find the interior pocket piece and glue it to the inside back of the purse piece with the zipper attached. Position it so it's about an inch from the bottom and centered from left to right. You can use the pocket on the back of the purse as reference for the correct positioning.
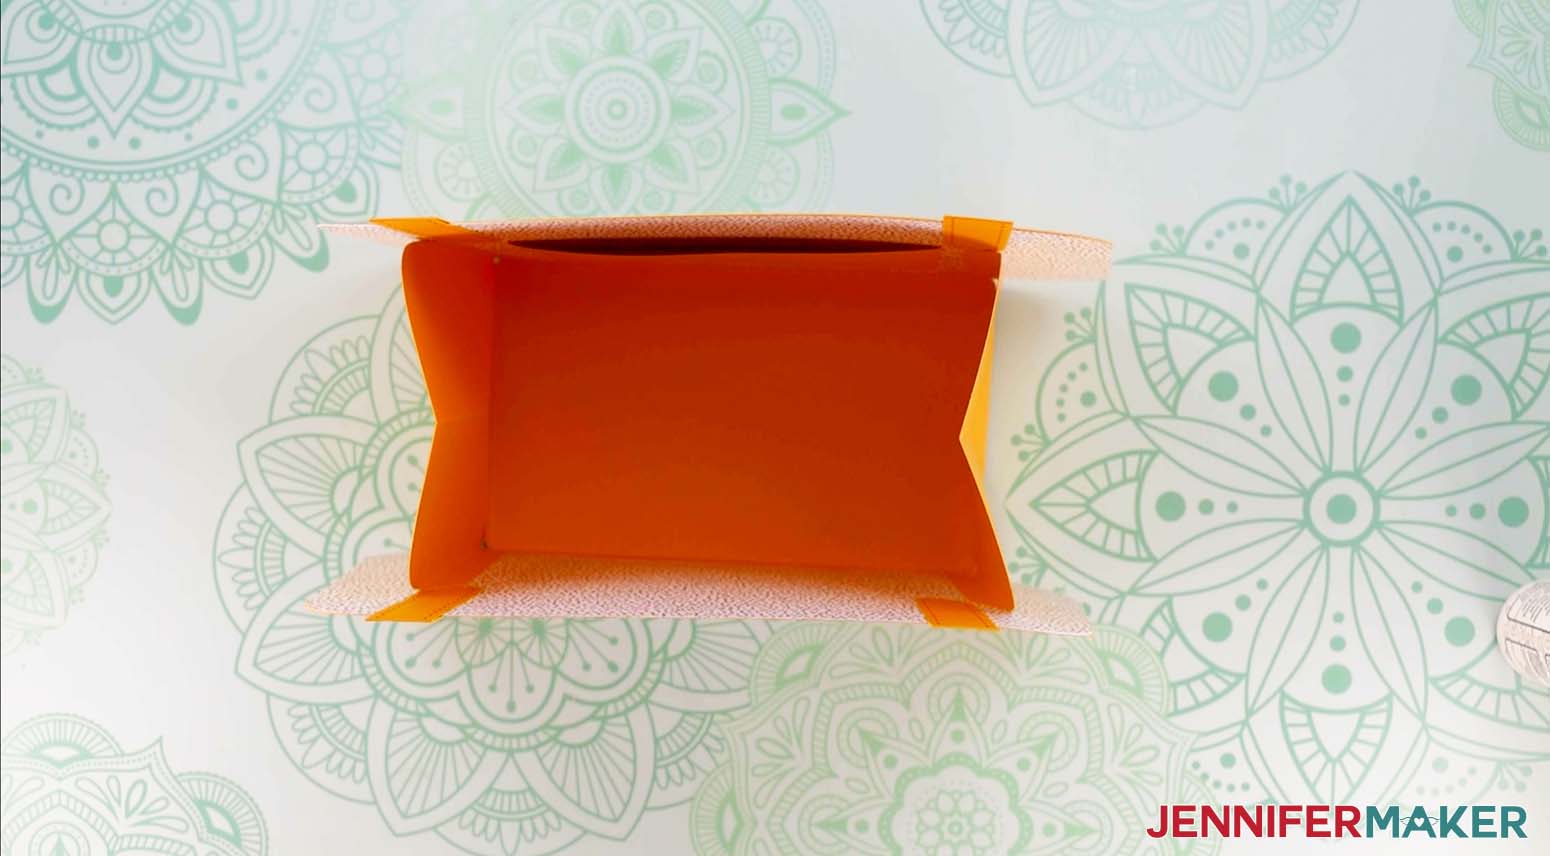
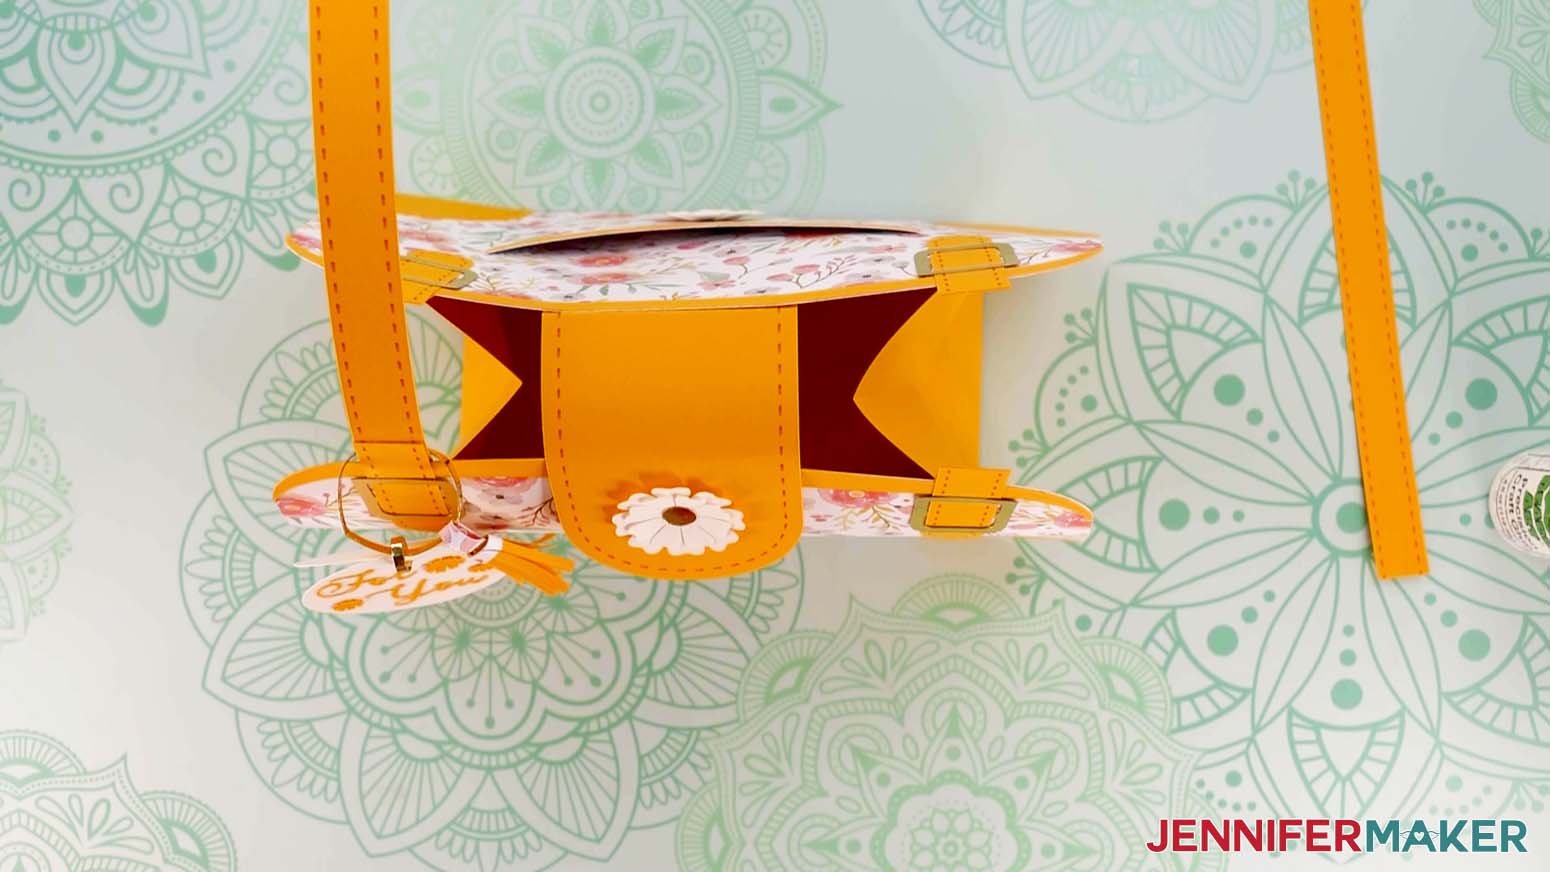
Lay the bottom piece in the middle of your work surface. Position the two side pieces and front and back pieces face down around the edges of the bottom piece. Place glue along the bottom piece's tabs one at a time and adhere the bottom of each surrounding piece to those tabs. The tabs will go on the inside of the bag.

Next, we'll make the foil strips into chains and accents. First, wrap the smallest strip around your pencil to encourage it to roll instead of fold or wrinkle. Slide it through the zipper pull and glue the two ends together, making a circle. Do the same thing with the next largest strip and slide it through the holes in the front and back of the gift tag. Finally, take the longest strip and slide it through the circle you just made around the gift tag and the tassel attachment. Roll it and attach the ends using the same method, making a second circle we'll slide around the handle later.
TIP: Use your Cricut tweezers to hold the strips in place until the glue dries.
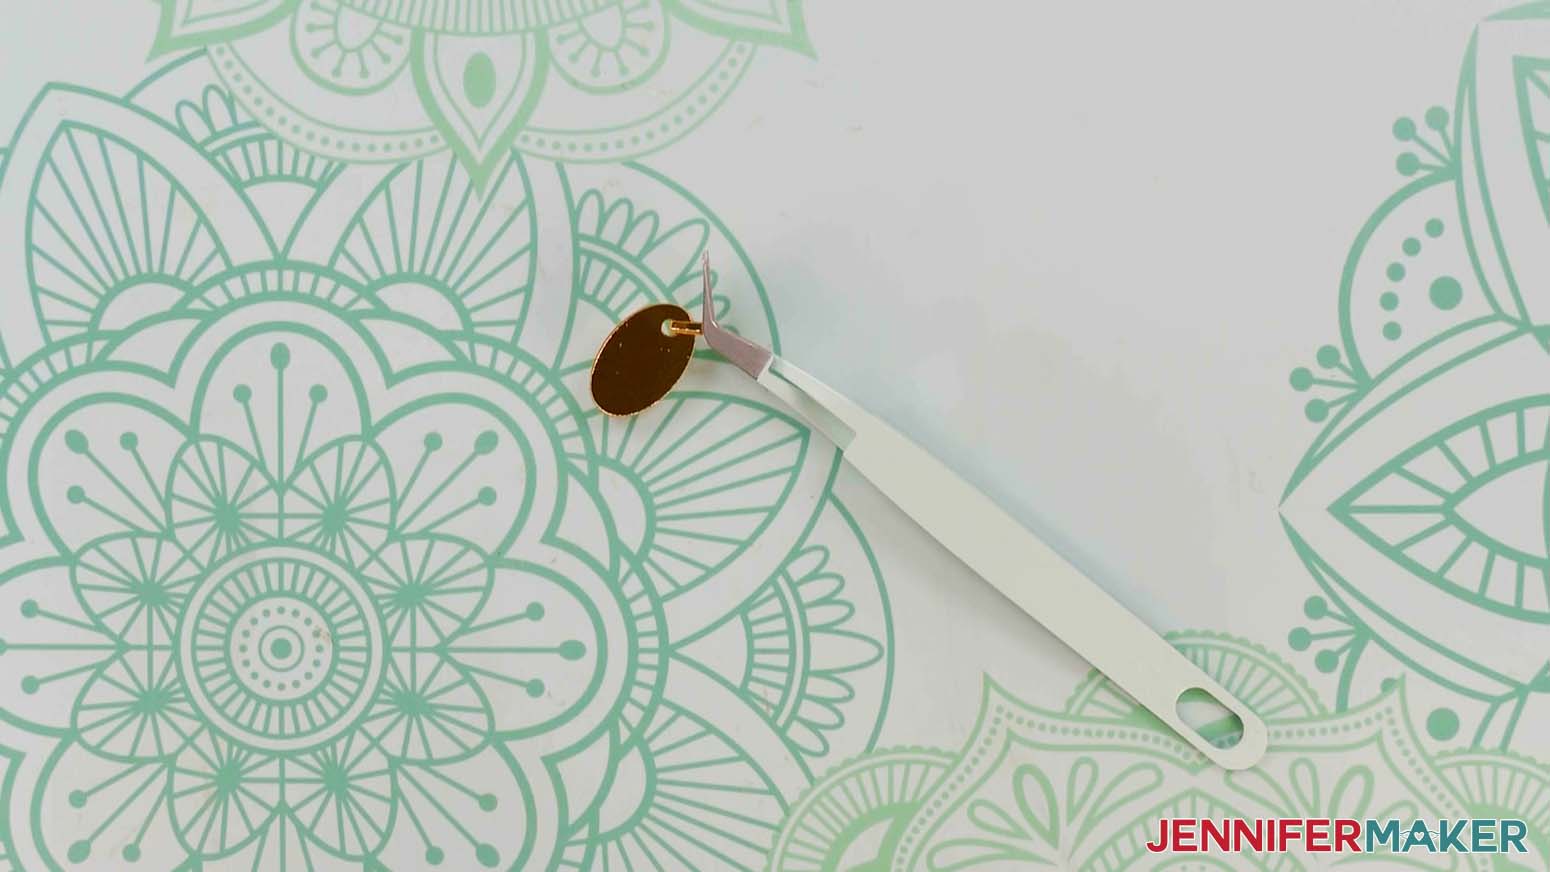
Once the smallest circle around your zipper pull is dry, glue it to the end of your zipper. Hold it in place until the glue starts to set and then let it dry completely. Once it's dry, the zipper pull will be able to hang freely like a real zipper.
NOTE: If you're having trouble working with the small foil strip, you can leave that piece off and glue the zipper pull directly to the zipper.
Make sure the glue holding your large pieces together is dry and the tabs on your side pieces are facing inward. Put glue along a tab of one side piece and adhere it to the front or back piece so it's perpendicular to the bottom piece. Repeat for the remaining three side tabs. It helps to press the tab against the front or back piece while that piece is lying flat on your work surface.
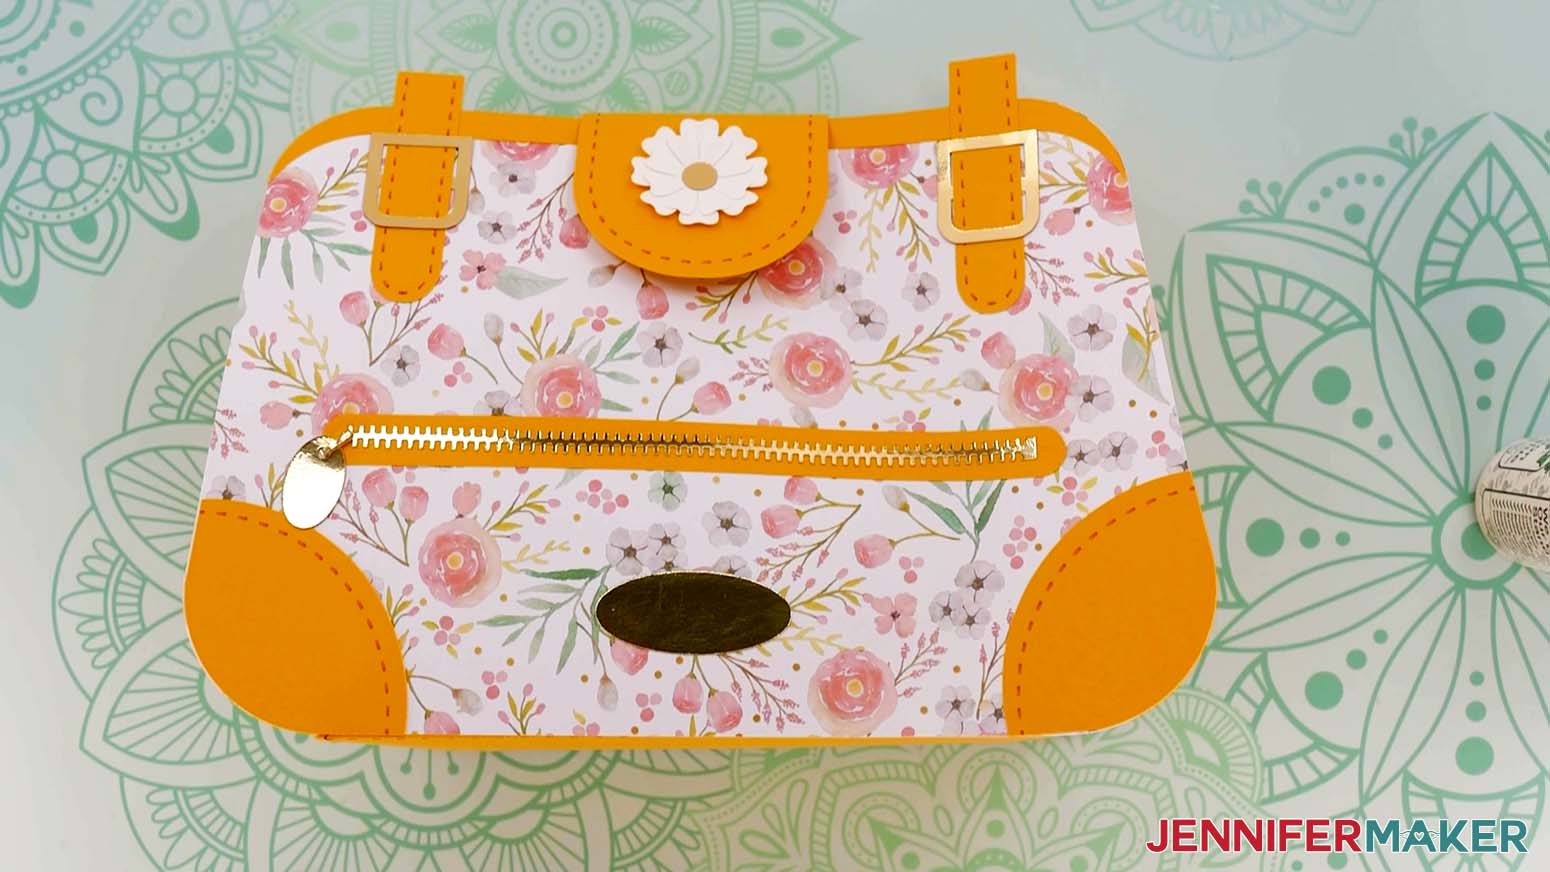
Take the flap piece and glue the remaining flower to the center on the stitched side, about 1.25" from the rounded end. Glue the flap to the inside of the back bag piece so its fold lines up with the top of the back piece. Stick one side of a complete VELCRO dot to the back side of the flap in the same spot as the flower on the front side. Fold over your flap and align it where you'd like it to close. Once it's in position, press down so the other sticky side of the VELCRO adheres to the paper on the outside of your purse.
Slide the tag ring over the top of one of your front handle pieces. Slide the large ring you attached to the gift tag over the other front handle piece. If you're using an acrylic keychain, attach the metal loop with ribbon so it can be removed without damaging the handles.
Now take two long unattached handle pieces and glue them back to back with the stitching facing outward. When that dries, add glue about half an inch up from the end of that piece and glue it to the back of one of the small front handle pieces. Glue the other end to the back of the other front handle piece, completing the handle. You can adjust the length of your handle before gluing the second end in place.
Repeat this process for the handle on the back side of the bag, making sure its length matches the front handle.
If you made the reinforcement for the bottom, place it into the bottom of your bag.
Daisy Duke Wallet
The Daisy Duke Wallet doesn't have a separate piece for the flap. Instead, the main piece folds over on itself and the flower can be glued to the center of the front section. The VELCRO dot will be placed on the back of this section and attached following the same steps as above.
Fold the tassel's attachment piece so it has an L shape. Add glue to the inside of that short tab and attach it to one of the inside edges of the wallet. The tassel will stick out to the side when the wallet is closed. The zipper for the Daisy Duke Wallet will be glued to the center of the back section. This is how it should look when the pieces are correctly placed.
Couture Bag Handles
The Couture Handbag has one chain-shaped handle instead of two handle straps on either side of the bag. Glue the chain pieces back to back so that both sides are shiny. After you've assembled the bag, glue one chain's open end to the inside of the bag's right side. Repeat with the other chain on the left. Carefully overlap the free chain ends to make the handle the length you want. With the chain layers aligned, carefully glue them together.
STEP 6: SHOW IT OFF!
You're done!
Notes
Note for those using the "score-tool-or-stylus" files: These files include guidelines for placing different pieces of the bags in the correct spots, which means you can have perfectly centered embellishments without the extra work! There are guides for the handles, outside pockets, zippers, buttons, and filigree designs.
Flower Power Handbag Finished Size: 10.5” wide by 10.5” tall by 4.5” deep
Daisy Duke Wallet Finished Size: 3.75" wide by 2.125" tall by 1" deep
Heartbreaker Handbag Finished Size: 10.5" wide by 11" tall by 4.5" deep
Couture Handbag Finished Size: 8.125" wide by 10" tall by 3.5" deep
Fonts Used:
Biosha Script: "For You" (Gift Tag, Flower Power Handbag)
Tingler Print: "Alexa" (Decal for Acrylic Keychain, Flower Power Handbag)
Questions About How to Make Paper Handbags & Purses
How do I know which piece is which in these paper handbag designs?
Here are diagrams for all four of the designs:
How do you make a designer purse out of paper?
It’s easier than you might think! Just download my collection and get some good-quality cardstock, glue, and your cutting machine ready to go!
How do you make cardstock bags?
Assembling a 3D paper bag out of cardstock is easier than it might seem. You’ll use creased tabs and adhesives to change the flat paper into a functional work of art with my tutorial!
What can I use instead of a gift bag?
There are so many easy crafts to use in place of a gift bag or paper purse, especially if you have a cutting machine! You can adjust my wine bag design, my purse gift bag, or use any of my cute box projects.
What is the best paper to use for this project?
We used 65 and 80 lb cardstock to make the bags flexible but sturdy enough to hold light items.
How should I decorate my paper handbags & purses?
You can make your own paper purse with any style or details you like! I’ve included steps for adding a name to the an acrylic keychain or cardstock gift tag, but you can get really creative! Different colors of ribbon, fancy cardstock, mixing and matching elements are all good ideas!
Get my free SVG cut files for the Paper Handbags & Purses!
Now, I’d love to see your paper handbags & purses! If you make bags with these designs, please share a photo in our Facebook group, email it to me at [email protected], or tag me on social media with #jennifermaker.
Love,

Want to remember this? Save the Paper Handbags & Purses Tutorial to your favorite Pinterest Board!