
I have a confession. I used to buy birthday cards from the store without a great deal of planning. Back then, I would stop in to pick up a gift bag and birthday card as almost an afterthought to the present. I know — crazy, right? But now that I have a Cricut cutting machine, I can make these gorgeous, handmade cards that are fun, thoughtful, and really not-so-hard. I’ve given my butterfly card, fairy house card, apple tree card, and coffee cup gift card holder cards all as birthday ca rds in the past few months. But I decided it was time to design something just for birthdays, so I’ve made a pop-up birthday cake card!

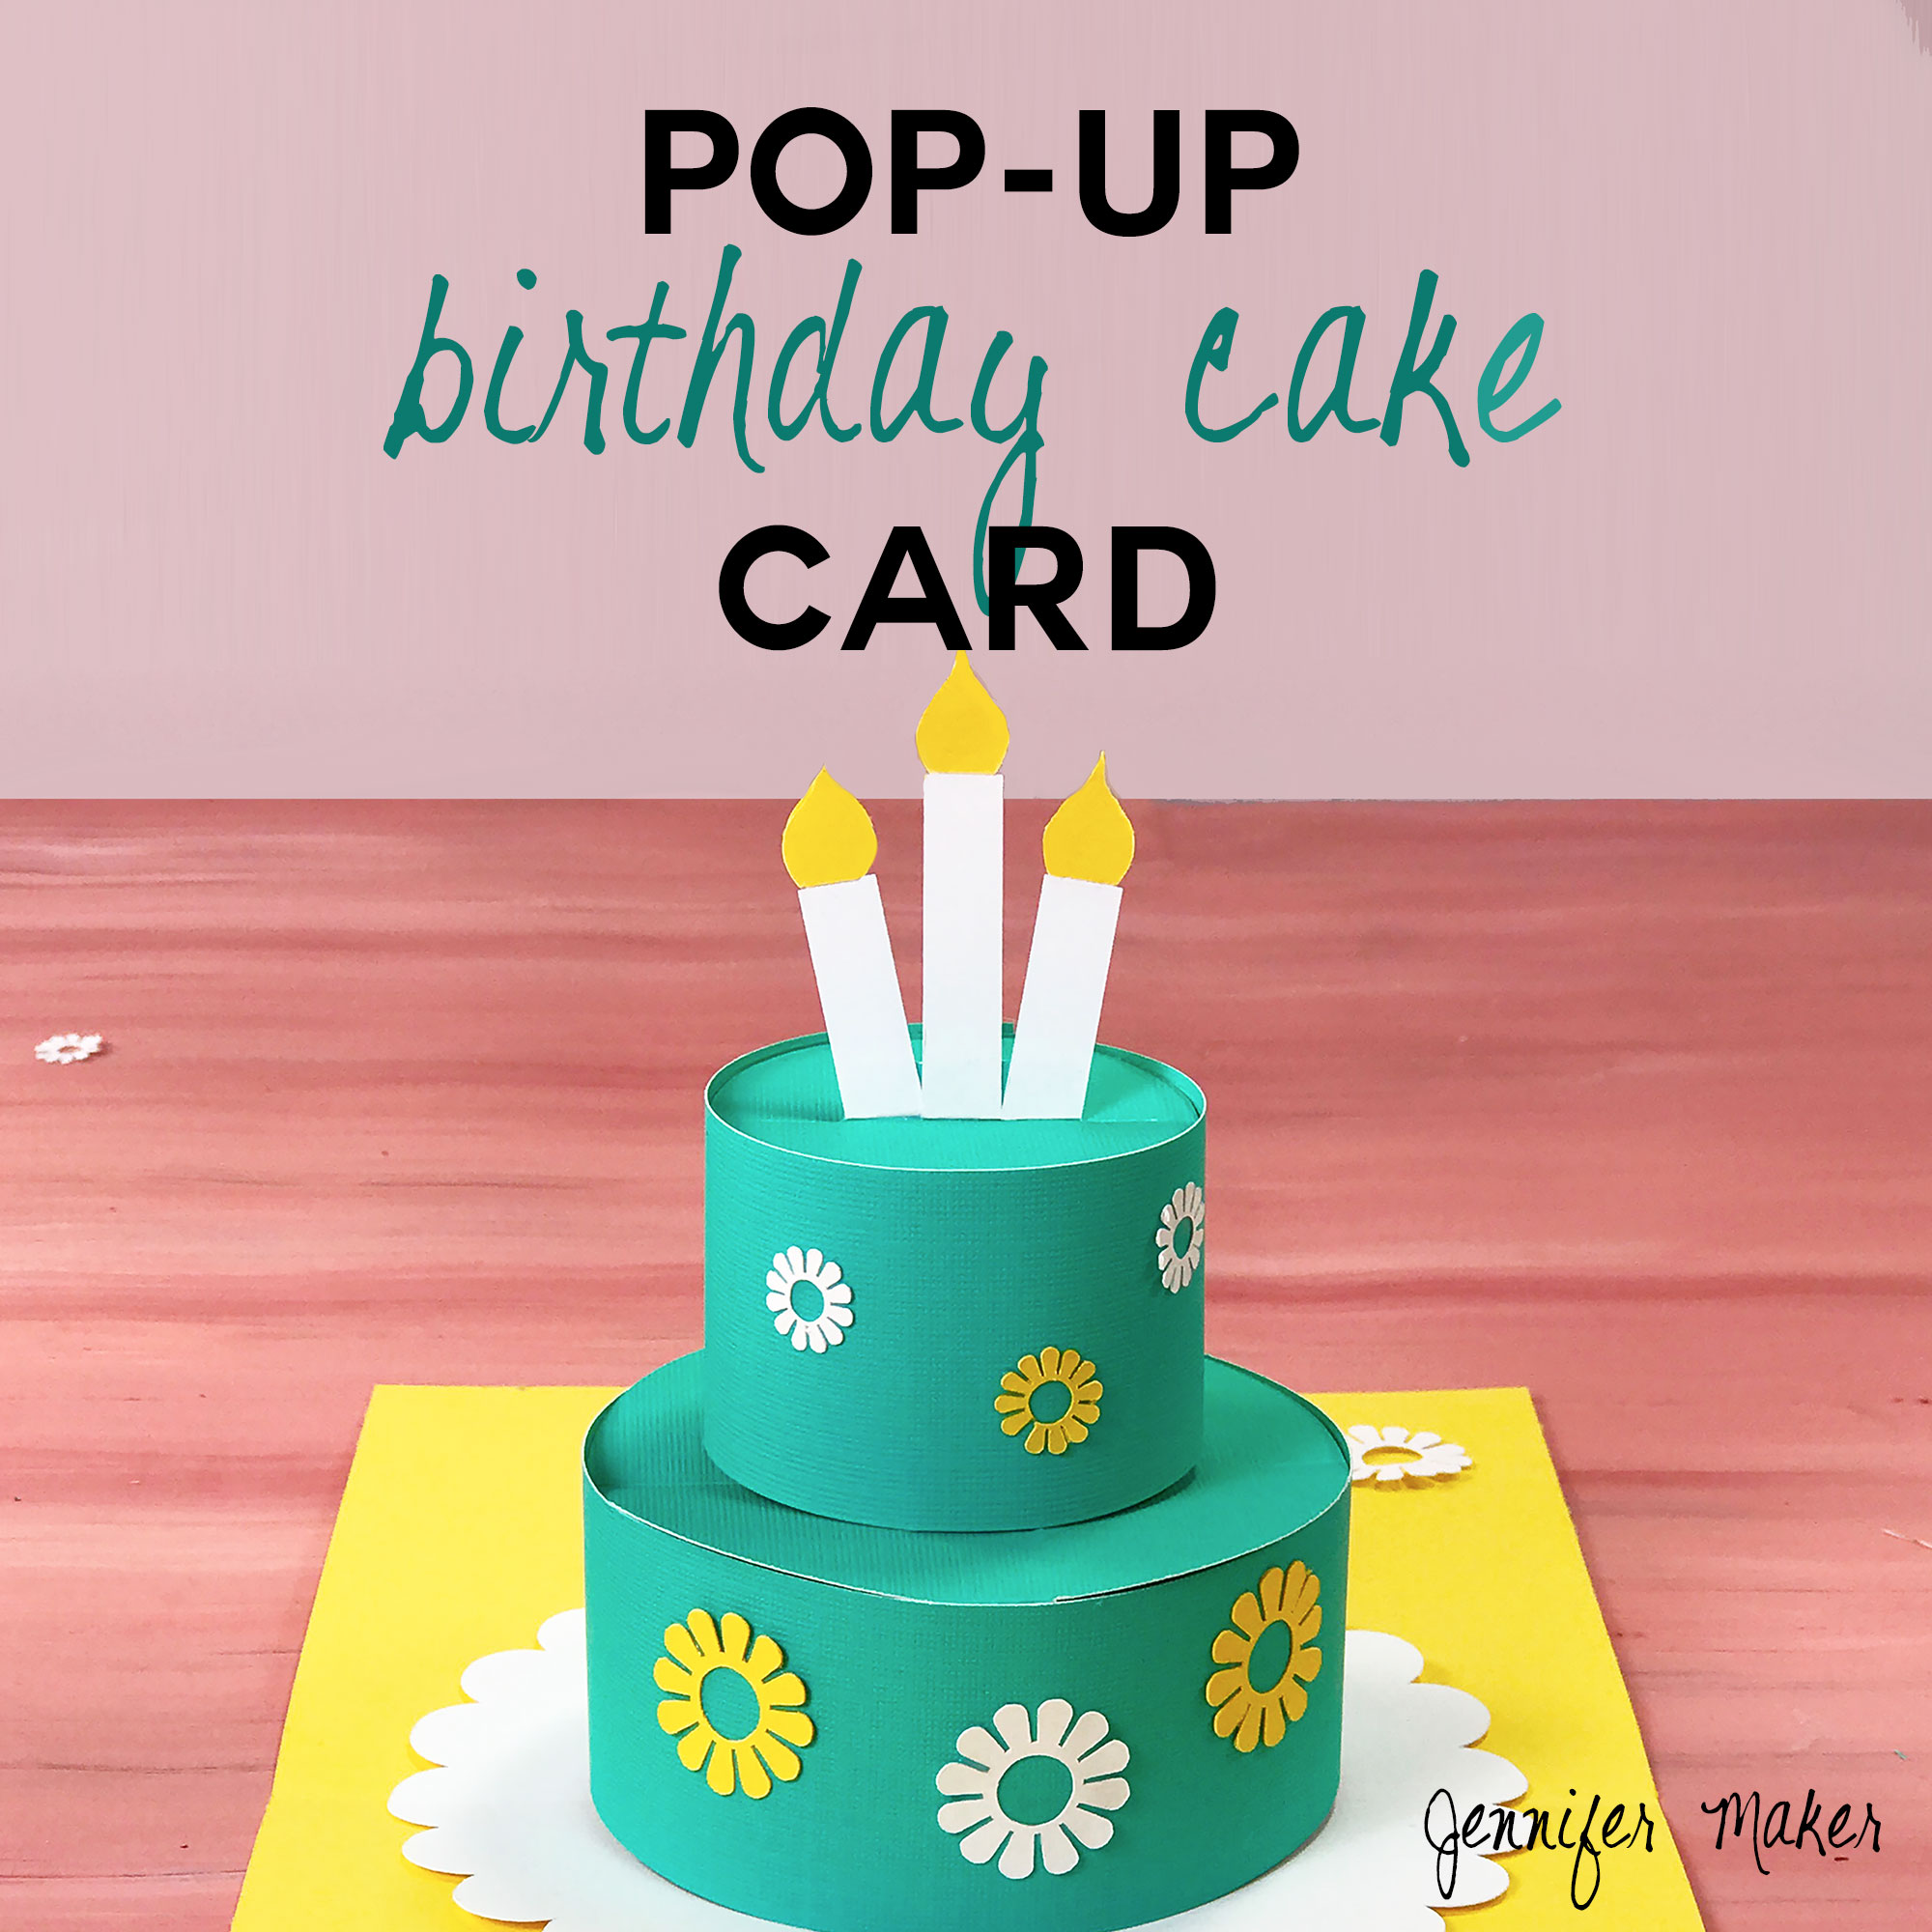
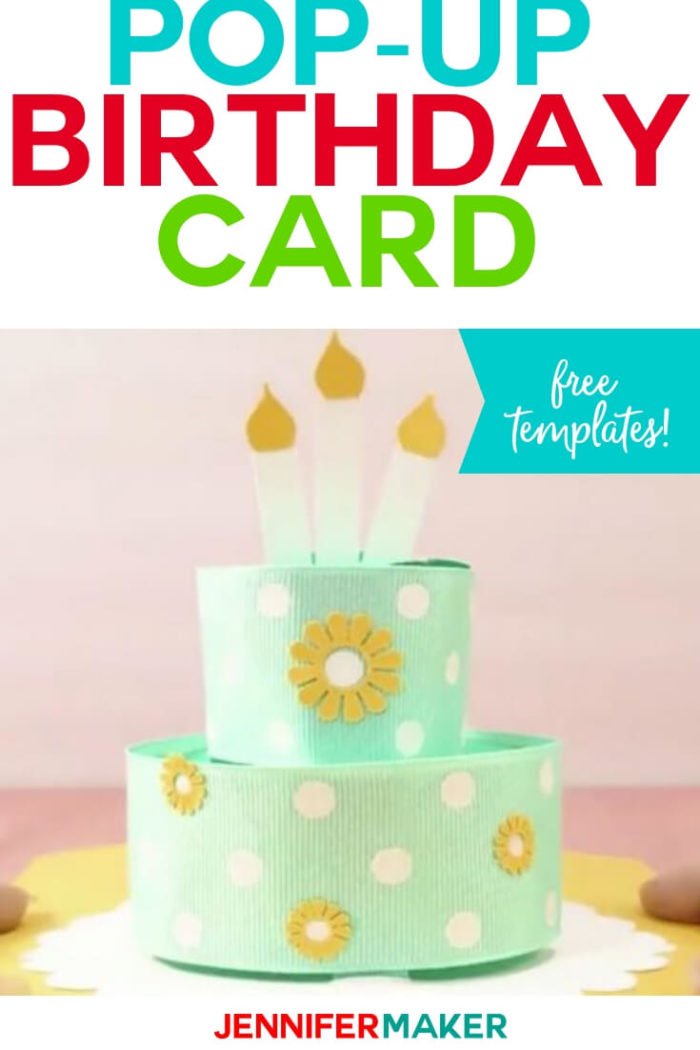
What I love about my birthday cake card — and what I hope you’ll love, too — is how it actually pops up into a round, two-layer cake … complete with candles! It’s like something magical from Harry Potter. So you can put it in an envelope, mail it off to a friend, and they’ll open it up to see a wonderful little cake. Alas, it doesn’t smell like chocolate or taste like funfetti — I’ll let you figure out how to do that.
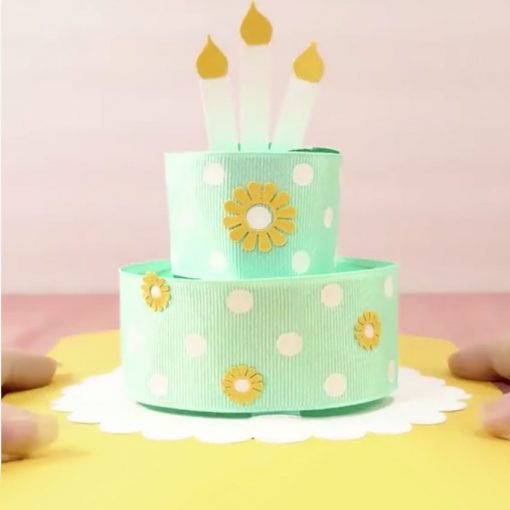
Here’s the pop-up birthday cake card in action … isn’t it cool?
In this tutorial, I will show you exactly how you can make a pop-up birthday cake card. I offer three different ways to make your cake sides for different effects, including how you can use ribbon instead of cardstock. You’ll only need a few pieces of cardstock to make this card happen.
This pop-up birthday cake card design is FREE. If you like it, please consider sharing it with your friends on Facebook or Pinterest (there are sharing buttons at the top of the post). My compensation is seeing people make my designs and being happy. (Seriously!)
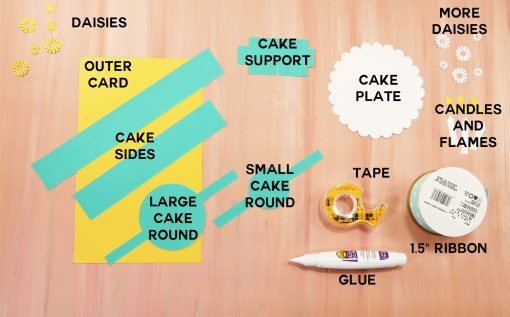
Pop-Up Birthday Cake Card Materials
Some of the links below are Amazon affiliate links for your convenience. Read my full disclosure policy.
-
- Cardstock, three 8.5″ x 11″ sheets (I used DCWV Brights Stack)
- Tape (regular and double-stick) and glue
- 1.5″ wide ribbon (optional, used for the sides of your cake)
- A 5″ x 7″ envelope to put this in (optional)
- A way to cut your cardstock (I used the amazing Cricut cutting machine!)
- Design #35 – My free SVG design files (available in my free resource library—get the password by filling out the form at the bottom of this page)
How to Make a Pop-Up Birthday Cake Card
STEP 1: GET THE FREE POP-UP BIRTHDAY CAKE CARD DESIGN
First, download Design #35 which is my free SVG cut files or PDF from my free resource library. If you’re going to cut it on your cutting machine, upload the file to your design software.
Tip: If you’re not sure how to upload an SVG cut file to Cricut Design Space, watch this helpful video training series I made. If you’re on an iPhone or iPad, here’s how to download and upload SVG files to the Cricut Design Space app.
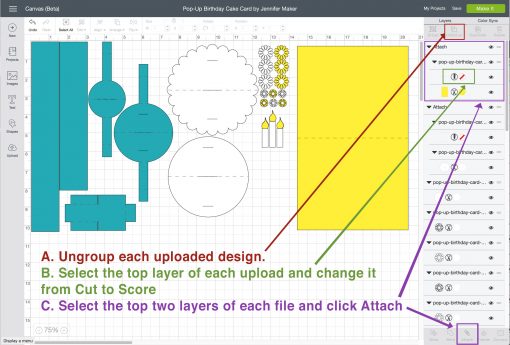
IMPORTANT: This design has three SVG cut files. These files have SCORELINES in them. I’ve grouped each scoreline with the section it goes with. You’ll need to first UNGROUP the main group, then change the layers of scorelines to “Score” in Cricut Design Space, and then attach the score layer to the cut layer that goes with it. Need help with the scoring lines? Check out my tutorial on Cricut Scoring, Grouping, and Attaching!
STEP 2: CUT OUT YOUR CARD STOCK
After attaching the score layers with the cut layers, you can click Make It and proceed to cutting.
Load your fine-point blade and cut your cardstock (I use Medium Cardstock in my Custom Material Settings in Cricut Design Space). If you have any issues cutting the intricate letters, be sure to read my Cricut Cutting Problems guide for ideas.
STEP 3: PUT TOGETHER YOUR POP-UP BIRTHDAY CAKE CARD
With your cardstock cut out, it’s time to assemble the cake! First, watch the full assembly video so you see how it goes together:
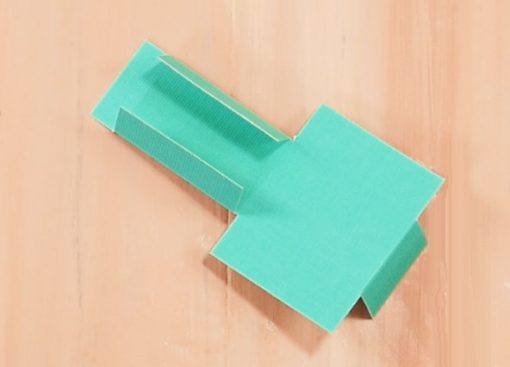
Now, let me walk you through each step. First, fold your cake support just as I’ve shown in the photo below. The two tabs on the side get folded in, along with the tab on the bottom.
Next, fold your cake rounds (both large and small) just as I’ve shown below. The narrow strips fold down to become supports for the sides of your cake. You also fold your cake rounds in to a V-shape to allow them to fold easier when you close your card. (Note: If you do not intend to ever fold your cake, you do not need to fold the tops of your cake rounds.)

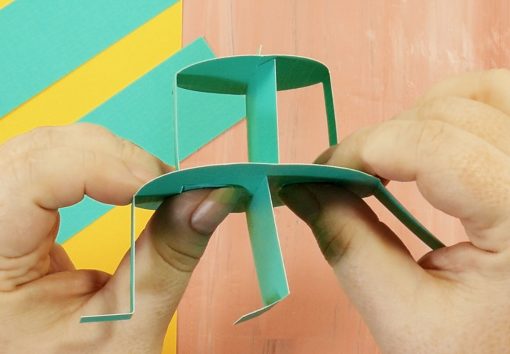
Now, slide your cake support up through the bottom of your large round cake, through the slot in the middle. Then open up the tabs on the side of the cake support.

Next, put your small cake round on top over the tab at the top of the cake support, and slide the side supports into the slots on the top of the large cake round. Glue the tabs of the side supports to the bottom of the large cake round, as shown below.
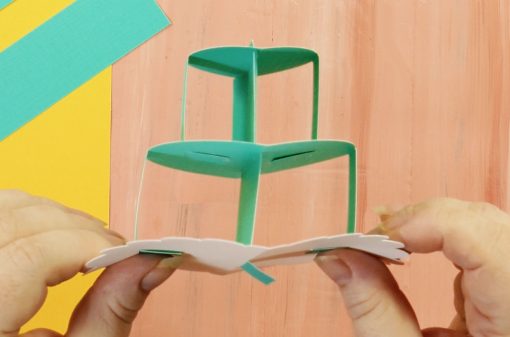
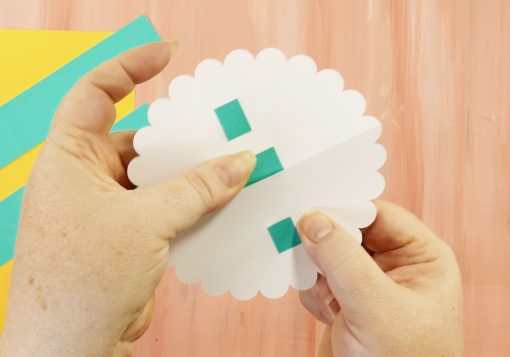
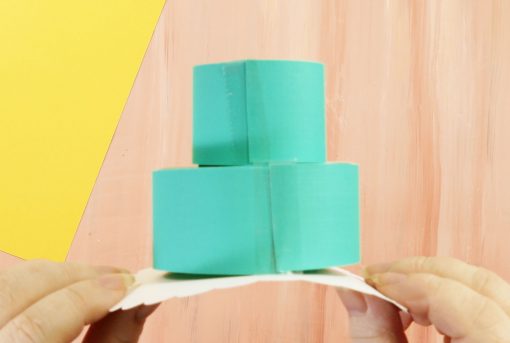
Now decide which of the two round cake plates you want to use — I included a plain plate and a scalloped plate in my files. Fold it in half along the score line. Then insert the tabs of the cake supports (center and sides) into the slots on the plate, and glue down on the underside.
This is the basic structure of your cake! Now you need to decide what sort of cake sides you want — flat cardstock, crimped cardstock, or ribbon. Flat cardstock is fine, and it looks great if you never fold it. But once you fold it, the paper won’t ever want to make a perfect circle around the cake again. So if this bothers you (it,s fine if it does not), I have two solutions — crimp your cardstock cake sides before you put them on, or use ribbon! All three go on in the same way, so I’ll just show you how to attach the plain cardstock.
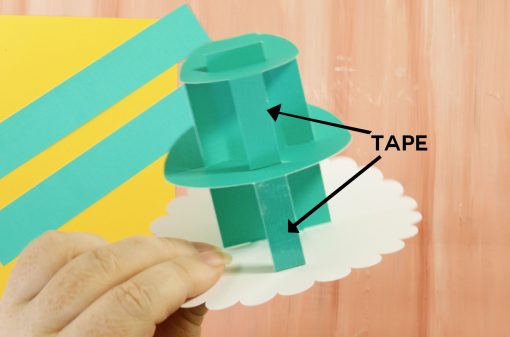
Put double-stick tape on the four side supports of your cake. Be sure your tape does not peek out around the sides or tops of your supports — trim it off it does, or else your cake may stick to itself instead of pop-up.
Next, put the end of one of your cake sides onto a taped support and press down hard. Do this for both layers.
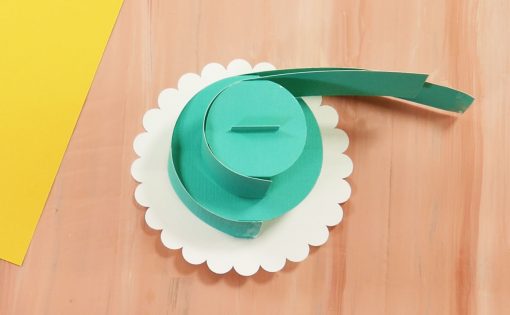
Wrap the sides around. When you get to the start point for each side, do not attempt to use double-stick tape — it’s not strong enough. Instead, I recommend you put regular tape on it — this will be the back, so the tape won’t be noticeable. But you can also try to glue it (though I found that was difficult, too, to be honest.)
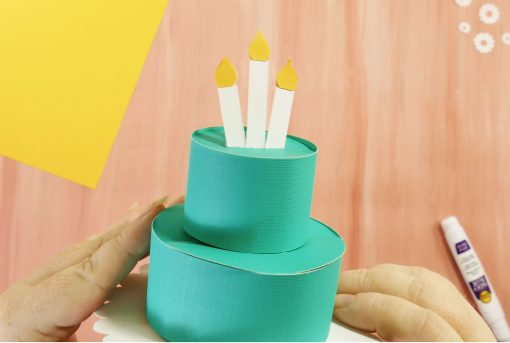
Now, tape the candles (or whatever you want) to that tab sticking out of the top of the cake. If you decide not to put anything on the top, glue or tape that tab down flat on top of the cake so it doesn’t wiggle its way loose.
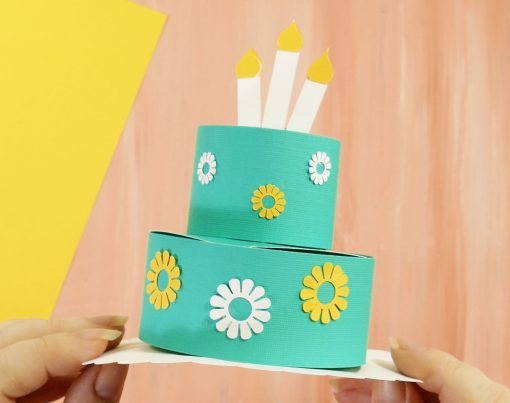
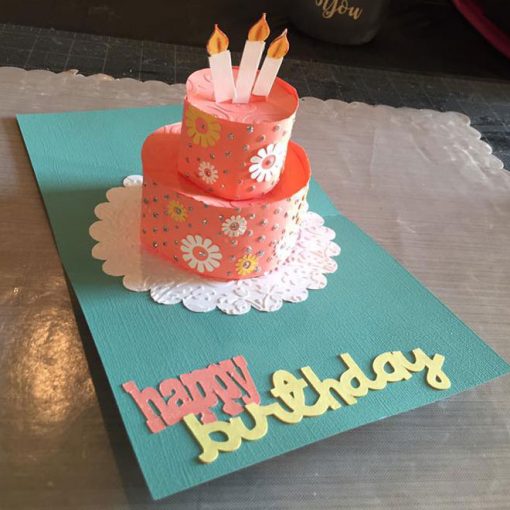
At this point, you can decorate your cake as you please. I was in the mood to make a daisy cake, so I included little daisies you can glue on if you wish. If you decide to make more elaborate decorations, I recommend you glue them on while the cake sides are flat.
Now, fold the outer card in half along the score line. Then glue the bottom of the cake plate to your outer card. I recommend you attach it while the card is opened and perfectly flat, making sure you line up the creases in the cake plate with the creases in the card.
STEP 4: SHOW IT OFF!
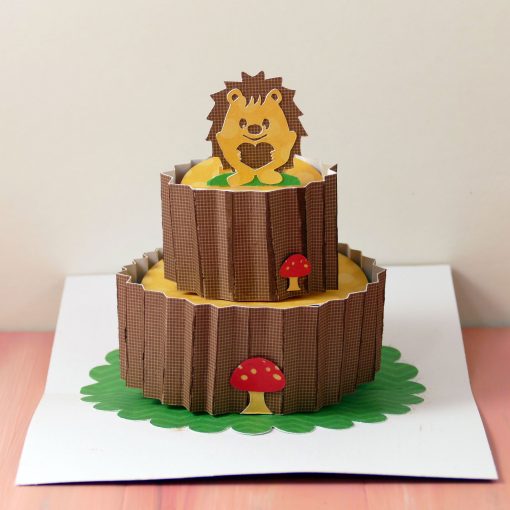
And here are two alternate pop-up birthday cake cards I made — one with a hedgehog that uses crimped paper to disguise the folds, and the other with ribbon (which does not want to crease) to maintain the nice round shape of the cake.
I think this pop-up birthday cake card is SO much fun! And I realized, after I made it, that you could use it for a wedding cake card, too! I may have to make a design just for that in the near future.
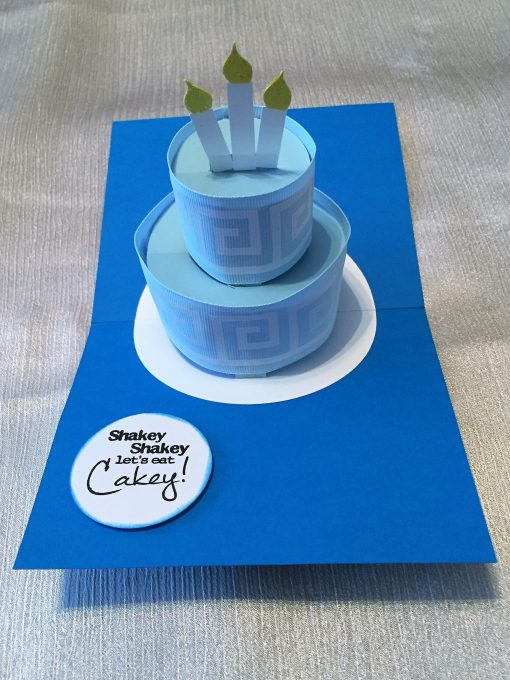
ere is a super-cute birthday cake card made by reader Nancy Hudgins — she made two for her grandson’s birthdays:
And here is a pretty embossed version of the birthday cake card by reader Christa White:
We’d love to see YOUR pop-up birthday cake cards! Please share a photo in our Facebook group or tag me on social media with #jennifermaker.
Ready for the files? Get the password for the library with the free pattern and SVG/DXF files here by filling out this form:
Love,

More Pop-Up Card Tutorials & SVG/DXF Cut Files


Save Pop-Up Birthday Cake Card to Your Favorite DIY Pinterest Board!
![]()
Wow! Make a Pop-Up Birthday Cake Card with free pattern and tutorial!
Do you like to make 3D paper crafting projects, too? Share and leave a comment below!
More Fun and Easy Craft Posts
DIY Dry Erase Board — So Simple & Cute
Make a Craft Supply Organizer in 5 Minutes!

Jennifer, I just Love these Cards!!!
Such a Great Ideal. I’m going to try to make a Card. My Daughter just bought a House, It’s her first Big Leap in Life. So I thought why Not Try to make a Card for First home owners. If it’s a Success, I’ll send you a picture.
Thank You,
Chris
Sounds wonderful, Chris!
What a cute card! Love it Sharing on twitter.Thank you for sharing on Merry Monday! Hope to see ya next week!
Kim
Wow, I love your site. It is giving me so much inspiration. You seem so organized, I am envious! So much creativity. I am working on a craft blog too and you just inspired me to keep working on it. Thanks!
Thank you, Laurie! I’m delighted to hear you’ve started a craft blog!! Email me if you want to talk about blogging. I’m happy to share what I know. 🙂
Fantastic designs! It is so fun that a two layer cake pops up!!x
Works great ….although the small cake layer side strip seems about 1″ too long. I used an embossing folder for the sides and it looks great and the folds don’t show as much. Thanks for sharing! I also found it easier to attach the support adhesive before assembling the cake. Thanks again!
I have tried this card a couple of times and just can not make it work. Tried satin ribbon, grosgrain ribbon and cardstock. I conquered the tree card so at some point I WILL get it!
What is crimped paper, or how do I crimp paper for this project? That part was not covered in the instructions.
We didn’t cover it in the instructions because it was just an option to look at, Kathy! Crimped paper has pleats in it like a hand-held fan. You can either buy a crimper to do that for you or fold the paper back and forth to make the pleats although that does take some time. 🙂