
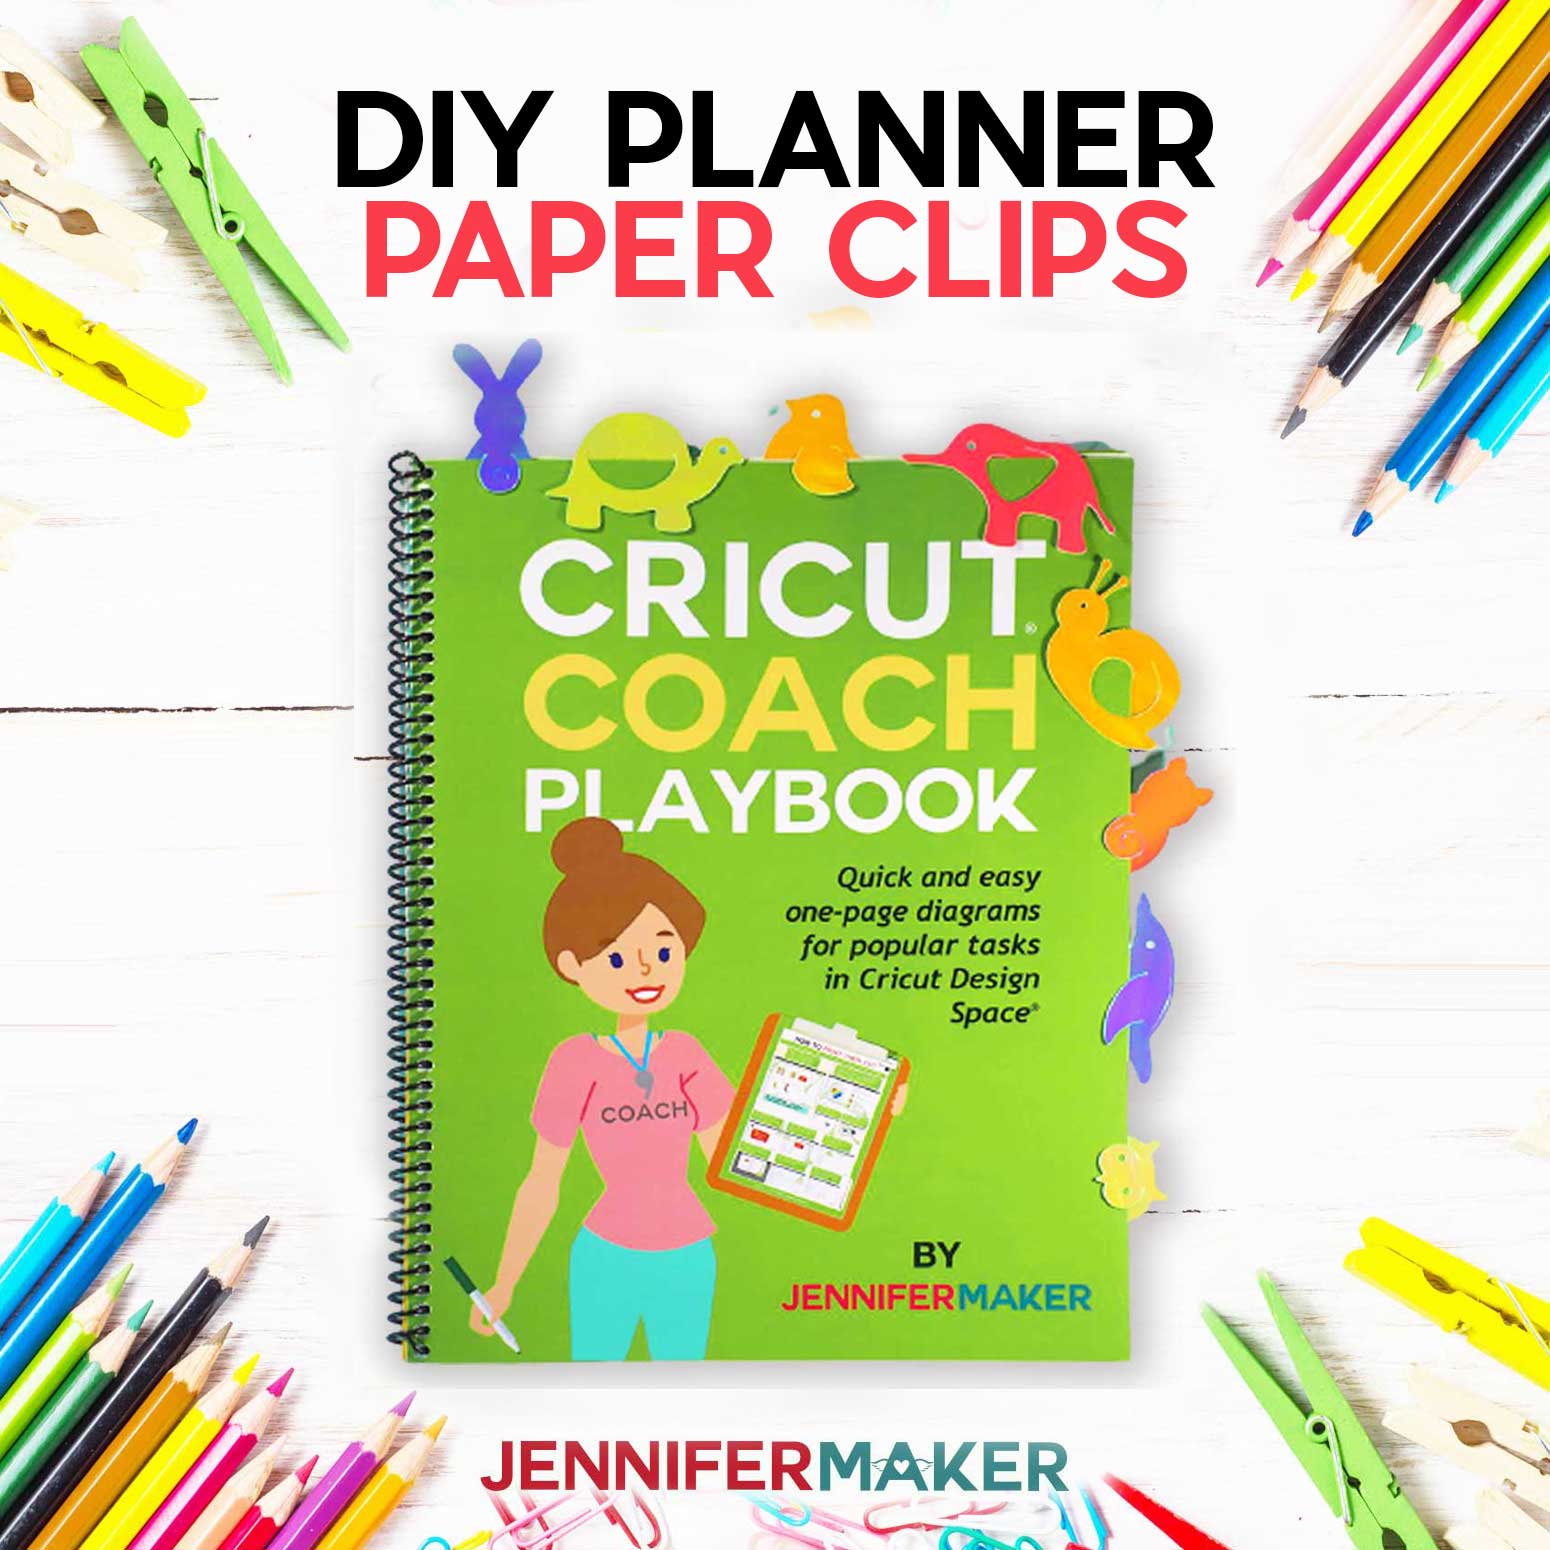
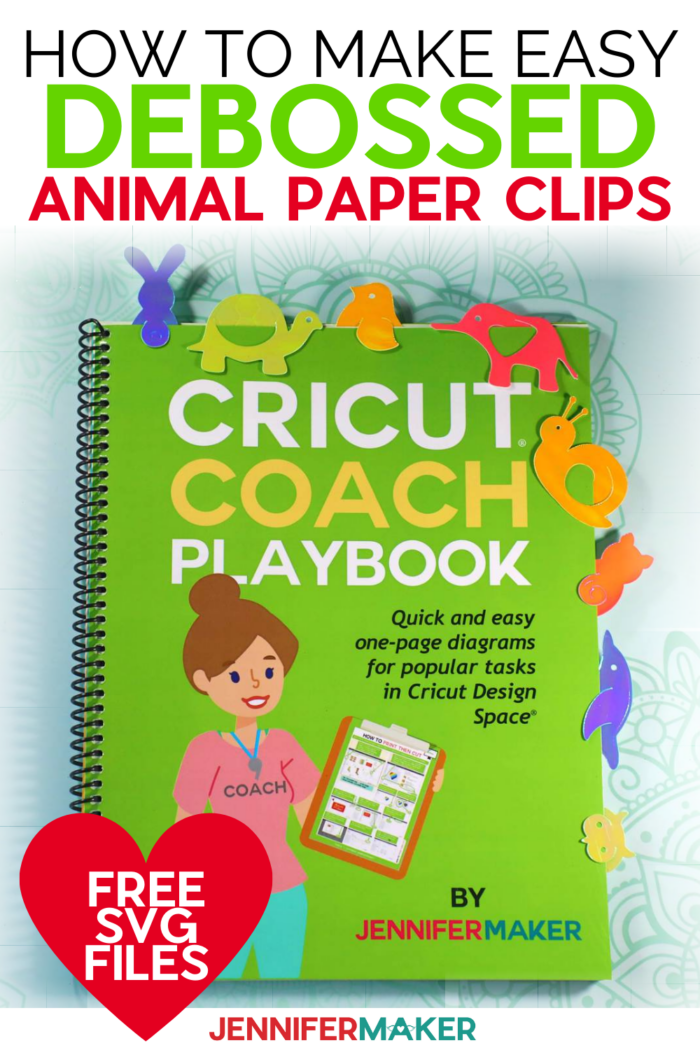
Learn how to make these fun and colorful debossed animal paperclips to put in a planner, brighten up your paperwork, or mark a page in your favorite book.
What I love about crafting is that I can take everyday items and make them fun and pretty! And that is exactly what we’re doing today by taking something ordinary — paperclips — and turning them into something fun. I love projects with animal themes like my Paper Dog and Puppy Boxes and my layered Hummingbird SVG. This is a great project for beginners! So for Day 13 of The Great Maker 25-Day Gift-Away Challenge, I am showing you how to make Debossed Animal Paperclips!
See exactly how to make make these paper clips in my tutorial video (or keep scrolling if you prefer a printable step-by-step photo tutorial):

 What is The Great Maker 25-Day Gift-Away? This is an annual tradition here at JenniferMaker! Every day for the first 25 days of December we gift you with a brand new project, design, tutorial, and video. On top of that, we host a giveaway with 25 prizes. Some of the amazing prizes are Cricut cutting machines, sewing machines, gift cards, and beautiful print editions of our popular Cricut Coach Playbook. You can even earn bonus entries for sharing photos of the daily projects! Click here to learn more about The Great Maker 25-Day Gift-Away!
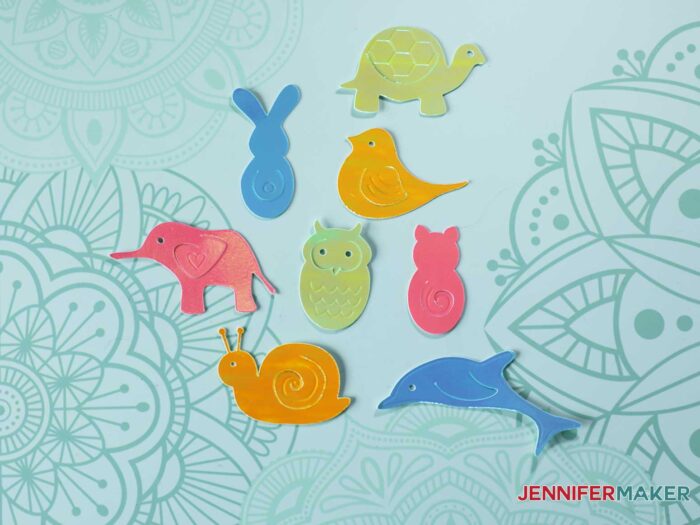
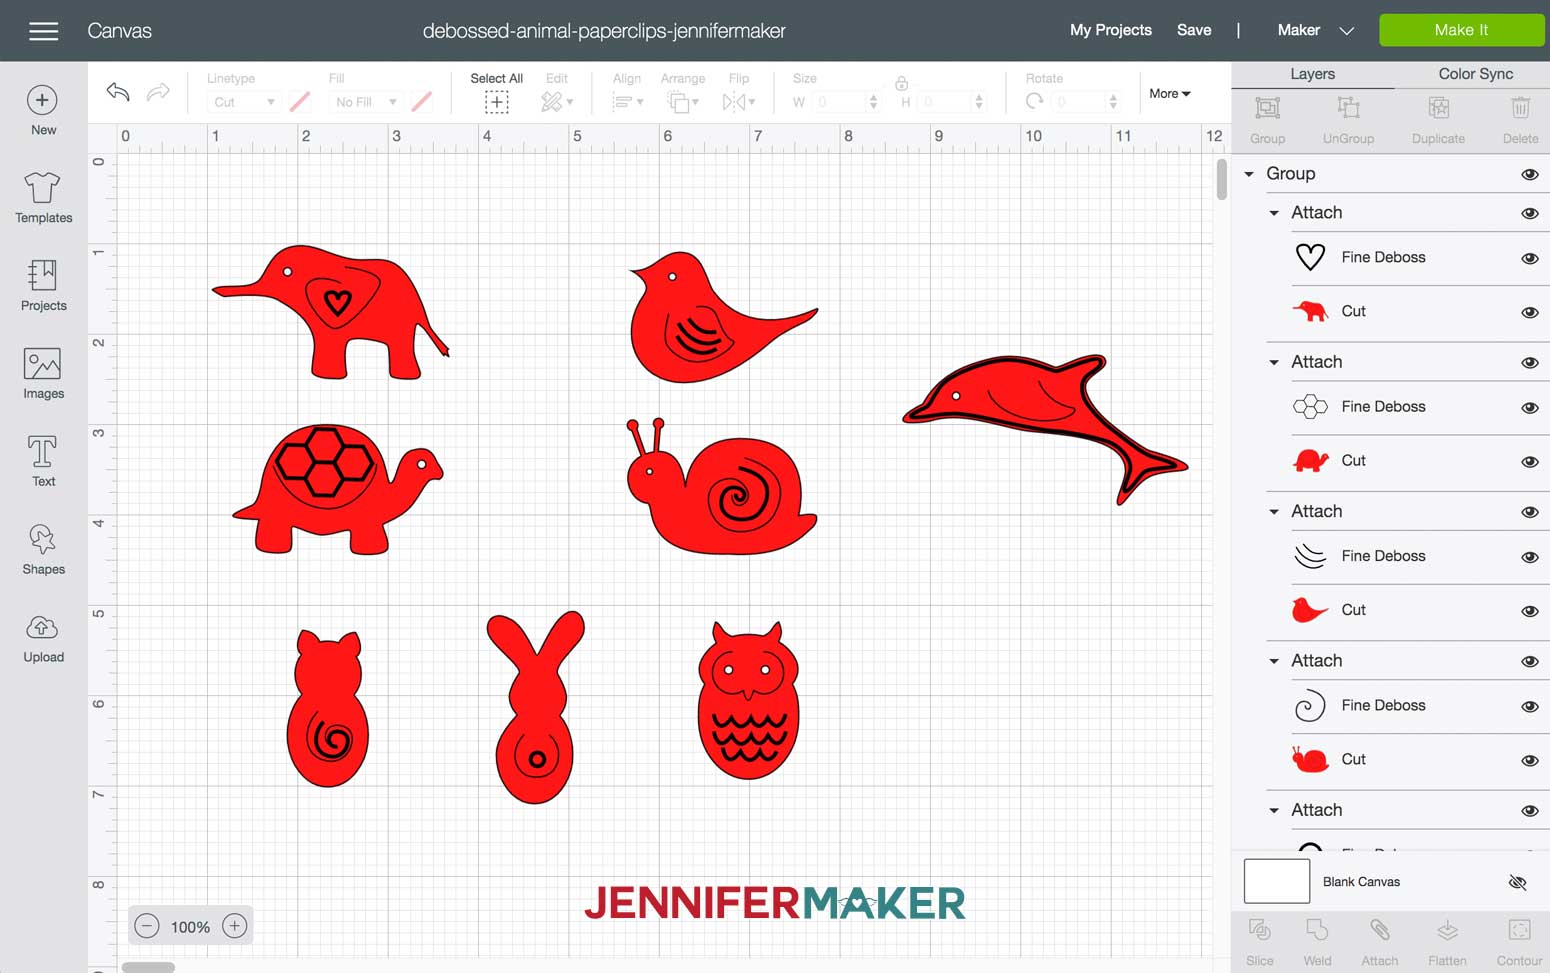
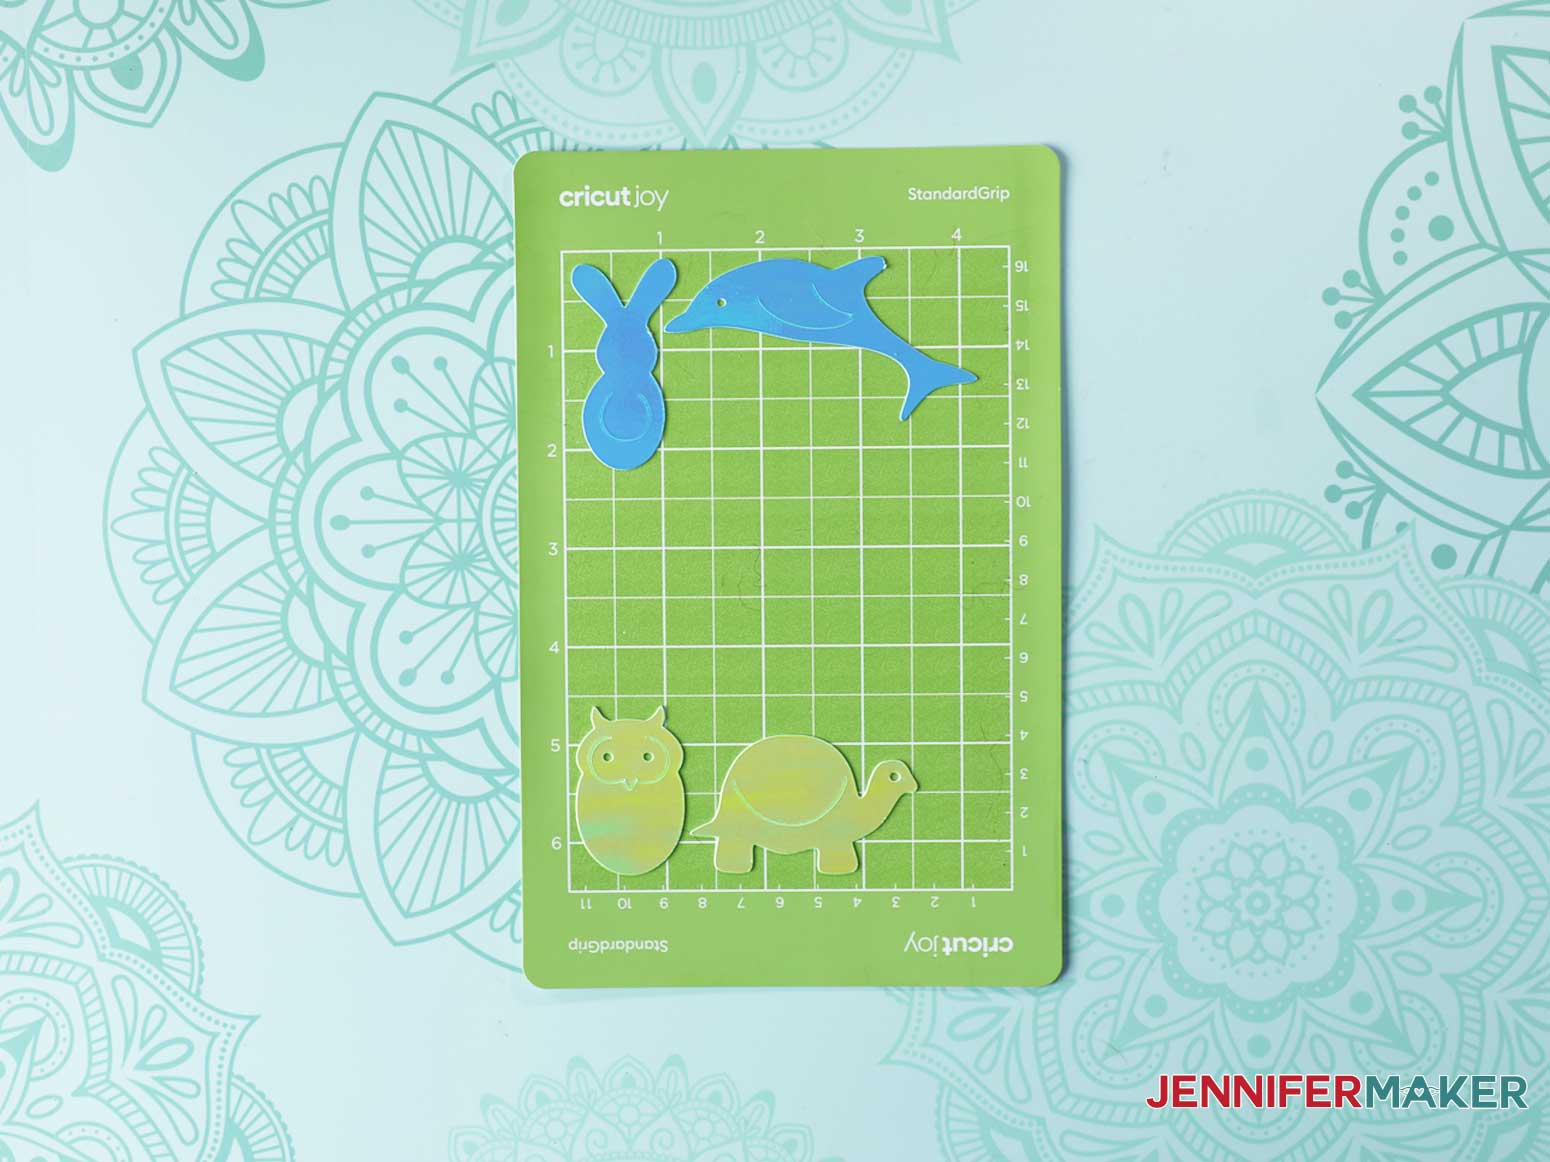
These paperclips work really well in a planner to brighten your day, and also work wonderfully as bookmarks! There are eight designs — a turtle, elephant, dolphin, owl, snail, cat, bird, and a rabbit. SO fun and cheerful!

All you need for this project is some cardstock, poster board, or Kraft board and a way to cut it! I’m using several sheets of holographic Kraft board for a bright, happy look. You won’t need much — one sheet will make a lot of paper clips!
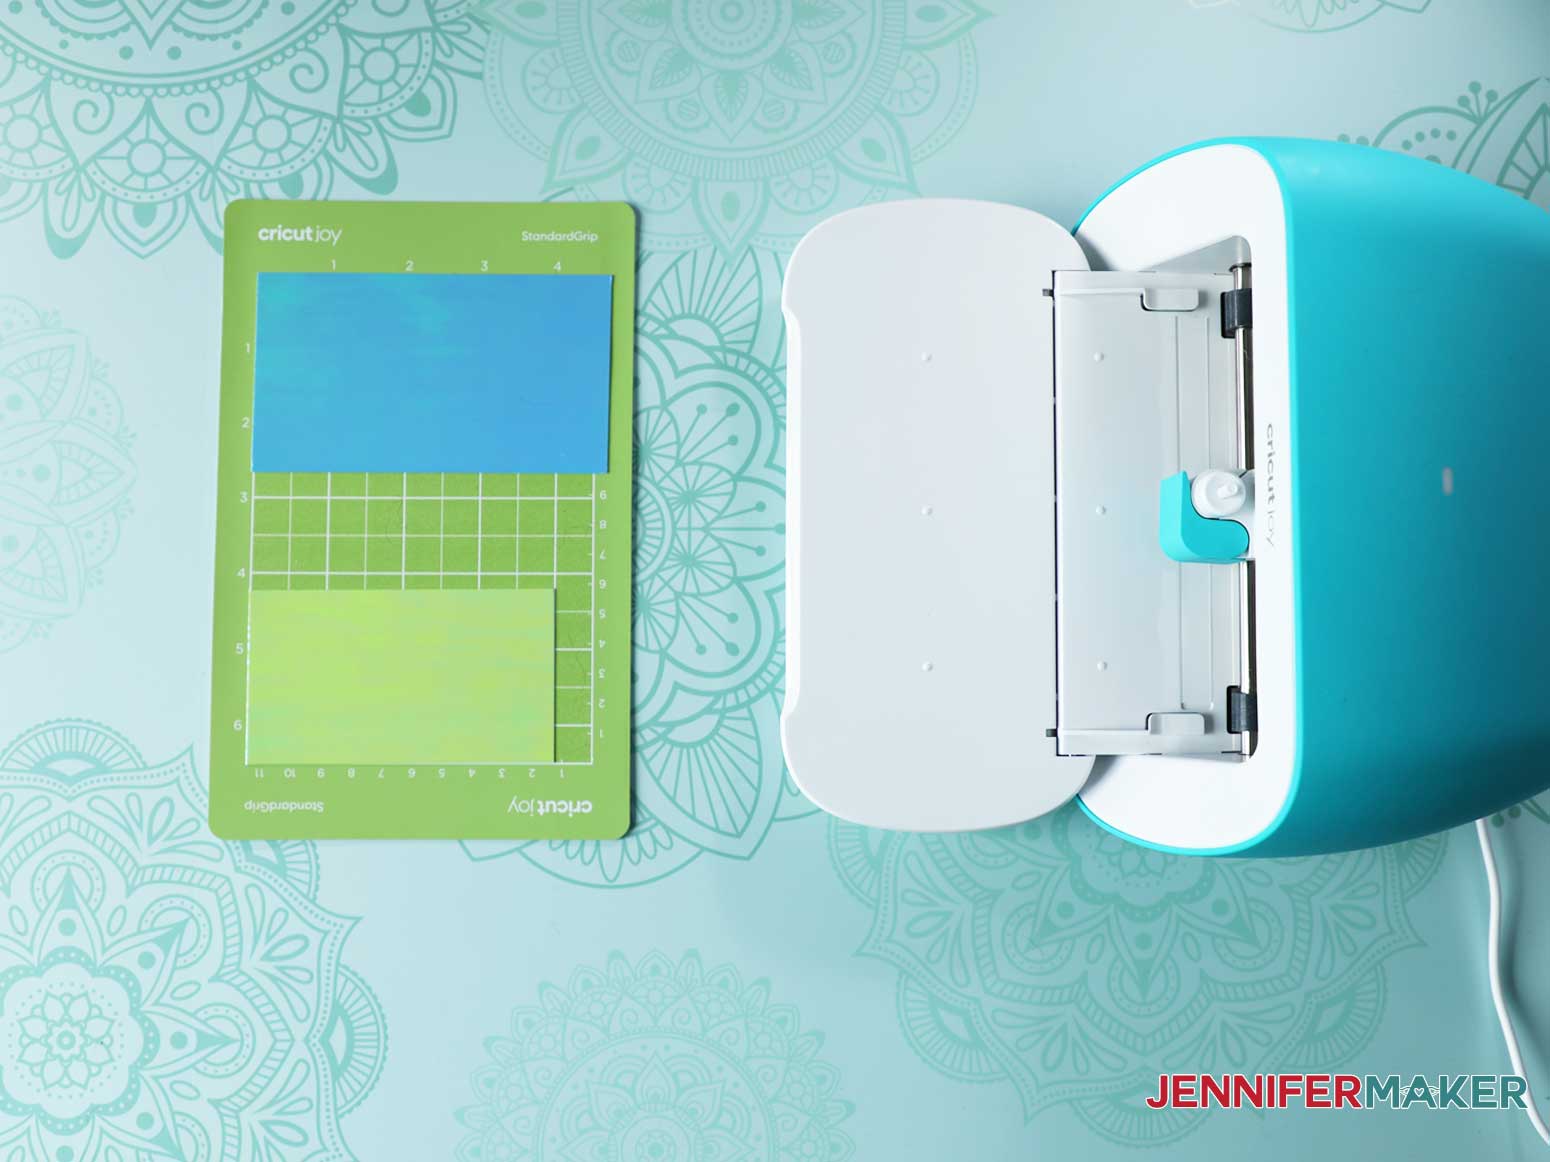
To cut these planner paperclips, I’m using my Cricut cutting machine. You can cut these on a Cricut Joy, Explore, or Maker, or just cut them by hand with a craft knife using the printable PDF. If you use a Cricut cutting machine, you’ll also want the green standard grip cutting mat and the fine point blade.
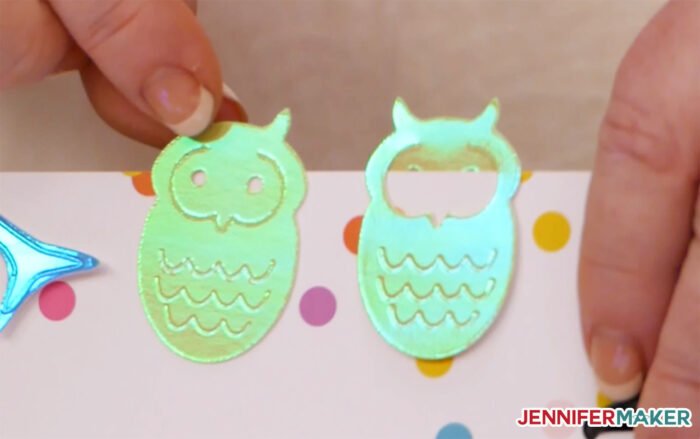
Now just for fun, I also included a little debossing detail. Debossing is when you push INTO your paper to create an indent. You can deboss on the Cricut Maker with the debossing tip — that’s tip number 21. If you don’t have a Maker and the debossing tip, you can get similar detail by using the scoring stylus on a Cricut Explore. Here is a paper clip I debossed with the scoring stylus on the Cricut Explore here on the left, and compare that to the one debossed on the Maker on the right — looks pretty good, doesn’t it?
So let me show you where to get my eight free paperclip designs and then I’ll show to cut your super cute, super easy planner paperclips! This post contains some affiliate links for your convenience (which means if you make a purchase after clicking a link I will earn a small commission but it won’t cost you a penny more)! Read my full disclosure policy.
Materials to Make Debossed Animal Paperclips
View my Amazon shopping list with the exact items we used to make this project!
-
- Foil Kraft Board or Cardstock
- Cricut Fine Debossing Tip + QuickSwap Housing (for a Cricut Maker)
- Cricut Scoring Stylus (for a Cricut Explore)
- Cricut StandardGrip Cutting Mat
- A way to cut your Kraft Board (I used a Cricut Maker series cutting machine but this can also be cut on a Cricut Explore series, Cricut Venture, or a Cricut Joy series machine)
- Design #264 – My free planner paperclip SVG design files (available in my free resource library—get the password by filling out the form at the bottom of this page)
How to Make Debossed Animal Paperclips
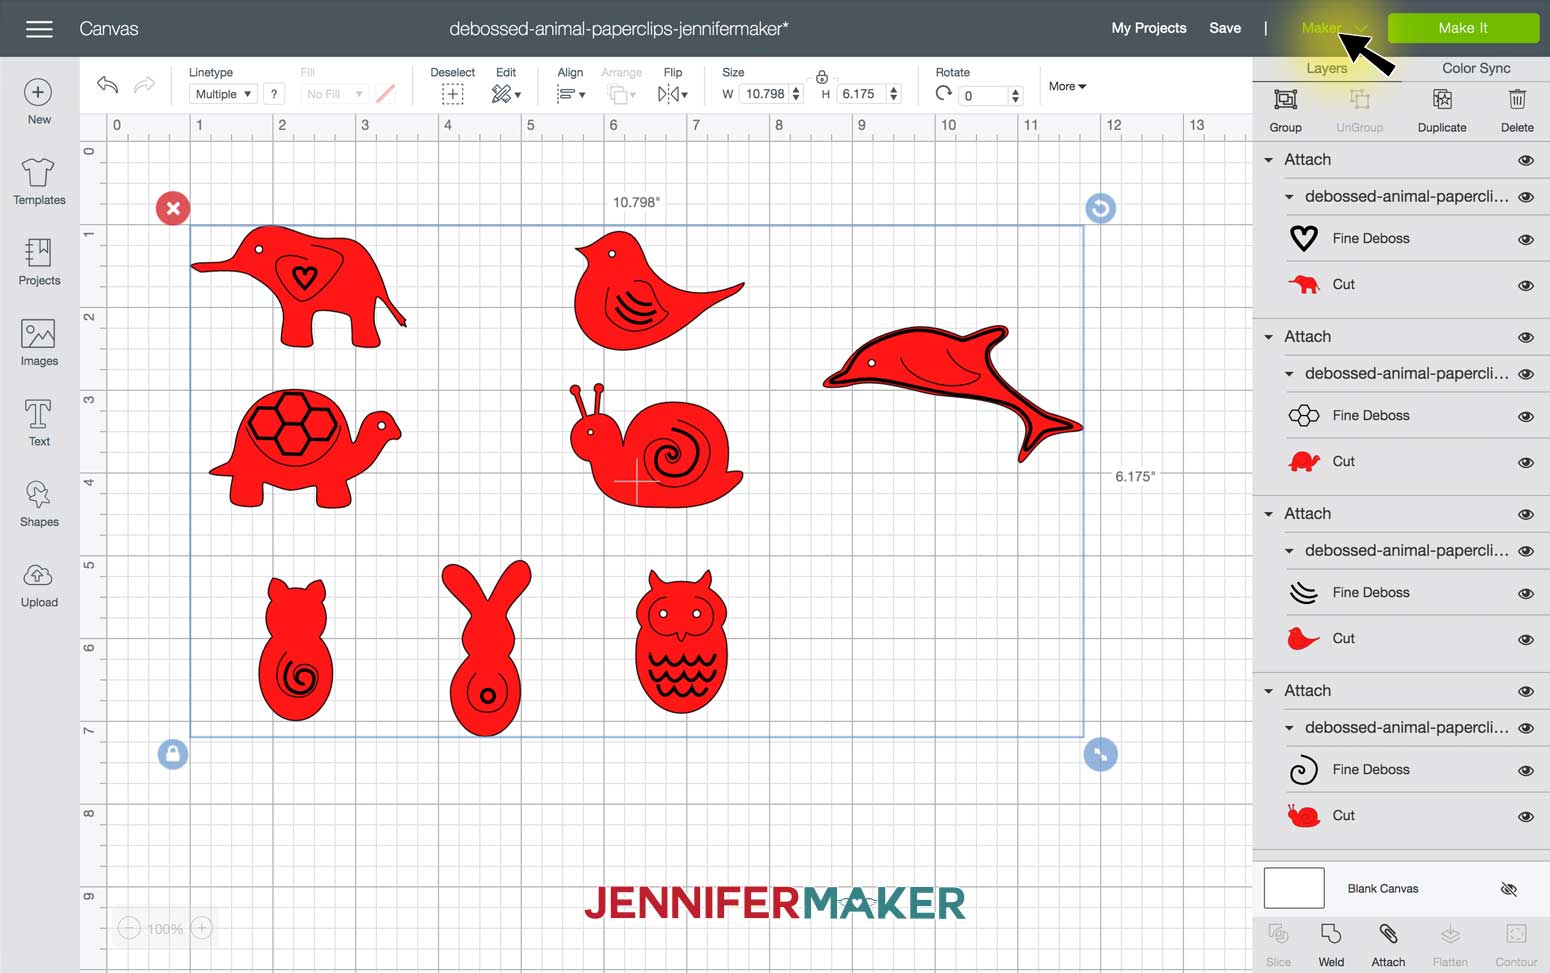
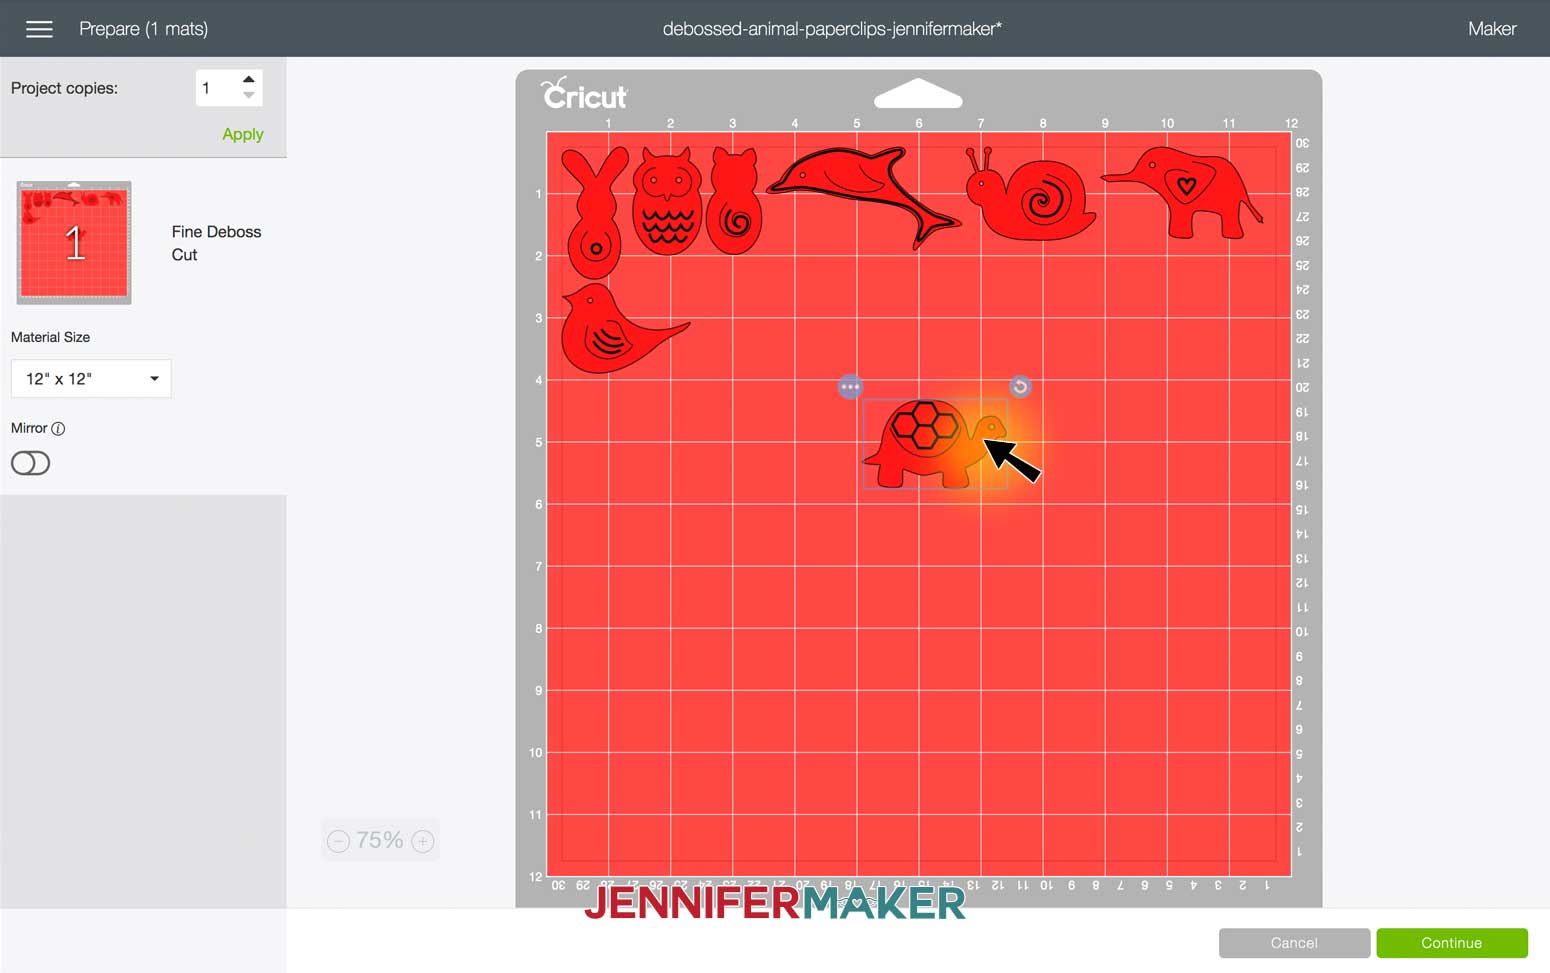
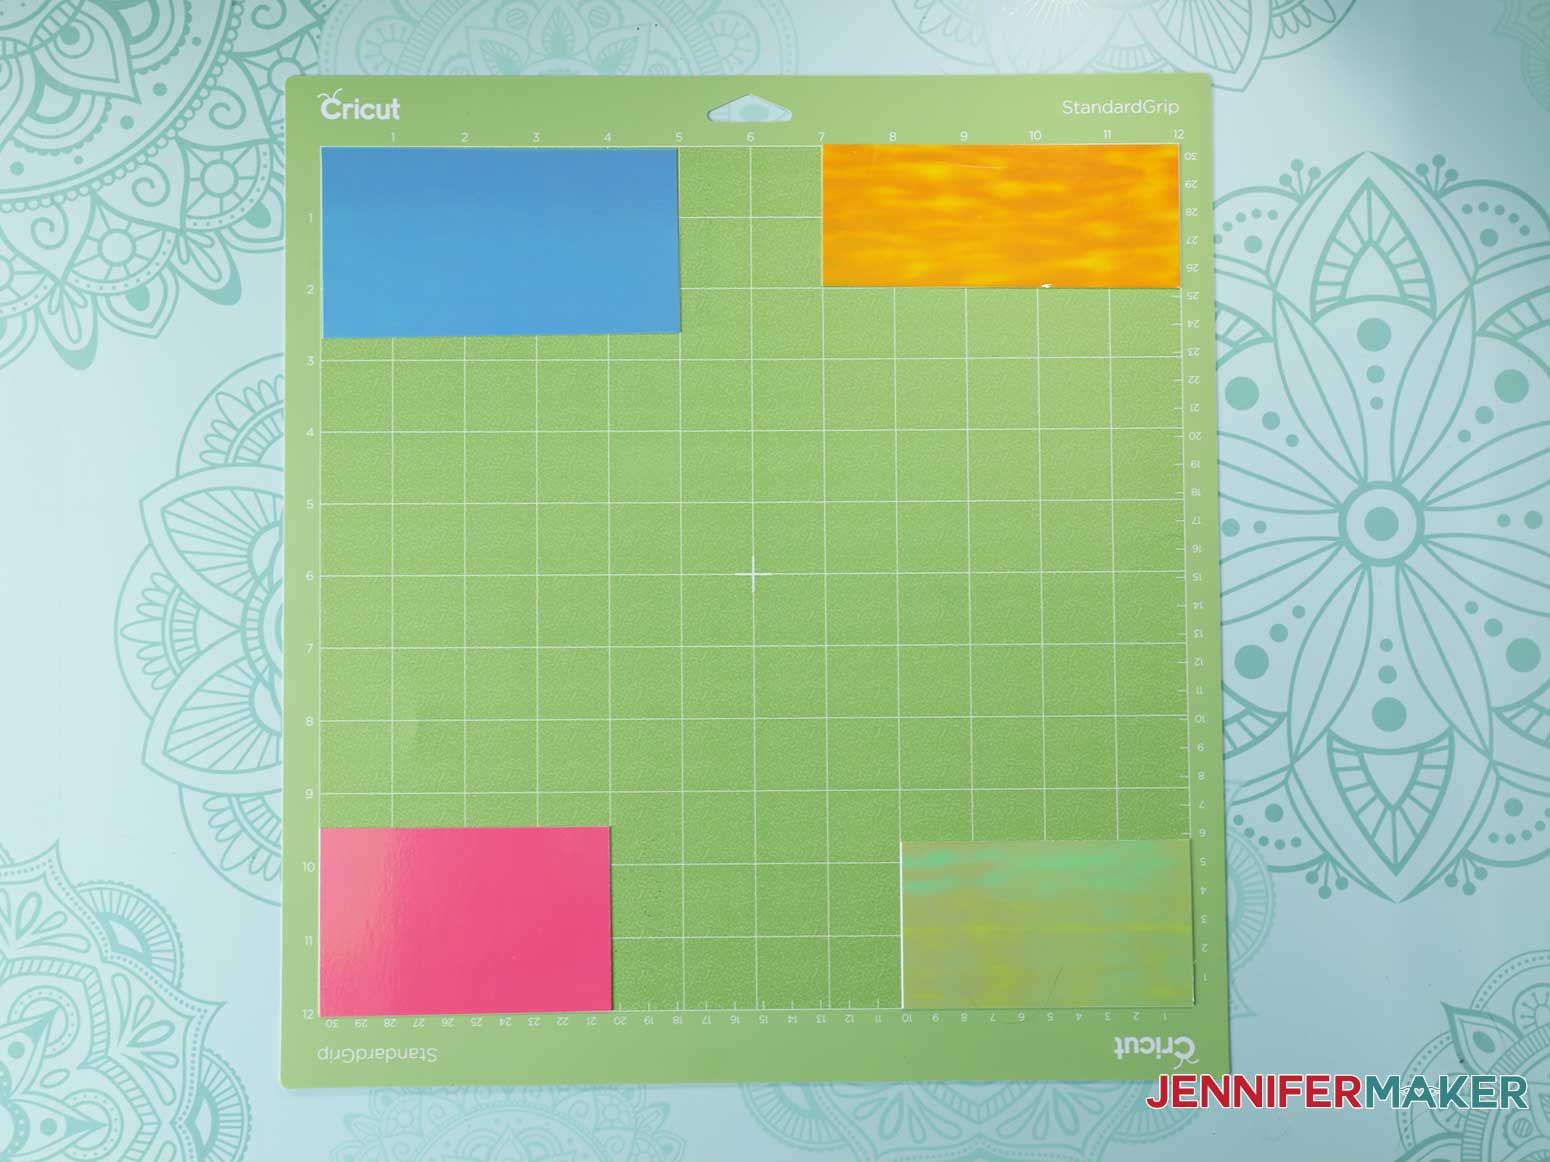
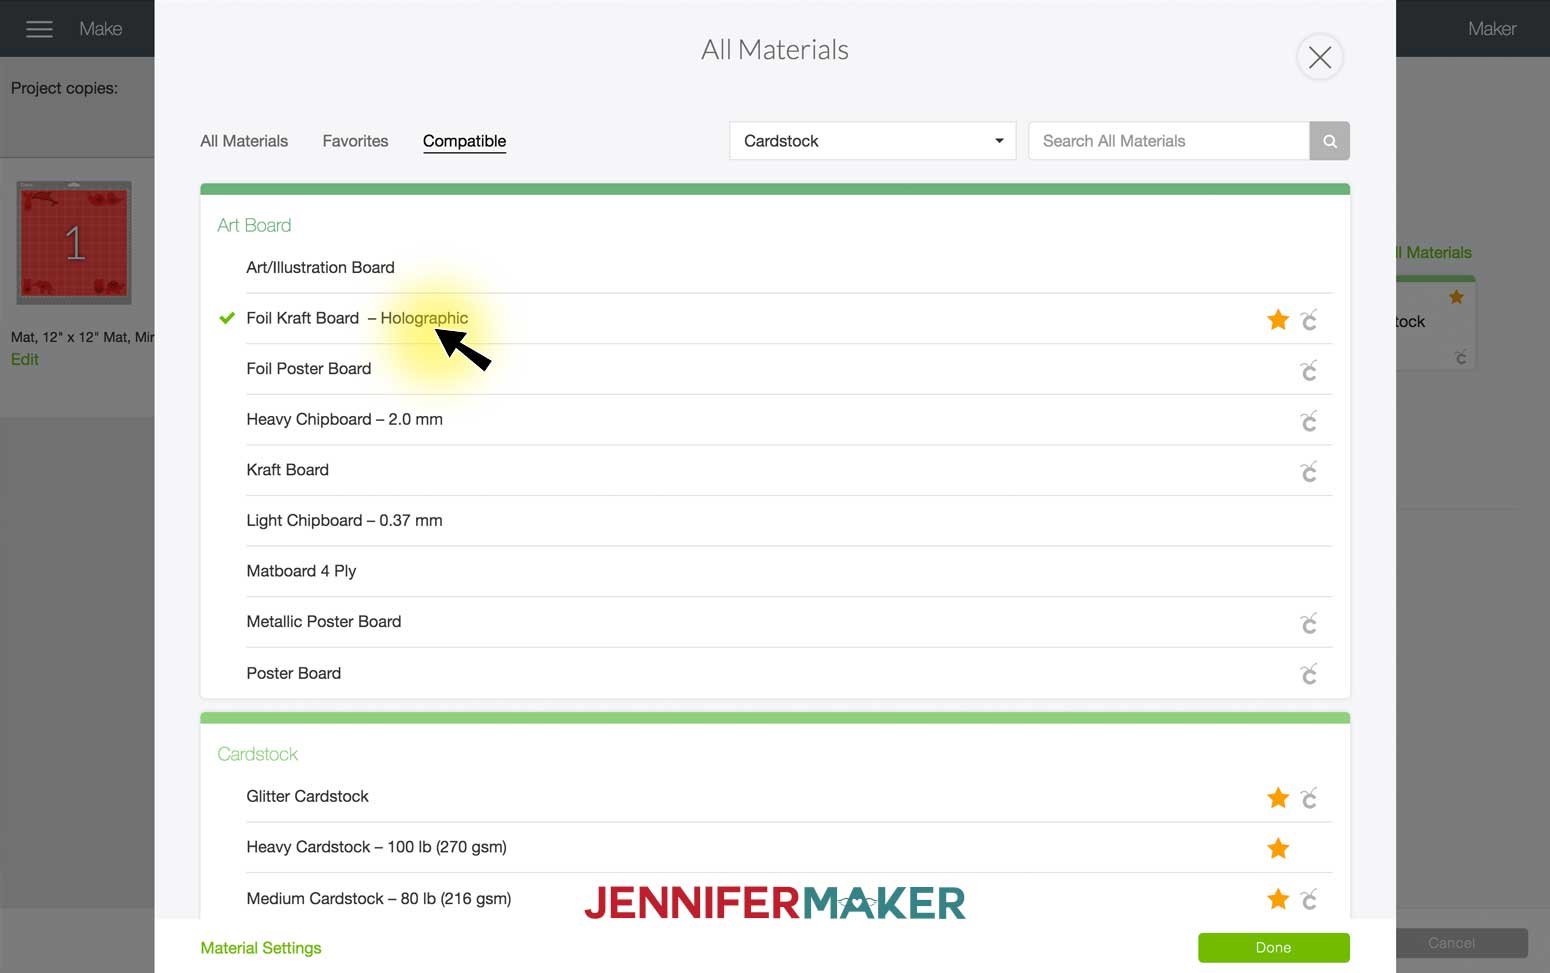
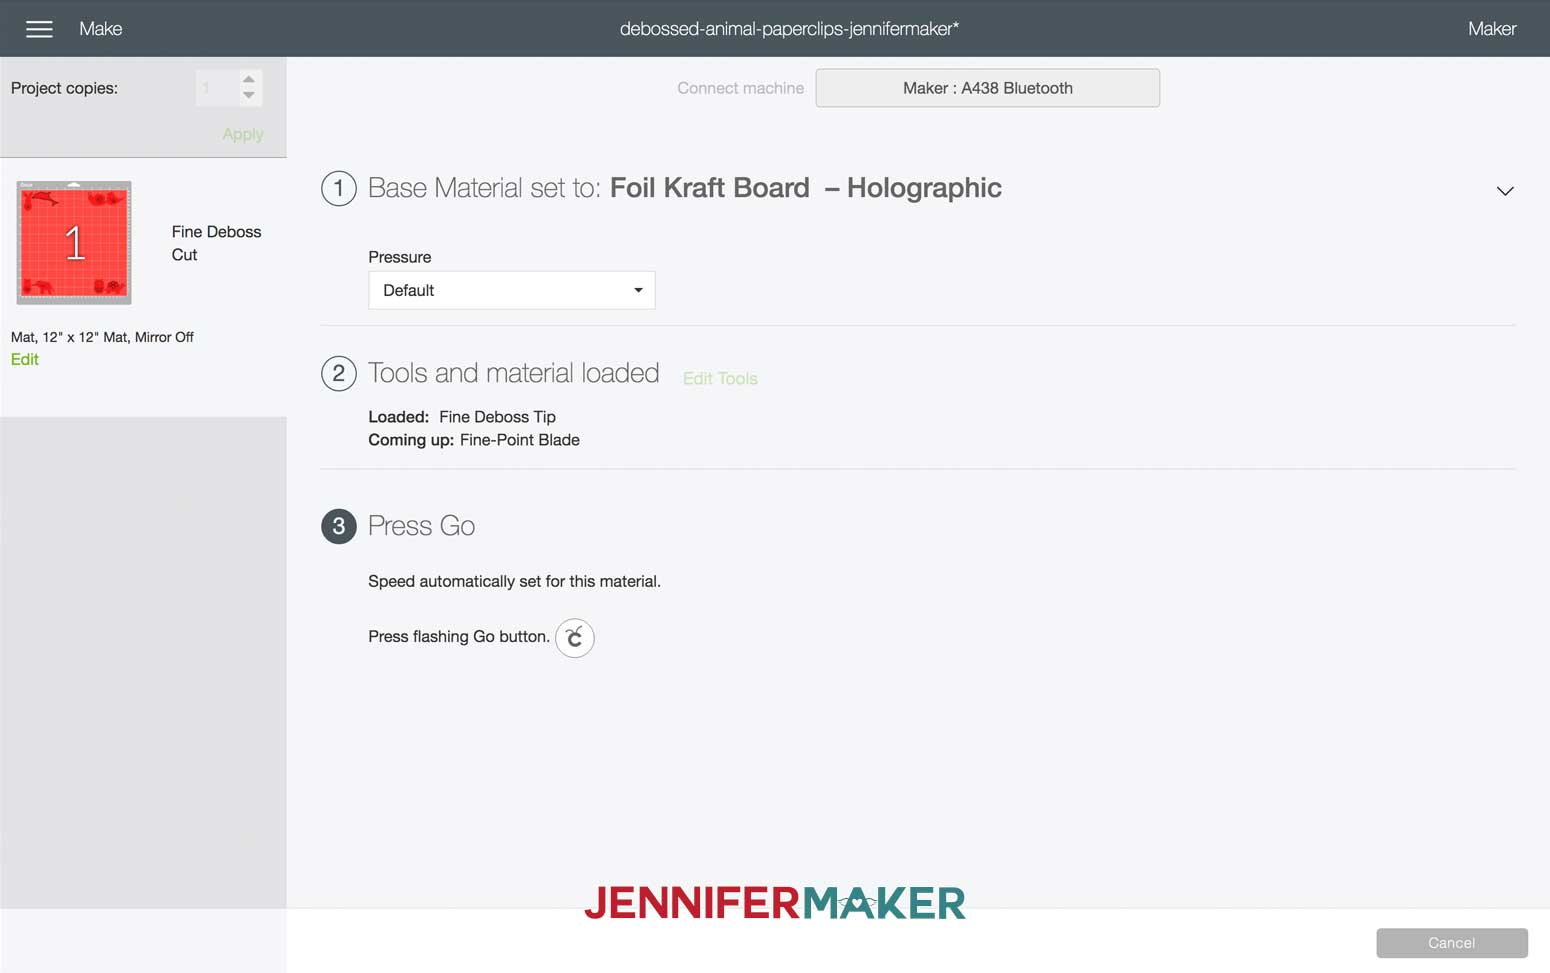
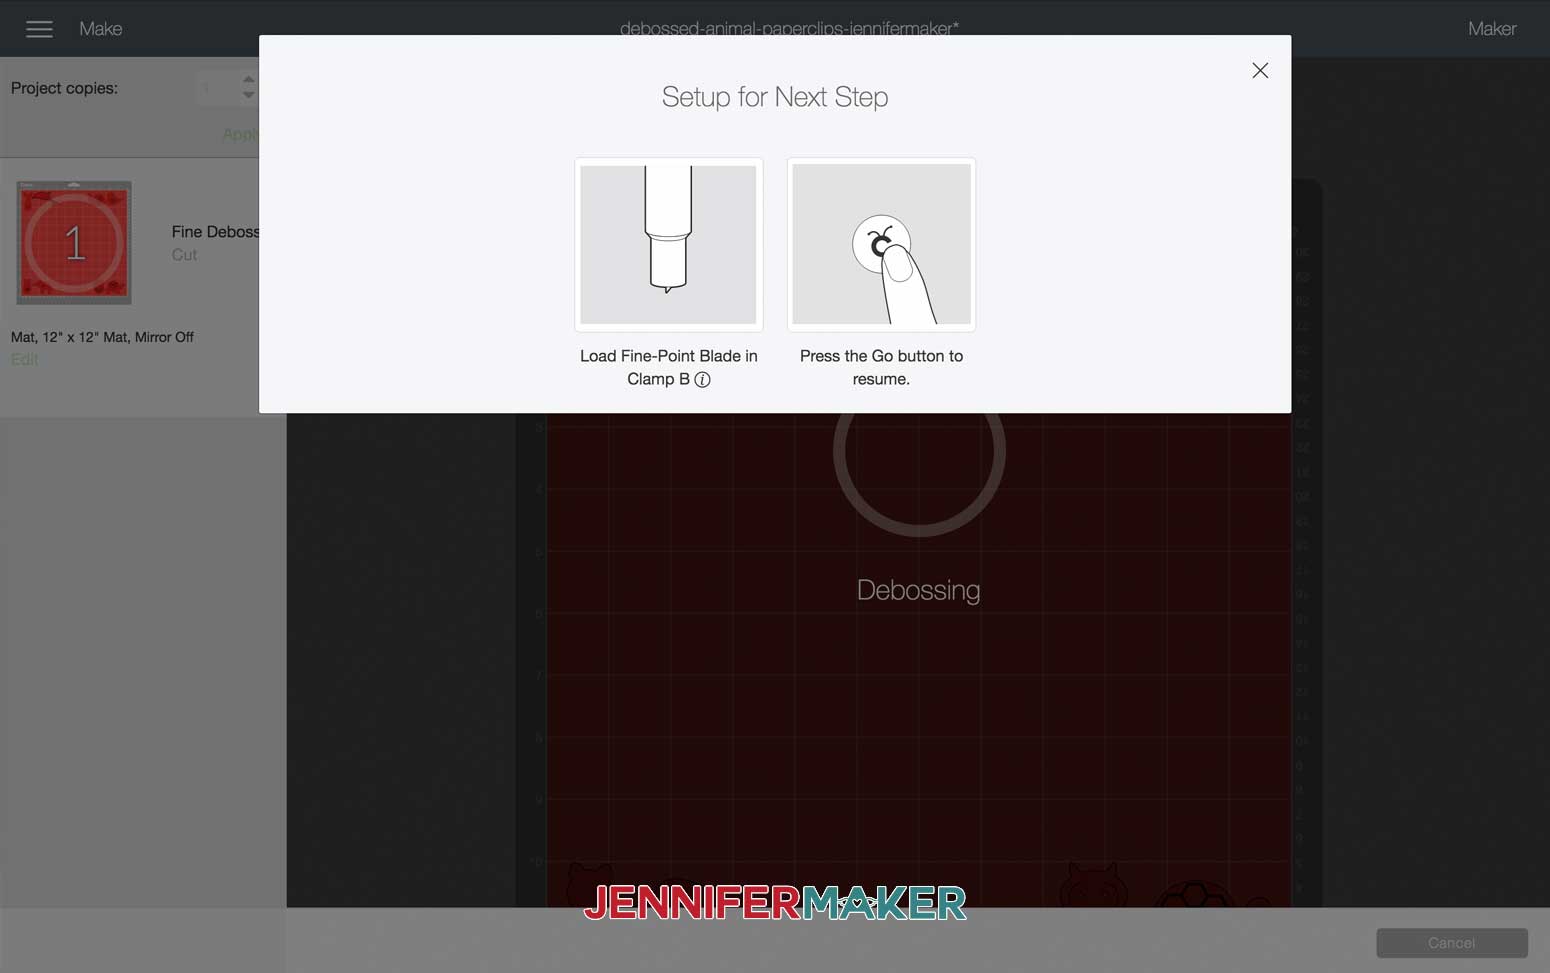
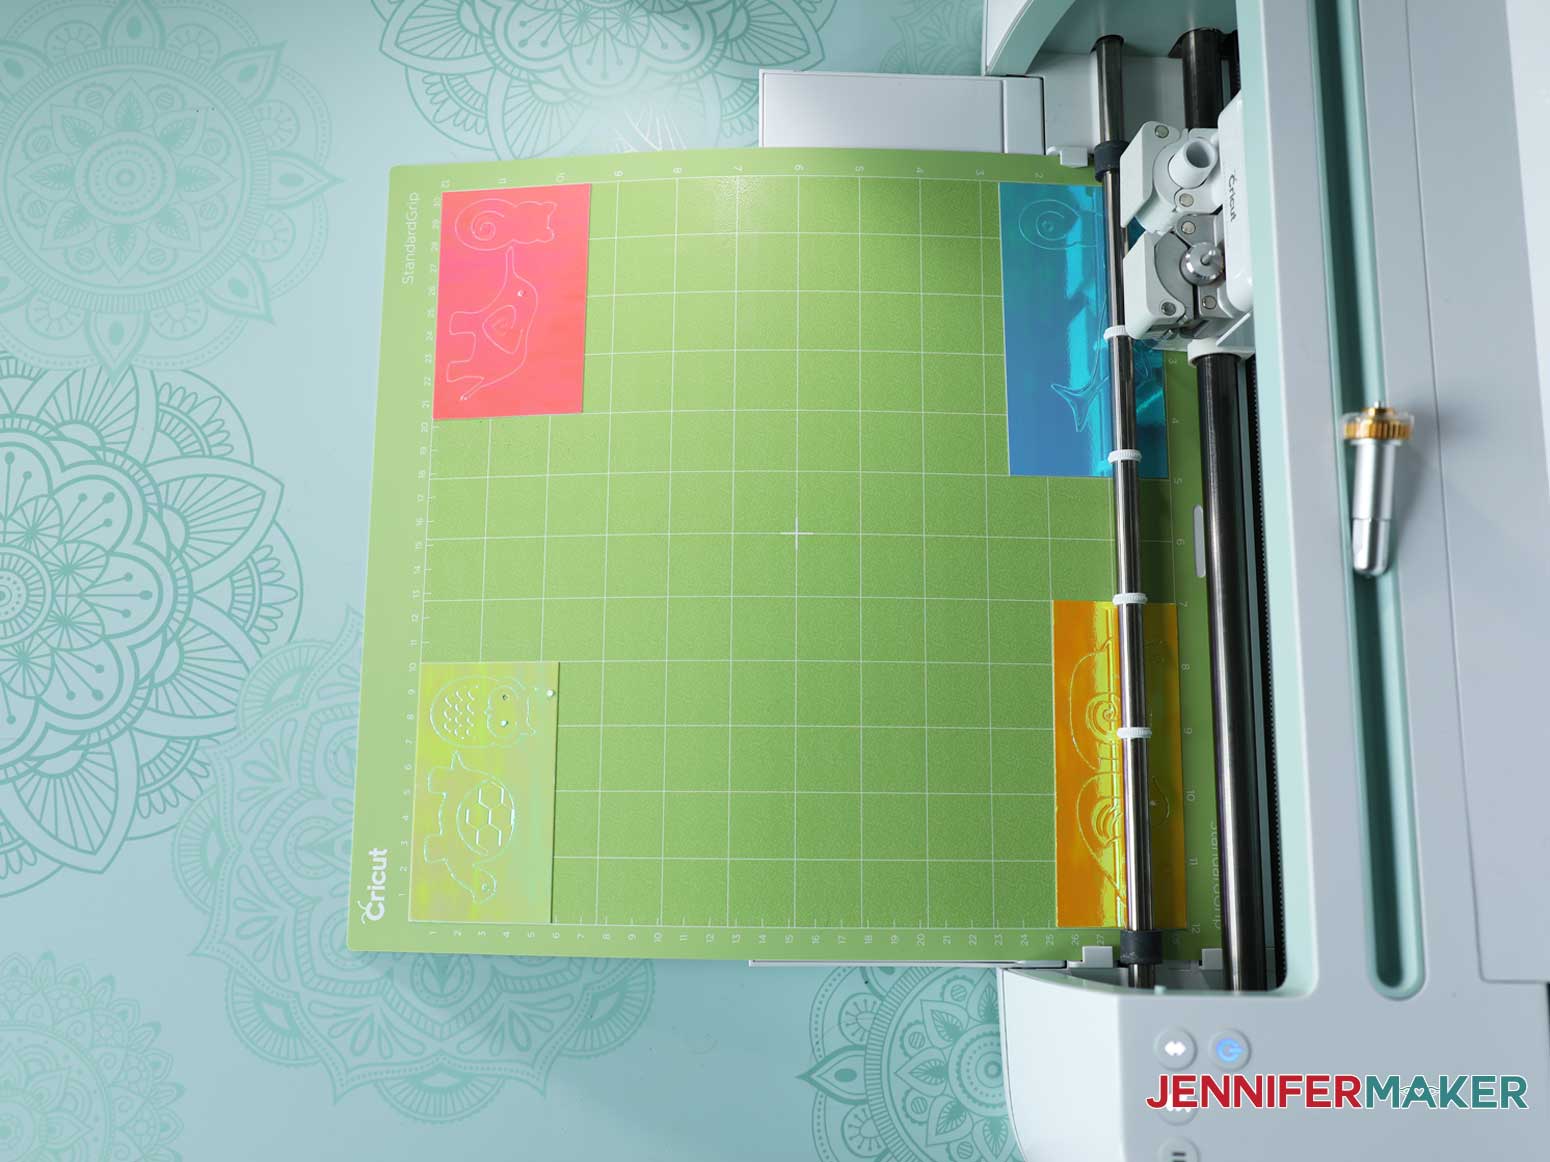
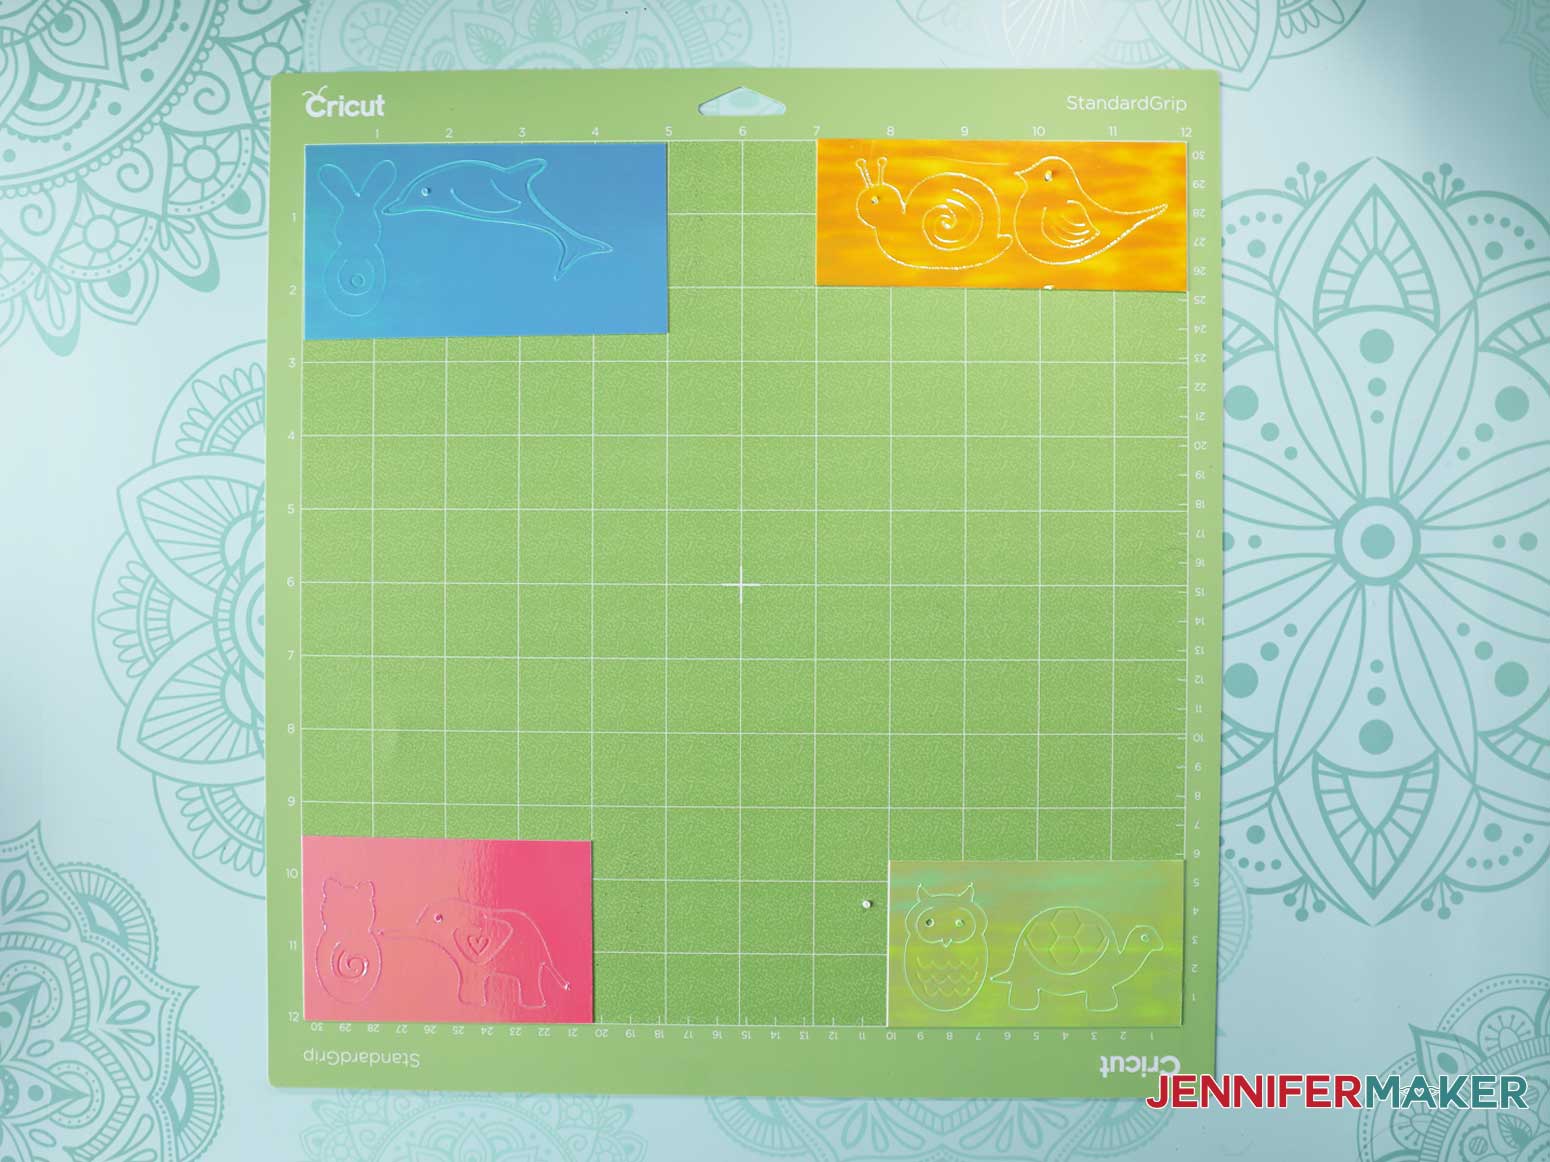
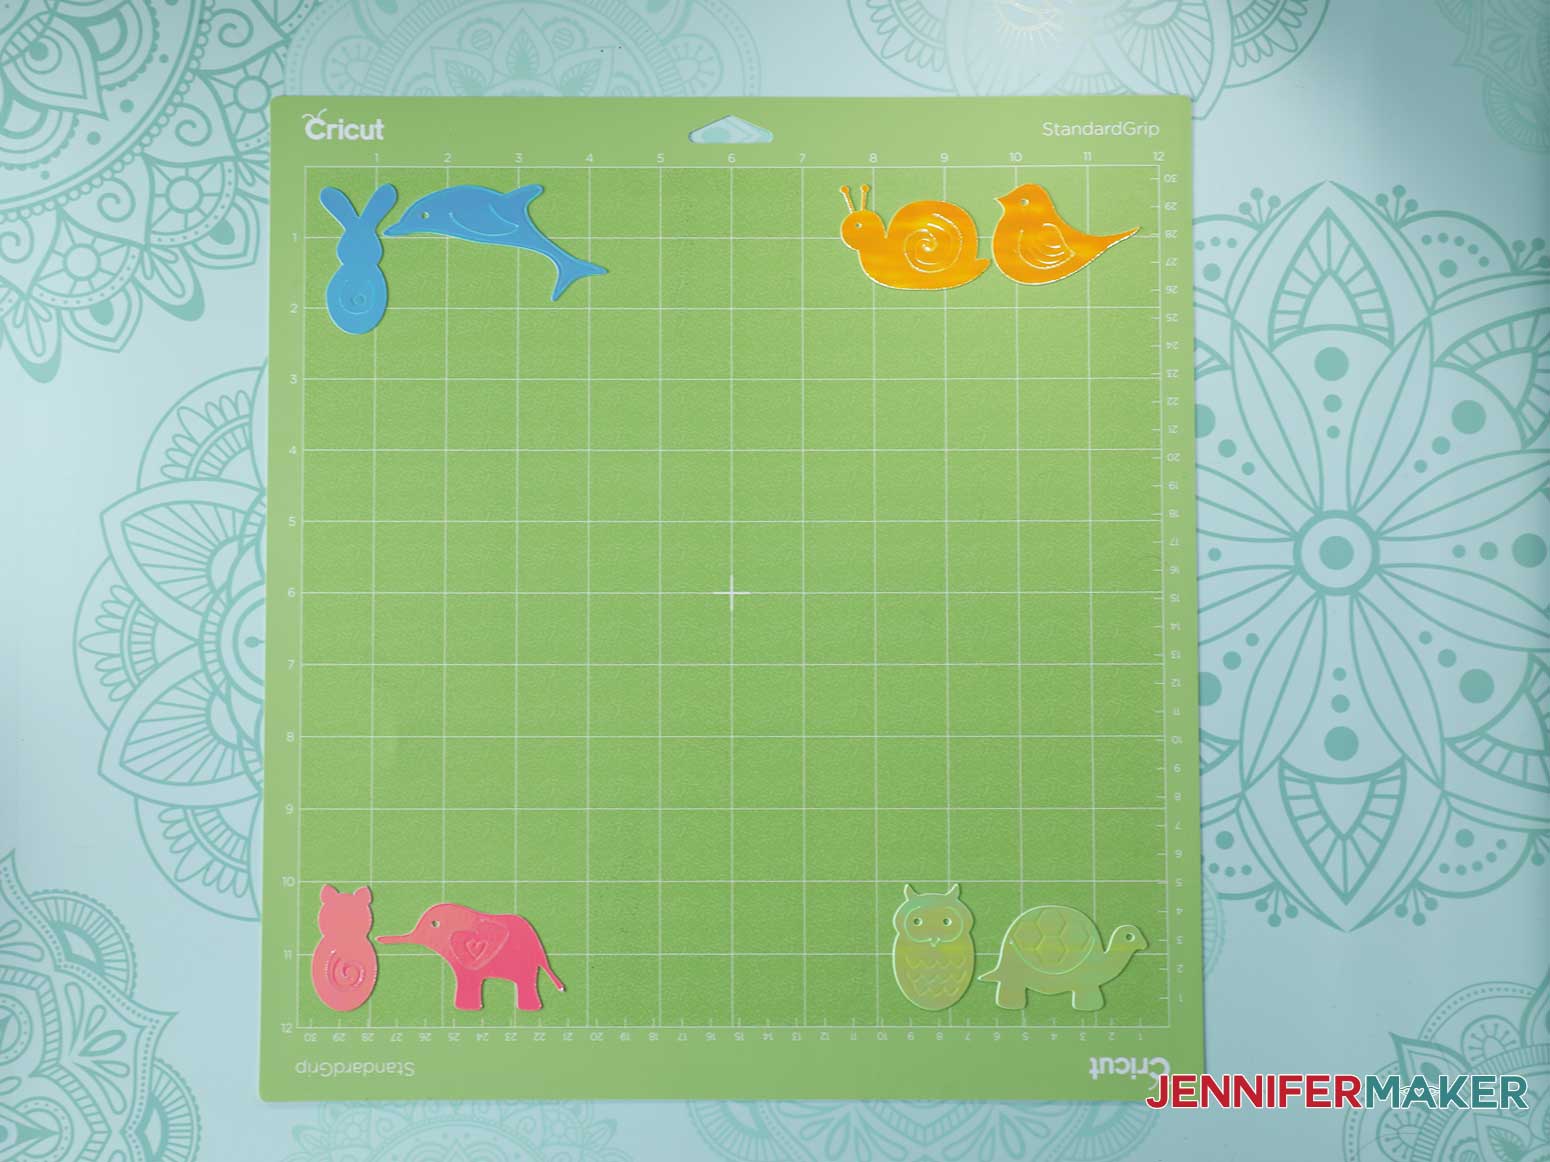
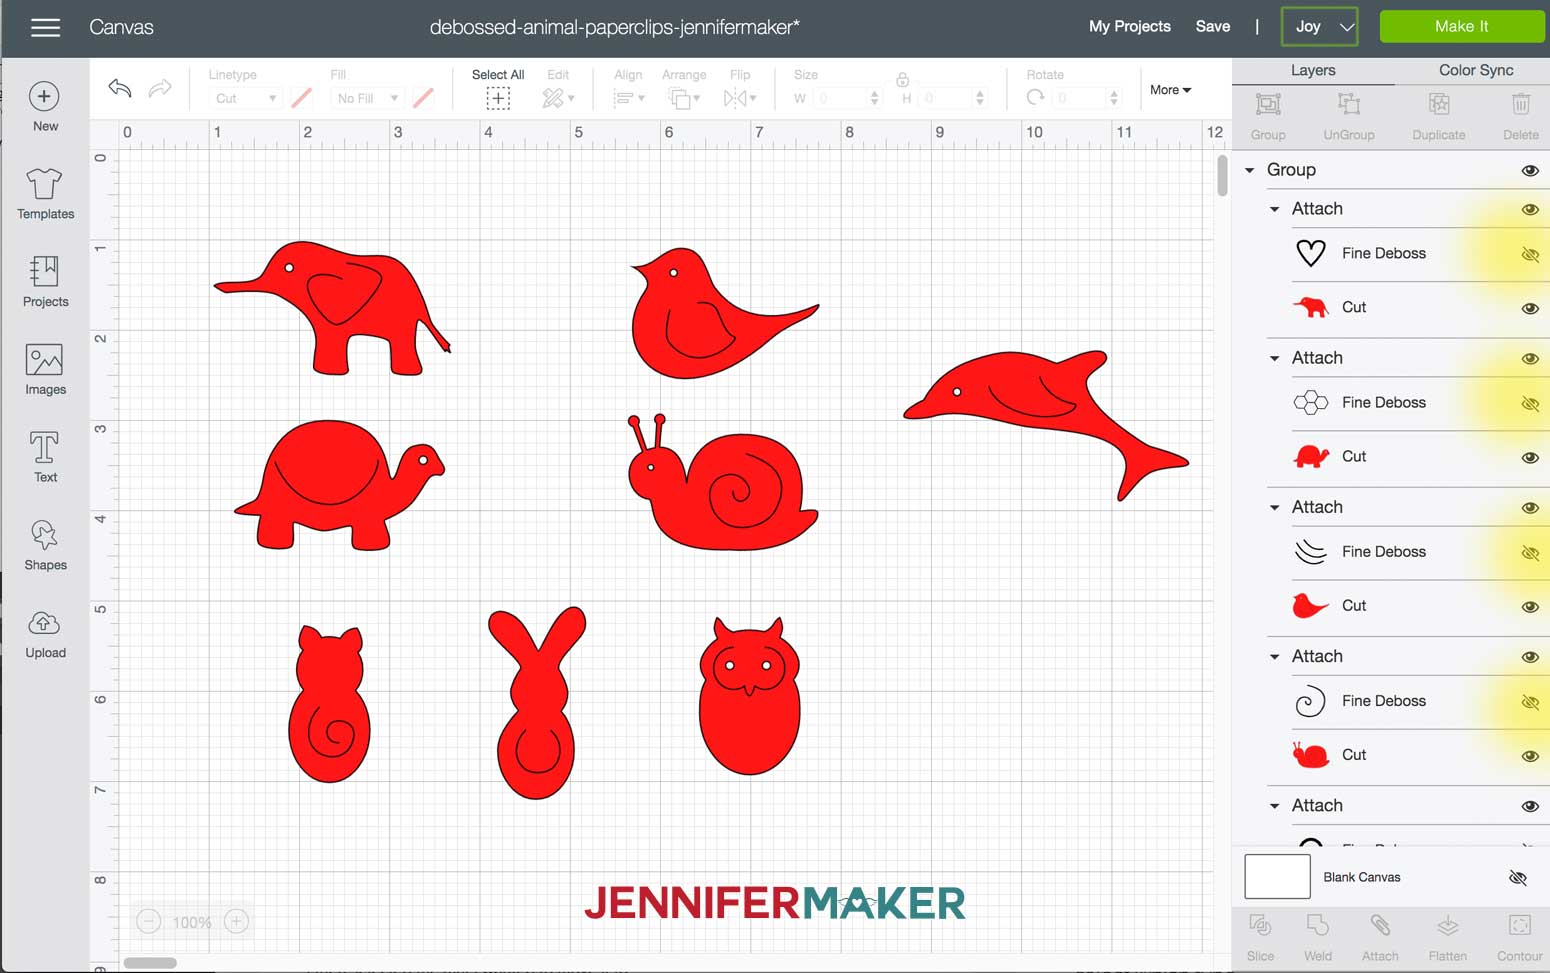
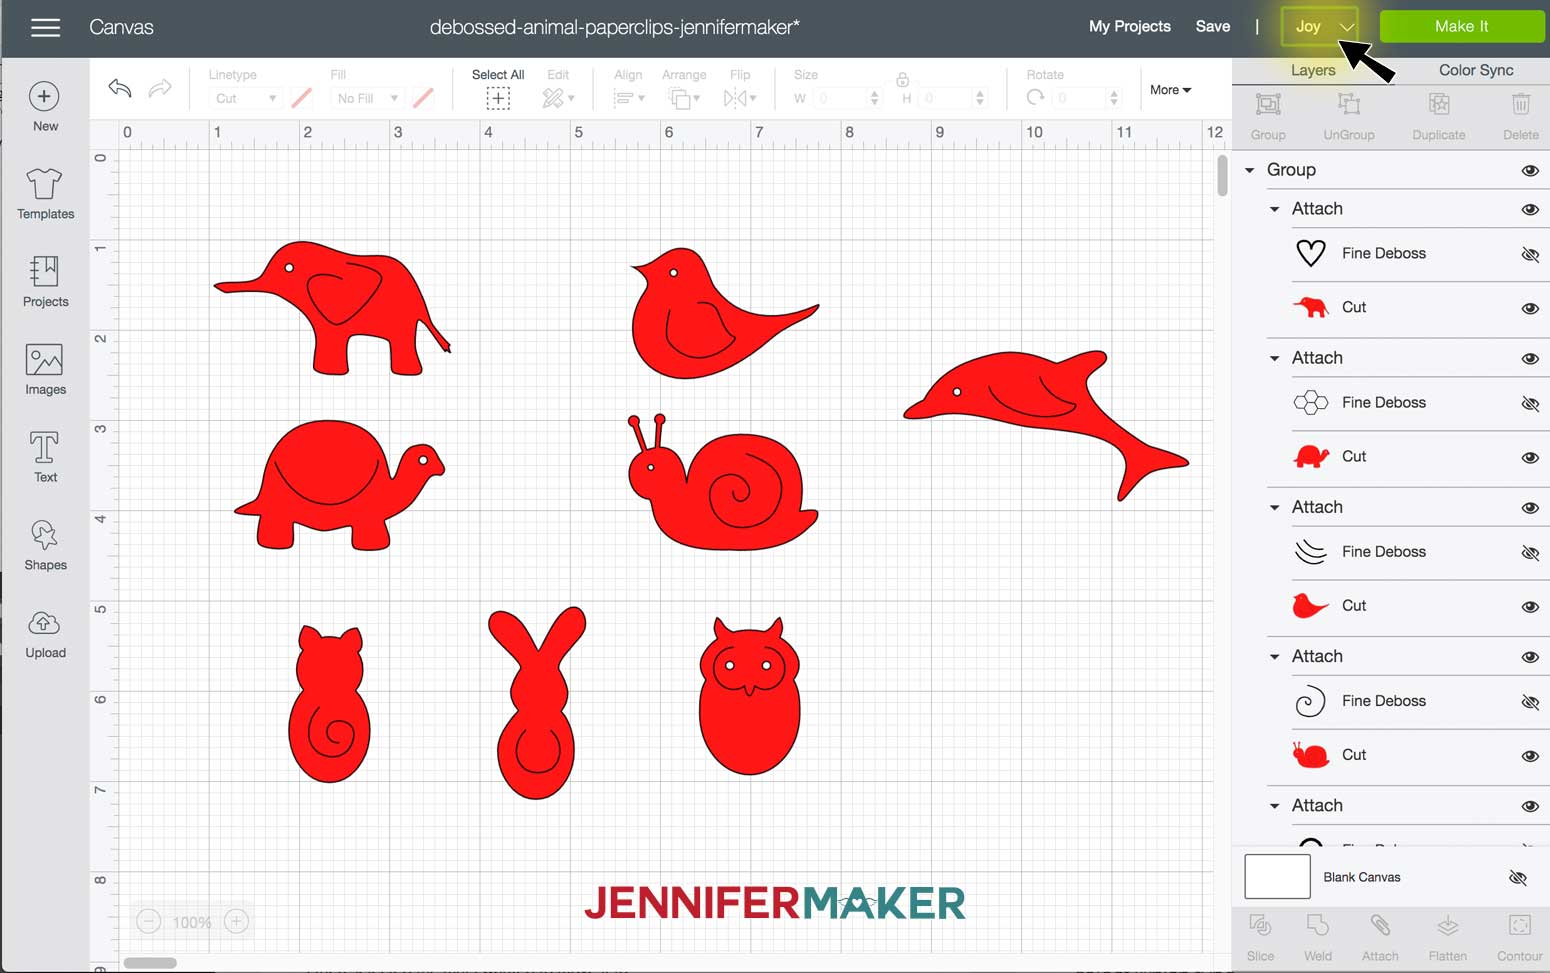
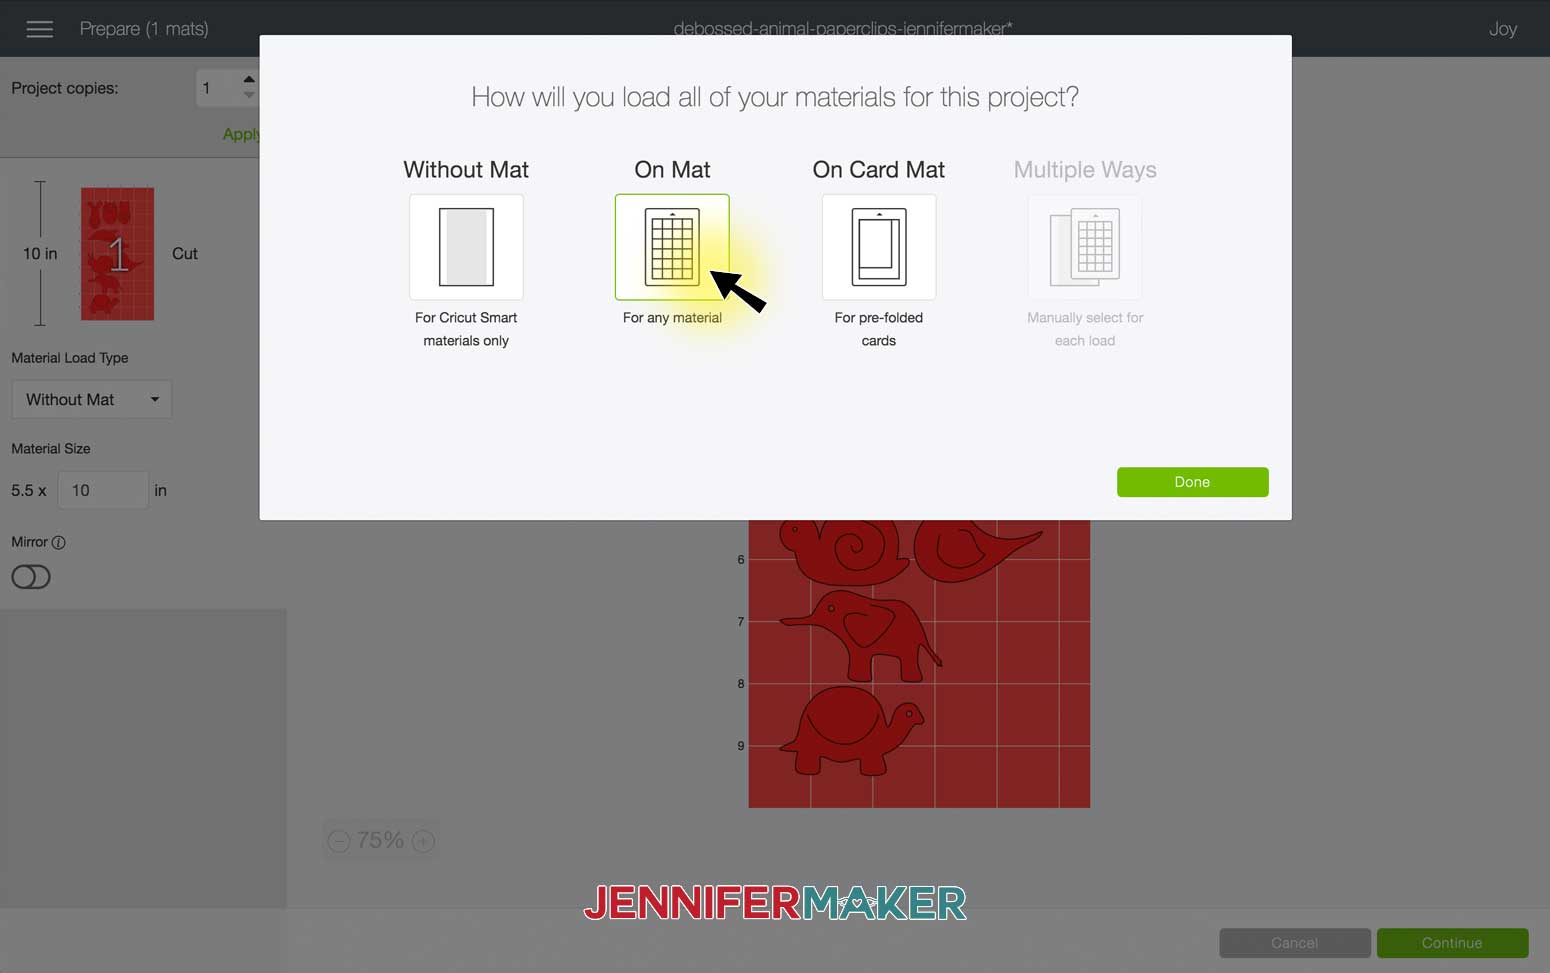
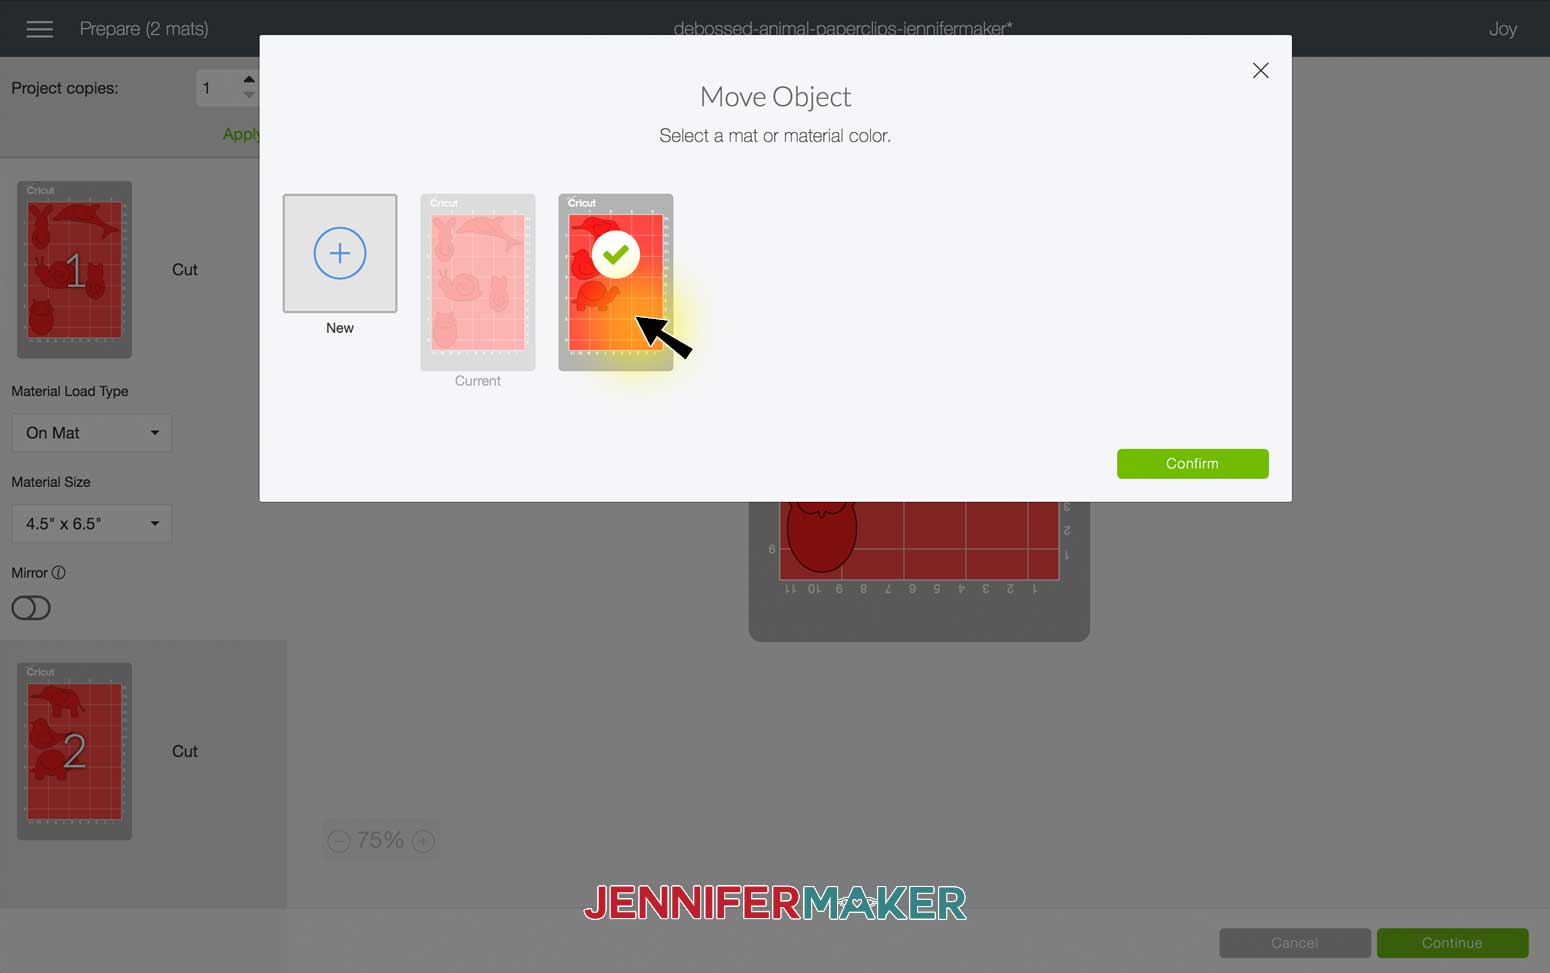
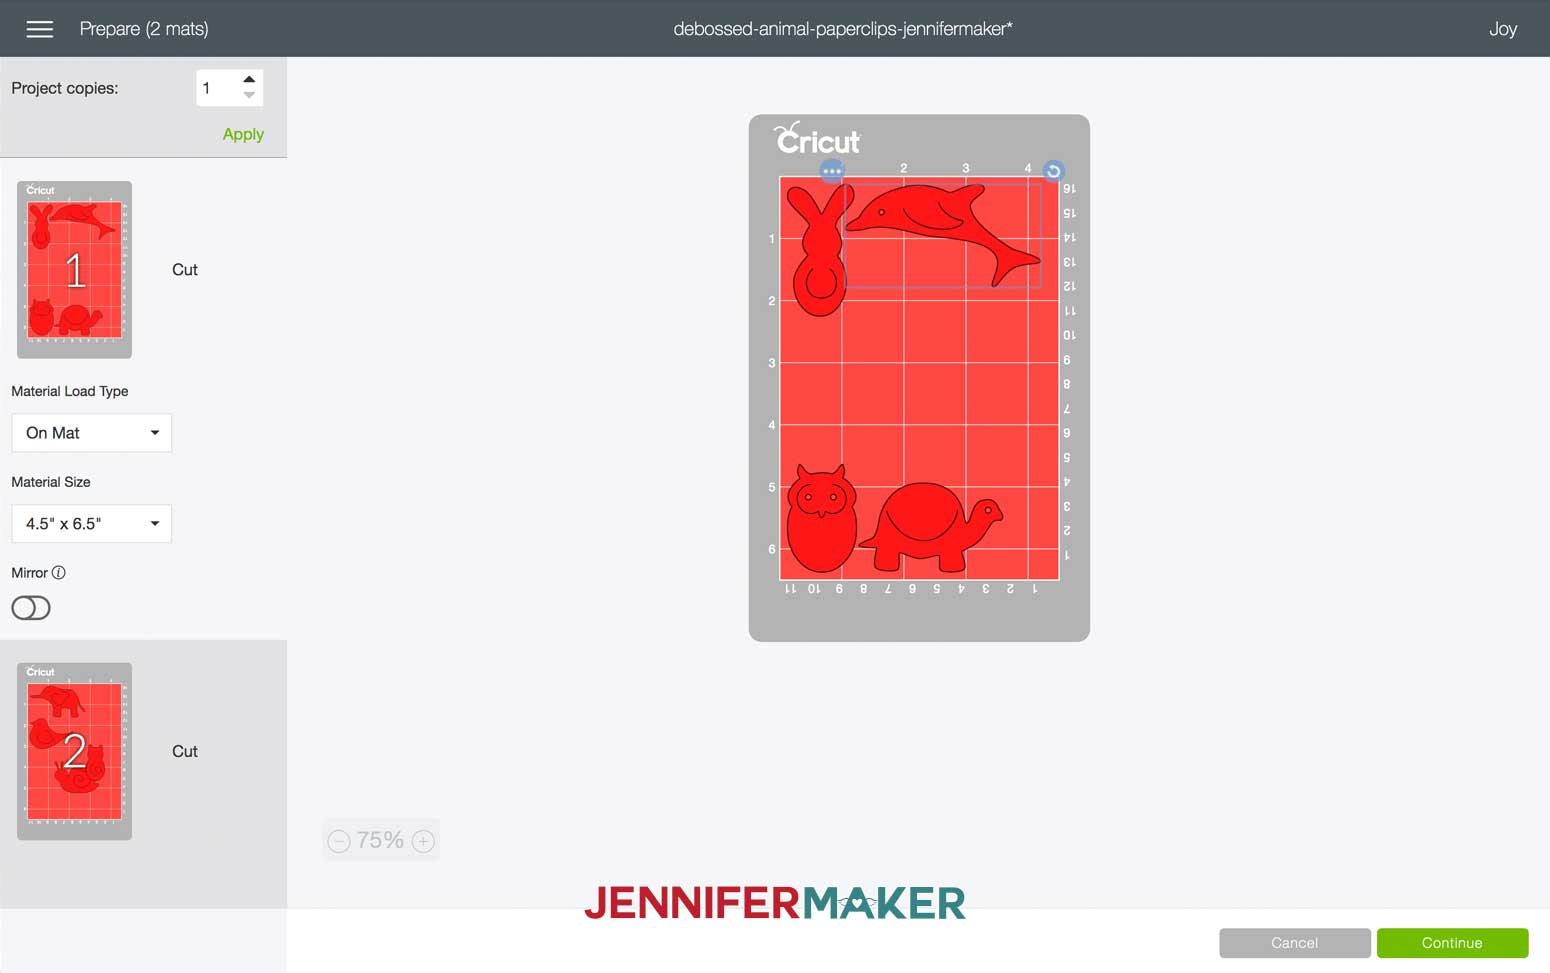
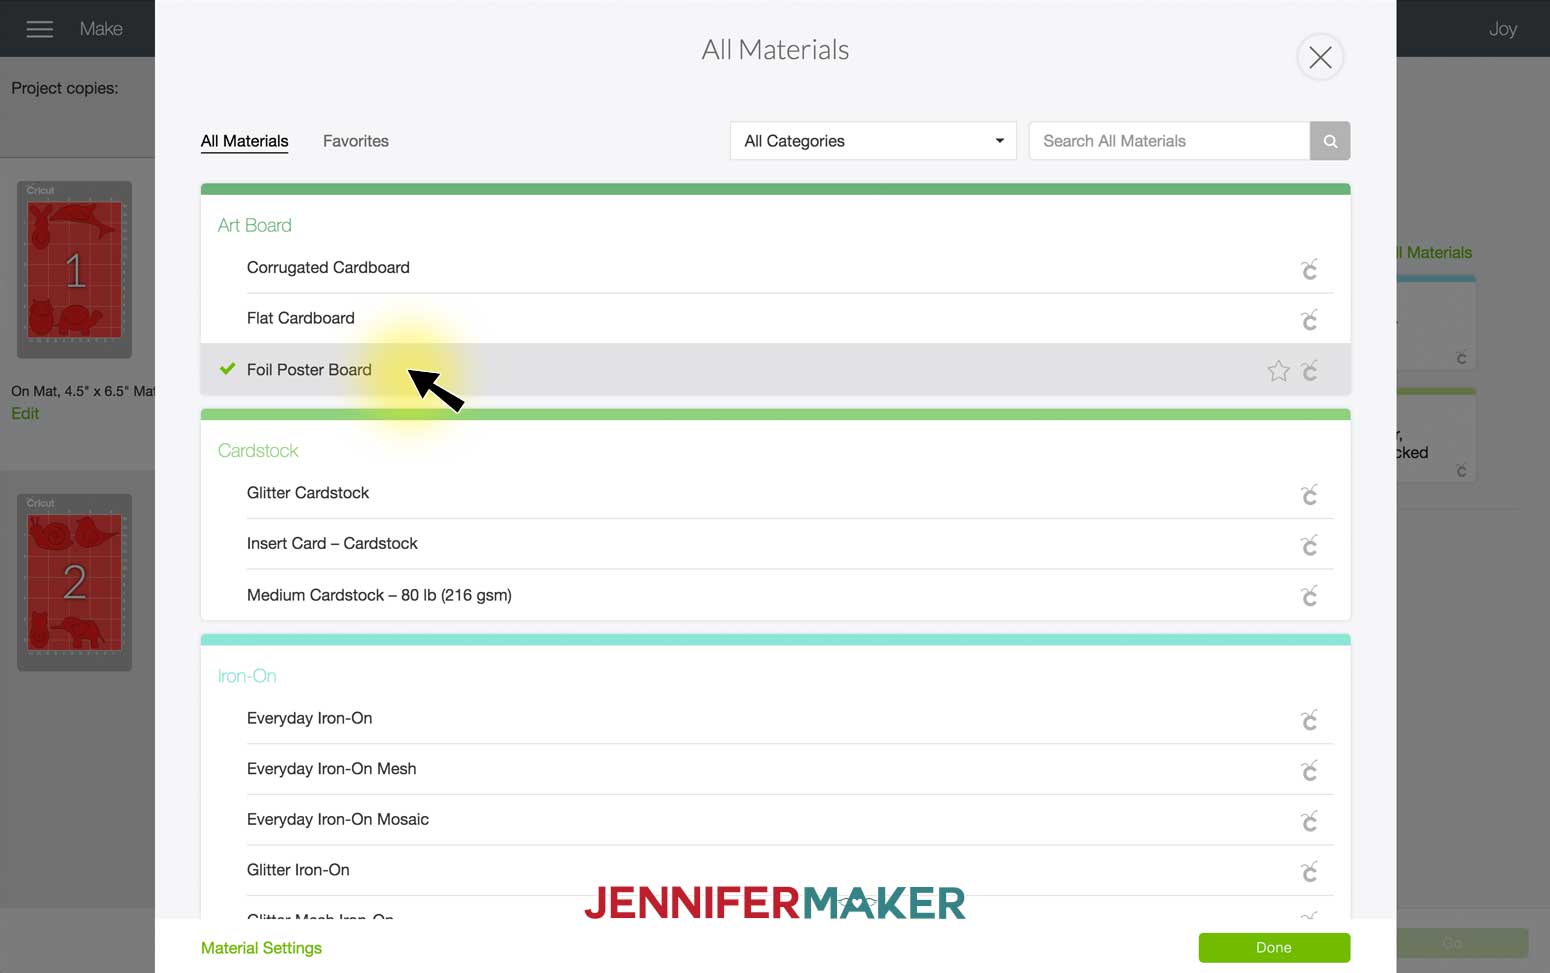
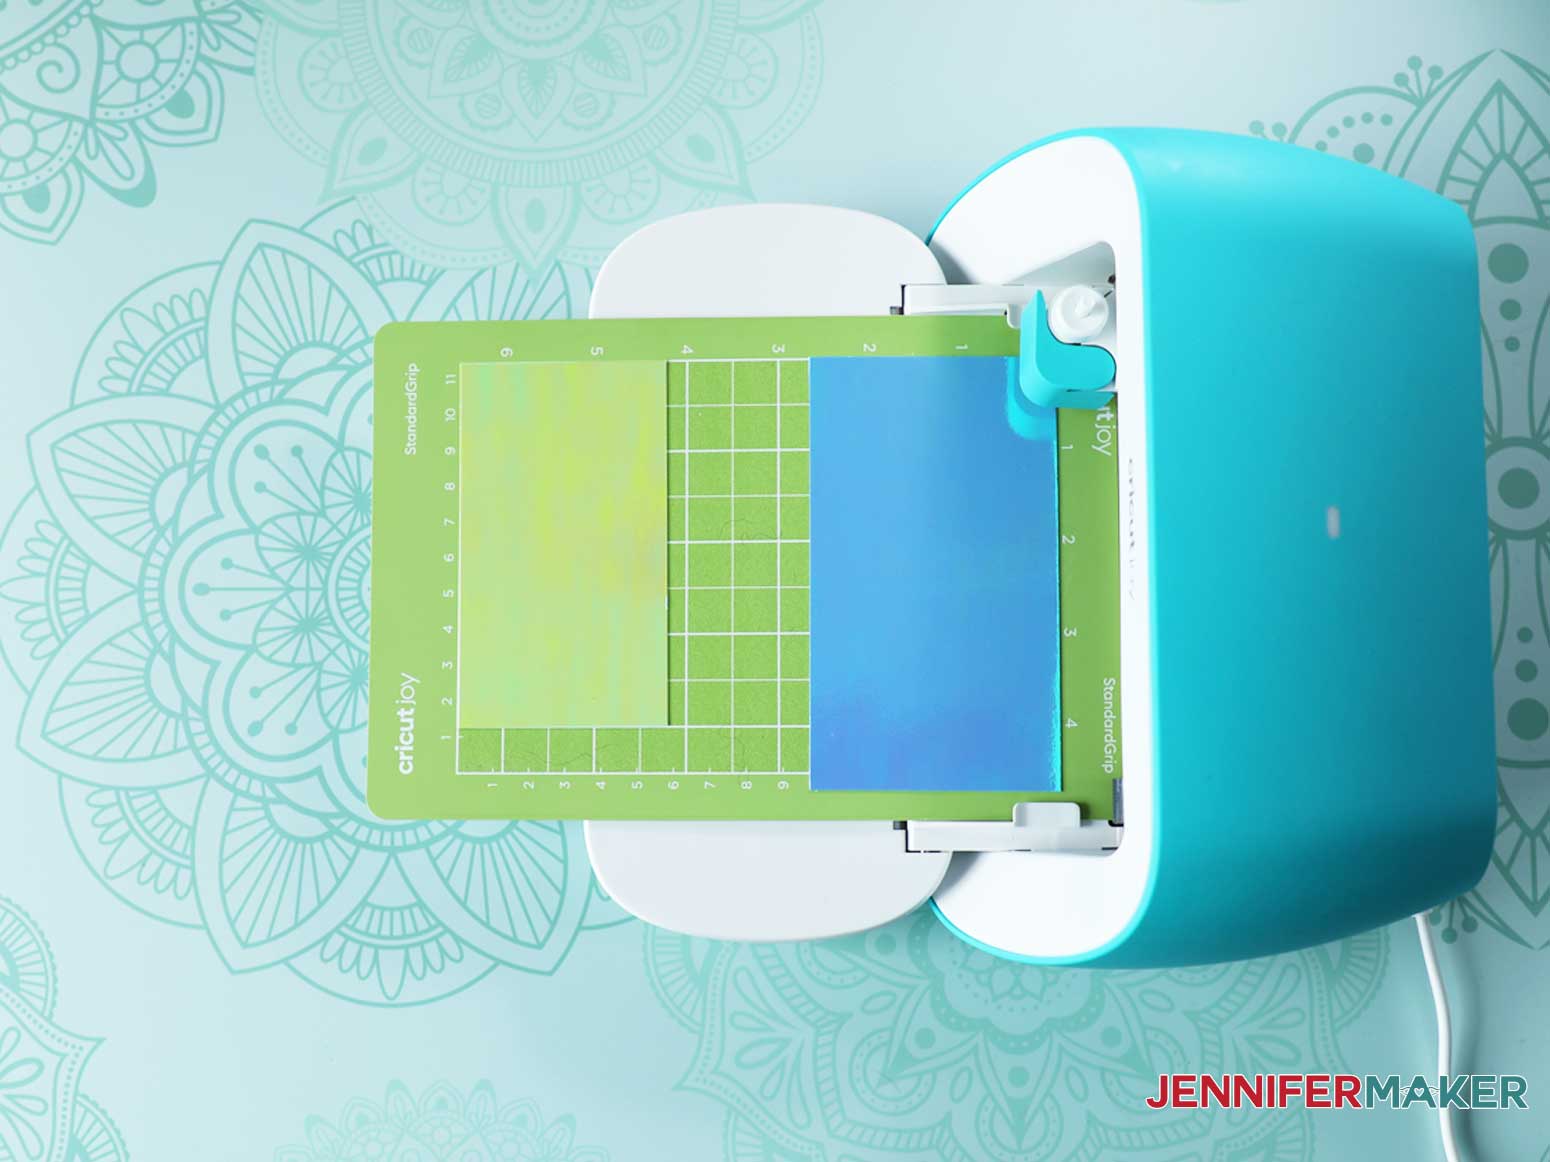
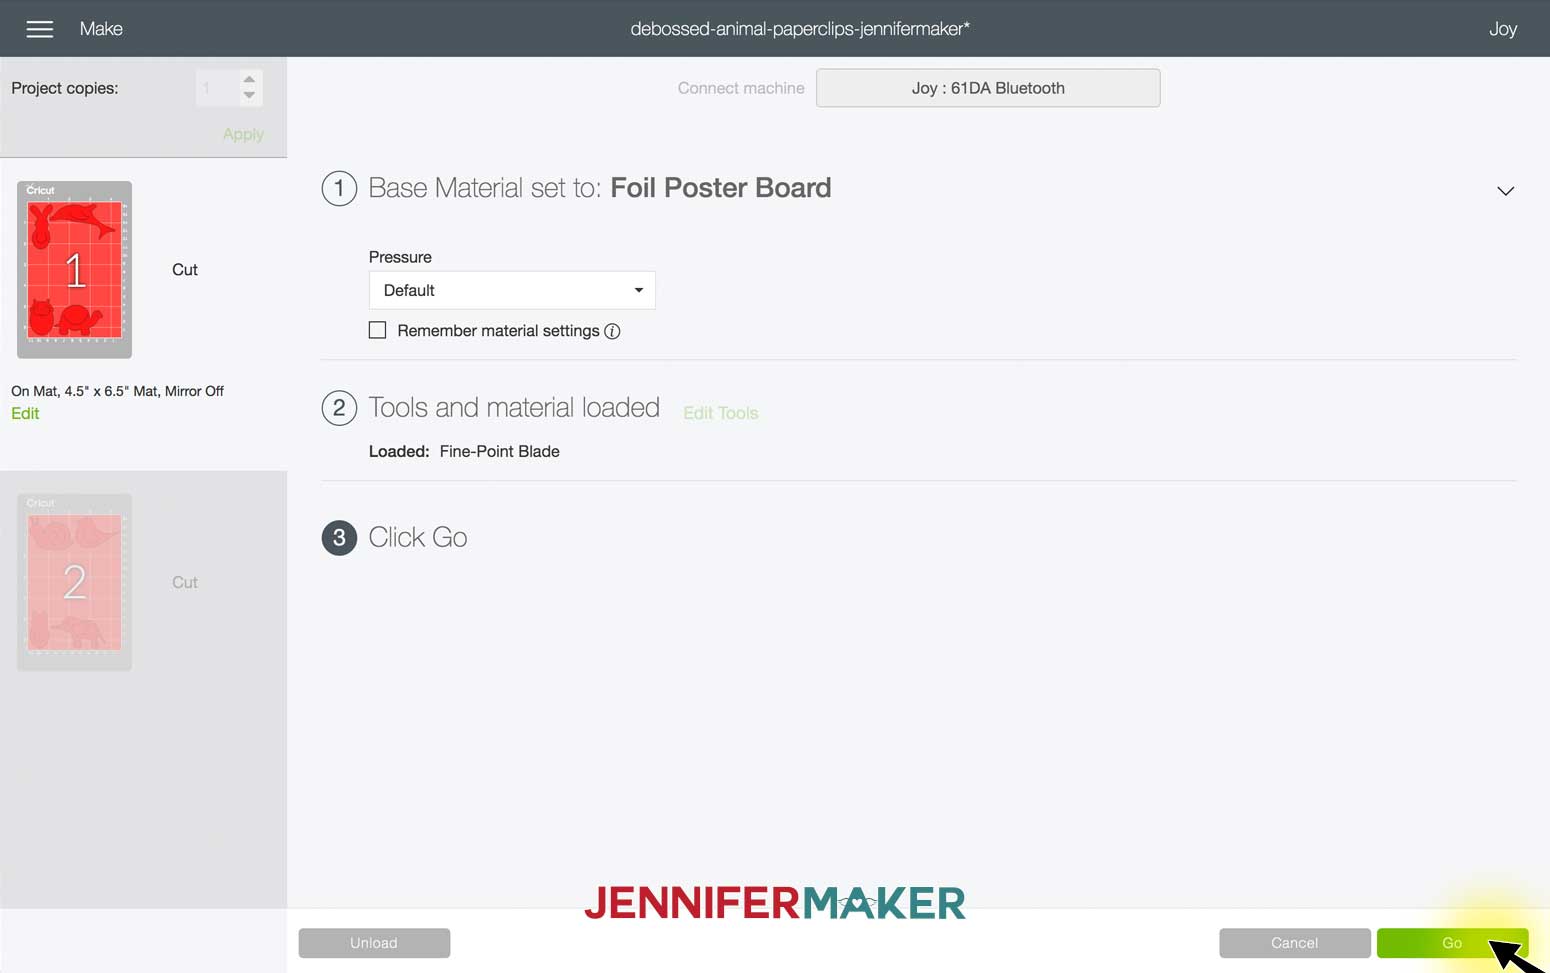
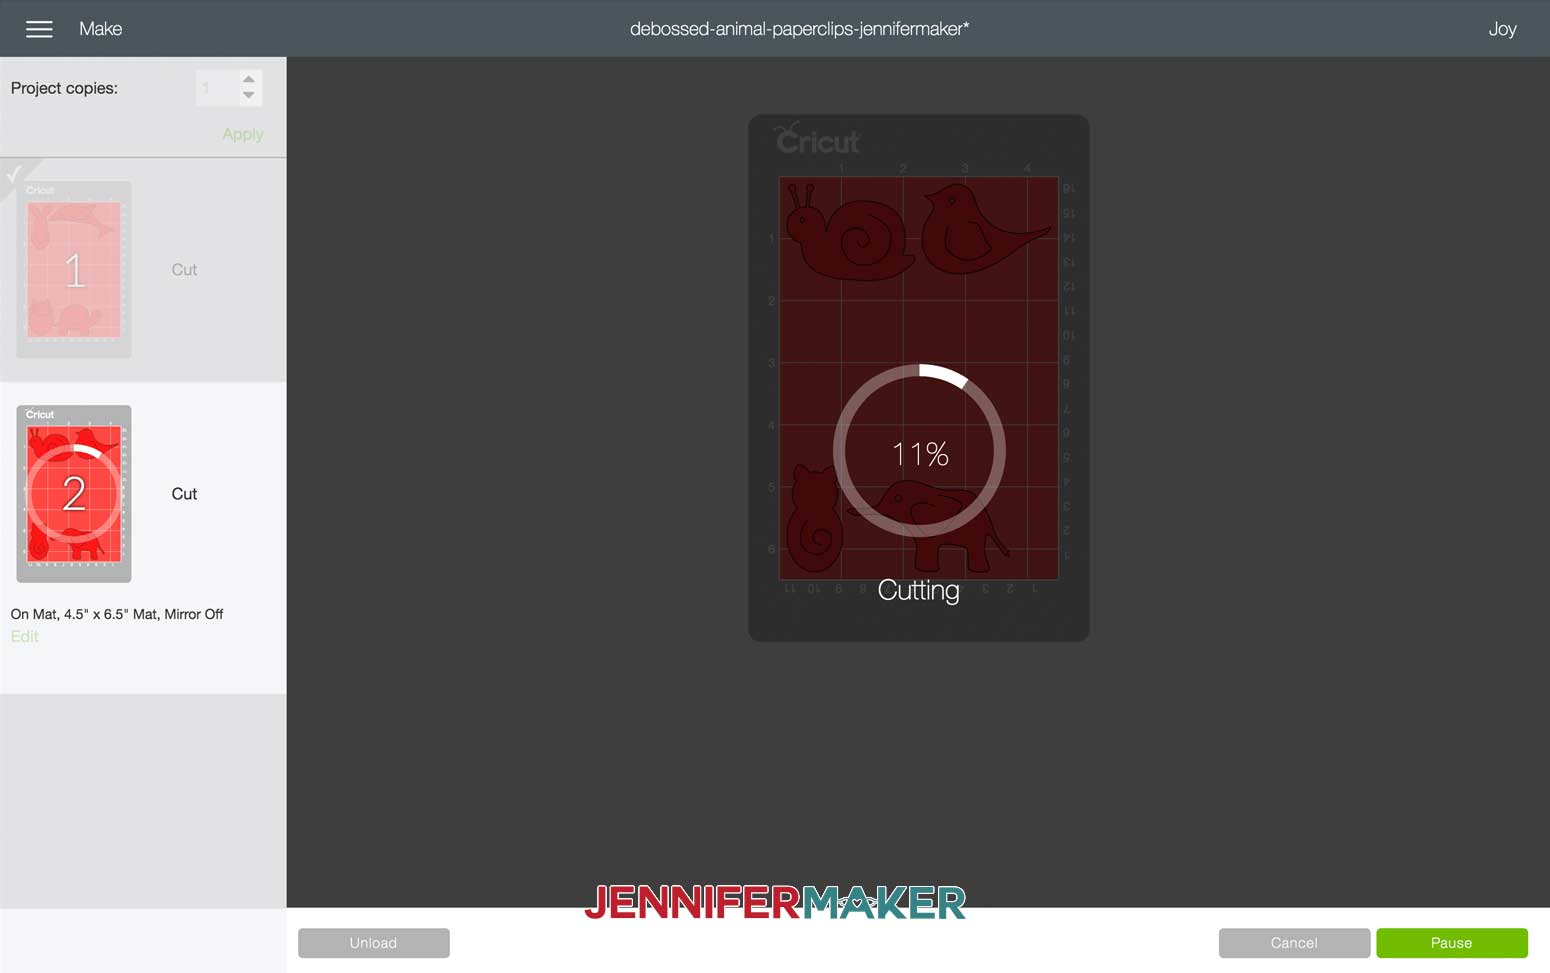
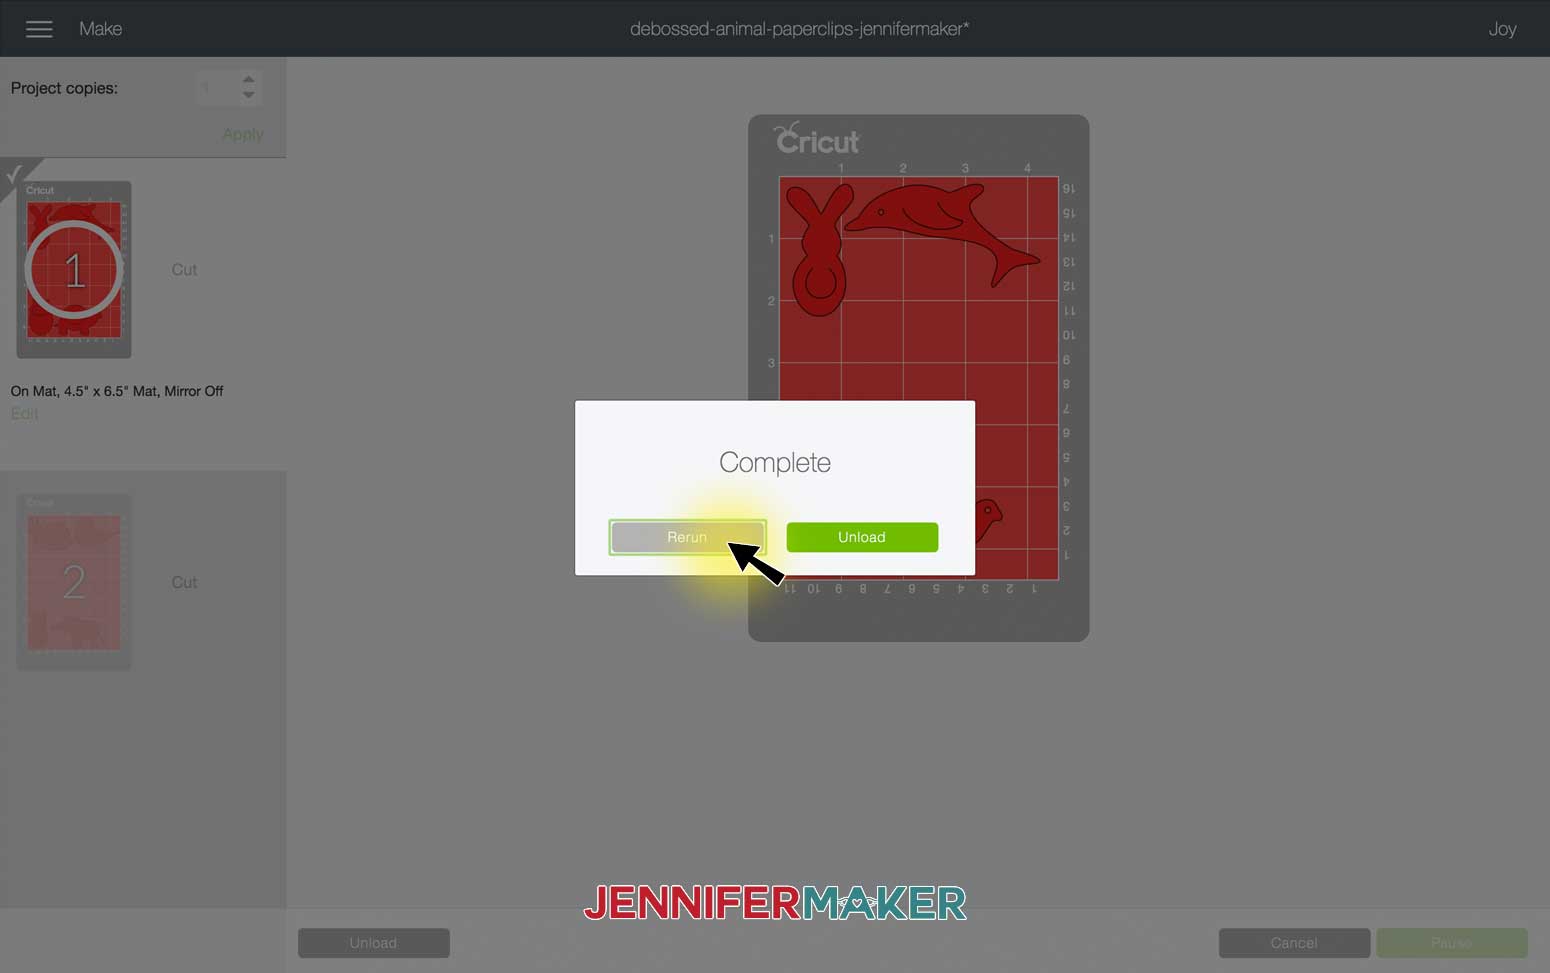
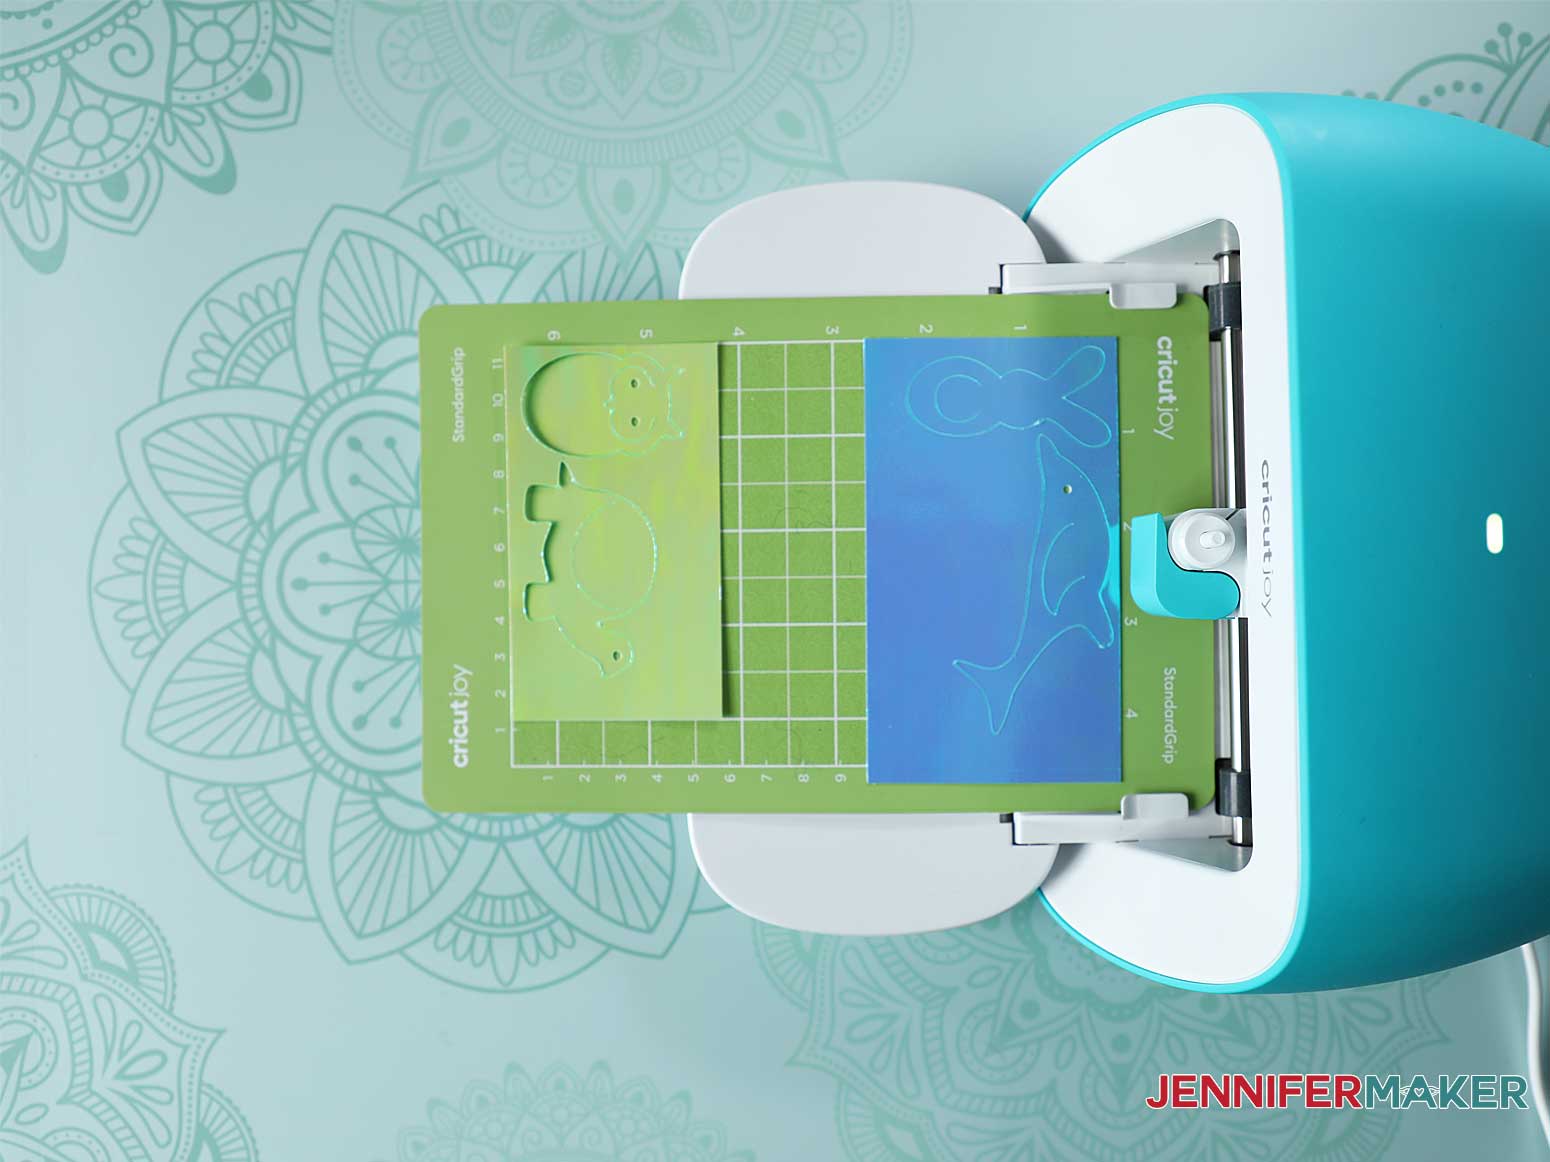
This easy-to-follow tutorial shows you how to deboss Kraft board using the Cricut Maker's fine debossing tip or Cricut Explore's scoring stylus. I will also show you how to turn off the debossing feature so you can cut the Animal Paperclips on the Cricut Joy. Get Design #264 which are my free Debossed Animal Paperclip SVG designs from my free resource library (get the password to the library by filling out the form at the bottom of this post). There are two SVG files in the Zipped folder. One is for cutting and debossing the paperclips on a Cricut Maker (animal-paperclips-deboss-jennifermaker-SVG.svg), and the other is for cutting and scoring the paperclips on a Cricut Explore (animal-paperclips-score-jennifermaker-SVG). If you are using a Cricut Joy you may upload either file. Upload the Debossed Animal Paperclips SVG file appropriate for your specific machine into Cricut Design Space. If you're not sure how to upload an SVG cut file to Cricut Design Space, watch this helpful video training series I made. If you're on an iPhone or iPad, here's how to download and upload SVG files to the Cricut Design Space app. First, check to make sure the SVG file imports correctly. Each paperclip has two attached layers. In the file for the Maker the first layer of each paperclip should automatically be set to Fine Deboss. In the file for the Explore this first layer is set to Score. The second layer in both files is set to Cut. This is what the SVG file looks like when it is imported into Design Space for a Maker: This file is set up so each paperclip has decorative accent lines that we will deboss (push the material INWARD, which is the opposite of emboss). This requires using a Fine Debossing Tip on a Cricut Maker or a Scoring Stylus for a Cricut Explore. TIP: If you don’t have a Cricut Maker or Explore you can still cut the paperclips without the debossing feature! To do this, turn off the deboss (or score) layers for each paperclip by clicking on the eyeball on every layer that says Fine Deboss (or Score). Once they are all hidden, your file is ready to cut without debossing. Skip to Step 4 if you are using a Cricut Joy. Now, you have eight paperclips ready to Deboss (or Score) and Cut. Select your machine from the list on the top bar next to the Make It button. Click Make It and you will be prompted to select your material settings and place your Kraft board pieces on your cutting mat. I made eight paperclips from four different colors (two of each color). To cut multiple colors of paper using only one mat, I needed to position each paperclip element into a different corner or section of my cutting mat in the mat preview screen. I did this by clicking and dragging each paperclip element to move them around the mat. TIP: I used the corners to line up the elements and paper on the mat, but the ruler measurements can come in handy here if you are using multiple pieces of paper. Once the Cricut knows where to deboss (or score) and cut everything, I placed my pieces of Kraft board onto a green cutting mat and used a burnisher to smooth it down and adhere it to the mat. Make sure each piece of paper is appropriately sized. Refer to the Mat Preview for the placement and size needed by clicking/hovering over it as you place your material. See my video tutorial about placing multiple colors onto a single mat for more detail. For this project, I used Cricut Holographic Foil Kraft Board, so in the Materials section, I selected this type of paper in the Art Board section. I then loaded my Fine Debossing Tool (#21) into my Cricut Maker (Scoring Stylus for the Cricut Explore). The debossing tip has a small rollerball in the tip, which presses down on the material to give the debossed look. Now follow the prompts to load the mat into your Cricut and press the Go button when you’re ready to begin. Your Cricut Maker will use the Fine Debossing Tip or Scoring Stylus to deboss the Kraft paper. When it’s done, it will prompt you to change your tool to the Fine Point Blade. Click the Go button, and the Maker will now cut out the paperclips. When finished, gently remove the paper and paperclips from the mat. Congratulations! You’ve debossed and cut your paperclips! These are the pieces you’ll have when you’re done: If you don’t have a Cricut Maker or Explore, you can still cut out the paperclips using the Cricut Joy. To prepare the file, you’ll need to turn off the deboss or score layers by clicking on the eyeball on every layer that says Fine Deboss (or Score). Once they are all hidden, your file is ready to cut without debossing. When you're ready to Cut, select your Joy from the top bar next to the Make It button. Click Make It and you will be prompted to select which type of mat to use (for Joy machines). To cut multiple colors of paper using only one or two mats, I needed to position each paperclip element to a different corner or section of my cutting mat in the mat preview screen. I did this by clicking and dragging each paperclip element to move them around the mat. I used the corners to line up the paper, but the ruler measurements can come in handy here. I then selected the mat I wanted to move it to. Then I clicked and dragged each element around the mats until they were positioned where I wanted them. Once the Cricut knows where to cut everything, I placed my pieces of Kraft board onto a green cutting mat and used a burnisher to smooth it down and adhere it to the mat. Make sure each piece of paper is appropriately sized. Refer to the Mat Preview for the placement and size needed by clicking/hovering over it as you place your material. See my video tutorial about placing multiple colors onto a single mat for more detail. Now, select the Art Board material. I selected Foil Poster Board. Follow the prompts to load the Fine Point Blade and mat into your Cricut. Press the Go button when you’re ready to begin. Your Cricut will cut the Kraft board. When it’s done, it will prompt you to unload the mat. Check your paperclips before unloading the mat and Rerun as many times as necessary until the paperclips are fully cut and pop off the mat easily. I had to Rerun each mat three times. When the pieces are fully cut out, gently remove the paper and paperclips from the mat. These are the pieces you’ll have when you’re done cutting, without the debossed detail: How do you use your Debossed Animal Paperclips? To bookmark pages in your favorite novel? Perhaps in your scrapbooking designs? Special thanks to the JenniferMaker Design Fairy Team, specifically Design Fairy Kelly, for helping me design these adorable animal paperclips. As an Amazon Associate and member of other affiliate programs, I earn from qualifying purchases.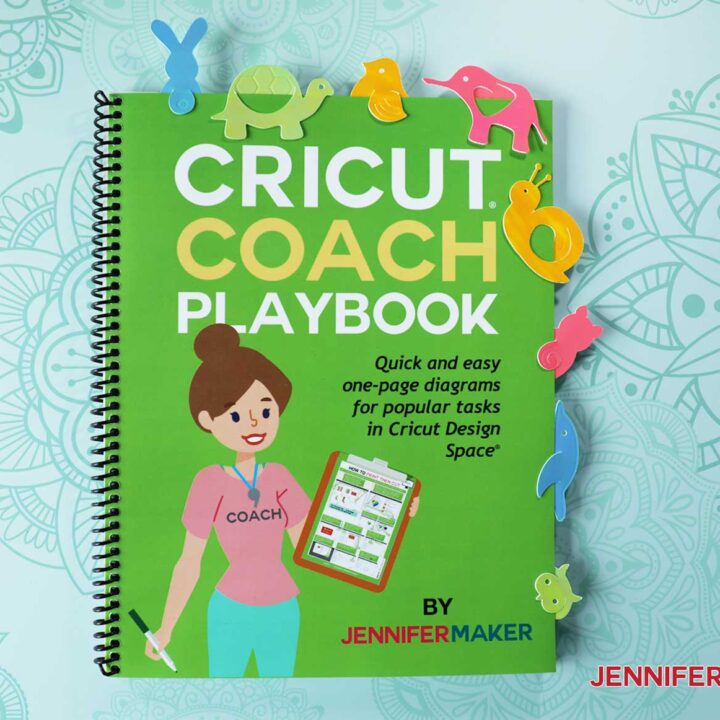
Cute Planner Paperclips
Materials
Tools
Instructions
STEP 1: GET MY FREE DESIGN FILES
STEP 2: SET UP THE FILE TO DEBOSS AND CUT
STEP 3: LOAD THE MATERIALS AND TOOLS


STEP 4: HOW TO CUT THE PAPERCLIPS USING A CRICUT JOY
On the Joy, if you have a 4.5” x 12” mat you can cut all pieces using one mat, even if you are cutting multiple colored papers. But I used a 4.5” x 6.5” mat so had to arrange the paperclips on two different mats. To do this, I clicked the three dots on the upper left corner of an element and selected Move object.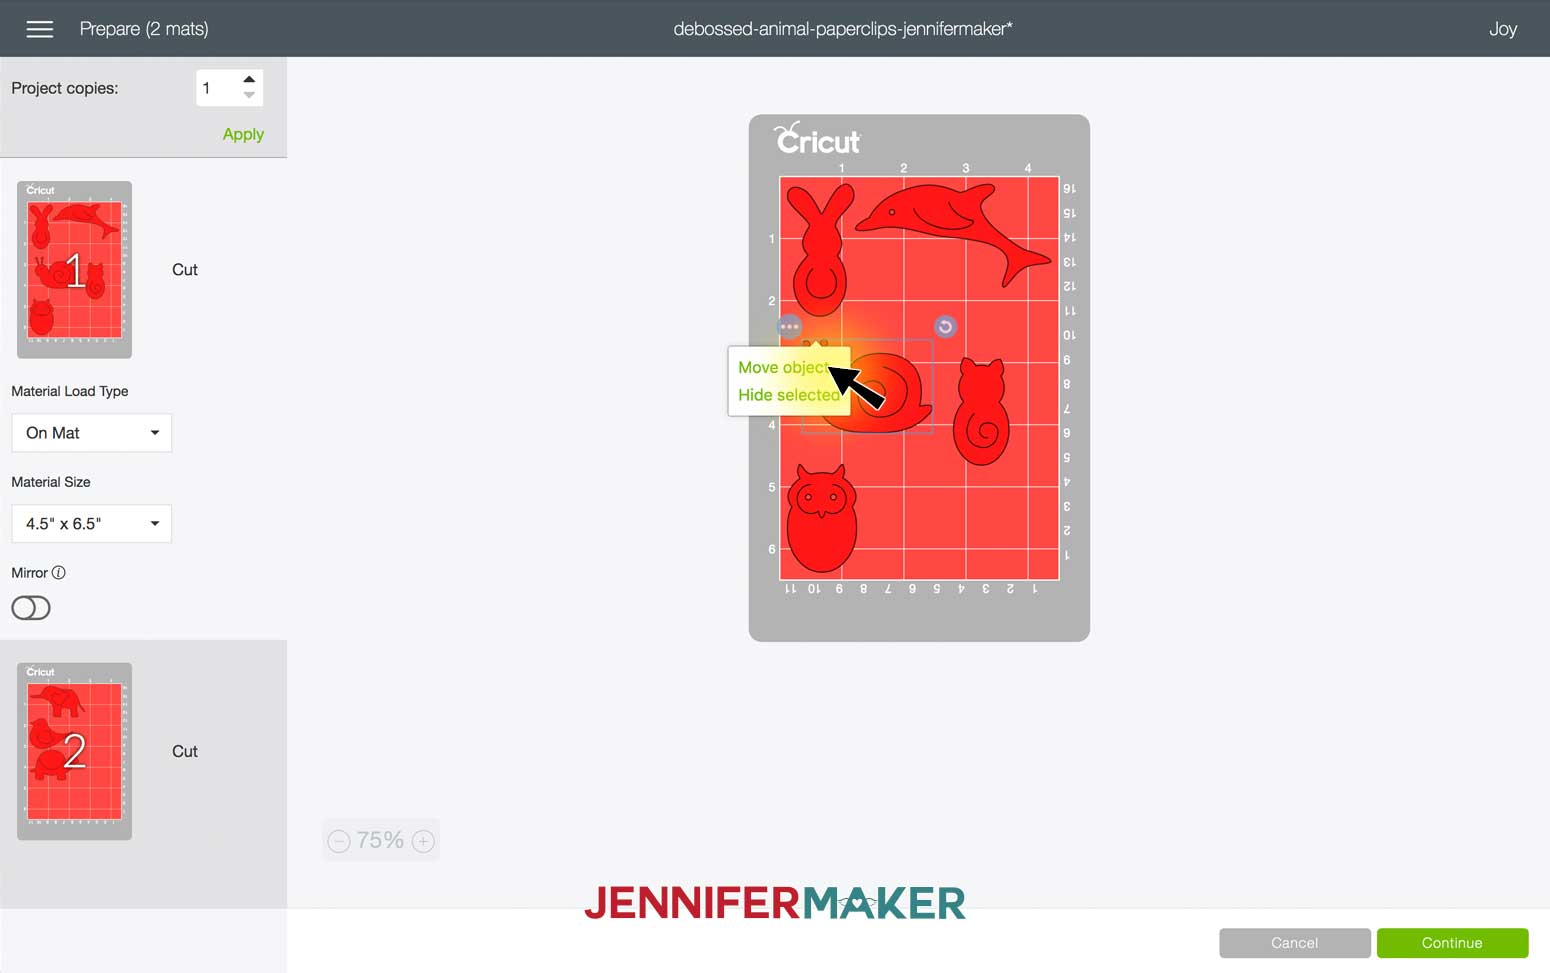

STEP 5: SHOW IT OFF
Notes
ACKNOWLEDGMENTS
Recommended Products

Answers to Your Questions About Making Deobossed Animal Paperclips
Q: What can you use in place of Holographic Kraft Board?
You can use any other Kraft Board or cardstock. If you only have 65 lb. cardstock, you can cut a couple of the same pattern and glue them together for more durability!
Q: Can you use the debossing tool on the Cricut Explore?
No, you cannot use a debossing tool on the Explore, but you can use a Scoring Stylus instead to create the same effect! Our link has two different SVG’s – one for the Maker (with the debossing tool), and one for the Explore (using a scoring stylus)! Upload the “animal-paperclips-deboss-jennifermaker-SVG” for the Maker, and “animal-paperclips-score-jennifermaker-SVG” for the Explore!
Q: Can the scoring stylus be put in the other tool holder on the maker, or does it need to be switched in the middle?
The scoring stylus goes in Attachment A, just like on the Explore and it can remain in there while you make the entire project. No need for switching!
Get My Free SVG Files to Make Debossed Animal Paperclips
I’d love to see your Debossed Animal Paperclips. Please share a photo in our Facebook group or tag me on social media with #jennifermaker.
See all of the projects, tutorials, and free designs in The Great Maker 25-Day Gift-Away Challenge!
Love,

Want to remember this? Save this Debossed Animal Planner Paperclips tutorial to your favorite Pinterest Board!

I only have cardstock and it was mentioned that two pieces could be put together to make it more sturdy. Would you glue it AFTER cutting?
I am thinking about foil over cardstock. Thanks for this awesome tutorial!
I noticed you Happy Planner – I am a HP Girl too!
Hi Joy! So glad you loved the tutorial! Yes, you would glue after cutting!
Hey so just wondering can you make these cute little guys out of like faux leather too?
with maybe a stiffener?
You absolutely could!