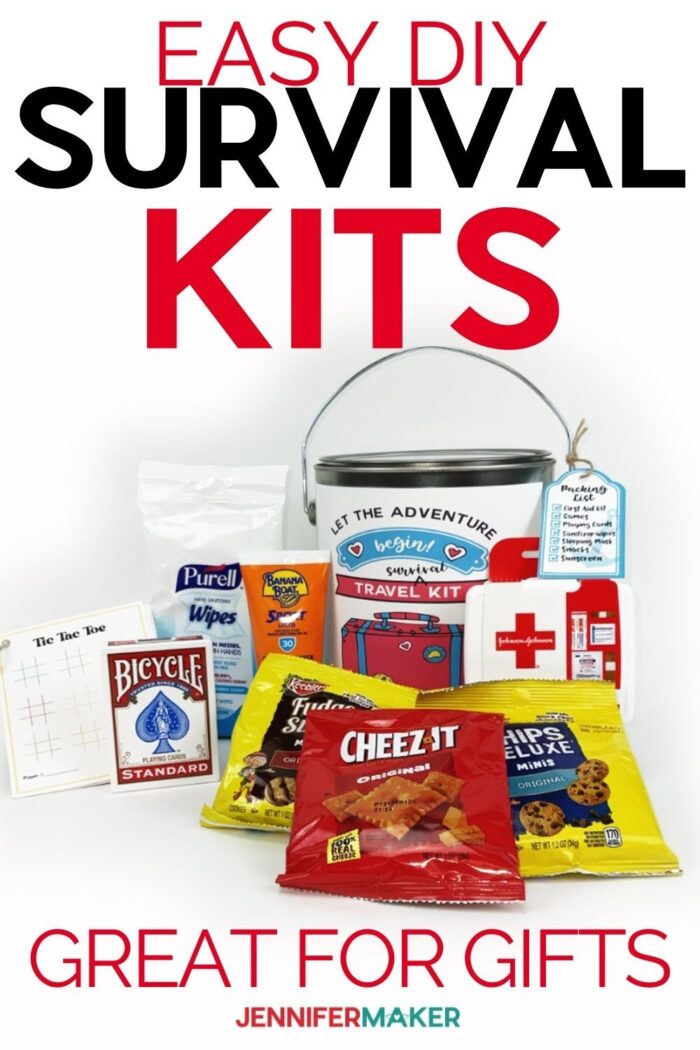
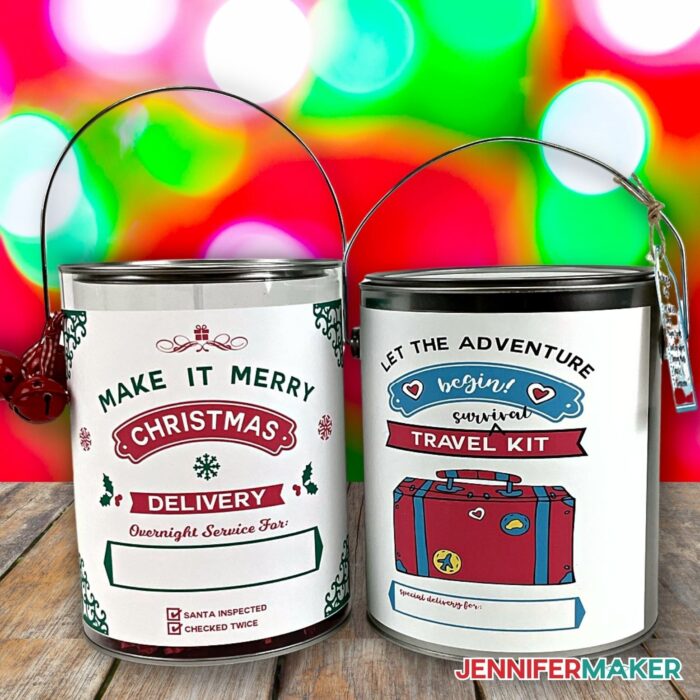
Learn how to make adorable Paint Can Survival Kits that are easy to make and fun to give!
Here’s a new take on a gift basket, not unlike my popular Santa Sack project! I’m going to show you step by step how to design your very own personalized Survival Kits using paint cans and your Cricut cutting machine. Fill them with whatever you want! I have a design for the holidays and one for travel. These DIY survival kits make unique gifts for friends and family of all ages.

How fun are these personalized survival kits?! They make for great gifts during the holidays and are not very pricey to make. Of course, you decide what goes into them so they are perfect just for you or your loved ones!
To make these DIY survival kits, we first need special paint cans! No, these are not your usual old paint cans — I’m using a special clear one and a solid one, both are just over eight inches high and six inches wide.
I’m also using my favorite sticker paper for the labels: Avery Printable Sticker paper in 8 and a half by 11 inch sheets. I like this printable sticker paper because it’s compatible with most printers.
And we’ll need some white card stock for the tags. And of course all the fun goodies we will put inside the cans. I chose some must have travel items for the Travel kit like sunscreen and a sleep mask and some fun and festive holiday items for the Holiday kit like cookie cutters, a pretty candle and of course Candy Canes!
Of course we’ll also need our amazing Cricut cutting machine, a mat, brayer, weeding tool, scraper and measuring tape.
Like I mentioned before, these were so fun to make and make for great gifts for your loved ones. I think anyone would be happy to receive a personalized kit filled with some fun goodies. Of course we’ll be adding more than just fun goodies, we’ll also be adding necessities just in case we need them.
This simple project can be used to give to your children on long road trips, keep them on hand for emergencies, or give them away to a friend who is going through a tough time and just needs a little pick me up.
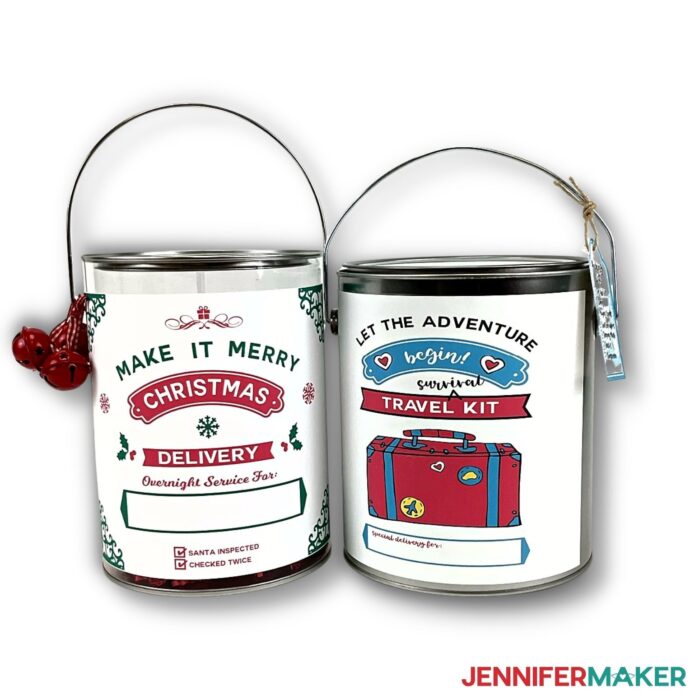
I’ve made two versions of these DIY survival kits for your to choose from, one for the holidays, and one as a fun travel kit:
Here’s a supply list of what you need to make DIY survival kits! This post contains some affiliate links for your convenience (which means if you make a purchase after clicking a link I will earn a small commission but it won’t cost you a penny more)! Read my full disclosure policy.
Materials to Make Survival Kits
View my Amazon shopping list with the exact items we used to make this project
- One (1) clear plastic paint can or a solid silver paint can
- Avery Printable Sticker Paper (I recommend Avery over Cricut brand because it’s compatible with more printers)
- White Cardstock
- Ann Clark Cookie Cutters
- Jingle Bells/Ribbon
- Crinkle Cut Paper
- Things to put in the survival kits, such as Scented Candles, Mini Candy Canes, Pair of Cozy Socks, Hand Sanitizing Wipes, Mini First-Aid Kit, Mini Colored Pencils, Sleeping Mask, Deck of Playing Cards, Small tube of Sunscreen and so on)
- Loose Leaf Binder Ring – Optional
- One 12″ x 6′ roll (1) Clear Vinyl– Optional
- (Optional) Fonts (I used Tingler Script Font)
- Green StandardGrip Machine Mat 12″ x 12″
- Brayer
- Weeding Tool
- Scraper
- Measuring Tape
- A method to cut your vinyl – I used the amazing Cricut Maker but you can also use the Cricut Explore (you do need Print Then Cut, so the Cricut Joy is not an option here)
- Design #322 – My free SVG/PDF/DXF design files are available in my free resource library (get the password by filling out the form at the bottom of this page)
How to Make Your Own DIY Survival Kits
The detailed step-by-step assembly video on how to create these personalized vinyl letter decals was broadcast during Maker Academy Weekend 2021. Get a pass to watch all 20+ workshops, each with a printable handbook, transcript, audio files, design files, and support with a VIP pass below:


Paint Can Survival Kits
I'm going to show you how to make adorable Paint Can Survival Kits that are easy to make and fun to give.
Materials
- Here is a shopping list of the actual items I used to create this project! This list contains affiliate links. As an Amazon Associate I earn from qualifying purchases.
- One (1) Clear Plastic Paint Can, gallon
- One (1) Silver Paint Can, gallon
- Avery Printable Sticker Paper, 8.5" x 11" (I recommend Avery over Cricut brand because it’s compatible with more printers)
- White Cardstock, 8.5" x 11" (for games and tags)
- Ann Clark Cookie Cutters (Christmas)
- Two (2) Jingle Bells/Ribbon (Christmas)
- Crinkle Cut Paper (Christmas)
- Two (2) Scented Candles (Christmas)
- Mini Candy Canes (Christmas)
- One (1) Pair of Cozy Socks (Christmas)
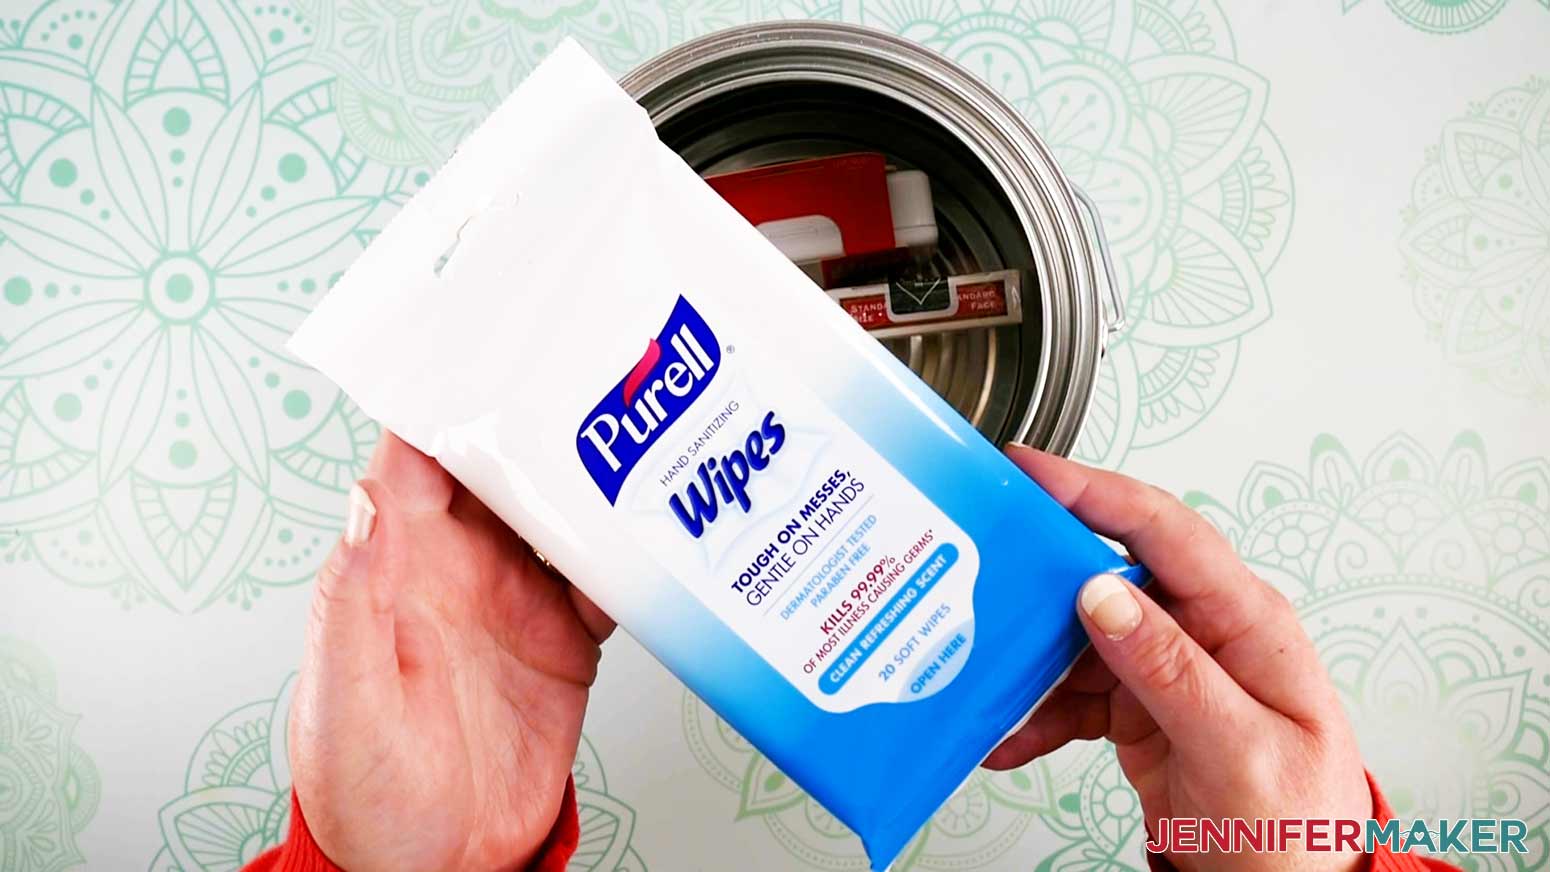
- One (1) package of Purell Hand Sanitizing Wipes (Travel)
- One (1) Mini First-Aid Kit (Travel)
- Mini Colored Pencils (Travel)
- One (1) Sleeping Mask (Travel)
- One (1) Deck of Playing Cards (Travel)
- One (1) small tube of Sunscreen (Travel)
- One (1) Loose Leaf Binder Ring - Optional (Travel)
- One 12" x 6' roll (1) Clear Vinyl - Optional (Travel)
- Tingler Font by FontBundles.net
Tools
Instructions
STEP 1: GET MY FREE PAINT CAN SURVIVAL KIT DESIGN FILES
In this tutorial, I'm going to show you step by step how to design your very own personalized Paint Can Survival Kits with your Cricut. I have one for the holidays and one for travel. These are so fun to make and they make great gifts for friends and family of all ages.
First, download my Paint Can Survival Kits designs from my library – look for Design #322.
TIP: If you are not sure how to upload an SVG cut file to Cricut Design Space, watch this helpful video training series I made. If you are on an iPad or iPhone, here is how to download and upload SVG files to the Cricut Design Space app.
I will be using the Cricut Maker 3 for this tutorial, but you can use any Cricut model except for the Cricut Joy to make these.
STEP 2: PRINT THEN CUT THE DESIGN
First, click the upload icon in Design Space.
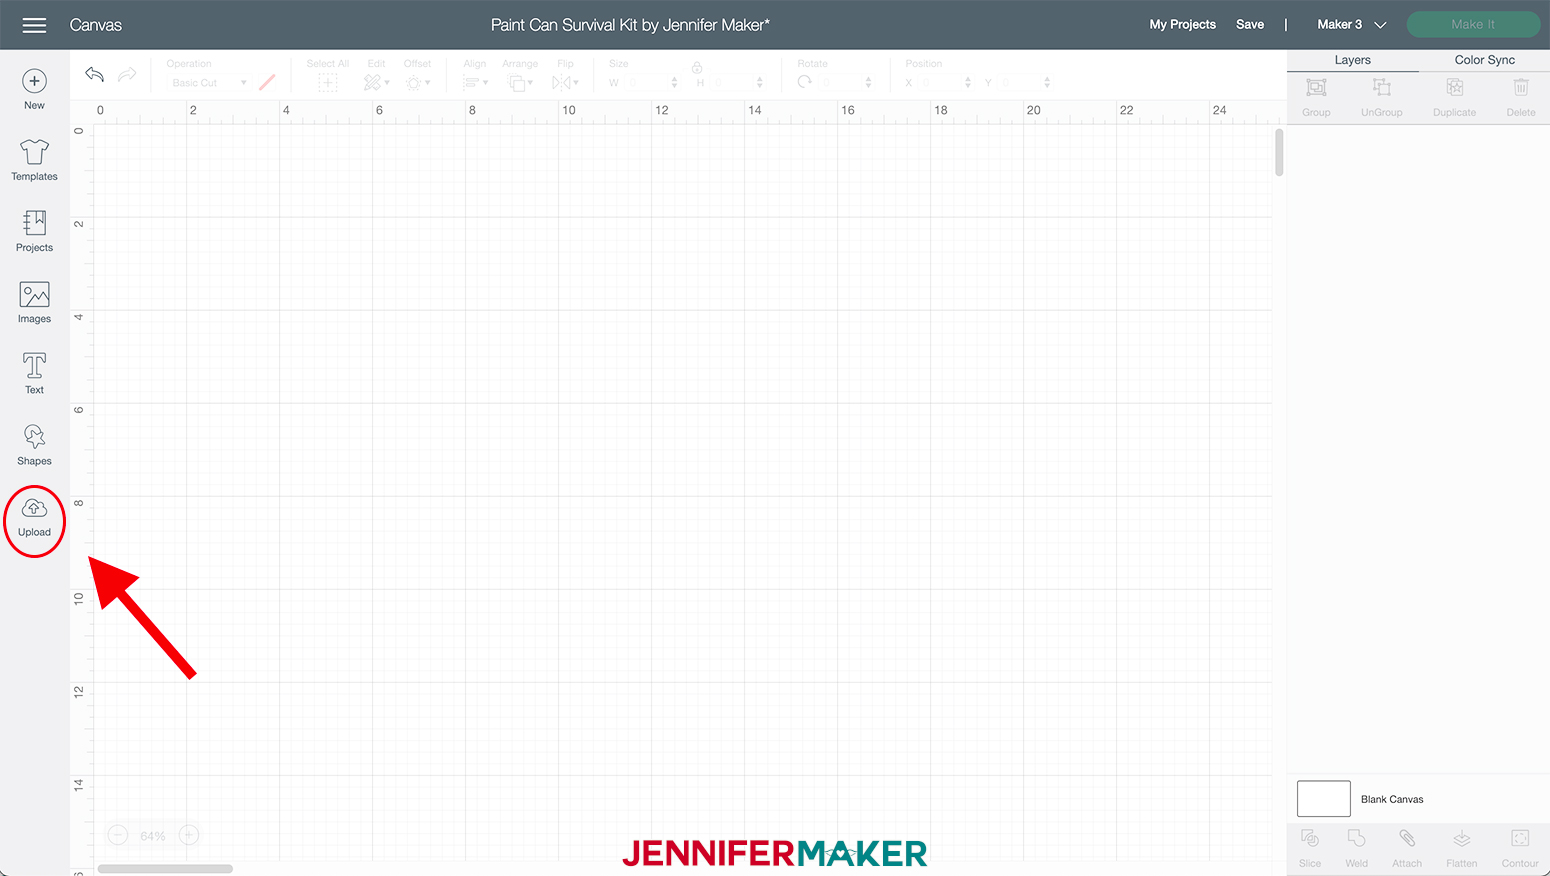
Now, click the “upload image” icon in Design Space to select your design.
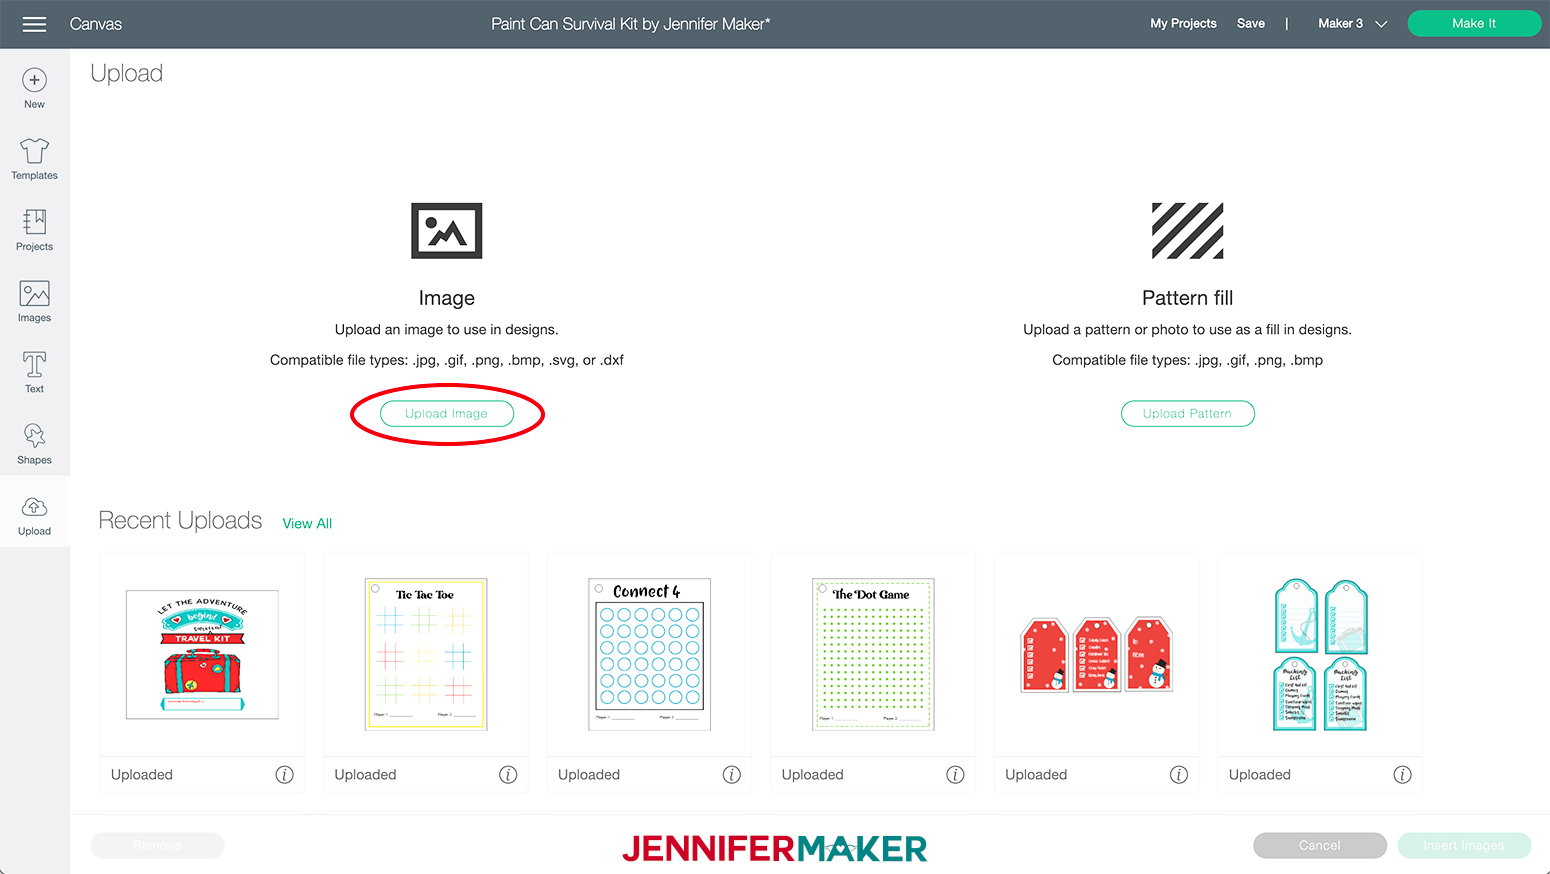
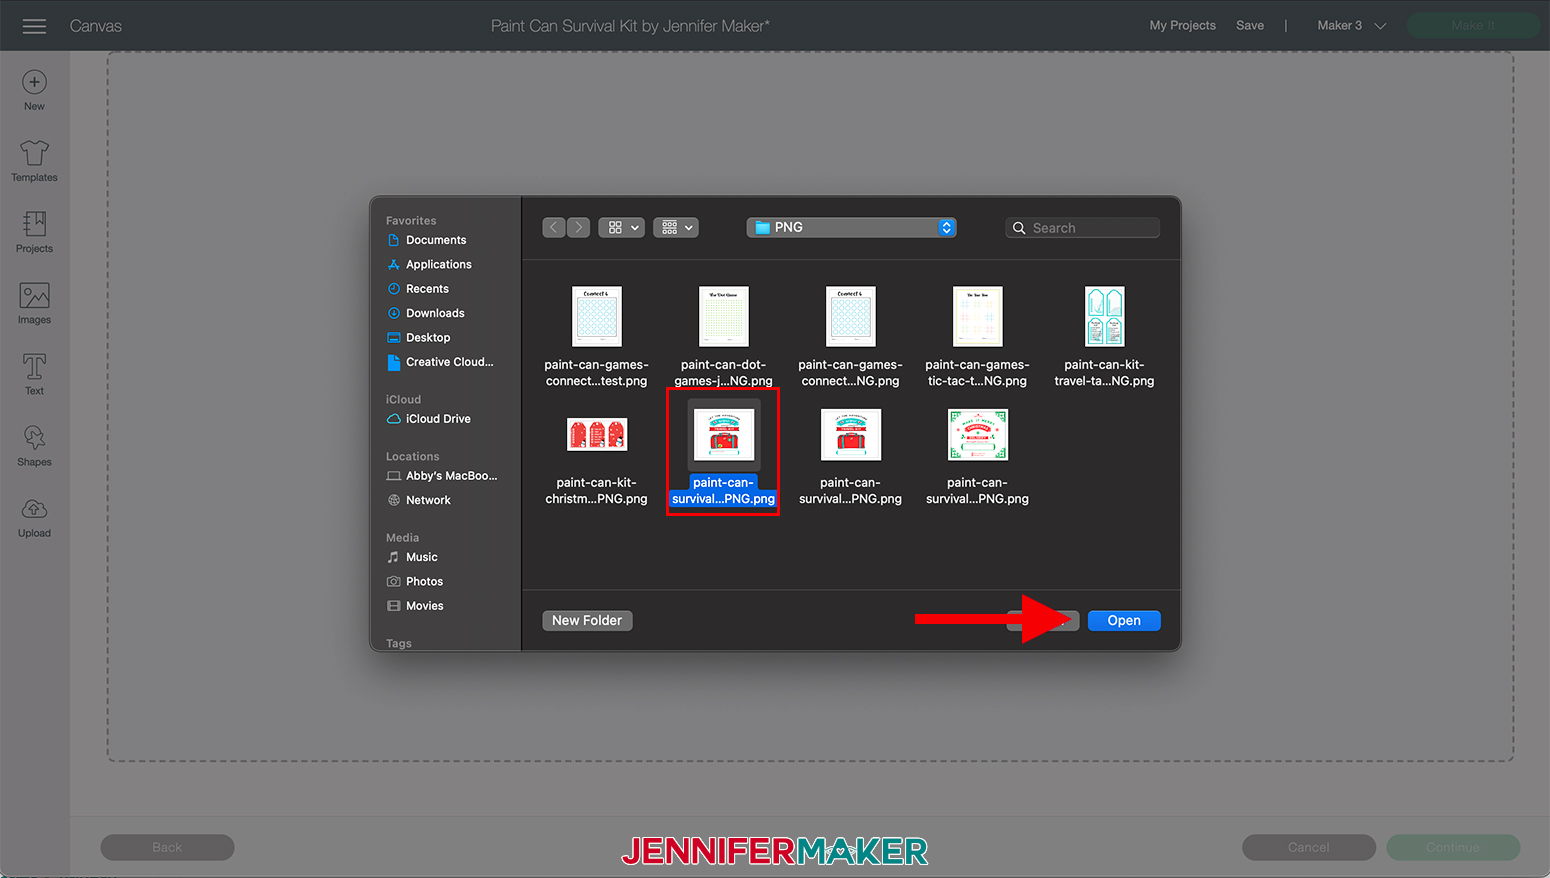
Click "Browse" to select your file.
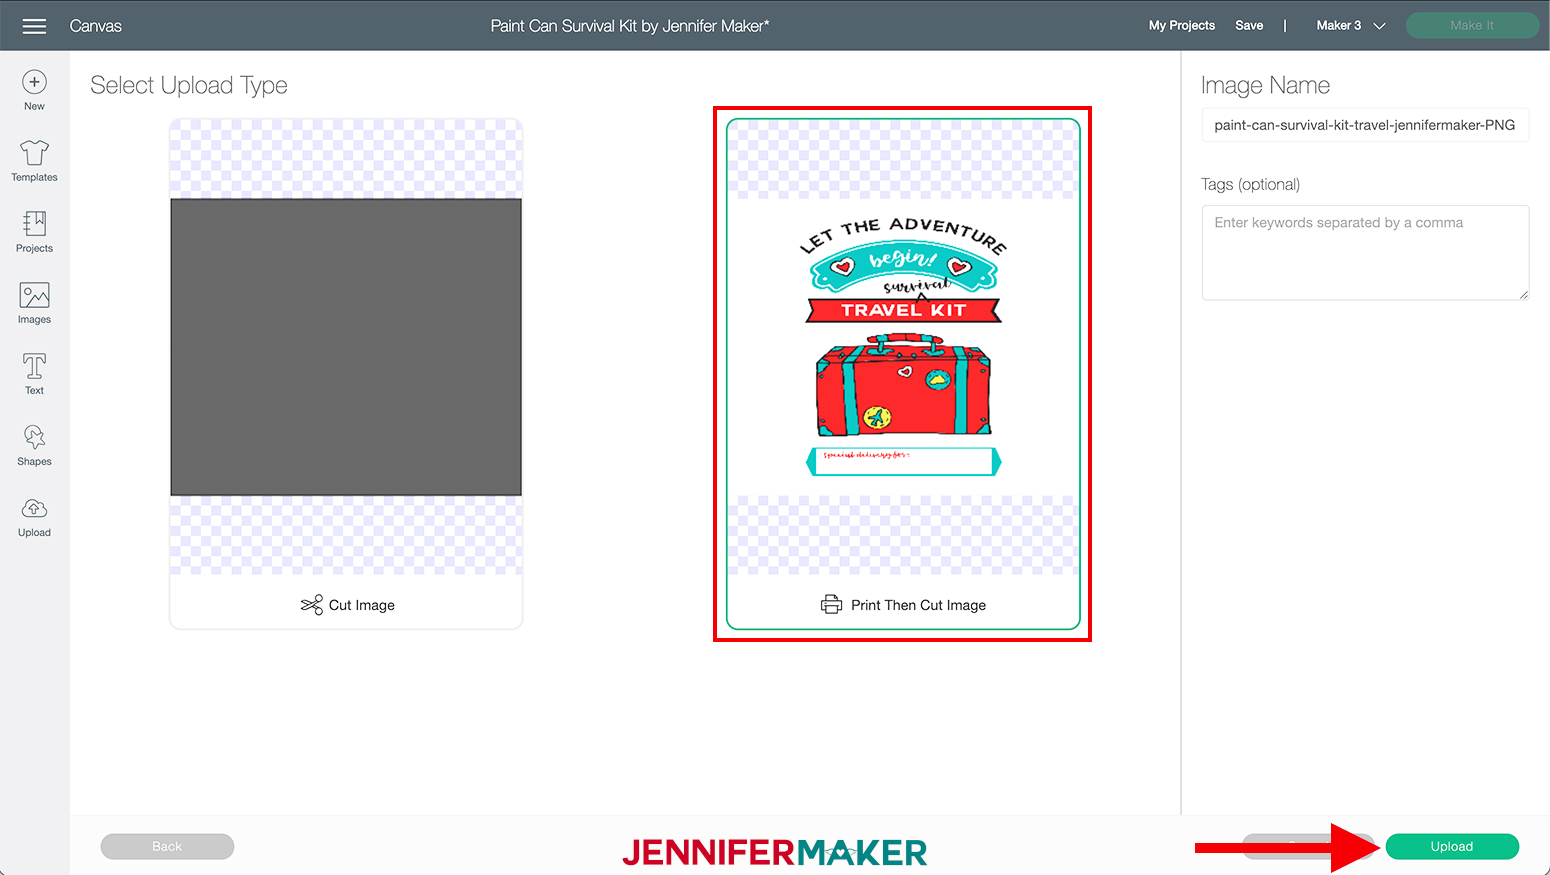
Select the design you would like to use for your cute paint can survival kit and click "Open." I am going to be using the Travel one as an example, but the steps are the same for both.
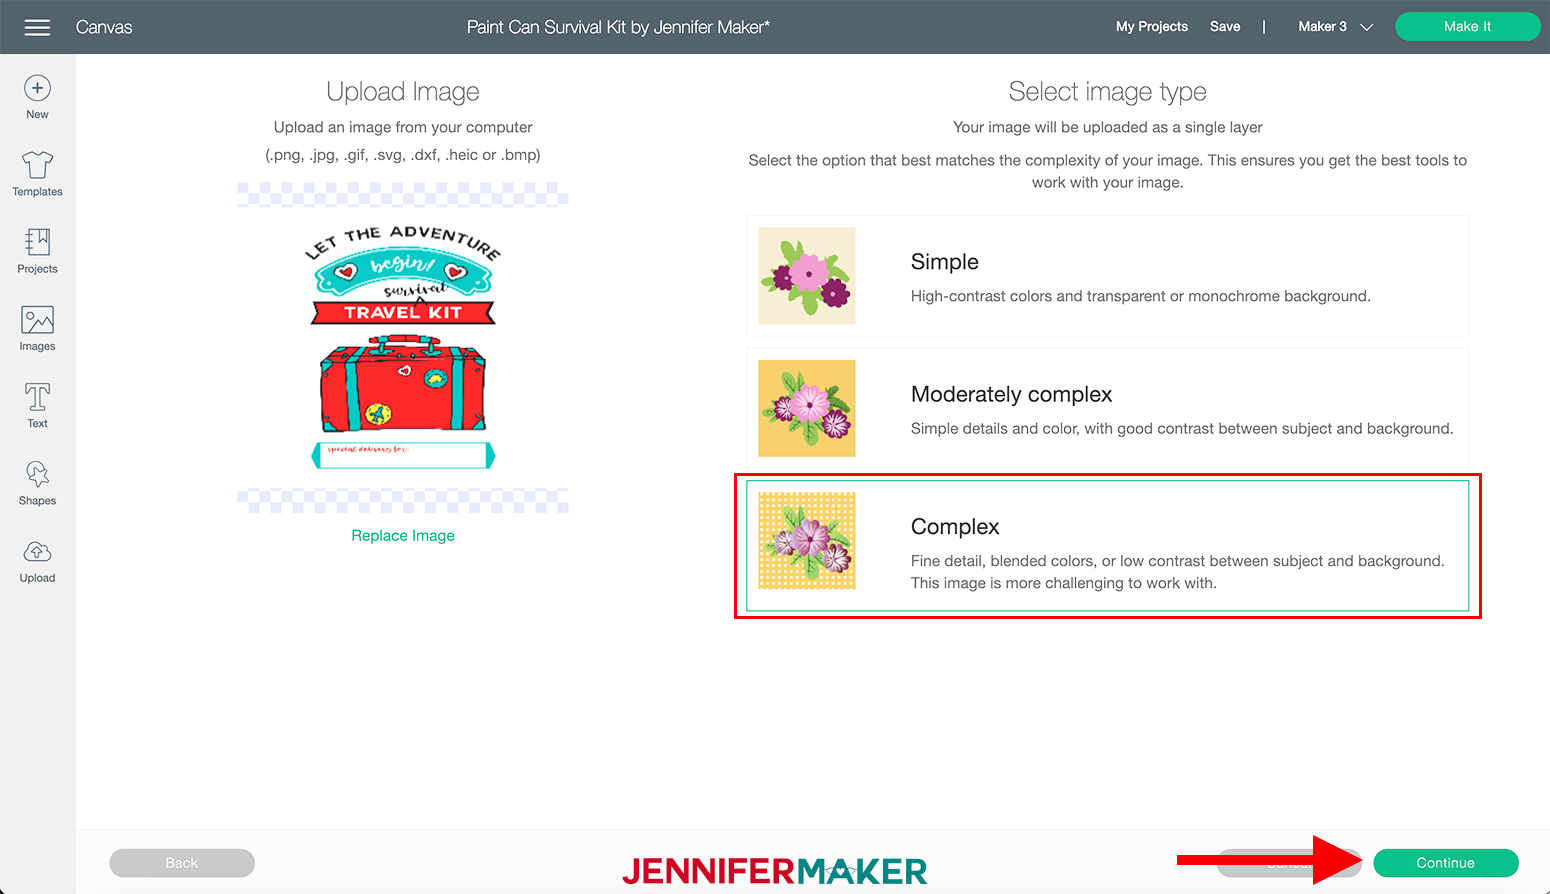
Select “Complex” for the image type and then click "Continue."
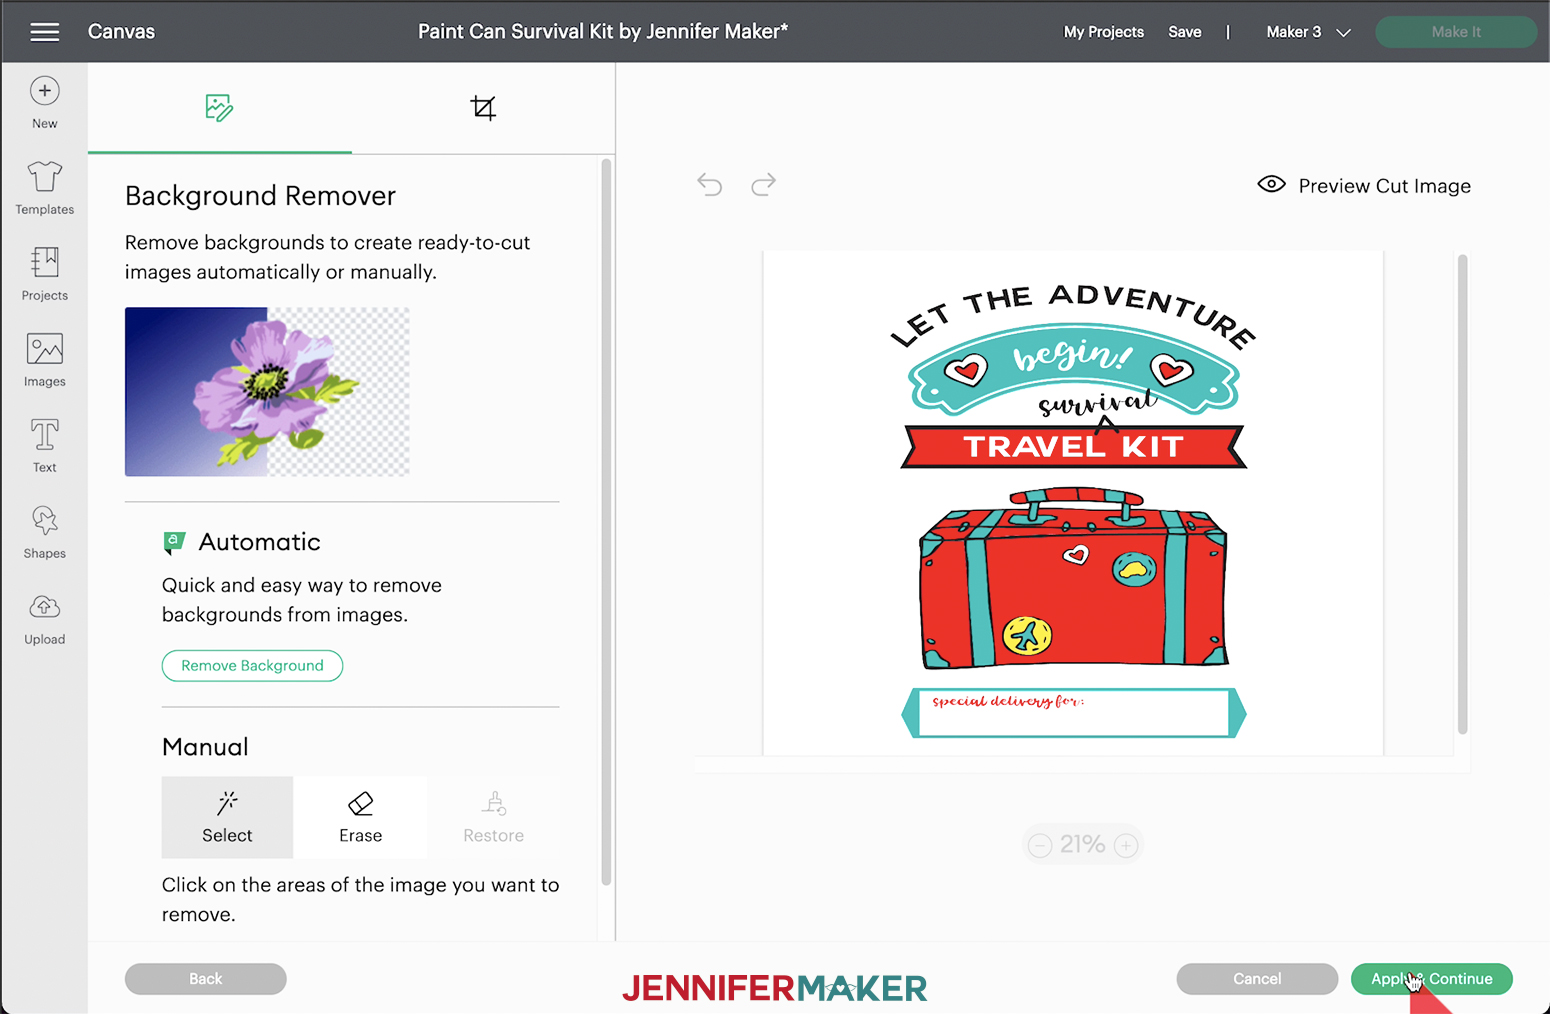
On the "Select & Erase" screen, click "Apply & Continue."
Select "Print Then Cut Image" on the Upload Type screen and then click "Upload."
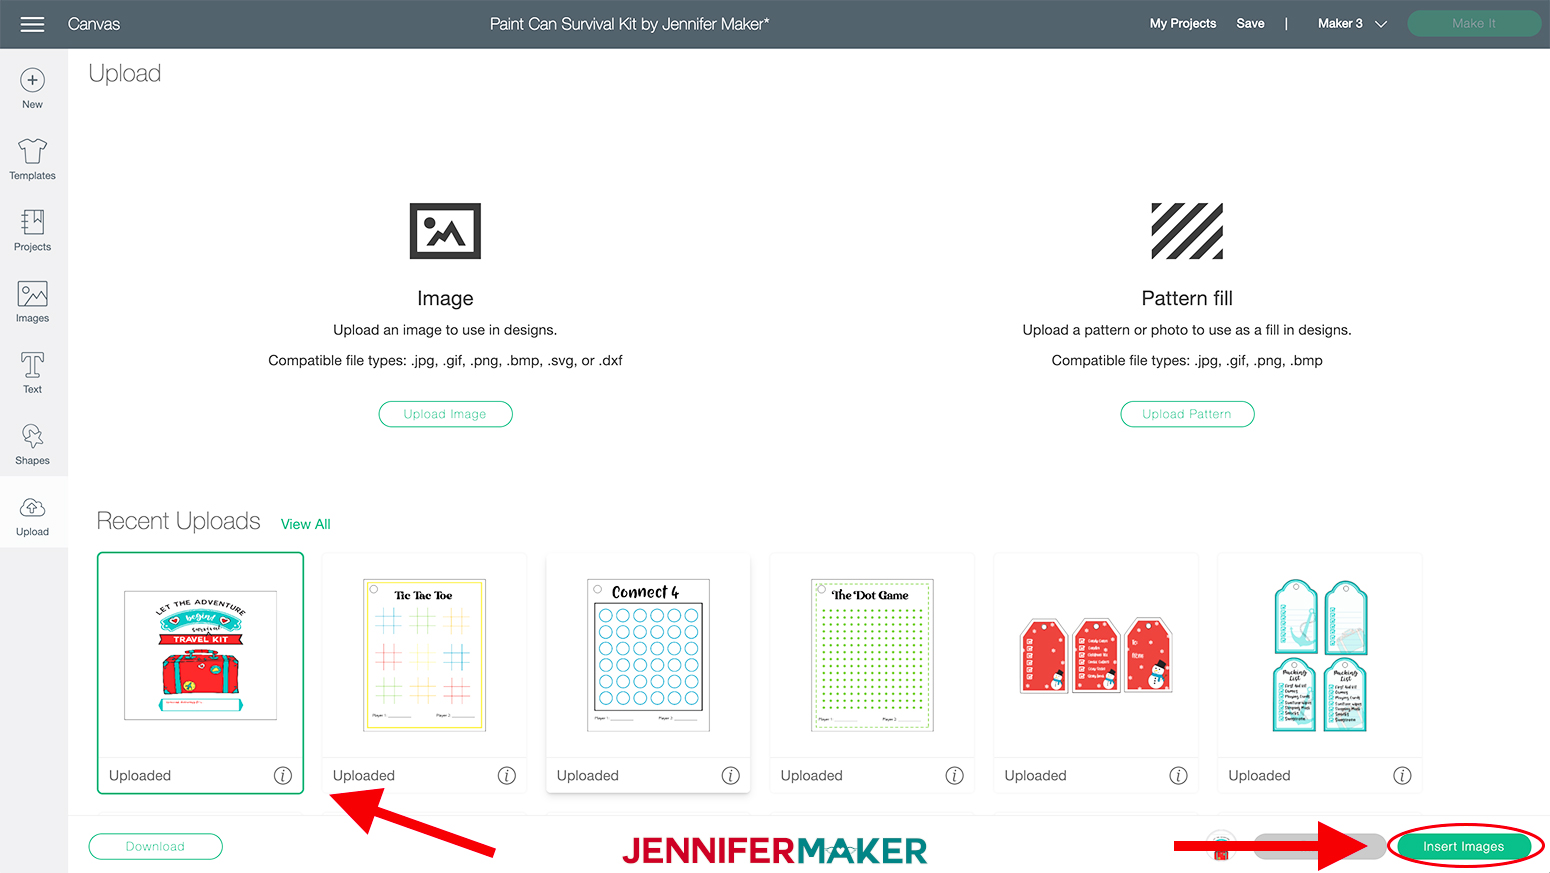
Select the image from your "Recent Uploads" and then click "Add to Canvas."
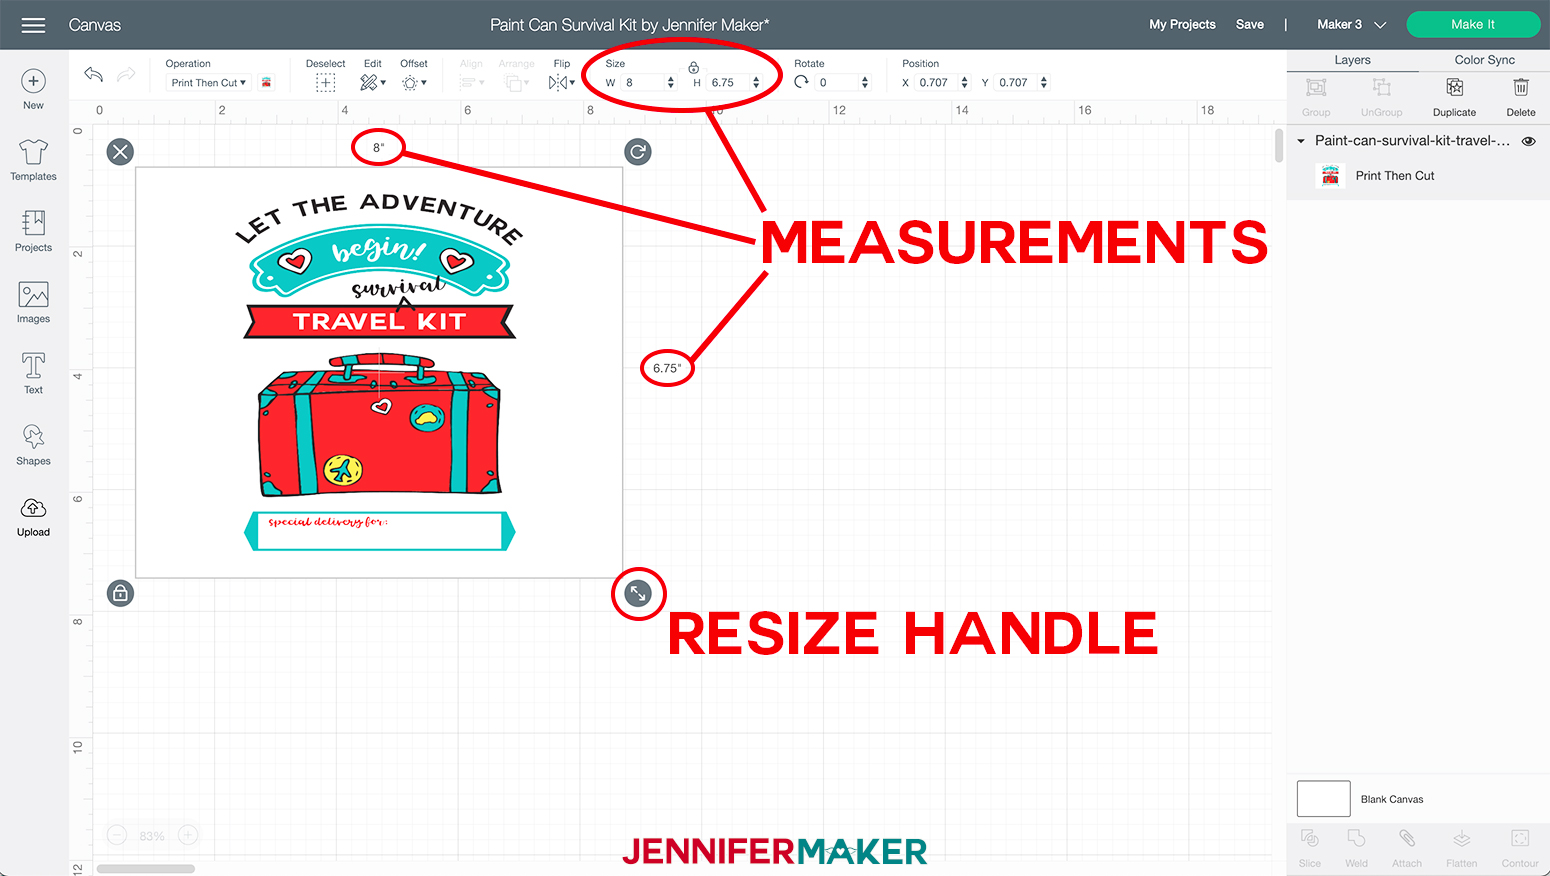
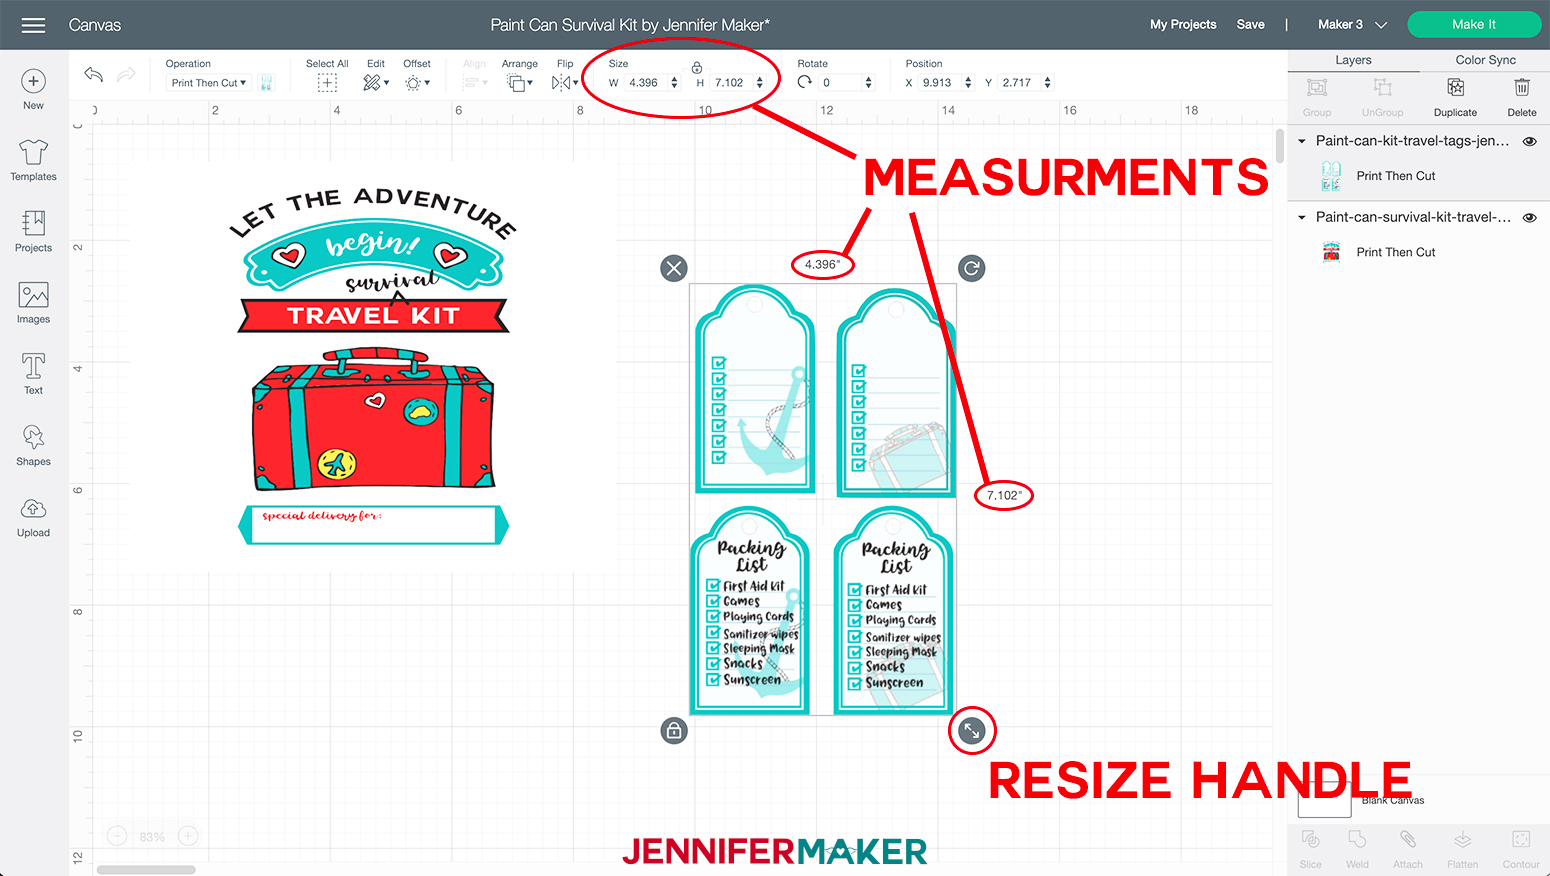
Once you have your file in Cricut Design Space, we are going to adjust the size of the design using the size adjustment box on the top of the screen and type in the measurements.
Resize it so that your final dimensions are 8” x 6.75.”
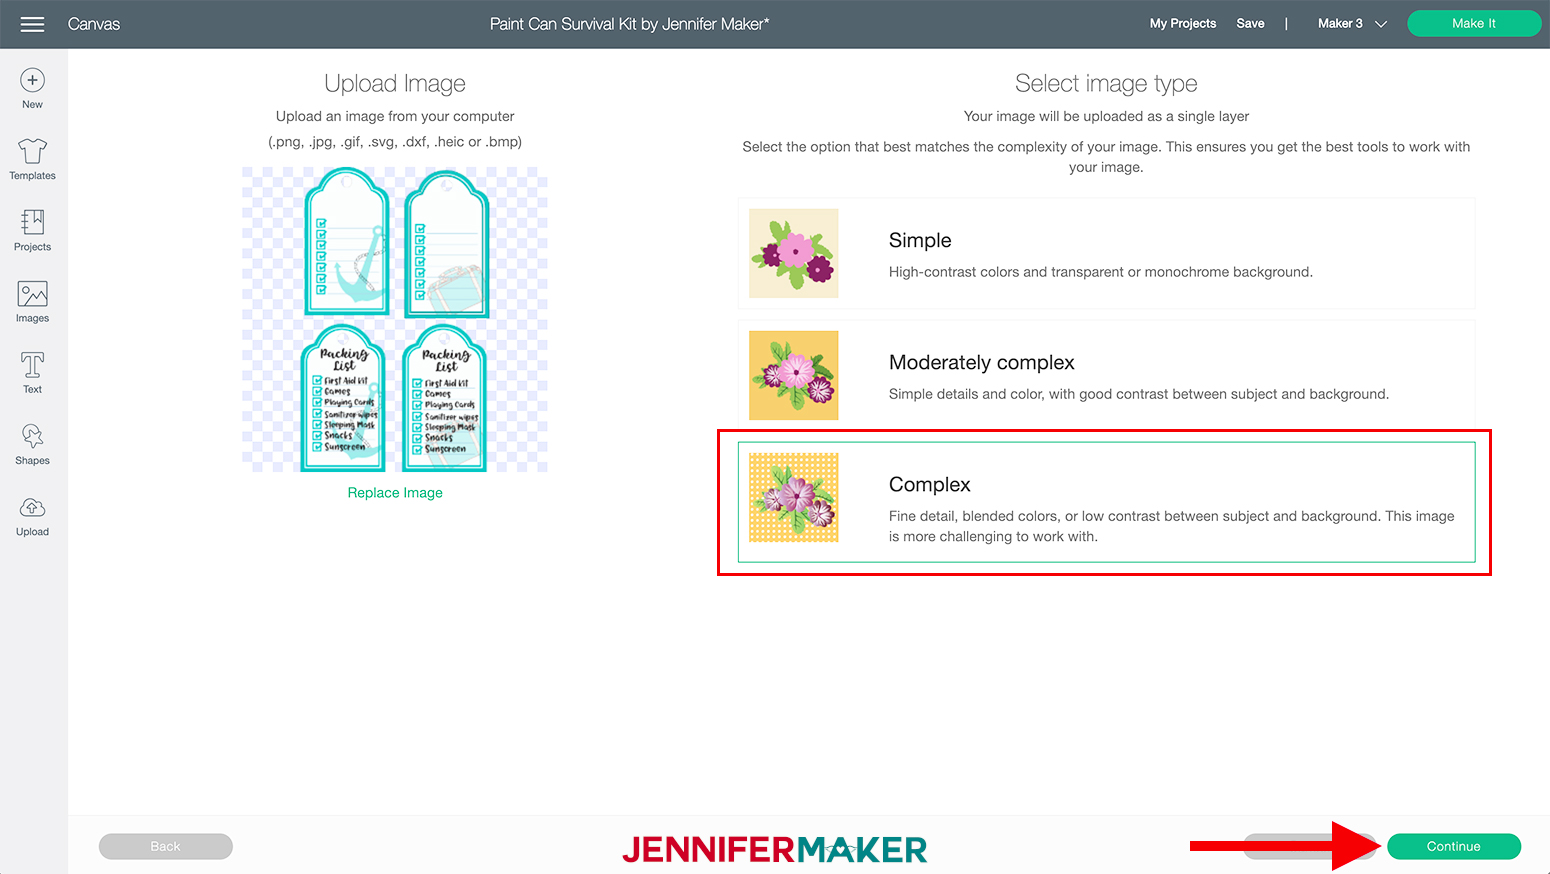
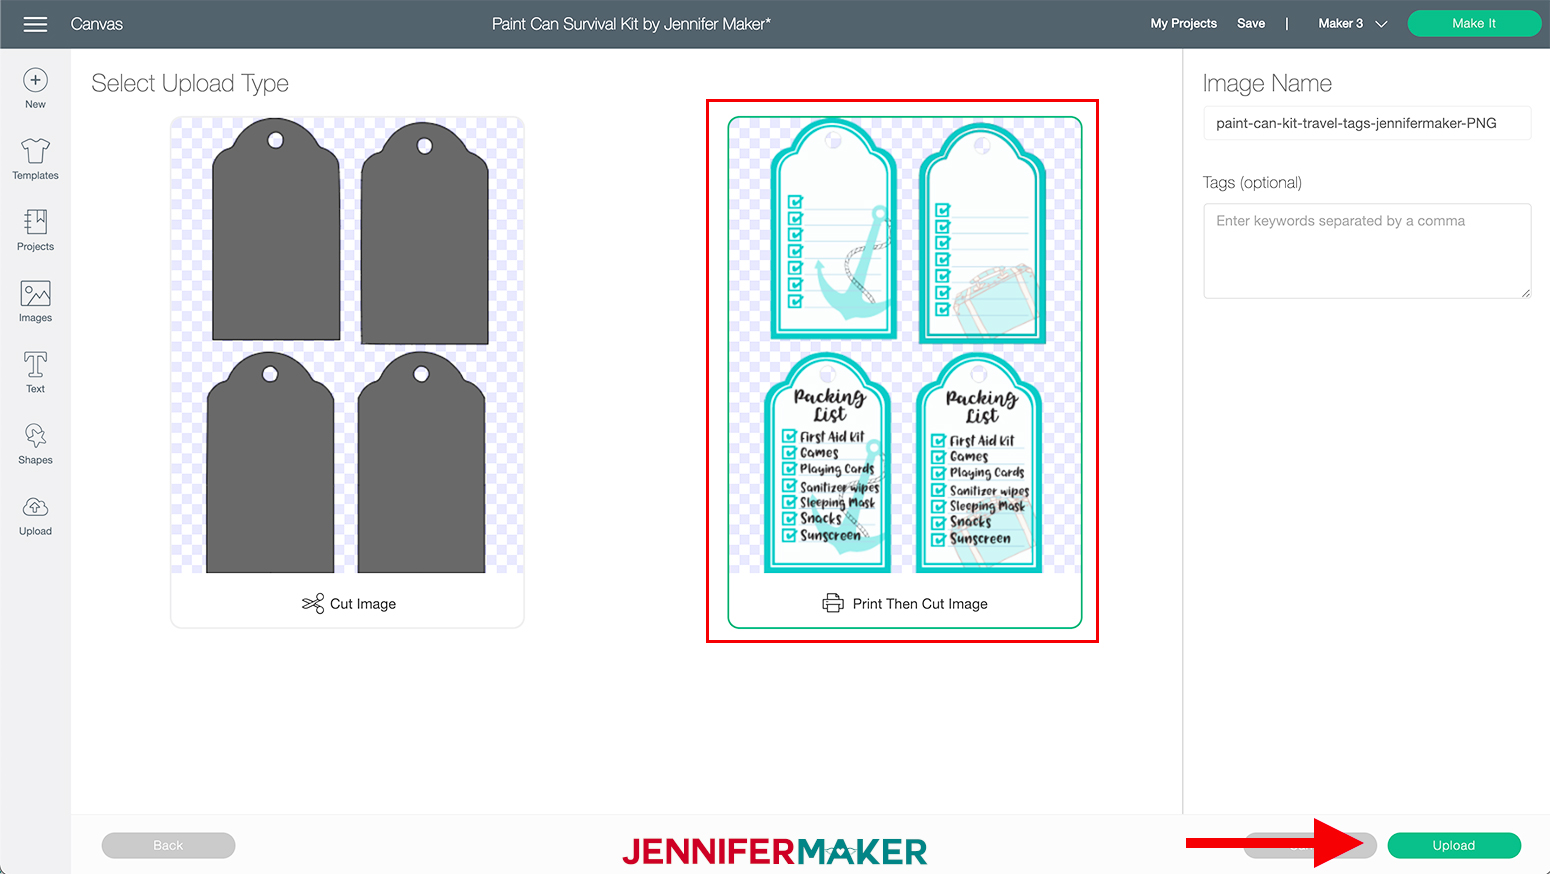
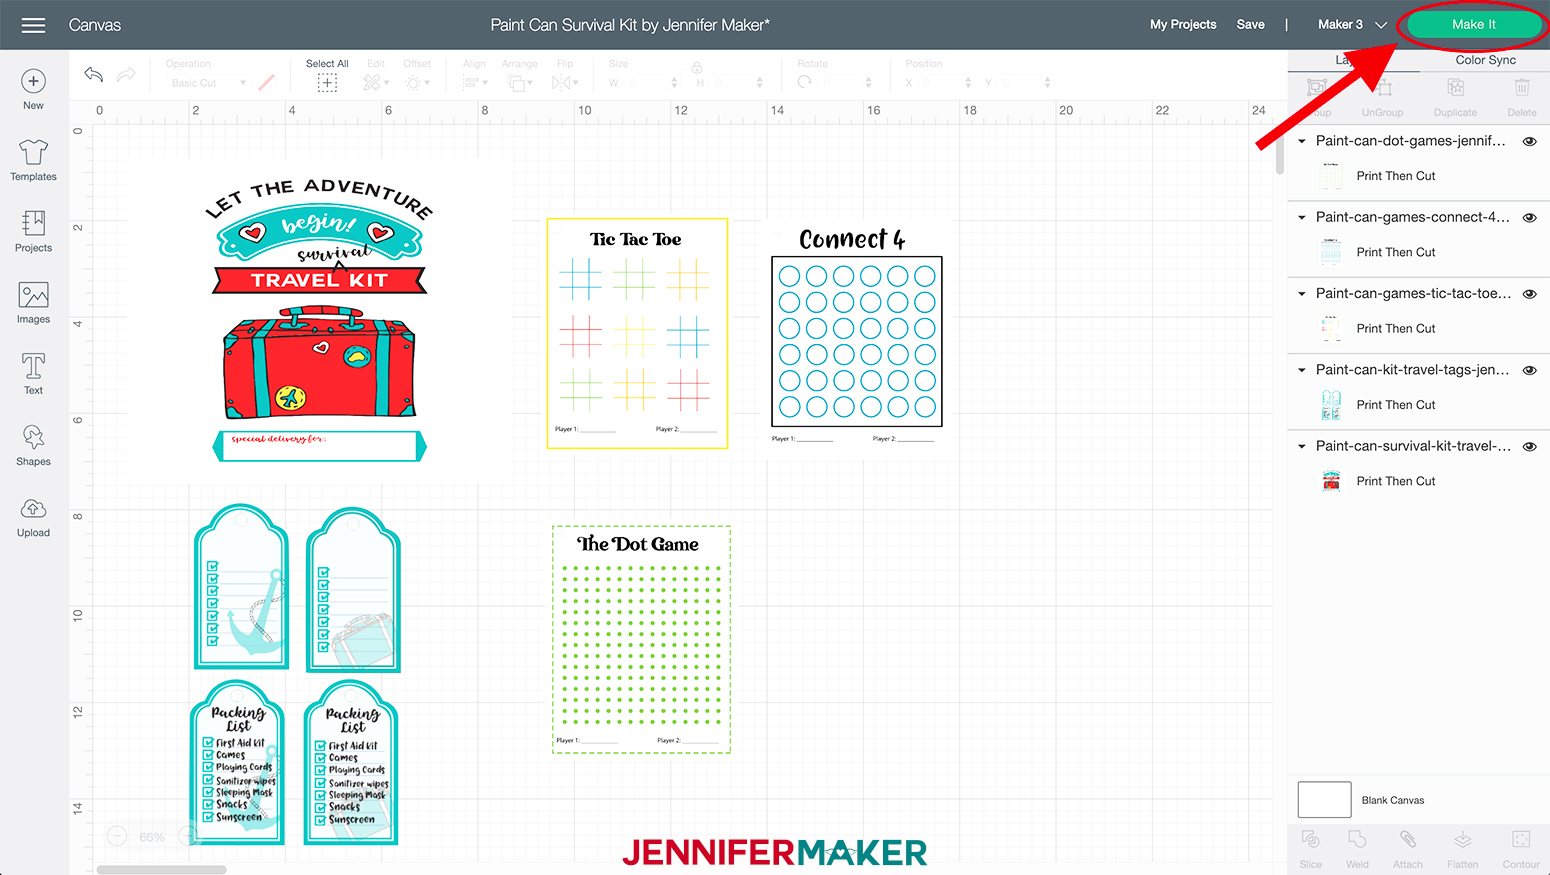
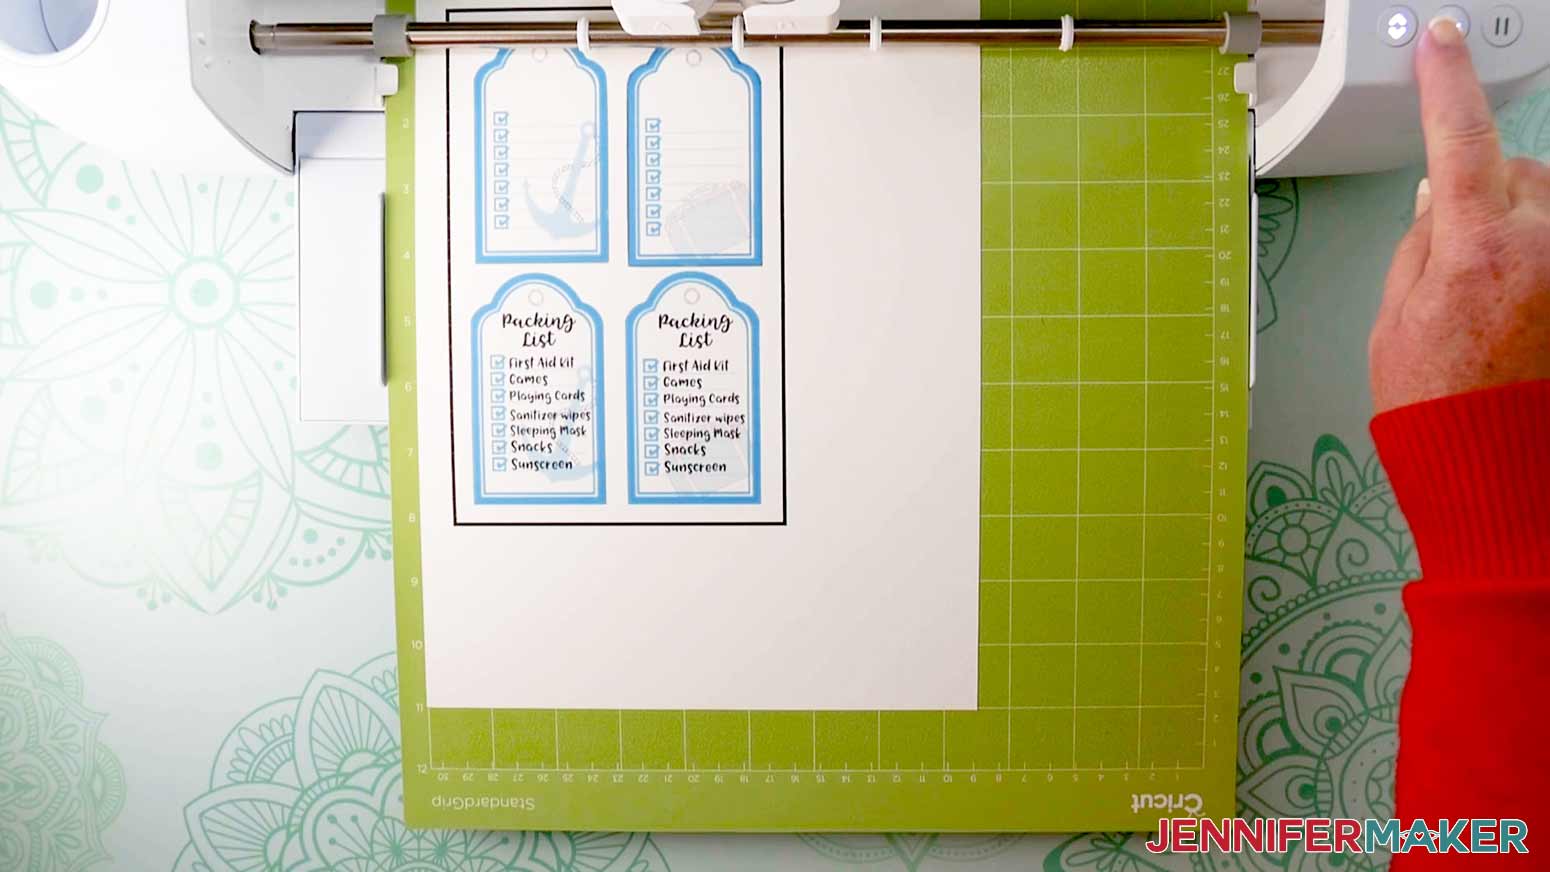
Now that we have our front design, we are going to upload our adorable tags to go along with our paint can! This step is optional. I have included 4 different tags, some with preprinted lists and two without so you can fill them in later.
Again, click the upload icon in Design Space and select the paint can tag file.
Select “Complex” for the image type and then click "Continue."
On the next screen, click "Continue."
Select "Print Then Cut Image" on the Upload Type screen and then click "Upload."
Select the image from your "Recent Uploads" and then click "Add to Canvas."
Now we are going to resize our tags so that they are each 2” x 3.” My total dimension size is 4.396” x 7.102.” For the Christmas tags, the total dimension size is 7.113” x 3.529” for a 2.25” x 3.5” tag.
Next, we are going to upload our three-game files for the travel paint can. This step is also optional.
You can print just one or all three. I’m going to show you all three. Upload the files one at a time, like we did above and resize them so that they are 4” x 5.”
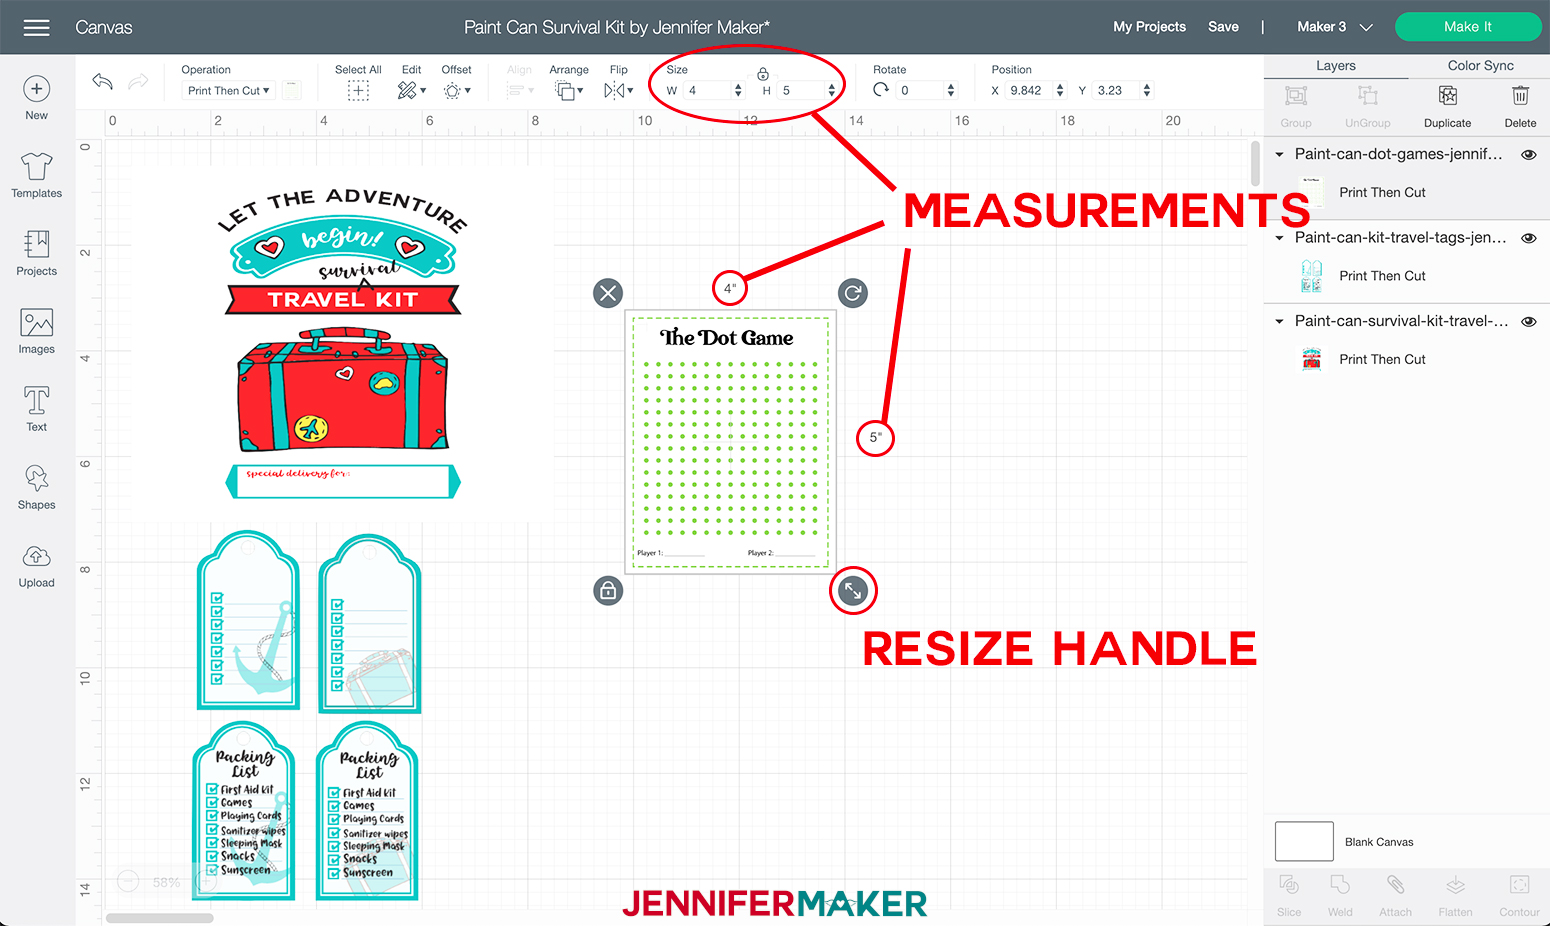
Duplicate the game sheets for as many games as you would like, by clicking the game sheets and selecting duplicate on the top right corner of the screen. I am going to make two of each.
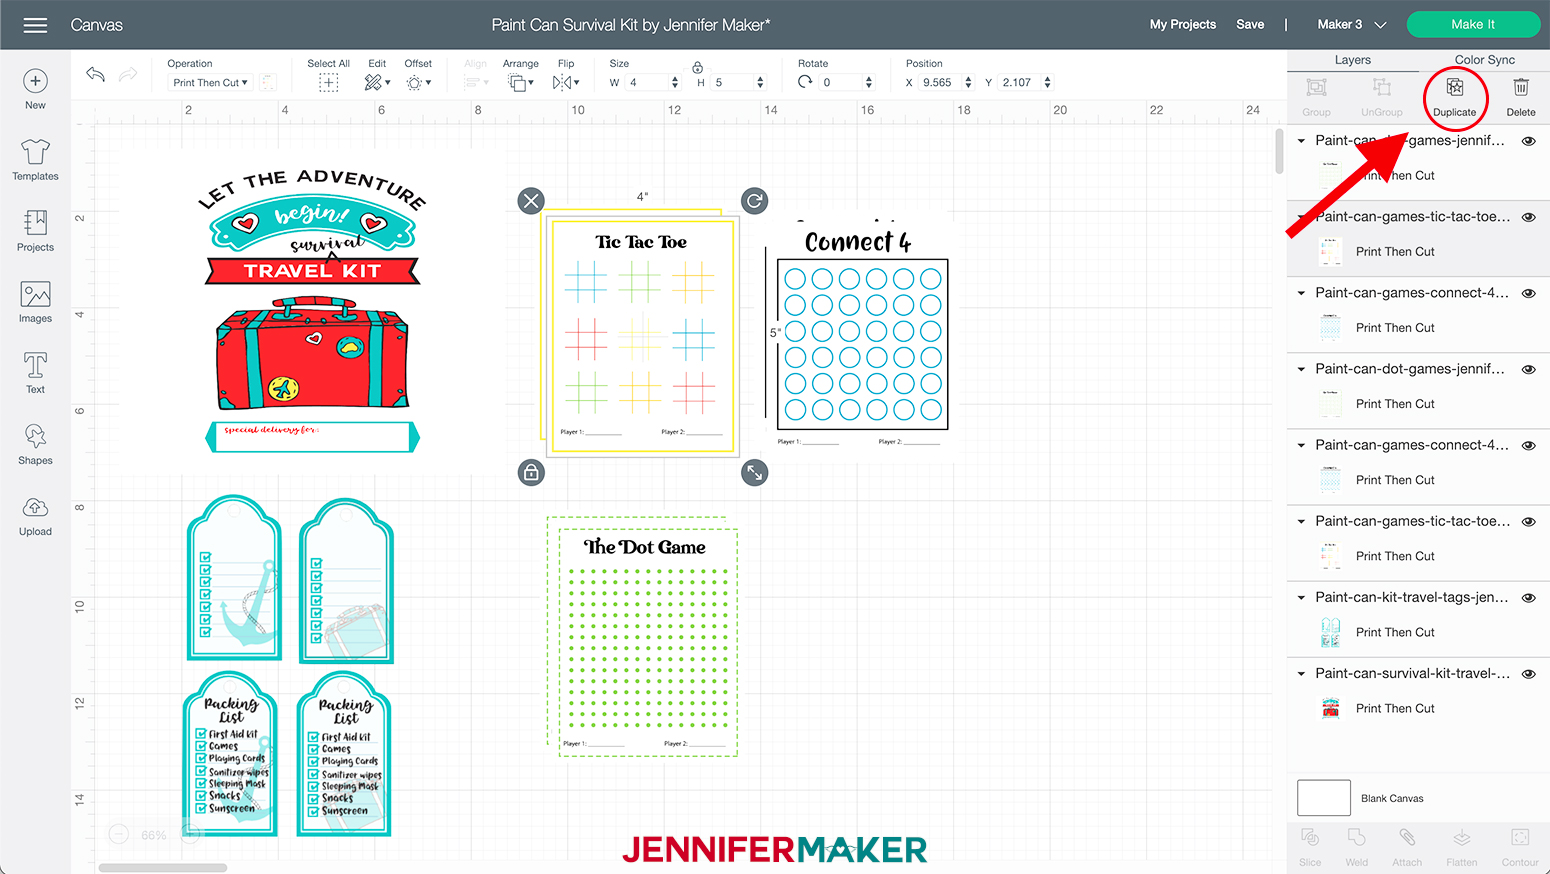
NOTE: You can fit two games on an 8.5" x 11" piece of cardstock.
Now we are going to click "Make It" on the top right-hand side of the screen.
On the next page select "Continue" on the lower right-hand side of the screen.
For this project, we are using Print Then Cut. To do this insert the Avery Printable Sticker Paper into your printer so that it prints on the plain white side.
Click "Send to printer" in Cricut Design Space. On the pop-up page "Print Setup" I recommend turning on both "Add Bleed" and "Use System Dialog" by clicking on the toggle so they switch to green. This ensures the highest print quality.
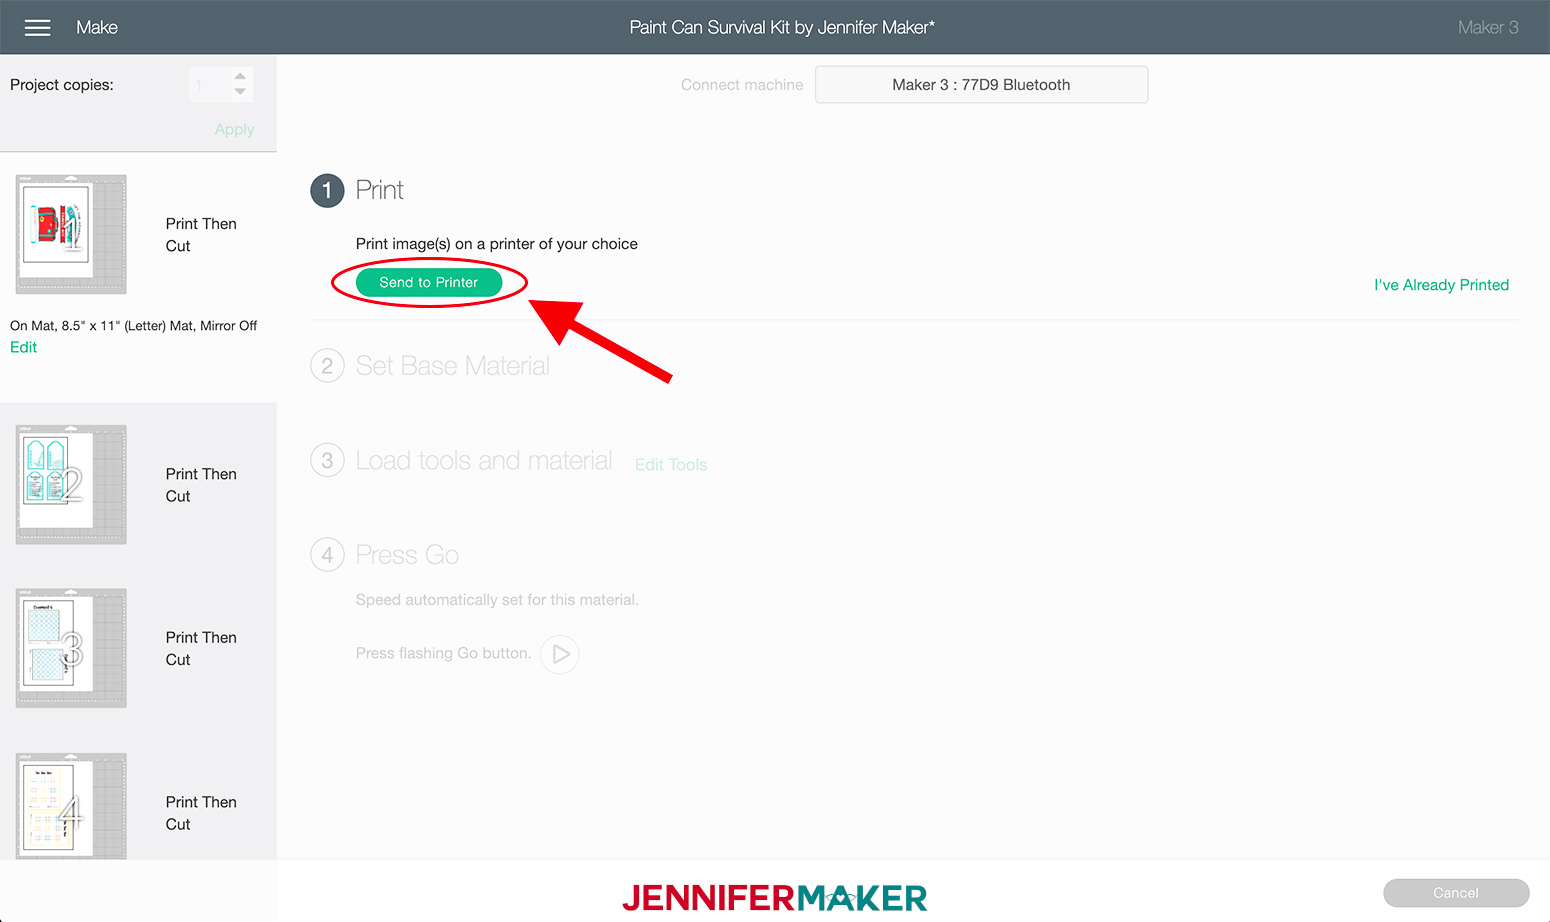
Once you hit "Print" and if you selected "Use System Dialog" (this option is not available on all printers) another pop-up box will appear, keep in mind it might pop up behind what is on your screen, so just minimize those windows if you don't see it. Once there, I recommend printing on “Best” setting. Then click “Print."

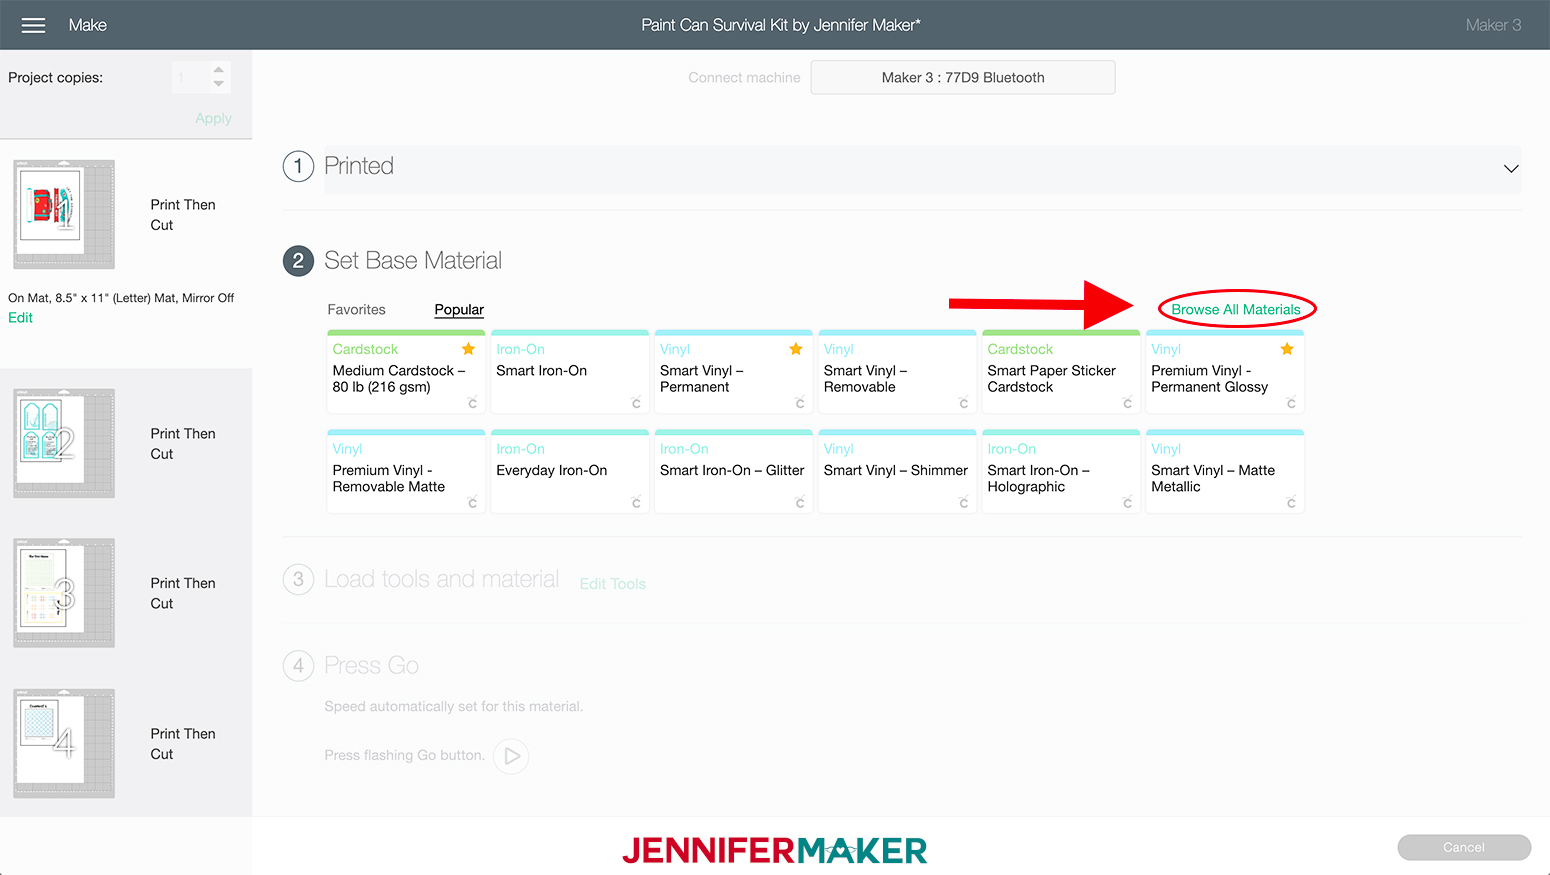
Once the design is printed it's time to select our materials for this project.
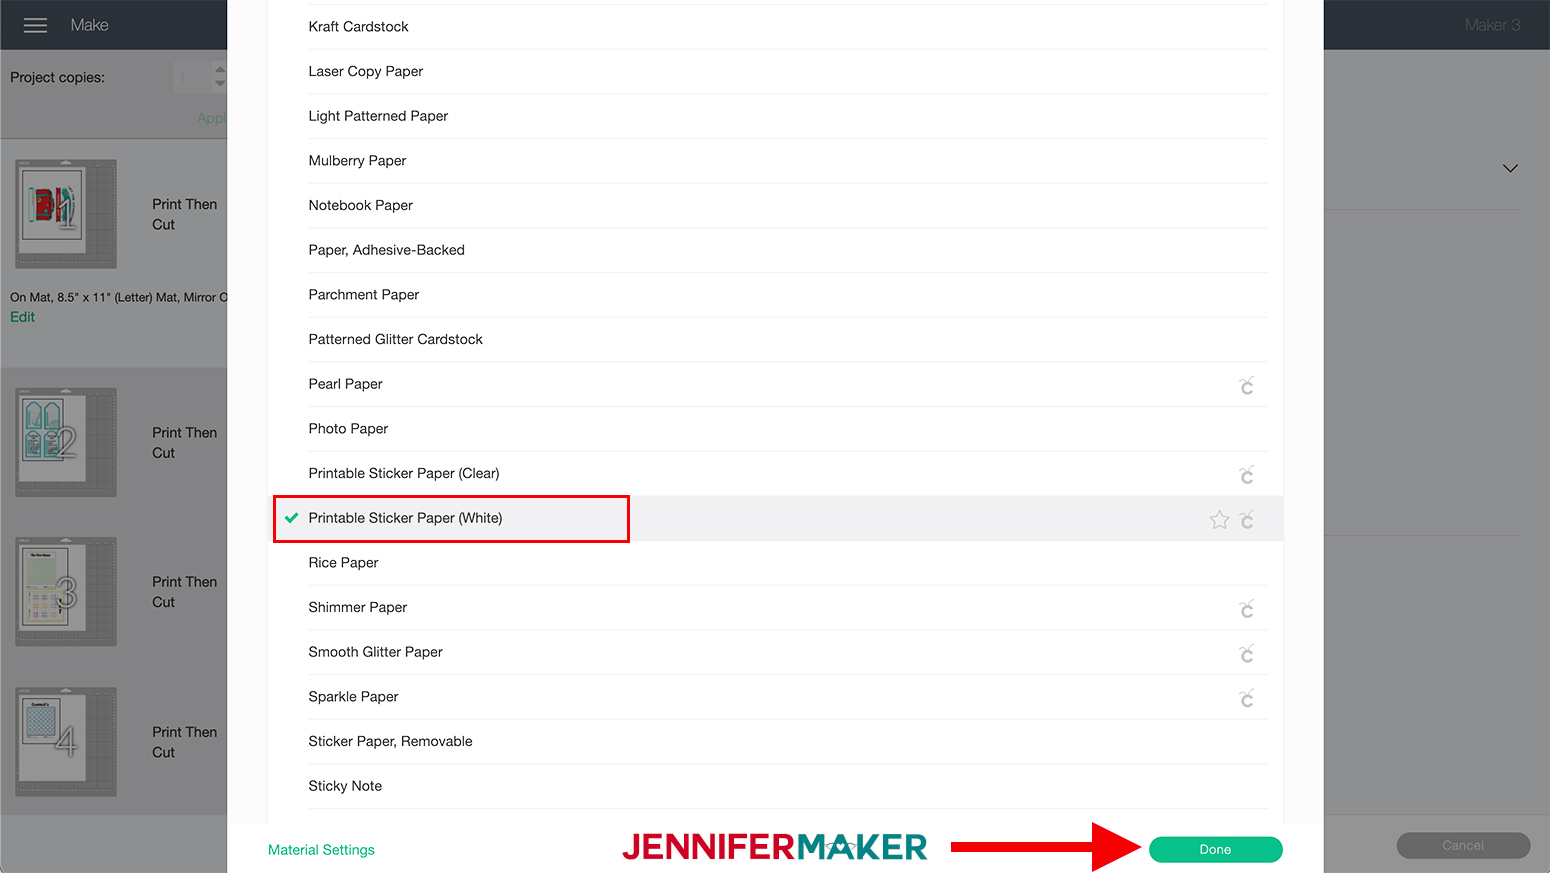
For the first mat which has our front design on it. Click on "Browse All Materials" and select "Printable Sticker Paper (White)" under paper in the materials menu.
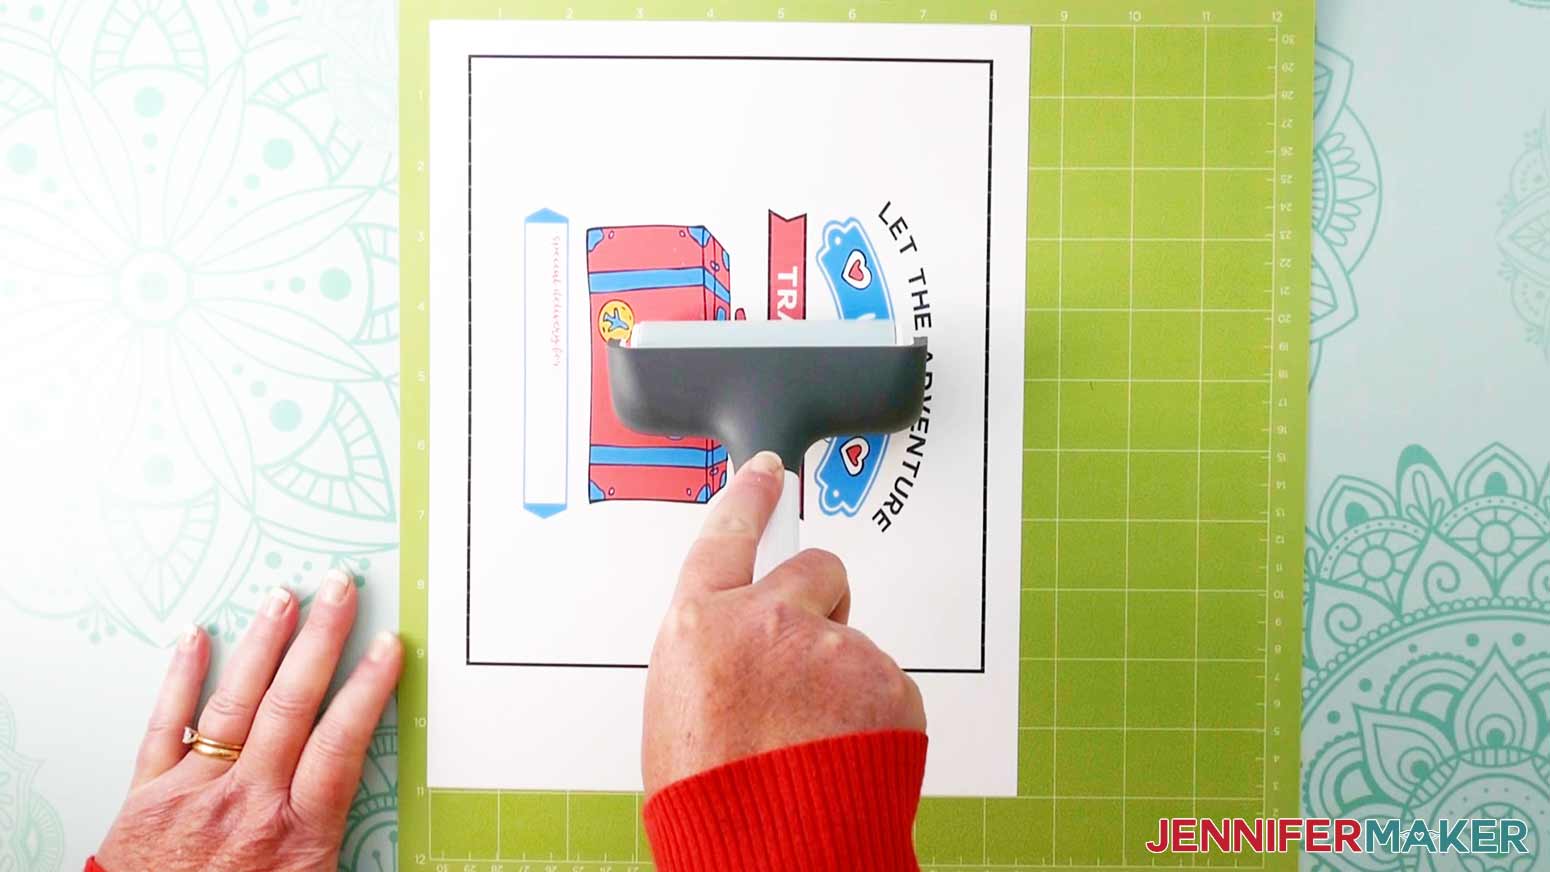
Place your new printed design on a Cricut Green StandardGrip Machine Mat 12" x 12" and burnish it down with the Cricut Brayer Tool, this ensures it has properly adhered to the mat.
Load your mat and select the blinking "Arrow/Go" button. Once it is done cutting, unload your mat by pressing the blinking "Load/Unload" button.
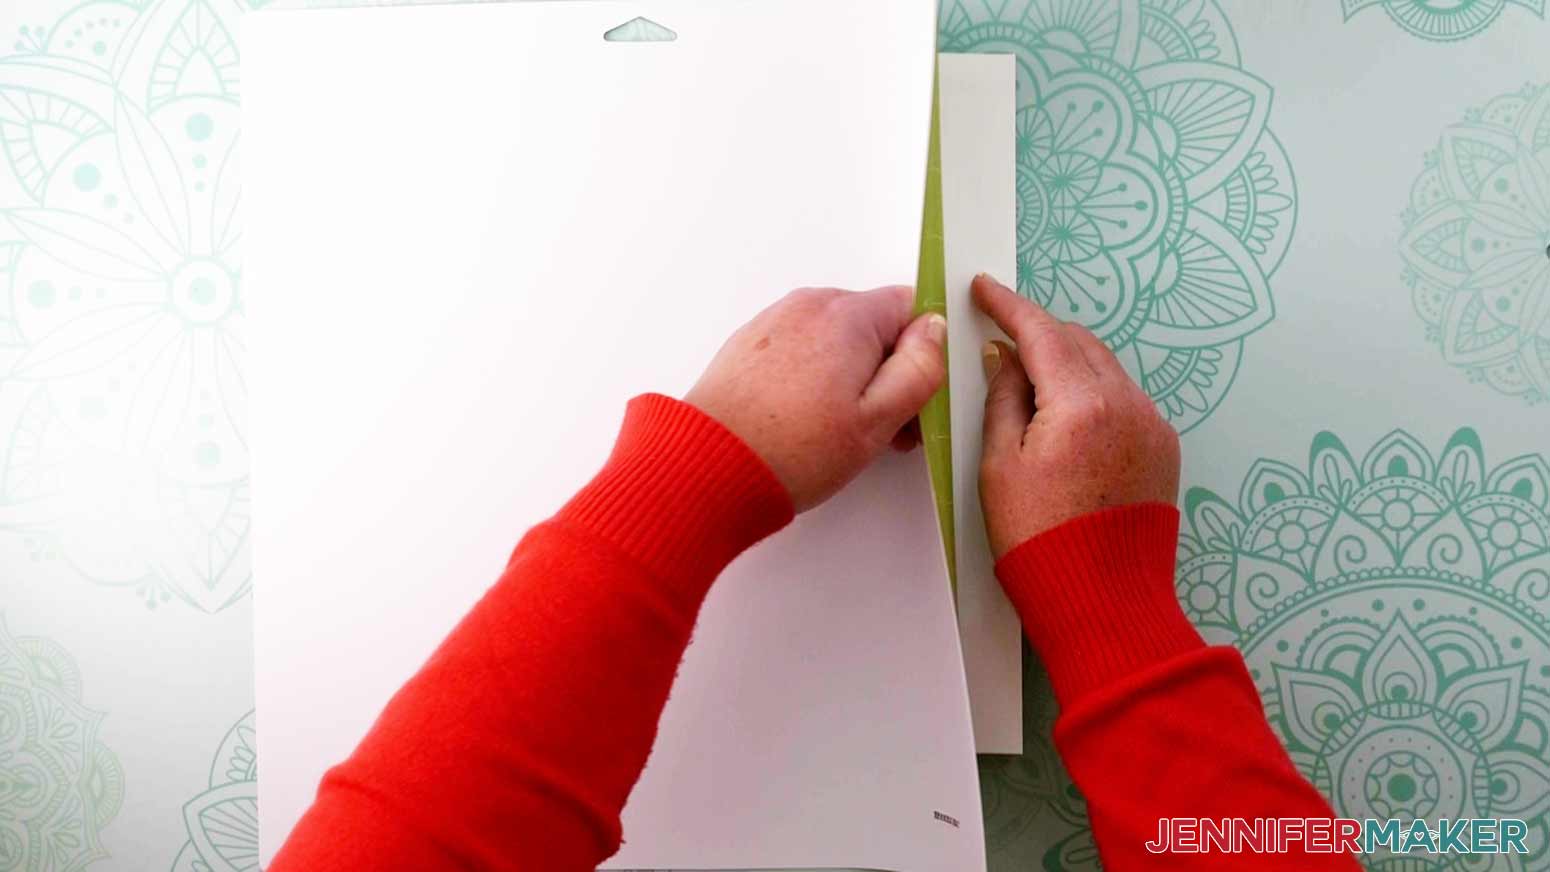
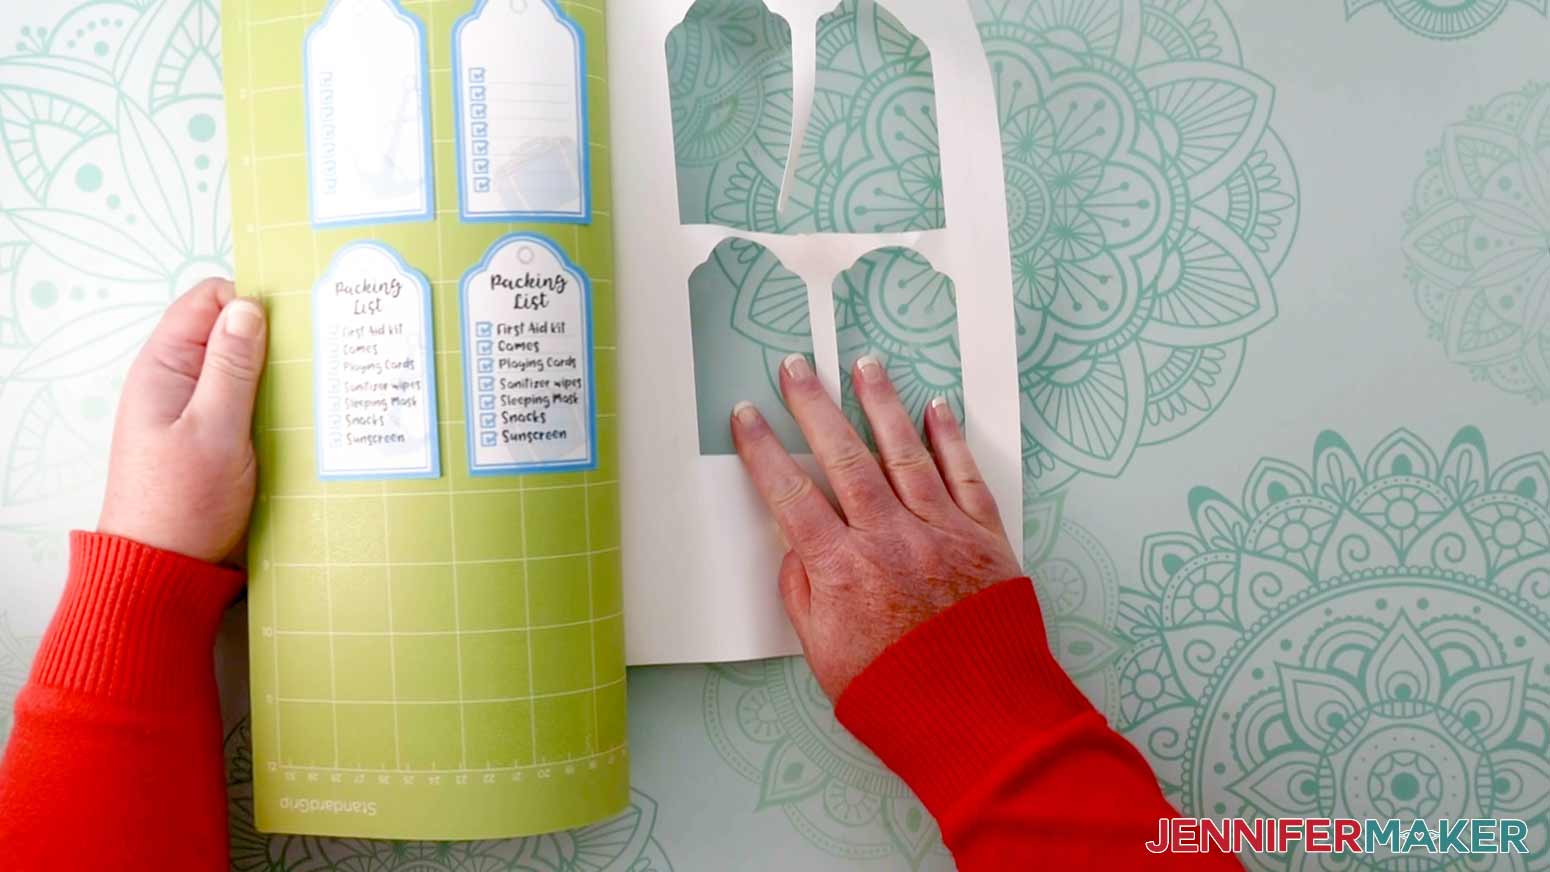
To remove the design from the mat, flip the mat over and peel the mat away from the sticker paper. This prevents the material from curling.
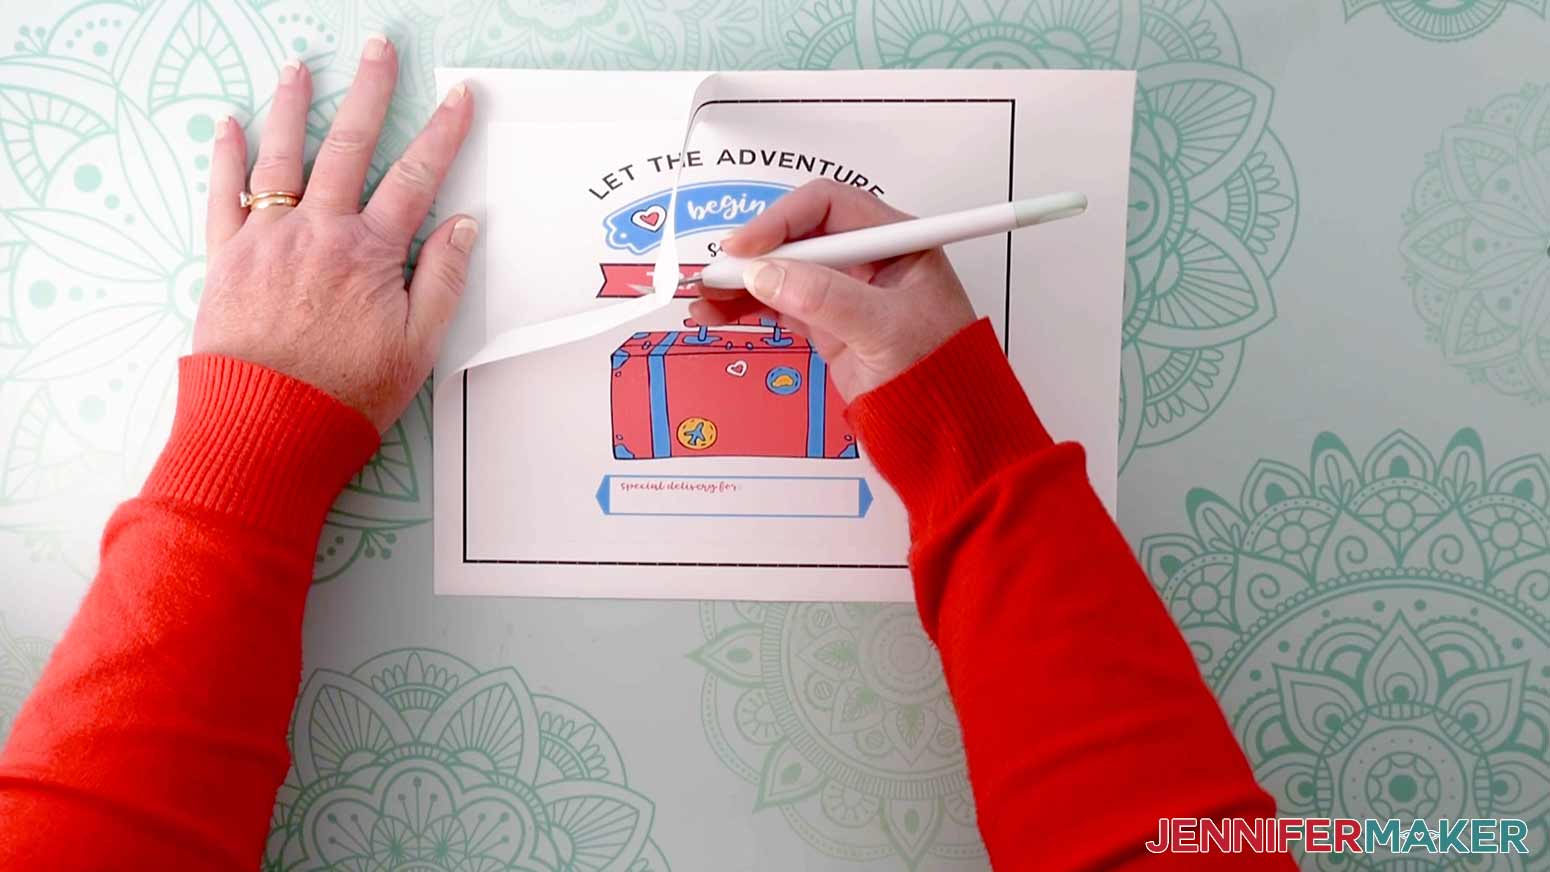
Next, we are going to weed the excess sticker paper from the design. Using your Cricut Weeding Tool choose a corner and separate the top layer from the bottom layer.
Set this aside for now.
Next, we are going to print then cut our tags.
Insert white cardstock into your printer, and then click "Send to Printer" in Cricut Design Space. On the pop-up page, select "Print” and I always select “Best.”
Next, select "Browse All Materials" again and then click "Medium Cardstock – 80 lb (216 gsm)" under "Paper" in the materials menu.

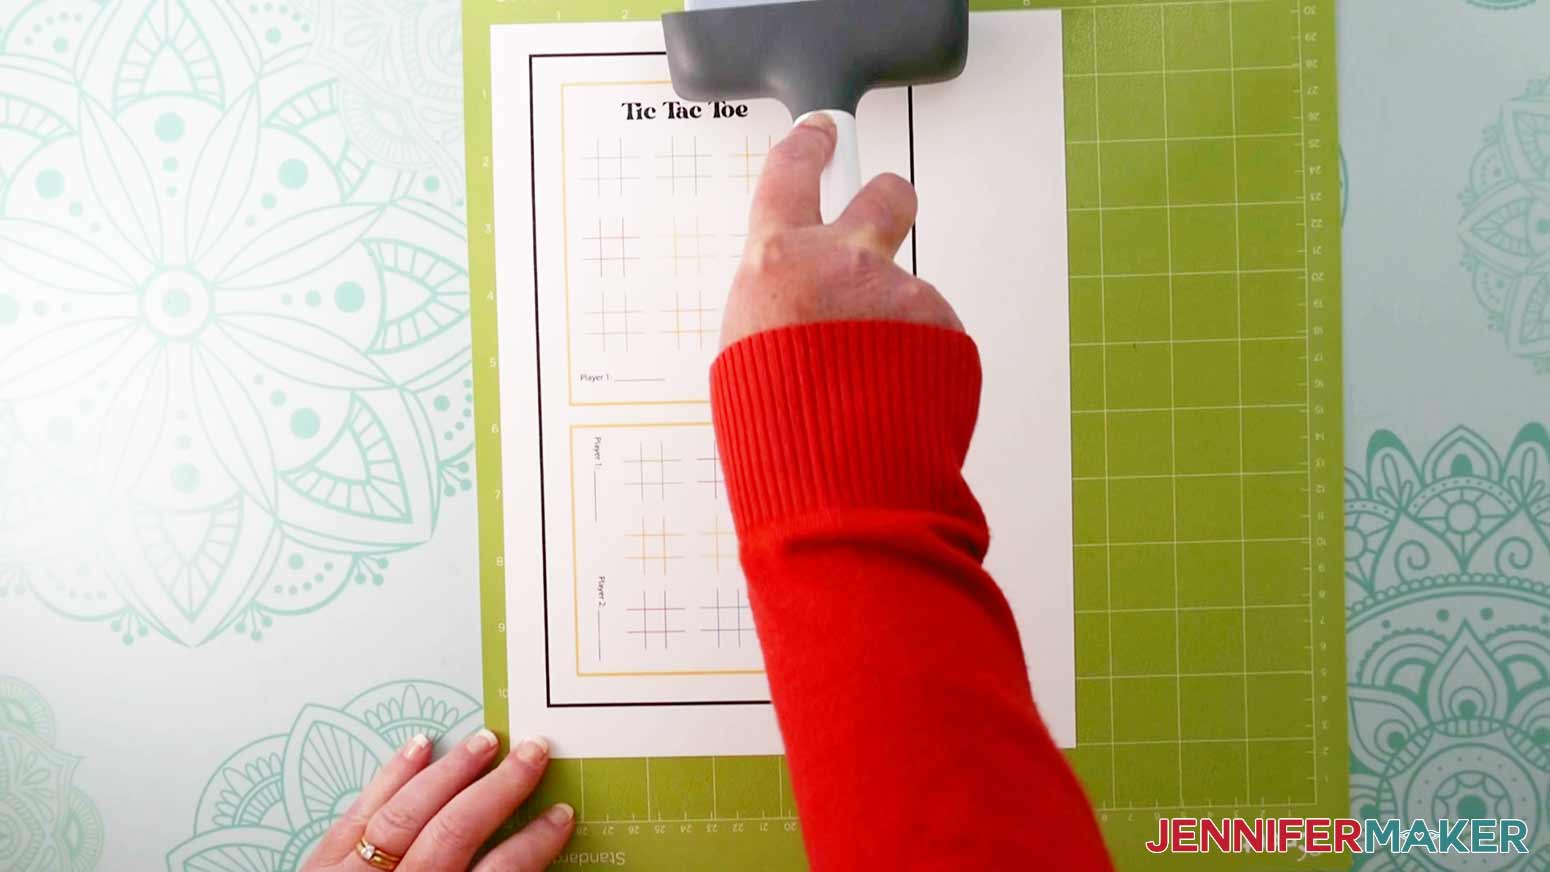
Place your cardstock on your Cricut Green StandardGrip Machine Mat 12" x 12" and burnish it with the Brayer Tool. Now Load your mat and select the blinking "Arrow/Go" button.
Once it is cut, carefully remove it from the mat by flipping the mat over and peeling the mat away from the cardstock to help prevent curling.
Set these aside for now.
Lastly, we are going to print then cut the game sheets.
Again, insert white cardstock into your printer. Click "Send to printer" in Cricut Design Space. On the pop-up screen, select "Print."
Select "Browse All Materials" and select "Medium Cardstock – 80 lb (216 gsm)" under "Cardstock" in the materials menu.

Place your newly printed design on a Cricut Green StandardGrip Machine Mat 12" x 12" and burnish it with the Brayer Tool.
Load your mat and select the blinking "Arrow/Go" button. Once it is done cutting, unload your mat by pressing the blinking "Load/Unload" button.
To remove the design from the mat, flip the mat over and peel the mat away from the cardstock.

Repeat these steps for the remaining game mats.
Once we have them all cut, we are going to stack them on top of each other with the holes lined up.
Next, attach them together with a loose-leaf binder ring or tie it with a ribbon. Now you have your very own gamebook that we can put in our paint can!
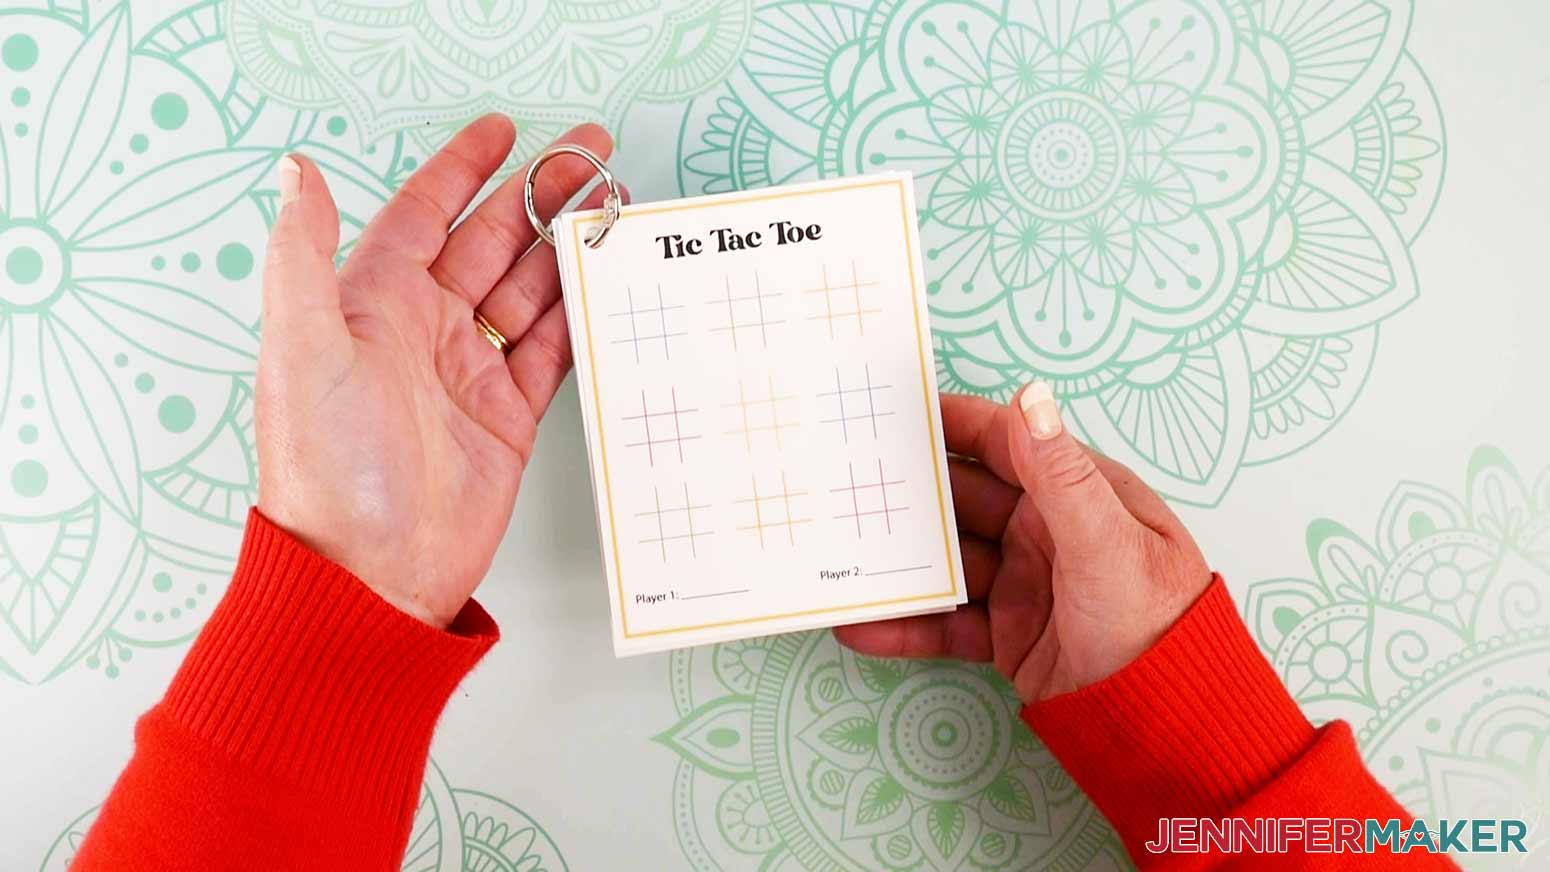
TIP: Cut out clear vinyl in a 4" x 5" rectangle for each of your game sheets and place it on top of each game card and use dry erase markers so the fun never ends!
STEP 3: DECORATE YOUR PAINT CAN
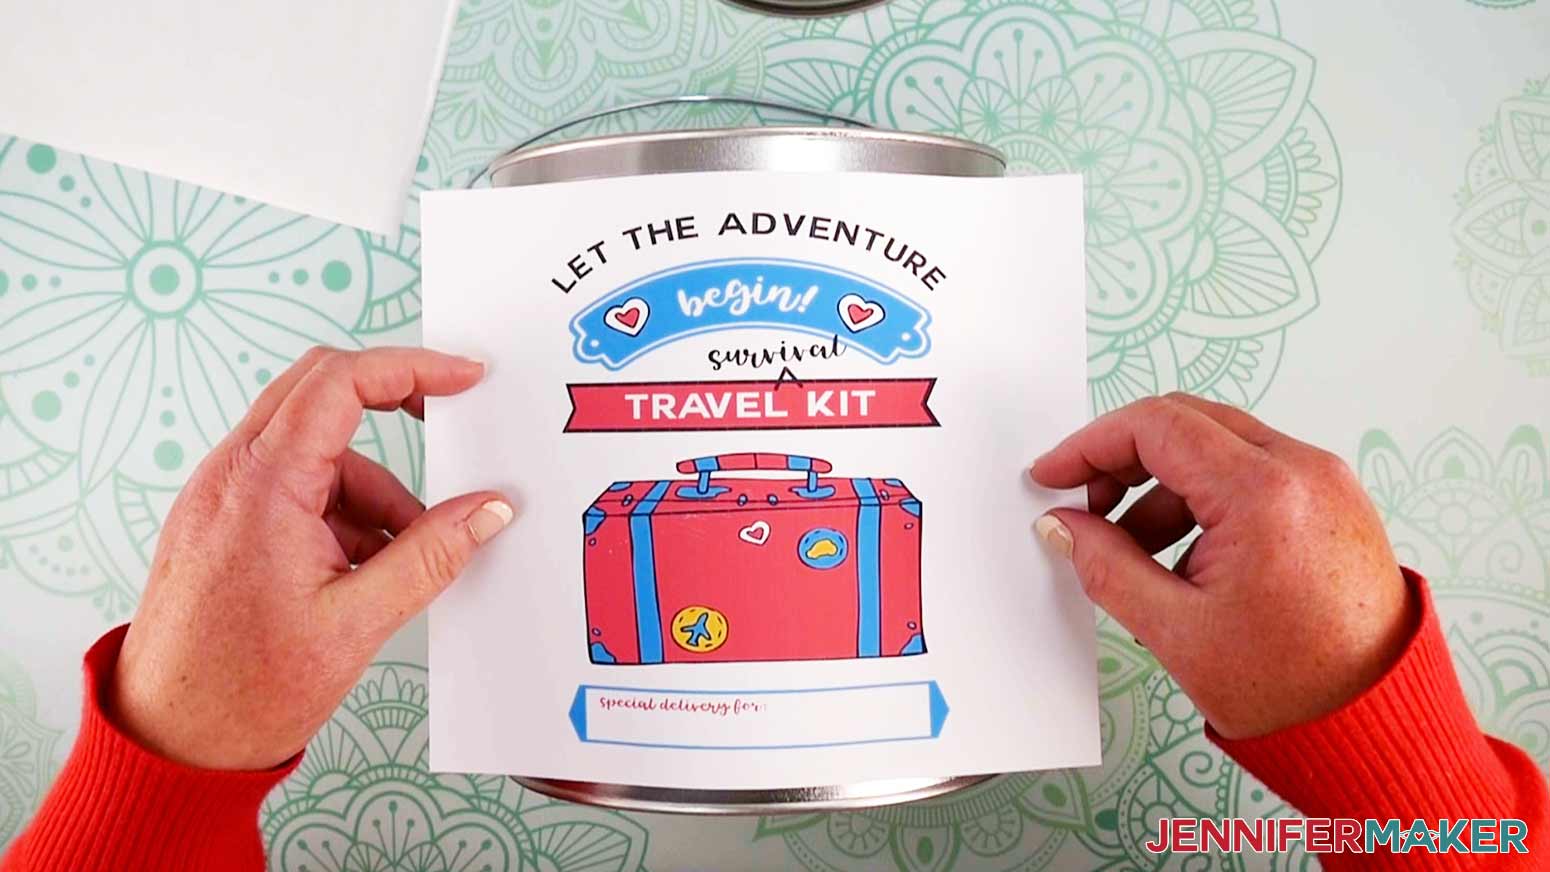
Now it's time to decorate our Paint Can Survival Kit!
First, grab your paint can. Next, peel the design from the sticker backing and center it in the middle of the paint can, and tack it down.
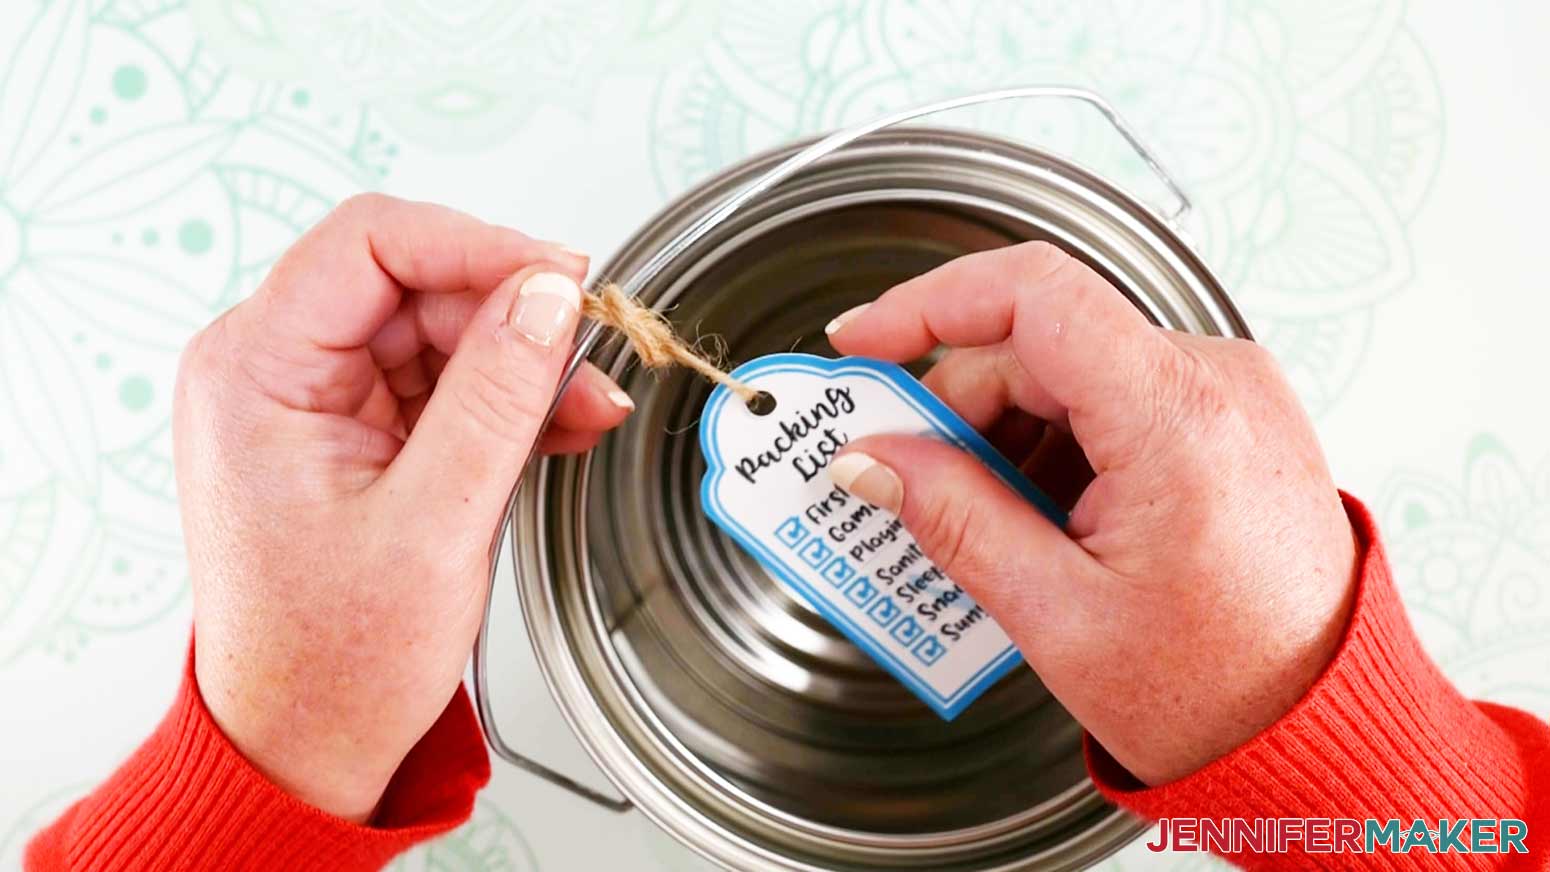
Next, tie the tag to your paint can using a 6" piece of ribbon. You can use any kind of ribbon, I am using the ribbon that comes with the jingle bells.
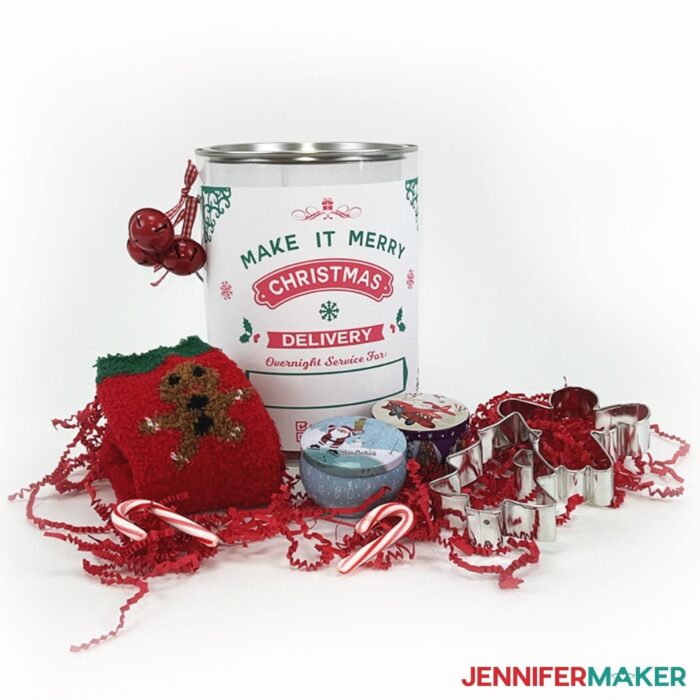
NOTE: All of these steps are the same for the Christmas Paint Can Survival Kit. I also added some jingle bells to this can by using two pieces of 6" ribbon to tie them to the paint can handle. Feel free to add more if you like!
STEP 4: FILL WITH GIFTS
For our final step, we are going to fill the paint can with all kinds of fun gifts!
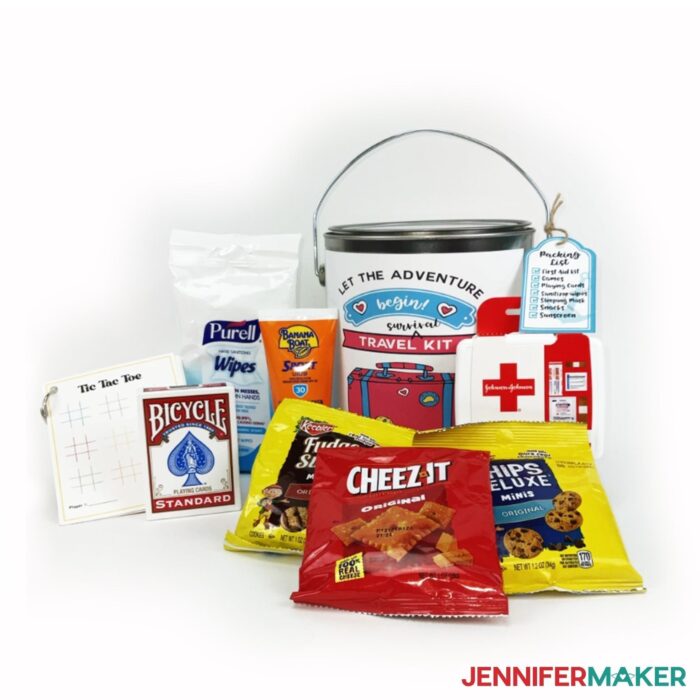
For the Travel-theme paint can, I put the first-aid kit and the deck of cards in first. Then, I added the hand sanitizing wipes, sunscreen, some yummy snacks, the printed travel games, pencils, and the sleeping mask.
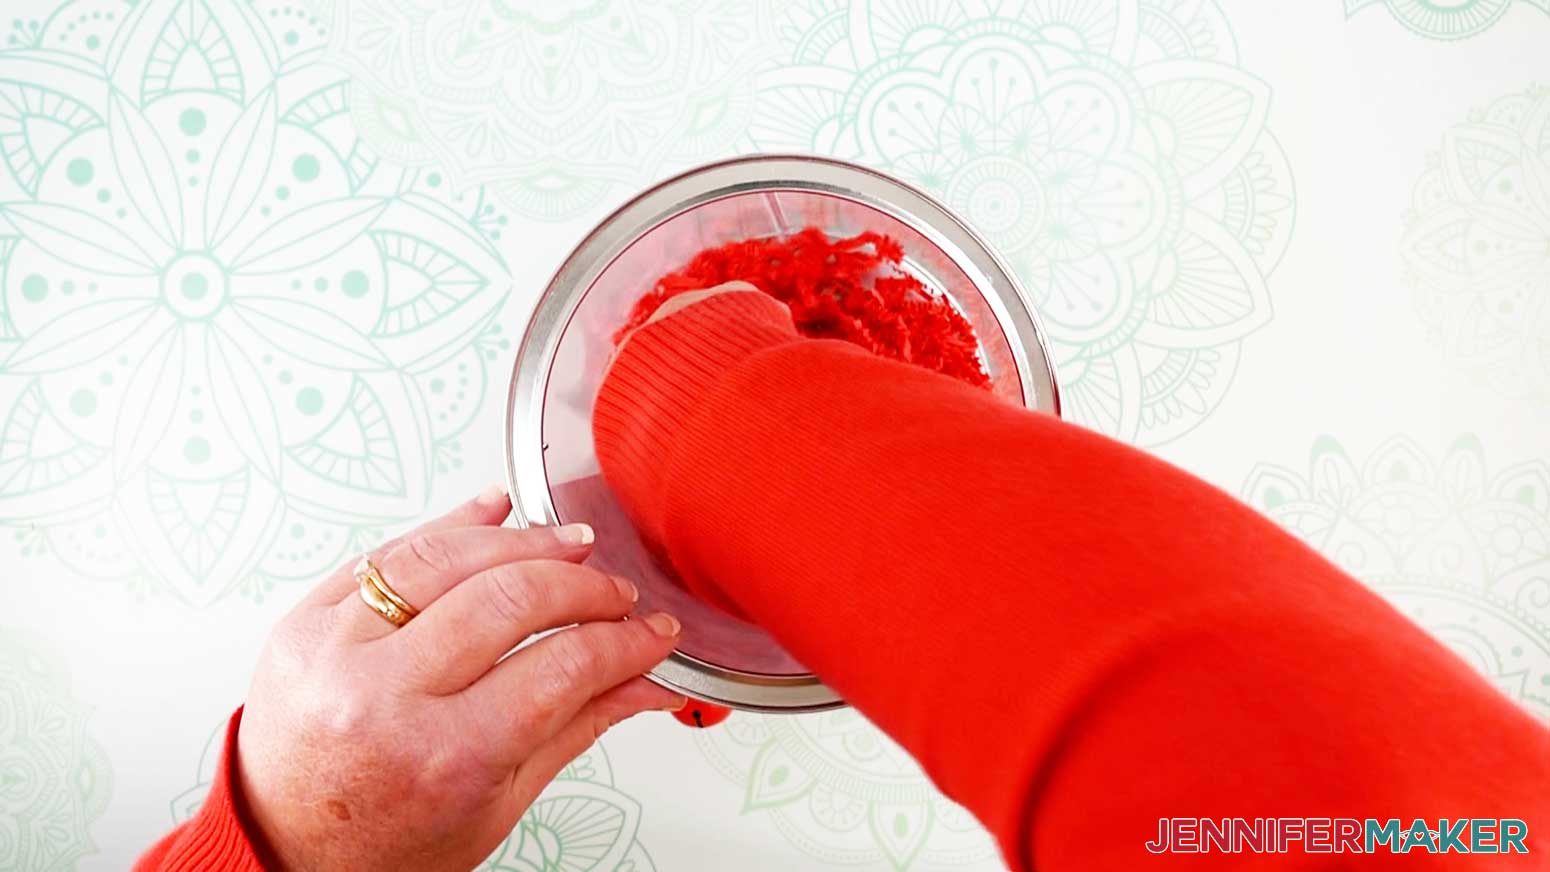
For the Christmas-theme paint can add a handful or two of the Crinkle Cut Paper (Red) to cover the bottom of the paint can.
Next, add the rest of your gifts to the Christmas-theme paint can.
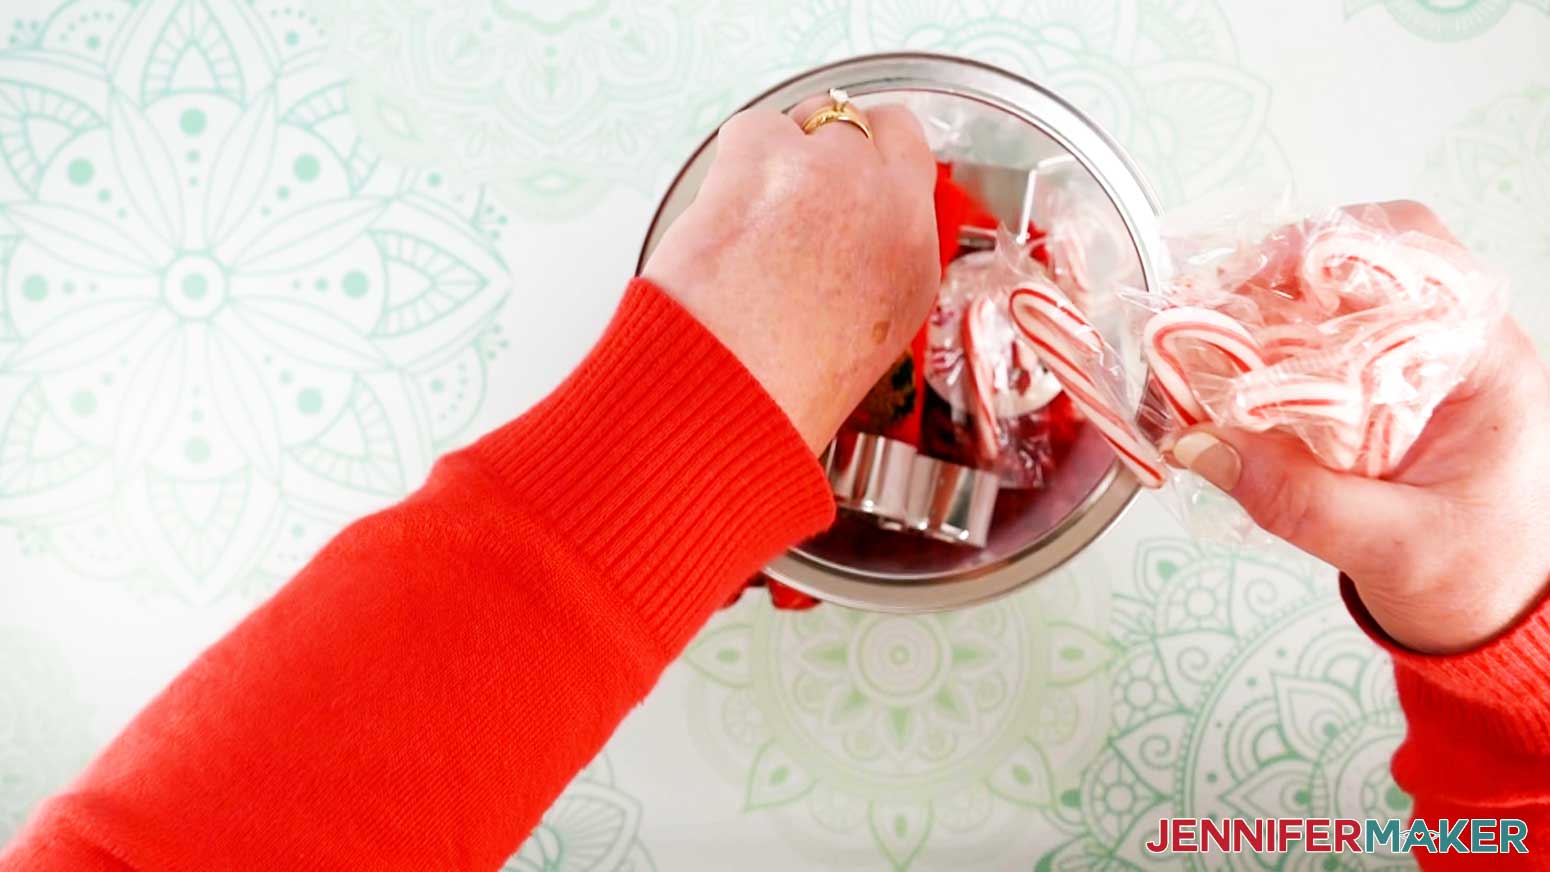
I put my candles in first because they are the heaviest. Then, I added my cookie cutters, cozy socks, teeny-tiny tinsel tree, and some small candy canes.
 NOTE: This is what I chose to put my Paint Can Survival Kits. Have fun and be creative in picking your filler gifts! Make sure they are small enough to fit in your paint can.
Notes
If you’ve ever been on the road where you quickly need a first aid kit, or some sanitizing wipes, you know how handy these survival kits would be during a time like that. Or maybe you just want a quick snack but don’t want to head out to the store. These survival kits are perfect for saving the day and they are so easy to refill when you’ve used up any of the items.
I really love the idea of giving these out during the holidays because instead of buying someone something they may not like or use, I can stuff it with their favorite goodies, snacks, and maybe even a gift card or two!
Answers to Your Questions About How to Make DIY Survival Kits
Q: Where is your tutorial for this project?
This is a special project we made for our free Maker Academy Weekend event! A complete and detailed step-by-step video premiered during the event November 4-7, 2021. Get access to the workshop video and printable workbook with a VIP Pass to Maker Academy Weekend 2021, which comes with other perks and bonuses, too!
Q: Can I make the survival kits on a Cricut Joy?
This project uses the Print Then Cut feature on the Cricut Explore and Maker machines.
Get a free ticket to Maker Academy Weekend to see how this works!
I love seeing what you make with my designs and how you use them! Please share a photo of your survival kits in our Facebook group or tag me on social media with #jennifermaker.
Love,

Want to remember this? Save this DIY Survival Kits Tutorial to your favorite Pinterest Board!