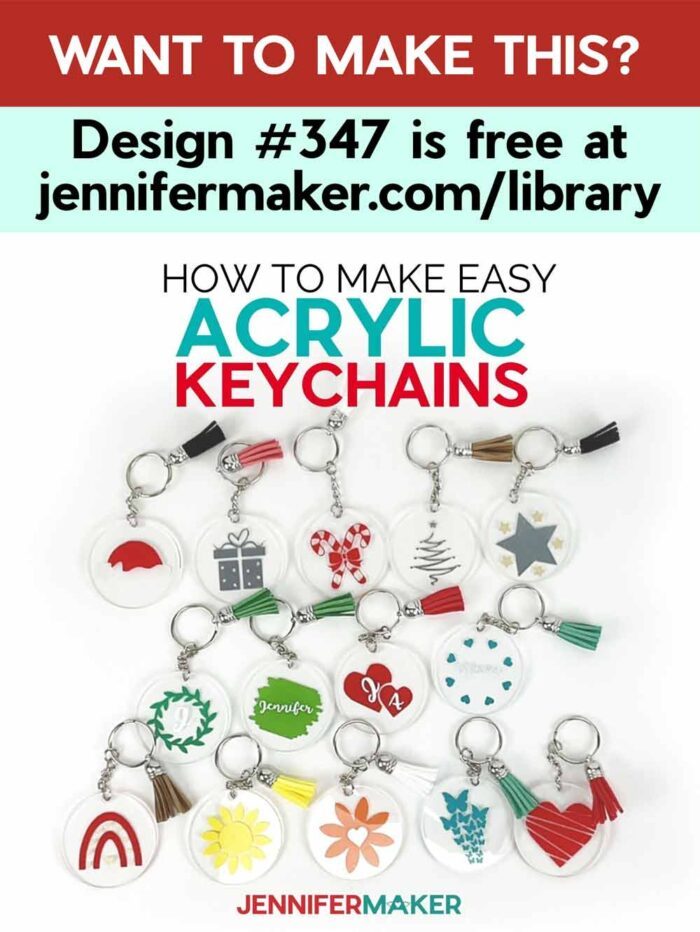
Learn how to make cute and easy acrylic keychains with vinyl!
Learn how to make a super fun and easy personalized gift that is perfect for anyone on your holiday list! We all know finding just the right gift for everyone on your list is not an easy task, especially something affordable. But I have a great idea that ticks all the boxes! We made some DIY acrylic keychains earlier this year, and I loved them so much we needed more designs! These easy Acrylic Keychains are easy to make, inexpensive and they can be customized for anyone! Grandma, teachers, helpers, kids, you name it! Oh, and they also make great party favors!
Want to save this project? Enter your email below and we’ll send the project straight to your inbox.
Watch the step-by-step video tutorial for this fun holiday home decor project:

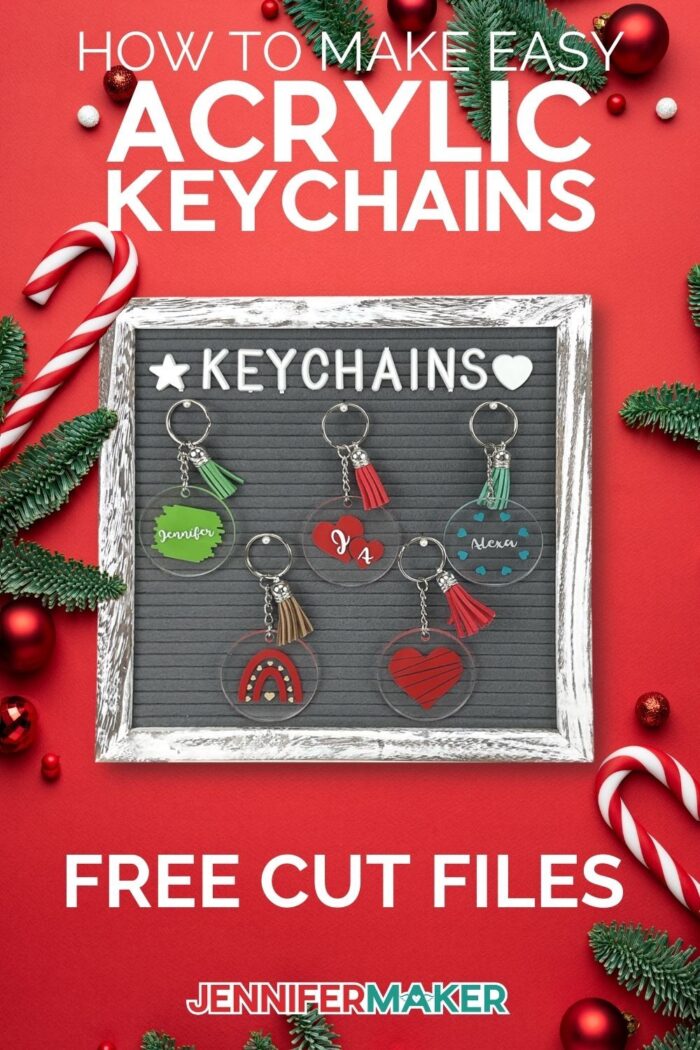
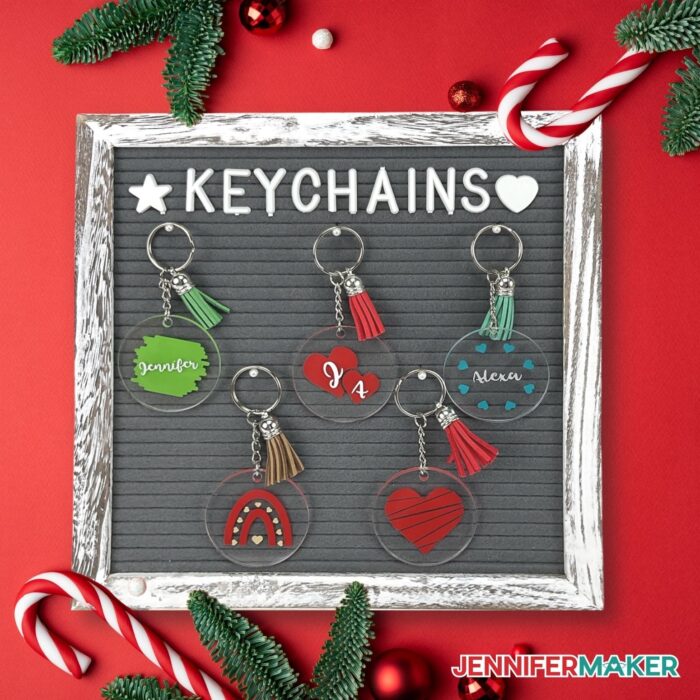
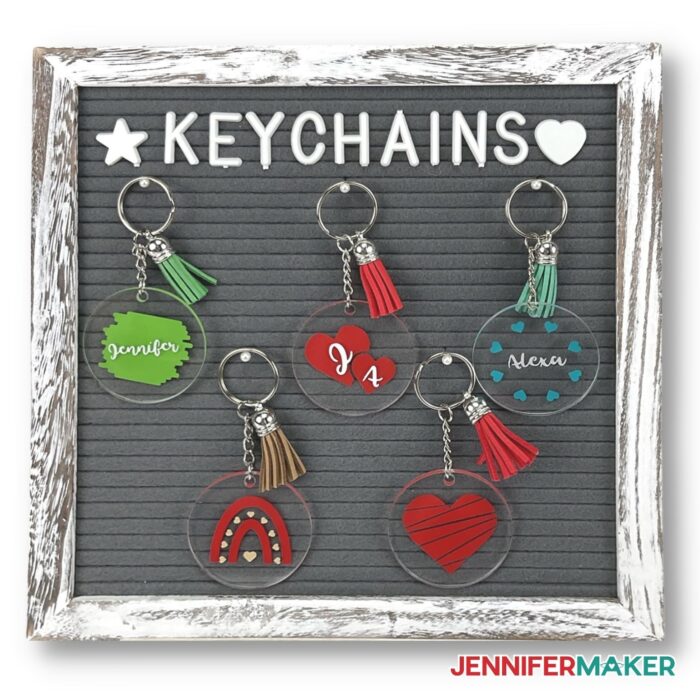
Just look how cute these acrylic keychains look on this letter board:
The best part of making these keychains is you don’t need a ton of materials. You can buy these acrylic keychains in bulk on Amazon and they come with coordinating tassels. I’m using a variety of vinyl, along with transfer tape. And of course my Cricut Cutting machine…you can make these on all the models, including the Cricut Joy. We’ll need a weeding tool, a scraper and a small pair of pliers to put the keychains together.
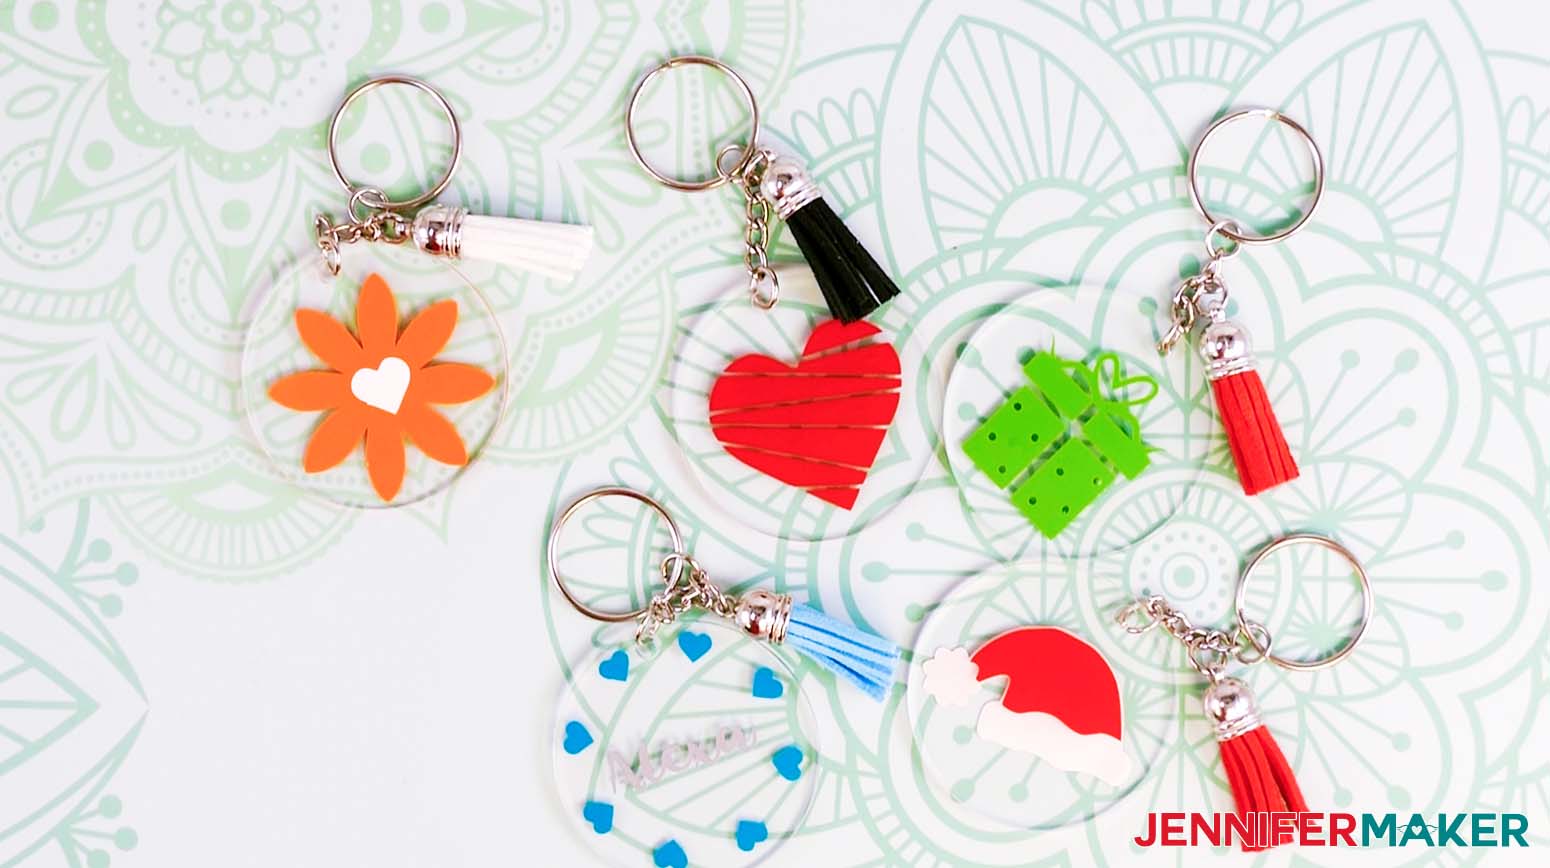
Do you have a favorite? I think mine is either the two hearts with the initials or the heart rainbow. Oh, and of course, you can change the color on any of them!
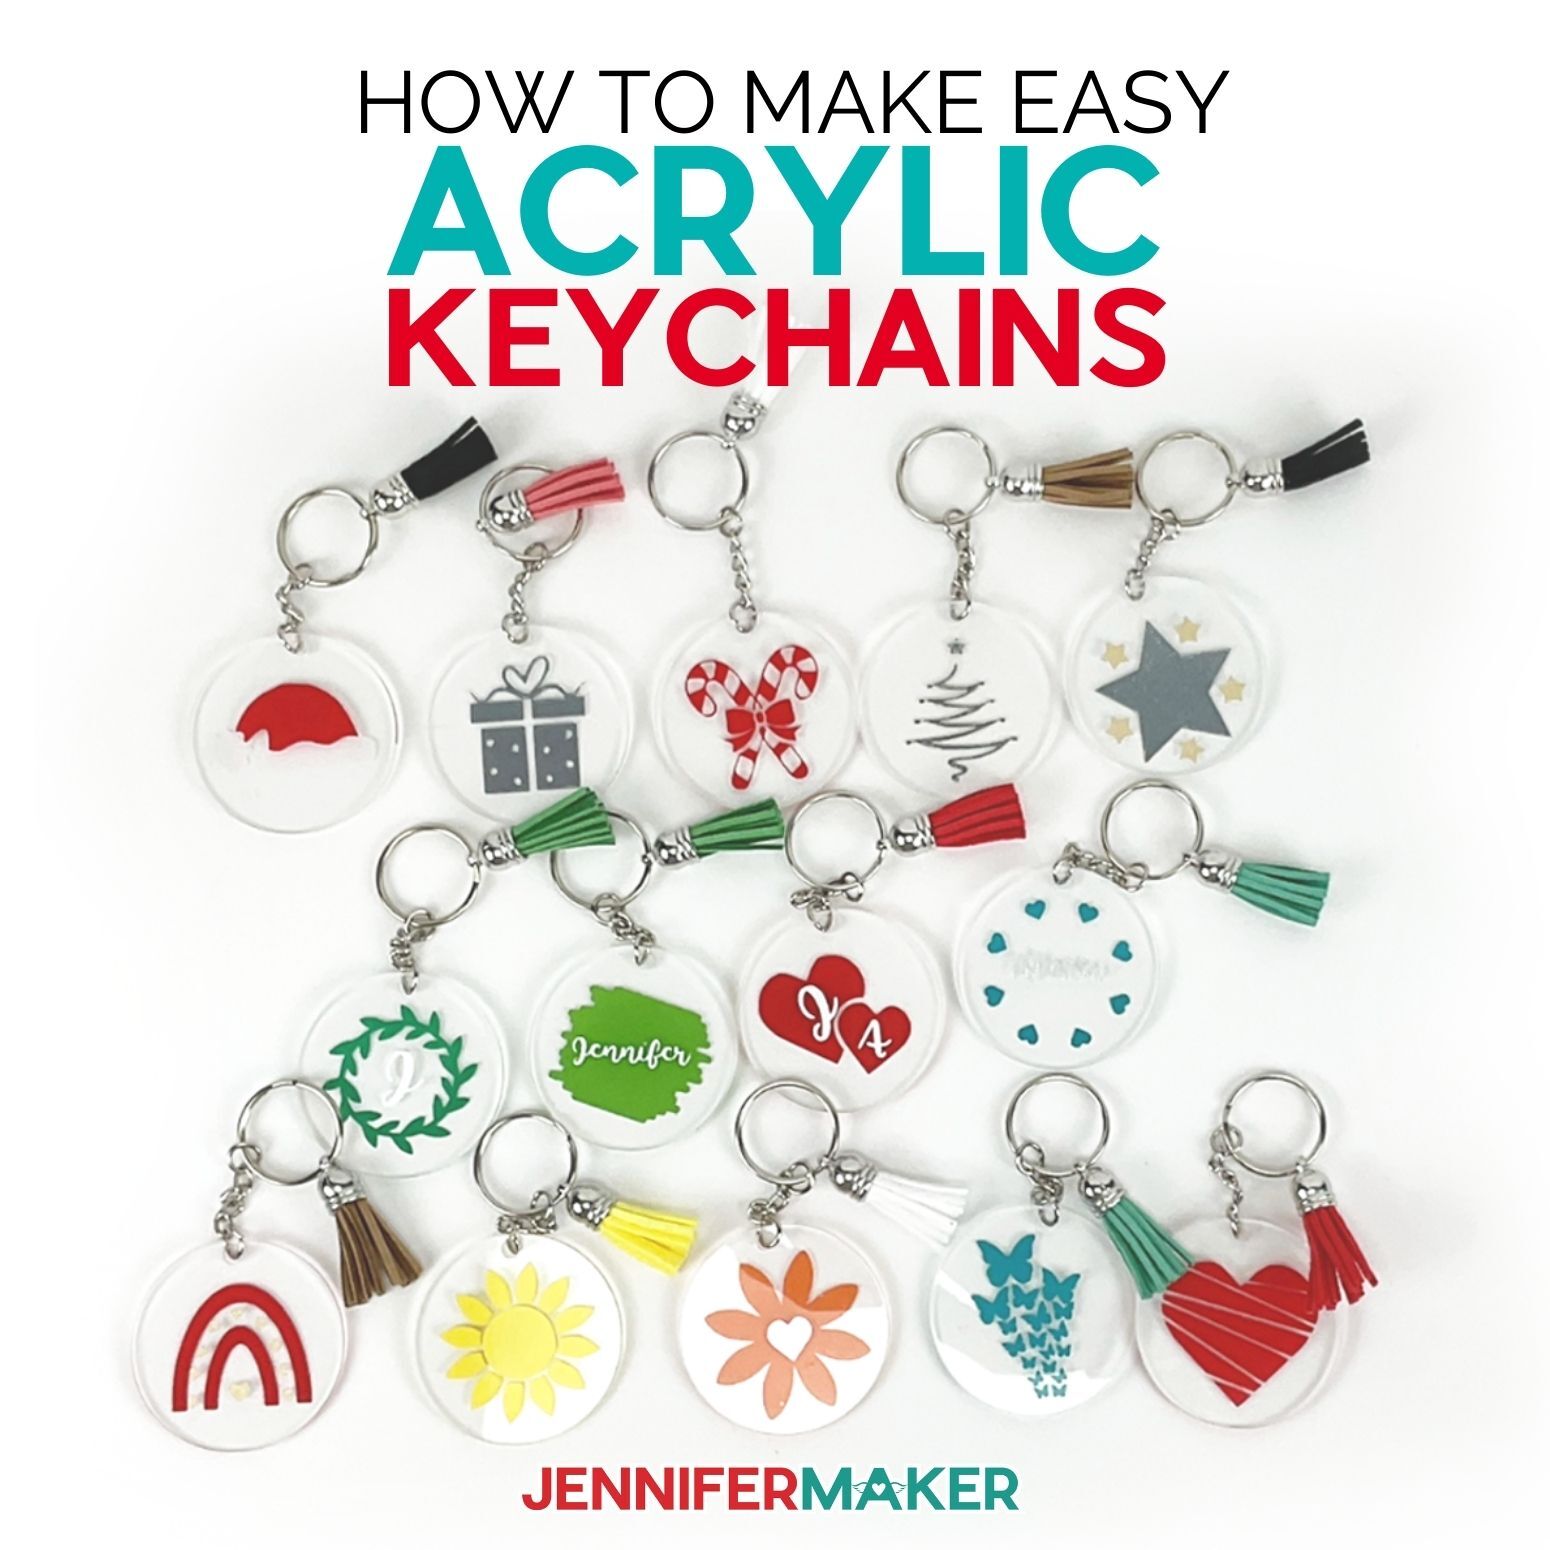
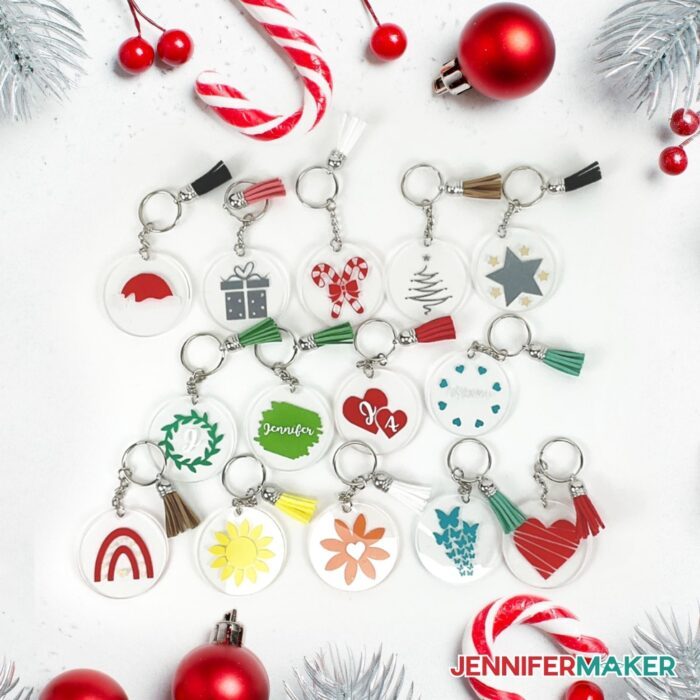
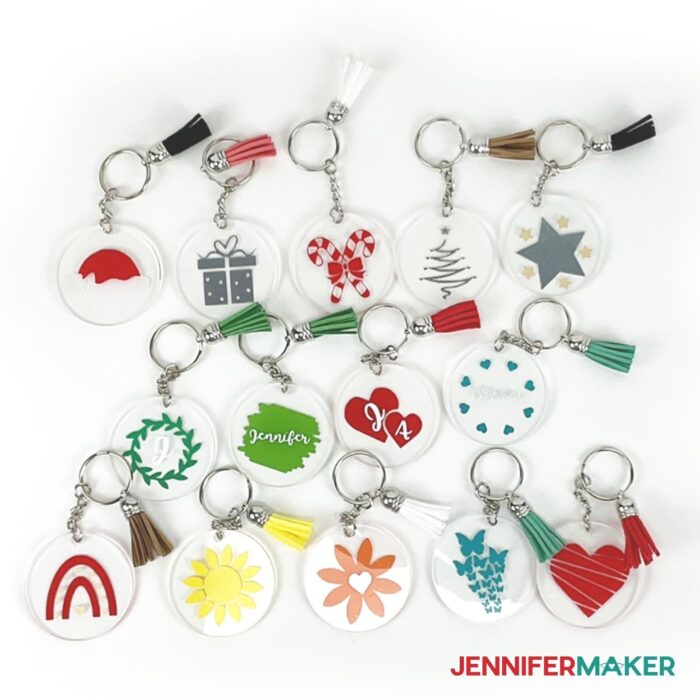
There are fourteen free designs for you to choose from and you can either make all of them or choose from your favorites! Here are some more examples of the designs I’ve included which you can customize to your heart’s desire. Aren’t they so cute paired with the tassels?
Imagine how many of these you could make in a batch. These acrylic keychains make for great gifts and are also a great item to sell at craft fairs or on an Etsy shop. Seriously, I’ve seen some sell like hotcakes!
To personalize them, I’m using a variety of permanent adhesive vinyl — both glossy and glitter — along with transfer tape. If you use regular glossy vinyl, be sure to use standard grip transfer tape. Only use strong grip transfer tape — the stuff with the purple lines — if you’re using a vinyl with a texture, such as glitter vinyl. If you use the strong grip transfer tape with a smoother vinyl, you’ll find it nearly impossible to get off the transfer tape.
To cut the designs and personalize for the acrylic keychains, I think it’s easiest to cut a cutting machine, like the Cricut … and you can make these on all the modern Cricut cutting machines, including the Cricut Joy. If you use a cutting machine, you’ll also want a weeding tool and a scraper.
Also useful is a small pair of pliers to put the keychains together when you’re all done! And I’ll also show you an optional trick to protect your vinyl from getting scratched and dinged up by keys!
Let me show you how easy it is to make these cute and easy acrylic keychains with my free SVGs! This post contains some affiliate links for your convenience (which means if you make a purchase after clicking a link I will earn a small commission but it won’t cost you a penny more)! Read my full disclosure policy.
Materials to Make Easy Acrylic Keychains
View my Amazon shopping list with the exact items we used to make this project
- Acrylic Keychain Blanks with Tassels
- Cricut Premium Permanent Vinyl or Value Vinyl
- Cricut Shimmer Vinyl Sheets
- Transfer Tape
- (Optional) Mod Podge Spray Acrylic Sealer – Gloss
- (Optional) Font for personalization: I used Tingler Script
- A method to cut your vinyl designs: I used the amazing Cricut Maker 3 but you can also use a Cricut Maker series, Cricut Explore series, a Cricut Joy series, or a Cricut Venture cutting machine
- Cricut Green StandardGrip Machine Mat 12″ x 12″
- Weeding Tool
- Scraper Tool
- Small Pliers (to Attach Chain and Key Ring)
- Design #347 – My free keychain SVG/DXF/PDF designs (you’ll find more designs in #333, too) available in my free resource library – get the password by filling out the form at the bottom of this page
How to Make Your Own Easy Acrylic Keychains
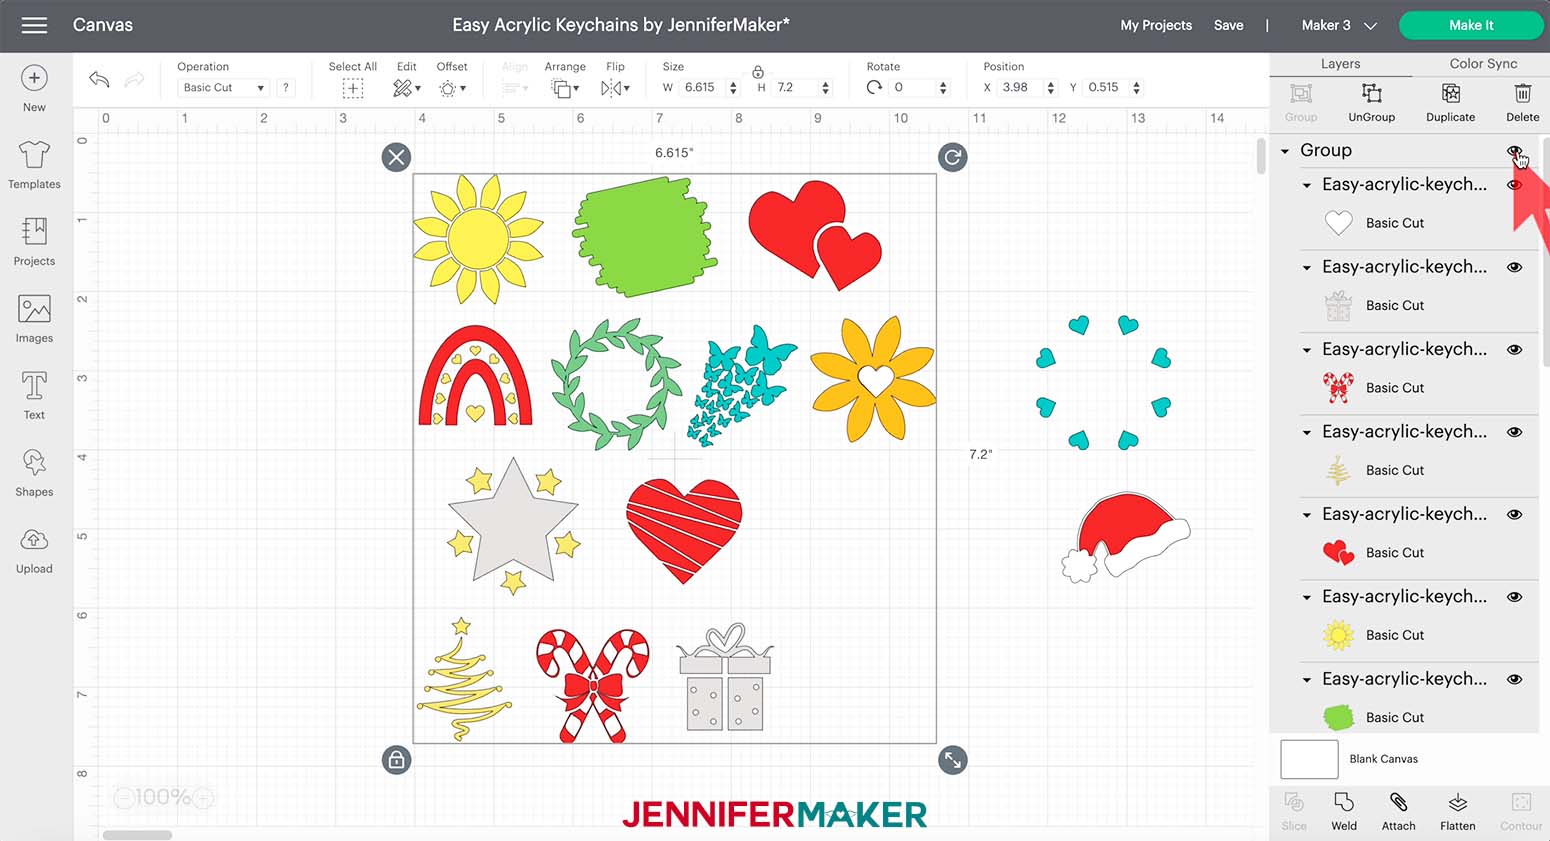
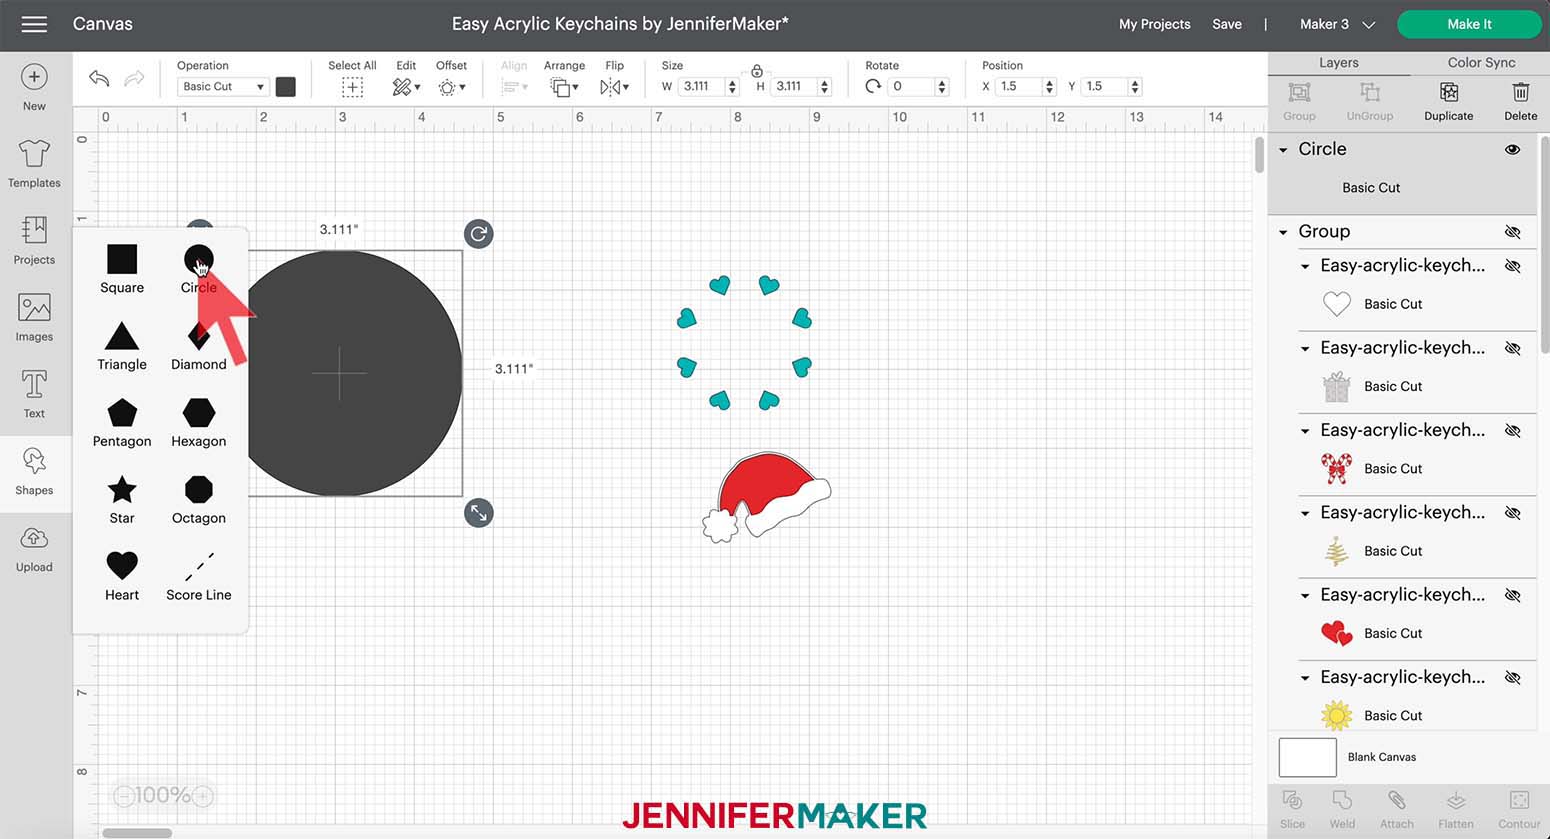
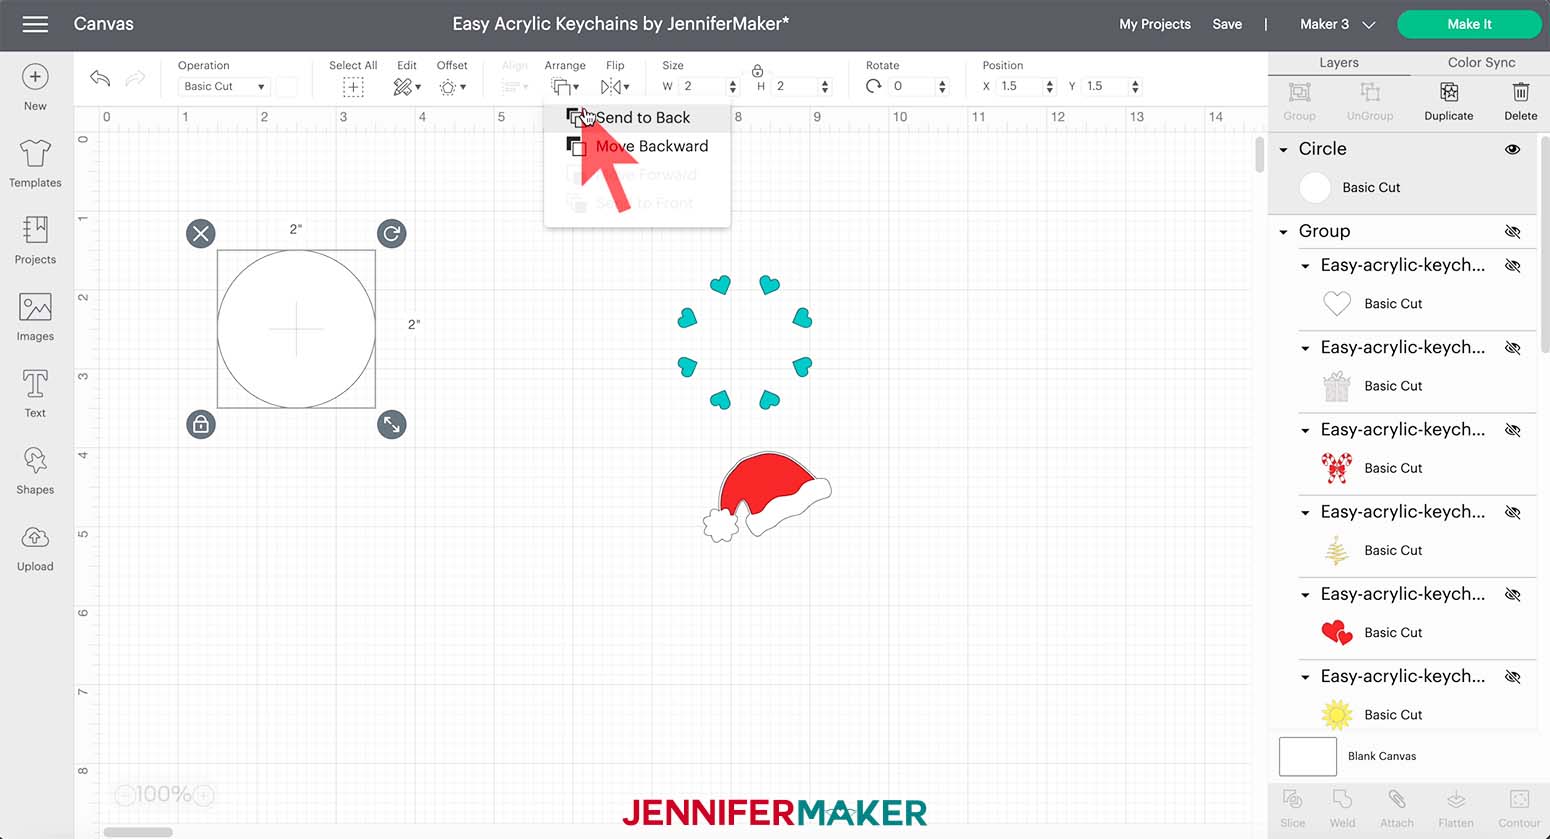
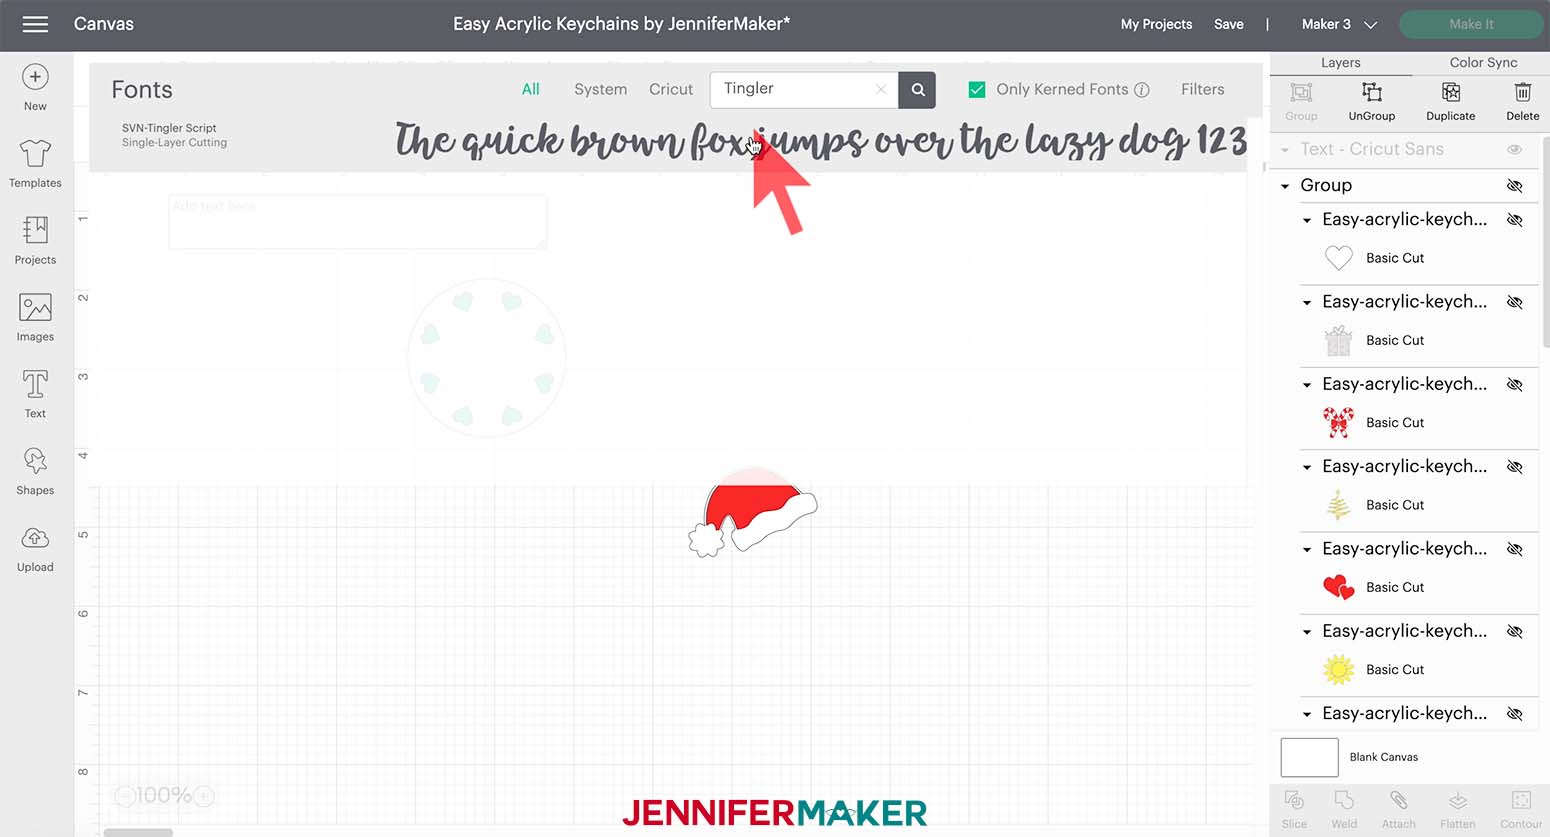
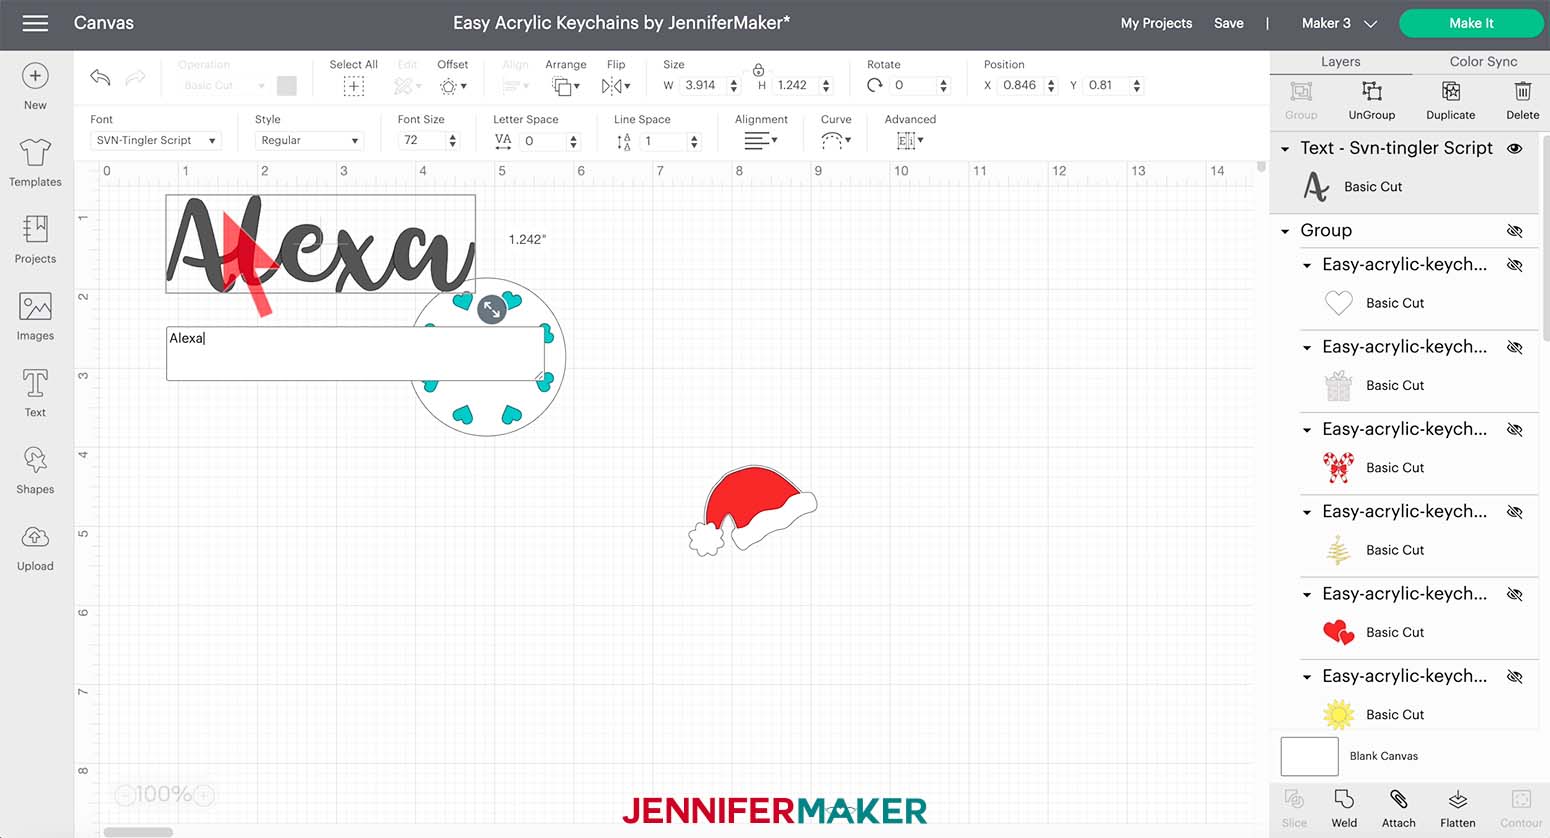
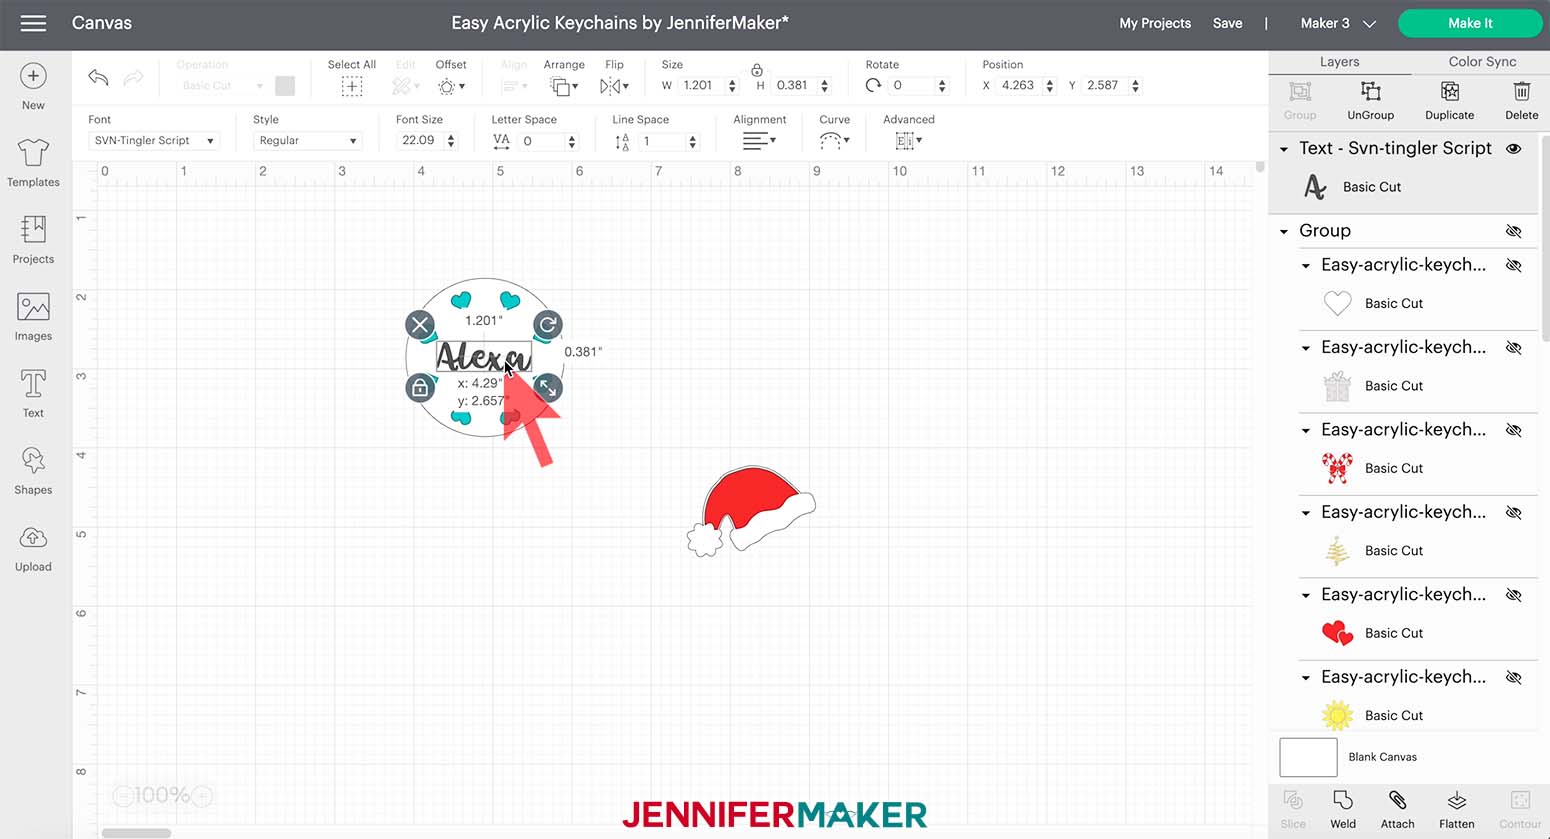
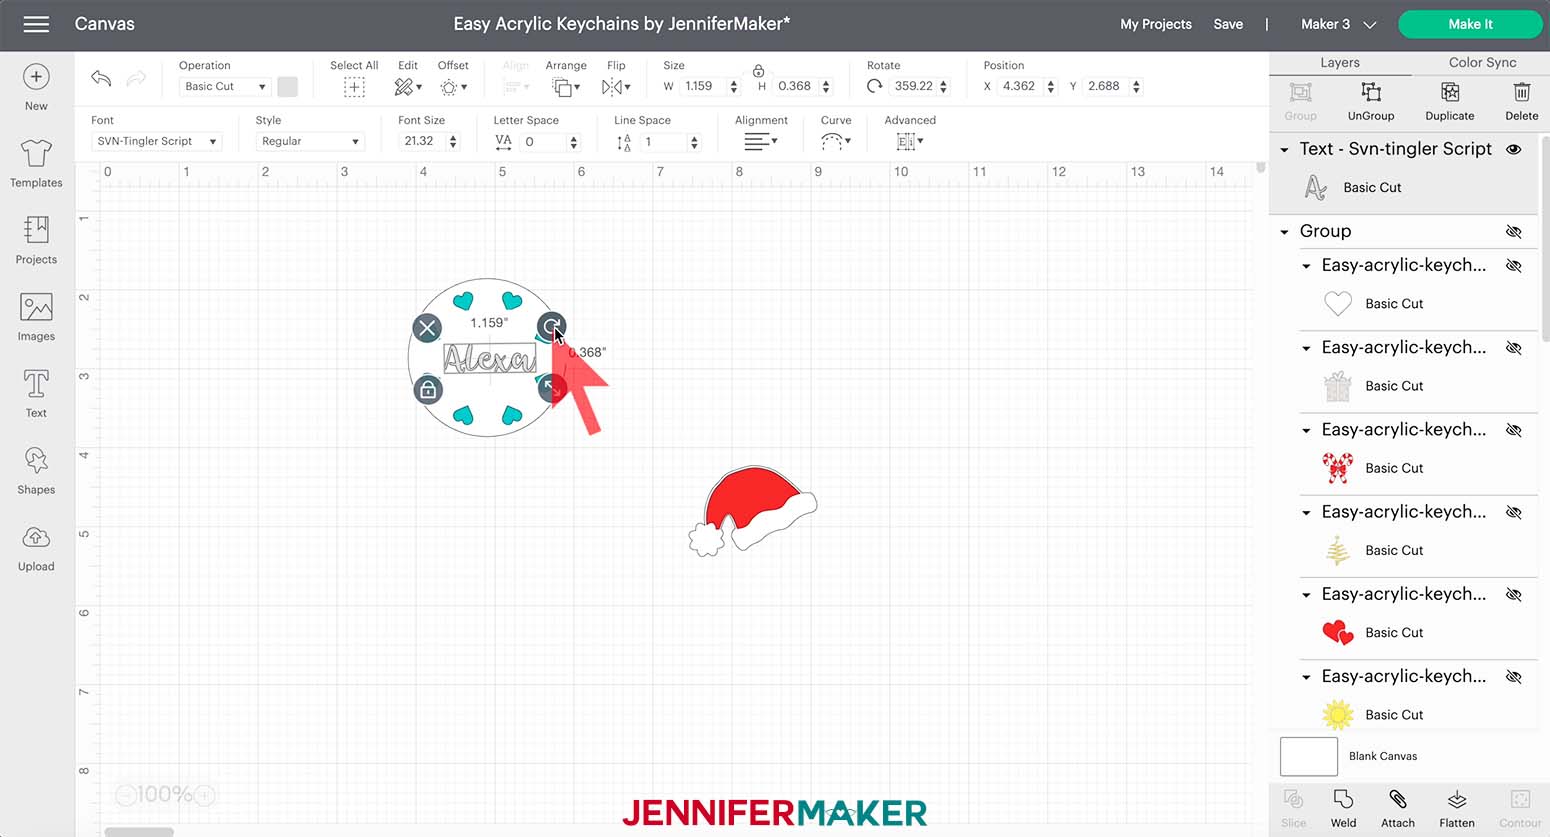
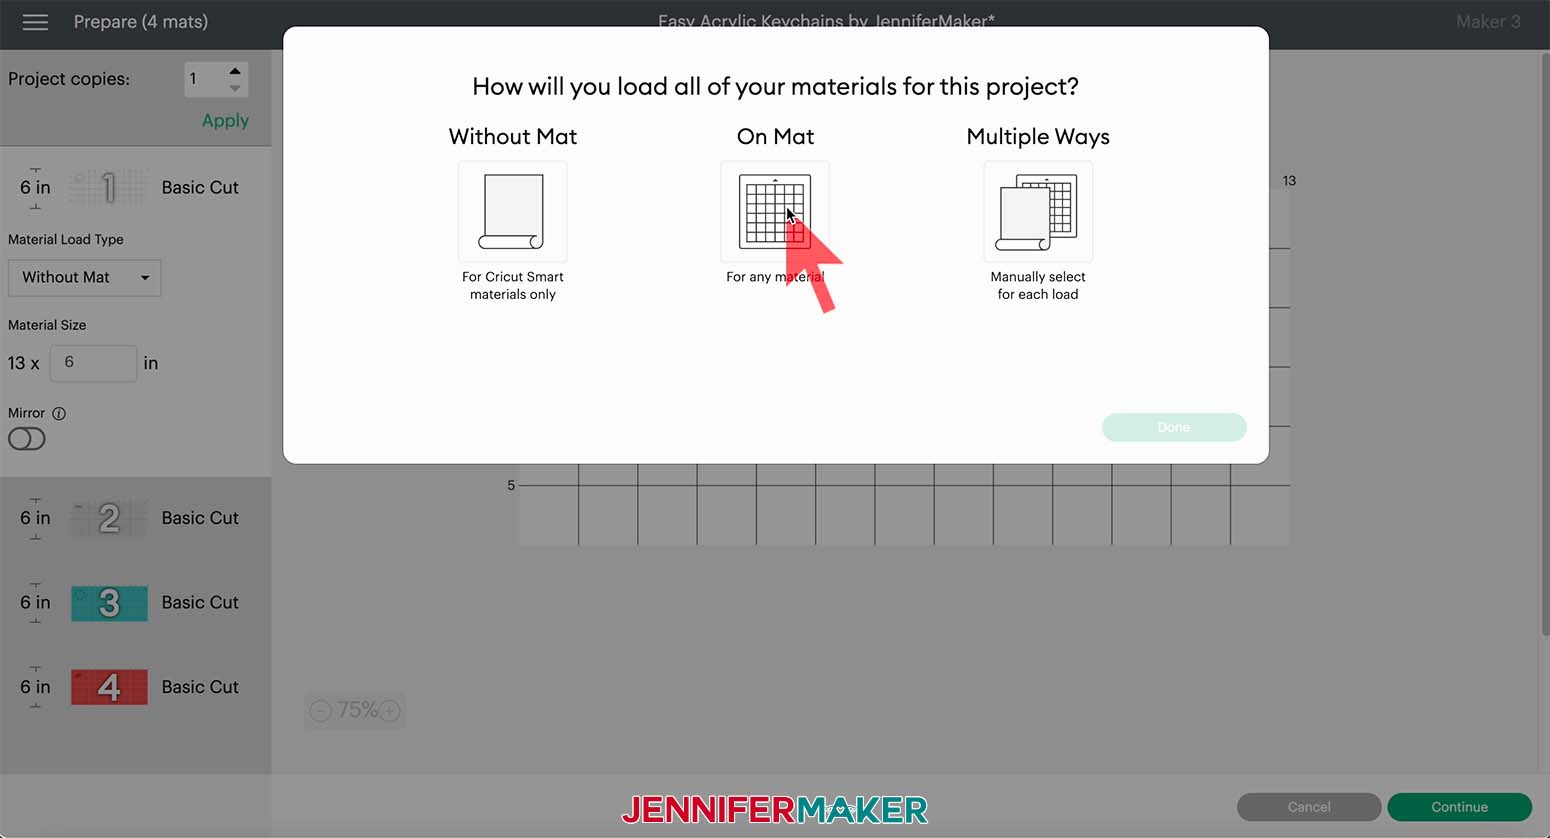
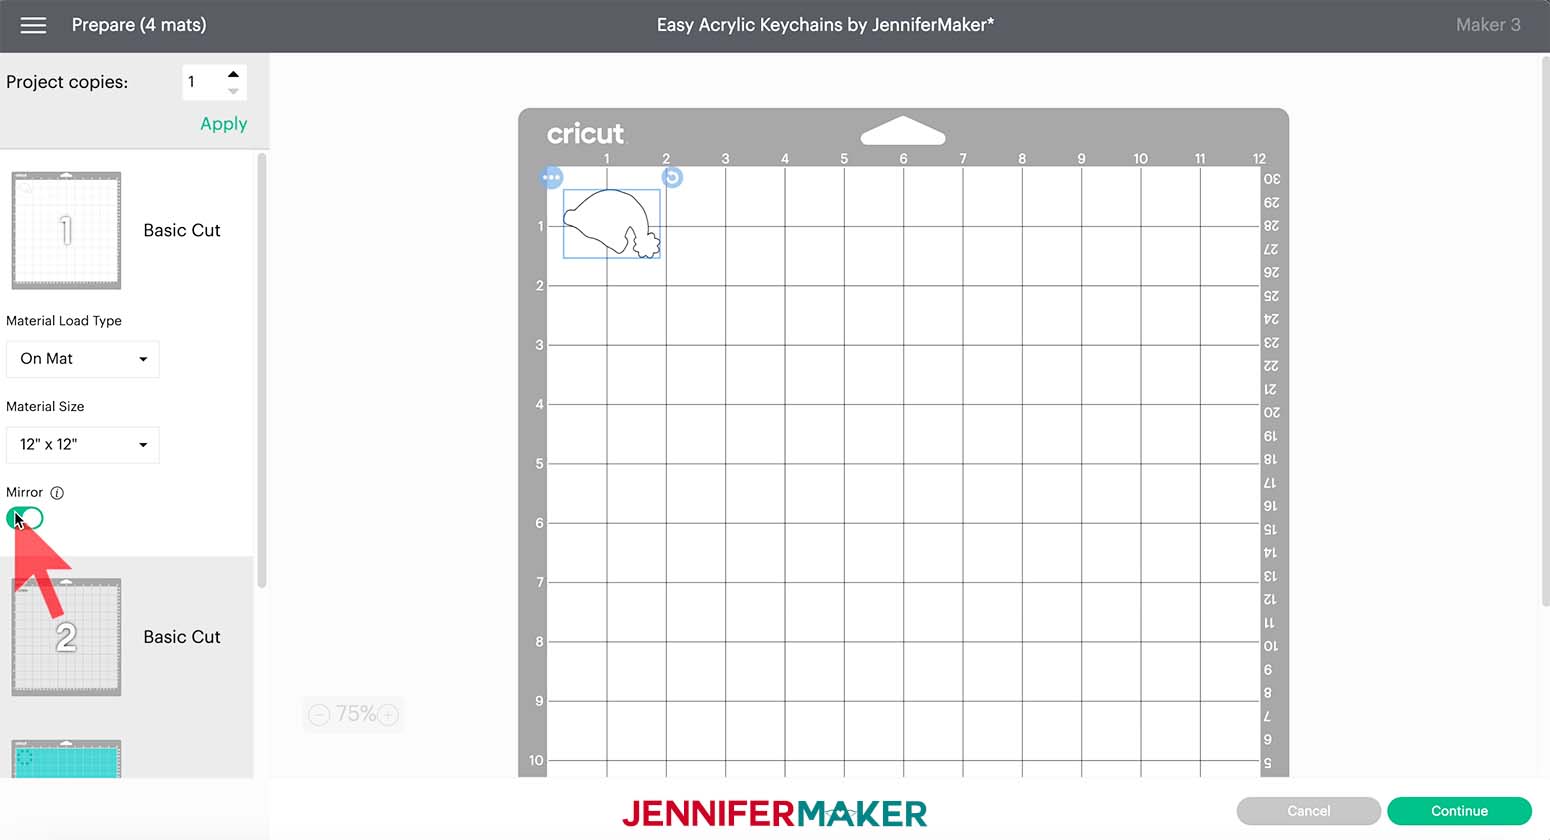
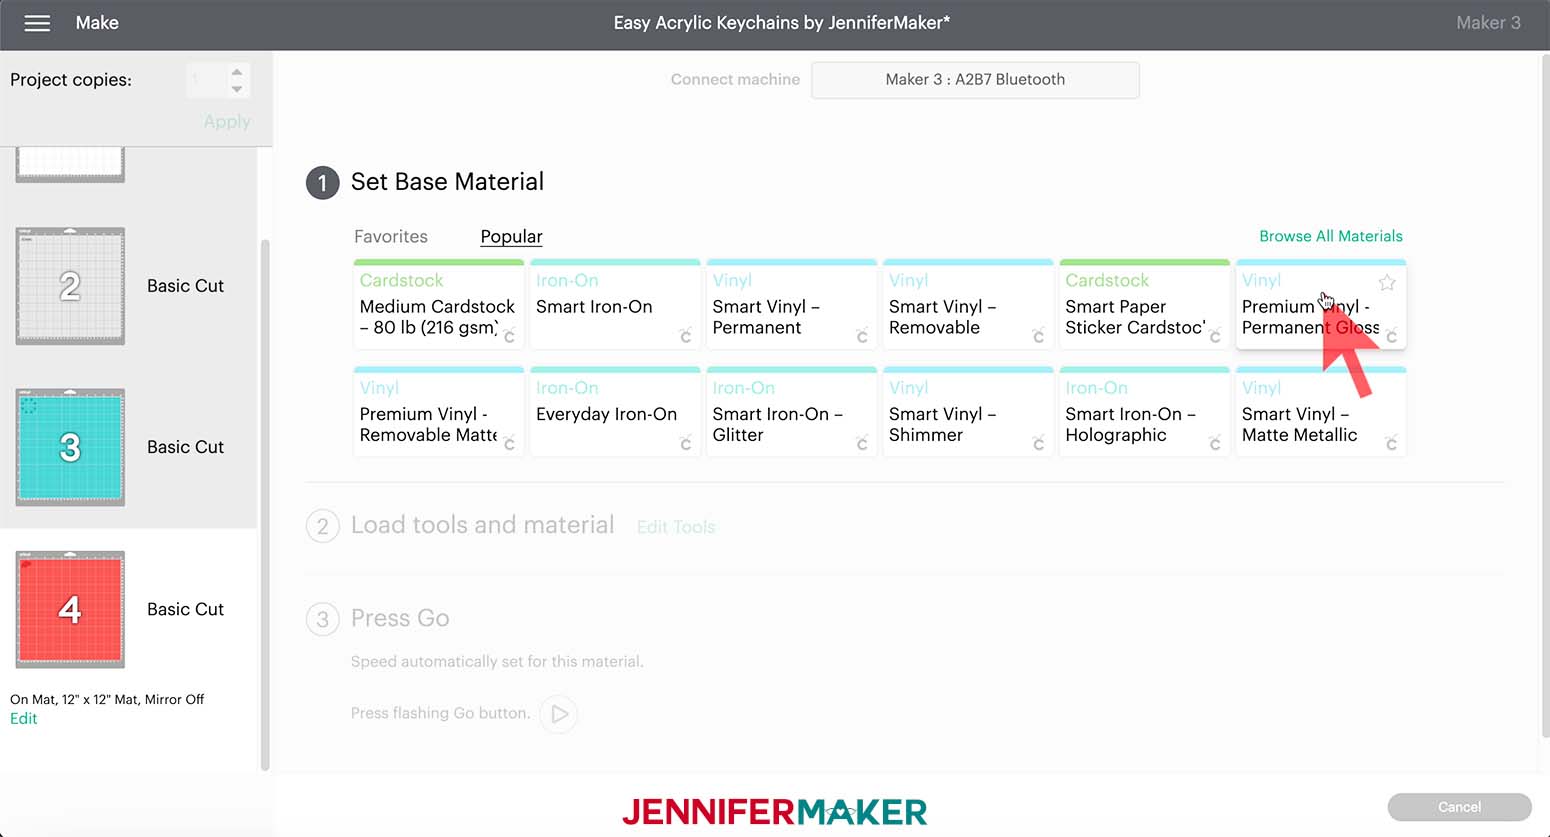
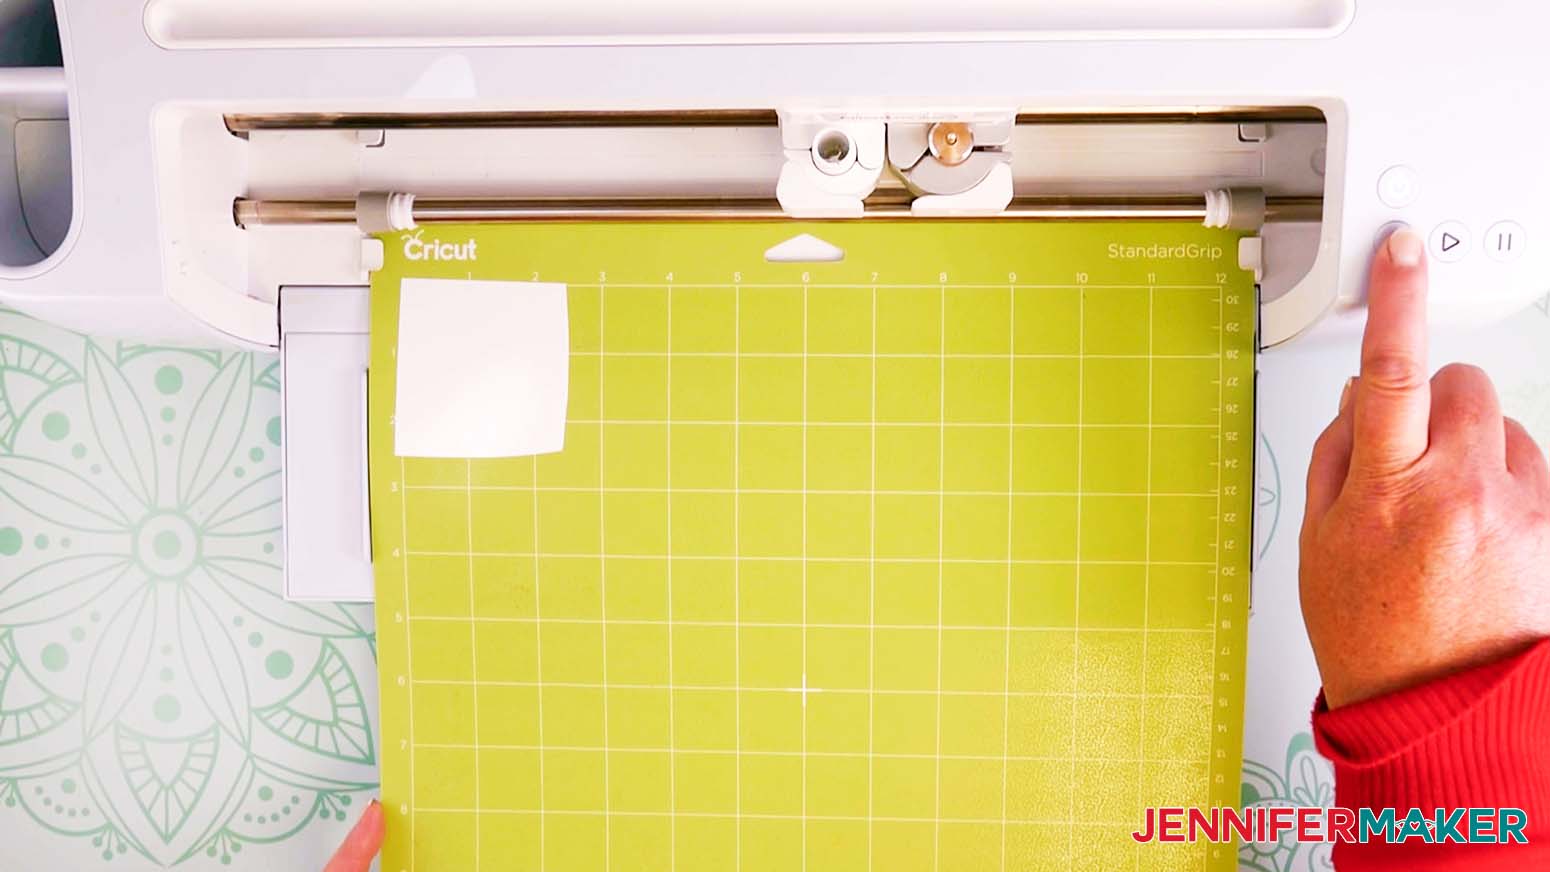
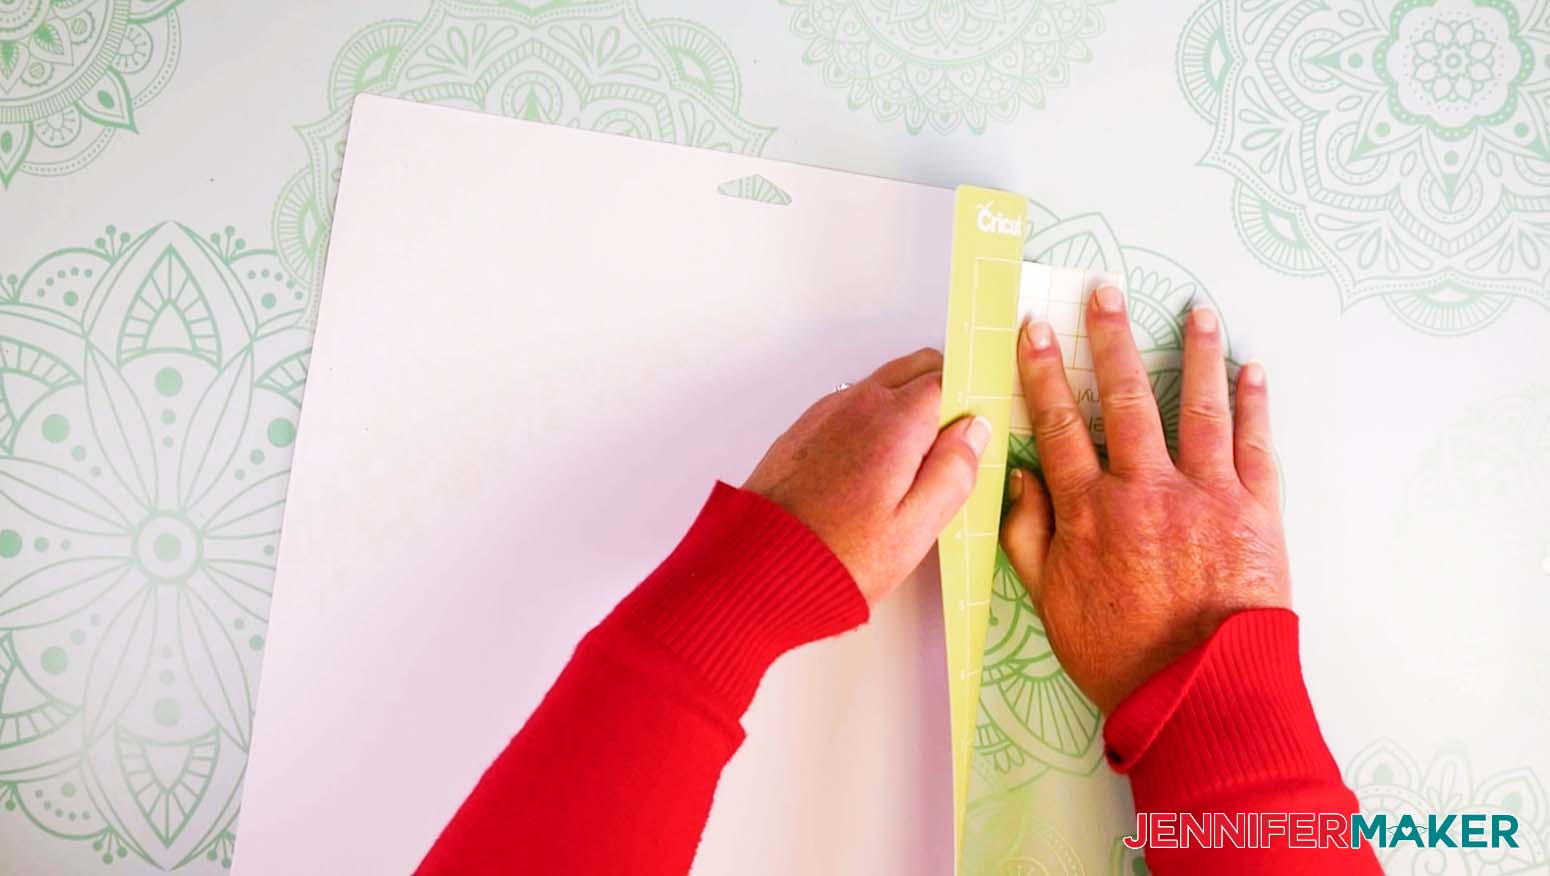
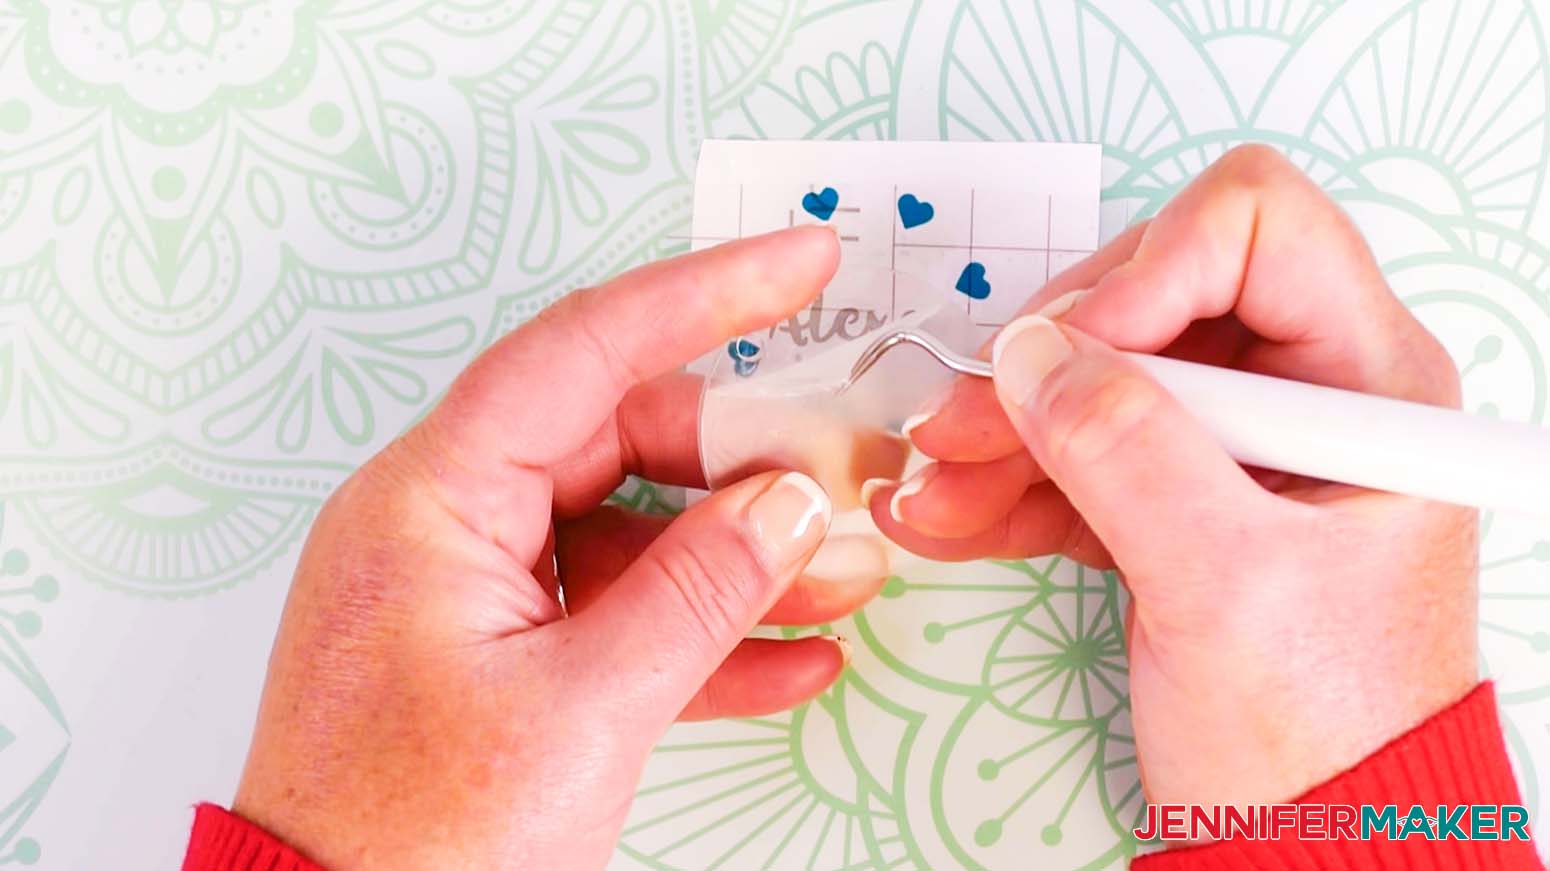
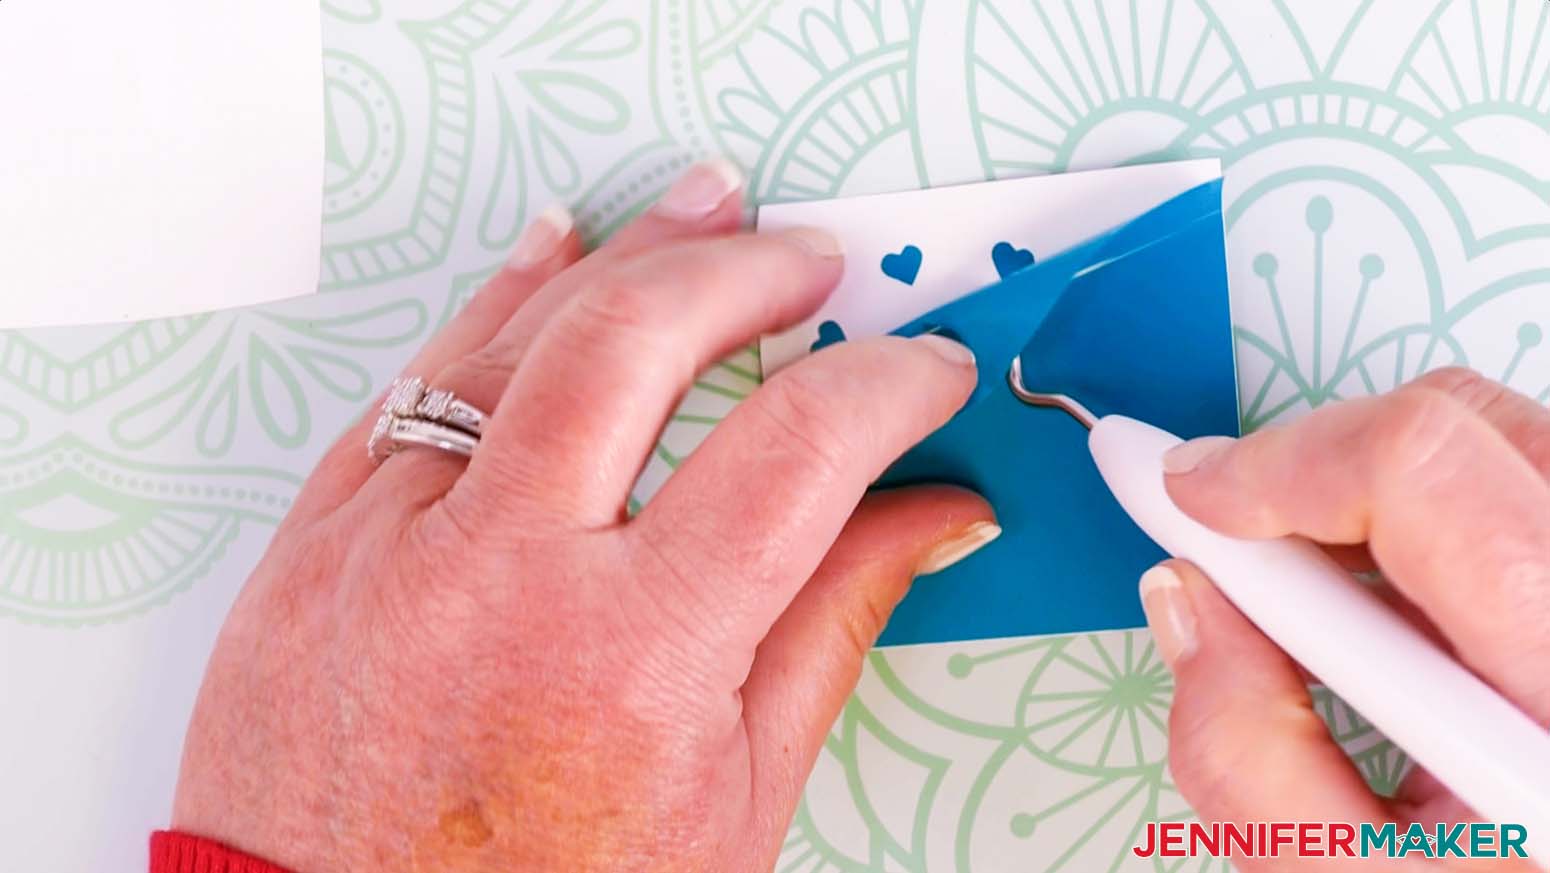
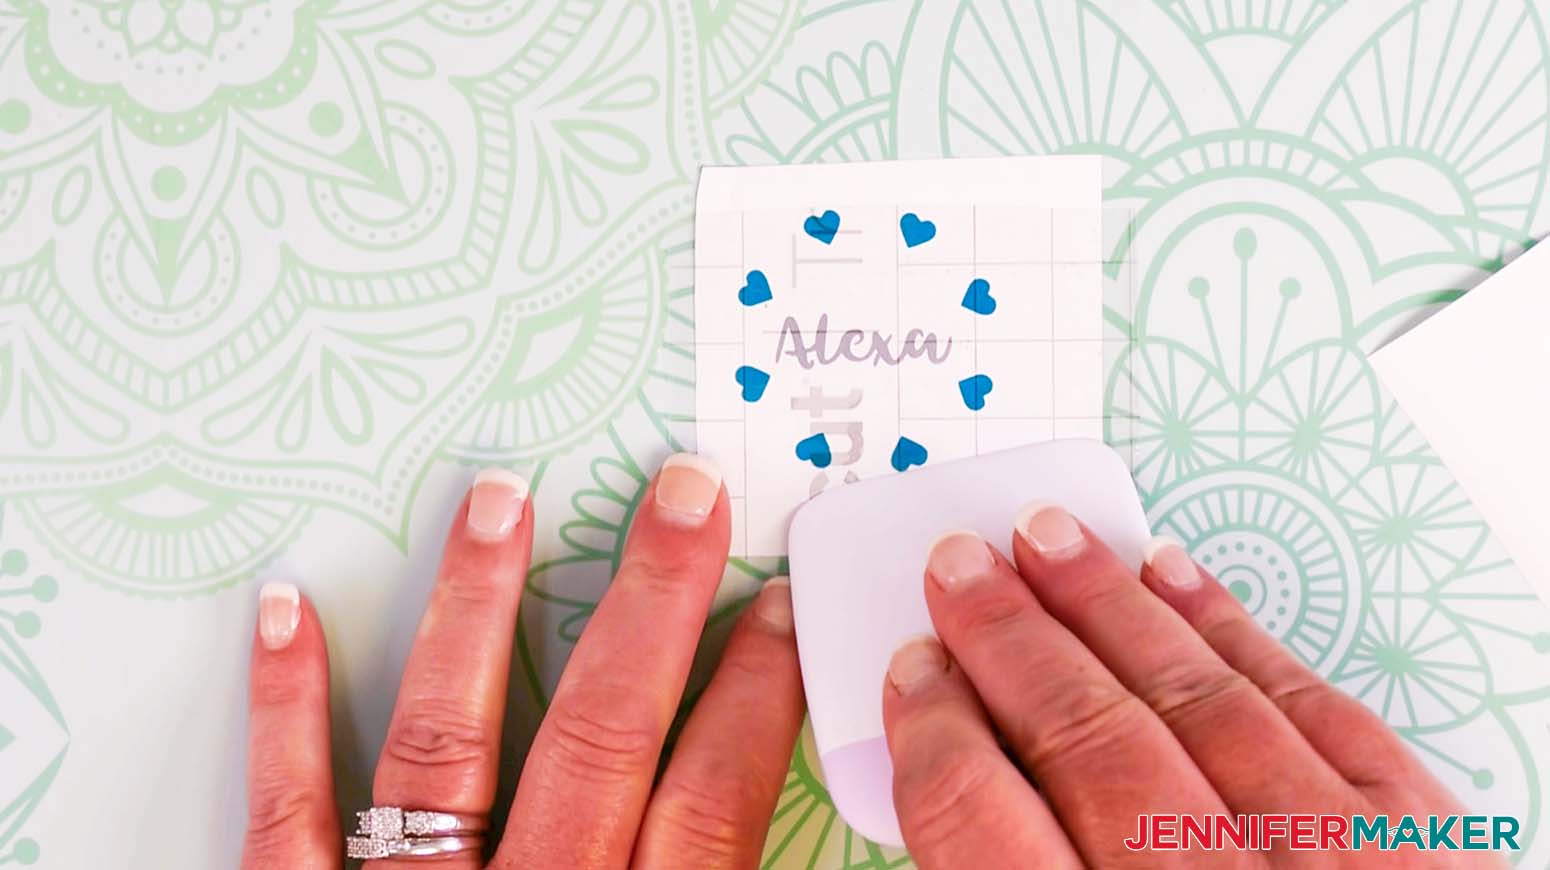
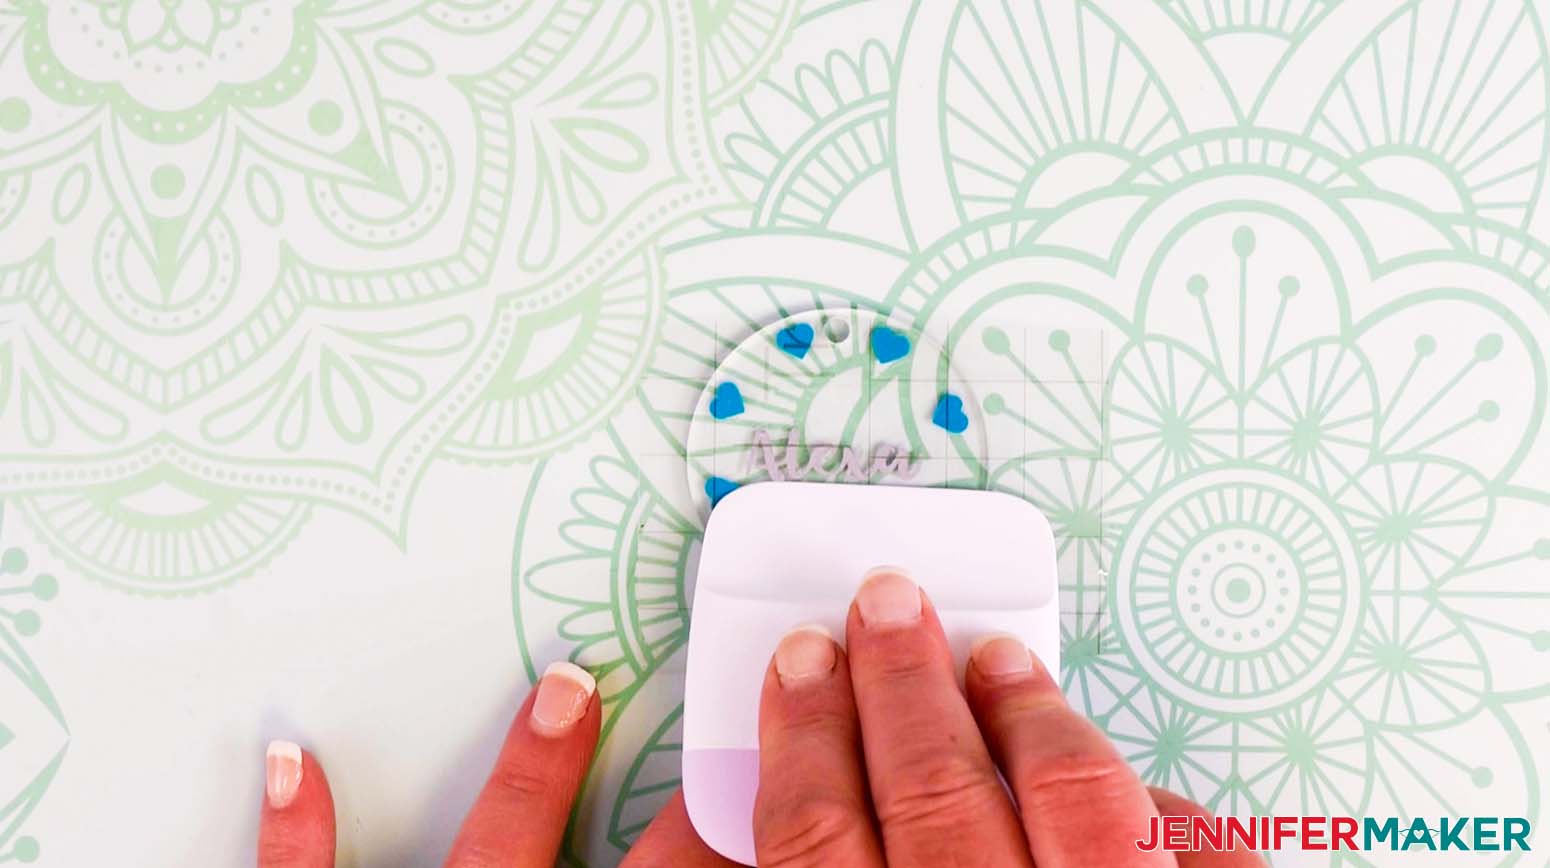
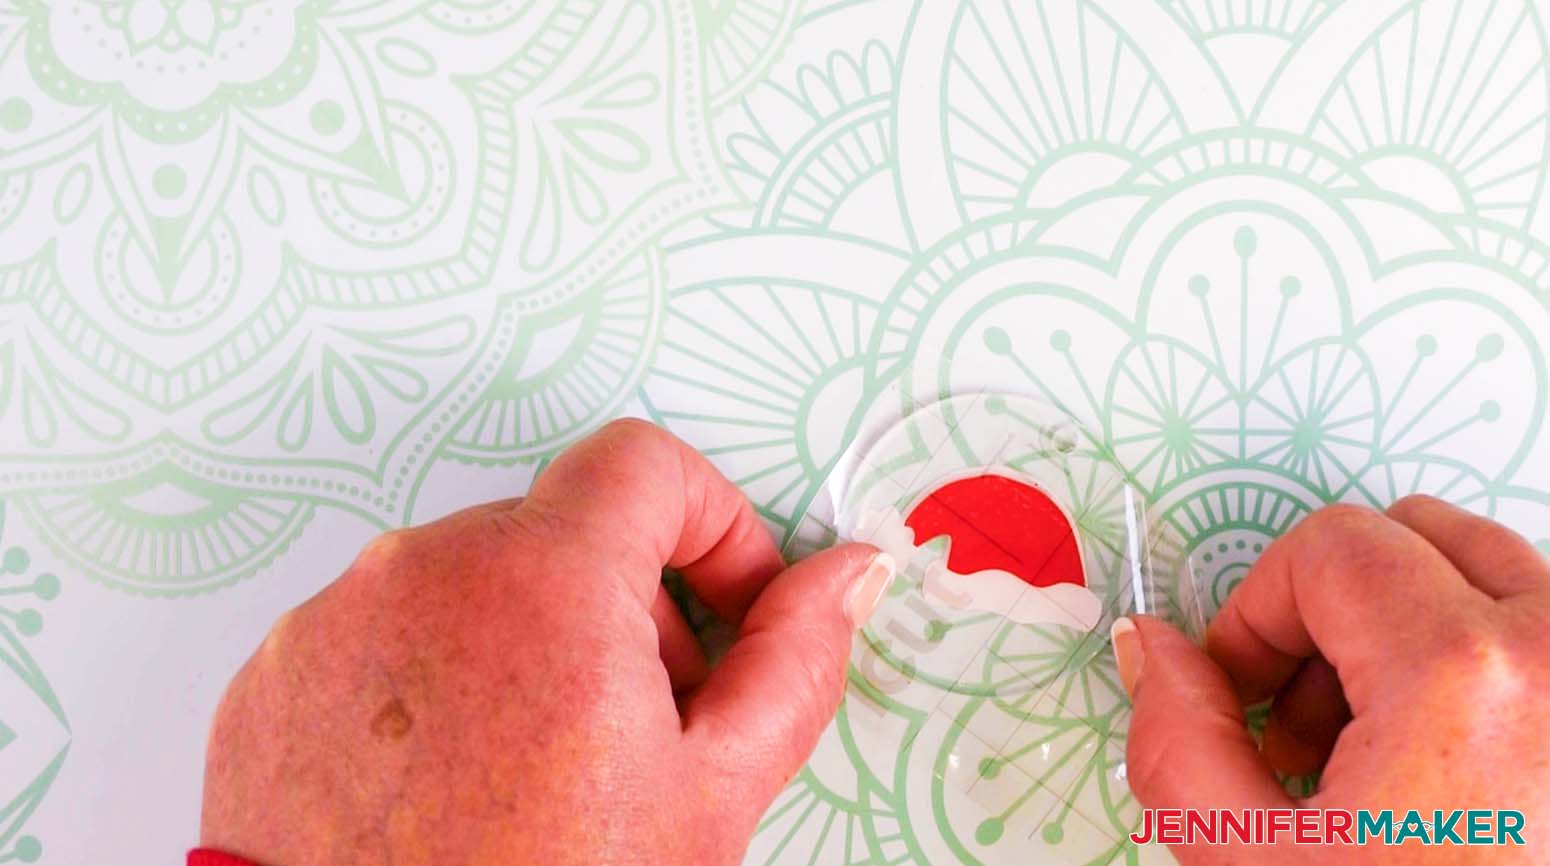
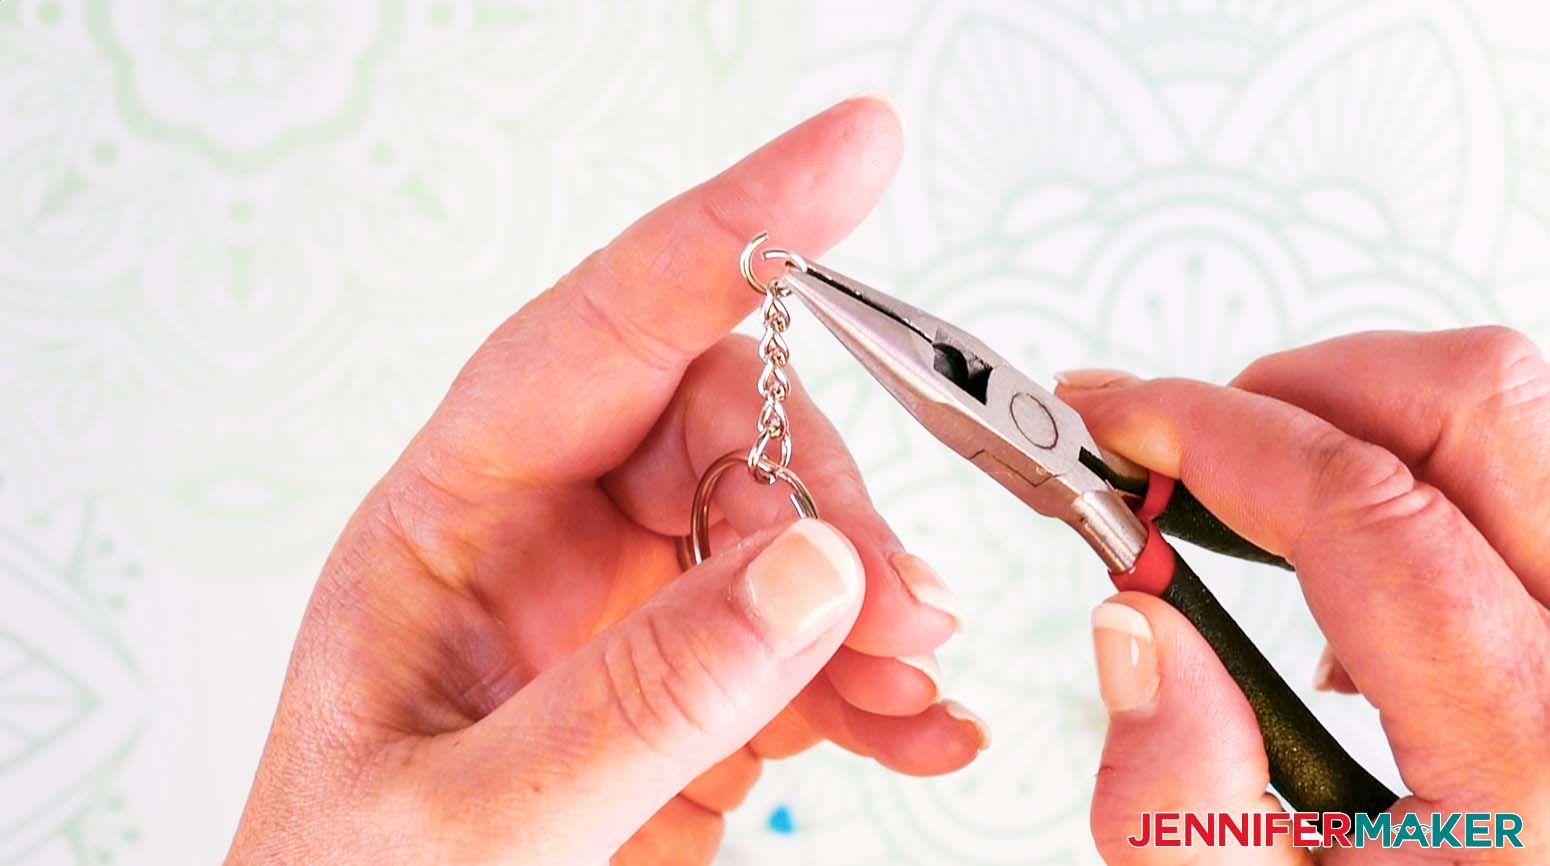
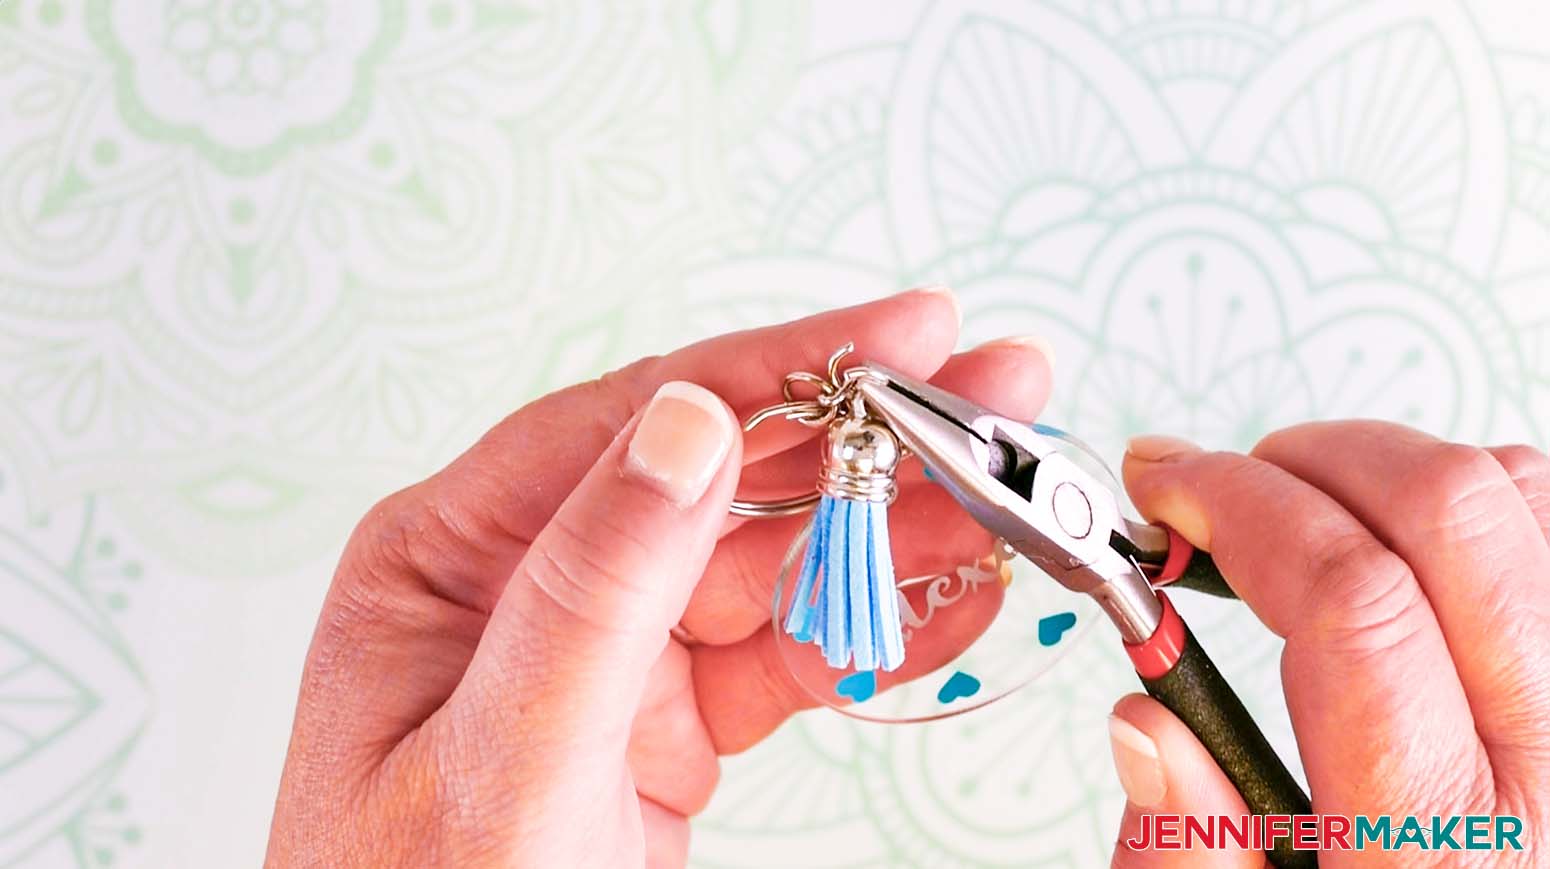
Learn how to make cute and easy acrylic keychains with vinyl! The first step is to download my Easy Acrylic Keychains designs from free resource library -- it's design #347. TIP: If you are not sure how to upload an SVG cut file to Cricut Design Space, watch this helpful video training series I made. If you are on an iPad or iPhone, here is how to download and upload SVG files to the Cricut Design Space app. This is what my Easy Acrylic Keychains SVG looks like when uploaded to Cricut Design Space. You have fourteen designs to choose from! You can make all of them or choose to hide or delete the designs you don't want to make. I’m going to make the heart ring and the Santa hat. First we will ungroup the designs by clicking “Ungroup” at the top of the layers panel on the right. Next, click on the designs you want to make and pull them off to the side. Now select the designs you want to delete, group them together by clicking “Group” at the top of the layers panel and then click delete. Now let’s regroup the Santa hat design to keep it together. The red and white layers will cut separately, but this way, if you make any changes to the design, the changes will be applied to both layers. My Easy Acrylic Keychain Designs are sized for 2" acrylic round keychains. If you are using a different shape or size, you will want to create a template to make sure your designs are sized to fit correctly. To do this, click on Shapes and then select Circle. You can click and drag the Resize handle to the size you need or you can manually enter the measurements at the top of the screen under "Size." I recommend changing your template to white to better see your designs. Click the Color menu and select white. You can really pick any color because you won't cut the template but white is easiest to see the colorful designs. Before you size your designs, send your template to the back layer, otherwise it will hide every design that you drag to it. With your circle selected, click Arrange and Send to Back. Now you can click and drag any of the designs to the circle to see how they'll fit. REMEMBER: Make sure to account for the small keyring hole at the top of your design. PERSONALIZATION: Several of my designs could be left as they are or you can add a name or initial added to them. To add your own personalization, click on the Text icon on the left side of your canvas and then click on the font menu. I'm going to use the font Tingler, but of course you may use any font you'd like. TIP: Need help installing a font in Cricut Design Space? Check out this video and blog post I made that explains everything step by step. Once you've selected your font, click in your text box and type the name or initial that you'd like to use for personalizing your keychain. When you're done, click anywhere on the blank part of the canvas to get out of the text editing mode. Click and drag your name over the design you wish to personalize. Your text will be way too big so make sure to use the Resize handle to adjust the name to fit both your design and template. Once you are happy with the size, align the design and text by selecting both and clicking on “Align” at the top and “Center.” Lastly, be sure to select the color you'd like to cut the personalized name. Like before, with the name selected, click on the Color menu and select your color. Repeat these steps for additional name or initials for your designs. TIP: You can also use the Rotate handle to get the personalization angled just the right way. Once you have added personalizations and hidden or deleted anything you don't want you are ready to click on Make It in the upper right corner. NOTE: If you haven't deleted your template circle, make sure to do so before moving clicking Make It. If you are using a Cricut Maker 3, Explore 3, or Joy, you will be asked if you are cutting your designs without a mat, on a mat, or multiple ways. Remember that only Smart Materials may be used without a mat. I am not using Smart Materials with this project so I will select "On Mat" and click "Done." We will be applying these designs to both the front side and the back side of the acrylic keychains. We need to make sure to MIRROR all of the designs that will be placed on the backside of the keychain. I will be placing the white part of the Santa hat on the back side of my keychain so I am going to mirror it. The red part of the hat will be on the top part of the keychain so I do not want to mirror that layer. When you're done, click back on the first mat and click Continue. NOTE: If your design is symmetrical or you only plan to apply vinyl to the front side of your keychain, then you do not need to mirror it. Now we need to select our materials. I am using Premium Vinyl - Permanent Glossy so I will select that then I will adjust my pressure to "More" to ensure a clean cut. TIP: If this vinyl option isn't listed, click on Browse All Materials to search for it. TIP: If you are using a Cricut Maker 3 or Explore 3 and using the same material for all of your mats, you can click "Remember material settings" so that you don't have to select your materials after each mat. If you plan to use different materials, you'll want to leave this unchecked so that you can change your settings with each material. Place your material on your green mat with the pretty vinyl side facing up and press the arrows to load the mat into your Cricut. When your Cricut is ready, press the flashing middle button to cut your vinyl. TIP: If you want to save time, you can cut more than one color of material at once on the same mat. To find out how, check out my blog post or video: The 25 Best Cricut Tips & Tricks. It’s Tip #24! When your first mat is done, press the arrow button to unload your mat. Flip your mat over and carefully pull it away from your vinyl. Load the vinyl for your next mat and repeat these steps until all of your vinyl colors are cut. Before prepping your vinyl, make sure you remove the protective coating from your acrylic keychains. With your weeding tool, gently remove all of the excess vinyl from your design. Once your designs are weeded, it is time to apply your transfer tape. Cut a small piece of transfer tape to match the size of your cut design. Peel off the backing of the transfer tape and place it on the vinyl. Use your small scraper to burnish the transfer tape to the vinyl. Peel away the vinyl backing. If any part of the vinyl does not adhere to the transfer tape, burnish that area again, then try to remove the backing. Place your design on your acrylic keychain and once again, use your scraper to adhere the vinyl to the keychain. Peel away your transfer tape. Again, if any parts start to lift with the transfer tape, reburnish the area. DOUBLE-SIDED VINYL DESIGNS: Follow the steps above but one layer will be on the front and one layer will be on the backside for a layered effect. Burnish the second layer to the transfer tape and again, remove the vinyl backing. Once your vinyl is applied to your keychain, burnish the vinyl over the transfer tape to help it stick well to your keychain. Gently remove the transfer tape from the vinyl. NOTE: You do not need to seal your vinyl-only designs as long as you used permanent vinyl for your designs. Select your chain, clasp, and tassel from your kit. Loop the chain into the ring clasp and then put the ring clasp onto the acrylic hole. Use your pliers to close the clasp to attach the chain. Repeat the same process to attach the tassel to the chain. Wasn't that so fun and easy? Imagine how many you could make in a batch. These acrylic keychains make great gifts and are a great item to sell at craft fairs or an Etsy shop.
Easy Acrylic Keychains
Materials
Tools
Instructions
STEP 1: GET MY FREE EASY ACRYLIC KEYCHAIN FILES

STEP 2: PREPARE YOUR SVG DESIGNS


STEP 3: CUT YOUR VINYL DESIGNS
STEP 4: WEED AND APPLY YOUR VINYL DESIGNS
STEP 5: ASSEMBLE YOUR EASY ACRYLIC KEYCHAINS
STEP 6: SHOW IT OFF
Notes
Fonts Used
Answers to Your Questions About How to Make Easy Acrylic Keychains
Q: Am I able to resize the keychain designs for different blanks?
Of course! You are welcome to resize the designs to fit your blanks perfectly and make them look just the way you want. To do this you will want to create a template to make sure your designs are sized to fit correctly.
Q: Can I personalize the keychain designs?
Several of my designs could be left as they are or you can add a name or initial added to them!
Q: Can I put vinyl on both sides of the acrylic keychain?
Yes, totally! I show you how to do that in this tutorial.
Get my free SVG files to create cute and easy acrylic keychains
I love seeing what you make with my designs and how you use them! Please share a photo of your acrylic keychains in our Facebook group or tag me on social media with #jennifermaker.
Love,

Want to remember this? Save this Easy Acrylic Keychains Tutorial to your favorite Pinterest Board!