
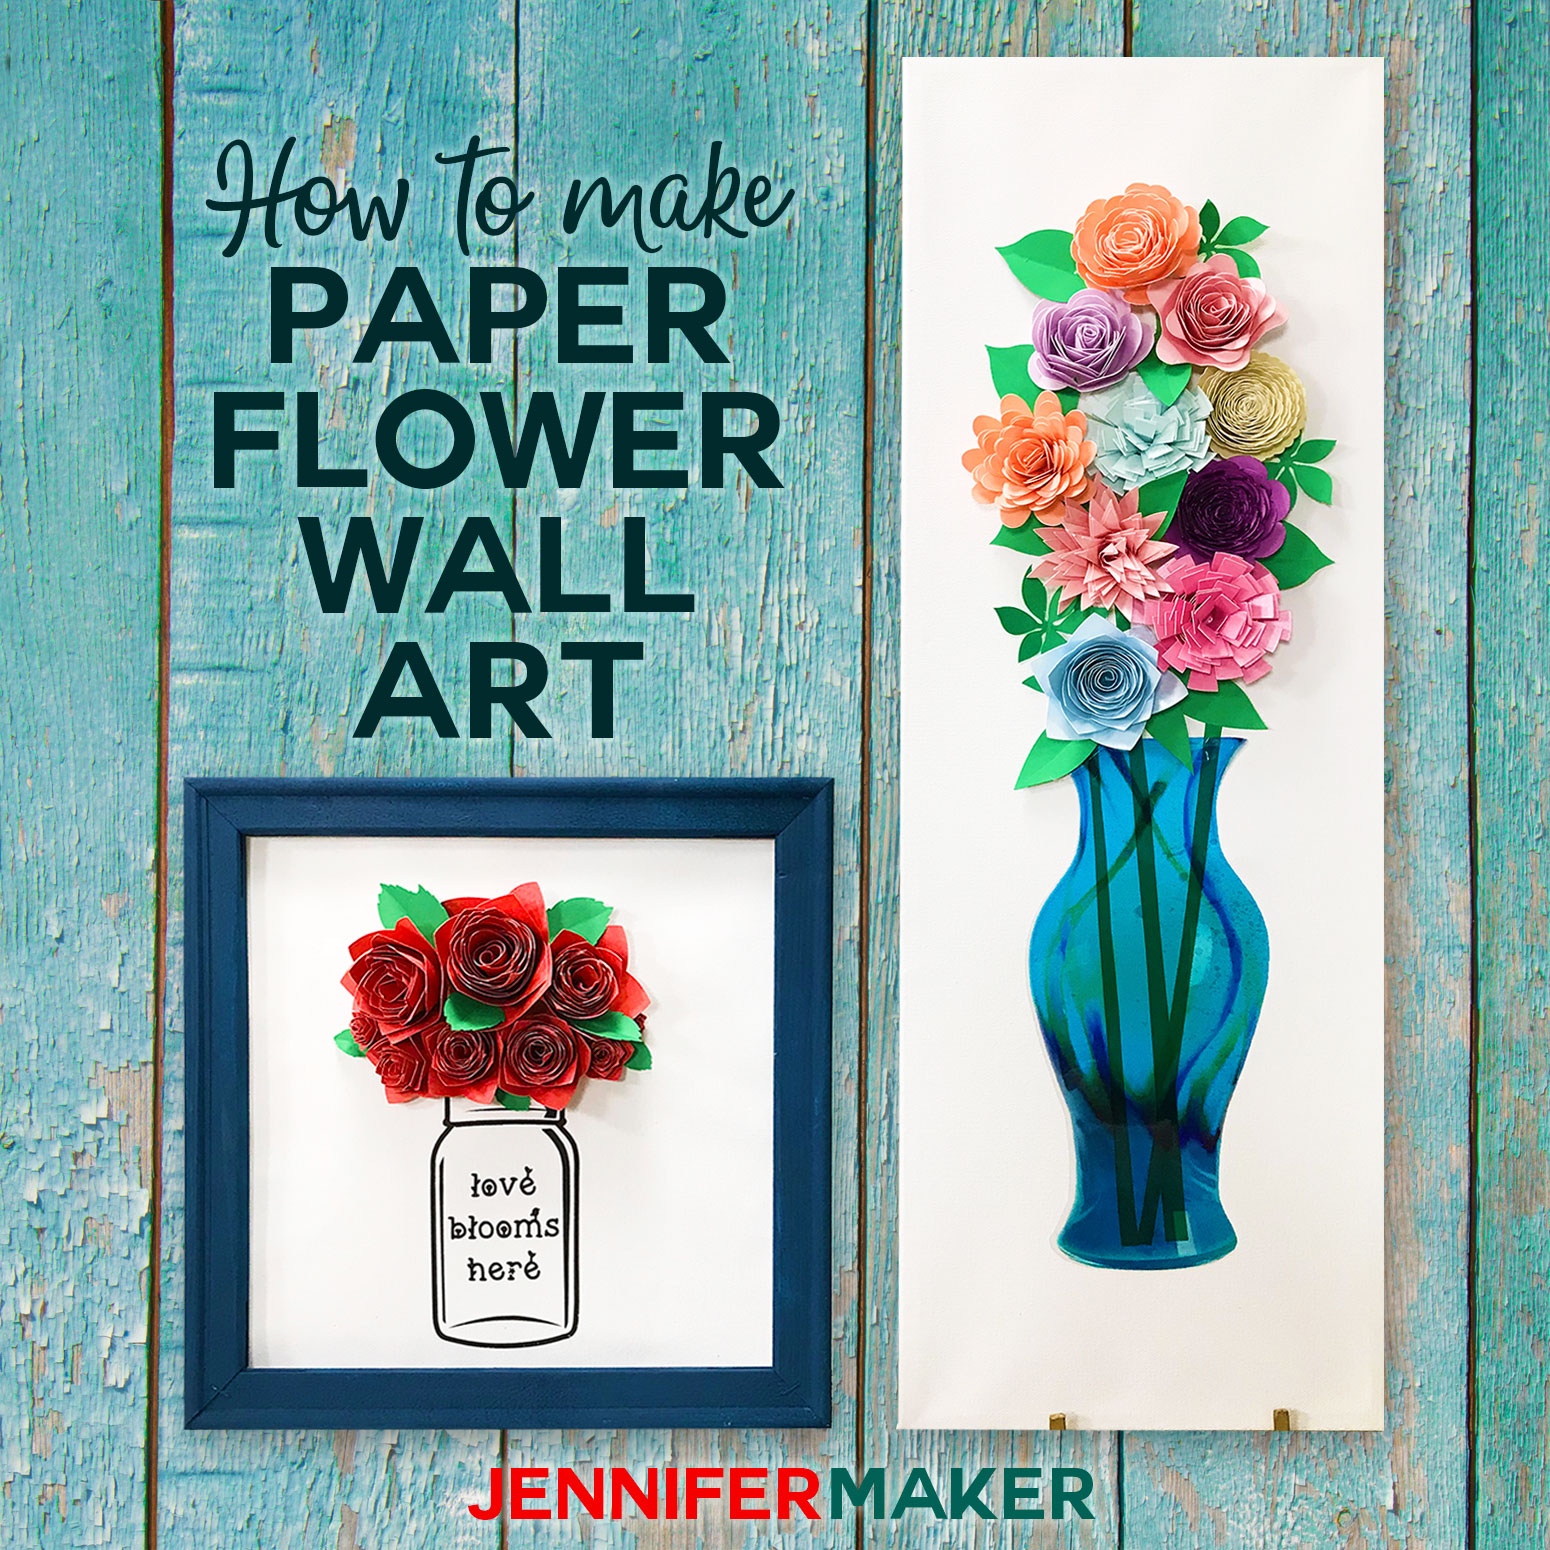
How to make paper flower wall art! I show you how to display your gorgeous 3D paper flowers on canvases by arranging them above 2D Mason Jars and art glass vases.
In my last tutorial I created a several bouquets worth of Cricut paper flowers. So now it’s time to put them to good use and create some beautiful wall art with them. I’ve designed two lovely DIY paper flower wall art canvases and I’m going to show you exactly how I made them so you can make one, too!
Want to save this project? Enter your email below and we’ll send the project straight to your inbox.
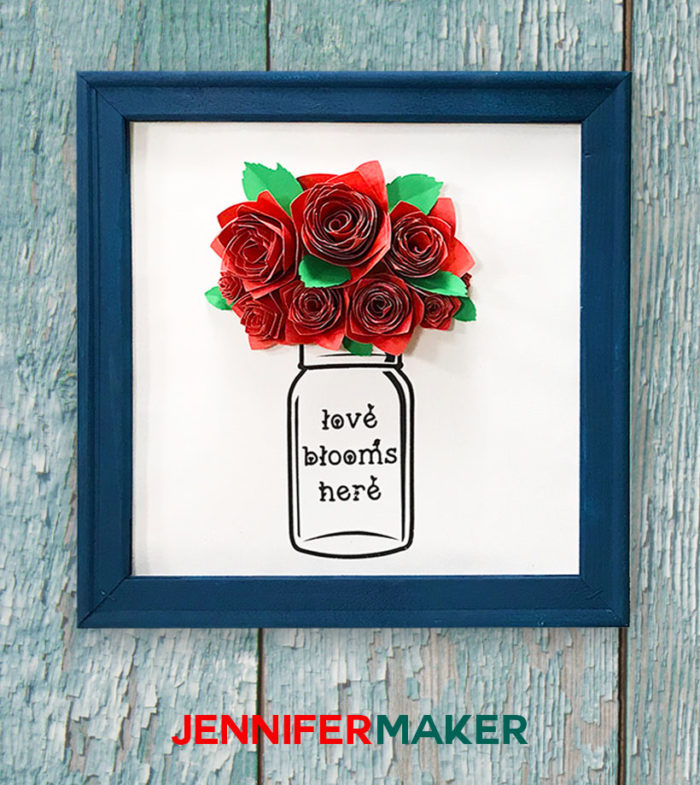
The first paper flower wall art I made is a cute Mason Jar filled with red paper roses. There are exactly 10 roses, and each one is a different size to give it a little perspective. The Mason Jar vase itself is iron-on vinyl on a reverse canvas. If you don’t know what that is, no worries — I’m going to show you! The words on the jar read, “Love Blooms Here.” This canvas is 12″ x 12″.
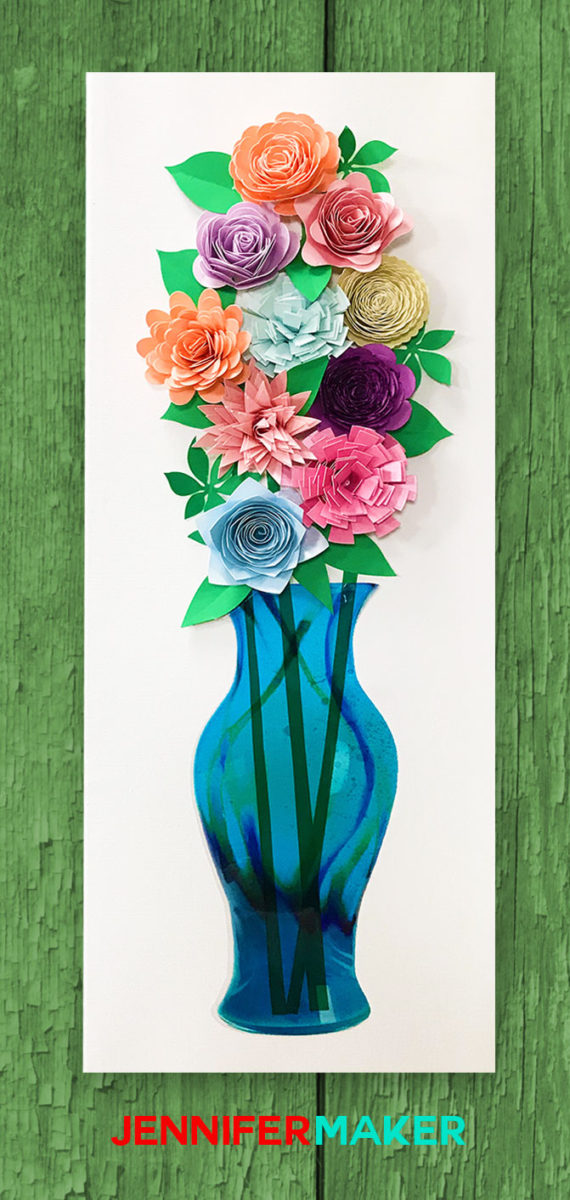
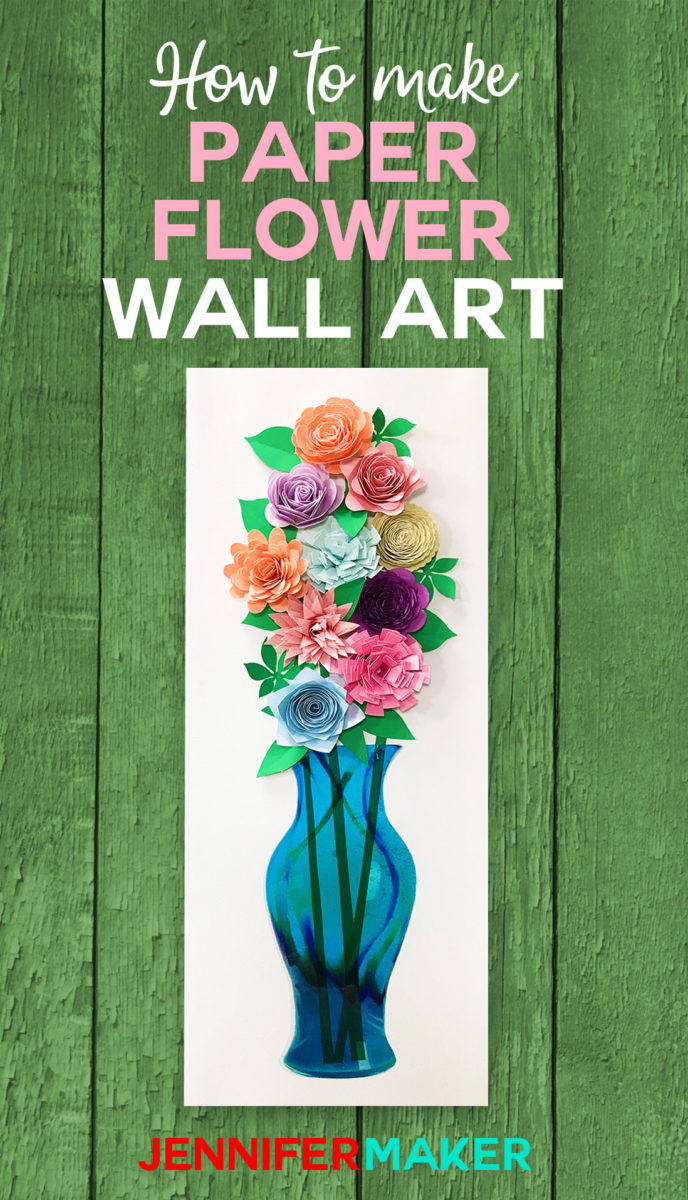
The second paper flower wall art canvas is a pretty art glass vase filled with 10 paper flowers — each one is a little different from one another. The flowers are made from shimmer cardstock to give them some added sheen. The vase is made from transparency film using Print Then Cut on my Cricut cutting machine. I designed five different vase colors for you to choose from— blue, green, amber, purple, and pink. This canvas is 8″ x 24″.
You can get the free files for both the Mason jar and the art glass vase here on my blog, plus links to the flowers and leaves (see below).
This step-by-step video tutorial shows you how to create both of these paper flower wall art canvases:
So let’s talk about how to make paper flower wall art! This post contains some affiliate links for your convenience (which means if you make a purchase after clicking a link I will earn a small commission but it won’t cost you a penny more)! Read my full disclosure policy.
Materials for Paper Flower Wall Art (Mason Jars & Art Glass Vases)
- 65lb – 80 lb. card stock (solid core paper works best — watch my paper flowers video to see the difference between solid core and white core) — this is my favorite paper for making paper flowers and Cricut Pearl Paper makes a pretty paper flower, too!
- Cricut quilling tool, homemade quilling tool, and or tweezers
- Hot glue gun and glue sticks (or tacky glue if you don’t have a glue gun)
- A stretched canvas, board, or something else to put your flowers on.
- Permanent spray adhesive
- (For the Mason Jar wall art) Iron-on vinyl (I used navy blue) and paint or stain for the reverse canvas (I used navy blue acrylic paint)
- (For the Art Glass Vase all art) Transparency film and green self-adhesive vinyl
- A way to cut your paper flowers (I used the amazing Cricut)
- Cricut’s paper flower and leaf patterns (learn exactly how to find them in step 1 below) — note that you will need to either purchase these flowers OR have a Cricut Access subscription
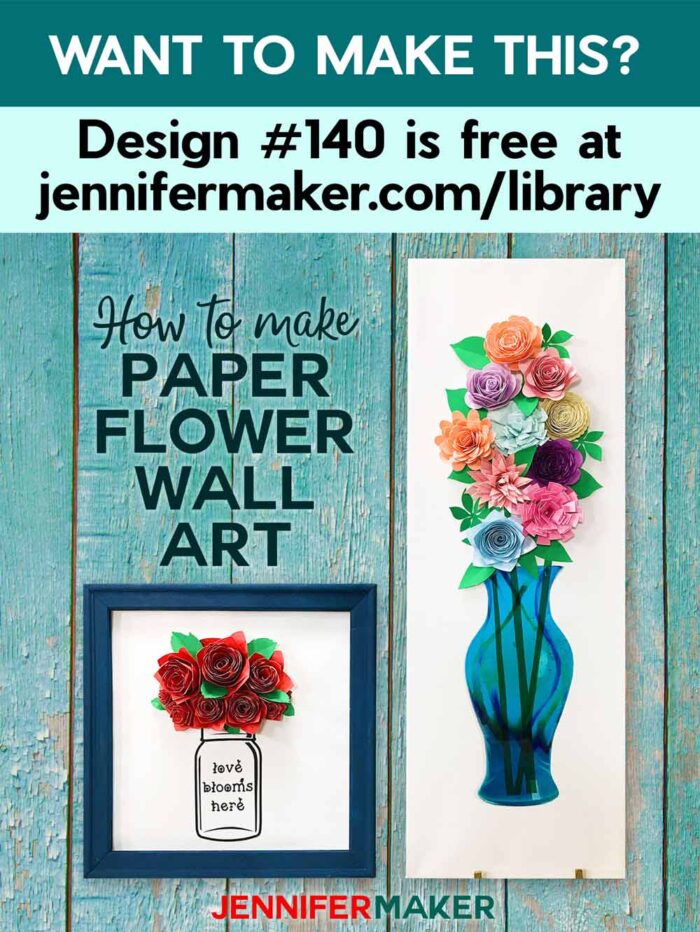
- (Optional) Design #140 – Paper flower designs (available in my free resource library—get the password at the bottom of this post)
How to Make the Mason Jar Paper Flower Wall Art
Step 1: Find the paper flowers and leaves in Cricut Design Space
Go to https://jennifermaker.com/masonjarflowers (or https://design.cricut.com/#/design/130681067) to get the exact flowers and leaves I used — they will come right up for you in Cricut Design Space! Super easy!
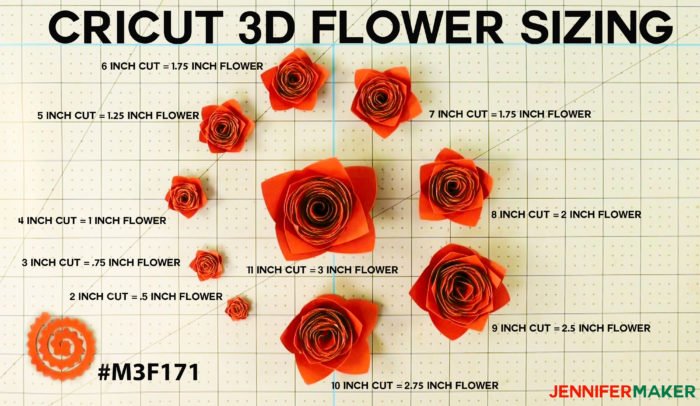
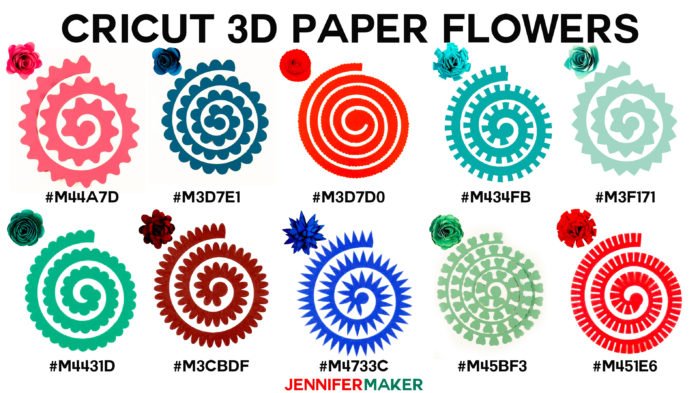
Note: If you prefer to find the flowers and leaves yourself, go to Cricut Design Space, click on Images, click Cartridges at the top, and search on Flower. Locate the Flower Shoppe cartridge and select the flower pattern and leaves you like. I used 10 of the #M3F171 flowers in sizes ranging from 2″ to 11″ and the #M449AE leaf in different sizes.
And here is a handy guide to Cricut paper flower sizing!
You can use different flowers than I did, of course. Here are the 10 Cricut paper flowers available in Cricut Access:
Note: If you have an older Cricut that cannot access Cricut Design Space, you can still make these flowers if you have the Flower Shoppe cartridge!
I cut out my 10 paper roses using a 60 lb. solid core red cardstock (slightly textured).
Watch my step-by-step Cricut paper flower video to see exactly how to assemble your paper flowers!
Step 2: Prepare your canvas or surface
Decide what you’d like to make your paper flower wall art on, such as a canvas or board. I decided to use a reverse canvas from a stretched canvas. To make a reverse canvas, start by placing a stretched canvas face down and use a craft knife to cut your canvas off the back (right next to the staples).
Once the canvas is removed from the frame, you flip the frame over and then stain or paint it as you wish. I decided to paint my frame with navy blue acrylic paint.
Watch my step-by-step video to see how I prepared my canvas.
Step 3: Get and apply the Mason Jar decal
I keep my Mason Jar SVG cut file (Design #140) in my free resource library. You can access the resource library here (if you need the password to it, sign up at the bottom of this page.)
Choose how you want to cut out your Mason Jar. You could do it with paper, self-adhesive vinyl, stencil vinyl (to stencil it), and so on. I decided to use iron-on vinyl so I knew it would stick well to my canvas!
I used my EasyPress to apply my Mason Jar to the canvas I removed in step 2. I set my EasyPress to 340 degrees, pre-heated my canvas for five seconds, then put on my decal and pressed for 30 seconds.
Watch my step-by-step video to see how I applied the Mason Jar decal.
Note: Once my Mason Jar decal was ironed on, I reattached the canvas to the back of the frame with hot glue. You can see an excellent step-by-step tutorial on how to make reverse canvas artwork here.
Step 4: Glue on your paper flowers and leaves.
This is the fun part! Just arrange the flowers however you wish above your Mason Jar decal and then hot glue them into place. When you’re done, glue in leaves. Watch my step-by-step video to see how I did it.
Here’s my finished paper flower wall art!
How to Make the Art Glass Vase Paper Flower Wall Art
Step 1: Find the paper flowers and leaves in Cricut Design Space
Go to https://jennifermaker.com/vaseflowers (or https://design.cricut.com/#/design/131684619) to get the exact flowers and leaves I used — they will come right up for you in Cricut Design Space at the proper size and quantity.
Note: If you prefer to find the flowers and leaves yourself, go to Cricut Design Space, click on Images, click Cartridges at the top, and search on Flower. Locate the Flower Shoppe cartridge and select the flower patterns and leaves you like. I used one each of the Cricut paper flowers listed in the graphic below (all were cut out at 8″ wide), plus the 3 each of the following four leaves: #M46FF7 #M4489E #M3E197 #M4258D
Here are the 10 Cricut paper flowers available in Cricut Access:
Note: If you have an older Cricut that cannot access Cricut Design Space, you can still make these flowers if you have the Flower Shoppe cartridge!
I cut out my 10 Cricut paper flowers in 80 lb. pastel shimmer cardstock.
Watch my step-by-step Cricut paper flower video to see exactly how to assemble your paper flowers!
Step 2: Get the Art Glass Vase decal and Print/Cut It
I keep my Art Glass Vase PNG files in my free resource library. You can access the resource library here (if you need the password to it, sign up at the bottom of this page.)
You can print the vase on plain paper, but I printed mine on transparency film to give it a see-through look like a real vase.
I used Cricut’s Print Then Cut feature. I cut my vase out at 9.2″ high. You will need to resize it after you bring it in (it comes in a larger size to preserve the high resolution.) Note that if you use Print Then Cut, your vase must be 9.25″ high or less in order to print then cut.
Watch my step-by-step video to see how I did this.
Step 3: Prepare your canvas
I chose to keep this project’s canvas simple and used a plain 8″ x 24″ stretched canvas. But you could also use a board or a reverse canvas — whatever you want!
Watch my step-by-step video to see how I did this.
Step 4: Attach your stems and vase to the canvas
I cut out three strips of 12″ x 12″ green self-adhesive vinyl to look like stems and placed them on my canvas.
Then I sprayed the back of my vase (made of transparency film) with permanent spray adhesive and placed the vase over the stems. The idea is to make the stems look like they are inside the vase.
Watch my step-by-step video to see how I did this.
Step 5: Glue on your paper flowers and leaves.
This is the fun part! Just arrange the flowers above the vase however you wish then hot glue them into place. When you’re done, glue in leaves to fill in any blank spots. Watch my step-by-step video to see how I did it.
Here’s my finished paper flower wall art!
Get more paper flower designs totally FREE!
Download all of my free paper flower designs by subscribing (free) below to get the password to my resource library.
Love,

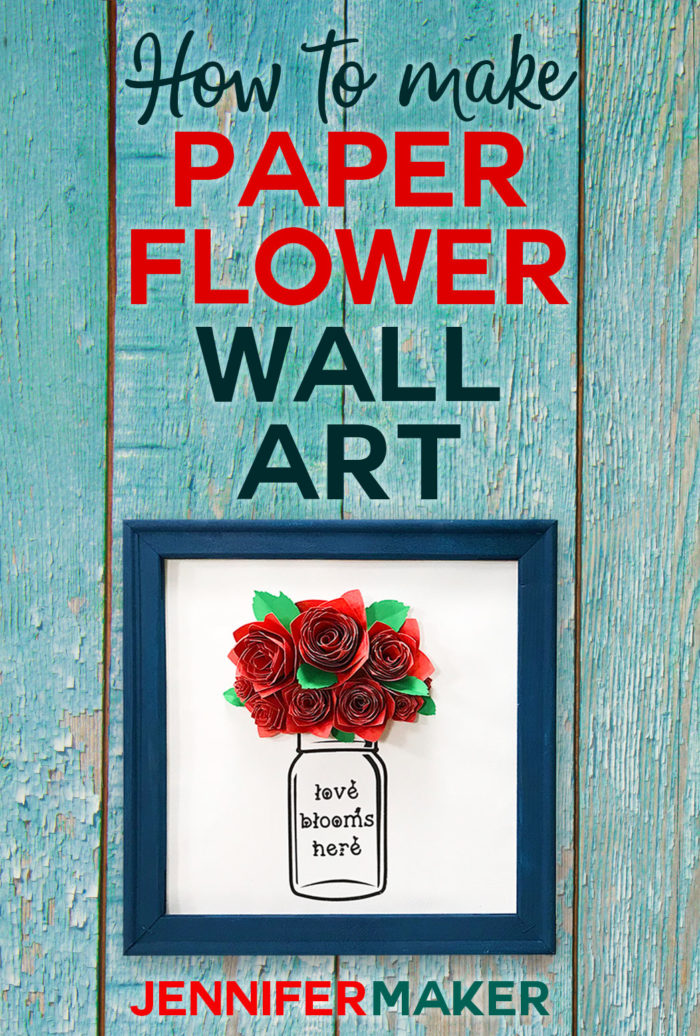
Want to remember this? Save the Paper Flower Wall Art Tutorial to Your Favorite DIY Pinterest Board!

You are Amazing!! I love your Flower Wall Art! Actually I love everything you make!!
Another awesome project. The transparent vase is really beautiful. Thank you for this tutorial.
I am so glad I ran across your website. I am saving to buy a maker but your tutorial book will make it so much easier to learn once I manage so save enough to finally buy it. In the meantime I can read through your manuel and learn tons of stuff so I am well prepared. Thanks for being here when I needed you.
I can’t find the Rose’s for the jar one
Hi Robin! I do mention how to get the flowers in step one of the tutorial. “Go to https://jennifermaker.com/masonjarflowers (or https://design.cricut.com/#/design/130681067) to get the exact flowers and leaves I used — they will come right up for you in Cricut Design Space! Super easy!” Keep in mind, you will need to purchase the file of flowers or have Cricut Access. Hope this helps!
do you have to have a laser printer?
Hi Katie! You could do it on an inkjet printer. Just make sure your material is made for inkjet printers.
Jennifer, I have just bought myself a cricut and came across your website, and you are so inspiring, I love what you do and now my head is buzzing with things to custom them to make them my own. I always come to you for guideance, so imformative and easy to follow. Thank you
I am so happy you are here crafting with me, Karen!
Hi Jennifer,
Thanks for the tips!
Any idea how to bend the rose petals without curling them (more like a flat petal going outwards)? I can’t seem to find anything on that :/
Here is an example: https://www.instagram.com/p/CMXoyj7BU2q/?igshid=ca6n69ao5dc0
Thanks!!
You could try pulling out on the petals between your thumb and index finger, creating a slight bend.