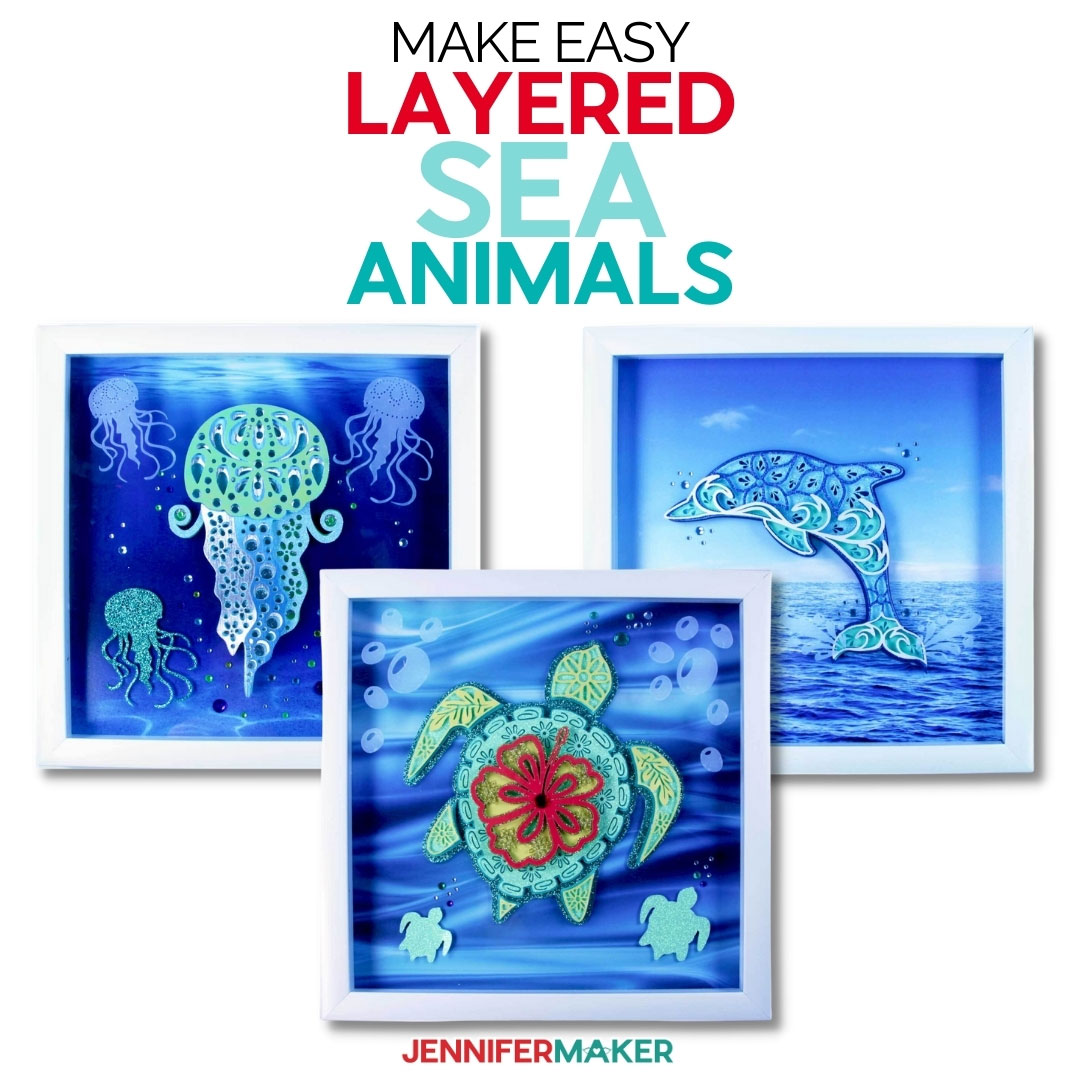
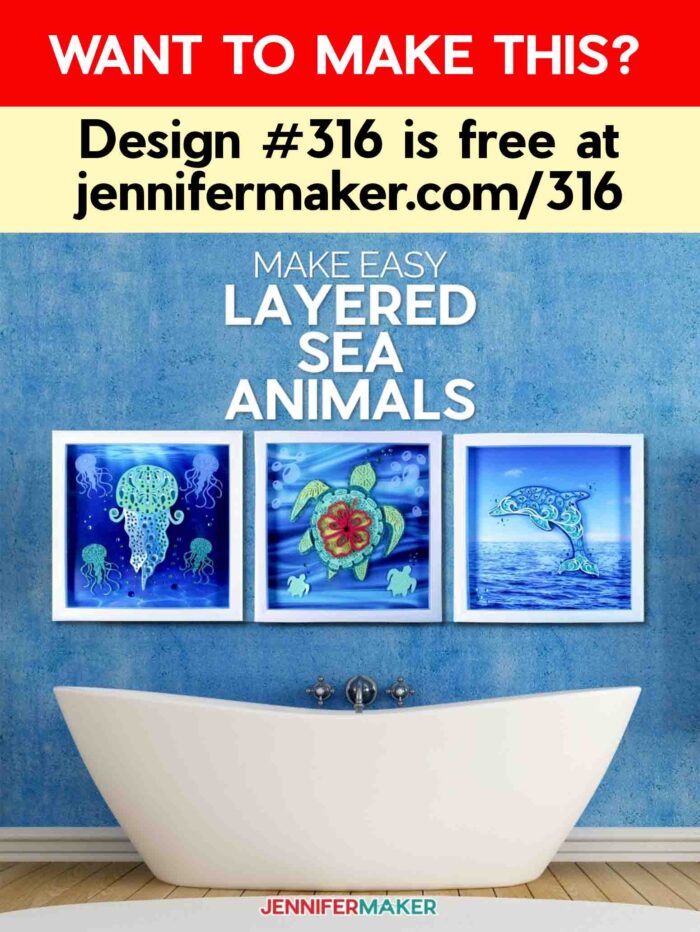
Learn how easy it is to make these gorgeous layered sea animals mandalas for the most eye-catching coastal home decor!
I love making layered mandalas! They are one of the most visually enticing pieces of art you can make with a Cricut cutting machine. Both my Easy 3D Layered Mandalas and my Layered Hummingbird projects have been hugely popular, and I think it it’s because they are really just so easy to make. This time though, I have combined my love of sea creatures with my love of mandalas to make some of my favorite designs yet. I’m excited to share these dolphin, turtle, and jellyfish layered sea animal mandalas with you so you can make them, too!
Want to save this project? Enter your email below and we’ll send the project straight to your inbox.
Watch the full step-by-step DIY Layered Sea Animals SVGs assembly video here:

If you haven’t made a mandala yet, I highly encourage you to give them a try! They are very easy to make and assemble and you don’t need a lot of special materials to make this adorable DIY layered sea animals framed art! My materials lists gives you ALL of the items needed to make ALL three designs – the turtle, the dolphin, and the jellyfish!
Each layered sea animal will fit into a 12 x 12 shadow box, making it fun and easy to display on your wall!

You can use any cardstock you have on hand! I found the cutest 12 x 12 cardstock with a water theme to use as a background for each shadowbox but this is where you can express your own fun and unique creativity too! What kind of background do you want to use for these cute animals?
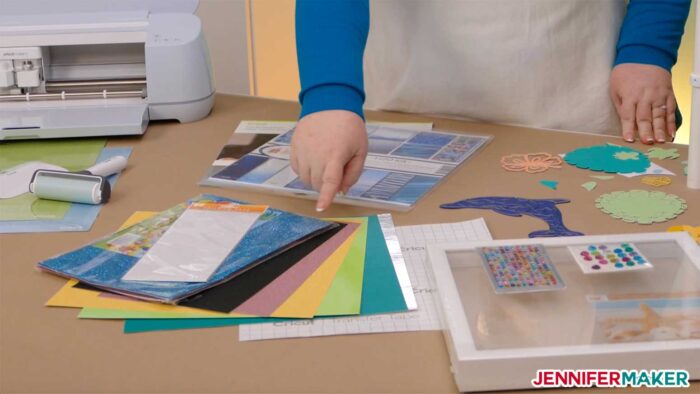
For the layered dolphin mandala, you will need (5) five pieces of 12 x 12 cardstock, and for the turtle and jellyfish mandalas you will need (6) six pieces of cardstock to create these cute sea creatures!

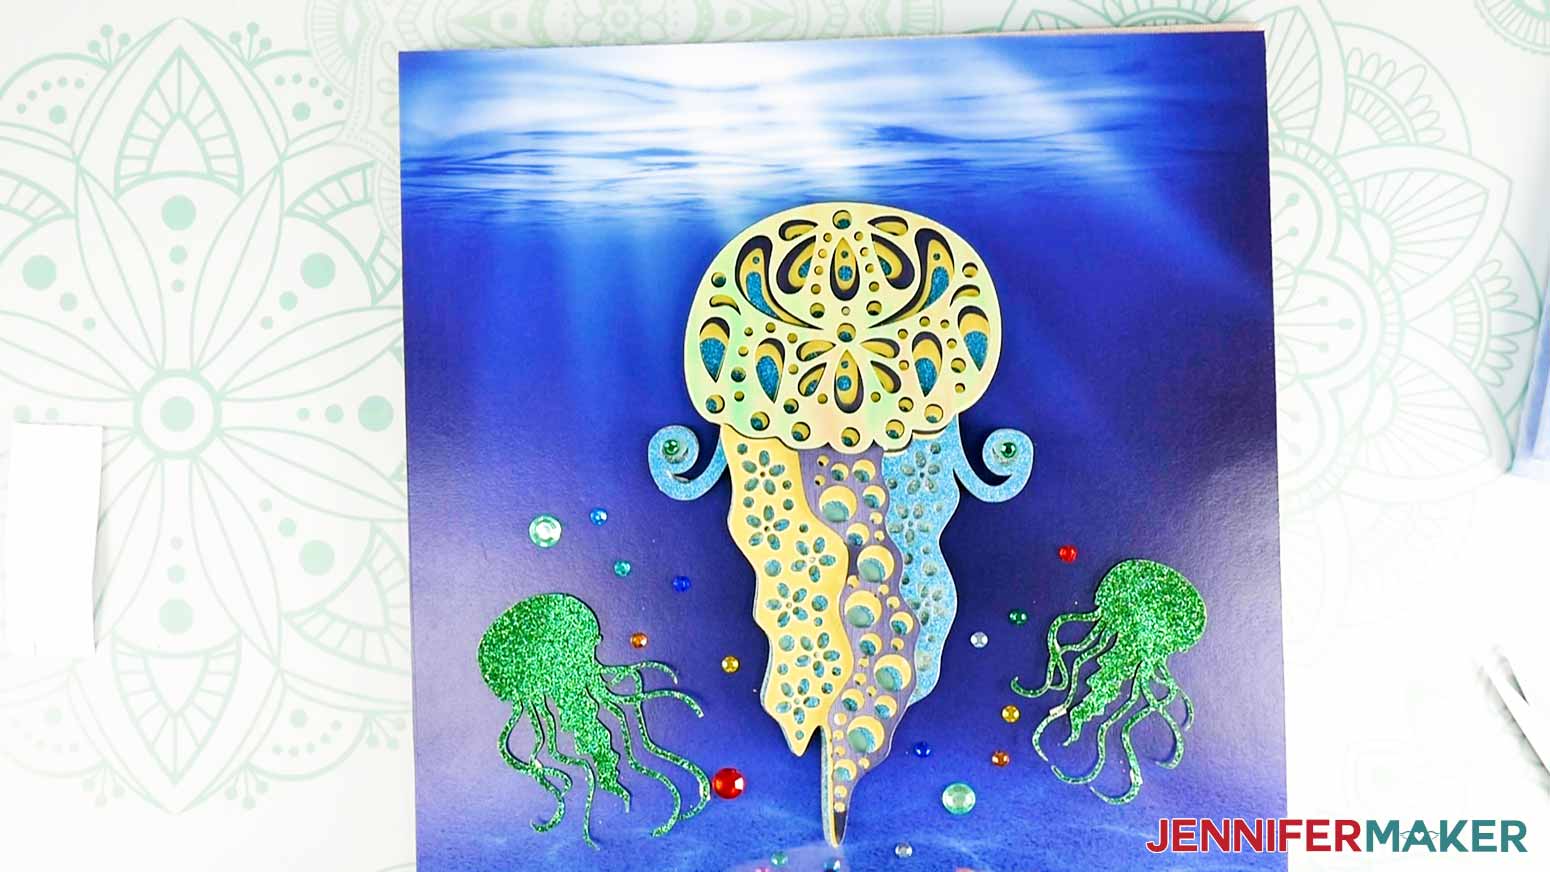
I have also included some extra decorative pieces that you can use to add fun accents to your DIY layered sea animal mandalas, like the extra jellies you see below! I cut out these extra pieces with glitter cardstock. Feel free to use whatever you have on hand or if you want, you can choose not to use them at all!
For more dimension, I used some frosted opaque vinyl to add some fun details to my shadow boxes. like splashes and bubbles. This vinyl goes on the glass of the shadow box and gives the mandala even more depth!
Another fun thing I used to make these animal mandala shadow boxes stand out were some rhinestone stickers —these added pretty details to my designs. They look like bubbles!
You don’t have to put your sea animal mandalas in shadow boxes like I did, but they look SO cool when you do! My shadow boxes are 12” x 12” but you can resize these designs to fit other size shadow boxes or frames.
And finally we’re going to use the Cricut cutting machine which allows us to make all the intricate cuts we need for these layered mandala designs super easy!

Let me show you how easy it is to make this wonderful layered sea animals with my free SVGs! This post contains some affiliate links for your convenience (which means if you make a purchase after clicking a link I will earn a small commission but it won’t cost you a penny more)! Read my full disclosure policy.
Materials to Make Layered Sea Animal Mandalas in Frames
View my Amazon shopping list with the exact items we used to make this project

- 5-6 pieces of 65-80 lb. 8.5″ x 11″ or 12″ x 12″ cardstock per sea animal, in whatever colors, textures, and finishes you like! Options include Textured Cardstock, Glitter Cardstock, Foil Kraftboard, and Shimmer Cardstock)
- (Optional) Paper or cardstock with water patterns (I used this exact collection)
- (Optional) Frosted Opaque Vinyl and Transfer Tape (used to decorate the glass on the frames)
- (Optional) Rhinestone Stickers (used to simulate bubbles)
- (Optional) Shadow Box (used to frame your layered sea animals)
- Double-sided adhesive foam squares or circles (you can also use 3D Zots or adhesive foam tape)
- Cricut Green StandardGrip Cutting Mat, 12×12
- XL Scraper
- Brayer
- Weeding Tool
- Scissors
- A method to cut your cardstock and vinyl – I used the amazing Cricut Maker but you can also use the Cricut Explore
- Design #316 – My free SVG/PDF/DXF design files are available in my free resource library – get the password by filling out the form at the bottom of this page
How to Make Your Own Beautiful Layered Sea Animals

Layered Sea Animals SVGs
Adorn your walls with these magical layered sea life frames!
Materials
- 5-6 sheets per sea animal of Cricut Glitter Cardstock (Jelly, Dolphin and Turtle) -- you can use 8.5" x 11" or 12" x 12" for all paper in this project
- 1 sheet of Cricut True Brushed Paper (Jelly)
- 1 sheet of Foil Cardstock
- 2 sheets of Shimmer Cardstock (Dolphin and Turtle)
- A few sheets of textured cardstock (Jelly, Dolphin and Turtle)
- 1 sheet of Water-Themed Printed Paper per sea animal (H20 Kit)
- A few inches of Frosted Opaque Permanent Vinyl (Optional, used to decorate the shadow box glass)
- Cricut Vinyl Transfer Tape
- Double-sided Adhesive Foam Squares or Circles
- Rhinestone Stickers (Optional)
- 12x12" Shadow Box (Optional)
- Design #316 (My free SVG/PDF/DXF design files are available in my free resource library - get the password by filling out the form at the bottom of this page)
Tools
- A method to cut your cardstock and vinyl — I used the amazing Cricut Maker but you can also use the Cricut Explore or Joy, or cut by hand
- Cricut Blue LightGrip Cutting Mat, 12x12 - used for paper
- Cricut Green StandardGrip Cutting Mat, 12x12 - used for cardstock and Kraft board
- Cricut XL Scraper
- Cricut Brayer
- Cricut Weeding Tool
- Cricut Scissors
- Isopropyl Alcohol
Instructions
STEP 1: GET MY FREE LAYERED SEA ANIMALS SVGS FILES
First, download my free Layered Sea Animals SVG/DXF/PDF, Design #316, from my free resource library. There are three different designs – a Jelly, a Dolphin and a Turtle. These pieces of art fit in a 12” x 12” shadow box and are perfect for hanging on your favorite wall!
You can cut these mandalas by hand with the printable PDF, or cut them on a cutting machine with the SVG cut files. Let me show you how to cut these on a Cricut cutting machine.
First, upload the SVG cut file to your design software. If you're not sure how to upload an SVG cut file to Cricut Design Space, watch this helpful video SVGs Made Simple training series I made.
If you're on an iPhone or iPad, here's how to download and upload SVG files to the Cricut Design Space app.
This is what the layered sea animal SVG cut files look like in Design Space when you import them to Cricut Design Space. Unless you want to resize them, everything is ready to cut!


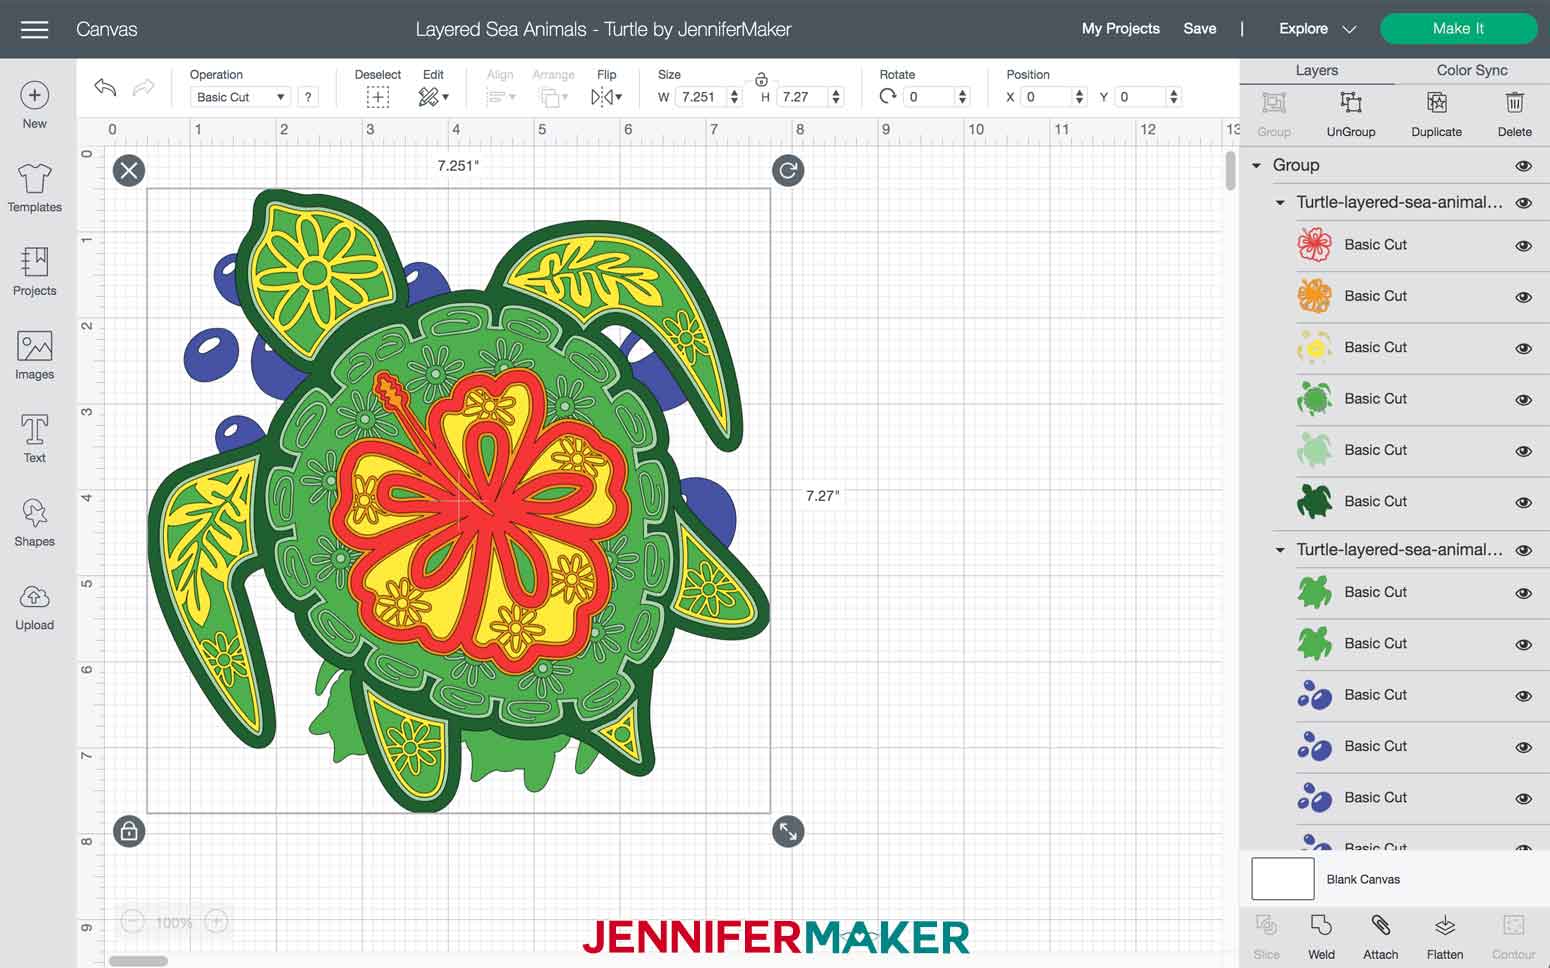
TIP: To change the size, click on the design on the canvas and then click and drag the arrow on the bottom right side until everything is the size you want. You can even cut these files on a Joy! You will need to resize them to fit on a Cricut Joy mat – the maximum width for cutting on a Joy mat is 4.25”. You may want to discard the top layers of the Jelly and Turtle because they will be too detailed and difficult to use once they are scaled down to cut on your Joy.
STEP 2: CUT THE LAYERED SEA ANIMALS SVGS
To make the layered Jellyfish mandala, these are the layers I cut and the materials I used.
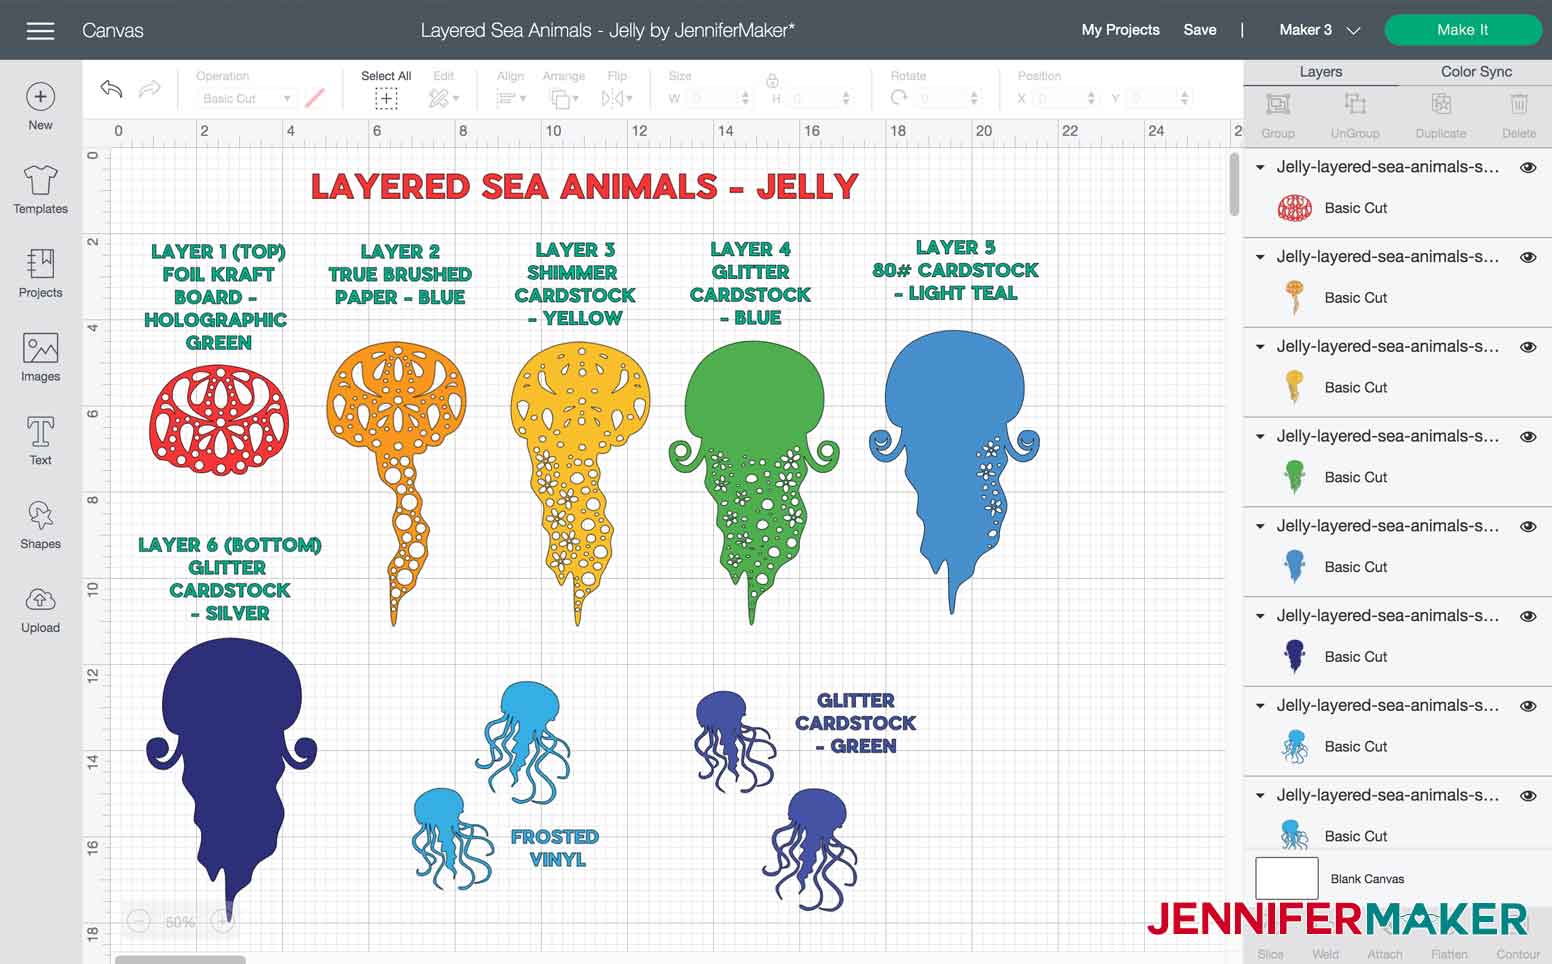
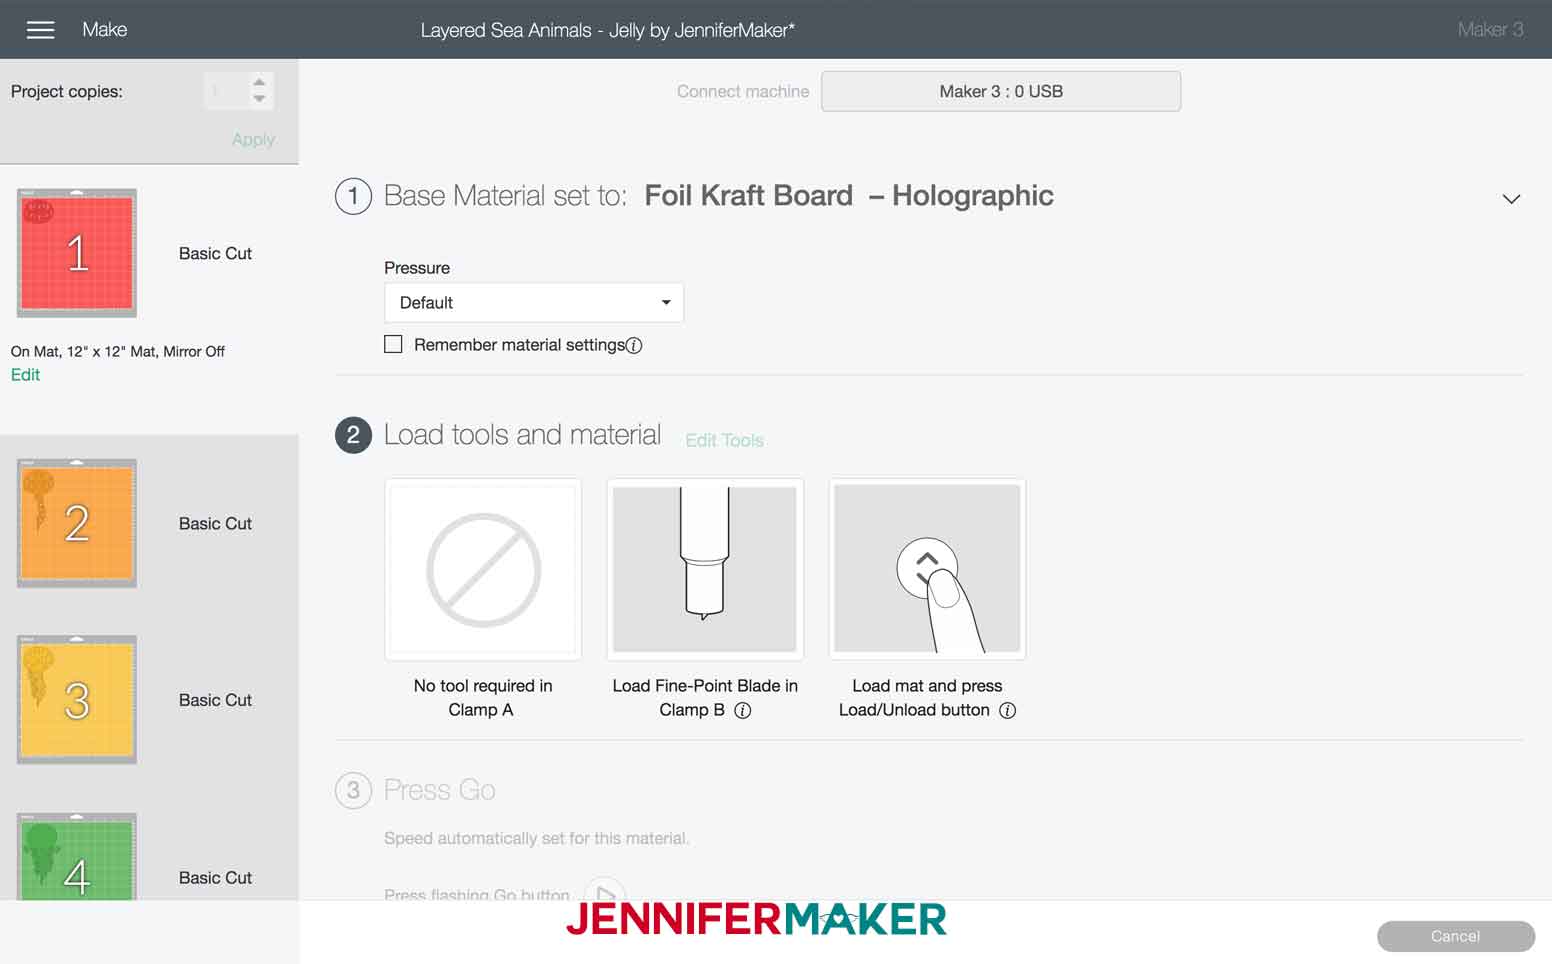
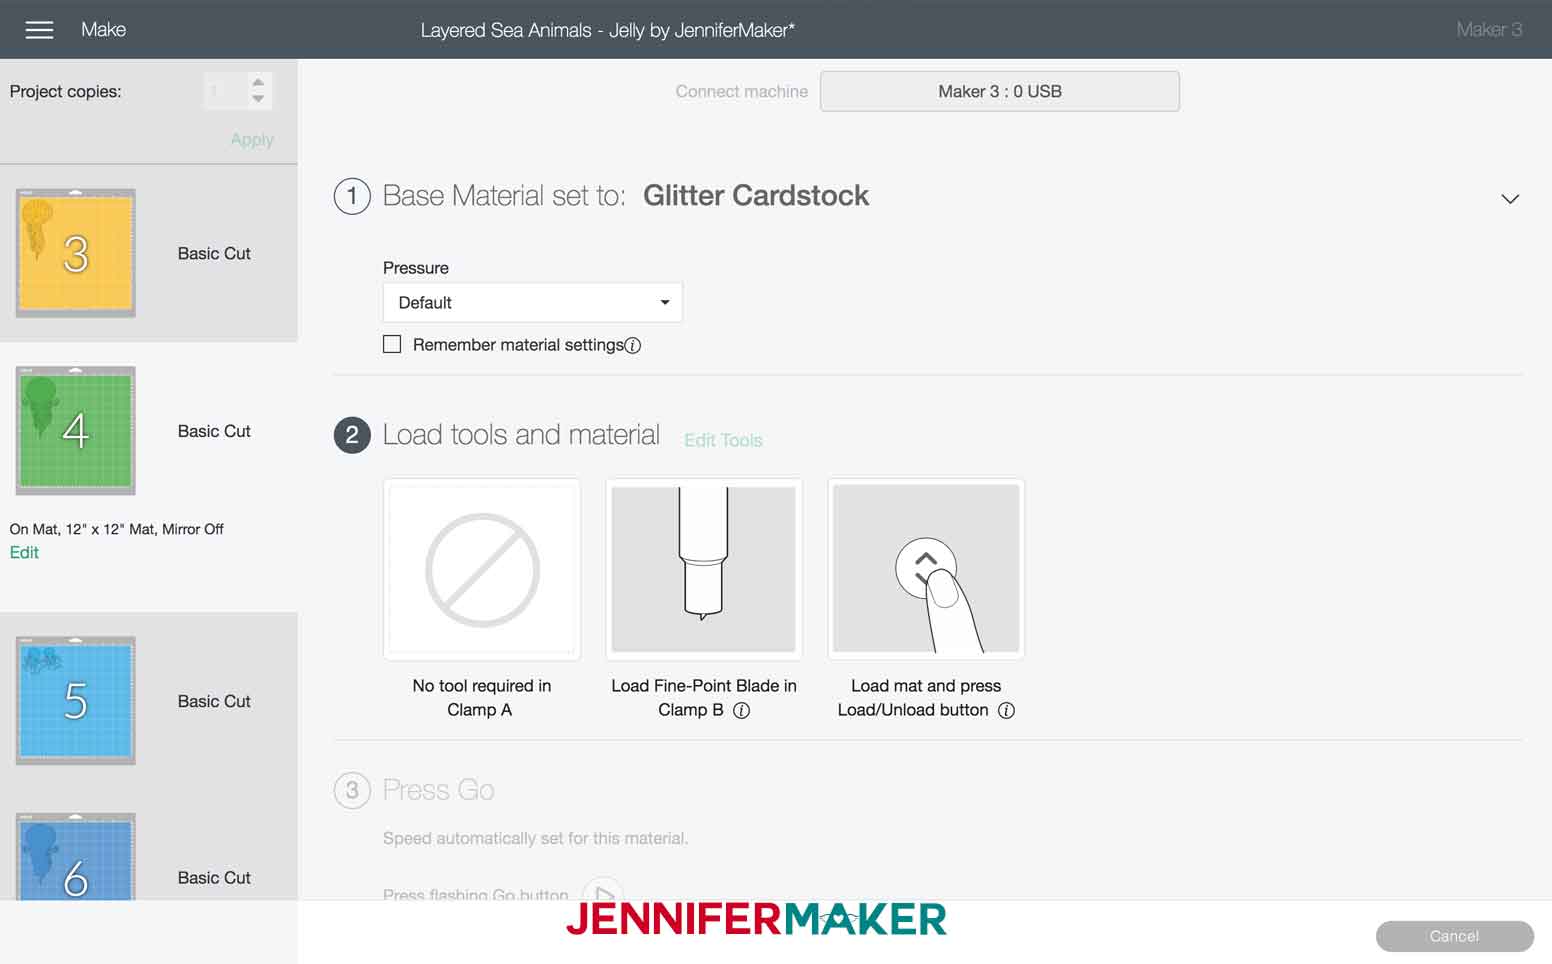
Click "Make It" and you will be prompted to select your material settings and place your material on your cutting mat. I used Cricut Foil Kraft Board - Holographic in Neon Green on a Green Standard Grip Mat for Layer One (the top layer).
For the material settings, I selected Foil Kraft Board - Holographic with "More" pressure. Make sure the Fine Point Blade is loaded in Clamp B, then load your mat into your machine and press the Go button.
When Layer 1 is done cutting, check to make sure the Kraft Board is cut all the way through BEFORE unloading the mat. If it needs to be cut again, simply press the Go button and your machine will recut it. If it cut properly the first time, press the Unload button on your machine.
TIP: If you have any issues cutting, check out my Cutting Problems Guide. It contains all the tips I use to get clean cuts consistently.
Carefully remove the layer from the mat. (Take a look at this tip if you're having issues with your cardstock curling or ripping.)
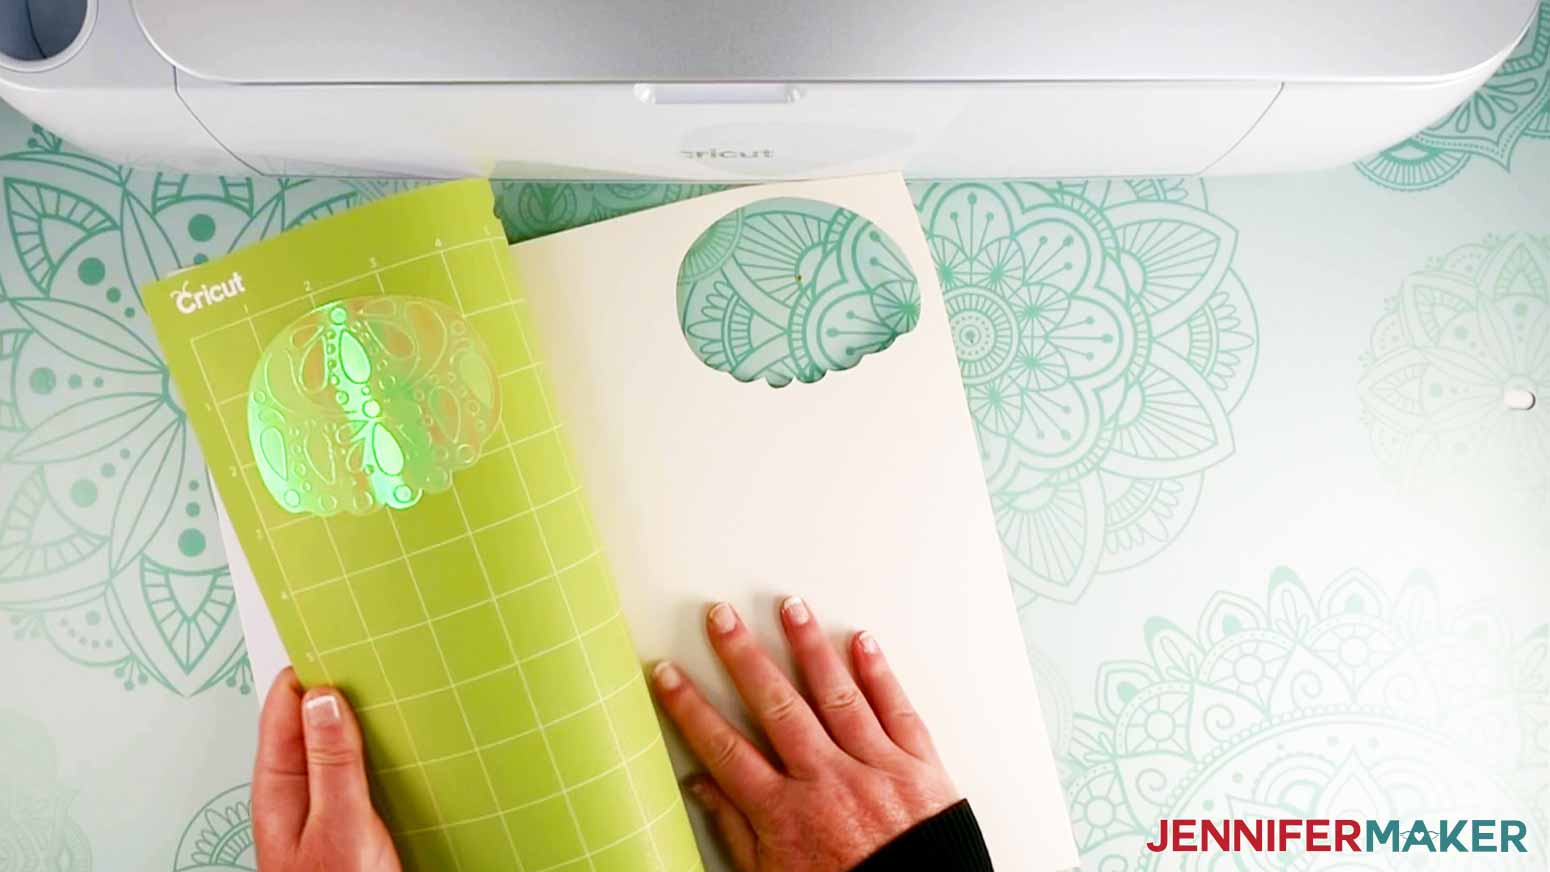
TIP: As you cut your layers, each design will leave behind cut-out pieces on your mat. I carefully peeled them off using my fingers and also used my Cricut XL Scraper tool to easily pry those pieces off.
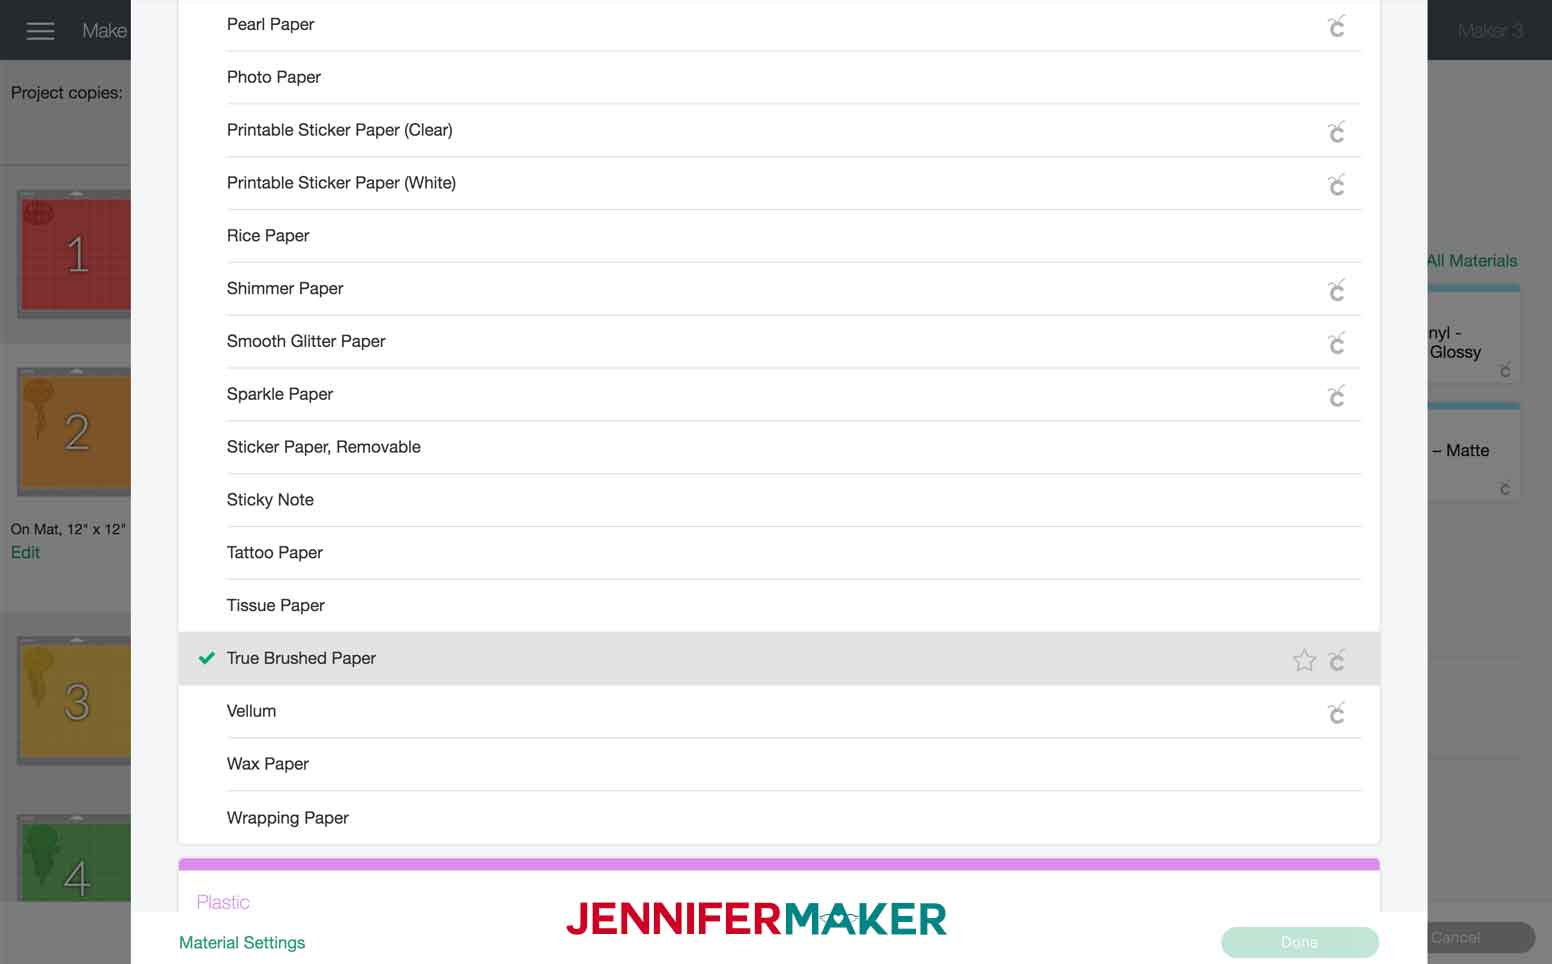
After your first mat is done, you will be prompted to load the second mat. For Layer 2, I adhered a sheet of Cricut True Brushed Paper in Navy Blue on a Green Standard Grip Mat. In Material Settings, I selected True Brushed Paper and set the Pressure to Default. Your Fine-Point Blade should already be loaded so load your mat and press Go.
Check your cut piece before unloading, and recut it if necessary. Unload the mat and remove your pieces like you did before.
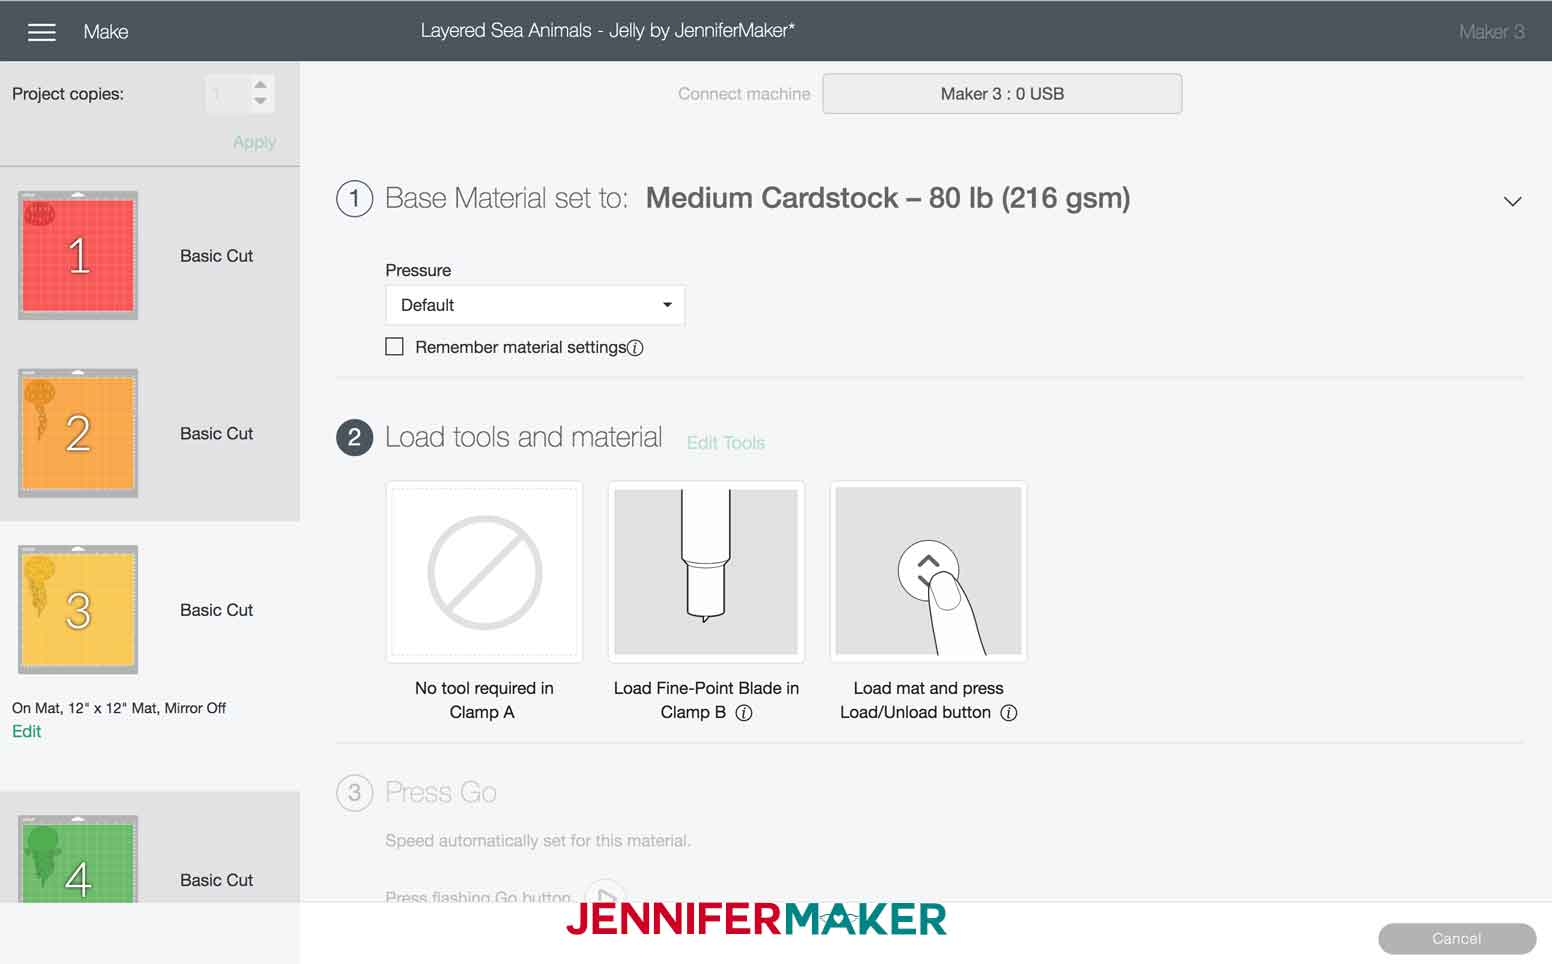
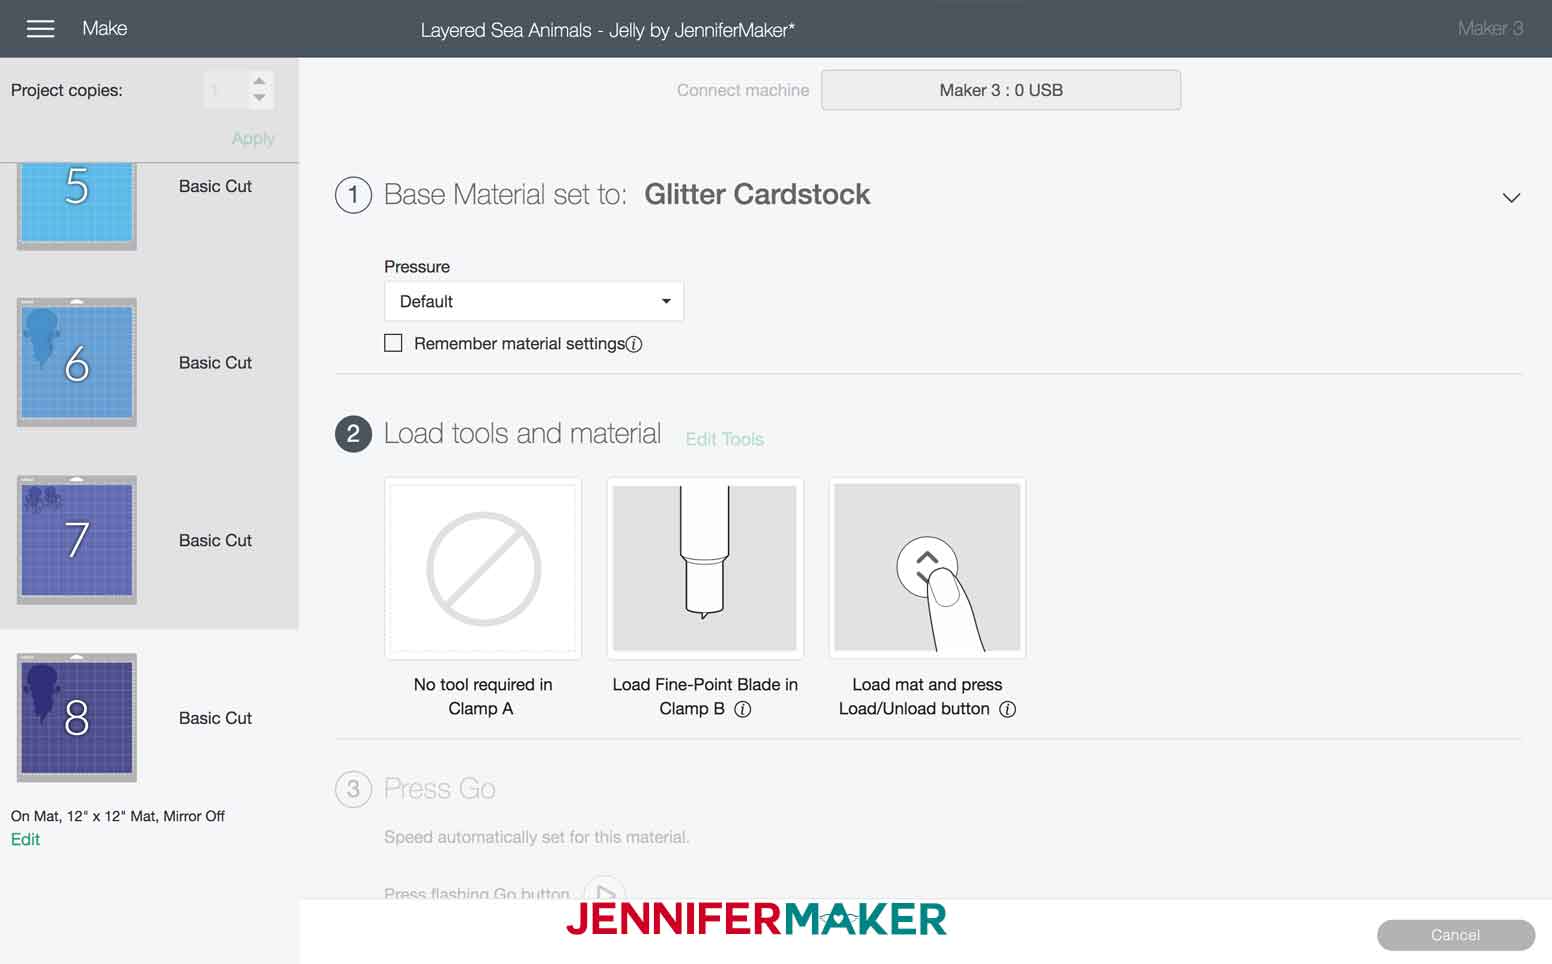
Now, prepare your mat with the material you want to use for Layer 3. I placed a sheet of Shimmer Cardstock in Yellow on my Green Standard Grip mat and loaded it into my machine. In Material Settings I selected Medium Cardstock - 80 lb (216gsm) with Default Pressure.
When it was done cutting, I removed the layer from the mat and set up the mat for Layer 4. I used Cricut Glitter Cardstock for this layer and selected Glitter Cardstock as the Base Material. I set the Pressure to Default, loaded the mat and pressed Go to cut.
When prompted to load materials and tools for Layer 5, I adhered a piece of 80# Textured Cardstock in Light Teal on Green Standard Grip cutting mat. In Material Settings I selected Medium Cardstock - 80 lb (216gsm) with Default Pressure.

Once it was done cutting and I unloaded the mat, I placed a sheet of Glitter Cardstock in Silver on a Green Standard Grip Mat for Layer 6 (the bottom layer). I used Cricut Glitter Cardstock for this layer and selected Glitter Cardstock as the Base Material. I set the Pressure to Default, loaded the mat and pressed Go to cut.
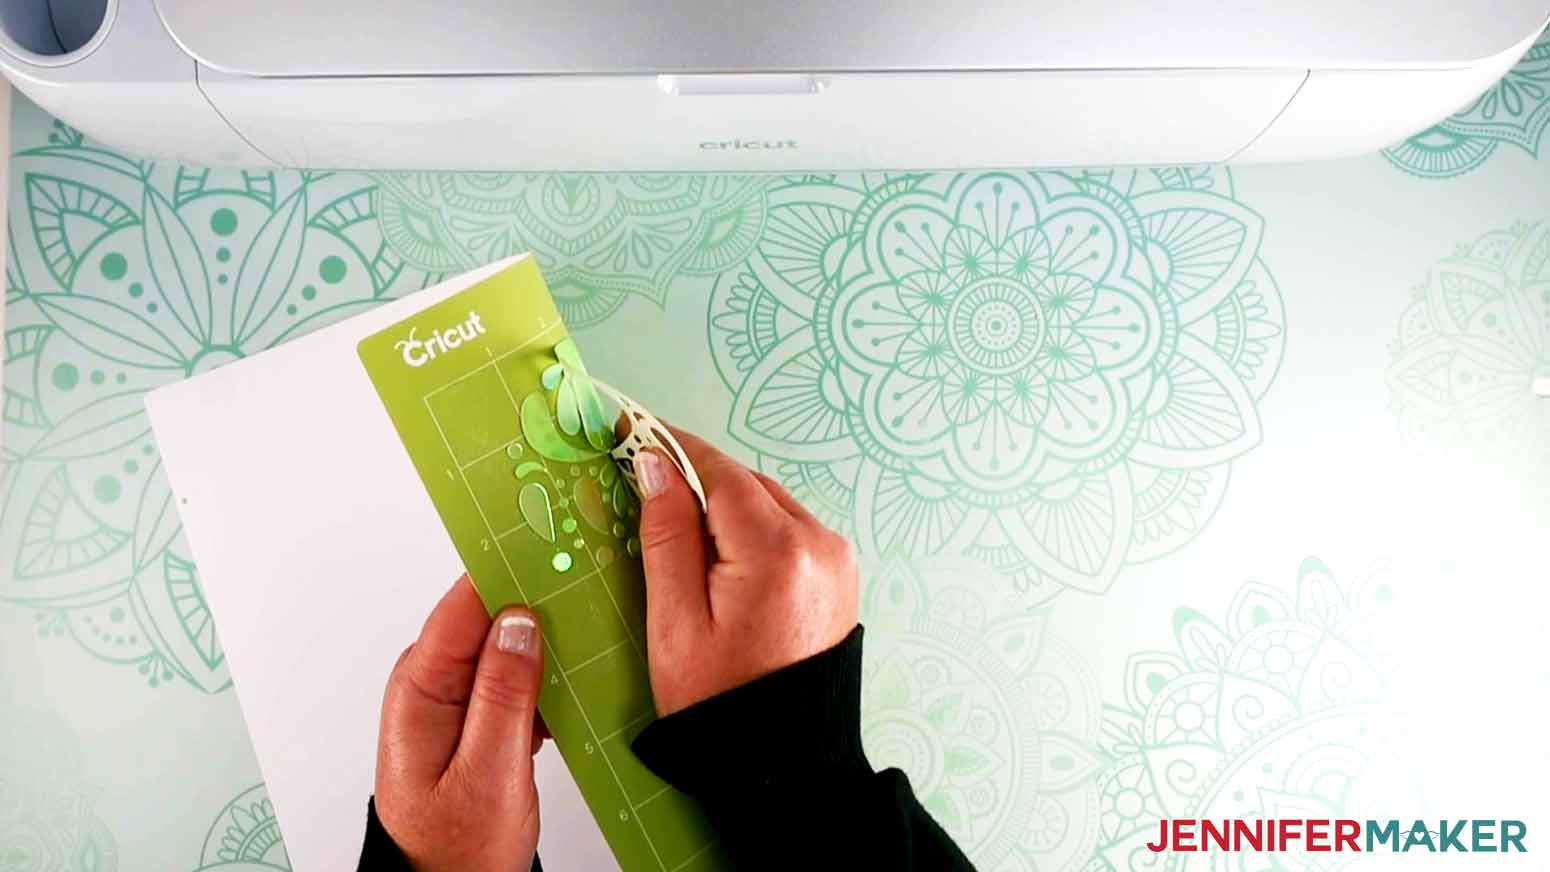
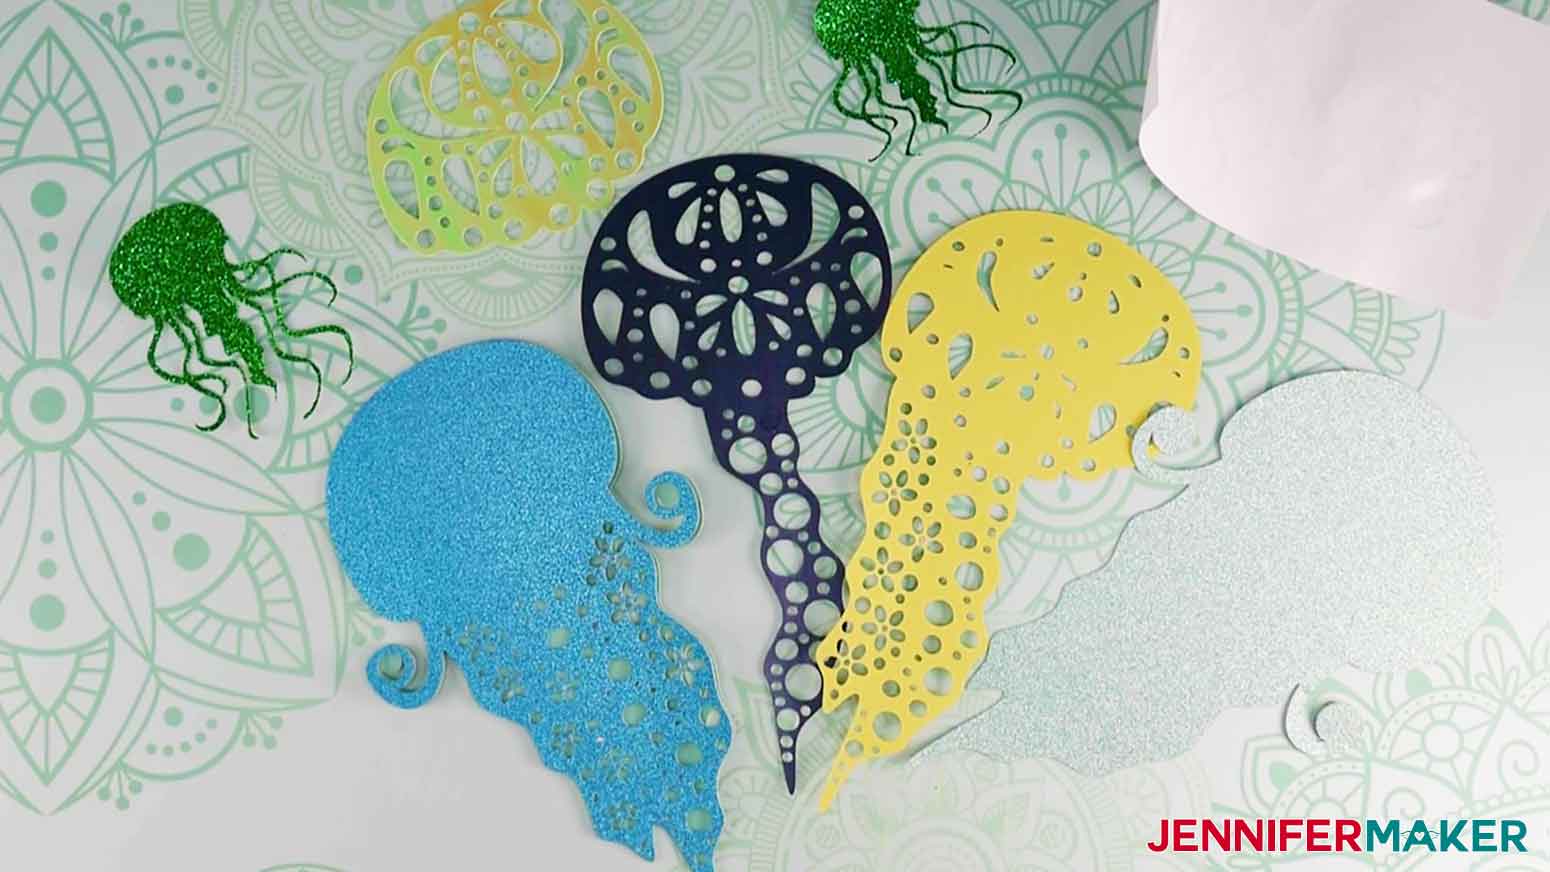
TIP: Each SVG cut file includes the sea animals layers PLUS some extra decorative pieces. The Turtle file includes two small turtles that I cut on glitter cardstock and some bubbles, which I cut on frosted vinyl and used to decorate the glass of the frame. The Dolphin file includes splash designs, which I cut on frosted vinyl and adhered to the frame glass. The Jelly file includes four small jellies – I cut two with glitter cardstock and two with frosted vinyl.
Now that I’m done cutting, these are all the Jellyfish pieces I have.
To make the other layered sea animal mandalas, I used similar materials. Here are the materials and settings I used to cut the Dolphin layers.

Layer 1 (top piece): Shimmer Cardstock -- in Material Settings I selected Medium Cardstock - 80 lb (216gsm) with Default Pressure.
Layer 2: Glitter Cardstock -- in Material Settings I selected Glitter Cardstock with Default Pressure.
Layer 3: 80# Cardstock -- in Material Settings I selected Medium Cardstock - 80 lb (216gsm) with Default Pressure.
Layer 4: Glitter Cardstock -- in Material Settings I selected Glitter Cardstock with Default Pressure.
Layer 5: 80# Cardstock -- in Material Settings I selected Medium Cardstock - 80 lb (216gsm) with Default Pressure.
Here are the Dolphin pieces after they are cut.

And these are the Turtle layers and material settings.

Layer 1 (top piece): Shimmer Cardstock -- in Material Settings I selected Medium Cardstock - 80 lb (216gsm) with Default Pressure.
Layer 2: Glitter Cardstock -- in Material Settings I selected Glitter Cardstock with Default Pressure.
Layer 3: Shimmer Cardstock -- in Material Settings I selected Medium Cardstock - 80 lb (216gsm) with Default Pressure.
Layer 4: Glitter Cardstock -- in Material Settings I selected Glitter Cardstock with Default Pressure.
Layer 5: 80# Cardstock -- in Material Settings I selected Medium Cardstock - 80 lb (216gsm) with Default Pressure.
Layer 6: Glitter Cardstock -- in Material Settings I selected Glitter Cardstock with Default Pressure.
And these are the Turtle pieces after they are cut.
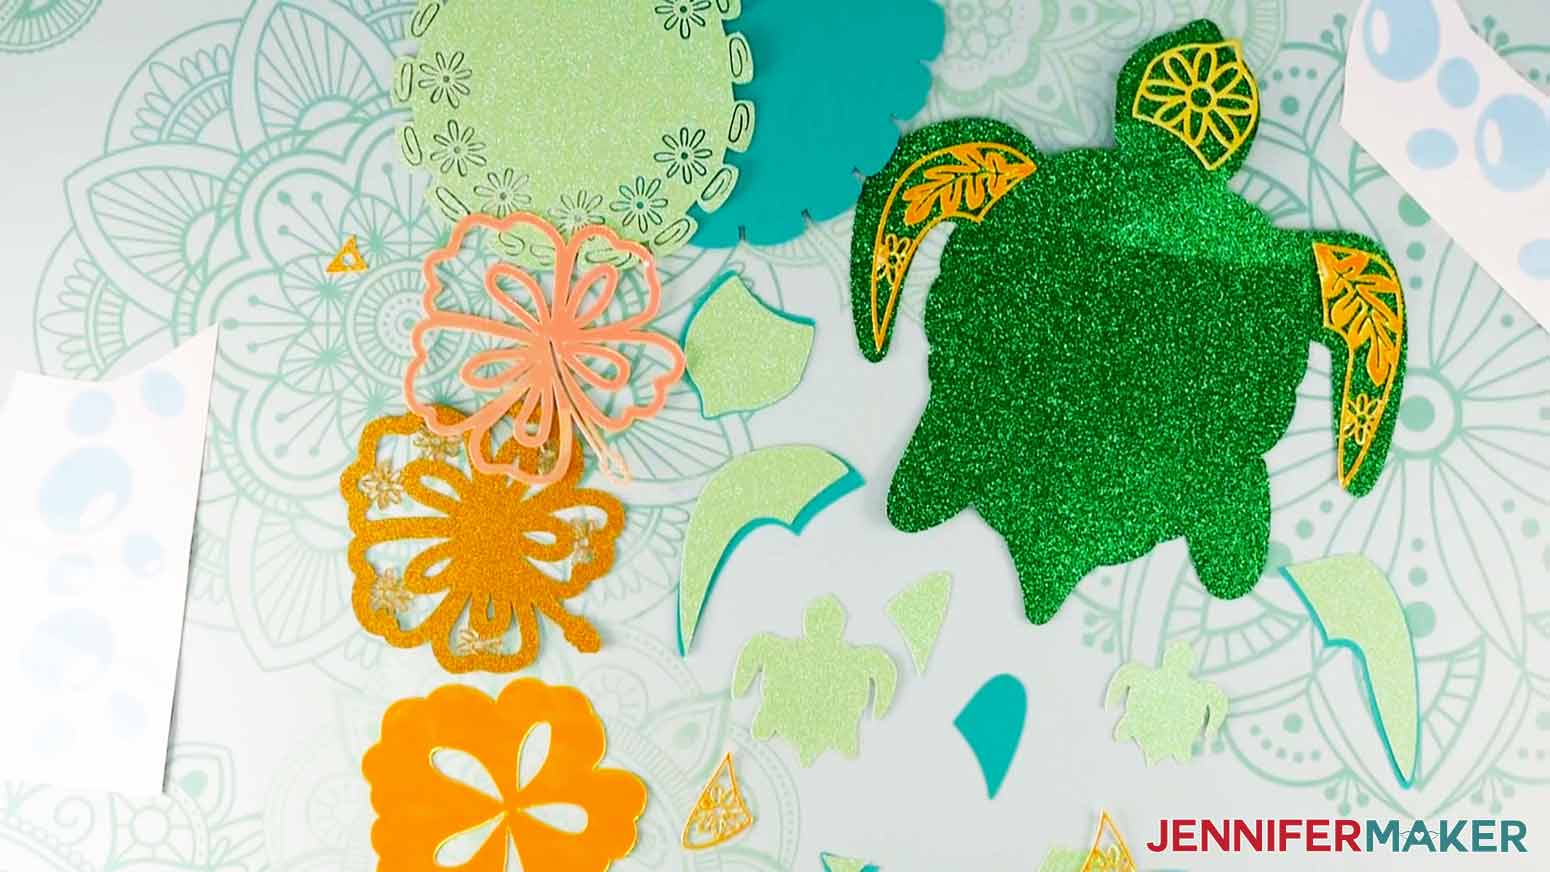
These are all the Layered Sea Animal pieces you’ll have when you’re done cutting.
STEP 3: ASSEMBLE THE LAYERED SEA ANIMALS
I'm going to show you how to assemble the Jelly -- the process is the same for all the designs.
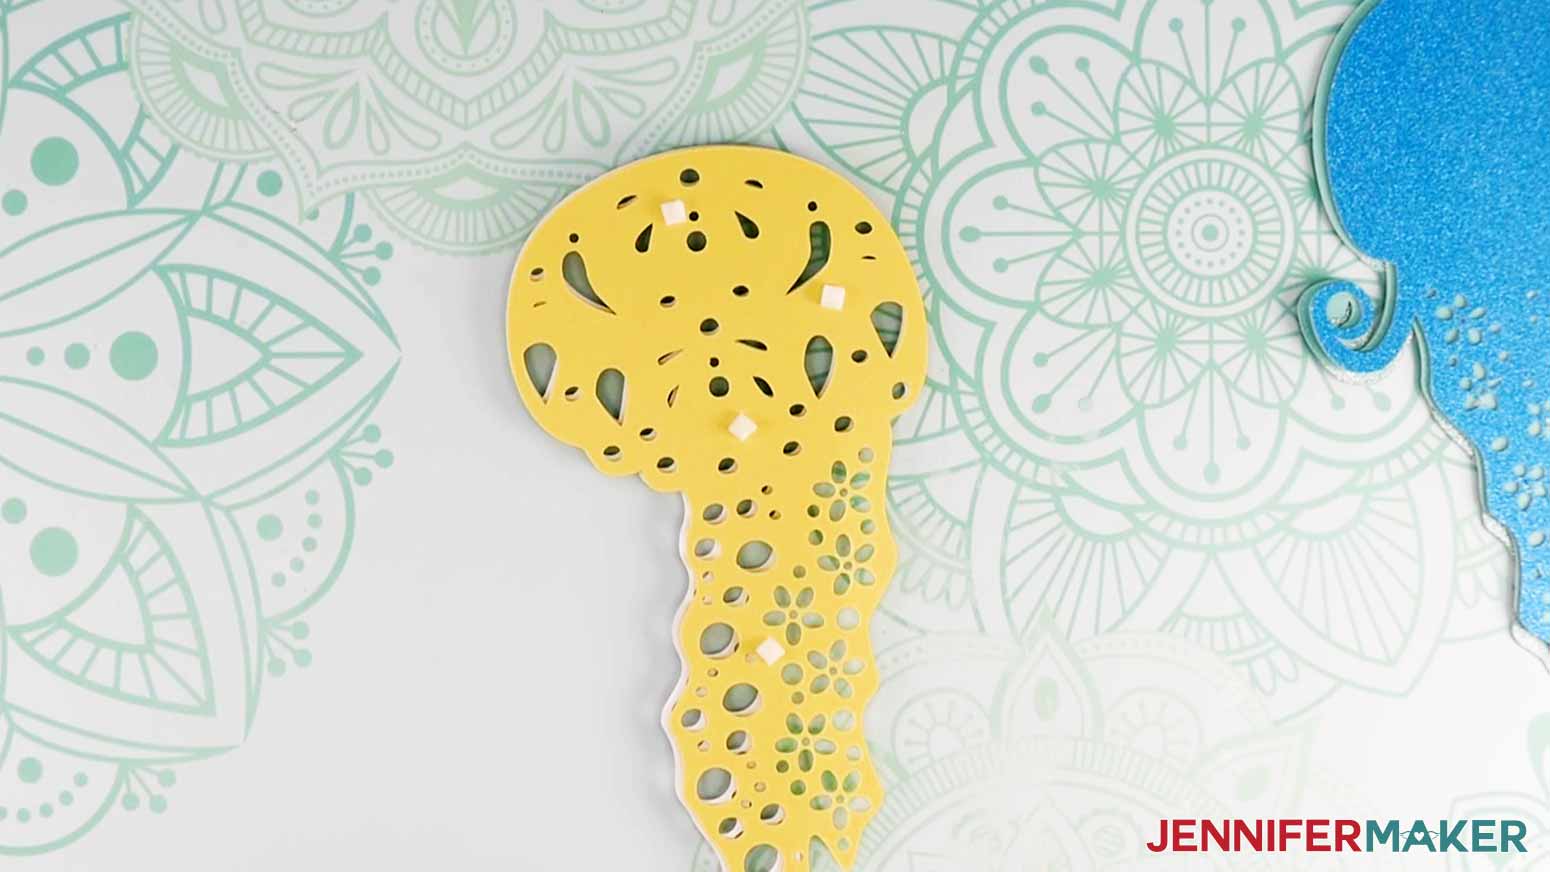
Once you have your pieces cut, you'll want to apply double-sided foam adhesive to the backside of all the layers. I cut down squares of foam adhesive with scissors to fit as needed.
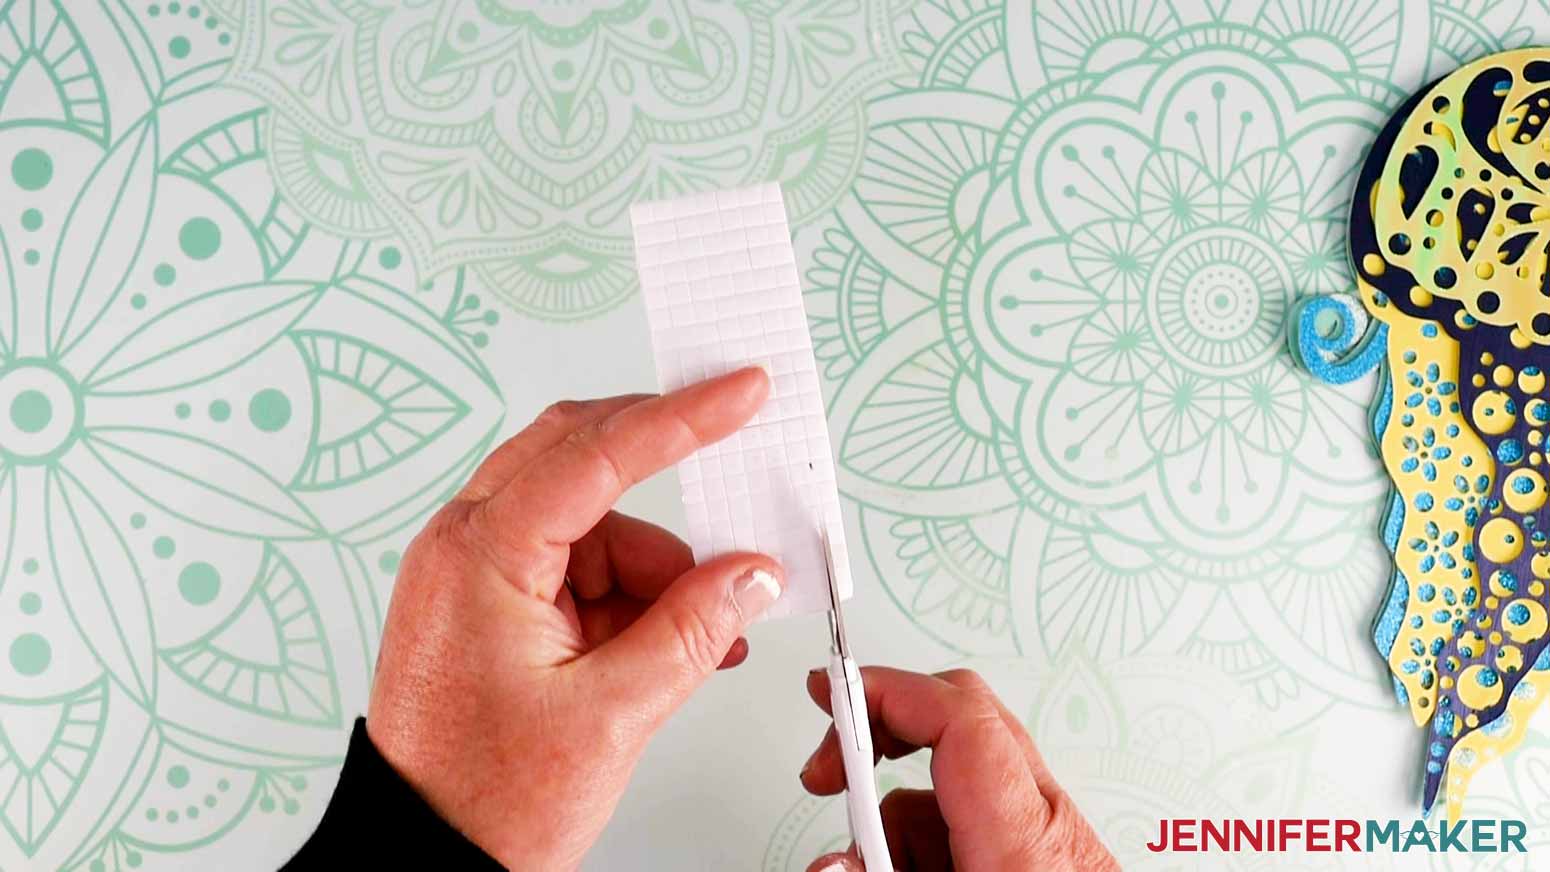
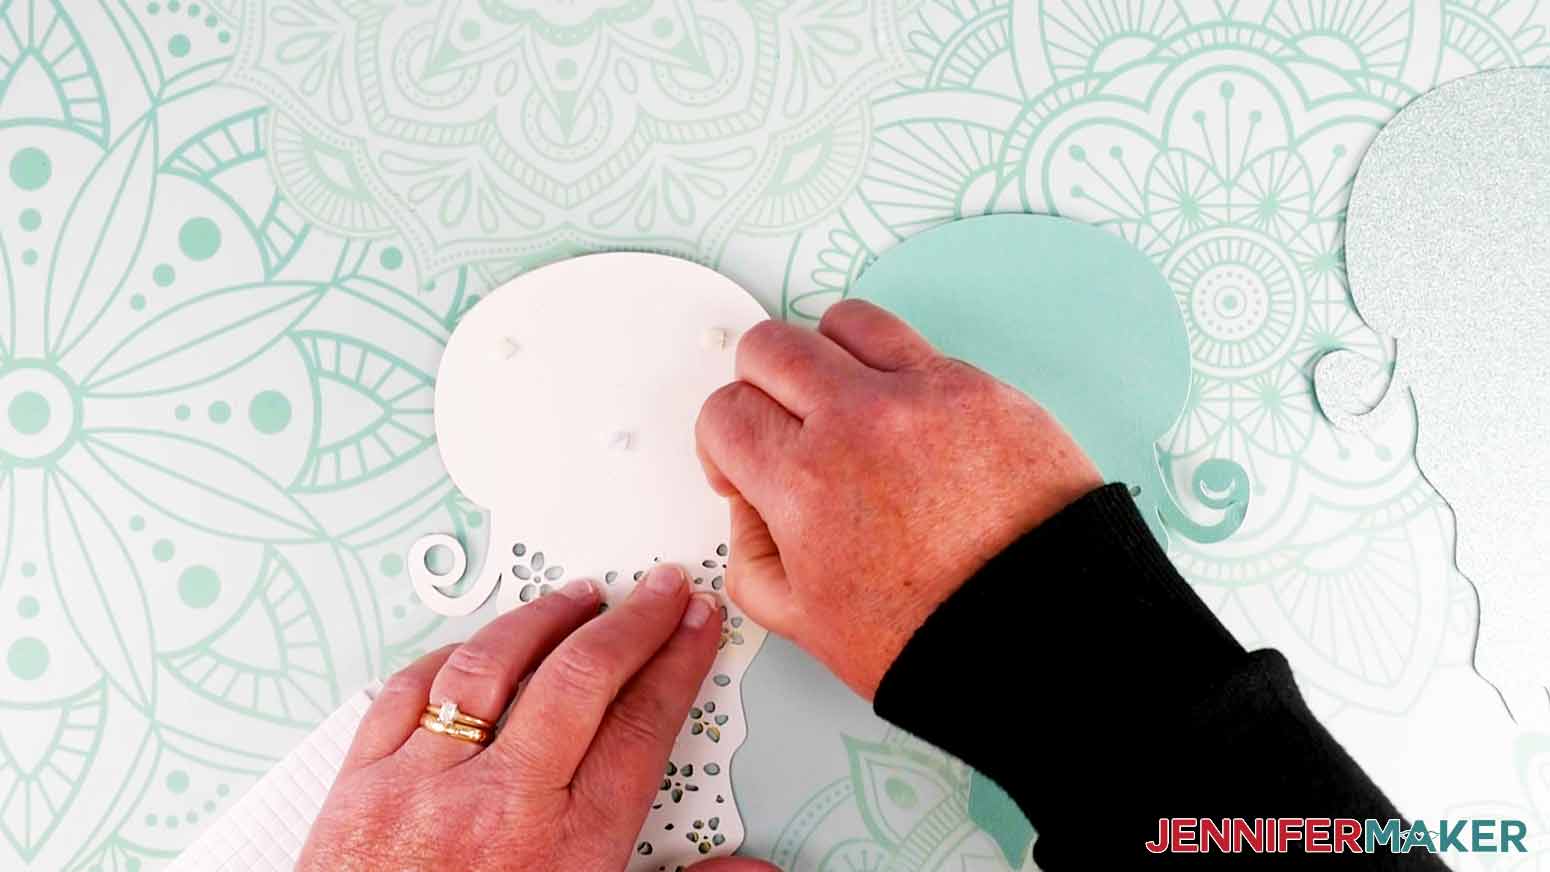
This is how I applied the adhesive foam to Layer 1 (the top layer) of the Jelly.
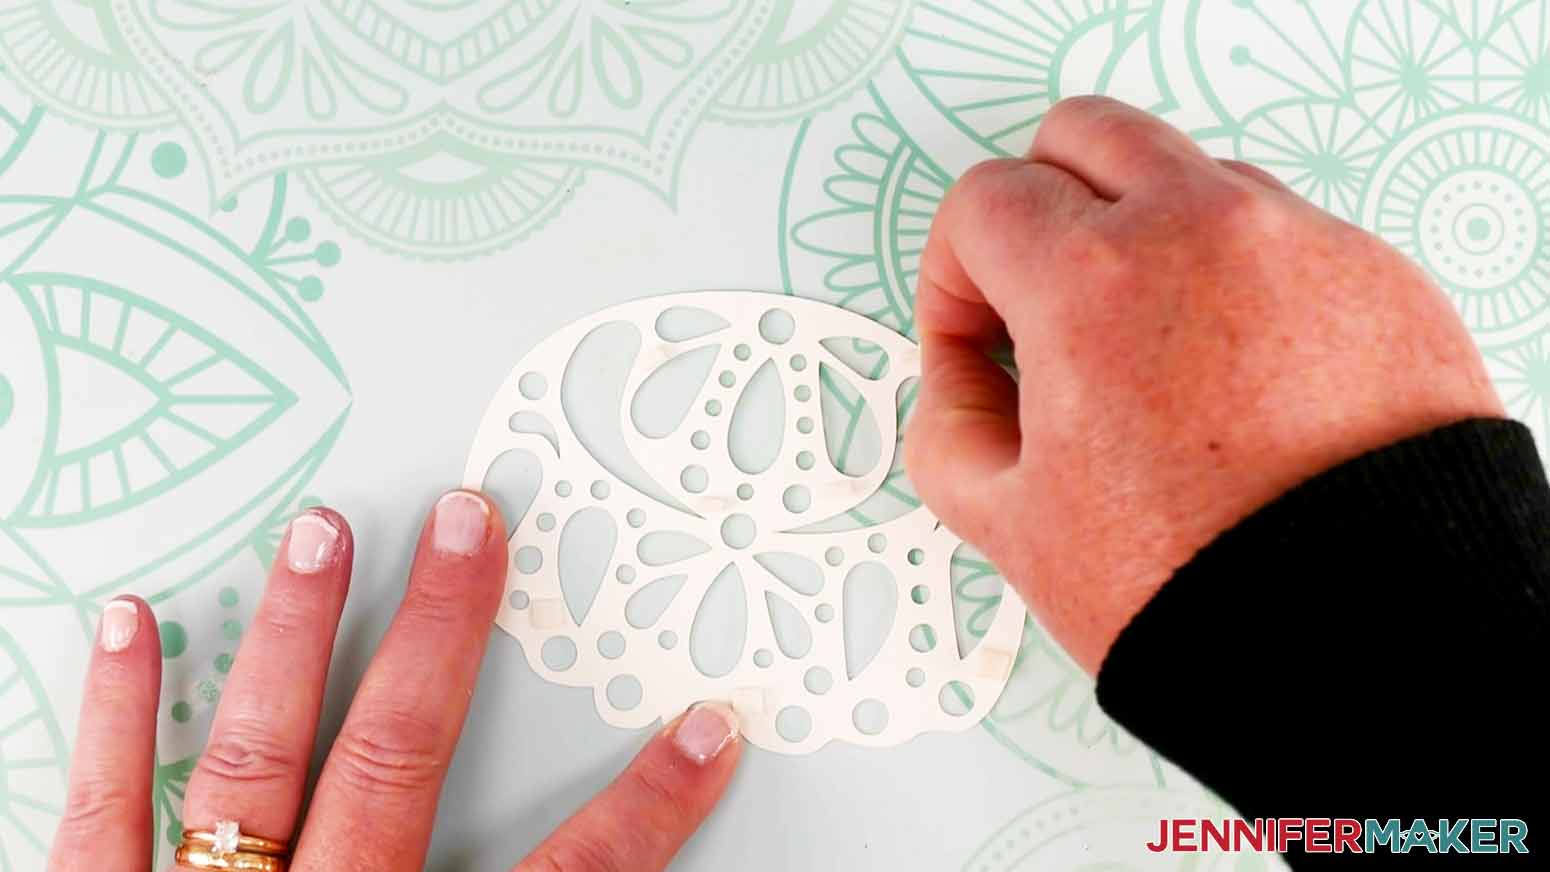
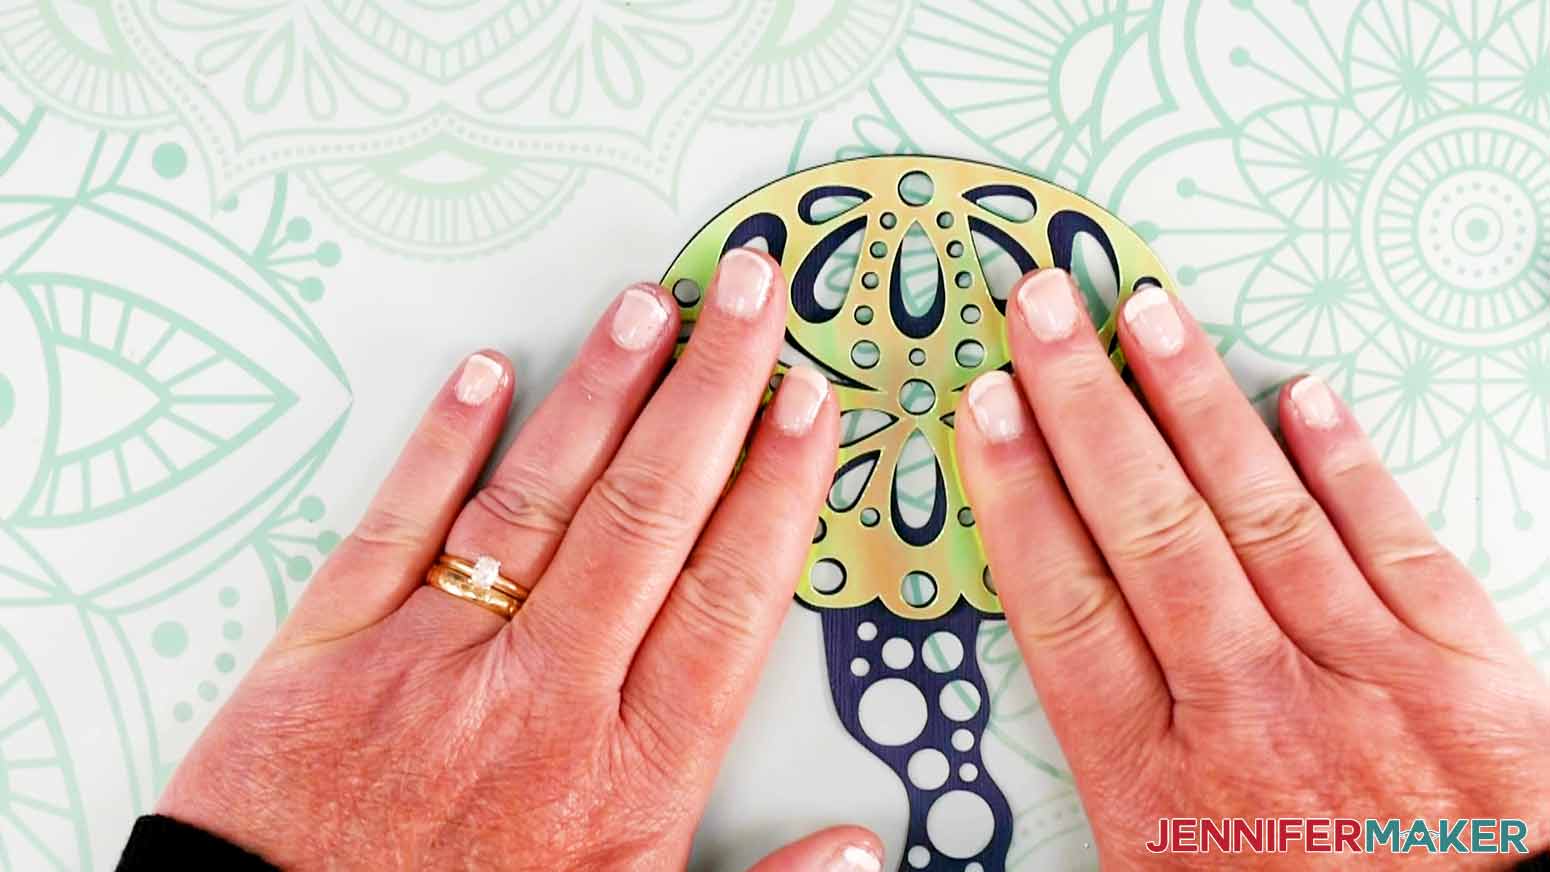
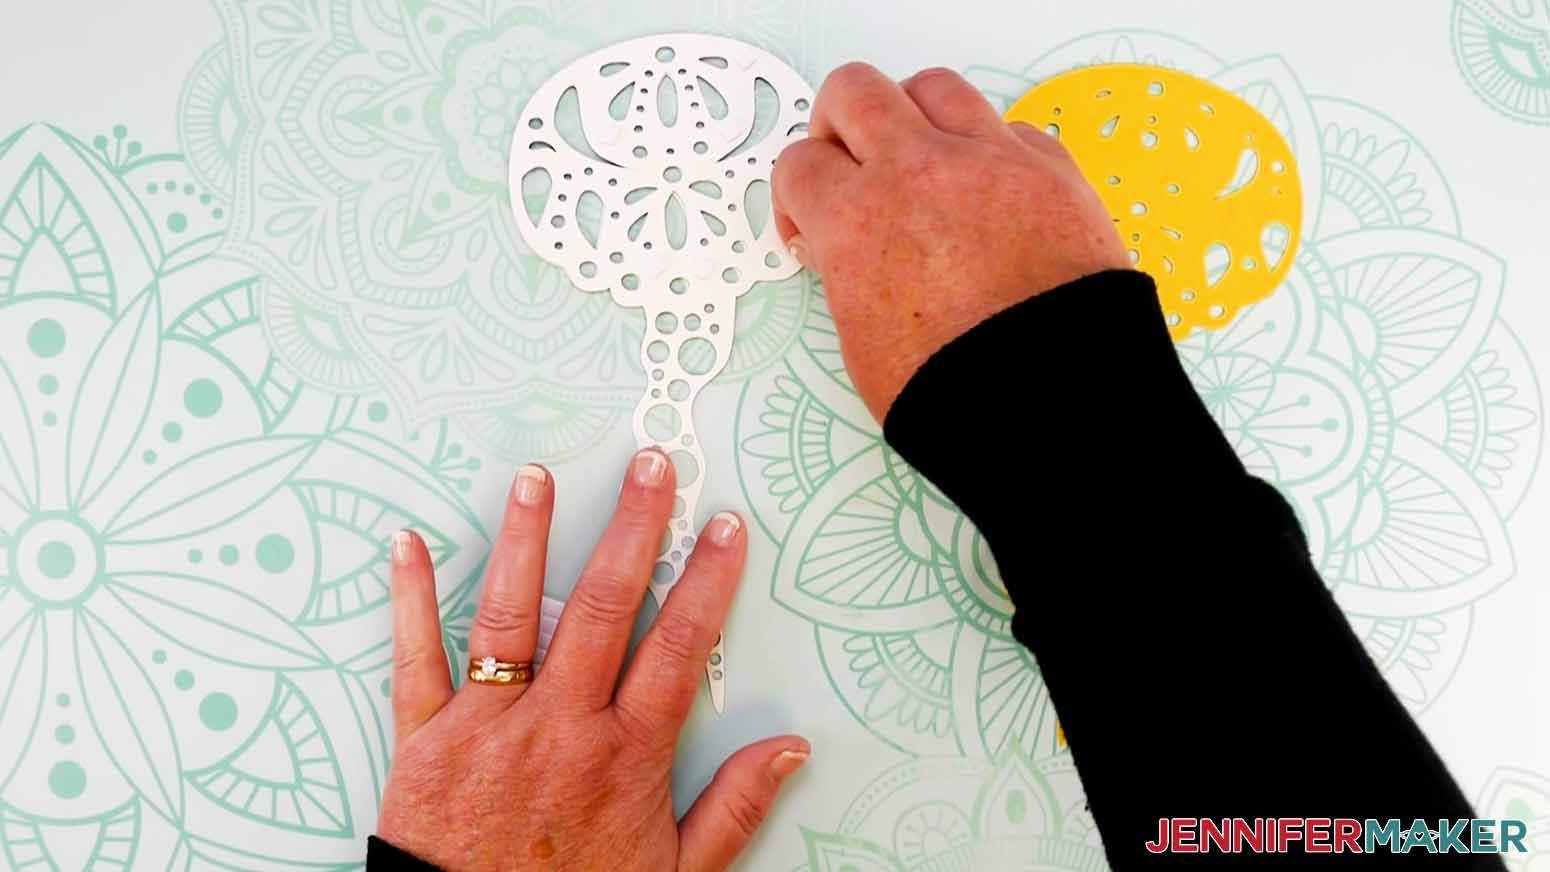
Center and place your top layer on Layer 2.
TIP: As you place the mandala layers on one another, lay them down lightly so you can adjust your placement if needed, then press to the underlying layer.
Add adhesive foam to the back of Layer 2.
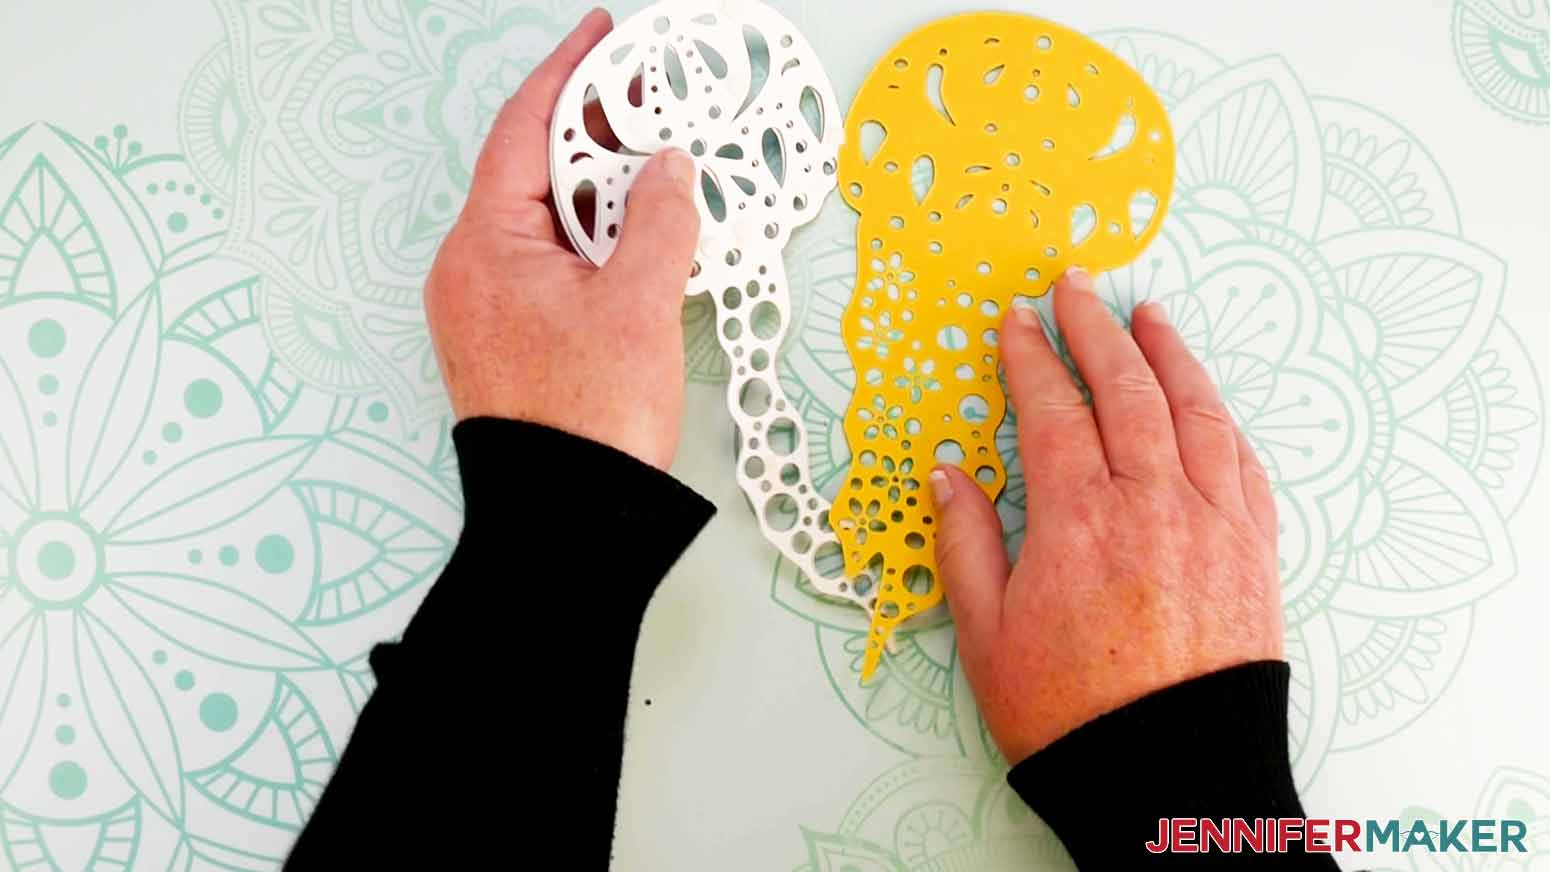
Align and place Layer 2 on top of Layer 3.
Add adhesive foam to the back of Layer 3.
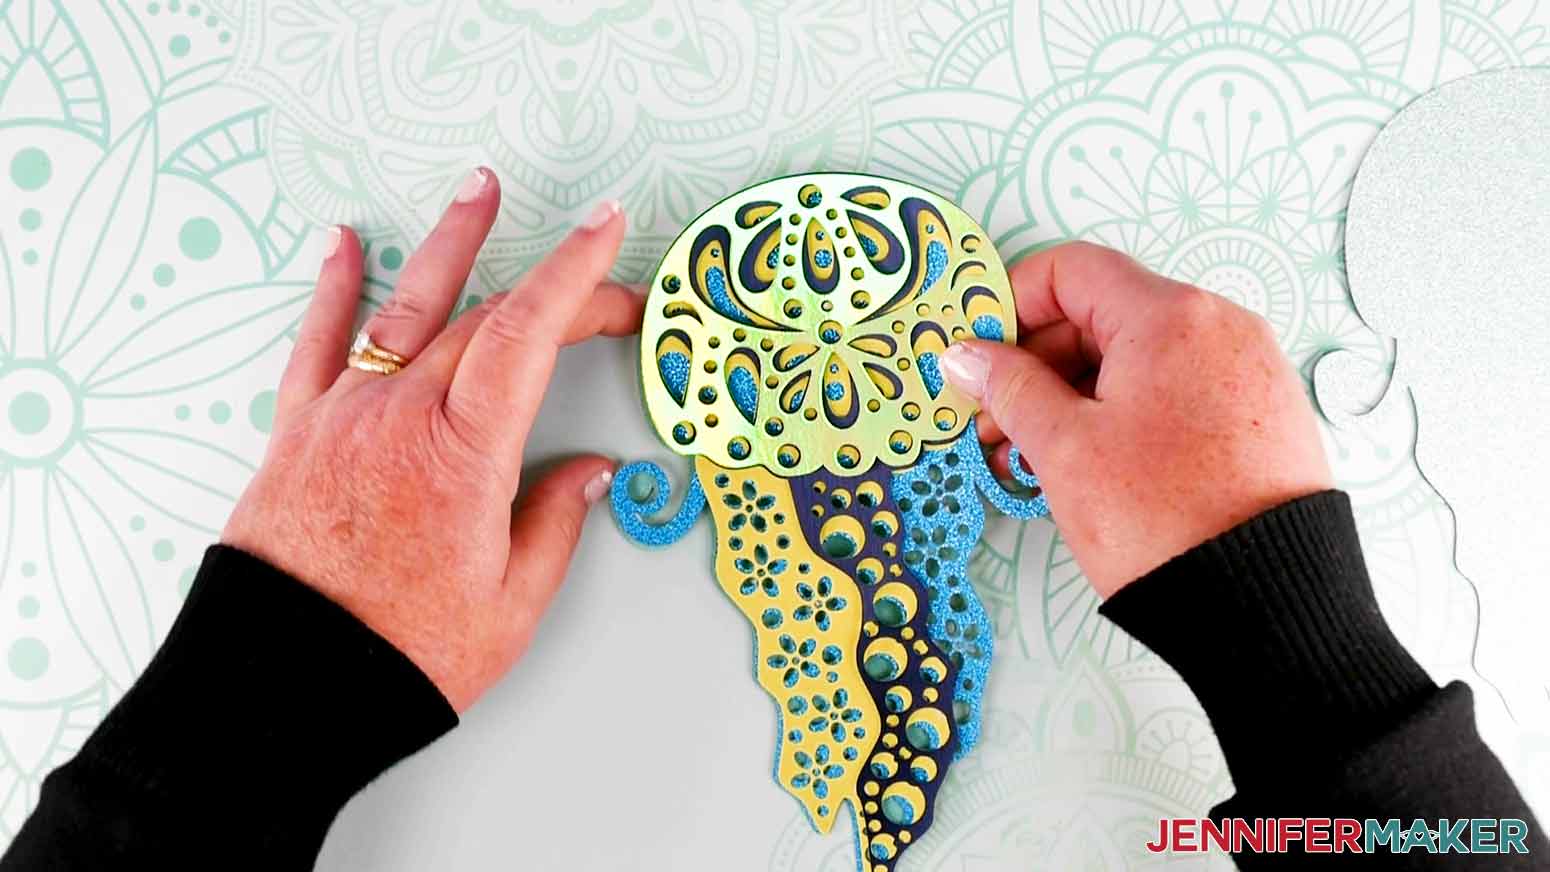
Place Layer 3 on top of Layer 4.
Continue placing the mandala layers one on top of the other. Refer to the file in Cricut Design Space for placement. Below you'll see how I placed the foam adhesive on Layer 4.
Place Layer 4 on top of Layer 5.
And here is Layer 5 with the adhesive on the back.
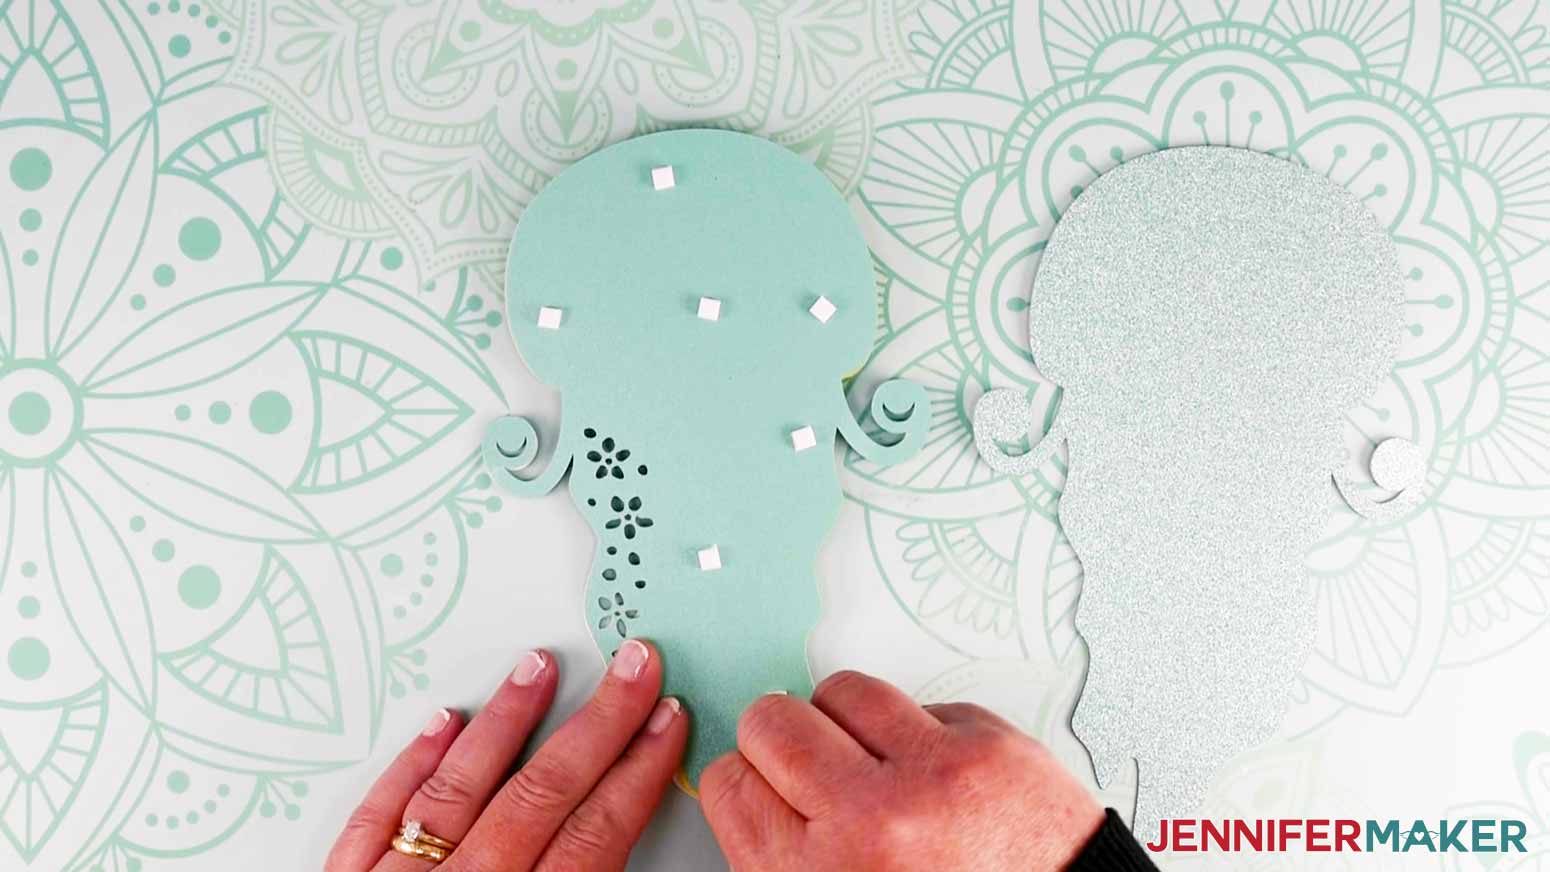
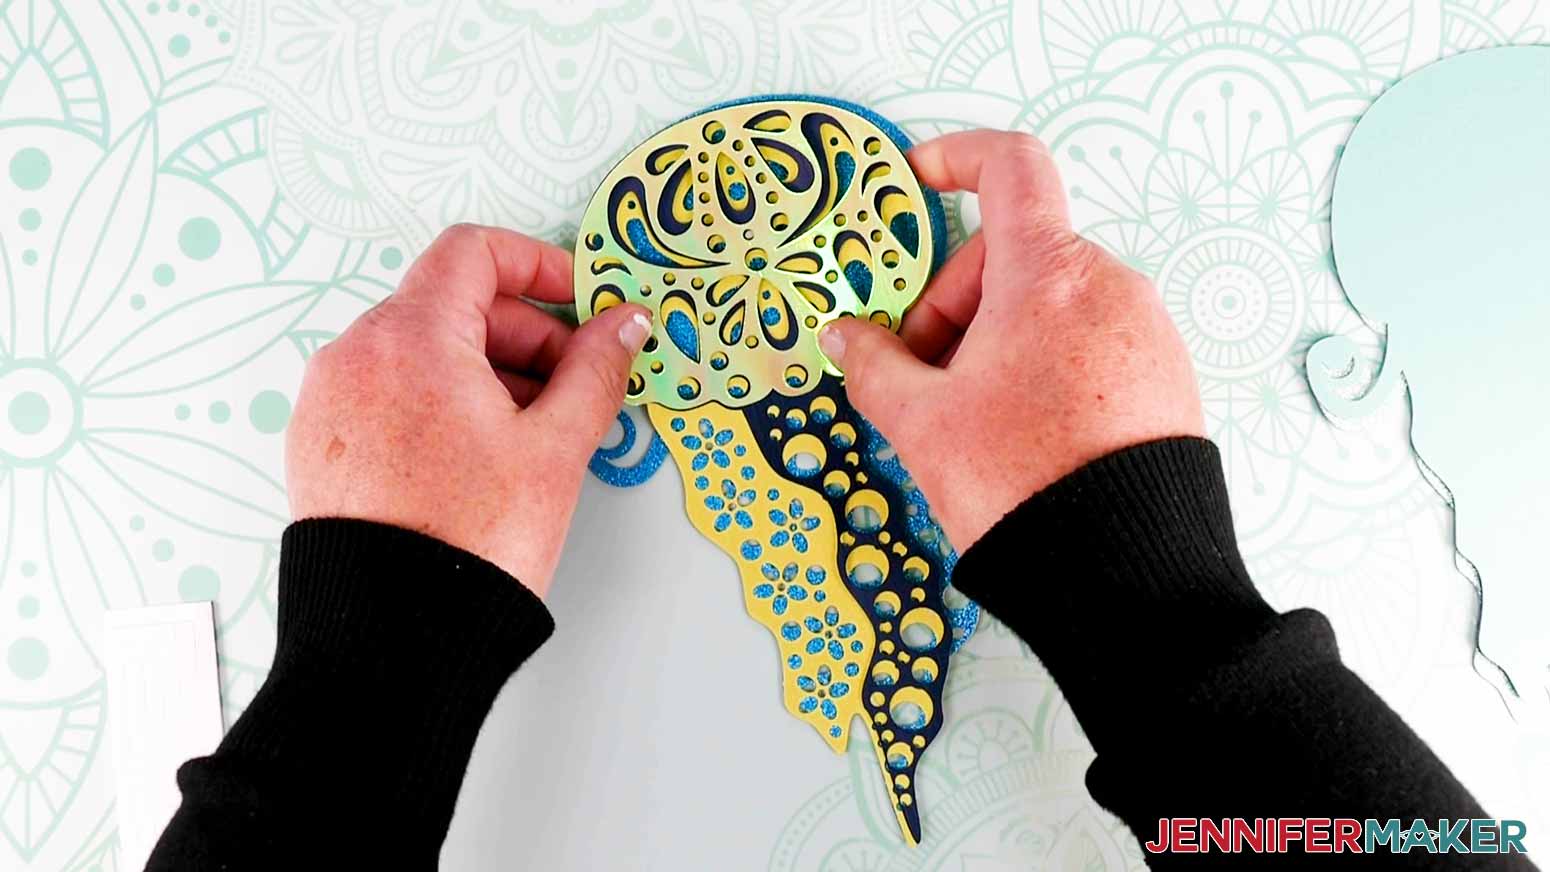
Place Layer 5 on top Layer 6 (the bottom layer) to complete the design.

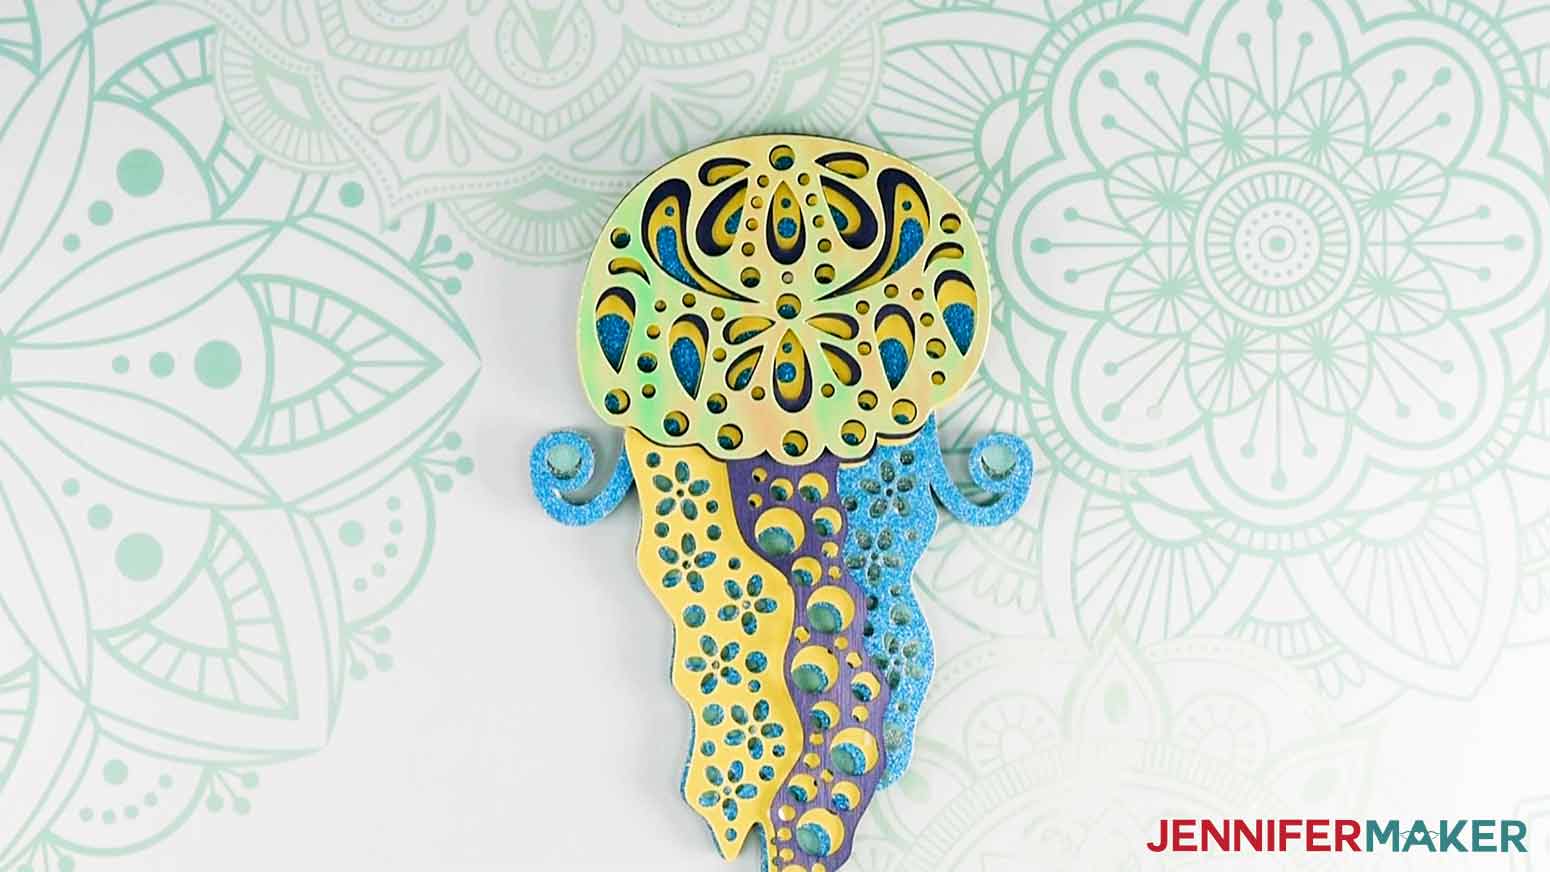
Now our Layered Jelly is complete! Next, let’s put it in the frame and add some embellishments.
STEP 4: ASSEMBLING THE SHADOW BOXES
Once the Jelly is assembled, let’s give it a home!
First, select a piece of cardstock from the water-themed H2O kit as your background.
Next, take the backer board of the frame off.
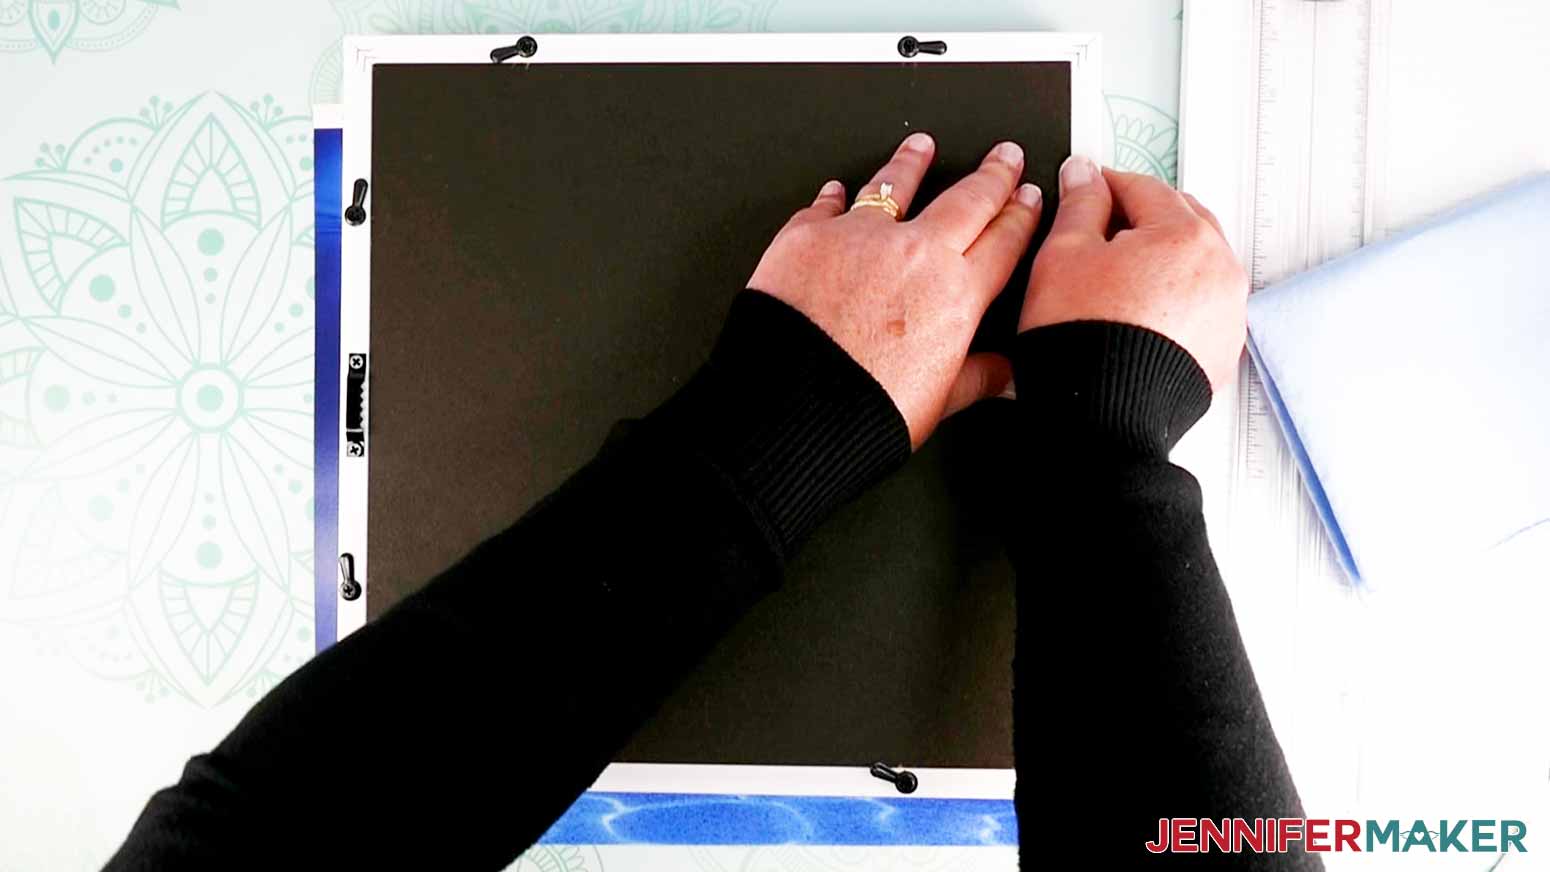
Place the shadow box's backer board over your cardstock and trace a line where you’d like to trim the paper.
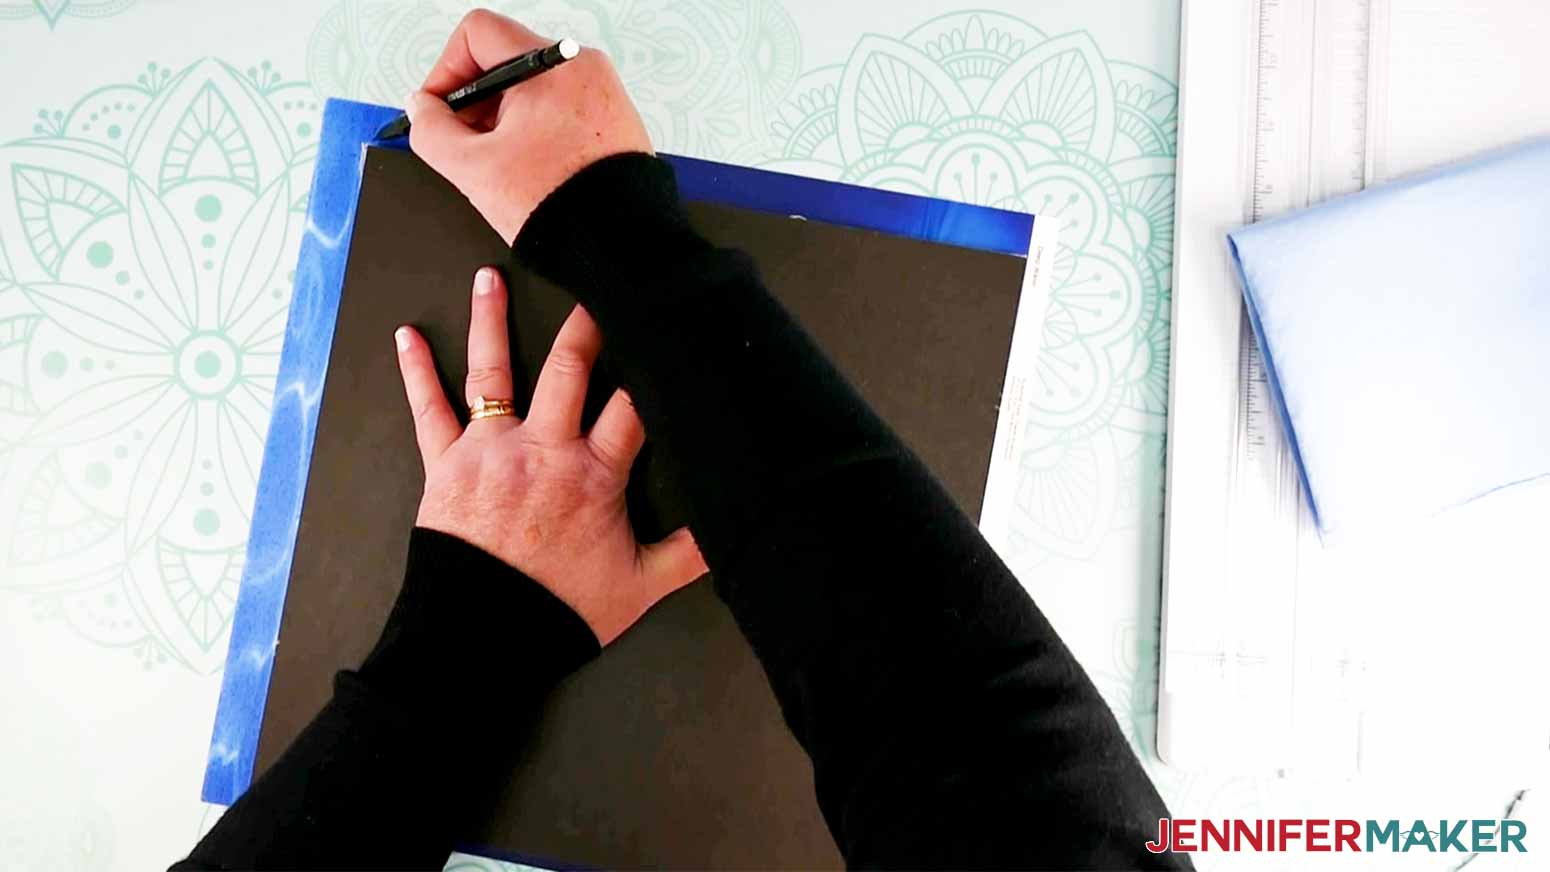
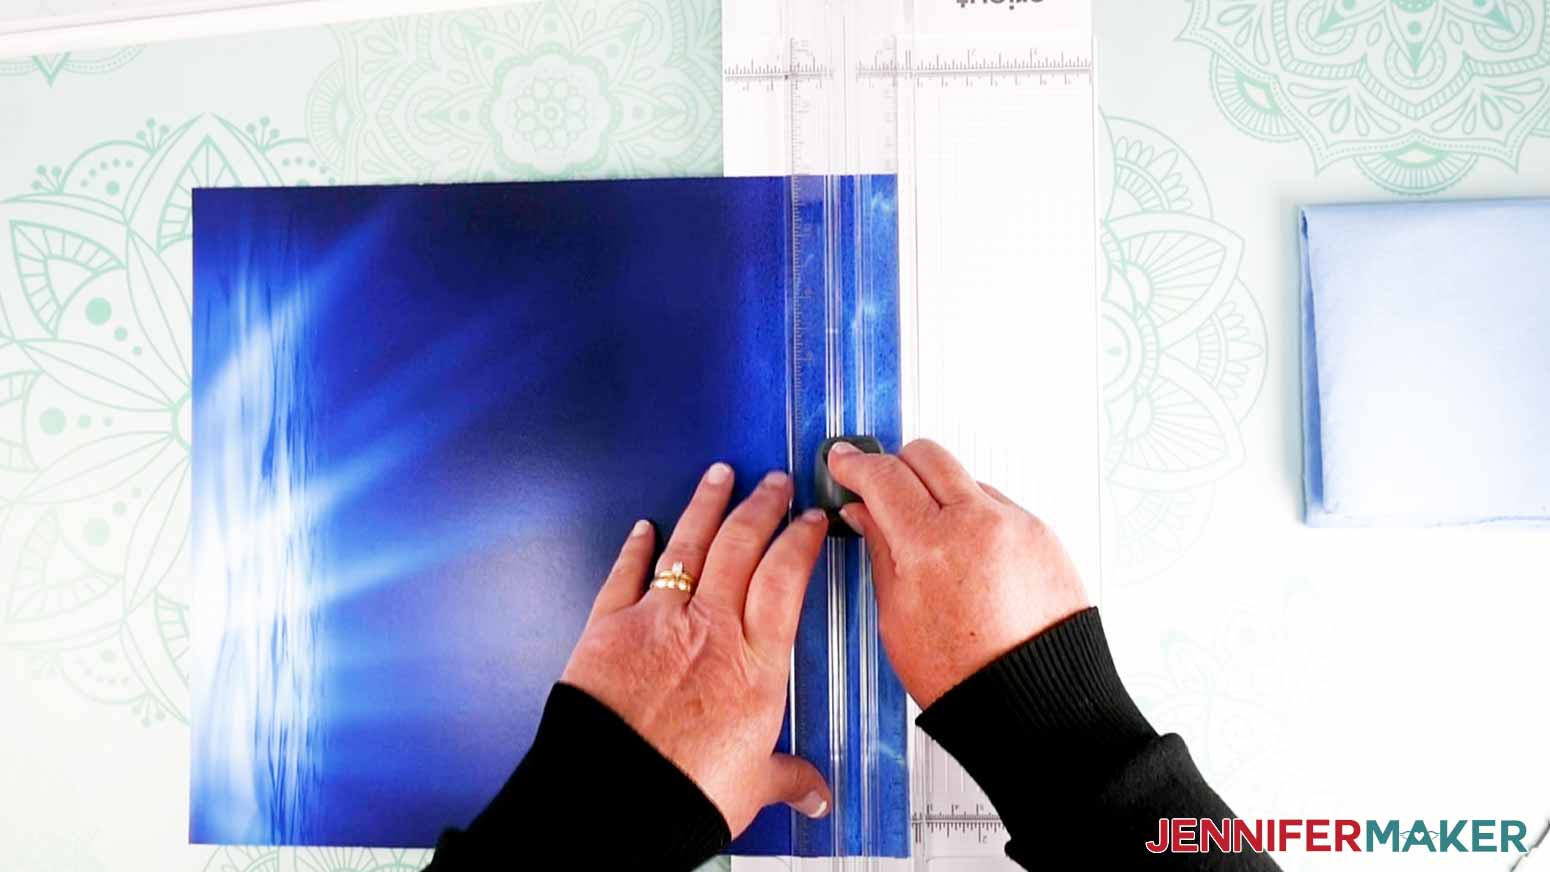
With a trimmer or scissors, cut the cardstock along your traced line.
Now, let’s attach our Jellyfish mandala to the background. Place adhesive on the back of your layered Jelly.

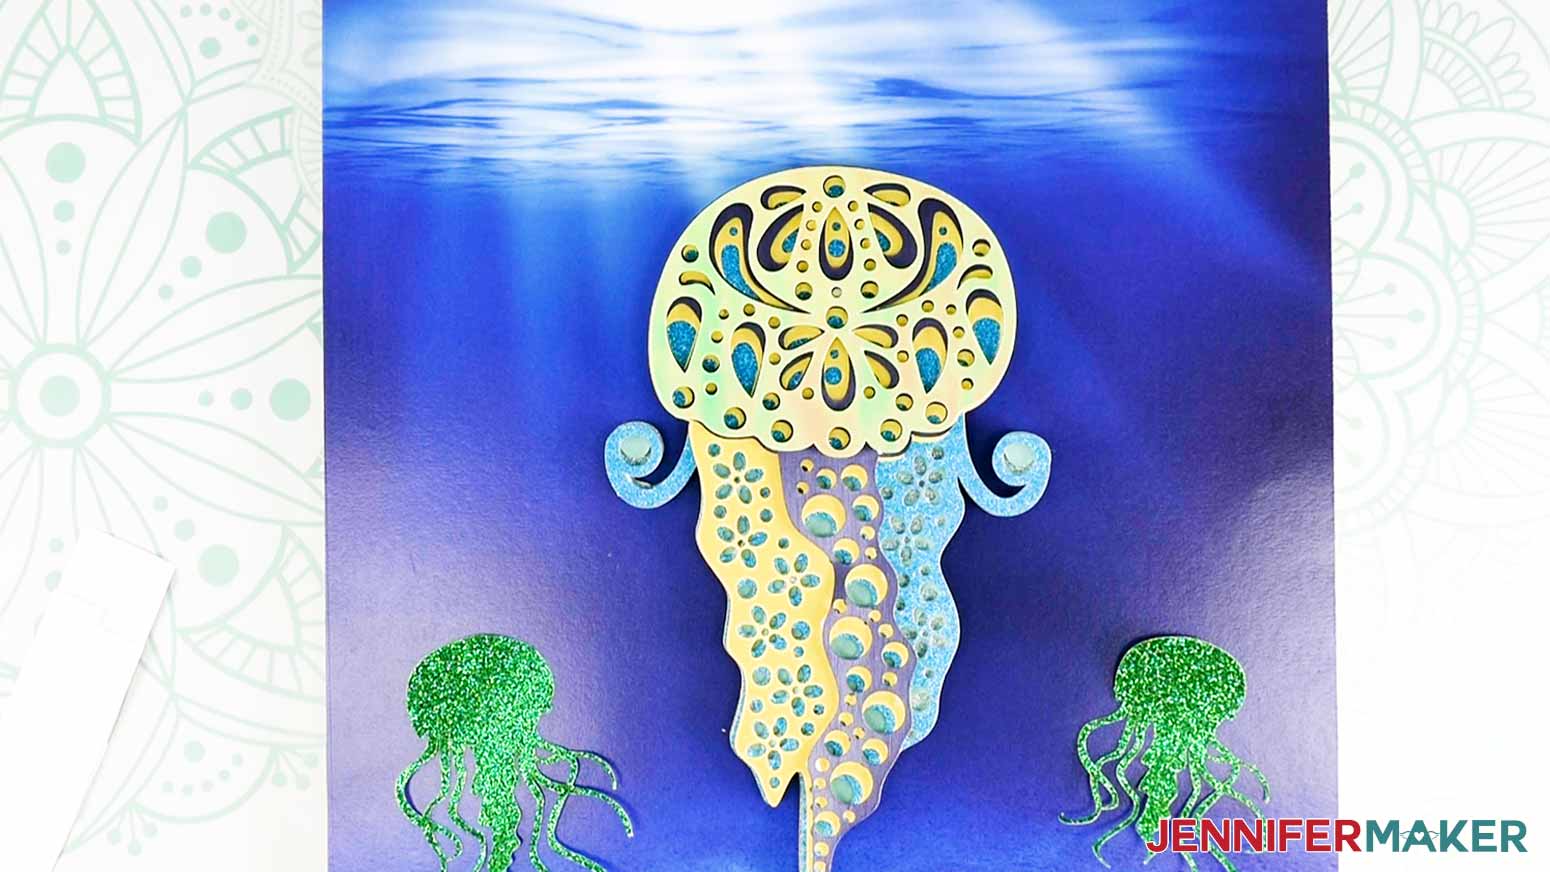
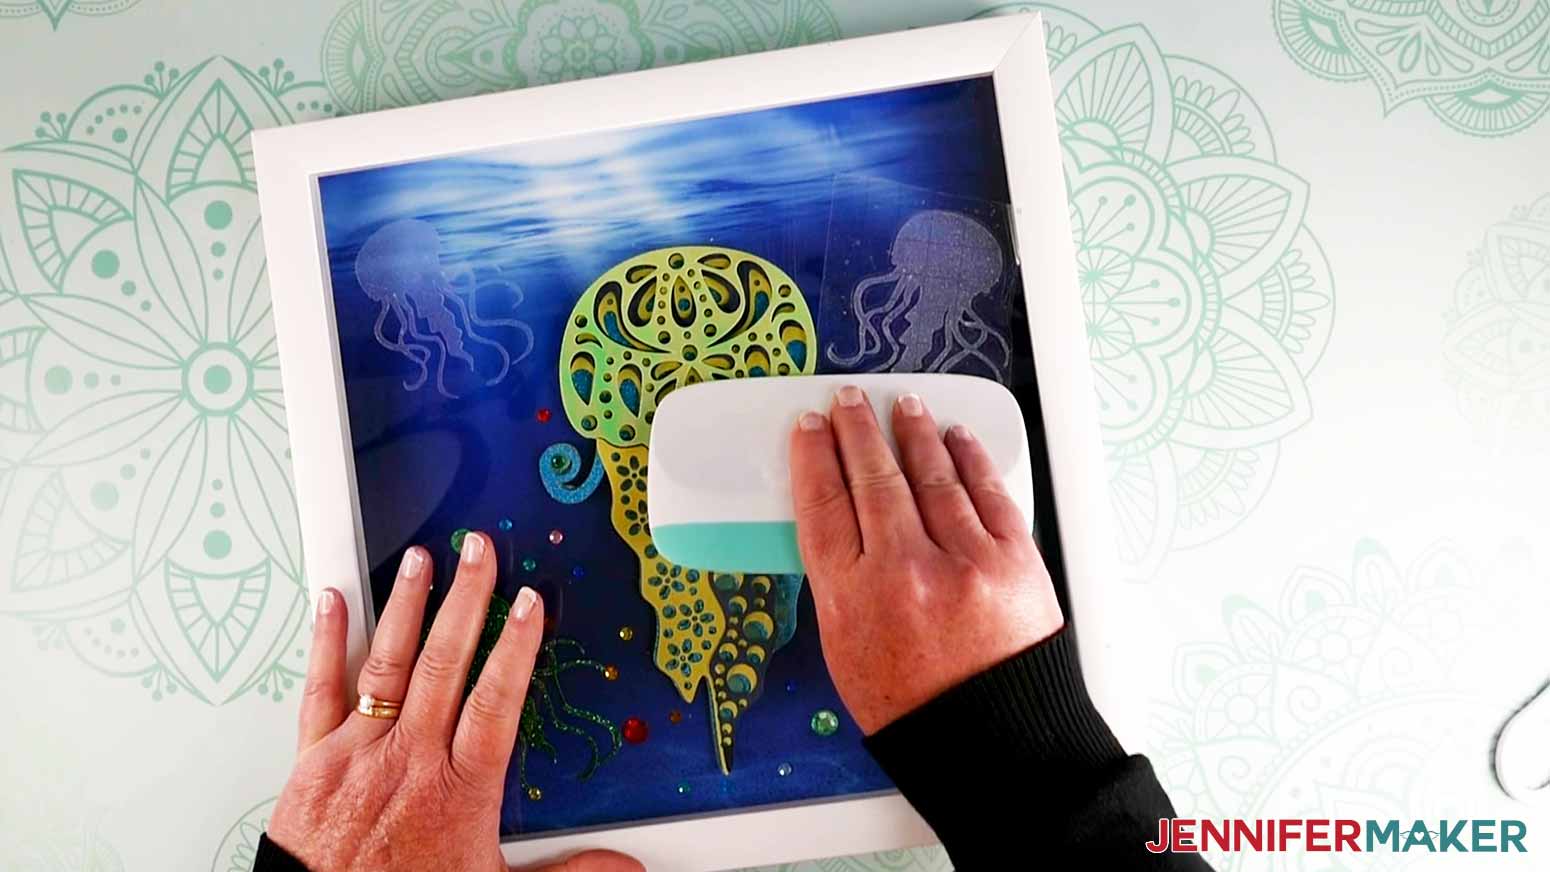
Center the Jelly on the background and gently press down.

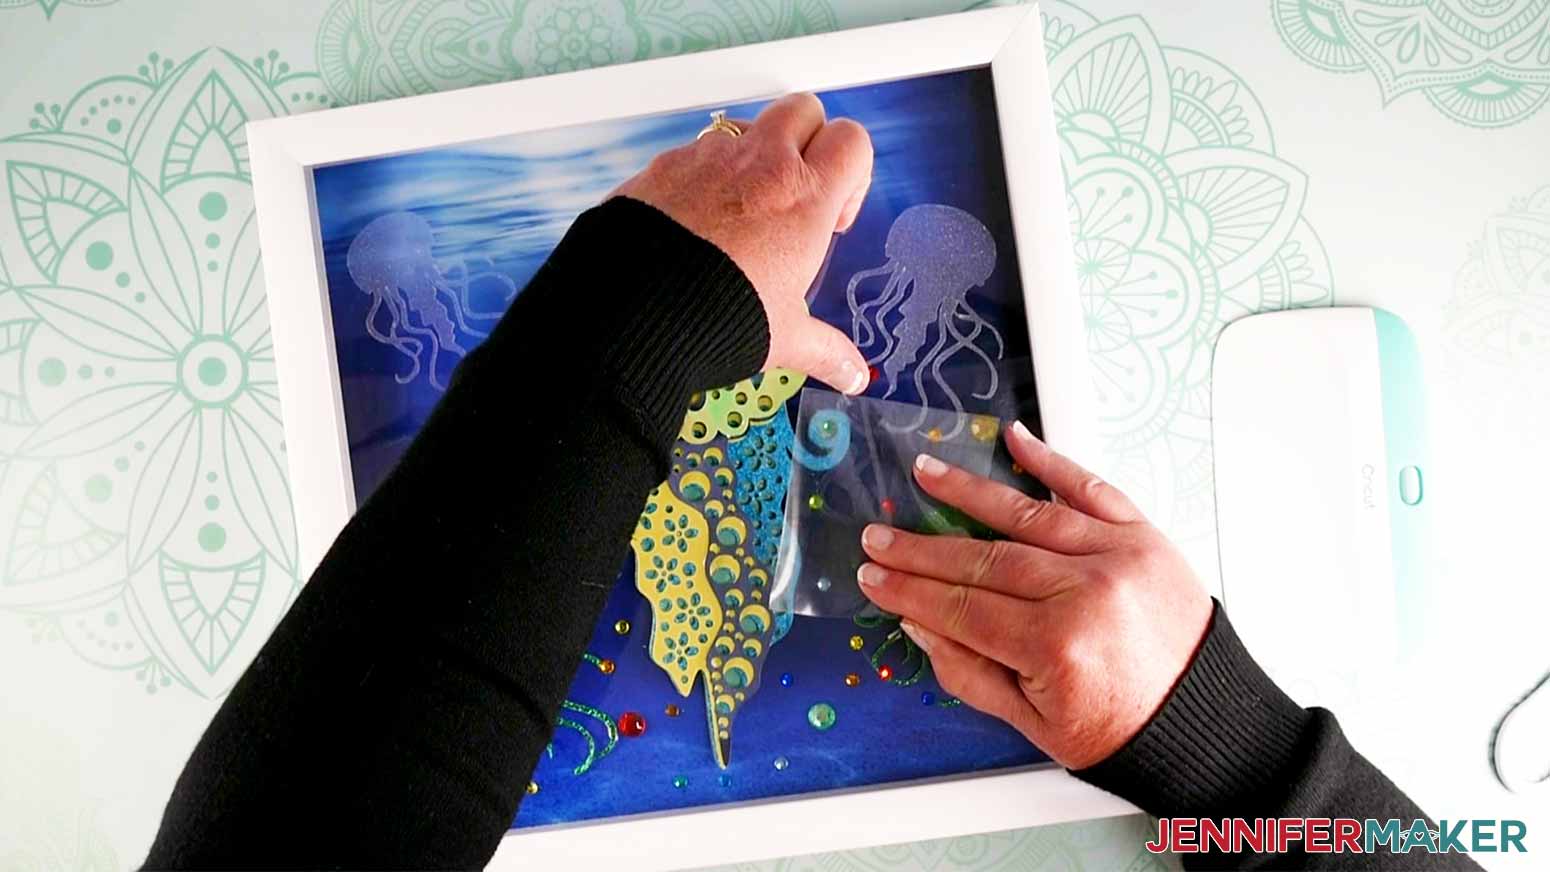
Put adhesive on the back of your small decorative cardstock Jellies and place them down on the background like this:
Decorate the background with the adhesive jewels. I added a couple right on my layered Jelly, too.
We’re almost done! Assemble the frame and close the tabs on the back.
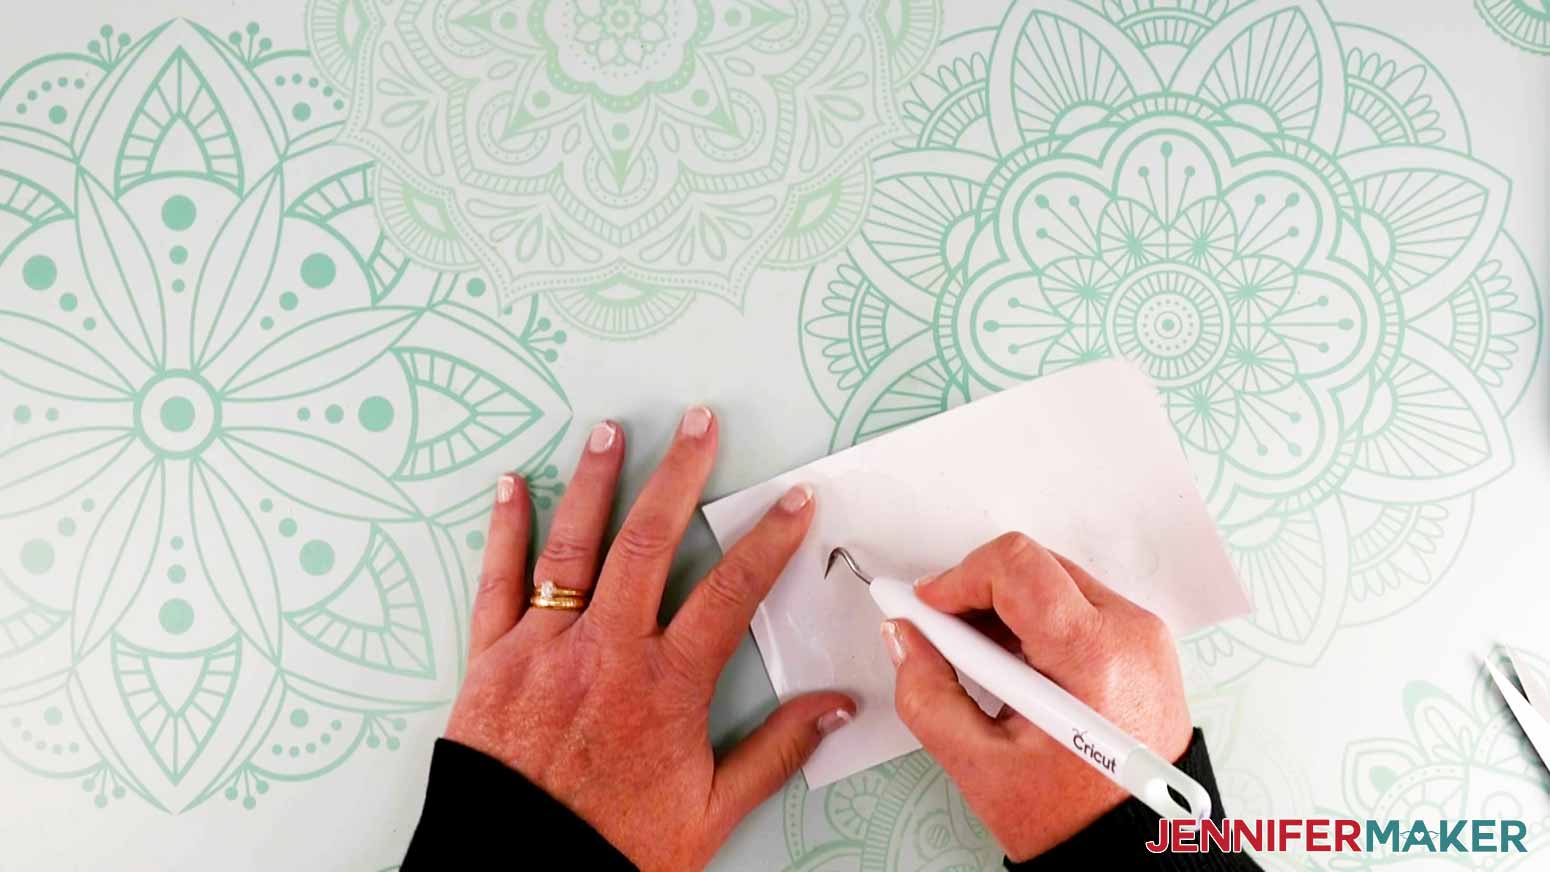
To put our frosted vinyl Jellies on the shadow box glass, we’ll first need to weed them, which means to remove all the extra bits that you don’t want to transfer to your frame. You might be able to do this with your fingernail, but you might want to use a weeding tool (I do).
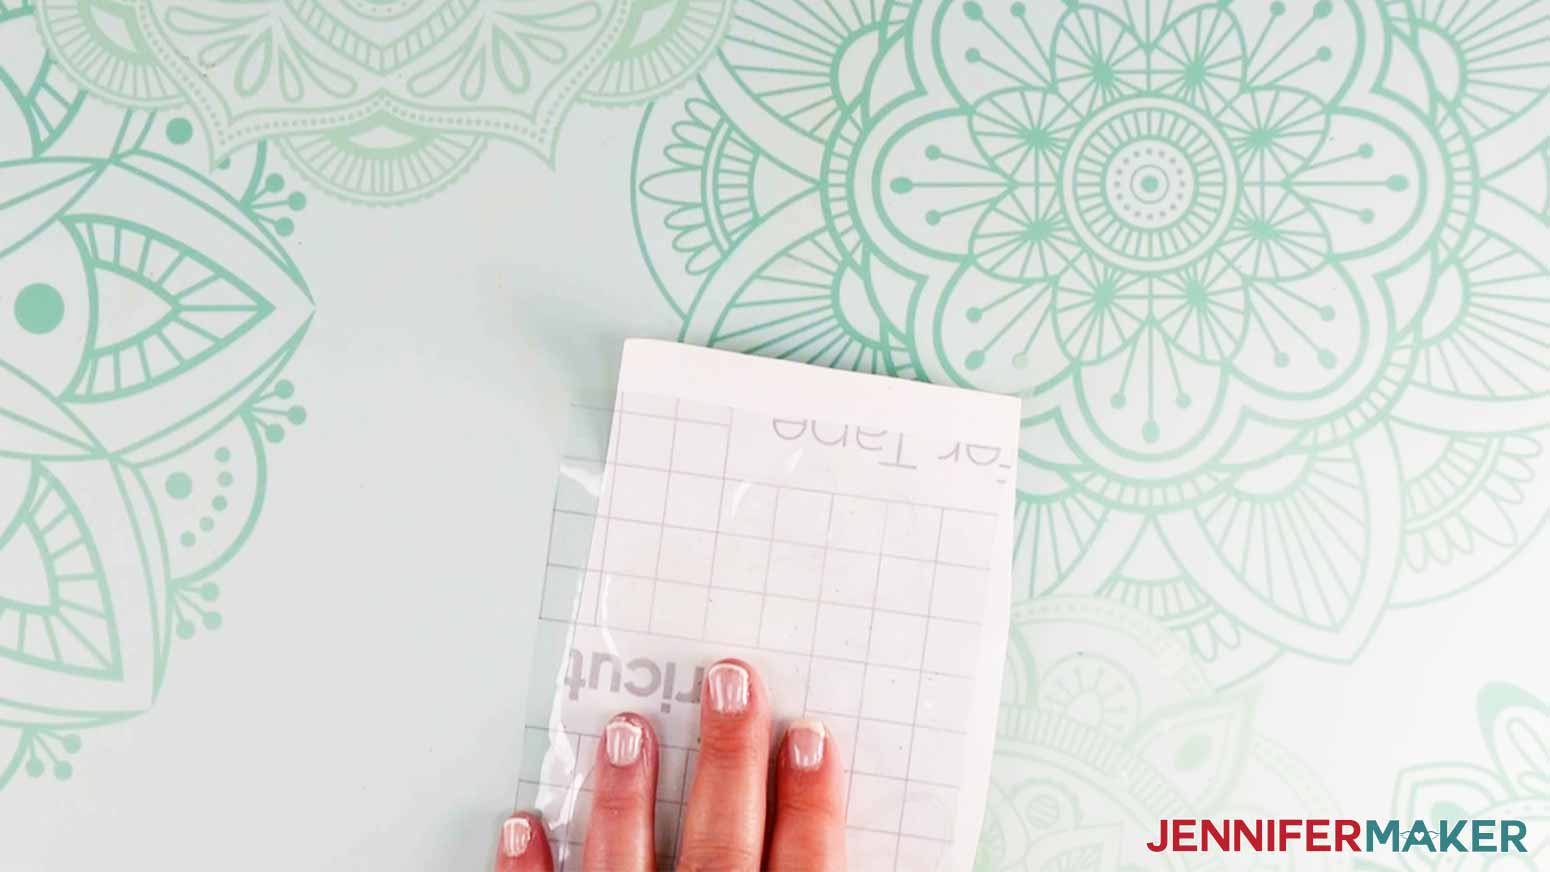
After the vinyl is weeded, you need a piece of transfer tape to transfer your design to the frame. Cut out a piece of transfer tape that is slightly bigger than your design. Take the backing off of the transfer tape and place it sticky side down on the Jelly vinyl decal. Use a scraper tool to burnish the tape onto the vinyl. To do this, start at the center and move outwards so that you don’t get creases and bubbles in your transfer tape. This is my vinyl with the transfer tape applied.
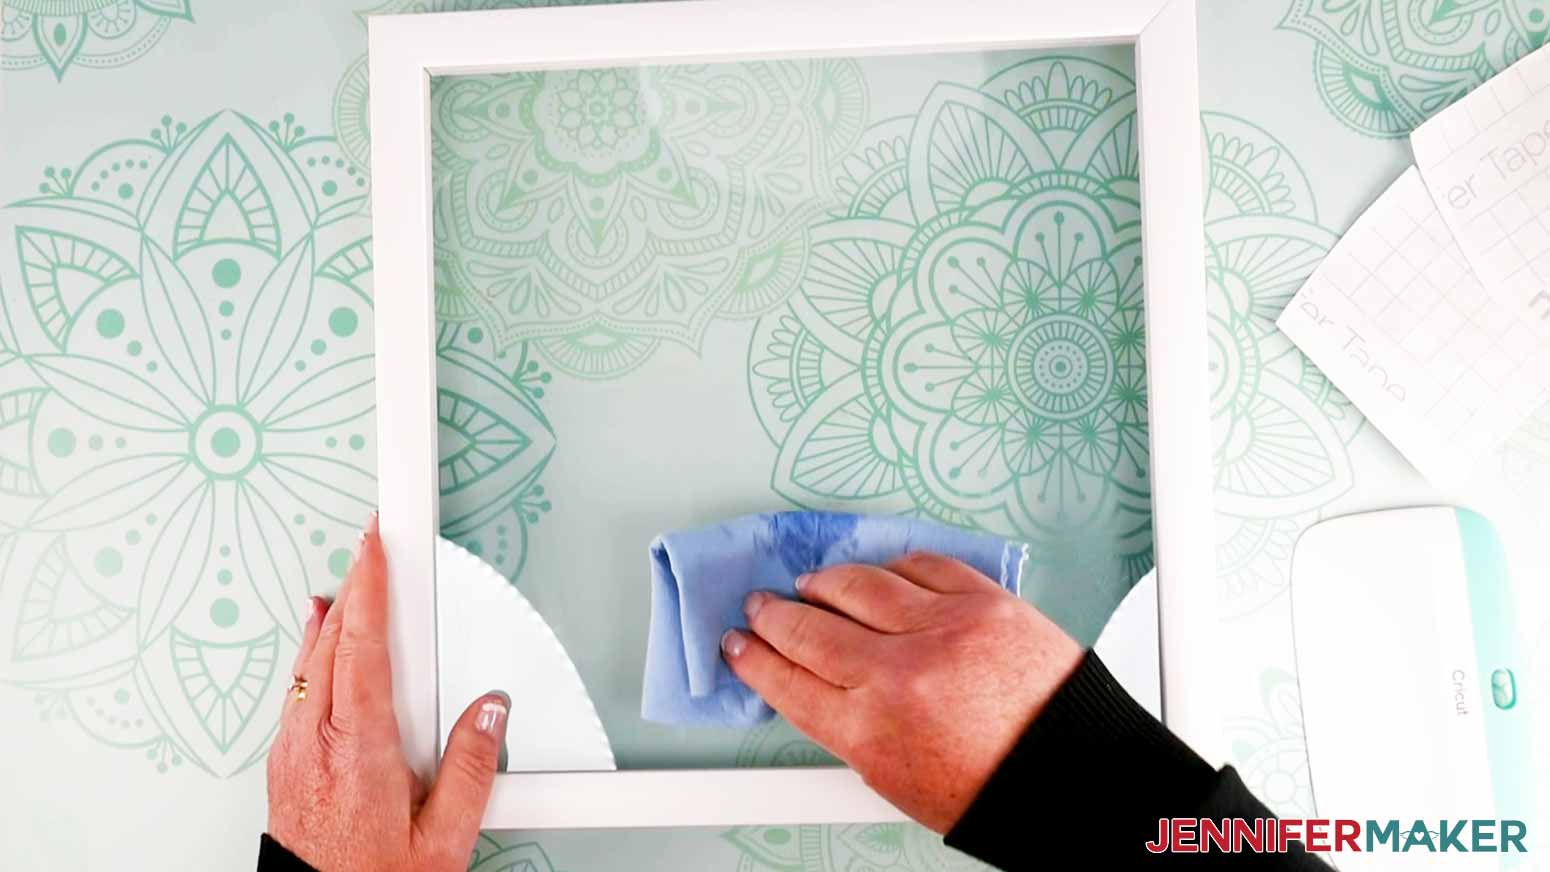
Clean the surface of the glass with isopropyl alcohol. This will remove any oil or dirt and get the surface as clean as possible -- and it will make a difference in making sure the vinyl decal sticks and stays stuck. We want our decals to stick as well as possible, right? It’s no fun putting something on and having it come right off.
Apply the vinyl to the glass and smooth it down. You may want to use a scraper to help remove any bubbles.
Carefully remove the transfer tape, making sure the Jelly decal remains stuck on the glass.
Repeat this process to attach the second vinyl Jelly.
Now, add a few more jewels to the glass and hang your frame on a wall!
STEP 5: SHOW IT OFF
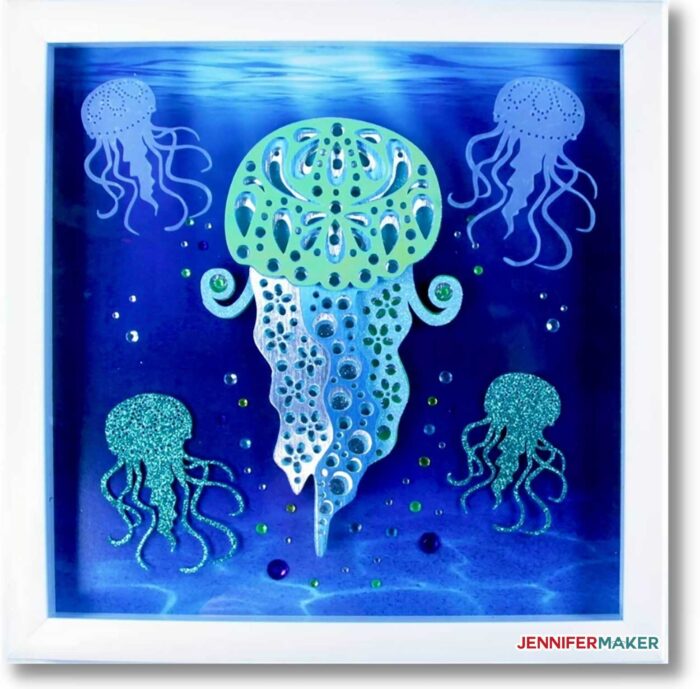
This is what my framed Jelly looks like when it's finished!

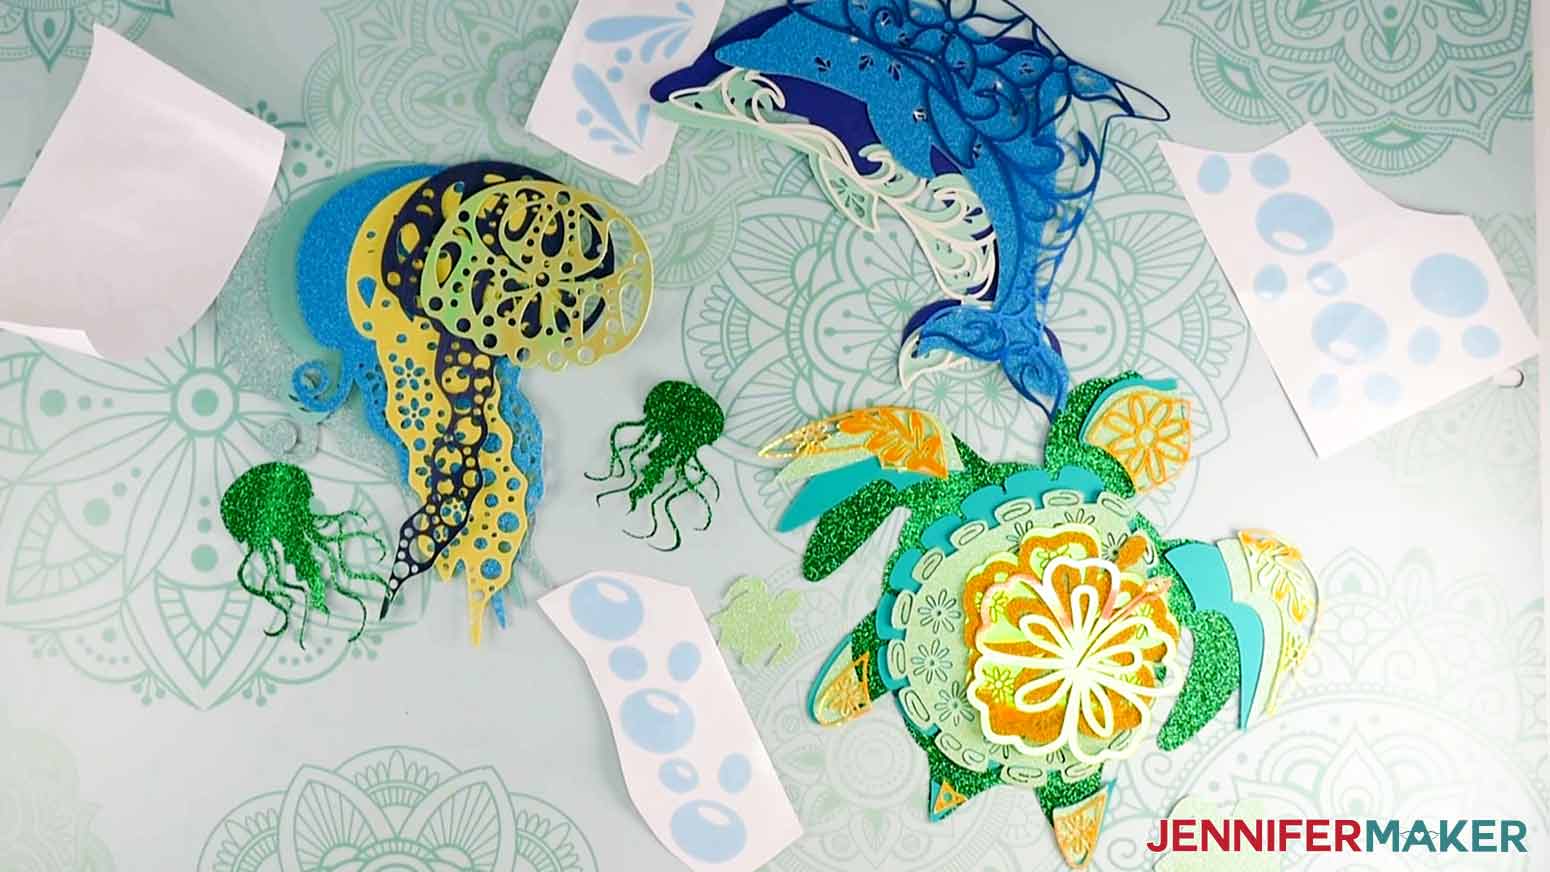
And this is what all my layered animals look like before they are framed.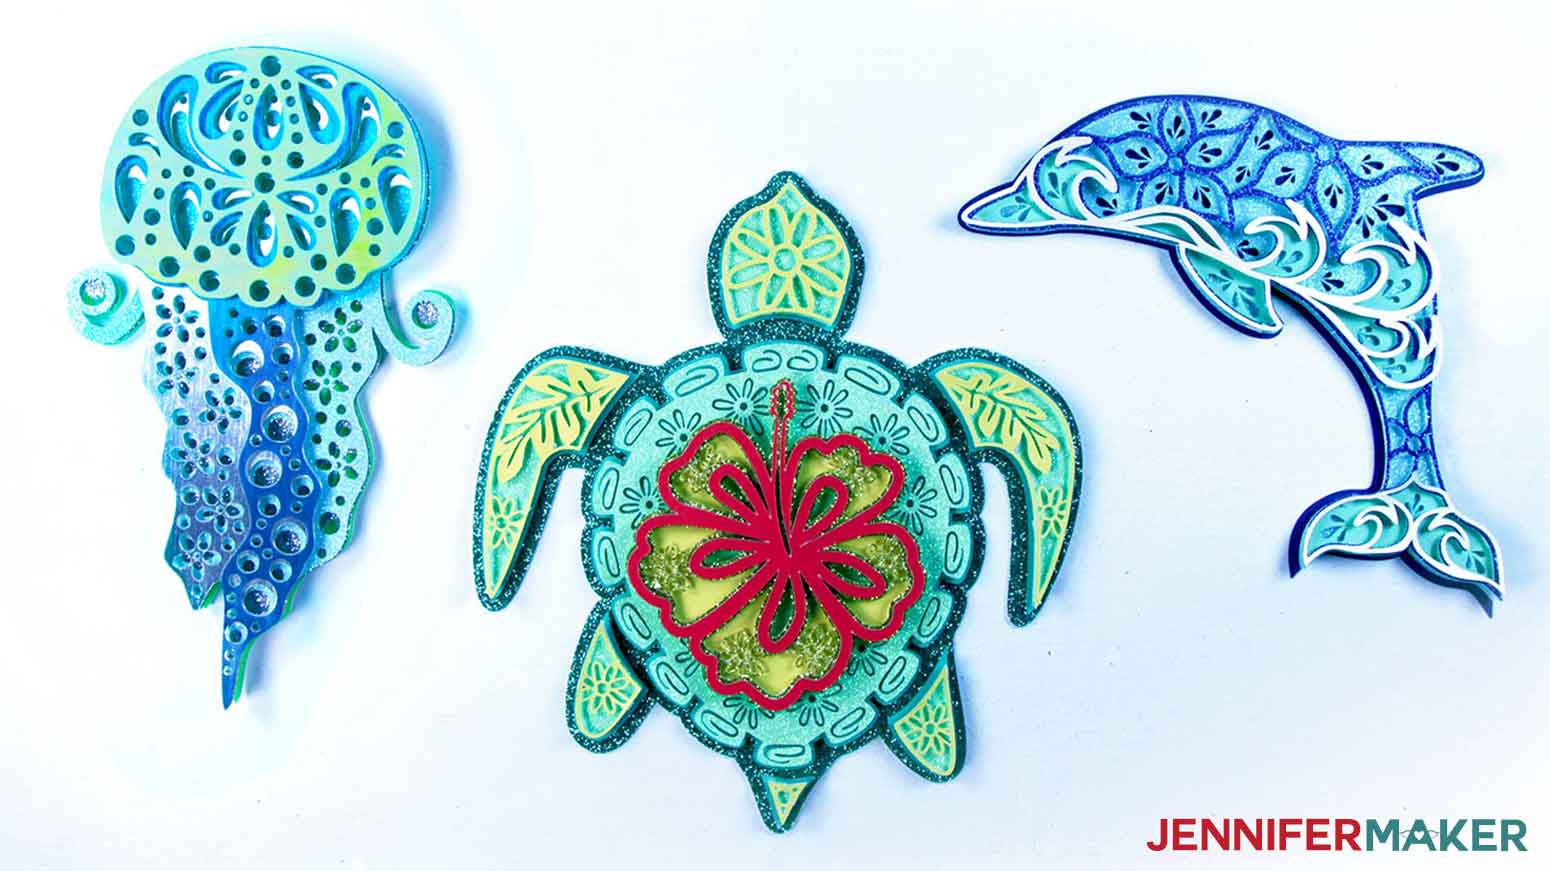
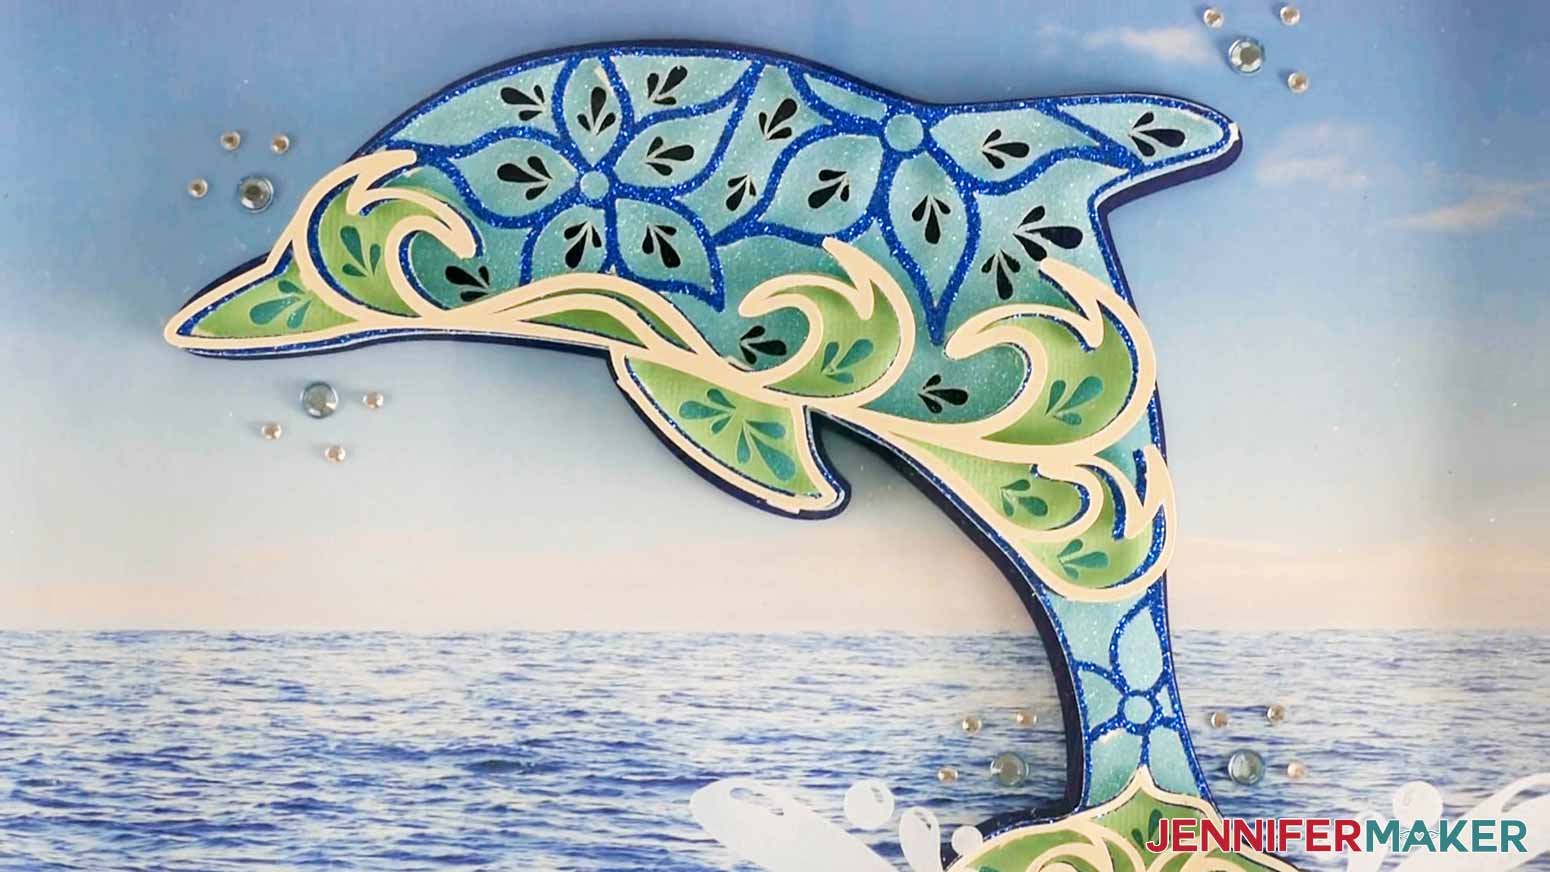
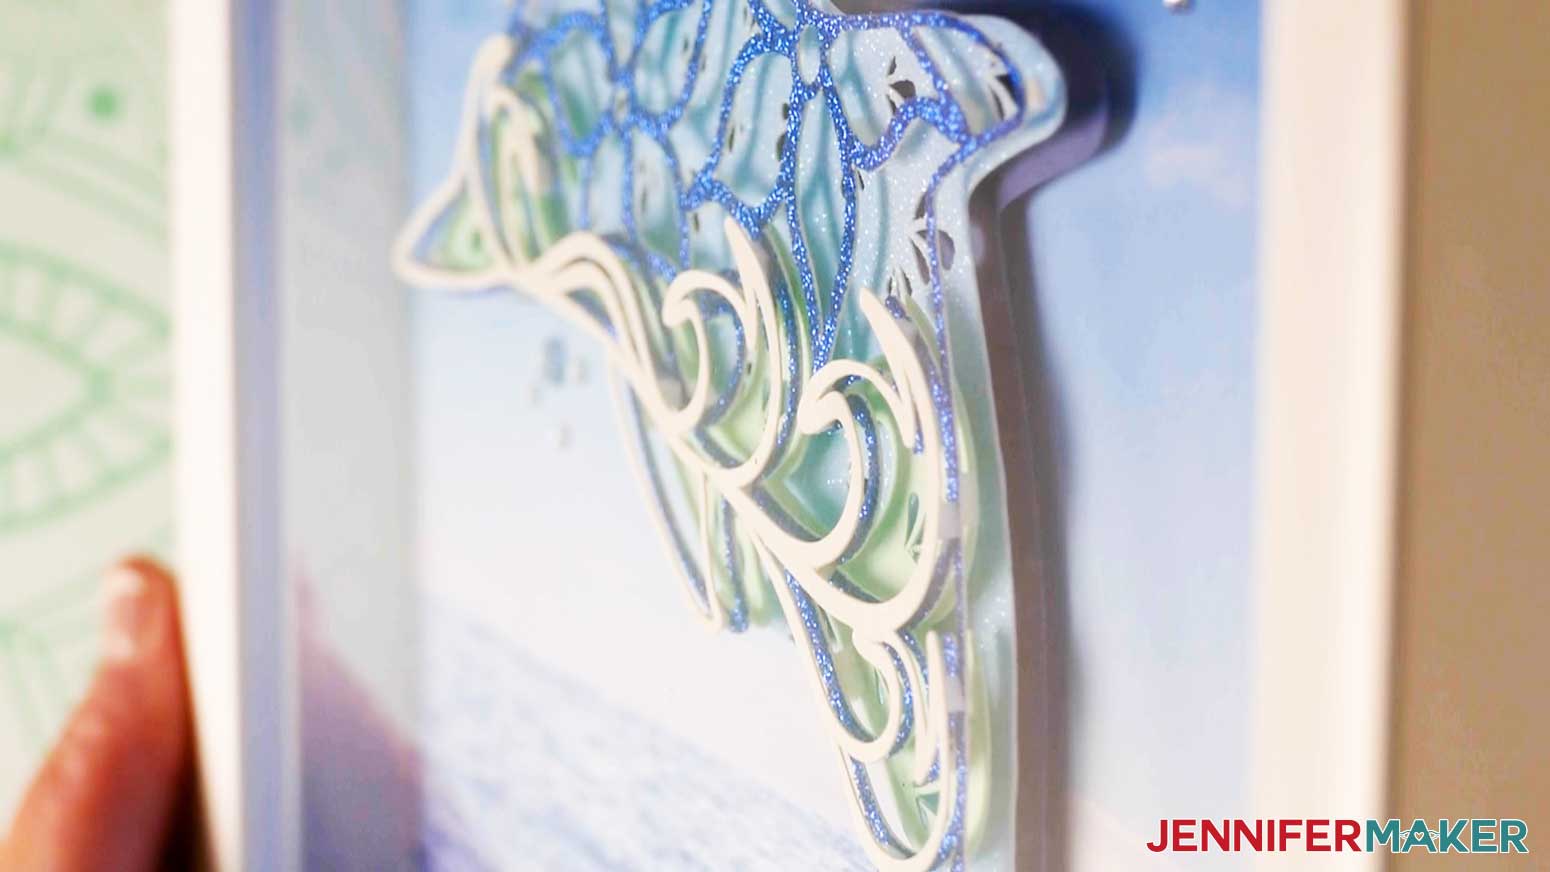
And here is a close-up picture of the dolphin layers:
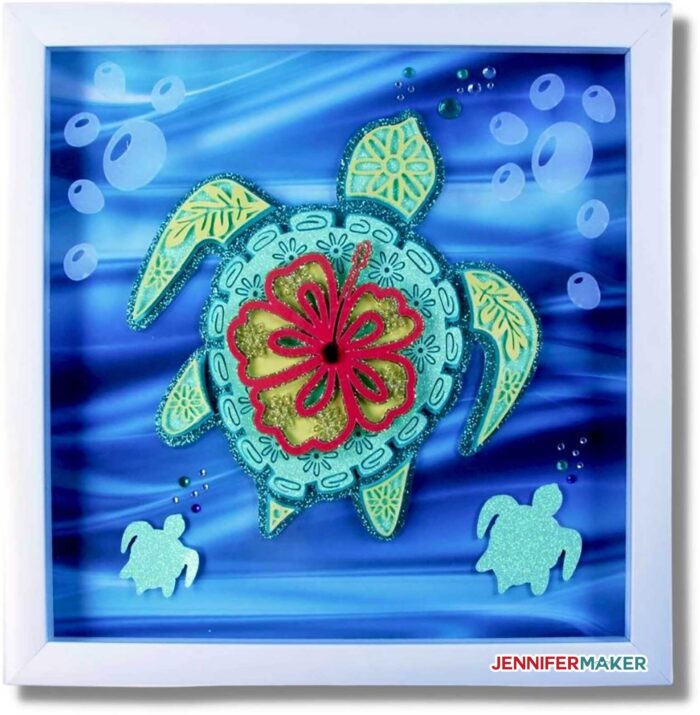
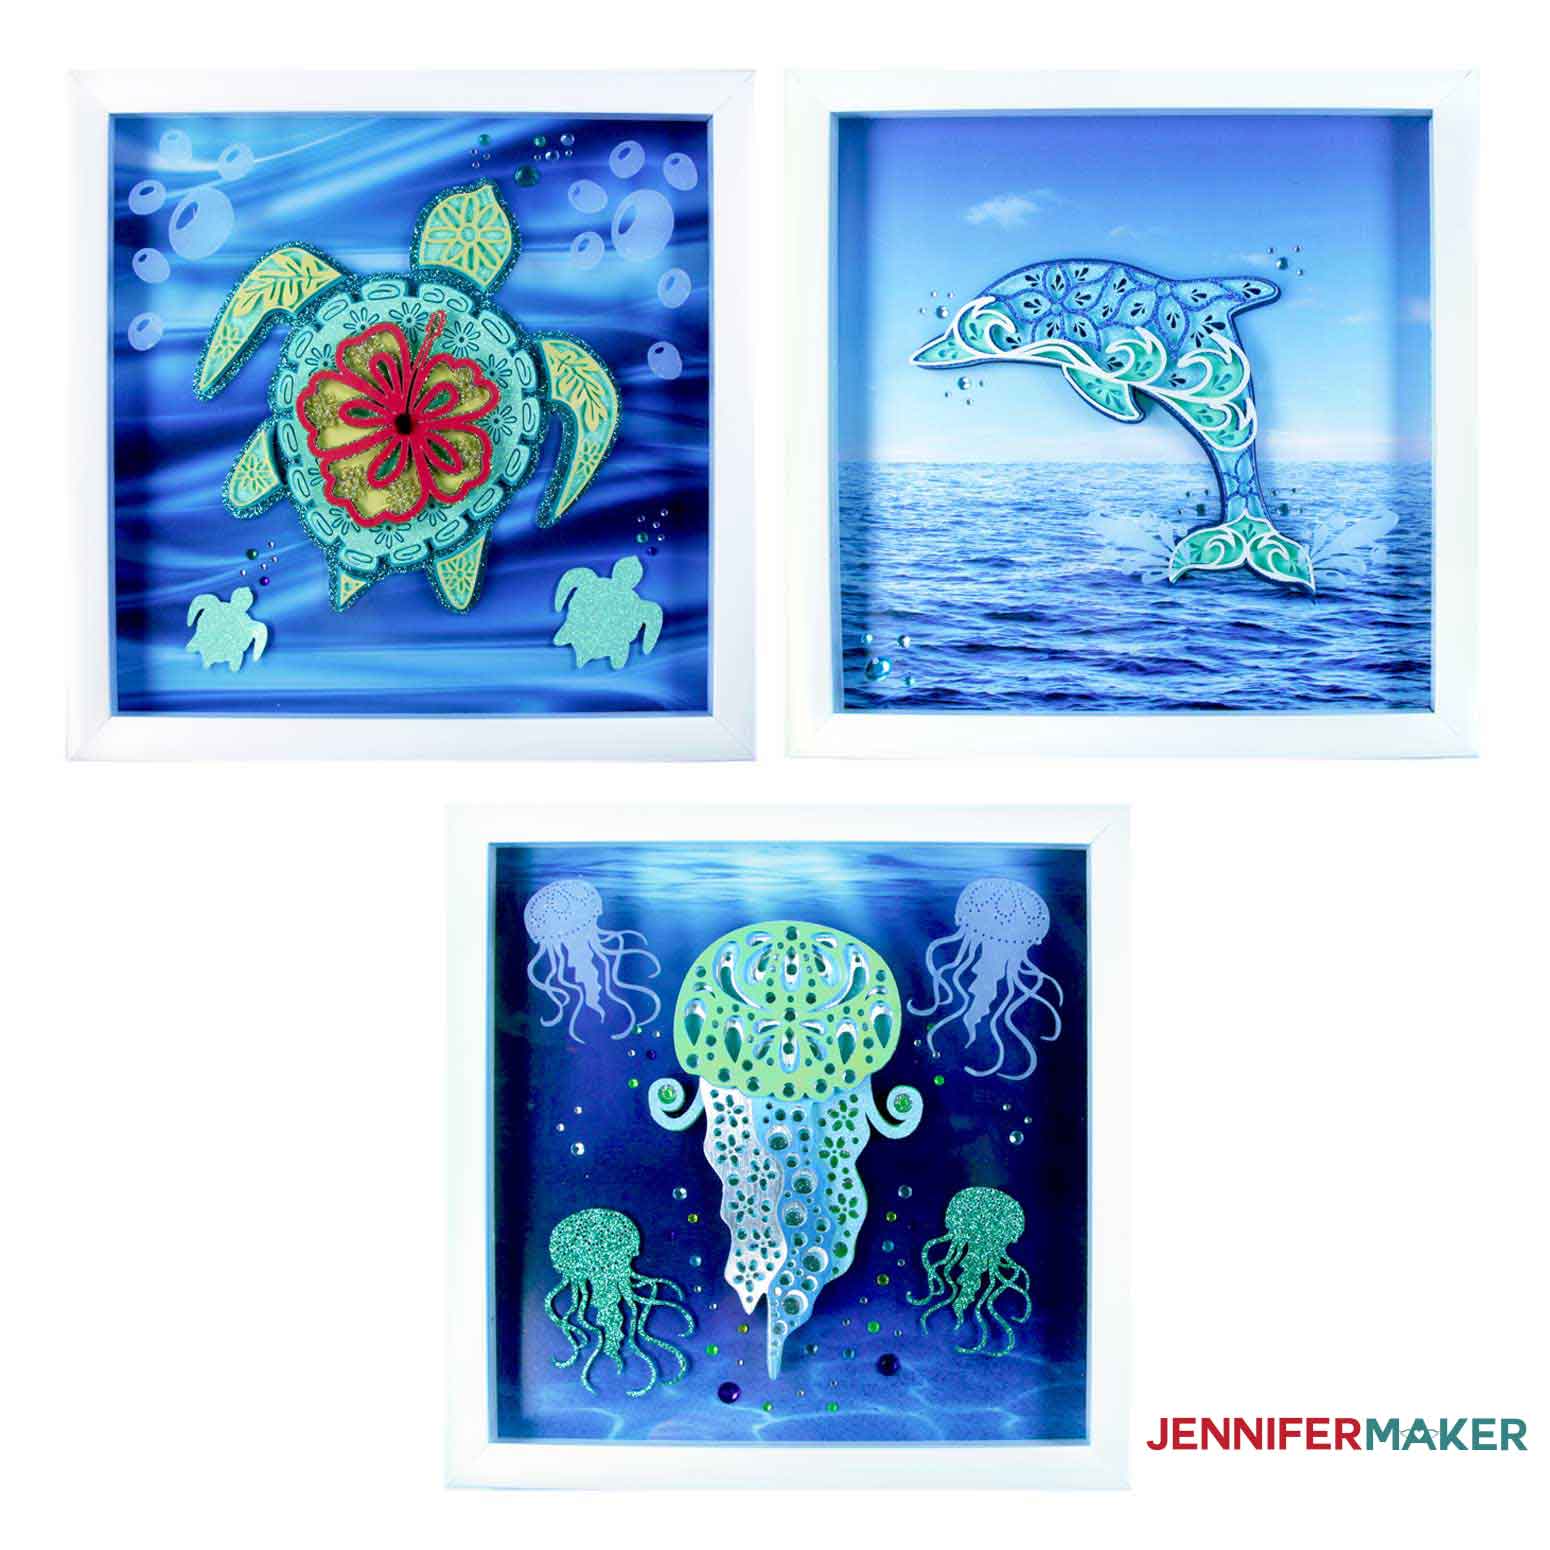
This is what all my Layered Sea Animals frames look like after they are put together!


Notes
The final size of each framed layered mandala art piece is 12x12 inches.
Recommended Products
As an Amazon Associate and member of other affiliate programs, I earn from qualifying purchases.

Answers to Your Questions About How to Make Cute Layered Sea Animals
Q: What kind of paper do I use?
You can really use any 65 lb-80 lb. or higher cardstock to make layered sea animals — it’s your choice what color and texture you want to use. If you want to use the exact same materials I used, check the materials list above as I used a variety of glitter cardstock, shimmer cardstock, textured cardstock, and even foil kraftboard. I recommend you watch my Amazon Live “Favorite FInds” episode on the best tools and supplies for making layered mandalas here!
Q: How do I keep my layers stuck together?
I used double-sided foam adhesive squares applied to the underside of each layer, which gave the layered sea animals a cool look with depth and shadow. But you could also use adhesive foam circles or 3D zots to achieve a similar effect. And you can also just keep the layered flat against one another by using tacky glue or spray adhesive instead. There are no rules, just what you prefer!
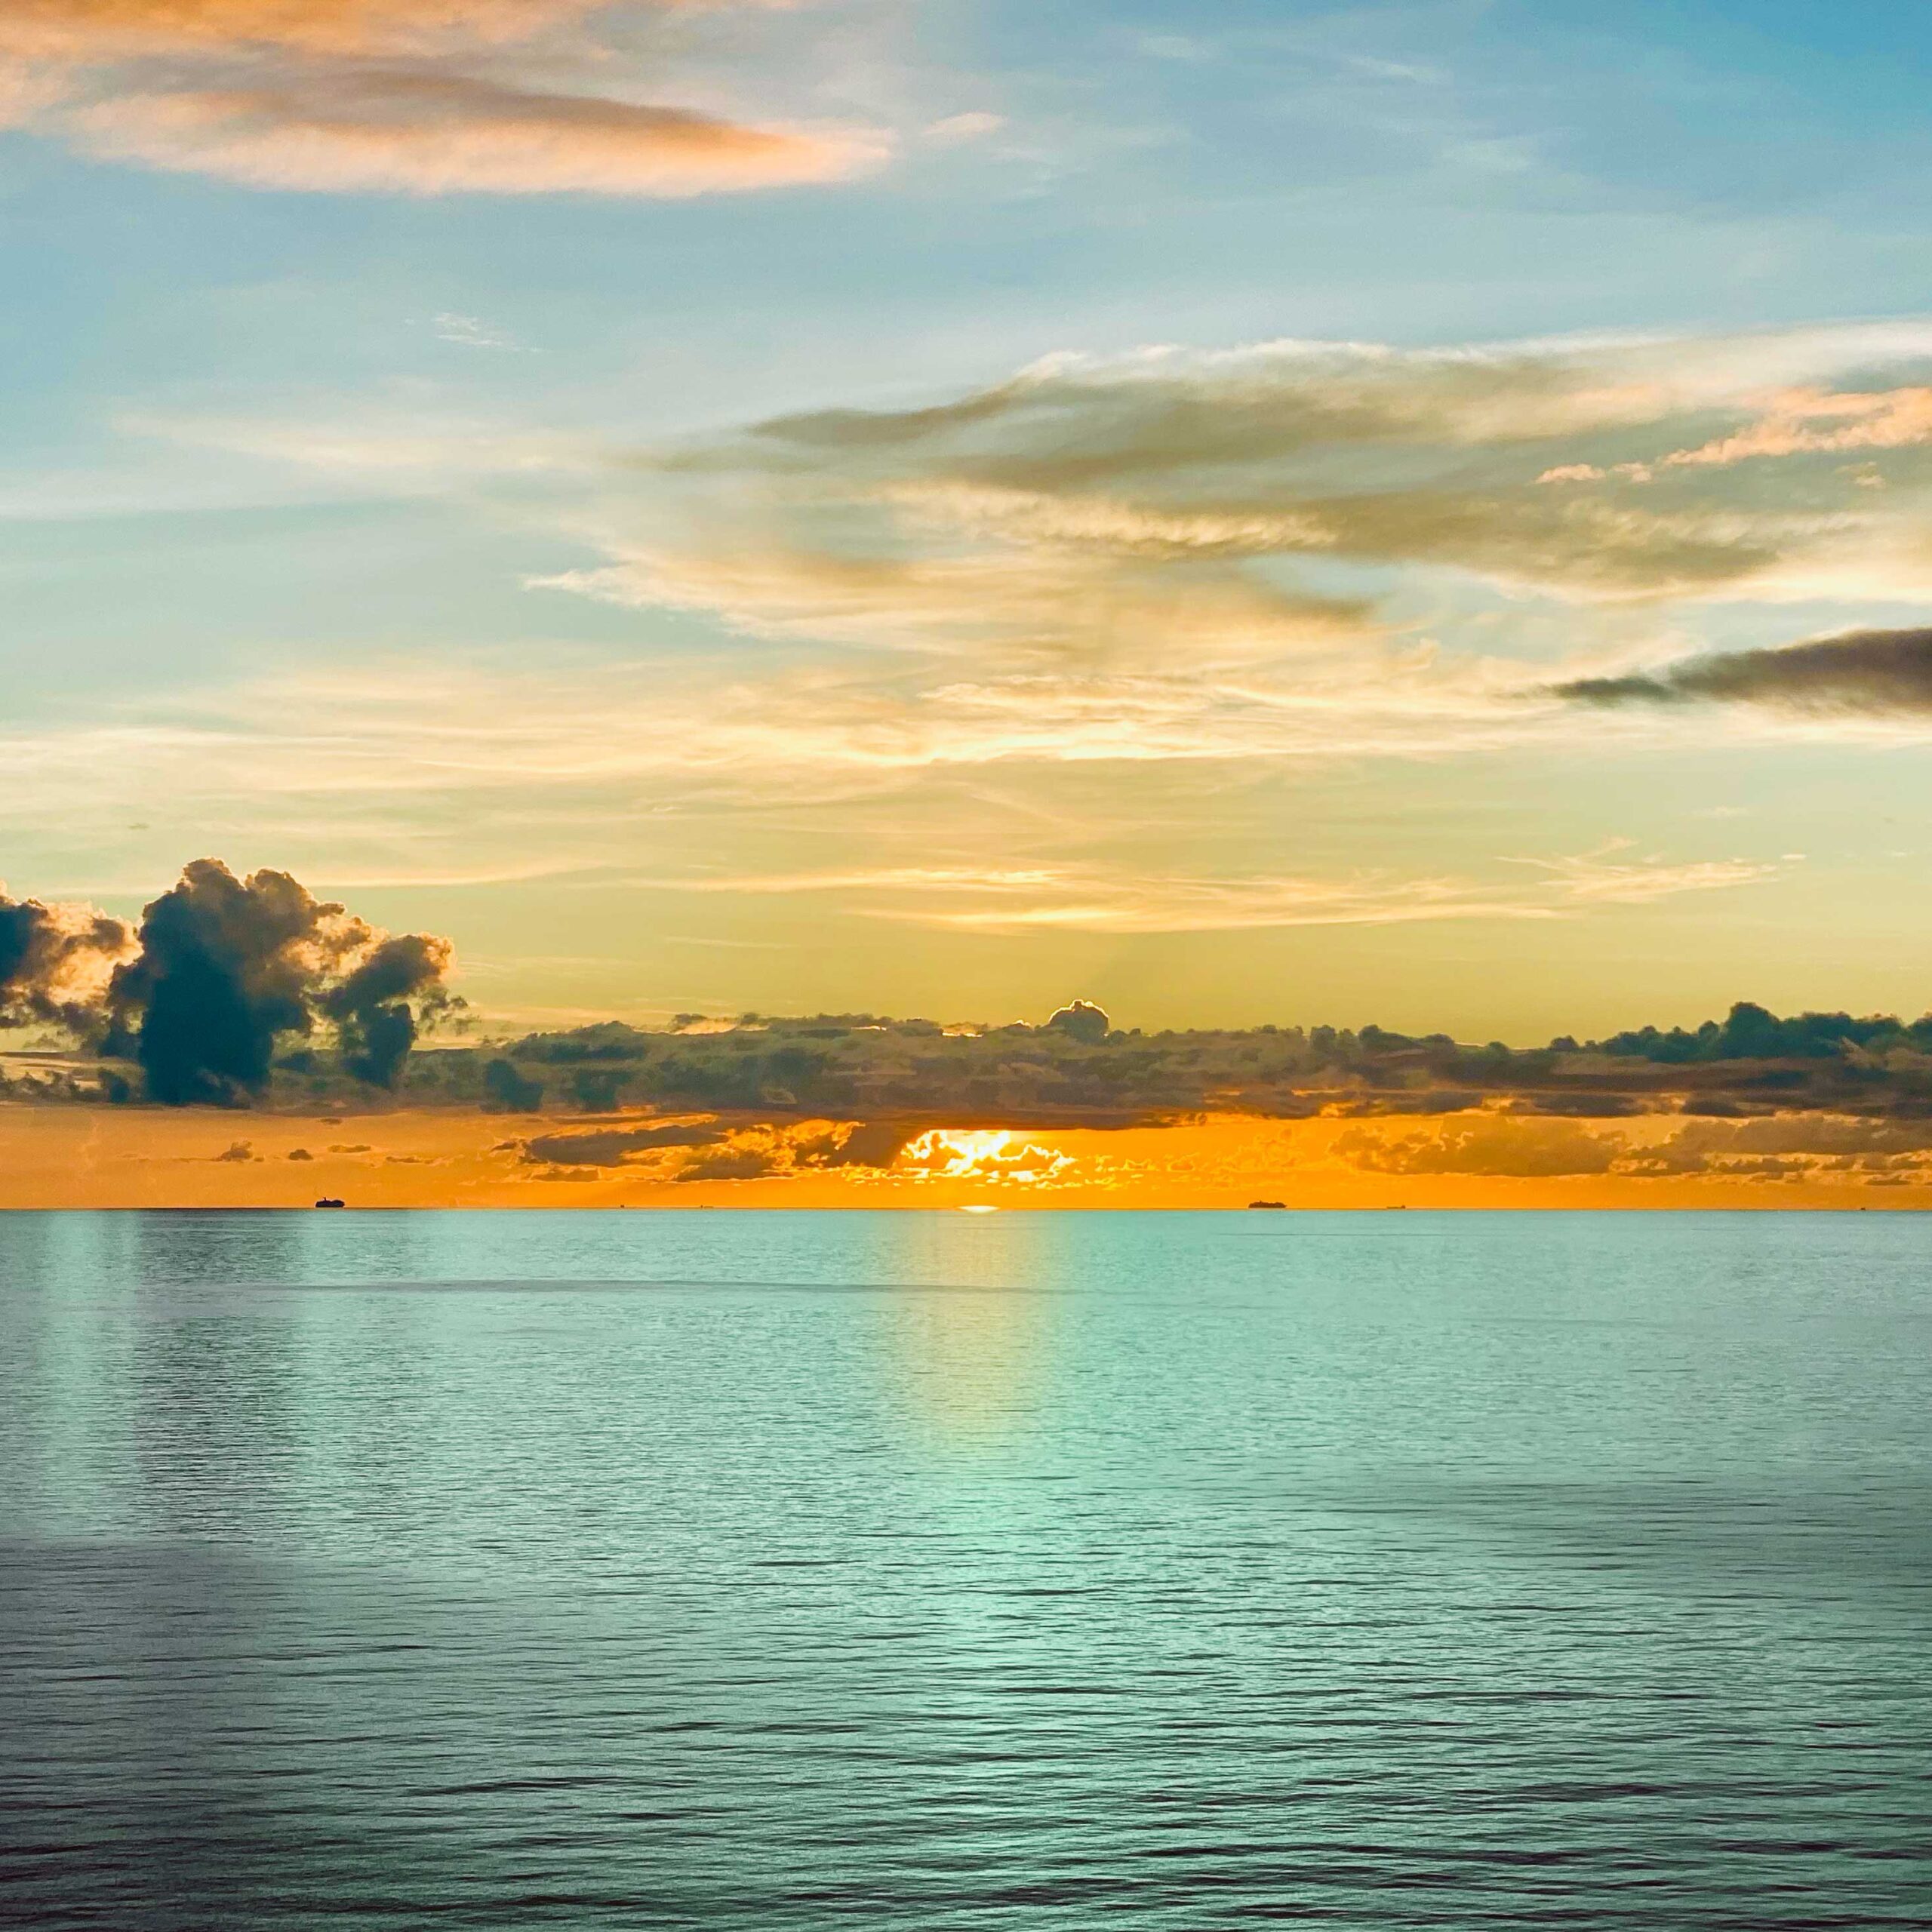
Q: What can I use instead of those water-themed papers behind my layered sea animals?
Any other piece of cardstock or foil kraft board in the right size will look amazing! Or why not get creative and paint a sheet of watercolor paper with a little watercolor for a beautiful, watery effect? Or you’re welcome to use a photo I took myself from my recent cruise — this is a sunset on the Atlantic ocean (click it to download a high resolution photo suitable for printing):
Q: Can I cut these sea animal mandalas on a Cricut Joy?
Yes! You will need to resize them to fit on a Cricut Joy mat — the maximum width for cutting on a Joy mat is 4.25”. You may want to discard the top layers of the Jelly and Turtle because they will be too detailed and difficult to use once they are scaled down to cut on your Joy.
Q: My cardstock keeps ripping on the mandala’s intricate cuts. What can I do?
Be sure you’re using a clean and sticky machine mat, good quality cardstock, and a clean blade. See my Cricut Cutting Problems post for all the tips I use to get clean cuts everytime.
Q: My score lines are not pre-set like you mention in your assembly video. What do I do?
You will need to select each layer that should be a score line, change it to score in the Operation menu, then attach the score line to the base layer. See my scoring tutorial for more details.
Get my free SVG files to create beautiful Layered Sea Animal Mandalas
I love seeing what you make with my designs and how you use them! Please share a photo of your layered turtles, jellyfish, and dolphins in our Facebook group or tag me on social media with #jennifermaker.
Love,

Want to remember this? Save this Layered Sea Animals SVGs Tutorial to your favorite Pinterest Board!