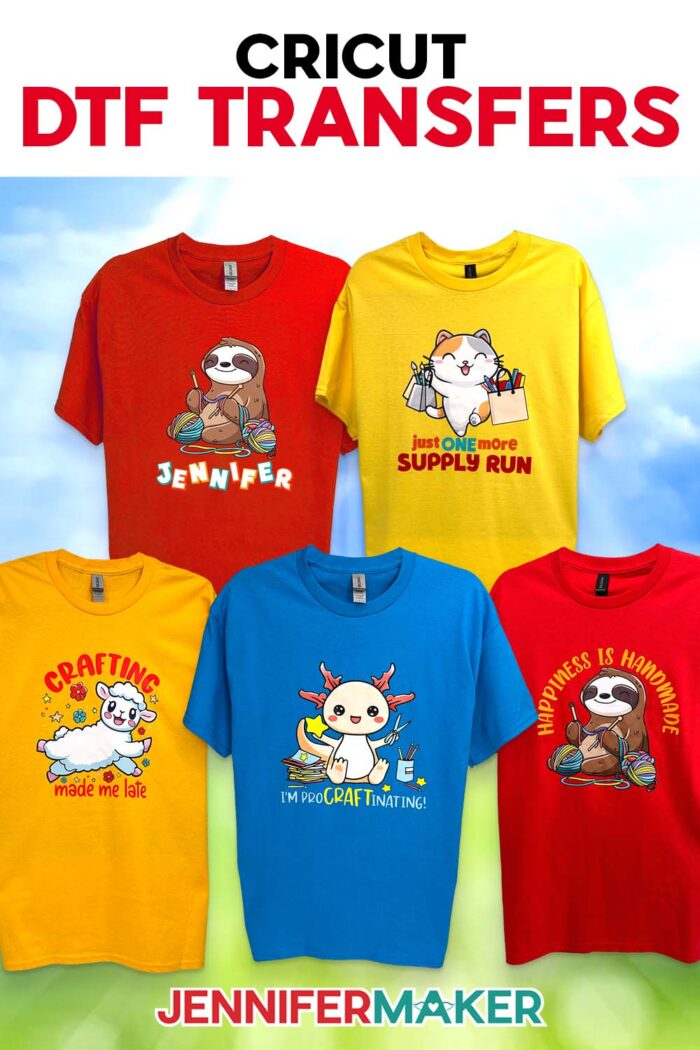
Learn how to order Cricut DTF transfers and customize shirts with full-color designs!
One of the biggest reasons I avoided making my own DTF prints at home was the mess and extra equipment. I love a colorful shirt project, but I did not love the idea of buying a Direct To Film printer, handling adhesive powder, or trying to figure out complicated setups just to make one custom T-shirt. So when Cricut introduced Cricut DTF transfers directly inside Cricut Design Space, I knew I had to test it for myself and share the results with you!
Watch the full step-by-step tutorial on how to use Cricut DTF transfers:

I wanted to see if the ordering process was easier than other services, how the prints compared to services like Jiffy and Ninja Transfers, and whether the finished shirt would really give me the bold colors and impressive results Cricut promised.
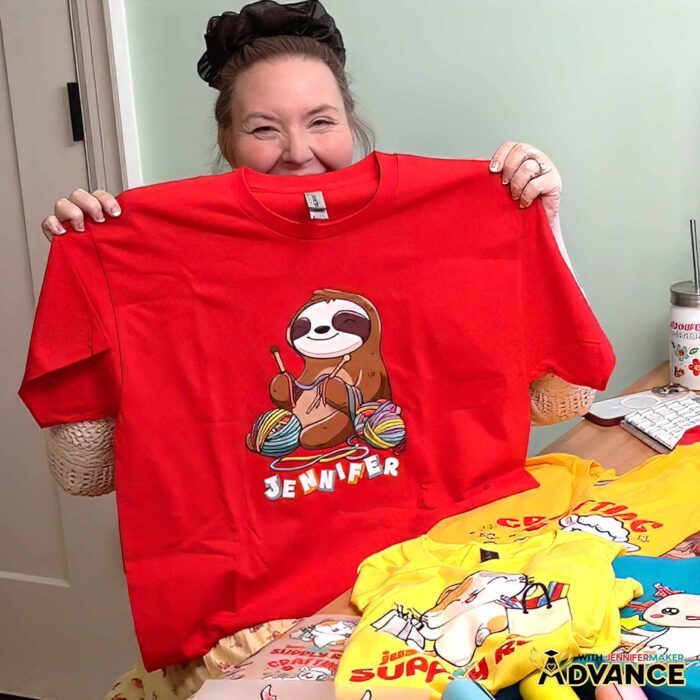
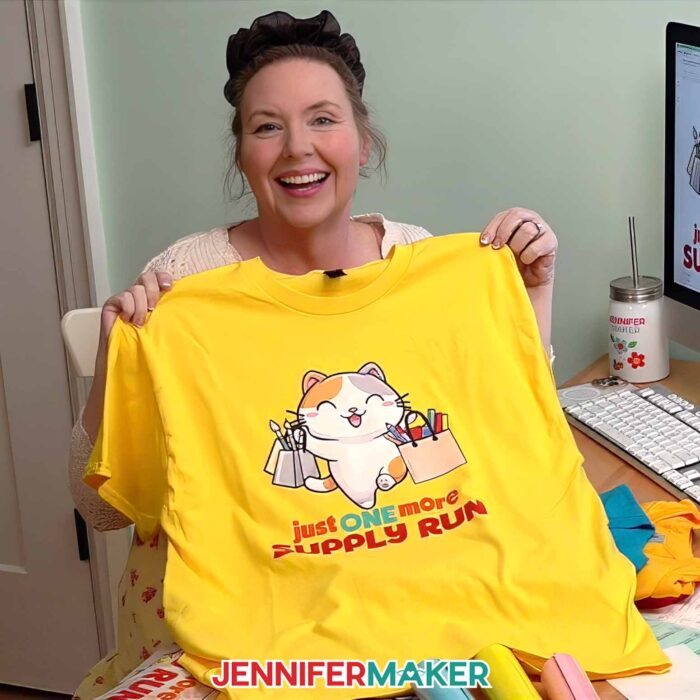
I ordered multiple of my own designs with a transparent background. When they arrived, I pressed them onto 100% cotton T-shirts using my Cricut EasyPress, but you can press them onto any fabric with any heat press. And the process felt much simpler than I expected!
Ordering Cricut DTF Transfers in Design Space
The biggest difference I saw when ordering DTF transfers through Cricut is convenience. Instead of uploading finished artwork to another website or building gang sheets manually, everything happens right inside Cricut Design Space. You choose your blank, select your transfer size, upload your artwork, and place your DTF orders without leaving the Cricut ecosystem. That makes this a great option for personal projects and beginner crafters who want high-quality transfers without navigating a separate ordering website.
I also liked that Cricut gives you more room to design before you order. With many third-party services, you upload a finished file and can usually only resize it or adjust the quantity. With Cricut DTF transfers, you start on a fresh DTF Canvas inside Cricut Design Space.
That Canvas works a lot like the regular Design Space Canvas, but it is sized to match the transfer sheet you chose. What you see on the screen is what Cricut prints. You can upload artwork, resize it, arrange multiple parts of the design, preview different shirt colors, and build your project before adding it to your cart.
That really helps if you’re working with intricate patterns, matching a specific creative vision, or still deciding on the final look of your custom T-shirt. In my ADVANCE with JenniferMaker tutorial for this project, I go deeper and show you how to add your own text to the design. But even in the basic ordering process, it’s nice to know you aren’t locked into one finished upload right away. Cricut gives you more creative flexibility before you order.
Once my order arrived, the fun part started.
How the Cricut DTF Transfers Arrived
The package included the transfers, instructions, and parchment paper for pressing. Everything arrived flat and organized, which I really prefer over rolled transfers.
The colors looked bright and vibrant right away. My solid areas printed beautifully in full color, and even the thin details transferred well during pressing. I did notice slightly grainy areas in more translucent sections of the artwork, but the details still transferred successfully.
Applying Cricut DTF Transfers to a Shirt
Pressing the transfers was also easier than I expected.
I used my Cricut EasyPress and followed the Cricut Heat Guide settings for cotton shirts. One thing I noticed immediately was that Cricut’s carrier sheet is not sticky like some other services. That means alignment matters more, especially when you press custom DTF transfers onto fabric.
Using a center crease and heat-resistant tape on all four sides helped keep the DTF film secure in the desired location during pressing.

Another surprise was the pressing process itself. Other services I have tested often need a second press after peeling. Cricut only needed one press in my testing. That saved time and made the process feel more beginner-friendly.
For the best way to apply these transfers, use parchment paper, apply firm pressure with your heat press machine, and allow the design to cool completely before peeling. The cold peel method gave me the cleanest release and the most durable prints.
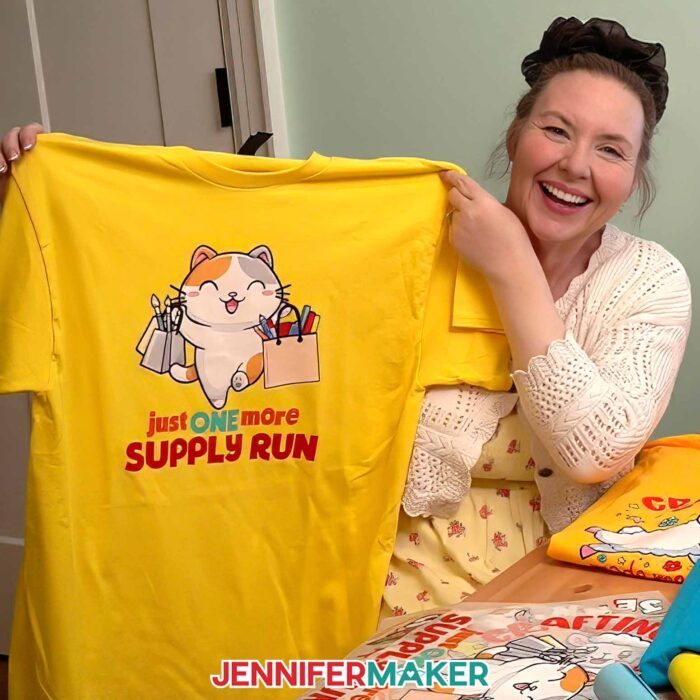
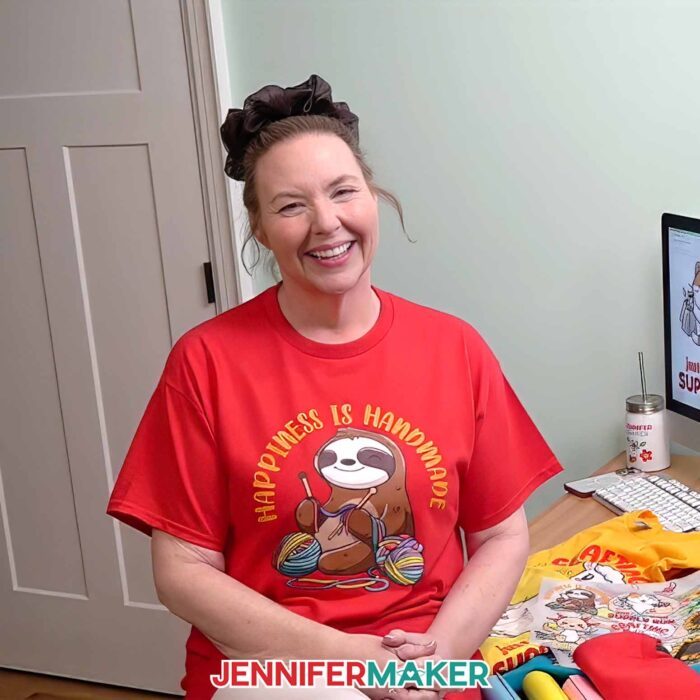
The finished shirt feels lightweight, colorful, and smooth on the fabric. It reminds me a lot of heat transfer vinyl, but with vivid, multicolor transfers and far more detail.
Customize Your Cricut DTF Designs in ADVANCE
And remember, if you want to customize the crafty animal designs from this tutorial even more, be sure to check out the ADVANCE tutorial linked with this project. Inside ADVANCE with JenniferMaker, I show you how to personalize the artwork with names and phrases step by step. It is a great next step if you want to expand beyond the starter designs and make your shirts truly unique. Learn more about ADVANCE with JenniferMaker here!
I recommend watching the full video tutorial before you start. I walk through every step of the way, including ordering, sizing, placement, and pressing, so you can confidently create your own high-quality DTF transfers at home.
Do you want to learn how to prepare, order, and apply Cricut DTF transfers? Let me show you how fun and easy it is! This post contains some affiliate links for your convenience (which means if you make a purchase after clicking a link I will earn a small commission but it won’t cost you a penny more)! Read my full disclosure policy.
Materials to Make T-Shirts with Cricut DTF Transfers
View my Amazon shopping list with the exact items I used.
- One (1) T-Shirt (any style, but I used 100% cotton)
- One (1) DTF Transfer (purchased through Cricut Design Space)
- One (1) Piece of Parchment Paper (one piece ships with Cricut DTF order)
- Heat Press (I used the Cricut EasyPress – 13″ x 10″) -OR-
- Household Iron -AND-
- Pressing Pad
- My Free T-Shirt Ruler Guide -OR-
- Tape Measure
- Lint Roller
- Heat-Resistant Tape
- Scissors (optional to trim DTF sheet) -OR-
- Paper Trimmer (optional to trim DTF sheet)
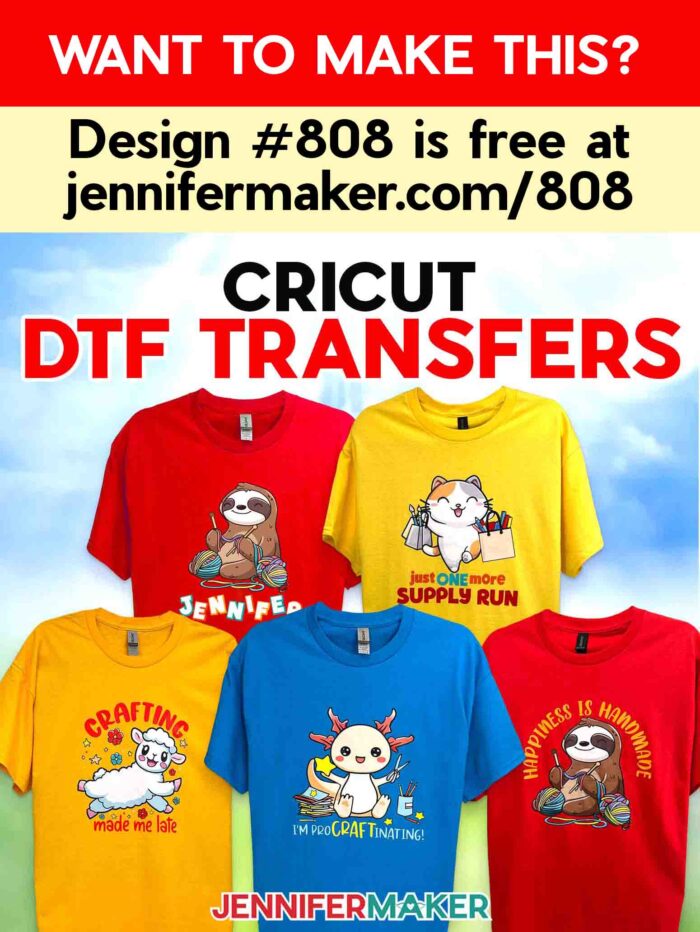
- Design #808 (My free PNG/PDF design files are available in my free library – get the password by filling out the form at the bottom of this page)
How to Make Cricut DTF Transfers
Cricut DTF Transfers
Learn how to create and order Cricut DTF Transfers and press them on a T-Shirt!
Materials
- One (1) Shirt (any style, I used cotton)
- One (1) Cricut DTF Transfer (purchased through Cricut Design Space)
- Parchment Paper
- Design #808 (My free PNG design files are available in my free resource library - get the password by filling out the form at the bottom of this page)
Tools
- Heat Press - I used the Cricut EasyPress 3 (12" x 10") -OR-
- Household Iron with a Cotton heat setting
- Pressing Mat
- My Free T-Shirt Ruler Guide
- Scissors
- Tape Measure
- Lint Roller
- Heat Resistant Tape
Instructions
STEP 1: GET MY FREE DTF TRANSFER DESIGNS
First, download my Cricut DTF Transfer files from my free library – look for Design #808. Alternatively, you can use the Save This Project form near the top of this post and the design link will be emailed to you.
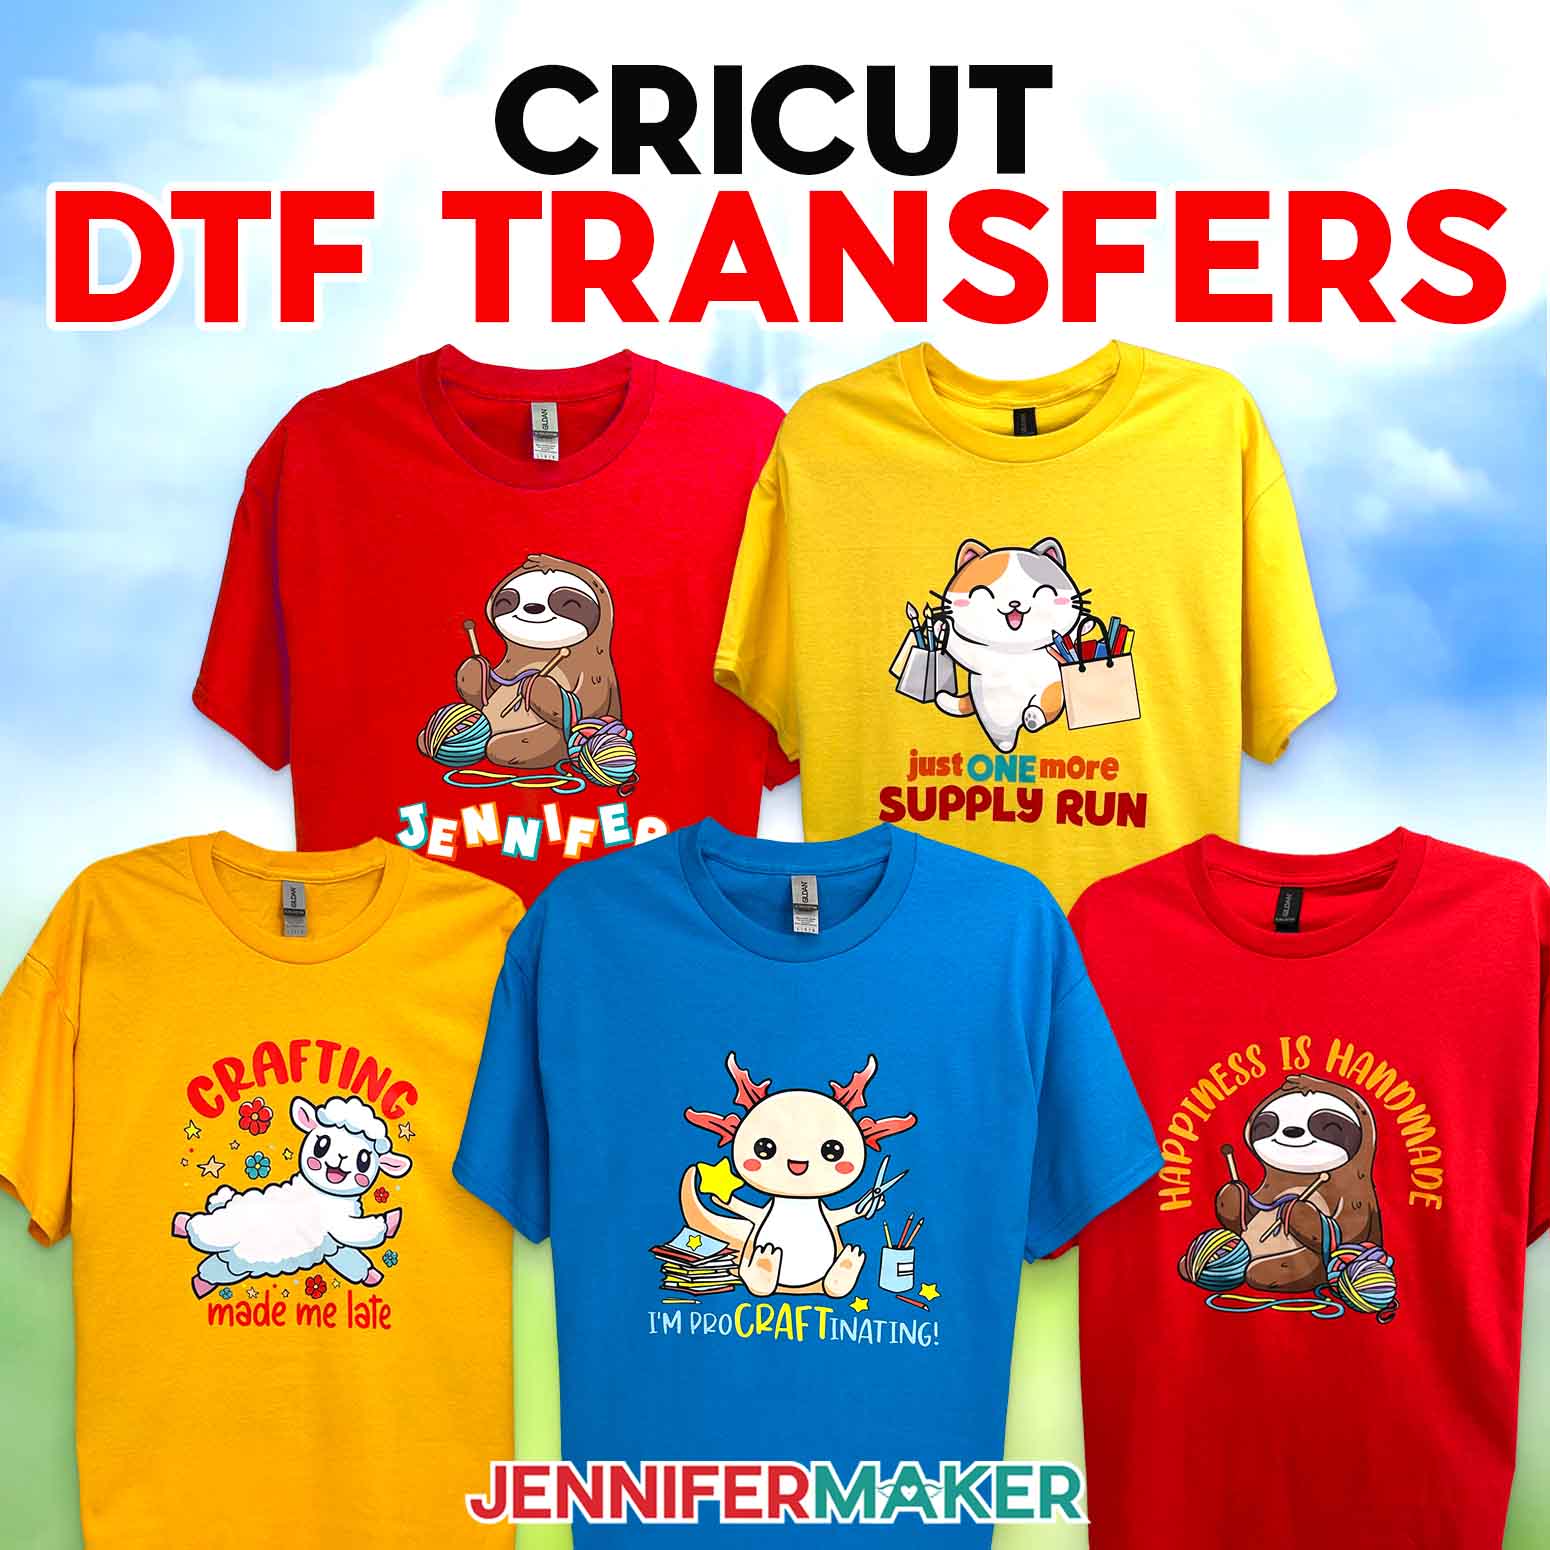
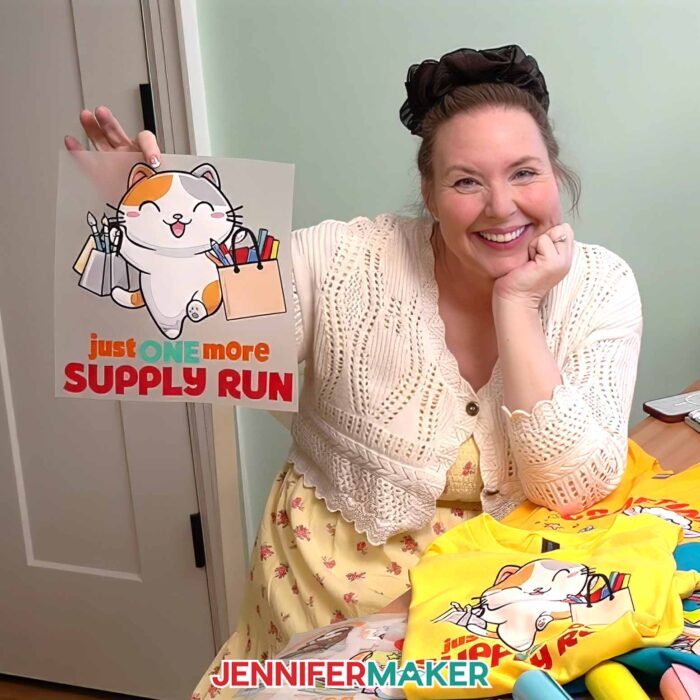
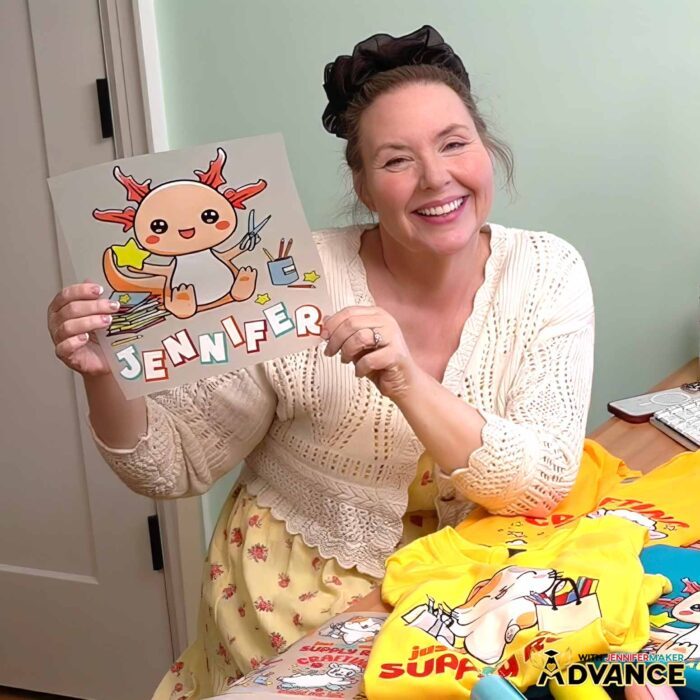
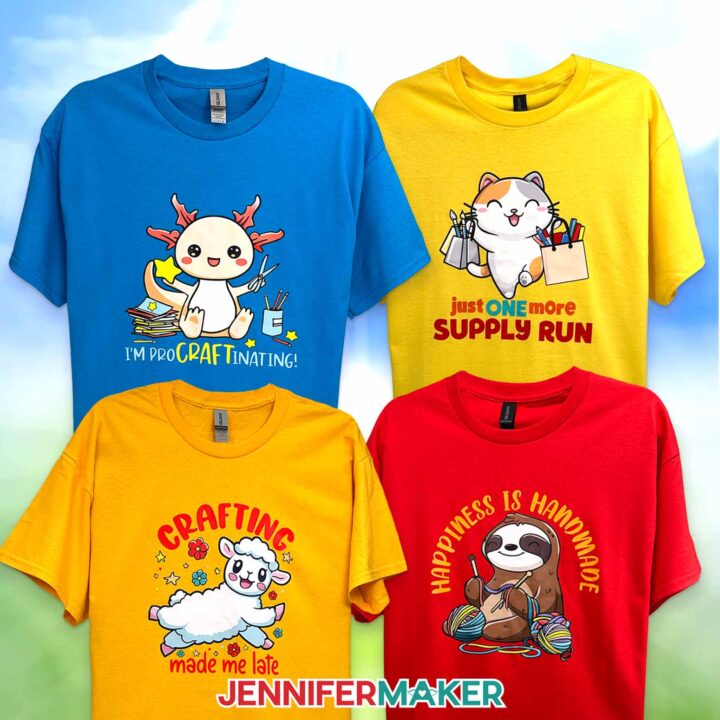
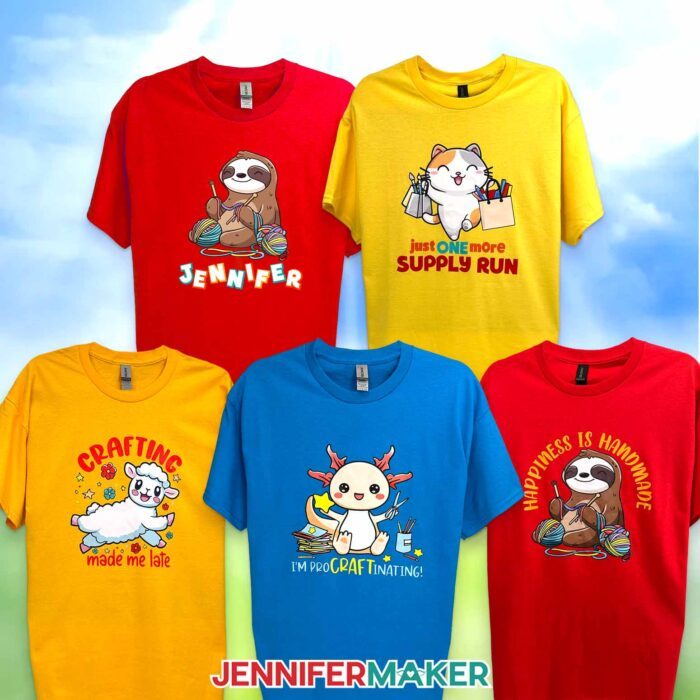
In the PNG folder, you’ll find my “axolotl,” “cat,” “lamb,” and “sloth” designs with fun craft-related sentiments for use with Cricut’s DTF service. All four designs are high-quality images with the background removed, perfect for use with DTF printing.
I made these designs with the help of AI and adjusted them using image editing software.
I’ll show you how to use these designs with Cricut Design Space, order your transfer through Cricut’s DTF Transfers service, and press them on a T-shirt.
TIP: If you’re not sure how to upload, go to jennifermaker.com/svgs to learn how to unzip and upload files.
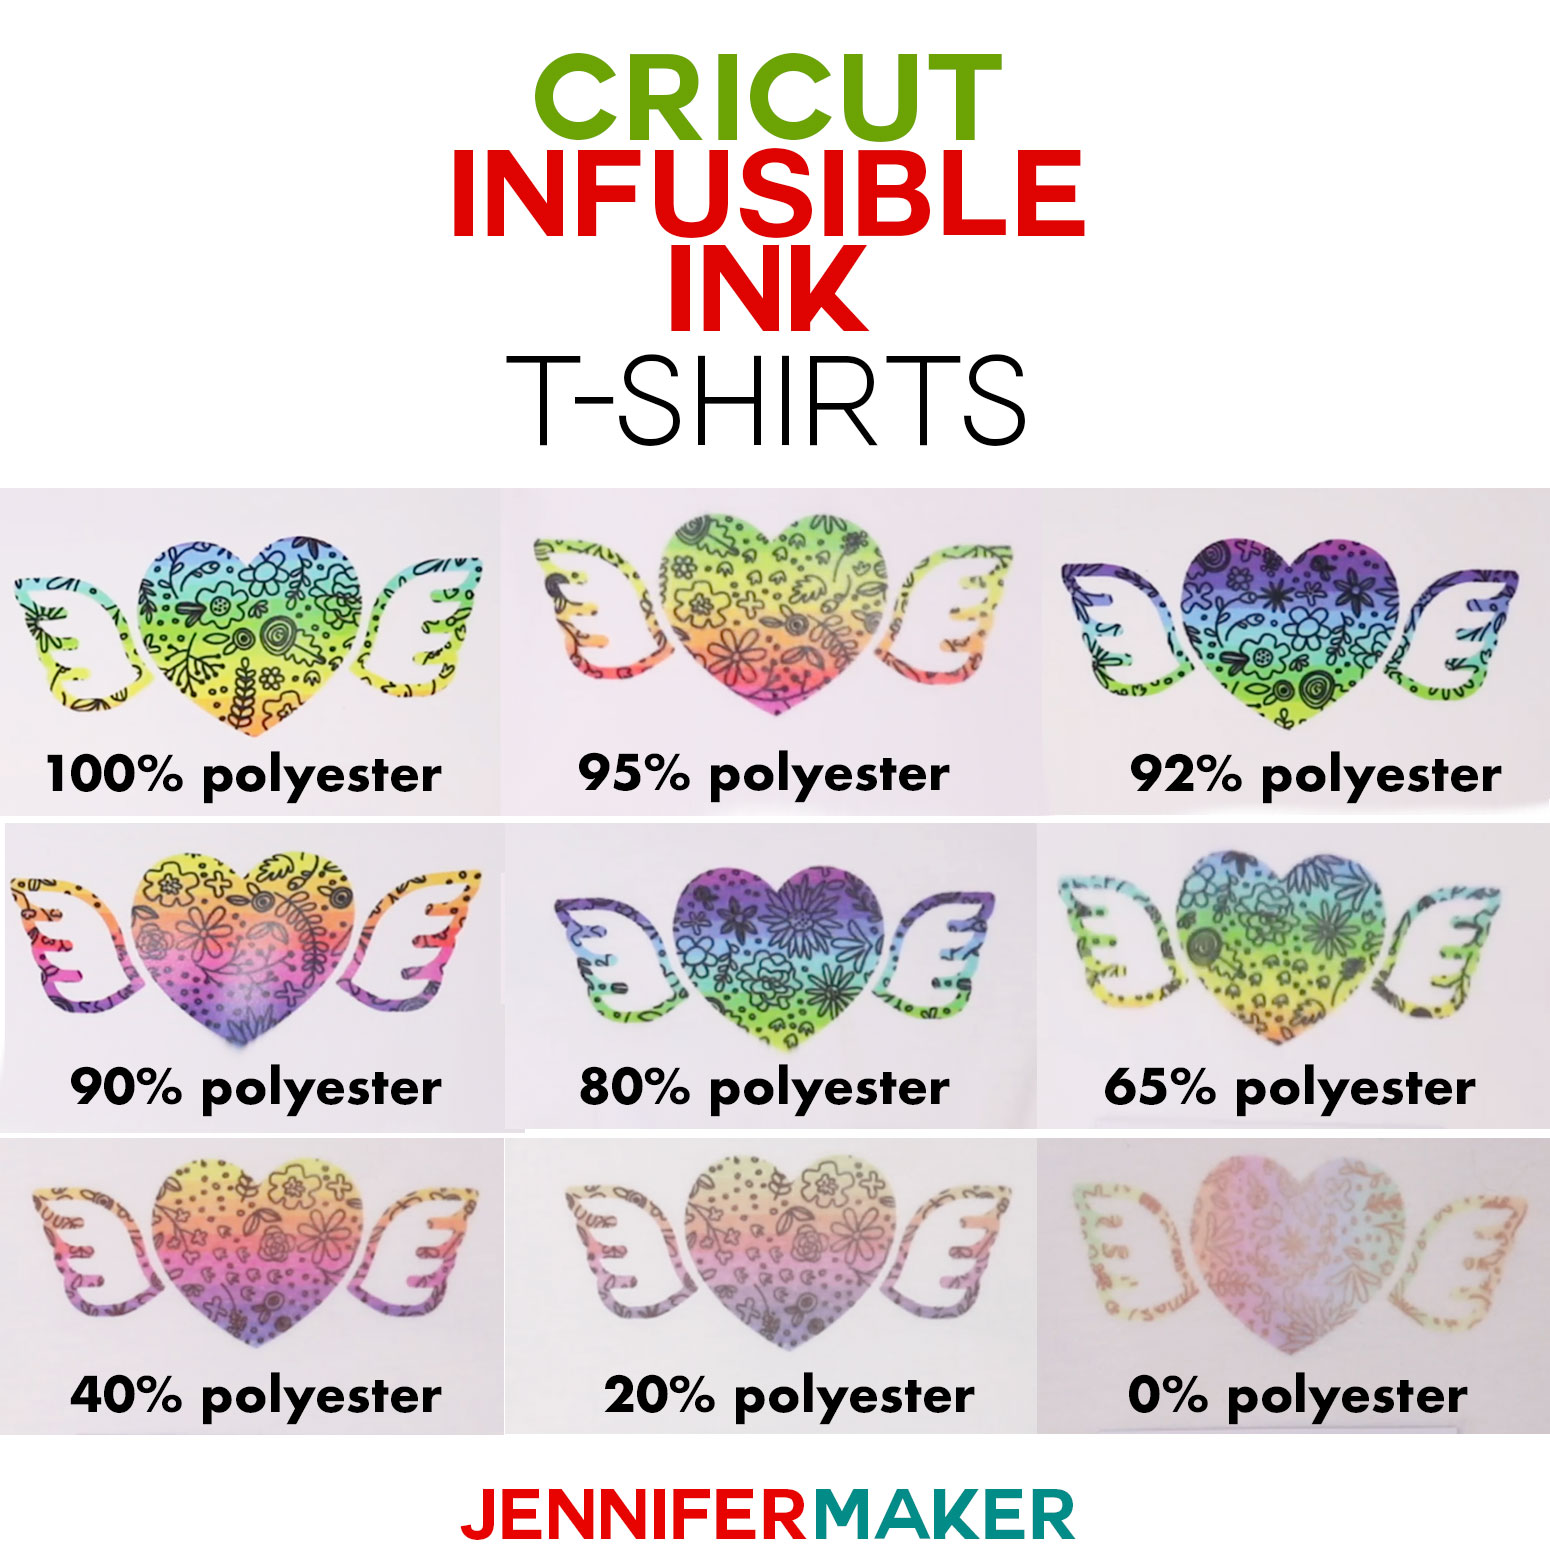
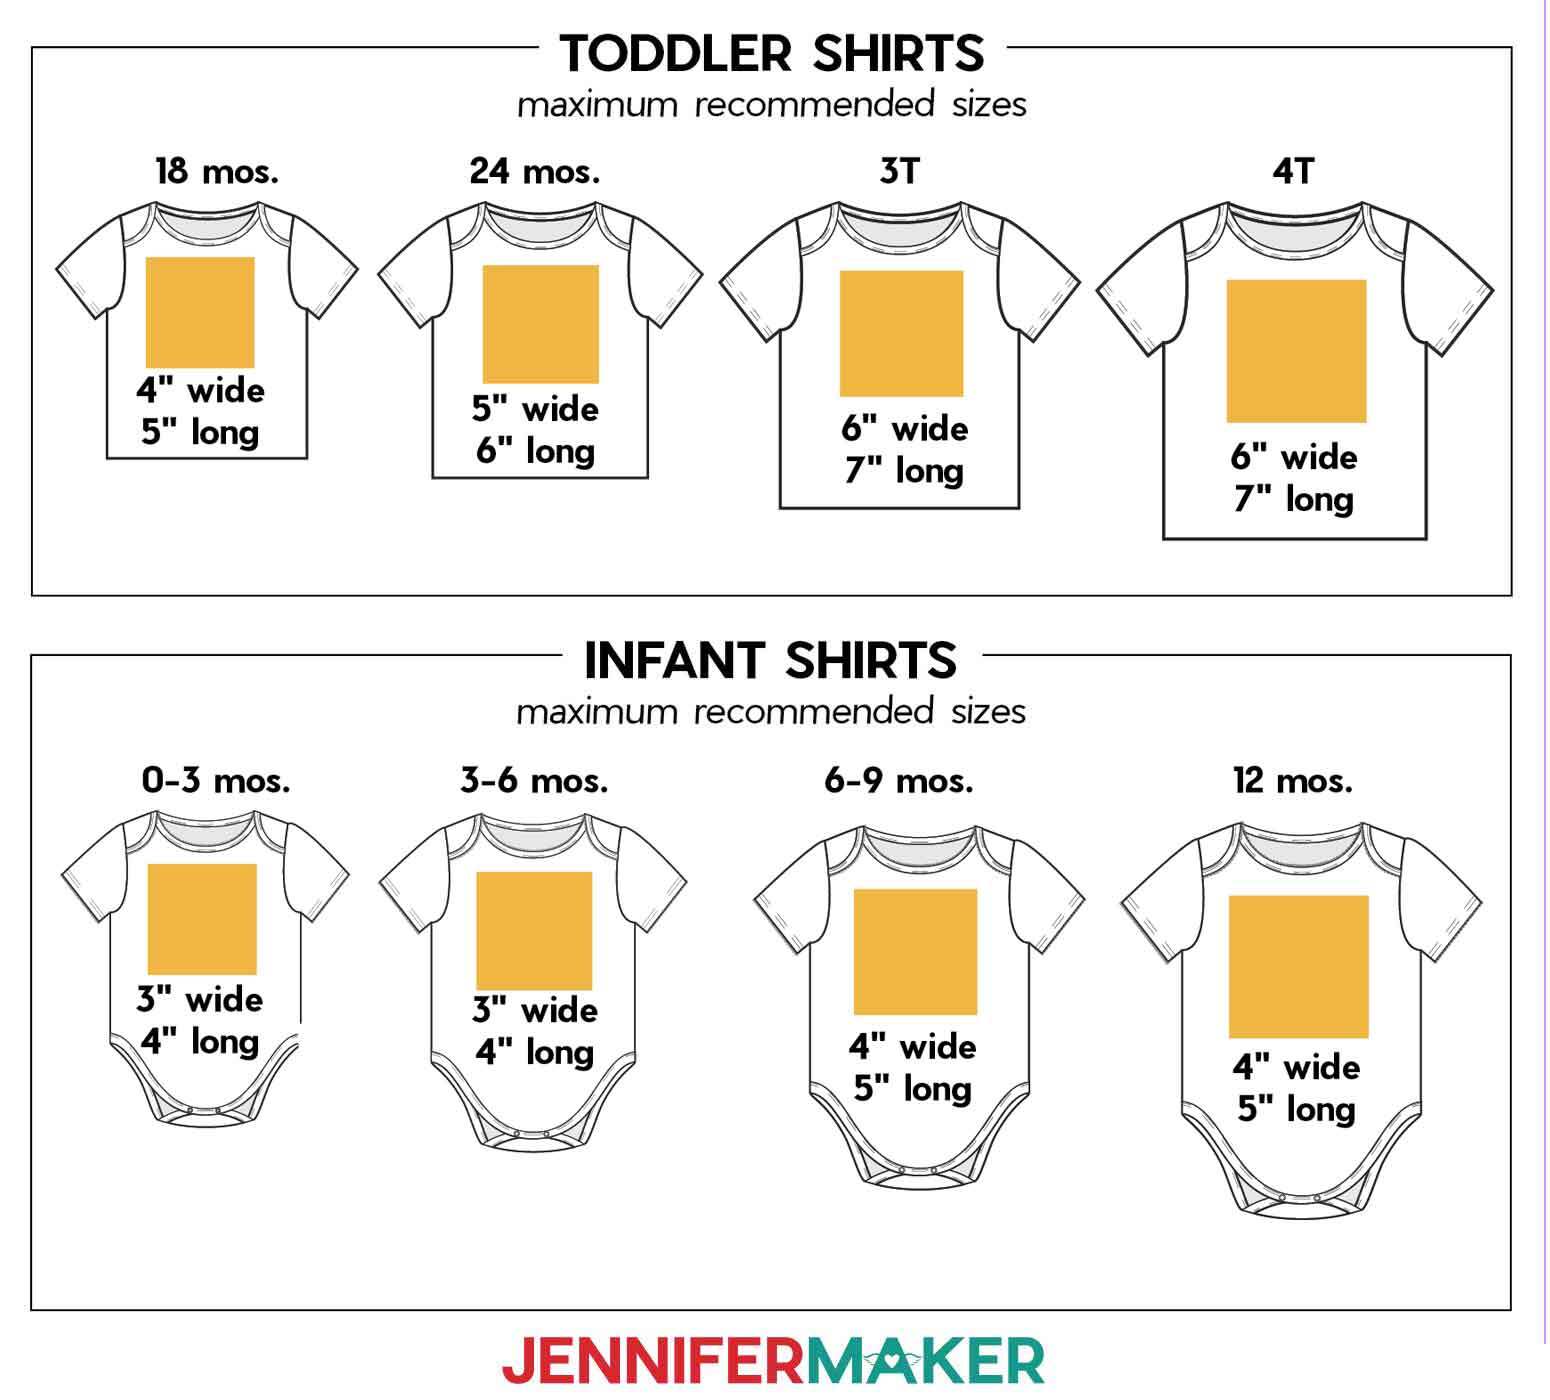
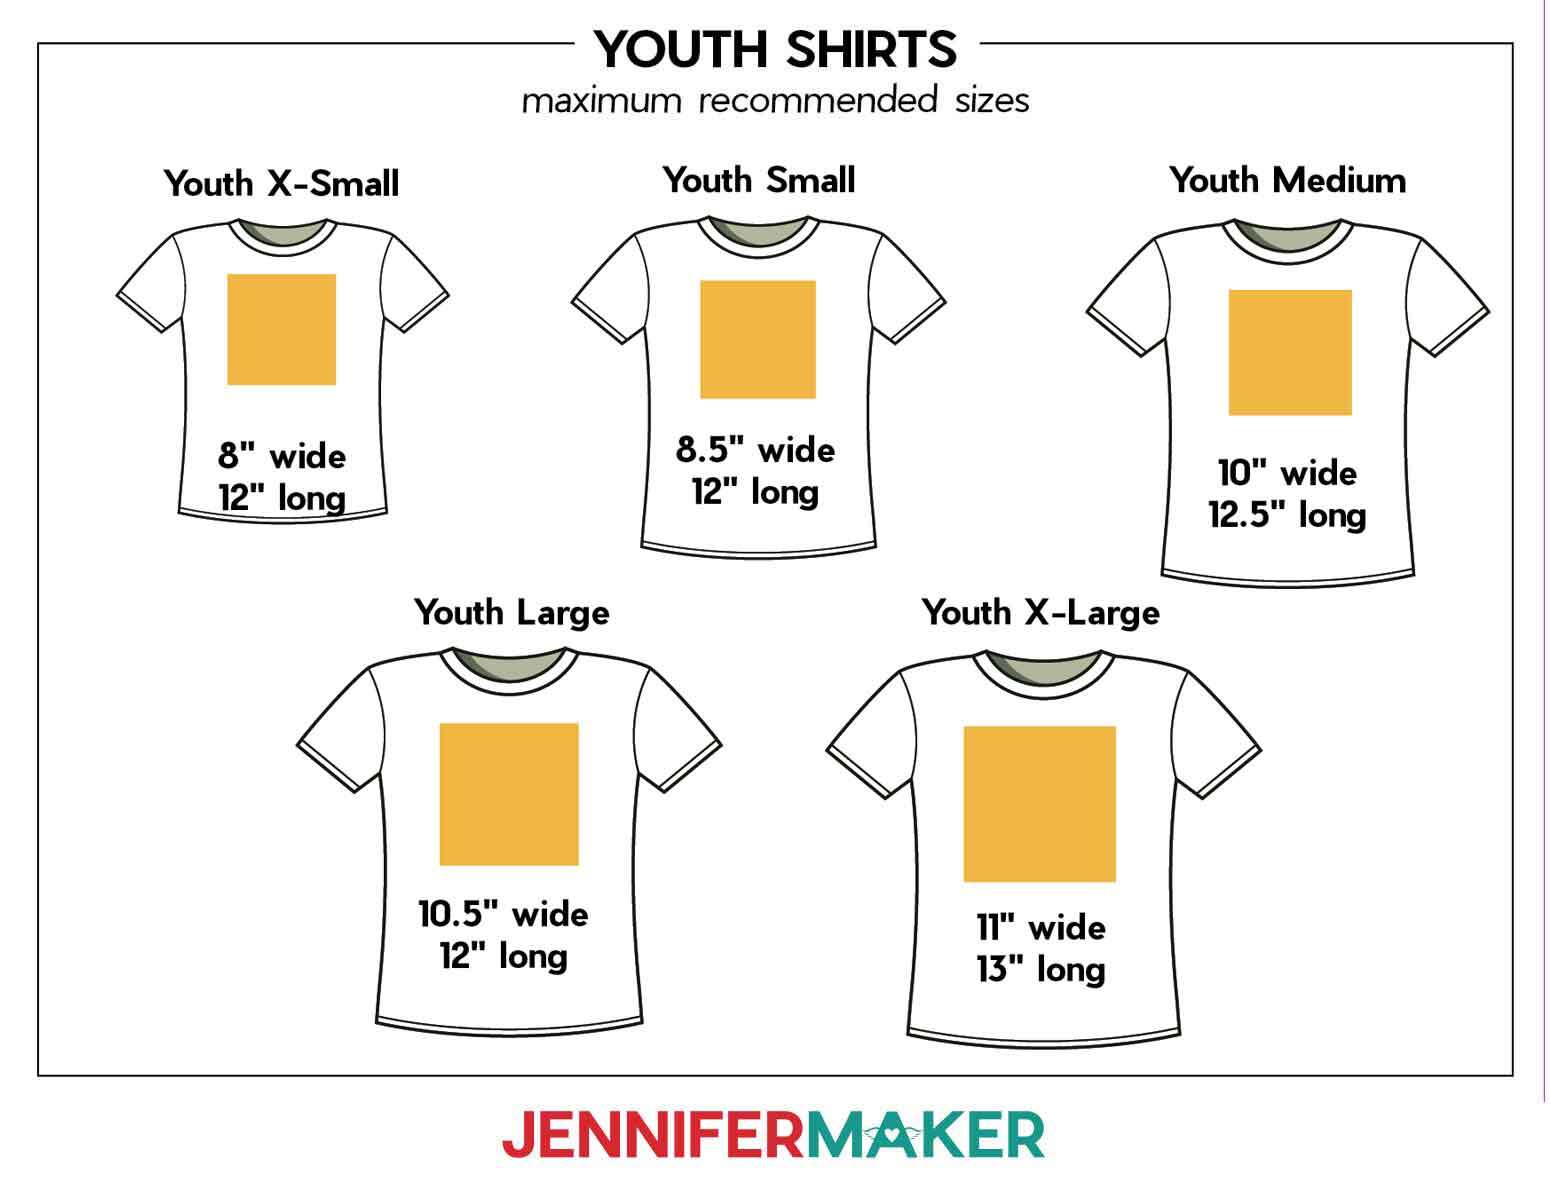
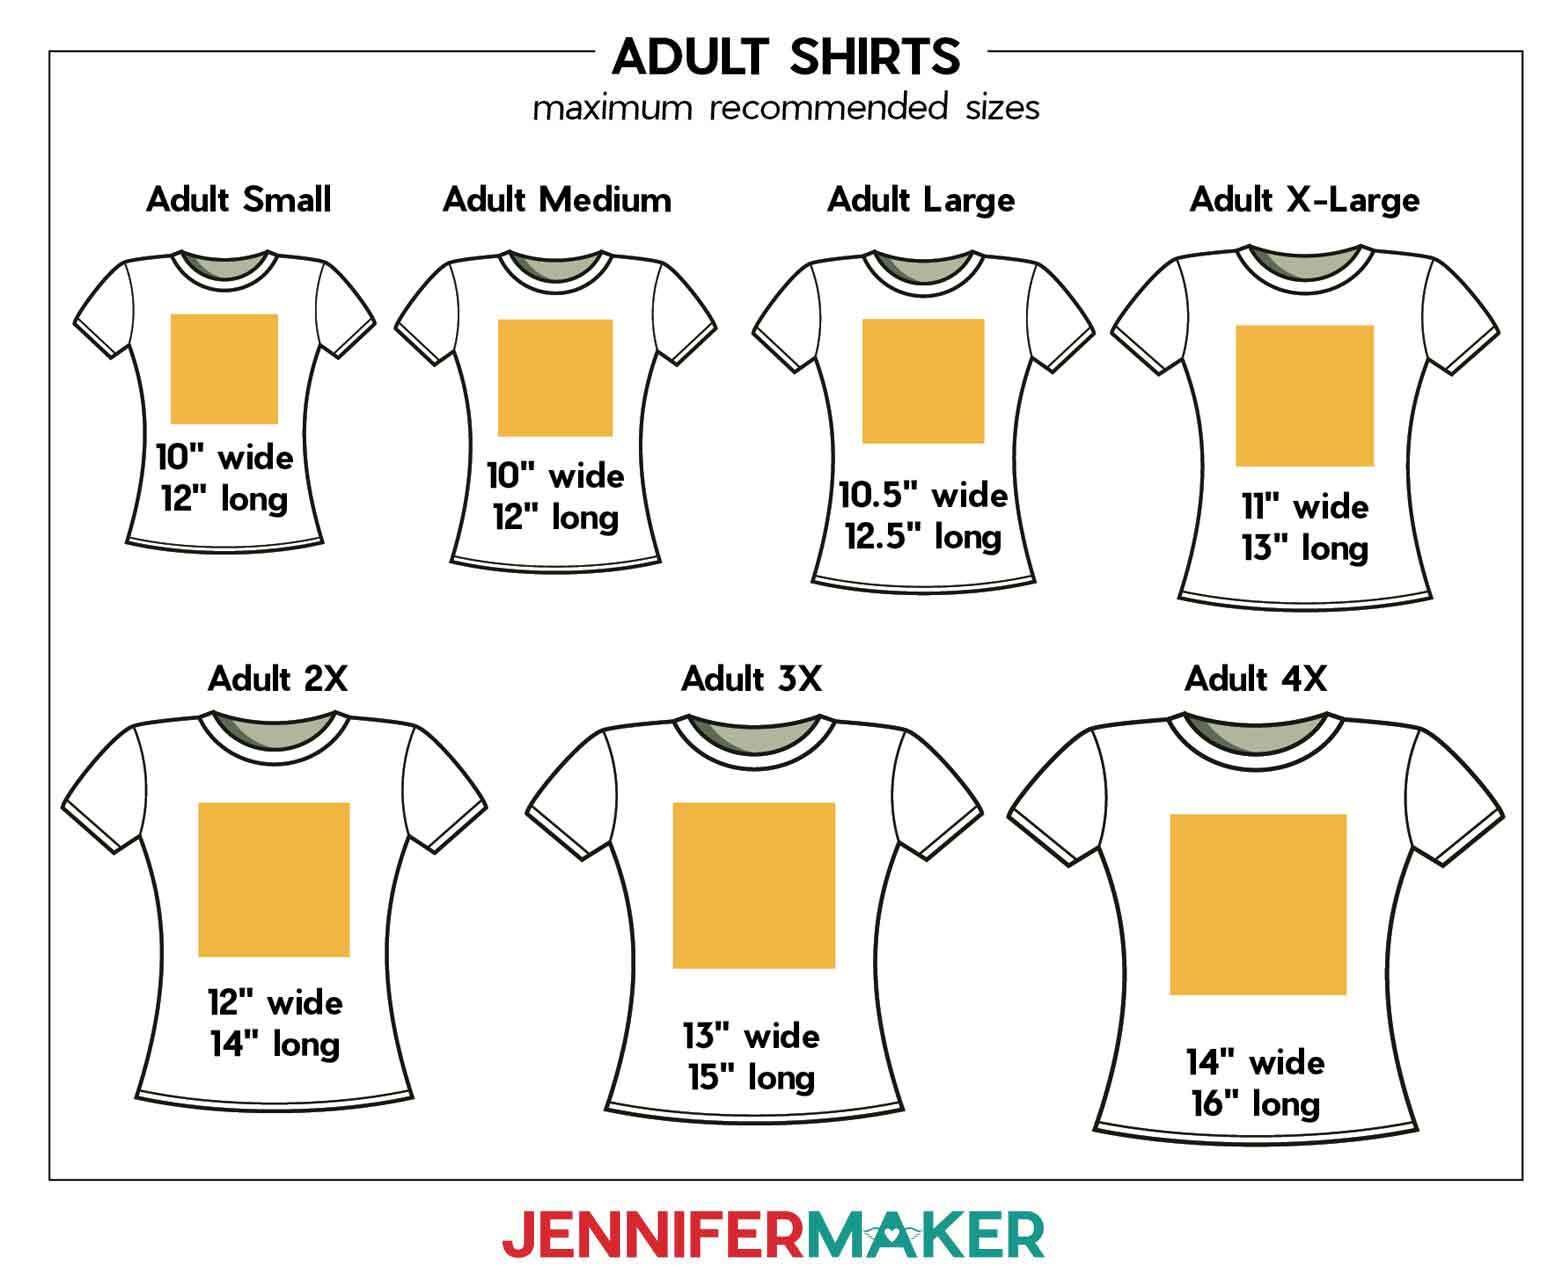
STEP 2: MEASURE YOUR SHIRT’S DESIGN AREA
- Use a tape measure to measure your shirt’s width across the chest, leaving empty space on both sides.
- Then measure about half the length of the shirt, starting a couple inches below the collar.
- Or, find the recommended maximum design size for your shirt using the guides below:


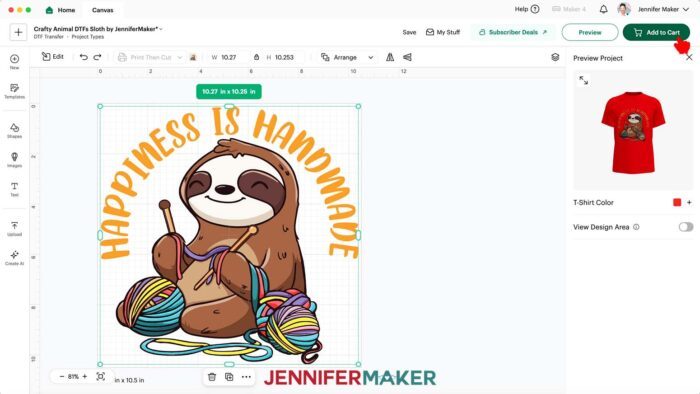
STEP 3: PREPARE YOUR DTF TRANSFER IN CRICUT DESIGN SPACE
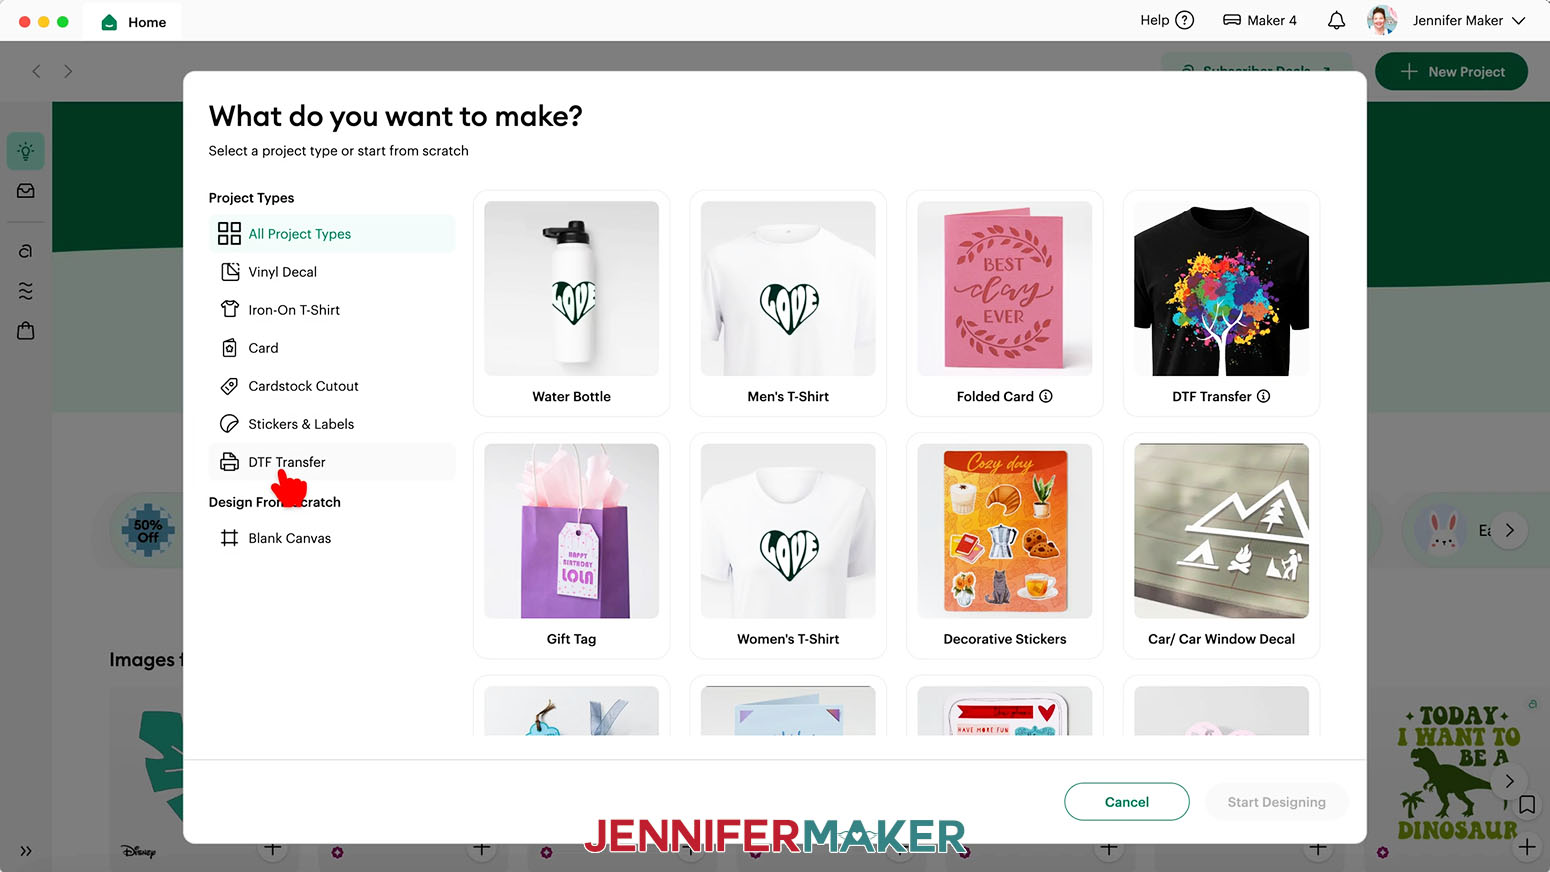
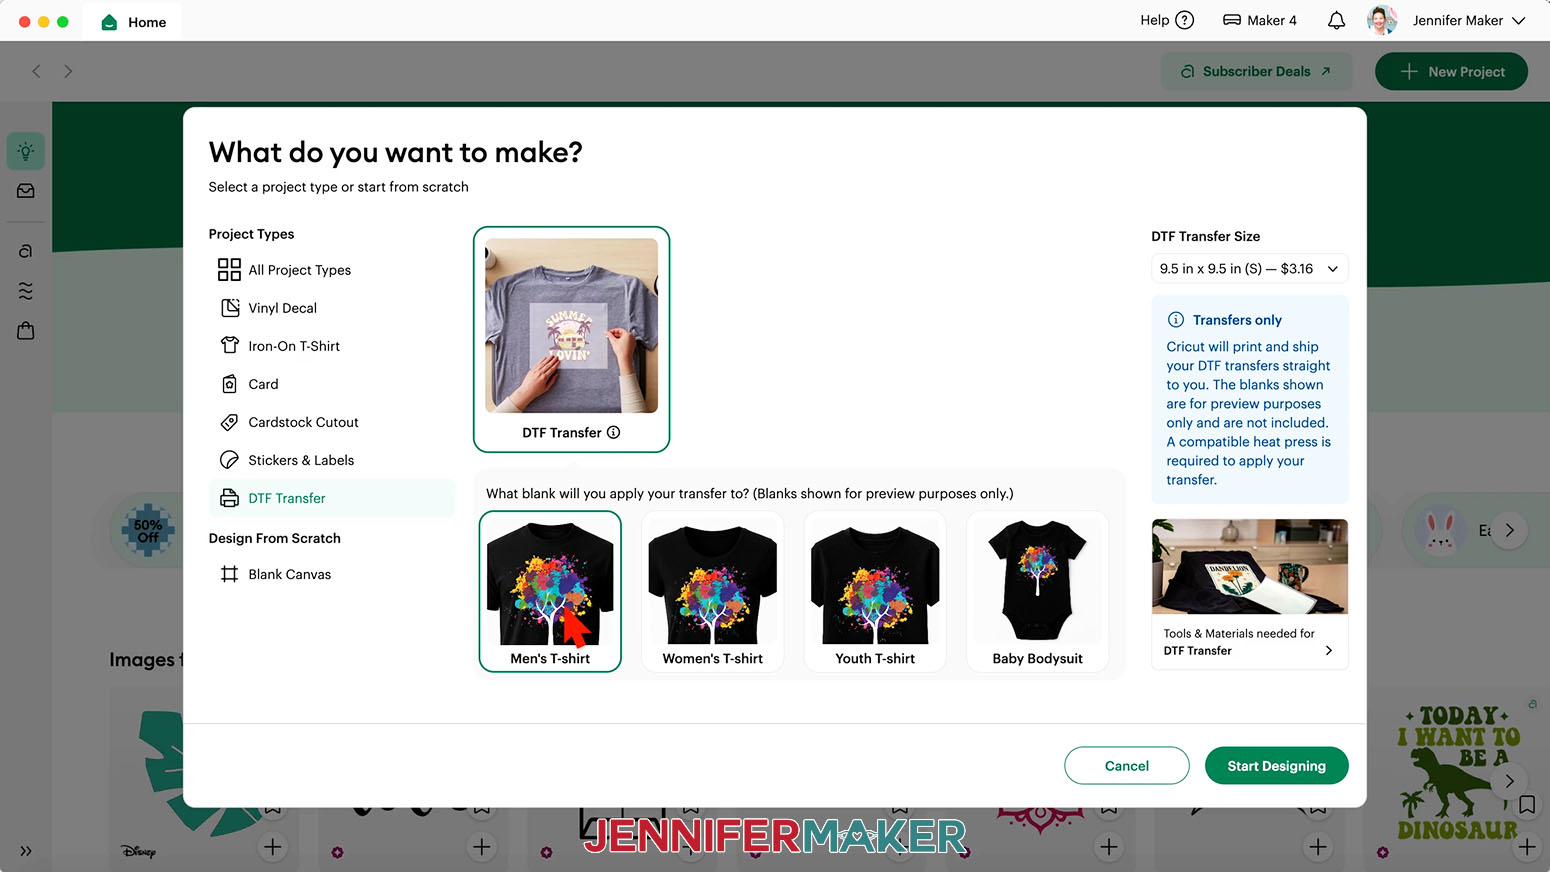
- In Cricut Design Space, click the “New Project” button.
NOTE: If you’re new to using Cricut Design Space, go to cricutkickoff.com for my introductory tutorial on Design Space basics. - Under the “Project Types” menu, select “DTF Transfer.”

- Select the blank you will apply your transfer to.
- Choose the “DTF Transfer Size” from the dropdown menu that is just larger than your blank’s design area. The sizes available are based on your blank selection in the previous step, so if you don’t see the size you want, choose a different blank in Step 3.
TIP: Cricut’s “DTF Transfer Size” ranges from 4” x 4” to 11.4” x 11.4”, and the size of the transfer determines the price, rather than the size of the design itself. The price increases the larger you go, so if you have multiple small designs, you can save money by combining them into one large transfer.
NOTE: Once you start designing your transfer, you won’t be able to select a new size without starting over or copying your design over to a second Cricut Design Space window. - Click “Start Designing.”
- Click the “X” in the “Direct to Film (DTF)” description window to close it and load your DTF Transfer Canvas.
- To add a design to your Canvas, click “Upload” and then “Upload Image.”
NOTE: The white box in the center of your screen is the DTF Transfer Canvas, which matches the transfer size selected in Step 4. Only elements placed inside the Canvas’s boundaries will be printed on the transfer sheet. - Click “Browse.”
- Select the PNG file of your choice from the design folder.
TIP: I recommend using a high-quality PNG with a transparent background like the ones in my design folder for best results, but you can also use PDF, JPG, and SVG files with at least 300 DPI image quality.
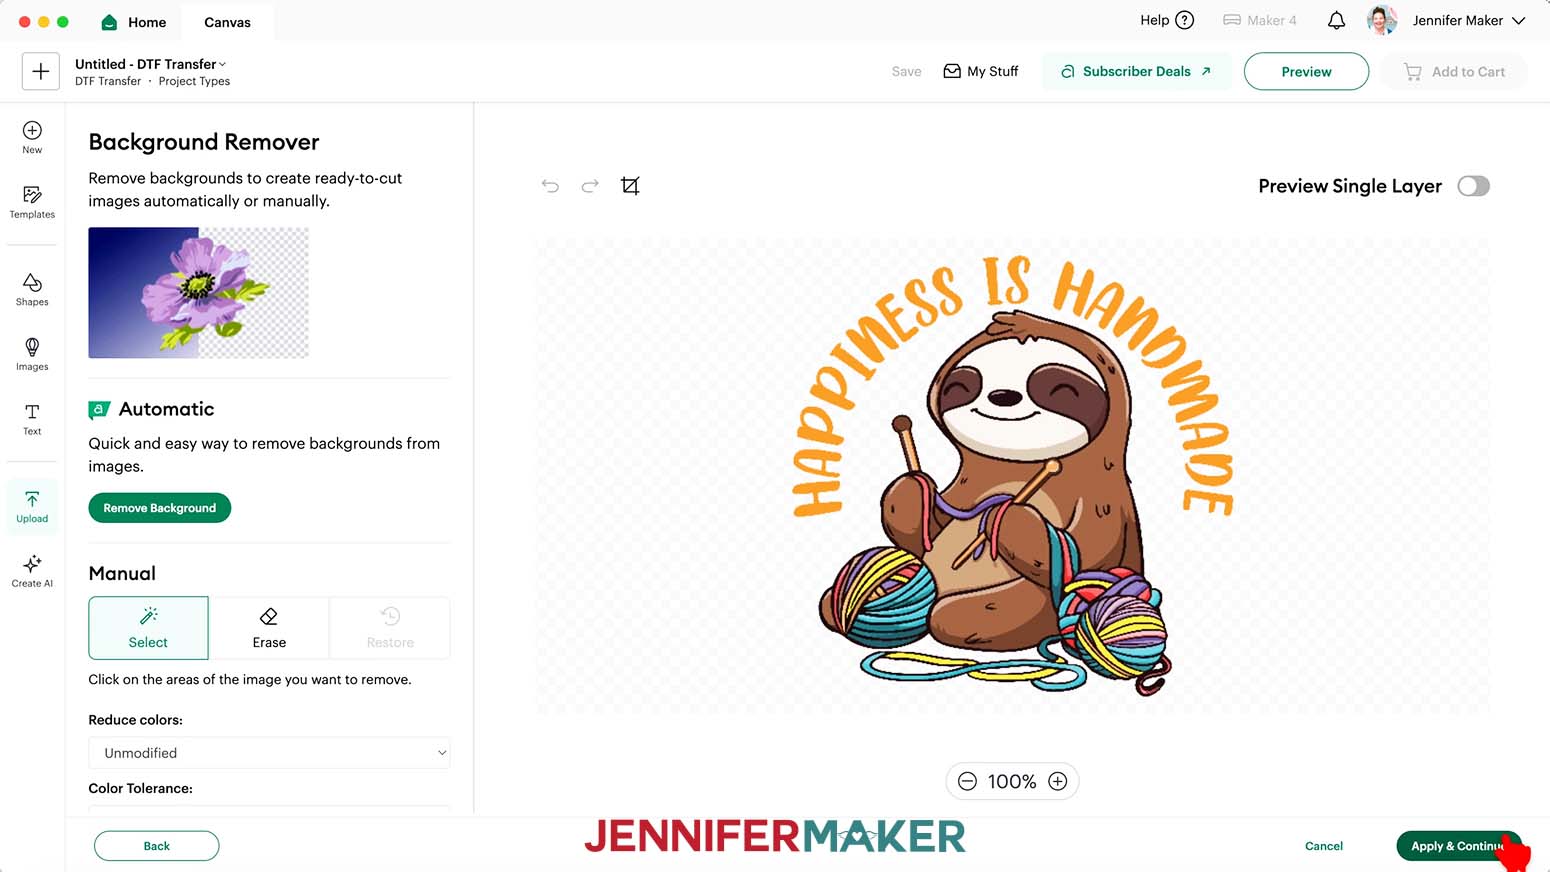
NOTE: I’ll demonstrate with the “sloth” design, but the steps are the same for all four designs. - Click “Open,” and then “Continue.”
- On the “Background Remover” screen, you don’t need to do anything since my PNG images already have the necessary areas removed, so click “Apply & Continue.”
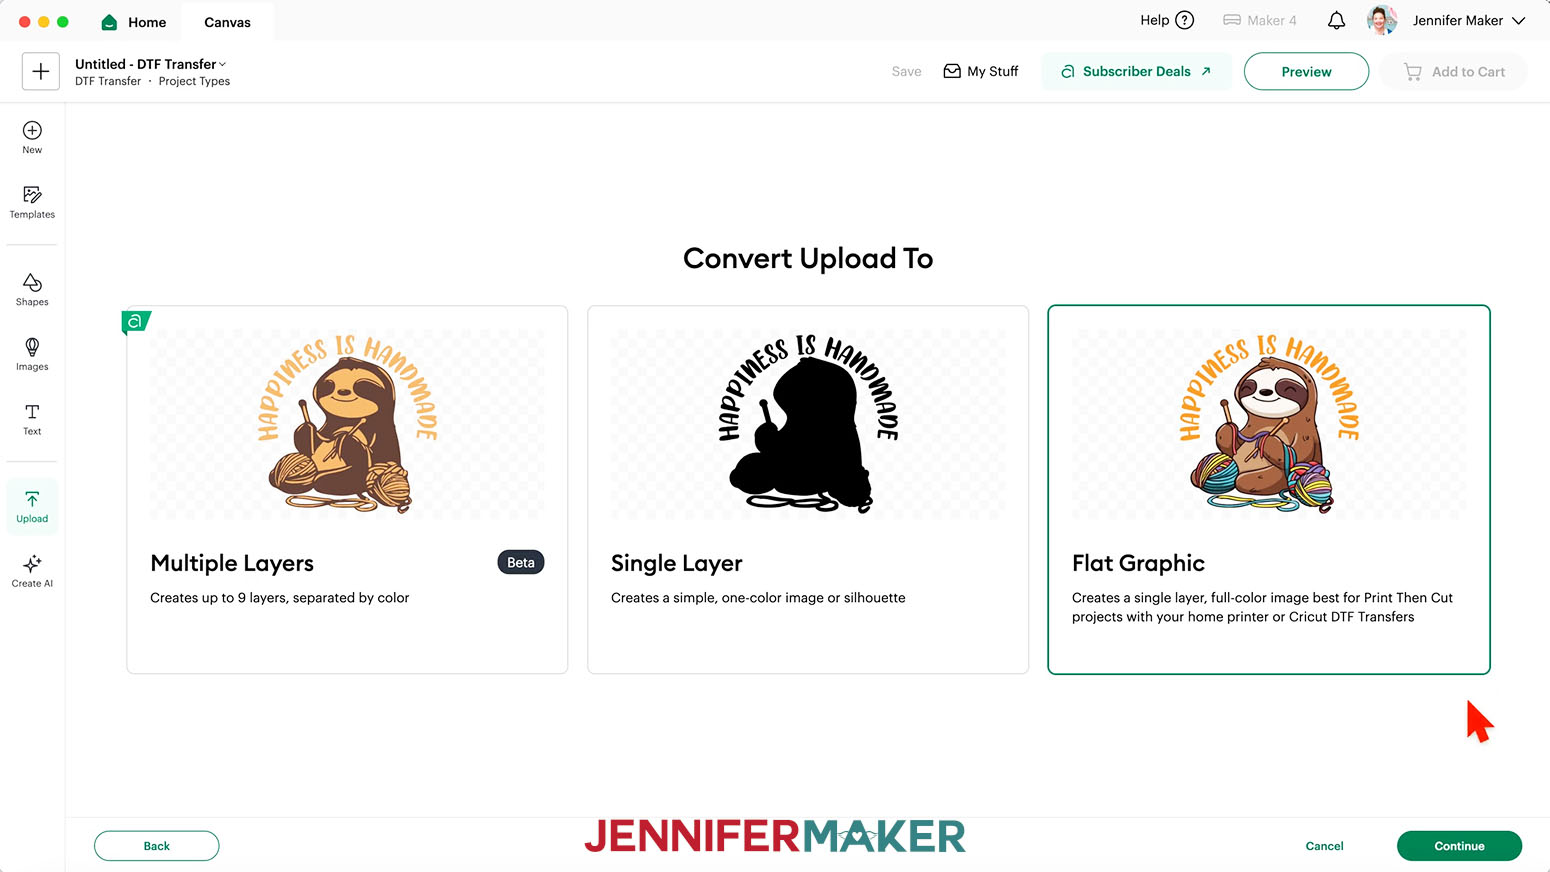
- On the “Convert Upload To” page, select “Flat Graphic” and click “Continue.”
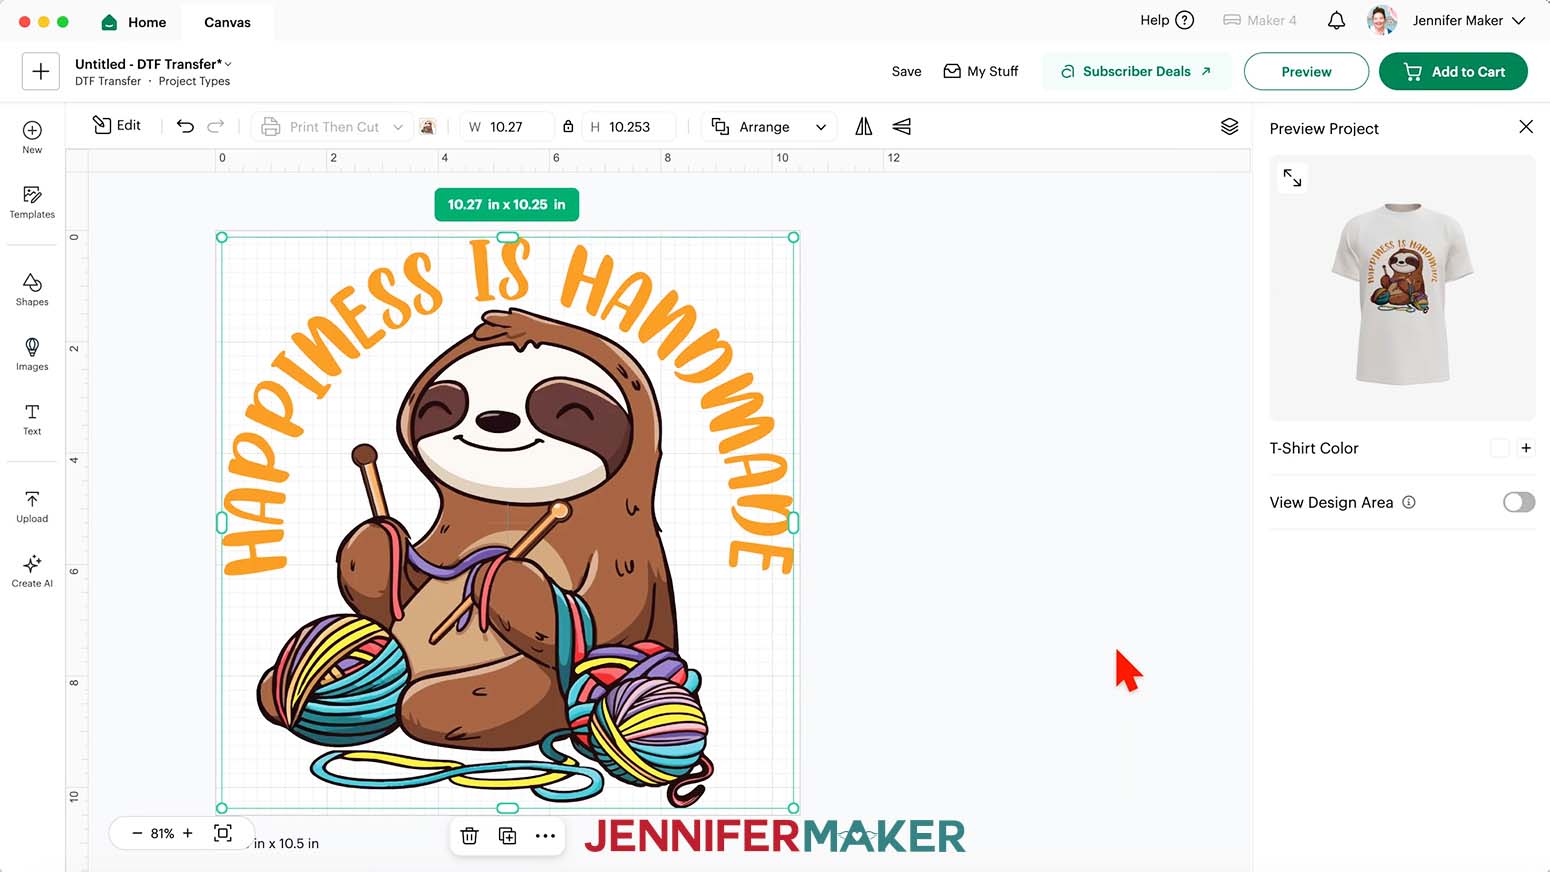
- Click “Upload” to add the design to your Canvas. The image will load in sized to fit your Canvas.
- Click “Save” and give your project a name.
NOTE: Your project’s name will show up in your shopping cart later so you can easily keep track of your order. - If you’d like to resize the design, select it and make sure the “Lock” icon between the size fields is closed to maintain proportions.
- Drag a corner handle to adjust the element’s size.
TIP: The “Preview Project” window to the right of the Canvas will show any size changes on your shirt.
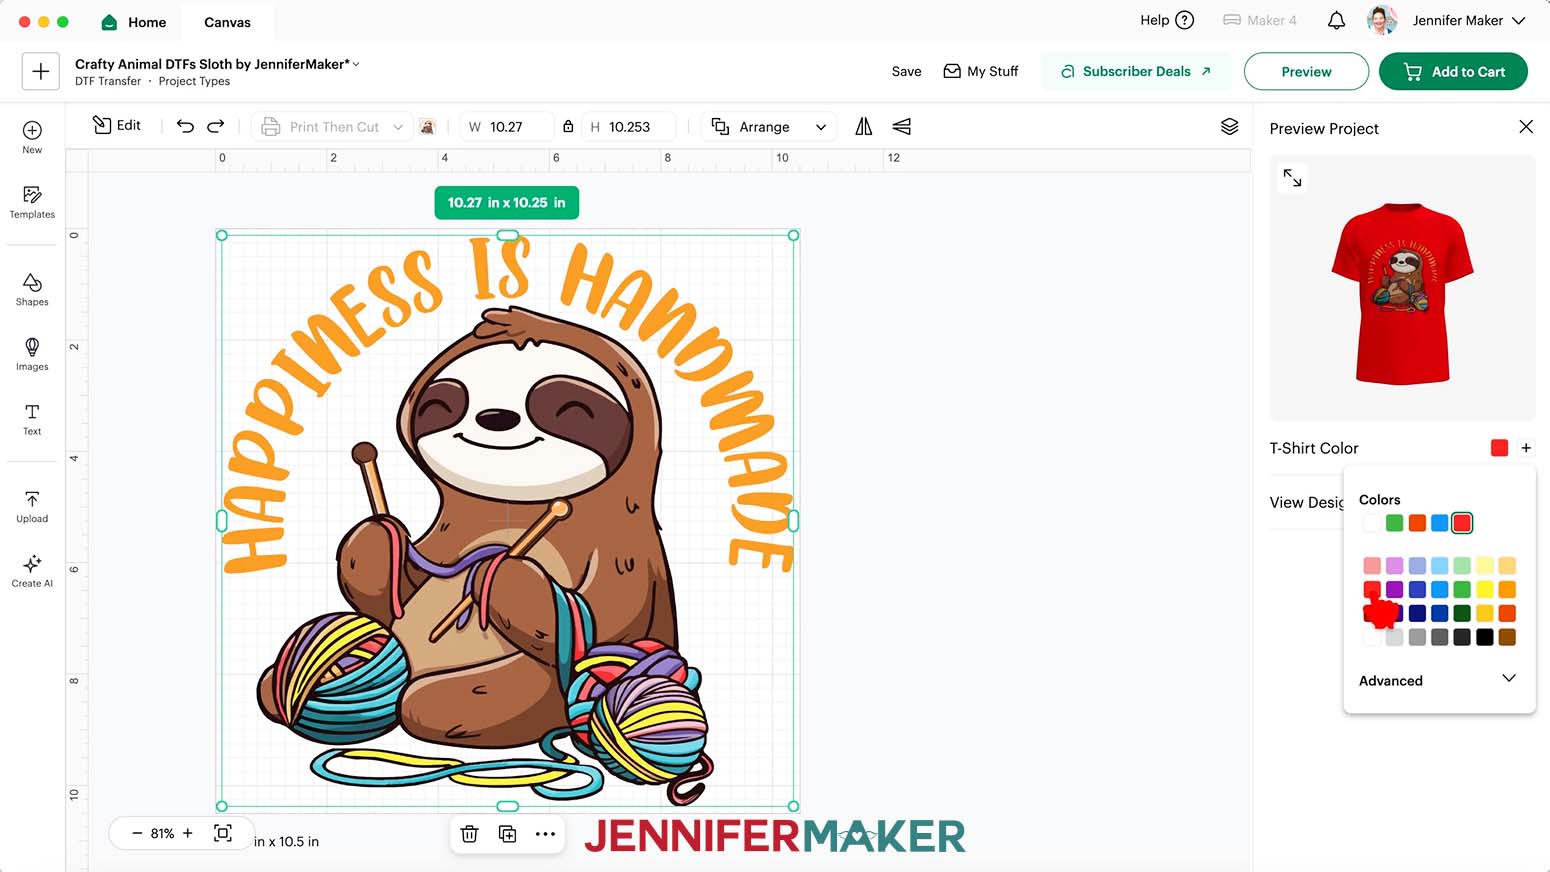
NOTE: I’ll keep mine the same size to fill my Canvas. - To preview how your design looks on a colored T-shirt, click the swatch to the right of “T-Shirt Color” and choose a new option.
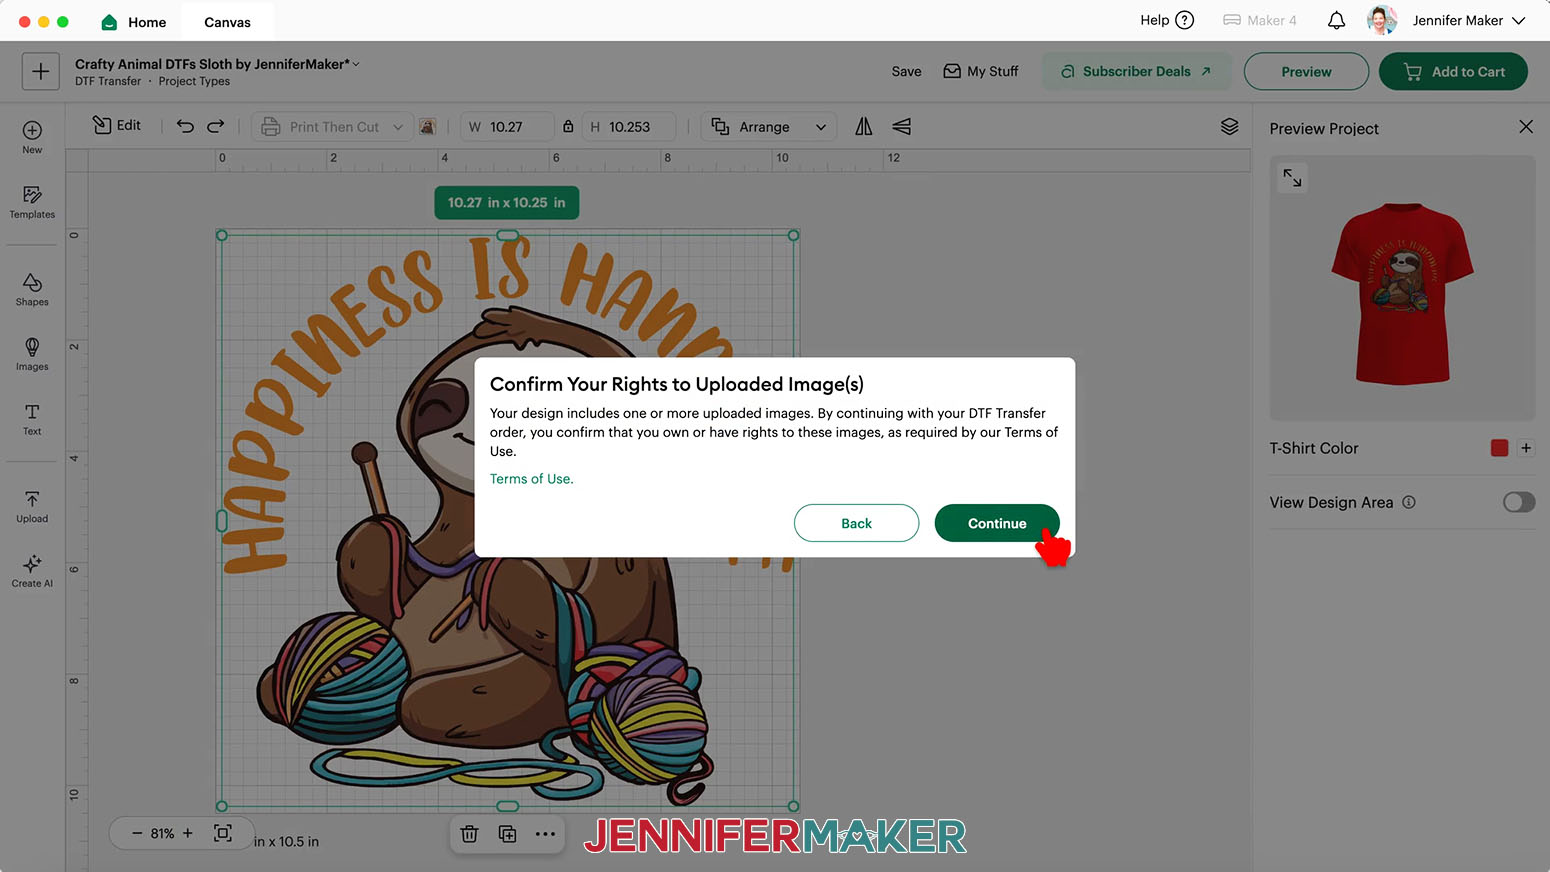
NOTE: I’ll change my T-shirt color to red. - When the DTF Transfer Canvas looks the way you want, click “Add to Cart.”
- In the “Confirm Your Rights to Uploaded Image(s)” window, click “Continue” to agree to the Terms of Use and confirm your right to use the design.
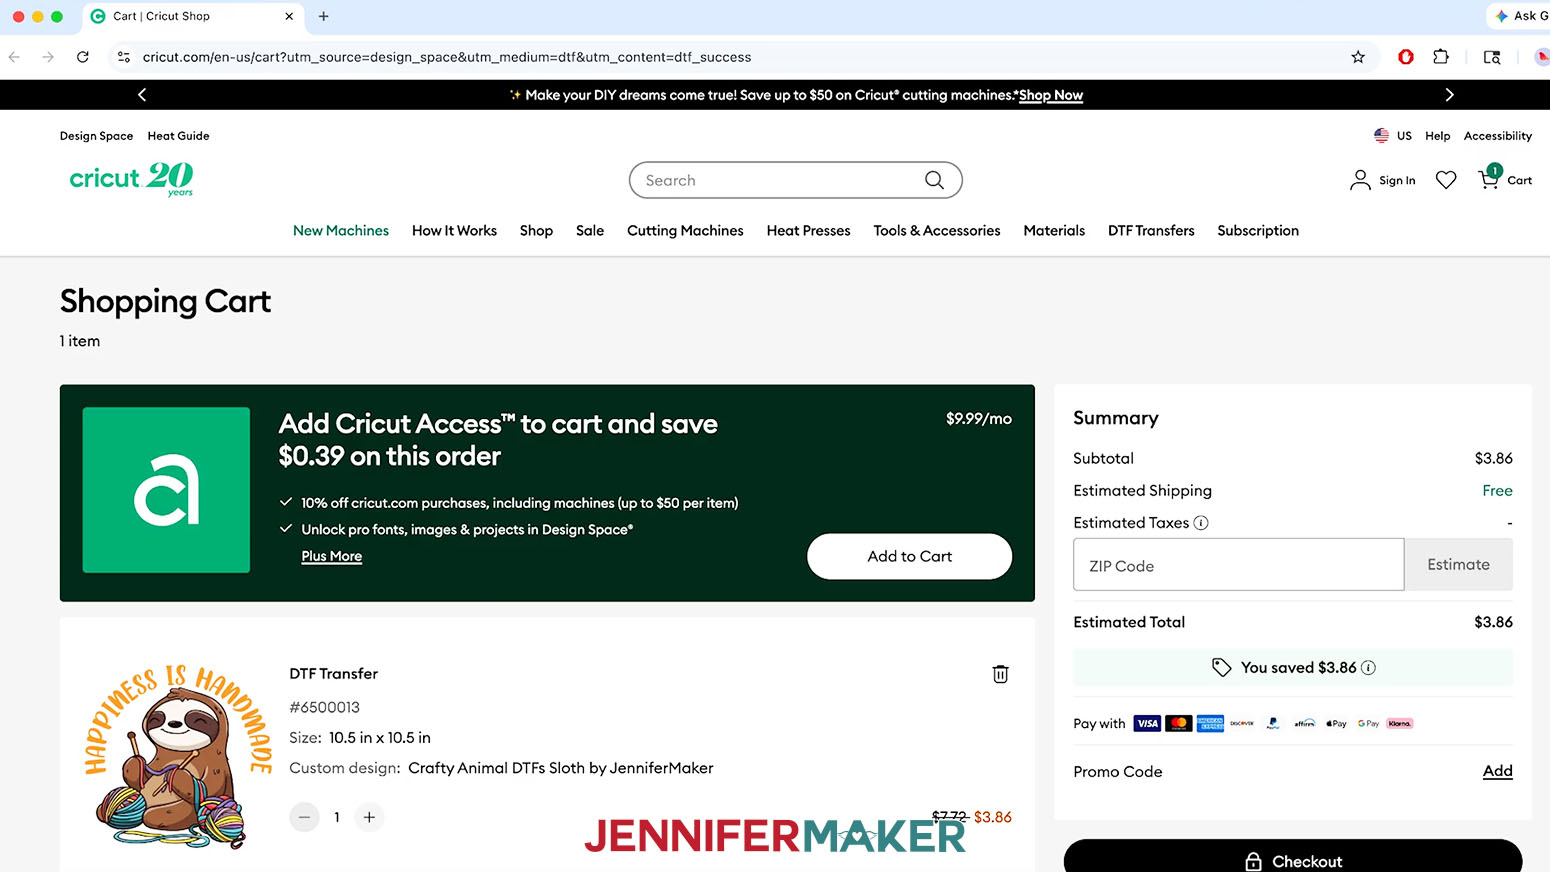
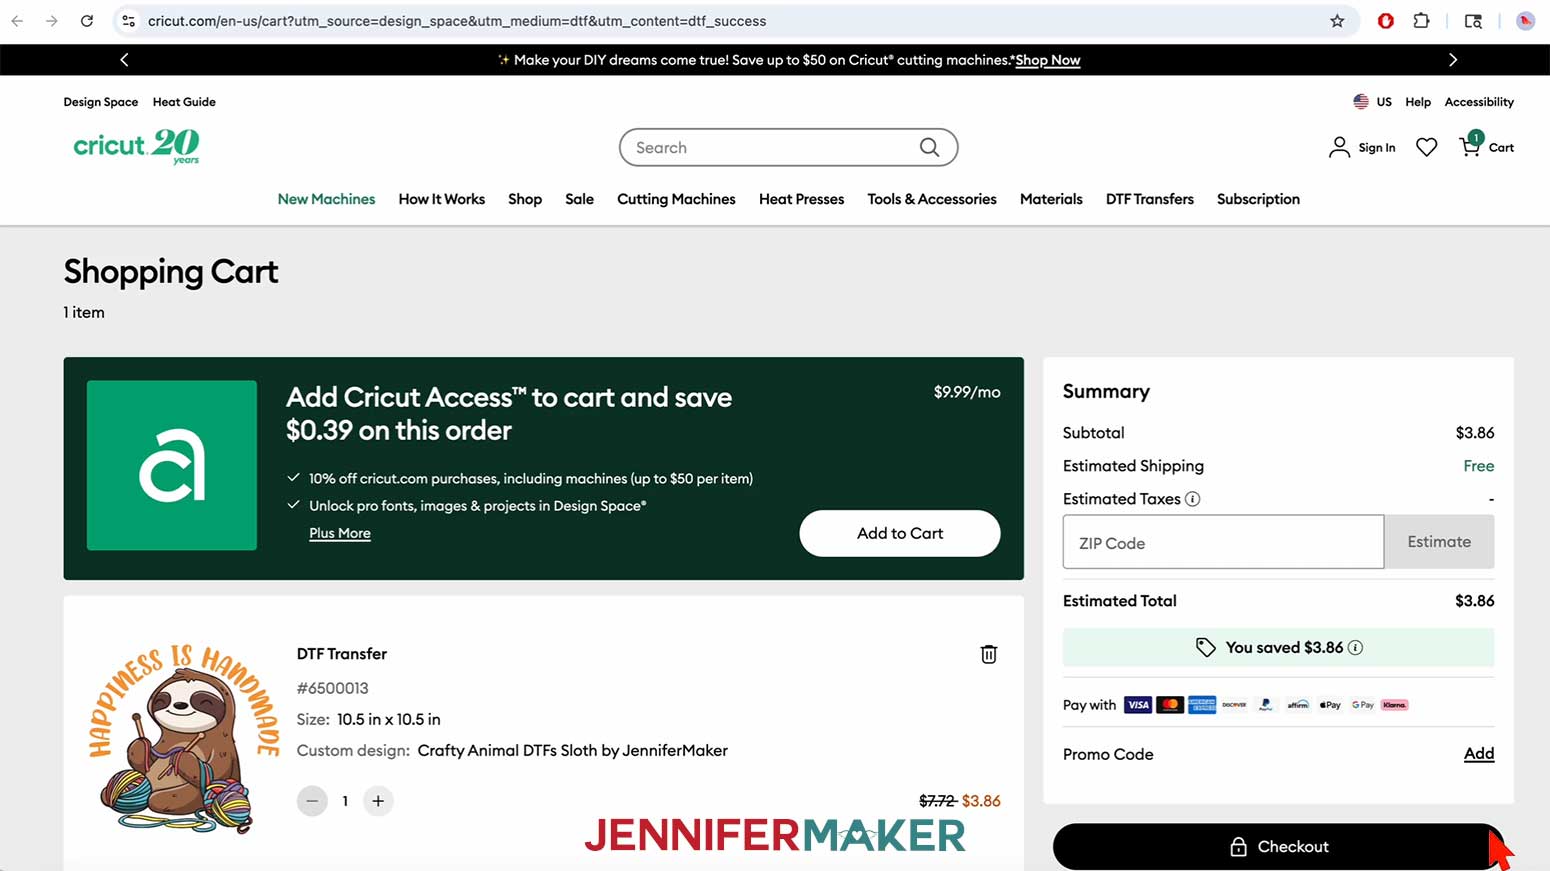
NOTE: My designs are free for you to use for personal use only. If you want to use my designs for commercial purposes, please read my licensing information before selling anything. - Your Cricut shopping cart will open in a sidebar or a new Internet browser window.
TIP: You can use the “Plus (+)” and “Minus (-)” icons on the Shopping Cart page to change the order quantity of a design.
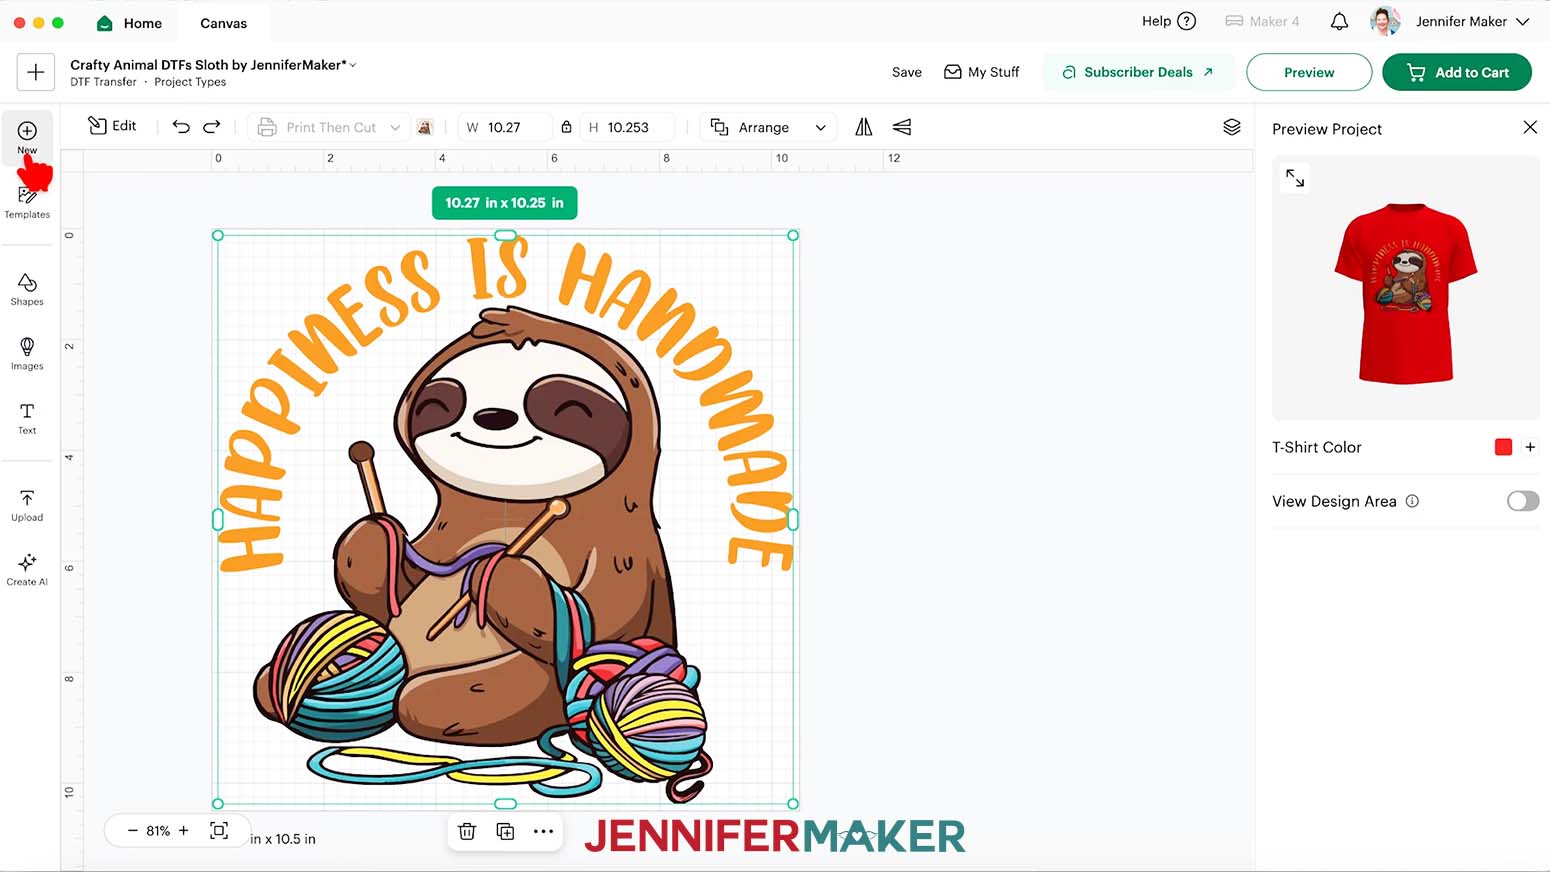
NOTE: If your browser is already open, the cart will load in a new browser tab instead. - To add a different size or another DTF Transfer design to your order, click on the “New” icon in Cricut Design Space.
TIP: If your cart is loaded in a sidebar, you may need to close it to continue. - Repeat Steps 2-20 to create your new design and add it to your shopping cart.
TIP: You can use the trash can icon to delete a design from your shopping cart. - When you’re ready to place your order, click “Checkout.”

- Click “Sign In with Cricut ID” and sign in to your Cricut account if needed.
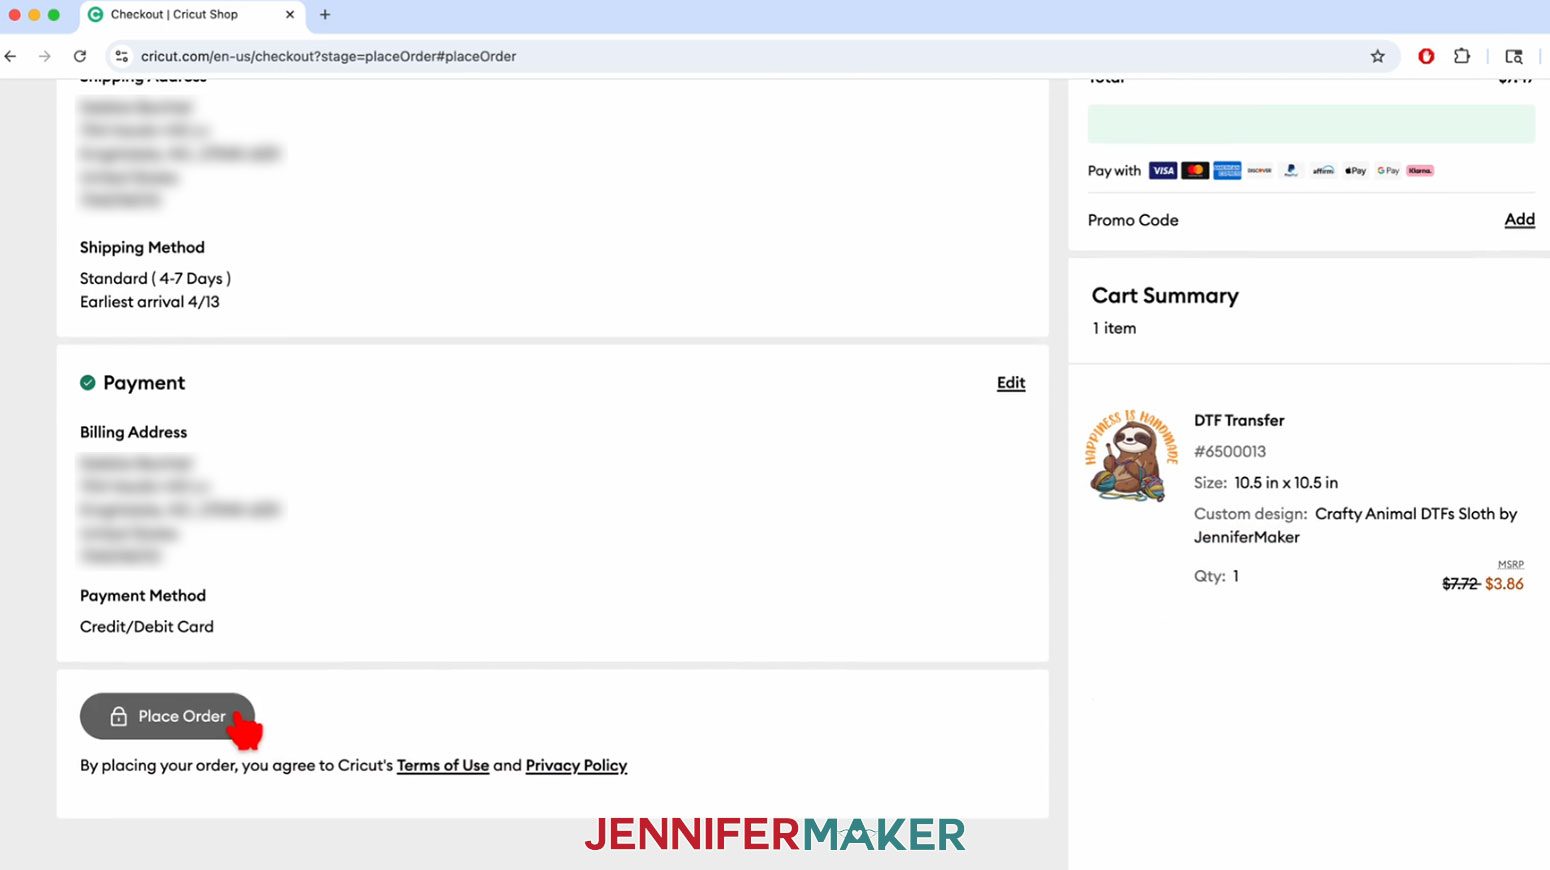
- Follow the checkout screens to add or edit your shipping and payment details.
- Click “Place Order” to submit your order to Cricut.

- Your printed DTF Transfer(s) will arrive soon, so look for them in the mail!
NOTE: Check your email or Cricut account order history for shipping and tracking information.


STEP 4: PRESS YOUR DTF TRANSFER
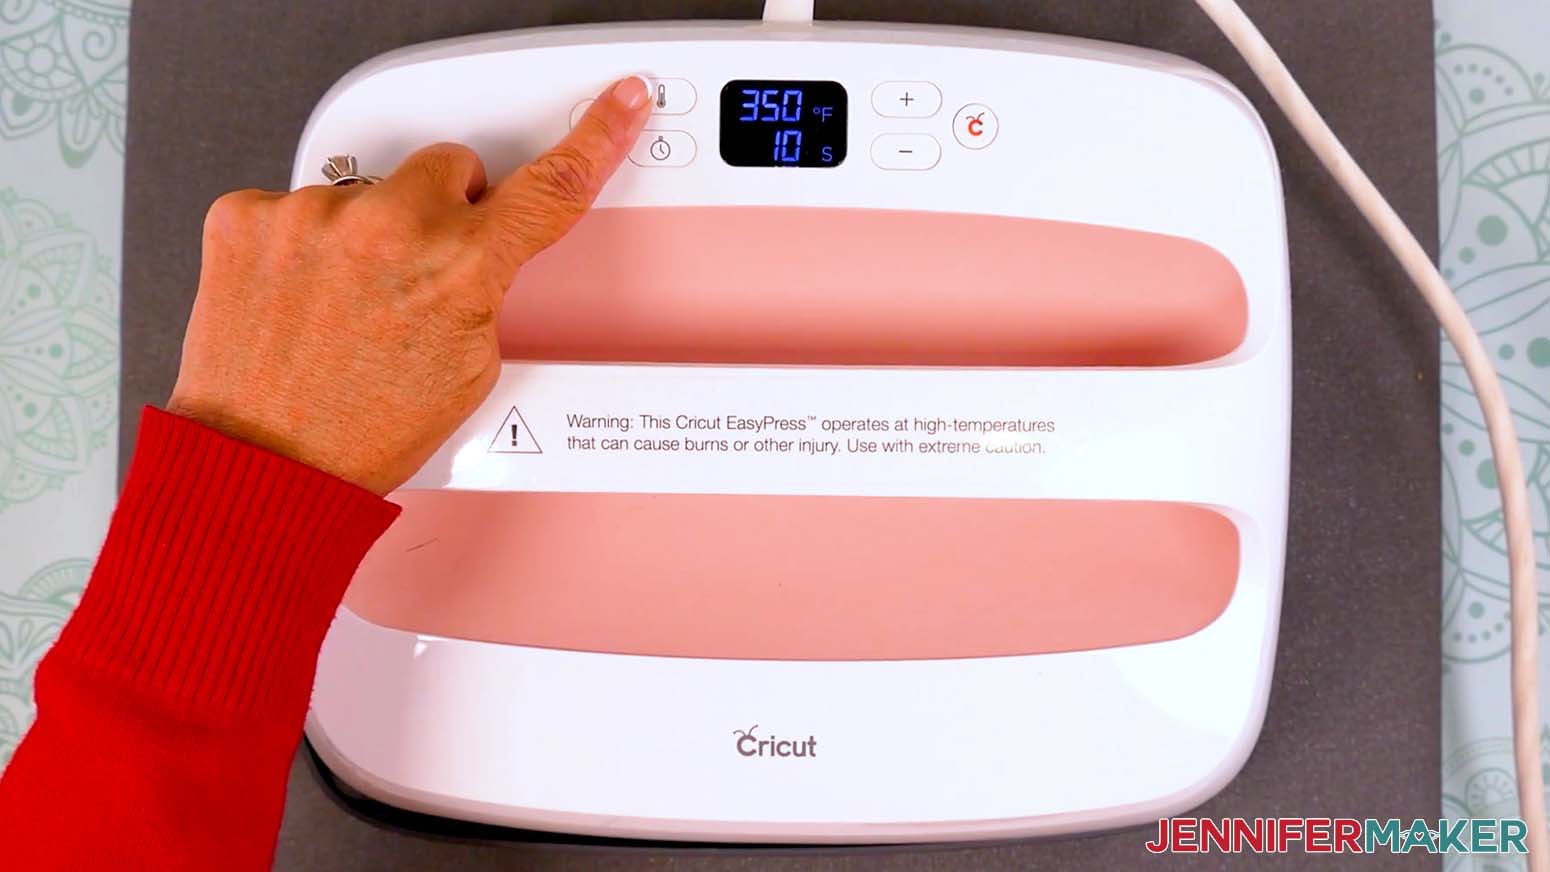
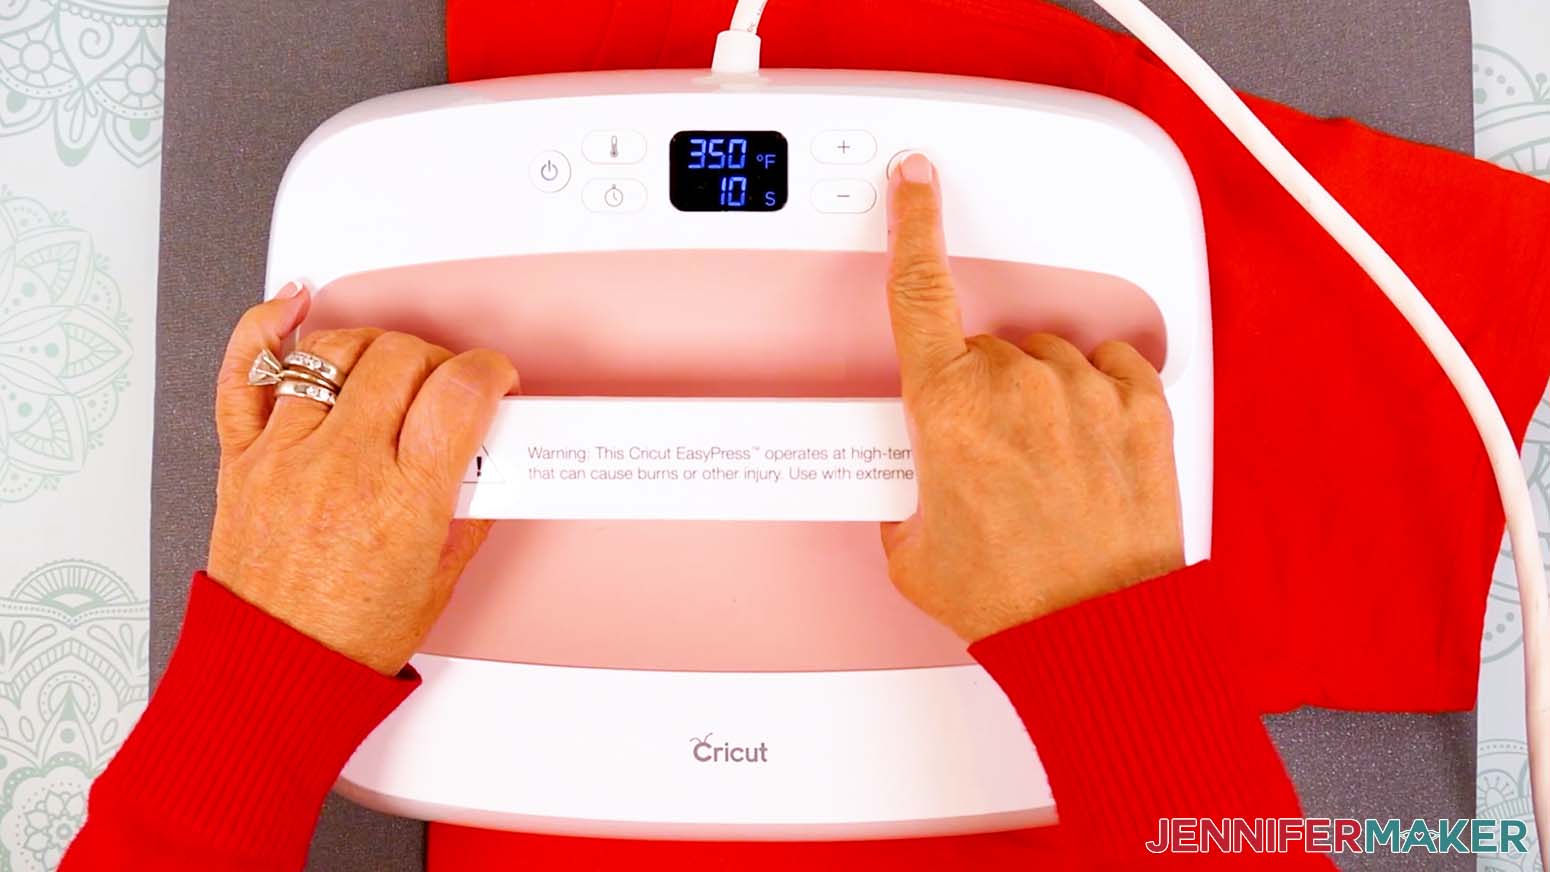
- Set the temperature of your EasyPress to 350℉ (175℃), and set the timer for 10 seconds.
TIP: I followed the time and temperature settings for 100% cotton according to Cricut’s Heat Guide with great results.
NOTE: To use a household iron, set it to the Cotton setting or whichever temperature setting is the closest to 350℉. Make sure to avoid using steam, as this can prevent the transfer’s adhesive from working properly. - Place your pressing mat on your work surface.
- Use a lint roller to remove any excess lint or debris from your shirt.
- Fold your shirt in half vertically and press it for 10 seconds along the crease.
TIP: This makes a center line in the fabric to help align your design, removes moisture, and pre-heats your shirt at the same time.
NOTE: Always remember to place your press back on the base after use. - Unfold your shirt and lay it face up on the pressing mat.
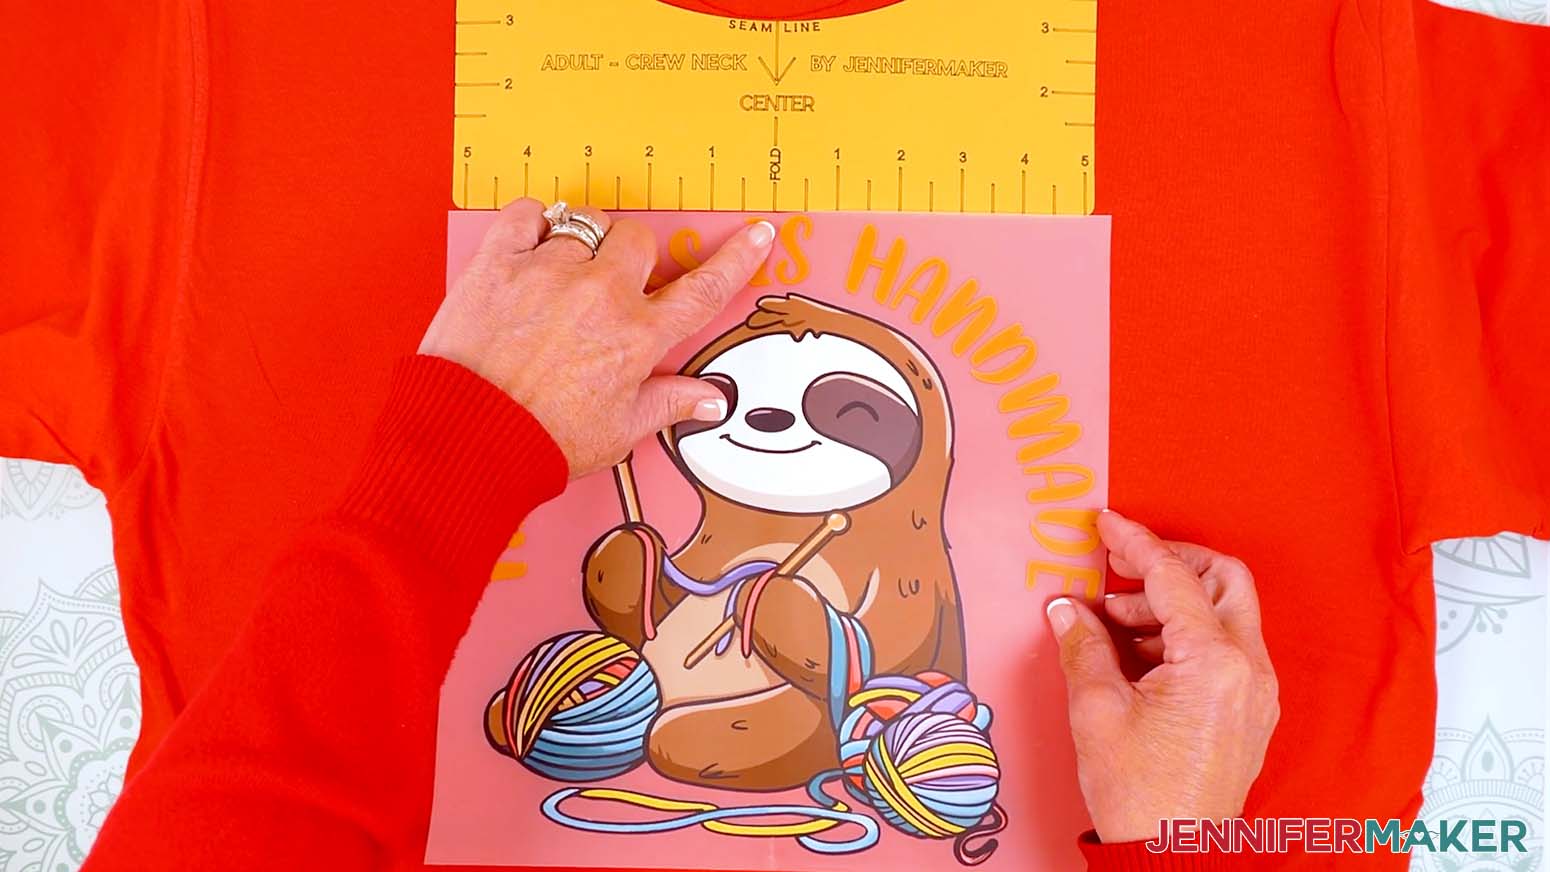
- Determine the center line of your DTF transfer by carefully curling the design along its vertical center, then crease it at the top and bottom of the film.
TIP: If your transfer film isn’t trimmed neatly and it’s difficult to find your design’s center, use a paper trimmer to square up the transfer film with the design. - With the design color-side up, center the transfer film on the T-shirt by lining up the creases on the film with the pressed line on the shirt about 2-3” below the neckline.
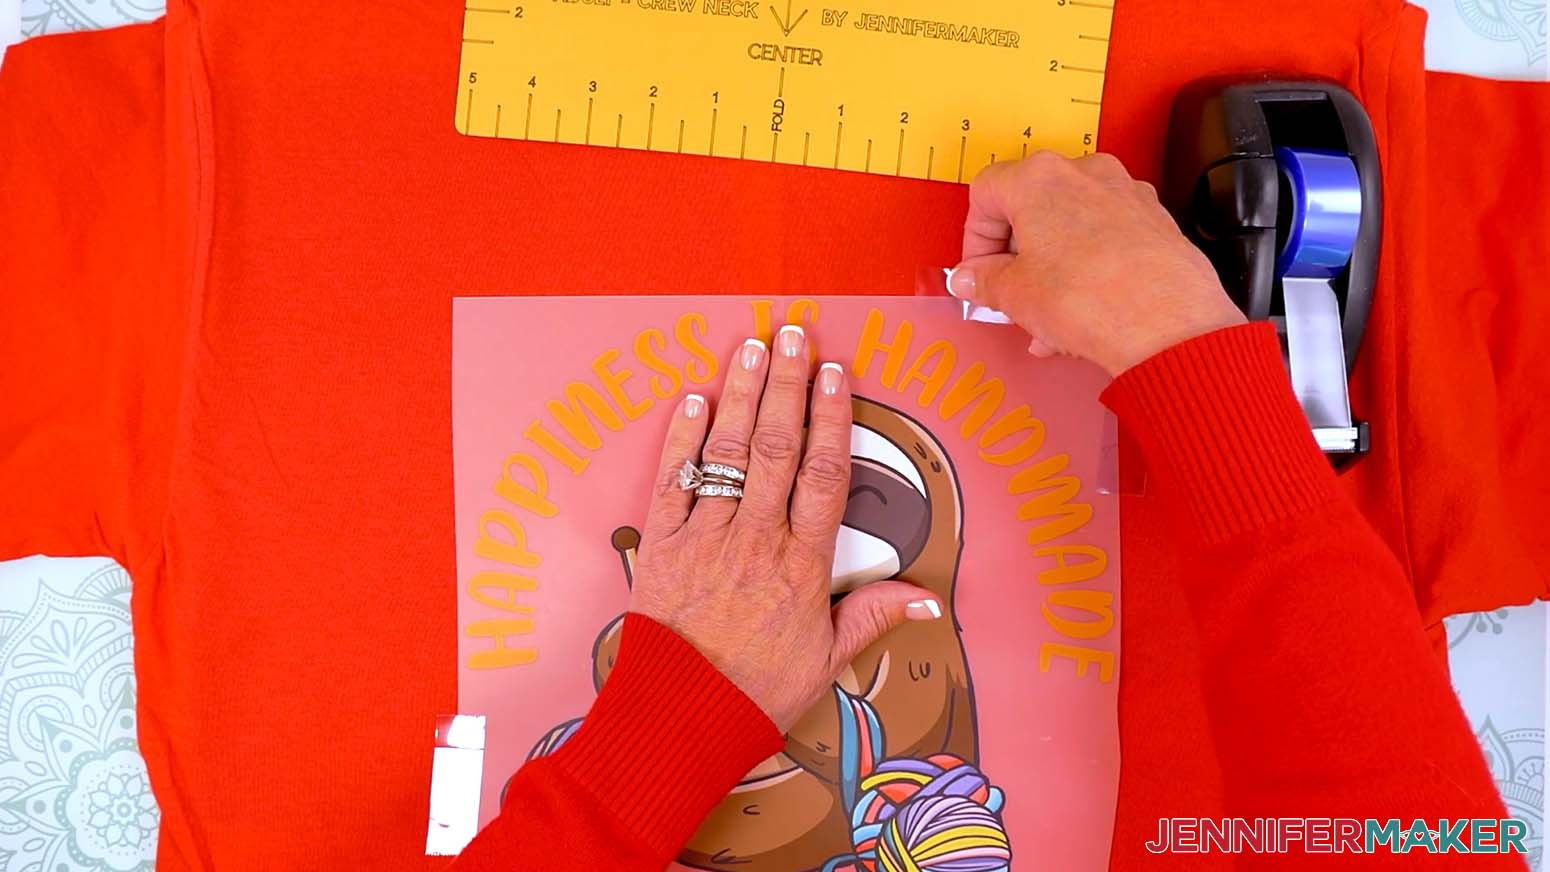
TIP: Use my T-Shirt Ruler Guide tutorial to create a T-shirt ruler guide to help with the perfect placement of your DTF transfer. - Use heat-resistant tape on all four sides to secure the film to the fabric, making sure it’s smooth.
NOTE: Avoid placing tape over the design to prevent temperature changes or creases on the colors when pressing. - If you’re using a T-shirt ruler, remove it.
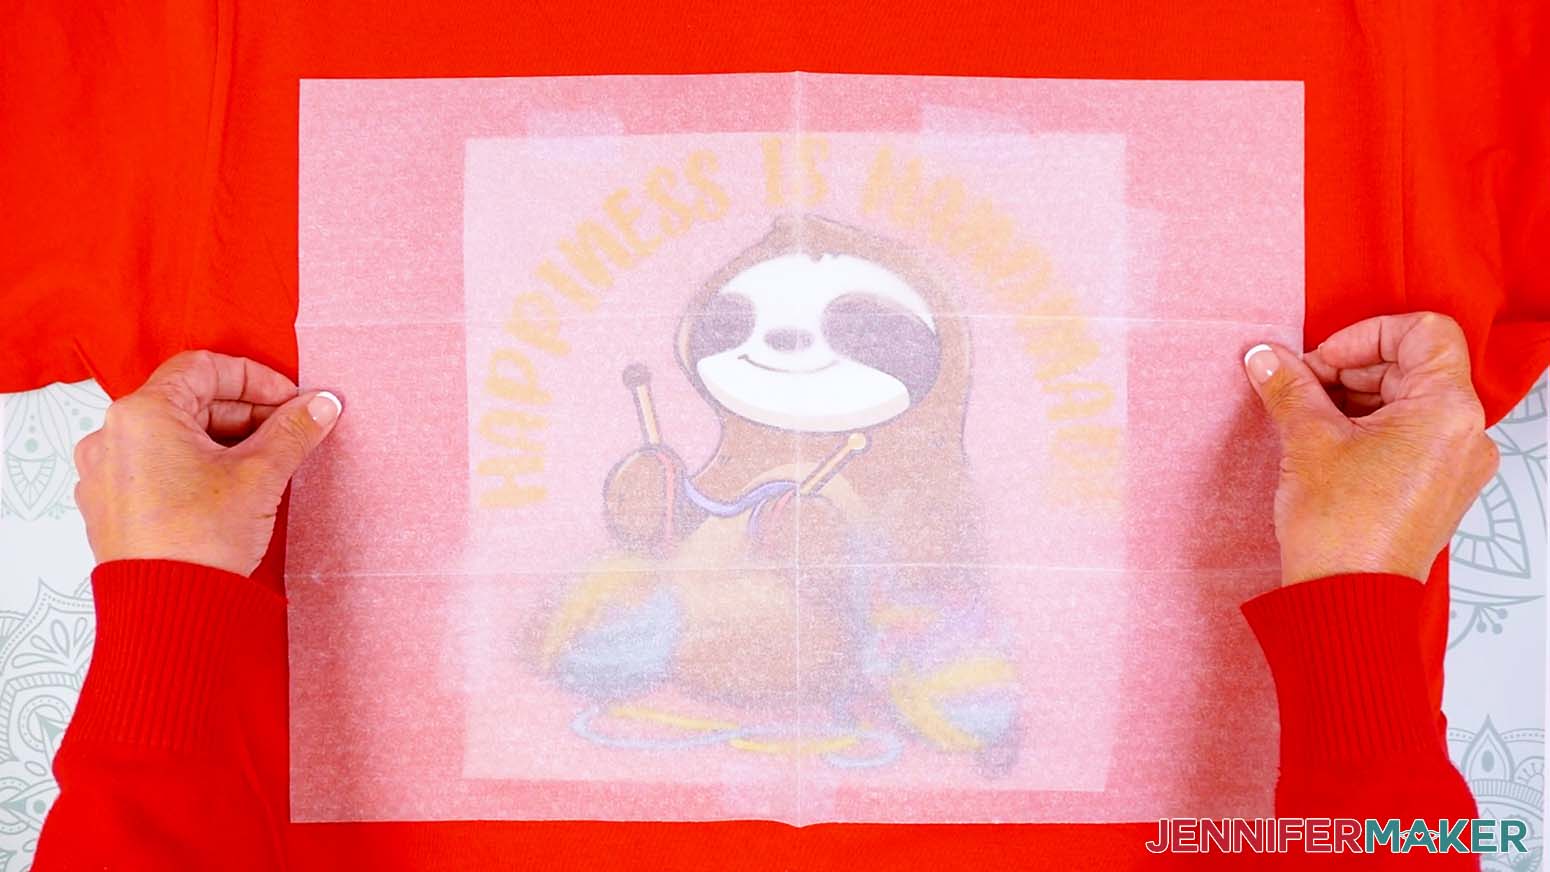
- Place a fresh piece of parchment paper on top of the shirt and design. Make sure it’s larger than the design and the heat press.
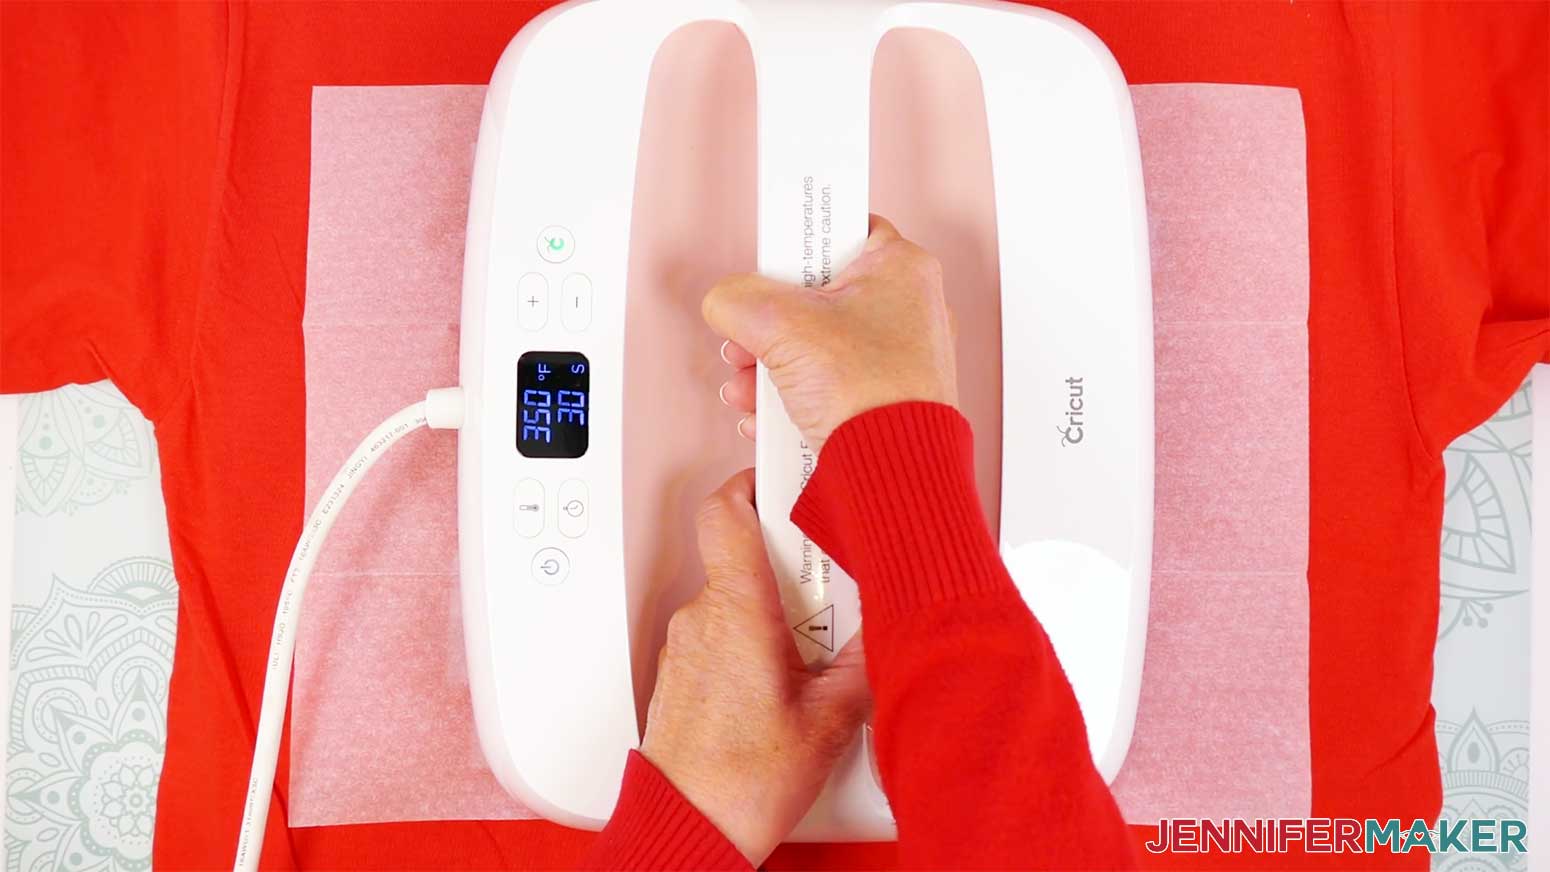
NOTE: Unlike sublimation projects, which use butcher paper, DTF requires parchment paper, which is thinner and lets more heat through to transfer the image. - Make sure the temperature of your EasyPress is at 350℉ (175℃), and the timer is set for 30 seconds.
- Cover the entire area of your design with the EasyPress and hold it in place. Press with firm, even pressure for 30 seconds.
TIP: Keep pressure even on both sides of the press for best results.
NOTE: If your design is larger than your heat press, press the design for 30 seconds at a time in sections, slightly overlapping where your pressing areas meet so each section is adequately heated. - When the time is up, remove the EasyPress.
- Allow the design to cool completely, about one to two minutes.
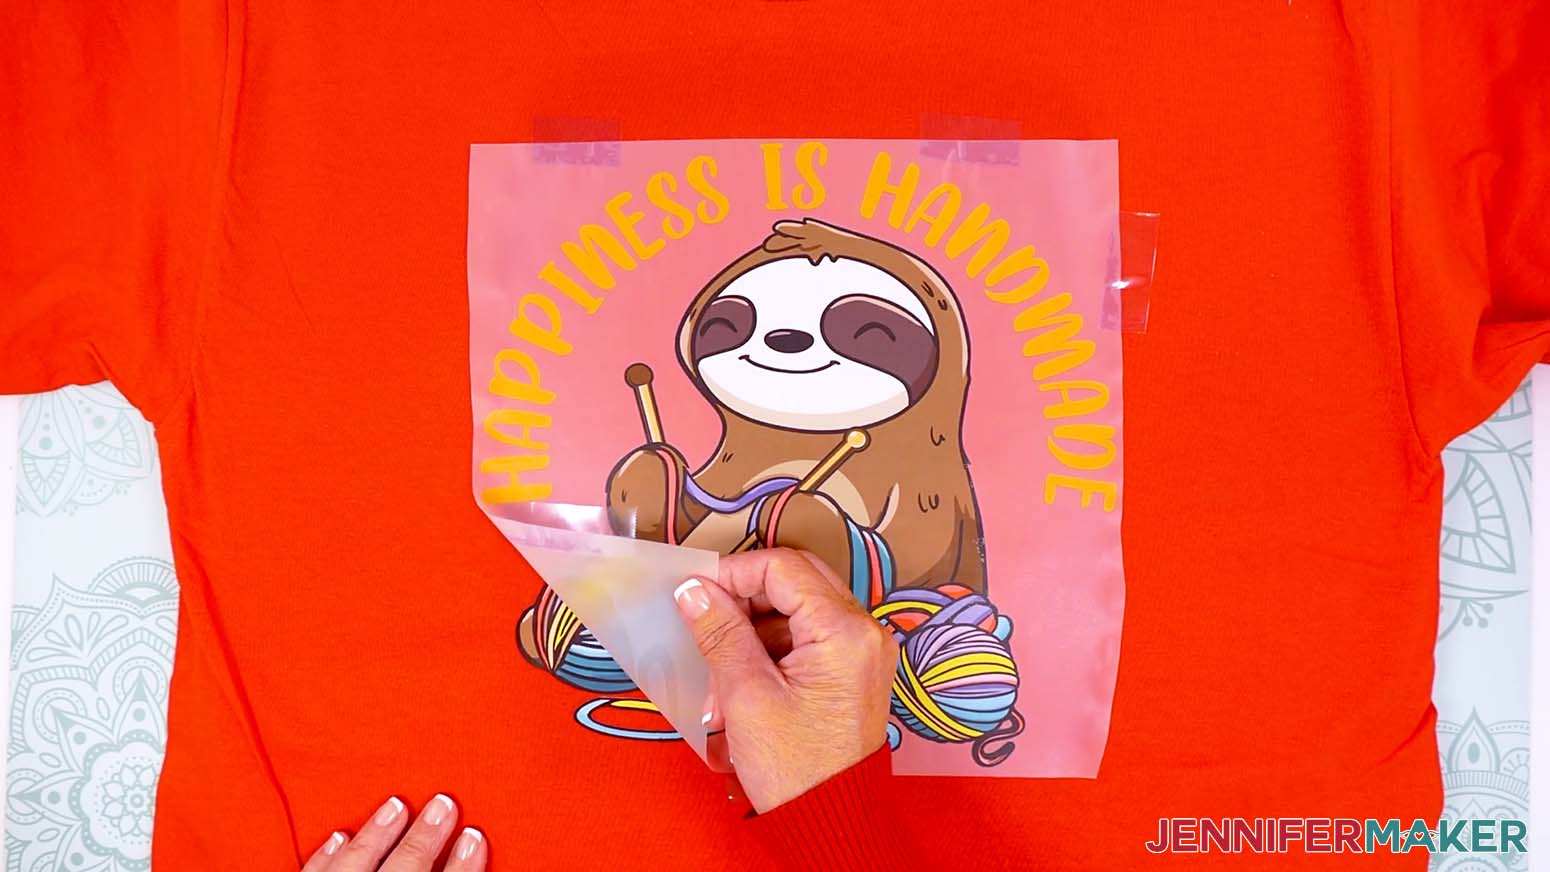
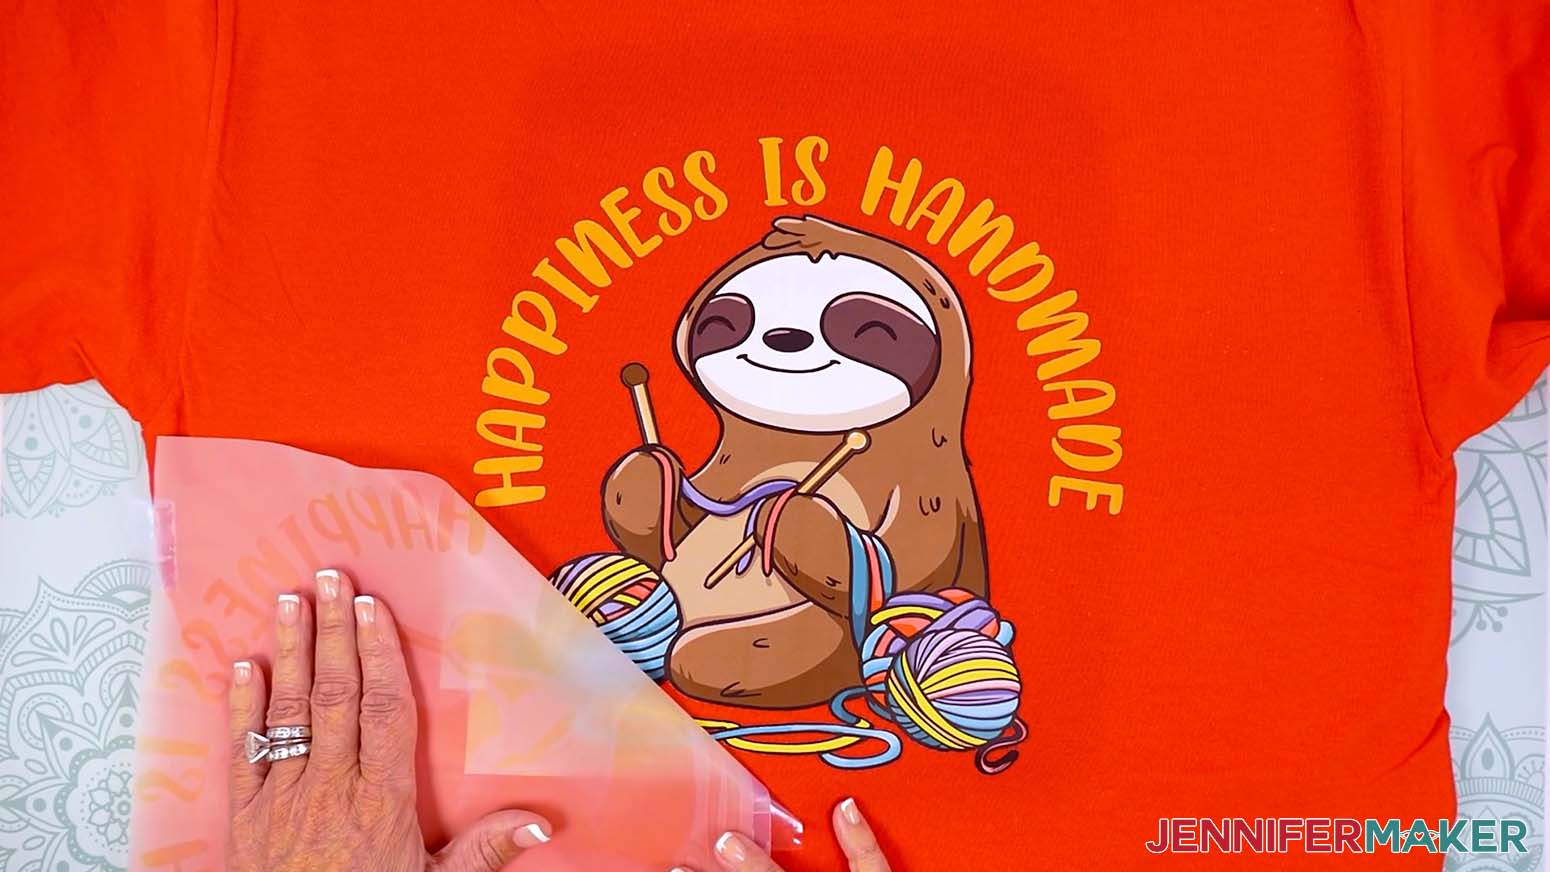
- Remove the parchment paper.
- Slowly peel the film from the DTF transfer. It may feel like the carrier sheet is still attached to the design, so go slowly to avoid damaging the transfer.
TIP: If any area of the design begins to lift from the shirt, lay the transfer film back down, cover it with parchment paper, and press for another 30 seconds.
TIP: If it’s very hard to peel, try peeling from a different starting point. - Your Cricut DTF transfer is complete!

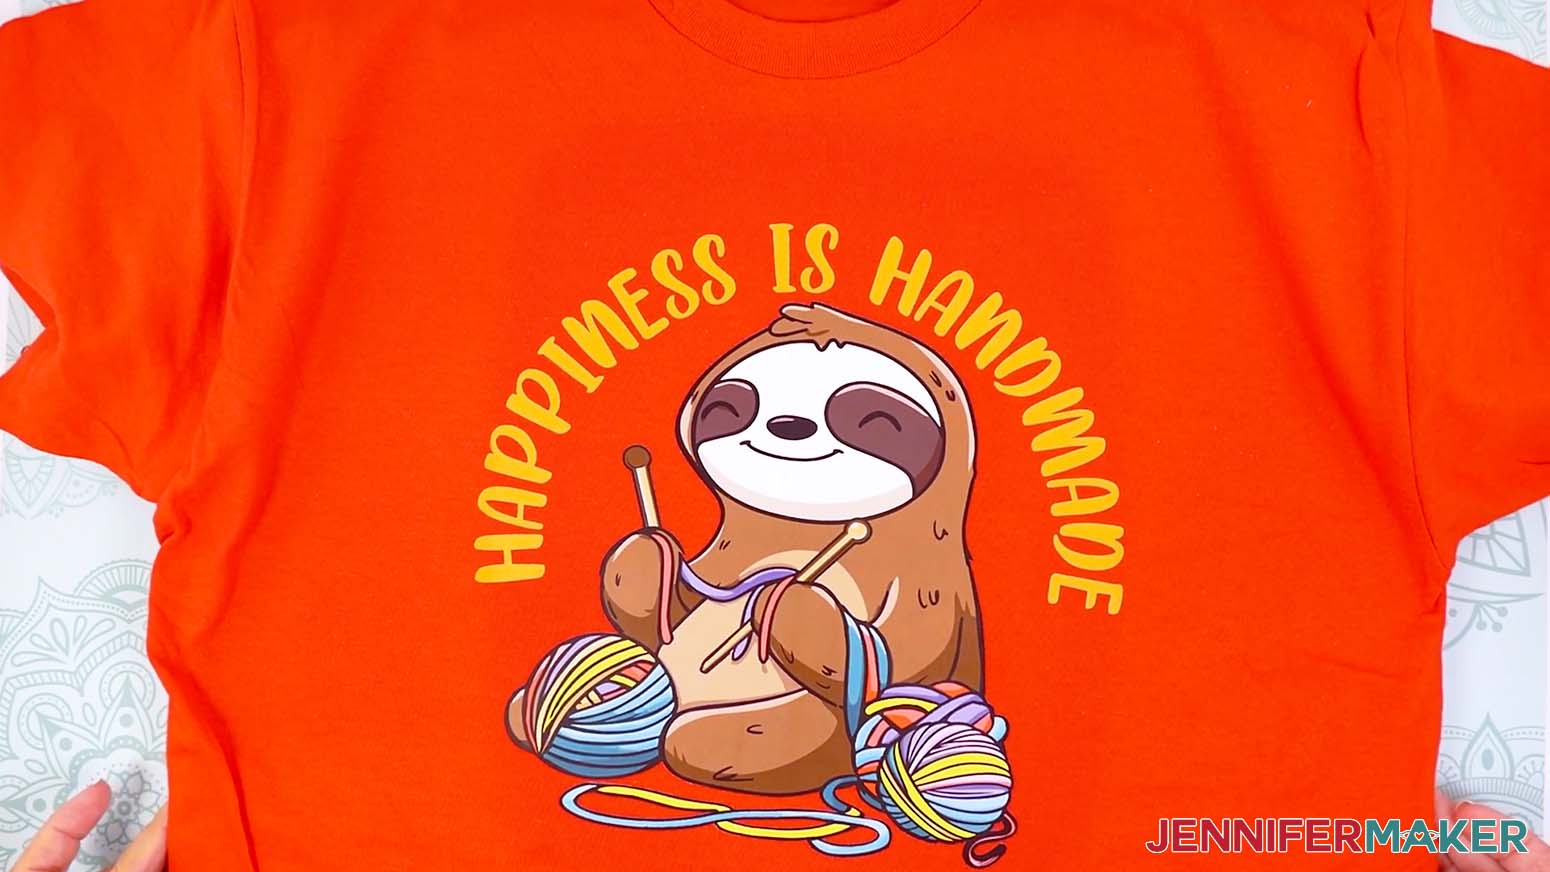
STEP 5: SHOW IT OFF
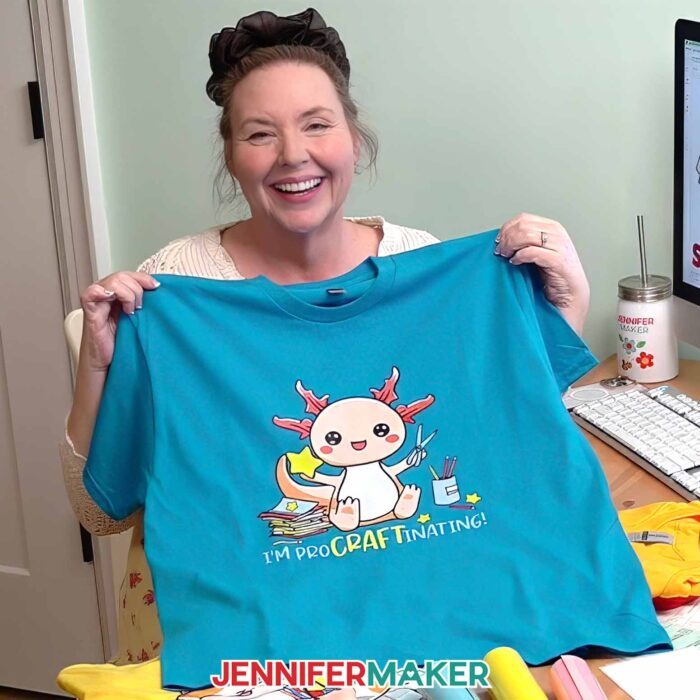
Now you know how to use Cricut DTF Transfers to create beautiful T-shirts with bright, full-color designs!
Notes
Design Sizes (for a Unisex Large Shirt ordered on a 10.5” x 10.5” Canvas):
Sloth - “Happiness is Handmade”: 10.27” x 10.25”
Axolotl - “I’m proCRAFTinating”: 10.26” x 9.97”
Cat - “Just One More Supply Run”: 10.15” x 10.27”
Lamb - “Crafting Made Me Late”: 9.13” x 10.27”
Care Instructions:
Allow 24 hours after application before washing. Turn inside out, then machine wash in cold water, tumble dry low. Do not bleach.
Fonts:
“Happiness Is Handmade”: Timberly Script
"I’m proCRAFTinating": Falling Leaves Print / Free Alternative: Delight Winter
"Just One More Supply Run": Rockey / Free Alternative: Hamberger
"Crafting Made Me Late": Splash / Free Alternative: Copy Duck
"Crafting Made Me Late": Peachy Day / Free Alternative: Peachy Day Personal Use
Answers to Your Questions About Cricut DTF Transfers
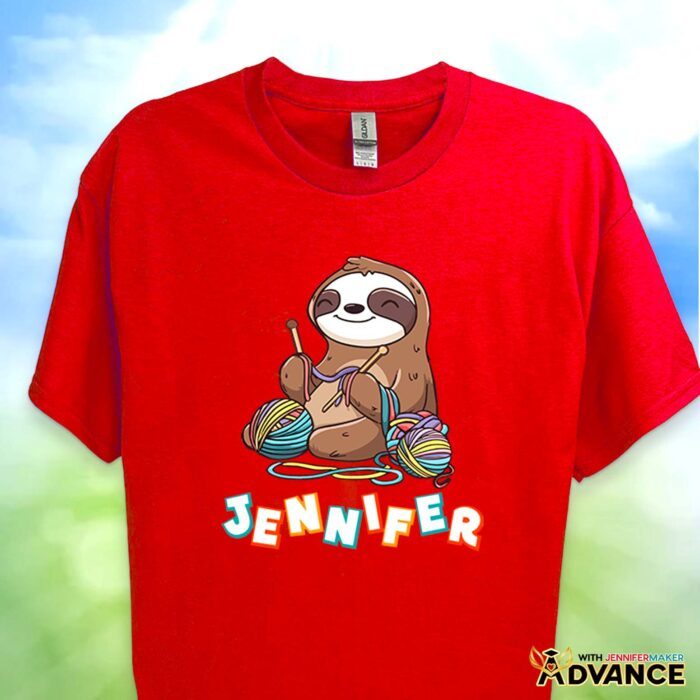
Q: How can I create custom Cricut DTF transfers?
A: You can learn how to create your own custom Cricut DTF transfer just like below in my ADVANCE program. Learn more about ADVANCE here!
Q: What are Cricut DTF transfers?
A: They are professionally printed transfers that Cricut creates for you after you upload artwork inside Design Space. Instead of printing at home, Cricut prints your design onto special transfer material so you can press DTF transfers onto shirts and other fabric blanks with heat.
Q: Are Cricut DTF transfers good for beginners?
A: Yes. Cricut DTF transfers are good for beginners because the ordering process is streamlined, the transfers arrive ready to use, and the single-press application makes the project less intimidating for first-time crafters.
Q: How is Cricut’s DTF printing service different from Jiffy or Ninja Transfers?
A: Cricut’s DTF service is different because the ordering process happens inside Cricut Design Space. Jiffy and Ninja Transfers usually use separate websites and gang sheets, which can give you more flexibility for bulk orders. Cricut is easier for beginners because it keeps uploading, sizing, previewing, ordering, and checkout in one familiar place.
Q: Do I need a DTF printer to use Cricut DTF transfers?
A: No. You do not need a DTF printer to use Cricut DTF transfers. Cricut handles the printing process for you, so there is no need to buy special equipment or manage adhesive powder at home.
Q: Can I use my own designs with Cricut DTF transfers?
A: Yes. You can upload your own design files for Cricut DTF transfers as long as they are high enough quality. PNG files with a transparent background work especially well because they avoid an unwanted box around the artwork.
Q: How will my Cricut DTF transfers arrive from the printer?
A: Cricut DTF transfers arrive ready to use and already printed on transfer film. In my order, the transfers came packaged flat inside a photo mailer instead of rolled up, which made them easier to handle right away. The package also included instructions and parchment paper for pressing. Each design was protected inside a zip-top bag, and everything arrived in great condition with bright, bold color already applied to the transfer film.
Q: How does DTF printing compare to using vinyl or sublimation?
A: DTF printing combines some of the best features of both vinyl and sublimation. Unlike vinyl, you do not need to cut, weed, or layer separate colors to create a detailed design. Unlike sublimation, DTF works on cotton and dark fabrics instead of requiring white or light polyester blanks. DTF transfers also allow for full-color artwork, fine details, and intricate patterns that would be difficult to create with standard heat transfer vinyl alone.
Q: Can you use a Cricut for DTF transfers?
A: Yes, you can use a Cricut for DTF transfers through Cricut’s built-in ordering service inside Cricut Design Space. Instead of printing transfers at home with a DTF printer, Cricut prints the transfer for you and ships it ready to press. You can upload your own designs, size them directly in Design Space, and order custom transfers without leaving the Cricut platform.
Q: How much does Cricut DTF Transfer cost?
A: The cost of Cricut DTF transfers depends on the transfer sheet size you choose. Cricut charges by transfer size instead of by individual decal. This means you can sometimes save money by placing multiple smaller designs onto one larger transfer sheet. Cricut also updates shipping totals and discounts directly inside your cart while you build your order.
Q: What temperature should I set my Cricut press to for DTF transfers?
A: For the best results on a cotton shirt, set your Cricut heat press or Cricut EasyPress to 350 degrees Fahrenheit, or 175 degrees Celsius. In my testing, that temperature worked well with Cricut’s recommended settings from the Cricut Heat Guide and produced bold, durable prints with a clean release from the carrier sheet.
Q: How do you use DTF with a Cricut EasyPress?
A: Start by preparing your shirt with a lint roller and a quick pre-press to remove moisture. Place the DTF transfer in the desired location and secure it with heat-resistant tape, since Cricut’s transfer film is not sticky. Cover the design with parchment paper, then press with firm, consistent pressure for thirty seconds using your Cricut EasyPress. Allow the design to cool completely before slowly peeling the carrier sheet away.
Q: Can SVG files be used for DTF transfers?
A: Yes, SVG files can be used for DTF transfers, along with PNG and JPG files. However, PNG files with a transparent background are often the easiest option for ordering because they upload cleanly and preserve full-color artwork without unwanted background edges. If you use SVG files, make sure all parts of the design are prepared correctly before uploading them into Cricut Design Space.
Q: Why should I use parchment paper with Cricut DTF transfers?
A: You should use parchment paper with Cricut DTF transfers because it is thinner than butcher paper and lets heat pass through more efficiently. That helps the design bond properly when you press custom DTF transfers.
Q: What is the cost of Cricut DTF transfers compared to other services?
A: The cost of Cricut DTF depends on the transfer size you choose. Cricut prices transfers by sheet size rather than by individual decal, so grouping multiple small designs on one larger transfer can be the best way to stretch your order.
Q: Can they handle complex artwork?
A: Absolutely. The DTF printing technique supports a wide range of designs, including intricate details and full-color prints without needing layering. I recommend using a high-quality PNG with a transparent background like the ones in my download folder for the best results.
Q: Do the transfers feel heavy on the shirt?
A: No. The finished transfers feel flexible and lightweight, especially compared to thicker vinyl applications.
Q: How do I get the best results from Cricut DTF transfers?
A: For the best results, start with a clean shirt, lint roll the fabric, place the transfer in the desired location, and secure it with heat-resistant tape. Use firm pressure and consistent pressure while pressing, then let the carrier sheet cool completely before peeling.
Q: How long do DTF transfers last?
A: Cricut DTF transfers can make long-lasting T-shirts when they are applied and cared for correctly. Wait twenty-four hours before washing, turn the shirt inside out, use cold water without bleach, and tumble dry on low.
Q: How do I pick between DTF and UV DTF?
A: If you’re deciding between DTF vs. UV DTF, the biggest factor is what you’re decorating. If you’re working with fabric (like T-shirts, tote bags, or sweatshirts), DTF is a great choice because it bonds to fibers with heat and works well even on dark fabrics. If you’re working with hard goods (like ceramic mugs, acrylic keychains, metal, or many plastics), UV DTF is the better option because it creates a full-color, permanent decal that transfers to smooth surfaces without heat. In short: DTF is for fabric, UV DTF is for hard surfaces.
Q: Can I make and sell shirts or other items using your DTF designs?
A: If you want to use my DTF designs and project materials for commercial use, please familiarize yourself with my important licensing information before selling your crafts.
Q: Where can I get help if I get stuck?
A: If you want quick troubleshooting or you want to show off your finished projects afterward, my Cricut Facebook group can be a helpful place to compare notes and see what others are doing.
Get my free PNG/PDF files to make your own Cricut DTF transfers!
(If you do not see the signup form above, click here.)
I absolutely love seeing your handmade crafts! Once you’ve learned how to order and use Cricut DTF transfers, inspire others and share photos of your project in our Facebook group or tag me on social media with #jennifermaker.
Love,

Want to remember this? Save this Cricut DTF Transfers Tutorial to your favorite Pinterest Board!