
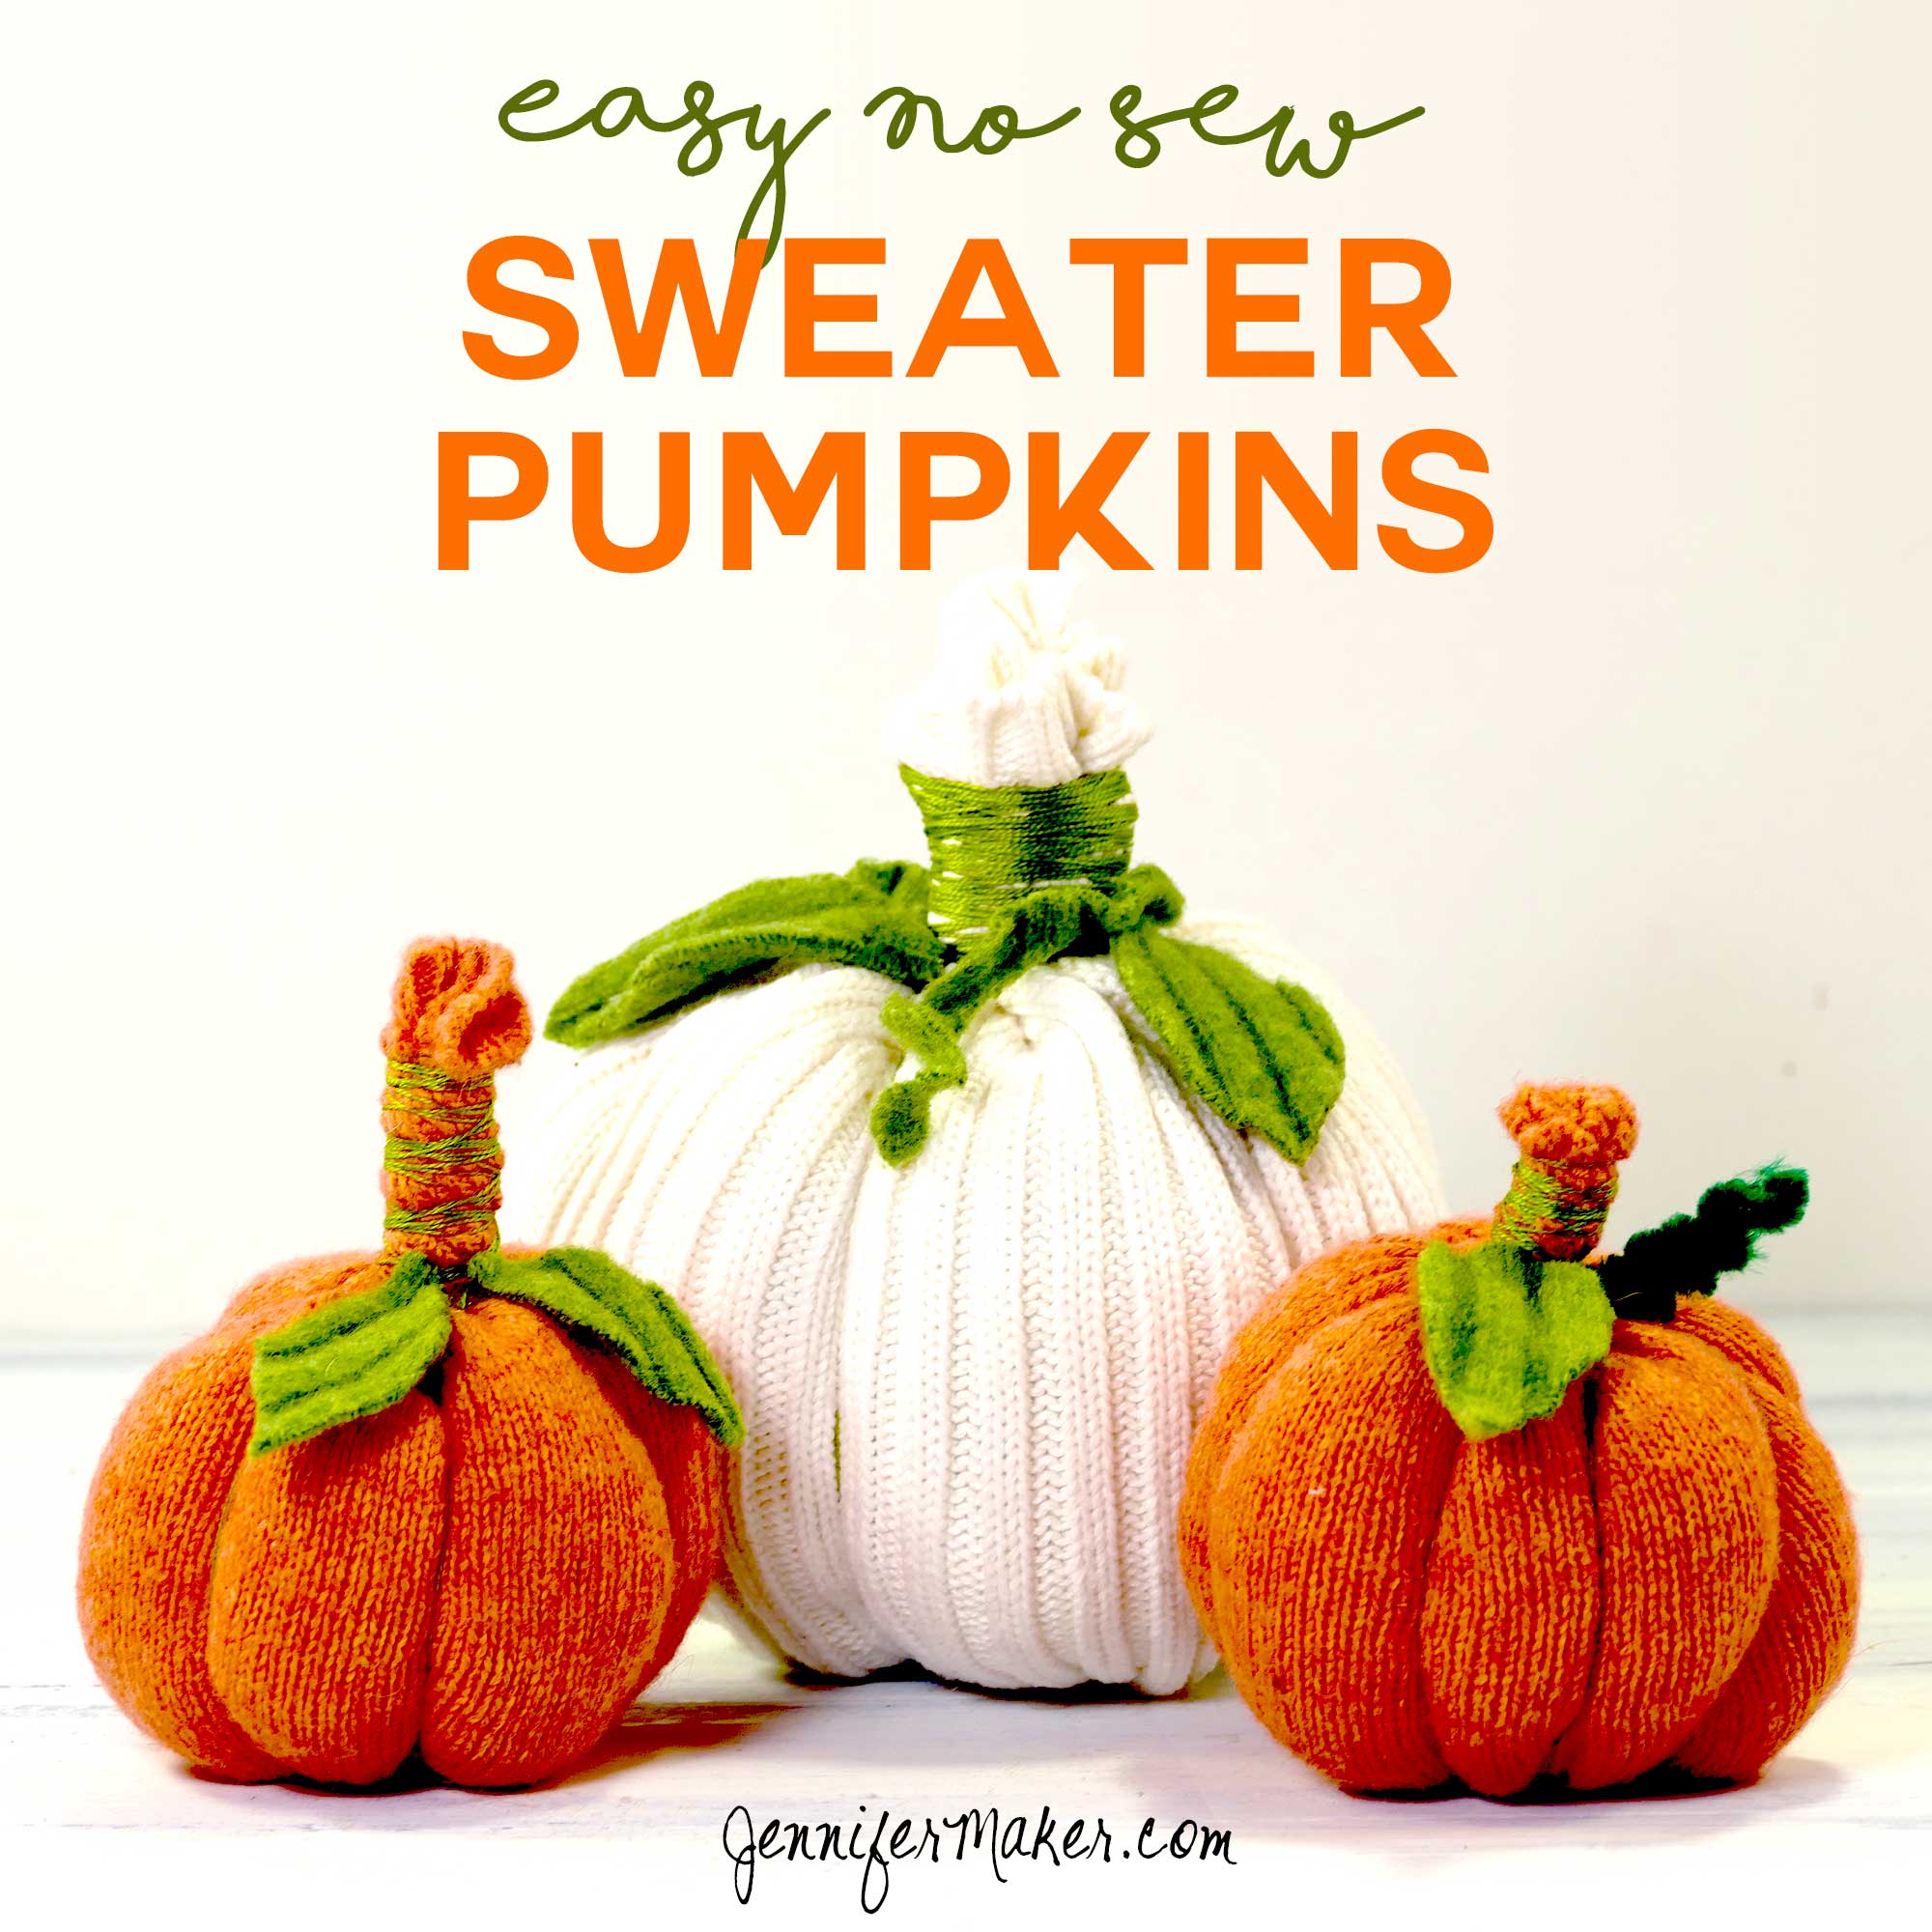
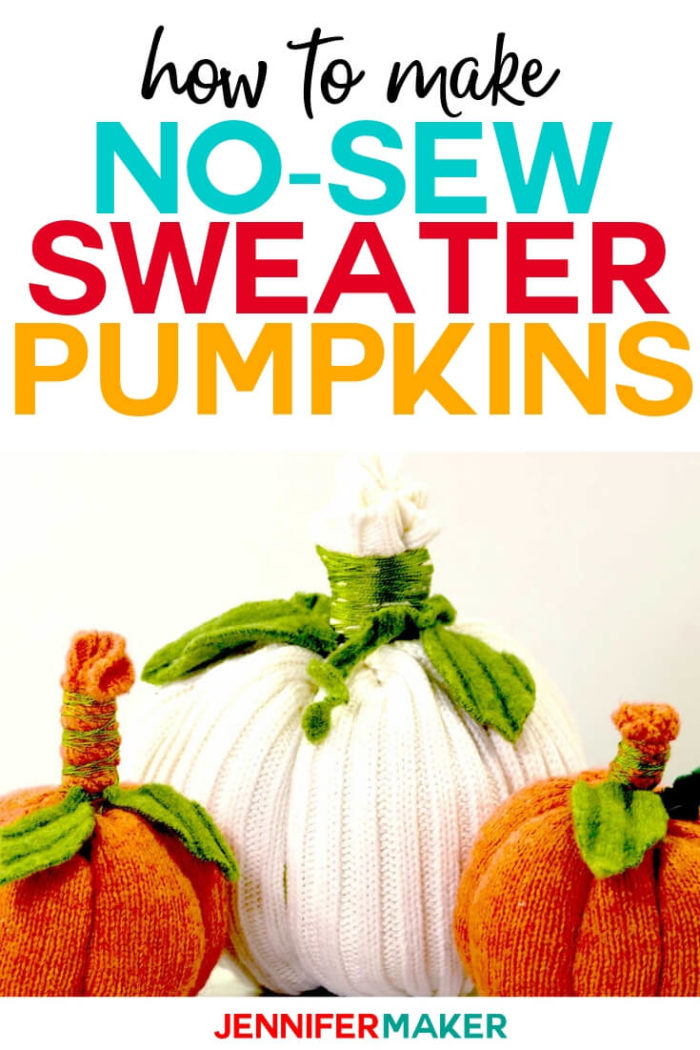
I adore making things with old sweaters. You may have already noticed this by the plethora of sweater upcycle projects on my blog, like my autumn dreamcoat, my snowflake coat, and all of my sweater hats, scarves, and mittens. And while it’s not quite sweater weather yet, autumn is definitely right around the corner. So tonight I decided to use a few sweaters in my stash to show you how easy it is to make sweater pumpkins. I made three no-sew pumpkins in about 30 minutes. They were SO fun to make, and they look so cute!
This post contains some affiliate links for your convenience (which means if you make a purchase after clicking a link I will earn a small commission but it won’t cost you a penny more)! Read my full disclosure policy.
DIY Sweater Pumpkins Materials
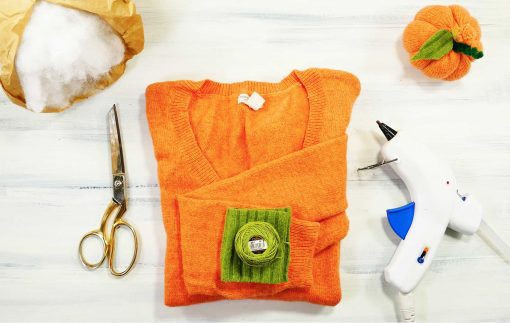
- Old sweaters (I get mine from my local thrift store) — any size, any type
- Embroidery thread or twine (I used this thread)
- Fiberfill or sweater scraps (for stuffing)
- Hot glue gun
- Scissors
Sweater Pumpkins Step-by-Step Tutorial
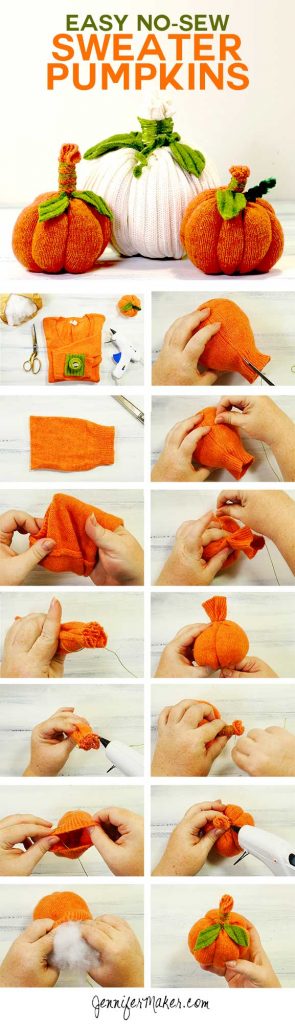
First, decide if you want a small, medium, or large sized sweater pumpkin. I made two small and one medium sweater pumpkin. Then use my sweater “pumpkin carving” chart below to see where to cut your sweater for which size pumpkin you want to make.
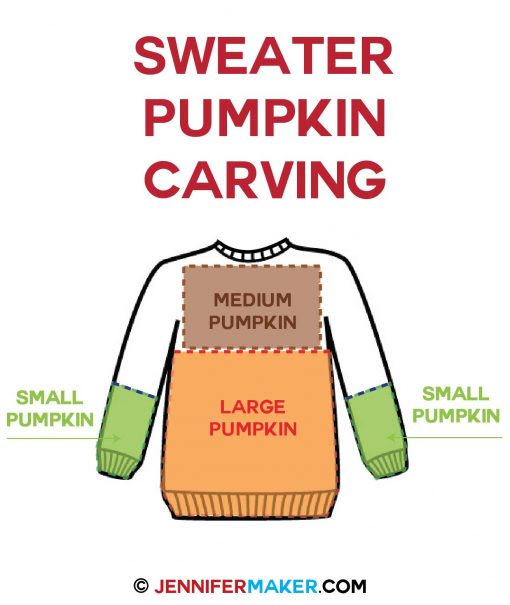
Cut your sweater for your preferred pumpkin size. Note that if you’re making small pumpkins, you can also use the upper arm of your sweater (above the cut shown in the chart above).
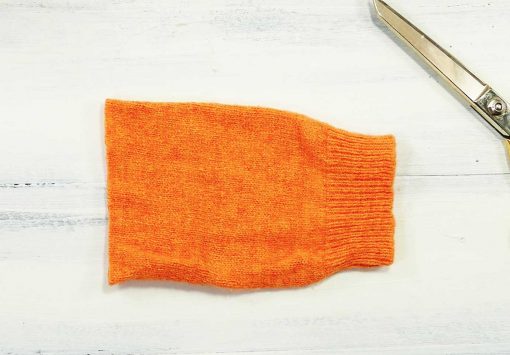
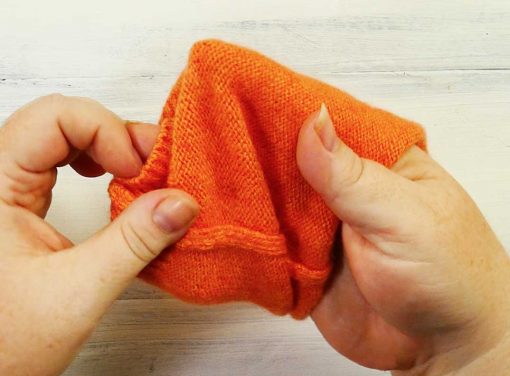
Turn the sweater part you cut inside out.
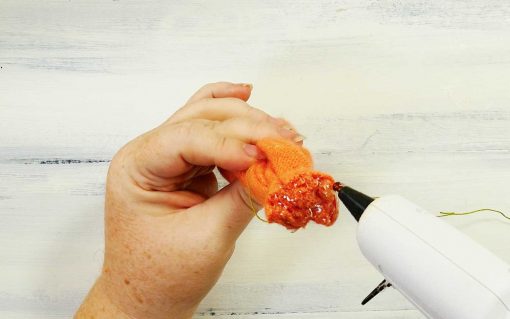
If you cut out a piece for a medium sized pumpkin, or your large sized pumpkin piece is a rectangle instead of a tube (which can happen when you cut up cardigans), you’ll need to glue the side closed before continuing. Just put hot glue on one short edge of your sweater piece and match up the other short edge to it, then press lightly (don’t burn yourself). Your goal is to make a tube. Allow the glue to set. (In the photo below, you can see how I am gluing the side of my medium-sized sweater piece.)

Take a long length of your embroidery thread or twine (at least two yards) and tightly close the bottom of your sweater tube, then knot it well. If you’re making the smaller pumpkin and have a cuff, close and tie the other end of your tube.
Apply a liberal amount of hot glue to the bottom edges where you’ve closed the tube with thread. Allow glue to set.
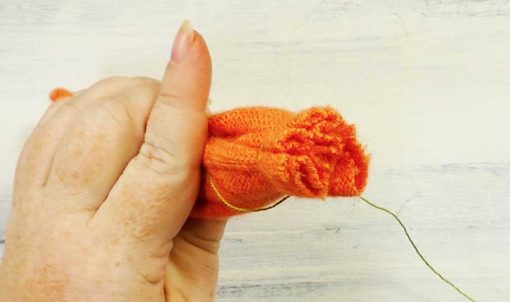
Now turn right side out and make sure the thread is coming out the top of what is now essentially a sweater sack!
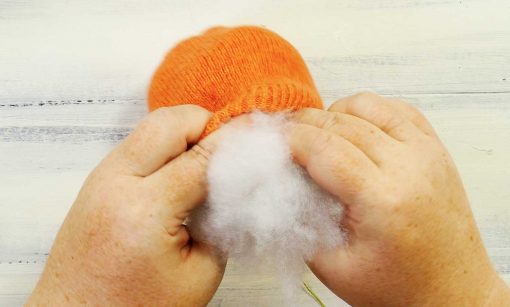
Stuff your pumpkin with fiberfill or whatever type of stuffing you prefer. You could also use sweater scraps!
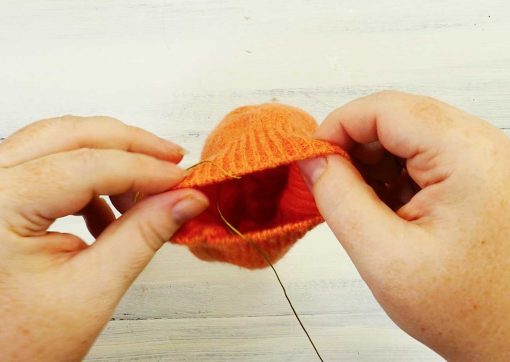
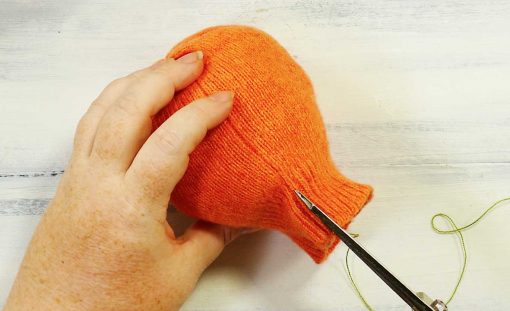
Cut a small notch next to the seam at the top edge of your sweater. Cut 1″ for a small pumpkin, 2″ for a medium pumpkin, and 3″ for a large pumpkin. This cut gives a place for your thread to come out without having to fold over the edge of your sweater.
Tug gently on the thread so it comes out of the notch you cut in your sweater (don’t pull the thread out, just allow it to hang out)
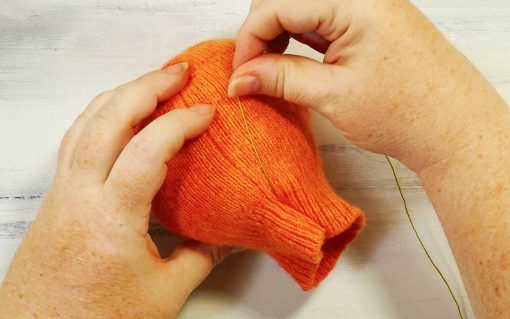
Gather up the top edge (1″ for small, 2″ for medium, and 3″ for large) and wrap the thread around the base of the top gathered section a few times to anchor it. This top section will eventually become the pumpkin stem.
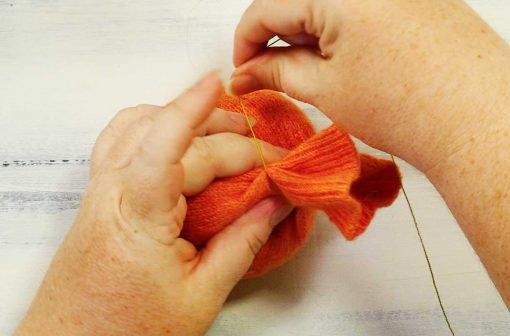
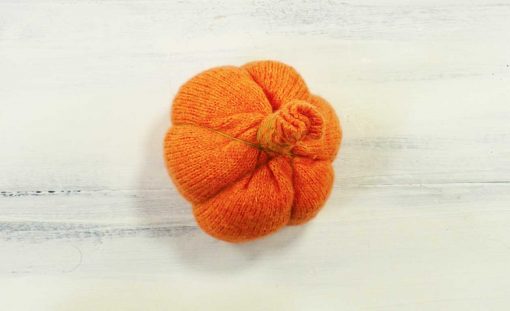
Begin wrapping the thread from the top to the bottom and back up again. Do this at least twice in the same spot. Wrap it in several sections and pull tightly each time. This creates the segmented pumpkin shape. Keep an eye on your thread to make sure it is going exactly what you want it to be. If necessary, you can wrap the thread around the stem a few times before wrapping it around the entire pumpkin — this keeps the thread anchored at the top a bit more.
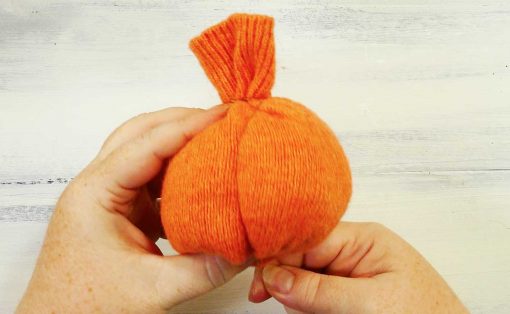
Once you are pleased with the segments you formed with the tight thread, continue wrapping the thread around and up the stem.
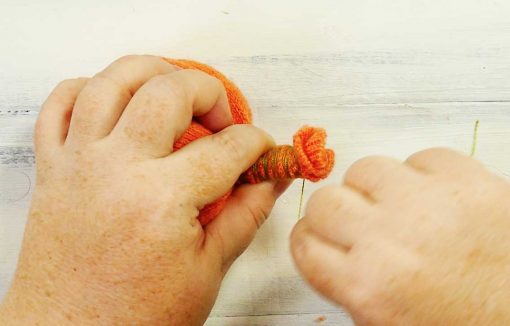
When you’re satisfied with the look of your stem, tie or glue the loose end of the thread.
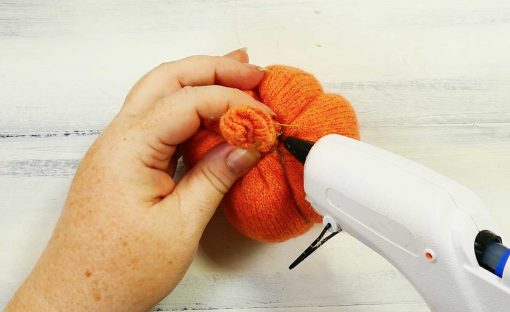
Adjust the pumpkin so it sits how you’d like it. You can leave it like this, or embellish it. Let’s add some leaves.
Cut out small leaves from another old sweater in a complimentary or contrasting color. Glue them to the top of your pumpkin.
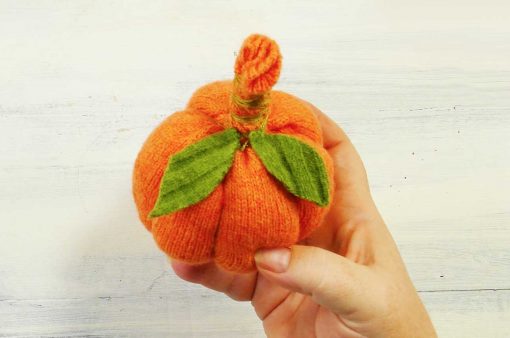
And that’s all there is to making sweater pumpkins! It’s a quick and easy project. Send me photos of your sweater pumpkins so I can share them with everyone here!
Love,

Like this tutorial? Please pin it to your favorite Pinterest craft board!


4 Comments