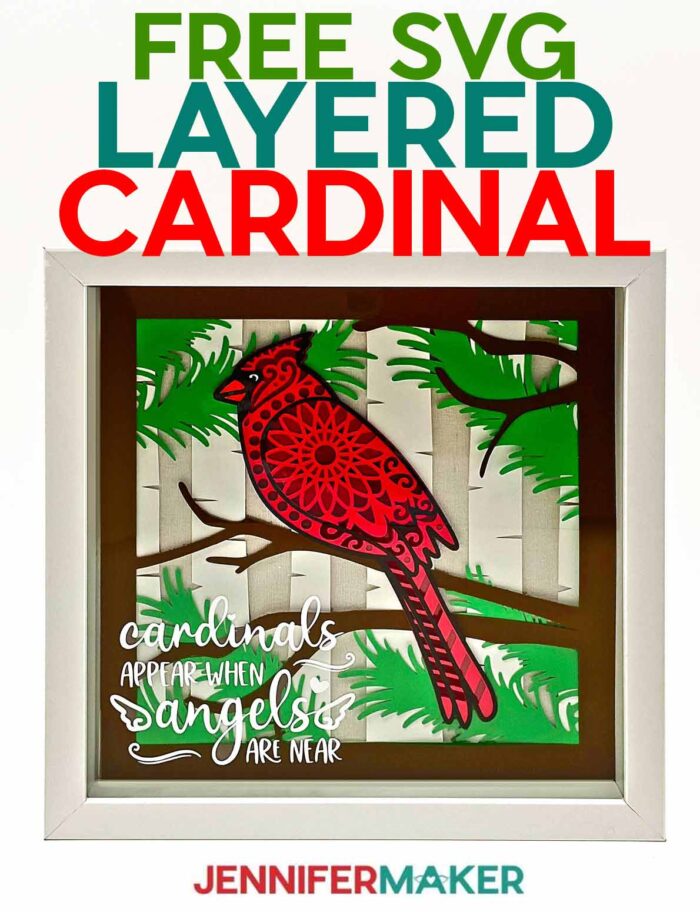
Learn how to make your own shadow box with lights featuring a layered cardinal SVG design!
Layered cardstock projects are so much fun, but displaying them all can get expensive if you buy a shadow box frame for every masterpiece! Fortunately, you and your Cricut can make your own shadow box, you can even add lights! I’ll show you how to make a beautiful frame to display my free cardinal SVG design. Don’t want to make a frame? It fits in a premade shadow box, too! And if you’re crafting with a Joy, I even have a special version of the cardinal just for you.
Want to save this project? Enter your email below and we’ll send the project straight to your inbox.
Watch my full video on how to make a lit shadow box with this cardinal SVG on my YouTube channel:

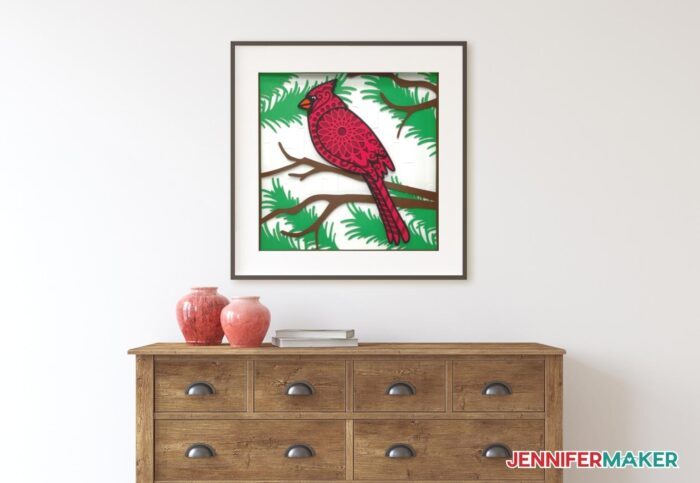
This project combines lots of home decor trends: layered paper, lights, and cardinals! I love how much cardinals mean to many of us and hope these free files help you remember a loved one.

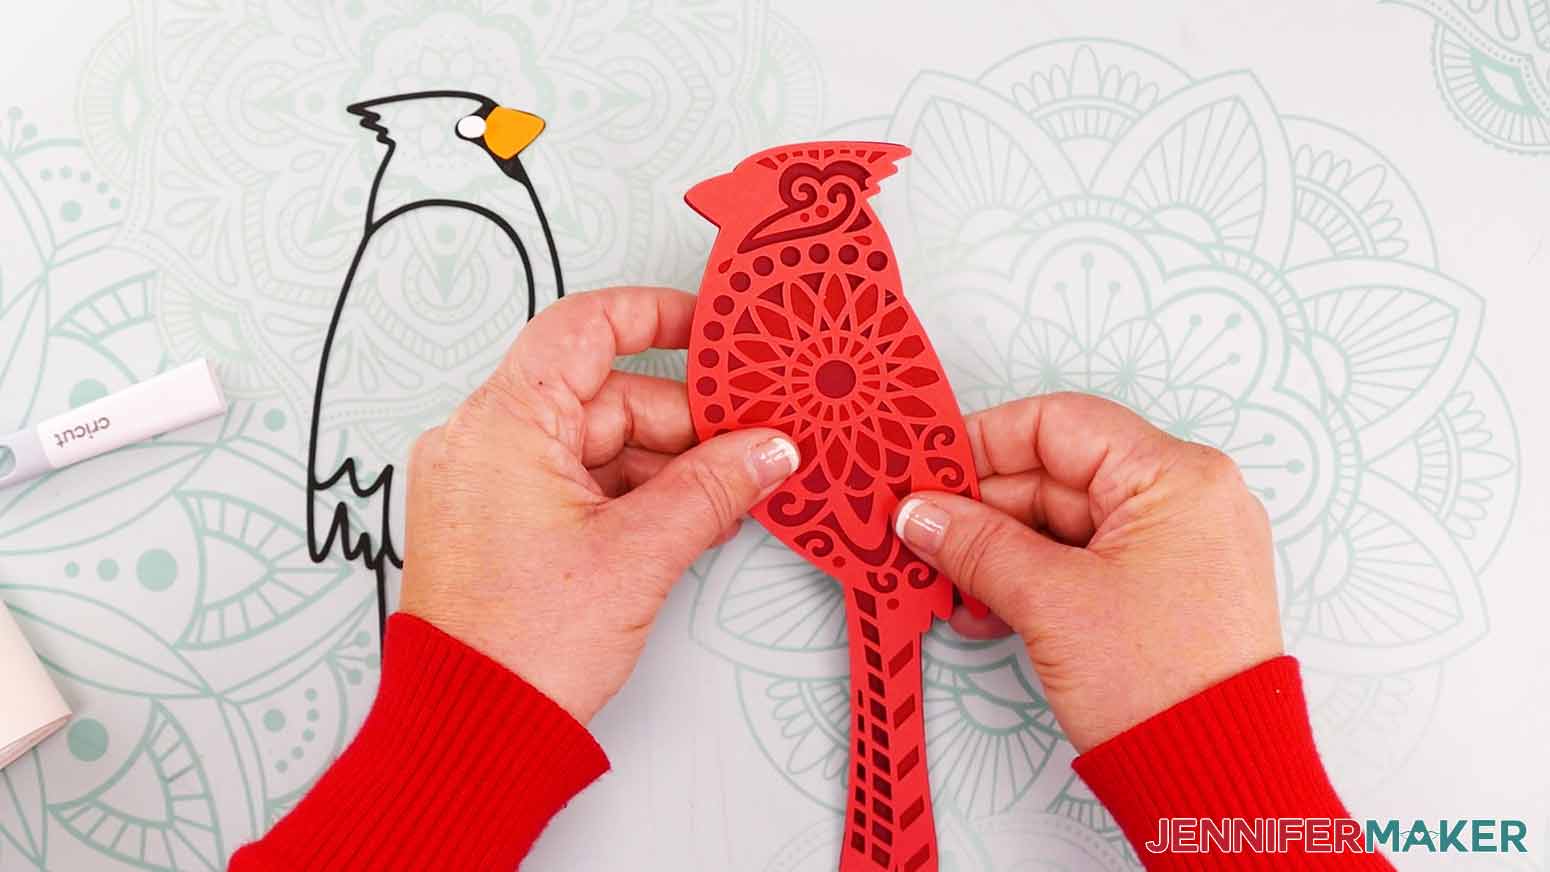
Cardinals are so striking, but detailed feathers are hard to create with paper! Instead, I added some mandala-inspired designs to show the different layers of reds for his feathers. They’re intricate, but our Cricut machines are up to the challenge! High quality paper is important to make sure cuts like these come out nicely. I used a mix of 8.5″ x 11″ and 12″ x 12″ 65 lb cardstock with great results, even on the thin black layer!
Adhesives in different forms and thicknesses make this cardinal design come to life. From perfectly flat glue to stacked foam tape and even clear 3D glue dots, they’re all perfect for our backyard bestie’s layers.
Of course, I’ll show you some fun ways to display your physical item. I’ve included SVG files for DIY cardstock shadow box frames you can make using Cricut Design Space.
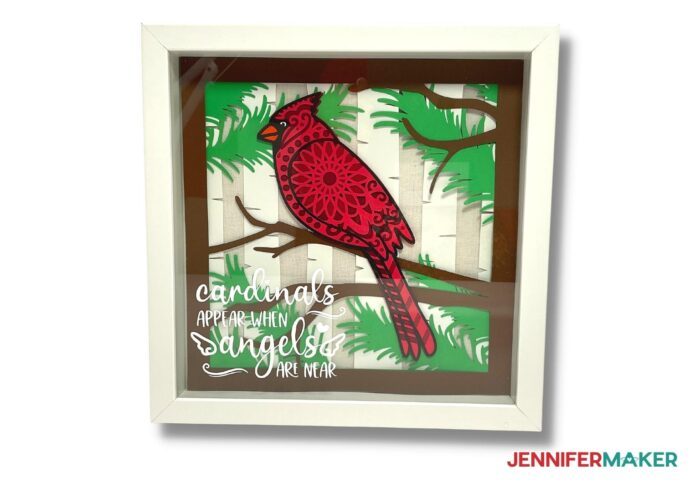
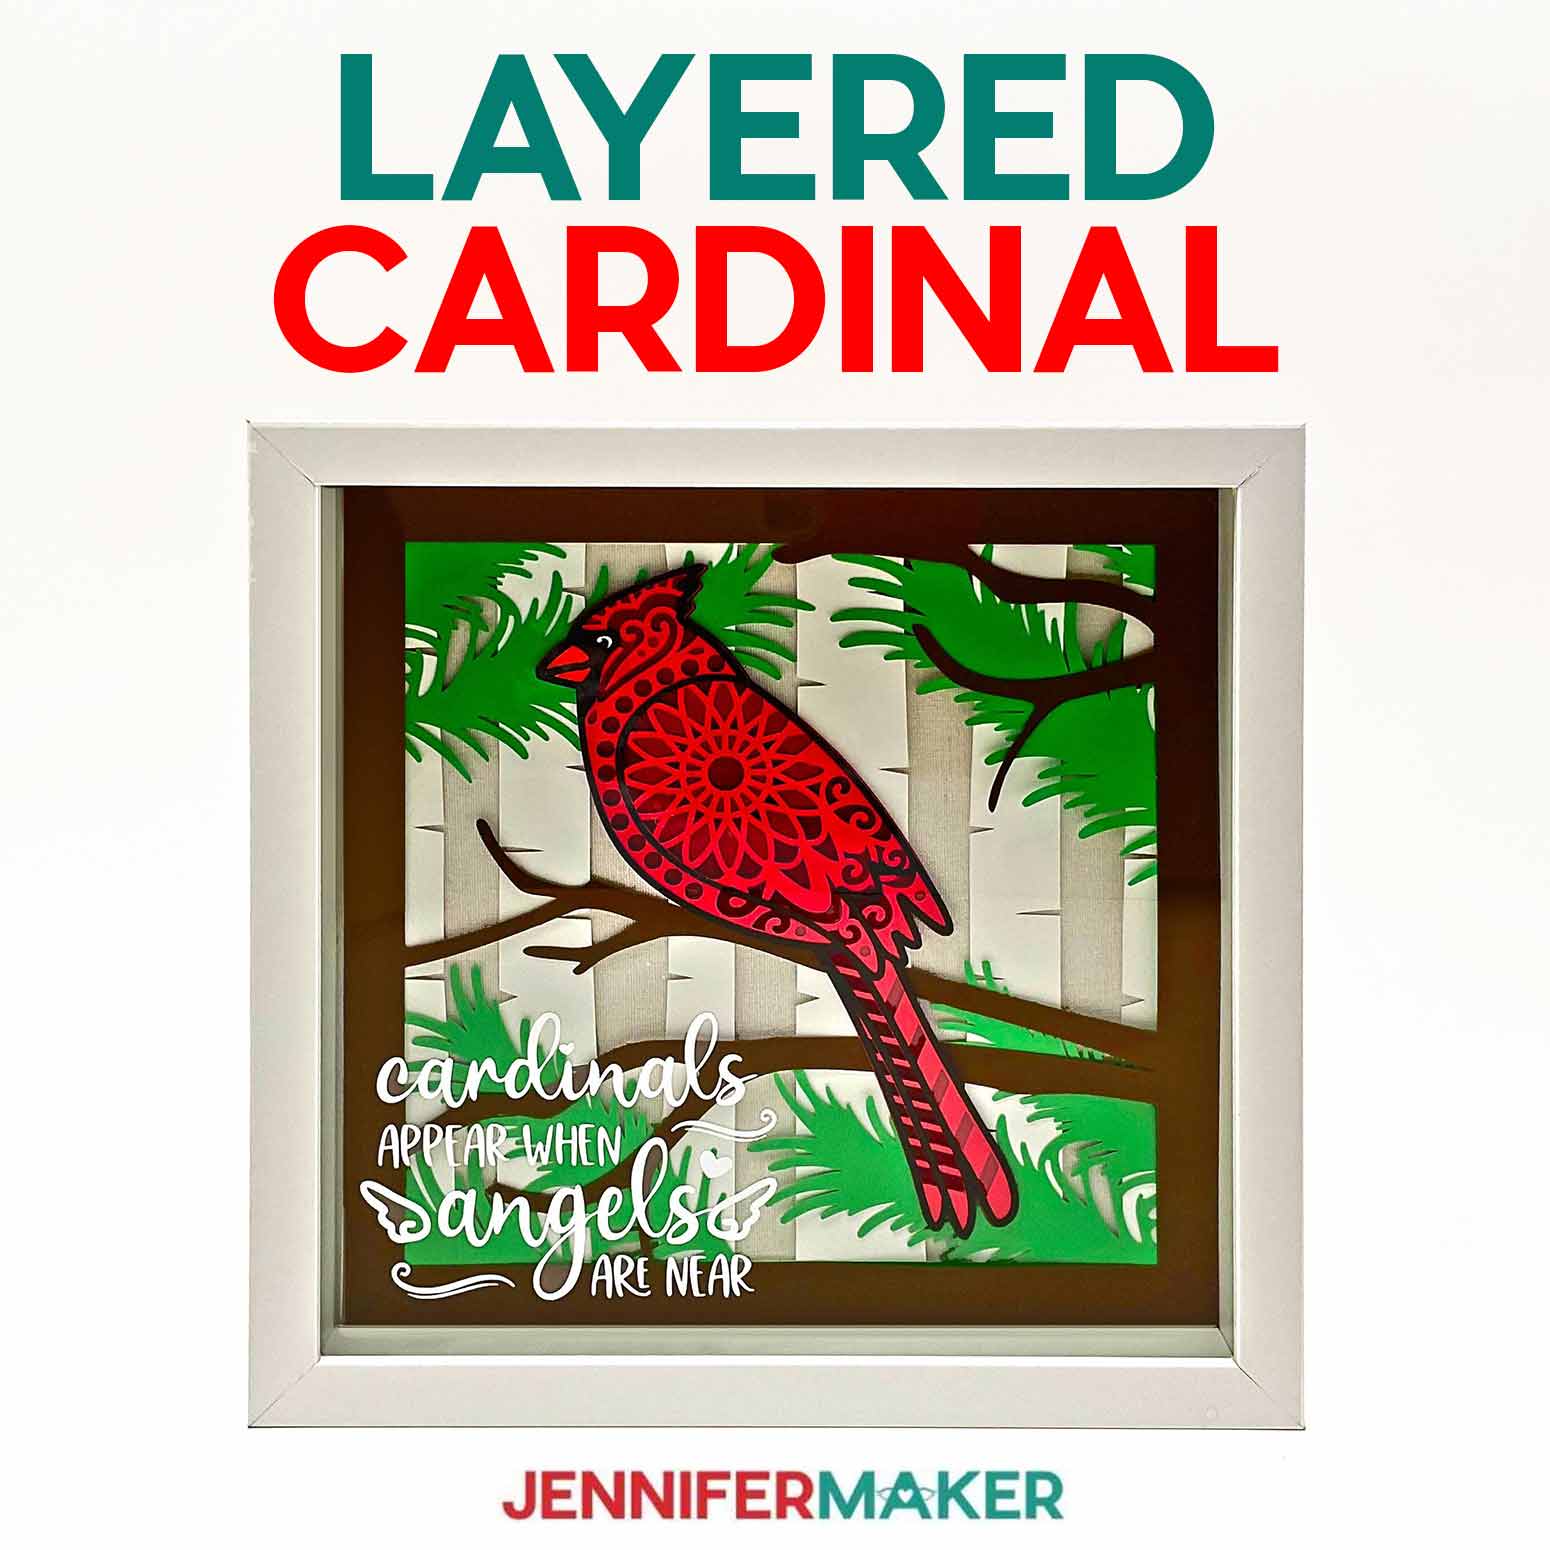
If you prefer to use a shadow box with glass, there’s a sweet saying you can include using vinyl, “Cardinals appear when angels are near.” The free design is easy to cut and apply.
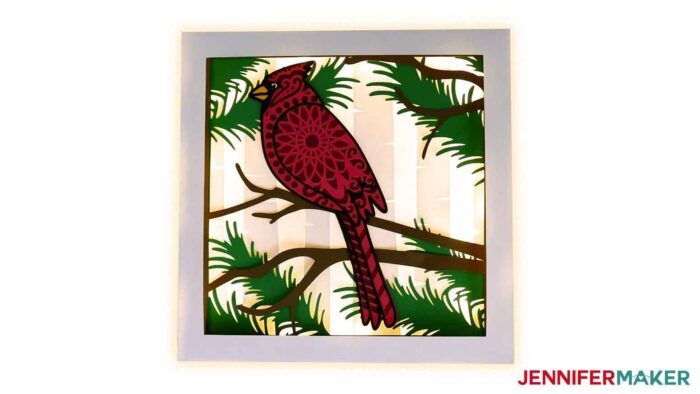
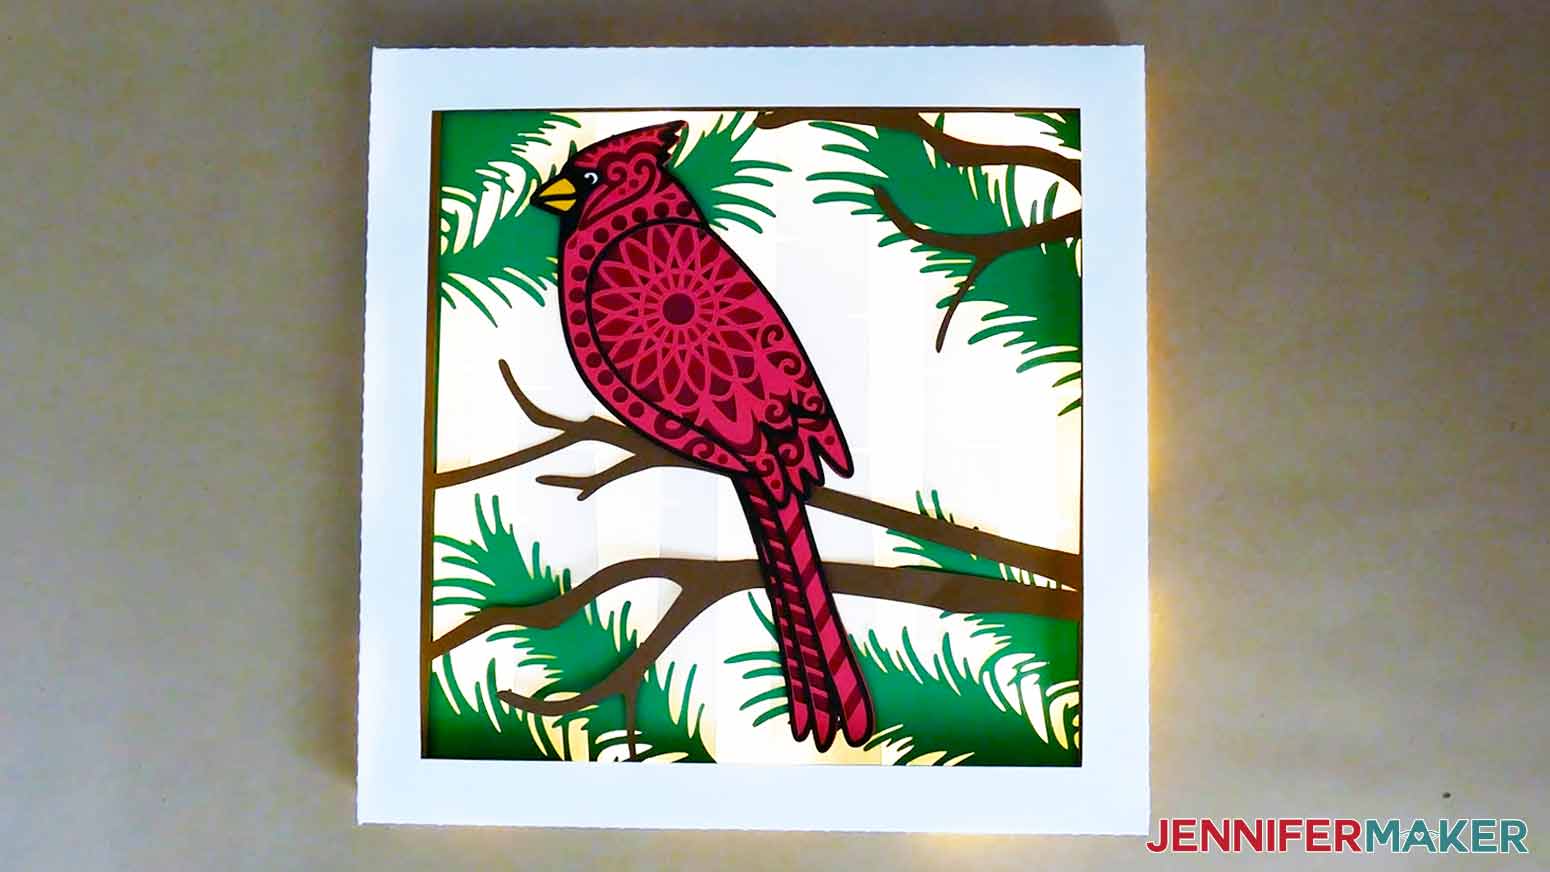
I’ll also show you how fairy lights can give your shadow box a soft glow! The results are pretty different depending on which frame you use, but they all look lovely. If you want some extra sparkle, glue some white glitter to the branches for a hint of snow.
I used a Cricut Maker 3, but you could use an original Cricut Maker or a machine from the Explore series for the large cardinal files. A StandardGrip machine mat works well, but a LightGrip mat helps with the extra detailed layers.
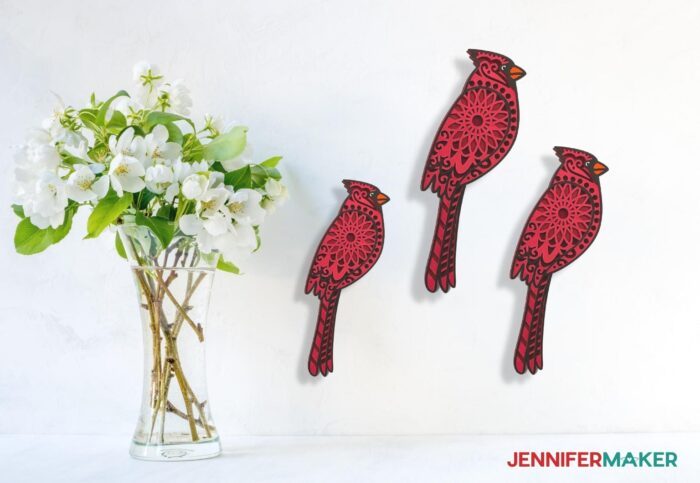
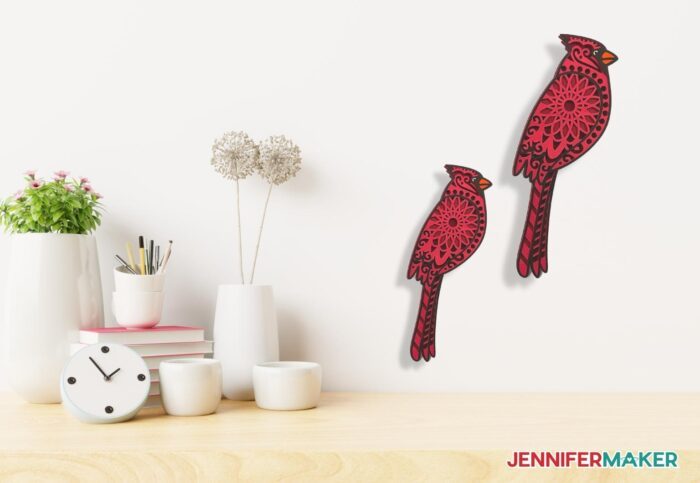
I even made a cardinal SVG cut file perfect for the Joy using the Medium Cardstock setting. He looks cute pinned to the wall, or you can add a loop of ribbon to make an ornament. The small design is so fast, you can make a whole flock.
I can’t wait to see what you make with my cardinal SVG design!
Ready to make this graceful, free cardinal SVG? You’re going to love this! This post contains some affiliate links for your convenience (which means if you make a purchase after clicking a link I will earn a small commission but it won’t cost you a penny more)! Read my full disclosure policy.
Materials to Make a Layered Papercraft Cardinal SVG and Shadow Box
View my Amazon shopping list with the exact items we used to make this project!
- 12″ x 12″ 65 lb Cardstock in orange, black, brown, green, and white and 8.5″ x 11″ 65 lb Cardstock in shades of red for the cardinal and background layers
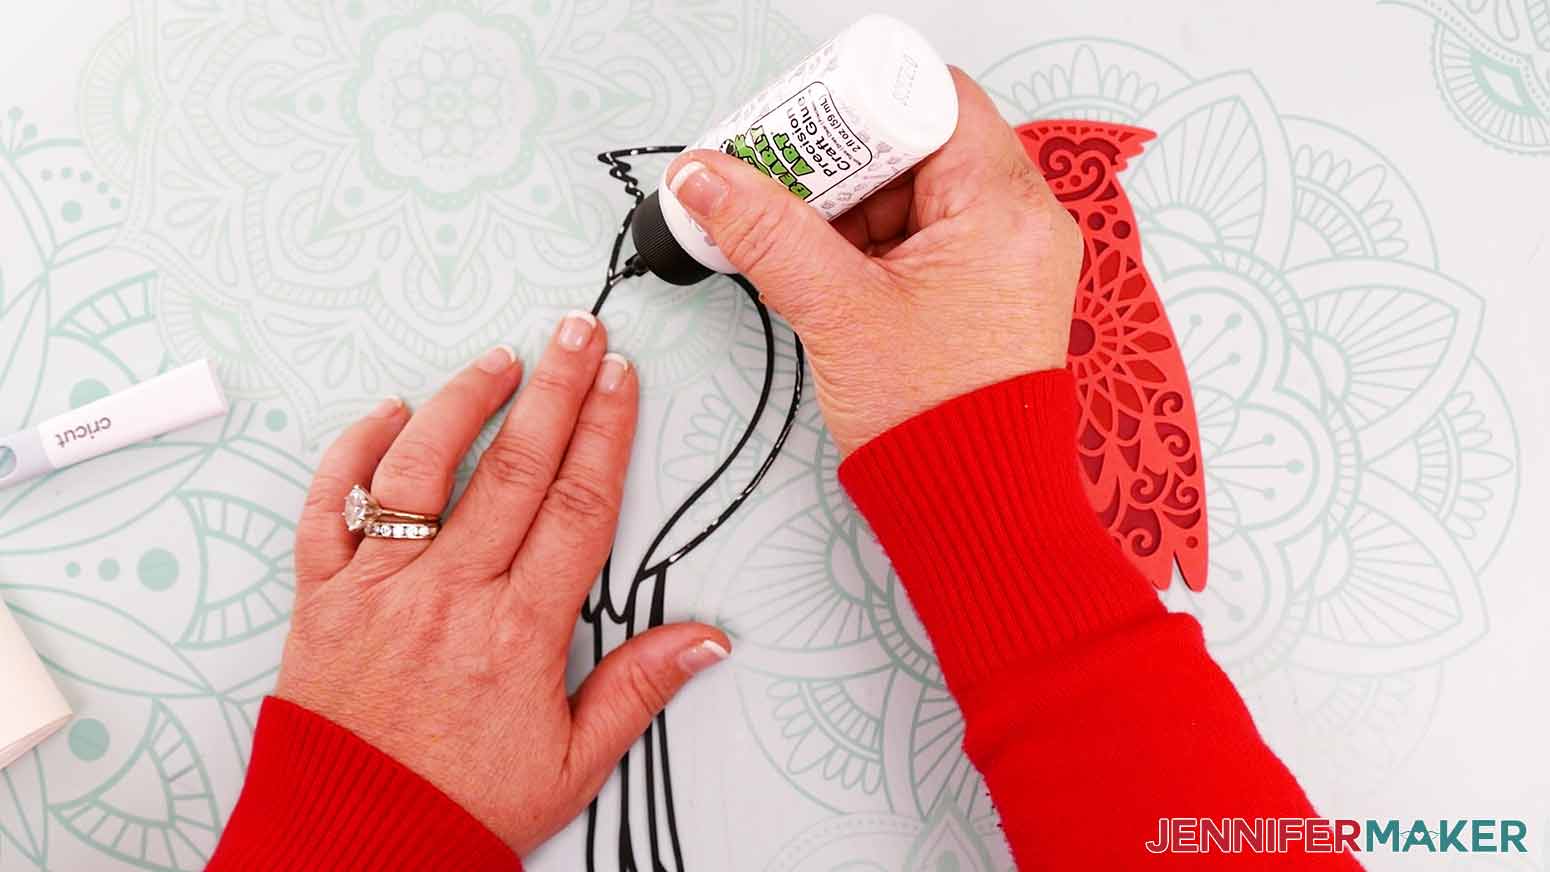
- Craft Glue — I used Bearly Art Precision Glue
- Double-sided Adhesive Foam Tape – I used both the 0.25″ and 0.37″ widths to stack my layers
- One Strand of 3.3′ Long Fairy Lights — optional, for placing inside your shadow box behind the cardstock layers
- 3/8″ Zots Glue Dots — optional, for attaching white background layers and fairy lights
- 3/16″ Zots Glue Dots — optional, for attaching and creating dimension between cardinal layers
- A method to cut your cardstock — I used the amazing Cricut Maker 3 but you can also use a Cricut Maker series, Cricut Explore series, or Cricut Venture, or Cricut Joy series machines with a standard Fine-Point Blade
- Cricut Blue LightGrip Machine Mat 12″ x 12″ or Cricut Green StandardGrip Machine Mat 12″ x 12″
- Brayer, Spatula, and Scissors
- A Weeding tool might help remove some of the tiny pieces
- Design #401 – My free template (available in my free resource library—get the password at the bottom of this post)
If you’re making the DIY Shadow Box frame, you’ll also need:
- 12″ x 12″ 65 lb Cardstock in white
- Scraper Tool or Ruler to make straight, sharp creases
- Scoring Stylus or Single Scoring Wheel if you prefer the scored file, which lets less light shine through the frame
If you’re using a purchased frame with vinyl, you’ll also need:
- A 10″ x 10″ Shadow Box
- Permanent Vinyl and StandardGrip Transfer Tape
- Scissors and Weeding tool to remove excess material
- Rubbing alcohol and a lint-free cloth to clean the glass
If you’re making a Joy-sized cardinal, you’ll need:
- A Cricut Joy series machine with a StandardGrip or LightGrip mat
- Red, orange, black, and white 65 lb cardstock cut to your Joy’s mat size – a paper trimmer helps!
- Craft Glue, a Brayer, and a Spatula
- A Weeding tool might help remove some of the tiny pieces
- String or ribbon tied in a loop and glued to the back to make a hanging ornament
How to Make a Layered Cardinal SVG in a Shadow Box
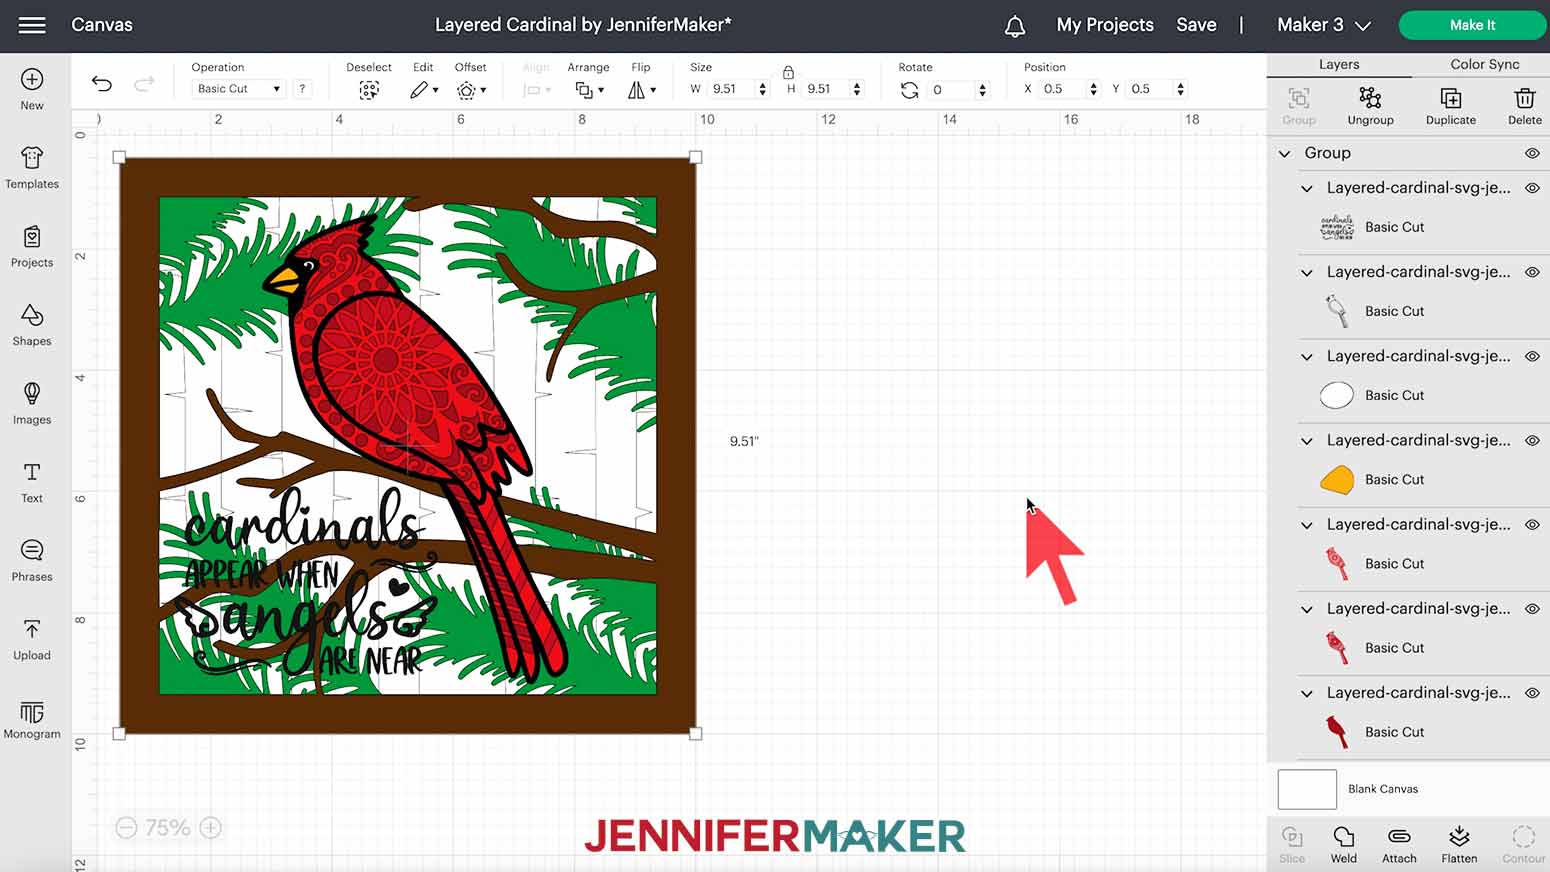
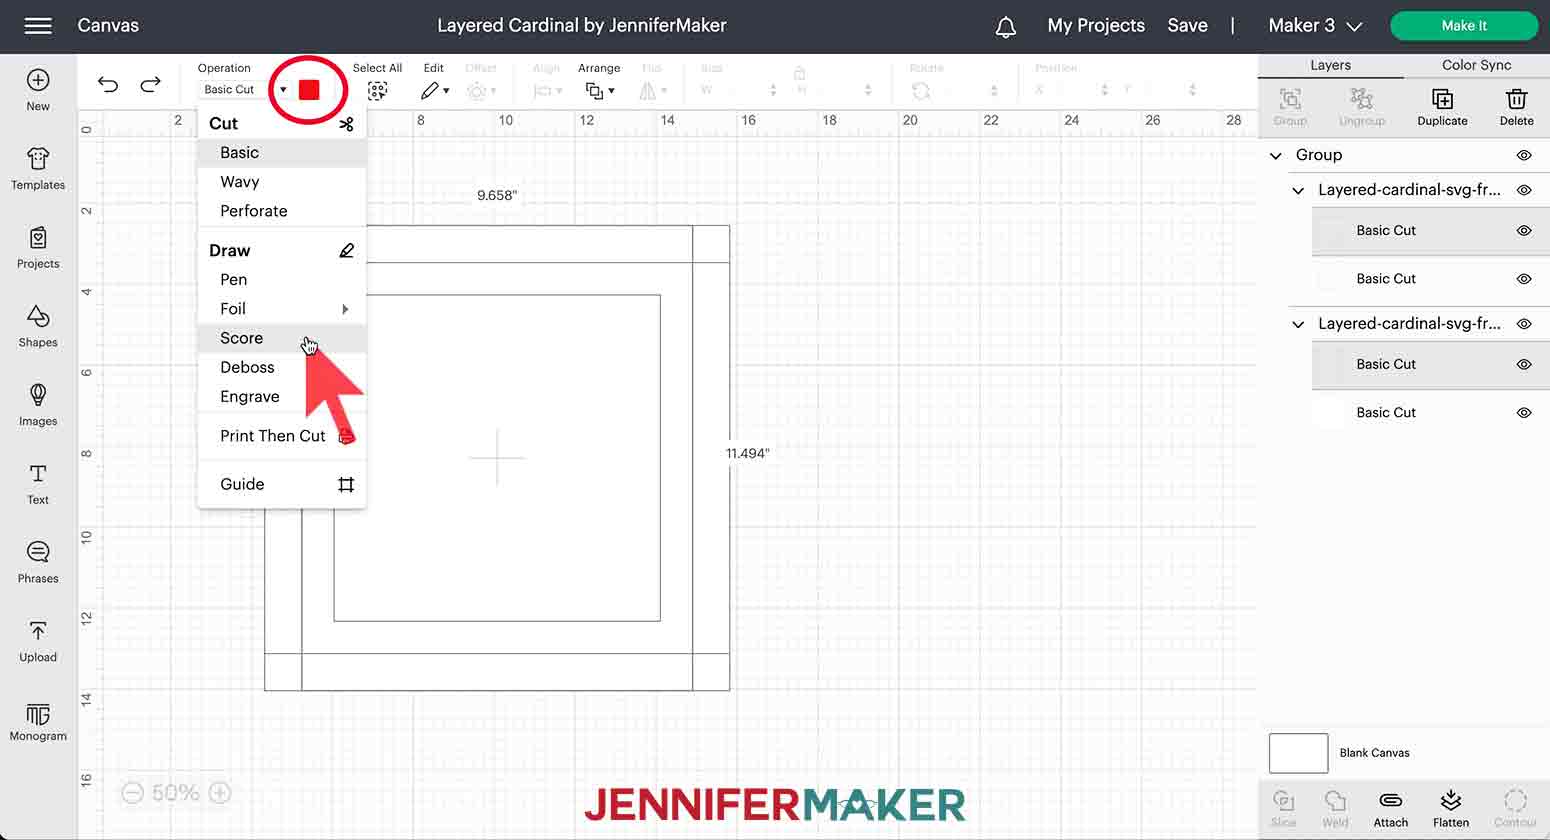
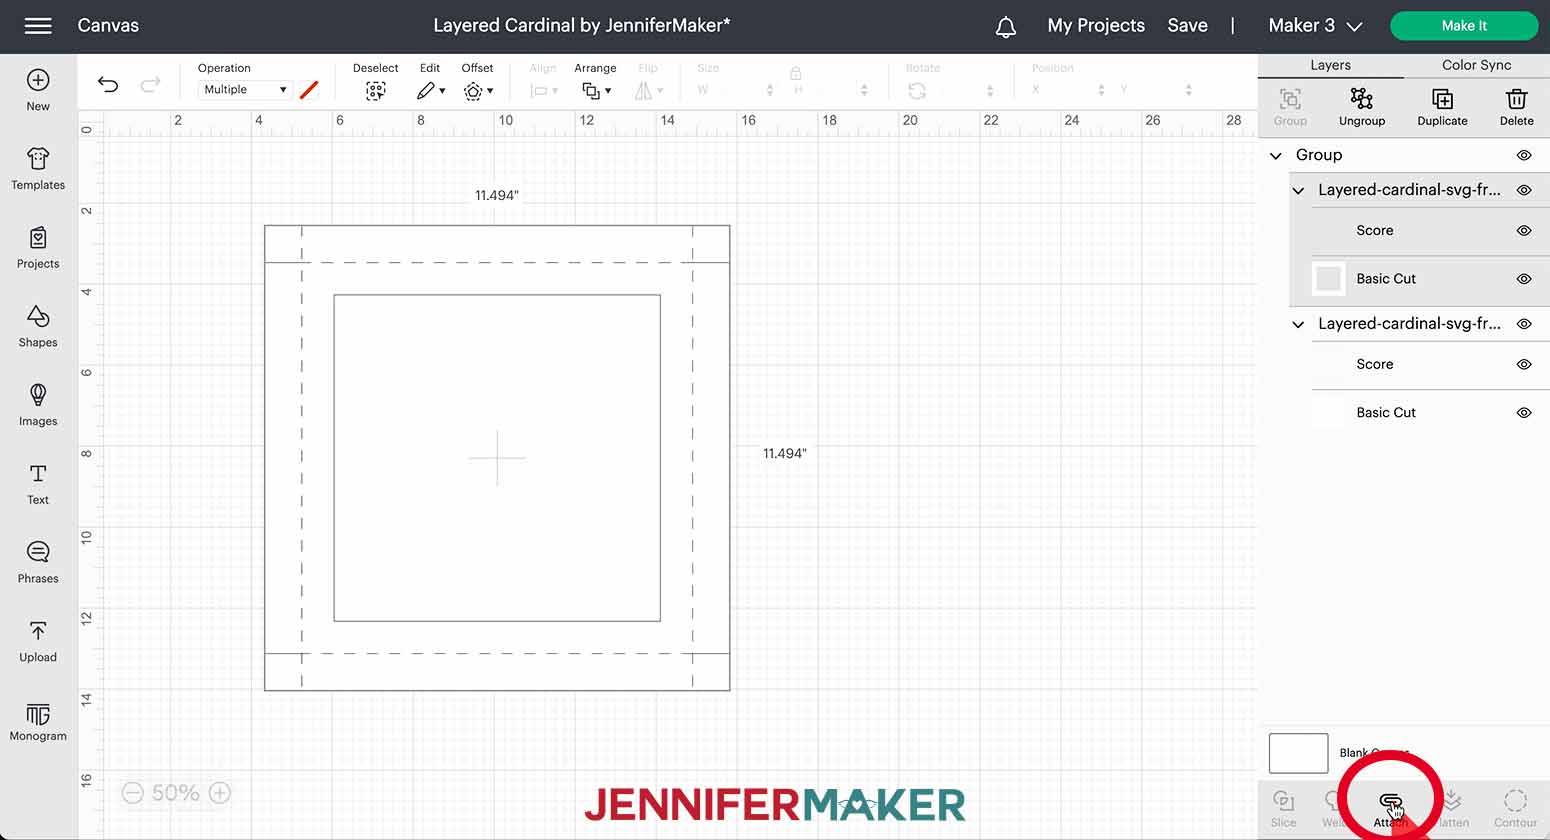
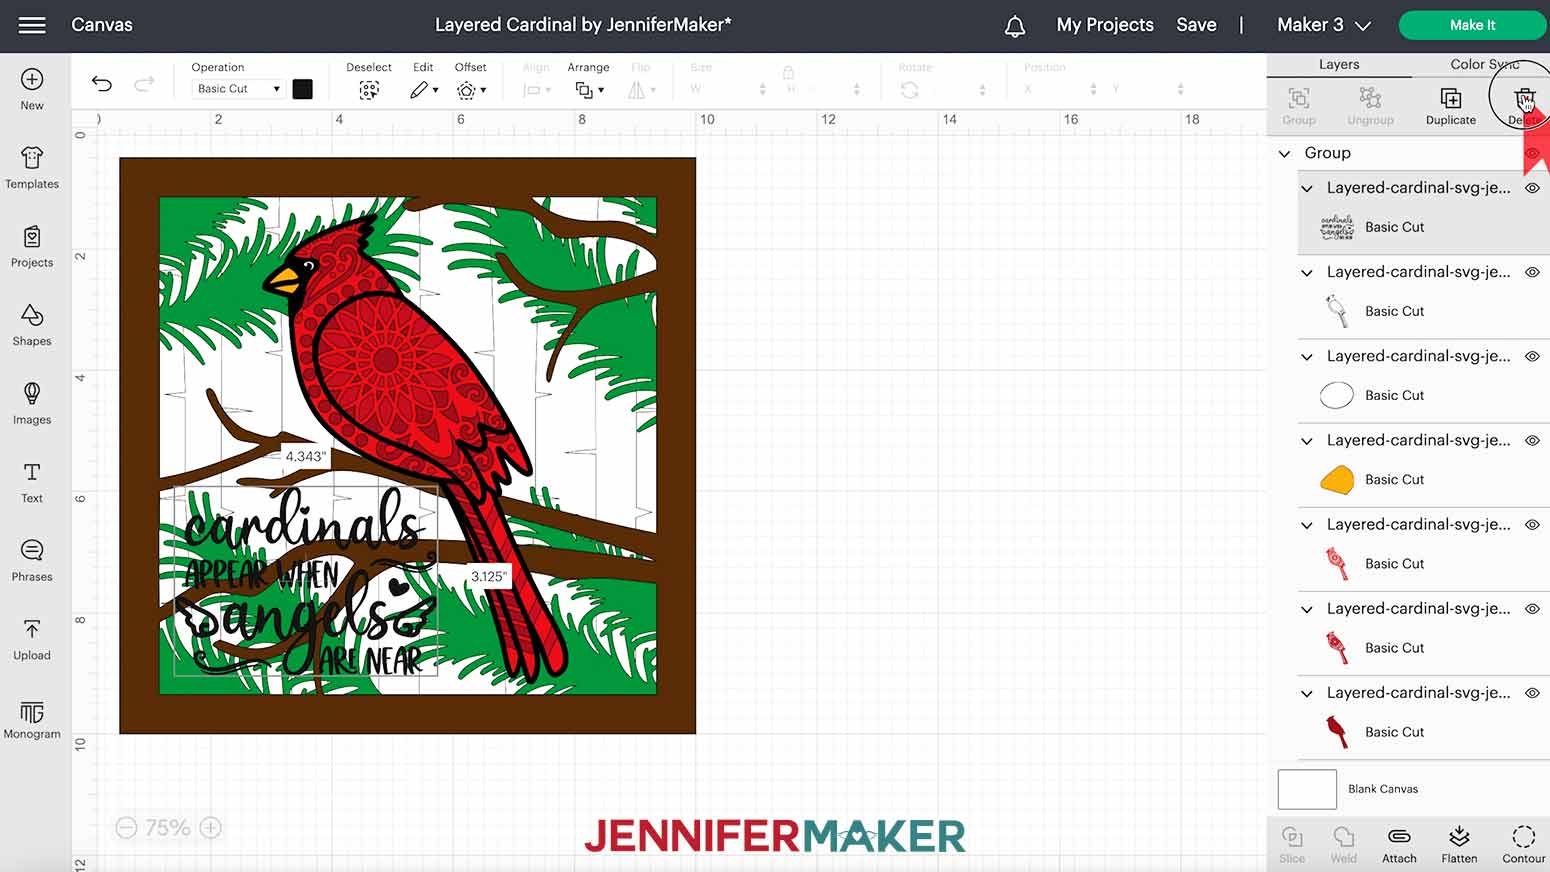
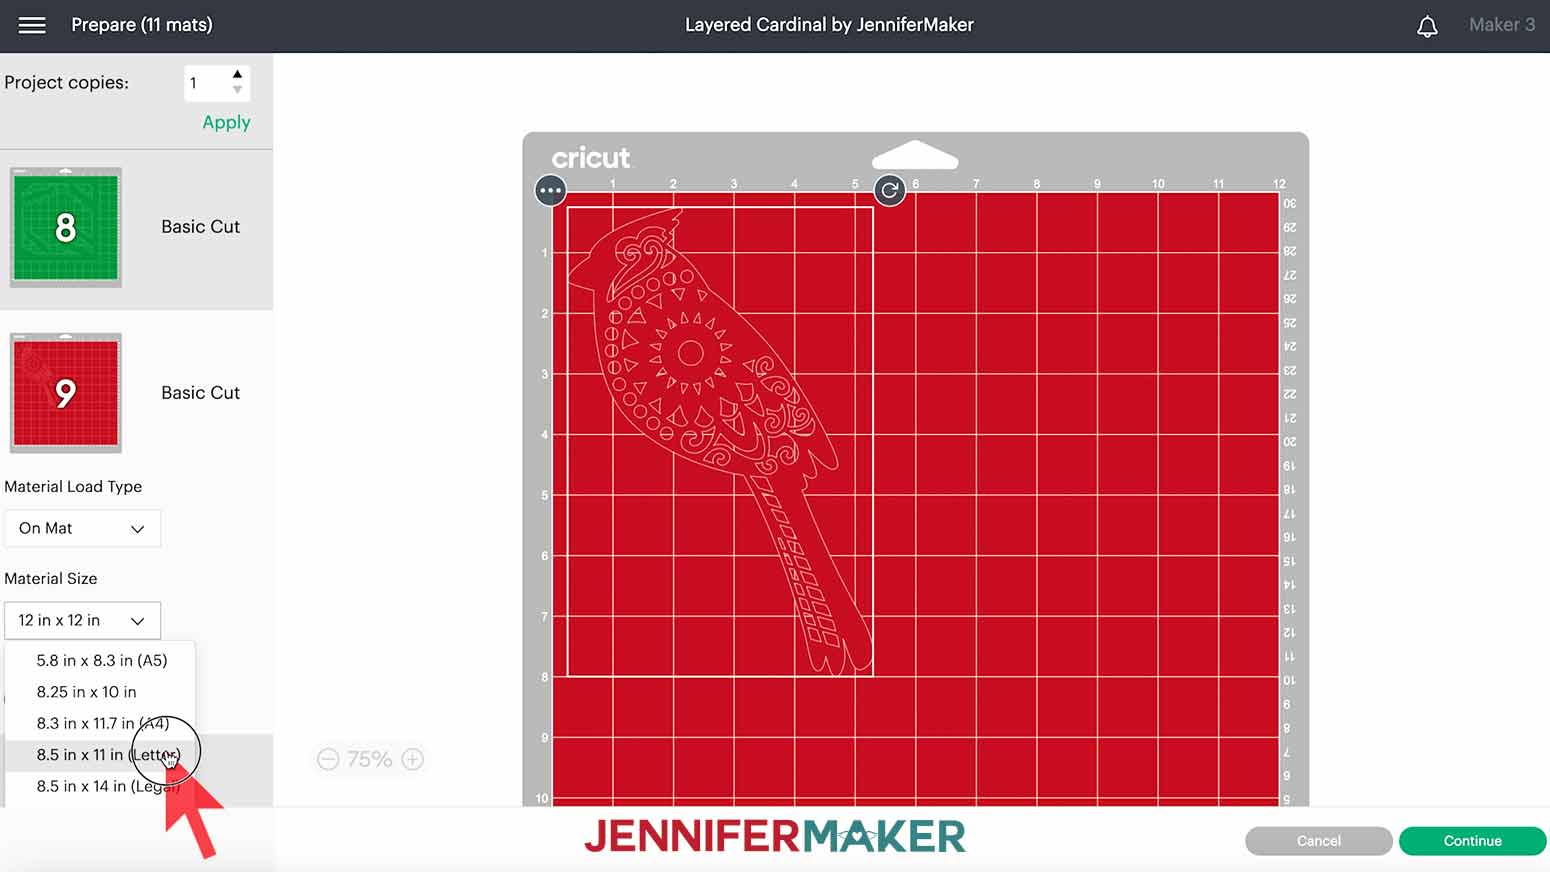
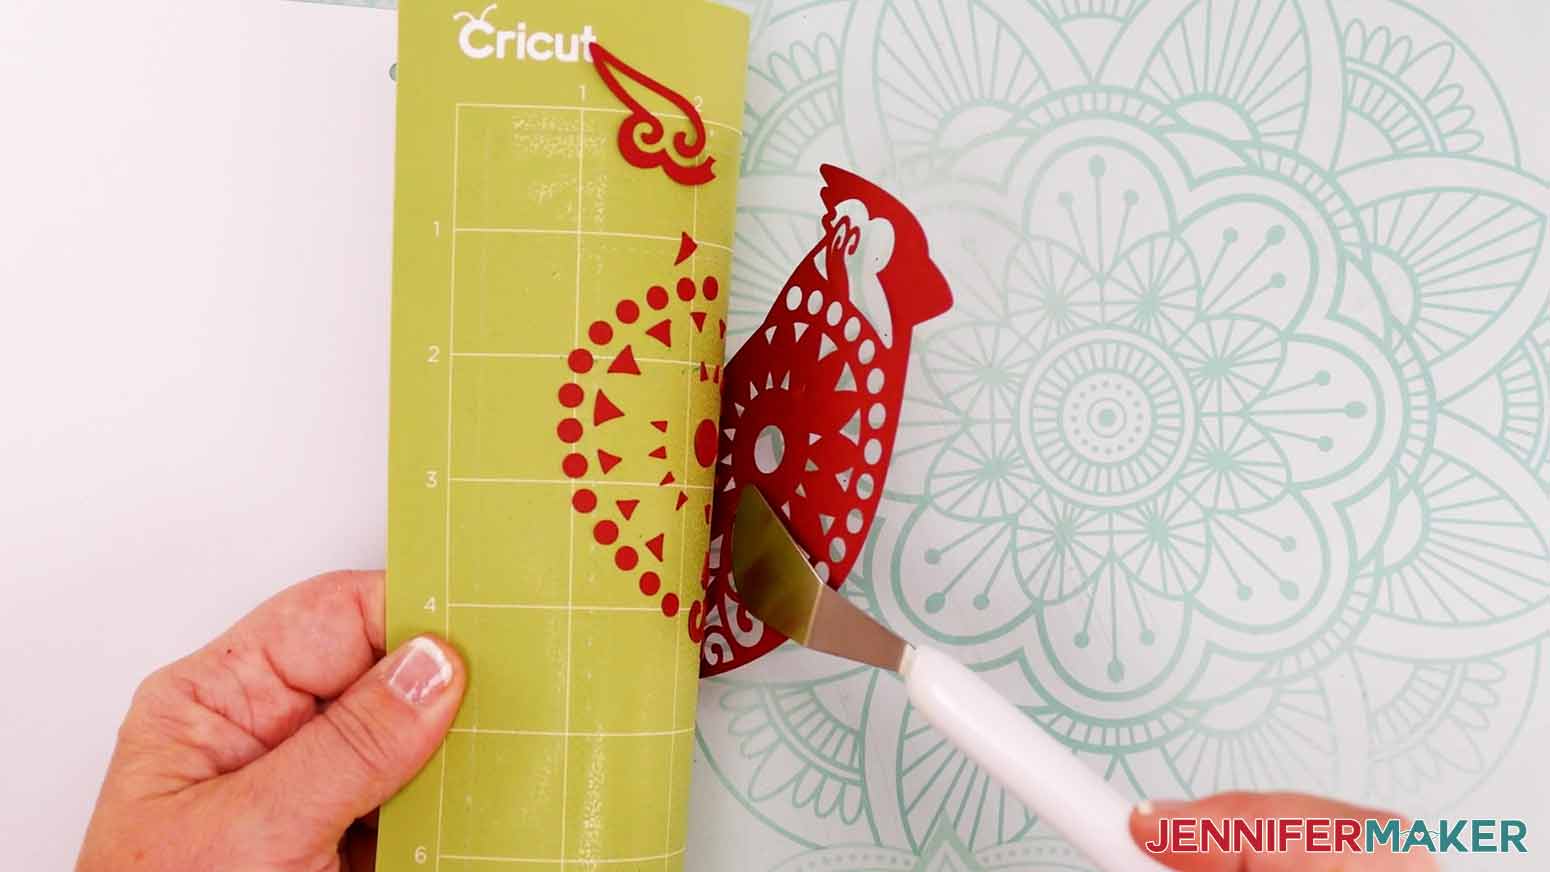
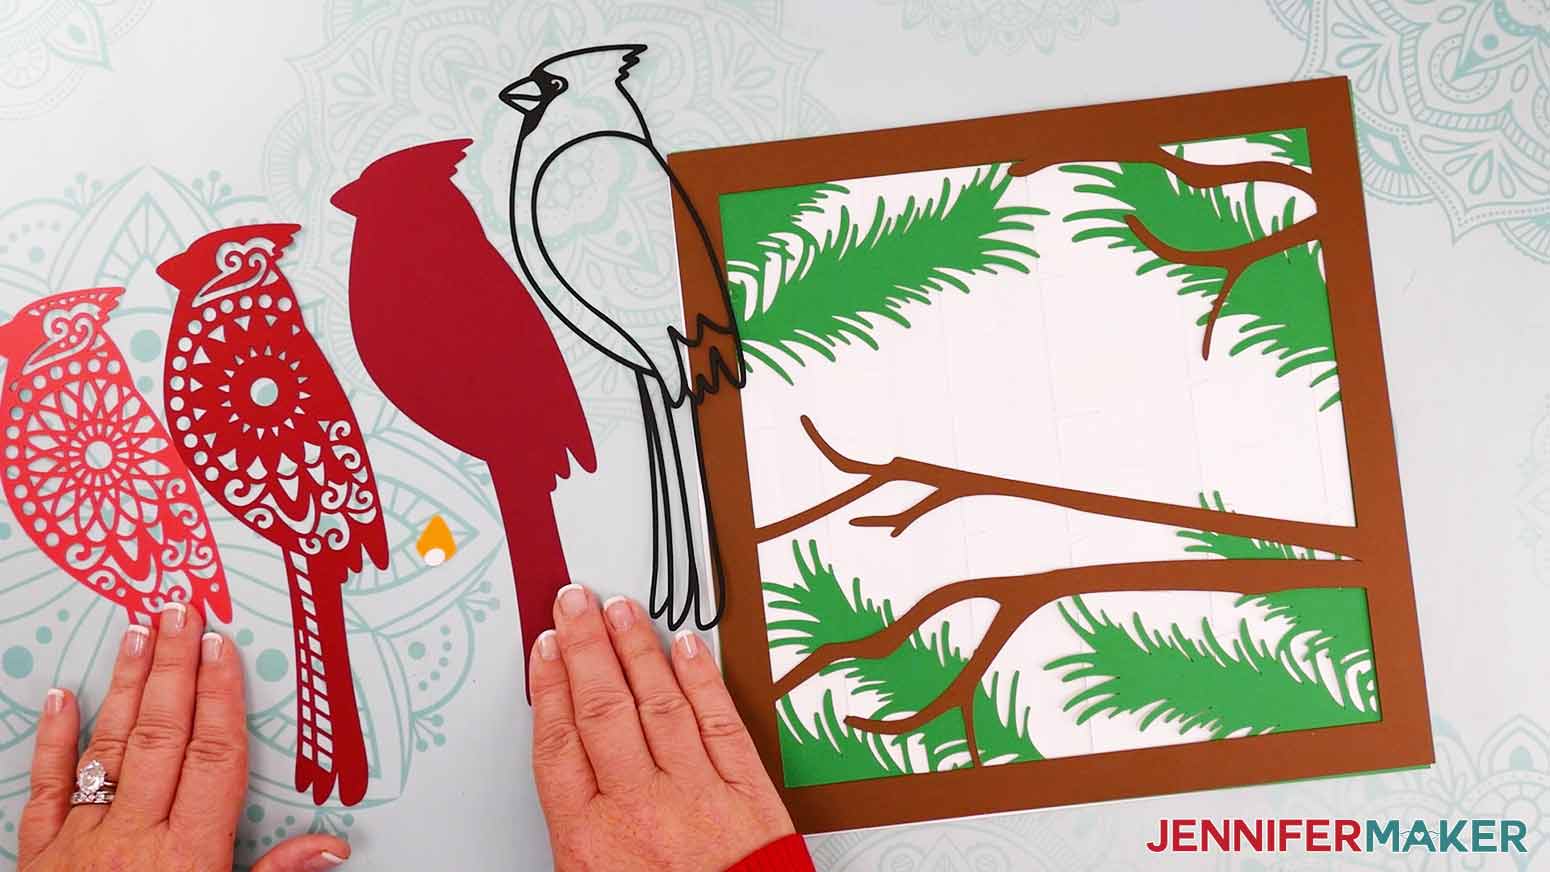
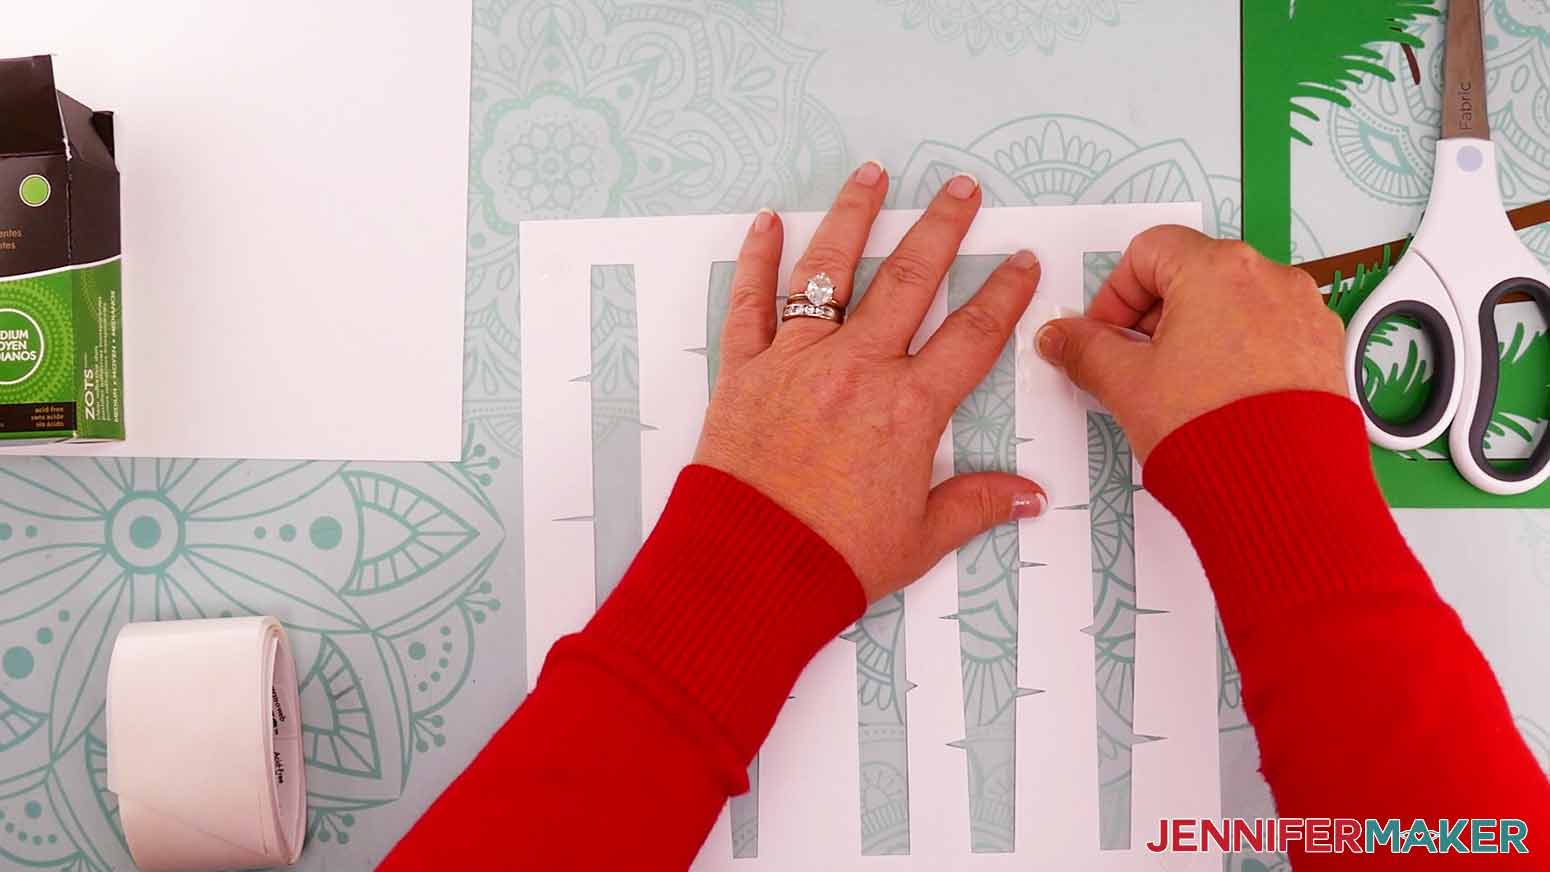
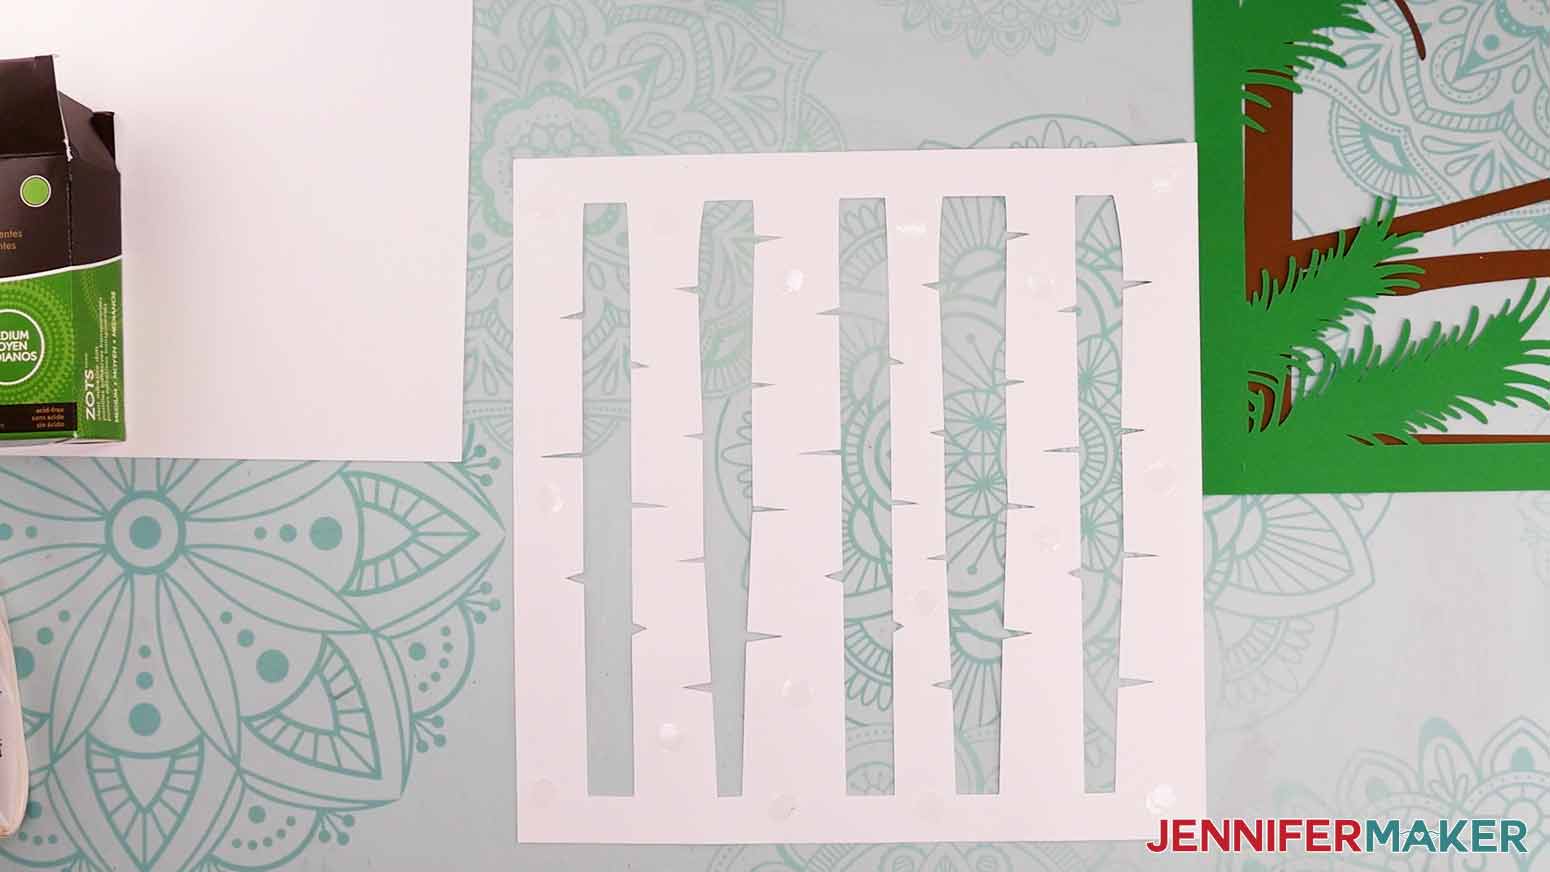
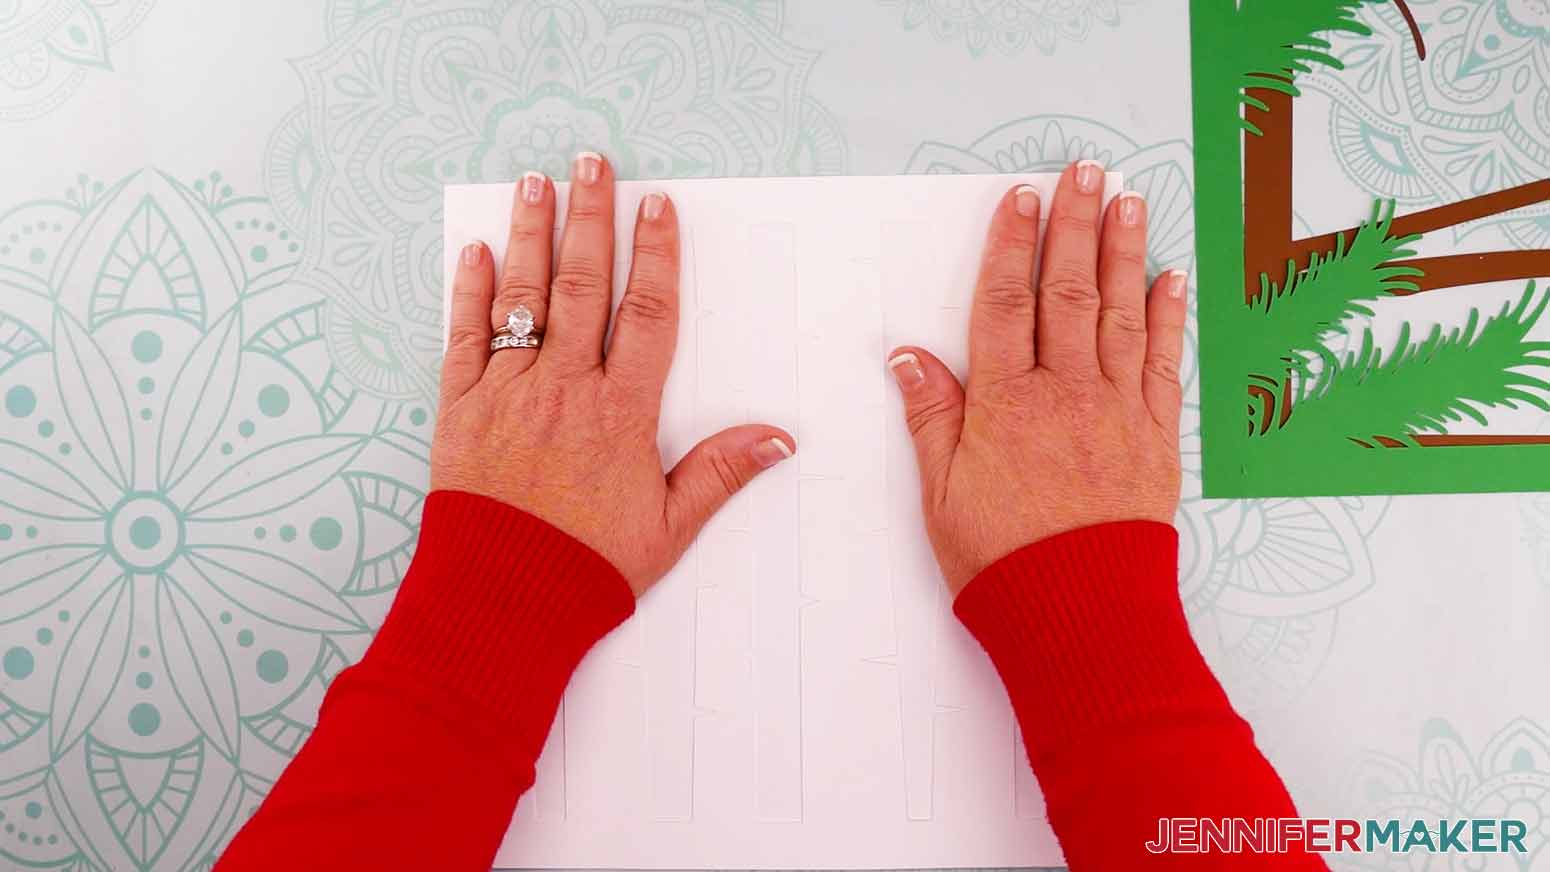
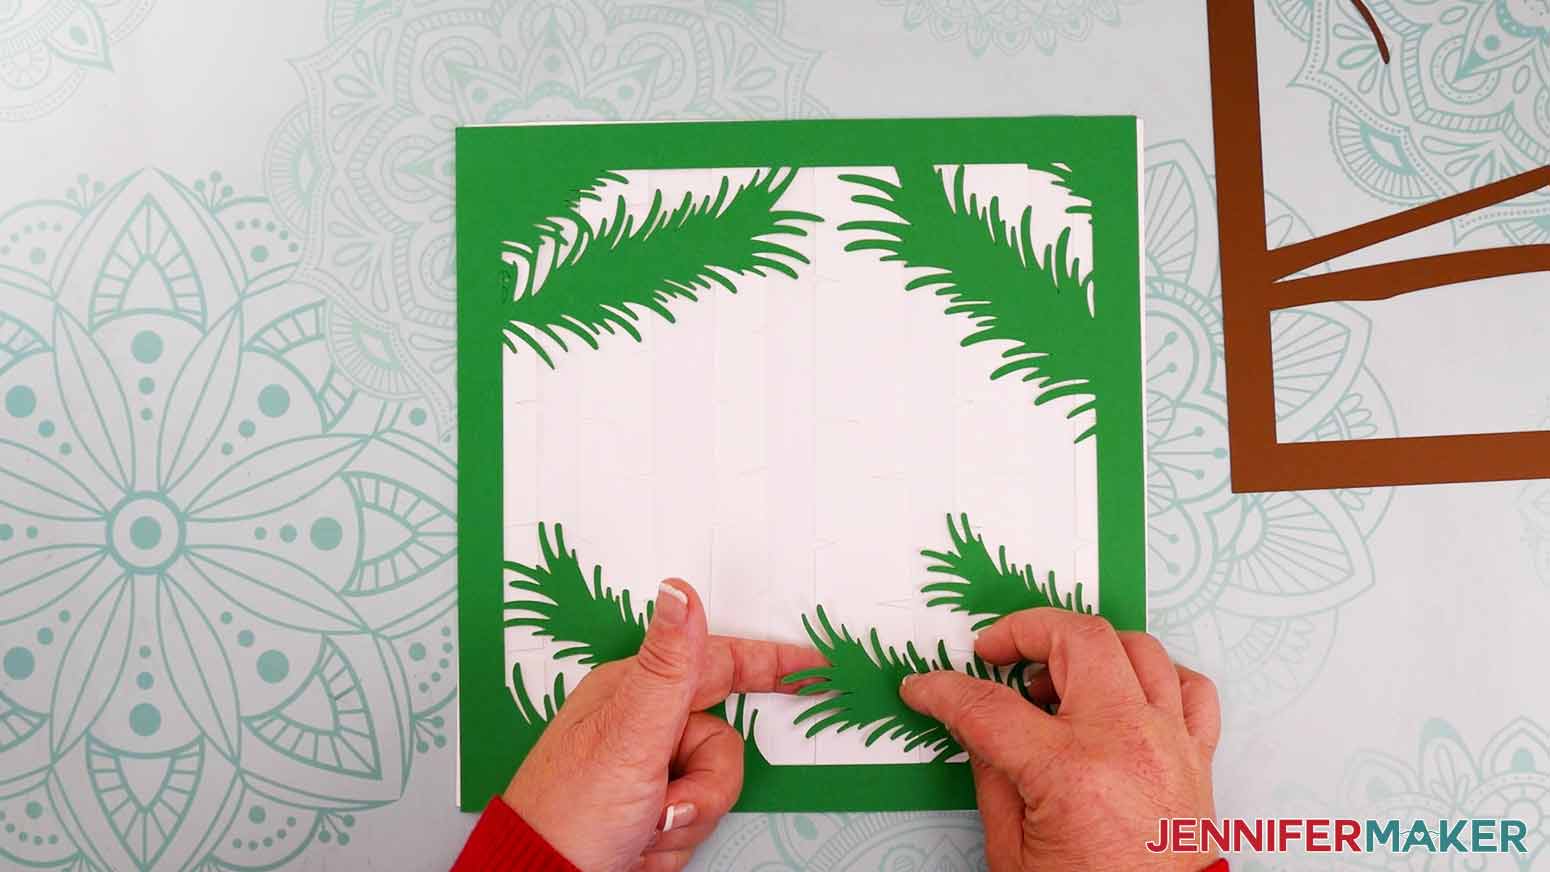
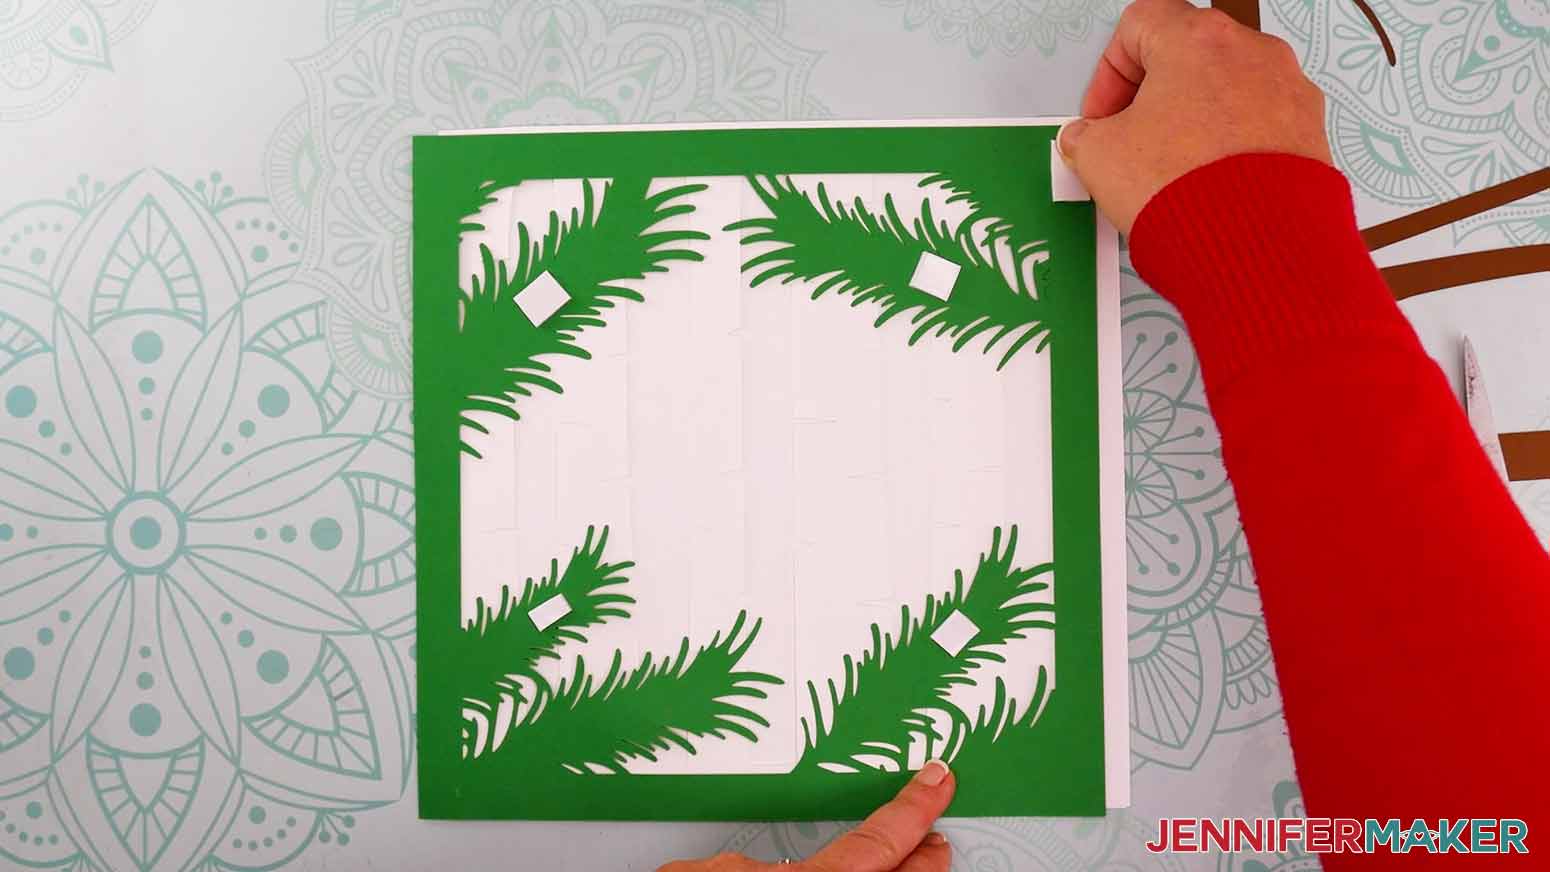
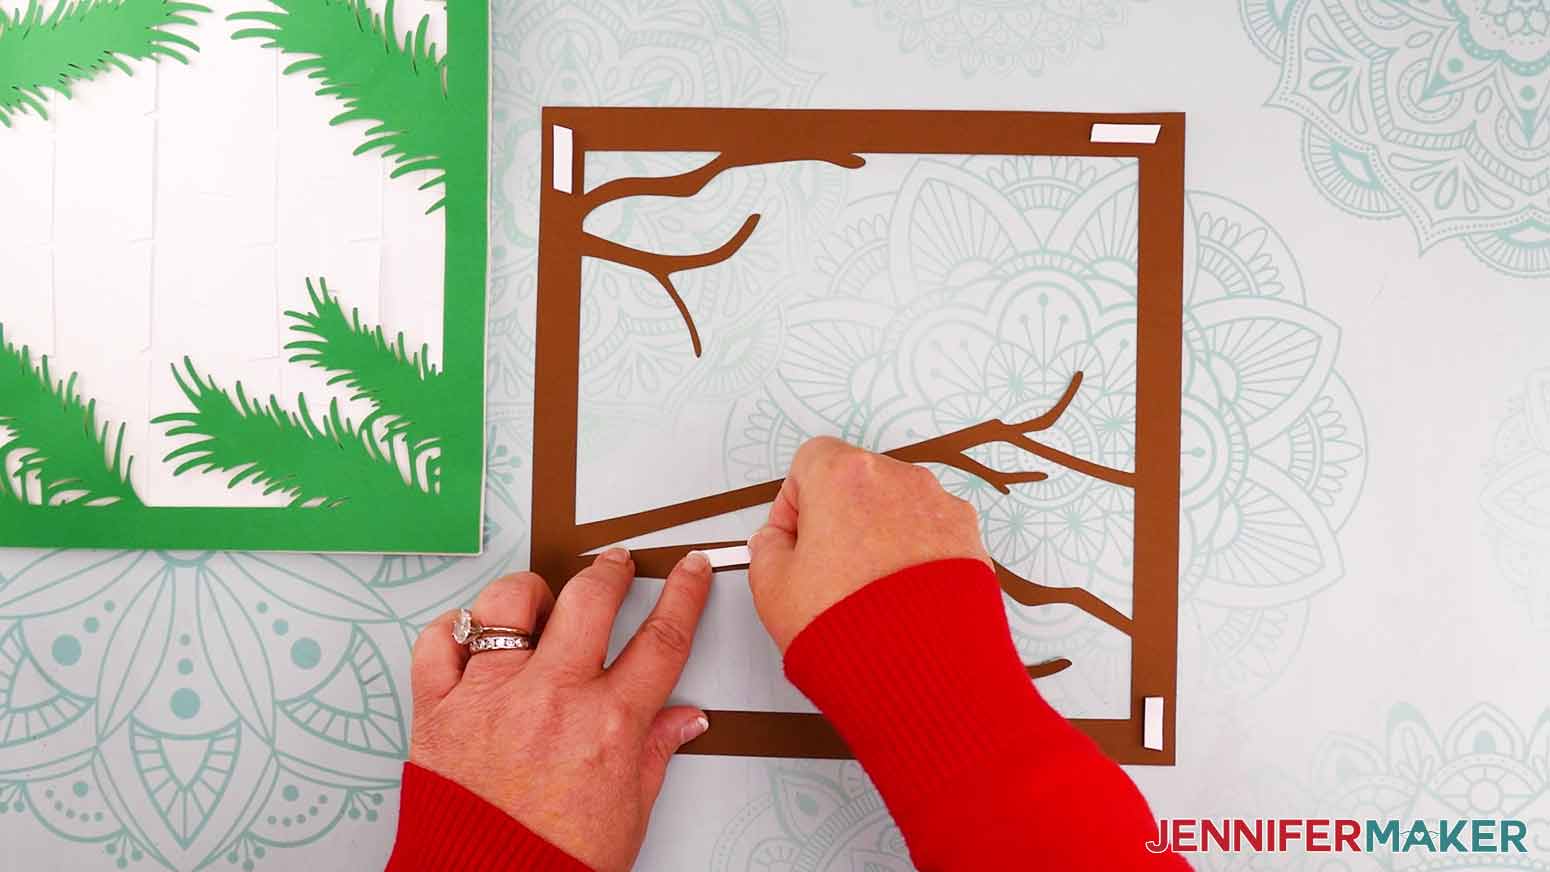
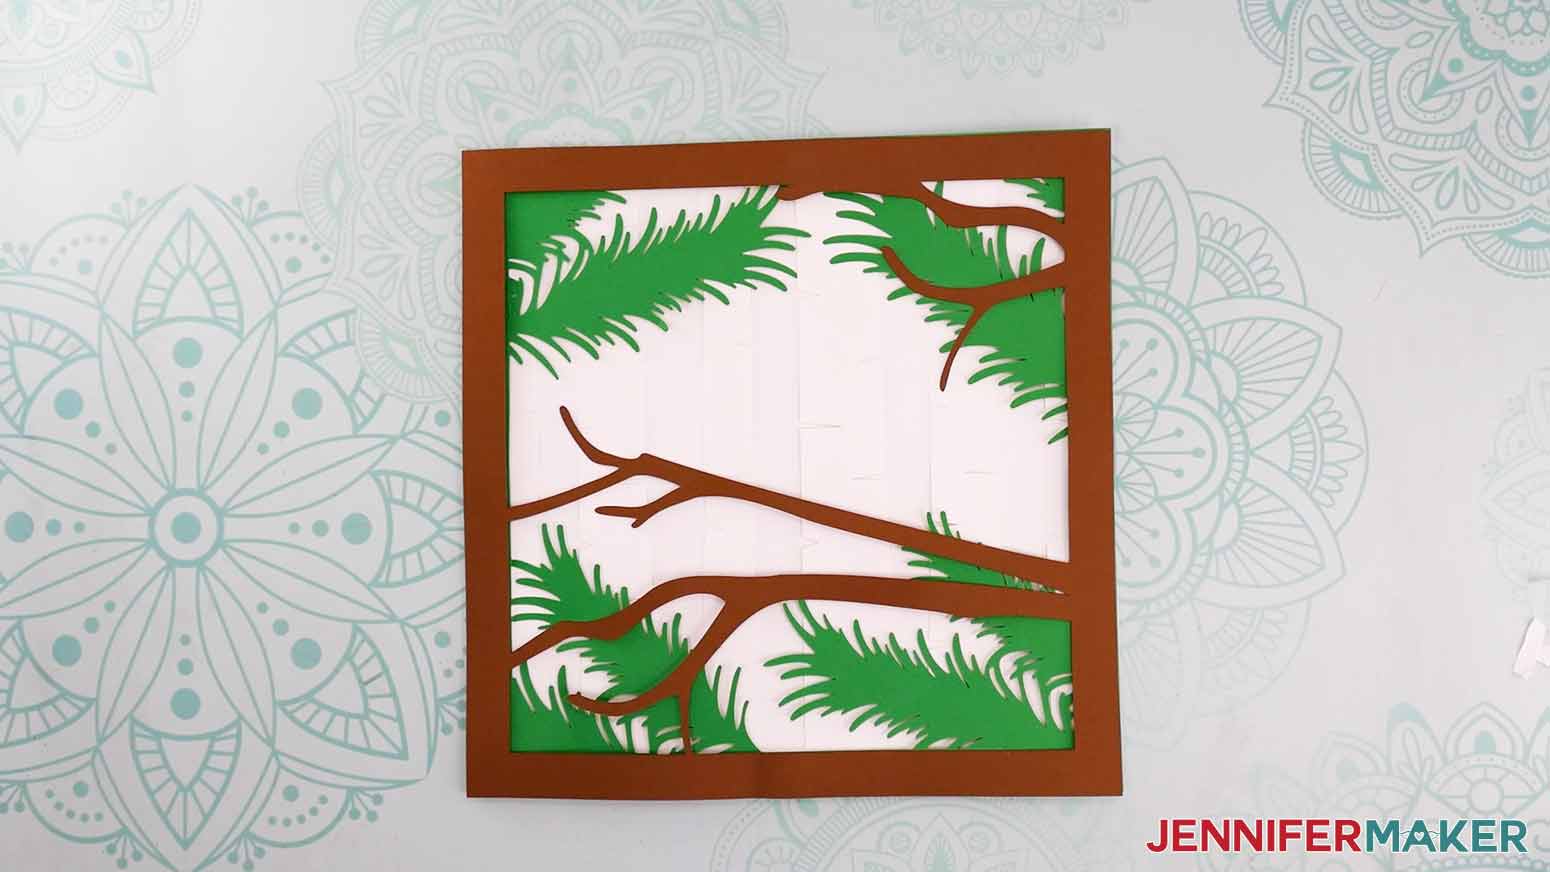
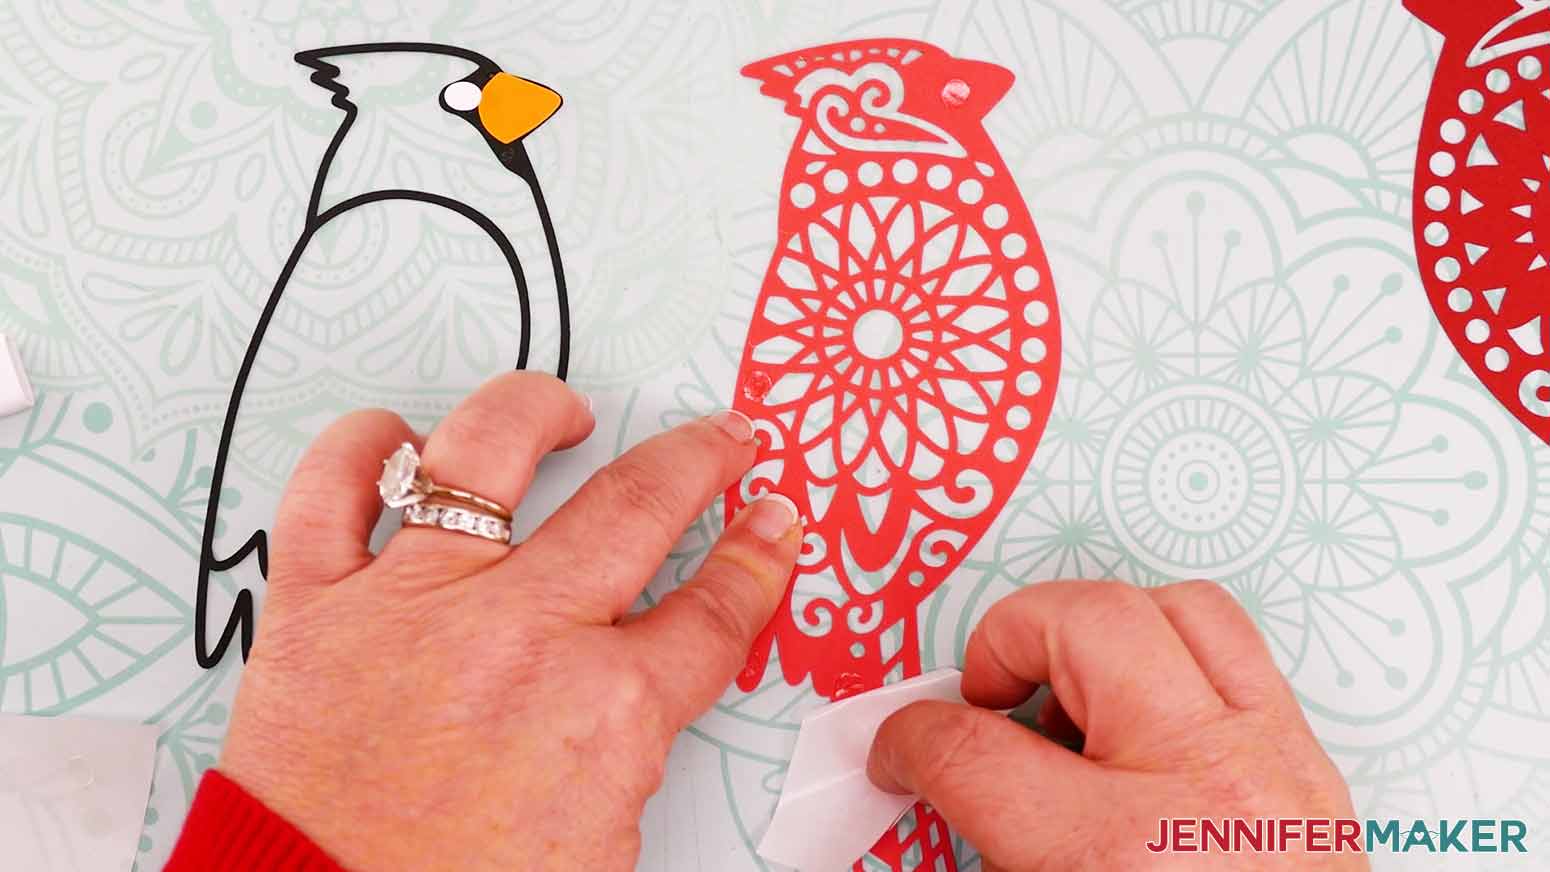
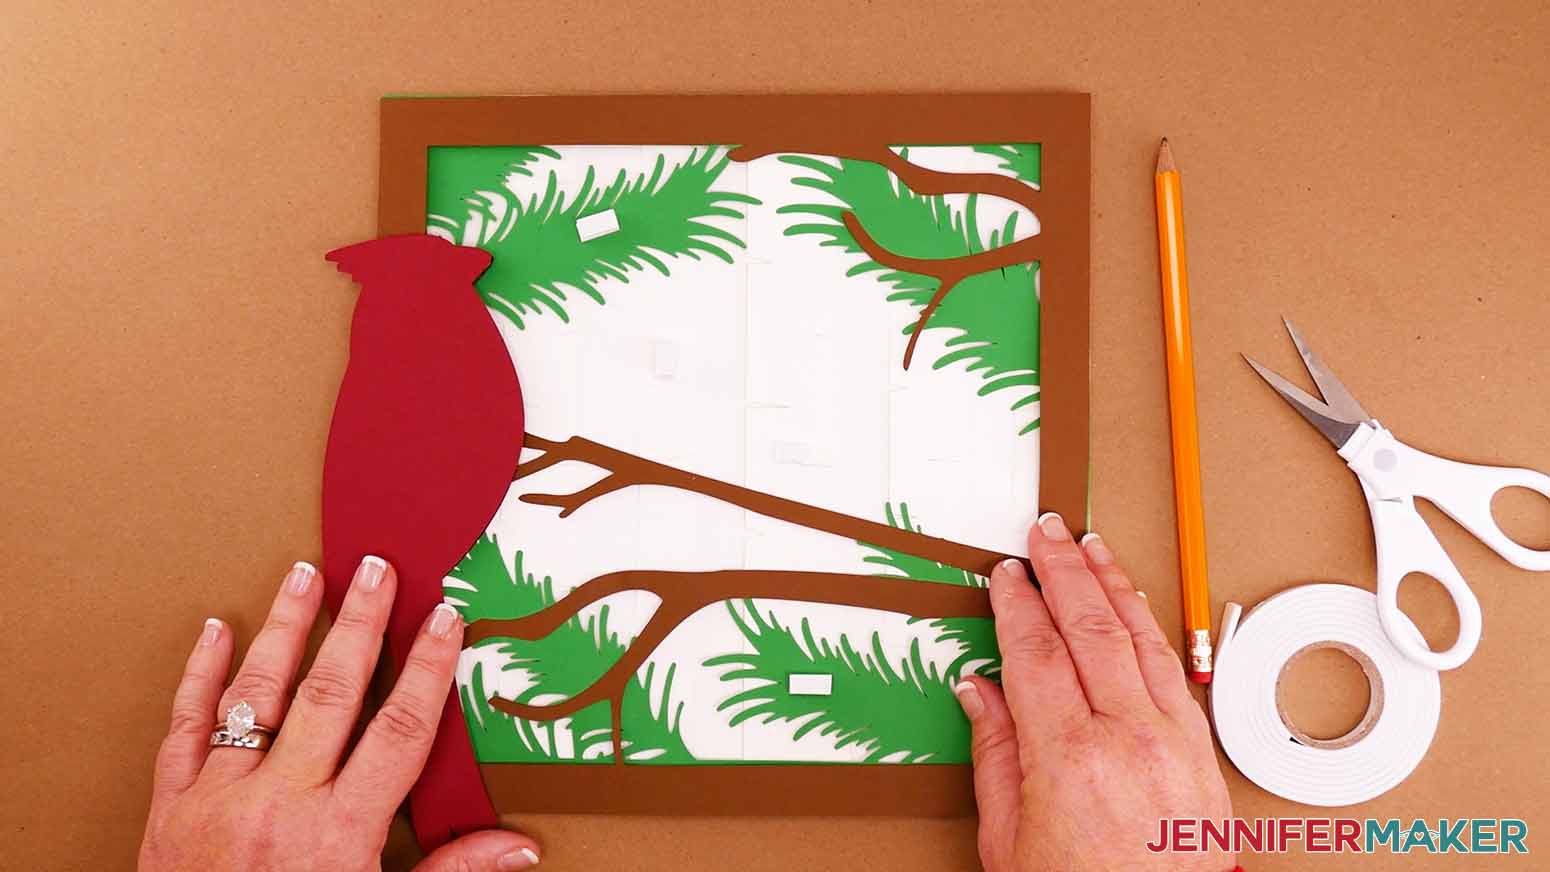
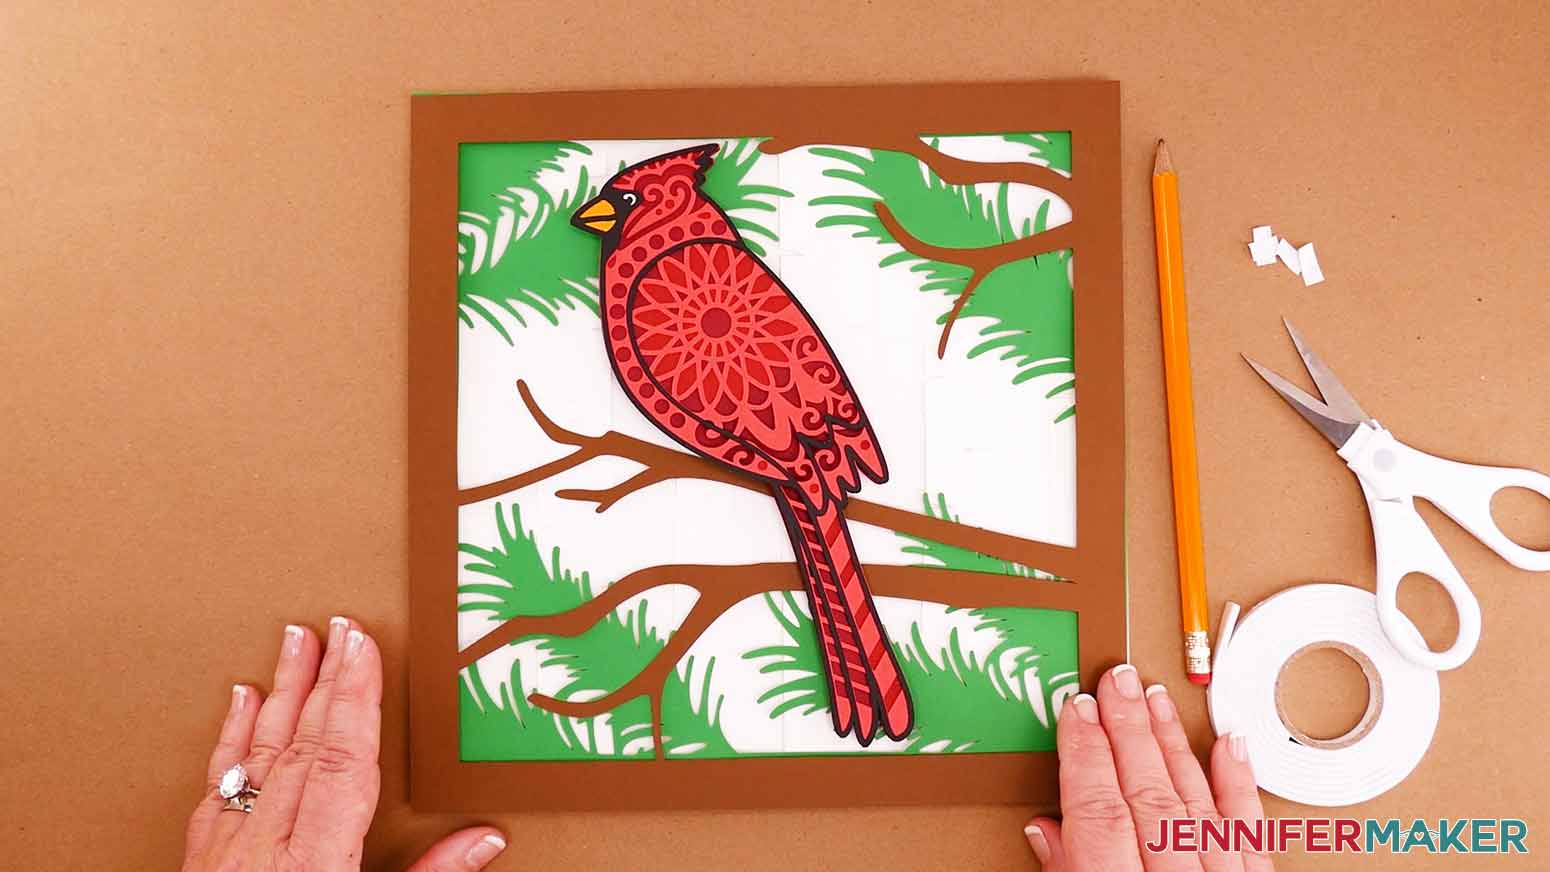
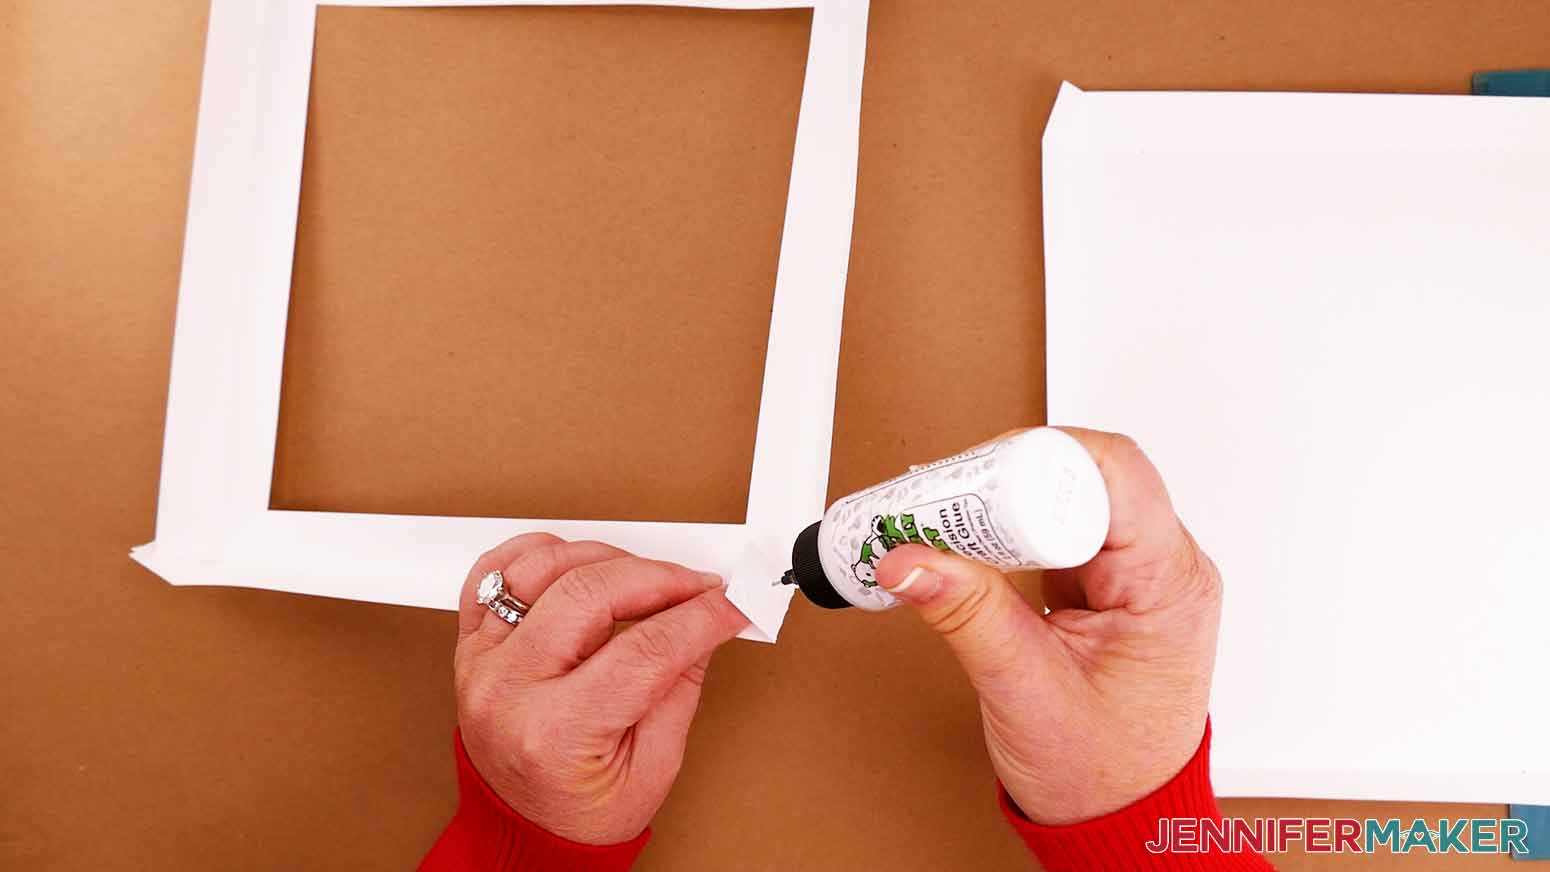
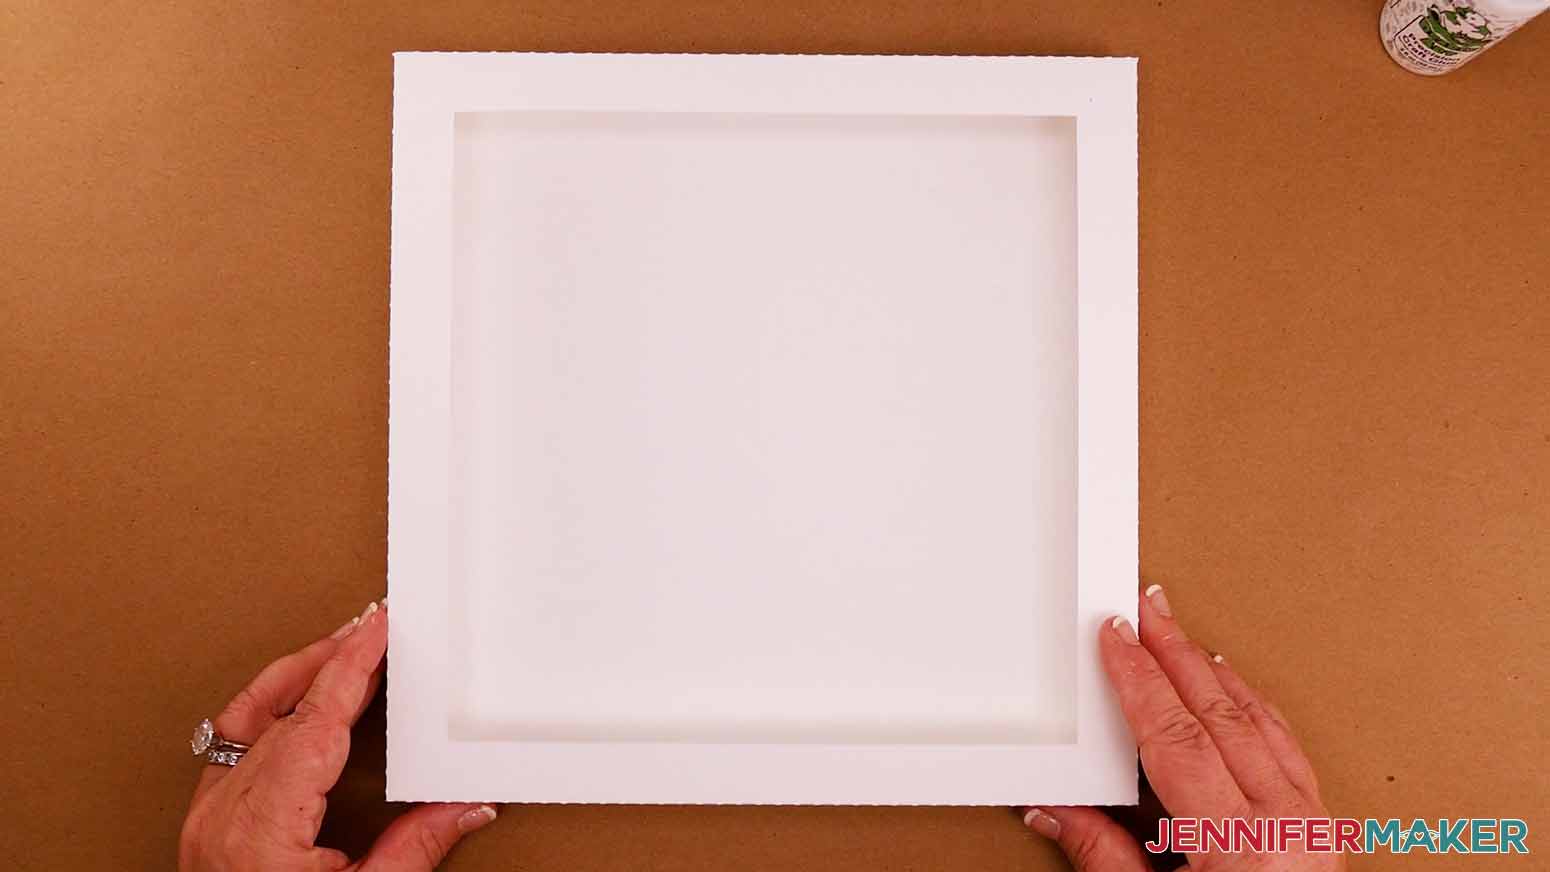
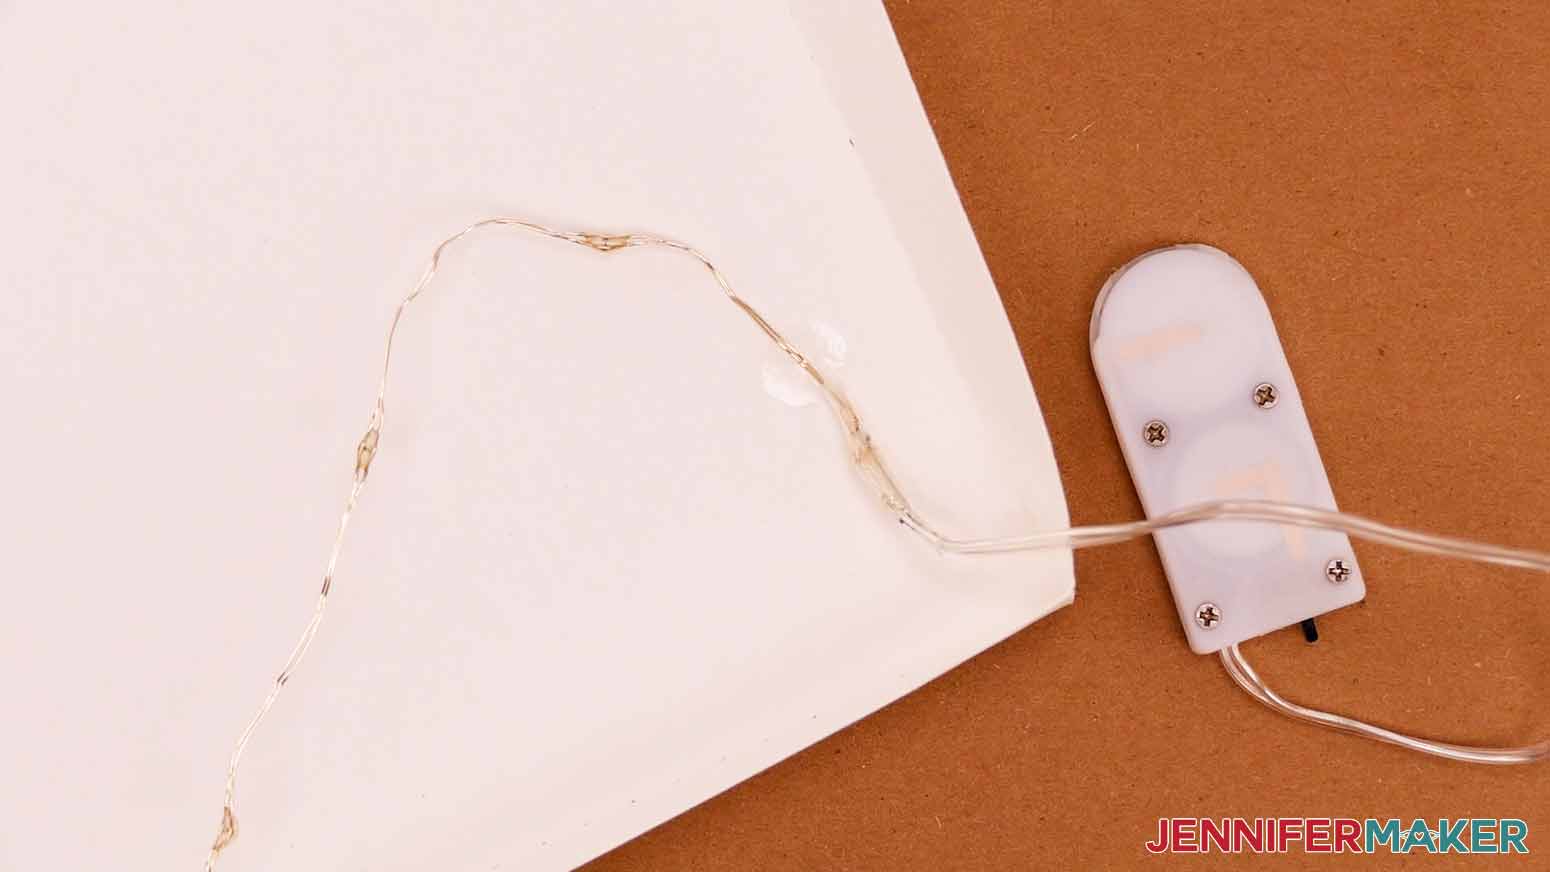
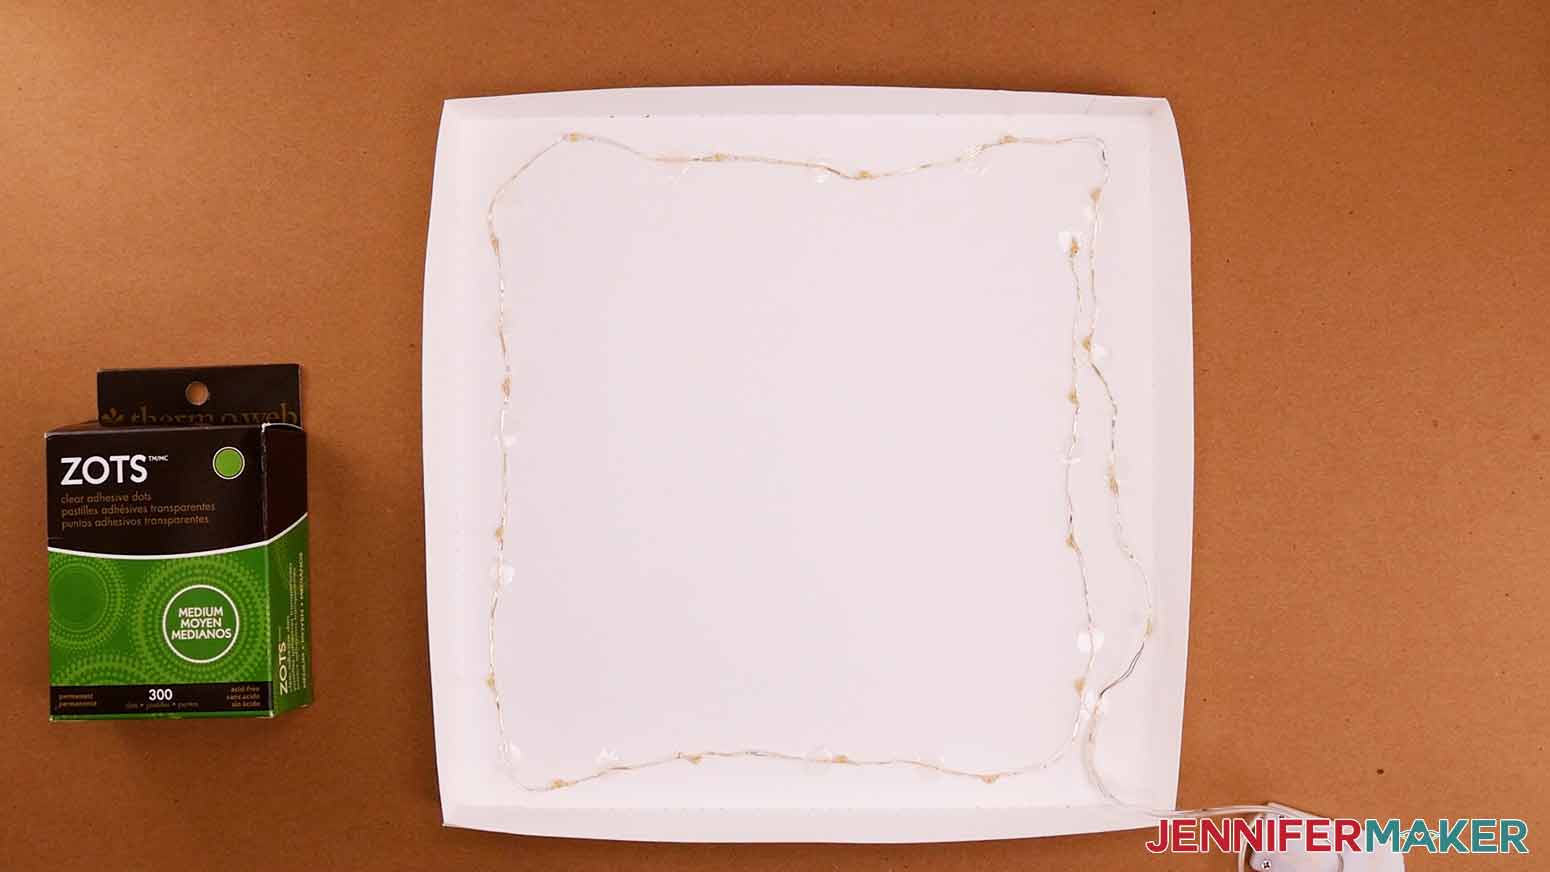
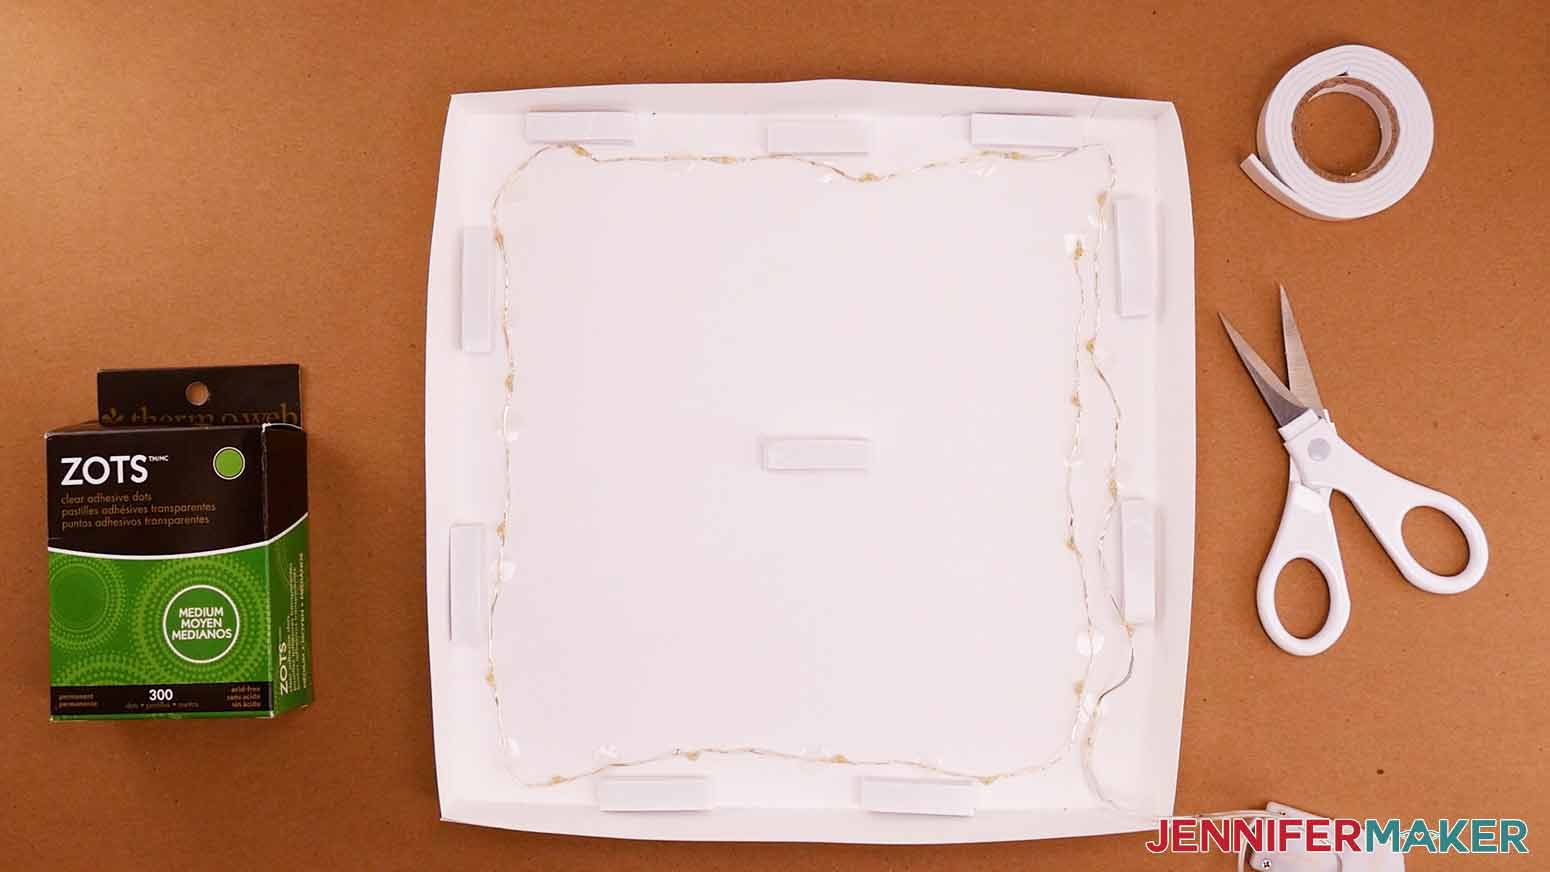
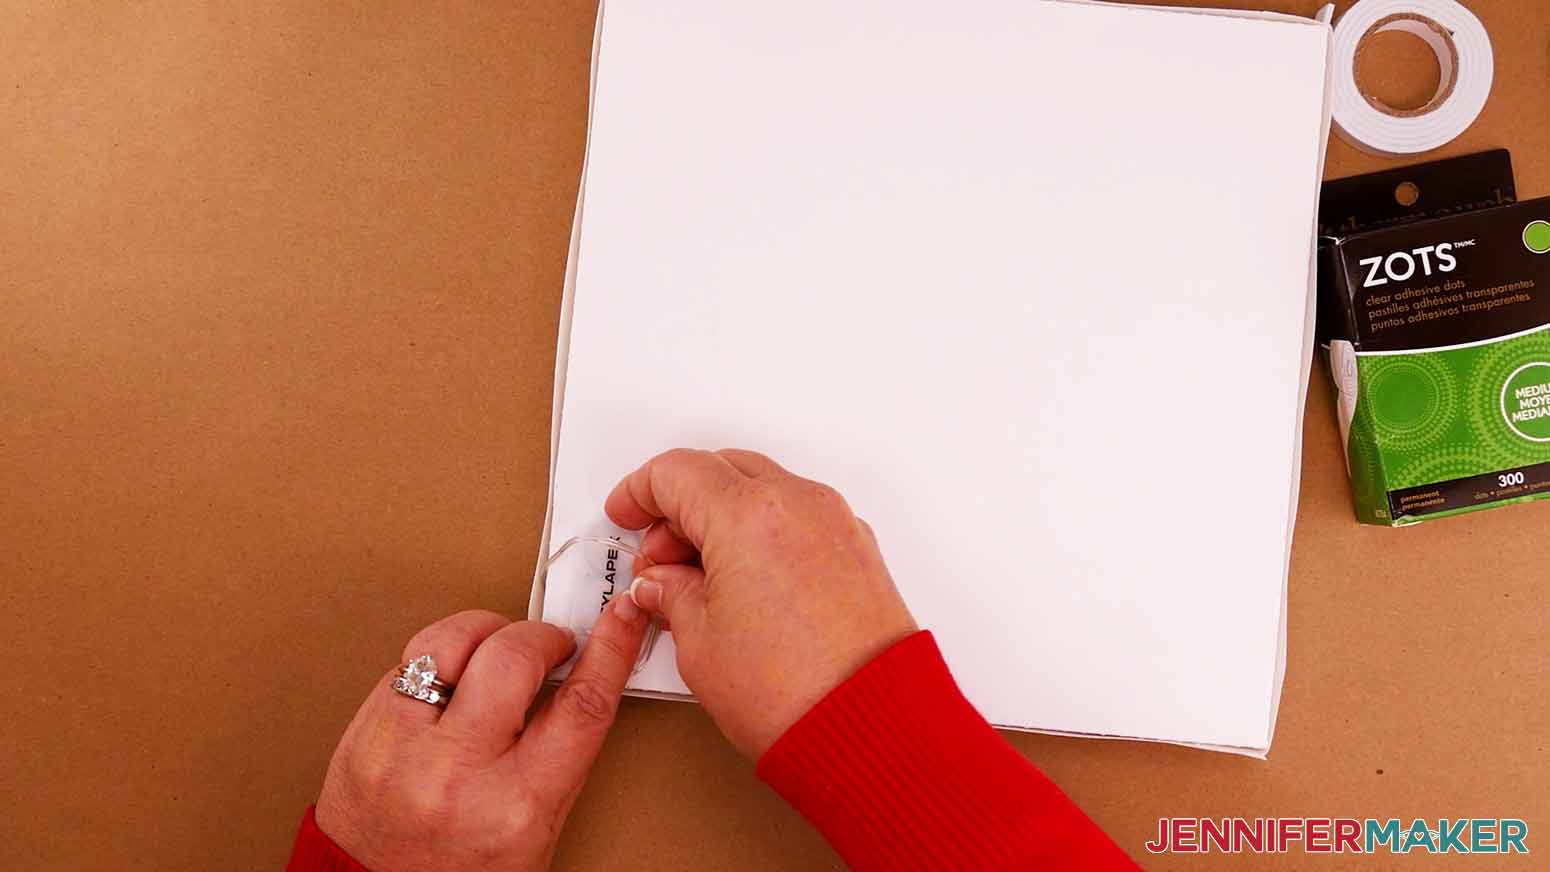
Learn how to make a beautiful layered cardinal SVG out of cardstock that you can display in a shadow box or handmade cardstock frame! First, download my Cardinal SVG/DXF/PDF files from my free resource library. It's Design #401. There are four files in the SVG folder: NOTE: If you want to make the cardinal on a Joy, upload that file and you're ready to cut! Use the Medium Cardstock setting and attach the layers using your preferred combination of glue and clear glue dots. Upload the SVG files to Cricut Design Space and add them to your Canvas. TIP: If you are not sure how to upload an SVG cut file to Cricut Design Space, watch this helpful video training series I made. If you're on an iPhone or iPad, here's how to download and upload an SVG file to the Cricut Design Space app. You can zoom out to see all of the designs by clicking on the minus (-) sign on the lower left. If you have both files on your Canvas, click and drag one to the side so they're both visible. This is what my Cardinal SVG file looks like when uploaded to Cricut Design Space. The design is set up to make one cardinal measuring approximately 5” wide by 7.75” tall. The optional background layers measure approximately 9.5" wide by 9.5" tall and fit perfectly into both the shadow box linked in my materials list and the DIY cardstock frames. When flat, the cardstock frame measures approximately 11.5" wide by 11.5" tall. If you're making the cardstock frame, you will need to convert and Attach the Score lines before cutting. They are the two layers with faint lines and no shapes in the Layers Panel. I’ve made the score lines red in the color swatch icon so they’re easy to distinguish from the other elements. Select the frame and click "UnGroup" at the top of the Layers Panel. Hold Shift while clicking on the two intended Score Layers in the Layers Panel. Make sure the color swatch in your top menu panel is red. If it’s not, you may have accidentally selected another layer. Just click off of the design and try again. With the correct layers selected, change the Operation at the top from "Basic Cut" to "Score." The lines are now dashed to indicate the machine will score instead of cut them. To attach the score lines to their appropriate cut layers, hold down your Shift key while selecting a Score layer and the Cut layer directly below it in the Layers Panel. Then, click "Attach" at the bottom of the Layers Panel. The newly-attached layers will jump to the top of the Layers Panel. Repeat for the other cut and score layer pair. Before you cut your design, make sure you want to include everything showing on your Canvas. If you don't want to cut an object, you can hide or delete it. For instance, if you're making a shadow box frame out of cardstock instead of using a purchased one, you won't have glass to decorate with the vinyl quote. So you'd delete the dark gray layer. Or, you can leave off the plain white square layer if you're mounting your cardinal inside a shadow box. This way, the material of your frame's backing will show through and make the Birch trees really pop. Now we're ready to cut. Make sure you have the right machine selected and click "Make It." If prompted, click "On Mat," "12 in x 12 in," and "Continue." I used eight different colors of cardstock for my cardinal and background: white, black, brown, orange, green, bright red, medium red, and dark red. I made my frame out of white cardstock. You can choose whatever colors you like. Just be sure there is enough contrast between each color, especially for the layers. If you're using the same red cardstock I am, you'll need to change the Material Size from "12 in x 12 in" to "8.5 in x 11 in (Letter)" for the red layers. Once you've done that, click "Continue" in the bottom right. For the majority of my mats, I used the "Medium Cardstock – 80 lb (216 gsm)" setting with "More" Pressure. However, for the two very detailed cardinal layers (my bright red and medium red mats), I used the "Cardstock (for intricate cuts)" setting because it gave me better results. To find it, click "Browse All Materials" and type "Intricate" in the search bar. Then select the result, click "Apply," and leave the Pressure at "Default." If you have trouble removing the intricate layers, try cutting them using a LightGrip mat instead of the Standard. If you're cutting the vinyl decal, select the "Premium Vinyl - Permanent Glossy" setting with "More" Pressure for that layer. If you want to apply the vinyl to the inside of the glass, make sure "Mirror" is turned on. If you're making the DIY frame, you'll need to load either the scoring stylus in Clamp A or scoring wheel in Clamp B for those mats. Follow the on-screen prompts to load your tools in the correct order for the appropriate mats. Place your first mat's material on your StandardGrip machine mat and use a brayer to make sure it's fully adhered. Check that your Fine-Point Blade is clean and in Clamp B. Then, load the mat into the machine and press "Go." When the cut is finished, unload the mat, flip it over, and roll it back to release the cardstock. This helps prevent the material from curling and ripping. Repeat the same steps for the rest of the mats. The mats with intricate details will take longer to cut. You can slide your spatula gently under those pieces to remove them. Don't lose track of the tiny pieces! Here's what all of my cut pieces for the cardinal and background look like. We will start with the background layers: To achieve the 3D look and make this project really pop, I used a variety of adhesive materials, including two sizes of clear Zots glue dots, two widths of double-sided adhesive foam tape, and my favorite Bearly Art craft glue. You can mix and match these on your own project to achieve your desired look. First, we will attach the two white background layers using the medium sized 3/8" Zots. Since these glue dots are so sticky, I ripped the paper backing around each dot so they were alone. Then, you can press the dot onto your cardstock while it's still attached to the backing. Peel off the backing, leaving the dot in place. This way, you never have to touch the glue dots with your fingers and don't have to worry about them sticking to you or each other. To attach them, flip the birch tree layer face down. You may need to refer to your Design Space Canvas to figure out which side is the front and which is the back. I placed glue dots in the four corners, along the edge of each side and on each of the birch trees inside the layer. Next, flip the layer over and hold it above the plain square layer. Make sure the edges are aligned and then lightly lay the birch tree layer down on top. If everything looks aligned, go ahead and press down to adhere both layers together. If something looks, off, gently lift that part back up and move it as needed before proceeding. TIP: If it's hard to get all four sides aligned, you can apply glue dots to just one half of your top layer and adhere that side to your bottom layer before adding glue dots to the other side. Grab the pine needle layer and medium (0.37") foam tape. Before placing any adhesive strips on the back of this layer, place it on top of your two assembled layers and note where the the pine needle pieces touch the birch tree pieces below. That's where the tape should go. You can lightly mark the spots on the back with a pencil if you like. Flip your pine needle layer over and place it flat on your work surface. Use your scissors to cut small strips of foam tape. I used 14. One by one, remove the backing and attach them in the areas you noted above. Also, place a strip in each of the four corners and one in the center along the edge of each side the same as you did with the birch tree layer. Remove the other backing from the adhesive strips. Then flip the layer over and align it over the assembled layers. Press down to adhere the layers once everything looks nice and straight. If it helps, you can remove the backing from just the strips on one side of the layer first, attach that side, and then move to the other side to finish attaching the layer. Next, attach the branch layer using thinner (0.25" width) adhesive foam tape. Make sure to cut your strips small enough that they don't show around the edges of the branches. Here's what my background layers look like once they're all attached. Set your background layers aside for now. Next we'll assemble the cardinal! You'll need the: Place the black layer face down and position the beak and eye pieces in the areas where they will be attached. Pay attention to how much they overlap because you'll need to apply a thin line of glue in those areas. Apply glue to the black layer and gently press down to adhere the beak and eye. If any extra glue seeps out around the edges, just wipe it away with your finger or a paper towel. Set this piece aside. Now take your top layer (my bright red layer with the most detailed cutouts) and place small glue dots on the back using the same method for the other layers. Space the dots as evenly as you can, making sure to adhere them to any large blank areas on this layer. I used approximately 18 glue dots. Flip the layer over and align it over the middle cardinal layer -- my medium red one with slightly fewer intricate cutouts. Once the two layers are aligned, press down to adhere them. Follow this same process to add glue dots to the back of the middle layer and then attach it to the bottom layer (my dark red one without any cutouts). Here's what my three cardinal layers look like once they're all assembled. Now we can glue the outline layer to the top of the red layers. I found that it was easier to do this in two sections. Place your black outline layer face down and apply a very thin line of glue around the top half of the cardinal's lines. Carefully flip and align this to the top of your red layers. Make sure the edges are even before pressing down to adhere the top part of these layers. Once that part is attached, lift up the tail part of the black layer. Apply glue to the red layer below, but make sure you only apply it in areas where the black will cover it. Press down to adhere the two layers when you're finished. Carefully wipe away any excess glue with your finger or a paper towel. Here's what my finished cardinal looks like. Now let's attach the cardinal to the background using adhesive foam tape. You can use either the 0.25" or 0.37" wide tape for this part. Since the background layers are all varying heights, we'll need to use double and triple layers of adhesive tape in some areas to fill the depth as needed. Position the cardinal on your background and center it as best you can. Try to make it look like the cardinal is sitting on the branch by positioning the bottom of the body just at the top edge of the branch. Note of where you'll need to place foam tape strips to keep the cardinal in place. I added tape in four areas: I found it easier to attach the tape to the background first, but you can attach it to the back of the cardinal first if that's easier for you. I placed: Peel off the backing from the top of your foam strip stacks and then position the cardinal above. Press down to adhere. Here's what my finished cardinal and background look like all assembled. If you're going to display your cardinal in a purchased shadow box, it's ready to attach! Make sure your assembled layers all fit nicely inside your frame before adhering them. Then, apply several medium sized glue dots to the back of your white background layer and attach it to the backing of your frame, making sure the hanging hardware on the back is facing the correct direction. If you cut the vinyl decal of the quote, you can add that to your glass now. Be sure you've weeded the design before applying it. First clean the area of the glass where you want to place your quote (I put mine in the bottom left corner) with rubbing alcohol and a lint-free cloth. Then cut a piece of transfer tape just a little larger than your decal. Use the "taco" method -- make the tape into a taco shape and lower the bottom onto the center of the design -- to apply the transfer tape to the decal and burnish it on both sides. Remove the backing from the transfer tape and use the "taco" method again to apply the decal to the glass. Make sure the decal is straight and you're happy with the placement before pressing down. Burnish all parts of the decal onto the glass before removing the transfer tape. TIP: You can refer to my Paper Flower Shadow Box Ideas + Hand Lettered Designs Tutorial for instructions on cutting, weeding, and applying a vinyl decal to glass. If you're making the DIY cardstock shadow box frame, assembling it is easy! First, take your two white frame pieces with the scored lines and place them in front of you face down. Fold upward along the score lines for both pieces. Use your scraper tool to crease along the folds if needed. TIP: It helps to bend the cardstock along a flat edged object, such as a ruler, to make nice, straight folds. We'll glue the tabs to their adjacent sides to give the frame its depth. Place a small amount of glue on the outside of each tab where it meets the inside of the long side piece next to it. Press to adhere it to the inside of the frame. Do this for all four tabs on both frame pieces. Once the glue is dry, make sure your front frame piece (the one with the cutout in the center) slides easily onto your back frame piece. Your frame is now ready! If you'd like to make your background layers stand out even more, you can add fairy lights behind them in your cardstock frame. First, turn on your lights to make sure they work. You might have to remove a battery protector tab. We'll use the medium sized glue dots to attach the lights evenly around the inside edge of the back of your frame. Start by attaching the lights at the end near the battery pack. Make sure the wire without any lights and the battery back itself are outside the frame and not attached. Place a glue dot in a bottom corner of your frame. Then press the wire next to the first fairy light against it to adhere it. The battery and plain wire will stay on the outside. Continue attaching glue dots evenly around the edge of your frame -- about 2-3" apart -- and pressing the wire sections on top. Once your entire strand of fairy lights is attached, it should cover the entire perimeter of the frame, with some overlap at the end. Now let's attach the background layers and cardinal to the back of the frame. Make several triple stacks of medium foam tape about 1" long. Being sure they won't be visible or interfere with the lights, place them on the bottom frame piece in the corners, in the middle of each side, and one in the very center. Once your cardinal is attached to the back of your frame, slide the front of your frame over the top and secure it with a few glue dots around the outside edges. You can also keep the battery pack in place with another glue dot. If you're hanging your frame on a wall, you'll want to attach the battery pack on an outside edge of the frame so you can turn the lights off and on. If you're setting your frame on a flat surface, you can attach the battery pack to the back side. One medium sized glue dot should be enough to hold the pack in place. You're done! Here's what my finished cardinal looks like assembled in the shadow box frame with the vinyl decal sentiment attached to the front of the glass. Here's what my finished cardinal looks like inside the DIY cardstock frame with fairy lights behind the layers. Cardinal with Background in Cardstock Frame Finished Size: 9.5" wide by 9.5" tall Cardinal with Background in Purchased Shadow Box Finished Size: 11" wide by 11" tall Fonts Used for Optional Decal: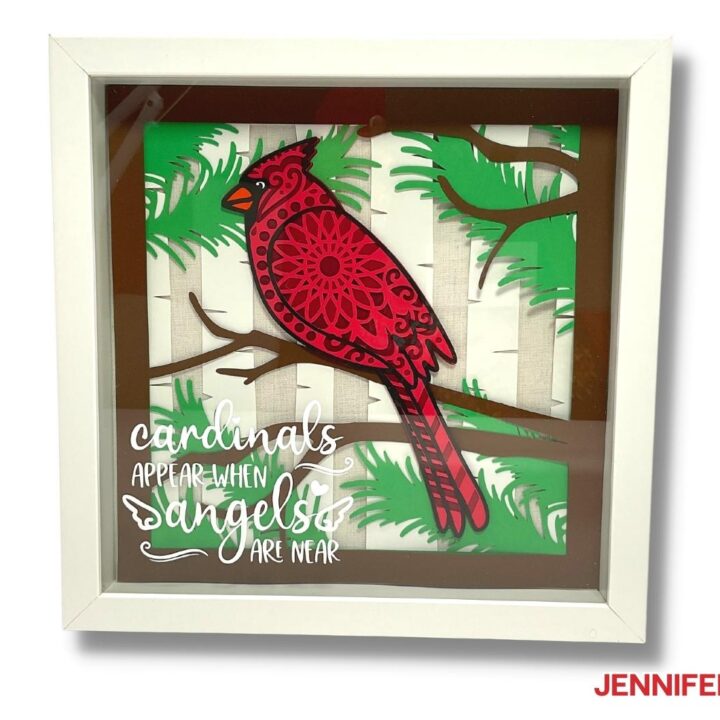
Cardinal SVG
Materials
Tools
Instructions
STEP 1: GET MY FREE CARDINAL SVG FILES
I'll show you how to create the full-size cardinal with the score tool version of the frame. If you'd prefer to use a pre-made shadowbox, just skip the steps related to the DIY frame.
NOTE: If you'd like to add lights to the DIY frame, you can use either file. However, you will get some light leaking out of the dashed cut lines if you use that version.STEP 2: PREPARE YOUR DESIGN FILES
STEP 3: CUT YOUR CARDINAL SVG DESIGN
STEP 4: ASSEMBLE YOUR CARDINAL AND BACKGROUND LAYERS


STEP 5: ASSEMBLE IN GLASS SHADOW BOX WITH VINYL SENTIMENT
STEP 6: ASSEMBLE YOUR CARDSTOCK FRAME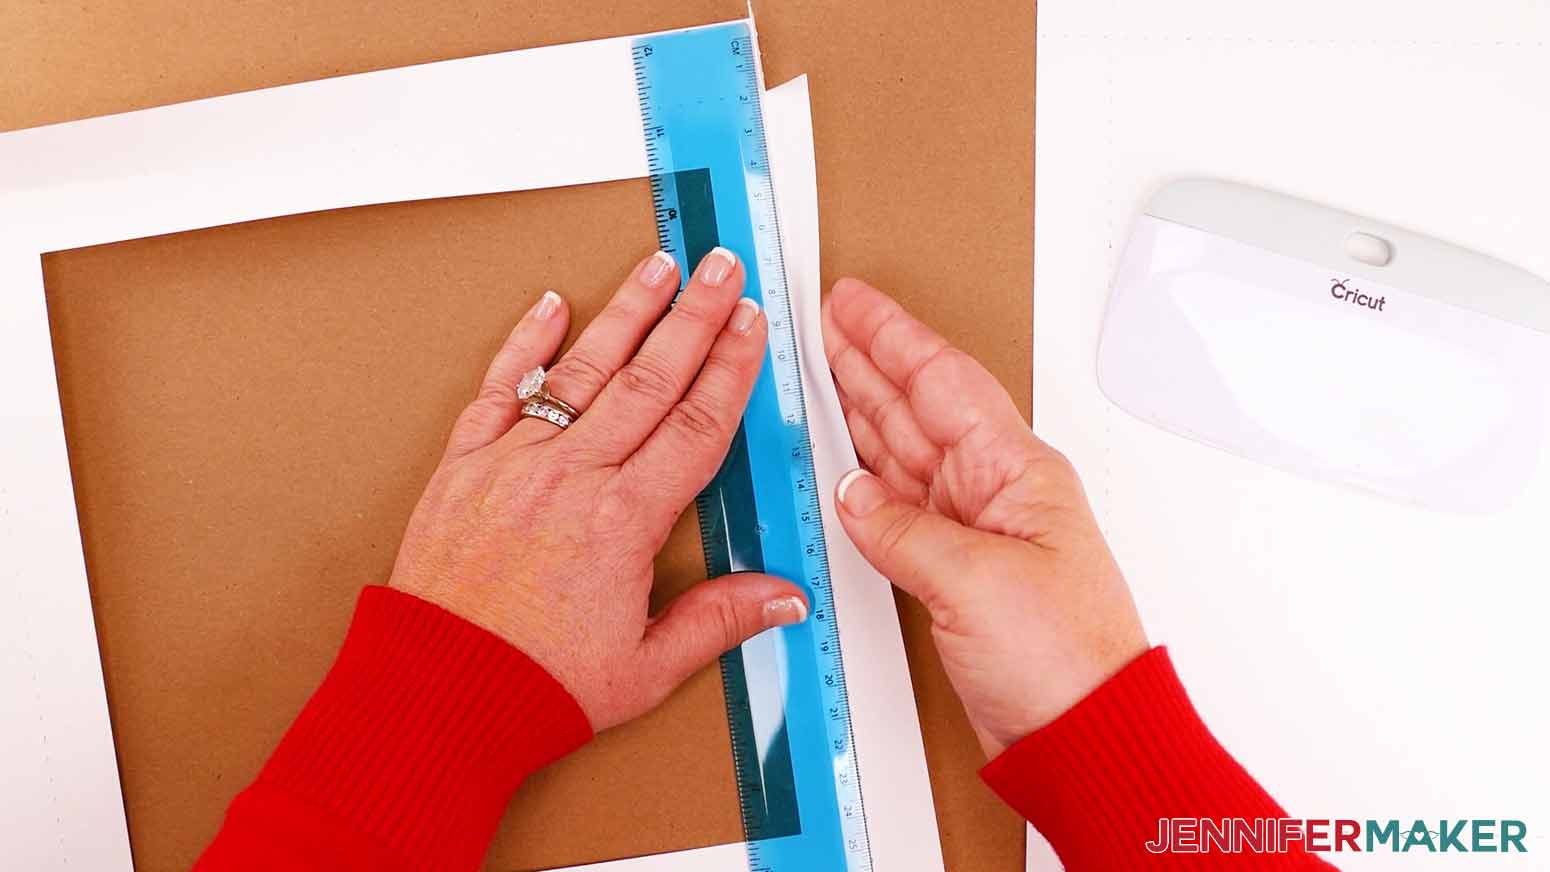
VARIATION: ADD FAIRY LIGHTS!
STEP 7: SHOW IT OFF!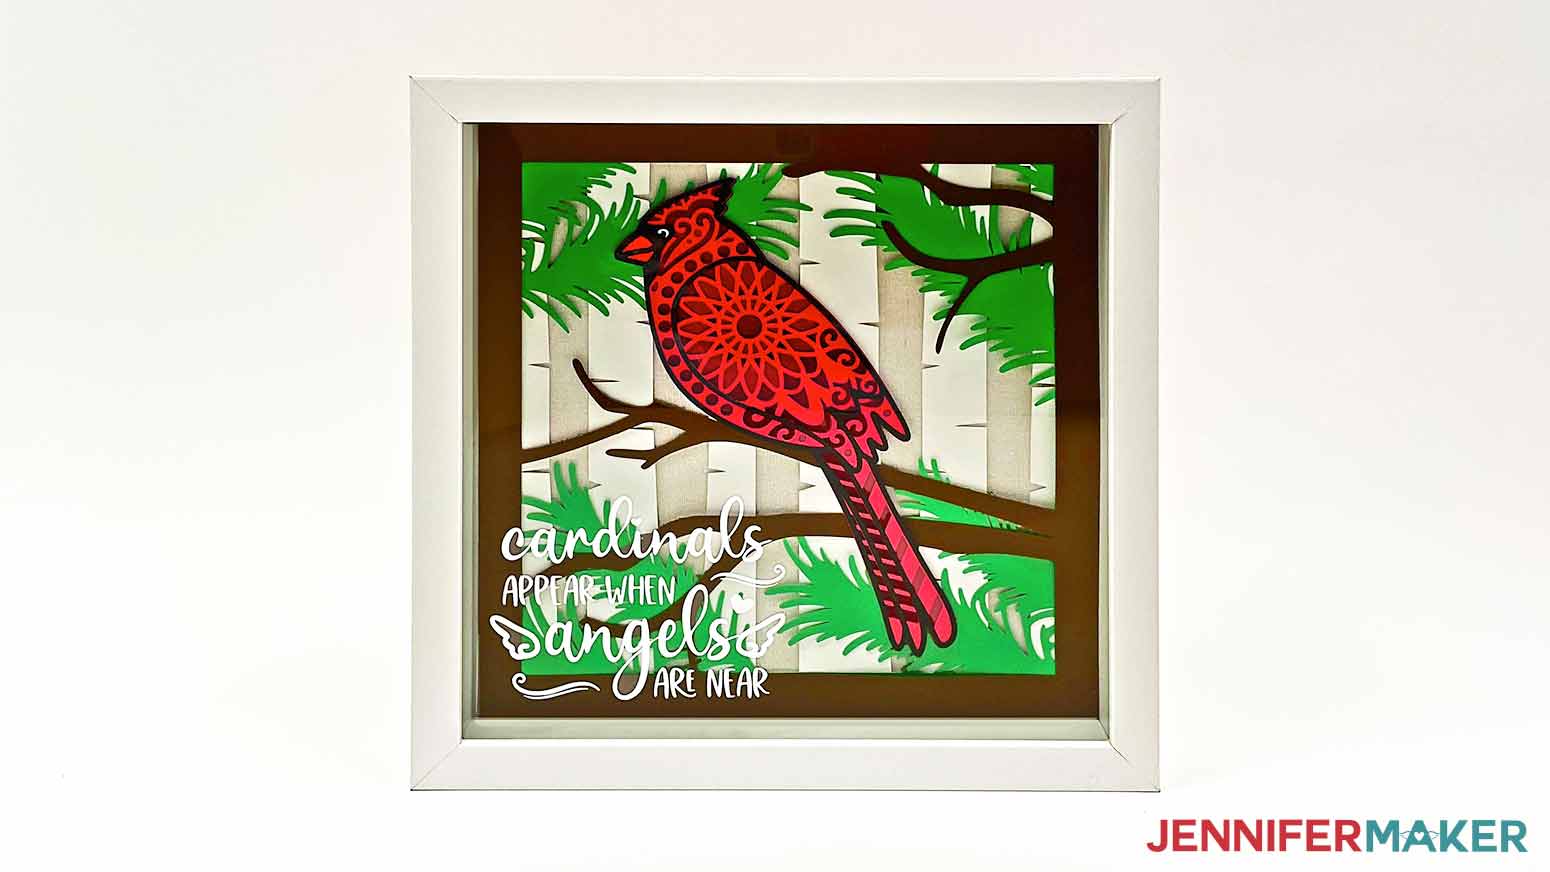
Notes
Questions About My Free Cardinal SVG
Get my instant download digital files for my free cardinal SVG!
I’d love to see your layered cardinal SVG projects and hear which version you liked the best! If you make a shadow box or anything else with this design, please share a photo in our Facebook group, email it to me at [email protected], or tag me on social media with #jennifermaker.
Love,

Want to remember this? Save the Free Cardinal SVG Design Tutorial to your favorite Pinterest Board