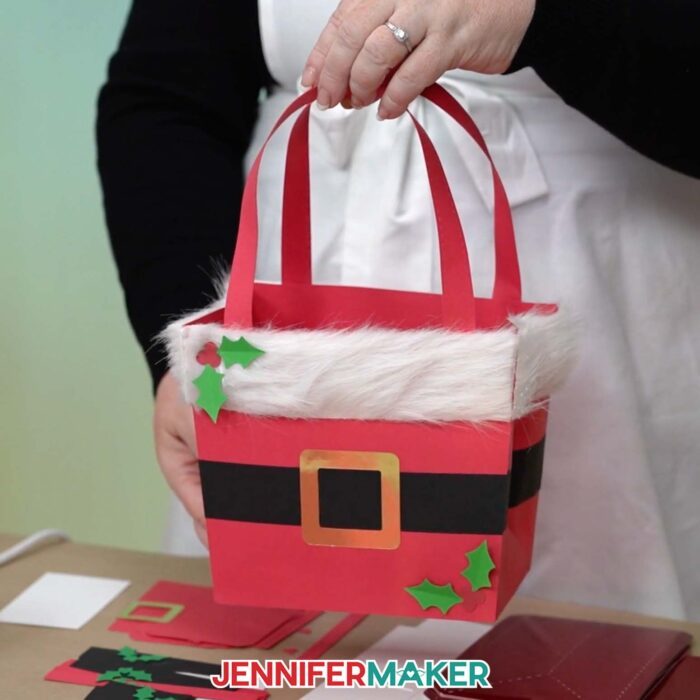
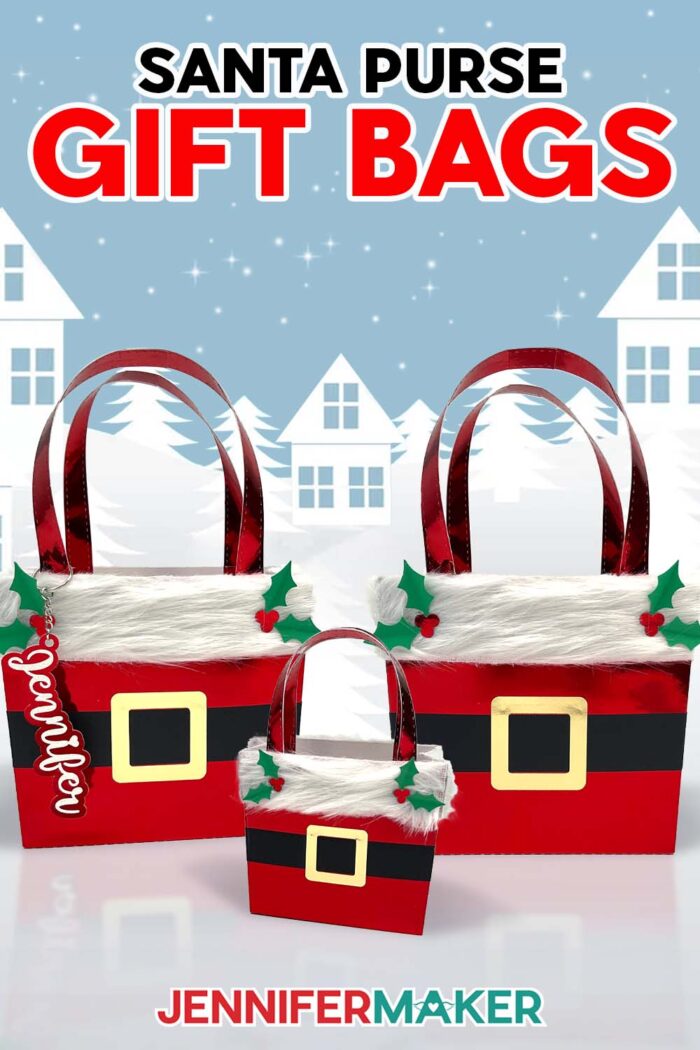
Learn how to make a festive Santa purse gift bag!
Put up your tree, hang the Christmas stockings, and get ready because Santa Claus is coming to town! If you’re exchanging gifts this holiday season like I am, you’ll need some gift wrap options. I love creating my own gift boxes and and bags, and this year I thought it would be super cute to make gift bags that look like a purse, inspired by the jolly old elf himself! In this tutorial, I’ll show you how to create our own Santa purse gift bag with cute belt and buckle details, and even some faux fur!
Watch the full step-by-step video tutorial on making a Santa purse gift bag:

Wrapping paper is a good option for some gifts, but what if the item you have is irregularly shaped, or it’s soft like a sweater or plush toy? Skip the gift wrap in favor of Christmas gift bags! My Santa purse gift bags will look so cute under the tree, packed with gifts on Christmas morning.
Making your own party supplies and gift bags is a great way to save money and add a personal touch to your gift wrapping. The bags at the store are often over-priced, and it’s way more fun to make them (and personalize them!) myself. In this tutorial, I teach you how to make your own Santa-inspired gift bag with a surprise inside.
In the free download file, I’ve included score version of the file that uses a scoring tool to create the foldable creases, as well as a no-score version that uses dashed cut lines. I’ll demonstrate with the no-score version so so you know which dashed lines to cut and which are for decoration.
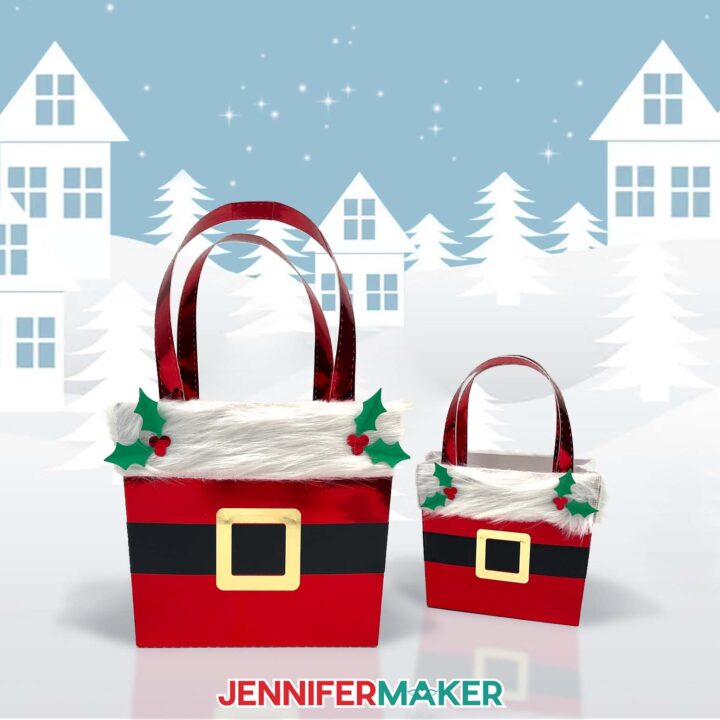
You can make the large bags using the main files, or you can use the Cricut Joy-sized version to make small Santa bags. For full details on how to cut and assemble my Santa gift sack, scroll down for the written tutorial with photos and additional information, or watch the video linked above for helpful how-tos.

I cut my Santa sack purse with my Cricut Maker 3, but you can also use a Cricut Maker, a Cricut Explore series machine, the Cricut Venture, Cricut Joy Xtra with the main files. If you use a Cricut Joy, I’ve got a version in the download file for you, too! I’ve also included DXF versions of the purse designs if that’s what your cutting machine uses, as well a PDF files if you’d like to cut the pieces by hand.
I recommend using high quality 65 lb cardstock for the structure of the bag, the Santa suit details, and the holly leaf accents, and 100 lb cardstock for the damage protection reinforcement panel in the bottom of the bag. If you use the materials I do, Santa’s bags can be filled with gifts up to 5 pounds!
As far as types of cardstock, I love metallic foil because it’s perfect for showing decorative stitches made from dashed cut lines! I recommend using good quality foil or plain colored cardstock for the sturdiest gift bags. Glitter cardstock is pretty, but you will need to use hot glue to glue together the seams. Craft glue just isn’t strong enough to adhere the glittery surfaces!
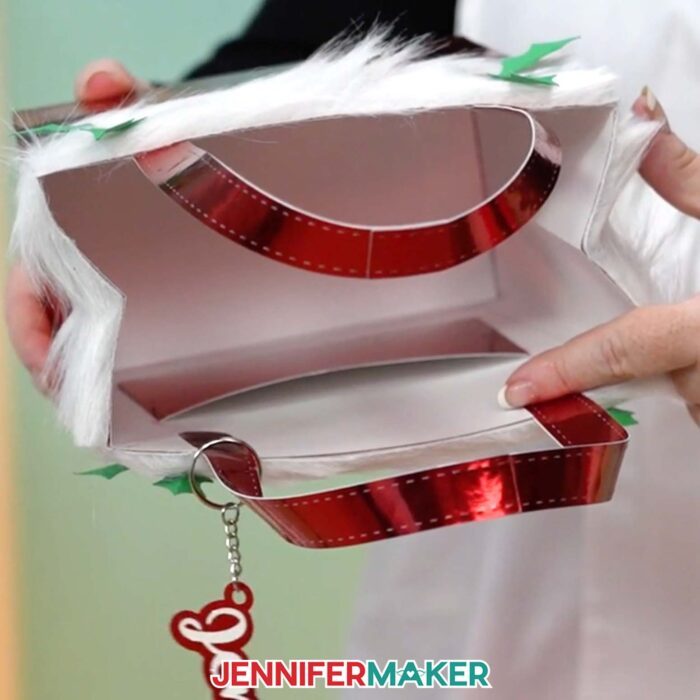
We’ll use hot glue to line the top edge with a faux fur trim — just like you’d see on Santa’s suit! I’ll even show you how to attach a secret pocket on the interior, perfect for a gift card or a special message inside!

I can’t wait to show you how to make a gift bag that says ho ho ho! Fill them with crafted gifts like personalized ornaments, sublimated items, or something store-bought. Stuff some color-coordinated tissue paper inside your Christmas bag for a finishing touch and your Santa purse gift bag is ready to bring the cheer!
Let me show you how to make a Santa purse gift bag! This post contains some affiliate links for your convenience (which means if you make a purchase after clicking a link I will earn a small commission but it won’t cost you a penny more, there is no additional cost)! Read my full disclosure policy.
Materials to Make A Santa Purse Gift Bag
View my Amazon shopping list for the exact items I used!
- Four to Six (4-6) Sheets of 8.5″ x 11″ or 12″ x 12″ 65 lb. Red Solid Core Cardstock -OR-
- Four to Six (4-6) Sheets of 8.5″ x 11″ or 12″ x 12″ 65 lb. Red Foil Cardstock or another cardstock option
- One (1) Sheet of 8.5″ x 11″ or 12″ x 12″ 65 lb. Gold Foil Cardstock (for buckle accent)
- Two (2) Sheets of 8.5″ x 11″ or 12″ x 12″ 65 lb. Black & Green Cardstock (for belt and holly accents)
- 2″ Wide White Faux Fur Trim
- One (1) Sheet of 8.5″ x 11″ or 12″ x 12″ 100 lb. White Cardstock (optional for fur patterns and to reinforce purse’s bottom)
- A way to cut your materials – I’m using the Cricut Maker 3 but you could also use the Cricut Maker, a Cricut Explore Series machine, a Cricut Venture, a Cricut Joy Xtra, or a Cricut Joy
- Cricut StandardGrip Machine Mat 12” x 12”
- Dark-Colored Pen (optional for tracing pattern onto faux fur)
- Scoring Stylus (optional for files with score lines) -OR-
- Single Scoring Wheel (optional for files with score lines)
- Brayer
- Spatula
- Scraper
- Weeding Tool (for popping out small pieces from intricate areas)
- Scissors (for cutting faux fur)
- Tweezers (optional)
- Craft Glue (I used Bearly Art Precision Craft Glue)
- Hot Glue Gun & Glue Sticks (for gluing faux fur)
- Silicone Finger Protectors (for use with hot glue)
- Butcher Paper (optional to keep your work surface clean)

How to Make a Santa Purse Gift Bag!
Santa Purse Gift Bag
Learn how to make a cute Santa purse gift bag out of cardstock and faux fur!
Materials
- Four to Six (4-6) Sheets of 8.5″ x 11″ or 12" x 12" 65 lb. Red Solid Core Cardstock -OR-
- Four to Six (4-6) Sheets of 12" x 12" 65 lb. Red Foil Cardstock -OR-
- Four to Six (4-6) Sheets of 8.5" x 11" 65 lb. Red Foil Cardstock
- One (1) Sheet of 8.5" x 11" or 12" x 12" 65 lb. Gold Foil Cardstock (for buckle accent)
- Two (2) Sheets of 8.5" x 11" or 12" x 12" 65 lb. Black & Green Cardstock (for belt and holly accents)
- 2" Wide White Faux Fur Trim
- One (1) Sheet of 8.5" x 11" or 12" x 12" 110 lb. White Cardstock (optional for fur patterns and to reinforce purse's bottom)
- Design #679 (My free SVG/PDF/DXF design files are available in my free resource library - get the password by filling out the form at the bottom of this page)
Tools
- A way to cut your cardstock - I’m using the Cricut Maker 3, but you can also use the Cricut Maker, a Cricut Explore Series machine, the Cricut Venture, the Cricut Joy Xtra, or the Cricut Joy
- Cricut Green StandardGrip Machine Mat 12" x 12"
- Craft Glue (I used Bearly Art Precision Glue)
- Hot Glue Gun & Glue Sticks (for gluing faux fur)
- Silicone Finger Protectors (for use with hot glue)
- Scoring Stylus (optional for files with score lines) -OR-
- Single Scoring Wheel (optional for files with score lines)
- Brayer
- Spatula
- Scraper
- Scissors (for cutting faux fur)
- Weeding Tool (optional for popping out small cutouts from intricate areas)
- Tweezers (optional)
- Butcher Paper (optional to keep your work surface clean)
- Dark-Colored Pen (optional for tracing pattern onto faux fur)
Instructions
STEP 1: GET MY PAPER SANTA PURSE GIFT BAG DESIGNS
First, download my Santa Purse Gift Bag files from my free library – look for Design #679. Alternatively, you can use the Save This Project form near the top of this post and the design link will be emailed to you.
In the SVG folder, you’ll find “score” and “no-score” versions of my purse design to cut on a cutting machine. Score versions are for those of you who have a scoring tool and want to use it, while the no-score versions are for those who can’t use a scoring tool or just prefer dashed cut lines instead of scores.
There is also a DXF folder with cut files, and a PDF folder with versions you can print and cut by hand.
Upload the SVG file you need to Design Space to get started. I’ll demonstrate with the “no-score” version on foil cardstock, which has some dashed cut lines that are creases and some that are decorative stitches. I’ll show you which ones to fold, and which ones are just for decoration.
TIP: If you’re not sure how to upload, go to jennifermaker.com/svgs to learn how to unzip and upload SVG files.
STEP 2: PREPARE AND CUT YOUR SANTA PURSE GIFT BAG DESIGN
CRICUT DESIGN SPACE
- In Cricut Design Space, open a blank Canvas.
- Click “Upload” and then “Upload Image.”
- Click “Browse.”
- Select the paper Santa purse SVG file of your choice.
NOTE: I’ll pick the “no-score” version.
TIP: If you want to use the "score" version, follow the steps in my Advent Tree Calendar tutorial to adjust and Attach the Score lines. - Click “Continue.”
- Click “Upload” to add the design to your Canvas.
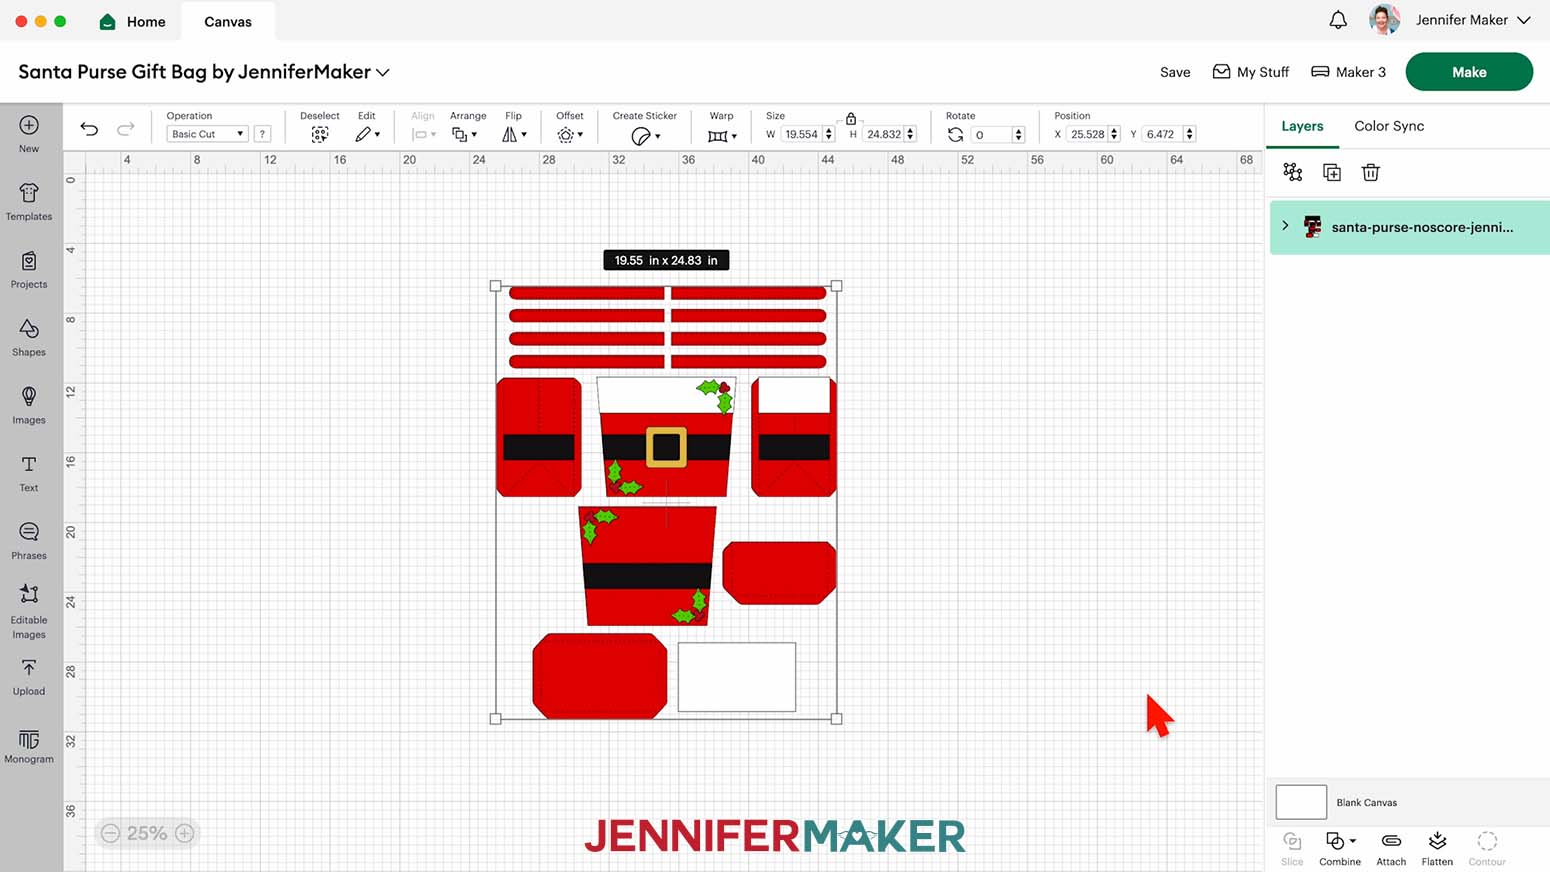
- Click the minus (-) icon in the lower left corner to zoom out and see everything on your Canvas.
NOTE: If your project uploads differently than is shown on this page (with the layers stacked on top of each other vs spread out), this is intentional to make sure your design does not change sizes on you. If you prefer to use the unstacked version of the design files, upload one of the files in the “Unstacked” folder and then make sure your layers match these dimensions:
santa-purse-noscore-stacked-jennifermaker-SVG: 19.55" x 24.83"
santa-purse-score-stacked-jennifermaker-SVG: 19.55" x 24.83"
santa-purse-joy-stacked-jennifermaker-SVG: 11.16" x 15.18" - The two large tapered square pieces are the front and back of the purse. The two large rectangular pieces with tabs on the left and right are the purse’s sides. The rectangular piece with four tabs is the bottom of the purse, and the rectangular piece with three tabs is the inside pocket.
The four black rectangles (two short and two long) are the belt pieces, and the square-shaped outline piece is the belt buckle. The eight long, thin strips are the handle pieces.
The four berry pieces and four leaf pieces are the (optional) holly accents.
The two white strips are (optional) patterns for cutting the faux fur. The large white rectangle is the (optional) reinforcement panel for the bottom of the purse.
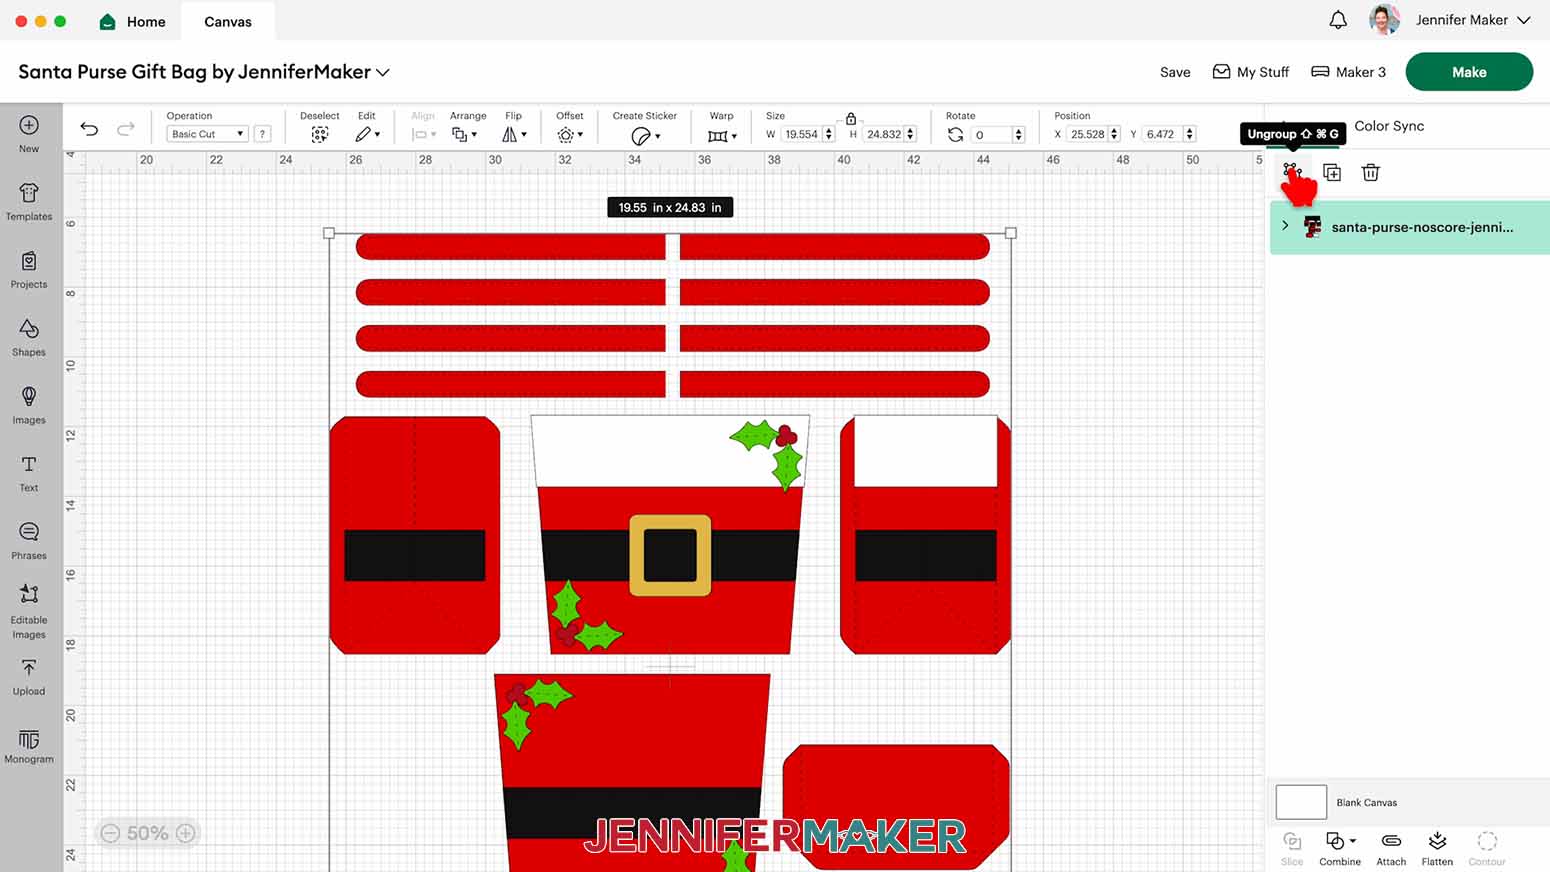
- Click “Save” and give your project a name.
- The design is ready for you to cut as is, but you can make a few adjustments to save time or material.
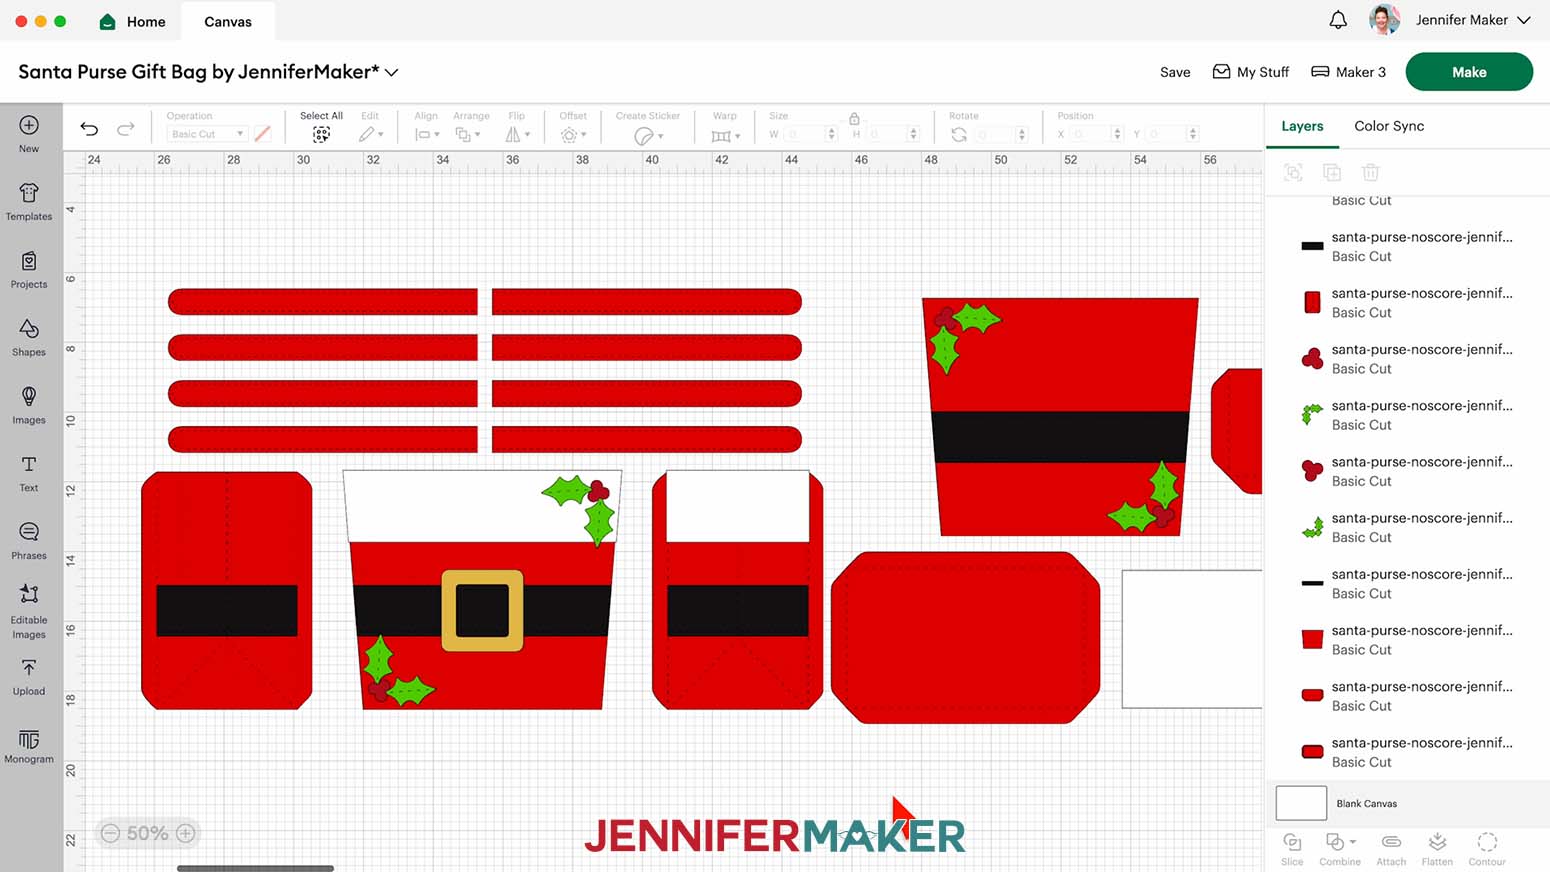
NOTE: I’ll show you which adjustments you can make, but I’ll keep my design in its original state. - Ungroup the design to work with the pieces individually.
- To delete any optional pieces you don’t want, select them on the Canvas and click the “Trash Can” icon.
NOTE: The optional pieces are the holly berries and leaves, the fur trim patterns, and the bottom reinforcement panel. You can also remove four of the handle pieces, but only do this if you’re using two-sided or solid core cardstock, or else the back side of your handles may not match the front side. - To change the color of a piece to match the cardstock you’ll use, select it on the Canvas and use the Color Box next to “Operation” to pick a new color.
- Your project is ready to cut!
CUTTING
- Make sure the correct machine is selected in the top right.
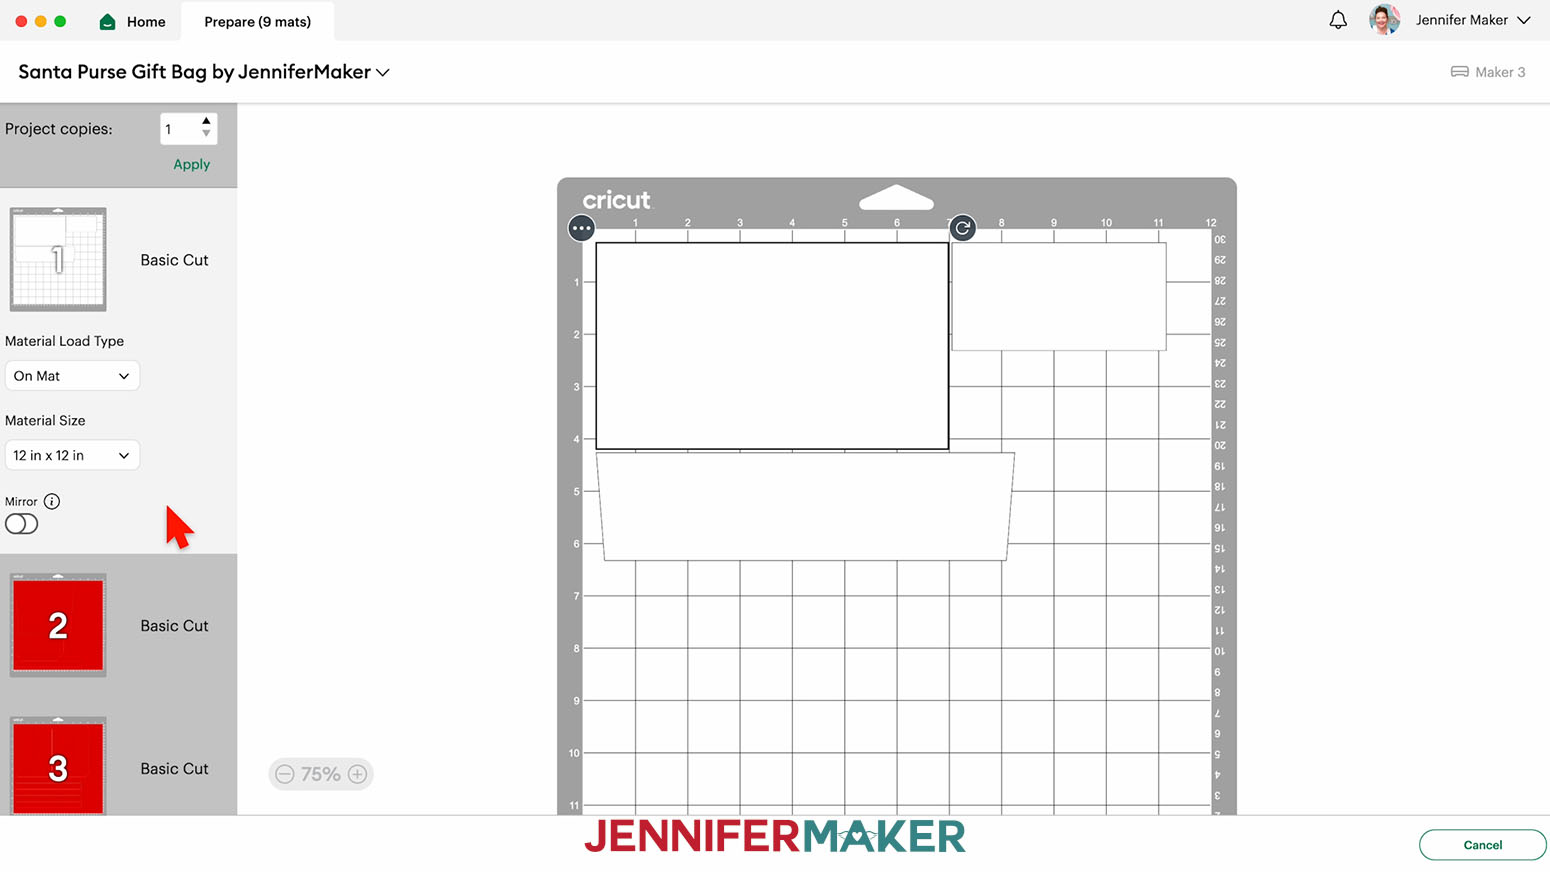
- Click “Make.”
- On the Prepare screen, make sure the correct Material Size is selected for your materials.
- Select the first mat again and click “Continue.”
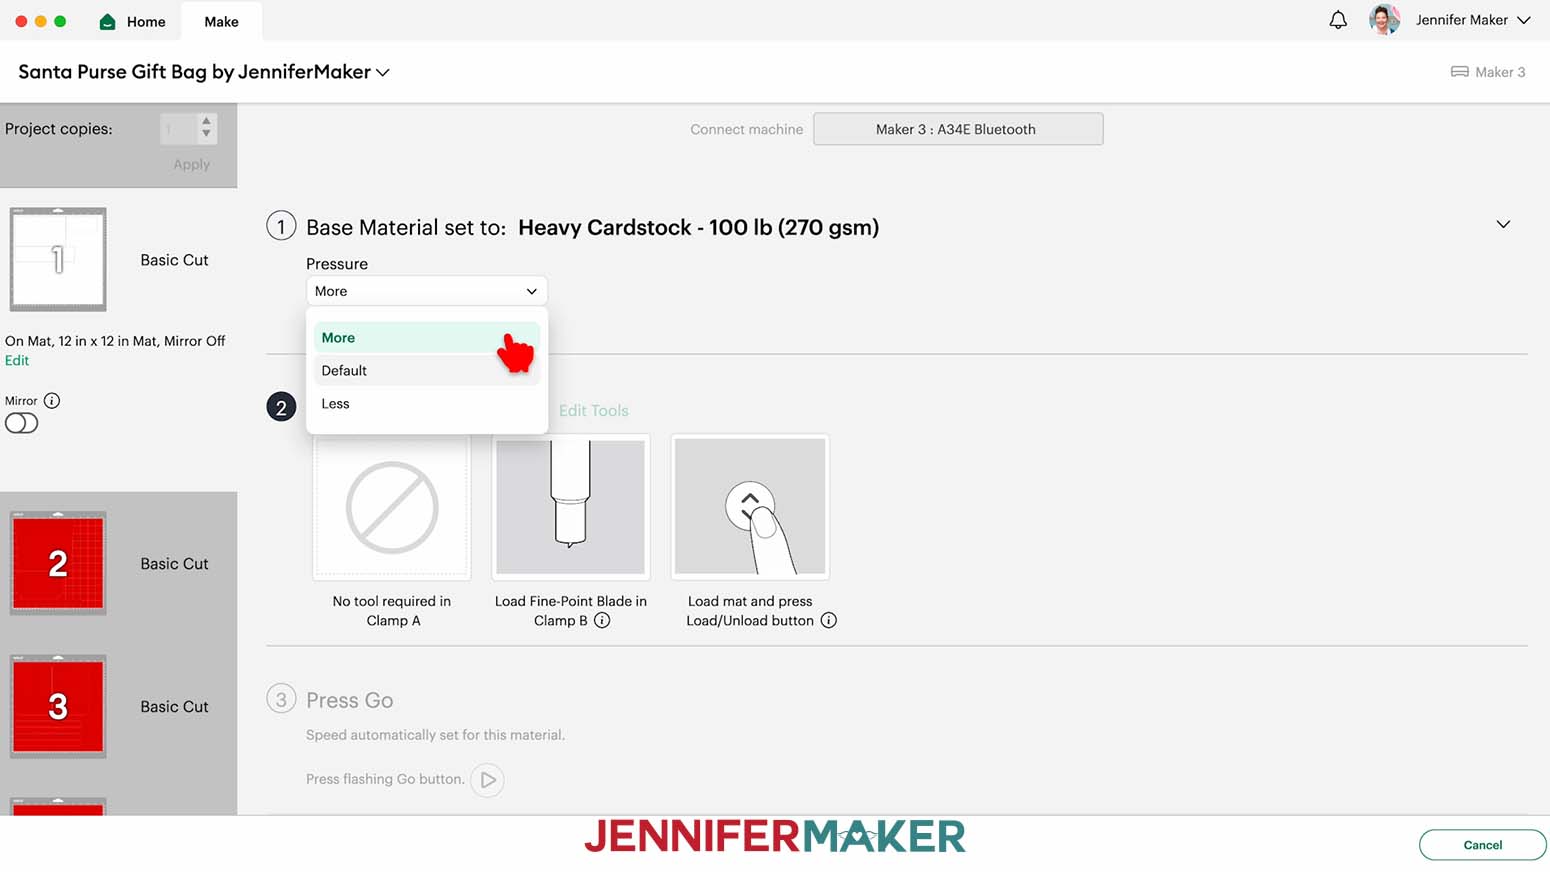
- On the Make screen, set the Base Material for your first mat. Mine is the white mat. I’ll use “Heavy Cardstock - 100 lb (270 gsm)” and change the Pressure to “More” to cut the fur trim patterns and reinforcement panel.
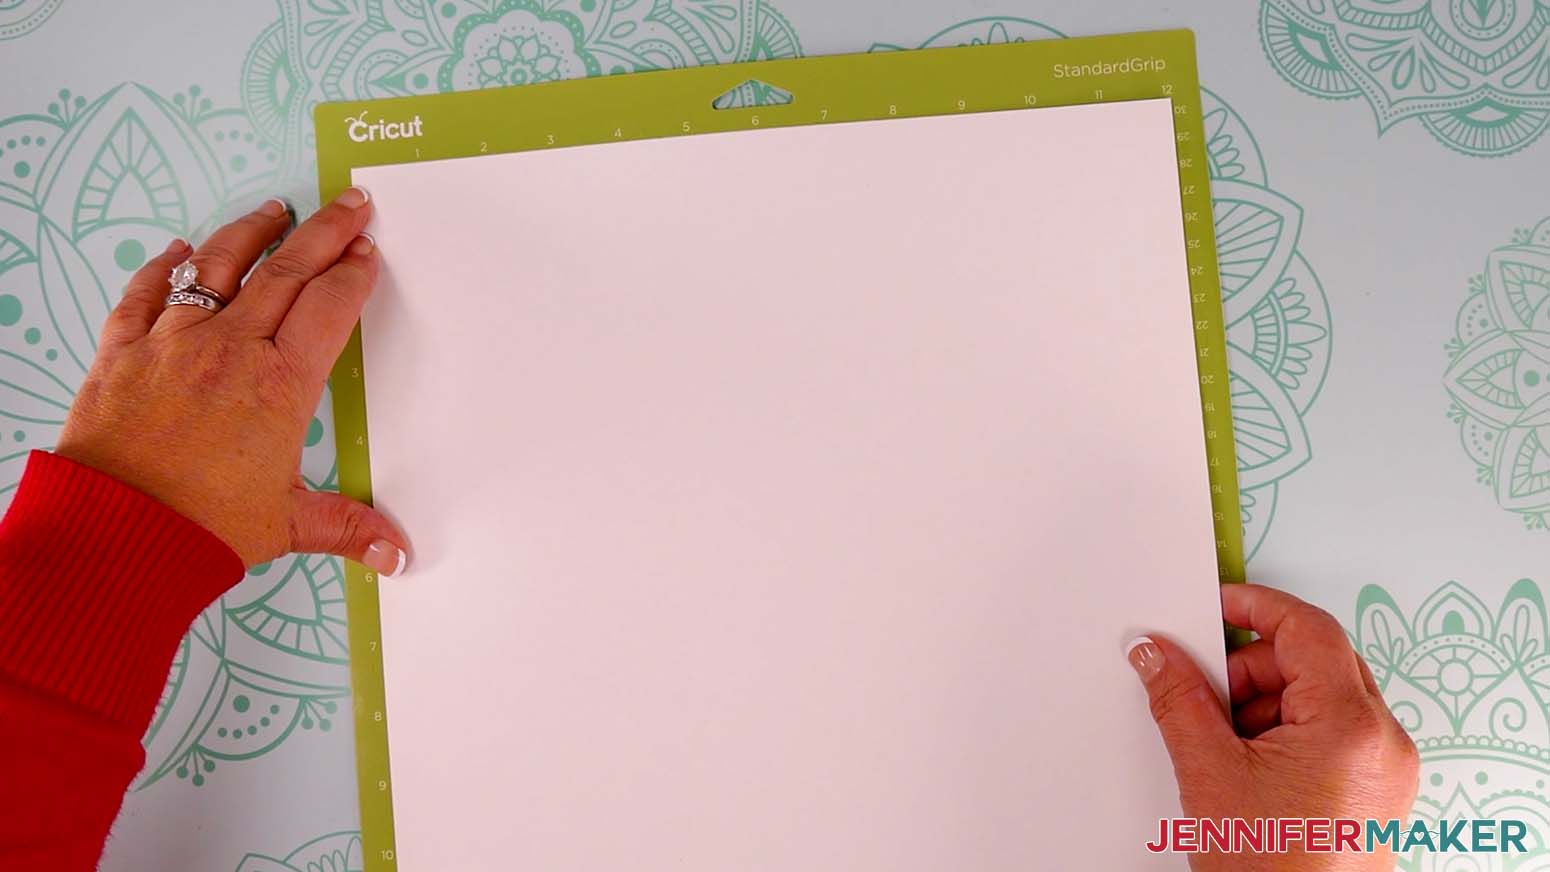
TIP: Changing the Pressure to “More” results in a cleaner cut. - Place your first piece of cardstock face up on a green StandardGrip machine mat.
- Use a brayer to make sure it’s fully adhered.
- Check that your Premium Fine-Point Blade is clean and in the clamp.
- Press the flashing “Load/Unload” button to load the prepared mat into your Cricut.
- Press the flashing “Go” button to begin cutting.
- When it has finished cutting, don’t unload the mat right away. Gently lift a corner of the material to make sure the cuts went all the way through. If not, press the “Go” button again to make a second pass of cuts in the same spots.
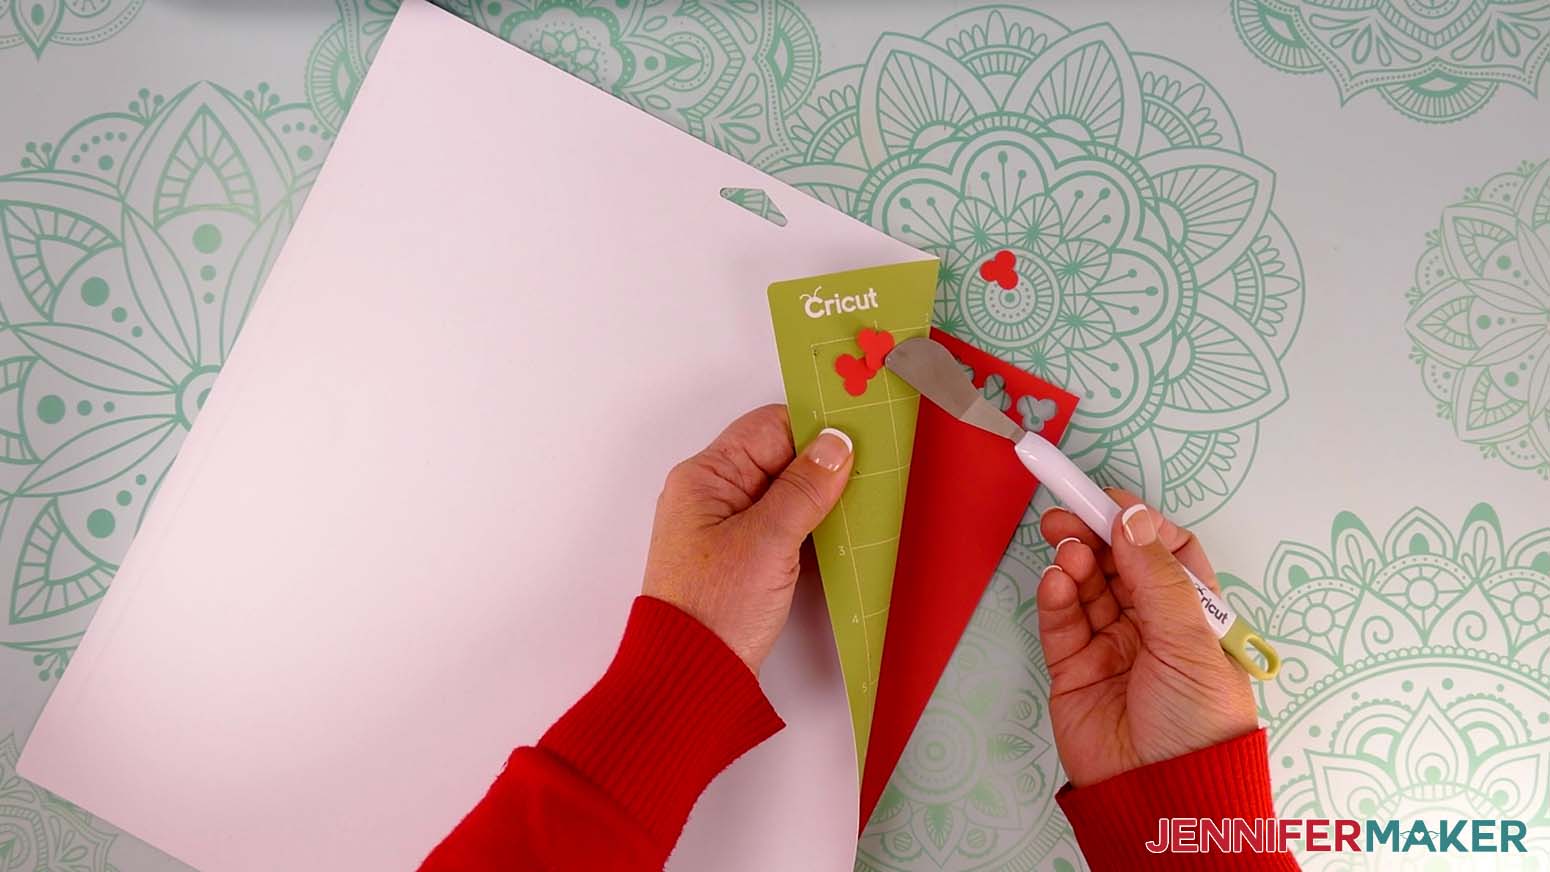
- When the cuts are complete, unload the mat, flip it over onto your work surface, and roll it back to release the cardstock.
- Use a scraper tool to remove any small bits left on your mat after you remove the cut pieces.
- For the remaining mats, set your material to the “Medium Cardstock - 80 lb (216 gsm)” setting with “More” pressure to cut both the foil cardstock and the regular cardstock.
NOTE: After you set the material for a mat color, you can check the box next to “Remember Material Settings” to save time between mats. - Follow Steps 6-13 to load and cut the cardstock for the rest of your mats.
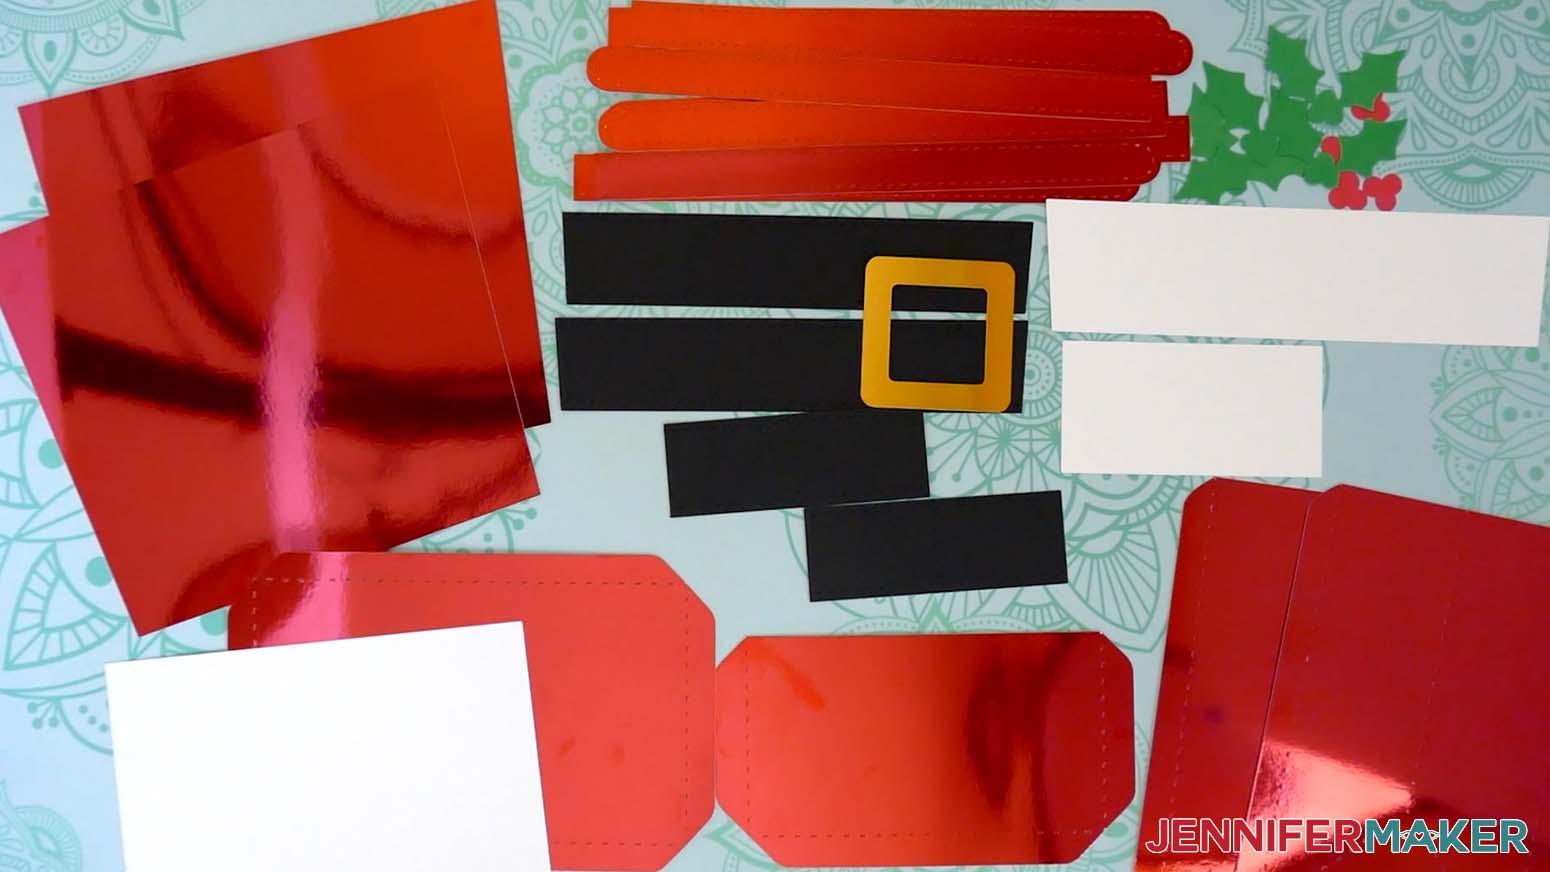
TIP: Use the spatula to help lift delicate parts, and your weeding tool to poke out small bits of cardstock that may have been left behind. If you have any issues with your cuts, go to jennifermaker.com/cleaner-cuts. - Lay out all of the pieces face up in organized piles. If you cut everything like I did, you should have:
- Front and back pieces for your purse, as well as a long fur trim pattern.
- Two side pieces for your purse, as well as a short fur trim pattern.
- Two short belt straps and two long belt straps, plus a belt buckle.
- A pocket piece, eight handle pieces, and a bottom piece for your purse, as well as a bottom reinforcement panel insert.
- Four holly leaf pieces and four holly berry pieces.
TIP: Refer to the Design Space screen if you’re not sure about some pieces’ orientation.
STEP 3: ASSEMBLE YOUR PAPER SANTA PURSE GIFT BAG
FOLD THE SANTA PURSE PIECES
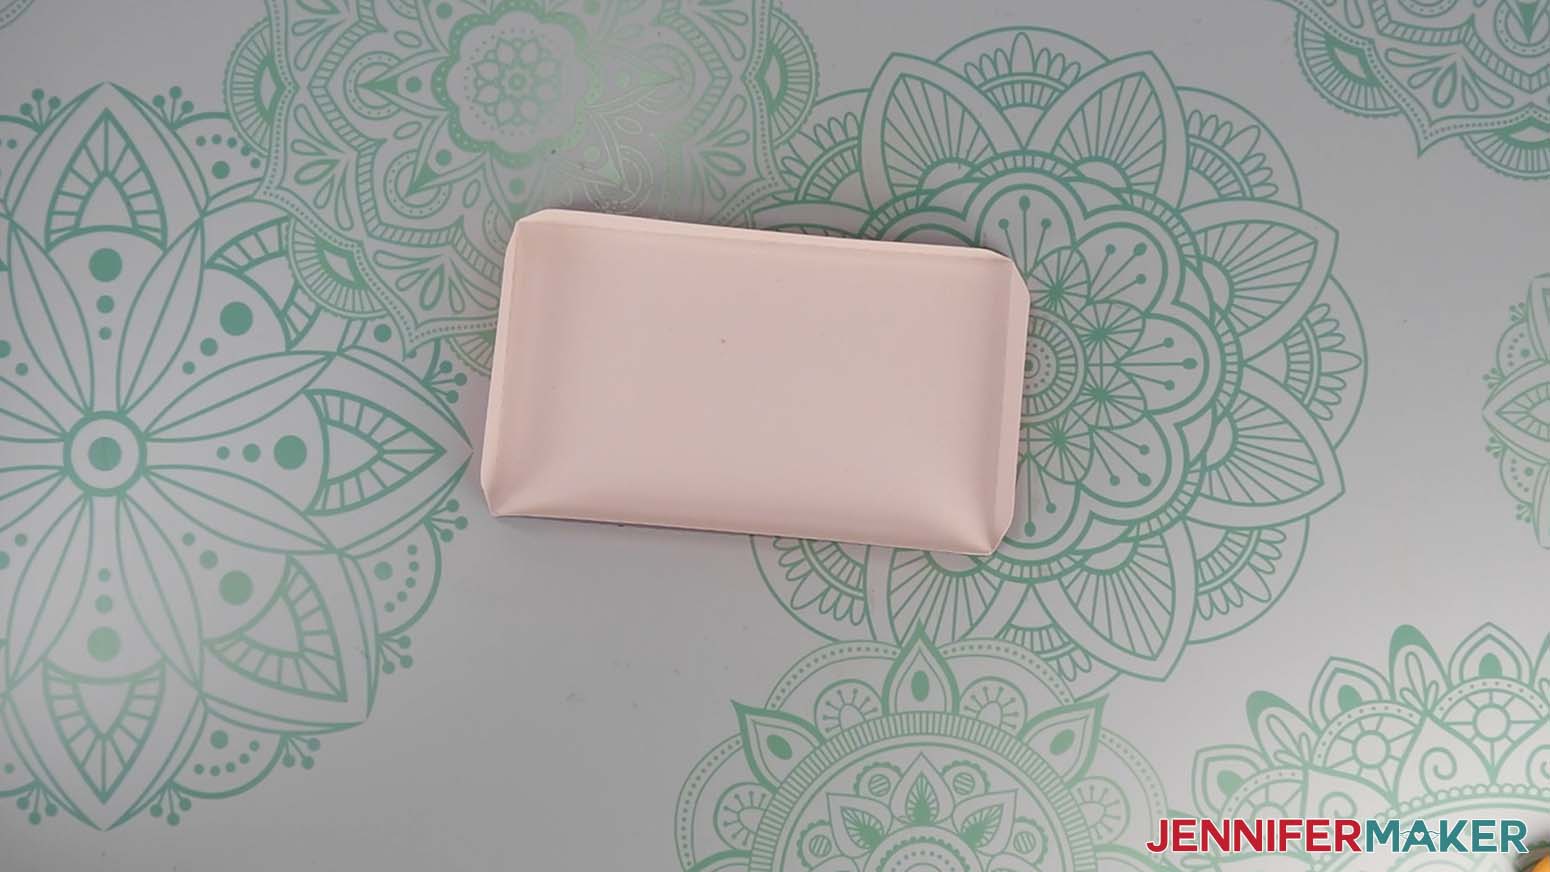
- Take your bottom piece and fold the tabs along the crease lines, away from the pretty side.
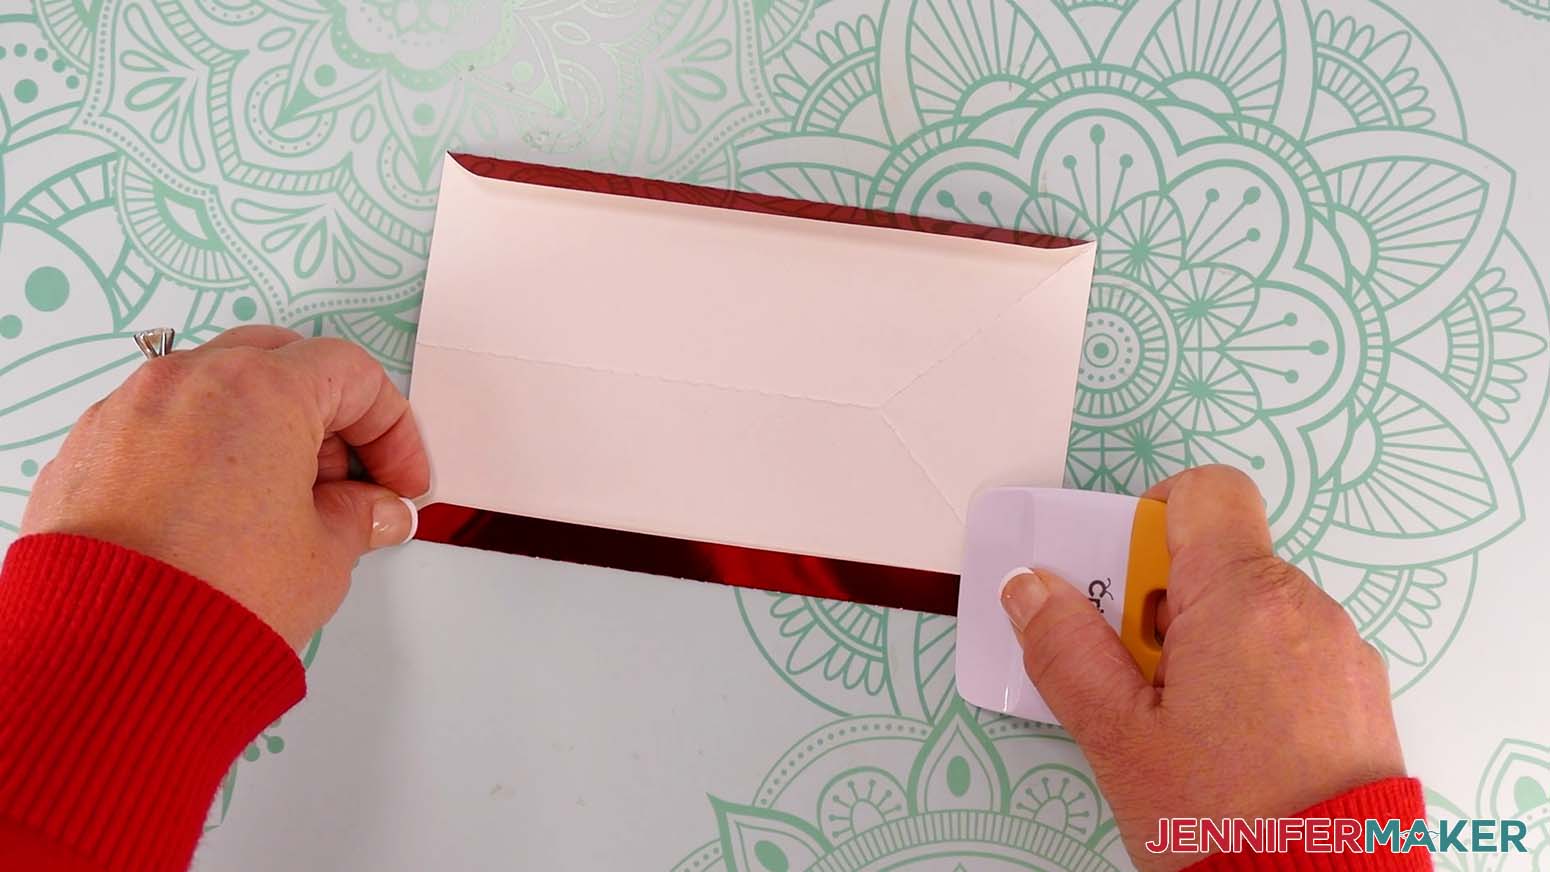
- Run a scraper tool along the creases to sharpen the folds.
- Repeat Steps 1-2 for the pocket piece.
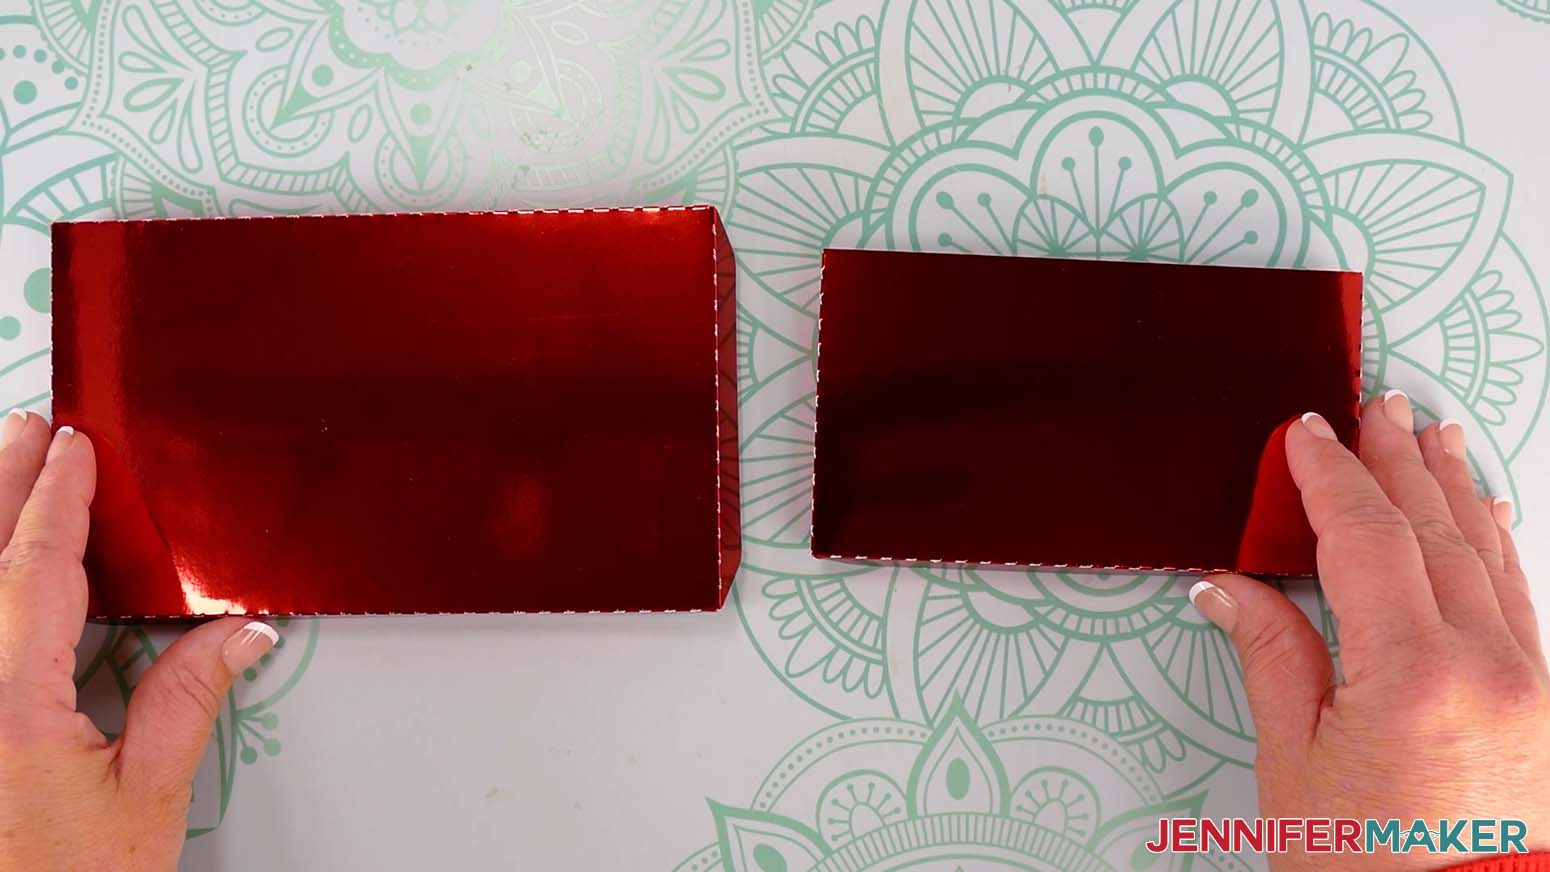
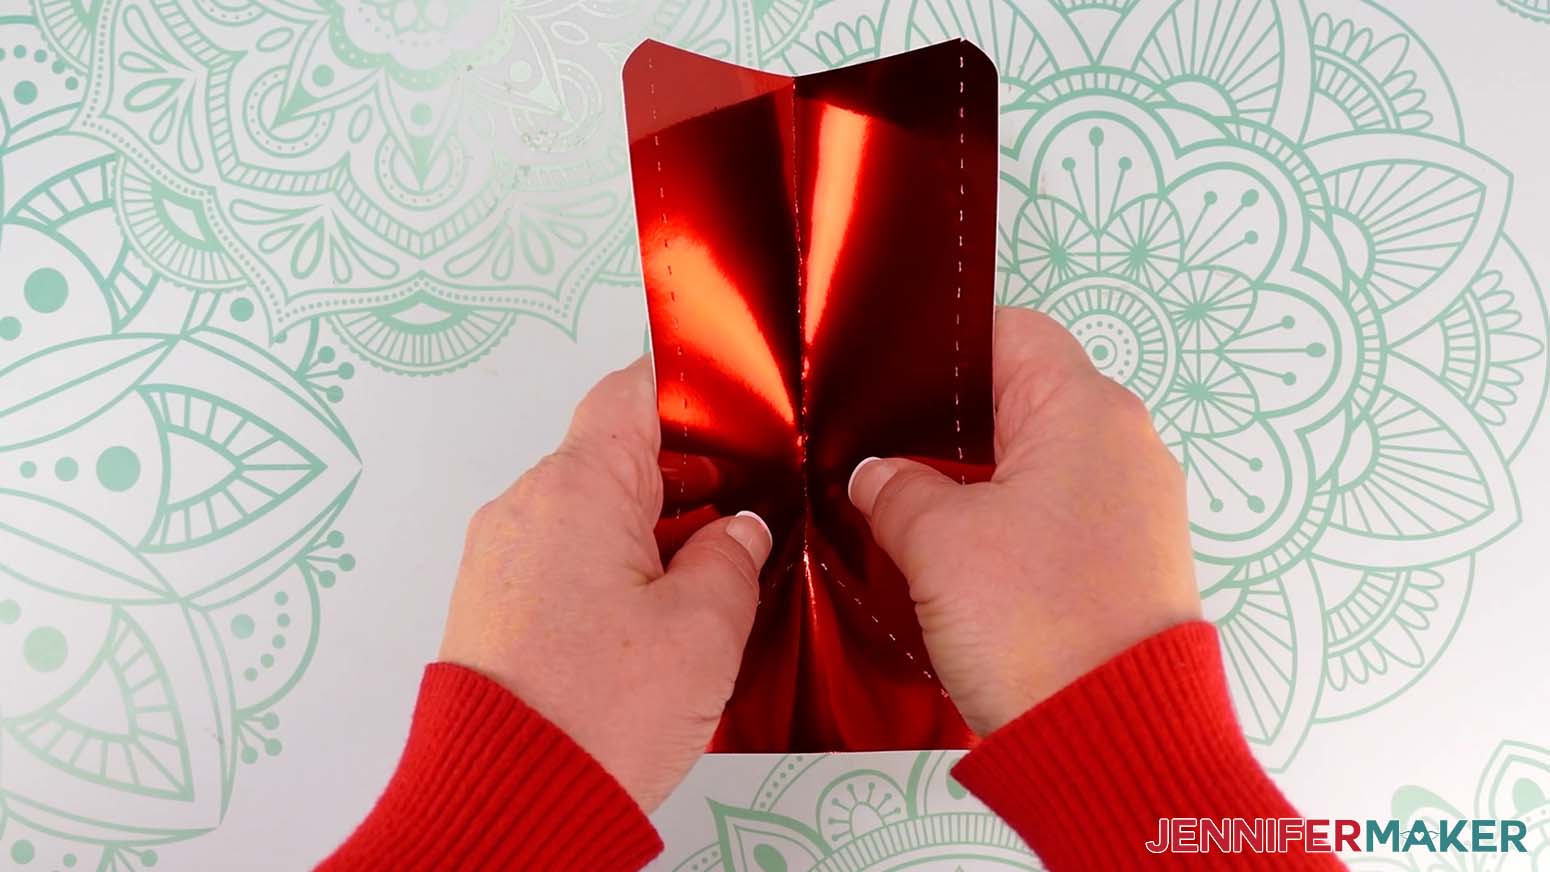
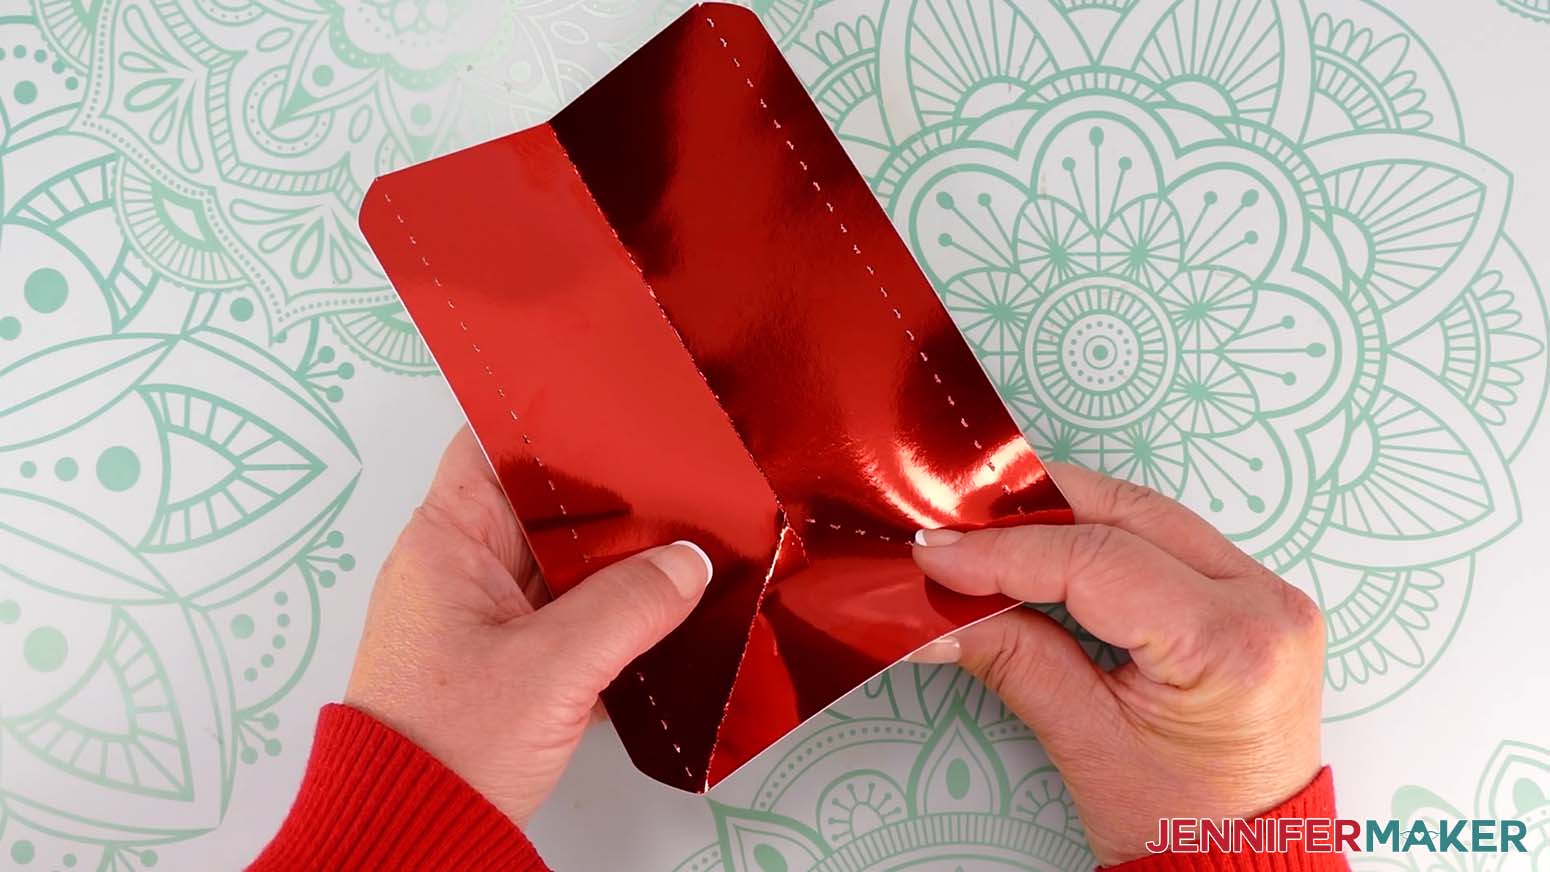
- Take your first side piece and fold down from the top along the center crease line, toward the pretty side, until you get to the point where three lines meet.
- Fold along the left diagonal crease line, toward the pretty side, from the meeting point down to the bottom edge.
- Then fold the right diagonal crease line in the same way.
- Use the scraper tool to sharpen all three folds, just along the crease lines.
TIP: Work outward from the lines’ meeting point to make sure you don’t crease beyond the lines. - Fold the two tabs of the side piece along the crease lines, away from the pretty side.
- Use your scraper tool to sharpen the folds.
- Repeat Steps 4-9 for the other side piece.
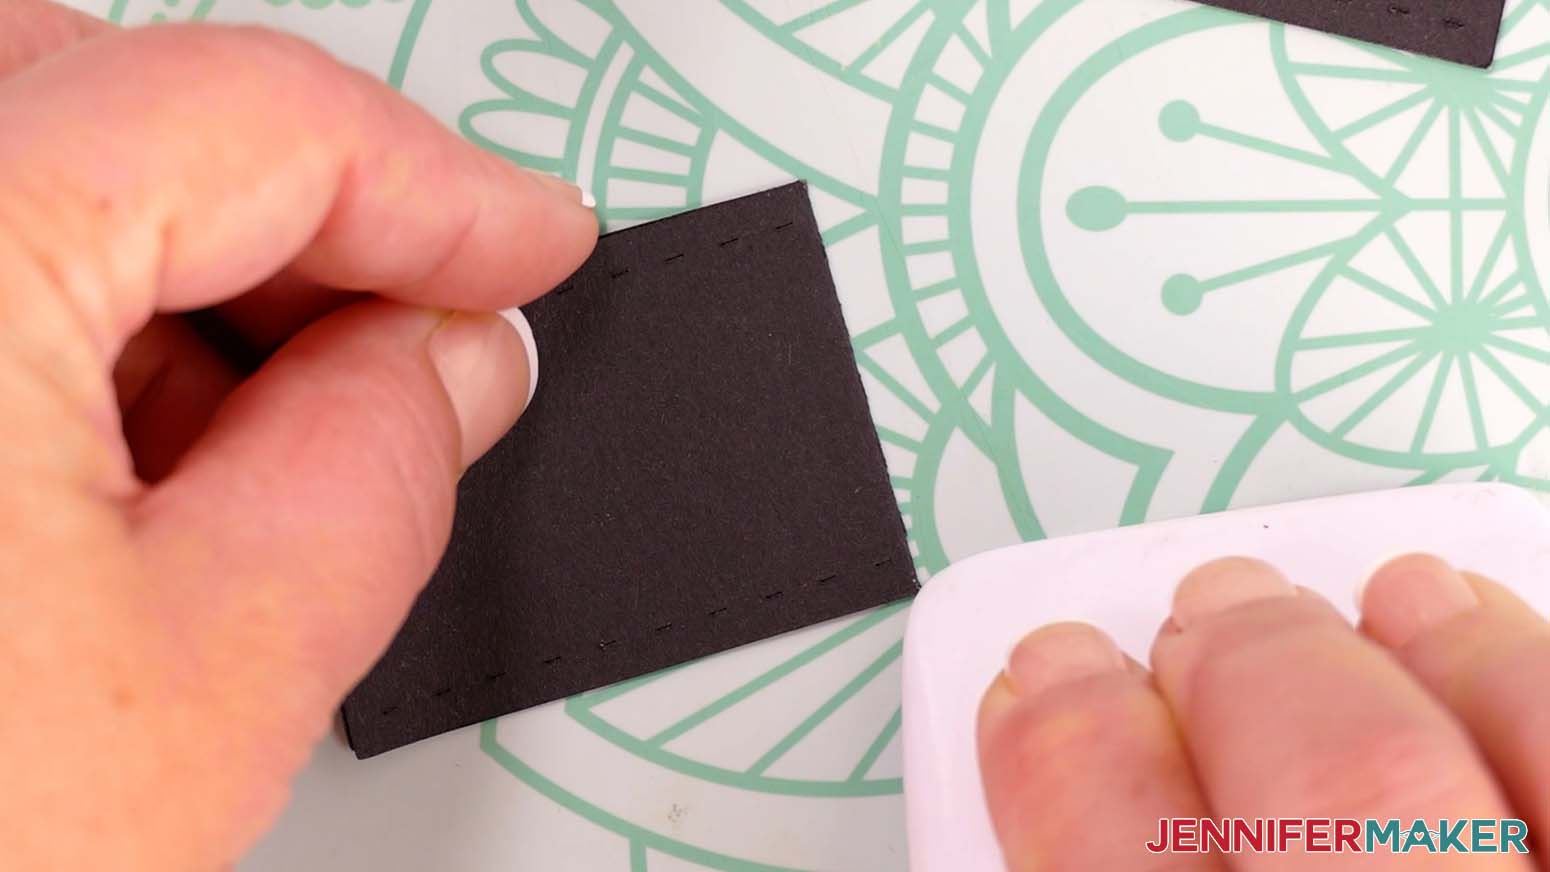
- Take one of the short belt straps and hold it horizontally.
- Fold it in half along the vertical crease line.
- Use your scraper to sharpen the fold.
- Repeat Steps 11-13 for the other short belt strap.
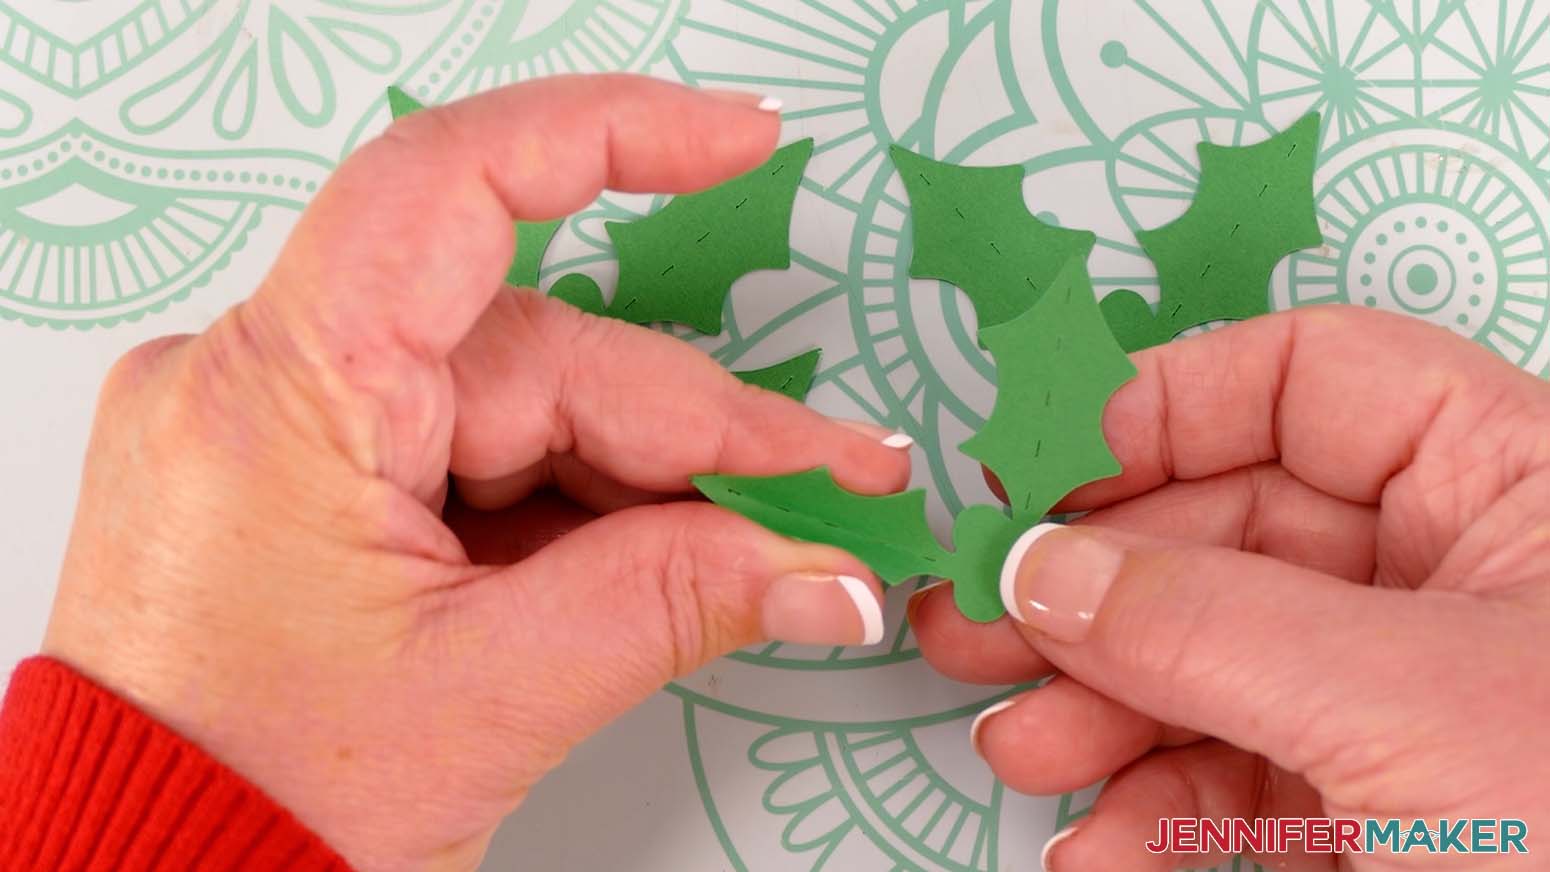
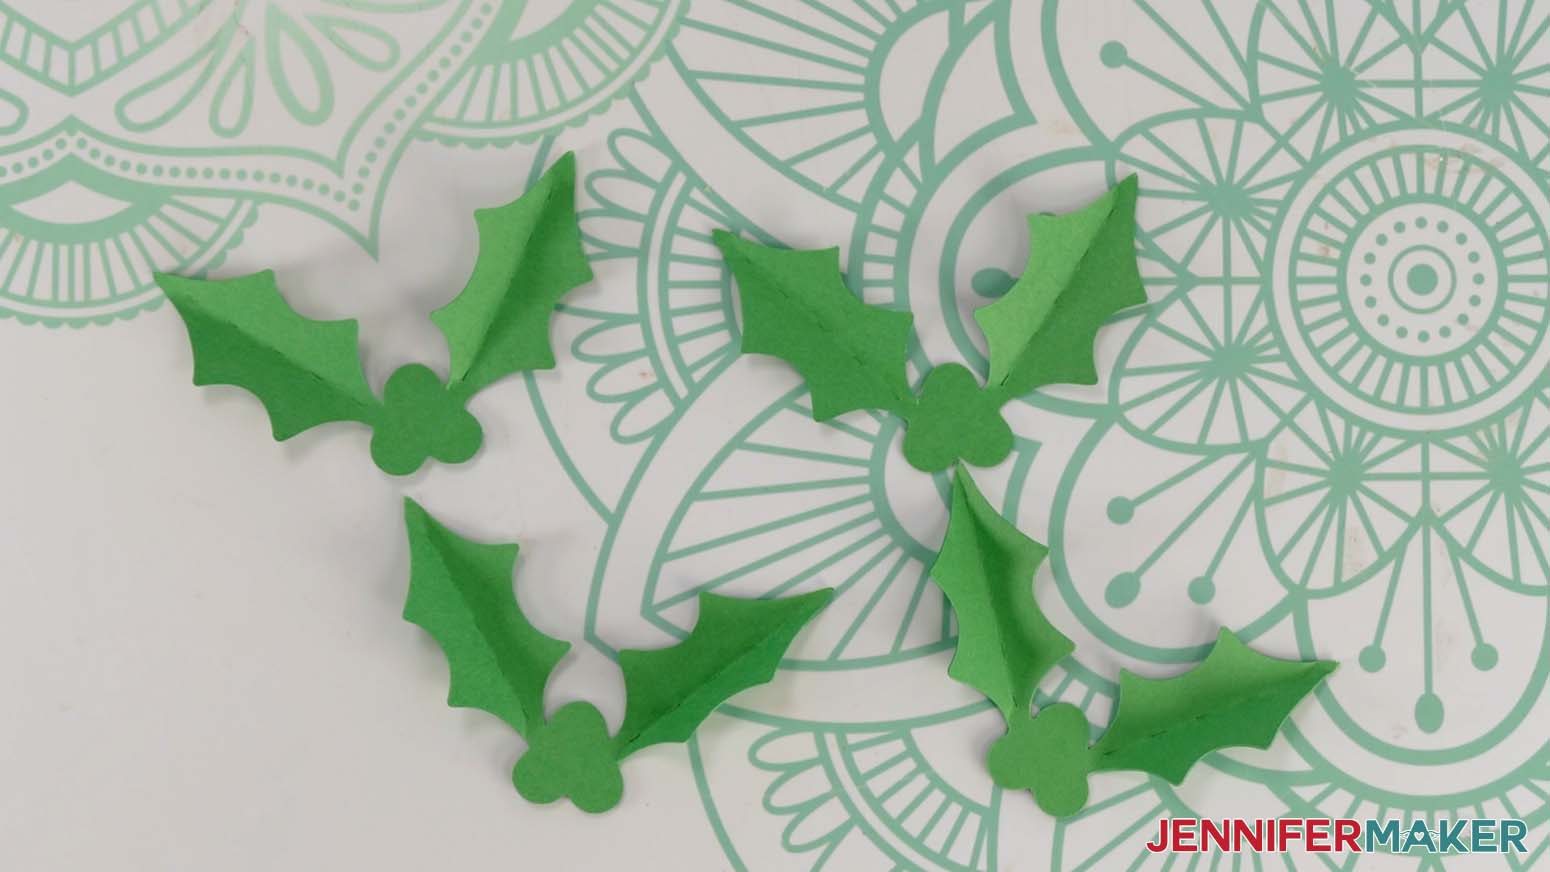
- If you cut the optional holly pieces, take one of the leaf pieces and fold upward along both of the crease lines to give your leaves dimension.
NOTE: You can use your scraper tool to help fold the leaves if you like, but it’s not necessary to have sharp folds for this piece. - Repeat for the three remaining holly pieces.
GLUE THE SANTA PURSE PIECES TOGETHER
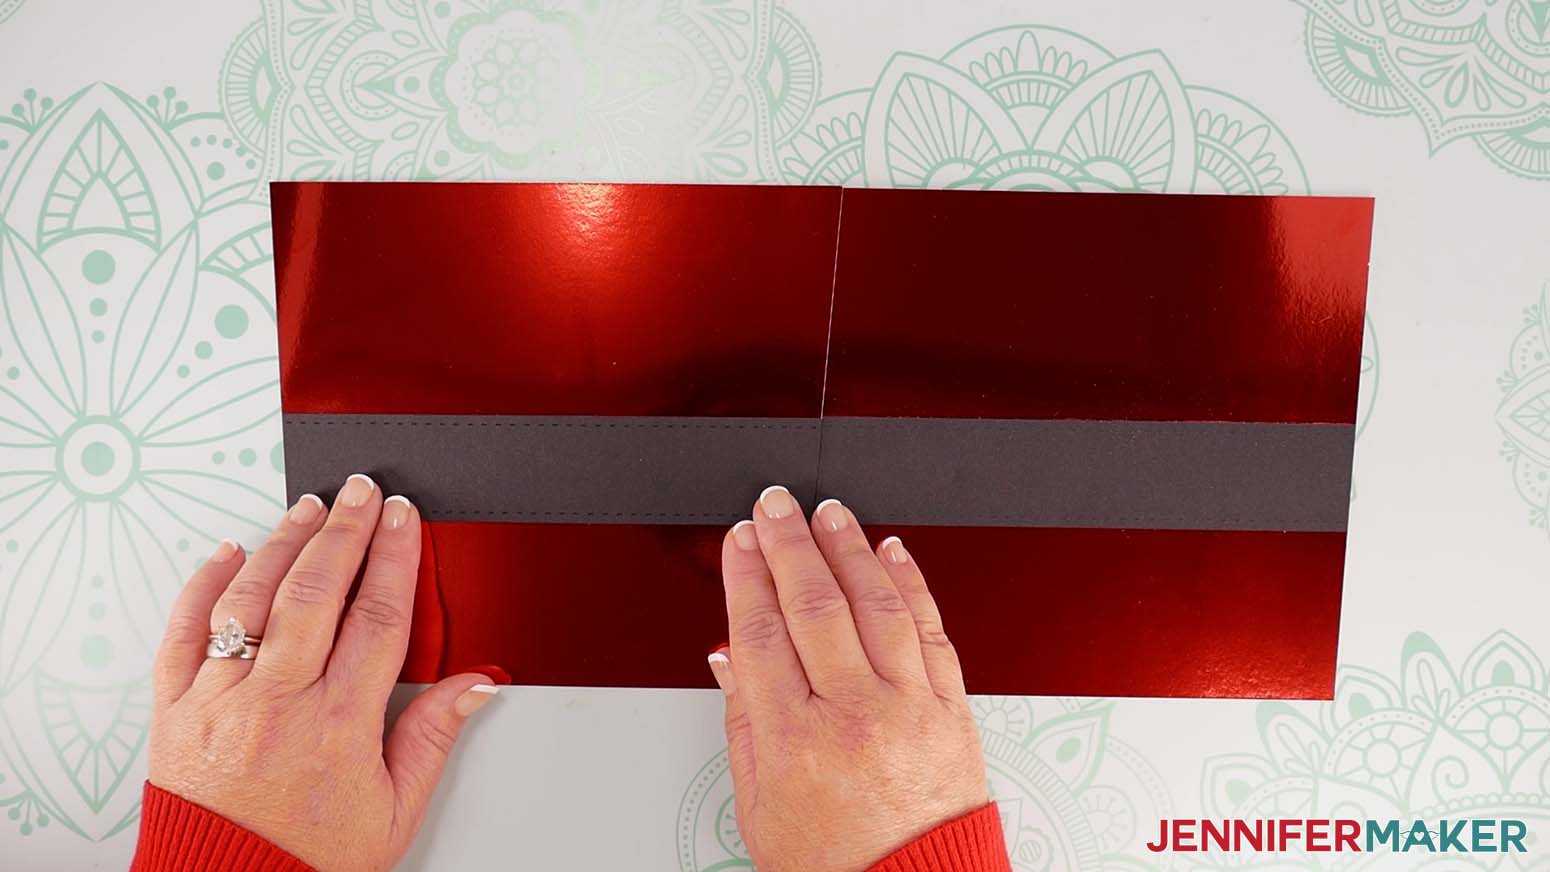
- Lay the front piece of your purse pretty side up. The top edge should be slightly wider than the bottom edge.
NOTE: The front and back pieces are the same, so you can use either. - Line up one of the long belt straps on top of your bag with the sides angled inward to match the shape of the purse.
TIP: You’ll know your strap is in the right place when its left and right sides are flush with the sides of the purse and no color from the front piece is showing at the side edges. - Lift and flip the bottom of the belt strap over the top, so the strap rests just above the proper position on the purse.
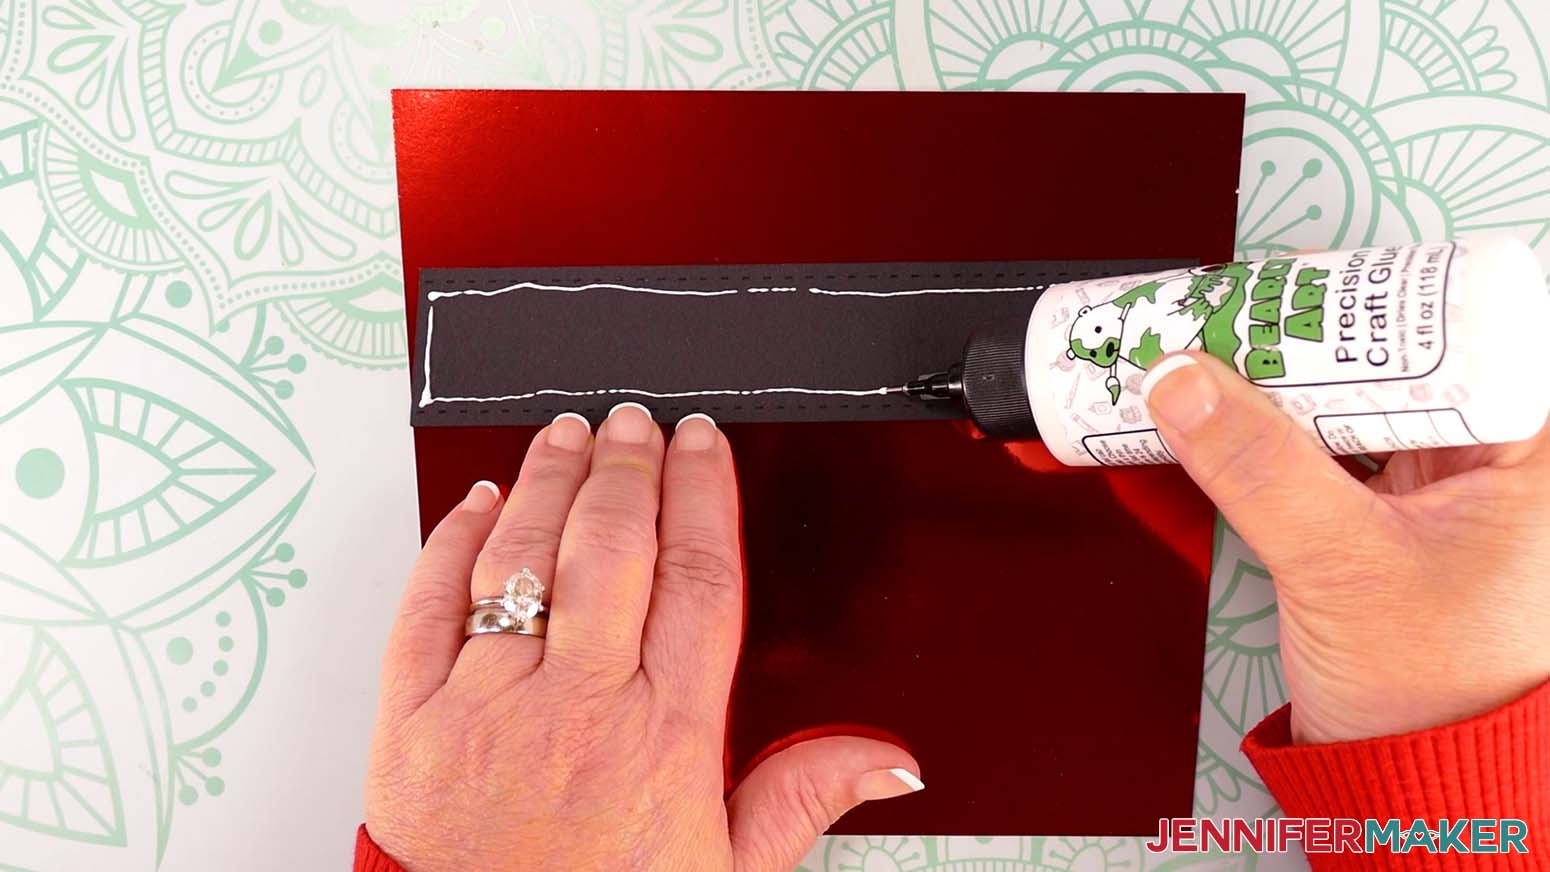
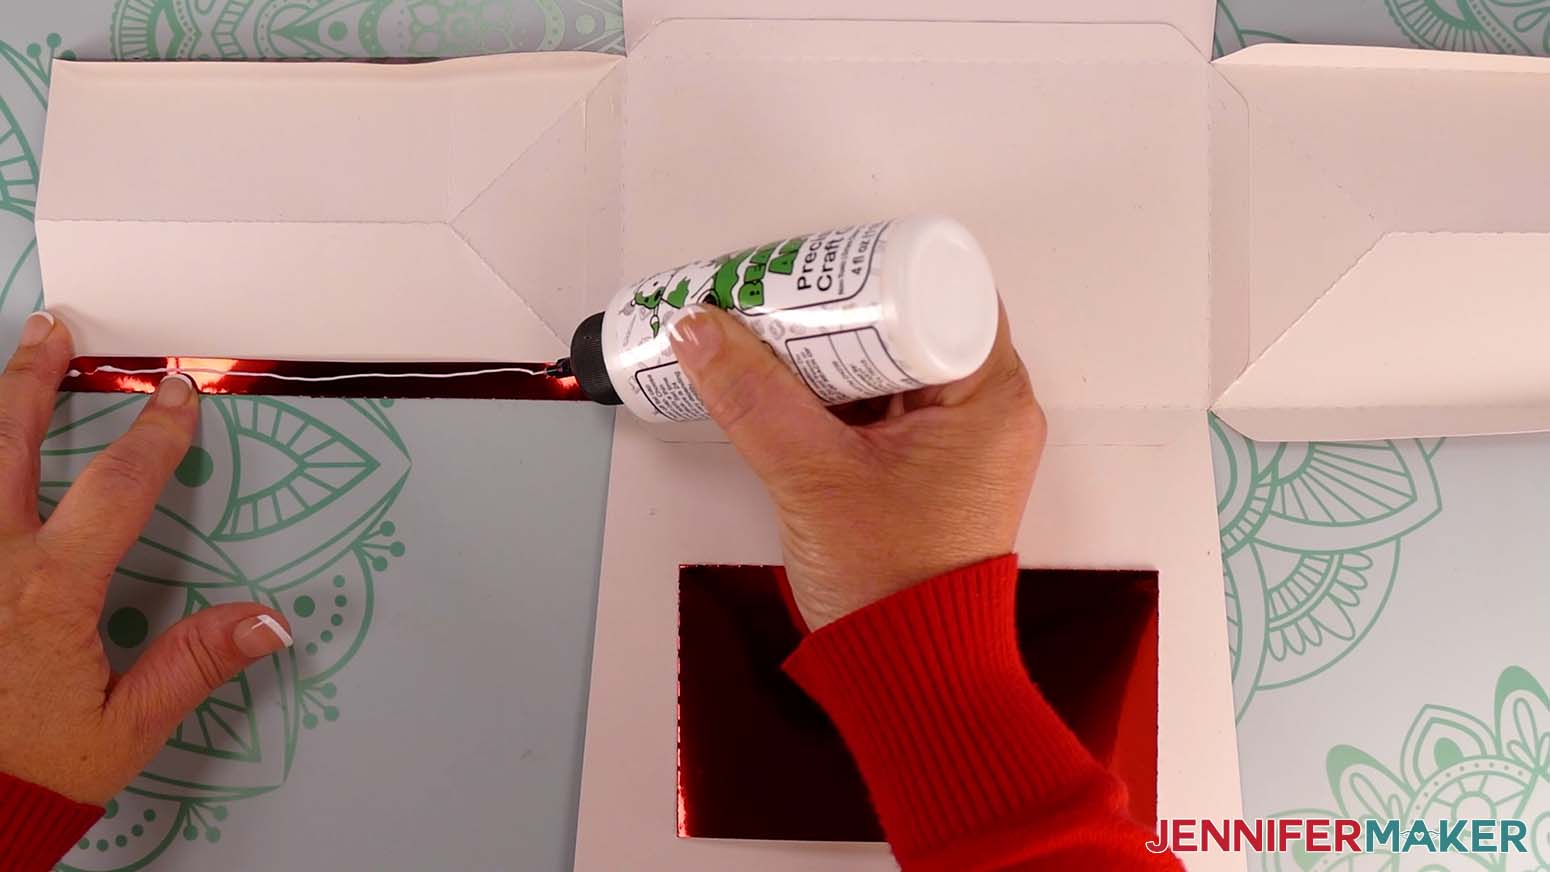
- Apply a line of craft glue around the inside edge of the belt strap.
TIP: The precision tip on a bottle of Bearly Art glue works really well! - Flip the belt strap from the top down so that it is lined up properly on the purse.
- Press along the edges to adhere the strap.
TIP: Use a paper towel or finger to dab away any excess glue. - Lay the purse’s back piece beside the front piece in the same orientation, pretty side up, with the tops of both pieces aligned.
TIP: You can overlap the top corners slightly to make sure the pieces are aligned. - Lay the second long belt strap face down in your work area.
- Apply a thin line of craft glue around the inside edge of the strap.
- Flip the strap over and position it on the purse’s back piece, aligning it with the strap on the front piece.
- Press along the edges to adhere.
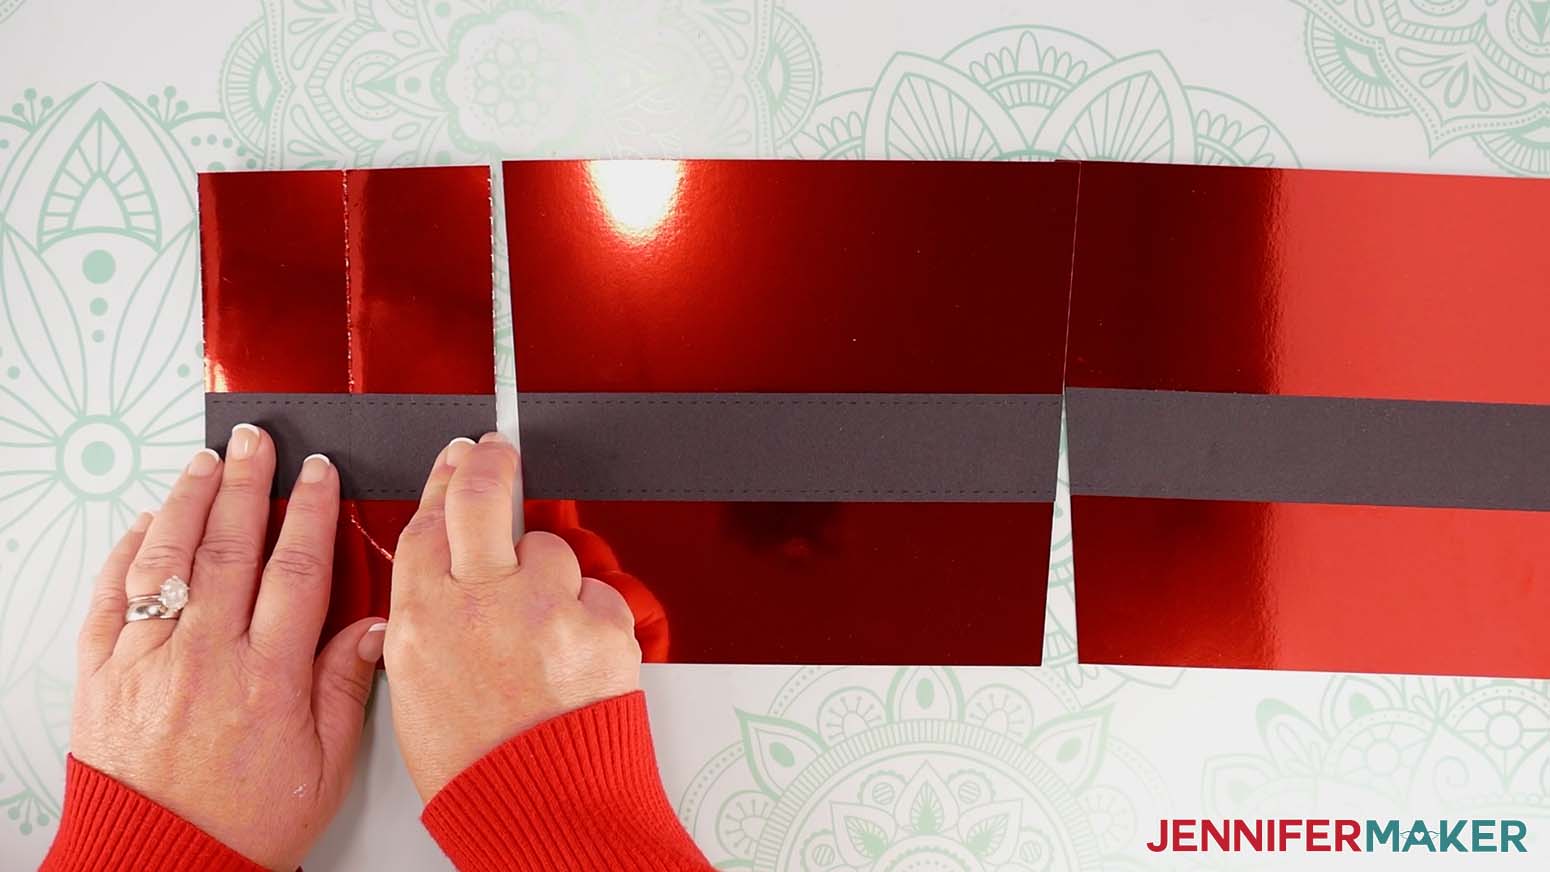
- Now lay one of the purse’s side pieces beside the front piece, pretty side up, with the tops of both pieces aligned.
TIP: Keep the side piece’s tabs folded under.
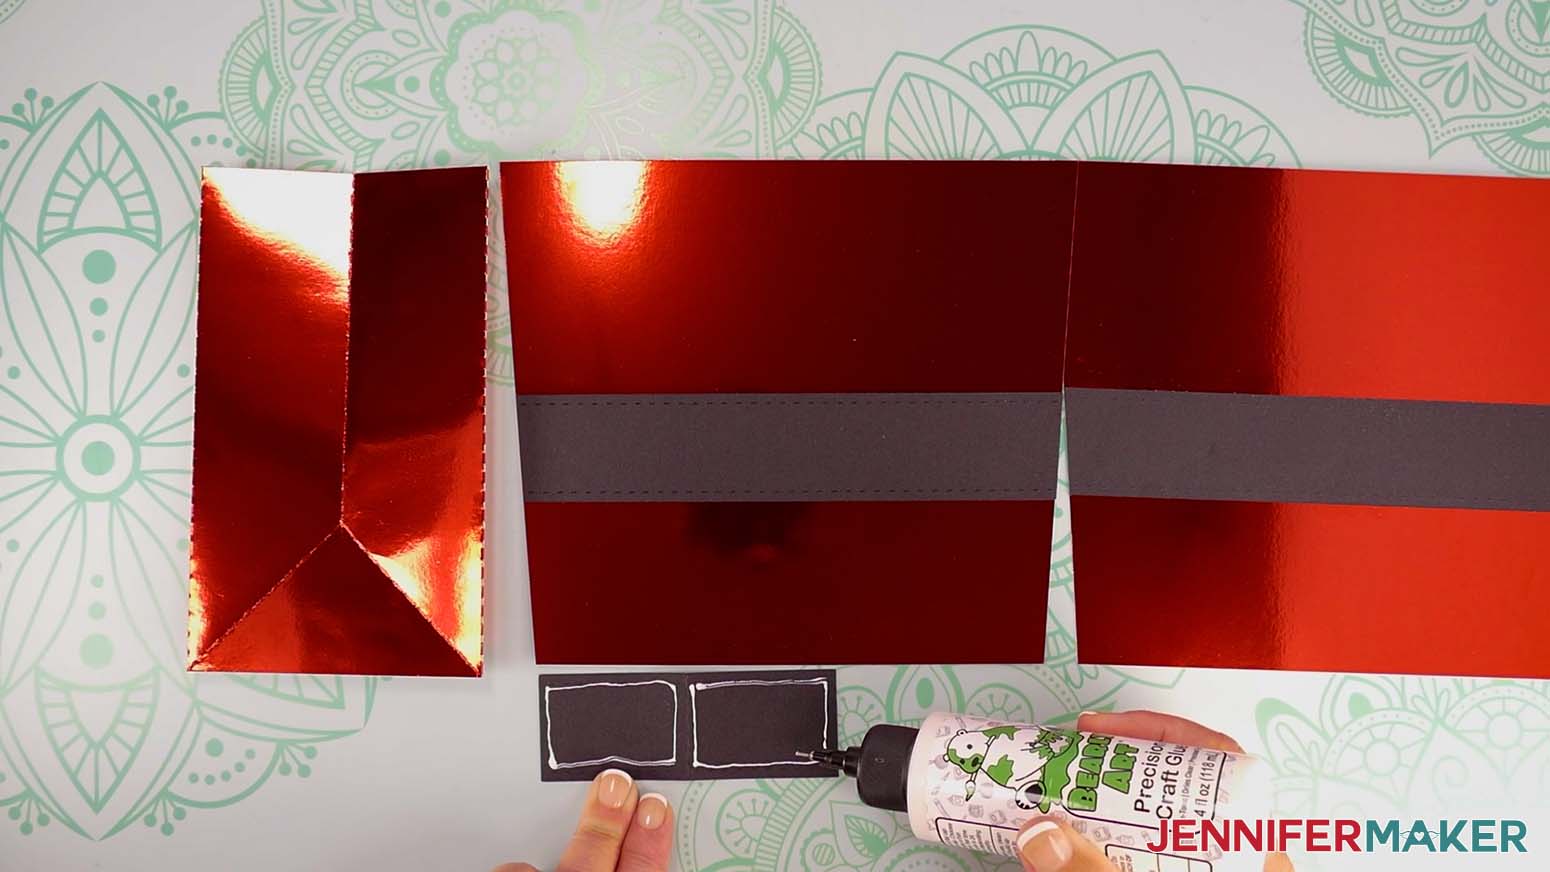
NOTE: The top of the side piece has the center crease, not the diagonal creases. - Lay one of the short belt straps face down in your work area.
- Apply a thin line of craft glue around the inside edges on the left half of the strap. Do the same for the right half.
NOTE: This makes two box-shaped lines of glue, one on each half of the strap. - Flip the strap over and position it on the purse’s side, aligning its top with the top of the strap on the front piece.
- Make sure the strap’s vertical crease is aligned with the side’s vertical crease, as well.
- Press along the edges to adhere.
- Repeat steps 12-17 to adhere the second short belt strap to the purse’s other side.
- Allow all of the pieces to dry.
- Test that the sides still fold along the vertical crease line, and make sure all of the straps are fully adhered.
- If any spots on the straps aren’t sealed well, use the precision tip of your Bearly Art glue to apply more craft glue, press to re-seal the pieces, and then allow the glue to dry.
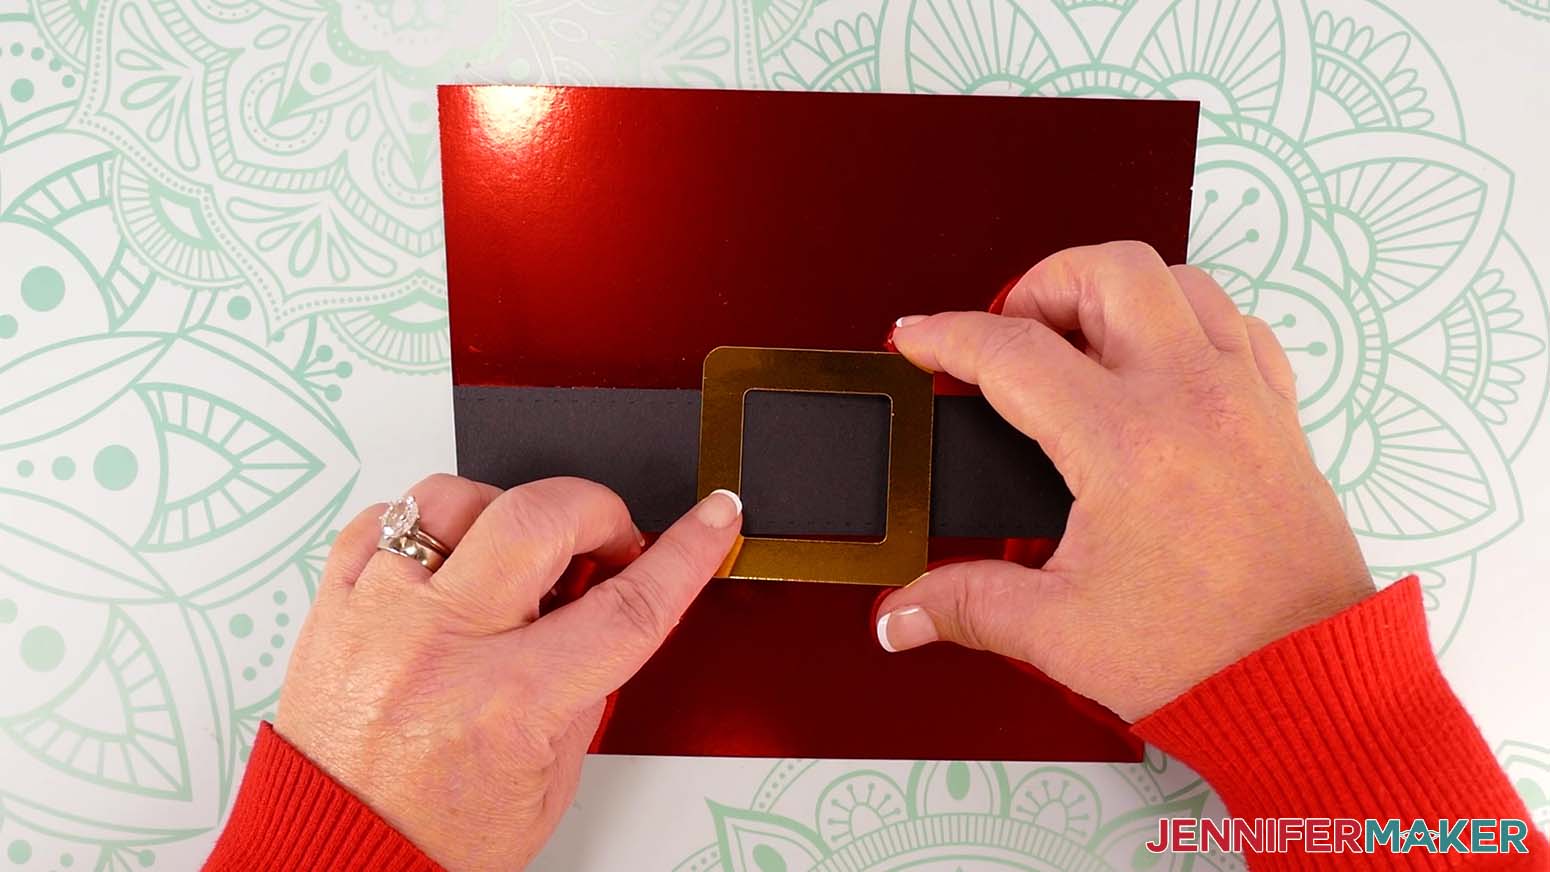
NOTE: You want to be sure the straps’ edges are completely sealed or else they might get caught on something and pop off your gift bag! - Lay the purse’s front piece pretty side up and the buckle pretty side down.
- Apply craft glue to the buckle’s back on all four sides.
- Flip the buckle over and position it over the center of the purse’s front strap.
- Press down to adhere, and allow the glue to dry.
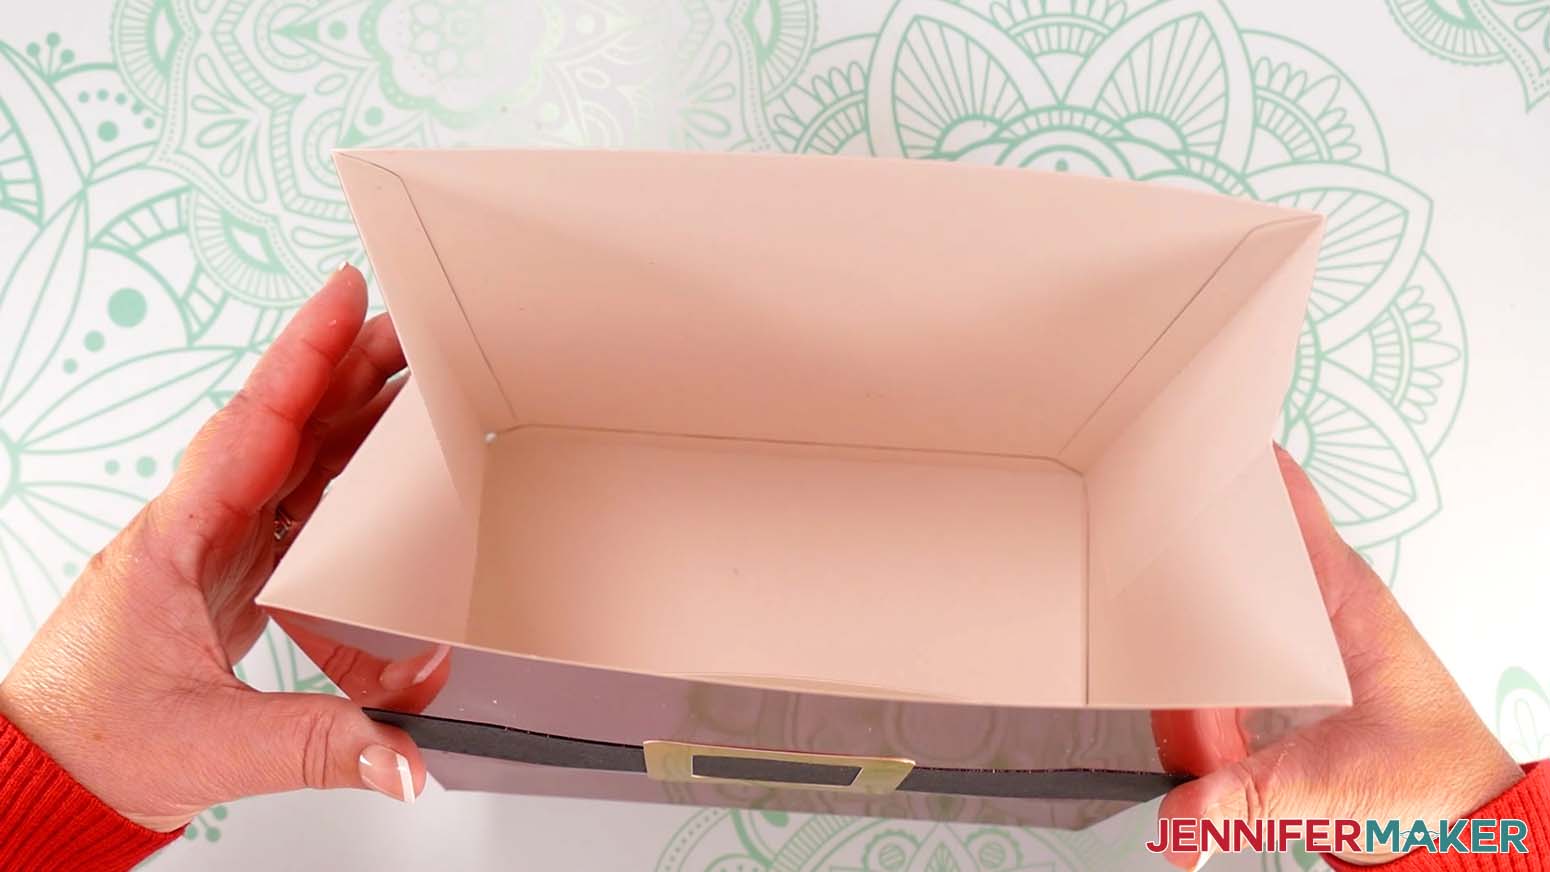
ASSEMBLE THE SANTA PURSE BASE
- Gather the bottom base piece, two side pieces, and the front and back pieces.
- Place the base on your work surface, pretty side down, with the short sides on the left and right.
- Place the purse’s two side pieces along the short sides of the base, pretty side down, with their bottom edges touching the base.
- Place the purse’s front piece along the bottom side of the base, pretty side down, with its bottom edge touching the base.
- Place the purse’s back piece along the top side of the base, pretty side down, with its bottom edge touching the base.
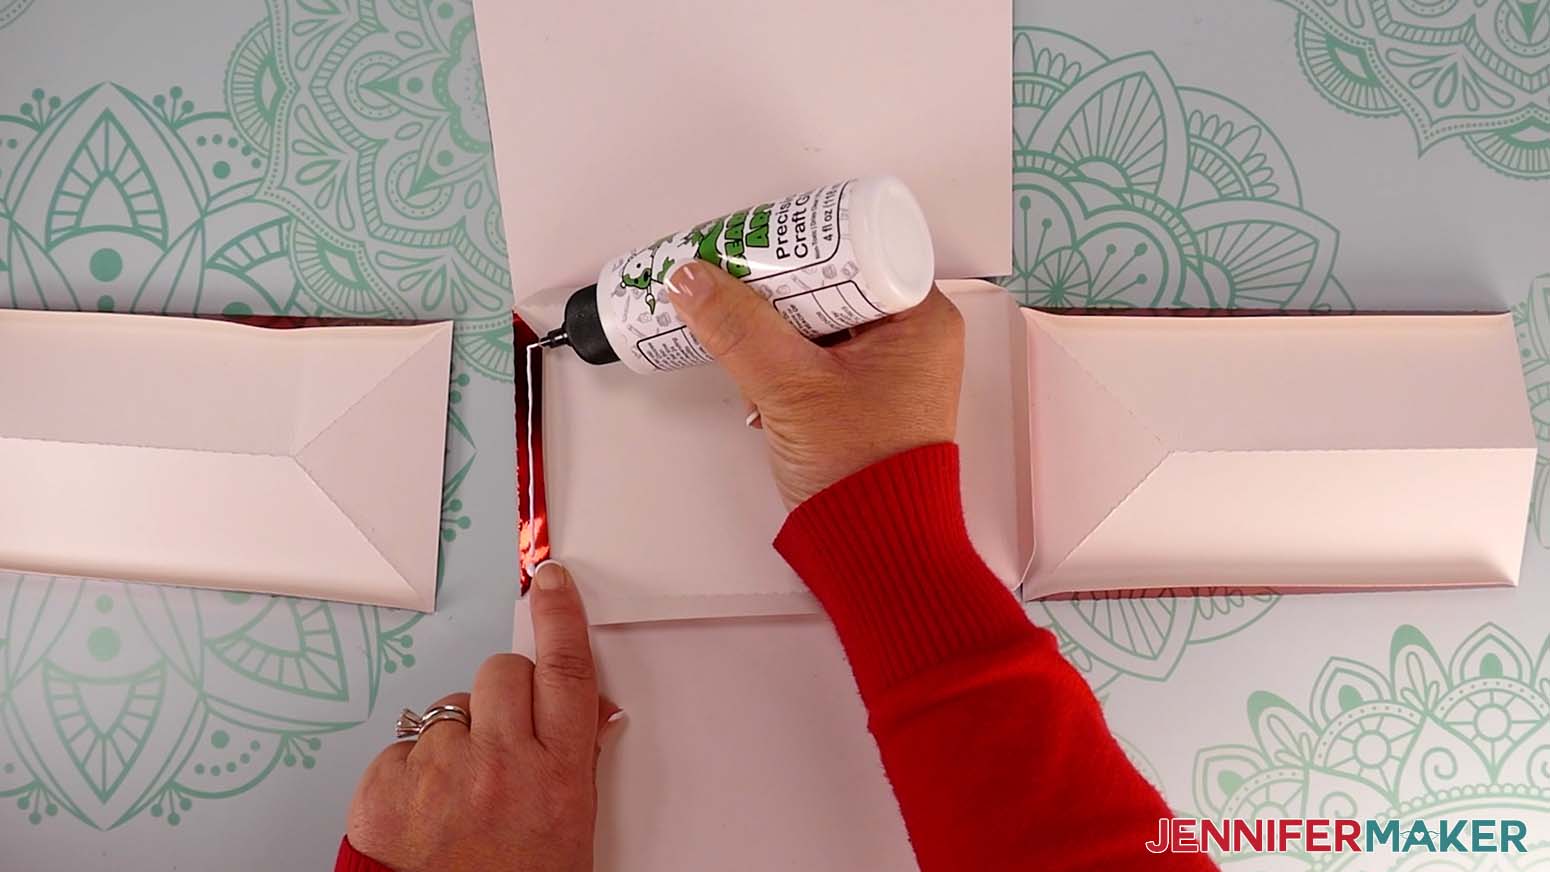
- Fold in the left tab of the base piece so the pretty side is face up.
- Apply craft glue to the tab.
- Align the purse’s left side piece against the base’s left creased edge.
- Flip the glued tab down onto the left side piece.
- Press down along the entire tab to adhere.
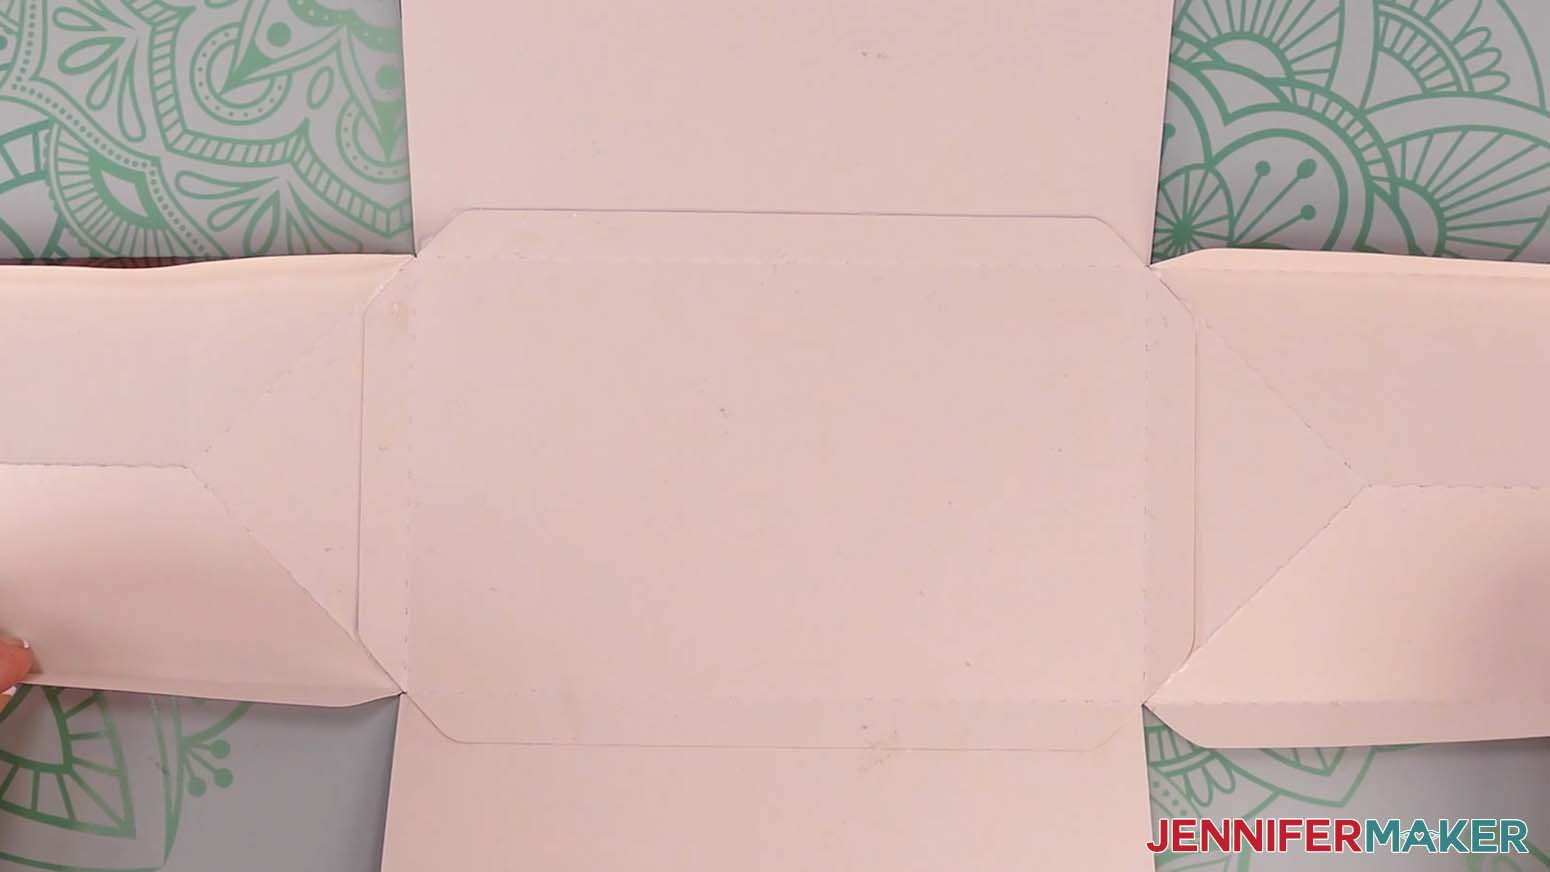
- Test to make sure the piece folds up along the creased tab.
- Repeat Steps 6-11 to adhere the base’s right, front, and back tabs to the purse’s right, front, and back pieces.
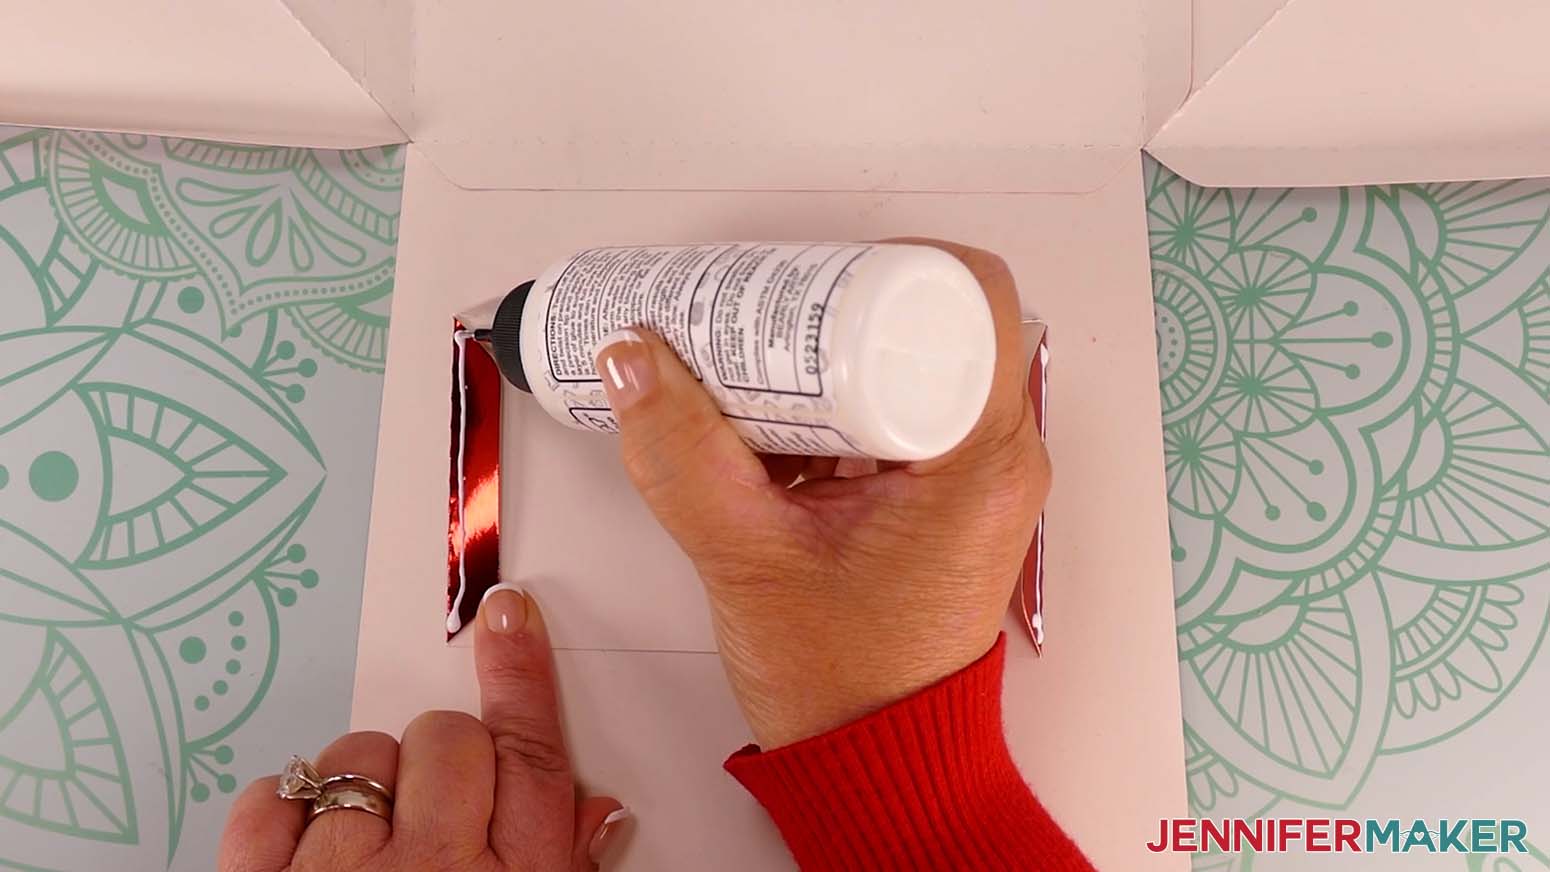
- Take your pocket piece and arrange it so the tabs are folded under, and the side without the tab is facing away from the base.
- Apply craft glue to all three pocket tabs.
- Center the pocket on the back of the purse’s front side (mine is at the bottom of my base).
- Press along the edges of the tabs to adhere the pocket to the inside of the purse.
- Allow the glue to dry with the base open, pretty side down.
- Once the glue is dry, fold up the bottom tab of the left side piece.
- Apply craft glue to the tab and fold the left side up.
- Fold the front of the purse up to meet the glued tab, and align its edge with the folded crease of the side tab.
- Press along the entire tab to adhere it to the inside of the purse.
TIP: Rotate the purse so the front side is against your work surface and you can press the tab down from the inside, using your work surface to adhere it well. - Repeat steps 18-21 to adhere the bottom tab of the right side piece to the front of the purse.
- Turn the purse so the back side is facing you, pretty side down on your work surface, and the front and sides of the purse are standing up.
- Apply craft glue to the left and right side tabs.
- Lower the back piece onto the side tabs to line up the edges, then flip the purse so the back is on your work surface.
- Press along the tabs from the inside to adhere them to the purse’s back.

ATTACH THE SANTA PURSE HANDLES
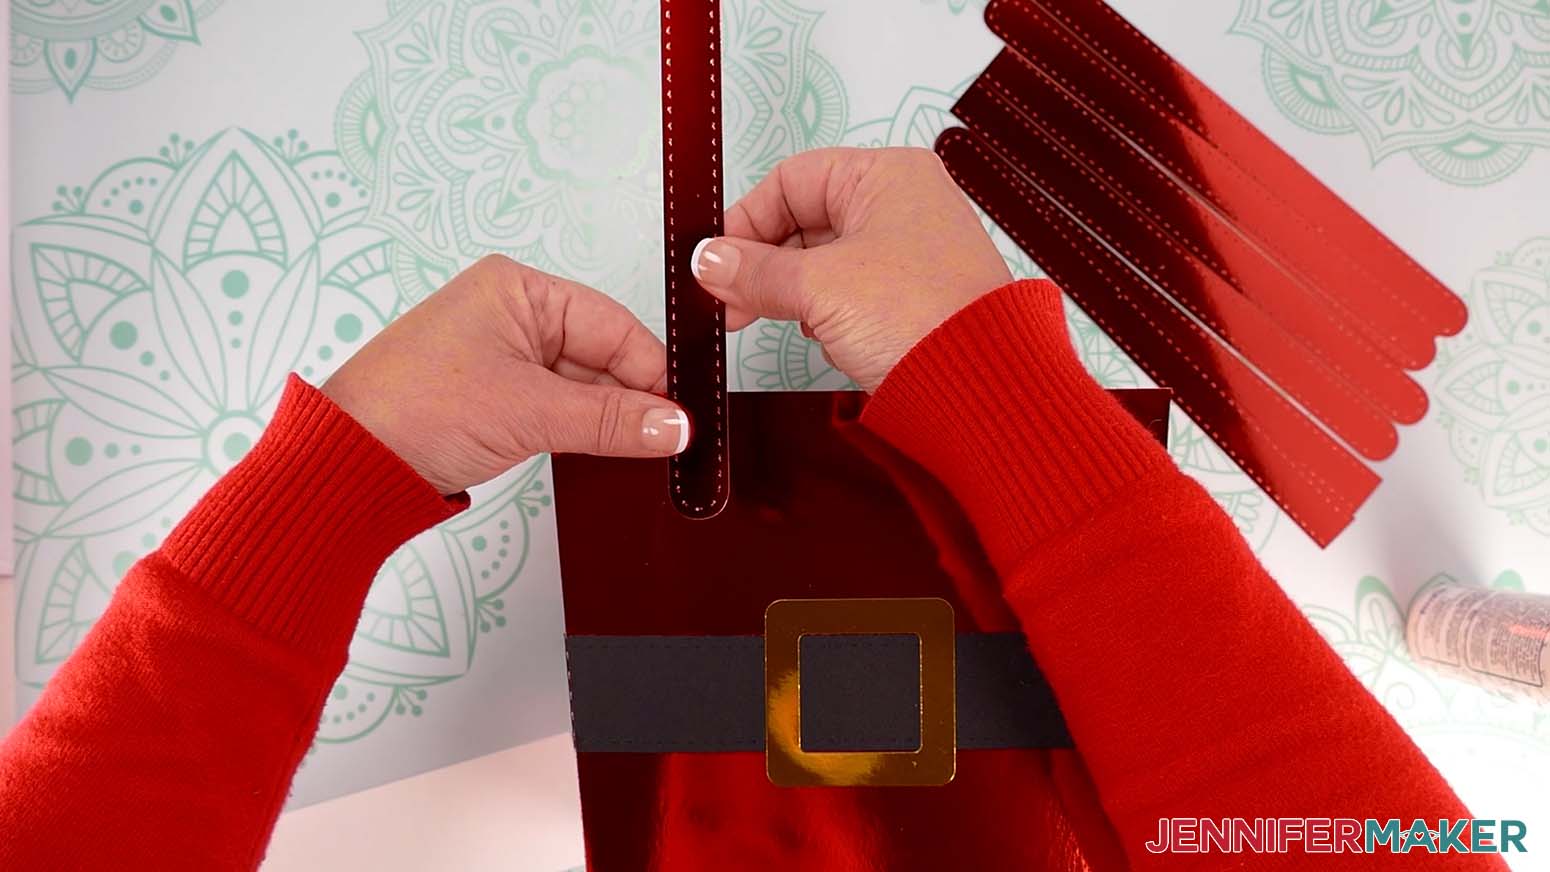
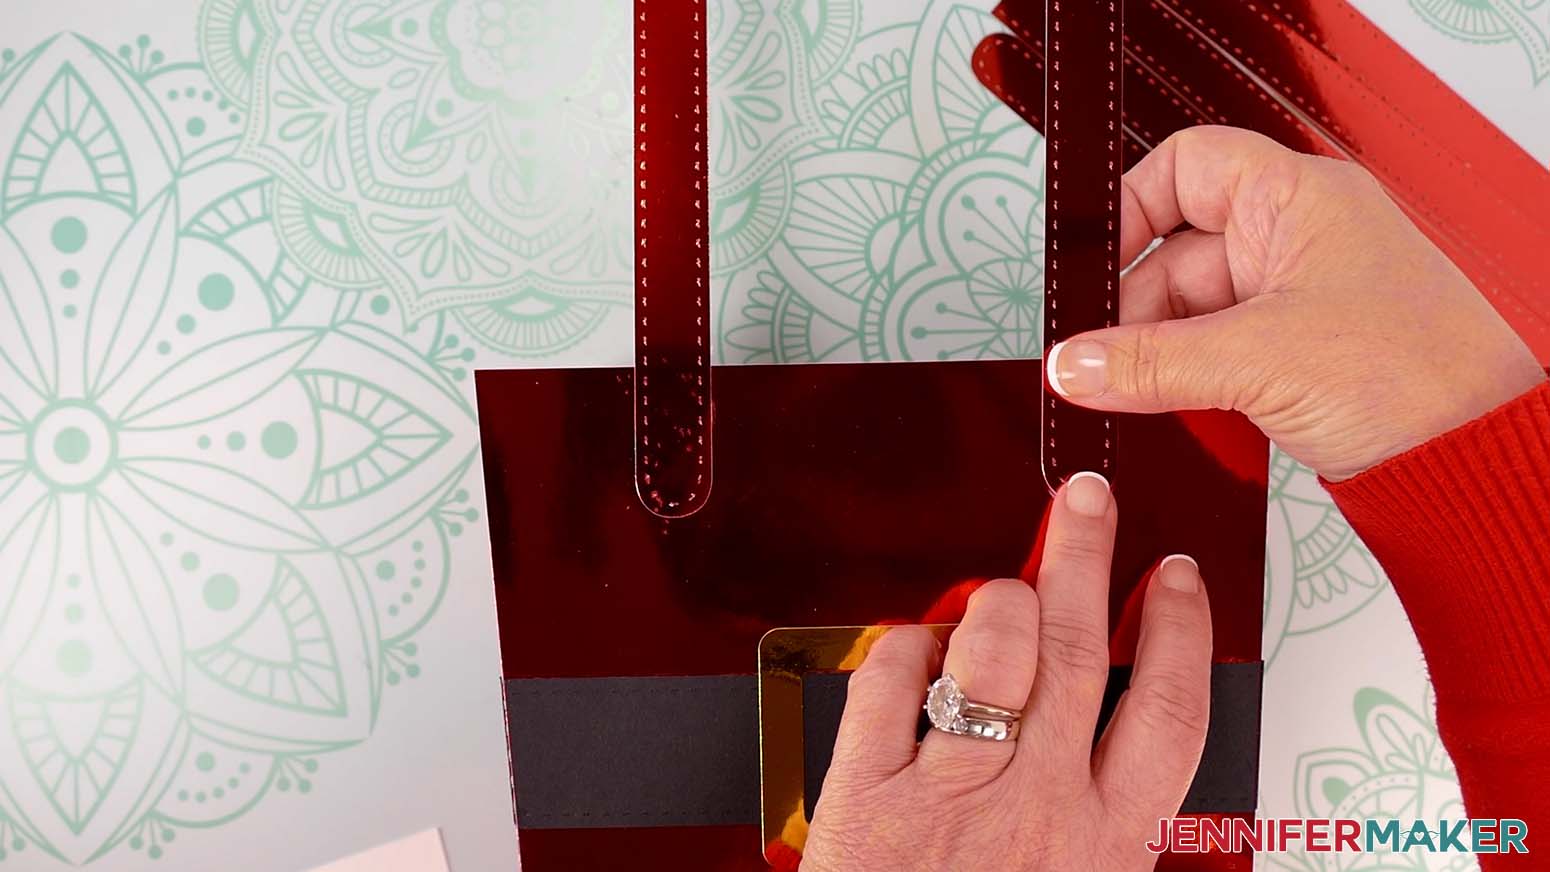
- Gather your eight handle pieces, and face the front side of the purse toward you.
- Take the first handle piece and lay it pretty side down.
- Apply craft glue to the bottom section of the rounded end of the handle piece.
- Attach the handle piece to the purse’s top left corner. Make sure it’s oriented so the handle is straight up and perpendicular to the top of the purse.
TIP: Use your long fur trim pattern piece to check that the end of the handle doesn’t stick out below the bottom edge of the trim. - Press and hold the handle piece in place until the glue is dry.
- Repeat steps 2-5 to attach a handle piece to the purse’s top right corner.
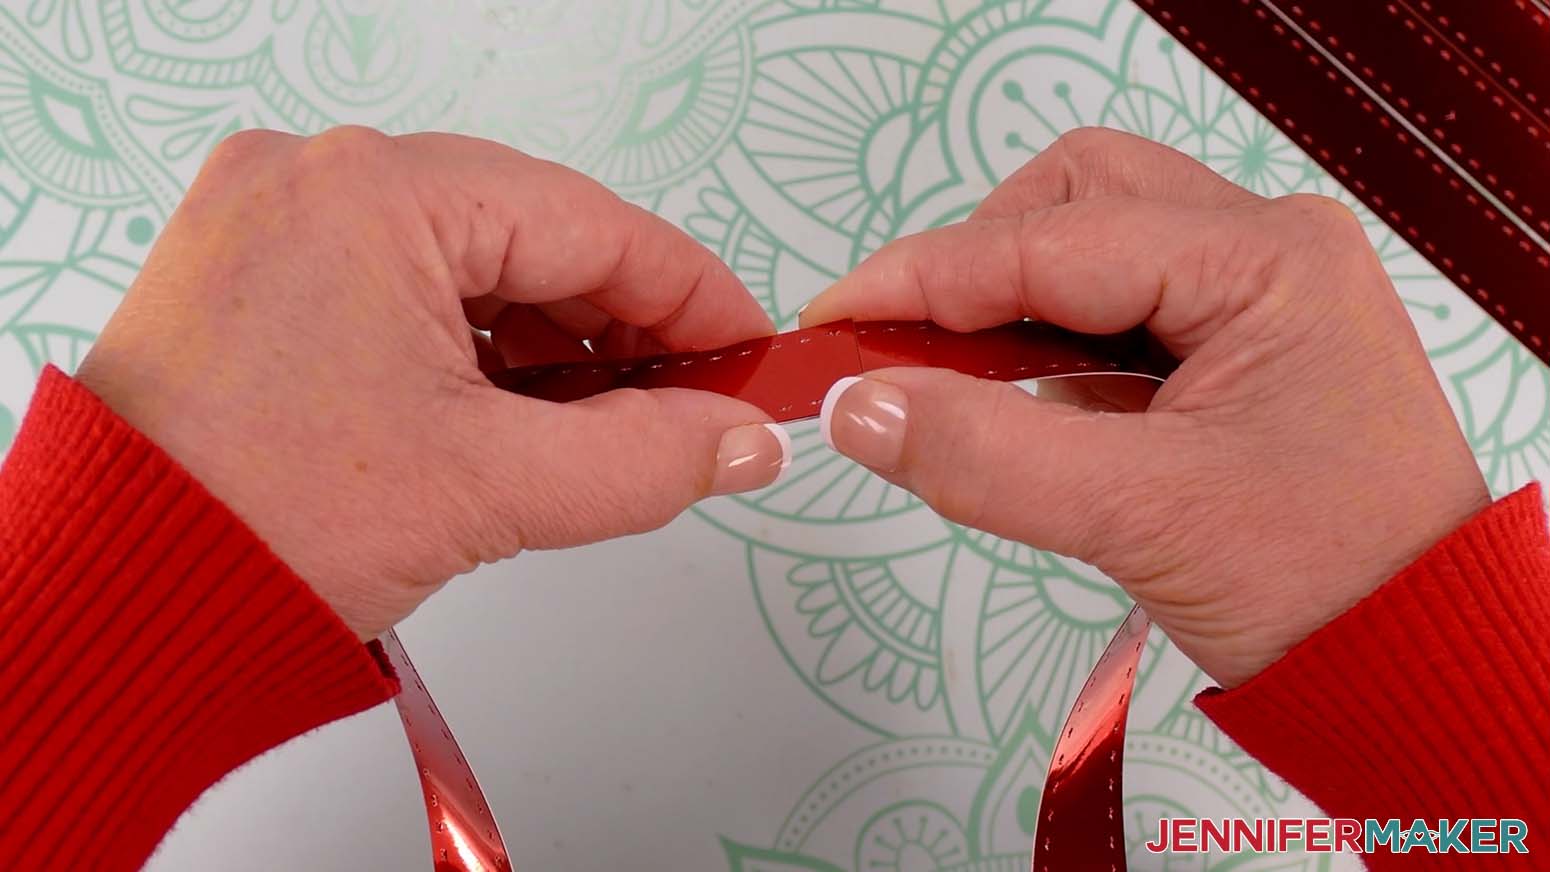
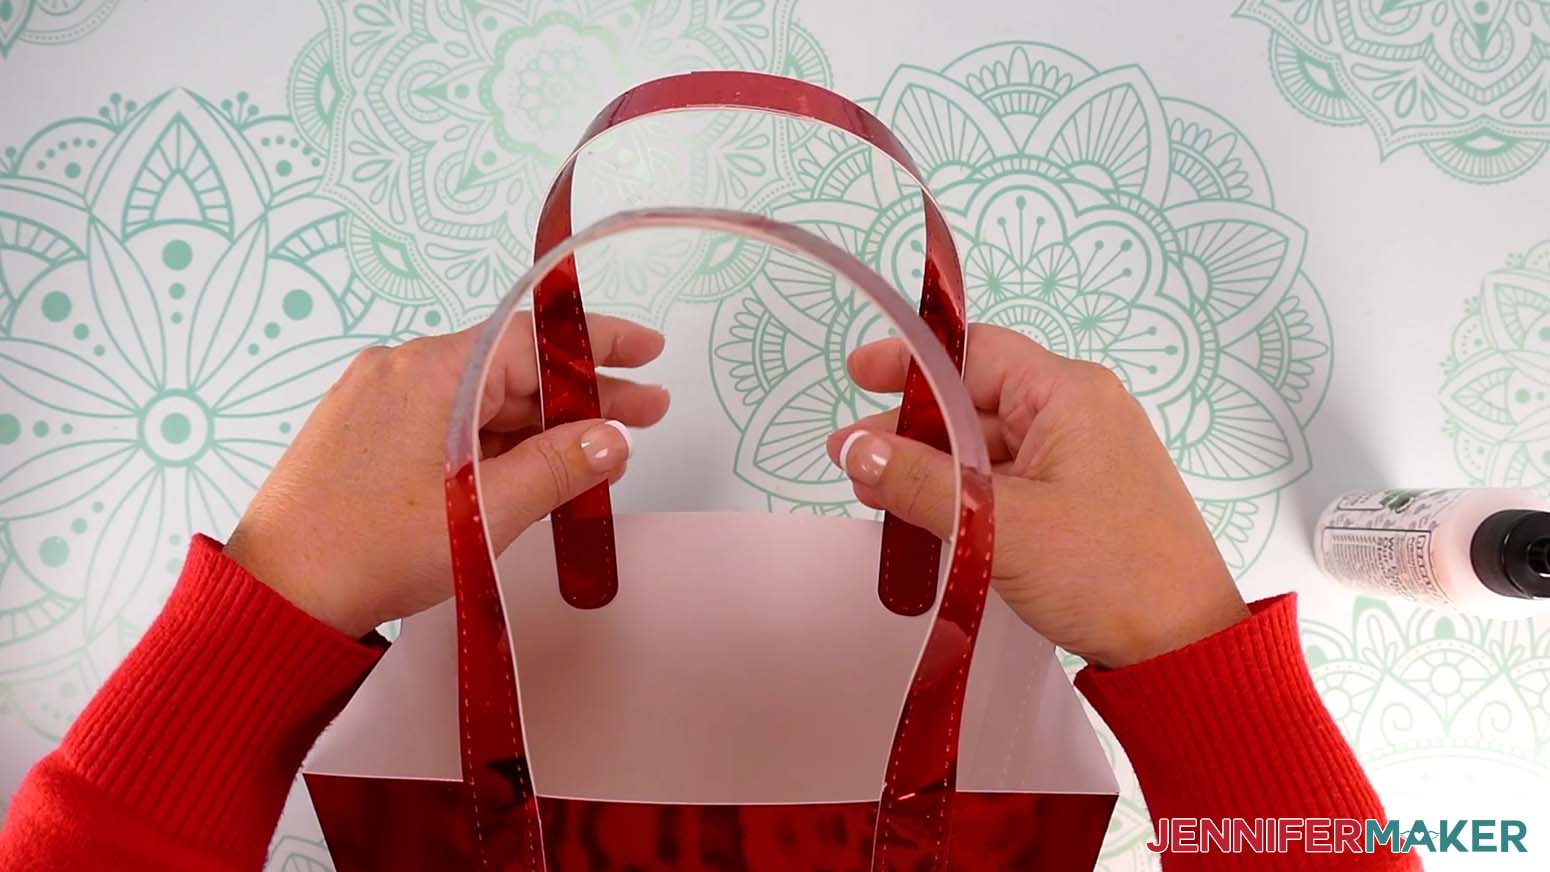
- Once the glue is dry and the handle pieces are securely attached to the purse, add craft glue to the very end of the shiny side of the right handle piece’s unattached end.
NOTE: If you plan to attach anything to your bag handle, make sure to do that before gluing the handle pieces together in this step. - Bring the unattached ends of both handle pieces together shiny side up so they overlap by about 1”, with the glued end on the bottom.
TIP: Keep the overlapping ends aligned. This will add a natural curve to your purse handle. - Press and hold the overlapping area together until the glue is dry.
- Turn the purse so the back is facing toward you.
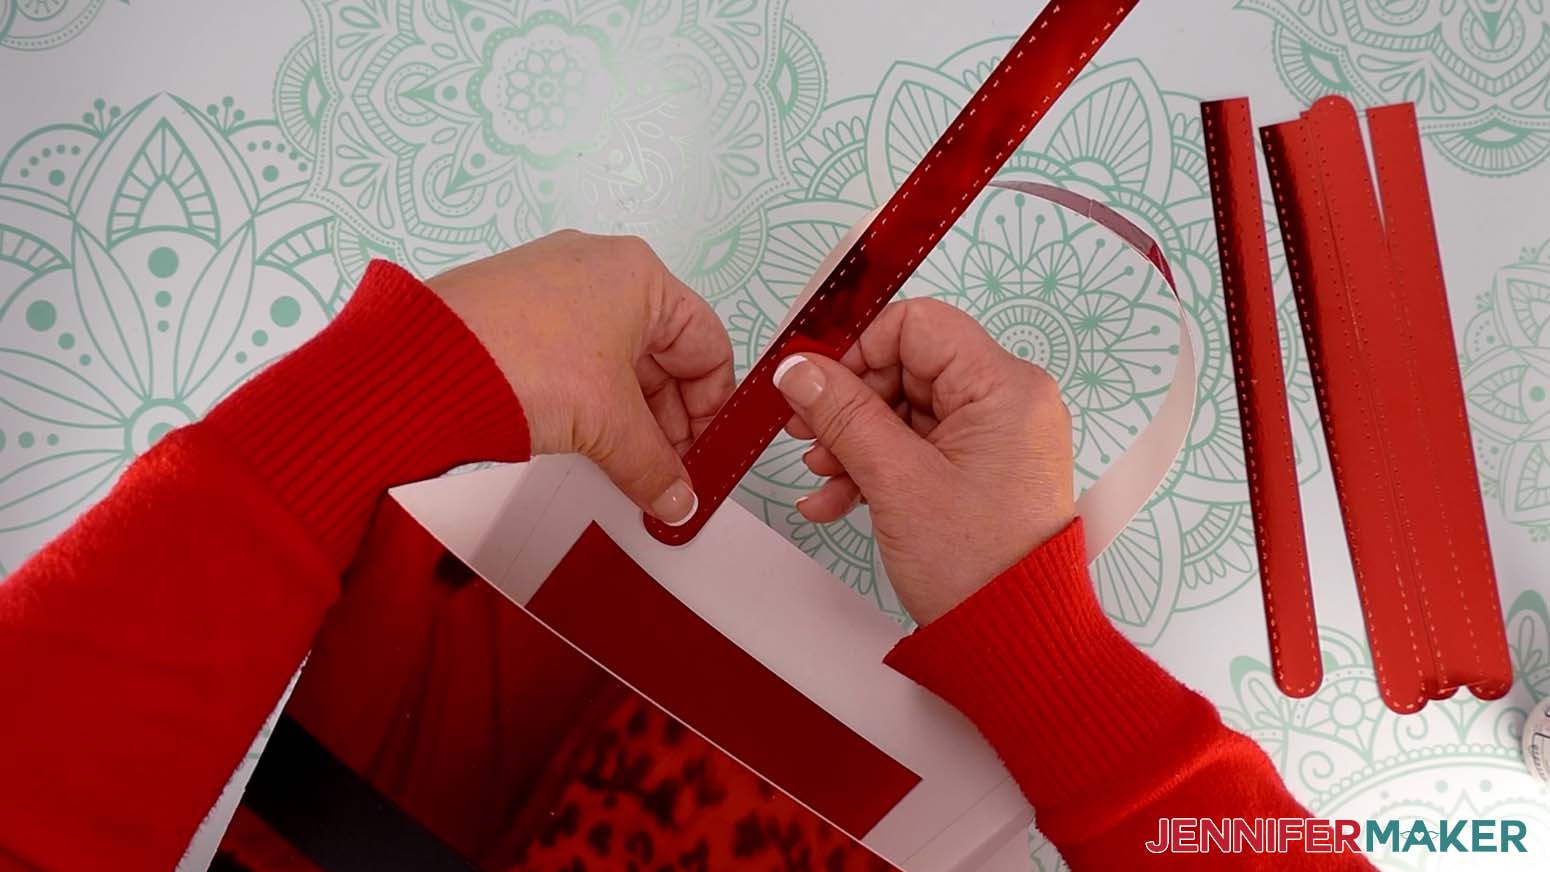
- Take another handle piece with the pretty side down, and apply craft glue to the bottom section of its rounded end.
- Attach the handle piece to the purse’s inside left corner, aligning its rounded end with the attached handle’s rounded end on the outside of the purse the best you can.
- Press firmly to adhere the handle in place.
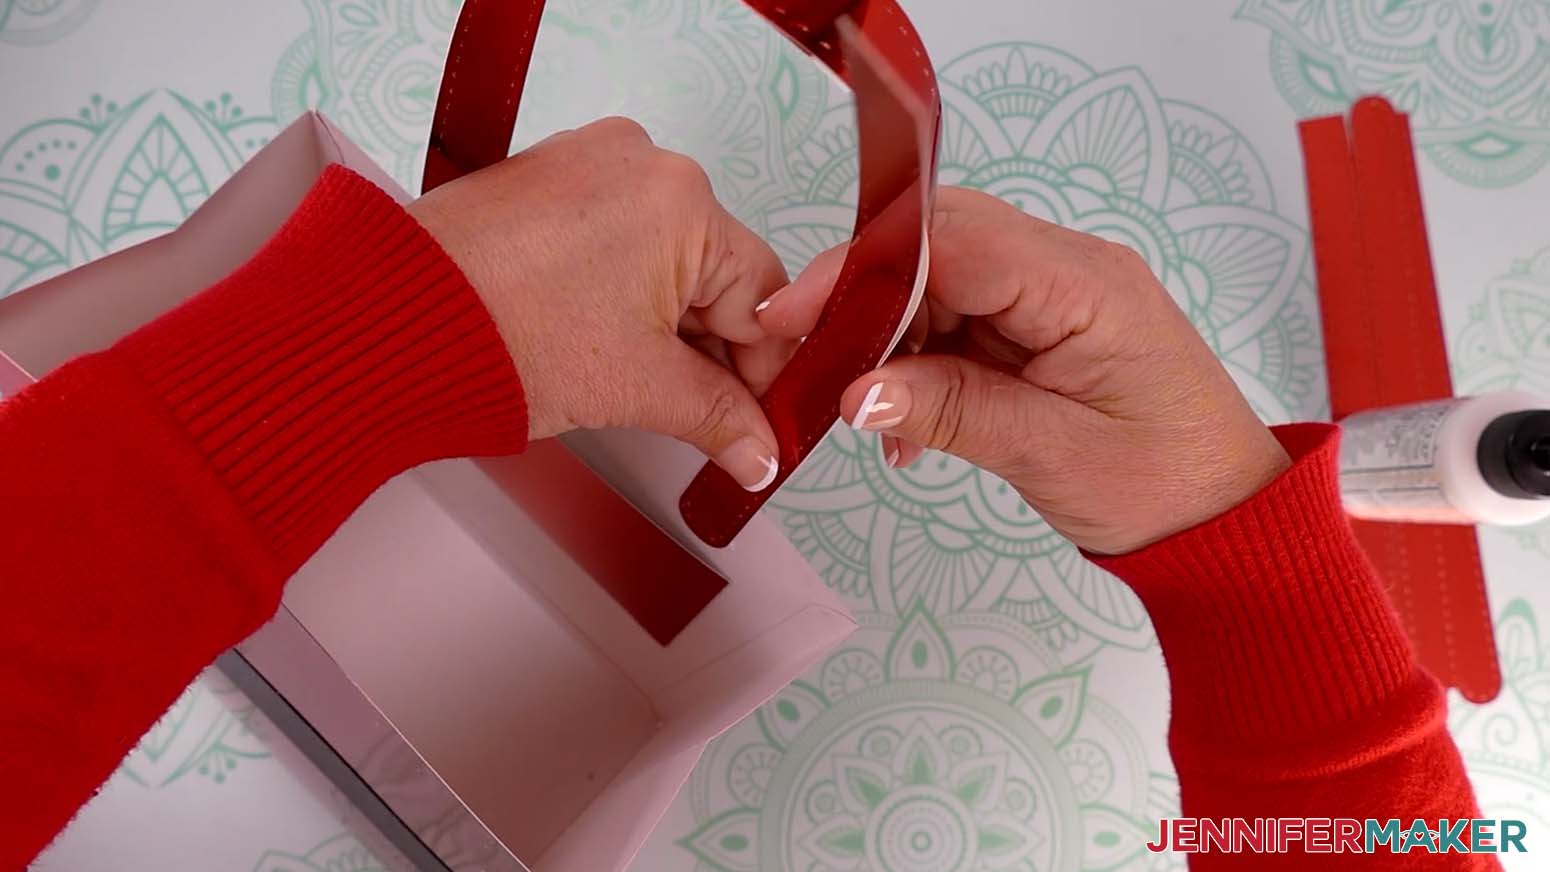
- Apply craft glue to the rest of the handle piece’s plain side.
- Carefully adhere the handle pieces back to back, starting from the bottom, keeping them lined up as you go.
- Press and smooth from top to bottom to adhere the handle pieces to each other.
- Repeat steps 11-16 to attach a handle piece to the purse’s inside right side. The ends of the four handle pieces will overlap each other in the center to make the finished handle nice and sturdy.
- Once the entire front handle is in place, follow steps 2-17 to attach the second handle to the back of the purse.
ADD THE SANTA PURSE ACCENTS
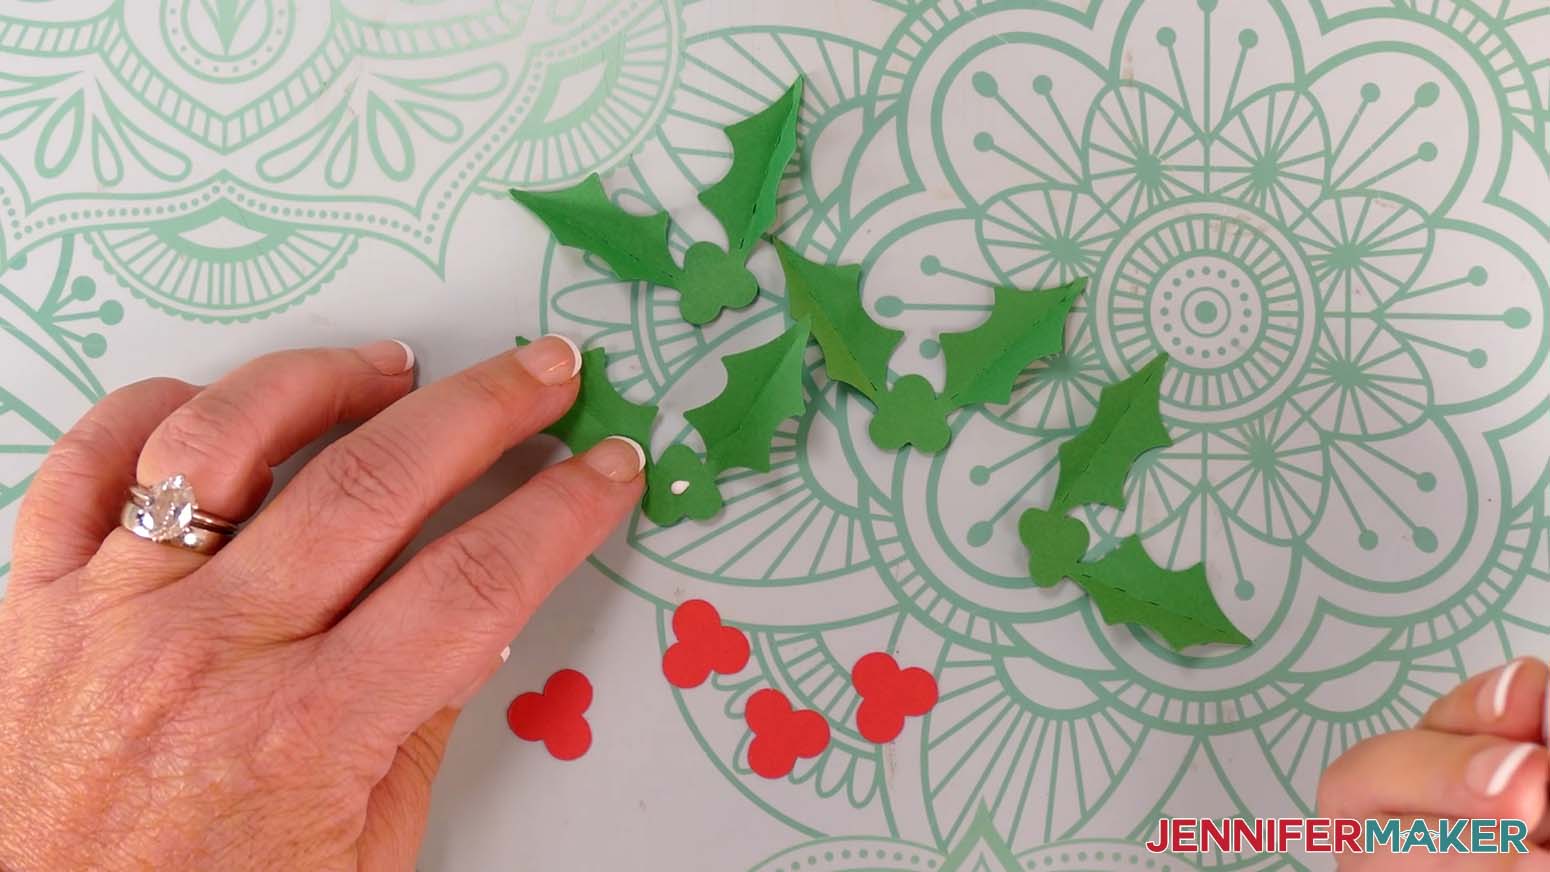
- To assemble your holly pieces, lay a leaf piece on your work surface with the leaves folded upward.
- Apply a small amount of craft glue to the center area where the berry piece will go.
- Align the berry piece over the berries in the center of the leaf piece.
- Press down to adhere the berries to the leaves.
NOTE: The berry piece is slightly larger than the berry area on the leaf piece to make alignment easier. - Repeat steps 1-4 for the three remaining leaf and berry pairs.
- Plug in your hot glue gun to warm up and make sure your work area is protected.
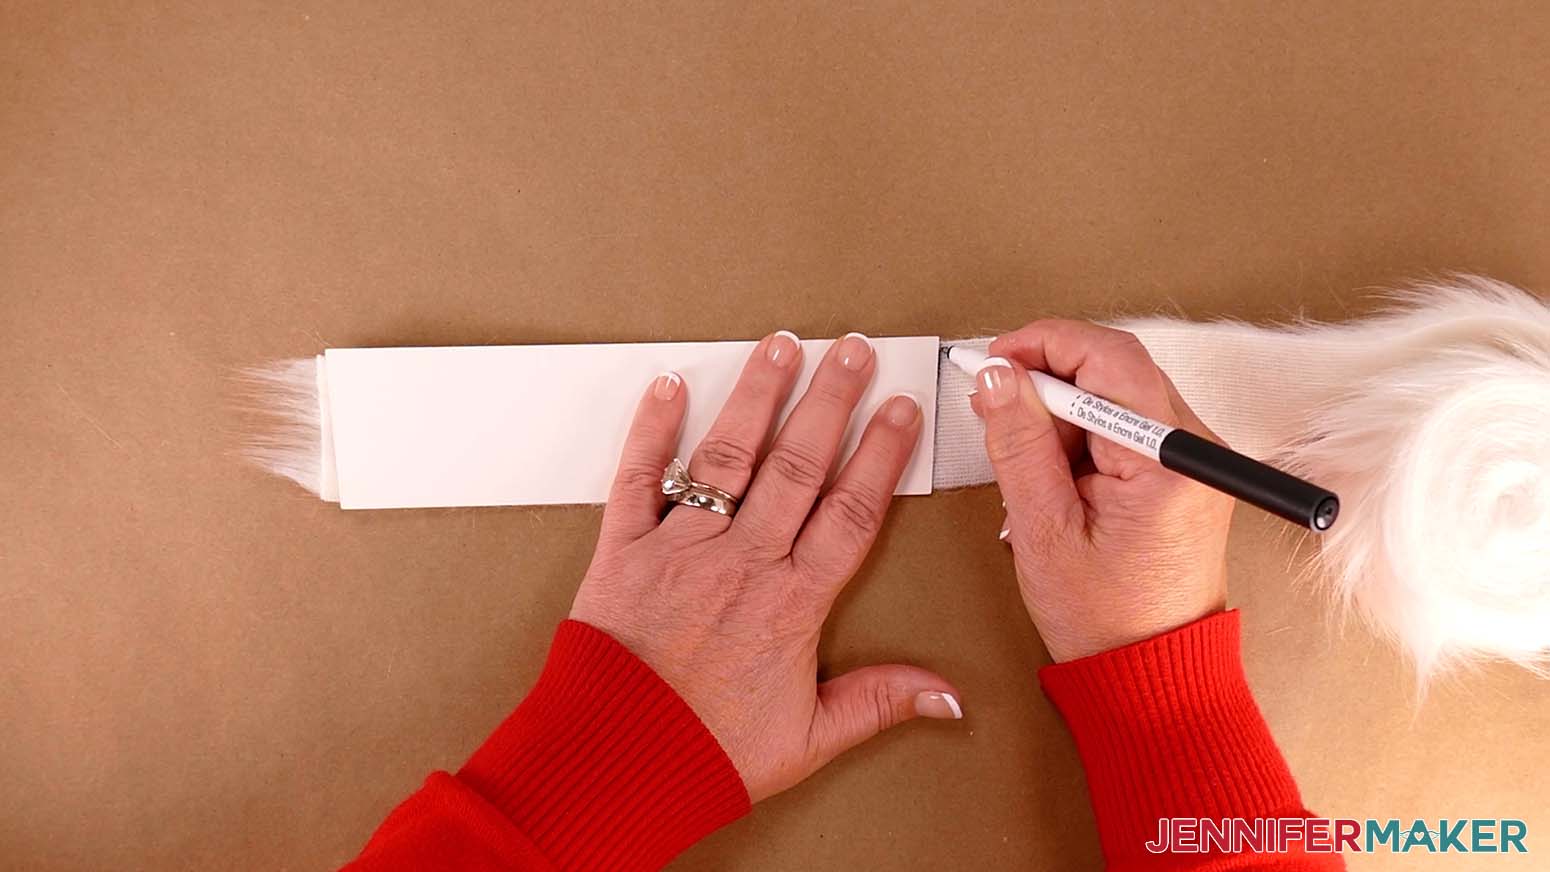
- Take your faux fur trim and place it pretty side down.
- Lay the long cardstock trim pattern on top of the faux fur.
- Use a dark colored pen to trace the edges of the pattern onto the fur trim.
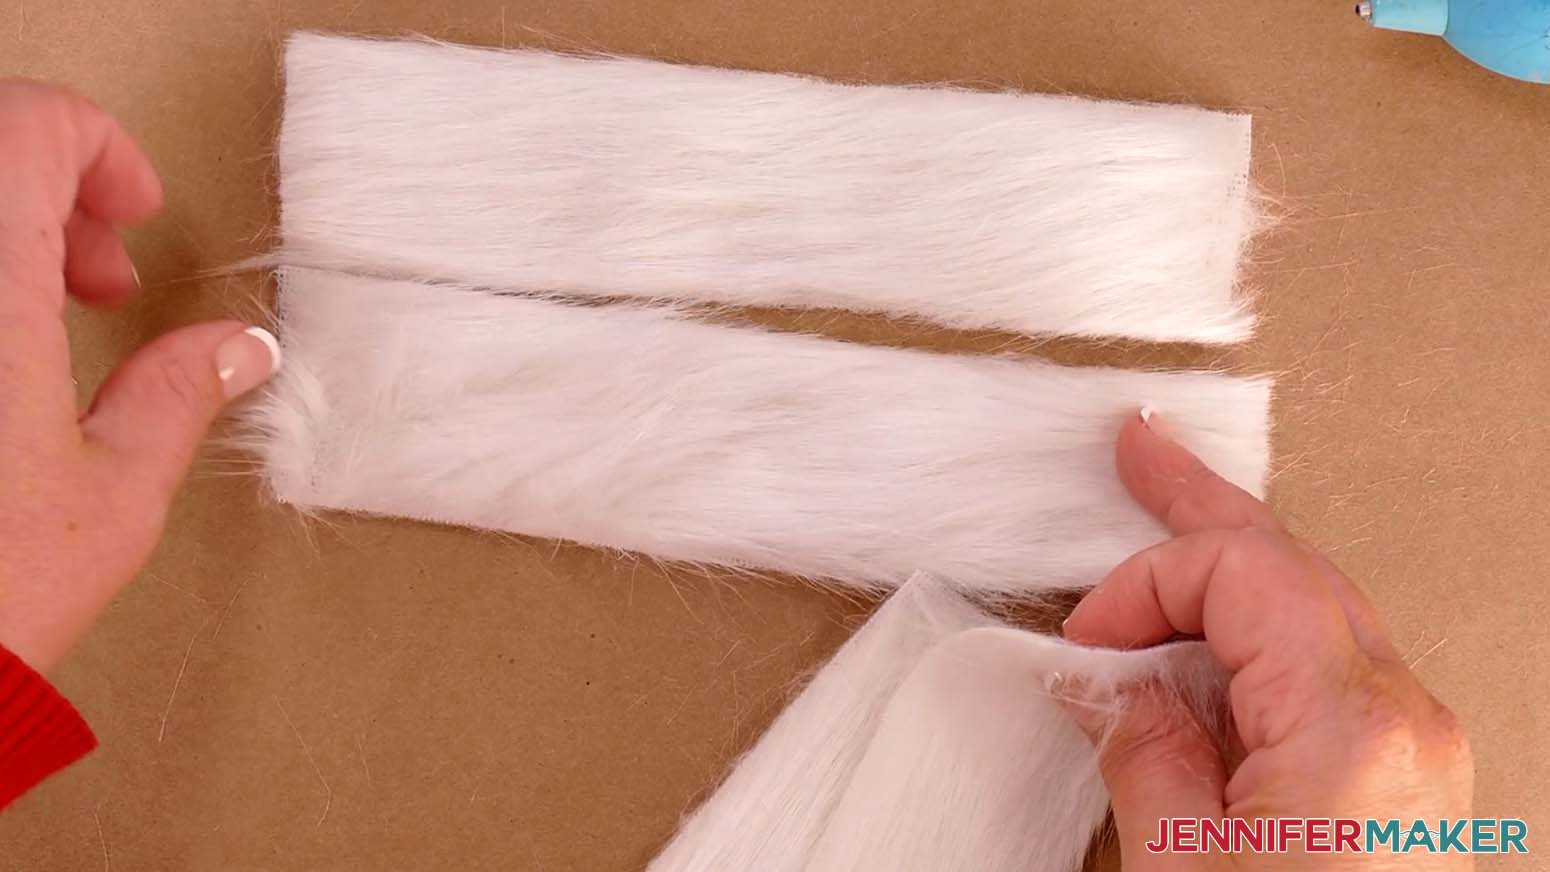
- Use sharp scissors to cut along the pen marks and create a long strip of faux fur trim with angled sides.
- Pull away and discard any loose bits of fur from the strip.
- Repeat steps 7-11 to cut another long strip of fur, then follow the same steps to cut two short strips of fur using the short cardstock trim pattern.
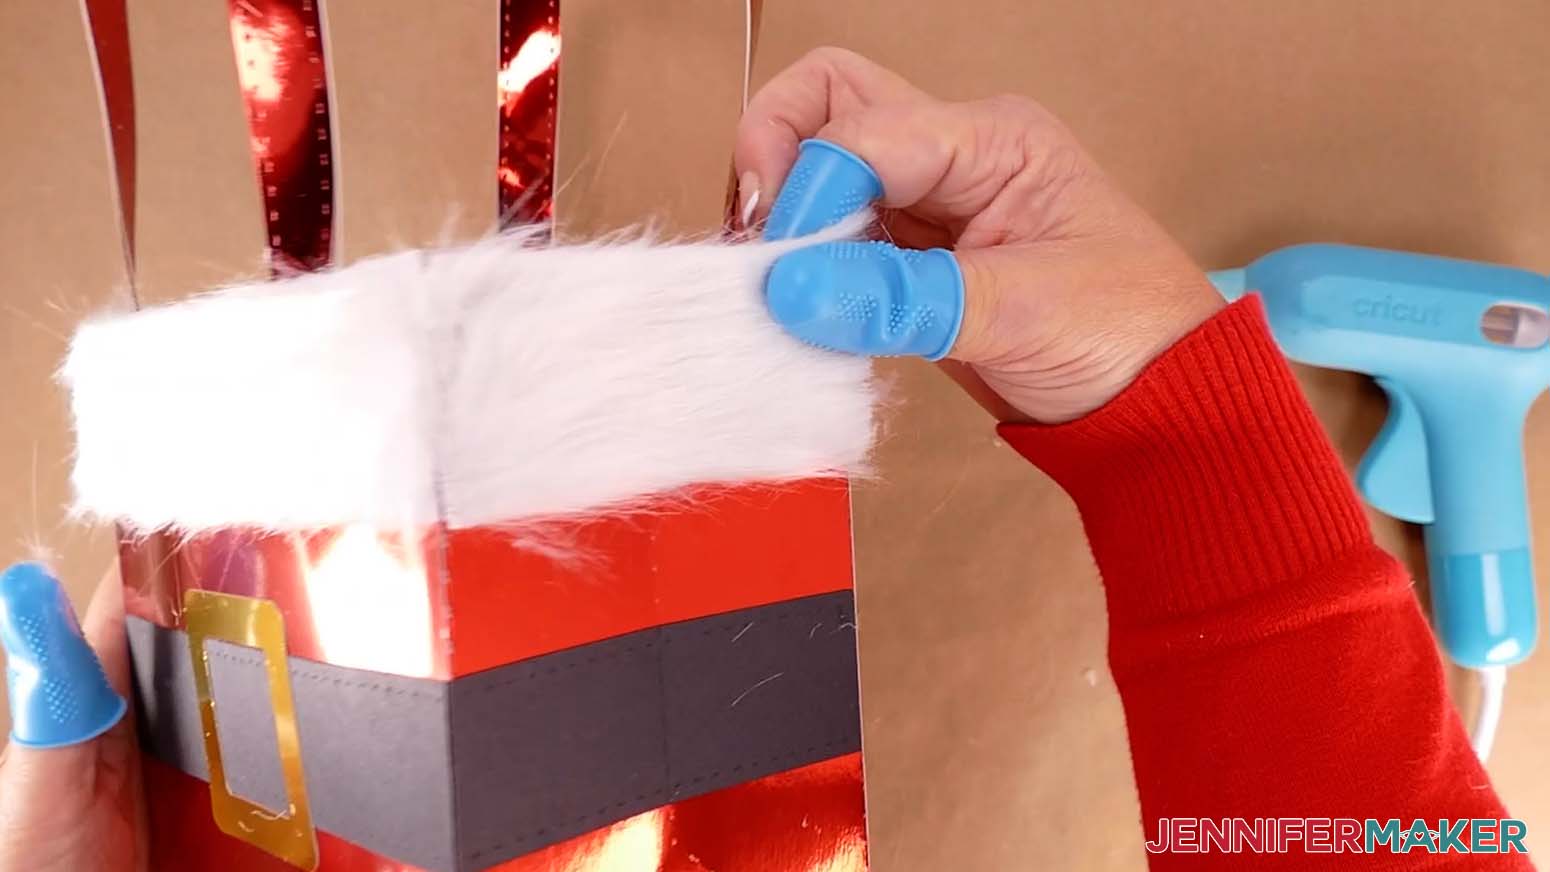
NOTE: You will have two long strips of fur trim with angled ends, and two short strips of fur trim with straight ends. - Put on your finger caps to protect your fingers from hot glue.
- Position one of the long fur trim strips along the top of the purse’s front side, making sure the angles match.
NOTE: The wider edge of the strip should be at the top. - Add hot glue along the inner edge on the back of the fur strip.
- Place the strip onto the top edge of the purse, pressing around the edges to adhere it well.
TIP: Work quickly to keep the hot glue from setting before you press the edges. - If any spots don’t adhere well, add additional hot glue, then press the fur in place to re-seal.
- Repeat steps 13-17 to adhere the second long strip of fur to the purse’s back side, then follow the same steps to attach the two short strips of faux fur to the purse’s two sides.
- Cut away any bits of fur that might be clumped together with glue.
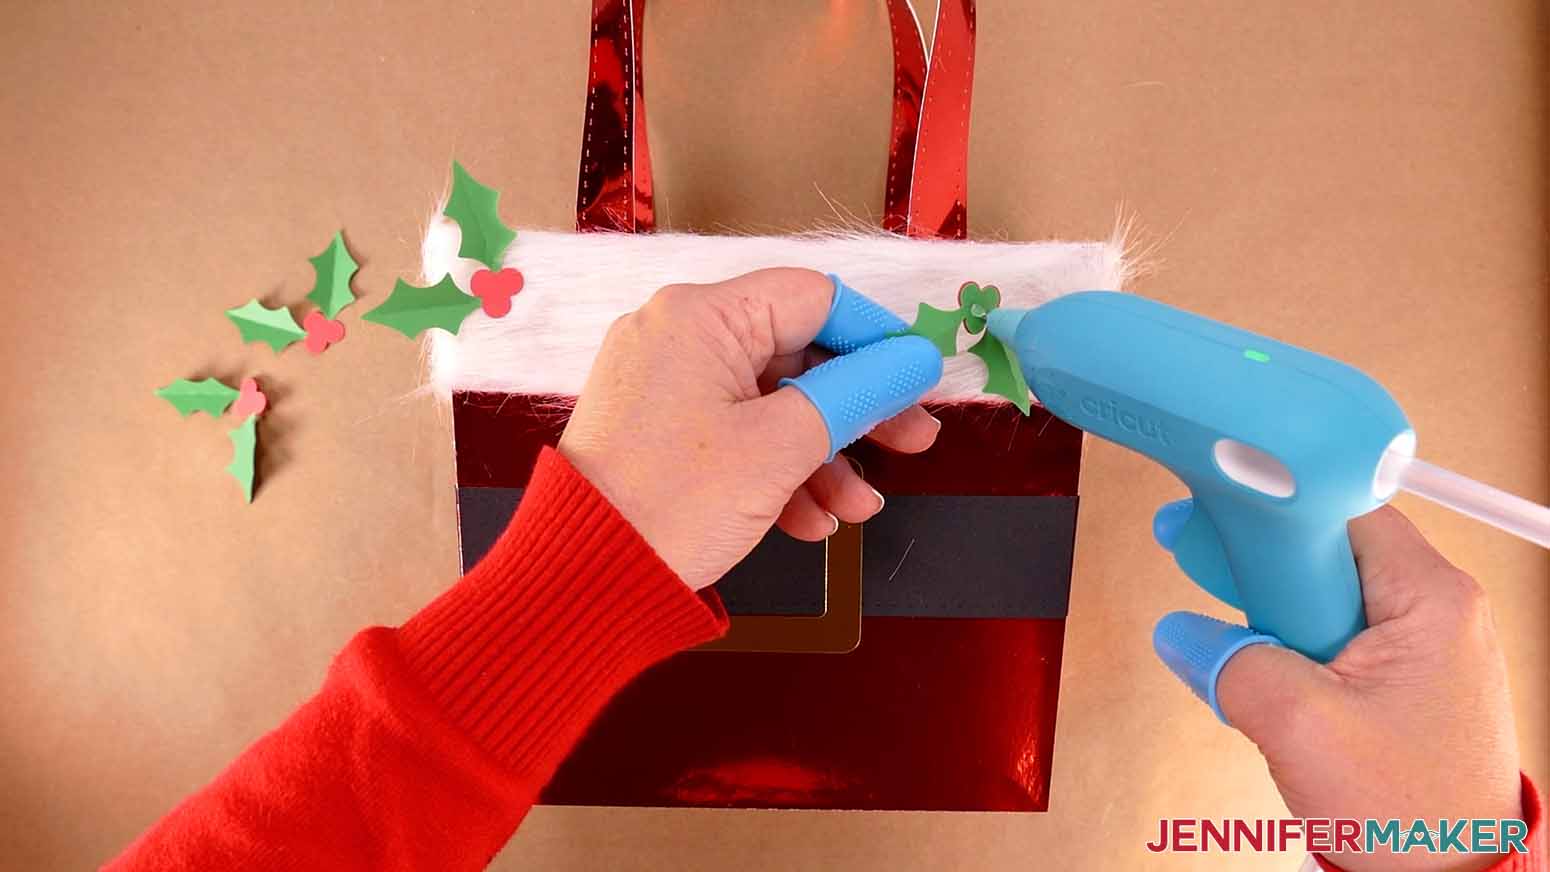
- Next, add a small dot of hot glue to the back of a holly piece and attach it to your purse. Then repeat for the other three holly pieces.
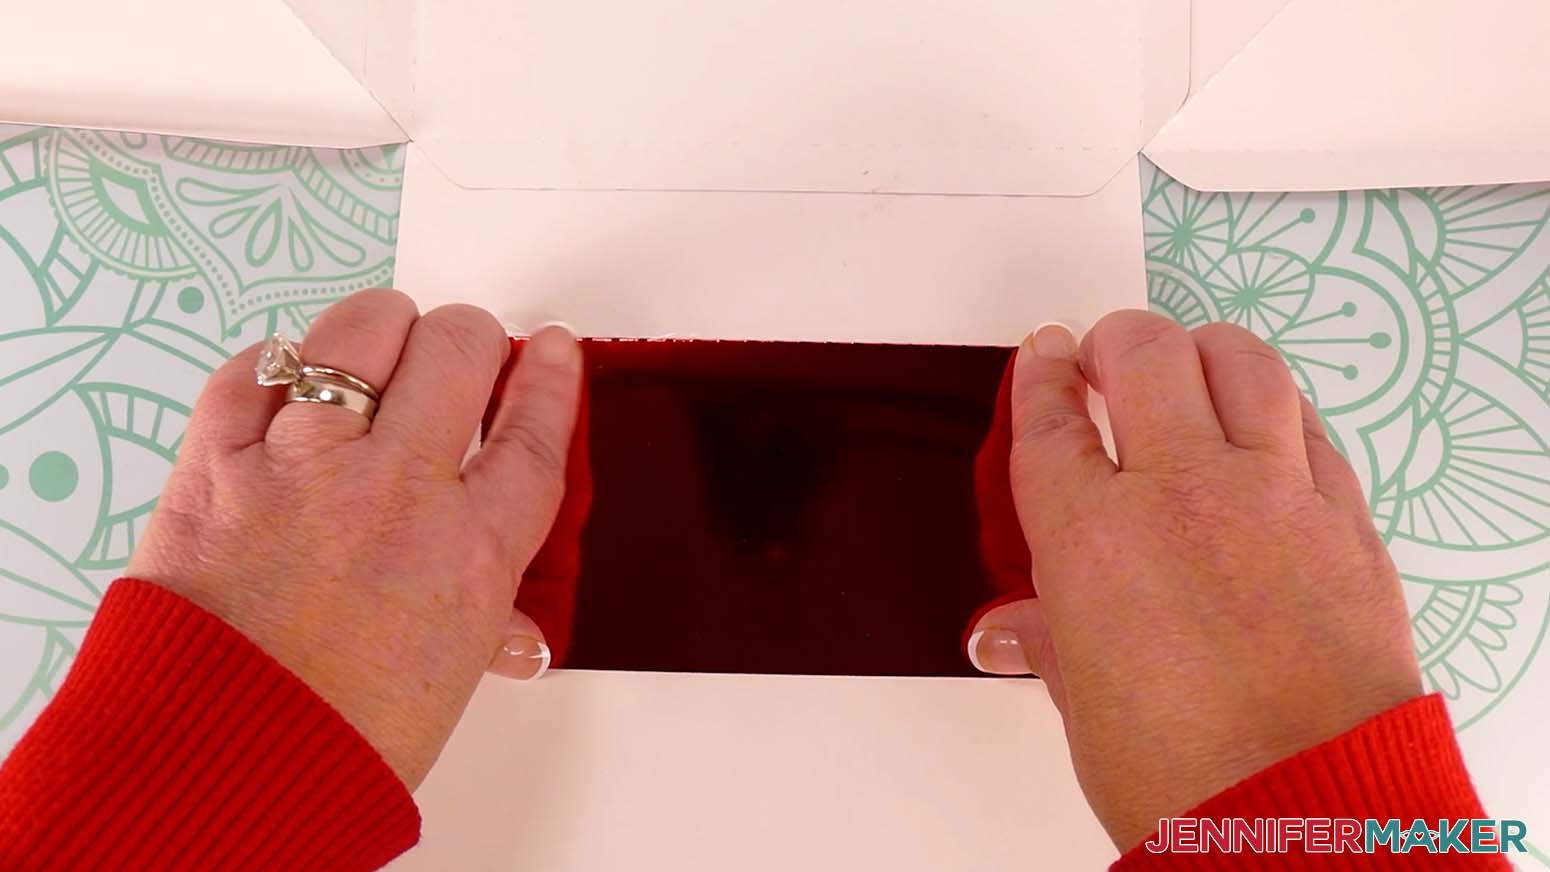
NOTE: I’ll attach mine to the top corners on the front and back of my purse. - Place the optional cardstock reinforcement panel in the bottom of your purse for extra sturdiness.

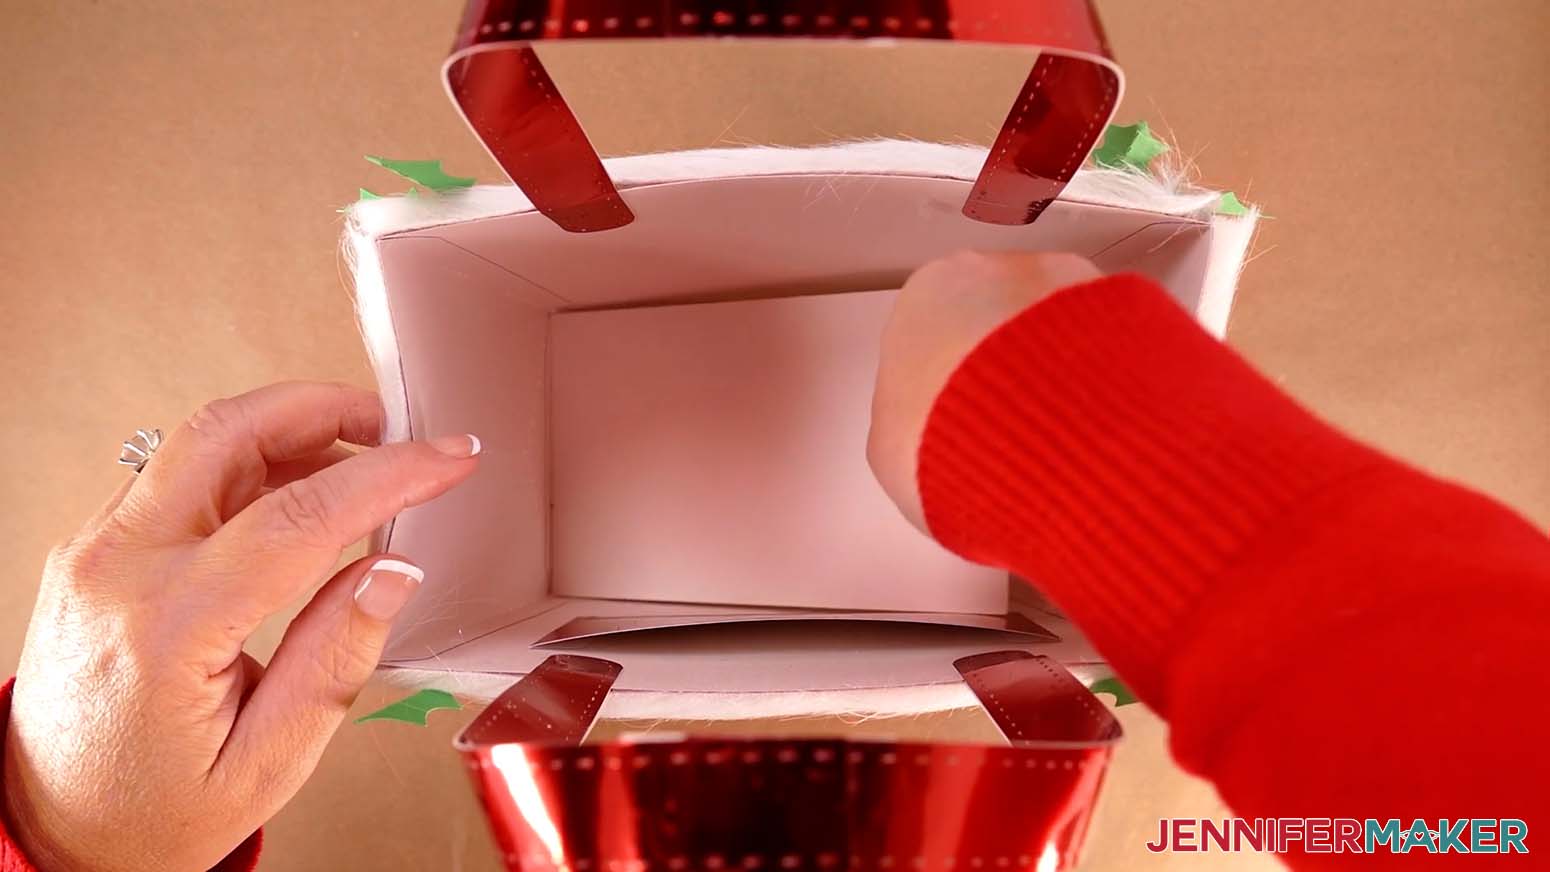
STEP 4: SHOW IT OFF
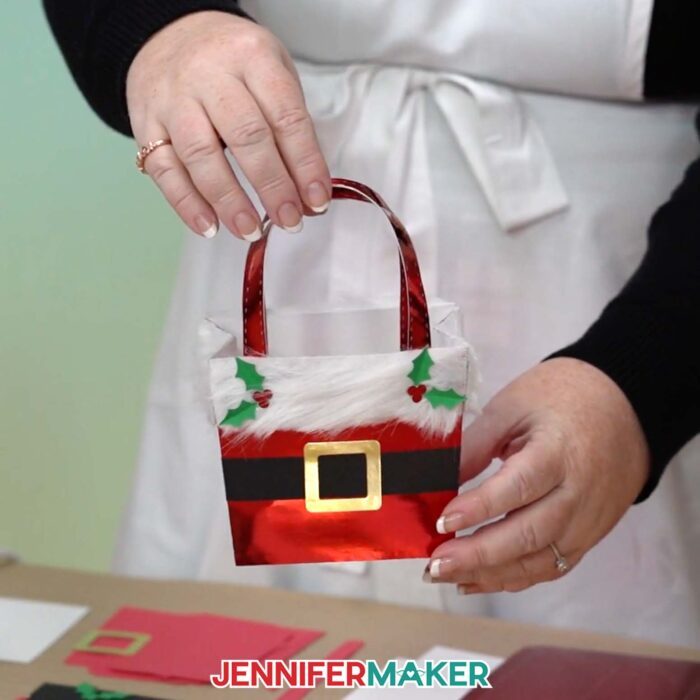
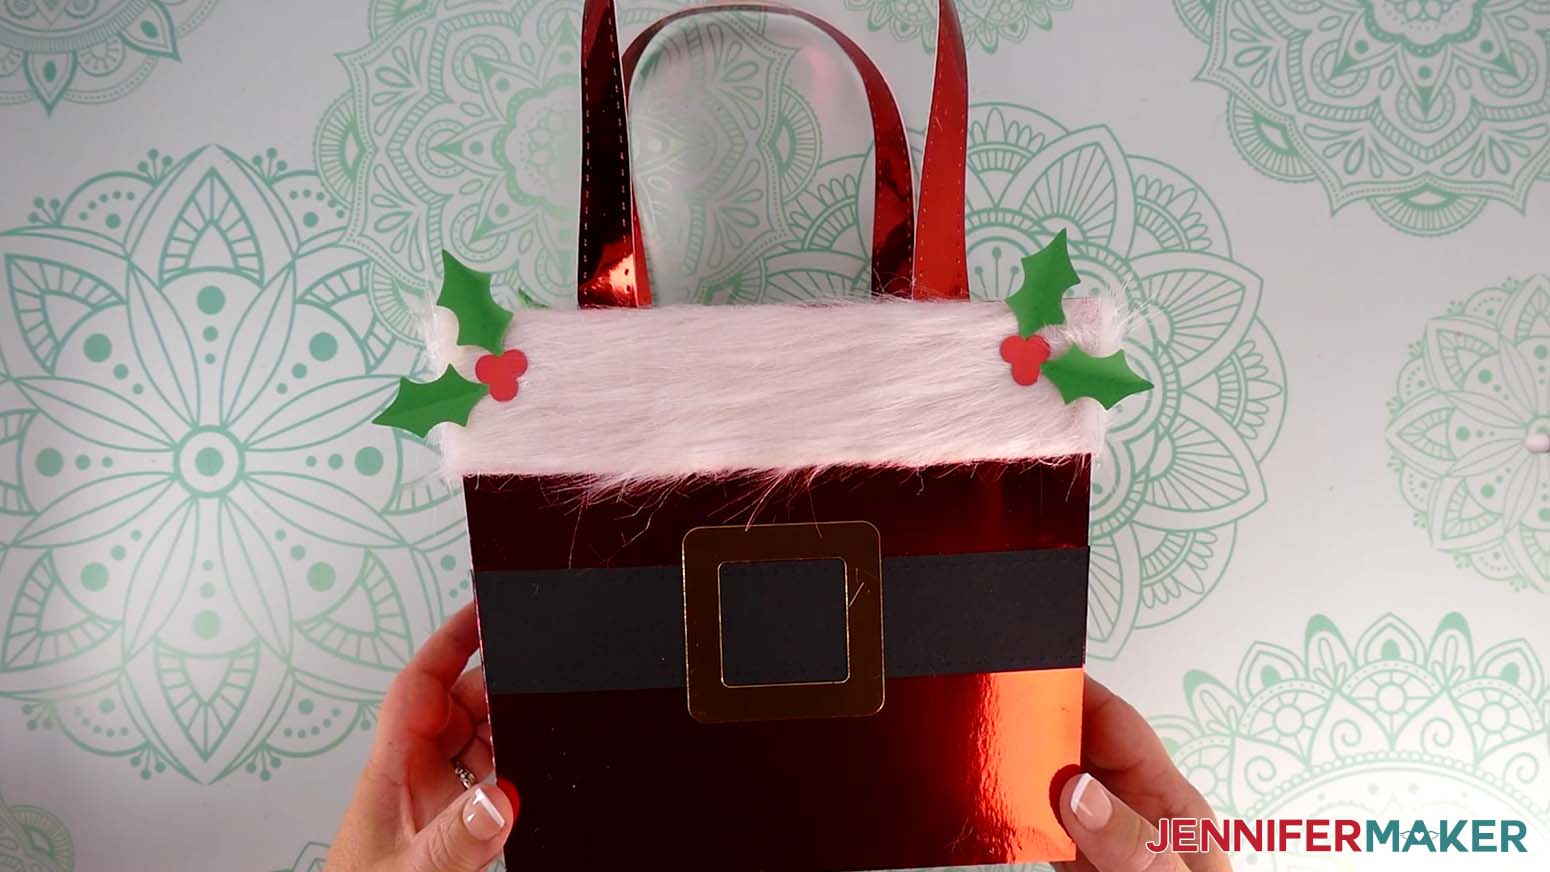
You now have a cute Santa-themed purse that makes the perfect gift bag!
Notes
The assembled purse gift bag can hold up to 5 lb. of weight.
Finished Size: 8"W x 13"H x 4"D
Answers to Your Questions About How to Make a Santa Purse Gift Bag
Q: I want to customize my Santa purse gift bag. How do I do that?
A: You can learn how to design your own purse dangle keychain for your Santa purse gift bag in my ADVANCE program. Learn more about ADVANCE here!
Q: How do I know if my design uploaded at the correct size?
A: If you are using Cricut Design Space Beta for Desktop, try switching to the Live version as this has sometimes worked in our testing, or use the stacked version of the design and ungroup it to spread the pieces out.
If you are using the stacked designs, here are the dimensions you should see on your Canvas:
- santa-purse-joy-stacked-jennifermaker-SVG: 11.157″ x 11.91″
- santa-purse-noscore-stacked-jennifermaker-SVG: 11.97″ x 11.872″
- santa-purse-score-stacked-jennifermaker-SVG: 11.851″ x 11.953″
If you are using the unstacked versions, here are the dimensions you should see for each design on your Canvas:
- santa-purse-joy-jennifermaker-SVG: 11.157″ x 15.176″
- santa-purse-noscore-jennifermaker-SVG: 19.55″ x 24.83″
- santa-purse-score-jennifermaker-SVG: 19.55″ x 24.83″
If you need help resizing your designs, please see my Resizing Guide.
Q: Can I cut these Santa purse gift bag SVG pieces on a Cricut Joy Xtra or original Cricut Joy?
A: Yes you can make small gift bags with a Cricut Joy! In my free download, I’ve included a version small enough to cut on a Cricut Joy.
Q: Do I have to use a Cricut to cut my Santa purse gift bag SVG pieces?
A: No! You can make gift sacks from paper or card stock that works with your equipment, or even just with scissors. We always include several versions of each free file in the free download ZIP file. If you have a Silhouette Cameo, which uses Silhouette Studio, you can use the DXF file in Silhouette Basic Edition. If you have upgraded to Silhouette Designer Edition, Designer Edition Plus, or Business, you can use the SVG format with your Silhouette machine to cut each intricate design. If you don’t have a cutting machine, you can print and then cut out my digital download PDF files, too! The ZIP archive in my resource library includes these file types and more!
Q: Help! My Cricut Design Space screen looks different than yours!
A: If you’re using the latest version of Cricut Design Space, your screen may have slight variations than the screen you see on the video tutorial. Good news: All of the same functions are there, they may just be in different spots or have new icons. Pause the video if you need, or follow along with the written tutorial. If you get stuck, ask for expert support in our Facebook group. Our group has become not just a help center, but also a vibrant community of real people and crafters! Plus, you can catch the latest news on JenniferMaker tutorials and more.
Q: Where can I find the supplies and tools to make a Santa purse gift bag?
A: My Santa purse gift bags can be made with simple supplies you may already have in your crafting stash. I like to shop on Amazon for their free shipping with my Amazon Prime membership (just make sure to look for sellers with 5-star reviews). Often, I receive my quality product usually a day or two after the purchase date, for no extra cost. Yay for quick delivery times! You can also find most, if not all of the supplies and tools at your local craft store.
Q: Can I make and sell these Santa purse gift bag designs?
A: I love supporting creative entrepreneurs! If you want to use my designs and projects for commercial use, please familiarize yourself with my important licensing information before selling your crafts.
I do not permit sale of my digital items, but you can sell the creative goods you make with them — as long as you follow my licensing requirements. That means you cannot sell the Santa purse gift bag SVG files, but you can sell bags that you made with the files on platforms like Etsy. Whether you use the Etsy app or the browser version, you’ll find a global marketplace filled with thousands small businesses, and interested buyers can find thousands of made-to-order items. I love to see creative crafting businesses thrive with the help of my designs and inspiration!
Q: Do you have any other holiday gift bag projects?
A: For more seasonal ideas for gift bags, check out these projects:
I even have a gift bag perfect for a wine bottle, but you can use the wine bag for other wine gifts, or decorate it differently to fit other bottles or presents! Check it out on my DIY Wine Gift Bag tutorial.
Q: Do you have tutorials for gift tags?
A: I love making gift tags with my Cricut! Here’s some projects to make your own, too:
Q: Do you have any cards I can make to go with the Santa purse gift bag?
A: I do! Check out these holiday card projects:
- Christmas Side Edge Cards
- Holiday Manor Pop-Up Card
- Snowflake Side Edge Card
- Lantern Pop-Up Cards
- Cute Winter House Cards
Need cards for other holidays? I’ve got Mother’s Day, Father’s Day, Valentine’s Day, and other cards for special occasions. Search for keywords like “birthday card,” “wedding card,” “anniversary card,” or another type to find what you need!
Q: Do you have any other holiday projects I can make?
A: Absolutely! My craft room is Ornament Central right now, plus I’ve got tutorials for other holiday decor, treat packaging, and more on my blog! Just browse through, do a search, or browse my library for inspiration and free files and tutorials.
Get my free SVG/DXF/PDF files to make a Santa purse gift bag!
(If you do not see the signup form above, click here.)
I love seeing what you make with my designs and how you use them! Please share a photo of your Santa purse gift bag in our Facebook group or tag me on social media with #jennifermaker.
Love,

Want to remember this? Save this Santa Purse Gift Bag Tutorial to your favorite Pinterest Board!

![DIY Cake Toppers with Custom Names and Sentiments Cut on a Cricut ] Free SVG Cut File #cricut #cakedecorating #birthday](https://jennifermaker.com/wp-content/uploads/diy-cake-toppers-custom-f.jpg)