
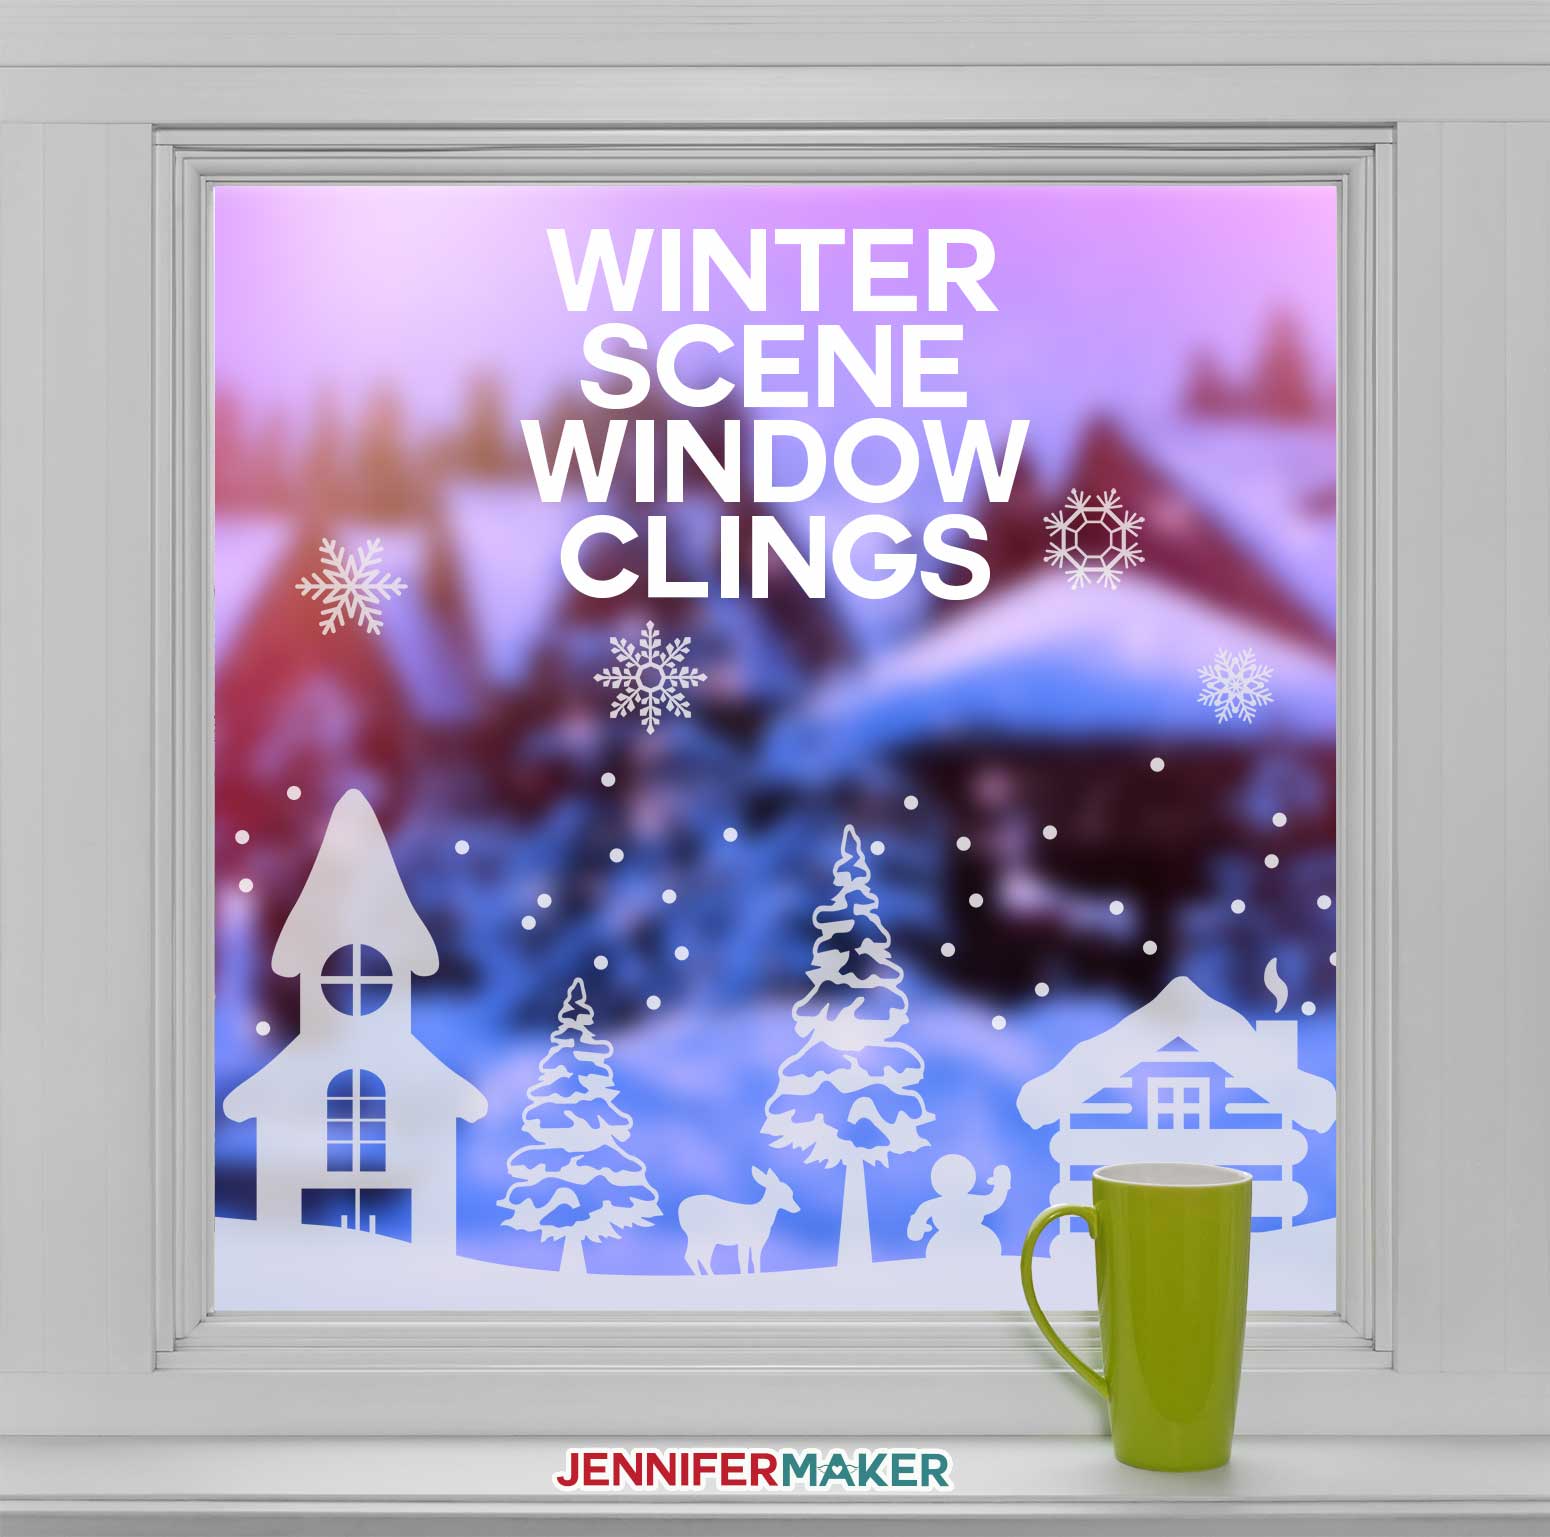
Learn how to make your own DIY winter scene window clings to brighten up a window or decorate a pretty picture frame!
Two winters ago I made some sweet little birdhouse window clings for my bathroom window. They are still there and every time I see them, I can’t help but feel a little more cheerful. AND, the best part is that even though they’re made of something as simple as window cling material, those birdhouses look as good as the day I put them up two years ago. Many of you have been asking for a winter scene window cling set, so for Day 22 of The Great Maker 25-Day Gift-Away Challenge, I am showing you how to create some cute winter scene window clings to decorate your home for the holidays.

You can put your winter scene window clings in an actual window, on glass doors, or if you don’t have a good window, you can put it into a frame with a glass like this! Any glass surface should work.

Whether you’re planning a cheerful Christmas gathering, planning a delightful Hanukkah celebration, New Years parties, or just decorating your home for the winter holiday season, these DIY window decals add an extra touch of joy to your home decor. They’re not just for winter, though! With all the customization options, they’re the perfect decoration for any time of year.
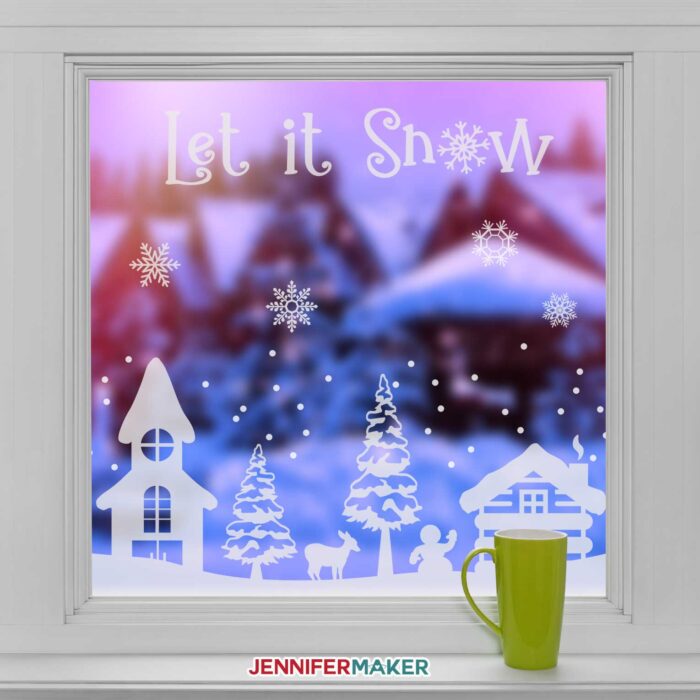
In this tutorial, I’ll show you how to prepare, cut, and apply DIY window clings cut with a Cricut cutting machine. I’ll walk you through how to apply them to a glass surface. You can turn your frosty windows into a cute winter wonderland with these perfect winter holiday decorations!
Create various sets of custom window clings so you can decorate your windows throughout the year.
Ready to make your own cute winter window clings? I’m excited to show you how! This post contains some affiliate links for your convenience (which means if you make a purchase after clicking a link I will earn a small commission but it won’t cost you a penny more)! Read my full disclosure policy.
Materials to Make Cute Winter Scene Window Clings
View my Amazon shopping list with the exact items we used to make this project!
- Cricut window cling material: white, black, gold, orange, red, silver, and frosted
- Rubbing alcohol
- Coffee filter or lint-free paper towel
- Photo Frame (optional)
- Cricut Tools, especially a weeder and a scraper
- Standard Grip Cutting mat (the 12″ x 12″ size)
- A way to cut your stencil (I used the amazing Cricut cutting machine!)
- Design #186 – My free SVG design files and template (available in my free resource library—get the password by filling out the form at the bottom of this page)
How To Make Winter Scene Window Clings
Step 1: Get my free Winter Scene Window Cling Design
My free SVG cut file contains many different designs to make your own window cling winter scene. Get my window cling designs (Design #186) from my free resource library (get the password to the library in the form at the bottom of this post).
Here’s what the SVG cut file will look like when you upload it to Cricut Design Space:
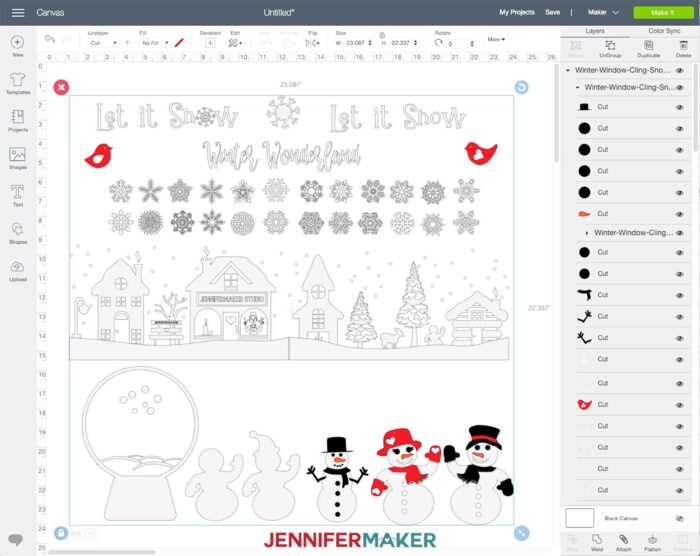
Tip: If you’re not sure how to upload an SVG cut file to Cricut Design Space, watch this helpful video training series I made. If you’re on an iPhone or iPad, here’s how to download and upload SVG files to the Cricut Design Space app.
Step 2: Prepare Your Winter Scene for Cutting
Measure the size of the area you will be applying the designs to and then once you choose the design you want to create resize the design to fit appropriately on your surface.
NOTE: If you are using a design with lettering and the design is going on the inside of your window to be viewed from the outside, you will want to mirror your designs so that the lettering can be read from the outside. If there is no lettering in your design it is up to you if you want to mirror.
Step 3: Cut Out Your Winter Window Cling Design
Put your window cling on the cutting mat with the liner side (paper side) DOWN.
Set your machine to cut the cling. On the Maker, Select “Browse all materials,” then select “Window Cling.” On the Cricut Explore Turn the Smart Set Dial to “Custom” and select “Window Cling” from the list of custom materials. All other types of machines refer to your user guide to determine how to use a “Kiss Cut.”
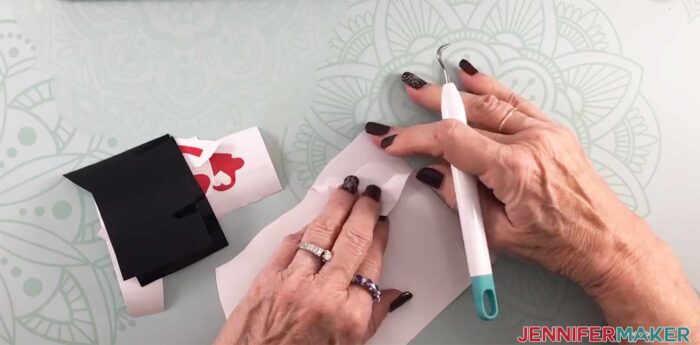
Step 4: Weed Your Cut Design
Once your window cling design is cut out ,use your tools to weed the design. Cling weeds just like vinyl does. If there are intricate cut outs in your design you can also apply the design to the surface and weed your design from the surface. It is sometimes easier to see where to weed once the design is applied to the surface.
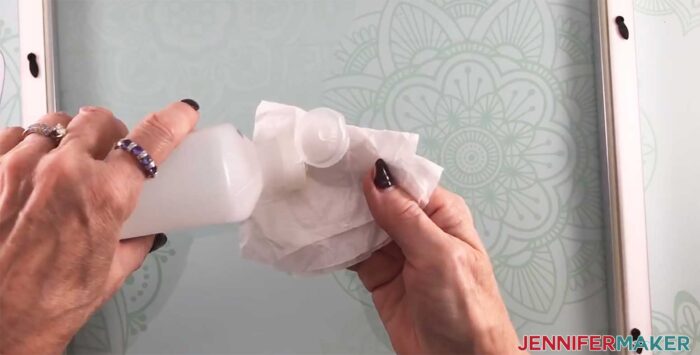
Step 5: Clean Your Surface and Position the Cling
Clean the surface that the design is going to be applied to with some alcohol and a lint free cloth or coffee filter. Allow the surface to dry before applying your design.
Once the design is weeded it can be applied to the surface in one of two ways:
1. Place the weeded design on the surface, burnish down with scraper and then remove the paper backing.
2. Remove the design from the paper backing and apply to the glass by hand. Burnish with the scraper. (This method works best for small window cling designs—not large designs.)
Window cling is different from vinyl in that it has no adhesive on the back and can be repositioned easily. Use the weeding tool to pick up any window cling you need to move and reposition it by hand.
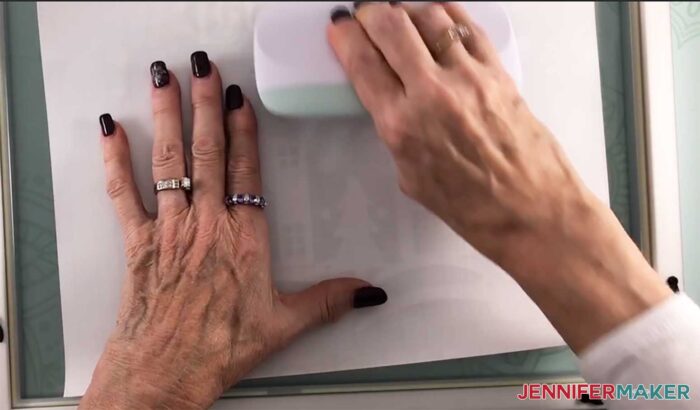
Step 6: Burnish the Window Cling Design on the Glass
Once you are happy with how your window cling design looks, use your scraper (or the edge of a credit card or store loyalty card) to burnish it down well to the glass.
NOTE: Some of the designs in the files have color layers. If you choose to use the color layers, you will again need to decide how you will be applying them to your surface. If it is a mirror or the inside of a window, just lay each piece down onto the surface and layer. If you are going to want the color layers to be seen from the outside, you will need to put your layers together first, then flip the whole design over and apply colored layer side to the window. This assures that the colors can be seen from the outside.
Get my free SVG files to make your own Winter Scene Window Clings!
I’d love to see your window cling projects and where you put them! If you make one, or any of my other Christmas decorations, please share a photo in our Facebook group, email it to me at [email protected], or tag me on social media with #jennifermaker.
Love,

Want to remember this? Save the Winter Scene Window Clings to your favorite Pinterest Board


Jennifer, this is my favorite project so far! Thanks for sharing, and I hope you are feeling better soon. I appreciate all the work you put into this 25 day gift-away.
Love the winter scene and window clings! Feel better soon. Achooo – dealing with a cold myself!
Sorry to hear you are not feeling well. Hope you get better soon, thank you for al you do!
Hope you feel better. Thanks for all your help and videos ??
Jennifer, love this project! wanted to use my window cling for a while and very intimidated by it! Thank you so much! Hope you get much need rest! Feel better soon. Hugs and Merry Christmas!
Feel better Jennifer, and thank you for the window cling tutorial. I love this and hope to make these soon.
I Love this. I’m going to make some for the church nursery after Christmas. The toddlers will absolutely love them. Thank you for doing this even when you are under the weather.
Take care of yourself and feel better soon!
Hi Jennifer. This is one of my favorite projects. Thank you for your hard work on the 25 day gift away. Feel better soon.
I love these.. would make great gifts too
Thank you for sharing all these. You definitely deserve a break and don’t feel guilty for one second. Looking forward on what is to come!
Jennifer, I know you must be exhausted. 25 days of solid mind boggling, idea making and designing has to take it’s toll. My favorite is the Red truck. Just cut it out and had a little problem, but good feedback from your helper was fantastic. Straightened me out with what I had to do. Thanks Feel well soon, Merry Christmas!!
I was just able to catch up on your projects today! I don’t know how you did it all! I hope you have some time to rest and feel better. This is a great project! I can’t wait to make some window clings for my room at the school I work at. It would be fun to change it up seasonally as I have floor to ceiling windows on one side! Thanks so much for all you have given to the Cricut crafting community!
oh my my I found it thank you so much for posting this.
i am looking to making a window cling but for appreciation to the first responders during the crises. Thanks for the detailed post – I now feel confident that I can make my own design as needed and apply the steps you outlined.
I can’t access the file from the resource library, ‘page not found’ 🙁
Hi Andrea, when you click on the design file in my Resource Library https://jennifermaker.com/resource-library/ the design downloads automatically. You’ll want to search your browser or your computer’s download files for it. If you still can’t locate the download, please reach out to my Communications Heroes at [email protected]. They’ll be happy to help!
Thank you, Jennifer. This is exactly what I was looking for.
Hooray!