
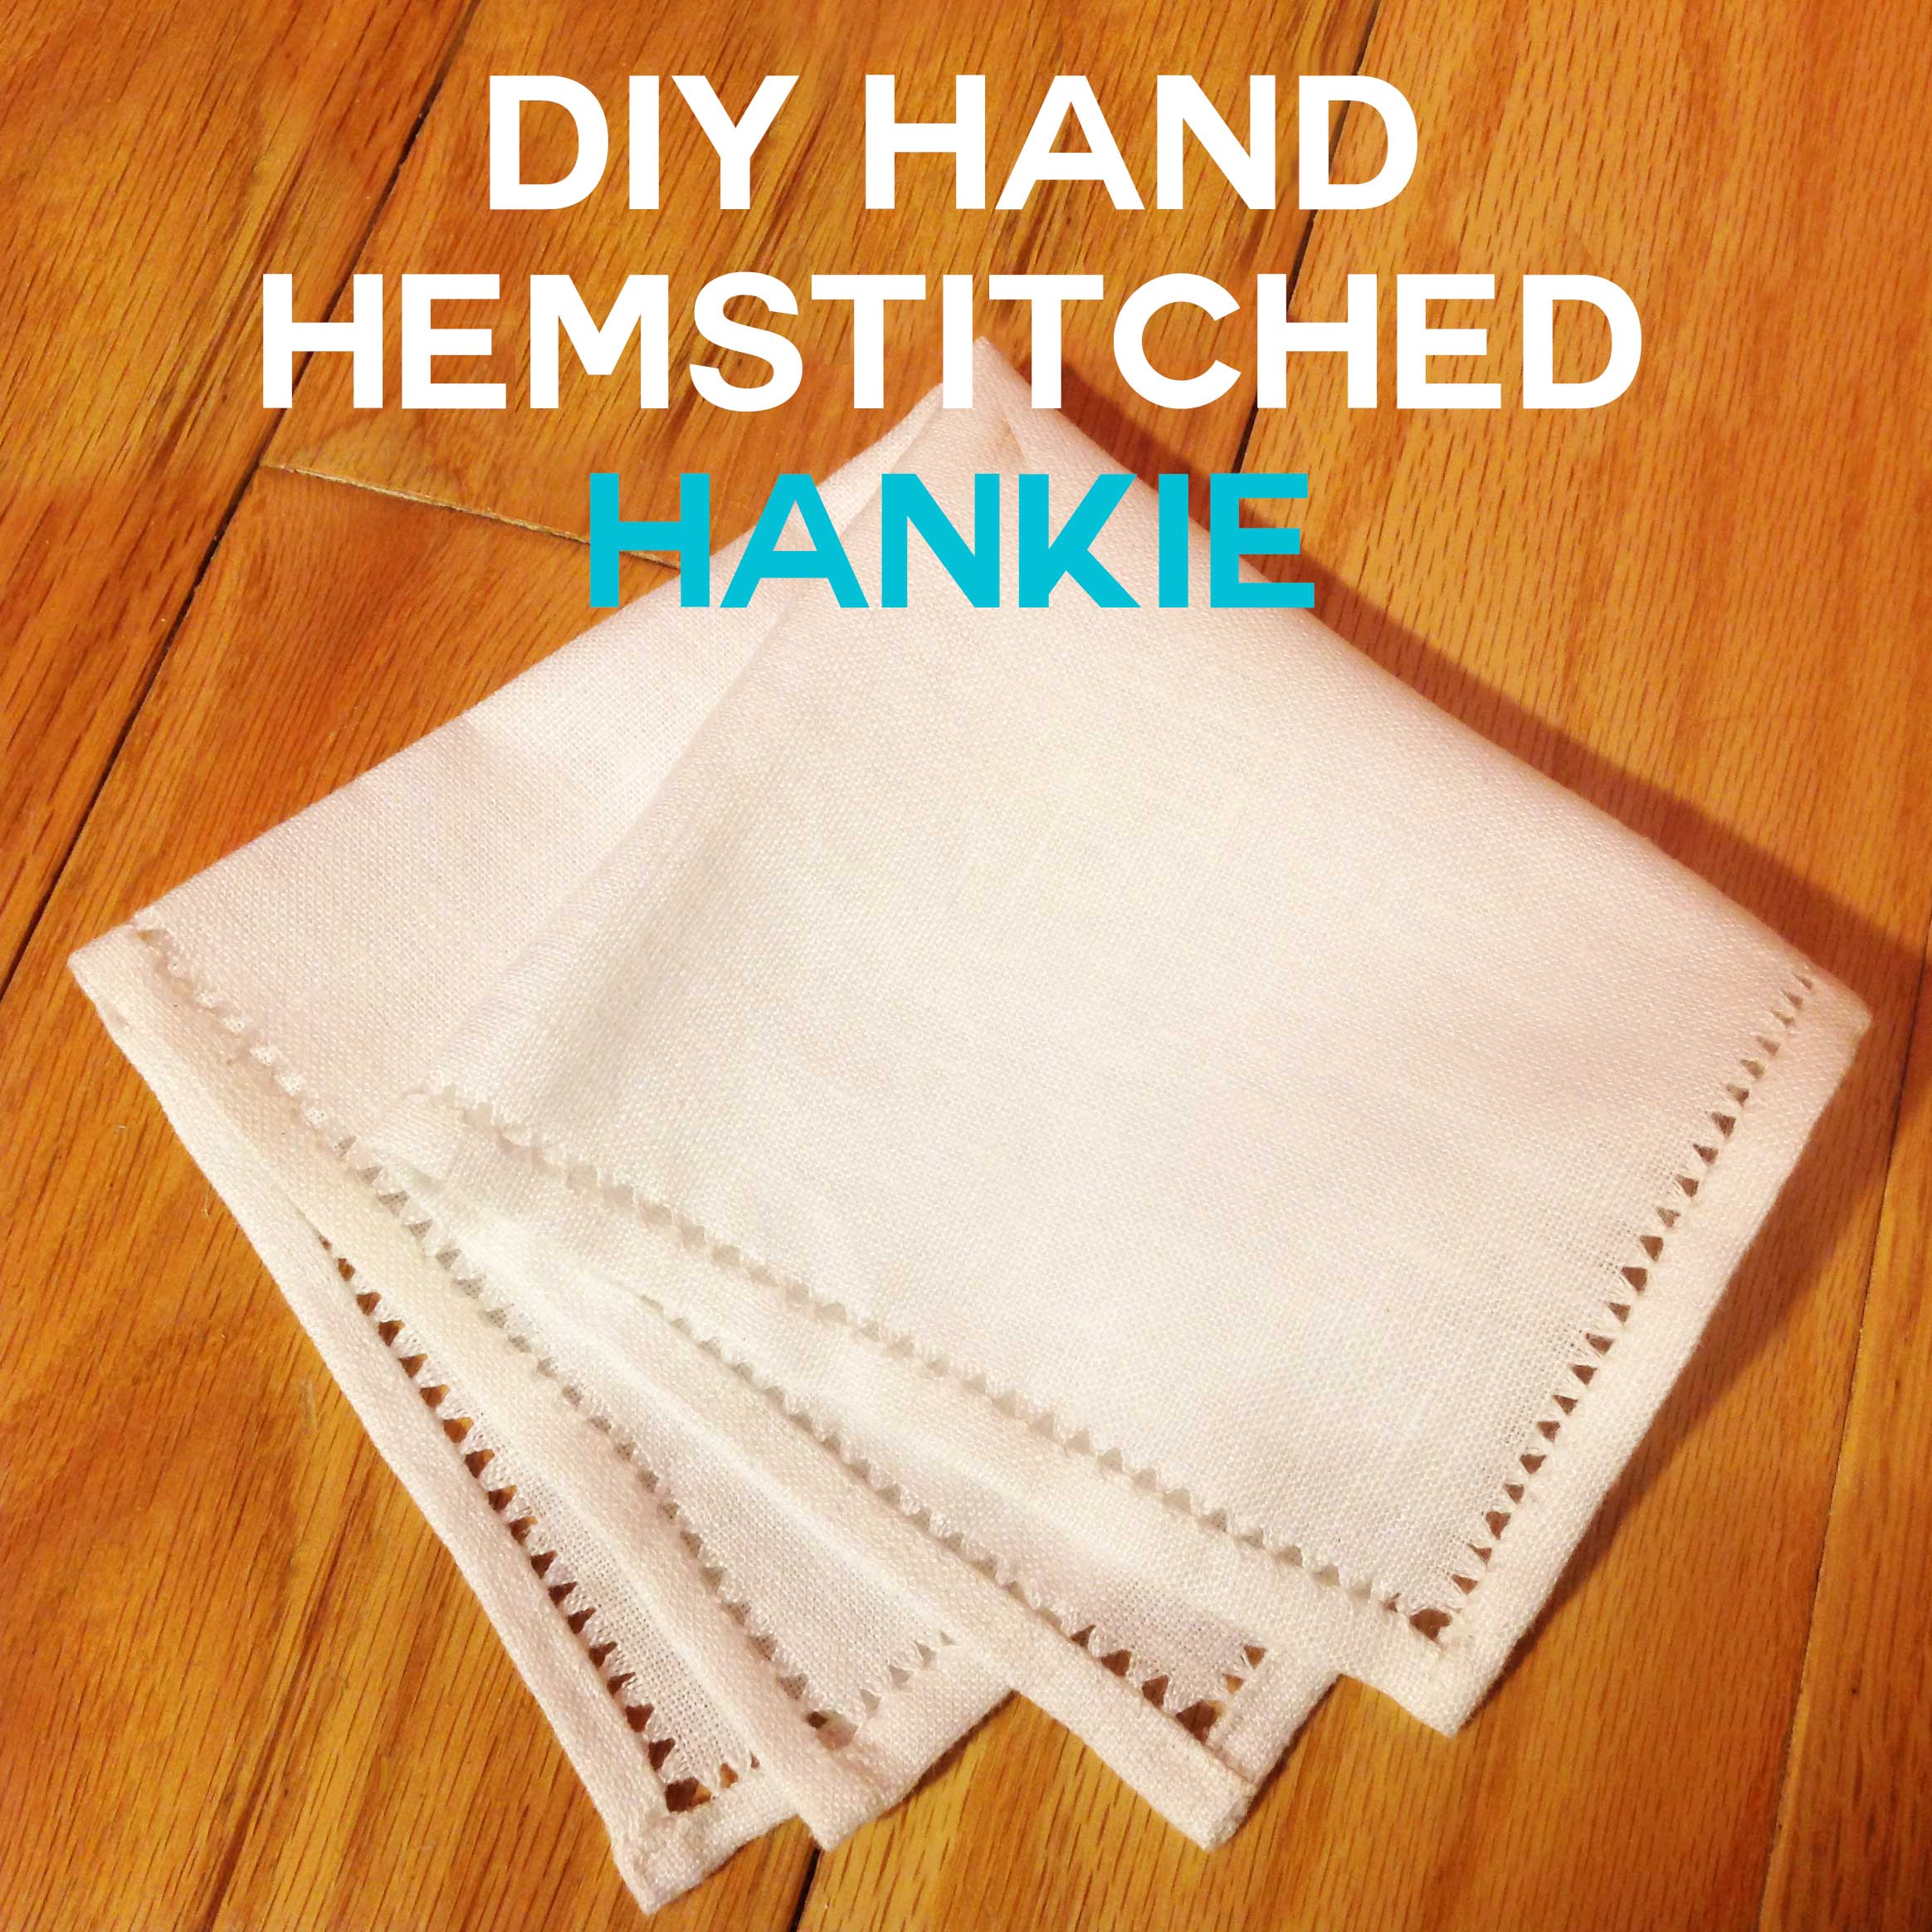
I love embroidery and various needle arts. A few years ago I was looking for a way to finish edges on a pretty apron I’d made and discovered drawn thread embroidery. I taught myself how to make simple hand hemstitched edges using the drawn thread work technique and I’ve been in love ever since. The great thing about this simple technique is that you hem and decorate at the same time! It’s a win win! In this hemstitched handkerchief tutorial, I will teach you basic hand hemstitching drawn thread work, specifically the mouse teeth, ladder, and serpentine hemstitches. I’ve taught over 100 people how do this, of all different skill levels, and you can do it, too!
Hemstitched Handkerchief Materials
I’ve linked the materials below with Amazon affiliate links for your convenience.
- A handkerchief sized square of 100% white linen (about 12″ x 12″)
- White cotton or linen thread
- Needle
- Small scissors (embroidery needle nose works best) or a seam ripper
- Tweezers
- Sewing gauge, ruler, or other measuring device
- Pins (optional)
- Fabric marker
Hemstitched Handkerchief Step-by-Step Tutorial
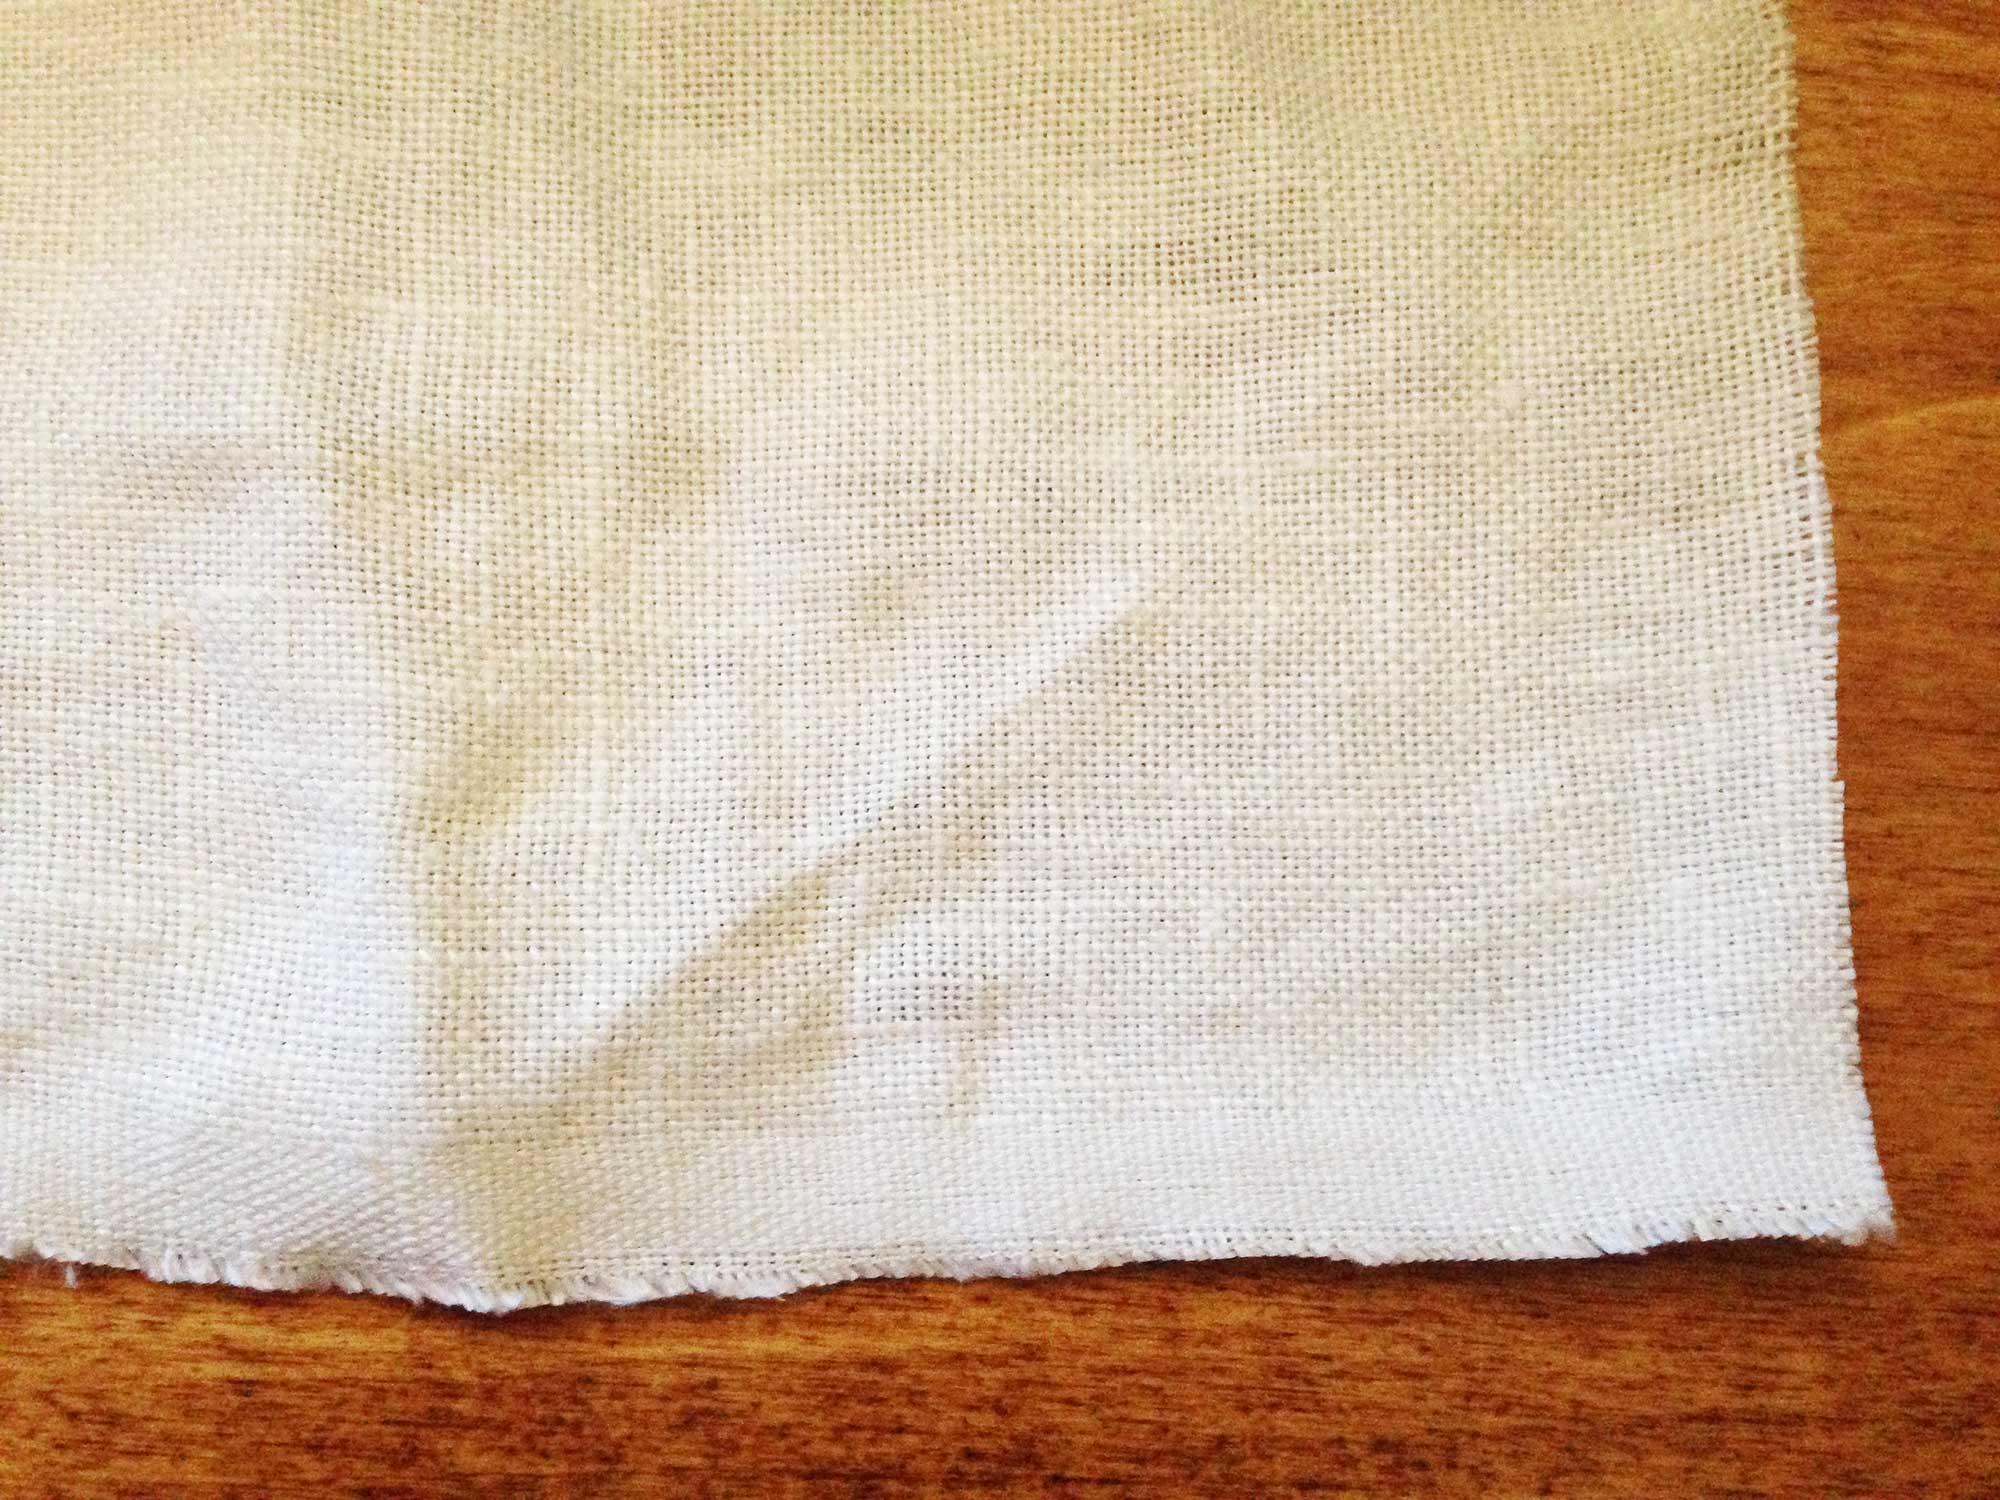
Step 1: Prepare your linen by cutting it to size (if it’s not already a 12″ square) and then square it up. To “square up linen,” find a thread near a corner, pull it out, and cut off the excess threads so you have a perfectly straight line on the grain of the fabric. Here’s my tutorial on how to square up linen (it’s on my costuming blog).
Step 2: Determine the width of your hem (I recommend 1/8″ or 1/4″), multiple your hem width by 3, and measure and mark that point at one corner of your linen. For example, if you want to make a tiny 1/8″ hem, you would measure 3/8″ from both edges at one corner and mark it clearly with a fabric marker.

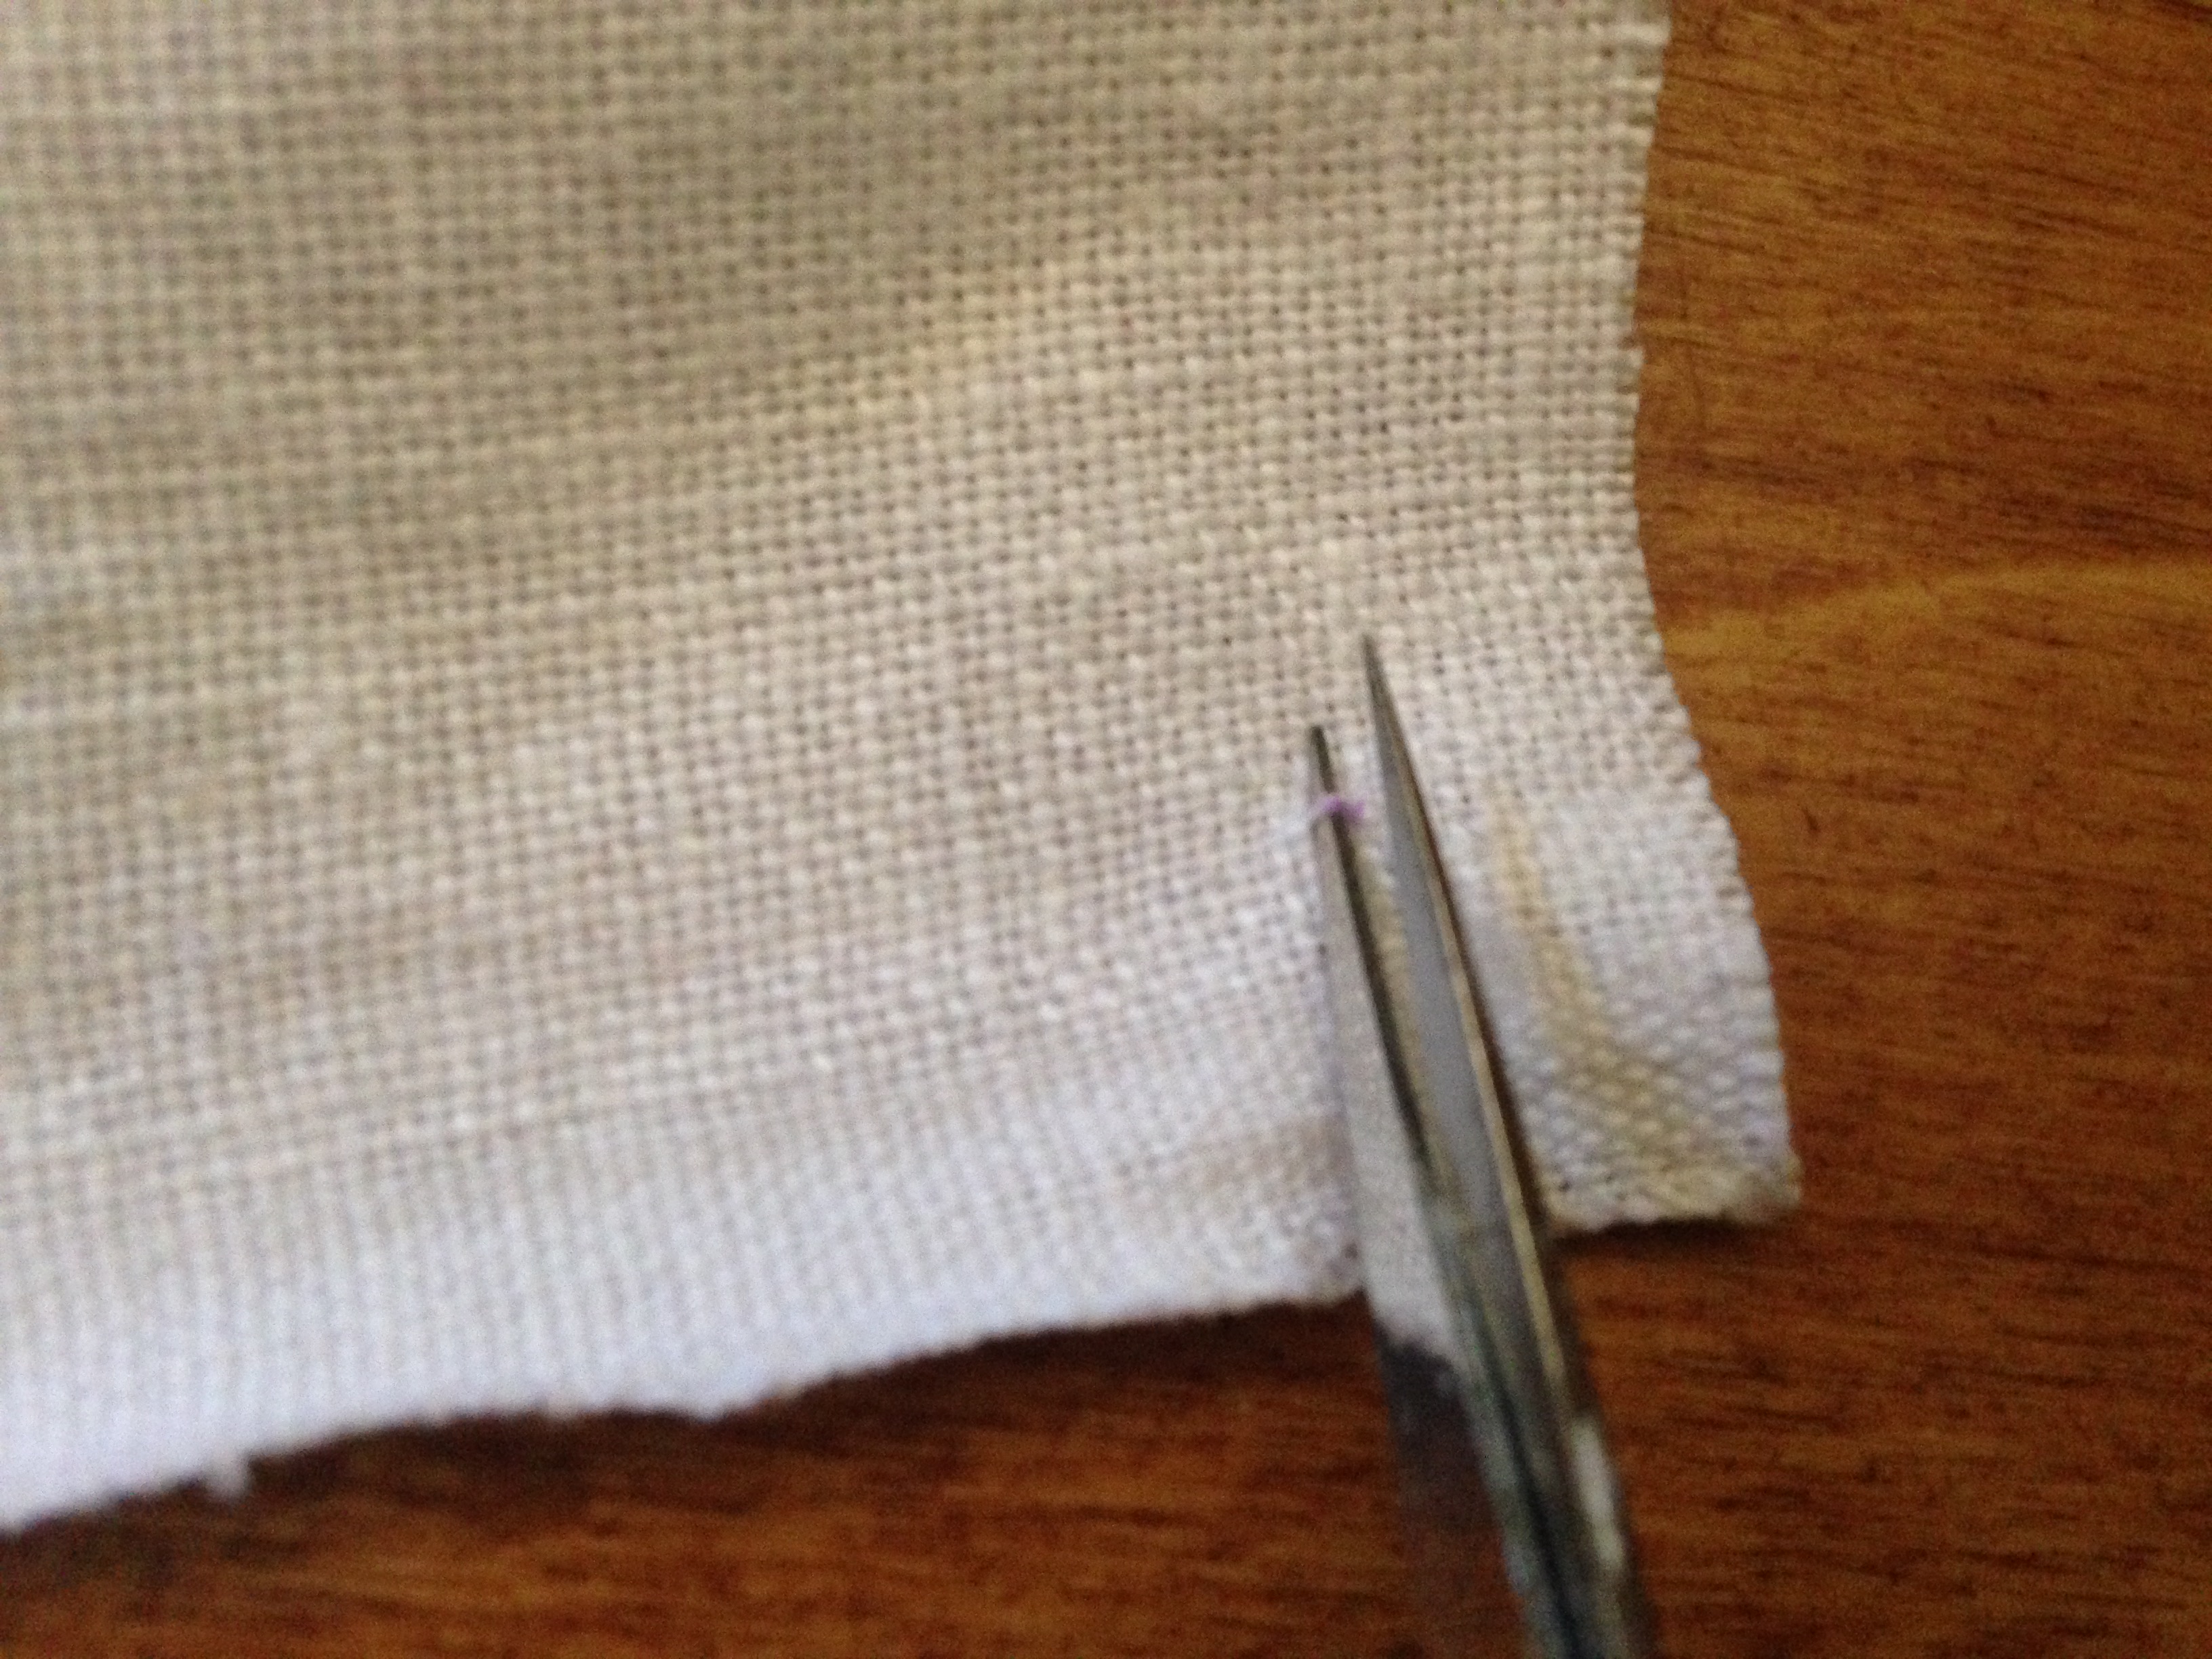
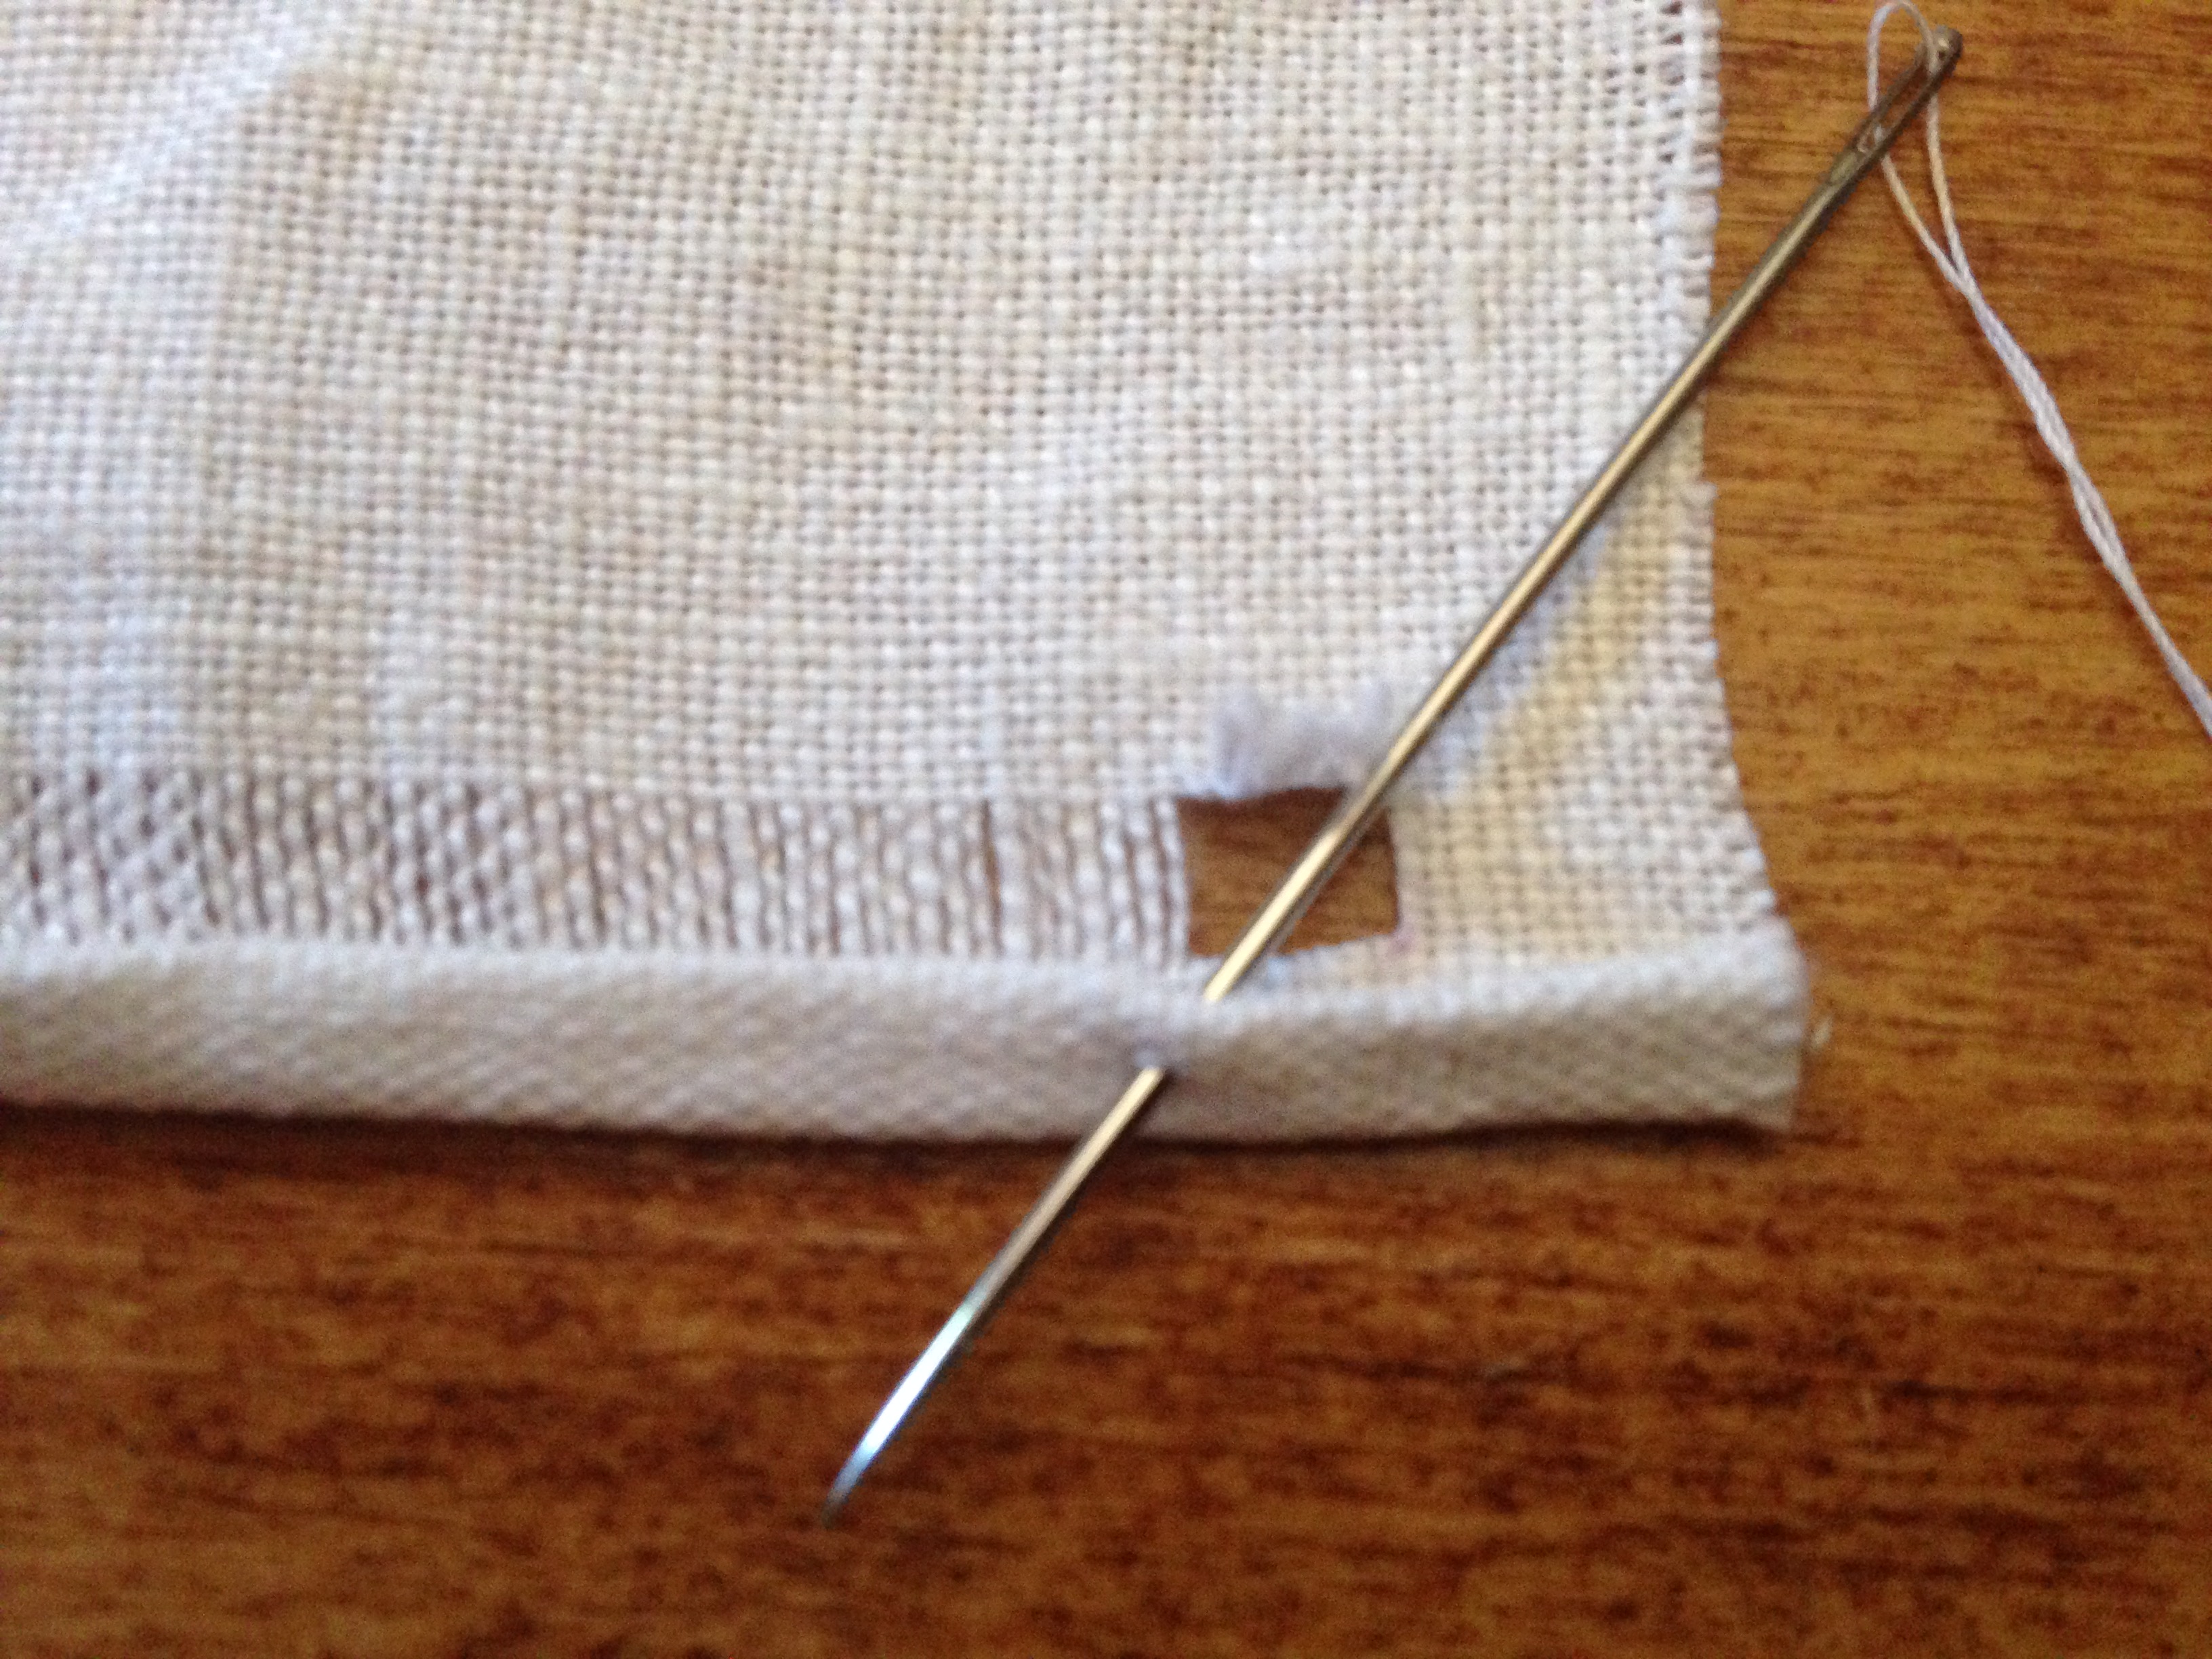
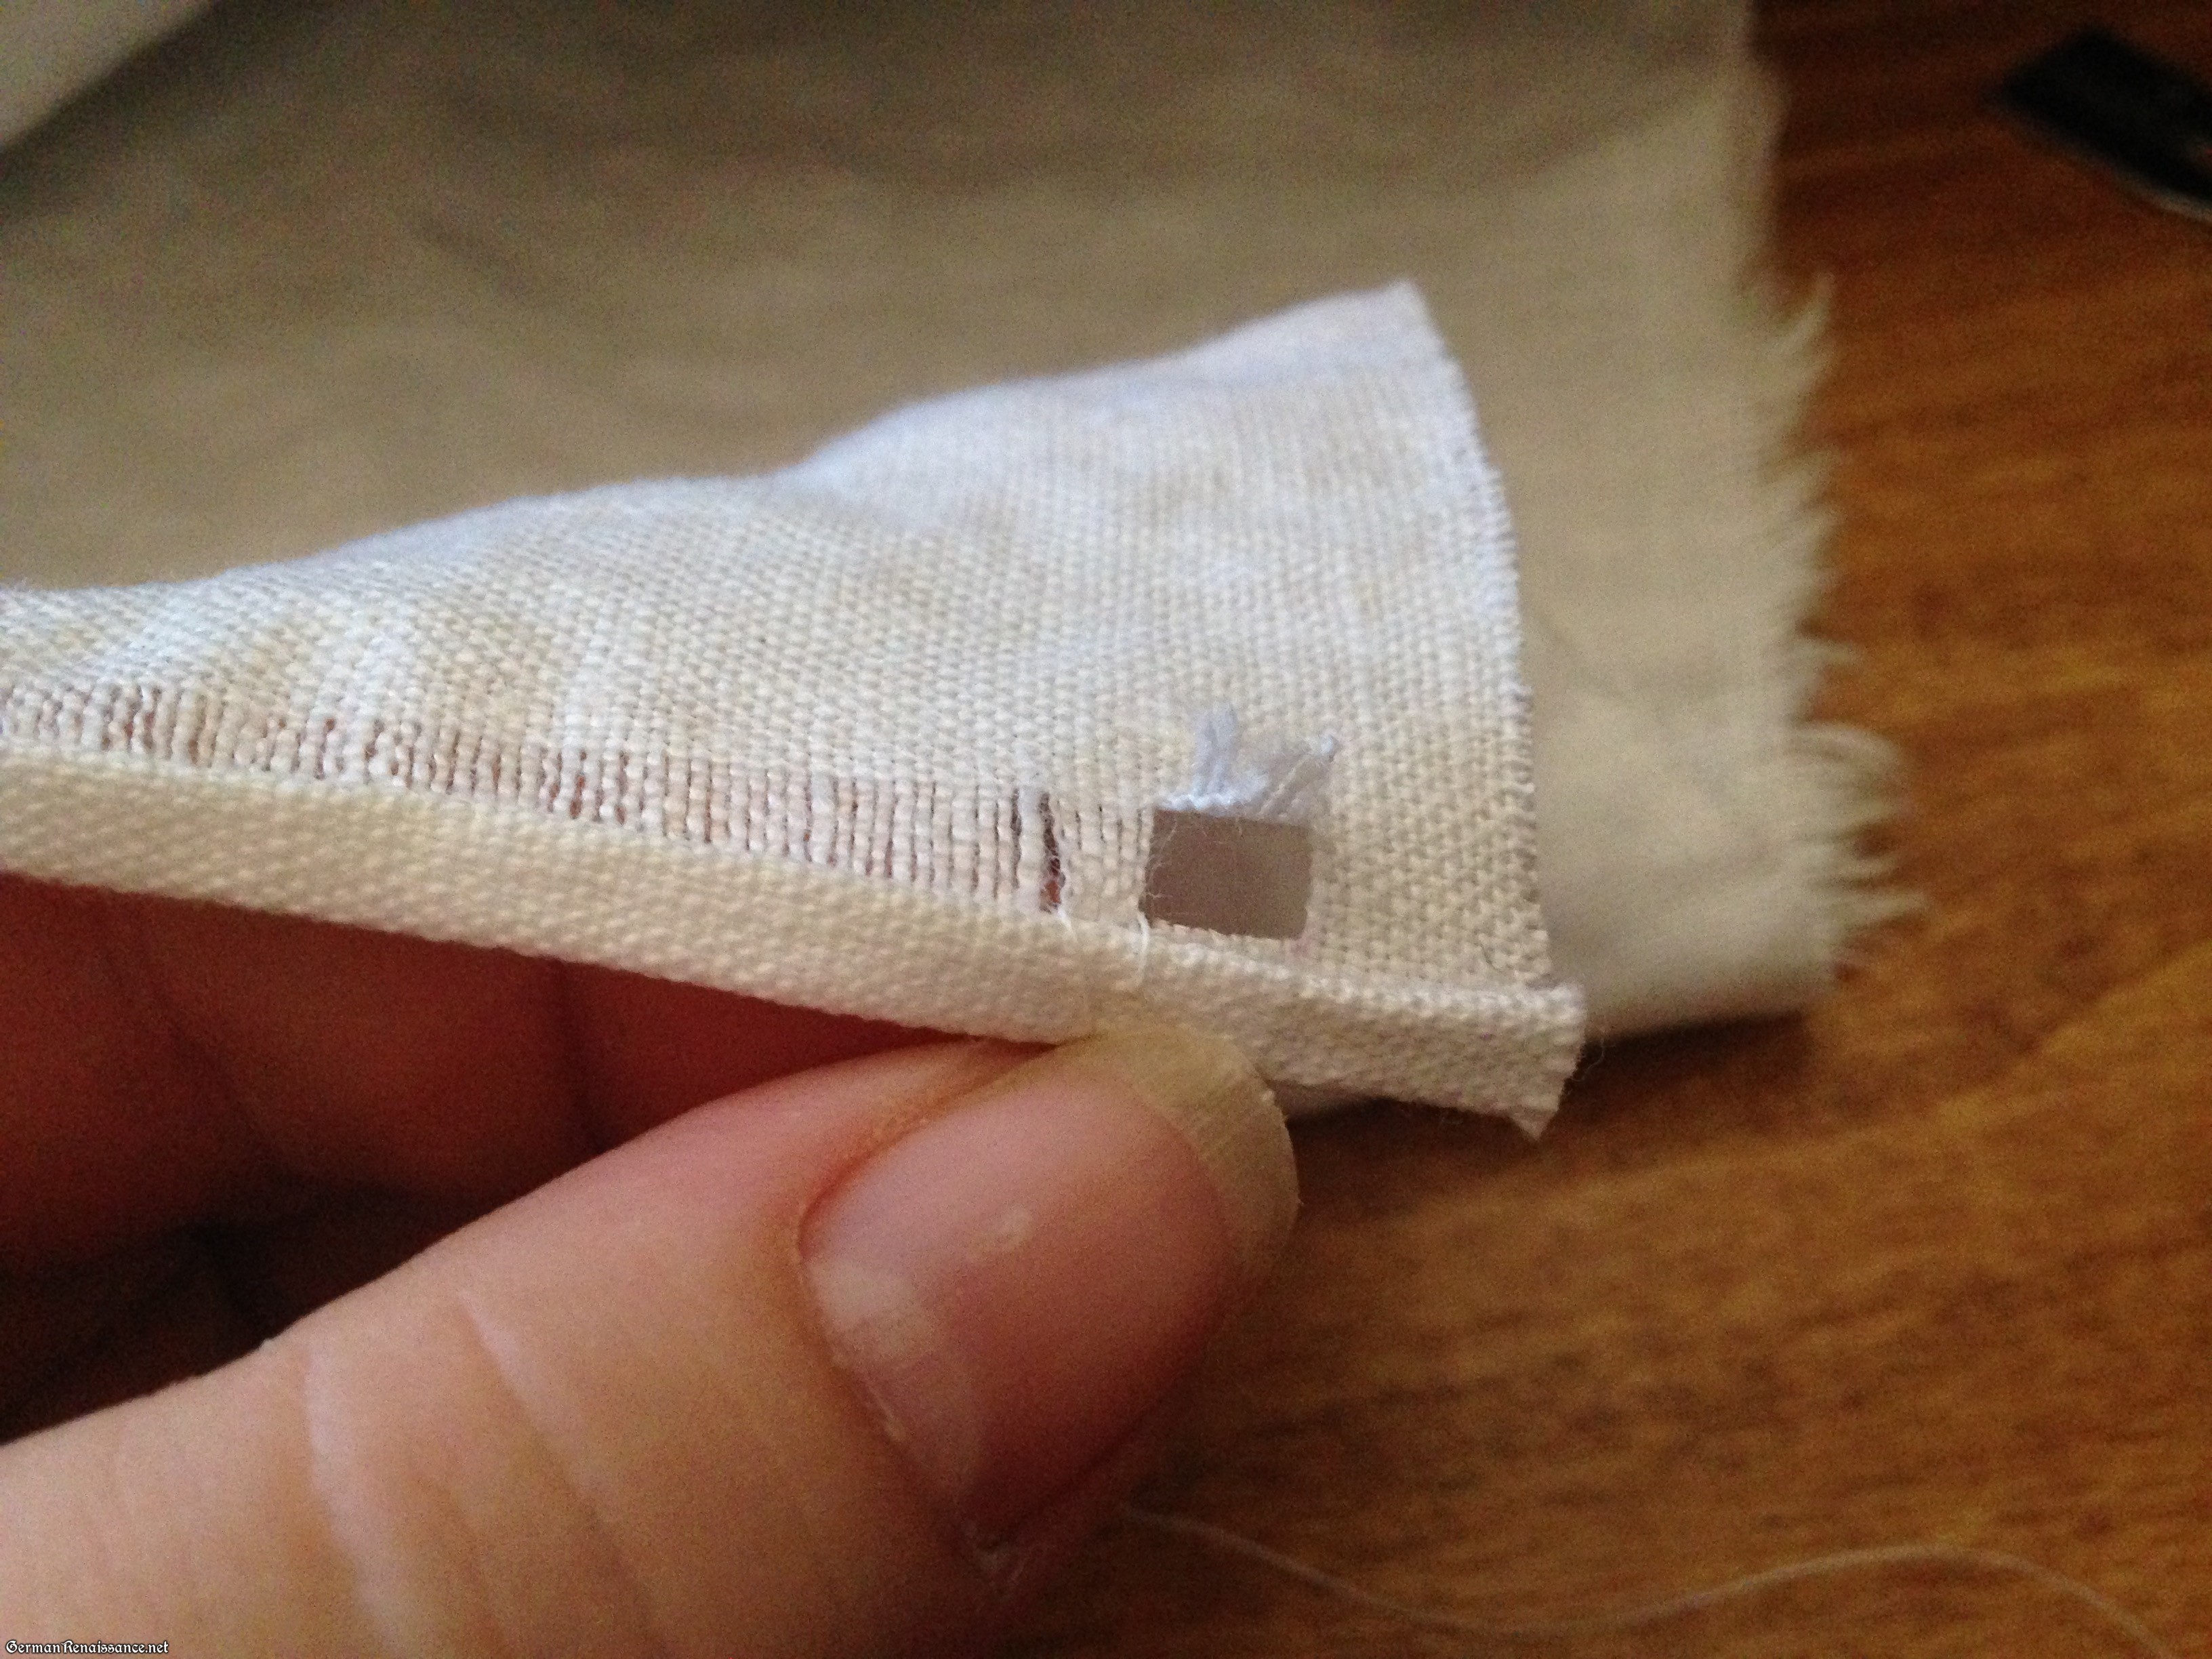
Step 3. At the point you marked in the prior step, gently pull up one thread with the end of a needle. Cut this thread (and only this one thread )as seen in the photo below. I recommend you use small, needle nose scissors as I do, but a seam ripper will do in a pinch.
Step 4. Gently tug the warp thread you cut (it helps to use tweezers here) until the fabric gathers along most of the edge of your linen, but do not pull it out yet. Stop pulling when you see the material gathering about 1/2 inch from the opposite corner.
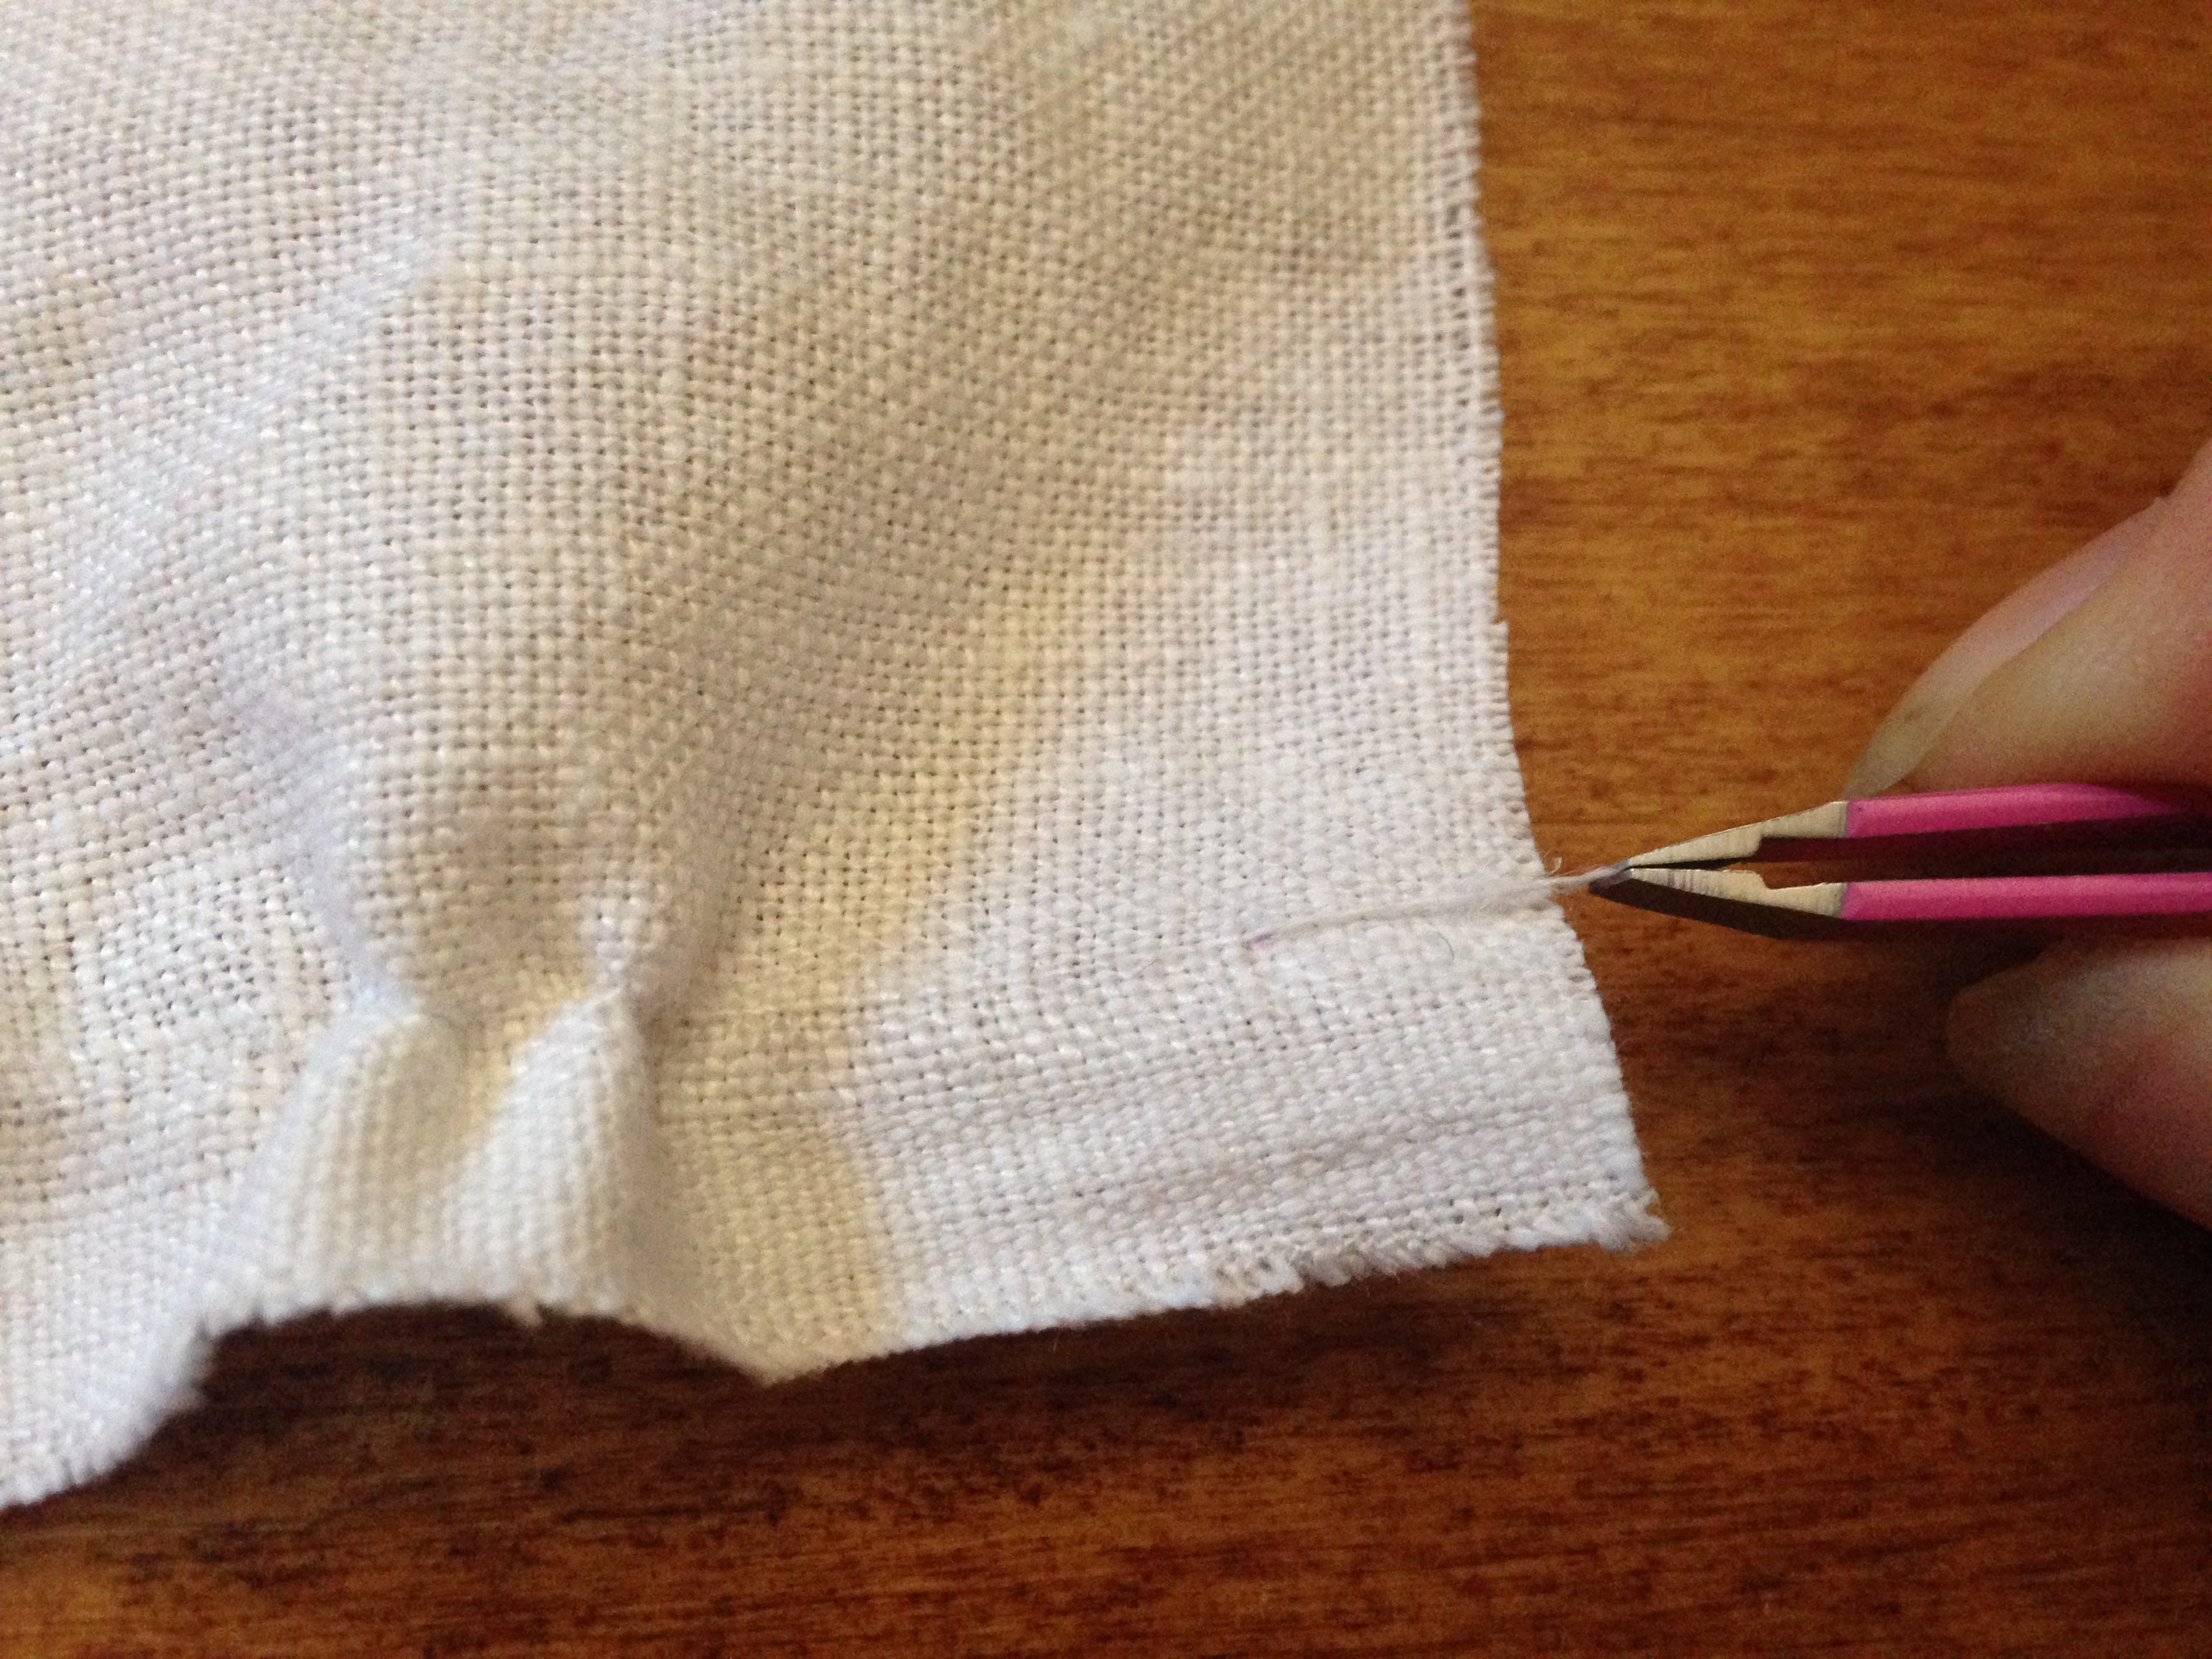
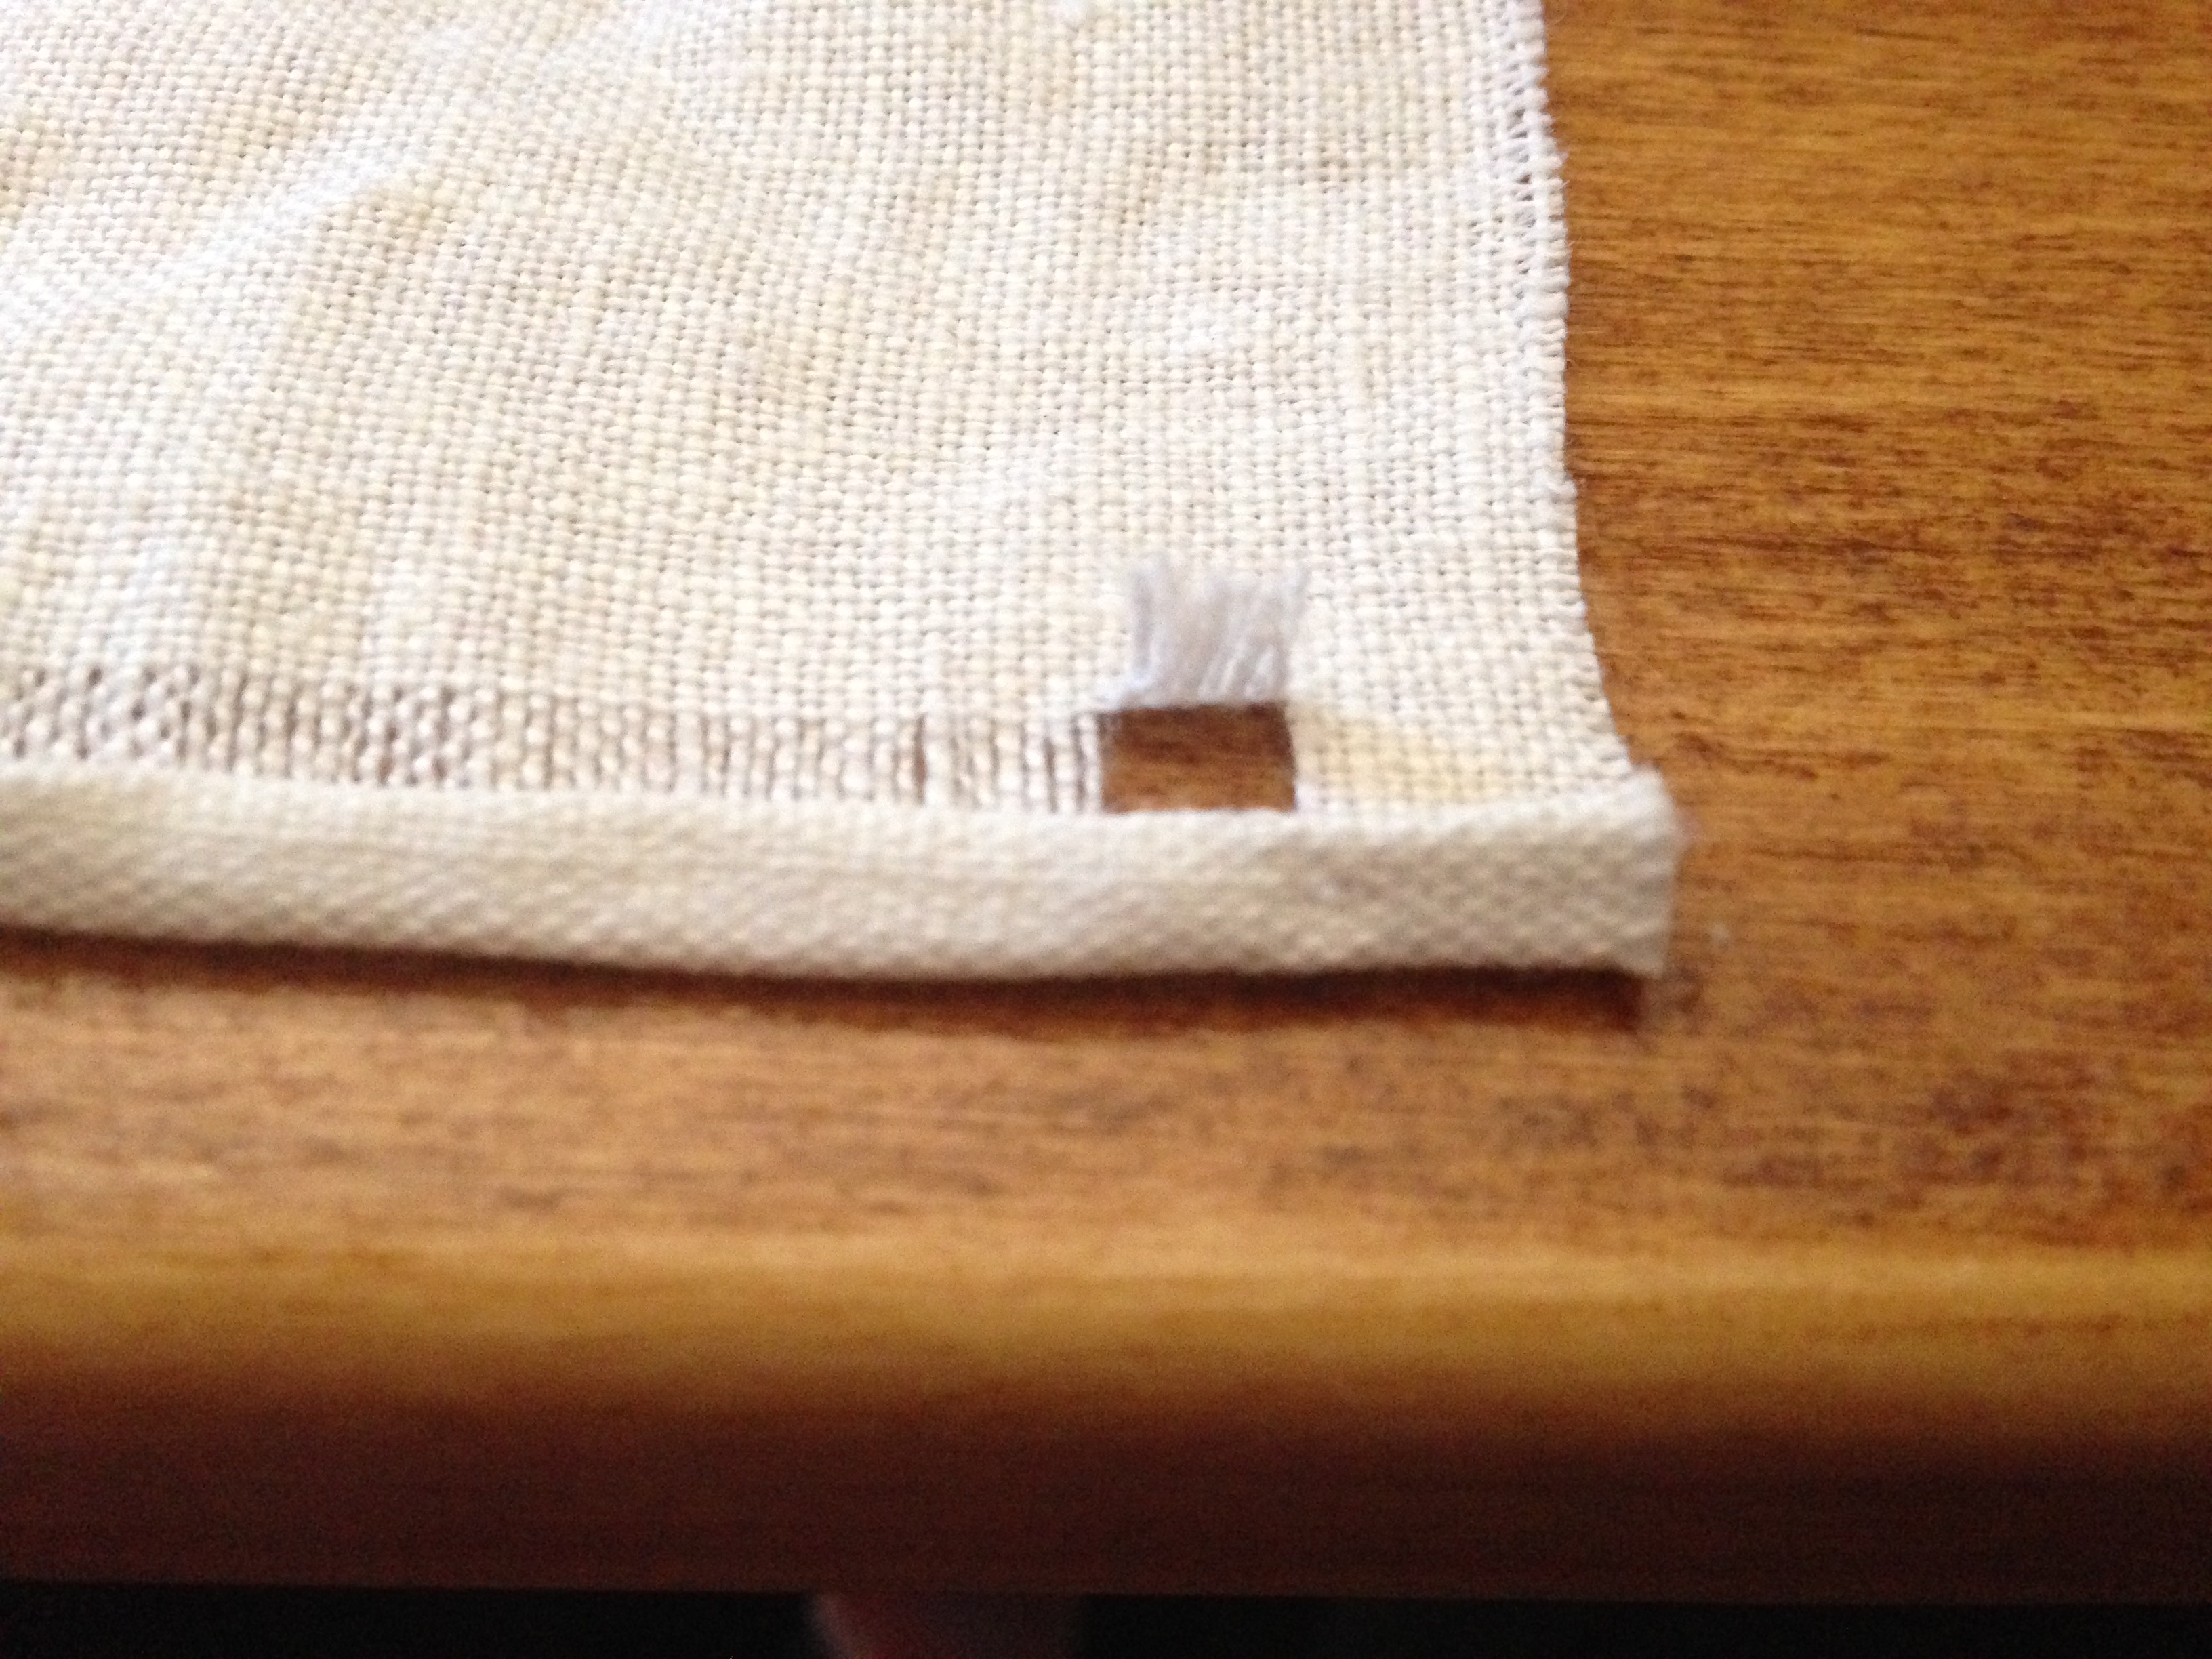
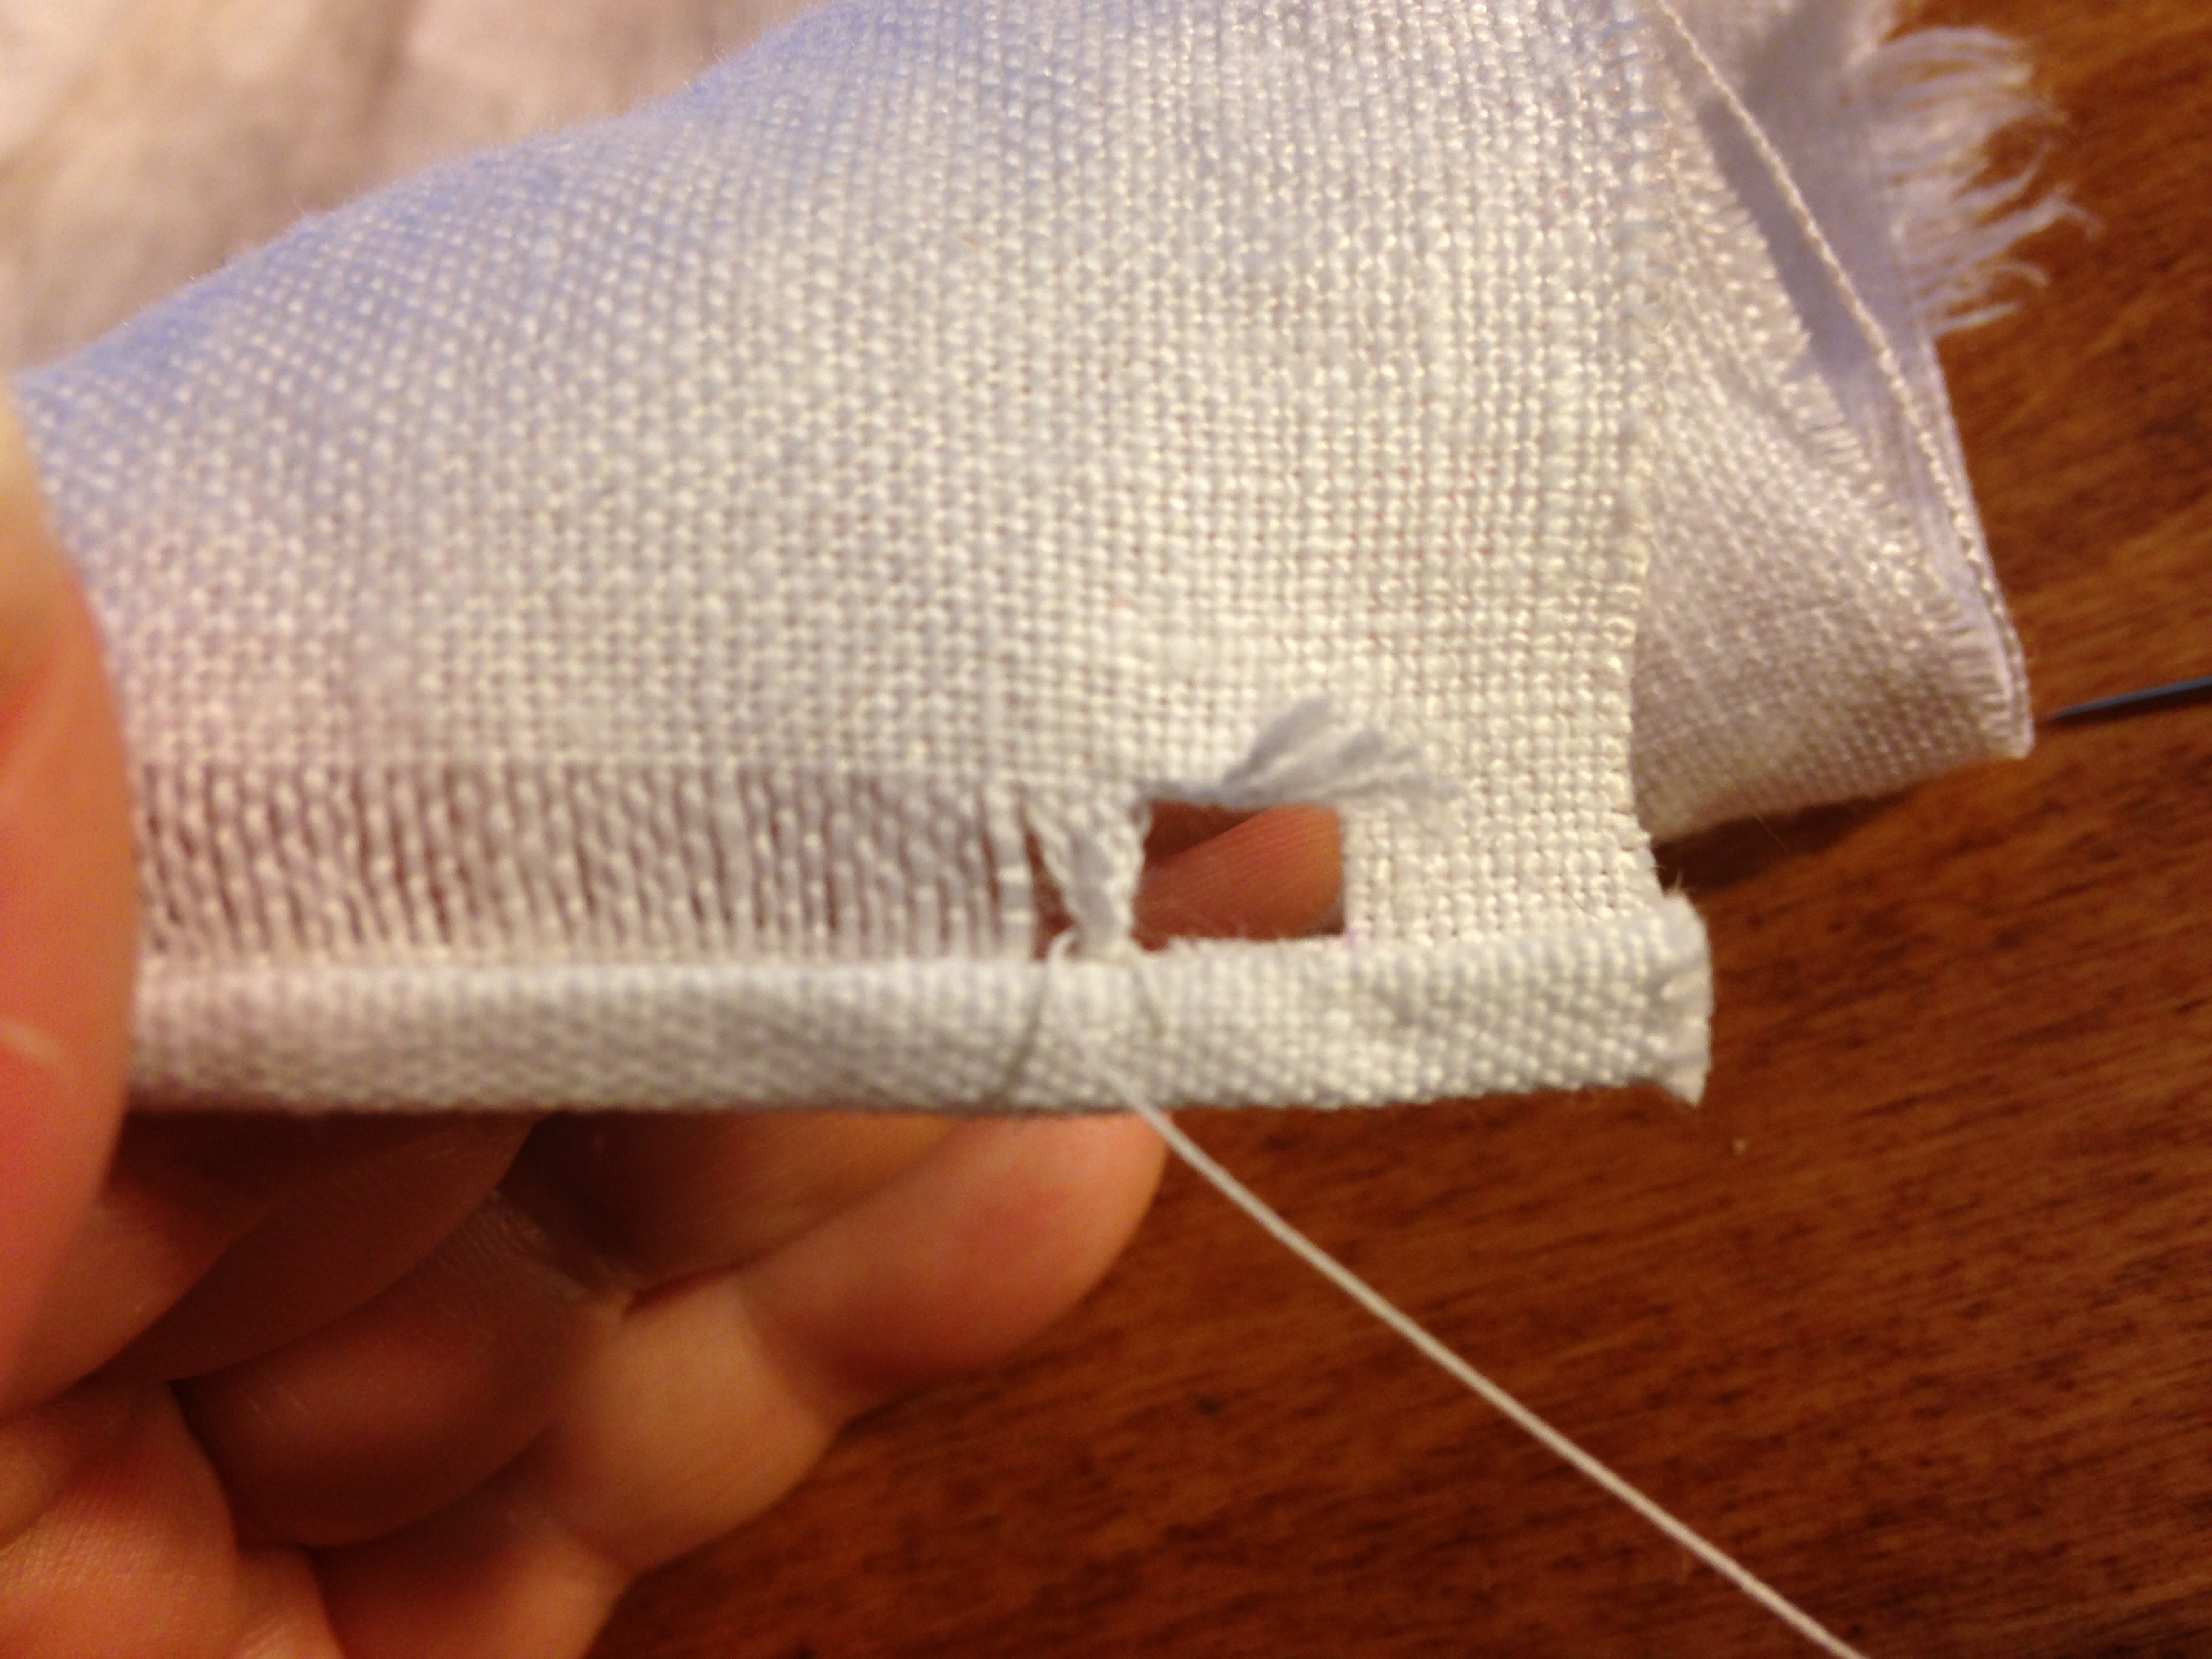
Step 5. Following the tugged thread all the way to the other corner of your fabric, measure the same distance from the edge that you marked in step 2 (for example., 3/8″). Now find the point at which your tugged thread meets that point, and cut it. Your goal is to remove the thread between the two marked points, leaving bits of thread in the “margin” of your fabric.
Step 6. Using your tweezer, gently tug the thread out of your fabric.

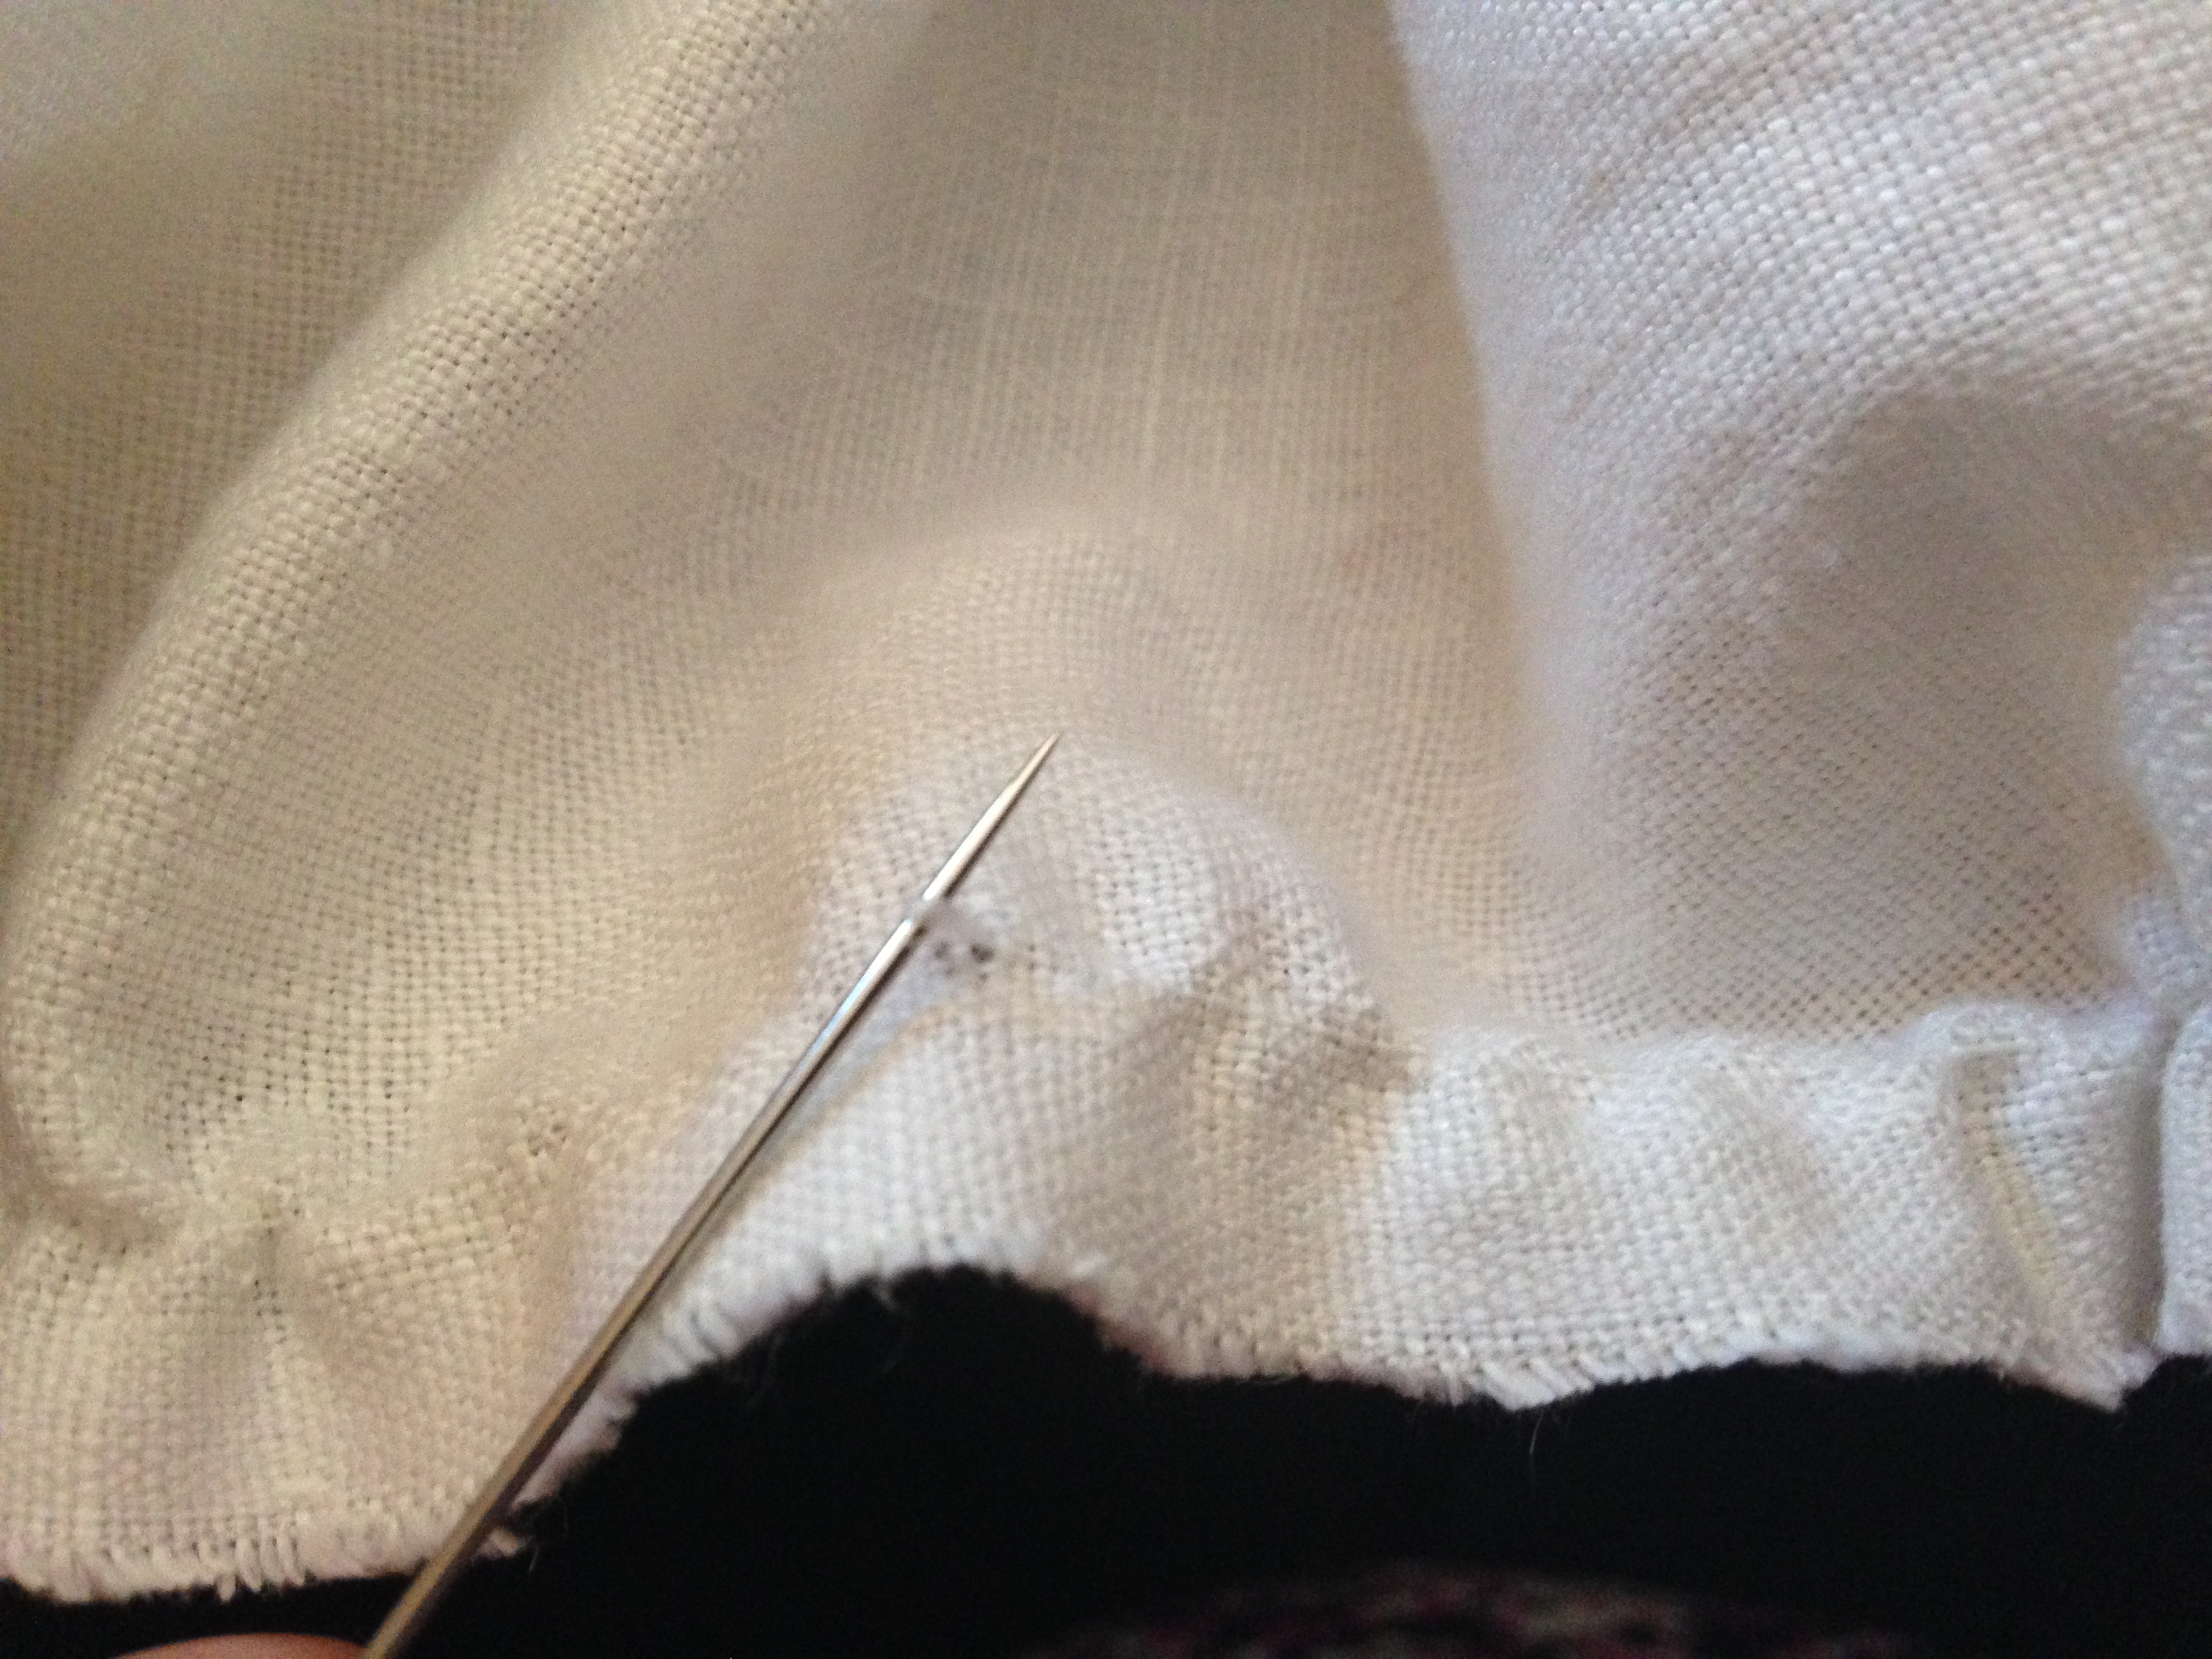
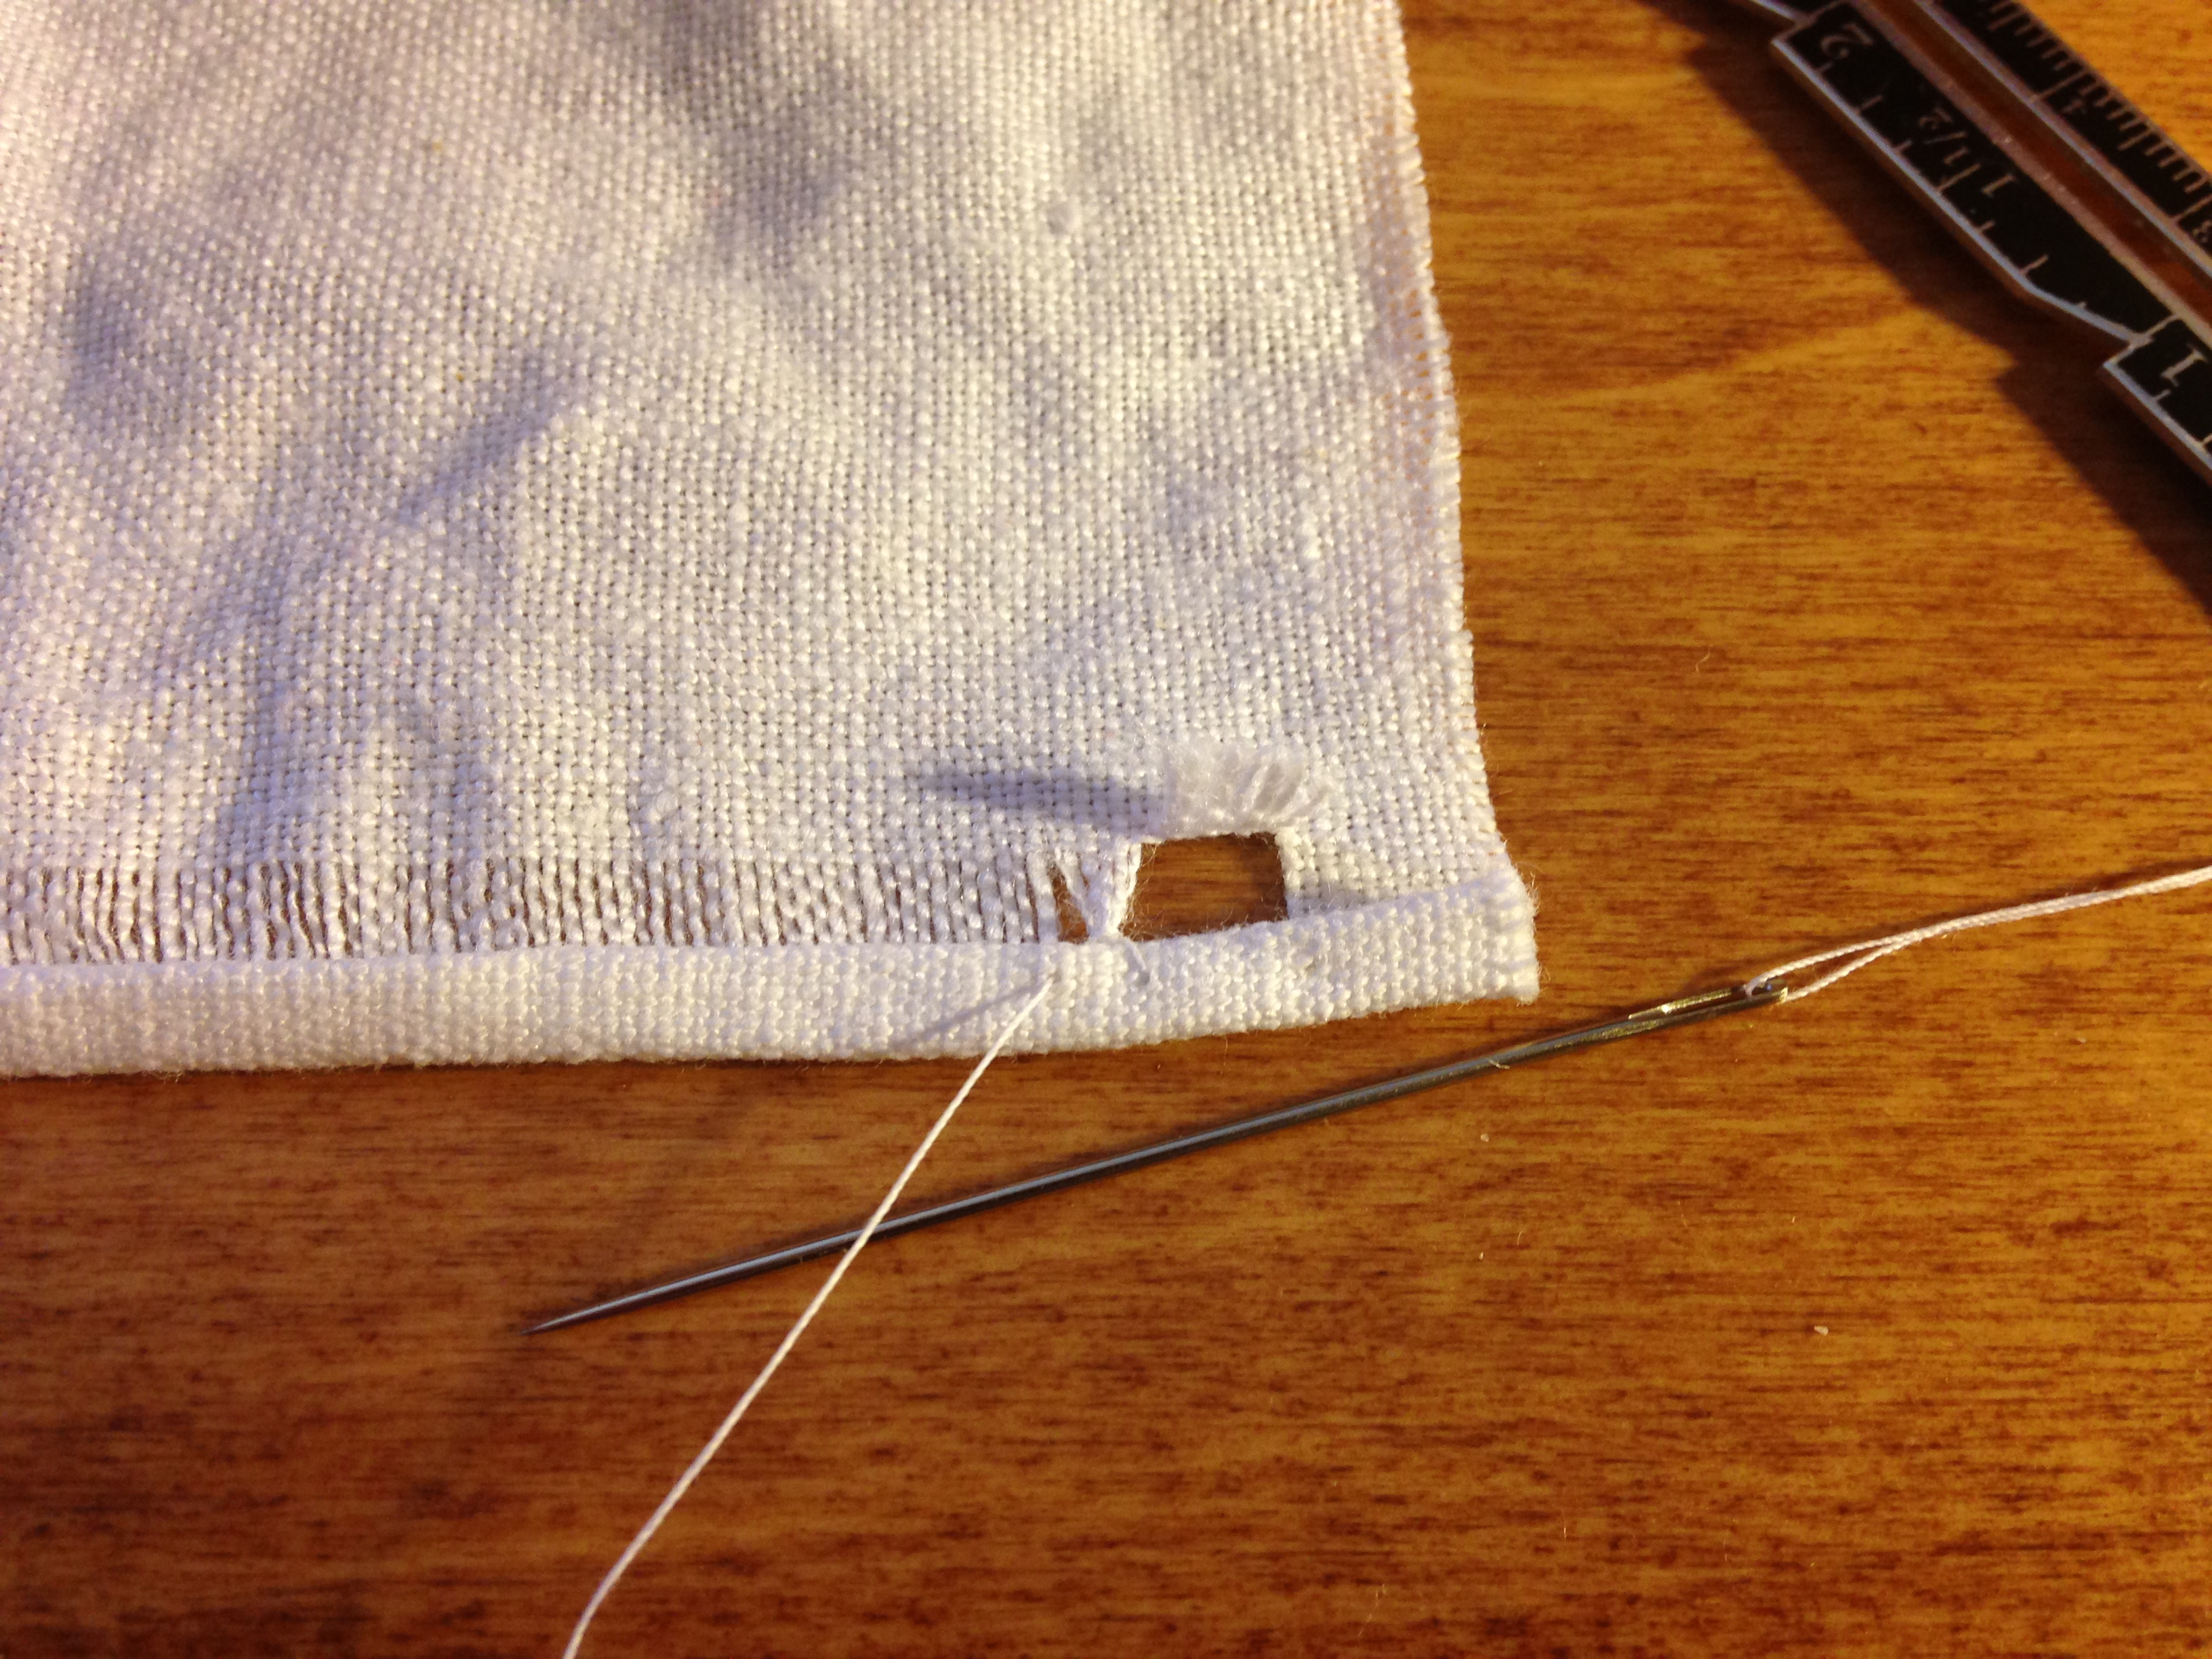
Tip: Sadly, most linens available for purchase today have weak threads that like to break while pulling. Not only is this frustrating, but it can leave fuzzy bits in your linen. If this happens to you, try removing shorter sections of thread by snipping the thread at intervals. The best way to do this is follow the tugged thread and then use a needle to pull the thread up (as seen in the photo below). Now insert the point of your scissors and cut. You can pull that thread without it breaking midway now.
Step 7. If you want to take out more warp threads, which I this is a good idea for this tutorial, cut the warp thread(s) at the two ends just above where you took out your first thread and pull out the thread(s). It’s a lot easier to take out threads once you’ve got the first thread out. For this hand hemstitched handkerchief tutorial, I took out eight threads.

Step 8. If you intend to hem the other sides(s) of your hand hemstitched handkerchief (which I recommend), you will also want to cut the same number of threads going in the other direction. For now, you can cut them at the bottom and flip them out of your way, then pull them later.
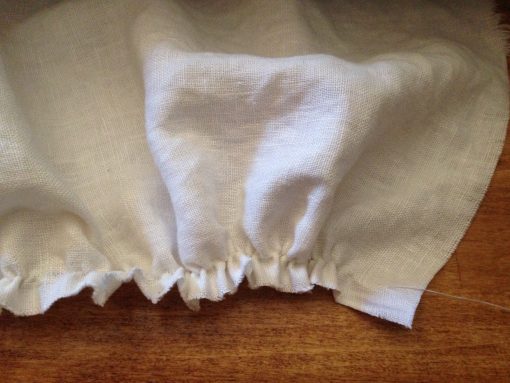
Step 9. Fold your hem up twice so that the top edge of the hem is in line with the bottom edge of pulled threads, as shown in the photo above. Press down on the hem with your fingers and, thanks to the properties of linen and the heat in your fingers, the hem will likely stay in place without pins.
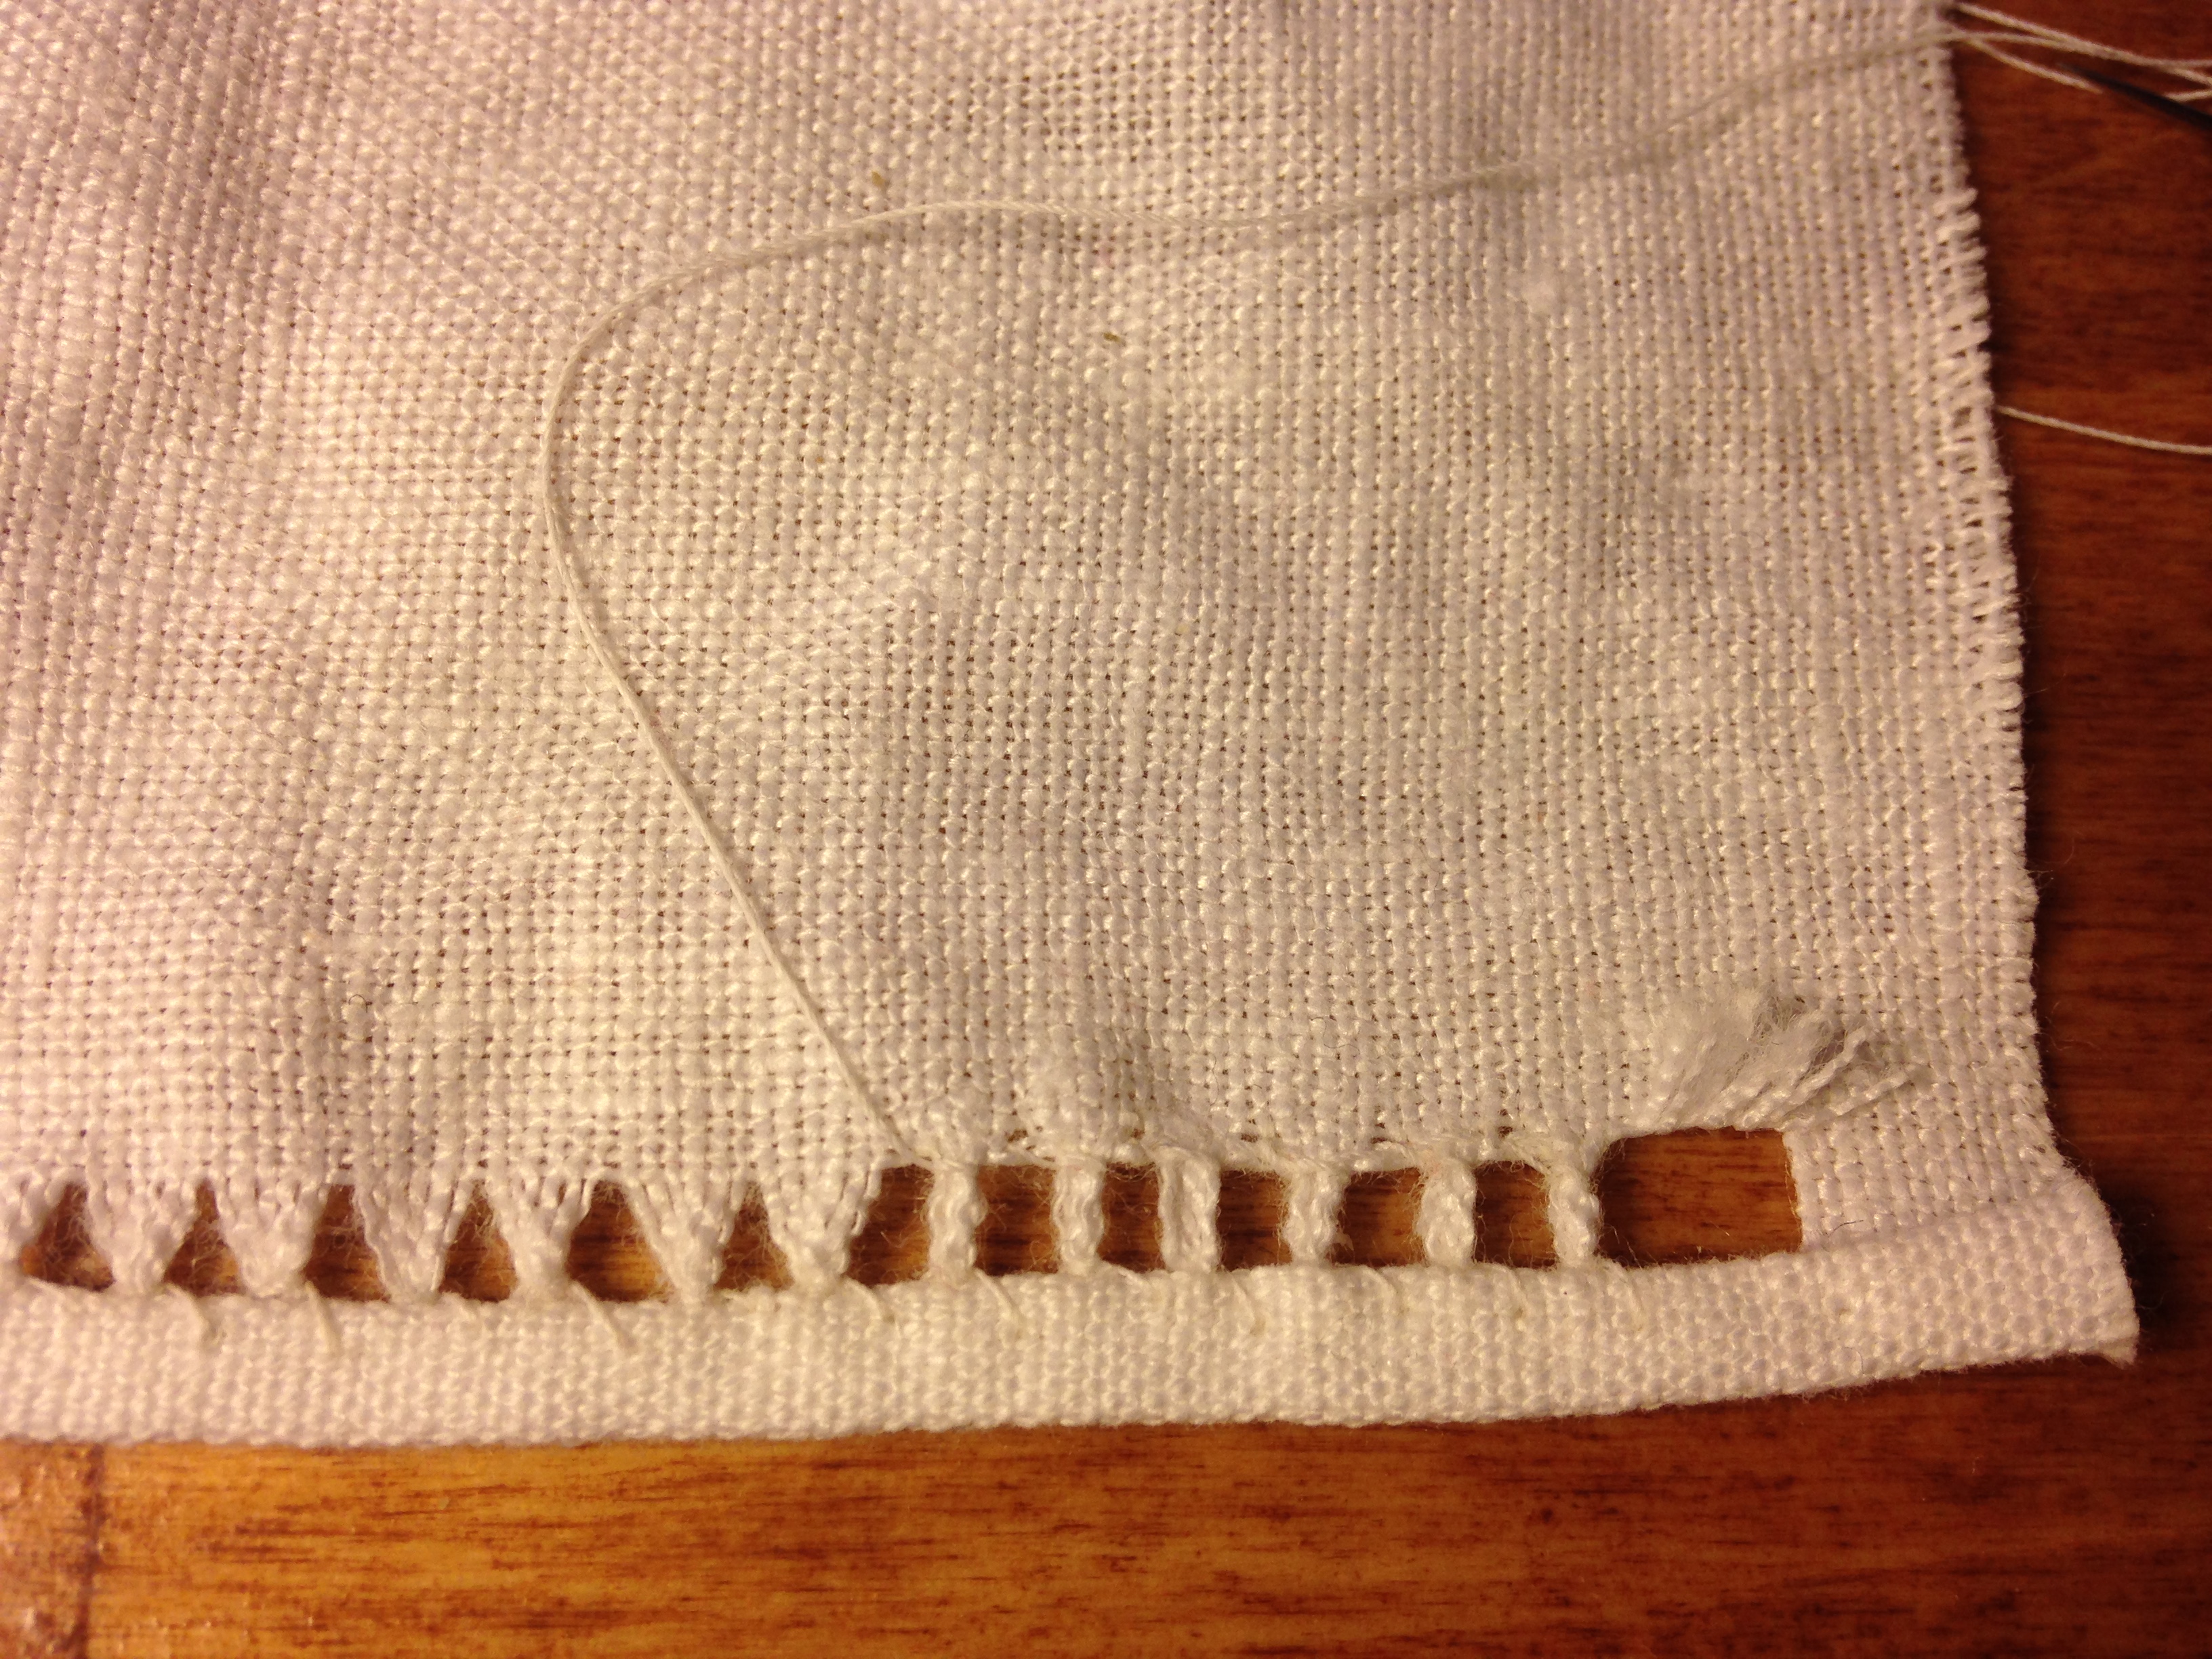
Step 10. Thread a needle and knot the end. Insert the needle into the hem, just to the left of the area without any threads. Push the needle through the fabric, making sure the knot stays under the fold of the hem.
Step 11. Put your needle behind several of the threads. For this handkerchief tutorial, I recommend going behind exactly six threads, as seen in the photo below.

Step 12. Pull the needle and thread through to the front of your linen, keeping the thread toward the bottom of the hem as shown in the photo below.
Step 13. Insert the needle again, just as you did in step 11. See how I am holding the thread at the bottom of the hem with my thumb? This is helpful for keeping the thread at the bottom.

Step 14. Pull the needle through again and gently tighten it around the threads so that the threads are pulled tightly together at the base. Do not pull so tight that the material bunches, however.
Step 15. Secure your hemstitch by taking a small stitch into the hem, from the inside of the hem out to the front, as shown in the photo below.
Step 16. Repeat steps 11-15 across the length of your handkerchief, as you can see me doing in the photo below.

Here is a handy diagram of this hemstitch to help you see how it works:
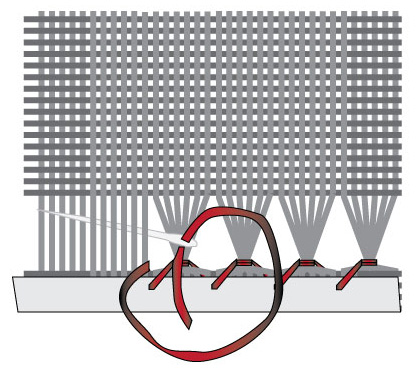 Hemstitch (diagram copyright Jennifer Marx)
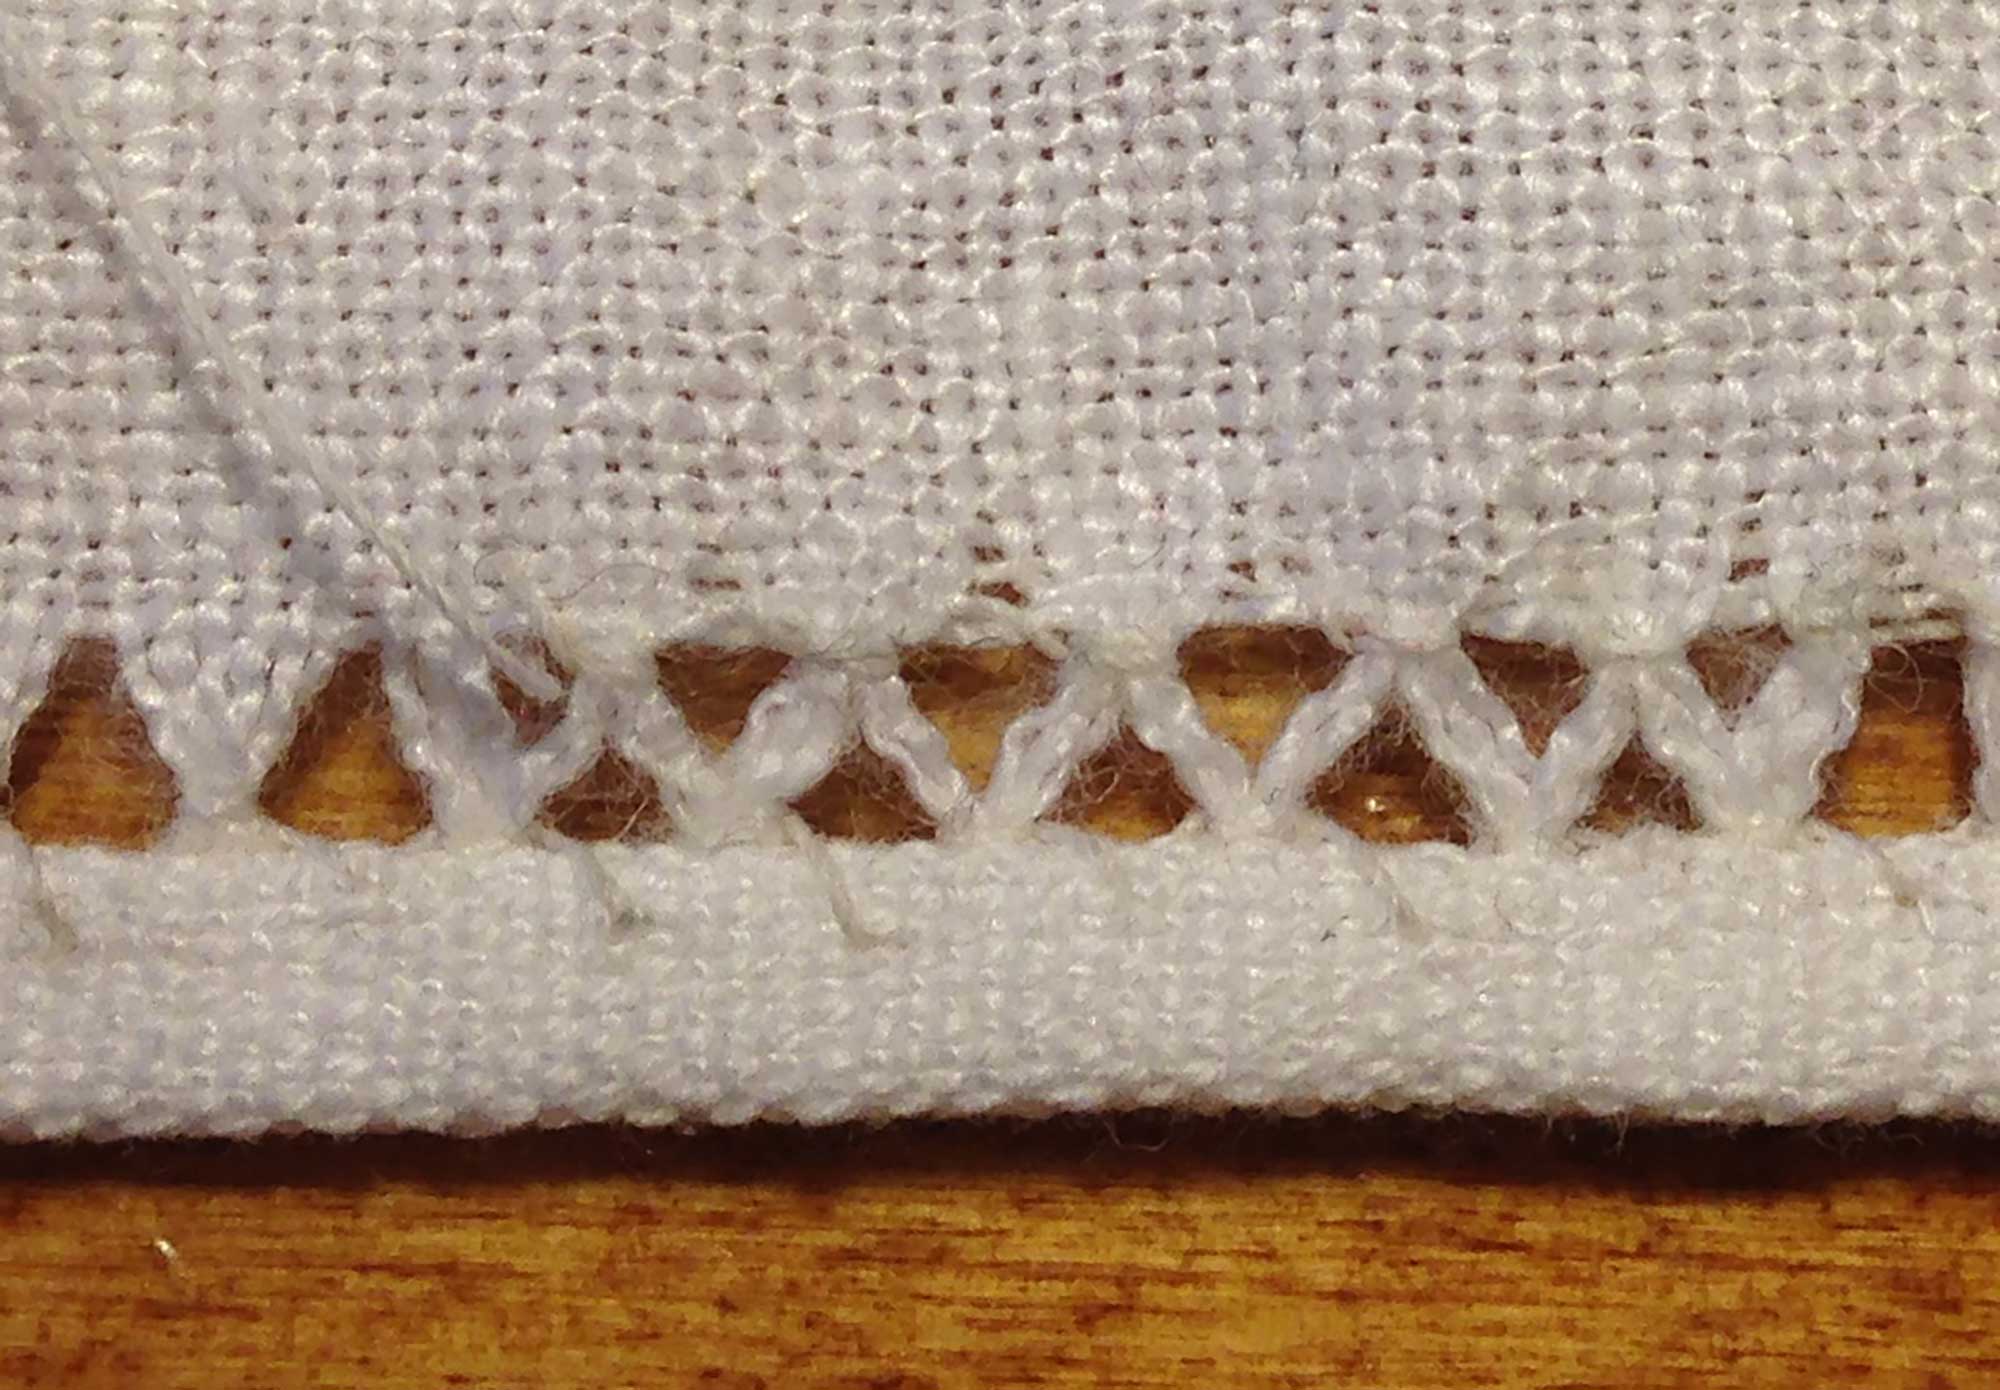
This hand hemstitch is the most basic. I call it the Mouse Teeth hemstitch. It’s excellent for a beginner’s hemstitched handkerchief. There are two other variations on this drawn thread hemstitch you can do. You can make a ladder hemstitch by repeating the same stitching across the top of the pulled threads, as seen in the photo below:
Tip: You can avoid knots completely by weaving your needle a bit some the threads above the area you’ll be working with and then stitch over it as you go along. After you’re done stitching you can cut the end of the thread’s tail and you won’t be able to tell where you started. To end this hemstitch, weave your thread back through threads and completed stitches along the edge of your hem, then cut off.
Another option is the serpentine hemstitch. For this stitch, just repeat the same stitch across the top edge of the section with the pulled threads, but this time stitch half of the threads from one group and half of the threads from the other group, like shown in the photo below:
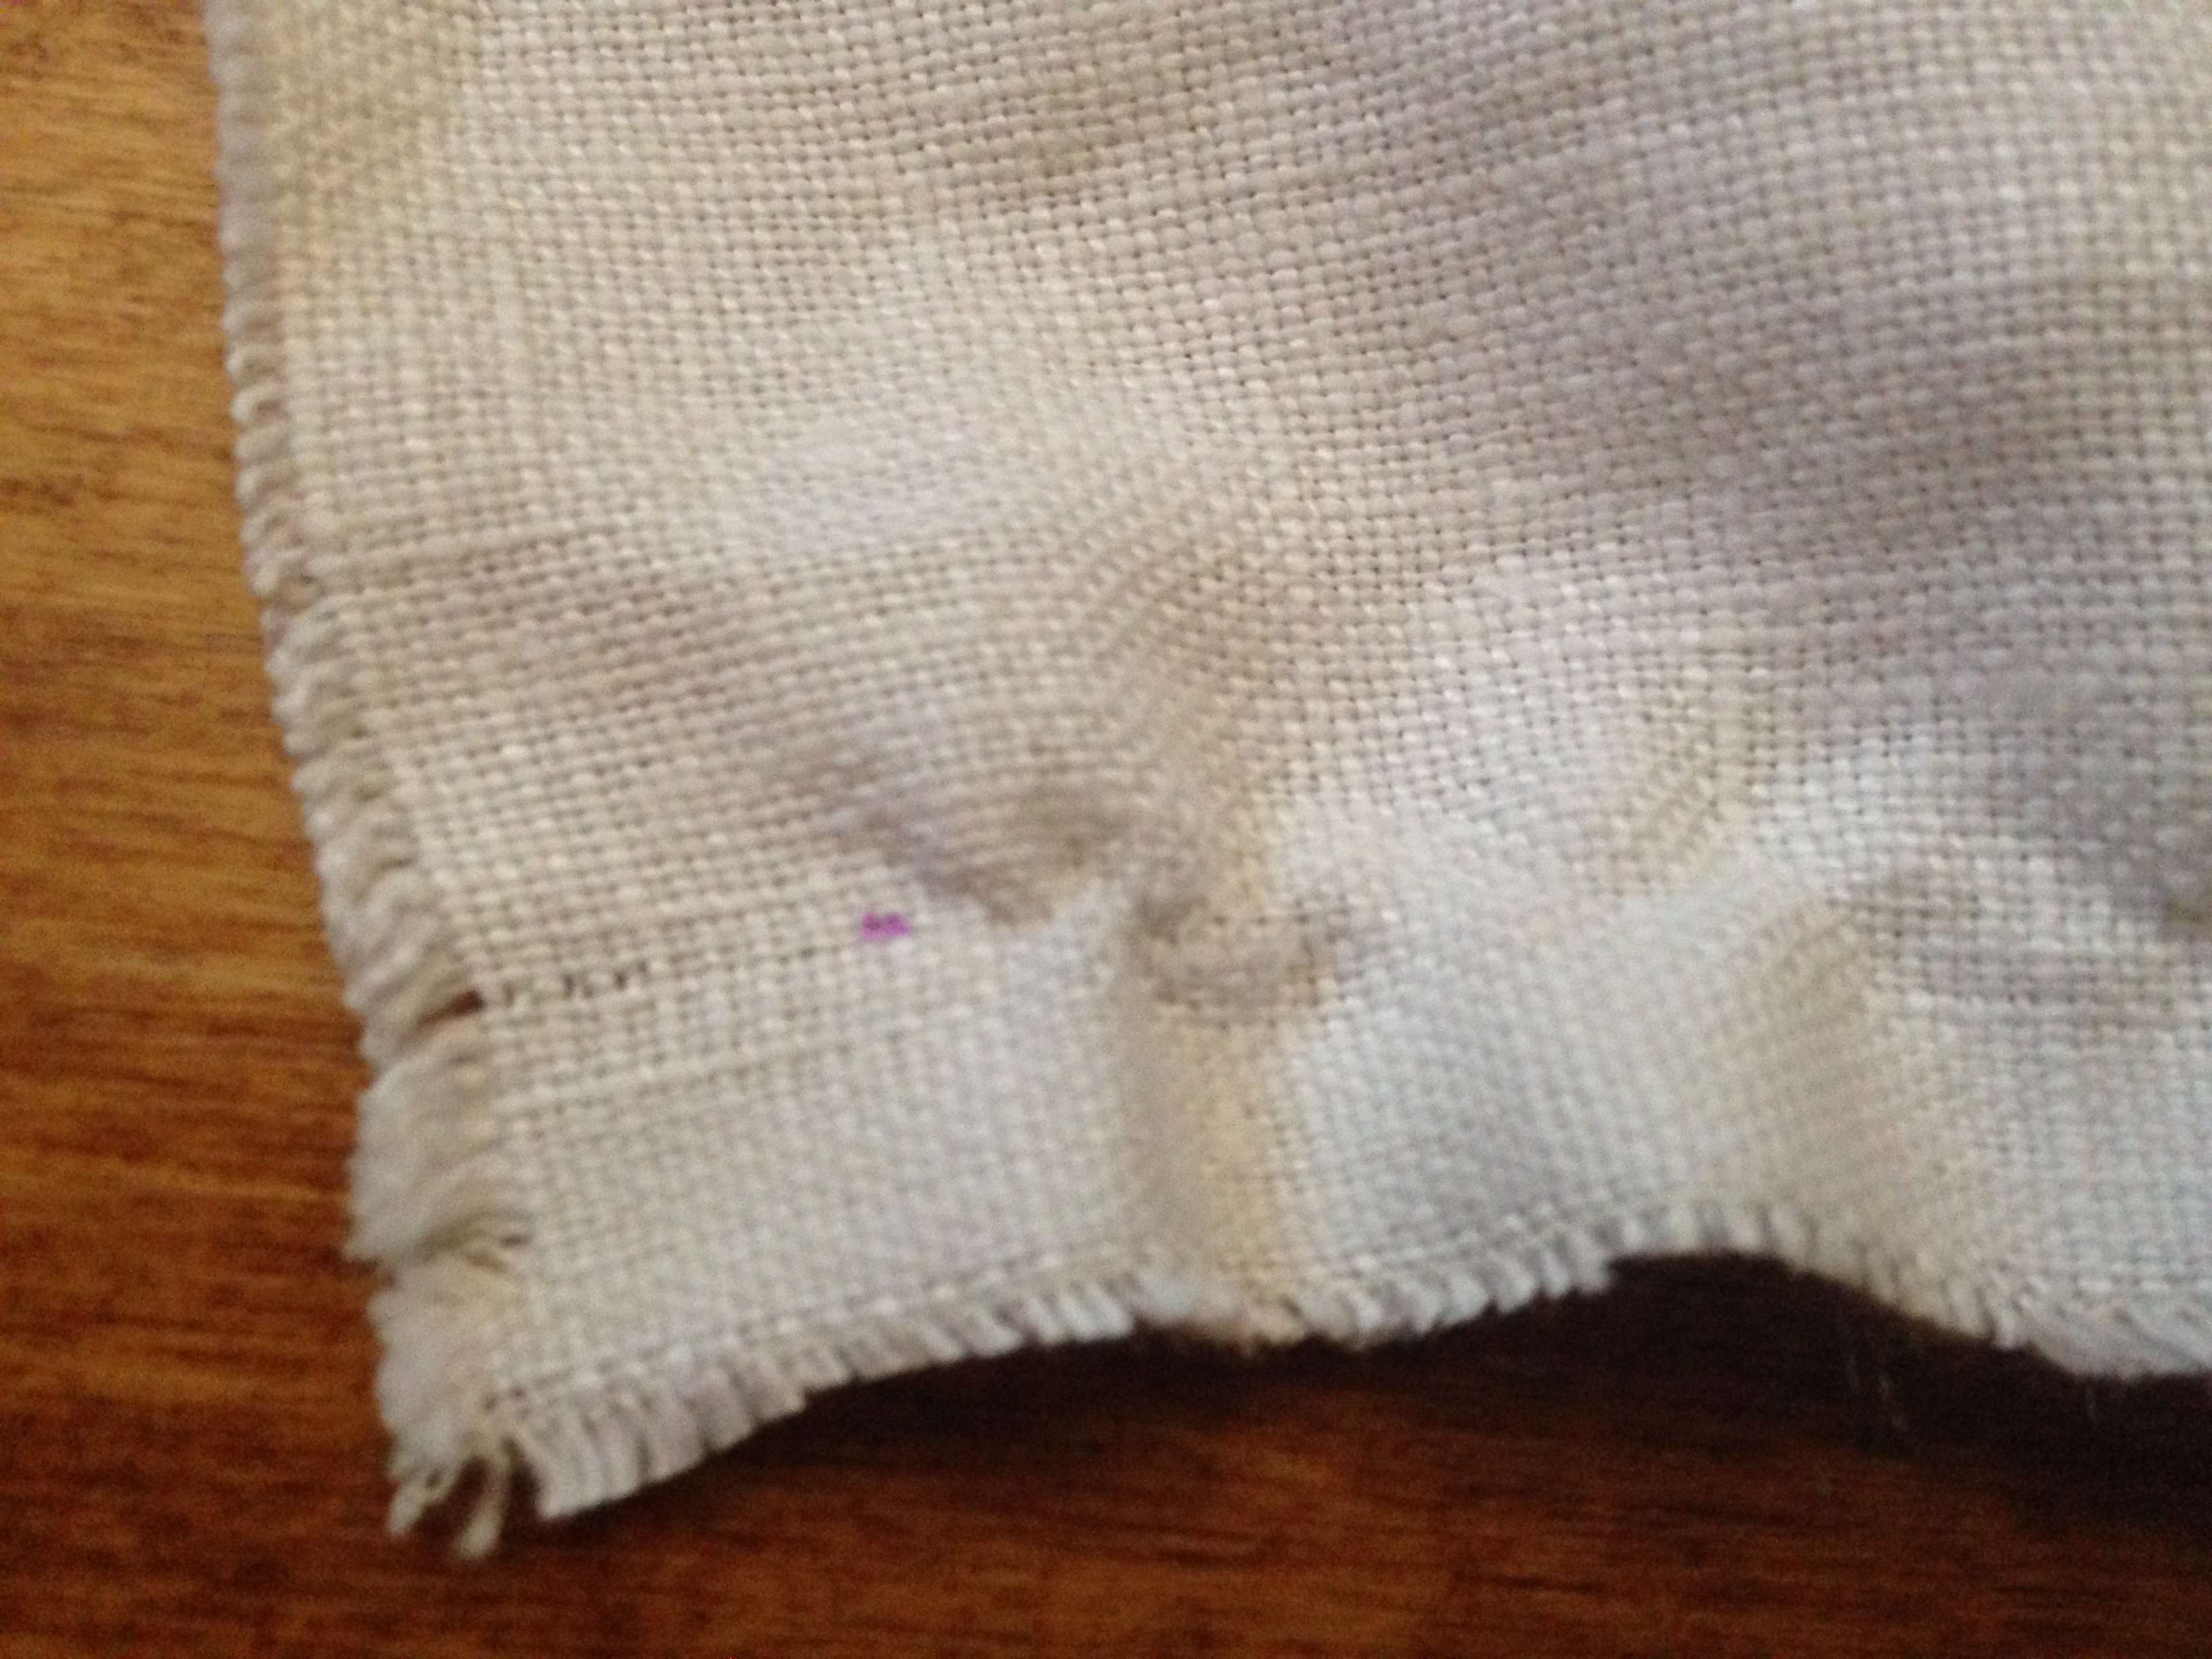
To turn the corners of your handkerchief neatly, cut the folds of the hem at the corner (this reduces bulk), fold up the hem on the adjoining side, press closed with your fingers (or pin), and use a button hole or satin stitch around the corner to keep it in place.
Repeat around each of the four sides of your linen to create a beautiful hand hemstitched handkerchief!
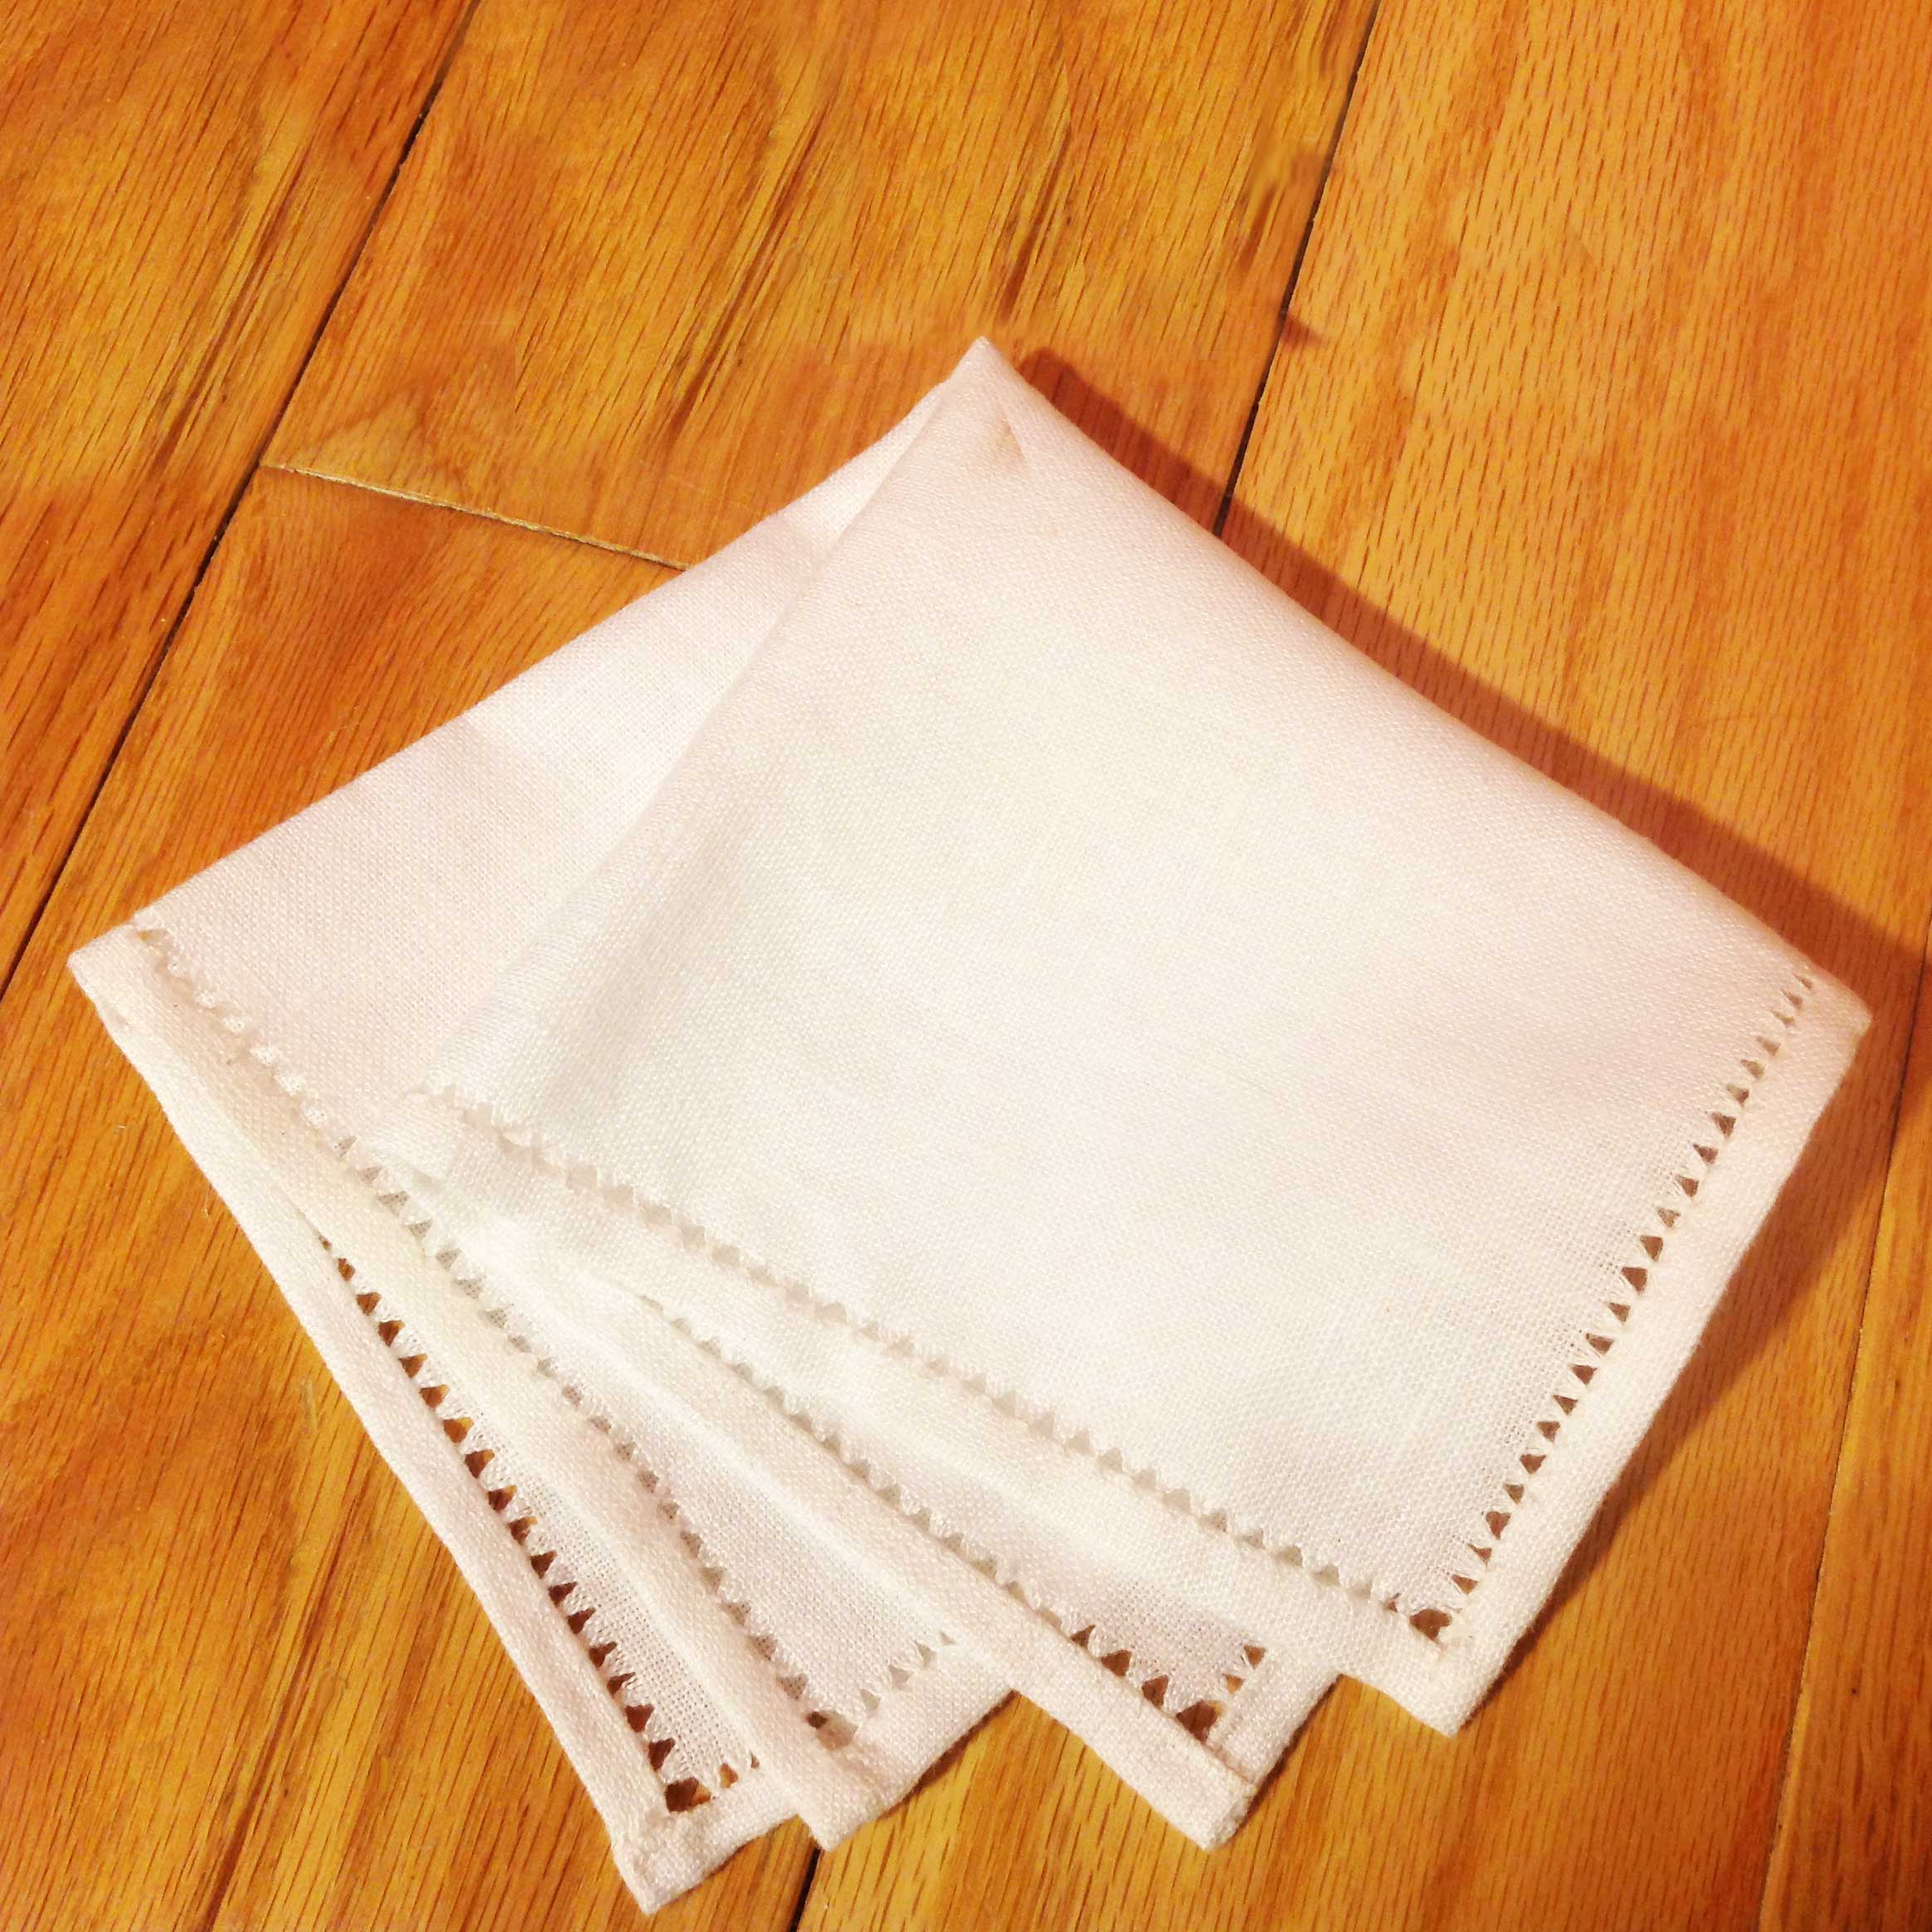
Isn’t that a pretty hand hemstitched handkerchief?
Hand Hemstitched Handkerchief Notes
You can do the hand hemstitch on as little as one pulled thread or as many as a dozen or more — it all depends on the look you want and the weight of your fabric. Finer fabrics can have fewer stitches drawn out, but coarser fabrics will need more drawn threads for the full effect. This technique can be done in places other than a hem, too, meaning you can stack lines for a more complex look.
This hankie took me about four hours to create. Expect to spend a bit more time on it if you’re new to this technique.
I hope you enjoyed this tutorial! Please let me know if you have any questions.
Love,

Like this tutorial? Pin it for later!


You make it look so easy 😉 I really do love how it came out. You did an awesome job!
Beautiful post. I love the serpentine stitch you illustrated!
I will be honest. I do sew, but I looked at this and thought, “That looks like it takes forever!” You make it look very easy and I do love that stitch!
This reminds me of my grandfather. I used to have hanky in his pocket all the time. They were beautifully embroidered. I always wonder why he used something so beautiful and hand crafted to wipe his hands or nose on. I didn’t think people still used hanky’s these days.
you make it seem so simple! I am craft and sewing inept lol like I have a sewing machine that Io can’t figure out how to thread lol.
okay now, you must have an abundance of patience! I would never be able to sit and complete this task! I like instant gratification. However, my daughter is all about crafts ad sewing and she woudl totally dedicate herself to this task.
That is truly lovely. I love seeing someone do these beautiful crafts that take time and patience. Just beautiful.
Thank you SO much, Terri!!
What a great and somewhat easy way to add interest to material. Your steps make it seem easy to do for someone with not a lot of experience!
Yes, I love that it hems and decorates at the same time. Thank you, CoCo!
This looks great. I’m not sure I’d spend that much time on a hanky. Love the tutorial, with the photo’s. The pics make it much easier to understand the technique
Thank you, Di! In this case, I think it’s more about the making it than it is about having a finished handkerchief to use. Making it was very relaxing. 🙂
Wow, so detail-oriented and intricate. I love it – looks like it took a lot of time, energy, and care. <3
Thank you for the kind words, Divya!
How pretty! I carried something like this at my wedding, I would love to make one. Great idea for gifts!
This WOULD make a great hankie for a bride-to-be! Thank you, Allison.
What a great gift this would be, I really love giving gifts that are handmade.
Handmade gifts are the best. Thanks, Debra!
That is so cool to see how it is done. I am not very crafty but you made it sound so easy that even I could do it.
Thank you, Carolyn! Anyone can do it! 🙂
You really do make this look so easy! I wish I had some sewing skills beyond a basic stitch.
I’m happy you think I make it look easy — it isn’t really that hard. 😀
This looks like a fun DIY project! I’m horrible at seeing, I don’t think I could manage this!
Thank you, Lydia! You never know what you can do until you try!
This is SO genius! These are dead expensive to buy yet they are so easy to make?! You’ve done such a good job making yours – it looks really professional, like i wouldn’t be able to tell whether you bought it or not! x
This is such a nice touch! I haven’t thought about this sort of DIY before – they’re very pretty as far as napkins go 🙂
Thank you, Courteney. It’s an old world technique, but a very pretty one, I think.
Those turned out so lovely and totally remind me of my Nana. She always had them in her pocket book!
Thank you so much, Kristin!
Sadly, I don’t know how to sew at all. However, this is a beautiful handkerchief!
oh my!! this is seriously gorgeous talent! I got one from my grandmother and I treasure it in a keepsake box cause I know it isn’t easy to do. thank you for sharing this.
Wow! That is such a great tutorial. Unfortunately, I’m probably not patient enough to make this. It’s beautiful though!
What a great tutorial! You really make it look easy to do! I used to love sewing with my grandma growing up but haven’t done it in a while.
Thank you, Chelsea! My grandma also used to love sewing, though it was my mom that taught me how to sew. I taught my son how to sew, too!
I love seeing the step by step pictures in order to create the stitch. The end result is stunning. I wish I had the patience to learn how to do this.
Oh wow this is incredible! You are very talented. Any bride to be would be lucky to receive such a precious heirloom as a gift.
Thank you for sharing your talent. I love your choice of crafts. Congratulations on losing 10 lbs. I’m also on the same quest. The garmin fitness watch and applications are really helping me. So far about 5 lbs a month. 30 lbs gone.
That’s awesome, Kay! I have a fitness watch that I need to wear again. I just haven’t been particularly active lately and I need to change that.
This is an excellent tutorial!