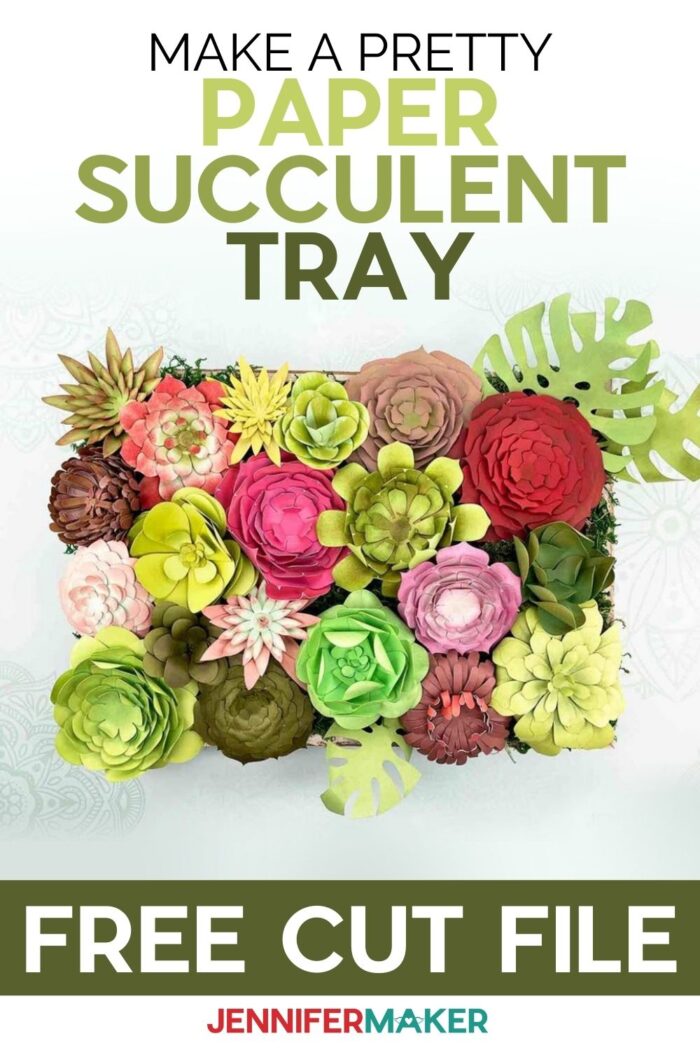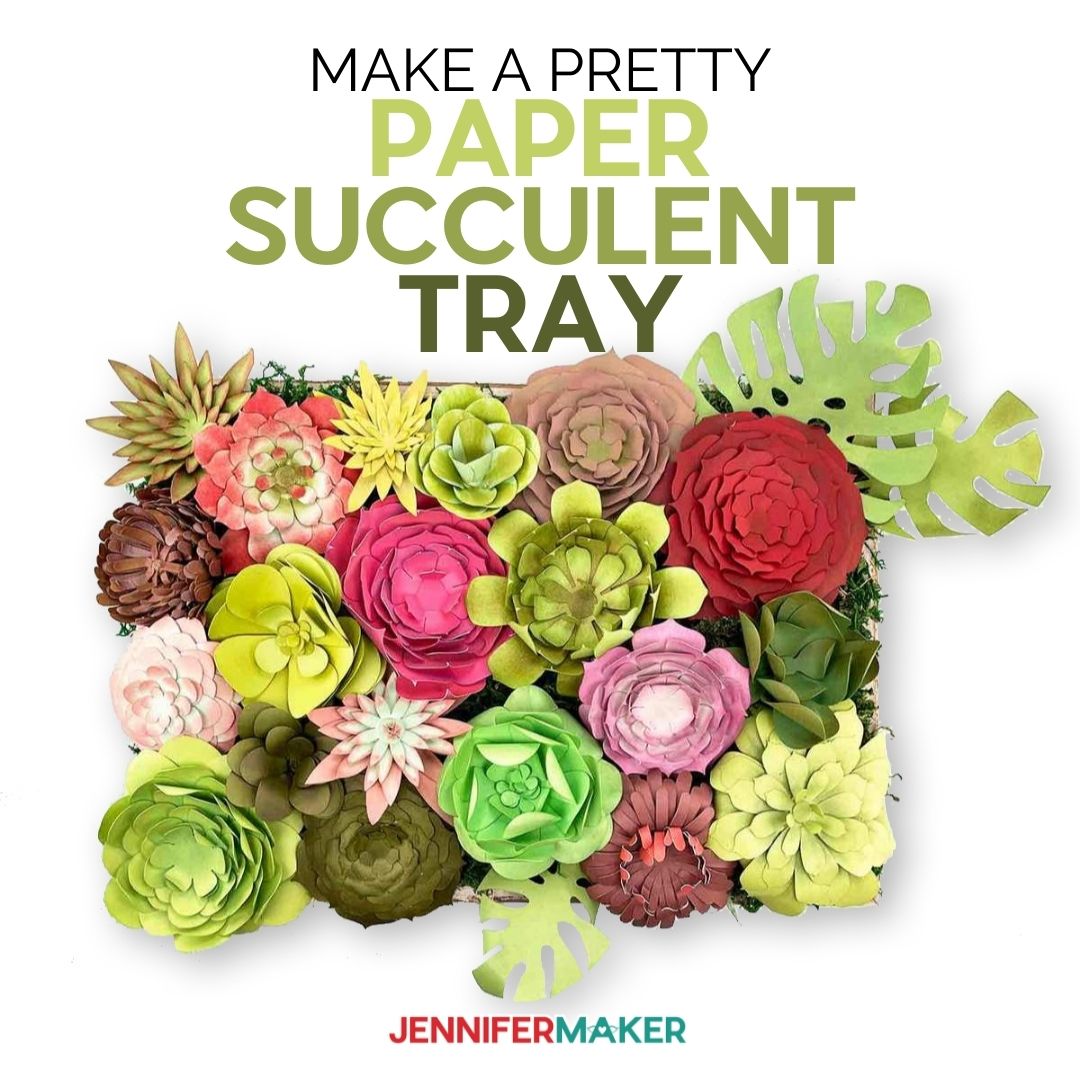

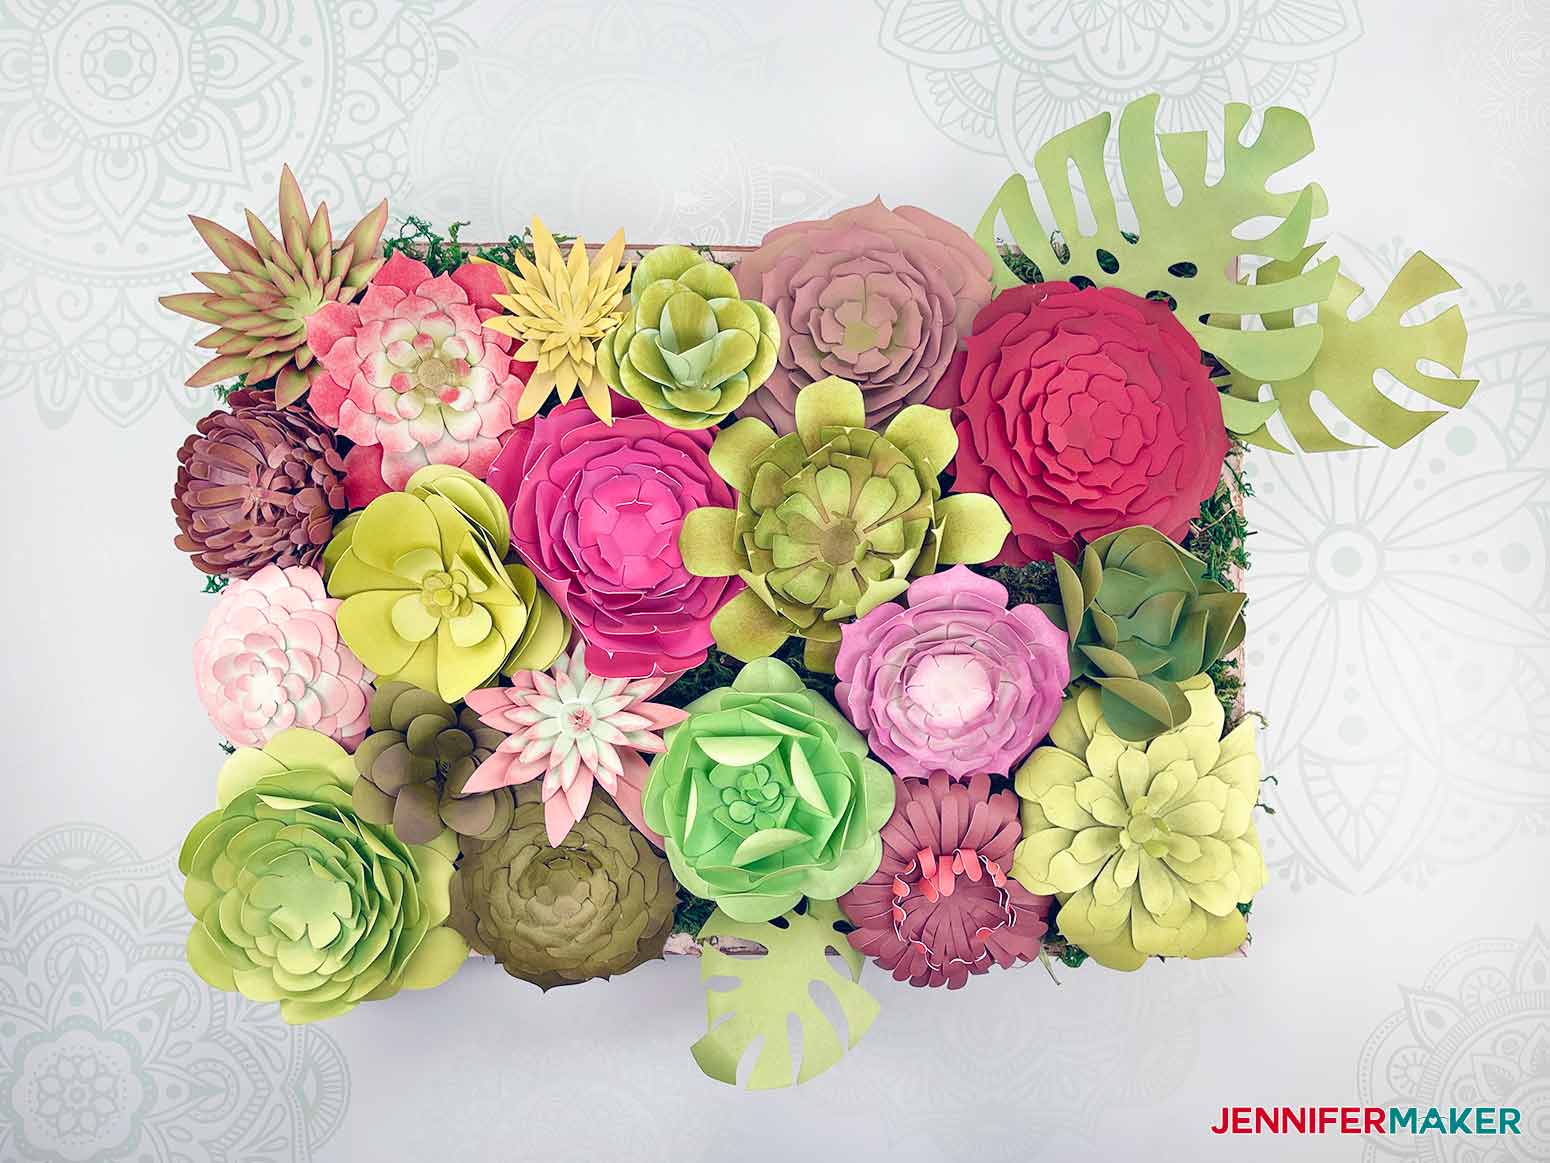
Learn how to make 18 DIY paper succulents and arrange them all together beautifully in a wooden tray planter!
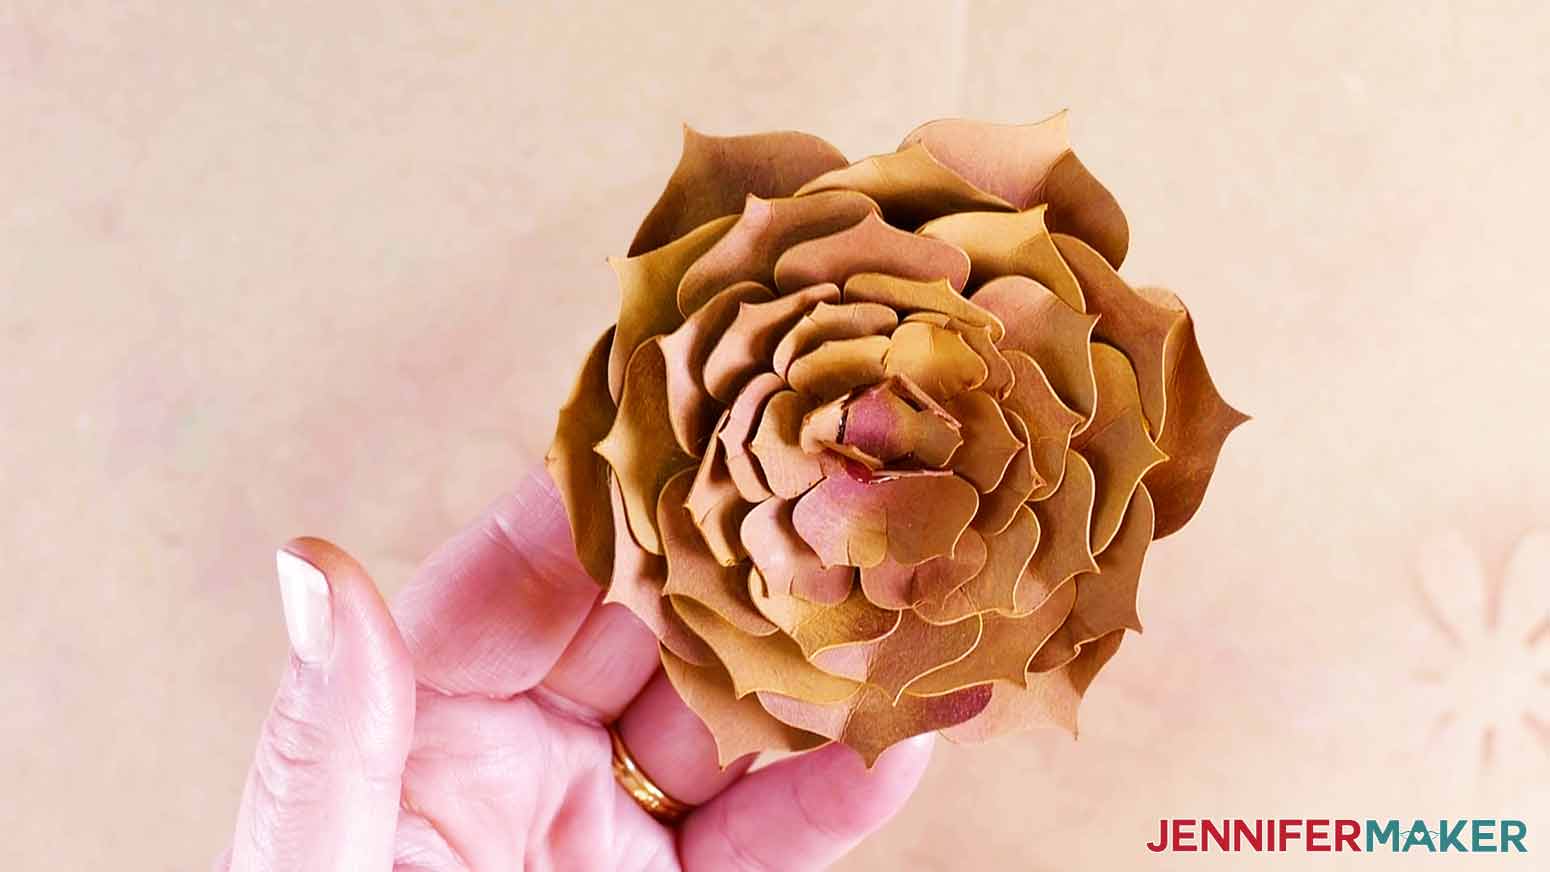
Paper flowers are fun to make, but it’s now autumn and I’m more in the mood for succulents! Now I don’t know about you but when it comes to plants, succulents rank pretty high on my list of favorites. They are beautiful, they come in so many different varieties and the best part about them is they don’t require much care. I mean, we all lead busy lives these days, right? In this tutorial, I’m going to show you how to make a beautiful tray of paper succulents that is completely care-free!
Watch me cut and assemble these DIY paper succulent templates in my video below!

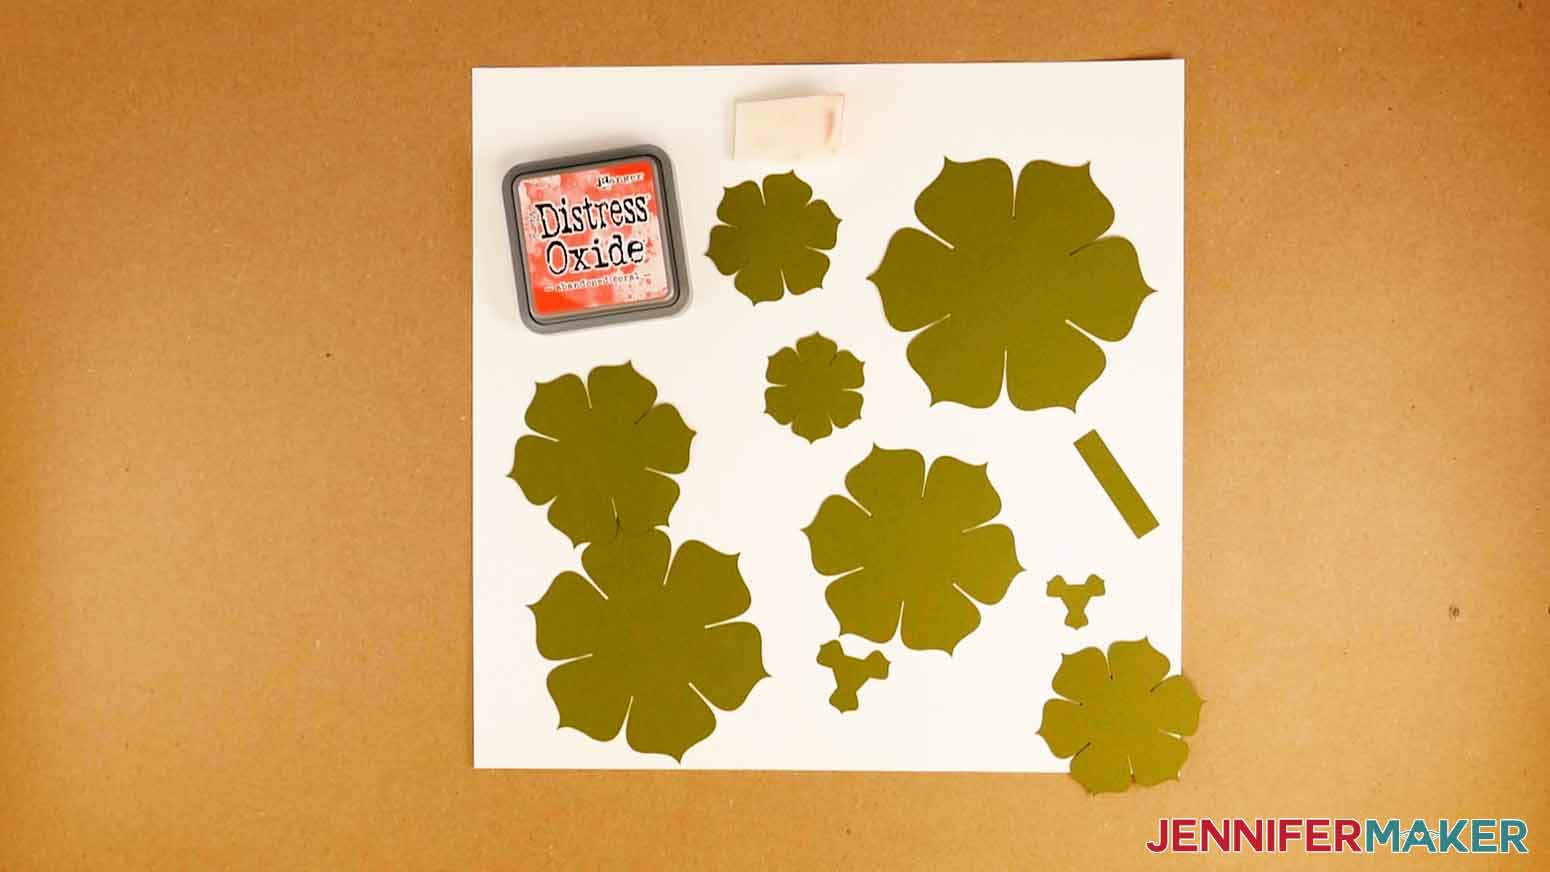
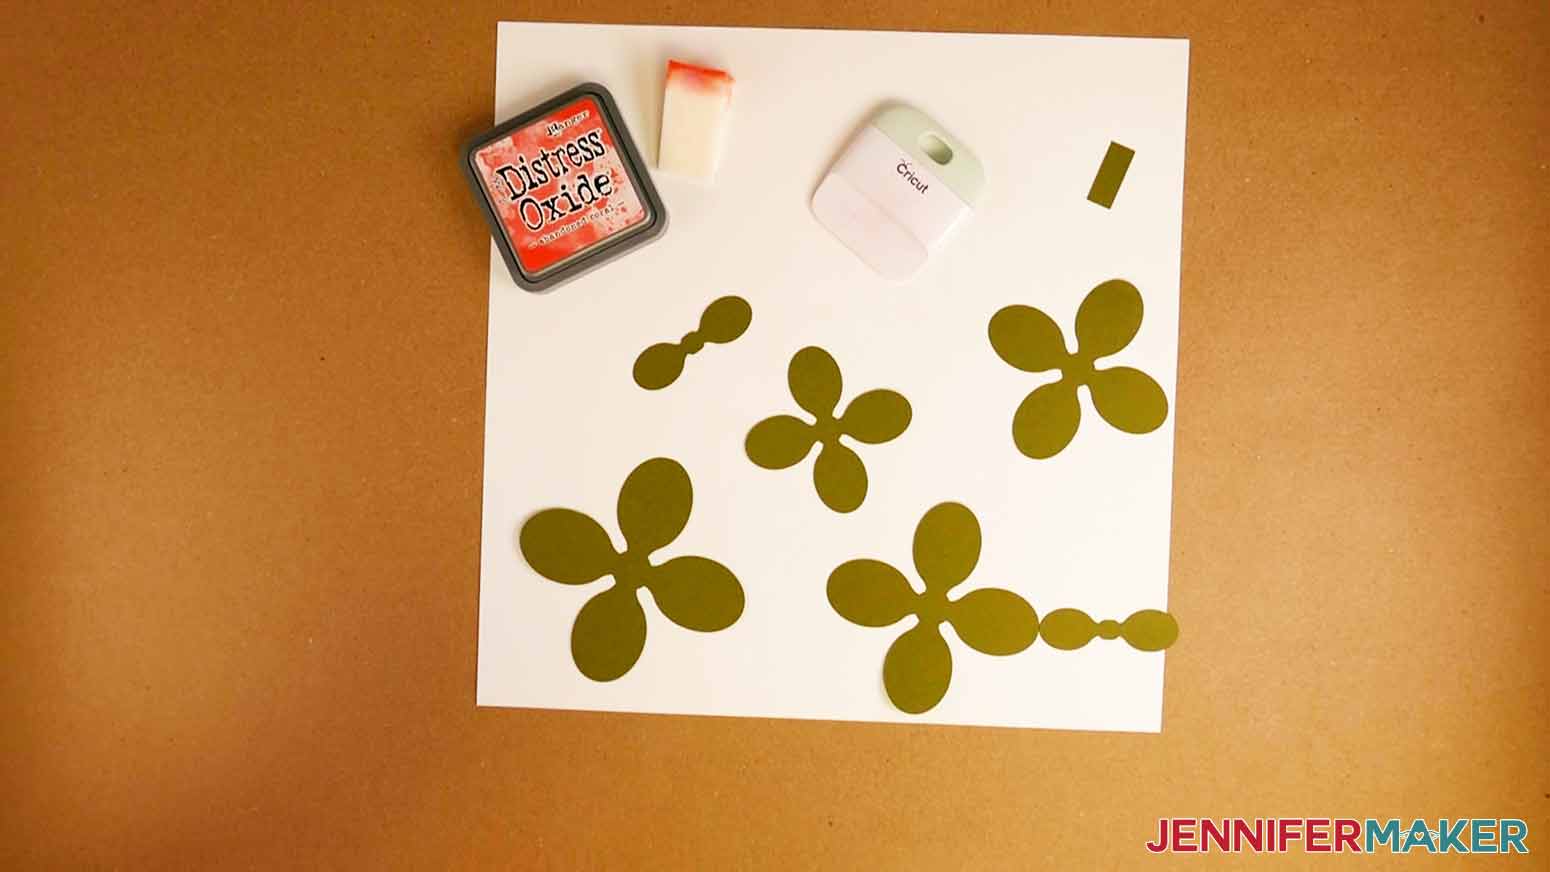
The materials you need to make these gorgeous paper succulents are mostly just cardstock and glue. I’m used a 65 lb. pack of cardstock pack called “Fields of Green.” I think this weight of cardstock works best for shaping the petals into realistic looking shapes. You’ll need two 12″ x 12″ sheets of maroon cardstock if you want to make paper succulents like mine.

To give you lots of options, I’ve re-created lots of paper succulent templates for you, including these beauties:
- Sedum Suncatcher
- Sempervivum
- Sedum Sieboldii (October Daphne)
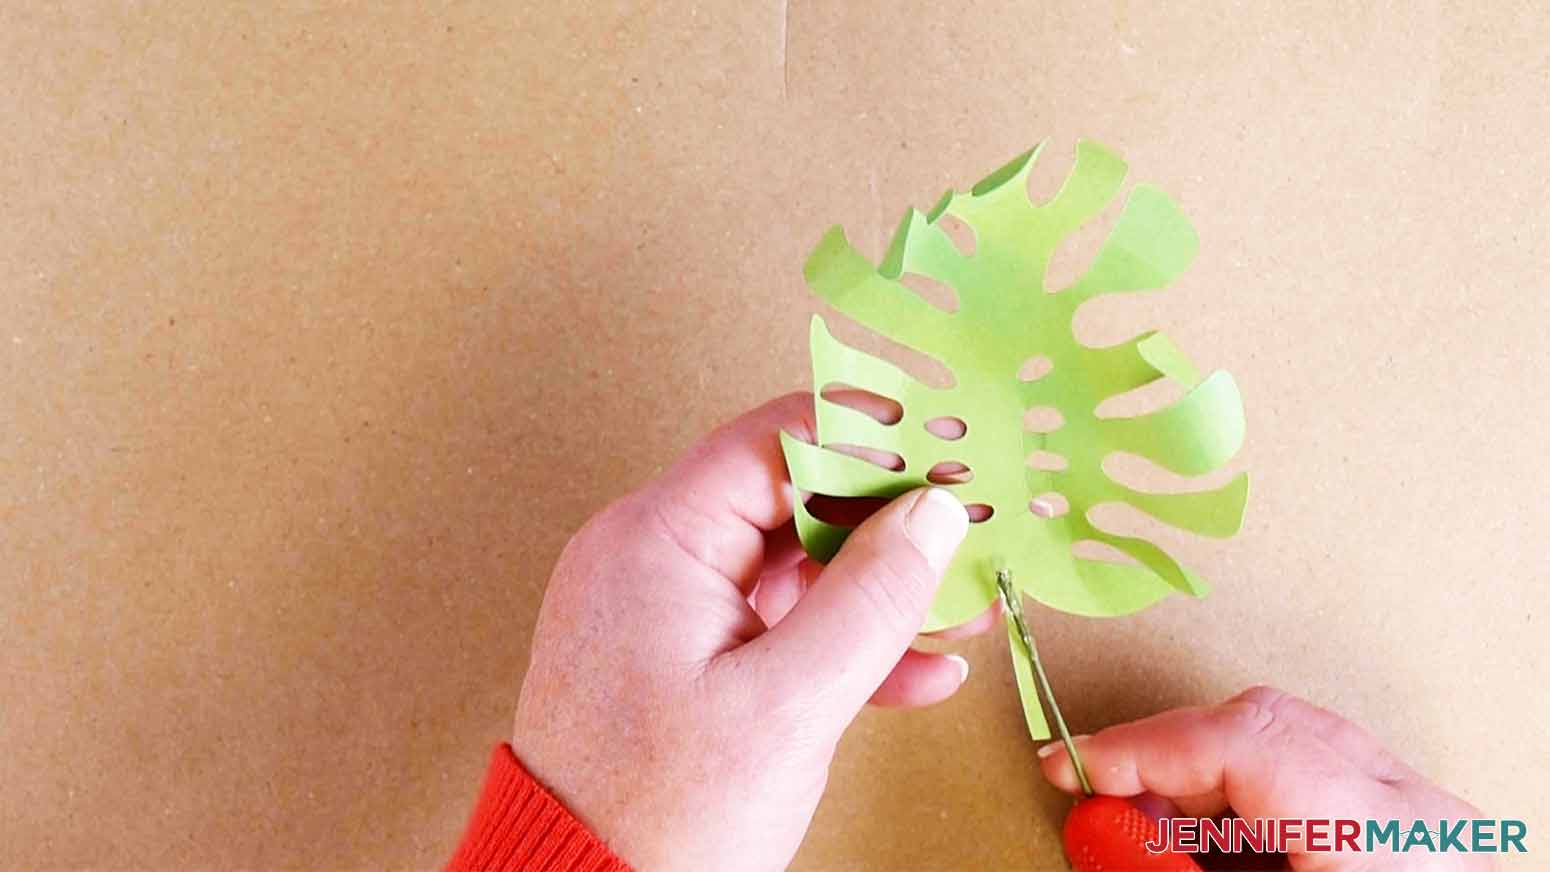
- Monstera Leaf (I know, it’s not a succulent, but it goes well with them!)
- Echeveria Rainbow
- Sedum Nussbaumerianum (Coppertone Sedum)
- Sempervivum “Jubilee”
- Aeonium “Green Platters”
- Aeonium Urbicum (Salad Bowl)
- Crassula (Devil’s Horns)
- Portulaca Molokiniensis
- Sempervivum Tectorum (Hens ‘n’ Chicks)
- Kalanchoe “Flap Jacks”
- Greenovia Dodrentalis (Mountain Rose)
- Sempervivum “Silver King”
- Sempervivum “Pacific Devils Food”
- Echeveria “Melaco”
- Aeonium Aroboreum “Zwartkop
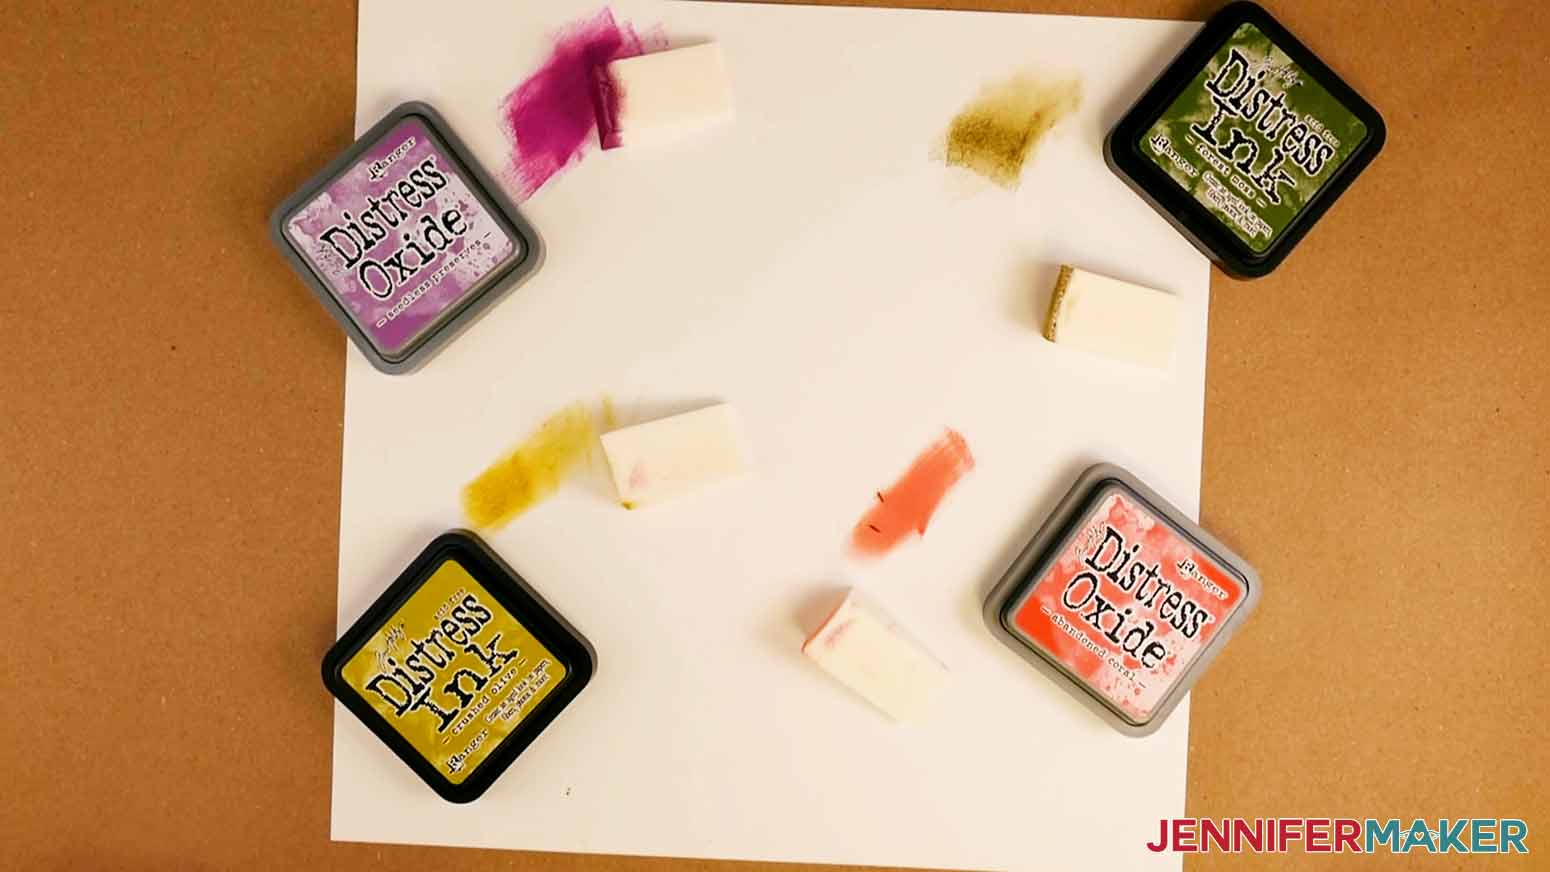
And if you want your succulents to look super realistic like mine do, you can use Pan Pastels and Oxide Distress inks to color your card stock.
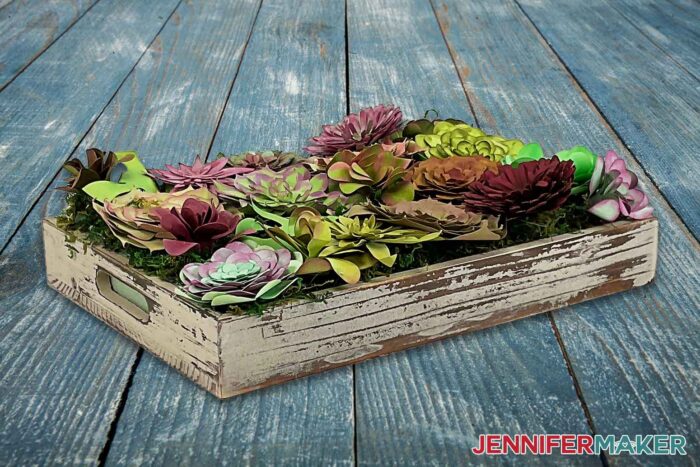
Displaying paper plants is easy — just “plant” them like you would a real one. I put my paper succulents in a rustic wood tray. The link to this tray is in my materials list below.
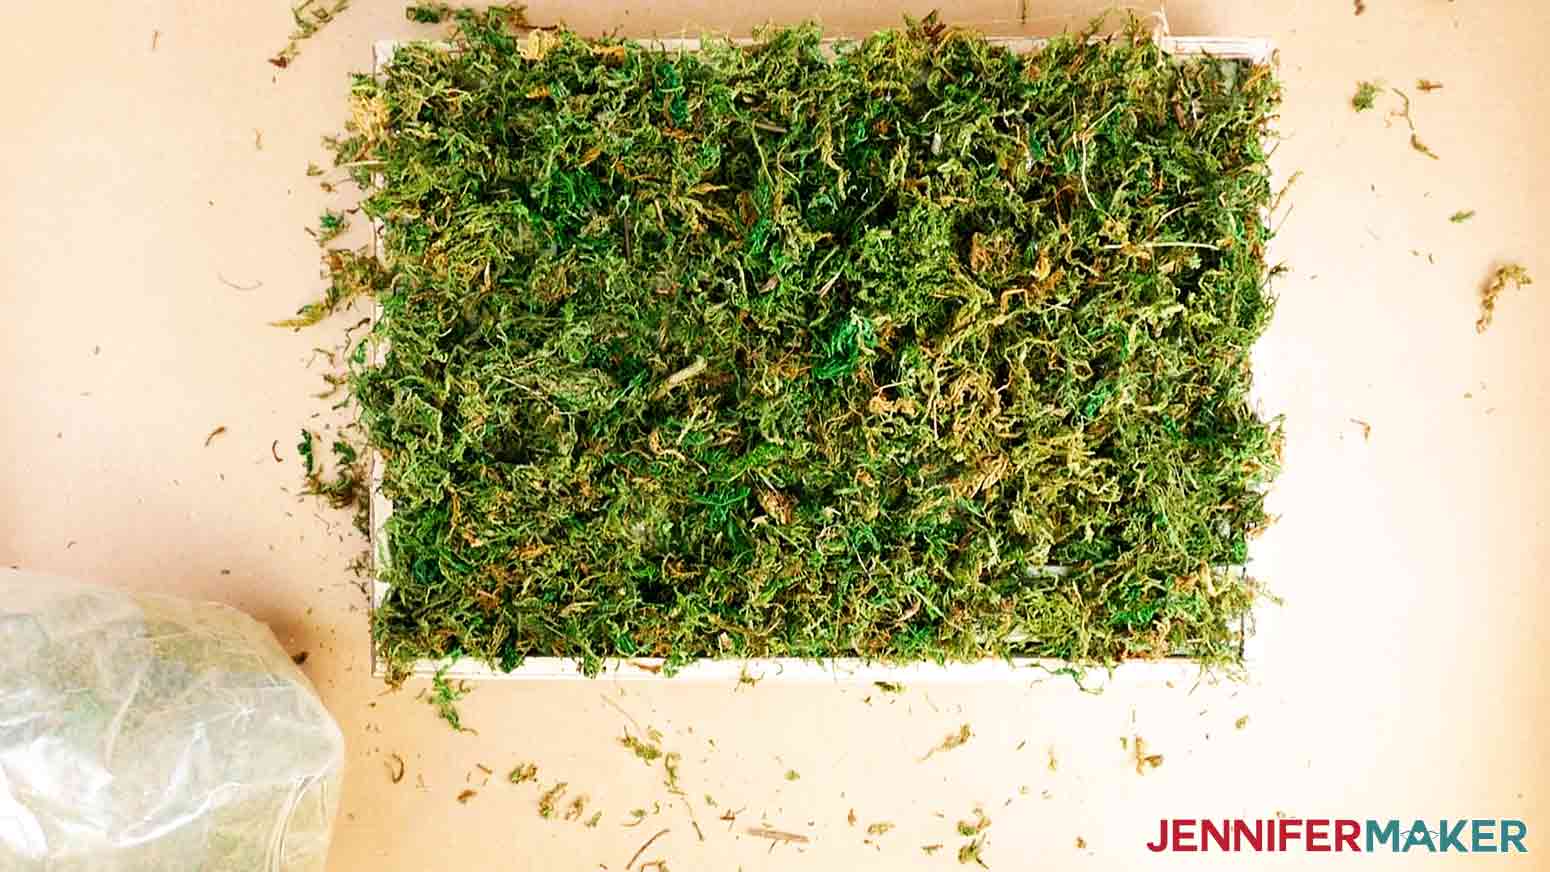
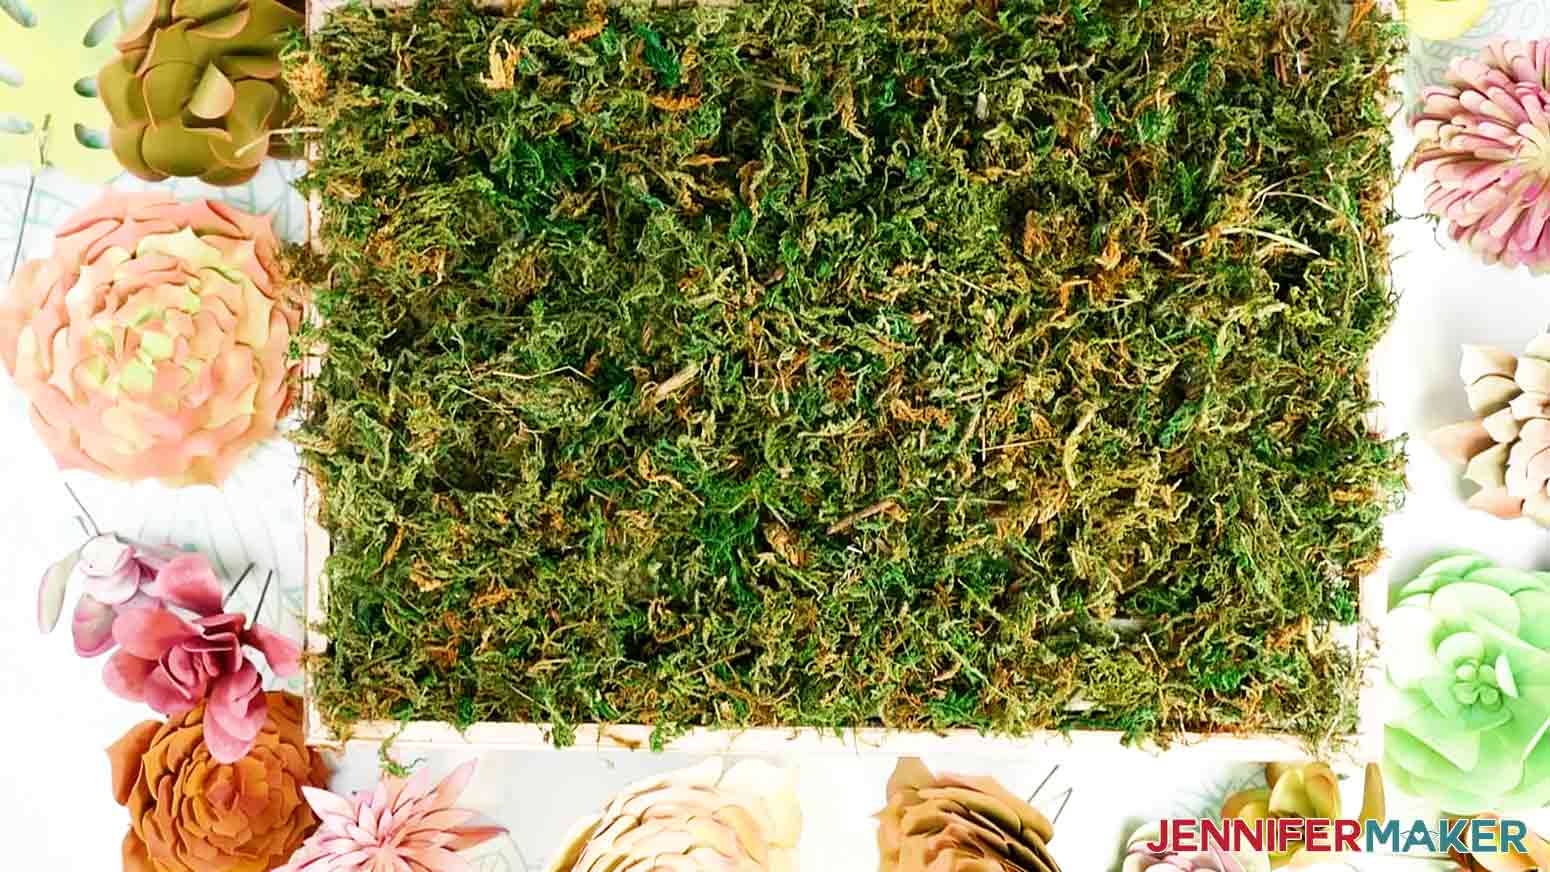
To keep the paper succulents in the tray, I used three to four bricks of floral foam, some 18 gauge floral wire, and a bit of artificial moss.
Other useful tools include a hot glue gun, something to cut our floral bricks like a hacksaw, some needle nose pliers, a quilling tool, tweezers and some small wooden dowels.
Let me show you how to make this paper succulent tray on a Cricut cutting machine! This post contains some affiliate links for your convenience (which means if you make a purchase after clicking a link I will earn a small commission but it won’t cost you a penny more)! Read my full disclosure policy.
Materials to Make a Paper Succulent Tray
View the Amazon shopping list with the exact items we used to make this project!

- Sixteen (16) sheets of 12″ x 12″ 65 lb. cardstock in shades of green
- Two (2) sheets of 12″ x 12″ 65 lb. magenta cardstock
- One (1) wooden serving tray
- Artificial moss (I used half a bag)
- Floral dry foam (3-4 bricks)
- 18 gauge floral wire in dark green (approximately 6″ for each succulent)
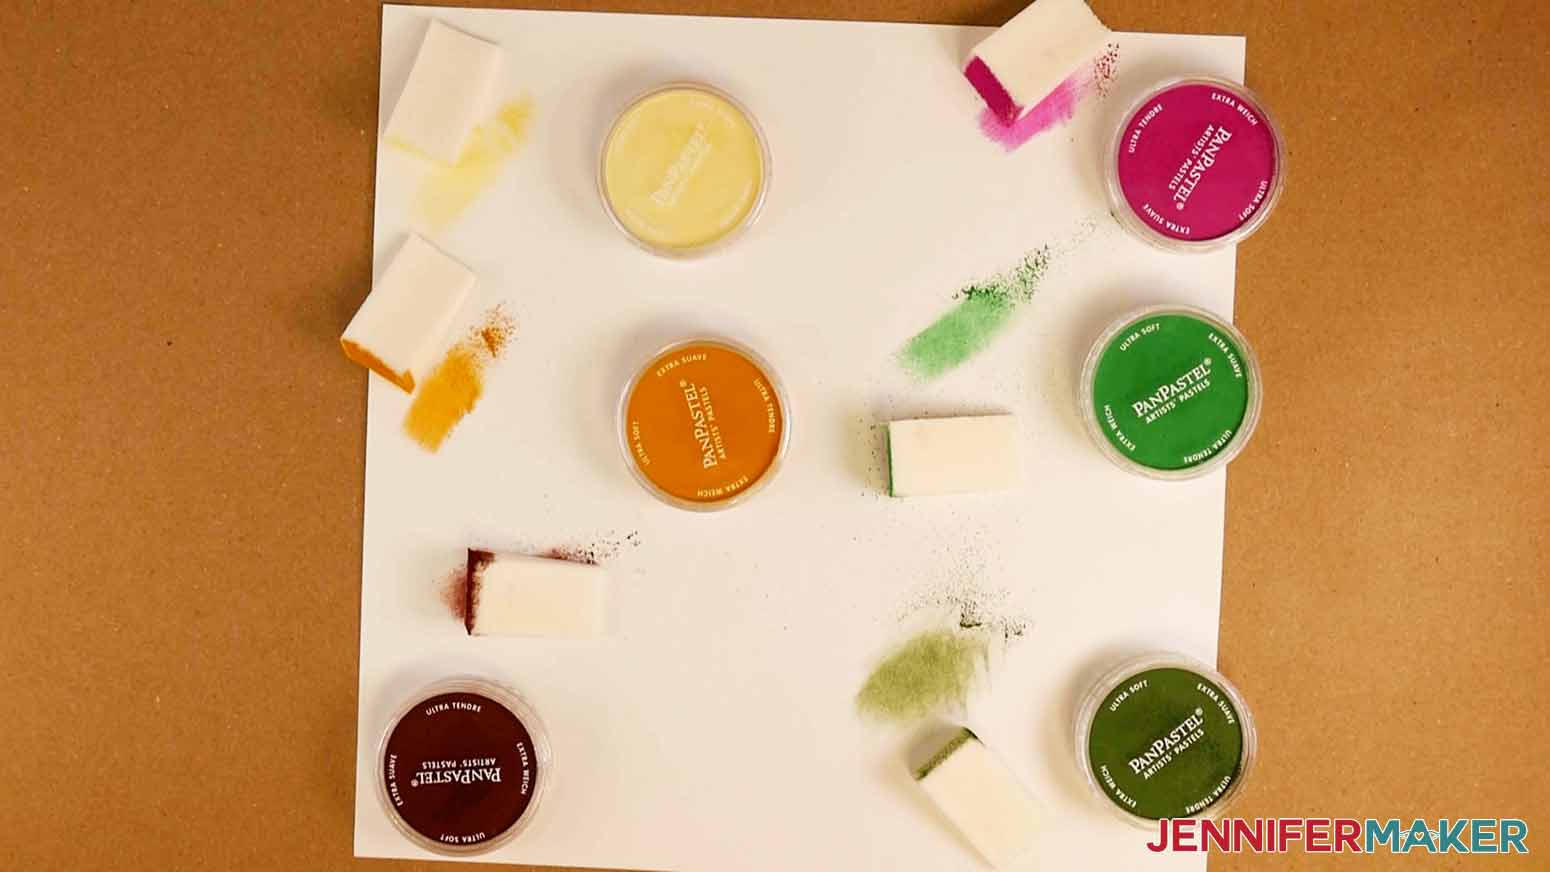
- (Optional) Pan Pastels (Magenta, Yellow Tint, Green Shade, Permanent Green, Red Extra Dark, Yellow Ochre)
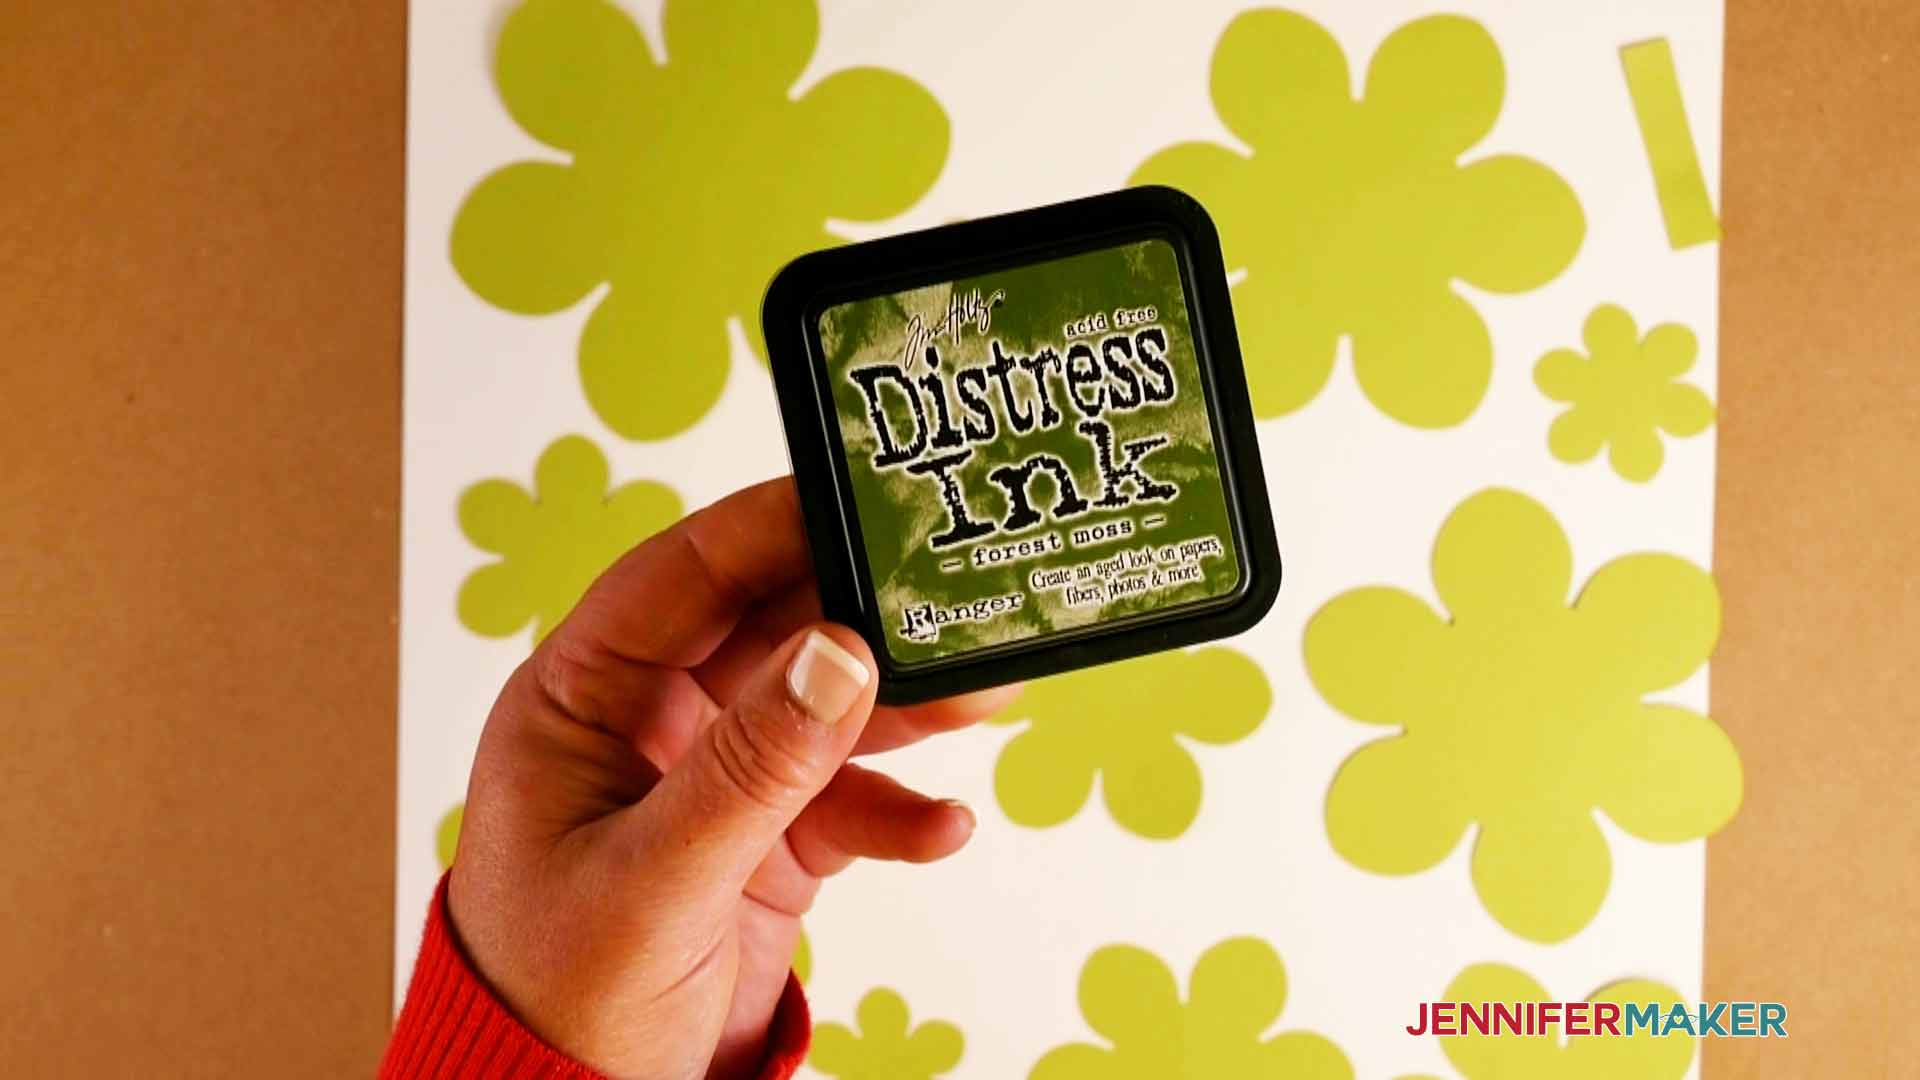
- (Optional) Distress Oxide Inks (Crushed Olive. Forest Moss, Abandoned Coral, Seedless Preserves)
- (Optional) Plastic Storage Bags (for organizing your succulents as you cut and work with them)
- (Optional) Scrap Paper or Kraft Paper (to protect your work surface while using pastels and inks)
- Hot Glue Gun and Hot Glue Sticks
- Hacksaw (Electric Knife or Long Knife) for cutting the foam bricks
- Needle Nose Pliers and Wire Cutters for cutting the floral wire
- Scraper Tool
- Cosmetic Sponges
- Hot Glue Finger Protectors
- Paper Quilling Tool -OR- Tweezers
- Wooden Dowels (optional)
- Blending Brushes (optional)
- Gloves (optional)
- Protective Eyewear (optional)
- A method to cut your cardstock – I used the amazing Cricut Explore 3 but you can also use the Cricut Maker 3, original Maker, or any cutting machine in the Cricut Explore Family – you can even use the Cricut Joy if you make the slightly smaller Joy version! Alternately, use scissors or a craft knife.
- Cricut 12″ x 12″ StandardGrip Cutting Mat
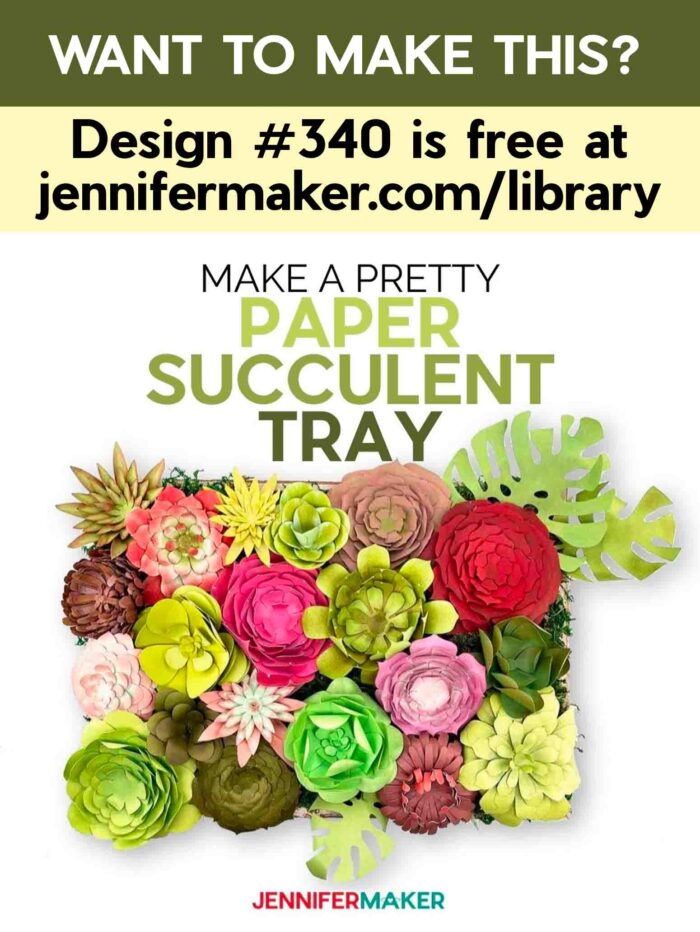
- Design #340 – My free bookmark SVG/PDF/DXF design files are available in my free resource library – get the password by filling out the form at the bottom of this page
How to Cut and Assemble Paper Succulents
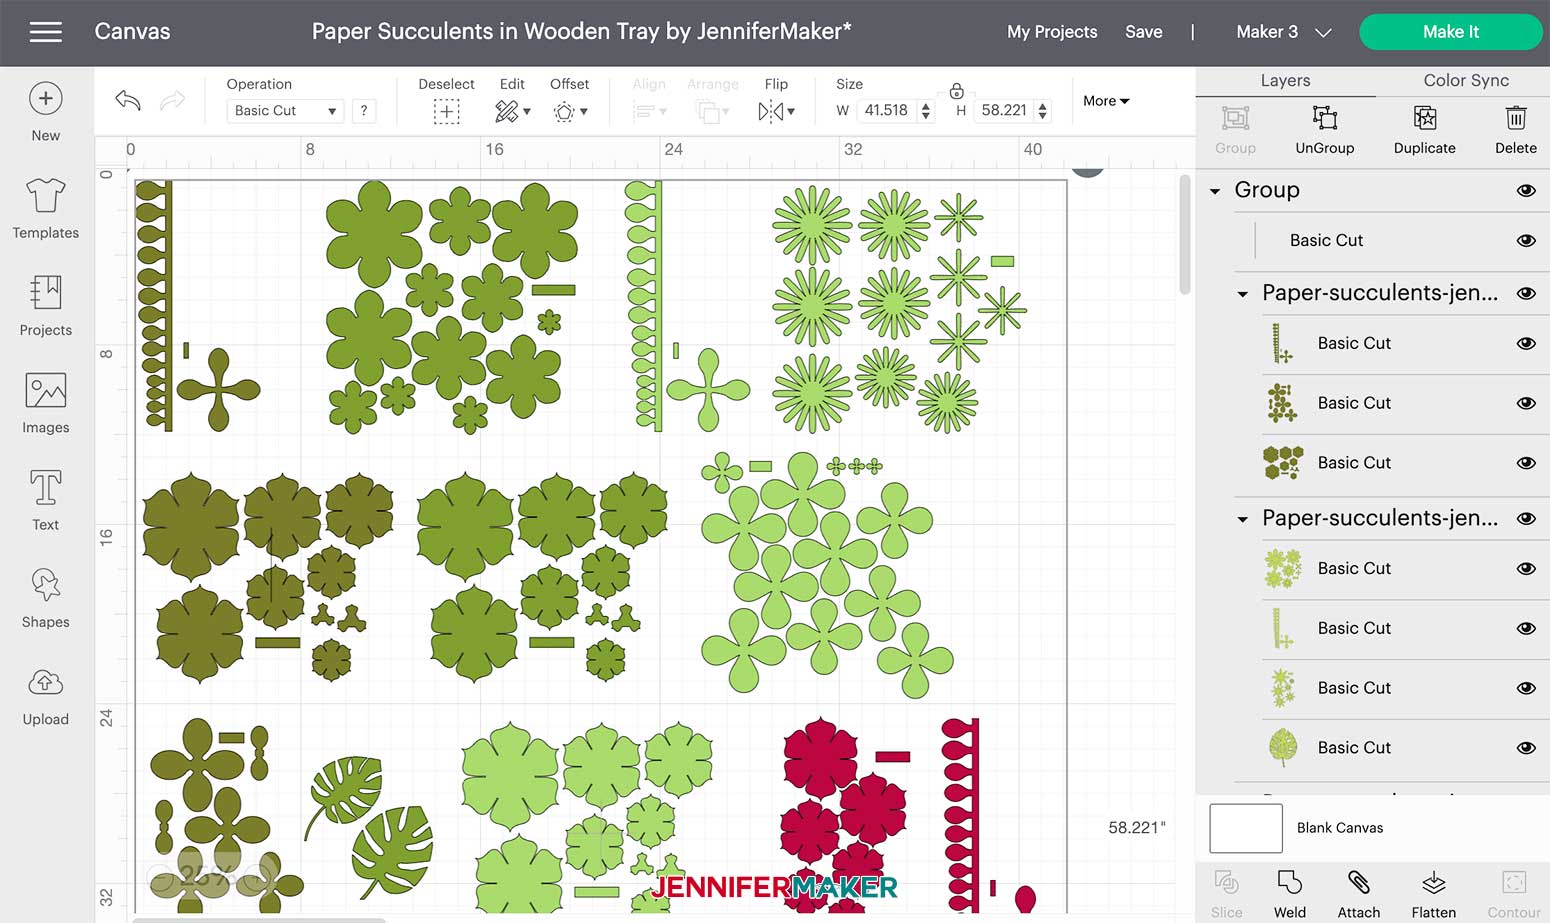
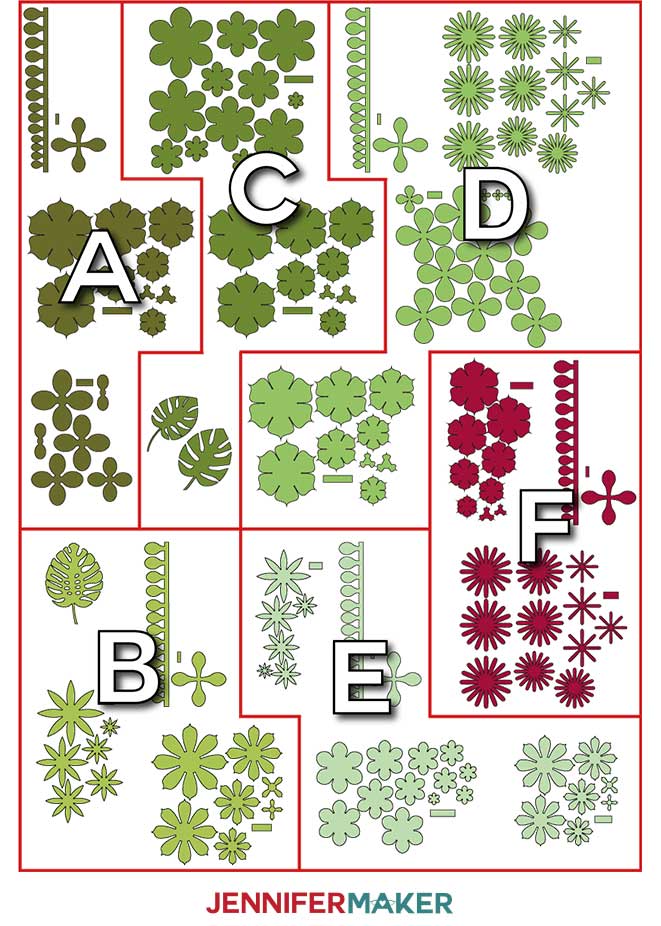
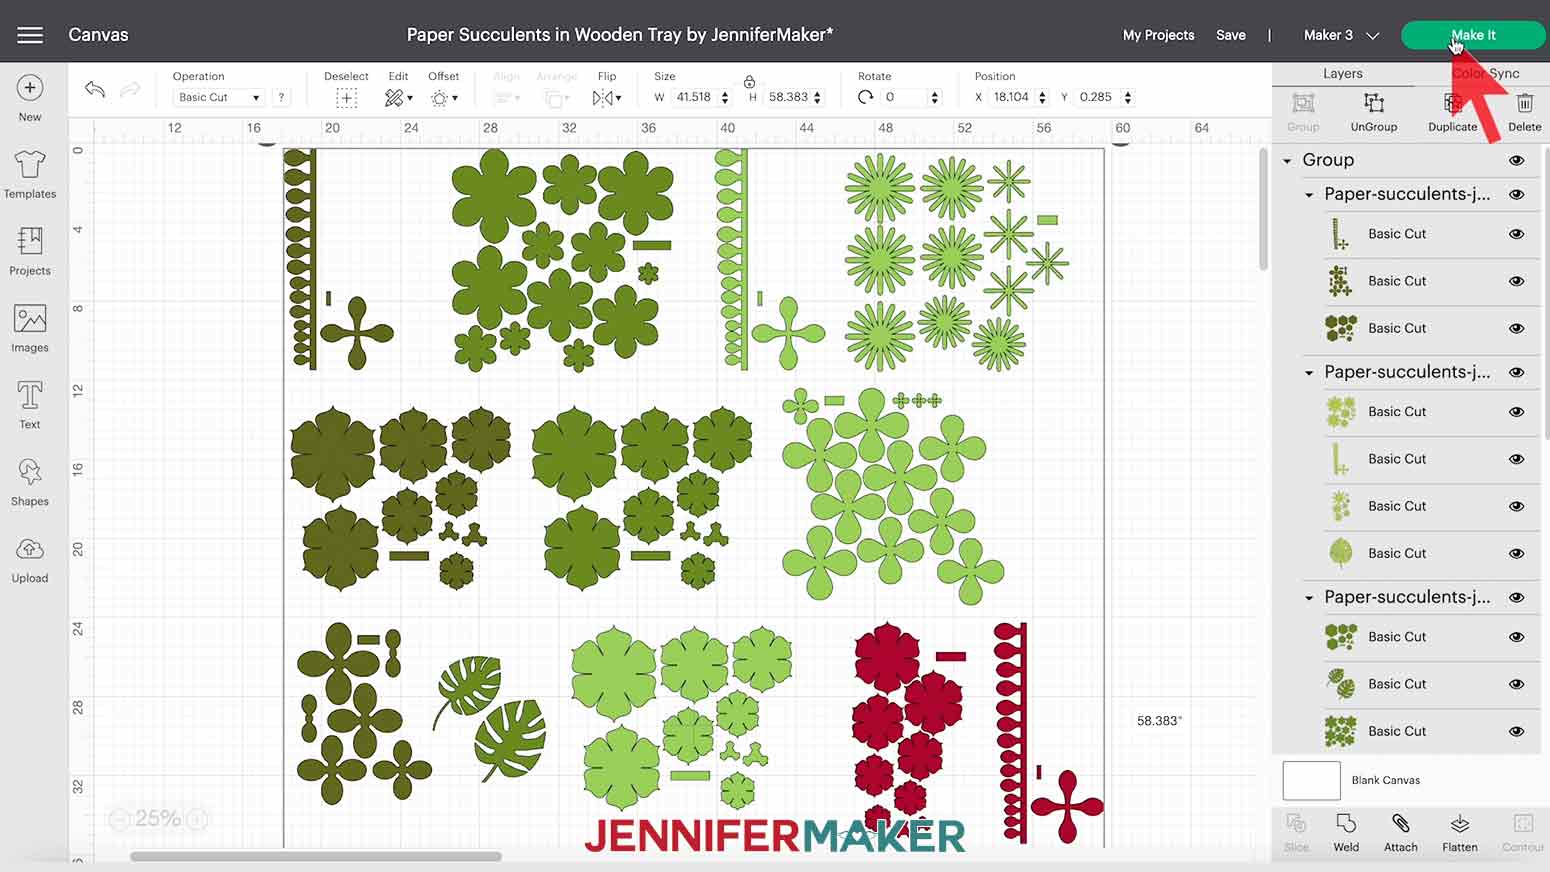
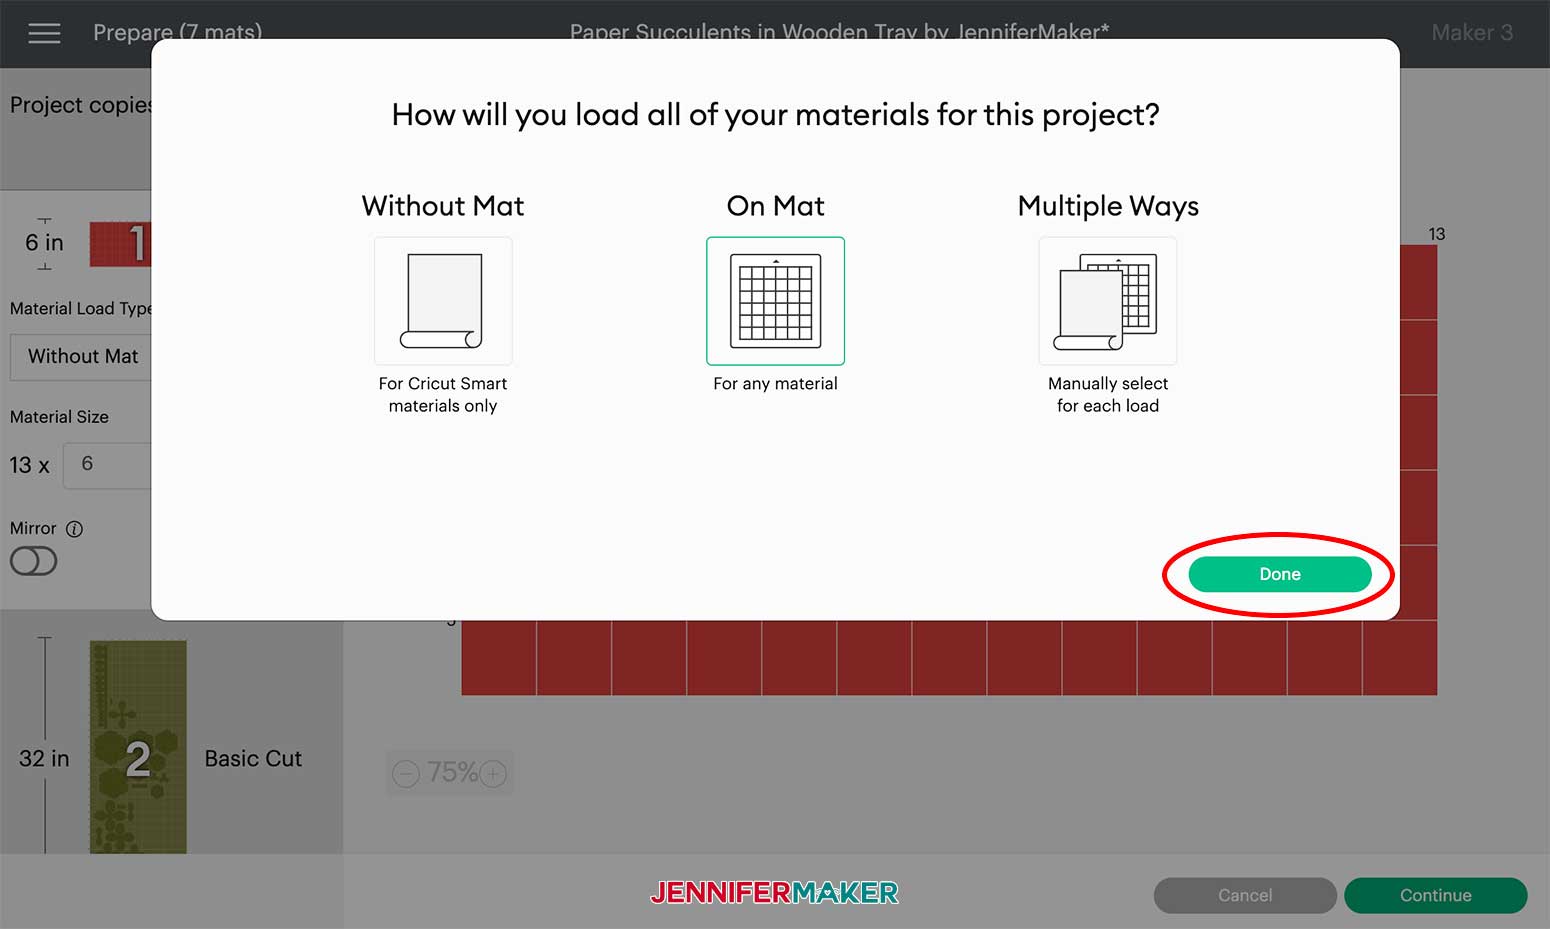
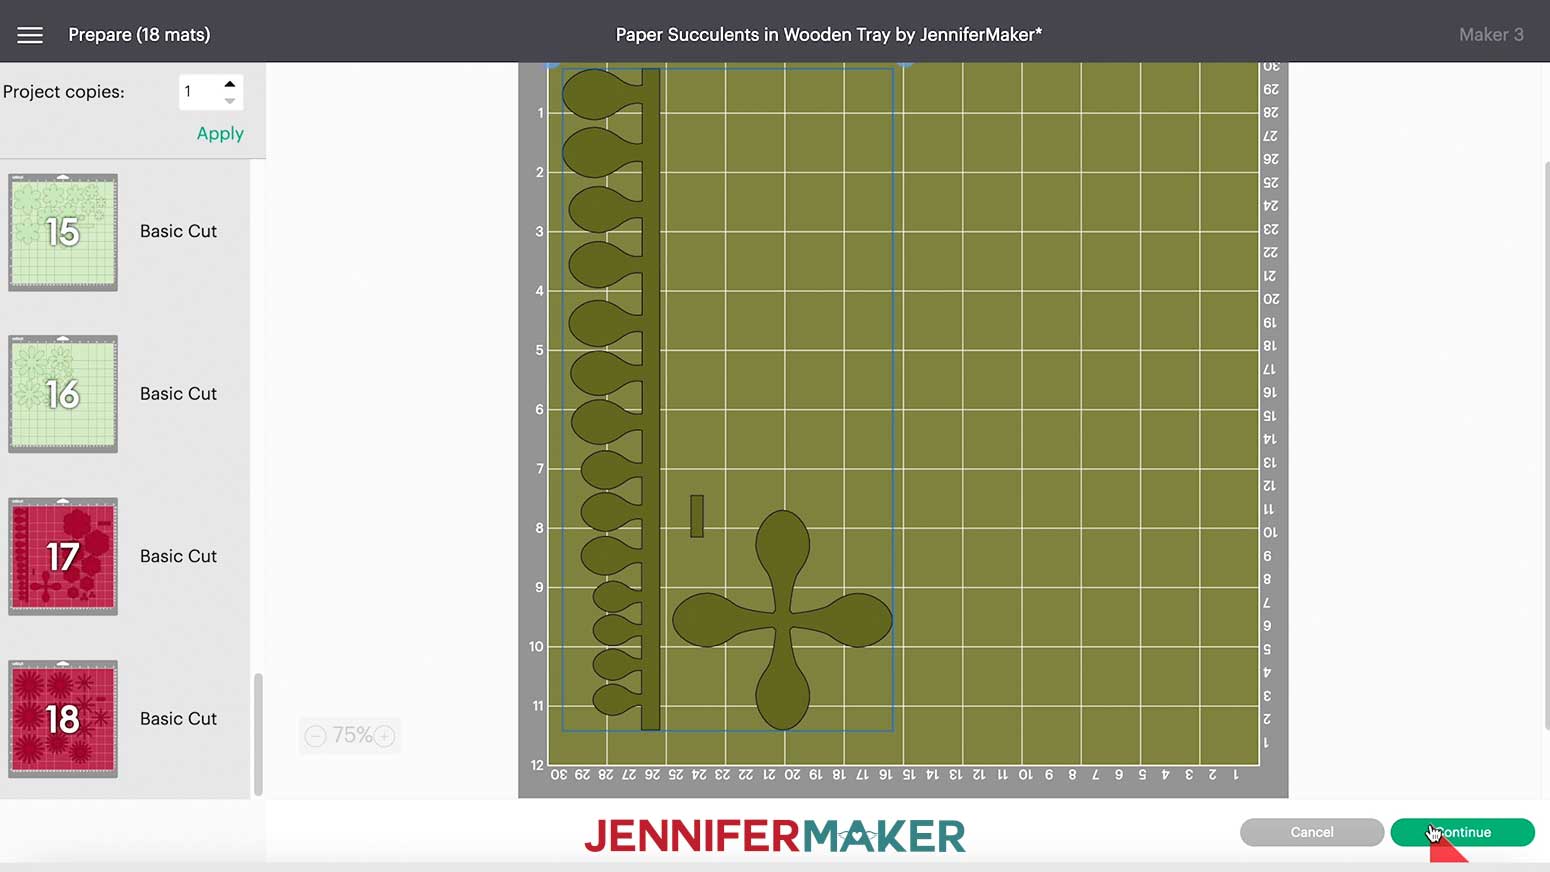
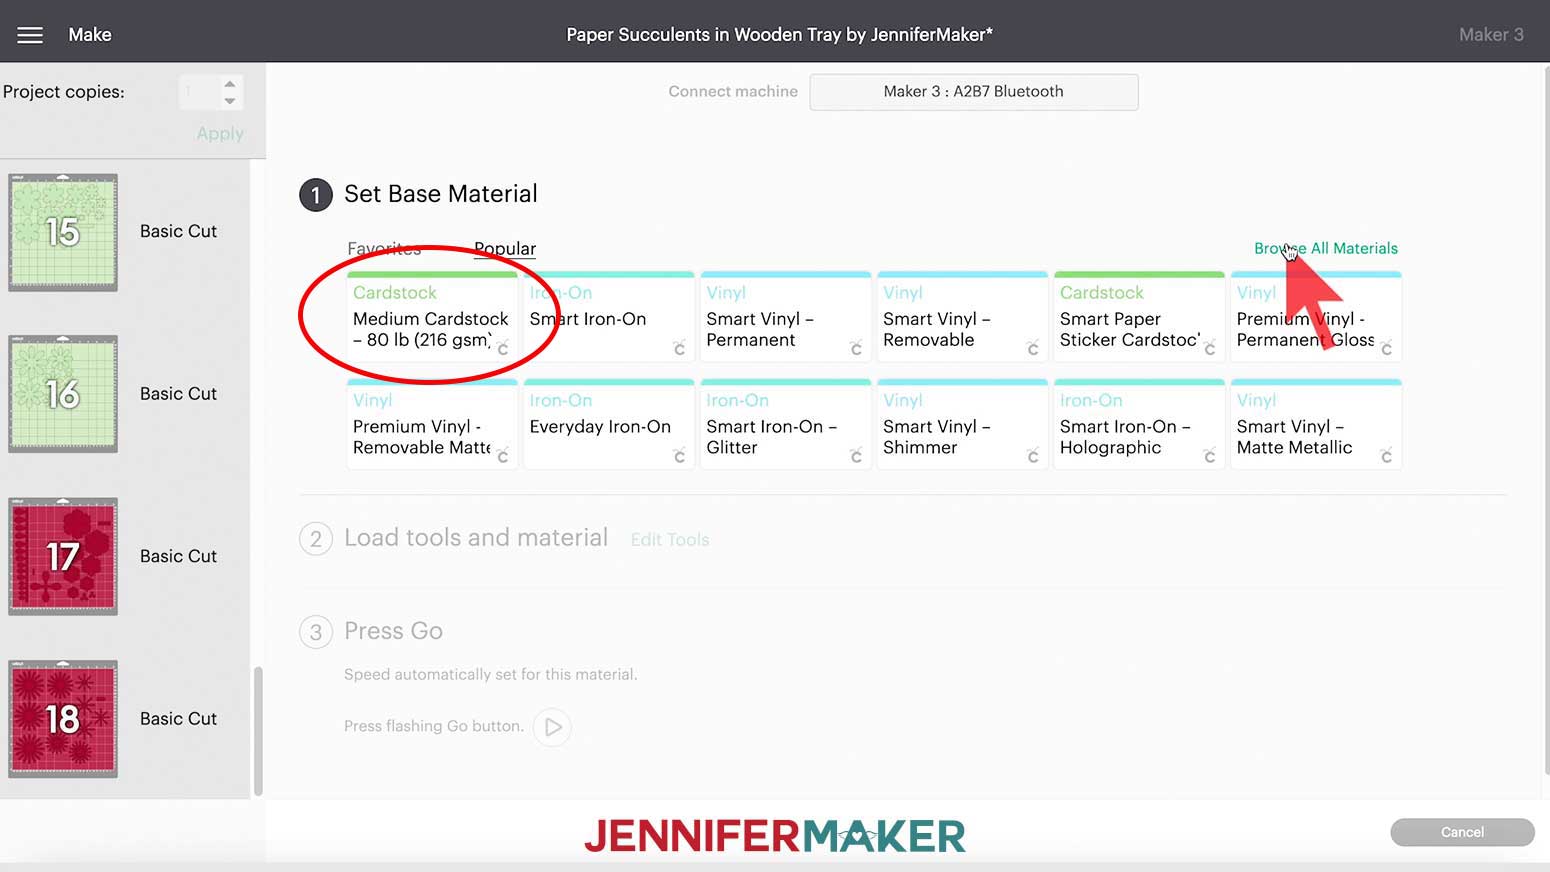
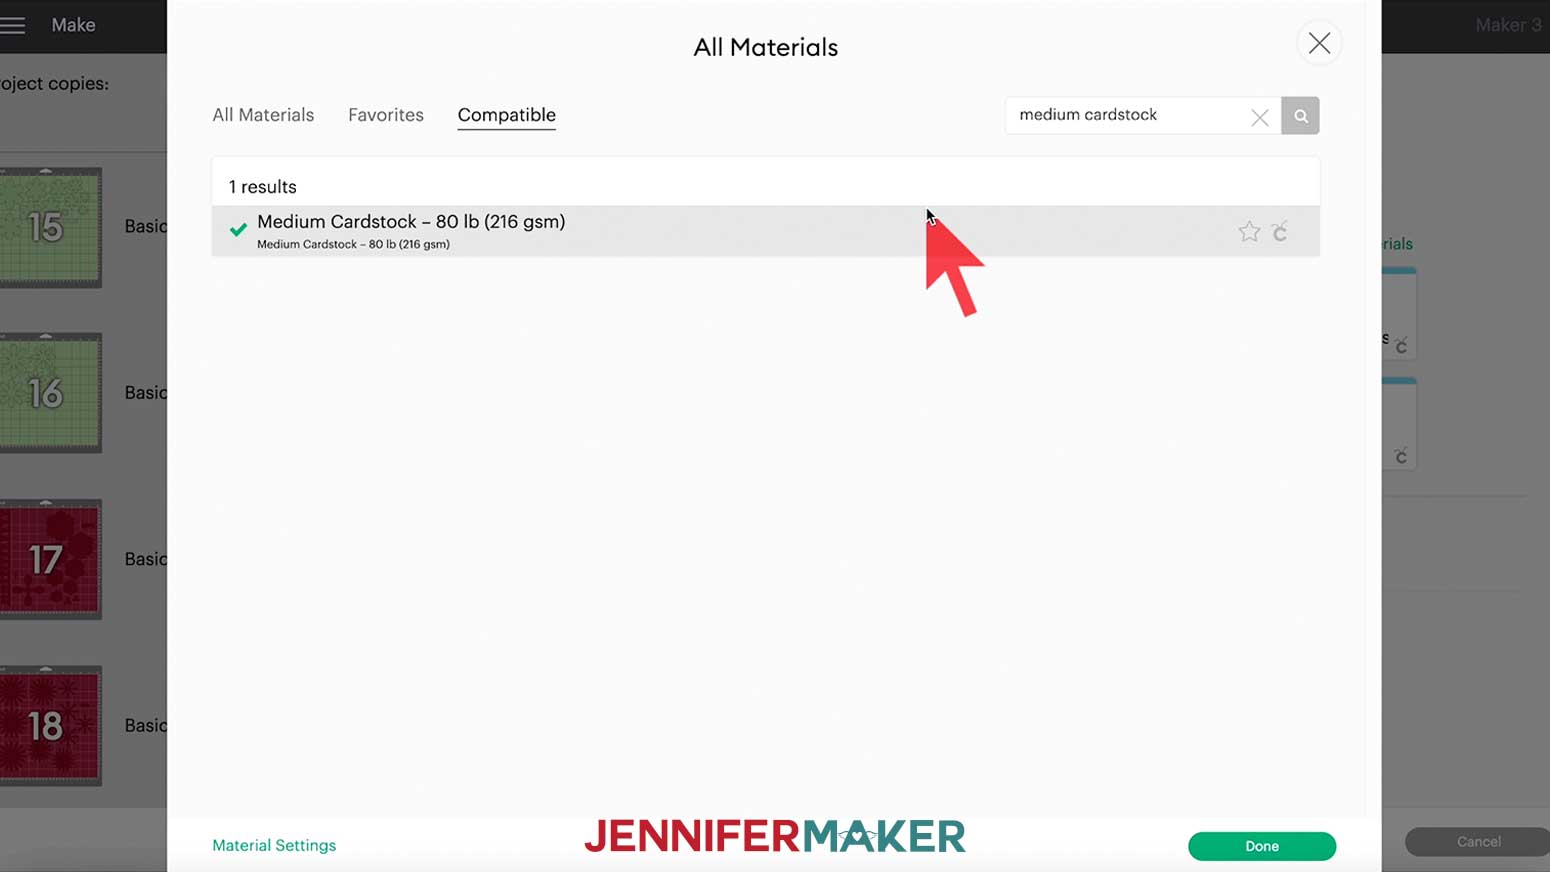
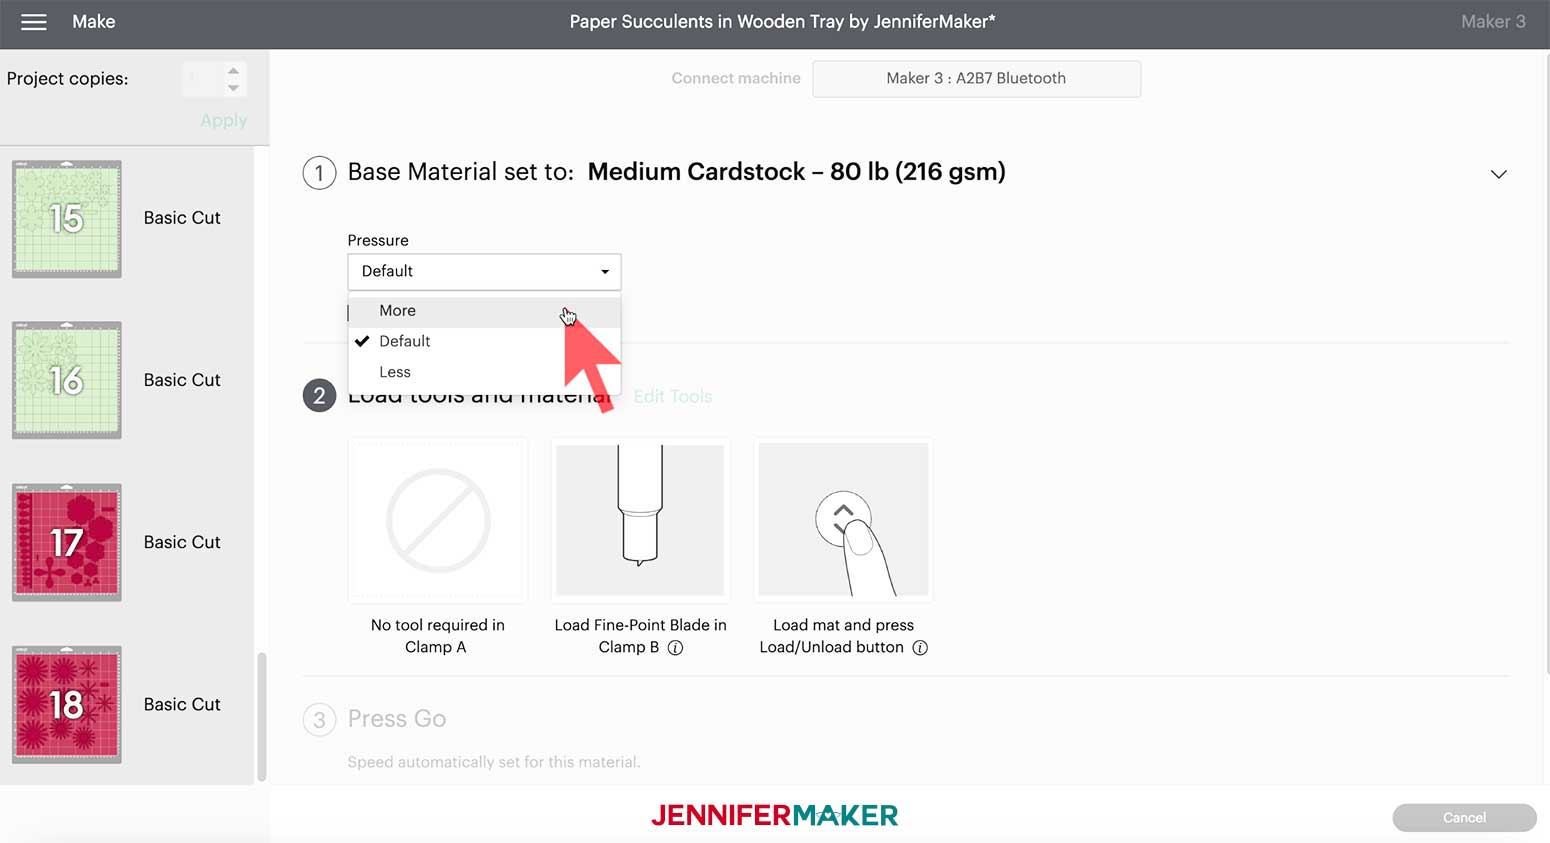
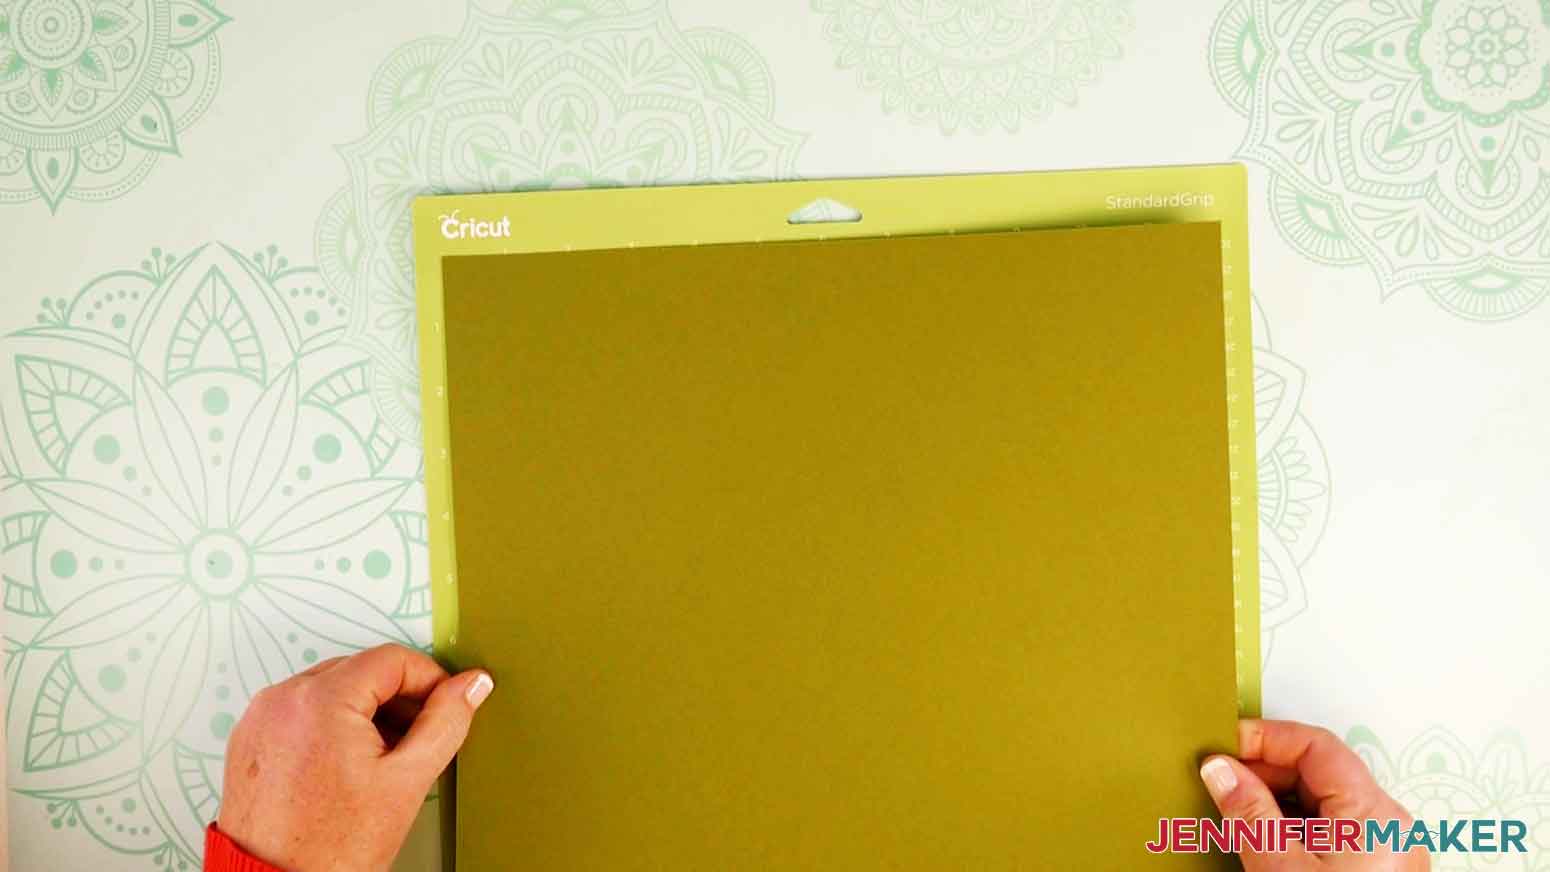
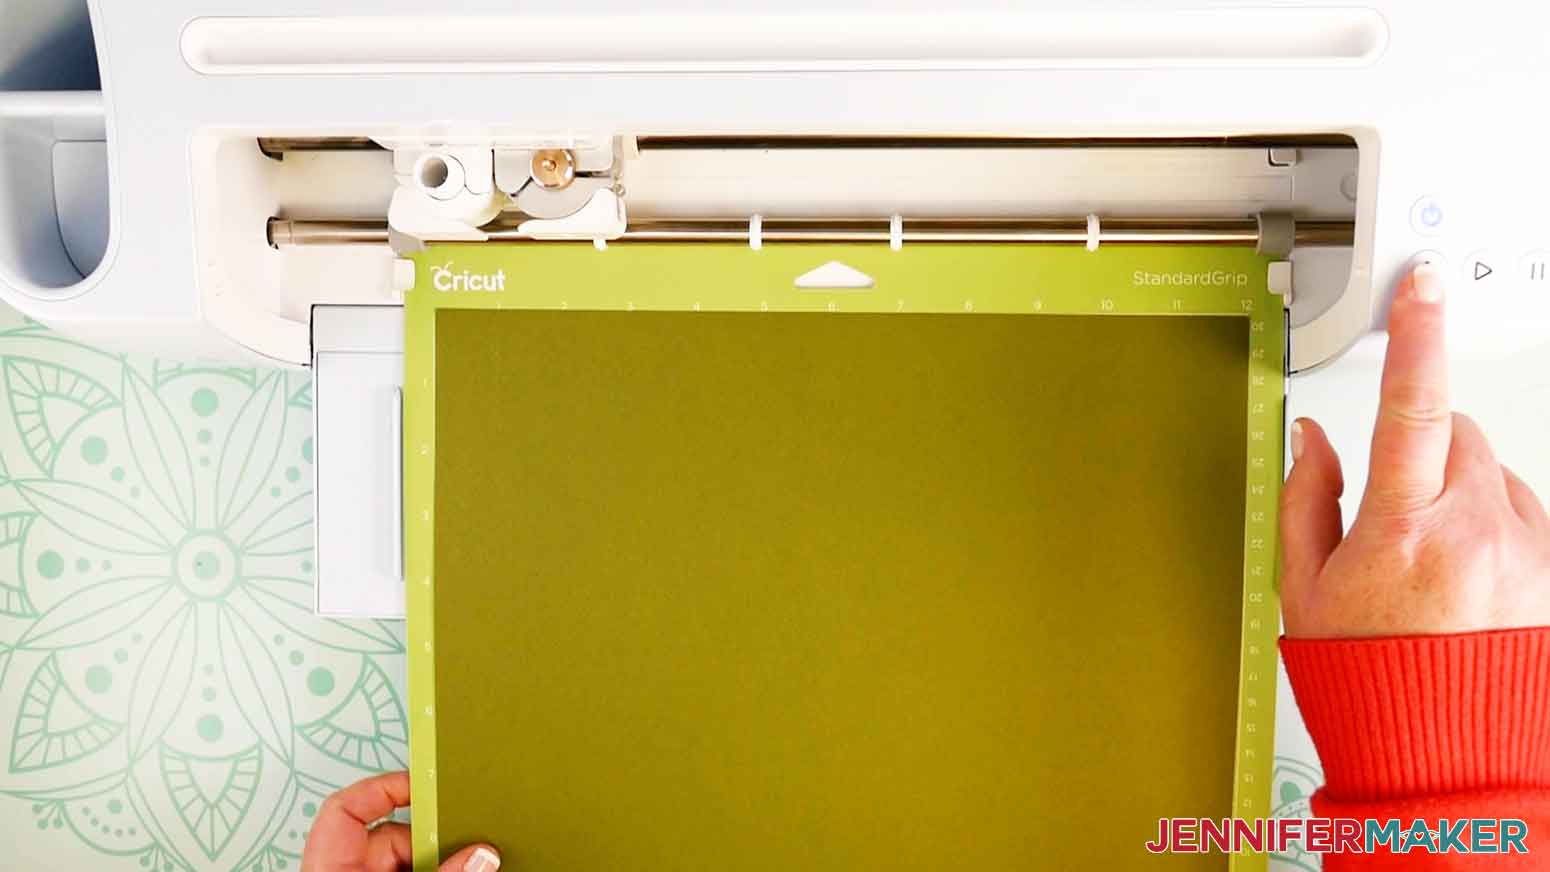
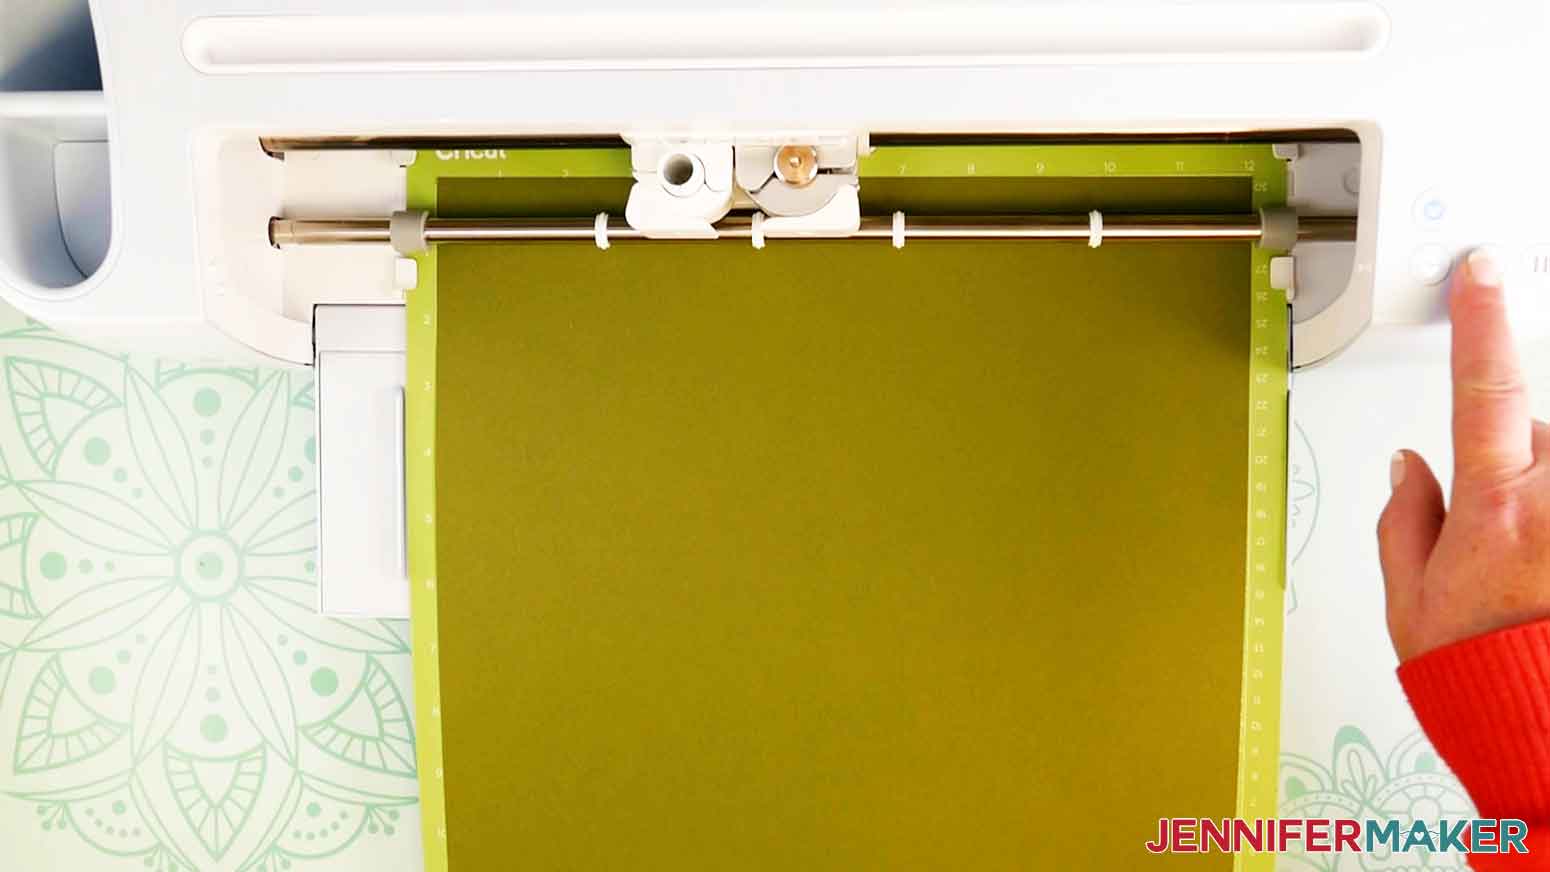
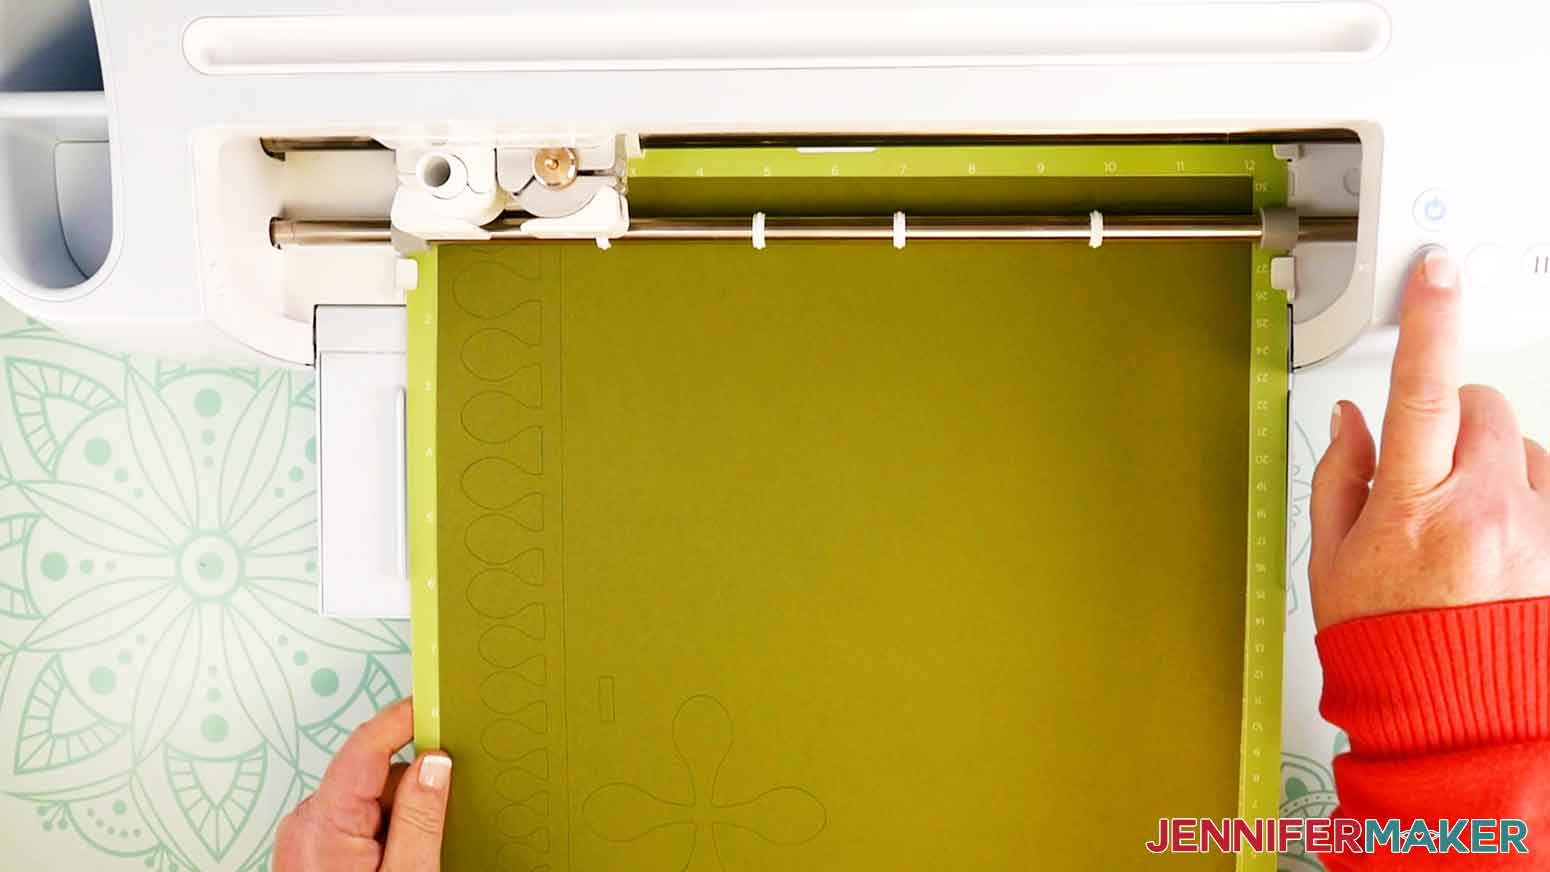
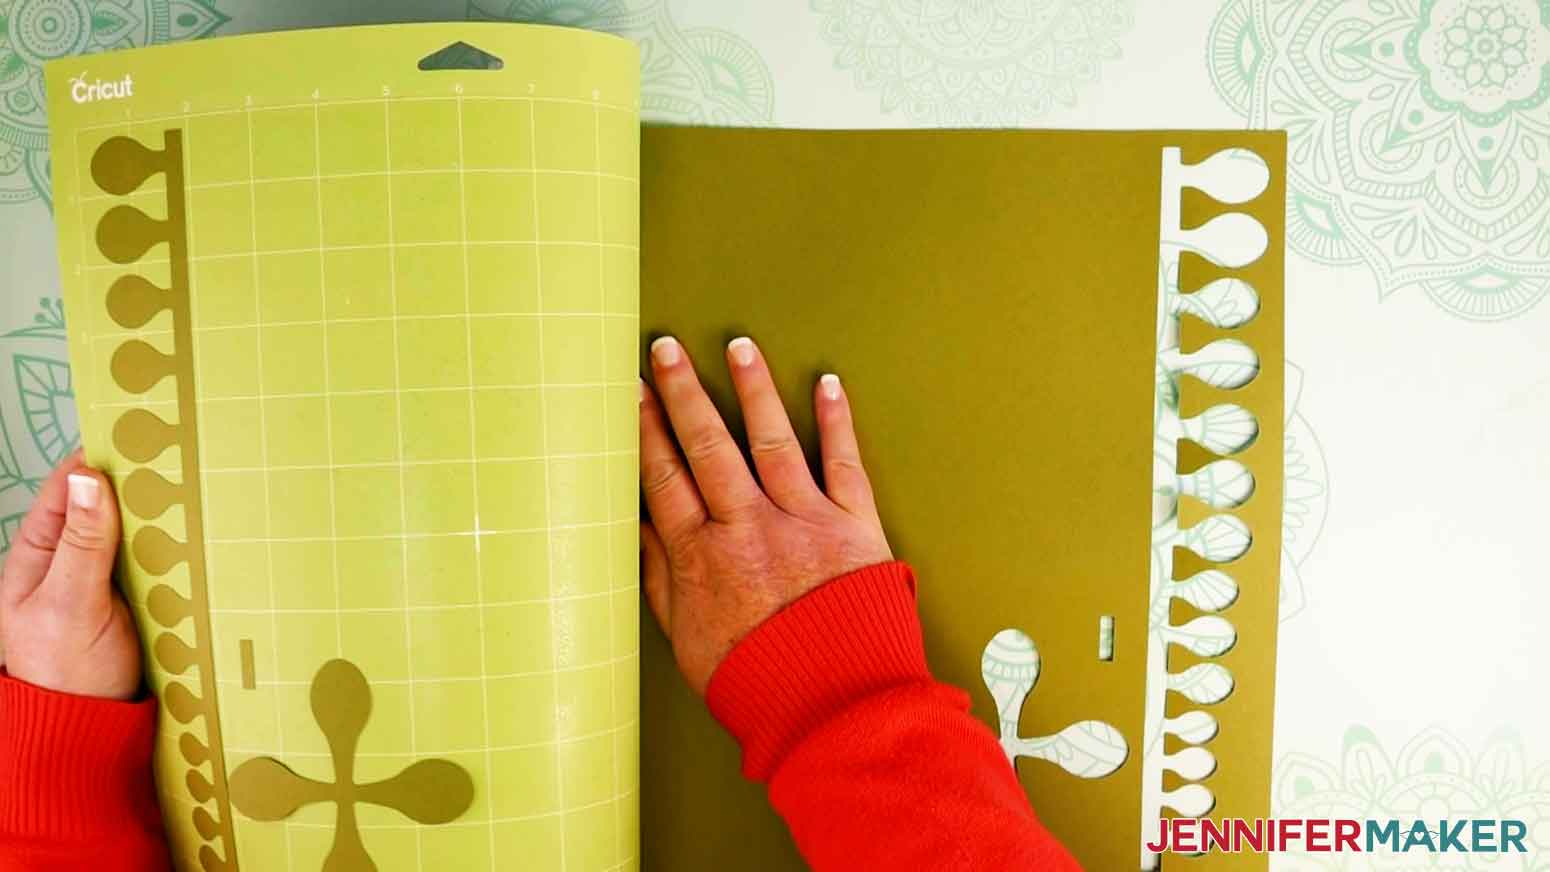
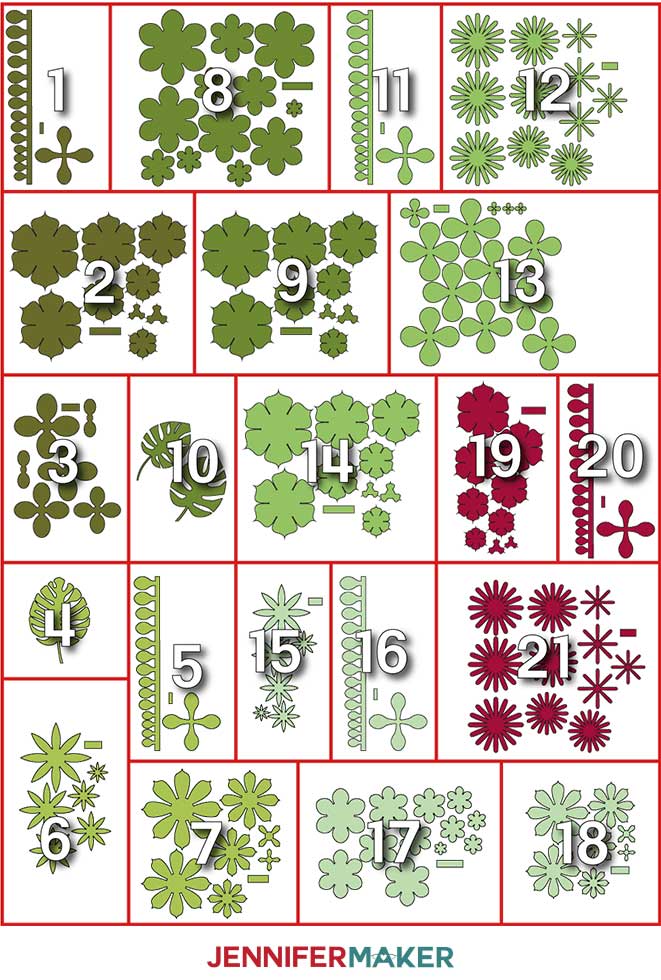
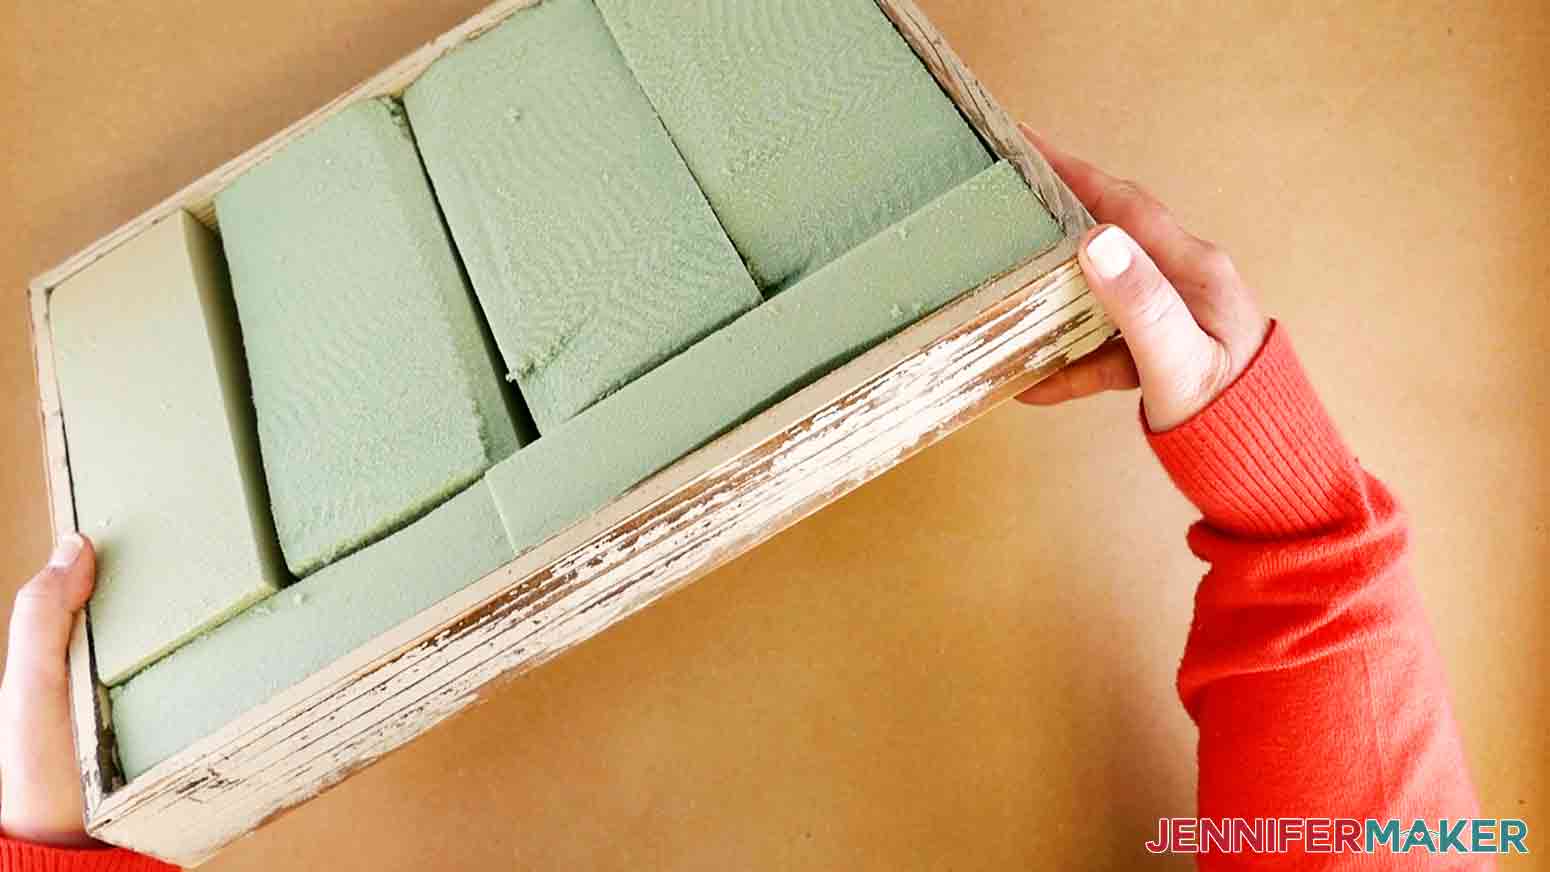
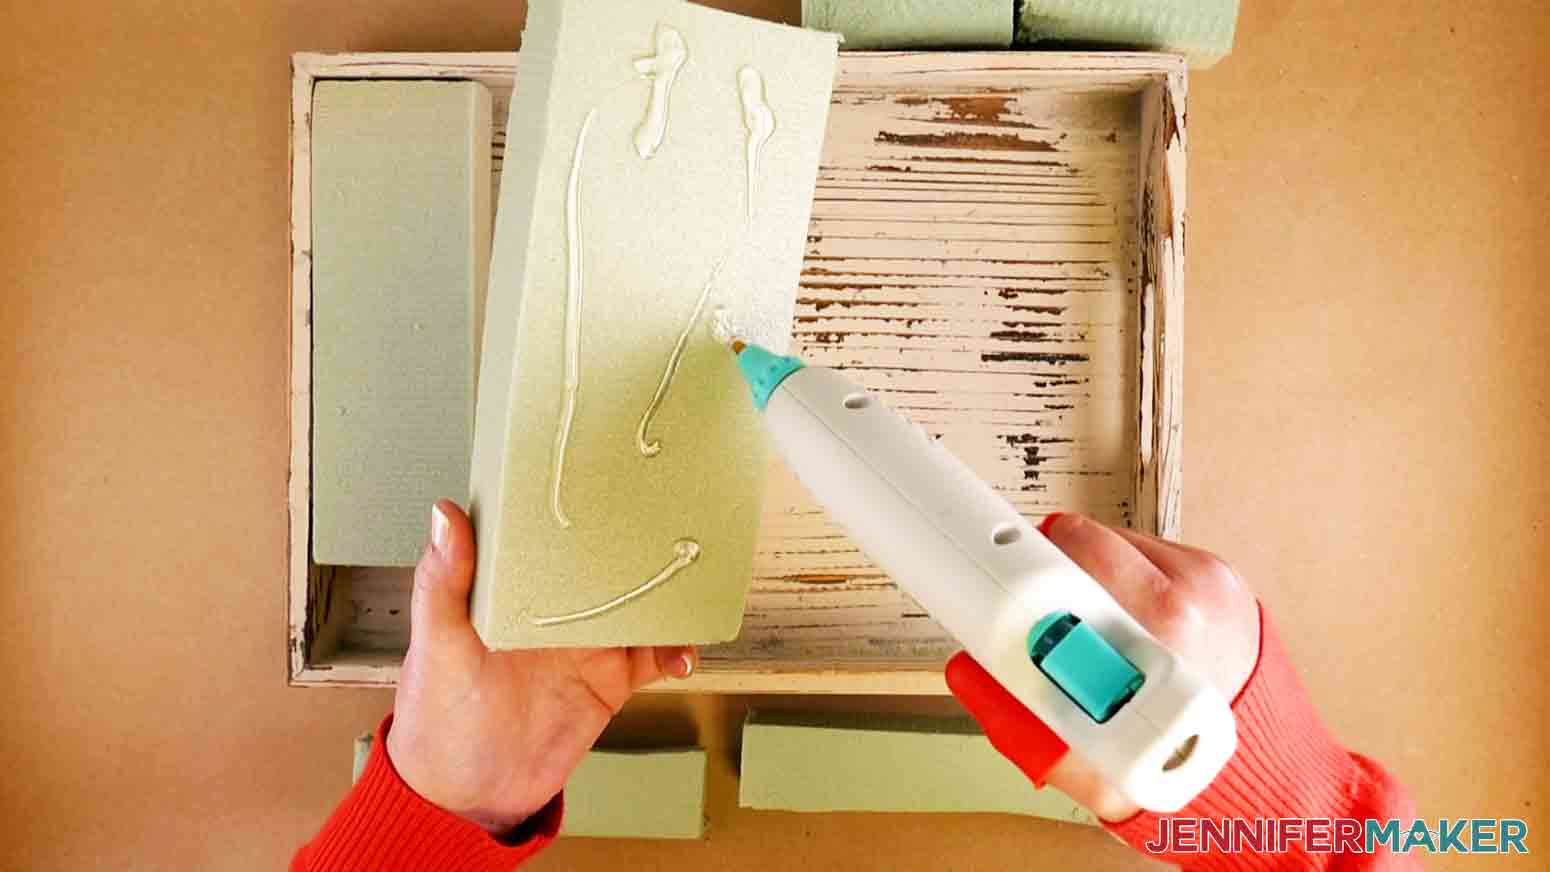
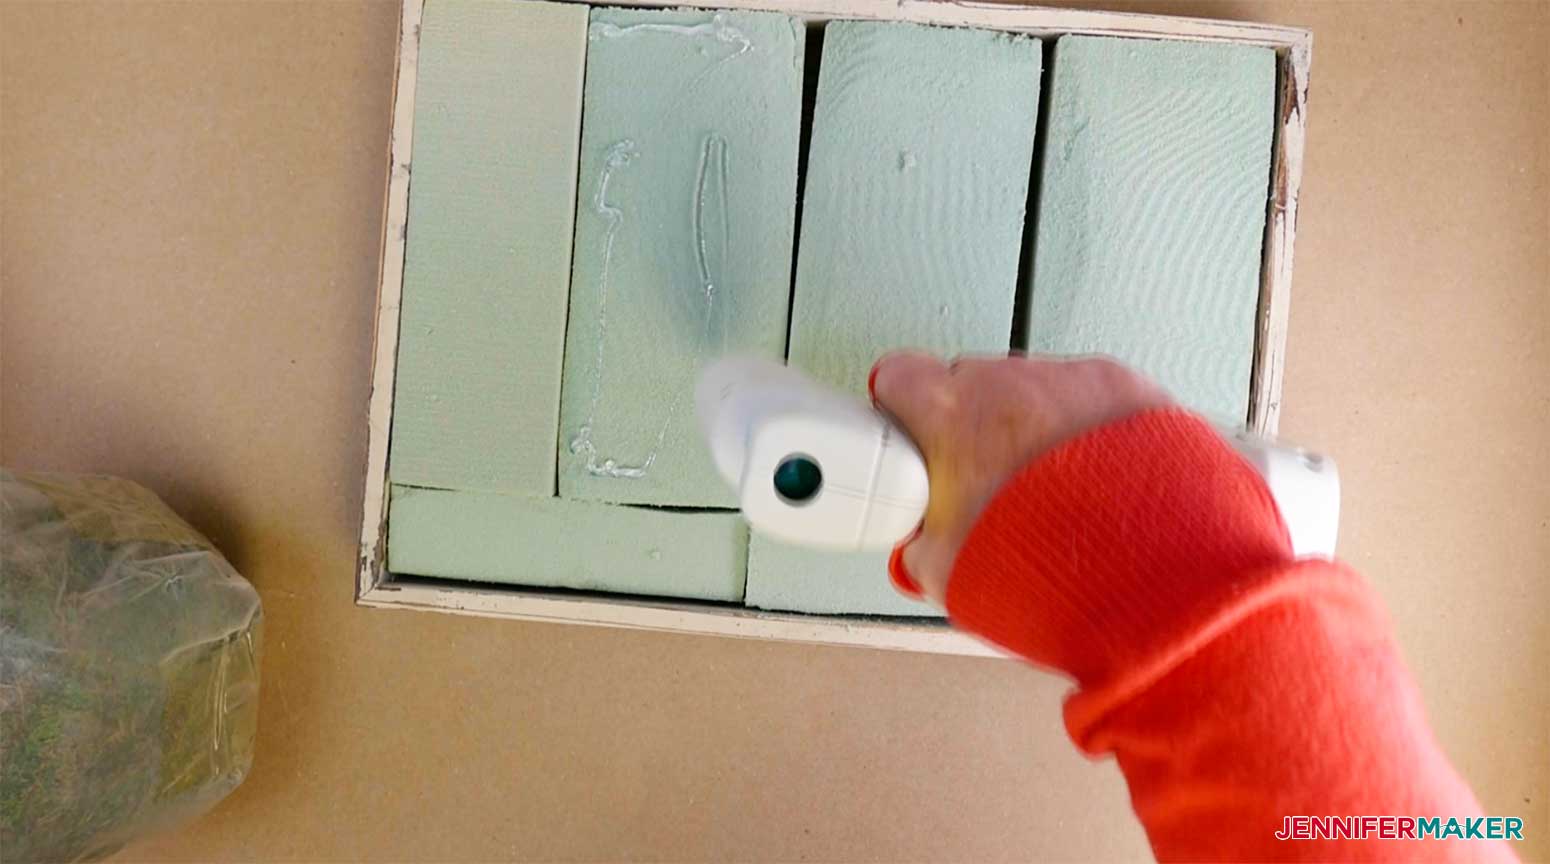
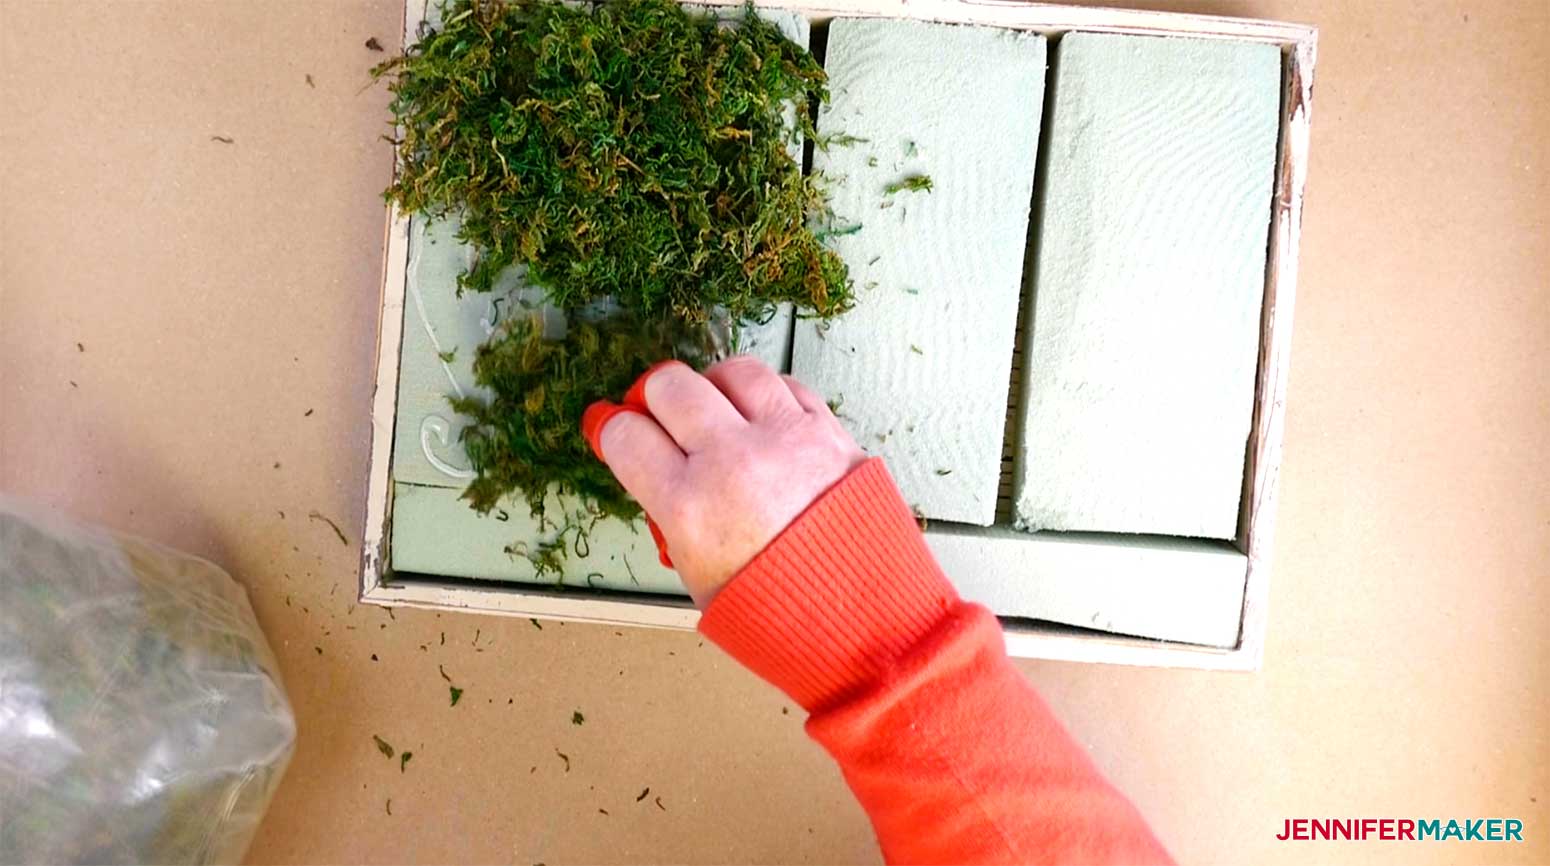
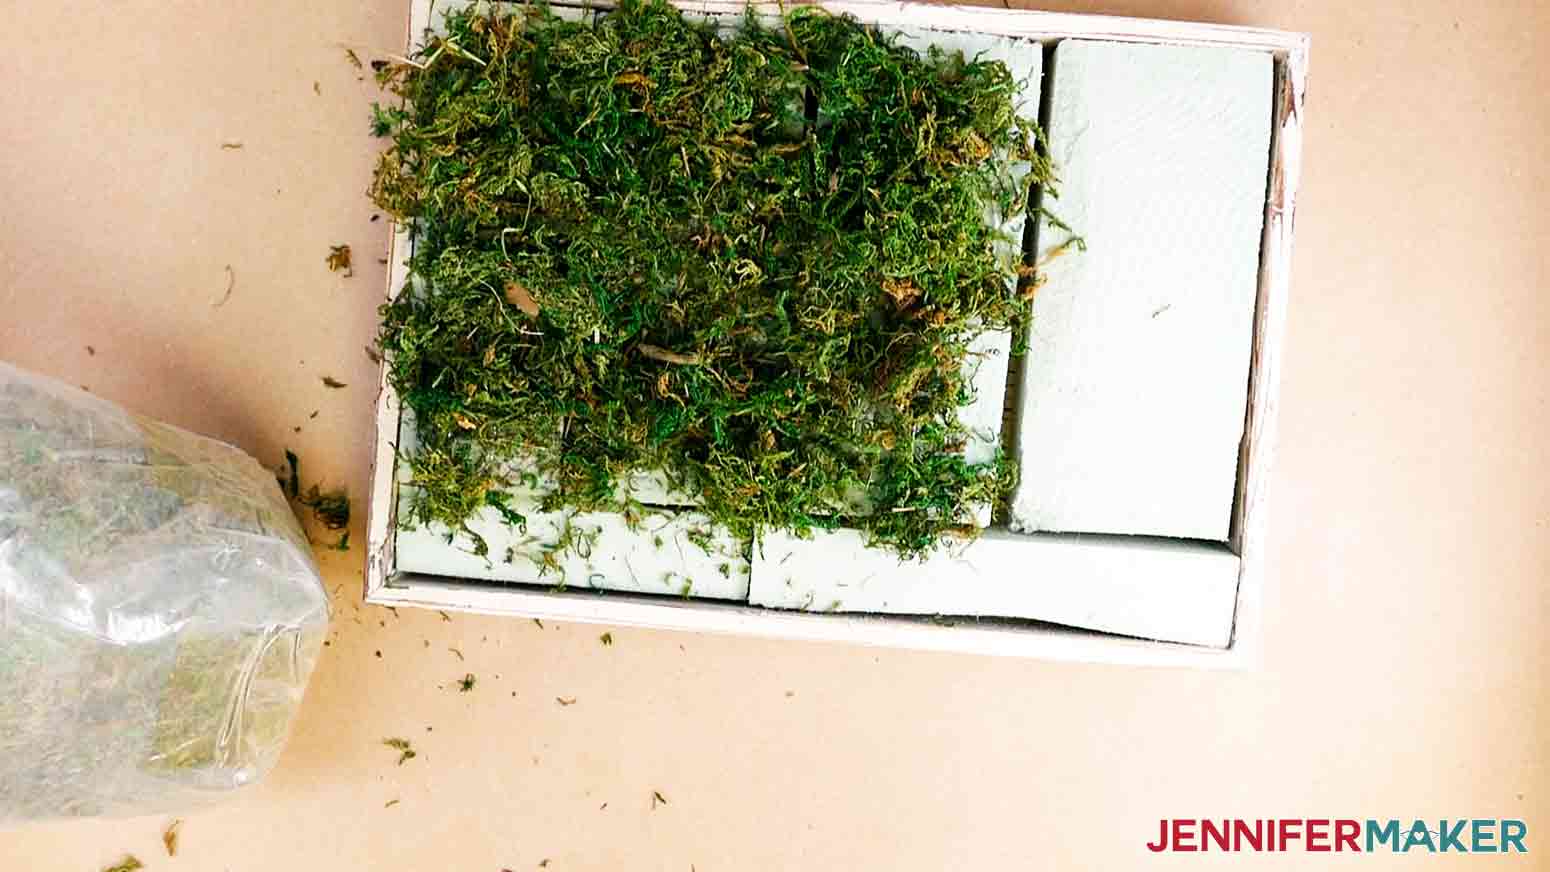
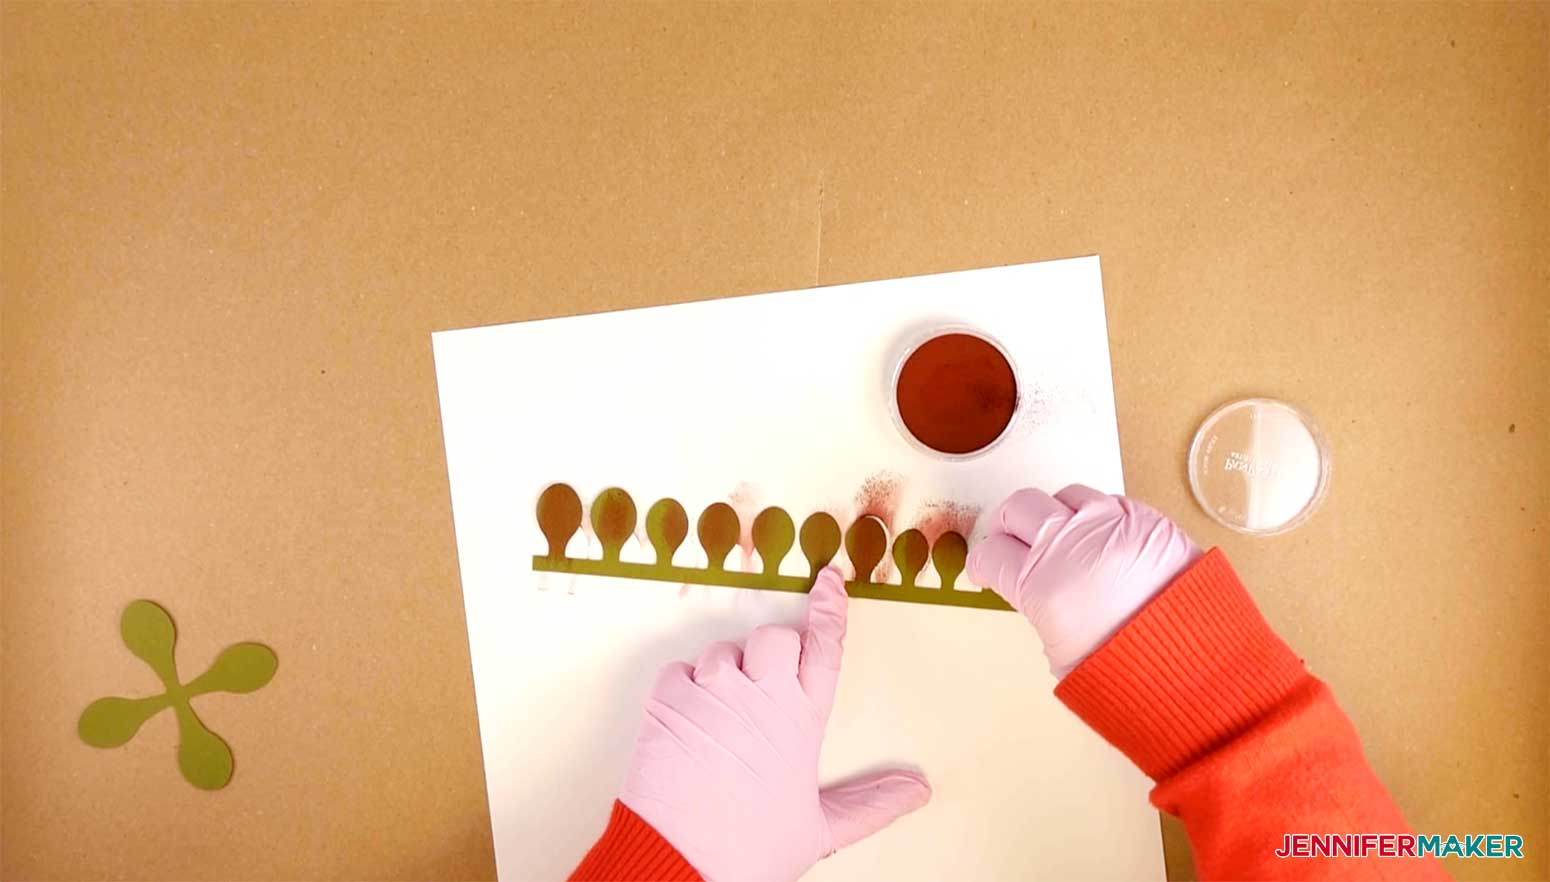
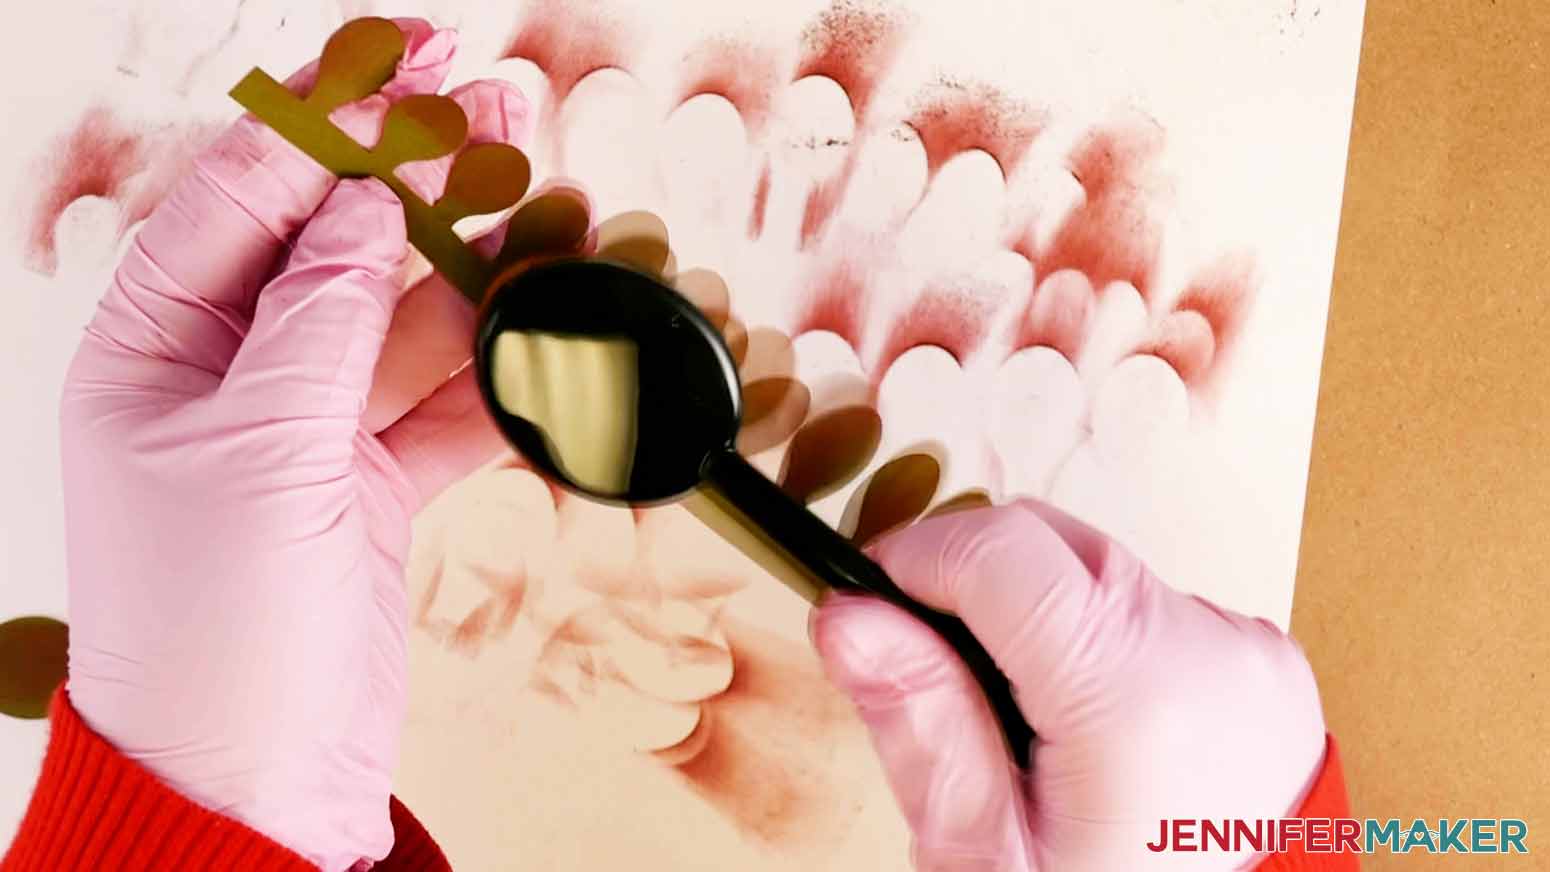
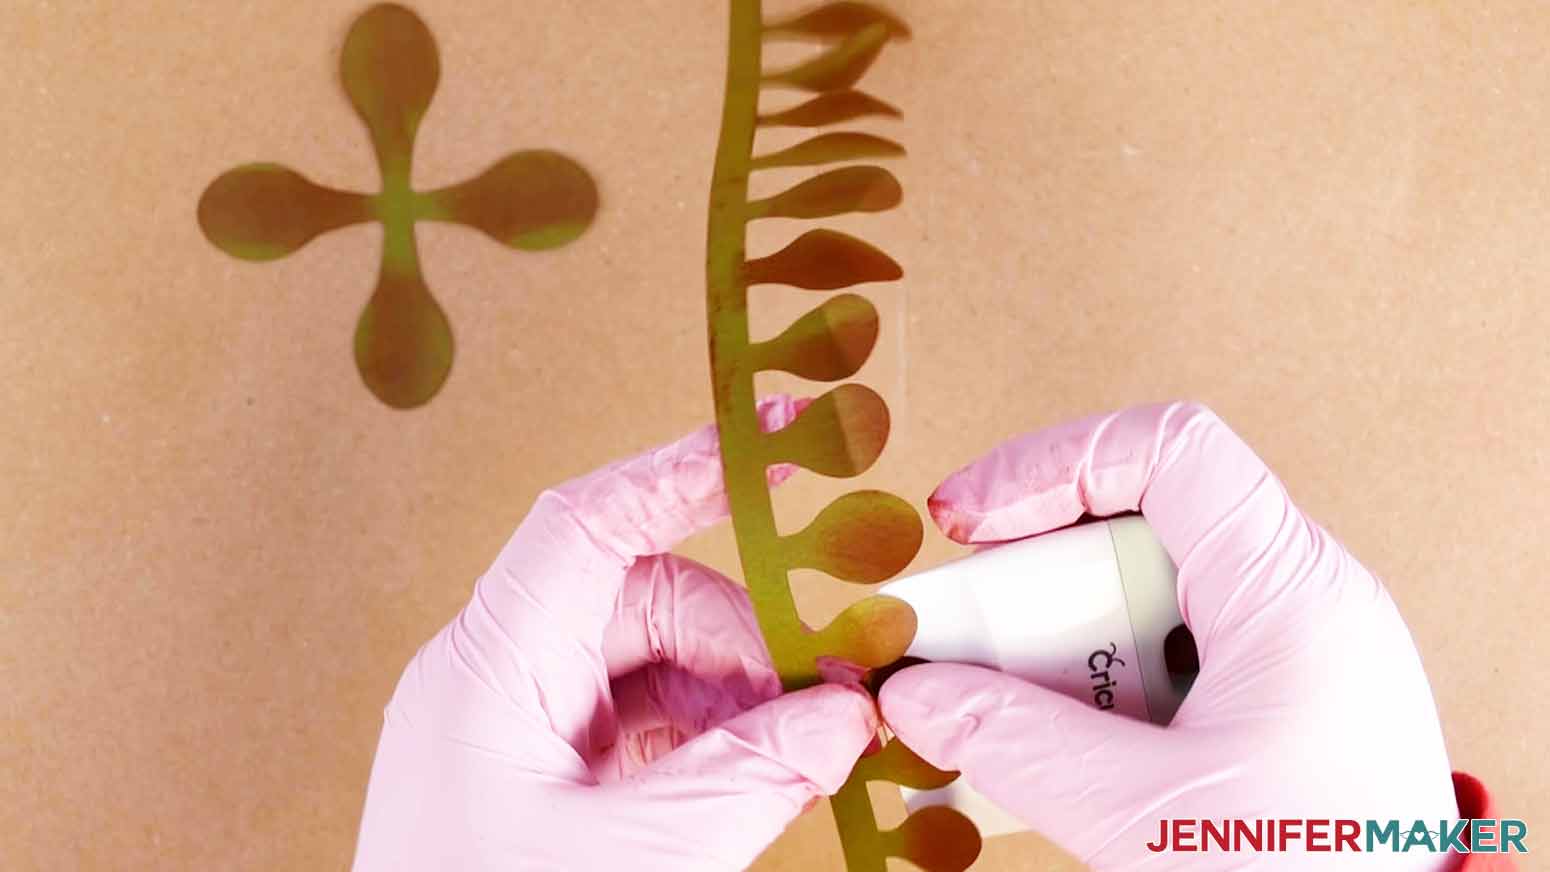
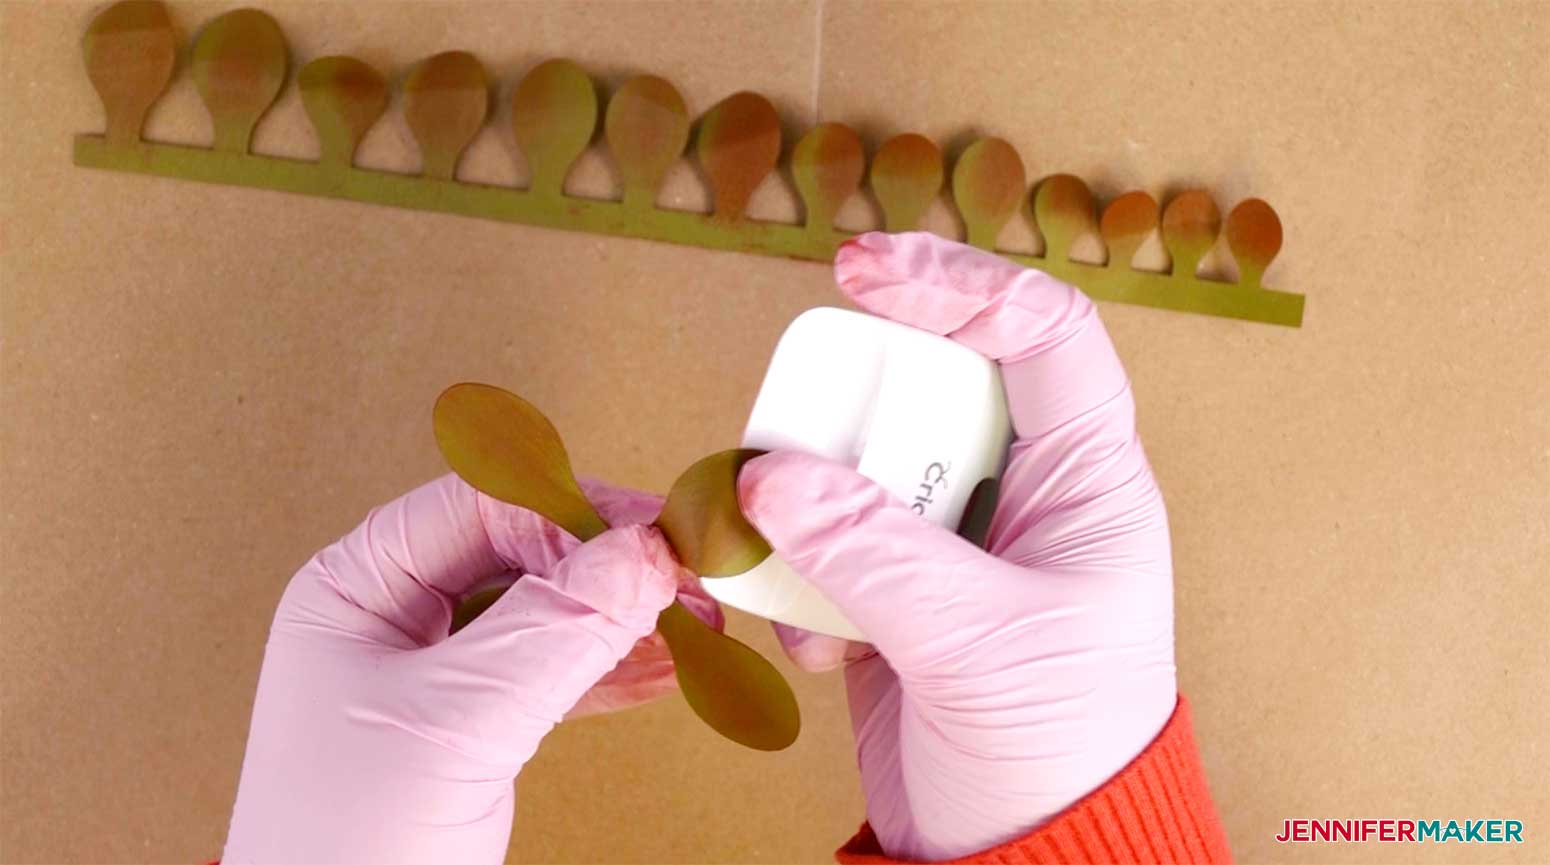
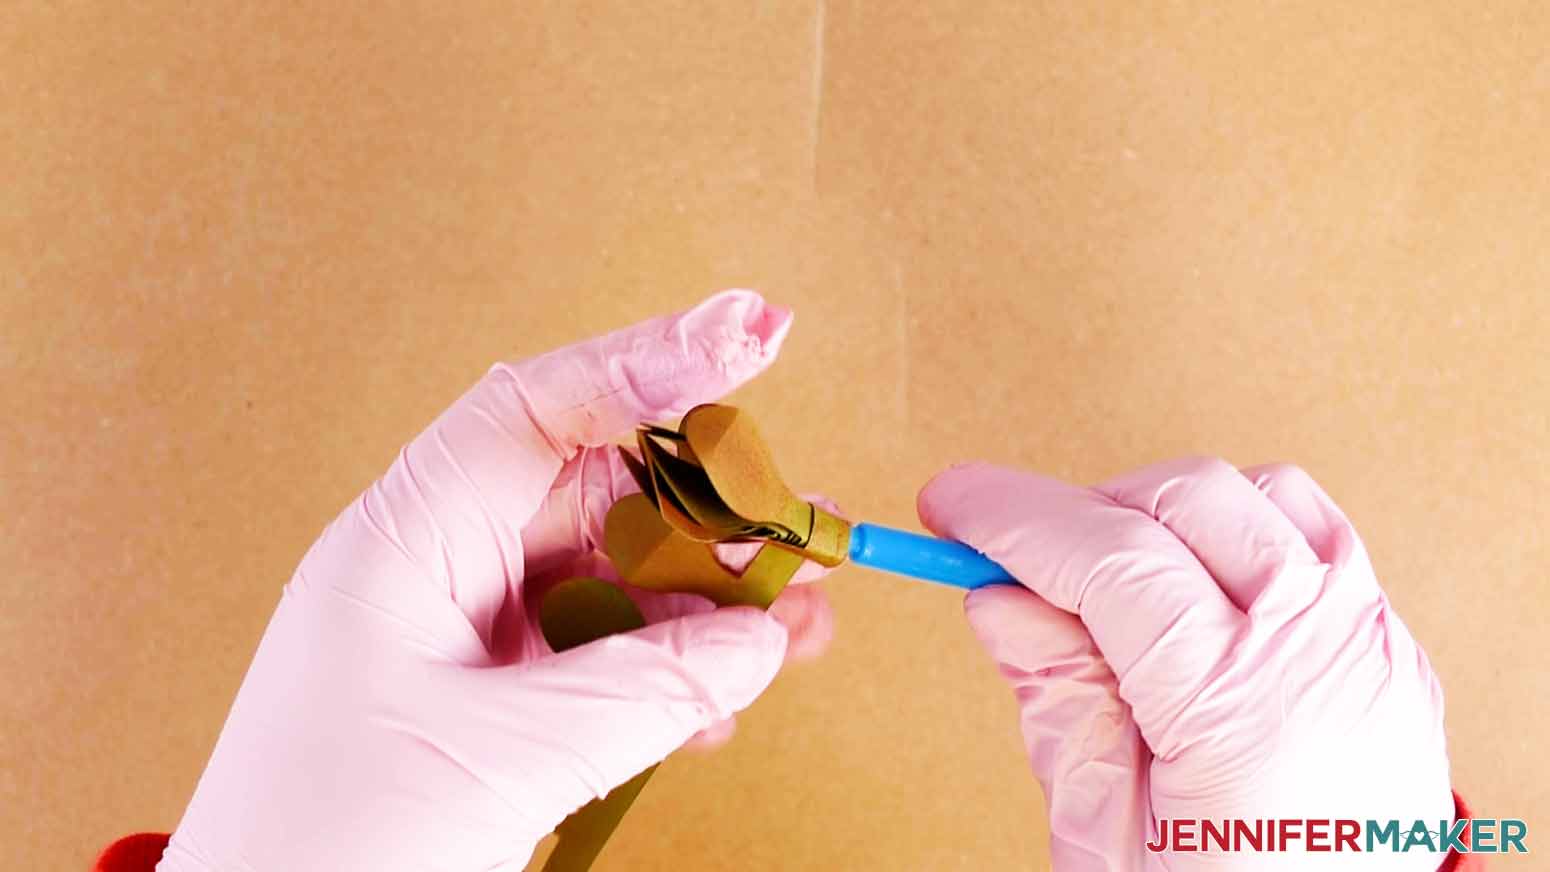
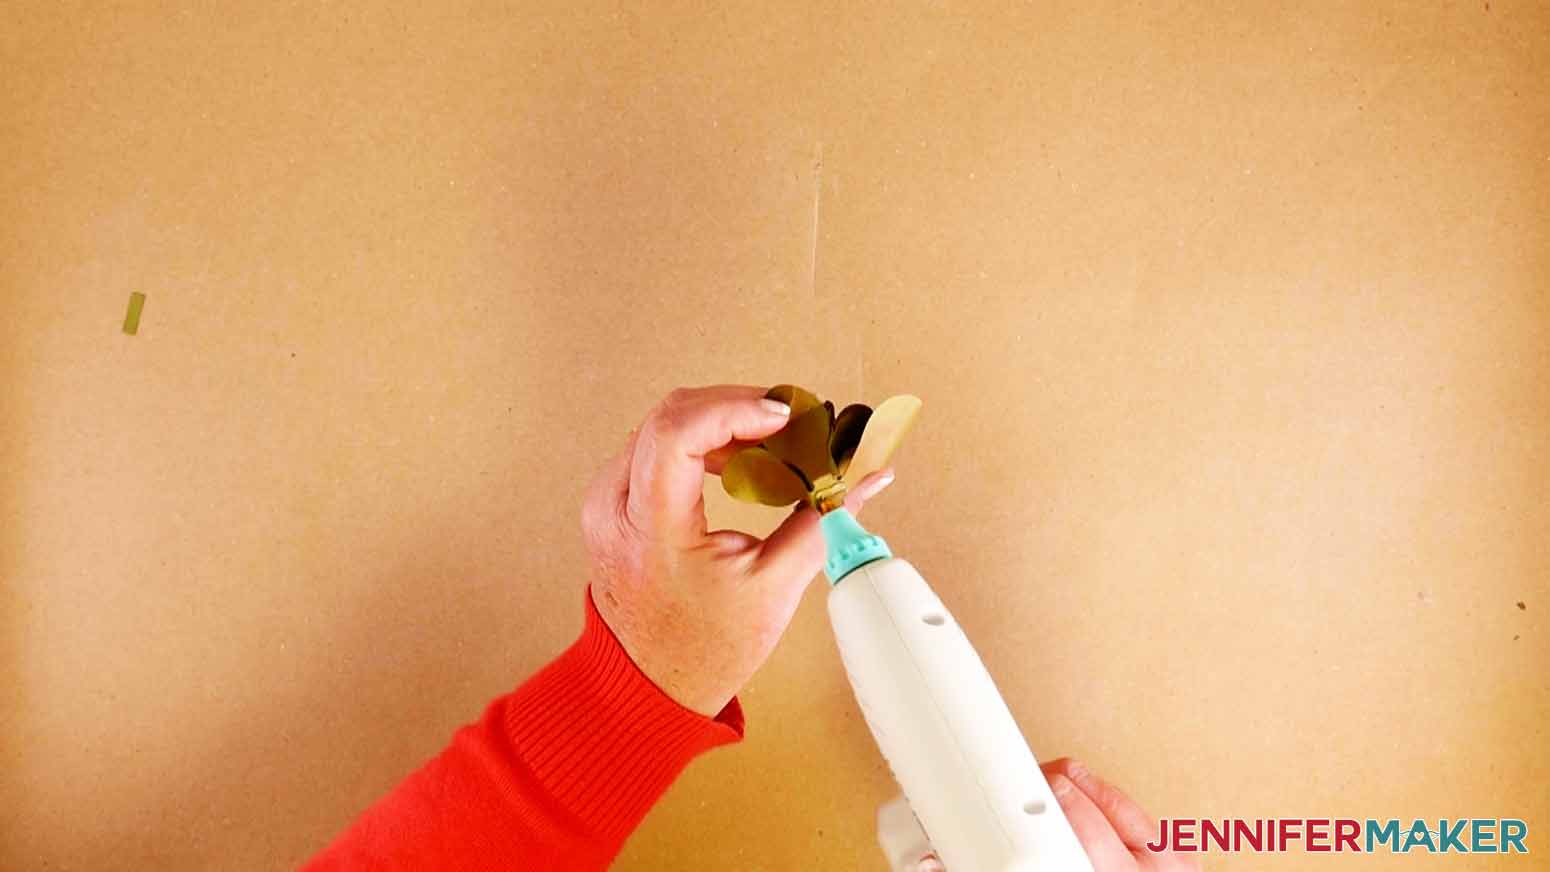
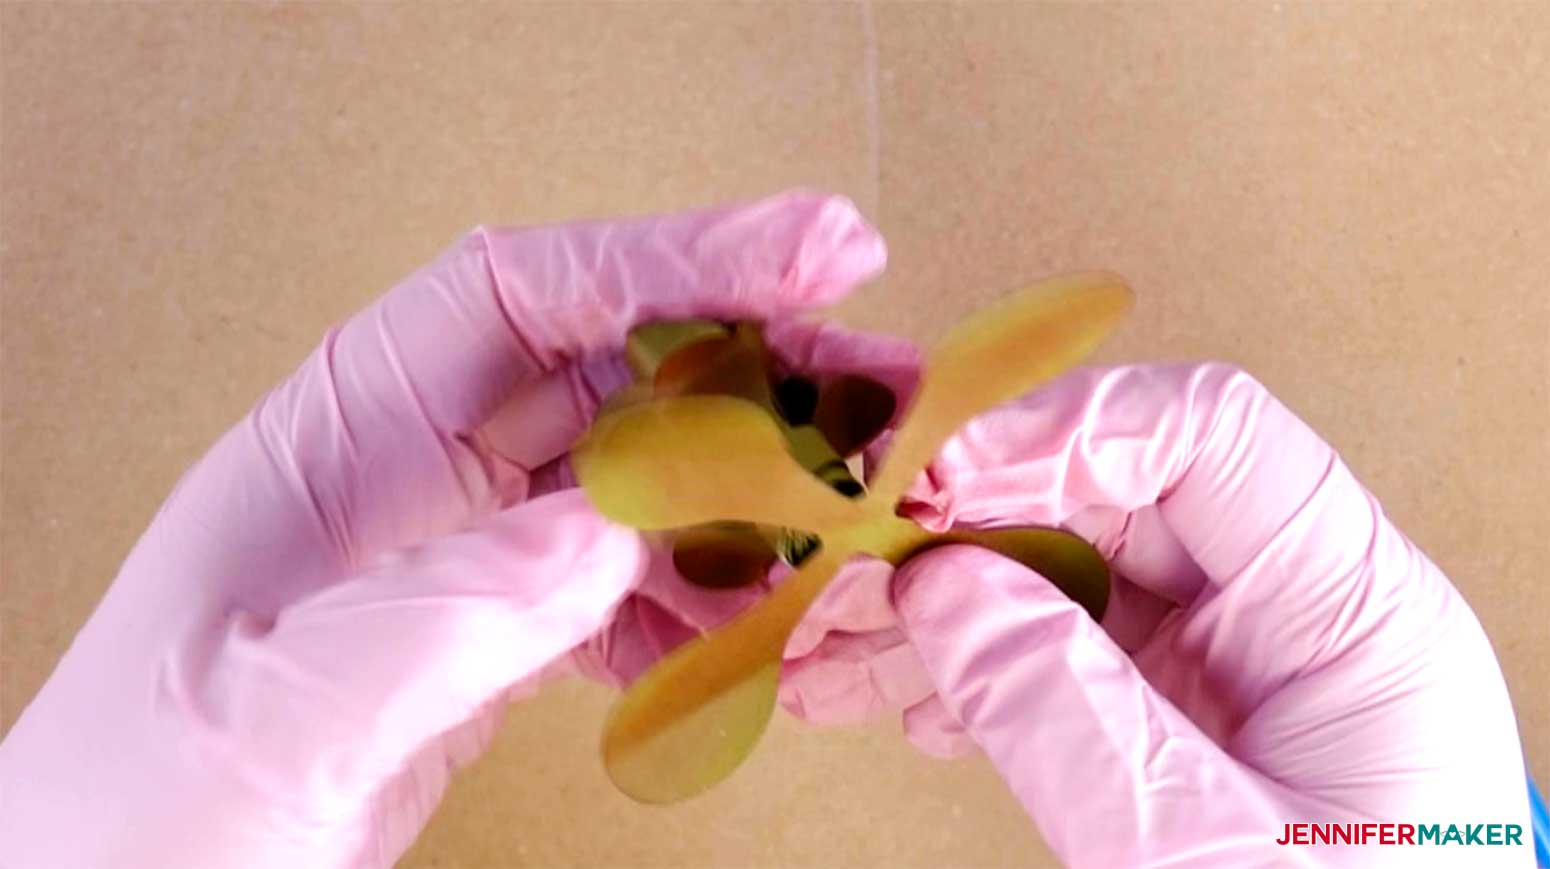
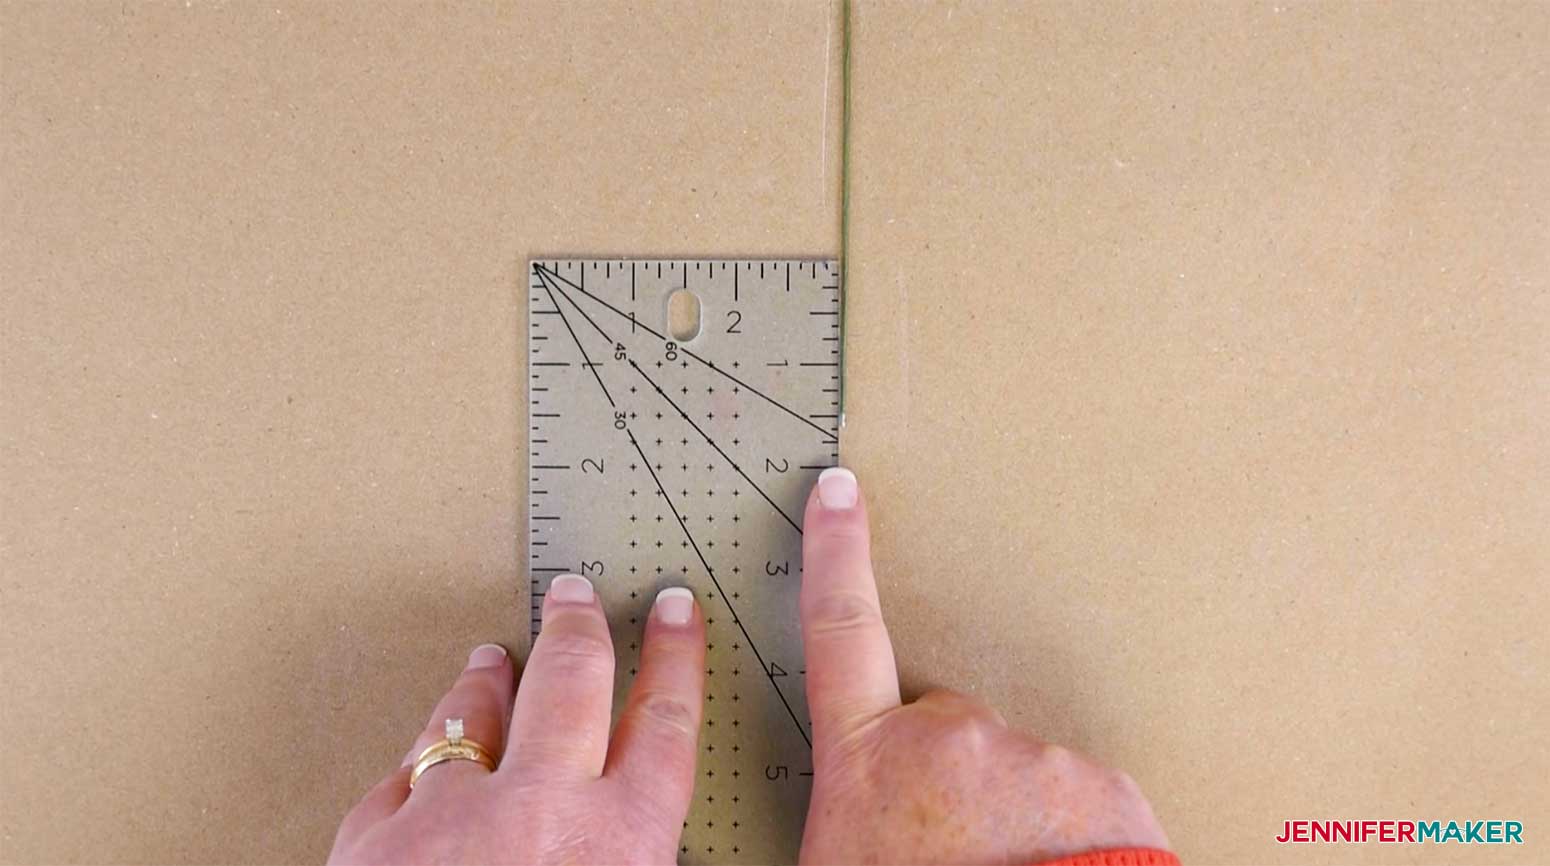
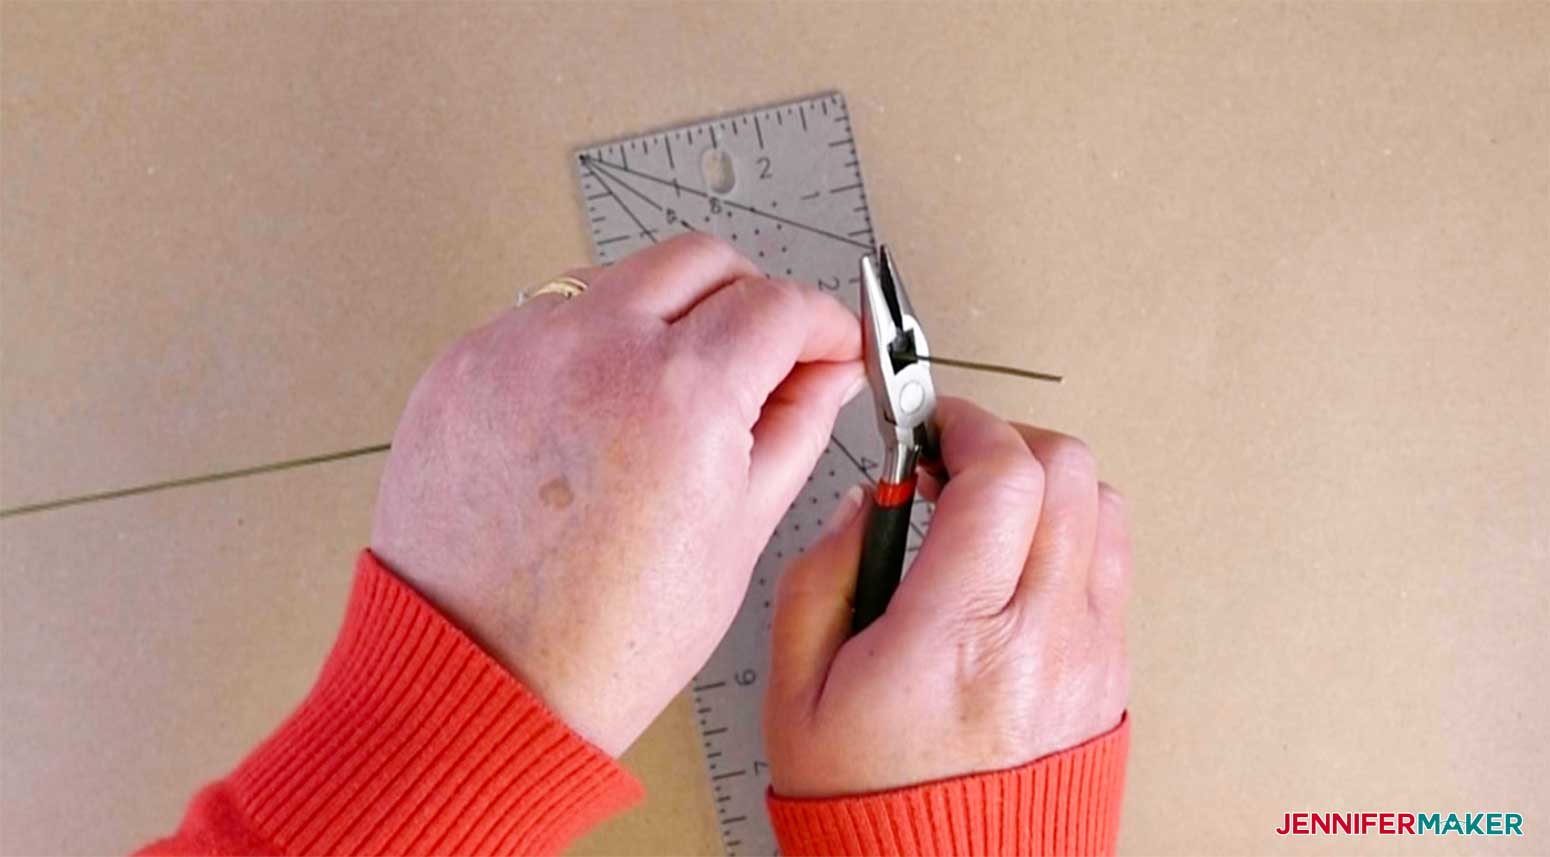
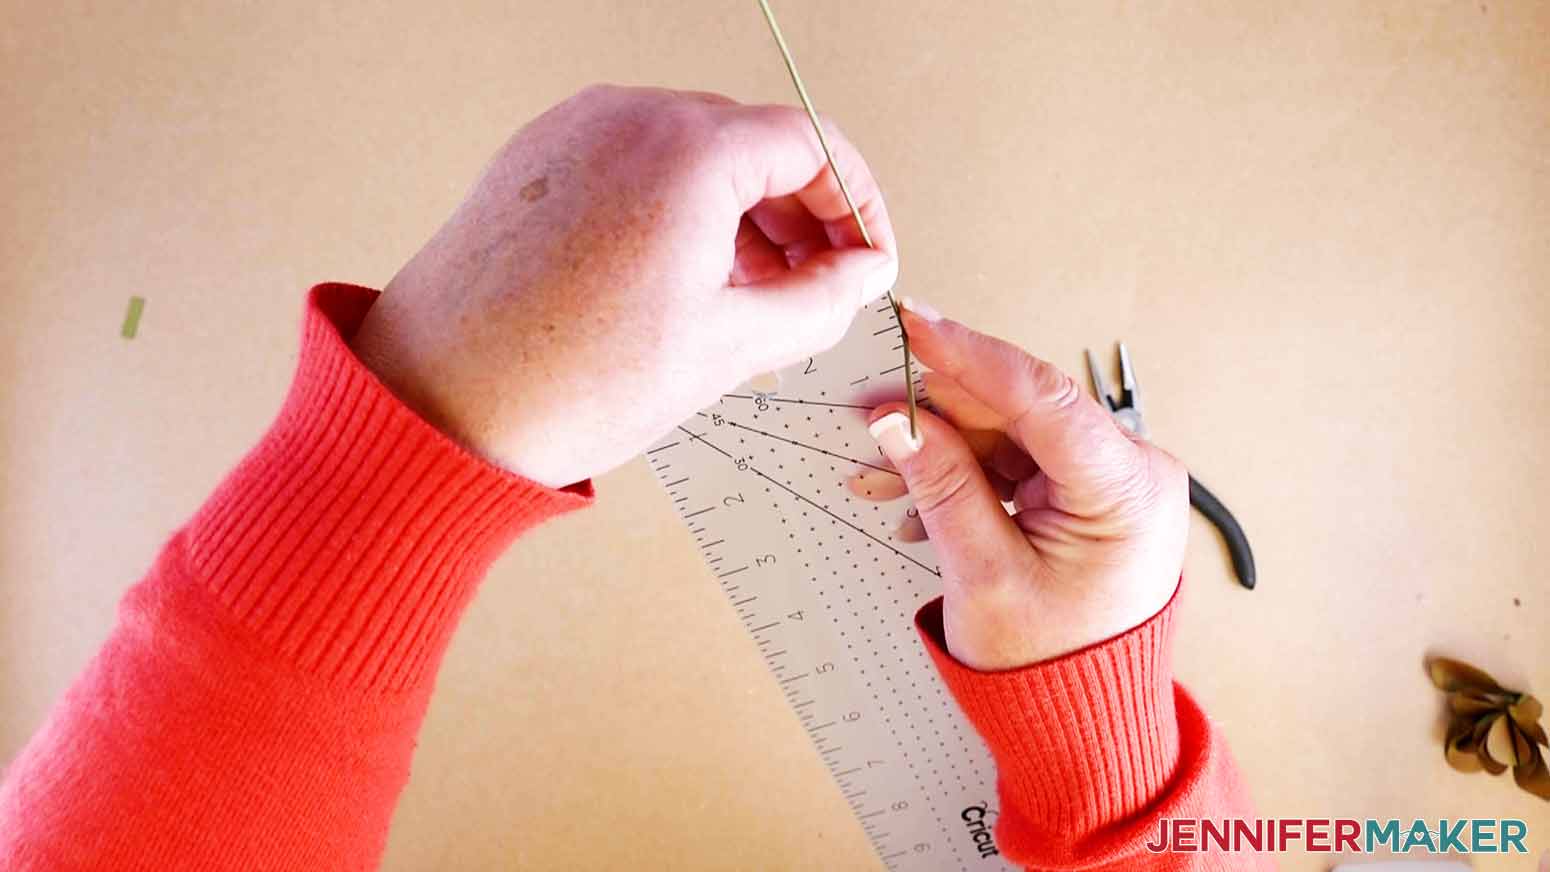
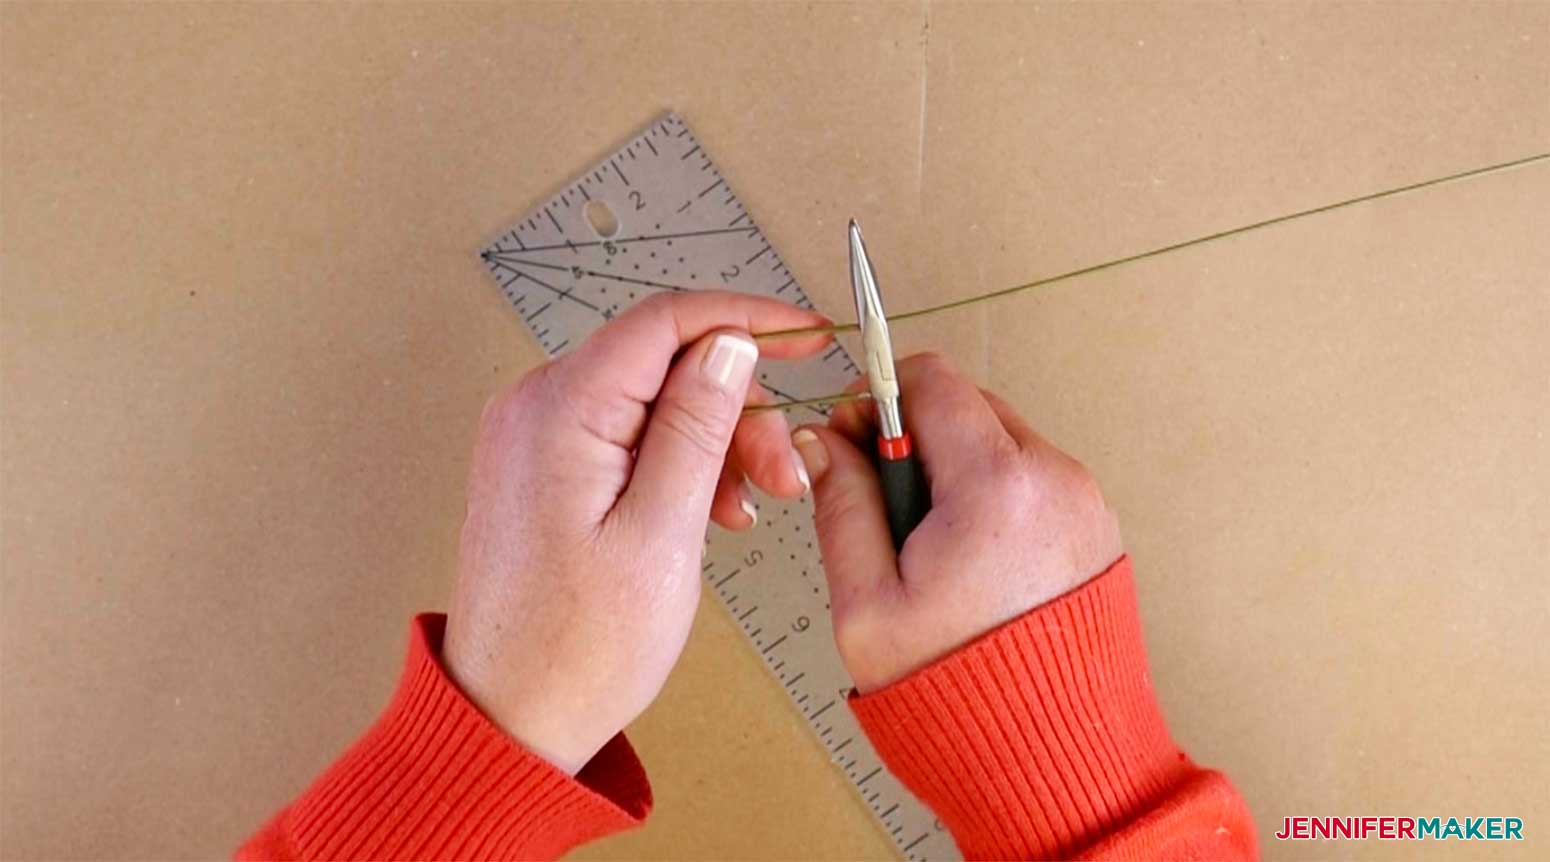
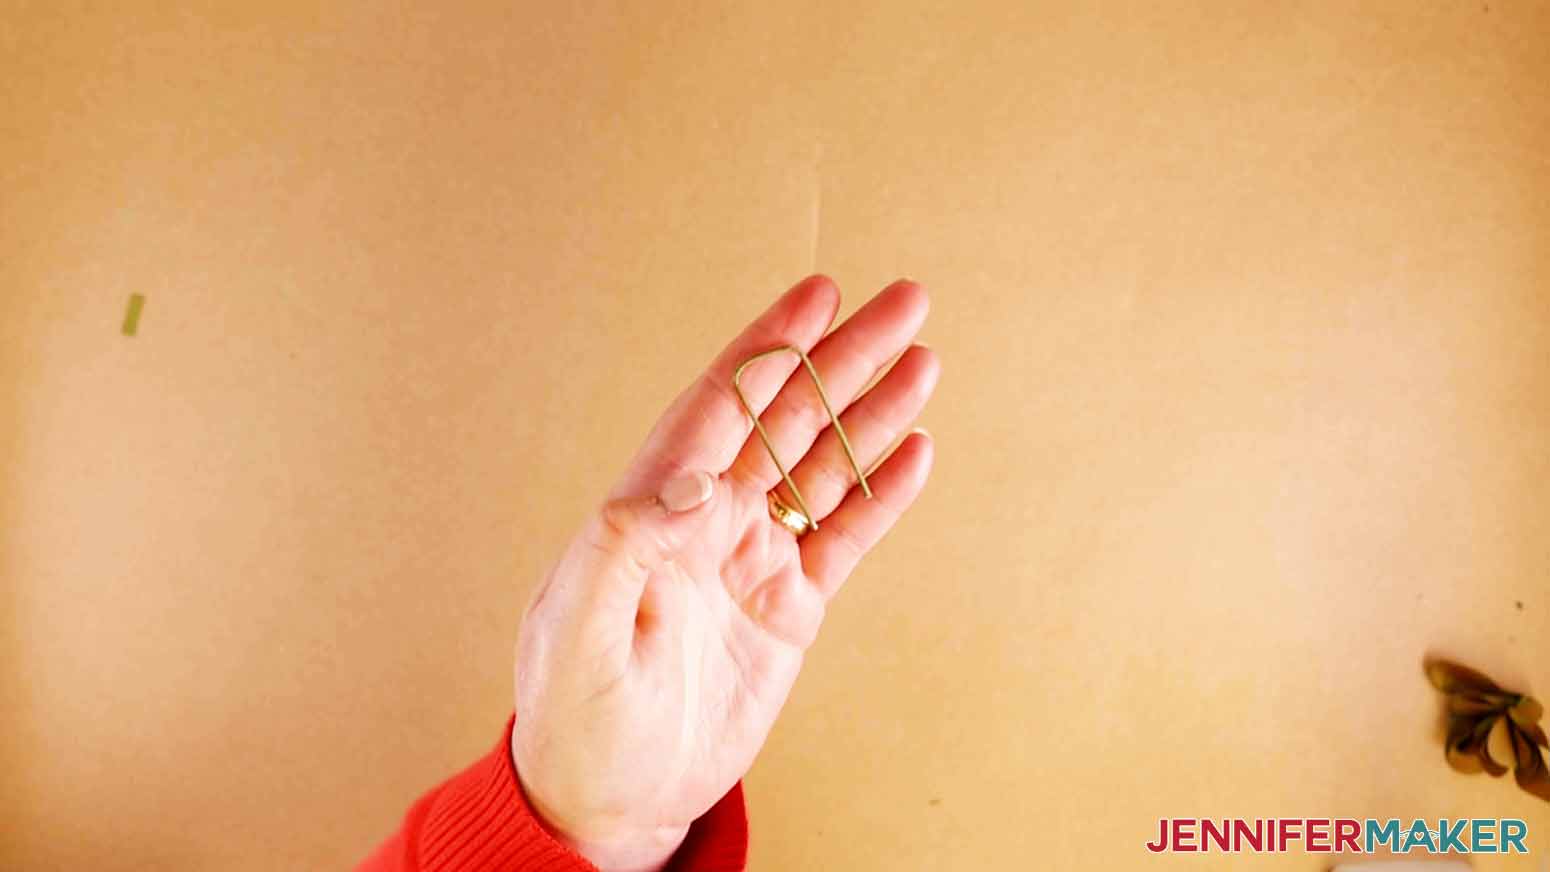
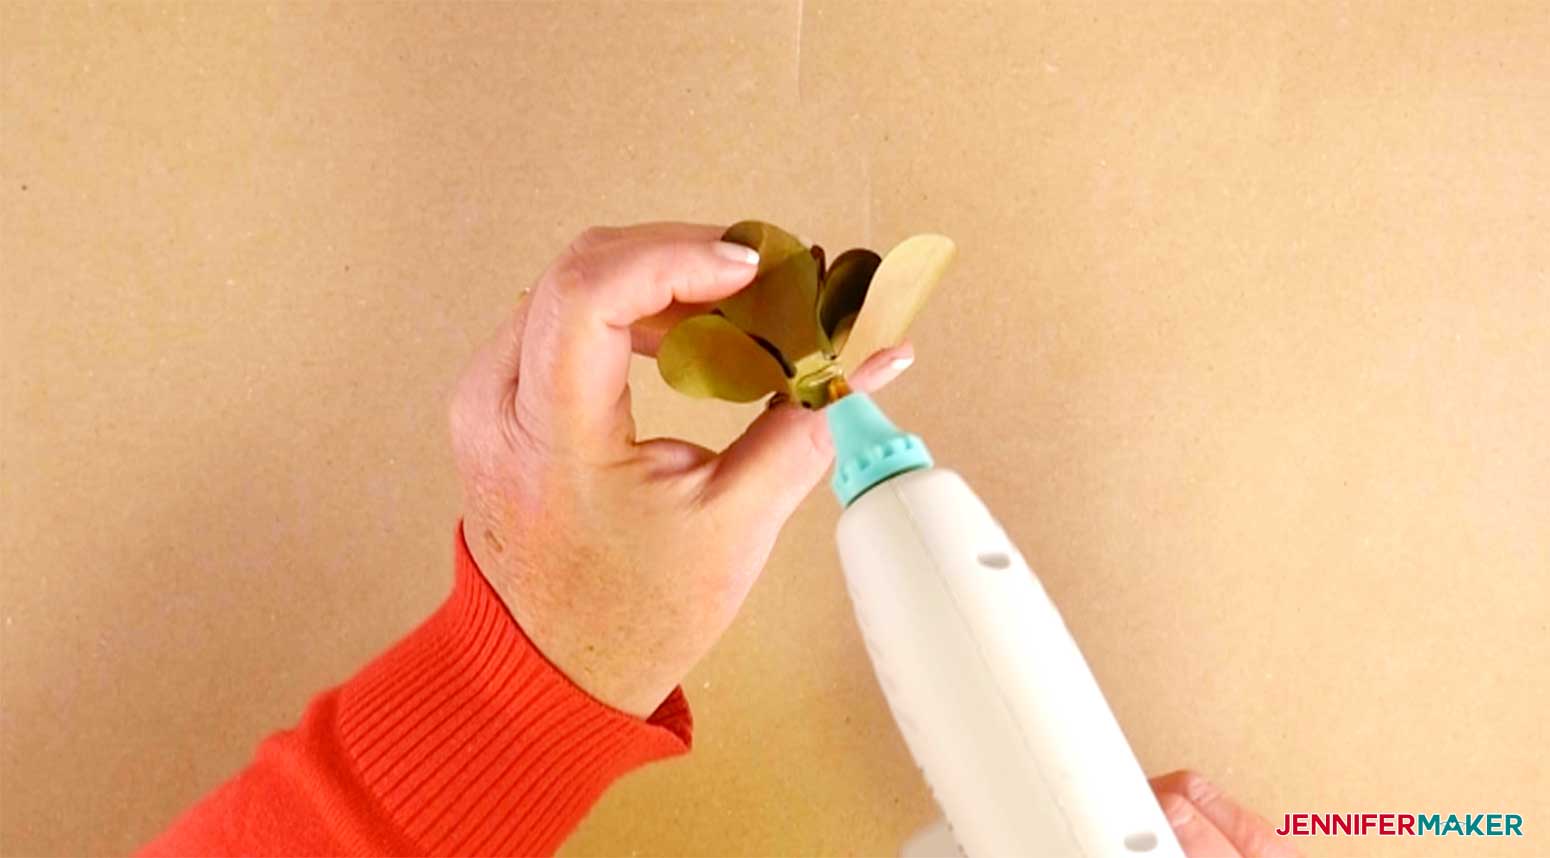
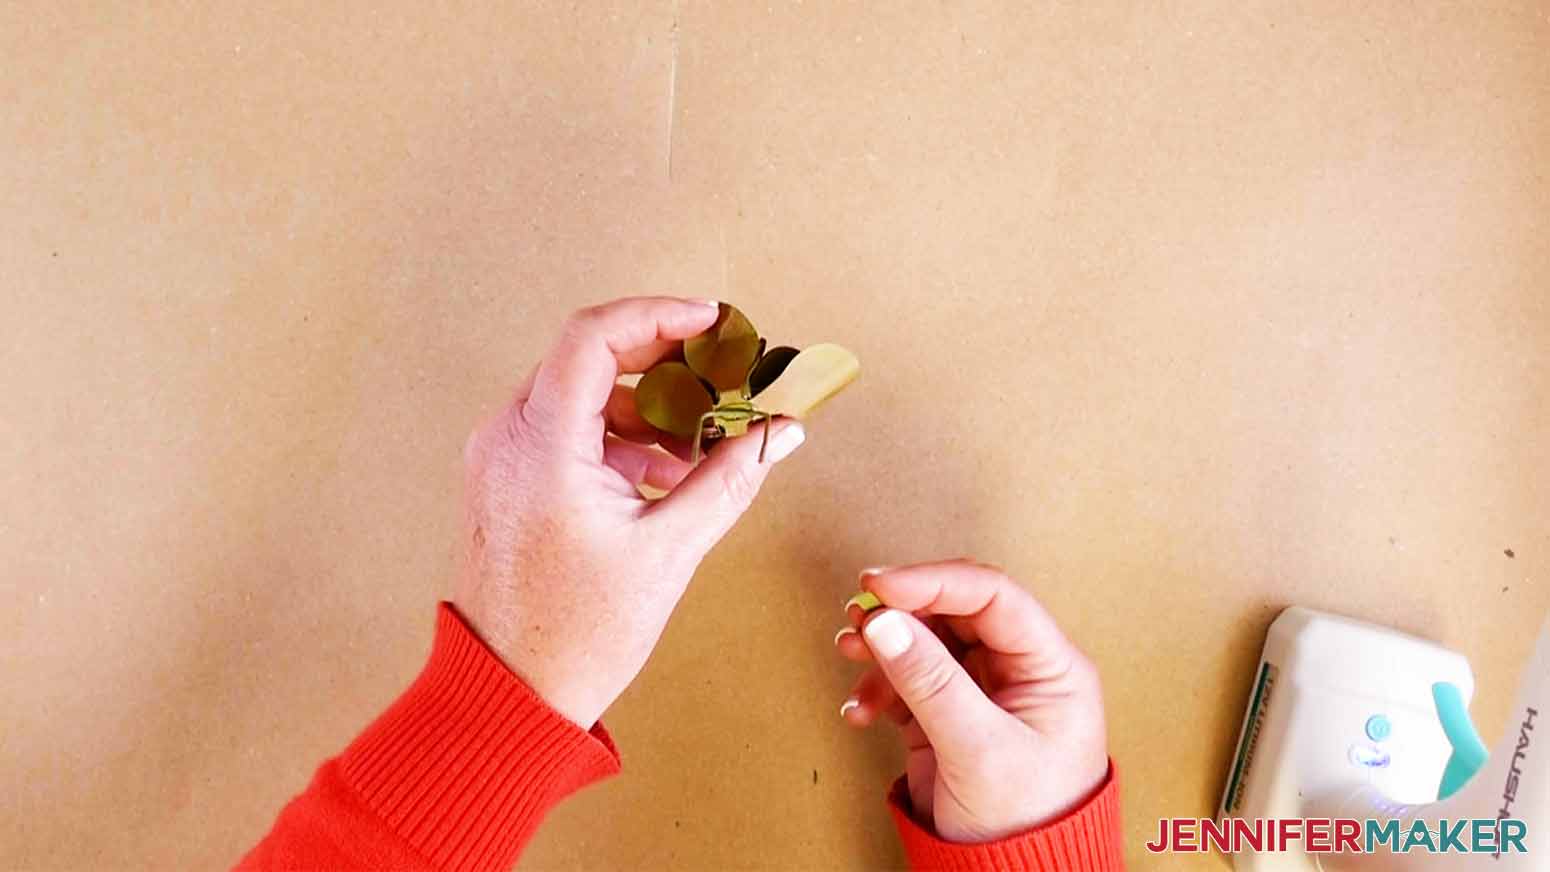
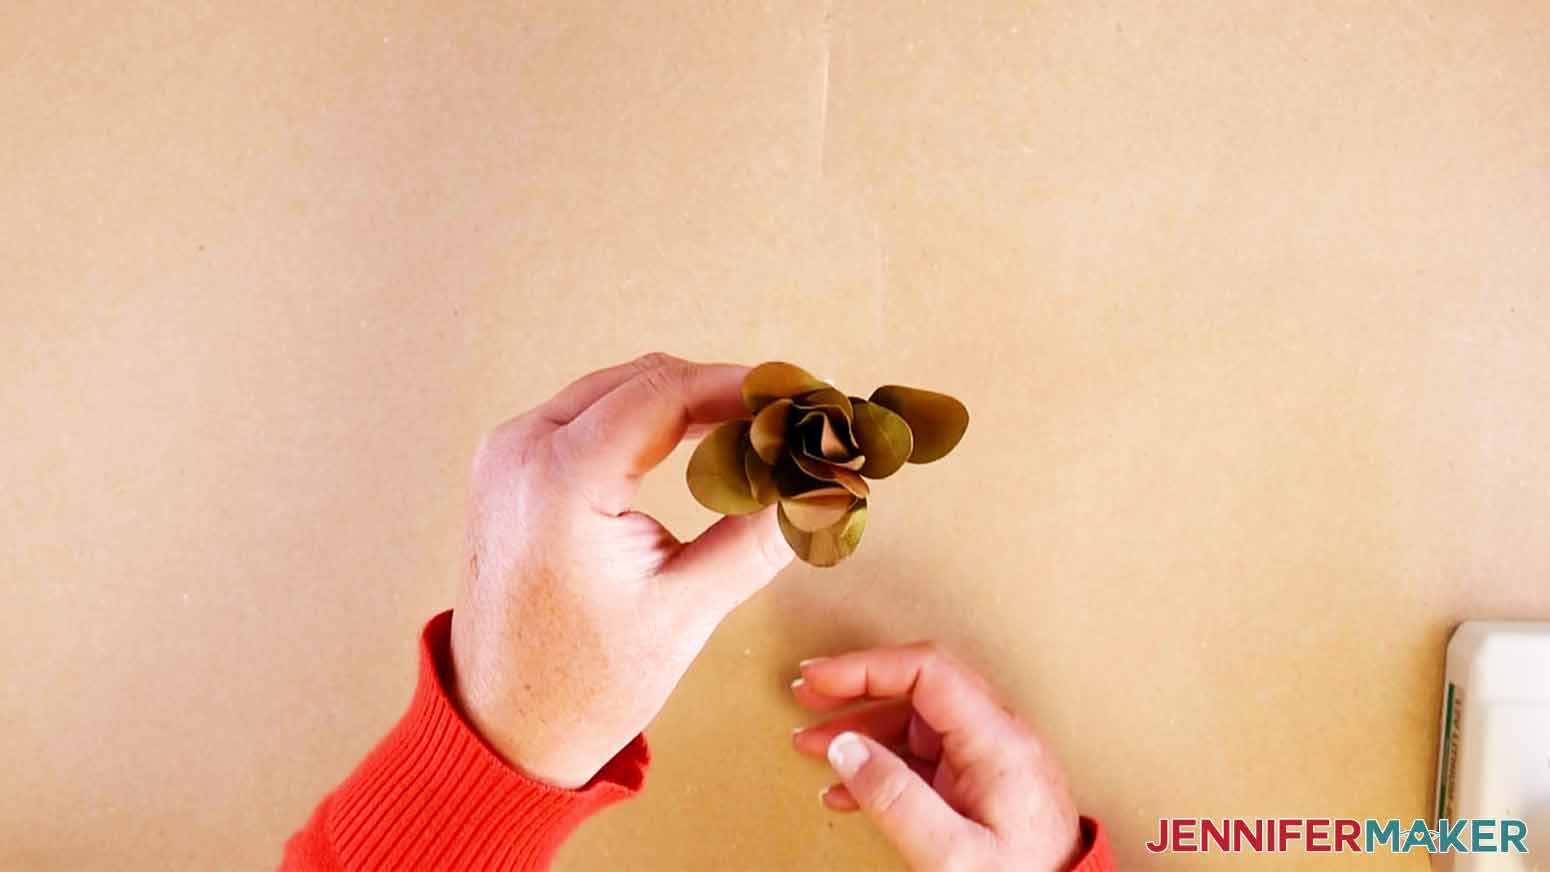
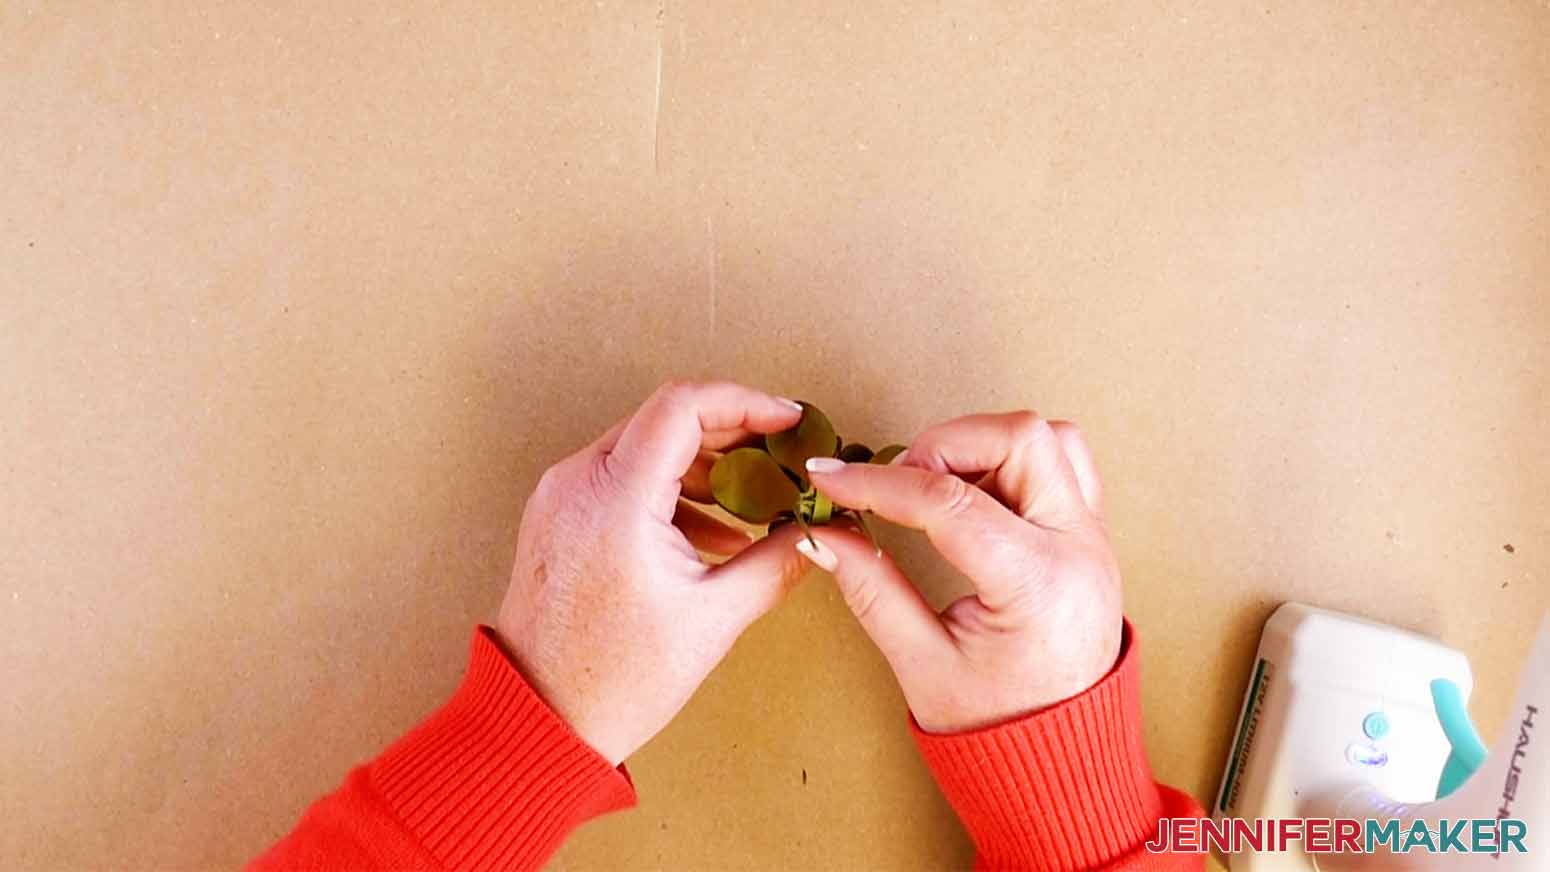
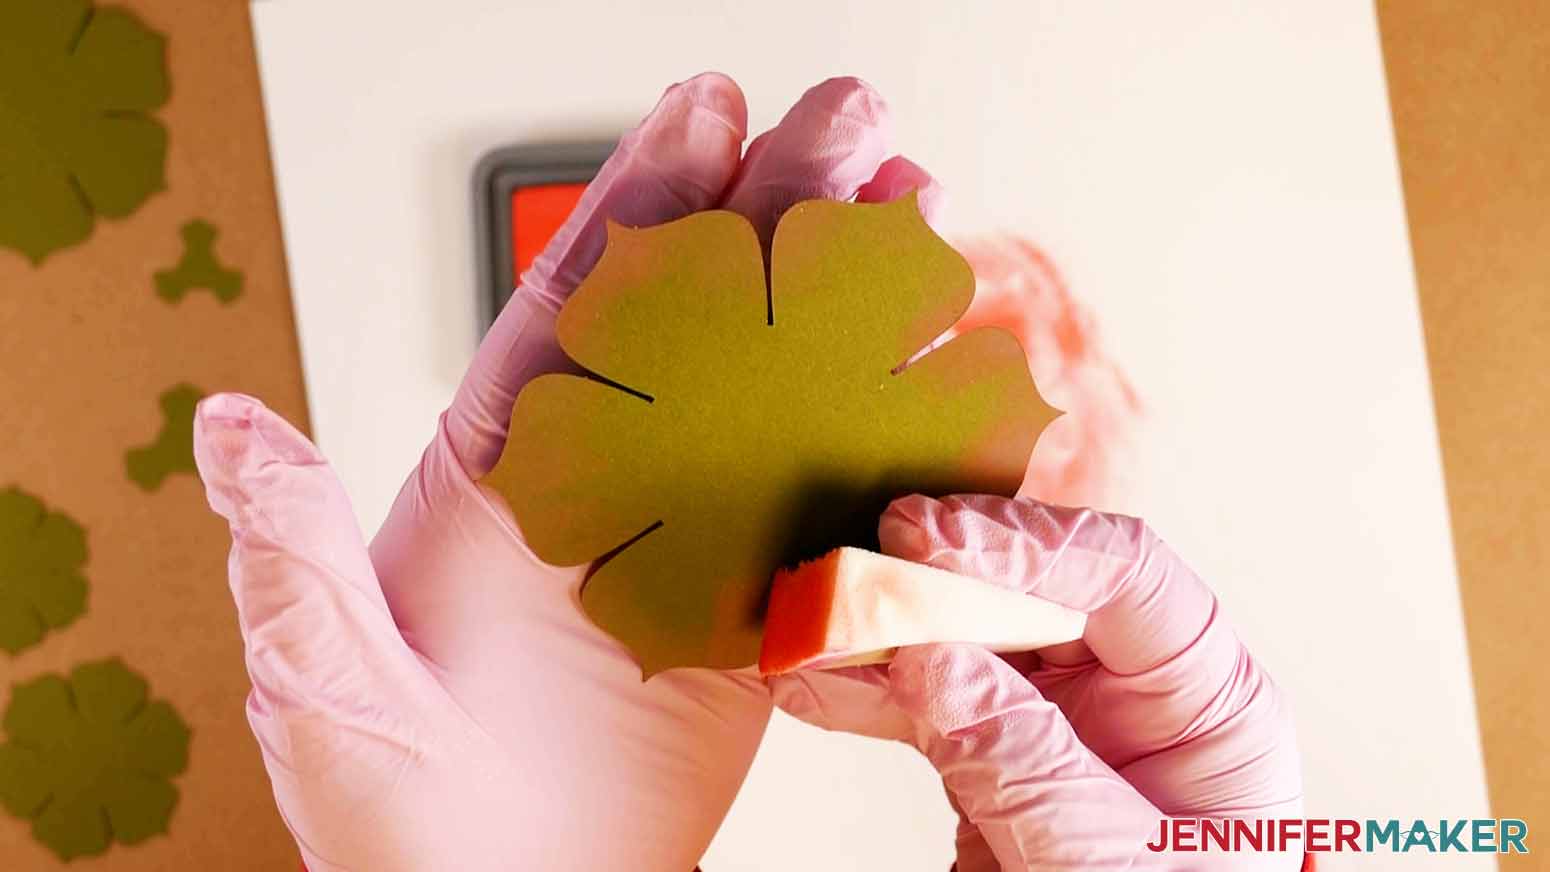
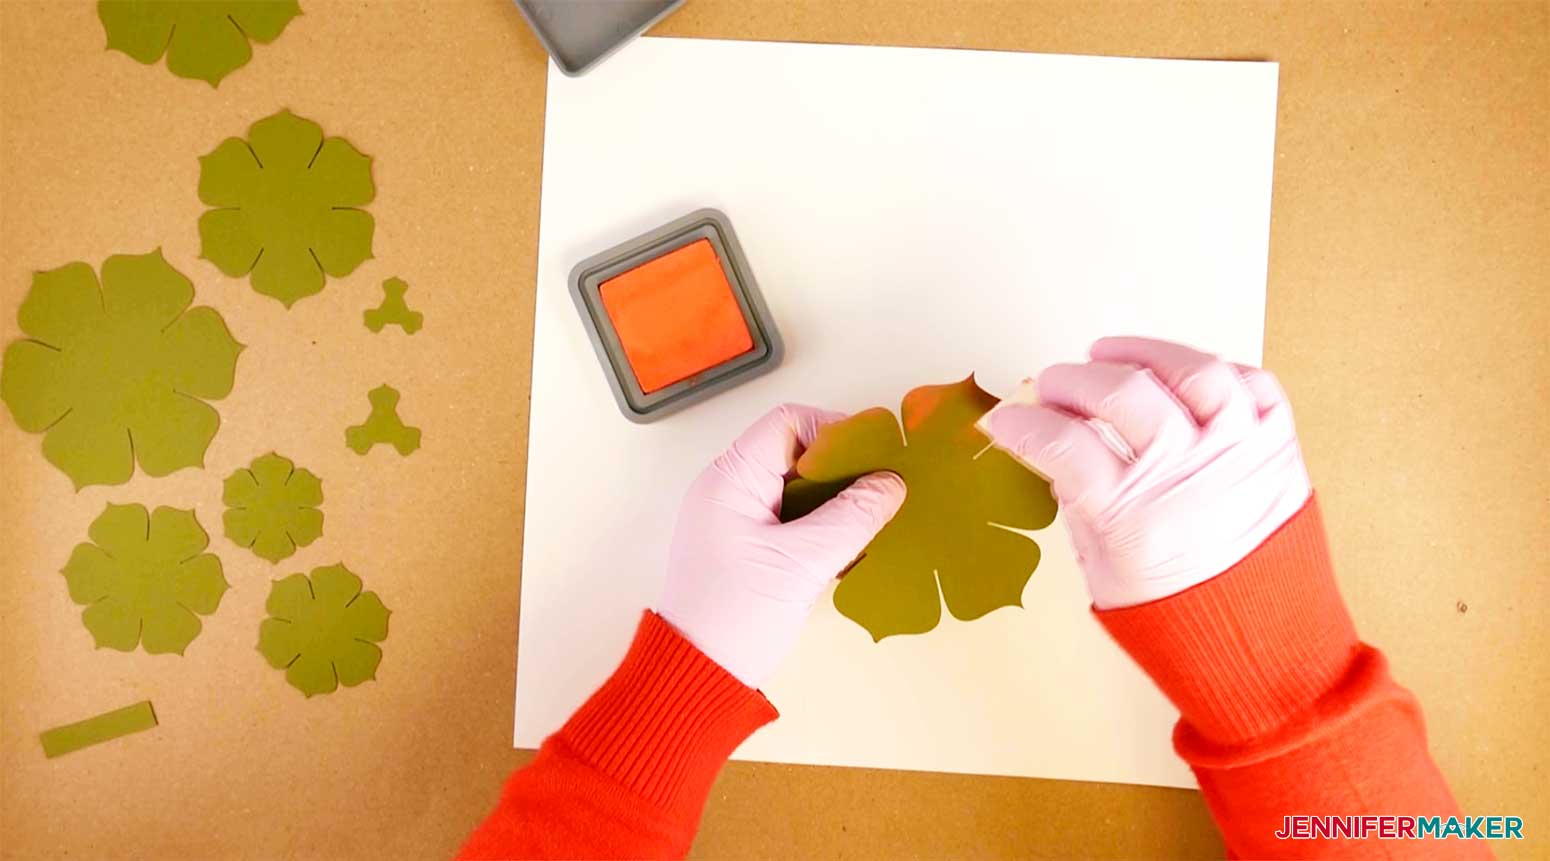
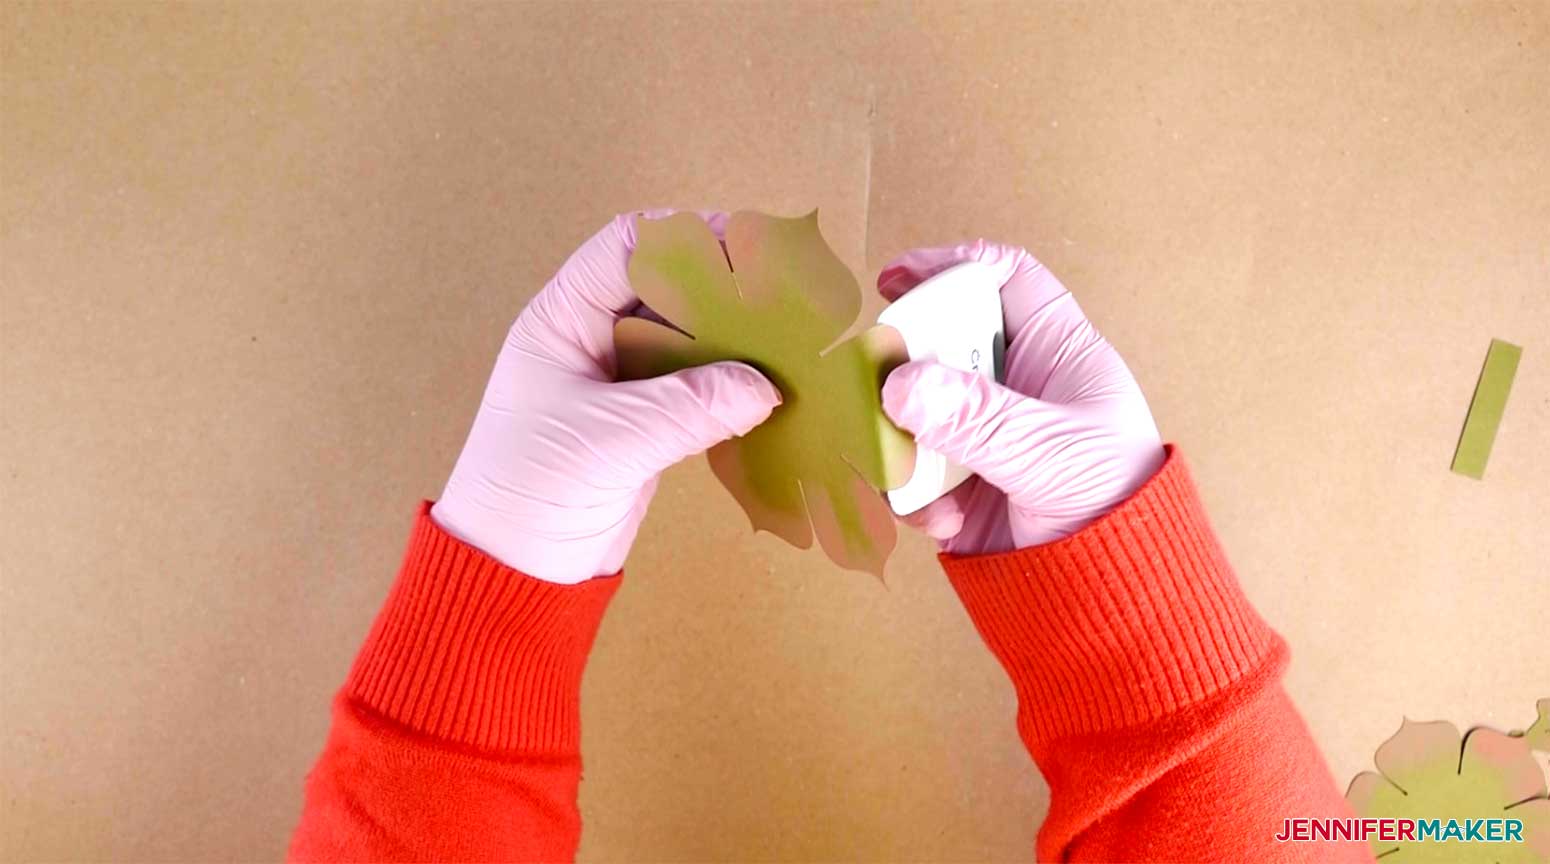
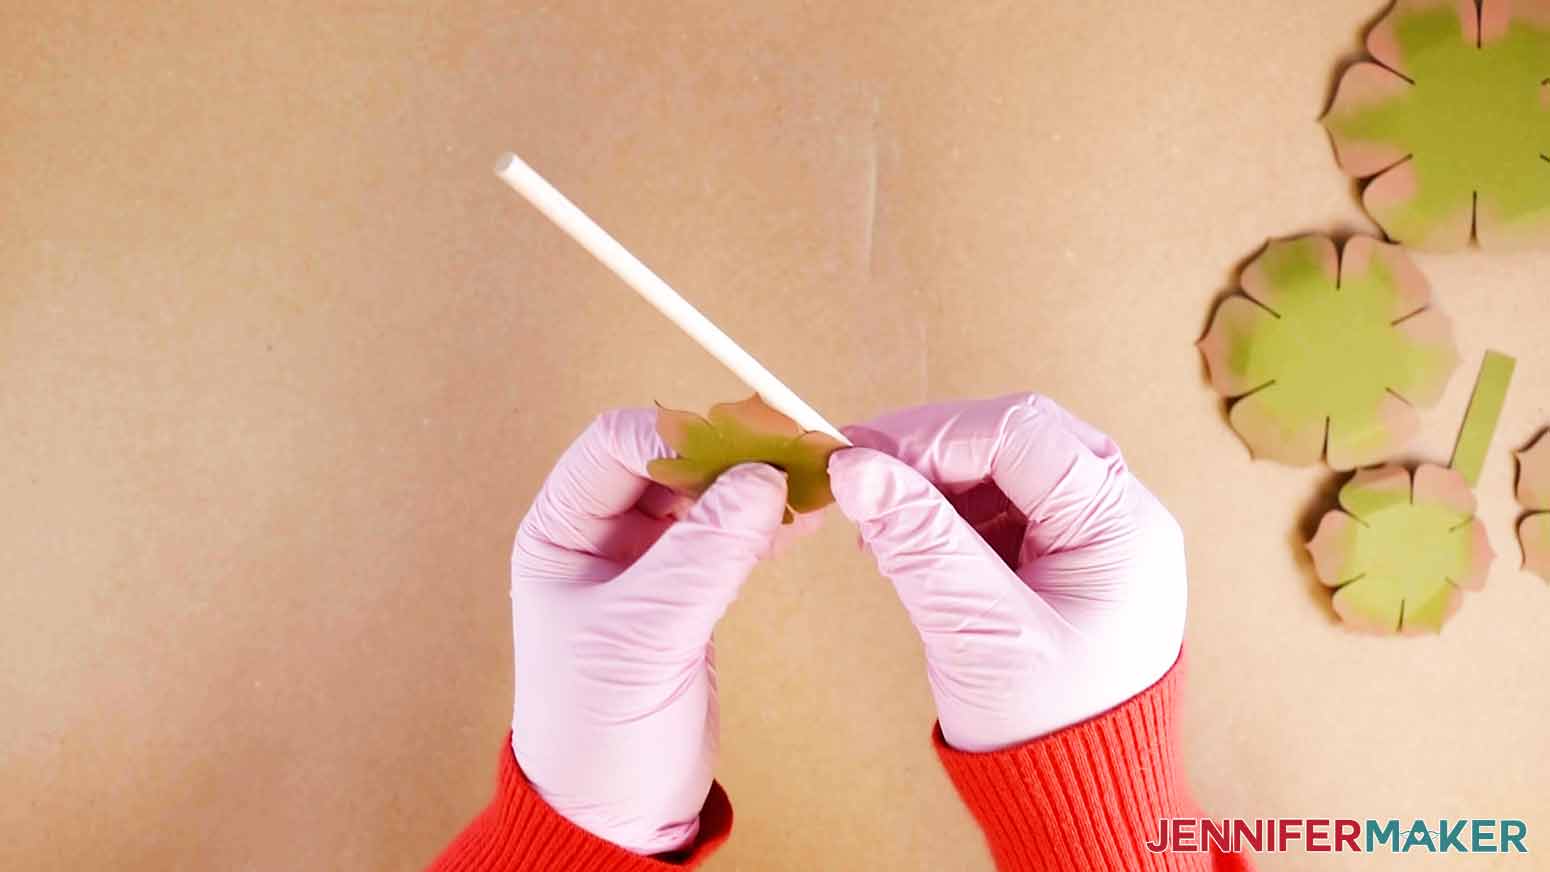
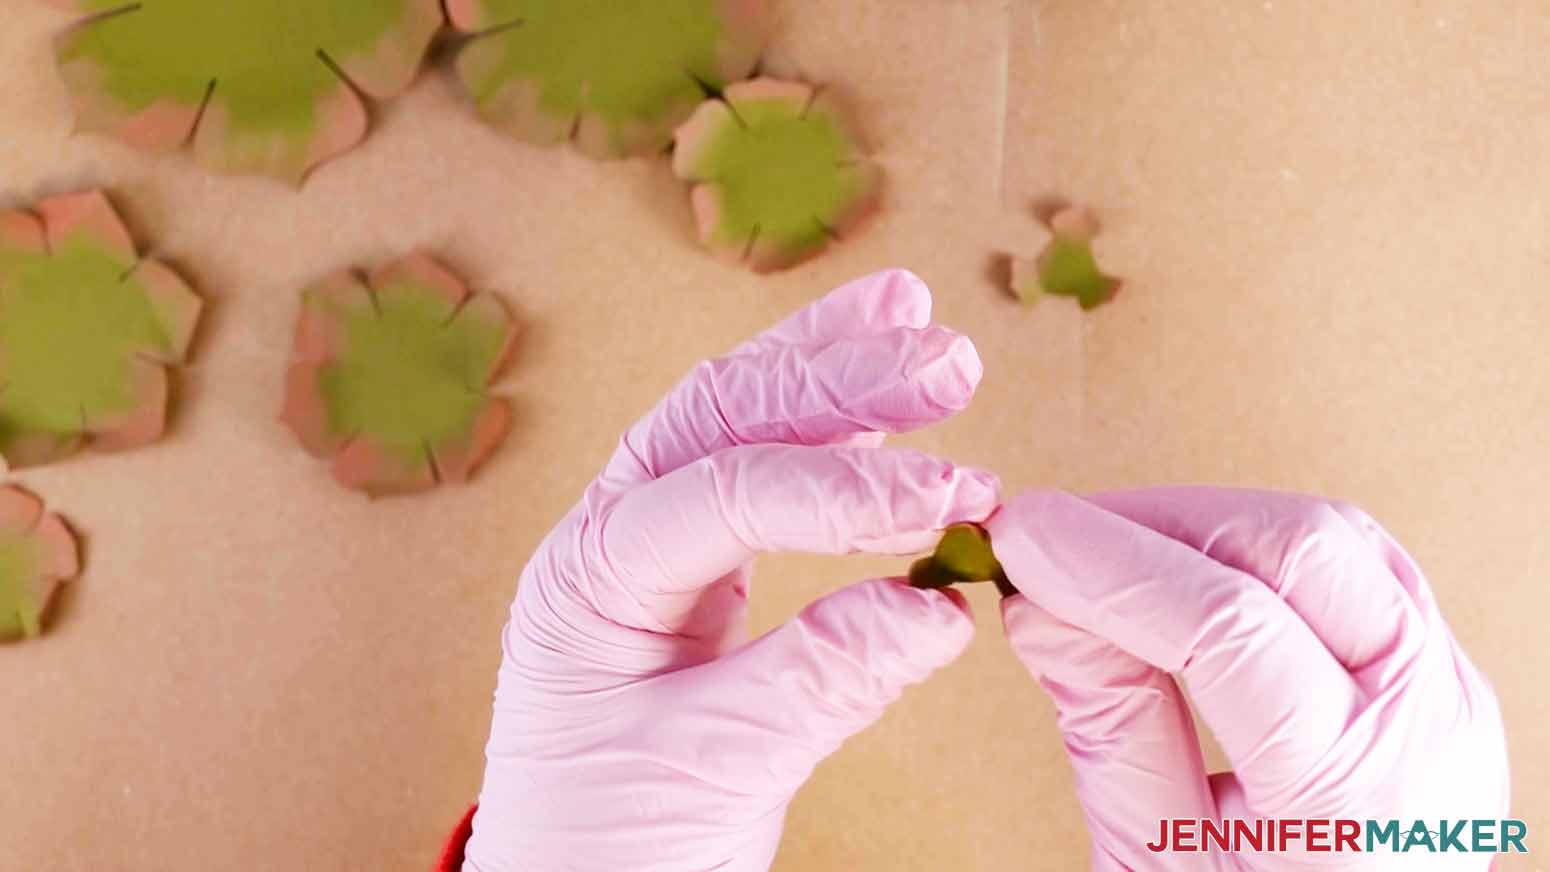
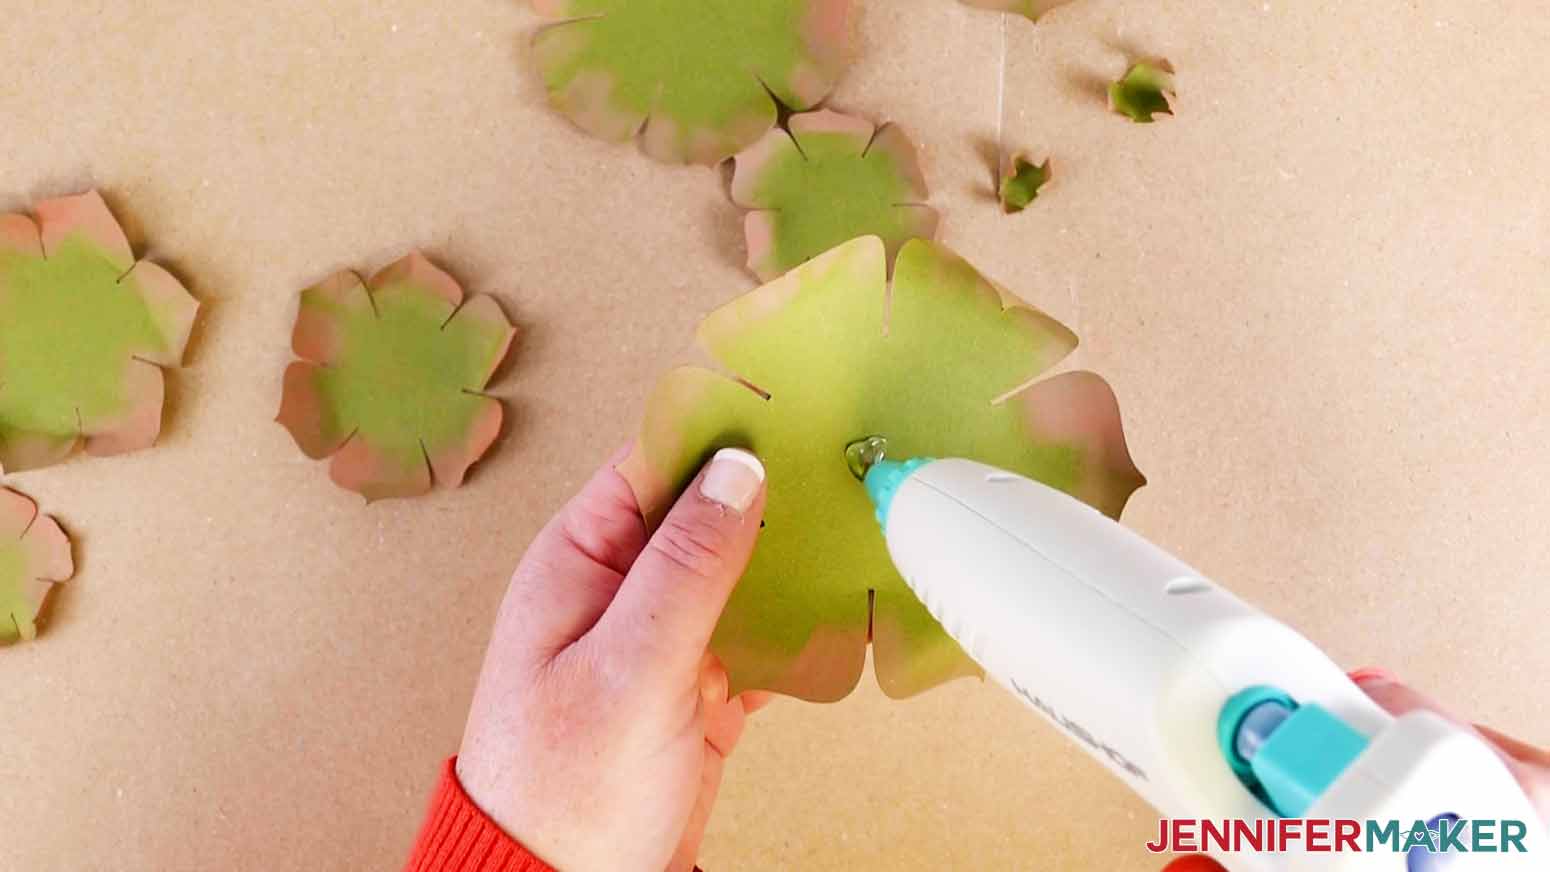
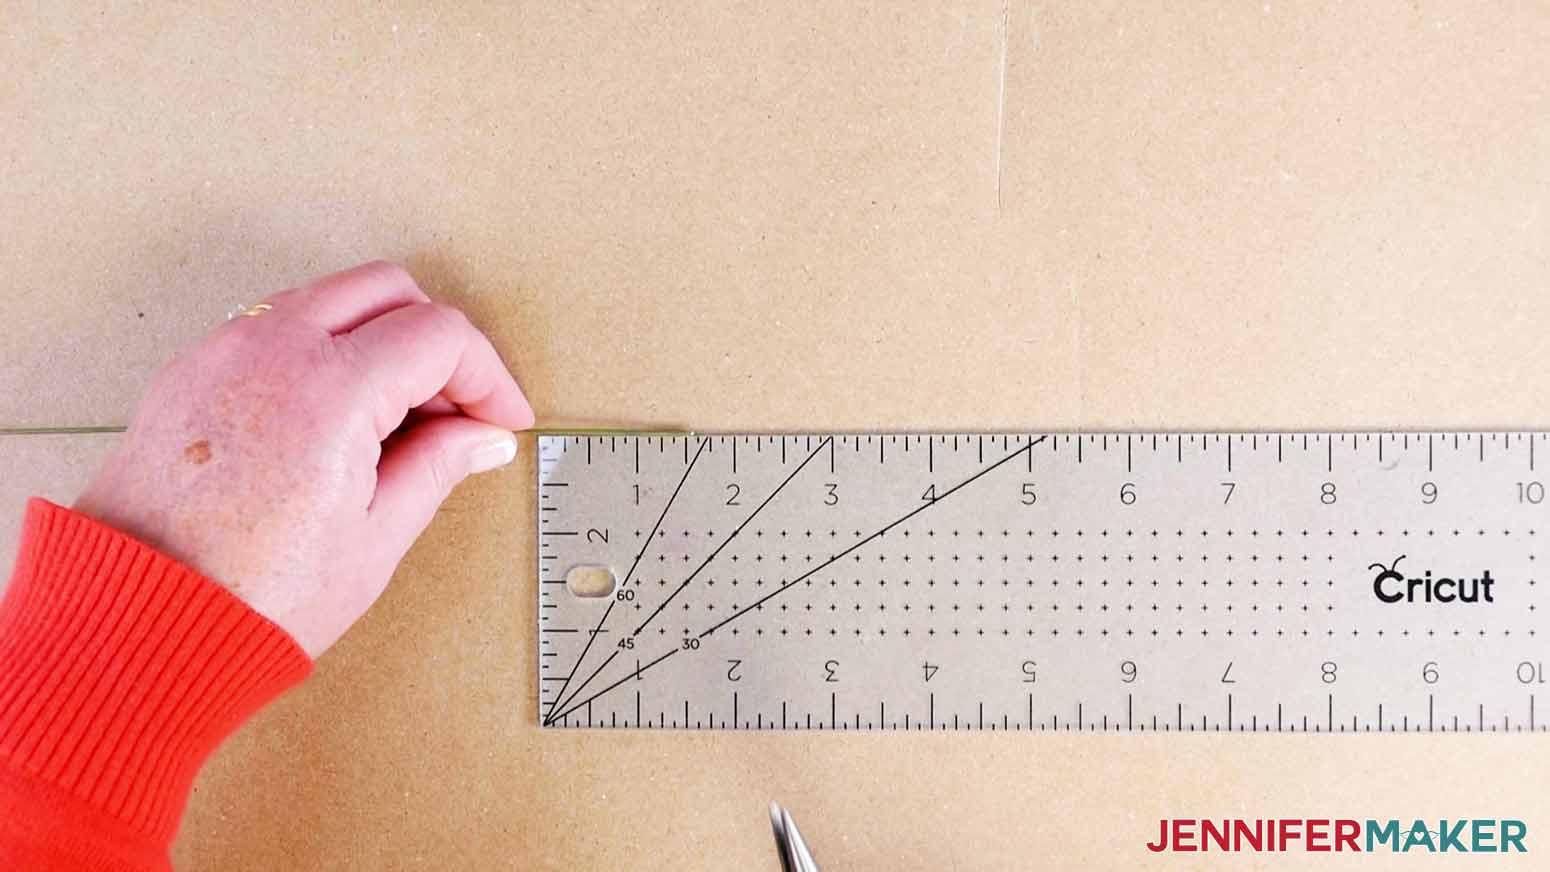
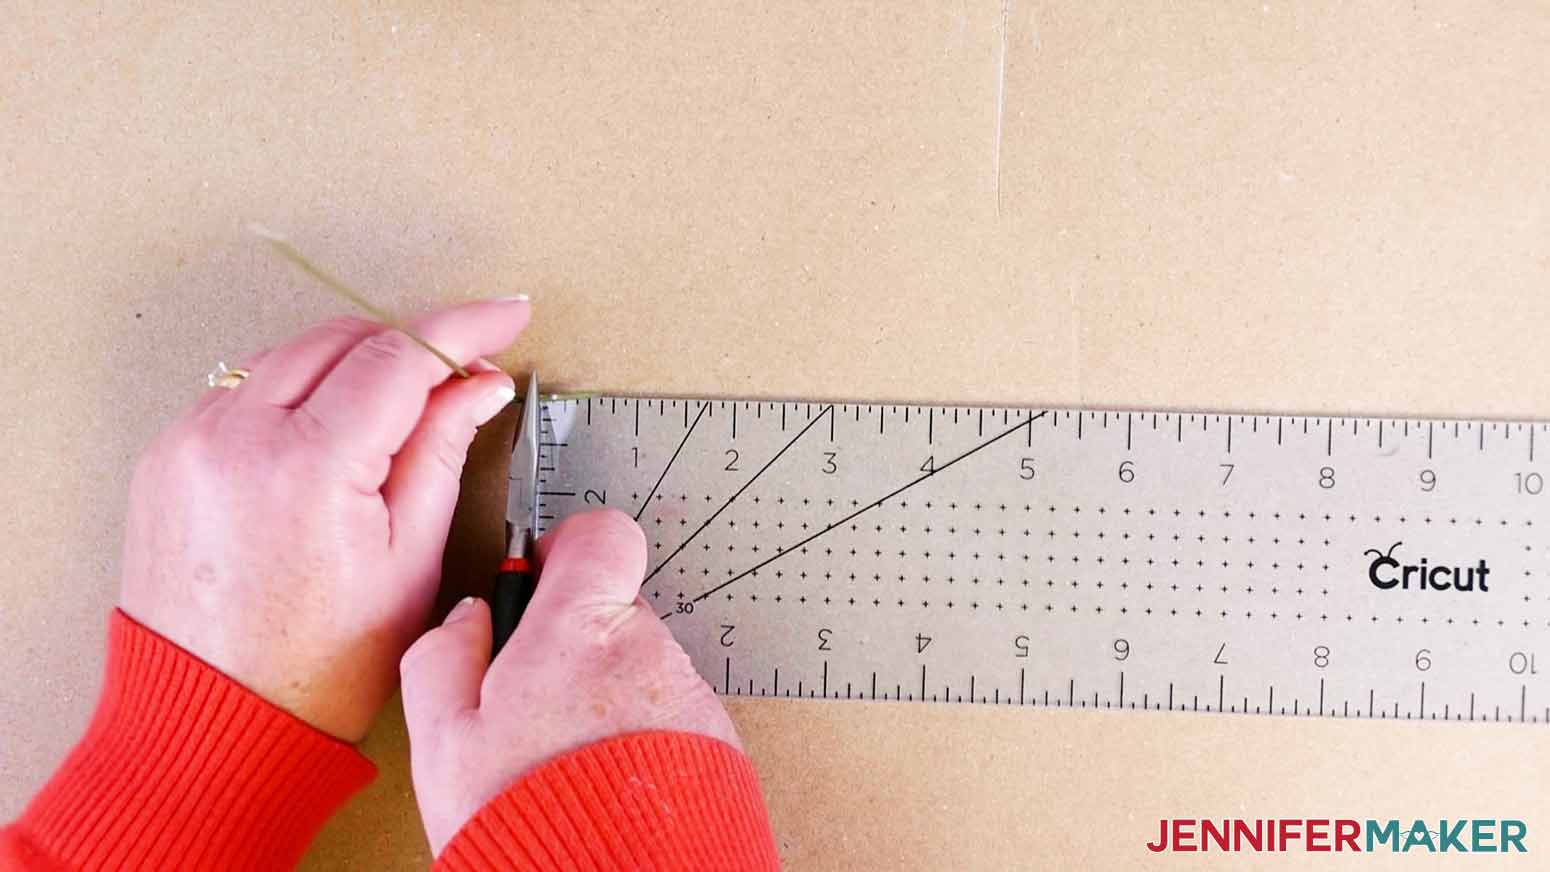
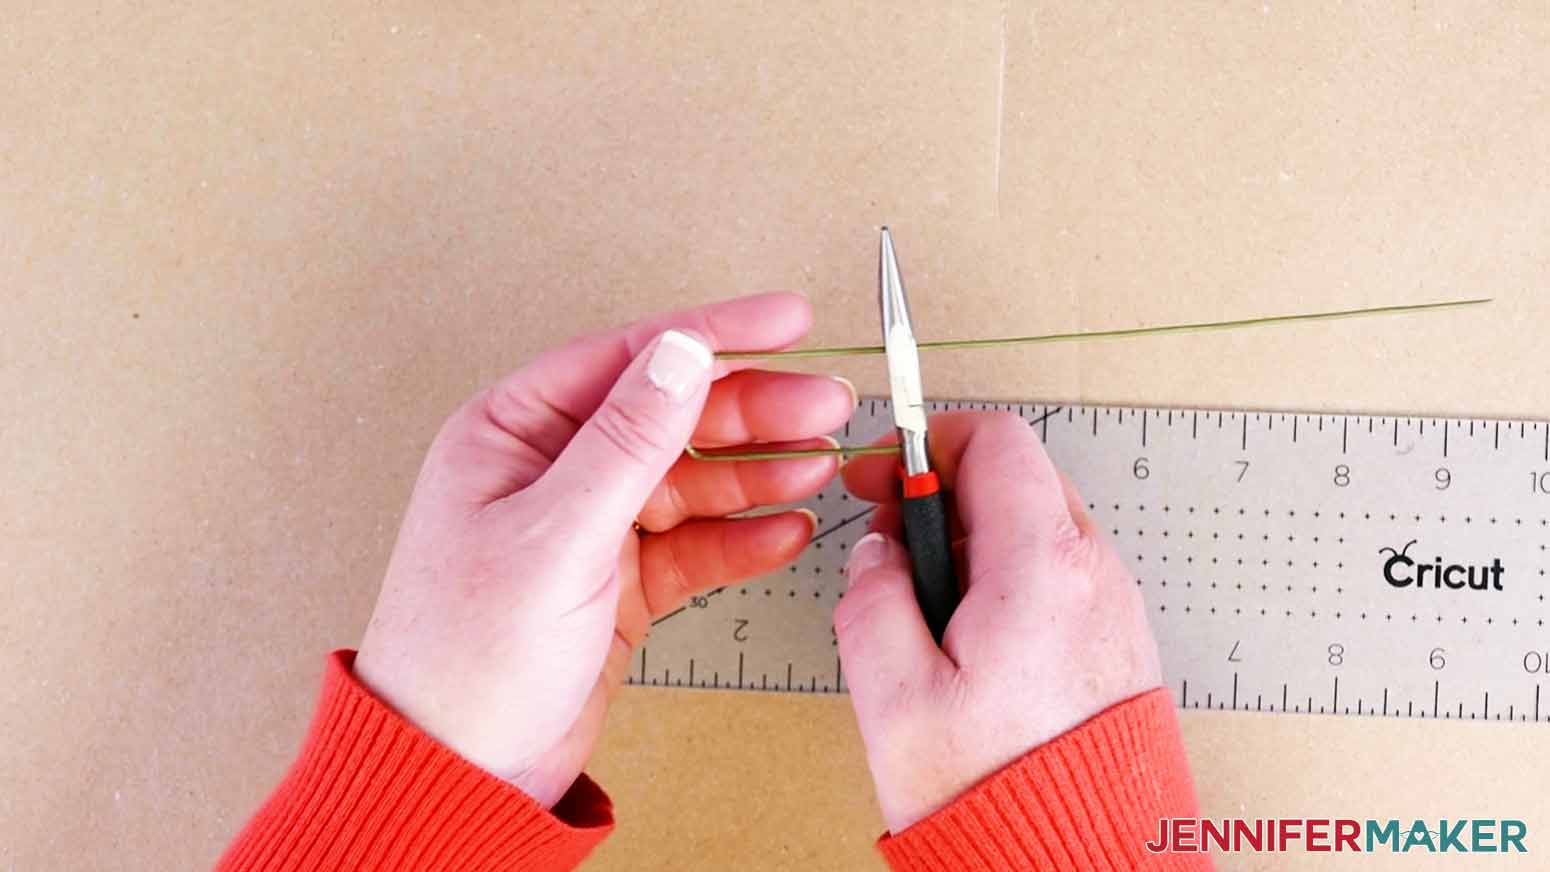
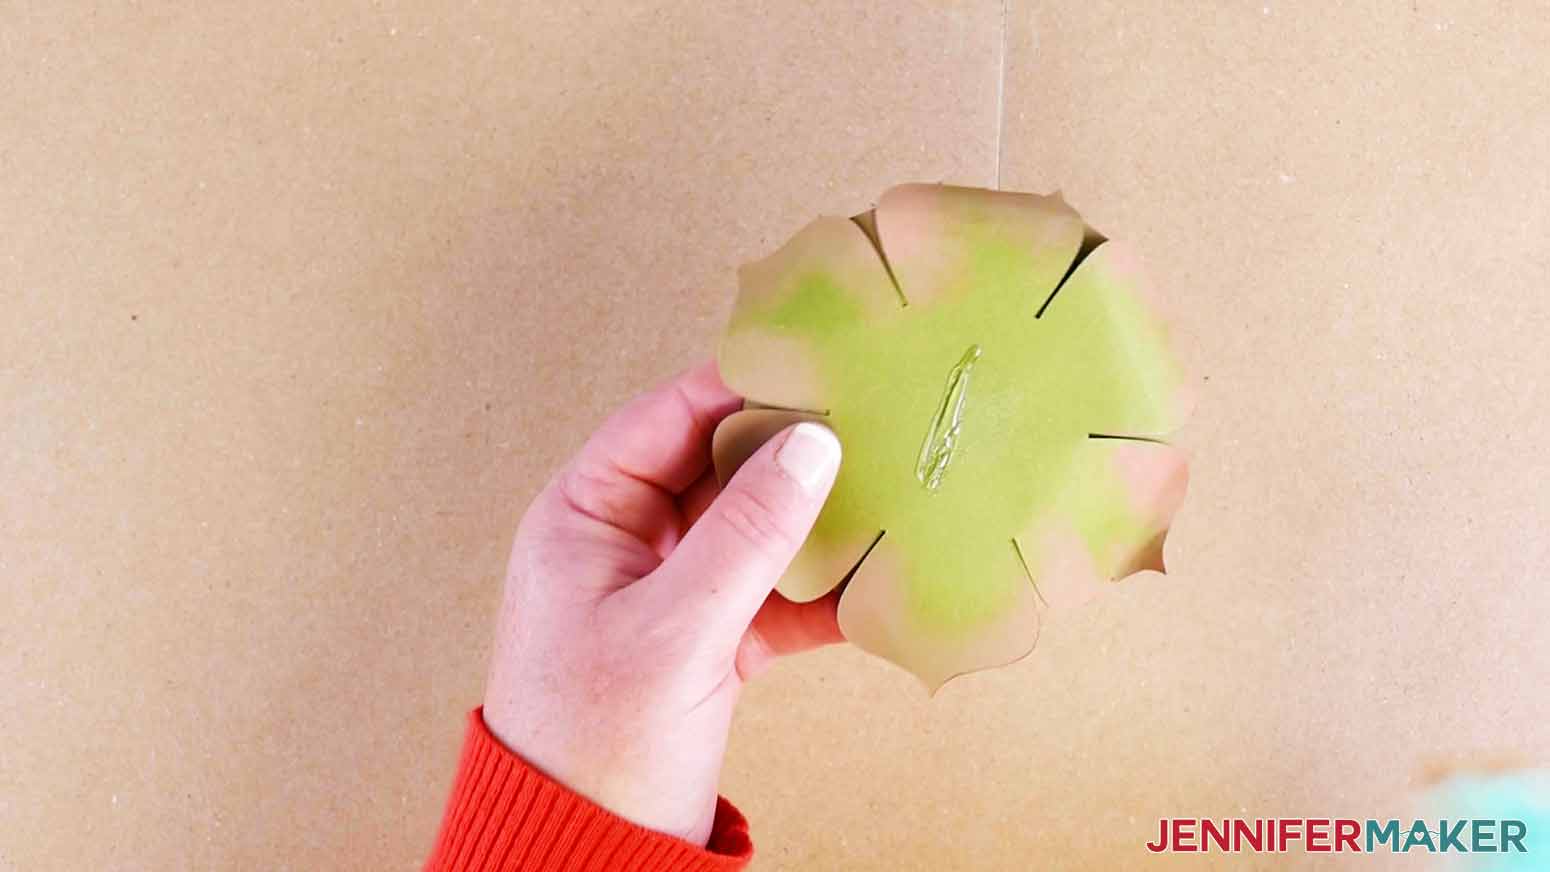
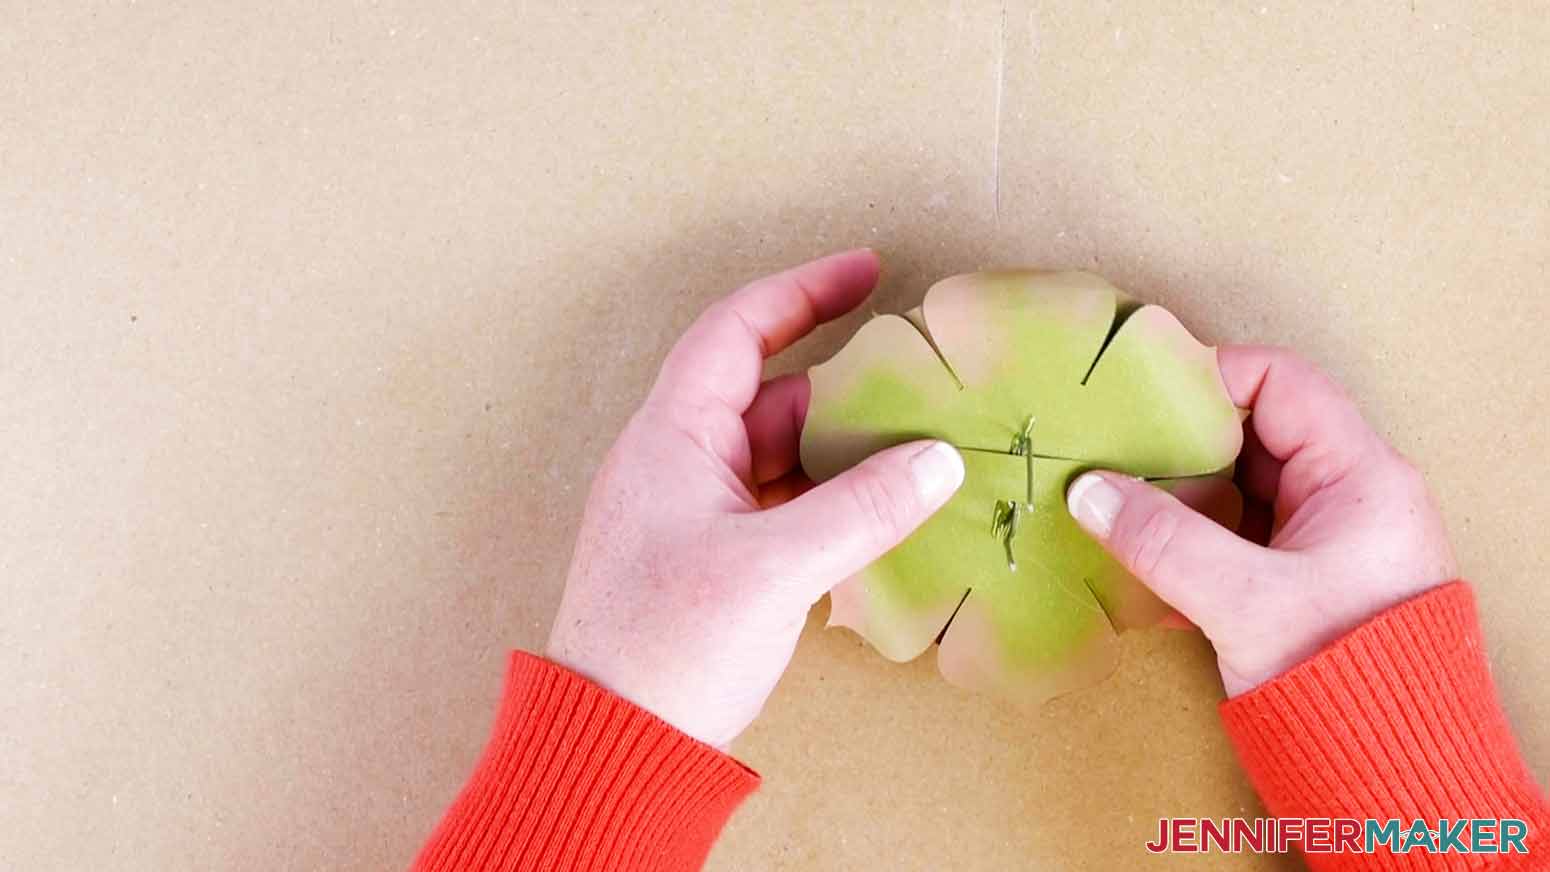
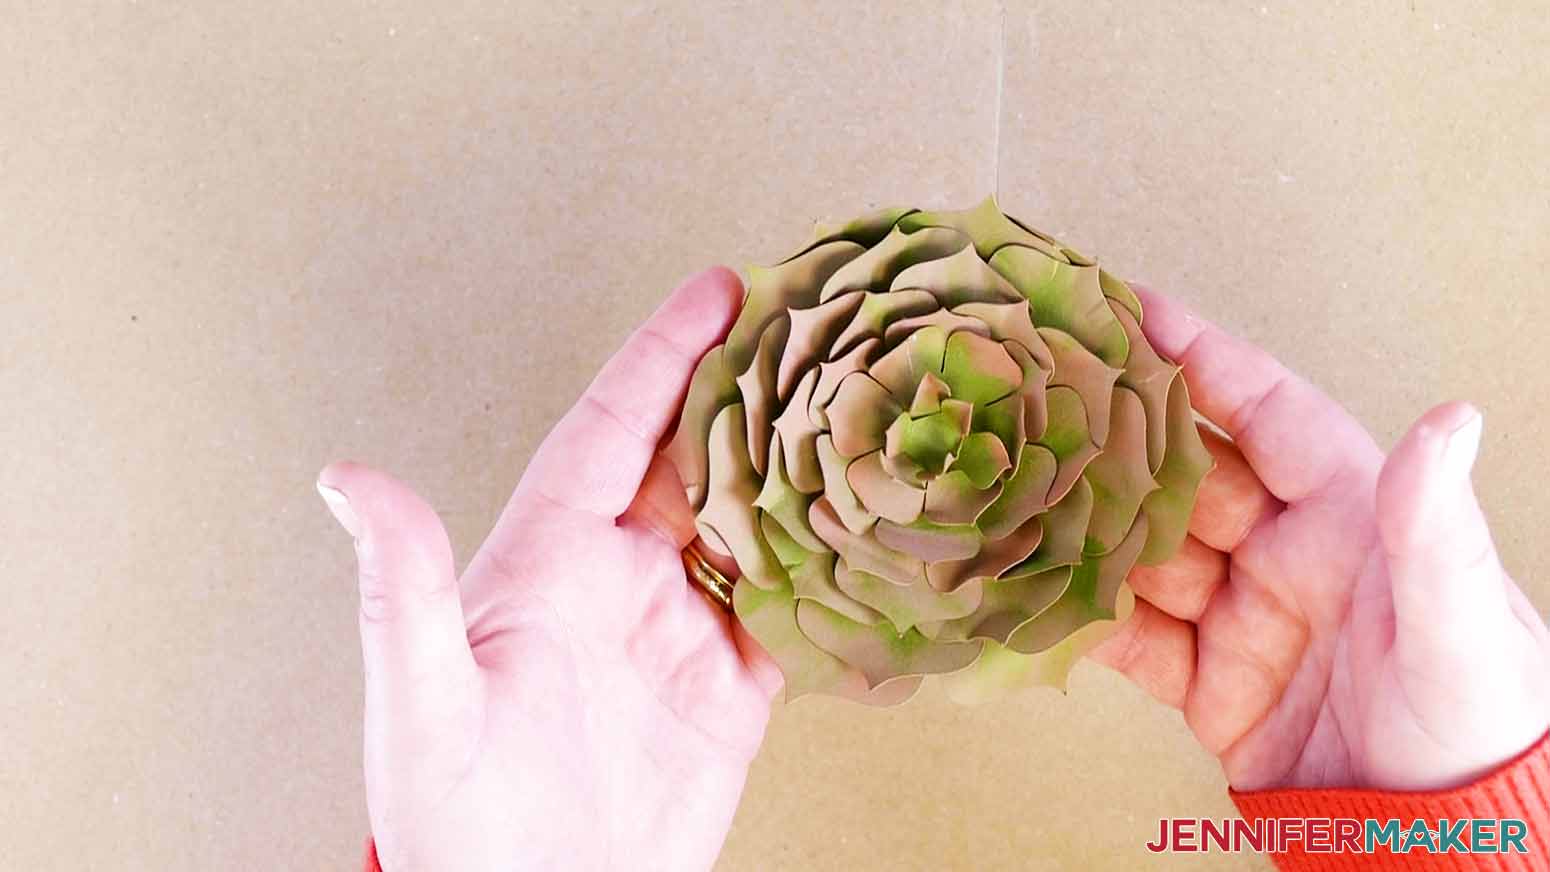
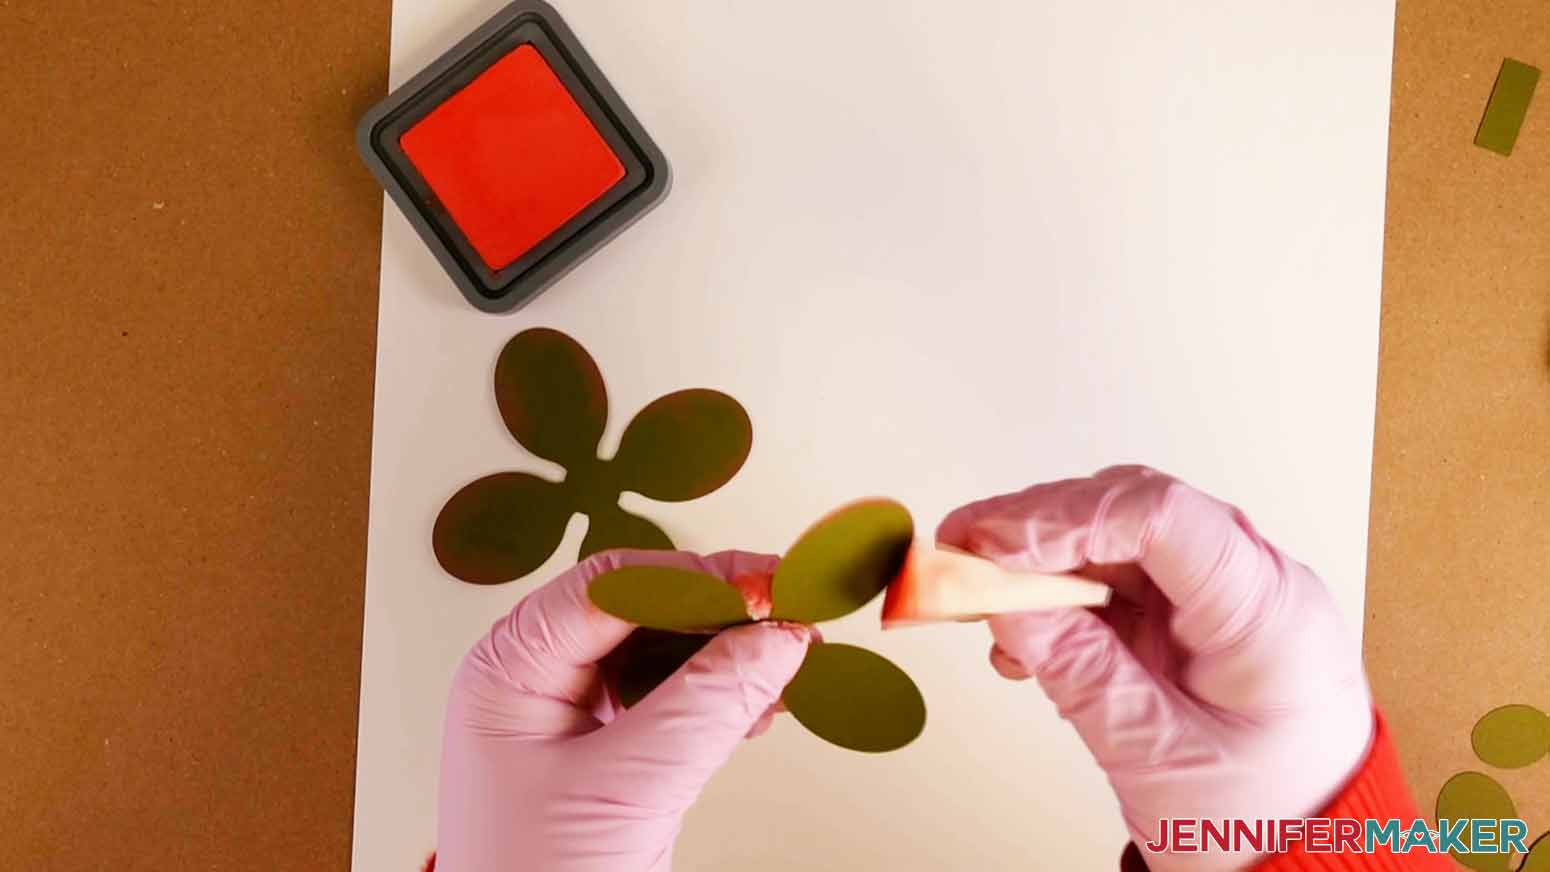
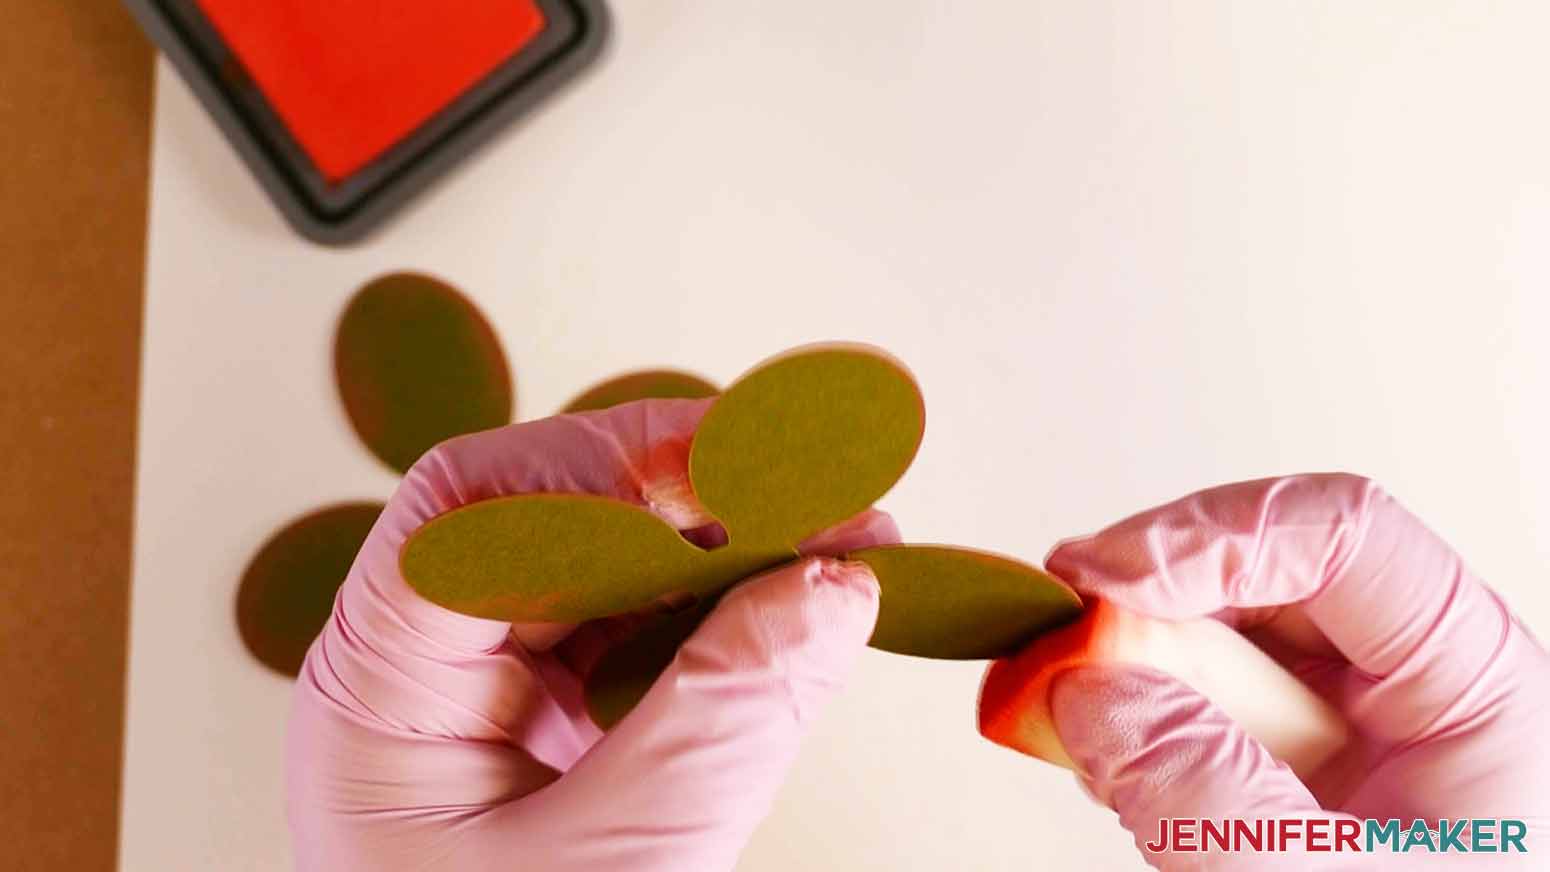
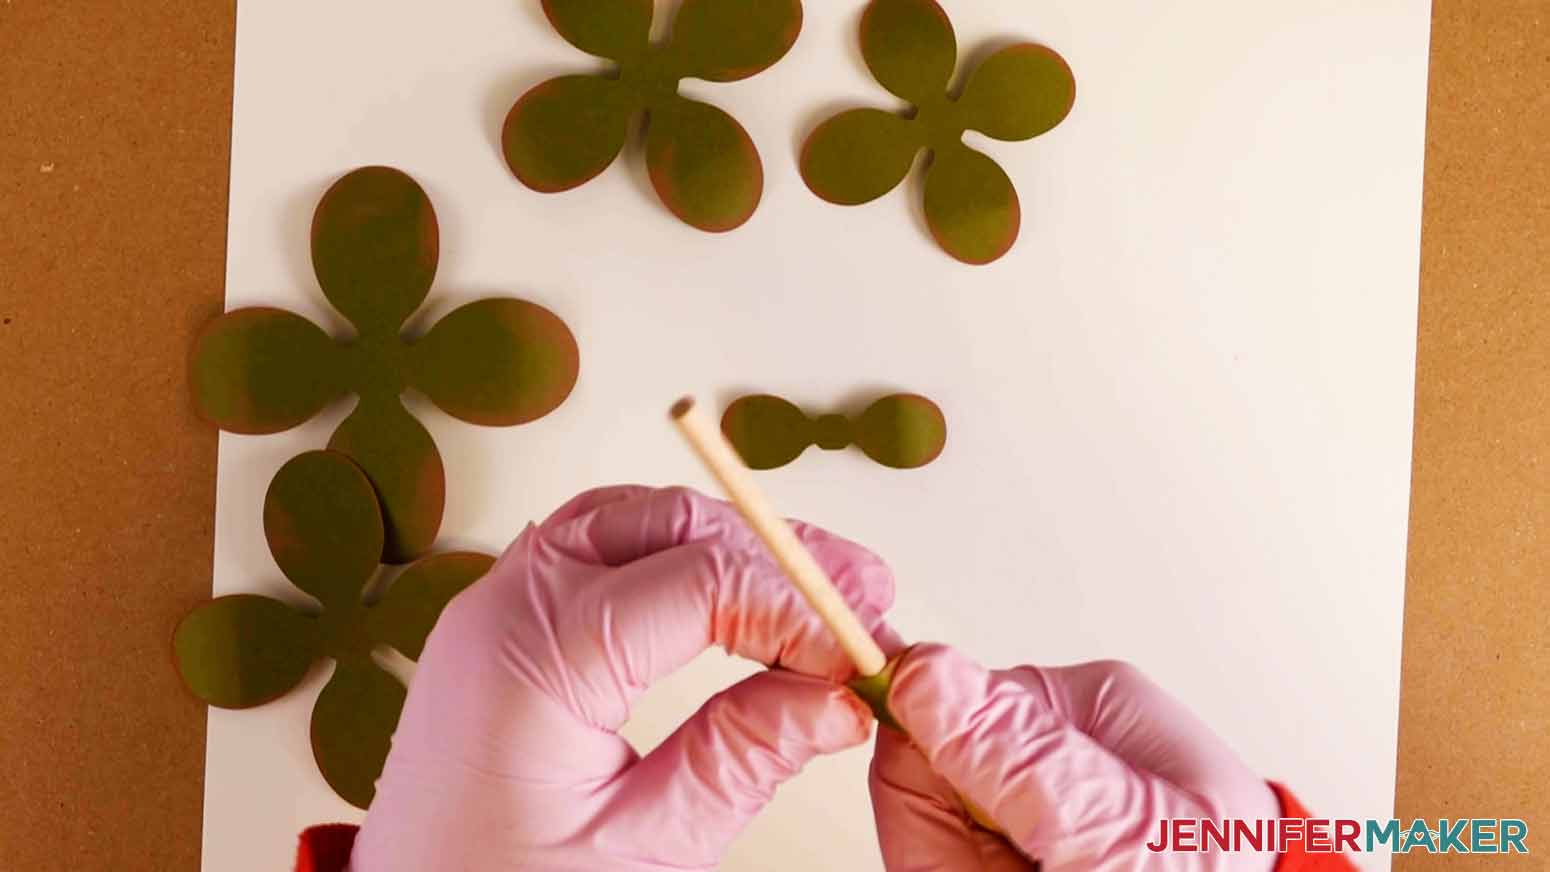
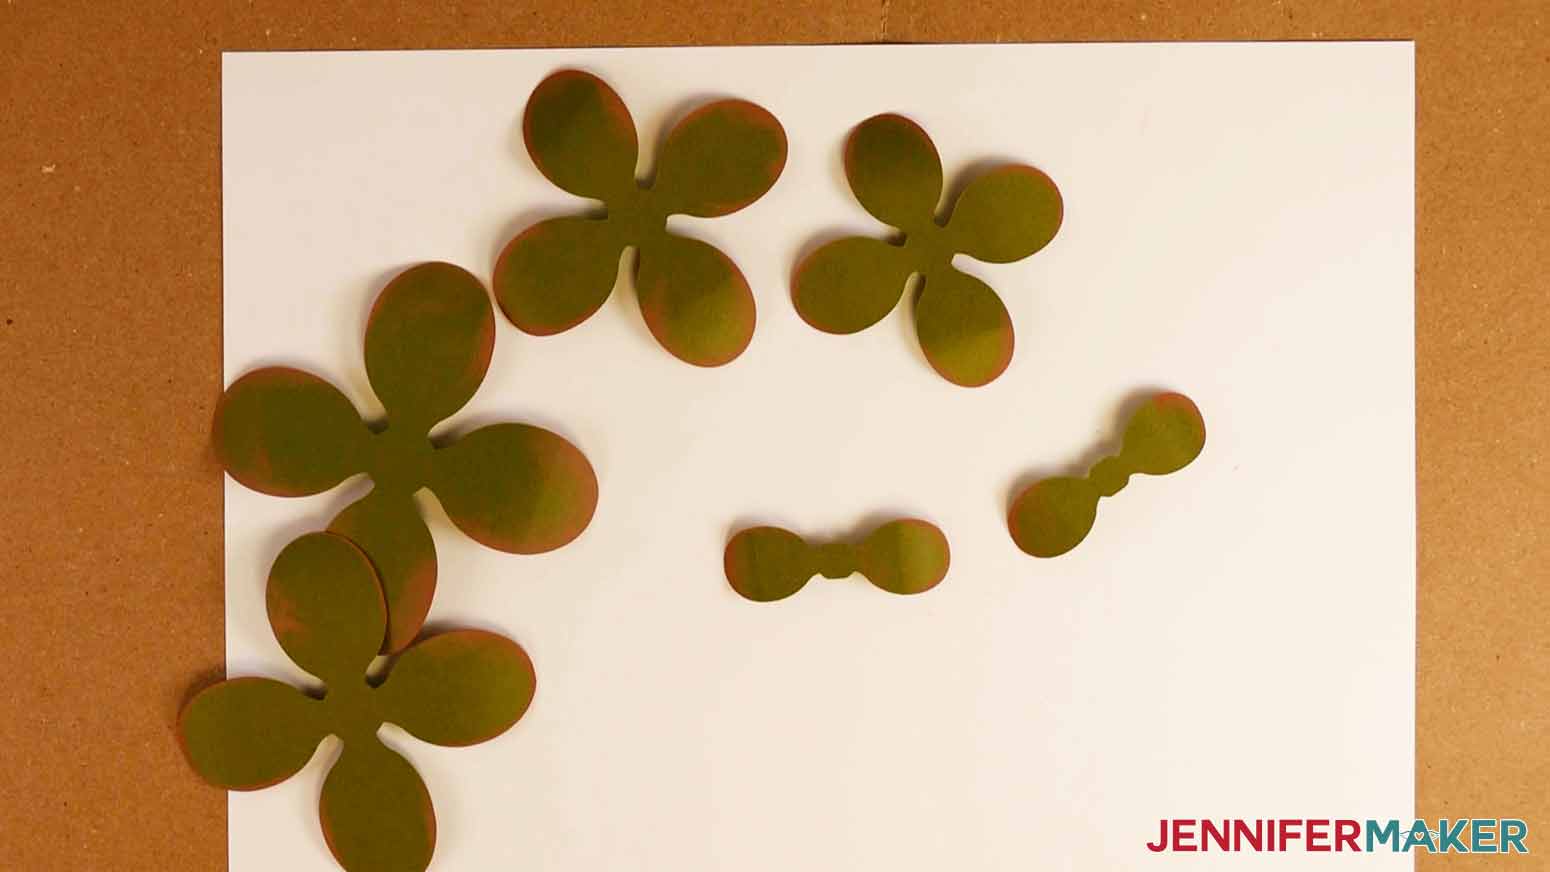
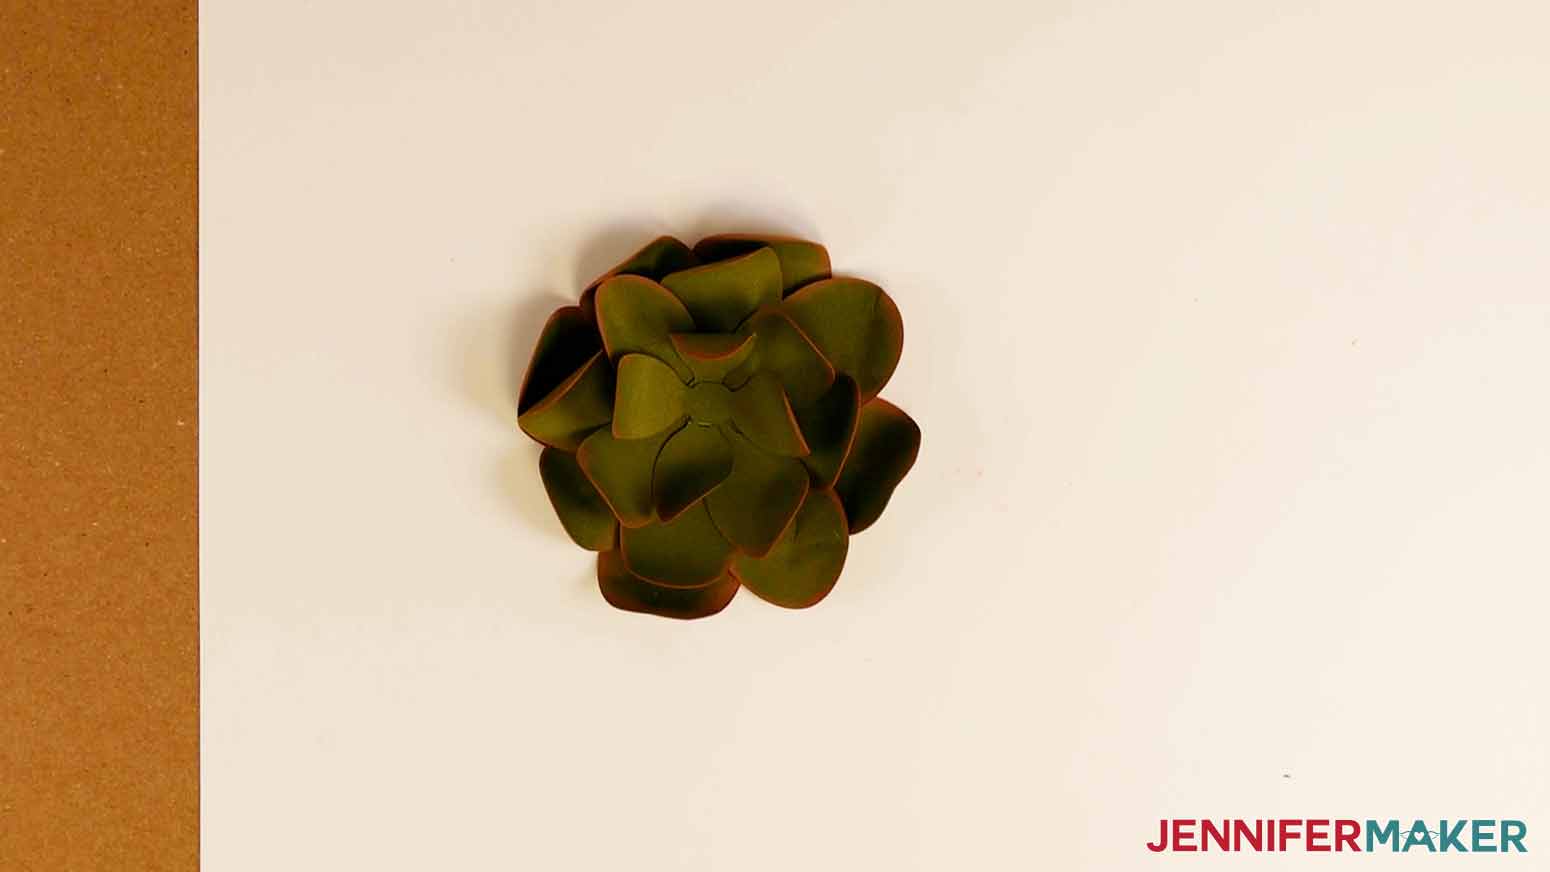
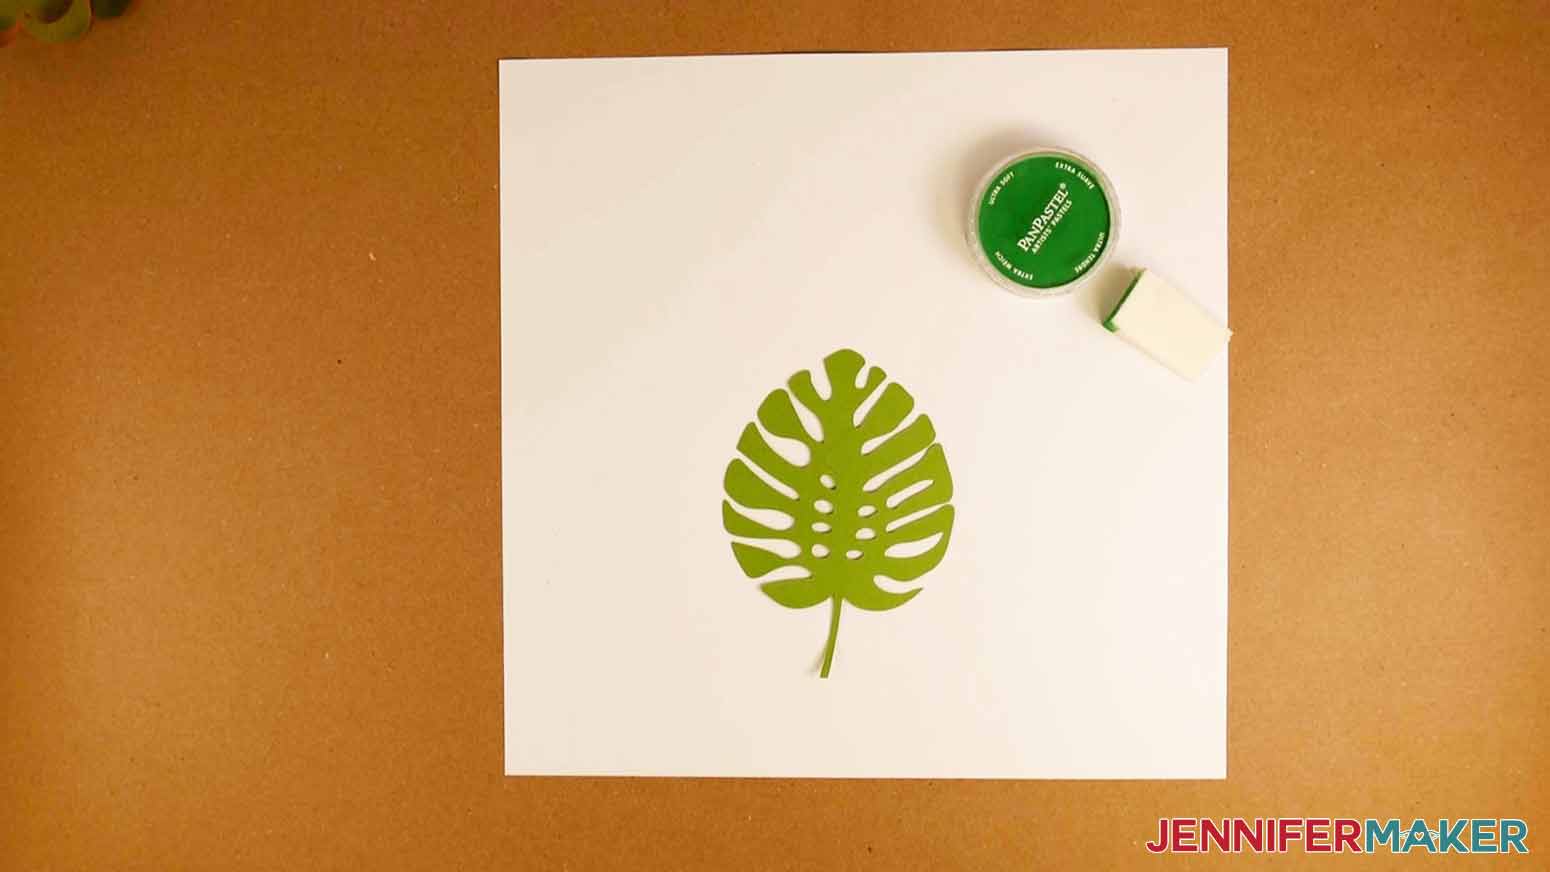
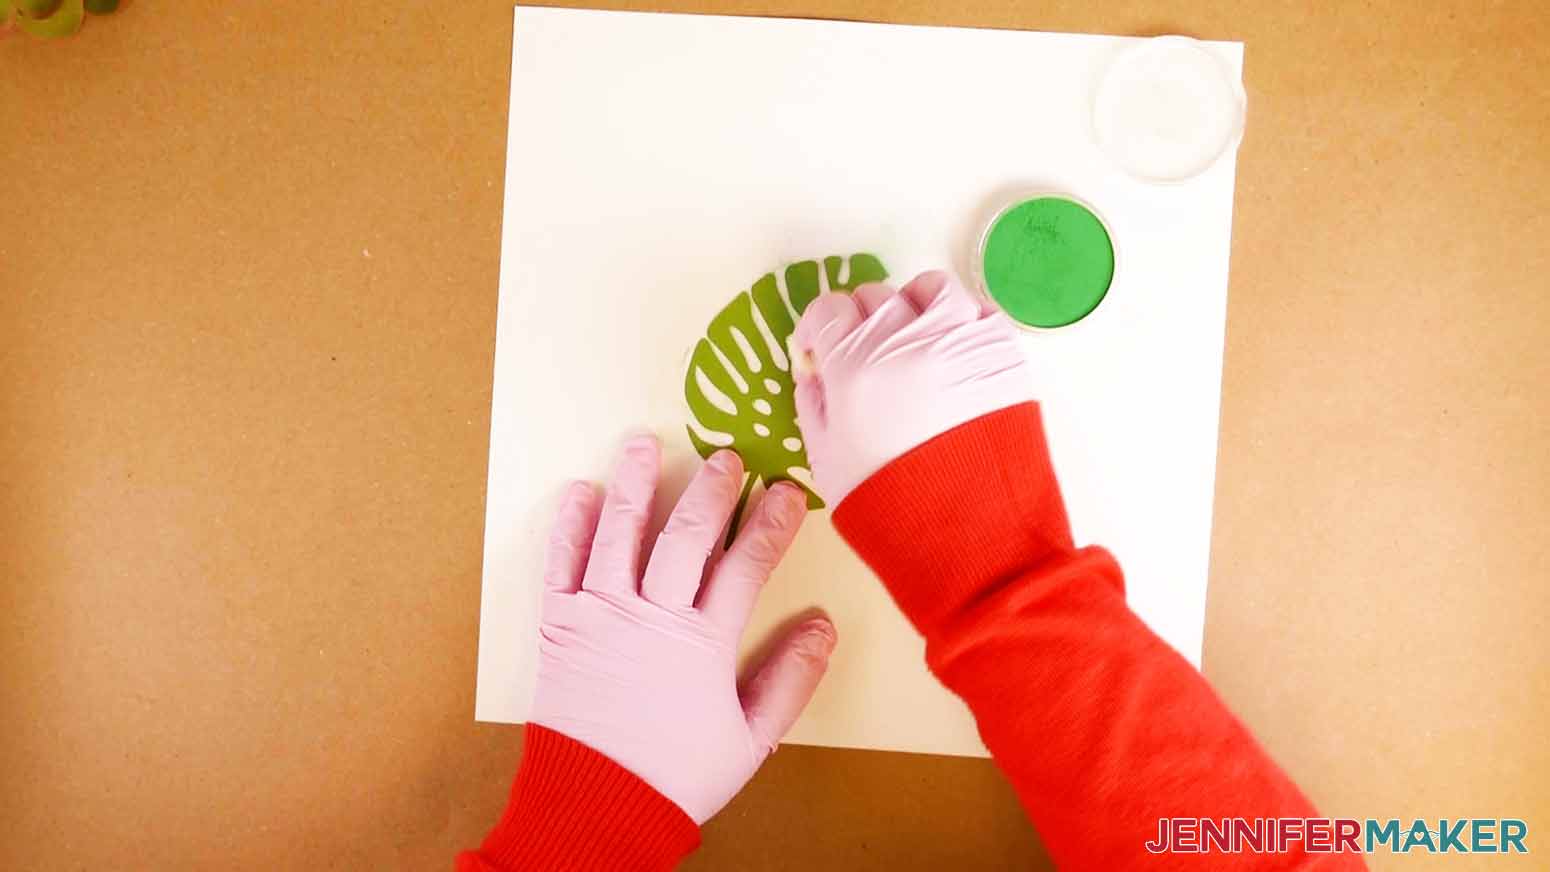
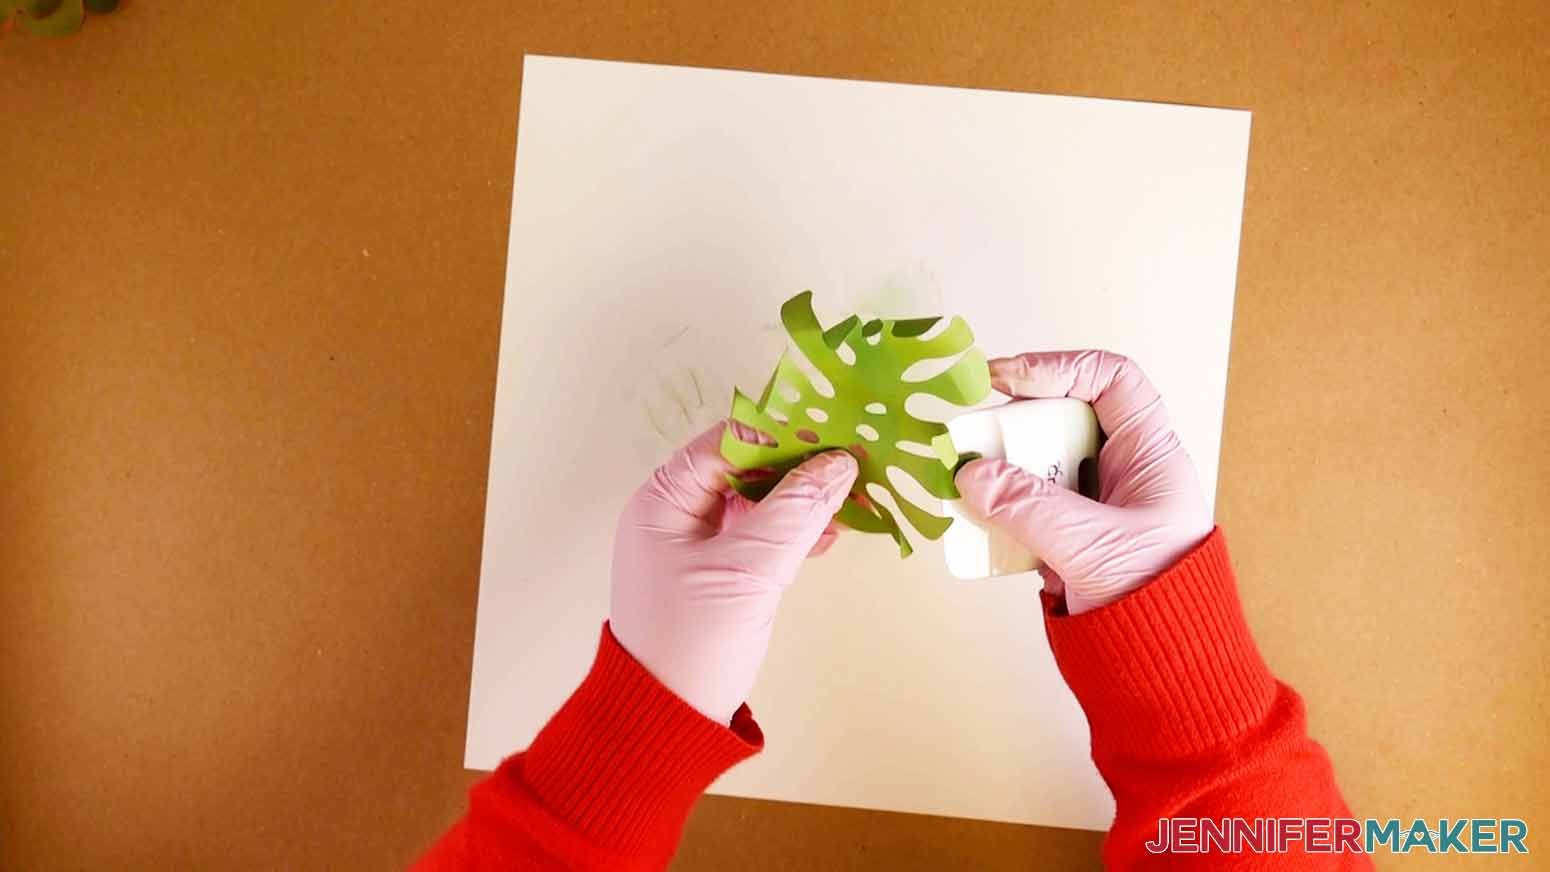
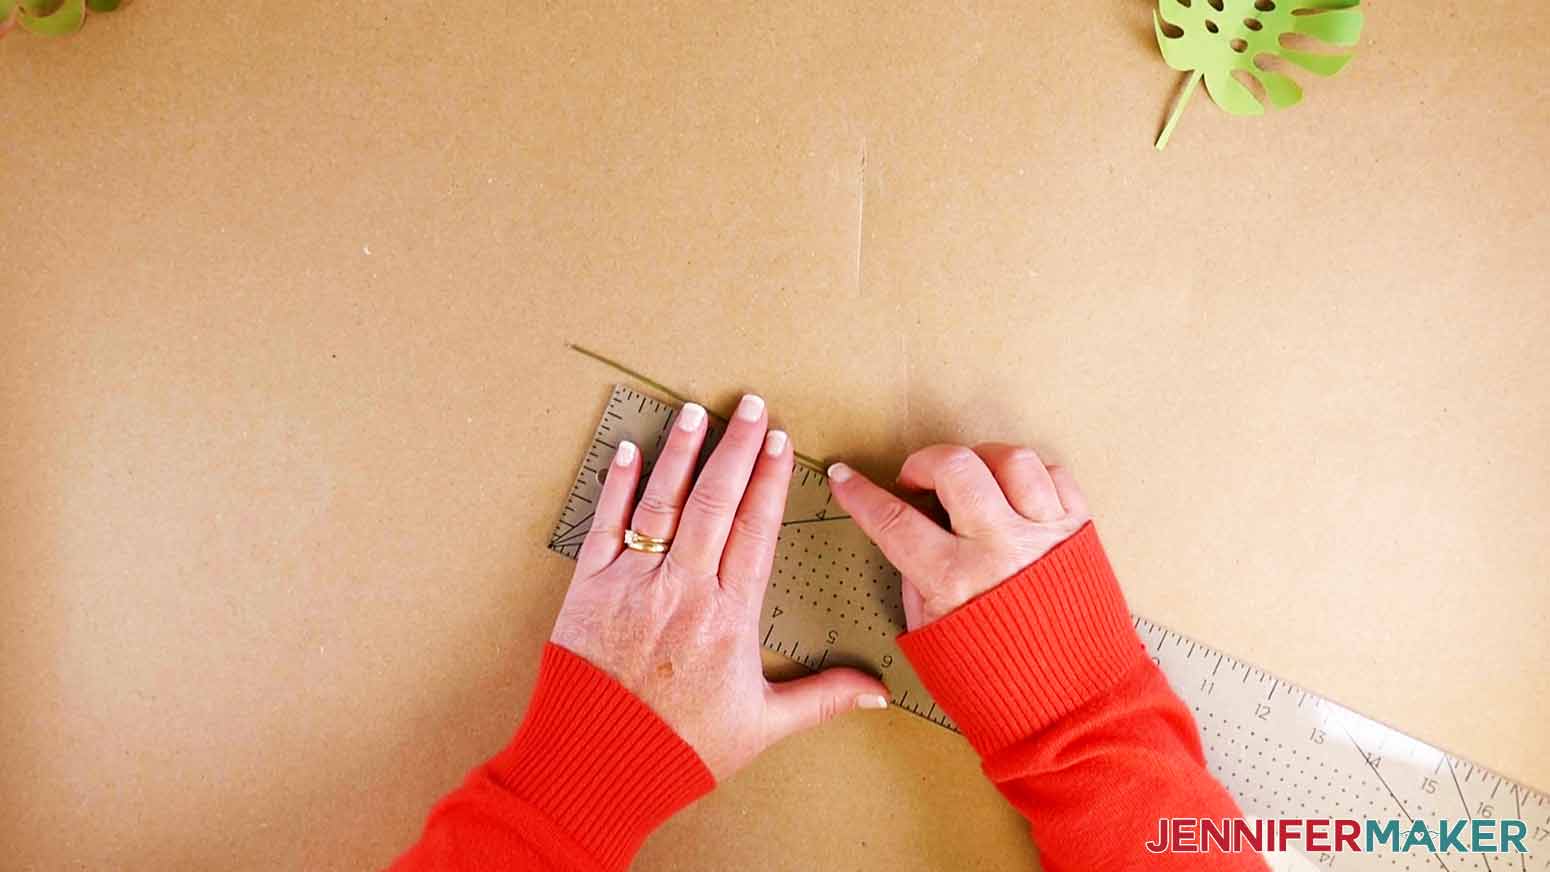
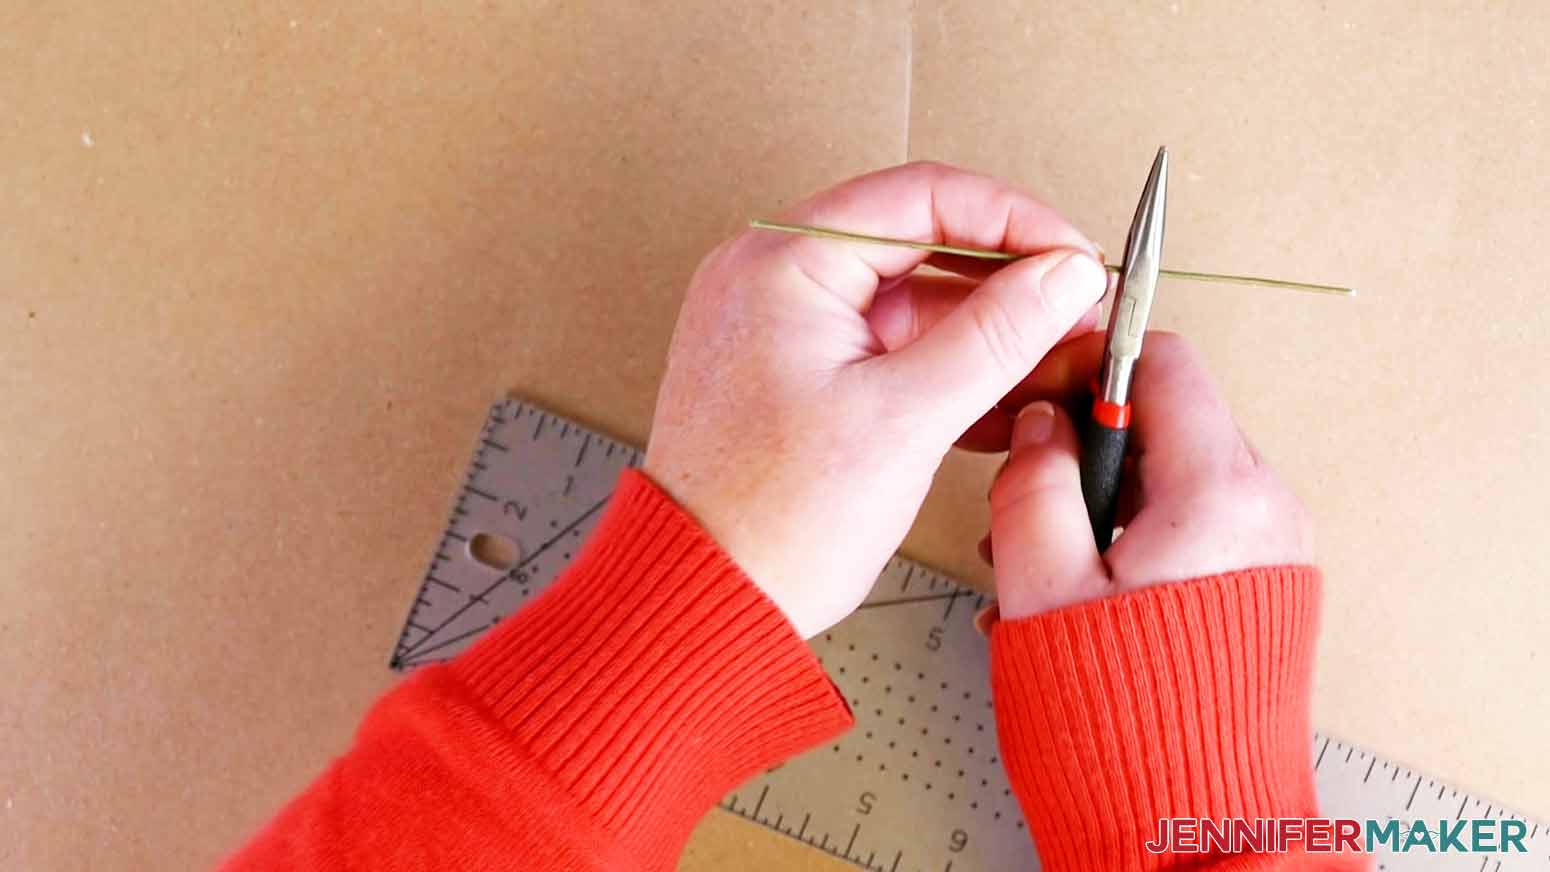
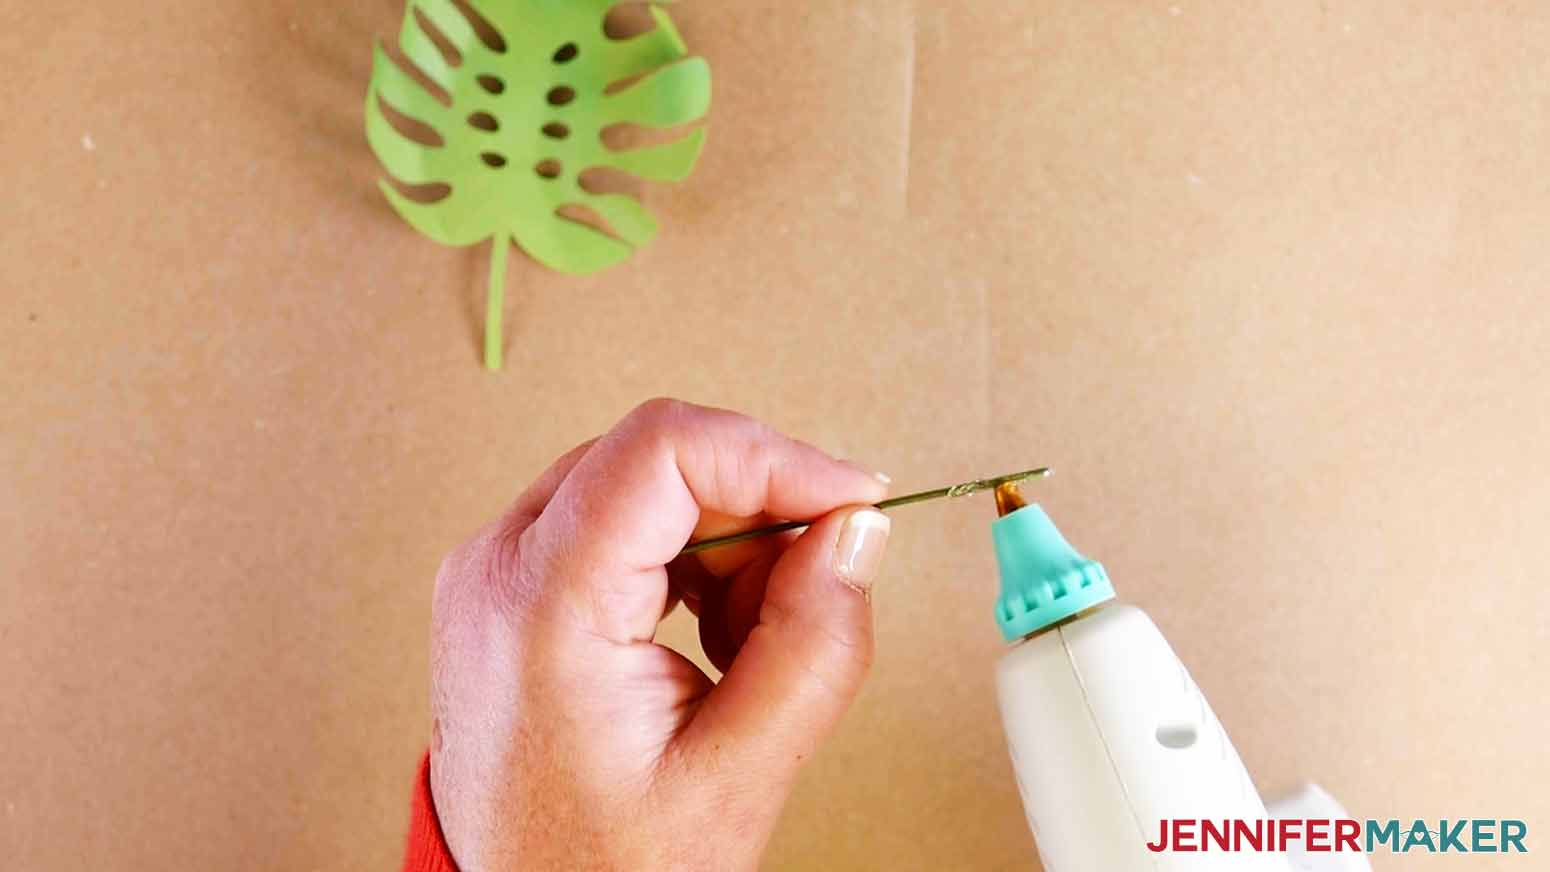
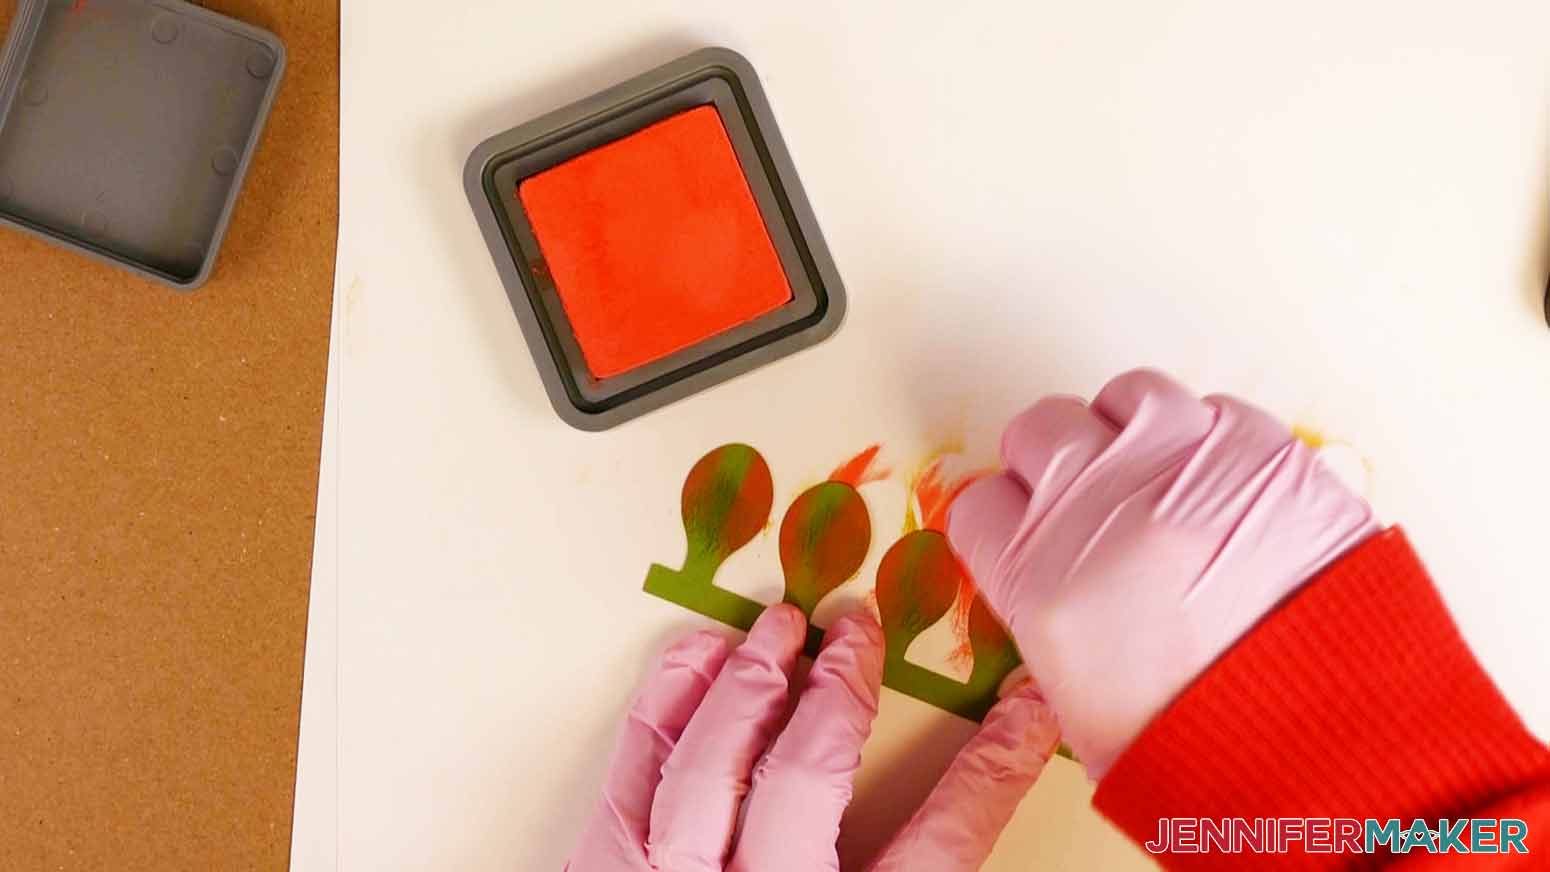
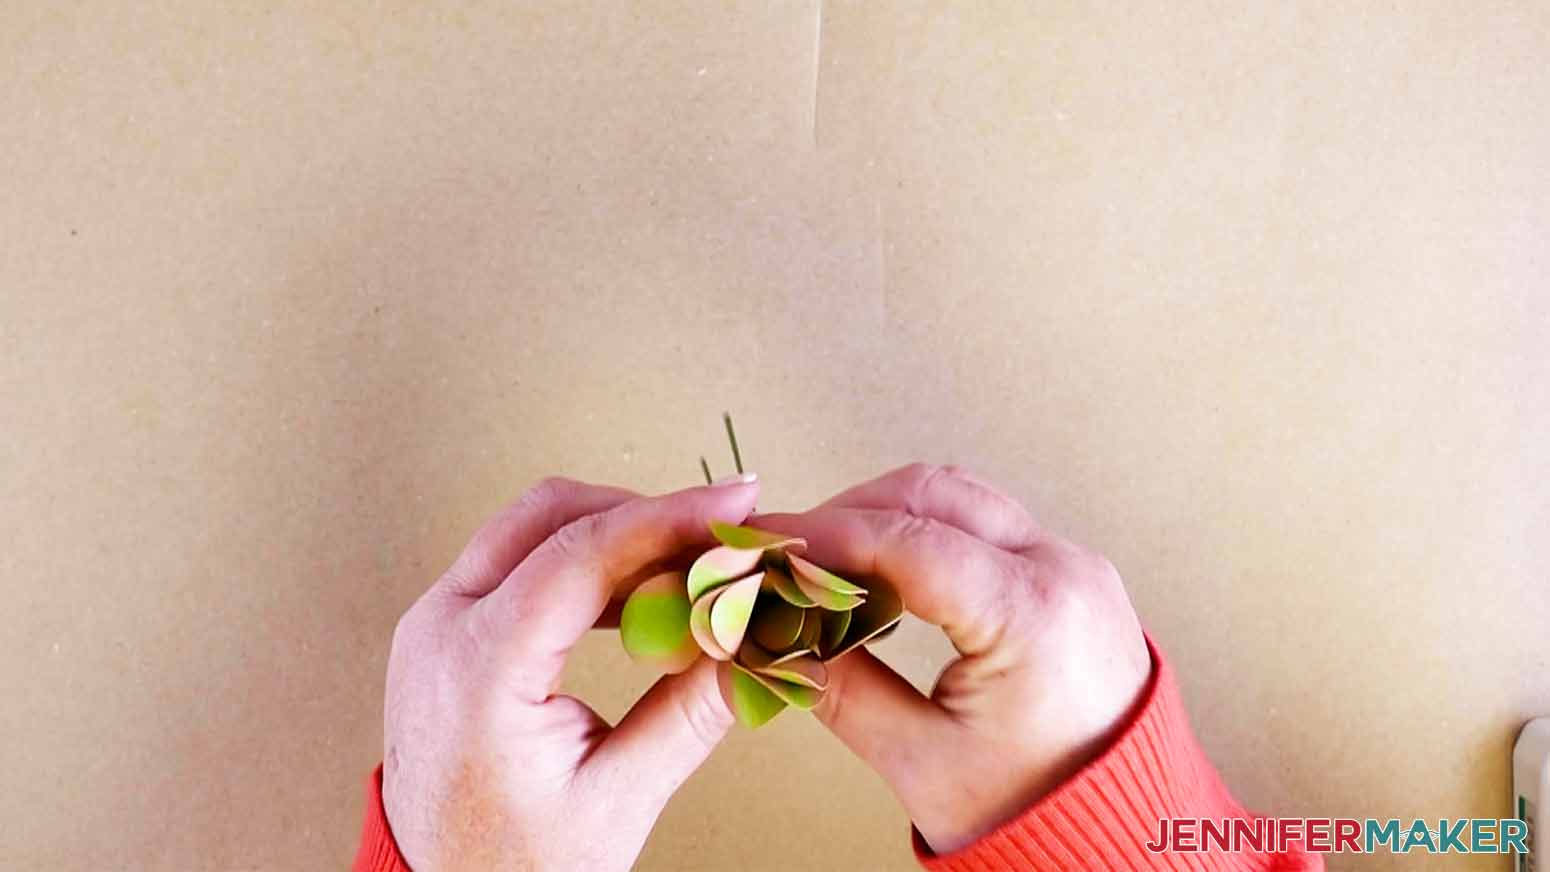
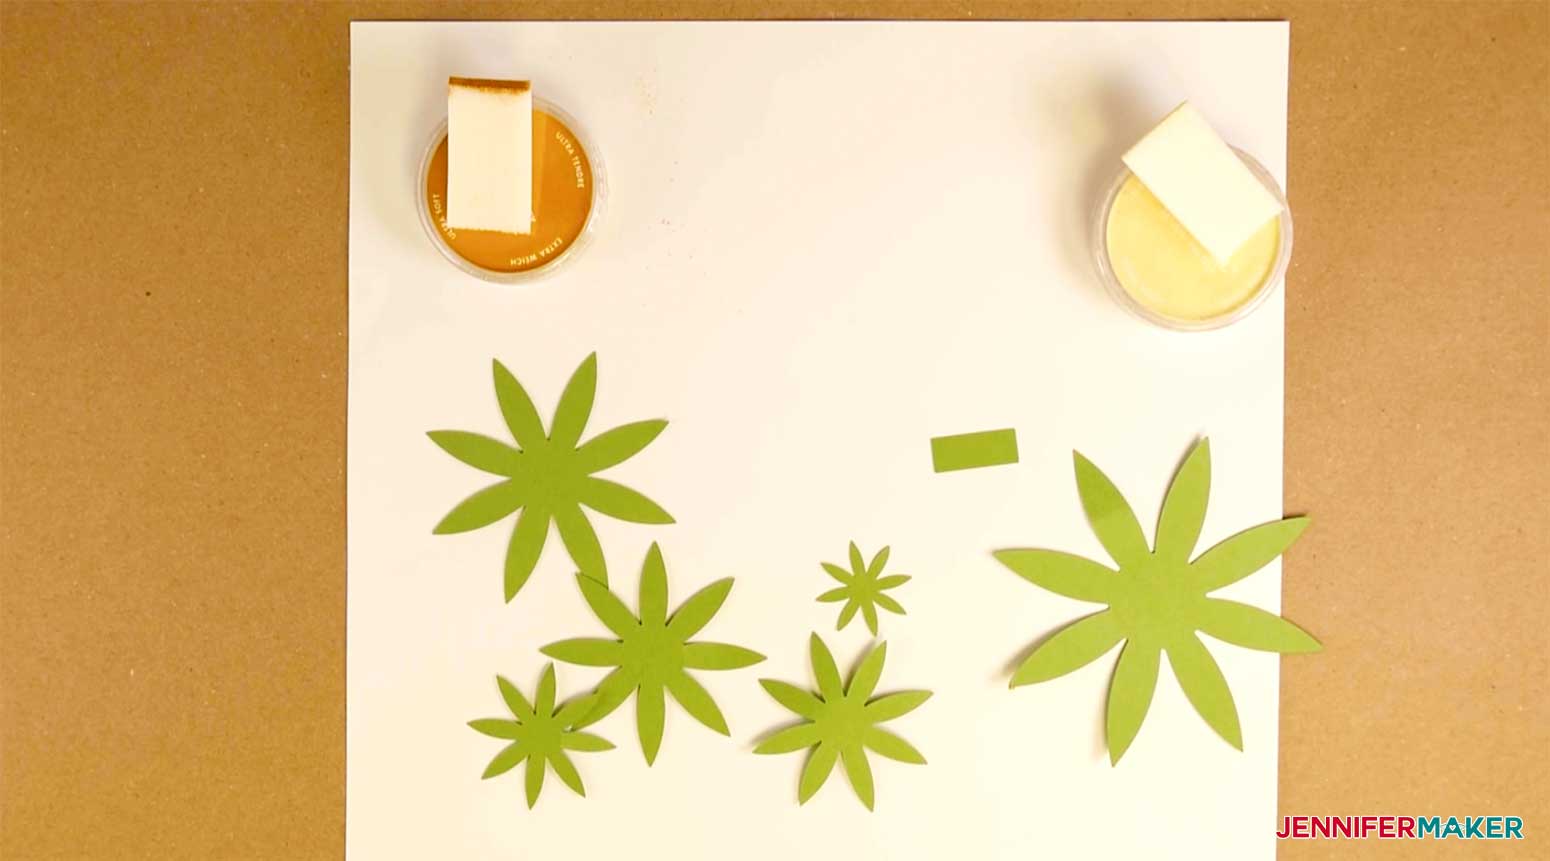
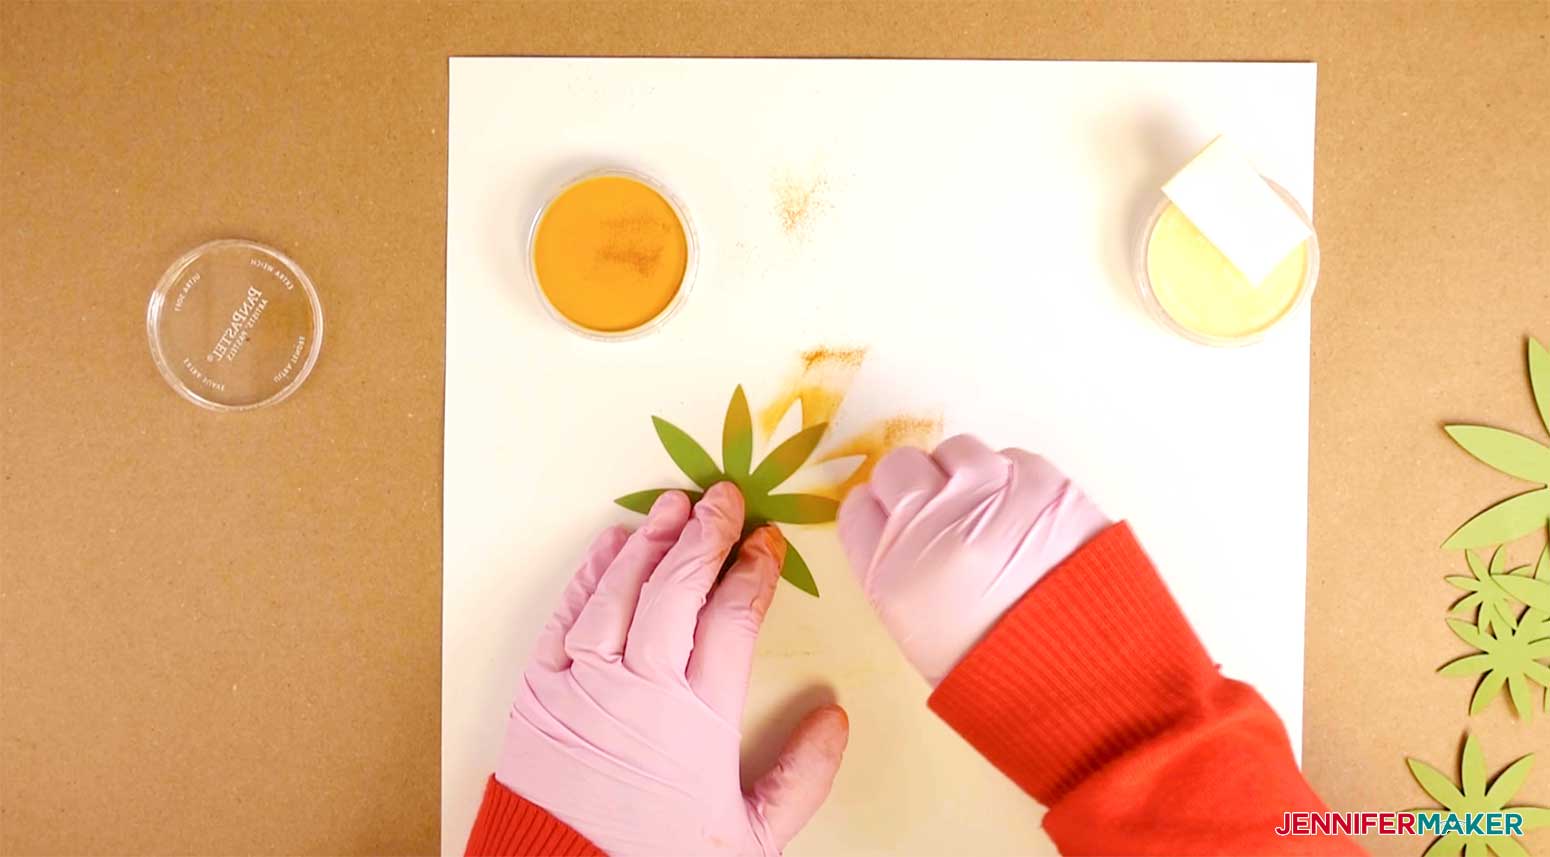
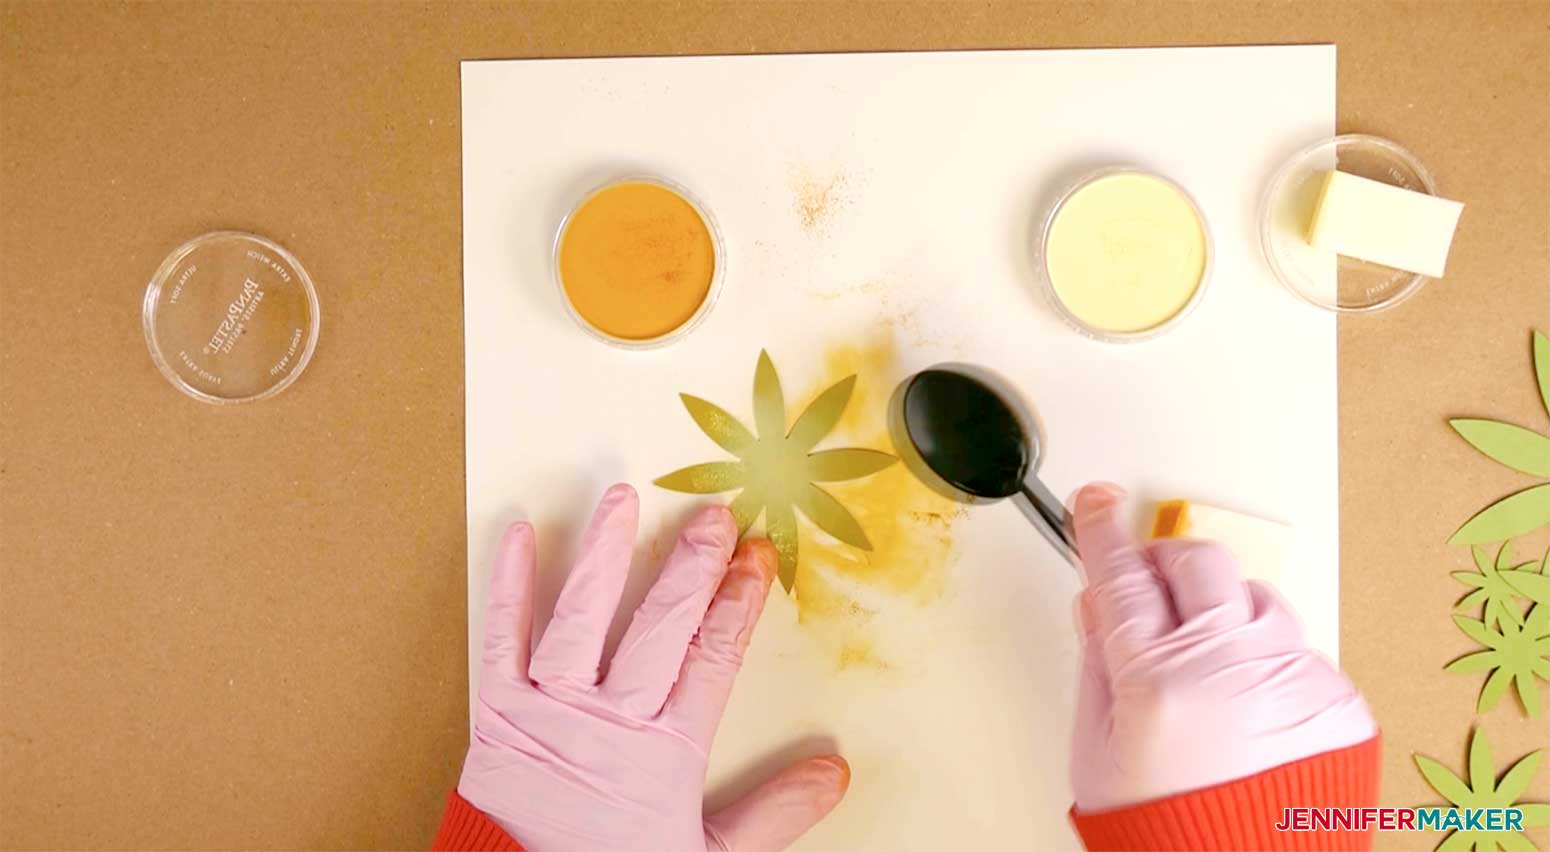
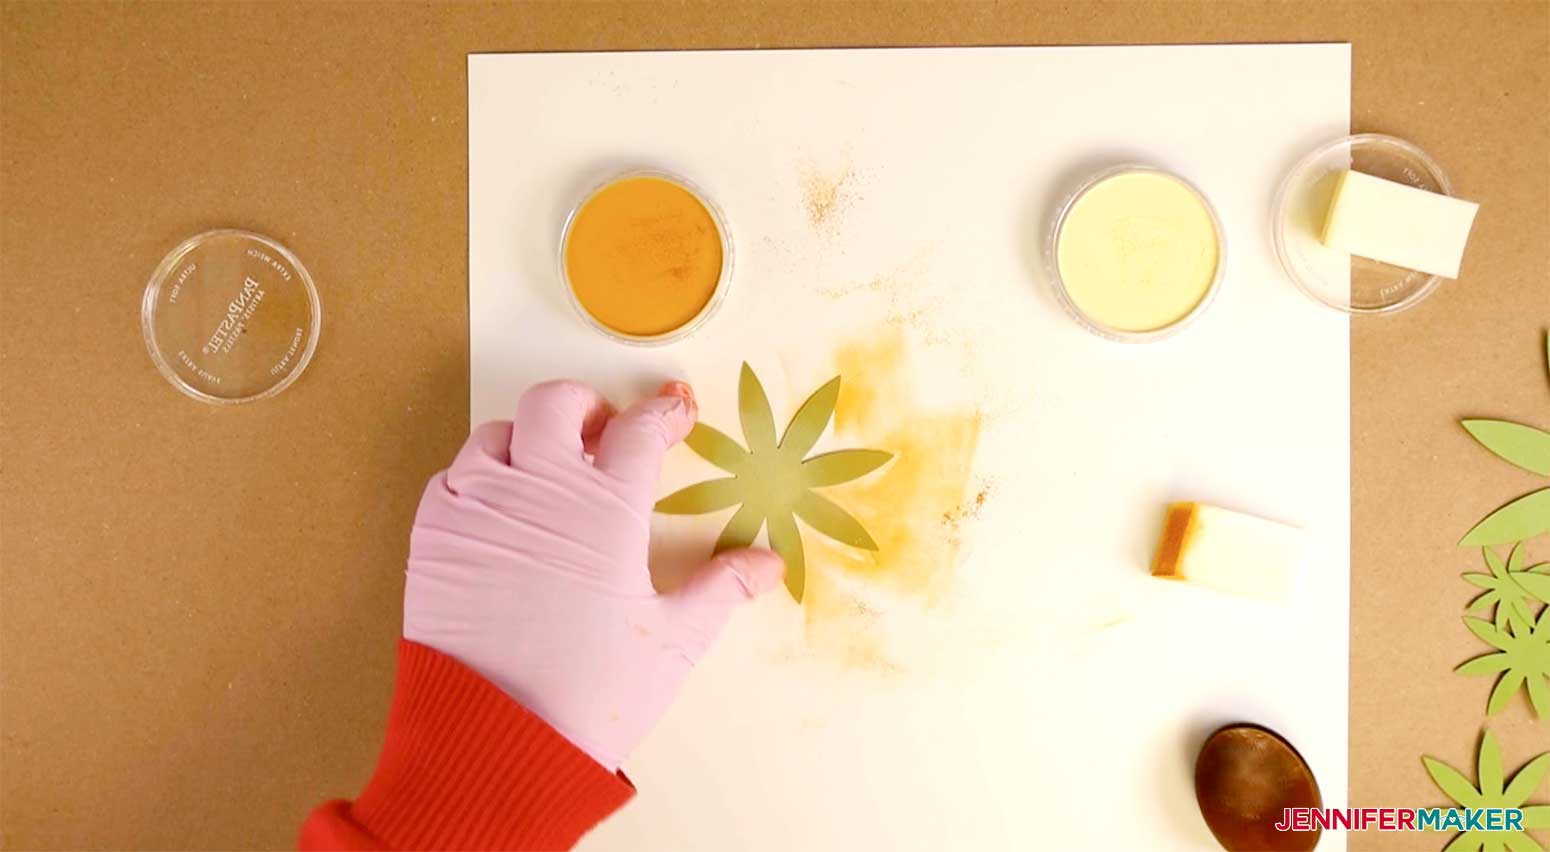
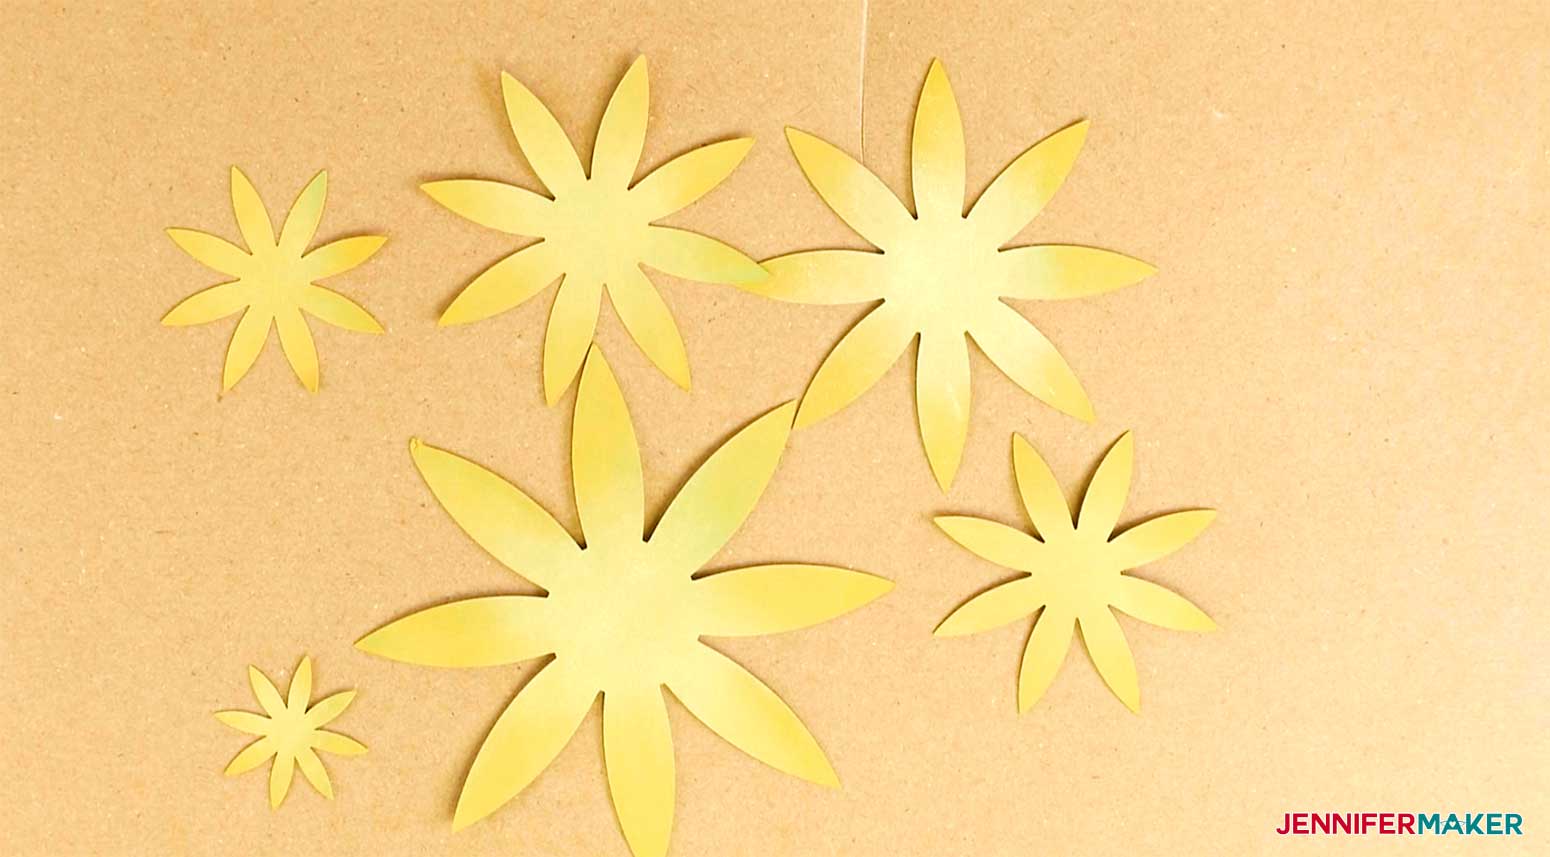
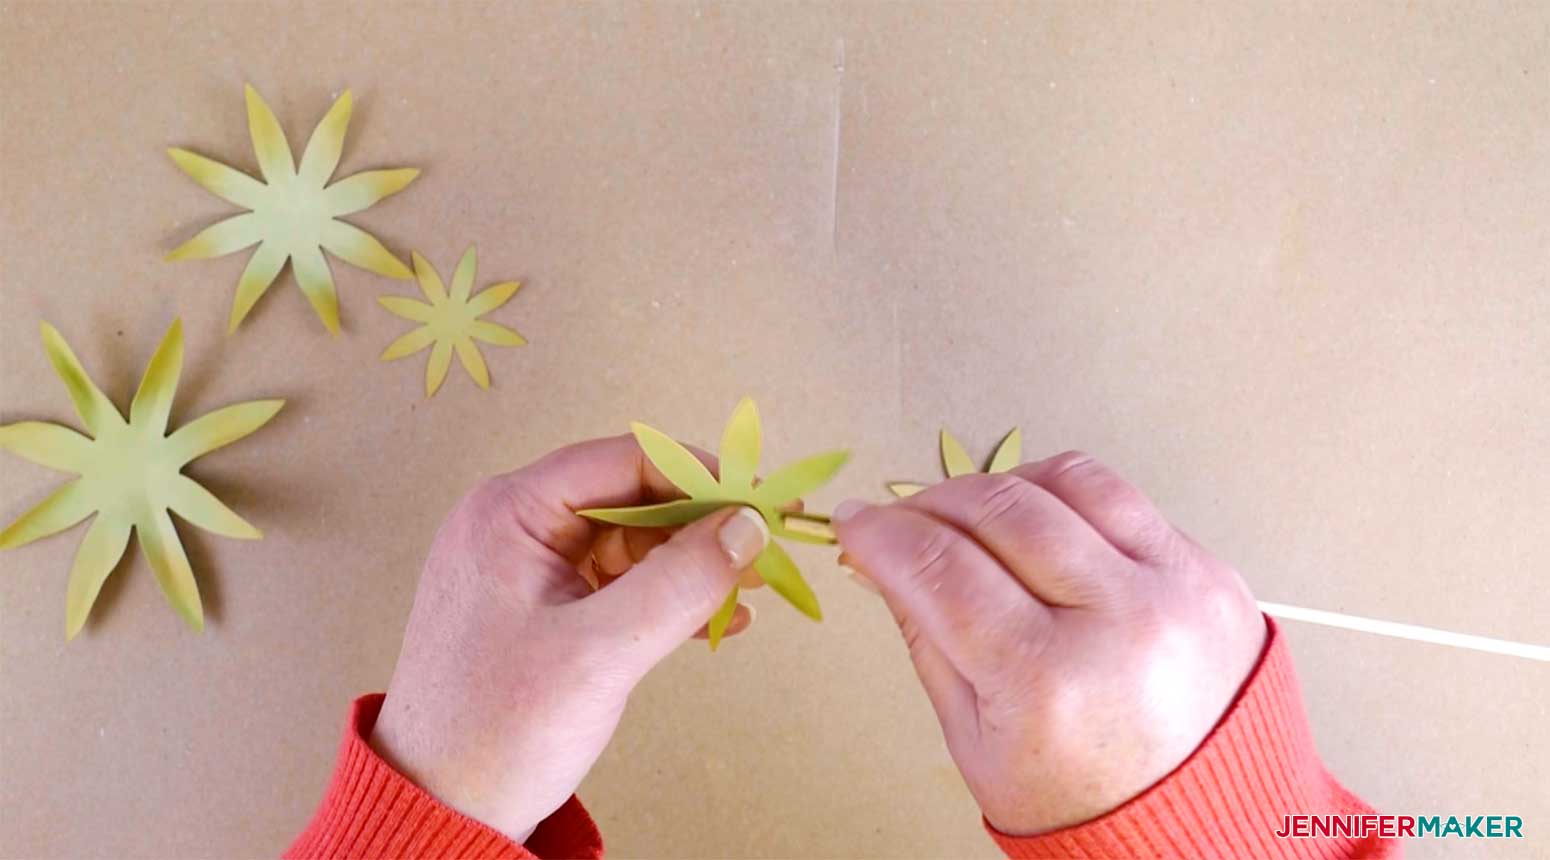
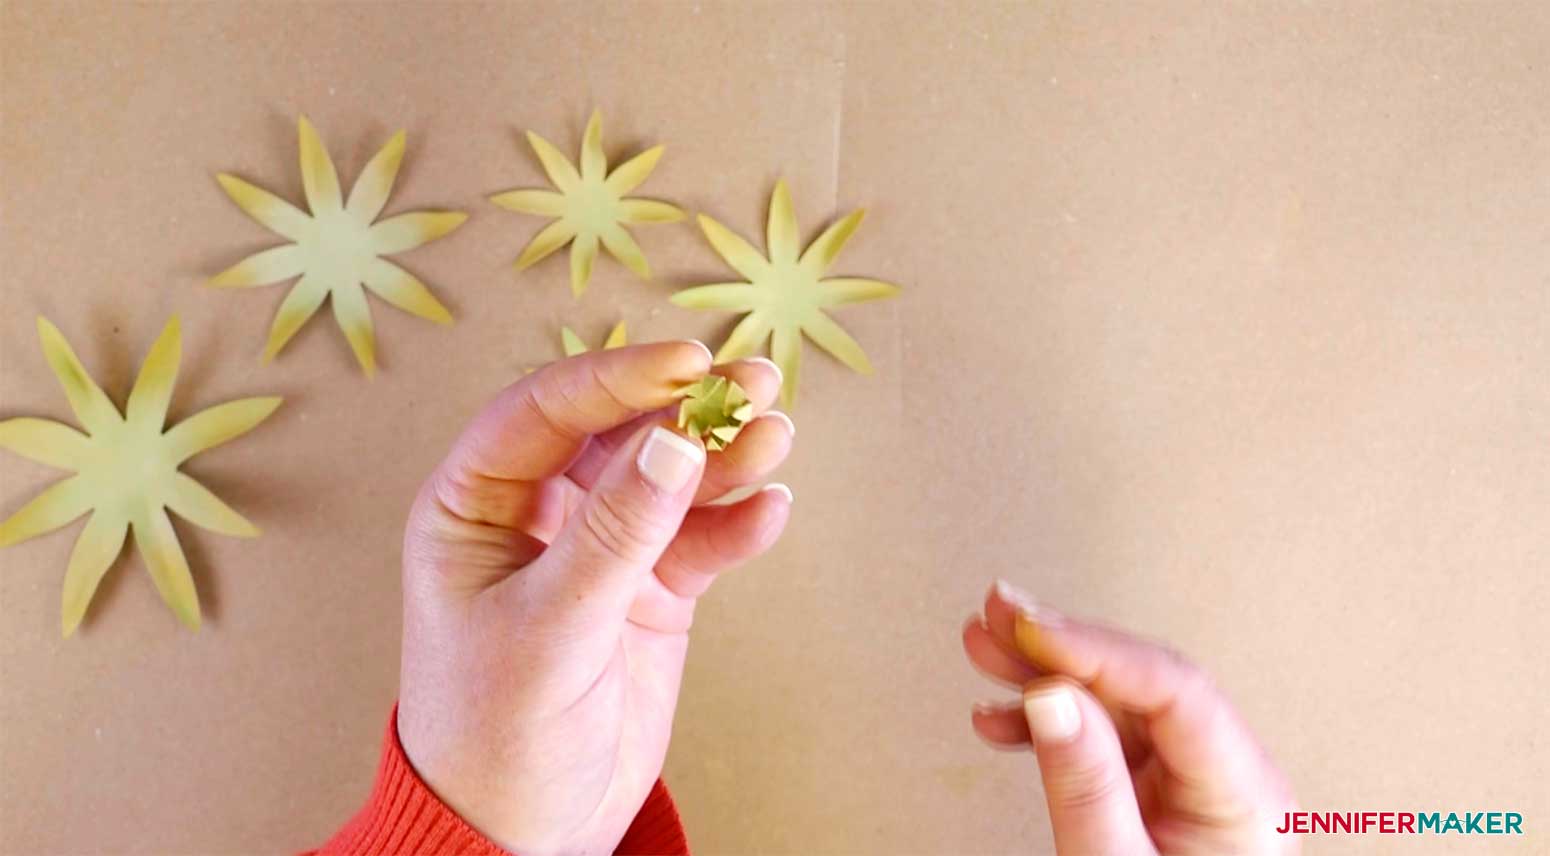
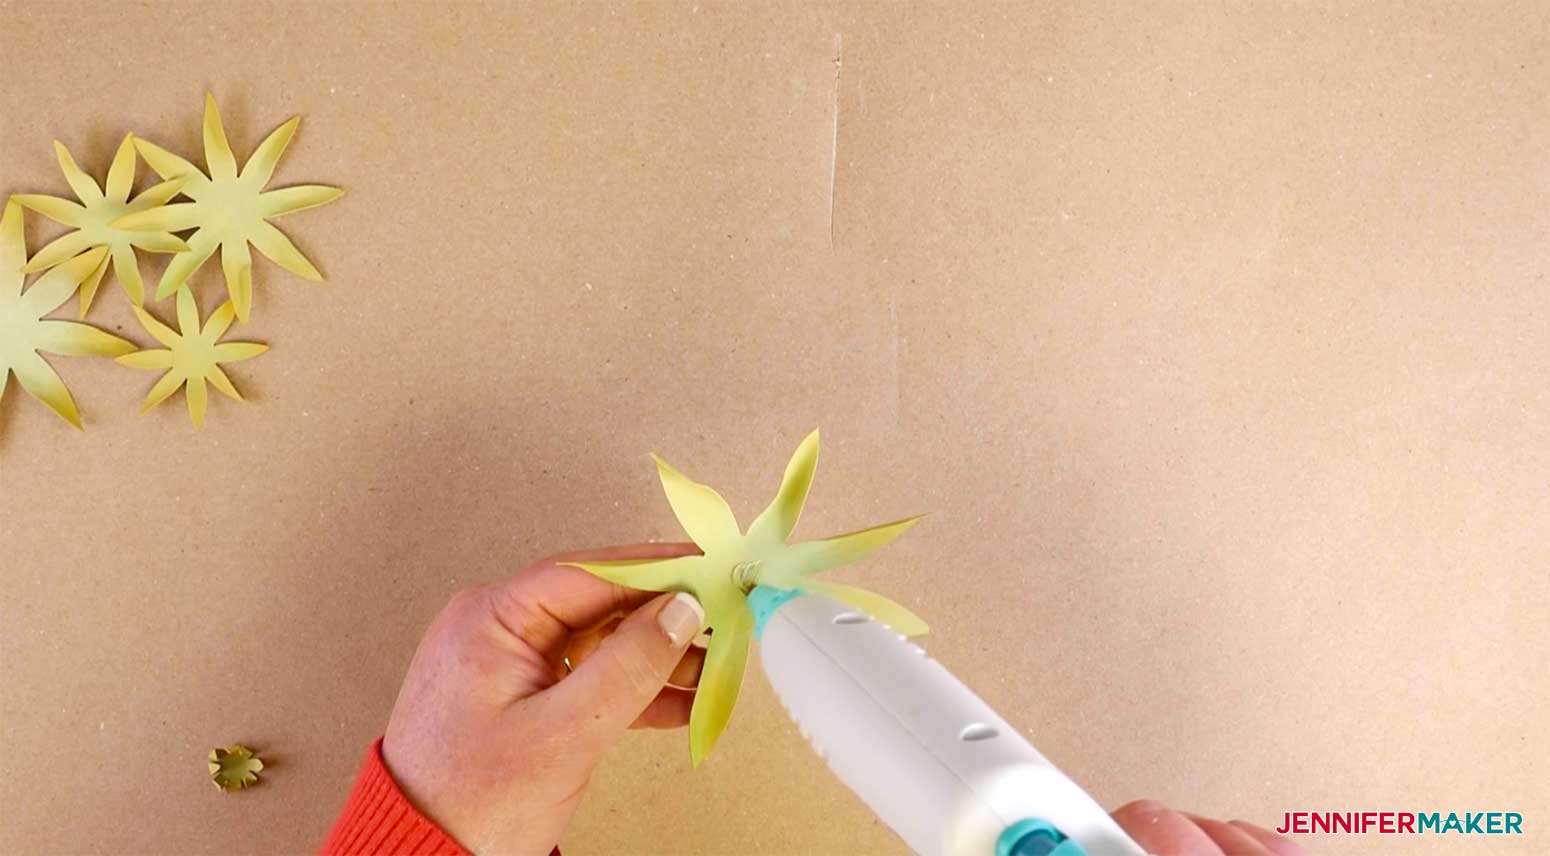
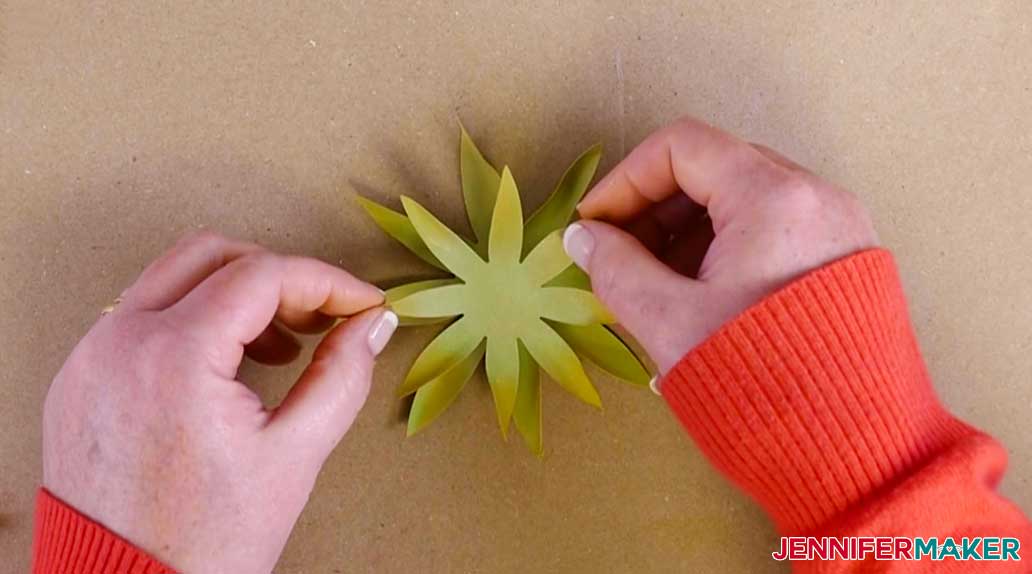
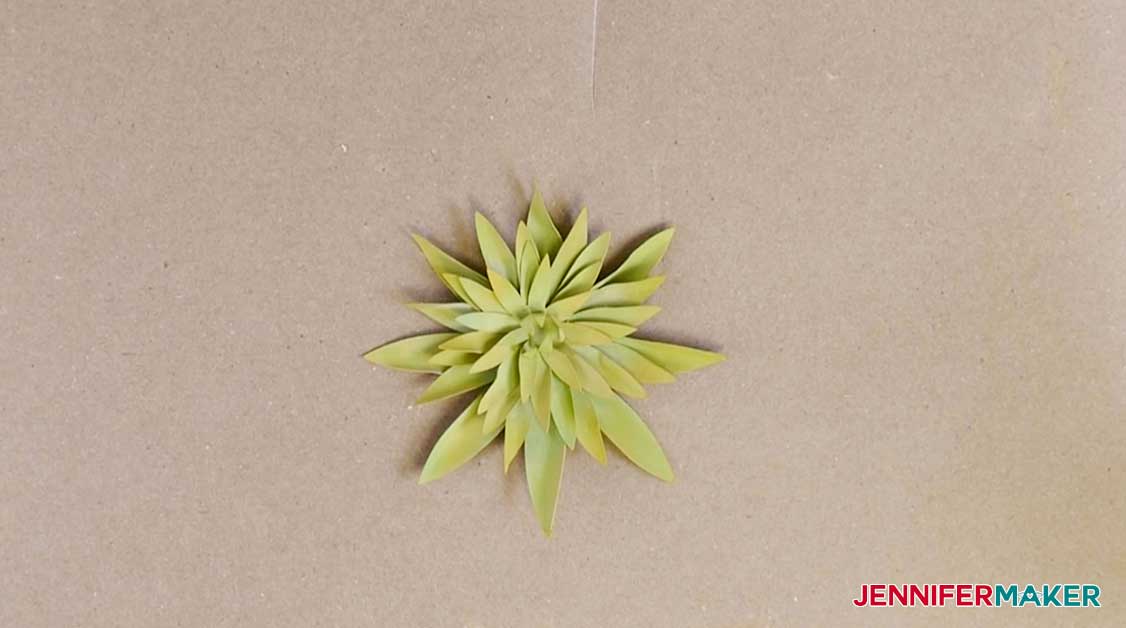
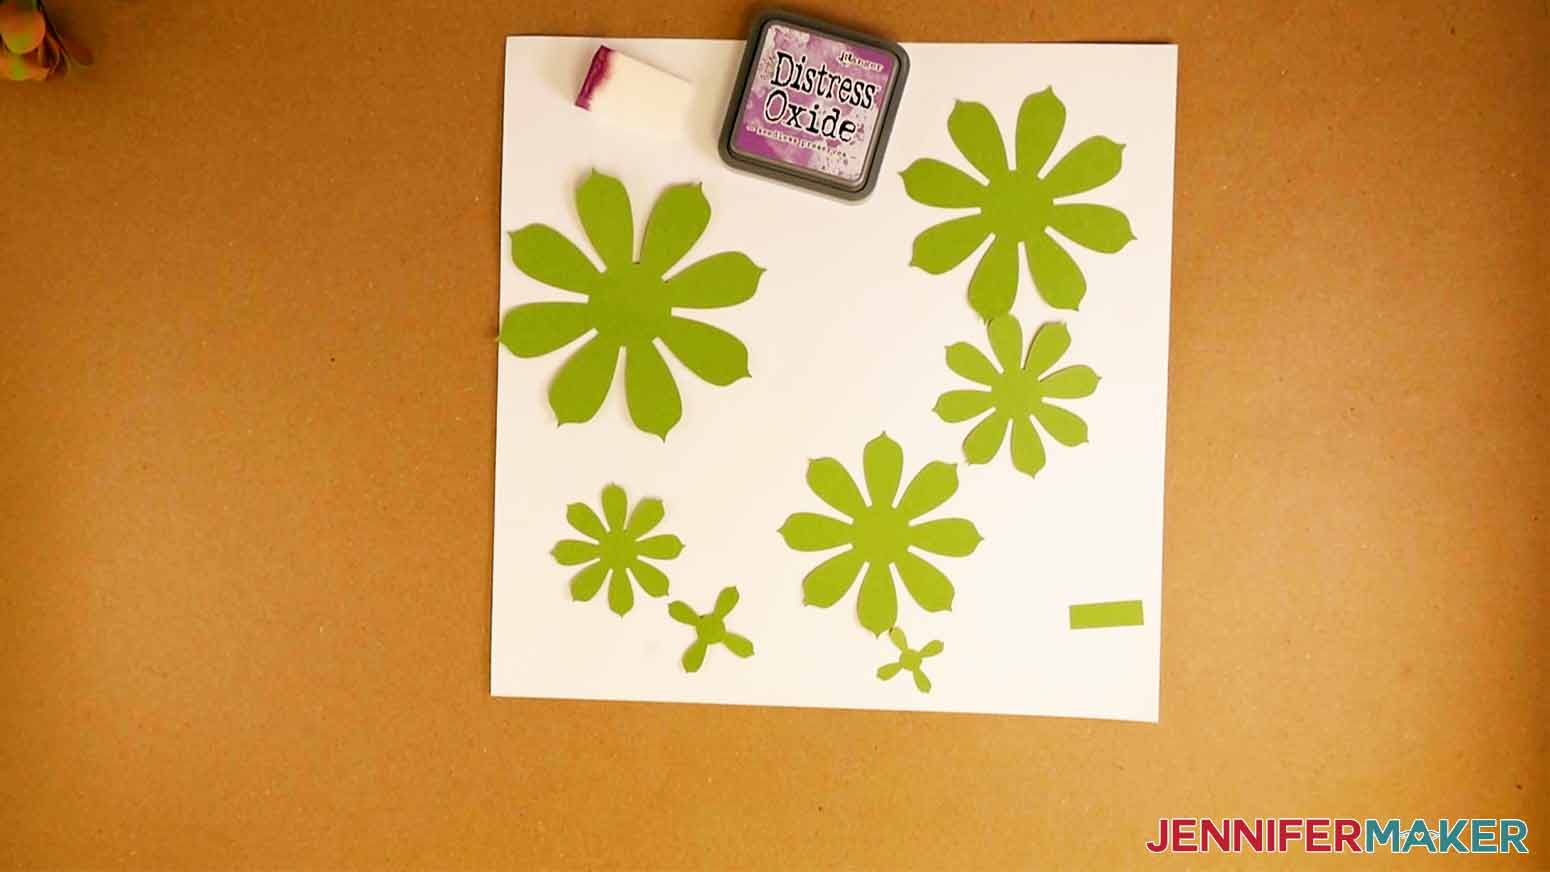
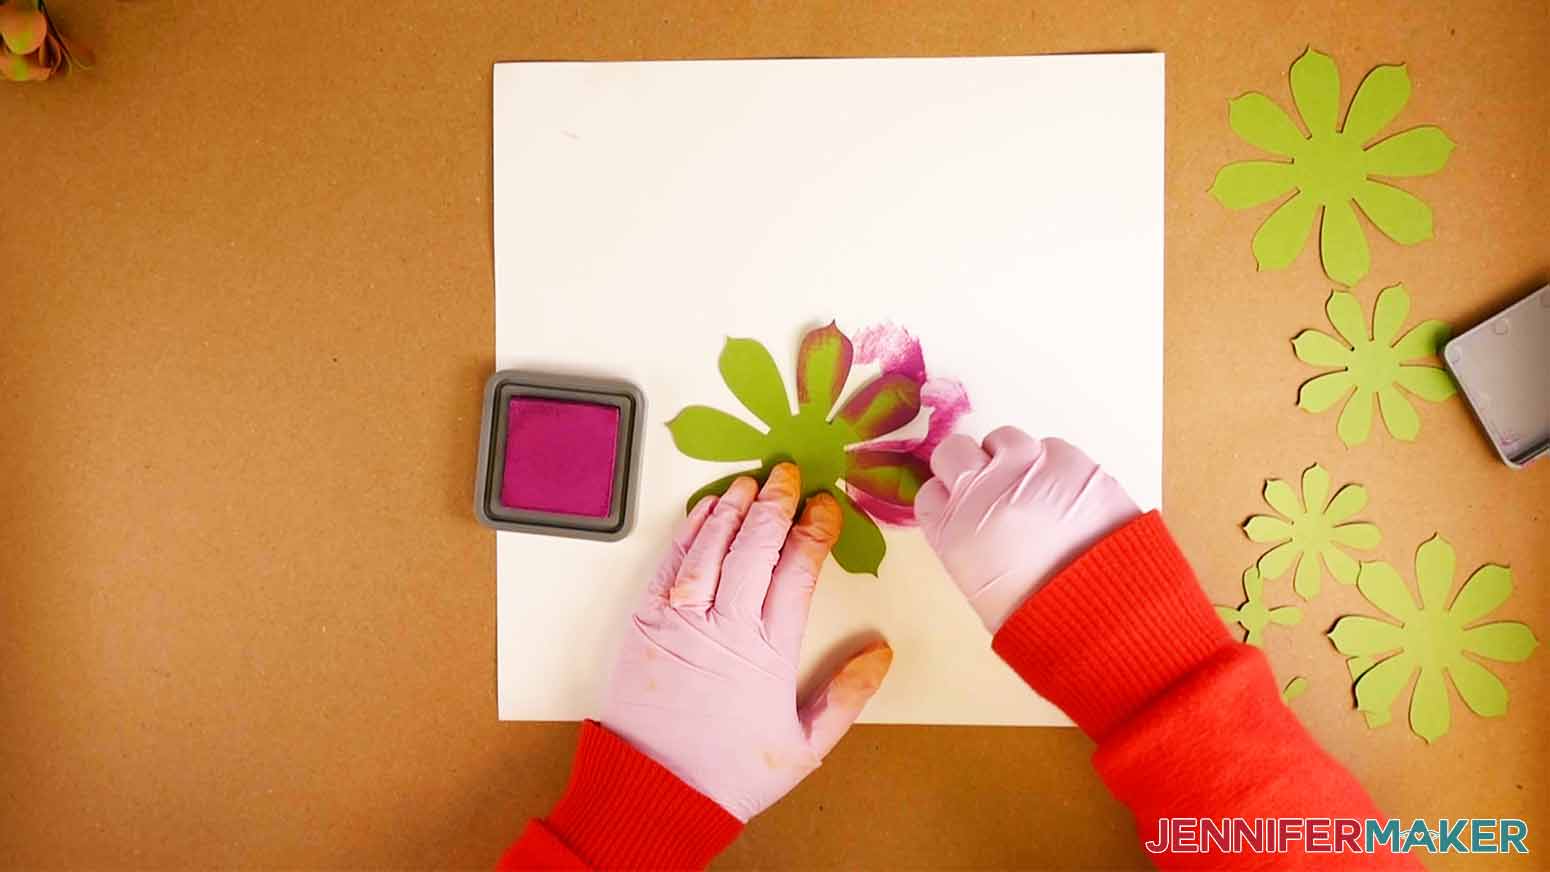
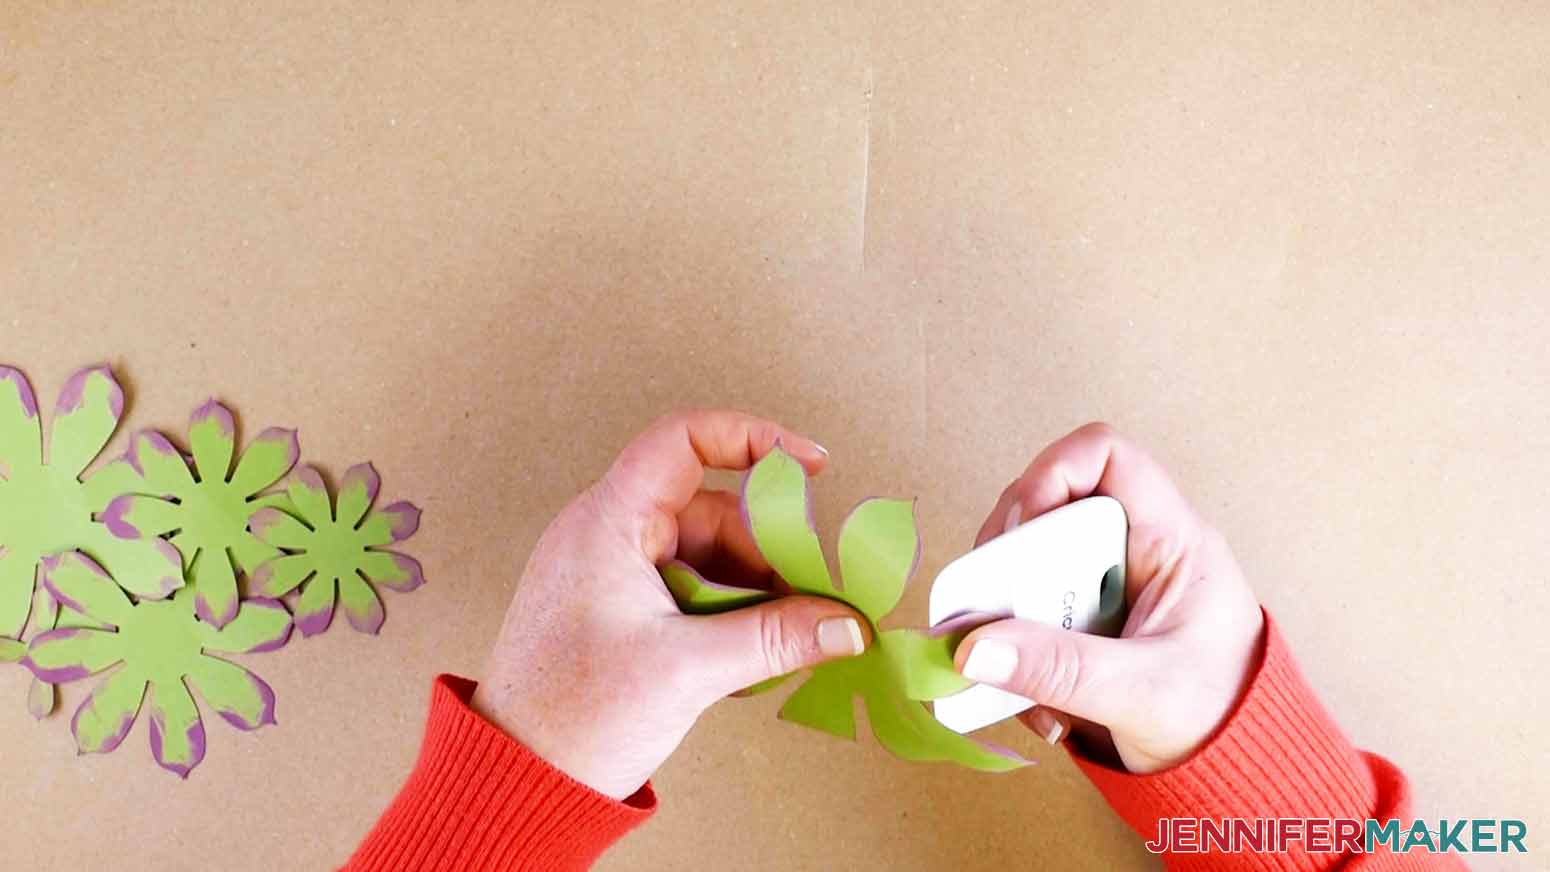
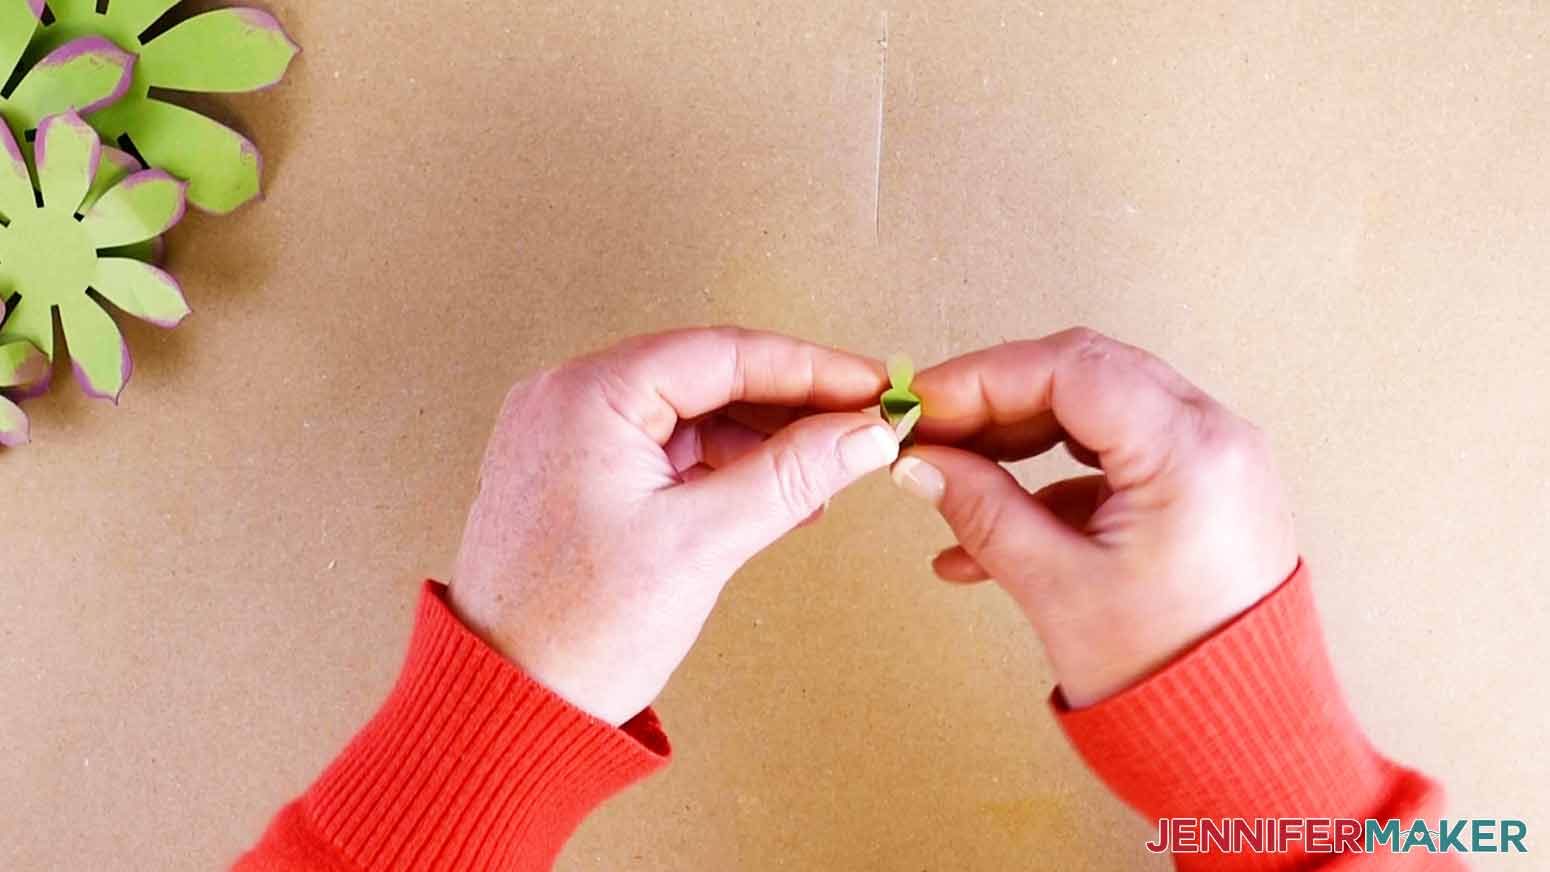
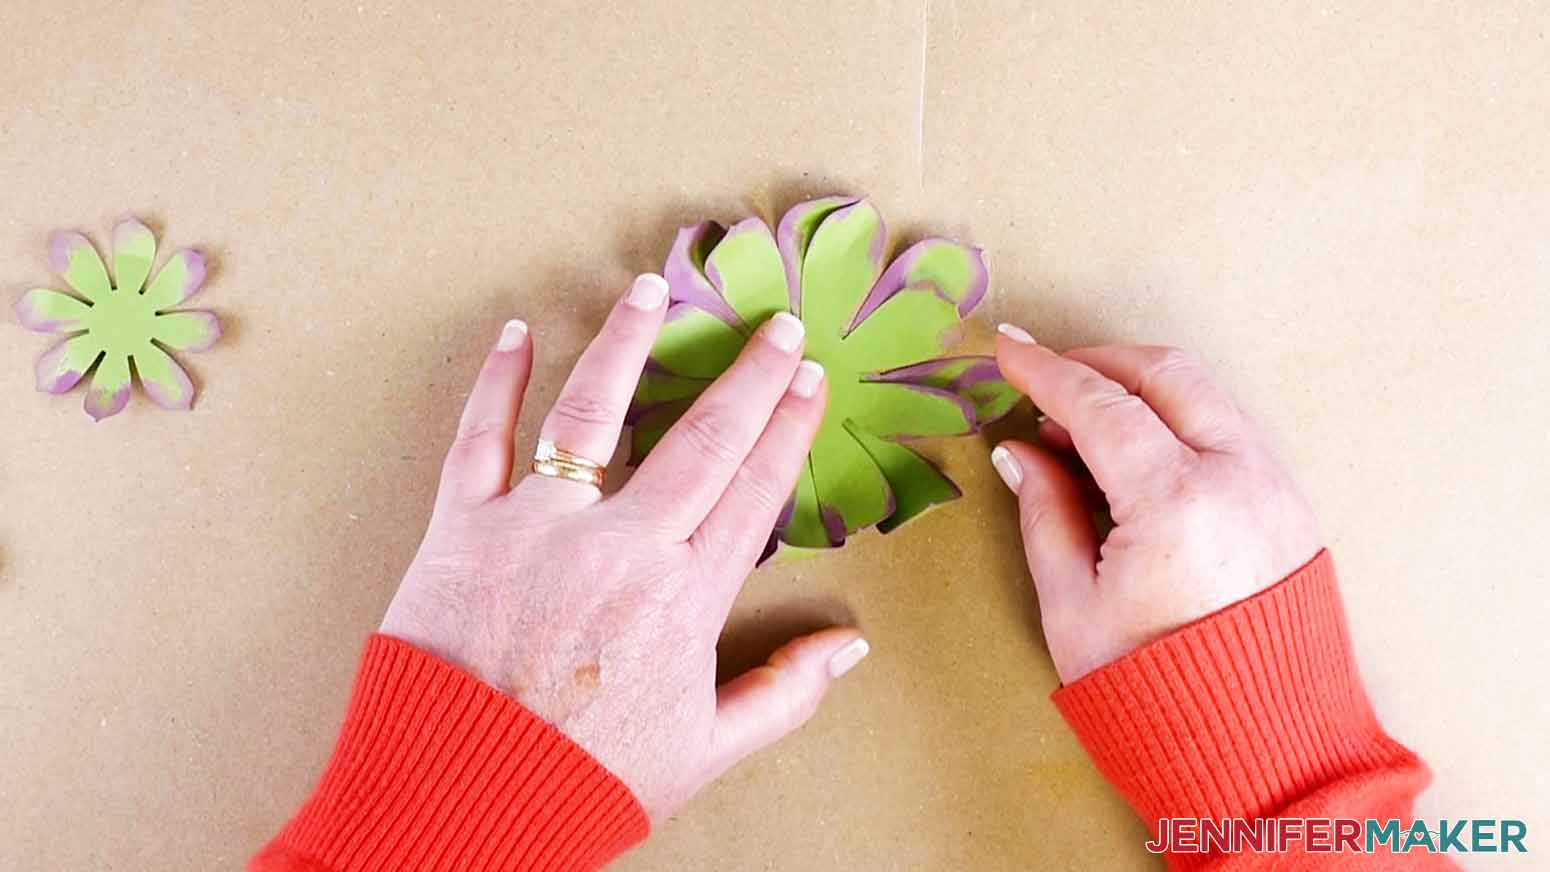
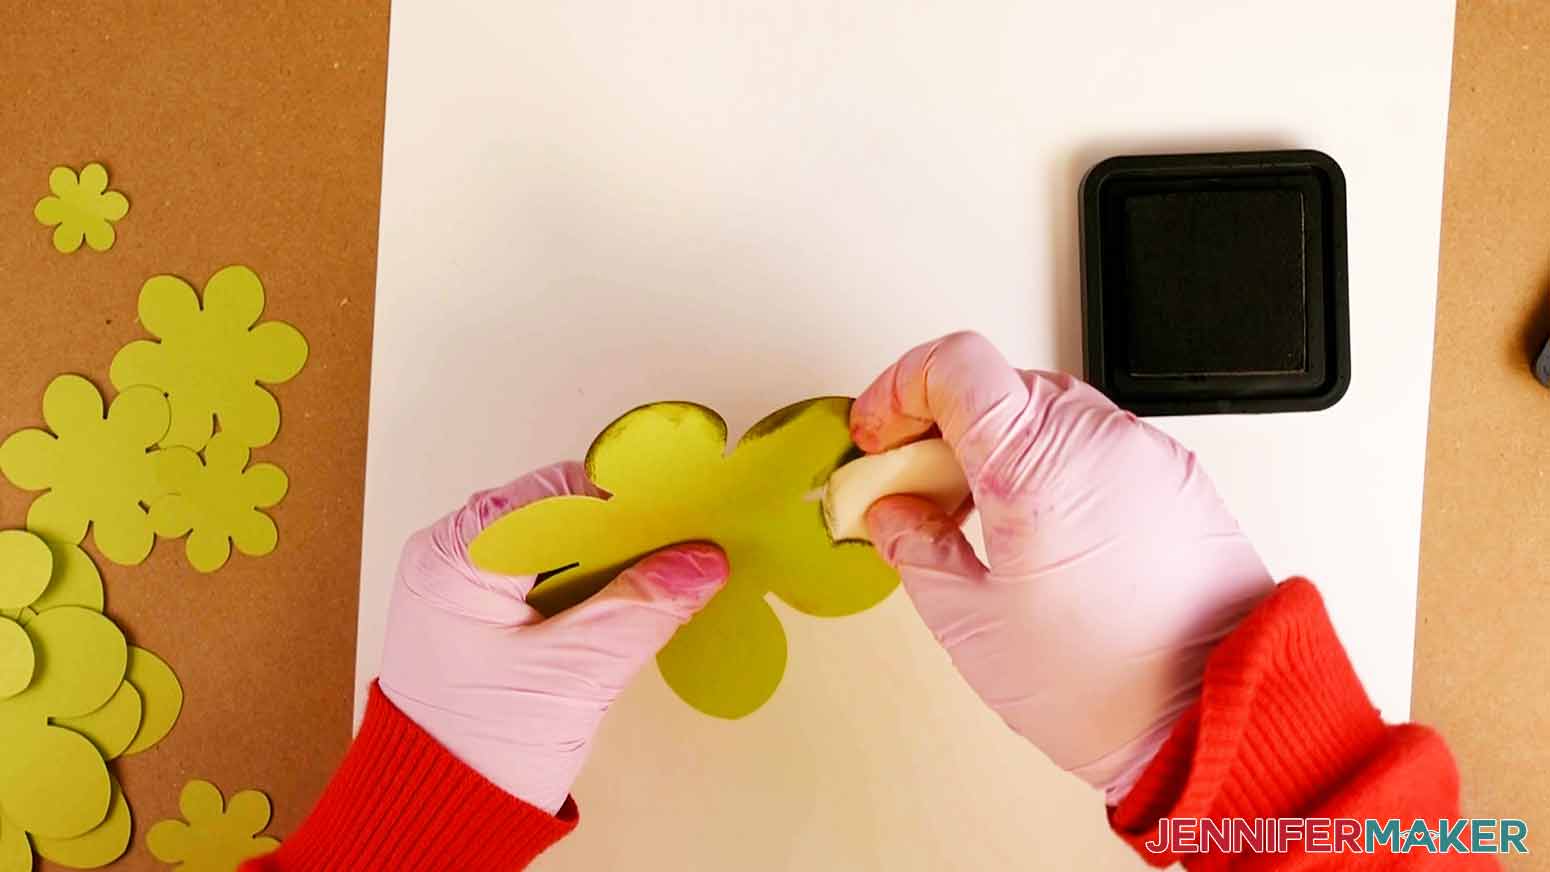
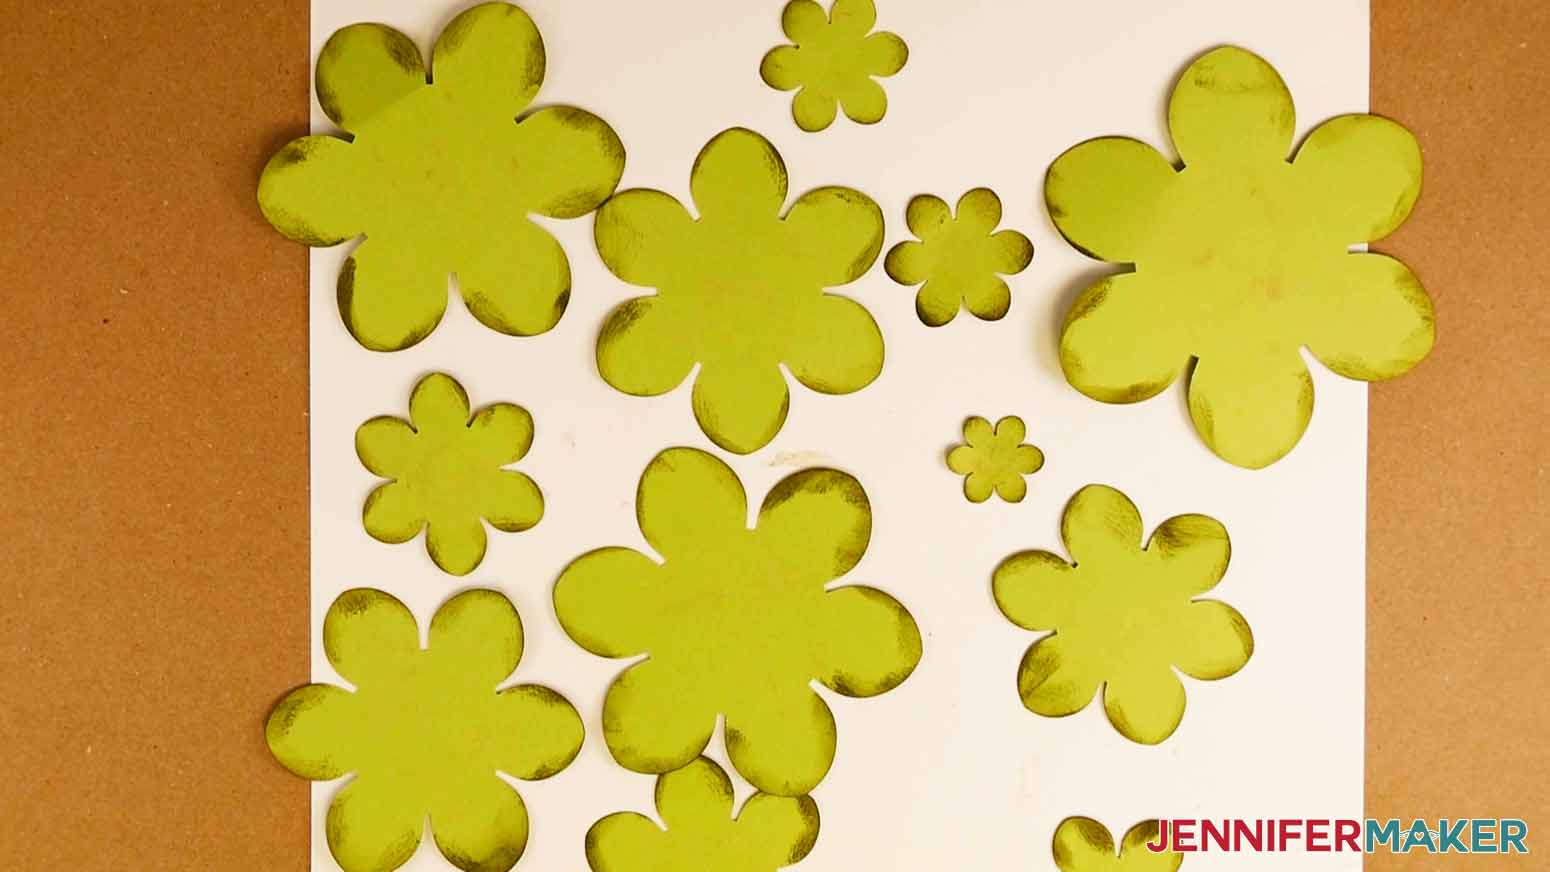
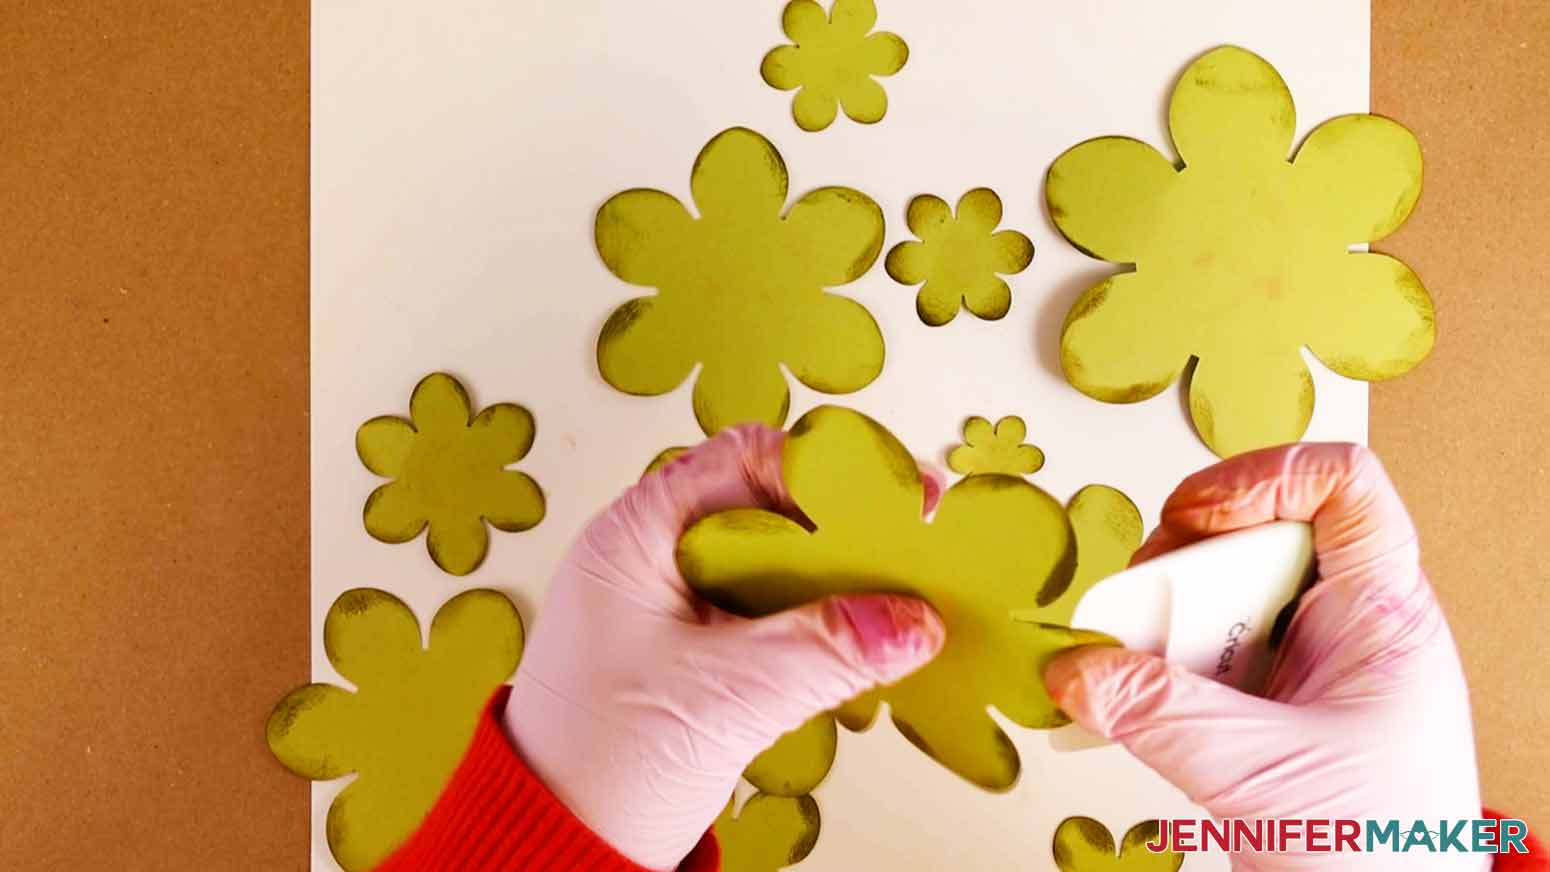
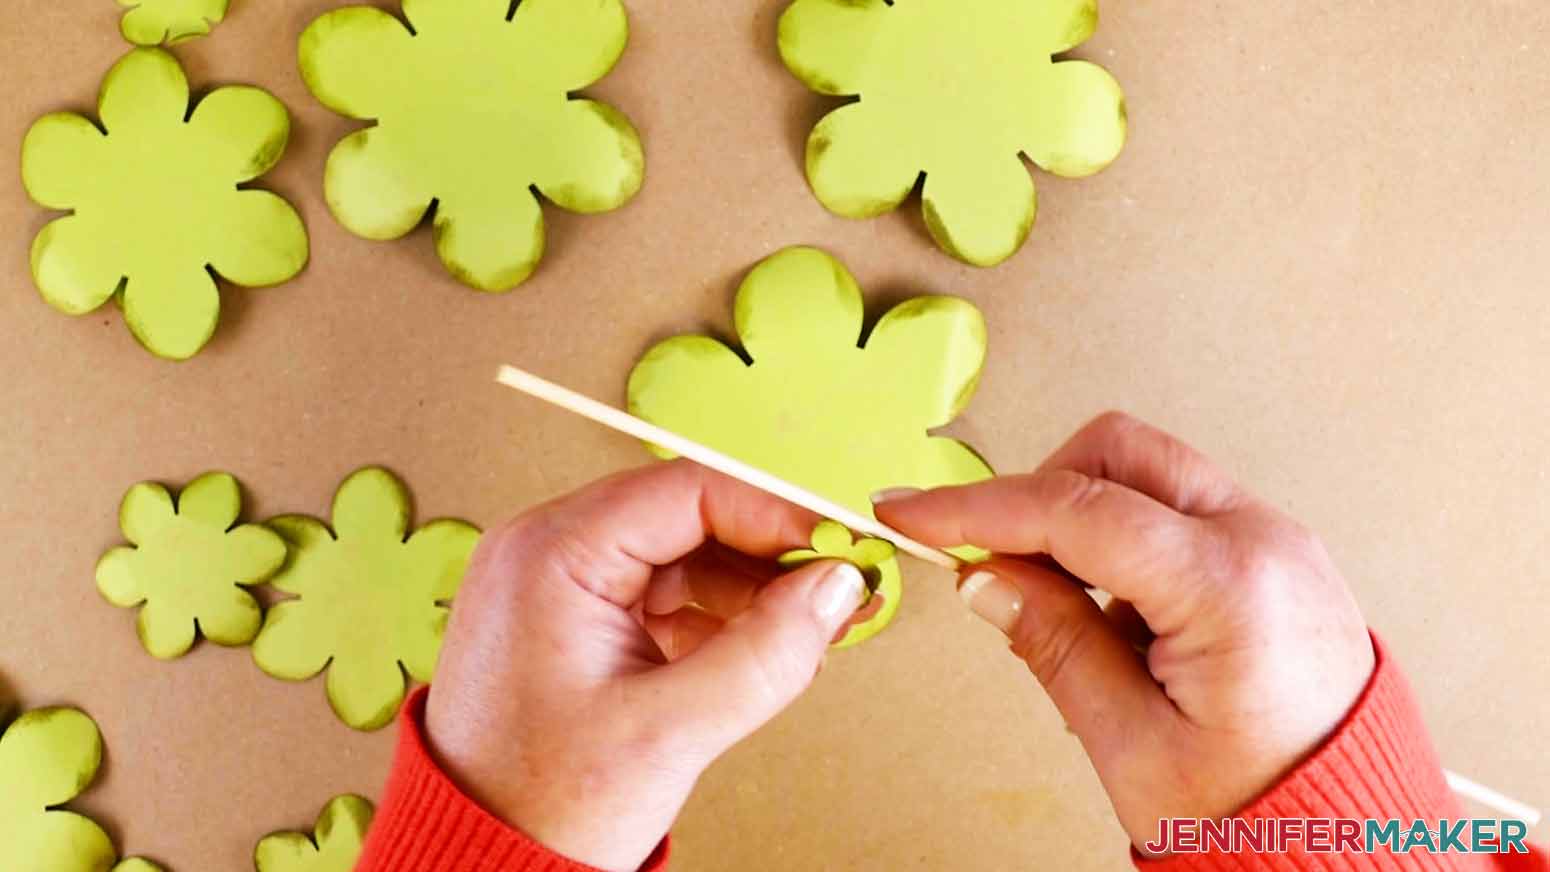
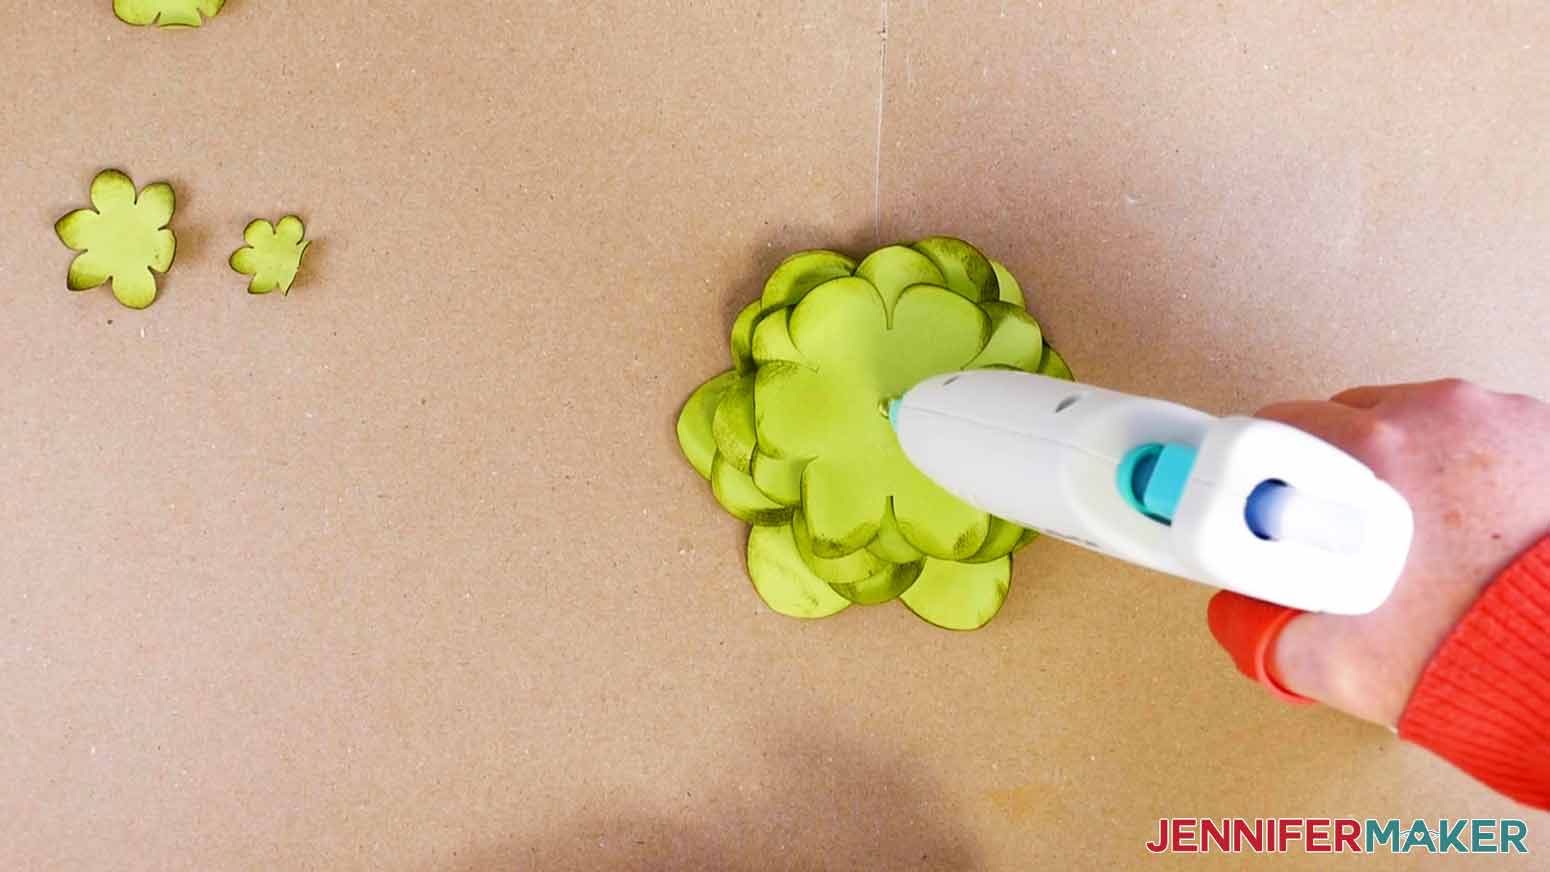
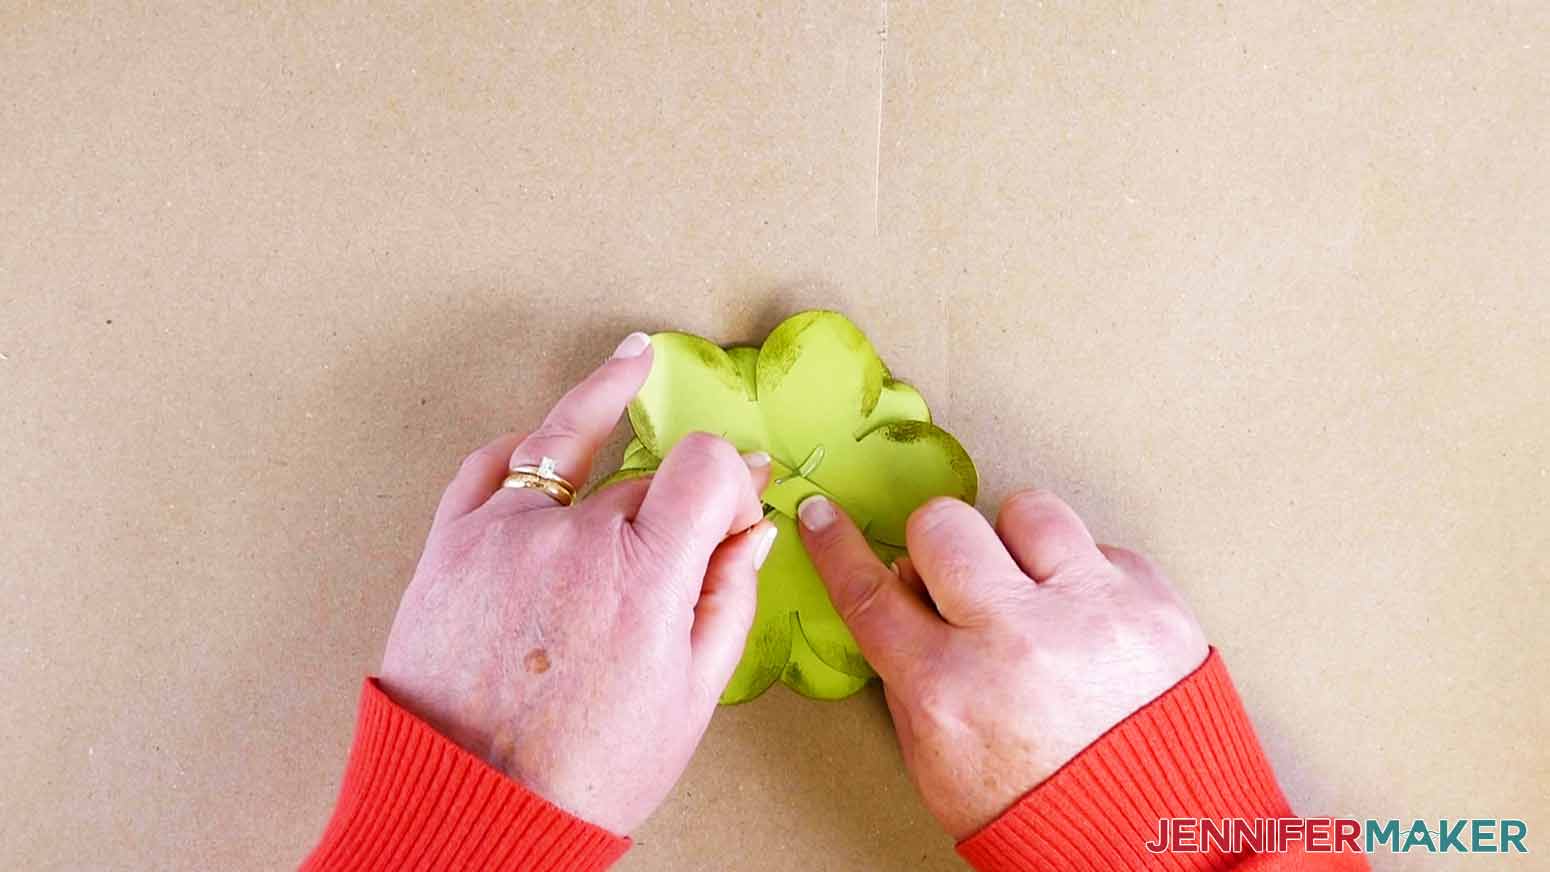
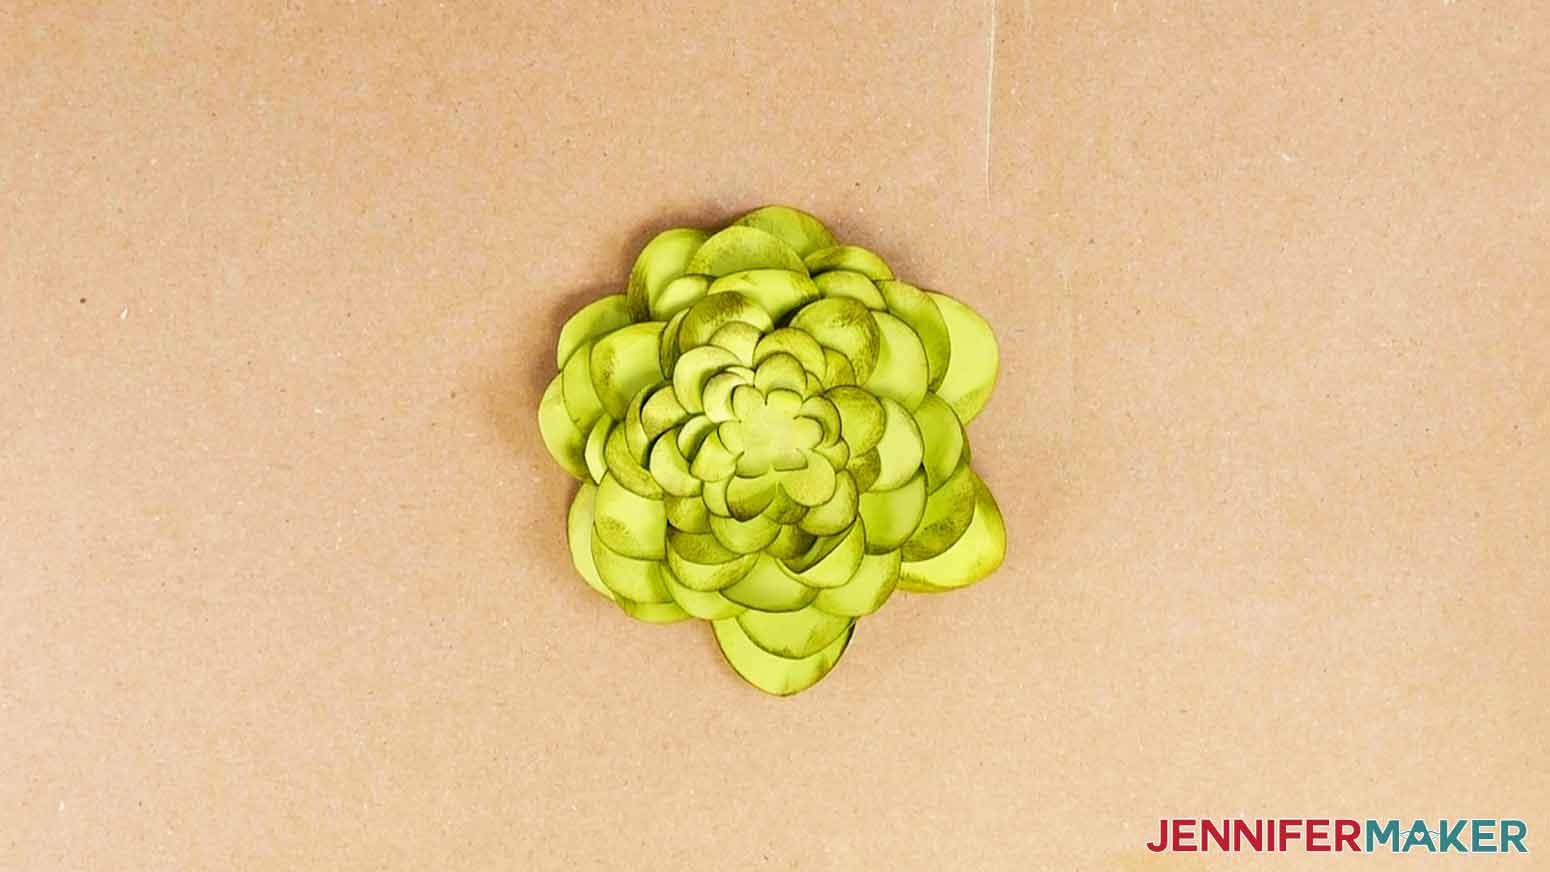
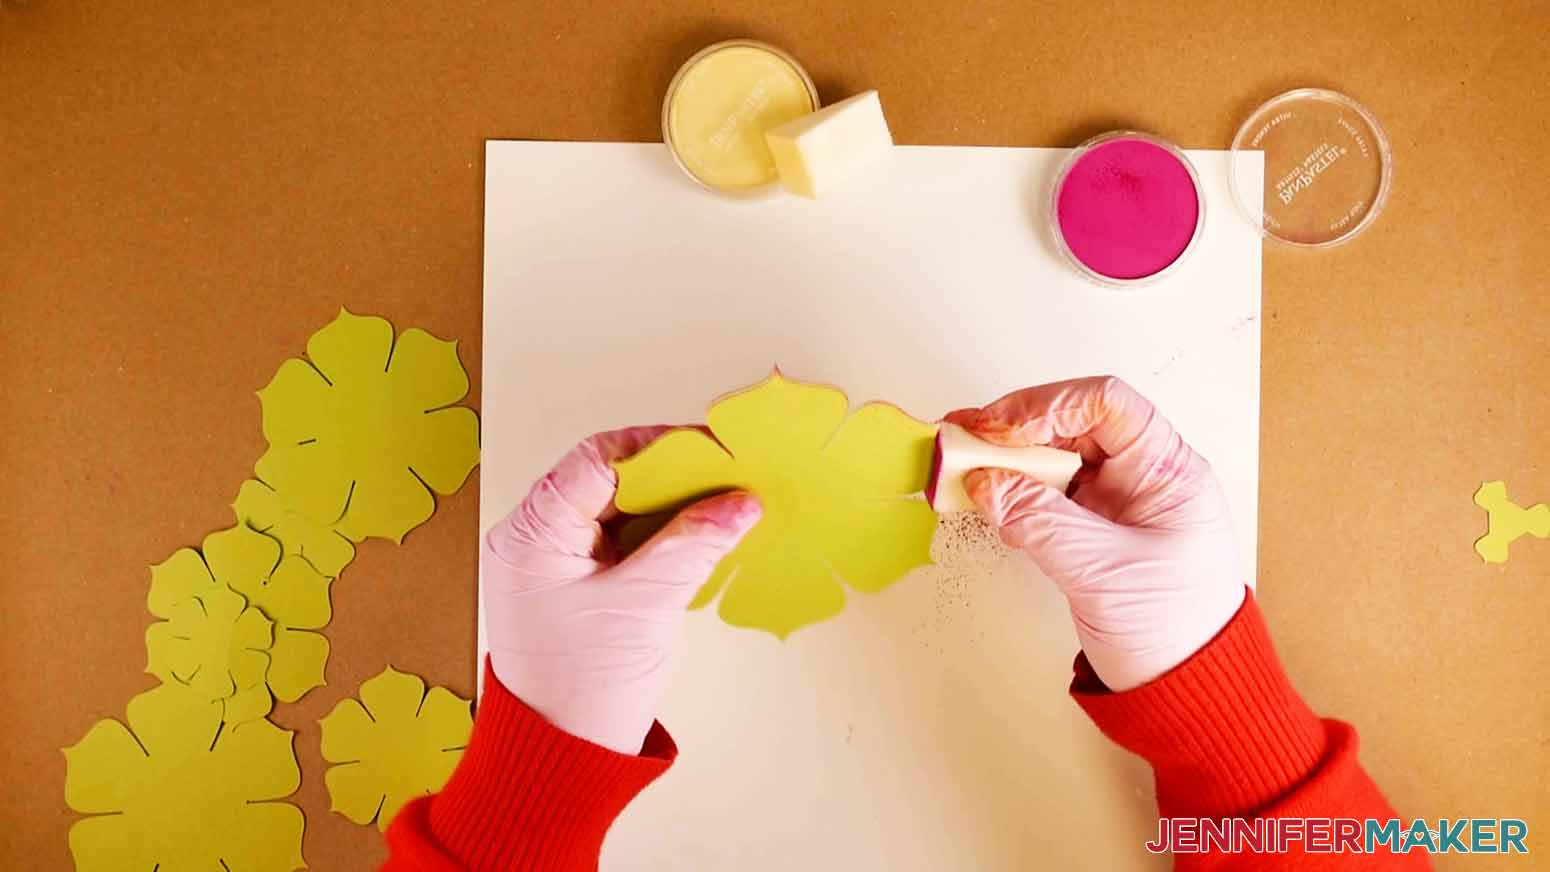
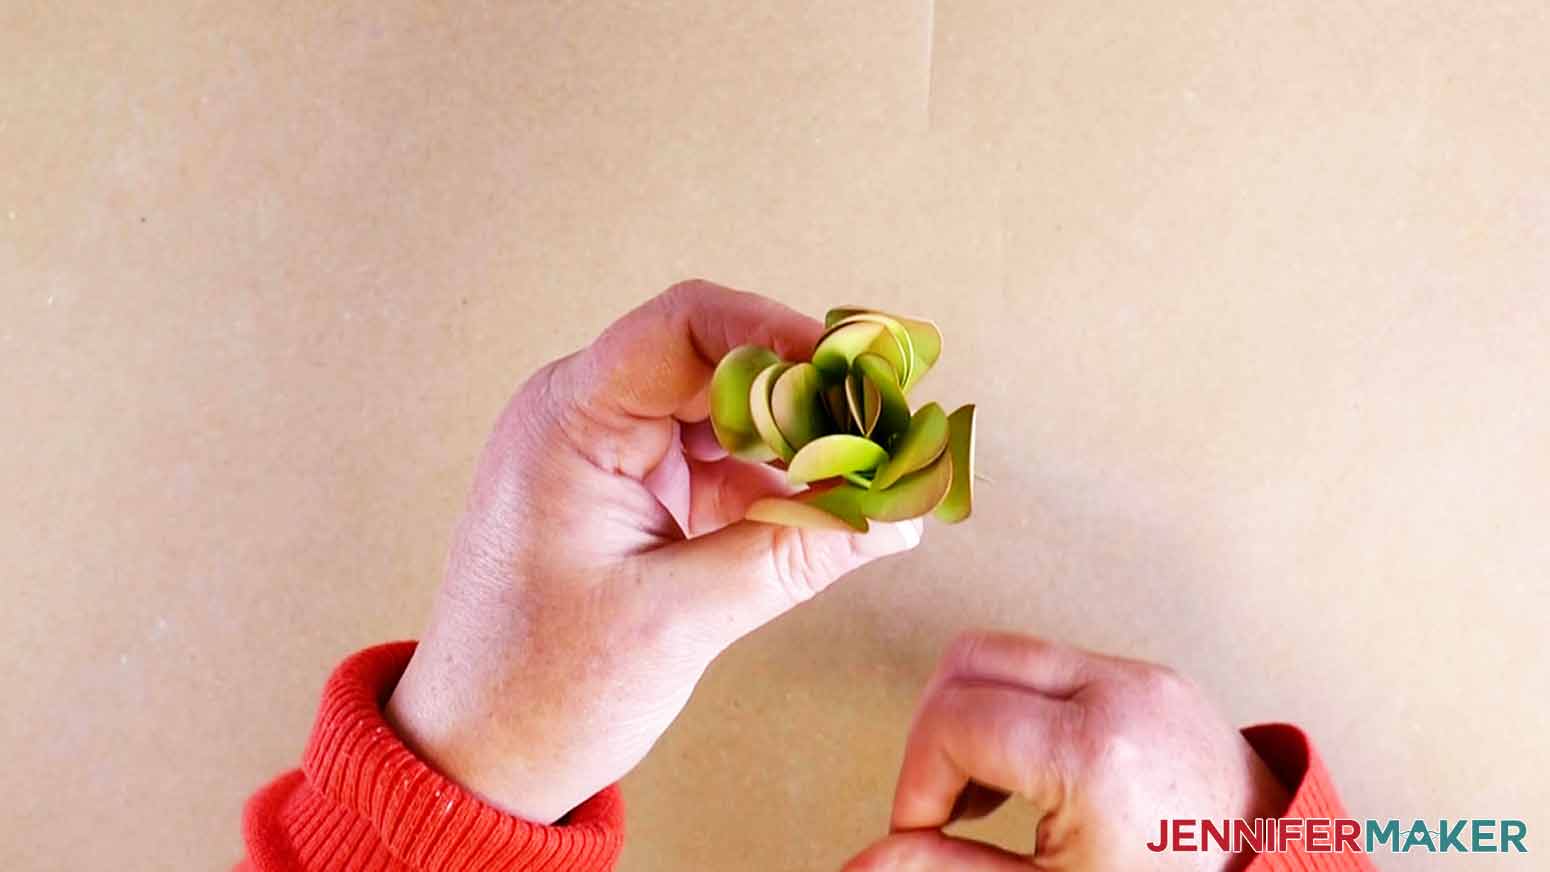
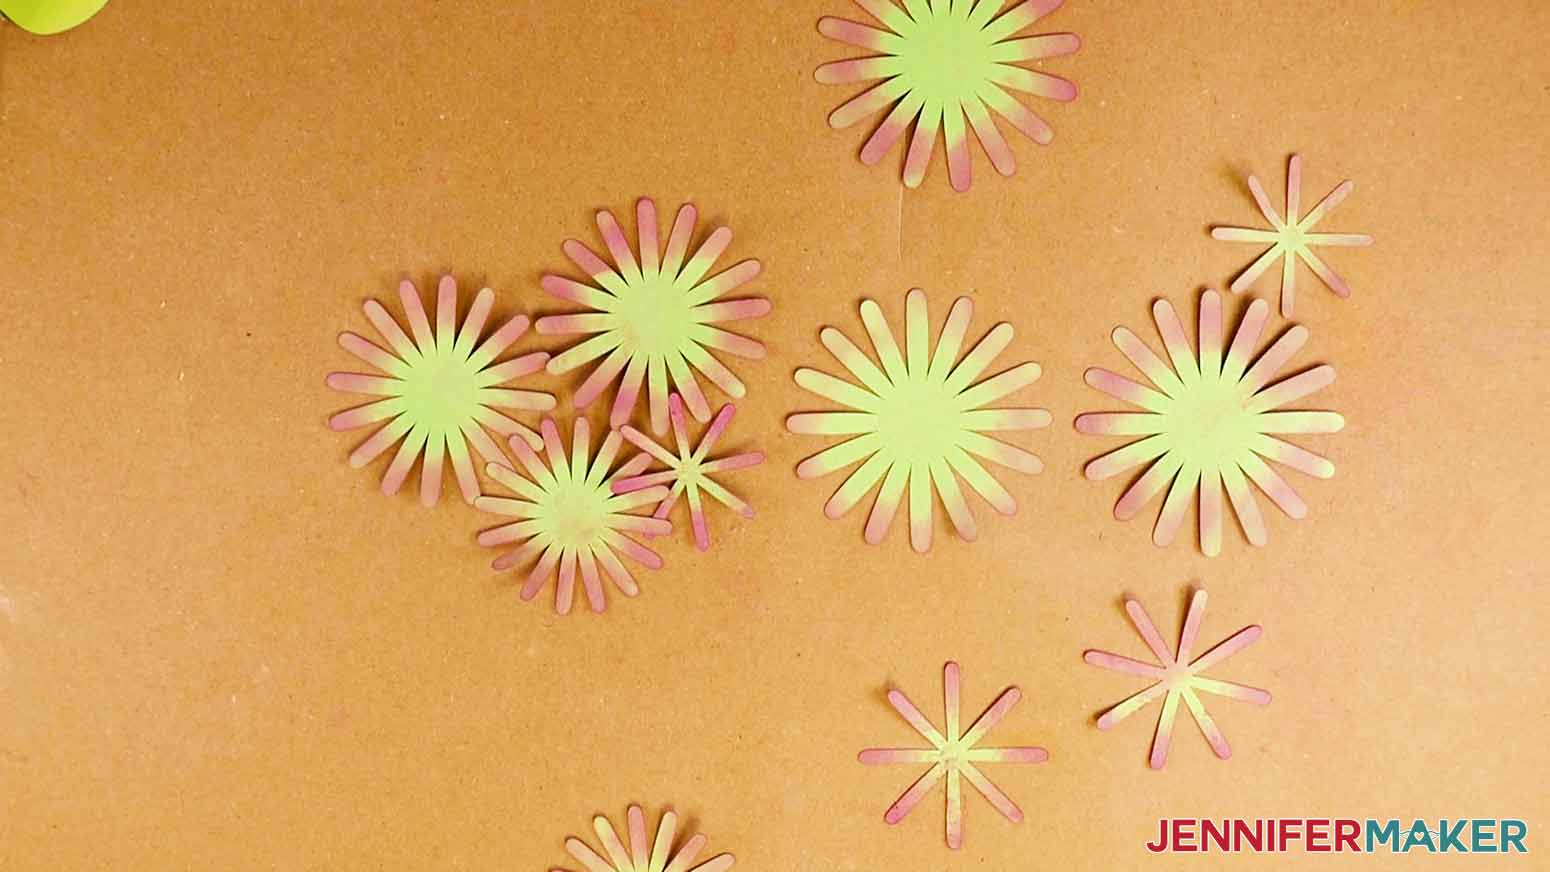
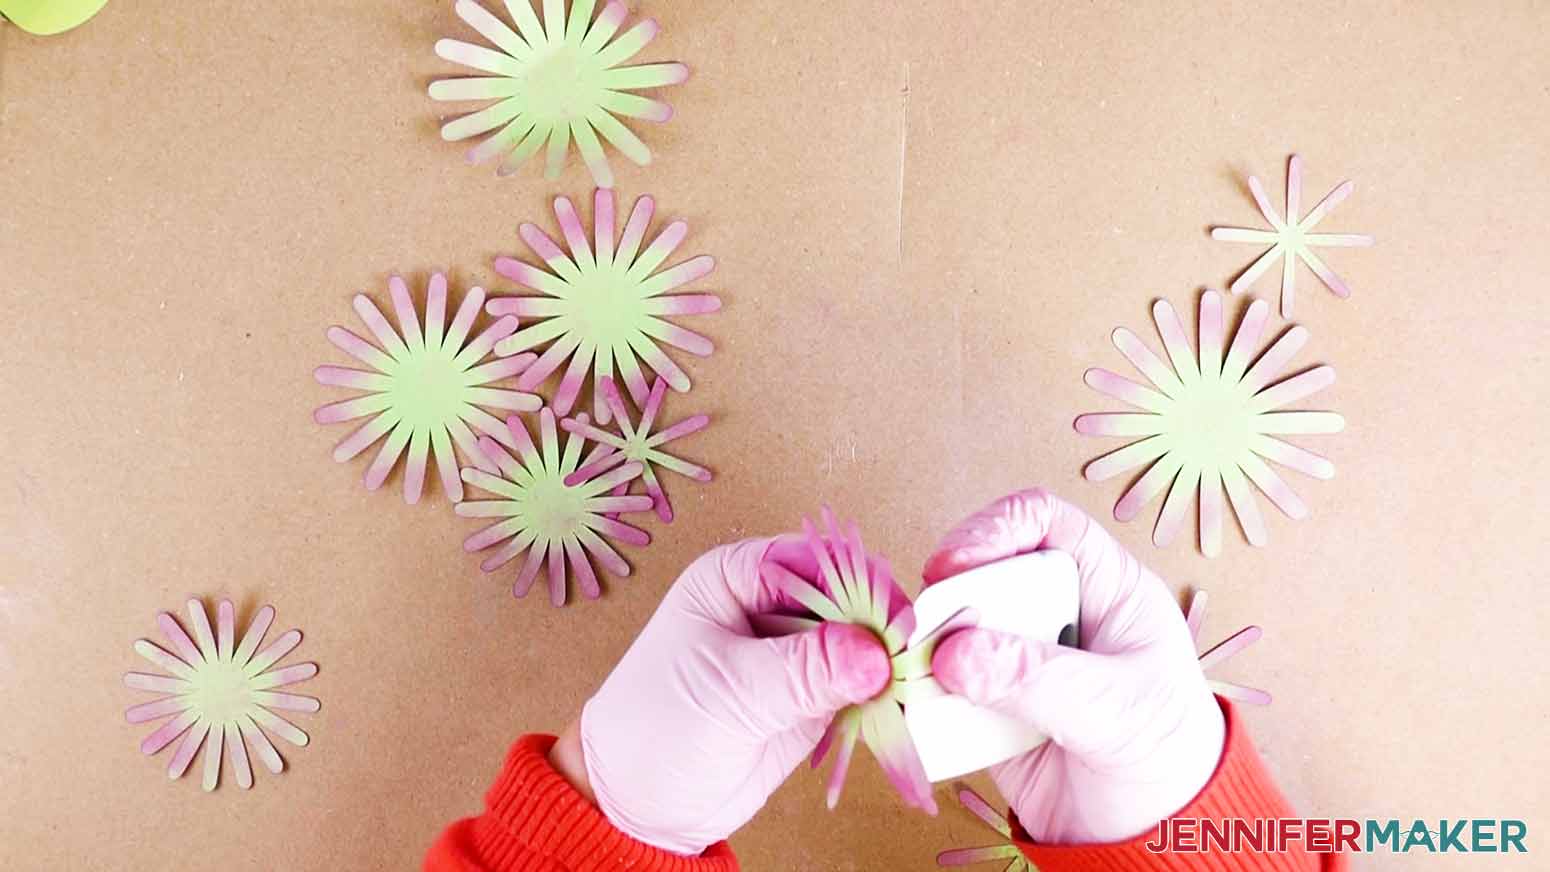
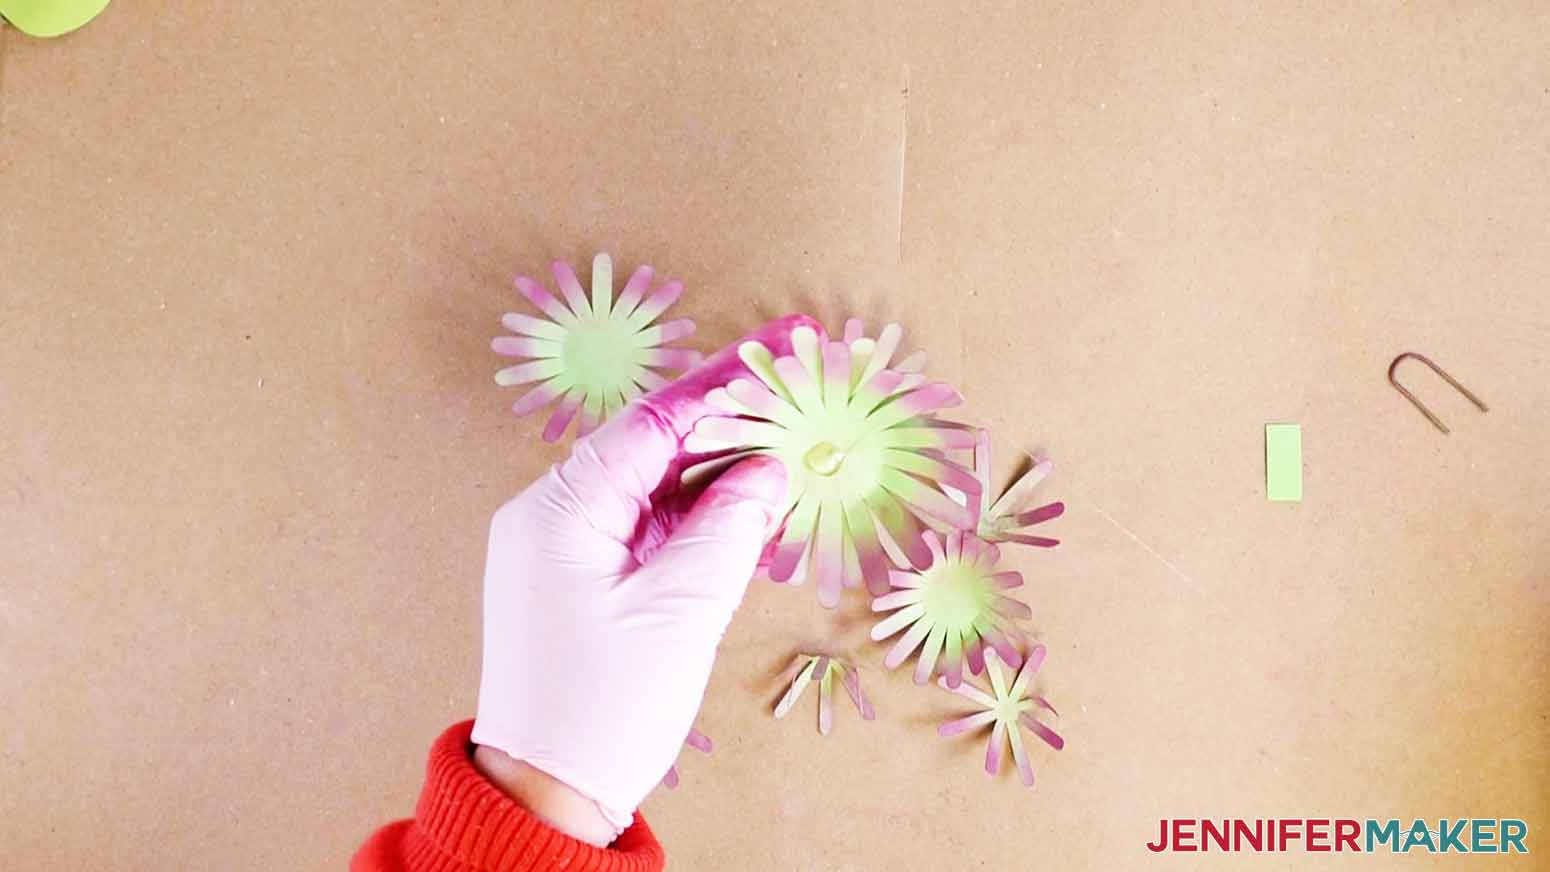
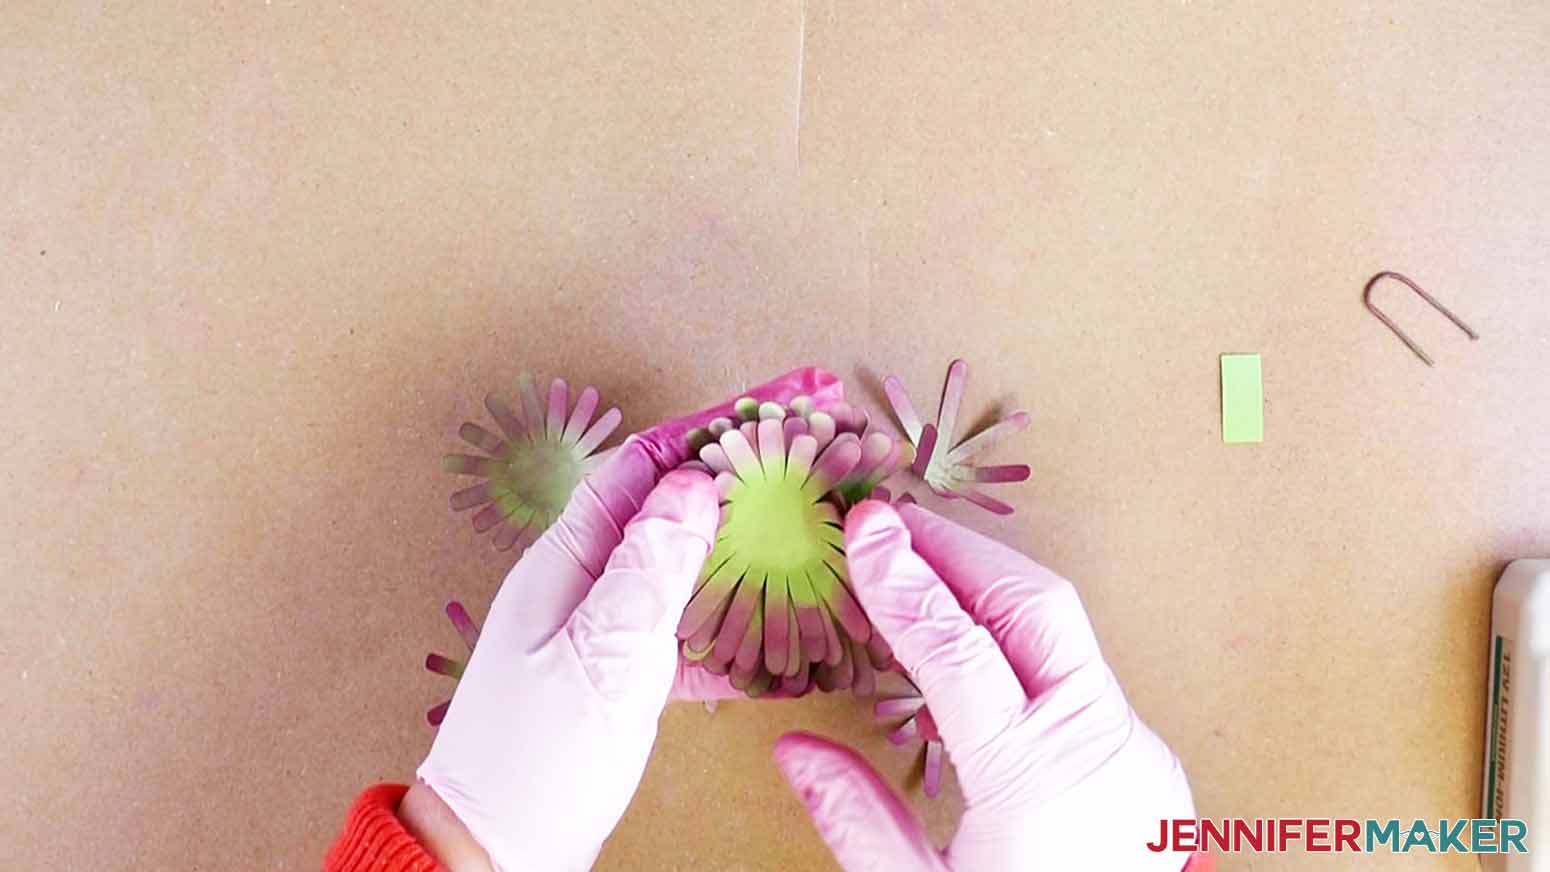
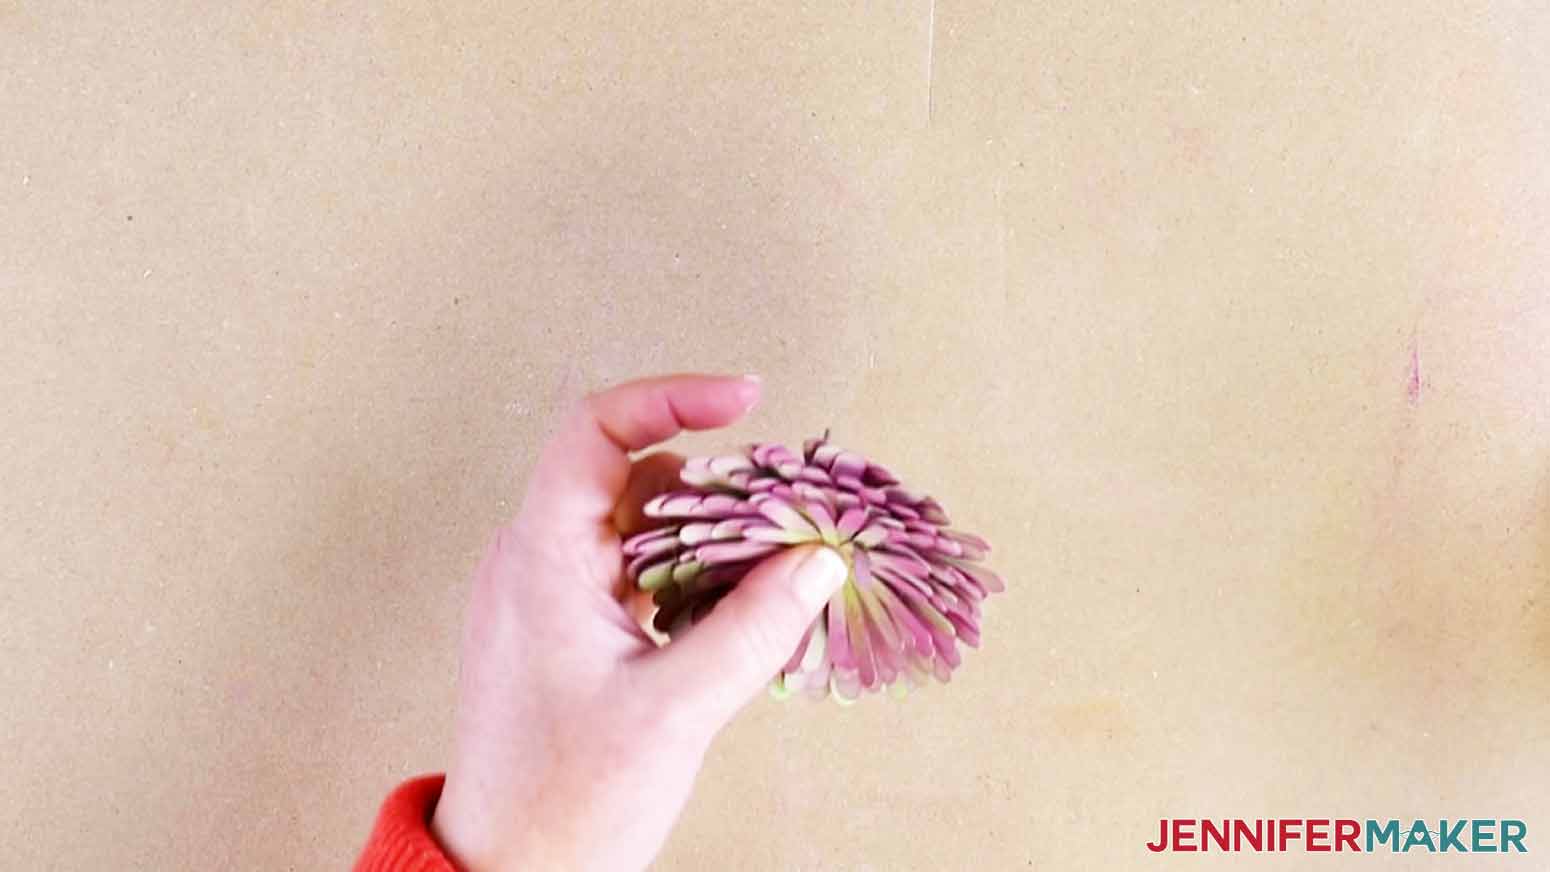
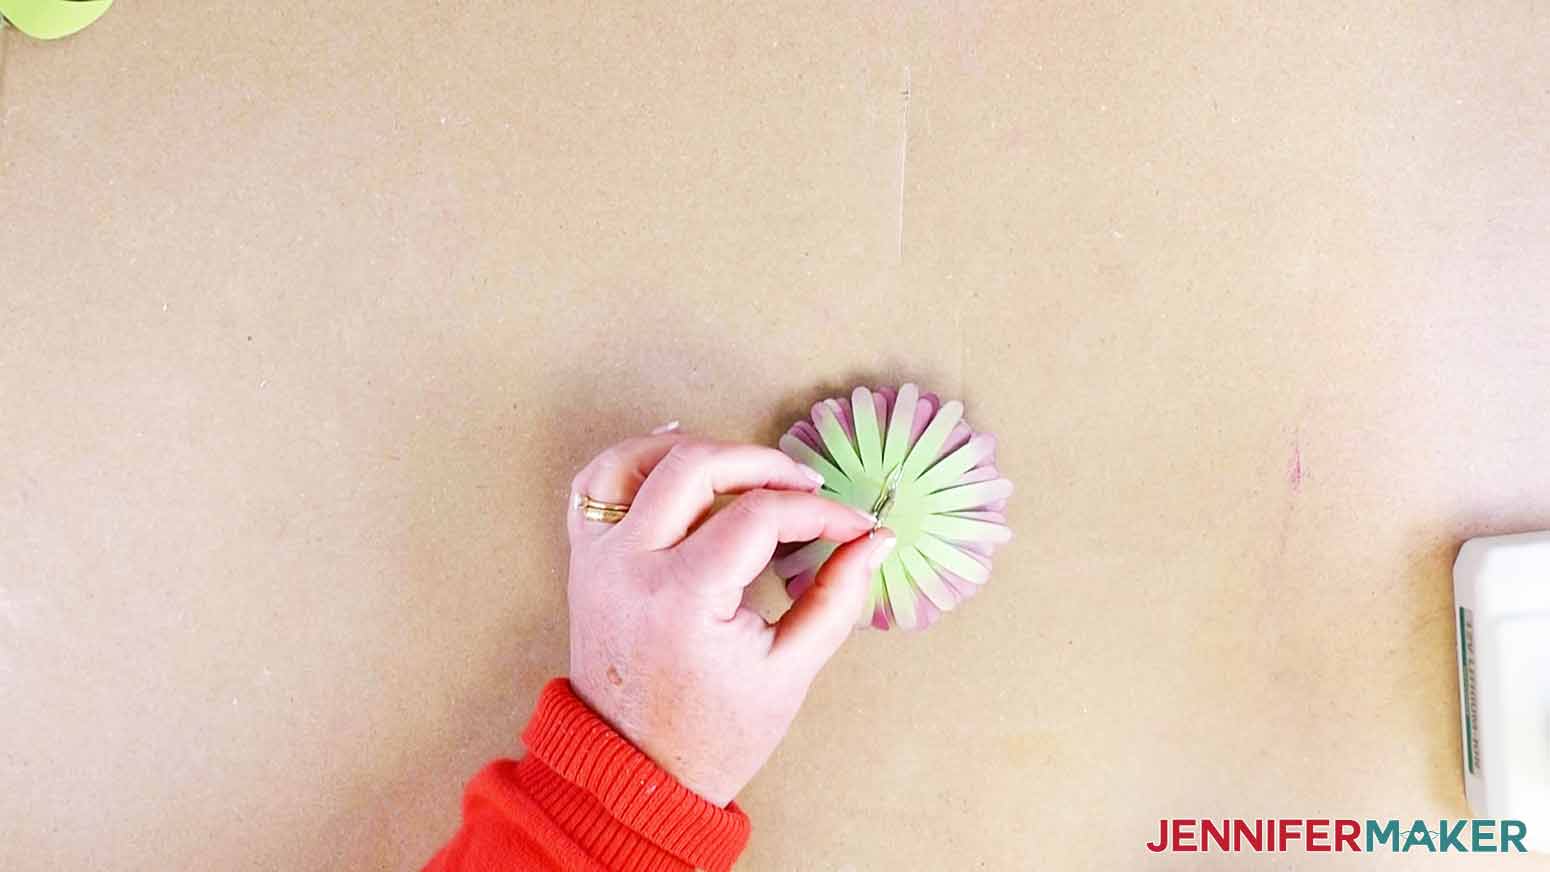
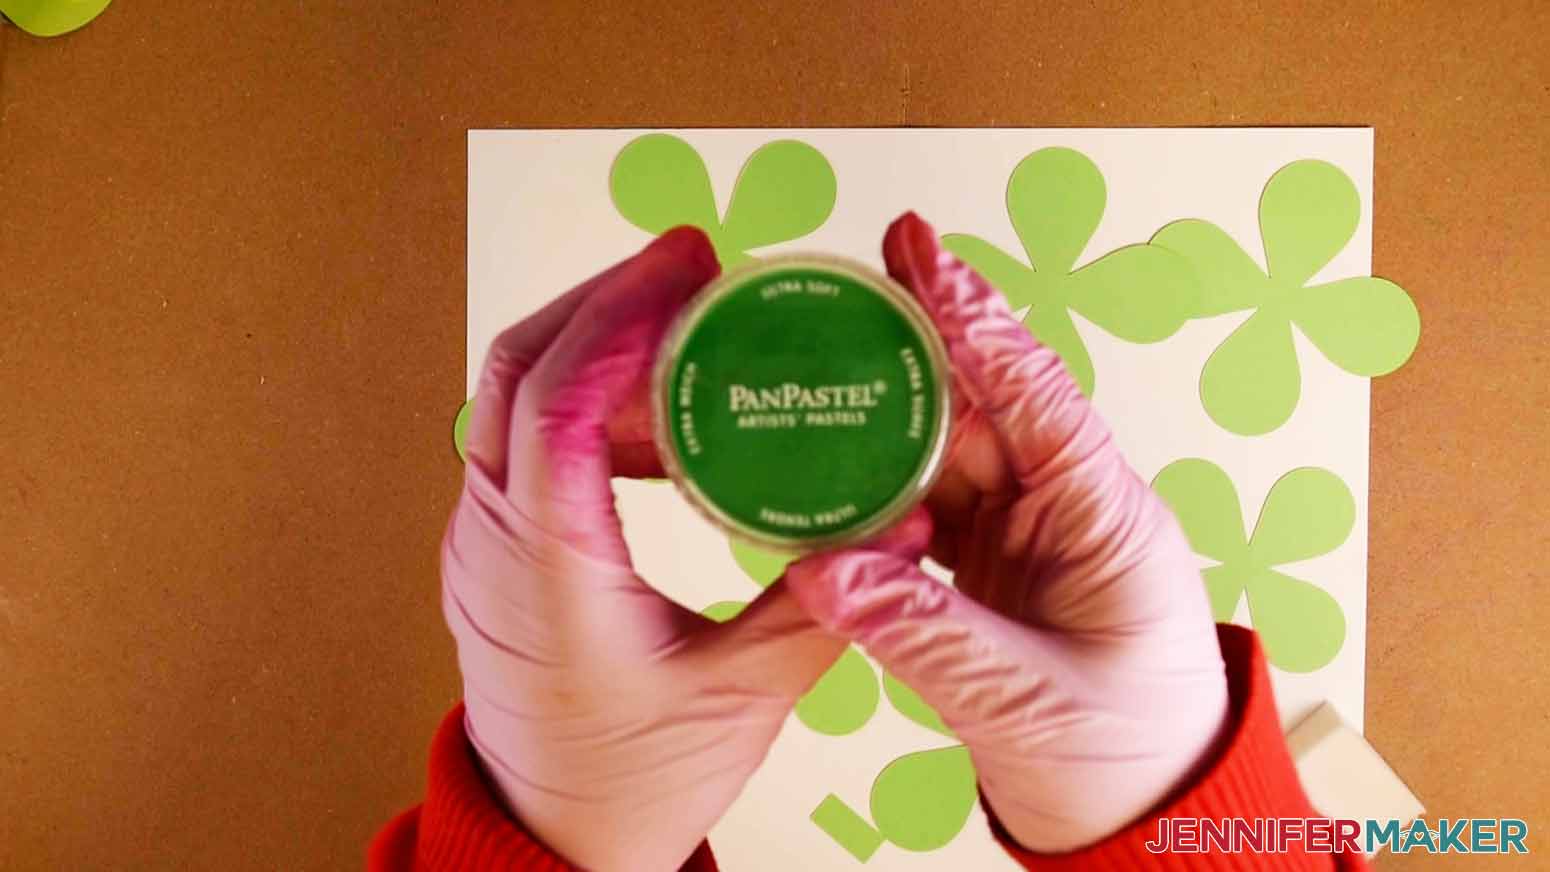
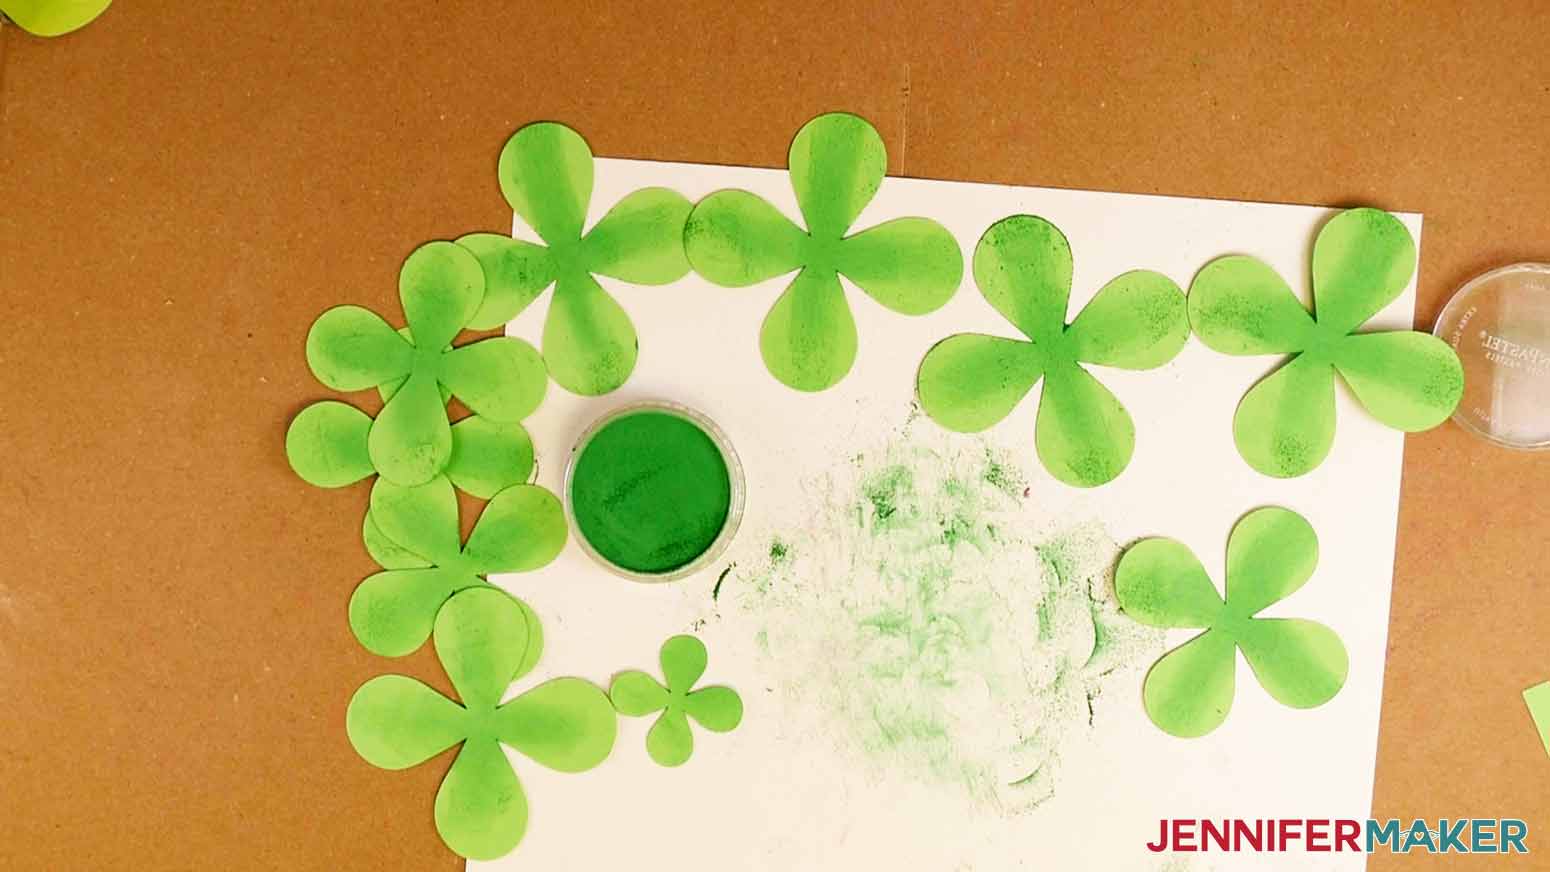
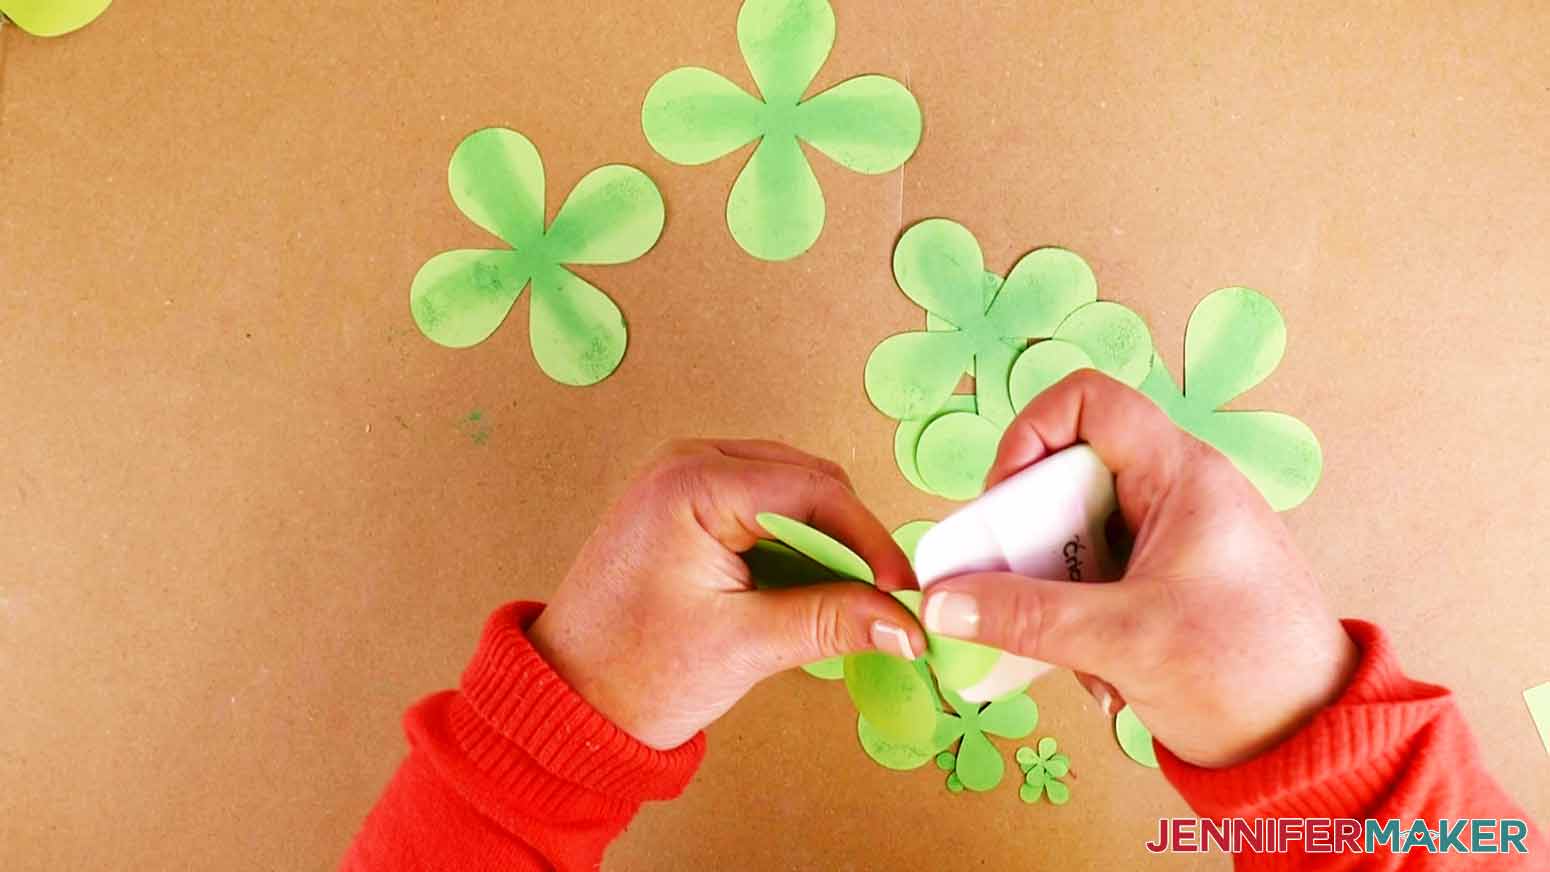
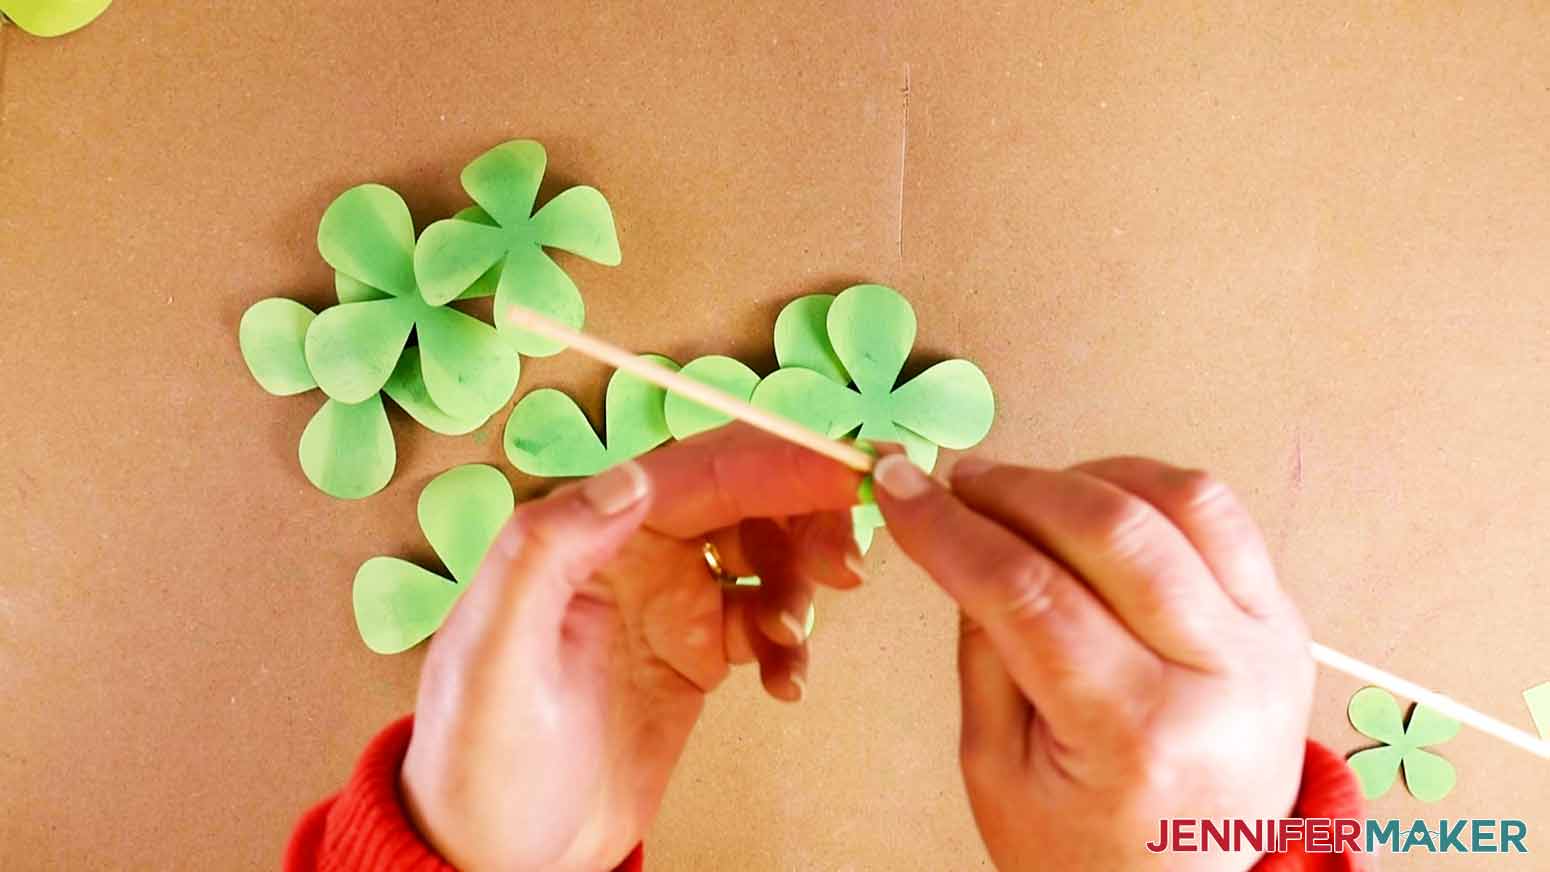
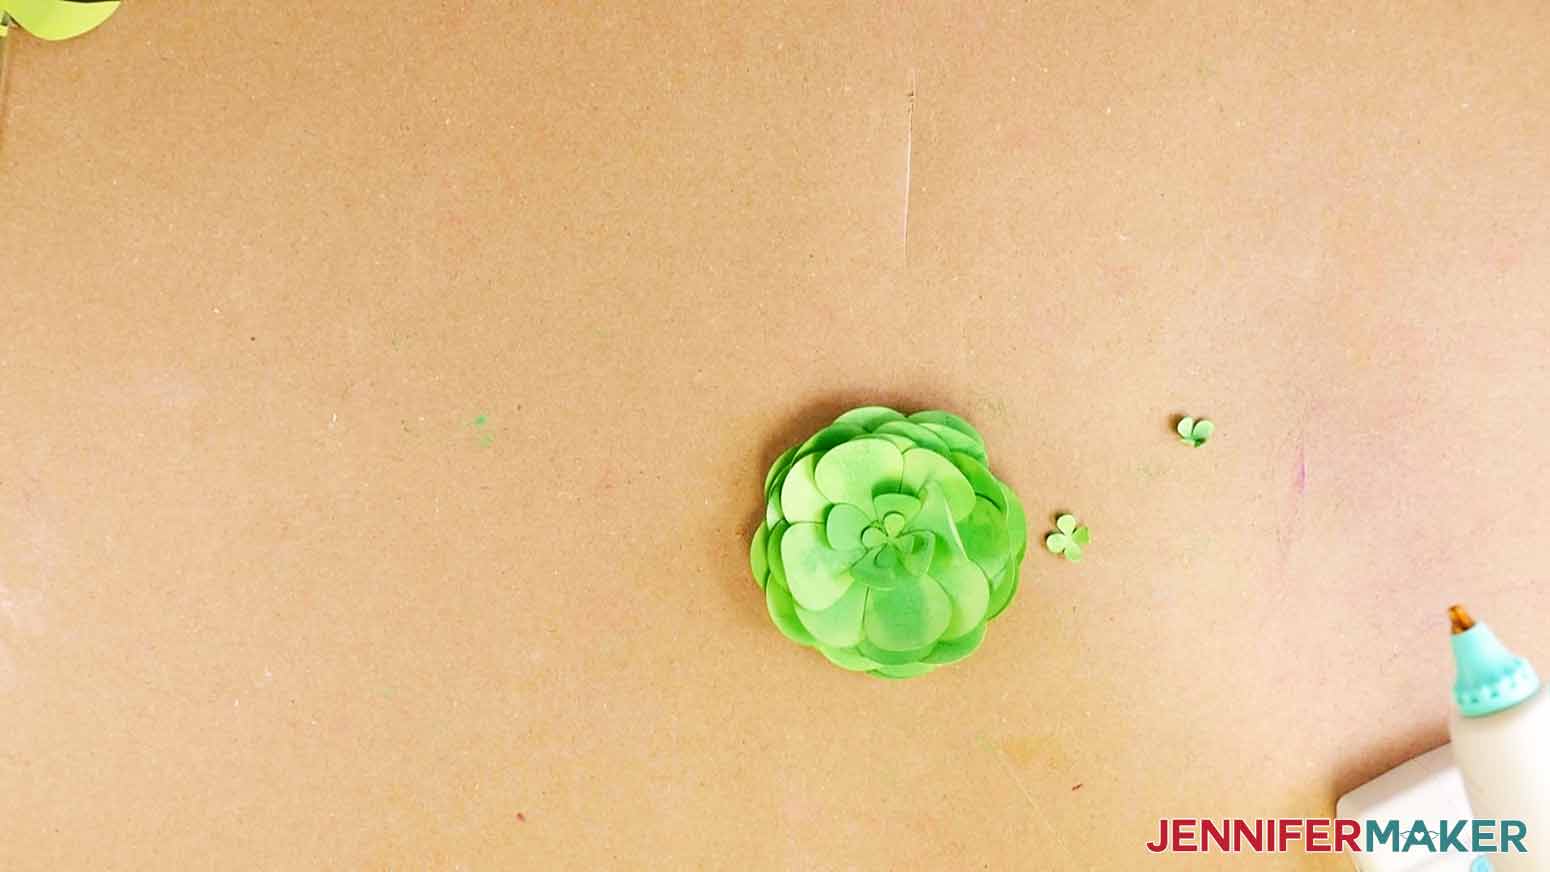
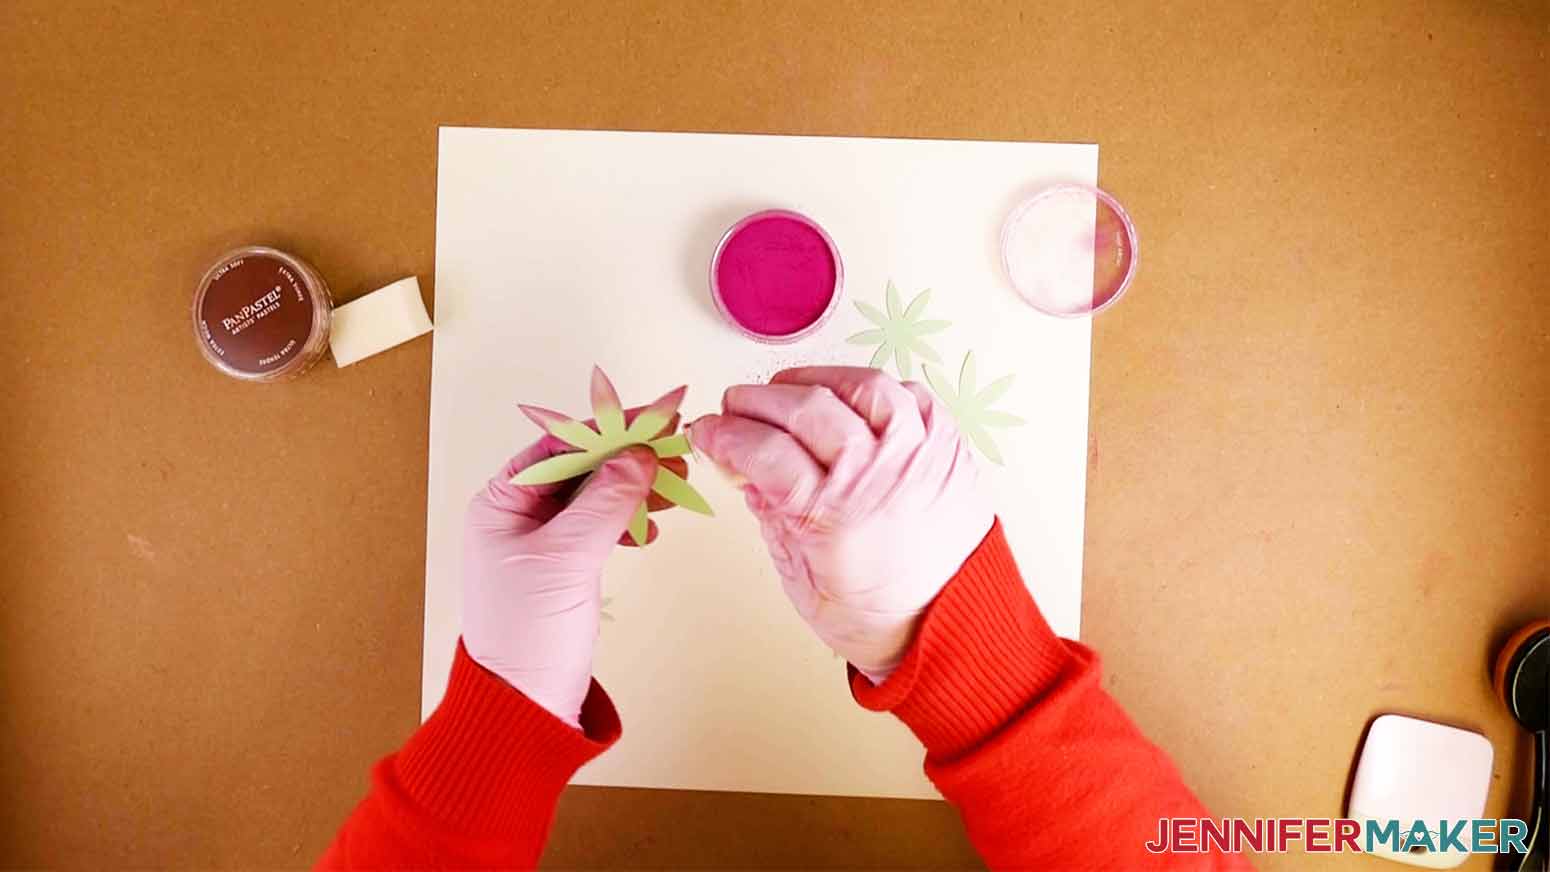
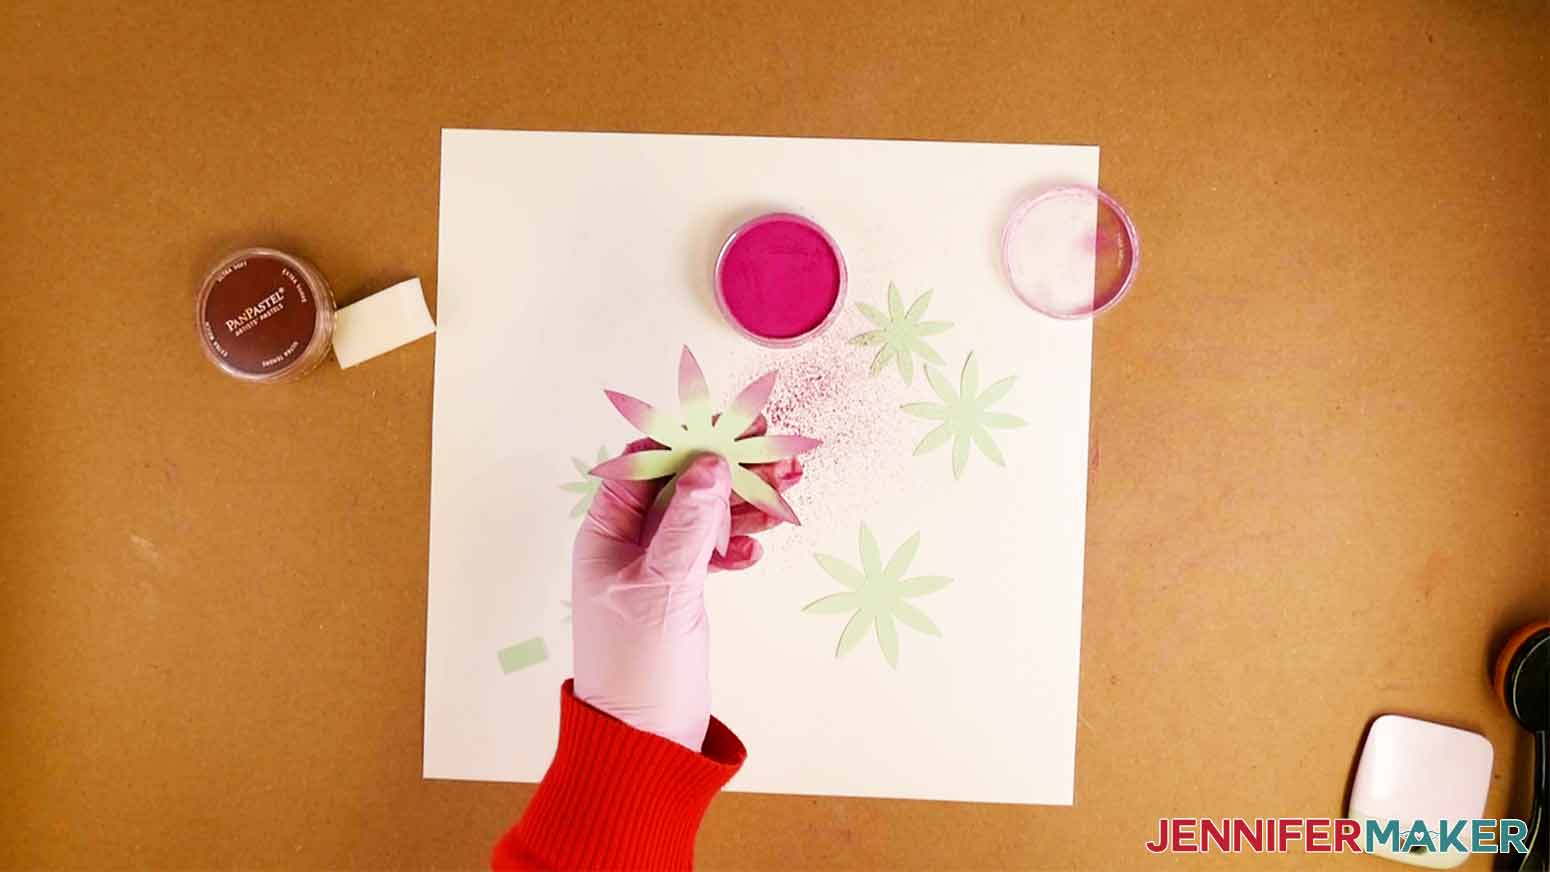
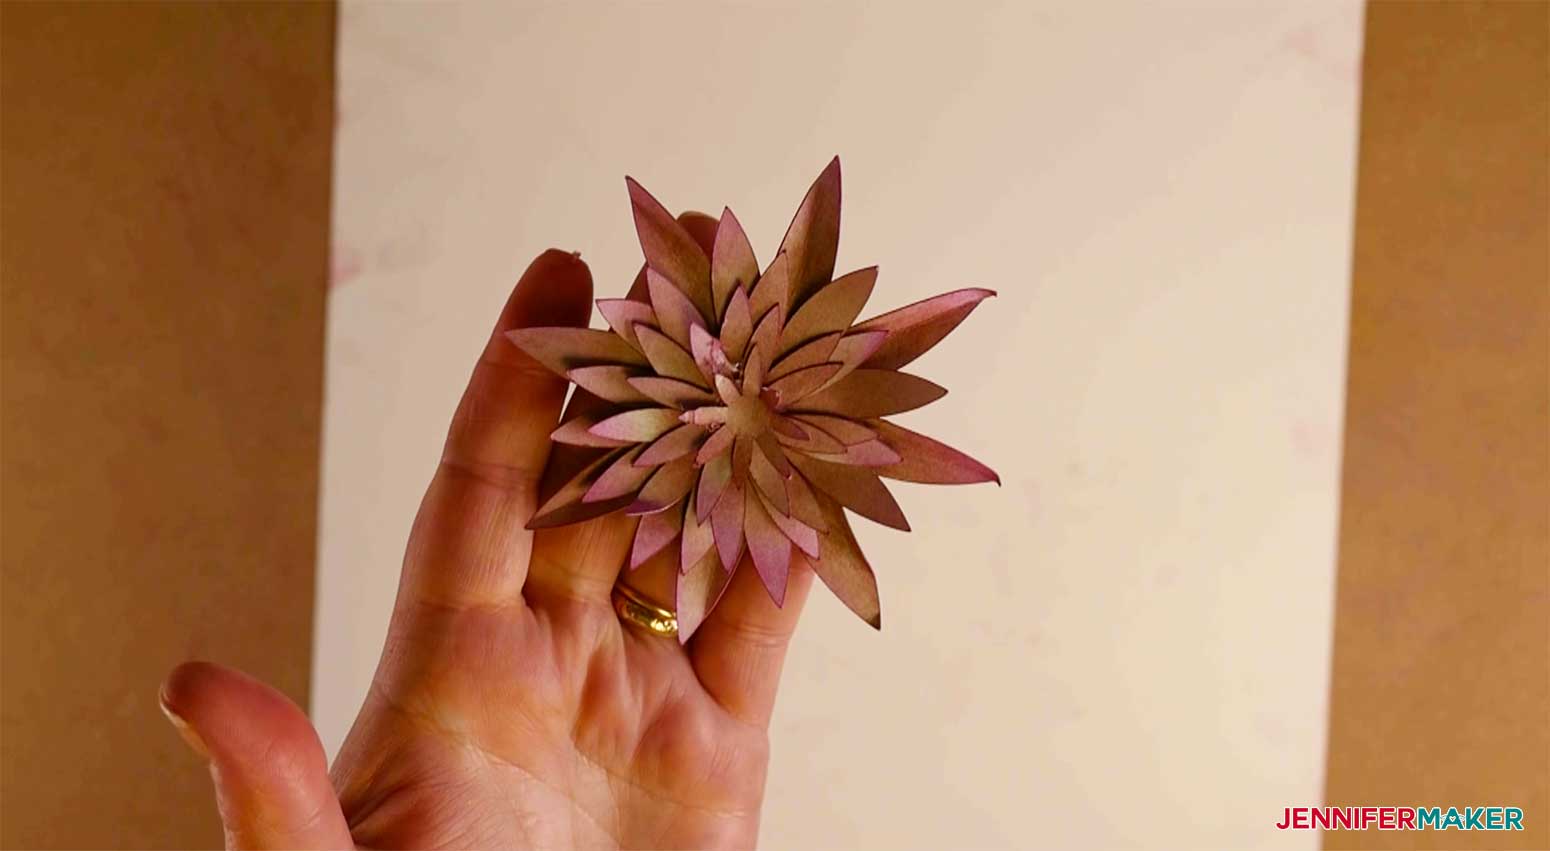
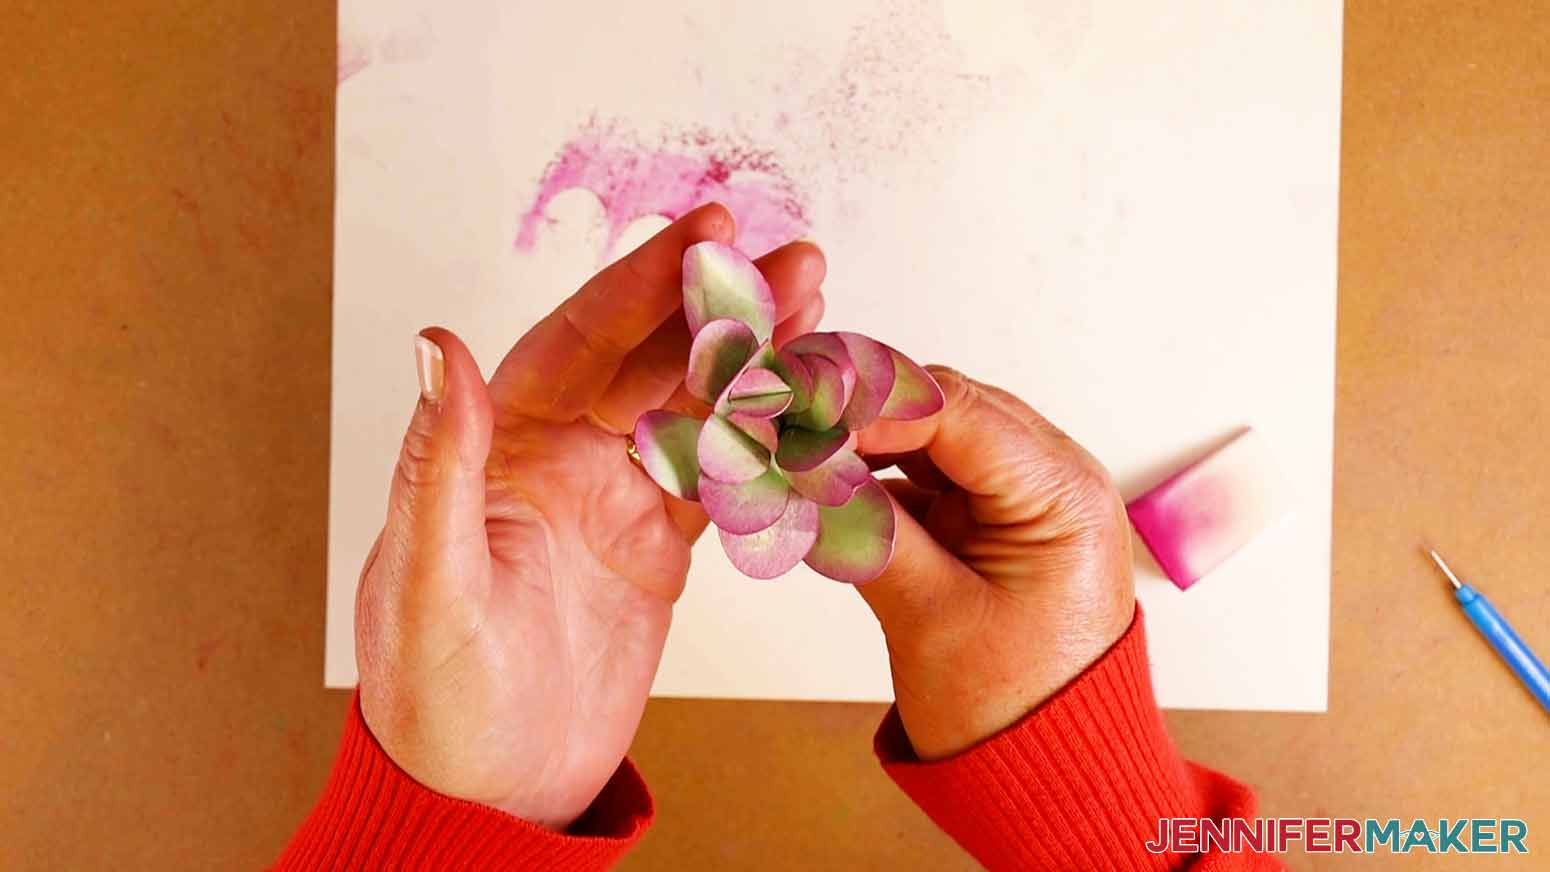
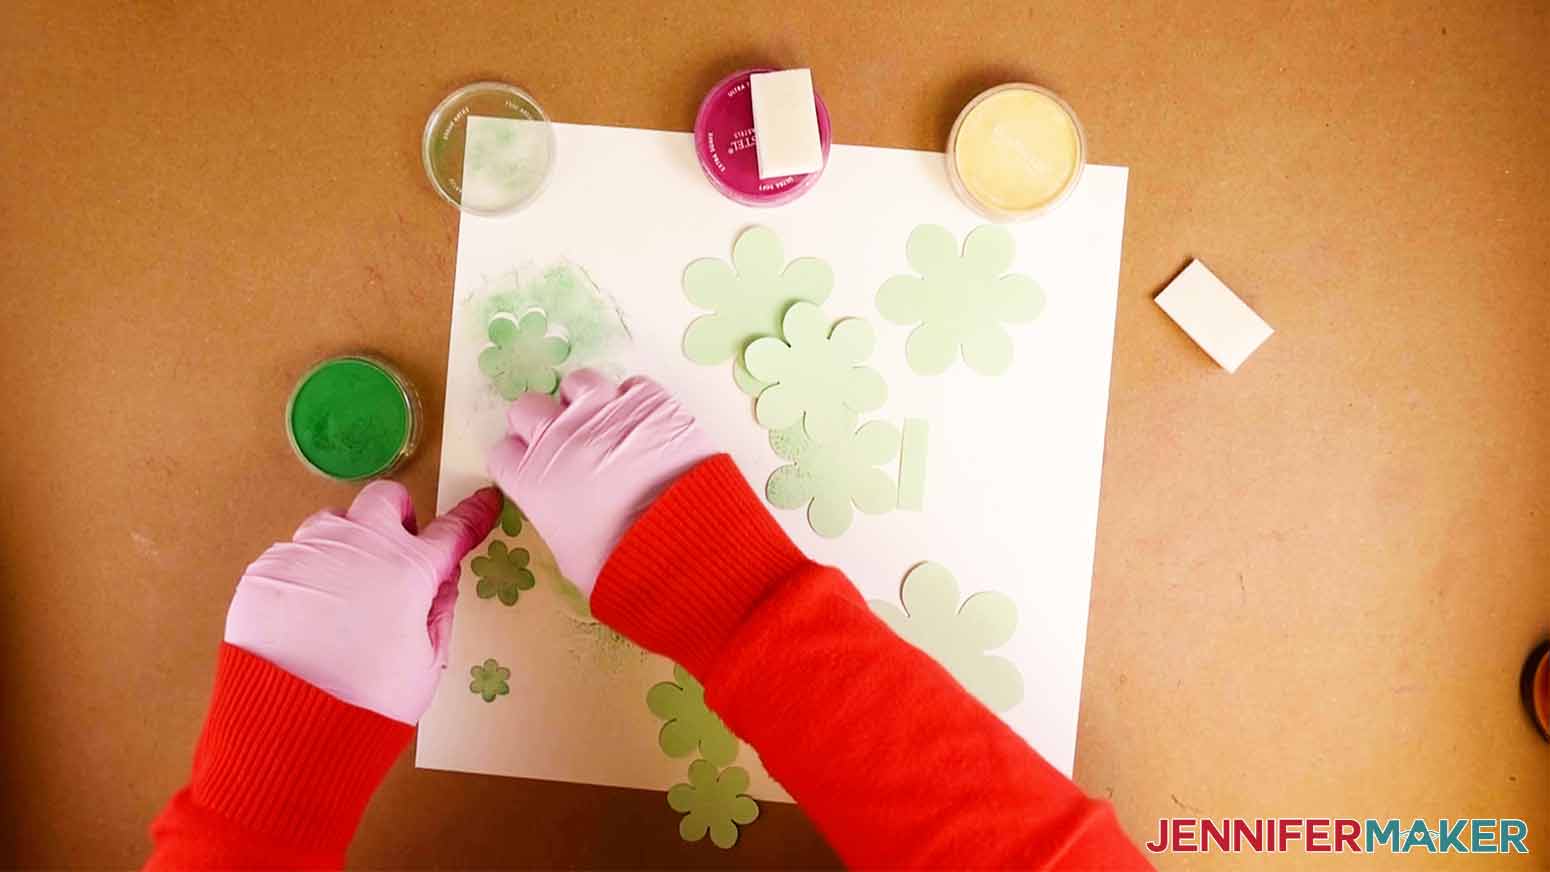
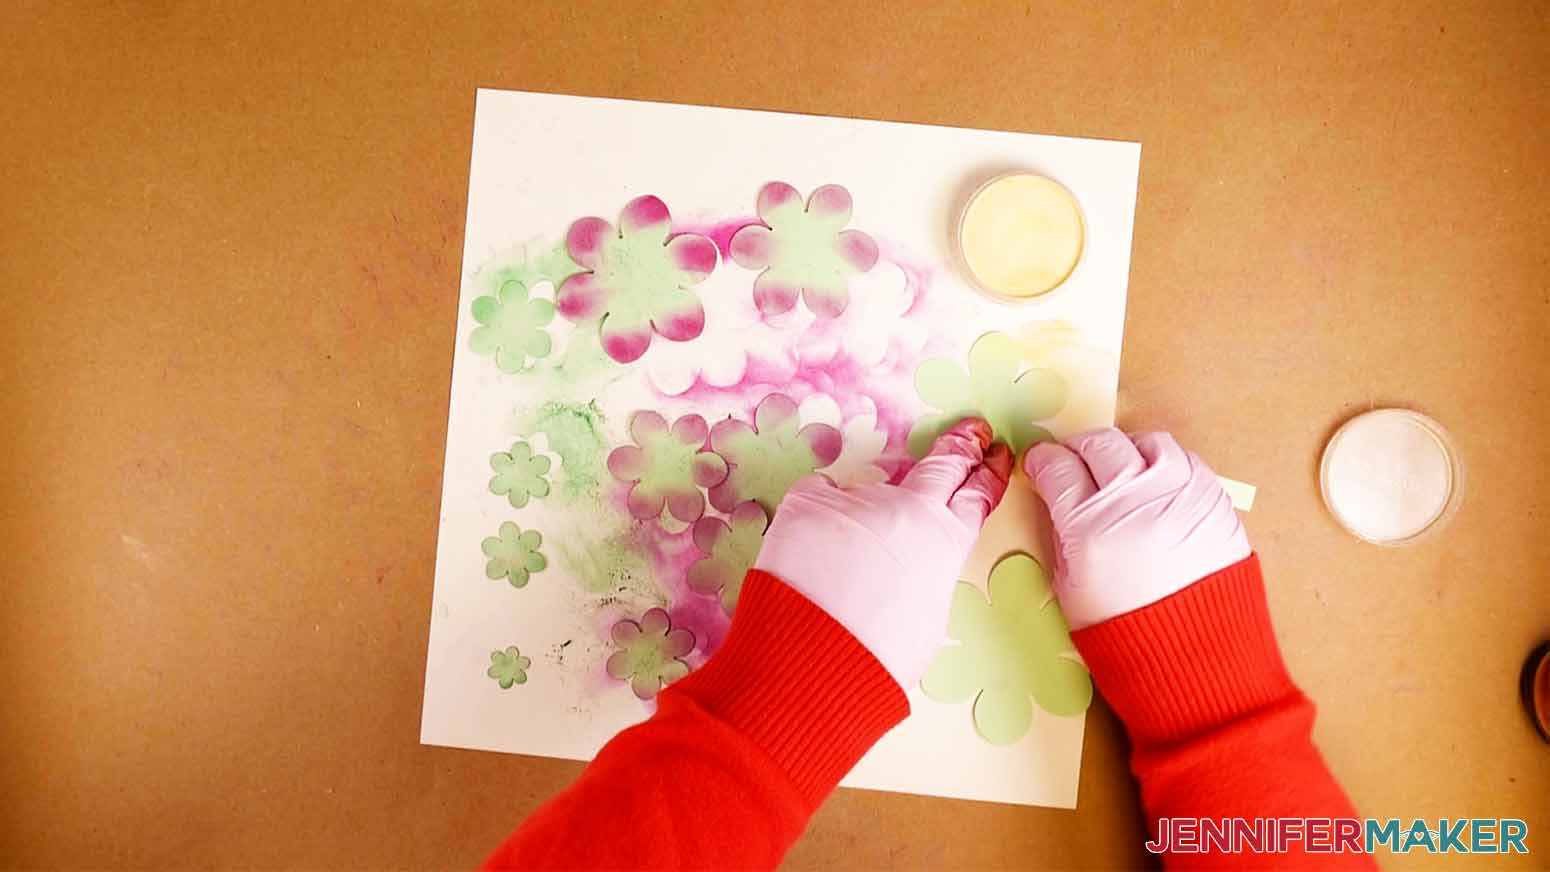
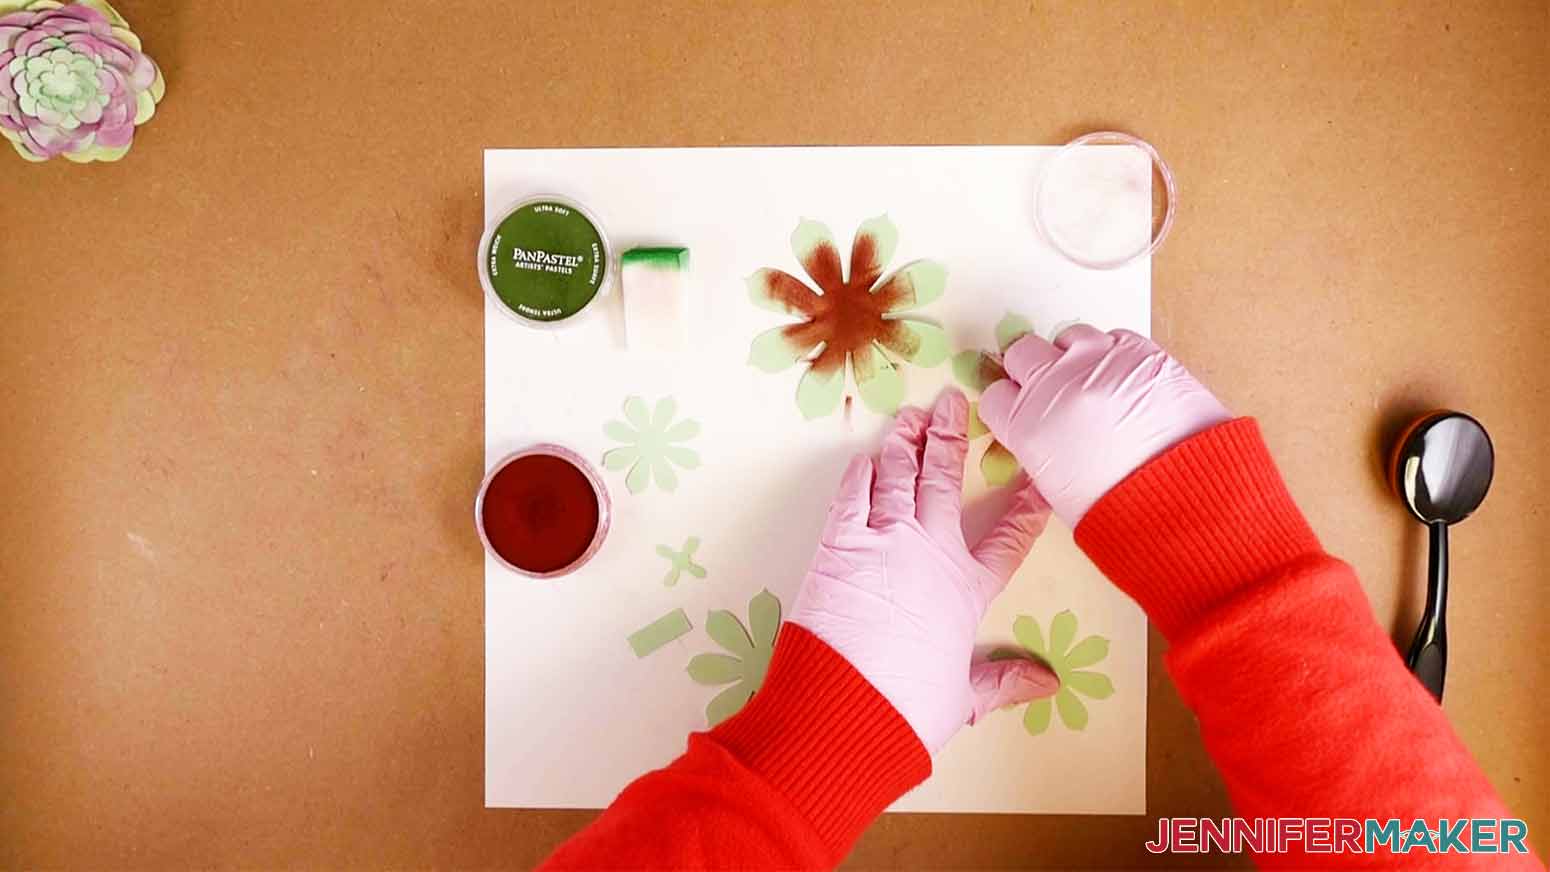
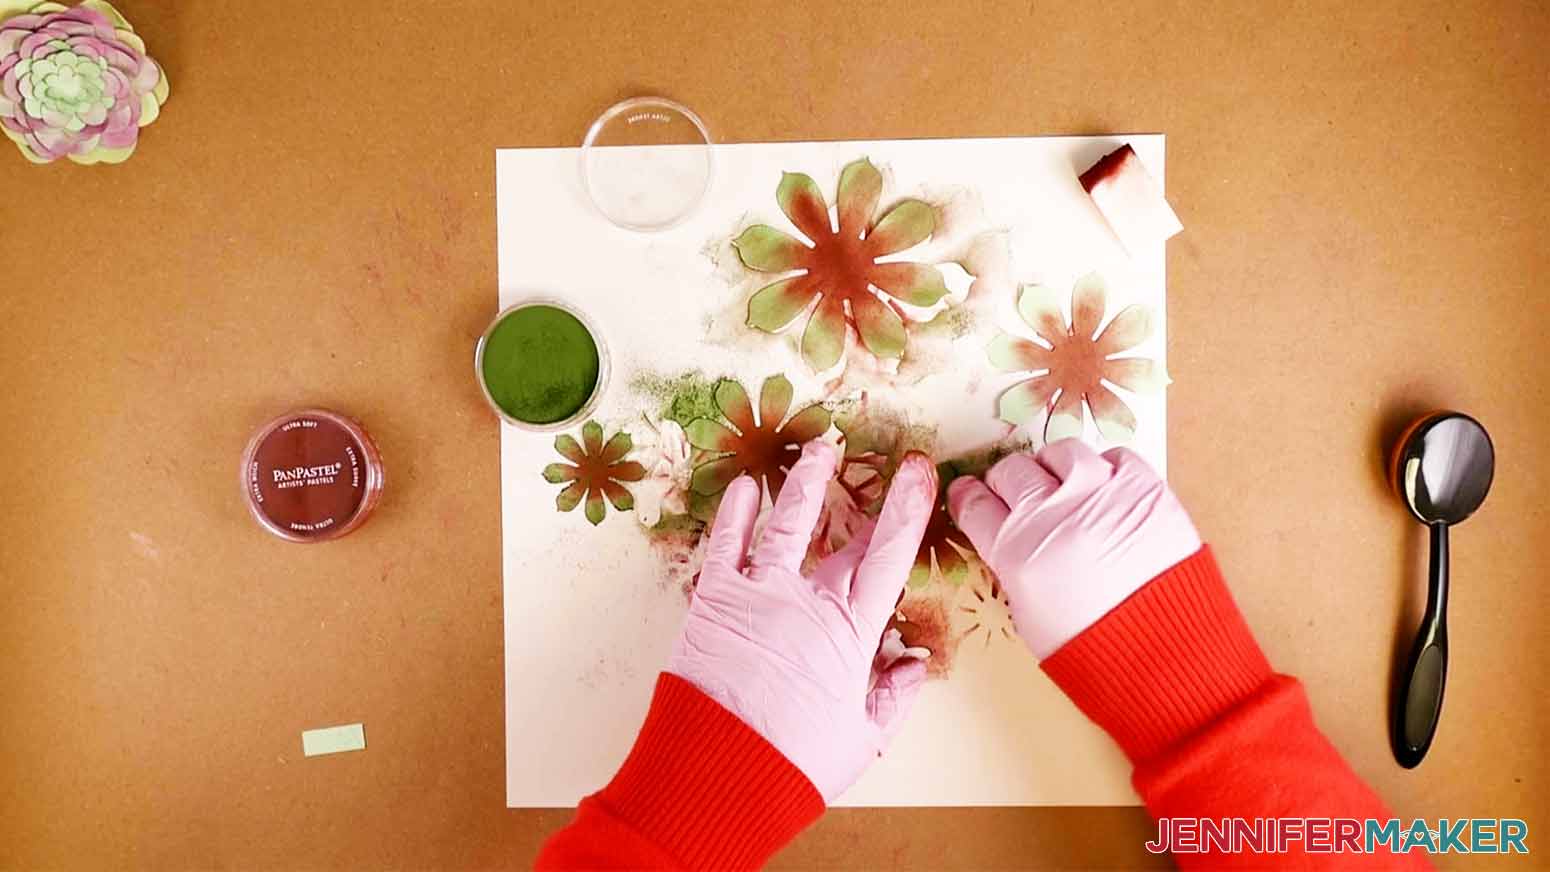
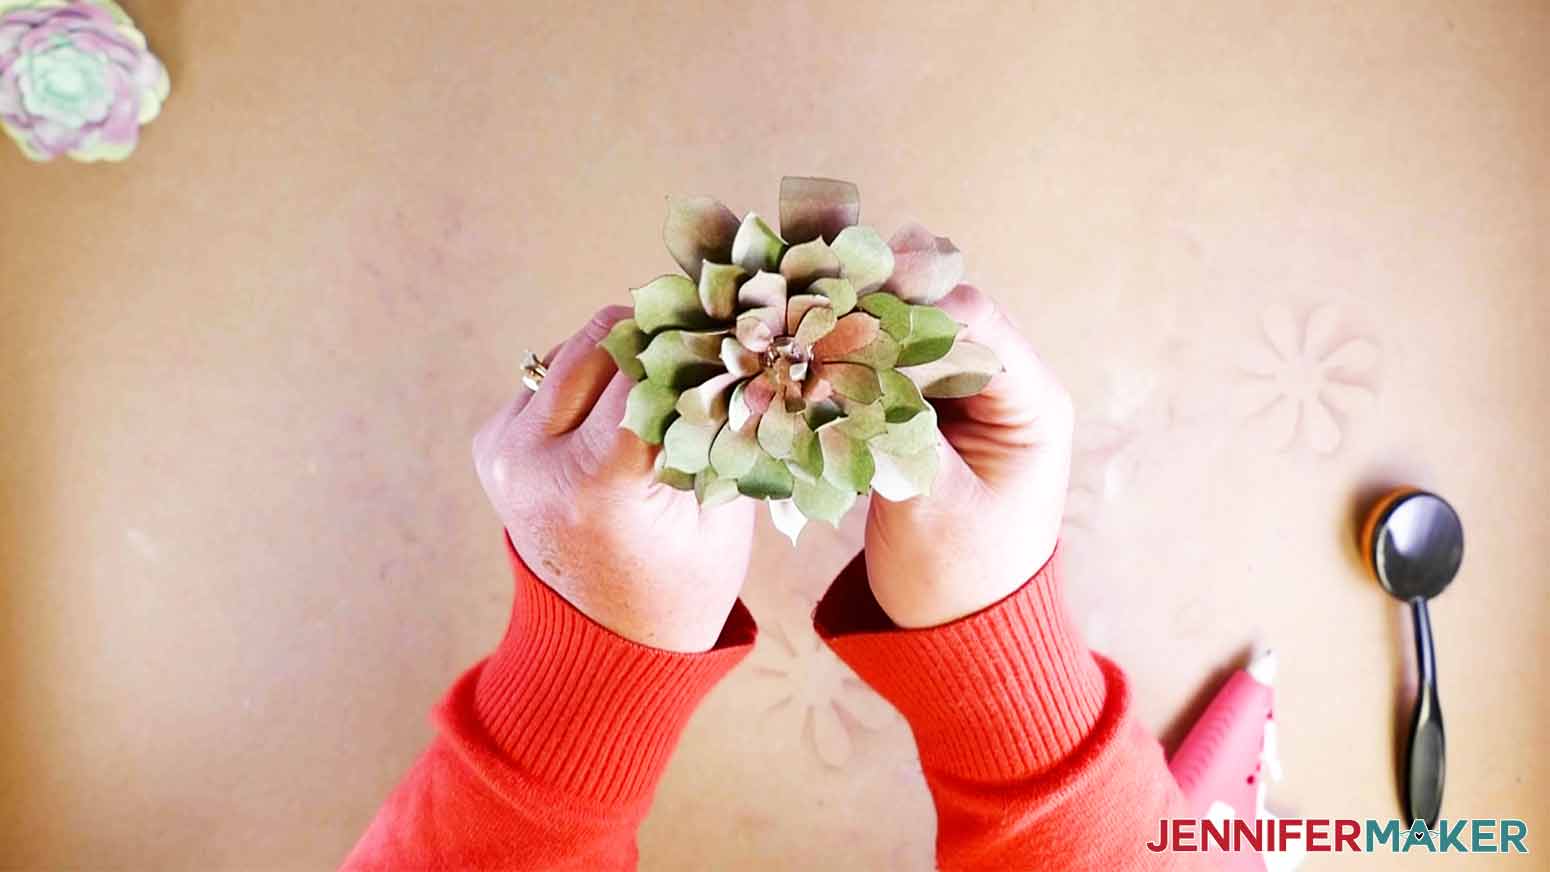
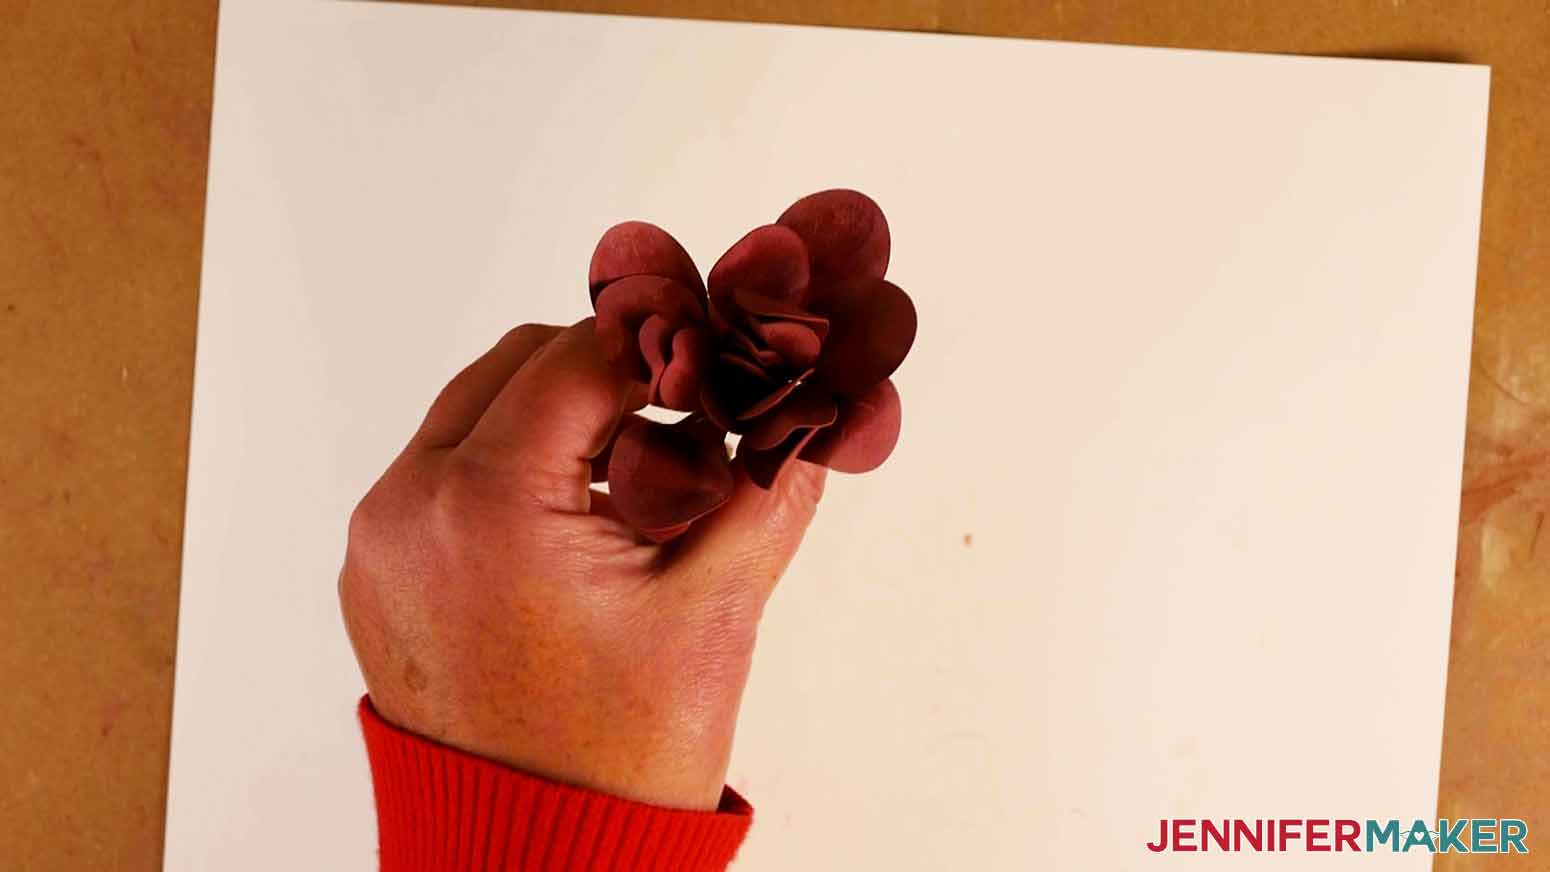
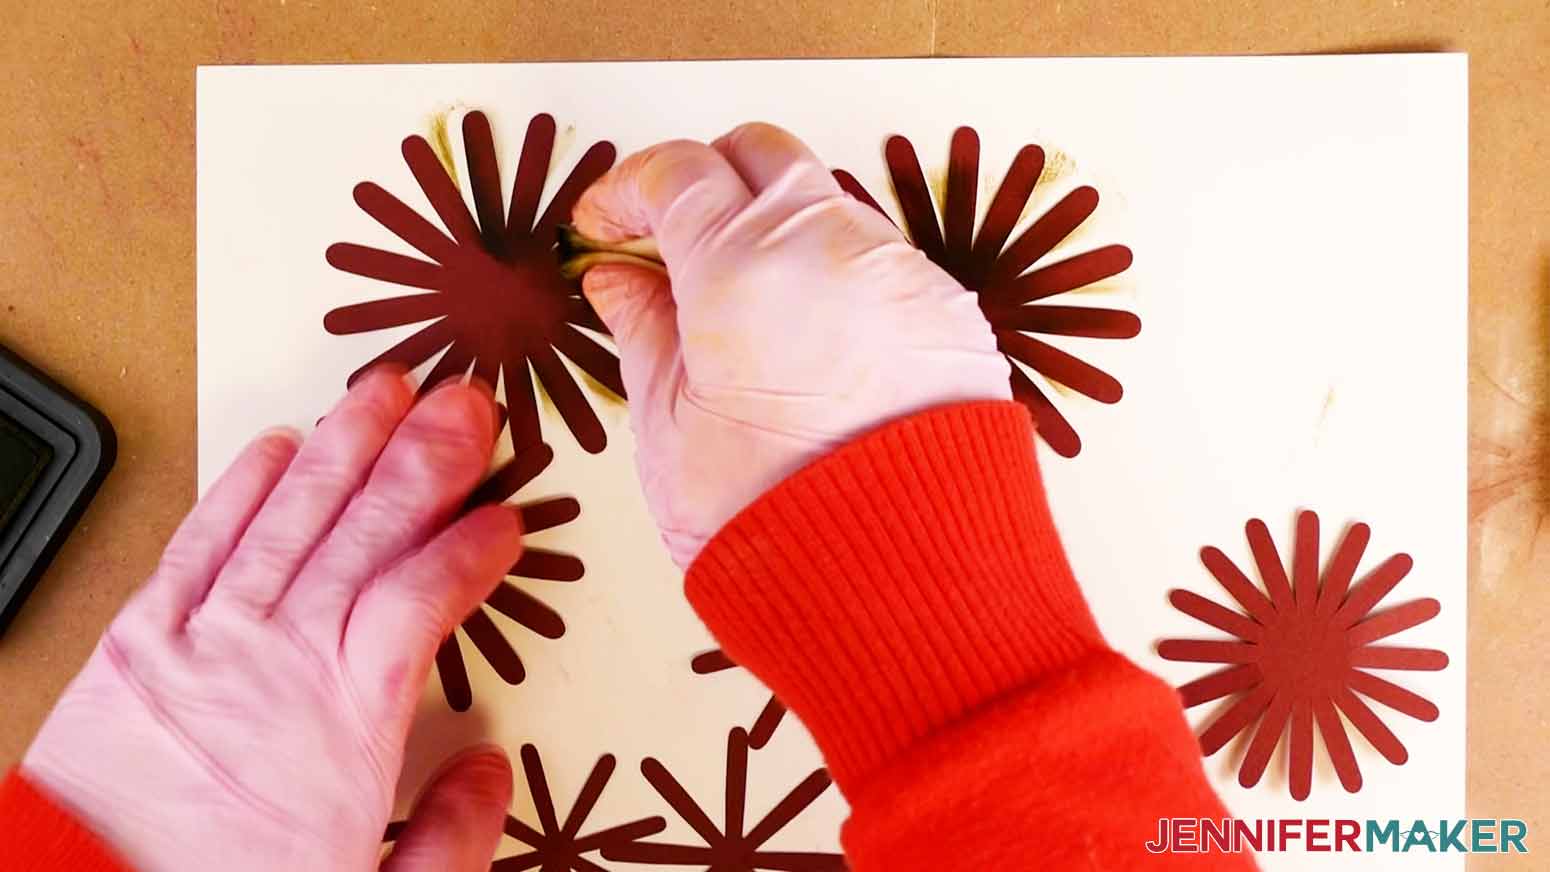
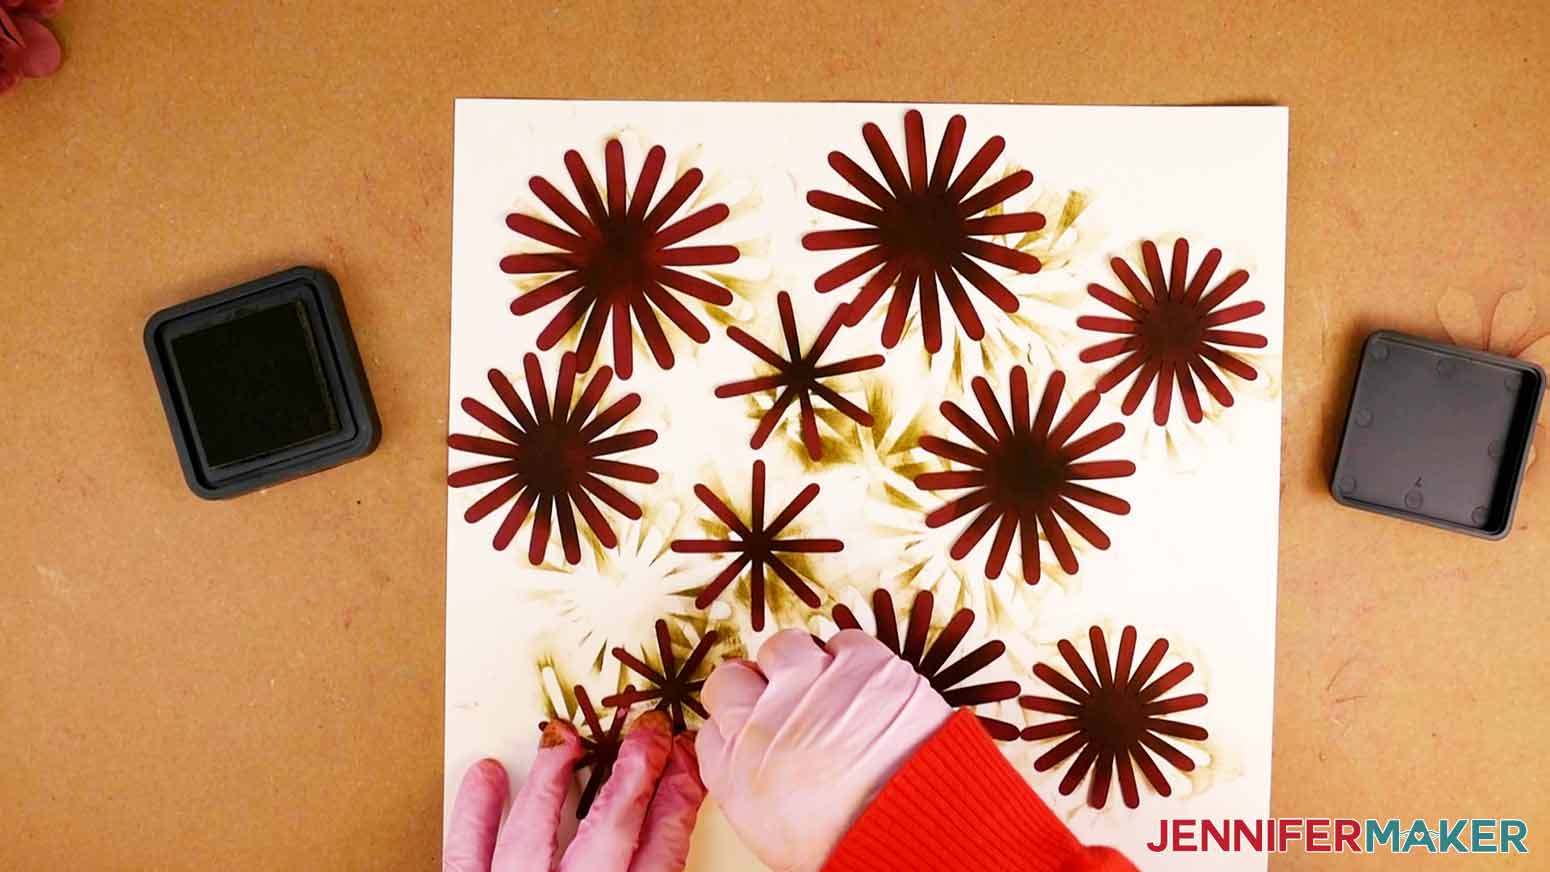
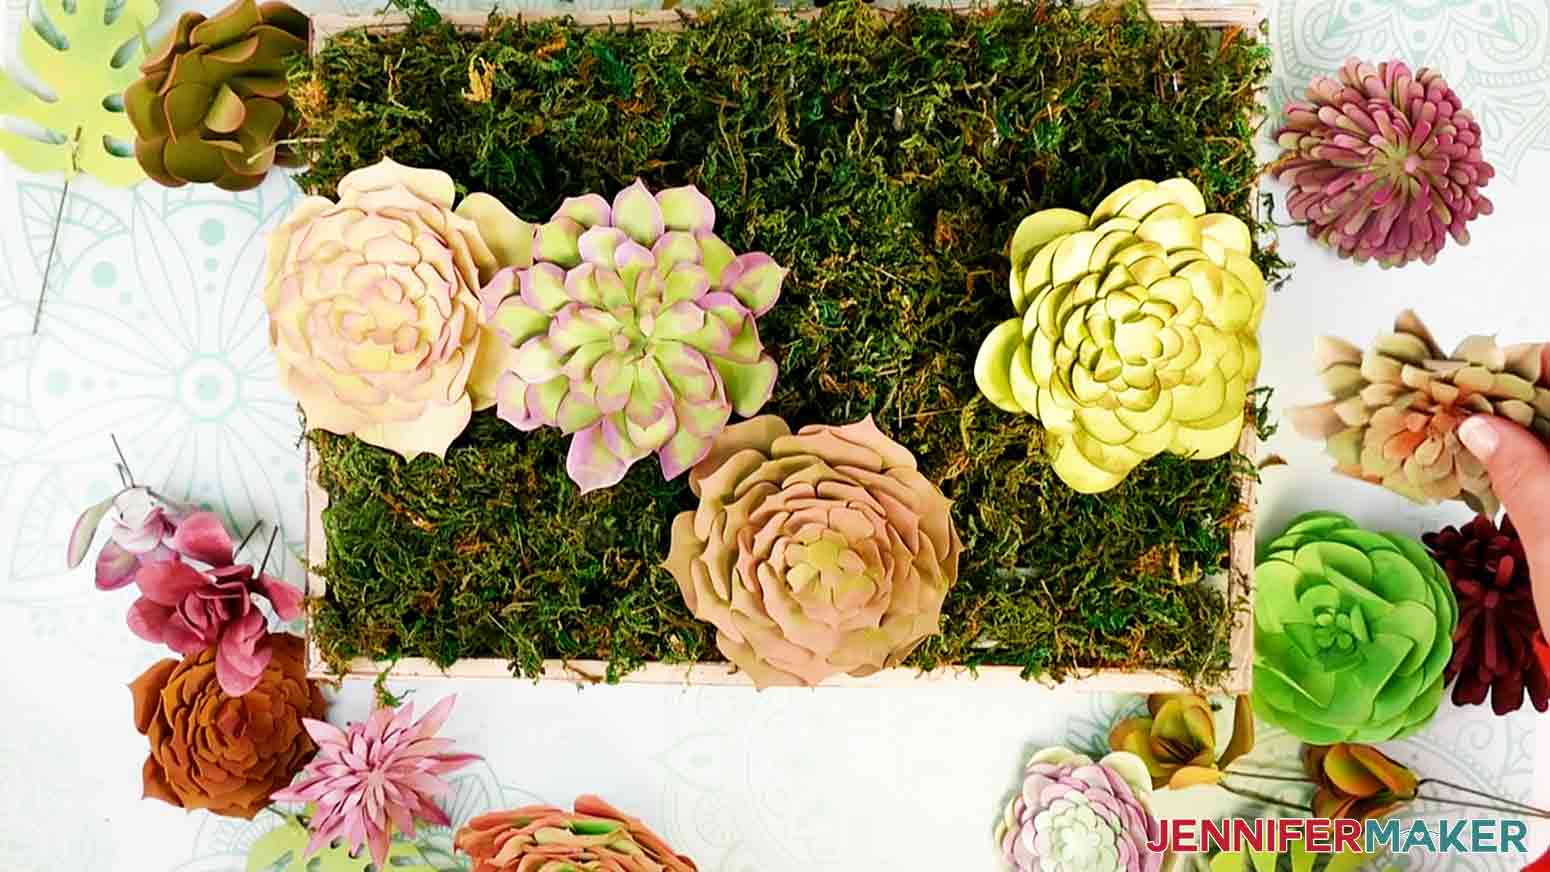
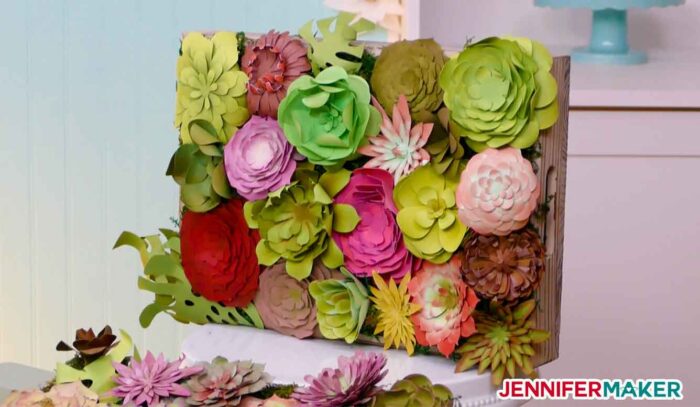
How would you like to make a tray filled with beautiful succulents that need no maintenance or watering? I'm going to show you how to turn a wooden tray into a beautiful paper succulent arrangement that can be hung on your wall or placed on a table. Let's get started! First, download Design #340 which is my free Paper Succulents SVG/DXF/PDF from my free resource library. This is what my Paper Succulents SVG file looks like in Cricut Design Space. Tip: If you're not sure how to upload an SVG cut file to Cricut Design Space, watch this helpful video training series I made. If you're on an iPhone or iPad, here's how to download and upload SVG files to the Cricut Design Space app. My design file includes multiple succulents and some tropical leaves. Depending on your tray size, you may need to cut additional succulents to fill your tray. I used the medium-sized tray from my supplies list and cut three extra succulents, in addition to cutting the entire design, to fill the tray. My design is made up of six groups. Each group represents a different color of cardstock. It takes 18 12" x 12" mats. I've colored the groups A-F to match the green shades in the cardstock listed in my supplies. Group F uses the maroon cardstock. Once you've uploaded the SVG into Design Space, it's ready to cut, all you have to do is click "Make It." If you are using a Maker 3 or Explore 3 machine, you will see a screen asking how you will be loading your material. Select "On Mat and then click “Done.” You will not see this screen for other Cricut cutting machines. On the next screen, the "Prepare" screen, it should show "18 mats" in the upper left hand corner. Click "Continue." Now we will select the base material. I have selected "Medium Cardstock - 80 lb." If you do not see this material in your base material favorites, click "Browse All Materials." Type "medium cardstock" in the search bar then select "Medium Cardstock - 80 lb" and then click "Done." I always select more for my cutting pressure to ensure a nice, clean cut. Apply your first sheet of cardstock to your StandardGrip Machine mat. Load your first mat into the machine. Then begin the cut when the go button begins to blink. When your cut is complete, press the unload button on your machine. To remove the cardstock from the mat, I find it easiest to turn the mat over and slightly bend the mat back to release the cardstock. Place the next sheet of cardstock on your mat and continue cutting. Repeat this process until all succulent designs are cut. CUT ORDER As your Paper Succulents cut, I recommend placing the pieces for each succulent into individual stacks or into plastic storage bags. You will be cutting a lot of parts and it is easy to mix them up or misplace a small piece. Below is a diagram of each succulent in the order in which they will cut. When I refer to succulent numbers during the assembly of this project, use this graphic for reference. You will also find a JPG of this graphic in the design files. Using a hacksaw or knife, cut your floral foam and arrange them so they fill the bottom of the tray. Cut the floral foam so it doesn’t exceed the height of the tray. You do not have to worry about the foam pieces being cut perfectly. Once everything is in place, we will glue the floral foam to the tray. Remove one piece of floral foam from the tray at a time and add glue to the bottom of the foam, or the bottom of the tray, then place the foam back into the tray. Continue doing this until all the foam is glued down. After you have glued all pieces of floral foam into the tray, we are going to add artificial moss to the top of the foam. To do this, begin adding a lot of hot glue to the top of the floral foam then press pieces of moss into the glue. You will want to do this in small sections to avoid the hot glue cooling. I highly recommend wearing hot glue finger protectors to avoid finger burns during this process. Continue adding hot glue and fake moss until the entire top of the tray is covered with moss. ABOUT THE PANPASTELS AND RANGER INKS Before I go into how I used PanPastels and Ranger Inks to color my succulents, I want to give you some information on the inks and pastels I am using. The Ranger Distress Inks are dyes, dry quicker, and are more transparent than Ranger Distress Oxides. The Ranger Distress Oxides are pigments, more opaque, and don't dry as fast as the inks. I forgot to wear rubber gloves and learned that these inks can be challenging to remove from your hands with soap and water. The dyes eventually came off my hands after 1-2 days. For this reason, I recommend wearing rubber gloves when working with the Ranger Distress Inks and Oxides. PanPastels are super soft, easily blendable, and rich in color. They are highly pigmented and require no drying time. Unlike pastel chalk, they are low dust and offer a greater coverage. I found the PanPastels much easier to work with than the Ranger Inks. And no matter how much you get on your hands, the ink washes off completely with soap and water. You may want to practice how to apply the inks and pastels before working with your succulent pieces. LET'S ASSEMBLE Assembling the succulents is fun and lets you get creative. I am going to show you how I made my the succulents using the Ranger Inks and Oxides as well as the PanPastels. Coloring your succulents is optional, but I think it makes them look more realistic. Refer to the cut order graphic above, which identifies each of the Paper Succulents by number. SUCCULENT 1 - SEDUM SUNCATCHER You will need your cut pieces for succulent 1, a cosmetic sponge, and the PanPastel in Red Extra Dark. To keep your hands clean, you can wear rubber gloves. I also recommend using a piece of scrap paper or kraft paper to protect your work surface. Rub the cosmetic sponge into the PanPastel to pick up color. I am shading each leaf differently by alternating between shading the middle, end, and side. Apply the pastel starting at the leaf and pushing out to the scrap paper. Do not apply in a back and forth method. Once you have finished adding color to this side, flip the piece over and begin adding color to the back. For the base piece, I am coloring the inner most part of each leaf on both sides. Do not add color to the small rectangular piece of cardstock. You can use a brush to remove excess pastel from the cardstock. To mold each leaf I am using my cricut scraper tool. Place the scraper tool near the middle of the leaf and pull to the edge. This technique is similar to taking scissors to curing ribbon. Do not pull too hard or you are likely to rip off the leaf. I also am alternating the direction in which I am forming each leaf. Next, curl the base piece. We are going to roll the long piece with all the leaves using a quilling tool. You can make your own, purchase one, or use a pair of tweezers. Insert the cardstock into the quilling tool starting at the end with the smaller leaves. Begin rolling the strip of cardstock around your quilling tool. When you come to the end, add glue to the end of the piece and secure so it does not come unrolled. I am using these handy finger protectors from my supply list so my fingers don't get burned. Flip your succulent over and add hot glue to the entire bottom of the succulent. Place the base piece on top of the hot glue and hold it until the hot glue is cool. Grab a piece of floral wire and measure 1.5" from the end. Hold the wire with your needle nose pliers and bend the wire 90 degrees (an L-shape) at 1.5". Measure 0.25" from the bent corner of the wire, then bend the wire 90 degrees again using your pliers. Use wire cutters to cut the end of the floral wire so it is the same length as the other side. Please be cautious when cutting floral. You can wear protective eyewear to shield your eyes from flying wire. This is what your bent wire should look like. It reminds me of a staple with long legs. Turn your succulent over and add a line of hot glue the length of the rectangular piece of cardstock to the base. Place your wire into the hot glue with the legs sticking up. Immediately place the rectangular piece of cardstock in the center of the wire to cover the wire and hot glue. You've just made your first paper succulent. SUCCULENT 2 - SEMPERVIVUM You will need your cut pieces for succulent 2, a cosmetic sponge, and scrap or kraft paper along with Ranger Distress Oxide ink in Abandoned Coral. I highly recommend wearing rubber gloves when using Ranger inks as they stain. Press a cosmetic sponge onto the ink pad then lightly begin inking the outer edges of each leaf. Apply the ink beginning at the edge of the cardstock and working out. Do not apply the ink using a back and forth method. Continue adding color to each leaf. Flip the piece over and color each leaf on the back side. Do not add color to the small rectangle piece of cardstock. This will be placed on the bottom of the succulet and used to add the floral wire. Next I am going to give each leaf some shape using the Cricut Scraper tool. To mold the leaf, place the leaf on top the edge of the scraper and pull. This is the same technique I demonstrated when we made the first succulent. As you get to the smaller pieces you may find the leaf difficult to shape with the scraper tool. This is where the wooden dowels come in handy. Grab a 3/16" dowel and wrap ends of each leaf around the dowel. For the two small triangle shaped pieces, fold the three tabs up. To assemble this succulent we will start with the largest piece and work our way to the smallest. Add hot glue to the center of the largest piece. You do not need a lot of hot glue. Place the next piece on top and stagger the leaves. Continue until you have glued all the pieces together. We are going to add floral wire to the bottom of this succulent using the same process we did for succulent 1. Measure 1.5" from the end of the floral wire. Using needle nose pliers, bend the wire 90 degrees as we did when assembling the first succulent. From the bend, we are going to measure 0.5" before making the second 90 degree bend. This is because our rectangular piece for the base is wider than the piece used for succulent 1. Add a line of hot glue to the bottom of the succulent that is slightly less than the length of the rectangle piece. Place your floral wire into the hot glue with the legs up. Place the rectangle piece of cardstock between the legs of the wire and press onto the hot glue. Hold until the glue has cooled. Here is what my succulent two looks like assembled. SUCCULENT 3 - SEDUM SIEBOLDII "OCTOBER DAPHNE" In addition to the pieces for succulent 3, grab a cosmetic sponge, rubber gloves, and Ranger Abandoned Coral Distress Oxide ink. Use a piece of scrap or kraft paper to protect your work surface from stains. Press your sponge onto the ink pad then feather the sponge onto the very edges of each leaf. You want a nice bright line around the edges. Continue adding ink to the front and back of each piece except the rectangle piece of cardstock. Take your scraper tool and mold each leaf using the same technique we did for succulent 2. When you get to the smaller pieces with two leaves, use a 1/4" dowel to shape each leaf. Assemble the succulent from the largest sized piece to the smallest. Make sure to stagger the pieces. Add the floral wire using the same method and measurements I used for succulent 2. PLANT 4 - MONSTERA LEAF These are the materials to create the monstera leaf. I am using permanent green Pan Pastel to color the leaf. Using the Permanent Green PanPastel with a cosmetic sponge, I am adding color randomly to various parts of the front and back of the leaf. I am using my scraper tool again to give the leaf shape. Cut a piece of floral wire approximately three to four inches long then cut with wire cutters. Add about an 1" of hot glue to the end of the wire. Place a half inch of the hot glued end to the backside of the leaf where the stem is. Take the stem of the leaf and begin wrapping it around the other half of the hot glue. SUCCULENT 5 - ECHEVERIA RAINBOW Assemble this succulent using the same steps for succulent 1. This time, color the leaves a little different. Use the Ranger Crushed Olive Distress Ink and add a stripe in the middle of each leaf. Then use the Coral Distress Oxide on each side of the green stripe. When you have finished adding color to the font, continue with the back side of the piece. Follow the same steps from succulent 1 to assemble the succulent and add the floral wire to the bottom. SUCCULENT 6 - SEDUM NUSSBAUMERIANUM "COPPERTONE SEDUM" Grab your pieces for paper succulent 6 along with Yellow Ochre and Hansa Yellow PanPastels. As with the other succulents, you will need your cosmetic sponges and a piece of scrap or kraft paper to cover your work surface. Start by using the Yellow Ochre PanPastel. Press a cosmetic sponge to the pastel then gently brush the color on the outer half of each leaf. Take the Hansa Yellow PanPastel and apply highlights at the bottom half of each leaf. Repeat this process to color the front and back of all pieces. Optional: Use a brush (or a cosmetic sponge) to blend and/or brush off any excess pastel. This is what my first piece looks like. Repeat this process for the remaining pieces. Here I am using small 1/8" dowel and wrapping the sides of each leaf around the dowel. For the smallest piece, fold up all the leaves to the center Again, we will assemble this succulent starting with the largest to smallest piece. Add hot glue to the center of the largest piece. Place the next size leaf on the glue and stagger the leaves. Continue until all your pieces are assembled. Apply floral wire to the back of the succulent using the same method and measurements we did for succulents 2 and 3. SUCCULENT 7 - SEMPERVIVUM "JUBILEE" For this succulent you will need the pieces for succulent 7 along with Ranger Seedless Preserves Distress ink. Take your sponge and press it onto the ink pad then apply the ink to the outer edges of each leaf like we did for succulent 2. Once you have added color to all the leaves on the front, flip the piece over and add color to the back. Continue applying color to the outer edge for the remaining pieces, front and back. Use the scraper tool to shape each leaf like we have done with the succulents we have already made. Continue shaping each leaf except the two smallest pieces. Fot those two pieces, bend the four leaves toward the center. Assemble the succulent pieces largest to smallest by adding hot glue in the center. Remember to stagger the leaves like we did with succulent 2. Follow the process to add floral wire to the bottom of the succulent. Refer to the directions in succulent 2. SUCCULENT 8 - AEONIUM "GREEN PLATTERS" Grab the pieces for succulent along with Ranger Forest Moss Distress ink. Take your sponge and press it onto the ink pad then apply the ink to the outer edges of each leaf like we did for succulent 2. Once you have added color to all the leaves on the front, flip the piece over and add color to the back. Continue applying color to the outer edge for the remaining pieces, front and back. Use the scraper tool to shape each leaf like we have done with the succulents we have already made. When you get to the smaller pieces, use a 1/4" or 3/16" dowel to shape the leaf. For the smallest piece, fold the leaves toward the center like we have done with the previously assembled succulents. Assemble the succulent pieces largest to smallest by adding hot glue in the center. Stagger the leaves like we have with the other succulents. Follow the process to add floral wire to the bottom of the succulent. Refer to the directions in succulent 2. SUCCULENT 9 - SEMPERVIVUM Assemble this succulent using the same steps for succulent 2. This time, color the leaves using PanPastel Magenta on the very tips and Yellow Tint for the rest of the leaf. Continue adding color to the front and back of each piece. For the two small pieces, color the leaves using only Magenta. Follow the same steps from succulent 2 to assemble and add the floral wire to the bottom. PLANT 10 - MONSTERA LEAF Follow the directions for succulent 4, the other Monstera leaf. SUCCULENT 11 - AEONIUM URBICUM "SALAD BOWL" Assemble this succulent using the same steps for succulent 1. This time, color the bottom half of the leaf with PanPastel Yellow Ochre and use Red Extra Dark for the tips of the leaves. When you have finished adding color to the front, continue with the back side of the piece. Follow the same steps from succulent 1 to assemble and add the floral wire to the bottom. SUCCULENT 12 - CRASSULA "DEVIL'S HORNS" You will need the pieces for succulent 12, cosmetic sponges, and PanPastel Magenta. Flip the piece over and continue adding color to the back. Continue adding color to the remaining pieces. Use your scraper tool to shape the leaves. We are going to be assembling this succulent so the leaves are pointing up. Start with the largest piece and work to the smallest. Add hot glue to the center of the largest piece. You do not need a lot of hot glue. Place the next piece on top and stagger the leaves. Continue until you have glued all the pieces together. Add the floral wire to the bottom of the succulent as we did with succulent 2. SUCCULENT 13 - PORTULACA MOLOKINIENSIS Grab your pieces to make succulent 13, PanPastel in Permanent Green, and a cosmetic sponge. Don't forget to protect your work surface. Begin applying color from the center toward, but not to, the edges of each leaf. This is what my pieces look like colored. To mold the leaf use a Cricut scraper tool and place the leaf on top the edge of the scraper and pull. Place the scraper tool near the middle of the leaf and pull to the edge. Take the next smallest piece and use a small 3/16" wooden dowel to curl each leaf. For the three smaller pieces, fold each leaf toward the center. Assemble the pieces beginning with the four larger pieces. Add glue to the center of the piece and stagger the leaves. Continue until all pieces are assembled. To add the floral wire, follow the same process as we did for succulent 2. SUCCULENT 14 - SEMPERVIVUM TECTORUM "HENS N' CHICKS" Follow the instructions for making succulent 2 to make succulent 14. SUCCULENT 15 - GRAPTOVERIA "FRED IVES" Assemble this succulent exactly like we did for succulent 5. Use PanPastel Magenta on the outer edges of the leaves and Red Extra Dark in the very middle of each leaf. This is what my assembled succulent looks like. SUCCULENT 16 - KALANCHOE "FLAP JACKS" Assemble this succulent the same way we did for succulent 1. Use PanPastel Magenta around the edges of each leaf. This is what my succulent looks like. SUCCULENT 17 - GREENOVIA DODRENTALIS "MOUNTAIN ROSE" We will assemble this piece the same way we assembled succulent 8. We will be using PanPastel Permanent Green, Yellow Tint and Magenta. We are going to color the pieces smallest to largest. For the first four pieces, color the pieces with Permanent Green. Color the remaining pieces, except the largest two pieces, using Magenta. Take a hint of Yellow Tint to the end of each leaf. For the two largest pieces, color the outer half of the leaf with Yellow Tint and the inner half of the leaf with Permanent Green. Continue shaping the leaves and assembling like we did for succulent 8. SUCCULENT 18 - SEMPERVIVUM "SILVER KING" For this succulent we will be assembling it the same way we did for succulent 7. This time we will use PanPastel Red Extra Dark and Green Shade. Begin coloring the bottom two-thirds of each leaf with Red Extra Dark then color the tip of each leaf using Green Shade. Continue assembling and adding the floral wire like we did for succulent 7. SUCCULENT 19 - SEMPERVIVUM "PACIFIC DEVILS FOOD" Assemble this succulent exactly like we did for succulent 2 except use PanPastel Yellow Ochre ink. SUCCULENT 20 - ECHEVERIA "MELACO" Assemble this succulent following the same directions for succulent 1 except use Abandoned Coral on the outer edge of each leaf. SUCCULENT 21 - AEONIUM ARBOREUM "ZWARTKOP" For this succulent, follow the same directions for succulent 12. Color each leaf by adding Ranger Forest Moss Distress Ink to the inner half of each leaf. For the four smallest pieces, color each leaf entirely using Range Crushed Olive Distress Ink. Continue assembling and adding wire as we did for succulent 12. Play with different shading techniques for your succulents. Curling the leaves under or over will give each succulent a completely different look. The most important part is to have fun. Succulents come in a variety of colors and shapes and they are all so beautiful. Now that we have plenty of succulents made, its time to add them to our tray. Grab your tray and assembled succulents. Begin arranging your succulents in the tray by sticking the floral wire through the moss and into the floral foam. The nice thing about having the floral wire at the bottom of each succulent is that you can move the succulents around until they are placed exactly how you want them. If you find your floral wire is too long, use your wire cutters to snip it shorter. Once you are happy with the arrangement of your succulents, remove a succulent from its placement, add hot glue to the tips of the floral wire, then return it to its spot. This helps secure the succulent in place and ensures they will not fall out when moving the tray. You can also use your paper succulents and add them to a pot, mug, or basket. The possibilities, combined with your creativity, are endless. This is what my finished succulent tray looks like. Isn't it gorgeous? My paper succulent tray is a great addition to any home decor. It looks great hanging on the wall or placed on a countertop. The best part is they are maintenance free and you can't kill them. The paper succulent tray also makes a great gift! As an Amazon Associate and member of other affiliate programs, I earn from qualifying purchases.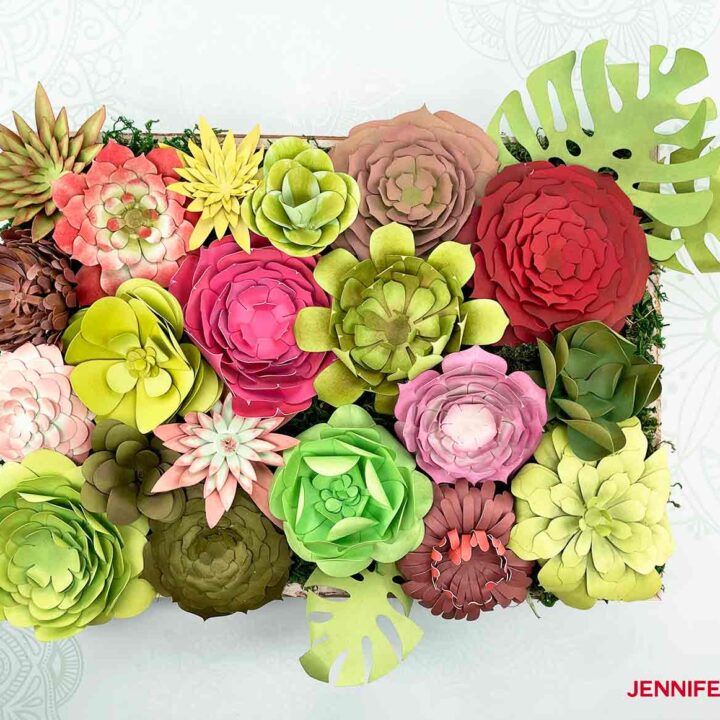
Paper Succulents
Materials
Pan Pastel pigments (optional)
Ranger Distress Inks and Oxides (optional)
Tools
Instructions
STEP 1: GET MY FREE PAPER SUCCULENTS FILE
STEP 2: CUT THE PAPER SUCCULENTS DESIGN
STEP 3: PREPARE THE TRAY
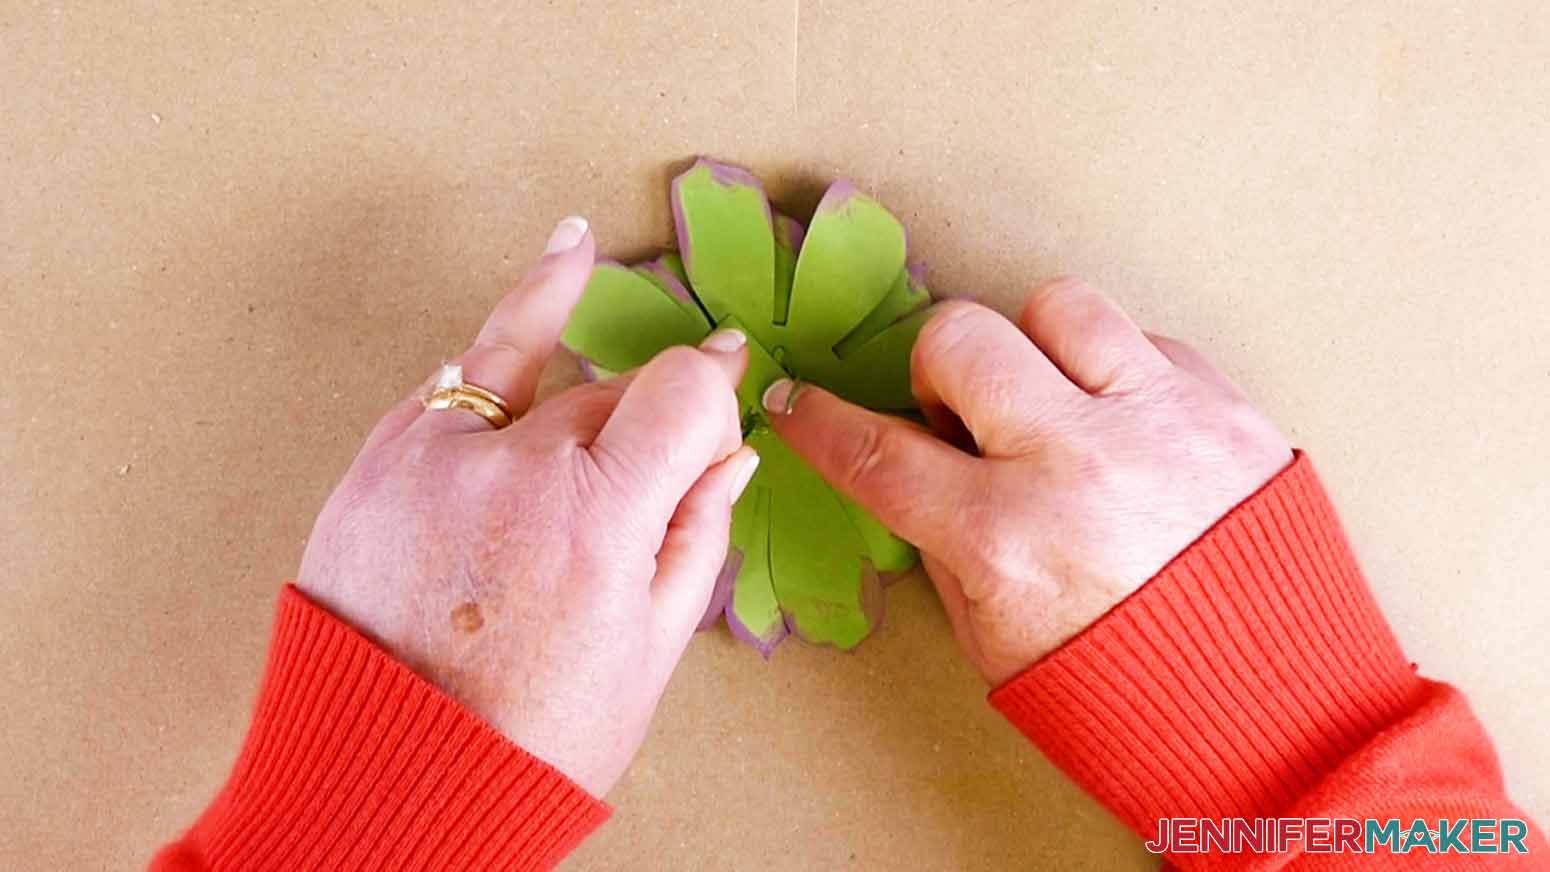
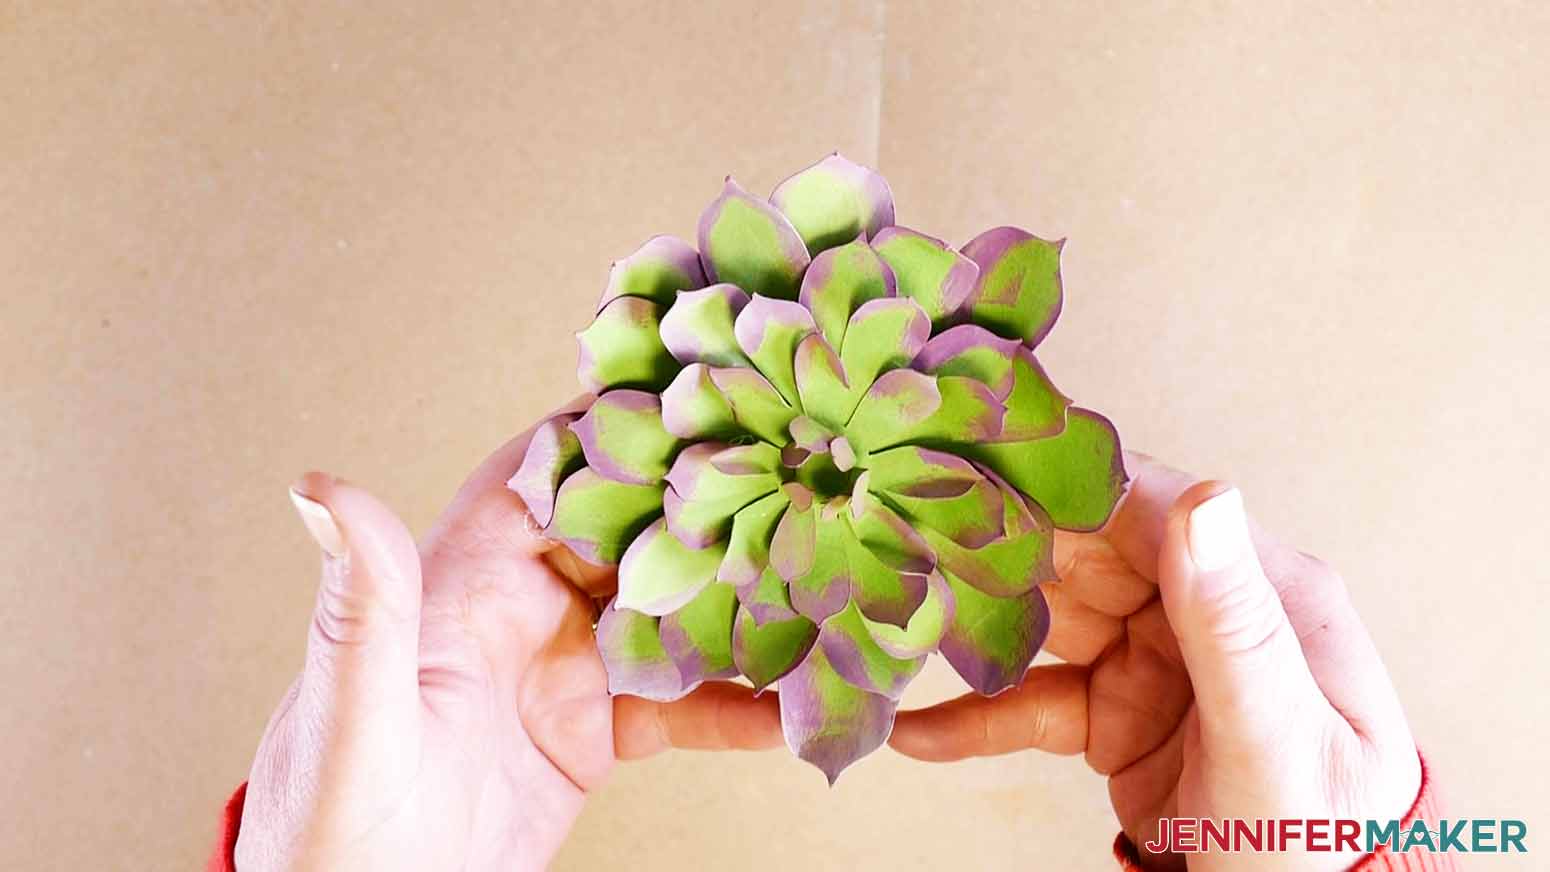
STEP 4: ASSEMBLE THE SUCCULENTS


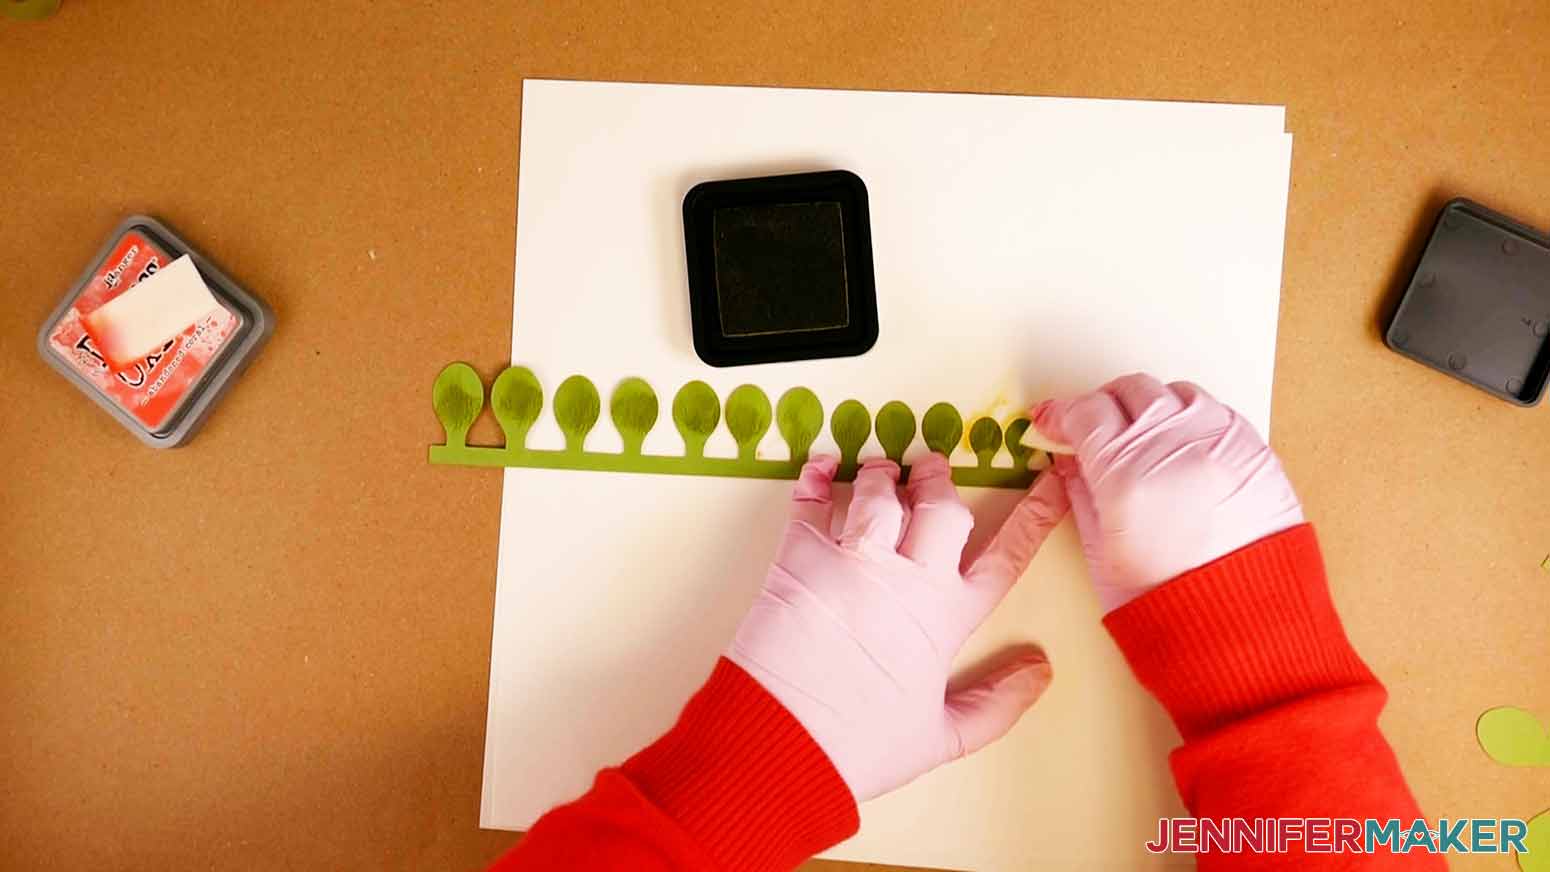
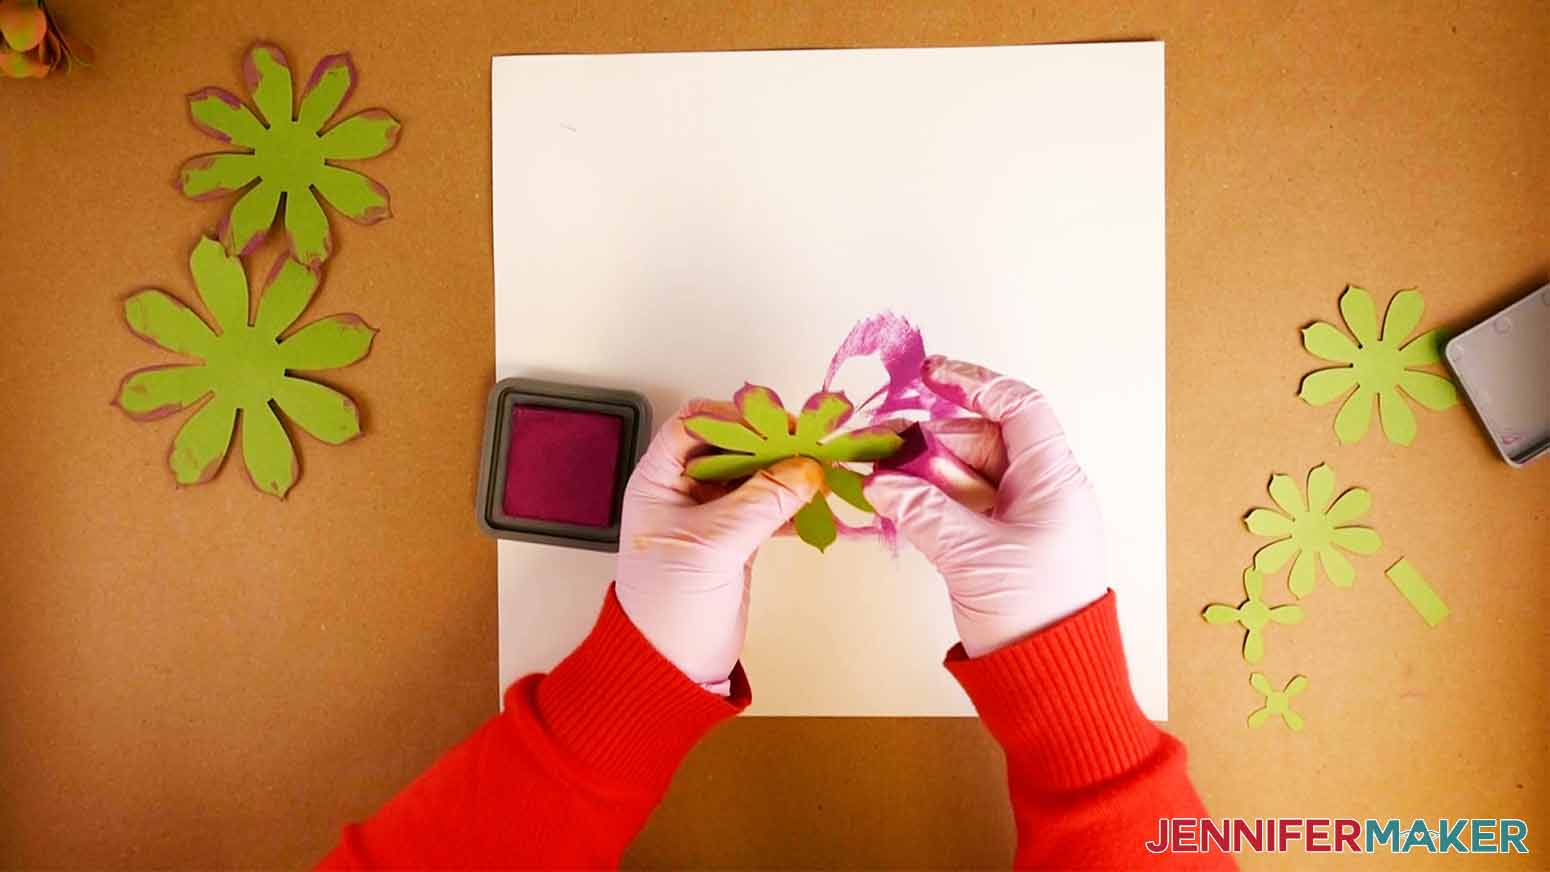

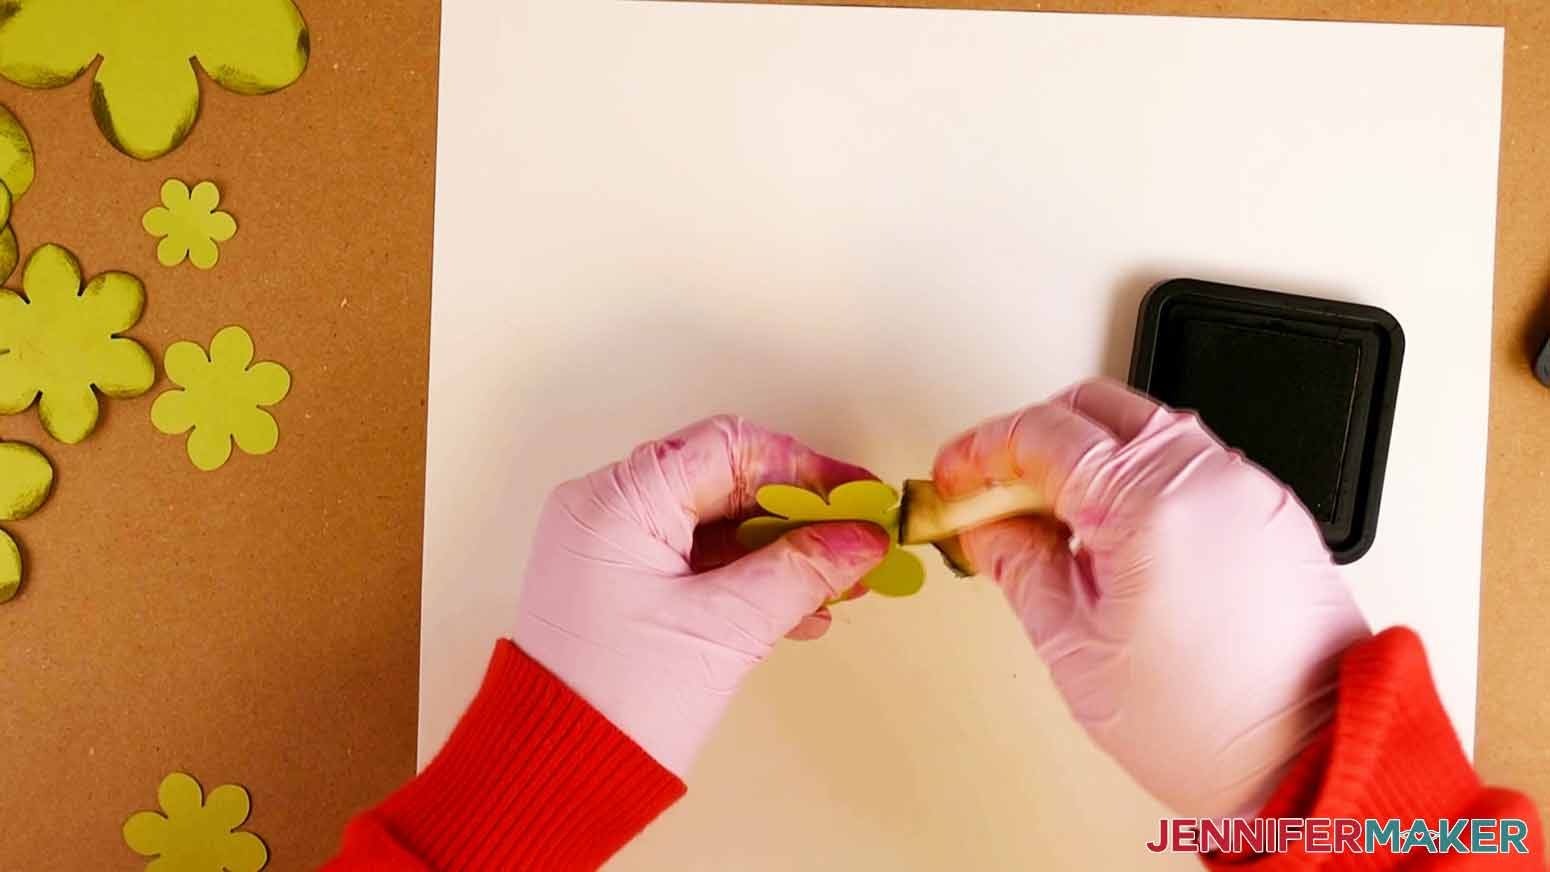
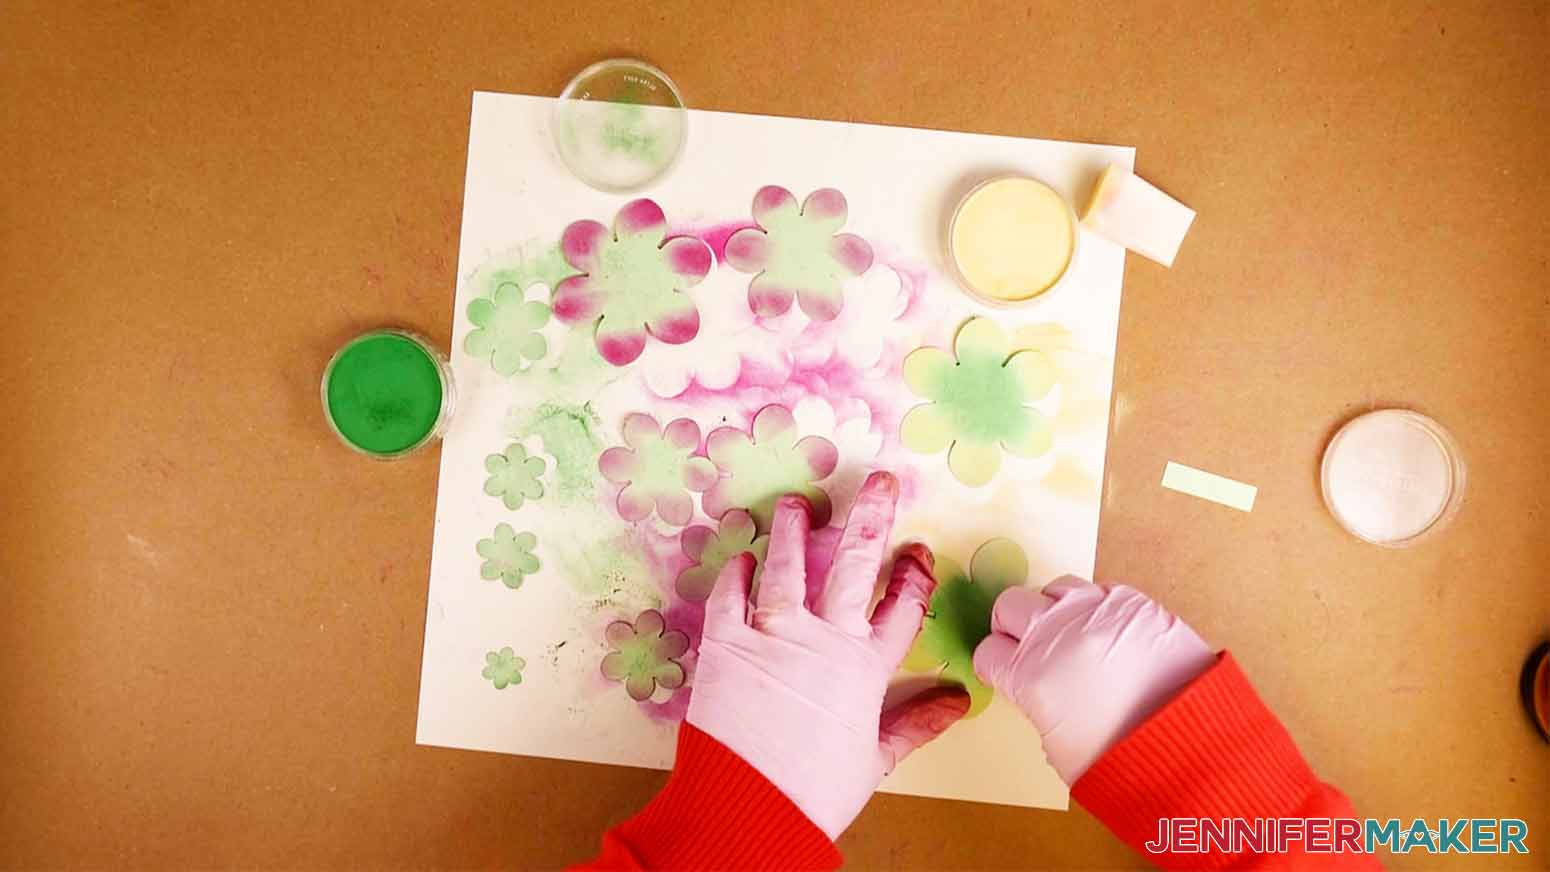
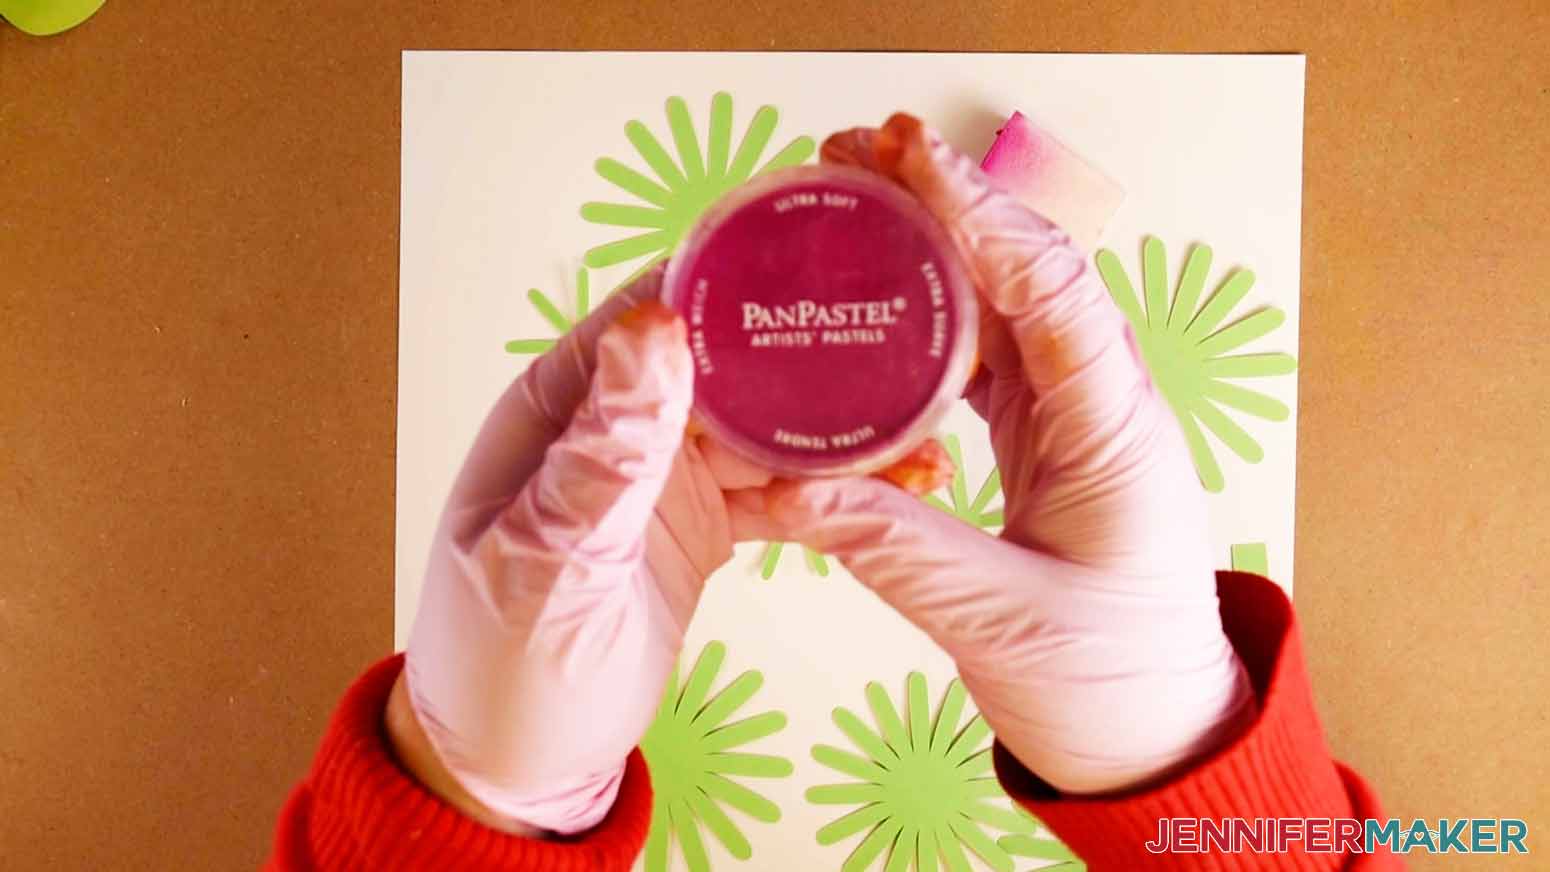 Wipe a cosmetic sponge into the Magenta pastel and add to the outer half of each leaf.
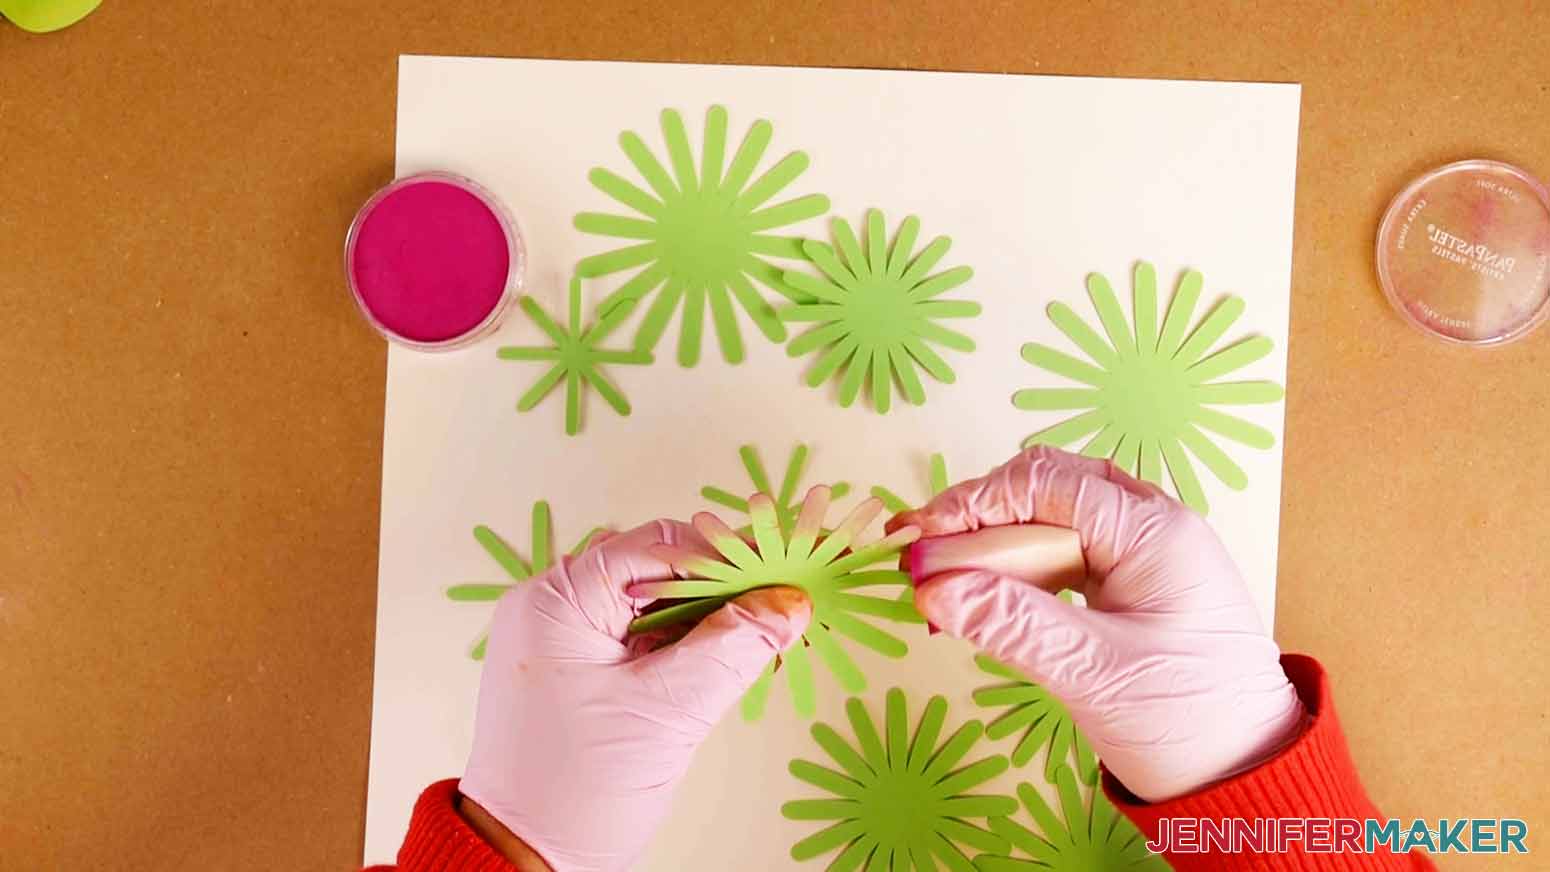


STEP 5: ASSEMBLE THE SUCCULENT TRAY
STEP 6: SHOW IT OFF
Recommended Products

Answers to Your Questions About Making Paper Succulents
Q: Can I cut these paper succulents on a Cricut Joy cutting machine?
Yes, if you use our special file marked as “Joy” in the SVG folder in the free pattern ZIP file. This special file is sized so you can cut your paper succulent pieces on a Joy-sized machine mat.
Q: Do I have to use PanPastels and/or Distress Oxide Inks?
No, this is completely optional. You can also use chalk, crayon, makeup (like eye shadow and blush), colored pencils, and dry-brushed acrylic paint to give your paper succulent pieces color and dimension.
Q: What kind of cardstock is best for paper succulents?
I think 65 lb. cardstock works best as it will be easier to shape the paper petals.
Q: Do you have other paper plants I can make?
Yes! Check out my paper spider plant template and tutorial.

Get my free SVG files to make your own paper succulents
I can’t wait to see what you do with your paper succulents! Will you put them in pots? Make them larger and decorate your walls? Please share a photo in our Facebook group or tag me on social media with #jennifermaker.
Love,

Want to remember this? Save this DIY Paper Succulents Tutorial to your favorite Pinterest Board!