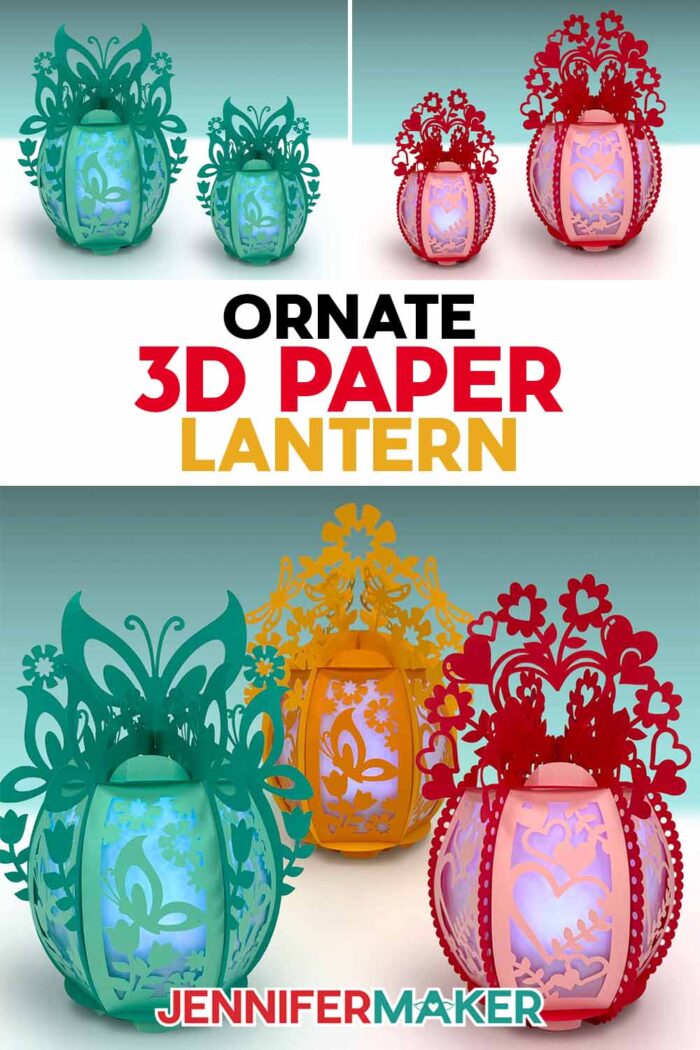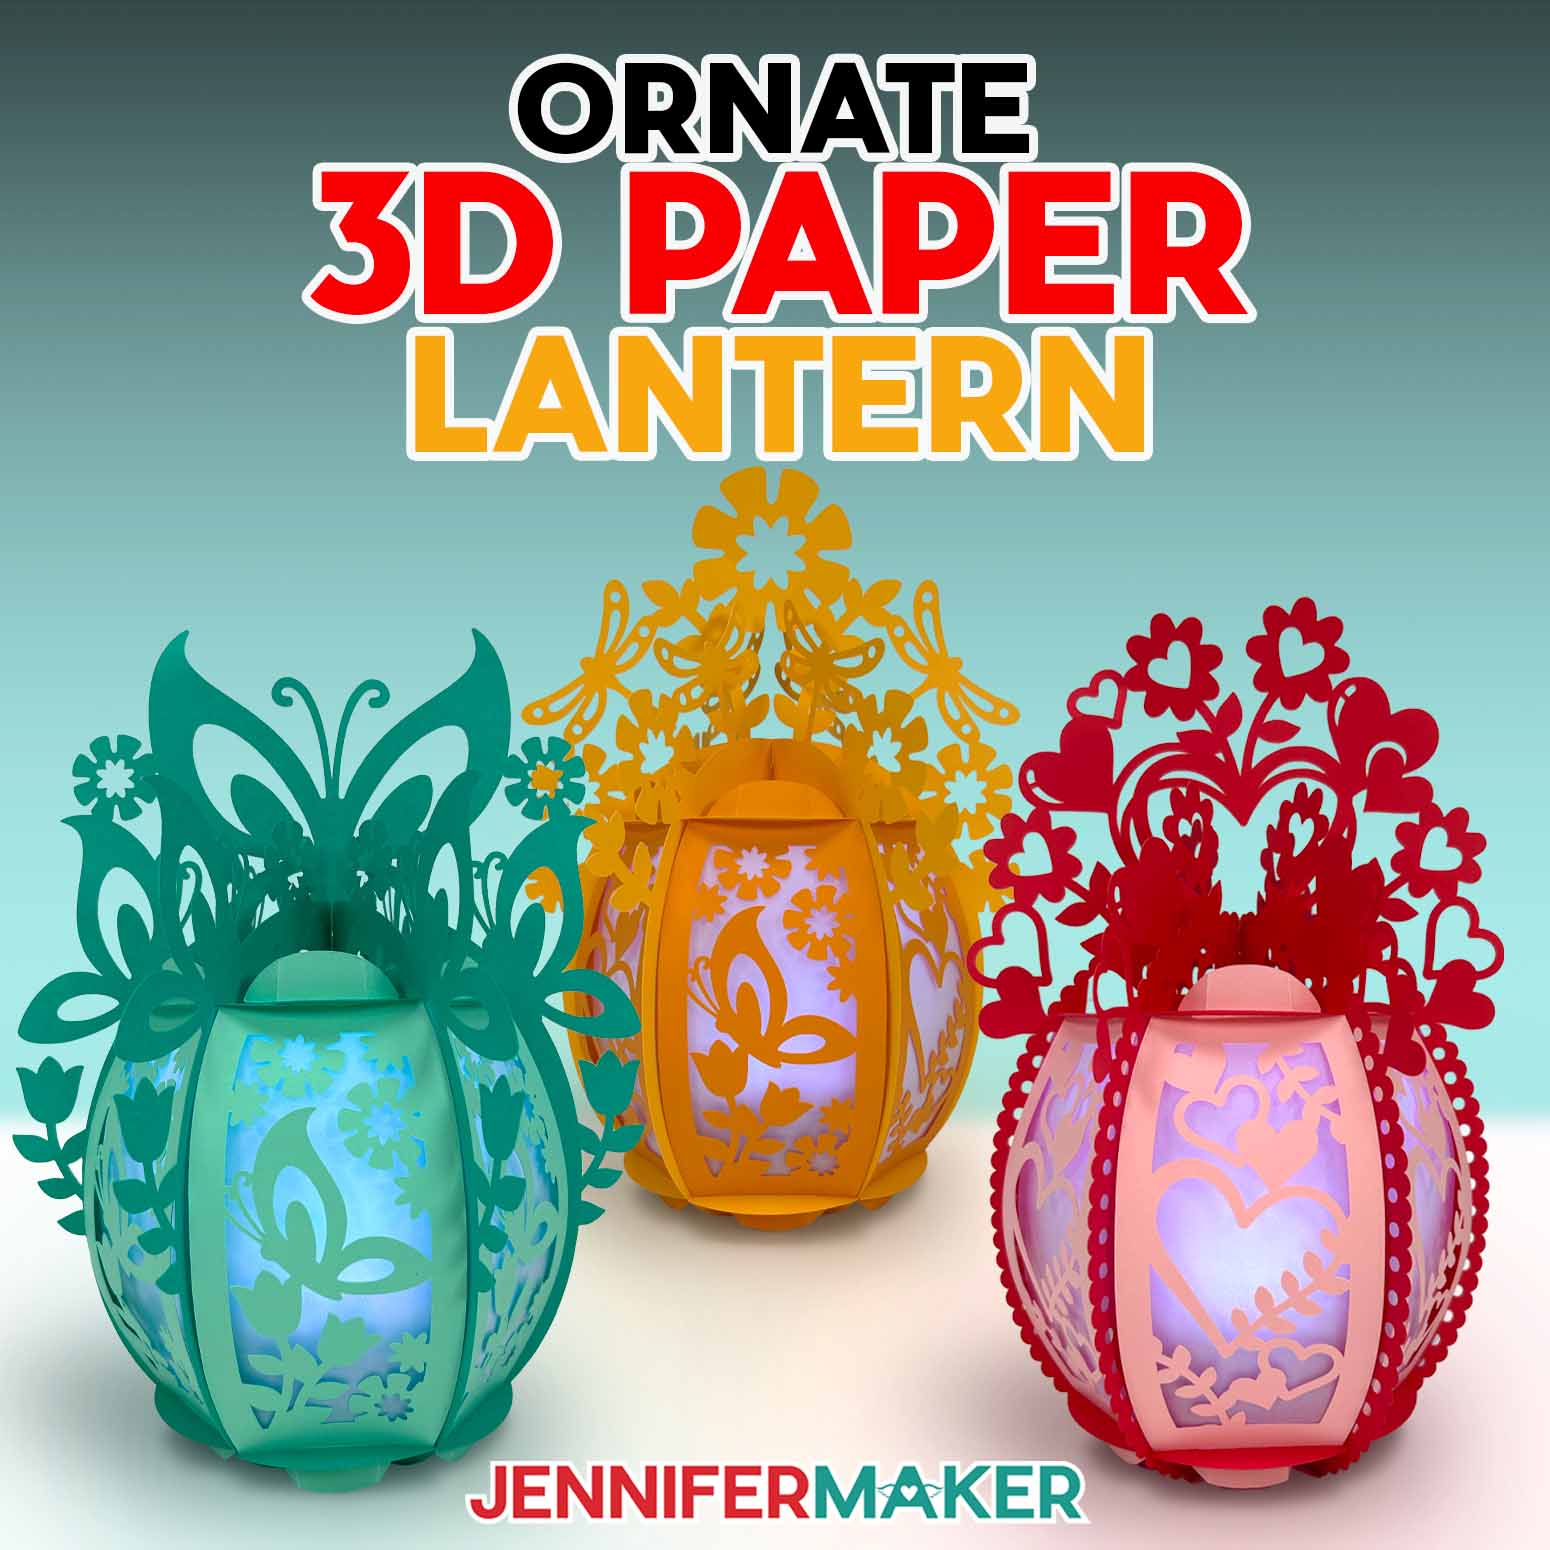
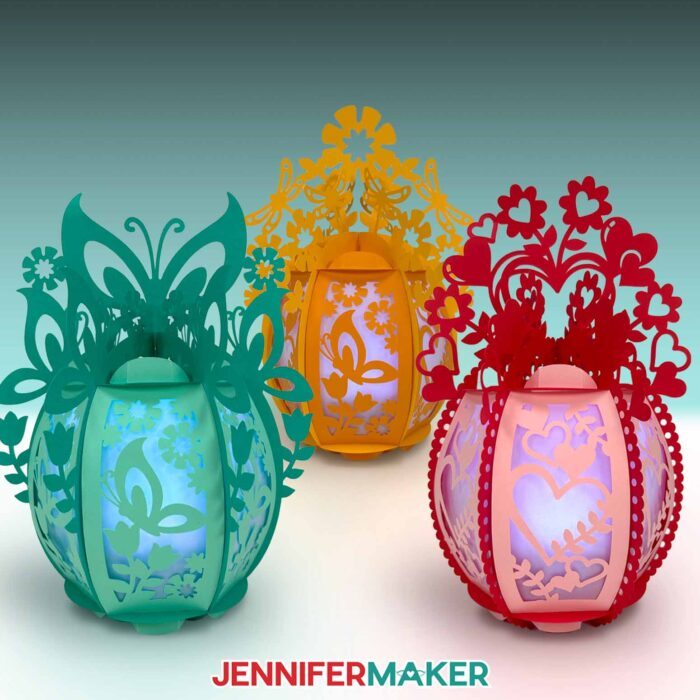
Learn how to create a beautiful and ornate 3D paper lantern!
A few sheets of cut paper and LED lights can become something surprisingly elegant when all those little details shine through! Whether you’re making this ornate 3D paper lantern for seasonal décor, a special celebration, or just because you enjoy creating beautiful things, I’ll walk you through every step in my video tutorial so you can craft right along with me.
Watch the full step-by-step tutorial on how to make an ornate 3D paper lantern:

How Do You Make an Ornate 3D Paper Lantern?
You can make an ornate 3D paper lantern using cardstock, a Cricut cutting machine, diffuser paper, and LED lights. In my video tutorial, I’ll show you how to prepare my free design files in Cricut Design Space, assemble the lantern step by step, compare vellum, parchment paper, and copy paper as diffuser material, and make both the full-size lantern and the Joy-sized version.
By the end, you’ll know exactly how everything fits together, from the first cut to the final assembly of my hearts and butterflies designs.
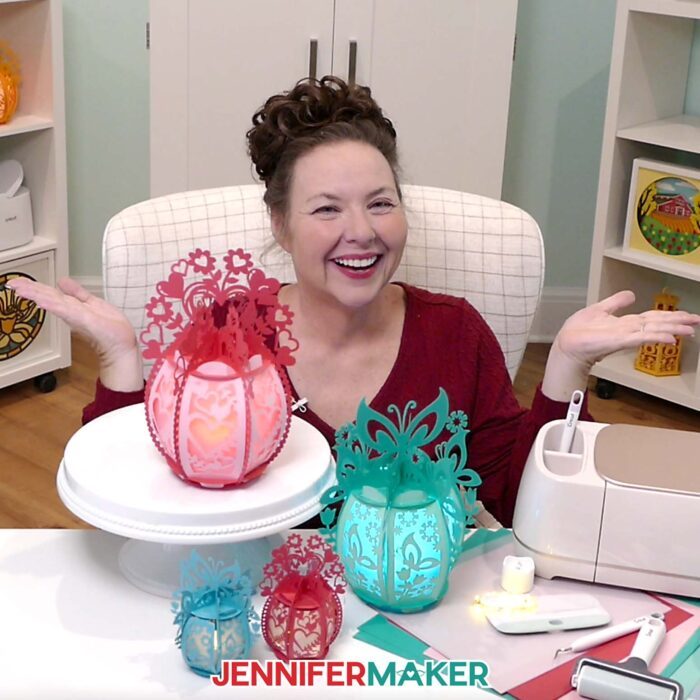
What Materials Do You Need to Make an Ornate 3D Paper Lantern?
This project uses just a handful of supplies, but choosing the right materials makes a big difference in your finished lantern.
You’ll need:
- Solid-core cardstock
- Diffuser material like vellum, parchment paper, or copy paper
- LED fairy lights, a tea light, or a puck light (no flames!)
- A Cricut Maker, Joy, or another compatible cutting machine
- A blue LightGrip machine mat for vellum
- A green StandardGrip machine mat for cardstock
In the tutorial, I explain why solid-core cardstock gives the cleanest results and how choosing the right thickness of paper helps your lantern stay sturdy while still cutting the intricate details beautifully.
How Do You Assemble the Lantern?
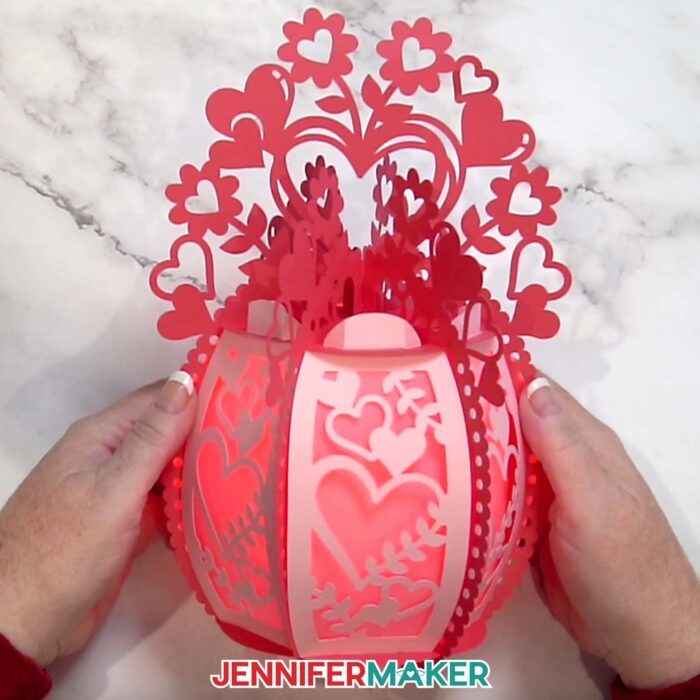
The assembly process is much easier when you can watch each step. In the tutorial, I’ll show you how to build the lantern’s frame, prepare the decorative panels, insert the diffuser material, add your lighting, and complete the final assembly. I’ll also explain the differences between the full-size lantern and the Joy-sized version so you can confidently make either one.
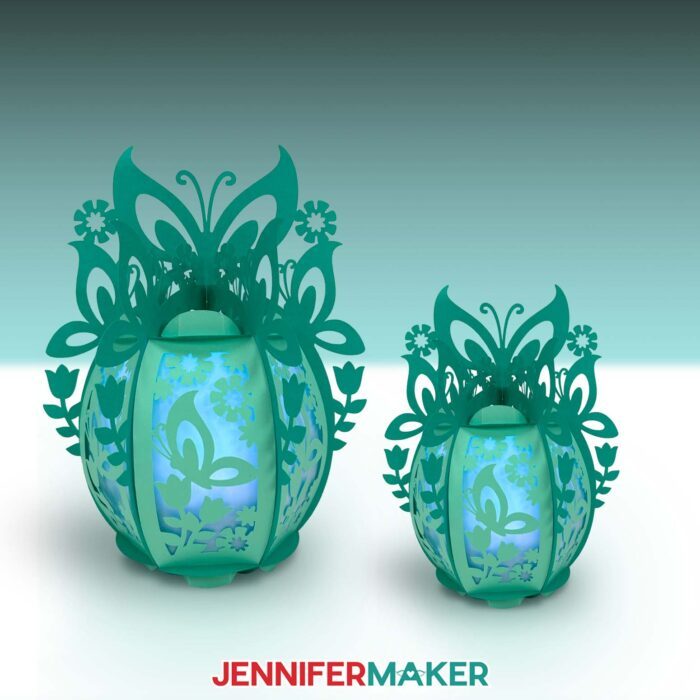
How Can You Customize Your Paper Lantern?
One of my favorite things about these paper lanterns is how easy they are to personalize.
Try different colors of cardstock to match the season or your décor. Or, experiment with diffuser materials to create a brighter or softer glow. Once you’ve made your first one, you’ll start imagining all kinds of different designs and color combinations.
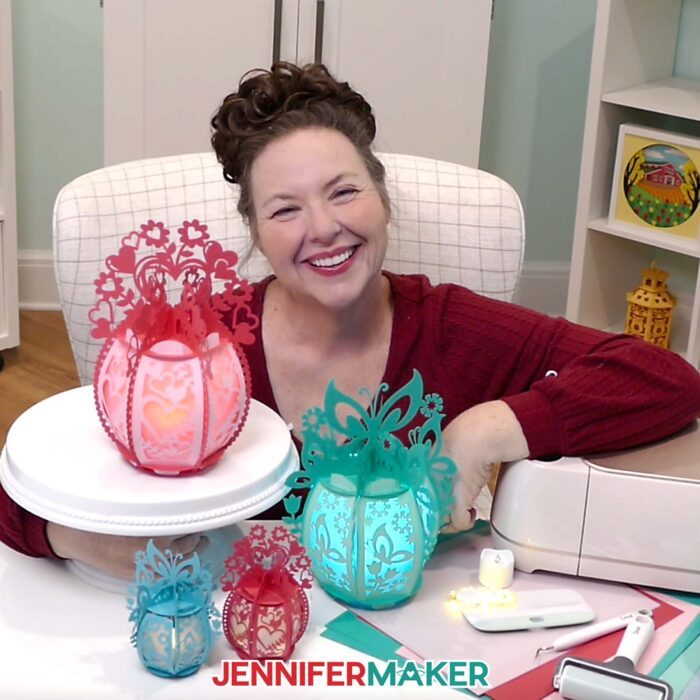
Want to Create Your Own Lantern Designs?
If you enjoy projects like this and want to grow your crafting skills even more, be sure to check out the coordinating ADVANCE tutorial. I’ll show you how to customize the outer frame of your lantern so you can create a one-of-a-kind luminary!
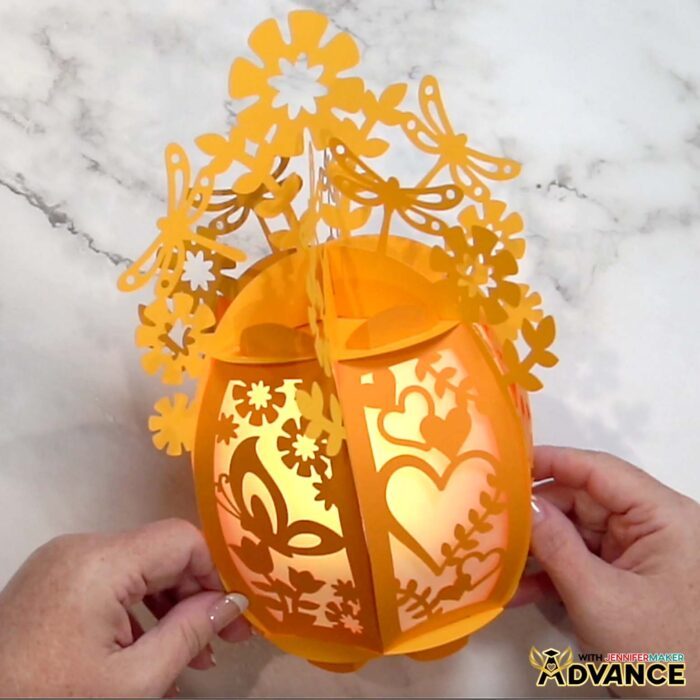
Inside ADVANCE, I teach additional techniques and customization ideas that build on projects like this while helping you feel more confident creating and personalizing your own crafts. If you’ve ever wanted to move beyond simply cutting SVGs and start creating projects that reflect your own style and ideas, ADVANCE is the perfect next step. Learn more about ADVANCE with JenniferMaker here!
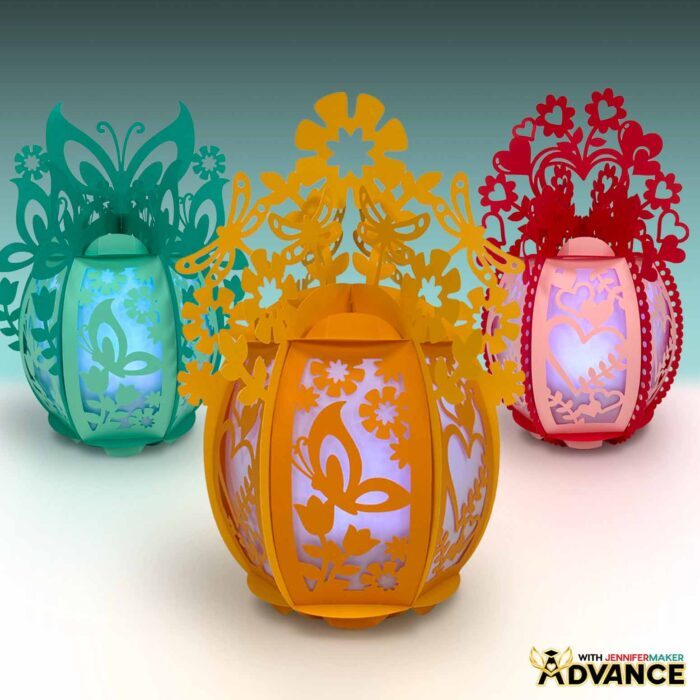
Get the Ornate 3D Paper Lantern Designs
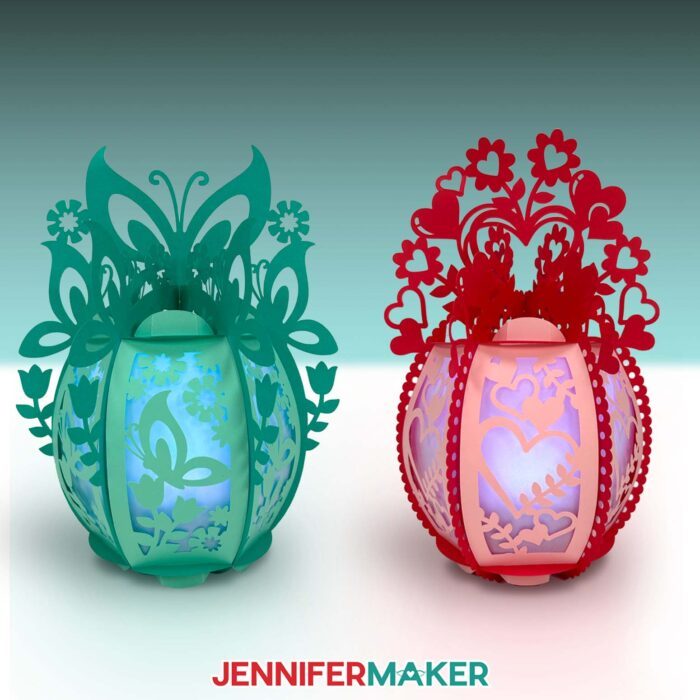
I’ve created two ornate 3D paper lantern designs you can use to make this project. The files include designs for cutting with a Cricut or other cutting machines, plus printable versions if you prefer to cut by hand.
The written tutorial below will show you how to prepare the pieces and assemble them into an amazing three-dimensional lantern. You can also follow along with the video tutorial to see the full process in action.
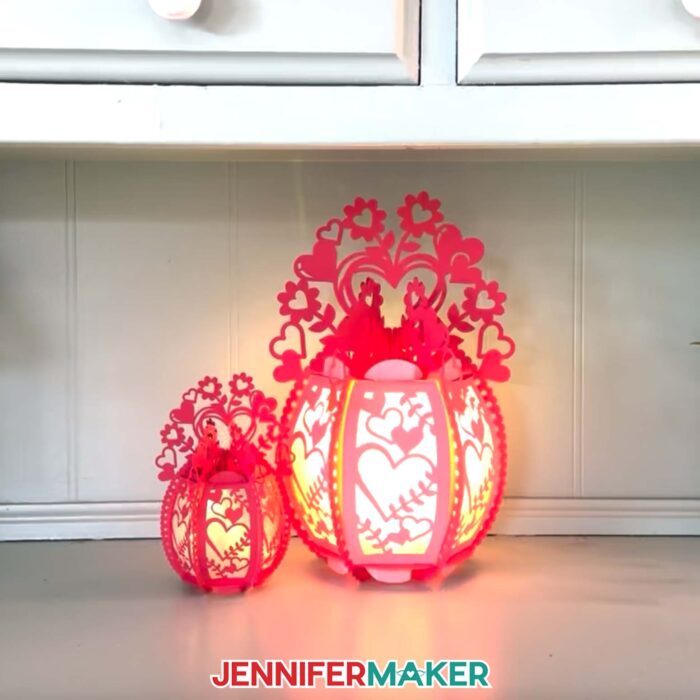
Do you want to learn how to make an ornate 3D paper lantern? Let me show you how fun and easy it is! This post contains some affiliate links for your convenience (which means if you make a purchase after clicking a link I will earn a small commission but it won’t cost you a penny more)! Read my full disclosure policy.
Materials to Make an Ornate 3D Paper Lantern
View my Amazon shopping list with the exact items I used.
- Three to Six (3-6) Sheets of 8.5″ x 11″ or 12″ x 12″ 65 lb. Solid Core Cardstock (any colors)
- One to Two (1-2) Sheets of 12″ x 12″ or 8.5″ x 11″ Vellum (for optional diffuser panels)
- One (1) Strand of LED Fairy Lights -OR-
- One (1) Remote-Controlled LED Tea Light -OR-
- One (1) Remote-Controlled Puck Light (only for the full-size lantern, too large to fit in the Cricut Joy-sized lantern) -AND-
- Three (3) AAA Batteries (for LED puck lighting)
- Cricut Green StandardGrip Machine Mat 12″ x 12″
- Cricut Blue LightGrip Machine Mat 12″ x 12″ (for optional diffuser pieces)
- Cricut Joy StandardGrip and LightGrip Machine Mats (optional for Joy-size lantern)
- Scoring Stylus -OR- Single Scoring Wheel (optional for files with score lines)
- Brayer
- Spatula
- Scraper
- Weeding Tool (optional for poking out small cutouts)
- Tweezers (optional)
- Design #794 (My free SVG/DXF/PDF design files are available in my free library – get the password by filling out the form at the bottom of this page)
How to Make an Ornate 3D Paper Lantern
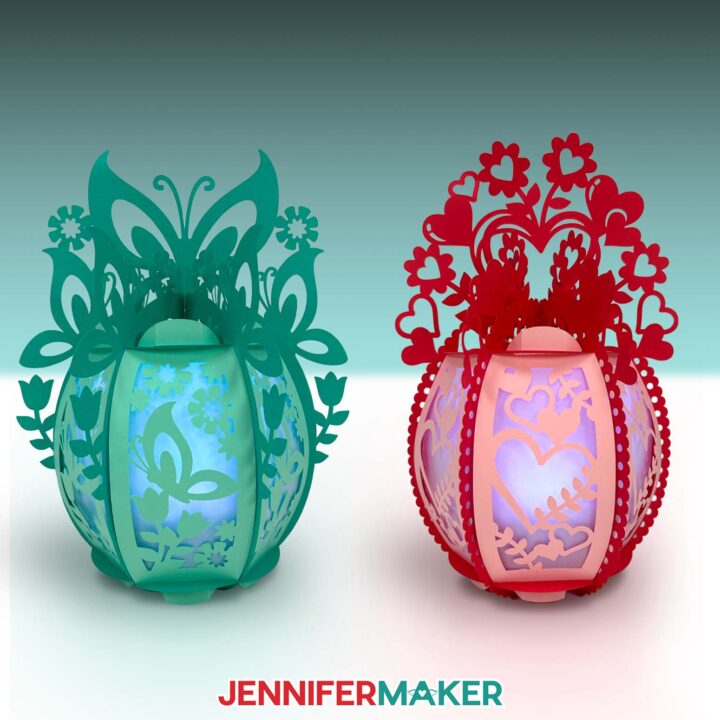
Ornate 3D Paper Lantern
Learn how to make an ornate 3D paper lantern with intersecting elements on the outside!
Materials
- Three to Six (3-6) Sheets of 8.5” x 11” or 12" x 12" 65 lb. Solid Core Cardstock (any colors)
- One to Two (1-2) Sheets of 12" x 12" or 8.5” x 11” Vellum (for optional diffuser panels)
- One (1) Strand of LED Fairy Lights -OR-
- One (1) Remote-Controlled LED Tea Light -OR-
- One (1) Remote-Controlled LED Puck Light (only for the full-size lantern, too large to fit in the Cricut Joy-size lantern)
- Three (3) AAA Batteries (for LED puck light)
- Design #794 (My free SVG/PDF/DXF design files are available in my free resource library - get the password by filling out the form at the bottom of this page)
Tools
- A way to cut your materials - I’m using the Cricut Maker 4, but you can use any Cricut Maker Series machine, a Cricut Explore Series machine, the Cricut Venture, the Cricut Joy Xtra, Cricut Joy 2, or the Cricut Joy.
- Cricut Green StandardGrip Machine Mat 12" x 12"
- Cricut Blue LightGrip Machine Mat 12" x 12" (optional for diffuser pieces)
- Cricut Joy StandardGrip and LightGrip Machine Mats (optional for Joy-size lantern)
- Scoring Stylus (optional for files with score lines) -OR-
- Single Scoring Wheel (optional for files with score lines)
- Brayer
- Spatula
- Scraper
- Weeding Tool (optional for poking out small cutouts)
- Tweezers (optional)
Instructions
STEP 1: GET MY FREE ORNATE 3D LANTERN DESIGNS
First, download my Ornate 3D Paper Lantern files from my free library – look for Design #794. Alternatively, you can use the Save This Project form near the top of this post and the design link will be emailed to you.
In the SVG folder, you’ll find “score” and “no-score” versions of my butterfly and heart 3D ornate lantern designs. There is also a folder with files sized to fit the Cricut Joy.
The “score” versions require a Scoring Stylus or Single Scoring Wheel to create smooth lines for folding and alignment. If you don’t have a scoring tool, or if you prefer dashed cut lines, you can use the “no-score” versions instead.
There is also a DXF folder with cut files, and a PDF folder with versions you can print and cut by hand.
TIP: If you’re not sure how to upload, go to jennifermaker.com/svgs to learn how to unzip and upload SVG files.
STEP 2: PREPARE AND CUT YOUR ORNATE 3D LANTERN DESIGN
CRICUT DESIGN SPACE
- In Cricut Design Space, open a blank Canvas.
NOTE: If you’re new to using Cricut Design Space, go to cricutkickoff.com for my introductory tutorial on Design Space basics. - Click “Upload” and then “Upload Image.”
- Click “Browse” and select the lantern SVG file you want to use.
NOTE: I’ll demonstrate with the main “score” version of the heart design. - Click “Open,” and then “Continue.”
- Click “Upload” to add the design to your Canvas.
TIP: You can click the minus (-) icon in the lower left corner to zoom out and see everything on your canvas.
- Click “Save” and give your project a name so you can find it easily.
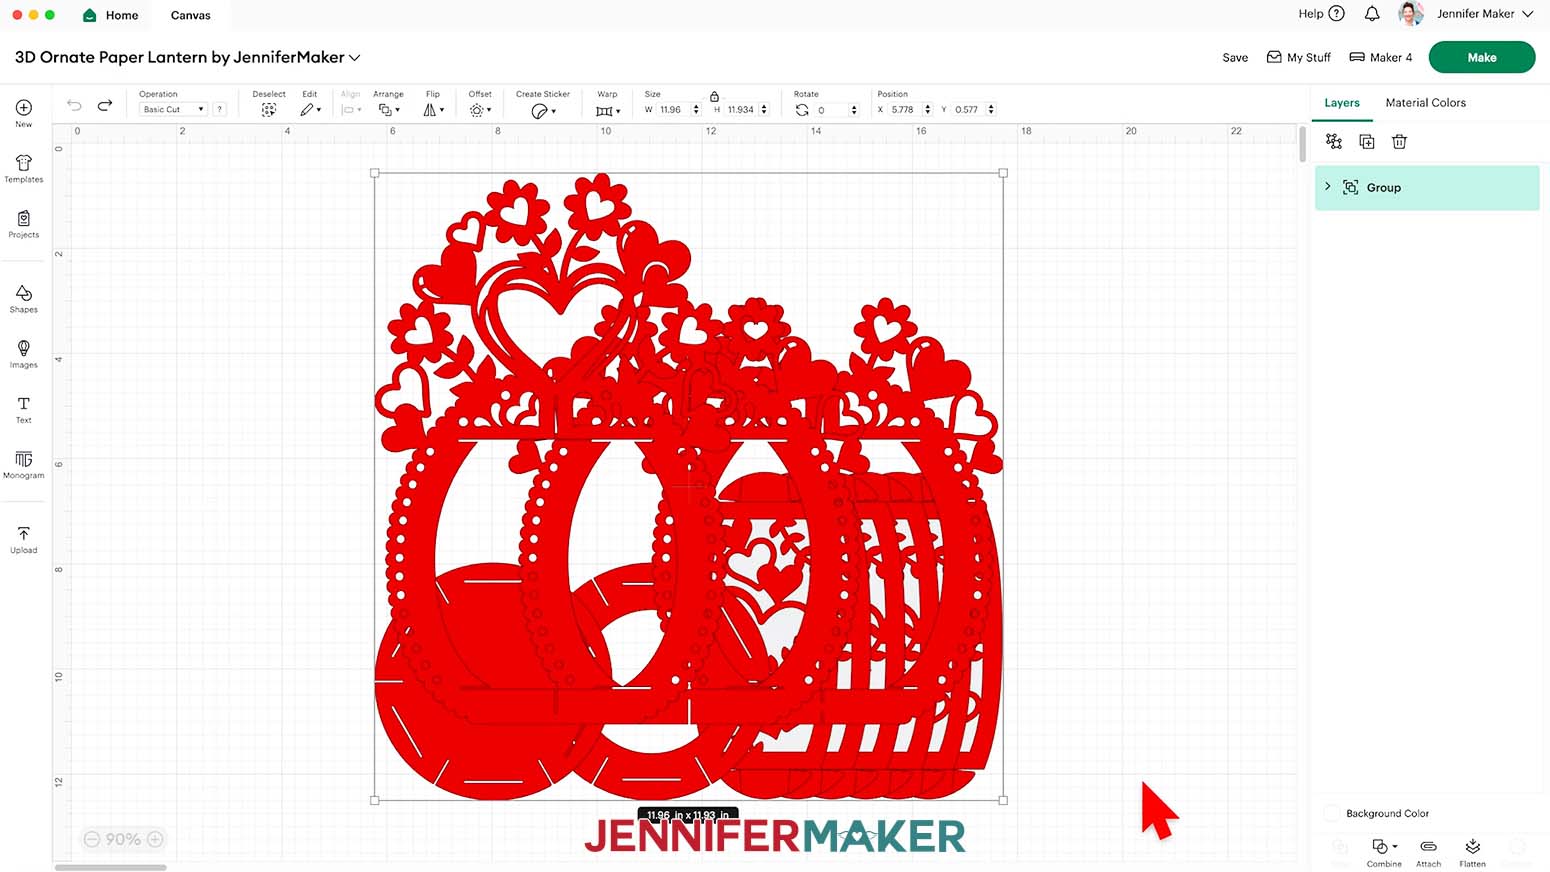
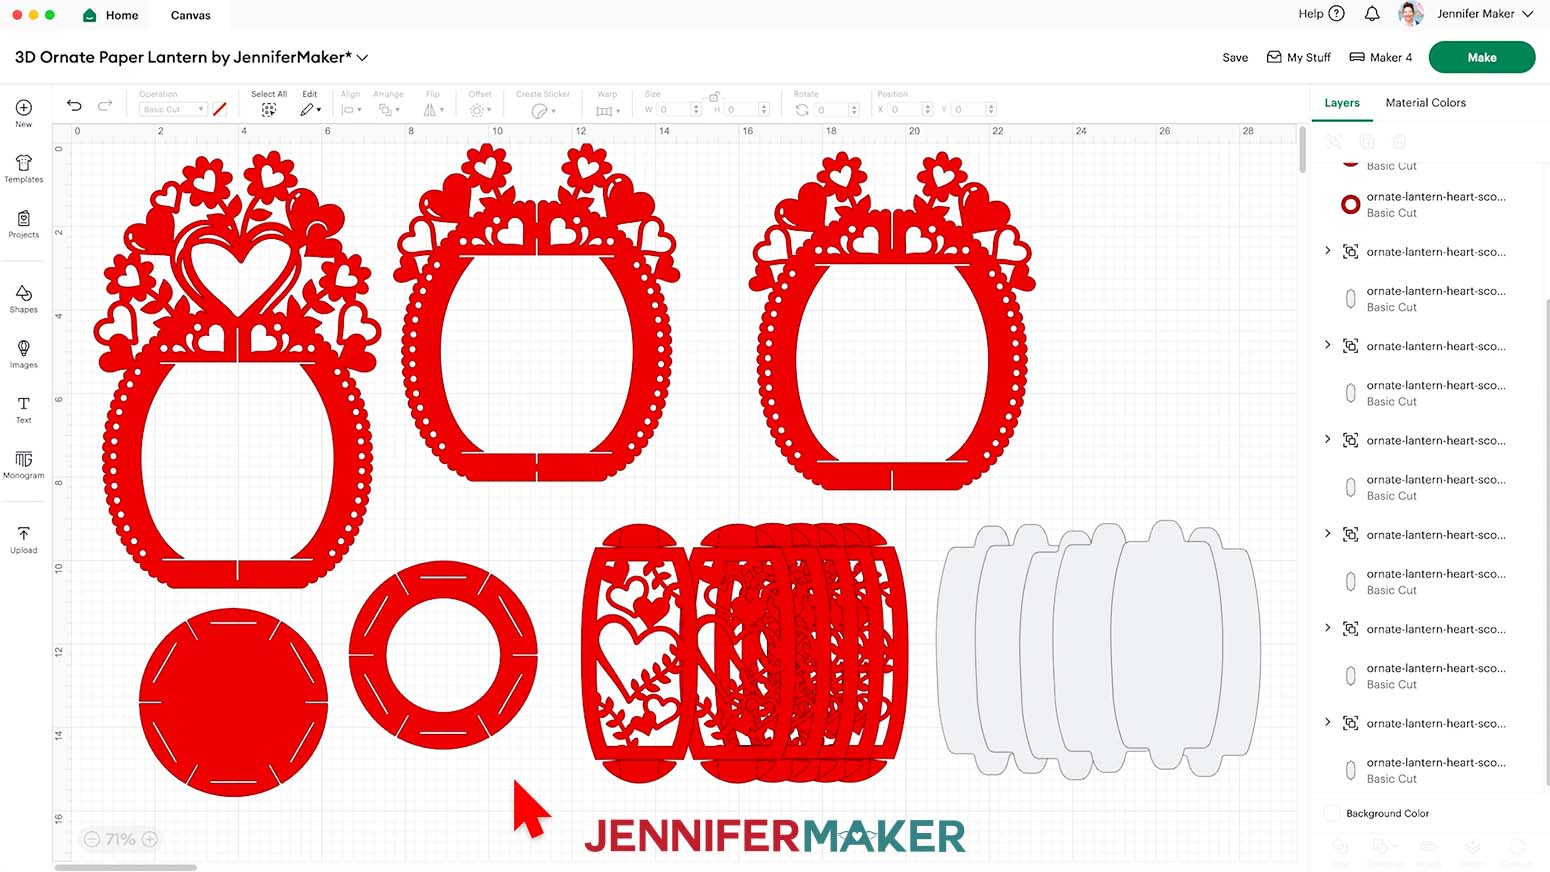
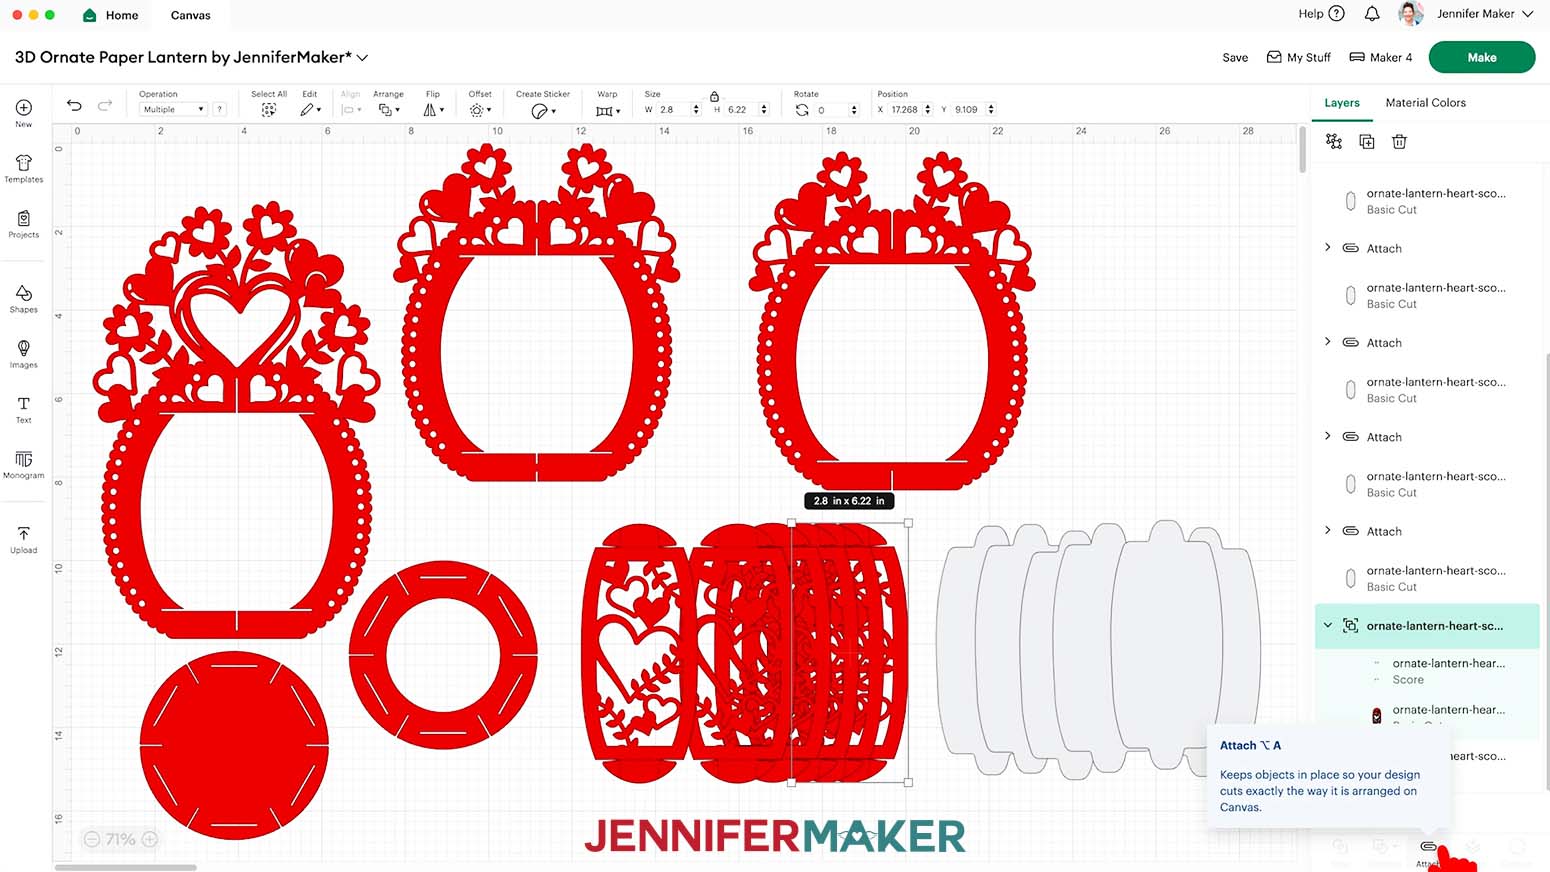
- “Ungroup” the design to work with the elements separately. You can drag them apart to see everything as needed.
NOTE: On your Canvas, you have one large main frame with a large decoration, two secondary frames, two circular base pieces, six decorative panels for the lantern base, and six optional gray diffuser panels. - If you don’t want to cut the diffuser pieces, drag the decorative panels away to expose the gray diffuser layers. Select the diffuser pieces and click the “Trash” icon to delete them.
NOTE: I’ll keep the diffusers. - To change the color of a piece to match the cardstock you’ll cut it from, select the piece in the Layers Panel, click the Color Box, and choose a new color.
NOTE: I’ll keep everything red. - Next, scroll down in the Layers Panel to find six groups of panel pieces, each indicated by a small arrow.
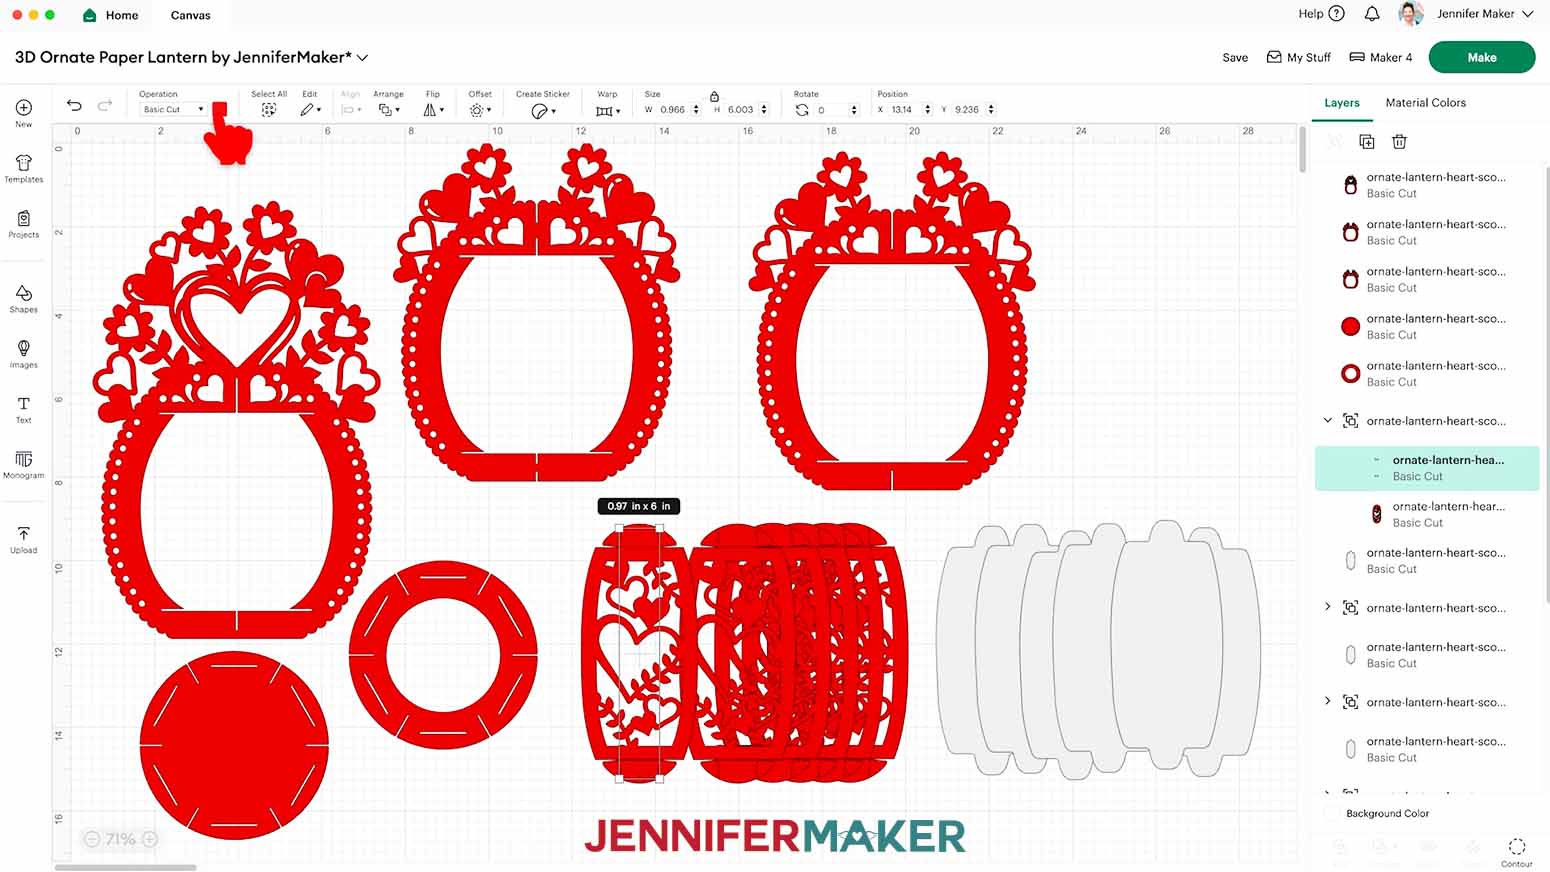
NOTE: We need to adjust these groups to make sure the score lines are made on the panel tabs correctly. - In the Layers Panel, click the arrow to expand the first panel group.
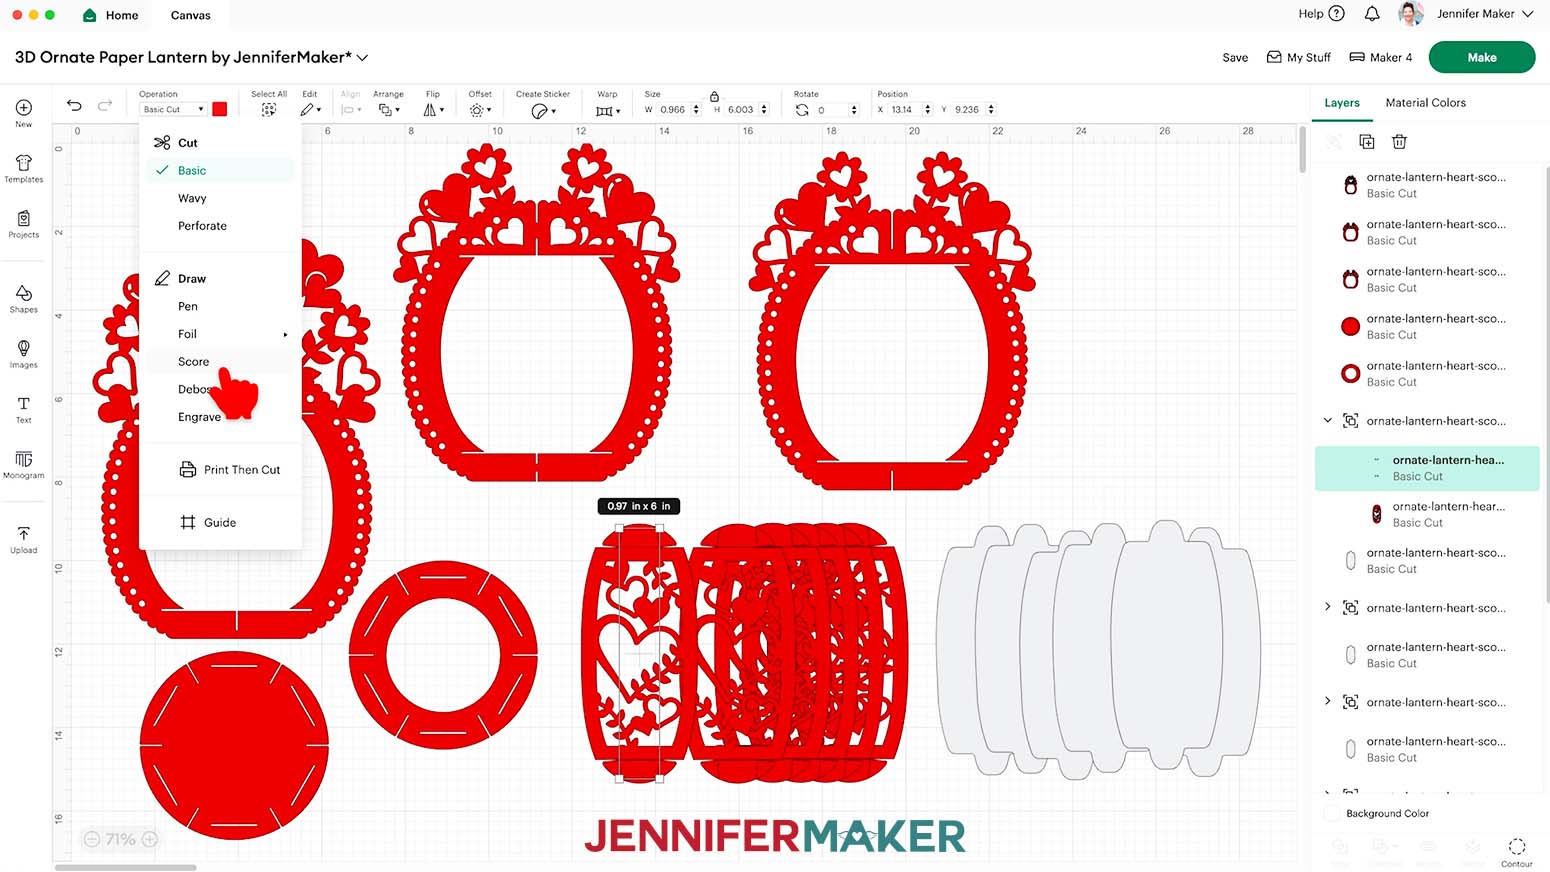
- Select the top layer with the solid lines and change it to “Score” so the Cricut knows to make the crease lines where your panel tabs will be folded.
NOTE: The score lines for this project are all red, which is reflected in the Color Box when selecting a line layer.
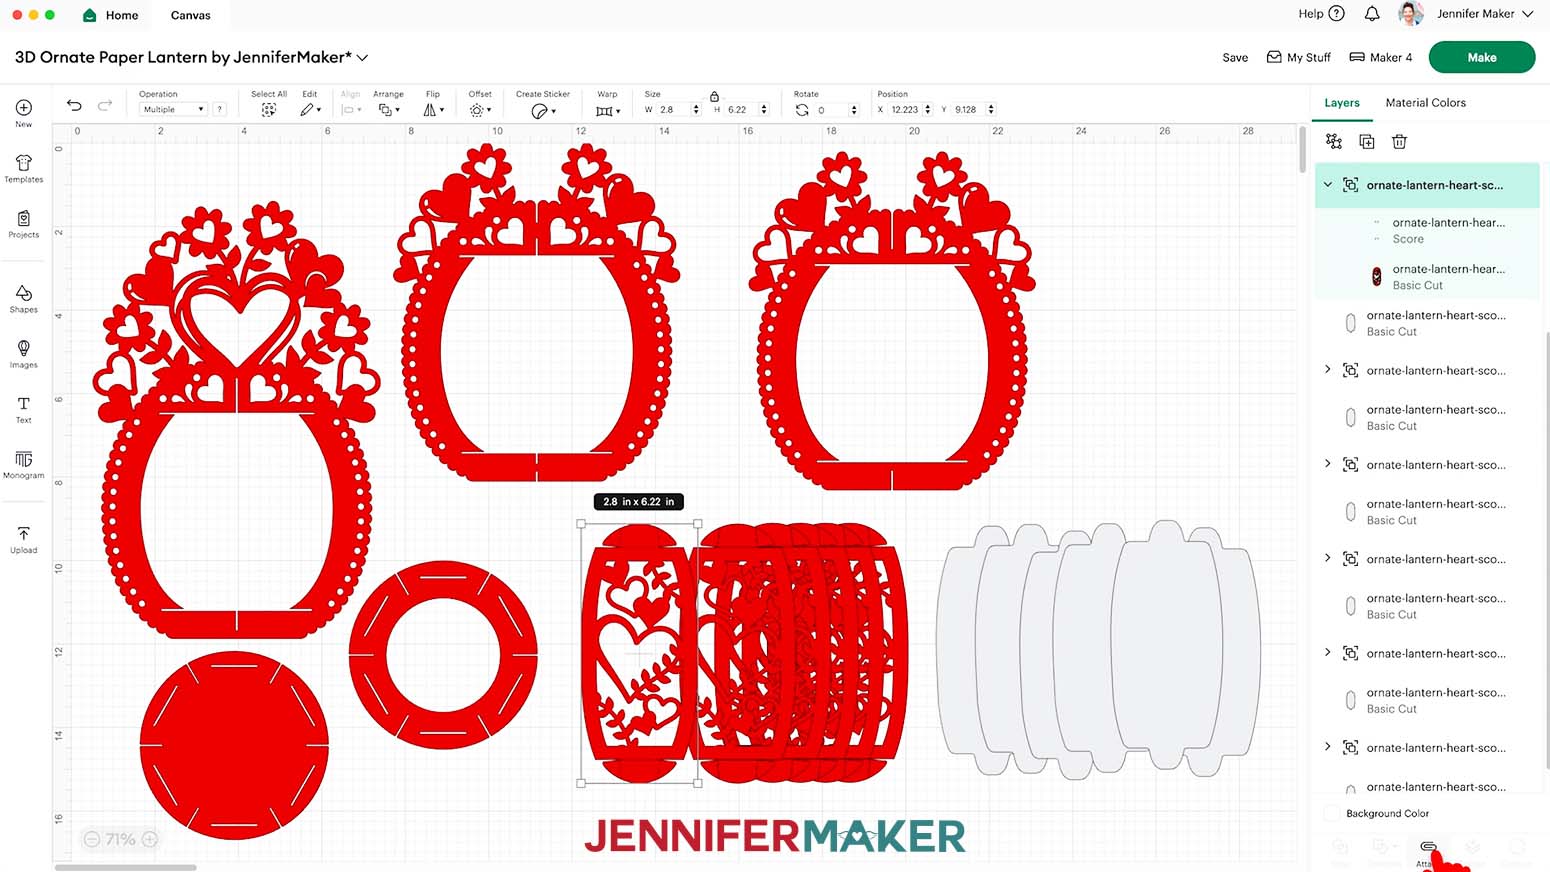
NOTE: If you’re making the “no-score” version, your crease lines are already dashed line cuts and don’t need to be changed to “Score,” so you can skip this step. - Click the group layer with the arrow to select both layers in this group, then click “Attach” to keep your score lines with your cut shape.
- Repeat Steps 11-13 for the five remaining groups of panels, changing the lines to “Score” and attaching them to their cut shapes.
- Your project is ready to cut!
CUTTING
- Make sure the correct machine is selected in the top right.
- Click “Make.”
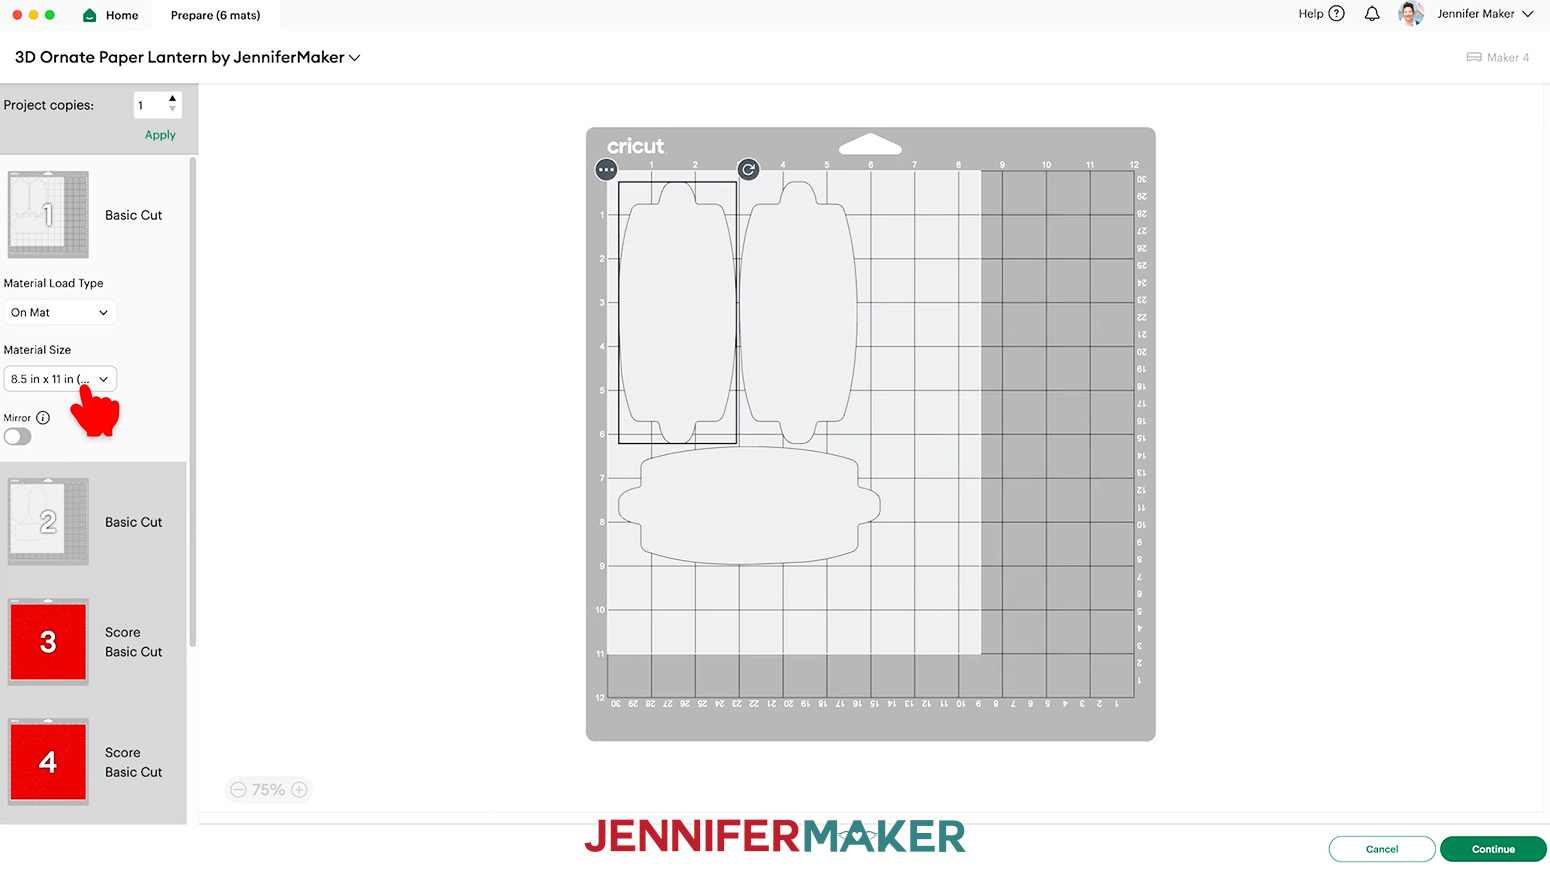
- On the Prepare screen, make sure the correct Material Size is selected for your materials.
NOTE: I’m using “8.5 in x 11 in” vellum and “12 in x 12 in” cardstock.
NOTE: If you see a mat with just lines, one or more of your score layers may not have attached correctly, so click “Cancel” to return to the Canvas and check, then adjust as needed. - Once you are satisfied with your mat layouts, select the first mat again and click “Continue.”
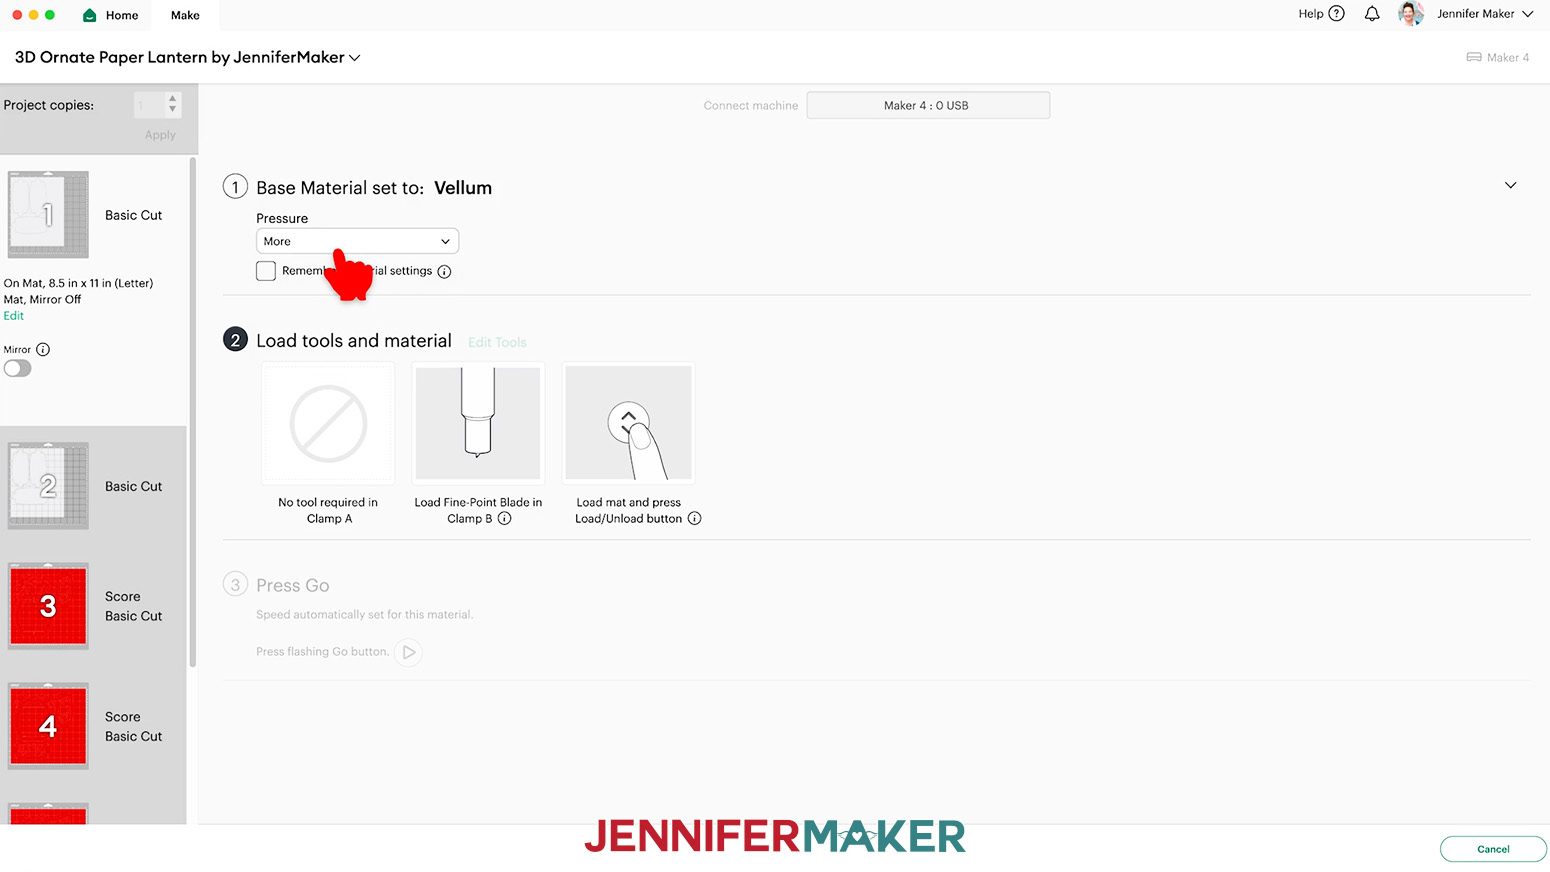
NOTE: My first mat is the gray vellum, but yours may be different if you’re not using diffusers or have changed some colors. - On the Make screen, set the Base Material for your first mat.
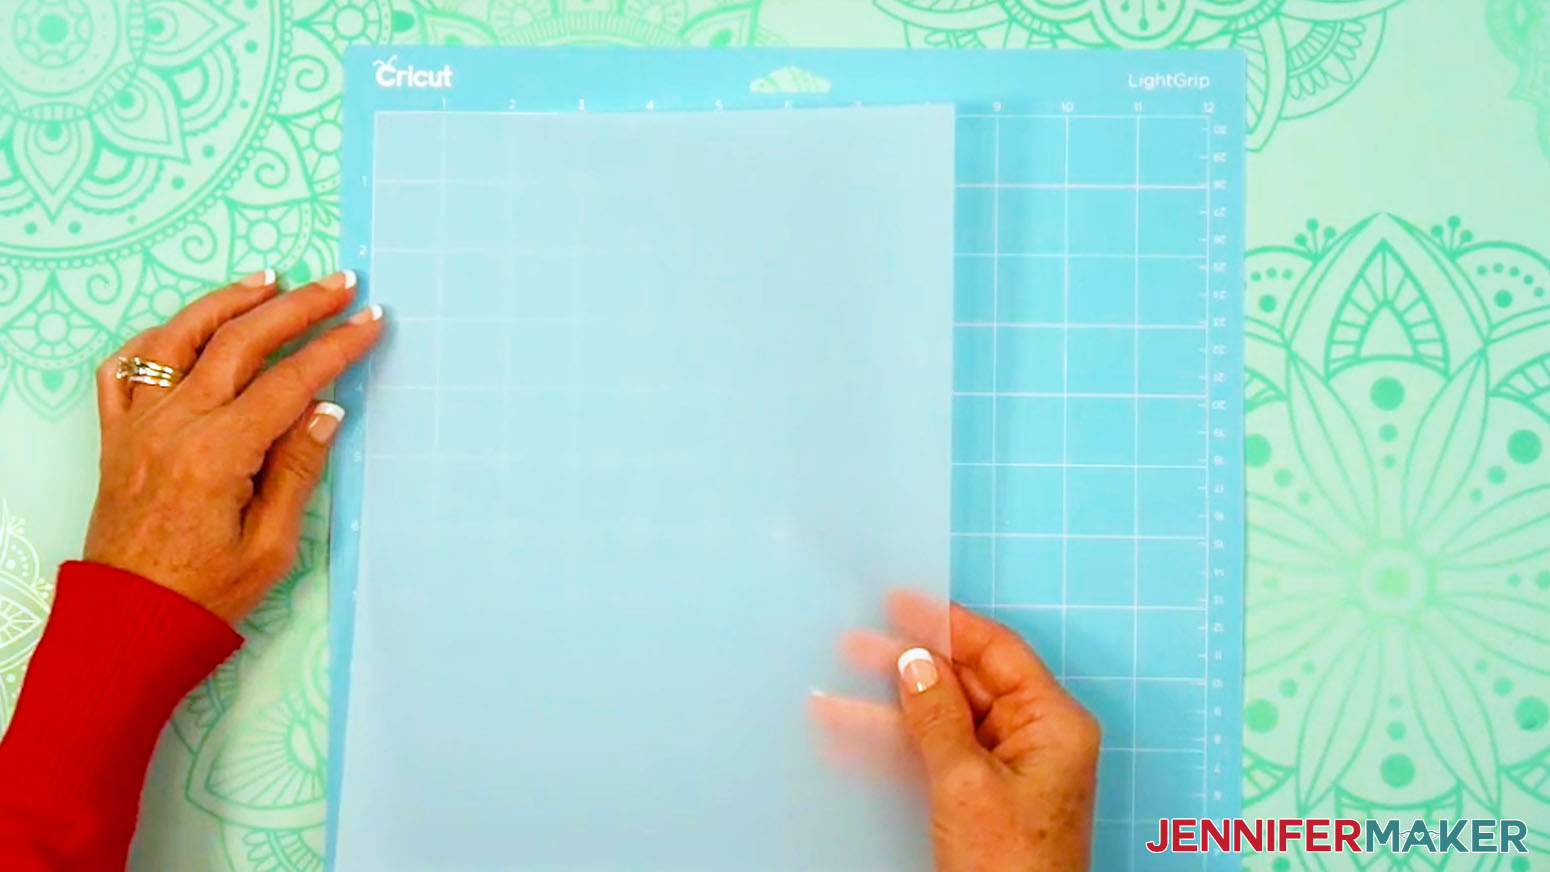
NOTE: My first mat is the gray vellum. I used the “Vellum” setting with “More” Pressure. To cut vellum on the Joy, I used the “Laser Copy Paper” setting with “Default” Pressure. - Place the vellum face up on a blue LightGrip machine mat to cover the design area on the screen.
TIP: You can also use a less sticky green StandardGrip machine mat. - Use a brayer to make sure it’s fully adhered.
- Check that your Premium Fine-Point Blade is clean and in the clamp.
- Press the flashing “Load/Unload” button to load the prepared mat into your Cricut.
- Press the flashing middle button to begin cutting.
- When it has finished cutting, don’t unload the mat right away. Gently lift a corner of the material to make sure the cuts went all the way through. If not, press the middle button again to make a second pass of cuts in the same spots.
- When the cuts are complete, unload the mat, flip it over onto your work surface, and roll it back to release the vellum.
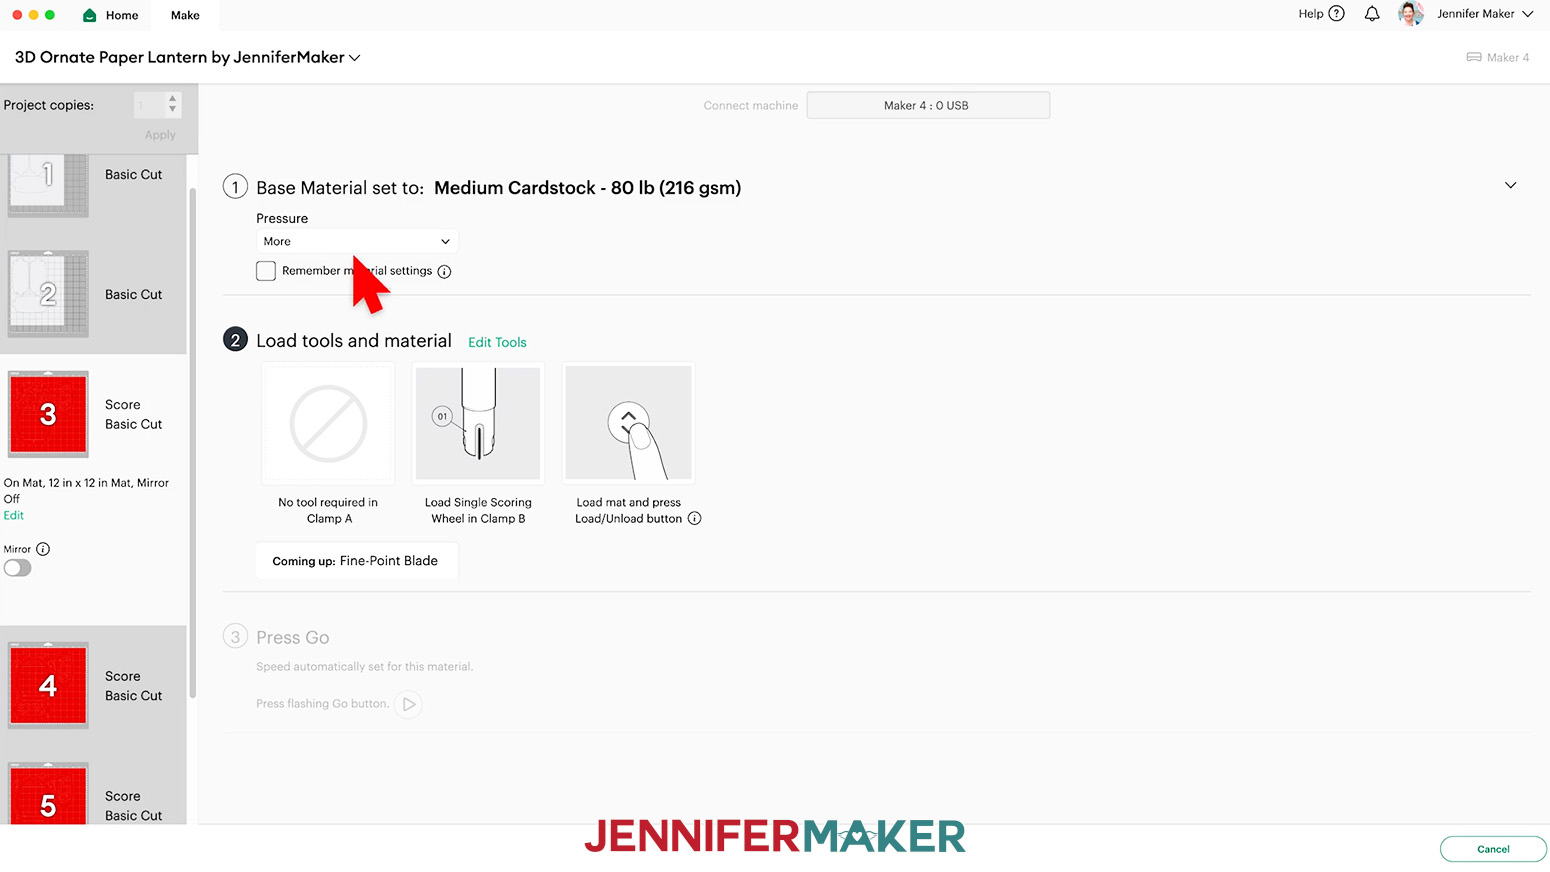
- For regular cardstock mats, I used the “Medium Cardstock - 80 lb (216 gsm)” material setting with “More” pressure for cleaner cuts.
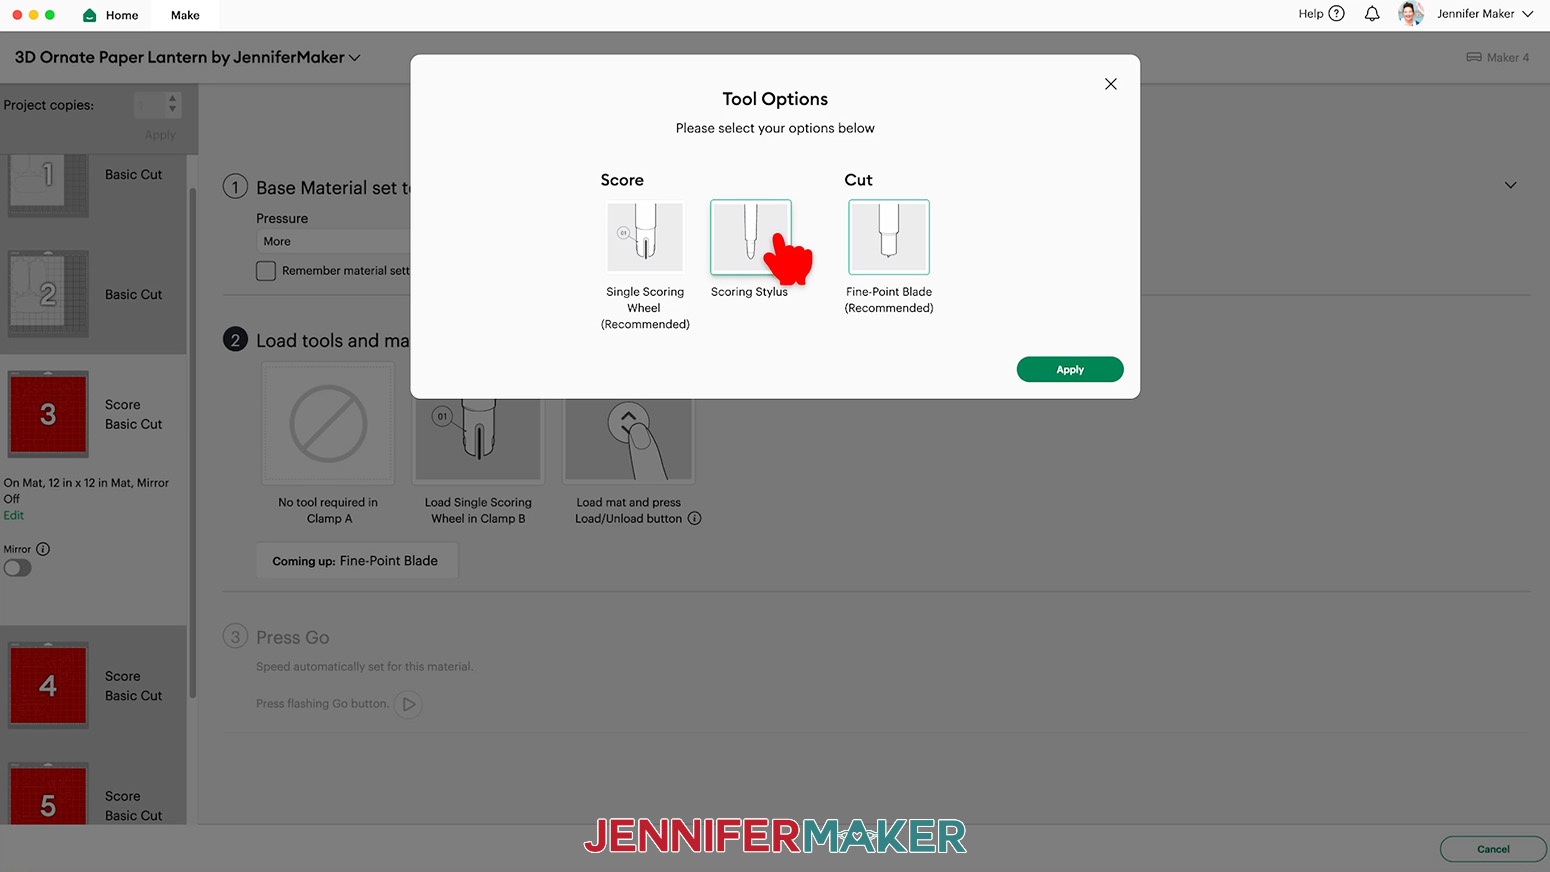
- If your mat has score lines, follow the screen prompts to select and add your scoring tool. Depending on your machine, click “Edit Tools” and select the Scoring Stylus to load both the scoring tool and the blade at the same time. Or you can select the Scoring Wheel and switch tools when prompted. Click “Apply” to close the “Edit Tools” window.
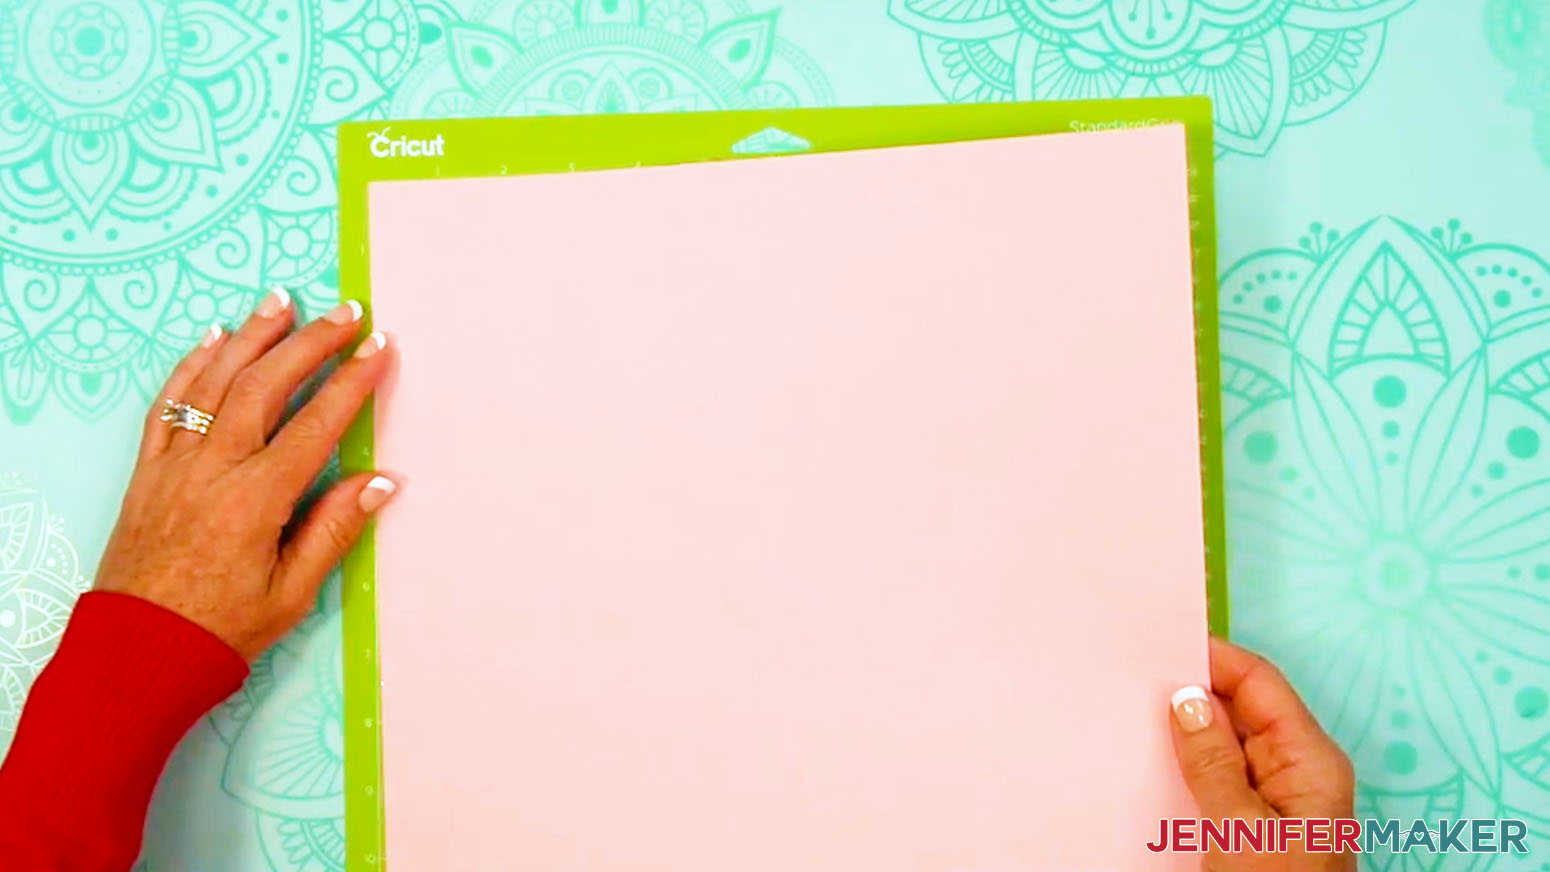
NOTE: If you’re using the “no-score” version, you won’t see the Scoring Tool prompts since all of your creases are dashed cuts. - Place your regular cardstock face up on a green StandardGrip machine mat.
- Repeat Steps 7-12 to cut your cardstock mats.
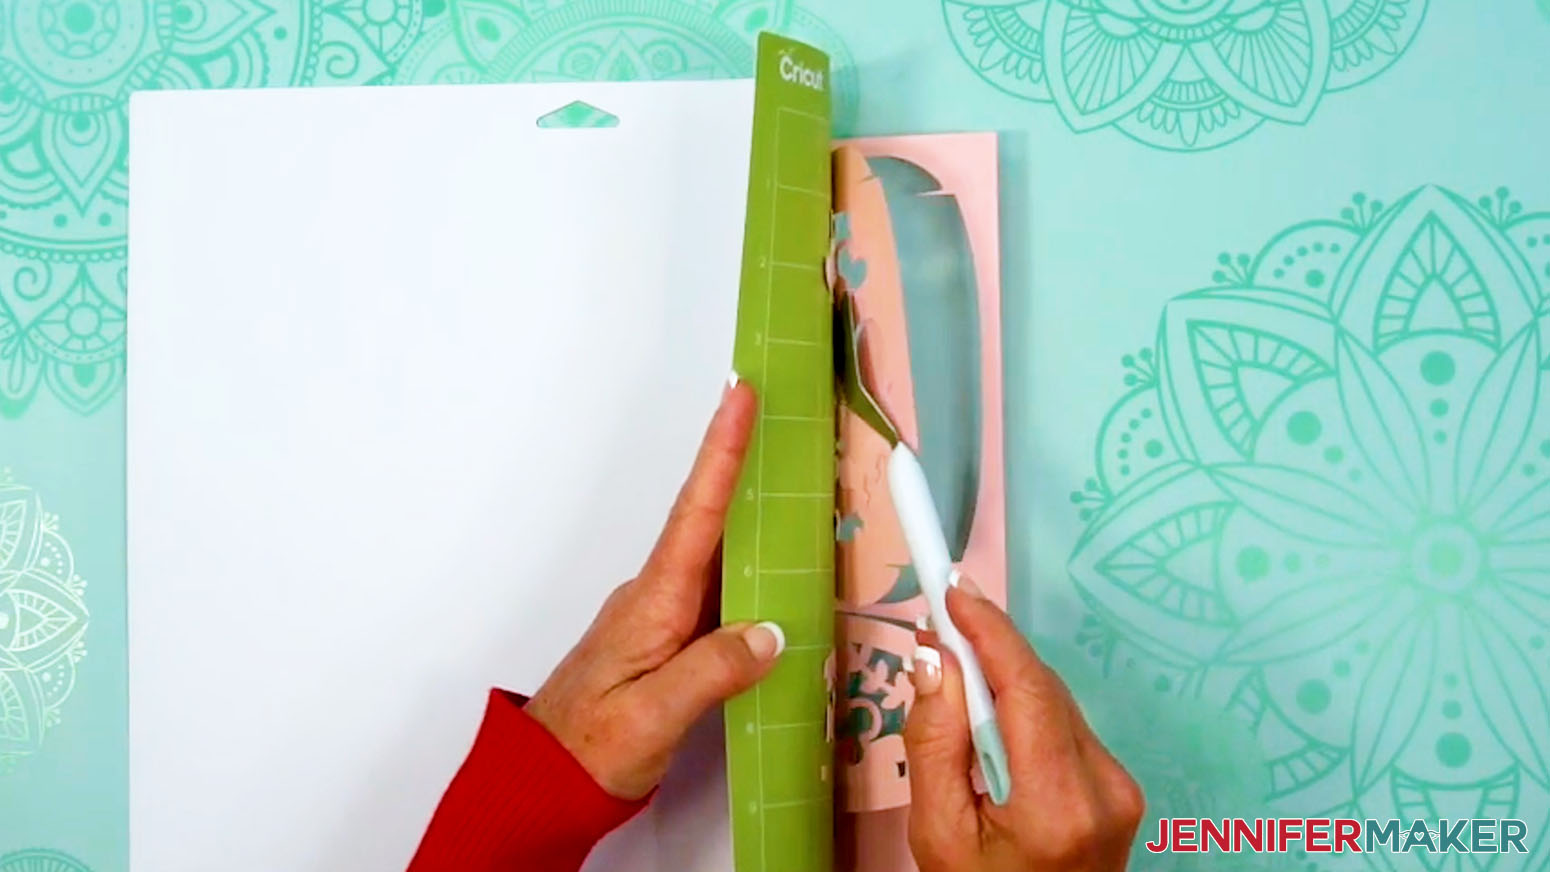
- Use the spatula to help lift delicate parts, and your weeding tool to poke out small bits of cardstock that may have been left behind.
TIP: If you have any issues with your cuts, go to jennifermaker.com/cleaner-cuts. - Use a scraper tool to remove the small bits left on your mat after you remove the cut pieces.
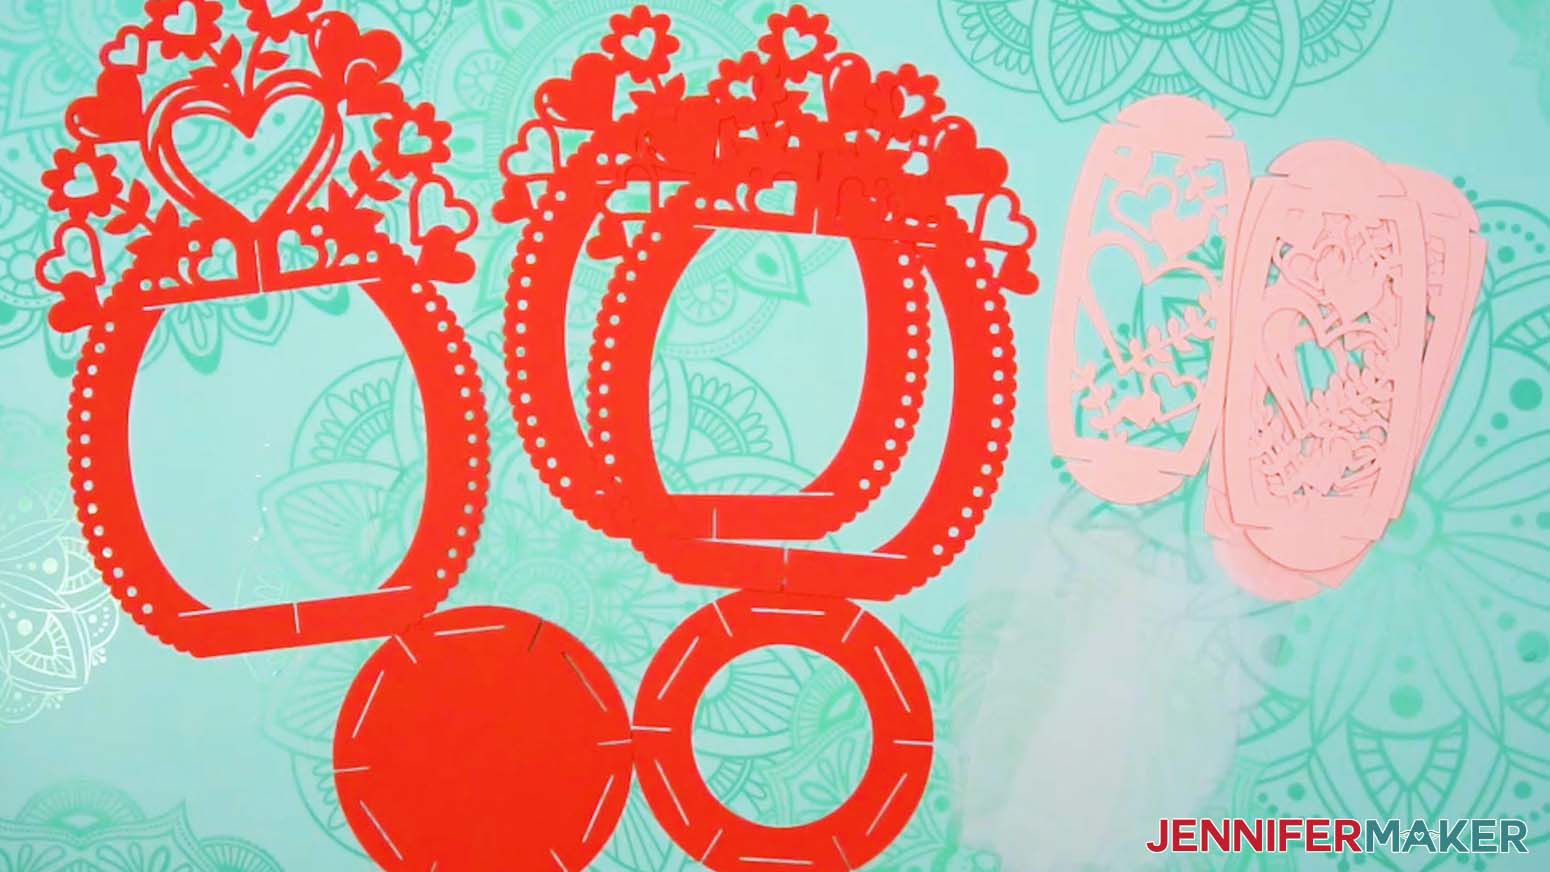
- Lay out all of the pieces face up in organized piles. You should have:
- One main frame piece with a vertical slit at the bottom of the arch
- One frame piece with slits at the top and bottom of the arch
- One frame piece with a slit at the top of the arch
- Two circular base pieces
- Six decorative panels
- Six diffuser panels (if you cut them)
TIP: Refer to the Design Space screen if you’re not sure about some pieces’ orientation.
STEP 3: ASSEMBLE YOUR ORNATE 3D LANTERN
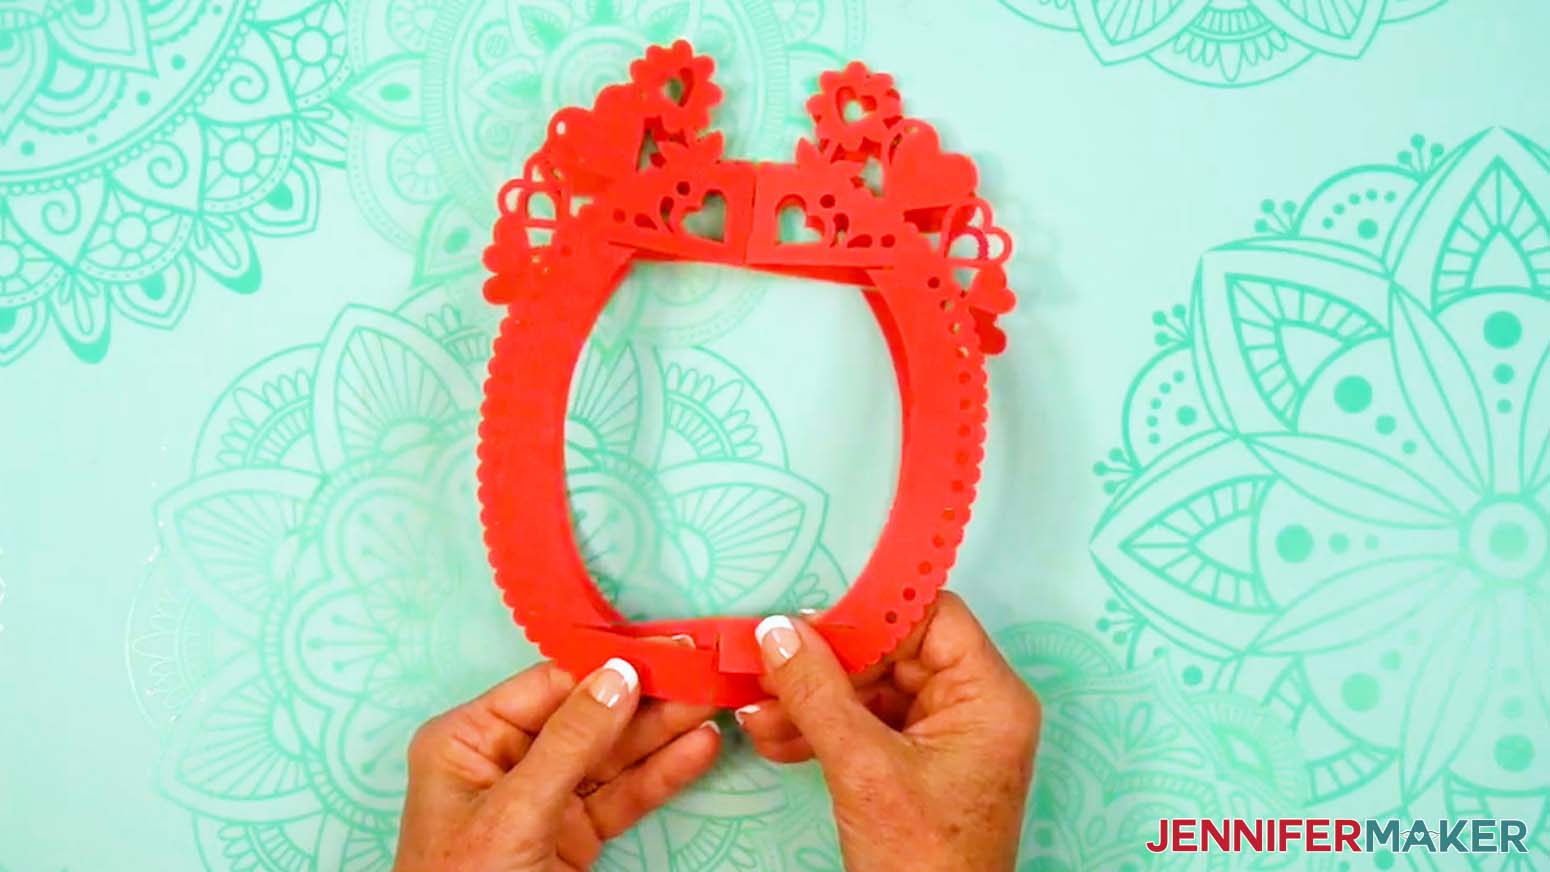
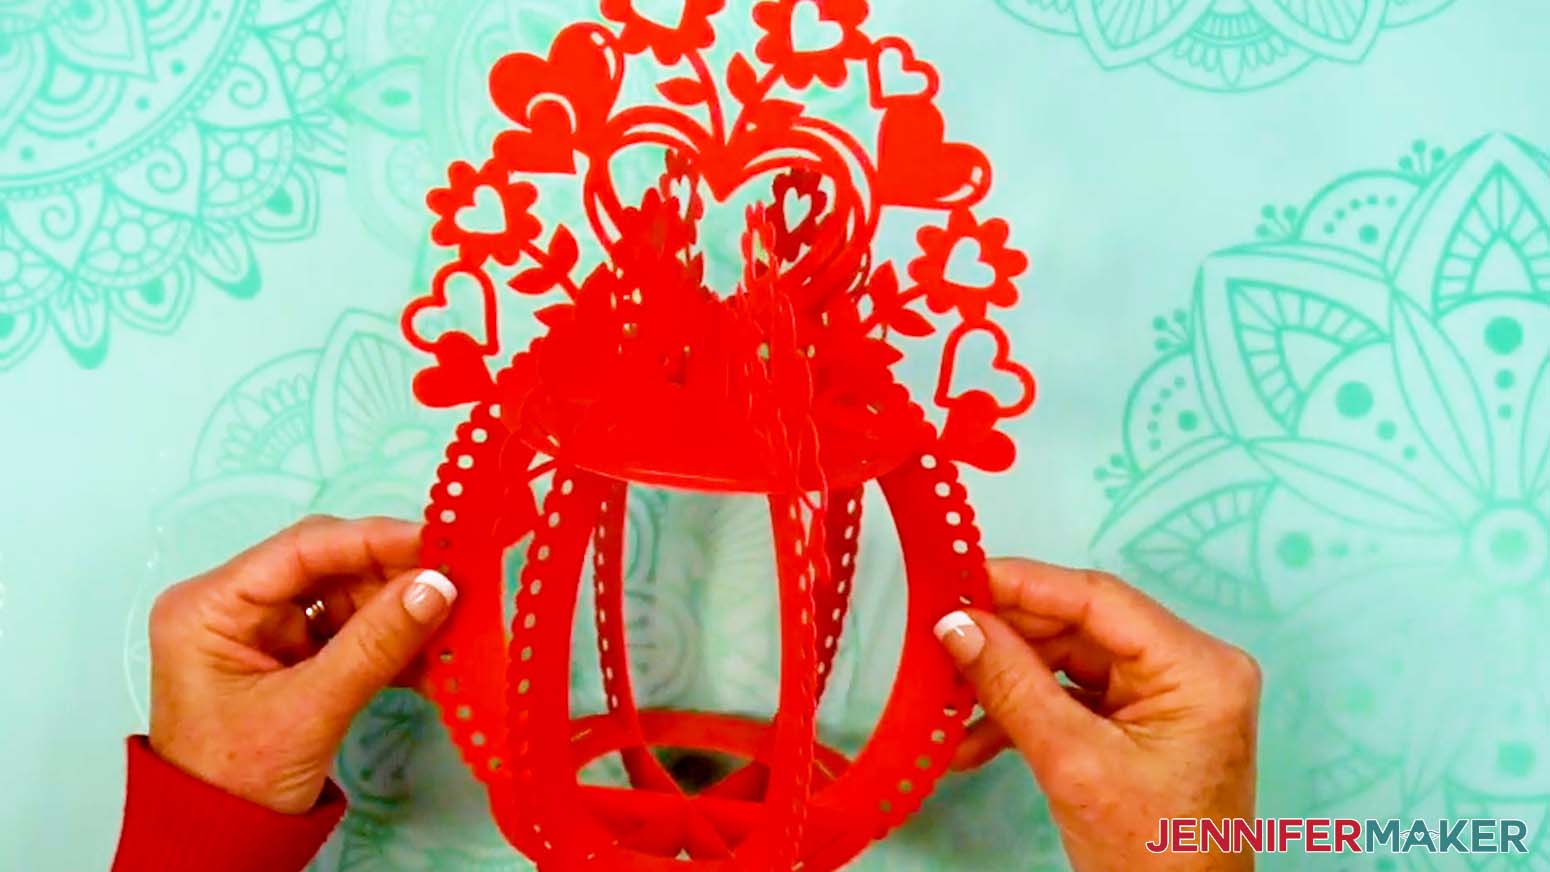
- Take the lantern frame piece with a slit at the top of the outer edge and slot it inside the frame piece with slits at the top and bottom of the edges.
NOTE: Be careful not to catch the extra elements on the frames. - Lay the two frame pieces flat against each other, then slot them into the main frame piece.
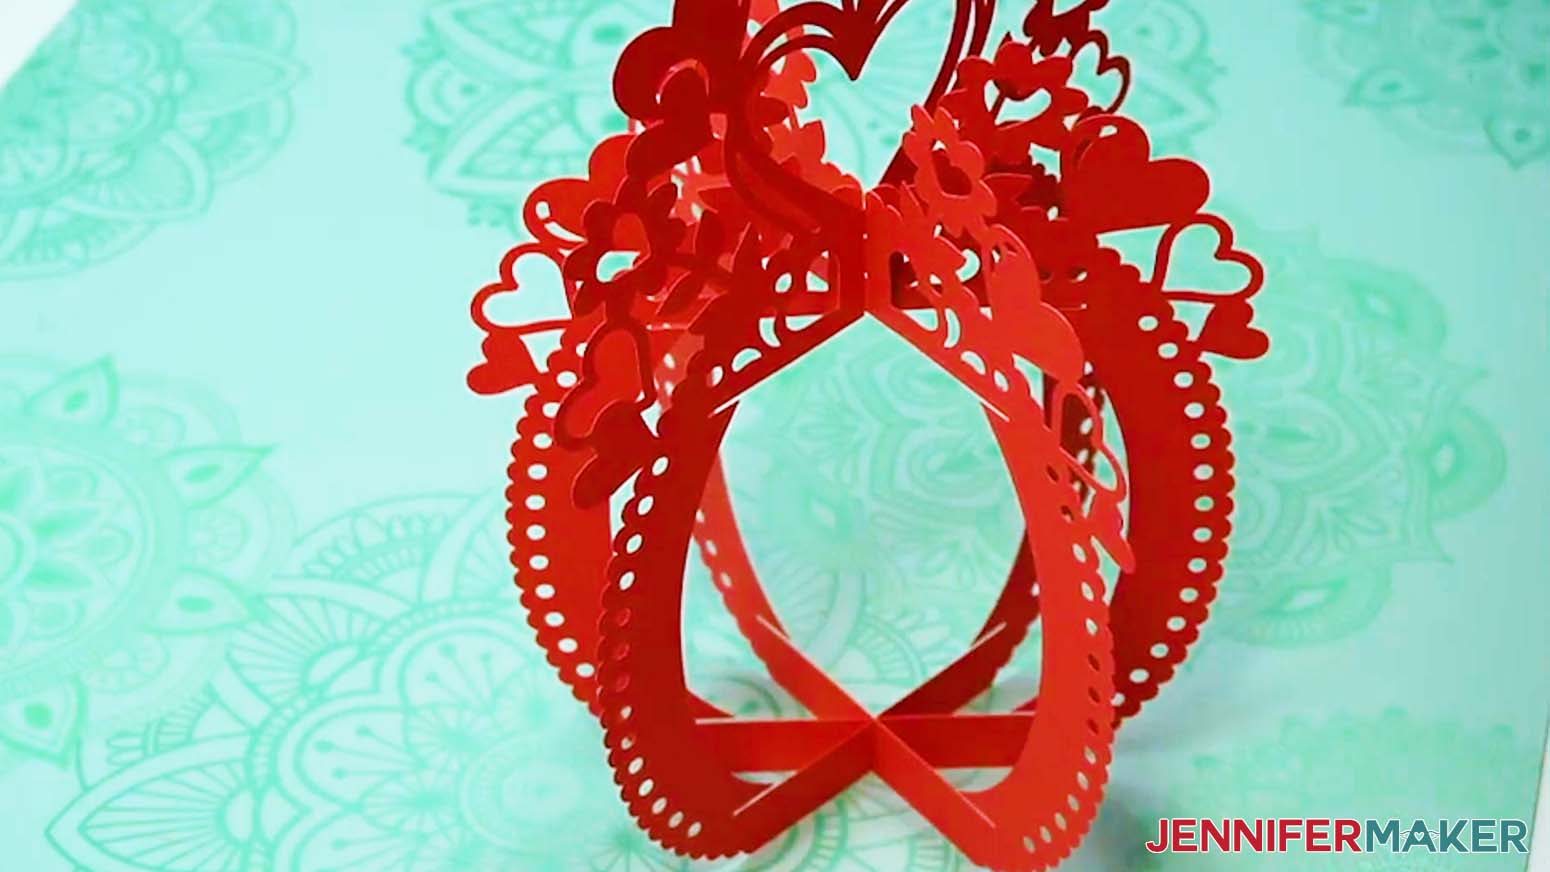
- Spread out the frame pieces, and stand the constructed frame upright.
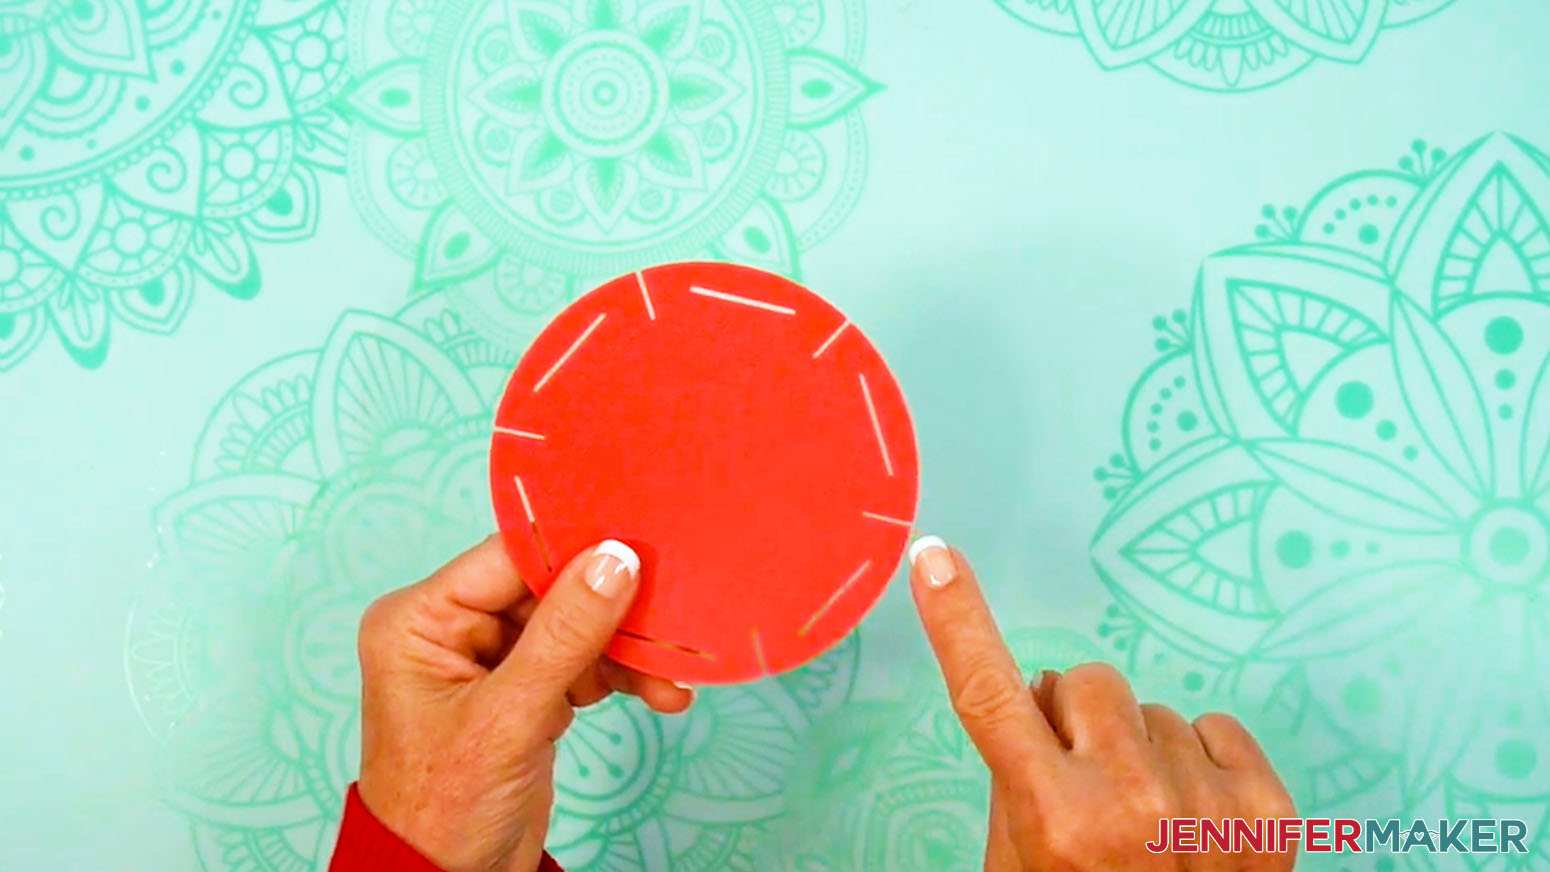
- Insert the solid top base piece’s six outer slits into the three frame pieces’ top slits.
TIP: Curve the inner frames slightly if needed to fit them into the top base piece’s slits. - Insert the bottom base piece’s six outer slits into the three frame pieces’ bottom slits.
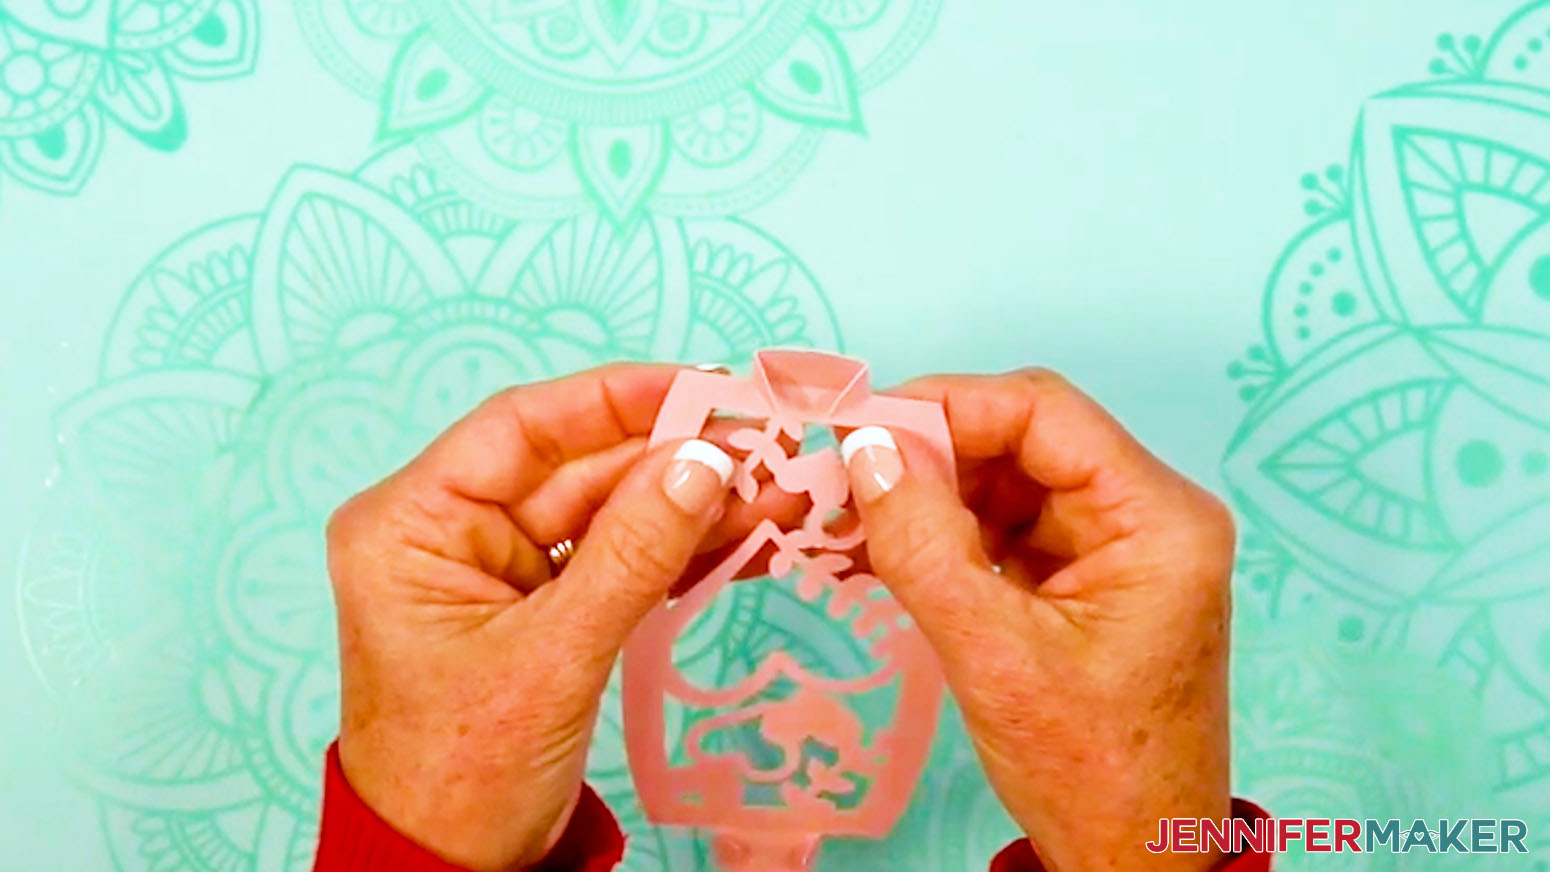
NOTE: The bottom base has a hole in the center for access to the lights in the assembled lantern. - Take the first panel piece and fold back the top and bottom horizontal crease lines.
- Then fold back the top tab’s two wings (the small side tabs) along the vertical crease lines, and do the same for the bottom tab wings.
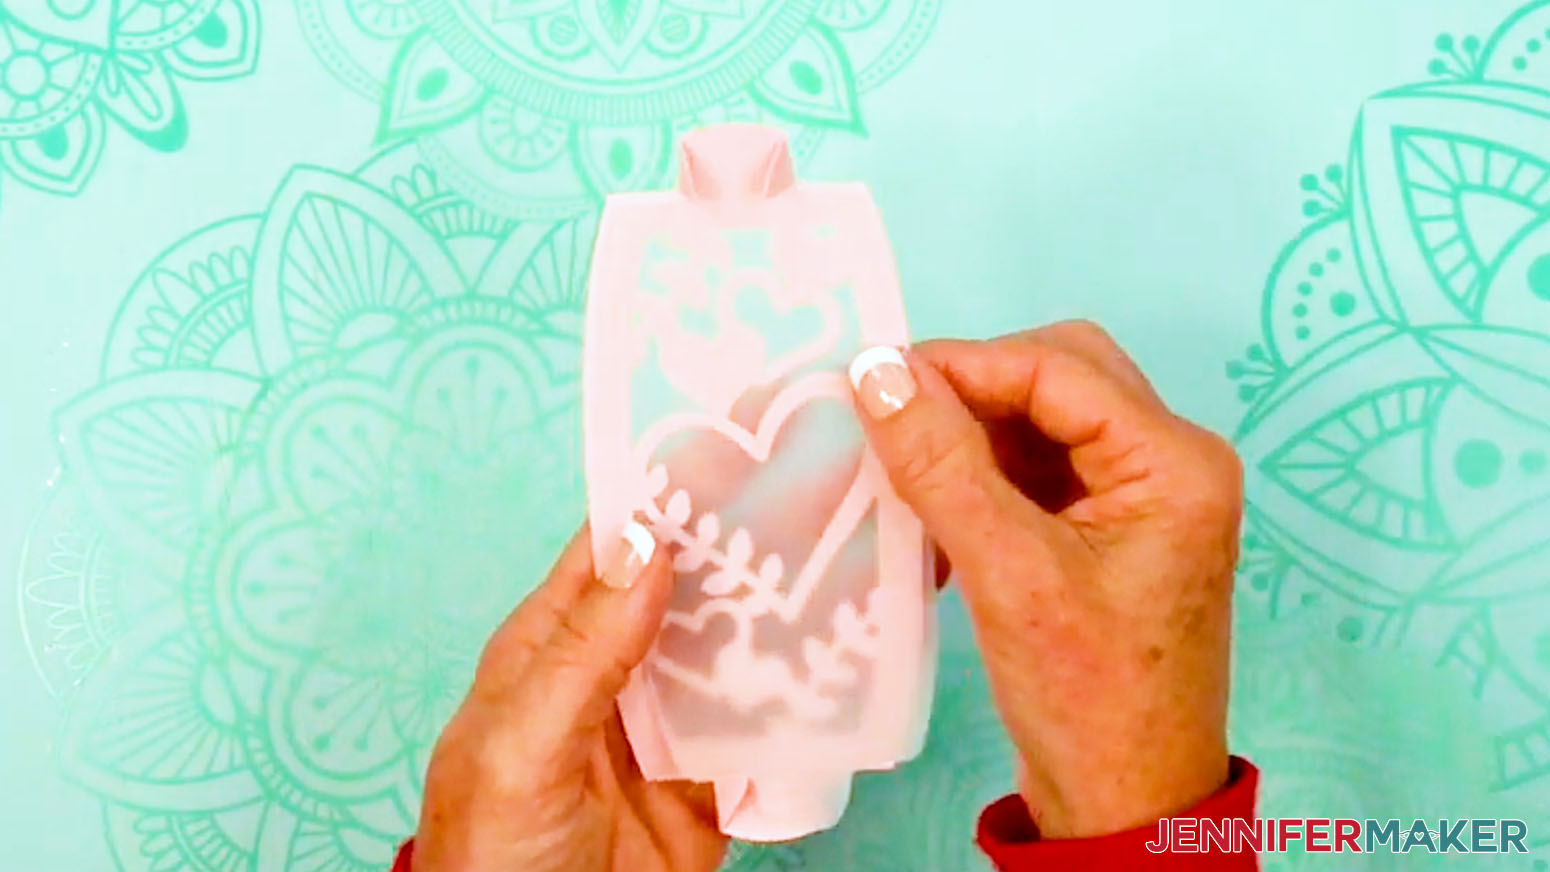
NOTE: Make sure your panel’s design is facing the correct direction when you fold the tabs back. - If using the vellum diffuser pieces, insert one onto the back of your folded panel, using the wings to hold it in place.
- Repeat Steps 6-8 for the five remaining panels and diffusers (if using them).
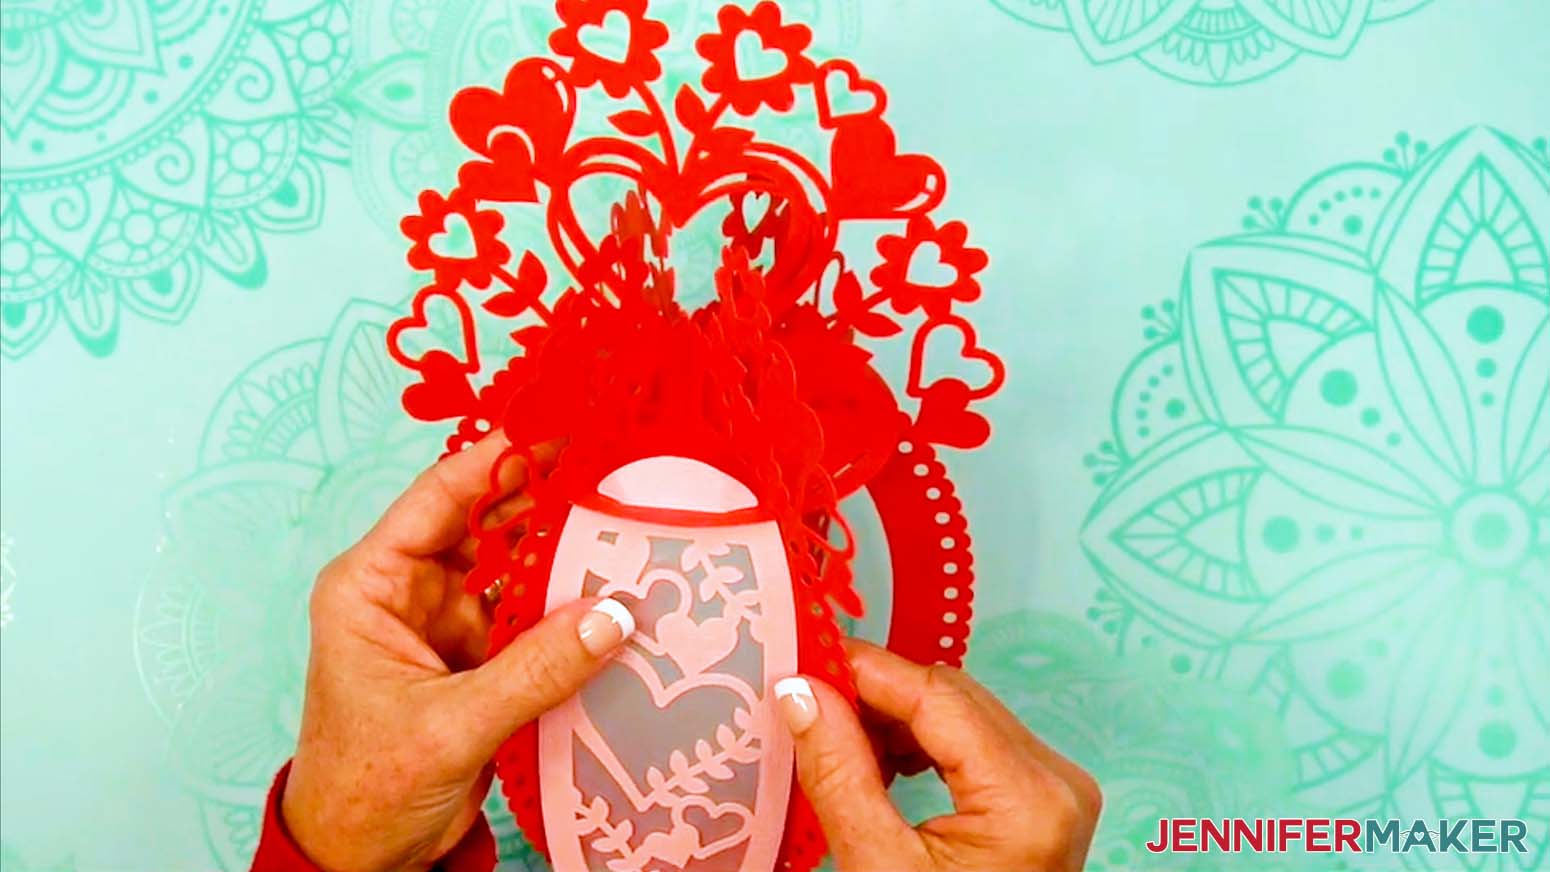
- Insert a panel’s top and bottom tabs into the first section of the frame’s top and bottom base slots.
- After each tab is inserted, unfold the tab’s wings to lock the panel in place.
TIP: The tweezers can help you move the wings and tabs, especially on the small Joy-size lantern. - Repeat Steps 10-11 to insert the next four panels.
NOTE: We will insert the last panel after we put the lights inside. - Test your lights to make sure they work, including any remotes depending on your light source. You may have to remove a battery protector tab first.
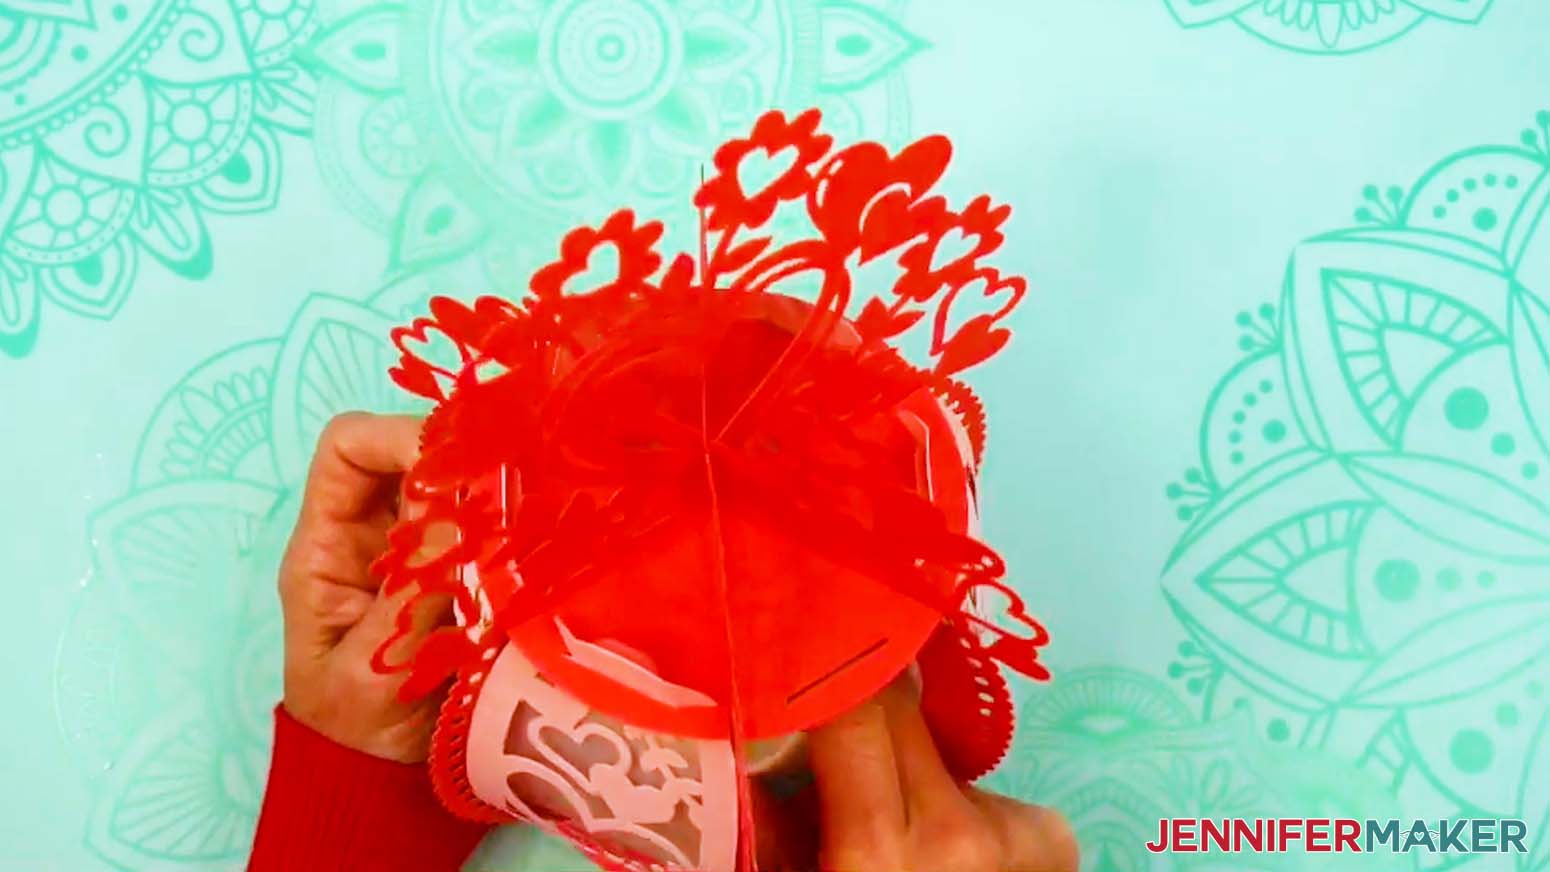
- If you’re using an LED tea light or puck light (not compatible with the Joy-size lantern), place it inside the opening at the bottom of the lantern base.
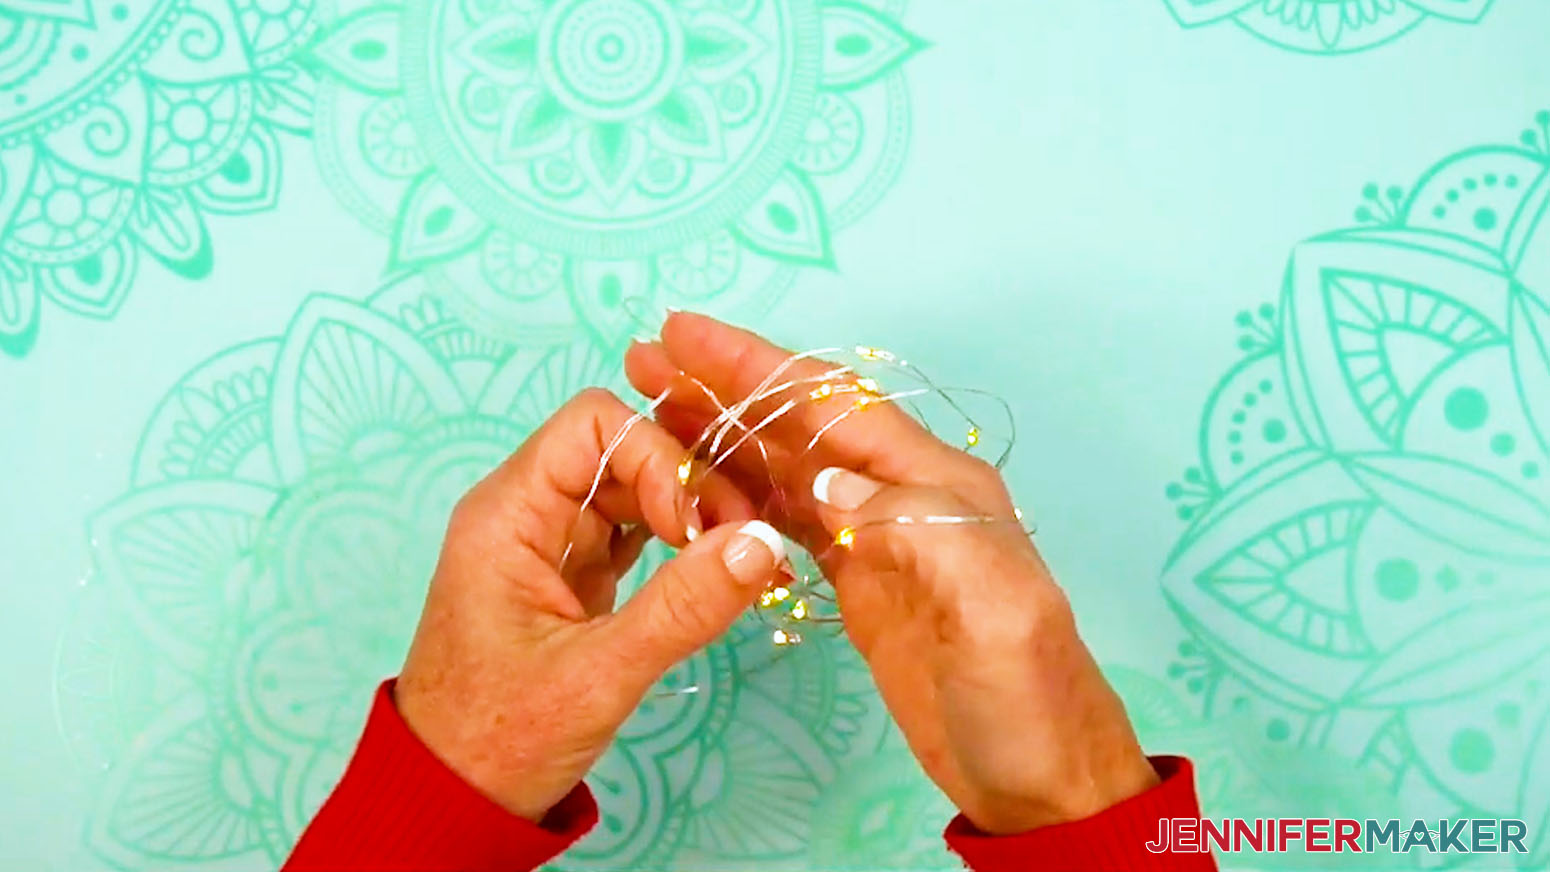
- If you’re using fairy lights, remove any twist ties, and then unwind the lights.
- Loosely wrap the wire around your fingers to make a coil to evenly distribute the lights.
TIP: Coil the lights more tightly to fit inside the smaller Joy-size lantern. - Place the coil of lights and the battery pack inside the lantern.
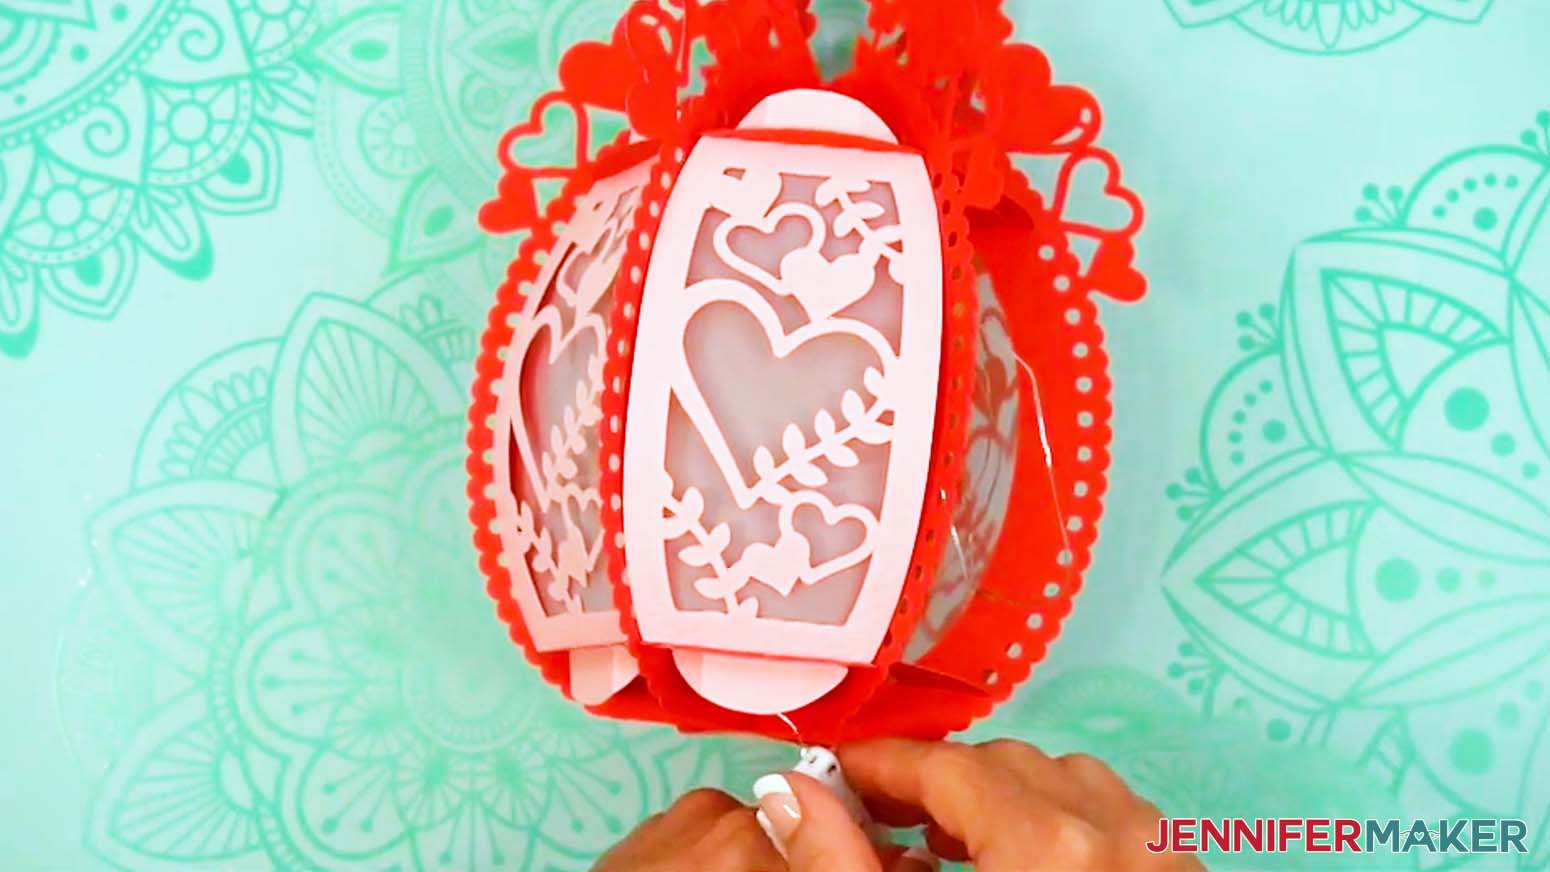
TIP: Position the battery pack so the power switch is easily accessible via the openings in the bottom of the lantern. Or, to keep the battery pack accessible without having to reach inside the lantern, slide the battery pack through a bottom hole and keep it hidden behind the lantern. - Once your lights are inserted, follow Steps 10-11 to slot in the final panel.
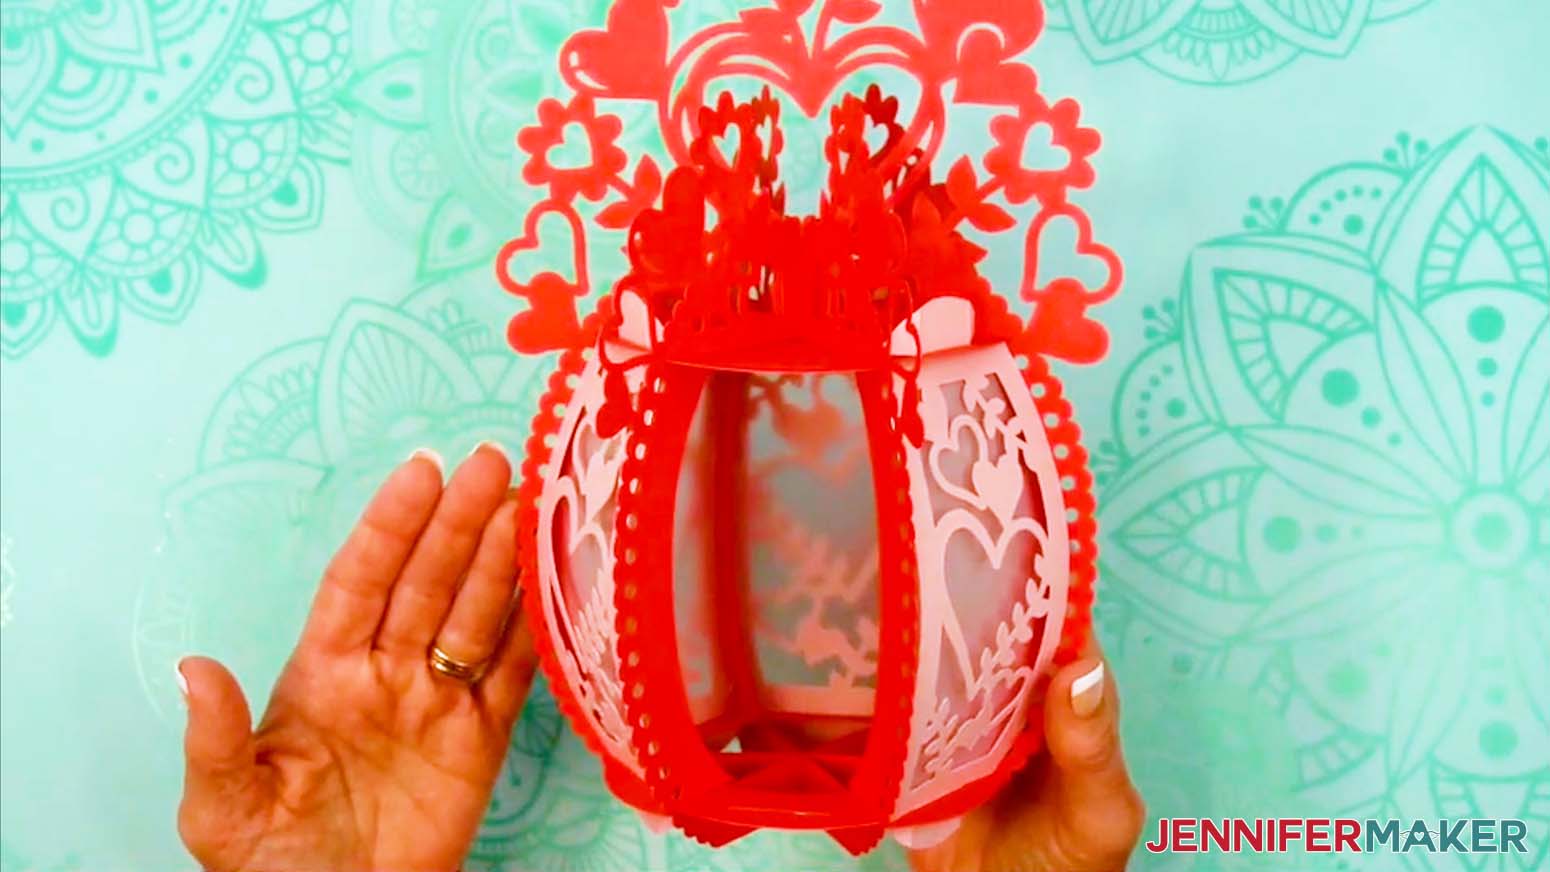
- Your ornate 3D paper lantern is ready for display!
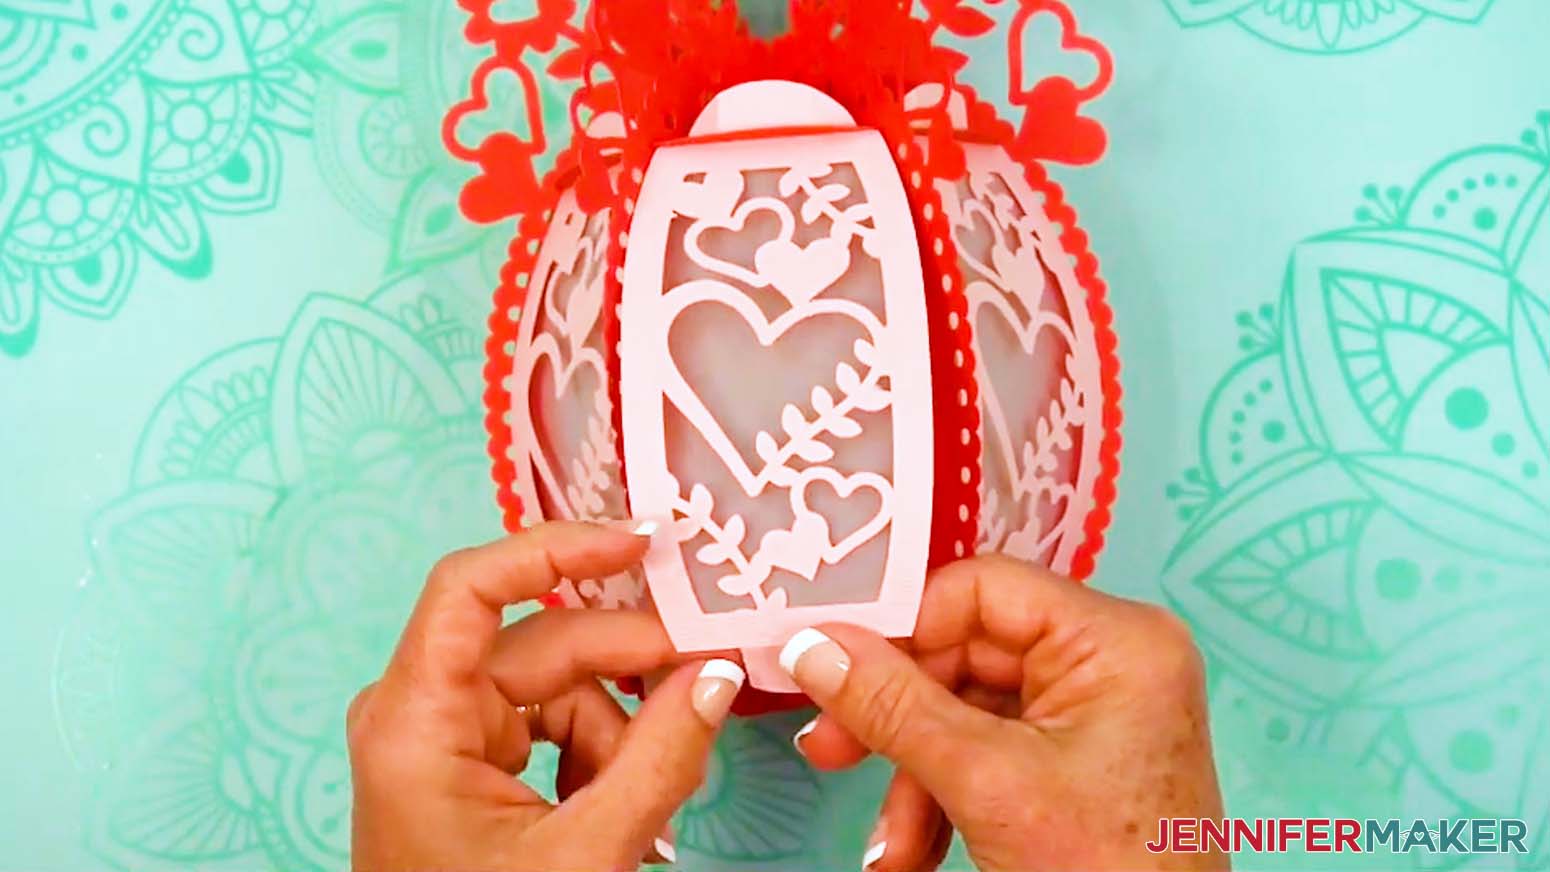
STEP 4: SHOW IT OFF
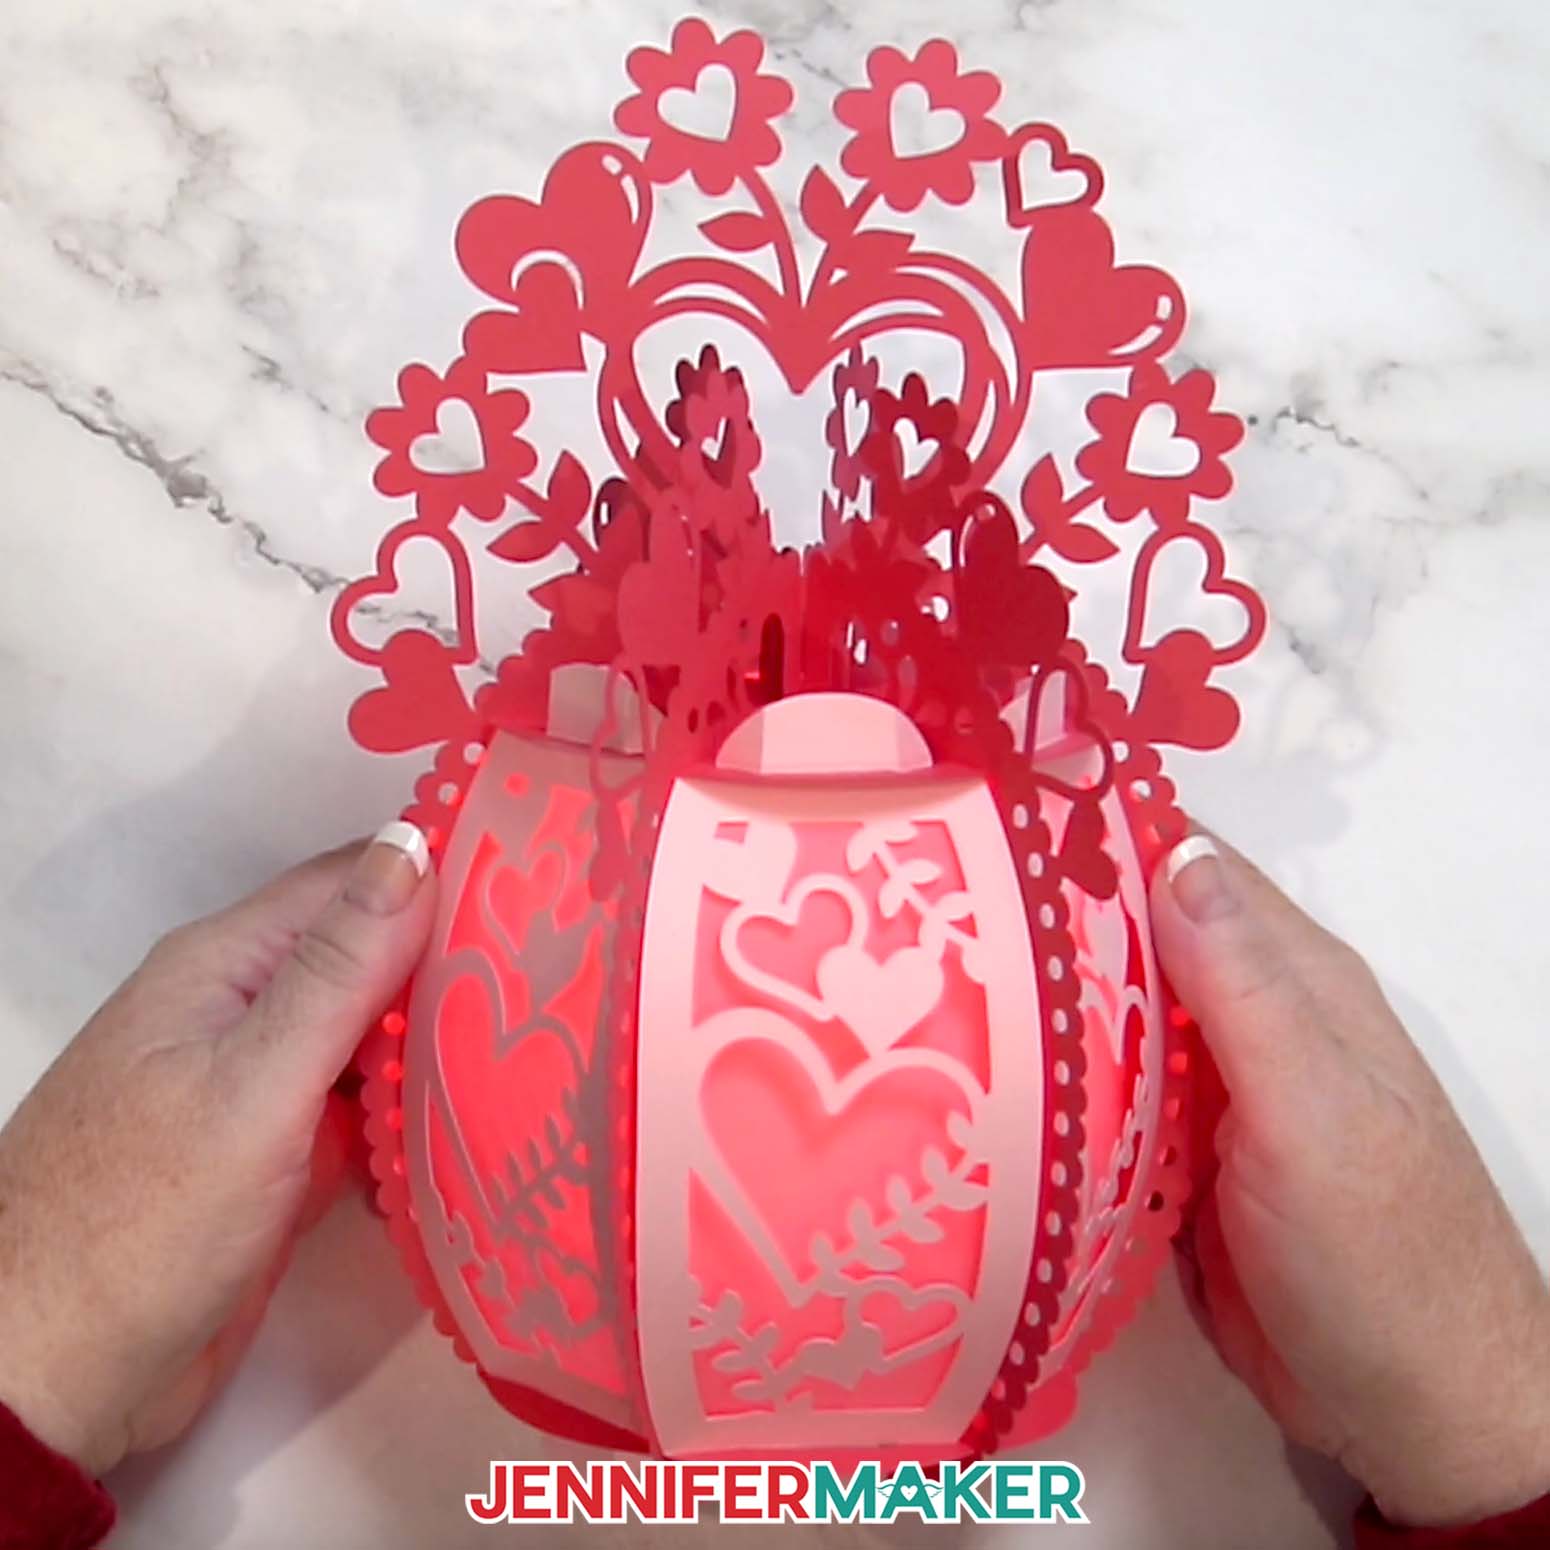
You now have a 3D ornate paper lantern sure to impress any guests!
Notes
Finished Sizes:
Full-Size Butterfly Lantern: Approximately 8"W x 10"H x 7.5"D
Full-Size Heart Lantern: Approximately 7"W x 10.5"H x 6.5"D
Joy-Size Lanterns: Approximately 4"W x 5.5"H x 3.5"D
Answers to Your Questions About Making Ornate Paper Lanterns
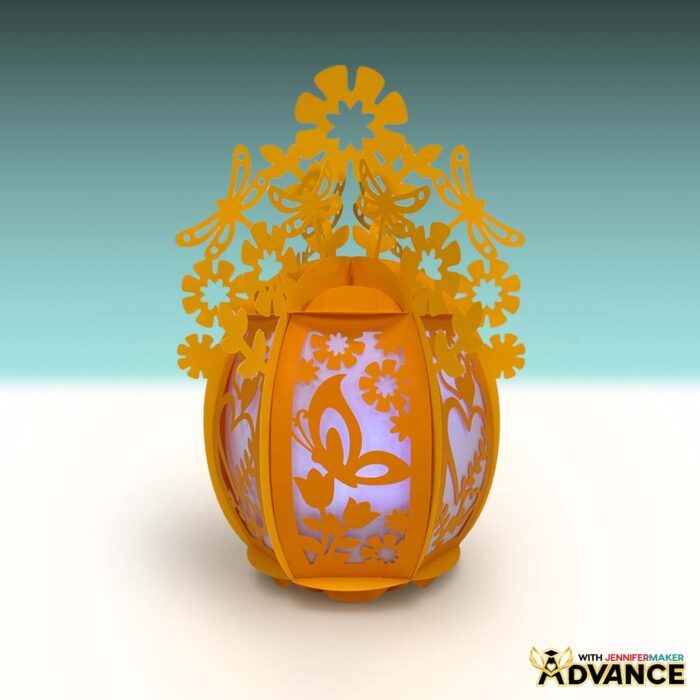
Q: How can I customize the outside of my lantern?
A: You can learn how to customize your lantern’s outer frame like the one below in my ADVANCE program. Learn more about ADVANCE here!
Q: What materials do I need to make this ornate 3D paper lantern?
A: You’ll need solid-core cardstock for the lantern pieces, diffuser material, and LED lights. I compare vellum, parchment paper, and copy paper in the tutorial so you can see exactly how each one changes the finished glow. I also demonstrate several lighting options, depending on which lantern size you’re making.
Q: Why do you recommend solid-core cardstock?
A: Solid-core cardstock has color all the way through the paper instead of only on the surface. That means your cut edges stay the same color as the rest of the project instead of showing white. Combined with the right thickness of paper, it creates a lantern that’s both sturdy and beautifully finished.
Q: Which Cricut machine can I use?
A: I demonstrate with a Cricut Maker 4, and I also show how to make the Joy-sized version. The assembly process is very similar, but I point out the important differences so you can confidently make either size. You can also make this project with another Cricut Maker series machine, a Cricut Explore series machine, another Cricut Joy-series machine, or the Cricut Venture.
Q: What’s the difference between the score version and the no-score version?
A: The score version is designed for machines that can create score lines, making the folds crisp and easy to follow. The Joy version uses dashed cut lines instead.
Q: Which diffuser material works best for paper lanterns?
A: Each material creates a unique look.
- Vellum creates the brightest and most even glow.
- Parchment paper gives a softer, warmer appearance.
- Copy paper works well as a budget-friendly option with a more directional glow.
Seeing all three side by side in the video tutorial makes it easy to choose the look you like best.
Q: What kind of lights can I use inside a paper lantern?
A: The larger lantern can hold an LED tea light, fairy lights, or a puck light. The Joy-sized lantern works best with an LED tea light or a shorter strand of fairy lights. When using fairy lights, position the battery pack where you can easily reach it after assembly, or tuck it inside if it came with a remote. Do not use flames in paper projects.
Q: Which machine mat should I use?
A: Place vellum, copy paper, and parchment paper on a blue LightGrip machine mat. For cardstock, use a green StandardGrip machine mat. Before cutting, smooth the material with a brayer so it stays securely in place throughout the cut.
Q: How do I keep my material from curling after cutting?
A: When your Cricut finishes cutting, flip the mat over onto your work surface and peel it away from the material instead of pulling the material off the mat. This simple trick helps keep cut pieces flatter.
Q: How can I display my ornate 3D paper lantern?
A: These lanterns make for beautifully welcoming lights in your home. Display one on an end table, use one as a cute table centerpiece, or place several along a fireplace mantel. They look especially lovely grouped together in different colors.
Q: Can I make and sell ornate paper lanterns or other items using your designs?
A: If you want to use my ornate 3D paper lantern designs and project materials for commercial use, please familiarize yourself with my important licensing information before selling your crafts.
Q: Where can I get help if I get stuck?
A: If you want quick troubleshooting or you want to show off your finished projects afterward, my Cricut Facebook group can be a helpful place to compare notes and see what others are doing.
Get my free SVG/DXF/PDF files to make your own Ornate 3D Paper Lantern designs!
(If you do not see the signup form above, click here.)
I absolutely love seeing your handmade crafts! Once you’ve made an ornate 3D paper lantern, inspire others and share photos of your project in our Facebook group or tag me on social media with #jennifermaker.
Love,

Want to remember this? Save this Ornate 3D Paper Lantern Tutorial to your favorite Pinterest Board!