
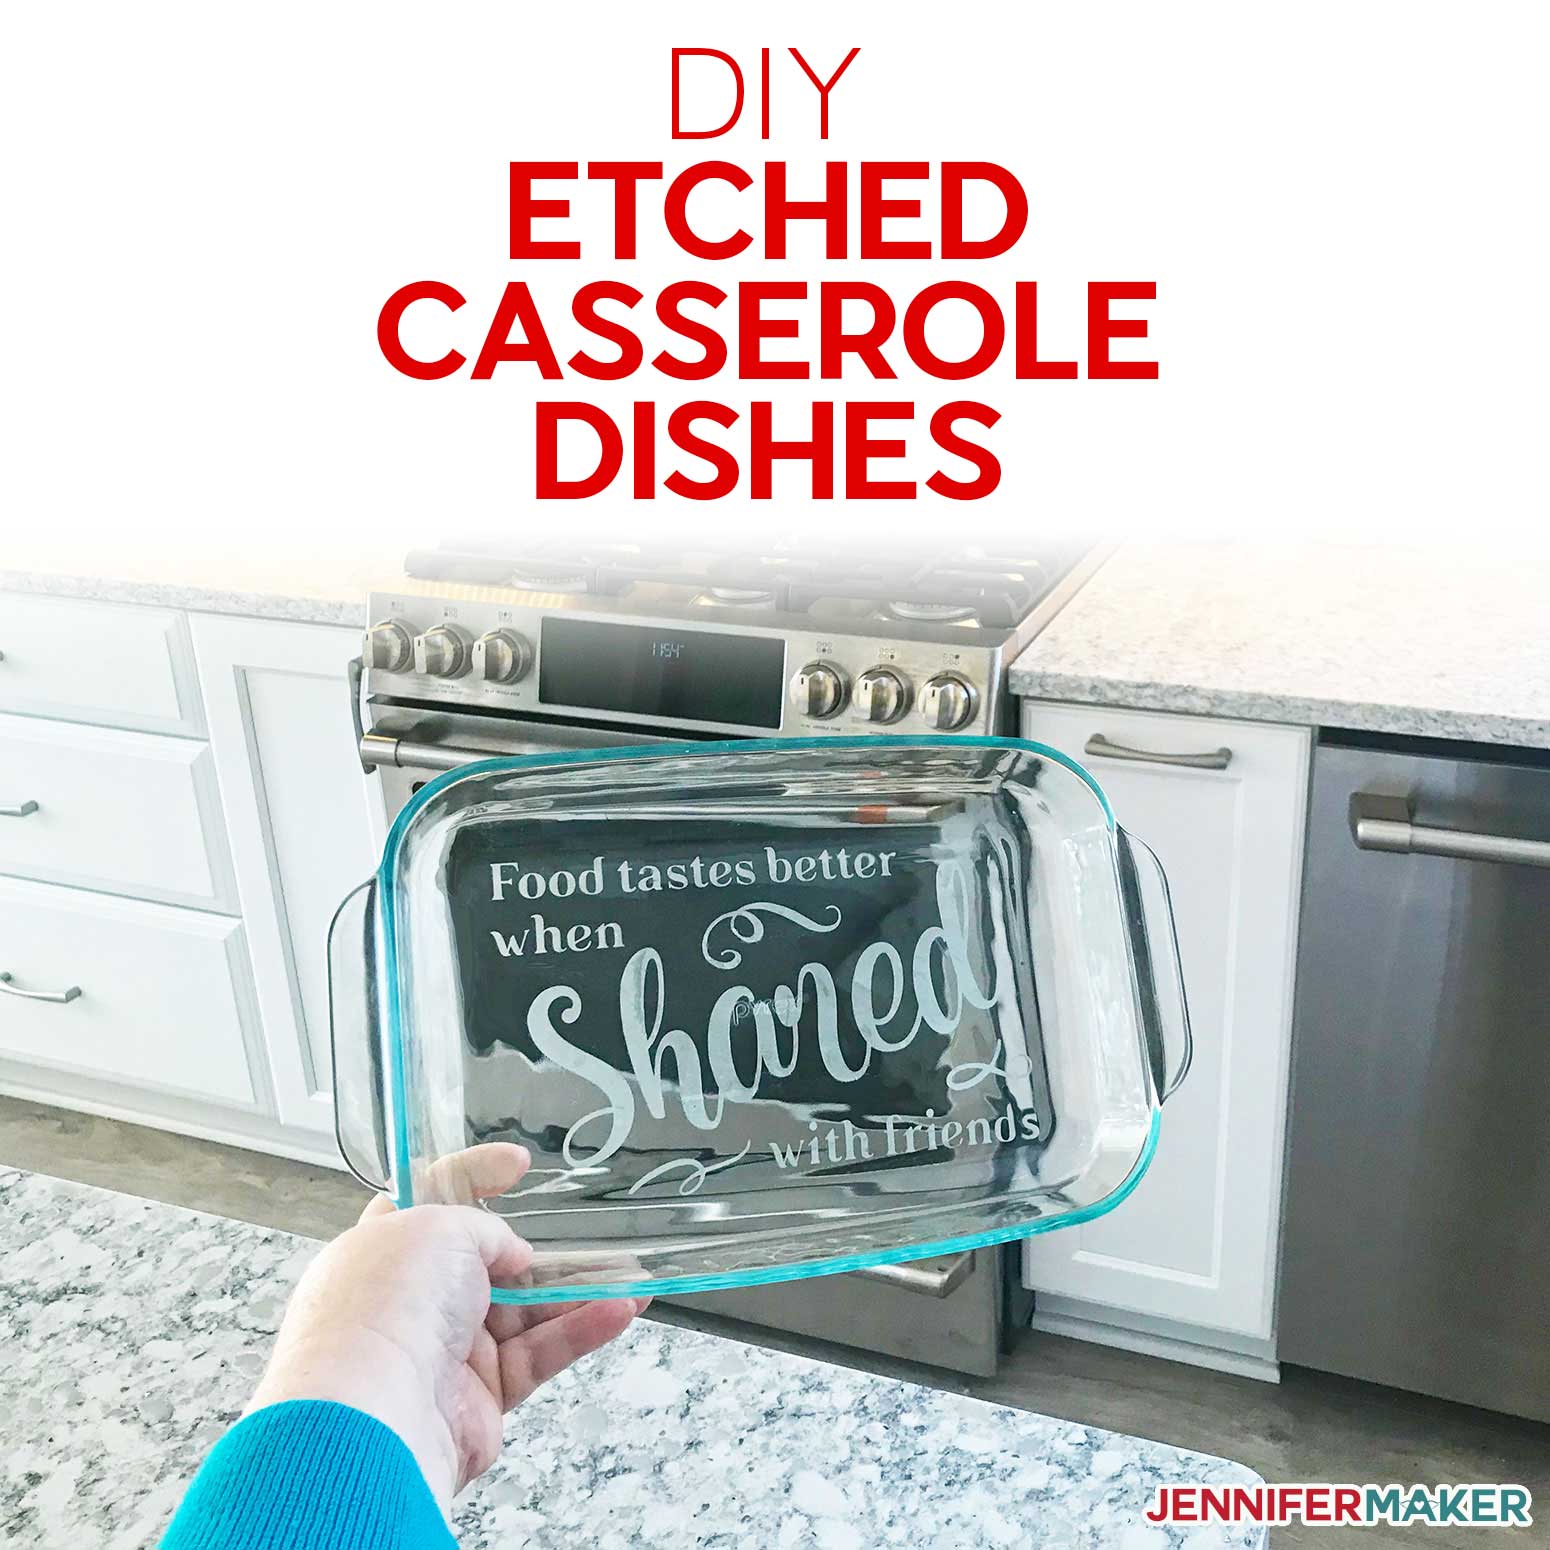
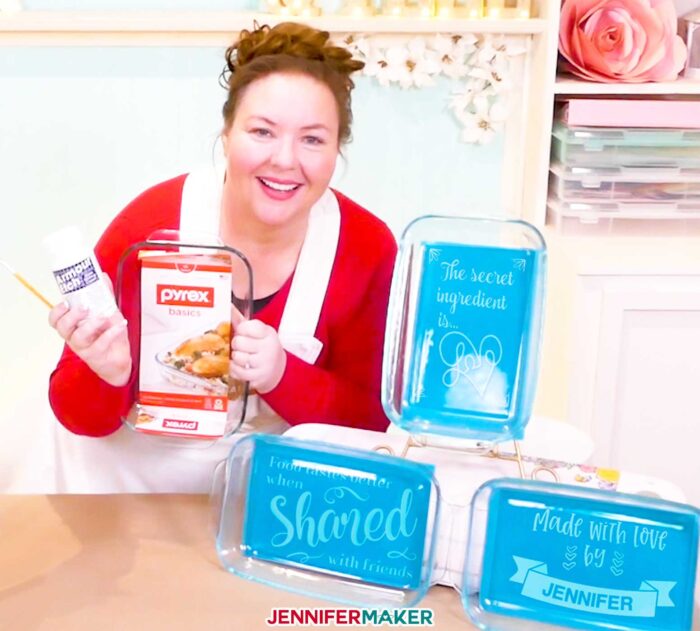
Learn how to etch casserole dishes, even glass Pyrex bakeware, with personalized and beautiful designs. Etched glass casserole dishes make great wedding and housewarming gifts!
A year ago I taught you how to etch glass the easy way using a vinyl stencil and some etching cream, and we’ve all had so much fun etching things since then. Using this technique, you can personalize nearly any glass, including wine glasses, coasters, and decorative glass plaques. It’s really quite easy! But what if you want to etch glass BAKEWARE, like a Pyrex casserole dish? Can you do it and still put food in it? Oh yes, you can — and I’m going to show you how in this tutorial!
Watch the full step-by-step tutorial on how to make etched casserole dishes on YouTube:

Now, glass etching is nothing more than roughening up the surface of the glass in specific areas to create a design. You can do it in a bunch of different ways, but the easiest way is do it chemically using an etching cream. You can literally just paint the etching cream on your glass, wait a bit, and rinse it off, but it’s much more effective and attractive to create and apply a vinyl stencil and THEN put the etching cream on, and that’s the technique I am teaching you today.
So for this tutorial, you’ll want a glass casserole dish, or really any glass bakeware will do. I’ve heard reports that older Pyrex casserole dishes, like those made before 1998, were made of a different type of glass (called borosilicate) that is harder to etch. But most of the Pyrex casserole dishes sold in the U.S. since then etch just as well as any other sort of glass. So don’t worry too much about this unless you’re using a pretty old casserole dish. For this tutorial, I am using a 2-quart 7″ x 11″ Pyrex oblong baking dish that I bought from Amazon — links to everything in this tutorial are below.
Please note: Dishes made of Borosilicate WILL NOT WORK. Dishes from Ikea and some other brands of dishes may be made of borosilicate glass, therefore, they will not work. Borosilicate glass is a tougher type of glass. If you see a note that your dish is very scratch and impact resistant to withstand rapid temperature changes, it’s possible it may not work to etch correctly. Please check the etching cream manufacturer’s website for more information.
You also need some permanent adhesive vinyl and a way to cut your stencil from it, such as a Cricut cutting machine. I recommend permanent vinyl over removable vinyl because it will form a tighter seal, and thus a better and clearer etched design.
And, of course, you need the etching cream itself! I use Armor Etch glass etching cream and it works great. You don’t need much either, so a little goes a long ways.
Other useful things to have when etching your glass bakeware include transfer tape for getting your stencil onto your bakeware, alcohol to clean your glass surface before applying the stencil, masking tape to make sure you don’t etch outside your design, and tools like a paintbrush, a weeding tool, and a scraping tool.
UPDATE: And a word about safety — be sure to read the instructions on the back of your etching cream bottle, especially the safety precautions and what to do if get some cream on you. I recommend working in a well-ventilated area and wearing gloves, an apron, eye protection, and a respirator while you’re working with the etching cream.
Now, the key to etching glass casserole dishes and any other glass that will come into contact with food is to put the etching on the OUTSIDE of the glass, so that means either on the dish’s underside or outer sides. This allows you to cook food in the bakeware normally without any harm to the etching. In the process of etching, a very thin layer of glass is removed and that area becomes susceptible to staining from food. But if you keep the etching on the OUTSIDE, it pretty much never touches the food and stays looking great. And I will show you how to apply your stencil to the underside of your dish so your design shows through properly!
The only other thing to take into consideration is the raised lettering that usually appears on the bottom of the glass bakeware. I personally don’t care about the lettering and just ignore it. The etching cream still works on it. But if the lettering bothers you, you can just place your design around the lettering by measuring and moving your design elements before you cut your stencil—I explain how to do that in my tutorial on how to make vinyl decals for kitchen appliances.
To get your started on this project, I’m sharing several free stencil designs for glass casserole dishes. Then I’ll show you how to etch your casserole dishes with the stencils and etching cream!
Ready to make your own etched casserole dish? Let me show you how!! This post contains some affiliate links for your convenience (which means if you make a purchase after clicking a link I will earn a small commission but it won’t cost you a penny more)! Read my full disclosure policy.
Materials to Make Etched Casserole Dishes
View exactly what I used in my Amazon shopping list!
- Glass Baking Dish (Pyrex 2 Quart Glass Oblong 7″ x 11″)
- Permanent Vinyl (any color)
- Transfer tape (StandardGrip, NOT StrongGrip)
- Armour Etch cream
- Respirator with proper fit and cartridge
- Safety glass (if your breathing protection doesn’t cover your eyes)
- Disposable gloves
- Apron
- Butcher paper (to protect your work area)
- Isopropyl Alcohol (to clean the dish before applying the vinyl stencil)
- Paintbrush, small (no foam brushes)
- Painter’s tape or masking tape
- Weeding tool and wearable weeding silicone ring
- XL Scraper tool
- Brayer
- Scissors
- Timer
- Lint-free paper towels or coffee filters (for cleaning)
- Access to a sink or running water
- Green StandardGrip machine mat (the 12″ x 12″ size)
- A way to cut your vinyl (I used an amazing Cricut Maker series cutting machine and the decals can also be cut on a Cricut Explore series and even a Cricut Joy, Joy 2, and Joy Xtra!)
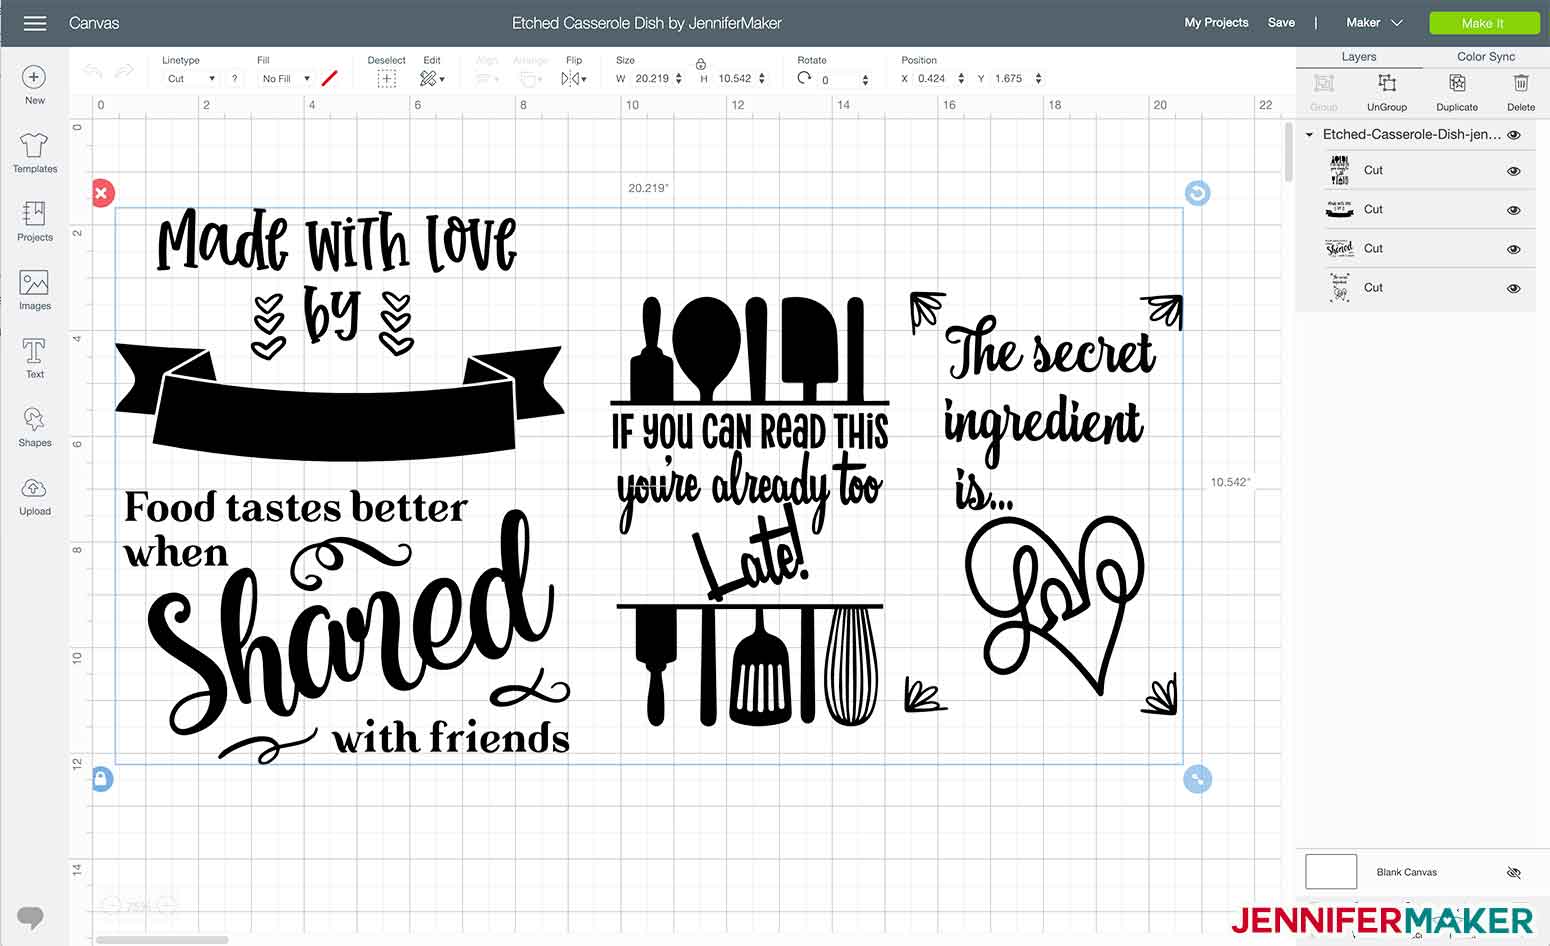
- Design #188 – My free SVG design files (available in my free resource library—get the password by filling out the form at the bottom of this page)

How To Make An Etched Casserole Dish
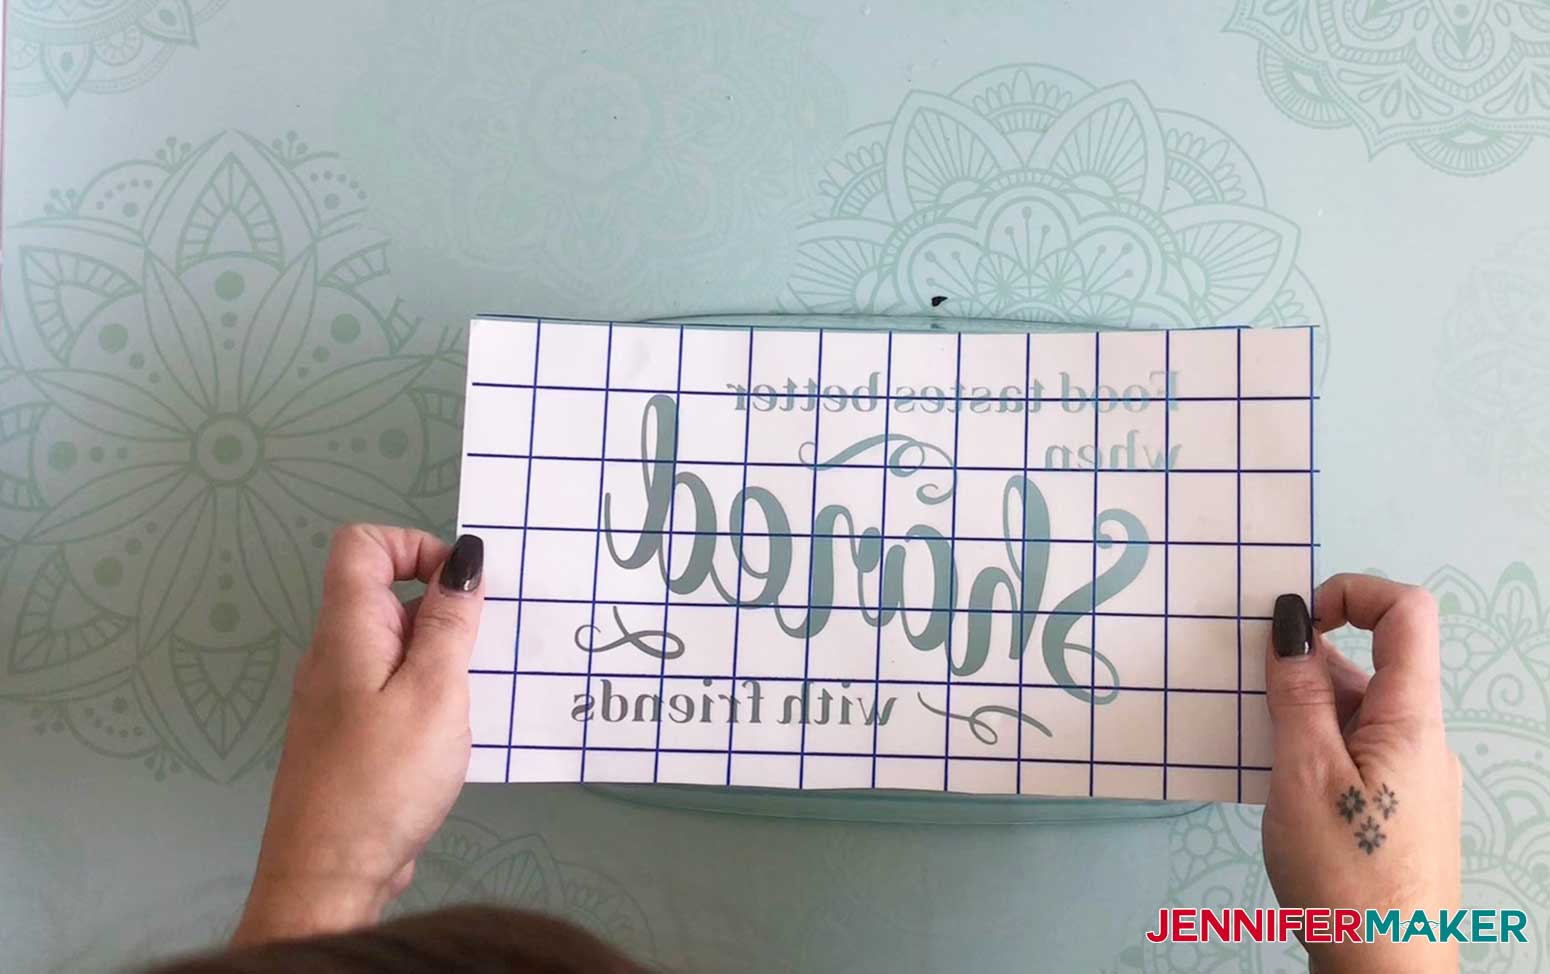
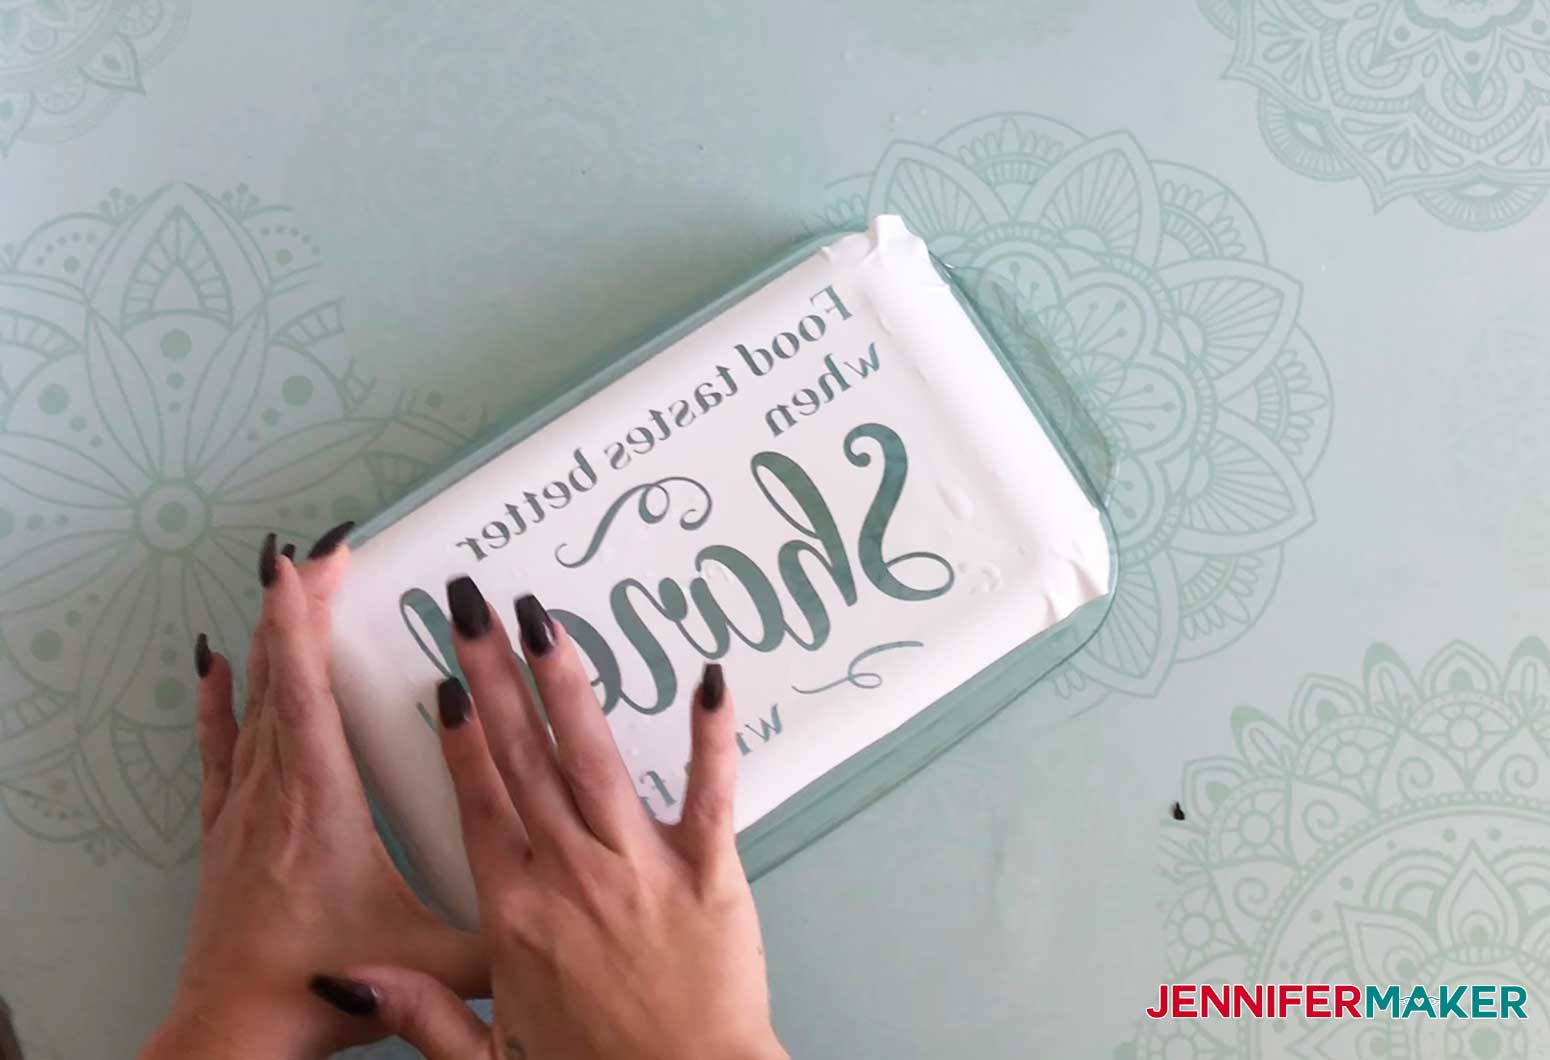
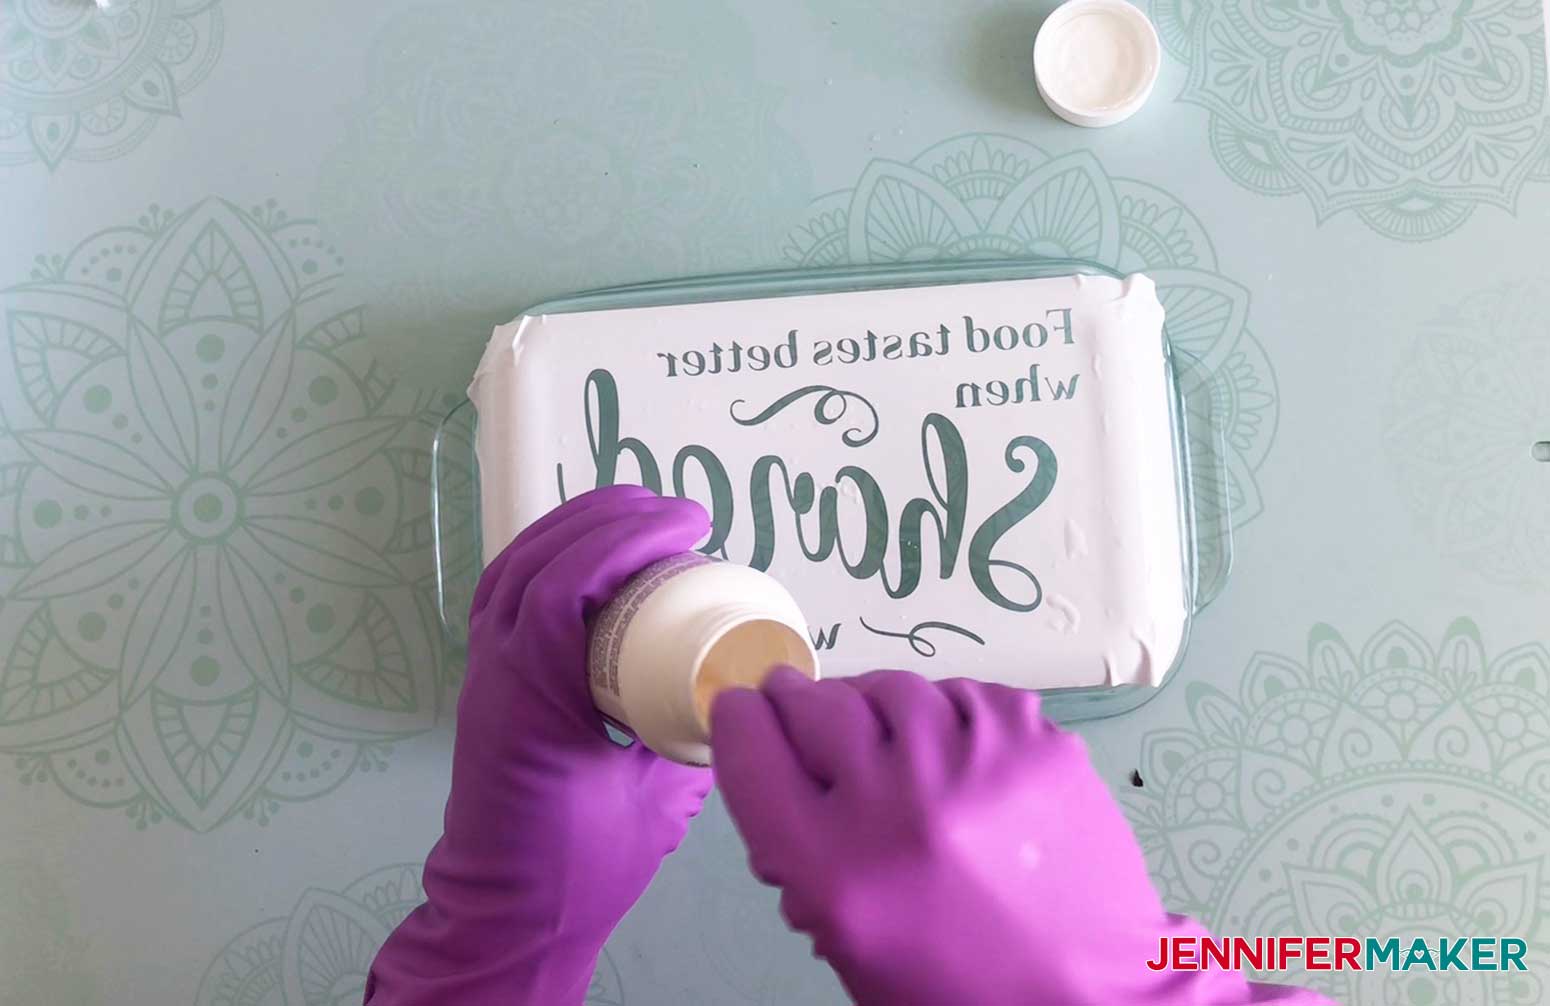
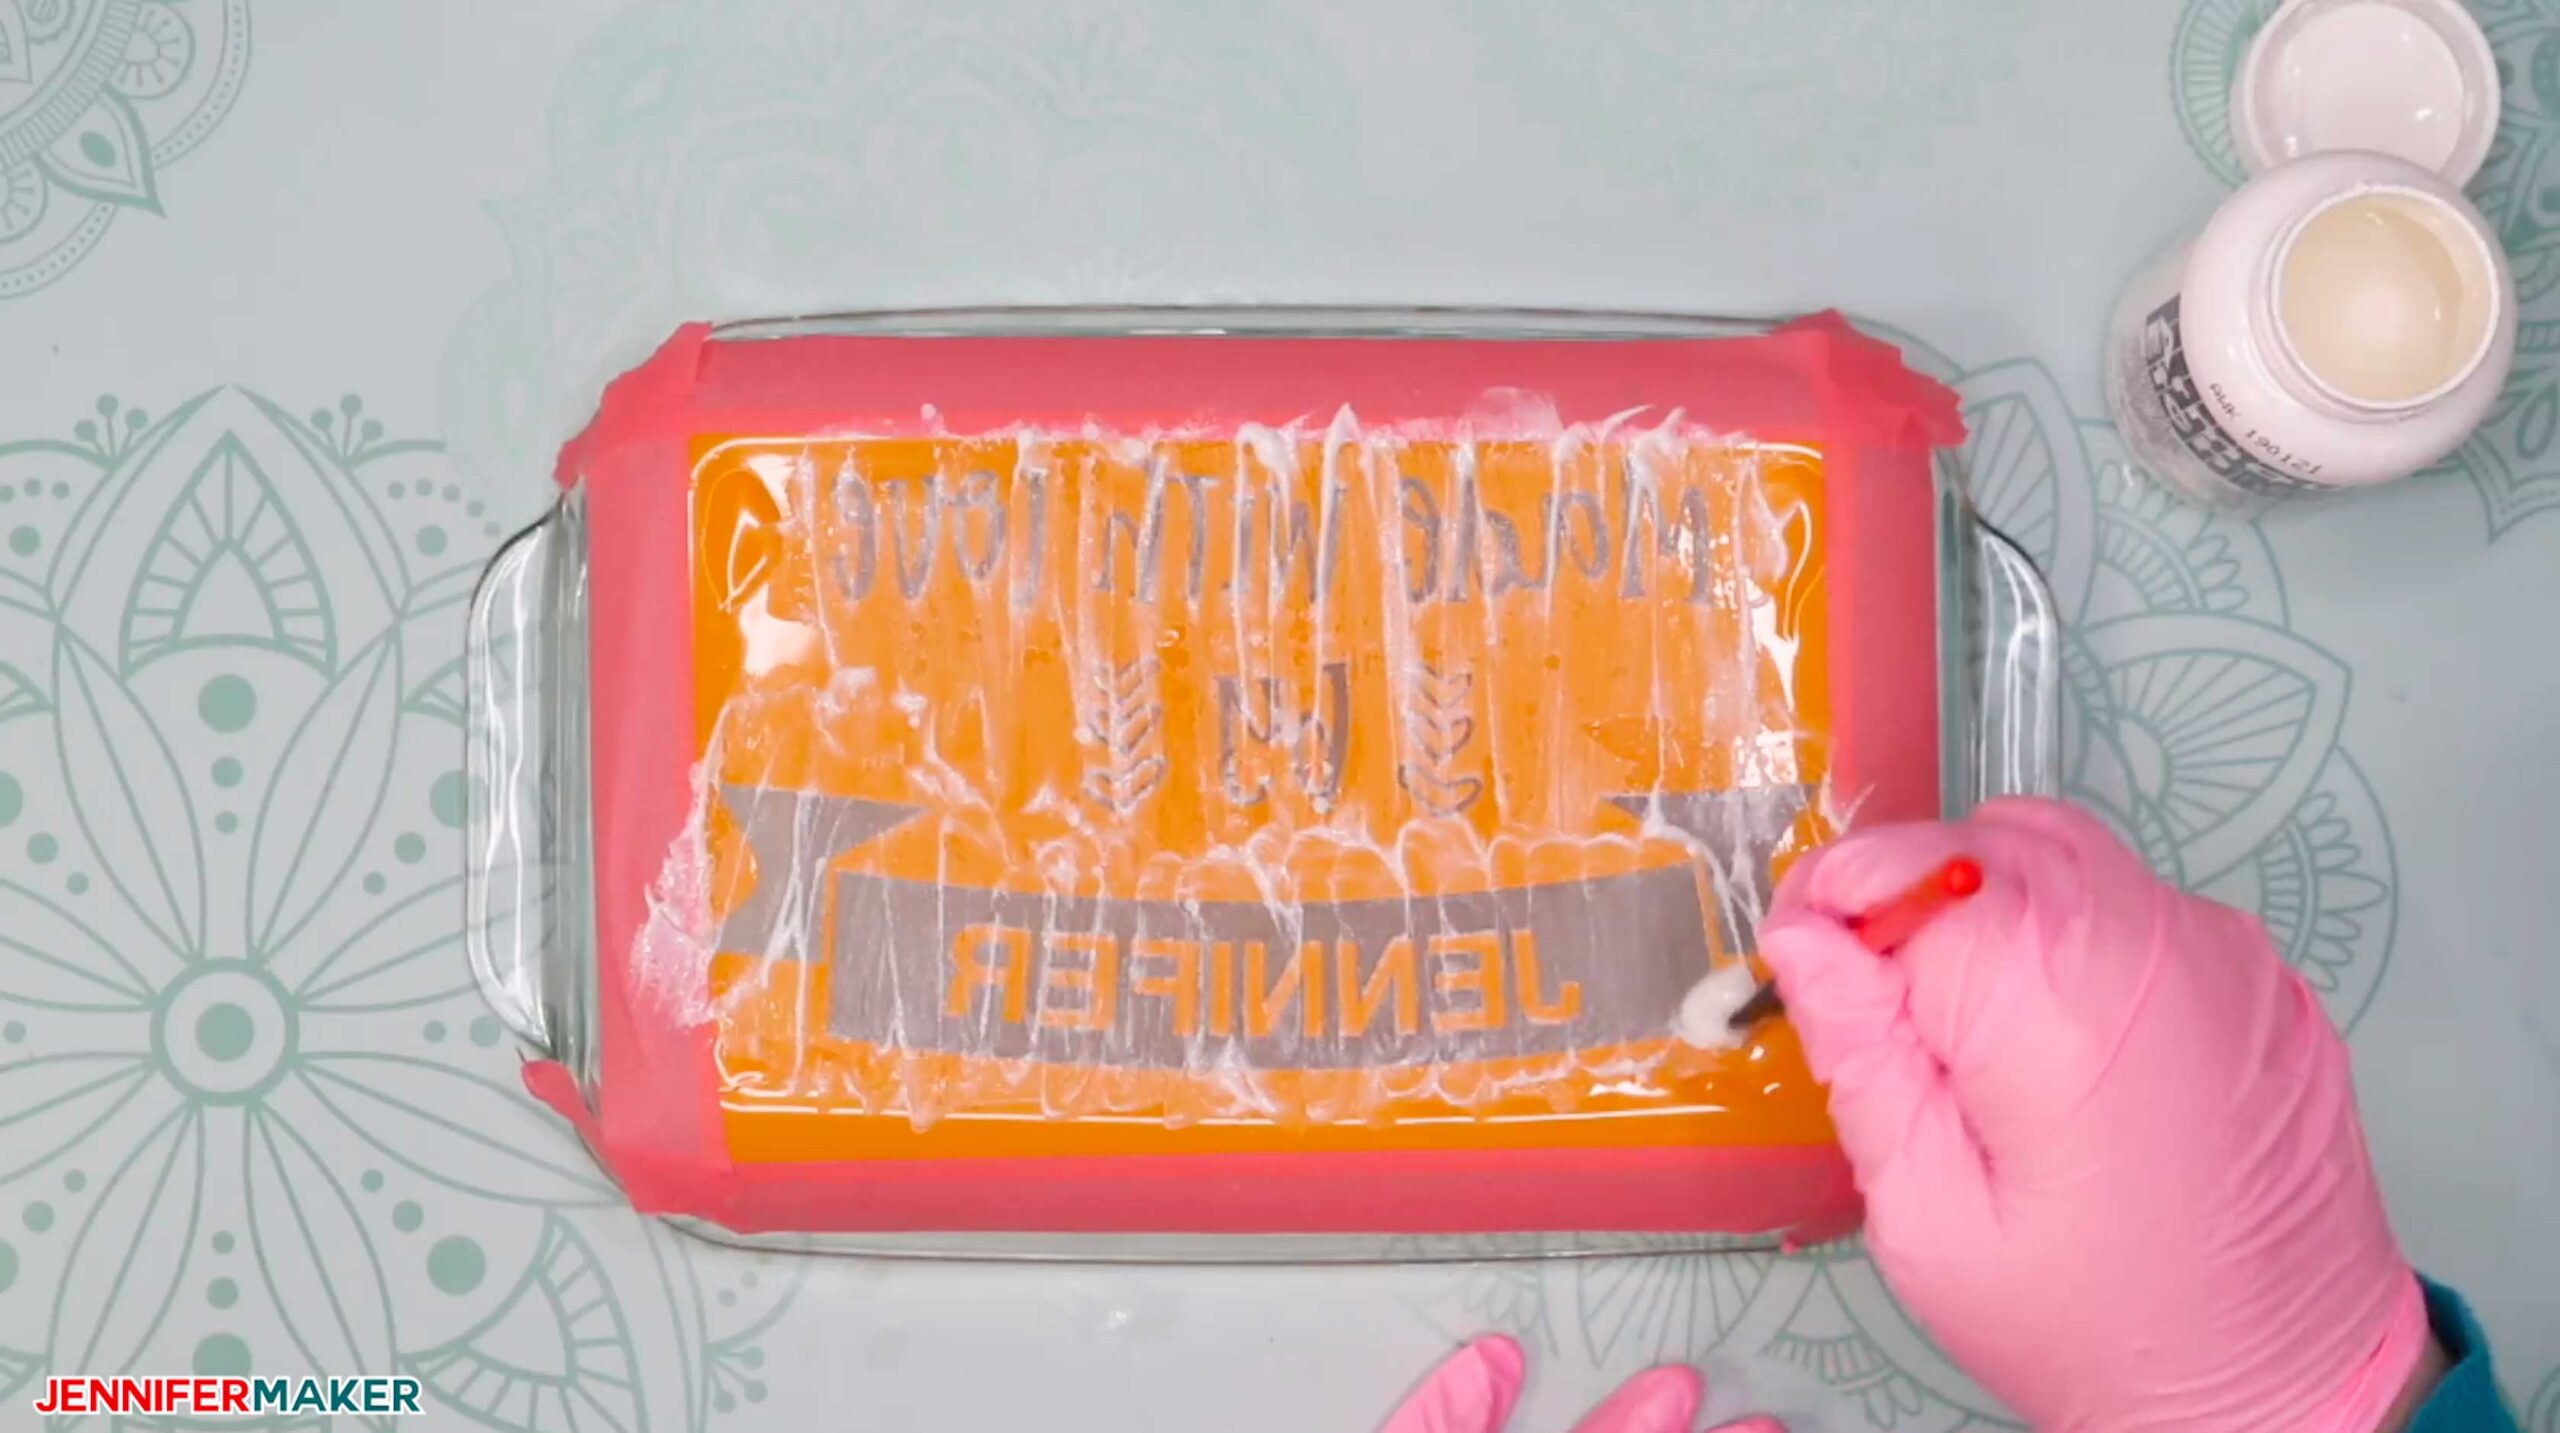
This etched casserole dish is simple and fun to make, and is a lovely hostess gift! My free Etched Glass Casserole Dish SVG cut file contains 3 different designs to make your own personal Casserole Dish. Get my free etched glass dish designs (Design #188) from my free resource library (get the password at the bottom of this post). Here’s what the uploaded file will look like once uploaded to Cricut Design Space: Tip: If you’re not sure how to upload an SVG cut file to Cricut Design Space, watch this helpful video training series I made. If you’re on an iPhone or iPad, here’s how to download and upload SVG files to the Cricut Design Space app . You’ll want to use permanent adhesive vinyl for this project as it gives a stronger bond and helps stop the etching cream from bleeding under the edges. Don’t forget to mirror your design before you cut it. Cut a piece of permanent vinyl to the right size for your design. Again, I recommend permanent vinyl over removable vinyl because I believe it forms a tighter seal for the stencil. Place your permanent vinyl color side UP on a green StandardGrip cutting mat. Load your fine-point blade into your Cricut machine and press the flashing button to begin your cut. Carefully reverse weed your design using a weeding tool. (Reverse weed means you’re only removing the vinyl you want your etching to appear under. So you're removing the design elements and leaving the rest of the vinyl.) If your design is not centered on your vinyl, trim it so all sides are equal -- this will help you when it comes to centering it on your casserole dish.Safety first Once your vinyl is weeded, cut a piece of transfer tape the size of your vinyl backing and apply it to the front of the vinyl decal. Using your scraper, go over the entire decal to make sure it adheres to your transfer tape. Gently remove the backing from the vinyl. Your decal is now ready to transfer to your glass! First, check which direction the raised lettering on the bottom is going and turn your casserole dish so the lettering is right side up. It'll bug you if those words are upside down. Now wipe down your glass casserole dish by cleaning it with isopropyl alcohol and a lint-free cloth or coffee filter. Be sure to let it to dry, which takes less than a minute. Next, carefully place your vinyl decal on your glass. I recommend you curve your decal a bit (like a taco) so only the center touches the glass, then press from the center out toward the edges to smooth it into position. This will give you a better seal with fewer creases or bubbles. Use your scraper over the entire surface of the transfer tape to adhere the vinyl well to your glass. Gently remove the transfer tape at an angle, leaving only the vinyl. Your goal is to have no wrinkles or creases at the edges of design. If you don’t have a wide margin on your vinyl decal, put some masking or painter’s tape around the edge of the vinyl to prevent getting any etching cream there. Now you’re ready to etch! First, remember to wear gloves, an apron, and protective glasses. Safety first! You should also shake or stir your Armour Etch etching cream before you use it. Using a regular brush (avoid foam brushes), brush on the minimum amount needed to cover the glass. You do NOT need to gob it on. Brush the etching cream around your design for five full minutes. Brush up and down, side to side, and diagonally. Keep the cream moving around your design, getting into every nook and cranny. After five minutes, rinse off the etching cream (or if you used a lot, scrape it back into the container first and then rinse). Make sure you get ALL of the cream off. You do not want to accidentally touch it or get it on your work surface. Once your casserole dish is rinsed off completely, dry it off and remove the vinyl. If you used permanent vinyl like me, it make take a little effort but it WILL come off. With the vinyl all removed, wipe down the surface again with rubbing alcohol. And that’s it — enjoy your beautiful etched casserole dish! Special thanks to the JenniferMaker Design Fairy team for helping me design and assemble this awesome casserole dish. As an Amazon Associate and member of other affiliate programs, I earn from qualifying purchases.
Etched Casserole Dish
Materials
Tools
Instructions
Step 1: Get my free Etched Glass Casserole Dish Designs
Step 2: Prepare your design for cutting
Step 3: Cut out your casserole dish design
Step 4: Reverse weed your cut vinyl to make a stencil
Step 5: Apply your vinyl stencil to your casserole dish
Step 6: Brush the etching cream on your dish
Step 7: Rinse off the etching cream after 5 minutes
Step 8: Rinse off the etching cream after 5 minutes
Notes
FONTS USED FOR THIS PROJECT:
ACKNOWLEDGMENTS
Recommended Products

If you have any questions on how to personalize your dishes with etching cream, let me know! Ask a question in the comments below this video, or come on over to my Cricut Crafters Facebook group at jennifer maker dot com slash cricut crafters
Answers to your Questions About Etching Glass Dishes and Casserole Dishes
Q: Will Armour Etch work on all glass dishes, including Pyrex?
Yes! I’ve etched my Pyrex brand glassware as well as other brands of casserole dishes. Some were new, some were old. It’s not the brand or the age that matters, but the glass composition. Not all glass compositions are the same, and thus not all react the same to the etching cream. In my experience, the higher quality glass that is “shatter resistant” are the ones the less likely to etch as well.
Q: How can I test to see if my glass casserole dish will etch properly?
Just put a VERY small amount of etching cream on the bottom of your casserole dish. You can use a small paintbrush or even a toothpick to do it to make sure you’re putting just a dot. Leave it there for a few minutes, then wash and dry and examine. If it etched well, you’re good to go. If you can barely see it, or can’t see it at all, your glass casserole dish is not a good candidate for etching.
Q: Can I put my etched casserole dish in the dishwasher or microwave?
Yes! Glass etched with Armour Etch is permanent and you can safely put it in the dishwasher or microwave. The only exception is if you choose to color it with paint or Rub and Buff — if you do, you’ll want to hand wash it and avoid the microwave.
Get my free SVG files to make your own Etched Casserole Dish!
I’d love to see your etched casserole dish, pie plate, and other bakeware! If you make one, please share a photo in our Facebook group, email it to me at [email protected], or tag me on social media with #jennifermaker.
Love,

Want to remember this? Save the Etched Casserole Dish Tutorial to your favorite Pinterest Board


I bought a casserole dish with no writing on the bottom before I saw this video and used it. It was made by Glad, it did not take the etching very well. if you move the dish just right you can see the writing, but only the outline. 🙁
I cannot find any where where it tells me what you used to make the etched area white.
Thanks in advance
Sherrie
We just used Armour Etch cream to etch the design! There is nothing white added, that’s just how it looks! Isn’t that great!!
Just did my first etch…on a Dollar Tree glass plate. Your directions were PERFECT and the results were awesome. Thank you for being such a great “instructor”!!!
Awesome, Annie!
So when I wash after adding glads etch my design is disappearing. – do I need to cure or bake it in?
The problem you may be having, Danielle, is your glassware. You do NOT need to cure or bake the Armour Etch. Some glassware, however, cannot be etched properly. What you need to look for is the amount of borosilicate in your glass! Older Pyrex (made before 1998) and dishes from IKEA and some other places seem to have a large amount of borosilicate in them. They will not etch at all, or won’t etch as well, like other glass. This is because borosilicate is a harder type of glass. If you see a note that your dish is very scratch and impact-resistant, or is made to withstand rapid temperature changes, it’s possible that it may not be able to etch correctly. Please check your etching cream manufacturer’s website for information. If in doubt, take a toothpick and put a dot of etching cream on the dish to test it out to see if it will etch or not! 😍