
Valentine’s Day is in just about a week. Greg reminded me of this a few days ago. “We don’t usually do much to celebrate it, do we?” I said to him. “Sure we do,” he replied back, “we always mark the occasion and do something special together.” Oops, he’s right! And, often, I’m caught unawares. Hence the forgetfulness about the holiday! But not this year! I made both Greg and my Alexa a Valentine’s Day gift that didn’t take too much time or money. I got most of what I needed for this project from Dollar Tree (I just love this store!). This DIY dry erase board is so easy to make, and you can personalize it with a simple printable or two. This is so simple that I have made a dry erase board to go into my new command center! So let me show you how to make your own dry erase board!
This is a post written by me about Dollar Tree and contains affiliate links. All opinions are genuine and my own. Please see my disclosure policy.

DIY Dry Erase Board Materials

- A Special Moments Narrow-Edge Black Plastic Photo Frames, 8×10 in.
- Inc. Magnetic Fine-Point Dry-Erase Markers, 3-ct. Packs
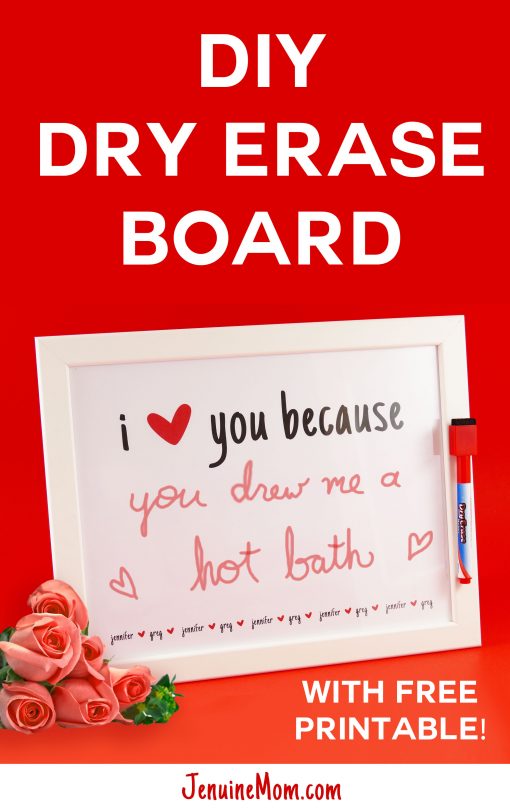
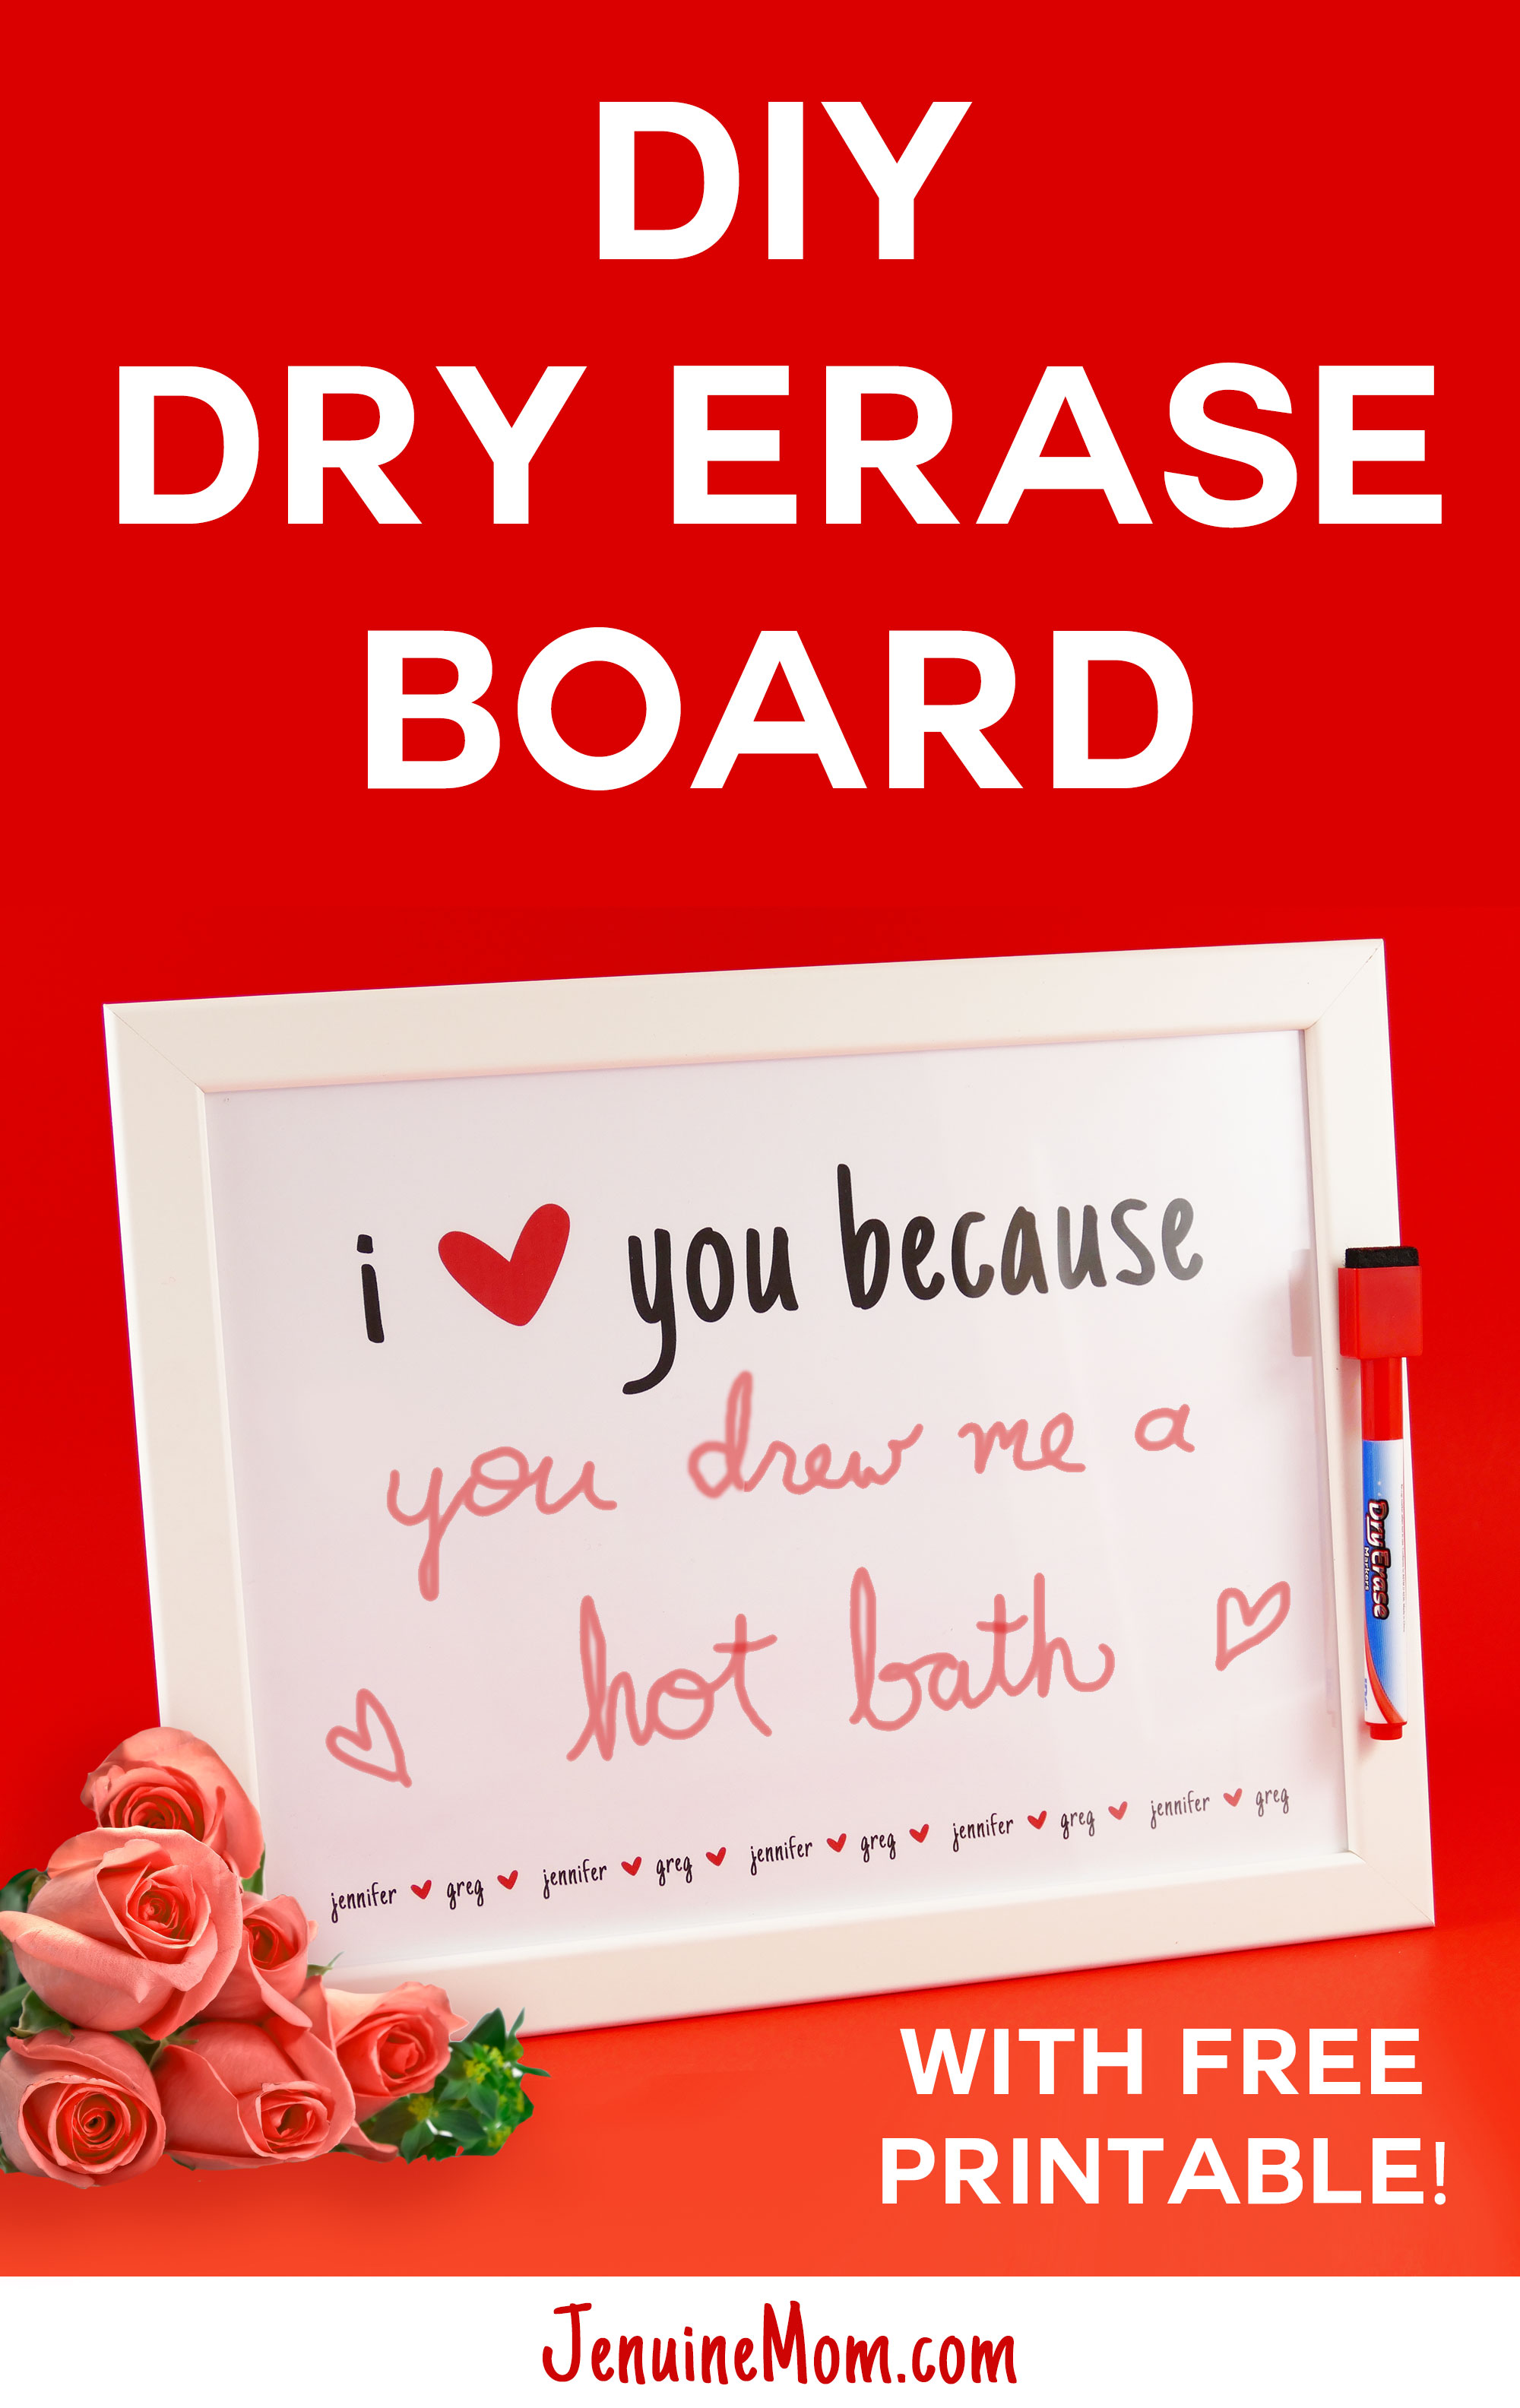
- A piece of scrapbook paper or a personalized, printed sheet of paper (the “i love you because” printable (Design #15) is available for free in my Resource Library)
- Scissors (they sell these at the Dollar Tree if you need ’em!)
- A magnet (optional) — I used a strong neodymium magnet, but do not use these if you have small children who might swallow the battery because they are dangerous
- Hot glue gun (optional)
DIY Dry Erase Board Step-by-Step Tutorial
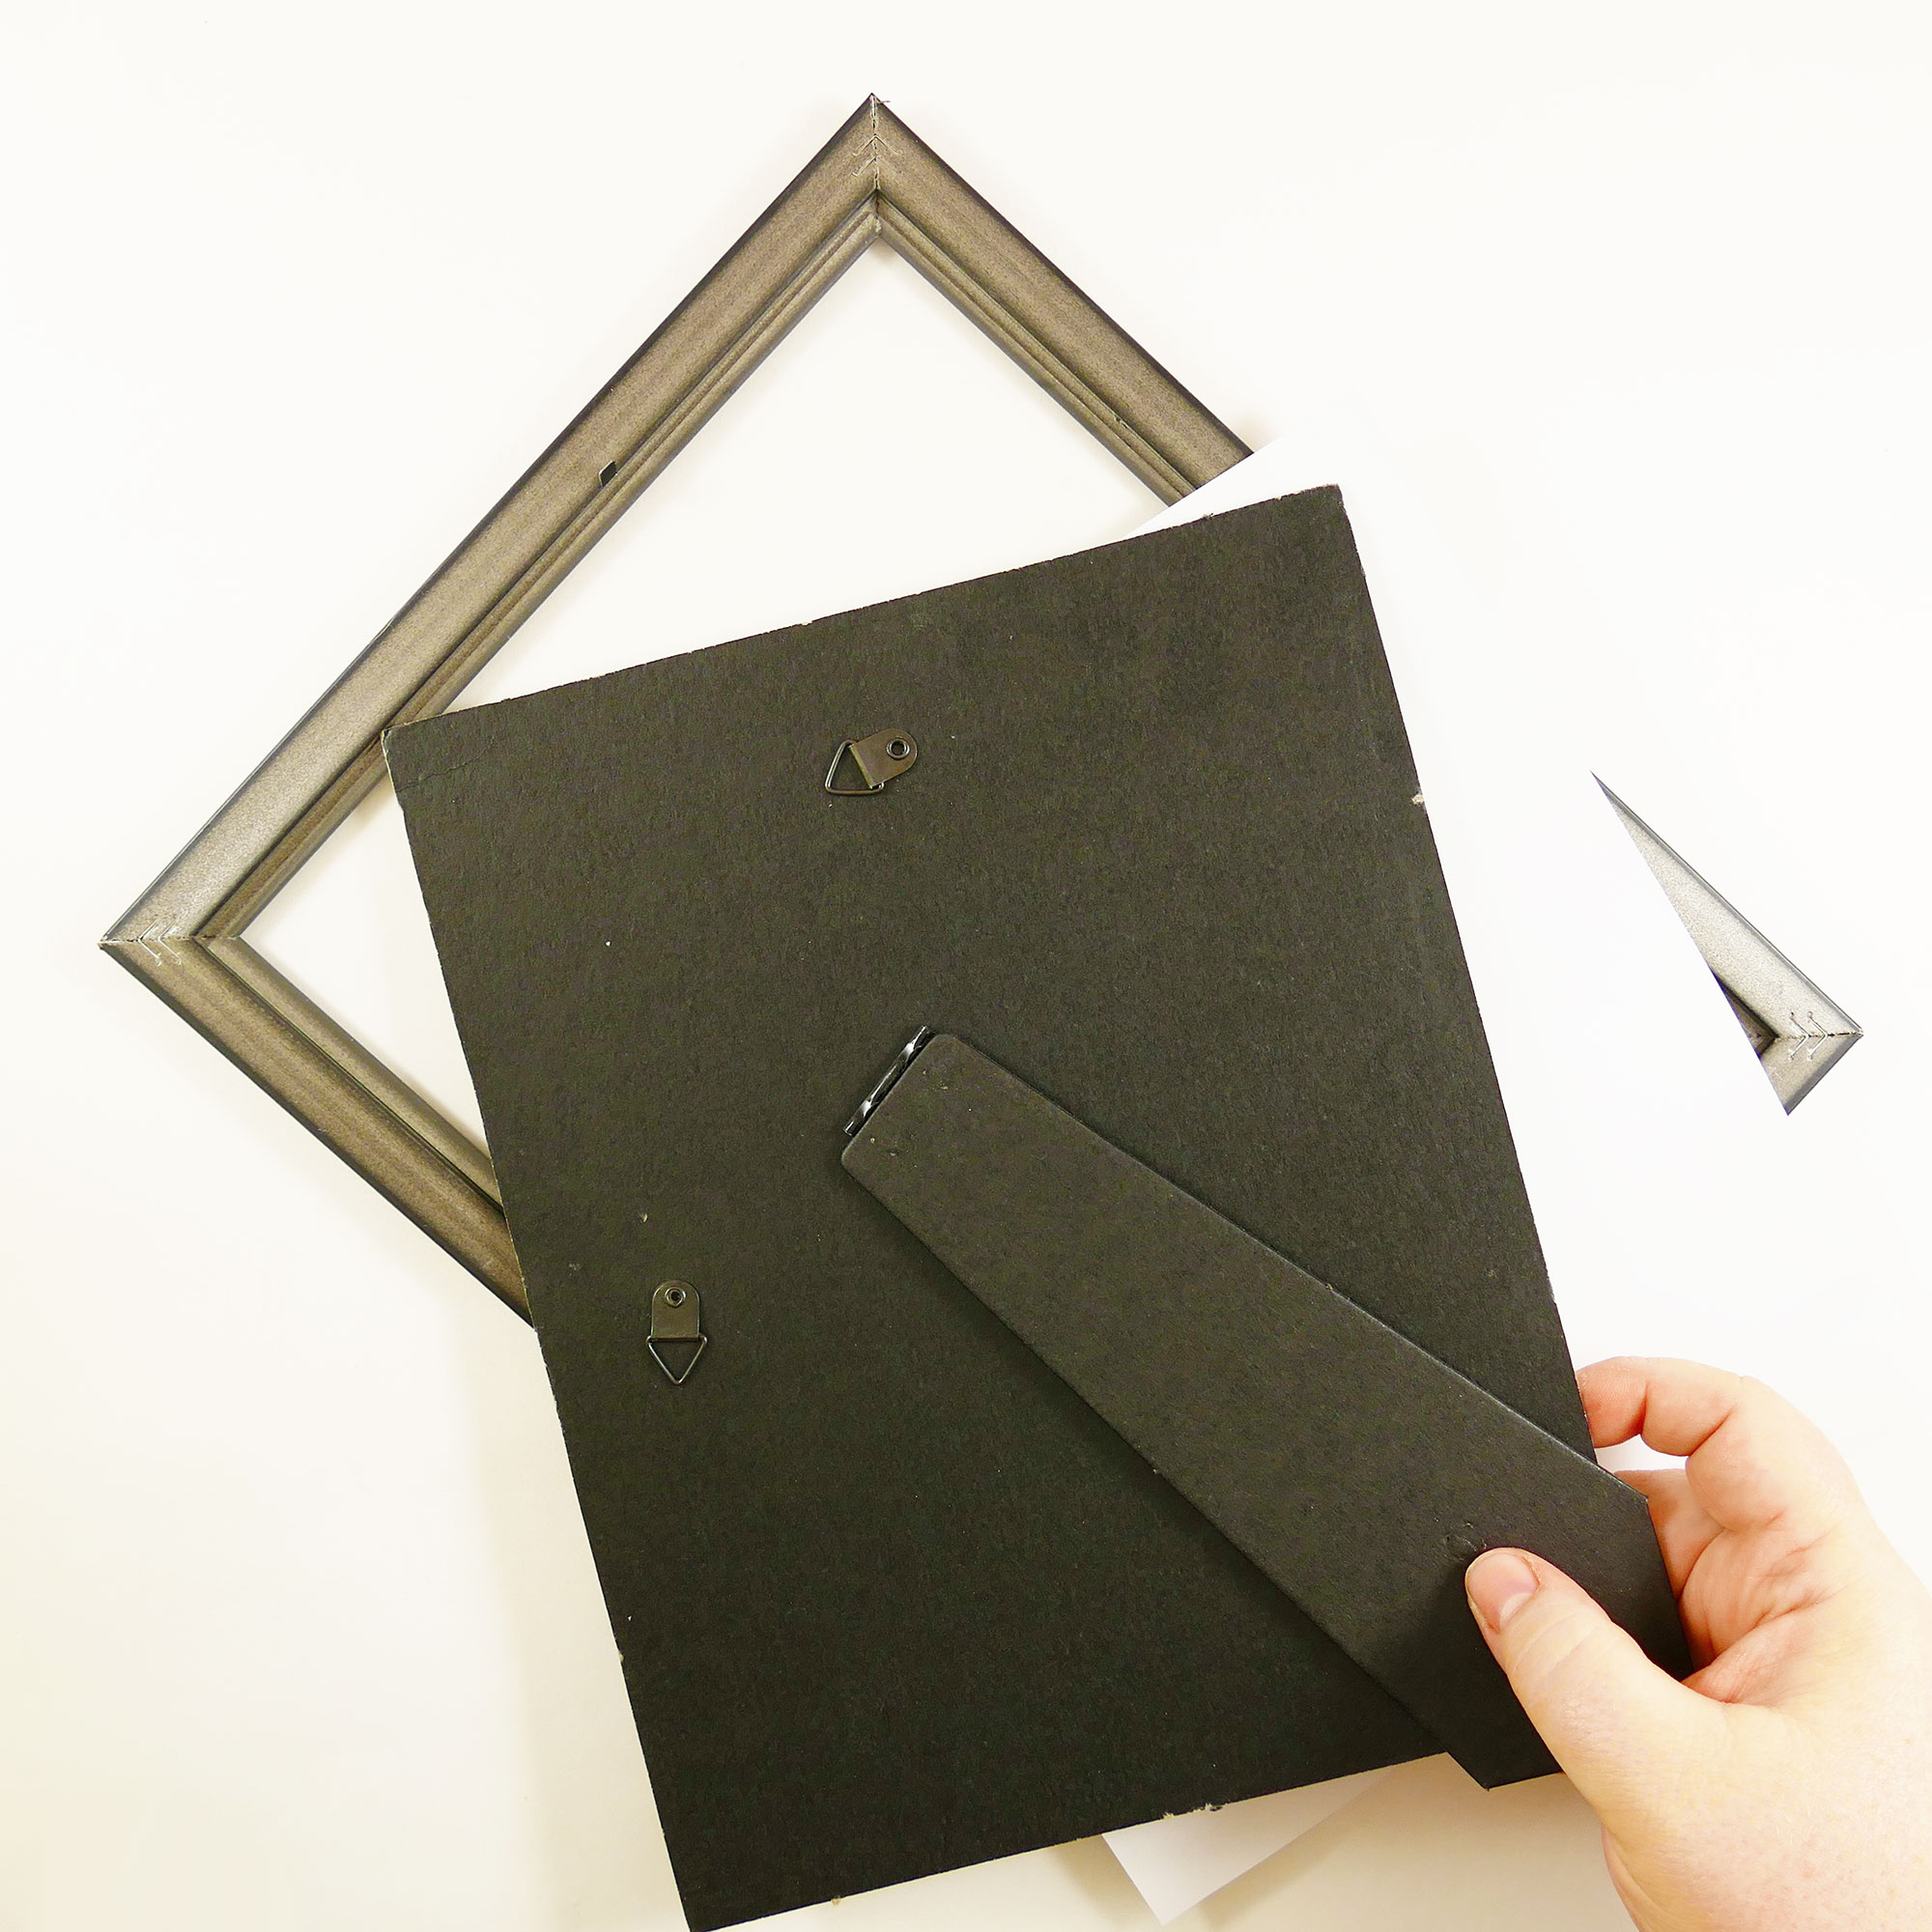
Step 1. Take the wrapper off your frame and any protective sheets that may be on the glass/plastic.
Step 2. Remove the back of the frame and take out the sample picture or sheet of paper in it.
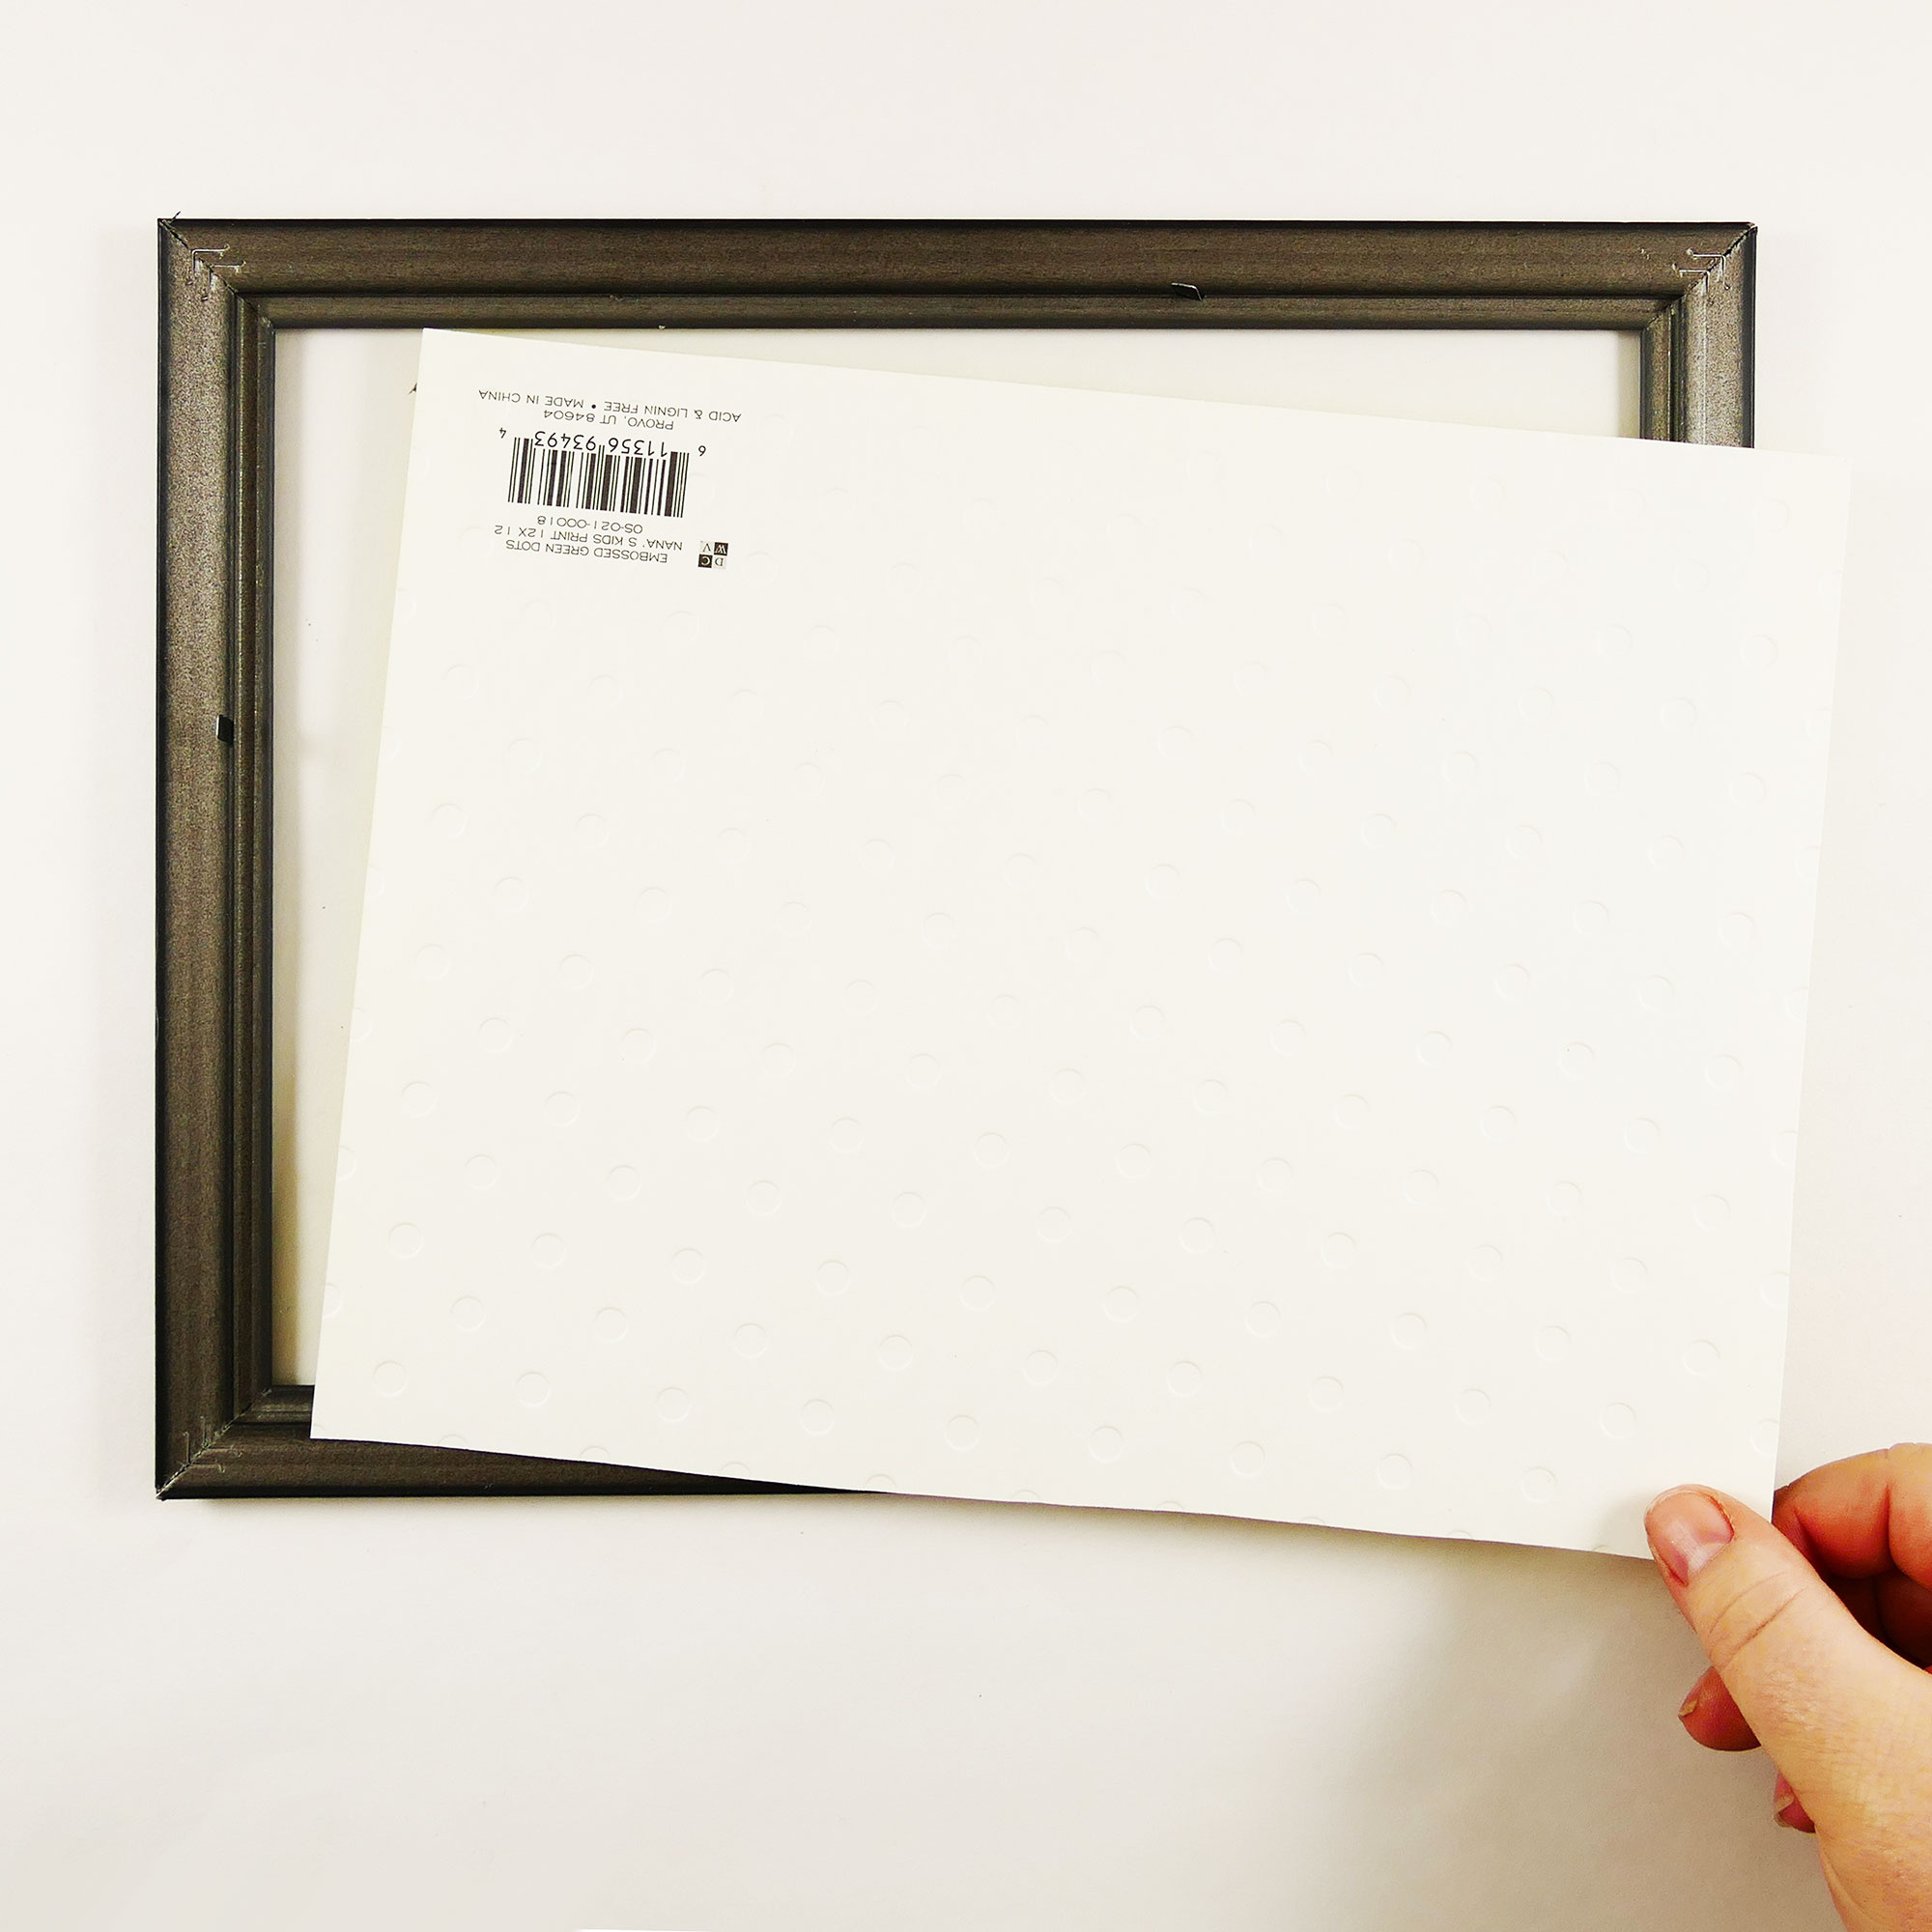
Step 3. Using the sample paper as a template, cut your scrapbook paper to the same size. If you’re making a personalized dry erase board, print and cut your paper to fit the frame.

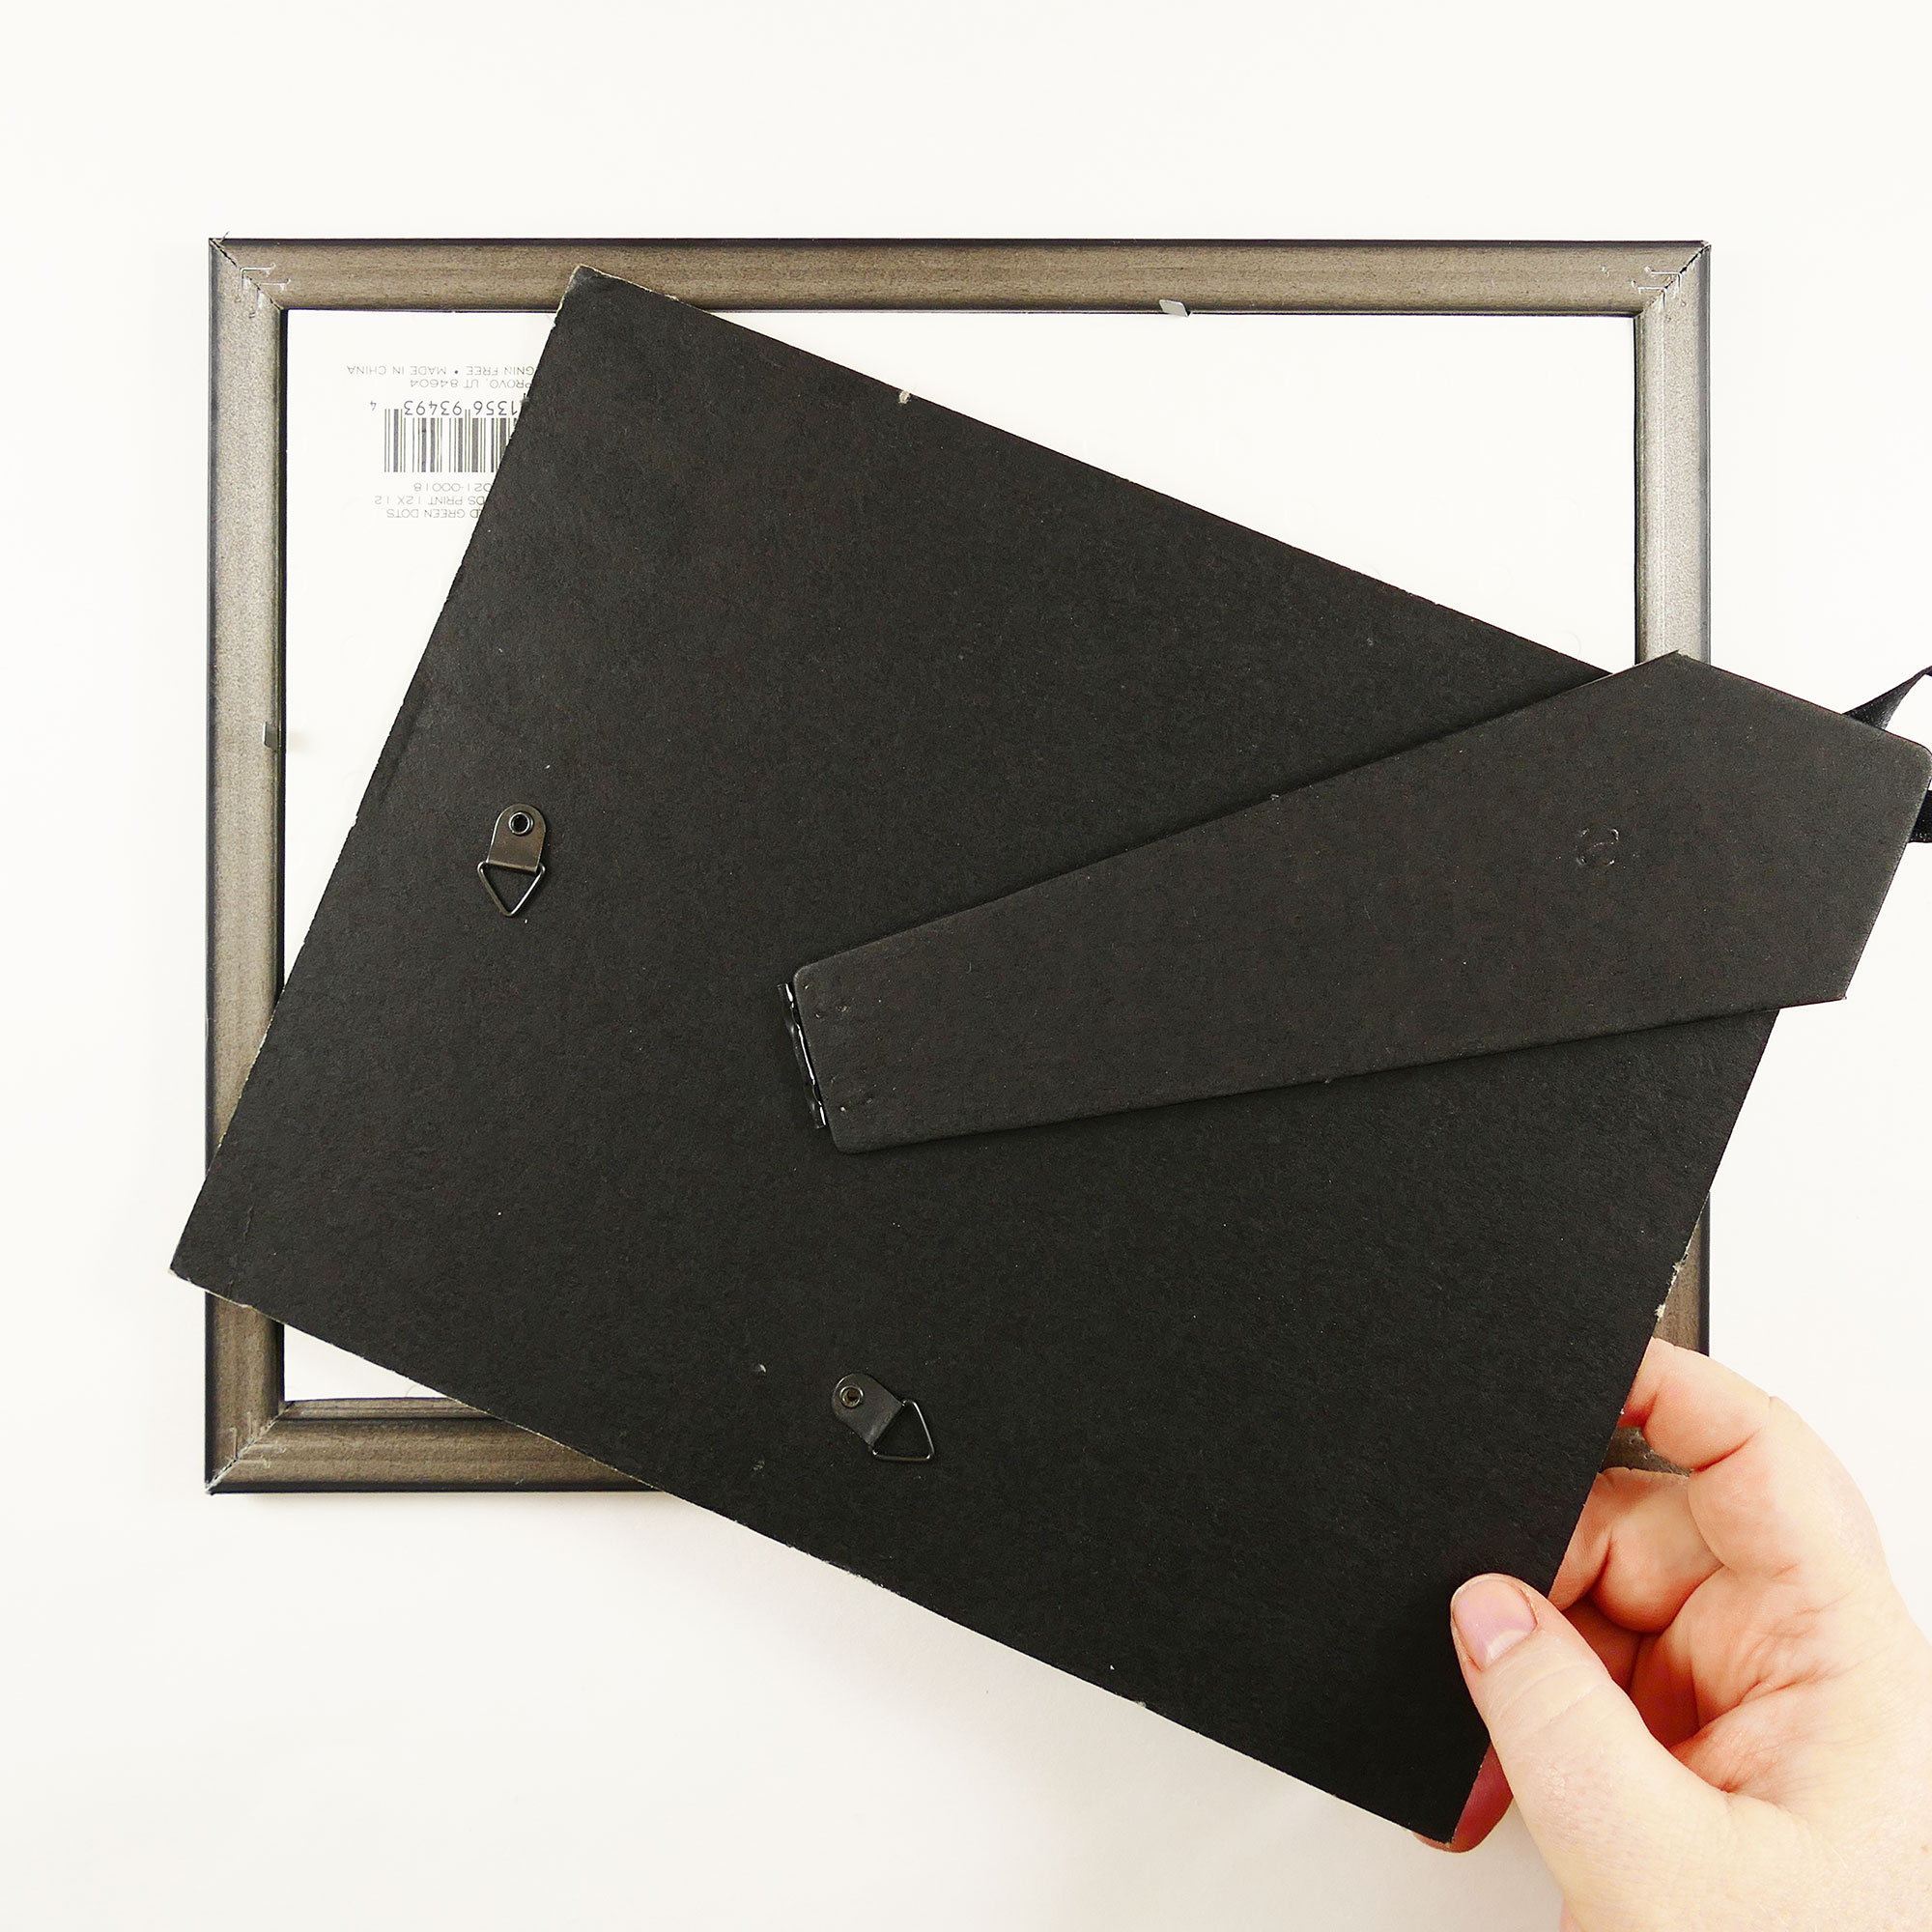
Step 4. Put the paper in the frame (pattern side down) and close up the back.
Step 5. (Optional) Hot glue a magnet to the side of your frame. I like to do this because we’re always losing our dry erase markers, and keeping the marker with the frame prevents that. With a magnet on the frame, you can attach the magnetic dry erase marker right to the frame.
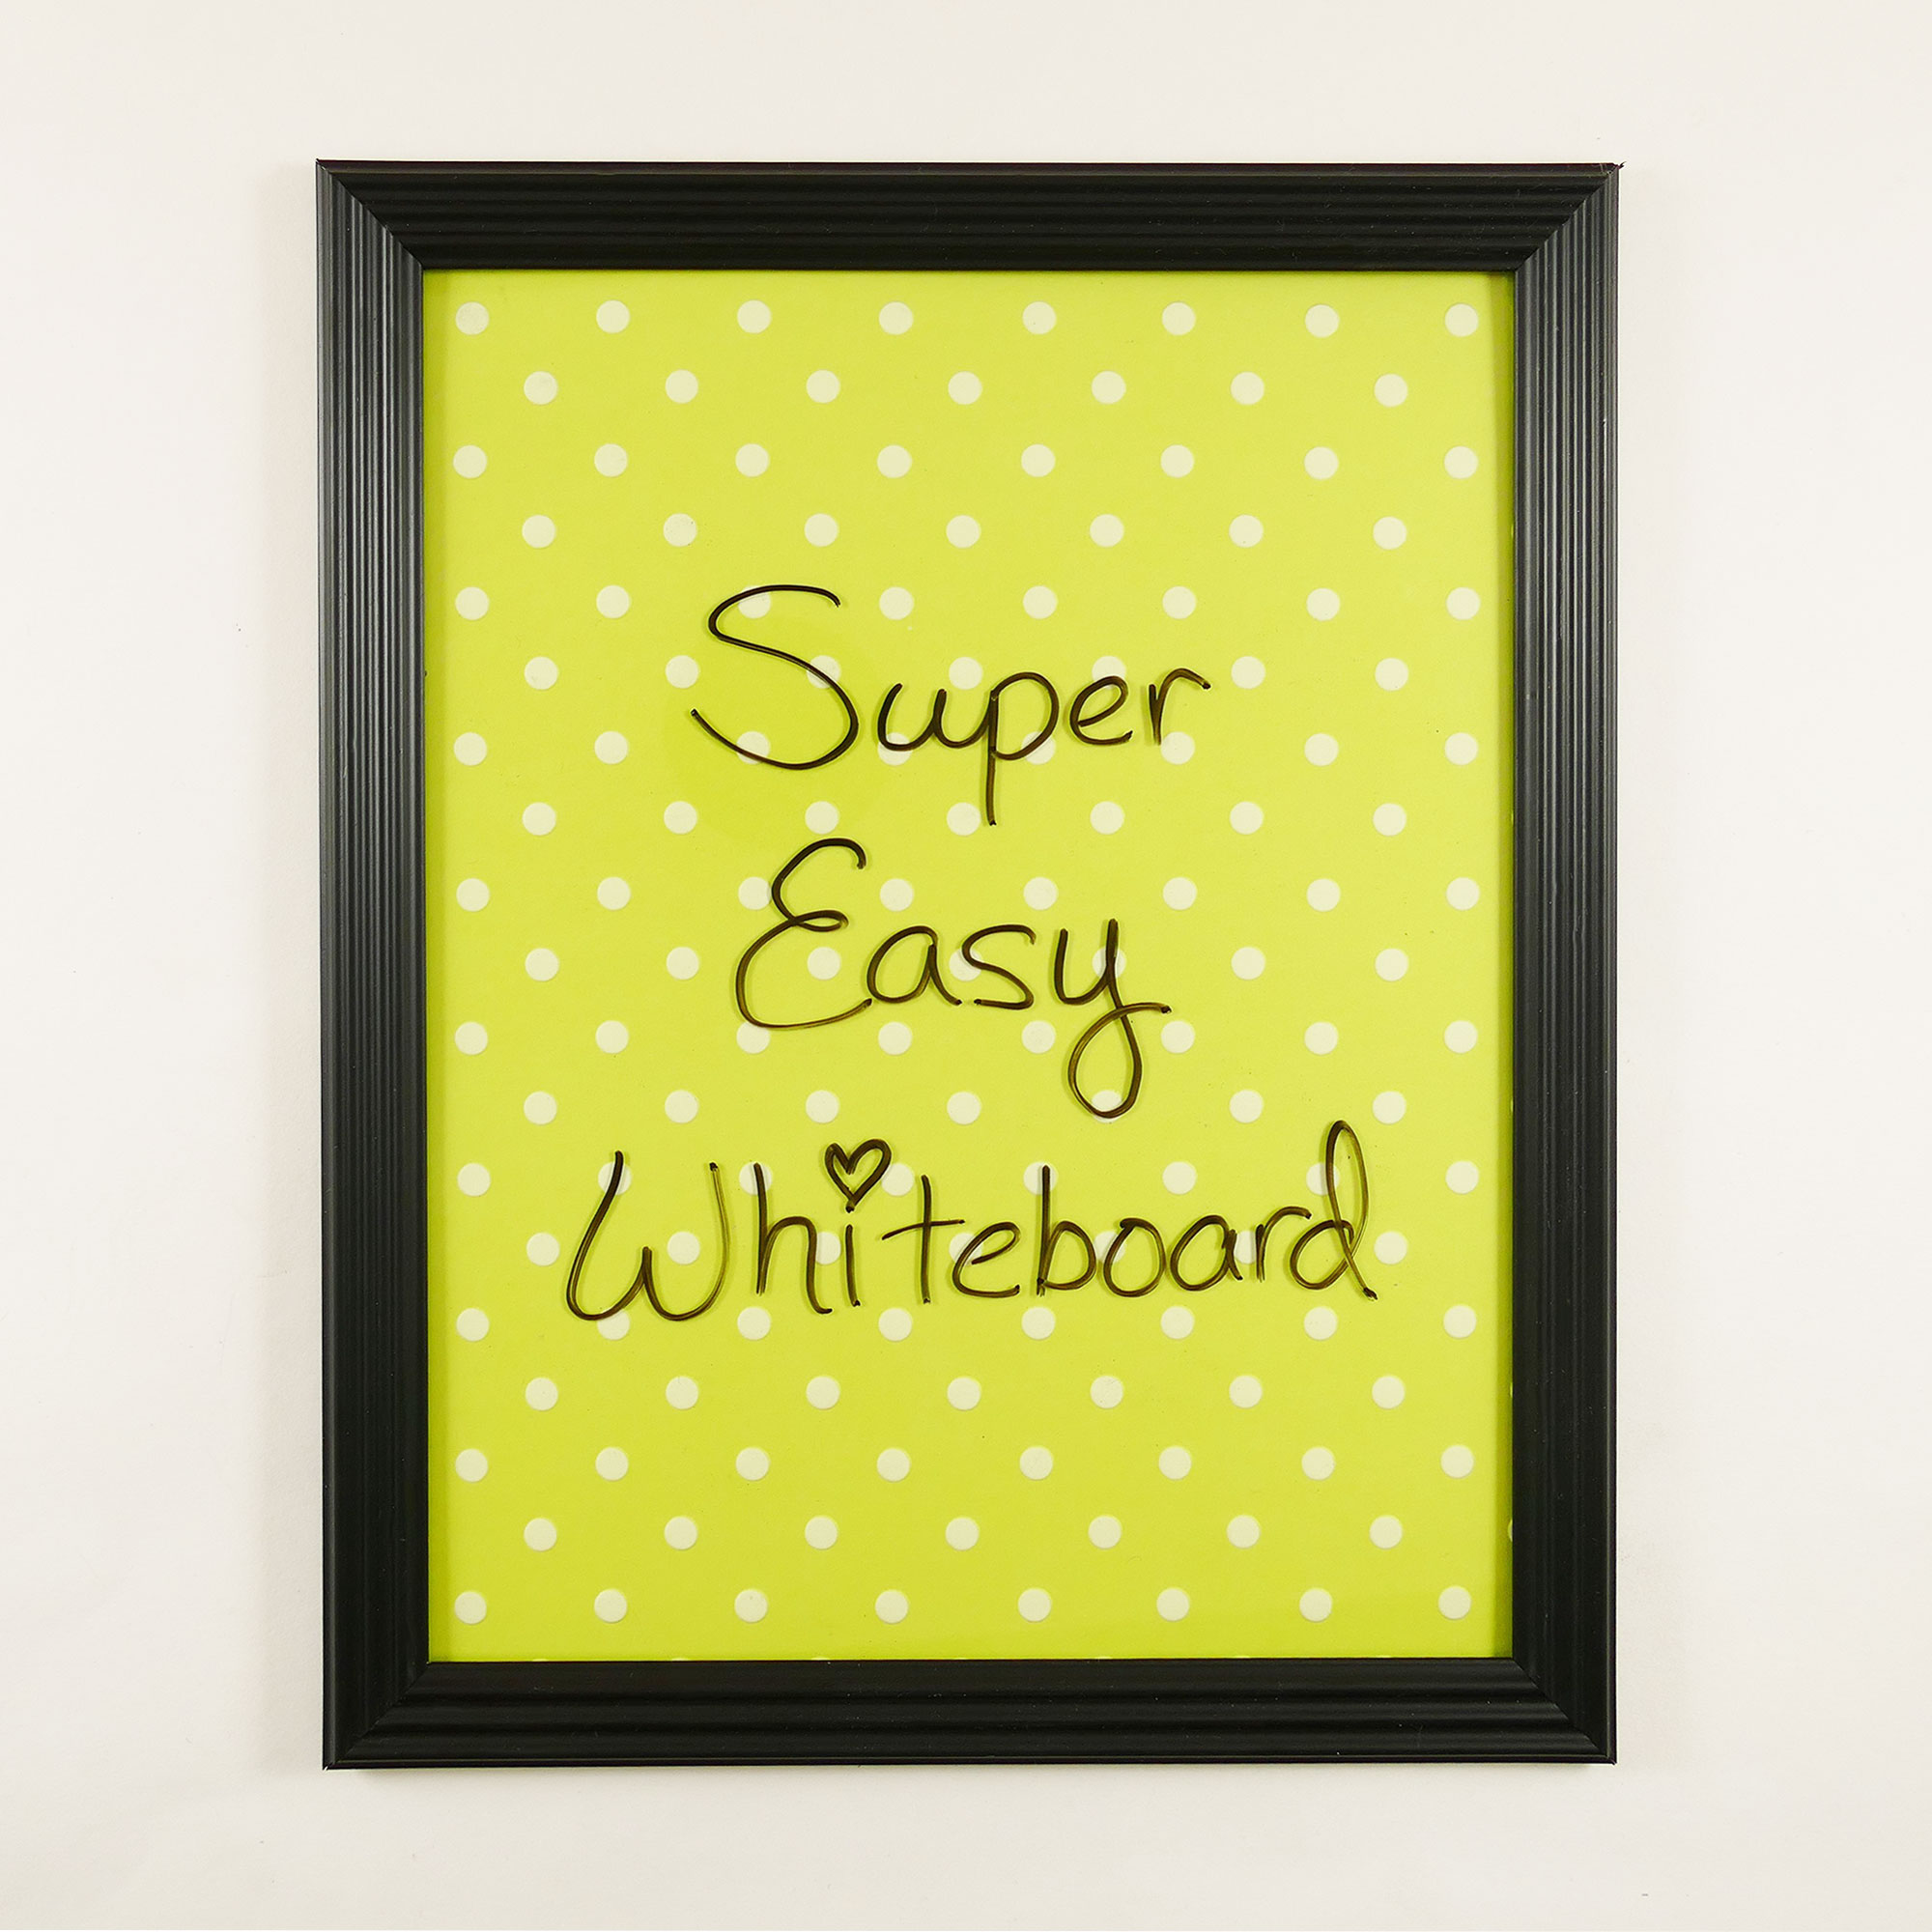
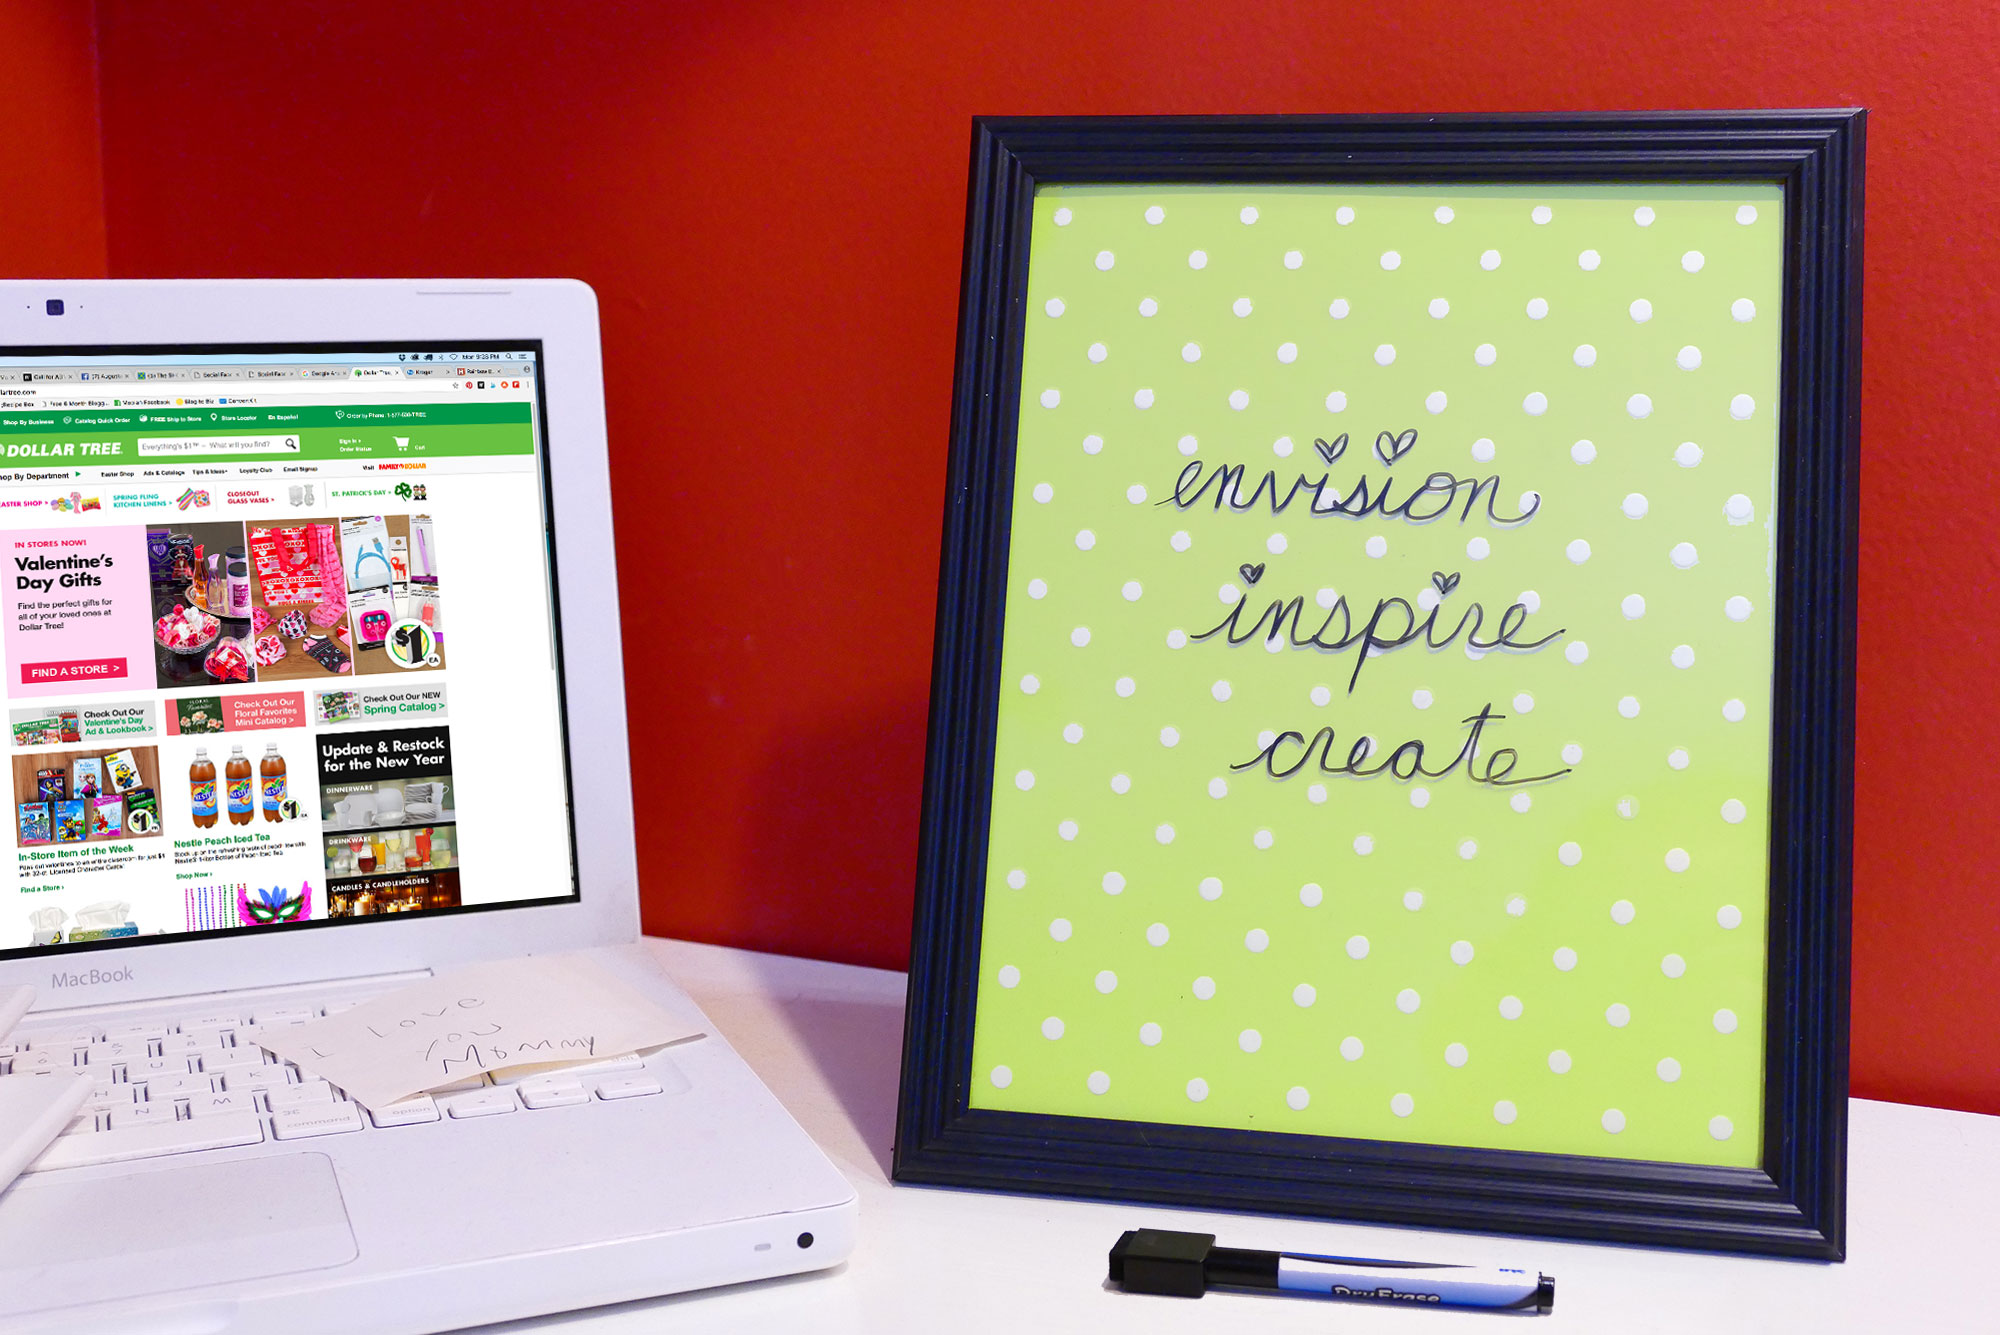
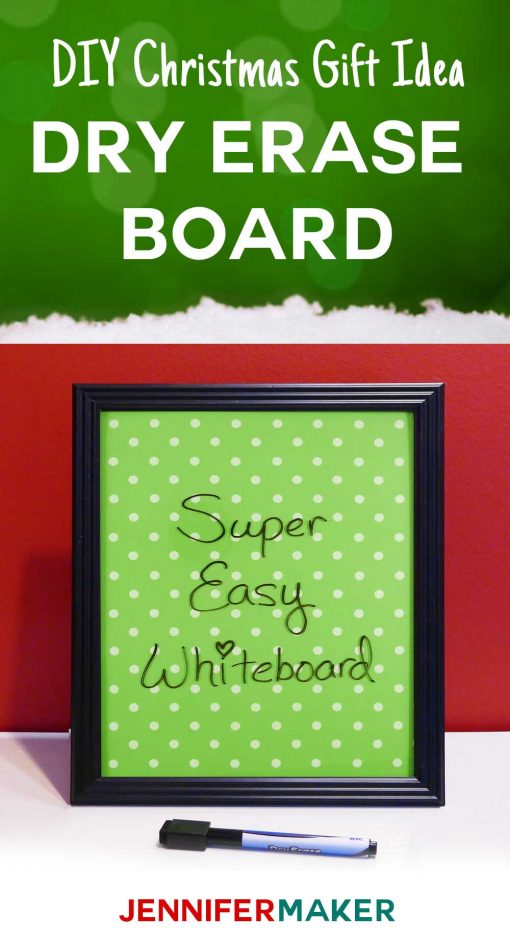
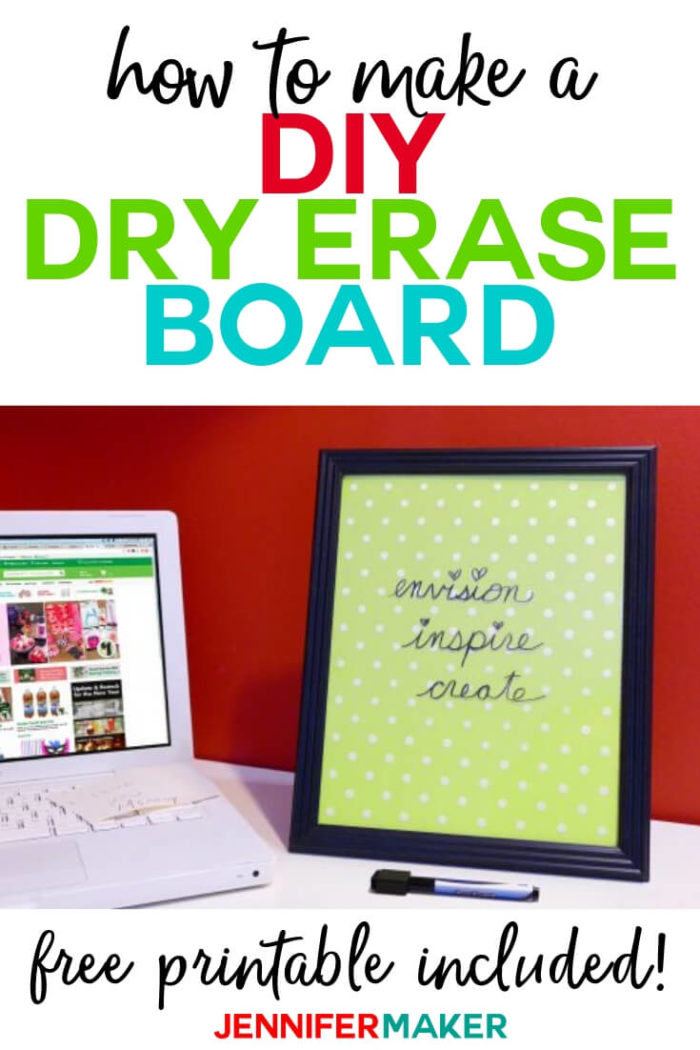
Isn’t it cute? It only took me five minutes to make!
I plan to attach this DIY dry erase board to Alexa’s bedroom door so she sees it often. Naturally, I will put new messages on it. She’s at that difficult tween stage in which it’s apparently no longer cool to snuggle with mom or show lots of affection, so I think something like this is a way for me to show her I still think he’s awesome.

I will put this frame in our bedroom where we can see it every night! Again, I plan to put heartfelt messages on it … and I have no doubt Greg will, too. He’s very sweet and affectionate!
Here’s what the magnet looks like hot glued to the frame.

If you’d like to make this “i love you because” frame, I uploaded the free printable to my Resource Library (you can get the password to it by filling out the form at the bottom of this post).
I loved this simple project, and I hope you do, too!
Love,

Like this tutorial? Please pin it to your favorite Pinterest board!


What a cute idea! This would be something I can do easily and would look adorable in my office.
This is a really good idea. It looks easy to do and affordable. I have so many old frames I could use.
I went on a dry erase craze a couple of summers ago, and did this to about 10 old frames in our house! They are so easy, turn out cute, and work great!
So simple, but so great to have and match any room you may put it in! Also easy to update!
I love this DIY for many reasons. And – I made my own DIY board like this years ago. I put inside the frame a printable for the weekly dinner menu. Then I just wrote it in for each day. Now if you want to know whats for dinner – just look at the board! Love it!
This is so so clever, I’m definitely making my own this weekend – I love chalkboards more but they are so damn messy and you get the bloody dust from the chalk absolutely everywhere. This is much more useful! x
This is super cute and looks so easy! I love how you can make it your own with different scrapbook paper. What a clever idea!
Yep, I am making this for my husband. I know he’ll like this! Such fun thing to do, the 40th anniversary of our marriage!
What a great project! Your photo’s and tutorial make it look super easy to make too! TFS!
I made this for my husband once and he really love it, it was fun to have a whole bunch of reasons why I love him.
We have one of these and my hubs likes to write inappropriate things on it! I’m gonna have to get rid of it when our daughter learns how to read!
This is so neat! I never would have thought that I could make a dry erase board like this.
i love this idea! its great to be able to change the background of your board, makes it so much more decorative and not so cold!
This is such a good idea! I might make one for my to do lists – there’s no point in wasting paper
This is cute and so easy. I think that it’s a fun thing you could have for kids so they can draw and redraw.
What a fantastic idea! Most dry erase boards are so dull, boring and plain I would love to make up a nice one for my house like this. Super cute.
I am absolutely loving the idea of using a dry erase for love notes to my kids! Amazing idea and great tutorial!
I love this so much. Who needs a boring white board when you can create your own unique board. Can’t wait to give this a try.
What a great DIY! I find that a lot of the fancier white boards are so expensive. This is such a frugal idea!
This is such a great idea for an organizational diy, or as a gift! I love diy’s that are made from dollar store items!!
I love this! I’ve been using dry erase boards a lot for my kids lately. We use them for school and fun during the day. These would be so easy to make!
I’ve seen this before on Pinterest, such a cute idea! And it’s so easy, too.
I made something like this just last weekend! It was crazy easy and I love it!
I love this idea! I’ve been wanting to make one and I have an empty frame that I haven’t had any pictures printed yet for so that would be perfect for this!
Yay! You should make one!
This is such a cute gift idea, especially for older kiddos and college kids with the dorm. Looks super easy to do too!
Fantastic idea! I would love to do this for my weekly meal plan. I think it’s so so smart. I was looking into laminating something but with your DIY, I can add cute paper and change it up for holidays. Love it
Hi, I did something similar. I bought a frame at a thrift store for $1. I took white craft paint and painted the glass with 2 coats letting it dry in between, then put the glass back in the frame painted side. But yours are so pretty, I may have to go find another frame and do your method! You have a great website! Love all your creativity! And I love the idea of no excuses about doing a craft. Summer for me is my craft time as I live in southern Arizona and so while I am out and about in the winter, not so much in the summer, but recently I have been putting off crafting, so thanks for the great reminder! Happy crafting!
Hi, Karen! Thank you so much for the comment and for the compliment on my site. It is much appreciated. Happy crafting to you, too!!
What a wonderful idea for a white board without the boring ‘white’! Thank you!!
Thanks, Audrey!