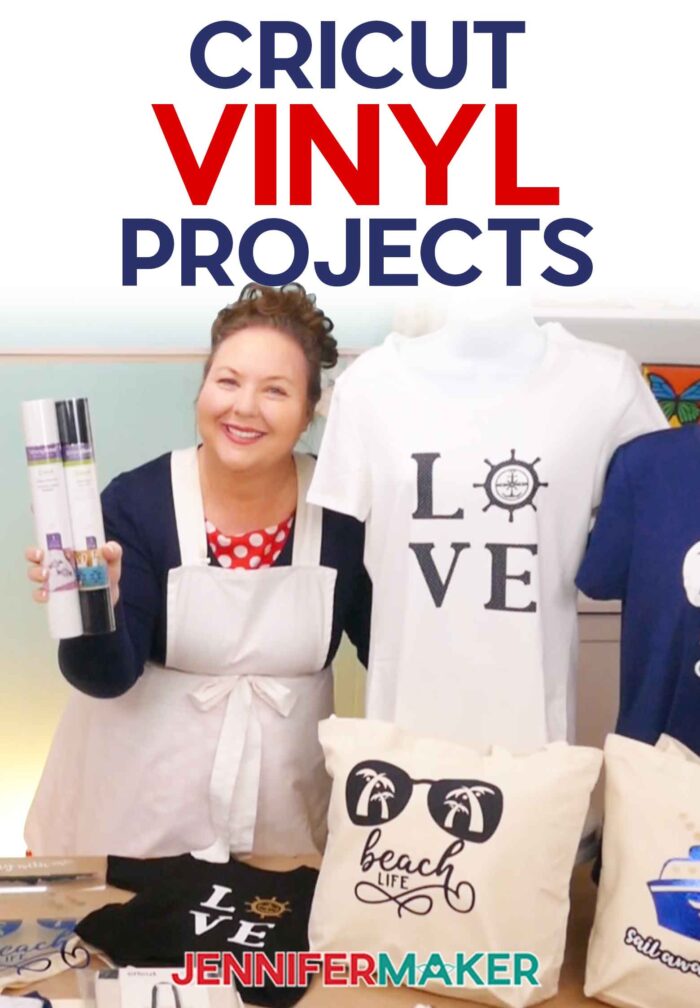
Learn how to make the Cricut vinyl projects of your dreams!
We’re lucky that there are so many options when it comes to Cricut vinyl projects! New colors, textures, and patterns show up all the time! It can be a challenge to keep them all straight, even if you’re focusing just on heat transfer vinyl. Especially if you’re just starting out or want to decorate a new material. If you’re looking for beginner Cricut projects, I have a lifesaver of a free design collection for you featuring several types of vinyl in different combinations! We’ll discuss which vinyl goes best with different materials, how to heat it, and how to layer for lovely, lasting results!
Watch the full step-by-step tutorial video on how to make Cricut vinyl projects:

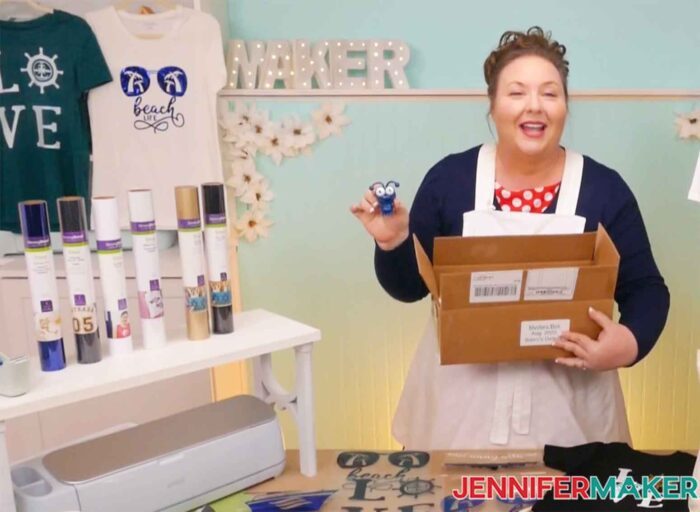
This is a Cricut Mystery Box project — it uses all the same vinyls that you could have gotten in the “Sailor’s Delight” mystery box that came out in August 2022. While this mystery box is no longer available for sale, you can still purchase the individual vinyls, which are all links below in my material list. Learn more about Cricut Mystery Boxes and their contents in my Cricut Mystery Box Guide.
While the options may seem overwhelming there are four main variables in Cricut vinyl projects: the item made of a known material to be decorated with a design using some type of vinyl and applied with specific heat settings. Once you’ve made a decision on one part, your choices for the next one are limited by it, so the process is much less overwhelming! Even if you’re a Cricut beginner, I think these Cricut project ideas are a great way to begin.
Here’s a fun project example:
I knew I wanted to try out Cricut’s SportFlex Iron-on vinyl, which I haven’t used very much.
According to Cricut’s instructions, it works best with polyester and nylon since it can stretch with those fabrics. But it doesn’t stick well to items with lots of cotton. A polyester t-shirt seemed like the perfect fit!
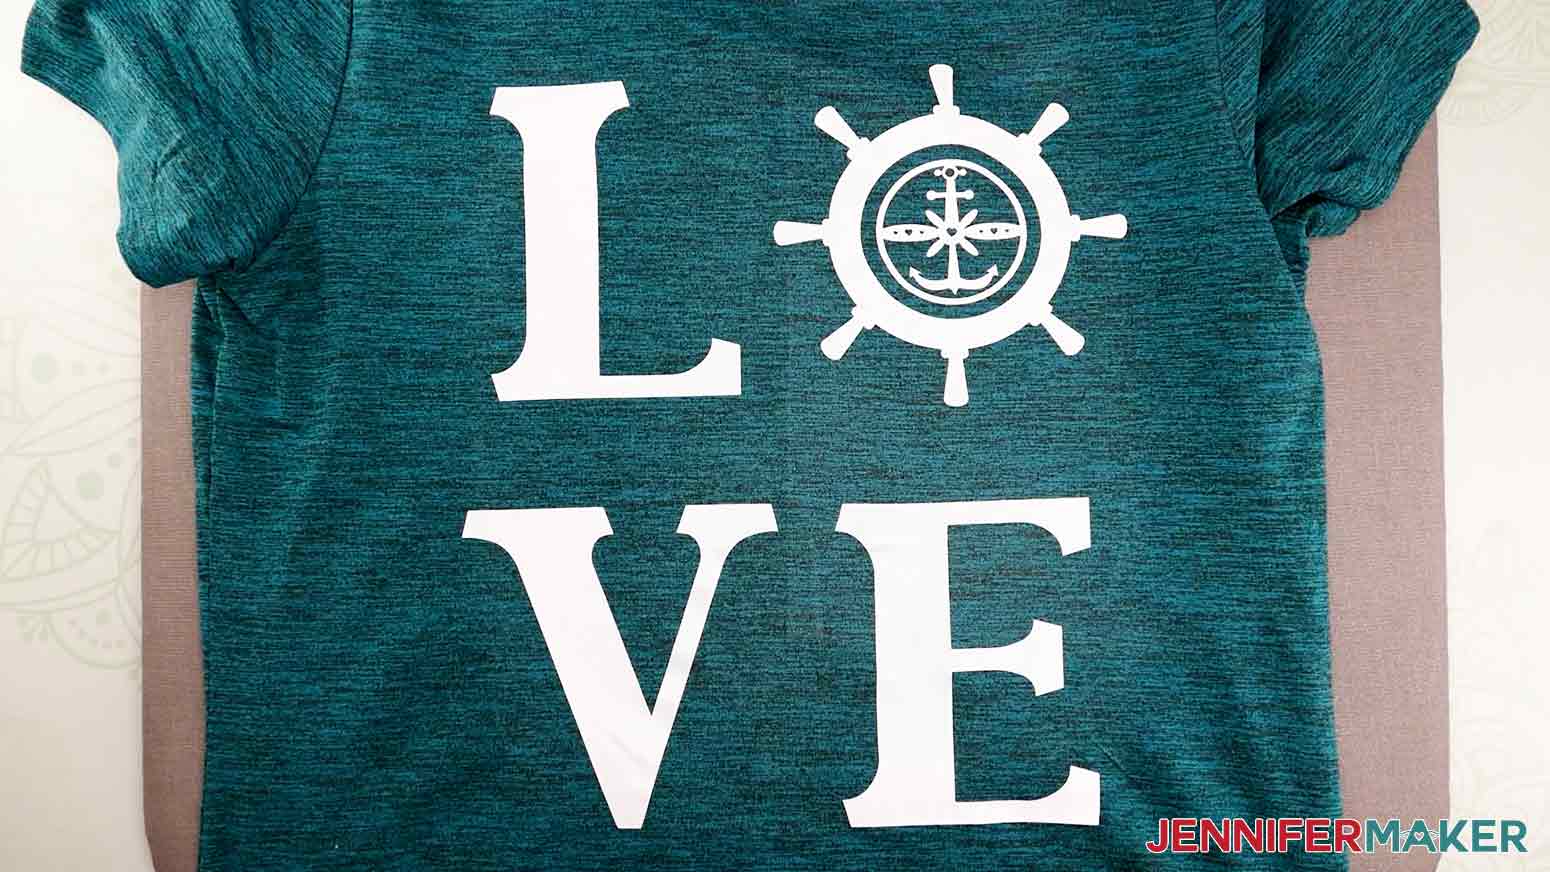
Since SportFlex is really thin and should only be layered with the same vinyl, I chose my single layered Love design. It has big sections of vinyl that will be comfortable due to the vinyl’s stretchiness, but the details are still thick enough that the vinyl shouldn’t tear during weeding.

Ready to try my process? Great! Let’s start.
Pick Your Item
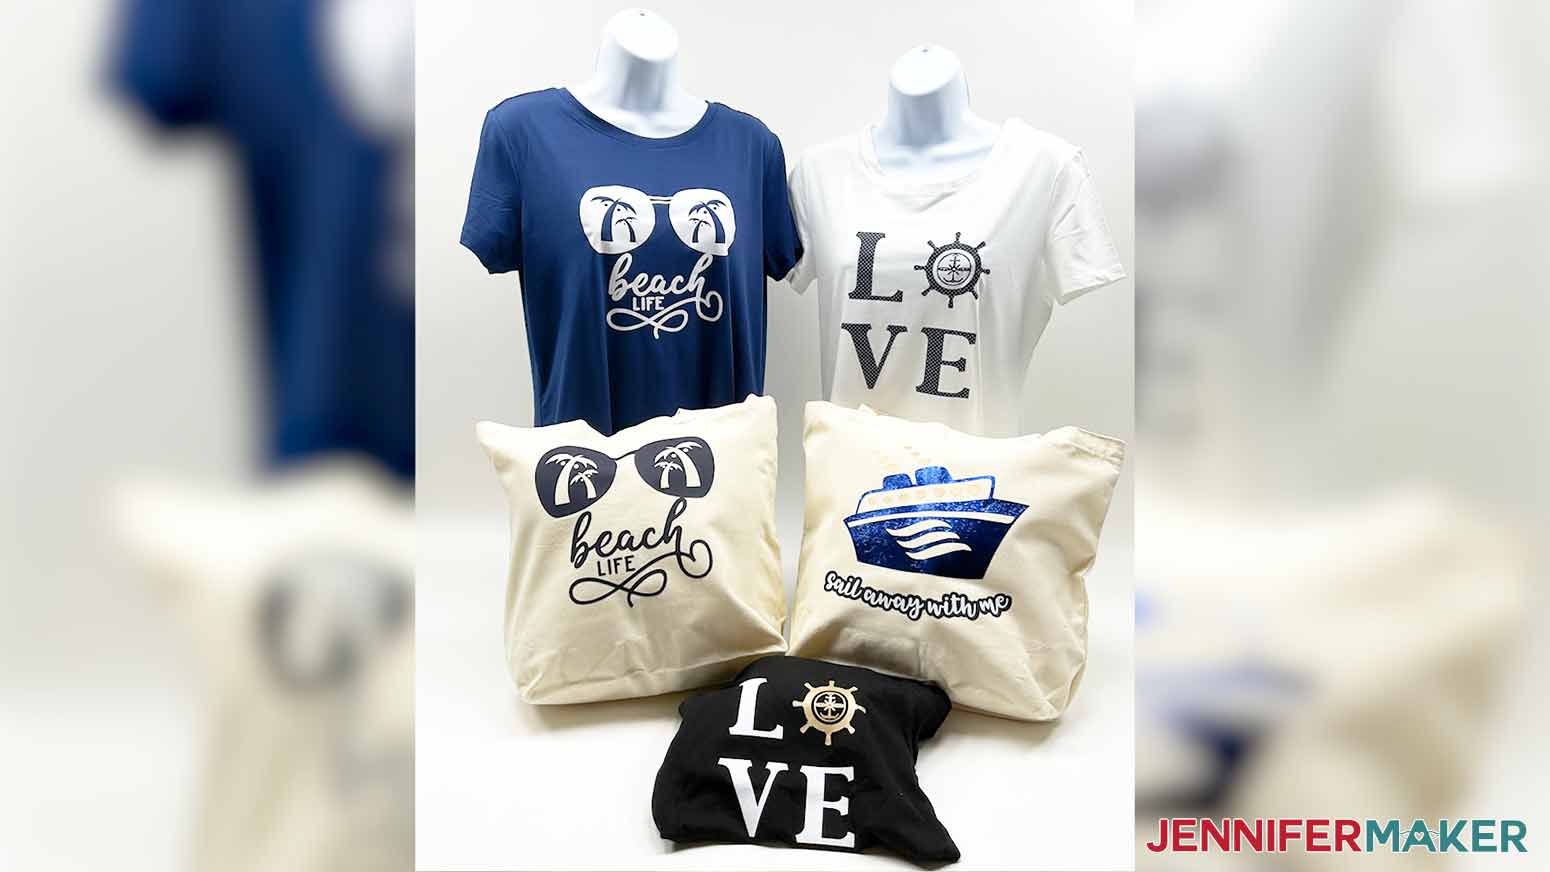
Well, what do you want to decorate? Make note of its material, care instructions, and dimensions to check that the vinyl you have is compatible! I decided to try a polyester shirt, canvas zipper pouch, and cotton canvas tote for my Cricut vinyl projects.
Pick Your Vinyl or Vinyls
Do you have material you want to try for the first time? Or is it time to use up some of your vinyl stash? See what you have that is compatible with your item. I have lots of tips in my Ultimate Guide to Vinyl! It helps to have a few options in mind so you can narrow them down according to your design. If you’re making your first project, follow my steps using the same materials to really learn the process.

Pick Your Design
This part is easy – just download some of my free designs for these easy Cricut projects!
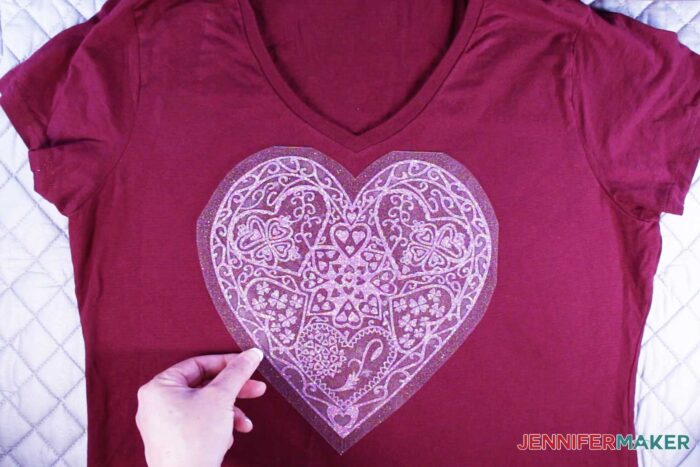
If you’re working with a large item, the Love design looks lovely nice and big. I’ll show you an easy way to resize it in Cricut Design Space to fit your shirt.
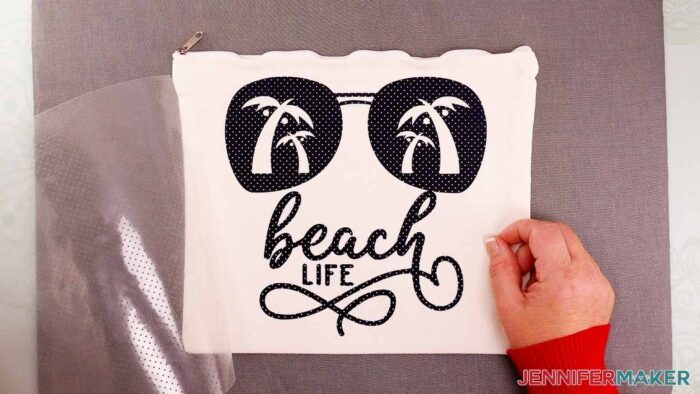
The Beach Life design also works well both big and small!
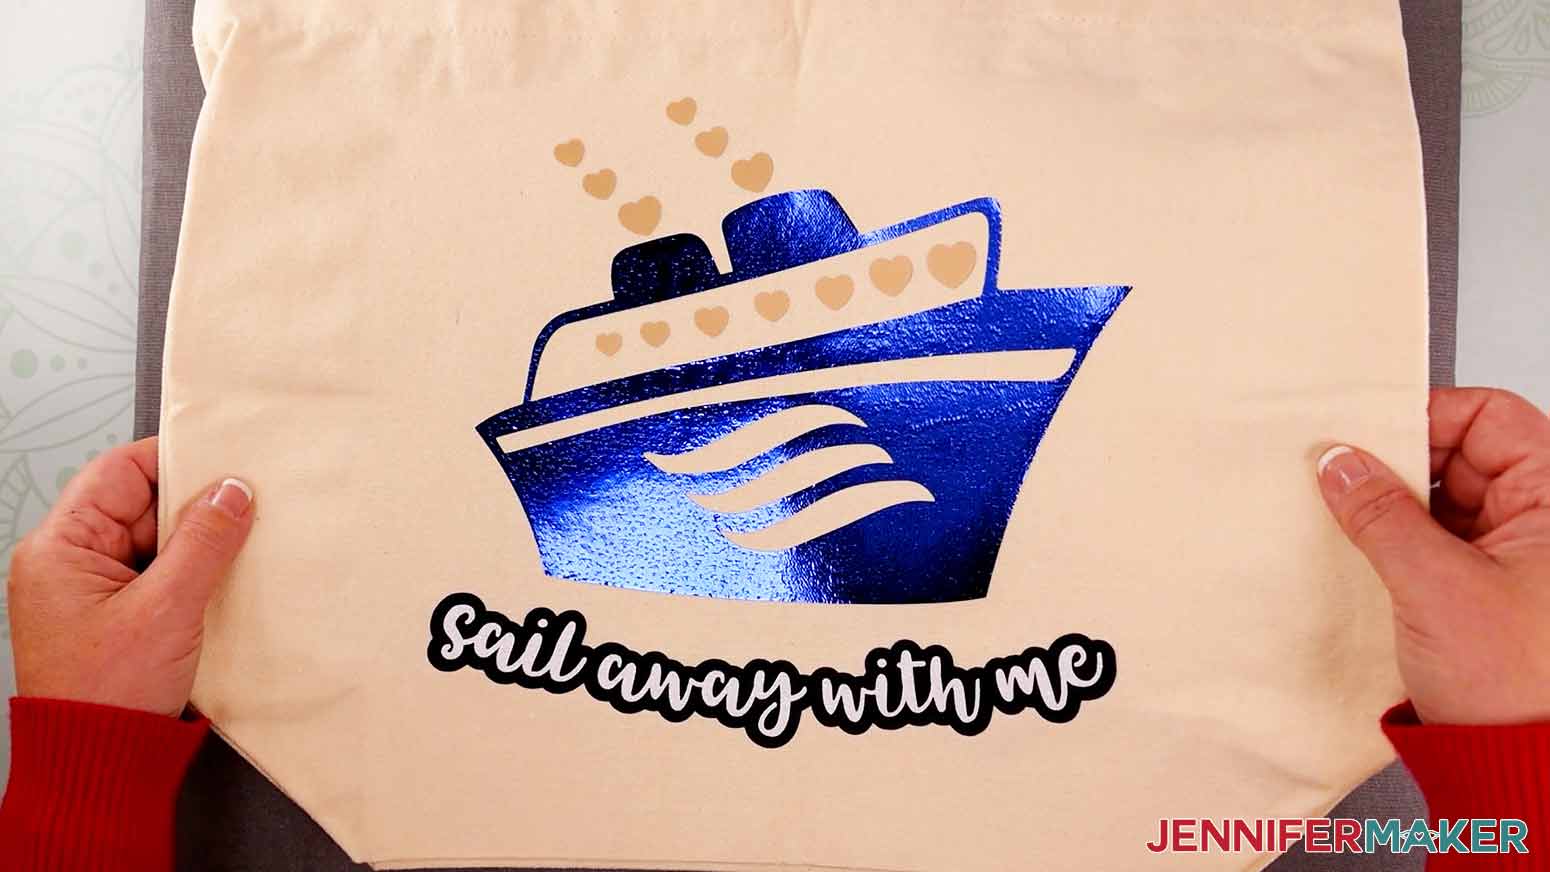
And if you’re ready to try out some layering, my Multicolored Ship is a good place to start! It’s super customizable and makes a perfect bag decoration! If you want to layer, plan out the design’s order. Not all vinyls can go on top of each other, which I’ll tell you about in the full video. Take notes, especially if you use options like glitter vinyl.
Make a Plan
Once you’re sure your item and vinyl are compatible, and that the design will work well with your choices, don’t jump right in.
There are lots of details in HTV crafting, so save your time and materials with a bit of research and planning, especially if you’re layering vinyl. Use the Cricut Heat Guide to check which temperature and time each vinyl needs according to your item’s composition and the heat press you’re using. There are some things to keep in mind when layering different vinyls with varying temperature needs, I’ll show you how to adjust the process for them.
Craft!
You know this part! Use my free files and tutorial to make your Cricut crafts. Remember, have fun!
Learn for Next Time
It’s always good to reflect on each project. That’s the best way to learn! What worked well? What would you do differently? Did you get a great idea everyone should know? Or do you have a question to help your next project go smoother? Make some notes for yourself, but I’d love for your to share your results in our Facebook group!
Now that you know the process, get your materials and supplies ready!
I used my Cricut Maker 3 for these Cricut vinyl projects, but you can also use an original Maker or machine from the Explore series, including a Cricut Explore Air. You could even make them small enough to cut on a Cricut Joy. A Green StandardGrip Machine Mat, fine-point blade, and brayer are all you need for perfect cuts!
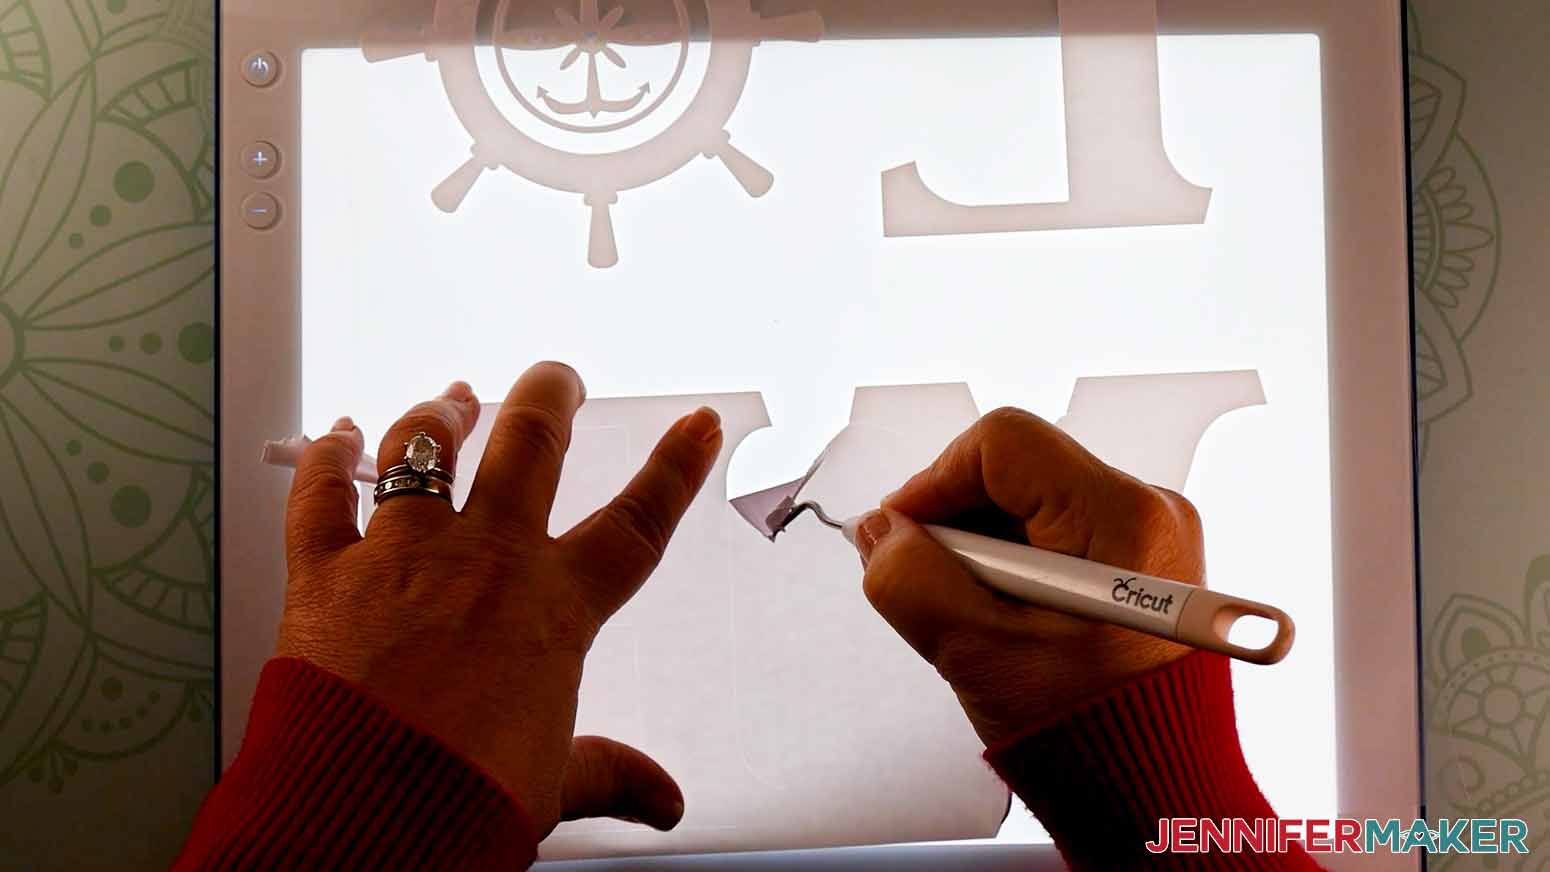
When you get to the weeding, your scissors and weeding tool will get a workout. If you’re using white vinyl like me, a Cricut Bright Pad can make all the difference. The cut lines are so much easier to see when you weed on a light box like this!
And when you’re ready to apply your heat transfer vinyl, prepare your heat press, pressing mat, heat resistant tape, and lint roller! Since SportFlex is so thin, I’ll show you how to protect it with some multi-use butcher paper. I love that stuff!
Looking for more Cricut vinyl projects? Here are some of my favorite projects. There’s a vinyl design for everyone in this list!
12 Target Dollar Spot Projects
Cricut Joy Projects – 4 with vinyl!
Three Balloon Bouquets with vinyl tips
Three Graduation Cap design ideas
Four Color Glass Etching designs – use vinyl as a powerful stencil!
13 Vinyl Designs Using the New Cricut Heat Presses
Eight Cricut Vinyl Projects for Home Decor
Three Layered Vinyl T-shirt Designs
Two Intricate Heart Designs using the wet vinyl method
Six Layered Vinyl Animal Designs for cups or lots of other items
Four DIY Porch Signs using Smart Vinyl
Intricate Heart Mandala with tips on cutting Glitter vinyl
Six Spring Home Decor Decals on my Amazon Live
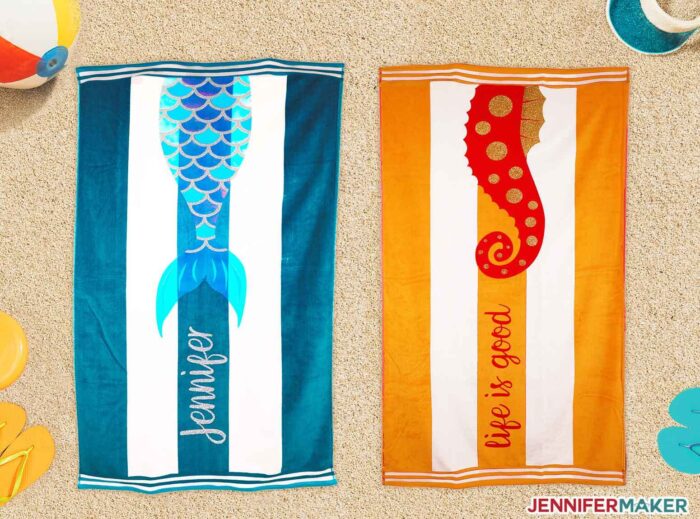
Two Customizable Beach Towel Designs with Smart Vinyl
Ready to make some Cricut vinyl projects? I’m super excited to show you how! This post contains some affiliate links for your convenience (which means if you make a purchase after clicking a link I will earn a small commission but it won’t cost you a penny more)! Read my full disclosure policy.
Materials to Make Cricut Vinyl Projects
View my Amazon shopping list with the exact items we used to make these projects!
- Lots of vinyls to play with! I used different combinations for each project:
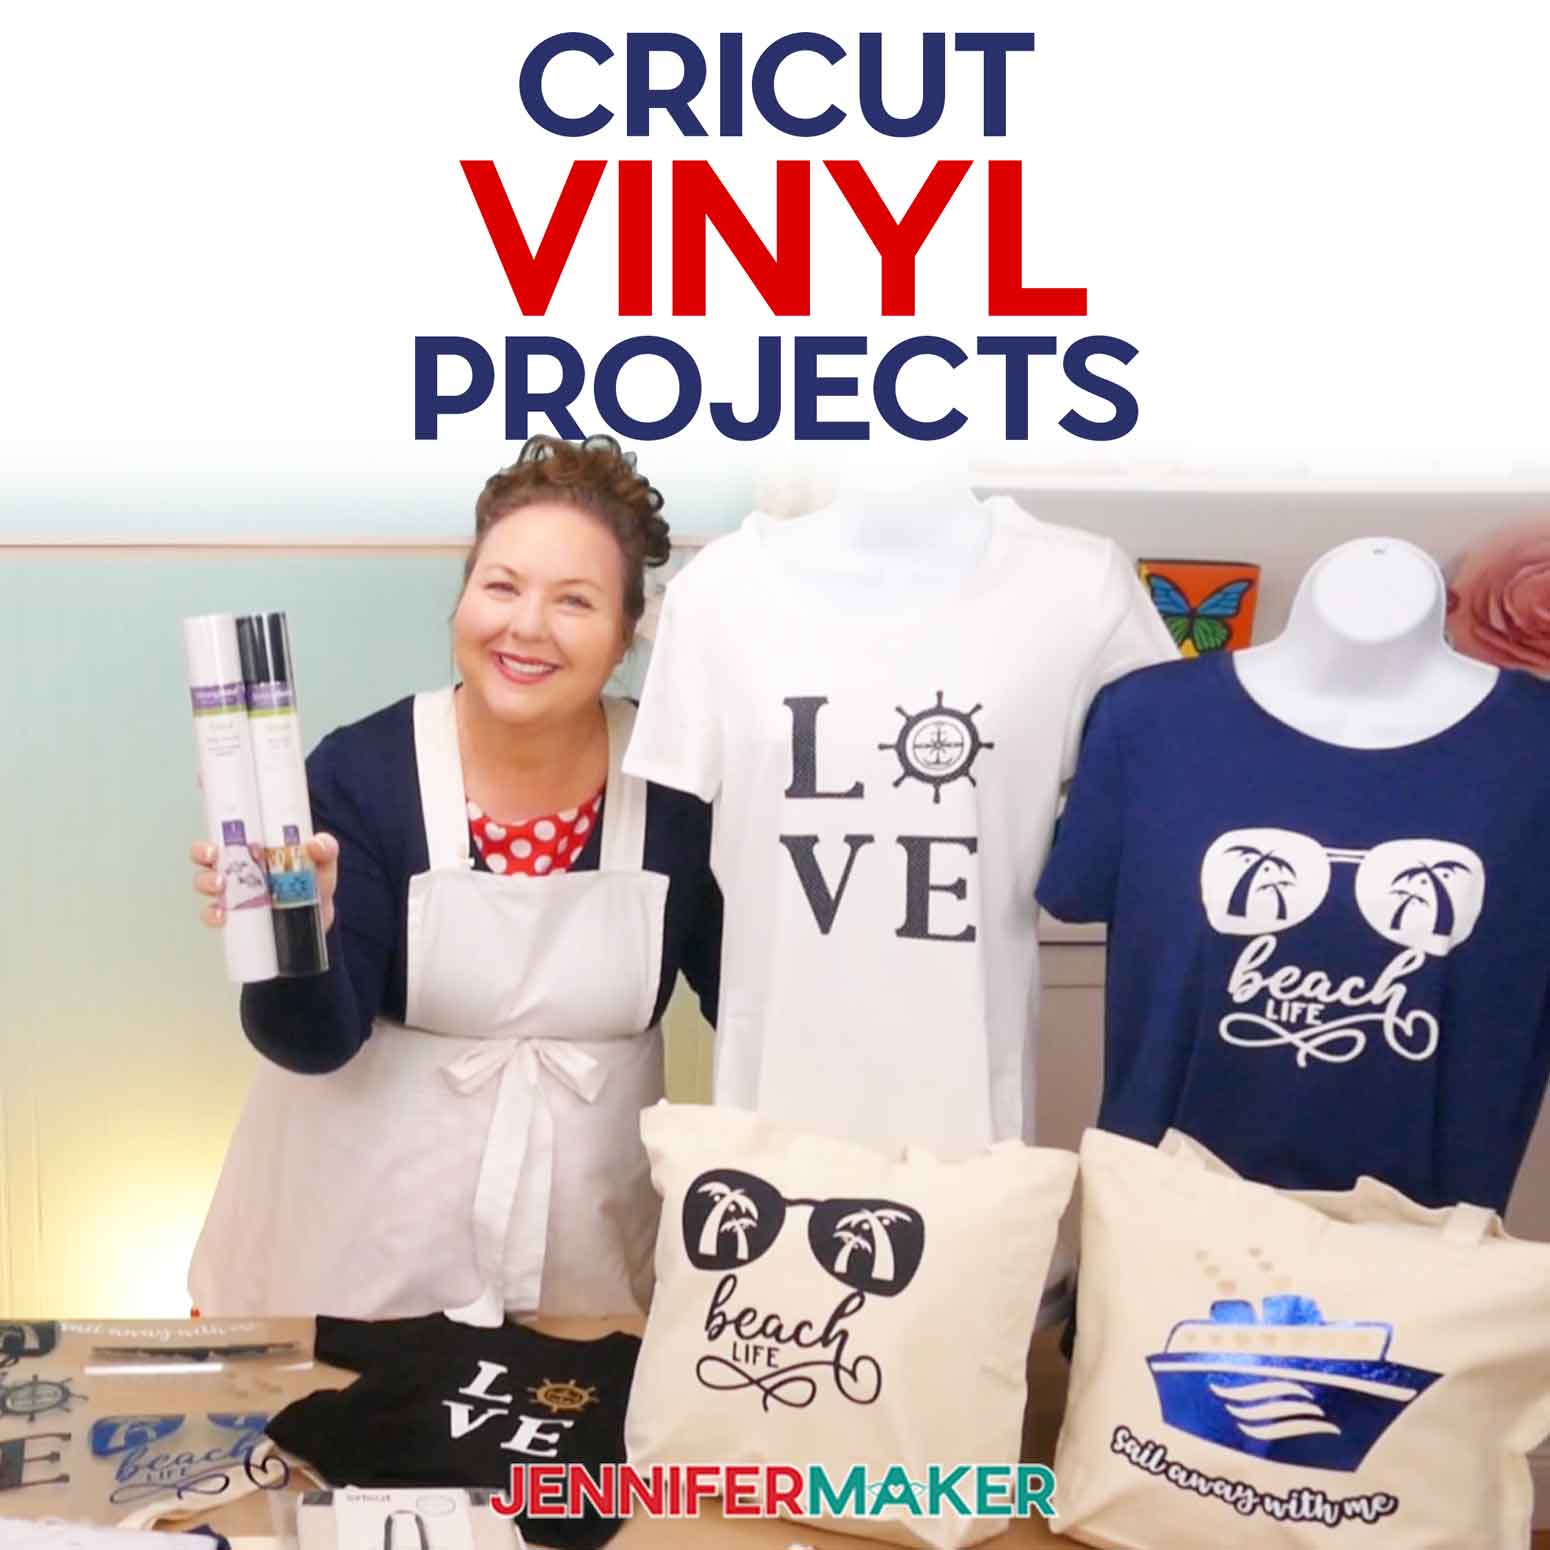
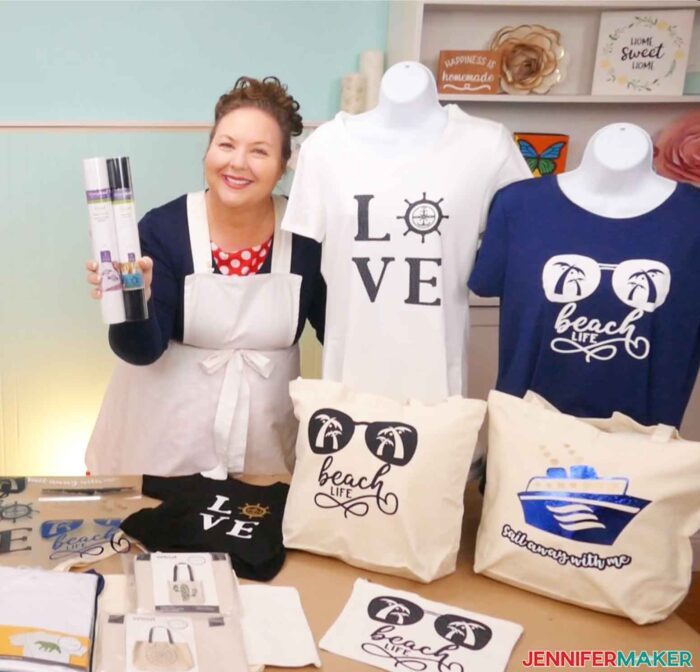
- T-shirt with Love Design used Cricut Sportflex Iron-On Vinyl in White on a medium teal 100% Polyester women’s shirt
- Zipper Pouch with Beach Life design used Cricut Mesh Iron-On Vinyl in Navy on a canvas pouch
- Tote with Multicolored Ship design used Cricut Everyday Iron-On Vinyl in Gold, Cricut Foil Iron-On in Royal Blue, Cricut Everyday Iron-On Vinyl in Navy Blue, and Cricut Glitter Iron-On Vinyl in White on a cotton canvas tote, but a white t-shirt would also work
- A method to cut your material — I used the amazing Cricut Maker 3 but you can also use the Cricut Maker or the Cricut Explore Series with a Green StandardGrip Machine Mat 12″ x 12″
- An appropriate heat press – I used my Cricut EasyPress 2 with the Cricut Heat Resistant Pressing Mat, Heat Resistant Tape, and Butcher Paper when working with SportFlex Iron-On
- Tools including a Weeding Tool, Brayer, Scissors, Lint Roller, and my Cricut Bright Pad, which is totally optional but really helpful when weeding!
- Design #405 (My free SVG/PDF/DXF design files are available in my free resource library – get the password by filling out the form at the bottom of this page)
How to Make Cricut Vinyl Projects
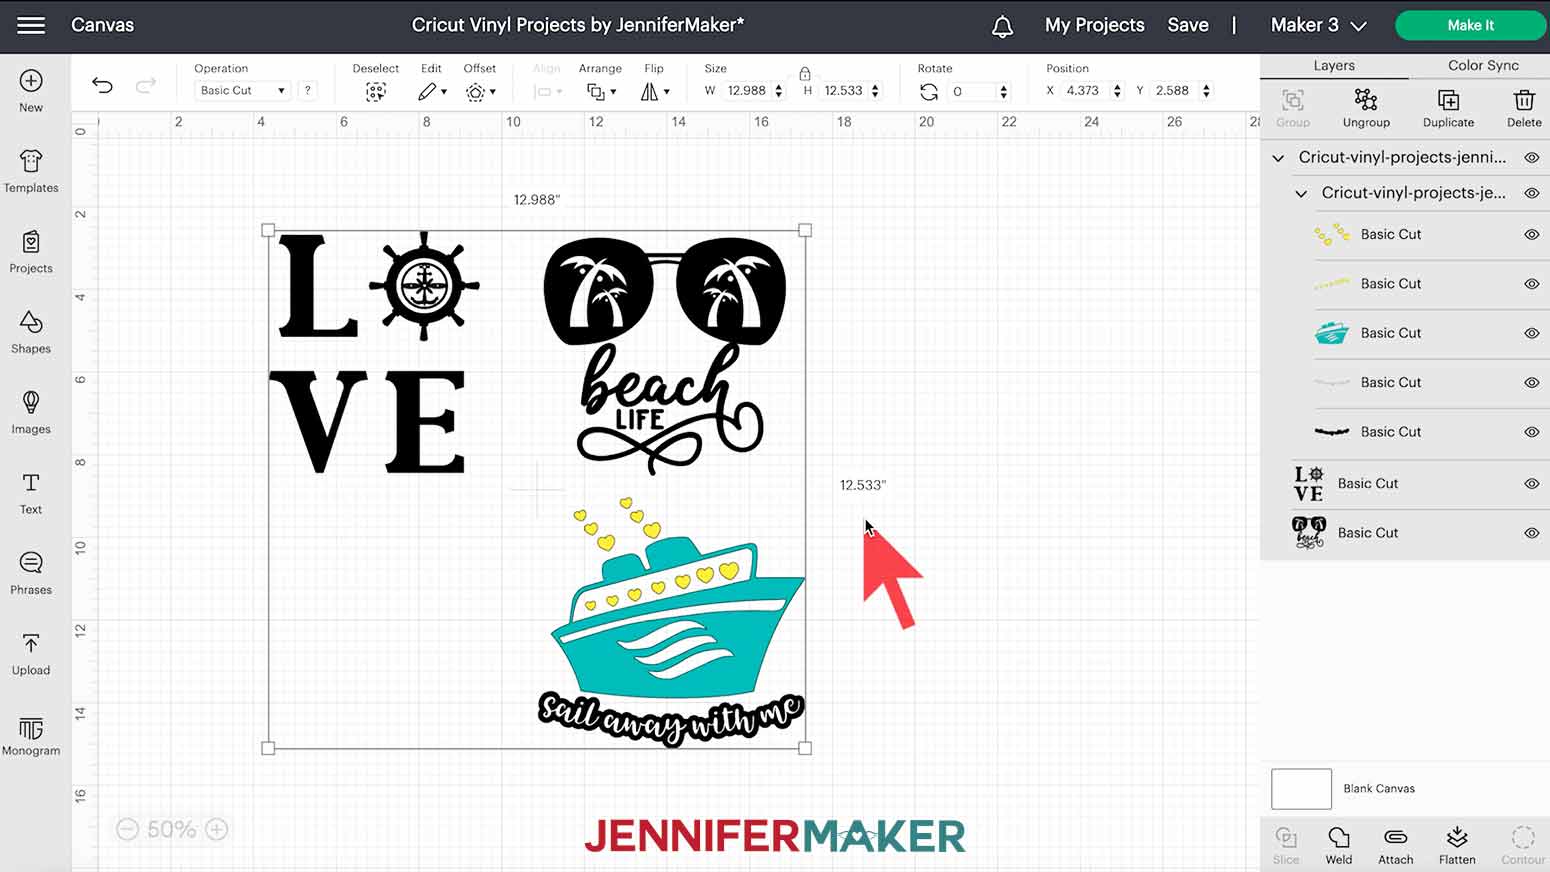
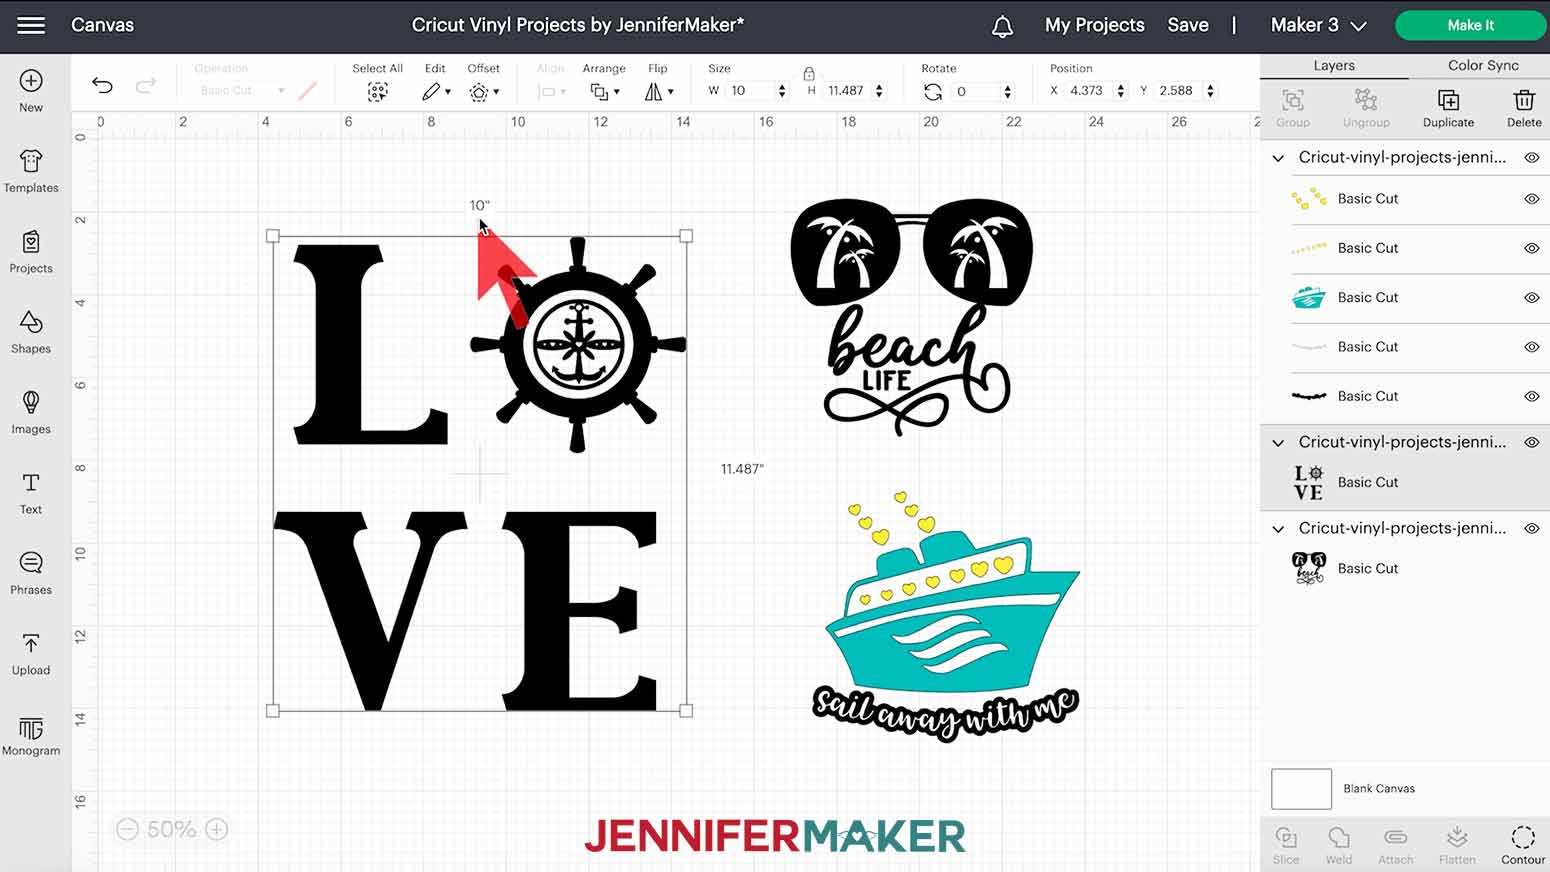
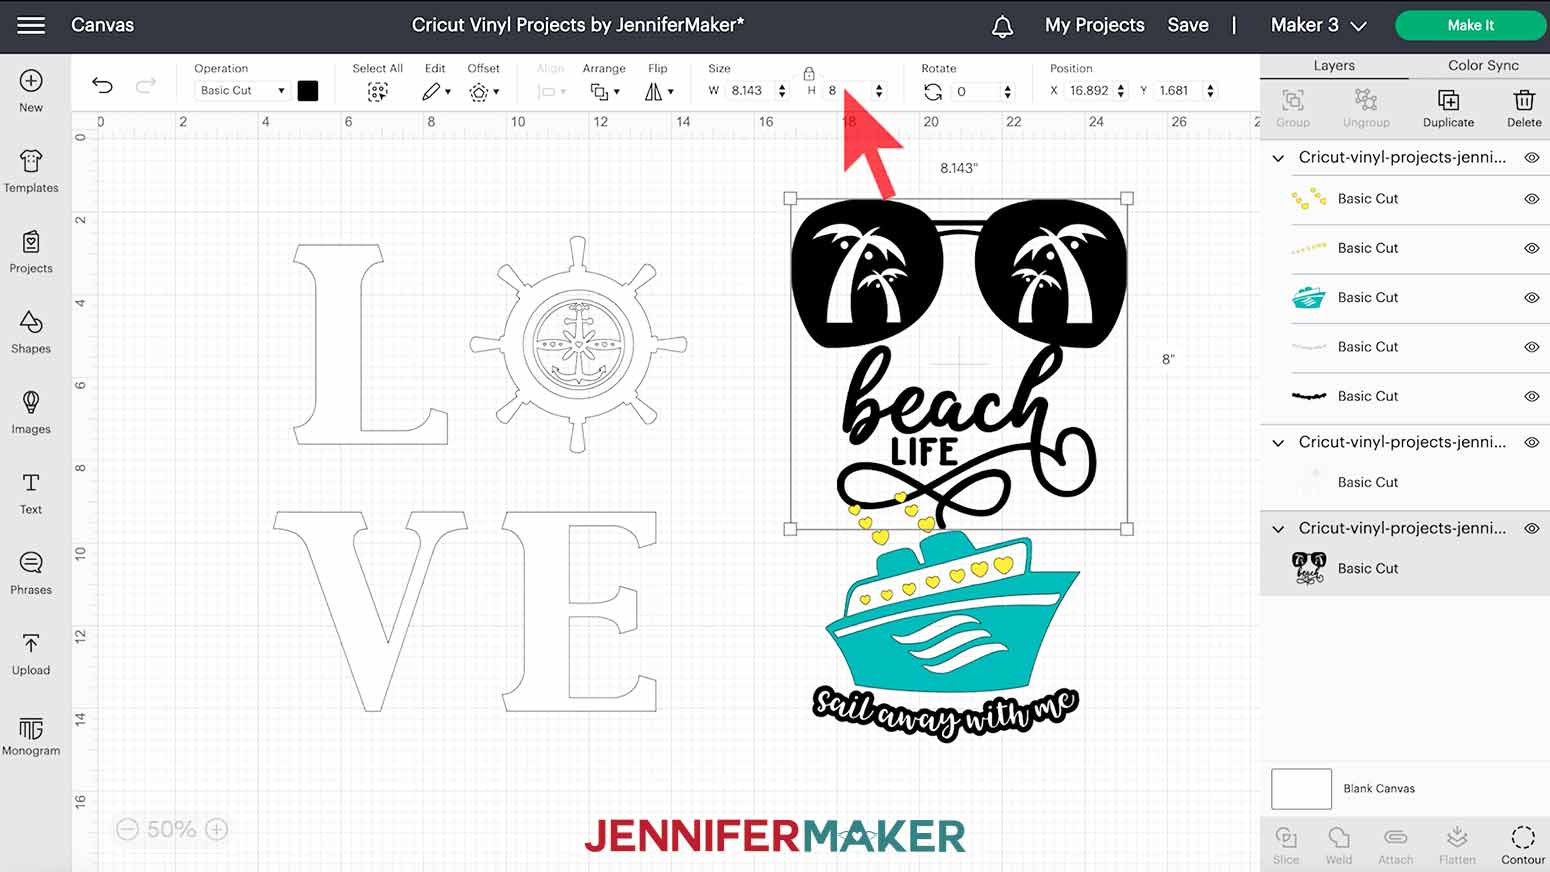
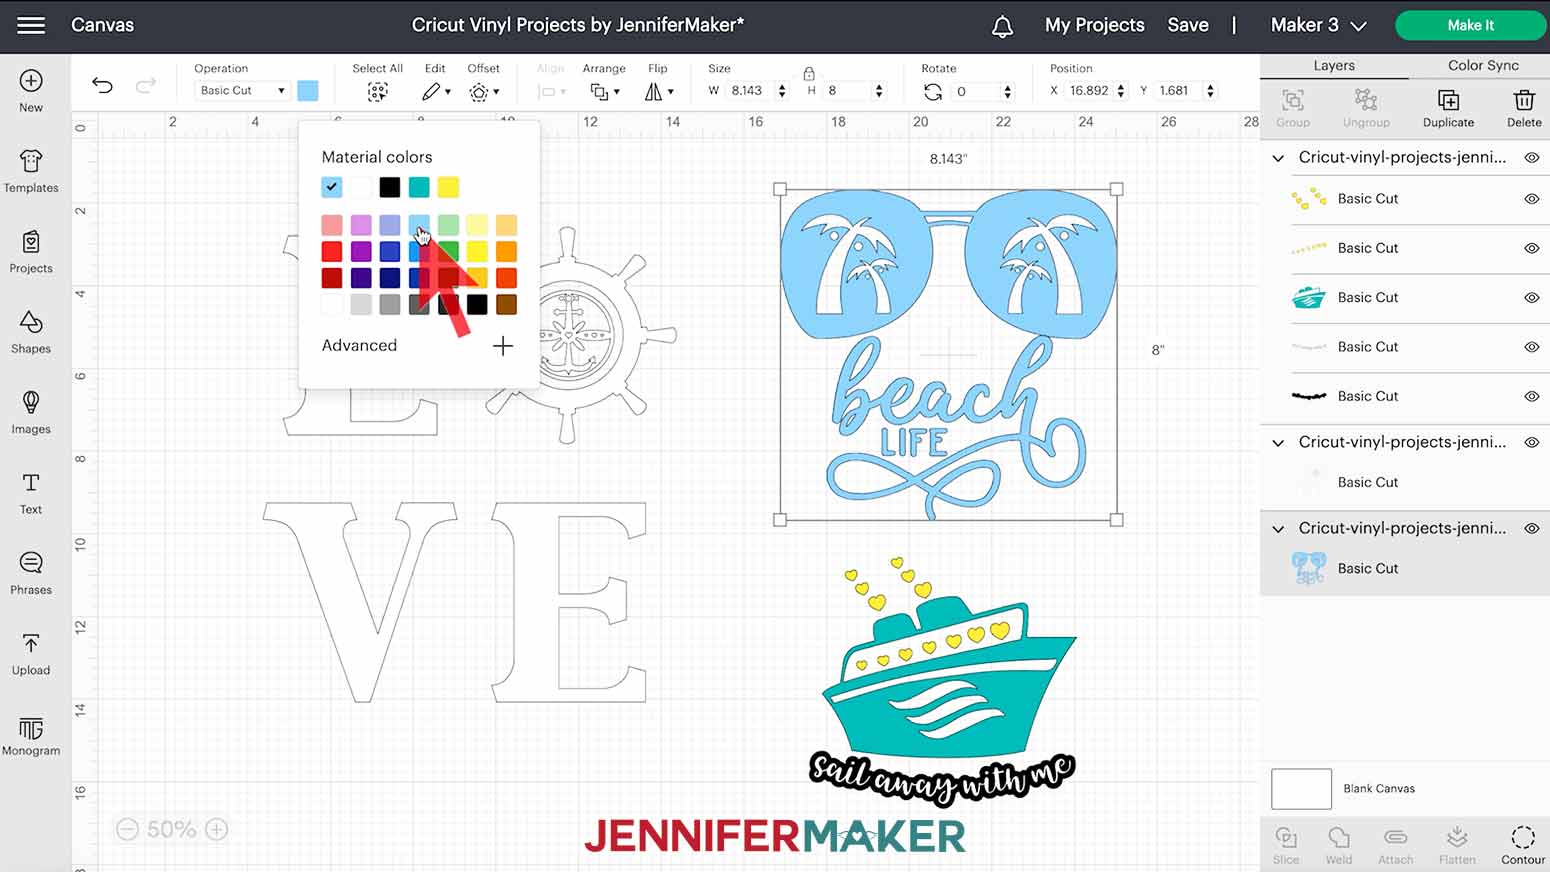
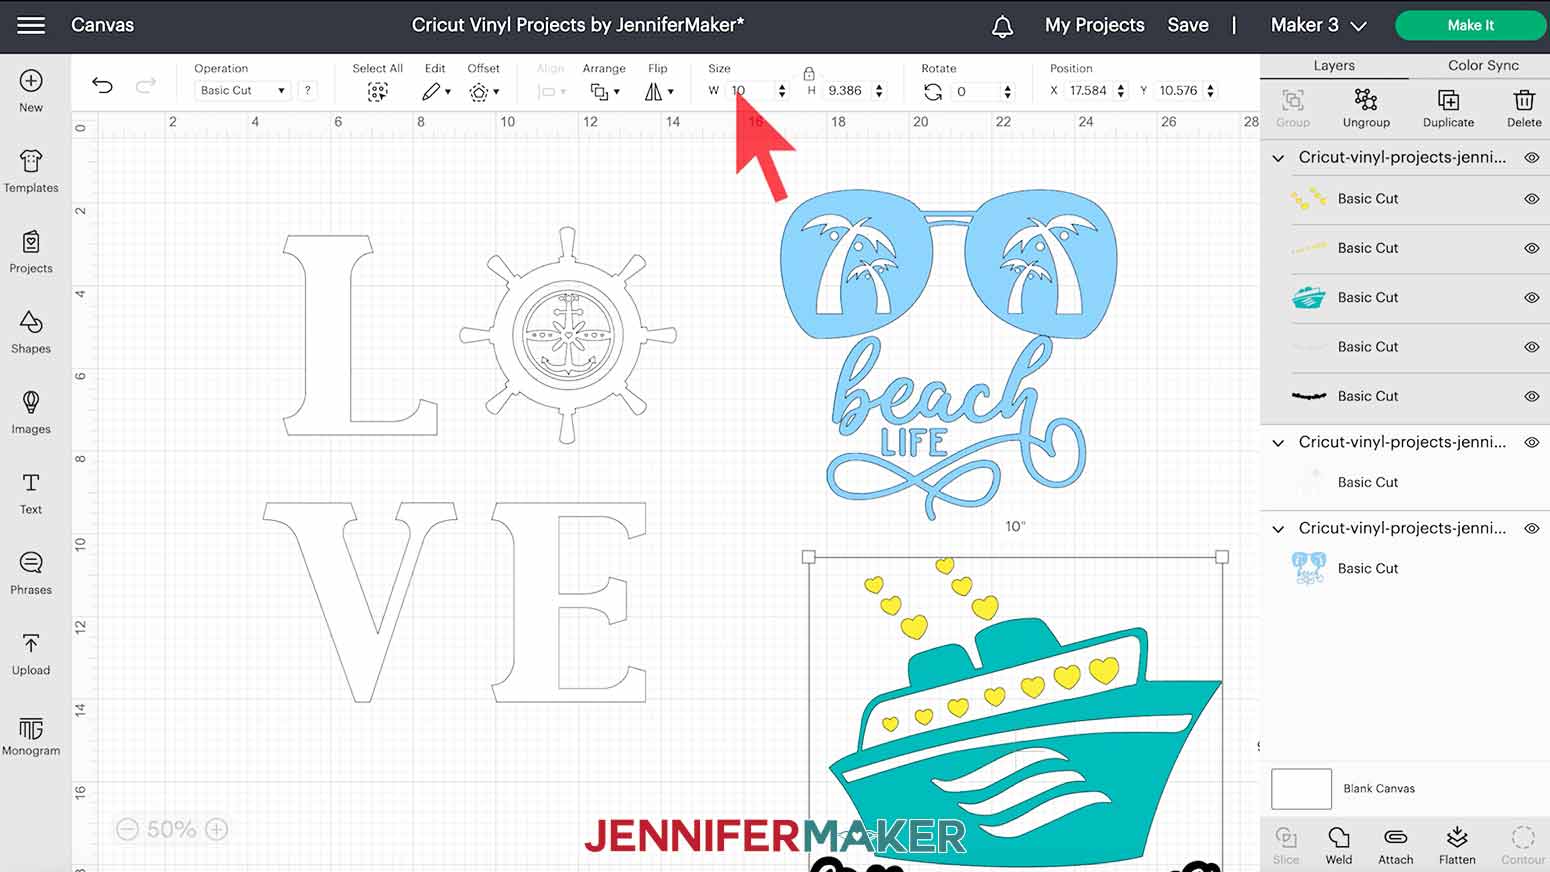
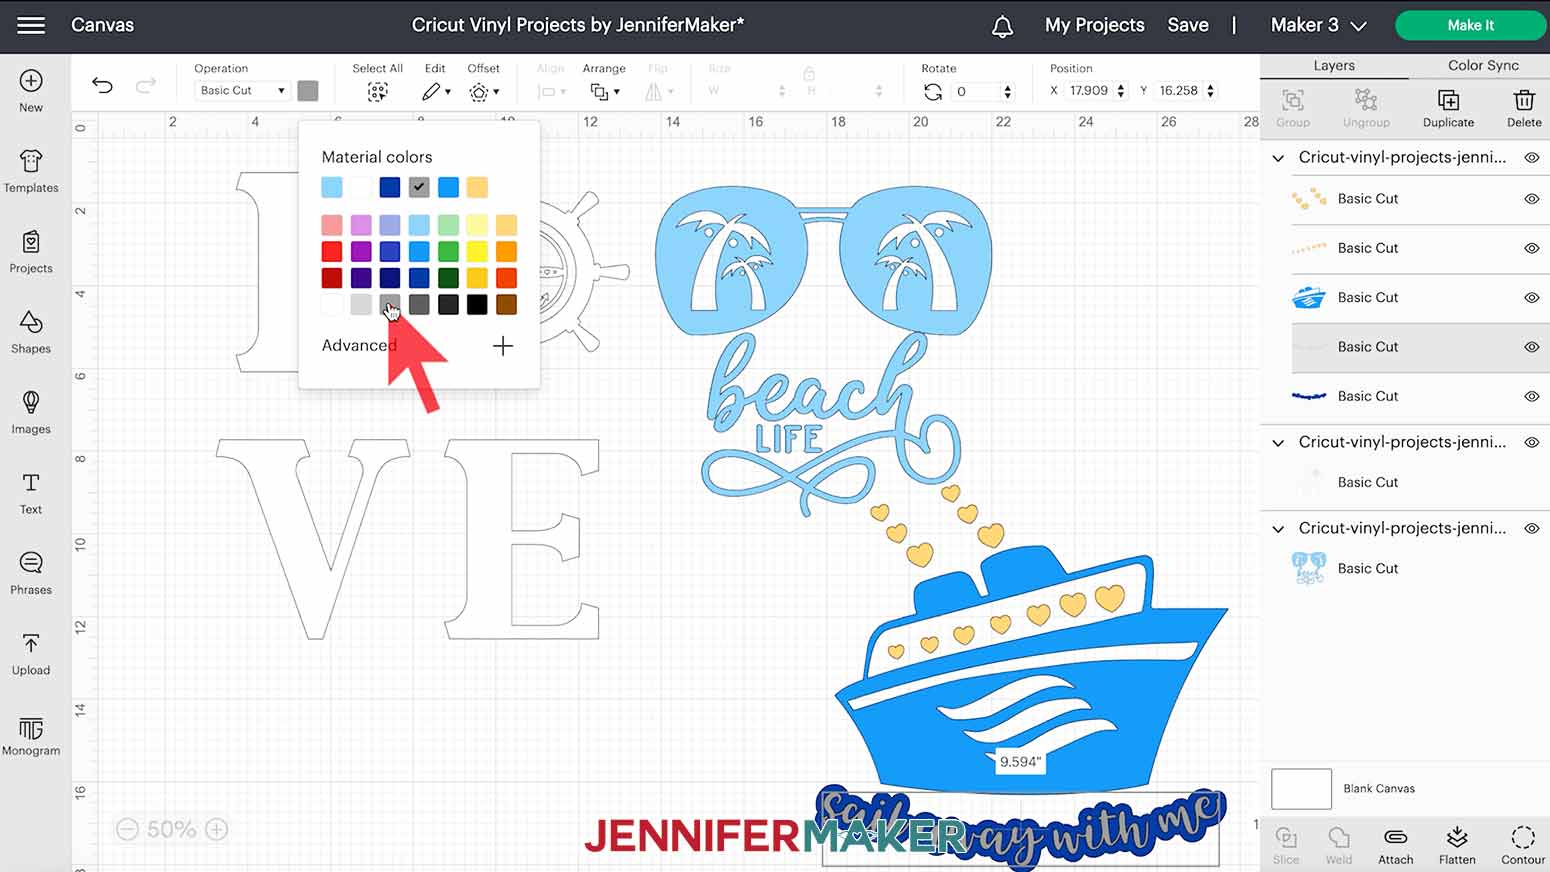
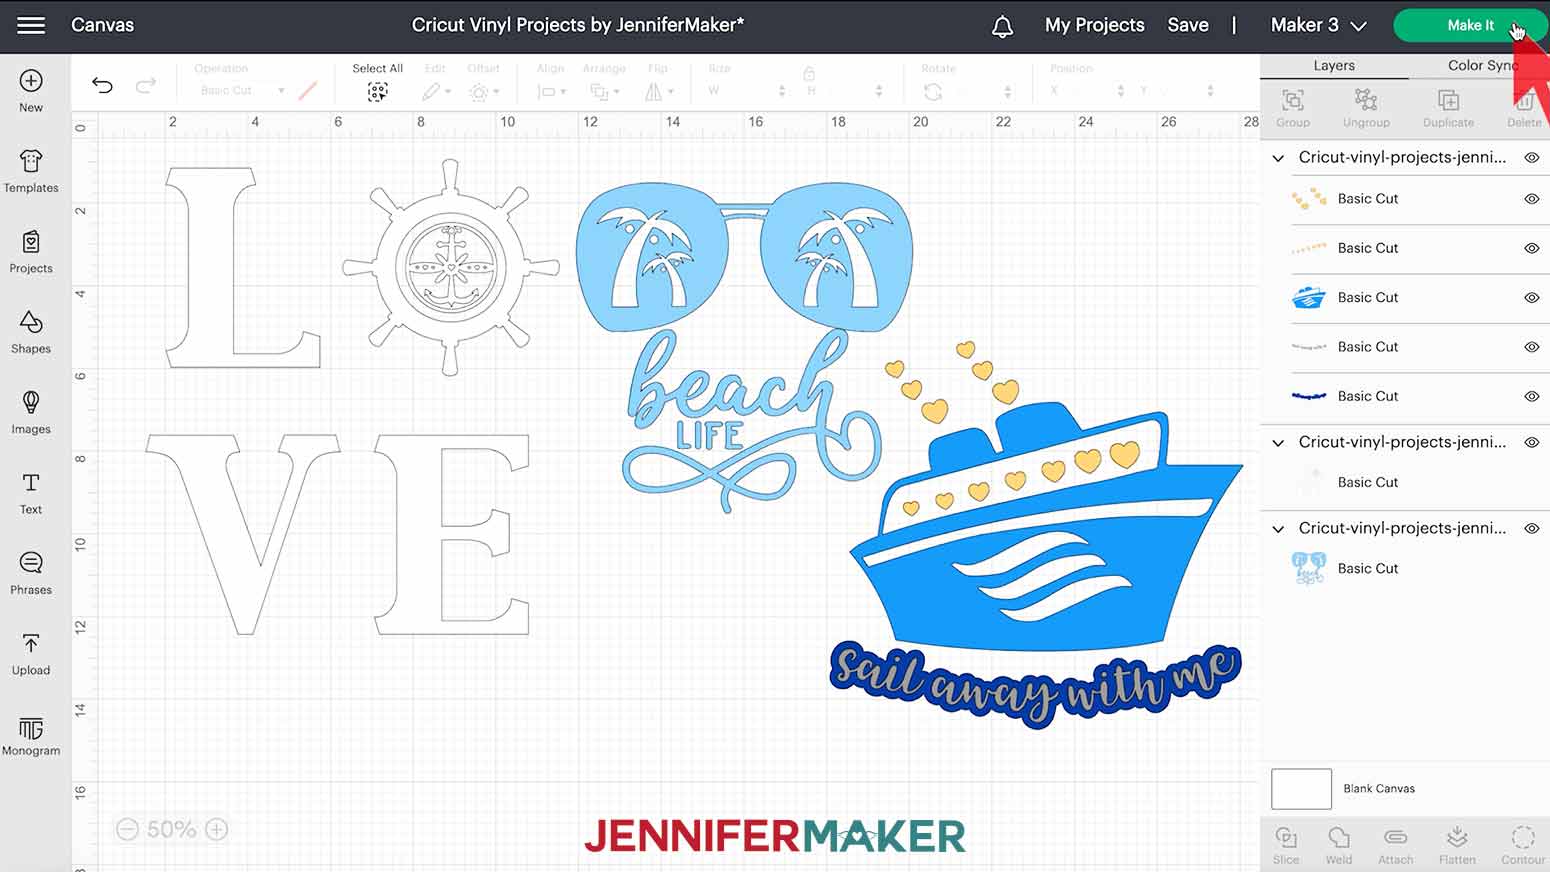
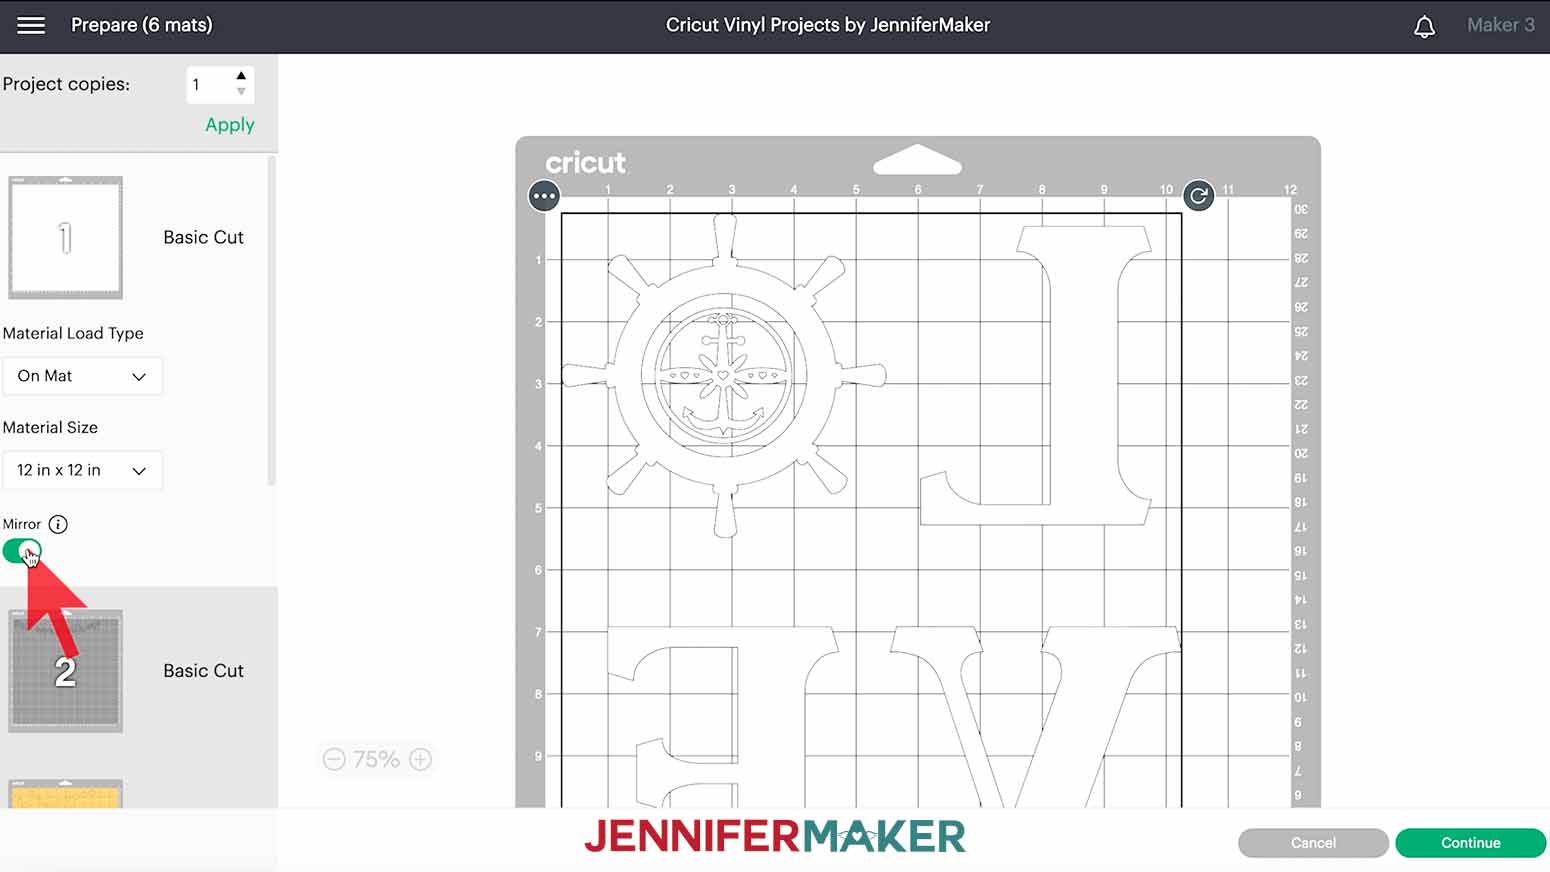
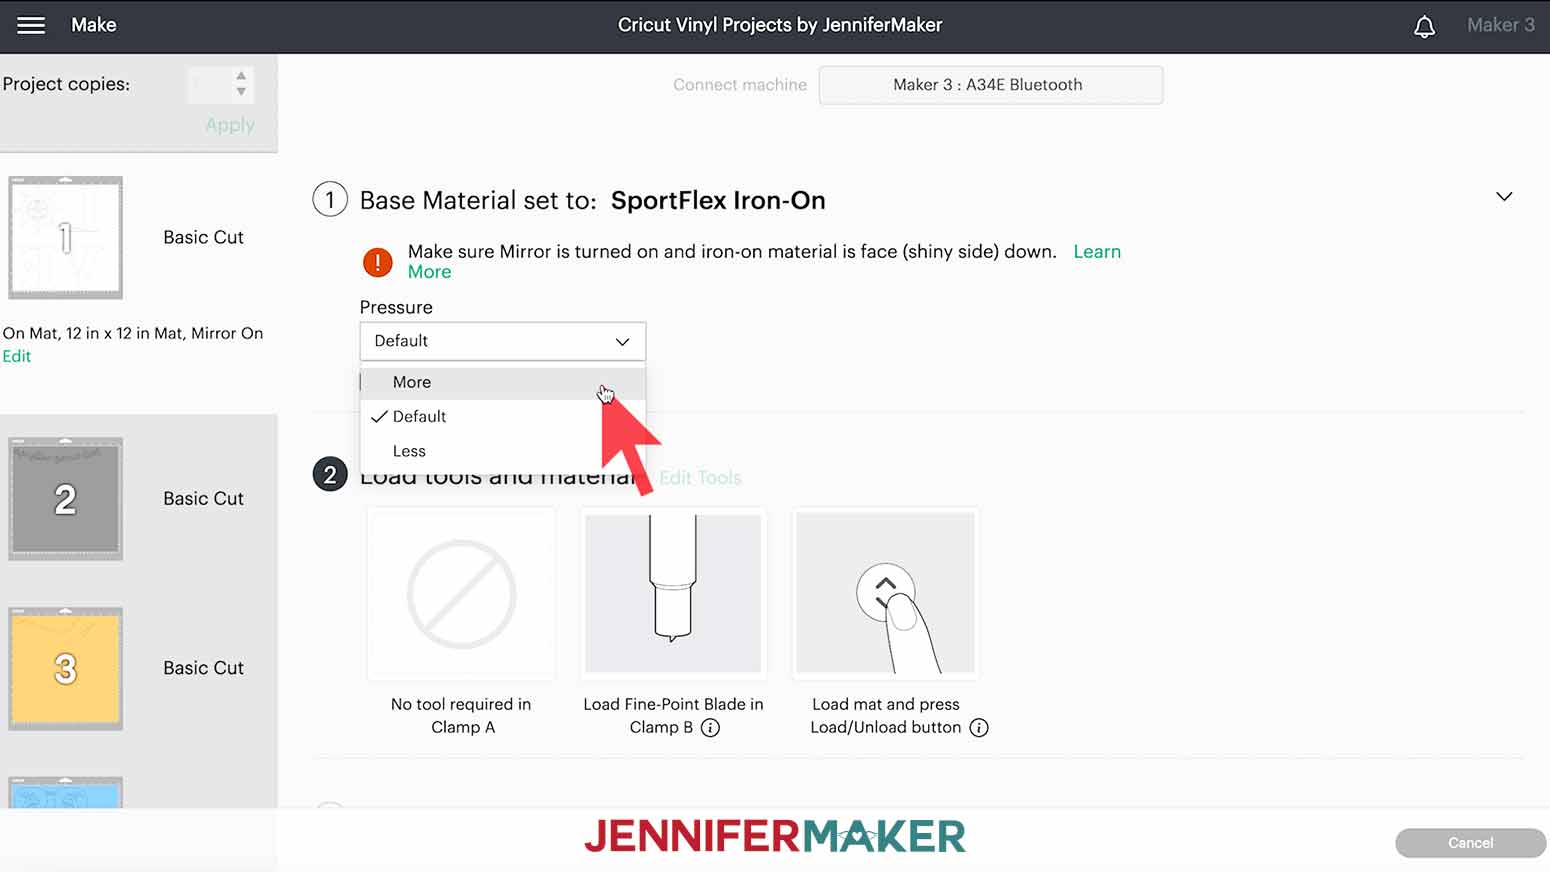
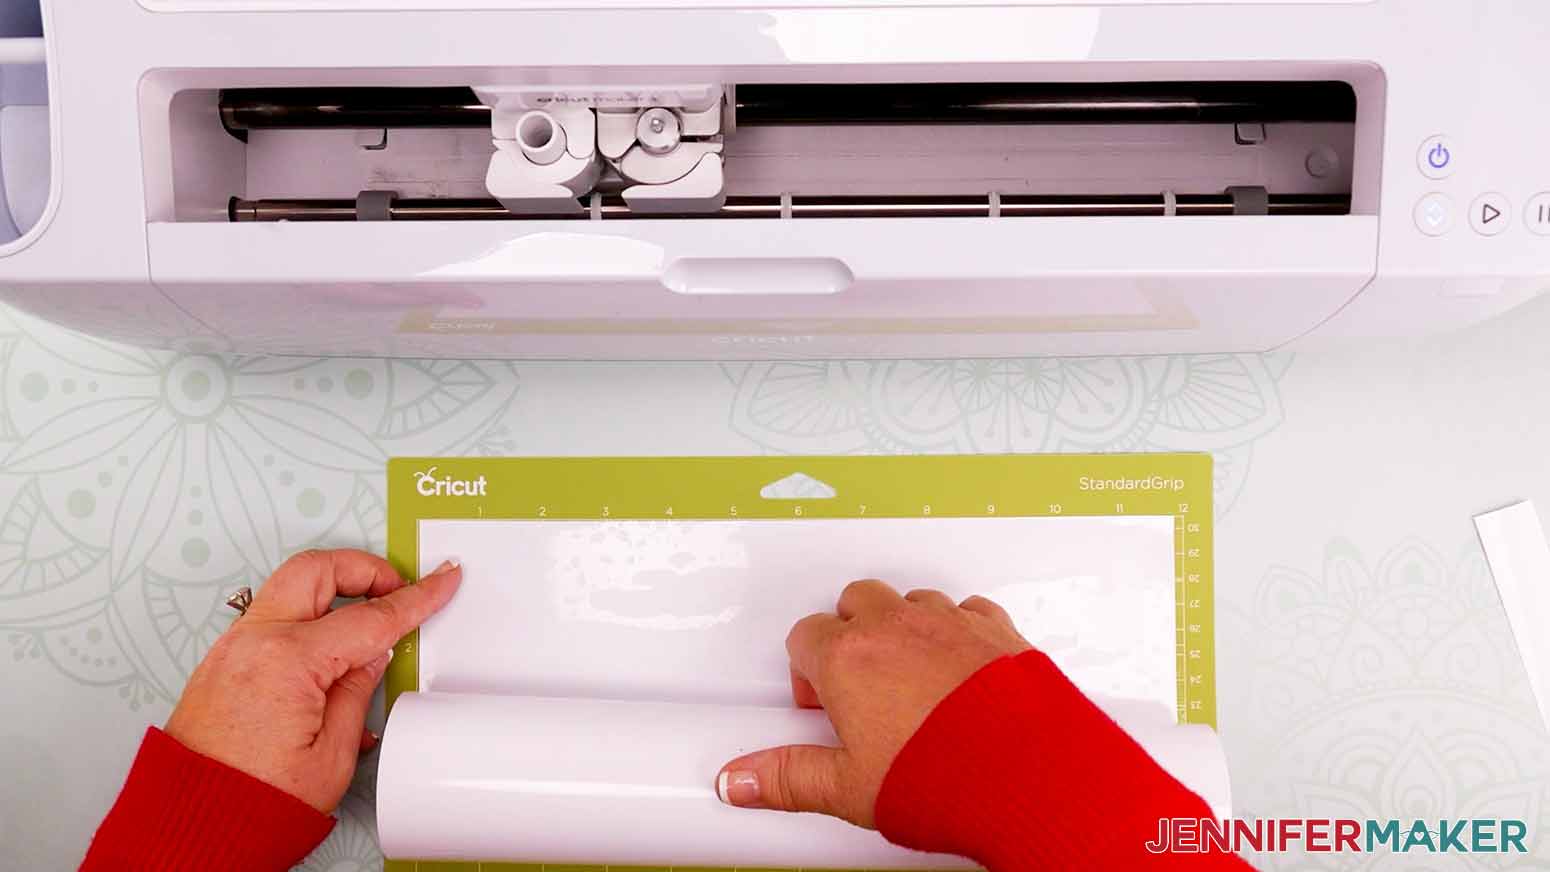
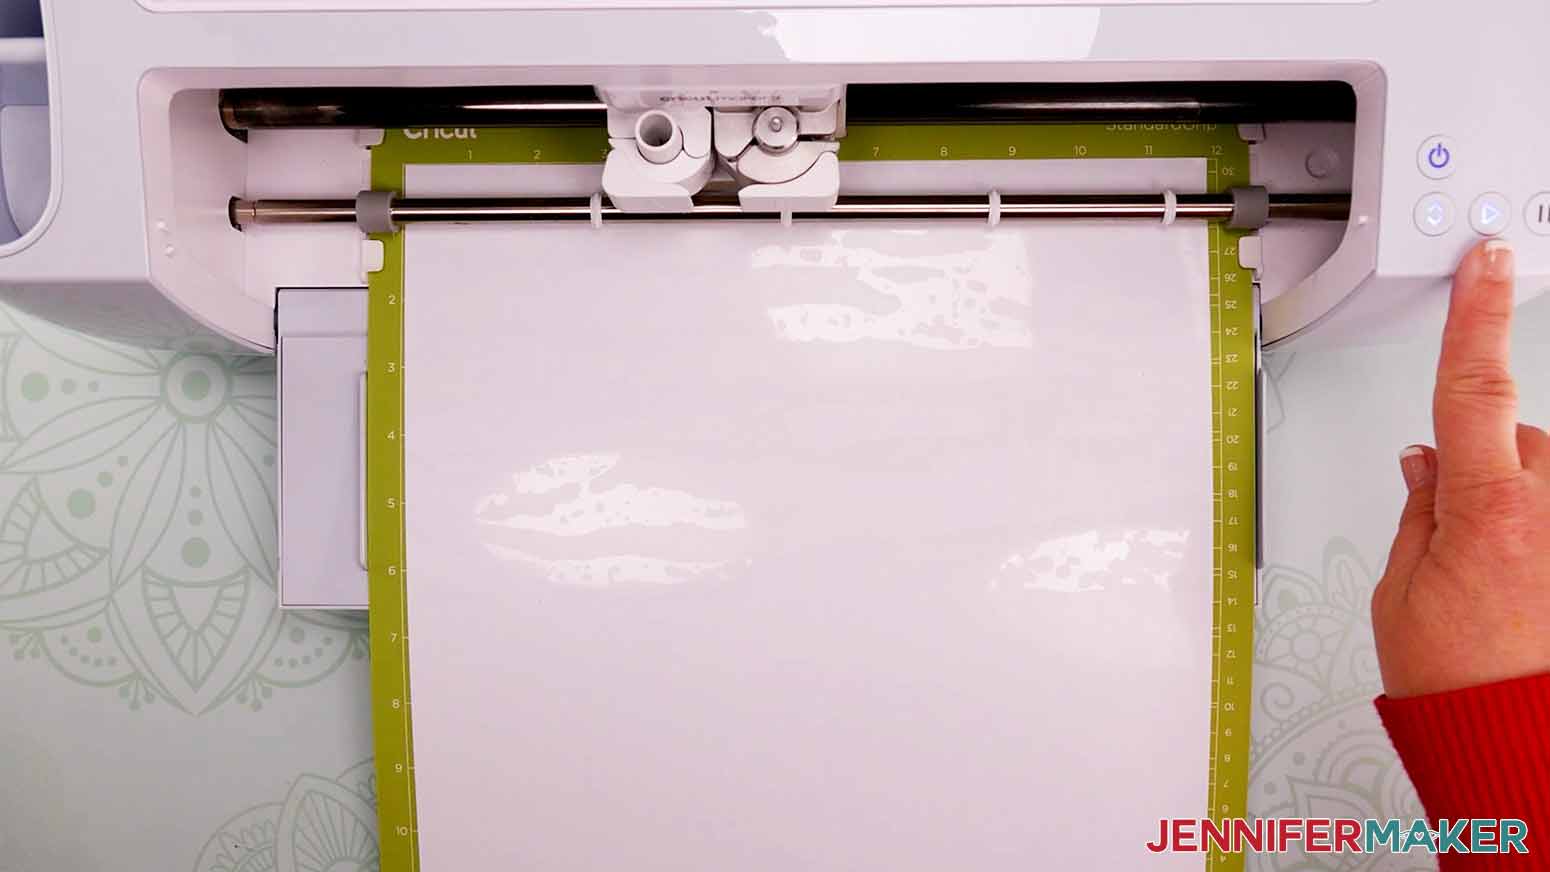
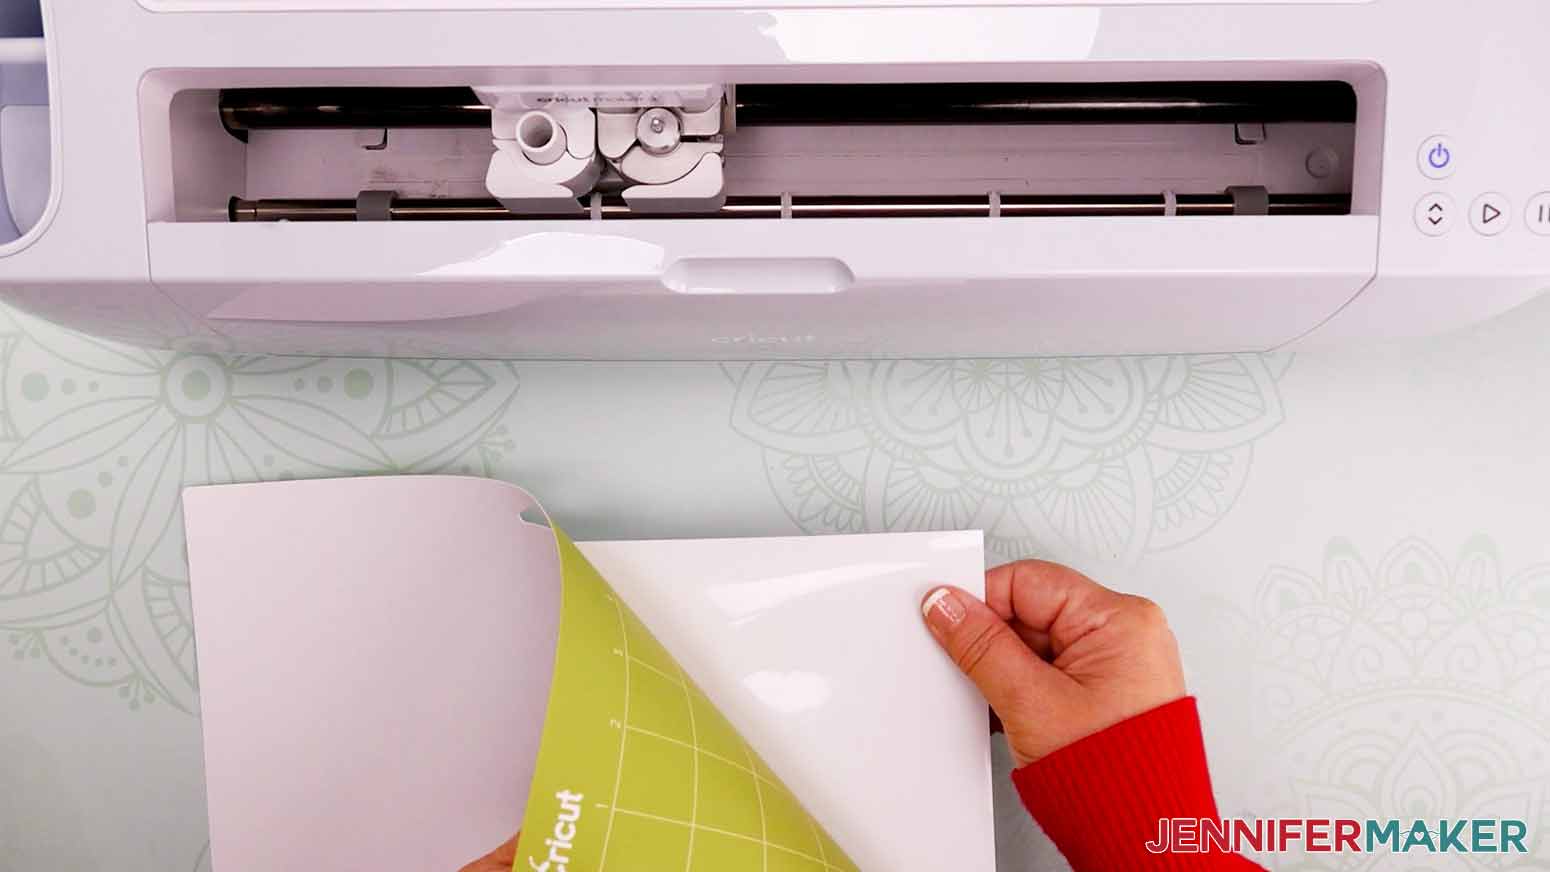
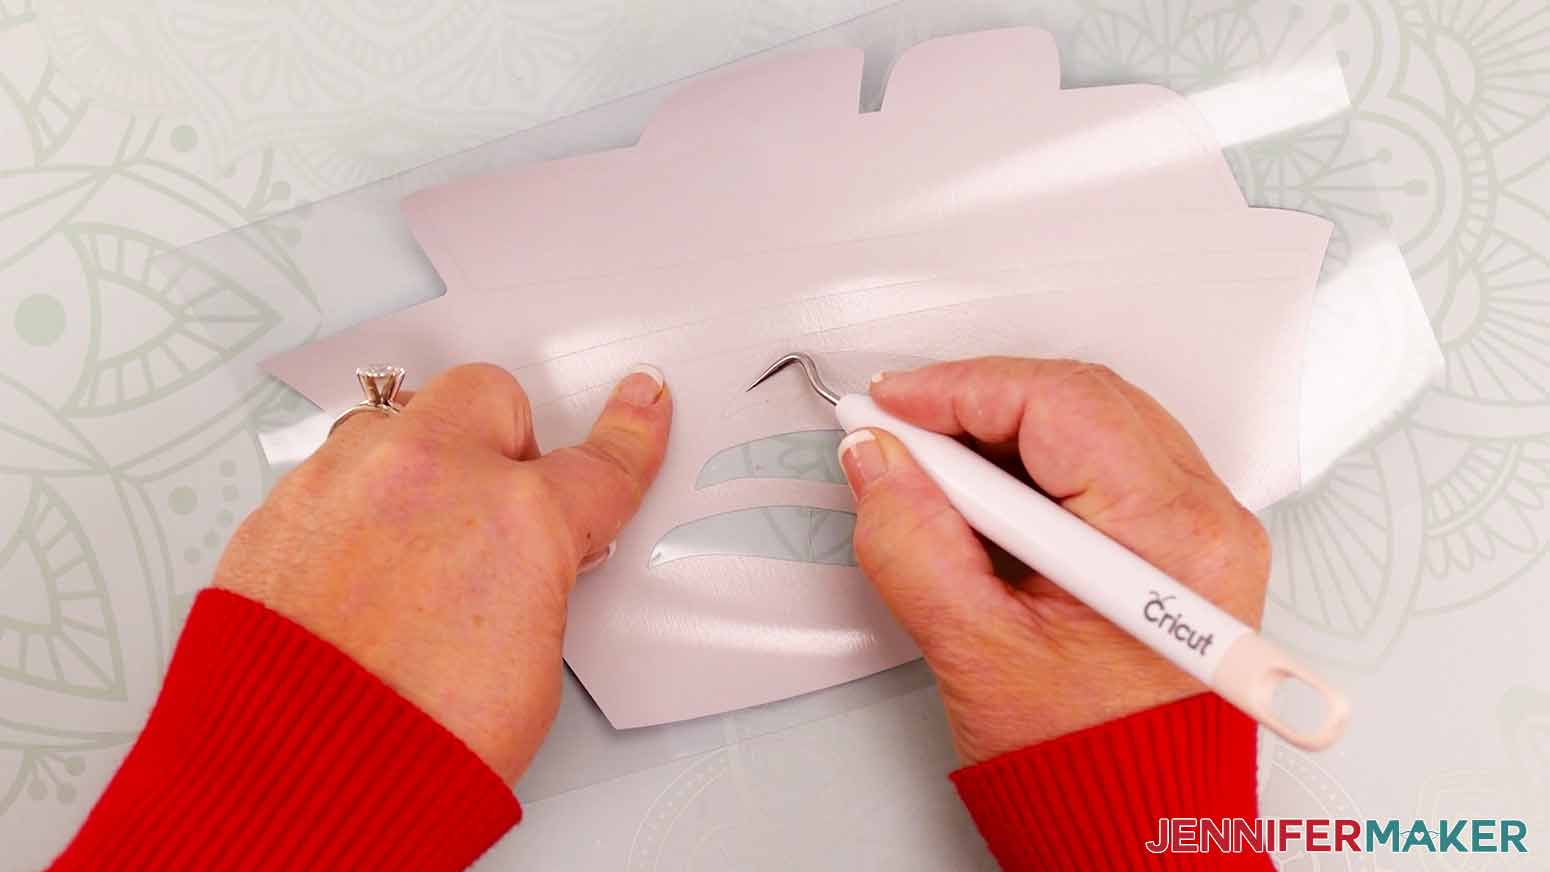
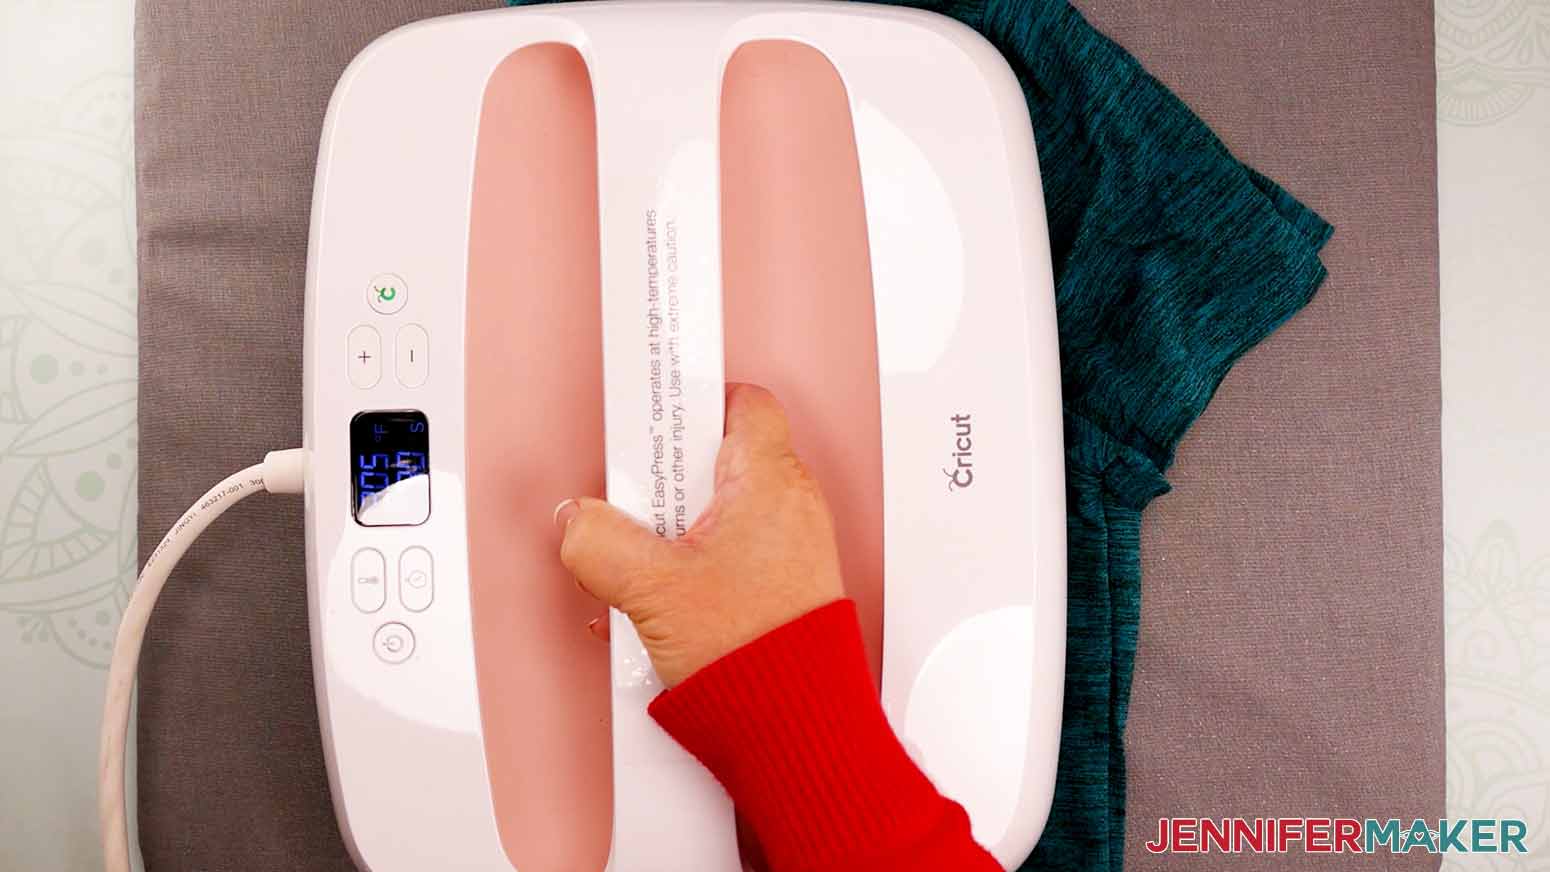
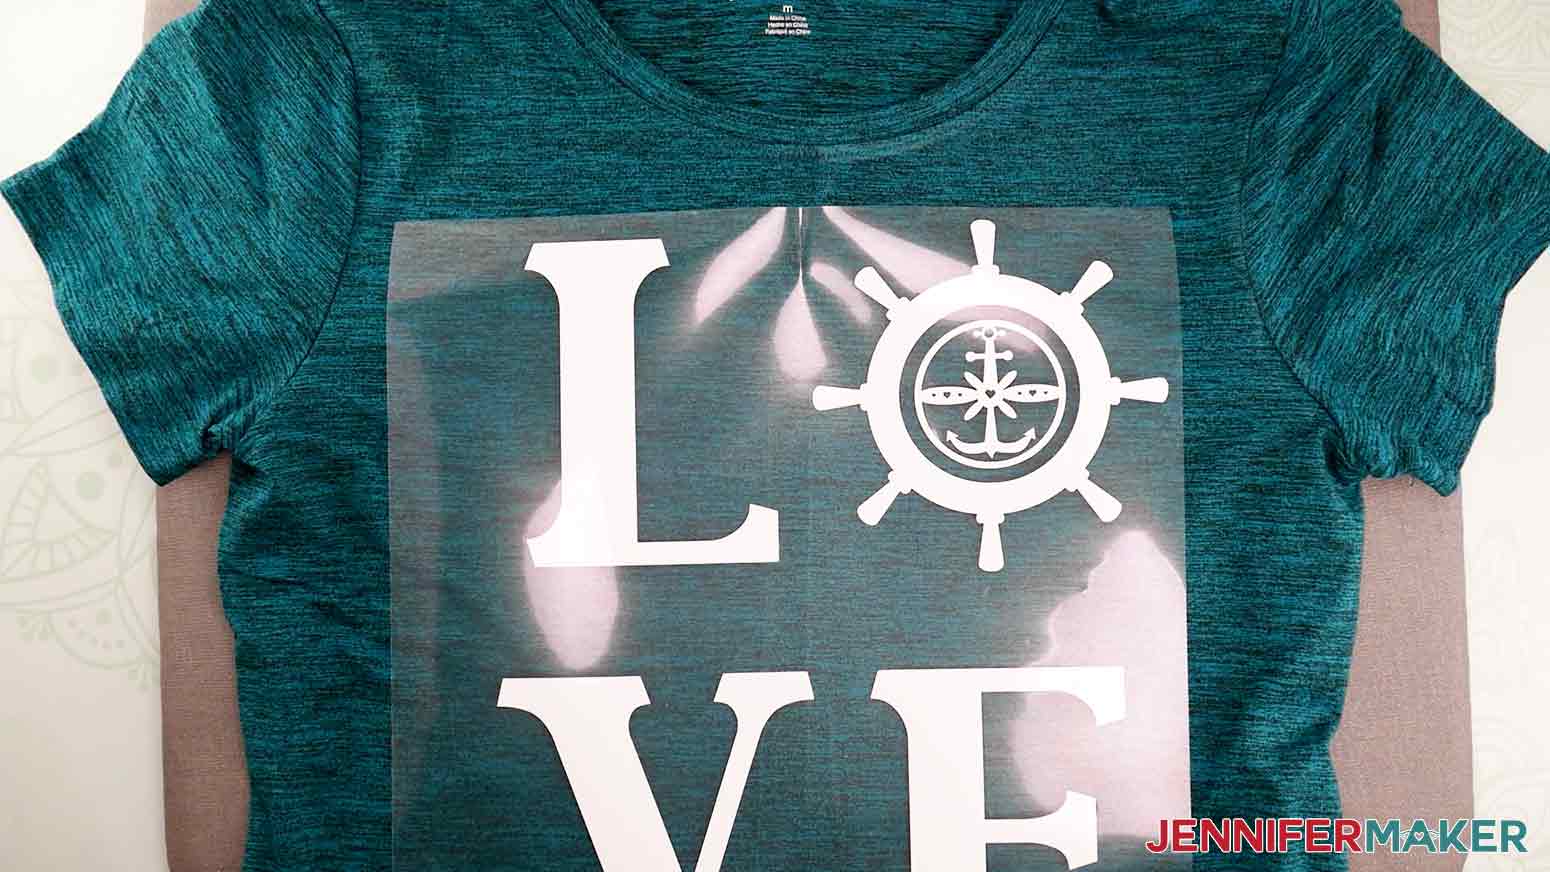
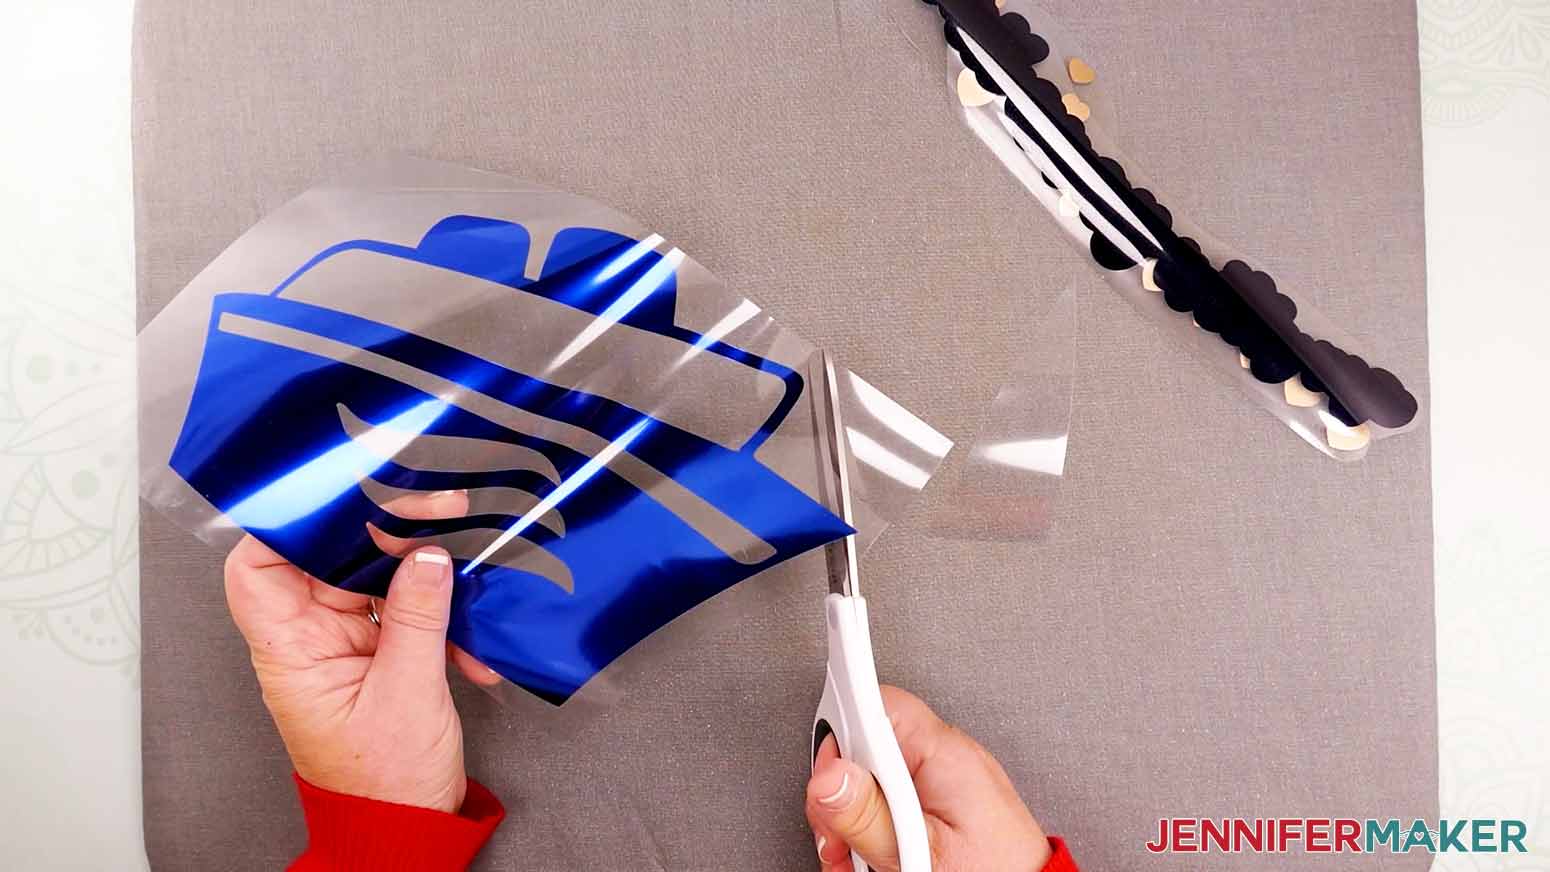
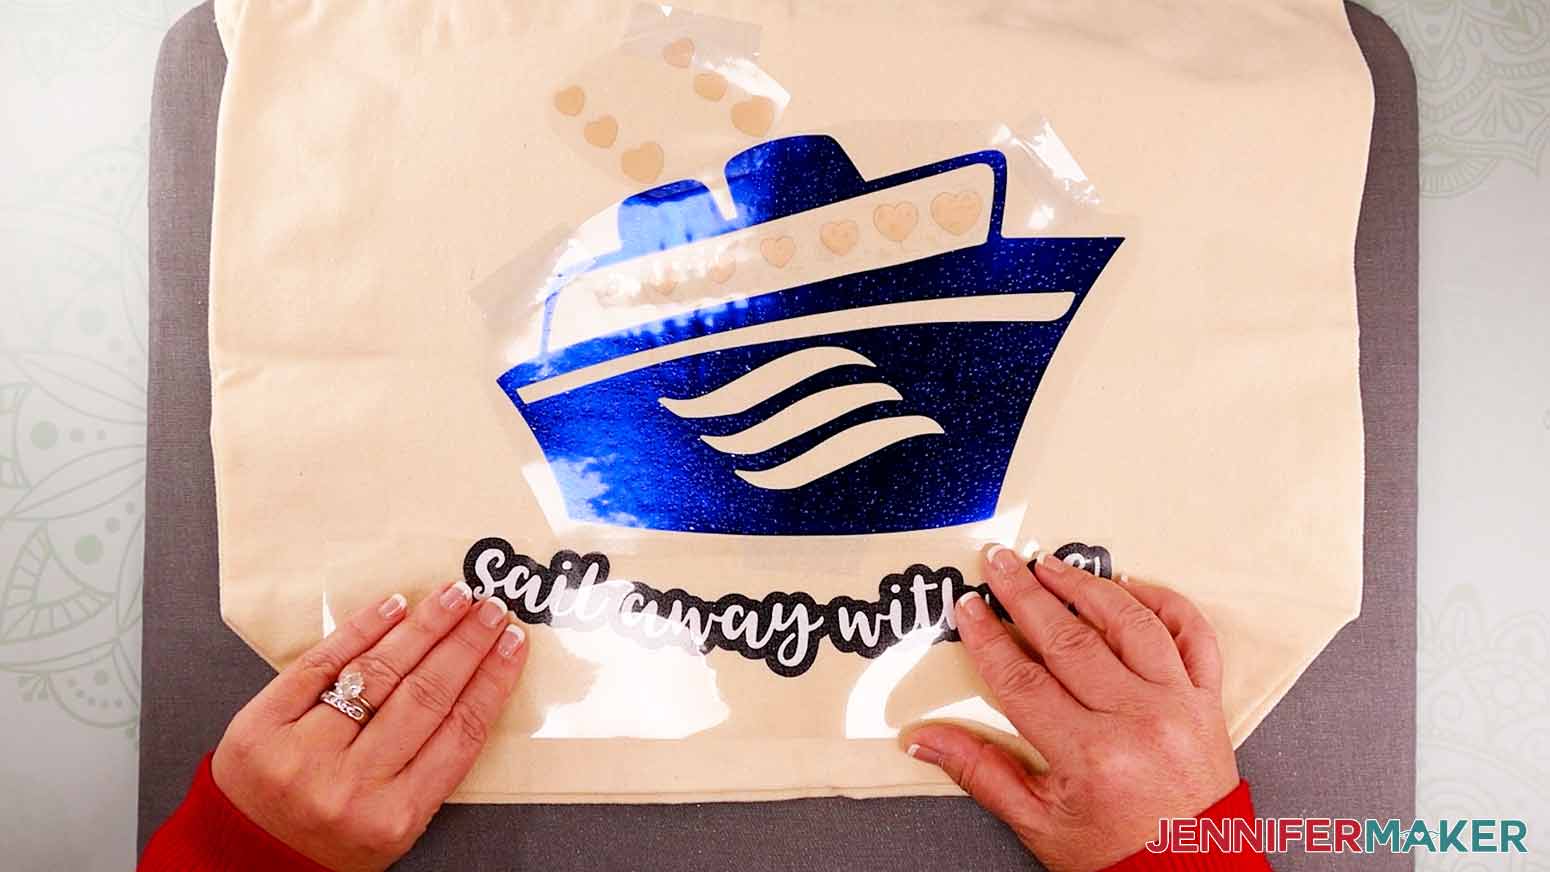
Create fun, nautical Cricut vinyl projects. The first step is to download my Cricut Vinyl Projects designs from my free resource library -- it's design #405. The SVGs are in one file for easy uploading! I've also included a DXF for other cutting machines and a PDF to cut by hand. TIP: If you are not sure how to upload an SVG cut file to Cricut Design Space, watch this helpful video training series I made. If you are on an iPad or iPhone, here is how to download and upload SVG files to the Cricut Design Space app. Upload the design collection to Cricut Design Space and add it to your Canvas. This is what my Cricut Vinyl Projects SVG file looks like on my Canvas. You can zoom out to see all of the designs by clicking on the minus (-) sign on the lower left. Notice that the Love and Beach designs use one color, but the ship design uses three, including letters and an offset layer that overlap. Keep that in mind while deciding how to use it and which materials to incorporate When it comes to Cricut Iron-On Vinyl, there are several types to choose from and a few rules to follow for the best results. You should always check that the vinyl will work with the item you want to decorate and you're layering them in the correct order. LAYERING Certain iron-on materials cannot be the base layer for layered iron-on vinyl designs. These types of vinyl should NOT have anything applied over them: Holographic, Holographic Sparkle, Foil, Glitter, Glitter Mesh, or flocked iron-on. The design will likely peel over time, especially when washed. Everyday Iron-On makes the best base for layering. Holographic, Holographic Sparkle, Foil, Glitter, Glitter Mesh, and flocked iron-on can be layered over Everyday Iron-On. EVERYDAY IRON-ON Cricut's Everyday Iron-On is the most universal of the heat transfer vinyls. It easily applies to the most types of materials. The appropriate blanks include burlap, cardstock, chipboard, cork board, 100% cotton, cotton canvas, cotton/poly blend, faux leather, felt, mesh, muslin, neoprene, polyester, silk, wood, and wool. GLITTER IRON-ON Glitter Iron-On adds a sparkle to your vinyl projects! You can apply it on its own or layer it over Everyday Iron-On. Ideal blank materials include burlap, cardstock, chipboad, cork board, 100% cotton, cotton canvas, cotton/poly blend, faux leather, felt, muslin, neoprene, polyester, wood, and wool. SPORTFLEX IRON-ON Cricut's SportFlex Iron-On is great for active wear! It is ideal for polyester and nylon fabrics but can also adhere to cork board and neoprene. It is important to note that the SportFlex Iron-On will not adhere to high cotton-blend fabrics. EVERYDAY IRON-ON MESH The Everyday Mesh Iron-On adds a fun aspect to your iron-on vinyl designs. It can be layered to enhance the mesh appearance or applied by itself. It best applies to burlap, cardstock, chipboard, cork board, 100% cotton, cotton canvas, cotton/poly blend, faux leather, felt, mesh, muslin, neoprene, nylon, polyester, silk, wood, and wool. FOIL IRON-ON Foil Iron-On adds a shiny, eye-catching touch to your designs. It will work well on cardstock, 100% cotton, cotton canvas, cotton/poly blend, faux leather, felt, mesh, muslin, neoprene, nylon, polyester, silk, and wool. These fun designs are nearly ready to apply to any compatible blank. It's a good idea to separate the designs to make customizing and cutting easier. First, click "UnGroup" to separate the designs on the Canvas. Now you can hide or delete whatever you do not want to make. I'm going to make all three so I will leave them all on the Canvas. Next, measure the blanks to determine the size for each design. I'm going to make a shirt, zipper pouch, and tote. When you're deciding on a size, also keep in mind the machine mat size and the area of your heat press if you want to cover the design all at once. 100% Polyester T-shirt with Love Design in Cricut SportFlex Iron-On You can use the diagrams in my Sublimation T-shirts for Beginners tutorial to find the best design size for your shirt type. Since I'm making a women's medium crewneck, I will resize the Love design to a maximum of 10" wide and 12" tall. Keep the lock icon at the top closed to maintain the design proportions and enter the correct width dimension into the W field under Size. I'll enter 10. If you'd like, change the color by clicking the color box next to Operation and making a selection. I'm going to change it to white to decorate a teal shirt with Cricut SportFlex Iron-On. Zipper Pouch with Beach Life design in Mesh Iron-On Next, the zipper pouch would be perfect for keeping beach accessories together. For this item, we don't want the design to get too close to the zipper or edges since those areas are hard to heat and press evenly. Measure your pouch and subtract 1" from each dimension to create a .5" margin all around the design. My pouch is 11" x 9" so I'll change the design's height to "8" for a good fit. Remember to keep the lock icon closed. I'm also going to change this design to blue. Tote with Multicolored Ship design in Various Vinyl Types Based on the size of my tote, I'm going to leave the lock icon closed and change the W to "10." The ship design is already separated into layers to use different colors. You can change them by selecting the individual layers and using the color box. The color that you set on your Canvas does not have to be the same color vinyl you use. You can ultimately place any color of vinyl on the cutting mat. I'm going to make the ship in dark blue Foil Iron-On, both of the hearts layers in gold Everyday Iron-On, and the letter backgrounds in navy Everyday Iron-On, which can layer with the white Glitter Iron-On I want to use for the letters. IMPORTANT: If you are using different types of vinyl, don't use the same color for more than one layer, including any other designs you're cutting at the same time. Cricut Design Space will put the same colors on the same mat to cut together. Since I want the letters to go on their own mat, I'll make them gray. Here's how my Canvas looks now. For Any Project Once your designs are sized and your colors are set for the different types of vinyl, select the right machine and click "Make It" in the upper corner. If you are prompted to pick how you will load your material, make the appropriate selection. I am using different types of Iron-on Vinyl on a 12" x 12" StandardGrip Machine Mat with my Maker 3 so I will select "On Mat." Click Continue. On the Prepare screen, make sure the correct design pieces are on the right mats if you're cutting them out of the same material. If you see a mistake, click Cancel to go back and fix it. Then, toggle "Mirror" ON for every mat. That way, the decals will face the right direction when we flip them over and iron them on to the blanks. Click back on the first mat and then click Continue in the lower right corner. On the Make screen, remember to change the material setting for each mat if you're using different types. If you don't see the vinyl you are using as a Material option, click "Browse All Materials" to search for it and select it. For all of the types of vinyl, I will select "More" Pressure from the dropdown menu. A Cricut Fine-Point Blade worked for all of my vinyl. It is important to place your iron-on vinyl SHINY SIDE DOWN on each machine mat. That way, we can adhere the correct side to the blank and the mirrored words will be legible. Press the flashing arrows to load your mat into your Cricut machine and when the middle button flashes, press it to begin the cut. When the first mat is done, press the flashing arrows to unload the mat. Flip the mat over and gently peel it away from the vinyl. This helps prevent unwanted curling. Place the next piece of vinyl shiny side down on the mat and load it into your Cricut. Again, select the appropriate material and "More" Pressure. Repeat these steps until you've cut all of your design pieces. Once the vinyl is done cutting, use your scissors to trim away excess material around the designs. Then, use a weeding tool to remove the rest of the vinyl including all of the small bits inside the letters. If you're using white vinyl, it can be hard to tell the material from the carrier sheet and find all the small pieces to remove. I like to place the vinyl on my Cricut BrightPad, which really helps! Different blanks, materials, and presses require different temperature, pressure, and peeling combinations. Consult the Cricut Heat Guide if you are using anything different from me. 100% Polyester T-shirt with Love Design in Cricut SportFlex Iron-On Preheat the EasyPress to 305°. Lint roll the shirt's front to remove any debris. Fold your shirt in half length-wise and place it on the heat resistant mat. Once the heatpress comes to the right temperature, press the crease for a few seconds to make an alignment line. Open the shirt and lay it face up, flat on the mat. Carefully fold your design in the same way, creasing just the very top and bottom of the liner and not any of the vinyl. Place the design shiny side up and the vinyl against the shirt, lining up the crease marks. The top of the design should be about 3" below the collar for an adult crew neck shirt. Use the crease to center the design and make sure it's even. Add heat resistant tape to keep the design in place. SportFlex Iron-On is very thin, so place a teflon sheet or piece of butcher paper over the liner to help spread the heat out. Press the design with light pressure (just hold the press in place with one hand) for 30 seconds. Then, gently flip the shirt over and press the back with light pressure for 15 seconds. Allow the shirt and vinyl to cool and gently remove the tape and liner. All done! Zipper Pouch with Beach Life design in Mesh Iron-On Set the EasyPress to 340°. Lint roll the pouch to remove any debris. Lay the pouch face up on your pressing mat. Once it comes to temperature, preheat the pouch for 5 seconds on the side you want to decorate. Place the Mesh Iron-On design on the zipper pouch vinyl side down. Add heat resistant tape to keep the design in place. Press with light pressure for 30 seconds. Flip the pouch over and press the back for 15 seconds. Allow the design and pouch to cool and gently remove the tape and liner. This one is done too! Tote with Multicolored Ship design in Various Vinyl Types Layered vinyl designs take more planning and often have different press settings. And remember, some of the vinyls (Holographic, Holographic Sparkle, Foil, Glitter, Glitter Mesh, or flocked iron-on) can't have another layer added on top. That means the glitter letters will go on top as a second layer. My first layer will be: Then, I'll add the Glitter Iron-On letters as the top layer. Closely trim the excess liner around the ship, heart, and offset pieces so that they won't overlap when in place. If any liner gets between the vinyl and the tote, the design will not stick. If you're working with vinyls that require different temperature like I am, preheat the EasyPress to the lowest one. I set mine to 290°. Lint roll the tote to remove any debris. When the press comes to temperature, preheat the tote on the heat resistant mat with light pressure for 5 seconds. Place the ship, hearts, and offset layer vinyl side down on the tote. Add heat resistant tape to keep the designs in place. Press the designs for 30 seconds with light pressure. Gently flip the tote and press for another 15 seconds on the back side. Leave the ship and heart liners in place to protect them from the next press. When cool, only remove the tape and liner for the offset piece. Lower the Easy Press temperature to 270° for Glitter Iron-On. Place the wording over the offset piece, vinyl side down. Make the visible offset as even as possible around the letters. Add more tape to keep it in place. Press the design for 30 seconds. Although the Cricut Heat Guide says to use light pressure, I used medium pressure (press with two hands) to help the bottom layer of Everyday Iron-On adhere to the tote. Flip the tote and again press for 15 seconds from the back. When cool, gently remove all of the tape and liner pieces. TIP: If any sections of vinyl lift with the carrier sheet, put it back down, place liner over any nearby vinyl, and reheat the area with the EasyPress. You're done! You're all done and now have some awesome Cricut Vinyl Projects! I can't wait to see your projects! I recommend waiting at least 24 hours before washing and wash inside-out if you can. CARE TIPS: Wait at least 24 hours before washing any item with iron-on vinyl. If any areas begin to lift, follow the pressing instructions to readhere the vinyl. FONTS Love - Gilden / Free Alternative: Made Sunflower Beach Life - Biosha and Berson Dream Trio / Free Alternatives: Rockabye and Moutarde Sail Away - Tingler Script / Free Alternative: Timberly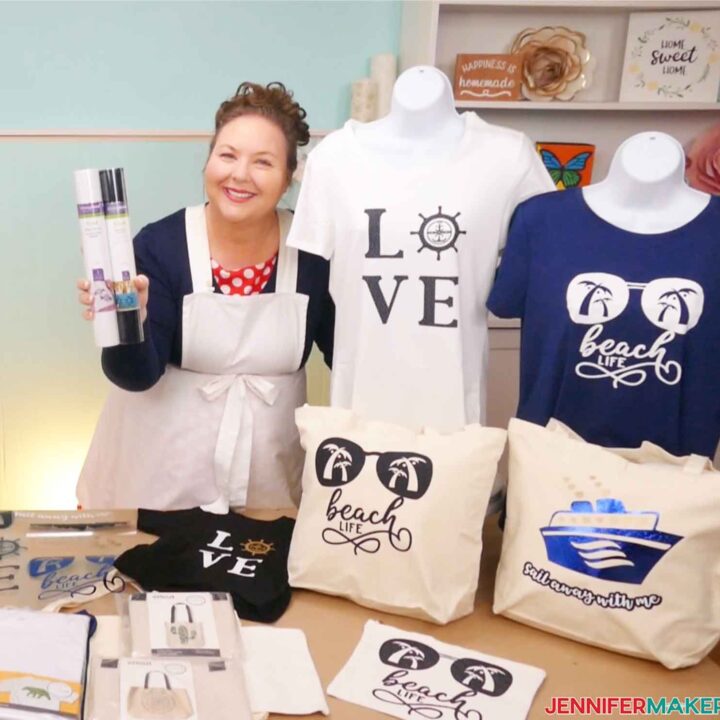
Cricut Vinyl Projects
Materials
Tools
Instructions
STEP 1: GET MY FREE CRICUT VINYL PROJECT FILES
STEP 2: PLAN YOUR IRON-ON VINYL AND BLANK MATERIAL
STEP 3: PREPARE YOUR CRICUT VINYL DESIGNS


STEP 4: CUT AND WEED YOUR CRICUT VINYL DESIGNS
STEP 5: PRESS YOUR CRICUT VINYL PROJECTS


STEP 6: SHOW IT OFF
Notes
Answers to Your Questions About Cricut Vinyl Projects
Q. What should I put vinyl on?
The options are almost endless! Depending on which type you’re using (permanent vinyl, removable vinyl, HTV, or other specialty vinyls like holographic vinyl or stencil vinyl) you can decorate water bottles, tote bags, home decor items, shadow boxes, school supplies, or even your new Cricut machine! Vinyl is a great way to customize your surroundings with craft projects like planner stickers, car decals, and even your own t-shirt designs!
Q. How do you make a vinyl project on Cricut?
After adjusting the SVG in Design Space, use the cutting machine to make it out of the vinyl, weed the excess, prepare your item, and transfer the design with heat!
Q. What do you need for Cricut vinyl projects?
You really just need a Cricut cutting machine, fine point blade, cutting mat, vinyl, a weeder, a heat source, and a compatible item to decorate for an easy project!
Get my free SVG files for the Cricut vinyl projects!
Now, I’d love to see your Cricut vinyl projects and the different ways you use different types of vinyl! If you make anything with these designs, please share a photo in our Facebook group, email it to me at [email protected], or tag me on social media with #jennifermaker.
Love,

Want to remember this? Save the Cricut Vinyl Projects Tutorial to your favorite Pinterest Board