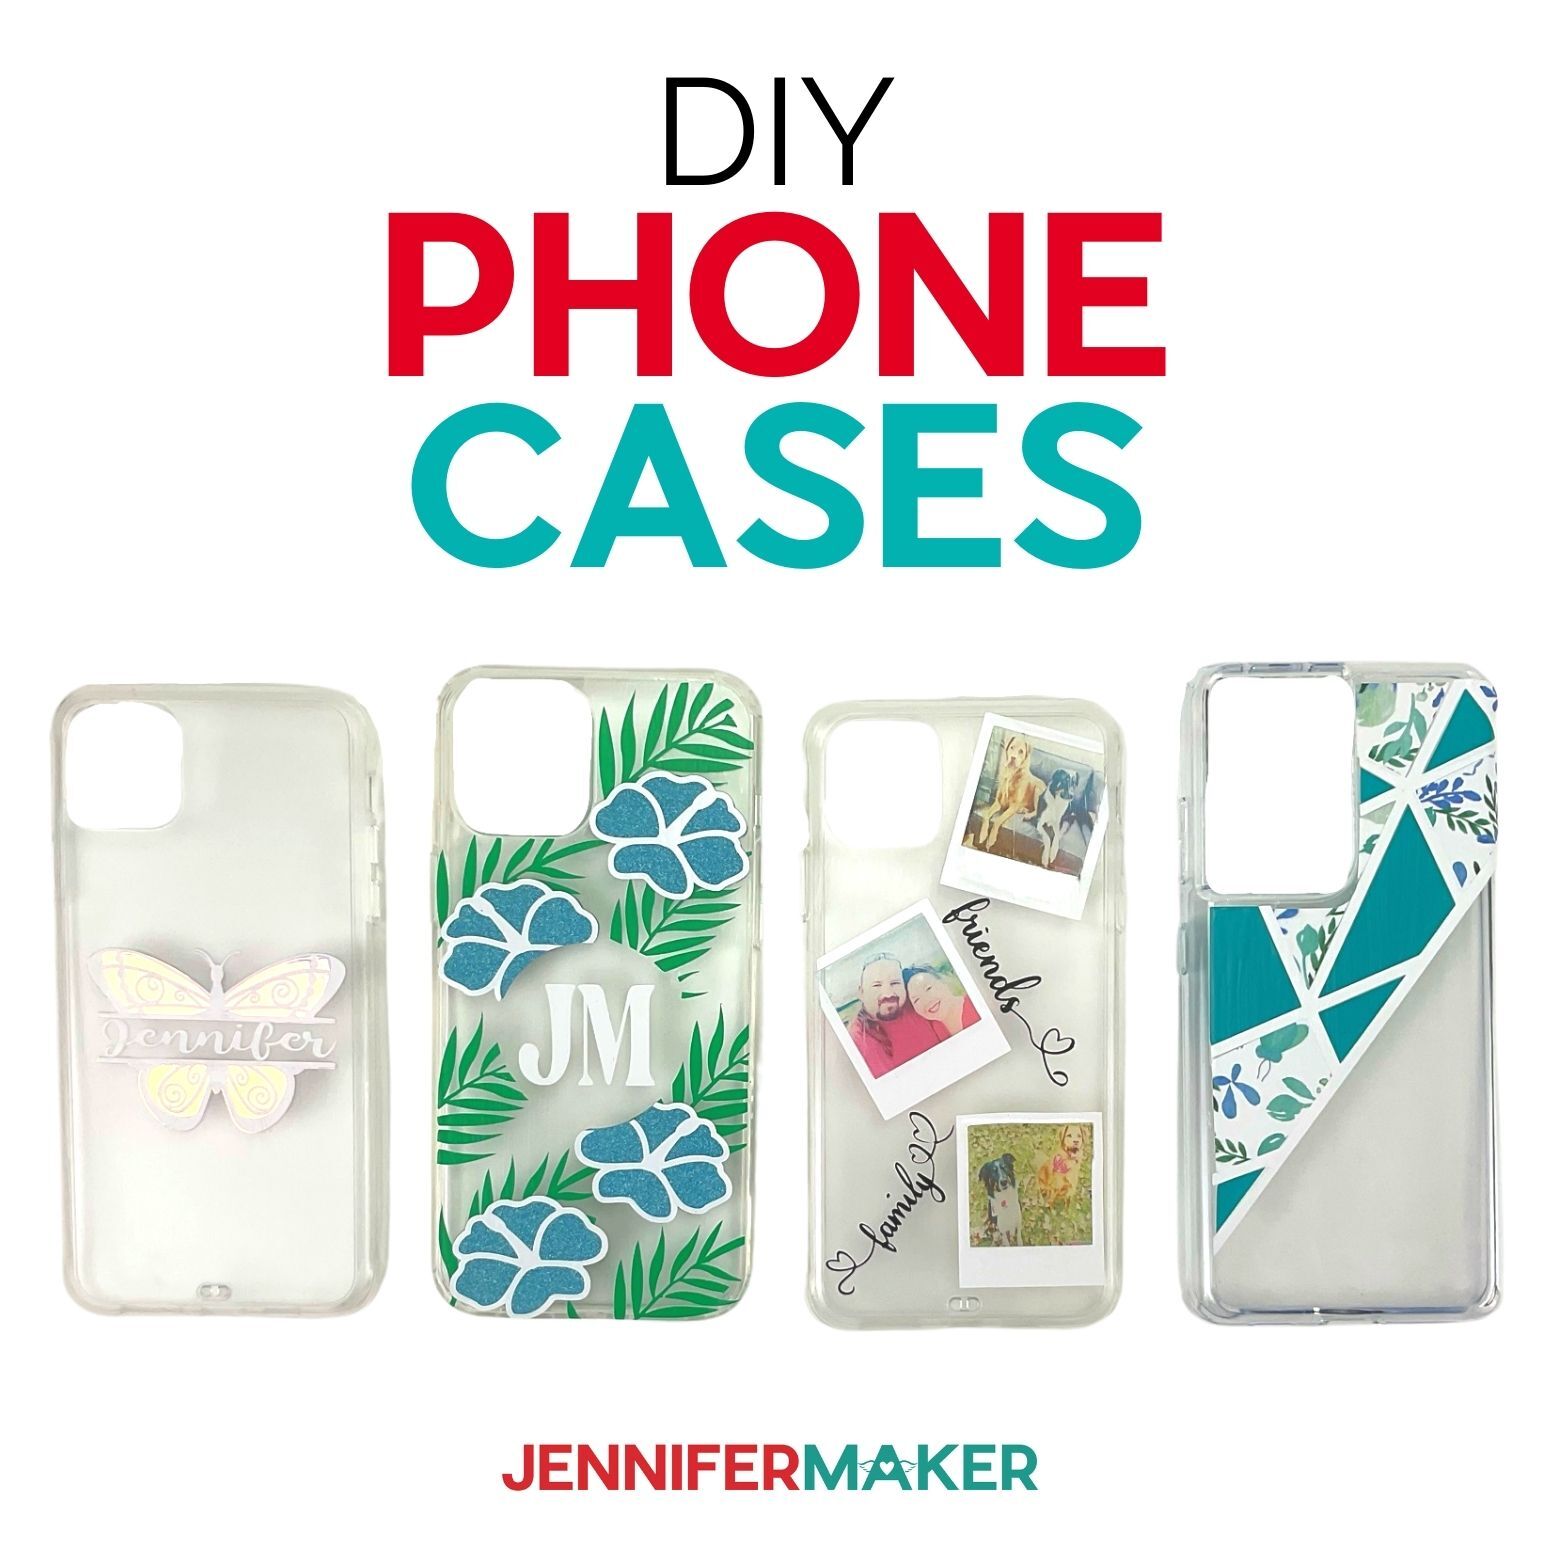
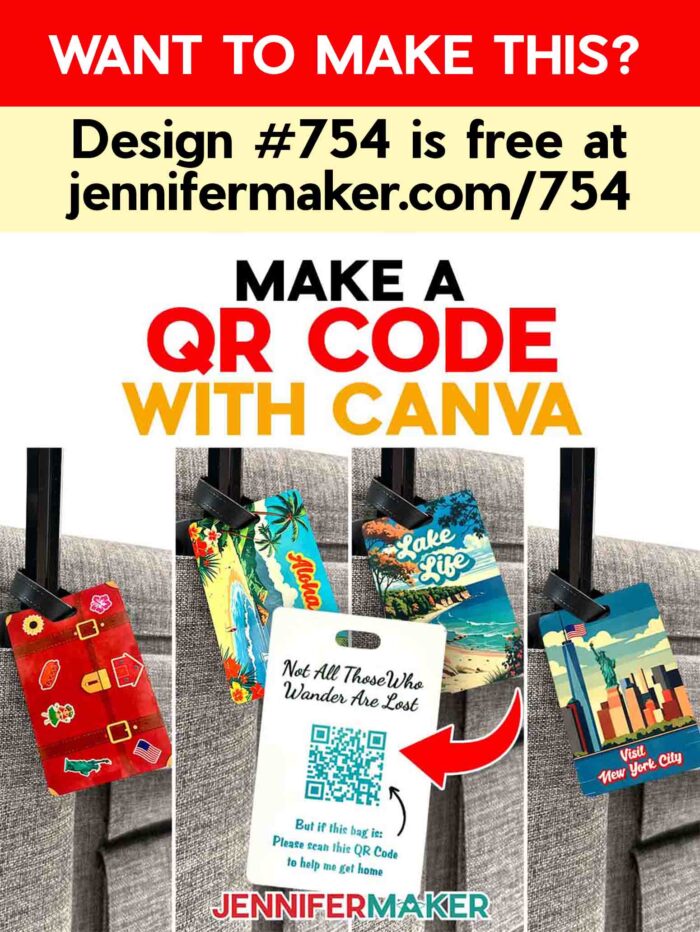
Learn how to make a QR code with Canva for your sublimated luggage tags!
Have you ever stood at the airport baggage carousel, scanning a sea of nearly identical suitcases, hoping yours comes around safely? Or maybe you’ve had that sinking feeling on vacation when your luggage doesn’t arrive, and all you can do is hope the airline’s tiny paper tag stays attached long enough for someone to find you. It can put a big damper on your travel plans, and that’s why I’m so excited to share this project with you! Imagine having a super durable luggage tag that is not just eye-catching so you can spot your bag easily, but also smart enough to help it find its way back to you if your bag ever gets lost in transit. It’s easier than you think, so let’s learn how to make a QR code with Canva for a luggage tag!
Watch the full step-by-step tutorial on how to make your own QR code luggage tags!

I’m thrilled to show you how to create a custom luggage tag using a free Canva account. That’s right, you don’t need the Canva Pro account with advanced features to make a QR code luggage tag!
First, what’s a QR code? A QR or “quick response” code is like a little pixel puzzle your phone’s camera can read in a snap, taking you straight to a website, landing page, or contact form. Using Canva’s built-in QR code generator, you can make customizable QR codes that connect to a contact form where a kind stranger or airport staff can quickly provide their contact information if your bag is found. This means you can travel with peace of mind, knowing you’ve shared seamless access to contact you should your bag go missing!
This project is perfect for beginners who are curious about sublimation and dynamic QR codes, and it’s a big win if you want to make something truly useful for your travels. I’ve made a free Canva template and a set of fun luggage tag designs to get you started, so you don’t have to figure it all out alone.
First, I’ll guide you through easy steps to create your destination URL in Canva using a free service called Jotform, which will link to a way to contact you, plus show any additional information you provide. When someone scans one of your QR codes, the Jotform page will pop up, making it simple for them to send you a quick message to let you know your bag has been found. This smart QR code solution keeps your personal details private while giving your luggage the best chance of getting back to you.
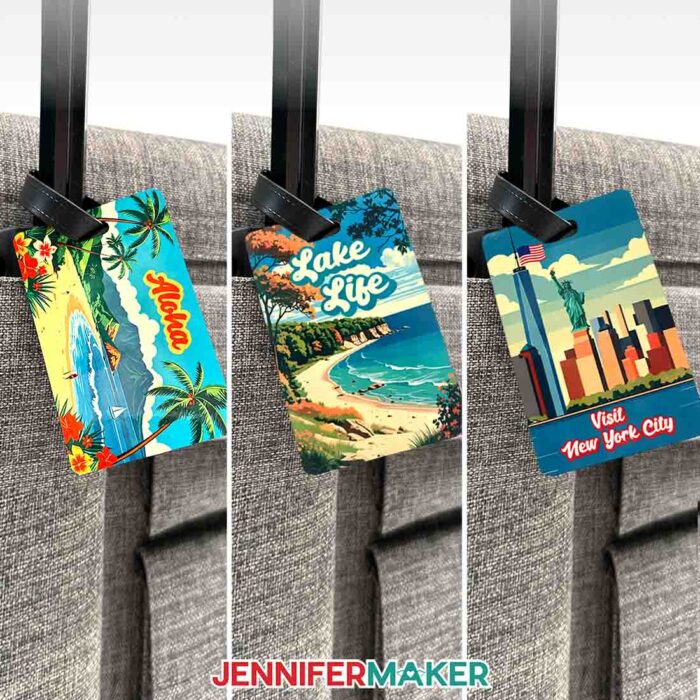
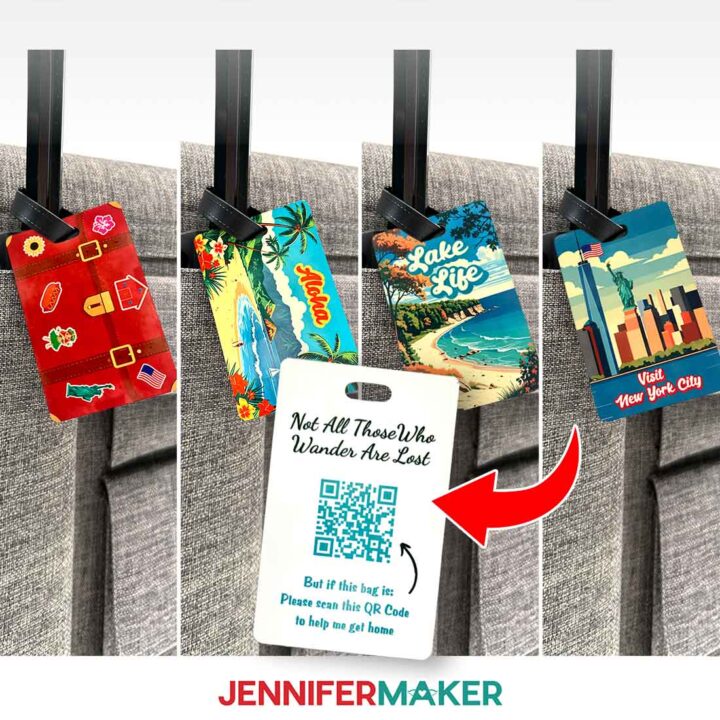
Next, I’ll teach you how to customize your luggage tag with one of the free designs I’ve prepared for you. From a sunny Hawaiian beach to a peaceful lake scene and a vibrant New York City skyline, you can match your tag to your adventure!
Then it’s time to generate your QR code using Canva’s QR code generator and add it to your design. I’ll show you how to save the code at the right size, ensuring it’s clear and easy to scan, lasting trip after trip.
Finally, I’ll show you how to print your luggage tag design onto sublimation paper using your sublimation printer, and I’ll cover each step of pressing the design onto both sides of a blank luggage tag with your heat press. Adding the keyring or loop is quick, and just like that, your luggage tag will be ready to travel with you on your next adventure.
So much of the success of sublimation comes from using the right time and temperature while pressing. Remember, every blank is different! In the tutorial, I’ll share the settings that worked the best for my luggage tag blanks.
Sublimation is such a satisfying process, and your end result will be a bright, sturdy tag that can handle the bumps of travel while keeping your luggage looking cute and easy to spot.

If your blanks are different from the ones in my materials list, check out my Sublimation Cookbook. It’s packed with loads of information to help you achieve great results consistently, including recommended time, temperature, and pressure settings for tons of unique materials.
There’s something special about traveling with items you’ve made yourself, Every time you see your luggage on the carousel, you’ll feel that spark of pride knowing you created something not just cute, but super practical with customizable QR codes. These tags also make fantastic gifts for globetrotting friends and family. Even if you’re brand new to Canva or sublimation crafting, you’ll find this project fun, straightforward, and the peace of mind is so worth it.

Want to learn how to create a personalized luggage tag that shows off your unique travel style? I’ll show you how to make any image look like a sticker to decorate your tag in my Advance with JenniferMaker program! My special workshop shows you how to use Canva, a free online design tool, to add your own images to personalize your luggage tags. You can even use Canva design options to add your brand logo to a luggage tag for work trips! Plus, you’ll have access to my personal collection of images and design elements in your member library! Click here to learn more about the Advance program!
Now all that’s left is to get started! Download your free luggage tag designs and follow me to Canva to start your QR code project today. Let’s craft smarter together and travel confidently, knowing your bags can find their way home!
So, want to learn how to make a QR code with Canva? Let me show you how fun and easy it is! This post contains some affiliate links for your convenience (which means if you make a purchase after clicking a link I will earn a small commission but it won’t cost you a penny more)! Read my full disclosure policy.
Materials to Sublimate a QR Code Luggage Tag
View my Amazon shopping list with the exact items I used.
- One (1) 2.4″ x 3.75″ Double-Sided Sublimation Luggage Tag
- One (1) Sheet of 8.5” x 11” A-Sub Sublimation Paper 125g
- 12” x 12” White Cardstock
- White Uncoated Butcher Paper
- Sublimation Printer – I used a converted Epson EcoTank ET-2800 Inkjet Printer
- Sublimation Ink
- Heat Press – I used the 9” x 9” Cricut EasyPress 3
- Cricut EasyPress Mat
- Heat-Resistant Tape
- Heat-Resistant Gloves
- Lint Roller
- Fan (for ventilation)
- Scissors -OR-
- Paper Trimmer
- Ruler or Measuring Tape
- Lint Free Cloth -AND-
- Isopropyl Alcohol (optional to clean the tag blank)
- Design #754 (My free PNG design files are available in my free library – get the password by filling out the form at the bottom of this page)
How to Make Your QR Code Luggage Tags
Make a QR Code With Canva
Learn how to make a QR code with Canva for your sublimated luggage tags!
Materials
- One (1) 2.4" x 3.75" Double-Sided Sublimation Luggage Tag
- One (1) Sheet of 8.5” x 11” A-Sub Sublimation Paper 125g
- 12” x 12” White Cardstock
- White Uncoated Butcher Paper
- Design #754 (My free PNG design files are available in my free resource library - get the password by filling out the form at the bottom of this page)
Tools
- Sublimation Printer - I used a converted Epson EcoTank ET-2800 Inkjet Printer
- Sublimation Ink
- Heat Press - I used the 9” x 9” Cricut EasyPress 3
- Cricut EasyPress Mat
- Heat-Resistant Tape
- Heat-Resistant Gloves
- Lint Roller
- Fan (for ventilation)
- Scissors -OR-
- Paper Trimmer
- Ruler or Measuring Tape
- Lint Free Cloth -AND-
- Isopropyl Alcohol (optional to clean the tag blank)
Instructions
STEP 1: GET MY FREE LUGGAGE TAG DESIGNS
First, download my Luggage Tag designs from my free library – look for Design #754. Alternatively, you can use the Save This Project form near the top of this post and the design link will be emailed to you.
In the PNG folder, you’ll find three luggage tag designs: a Hawaiian beach, a lake scene, and a New York City skyline. I made these designs with the help of AI art generation and adjusted them with image editing software.
You’ll also find a luggage tag template with outlines for positioning your design elements in Canva.
TIP: If you’re not sure how to download Zip files and upload designs, go to jennifermaker.com/svgs. The steps are similar for PNGs and Canva.
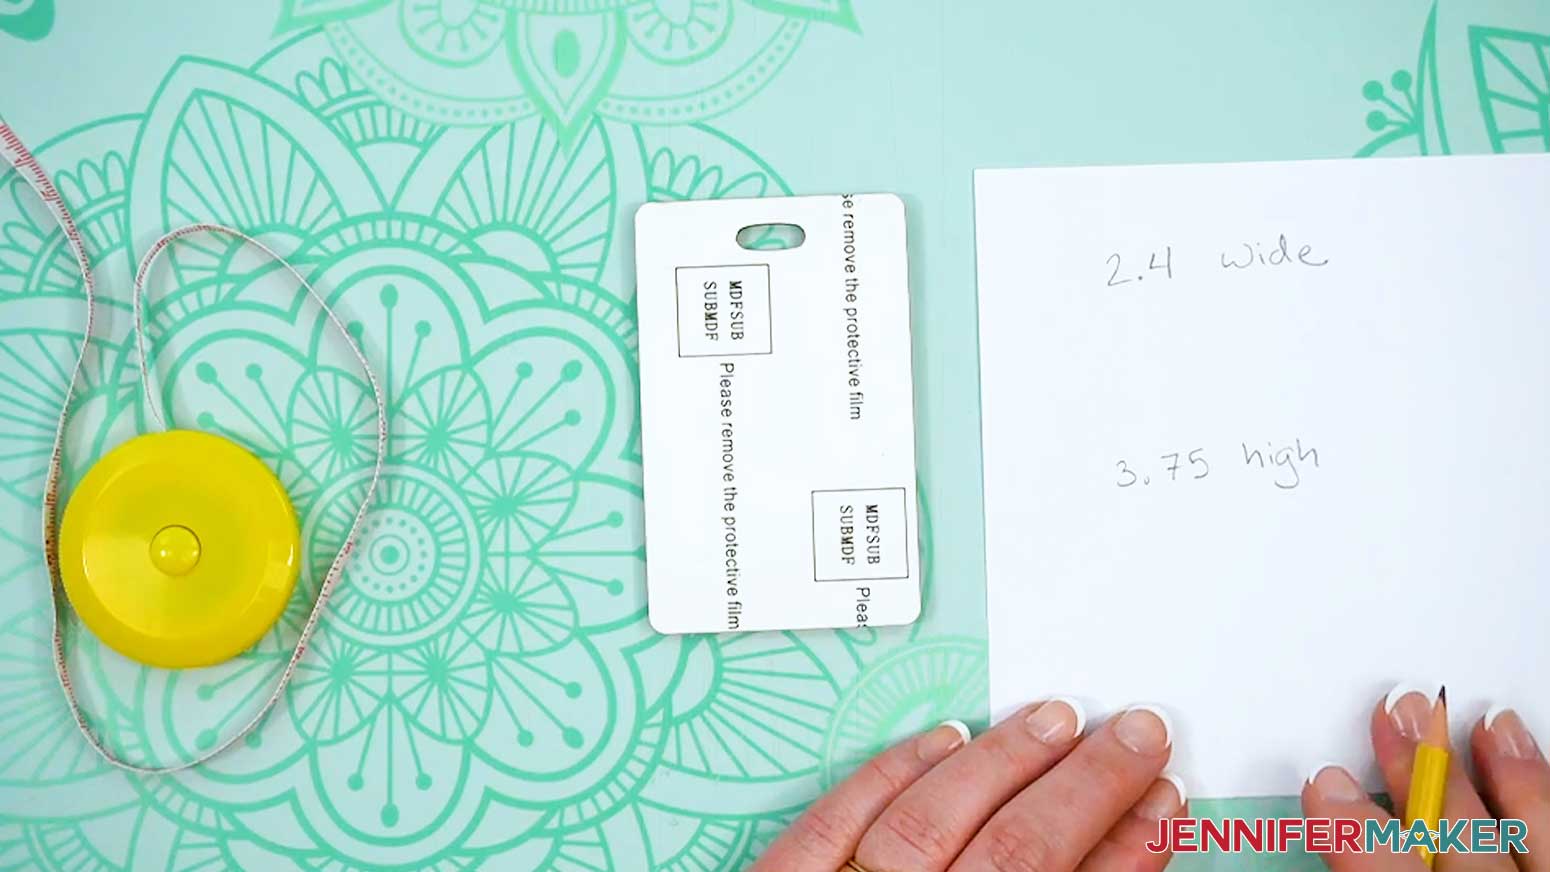
STEP 2: MEASURE YOUR LUGGAGE TAG BLANK
- Lay your luggage tag blank flat on your work surface in portrait orientation.
- With a ruler, measure the width from left edge to right edge, then the height from the top to bottom.
NOTE: My luggage tags measure 2.4” W x 3.75” H. Your sizing might be different even if you use the blank I recommend, so always be sure to measure.
TIP: Most sublimation designs should completely cover the blank to fill all the white space. - Record your measurements, and set aside your notes for now.
STEP 3: CREATE YOUR LUGGAGE TAG
DESIGN YOUR LUGGAGE TAG'S FIRST SIDE IN CANVA
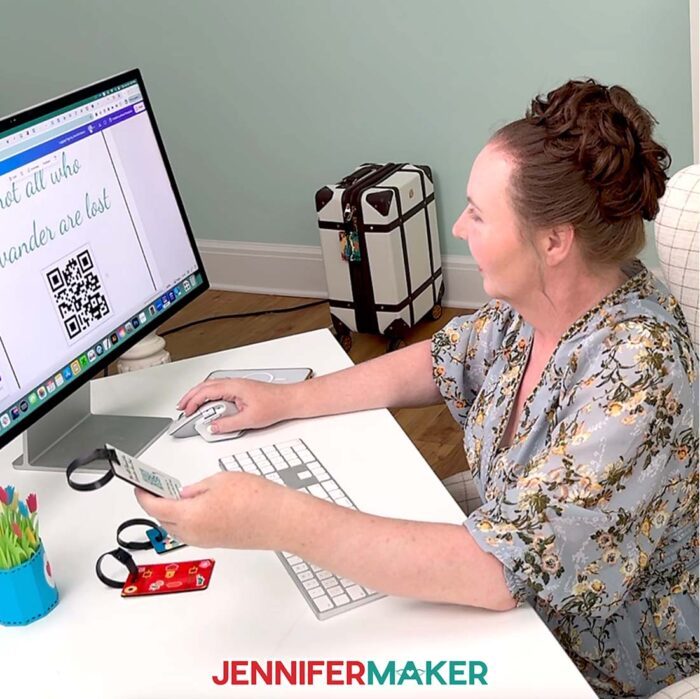
- In your computer’s browser, go to jennifermaker.com/canva.
NOTE: If you’re new to Canva, check out my Canva for Beginners tutorial. - Then, either sign in to your account or follow the prompts on the screen to sign up for a free account.
NOTE: Canva does offer paid subscriptions with more tools and elements, but I’ll show you how to do everything with the free account. - On the Canva Home screen, click the “Create a design” button.
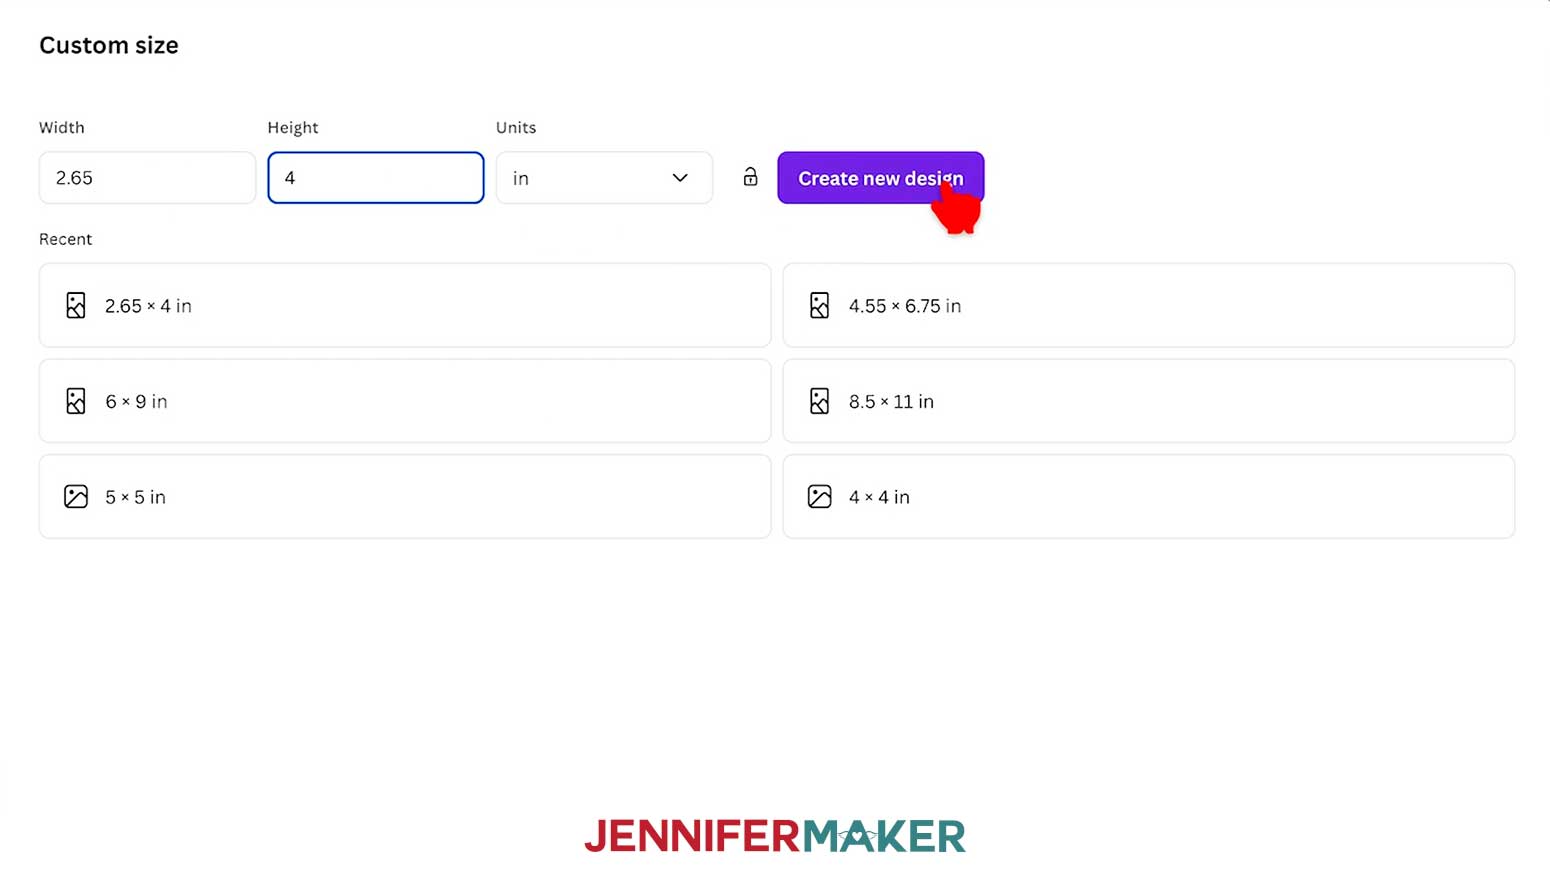
TIP: Depending on your view, the button may just say “Create.” - Click “Custom size” to set the dimensions of your canvas.
- In the “Units” box, click the dropdown menu and select “in” for inches.
- Enter your luggage tag blank’s “Width” and “Height” dimensions plus ¼” to allow a ⅛” bleed all around the design.
NOTE: I’ll enter “2.65” in the “Width” field and “4” in the “Height” field. - Then click “Create new design.”
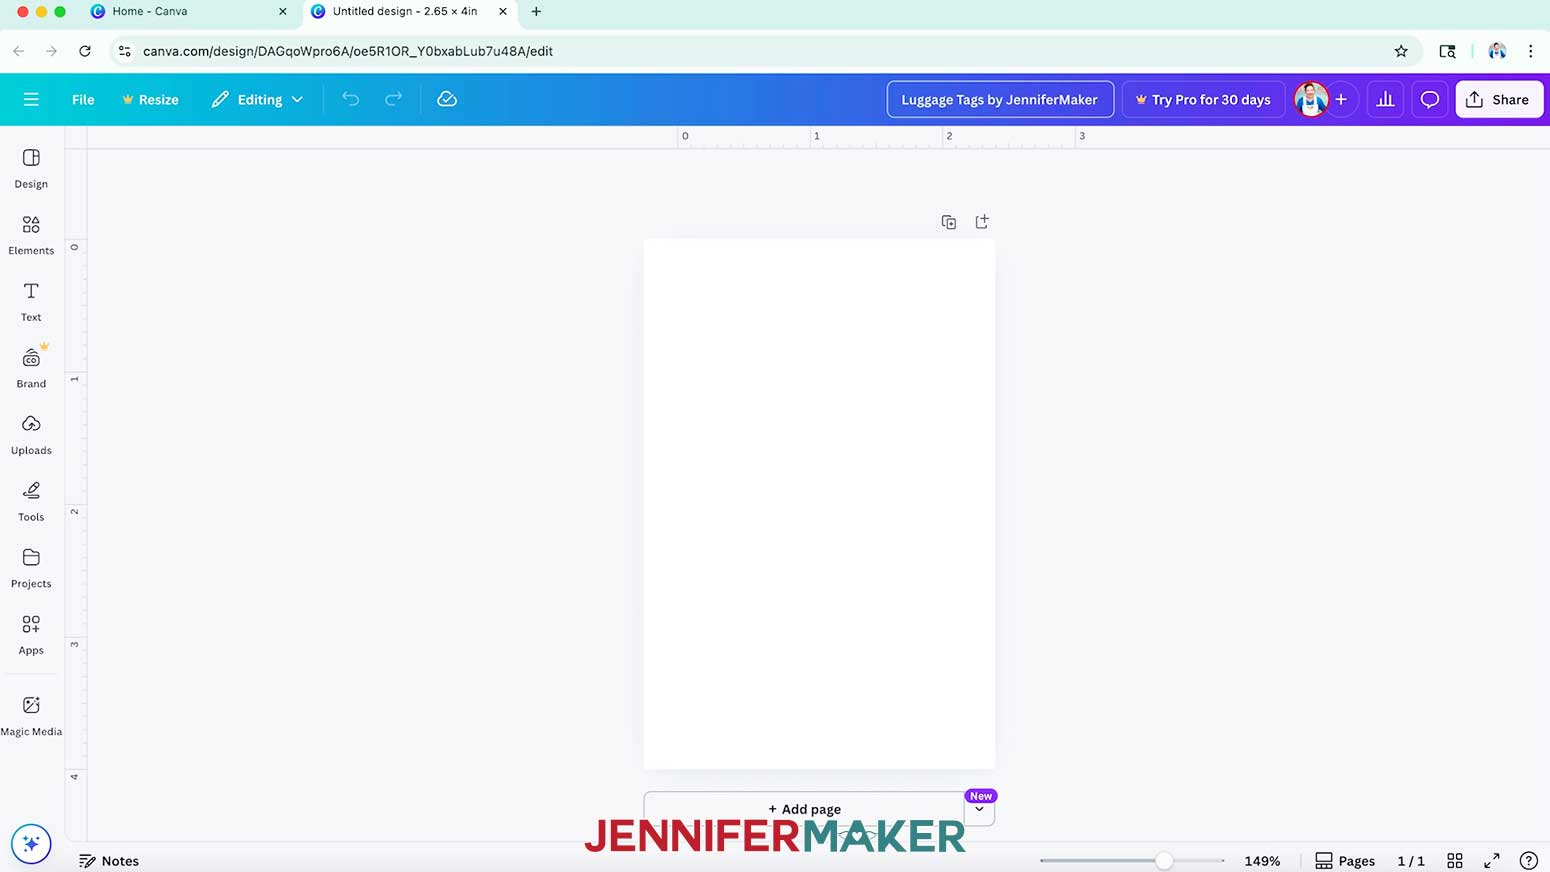
- To save your design, click the filename field at the top and replace the current name with your own.
NOTE: I’ll change mine to “Luggage Tags by JenniferMaker.” - To add the outlines template for your luggage tag, click on “Uploads” in the side panel, then “Upload files.”
NOTE: The template’s outlines help make sure essential parts of your design don’t cover the hole in the tag, where they won’t transfer. - Select the “template” PNG and click “Open.”
- In the Uploads Panel, click the template to insert it onto your canvas.
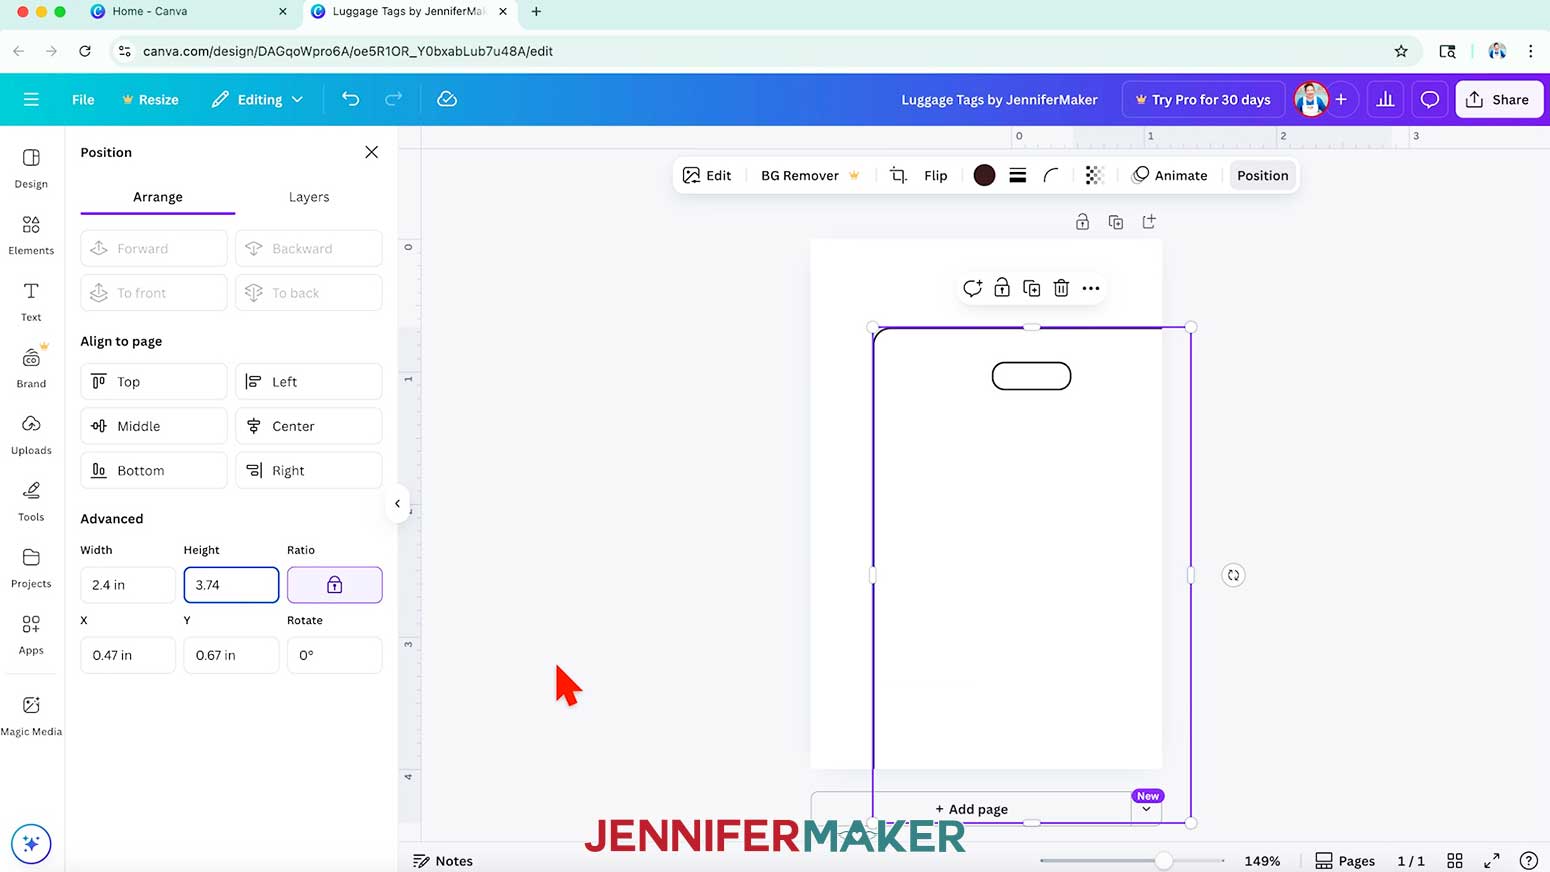
- Drag the template’s corners until the width (w) and height (h) in the purple box match your luggage tag’s dimensions.
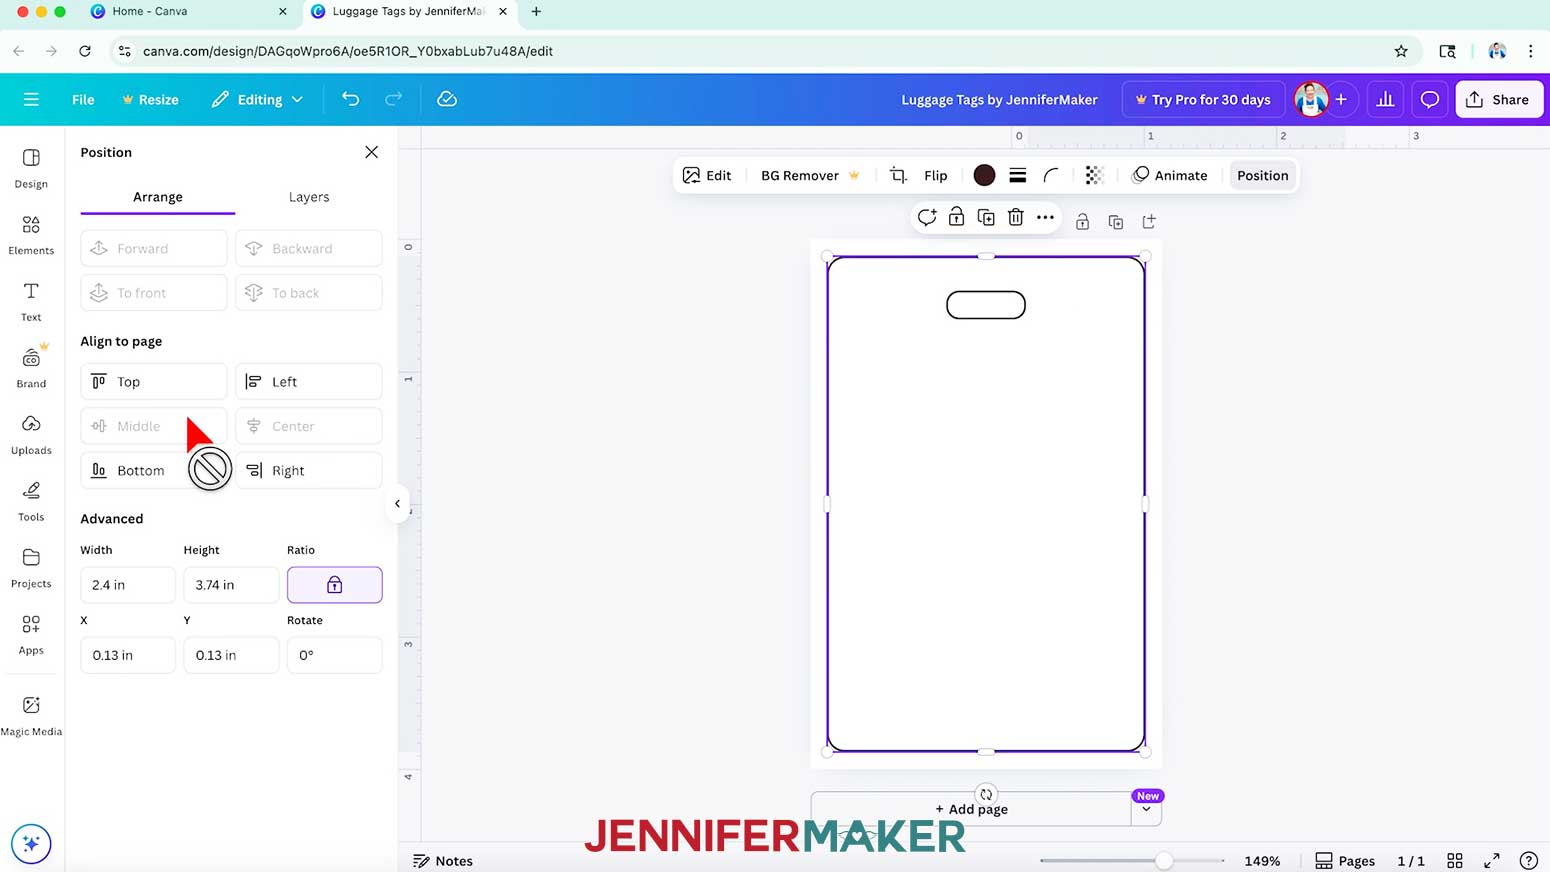
NOTE: I’ll adjust my template’s width to 2.4” and height to 3.7”. - With the template still selected, click on the “Position” button.
- Under the “Align to page” section, click “Center” and “Middle” to center the template on the canvas.
- Next, click on the “Duplicate page” icon above your canvas (it looks like two rectangles with a “Plus” sign) to add an identical page for your tag’s other side.
NOTE: The second page will be back of your tag, with the QR code and instructions to scan it if your bag is lost. - Scroll back up to Page 1 to work on your design.
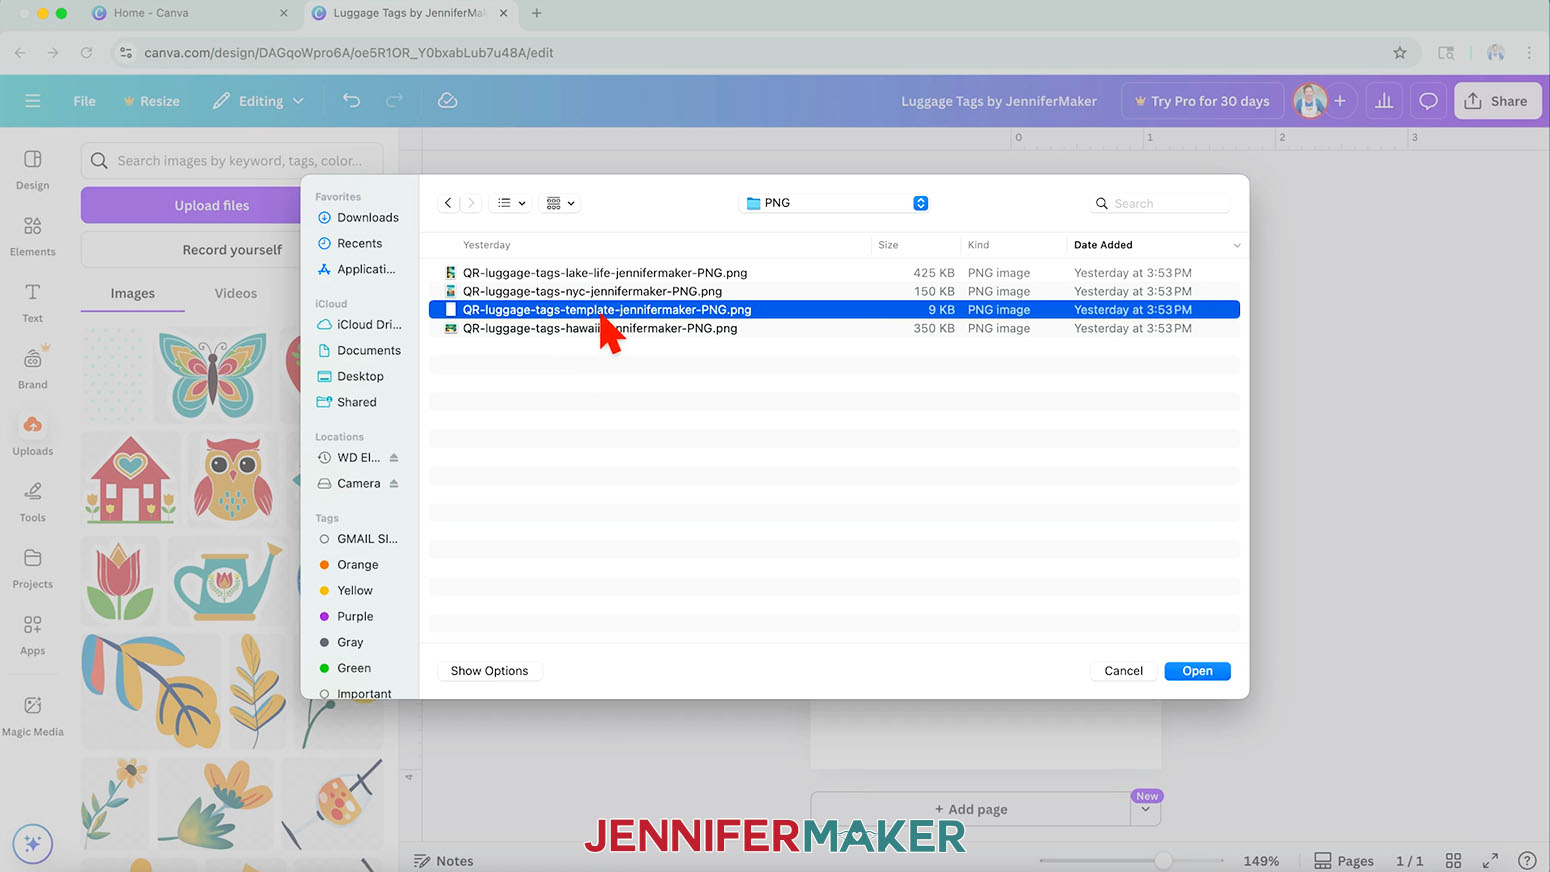
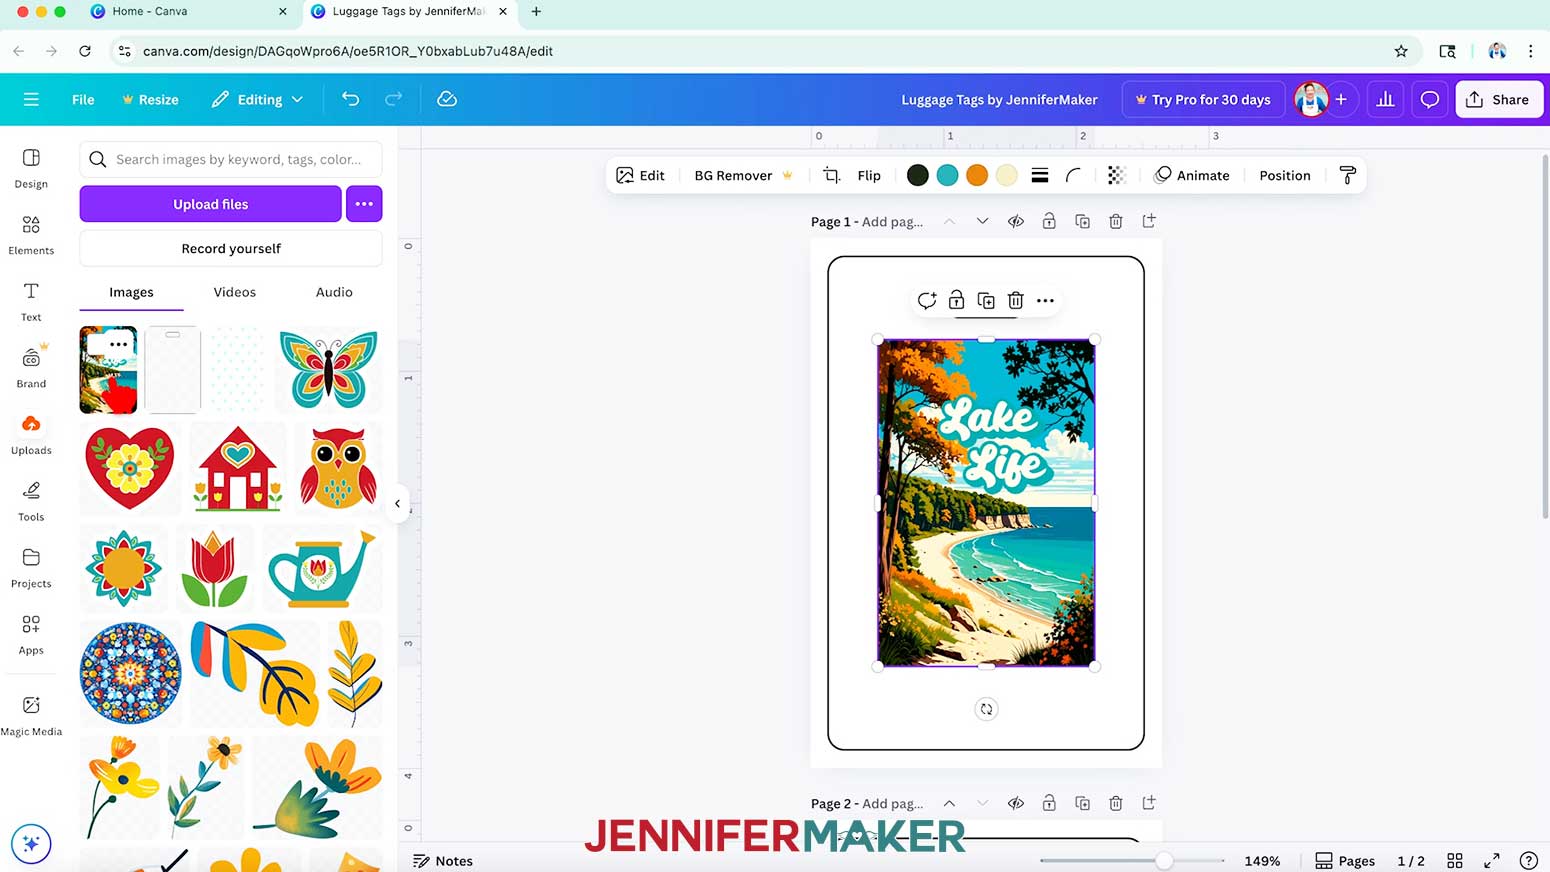
- To add one of my luggage tag images, click on “Uploads” in the side panel, then “Upload files.”
- Select the PNG image you want to add and click “Open.”
NOTE: I’ll select the “lake-life” PNG. If you use the “Hawaii” design, rotate it to match the template. - In the Uploads Panel, click the image to insert it onto your canvas.
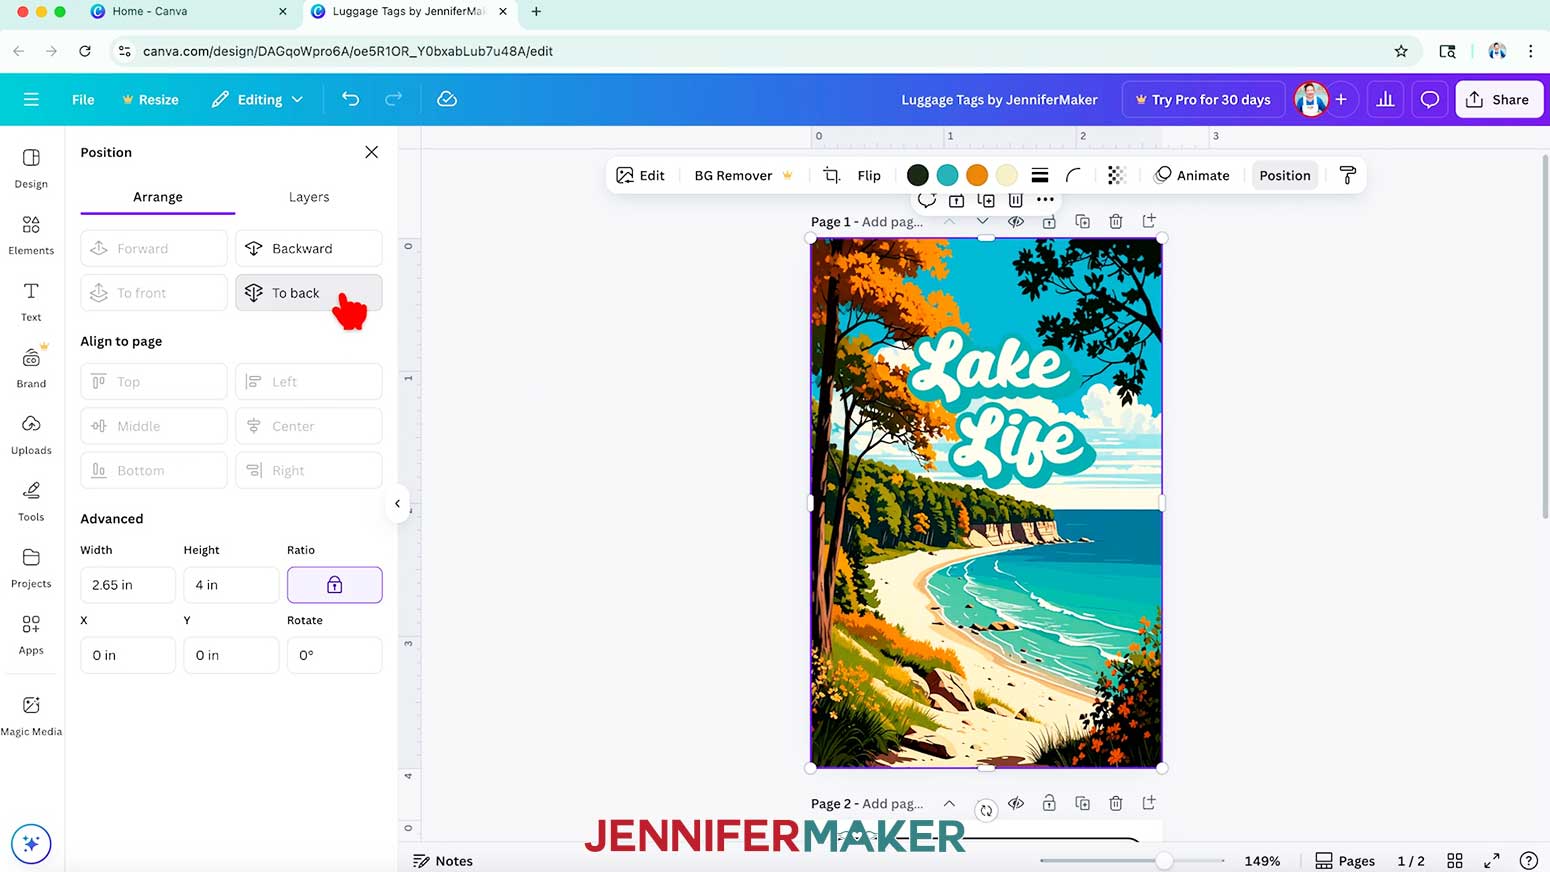
- Drag the image’s corners to resize it until it completely fills the canvas.
- With the image selected, click the “Position” button and select “To back” under the “Arrange” section so the template outlines are on top of the background.
- Make sure any important elements aren’t covering the hole in the luggage tag, where they won’t transfer.
- Once all your elements are in place, select the outlines template and click the “Trash” icon to delete it.
- And now your luggage tag’s first side is ready!

DESIGN YOUR LUGGAGE TAG’S SECOND SIDE
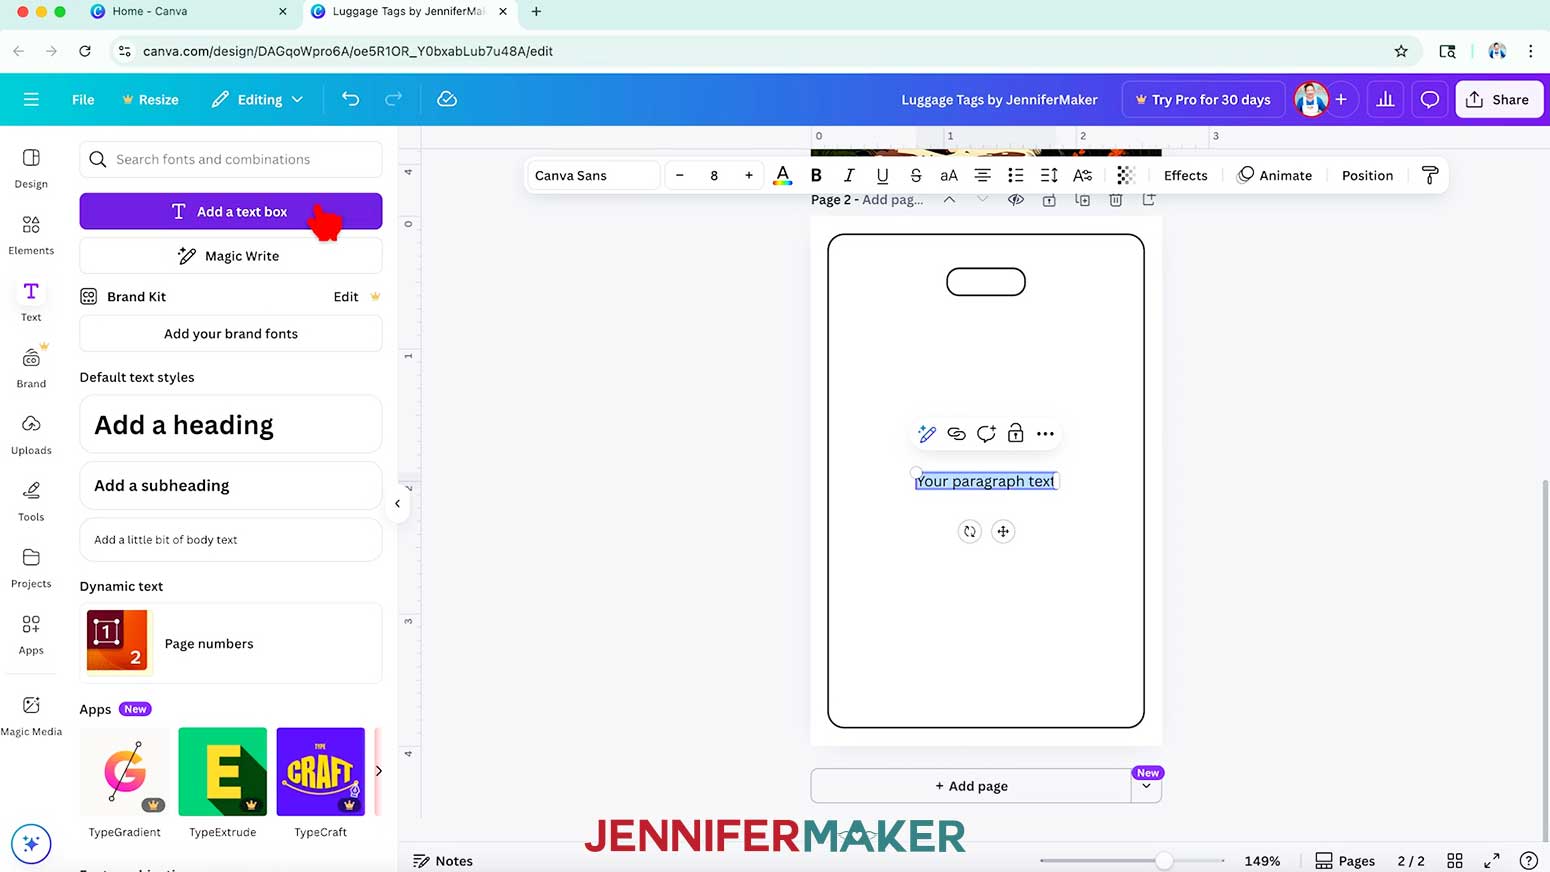
- Scroll down to Page 2 to begin designing side two of your luggage tag.
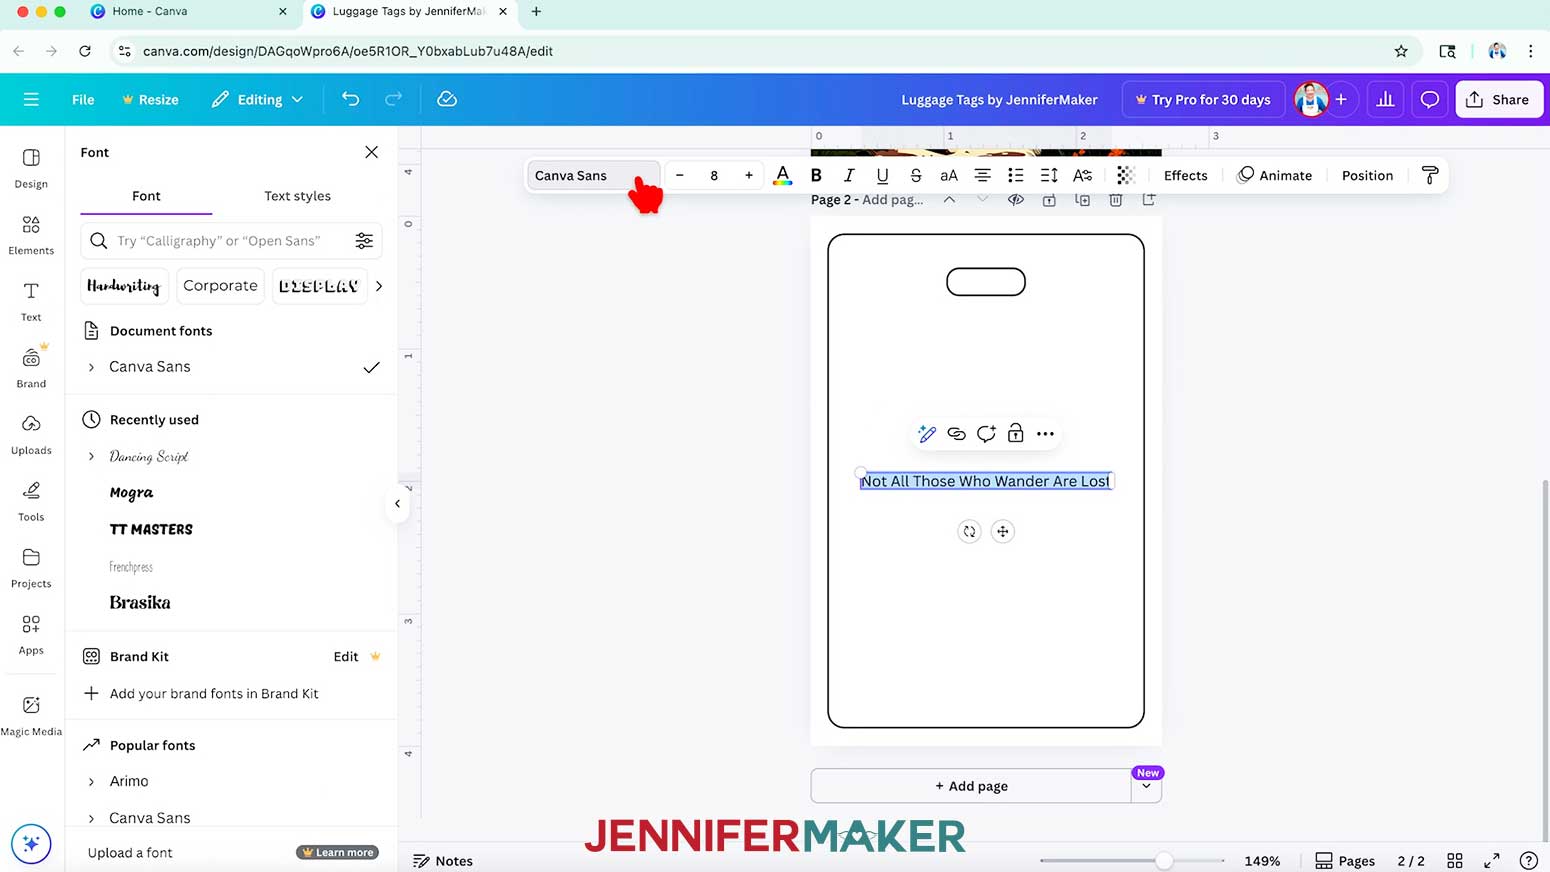
- To add text to your design, click the “Text” icon in the side panel, then click “Add a text box.”
- Double-click the text box and then type your desired text in the box.
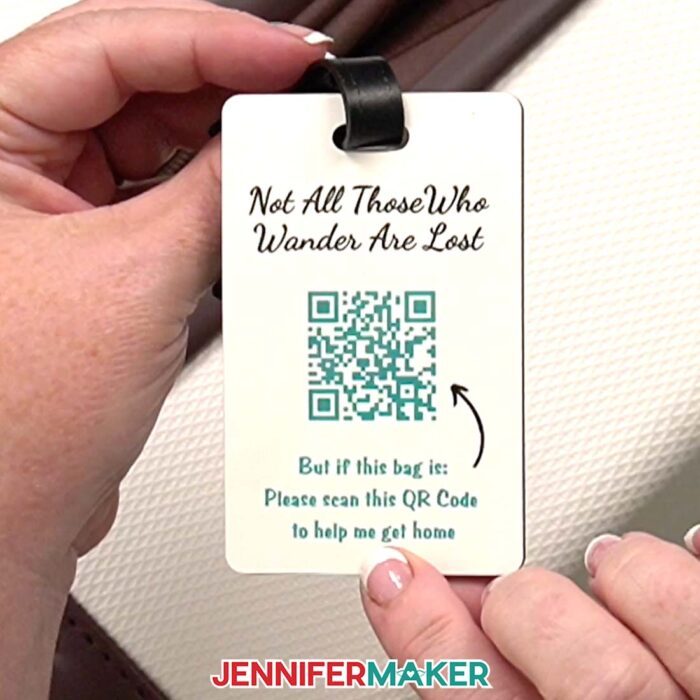
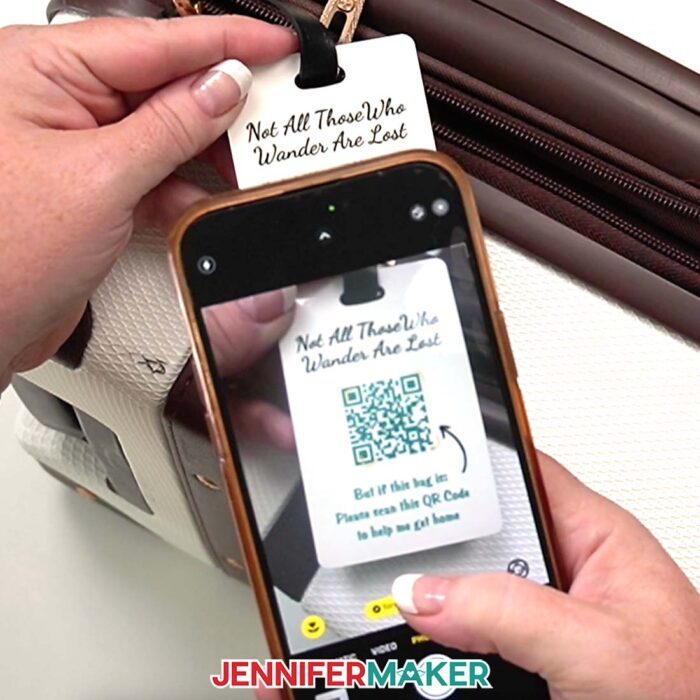
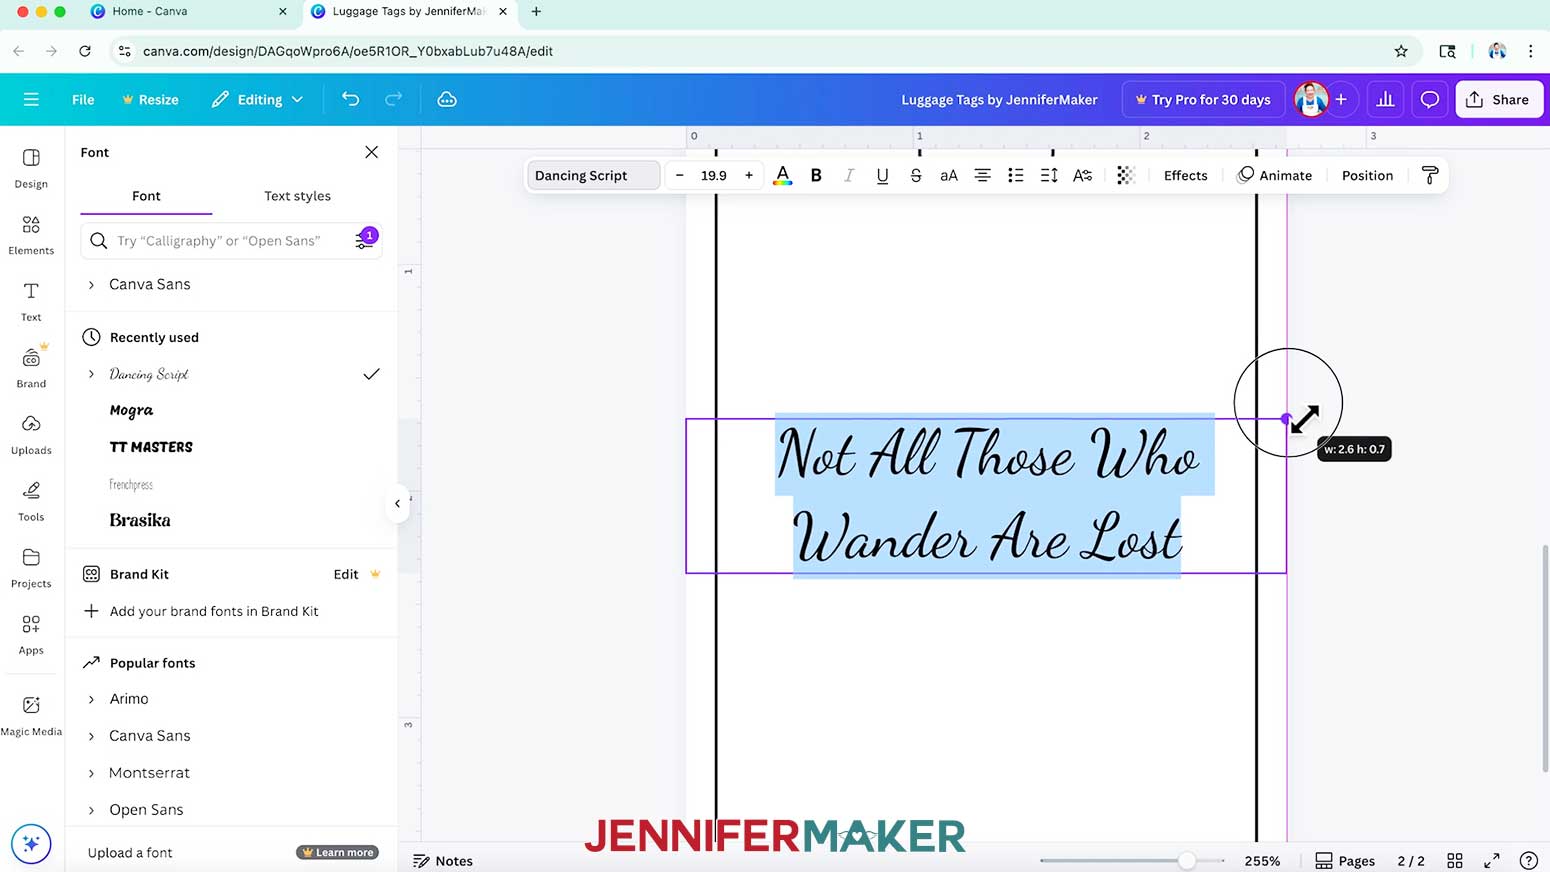
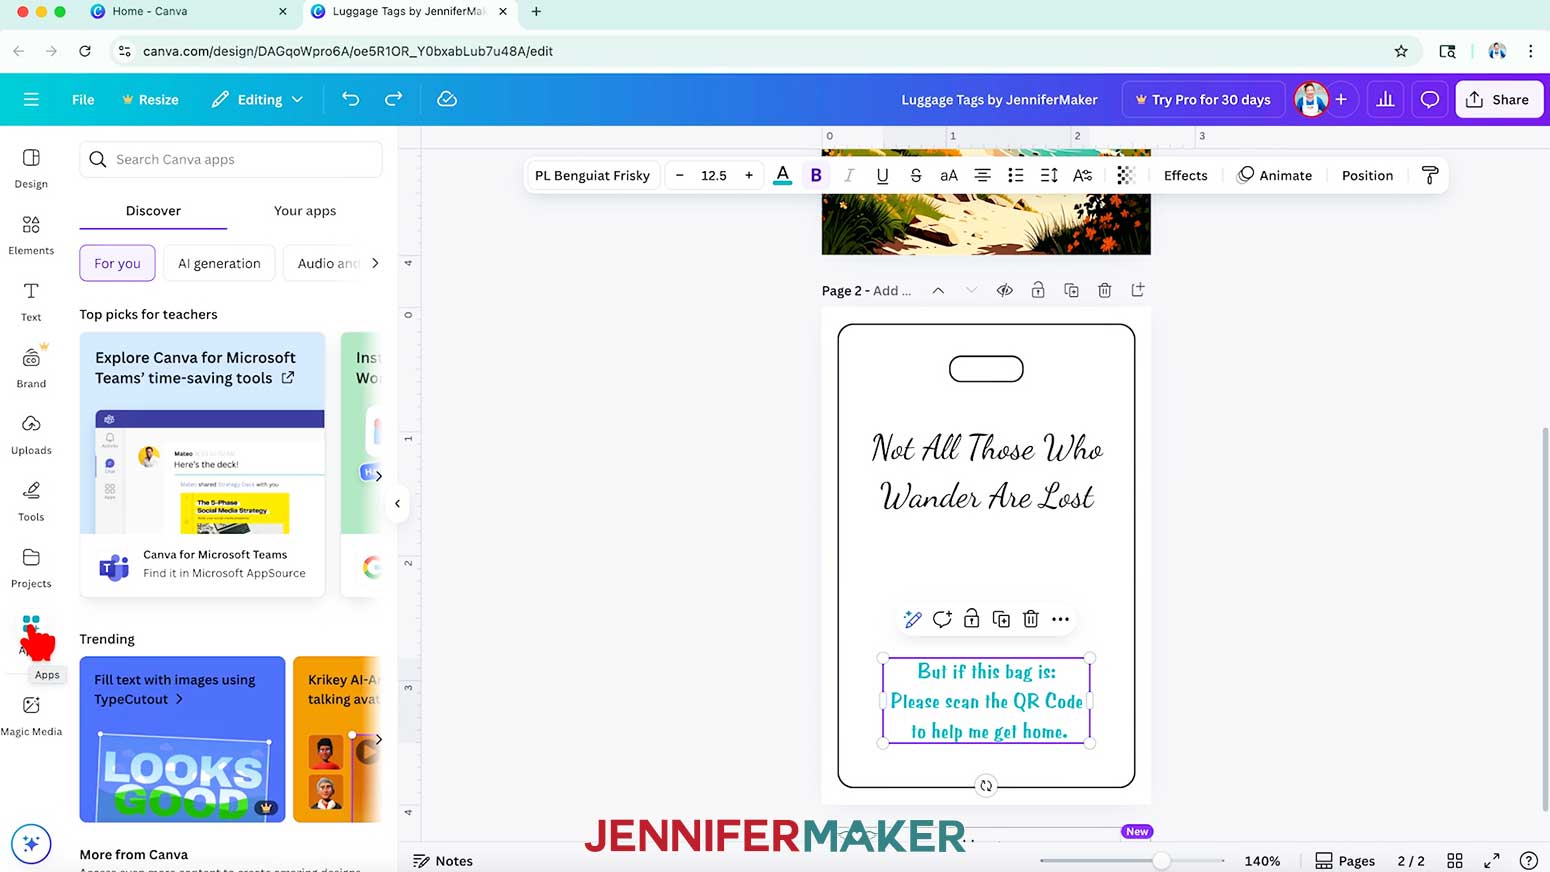
NOTE: I’ll type in “Not All Those Who Wander Are Lost.” - To change your text’s typeface, with the text box selected, click the field that says “Canva Sans” (or another typeface name) to open the Font menu in the side panel.
- Click on the icon with three horizontal lines and small circles to open the “Filter” menu, check the box next to “Free,” and click “Apply” to show only typefaces you can use without a paid account.
- Click a typeface you like from the list to apply it to your text.
NOTE: I’ll choose “Dancing Script.” - Use the text box’s side handles to change the text box’s line length, and the corner Resize handles to make your text larger or smaller as needed.
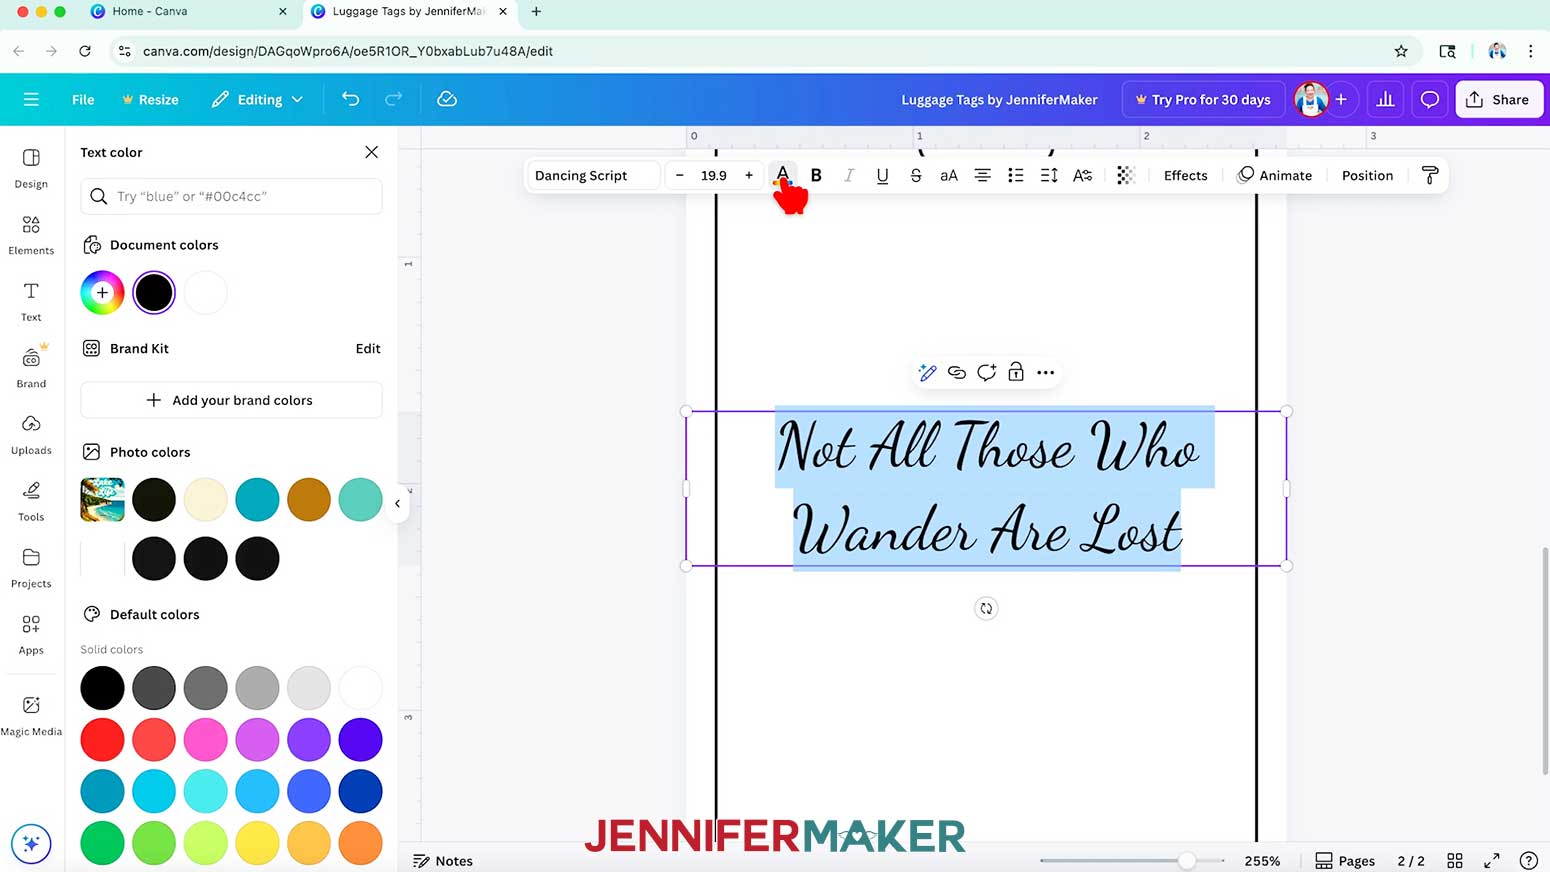
NOTE: I’ll bring in the sides so my words are on two lines, then resize the box until the font is easy to read, about size 20. - To change the color of your text, make sure the text box is selected, then click the toolbar button with the letter “A” above a color box and choose a new option.
- Click and drag the text box to move it into your desired position.
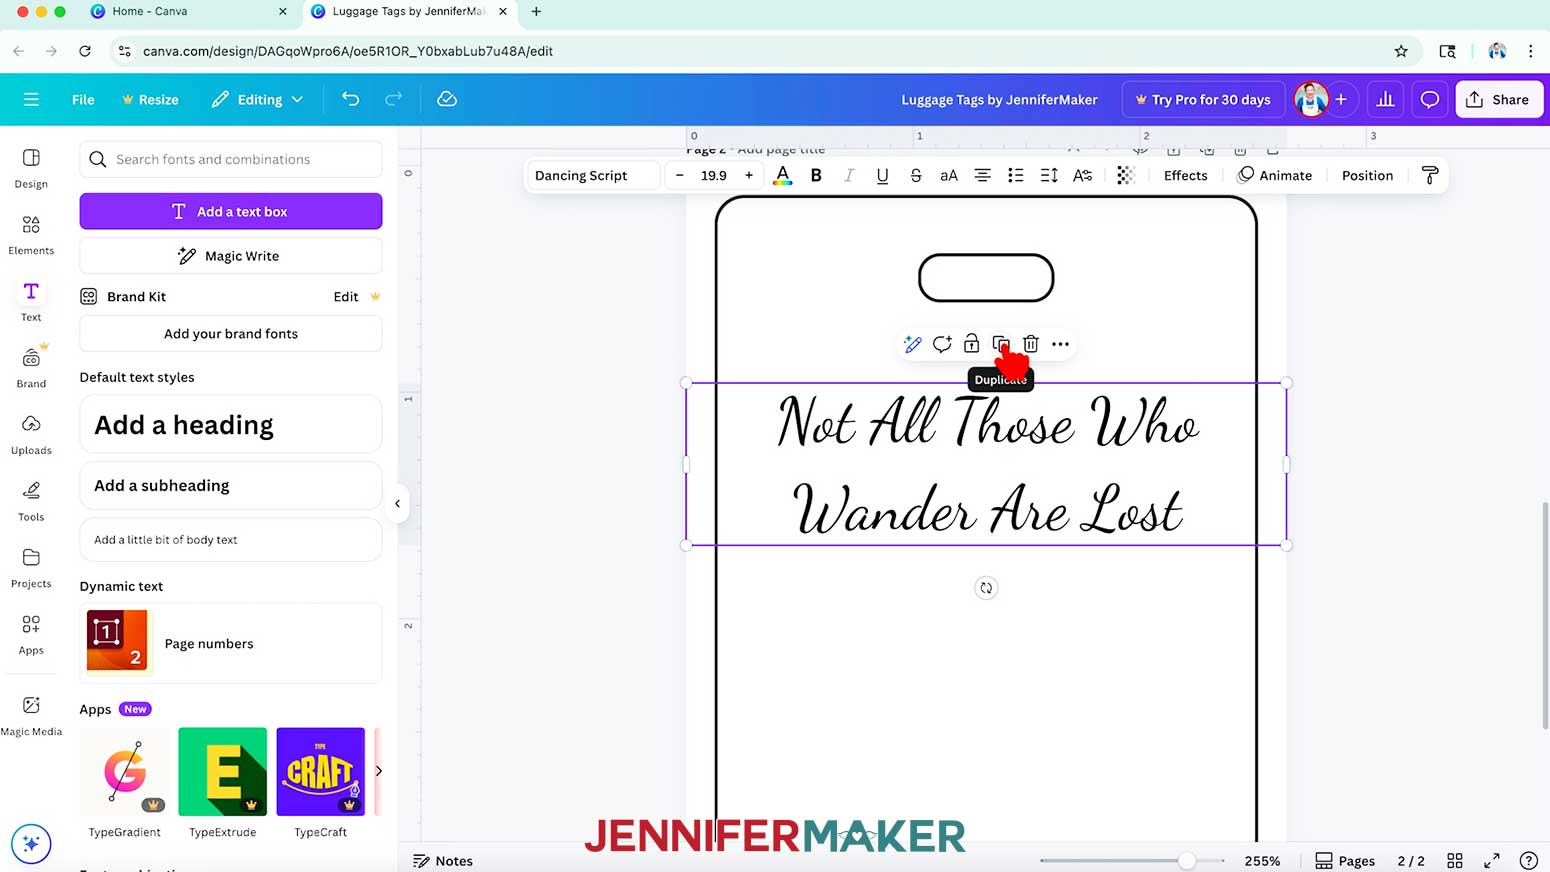
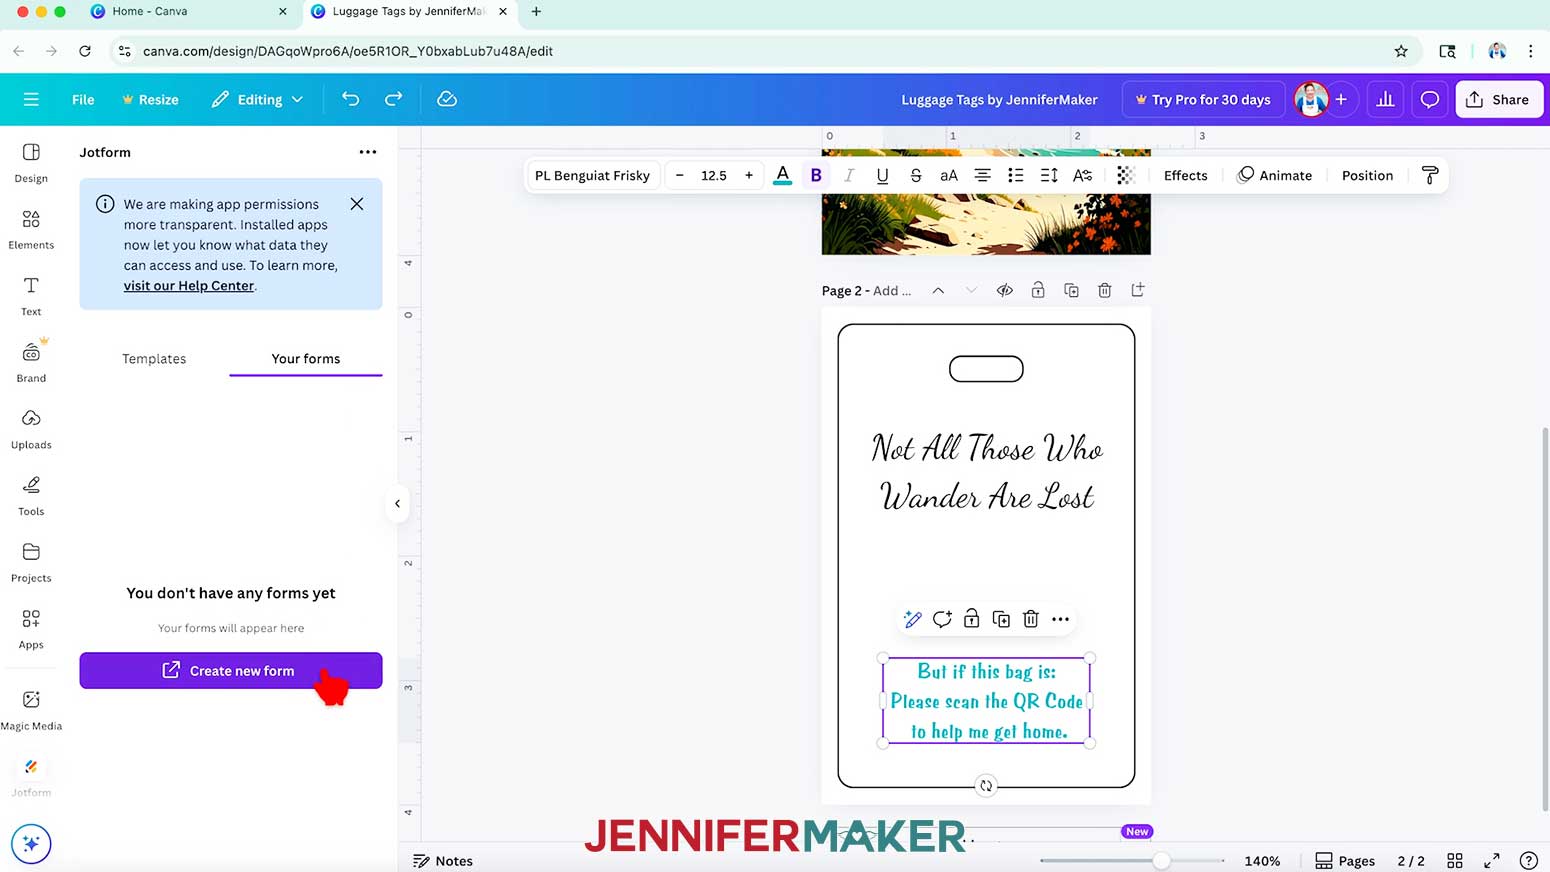
NOTE: I’ll move mine closer to the top of my tag, but below the hole, then I’ll use the purple guideline to center it from left to right. - Repeat Steps 2-9 to add and format any additional text, like a prompt about the QR code.
NOTE: I added, “But if this bag is: Please scan the QR Code to help me get home,” in the “PL Benguiat Frisky” typeface.

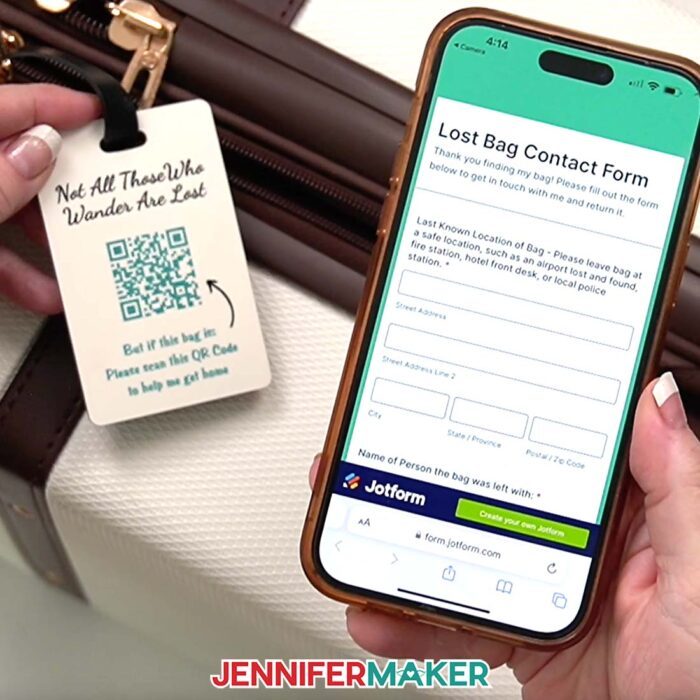
CREATE YOUR LOST BAG CONTACT FORM IN JOTFORM
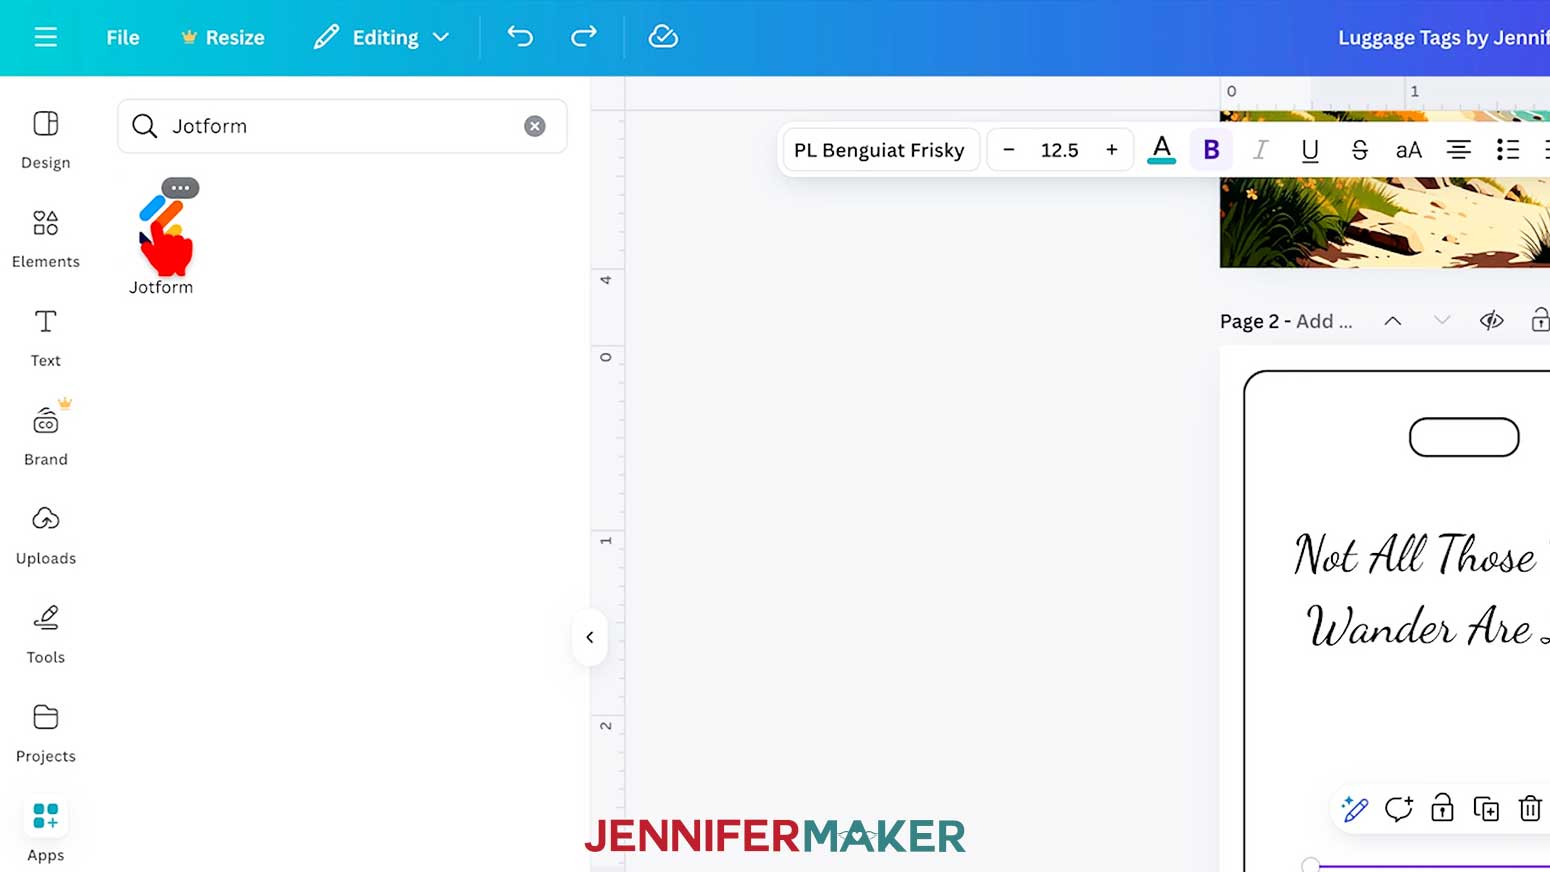
- Before we can add the QR code, we need a form to link it to. To create your form, click the “Apps” button.
- In the search bar, type “jotform” and select “Jotform” in the search results list.
TIP: Click the app’s three dots to see its information and confirm you have the option from Jotform instead of another creator. - Click the “Start for Free” button in the Jotform Panel.
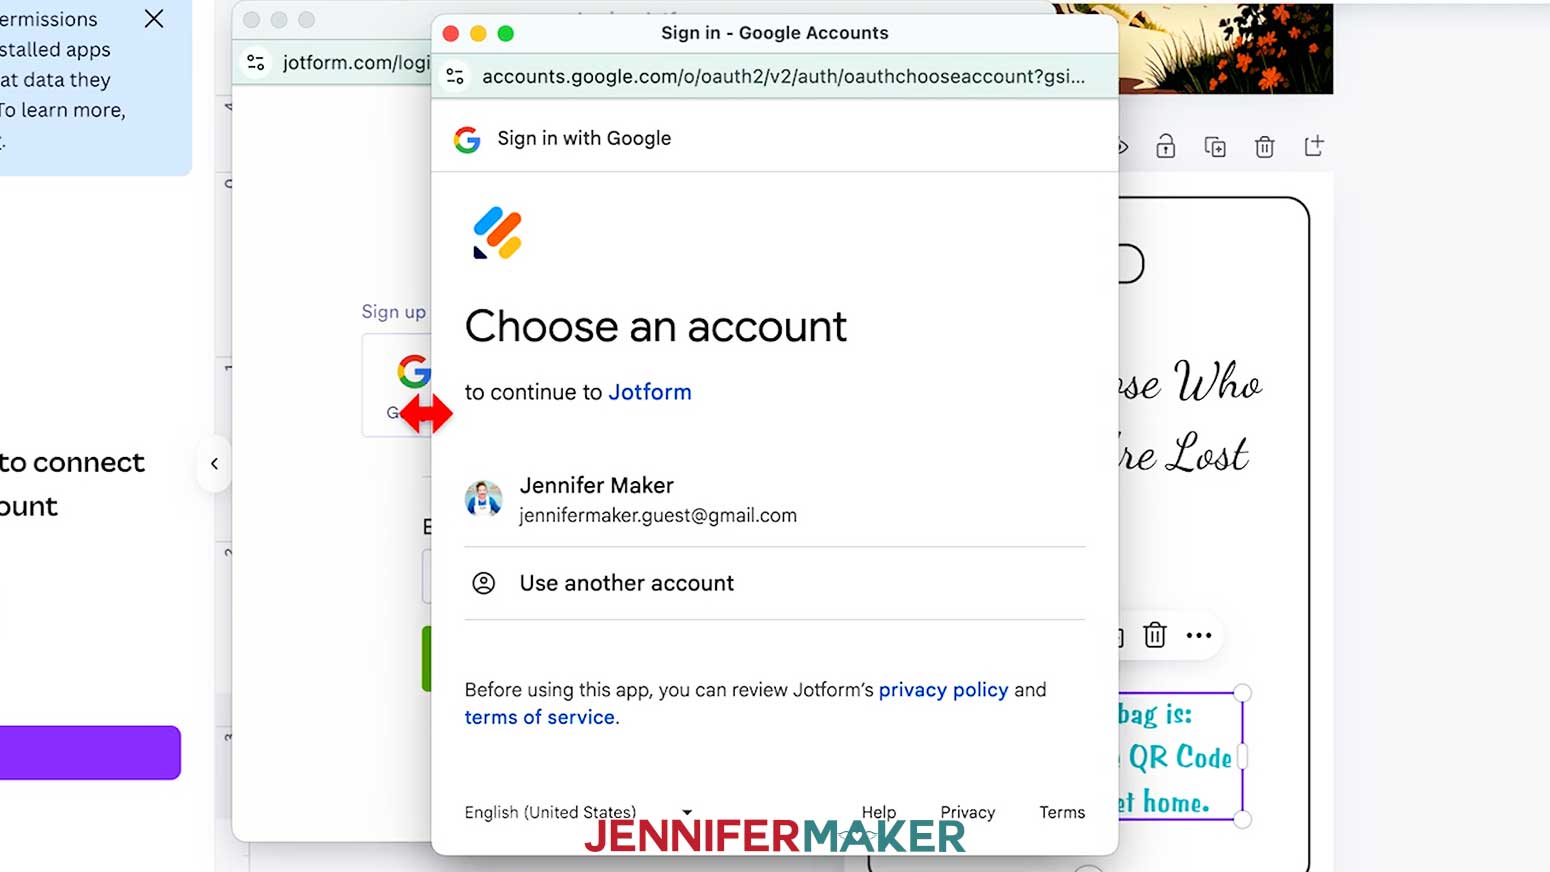
NOTE: This will start the process of connecting your Canva account to Jotform so you can save your forms and start collecting data. - Click the “Connect” button to open the Jotform Sign Up page in a separate browser window or tab.
NOTE: Make sure to leave the Canva window open so you can go back to it quickly and easily later! - Choose your preferred method to sign up for your free Jotform account and follow the prompts to create your account.
NOTE: I’ll click the “Google” button to sign up with my G-mail account. - On the “Terms and Privacy” screen, check the box to agree to Jotform’s terms and policies, then click “Continue.”
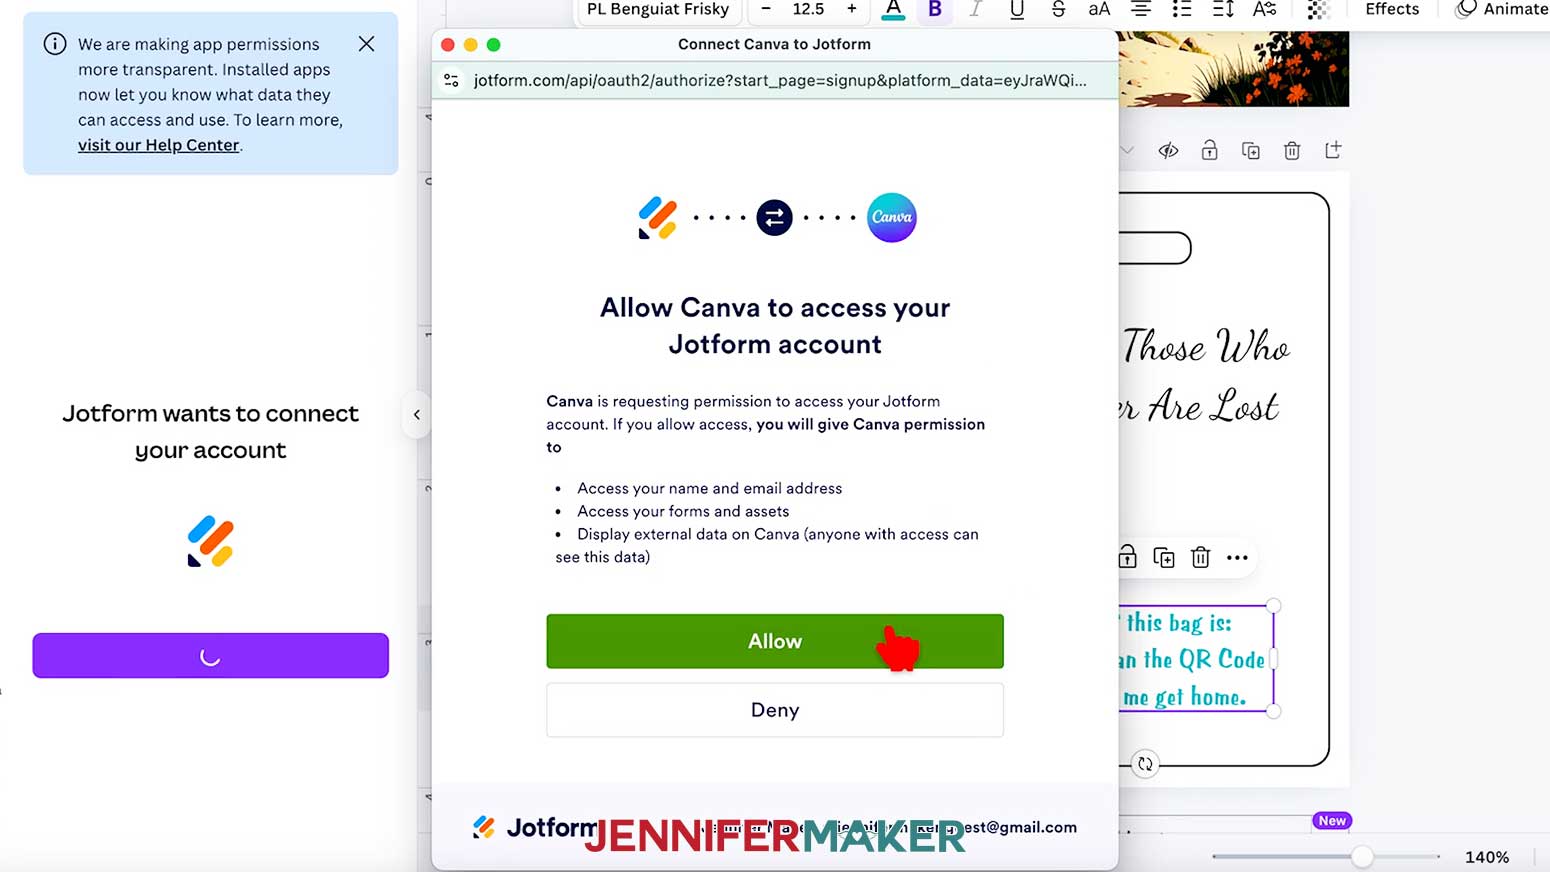
- Click the “Allow” button to allow Canva to access your Jotform account and share information between the two services.
- Your web browser will direct you back to Canva. Follow the prompts to log in again if needed.
- Back in the Canva workspace you set up, click on “Create new form” under the “Your forms” section of the Jotform Panel.
- Click the “Continue” button to leave Canva and open Jotform in a new browser tab.
- On the “Organization Settings” screen, click the “X” if you do not wish to upload an Organization Logo or set an Organization Name.
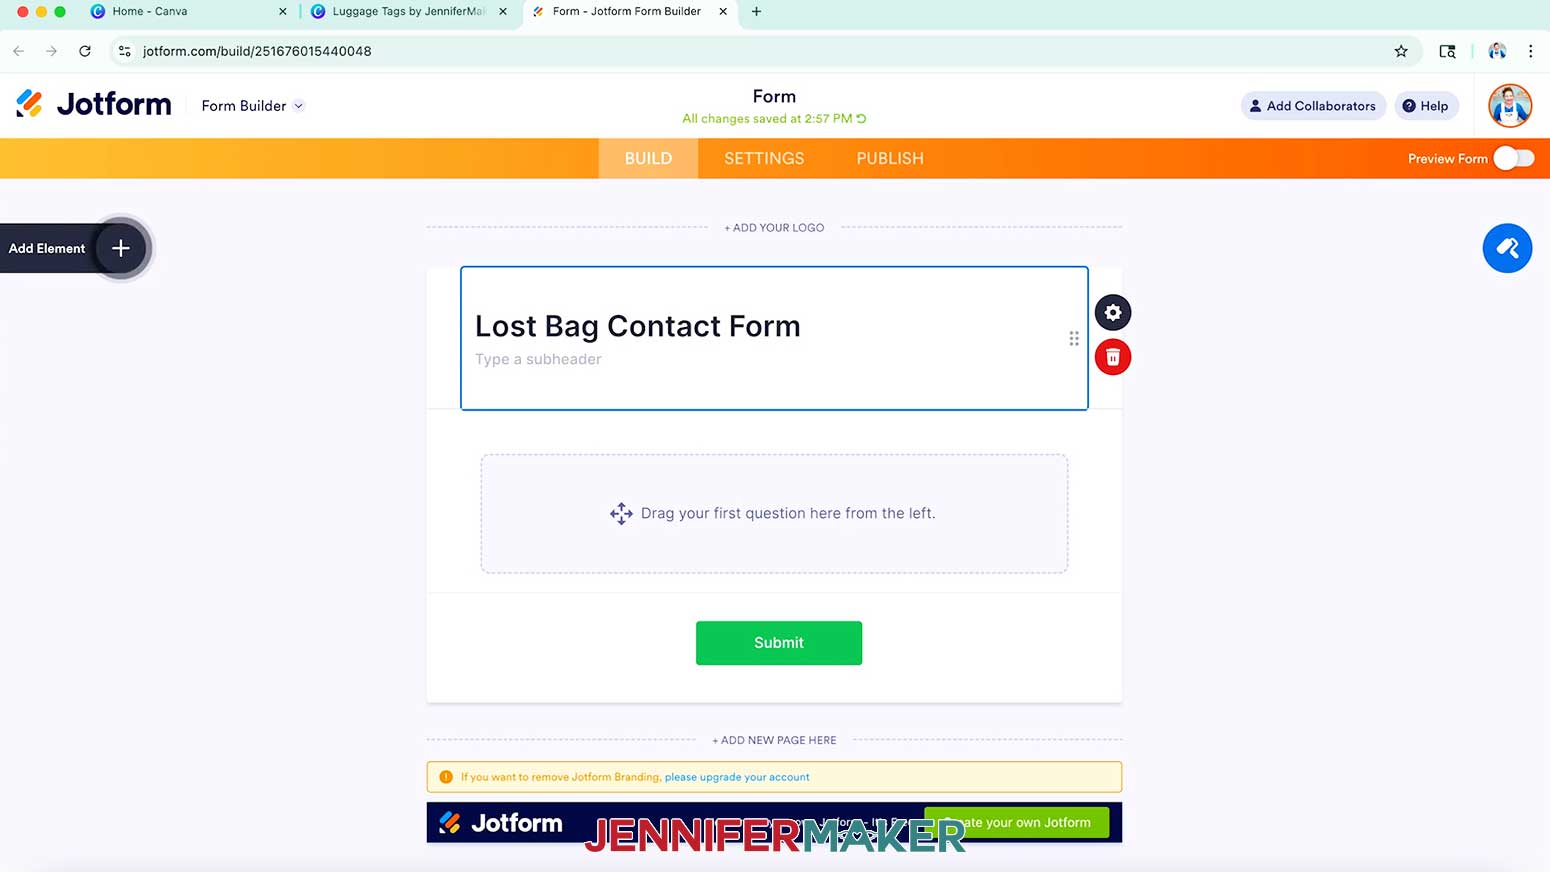
TIP: You can always fill these in later by accessing your Jotform Account Settings! - Now you can use the basic Form on screen to create your QR code! Click on “Form” to open the header editor and enter a name and short description for your form.
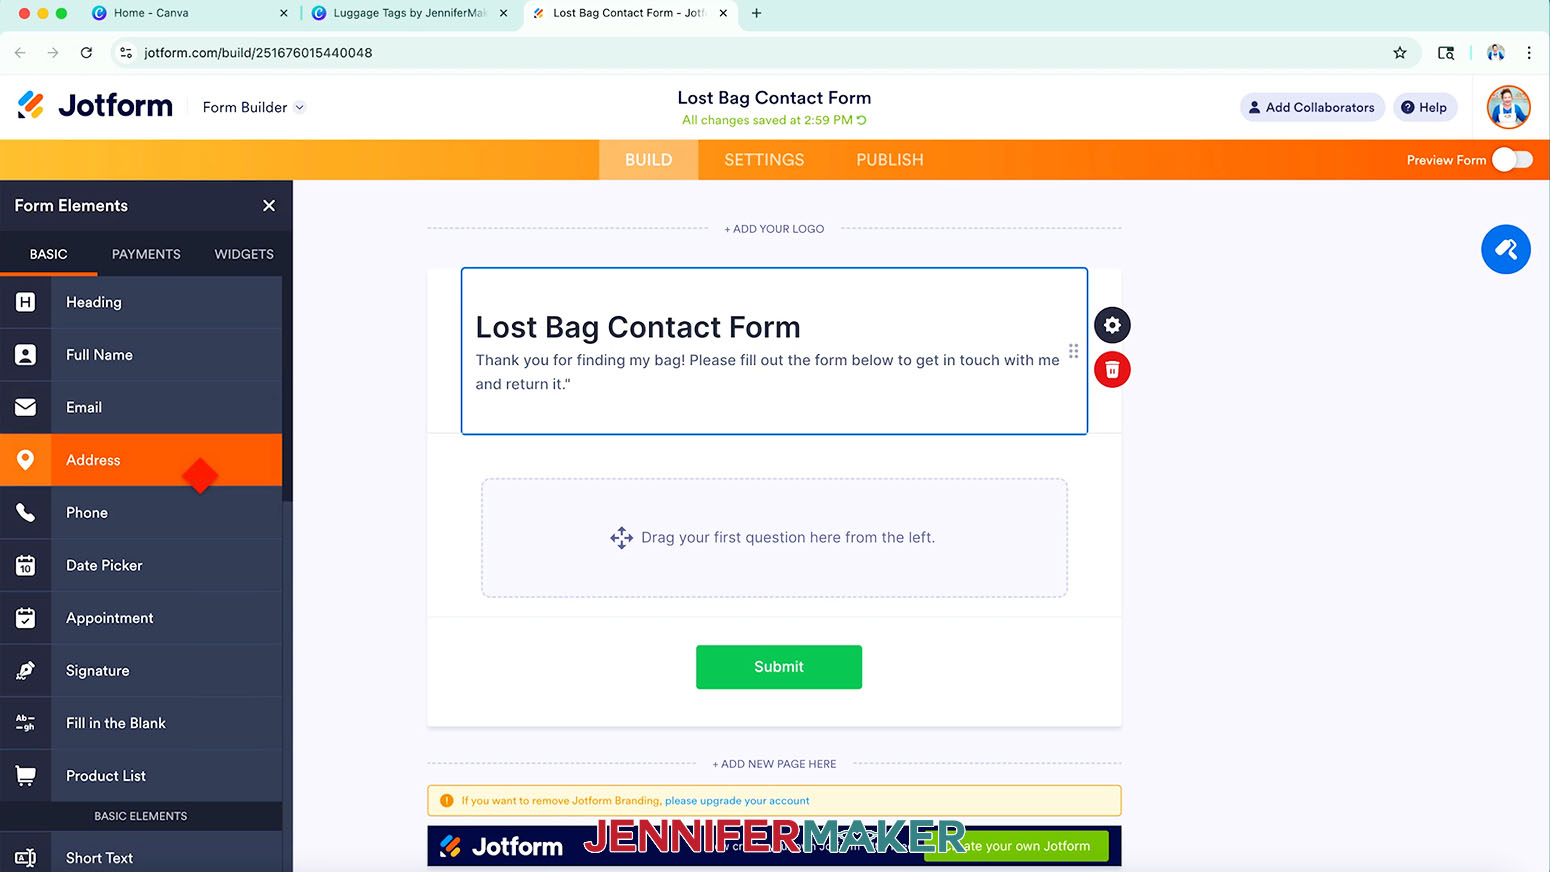
NOTE: I’ll type in “Lost Bag Contact Form” for the name. For the subheader description, I’ll type in “Thank you for finding my bag! Please fill out the form below to get in touch with me and return it.” - Click on the “Plus (+)” button beside “Add Element” and select “Address” in the Form Elements Panel to add an address collection field.
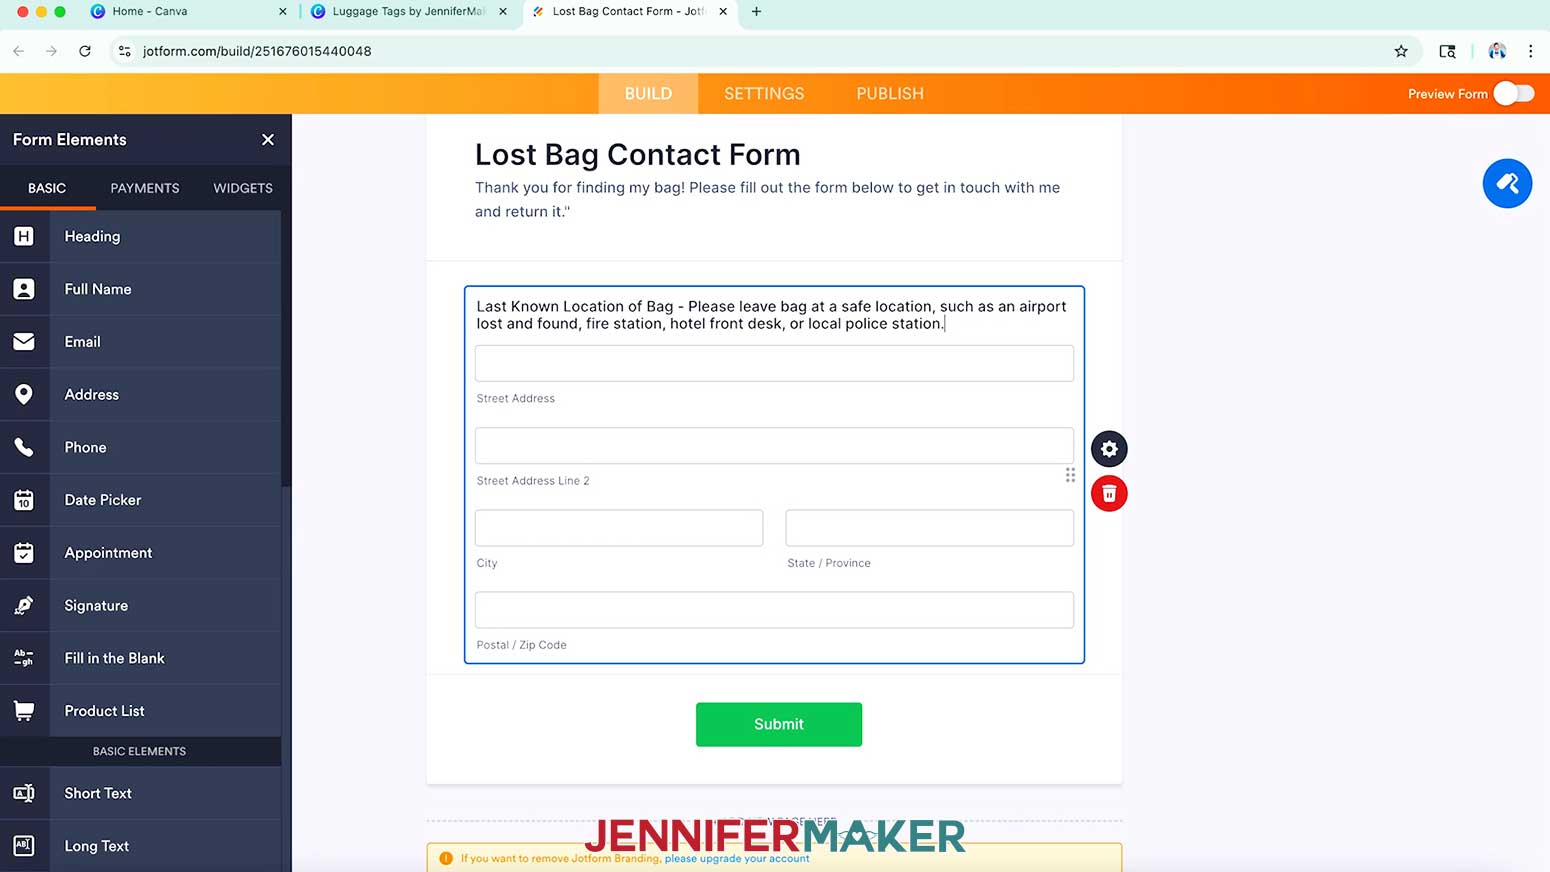
NOTE: This lets your bag finder tell you the location where you can retrieve your bag. - Click on “Address” in the form to change the title to help the bag finder know how to use the form.
NOTE: I’ll add the instructions: “Last Known Location of Bag - Please leave bag at a safe location, such as an airport lost and found, fire station, hotel front desk, or local police station.” - Select and adjust any other field titles you would like to customize.
NOTE: I’ll change “Street Address” to “Drop Off Location” and the “Street Address Line 2” to “Street Address.” - Next, click on “Full Name” in the Form Elements Panel to add a name collection field, then adjust it as needed.
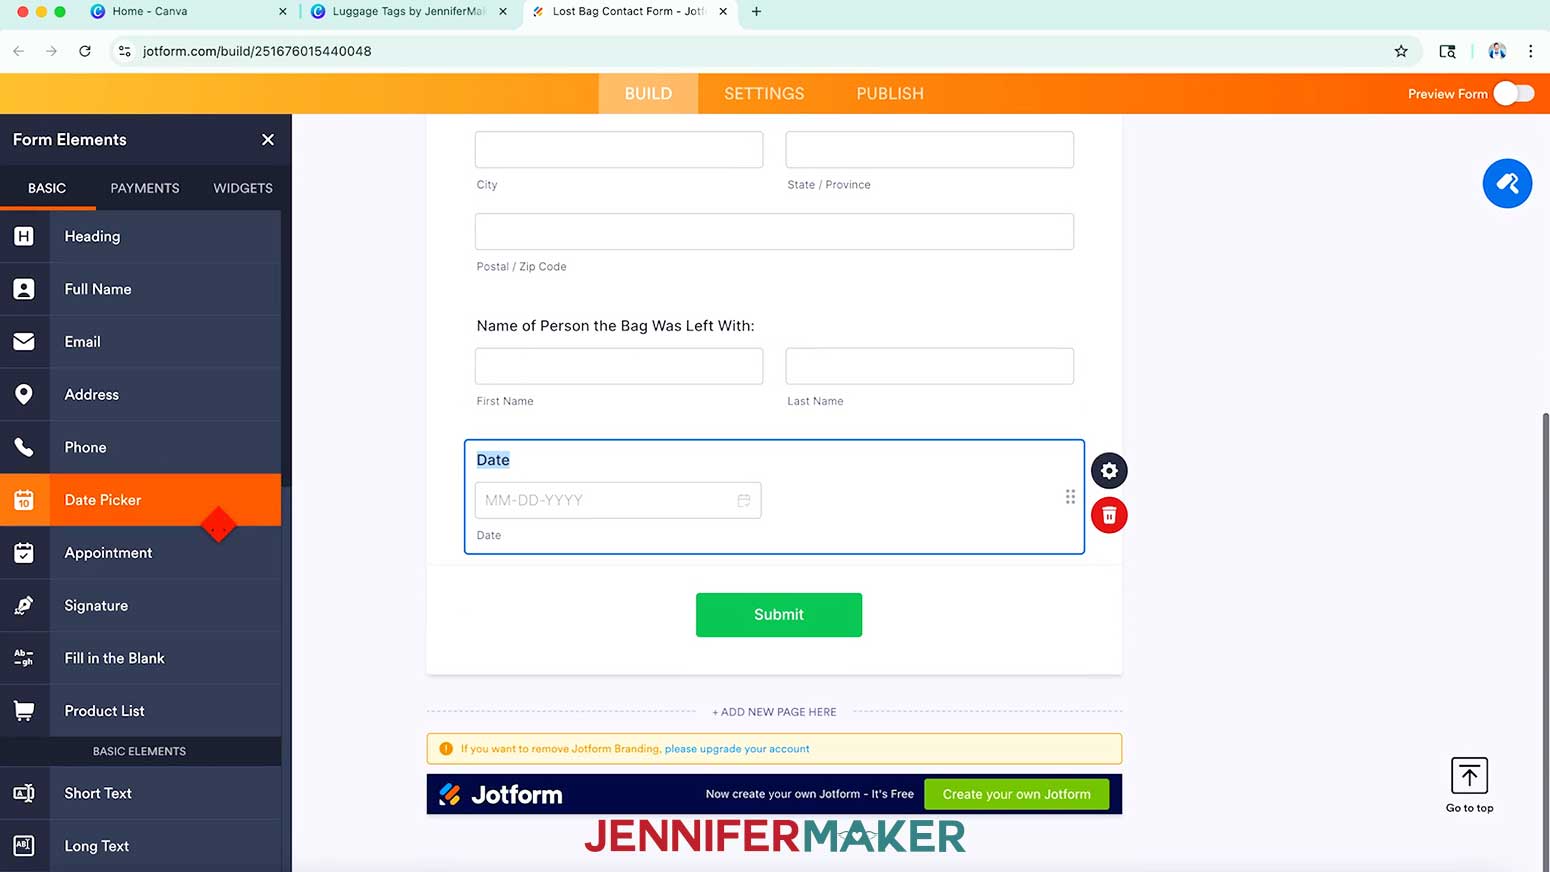
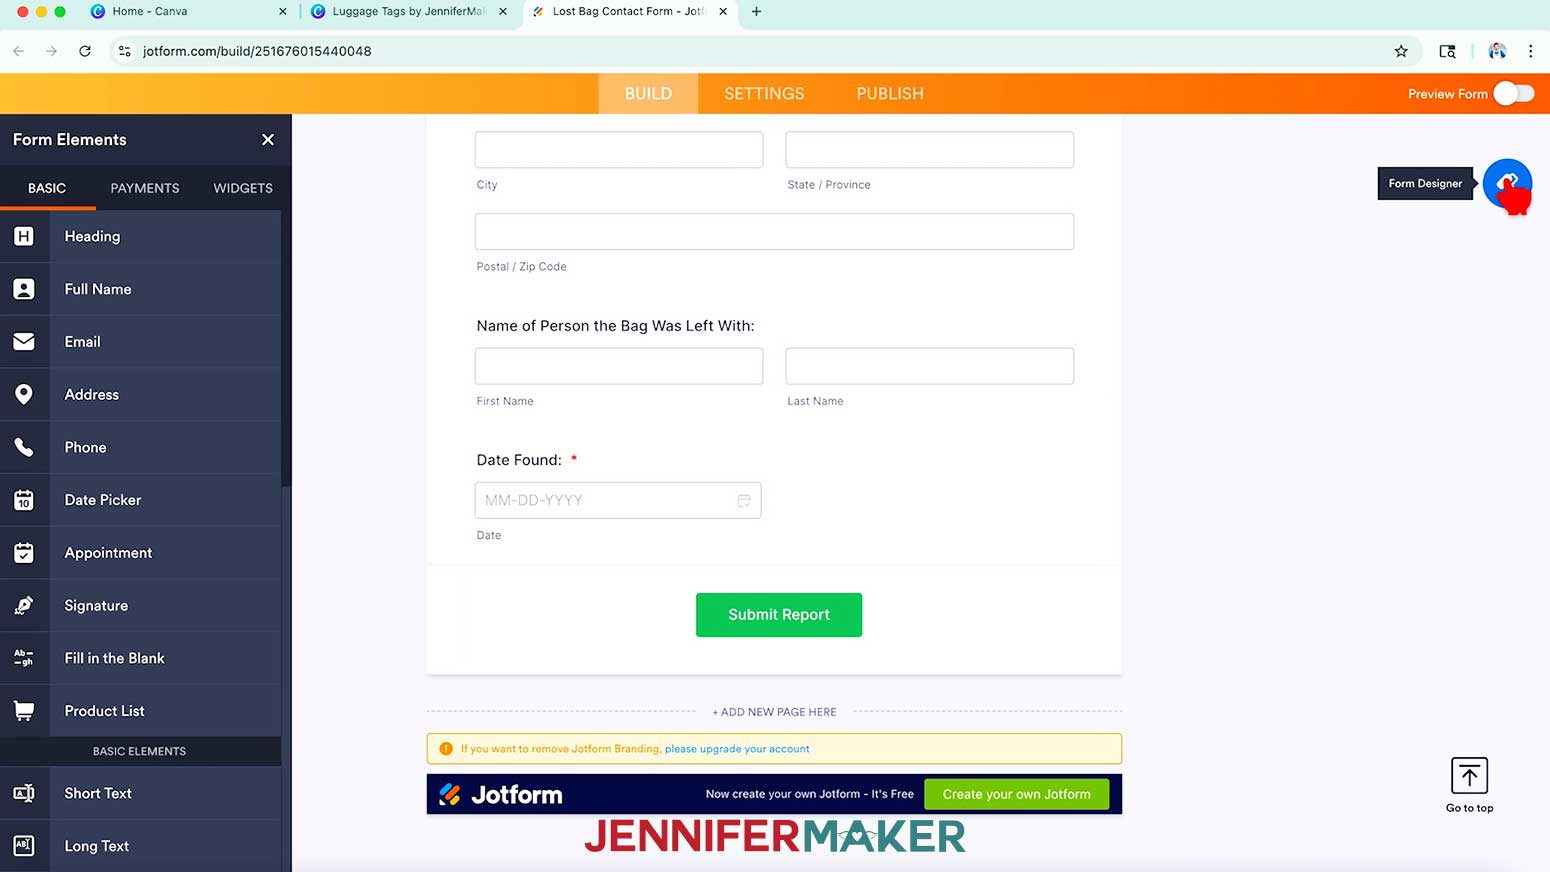
NOTE: I’ll use this to collect the name of the contact person who was last in charge of my bag by changing “Name” to “Name of Person the bag was left with:” - Next, click on “Date Picker” in the Form Elements Panel to add a date collection field, then adjust it as needed.
NOTE: I’ll use this to collect the date my bag was found by changing “Date” to “Date Found.” - Use Steps 13-15 to add and adjust any additional Form Elements as needed.
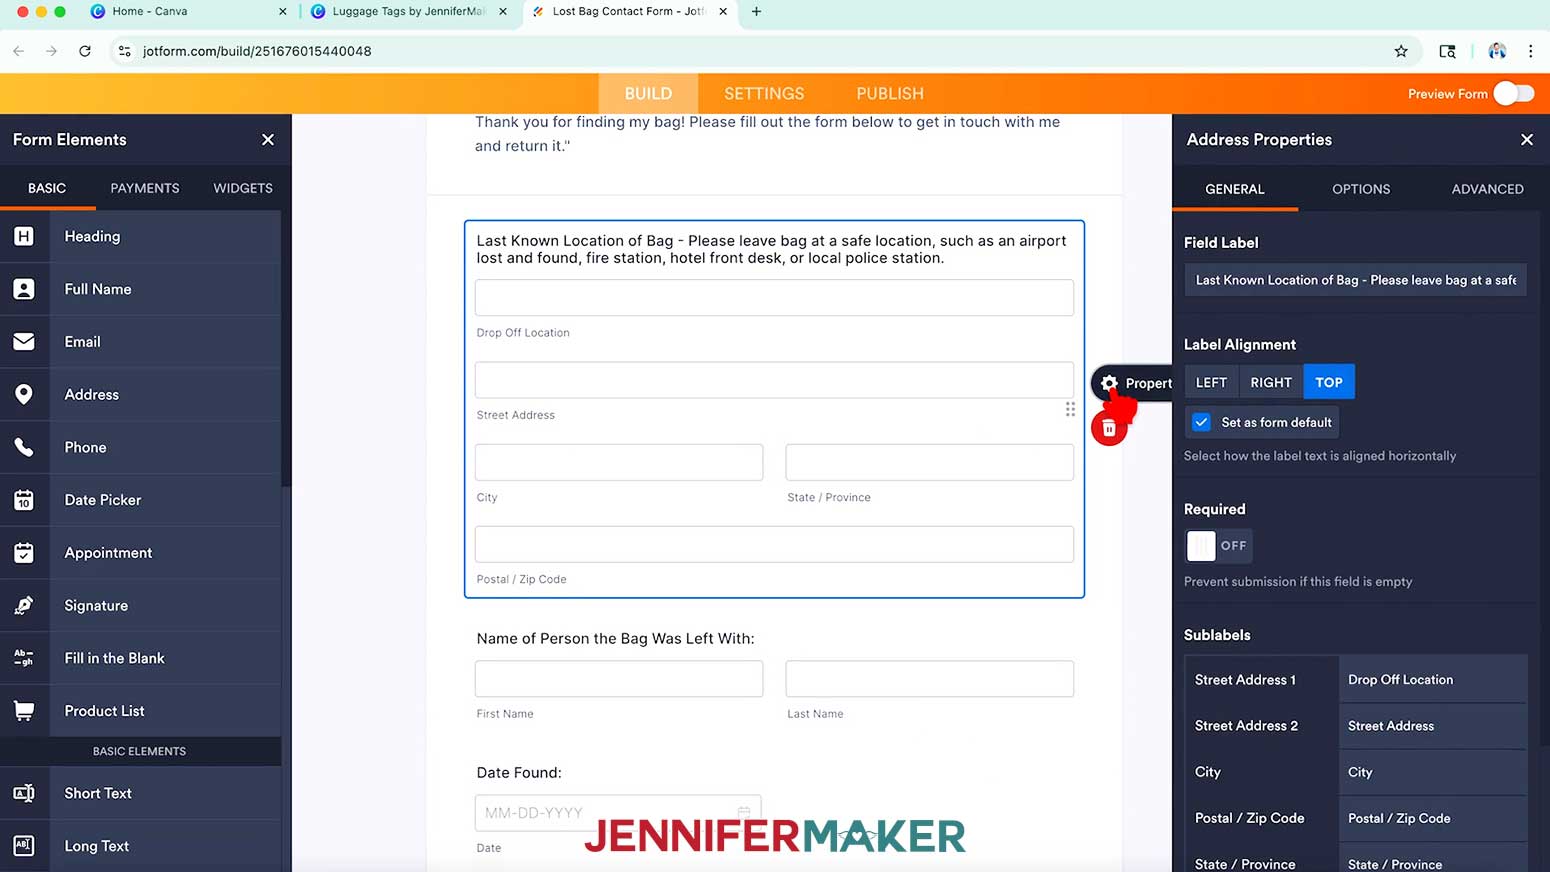
- Next, click on the Address area of the form, then click the “Gear” icon to open the element’s Properties Panel.
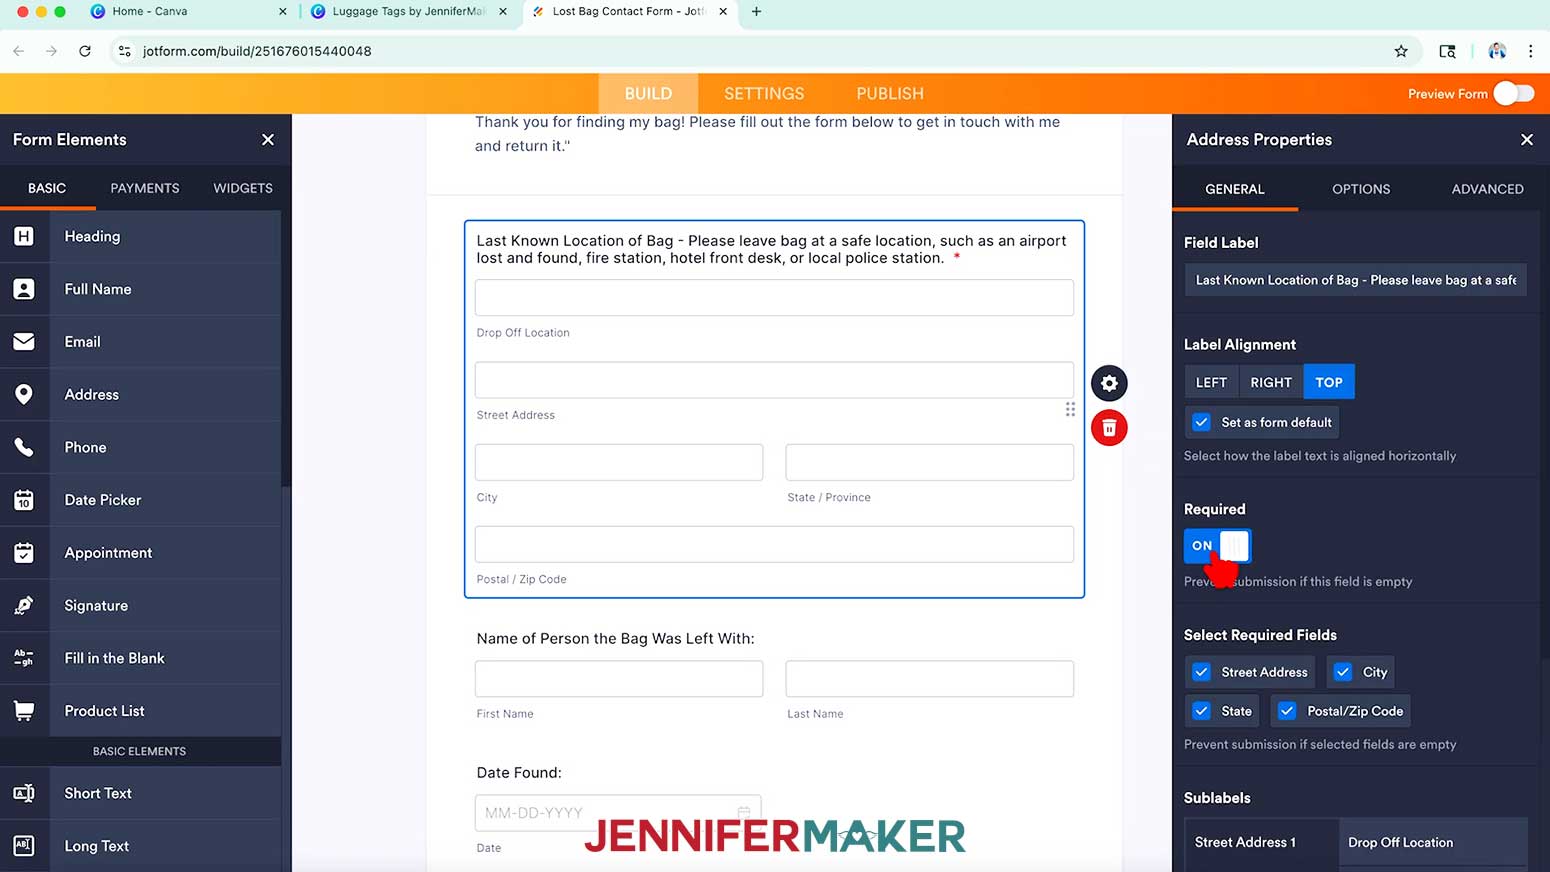
- Under the “General” section, toggle “Required” to ON to make sure this form can’t be submitted without address information.
- Under “Select Required Fields,” make sure the information boxes you want to require are checked.
NOTE: I’ll uncheck “Postal/Zip Code” just in case the bag finder doesn’t know the zip code of the city my bag is in, and leave the others checked. - Repeat Steps 19-21 for any additional areas you want to require for submission.
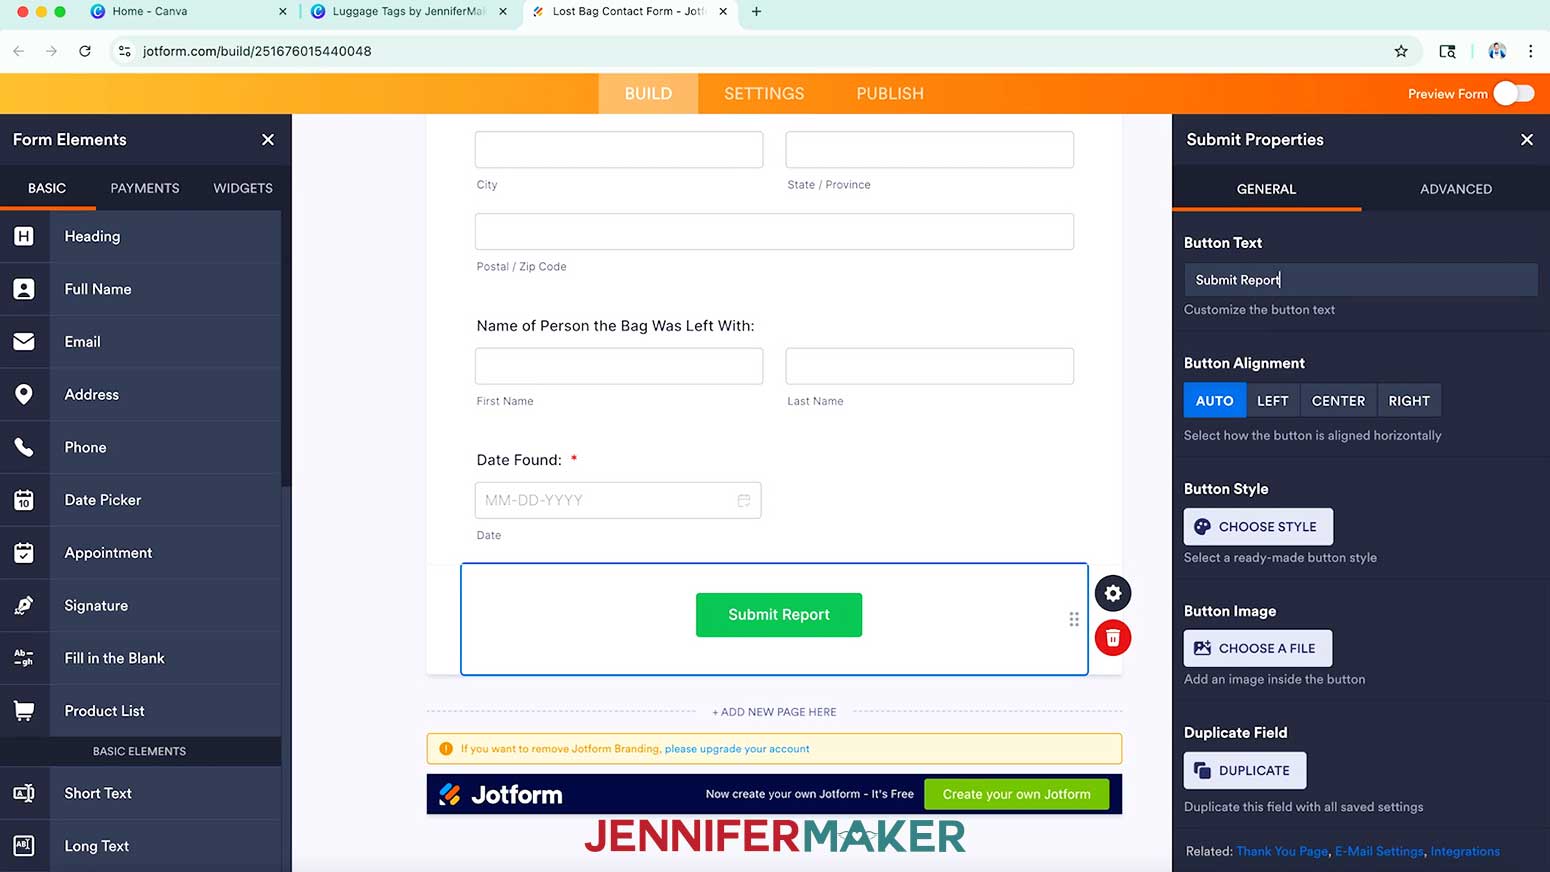
NOTE: I’ll require the “Date Found” information for submission. - To customize the “Submit” button, select it and click the “Gear” icon to open its Properties Panel. Adjust the settings as desired.
NOTE: I’ll change the button text to “Submit Report.” - To customize your form’s design, click the “Paint Roller” icon at the top right to open the Form Designer Panel.
- Toggle on “Preview Form” at the top to see how your form looks on Phone, Tablet, and Desktop. Toggle it off to return to your form and make any adjustments as necessary.
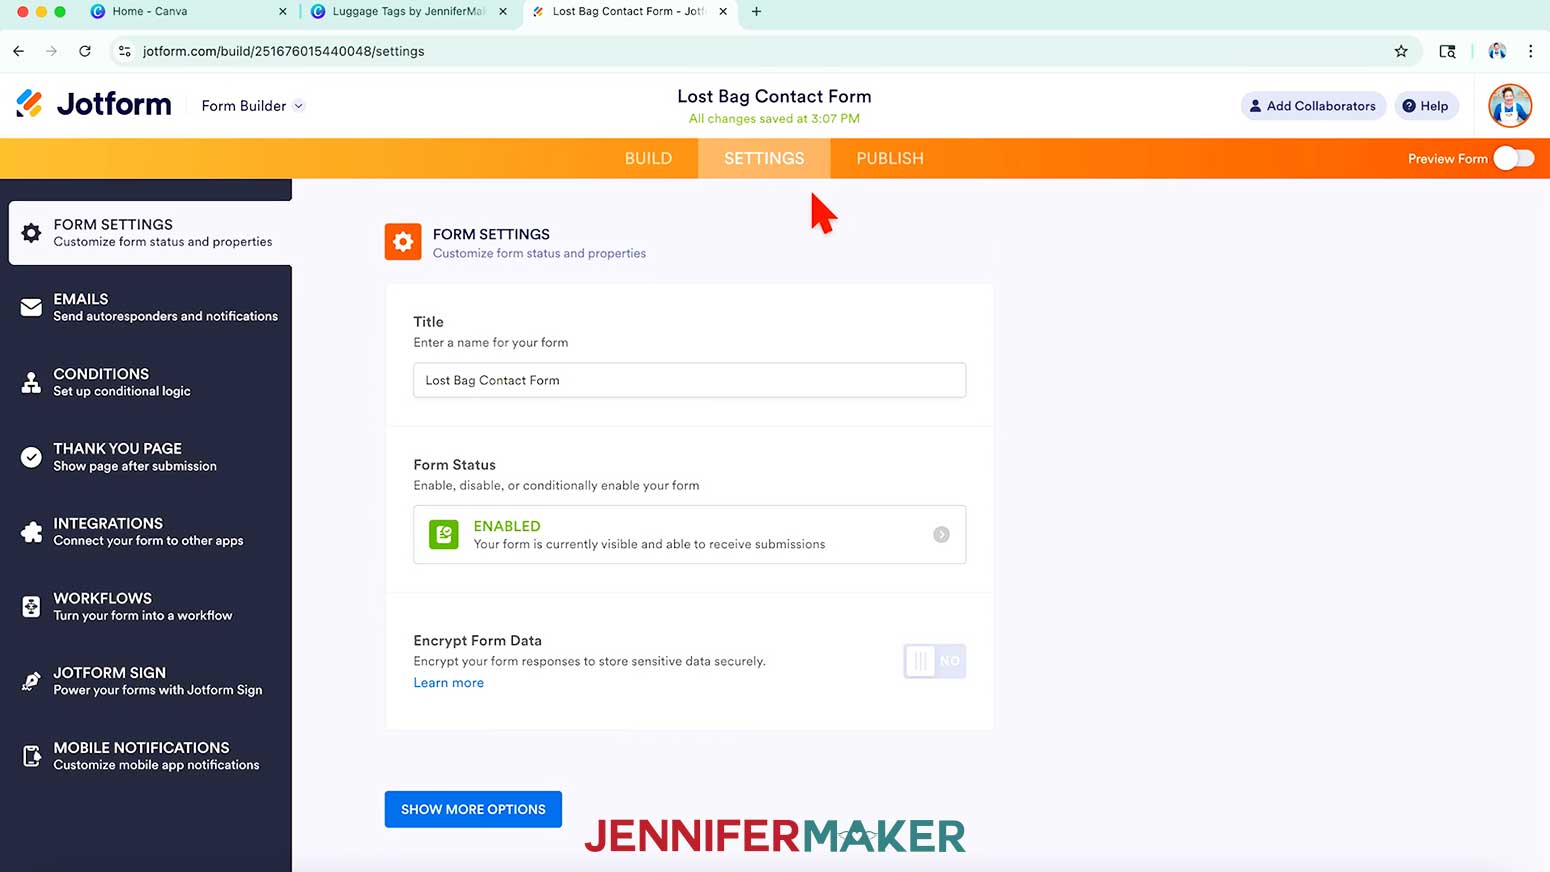
- Click on the “Settings” section at the top center of your screen and make sure the “Form Status” is “Enabled” so you can receive submissions. Click the X to close the window.
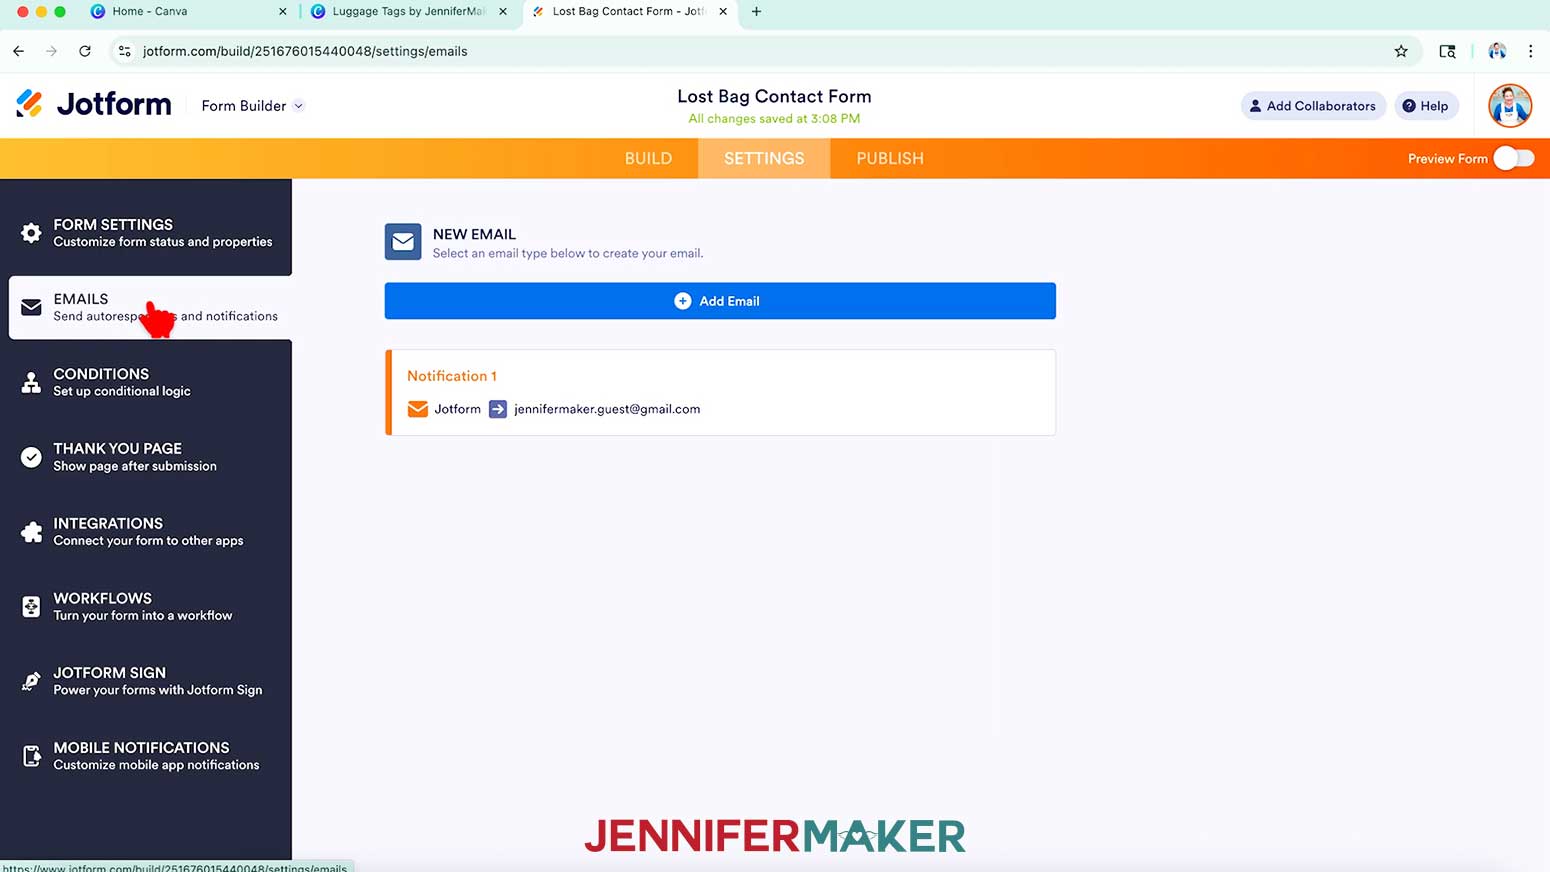
- Then click on the “Emails” tab on the left and confirm that the “Notification 1” item lists the email address where you want to receive responses.
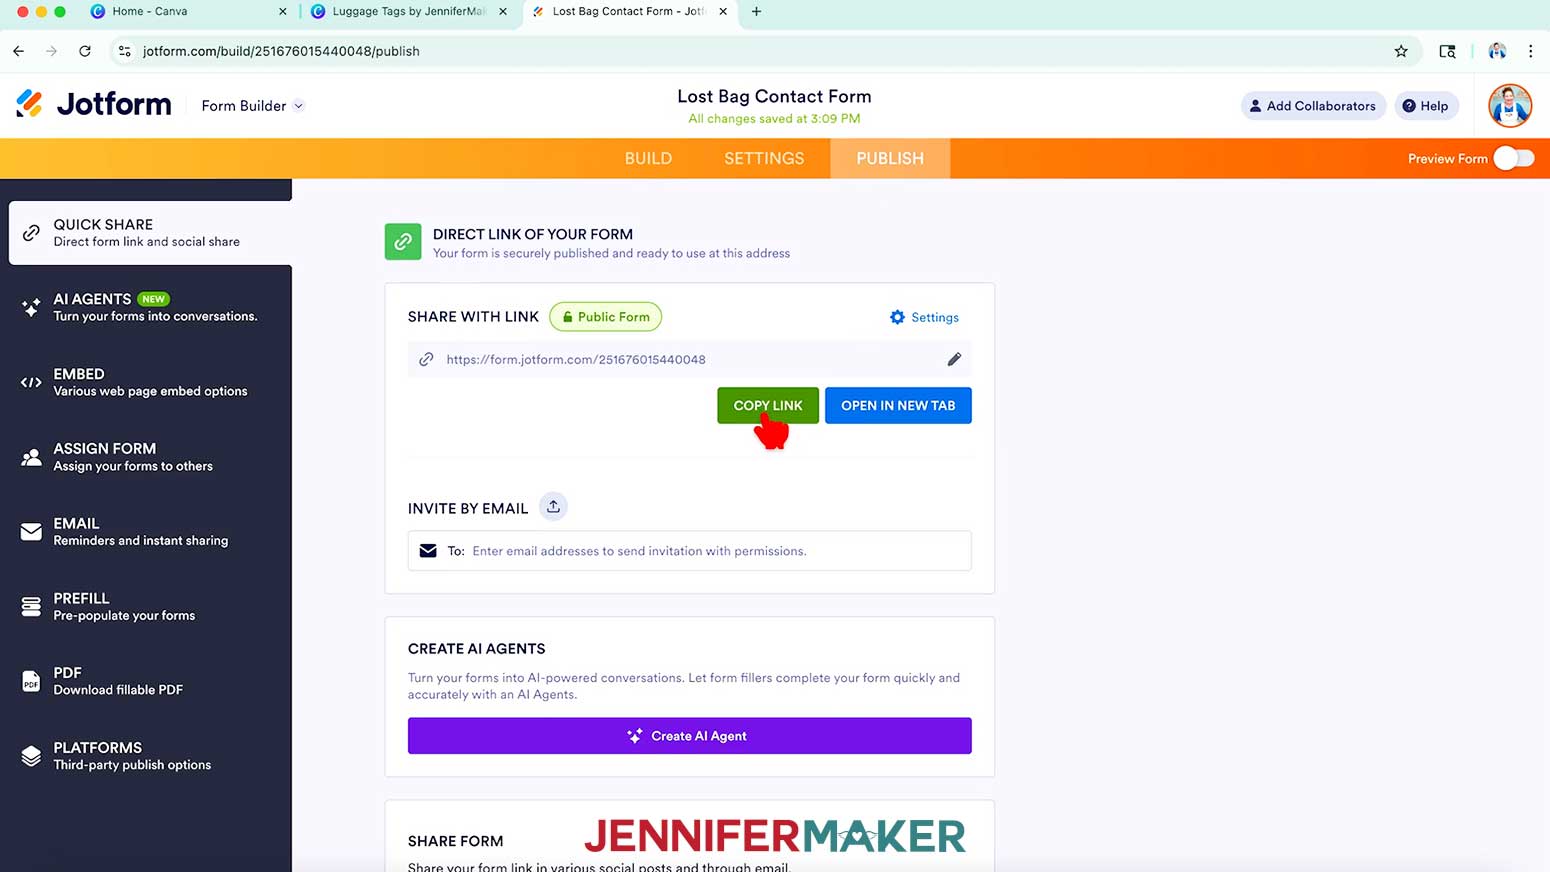
NOTE: If your email address isn’t showing on this tab, please see the notes below this tutorial for assistance. - Click on the “Publish” section at the top center of your screen to see your form’s share links.
- Then click the “COPY LINK” button to copy the link to your form.


GENERATE AND ADD A QR CODE IN CANVA
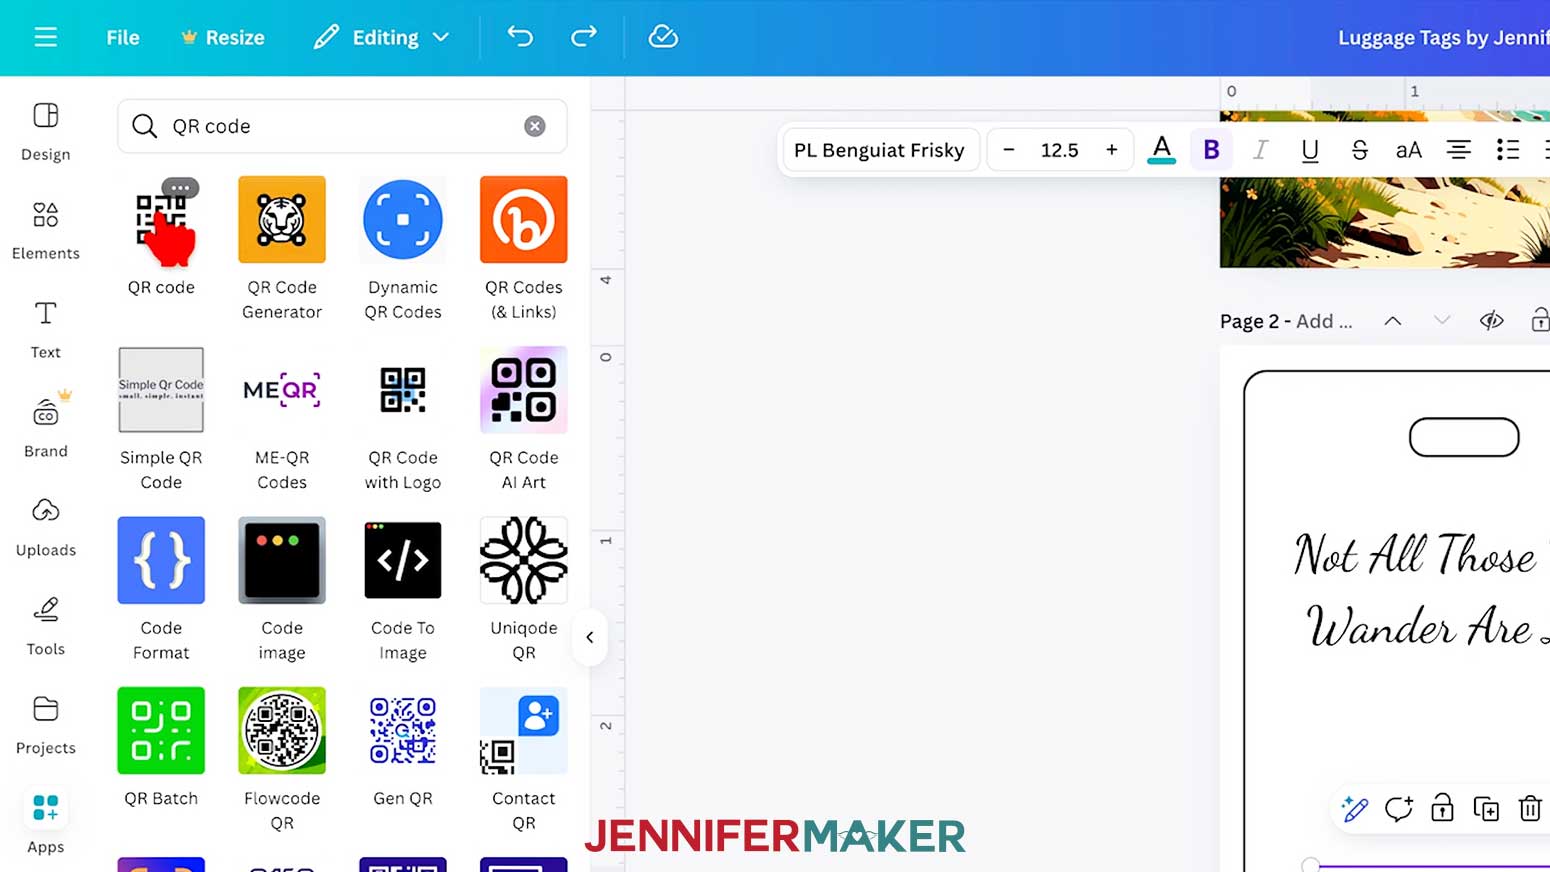
- Back in your Canva project tab, click on “Apps” and enter “QR Code” in the search bar.
- Click the plain black and white “QR Code” app in the search results to open the Canva QR Code app.
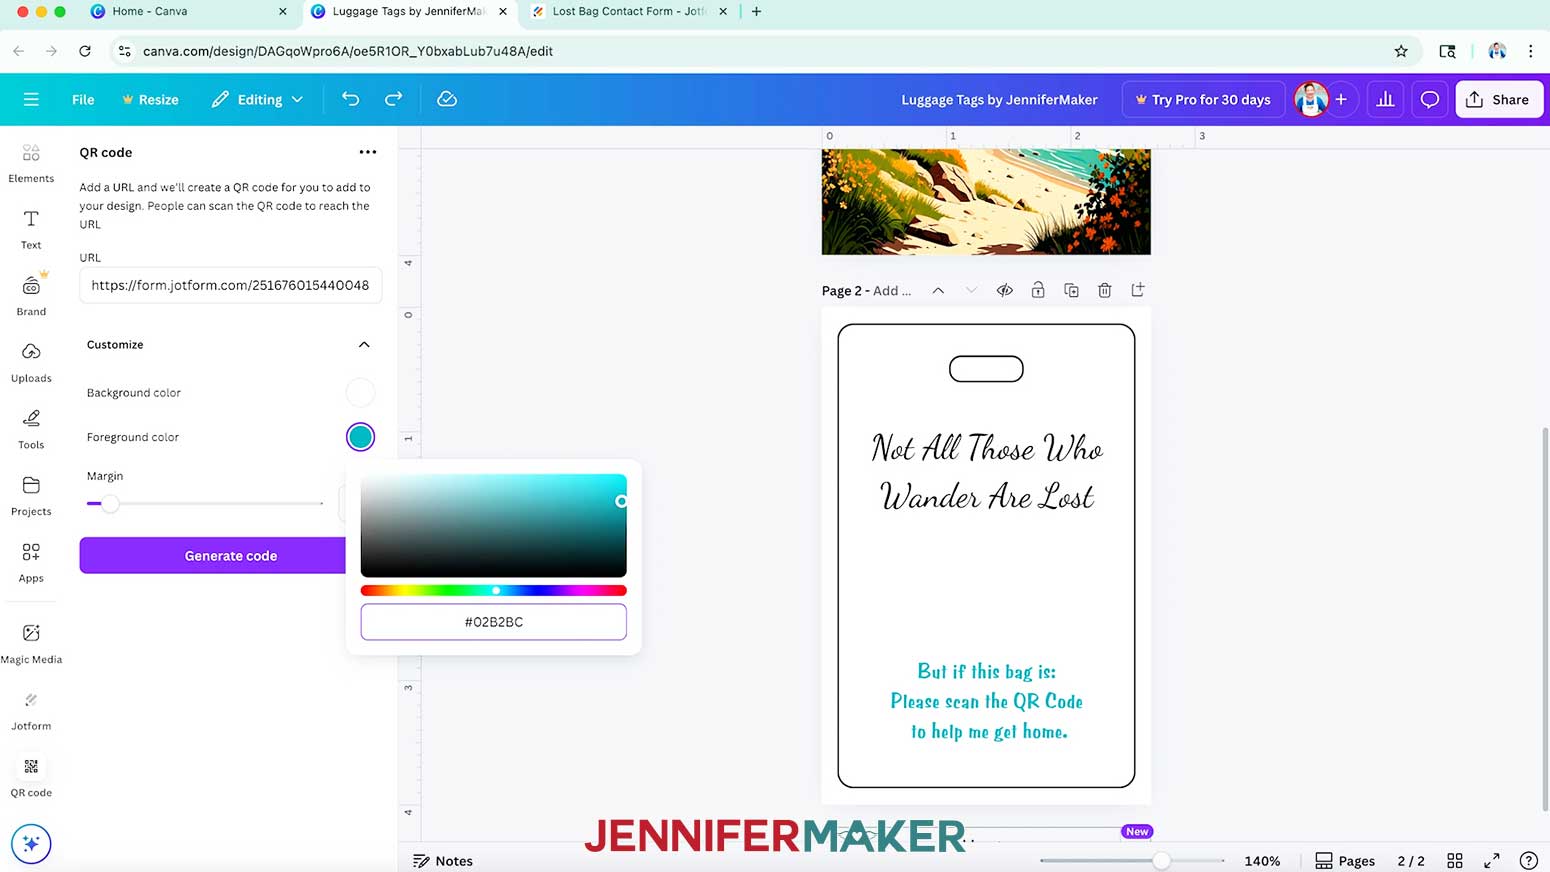
NOTE: If you click the three dots in the top right corner of the app, it should say “Created by Canva.” - Click “Open,” then paste your form’s link into the “URL” field.
- Click the down arrow next to “Customize” and use the swatches to choose your QR code’s colors.
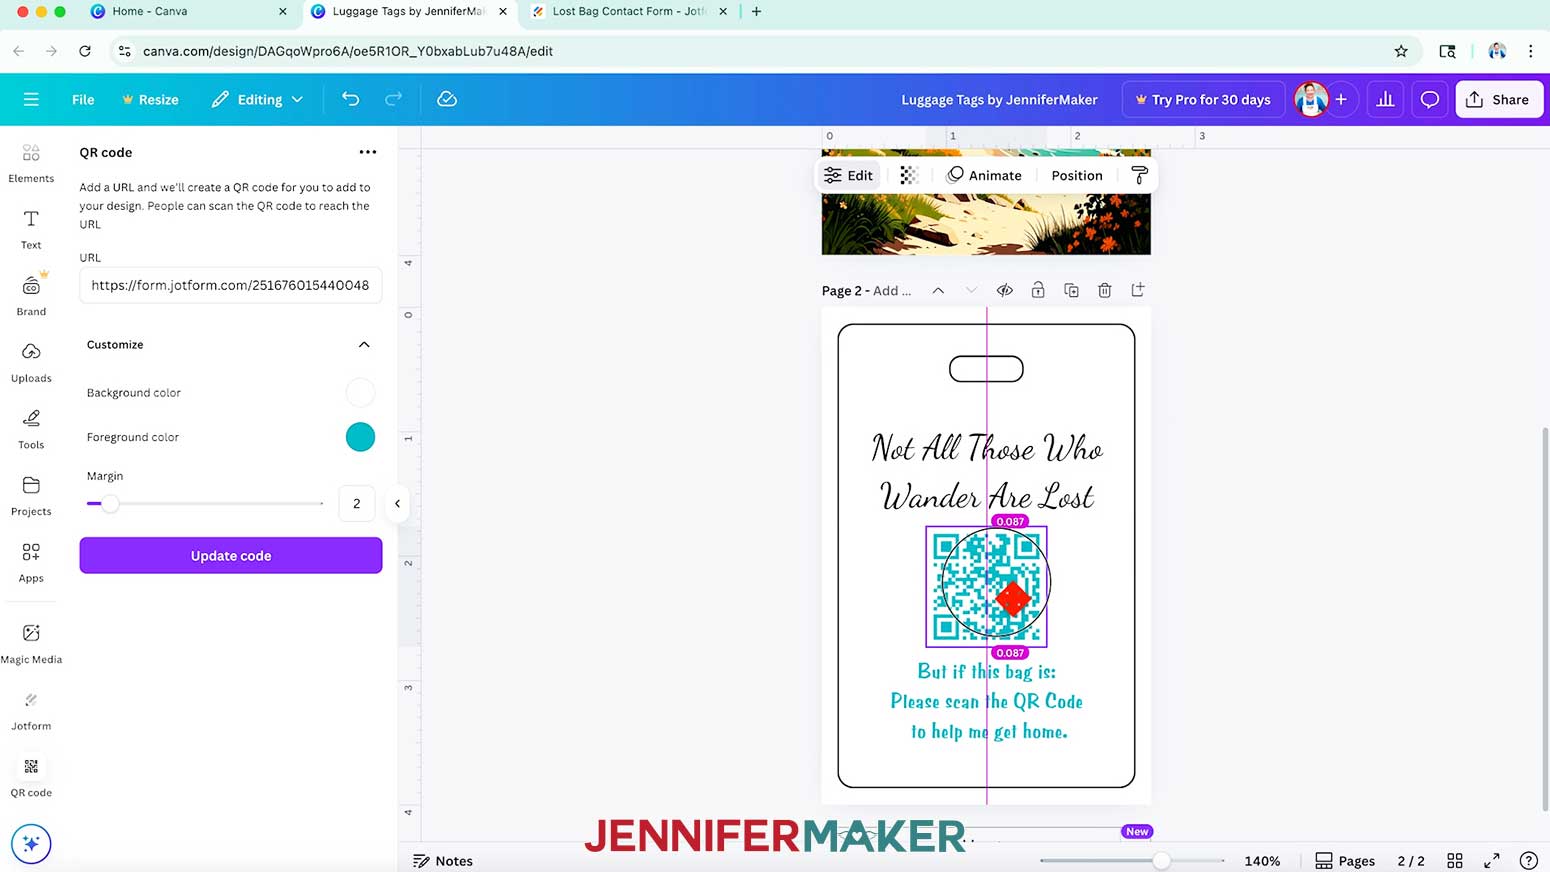
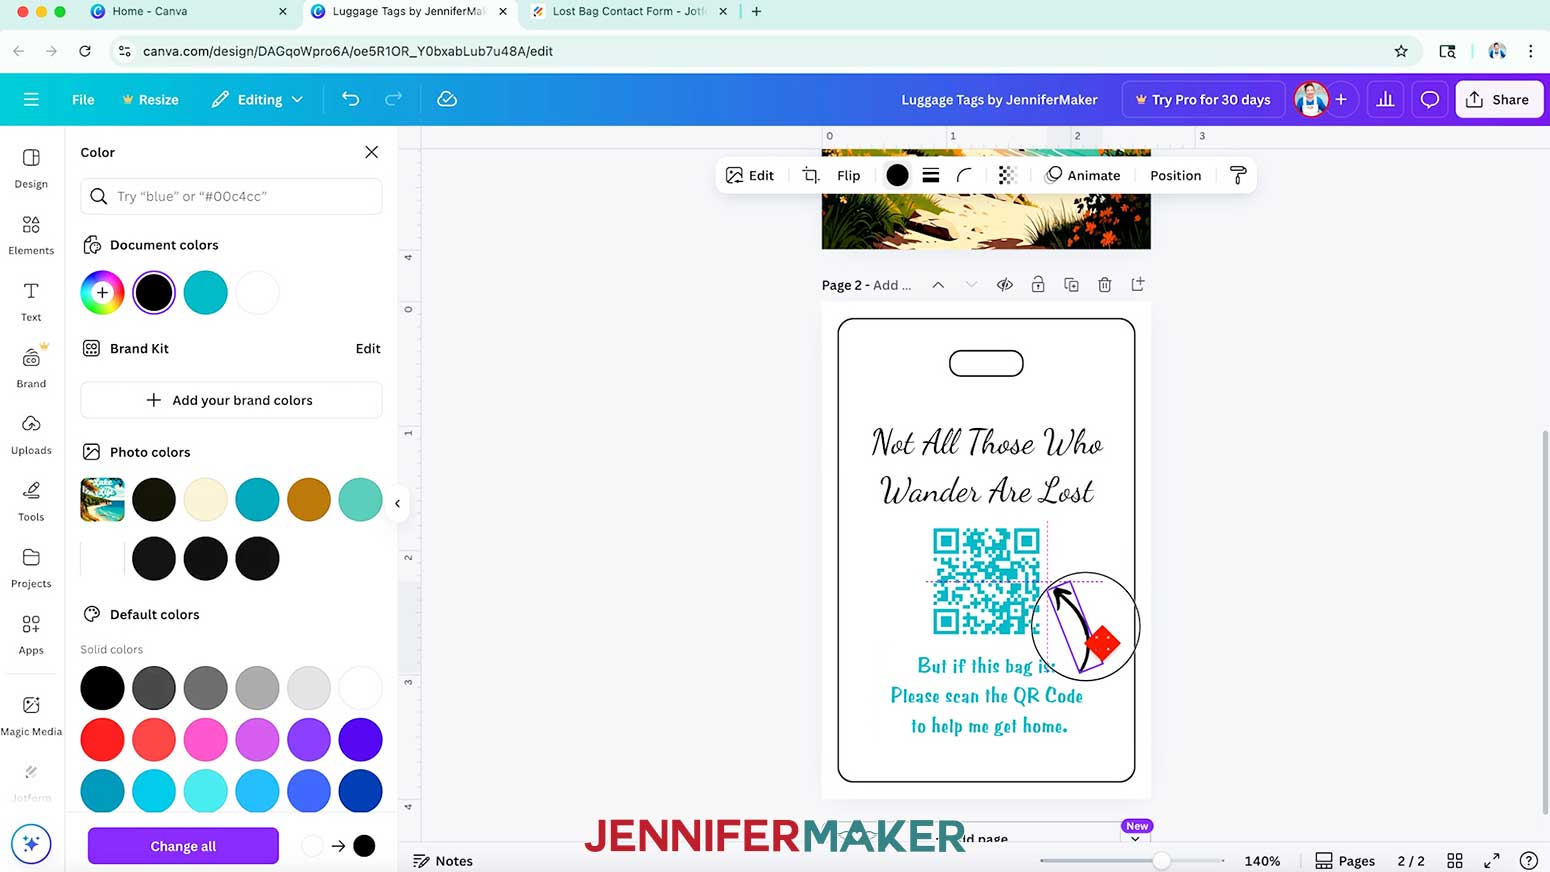
NOTE: I’ll click the “Foreground color” swatch and choose the same teal as my text to match. - Then click “Generate Code” to add the QR code with the link to your form to your design.
- Position the QR code as desired.
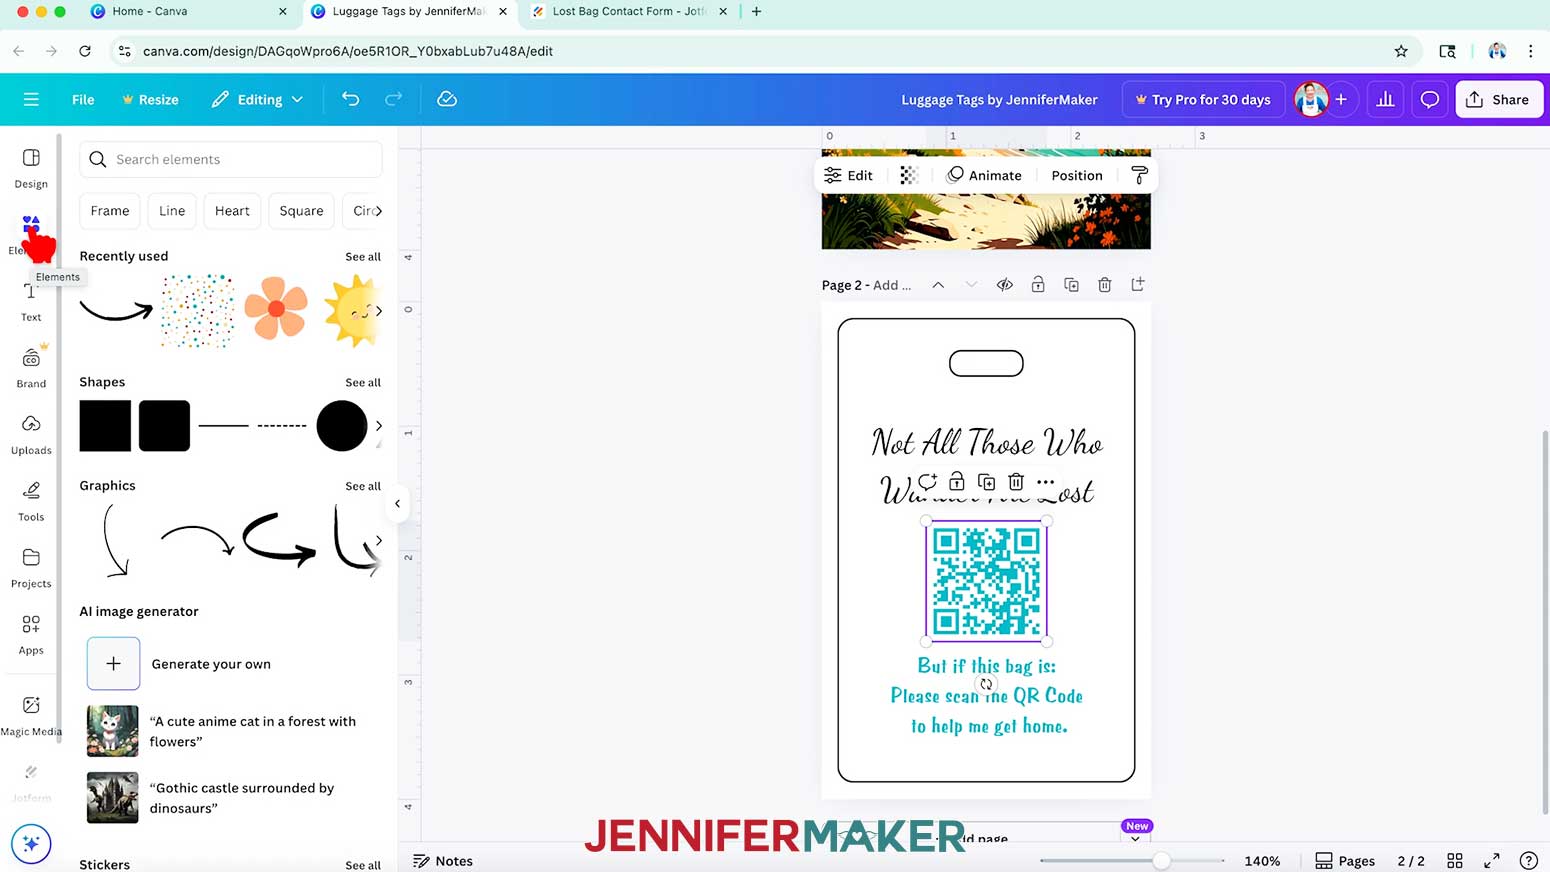
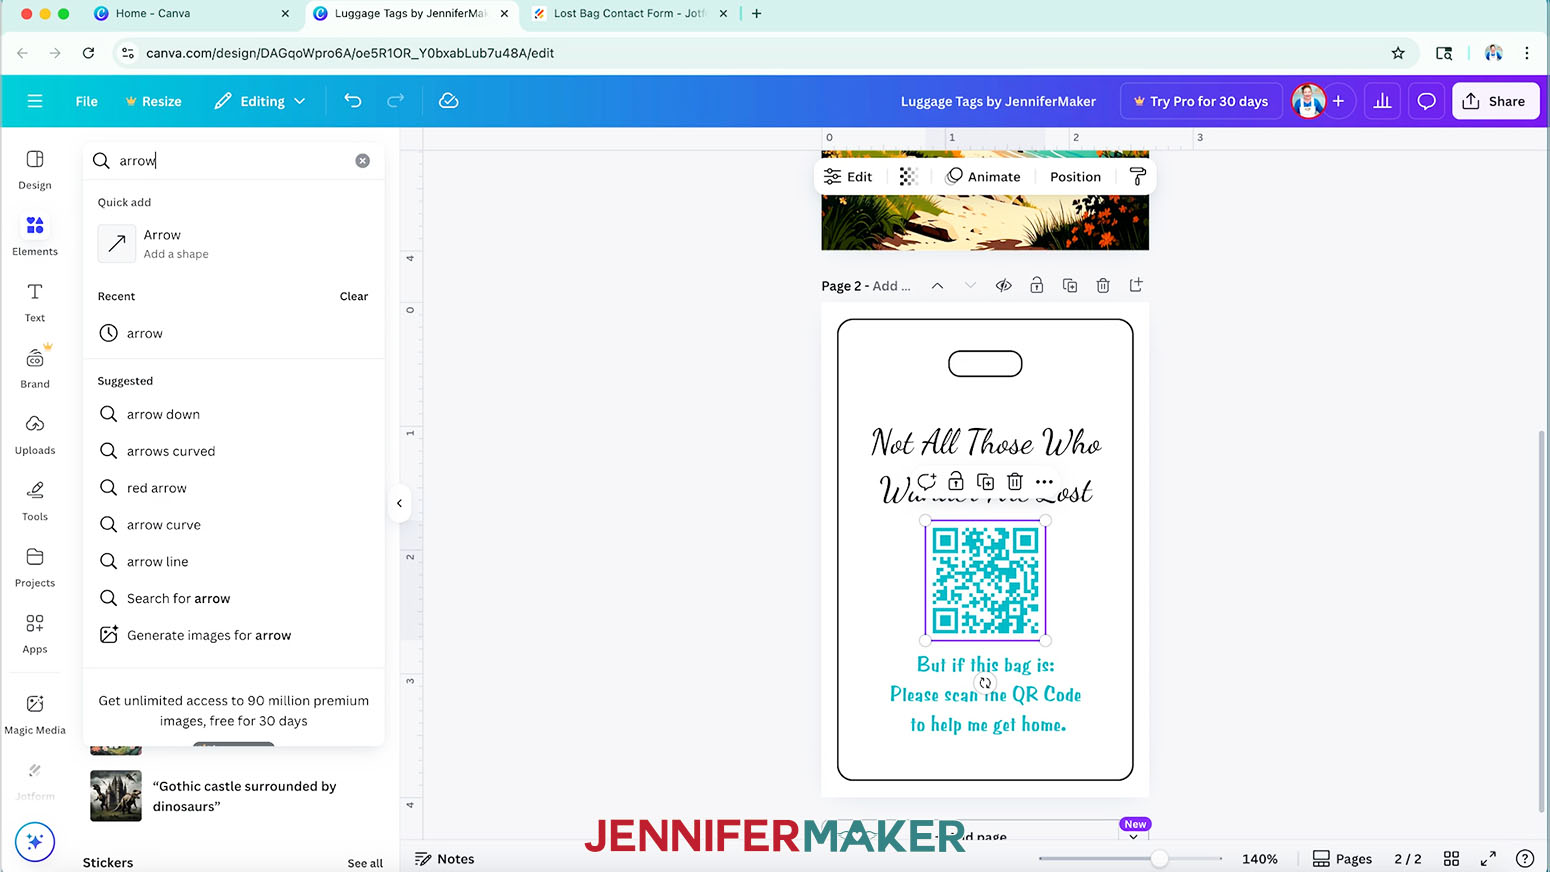
NOTE: I’ll center mine between my top and bottom text. - To add an image from Canva’s collection of graphics, click on “Elements” to browse the media library.
NOTE: Items with a crown are Canva Pro items. You’ll need to purchase them individually or sign up for a paid membership to download images using these elements. - Or, to find an image that fits a specific design you have in mind, type a related phrase in the “Search” bar.
NOTE: I’ll type in “arrow.” - Click “See all” to expand a section to see more available options in that category.
NOTE: I’ll expand the “Graphics” section. - When you find an image you like, click to insert it into your canvas.
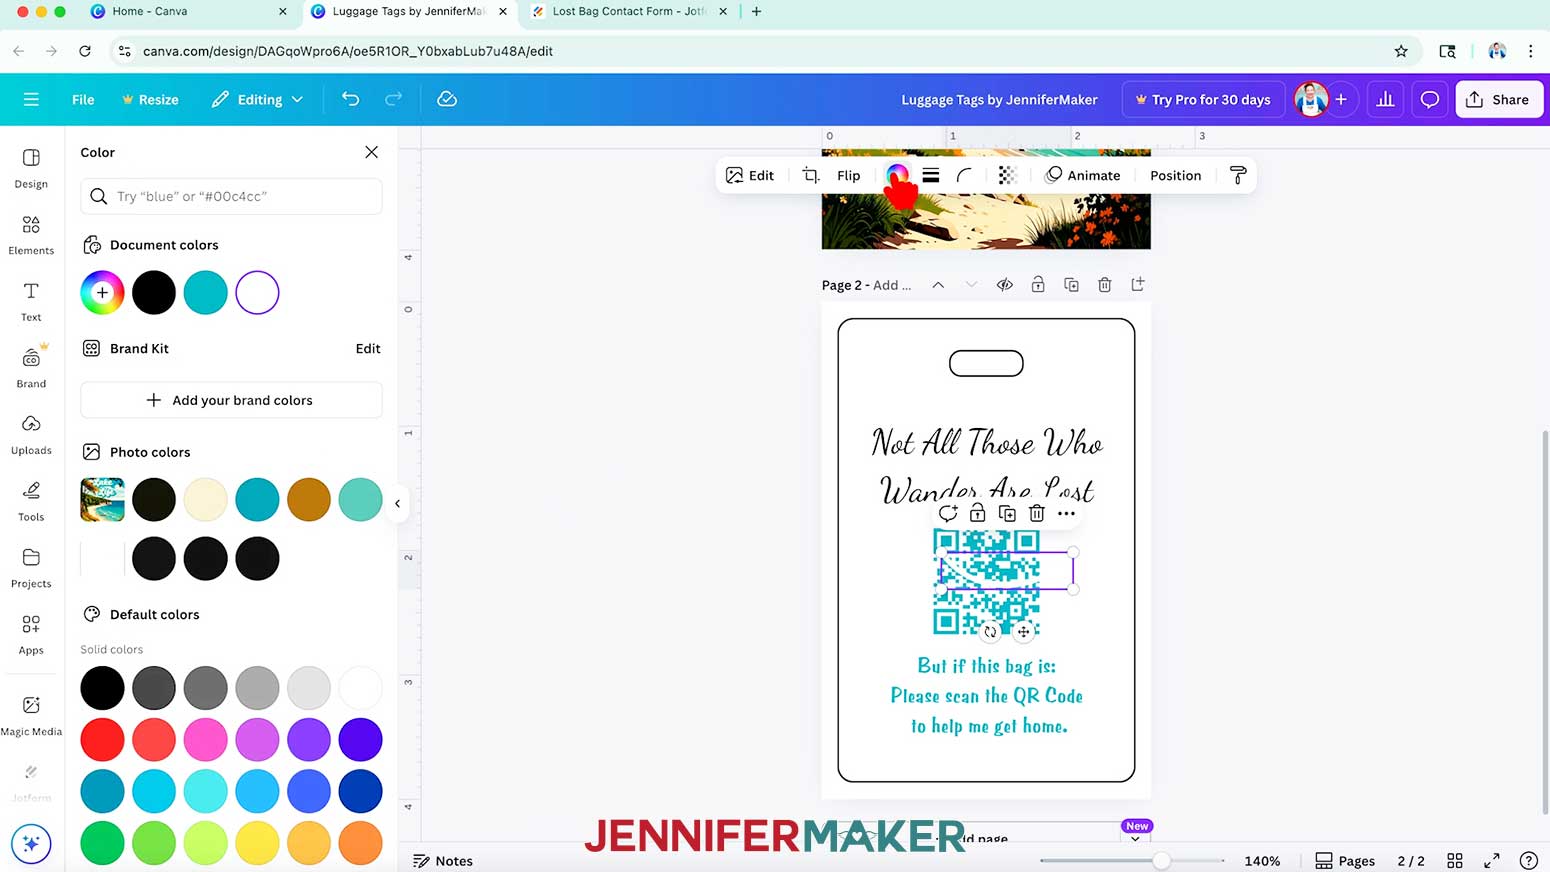
NOTE: I’ll insert a curved arrow. - To change an image’s colors, select it and make sure there are color swatches at the top, which indicate you can adjust them.
NOTE: If color swatches do not appear, you won’t be able to change the element’s individual colors. To learn about filter effects and other color correction tools in Canva, check out my How to Design a Wind Spinner in Canva tutorial. - Click the swatch you’d like to change, and select a new option in the Color Panel that appears. The new color will take the place of the original in your image.
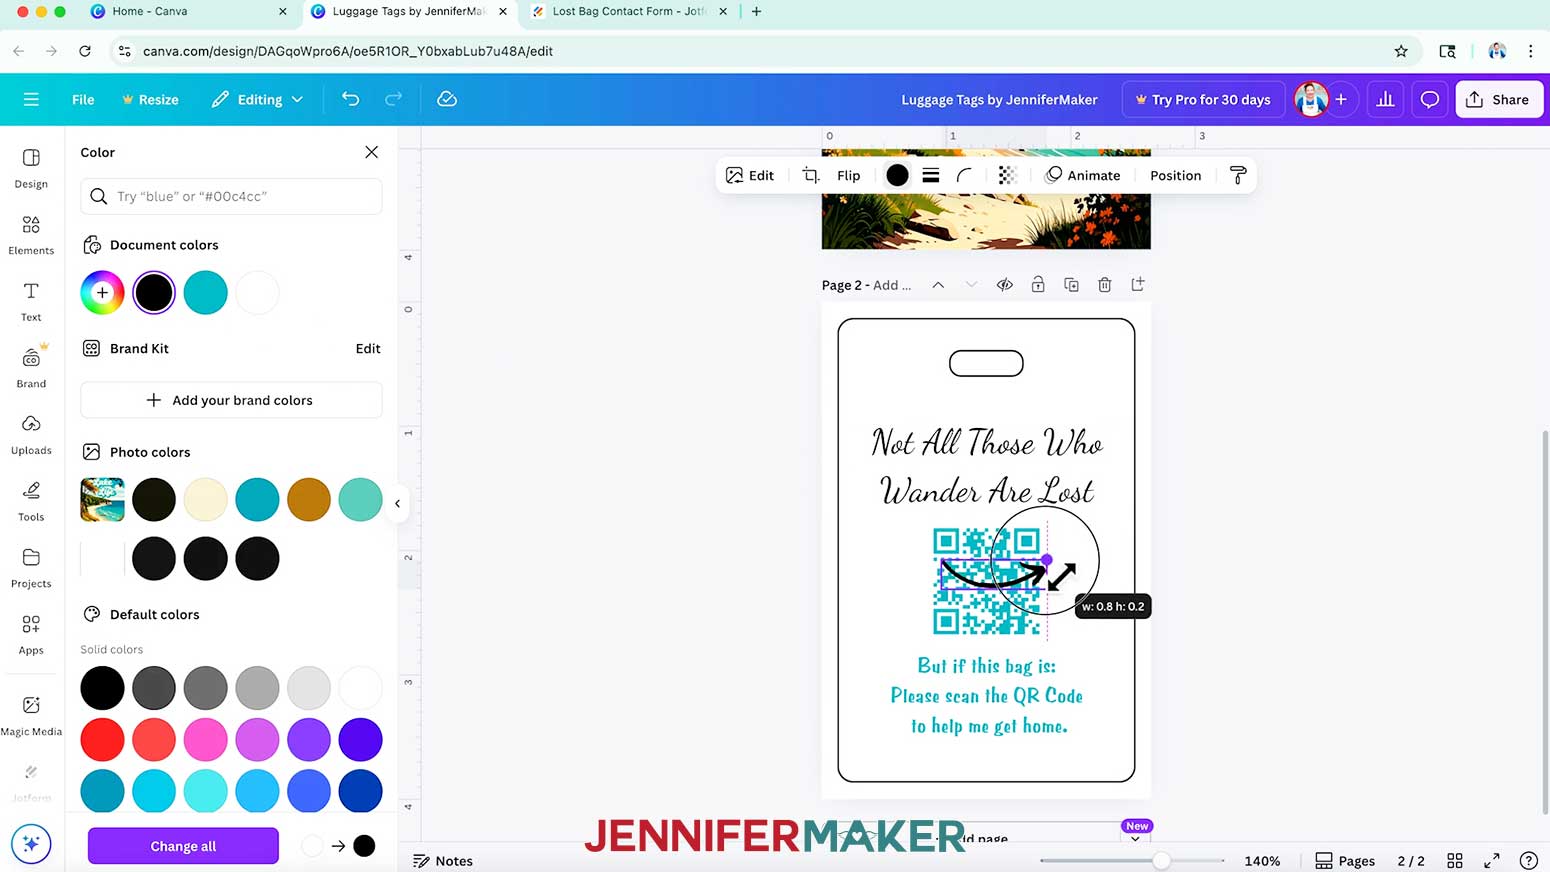
NOTE: I’ll click the rainbow swatch and change my arrow to black. - Use the corner handles to resize the graphic as needed.
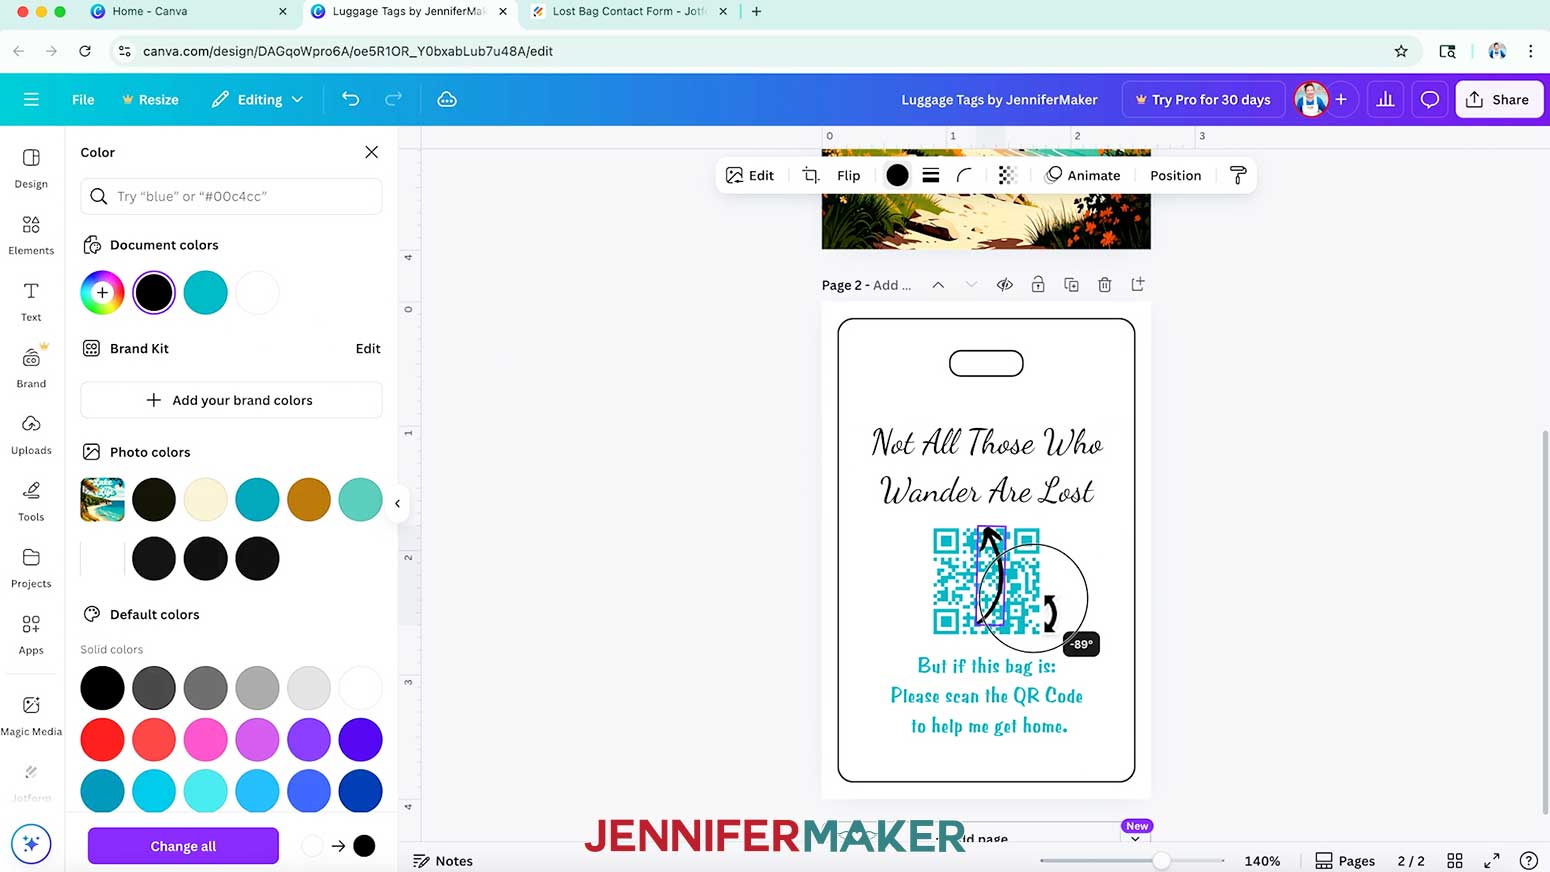
- To rotate an element, select it and drag the curved arrows outside the bounding box to adjust its angle.
NOTE: I’ll adjust my arrow so it points from the bottom text to the QR code. - Position your elements as desired.
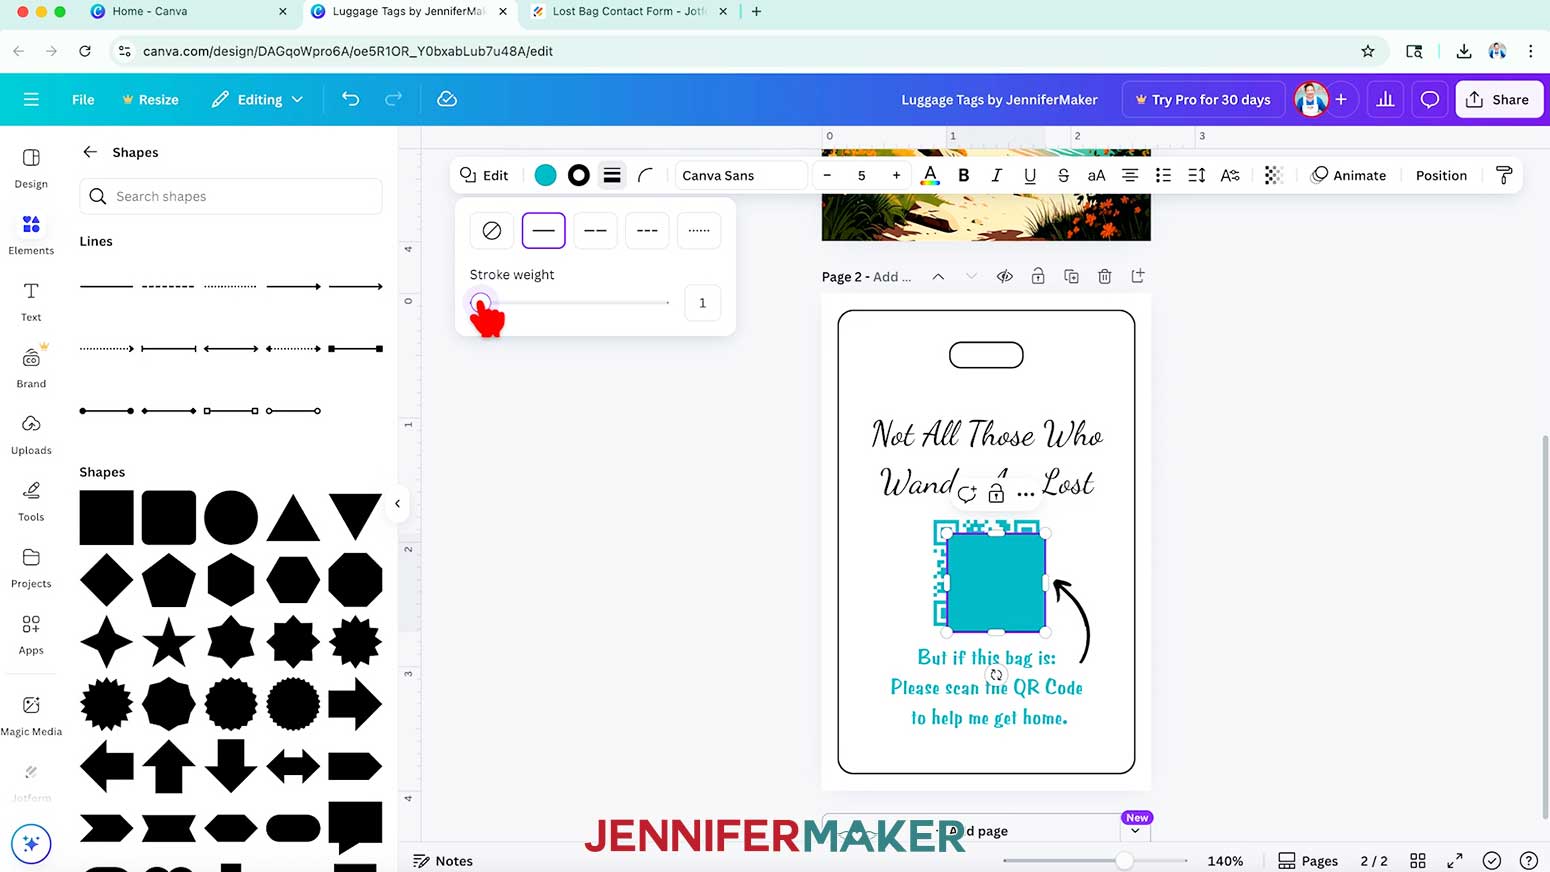
TIP: Use the pink lines that pop up to help align your elements. - To add guidelines for easier trimming on a white background, click “Elements” and select the square under the “Shapes” section.
- With the square selected, click the “Stroke style” button (it looks like a series of horizontal lines).
- Select the solid horizontal line, then adjust the “Stroke weight” slider to 1.
- Use the square’s Resize handles to stretch it to fill the entire canvas.
- Then click the solid color swatch and select the option with the red slash to apply “No color” to the inside of the shape, leaving behind just a thin, black border right at the canvas’ edges.
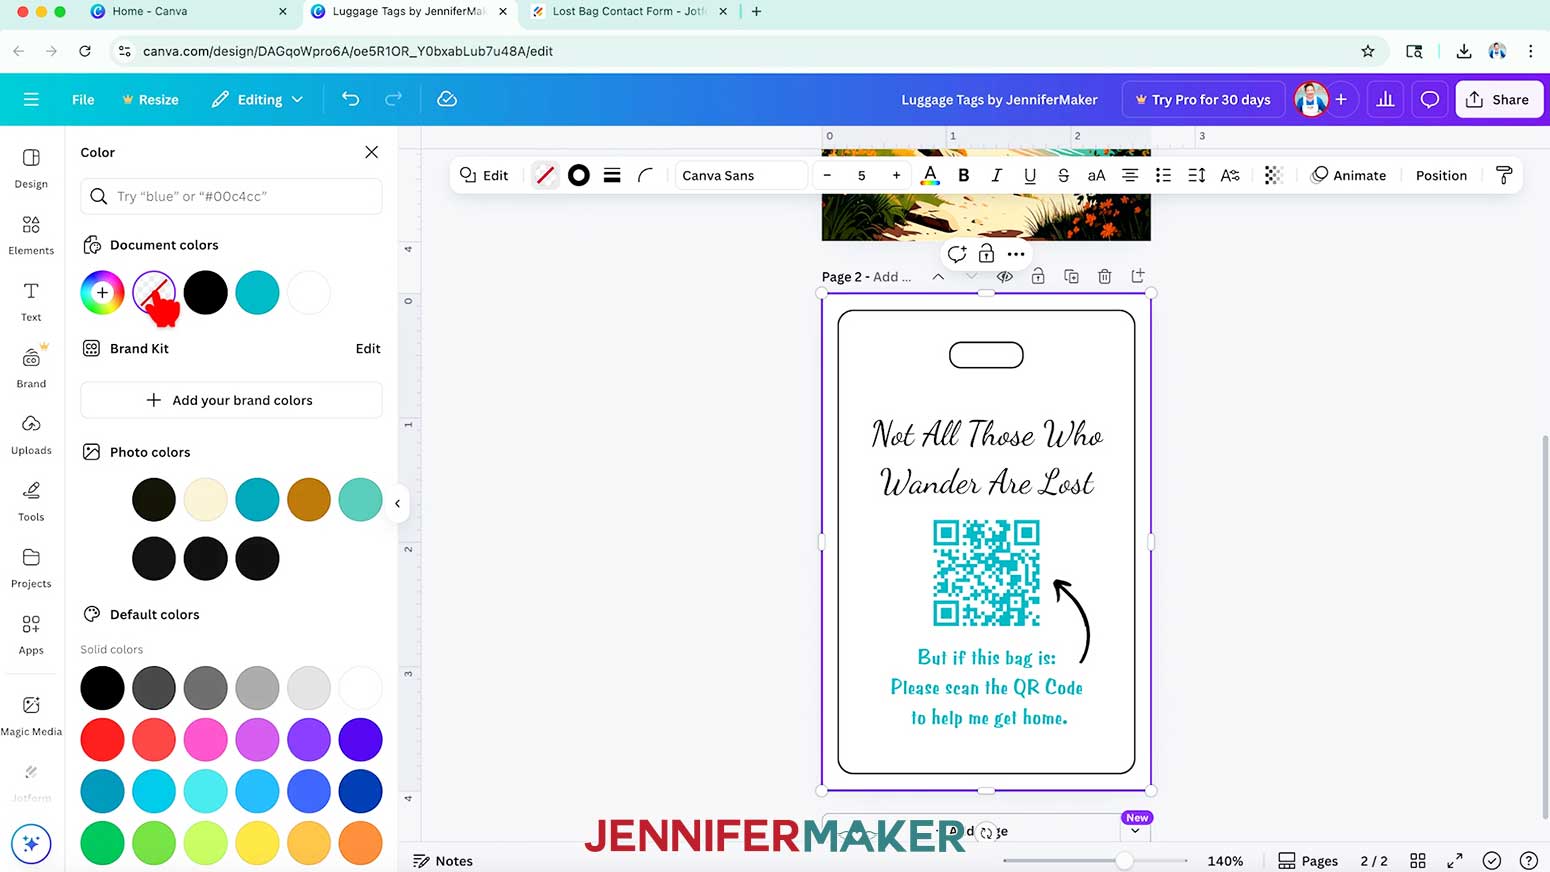
- Once all your Page 2 elements are in place, select the outlines template and click the “Trash” icon to delete it.
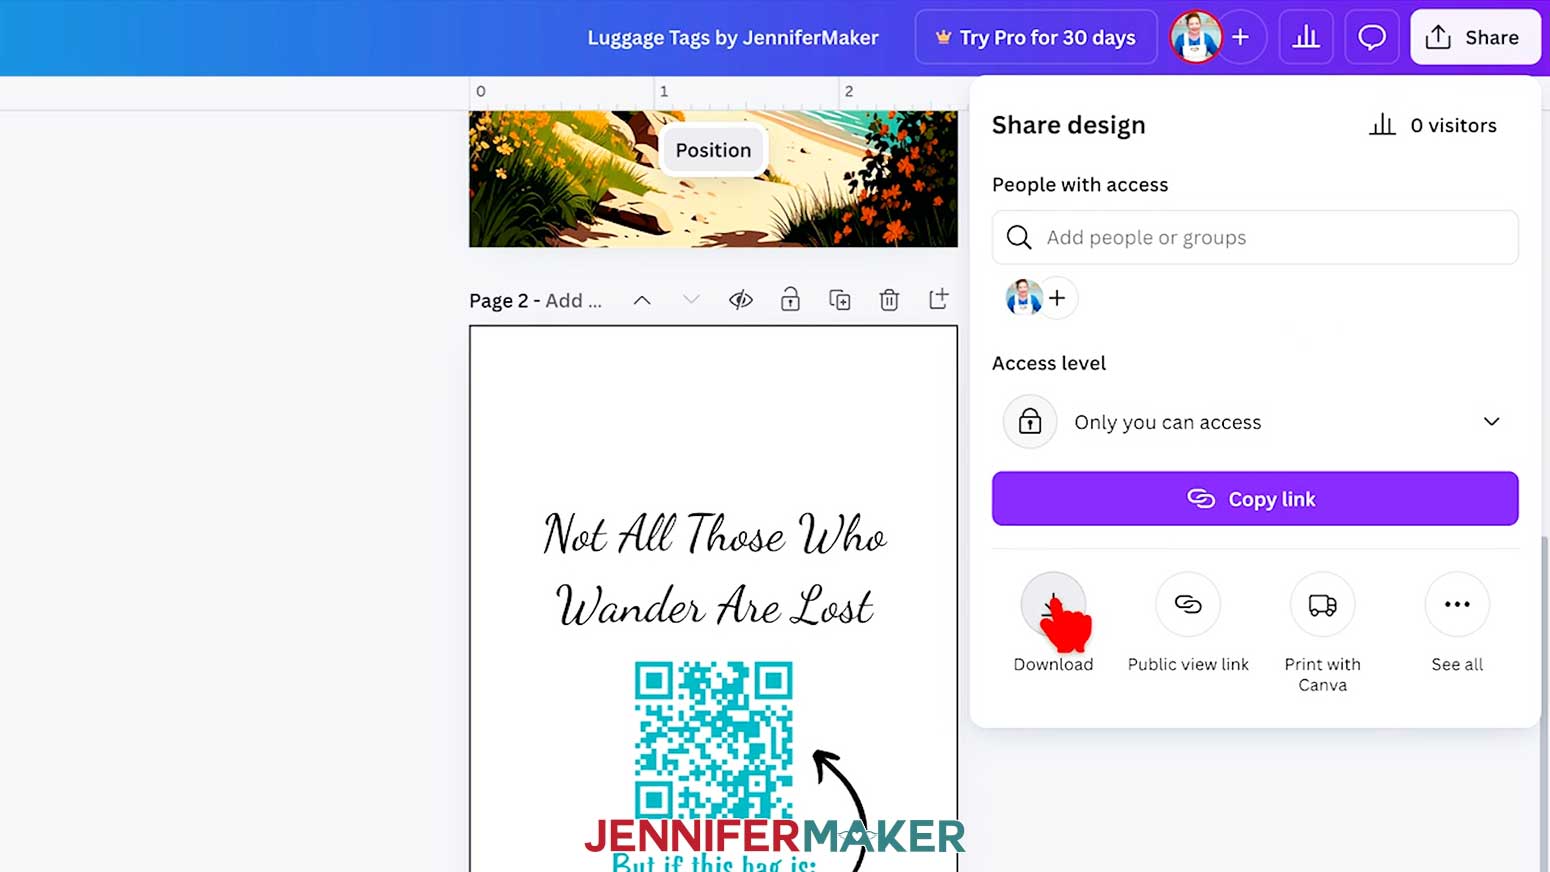
- To use the design, click “Share” in the top menu.
- Then select “Download.”
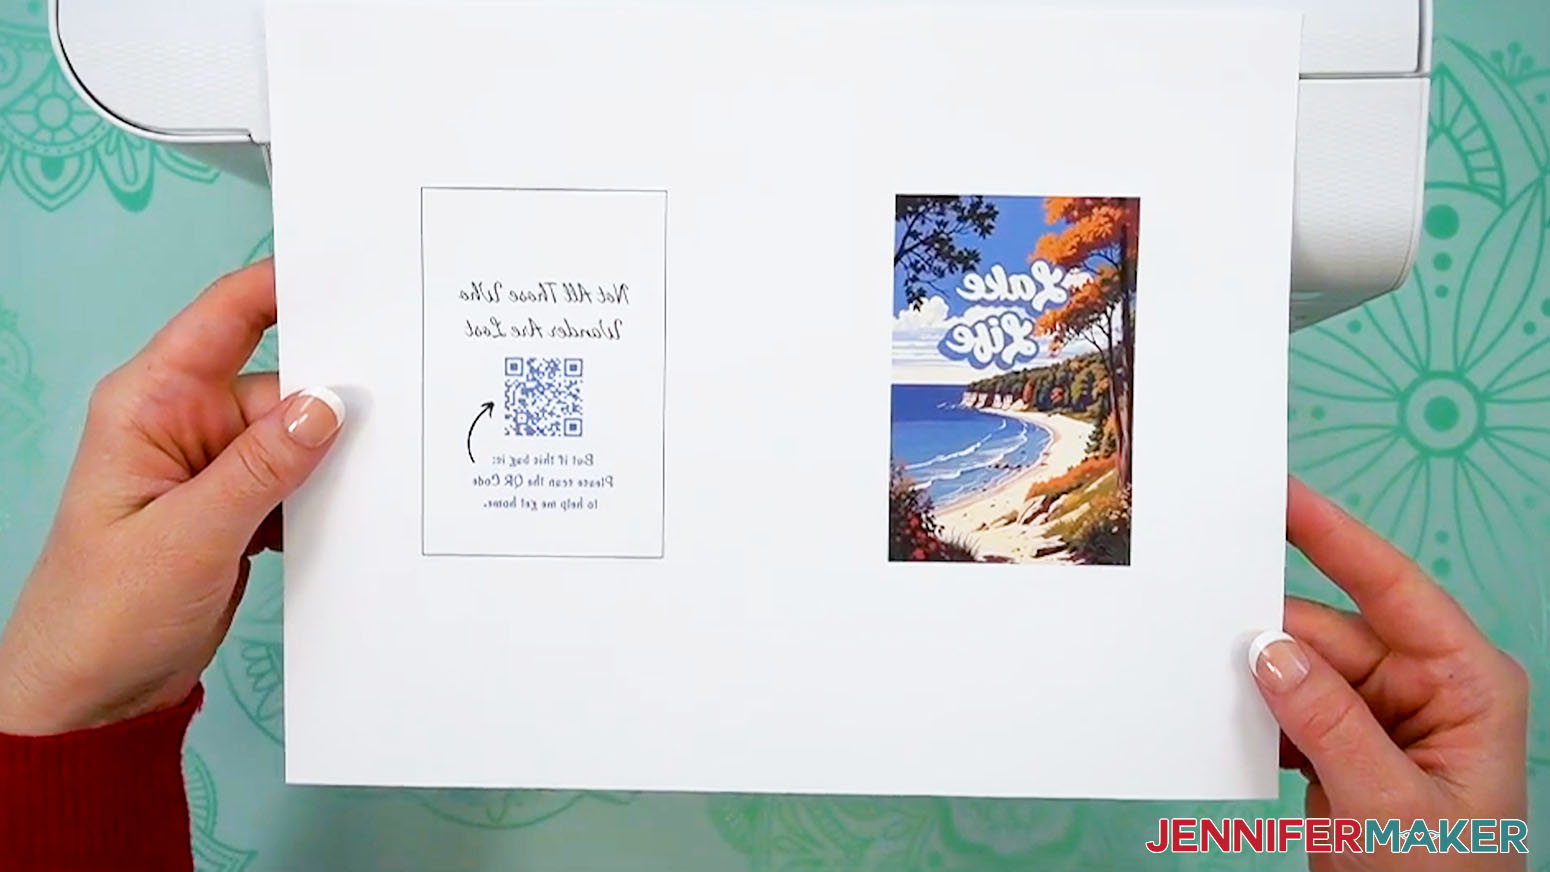
- Since we’ll print the design in Google Docs, make sure the file type is set to PNG.
- Make sure “Pages 1-2” is selected in the “Select pages” dropdown.
- Click “Download” to save the images to your computer in a zipped file.
- Then browse to your saved downloads folder and “Unzip” your design’s saved file.
- Your luggage tag designs are ready to print!

STEP 4: PRINT YOUR DESIGN IN GOOGLE DOCS
- Open Google Docs in the Google Chrome web browser on your computer.
NOTE: You will need a free Google account to use the free Google Docs software.
TIP: You can also download and open the Google Docs app, but you’ll have limited access to features, so I do not recommend it. - Click “Blank document” at the top left to open a new document.
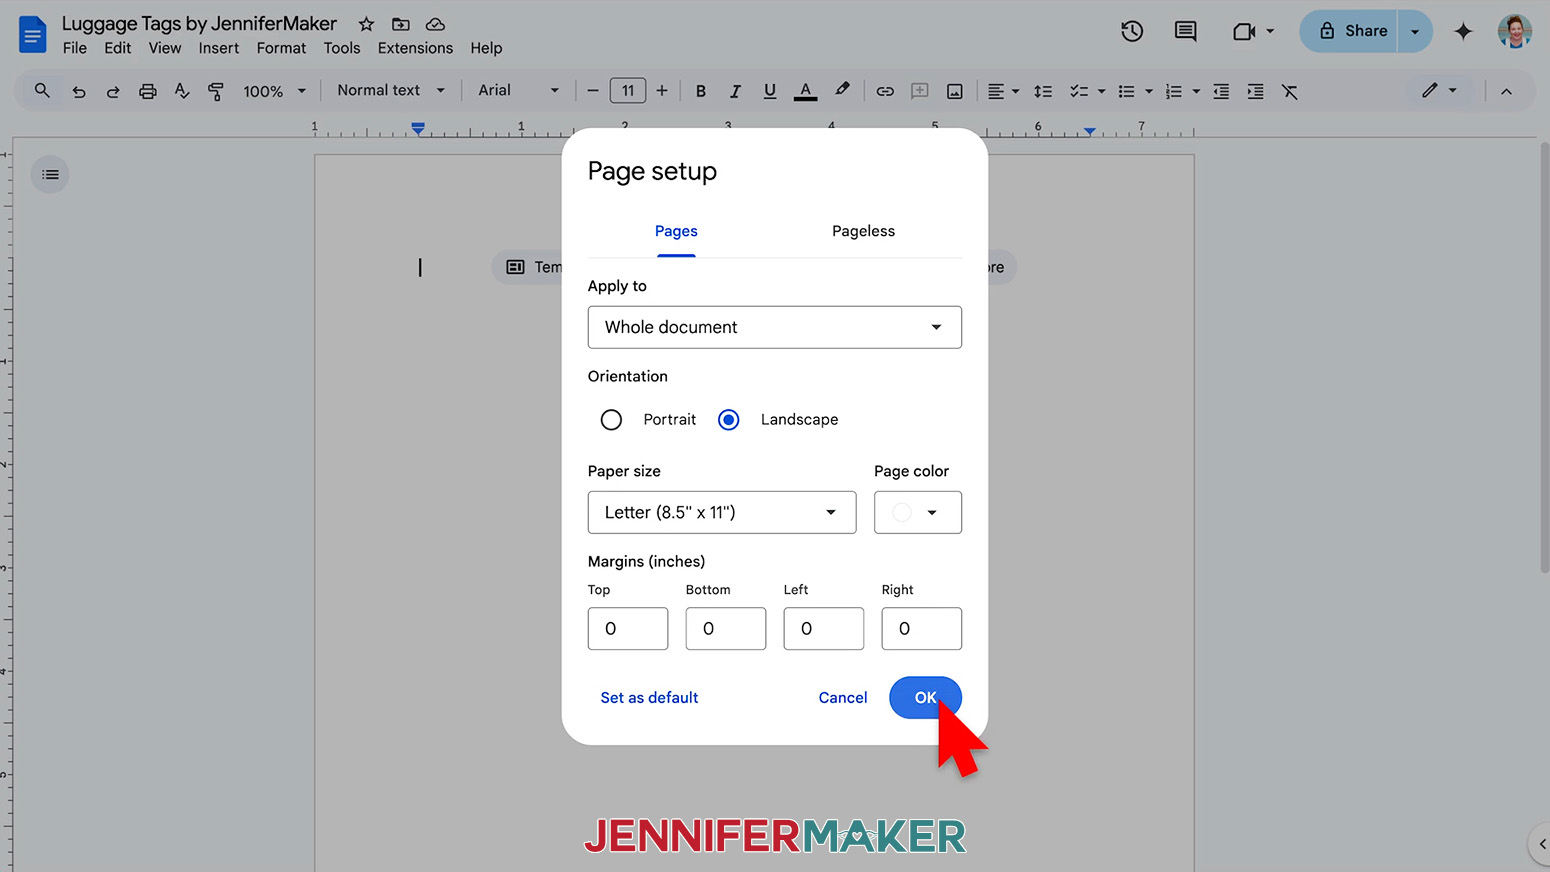
- Go to the File menu and select “Page setup.”
- Make sure the box next to “Landscape” is checked.
- Change your margins to “0” to use more of the page.
- Make sure your Paper Size matches your sublimation paper size.
NOTE: I’ll set mine to 8.5” x 11” or letter-size. - Click “OK” to apply the settings.
- Click the area that says “Untitled document” at the top and type a name for the file.
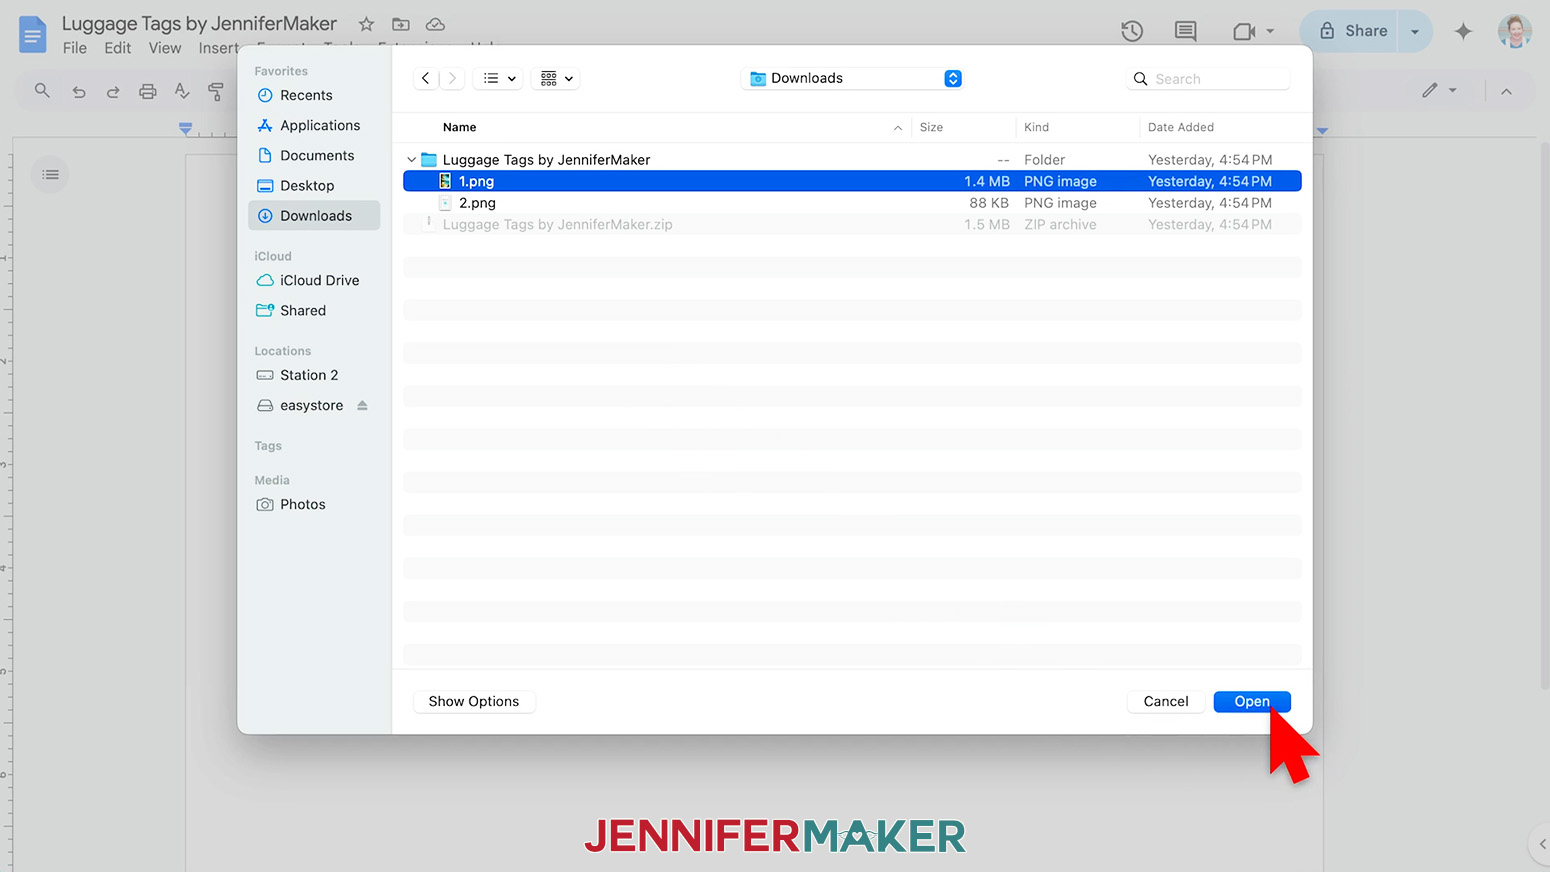
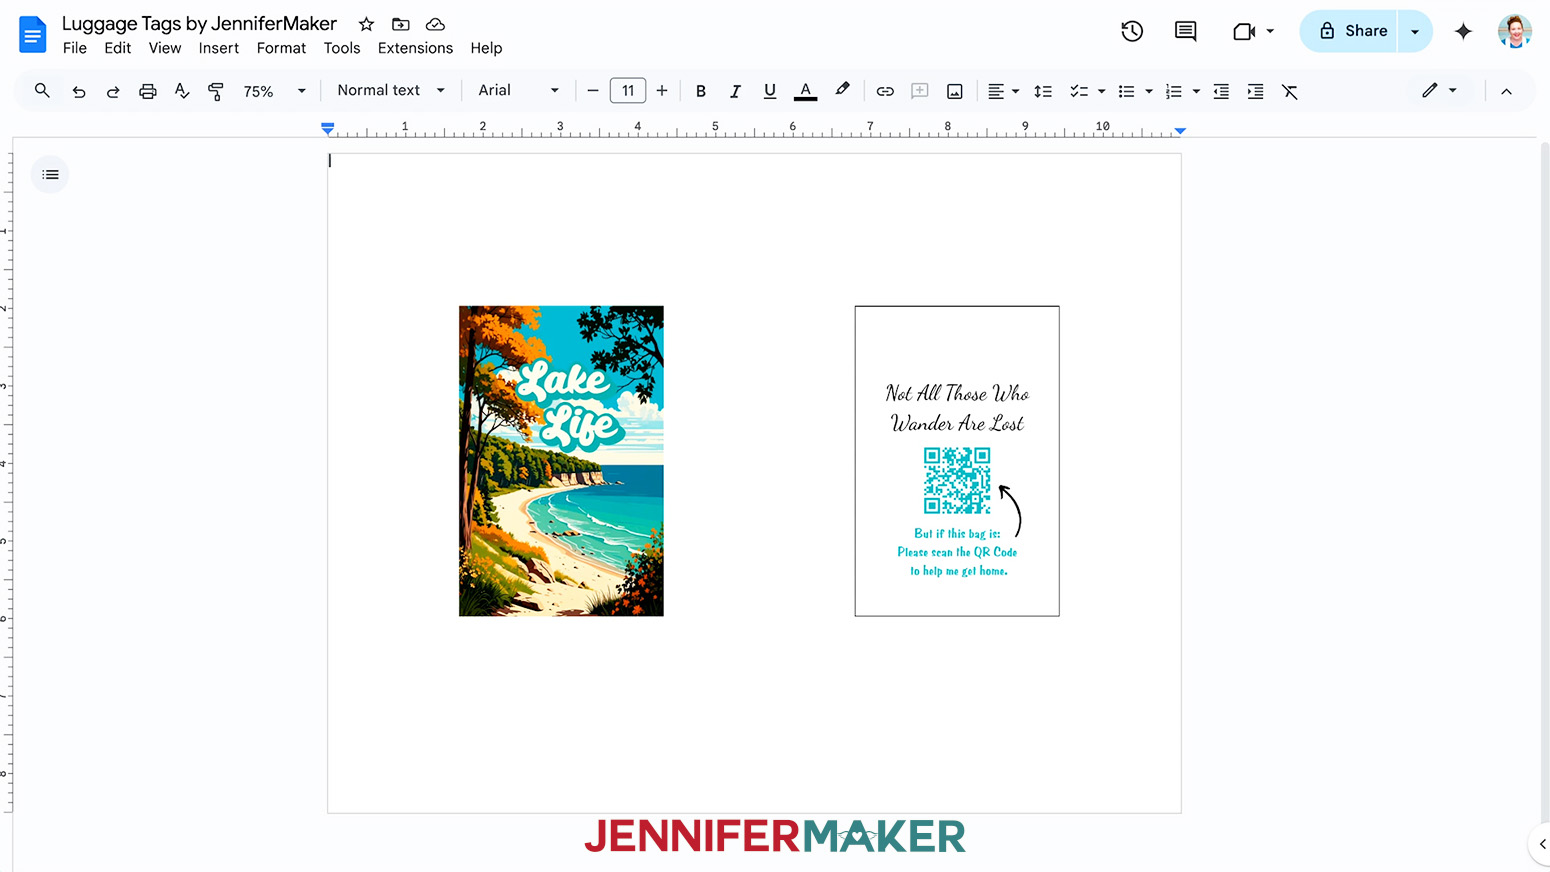
- Go to the Insert menu, select “Image,” and select “Upload from Computer.”
- Select the PNG file with your luggage tag’s first side design.
TIP: You’ll most likely find it in your Downloads folder and it will most likely be named “1.” - Click “Open” to add the image to your document.
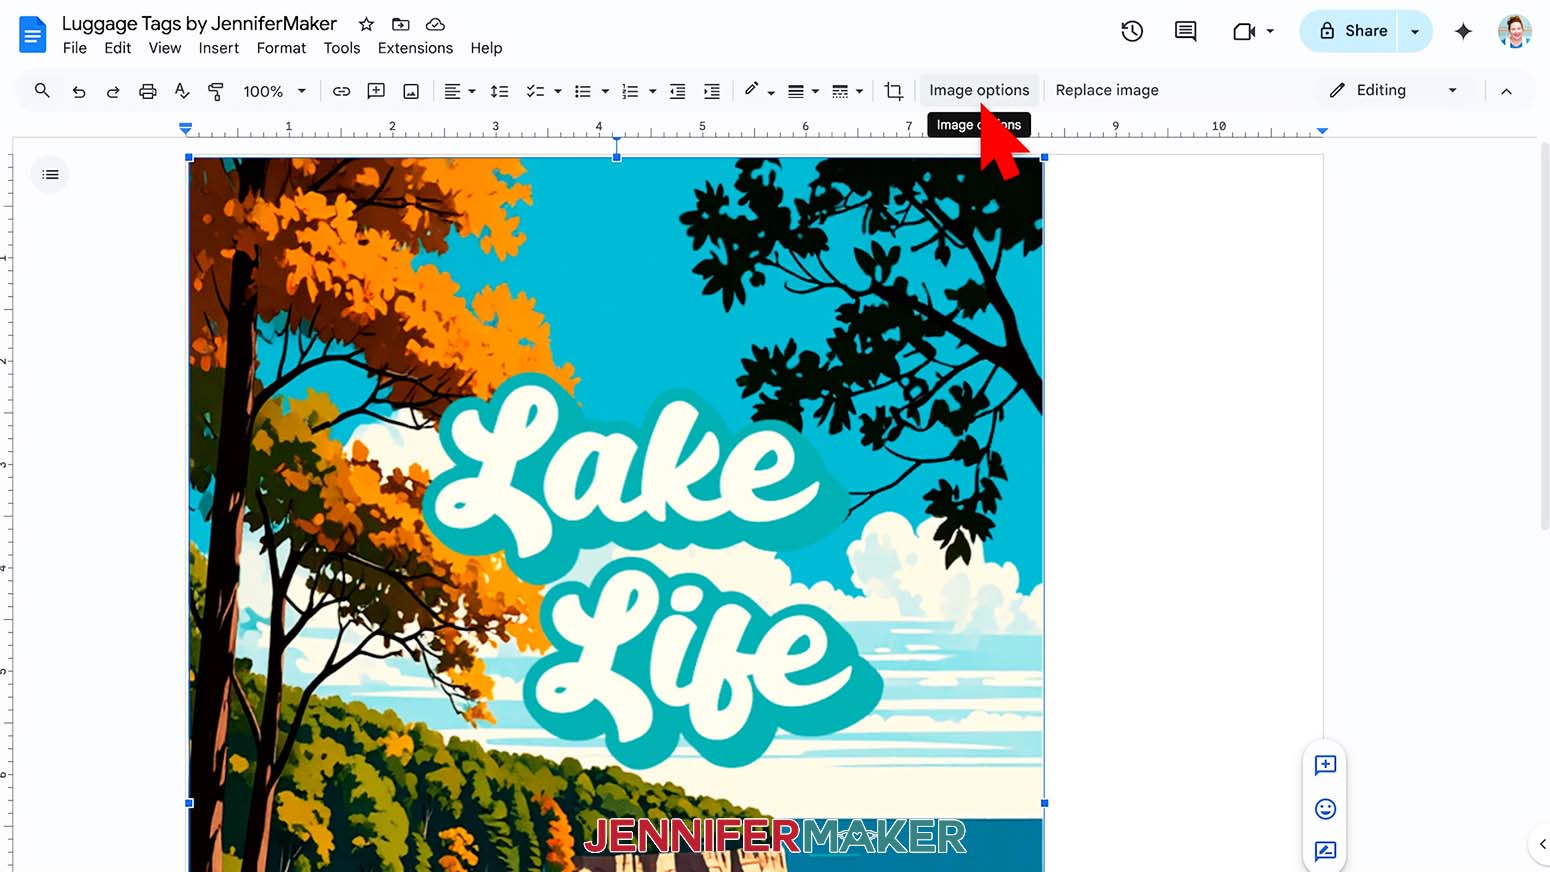
- Select the image and click “Image Options” at the top of the page.
NOTE: You can also open the menu by going to “Format,” “Image,” and “Image Options.” - Select “Size & Rotation.”
- Keep the “Lock aspect ratio” box checked to maintain the design’s proportions.
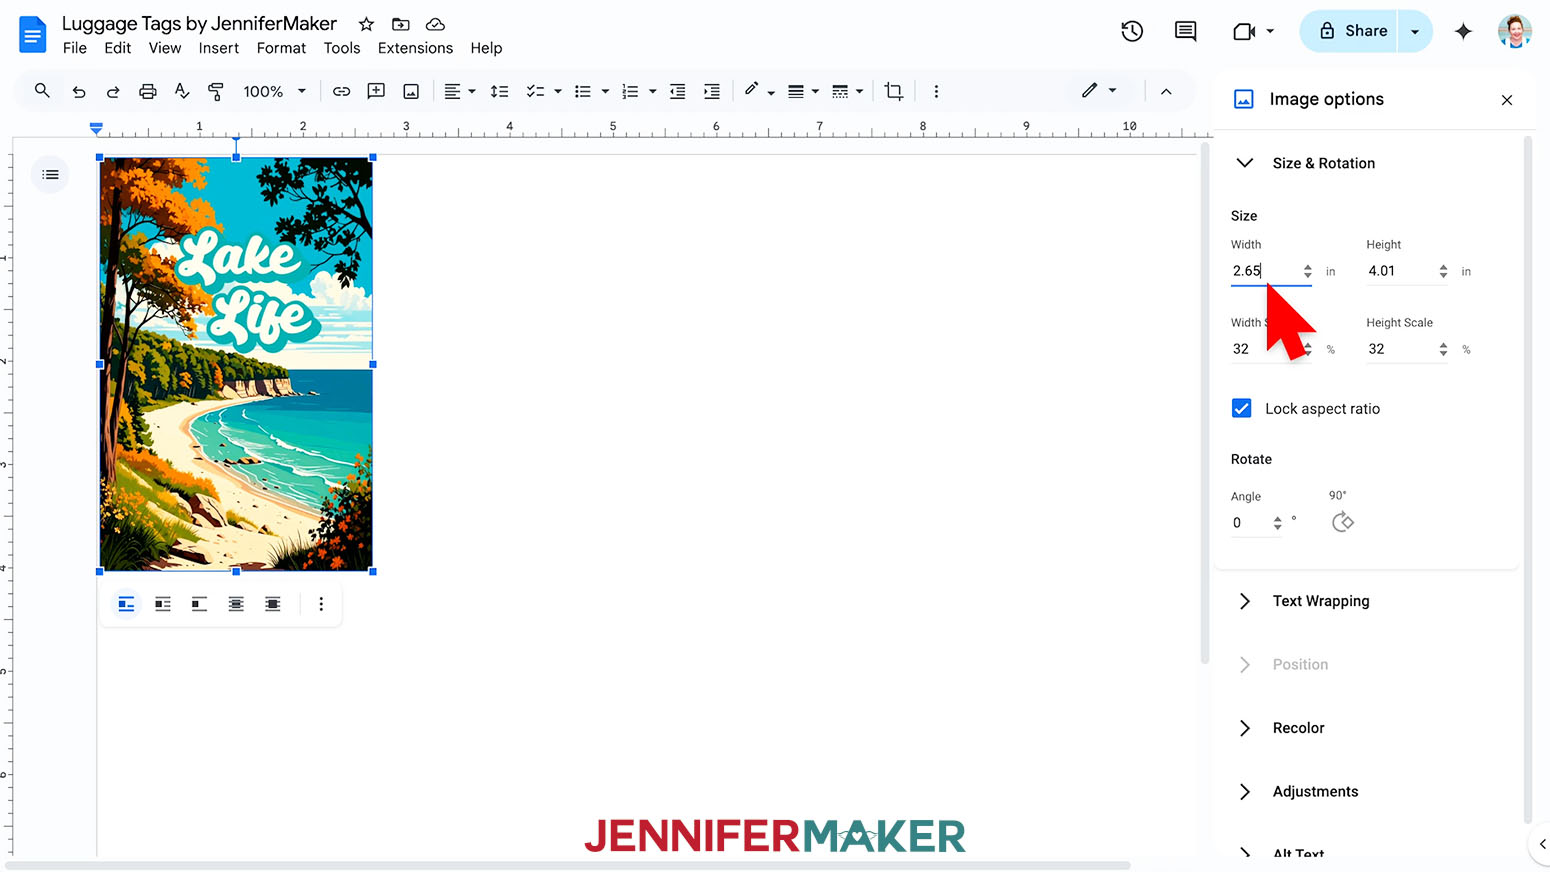
- Change the “Width” field so it’s about a quarter inch larger than the width measurement you recorded in “STEP 2: MEASURE YOUR LUGGAGE TAG BLANK” above to ensure your blank will be fully covered.
NOTE: My tags measured 2.4” wide, so I’ll set the width to 2.65”. - The “Height” field will automatically adjust proportionately.
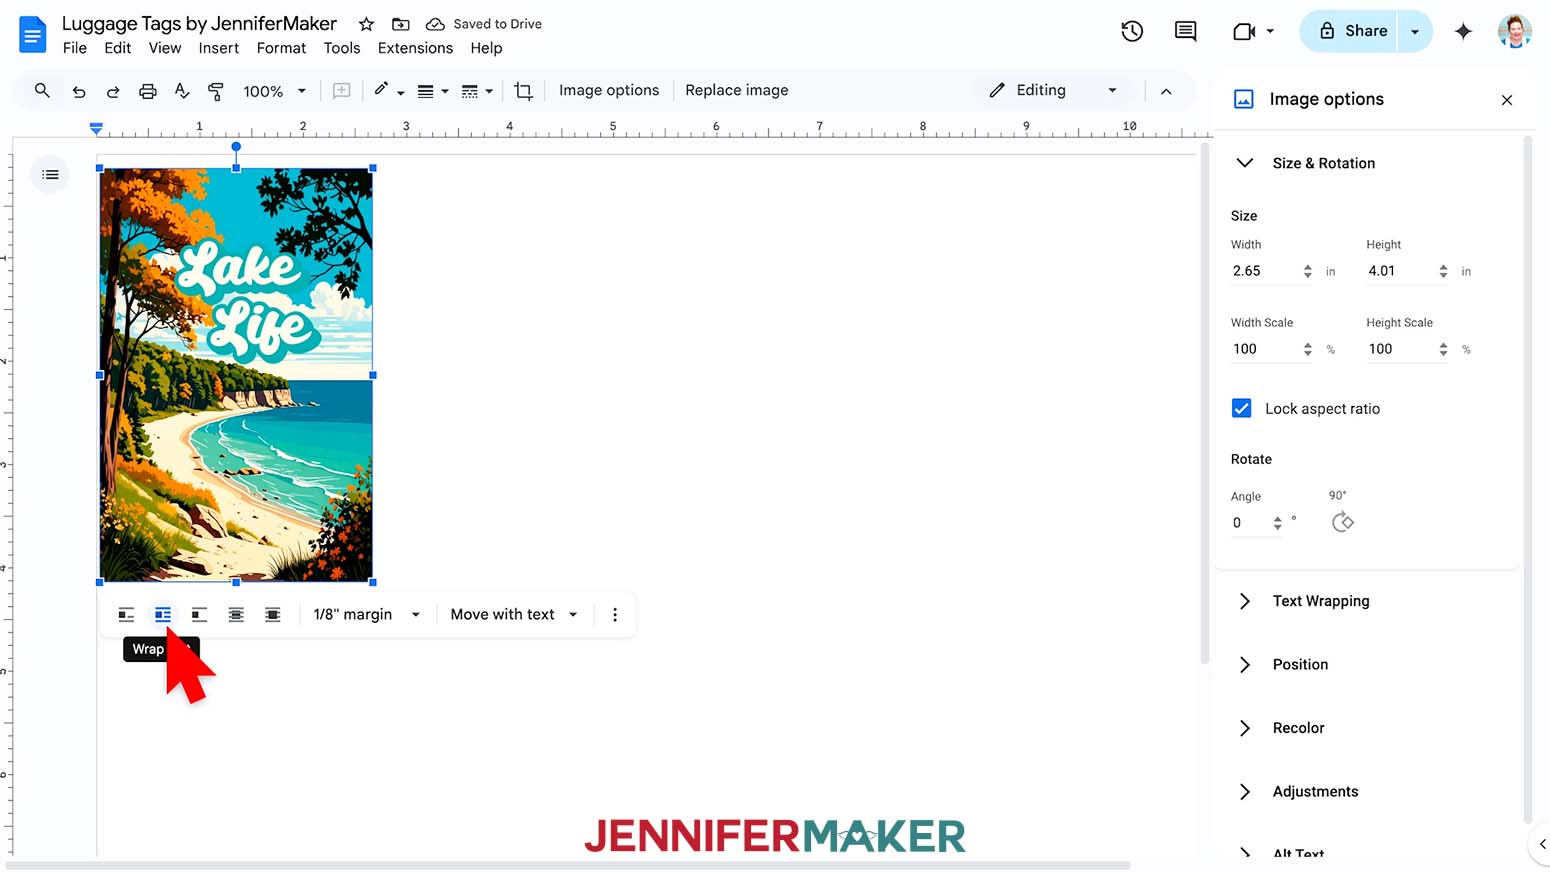
- Click the image and select the “Wrap text” icon from the menu that appears below it.
NOTE: This setting lets you move the design anywhere on the page. - Click and drag the image to the center of the page’s left side.
- Repeat Steps 9-18 to add the second side’s design to your document, dragging it to the center of the page’s right side.
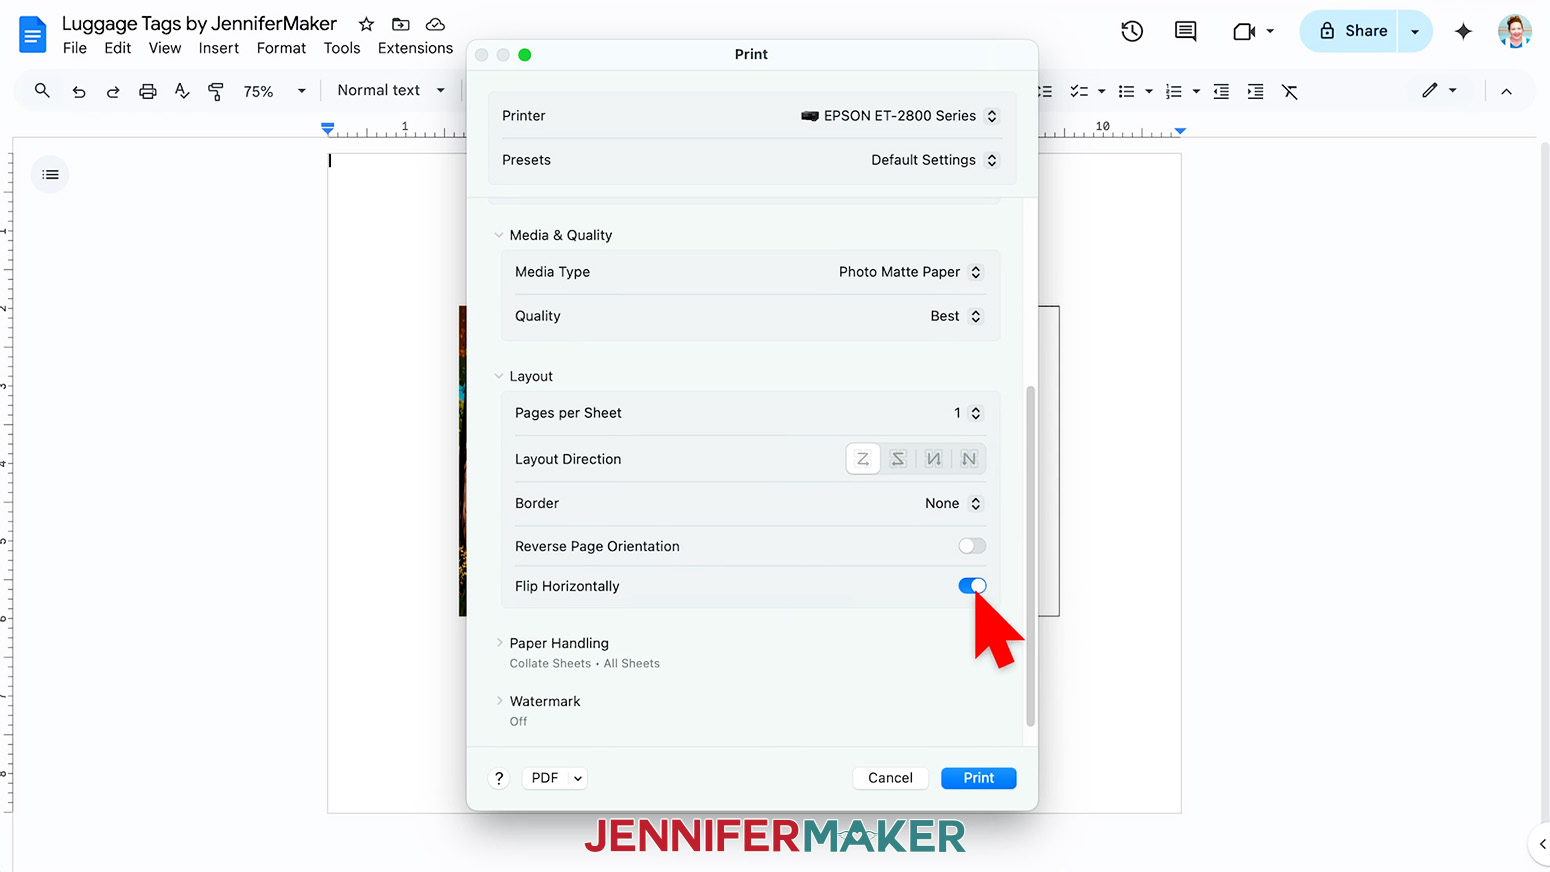
NOTE: The PNG for the second side will most likely be named “2.” - Go to the File menu and choose “Print.”
- Select your sublimation printer under “Destination.”
- Click the arrow beside “More Settings” to select “Print Using System Dialog.”
- Your print menu may look different - just make sure that you “flip horizontally” to mirror the images and select the highest print quality and best matte paper setting. Double-check the sublimation printer and paper size settings to make sure they still match.
- Load a sheet of sublimation paper correctly into your sublimation printer.
NOTE: Check the packaging for information on how to load the paper. - Click “Print.”
- Allow the print to dry before handling it, as the ink can smear.
NOTE: The printed designs will appear lighter before pressing. - Your images are ready to press!


STEP 5: SUBLIMATE YOUR LUGGAGE TAG
IMPORTANT: As with all sublimation projects, open a window and turn on a fan to improve your ventilation before beginning.
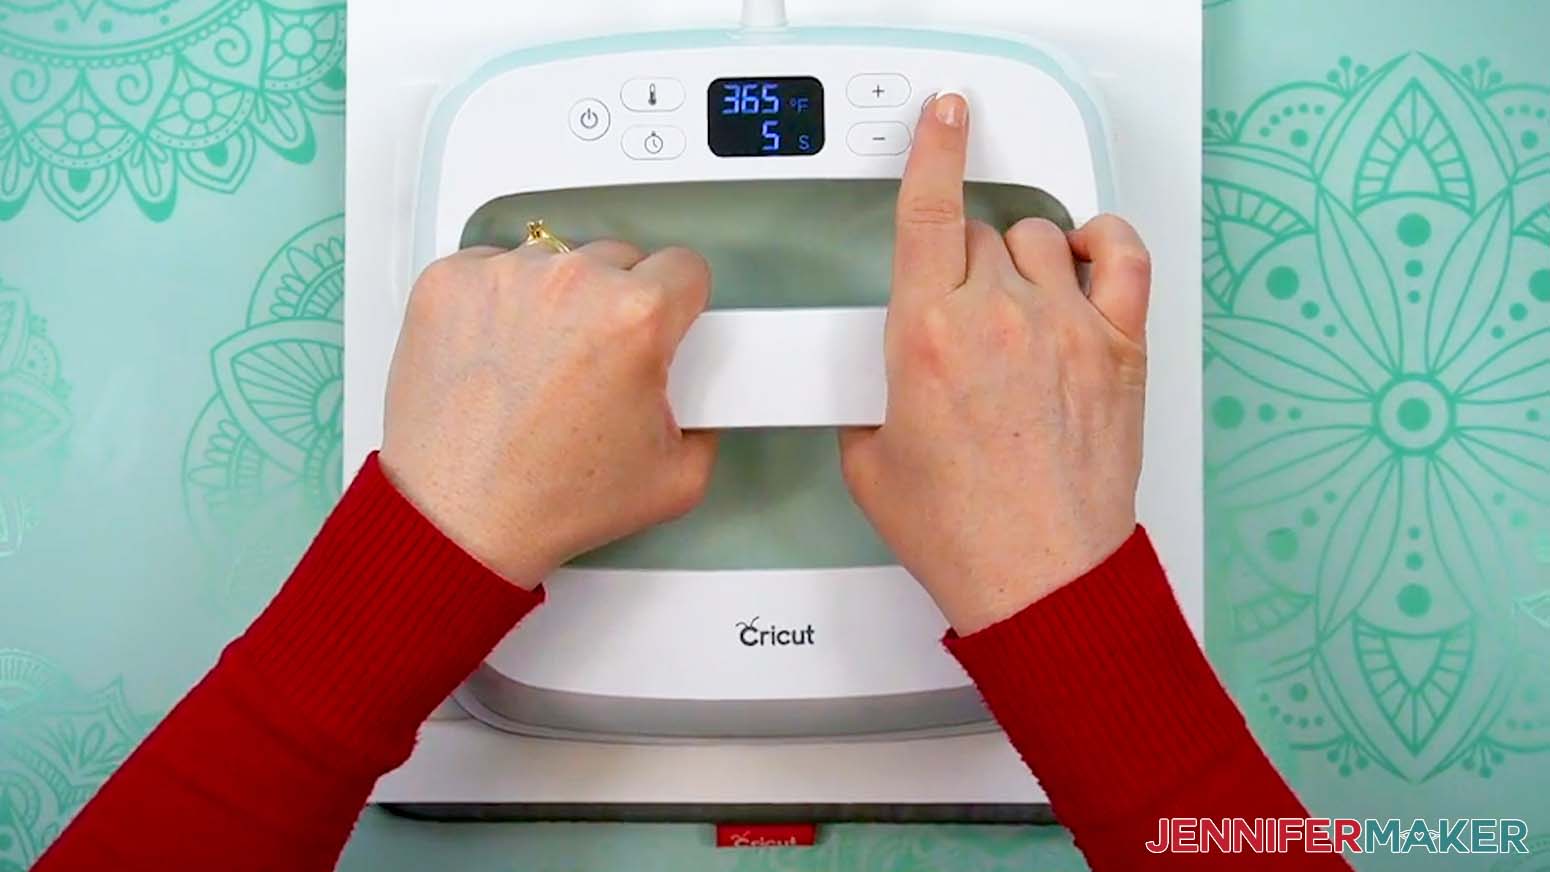
- Set the temperature of your EasyPress to 365℉ (185℃), and set the timer for 5 seconds.
TIP: I followed the time and temperature settings for ID Badges (Acrylics and Plastics) in my Sublimation Cookbook. Inside, you can find the settings for tons of other sublimation projects, too! - Place your pressing mat on your work surface with a fresh piece of protective white cardstock on top to protect it from any ink that may escape during the sublimation process.
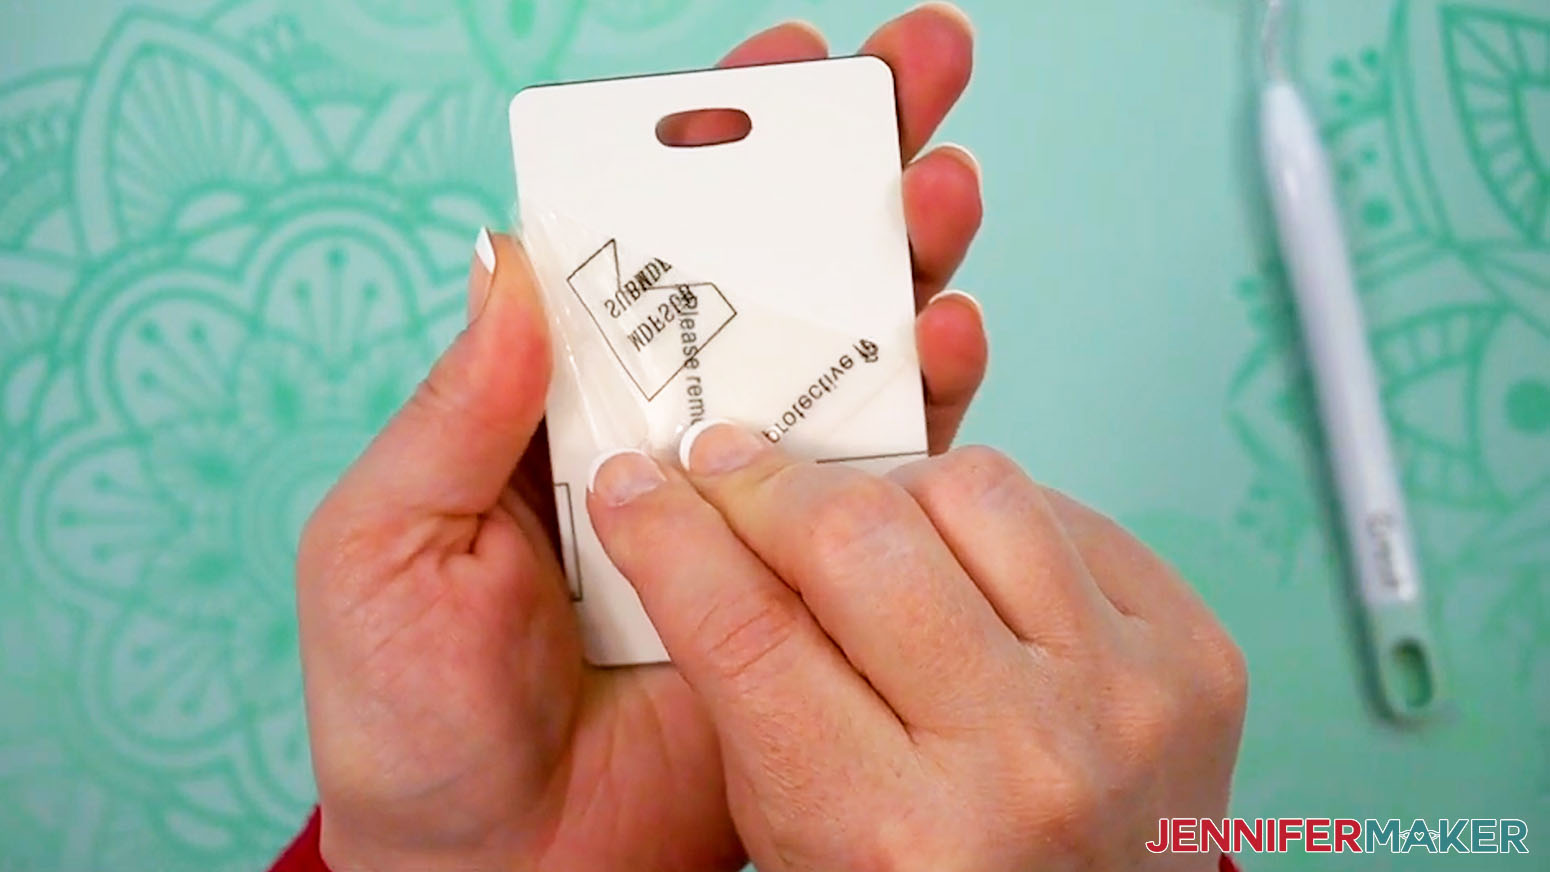
TIP: Your cardstock should be clean and free of any ink or other marks that could transfer to your blank during the sublimation process. - If your luggage tag blank came with a protective film, remove it only from the side you’re sublimating first. You can use tweezers or a weeding tool to carefully lift the film if it’s really stuck.
NOTE: I recommend only pressing one side at a time for the best results, even if you use an AutoPress. - If there’s any residue on your blank, wipe it away using alcohol and a lint-free cloth. Or use a lint roller to remove any dust or debris that accumulated during handling.
- Place the luggage tag sublimation-side-up on your pressing mat, then cover it with a sheet of white, uncoated butcher paper.
- Cover the entire area of your luggage tag with the EasyPress and preheat the blank with medium pressure for 5 seconds to remove moisture.
- Lift the EasyPress away from your blank.
NOTE: Always place your press back on the base after using. - Carefully lift away the butcher paper and make sure the preheated luggage tag is cool enough to touch, then set it aside to cool completely.
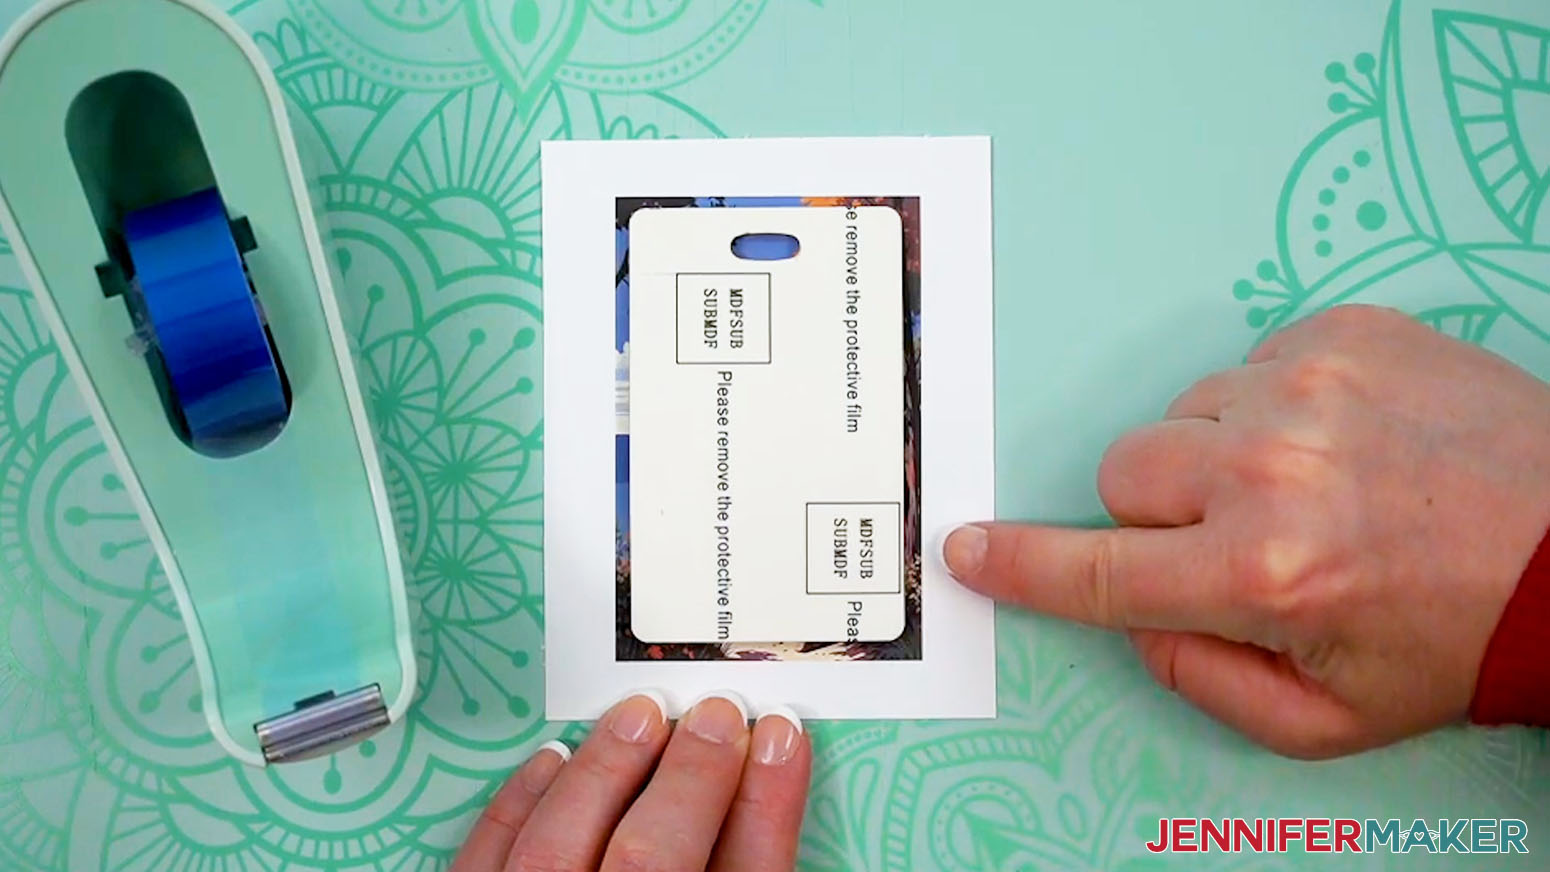
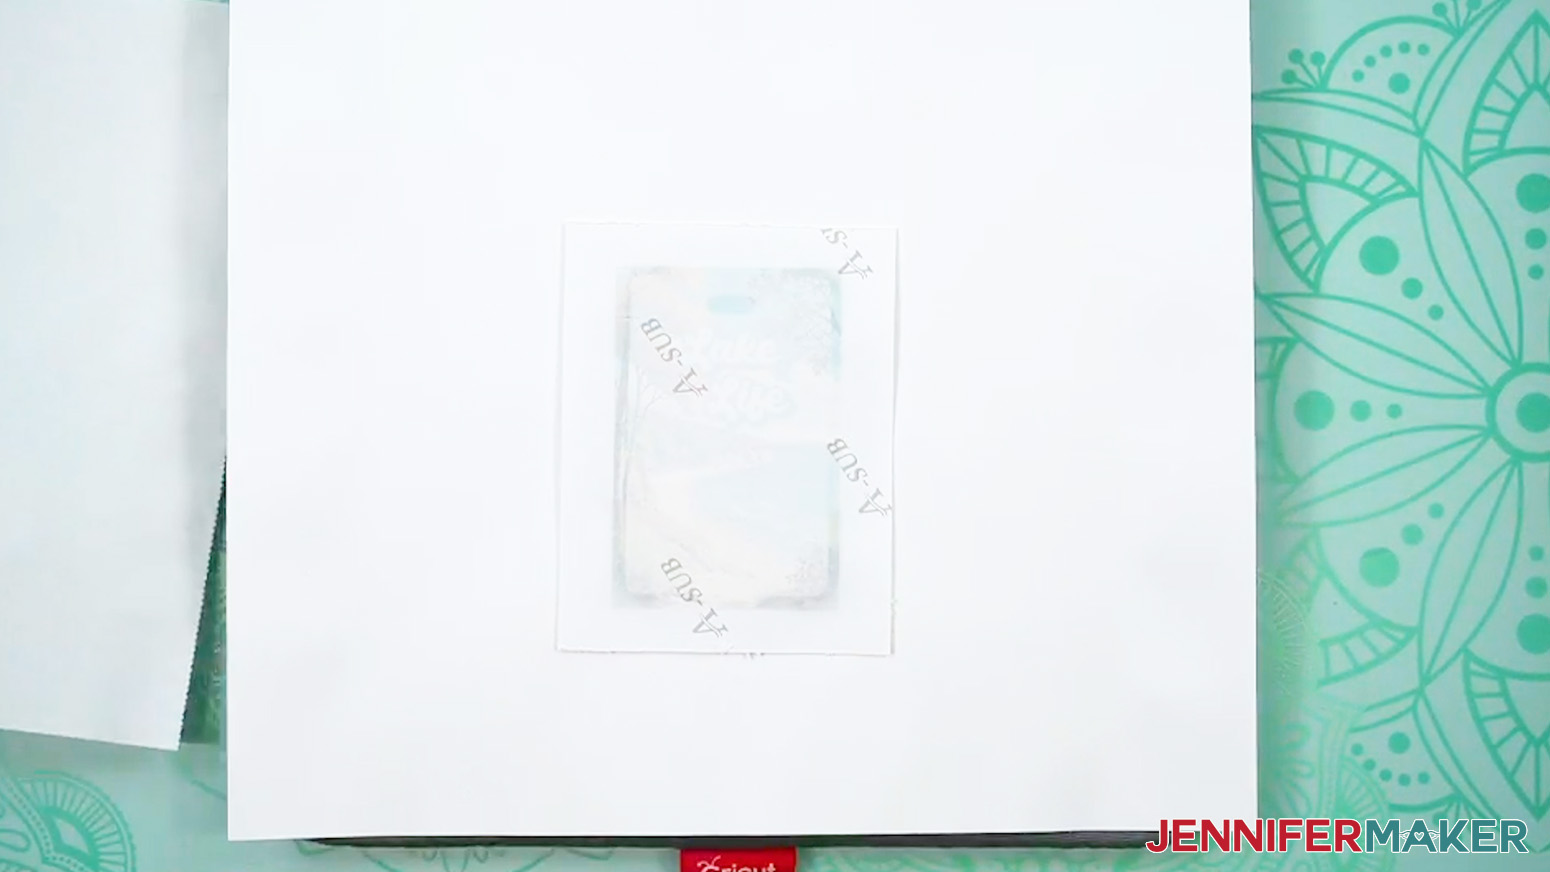
- Use scissors or a paper trimmer to cut your printed designs down to size, leaving about ½” of white around the ink’s edges.
- Place the printed design for your luggage tag’s first side face up on your work surface.
- Center the luggage tag blank unprotected-side-down on the print so an even amount of ink shows around all four sides.
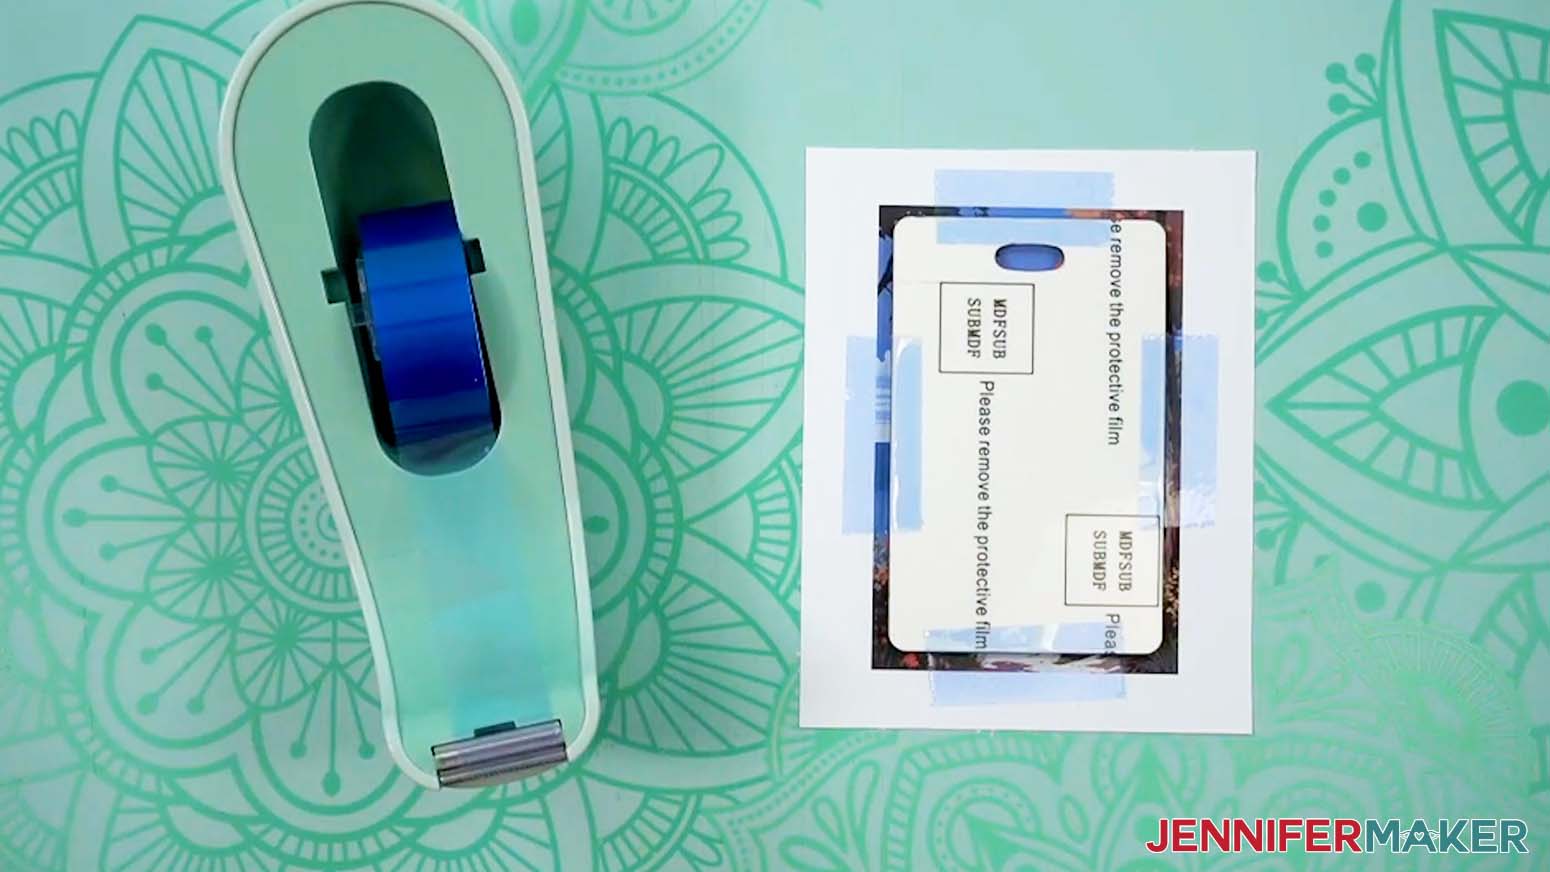
- Use heat-resistant tape to secure each side of the luggage tag to the paper so the pieces don’t shift during pressing.
- Carefully flip the blank over onto the cardstock so the print is face down.
- Place a fresh piece of white uncoated butcher paper on your project to completely cover it.
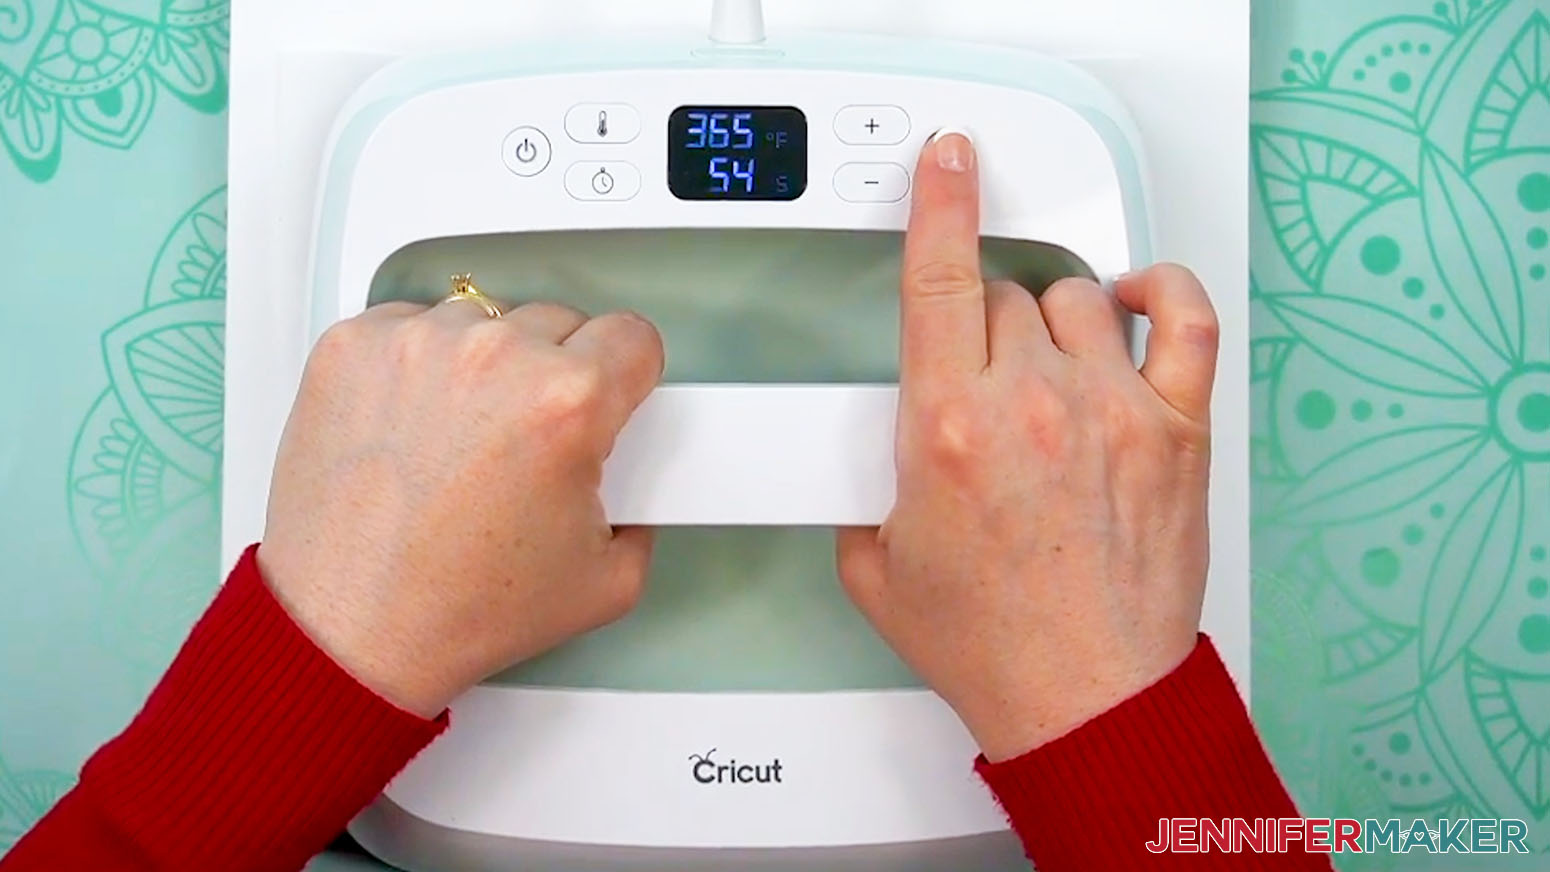
- Make sure the temperature of your EasyPress is at 365℉ (185℃), and the timer is set for 55 seconds.
- Cover the entire area of your luggage tag with the EasyPress and hold it in place with medium pressure for 55 seconds.
TIP: Keep pressure even on both sides of the press for best results. - When the time is up, lift the EasyPress straight up to avoid ghosting.
- The blank will still be a little hot, so put on your heat-resistant gloves and then remove the butcher paper.
- Once the blank is cool enough, remove the tape and design, then let it cool completely.
- Place a fresh sheet of white cardstock on your pressing mat, then repeat Steps 3-19 to sublimate the other side of your luggage tag.
NOTE: Remember to use fresh cardstock and butcher paper, and remove the film from your blank’s second side before sublimating! - Your sublimated luggage tag with a QR code is ready!


STEP 6: SHOW IT OFF
You now have a beautiful luggage tag with a handy QR code with a link to a return form in case your bag gets lost! Attach the tag to your suitcase using the included strap for stress-free travel!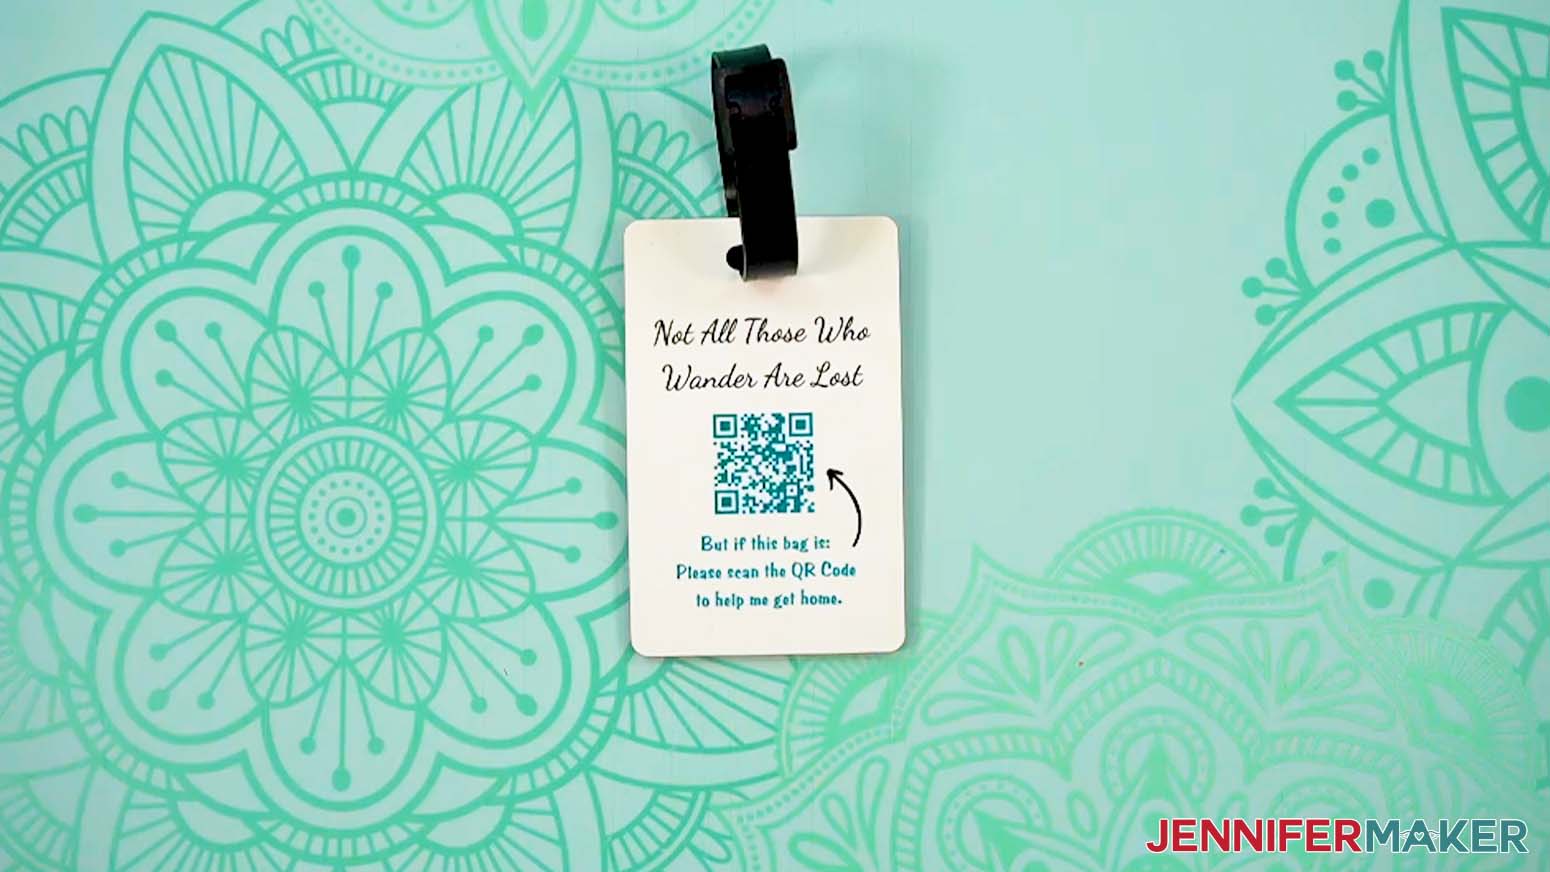
Notes
Print Size: 2.65” W x 4” H
Luggage Tag Size: 2.4” W x 3.75” H
Fonts Used:
Dancing Script (free Canva font)
PL Benguiat Frisky (free Canva font)
Front of Design: Andala Extrude & Andala Script / Free Alternative: Andala (for personal use only)
Jotform Email Troubleshooting Tips
If you don’t see a “Notification 1” entry in the Emails tab for your form, try these steps:
1. Click the blue "Add Email" button.
2. Select "Notification Email" for the email type.
3. Click on the "Recipients" tab.
4. Under "Recipient Email," enter the email address where you want to receive notifications in the form field.
5. Click "SAVE."
6. Now your email address should be listed!
If the email address is incorrect, hover over the entry and click the “Delete” icon. Then follow Steps 1-6 above to add a new email address.
Answers to Your Questions About How to Make a QR Code with Canva
Q: Is there an easier way to create a custom design for my QR Code Luggage Tag in Canva?
A: You can learn how to design your own custom luggage tags using Canva in my ADVANCE program. Learn more about ADVANCE here!
Q: Can I generate a QR code in Canva?
A: You sure can! This tutorial will show you the easy steps you can take to make a QR code with Canva to help combat lost luggage, but you can use QR codes for many other purposes, too!
Q: What can I link my QR code to?
A: QR codes have so many uses beyond lost baggage! Include one on an event flyer to share more details, link them to wishlists on a birthday party invitations; there are so many things you can do with them! If you’re a business owner, you can even link your QR code to virtual business cards or other marketing materials, online content, product information, social media profiles, social media posts, and so much more!
Q: How do I find images for my luggage tag?
A: You can use any of the images included in the project files, or find more in our library! You can also use your own photos and designs, images created through AI generators as long as you follow the tool’s guidelines, graphics from Canva or other online sources depending on usage requirements, or stock photos for your custom luggage tag. If you want to take your designs further, I share online resources and best practices so you can get better results when designing in my Advance program!
Q: How long do you press a luggage tag?
A: Just follow the tutorial with my free files to learn what times and temperatures work when learning how to sublimate luggage tags!
Q: Can you use sublimation paper twice?
A: Though it may look like there’s ink left on your sublimation transfer after pressing, there’s not actually enough to create another press. You can try, but your second attempt will probably look super faded and not the way you expect.
Q: Can a Cricut do sublimation printing?
A: While a Cricut cutting machine can be useful in some sublimation projects, it does not sublimate or print sublimation ink. However, you can use a Cricut and Infusible Ink pens to draw designs onto paper, which can be sublimated, or use a Cricut to cut SVG designs out of Infusible Ink transfer sheets. If you want to sublimate your luggage tags with printed designs, you’ll need a sublimation printer, a heat press, and other tools and materials you can find above in my materials list.
Q: Can I make and sell sublimated luggage tags?
A: If you want to use my designs and projects for commercial use, please familiarize yourself with my important licensing information before selling your crafts.
Get my free PNG files to and make your own sublimated luggage tags!
(If you do not see the signup form above, click here.)
I love seeing your sublimated projects, and how you use them! Once you’ve learned how to make your own QR code luggage tags, inspire others and share a photo of your projects in our Facebook group or tag me on social media with #jennifermaker.
Love,

Want to remember this? Save this How To Make Make a QR Code with Canva Tutorial to your favorite Pinterest Board!