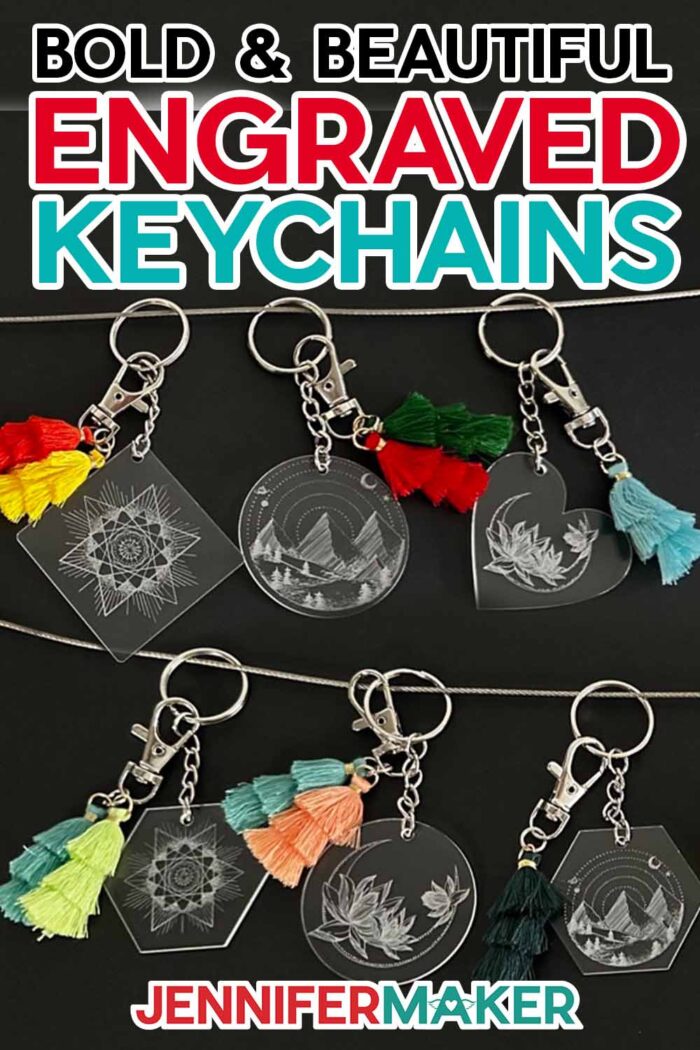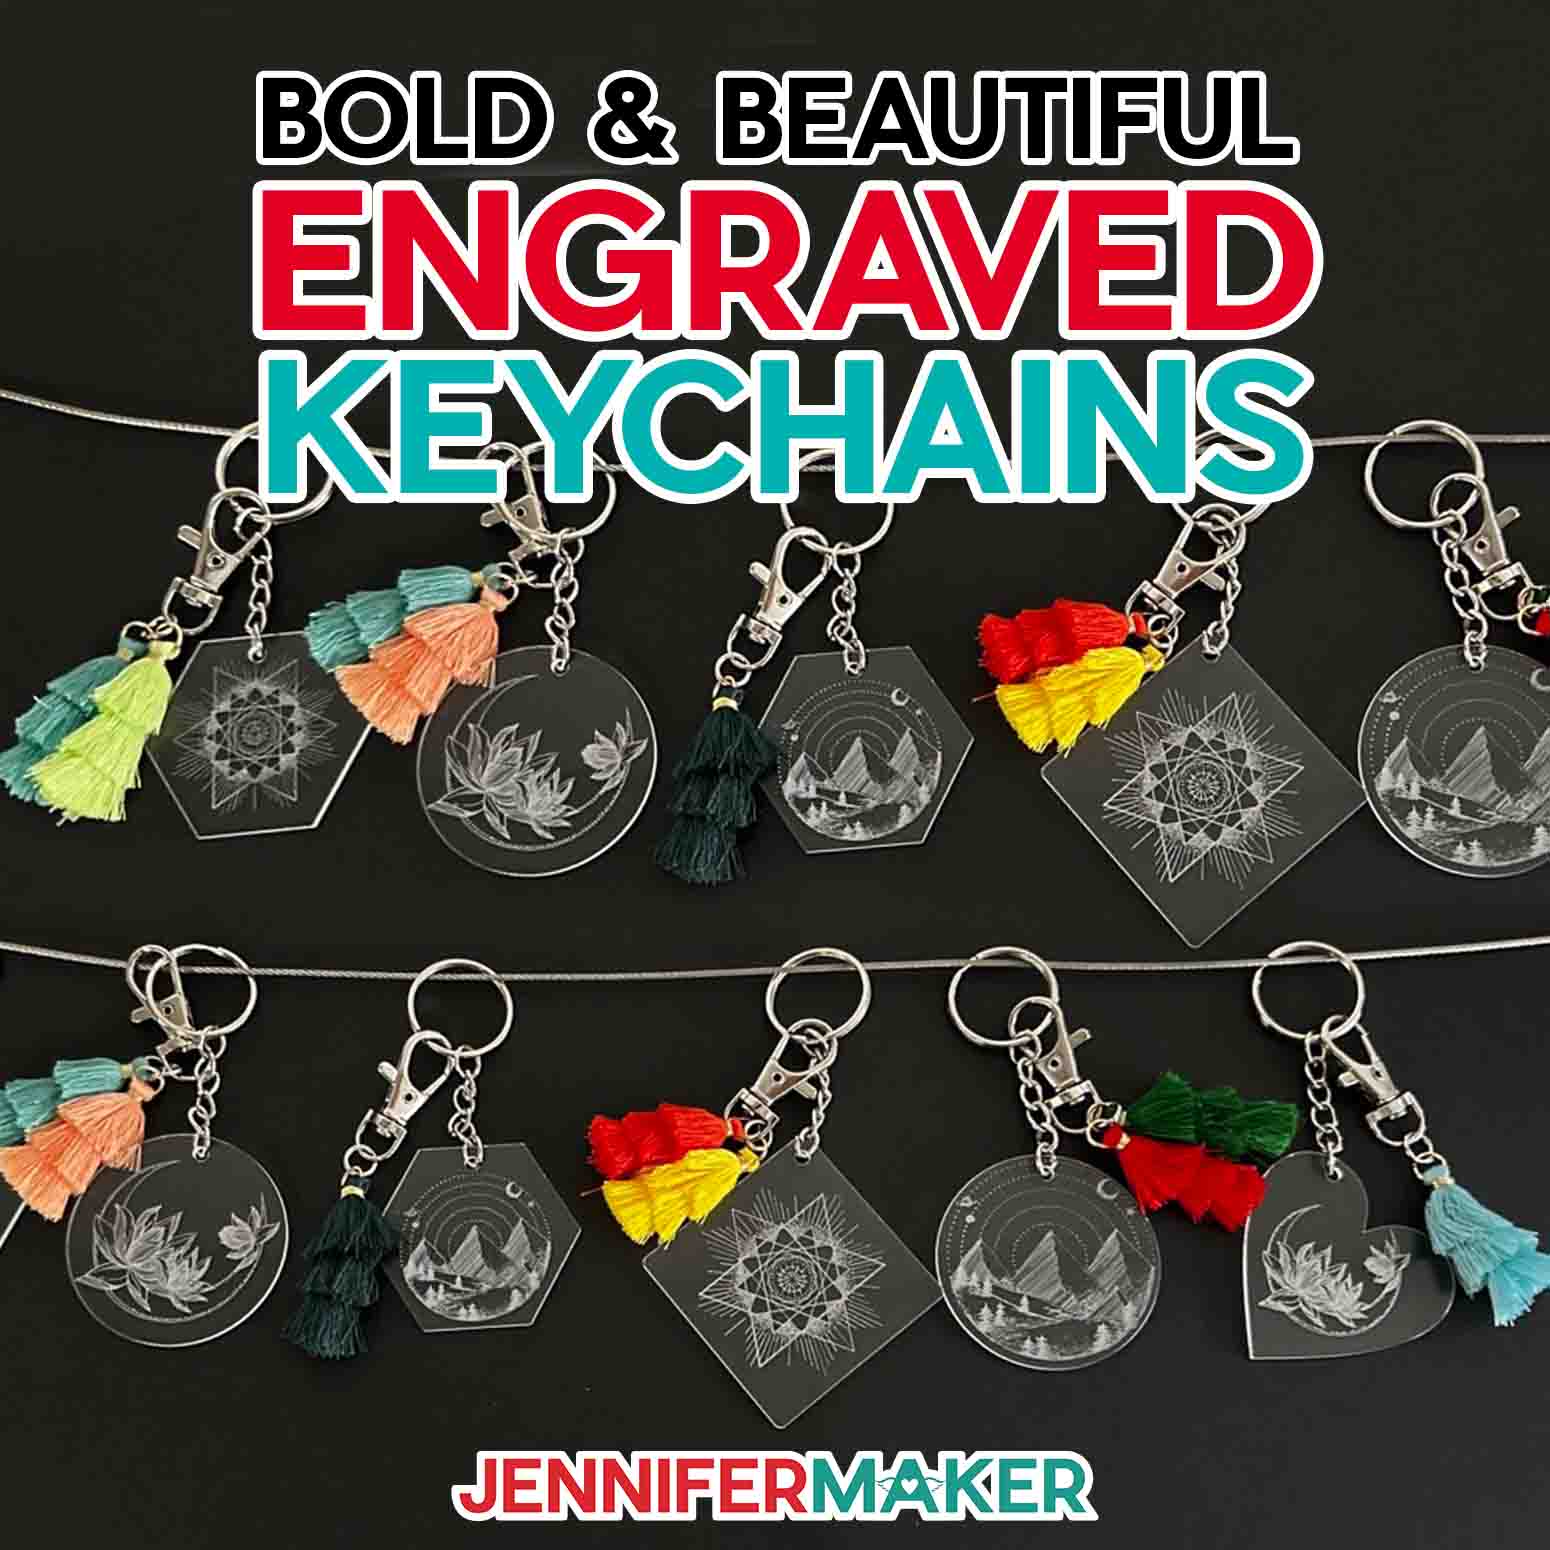
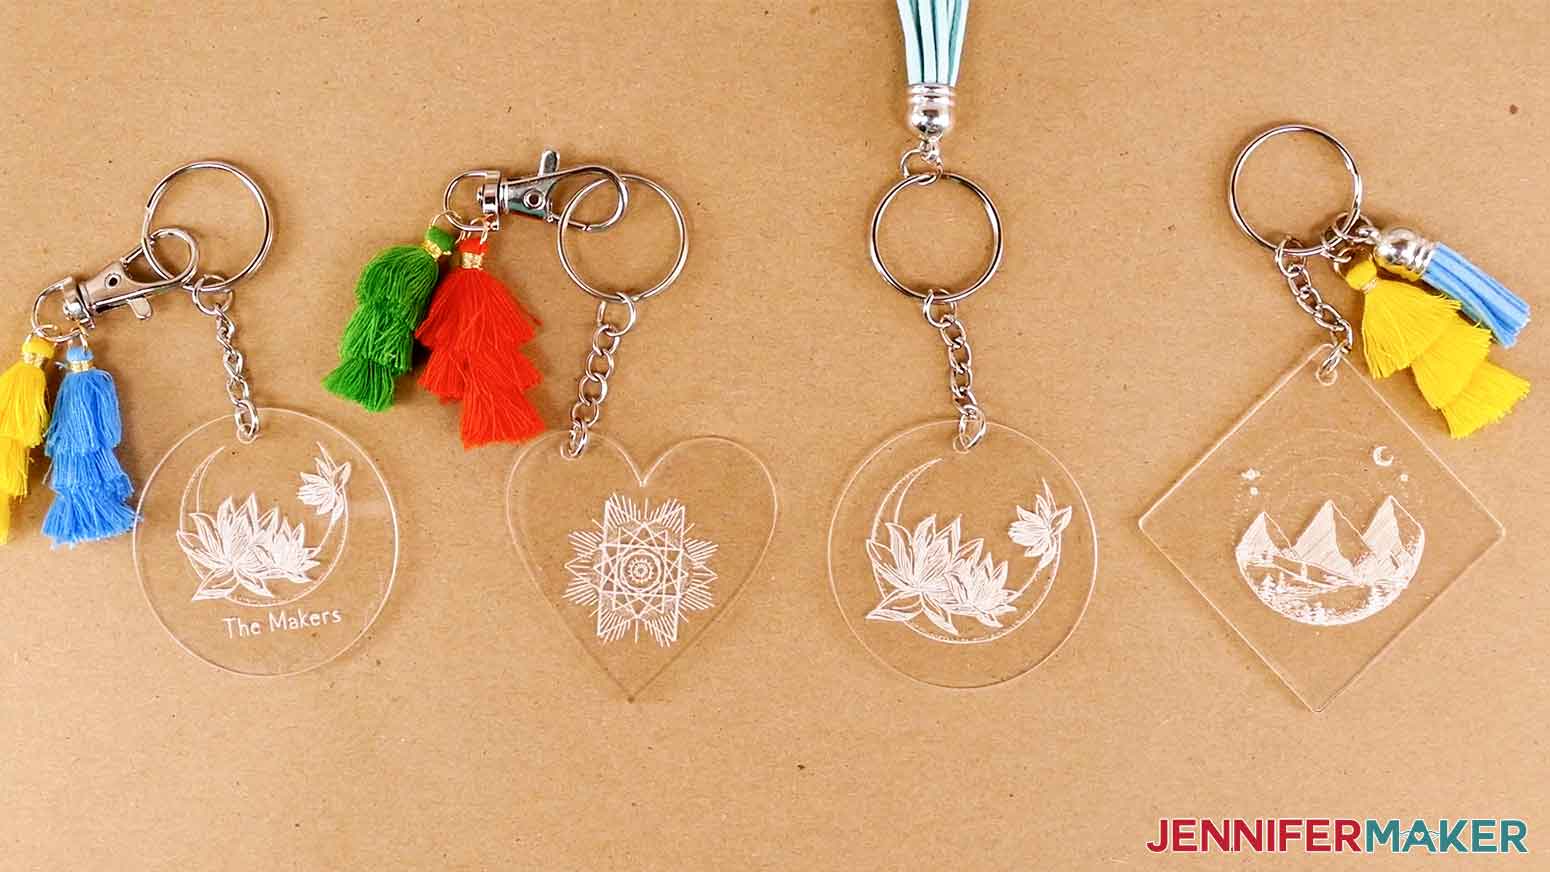
Learn how to use acrylic engraving on keychains to create delicate designs!
It’s so much fun to engrave acrylic with a Cricut, but getting the design placement correct can take a little practice. Today, I’ll show you a few tips to get it right the first time, even with small designs, like acrylic engraving on keychains! I’ll share some modern, intricate designs, but you can use this process to help with other engraving projects, too.
Watch the full step-by-step acrylic engraving on keychains tutorial!

 What is the Merry Maker Mingle? This is an annual tradition here at JenniferMaker! Every day for the first 25 days of December, we gift you with a brand new project, design, tutorial, and video for something YOU asked us to make. On top of that, we host a giveaway with 25 days of prizes. Some of the amazing prizes are Cricut cutting machines, sewing machines, gift cards, and beautiful print editions of our popular Cricut Coach Playbook. You can even earn bonus entries for sharing photos of the daily projects! Click here to learn more about the Merry Maker Mingle!
Making an engraved acrylic keychain is easier than you might think with a Cricut! With the right tools, some time, and my tips, you can make lots of these beautiful and functional gifts!

I’ll show you how to prepare my free acrylic engraving ideas in Cricut Design Space, but the most important step is getting the blank placed correctly on the machine mat. I tested out a popular method to get the placement just right and love it!
Not only is the Cricut hack pretty easy, it also works with various shape options. So you can mix and match as much as you like!

I made my engraved acrylic keychain projects on my Cricut Maker 3, but you can use an original Maker, too. The other Cricut machines don’t have engraving capability. You’ll need the engraving tip with its housing, a purple StrongGrip machine mat, painter’s tape, and a soft towel. A ruler will help adjust the designs to the size of the keychain, and pliers make attaching the key ring chains and tassels easier.
Let me show you how easy it is to make an engraved acrylic keychain! This post contains some affiliate links for your convenience (which means if you make a purchase after clicking a link I will earn a small commission but it won’t cost you a penny more)! Read my full disclosure policy.
Materials to Make an Engraved Acrylic Keychain
View my Amazon shopping list with the exact items we used to make this project
- Clear acrylic keychain blanks no thicker than 2 mm
- A Tassel or Pom Pom to decorate your new keychain. I love these simple, colorful Tri-Layered Tassels – they go with any design and you can even double (or triple!) them up!
- Key Rings with Chain
- A way to engrave your acrylic keychain. I used the amazing Cricut Maker 3, but you can also use the original Maker with the Engraving Tip. The Engraving Tool only works with the Maker series machines.
- Engraving Tip with Housing
- Cricut Purple StrongGrip Machine Mat 12″ x 12″
- Painter’s Tape or Masking Tape
- Soft Towel or Cloth for brushing off engraved pieces
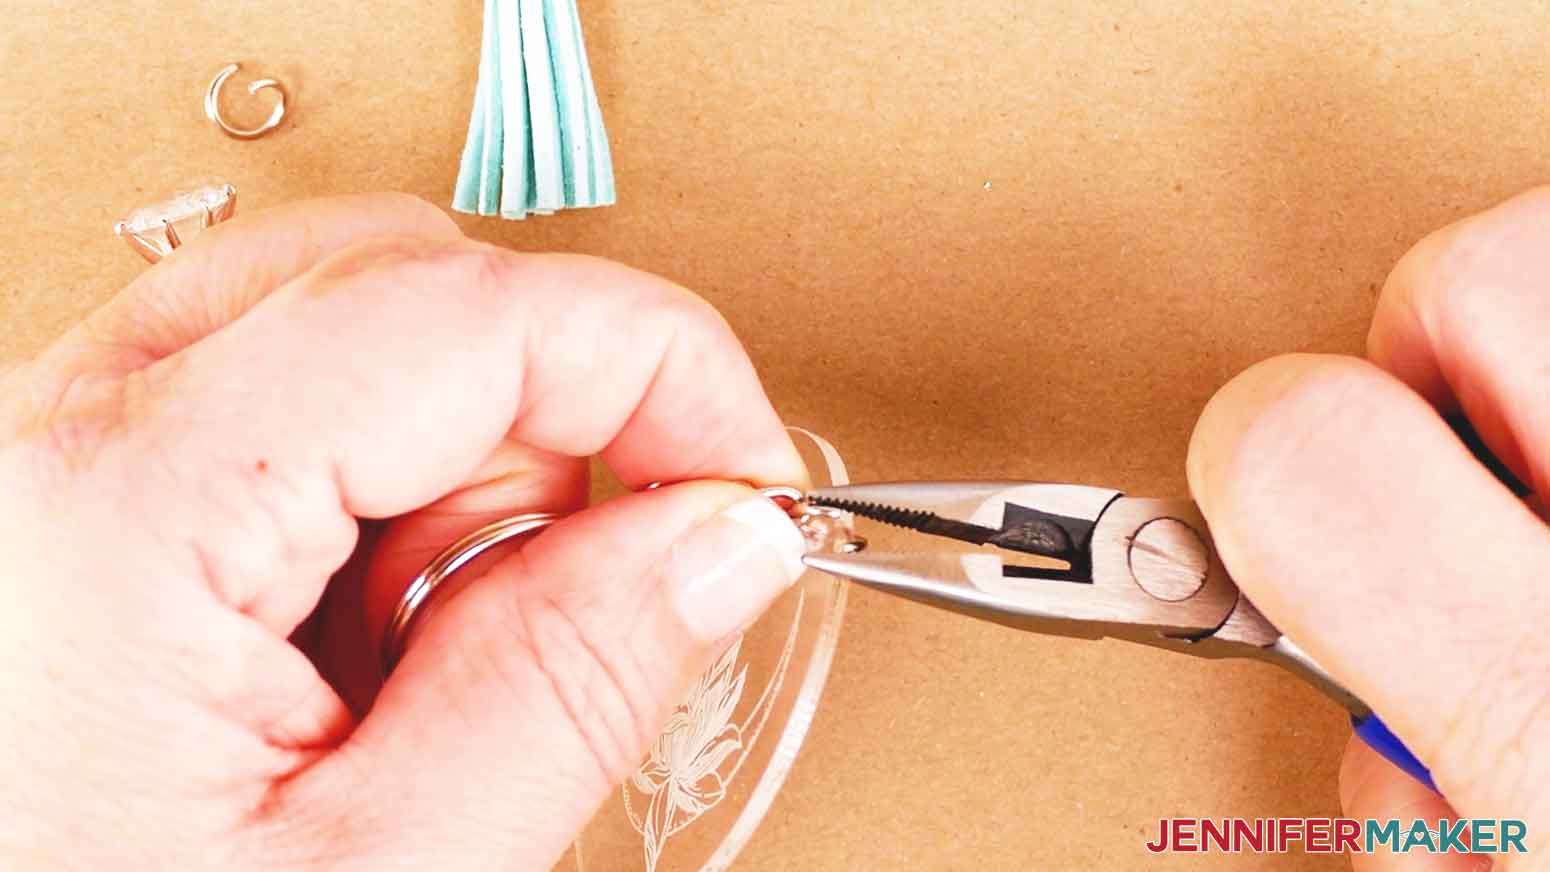
- Jewelry Pliers (any needle nose pliers will suffice to open the tassel’s jump ring)
- Measuring Tape (optional, for measuring the size of your blank)
- Design #460 (My free SVG/PDF/DXF design files available in my free resource library – get the password by filling out the form at the bottom of this page)

How to Make an Engraved Acrylic Keychain
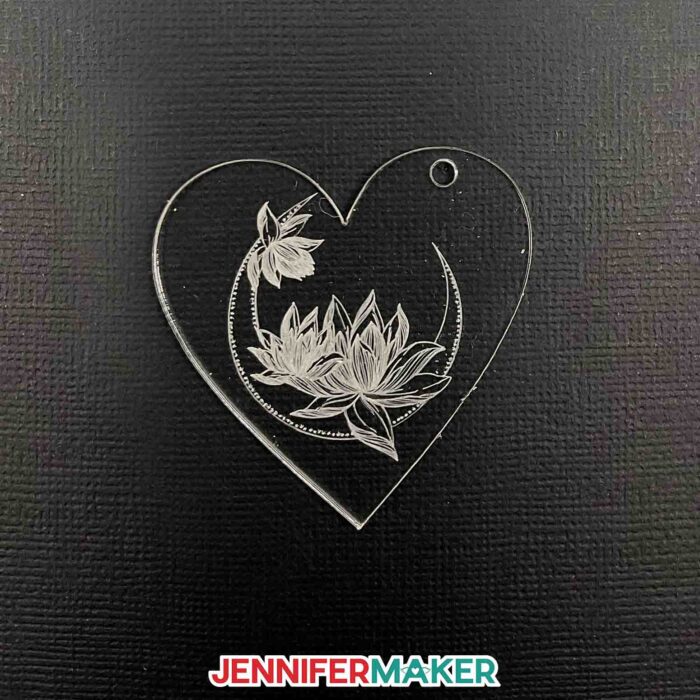
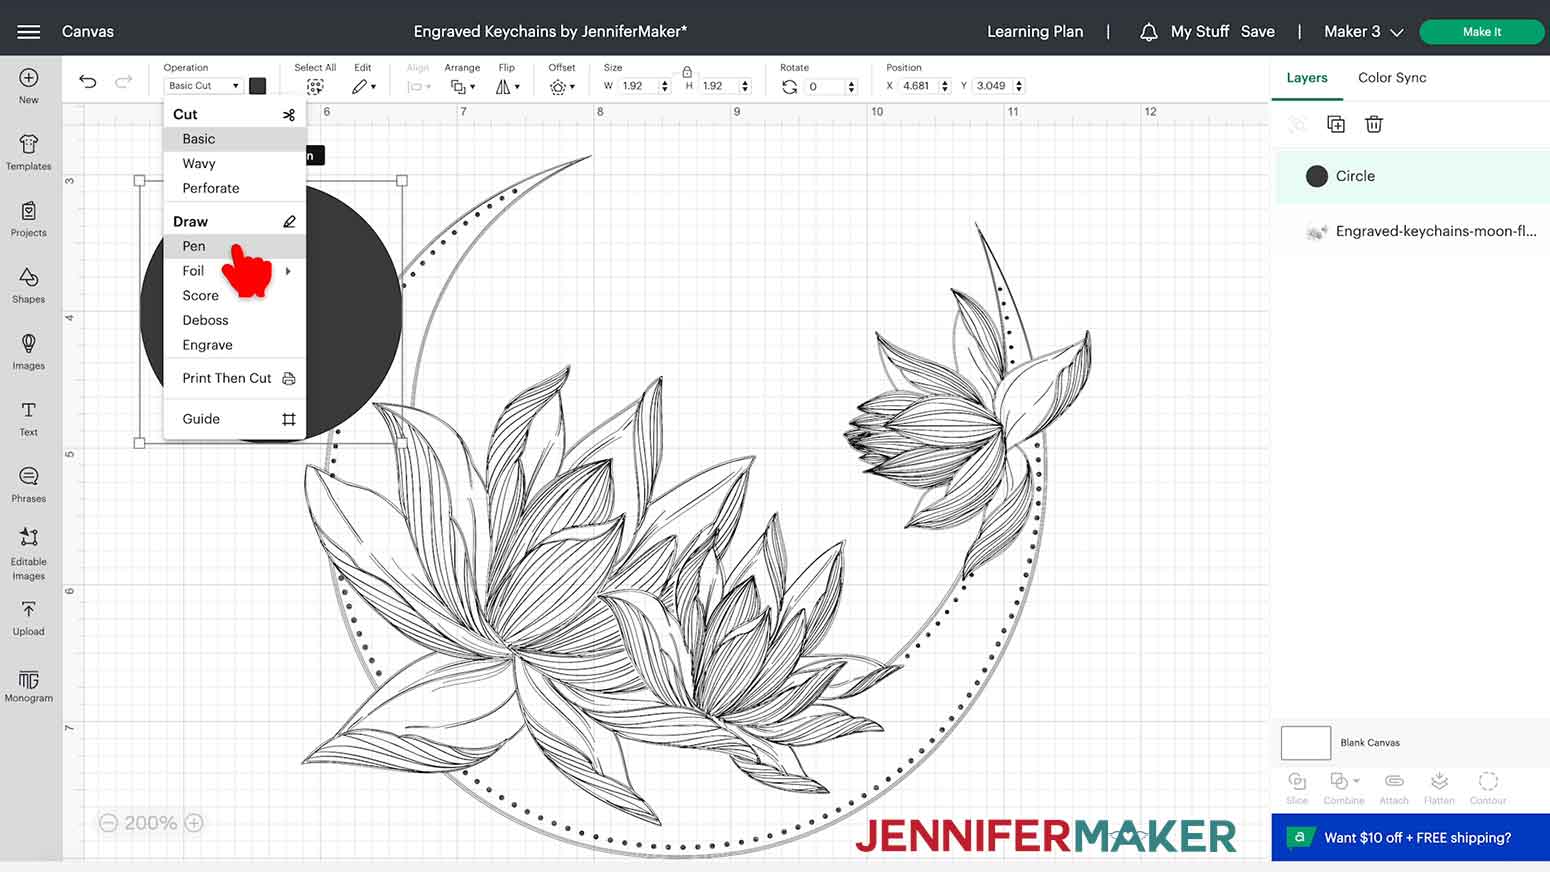
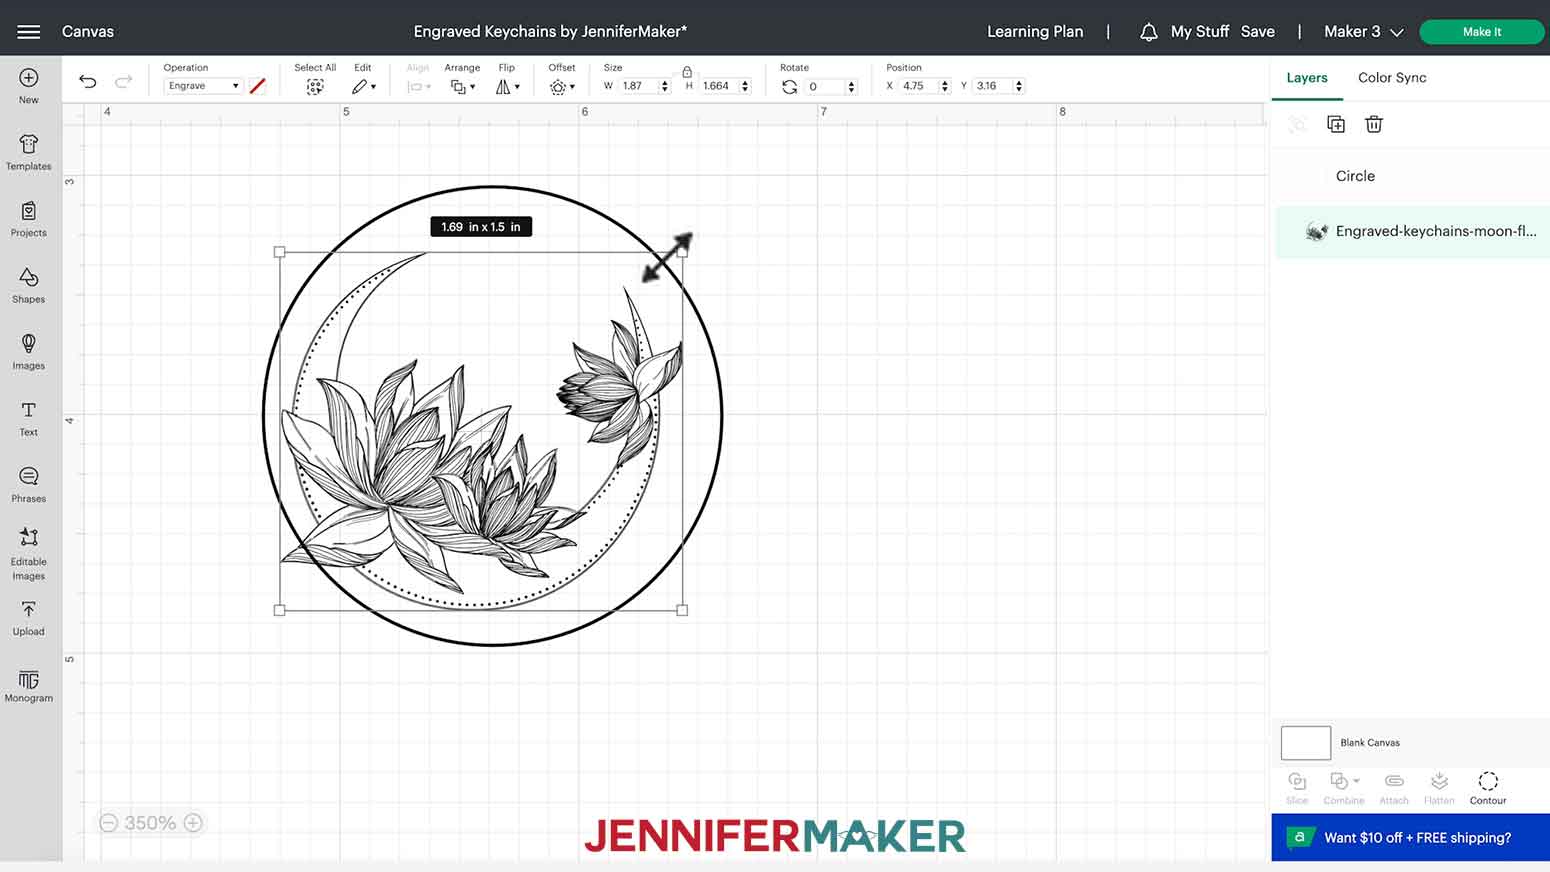
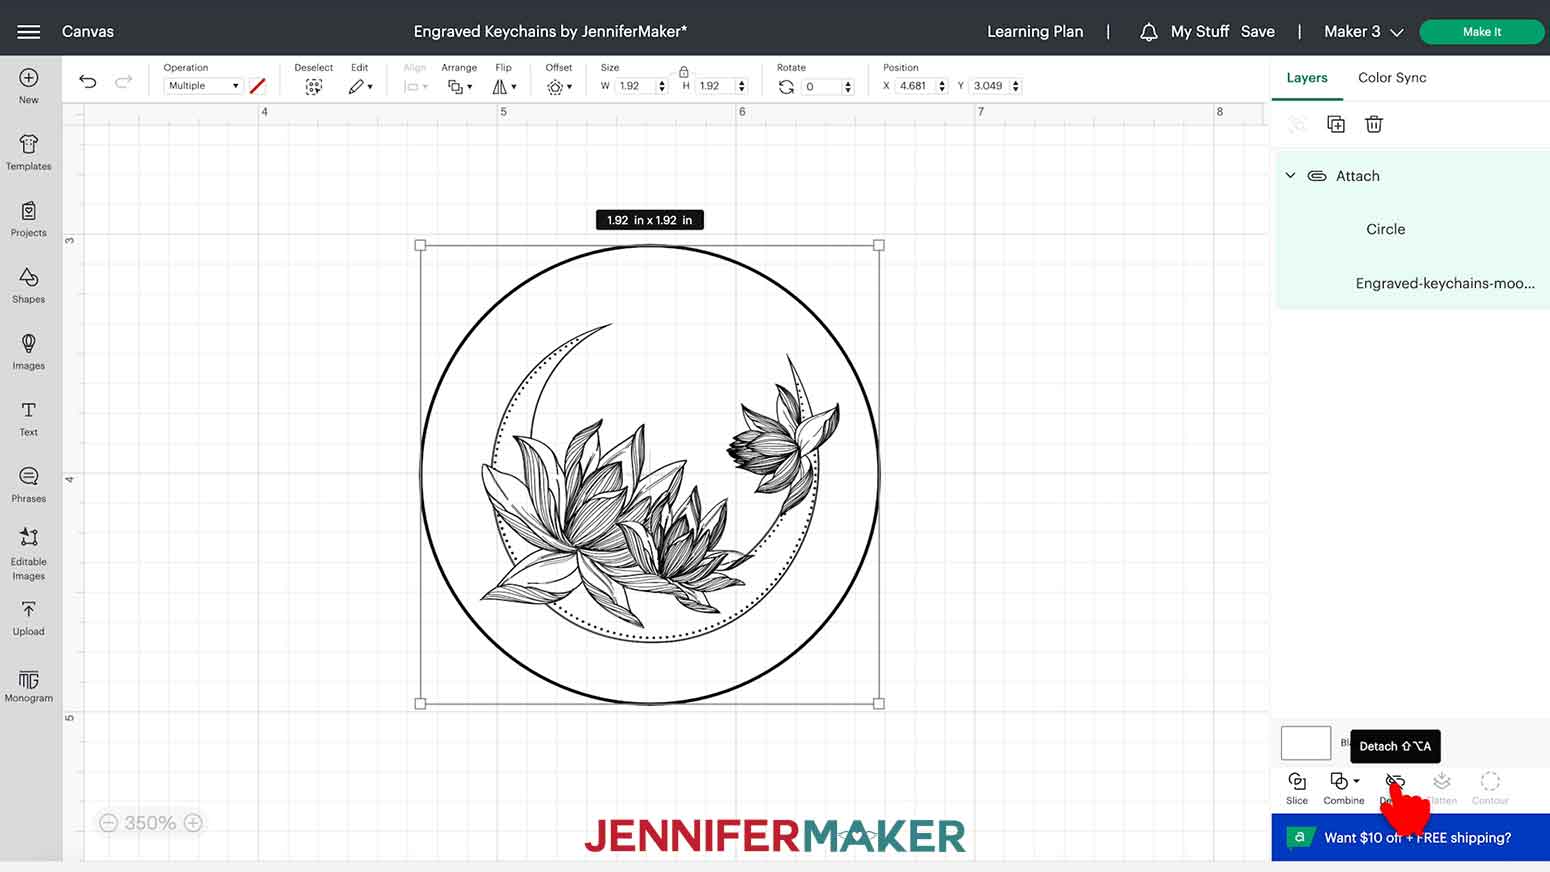
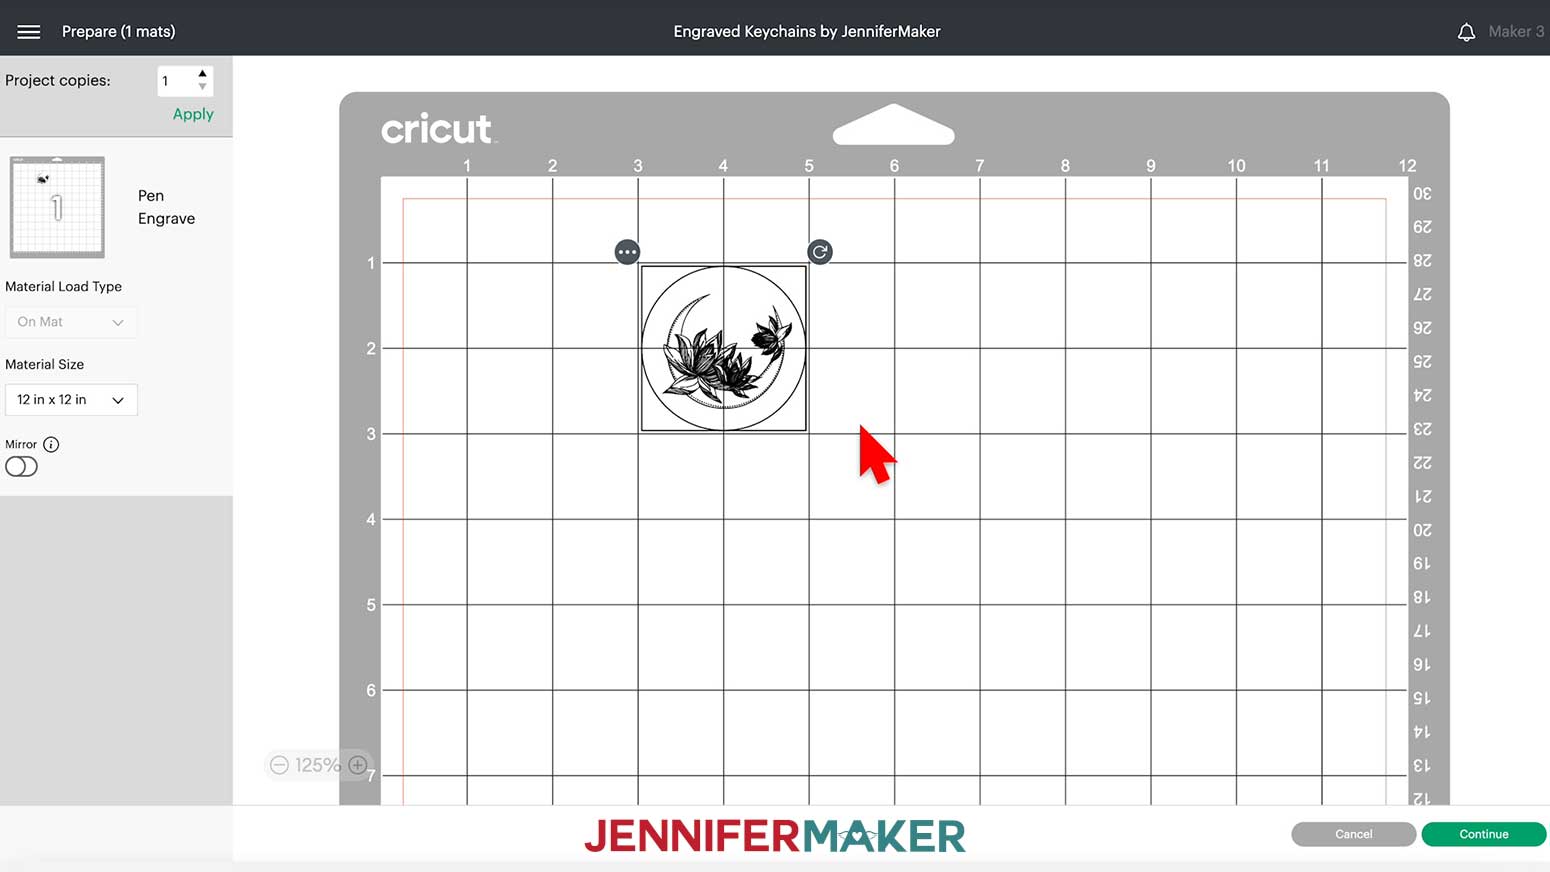
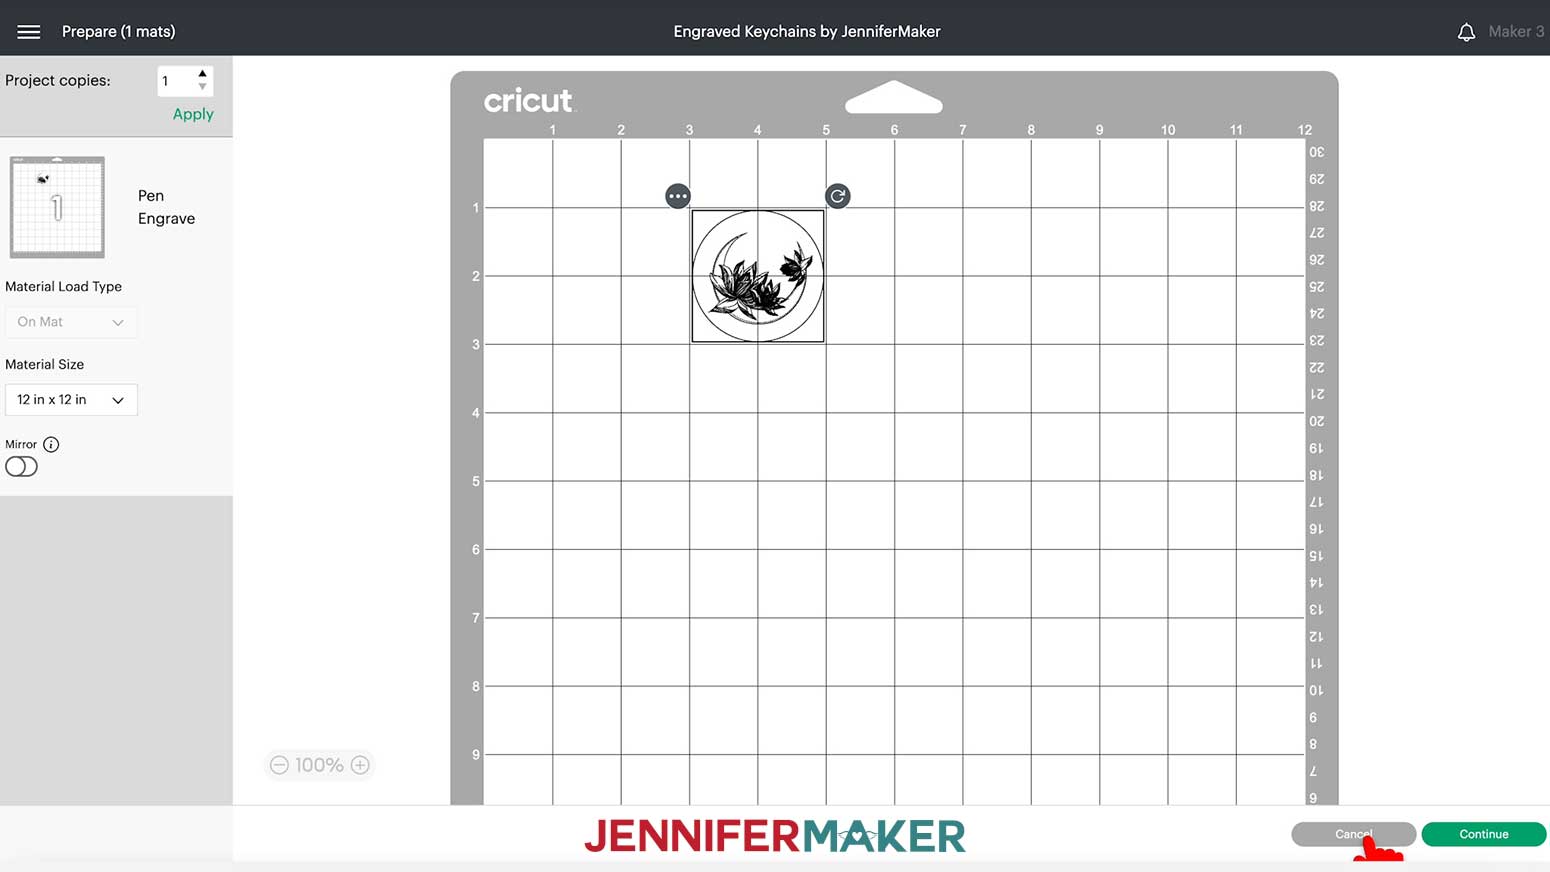
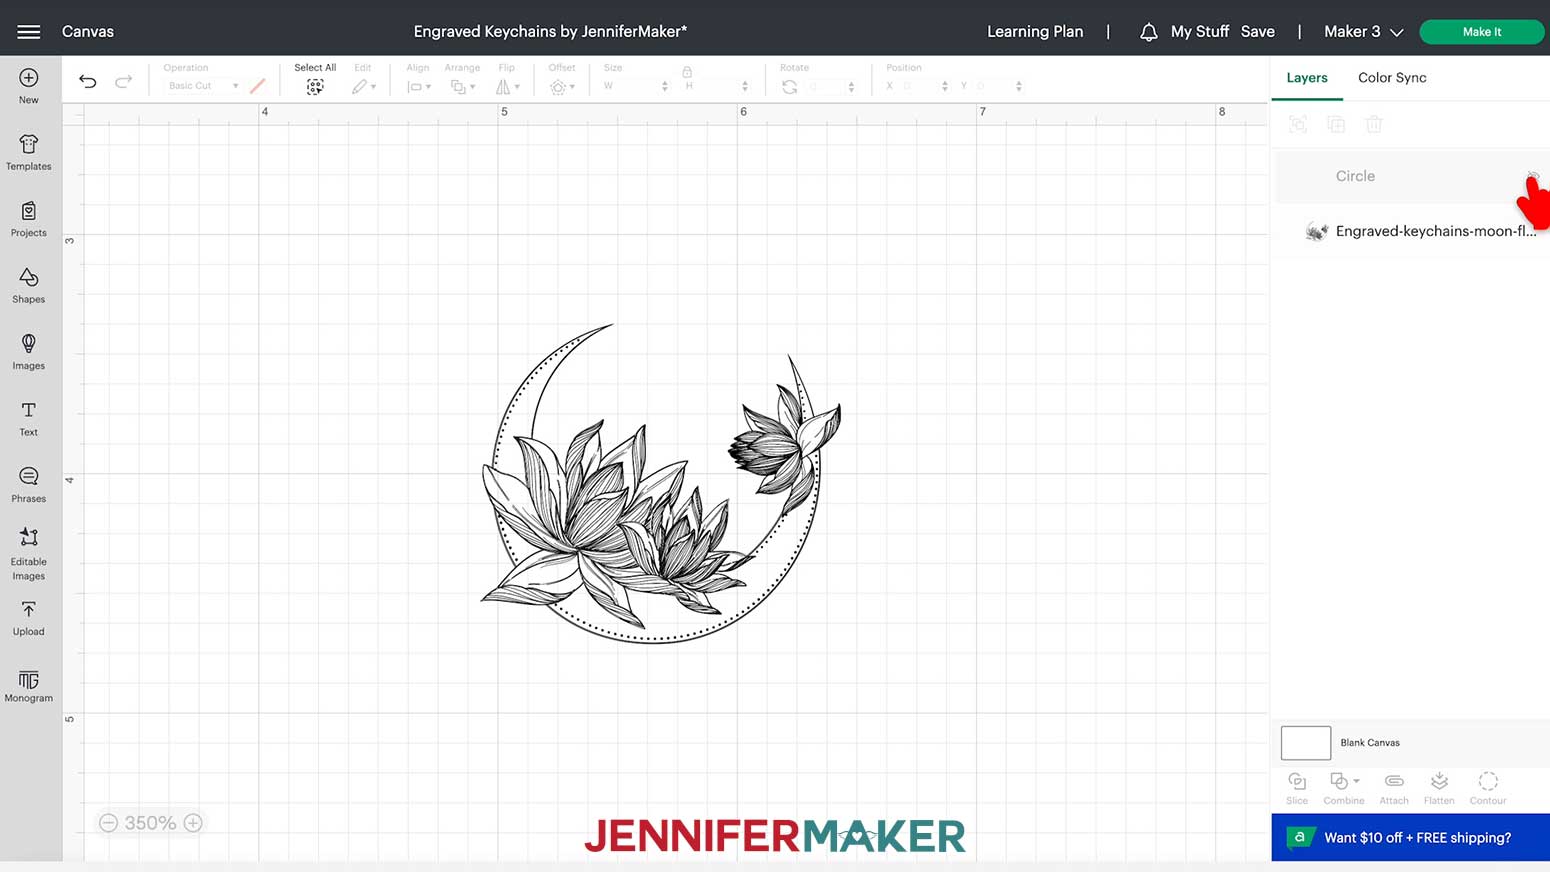
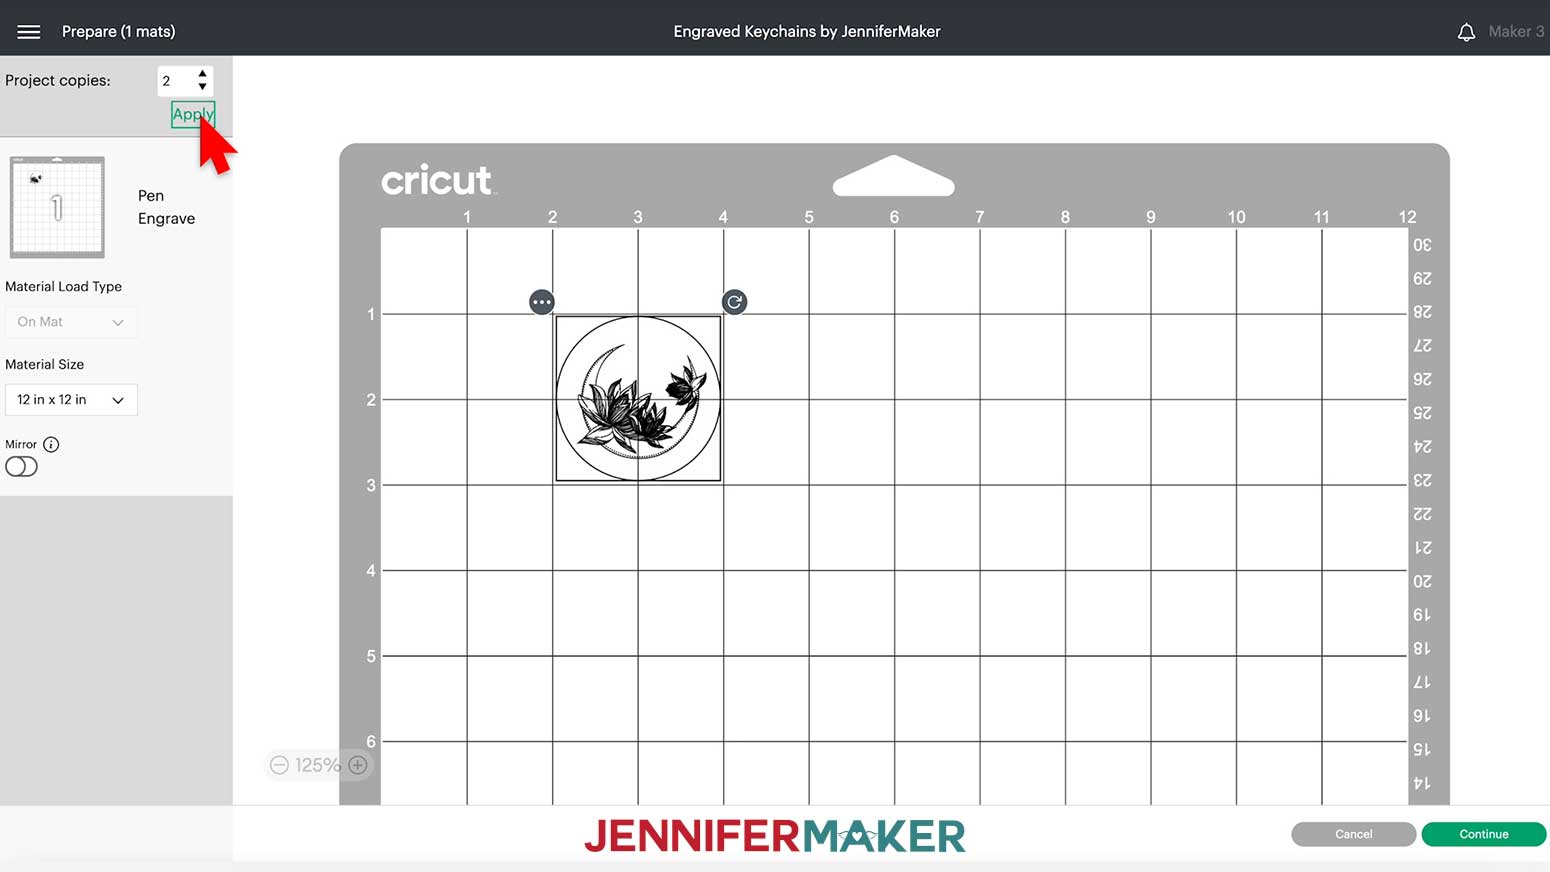
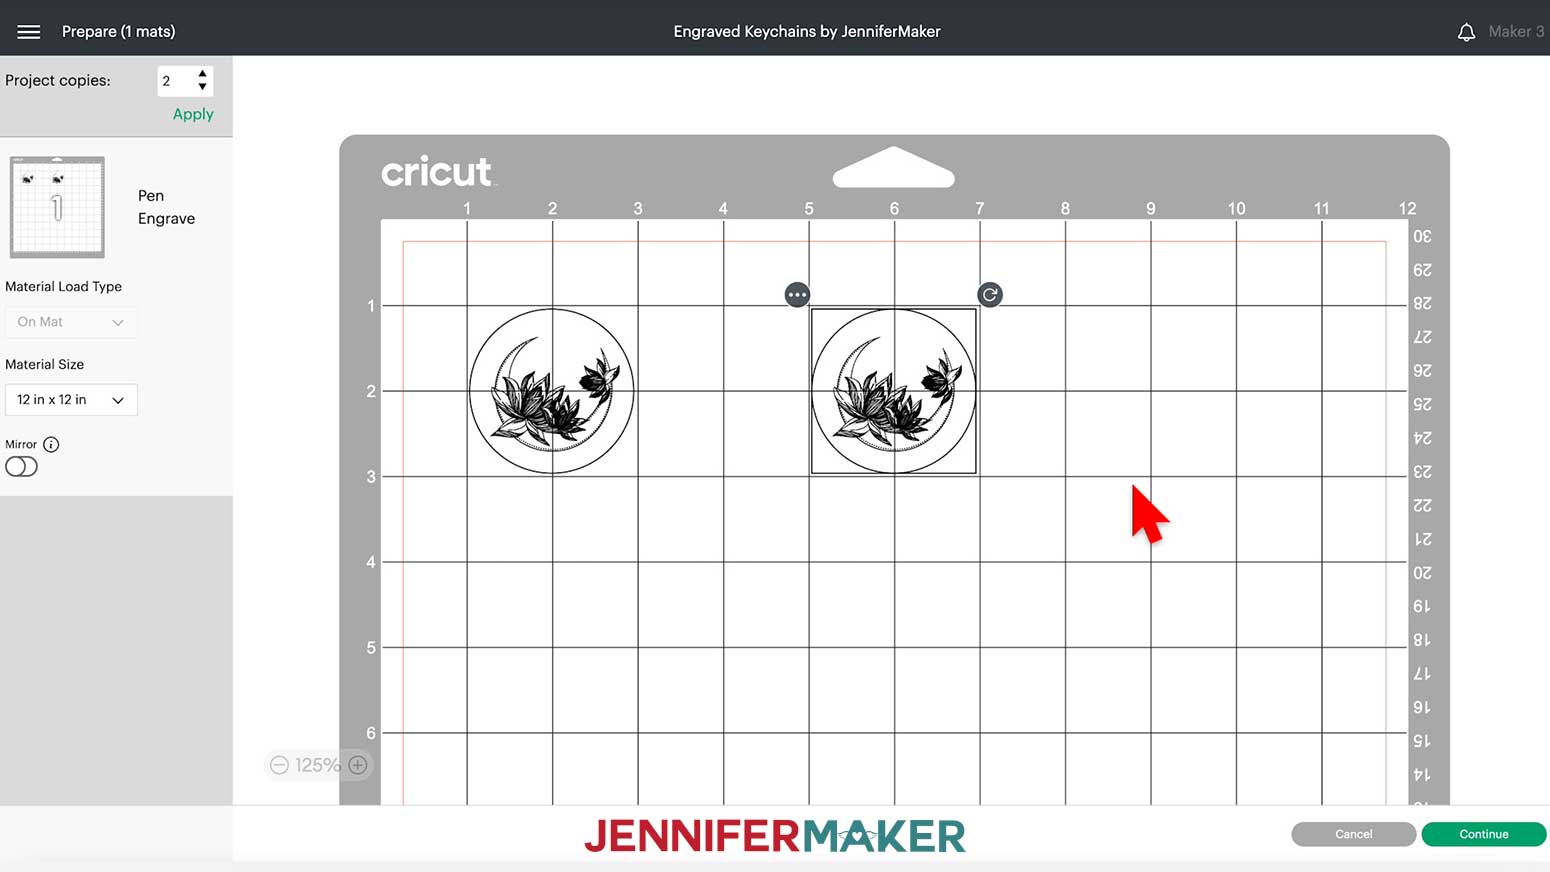
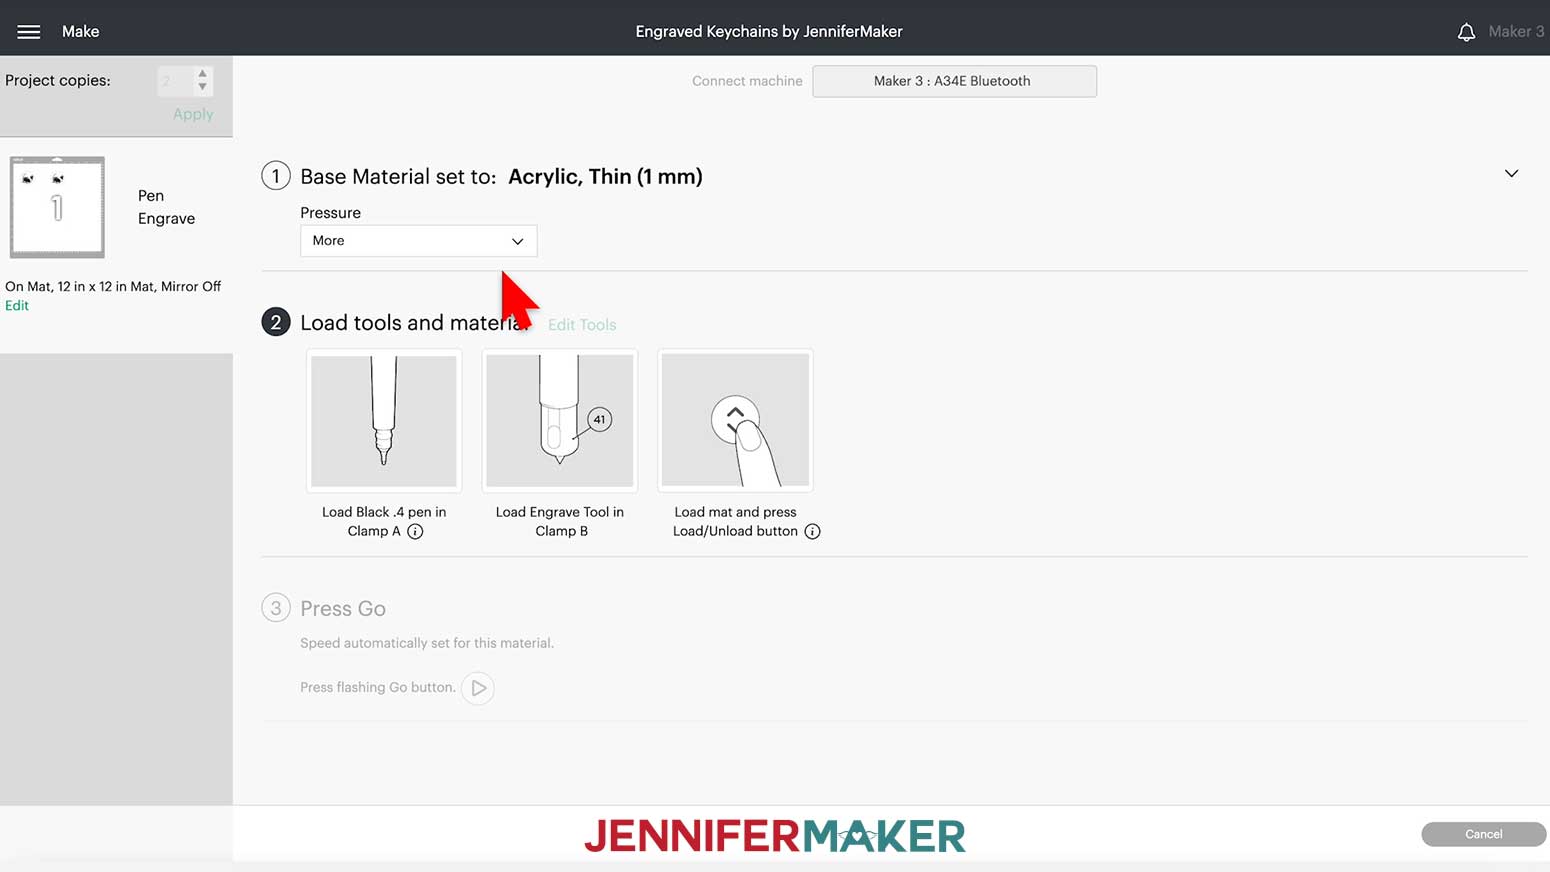
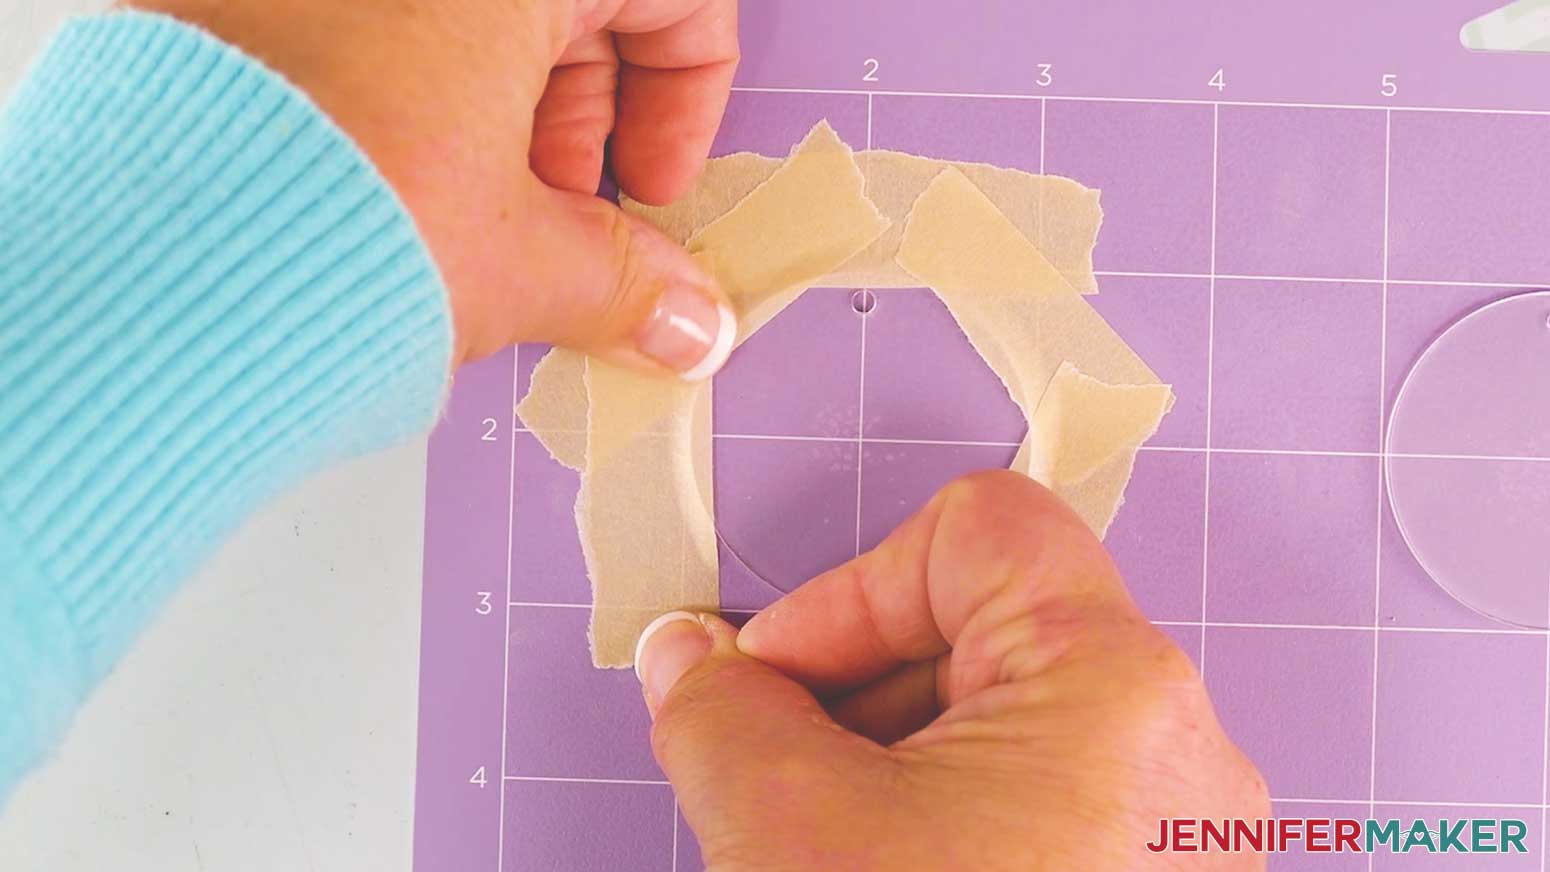
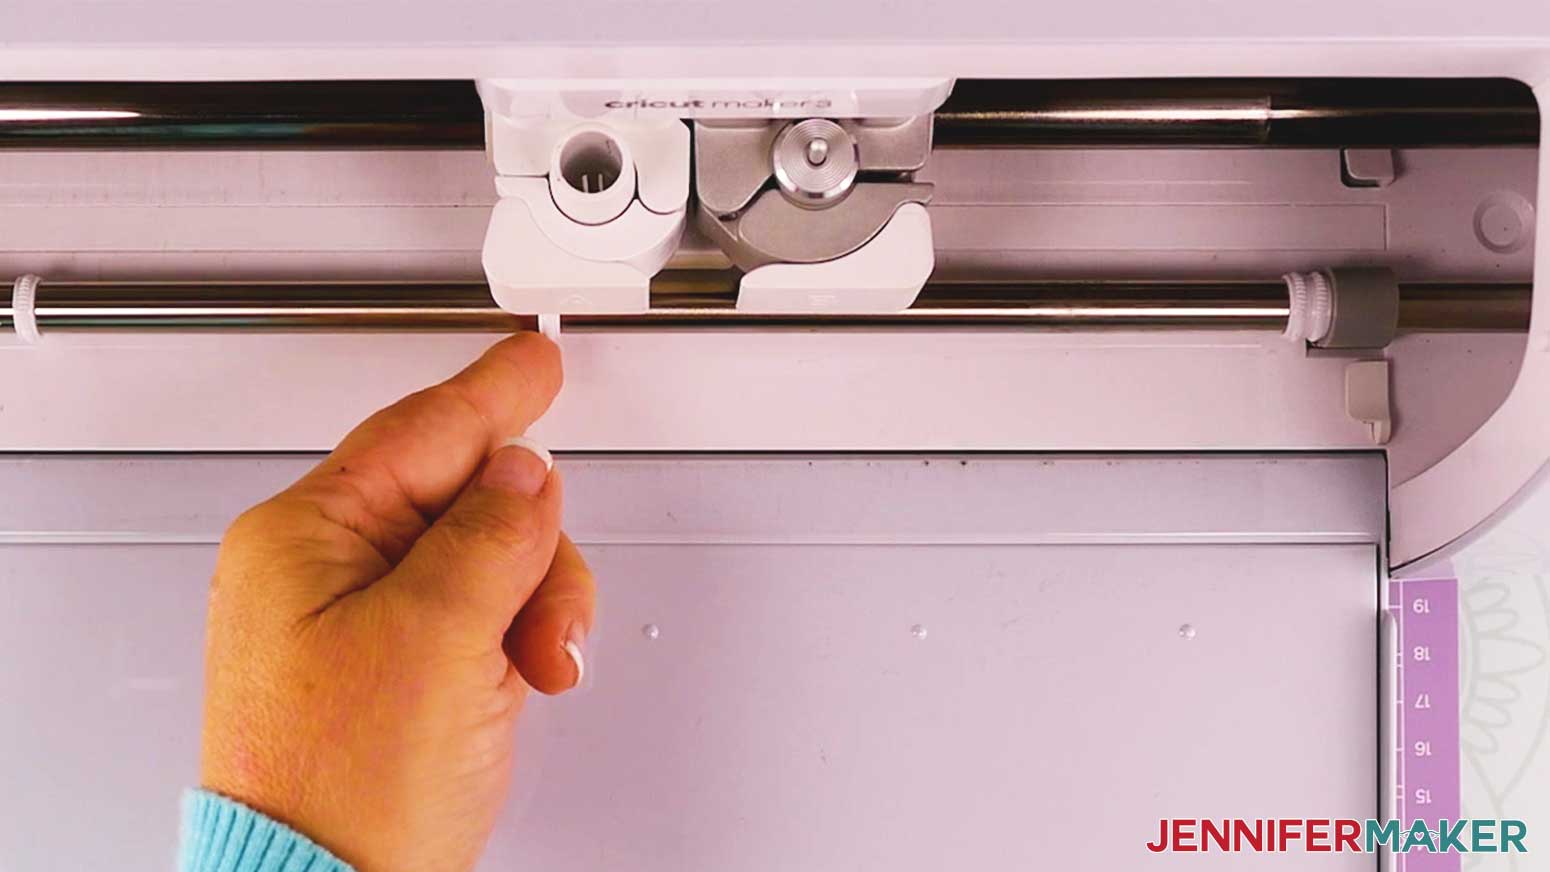
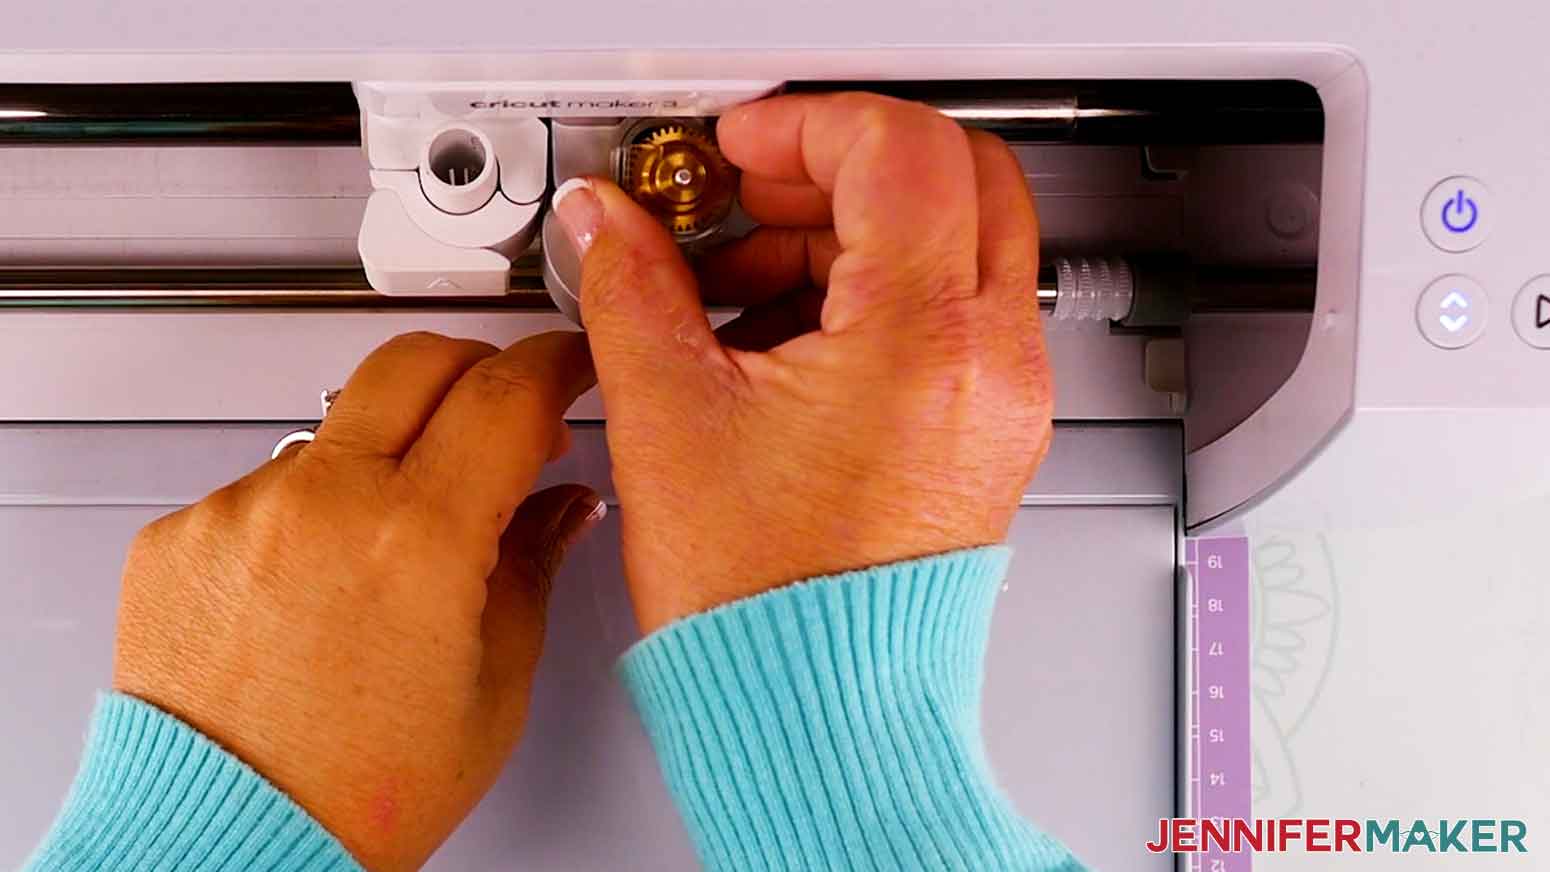
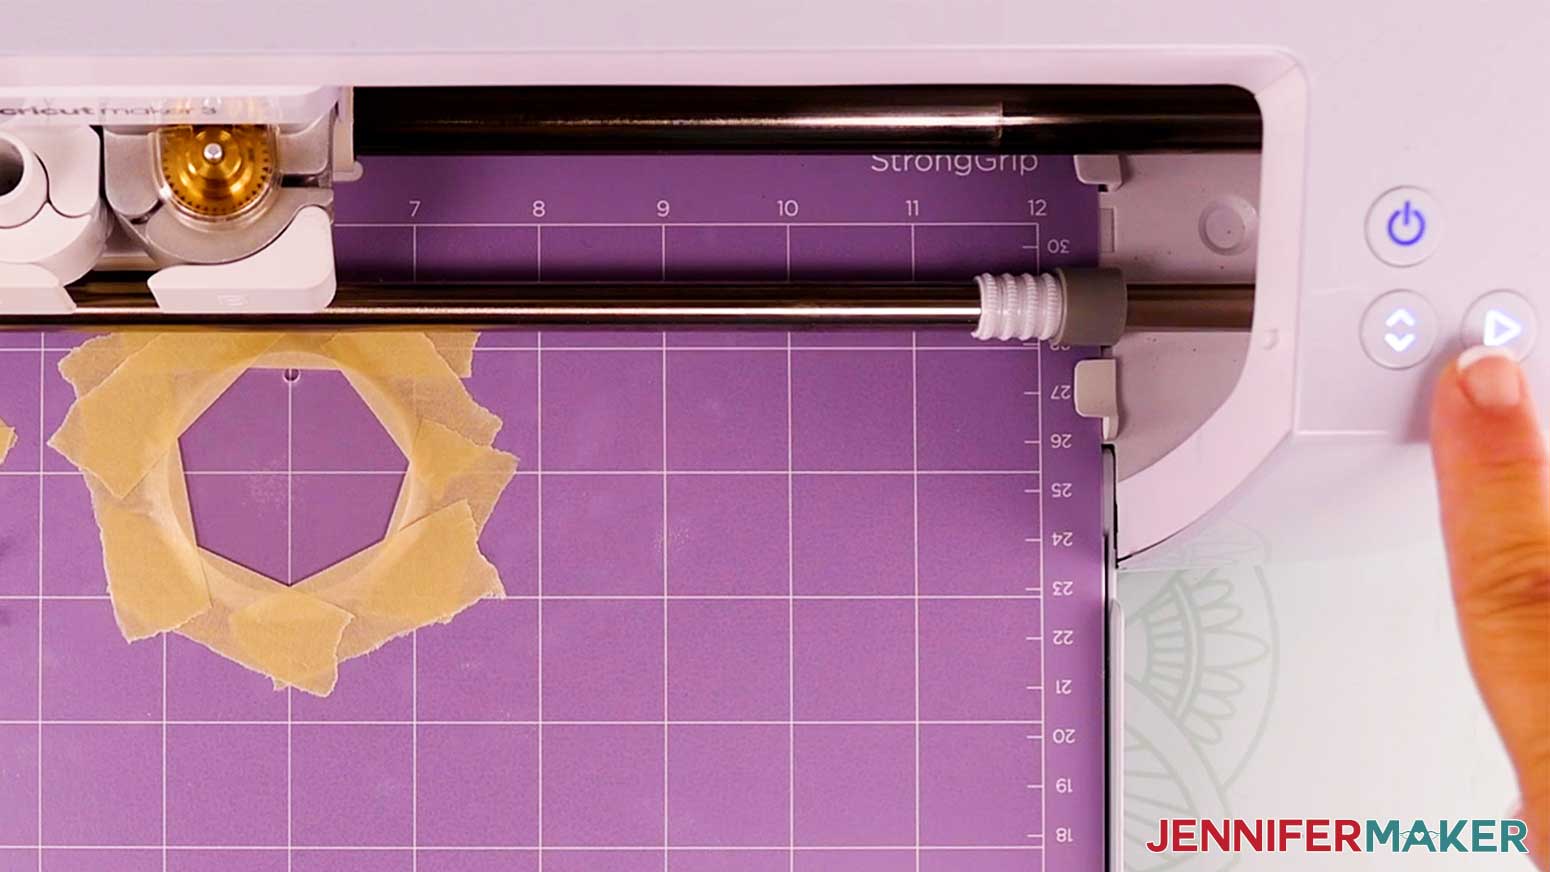
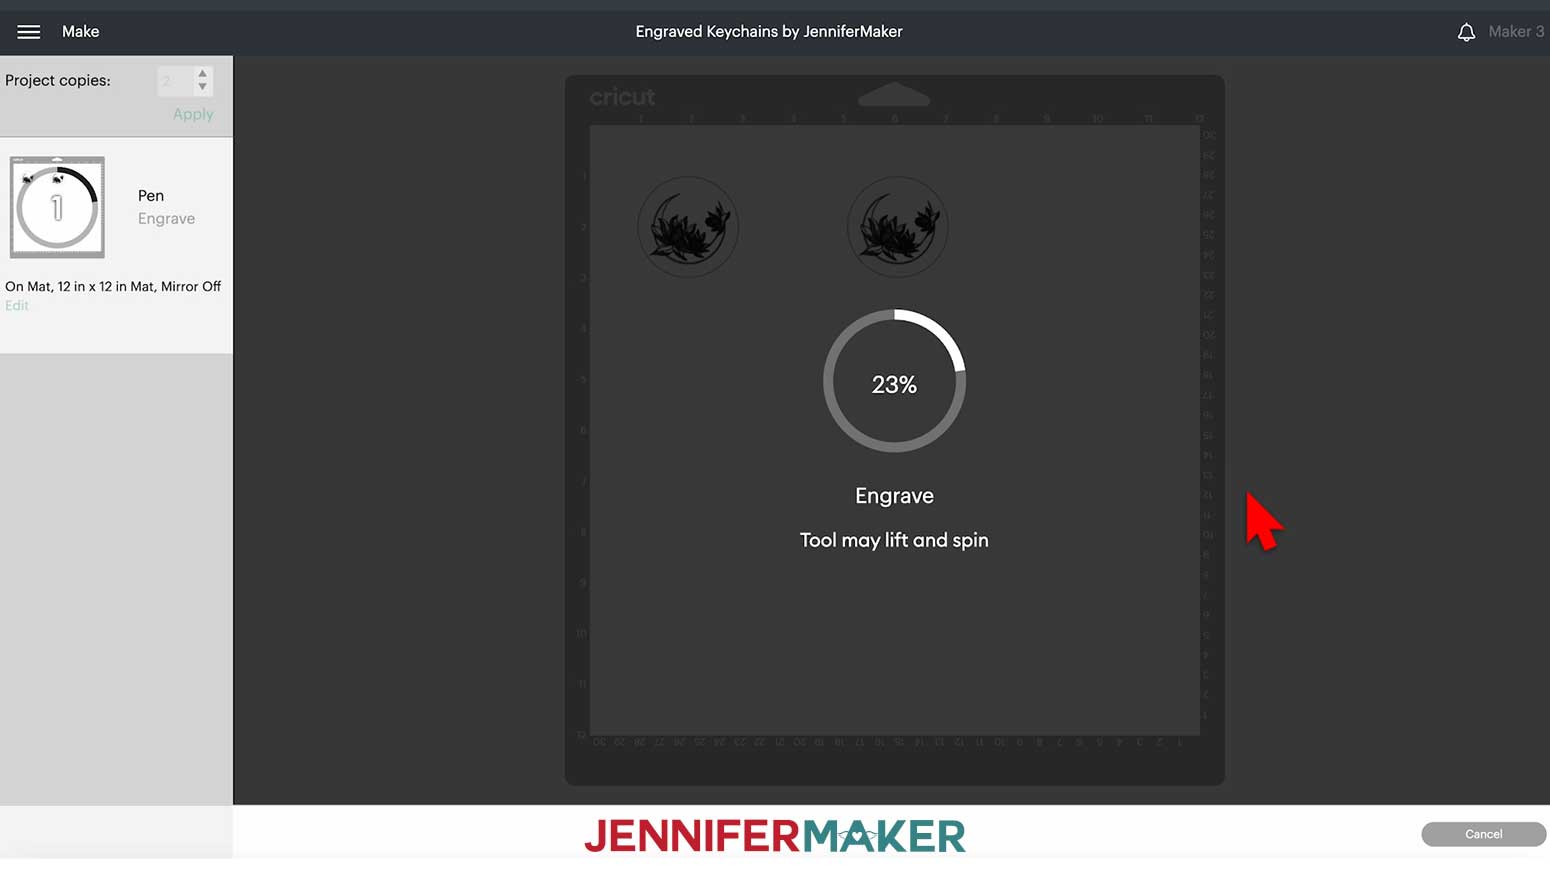
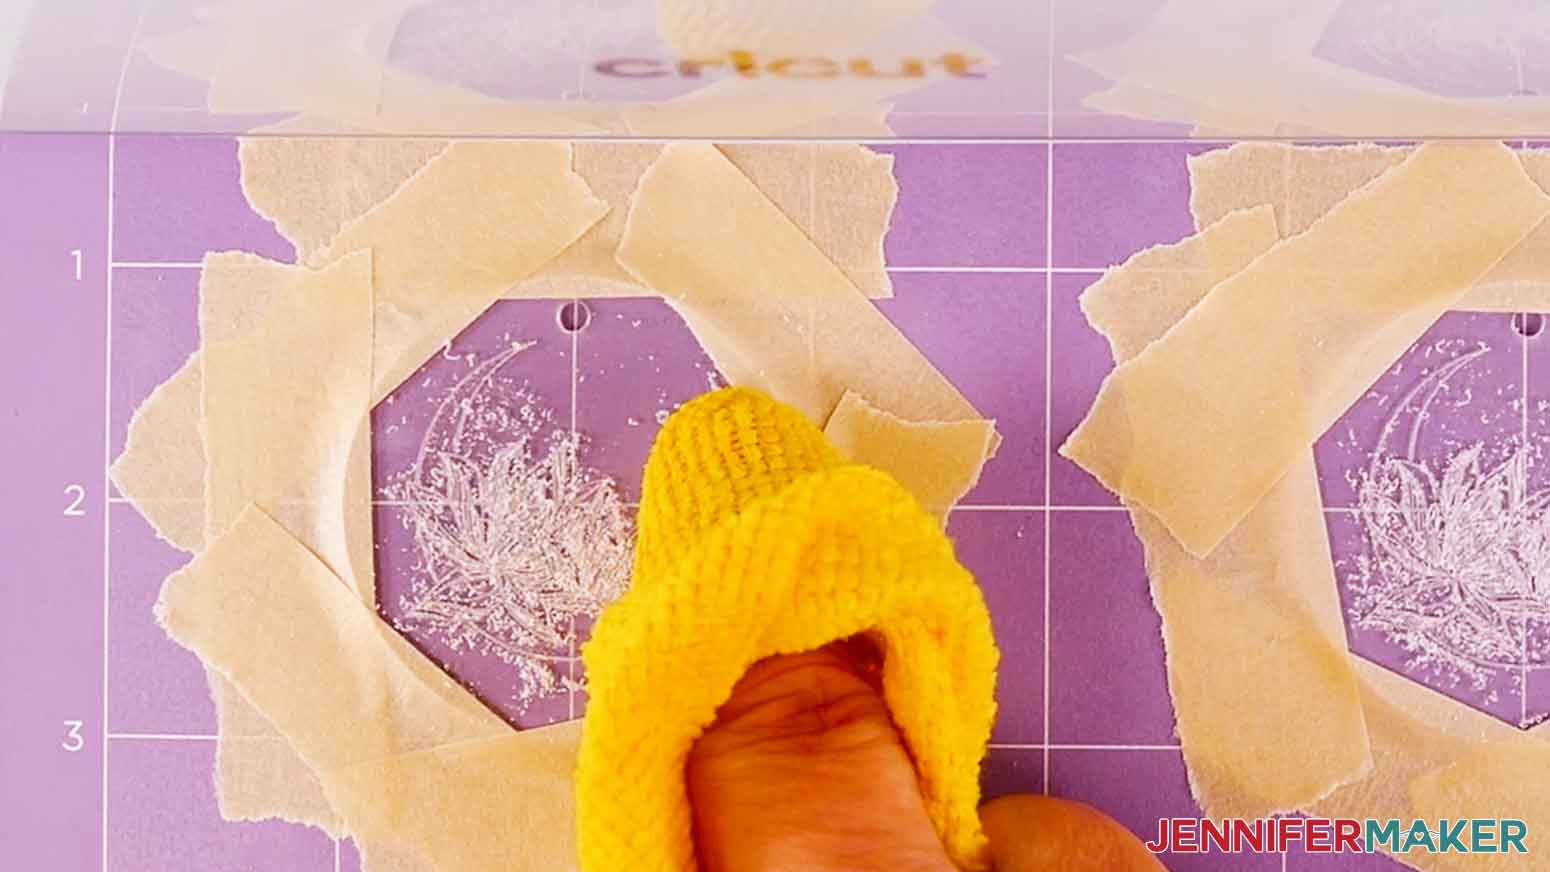
Learn how to make an engraved acrylic keychain, with intricate and centered designs using the engraving tool on the Cricut Maker - perfect for that last-minute stocking stuffer! I’ll show you how to engrave an acrylic keychain with a perfectly placed design, using the Moon Flower SVG from the download file. You can follow the same steps for any of the designs. We’ll resize our design to fit inside the circle in a moment, but first it’s time for that “hack” I mentioned earlier. In case you don’t know, a “hack” is really just a simple shortcut, trick or technique that makes getting from A to B a whole lot easier! In this case it involves changing our circle from “Basic Cut” to “Pen” under “Operation” in the top menu. The “trick” here is that we won’t actually use a pen. You’ll see what I mean in just a bit. Now, let’s get our design in the circle. With the design selected and the lock icon at the top closed, use the corner of the bounding box to resize the design. Now move the design into the circle and play around with the positioning and size. You can zoom in for a closer look. Make sure everything is in the circle, including the petals. Remember, there’s a tiny hole at the top of the acrylic blank to add the keychain. That doesn’t really matter for this design since there’s no engraving at the top. Once you are happy with the placement, select both your design and shape, and click "Attach". That’s it for the Canvas! Time to engrave! Make sure the right machine is selected at the top and click “Make It.” Here’s where the “pen hack” comes in handy. Design Space adds a “box” around the outline of the pen layer which shows us the dimensions of the acrylic blank and the position of the design within it. We can use that to drag our design exactly where we want it on the mat and ensure the engraving ends up exactly where we want it on the blank. If this sounds confusing, let me show you what I mean by showing what happens if we don’t use the “hack.” Click cancel. Now click “undo” in the top menu to detach the pen circle from the design. Now hide the circle and click “Make It.” We can still move the design, but now we are essentially guessing where it will end up on the blank. That’s why the “pen hack” is such a game-changer. It shows us the outline of the acrylic blank. So let’s go back and add it back. Drag the design back into position on the mat using the outline as your guide. The other great thing about this is that you can engrave more than one blank at a time using this method. Click on the arrow up next to “project copies” at the top and click “apply.” Now there are two copies. Of course you can add as many as you like. Now drag each design into position. I will place both designs one inch down. The first one I’ll place at one inch to the right, the second one I’ll place at 5 inches to the right. I like to leave space so I have enough room to tape the blanks to the mat to hold them in place while they engrave. Now click “Continue.” You may notice some if not all of the materials are grayed out, depending what you have in your favorites. That’s ok. Click “Browse all Materials.” In the search window, type “acrylic” and click on “acrylic 1 mm” and “Done.” Change the pressure to “More.” IMPORTANT: Since we are using the “pen hack” we are not given an option to choose 2 mm acrylic to match the size of our blanks, which would normally be there. That’s totally fine! I switch up materials all the time depending on the project and what I find works best during testing. Every machine is different and sometimes you need to experiment with different settings to get the best results. In Step 2, you will see “Load Tools and Material” which shows a pen and the engraving tool. You may be thinking to yourself…”But I thought you said we weren’t using a pen?” Even though it says to add a pen to “Clamp A” we won’t do that. And that’s perfectly fine! It won’t matter at all as you will see. We just want to make sure to add the “Engraving tool” to Clamp B.” Now let’s add the blanks to the purple strong grip machine mat. First, make sure to remove the protective cover from the disk. It may be on both sides, you can leave the backside on for now, we’ll remove that later. Right now it will protect the back of the blank from the sticky mat. Refer back to the screen to make sure the placement is right. Remember I placed mine one inch down and left enough room to tape them both down. Use painter’s tape or masking tape to tape down the edges of the blanks to make sure they stay put. Keep the tape close to the edges so it doesn’t get in the way of the engraving tool when it’s engraving the design. Before loading the mat, move the star wheels to the far right. Then add the engraving tool to Clamp B. Remember we are not adding anything to Clamp A. Also, and this is super important: depending on the design you choose, one keychain can take 25-45 minutes to engrave. Make sure that you are prepared by ensuring you have a good internet connection and that you turn off any auto sleep or screen saver functions on your computer. These functions will stop the engraving process and you will need to start over. Once you’re ready, load your mat and press the flashing button to start the engraving. You’ll first see the machine use the "ghost pen" to "draw" the circle, which is what we want. It’s not actually drawing anything, of course, because you didn’t put a pen in. Then it will continue to the engraving process. Since engraving is a more involved process than the usual cutting, I recommend watching your machine during the cut in case any issues arise. If you look back at your Design Space screen when the engraving begins you will see this pop up, don’t worry, that’s supposed to be there. It’s just letting you know that when the engrave tool lifts and spins that is what it is supposed to do! When your machine has finished engraving, unload the mat and use a soft cloth or lint roller to remove the debris from your acrylic disk. This is also a good time to remove debris from your machine and engraving tool as well. You can use a soft cloth or can of compressed air. Remove the tape and disk from the mat. Brush off any more debris. Remove the other protective film if it’s still in place. This is what my engraved acrylic moon flower design looks like! Using jewelry pliers, attach a keychain ring to the acrylic disc. Need a last-minute holiday gift? Your shiny new engraved keychain will make the perfect stocking stuffer! And there are endless ways to customize and adorn the acrylic blanks for a personalized touch.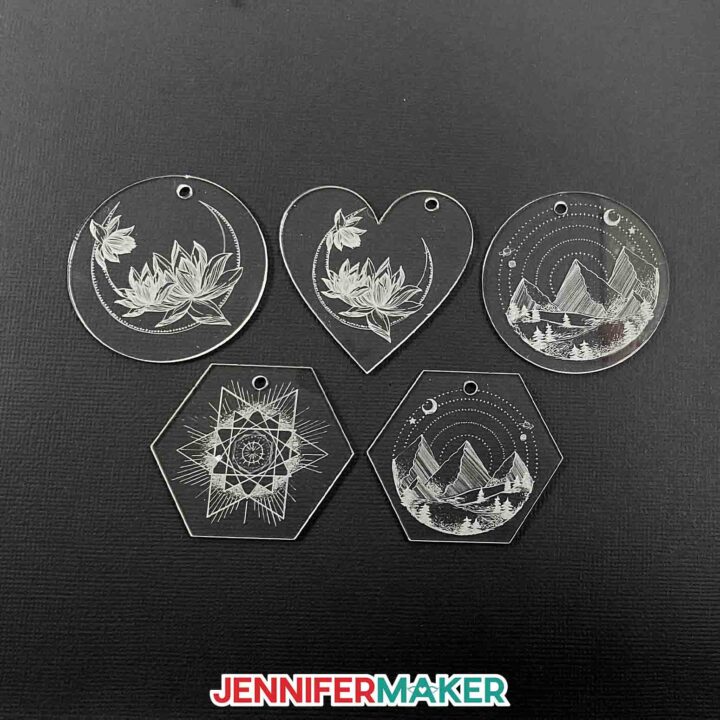
Acrylic Engraving on Keychains
Materials
Tools
Instructions
STEP 1: GET MY FREE ENGRAVED ACRYLIC DESIGN FILES
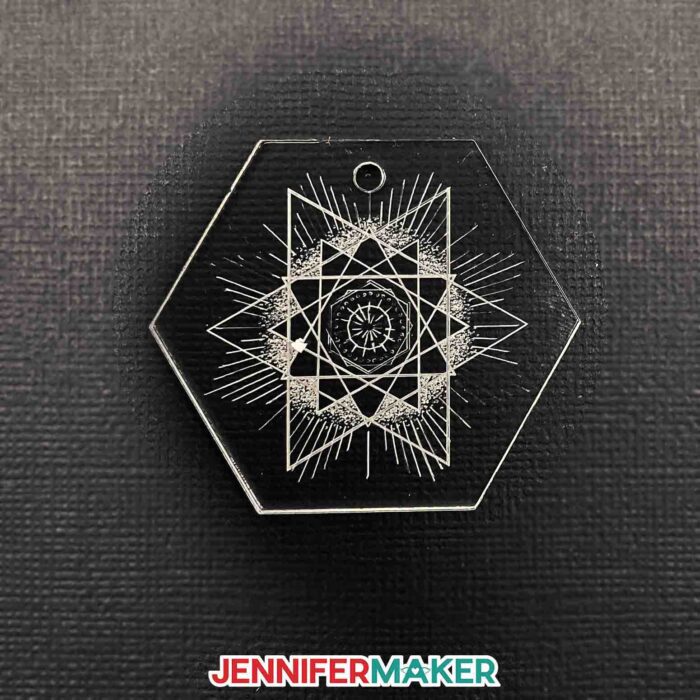
First, download my free Engraved Keychain SVG/DXF/PDF design files from my free resource library. It's Design #460. There are three different designs for you to choose from:
Upload the SVG file to Cricut Design Space and add it to your Canvas.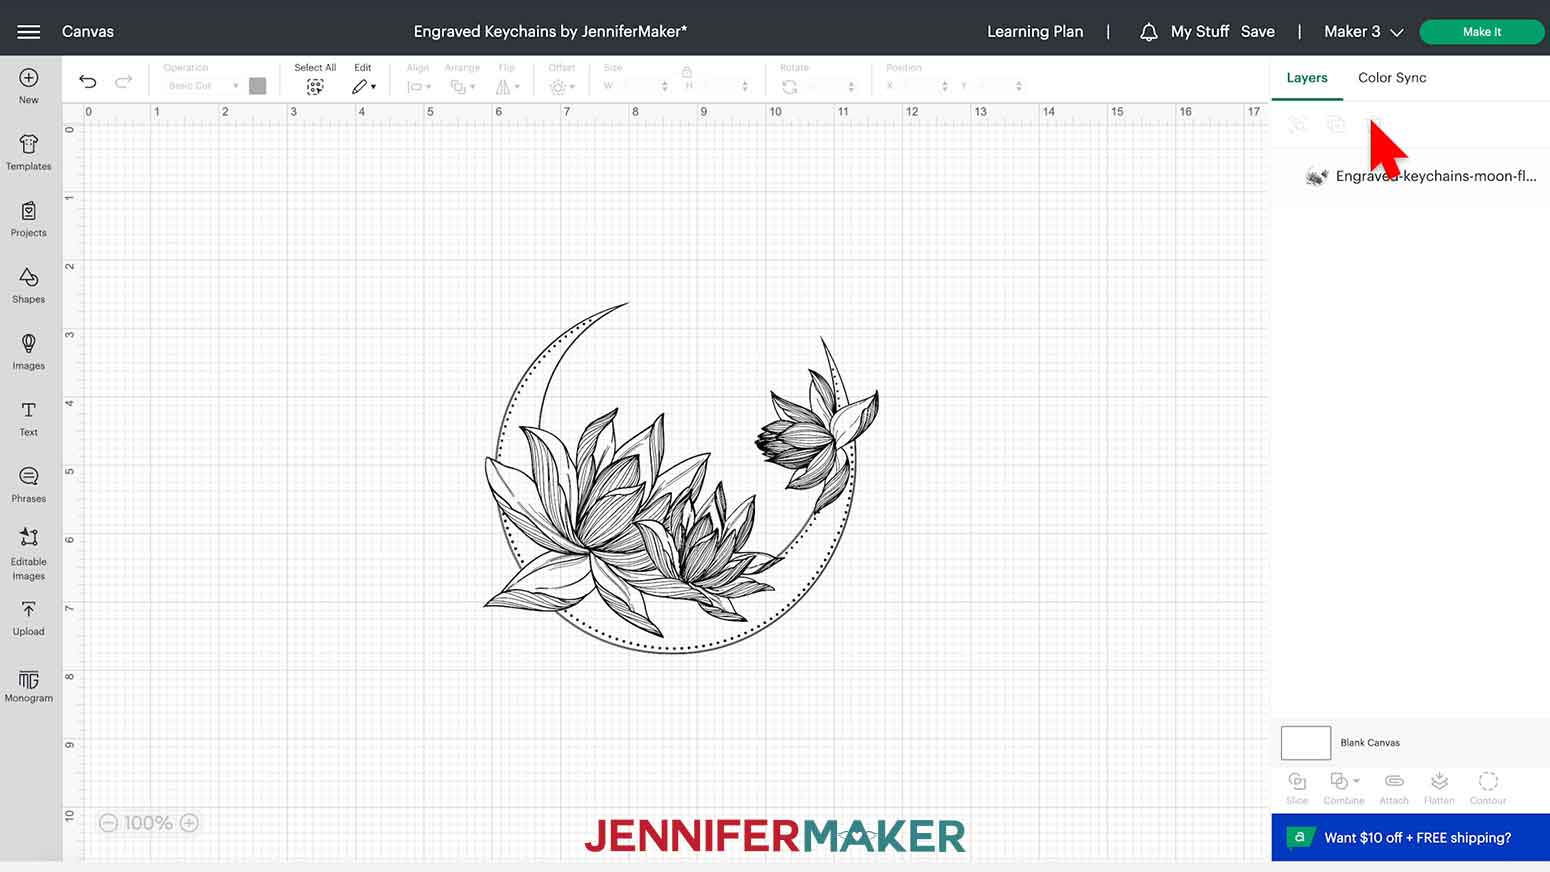
TIP: If you're not sure how to upload an SVG cut file to Cricut design space, watch this helpful video training series I made. If you are on an iPad or iPhone, here is how to download and upload SVG files to the Cricut design space app.STEP 2: PREPARE THE DESIGN FILES
This is what my engraved acrylic file looks like in Design Space.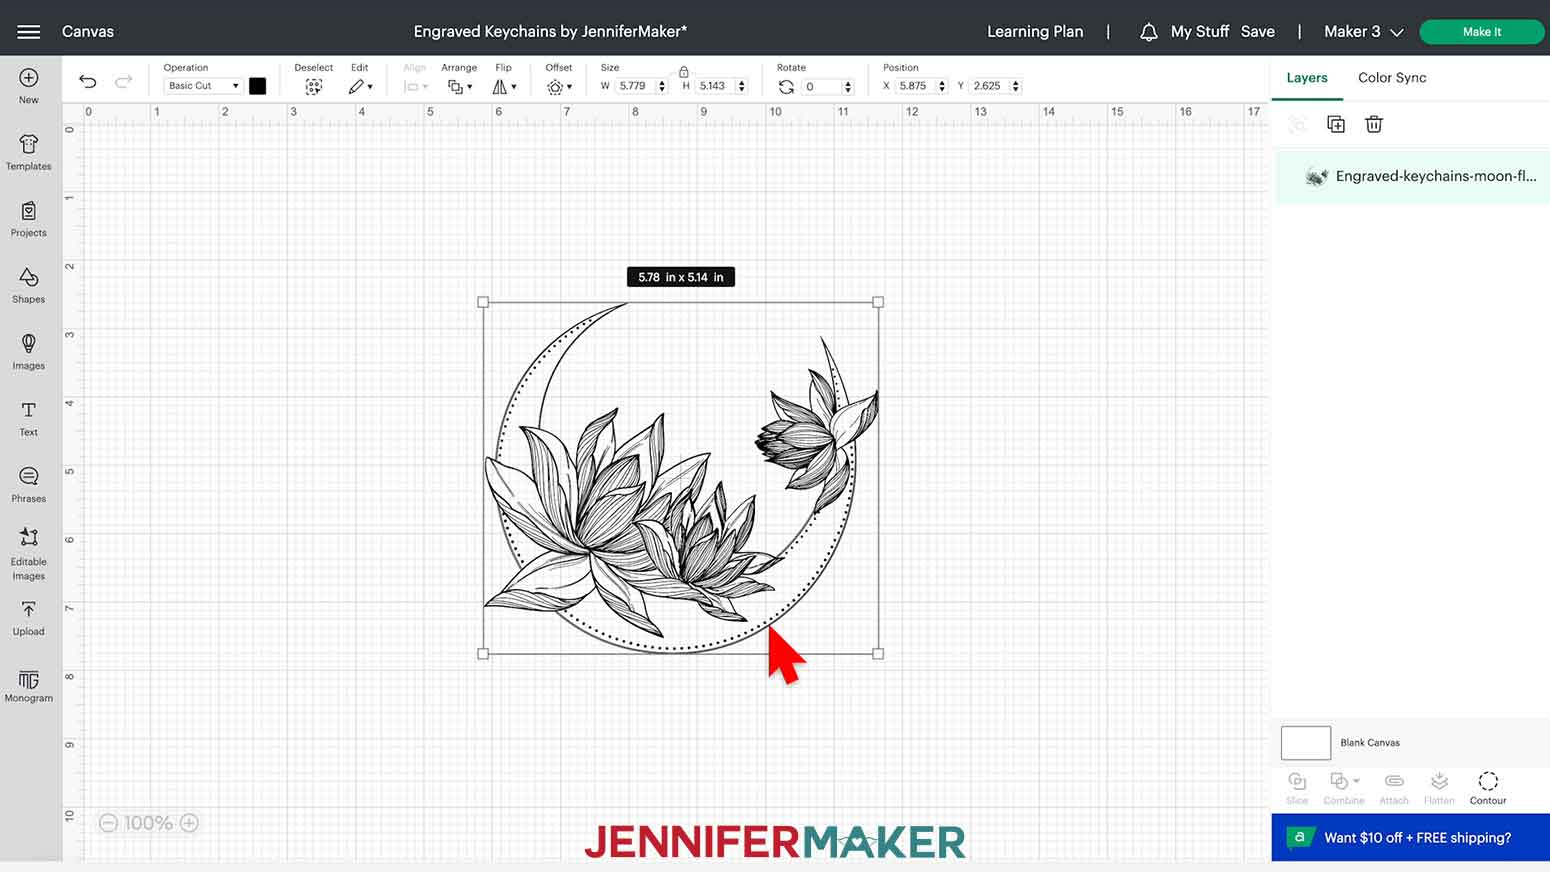
You’ll notice that the lines look really close together and very dark. This is okay and is what we want for engraving. We can zoom in quite a bit to see the design better by using the plus sign on the bottom left of the Canvas. Reposition the image on your Canvas as needed so that it’s in view. 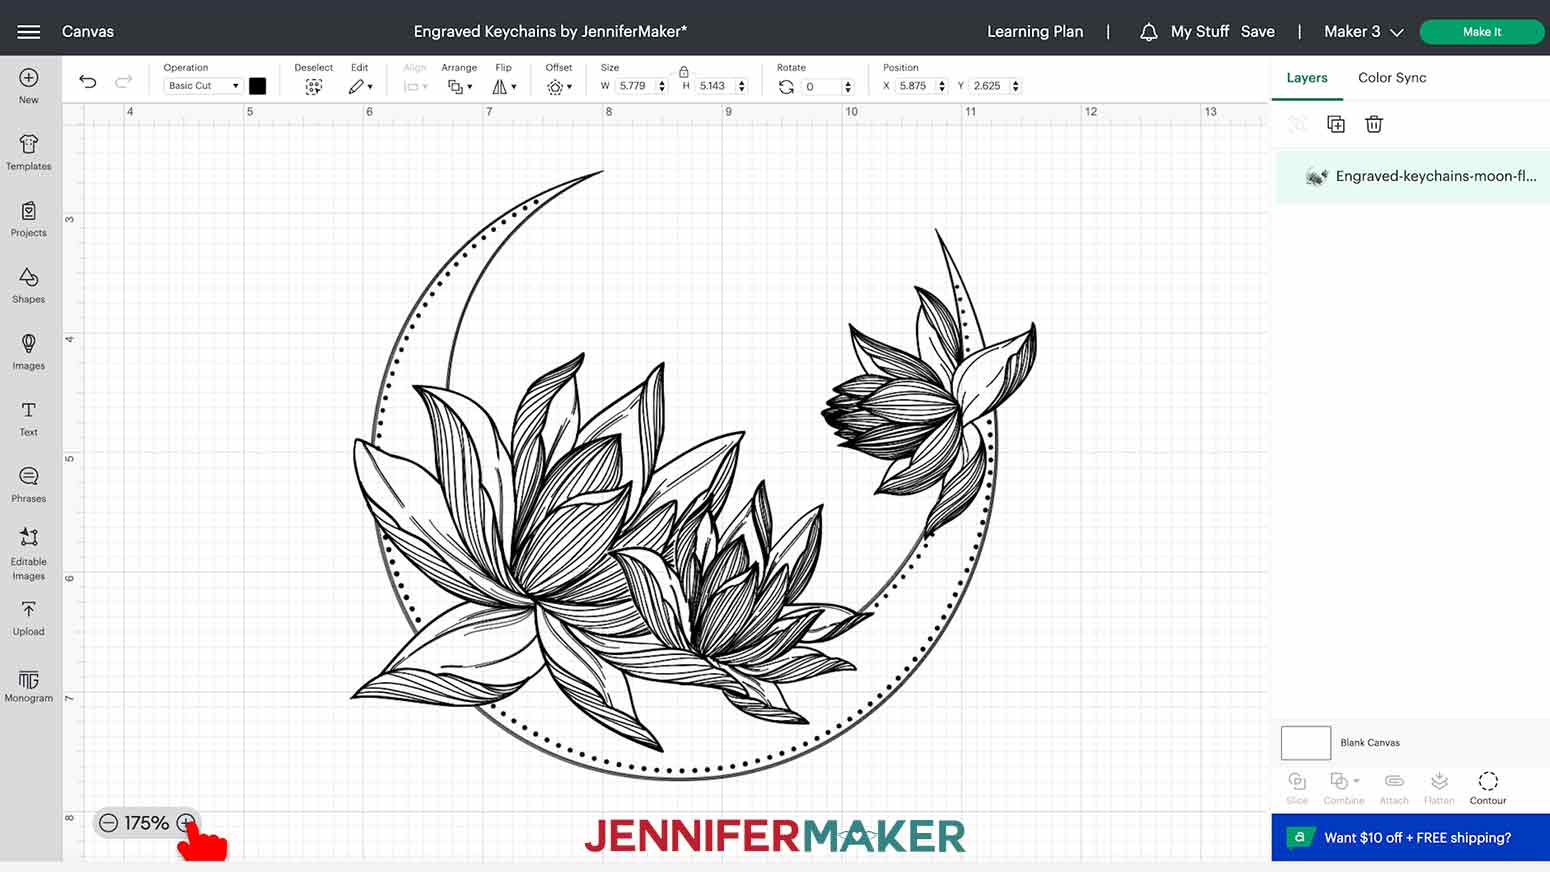
Now you can see the design details much more clearly.
With the image selected, click the field under Operation and select "Engrave."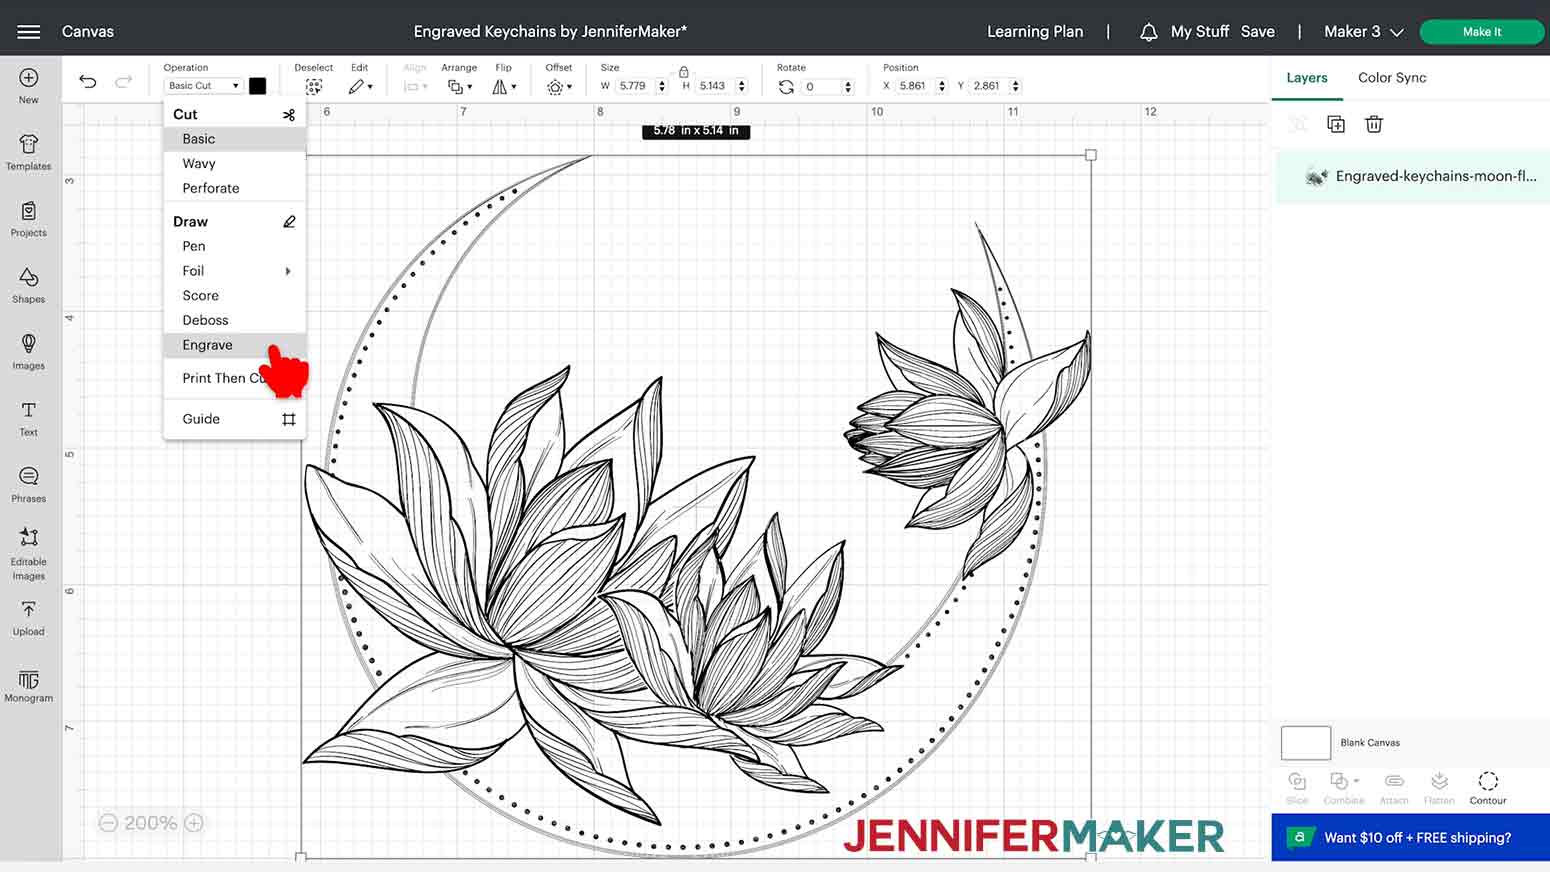
For this design, I’m using an acrylic keychain blank in the shape of a circle, just about 2" in diameter, so we need to resize the design - we’ll do this in just a moment.
Now click on Shapes in the left column and select a circle in the “free” section. We’ll use this sort of like a template. Let’s resize it to match our blank. Mine is just under two inches. Make sure the lock icon is closed at the top under size before entering the dimensions.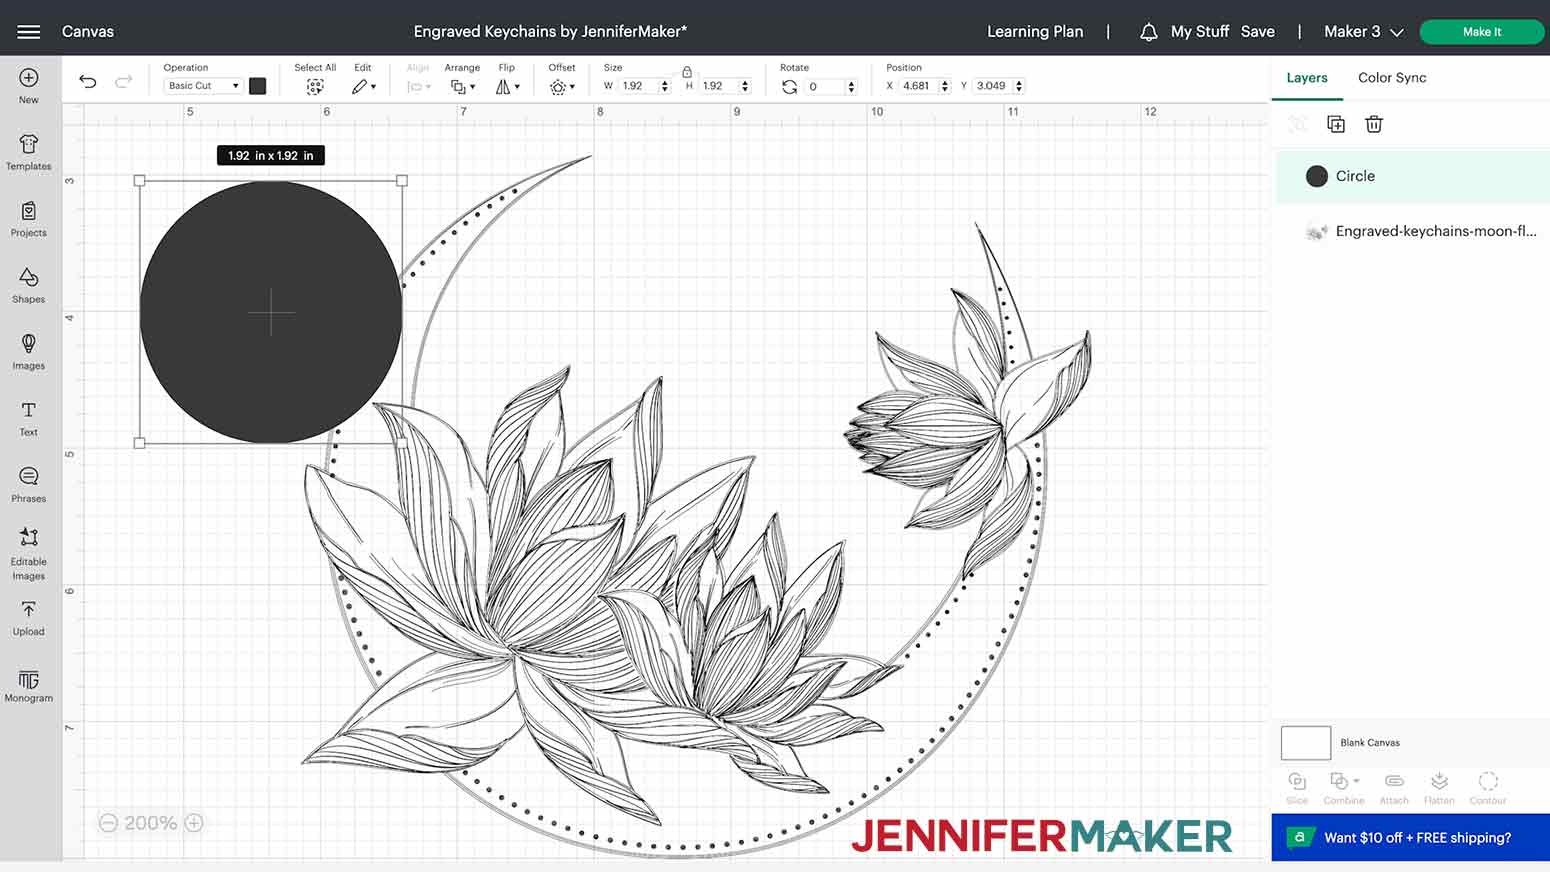
STEP 3: ENGRAVE THE DESIGN
You are correct! We aren’t. 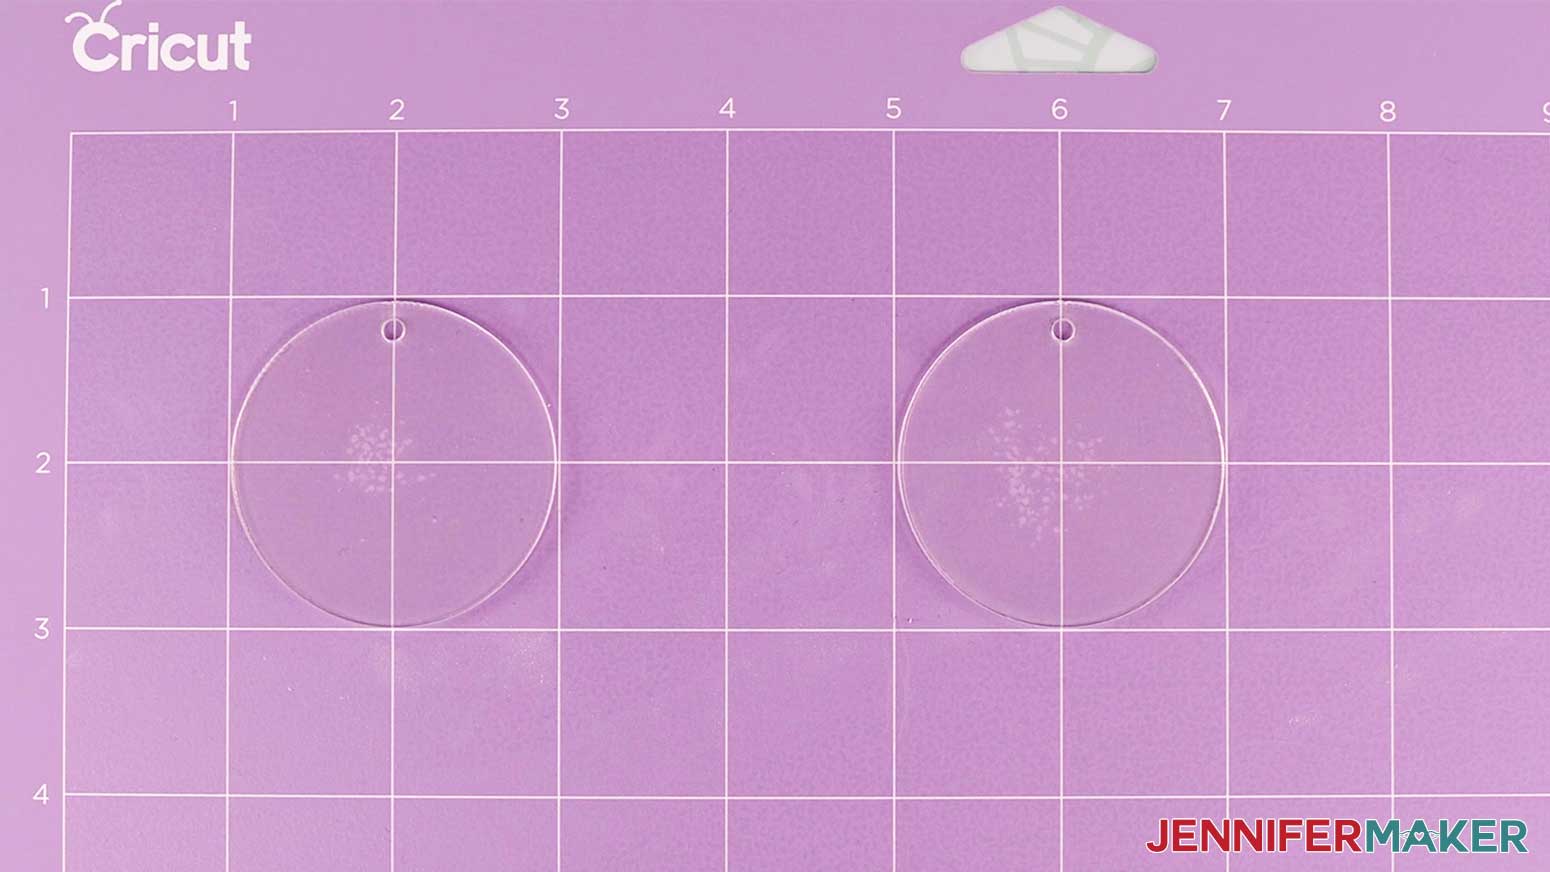

STEP 4: ASSEMBLE YOUR KEYCHAIN
Attach your choice of tassel (optional).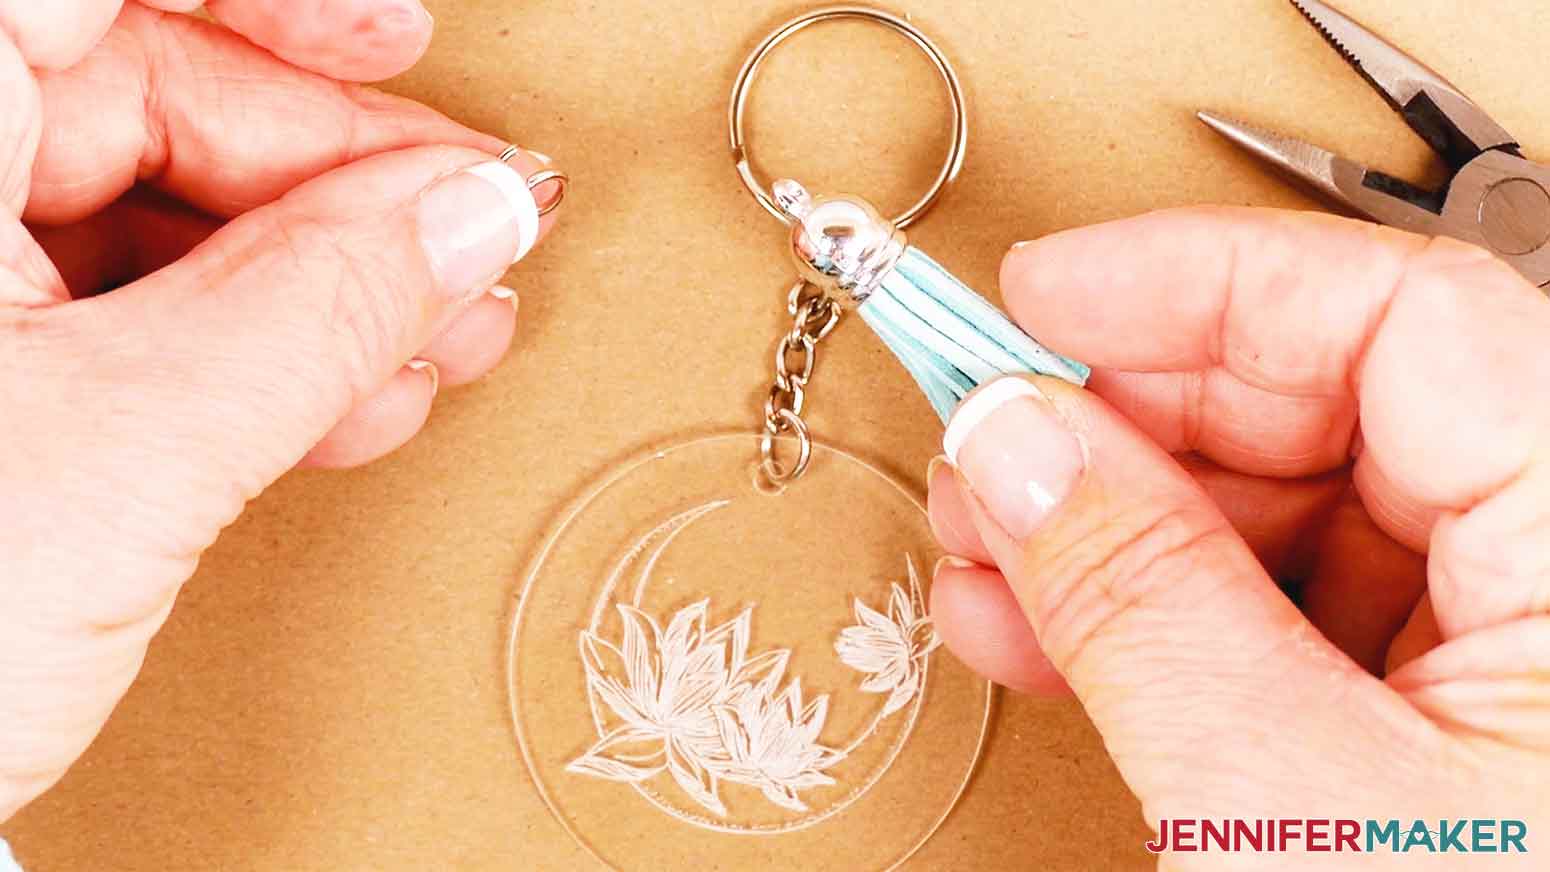
Done! 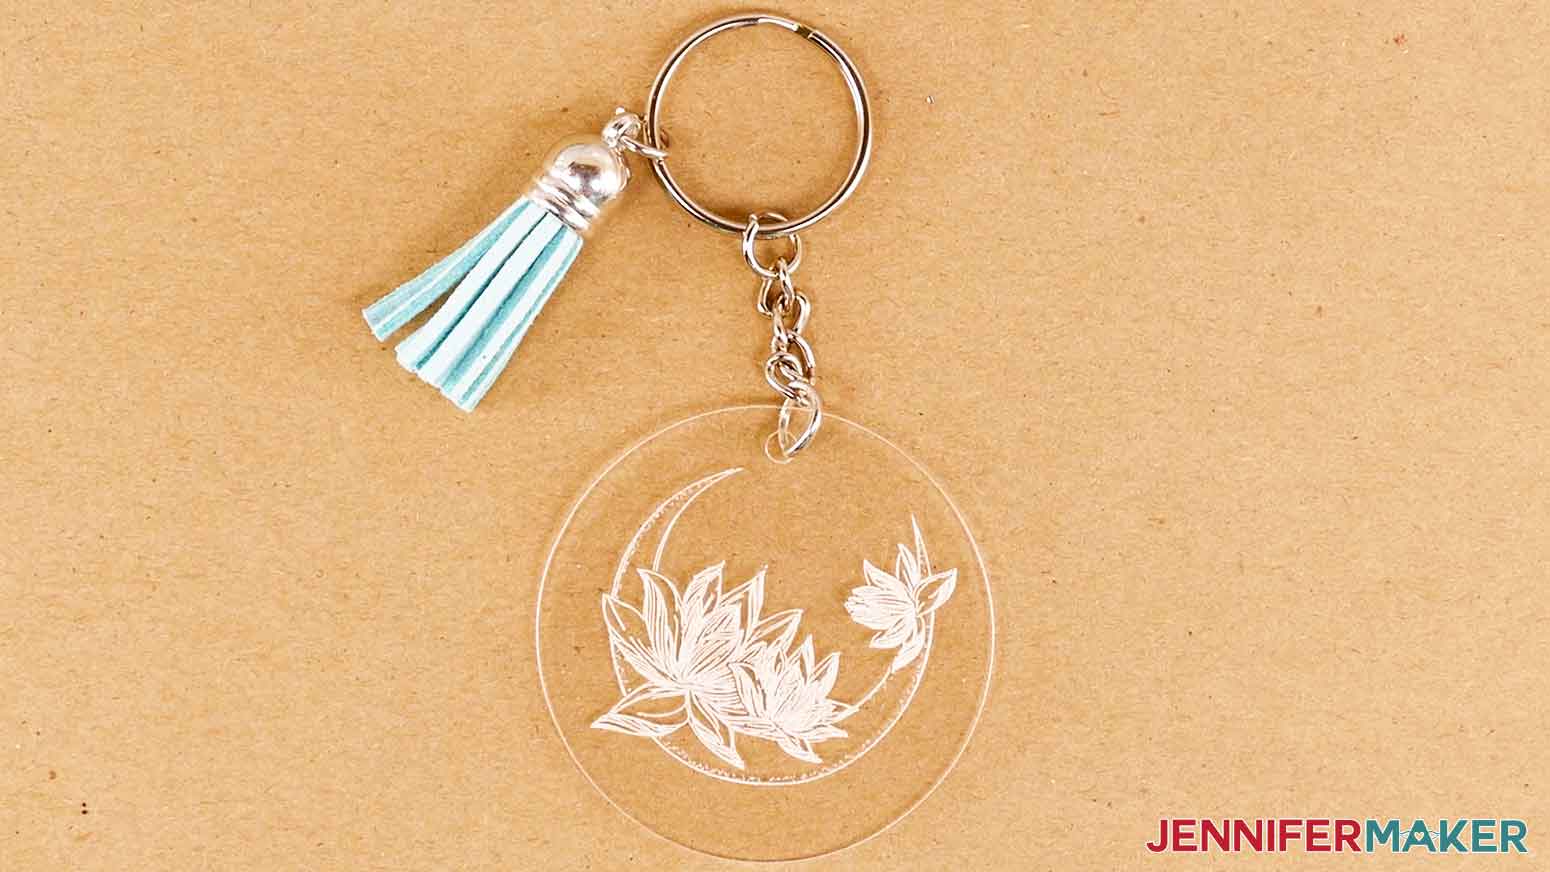
VARIATIONS:
Once you have mastered the placement of an engraved design, you can try making several at a time, or even using unique shapes.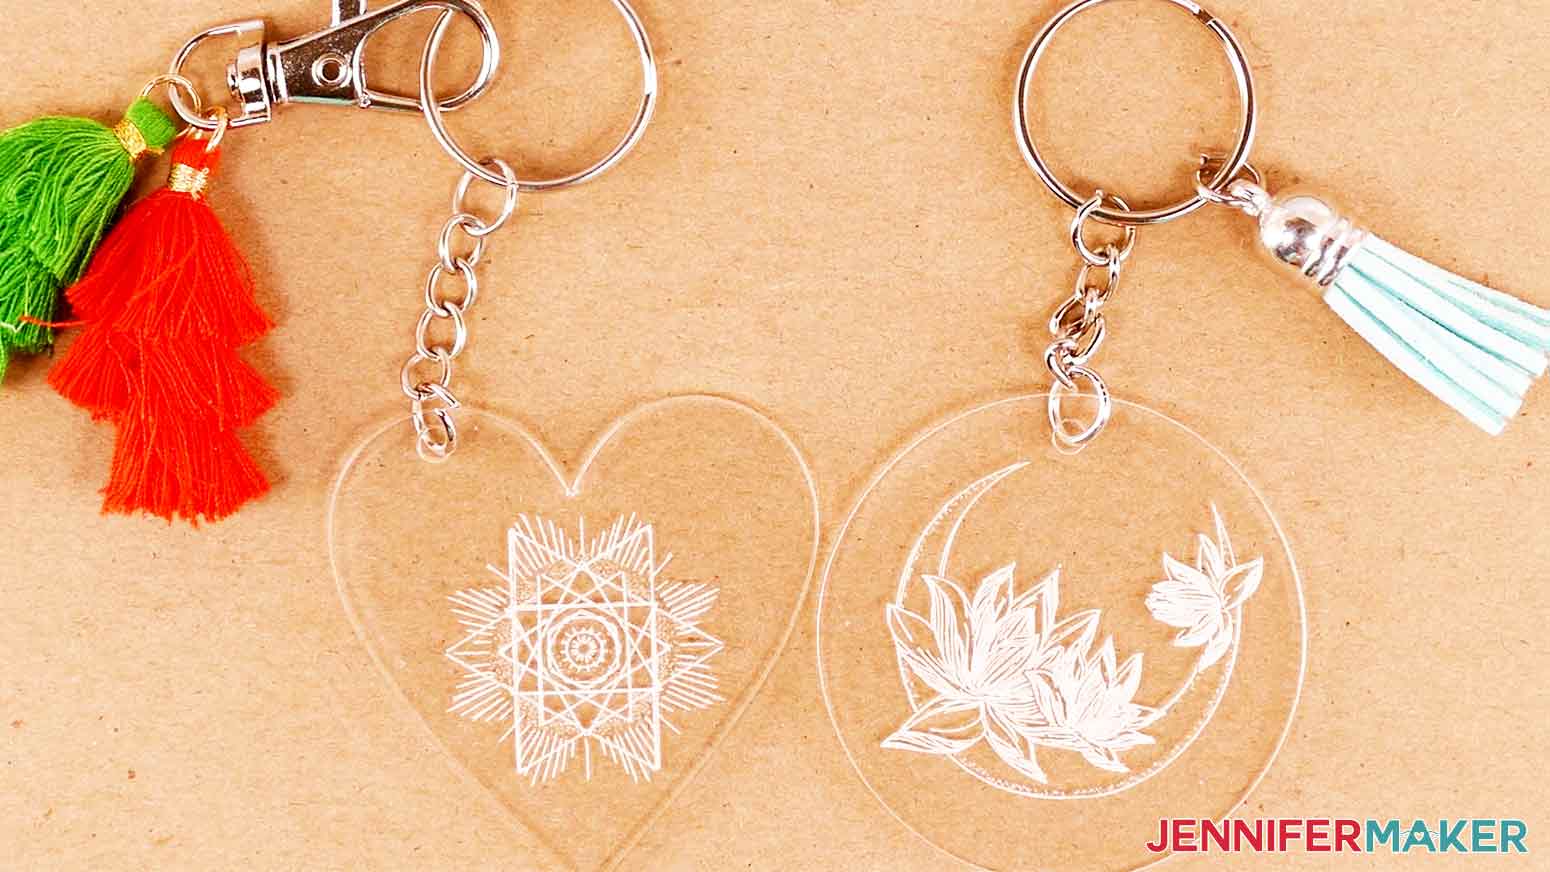
STEP 5: SHOW IT OFF
Answers to Your Questions About Acrylic Engraving on Keychains
Q: How do you engrave acrylic keychains?
I love engraving acrylic blanks with my Cricut machine, especially keychains! Once you get the placement correct, it is very easy.
Q: Can you engrave on acrylic?
Yes, you can engrave on acrylic with many machines, including a Cricut Maker or Cricut Maker 3.
Q: Can you engrave acrylic with a Cricut?
Yes, a Cricut Maker or Cricut Maker 3 can engrave on acrylic as long as you have the engraving tool.
Q: What do you seal acrylic keychains with?
I’ve used both mod podge and clear adhesive vinyl to seal acrylic keychains.
Q: Do you have to seal acrylic keychains?
I did not seal the front of my keychains to avoid losing the detail in the delicate designs.
Q: Do you mask acrylic before engraving?
I did not mask my acrylic key chains before engraving them.
Q: Can I cut this project on a Cricut Joy?
No, the Joy cannot engrave acrylic.
Q: What is Merry Maker Mingle?
Each day in December leading to Christmas, I present you with a brand new “gift” — a project to craft, make, or do. You can make these projects on a Cricut cutting machine or by hand if you don’t have one. Most of our Merry Maker Mingle projects will come with a fun video with yours truly, a step-by-step printable photo tutorial, and a free pattern/SVG cut file. Sign up to get daily updates and prizes!
Get my free SVG files to create acrylic engraved keychain projects!
I love seeing what you make with my designs and how you use them! Please share a photo of your acrylic engraving on keychains in our Facebook group or tag me on social media with #jennifermaker.
Love,

Want to remember this? Save this Acrylic Engraving on Keychains Tutorial to your favorite Pinterest Board!