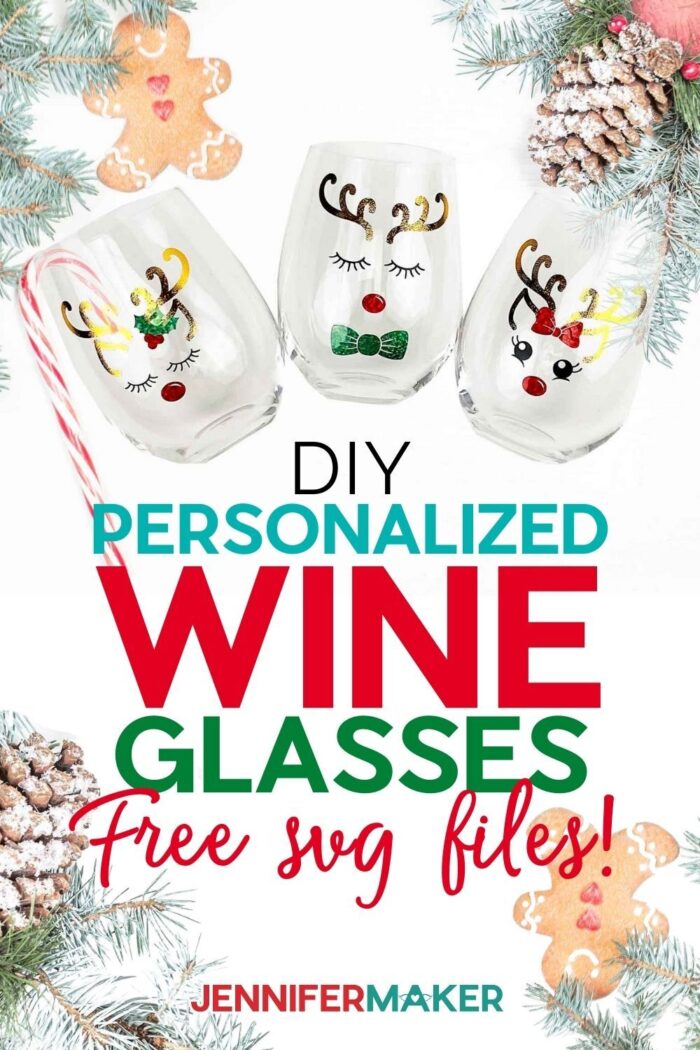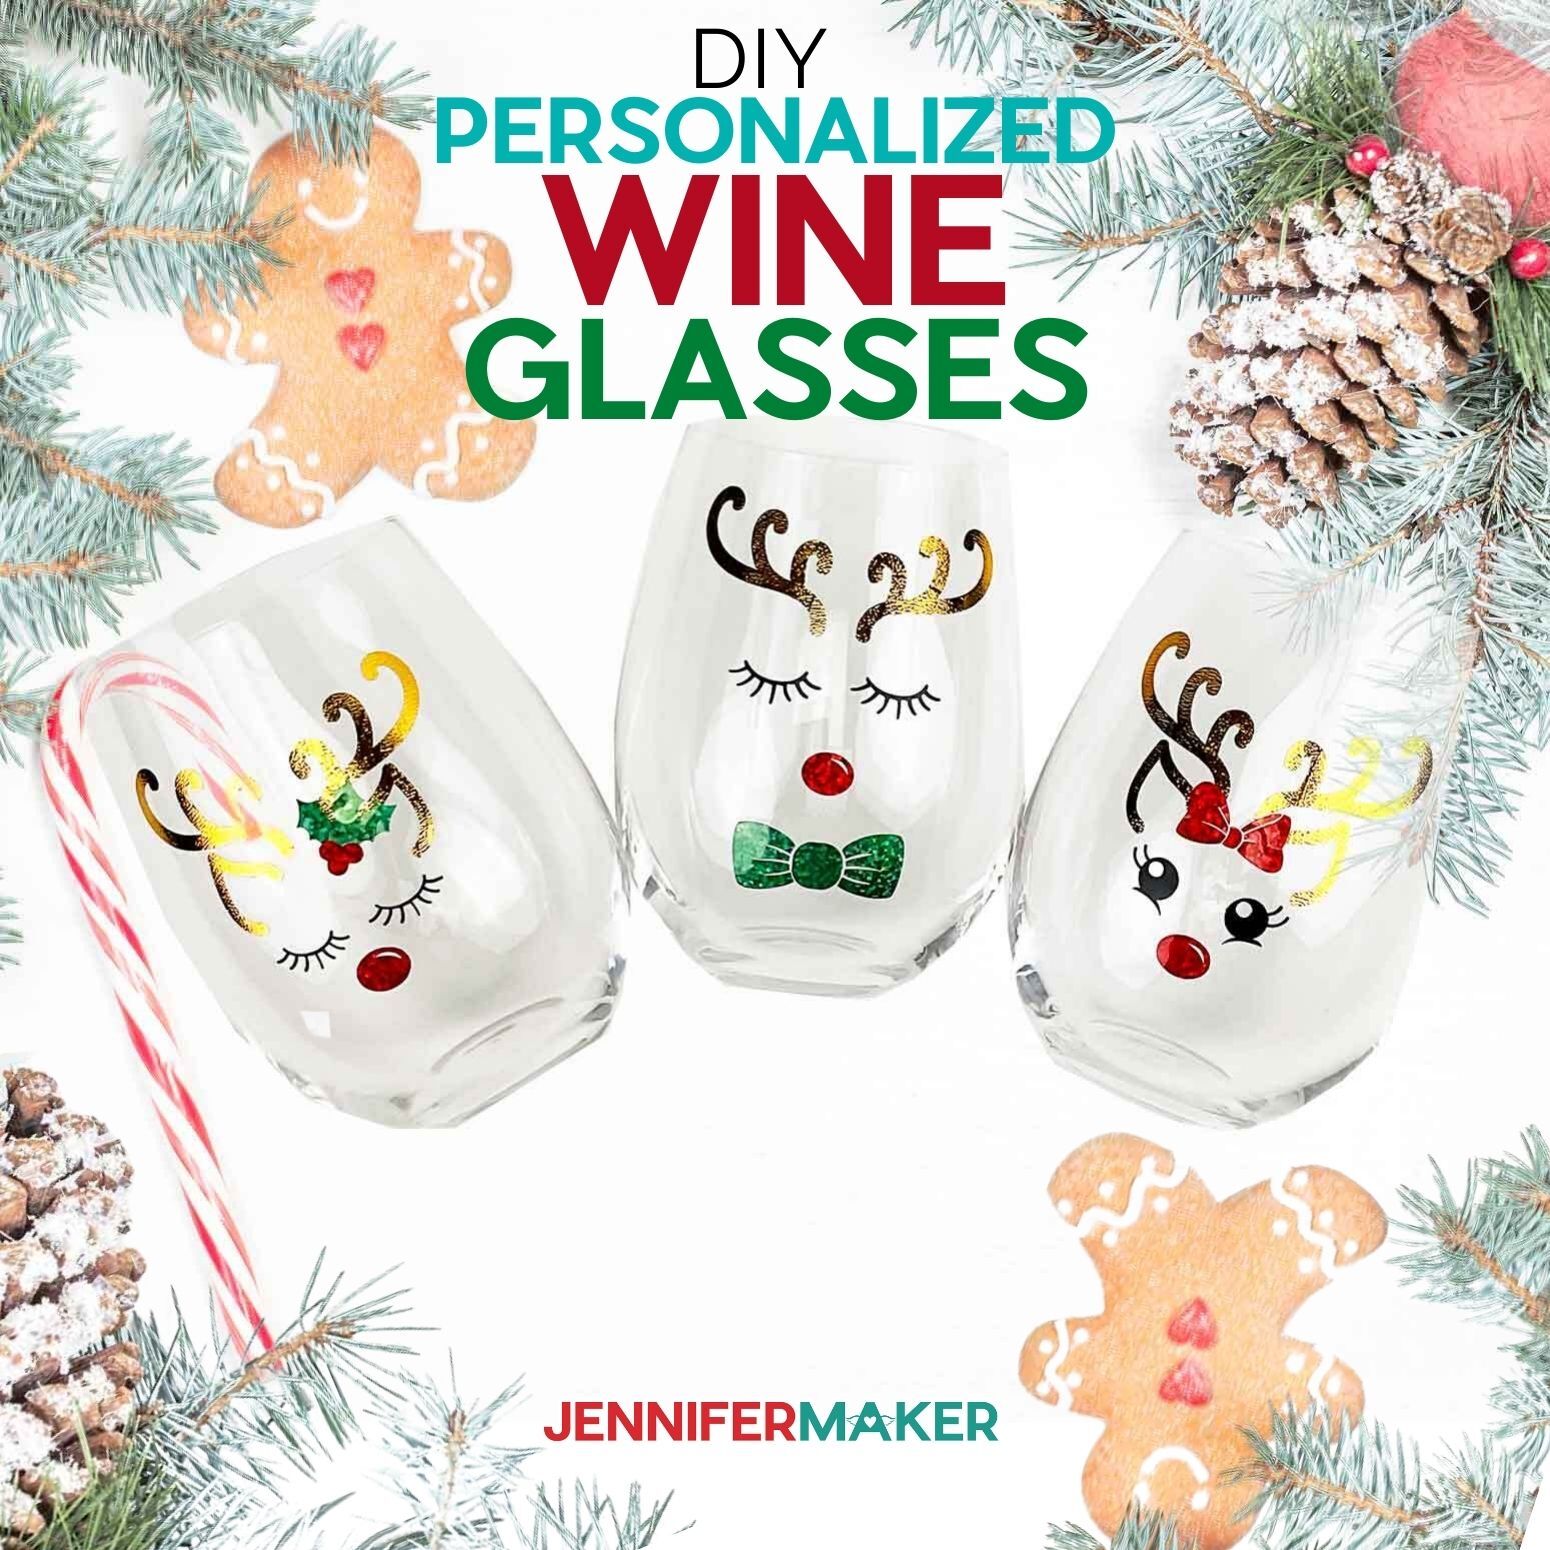
Create your very own personalized wine glasses with vinyl to make the perfect gift!
These personalized wine glasses are perfect to give as gifts, party favors or just for fun! Add a nice bottle of wine, some fun bev naps, and some cheese and crackers to a cute basket and you have a great hostess gift for any special occasion or holiday get together! You can also drop in battery operated tea lights and use custom wine glasses to decorate your home for the holidays or dress up your table for Christmas dinner. There are so many possibilities with a versatile project like these DIY personalized wine glasses!
Watch my full step-by-step tutorial video to make these easy personalized wine glasses from start to finish!

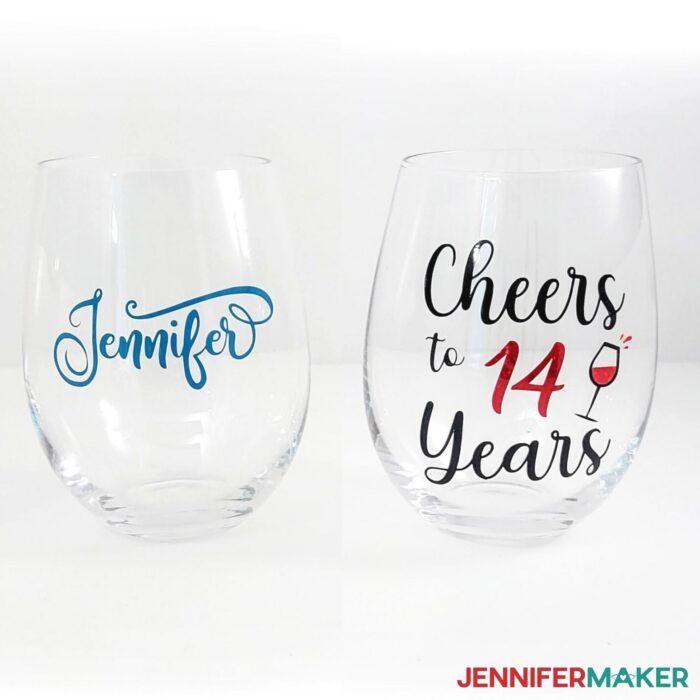
You are welcome to personalize these wine glasses however you’d like. You can add your guests names, use different color to match your holiday parties and decor, create sets to give out for Christmas presents, uand so much more!
I teach you how to design your wine glasses, use glyphs to get fancy letters, layer your vinyl the EASIEST way, and keep your vinyl straight on your wine glass!
I will also be showing you a technique I use to add vinyl to a curved surface like this because I know that is something many struggle with.
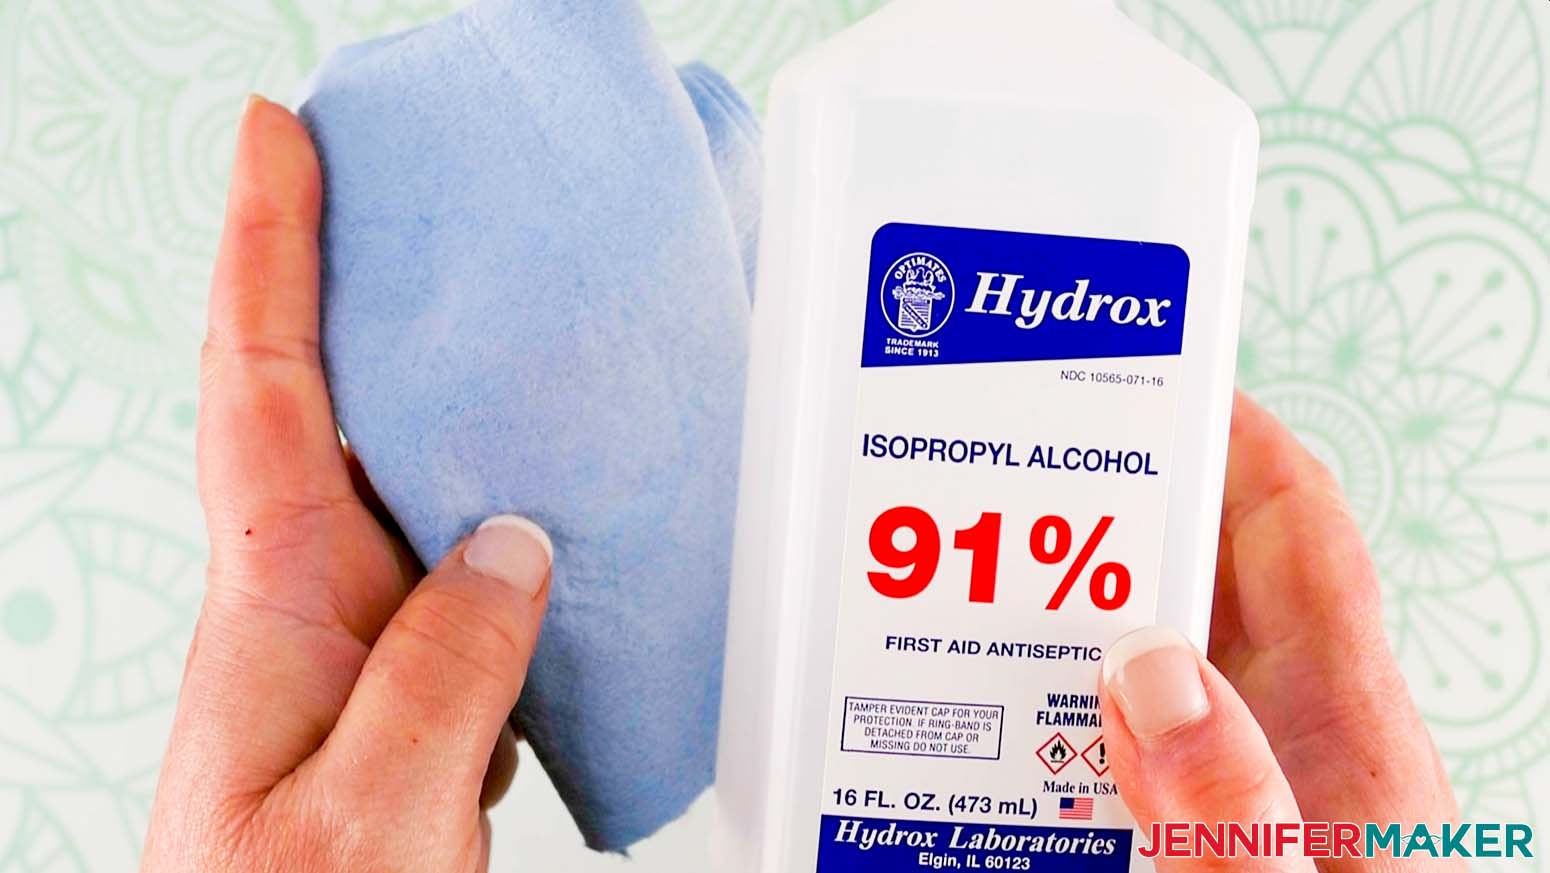
For this project we will need some wine glasses! You can either use ones that you have in your kitchen, or you can purchase new ones. I’m using these 20 ounce stemless wine glasses I found on Amazon, but you can find these anywhere and really use any size! We’ll also need some vinyl and transfer tape and rubbing alcohol to clean the glass to make sure the vinyl will stick!
I will be using my Cricut Maker 3 for this project, but you can make these on any Cricut cutting machine, including the Joy! Of course we will need a mat, scraper and weeding tool.
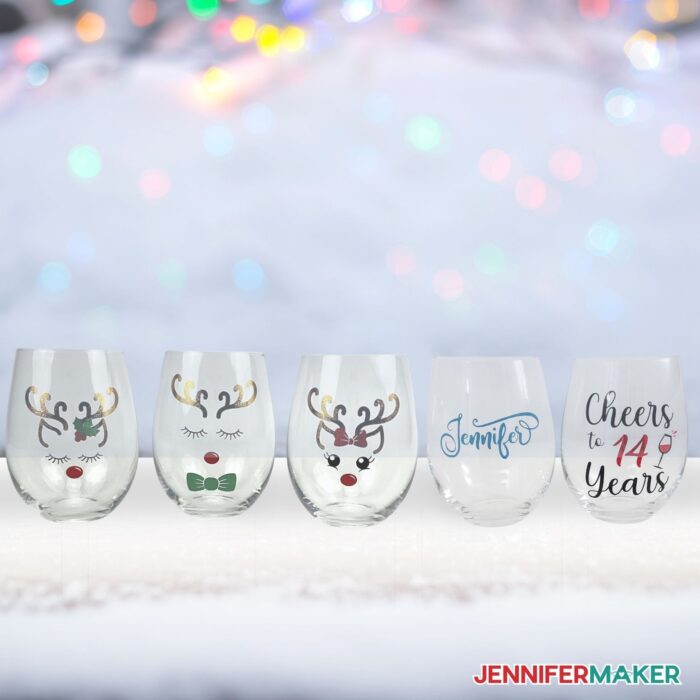
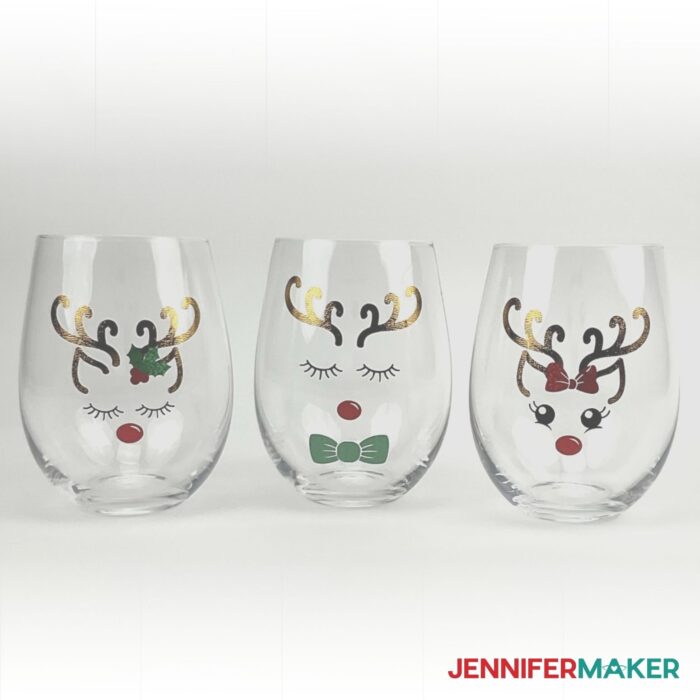
As you can see, you really don’t need lots of supplies to create these cute personalized wine glasses and they also don’t take very much time at all. Just look at how beautiful these turned out!

These make perfect holiday gifts for friends and family and they can also be used as a display piece to wow your holiday guests. Just pop in a battery operated tea light to the reindeer designs and let the fun begin!
Keep in mind, these glasses are handwash only. Don’t put them in the dishwasher or the vinyl will peel or melt off and we definitely don’t want that.
Also, I do not recommend sealing these with Mod Podge. It leaves streaks and can make the glass look cloudy and that’s not the look we are going for with this project. We want these glasses looking sleek and polished like we bought them from the store like this!
Pair these personalized wine glasses with a bottle of wine and one of our personalized wine bag patterns to easily create great gifts for your group of friends!
I can’t wait to see all your amazing wine glasses with your own design!
Let me show you how easy it is to make this beautiful personalized wine glasses with my free design templates! This post contains some affiliate links for your convenience (which means if you make a purchase after clicking a link I will earn a small commission but it won’t cost you a penny more)! Read my full disclosure policy.
Materials to Make a Personalized Wine Glasses
View my Amazon shopping list with the exact items we used to make this project
- Stemless Glasses (Set of 4, 20 oz) but you can use any glasses (white wine glasses, red wine glasses, champagne flutes, martini glasses) or even plastic cup
- Cricut Permanent Premium Vinyl – Black and Teal or your favorite colors
- Cricut Textured Metallic Vinyl – Gold
- Cricut Holographic Sparkle Vinyl – Red and Green
- Isopropyl Alcohol
- (Optional) Painter’s Tape
- (Optional) Font (I used Amastery Script, Amarillo, and Botton Love Script)
- A method to cut your Vinyl: I used the amazing Cricut Maker 3, but you can also use the Cricut Maker or Cricut Explore Series
- Cricut Green StandardGrip Mat (12″ x 12″)
- Cricut Standard Grip Transfer Tape
- Weeding Tool
- Scraper Tool
- Brayer Tool
- Lint-Free Cloth
- Design # 353 (My free SVG/PDF/DXF design files are available in my free resource library – get the password by filling out the form at the bottom of this page)
How to Make Your Own Personalized Wine Glasses
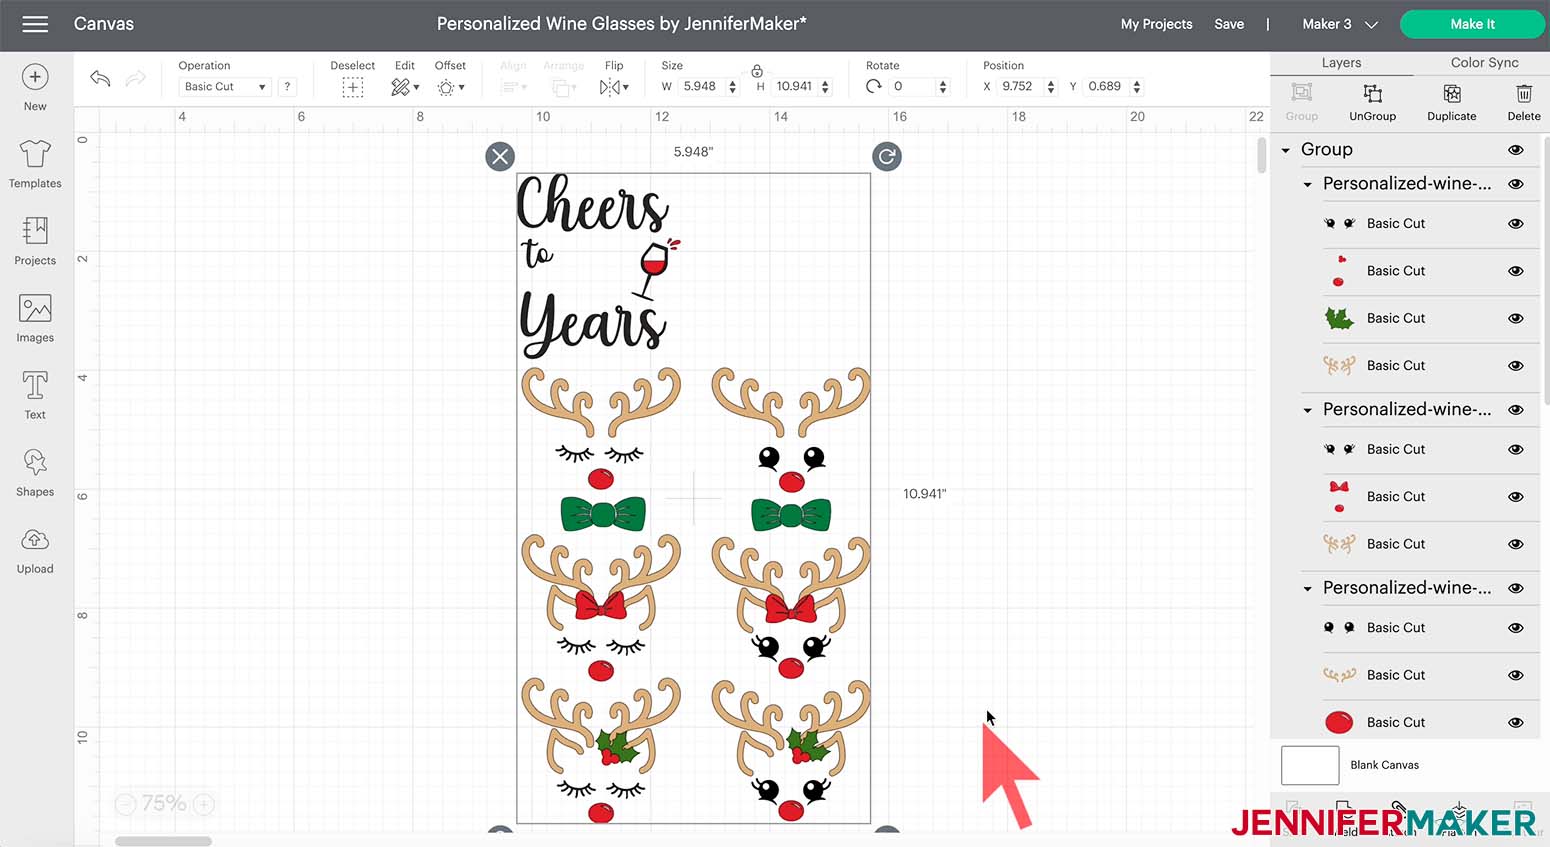
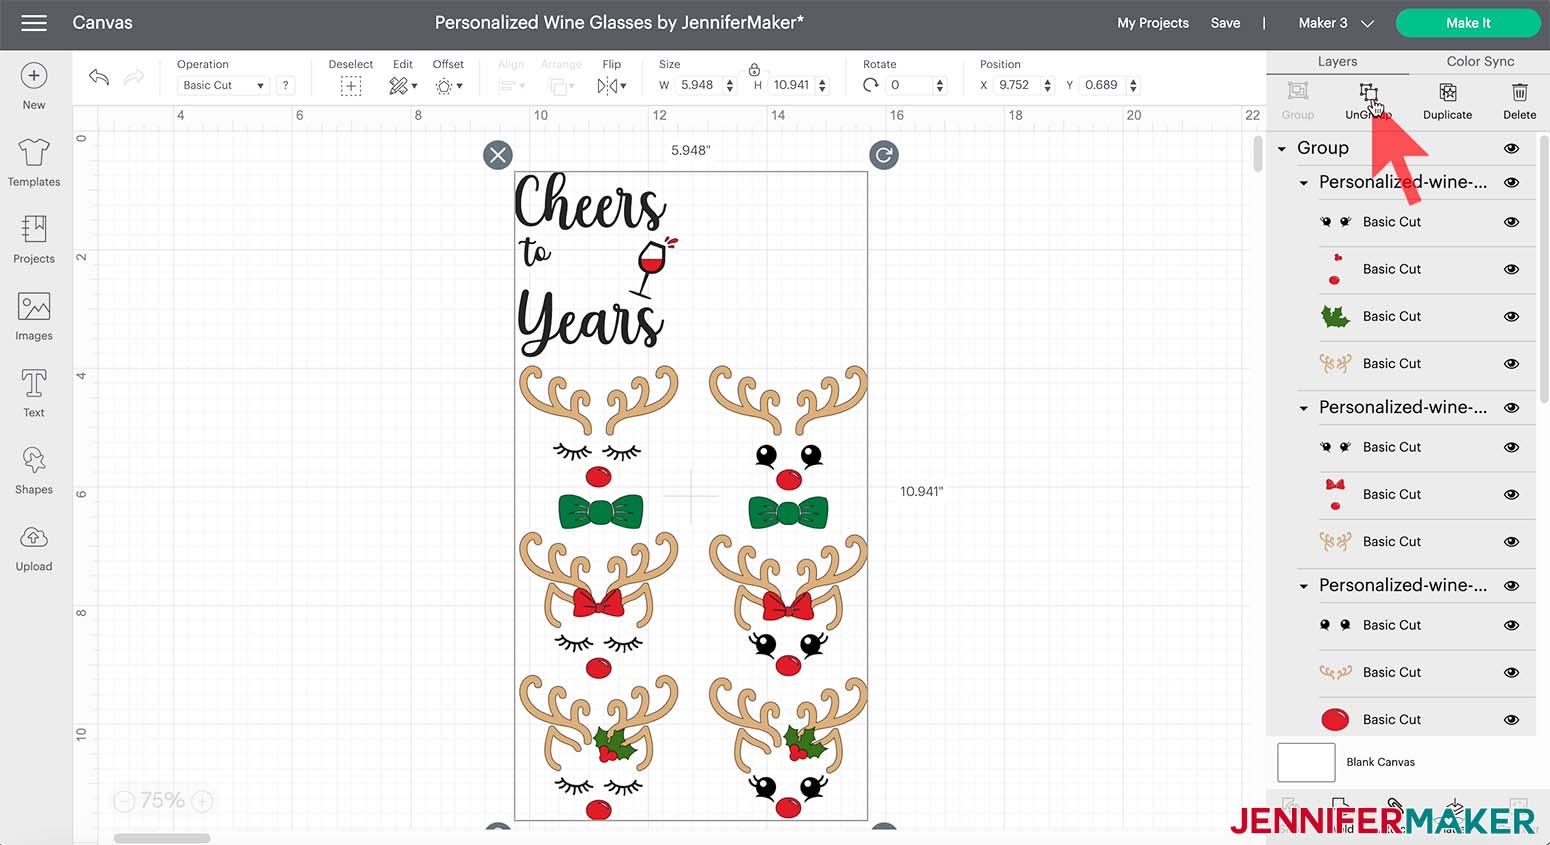
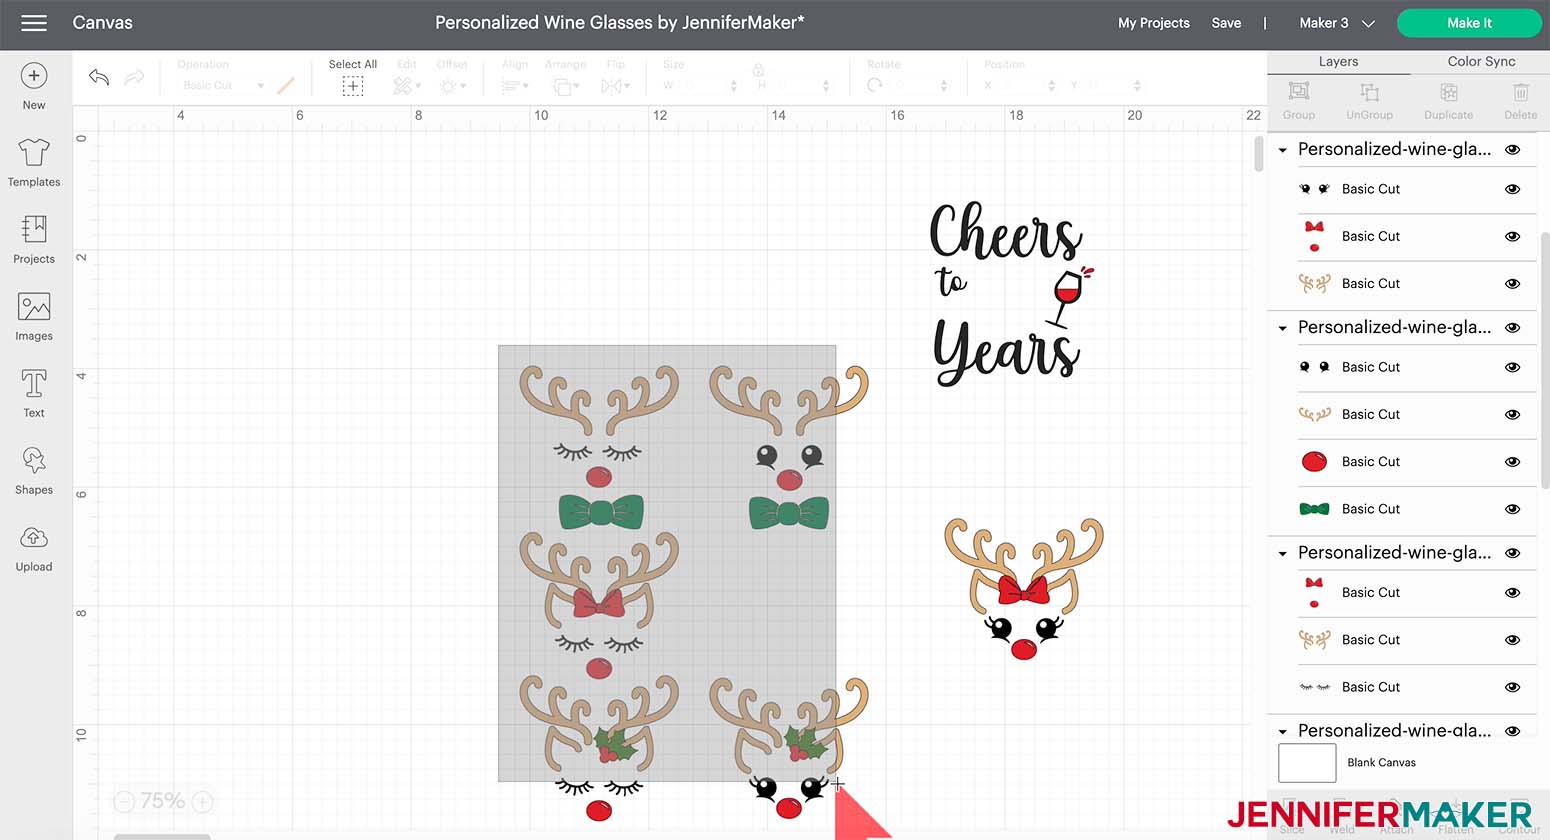
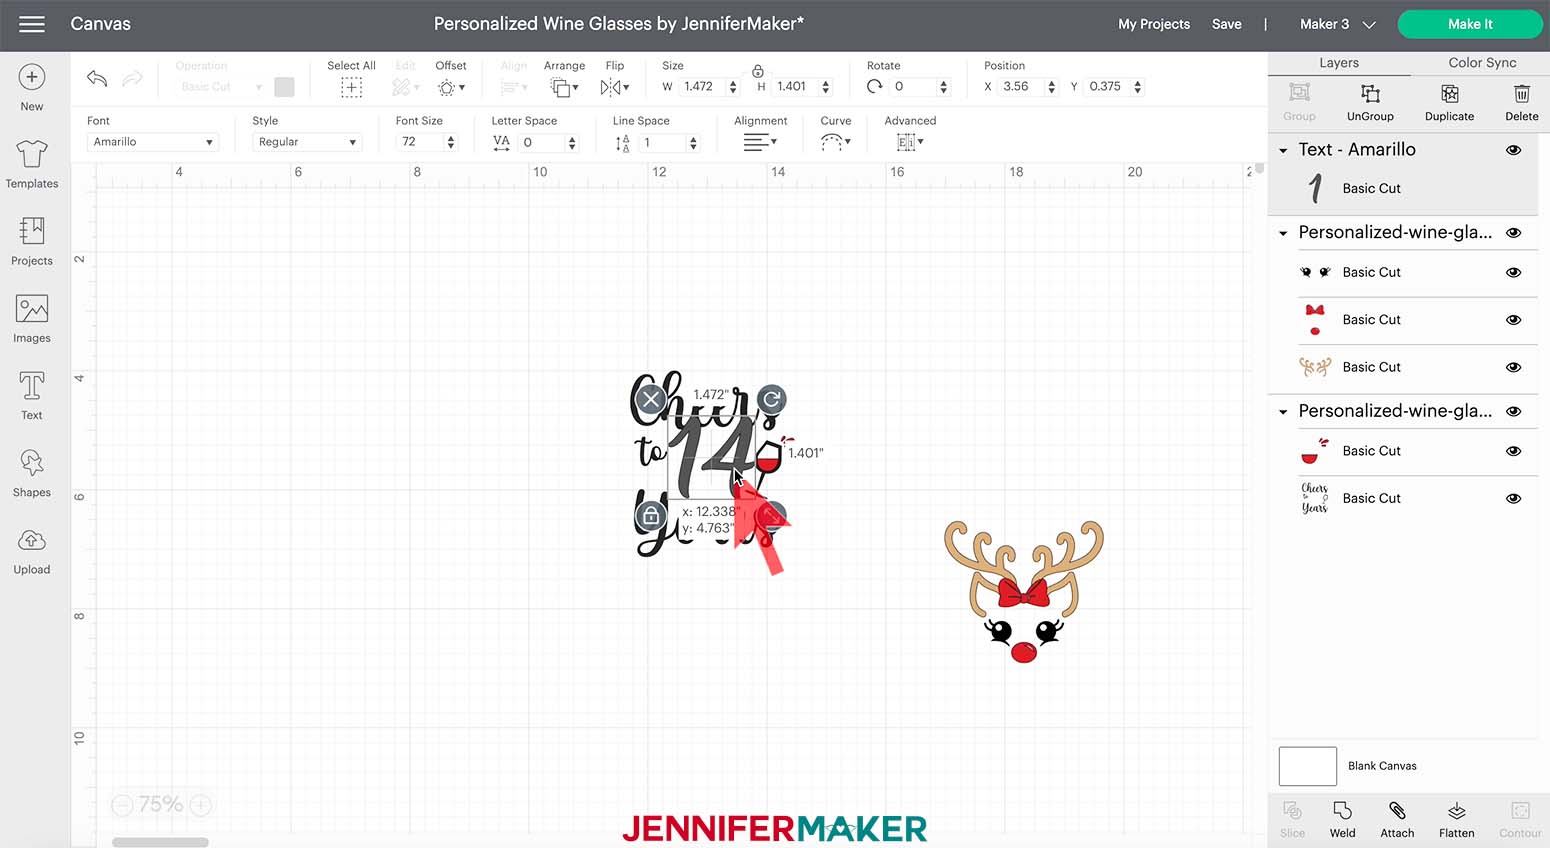
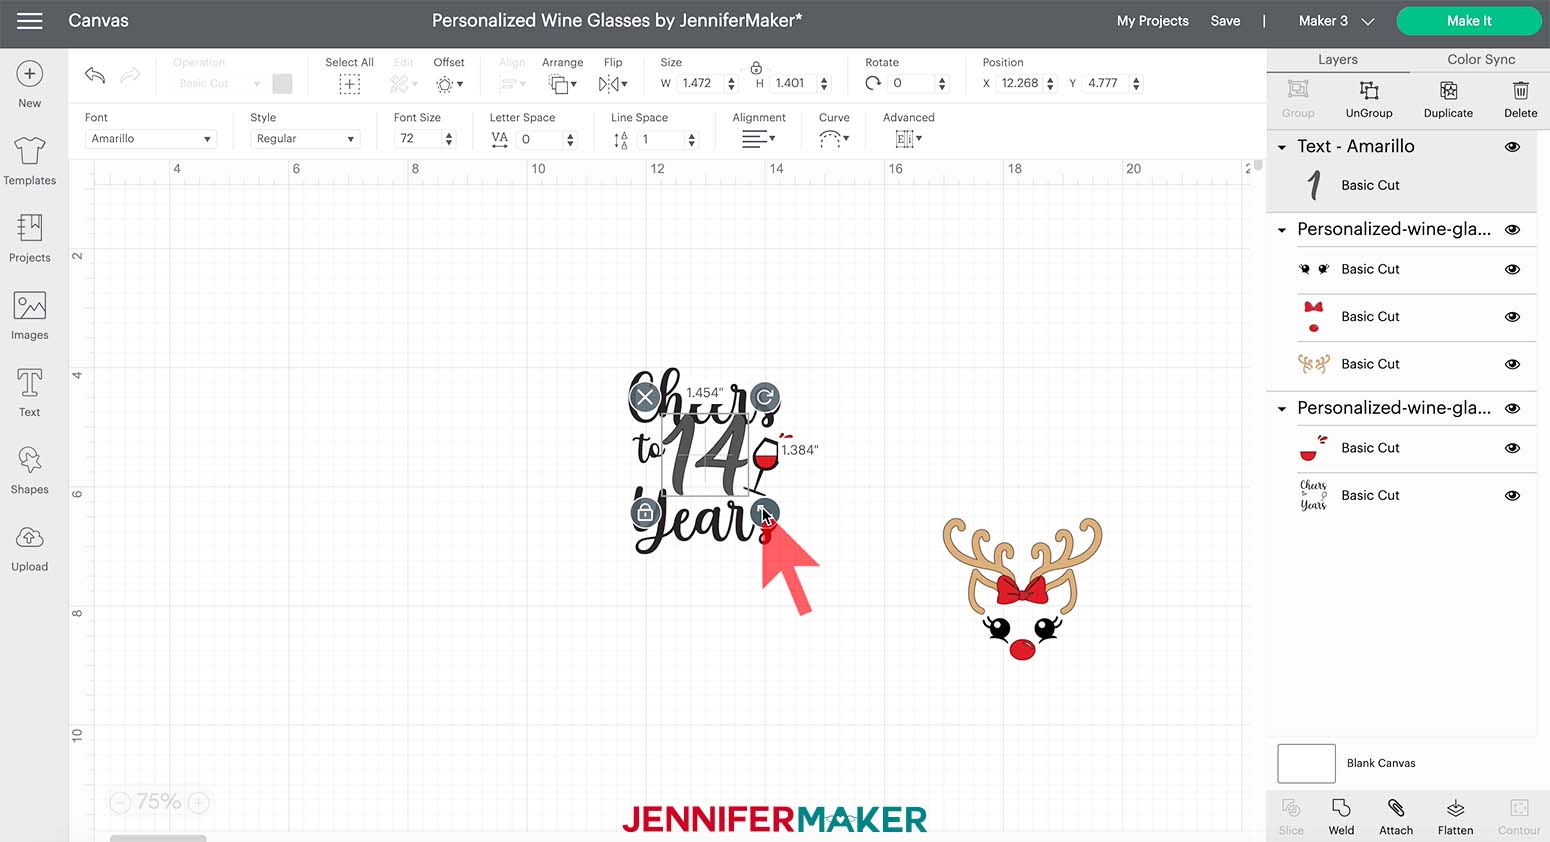
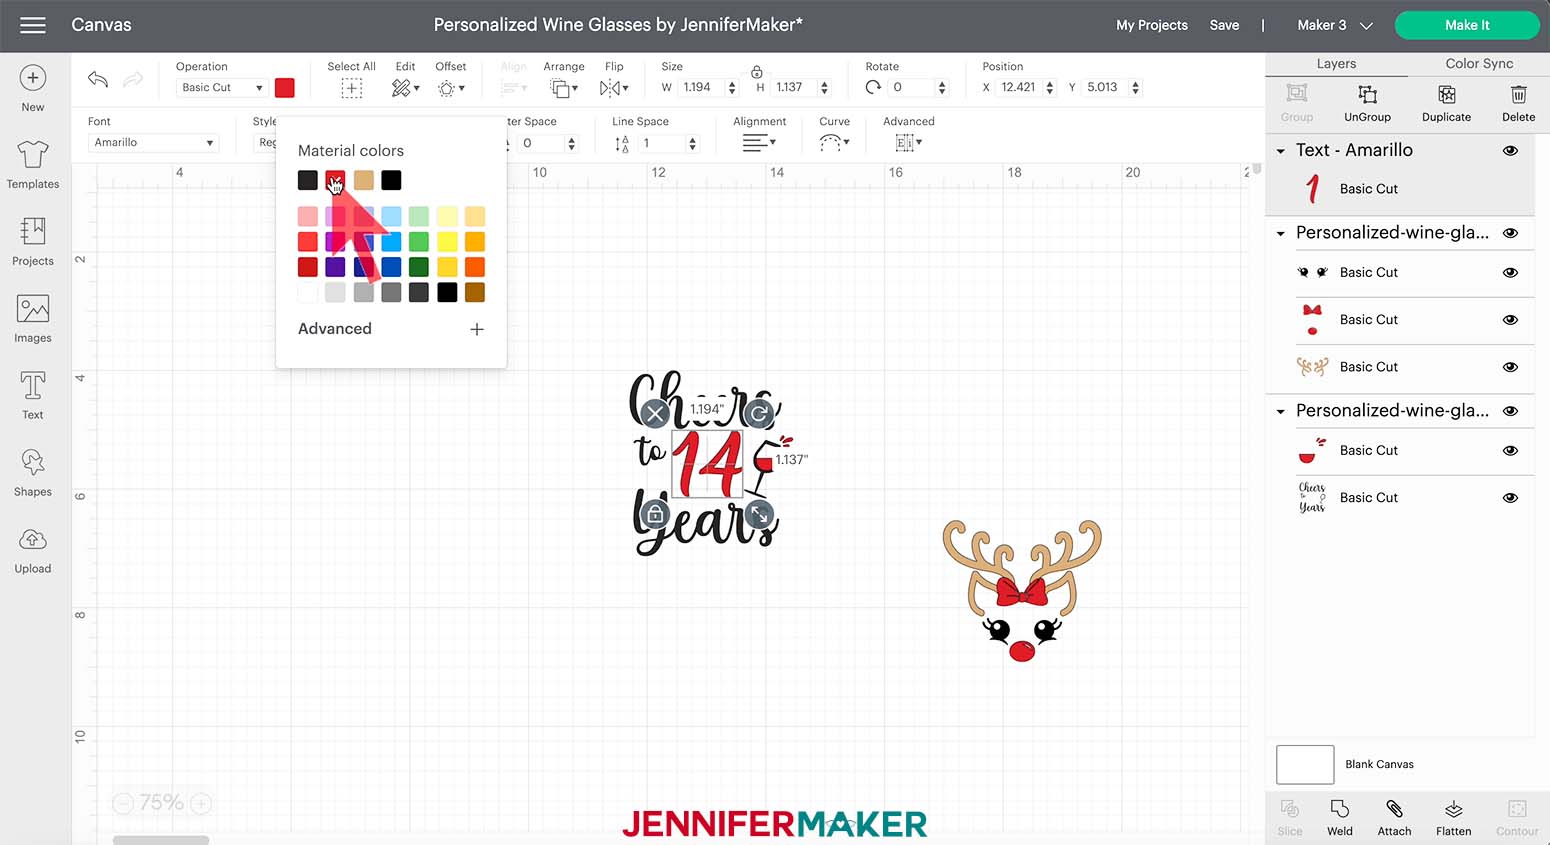
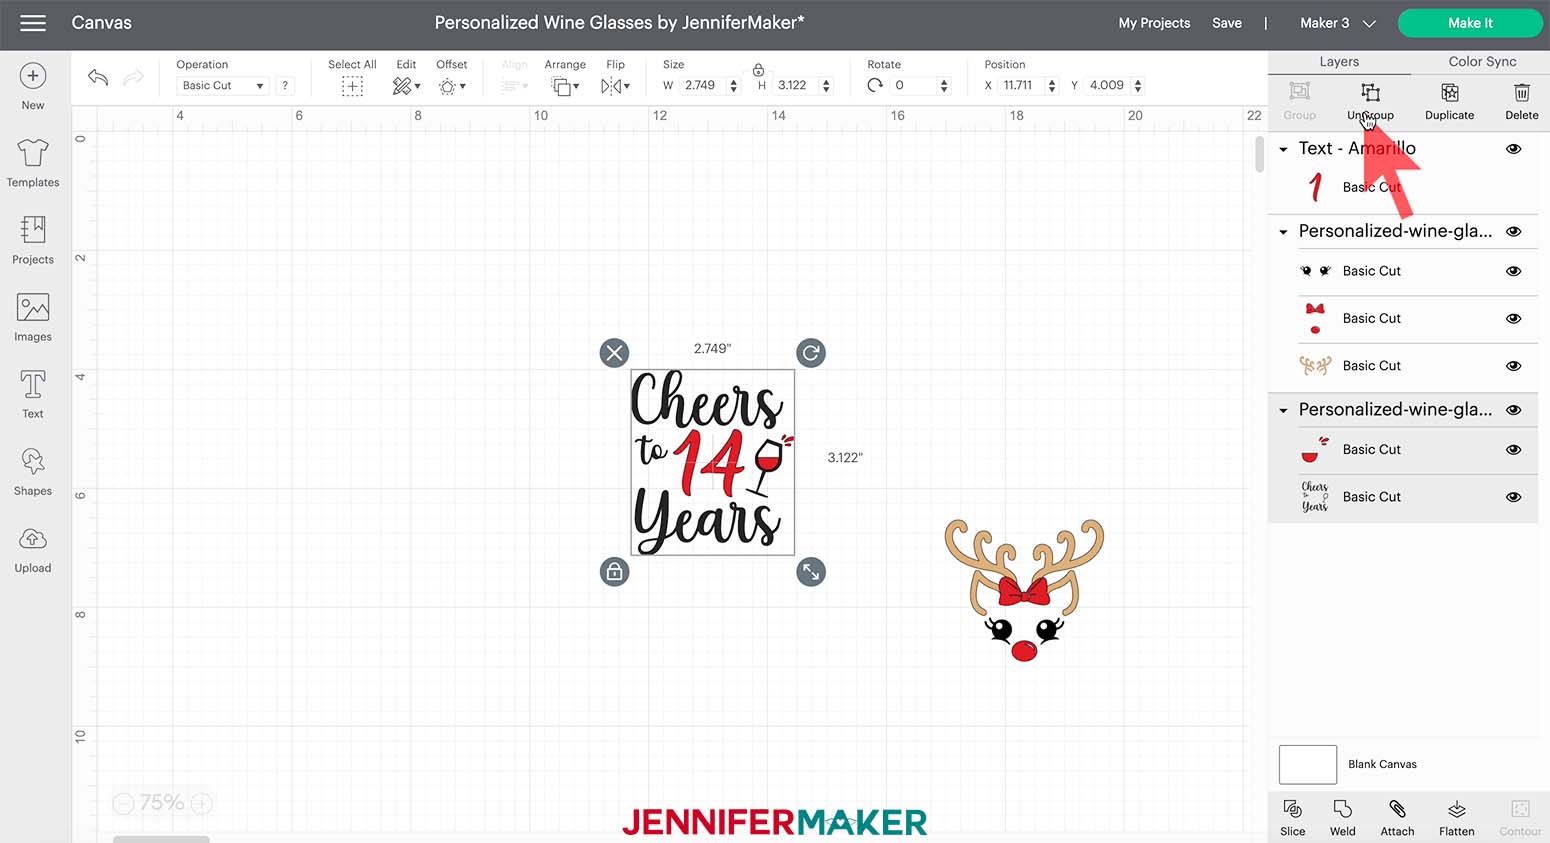
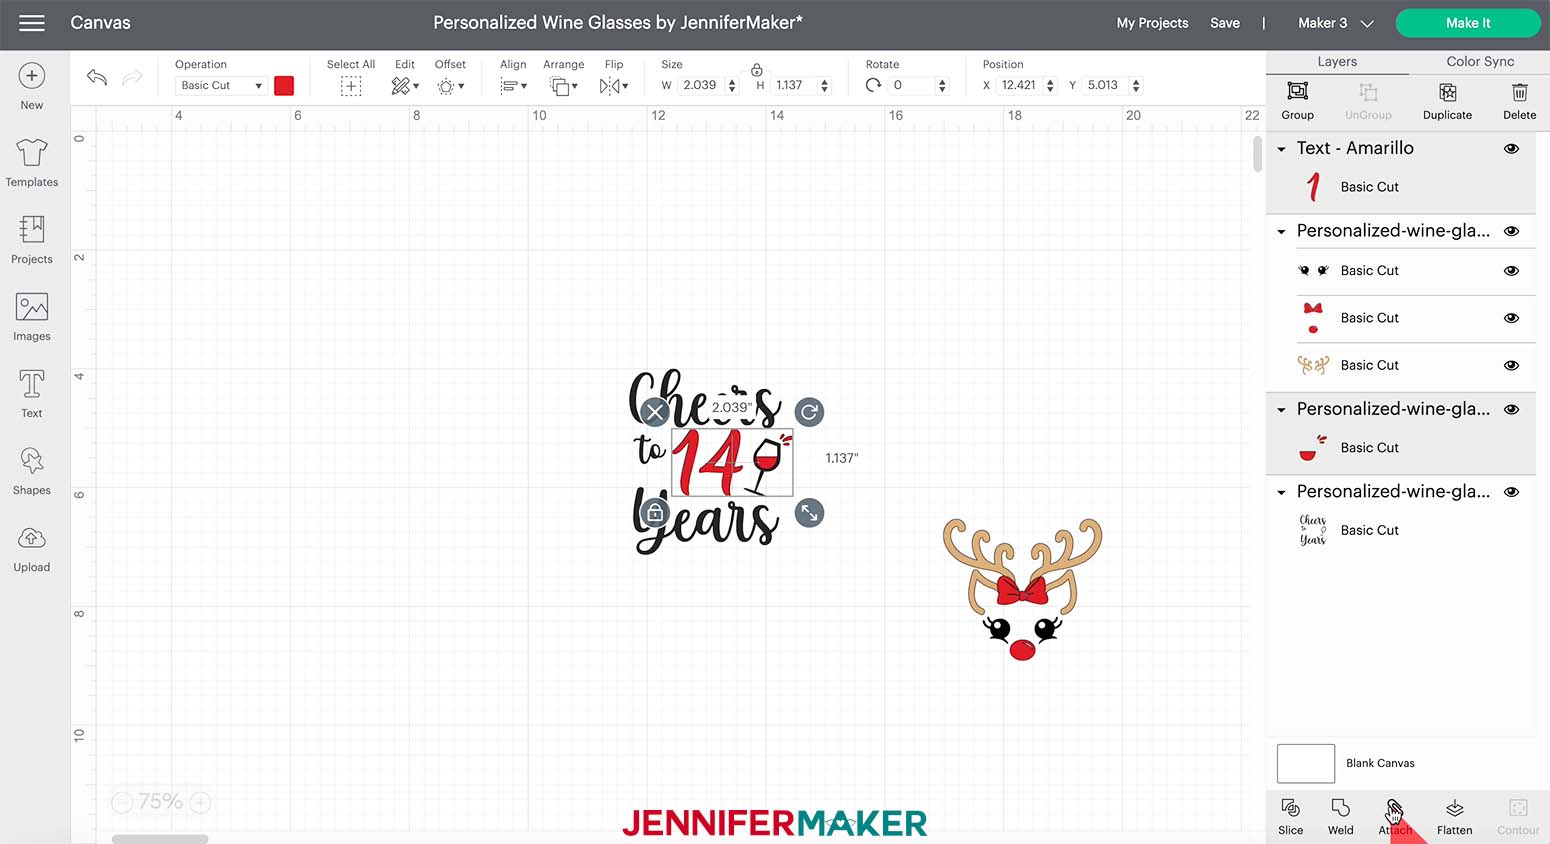
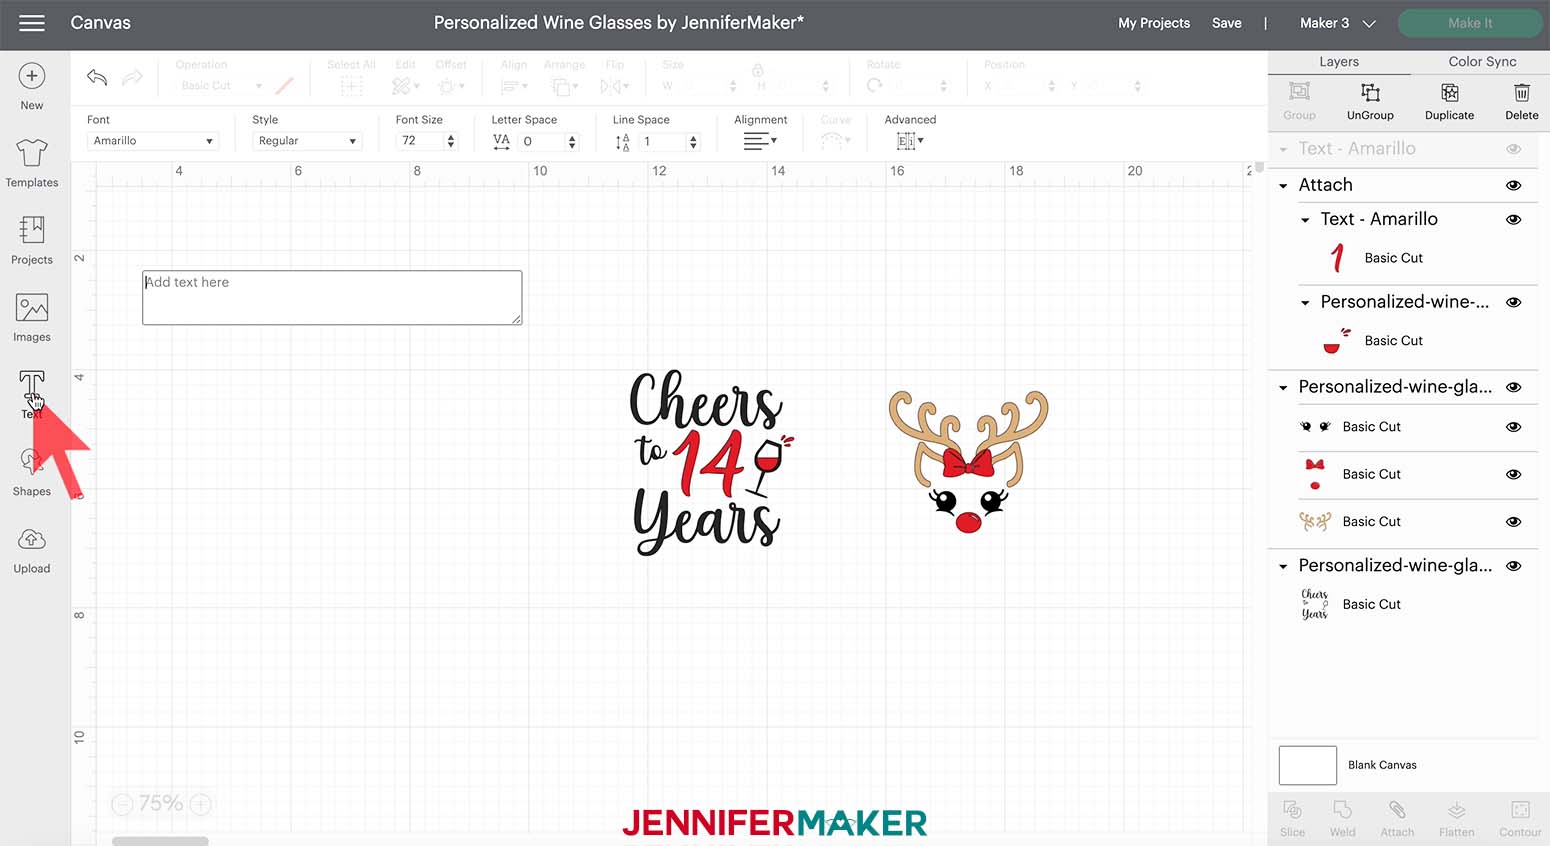
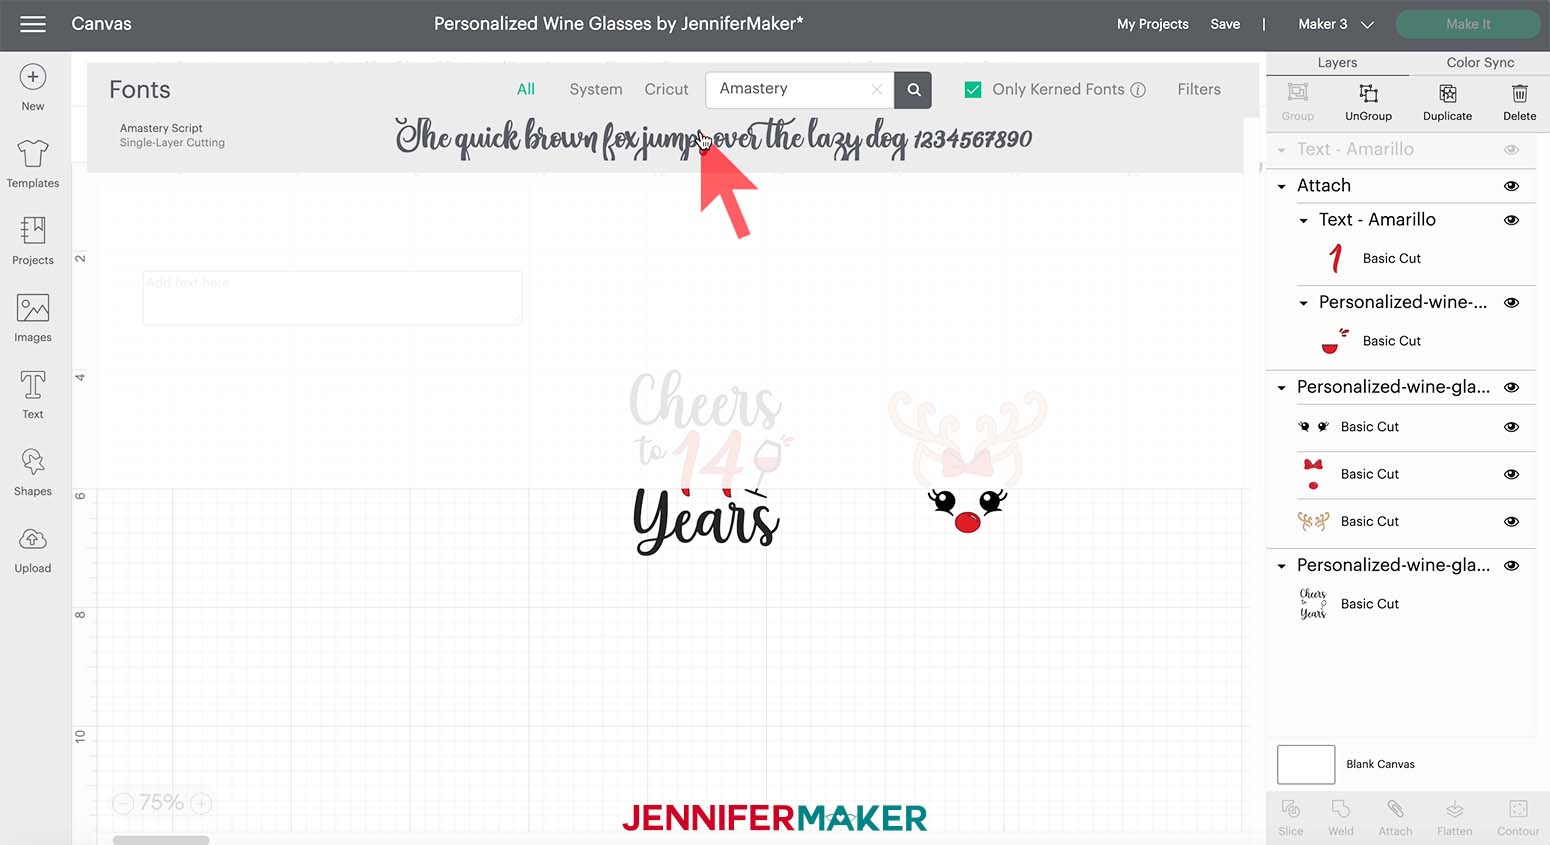
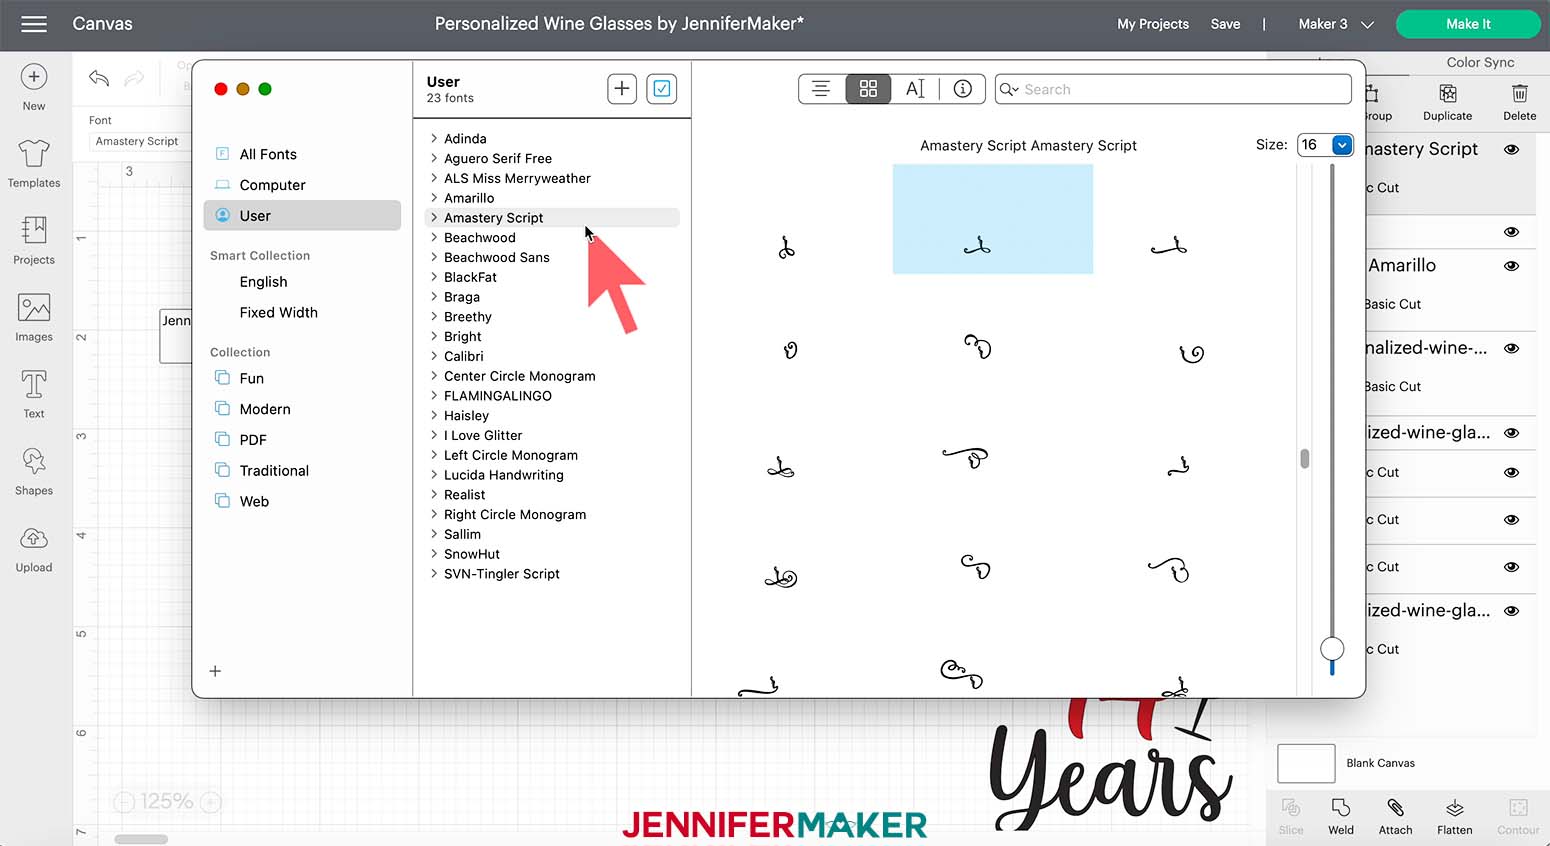
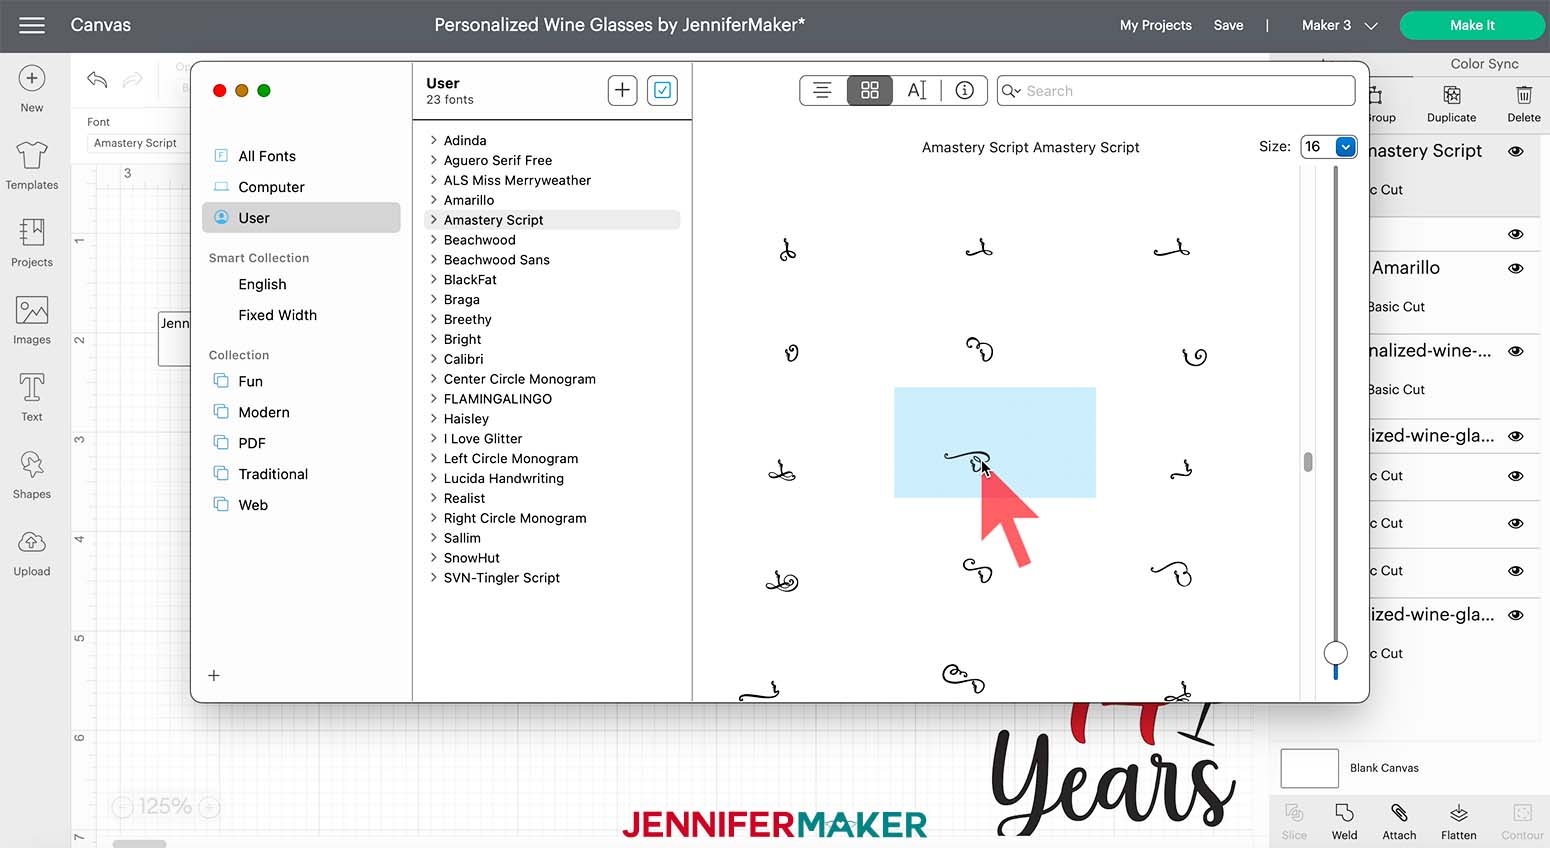
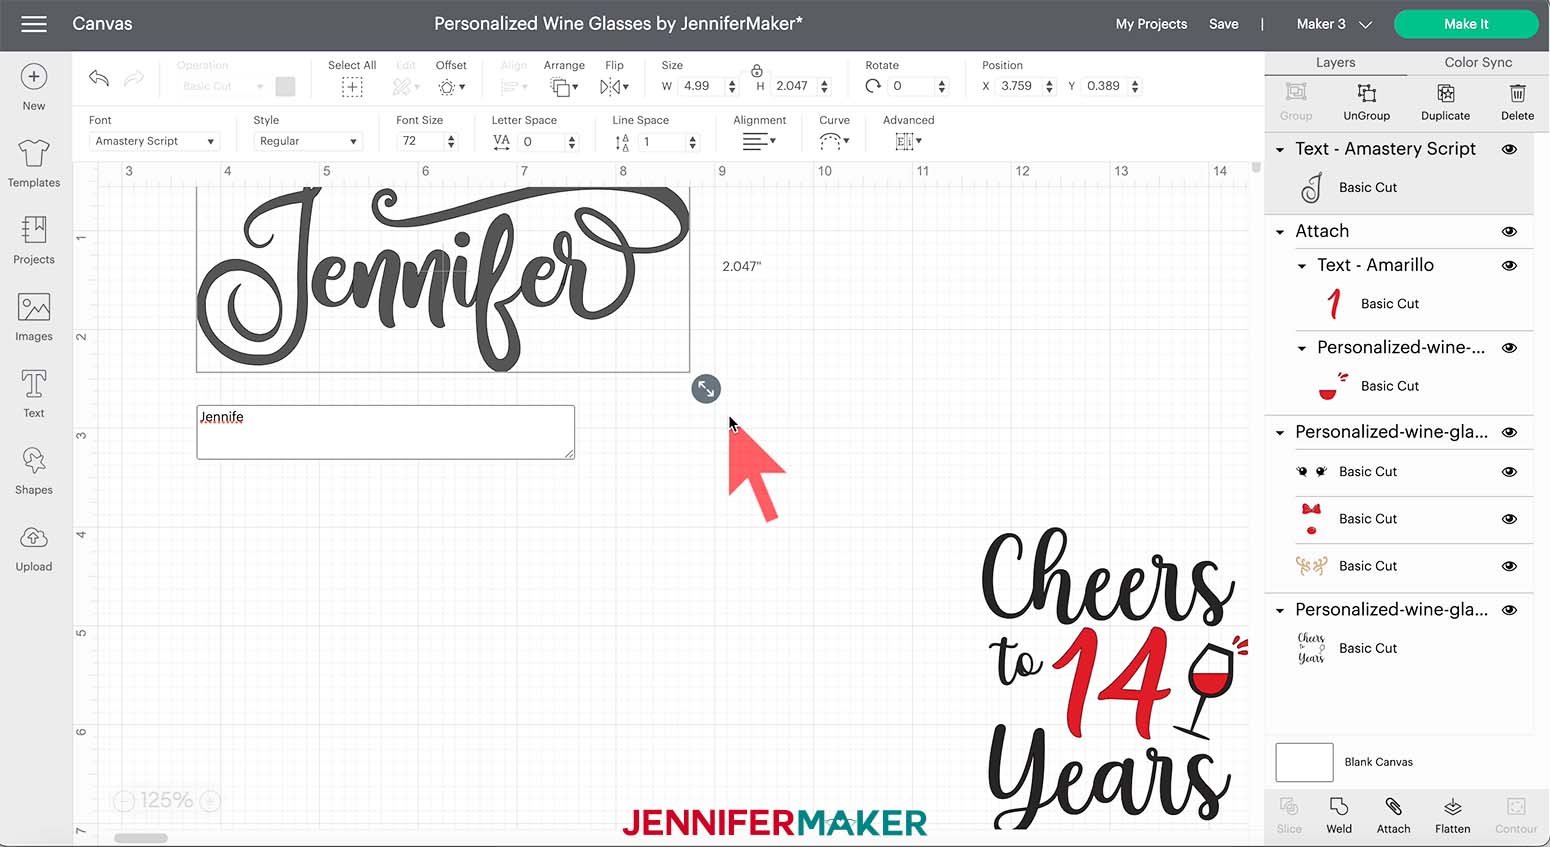
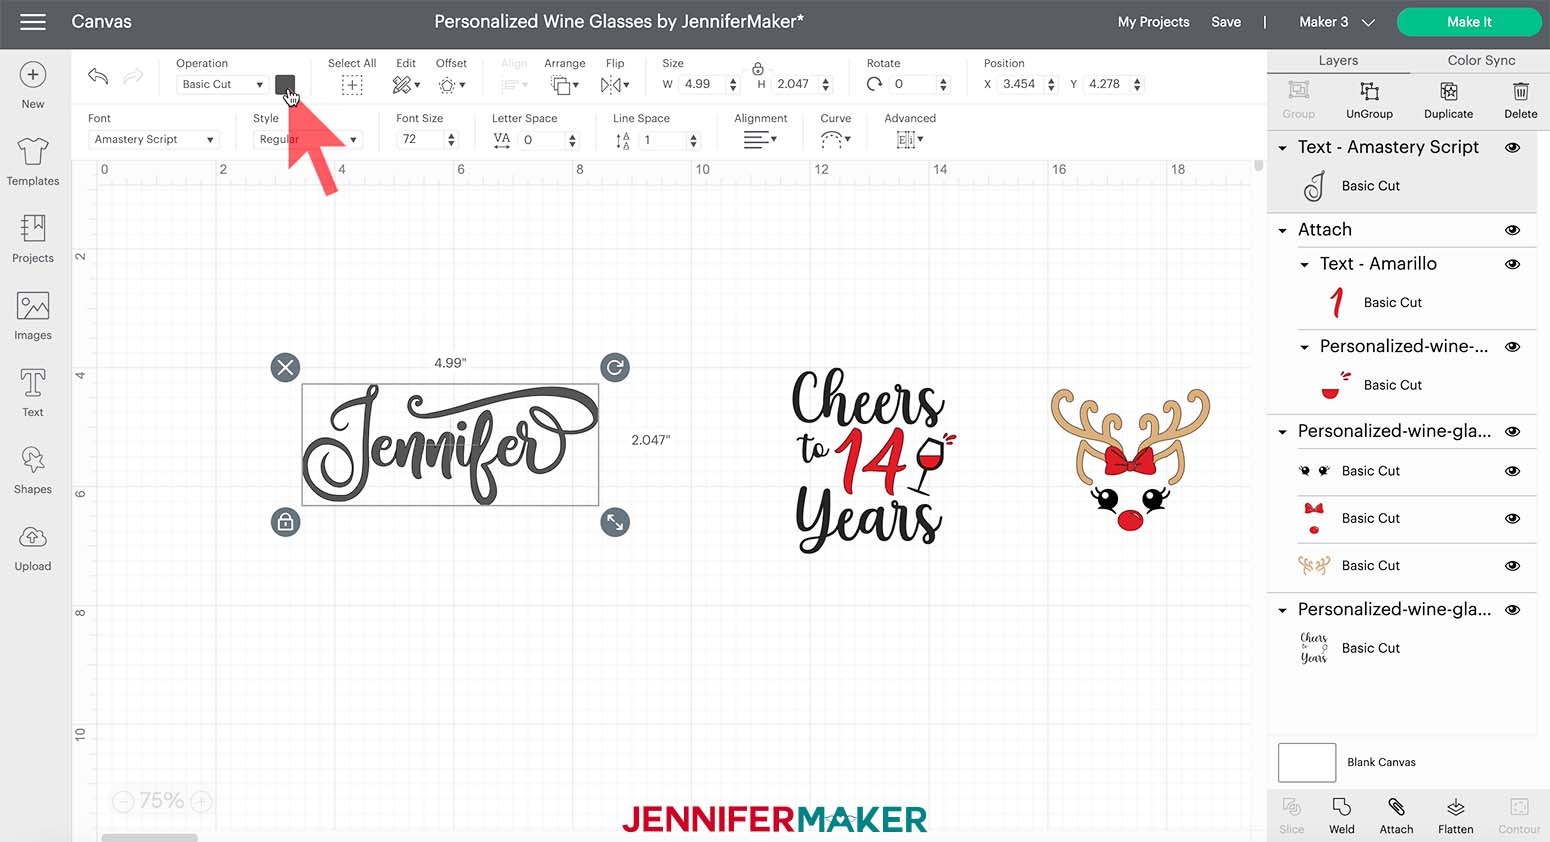
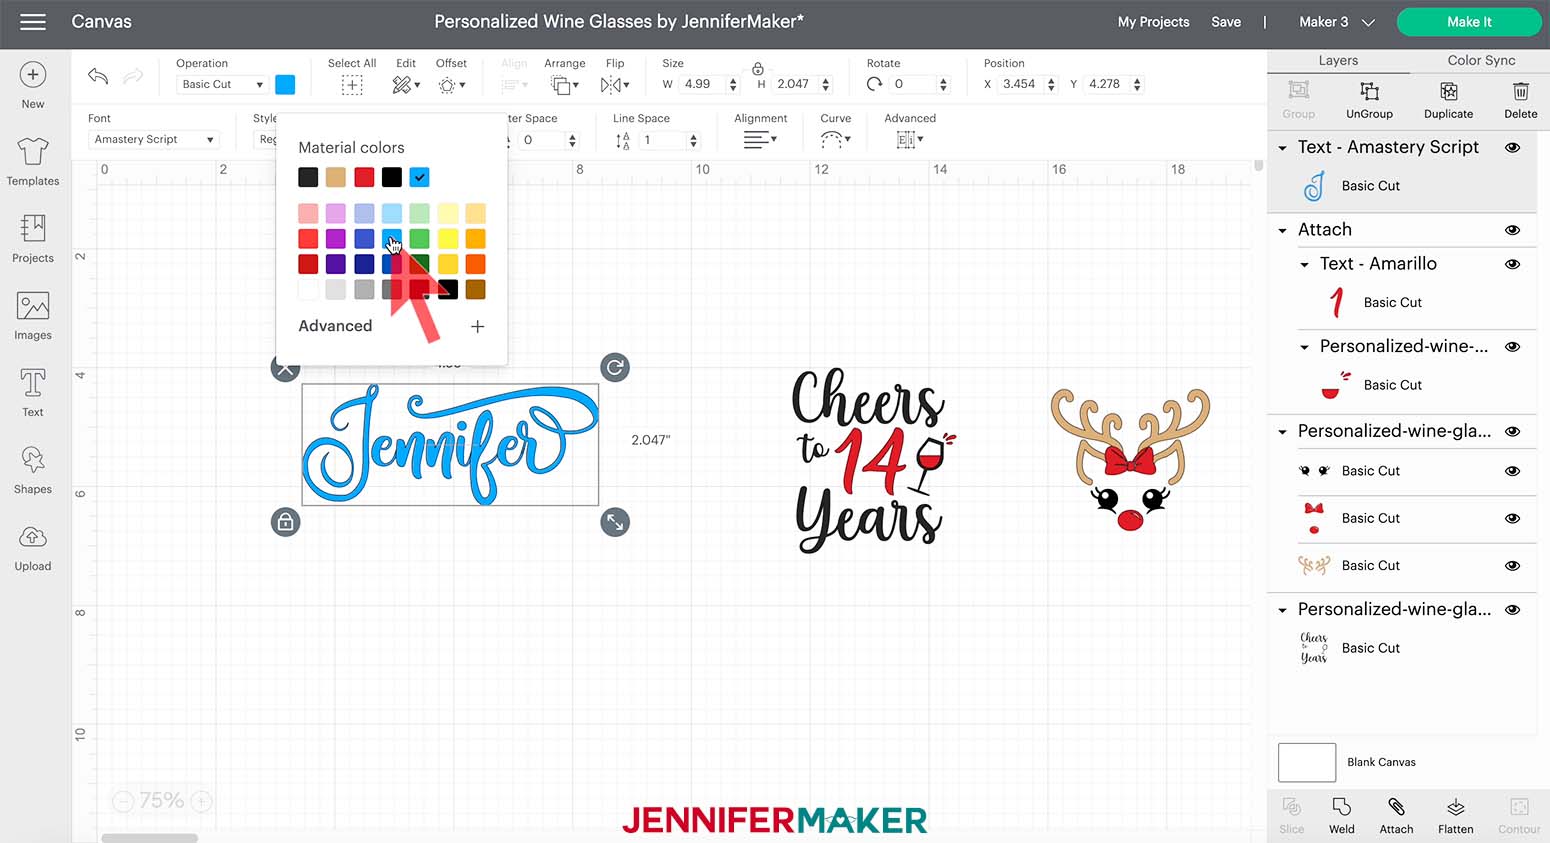
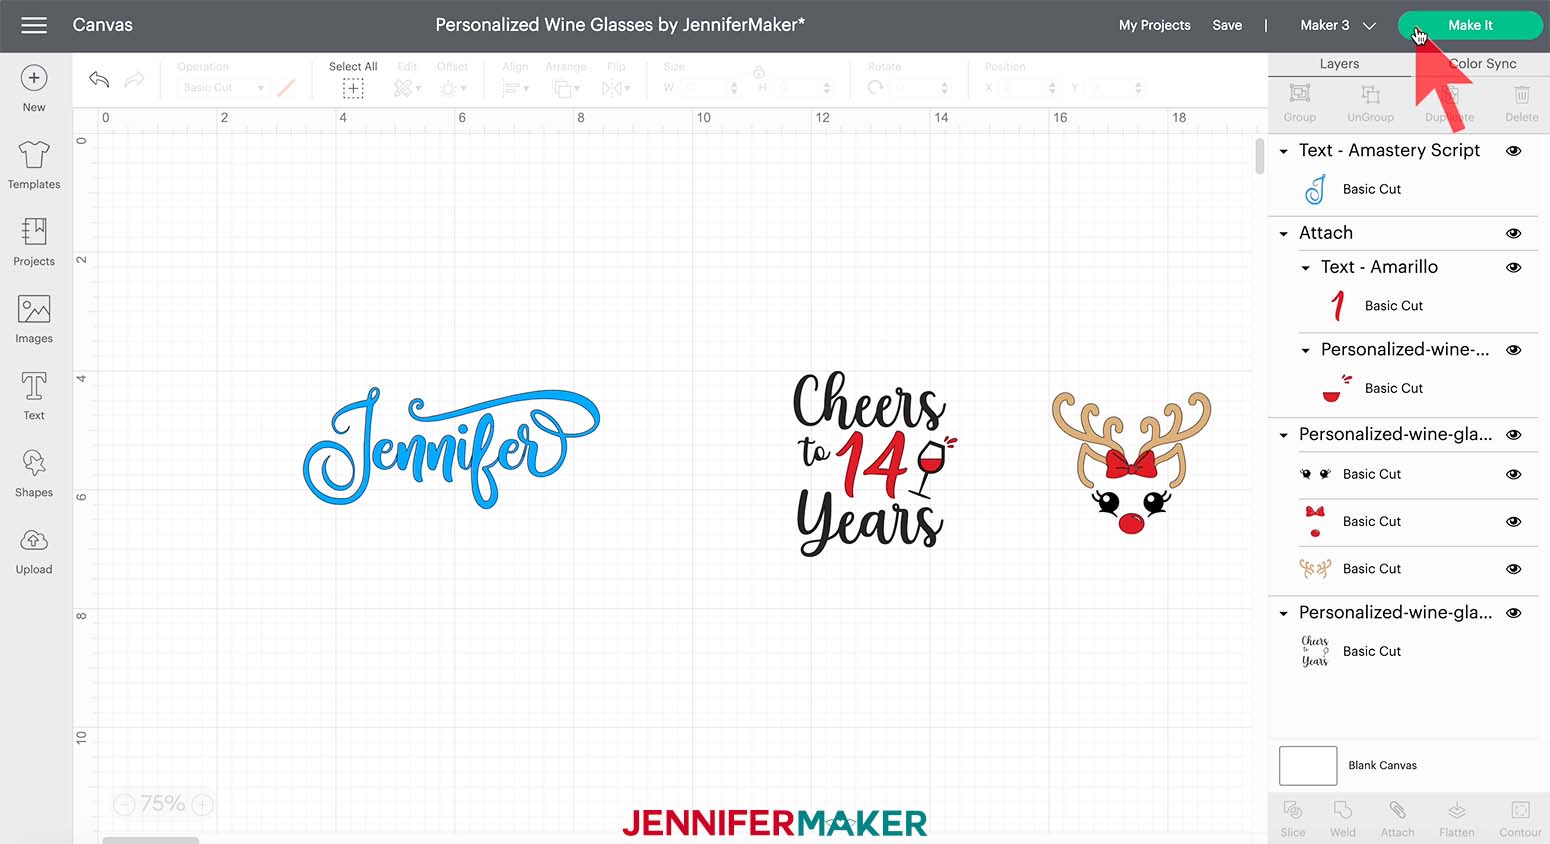
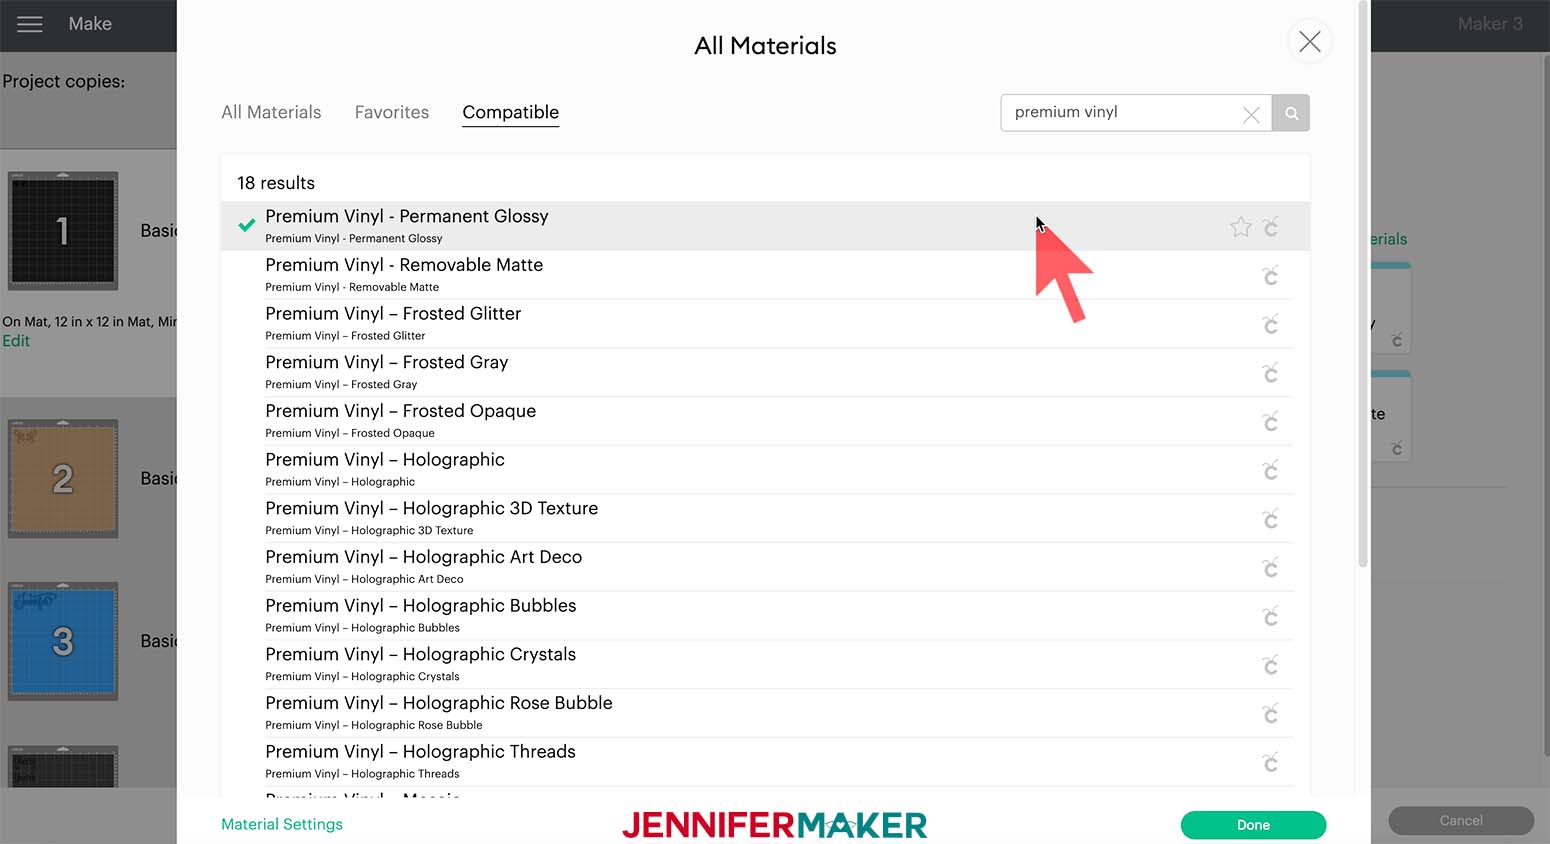
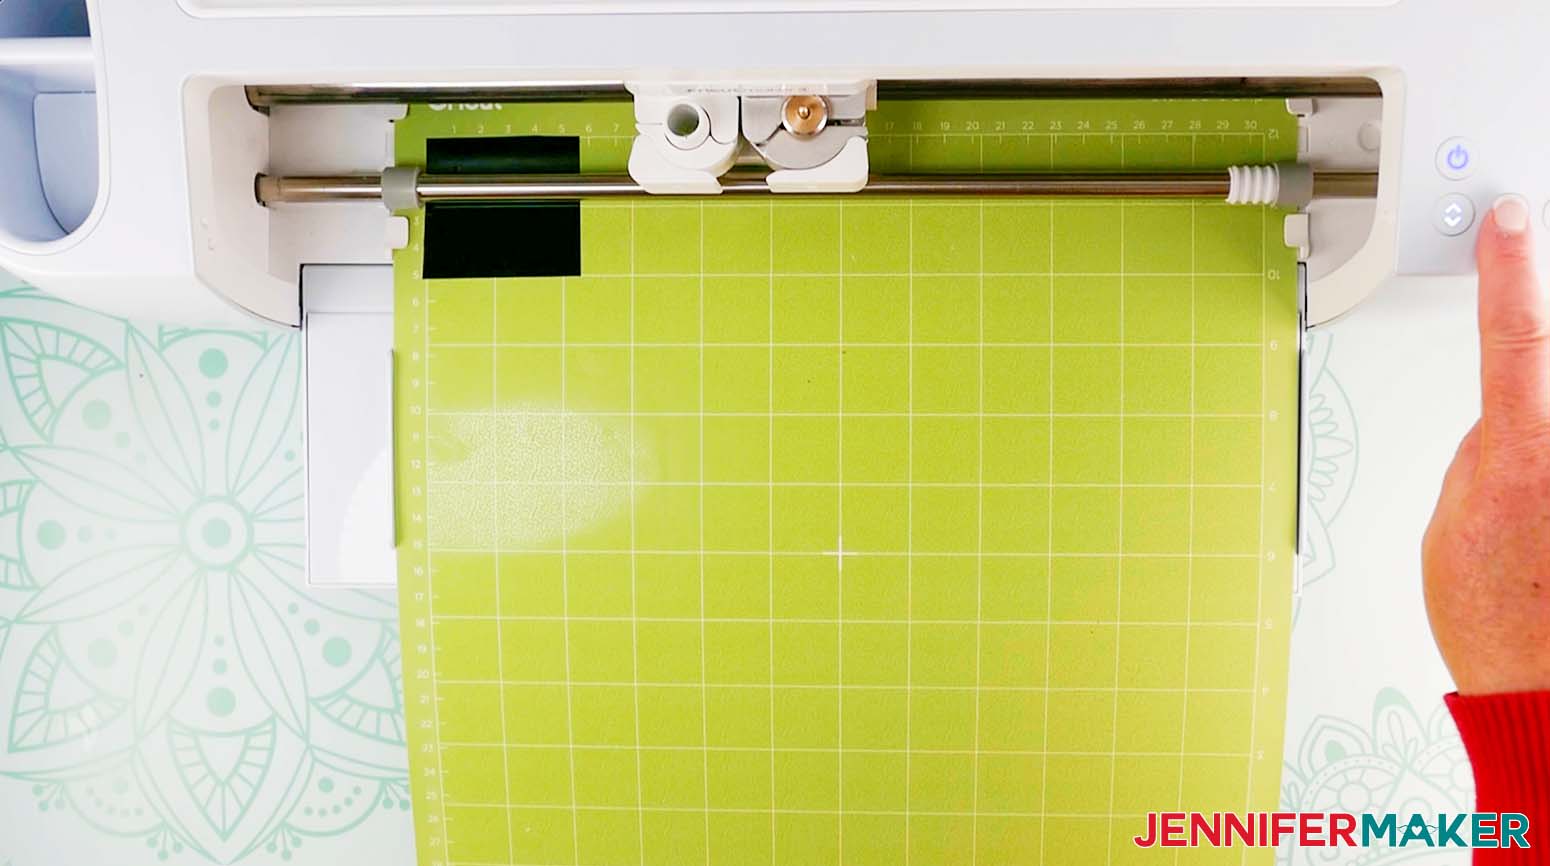
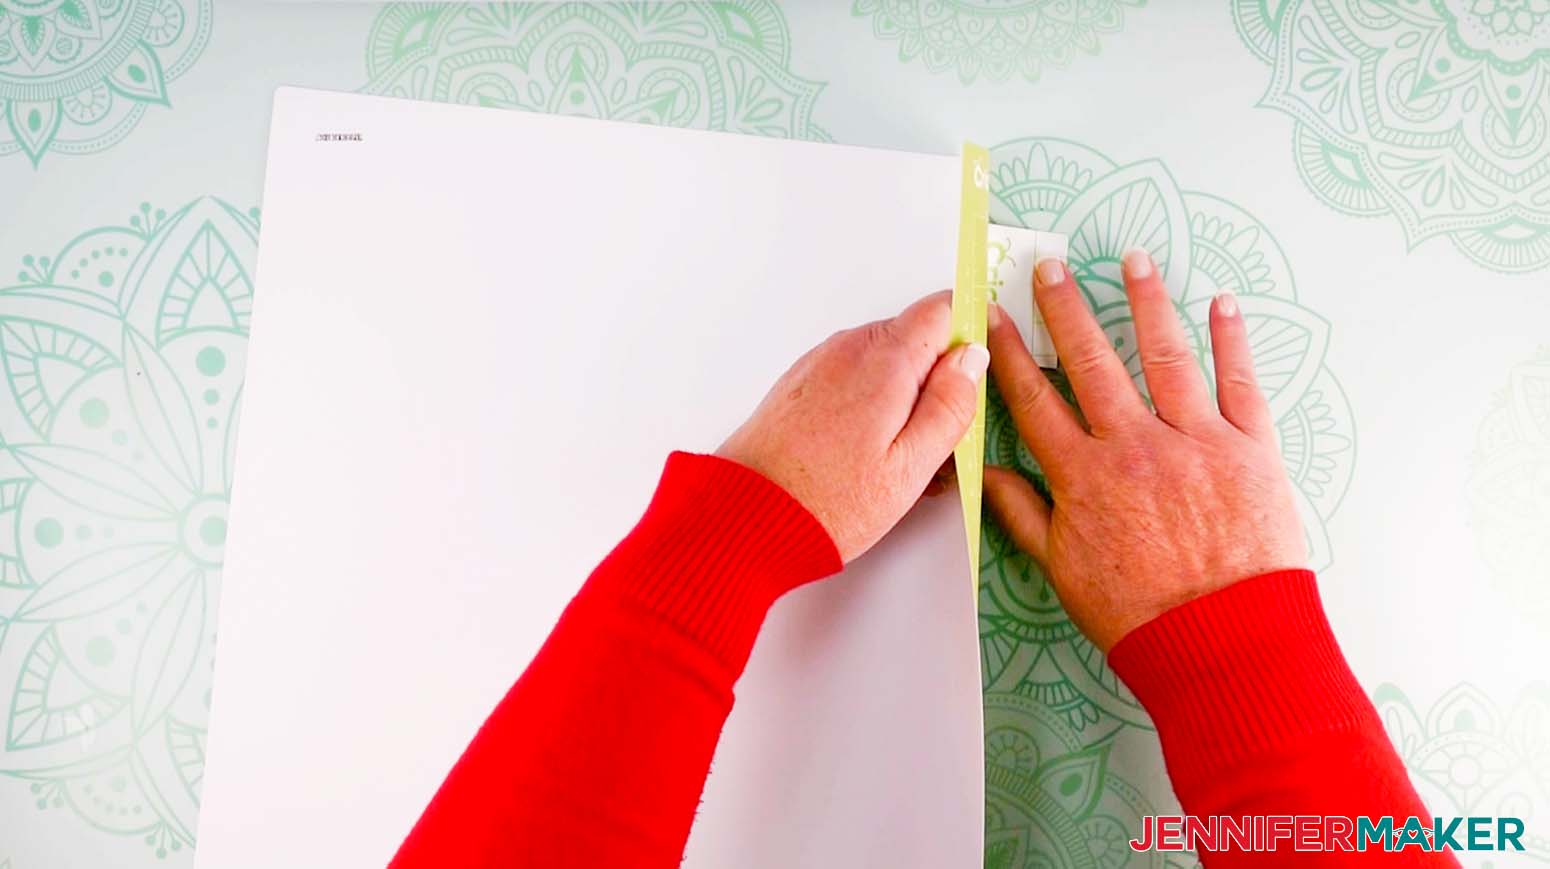
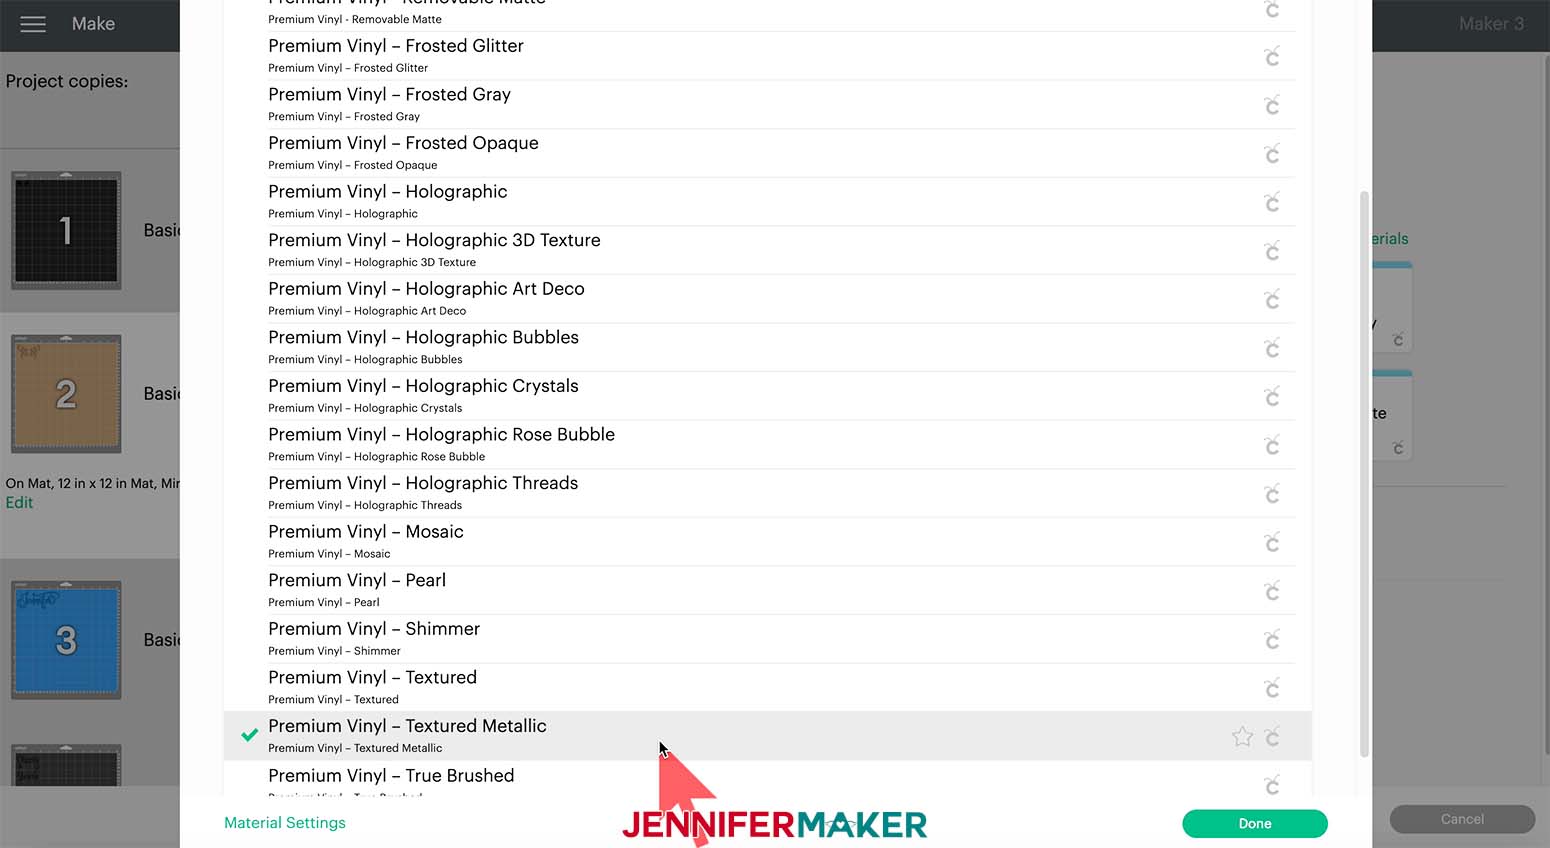
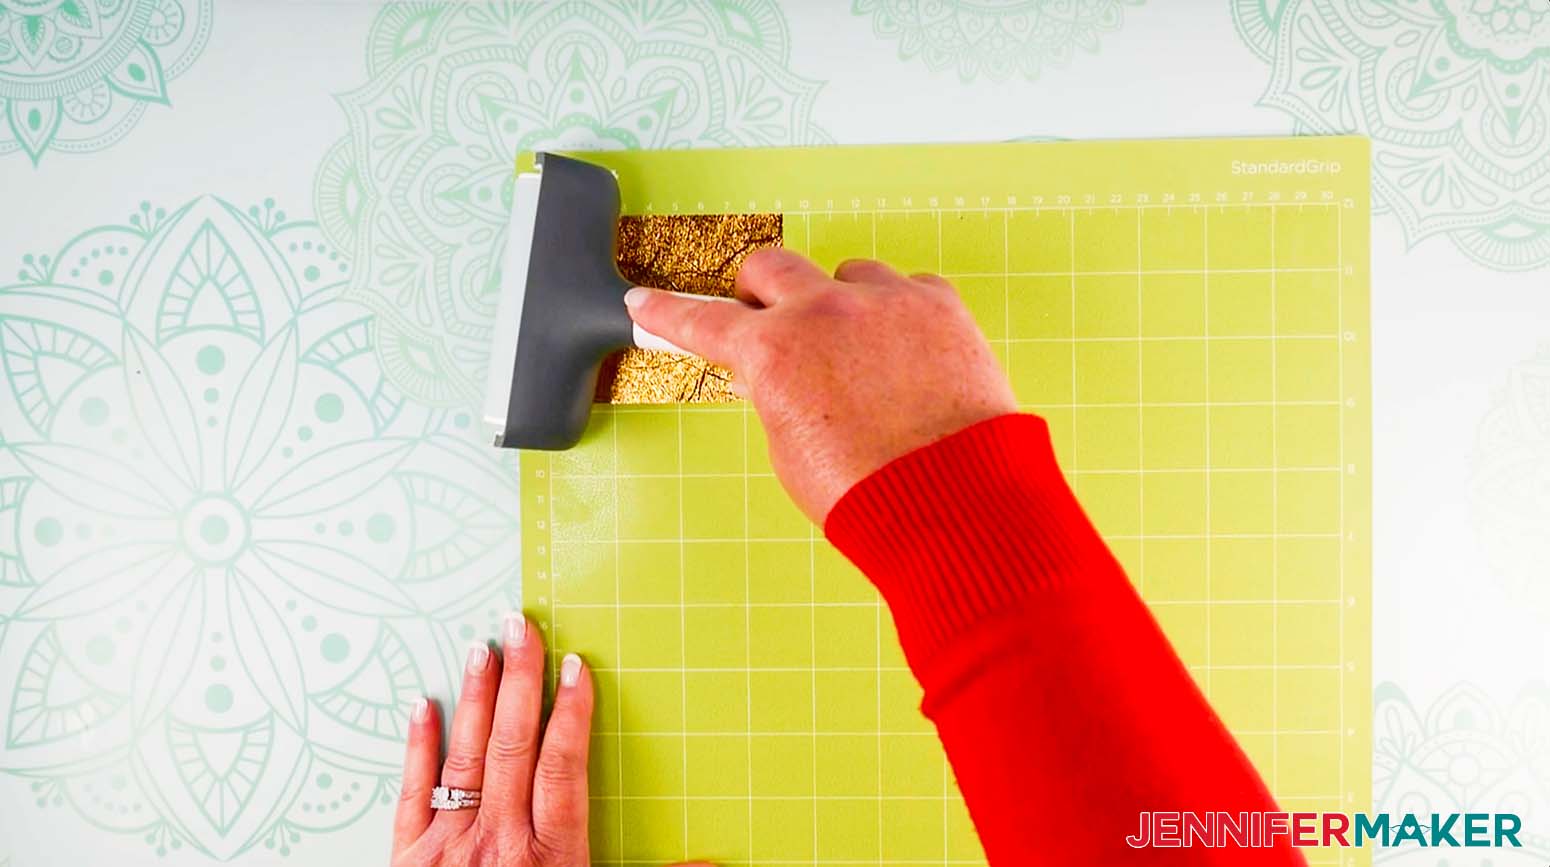
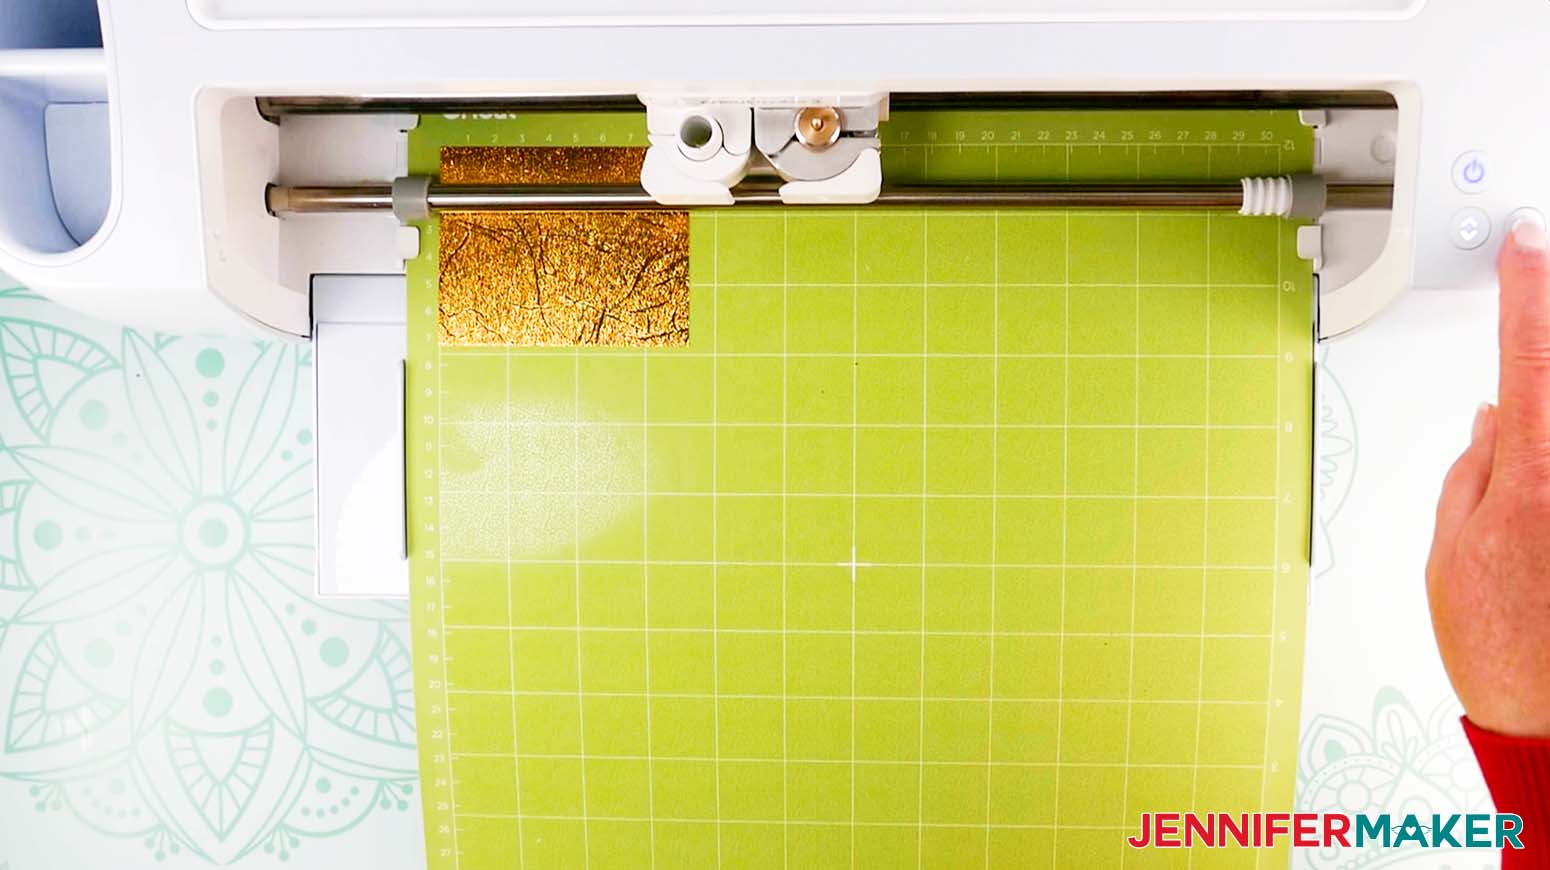
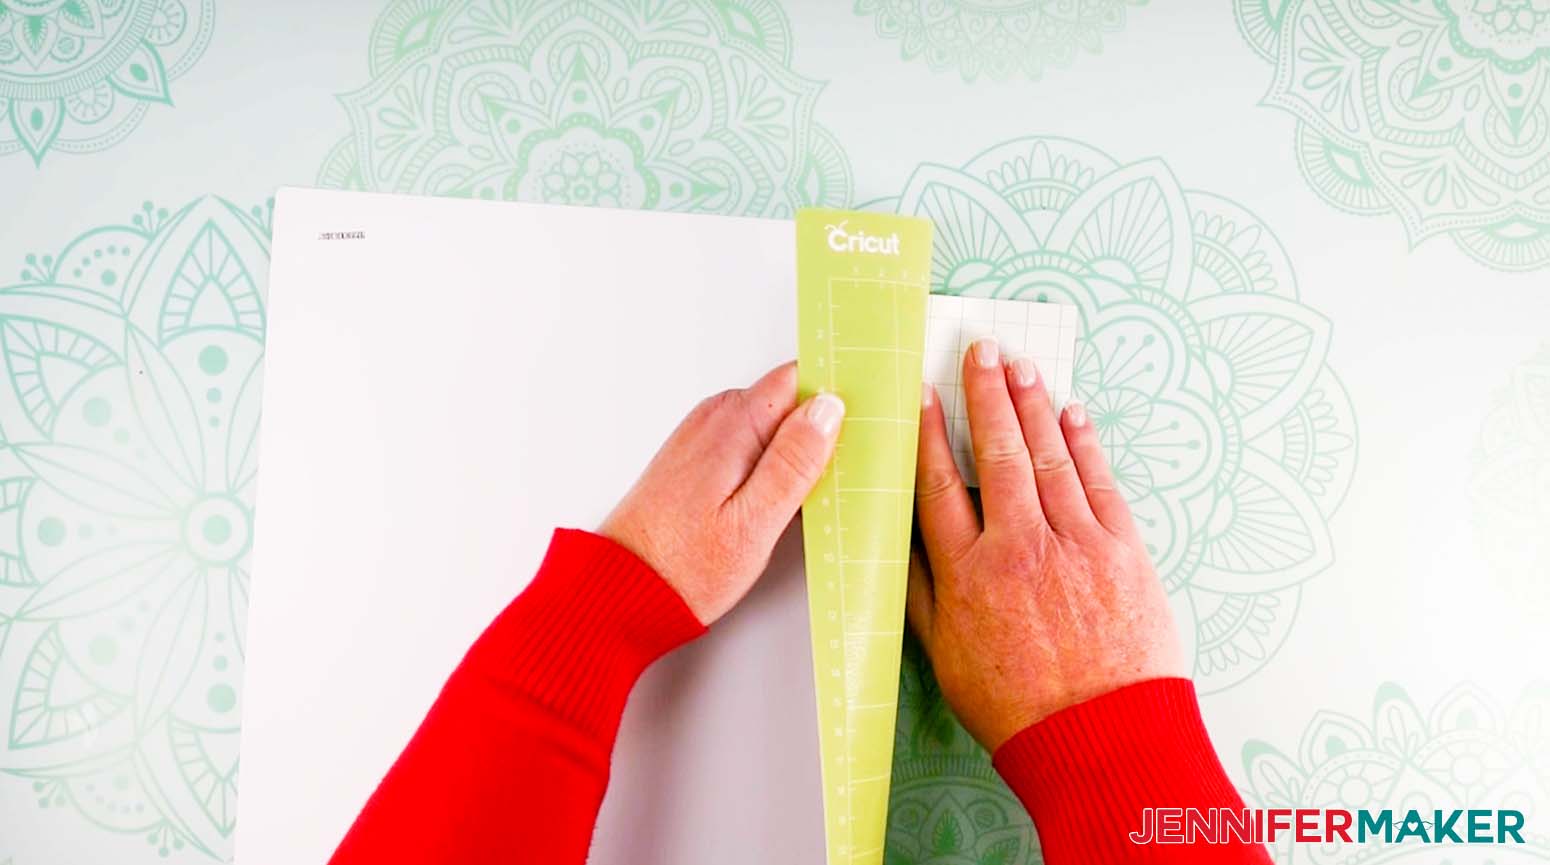
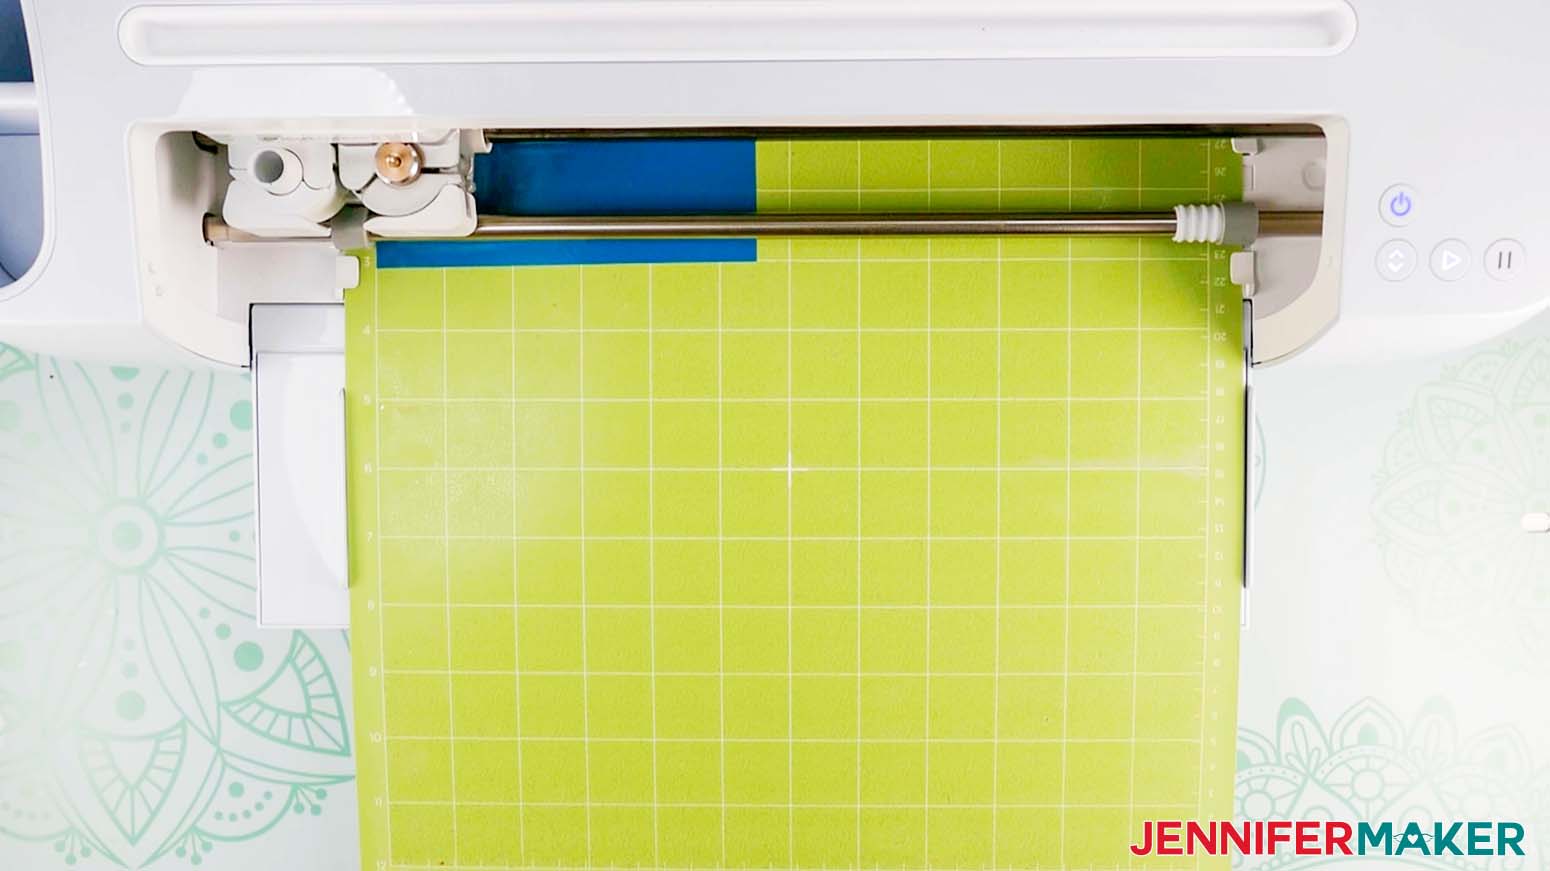
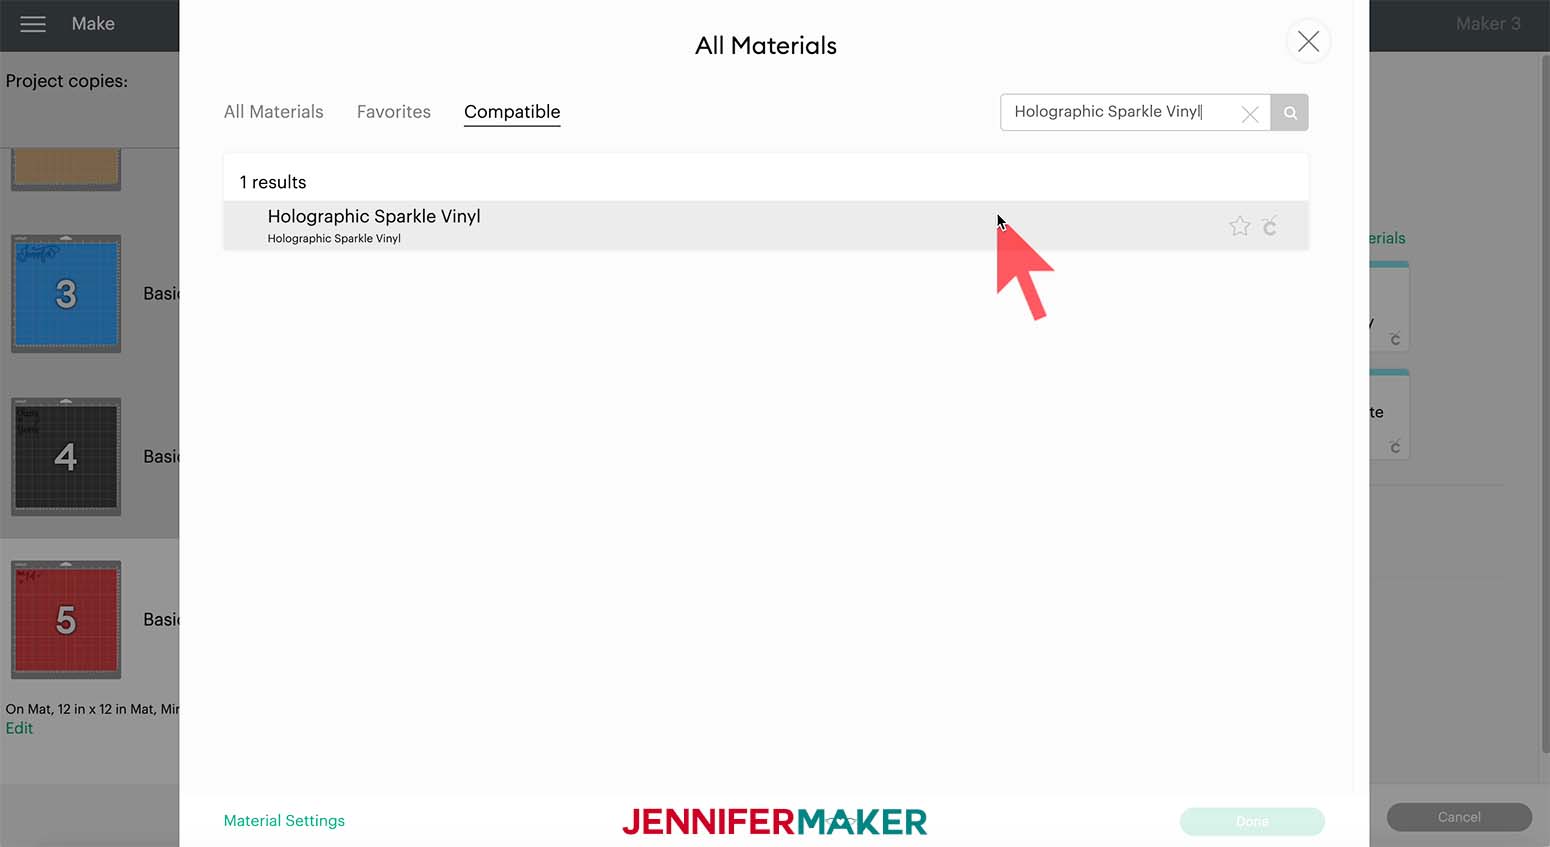
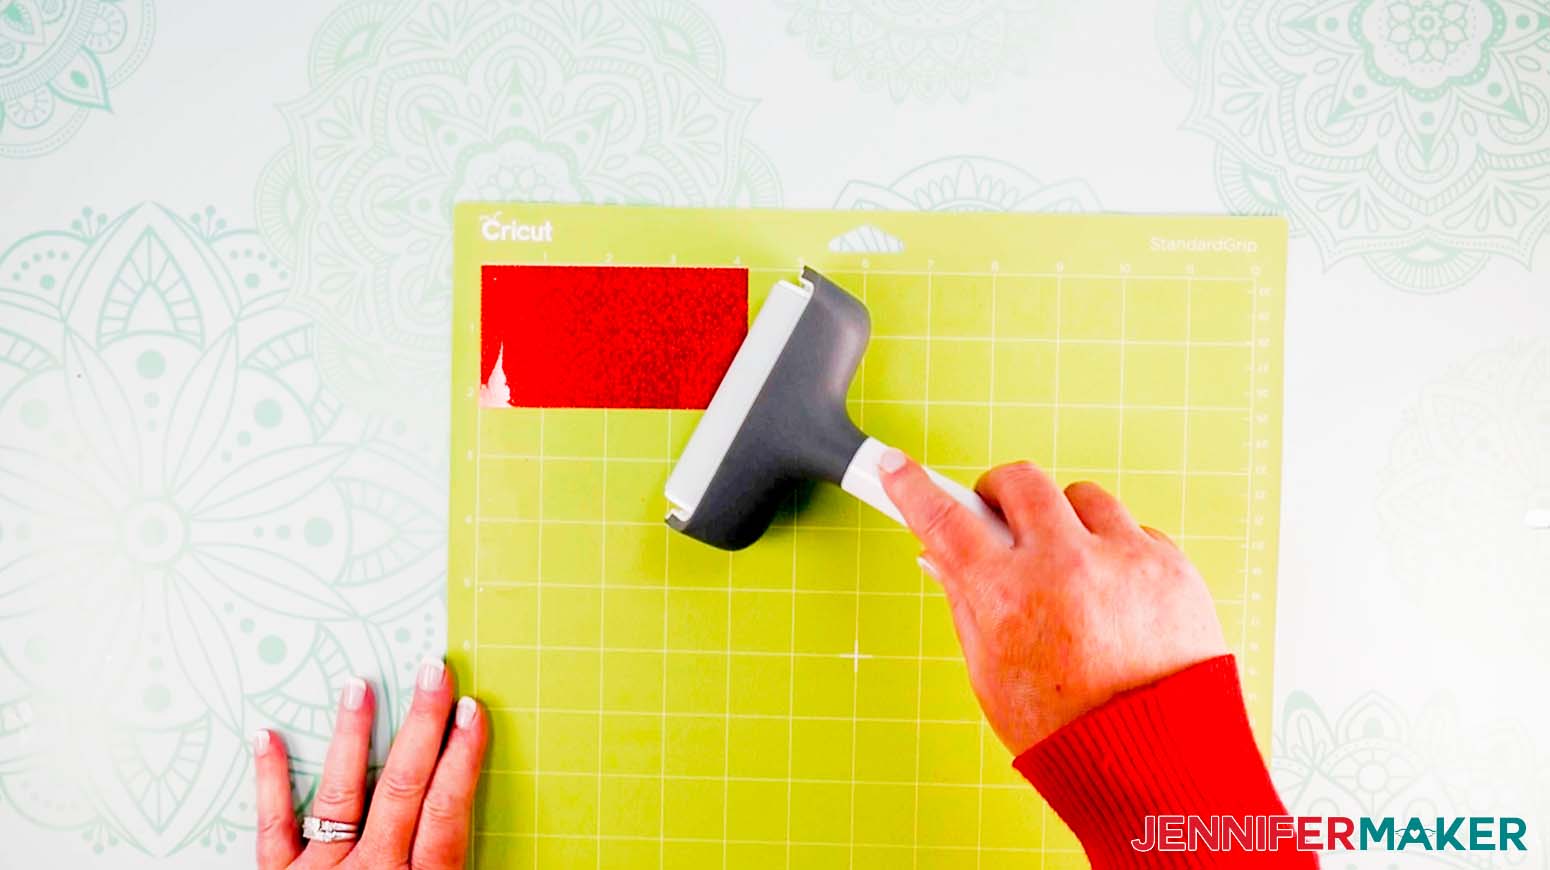
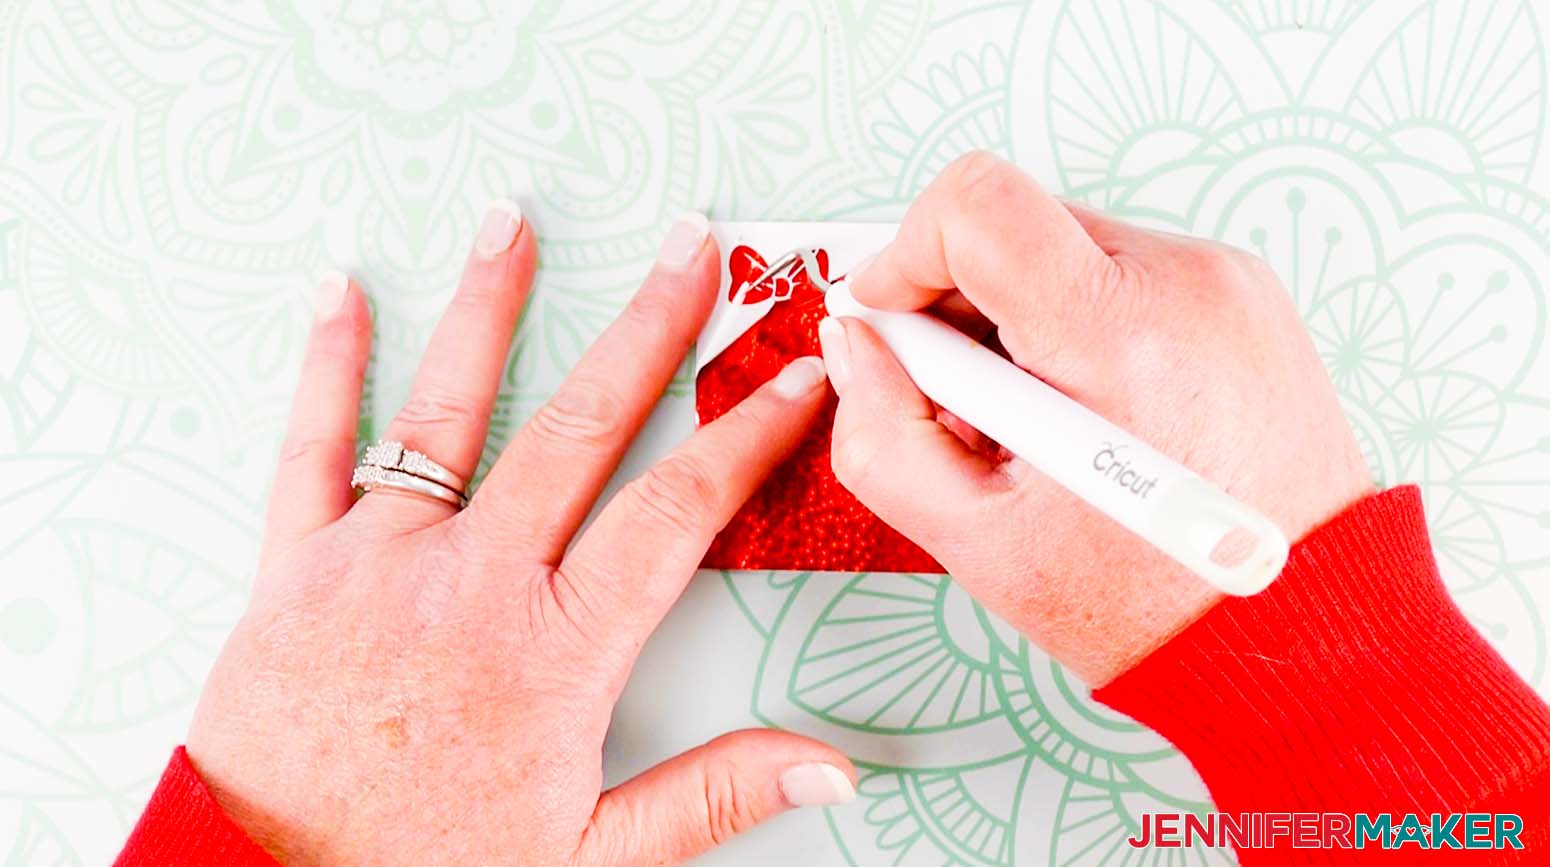
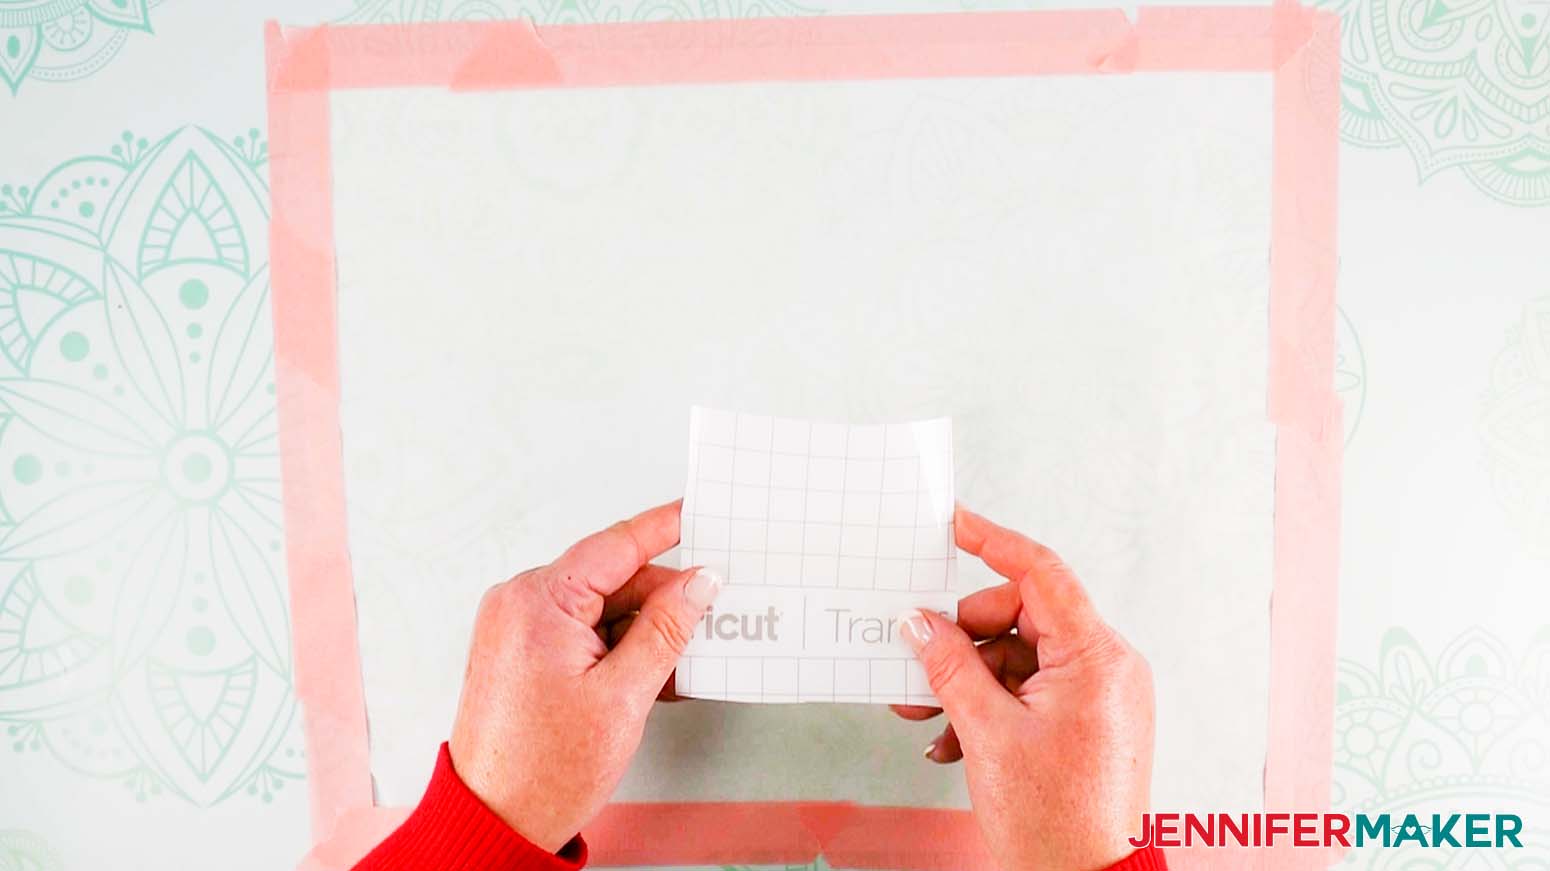
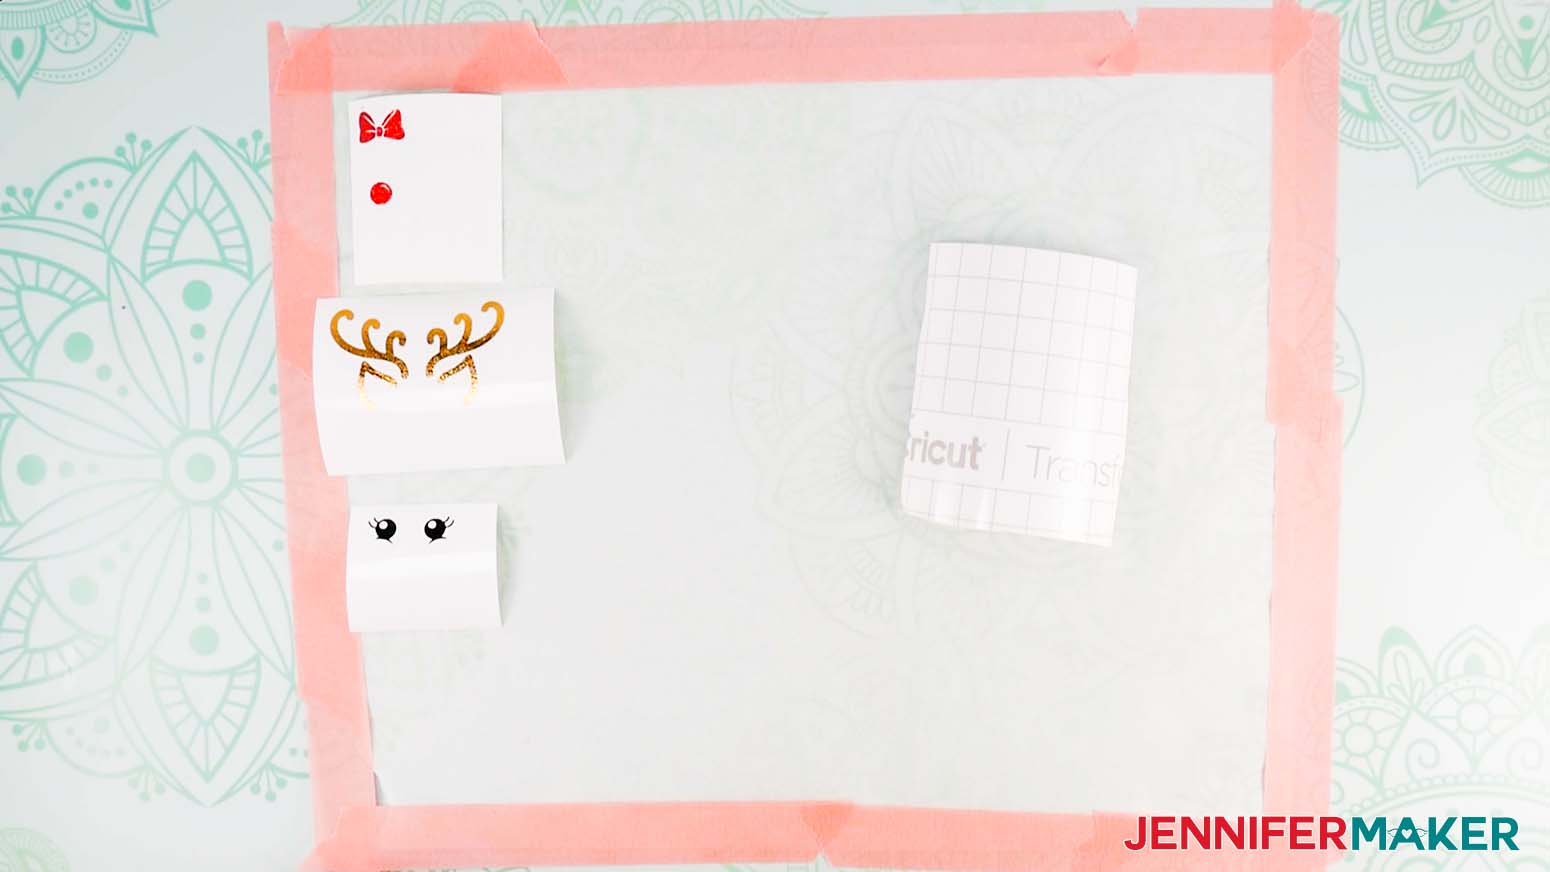
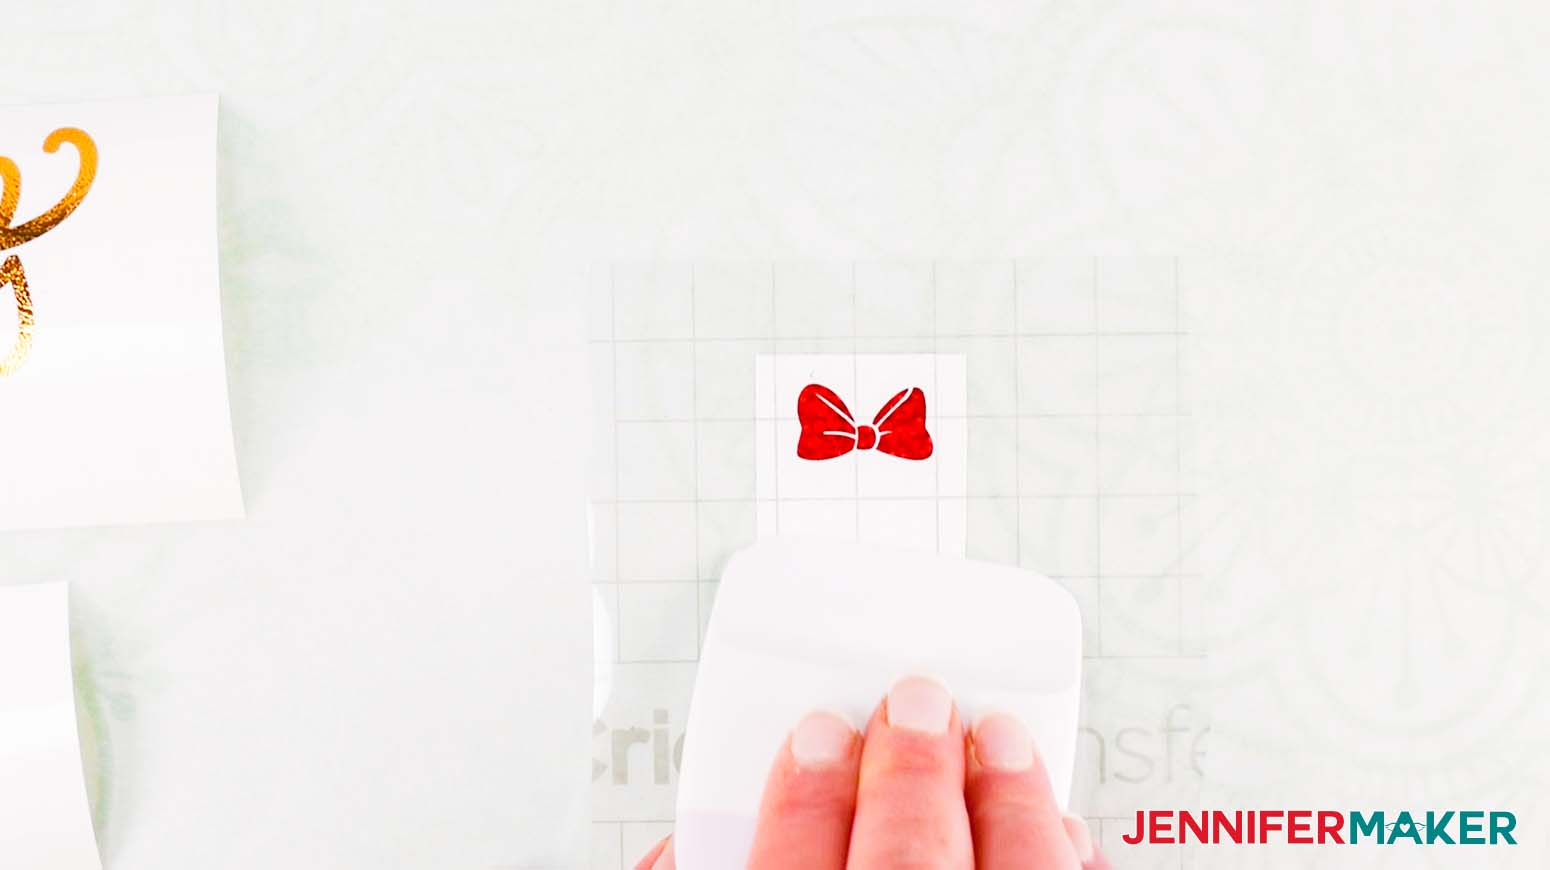
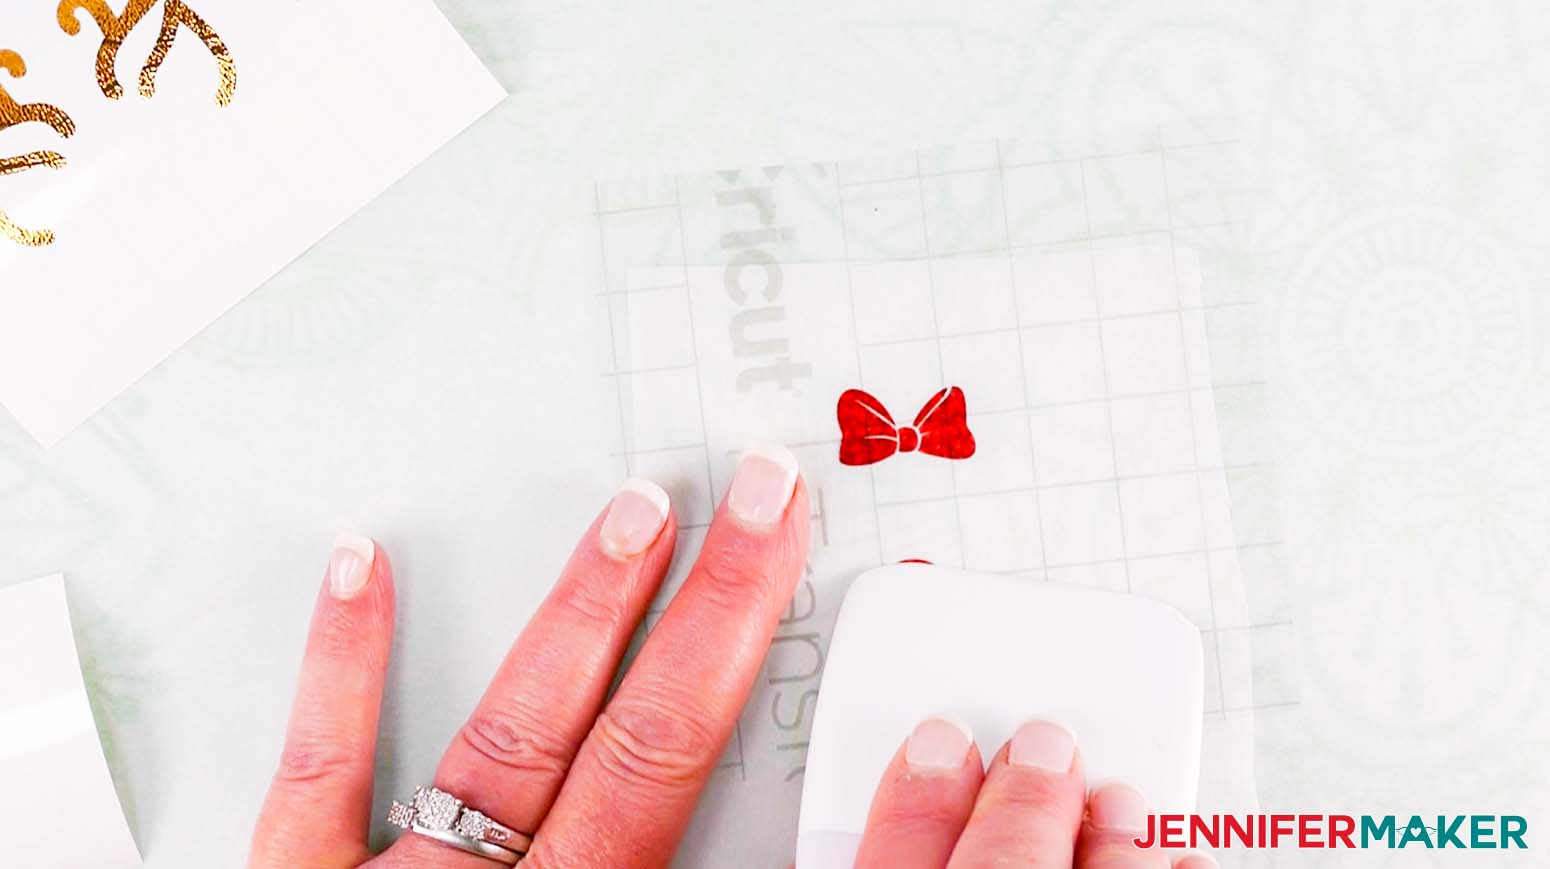
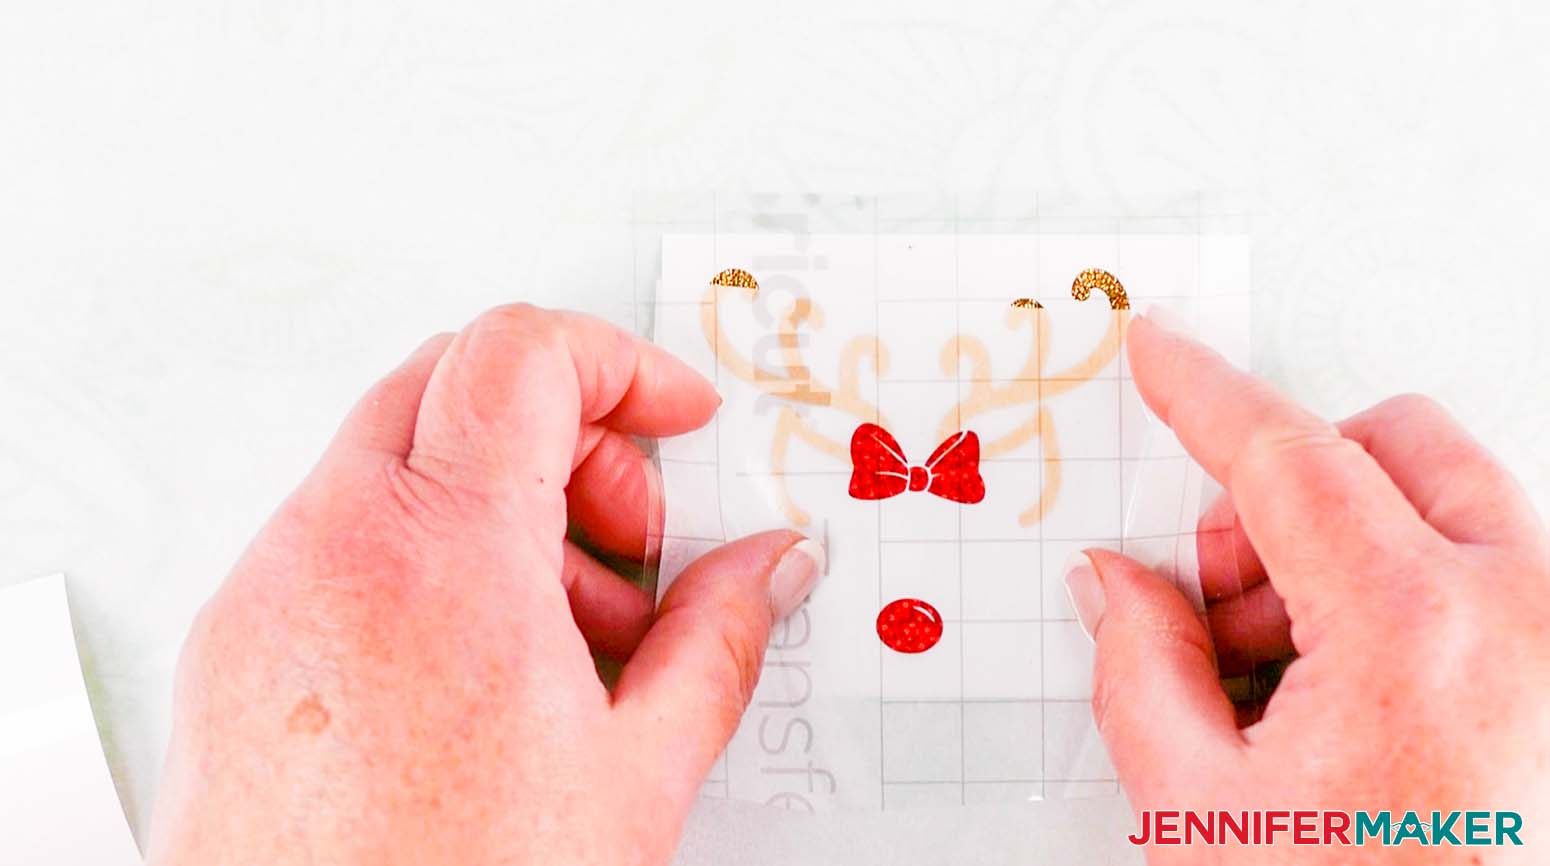
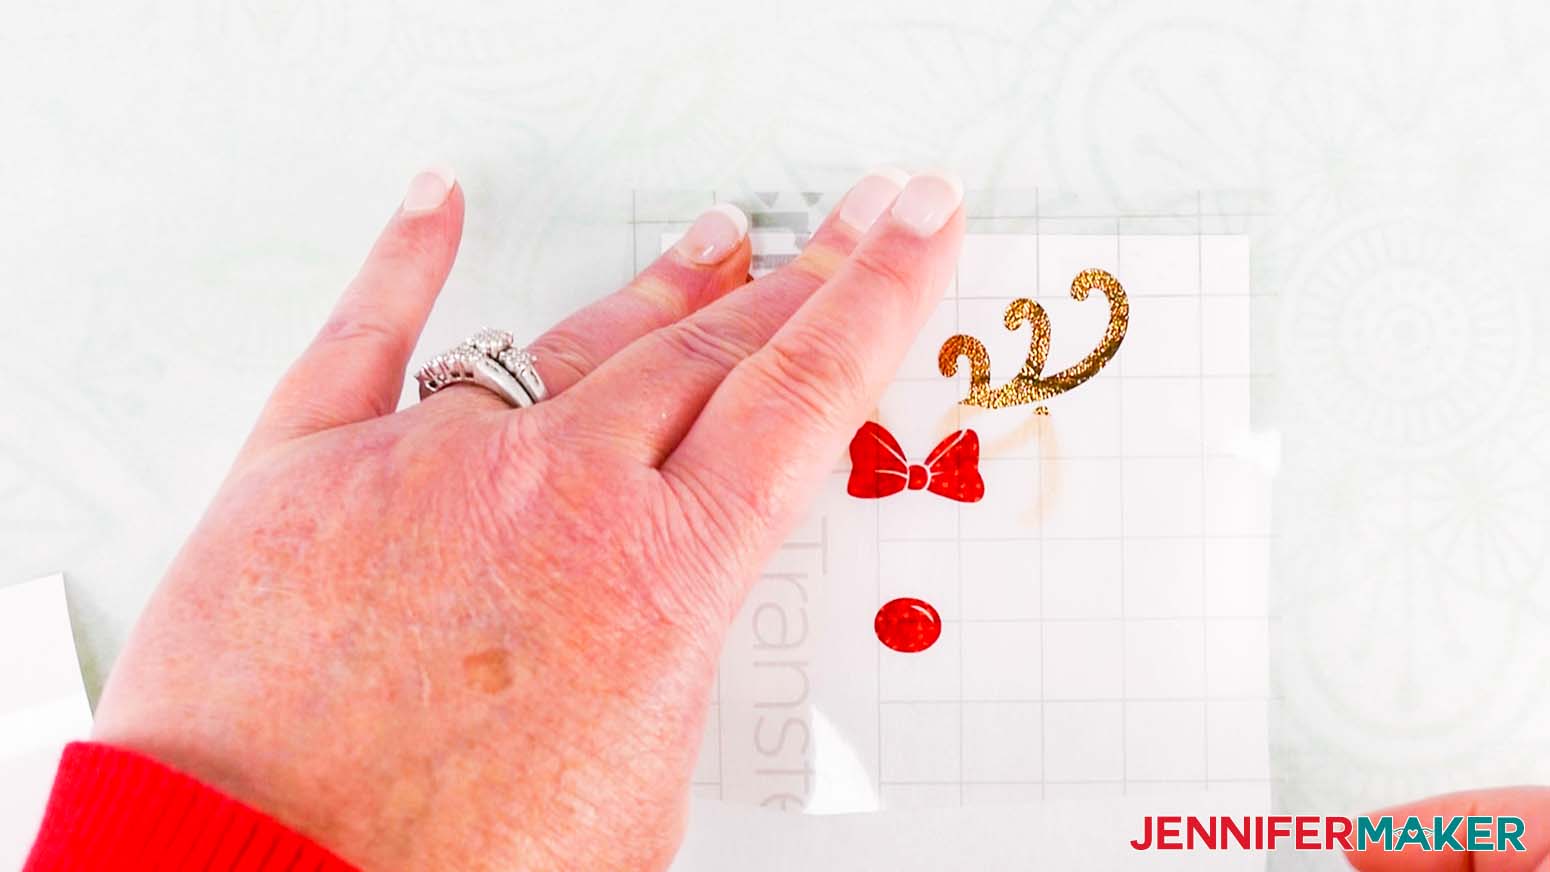
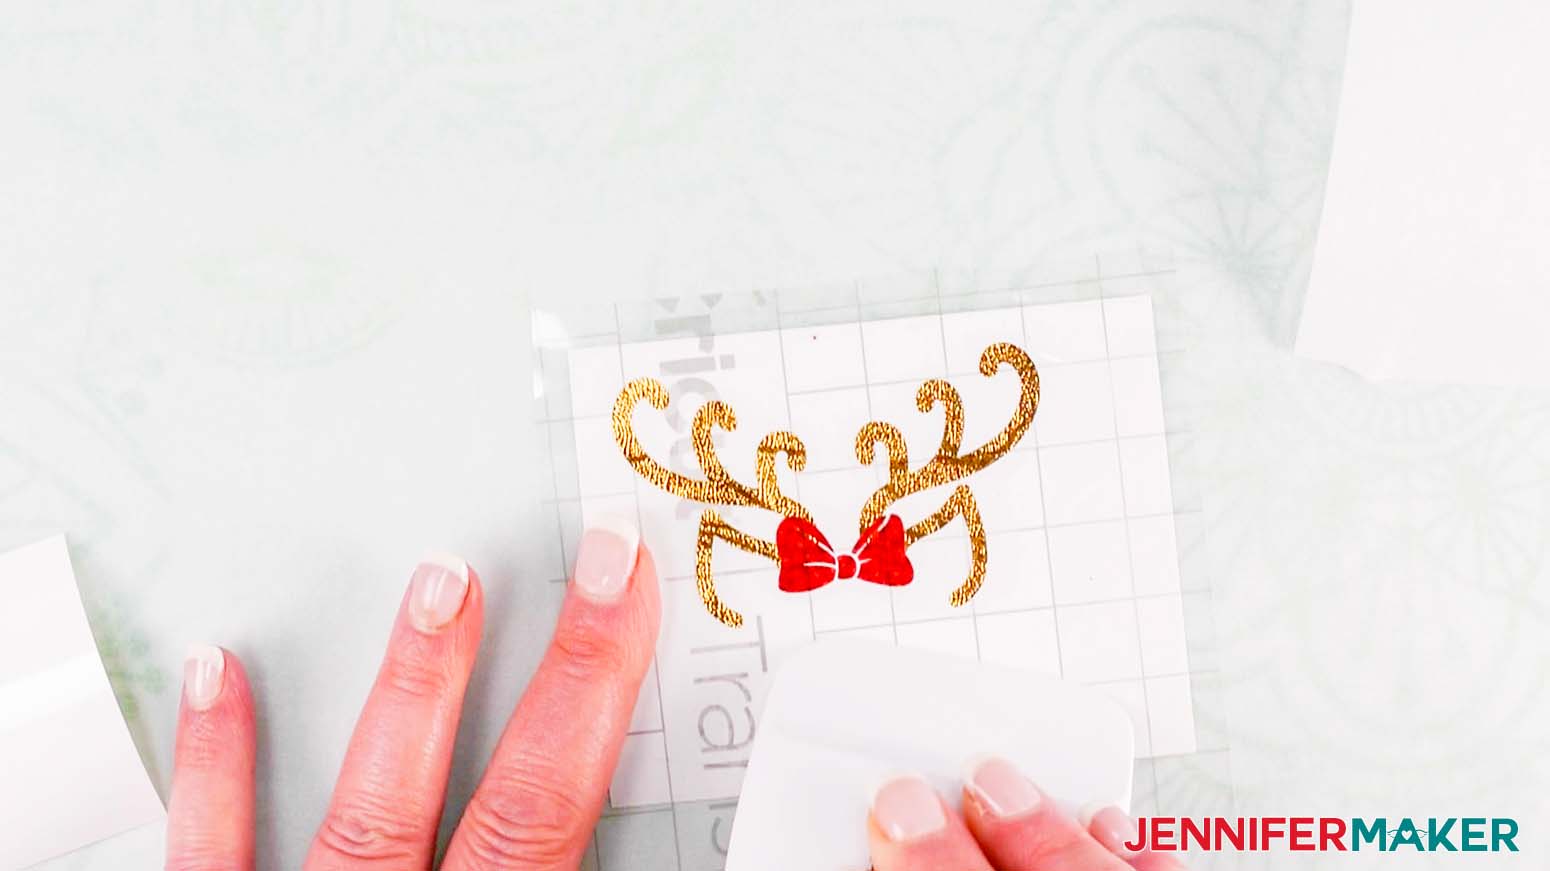
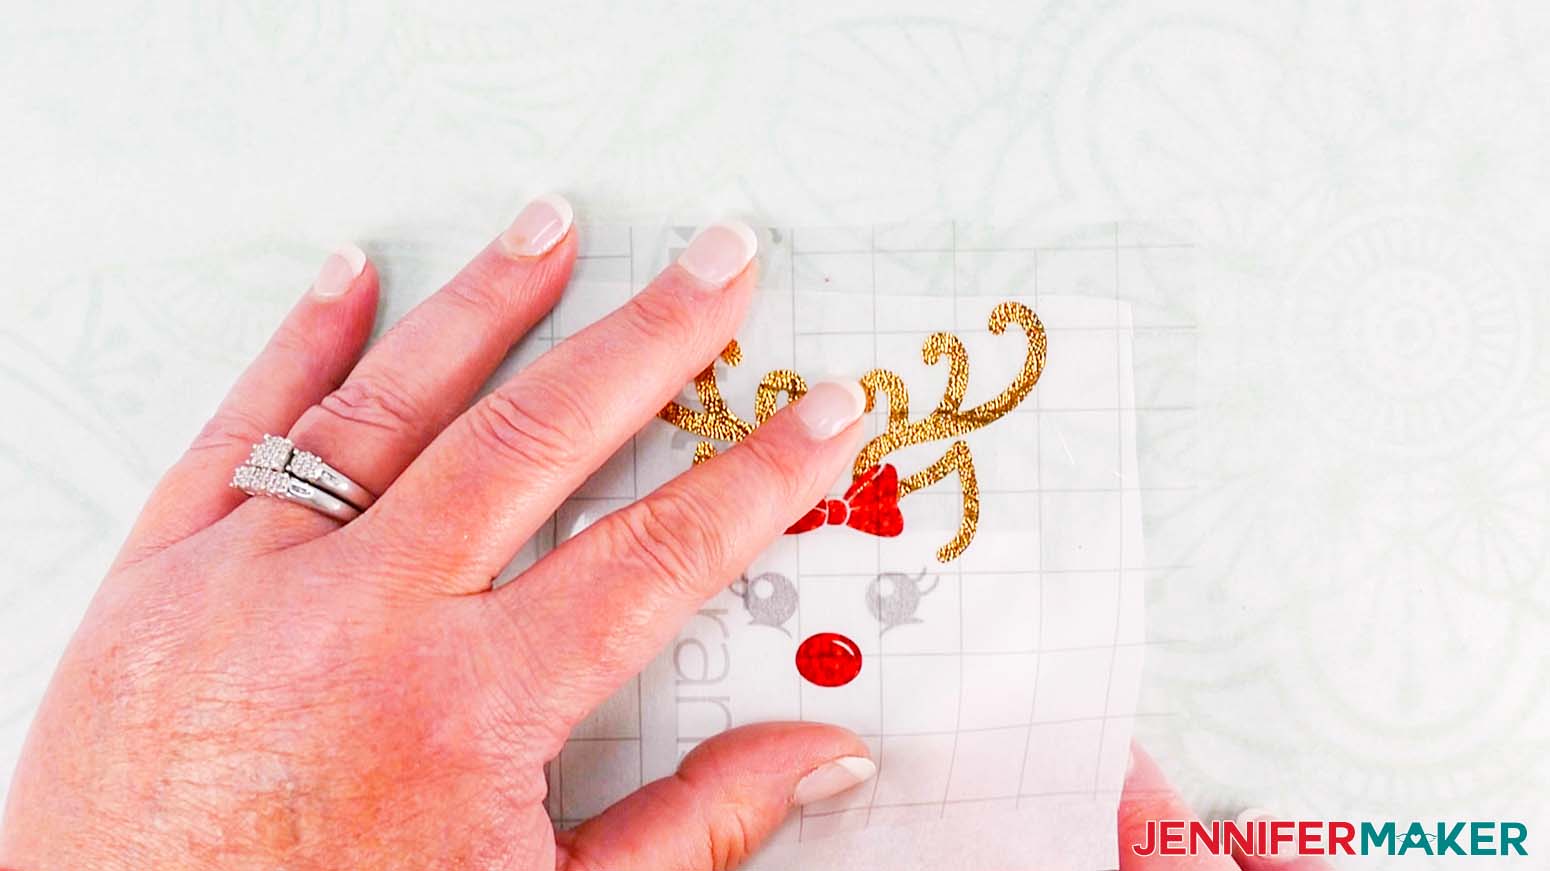
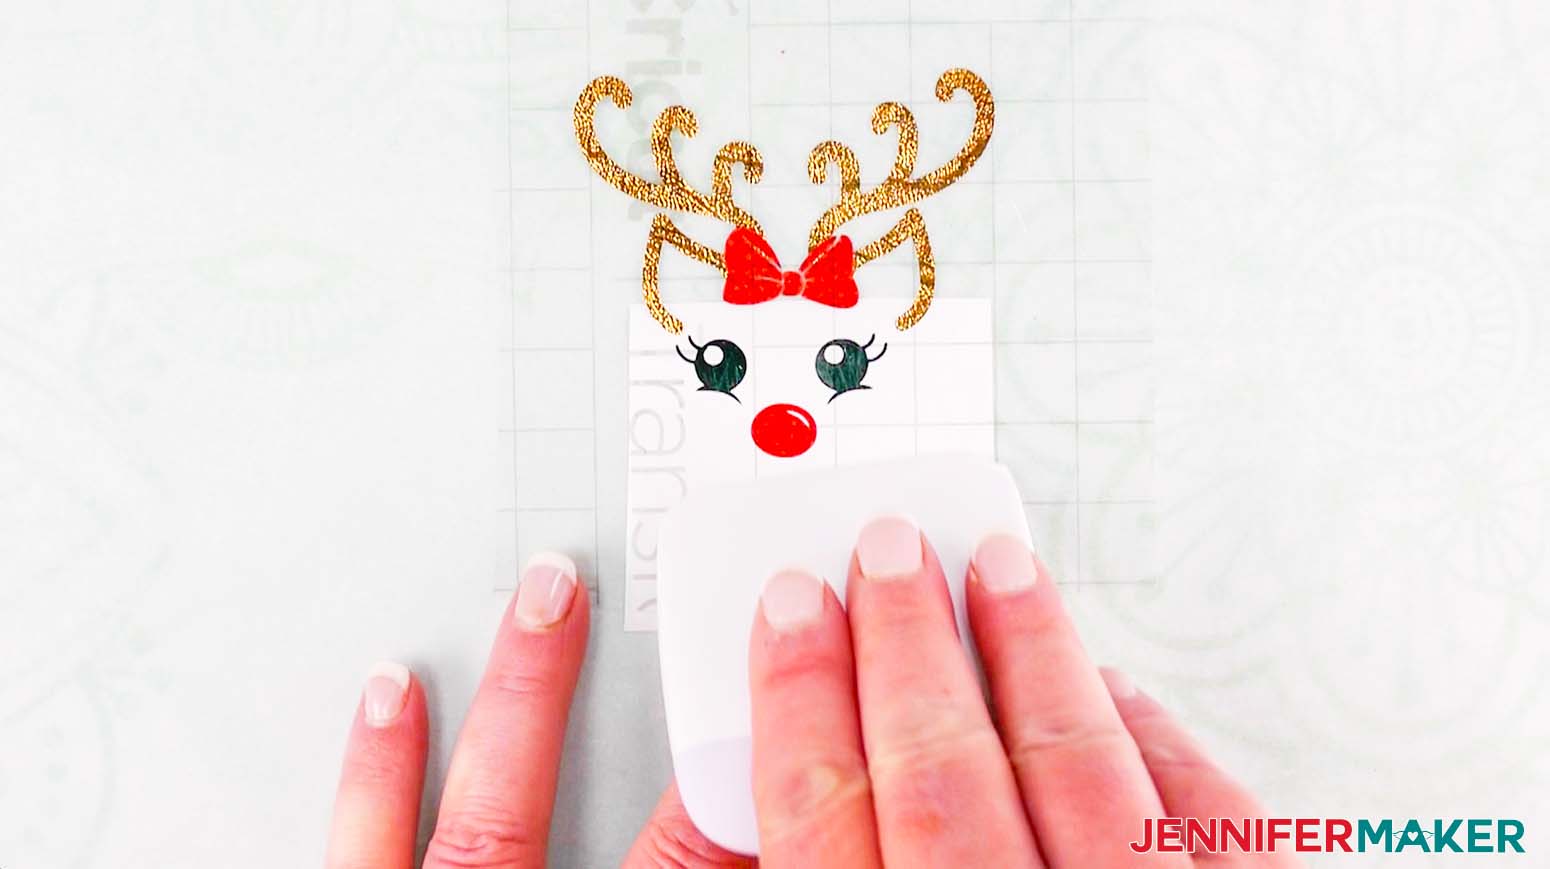
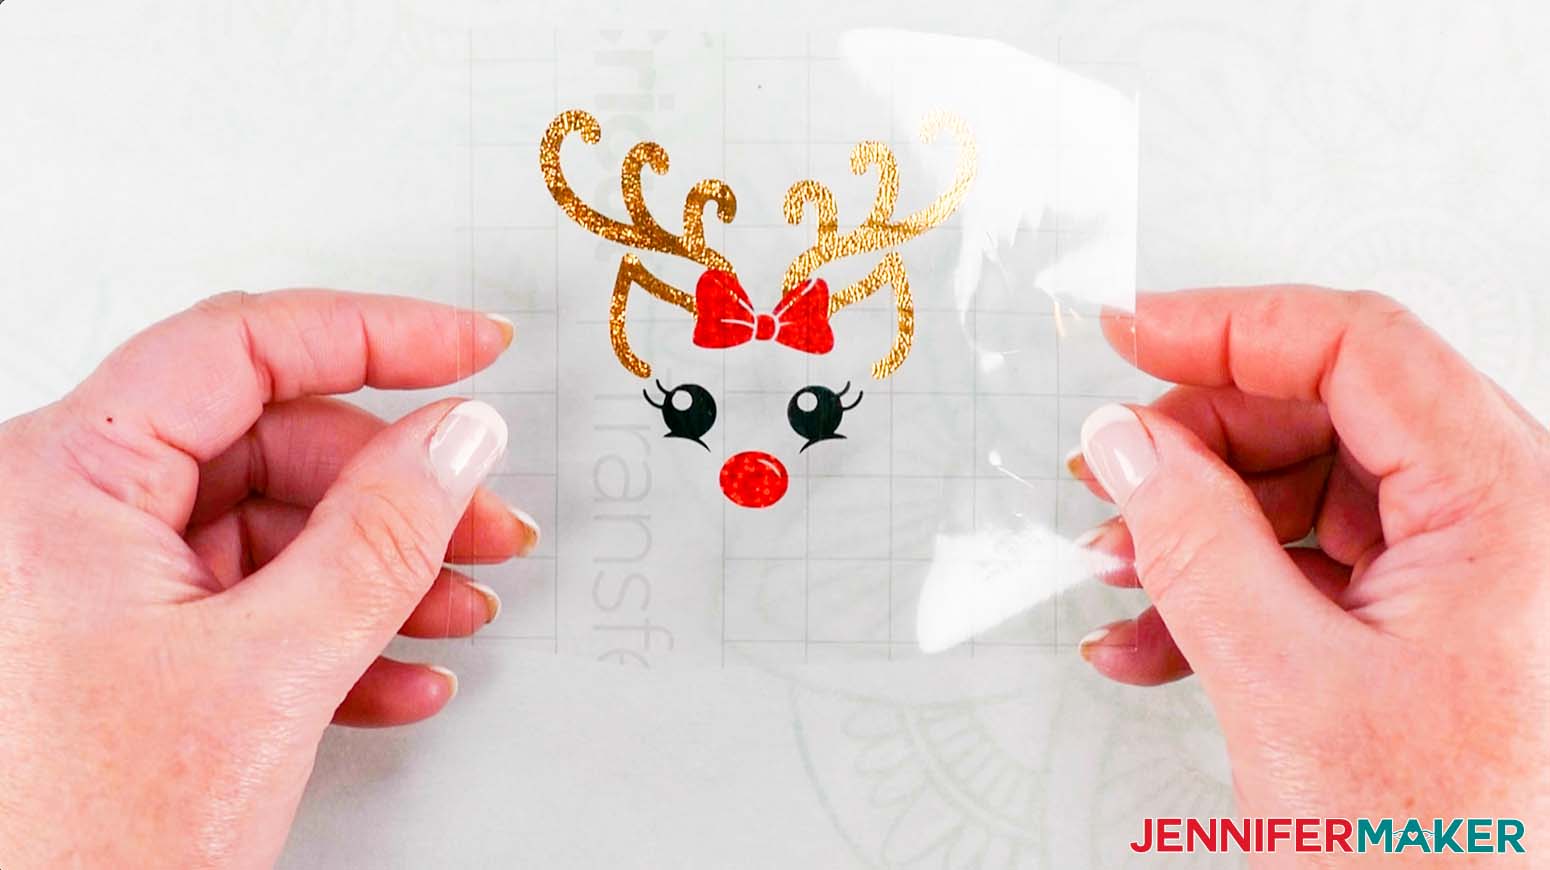
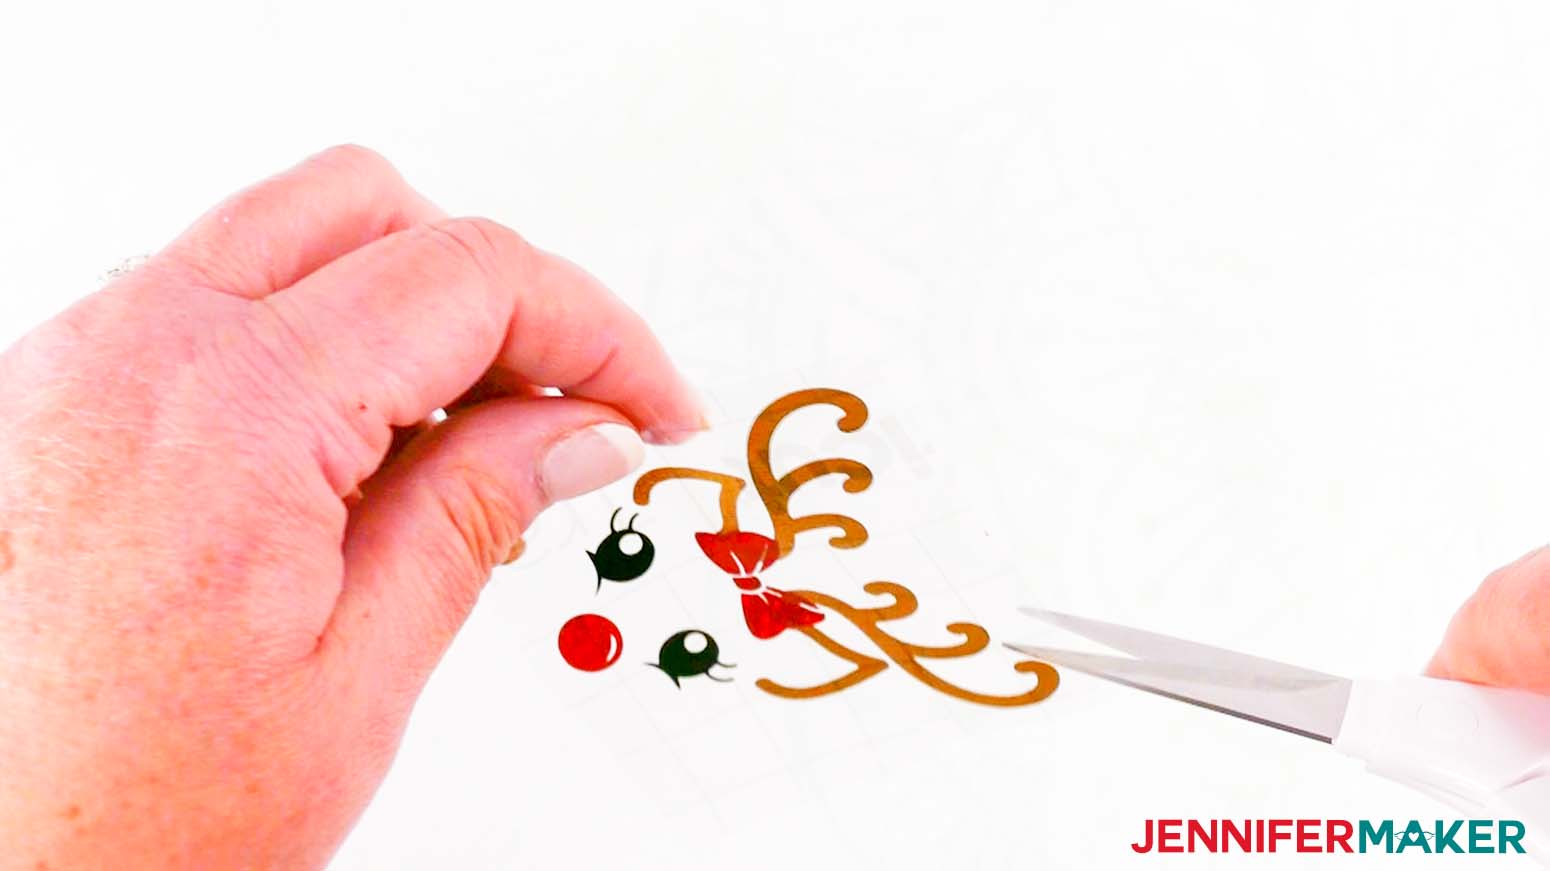
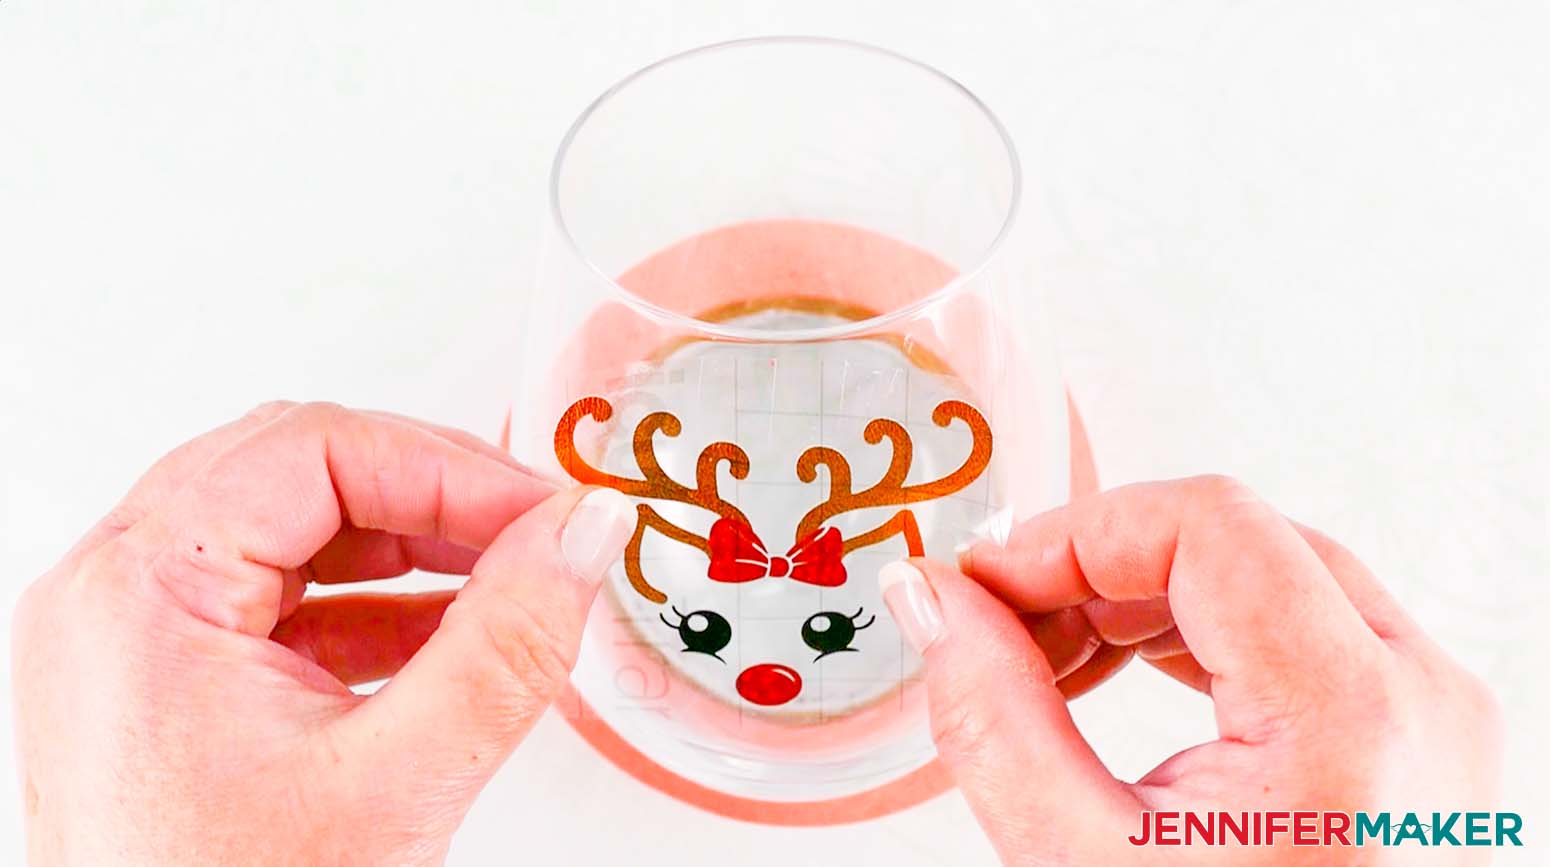
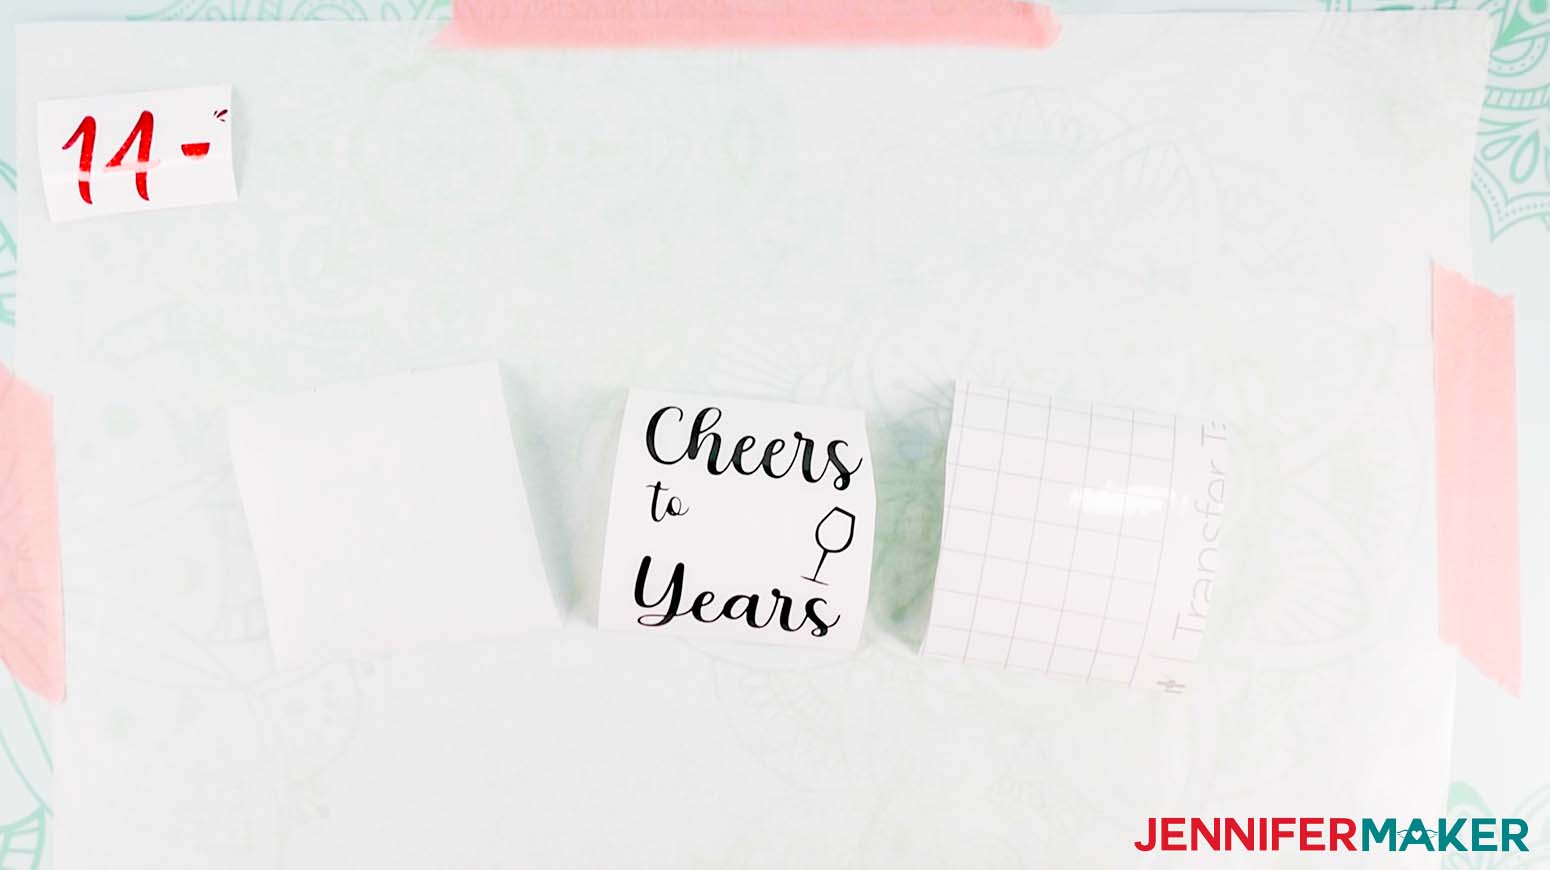
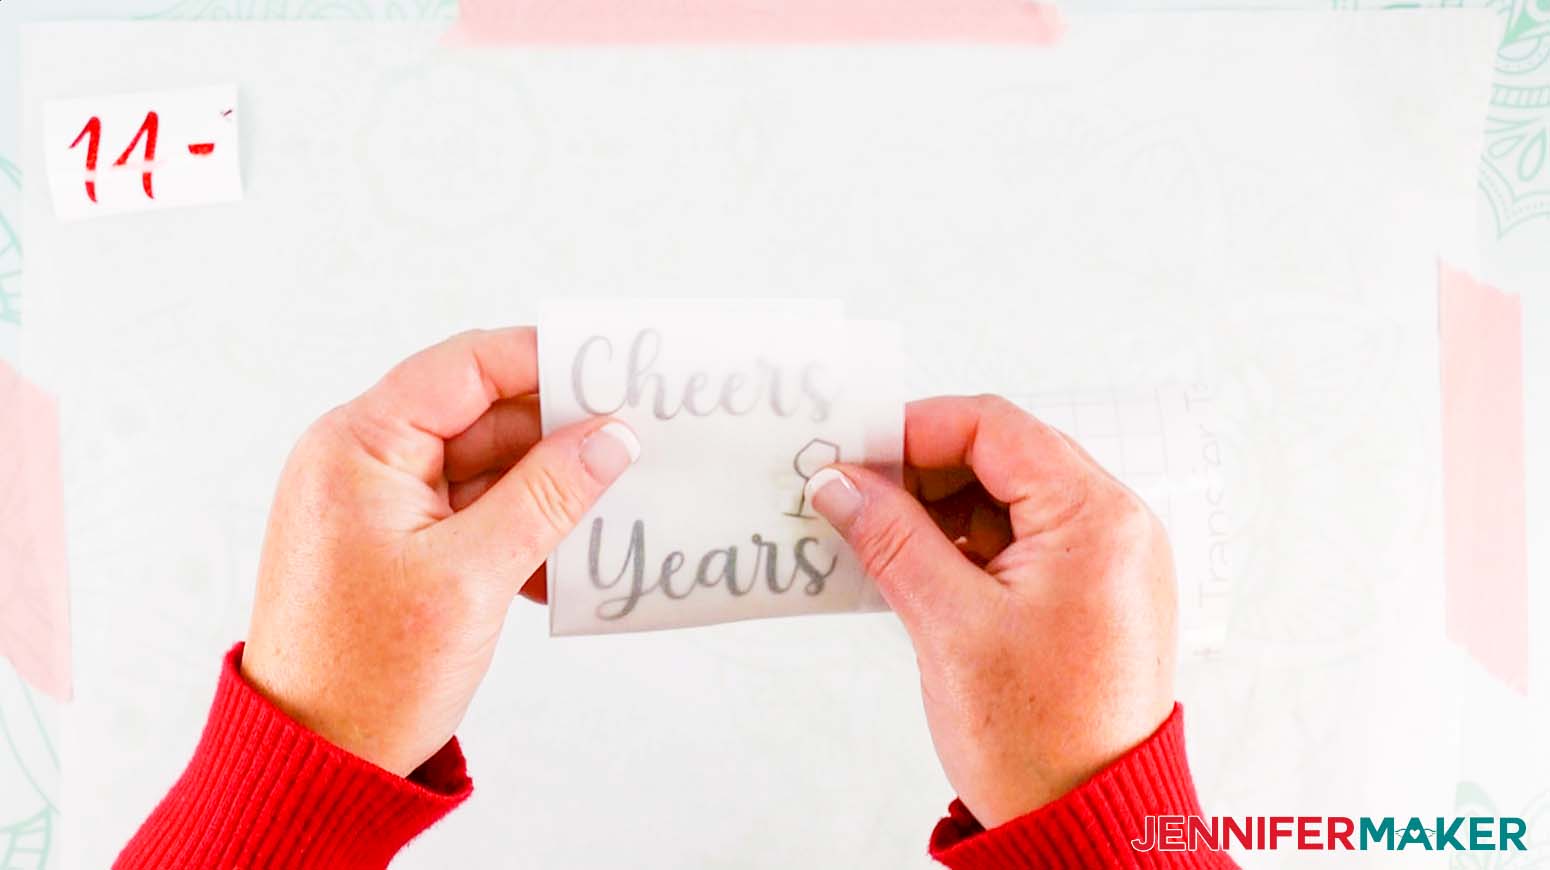
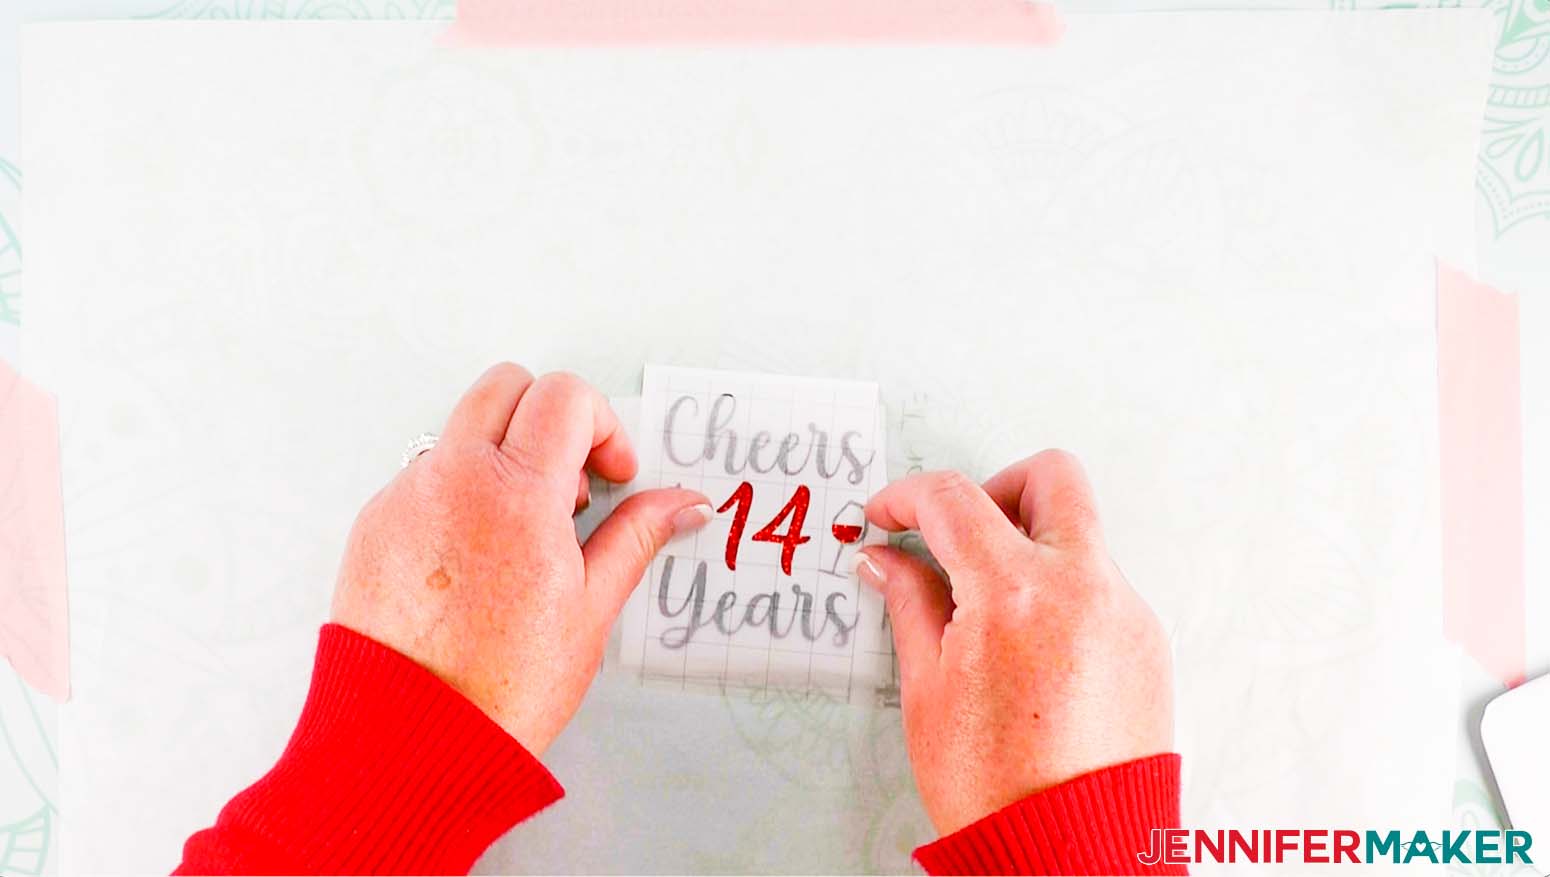
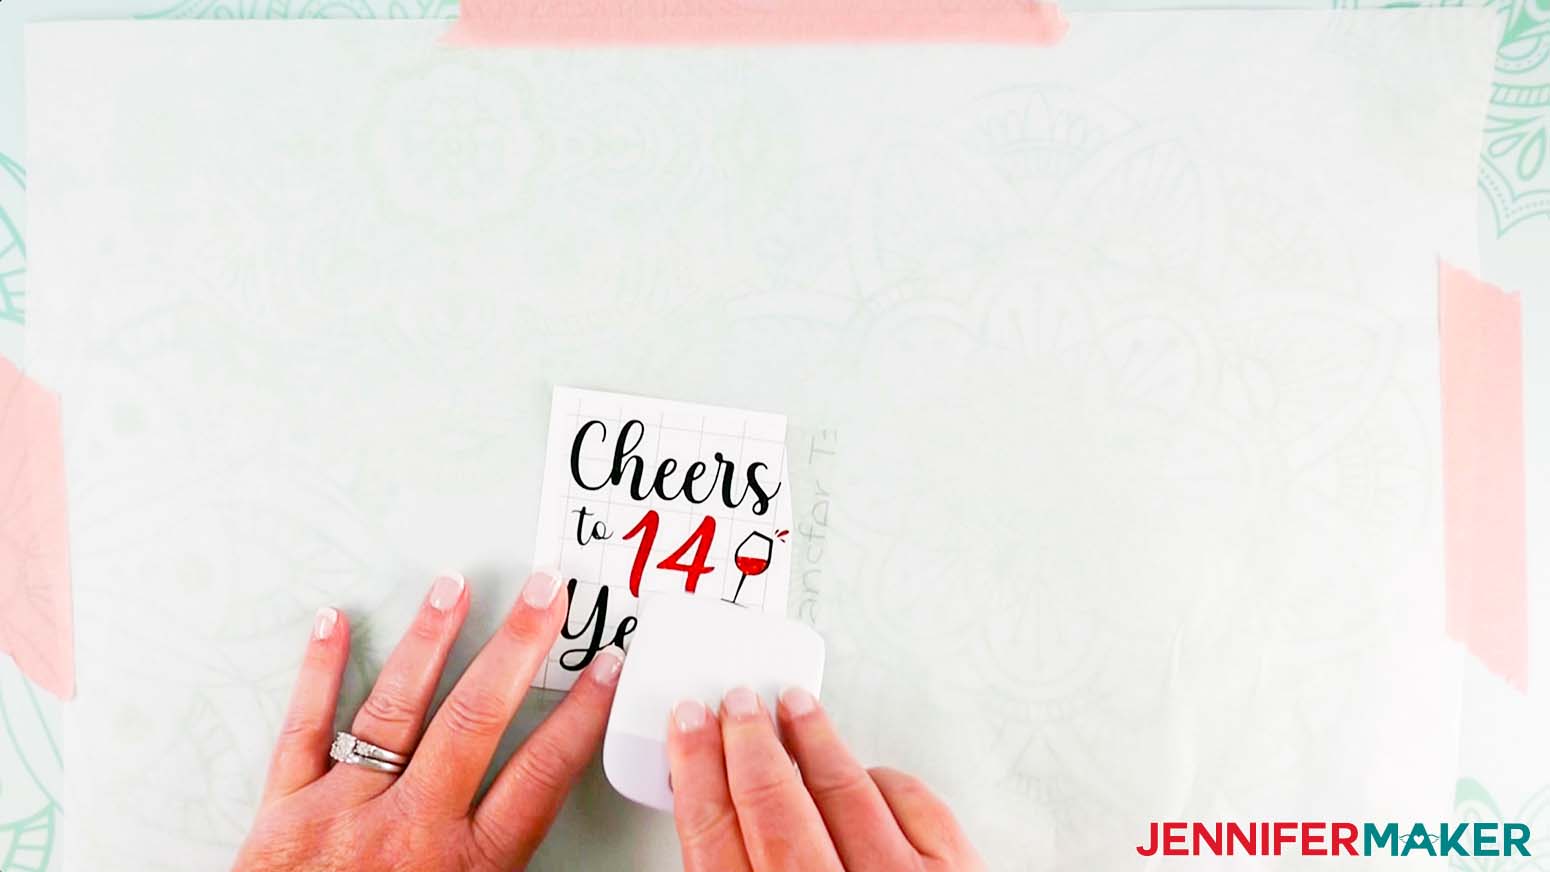
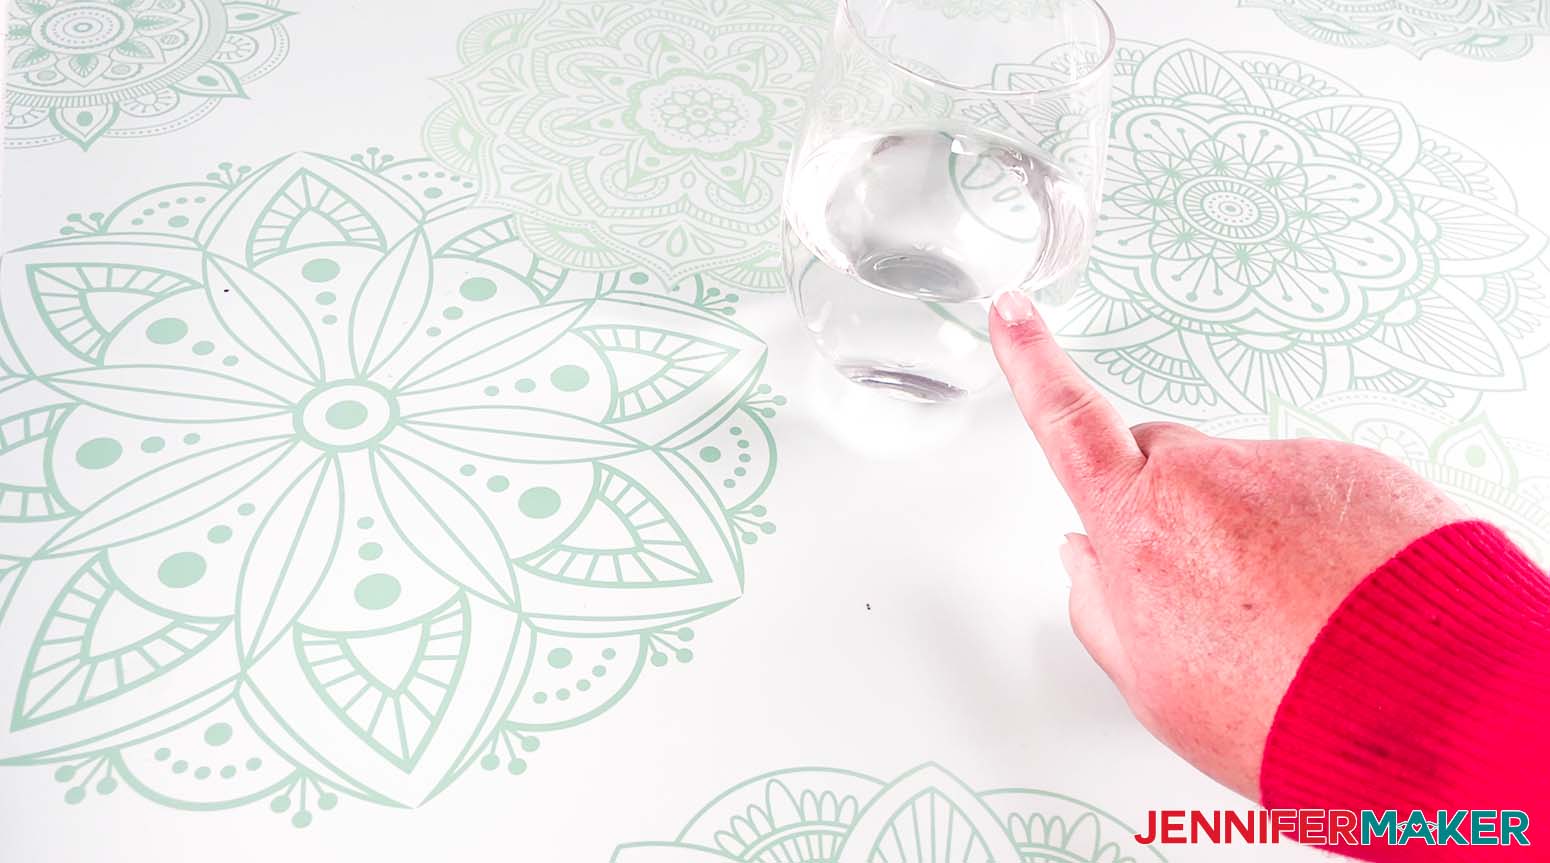
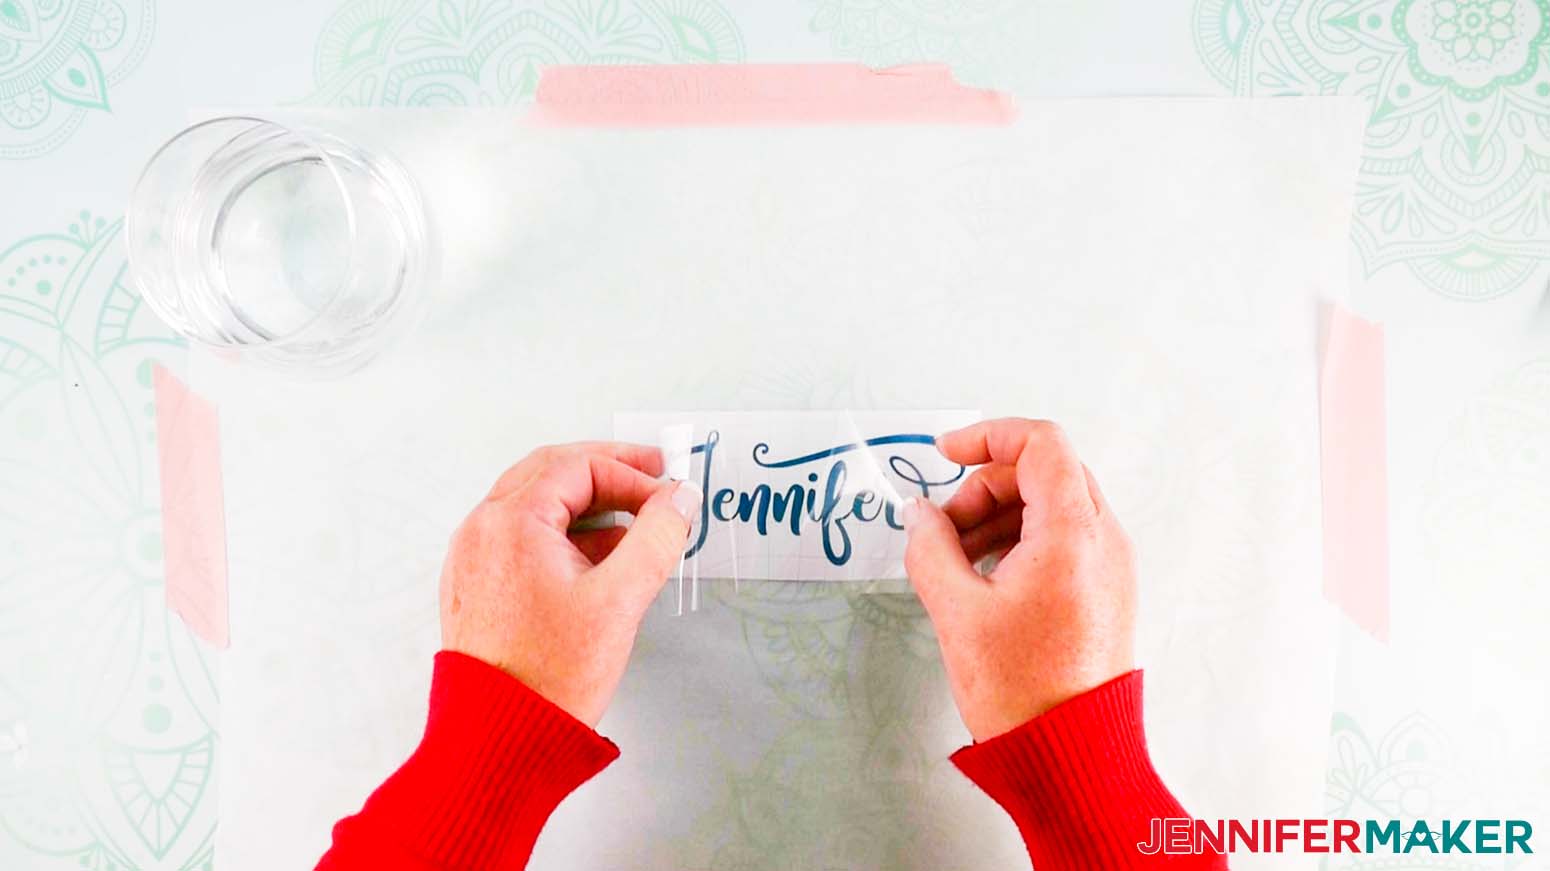
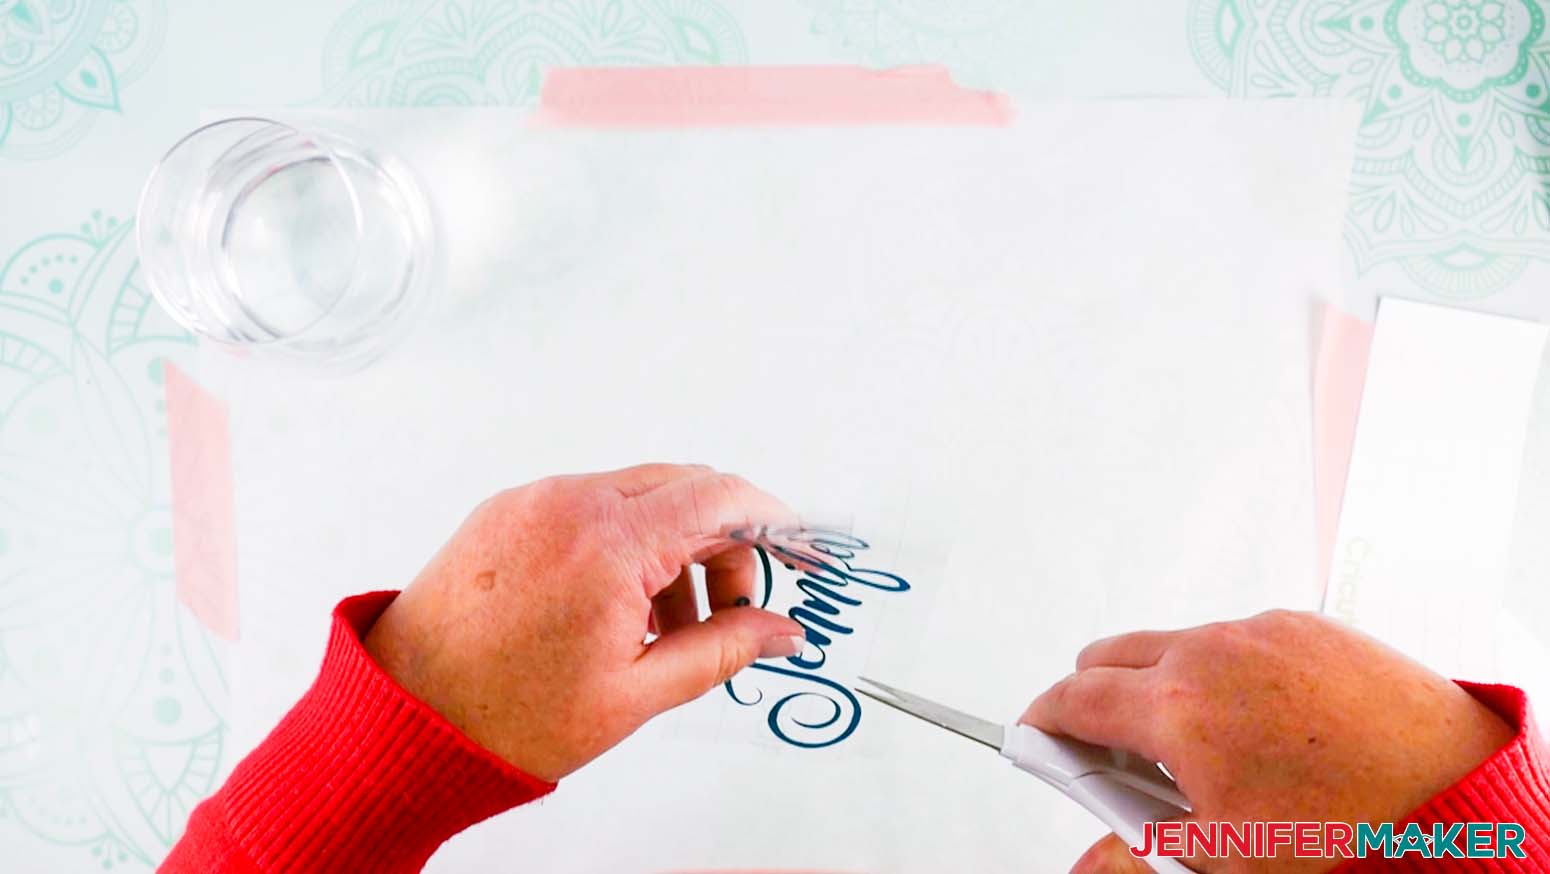
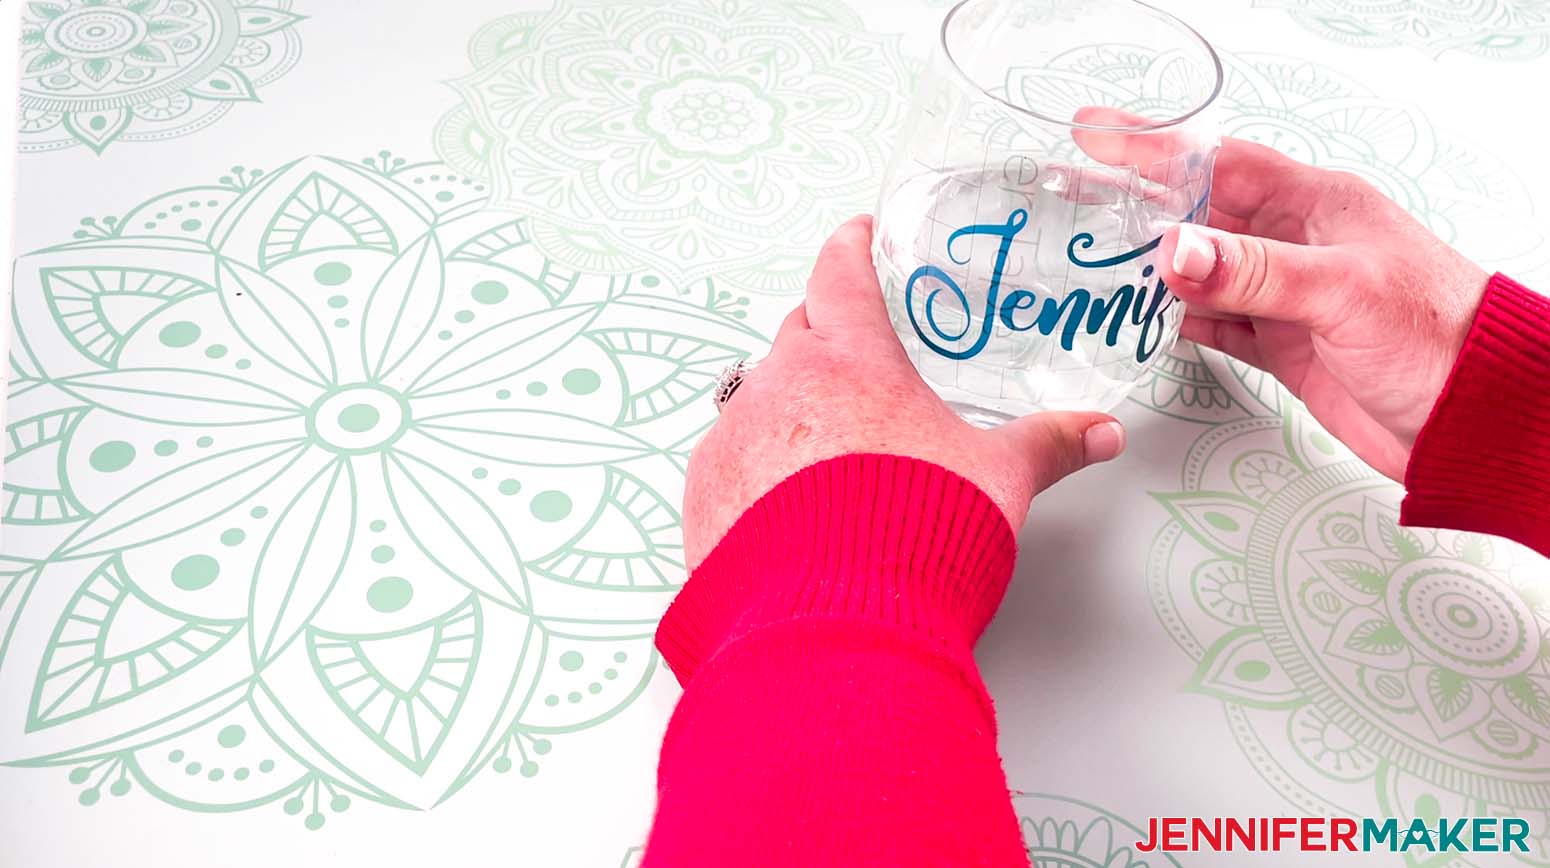
Create your very own personalized Wine Glasses, that make great holiday gifts! The first step is to download my Personalized Wine Glasses design from my free resource library — look for design #353. The ZIP file contains SVG files for cutting on a Cricut or another cutting machine, DXF files, and printable PDFs for cutting by hand. TIP: If you are not sure how to upload an SVG cut file to Cricut Design Space, watch this helpful video training series I made. If you are on an iPad or iPhone, here is how to download and upload SVG files to the Cricut Design Space app. Once the SVG is uploaded, zoom out to see the whole design by clicking on the minus (-) sign next to the magnifying glass in the lower left. This is what the Personalized Wine Glasses SVG looks like in Cricut Design Space. I have created a fill-in-the-blank “Cheers to… Years”. I put the number 14 as a placeholder, but you can add any number you would like. My SVG also includes six different reindeer. In this tutorial, I will also teach you how to personalize your wine glasses with a name or date. And I will explain how to use glyphs to add some pizzaz to your letters. And explain exactly what glyphs are. We will also go over one of the biggest questions I get about applying vinyl to wine glasses: "How do you apply vinyl to a curved surface?" I've got you covered...I have a great trick for that! I will be using the Cricut Maker 3 for this tutorial, but you can use any Cricut cutting machine for this project including the Joy. To start, we will need to “Ungroup” everything. Make sure the design is selected and click “Ungroup” on the top of the layers panel on the right. Next, pull the design(s) that you would like to make to the side. Then left-click and drag the bounding box over the other designs you don’t want. Then click "Delete" at the top right corner or on your keyboard. Reindeer: You can leave them as they are and they are ready to go. Just click "Make It" when you are ready to cut. Cheers: This design is a "fill-in-the-blank" design where you can add the year you would like in the blank spot. Here's how: Select the "Text" tool, and then, I am going to select a font from the drop-down menu at the top left of the screen. I am going to select "Amarillo" from FontBundles.net, but feel free to choose whatever font that you like! TIP: If you are not sure how to upload an SVG cut file to Cricut Design Space, watch this helpful video training series I made. If you are on an iPad or iPhone, here is how to download and upload SVG files to the Cricut Design Space app. Now that you have your font, click on the text box on the screen and type in the number you would like to use. I am using the number 14 for this design. Next, click and drag your number into position in the "blank" spot of the design. You may have to resize the number in order for it to fit correctly. To do this, click and drag the resize handle on the lower right hand side of the bounding box. Once positioned, you can change the color of the number. I’m going to change mine to match the wine in the glass. To do this select the number and click on the color box located next to the “Operation” menu on the top left of the screen. Then click the color red that is right under the "Material colors" heading. All the colors in your design are included right at the top there. Now we need to attach the red wine and the number so they stay the same distance apart from each other when they are cut out. This will make it easier for us to line up the design when we layer it. So click on the design and click “Ungroup” at the top of the layers panel on the right. Next, we are going to select the number layer and hold down the shift key and select the red wine layer, with these two layers selected click on "Attach" at the bottom right side of the screen. Next I will show you how to personalize a wine glass by adding a decorative name. These are fun for a dinner party or any celebration really. First select the "Text" tool and pick a font from the drop-down menu at the top left of the screen. I am going to select "Amastery Script" from FontBundles.net, but feel free to choose a font with glyphs that you like! Glyphs are those fun extras that come with fonts, like swirls or hearts or extra designs you can add to the text to make it “extra.” First, type your name. Now zoom in so we can see it closer. I’m typing Jennifer. Now it’s time to make it fancy by adding glyphs. A glyph is a different form of a letter or maybe a character or symbol that is included with some fonts. It’s a way to customize how your name looks. To add a glyph, go to where your fonts are stored (Mac: Fontbook, PC: Character Map) and select the font you are using in Cricut Design Space. This opens up a list of characters and glyphs (if your font includes them), find one you would like to use and click on it to highlight it. Next, copy the glyph by hitting Cmd+C (Mac) or Ctrl+C (PC). Then, we are going to go back to Cricut Design Space, and in the text box, we are going to paste the glyph by pressing Cmd+V (Mac) or Ctrl+V (PC). The glyph will show on your canvas but will not appear as a normal letter would in the text box, it will be a blank space or a box. You can repeat this for any other letter you would like as a glyph. I’m going to change the “r” in Jennifer. So I will first highlight the “r”, then on my Mac I will go to Font Book and highlight and copy the fancy “r” I would like to replace it with. Then I will return to Design Space and paste it in the text box. When you have finished typing your name and adding glyphs, click on the canvas to close the text box. TIP: To learn more about fonts and glyphs check out my tutorial on Make Knockout Designs in Cricut Design Space. Next, I am going to change the color of my name to blue since that is the color vinyl I want it to cut out on. To do this, I am going to select my name and click on the color box located next to the “Operation” menu on the top left of the screen. Then click the color I would like; I am going to pick this middle blue color. Now that we have everything prepped and ready, we are going to click “Make It” at the top right of the screen. Next, we are going to cut out our designs. If applicable, select “On Mat” on the next page. There is nothing to change on the prepare screen. So we can select “Continue” at the bottom right of the screen. Now, it is time to select the materials we are going to use for our first mat, which is our black eyes, we are going to select "Premium Vinyl - Permanent Glossy" from the materials menu. Then I am going to select “More Pressure” to get a cleaner cut. Next, we need to place our black permanent vinyl, shiny side up, on our Cricut Green Standard Grip Mat and burnish the vinyl to the mat using the Brayer Tool. Load your mat, and select the blinking "Arrow/Go" button to start the cut. When it has finished cutting, unload your mat. Remove the vinyl from the mat by flipping the mat over and pulling the mat away from the vinyl; this prevents the material from curling. For our next mat which is our reindeer antlers and ears. I am using Textured Metallic Vinyl (gold) for this mat so, I am going to select “Browse All Materials” and click “Premium Vinyl - Textured Metallic.” Then press “Done.” Then select “More Pressure" again. Now, place the gold textured vinyl, with the shiny side up, on your Green Standard Grip Mat and burnish the vinyl to the mat using the Brayer Tool. Load your mat, and select the blinking "Arrow/Go" button to start the cut. When it has finished cutting, unload your mat. Remove the vinyl from the mat by flipping the mat over and pulling the mat away from the vinyl. For the mat with our name on it, we are going to select “Premium Vinyl - Permanent Glossy” from the materials menu. Now, place the teal vinyl on a Green StandardGrip Mat and burnish it down, shiny side up, as we did before. Again, load and cut your material. Once it has finished cutting, remove the vinyl from the mat as we did before. We are going to use the same material settings for the mat with reindeer eyes. Repeat the same steps we did before for the teal vinyl. Now, we are going to cut our reindeer bow and nose out of red Holographic Sparkle Vinyl, so we are going to “Browse All Materials” and click “Holographic Sparkle Vinyl,” and click “Done.” Next, we are going to place the red Holographic Sparkle Vinyl, with the shiny side up, onto our mat and burnish it down. Then, load and cut your materials again. Remove the vinyl from the mat by flipping the mat over and pulling the mat away from the vinyl. Once your vinyl is cut, you’ll need to remove the excess vinyl and WEED everything. Now, we are going to assemble our wine glasses. First, let’s take the wine glasses and clean them with isopropyl alcohol and a lint-free cloth. This will clean the First, I am going to start with my cute reindeer. The same concept applies to my fill-in-the-blank "Cheers" design. We will layer the vinyl for both of these designs using parchment paper before we add it to the glass. First, lay out a piece of parchment paper the size of your work area and tape it down using painter's tape. NOTE: it doesn't matter what side of the parchment paper is facing up. Then, we are going to cut a piece of transfer tape the size of our whole design, in this case, around 3.5". Then, we are going to layout our pieces of vinyl in the order we are going to apply them. Our Decorations are first, antlers next, then our eyes and nose. Next cut a piece of parchment paper slightly smaller than our 3.5 inch transfer tape. Now, remove the backing from the transfer tape, and place the transfer tape onto the decorations and nose piece and burnish it down using the scraper tool. Gently remove the transfer tape, taking the vinyl with it. Next, place the decorations and nose on parchment paper leaving a small amount of transfer tape hanging over the edge of the parchment paper. Burnish the decorations down onto the parchment paper and adhere the transfer tape to your work surface. Then slide the antlers under the decoration that are on the parchment paper and line up the bow in the right spot. Remove the parchment paper and burnish the bow and nose down onto the antler piece. Next, continue burnishing the bow, nose, and antlers to the transfer tape. Then remove the vinyl backing of the antlers so that you have the decorations, nose, and antlers on your transfer tape. Now line up the antlers to the eyes and burnish the transfer tape down so that you have the decorations, nose, antlers, and eyes all on the piece of transfer tape. Gently remove the transfer tape, taking the whole design with it. Now here is the secret to applying vinyl to a curved surface. All you need is a pair of scissors to make the magic happen. Cut small slits all around the outside edge of the transfer tape. This allows the transfer tape and vinyl to bend around the glass and curve to the surface as its applied to prevent creases in the vinyl. Place the vinyl to the glass around ¾ of the way up the glass. Burnish the vinyl from the center outward using your finger or the scraper tool. NOTE: If you have trouble with the glass moving around while you are applying the vinyl. Set your wine glass in a roll of painter's tape to keep it from moving around. Once applied, gently take off all the transfer tape. It will most likely peel off in separate pieces since we made the slits beforehand to apply the vinyl to the glass. Now I will show you how to layer the vinyl for the Cheers design. Cut a piece of transfer tape and a piece of parchment paper the size of the biggest piece. For this design, it would be our black vinyl "Cheers to...years." Take your red wine/year layer and burnish the piece of transfer tape to it. Gently remove the transfer tape bringing the red vinyl pieces up with it. Next, place your black vinyl layer out in front of you and place the piece of parchment paper on top of it. Then place your red wine/year layer onto the parchment paper, with a small area of transfer tape still exposed. Then, line up your red wine/year layer to the black layer and press the exposed section of transfer tape onto your work surface so it stays in place. Once in place remove the parchment paper and burnish the decal down using the scraper tool. Again removing the transfer tape bringing the whole design with it. Apply the design to your wine glass as we did for the reindeer design. Finally, we will add our decorative name to our wine glass. Here's where we will use the water to help make sure our name goes on straight. Add room temperature water to the glass and fill it about halfway. NOTE: Only use room temperature water because hot or cold water produces condensation and doesn’t allow the vinyl to adhere to the glass. Cut a piece of transfer tape slightly bigger than the size of our design. Then, place the transfer tape on top of the vinyl and burnish it, using the scraper tool to make the vinyl adhere to the tape. I like to use the taco method. By holding the transfer tape in the shape of a taco, put the bottom of your “taco” onto the middle of your design. Smooth the tape over the decal from the center outward using the scraper tool. Gently pull the transfer tape off; the vinyl should come up with it. If the vinyl does not stick to the transfer tape, place the transfer tape back down and burnish it with the scraper tool again. Once you have your design off of the vinyl backing, cut small slits around the transfer tape. Be careful not cut into your design. Now we will use the waterline to help place our name in the right position and as straight as possible. Center the name on the glass using the water as a guide making sure the bottom of each letter (Except for the Uppercase letter) are on the waterline so we know that they are completely straight. Smooth the vinyl down from the center outward, using your finger, letting your vinyl slide into position. Because you cut slits in the transfer tape, it will go on smoothly and move into place. Do not force it into position. NOTE: These glasses are hand wash only. I do not recommend sealing these with Mod Podge as it leaves a streaky look on the glass. STEP 5: SHOW IT OFF Now you have some pretty personalized wine glasses to give as a gift. These can also be used as a display piece to wow your holiday guests. Just pop in a battery operated tea light to the reindeer designs and let the fun begin! I can’t wait to see all your amazing wine glasses. Fonts Used: Amastery Script from FontBundles.com Botton Love Script from FontBundles.com Amarillo from FontBundles.com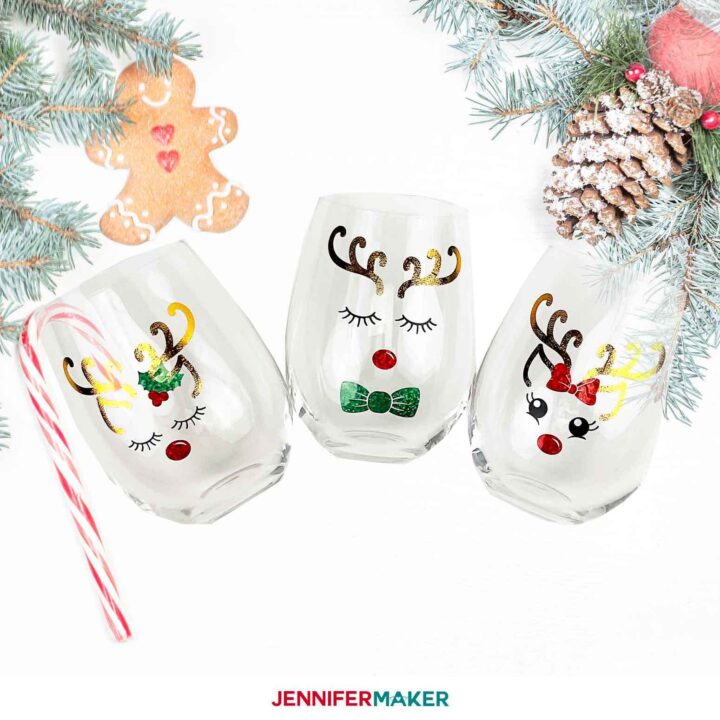
Personalized Wine Glasses
Materials
Tools
Instructions
STEP 1: GET MY FREE PERSONALIZED WINE GLASS DESIGN FILE
STEP 2: PREPARE YOUR DESIGN

STEP 3: CUT THE PERSONALIZED WINE GLASS DESIGNS

STEP 4: ASSEMBLE YOUR PERSONALIZED WINE GLASSES
Notes
Answers to Your Questions About How to Make Personalized Wine Glasses
Q: Are these personalized wine glasses dishwasher safe?
No, these are handwash only. If put in the dishwasher you risk the vinyl peeling or melting.
Q: Can I seal these wine glasses with Mod Podge?
I would not recommend using Mod Podge to seal the wine glasses as it will leave streaks and make the glass look cloudy. We don’t want that!
Q: I can’t get my wine glass to stay put as I apply the vinyl. Do you have any tips?
I actually have a tip for that! Set your wine glass in a roll of painter’s tape to keep it from moving around while you are applying the designs. You can see me do this in the tutorial video!
Q: Are these decals permanent designs?
Yes, so long as you hand wash them, the vinyl will stay on permanently or at least for a very long time.
Get my free SVG files to create beautiful personalized wine glasses
I love seeing what you make with my designs and how you use them! Please share a photo of your personalized wine glasses in our Facebook group or tag me on social media with #jennifermaker.
Love,

Want to remember this? Save this DIY Personalized Wine Glasses Tutorial to your favorite Pinterest Board!