
Learn how to make glass etching stencils for a glass cookie or treat jar with this simple, step-by-step tutorial!
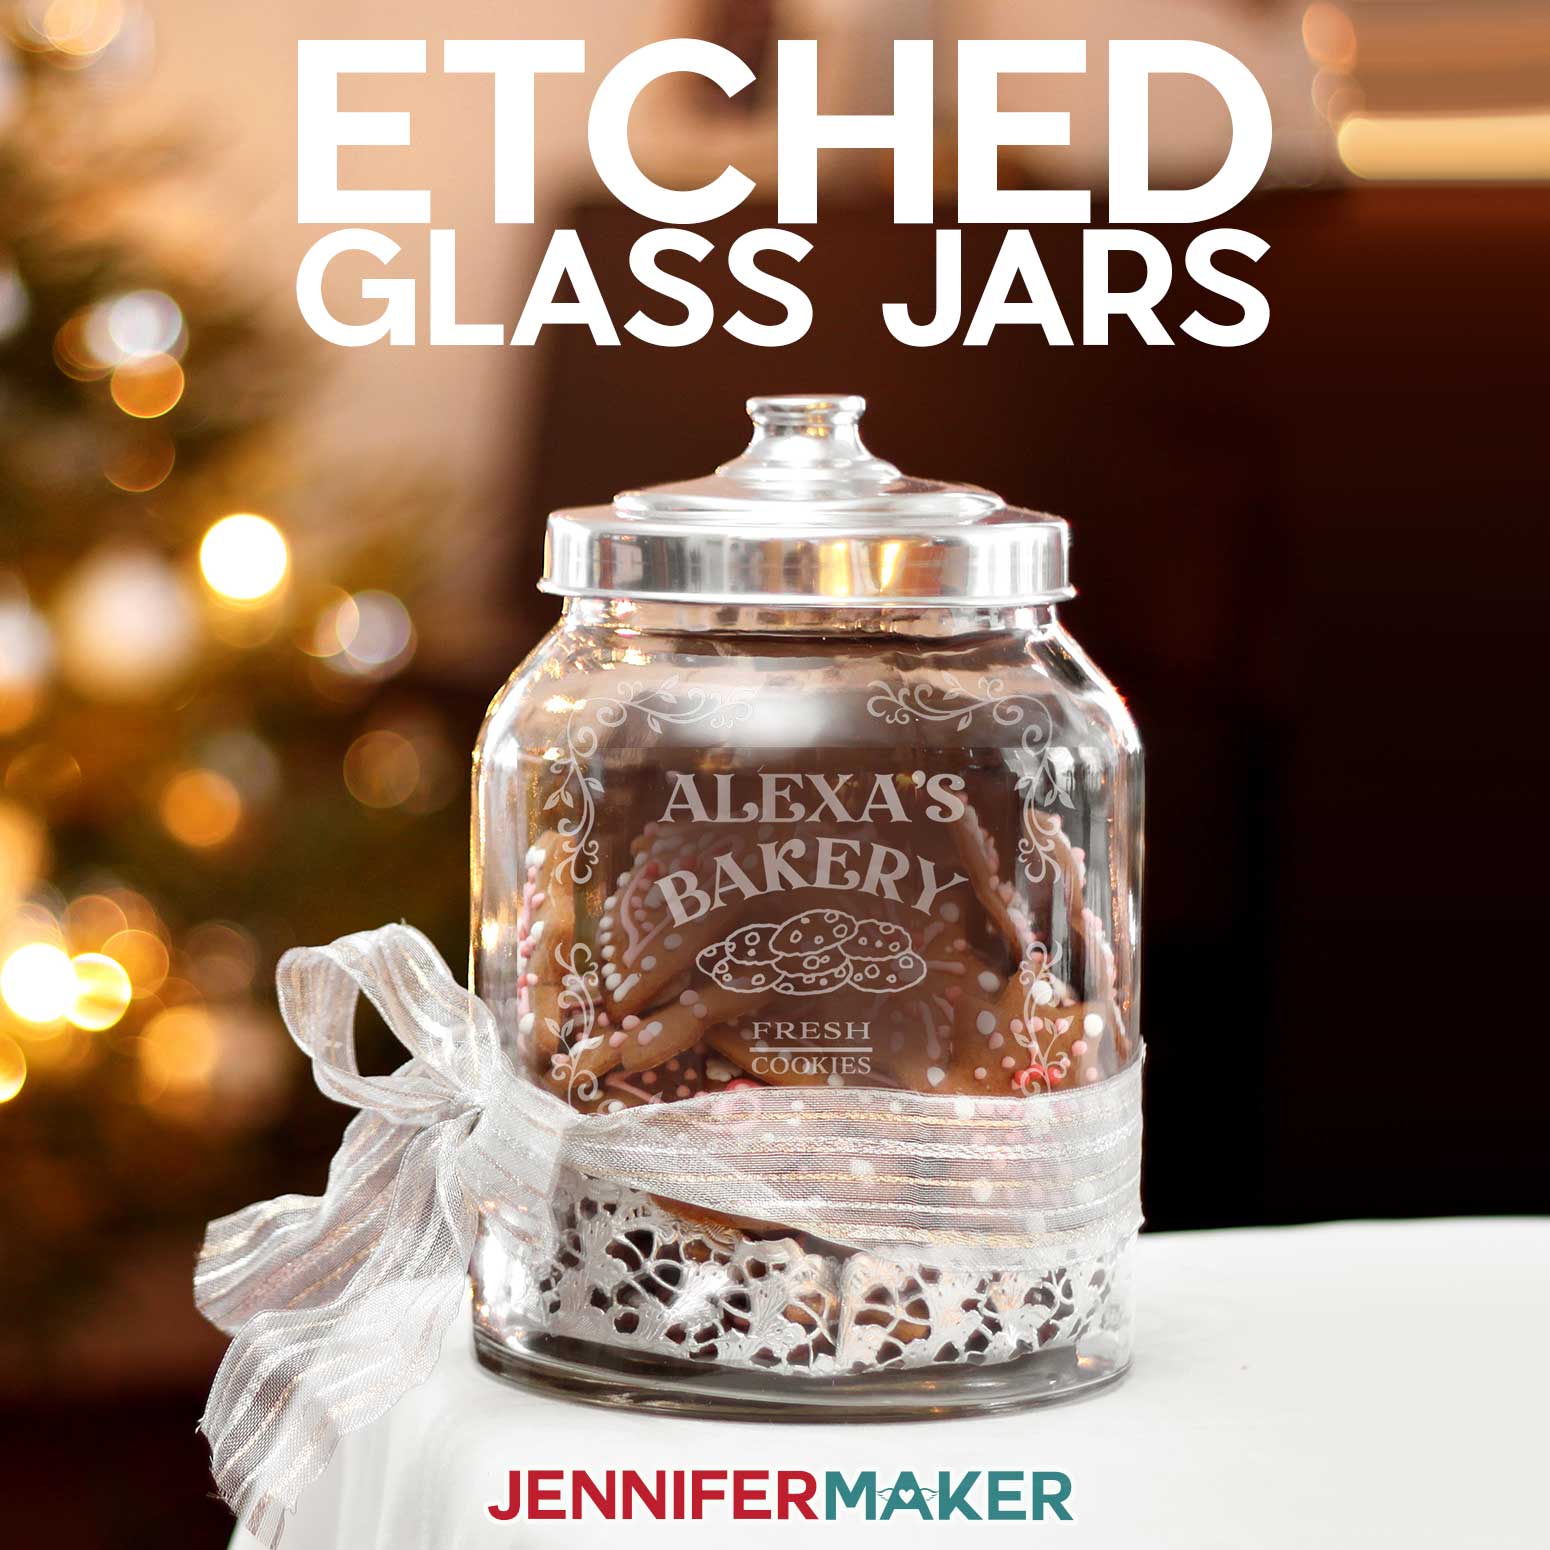
I love etching glass, and I’m always amazed at how easy it is to do. Last year I taught you how to etch a casserole dish with a nice flat bottom. So I thought this year it would be fun to teach you how to etch a curved surface like a glass jar! These make wonderful gifts — just fill them with treats or gifts! So for Day 15 of The Great Maker 25-Day Gift-Away Challenge, I am showing you how to make a glass etching stencils for personalized cookie and treat jars!
See exactly how to make glass etching stencil on a Cricut in my tutorial video (or keep scrolling if you prefer a printable step-by-step photo tutorial):

 What is The Great Maker 25-Day Gift-Away? This is an annual tradition here at JenniferMaker! Every day for the first 25 days of December we gift you with a brand new project, design, tutorial, and video. On top of that, we host a giveaway with 25 prizes. Some of the amazing prizes are Cricut cutting machines, sewing machines, gift cards, and beautiful print editions of our popular Cricut Coach Playbook. You can even earn bonus entries for sharing photos of the daily projects! Click here to learn more about The Great Maker 25-Day Gift-Away!
To etch glass, we need an etching cream. I have great success with Armor Etch cream. I put the link to this etching cream below!
Now to get a cool design onto the jar with the etching cream, you need a glass etching STENCIL! You can make one with permanent vinyl in ANY color. You can, of course, use stencil vinyl instead, but I find that the permanent vinyl works just as well. Do not use removable vinyl — it won’t stick well enough.
You also need the same size of transfer tape, regular grip, to get your glass etching stencil design onto your jar.
The jar itself should be curved in just one direction, meaning its sides should be straight up and down. If you use a jar that is more like a ball shape, you’ll find it really REALLY hard to get your vinyl on unless you keep your design very small. I’m using a one gallon jar for this project, and the link to this exact jar is below.
Now it’s also important to have some protective equipment, because etching cream is caustic and you do not want it on your skin or in your eyes. I recommend gloves, safety goggles, and an apron.
Other very useful things for this project include paint brushes, painter’s tape, isopropyl alcohol, and a lint-free cloth like these blue shop towels.
I cut my stencil on a Cricut cutting machine with a fine-point place and a green, standard grip mat. Now you just need the design for your jar! I’ve created three different designs for you to experiment with, and they can all be personalized!
So let me show you where to find these designs and then how to use them to cut stencils and etch your jar! This post contains some affiliate links for your convenience (which means if you make a purchase after clicking a link I will earn a small commission but it won’t cost you a penny more)! Read my full disclosure policy.
Materials to Make a Glass Etching Stencil for a Personalized Cookie Jar
View my Amazon shopping list with the exact items we used to make this project!
- One (1) 7 inch x 7 inch piece of Permanent Vinyl (your choice of color)
- One (1) piece of 7 inch x 7 inch piece of Stencil Vinyl (optional, used instead of the permanent vinyl if you wish)
- One (1) piece of 7 inch x 7 inch piece of Cricut Standard Grip Transfer Tape
- One (1) Glass Jar (I used these 1 Gallon Anchor Hocking jars)
- One (1) Amour Etch Cream 10 oz. (I used about 4 or 5 tablespoons of etching cream)
- One (1) Pinsetter Little Chunk font from Fontbundles.net (optional for personalization)
- One (1) Trancity font from Fontbundles.net (optional for personalization)
- One (1) The Tingler font from Fontbundles.net (optional for personalization)
- One (1) Watermelon Margarita font from Fontbundles.net (optional for personalization)
- One (1) Allspice Alternatives from Fontbundles.net (optional for personalization)
- Cricut StandardGrip 12×24 Inch Mat (green)
- Cricut Weeding Tools
- Nitrile Gloves
- Safety Goggles
- Paint Brush
- Painters Tape
- Alcohol
- Lint-free cloth, such as a shop towel or coffee filter
- Cricut Scraper
- A way to cut your vinyl (I used the Cricut Maker cutting machine but this can also be cut on a Cricut Explore)
- Design # 266– My free SVG design files (available in my free resource library—get the password by filling out the form at the bottom of this page)
How to Make a Glass Etching Stencil for a Personalized Cookie Jar
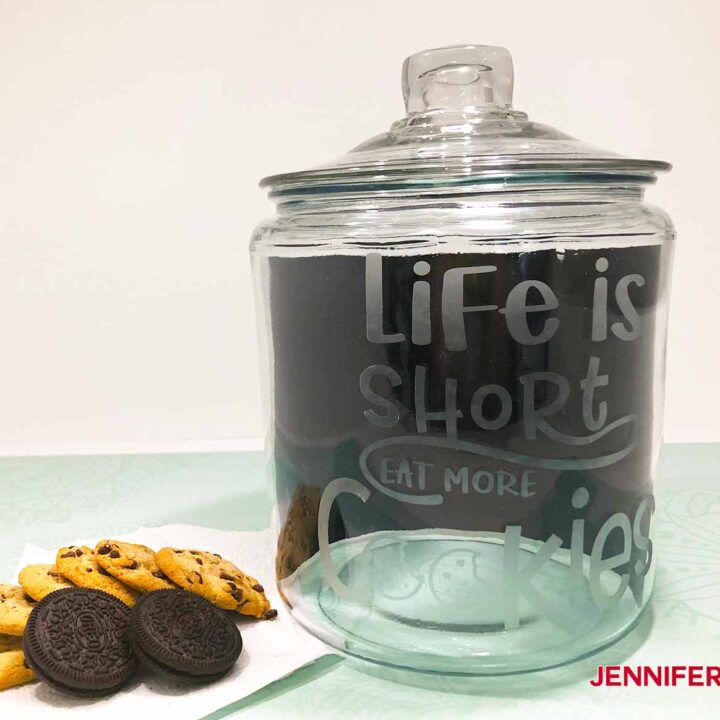
Etched Glass Cookie/Treat Jar
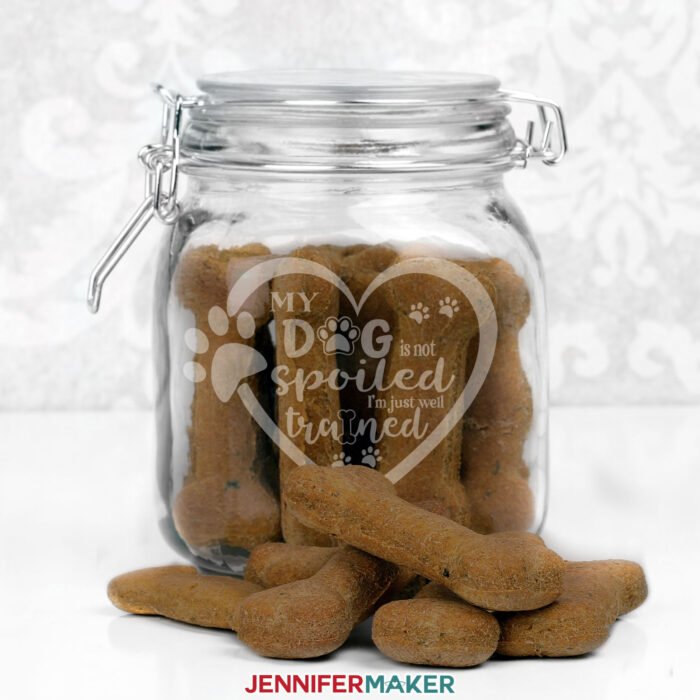
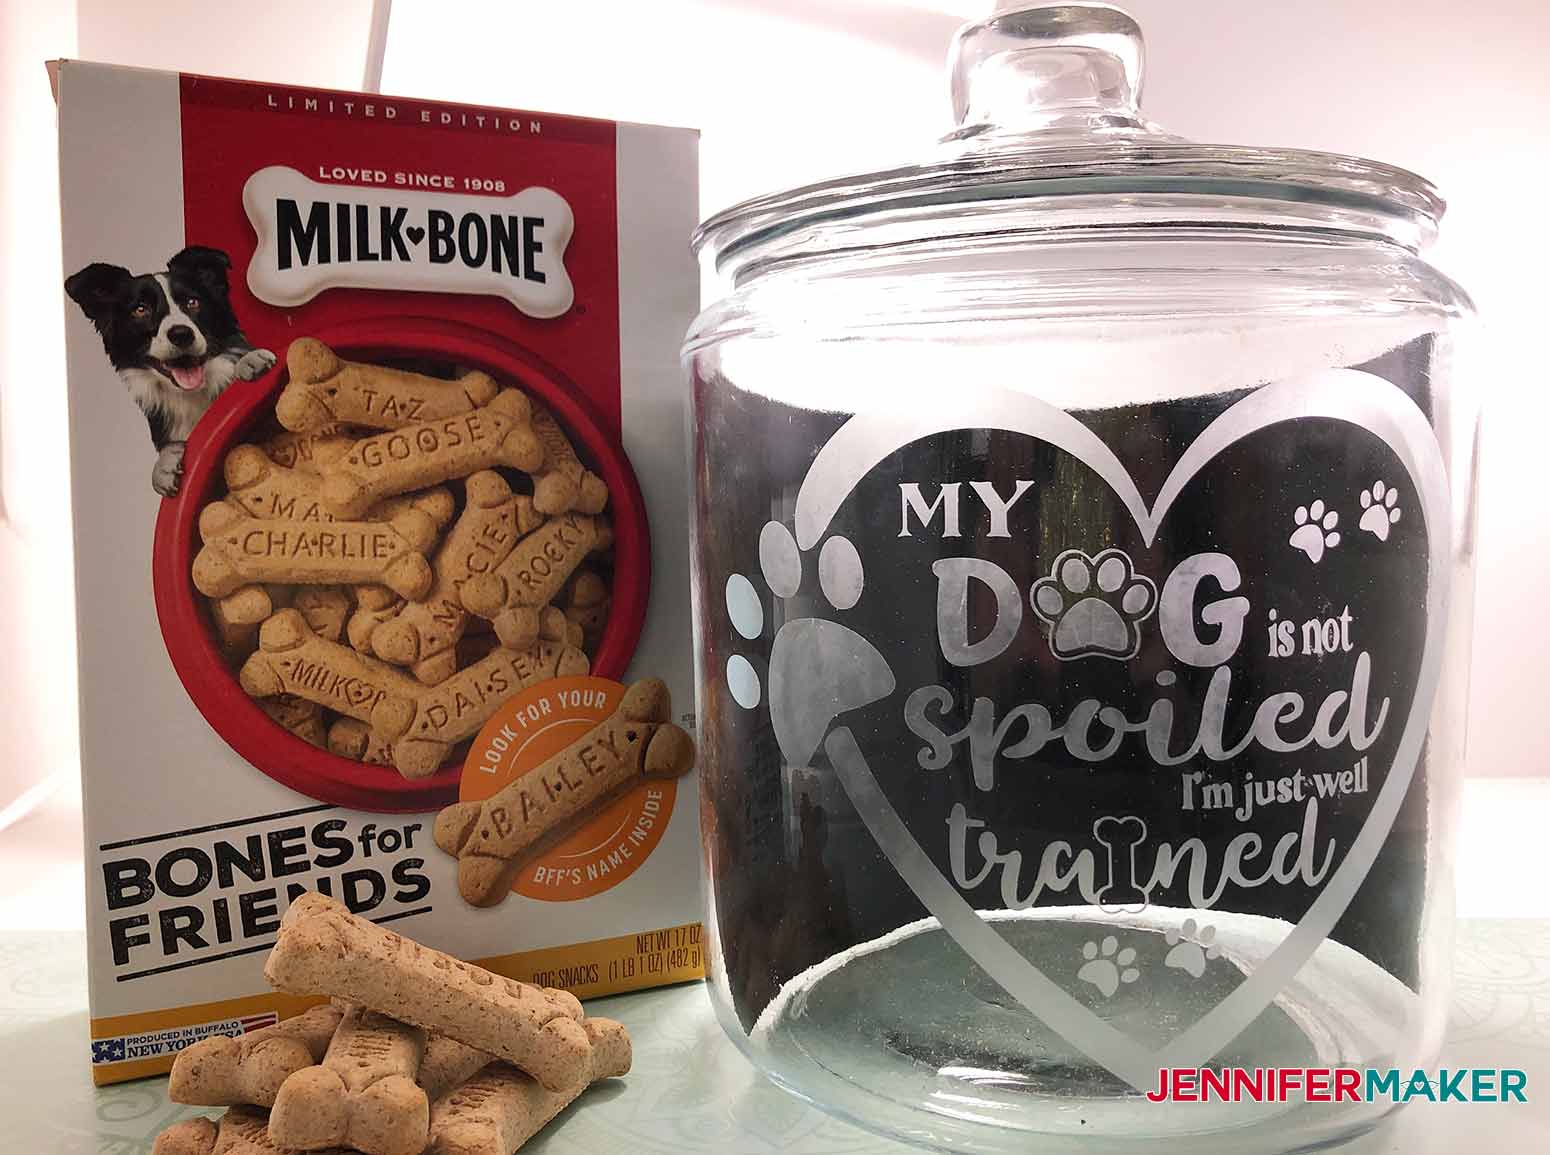
Personalized cookie jars are a big thing now and they do make super awesome gifts. And they are not only for cookies, how about a treat/rewards jar for those four-legged friends in the house? These were so fun, I can't wait to make more for gifts.
Materials
- One (1) 7 inch x 7 inch piece of Permanent Vinyl (your choice of color)
- One (1) piece of 7 inch x 7 inch piece of Stencil Vinyl (optional, used instead of the permanent vinyl if you wish)
- One (1) piece of 7 inch x 7 inch piece of Cricut Standard Grip Transfer Tape
- One (1) Glass Jar (I used these 1 Gallon Anchor Hocking jars)
- One (1) Amour Etch Cream 10 oz. (I used about 4 or 5 tablespoons of etching cream)
- One (1) Pinsetter Little Chunk font from Fontbundles.net (optional for personalization)
- One (1) Trancity font from Fontbundles.net (optional for personalization)
- One (1) The Tingler font from Fontbundles.net (optional for personalization)
- One (1) Watermelon Margarita font from Fontbundles.net (optional for personalization)
- One (1) Allspice Alternatives from Fontbundles.net (optional for personalization)
- Design #266 - My free Etched Glass Cookie/Treat Jar design file (available in my free resource library/get the password by filling out the form at the bottom of this page)
Tools
Instructions
STEP 1: GET THE ETCHED GLASS COOKIE/TREAT JAR DESIGN
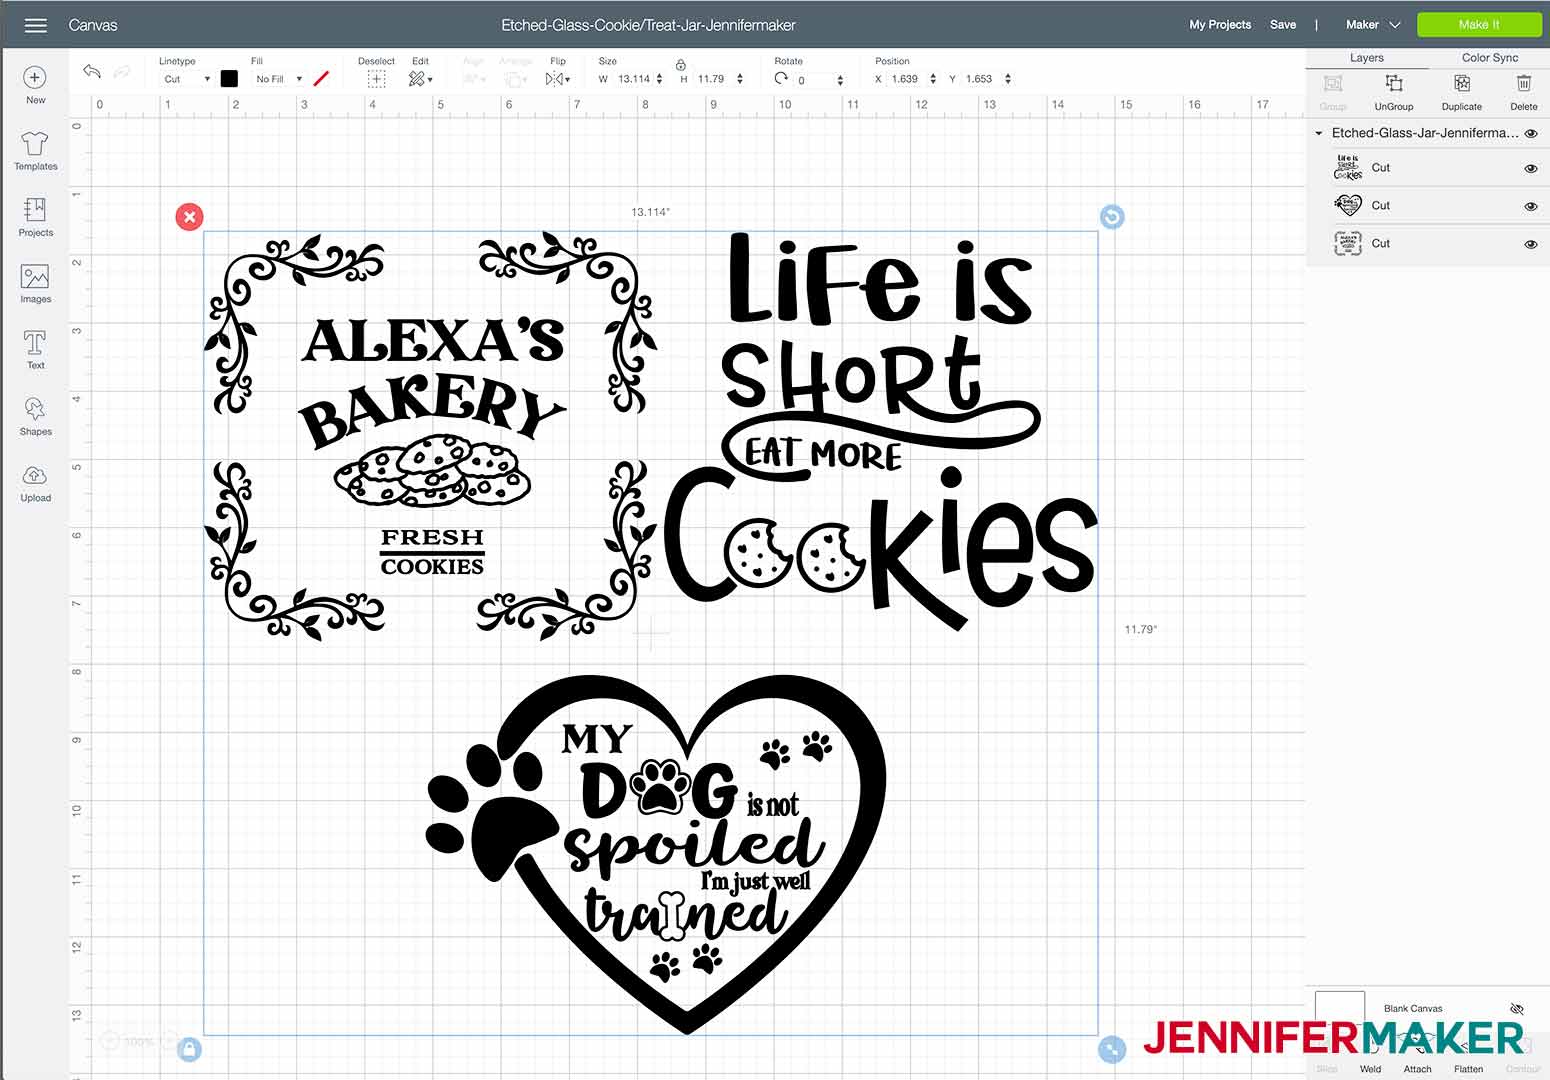
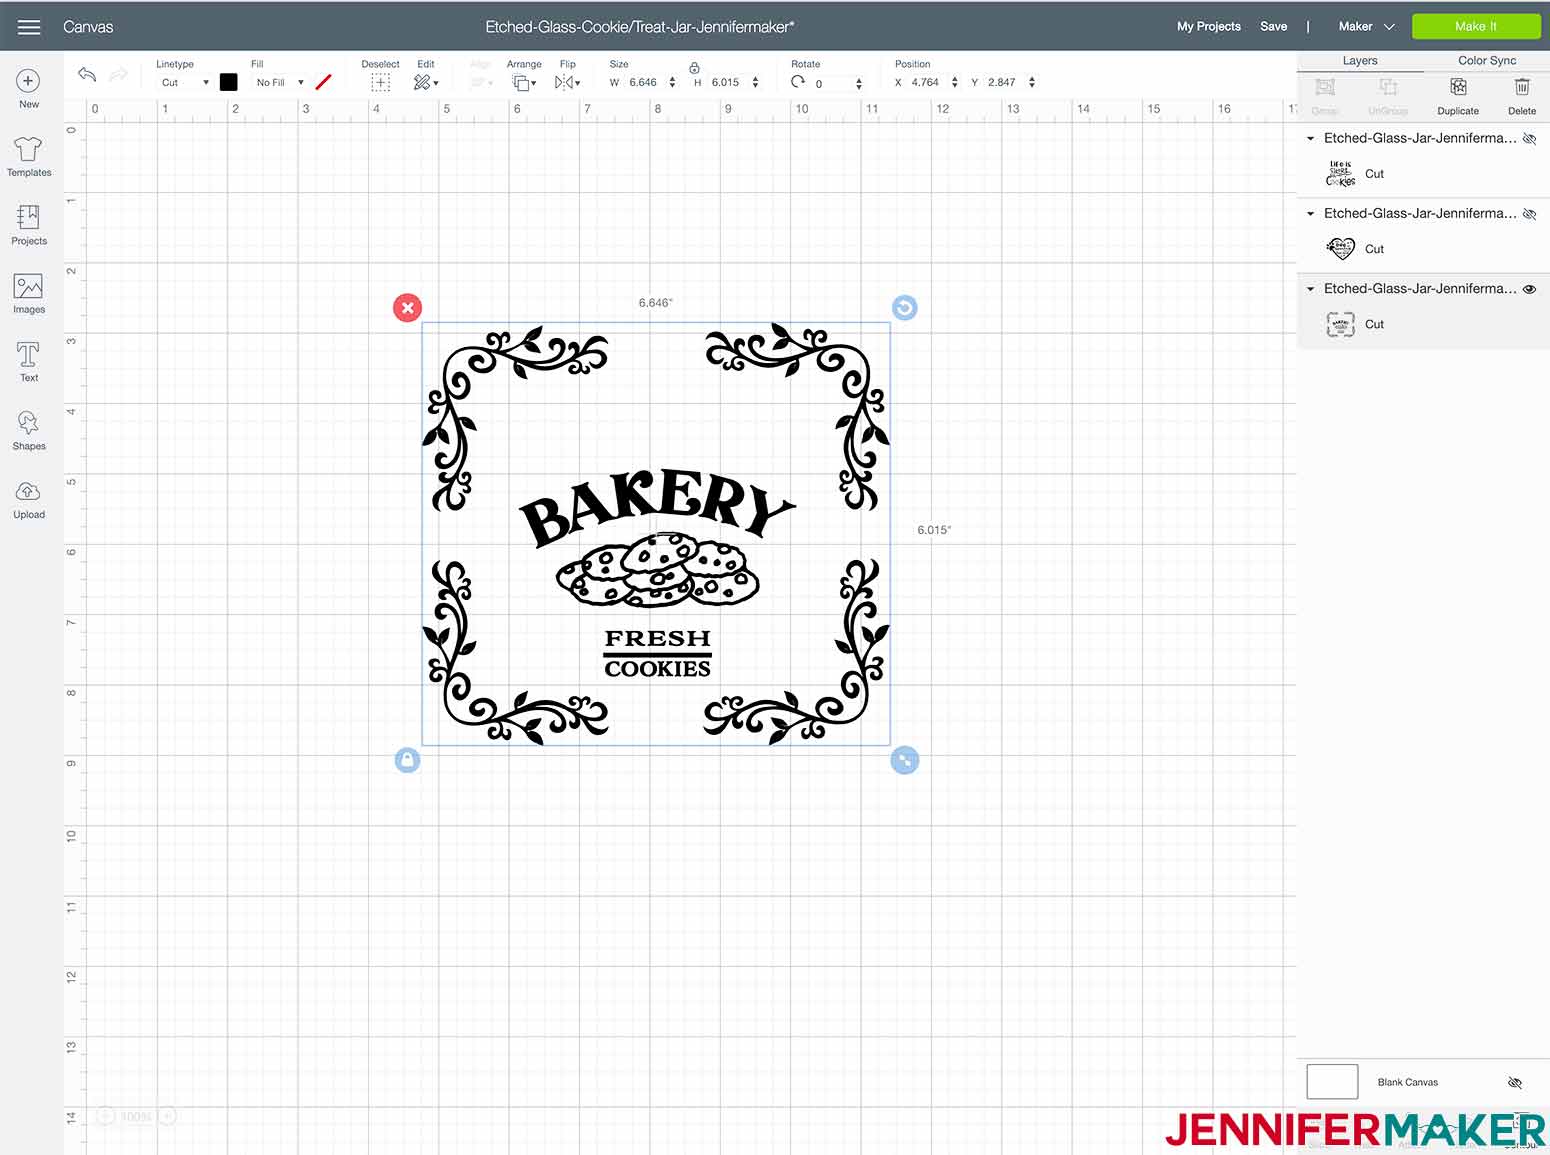
You can get my Etched Glass Cookie/Treat Jar design file #266 from my free resource library (get the password to the library in the form at the bottom of this page. Here is what my Etched Glass Cookie/Treat Jar SVG design file will look like when you upload it to the Cricut Design Space:
Tip: If you are not sure how to upload an SVG cut file to the Cricut Design Space, watch this helpful video training series I made. If you are on an iPad or iPhone, here is how to download and upload SVG files to the Cricut Design Space app.
STEP 2: UPLOAD THE STENCIL DESIGNS
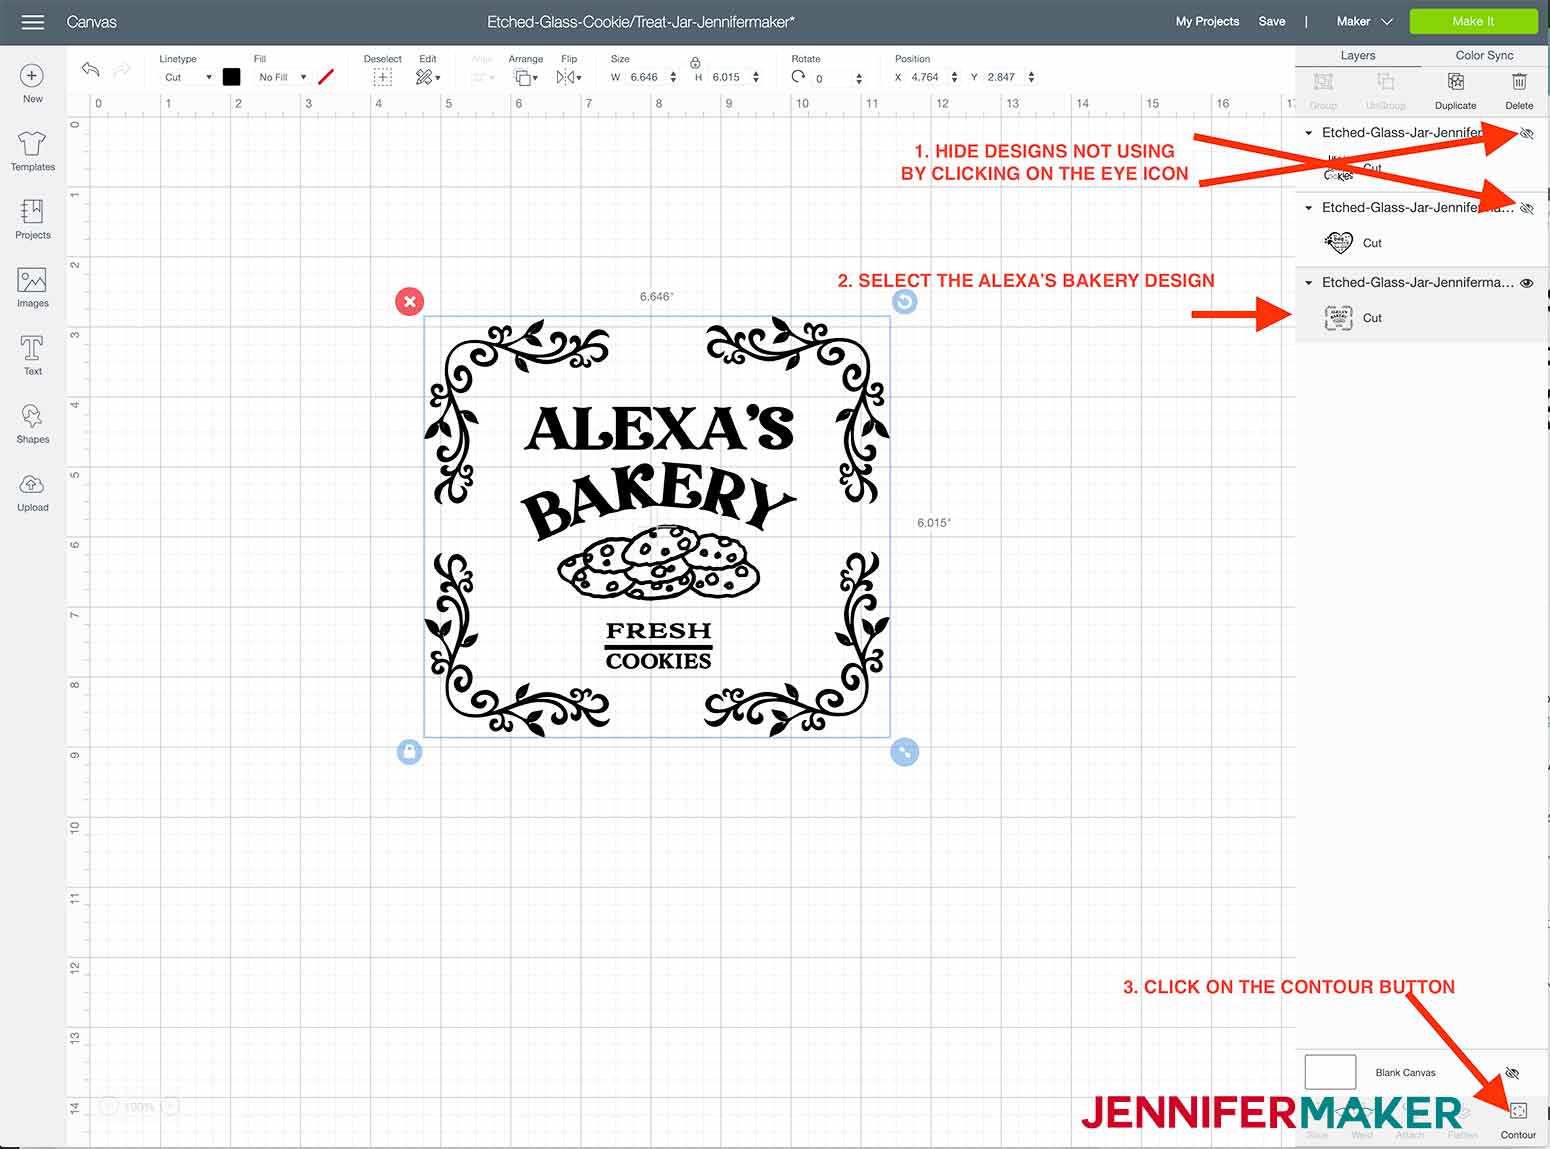
Upload the Etched Glass Cookie/Treat Jar design into Design Space. Once you have uploaded the design into Cricut Design Space, ungroup the designs and hide or delete the designs you are not going to cut. You can hide the designs by clicking on the "eye" icon. The design is sized for the glass jar that is in the materials list. If you are using a different sized jar to apply your Etched Glass Cookie/Treat Jar design, resize the design accordingly. You can resize with the resize icon in the lower right hand corner of the design, or just type a new size into the height and width boxes at the top of the screen.
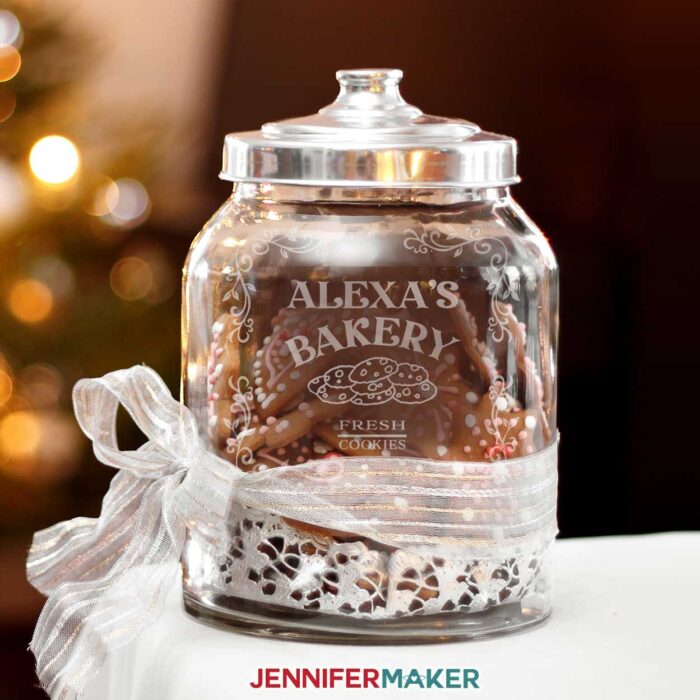
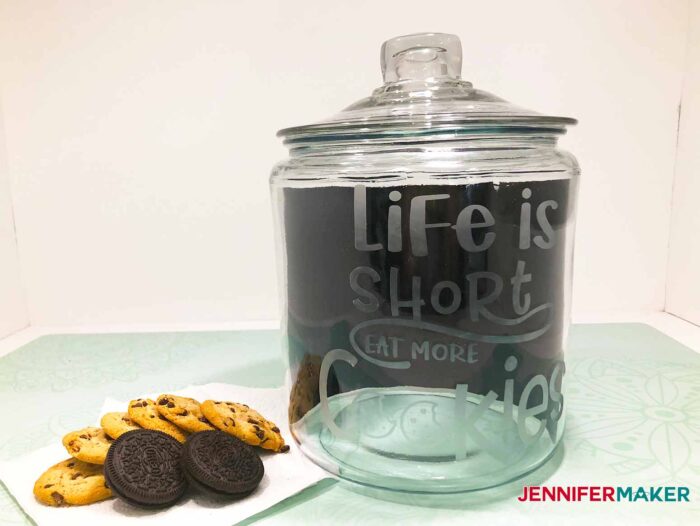
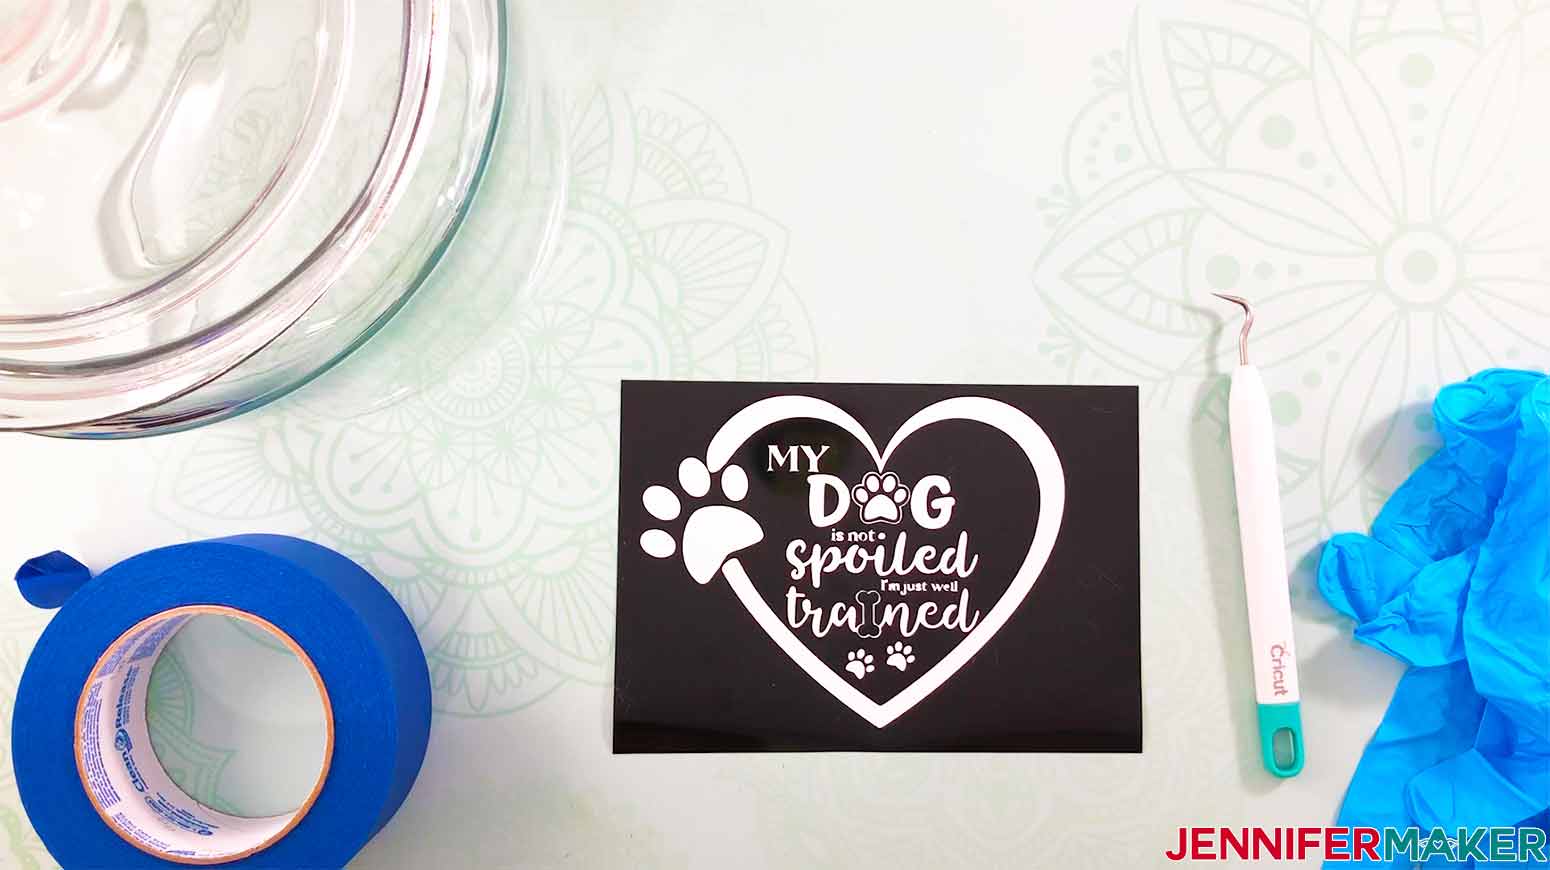
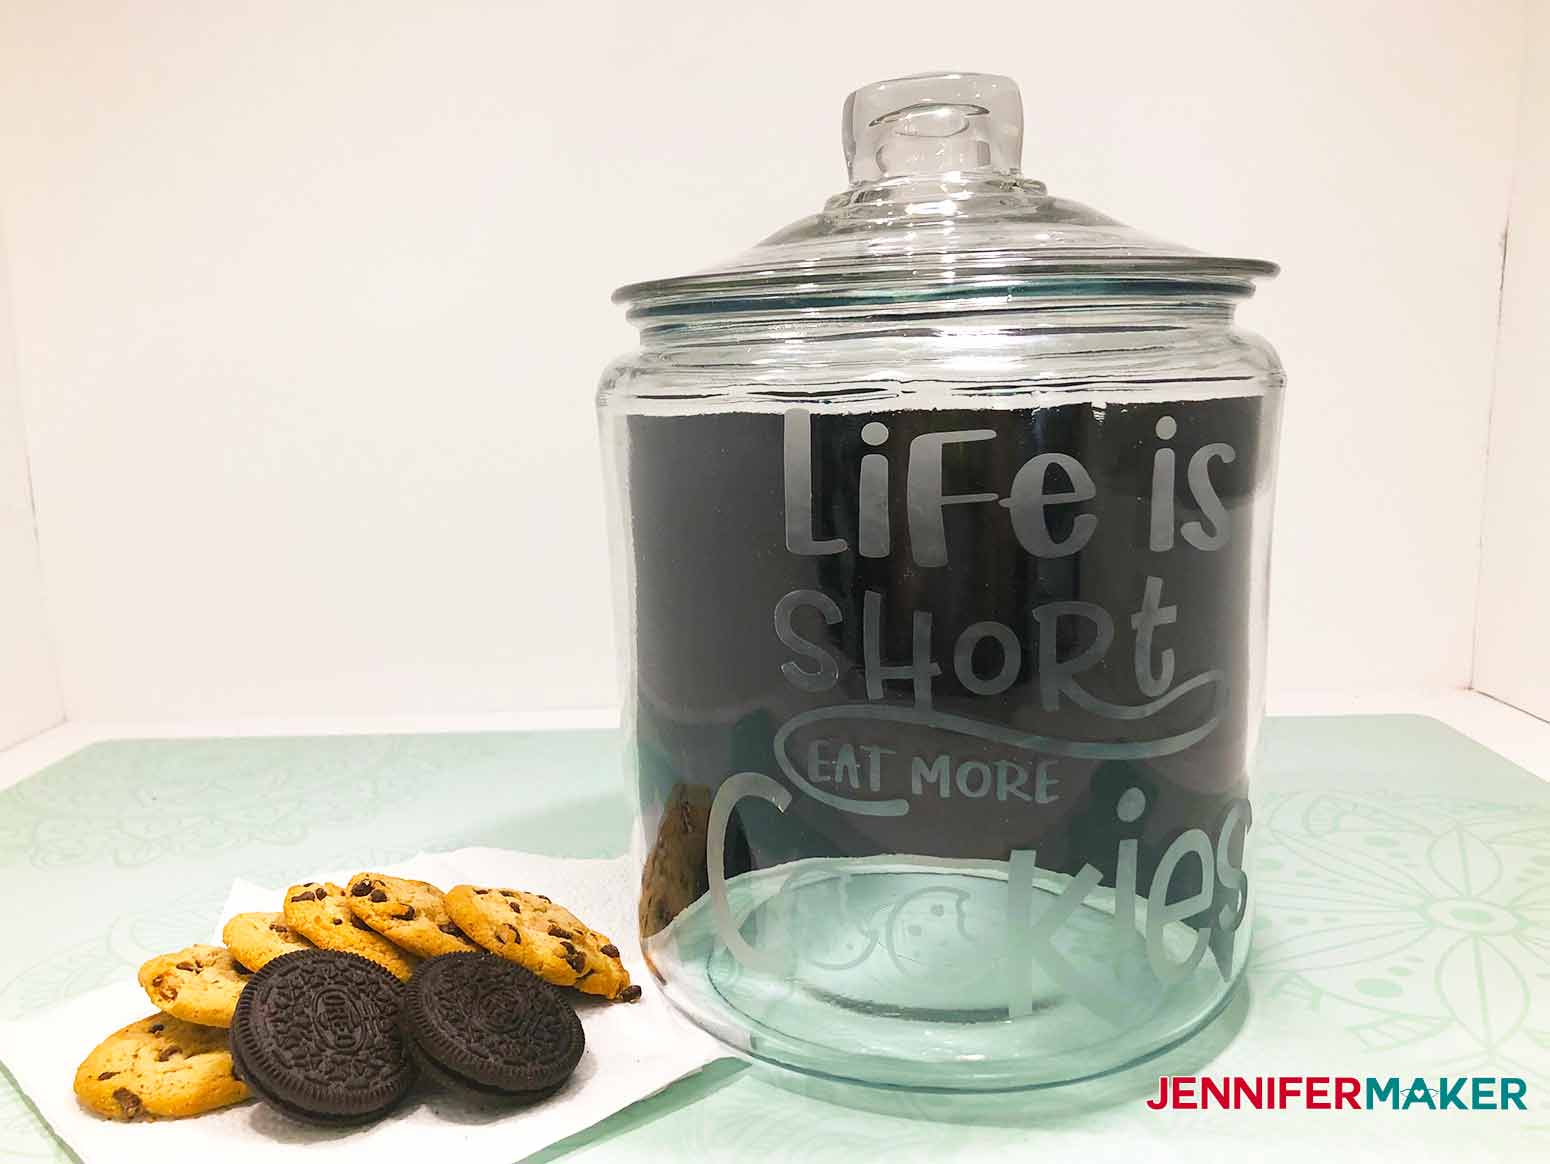
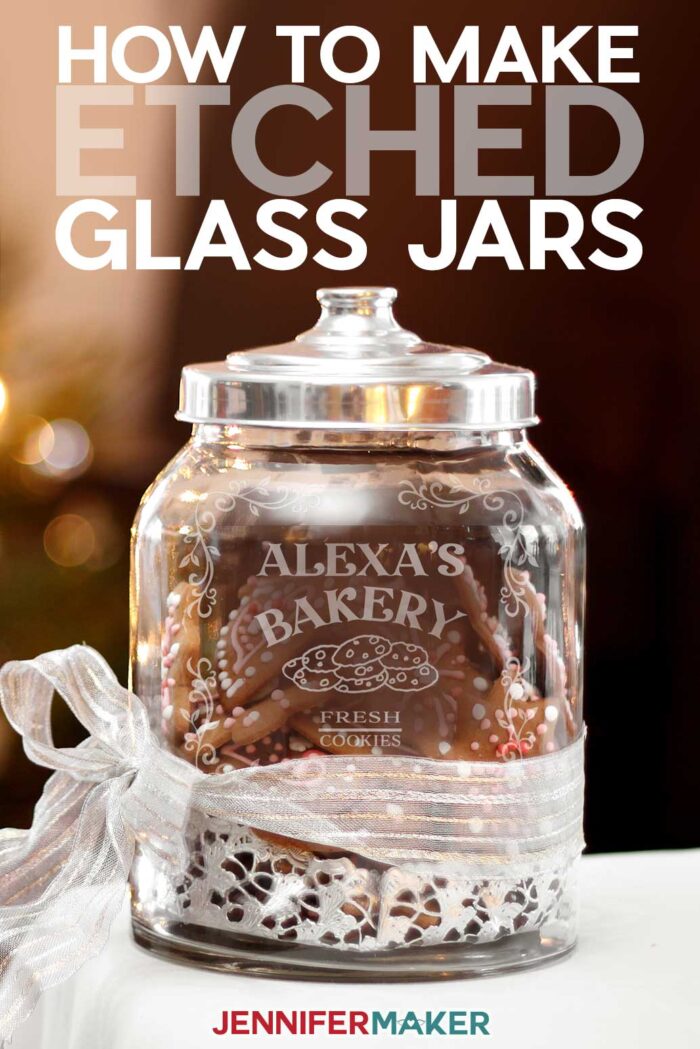
Two of my designs, "The Life is Short Eat More Cookies" and the "My Dog Is Not Spoiled" designs are ready to be cut as they are and if you picked one of these, you can click Make It now. However, if you chose to make the "Alexa's Bakery" design, you will want to customize it!. Let me show you how to customize this design.
Select the Alexa's Bakery design and click on the contour button in the lower right hand corner.
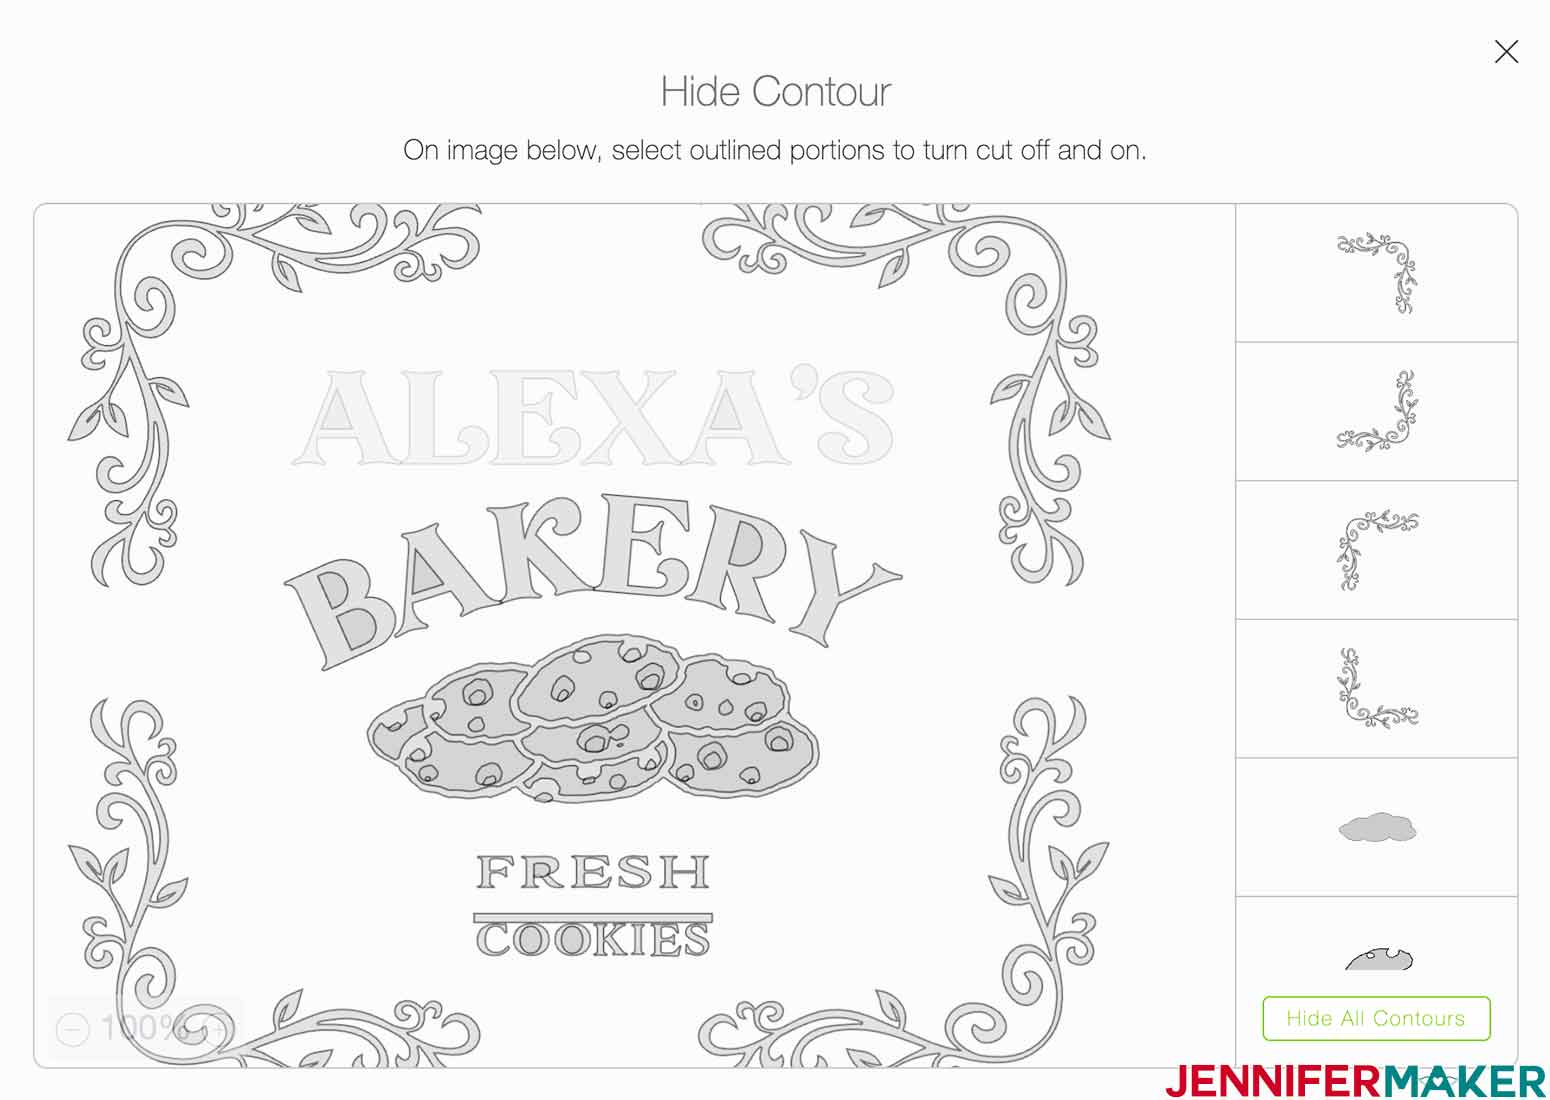
The Contour window will open and will look like this prior to making any changes to the design.

Select the letters you want remove (by clicking on them) here in the contour window and be sure to also select the centers of all the letters. Your Contour will look like this once you have all the letters selected. Click on the X in the upper right hand corner of the screen to close out of the Contour window and return to the Design Space canvas.
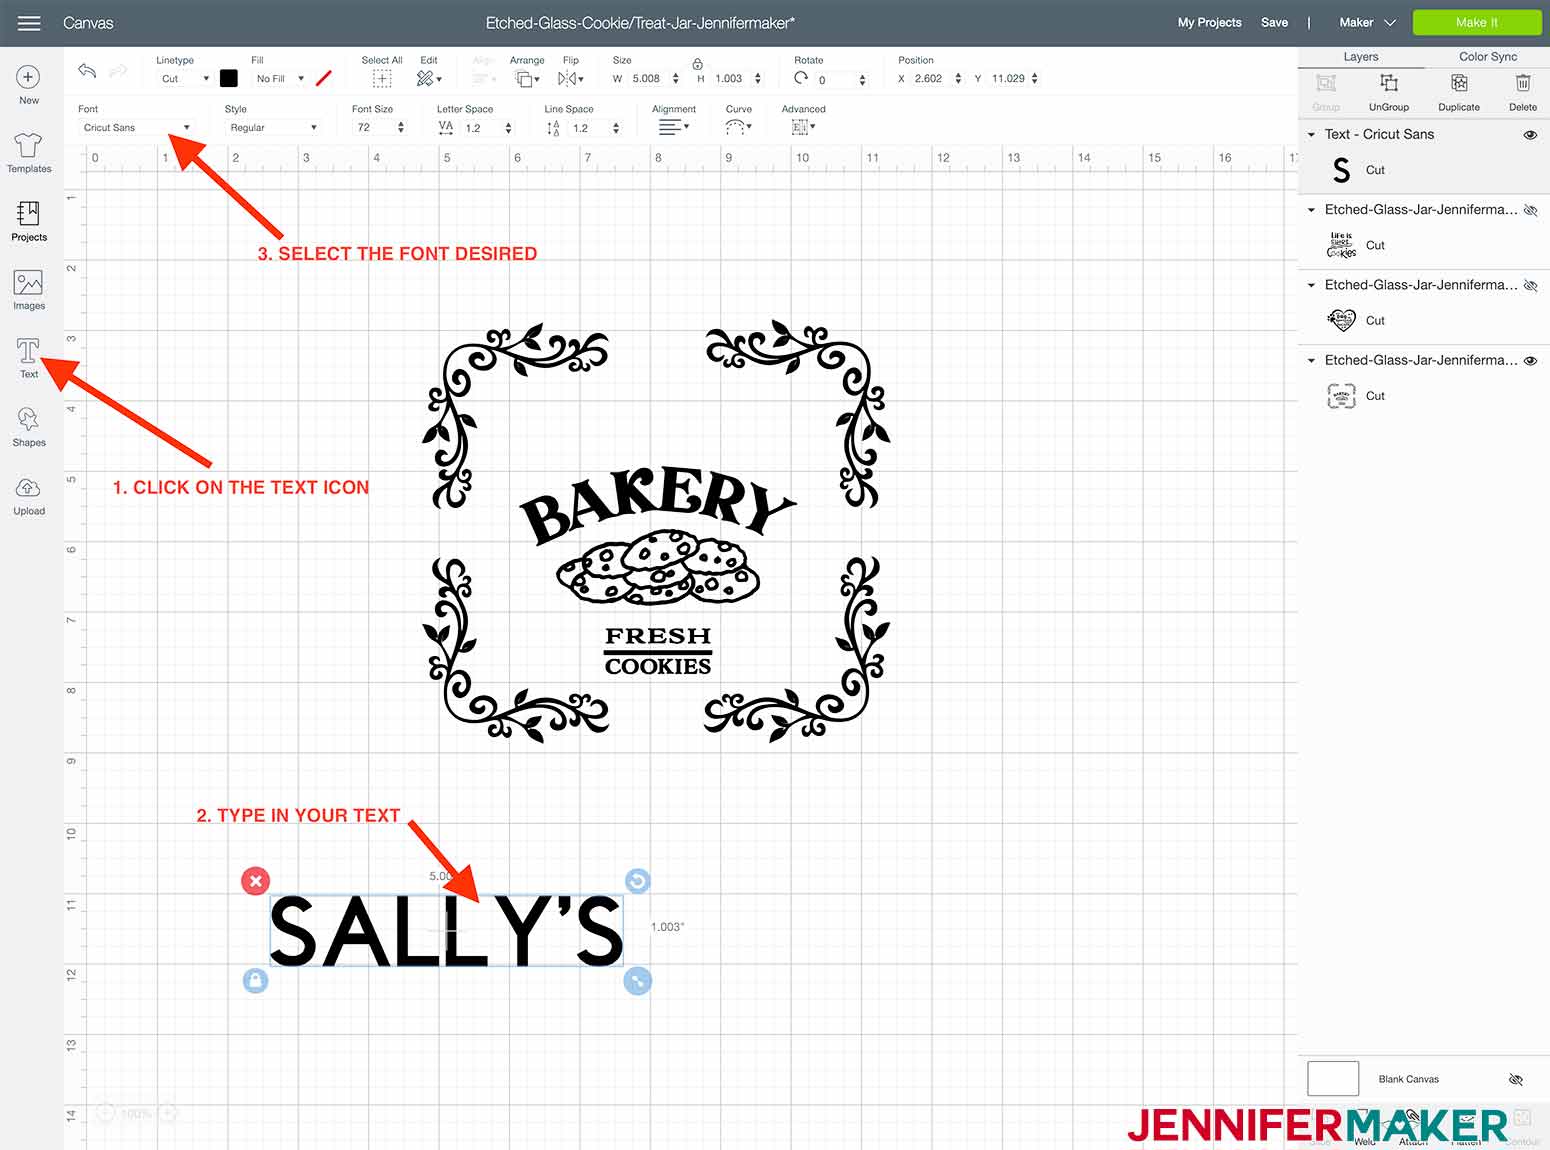
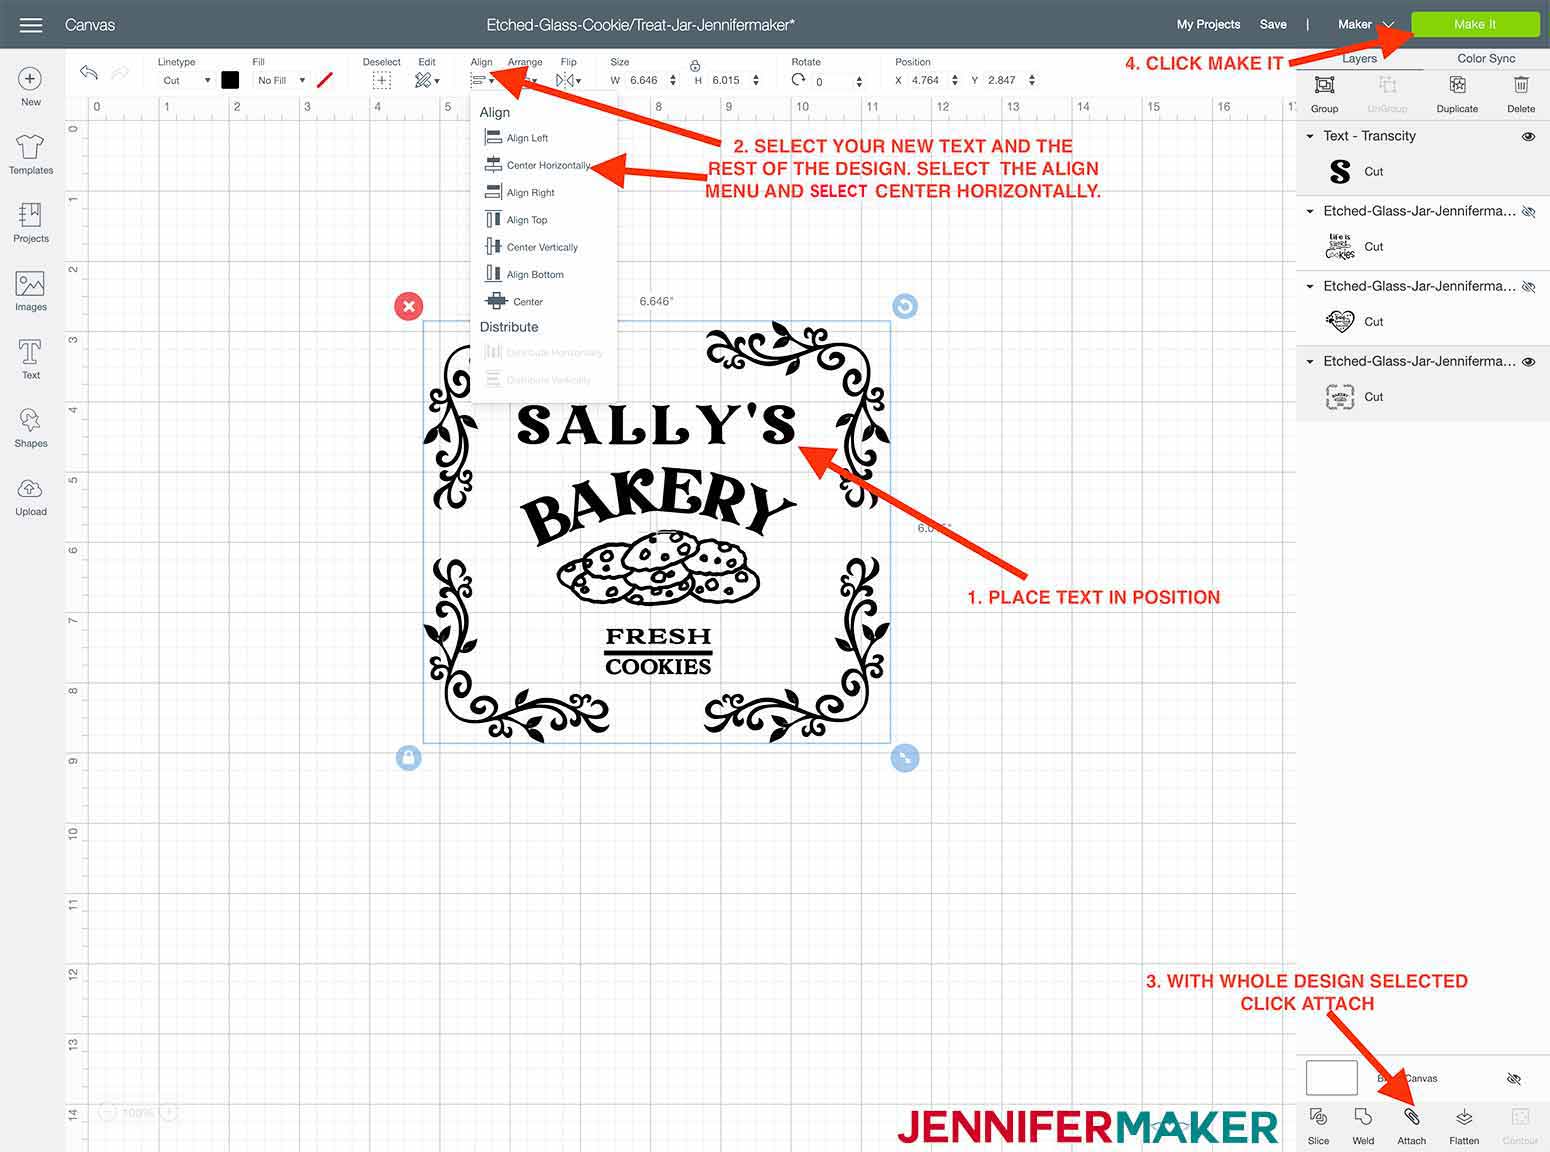
Back in the Design Space canvas, you will now see that Alexa's name has been removed. You will now be able to add your new text to the design by clicking on the Text button on the left hand side of the screen. Type in your text and then select the font you want to use. I used "Transcity" font from fontbundles.net, and there is a link to it below this video, however, you can use whatever font you desire. Align the new text with the original design. Now click both the design and the new text and click the attach button.
When you are ready, click Make It. On the Mat Preview screen you will see your design. You do NOT have to mirror your design. Click Continue and choose your material. I am choosing Premium Vinyl, which means permanent vinyl. Put your vinyl shiny side up on your cutting mat being careful to get it as smooth as possible, then load the mat into your Cricut and press the flashing button to begin cutting.
STEP 3: CUT AND WEED YOUR STENCIL
Prep your glass jar for the vinyl stencil by cleaning the outside with isopropyl alcohol and a lint free cloth or a coffee filter. Let the jar dry as you weed your design.
Weed your design while it is still on your cutting mat. Weeding the vinyl to be used for a stencil is done a bit differently than normal weeding in that you are going to weed in reverse. Instead of removing the vinyl around the letters, you’ll be removing the letters themselves. Be sure to leave all the centers of the letters in place. If they accidentally come out while weeding, just put them back in place carefully.
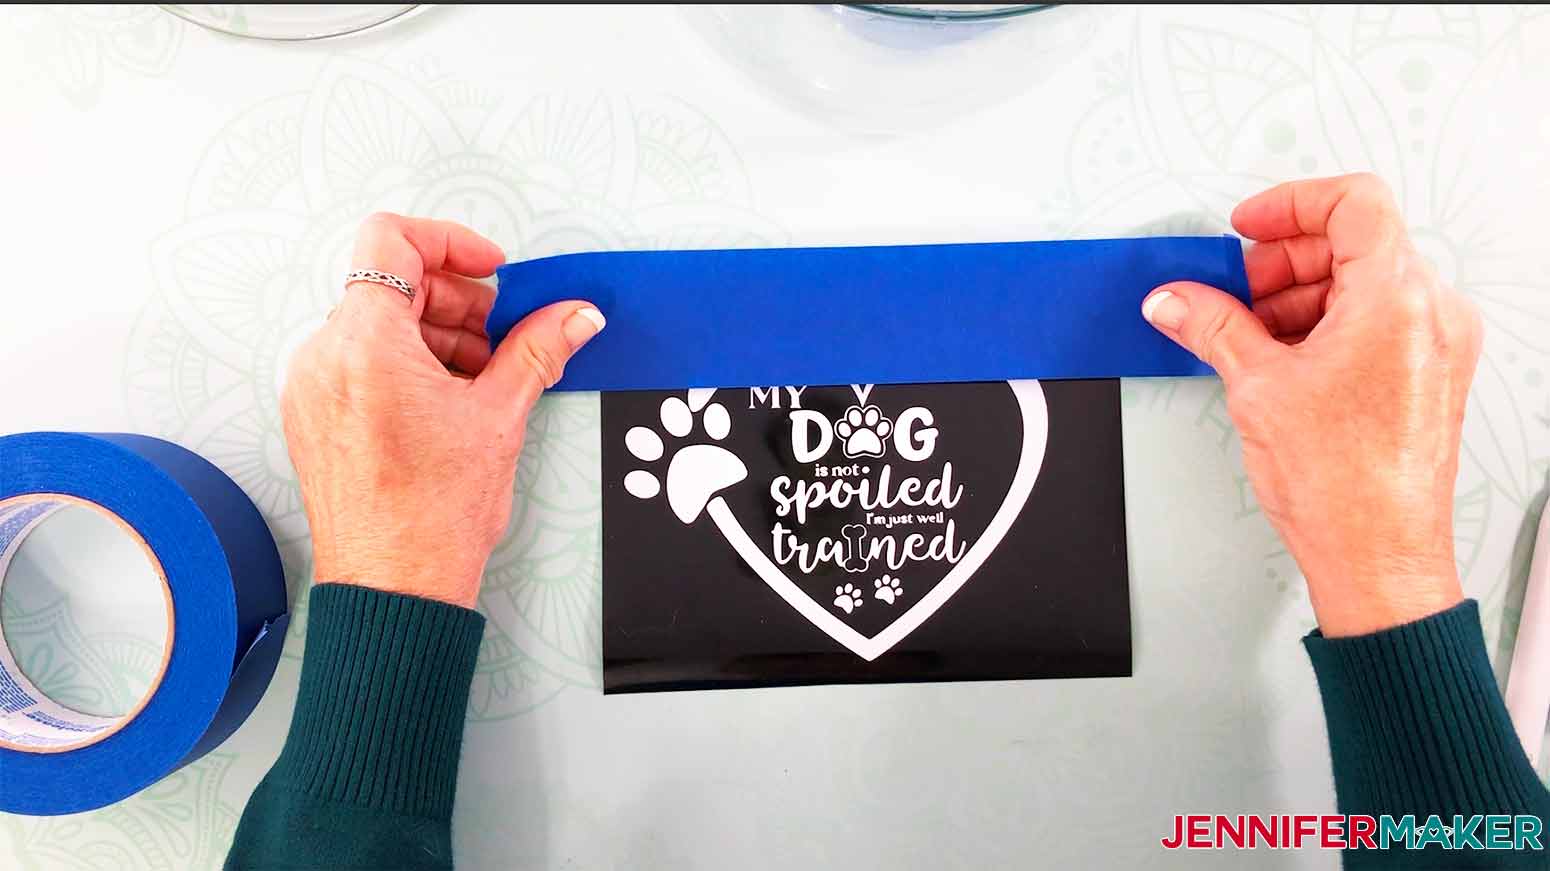
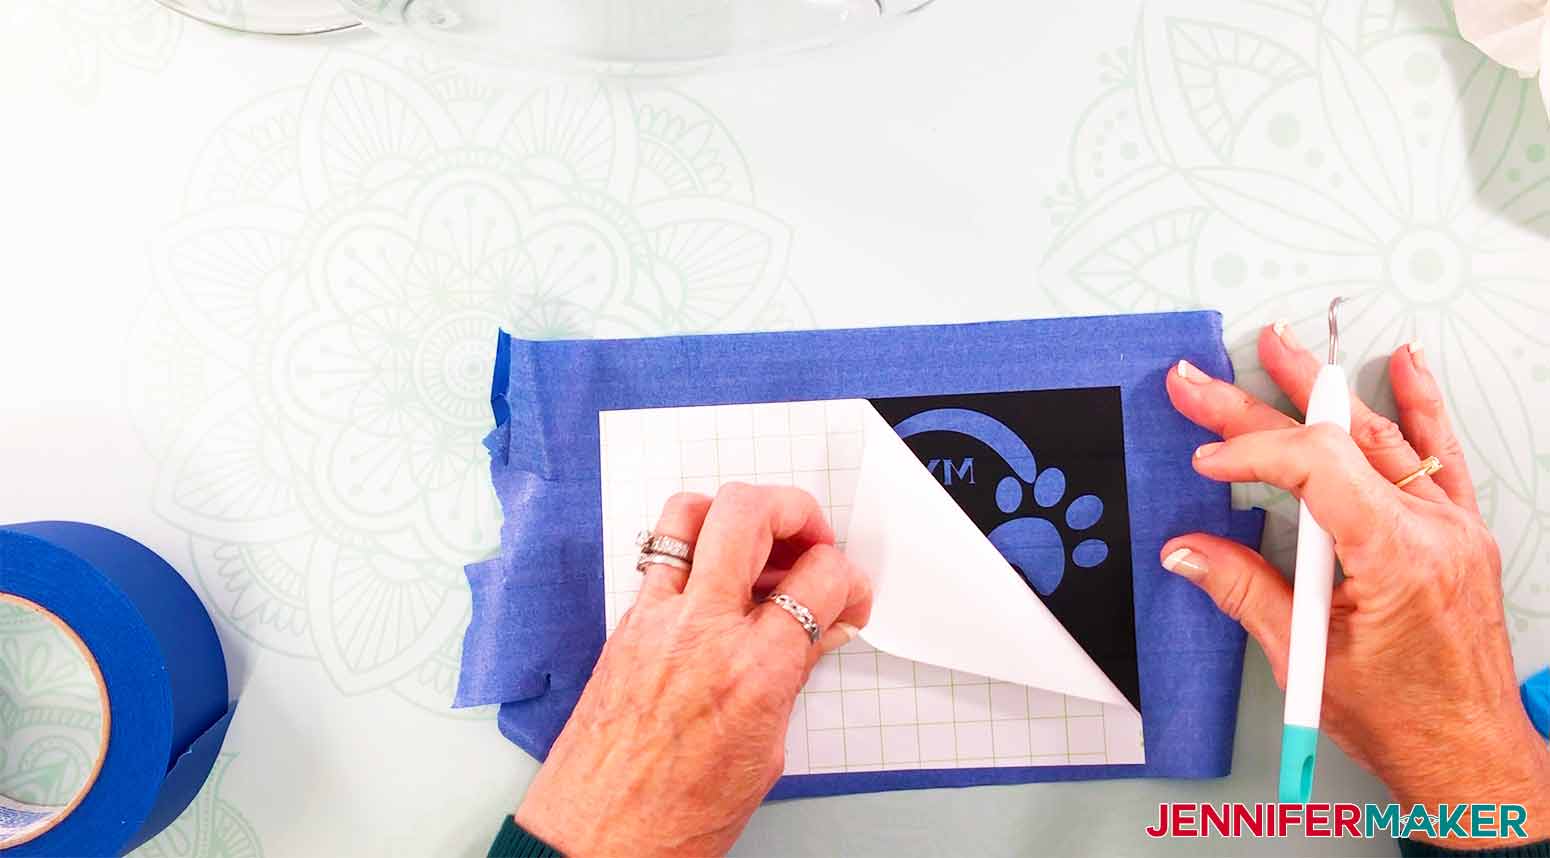
After the design is completely weeded, remove it from the mat. Now it is time to apply Cricut Transfer Tape to the design. I actually used painter's tape as my transfer tape. I find painters tape is more flexible to apply to a rounded surface such as this jar. If you want to also use painters tape, just cover the design with overlapping strips of tape. Once covered with either the painters tape or the transfer tape, flip your design over and remove the paper backing from the vinyl.
Your stencil is now ready to use!
STEP 4: APPLY THE STENCIL TO THE JAR
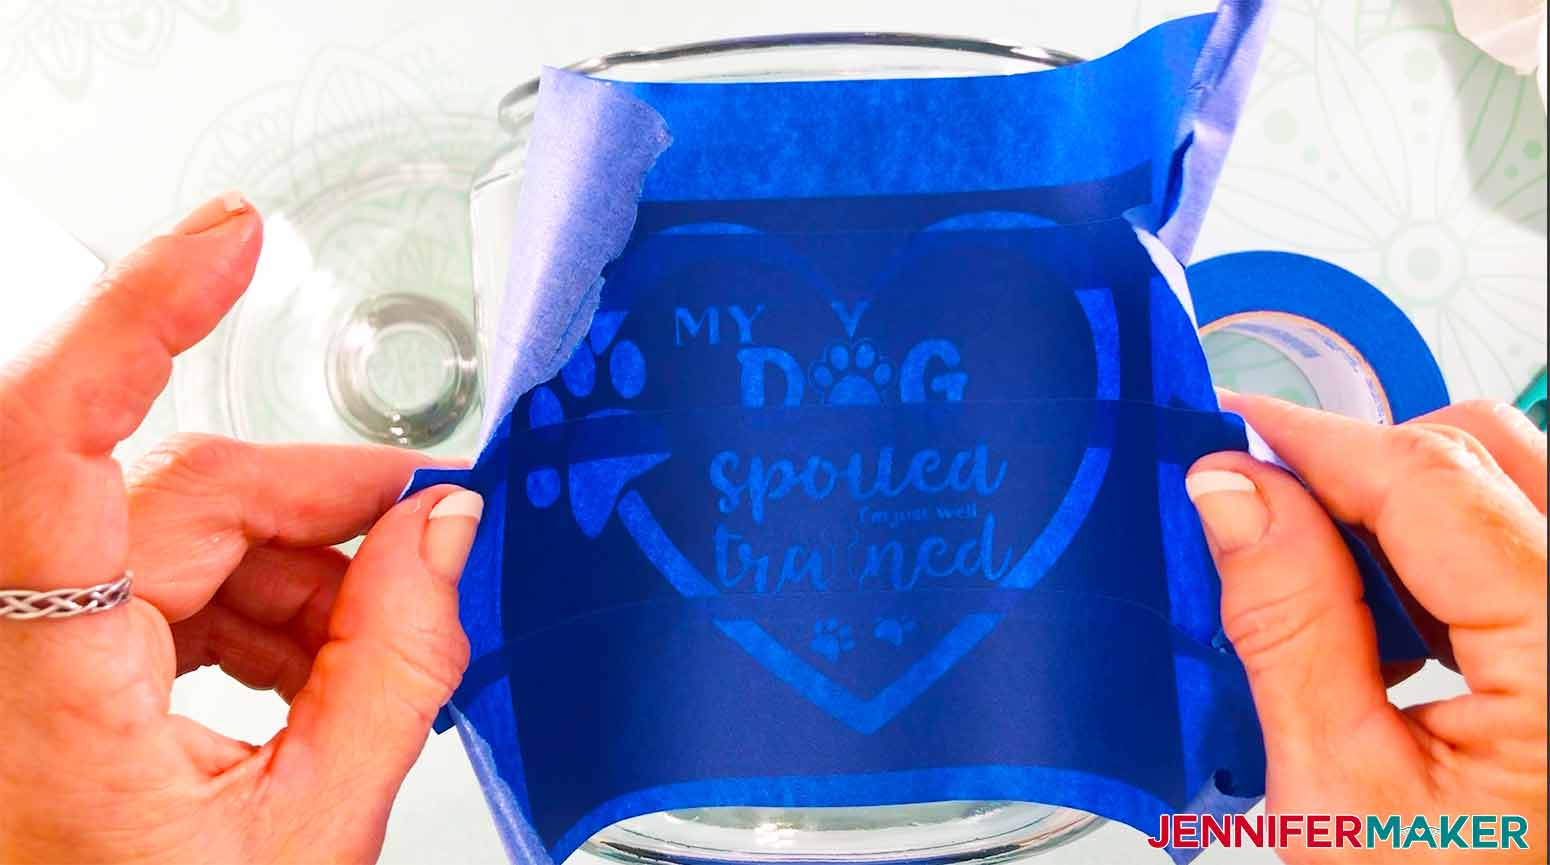
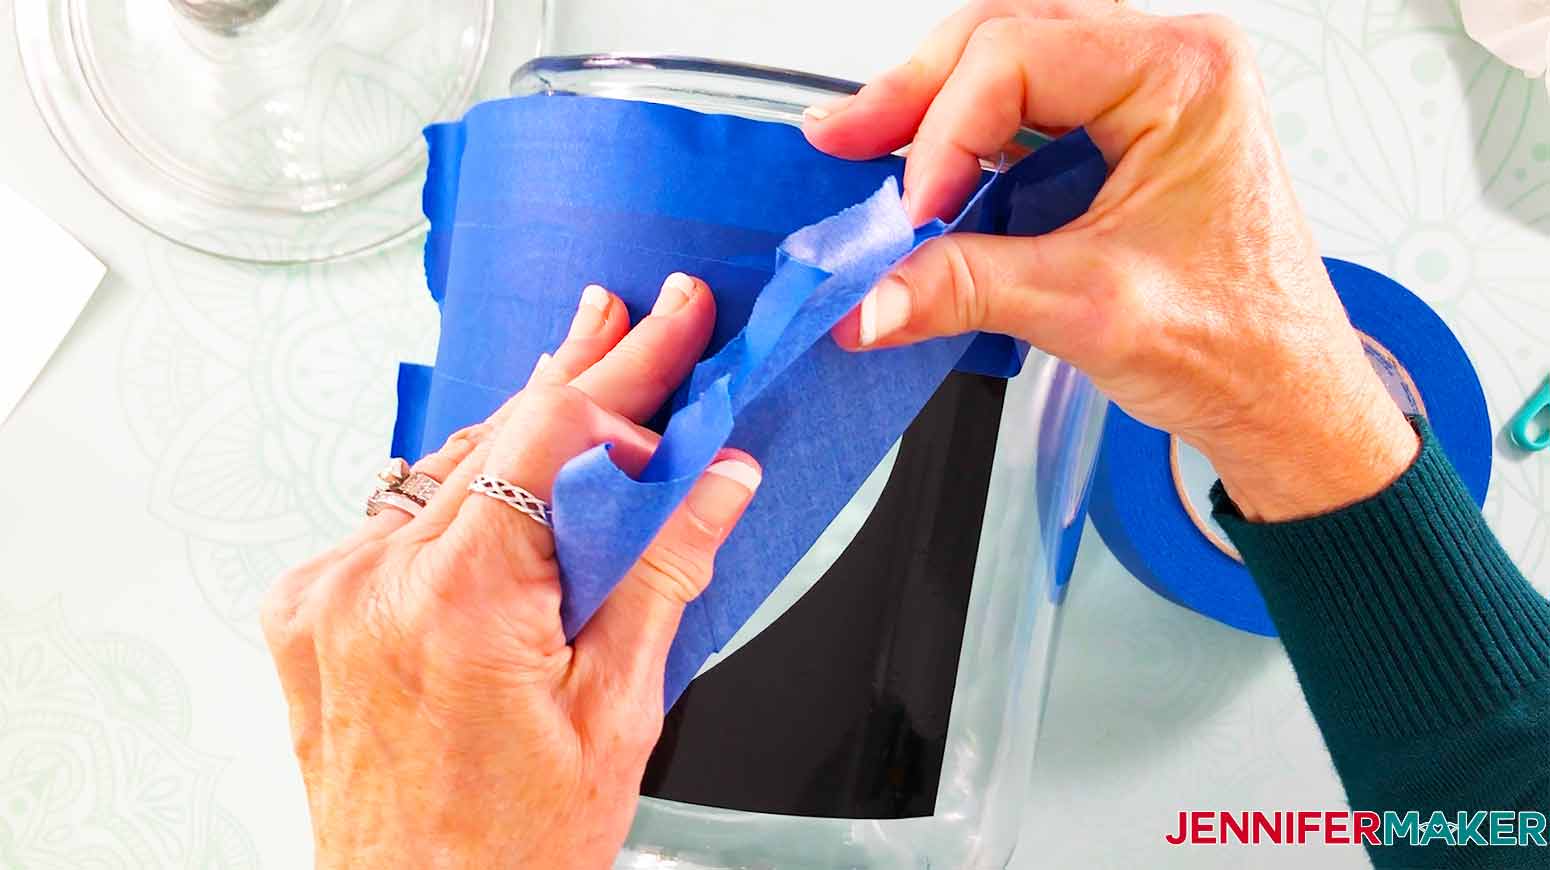
You are ready to place your design on the jar. I found that if I placed the jar lid on one side of the jar, that kept the jar from rolling around on my surface and made for easier placement. Fold your design up in a taco shape over the jar and lay the middle of the design down on your jar, gently rolling it out from the middle on both sides to the jar.
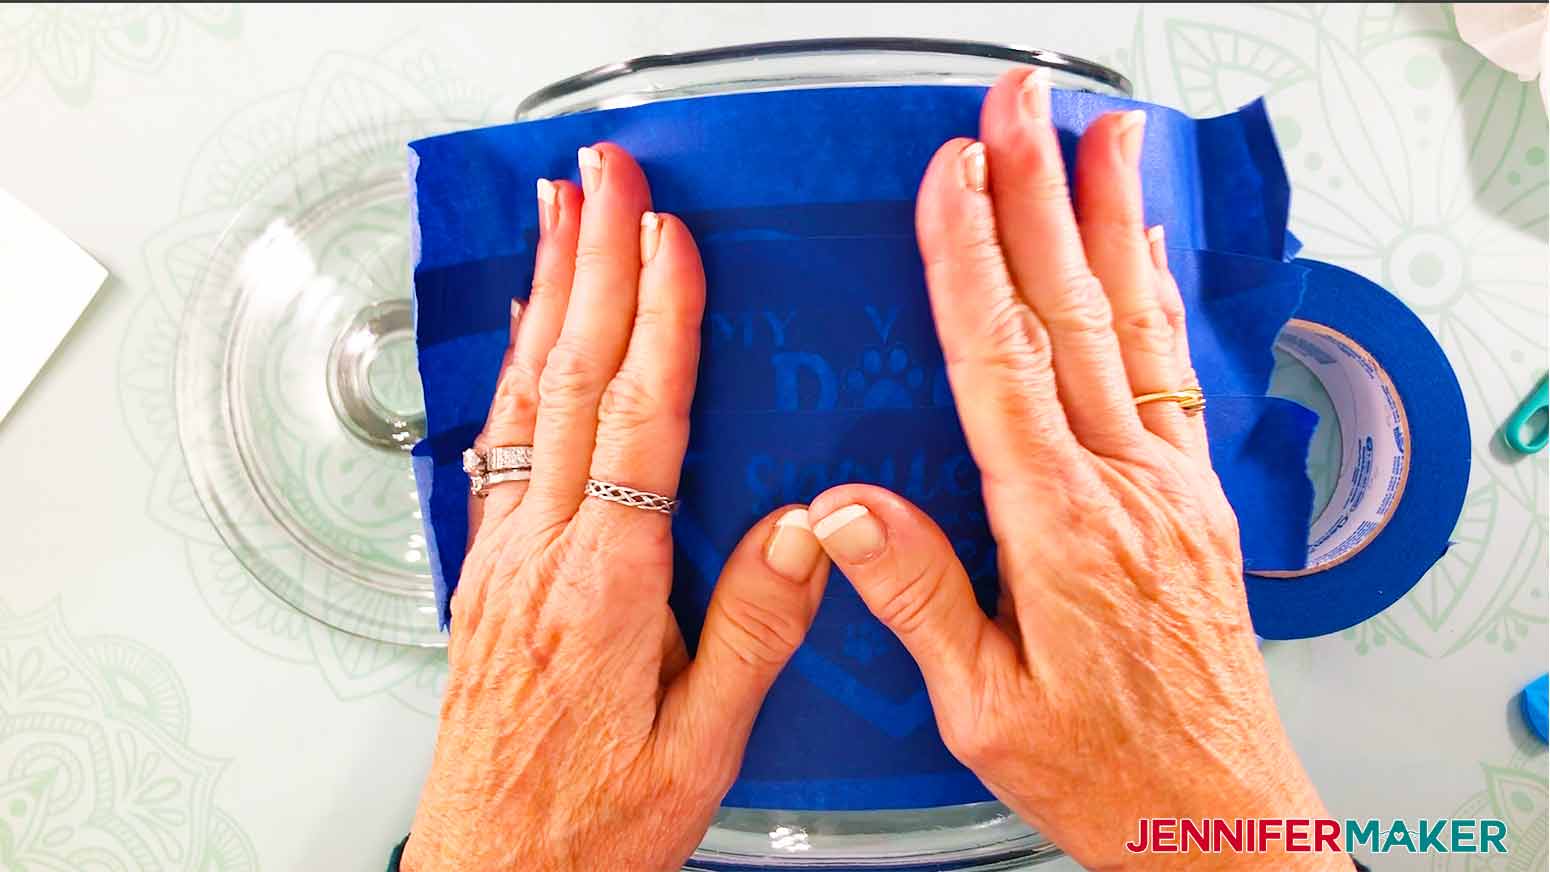
Before removing the transfer tape or the painters tape, be sure to burnish the vinyl down to the jar well, using either your Cricut scraper or your fingers.
Remove the transfer tape (or painters tape). If some of the vinyl comes up with the transfer tape, just push it back down again and continue to remove the transfer tape.
Check your vinyl to be certain all areas around the letters are adhered well to the glass. This step is important as it will stop your etching cream from bleeding into areas you don't want it to. Just go around all the lettering with your fingers and push the vinyl down well.
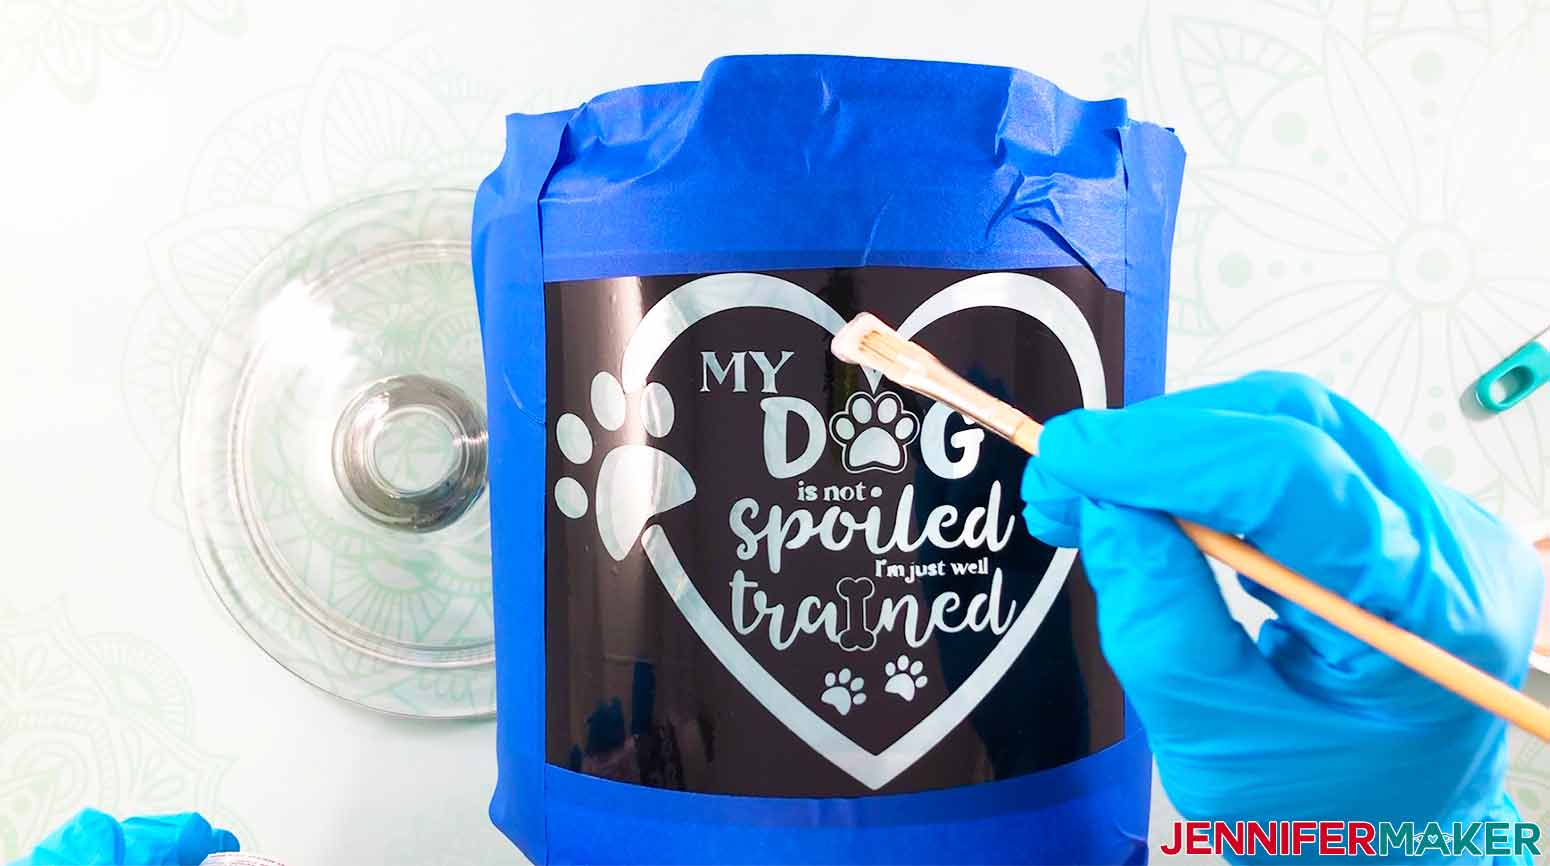
Before applying the etching cream, you may have to cover the jar area with painter's tape to assure not getting the etching cream on the glass where you don't want it.
Before opening the etching cream, be sure to put on a pair of safety goggles and rubber gloves. Etching cream is caustic and you don't want to get it on your skin or in your eyes.
Shake or stir your etching cream before you use it.
Apply the cream to the jar with a regular paint brush (avoid foam brushes), using your brush to move the cream on top of your stencil. Brush on the minimum amount of etching cream needed to cover the glass. You do NOT need to gob it on. Once it is on your design, move the etching cream around. Move it up and down, side to side, and diagonally. Keep the cream moving around your design, getting into every nook and cranny. The more you can keep the cream moving, the more even the etching will be. Overall, including applying, the cream needs to stay on the glass at least 5-10 minutes.
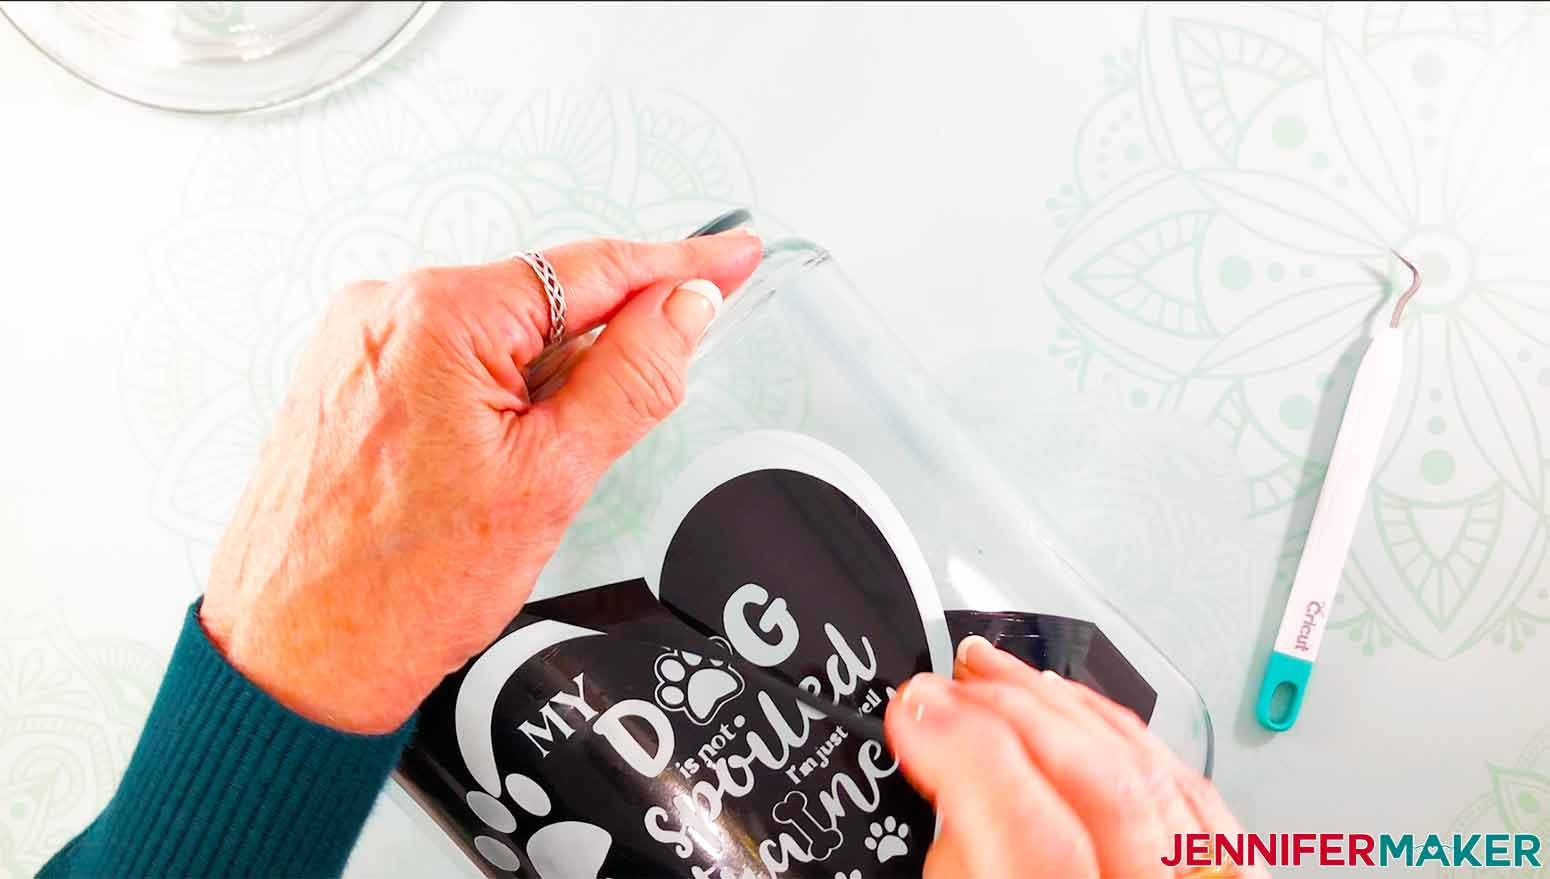
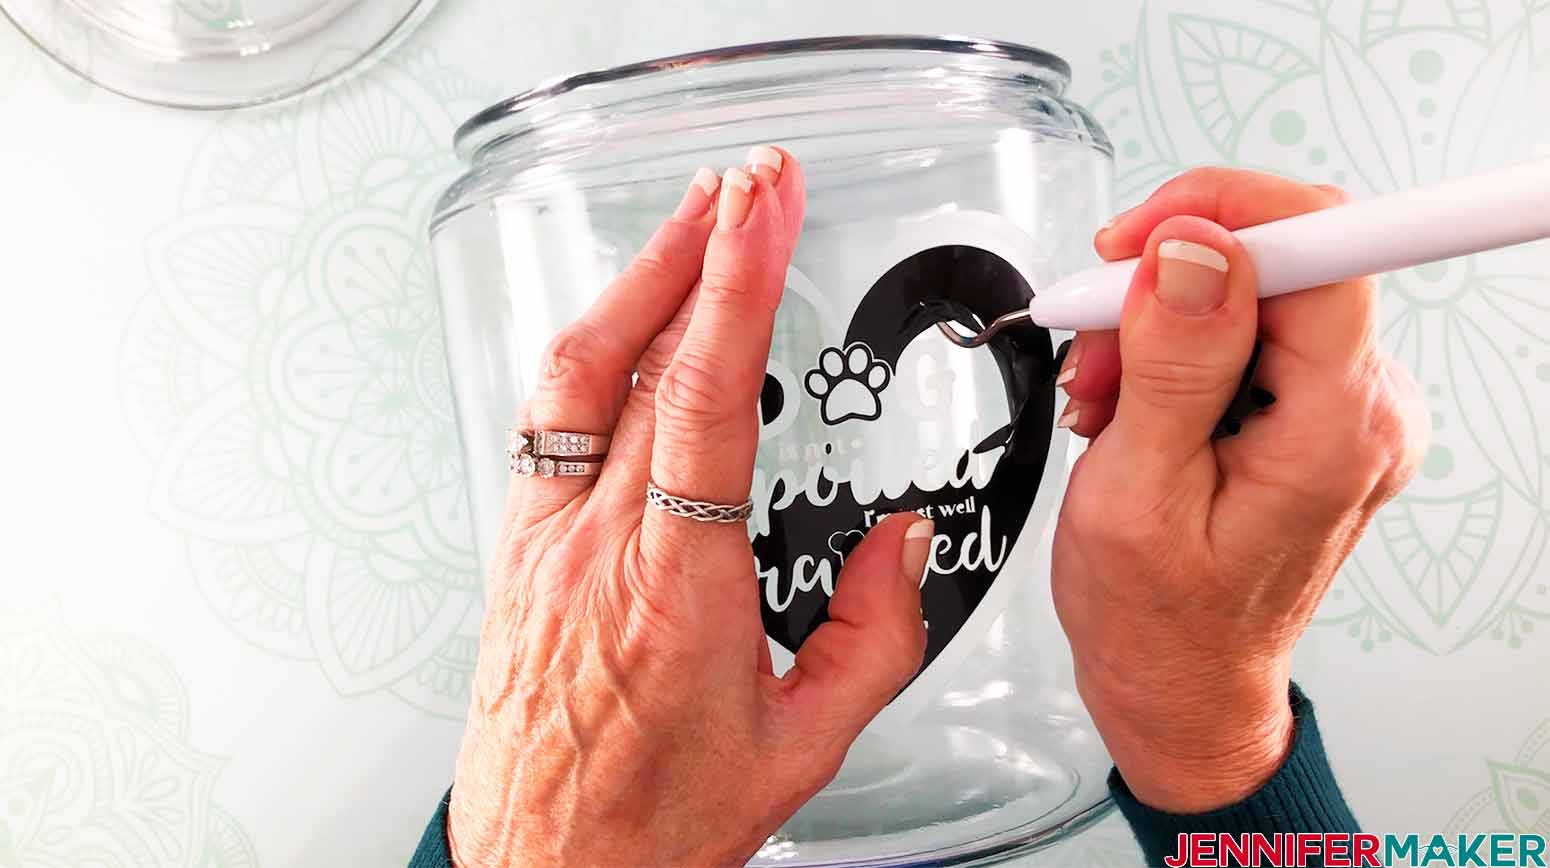
When the time is up, rinse the jar off under running water. If you used a lot of cream, scrape it back into the container first and then rinse. Be sure to get all the etching cream off the jar before you remove the vinyl stencil. You do not want to accidentally touch it or get it on your work surface. Dry the jar well and remove the stencil. You may need to use your weeding tool to remove any vinyl that can't be picked off by hand. Give the jar a final rinse after all the stencil has been removed.
STEP 5: SHOW IT OFF!
I’d love to see what you did with the Etched Glass Cookie/Treat Jar design. If you make one, please share a photo in our Facebook group, email it to me at [email protected], or tag me on social media with #jennifermaker.
Notes
Overall size of this project using the material I used was approximately 11 inches high x 22 inches in diameter x 7 inches in depth.
Special thanks to the JenniferMaker Design Fairy Team, specifically Design Fairy Vicki, for helping me design and assemble this Etched Glass Cookie/Treat Jar.
Answers to Your Questions About Glass Etching Stencils
Q: Can you use reusable vinyl?
No. Etching cream can potentially get under the repositionable vinyl, so you want to use permanent vinyl instead. It takes a few days for permanent vinyl to cure, so using it for this will give you the strength of permanent to give you a nice clean etched edge, and it will still be easy to remove!
Q: Can I use any shape and type of glass?
The sides of your glass need to be straight up and down. If you are using an orb or ball shape, it will be more difficult to put on the stencil. It can be done, but it will be more of a challenge.
Also if your glass has borosilicate, it will be much harder to etch! You will find this in much older glass pieces, Ikea pieces and some other current manufacturers. If you see a note that your glass is scratch and impact resistant, or is made to withstand rapid temperature changes, it’s possible that it may not be able to etch correctly. You can check your glassware or etching cream manufacturer’s website, or you can take a toothpick and put a dot of etching cream on the glass to see if it will etch or not!
Q: Can I use the Cricut Joy?
Absolutely. You will have to shrink your image or slice your image into smaller parts that fit on your mat.
Q: Does Etching Cream expire?
No, it does not expire!
Q: Can I reuse my stencil?
No, the stencil will not retain its shape or integrity in this project. This will be a one time use stencil only.
Q: How long do I leave the cream on?
It will vary depending on the project, but for this project, 5-10 minutes should be fine. You can leave it on longer with no issue. It’s not about the length of time, it is more about the movement on the glass!
Q: I accidentally got etching cream on a piece of the glass that shouldn’t have it. What do I do?
Unfortunately there is nothing you can do. The etching cream immediately starts to burn away at the glass once contact is made. I think these little nuances can add character to a project though! I’ve also seen people take these “mistakes” and turn them into another piece of the original design through further etching!
Q: Can you reuse etching cream?
Absolutely! You can scrape the excess off and put it back in the bottle to use again!
Q: What other materials can you etch?
What Armour Etch says about that is that their products are intended for “windows, mirrors and household glassware.” They don’t recommend it be used for anything other than that, including stainless steel (like tumblers), silicone, plastic or other materials. People in our groups have experimented with other things, but I haven’t heard about many being happy with the results! You can experiment with it, but we recommend sticking to glass.
Q: Can you add color to the etched design?
This process is designed to produce a gentle, fine, romantic sort of result! If you are looking for something that is going to stand out more, you would be better off using vinyl! You can use glass paints after etching the glass, however, to add color, such as these transparent inks, to your design if you would like!
Get My Free SVG files to Make Glass Etching Stencils for your Personalized Treat Jar
I’d love to see your personalized cookie jars and treat jar and your glass etching stencils! Please share a photo in our Facebook group or tag me on social media with #jennifermaker.
See all of the projects, tutorials, and free designs in The Great Maker 25-Day Gift-Away Challenge!
Love,

Want to remember this? Save this Glass Etching Stencil tutorial to your favorite Pinterest Board!


I’ve had problems etching some brands of baking glass dishes. What’s the best brand and how do you seal the stencil on the raised writing on the bottom of the dish? Thanks!
Trish
Hi Trish! For the best brand, I would go with what I have listed in this blog post, https://jennifermaker.com/etched-casserole-dish/
We just bought our Cricut Explore Air 2 and this Etched Glass Jar was our very first project. We followed the directions your provided and our etched jar was a success. My husband and I enjoyed working on this craft together and we cannot wait to make more. We are going to start early so that we can make our Christmas gifts next year. Thank you so much Jennifer!! ;O)
I’m so happy to hear it was a success and that you have a plan for next Christmas!
What to use to add color to the glass etching
I didn’t use any color on these, but You can use glass paints after etching the glass, however, to add color, such as these transparent inks, to your design if you would like!