Learn how to make paper dahlia flowers with simple materials in an easy-to-follow tutorial!
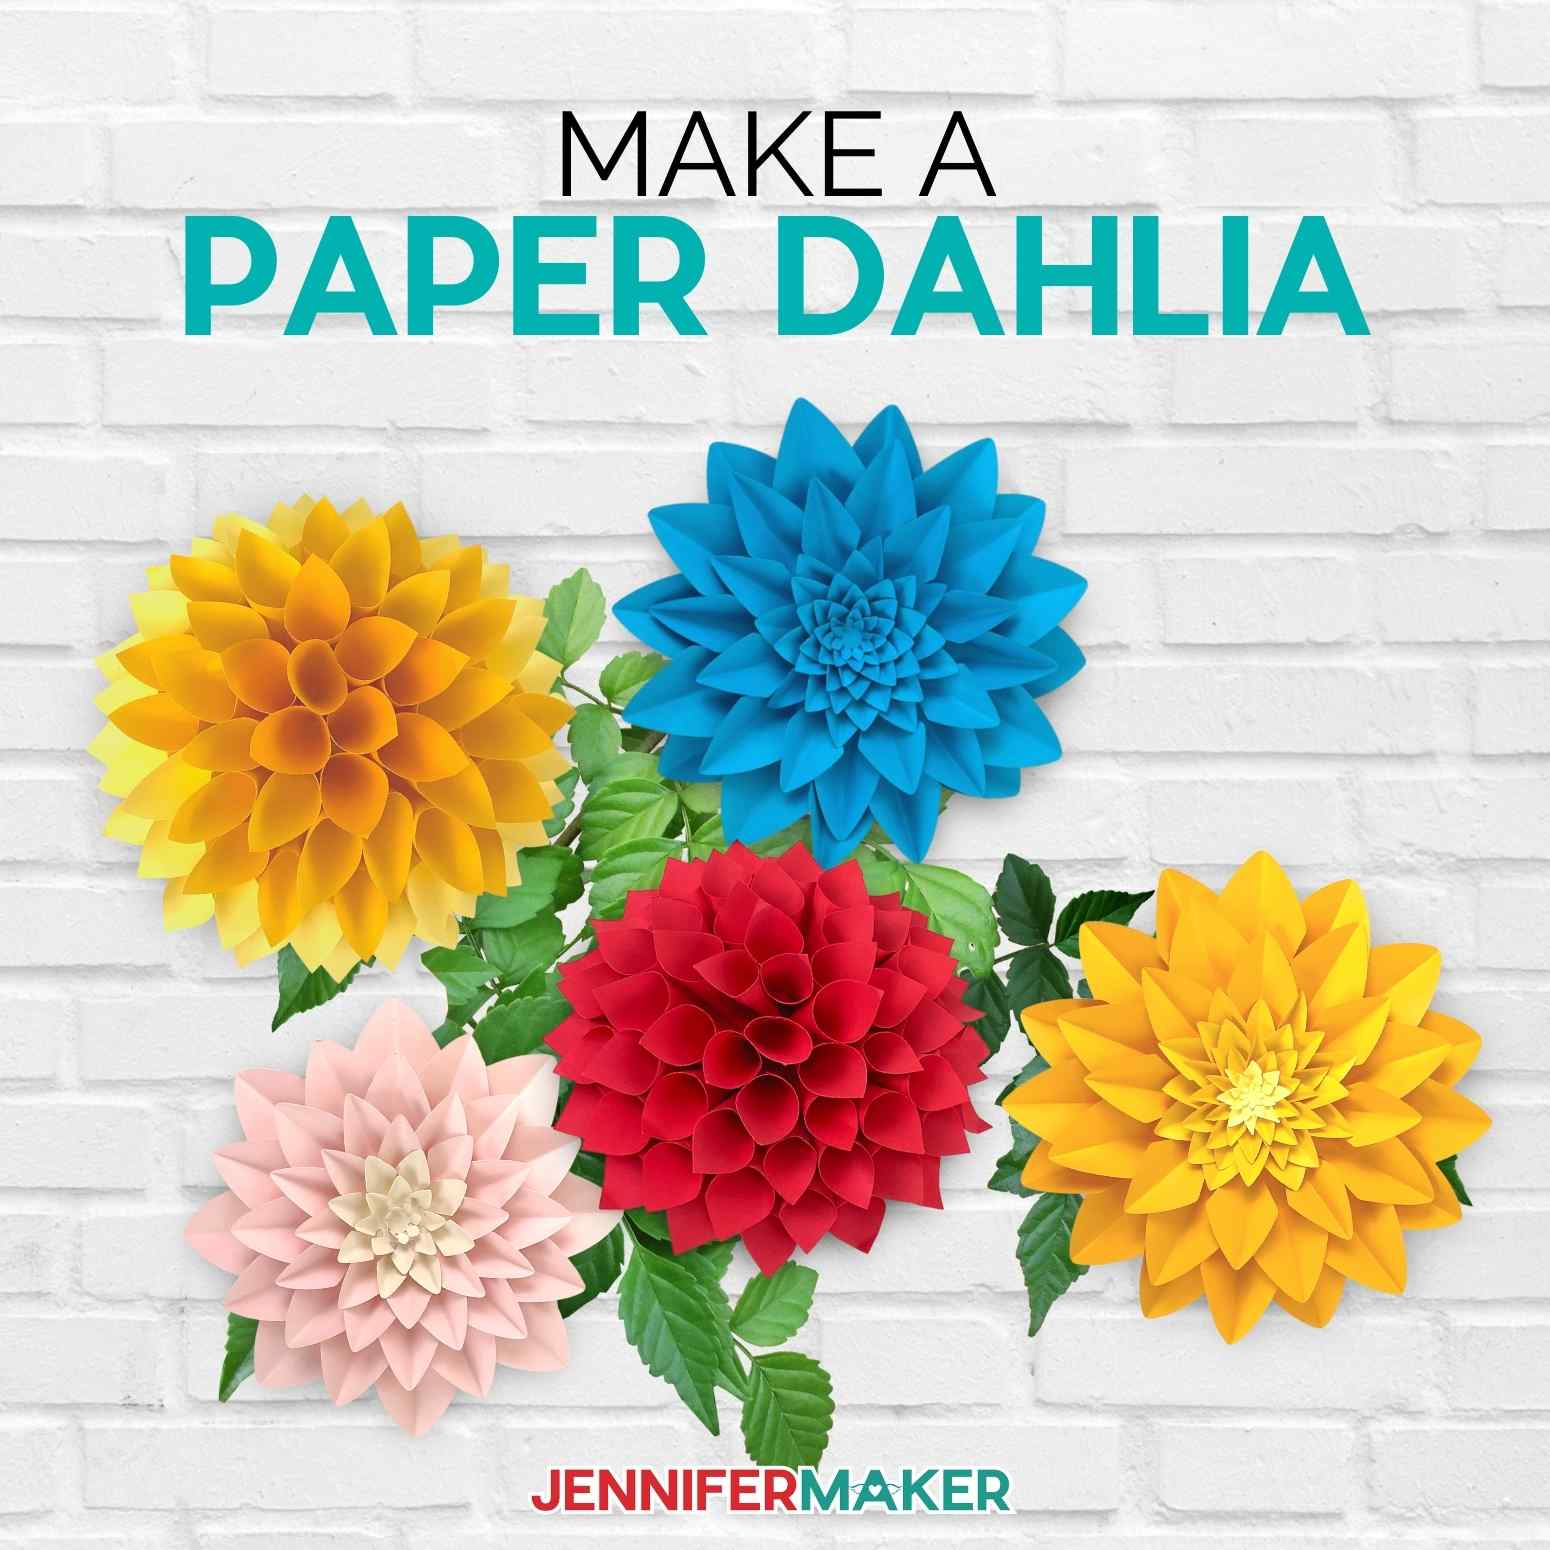
Paper flowers were some of the first decorations I learned to make with a Cricut. Since then, I’ve shared more than a dozen original paper flower SVGs and love seeing your creations. Today, it’s time for a new one: the paper dahlia in three styles! I just love dahlias and all the different forms they have. I designed two different types of dahlias to capture some of their diversity. And since the flowers come in so many different sizes, I’ve included ways to make paper dahlias from 4.5″ to almost 20″! With all these versions and the nearly endless cardstock options, you can make your own flower show! Let me show you how.
Watch the full step-by-step tutorial video on how to make paper dahlia designs!

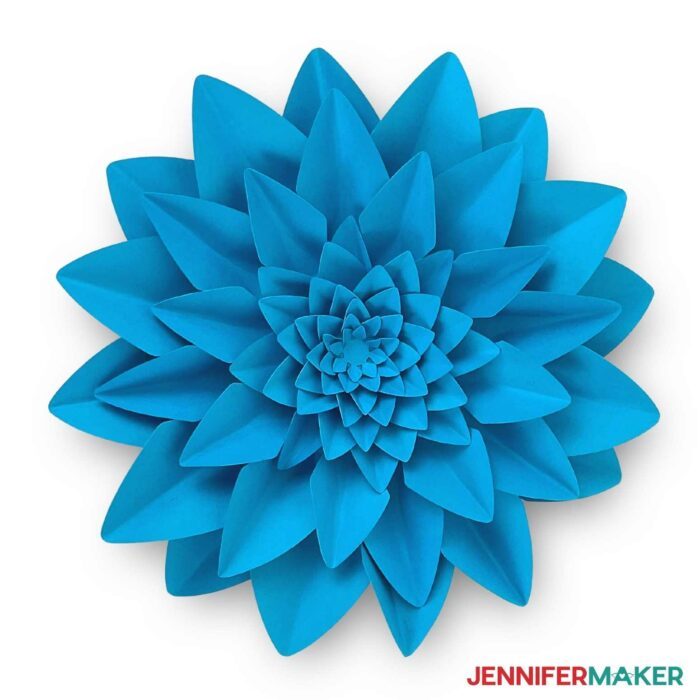
Dahlia flower petals come in so many shapes, I wanted to give you some options! So, this project includes one version made of cone petals and another with open, broad petals. I’ll show you how to make both dahlia petals in the tutorial so you can pick the style you want. I recommend trying both, though!
The cone shape petals use rolled paper. There are a lot of flower cones to roll, but sometimes a repetitive creative project is relaxing. A bone folder or simple ruler will help you with the curves. Once you get the technique down, you’ll fly through them. And lucky for us, our Cricut machines cut the flower petals, so it can keep cutting while you roll! And a small dot of glue secures the edges of the paper. So simple!
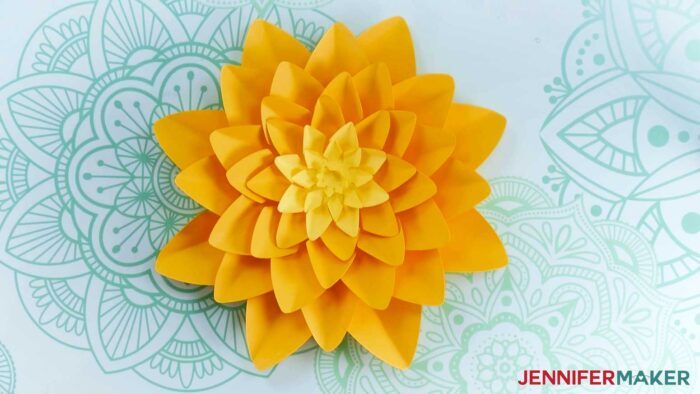
The broad petal design isn’t as time-intensive and has a very different look. If you want to make giant dahlias fast — like for a paper flower backdrop or event decor — this version will work well.
My third version is an adorable 8″ broad petal paper dahlia, which doubles as the center for the jumbo flower. It’s fast and easy, making it perfect party decor!
An easy way to experiment with paper dahlias is color. Today, I used good-quality 12″ x 12″ cardstock paper in shades of red for a natural look. I’ve also made them monotone and with bright colors for so many versions of the final look! If you use cardstock strategically, you can make even double color paper dahlias. For a fun challenge, look at real dahlias and try to recreate them in paper!
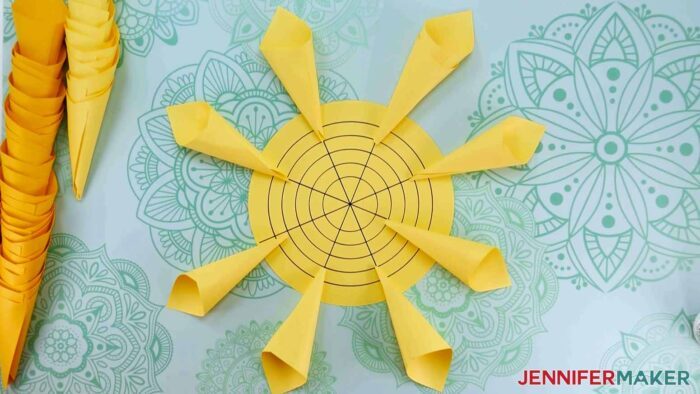
While nature isn’t perfect, flowers do follow patterns. To make it easier to mimic, I’ve included a base layer with gridlines. It looks like a dartboard and will help you recreate the natural geometry of a flower. And again, the Cricut does the work with a Fine Point Pen. By lining up the tips of the cones on the base, you’ll get a consistent diameter for your first layer of cones. Then, the paper cones’ tips move in a line for the next layer, gradually bringing the petals closer together at the center of the flower, just like a real dahlia.
Of course, there are so many fun ways to display your paper dahlia. You could attach a command hook to the back and create dahlia wreaths. If you want to hang a very large flower, add a piece of cardboard to the circle base for reinforcement. Or, hang several versions to create a backdrop for birthday party photos! If you want your flower to have a sturdy base, use a hot glue gun to attach an upside down plastic plate to the base. Just make sure you can’t see it from the front.
That’s all you need! So, let me show where to get the free paper dahlia SVGs and how to put them together.
Ready to make these pretty paper dahlia projects? This post contains some affiliate links for your convenience (which means if you make a purchase after clicking a link I will earn a small commission but it won’t cost you a penny more)! Read my full disclosure policy.
Materials to Make a Paper Dahlia
View my Amazon shopping list with the exact items we used to make this project!
- Good-Quality Cardstock – I used varying amounts of 12″ x 12″ 65-80 lb Cardstock in colors of your choice
- A method to cut your cardstock — I used the amazing Cricut Maker 3 but you can also use a Cricut Maker series, Explore series, Joy series, Venture, or cut by hand
- Cricut Green StandardGrip Machine Mat, 12″ x 12″
- Craft Glue – I used my favorite, Bearly Art Precision Glue
- Cricut Fine-Point Pen – for the larger flower bases
- Bone Folder or Ruler to help curl and fold petals
- Brayer
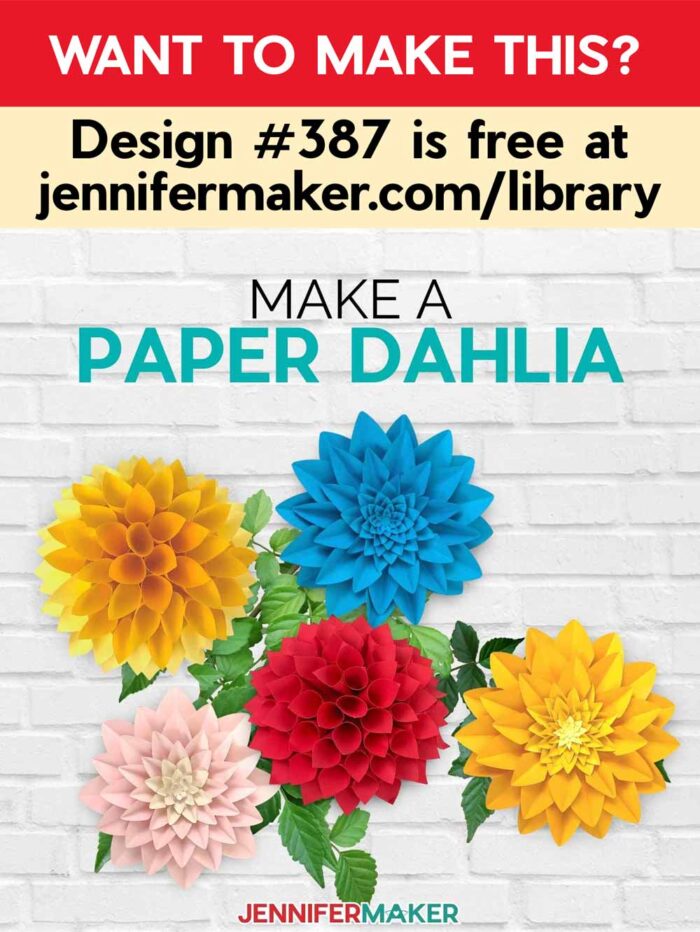
- Design #387 – My free SVG design files (available in my free resource library—get the password by filling out the form at the bottom of this page)
How to Make a Paper Dahlia
Learn how to make different styles of beautiful paper dahlia projects. First, download my Paper Dahlia SVG/DXF/PDF files from my free resource library. It's Design #387. I have included files for two different types of dahlias: one shaped with paper cones; and one shaped with broad paper petals, which can be made in two sizes. I'll demonstrate all three! The broad petal design has different sizes and pieces but does not require as many individual petals for the final project, so it cuts more quickly. Also, the paper cones take longer to assemble than the broad petals but make a more 3D finished flower. The final sizes can easily be changed to suit your needs. If you want a small, quick version, I recommend making the middle part of the broad petal design, which I’ll refer to as the 8” flower. There are versions of both flowers designed for the Joy available in my file, too! I recommend that you prepare and cut one of these flowers at a time. Each file is designed to create one flower. The cone petal design can make a variety of sizes from 10" to 15" in diameter without any changes. I’ll show you how to make the different sizes in the assembly section. The broad petal design makes a 18.5" flower. You can use it to make a 8" flower by only using the center ring of attached petals. To cut the large flowers for both designs, you need to prepare the base guidelines – the layer that looks like a dart board – which we’ll create using the Pen feature. First, you must set the guidelines to “Pen” and attach them to the base circle. To do this, select the design and click “UnGroup” above the Layers panel. Now, select only the guidelines on top of the circle (they are already a single layer for easy selection). Click “Basic Cut” under Operation and then select “Pen” from the drop-down menu. Select both the guidelines and the circle by holding shift and selecting both Layers. Finally, click “Attach” at the bottom of the Layers Panel. Your screen should now only show the smaller connected petals and you are ready to cut! If you want, you can resize any of these designs. To do this, click on “Select All” in the top menu, then simply drag the resize handle in the corner of the bounding box until you get the size you want. Make sure to keep the lock closed to maintain the aspect ratio. TIP: Combine your cuts to use fewer mats, saving time and material! First, note the intended colors of each mat so you know which color cardstock to use for each object. If you changed a mat's Material Size, return it to "12" x 12"" so that the Cricut knows you want to use the entire machine mat area. A "Move Object" pop-up will appear displaying thumbnails of your mats. Click on the mat you want to move the flower piece to and hit "Confirm." 8” Broad Petal: Place your cardstock on your StandardGrip Machine Mat and use a brayer to make sure it's fully adhered. For the base layer – which the 8" dahlia does not need – make sure your Fine Point Pen is in Clamp A and check that your Fine-Point Blade is clean and in Clamp B. Then, load the mat into the machine and press "Go." Once all the cones are assembled, it’s time to add them to the base. The guidelines provide a good starting point for your dahlia by keeping the cones even all the way around the base circle. Here are the pieces used to create the small dahlia with broad petals: Finished Size: Paper Cone Dahlia: Approximately 12-15" Broad Petal Dahlia: 18.5" or 8"
Paper Dahlia
Materials
Tools
Instructions
STEP 1: GET MY FREE PAPER DAHLIAS SVG FILES
The paper cone design is easy to cut because it only uses one size and shape of petal. However, it takes longer to cut since it uses many individual petals.
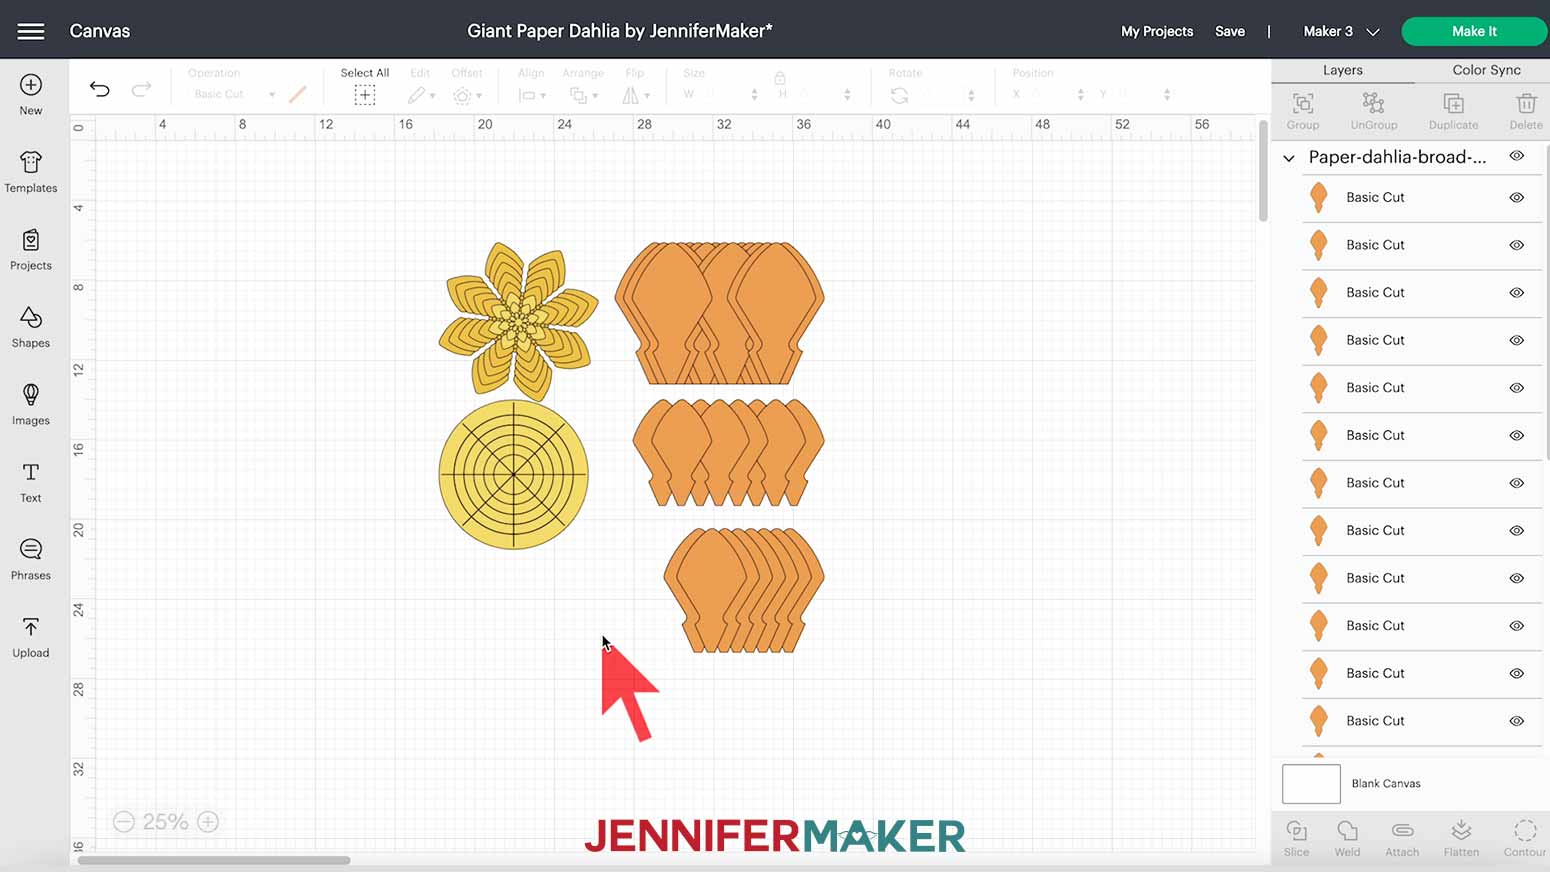
Choose the design you want to create. Then, upload the appropriate SVG file to Cricut Design Space and add it to your Canvas. You may need to zoom out to see the full design. You can click on the minus sign (-) in the lower left corner of the Canvas to do this.
Here’s what both designs look like on my Canvas. Remember, the 8" flower is part of the Broad design.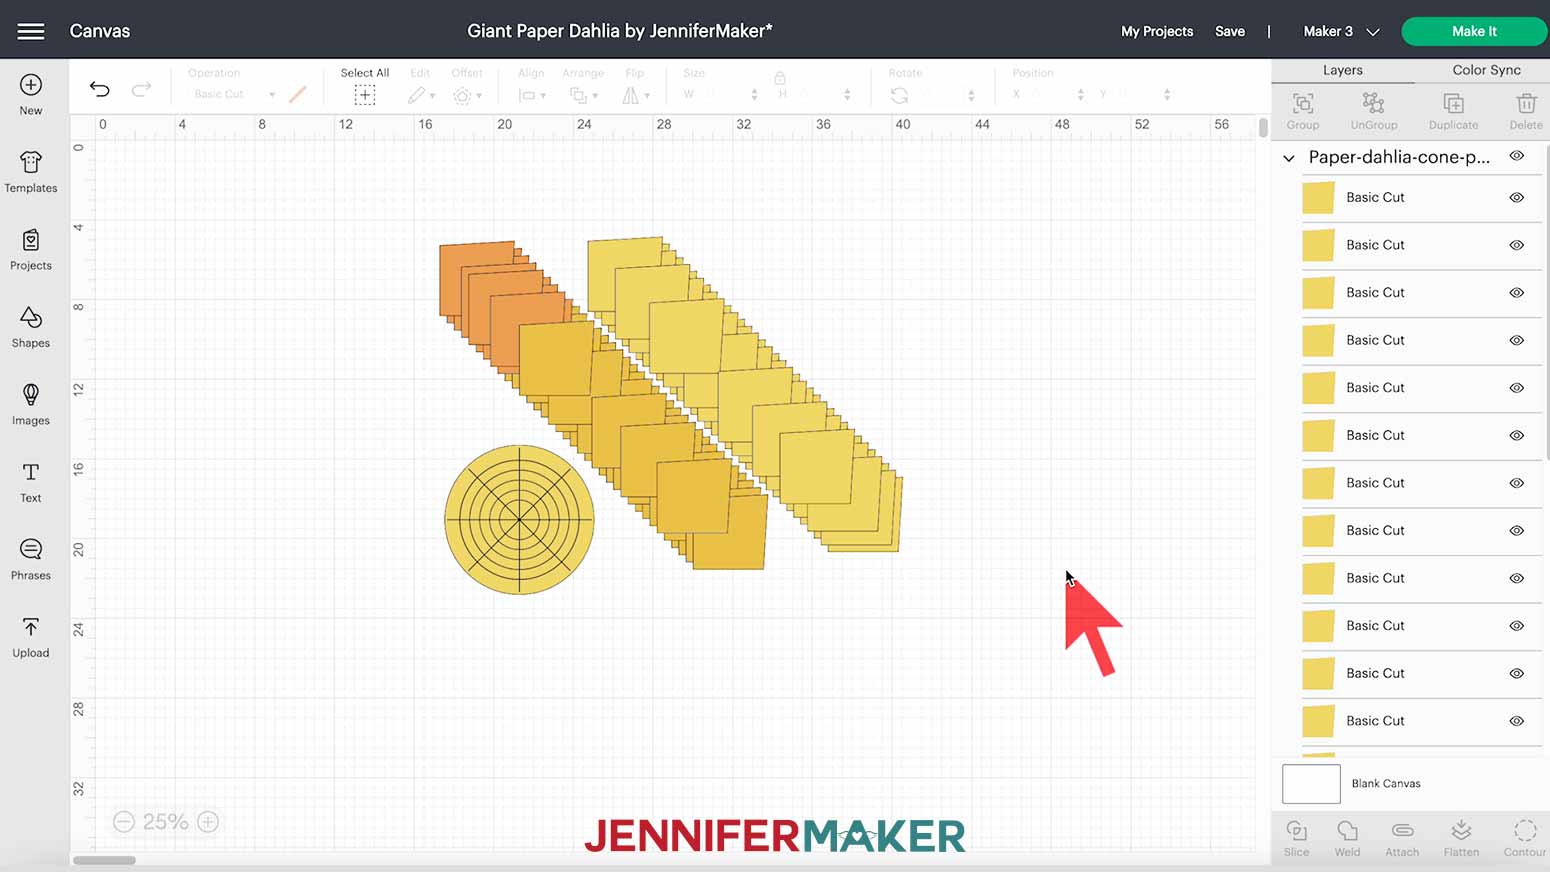
If you are not sure how to upload an SVG cut file to Cricut Design Space, watch this helpful video training series I made. If you are on an iPad or iPhone, here is how to download and upload SVG files to the Cricut Design Space app.
STEP 2: PREPARE YOUR PAPER DAHLIA DESIGN FOR CUTTING
Add the flower you want to make to your Canvas.
Your Canvas should look similar to mine for the cone-based design.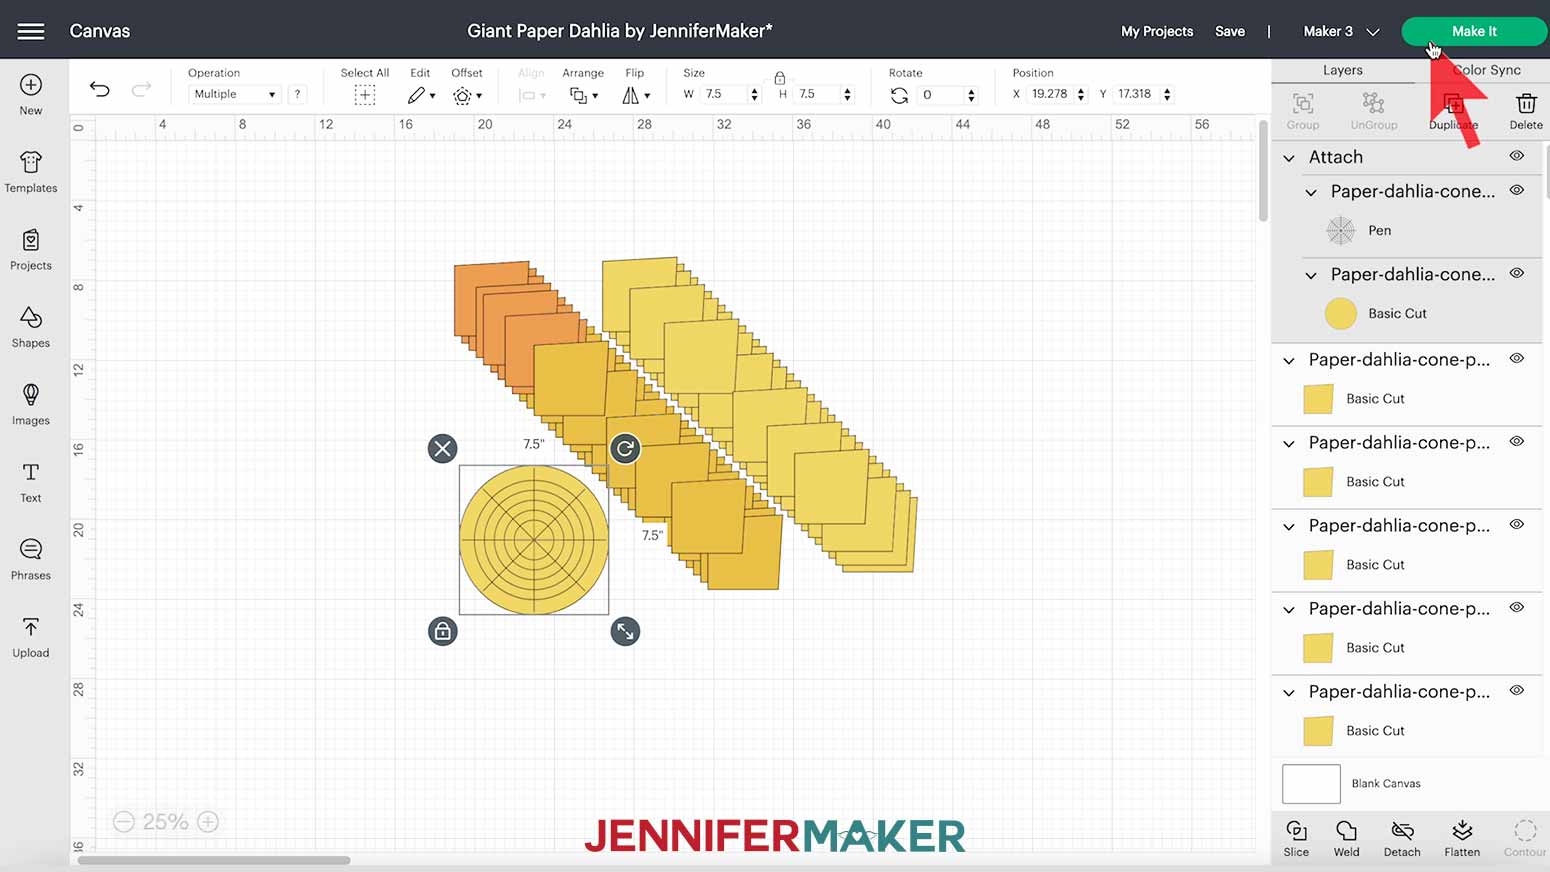
If you’re making the broad petal version, it should look like this.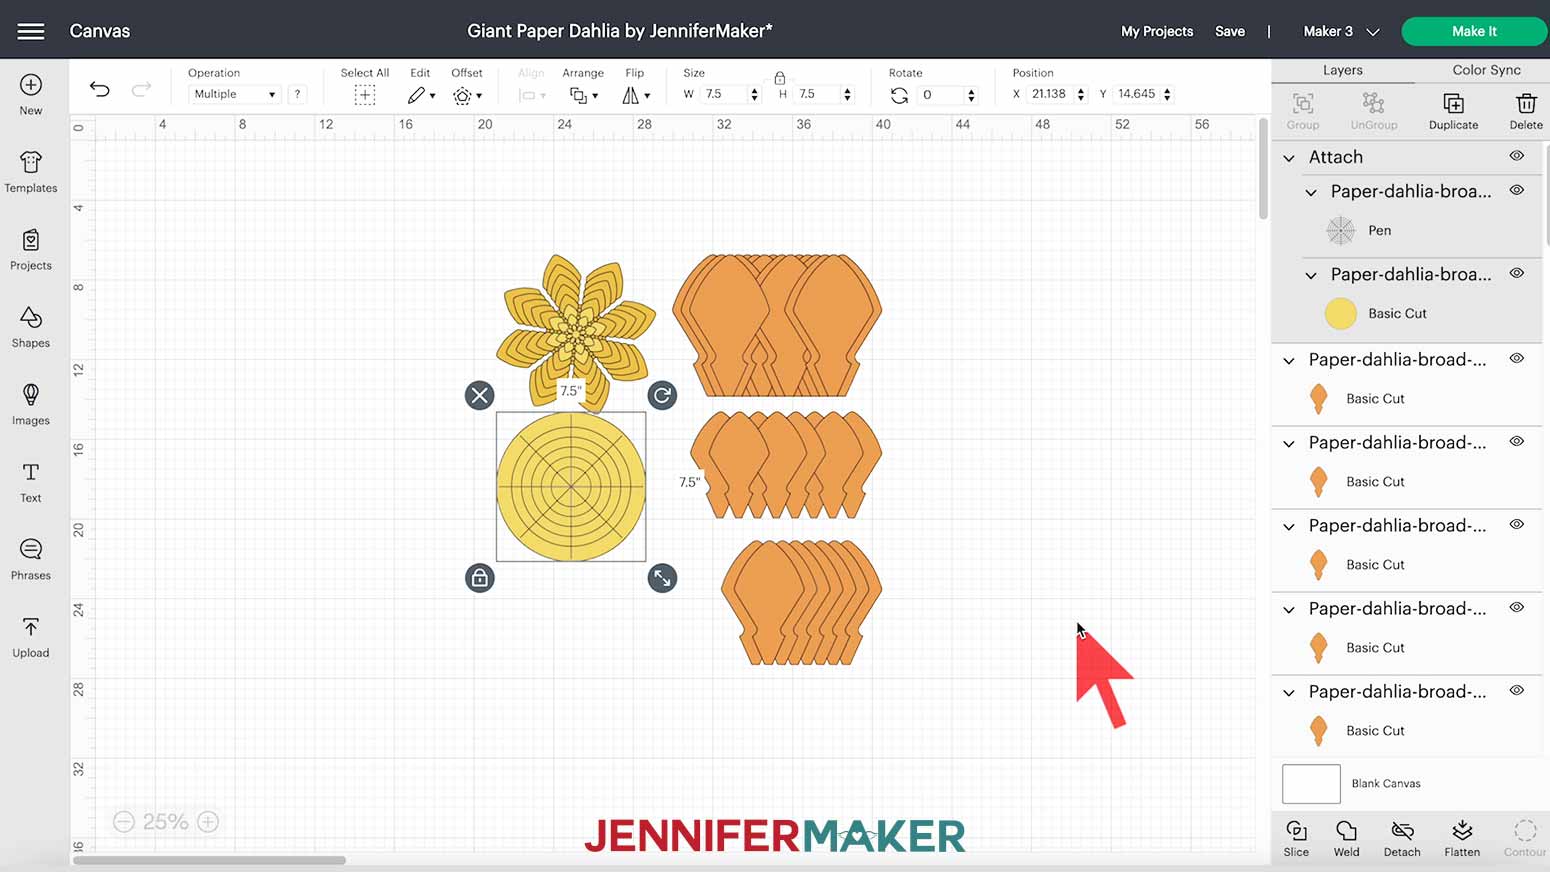
If you are making the cone design, jump to Step 3.
For the broad petal design, decide if you want to make the 18.5” or 8” flower. If you decide to make the larger flower, continue to Step 3. If you would like to make the smaller flower, select the broad petal design’s base circle, guidelines, and individual petals by dragging a bounding box around all of them. Click “Group” above the Layers panel. Now hide the group by clicking the Eye icon next to it in the Layers panel.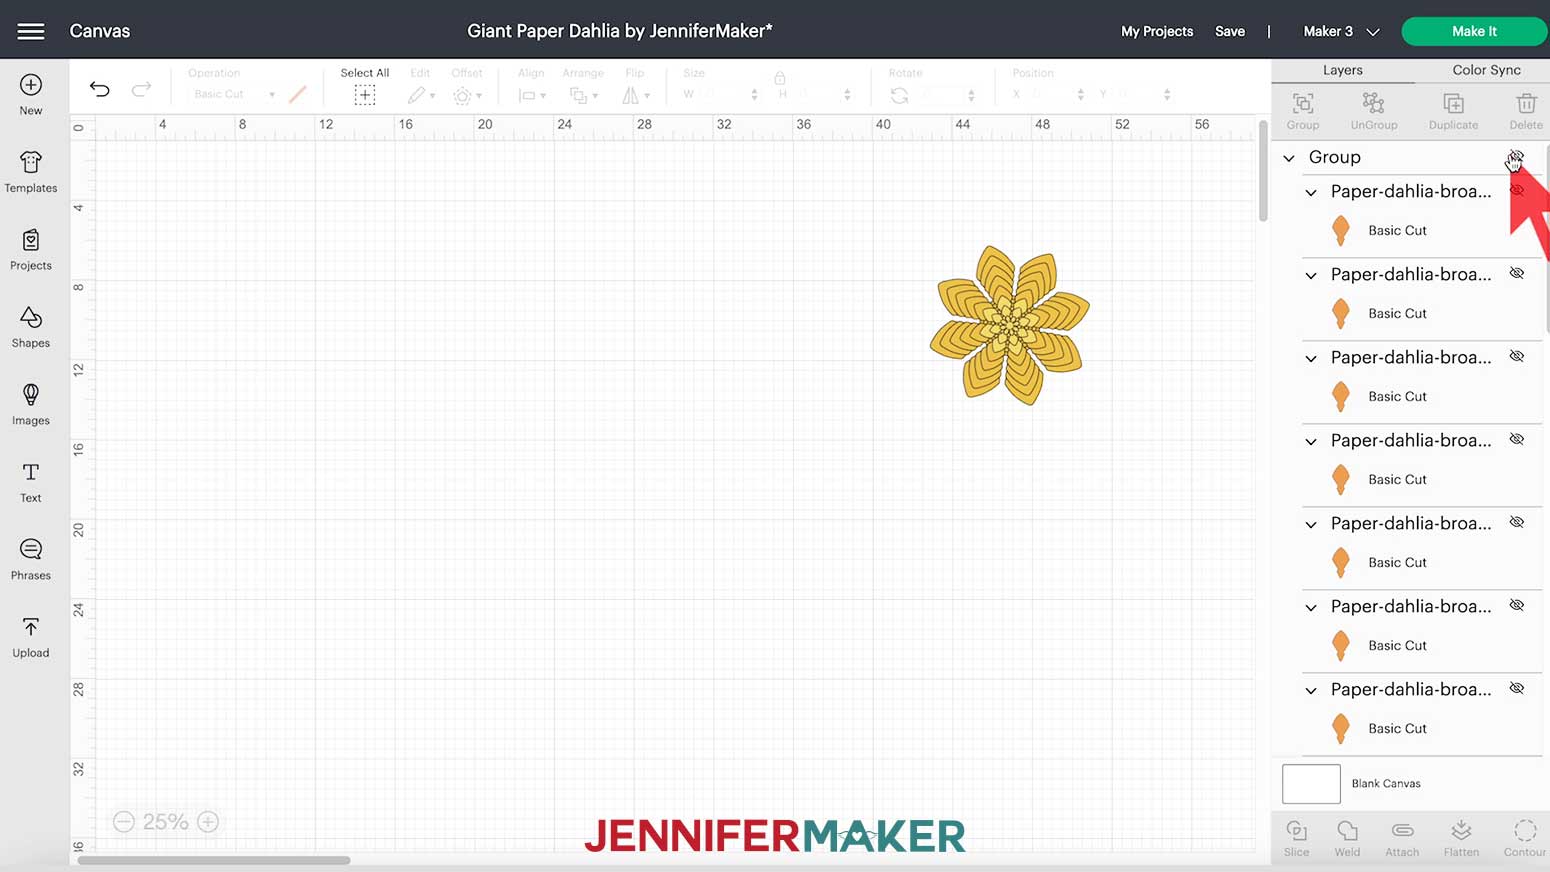
You can also enter exact dimensions under size in the top menu.
If you need help resizing an SVG in Cricut Design Space you can check out my resizing guide. I explain exactly what you need to do to resize any design to fit your needs.
And remember, I included Joy versions for both designs too! If you want to make much smaller flowers, you can use those versions on any machine.
STEP 3: CUT YOUR PAPER DAHLIA DESIGN
Now we're ready to cut. Make sure you have the right machine selected in the top menu and click "Make It."
If prompted, click "On Mat" and continue.
On the Prepare screen, make sure the size of the materials is correct for each color.
Select you want to combine, then click the three dots to the upper left of the first object, and choose "Move Object."
Your view will switch to that mat, with the object you just moved added to it. Drag that piece to an open part of the mat. Make sure lines don't overlap.
Here are my mats for each type of flower if you want to make yours the same:
Two (2) mats - outer petals in darker color
One (1) mat - three inner petals in lighter color
Broad Petal:
One (1) mat - base and smallest three inside pieces in the lightest color
Two (2) mats - middle of large flower/outer five pieces of the 8" version in the middle color
Seven (7) mats - individual large flower’s petals in three sizes in the darkest color
Cone Shape:
One (1) mat - inside cones in the darkest color
Three (3) mats - middle cones in the middle color
Five (5) mats - outer cones and the base in the lightest color
NOTE: The number of cones needed can vary because you use fewer cones for each ring as you move toward the center. If you roll them tightly, you may need to make extra. If you roll them loosely, you may not need all of them. If you need more of a certain color, cut additional copies of the needed mats.
Click "Continue" in the bottom right.
Now let’s choose material and tool options on the Make screen.
TIP: If you run into any issues cutting your materials check out my Cricut Tips & Tricks for Cleaner Cuts for help!
For all mats, choose “Light Cardstock – 65 lb (176 gsm)." I always select “More Pressure” for a nice, clean cut.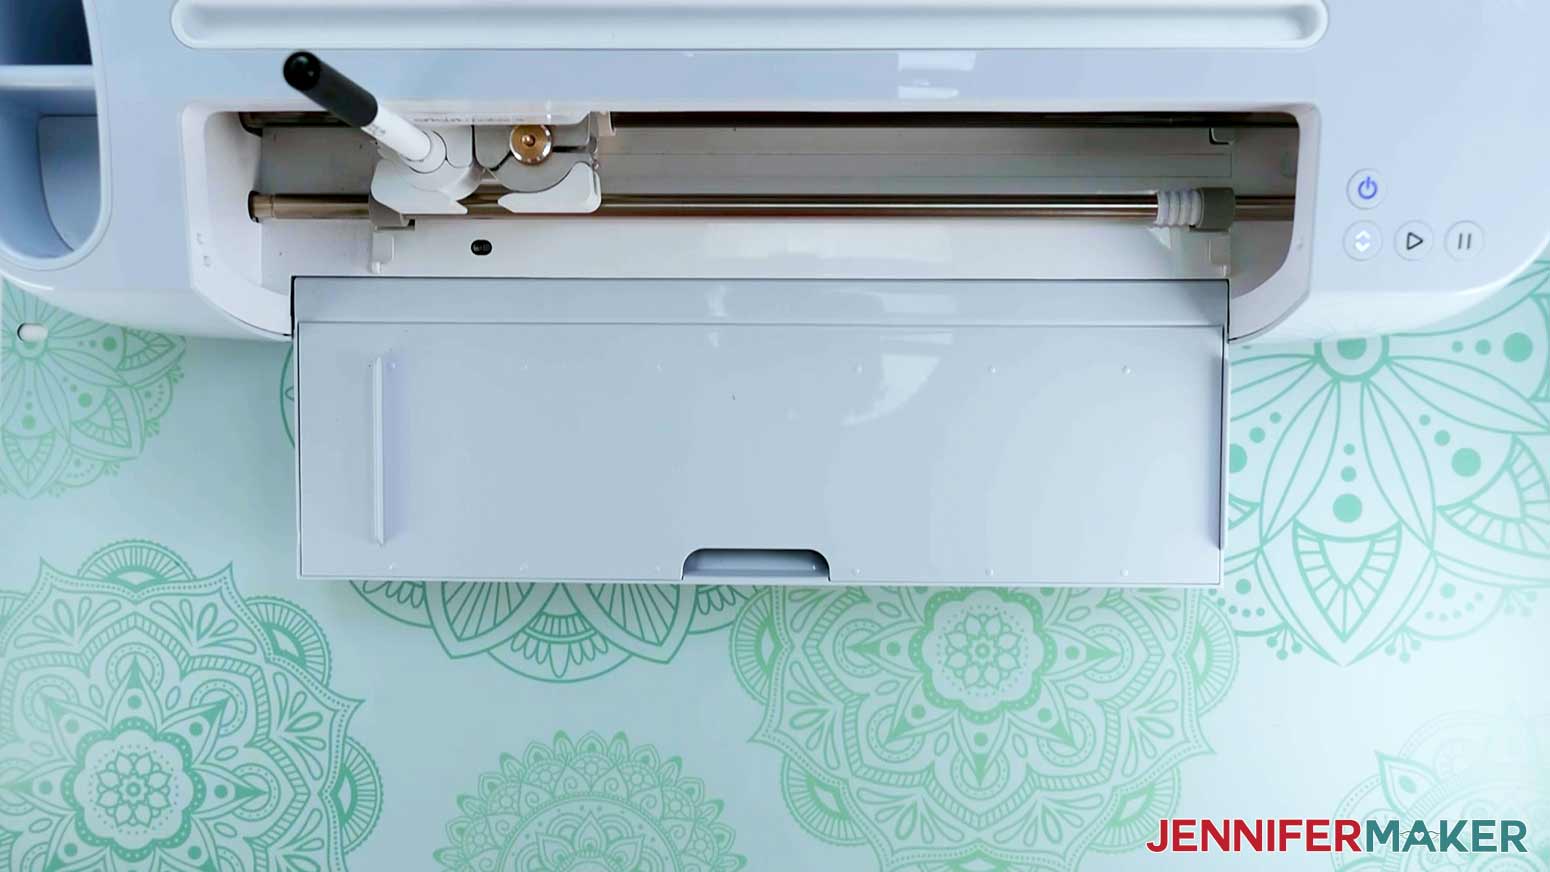
When the mat is finished, unload it, flip it over, and roll it back to release the cardstock. This helps prevent the cardstock from curling and ripping.
Cut all of your petals, using the color indicated on the screen. As you take the pieces off of the mats, stack duplicate elements together to keep everything straight.
STEP 4: ASSEMBLE YOUR PAPER DAHLIAS
The assembly directions for the two styles of dahlias are very different. I’ll demonstrate the cone-based design first.
Cone Petal Dahlia
Here are the pieces used to create the version with cone petals: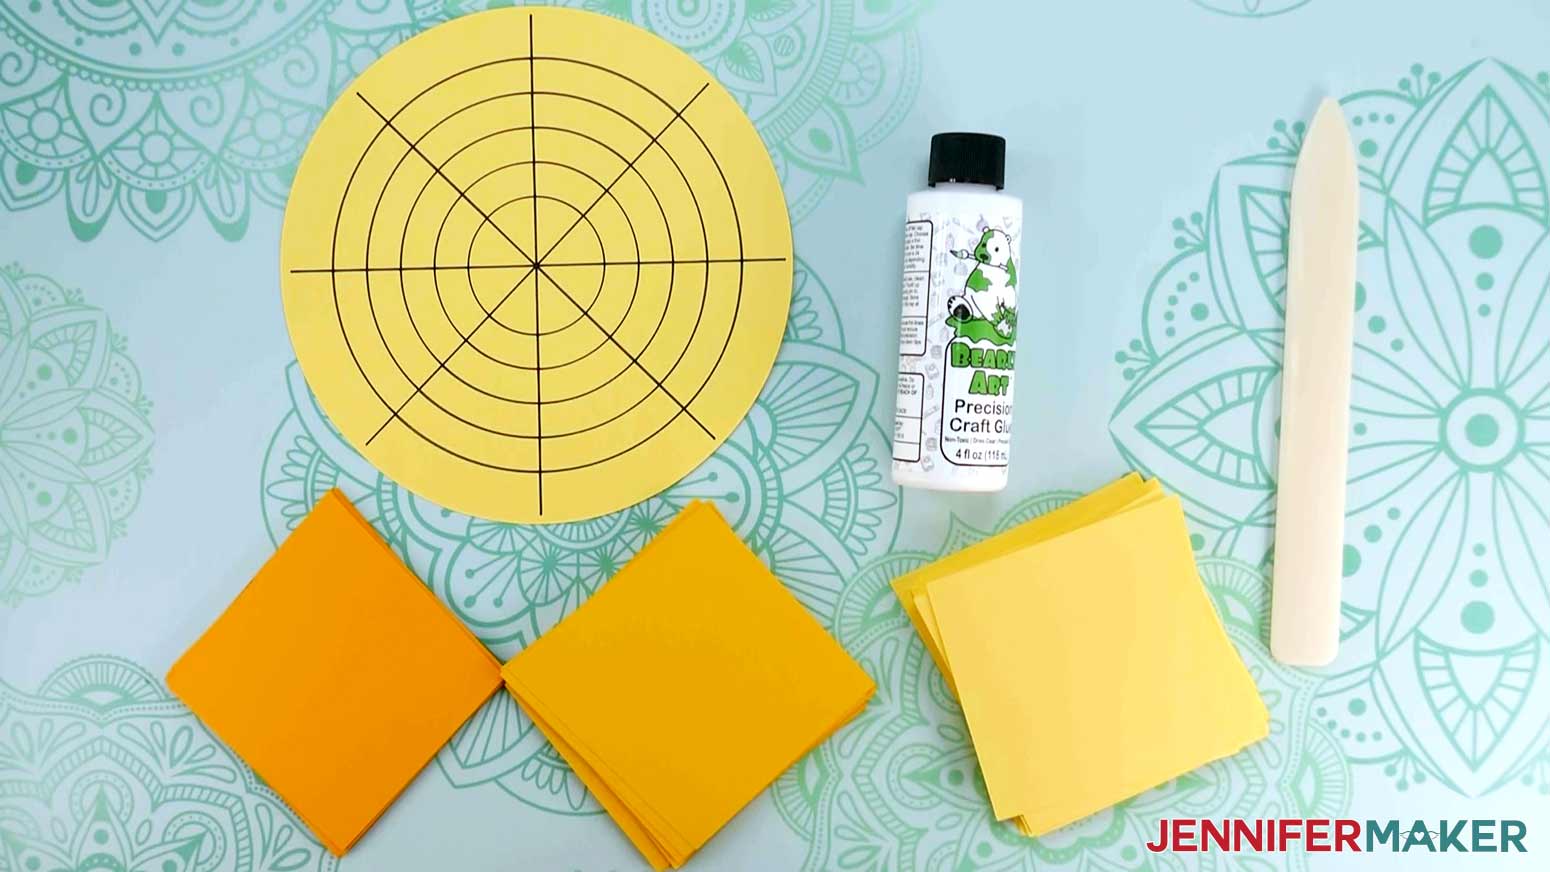
First, let’s shape all the petal pieces into cones. The petal shape is a rhombus, so it is not quite a square. Two sides are longer than the others. Turn the petal shape so that it is like a diamond with the longest sides on top.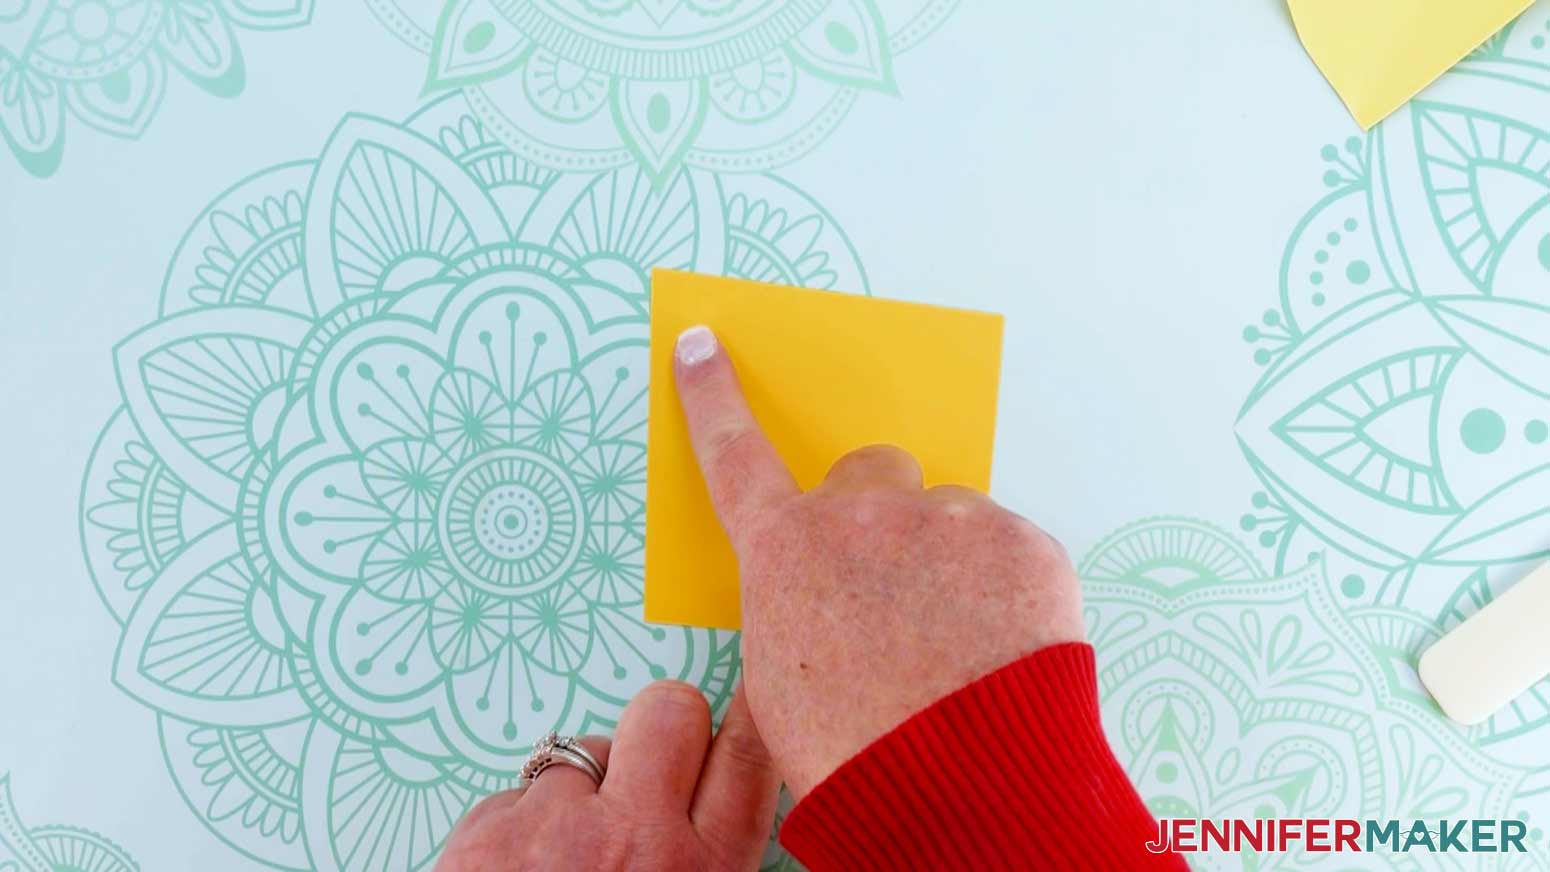
Curl the lower sides of the rhombus in toward each other using the bone folder tool. If you do not have one, you can simply curl the edges around your finger, or use the straight edge of a ruler. The side corners should overlap a bit.
Unfold the sides enough to put two dots of glue, one on the right corner facing you and another on the back of the left corner. Make sure the glue is close to the edges, but not so close that the glue will squeeze out when you press the corners into each other.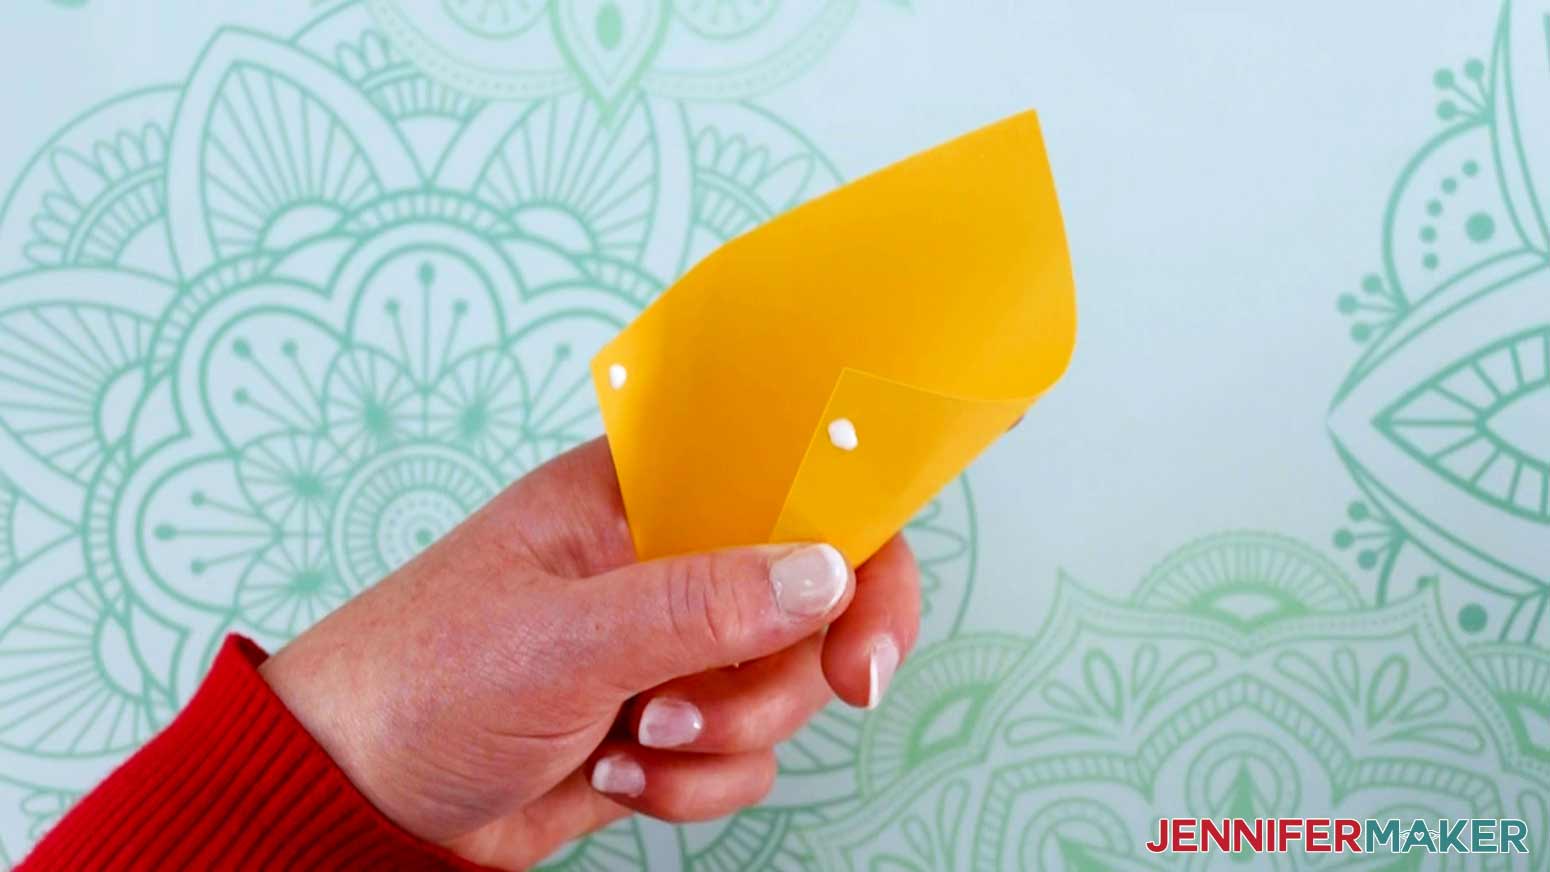
Pinch the glued spots together, closing your cone.
Lay down your first layer of cones before gluing them to get an idea of the final size. Start by choosing one of the guideline circles. I started two circles in from the edge for my largest dahlia. Place cones on all the straight lines first, making sure the tip of each cone is aligned to the edge of the same circle.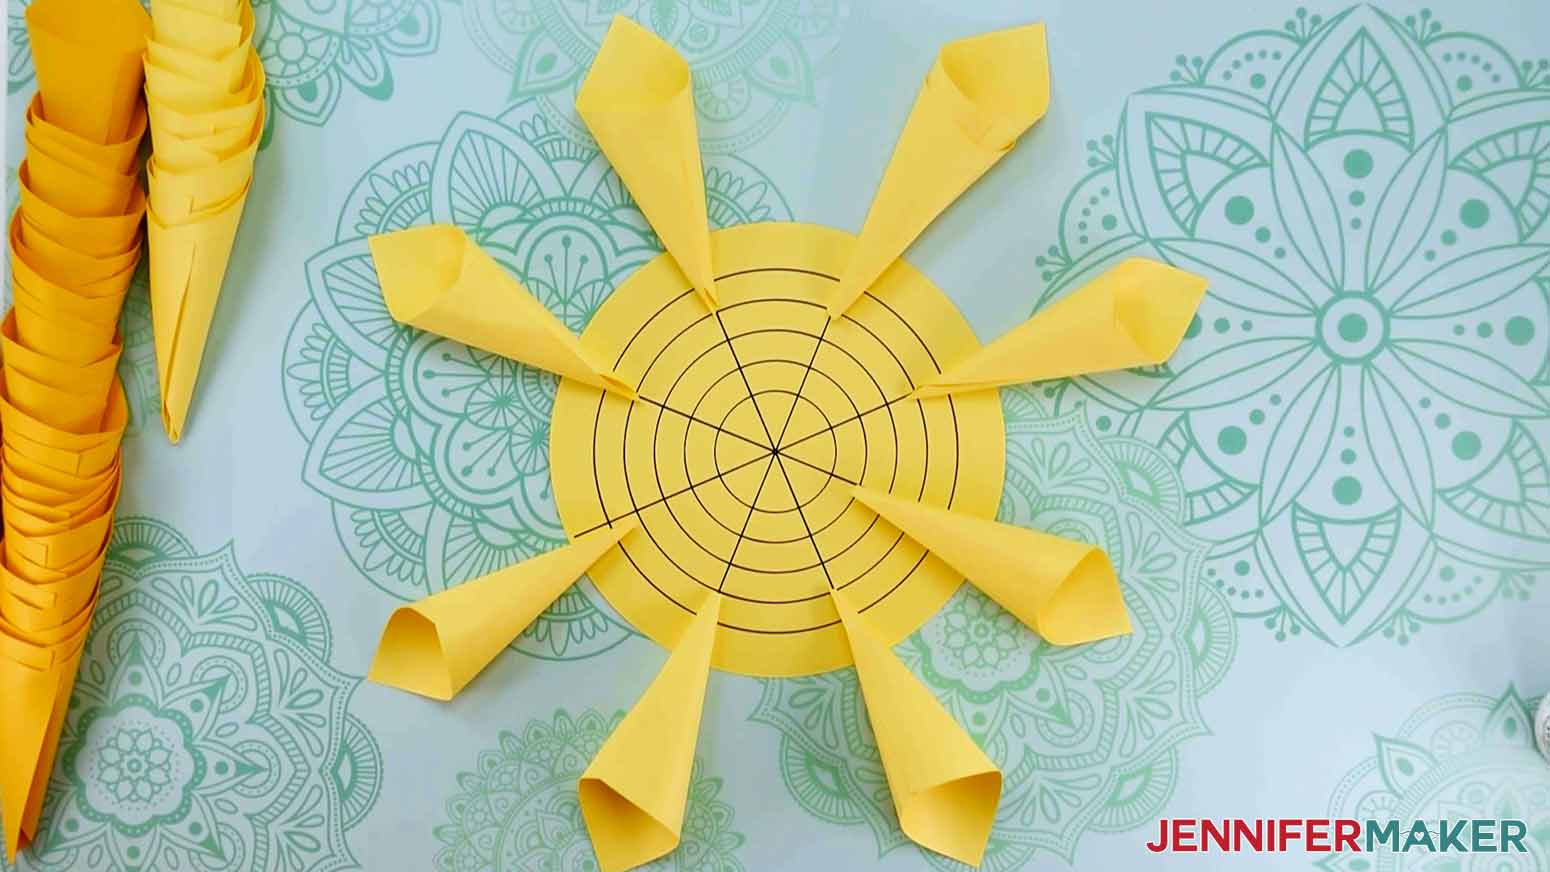
Now place cones in between each of the cones already on the base, making sure the tips of the additional eight cones are aligned to the same guide circle. You should use 16 cones in all for the first layer.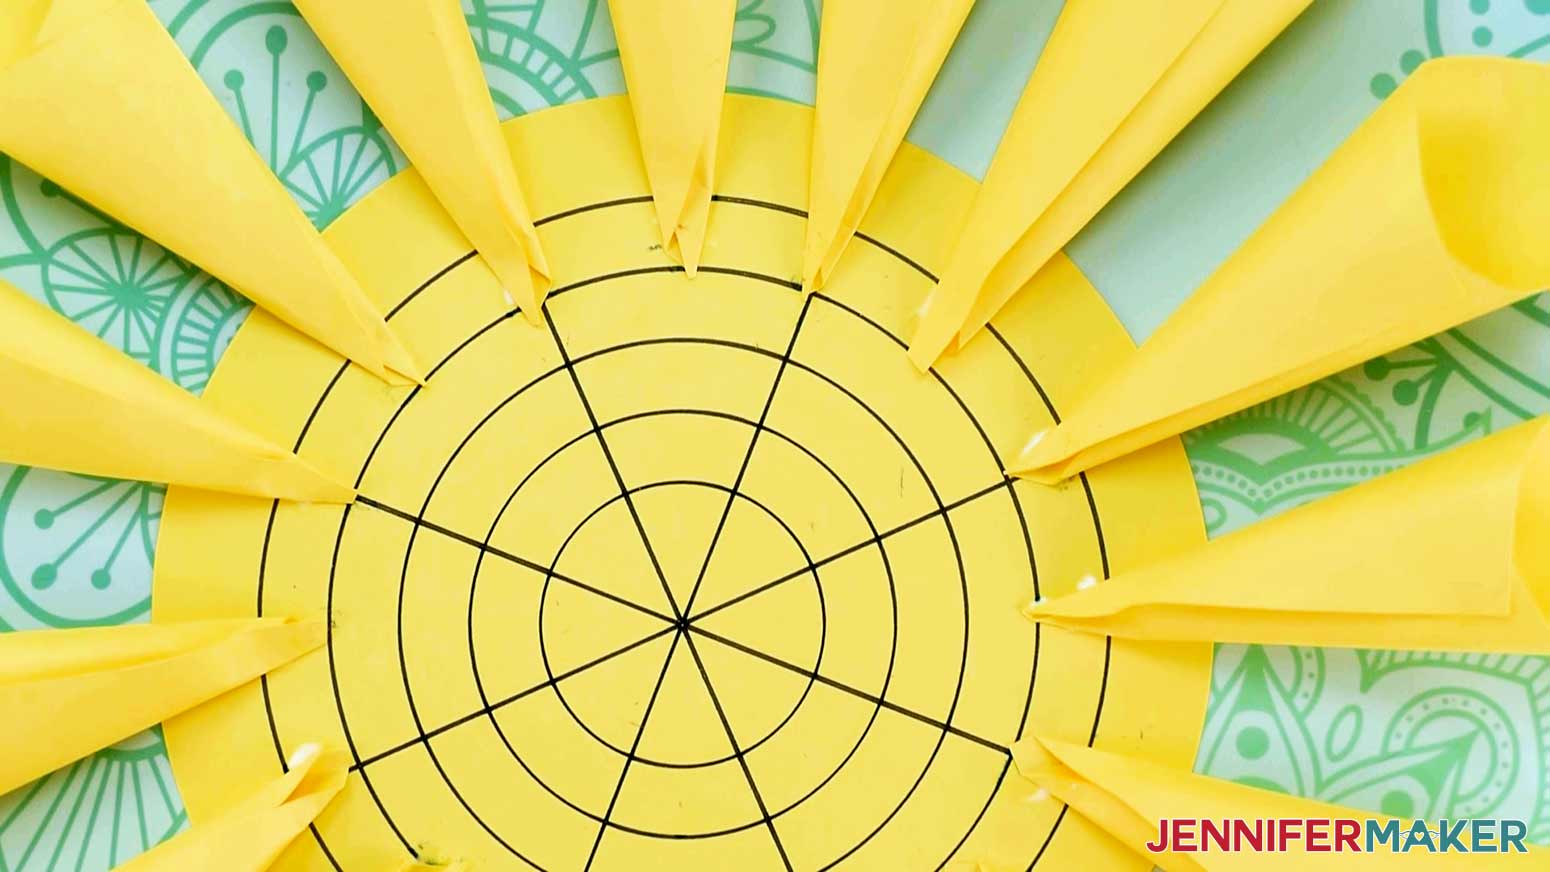
TIP: You can change the size of the dahlia by moving the beginning layer of cones to different circles on the guidelines. If you want it to be smaller, move the points to a smaller circle and the opposite for a larger flower. The same works for the broad design.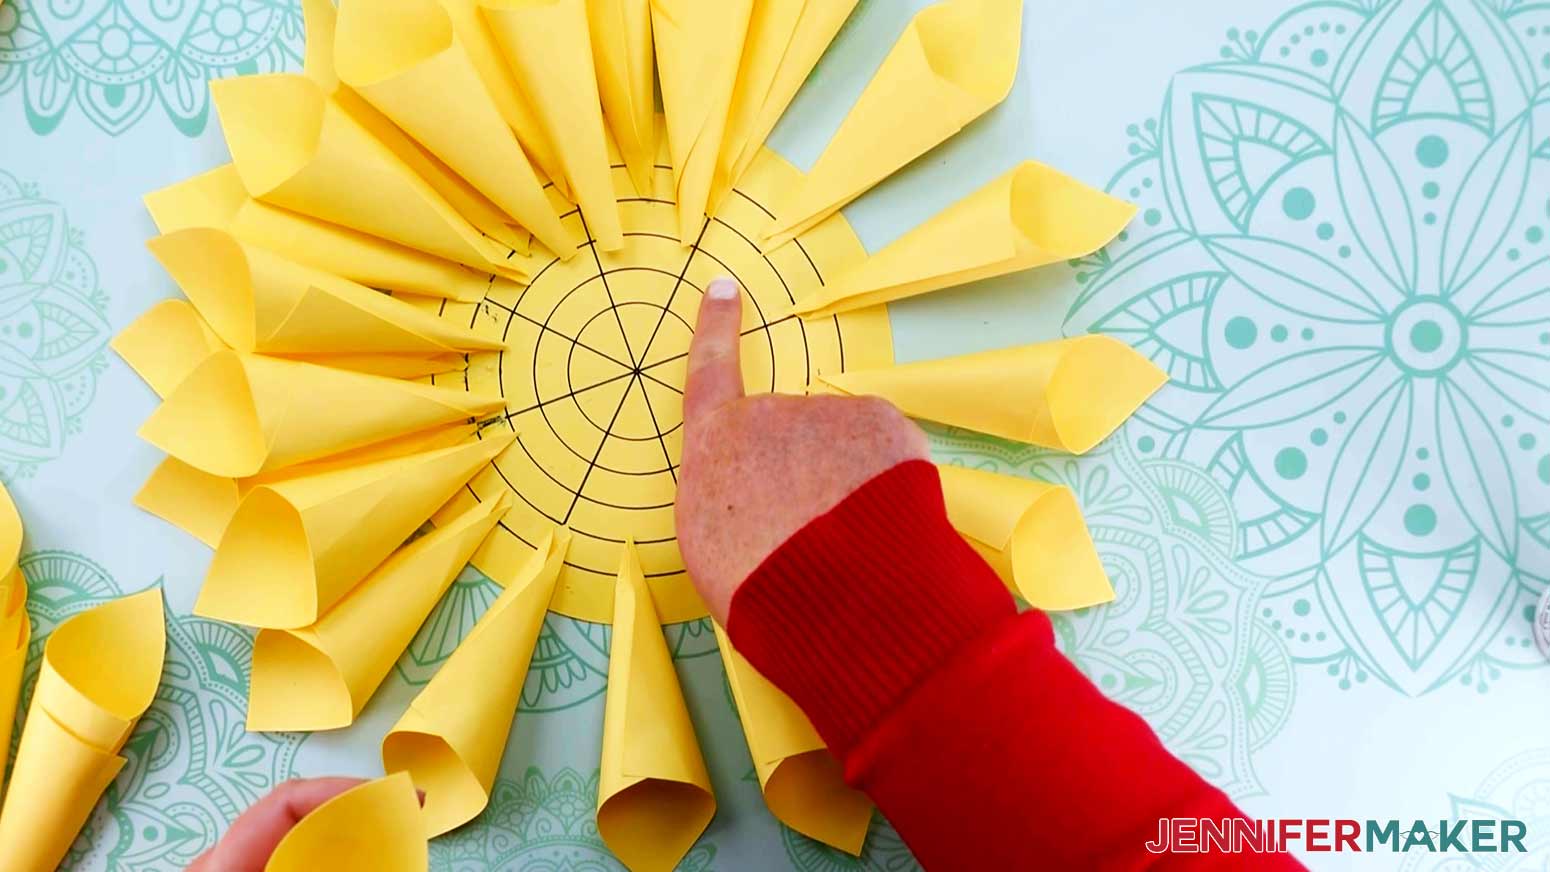
Check to make sure your overall size is what you expect. Adjust as needed. Begin gluing petals to the base by flattening the area of the cone that attaches to the base. Add glue to the back of the flattened area and press it onto the base. Make sure to line up the point of the cone to the correct guide circle.
Once you have glued all 16 of the cones to form your base layer, lay the next layer on top in between each of the already glued cones. The tips of the second layer of cones should line up with the next smaller guide circle. When you have arranged the second layer, check again to make sure your cones are where you want them before flattening and gluing them in place.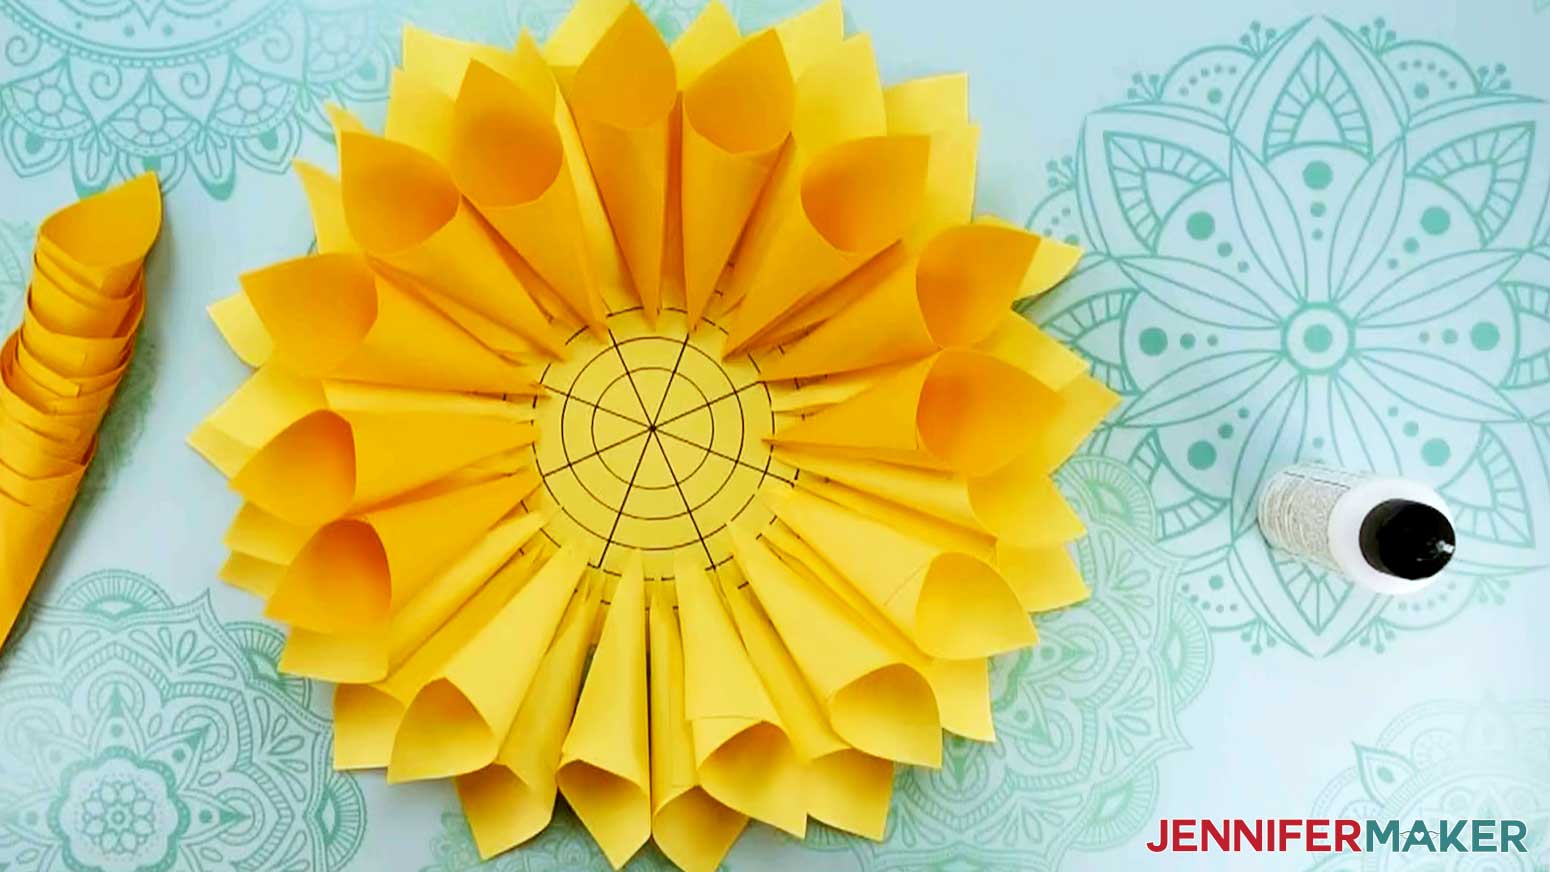
Continue gluing layers in this manner. You will use fewer cones for each layer as you work in toward the center. When gluing the center cone pieces, you will need a long tool to press the cone tips down into the center. The bone folding tool works quite well for this, but you can also use a small dowel or an unsharpened pencil.
Your cone dahlia is now complete!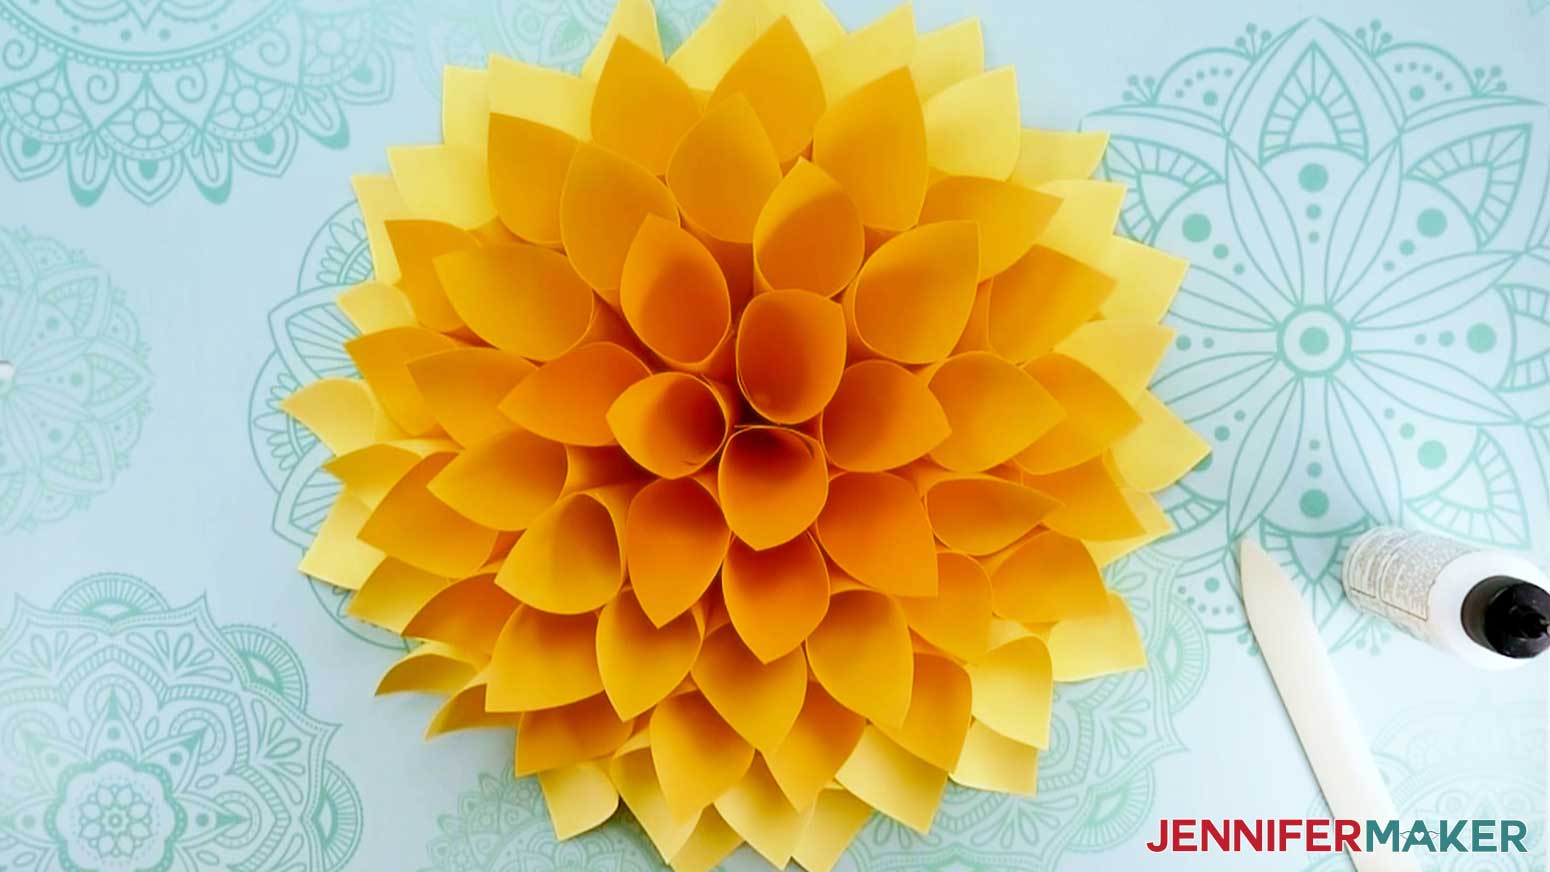
8” Broad Petal Dahlia
Creating the 8” dahlia is also the first step for making the larger Broad Petal design.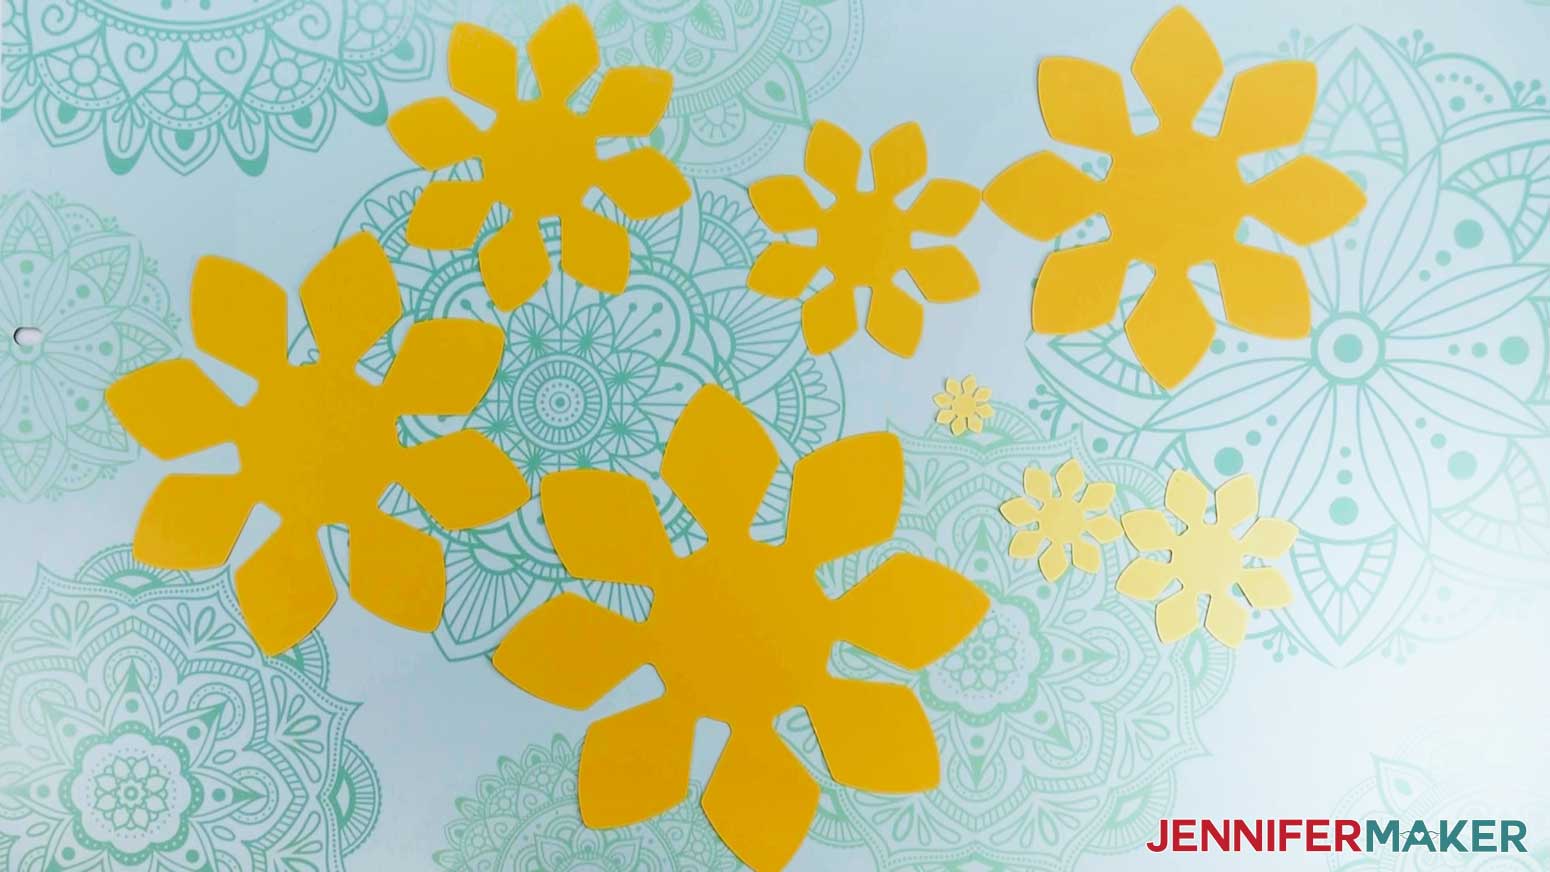
A center crease is all we need to shape the broad petals. To create the crease, carefully fold the petal sides together and press firmly with your fingertips starting at the outer tip and working toward the bottom flat edge. Stop creasing when the sides start to curve out. Unfold the petal. Now the upper part is cupped!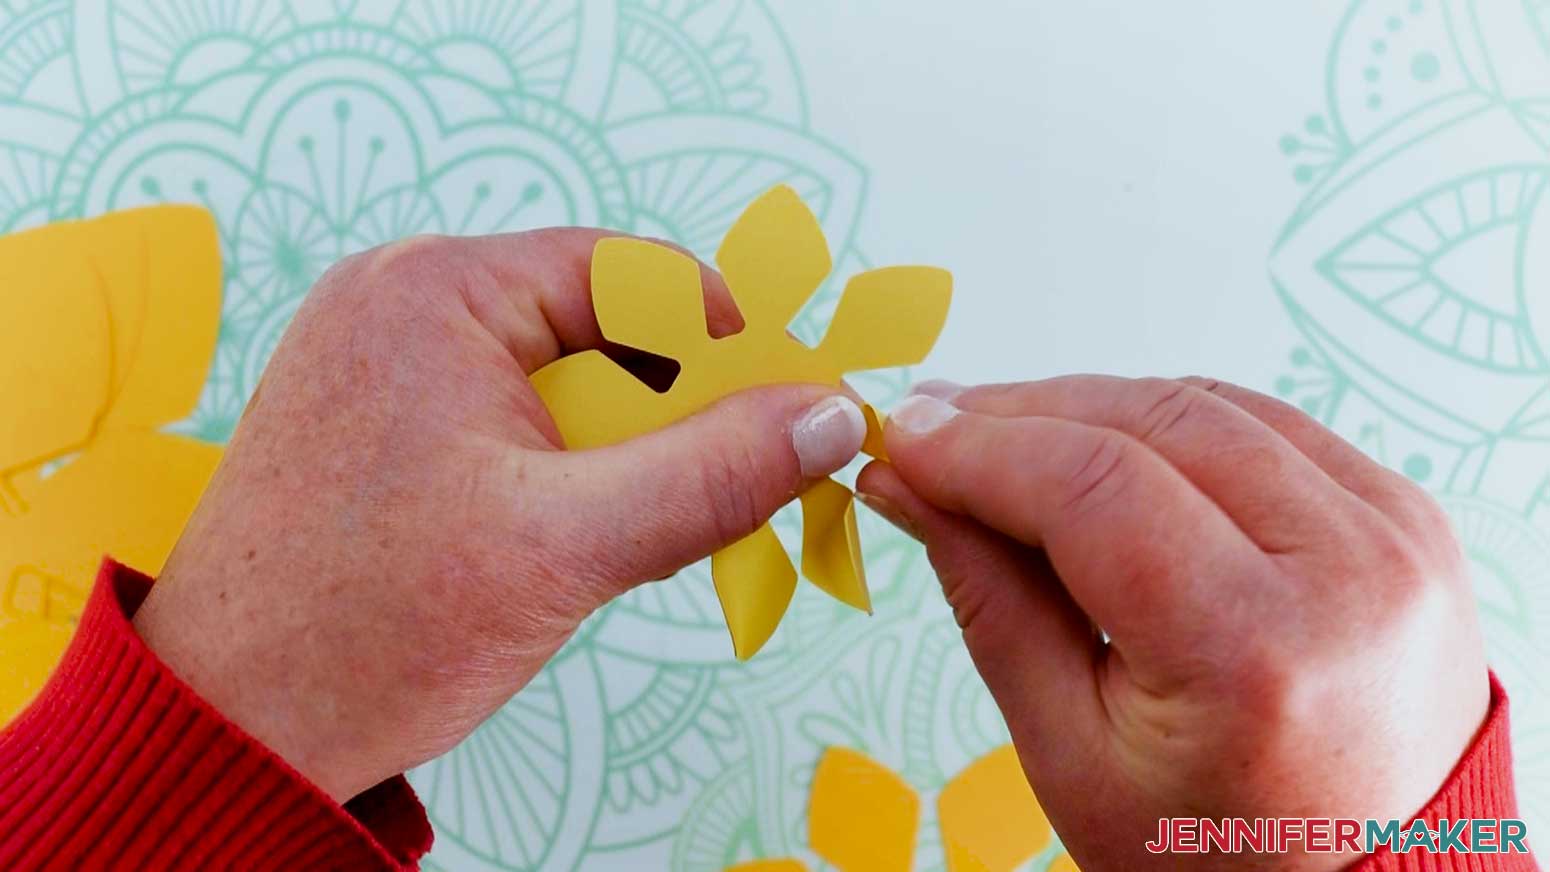
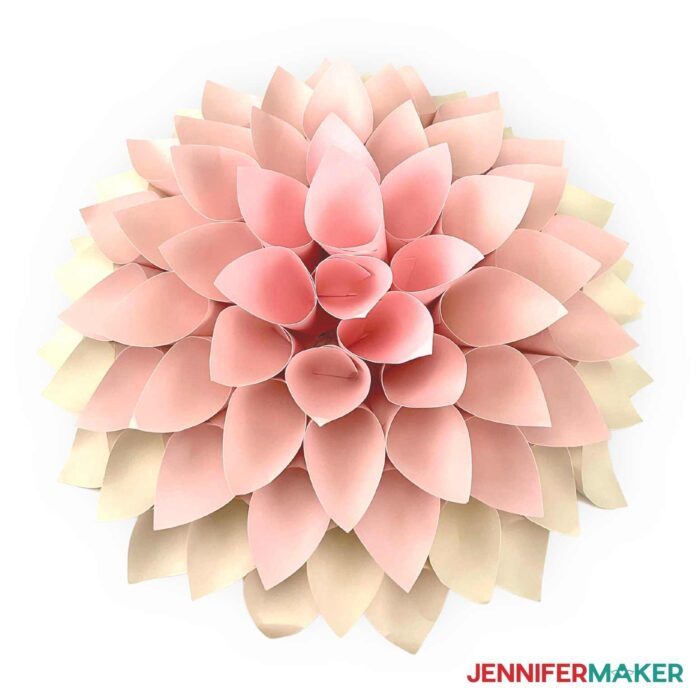
Before gluing the layers together, bend each petal up slightly from the central piece. For the smallest inner layer, bend the pieces in all the way and then pull them back out slightly to create the illusion of petals just opening.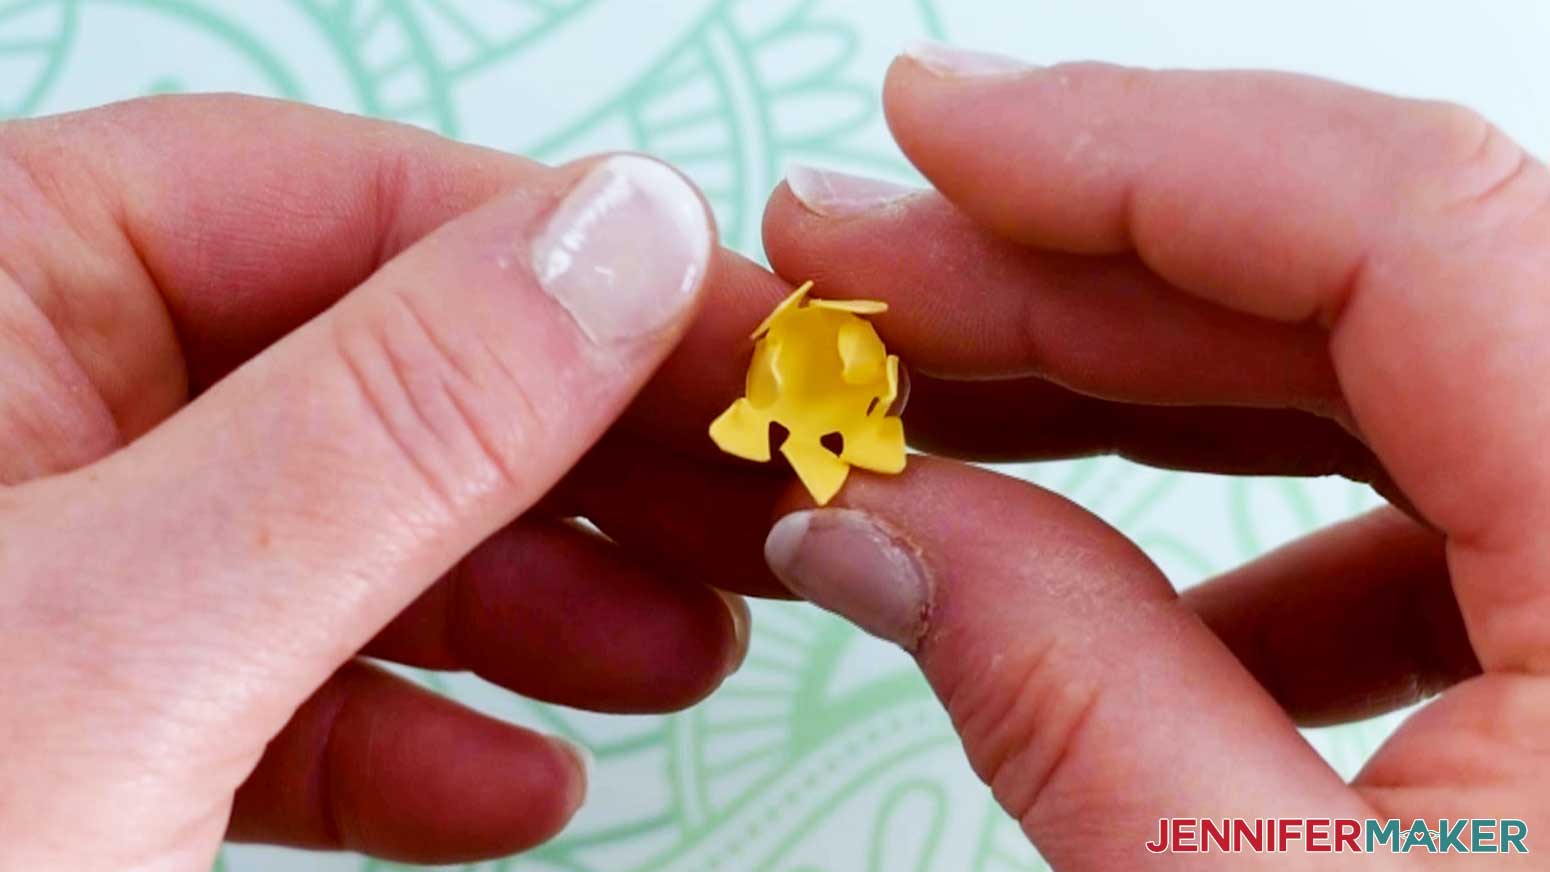
Add glue to the bottom of the second largest layer’s base and place it on top of the largest layer. Rotate the layer so that the petals of the second layer nestle in between the petals of the first.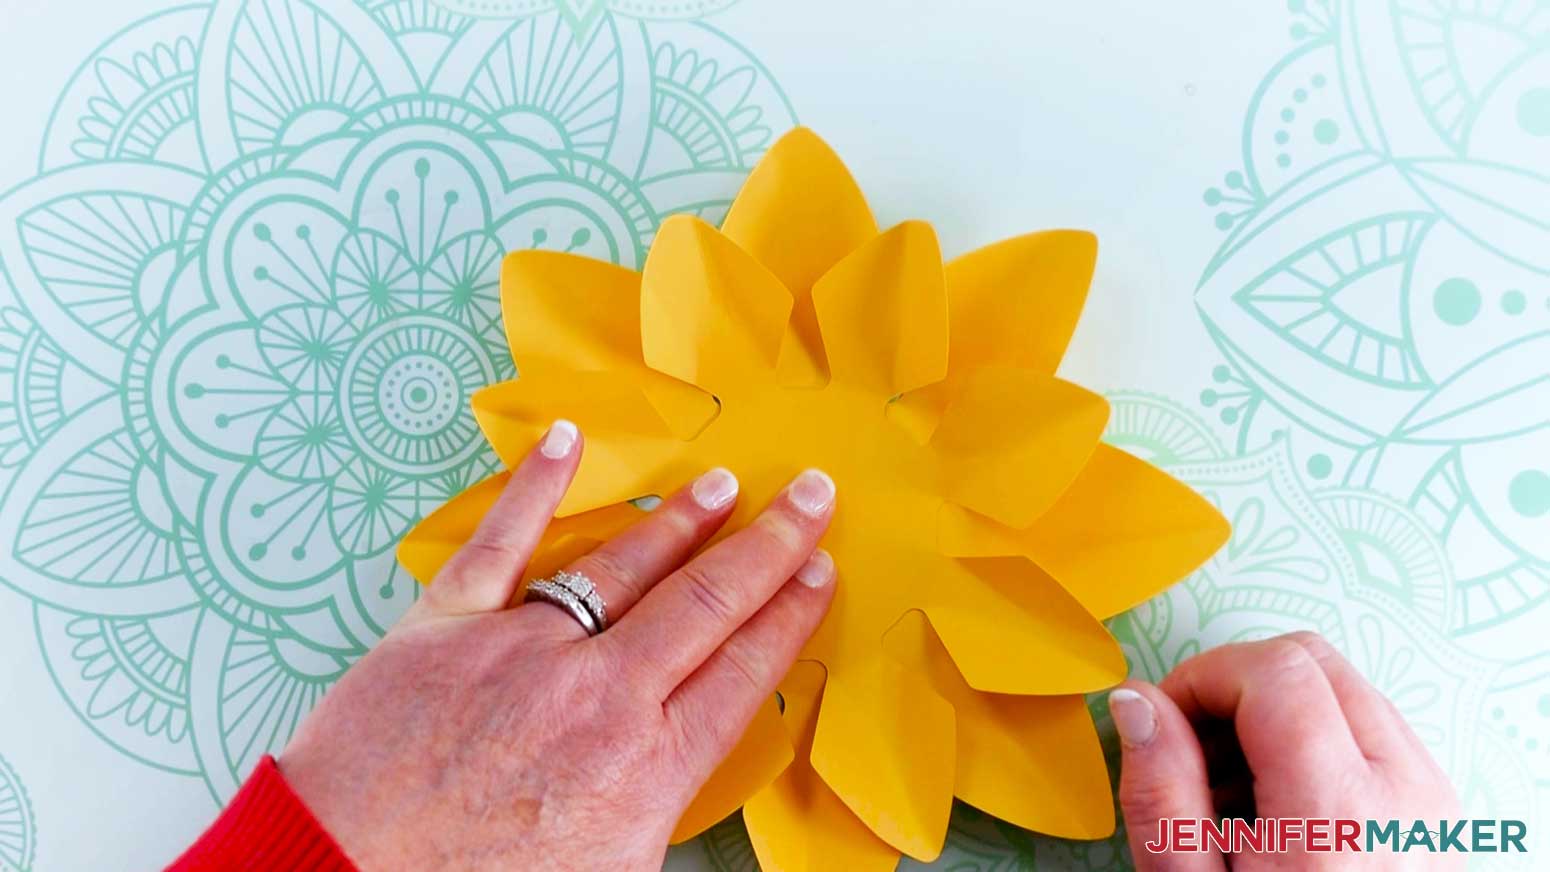
Continue applying glue to the next smallest layer, rotating the petals, and placing it on the center of the previous layer. Do this for all of the layers.
If you want to only create the 8” dahlia, you are now done! If you are making the jumbo dahlia, set this part aside and follow the broad petal assembly instructions below.
Broad Petal Dahlia
Here are the pieces used to create the dahlia with broad petals: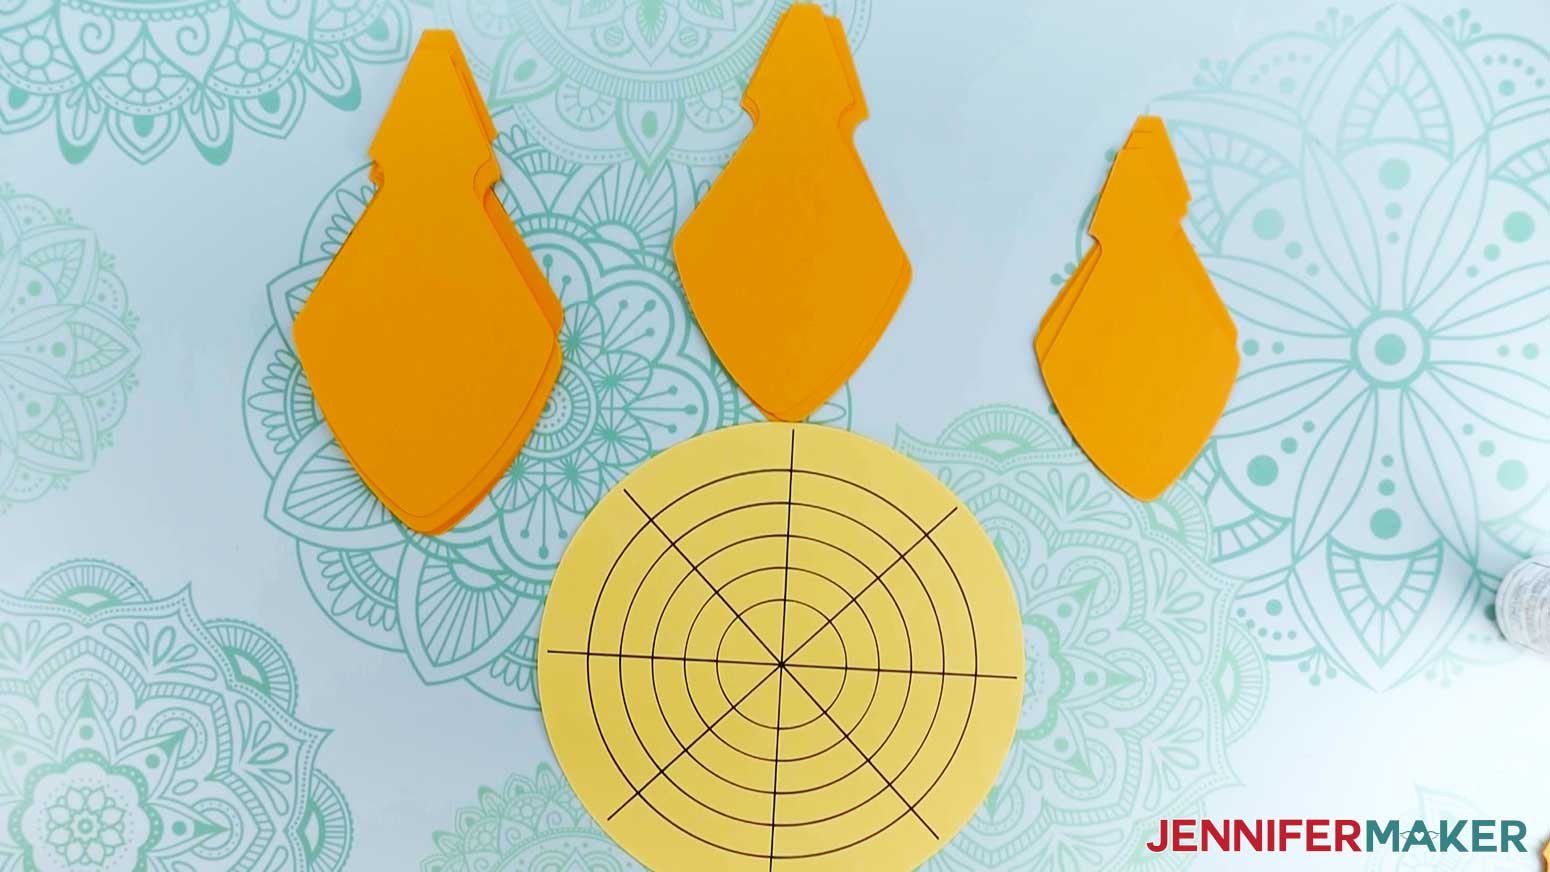
Follow the same creasing steps as the 8” petal instructions. Stop your crease when the petal’s sides curve out. The rest of the shape is what I’ll call its tab. We’ll leave that flat.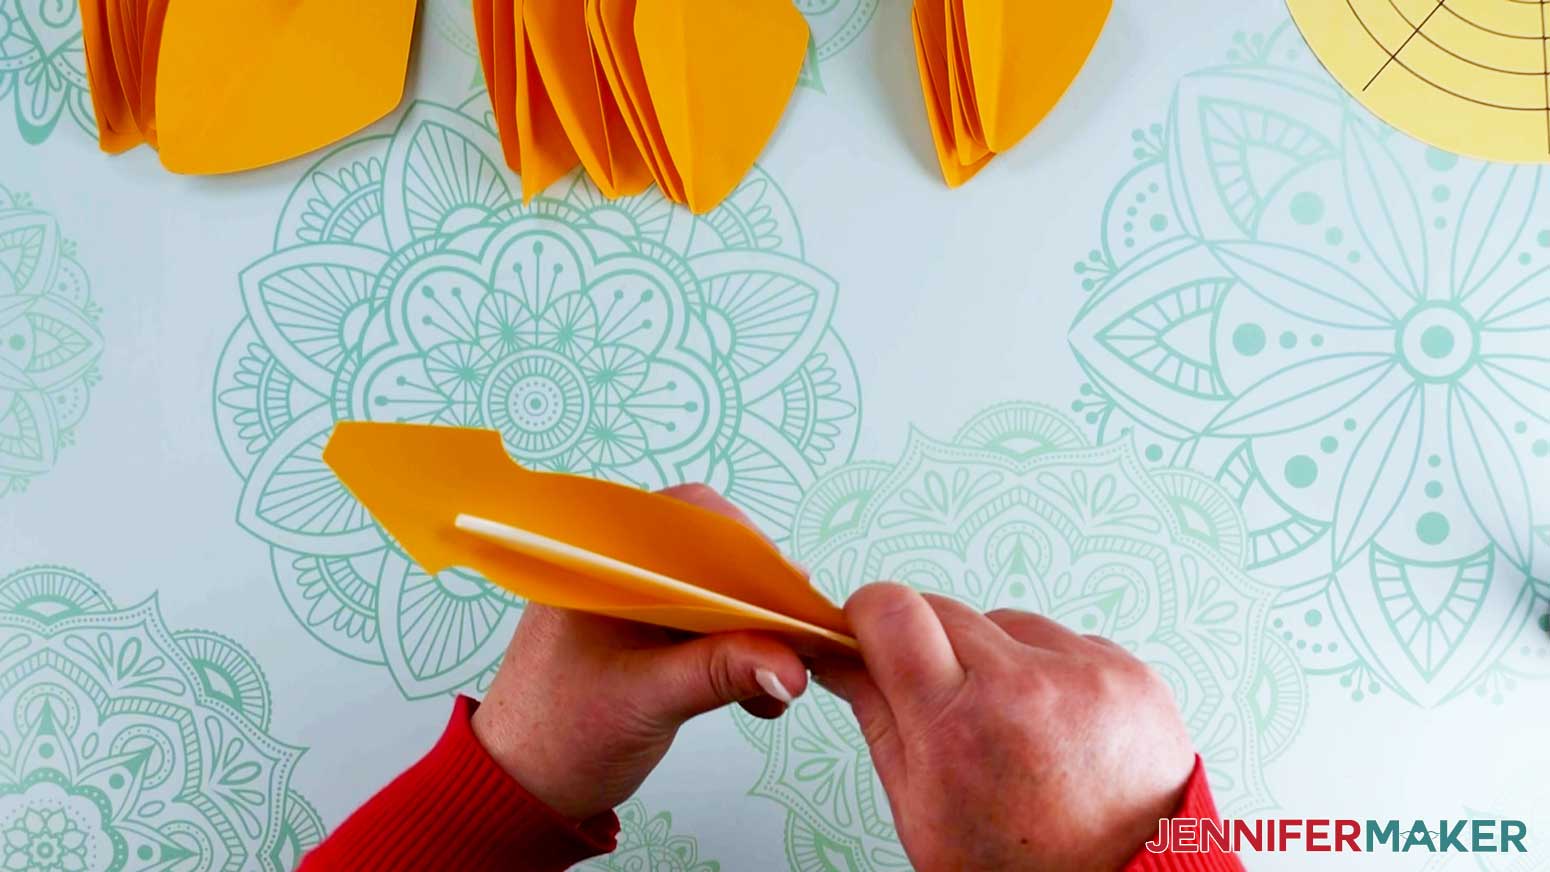
Crease all the petals before starting the assembly.
Now let’s assemble the first petal layer along the third drawn circle from the outside. Place eight large petals around the circle, aligning their creases with a long line and the flat tab edge with the pen line. Add a bit of glue to the back of each petal’s tab and press them in place. The top edge of the largest petals’ tabs should match the outer edge of the base circle.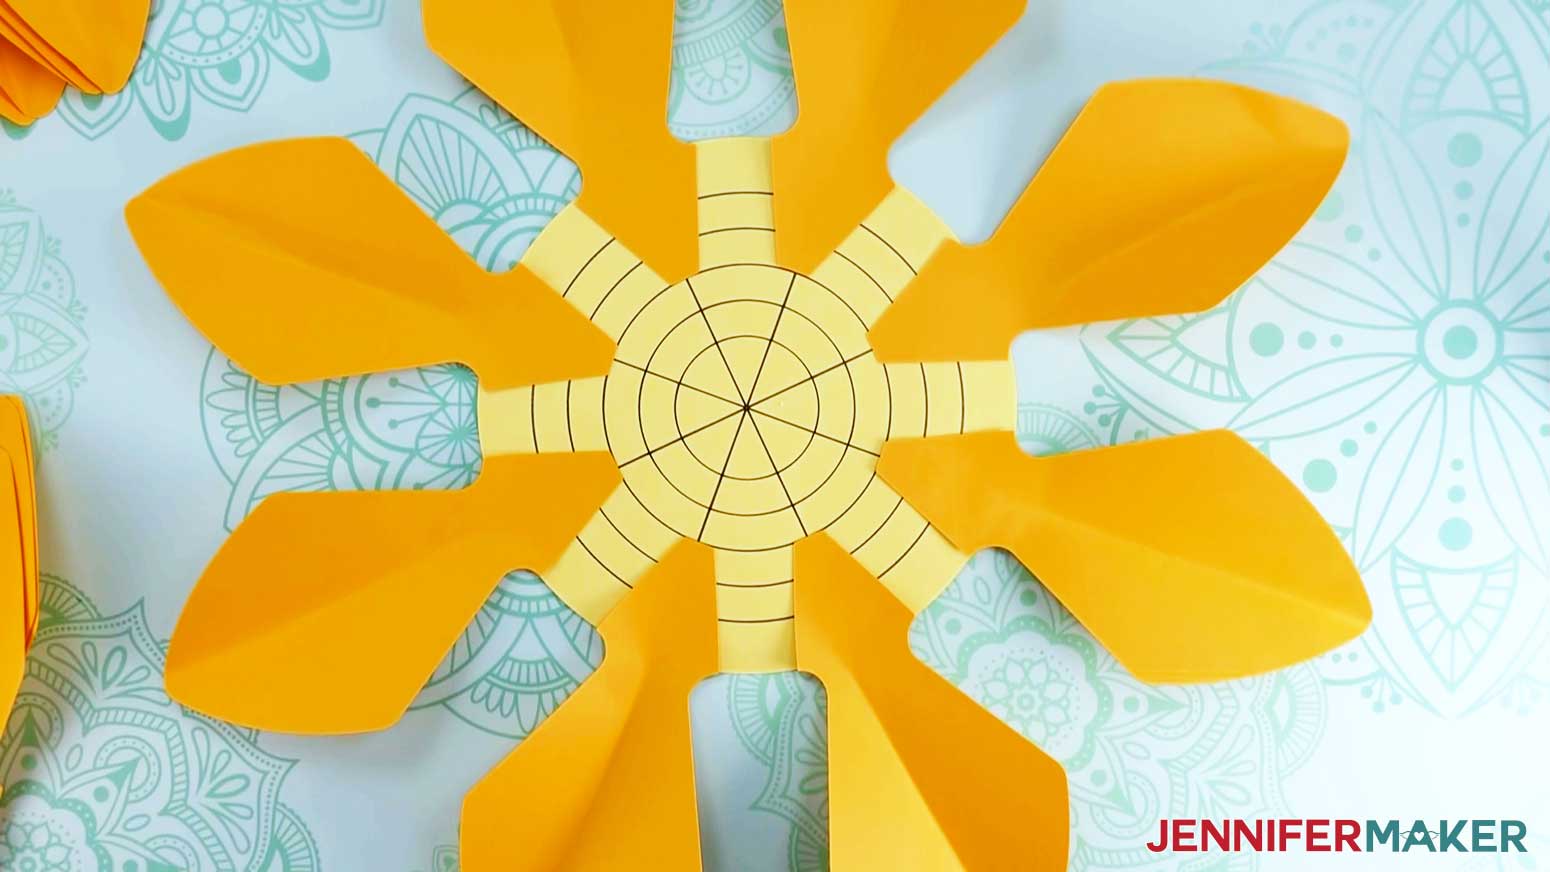
Slightly fold each petal up where the petal shape meets the tab. Next, glue another eight petals onto the circle base in between each petal already glued to the circle. Their edges should line up with the edges of the petals already on the base. The tab sides will overlap a bit. Also slightly fold these petals up where the petal tab meets the base.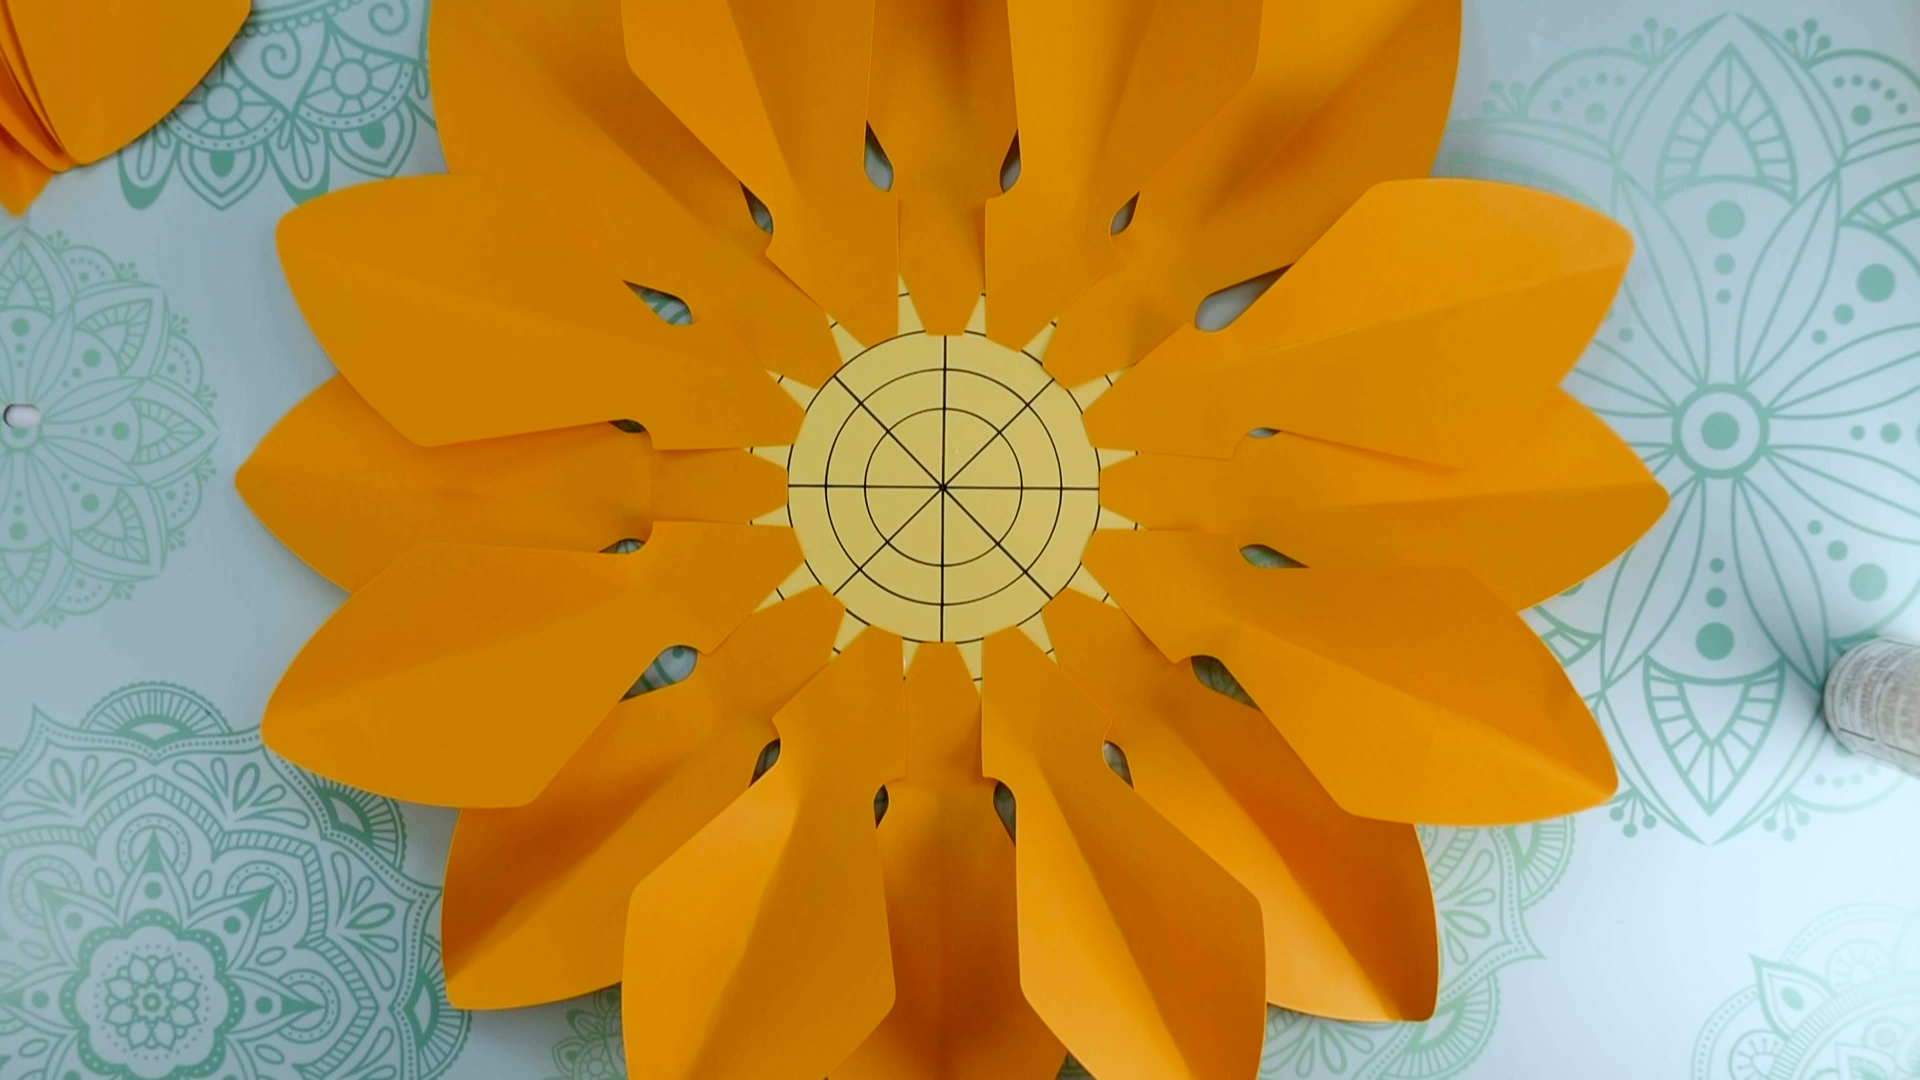
Continue placing the second and third layers of the petals in the same manner, moving each layer in so the bottom of the tab lines up with the next smaller ring. Use the medium-sized petals for the second layer and the smallest petals for the third. These layers only have eight petals each.
As you glue each layer, make sure to fold the petals up slightly at the tab before moving to the next layer.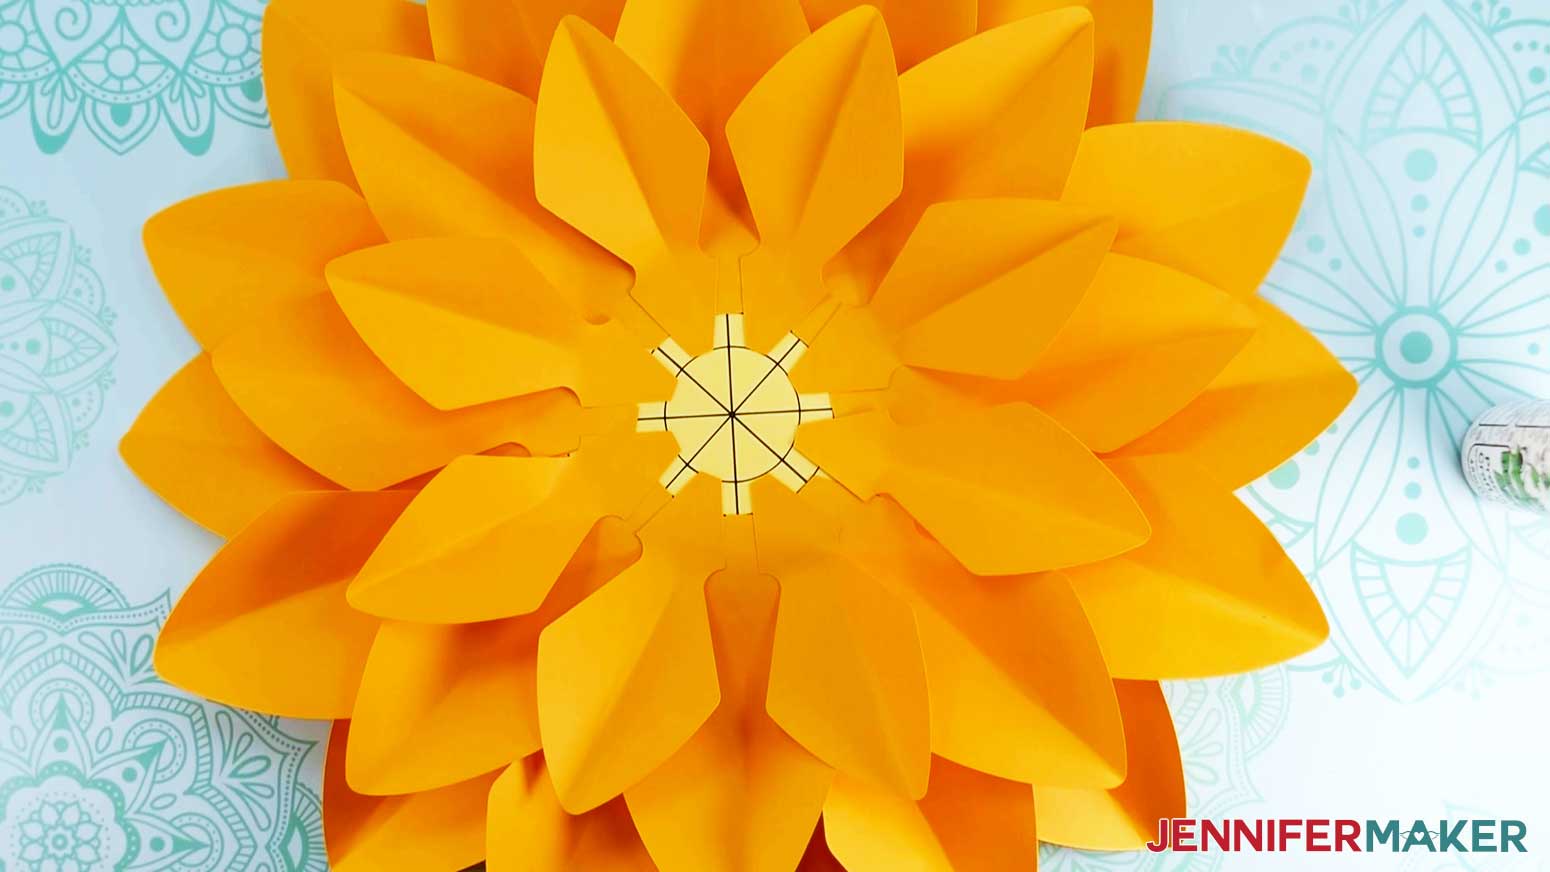
Apply glue to the 8” dahlia’s back and place it on top of the larger flower’s center base. Rotate the small dahlia so the petals fit together in a pleasing manner. Your jumbo dahlia is complete!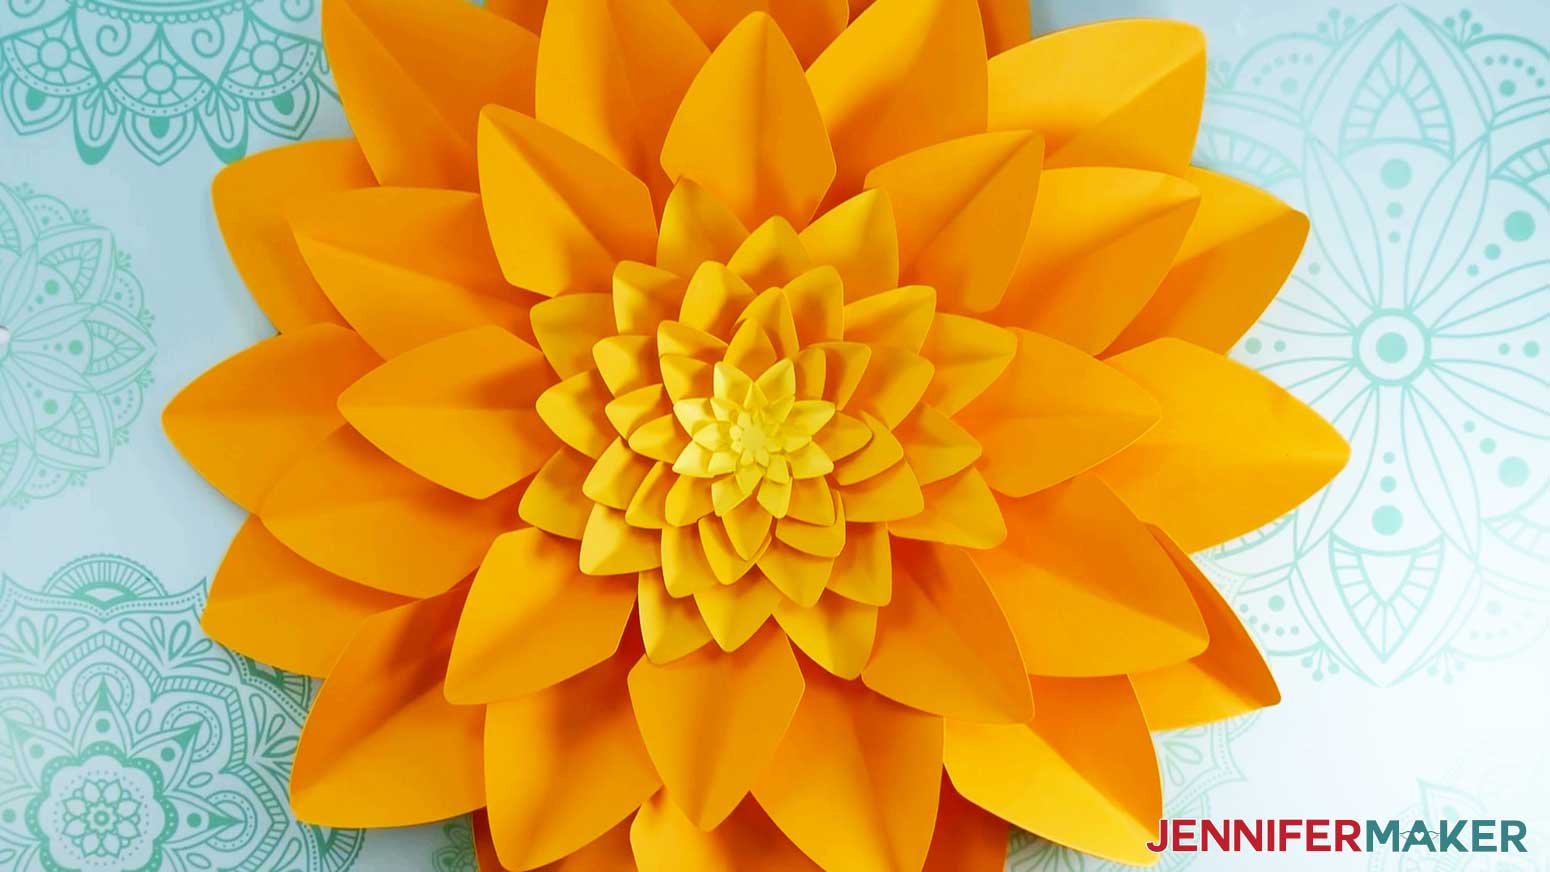
STEP 6: SHOW IT OFF!
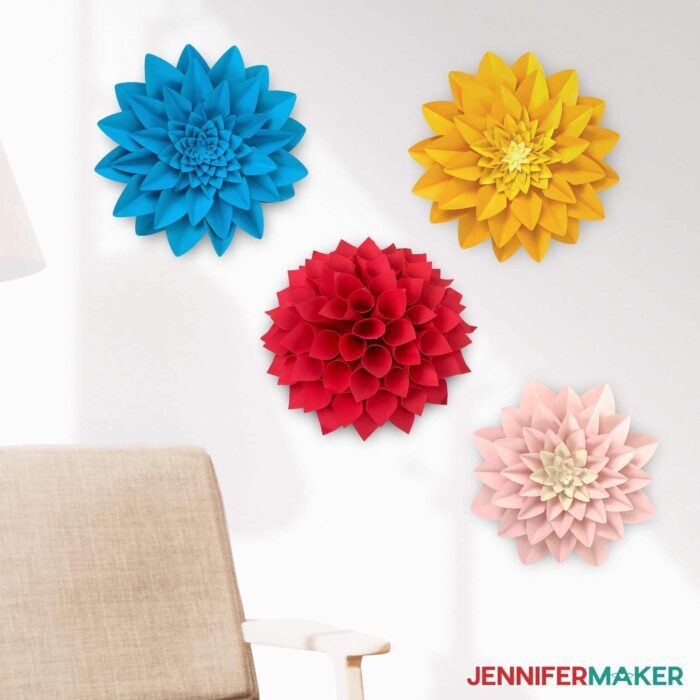
You can now display your dahlias! These work well to decorate your home. Place them on countertops and shelves with other decorative items, or on your table as a centerpiece. You can create wall murals using multiple flowers in different sizes and colors! You can even place the dahlias in shadow boxes.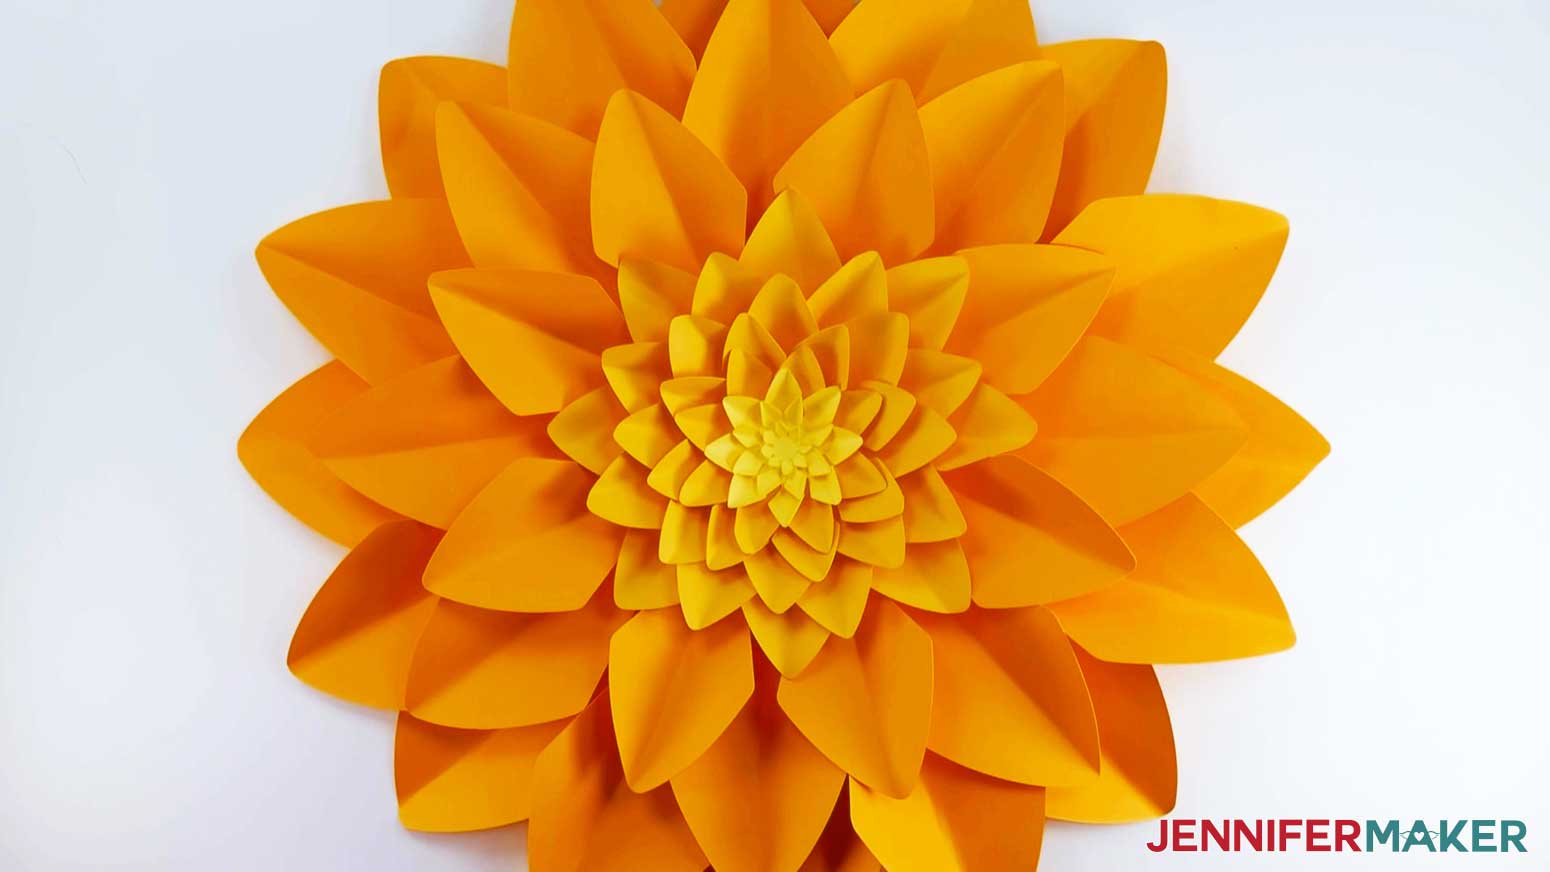

Notes
Answers to Your Questions about Paper Dahlia Projects
Get my free SVG files for the Paper Dahlia tutorial!
I’d love to see your Paper Dahlia! If you make a wall hanging or anything else with this design, please share a photo in our Facebook group, email it to me at [email protected], or tag me on social media with #jennifermaker.
Love,

Want to remember this? Save the Paper Dahlia Designs and Tutorial to your favorite Pinterest Board