
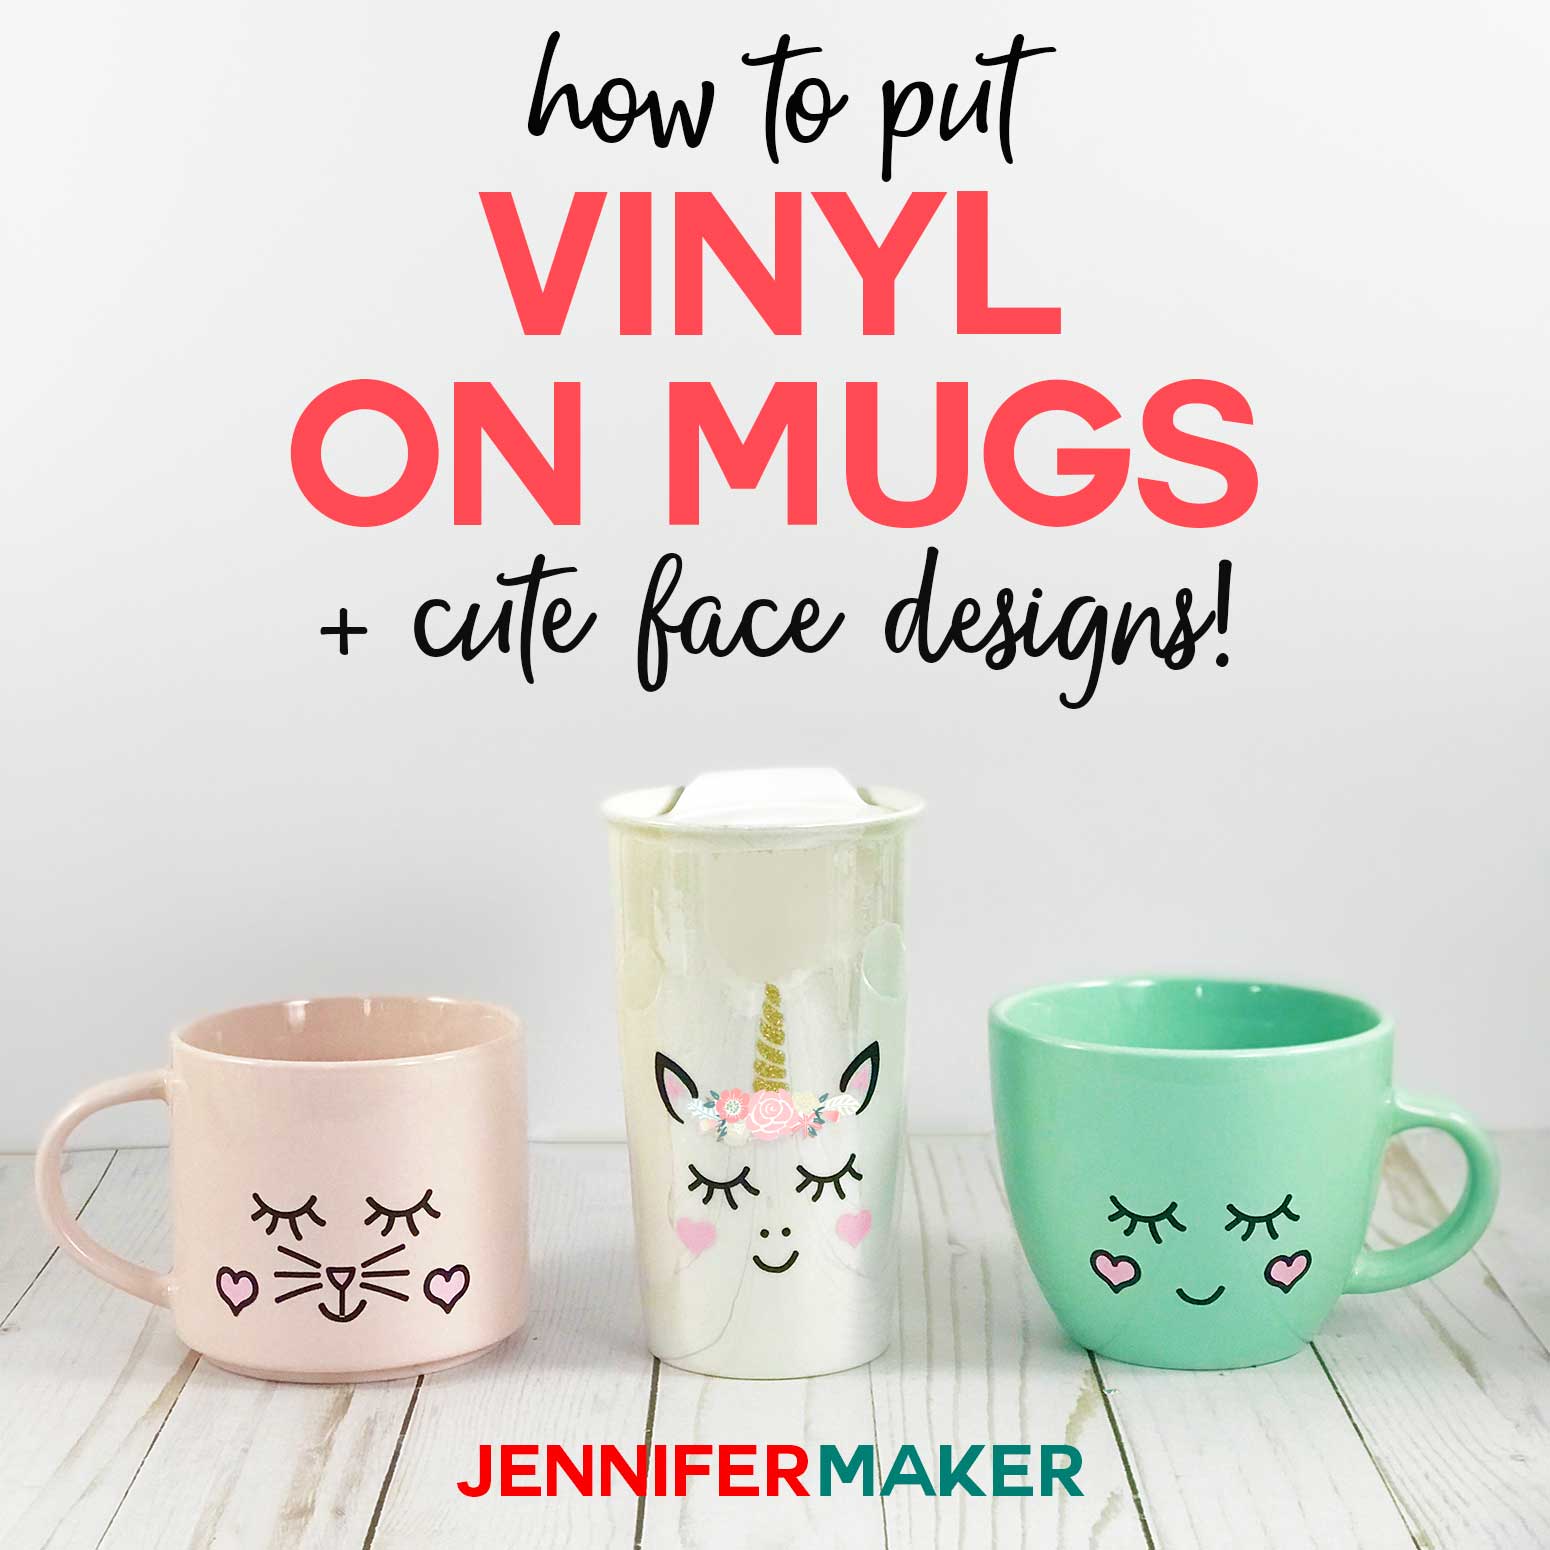
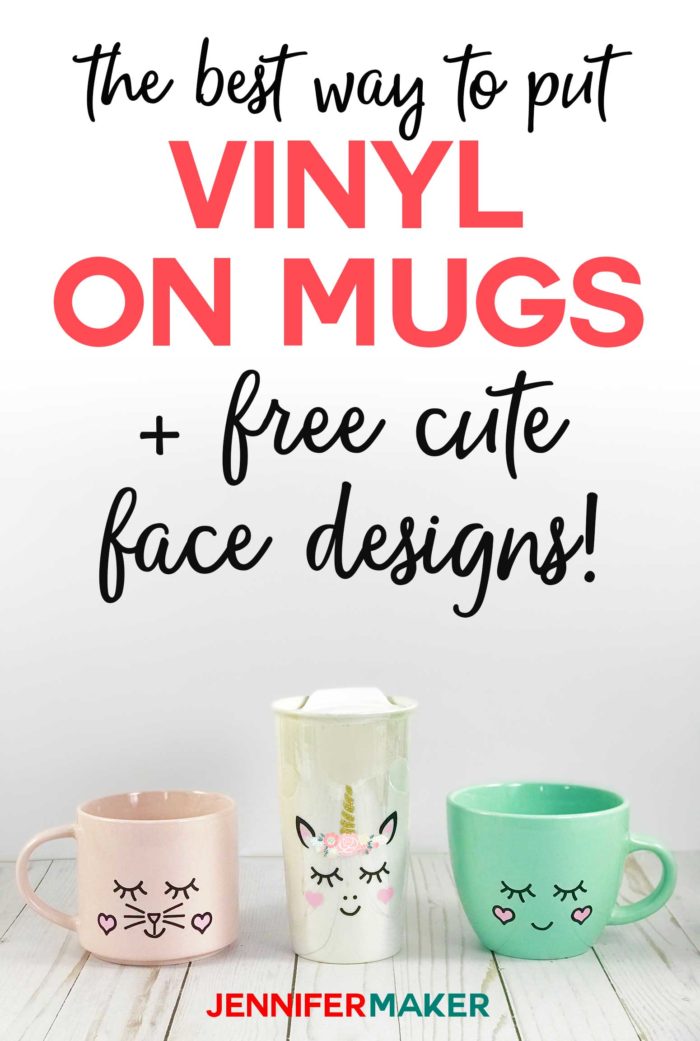
Learn the RIGHT way to put vinyl on mugs, including how to pick out the best mug, design, and vinyl for results that look great and last!
This was a well-requested tutorial! Many thanks to the readers and viewers who requested I show how to put vinyl on mugs (Anita H., Connie S., Melissa, Christina S., Stephanie P., Susan B., Lynda, Melissa, Cheryl W., Natalie, Sarah S., Cathy M., Crystal T., and Karen L.).
Key concepts taught in the video tutorial include how to select the right mug, design, and vinyl, how to transfer the vinyl to the curved surface of a mug, how to layer vinyl for a mug, and how to treat your vinyl appliquéd mug.
Let me show you how to put vinyl on a mug! This post contains some affiliate links for your convenience (which means if you make a purchase after clicking a link I will earn a small commission but it won’t cost you a penny more)! Read my full disclosure policy.
Materials for Vinyl Transfer Mugs
- Ceramic mugs (avoid anything powder coated or textured)
- Permanent adhesive vinyl
- Cricut StandardGrip Transfer Tape (do not use Strong Grip)
- Rubbing alcohol
- Cricut StandardGrip mat (green)
- Weeding tool
- Scraper tool
- A way to cut your materials (I used the amazing Cricut)
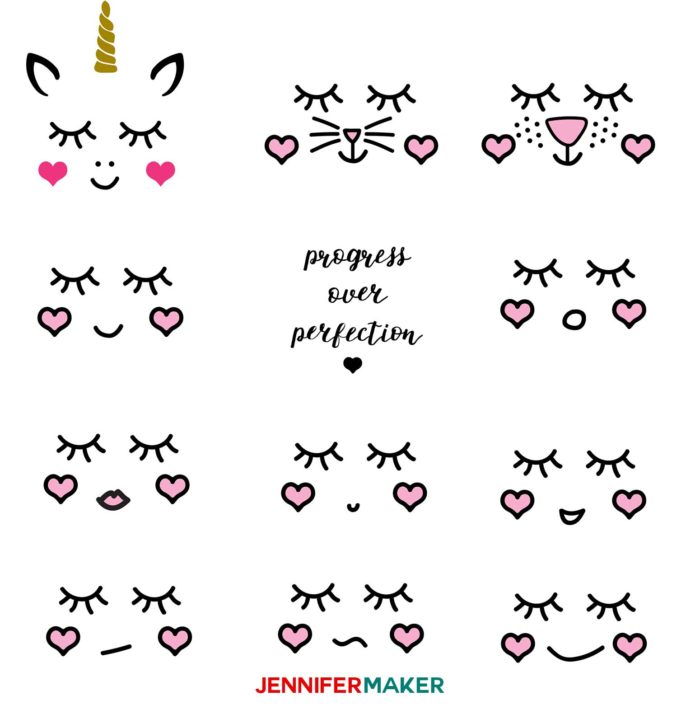
- Design #125 – My free SVG/DXF/PDF cut files/patterns (available in my free resource library—get the password at the bottom of this post)
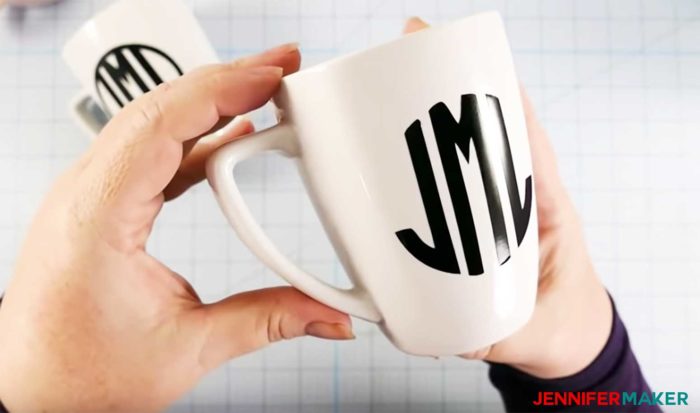
- Note: I used the Monogramos font for the monogram.

How to Put Vinyl on a Mug
Step 1: Find a Design For Your Mug
First, you need some cute designs for your mugs! I made some for you that you can download from my free resource library (you can get a password for it at the bottom of this page). If you’re going to cut the vinyl decals (Design #125) out on your cutting machine, upload the file to your design software. If you’re not sure how to upload an SVG cut file to Cricut Design Space, watch this helpful video training series I made. If you’re on an iPhone or iPad, here’s how to download and upload SVG files to the Cricut Design Space app.
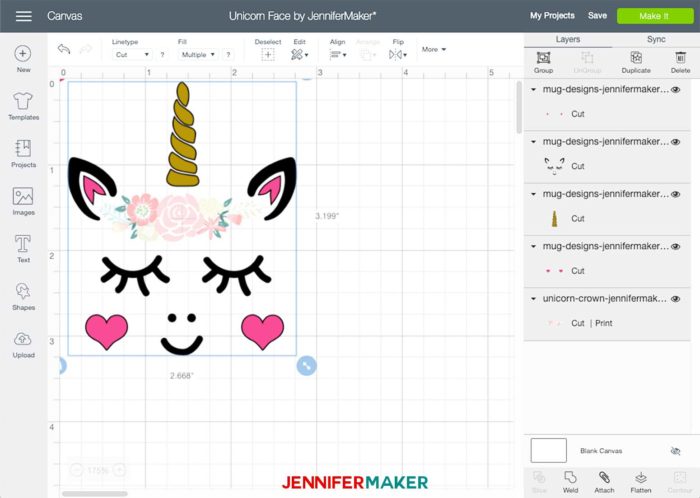
Note: The unicorn crown is in a separate file because it is a Print Then Cut image. Just upload it and add it to your canvas with the other mug designs — resize as necessary.
You should NOT mirror adhesive vinyl the way you would iron-on vinyl.
Step 2: Cut Out Your Vinyl
Place your permanent adhesive vinyl shiny color side UP (right side up) on your cutting mat. Cut the vinyl with the fine-point blade.
When you are done cutting, flip the mat over onto your work surface and peel it away from the vinyl carefully.
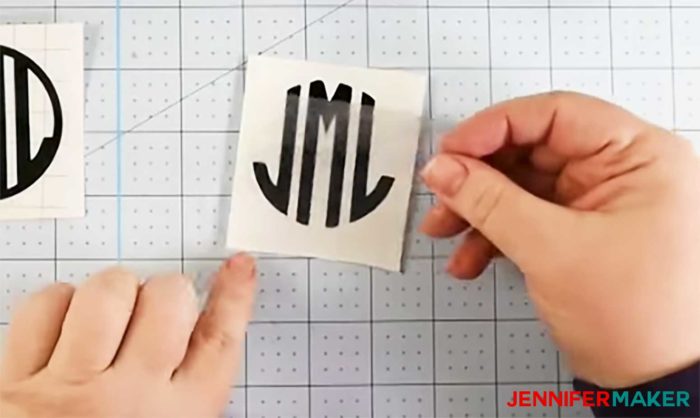
Step 3: Weed Your Vinyl
Once you cut out your vinyl, you want to weed it which means to remove all the extra bits that you don’t want to transfer to your mug. You might be able to do this with your fingernail, but you might want to use a weeding tool (I do).
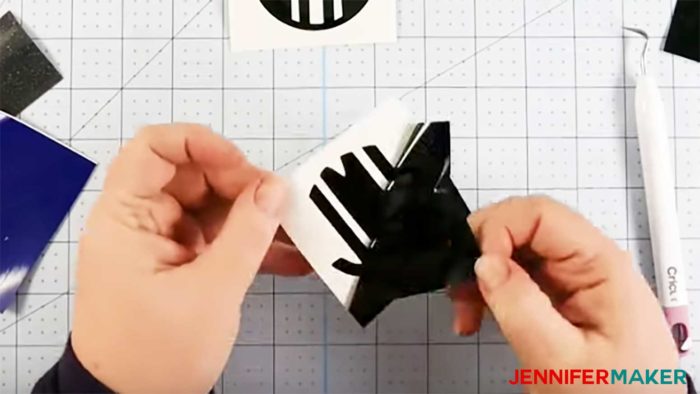
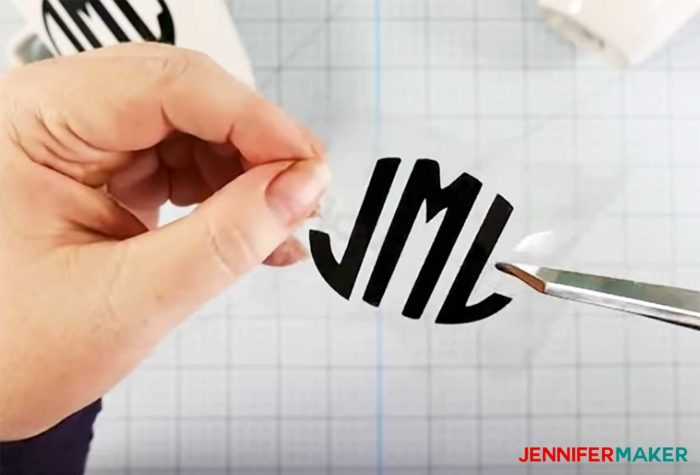
After the vinyl is weeded, you need a piece of transfer tape to transfer your design to our mugs. So you just want to cut out a piece of transfer tape that is roughly the same size, or at least the same size as your design. Take the backing off of the transfer tape and you put it onto the front of your vinyl decal. Start at the corner and move outwards so that you don’t get creases and bubbles in your transfer tape.
Note: Don’t put the vinyl sticky side down of your work surface because that will just mess with your vinyl’s ability to adhere to a mug.
Step 4: Apply the Vinyl to the Mug
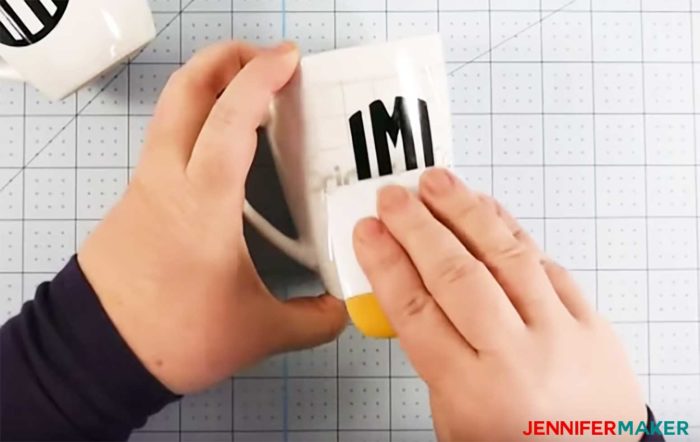
Clean the surface of your mug first with 91% isopropyl alcohol. This will remove any oil or dirt and get our surface as clean as possible. This will make a difference in the vinyl decal sticks and stays stuck. We want our decals to stick as good as possible, right? It’s no fun putting something on and having it come right off.

Make small snips around the edges of the transfer tape on your vinyl decal. These snips allow your transfer tape to bend with the curve of the mug and allow you to apply it on that curve without any creases.
Apply the vinyl to the mug, and allow the vinyl to move where it wants to go naturally. Don’t force it into a position. Just smooth it all down, and because you cut snips in the transfer tape, it will smooth and move into place.
So even though you may have creases in your transfer tape, you won’t have creases in our vinyl. This is the secret to putting vinyl around a curved surface like this.
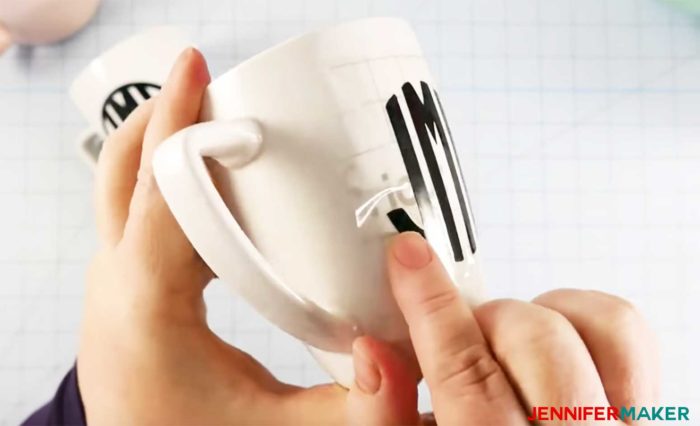
Take off all the transfer tape. Your goal is to see perfectly smooth and clear vinyl on your mug with no creases.
To learn how to apply a layered vinyl decal to a mug, please watch this video.
To learn how to seal a vinyl mug, please see this tutorial.
Get my free SVG cut files and patterns for the Vinyl Transfer Mugs
Vinyl mugs are fun and easy IF you do it the right way. Now, even though I did the dishwasher test, I still tend to hand wash my vinyl mugs. It’s your choice. So go ahead and put your mugs in the dishwasher (top rack only), but with the understanding that after the 100th time they might not look so great. (Or be prepared to seal your vinyl first.) But hey, you can always remake it, right?
If you make one of these vinyl transfer mugs, please share a photo in our Facebook group or tag me on social media with #makershowandtell.
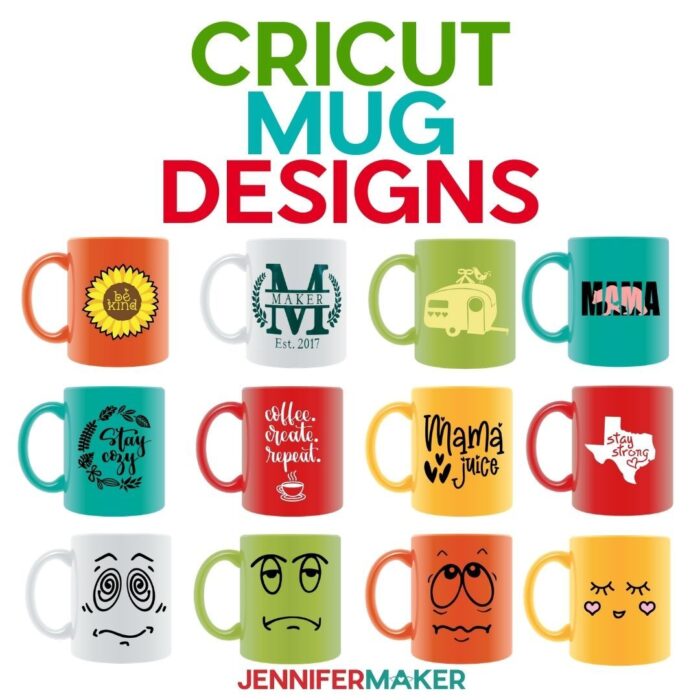
Want more Cricut mug ideas? Check out this idea list with photos and links to my FREE designs!
[ess_grid alias=”25days2″]
Love,

Want to remember this? Save the Vinyl Mug Tutorial to Your Favorite DIY Pinterest Board!
Awesome and cute! I just found your YouTube and came right here to the blog! I’m from Lansing, Michigan! Thanks for sharing your awesome creations and knowledge.
I was born in Lansing and my family still lives there. Thank you for the kind comments!
Jennifer,
You rock!!! Thank you so much for all your time and effort making these videos! I love how you are so thorough!! Thank you so much for the free svgs files, too!!!!
Yay! Happy you like my videos and designs.
I’m finding it really difficult as a new Cricut owner not to just jump in and try to do something adorable that is way past my learning curve, especially as I’m hoping to get some Christmas presents made from it. I really wanted to make the Snowy Little Church, but couldn’t understand the SVG file. Also, I’m holding off on the vinyl until I make a few cuts with cardstock!
Here’s my idea for the day, felt masks. My soon to be six (tomorrow) friend is getting a unicorn birthday/Christmas. I’ve seen some adorable unicorn masks that look easy to do. It would be nice to do a dinosaur mask for her little brother. I see a lot of adorable things to make for kids, so my friend’s children will be making a haul!
I love this idea! I am planning on making these as teacher gifts. Do you have the flower crown svg file for the unicorn anywhere?
Hi Jennifer, thanks for all your videos. I love watching them on my lunchbreaks! I’m a cameo fan and I also love using HTV on mugs. It does have limitations. You have to use a mug press, an iron just doesn’t give enough pressure or heat. You are also limited to the mugs that will fit in your press. Curved mugs don’t do so well but I’ve had great success with straight sided ones. Hope this helps. Much love from the North East of England. Daisy xx
Fabulous ideas. i will look into the canvas vinyl. I am from Canberra, Australia’s capital city – we are sweltering with temperatures over 110 degrees Celsius – but I am still looking for crafting ideas!!!
I know I’m late here but I only just found this post now. Thank you for the inspiration! I love your site!
I don’t see the password 🙁
The password is sent to you in email. Check your Promotions folder, spam folder, or junk mail folder. If you still cannot find it, send us an email at [email protected] and we can look you up and give you the password that way. 🙂
Great tutorial! The faces on the mugs look soo adorable. I will definitely will be making some mugs soon!
I’ve seen videos where people apply dishwasher safe mod podge to the mugs to seal them. Do you recommend doing that?
Yes, Mod Podge can be used!
Hello Jennifer, Thank you very much for the wonderful tutorial. Strangely (LOL) I had already taught myself some of the tips you shared. I quickly found out that Oracle 651 works better than anything else. However, I was recently asked to create a mug using an svg (Lady Whistledown) with with 3 lines of words. The issue I’ve been having is cutting the words without it tearing and keeping my dots over the I’s when weeding. I’ve tried enlarging the letters, reverse weeding, etc. My Cricut Maker is brand new so I doubt there’s anything wrong with the blade. I’ve also tried different settings (permanent outdoor vinyl, washi, more or twice cutting), none of which works. Do you have any suggestions that I haven’t mentioned here? Thank you for all you do to guide us all on our crafting journeys.
Hi there! Give the paper settings a try and see if that helps!
what brand of printable vinyl did you use (for the unicorn mug)?
I used Cricut Permanent Premium Vinyl to make the unicorn mug.