
Learn about the different types of vinyl, how and when to use each type of vinyl and where to buy vinyl! Let’s get rid of the confusion so you can start creating amazing things!
When you start out with your new Cricut and get ready to create your projects, you can get overwhelmed with all the choices for vinyl. In fact, one of the questions I get asked frequently is “What type of vinyl do I use for my project?” For all of my project tutorials, I link to the materials I use. But what if you’re trying to create something without a tutorial? Well, let me help you out! I’ll answer that question and many more.
This post contains some affiliate links for your convenience (which means if you make a purchase after clicking a link I will earn a small commission but it won’t cost you a penny more)! Read my full disclosure policy.
Q: What type of vinyl do I need for my project?
A: First, let me explain the two main types of vinyl. There is Adhesive Vinyl and Iron-On Vinyl (also known as Heat-Transfer Vinyl or HTV).
Adhesive vinyl is just like a sticker. The vinyl has one side that is pretty – it might be glossy or matte, it might have a pattern, glitter, holographic design, etc. This is the side that you want people to see. The other side of adhesive vinyl is sticky. The sticky side has a paper backing or liner on it. To apply adhesive vinyl to your surface, you would peel off the backing and stick it down onto the project surface. The pressure you apply will cause the adhesive to stick. My DIY Customized Starbucks Cups is a project that uses adhesive vinyl.
Iron-on vinyl (or heat-transfer vinyl or HTV) has a liner or carrier sheet covering the pretty side of the vinyl that will eventually be seen. The liner/carrier sheet is usually clear. The other side of iron-on vinyl has adhesive; however, the adhesive is not sticky to the touch. The adhesive is activated by applying heat to it. Learn more about Which Side of Iron-on Vinyl Goes Down.
So the quick answer to which vinyl do I need for my project is that it depends on what material you will be putting the vinyl on.
Q: What is adhesive vinyl used for?
A: Adhesive vinyl can be used on these surfaces:
- Plastic (See my DIY Santa Personalized Cup)
- Walls (See my Large Wall Decal project)
- Glass (See my Decorated Glass project)
- Metal (See my Decorated Instant Pot project)
- Ceramic (See my Knockout Design Decorated Tile project)
- Canvas (See my Paper Flower Dress Canvas project)
- Wood (See my Easy Vertical Welcome Sign project)
Adhesive vinyl is great for smooth, hard surfaces.

Q: What is Iron-On Vinyl used for?
A: Iron-on Vinyl (HTV) can be used on these surfaces:
- Fabric (See my Beginner Friendly T-shirt)
- Canvas (See my Reverse Canvas project
- Faux Leather (See my DIY Tote Bag project)
- Wood
Iron-on vinyl is great if the surface can tolerate the use of heat.

Q: Which adhesive vinyl is the best to use for my project?
A: In the Adhesive Vinyl category, there are different types – permanent vinyl and removable vinyl.
Removable vinyl is a perfect choice if you want a temporary design. Removable vinyl is great for decorating walls like with my Large Wall Decals. This vinyl can be removed without the need to repaint your walls. Cricut removable Premium Vinyl can be removed without leaving a residue for up to 2 years making it best for labels, indoor signs, and window decorations.
Permanent vinyl is good for designs that will be outdoors or items you might wash frequently. Car decals, outdoor wooden signs, and drinkware are often decorated with permanent adhesive vinyl. Cricut Permanent Premium Vinyl is permanent for up to 3 years and is also water-resistant and UV-resistant. I use permanent vinyl for projects like my DIY Vinyl Decal Tumblers, wood Welcome Porch Sign, nail decals, and DIY Vinyl on Mugs. I also use premium vinyl as a stencil when I do etched glass projects.
Other types of adhesive vinyl include:
- Chalkboard Vinyl (I use this in my Free Label Templates project)
- Smart Vinyl (See this in my DIY Pantry Labels project)
- Dry Erase Vinyl
- Glitter Vinyl
- Holographic Vinyl
- Premium Glossy Outdoor Vinyl (I use this in my Decorated Glass Block Light project)
- Premium Vinyl Shimmer – Permanent
- Printable Vinyl
- Stencil Vinyl (I use this for my Painted Concrete Stepping Stone project)
- Adhesive Foil (I use this in my DIY Subway Art project)
Q: How do I know what type of vinyl I have?
The first step is to look at the paper backing sheet. Some products will have the product name printed on the backing.
If the name isn’t printed, you can peel the backing sheet and the vinyl apart, which one is sticky? If the vinyl is sticky then it is adhesive vinyl. If the carrier sheet is sticky or even just slightly tacky and the vinyl isn’t, then this is iron-on vinyl.
Q: How do I use adhesive vinyl?
Step 1. Cut the Adhesive Vinyl
When you cut adhesive vinyl on your Cricut, you will place it with the vinyl side up and the paper sheet or liner down on the mat. You do not want to cut all the way through your backing.
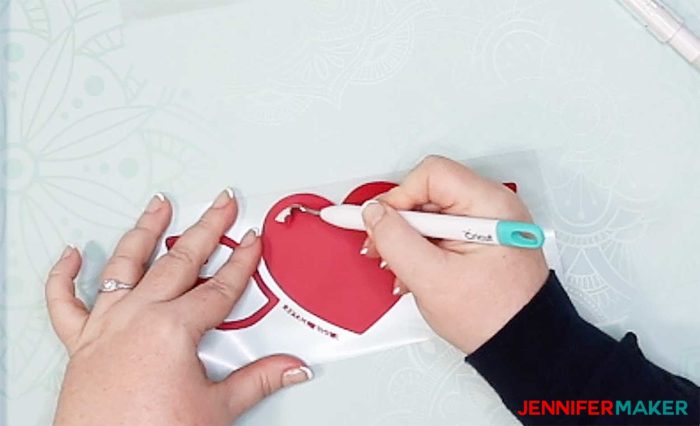
Step 2. Weed the Adhesive Vinyl
After cutting your vinyl, you then need to weed or remove all of the pieces that you don’t want. Here are some tips to help make the weeding process easier.
Step 3. Apply Transfer Tape
You’ll want to use Standard Grip transfer tape for most projects and StrongGrip Transfer Tape only for Glitter Vinyl.
Step 4. Apply Your Design to Your Project Surface
Use a Cricut Scraper or brayer to help ensure that the vinyl is adhered well.
Step 5. Remove Transfer Tape
Enjoy your new project!
Q: How do I cut Iron-On Vinyl?
A: Place the iron-on vinyl with the carrier sheet/liner side down on your mat and the adhesive or backside of the vinyl facing up. Also, make sure you mirror your image. If you can’t tell which side is the carrier sheet, look at the way it curves – the carrier sheet is always on the outside as it is rolled on a tube, so it will be on the outside of the curve.
Q: How do I know which side of the Iron-On Vinyl goes down on the mat?
A: I have a whole tutorial with lots of photos that answers this question in depth. So take a look at my post about Which Side of Iron-On Vinyl Goes Down to learn more.
Q: What heat source can I use for iron-on vinyl?
A: You can use a heat press, Cricut EasyPress, or household iron.
Q: What size should I make my iron-on vinyl design?
A: There are charts online to help you size your design; however, most of those charts list the maximum size that you can make a design. In most cases, you don’t want your design to be the maximum size. Typically, I size my designs on women’s shirts at around 8 to 9 inches, 10 inches at the most.
I prefer to take a shirt that has a design that is sized the way I like it and then I measure that design.
Q: Which machine can I use to cut vinyl?
A: You can cut vinyl on all three of the current Cricut machines (Cricut Maker, Cricut Explore, and Cricut Joy).
Q: What setting do I use for cutting my vinyl?
A: You will use the preset or custom material setting that is appropriate for the type of vinyl you are cutting.
Q: Which mat do I use to cut my vinyl?
A: I usually use my Cricut StandardGrip Mat for cutting vinyl. A new Cricut LightGrip Mat will also work as long as it’s sticky. I have a great blog post where I discuss Cricut Cutting Mats – which mat to use and how to keep them sticky!
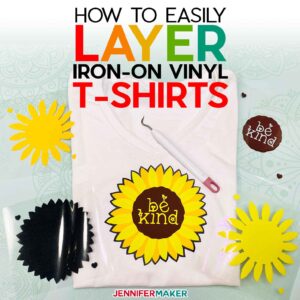
Q: Which iron-on vinyl should I use if I’m layering my project?
A: I recommend using Cricut Everyday Iron-On or Siser EasyWeed HTV for layering. I have a tutorial to help you layer iron-on vinyl shirts.
Q: Can I layer adhesive vinyl?
A: Yes, in fact, I layer vinyl with my Large Wall Decal project and my DIY Glitter Ornaments.

Q: Where can I get skin tone iron-on vinyl?
A: I used Cricut Everyday Iron-On Neutrals Sampler with a medium brown and dark brown. I also used Siser EasyWeed HTV in Cream or Tan.
Q: Can I layer with Glitter Iron-On Vinyl?
A: Yes, you can layer with Glitter Iron-On Vinyl; however, it has to be your top layer. You cannot layer anything on top of Glitter Iron-On Vinyl.
Q: Should you prewash shirts before applying an iron-on vinyl design?
A: It’s up to you. If you’re selling or giving it as a gift you probably won’t want to wash it. However, some people prefer to prewash to get rid of any sizing and to shrink the shirt. If you aren’t sure, go ahead and wash it. I really like the Bella Canvas tutorial
Q: If I use a household iron, what settings should I use?
A: For a household iron, use the highest temperature setting which is usually the cotton/linen setting without steam. You can find settings and times for using Cricut Iron-On vinyl at https://jennifermaker.com/easypress.
Q: Which side of adhesive vinyl goes down?
A: You will cut adhesive vinyl with the pretty adhesive side up and the paper backing/liner side down on your cutting mat. You will cut through the vinyl and leave the backing intact.
Q: Can I use adhesive vinyl on shirts?
A: You can; however, the adhesive vinyl will come off with wear and when you wash it. Because the fabric is not a hard smooth surface the vinyl will not adhere properly.
Q: Do you mirror adhesive vinyl?
A: Usually you would not need to mirror the design. However, if your design is going to be placed on the underside of a clear surface, then you would want to mirror it before cutting. An example of this design is my Customized Serving Tray with Vinyl or our Paper Flower Shadow Box with the vinyl on the inside of the box.
Q: How do I apply Iron-On Vinyl (HTV)?
Step 1. Cut your Iron-On Vinyl
Use a clean green StandardGrip mat to cut your iron-on vinyl. It’s very important you put your iron-on vinyl SHINY SIDE DOWN on your cutting mat. And remember, all iron-on designs must be mirrored before cutting!
Step 2. Weed the Iron-On Vinyl
Weeding is the process of removing all of the pieces of vinyl that you do not want to transfer.
Step 3. Apply the Iron-On Vinyl
Follow the steps for your specific material and project. This will include pre-heat, heat, and post-heat steps. You will use an iron, Cricut EasyPress, or a heat press to apply your design to your project. You can find settings and times for using Cricut Iron-On vinyl at https://jennifermaker.com/easypress.

Q: Where Can I Purchase Vinyl
A: I purchase most of my vinyl from Amazon or Cricut. I also buy vinyl from my local big box craft store; however, I usually can’t find all the colors and styles in person.
Here are some other online stores. I have not shopped at these stores and only list them as a resource. Including a store below is not an endorsement.
Note, free shipping notes are as of the date of this post. Please check the store’s website for more information.
- 651vinyl.com
- Adhesivevinylsupply.com
- Anteupgraphicsupply.com (Free shipping on orders over $75.)
- Atlantavinylstore.com (Free Shipping over $35.)
- Blue Water Vinyl & Gifts
- BrilliantVinyl.com
- Cleancutgraphics.com (Free shipping on orders over $25.)
- Craftcuttersupply.com
- Crafterspantry.com (Free shipping on supply orders over $59.)
- Creativedesignsupply.com
- Csdsvinyl.com (Free shipping on orders over $50)
- Dee-vinyl.com (Free Shipping on orders over $65.)
- ExpressionsVinyl.com
- Happycrafters.com (Free standard shipping on orders over $25.)
- Heatpressnation.com (Free shipping)
- Heat Transfer Haus
- Heattransfersource.com
- Heattransferwarehouse.com (Free shipping on orders over $165)
- Jpiblanks.com
- Jsisigns.com
- Mivinylworld.com
- Mycraftsource.com
- Onesourcesupply.com
- Platinumcraftvinyl.com
- Randmvinyl.com
- Setxvinyl.com (Free shipping on orders over $99)
- Shopcraftables.com (Free shipping for orders over $50)
- Shvinyl.com (Free shipping orders over $100)
- Skhouston.com (Free shipping orders over $100)
- Southwakevinyl.com
- Specialty-graphics.com
- Speedyvinylshop.com
- Stickitvinyl.ca (Free Shipping on orders over $125)
- Sweethomevinyl.com
- Swingdesign.com
- Thecloverpatch.com
- The Vinyl Spectrum
- Uscutter.com
- US Vinyl Supply (Free shipping on orders over $75)
- Vinylandtullesupply.com
- vinylfunforeveryone.com (Free shipping over $50.)
- Vinylpacks.com
If you have any other questions about vinyl, please let me know. You can email me at [email protected], and I’ll be happy to answer.
Love,

Want to remember this? Save this Ultimate Guide to Vinyl to your favorite Pinterest Board!
This was awesome
Thank you! I hope you found it helpful, Nicole!
I downloaded your book and it says I have reached by download limit…I have not copied the book…I keep it open in my safari to access when I need it…is there a way this can excess it…I was not aware there was a limitation to the download…
Hi Sandra, I’ve asked one of my Communications Heroes to reach out to you in regards to this. We can reset that for you. If you don’t receive that email, please contact us at [email protected] and we’ll be able to take care of that for you!