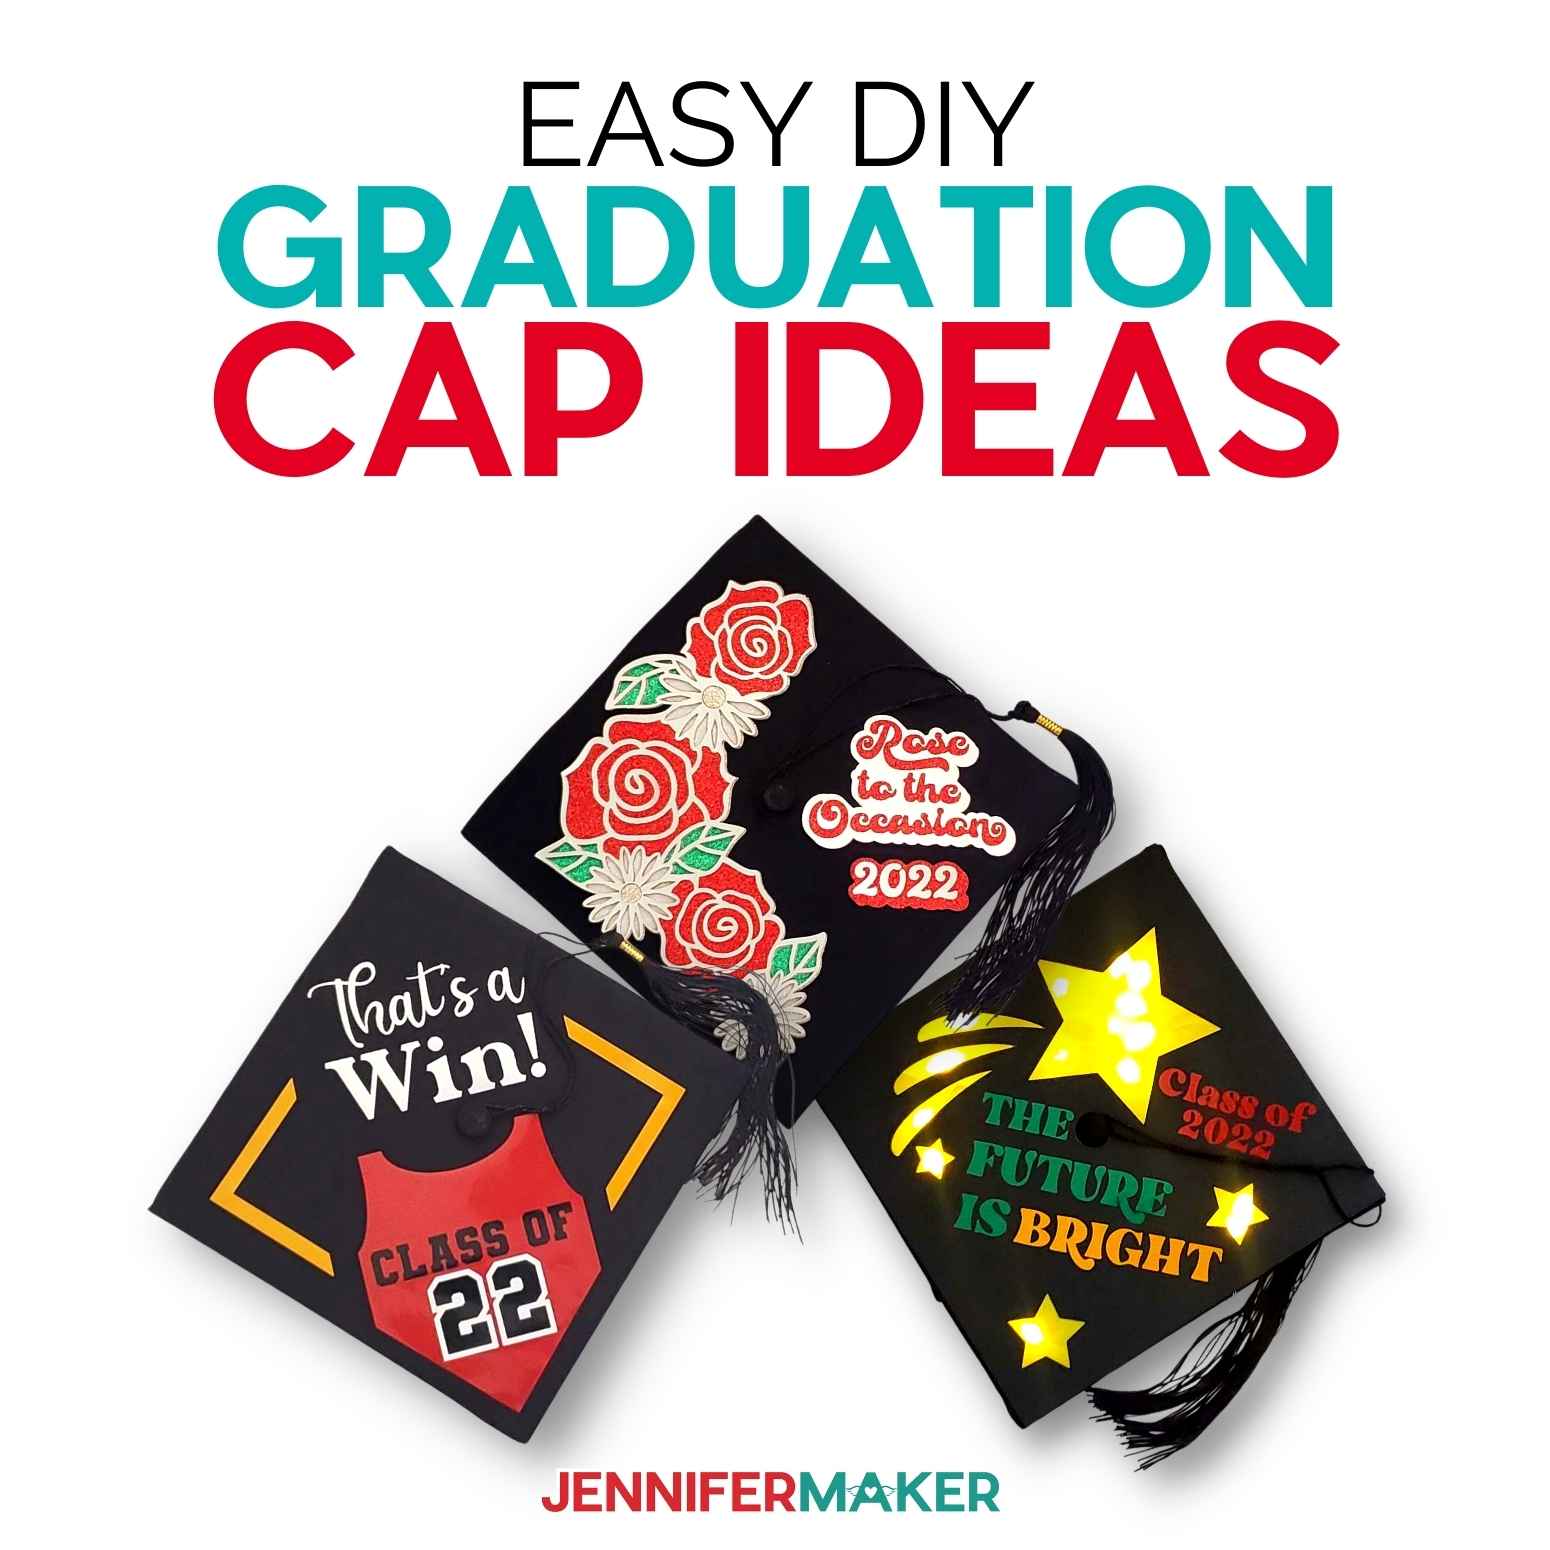
Learn how to decorate a graduation cap with vinyl, cardstock, and personalized designs!
Graduation Day is a special day to recognize students for their achievements! But between the long gowns and mortarboards, it’s hard to get recognized in that crowd. Luckily, I have the perfect solution. Today, I’ll share my best graduation cap ideas that you can make! You can customize these projects with different materials (like layered vinyl or even a plastic folder!) or use the techniques as inspiration to create your own designs. I’ll share my best tips to light up the stage during your graduation ceremony!
Watch the full step-by-step tutorial video on how to decorate your graduation cap on my YouTube channel!

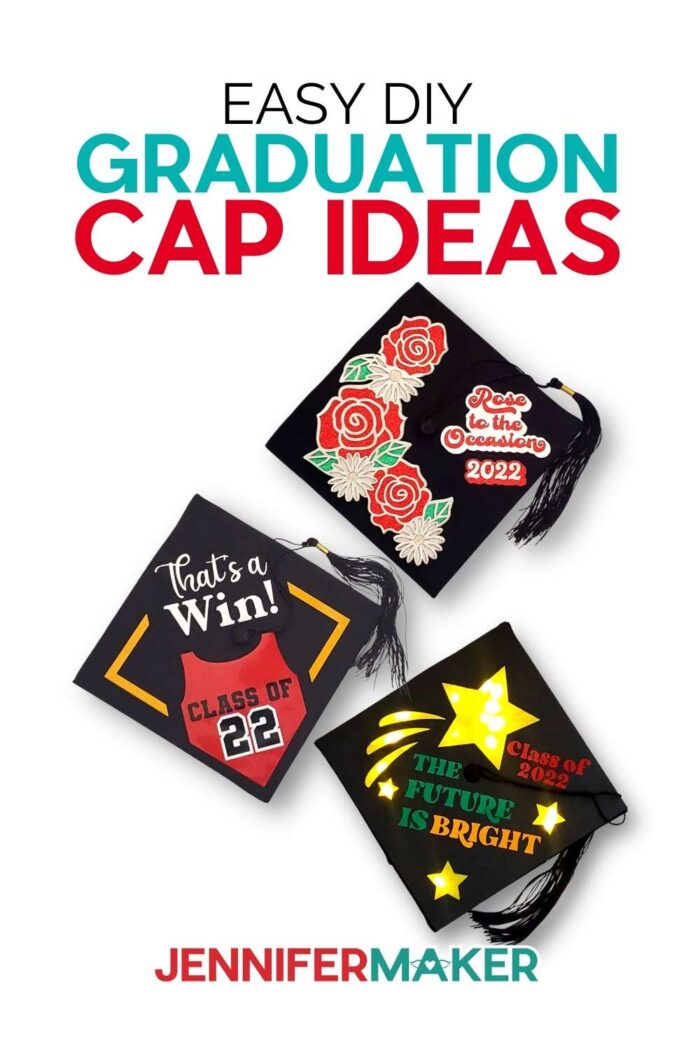
There are many different ways to decorate graduation caps, but these three designs are definitely my favorites.
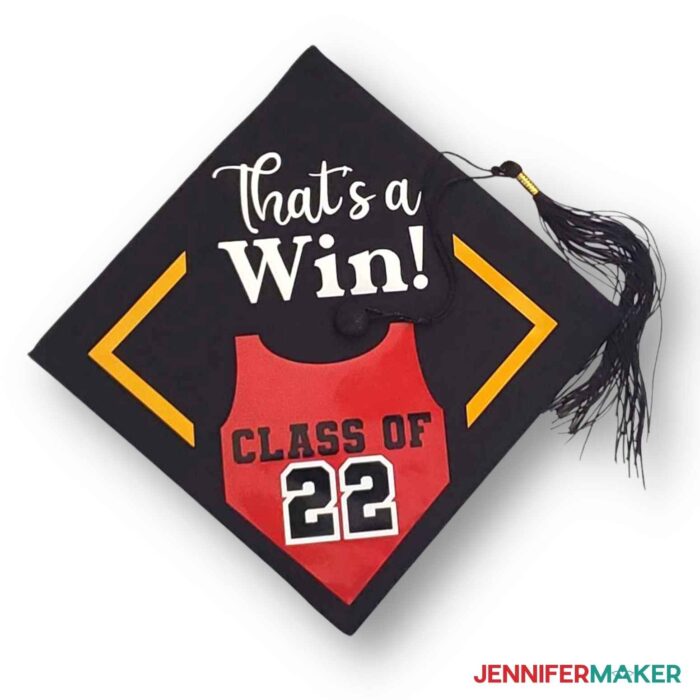
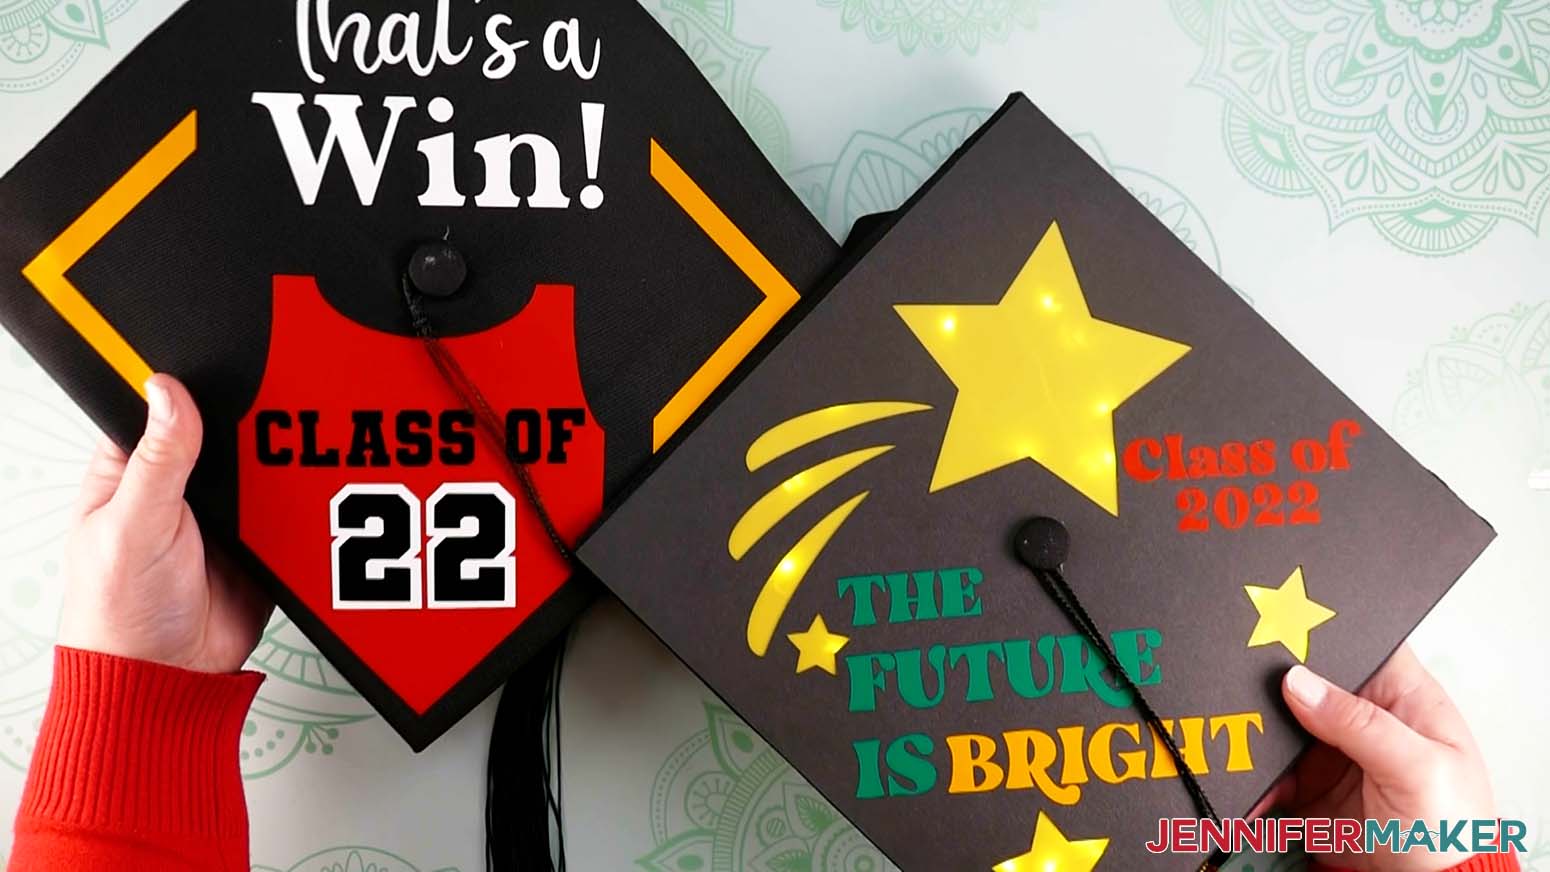
My Sports Jersey grad cap decoration design uses layers of permanent vinyl for a fast, easy approach. It’s the perfect way to decorate if it’s the night before the ceremony!
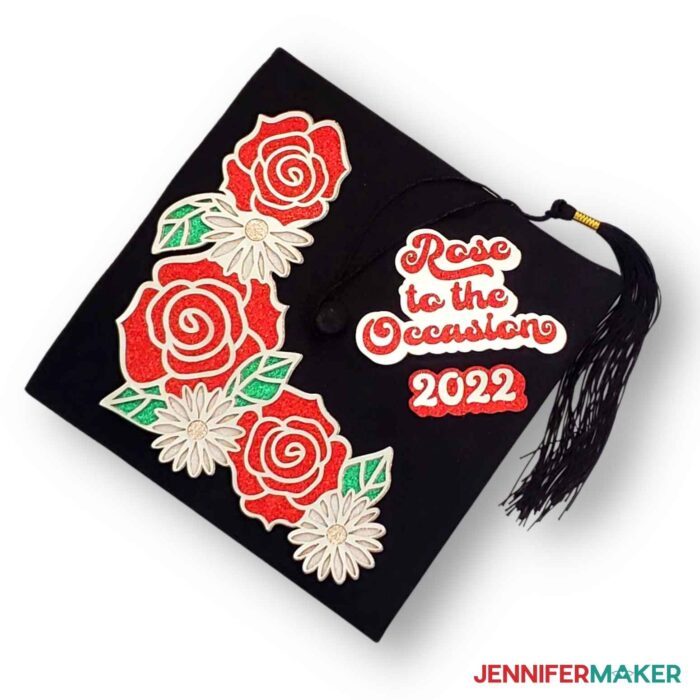
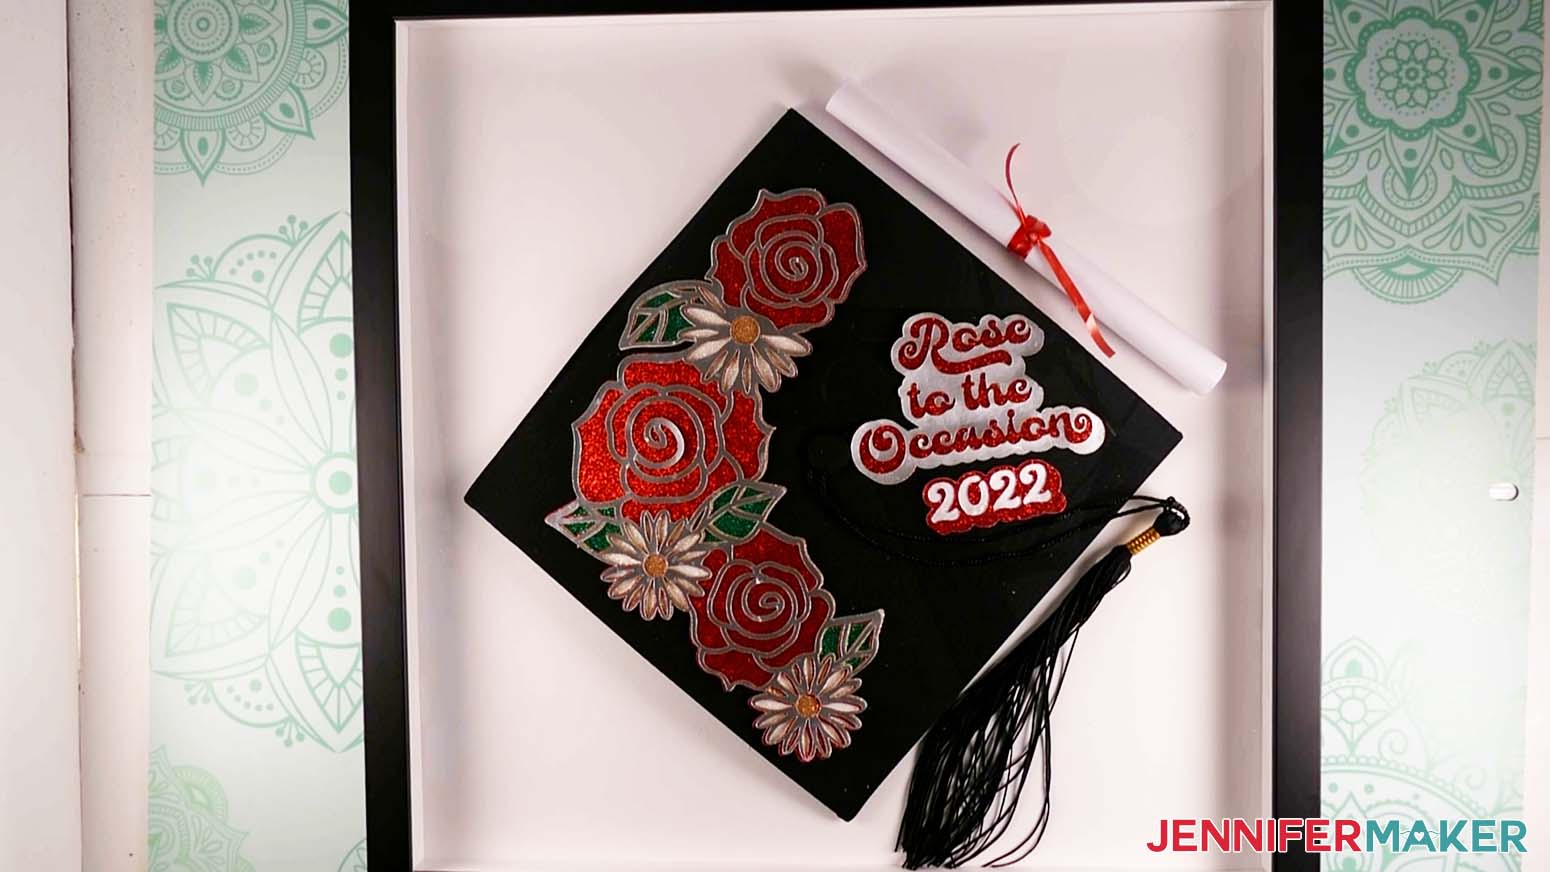
The Roses design is more involved and uses layered glitter and foil cardstock to focus all eyes on you! This design is easy to customize with your own quote, graduation year, or school colors. You can use different materials, but the flowers are super pretty with a little sparkle!
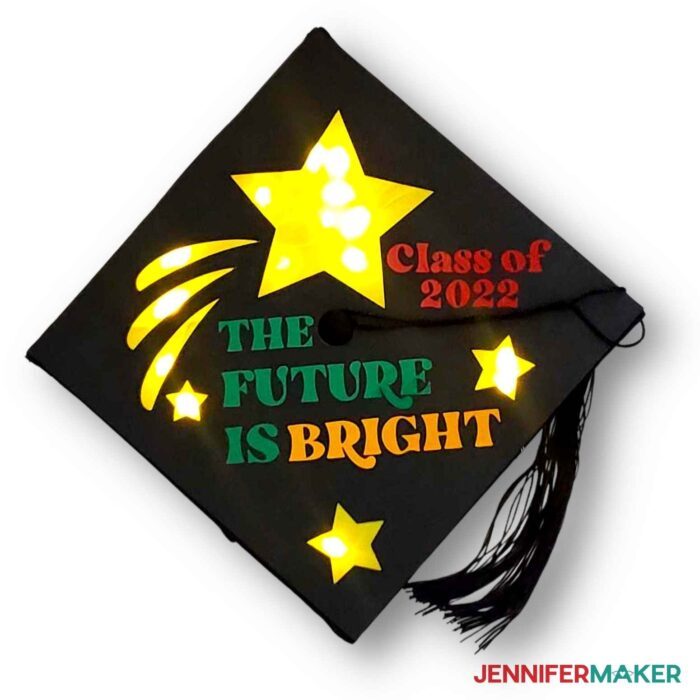
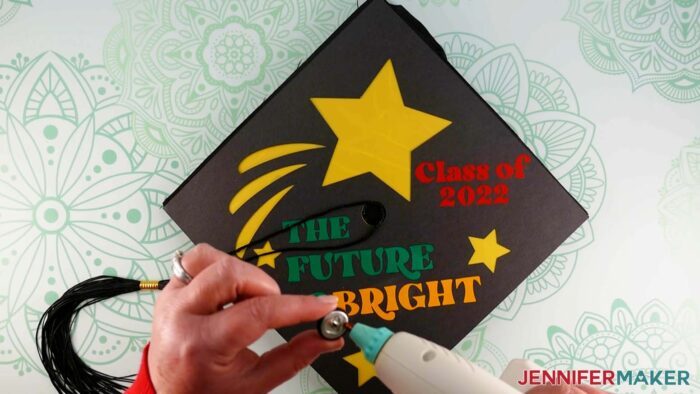
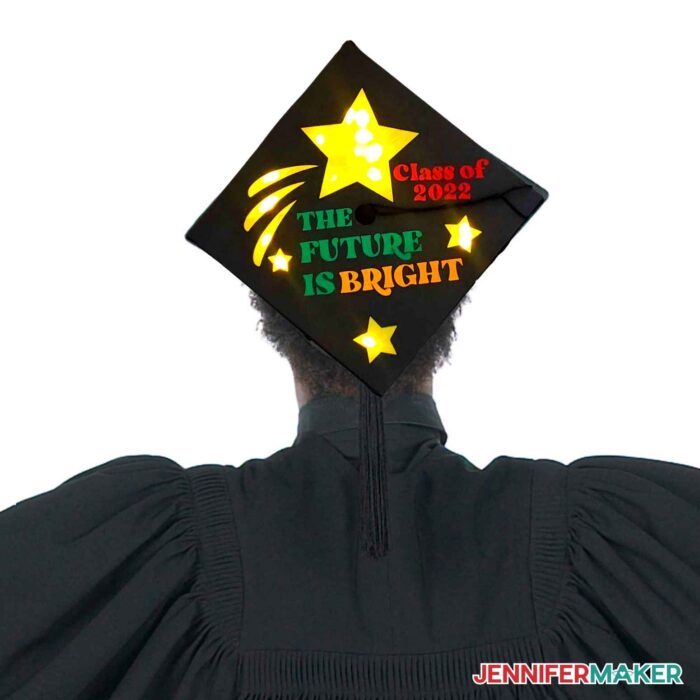
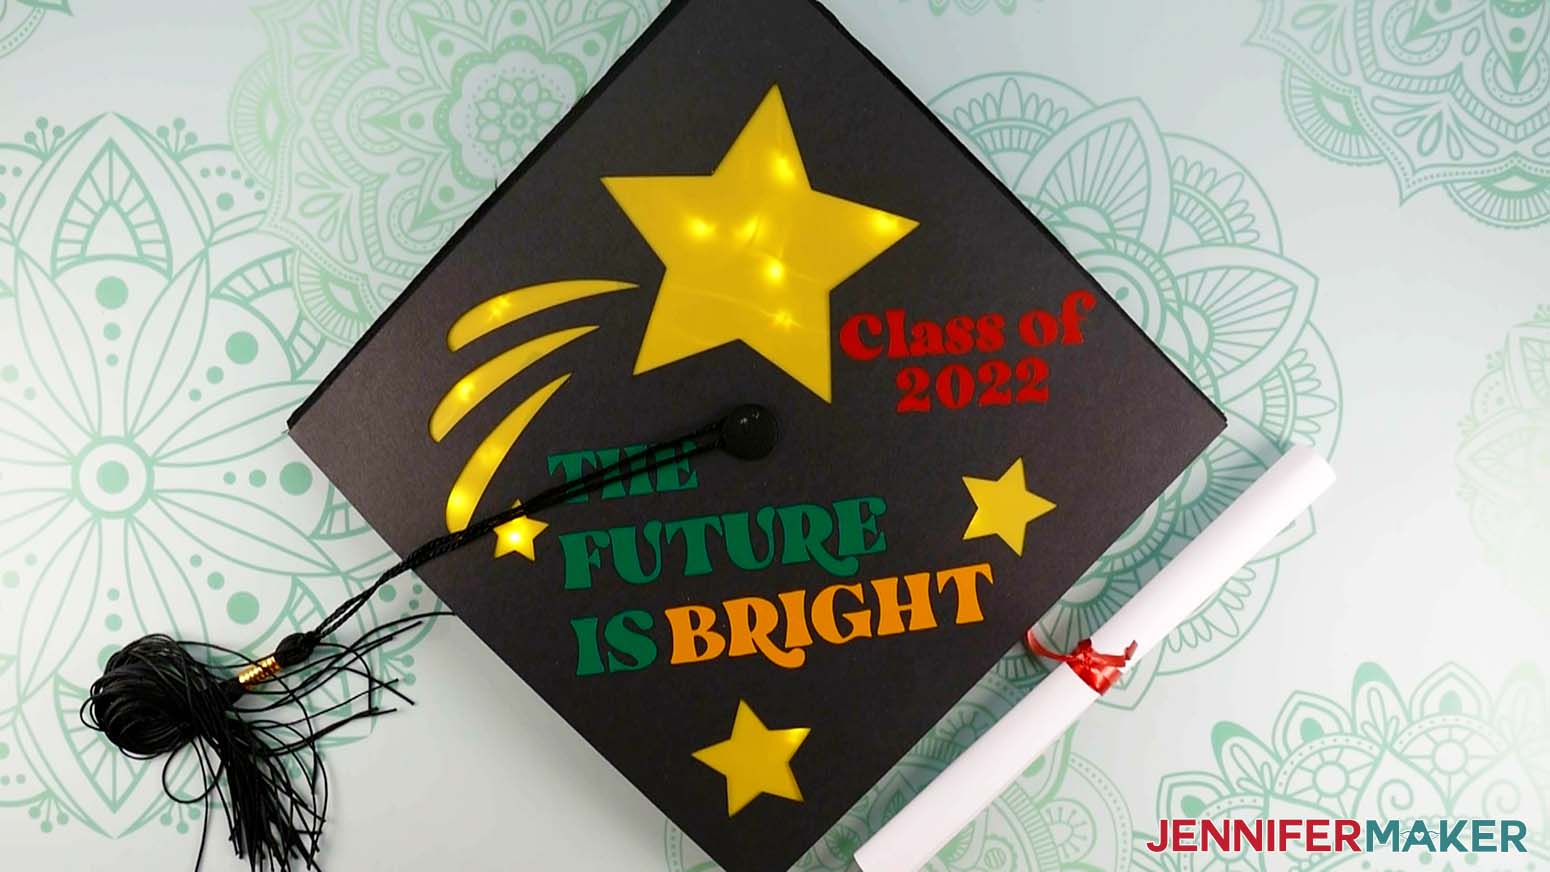
Finally, my Stars graduation cap topper is a real attention-getter! I’ll show you how to combine cardstock, plastic folders, vinyl, and fairy lights to make this stunning decoration. Best of all, the whole topper can be removed from the cap and displayed in a shadow box. I’ll show you how in my video!
Planning ahead will make the project go easier! First, make sure cap decorations are allowed and check for guidelines. Not all schools allow cap decor. If not, you might be able to make a topper to wear for photos!
My graduation cap ideas use a mix of 3D Clear Adhesive dots, craft glue, and transfer tapes, but you can adjust most steps to fit the supplies you have available.
These designs don’t take too many tools. I found a brayer, weeding tool, spatula, and scraper helpful for most steps. If you’re making a topper and find your tassel button is off-center, I’ll show you a workaround using scissors and hot glue.
Since you want to look your best, I recommend using a ruler or measuring tape to keep your decorations straight and aligned.
![]()
Now, about those tassel buttons. We found that – just like graduates – no two graduation caps are alike. Some are not quite square, others curve, and many have their buttons off-center. For most graduation cap ideas, that’s fine! Just shift your design elements. That’s one of the great things about DIY projects!
But, if you want to craft a topper, its hole needs to line up with the tassel button. If yours isn’t, follow my video to remove the button and reattach it once the topper is complete. It’s so easy and looks good!
However, if your button isn’t removable, the written instructions will help.
Making all three styles was a breeze with my Cricut Maker 3. You can also cut these designs on an original Maker or an Explore series machine. If you stick to smaller vinyl or cardstock words, quotes, and shapes, you can even personalize your awesome graduation cap ideas with a Joy! The standard blade that comes with each machine will work fine, just follow my material settings in the tutorial. A StandardGrip Machine Mat works for most materials – especially with painters’ tape for added security – but you may want a StrongGrip Machine Mat nearby just in case.
Now, let’s put your Cricut skills to the test! I’ll show you how to make the Stars design as well as share a few tips for the other graduation cap ideas.
Ready to make these awesome graduation cap decoration ideas? You’re going to love them! This post contains some affiliate links for your convenience (which means if you make a purchase after clicking a link I will earn a small commission but it won’t cost you a penny more)! Read my full disclosure policy.
Materials for DIY Graduation Cap Ideas
View my Amazon shopping list with the exact items we used to make this project!
- Graduation Caps — These caps are similar to those used for most high school and college graduations. If you are using a different cap, measure it and adjust the designs accordingly.
- One (1) Plastic Folder — Make sure it’s translucent enough that your lights will shine through!
- One (1) sheet of 12” x 12” 100 lb Black Cardstock — The heavier weight holds its shape better
- One (1) sheet 8.5″ x 11″ Silver Foil Cardstock
- Several sheets of 8.5″ x 11″ Glitter Cardstock — Use the colors you like, but I chose one each of red, white, green, and yellow
- Cricut Permanent Glossy Vinyl in Various Colors
- String of LED Fairy Lights, about 20 lights — This set of LED lights is lightweight, easy to shape, and has a small battery pack
- Glue Gun & Glue Sticks
- 3D Clear Adhesive Dots (1/2″ diameter x 1/8″ thick)
- Craft Glue — I used Bearly Art Precision Craft Glue
- Cricut Standard Grip Transfer Tape
- Cricut Permanent Vinyl Shimmer Silver — optional
- Cricut Strong Grip Transfer Tape — for Shimmer Vinyl
- One (1) 16″ x 16″ Shadow Box – optional, for display
- Painters tape — to keep the plastic in place on a StandardGrip Mat
- Tape Measure
- Weeding Tool
- Scraper Tool
- Brayer
- Scissors
- Spatula
- A method to cut your materials — I used the amazing Cricut Maker 3 but you can also use the Cricut Maker, Cricut Explore Series or Cricut Joy (for small decorations) with the standard Fine-Point Blade
- Cricut Green StandardGrip Machine Mat 12″ x 12″
- Cricut Purple StrongGrip Machine Mat 12″ x 12″ — optional, for the plastic or if you use Glitter Cardstock
- Design #382 – My free graduation cap ideas designs (available in my free resource library—get the password at the bottom of this post)
If you want to make a Stars graduation cap just like mine, you’ll need:
- One (1) Graduation Caps
- One (1) Plastic Folder — I used yellow
- One (1) sheet of 12” x 12” 100 lb Black Cardstock
- Cricut Permanent Glossy Vinyl — I used orange, green, and red
- String of LED Fairy Lights
How to Make Graduation Cap Ideas
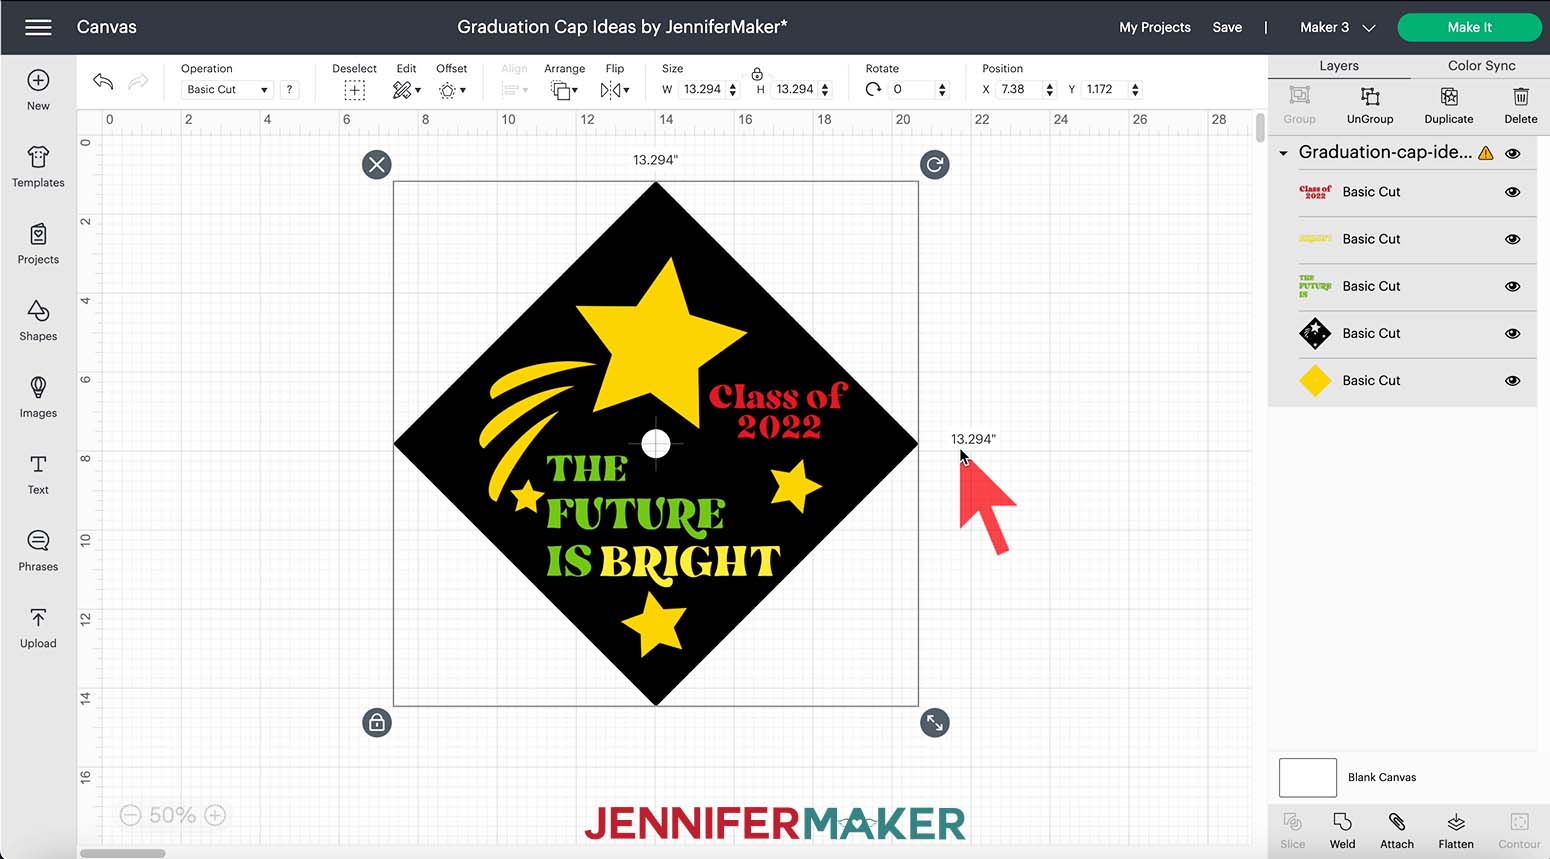
Learn how to use different materials to make your graduation cap stand out from the crowd! First, download my Graduation Cap Ideas SVG/DXF/PDF files from my free resource library. It's Design #382. I have included files for three designs: one with Shooting Stars; one with beautiful layered Roses; and one for the Sports-enthusiastic. Each design uses different materials to give you customizable options! Choose the design you want to create. Then, upload the appropriate SVG file to Cricut Design Space and add it to your Canvas. For this tutorial I’m going to show you how to make the Stars design. We will cover some tips for the other two designs at the end of the tutorial. The Stars design is set up to make one graduation cap topper. The black diamond shape measures 13.294" from the left corner to the right corner, but I’ll show you how to fit the layers on 12” x 12” machine mats. The topper layers sit on top of the graduation cap, with the lights closest to the hat’s fabric, then the plastic, followed by the black cardstock and vinyl. To make the layers fit on 12” x 12” machine mats, we will rotate both the black and yellow diamond shapes into squares. This size should work for most graduation caps. If your cap is larger, or smaller, you will need to adjust the size of the project. To do this, just enter specific dimensions in the top menu under Size. Make sure to keep the lock closed to maintain proportions. You can click and drag the Resize handle on the lower right side of the bounding box to adjust the size. If your cap button isn’t centered, I’ll show you how to fix that! If you can not remove the button from your cap or want to make a topper to save your design, here’s how. I’ll show you how to make a simple one first and then how to adjust the Stars design. Measure your cap and add a square the same size to your Canvas. Then, add a circle just a tad bigger than your button. Next, measure the exact position of your button on your cap. Measure from the left side in and the top side down to pinpoint the exact spot. Place your circle in that same spot using the rulers in Design Space, then select both layers and use the slice tool to cut out the circle! When you make the Rose or Sport cap, use this custom layer as a topper and add the design elements to it. Then, stick a few 3D adhesive dots to the underside. Carefully thread the tassel through the cutout and press the topper in place. This technique will also work with the “Stars” design, but it’s a little more complicated. After rotating the design, ungroup the layers. Now, add a circle shape to the Canvas a little larger than your cap’s button. Use the same measuring and placement steps as before to put the new circle in the right spot. Duplicate it and line this up with the original. One at a time, select the black and yellow layers and use the Contour tool to hide the original button contours. Then, select one of new circles and the black layer. Click Slice. Repeat for the yellow layer and second circle. Delete all the leftover circle layers. Adjust the size of your text decals if they run into the new hole. Follow the rest of the steps to assemble. Before cutting, you also need to prepare your yellow folder to make it fit on your machine mat. Open the folder and use sharp scissors to cut along the center crease until the two sides are separate. Cut away any extra pockets or pieces to create a flat sheet of plastic that will fit on your machine mat and under the rollers. Now we're ready to cut. Make sure you have the right machine selected and click "Make It." Place your cardstock on your machine mat and use a brayer to make sure it's fully adhered. Check that your Fine-Point Blade is clean and in Clamp B. Then, load the mat into the machine and press "Go." While the cardstock and plastic are ready to assemble immediately after cutting, you’ll need to weed the vinyl layers. Use a weeding tool to remove the excess vinyl. Remember to remove the small parts inside the letters. Place the decals on the cardstock to make sure you like their placement. You can keep the design open on you computer to help layout your elements correctly. Let's add the tassel and button back to the cap. With the tassel in place, add glue to the bottom of the button and place it in the center hole. Hold it firmly in place until it’s dry. This time could vary depending on the type of glue you are using. Your Light Up Graduation Cap is complete! NOTE: Keep in mind there's a possibility the fabric isn't completed adhered to the mortarboard underneath, so it might look a little off center if the fabric slides around a bit. That's ok, it doesn't have to be perfect. Once you have your graduation caps assembled, wear them proudly to stand out in the crowd. Show them off after your celebrations with a shadow box display made up of your cap and other mementos of your big day! The Finished Stars Graduation Cap design is 13.294" x 13.294", but can be rotated to be cut on 12” x 12” material and mats.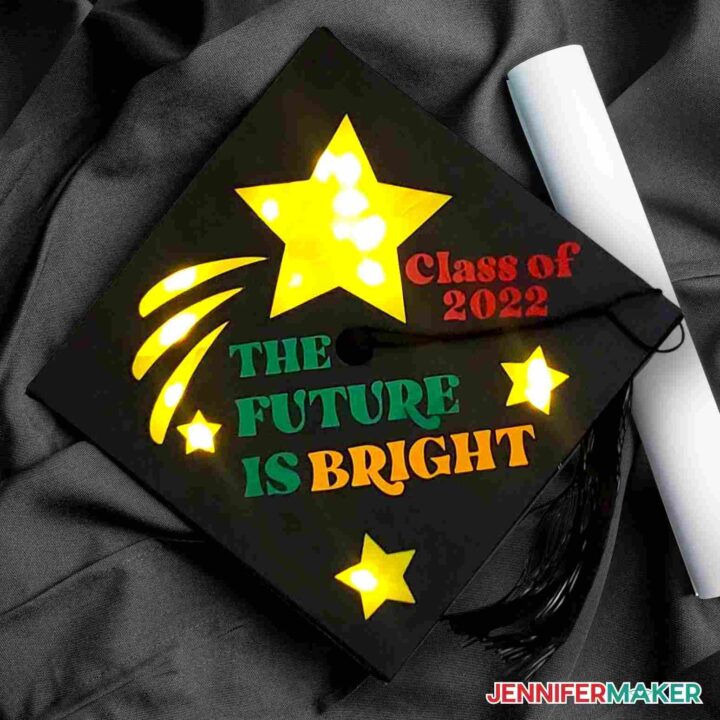
DIY Graduation Cap Ideas
Materials
Tools
Instructions
STEP 1: GET MY FREE DIY GRADUATION CAP IDEAS SVG FILES
The Stars Cap uses LED lights, translucent plastic, permanent adhesive vinyl, and cardstock. The Roses Cap uses glitter cardstock and foil cardstock. And the Sports Cap just uses permanent adhesive vinyl.
A Note About Vinyl: When choosing materials for my cap designs, I tested both iron-on vinyl and permanent adhesive vinyl applied directly to the graduation caps. The iron-on vinyl was difficult to use as the heat needed to apply it easily warped the structure of the cap. I found that using permanent adhesive vinyl worked quite well. It adhered to the polyester material covering the cap and — while it could be removed from the material if needed — held in place.
Here’s what all three of the designs look like in Cricut Design Space. 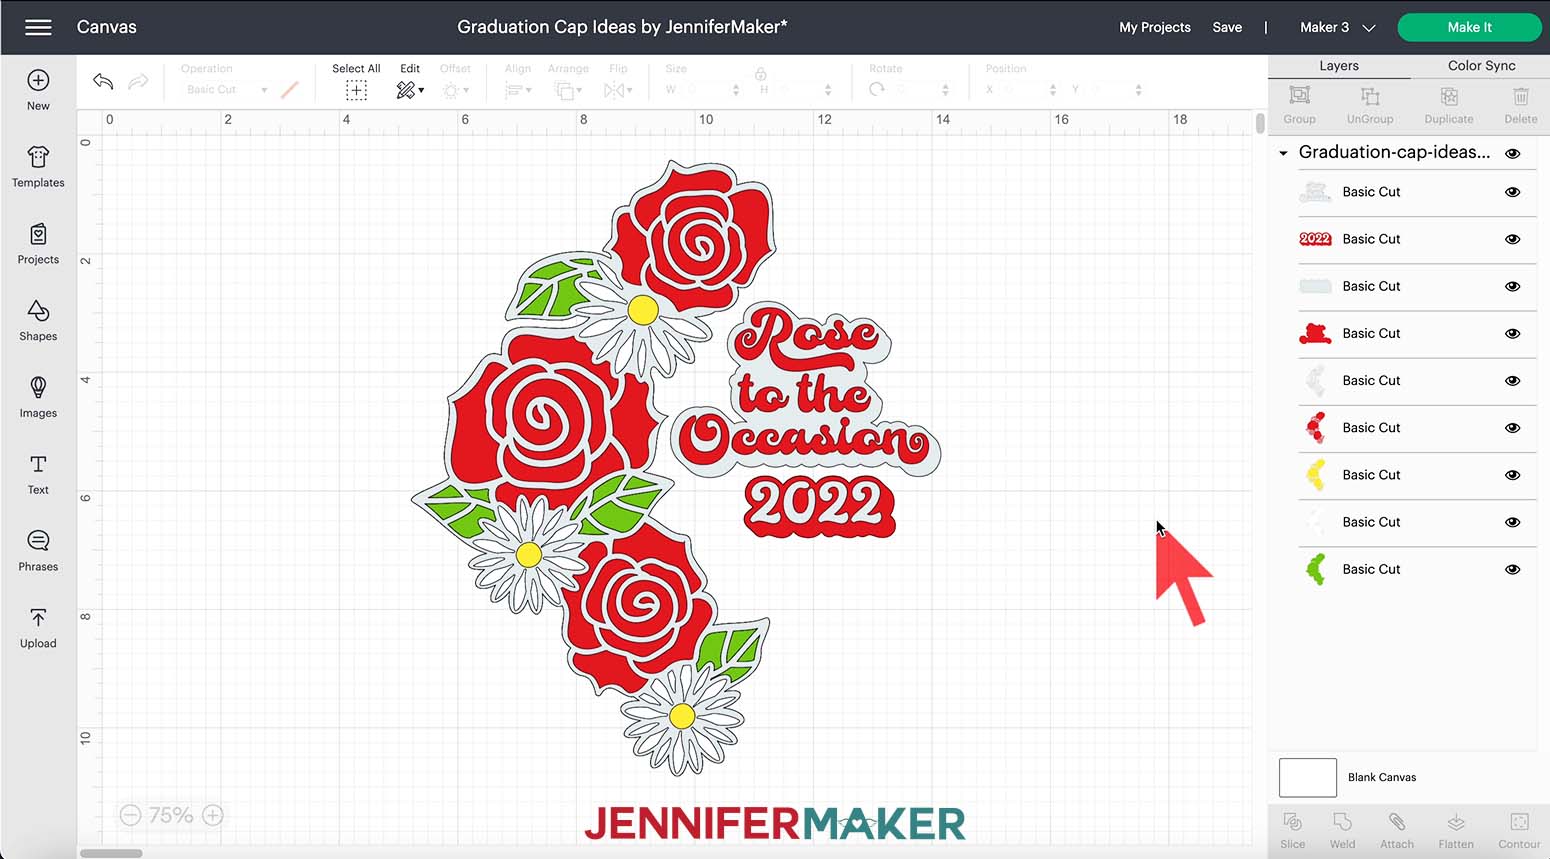

You may need to zoom out to see the full design. You can click on the minus sign (-) in the lower left corner of the Canvas to do this.
If you are not sure how to upload an SVG cut file to Cricut Design Space, watch this helpful video training series I made. If you are on an iPad or iPhone, here is how to download and upload SVG files to the Cricut Design Space app.STEP 2: PREPARE YOUR STARS GRADUATION CAP DESIGN FILE
Click “Select All” in the top menu, then just over to the right, enter “45” into the box under “Rotate.” Now the Cricut knows we can use 12” x 12” machine mats!
Your Canvas should now look similar to mine.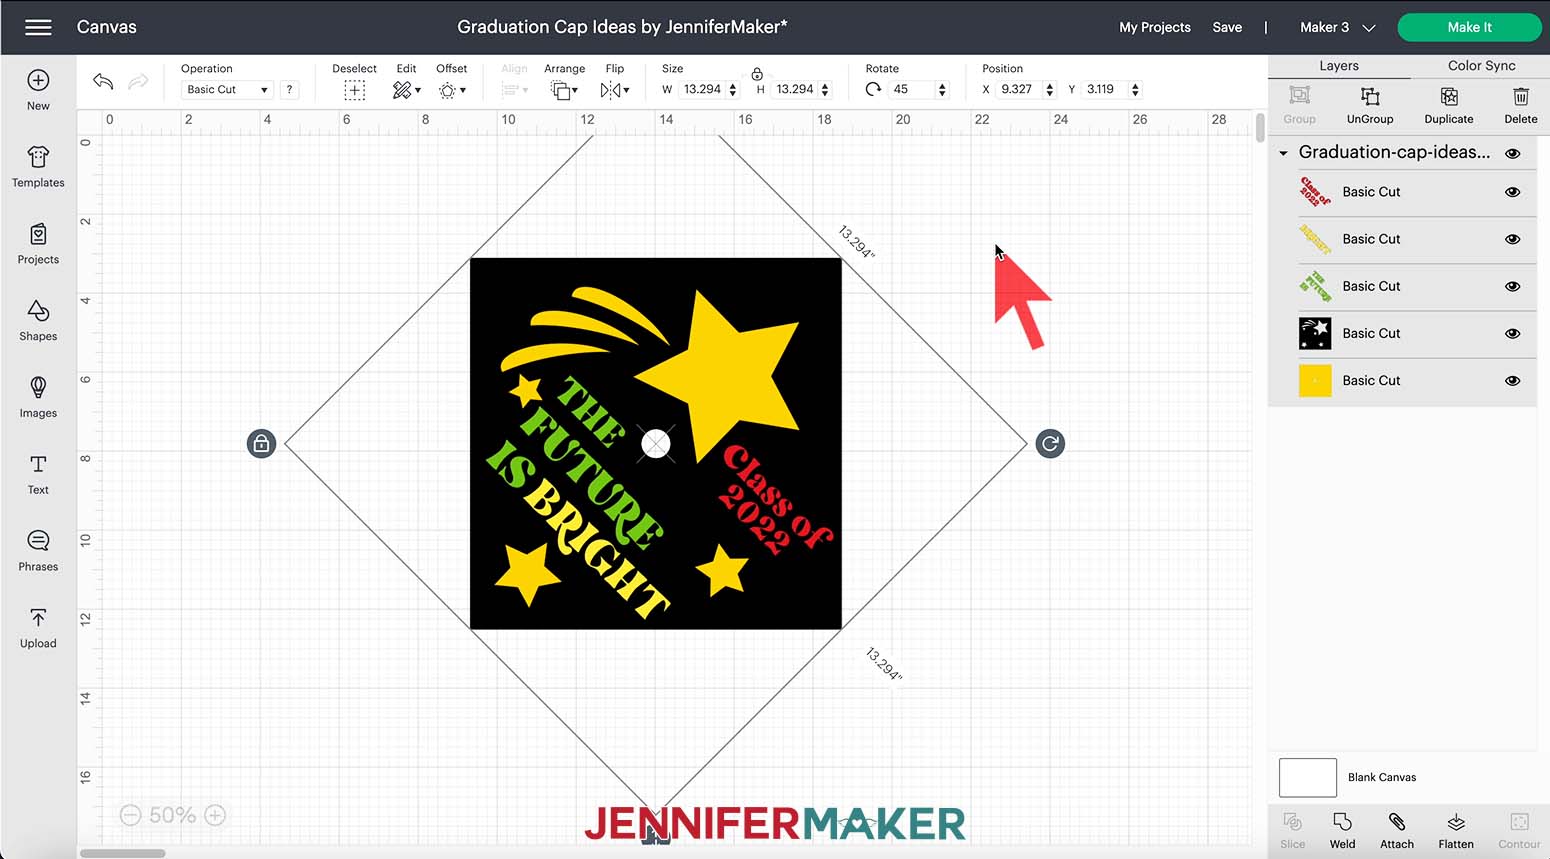
Also, this design has a hole in the center of the board for the tassel button on top. While measuring my caps for this project, I noticed that some buttons are not centered. ![]()
If you are using one of the graduation caps in my materials list, remove the tassel. Next, use a pair of scissors to remove the button. The button is glued on and should be super easy to remove. Don’t worry if you accidentally nick the fabric, we will be covering it up with our design so no one will see. We'll glue the button back on later and add the tassel.STEP 3: PREPARE YOUR FOLDER
STEP 4: CUT YOUR STARS GRADUATION CAP DESIGN
If prompted, click "On Mat" and continue.
You should see five mats on the Prepare screen. Click "Continue" in the bottom right.
Now we will choose material and tool options. You will need to select the correct material and tool options for each layer of your graduation cap topper.
TIP: If you run into any issues cutting your materials check out my Cricut Tips & Tricks for Cleaner Cuts for help!
For Mat 1, the black layer, choose “Heavy Cardstock – 100 lb (270 gsm). I always select “More Pressure” for a nice, clean cut. 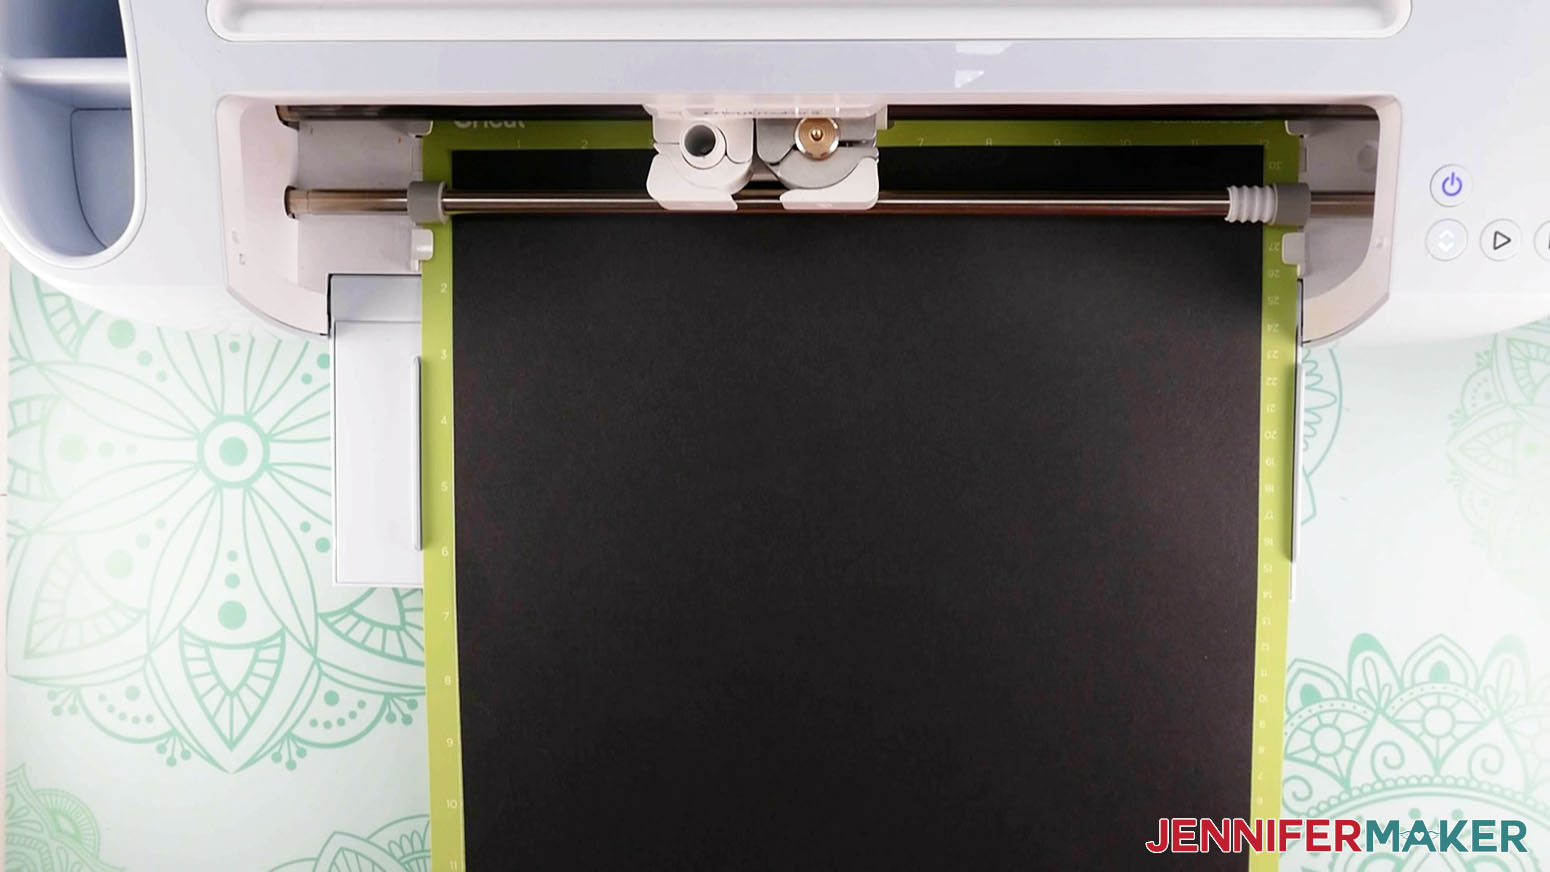
When the cut is finished, unload the mat, flip it over, and roll it back to release the cardstock. This helps prevent the cardstock from curling and ripping.
I used the “Acetate” setting to cut the plastic folder on Mat 2. To find that setting, click back where it says “Base Material set to” and then click “Browse All Materials.” Type “Acetate” into the search field and click enter. Then click on “Acetate” and click “Done.”
Again, I used “More Pressure” to get a clean cut on the folder.
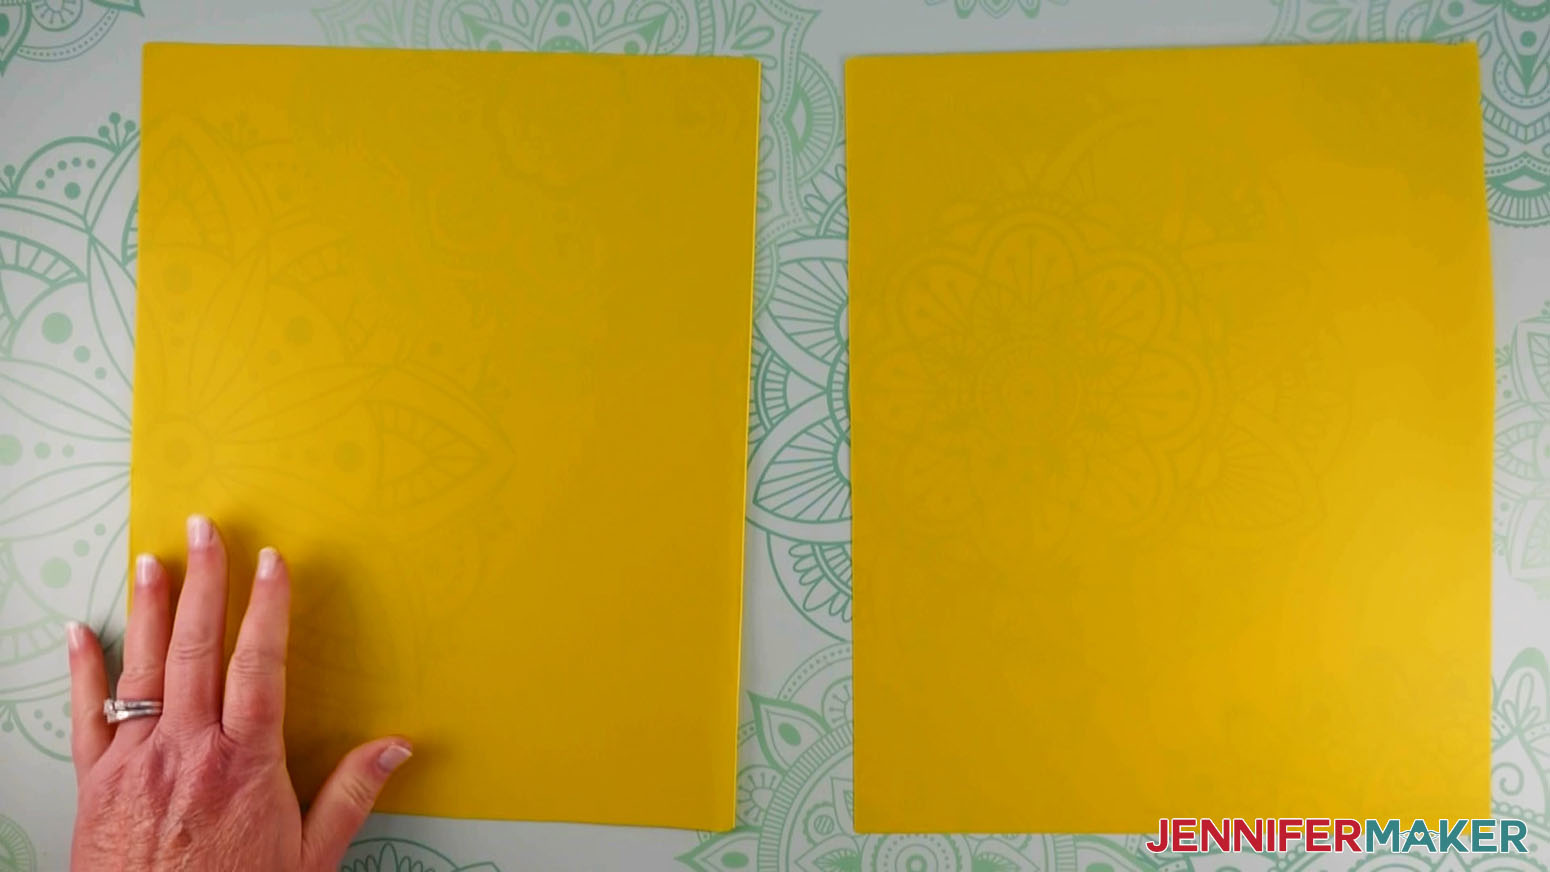
Now, add the plastic folder to your machine mat and use the brayer to make sure it’s fully adhered. You can use a StrongGrip Machine Mat, or a StandardGrip with some painters' tape along the sides. Don't let the tape go over the mat's edges since it may interfere with the rollers. This is an extra layer of security to make sure it stays put.
Once the cut is finished and BEFORE unloading the mat, check that the cut went all the way through the plastic. If it didn’t, hit the “Go” button again to make the cut a second time in the same spot. You can repeat this process if necessary. Once it’s ready, unload the mat, remove the painter’s tape, flip it over, and release the plastic. 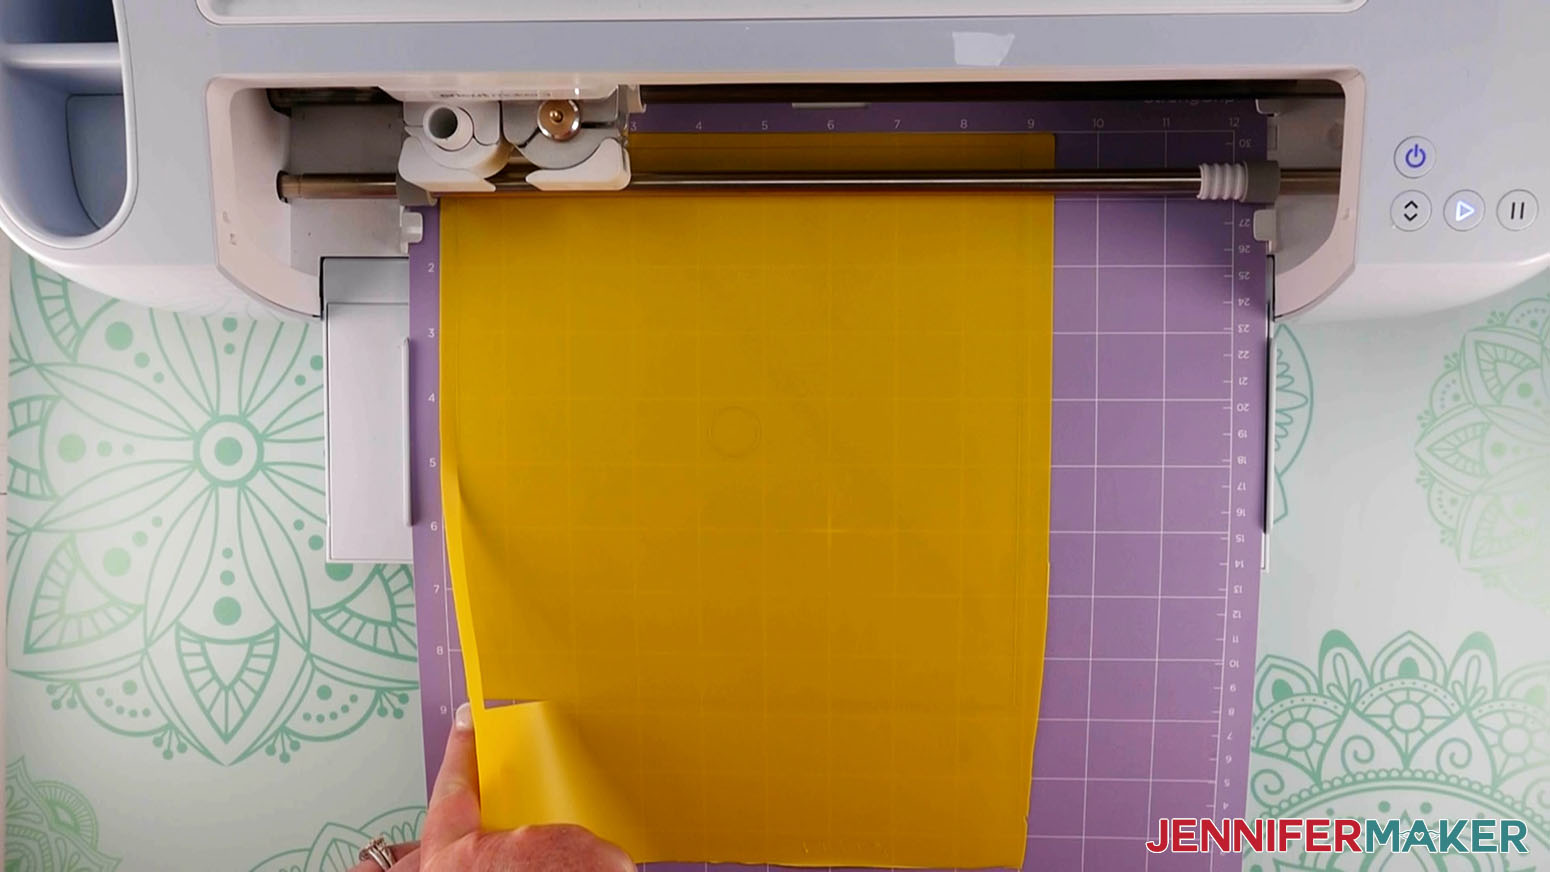
Mats 3, 4, and 5 cut well with "Premium Vinyl - Permanent Glossy" with "More Pressure."STEP 5: ASSEMBLE YOUR STARS GRADUATION CAP DESIGN
Once your vinyl material is weeded, cut pieces of Standard Grip Transfer Tape to the same sizes as your text areas. Remove the backer from the transfer tape. Apply the transfer tape to your vinyl decal by holding the transfer tape in the shape of a taco, then putting the bottom of your “taco” onto the middle of your design. Smooth the tape over the decal from the center outward using a scraper tool to burnish both sides. Once you have done that for each of the three pieces of text, you are ready to assemble the cap.
Here's a look at all the pieces that make up the Stars Graduation Cap Design.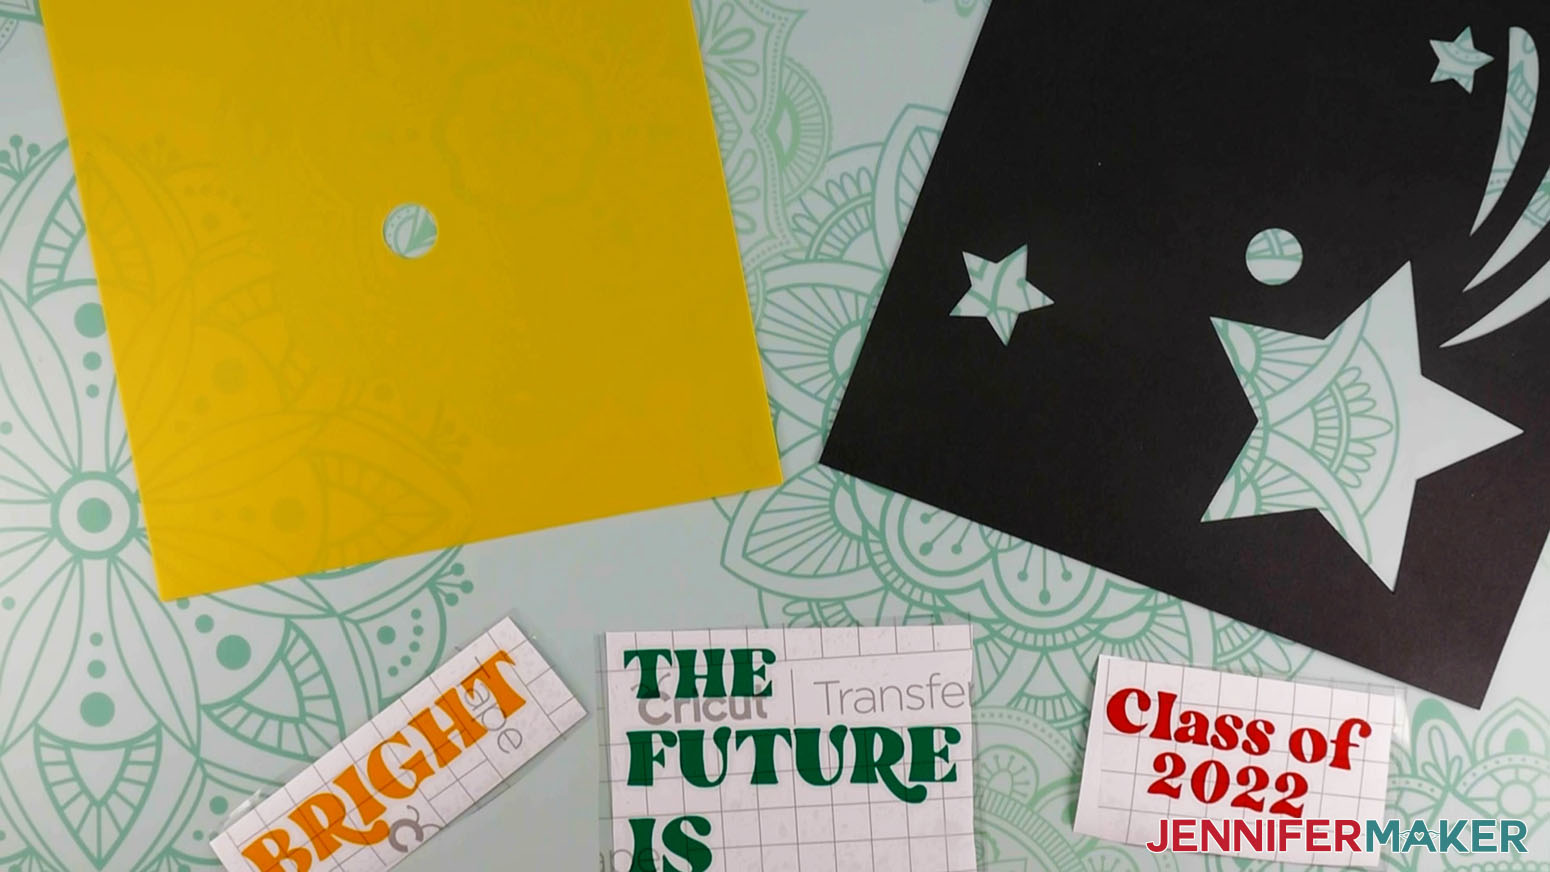
To begin assembly, put the black cardstock shape on your work surface. Make sure the largest star is at the top.
Apply the vinyl text to the cardstock. To do so, carefully peel the carrier sheet off the back of each piece of vinyl. The vinyl should remain adhered to the transfer tape. If little bits of it don’t want to transfer to your tape, scrape it again and pay careful attention to those problem areas.
Now, place your text in the correct areas on your cardstock, being mindful that it is straight. You can use a ruler to help.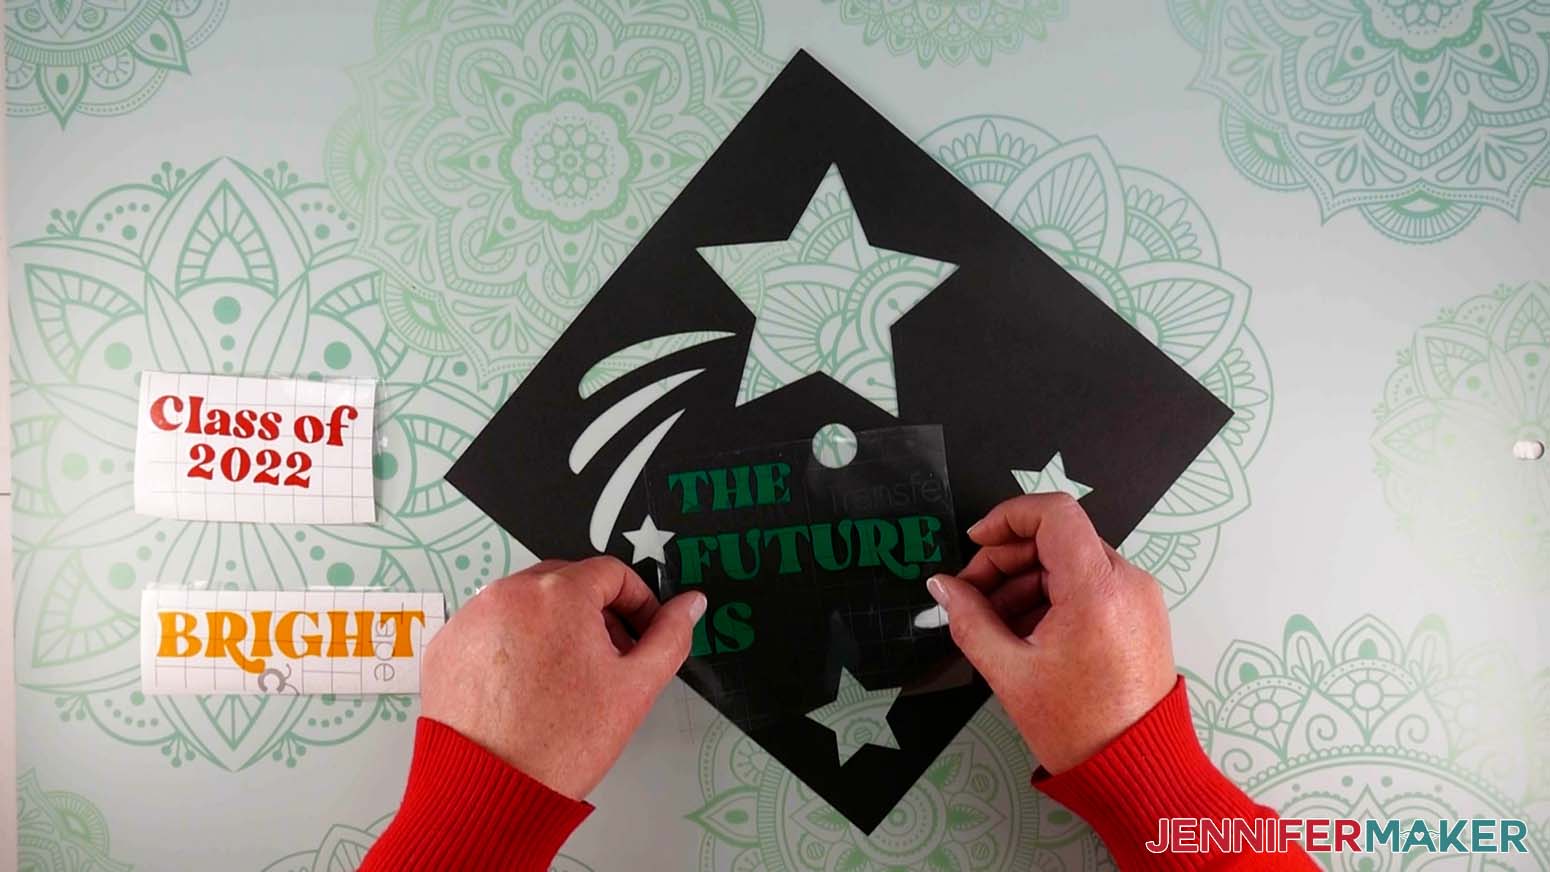
IMPORTANT: Normally, you would burnish all over your transfer tape to ensure the vinyl is well-adhered to your surface, but a slightly different approach works better with cardstock. Gently lay the design on the cardstock in the proper location. Use your fingertip (or another small blunt item) to press over only the vinyl areas under the transfer tape. Slowly and carefully peel away the transfer tape so that it doesn't damage the cardstock underneath. If the cardstock lifts, try to smooth the fibers back down. If the tape pulls up a lot of the cardstock, you can cut the black layer again and repeat with gentler burnishing.
Repeat for each vinyl decal. Apply all of the vinyl text before continuing.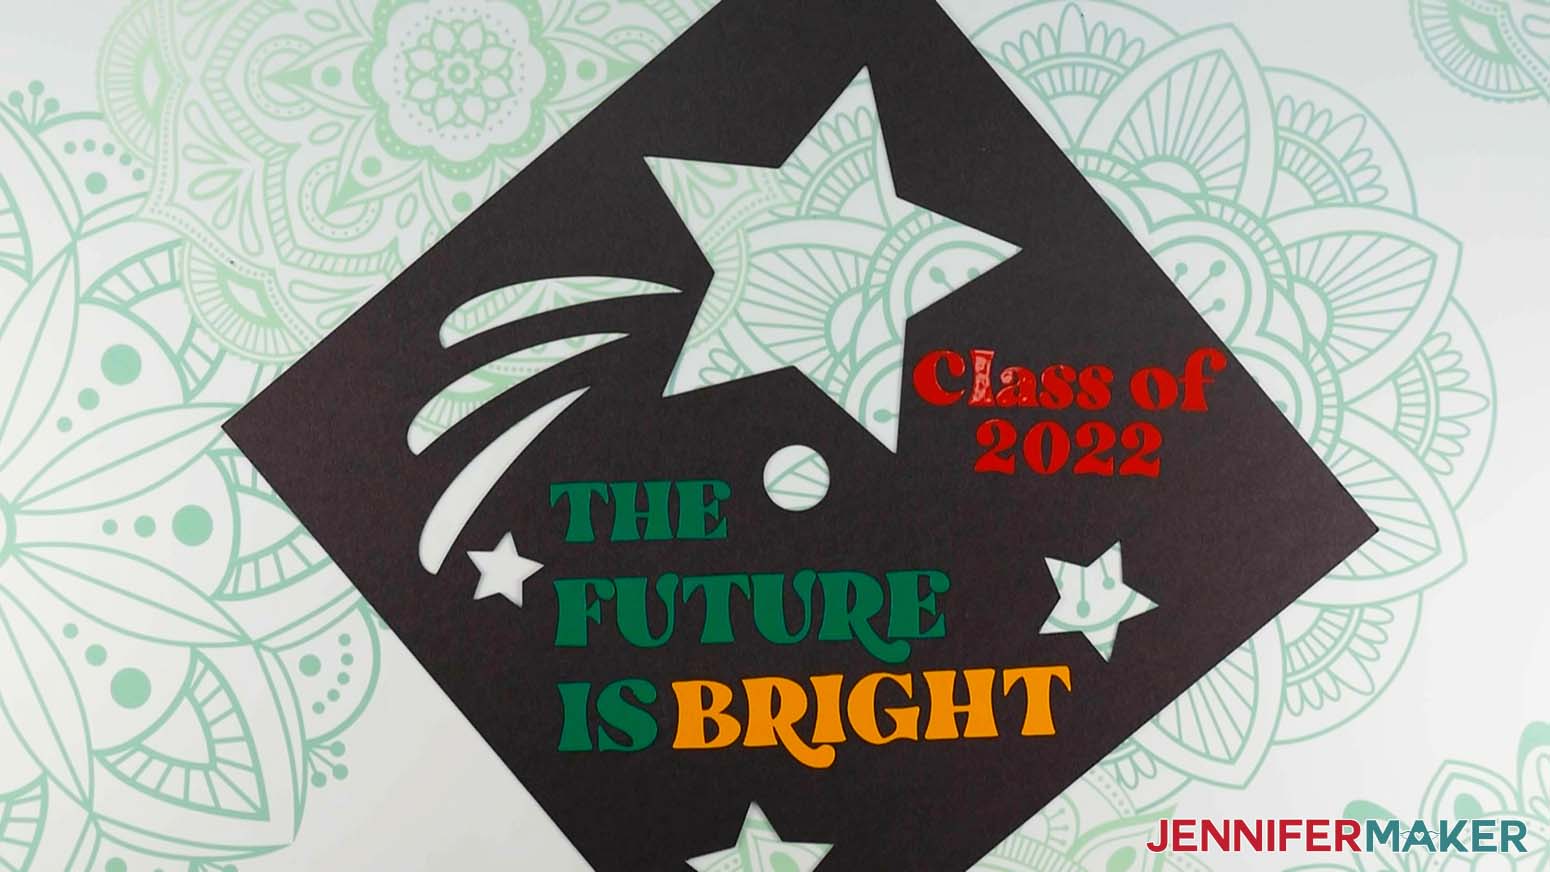
Flip the cardstock over so that it is face down. Apply thin lines of craft glue around all the cut out shapes, then fill in the larger areas with additional thin glue lines. Place the yellow plastic shape on to the black shape, making sure all cut out areas are covered and the center button holes line up. Since the yellow layer is smaller, you’ll see a border of black around the folder piece. Allow the glue to set for a moment before continuing.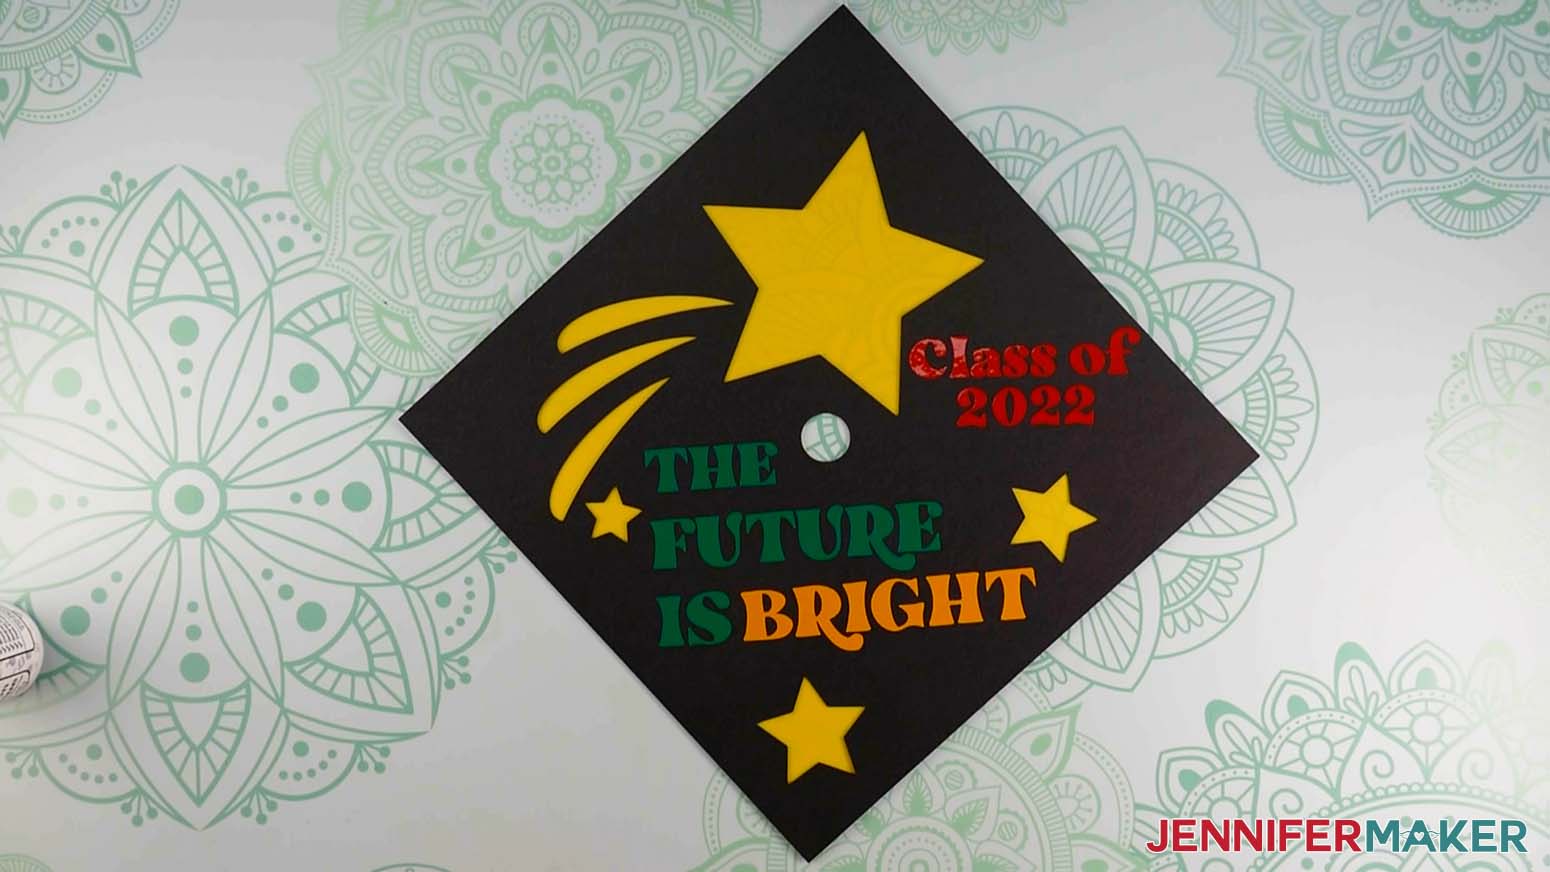
In the finished cap, we want the lights to shine through the yellow plastic in the shapes created by the black cardstock. So, we’ll add the string lights to the underside of the yellow plastic, sticking wire sections in place with the 3D adhesive dots. Concentrate the lights under the cutouts for the best shine.
I started with the light furthest from the battery pack and placed it in the big star, opposite from where I’ll hide the pack. Place a 3D adhesive dot on the yellow plastic outside the star cutout, but near where you want the light to sit. Hold the light where you would like it to shine and run the wire from the light to the adhesive dot. Press the wire into the adhesive dot. Move to the next light and repeat the process until you have filled the cut out areas with lights. 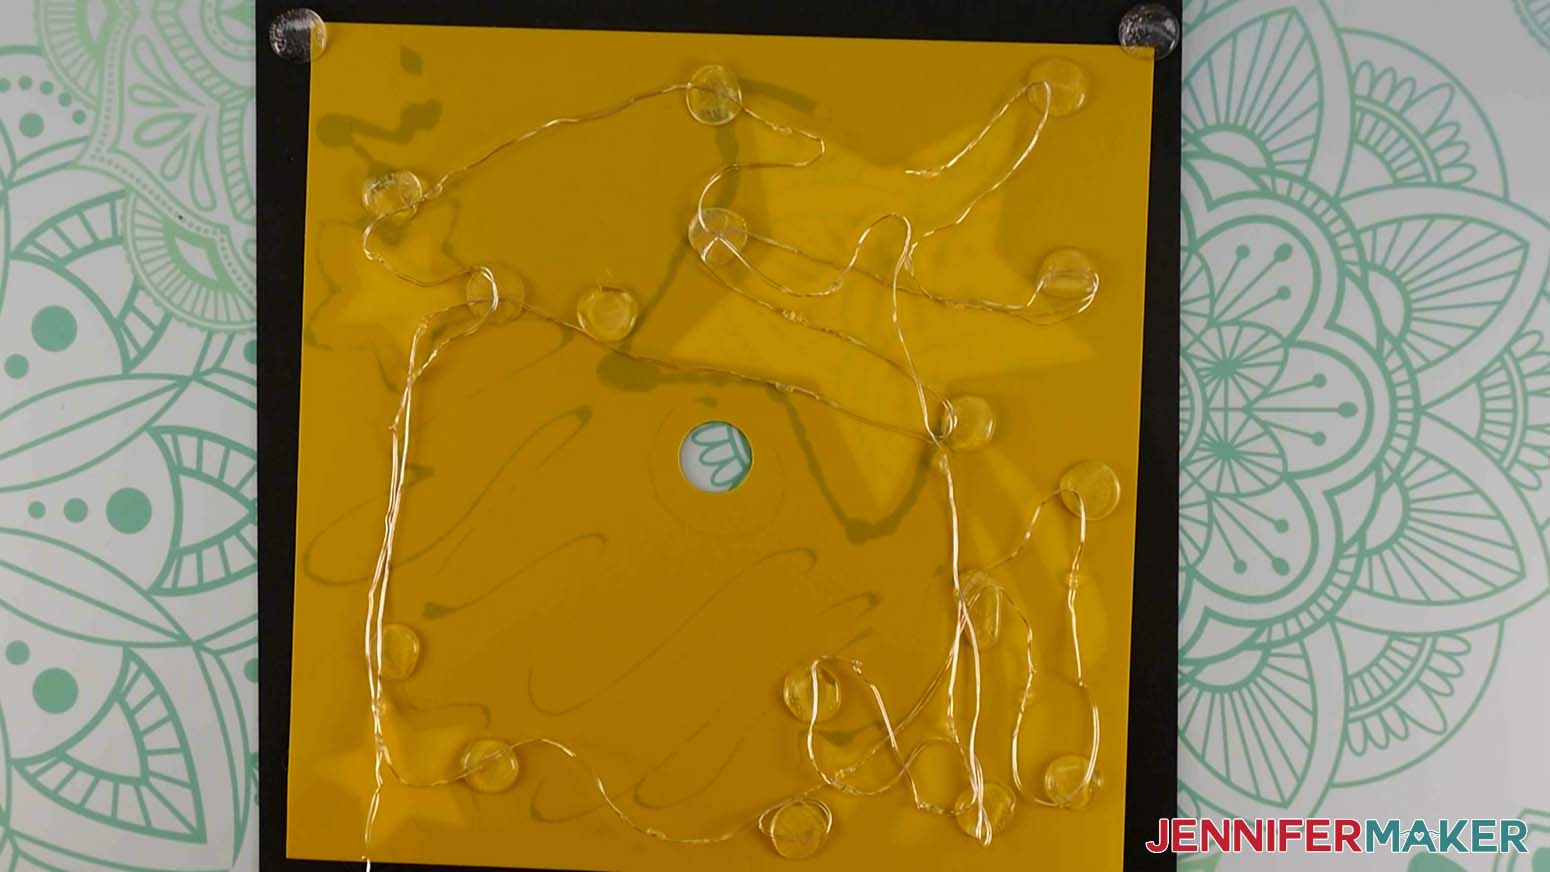
In some areas, you may be able to use the same adhesive dots for more than one light's wire section. When you are done applying the lights, you should have a small amount of wire that leads to the battery pack near the bottom of the cap.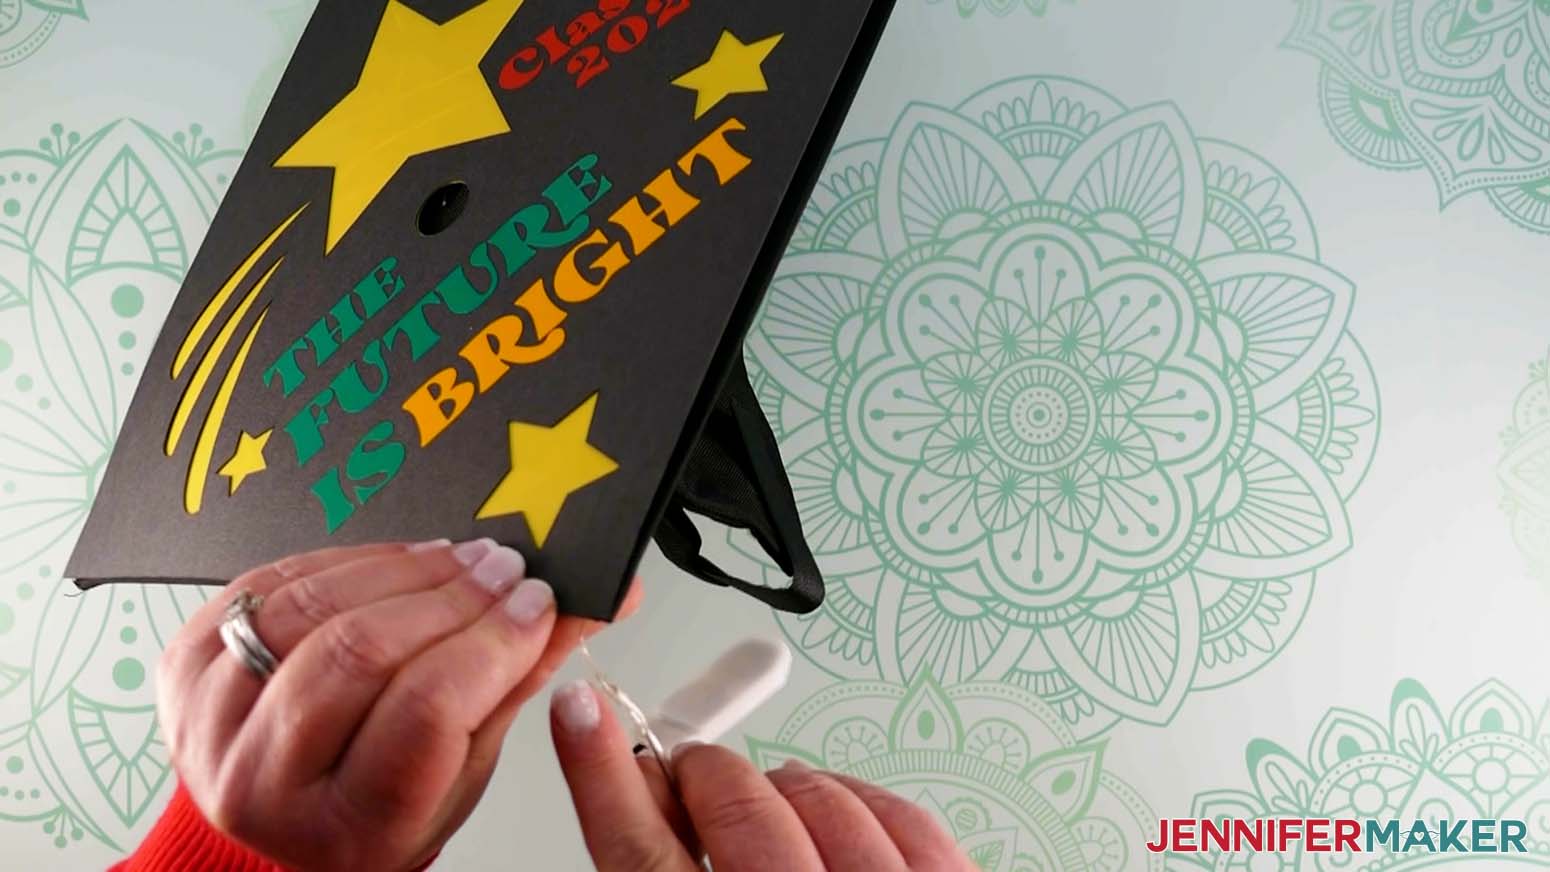
Place 3D adhesive dots on all four corners of the cardstock’s underside where it extends past the yellow plastic. Flip the layers over and apply the assembled topper to the graduation cap, making sure the four corners line up.
The wire and battery pack should stick out toward the bottom between the plastic and the cap. Flip the graduation cap over, place a 3D adhesive dot on the back of the battery pack and stick it to the underside of the graduation cap where it will be hidden behind the head. 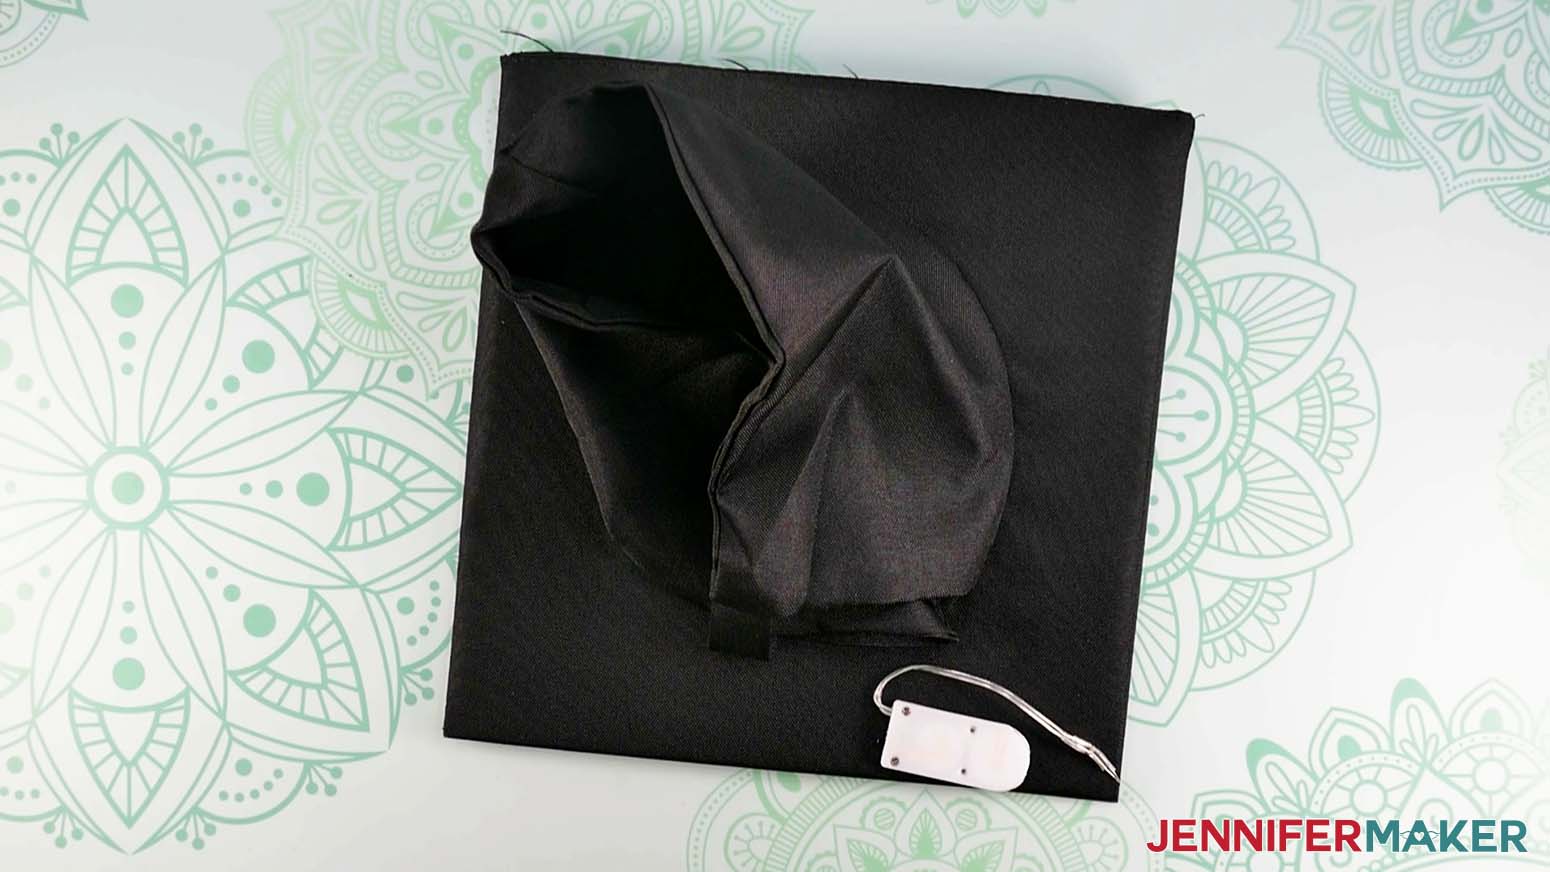

As I mentioned earlier, I have a couple of notes to help you cut and assemble the other two designs.
The Rose Graduation Cap is made up of several layers of glitter cardstock with a foil cardstock top piece. I found using a purple StrongGrip Machine Mat and the "Glitter Cardstock" cut setting along with "More Pressure" worked best for cutting the glitter cardstock.
I used a green StandardGrip mat and the "Cardstock (for intricate cuts)" setting with “Default” pressure for the foil cardstock. Your cutting machine may be different, so please remember to test cut your material before cutting the full designs. If you’re not sure how to do that, visit my Best Cricut Tips and follow #16!
It also has some intricate cuts that may make removal from your mats difficult. Remember to turn the mat over and roll the mat away from the cardstock. If the intricate pieces do not want to easily come away from the mat, try gently sliding a spatula under them.
To stack the layers of cardstock, start with the bottom layer and work your way to the top. The flowers stack: green, white, yellow, red, then silver. I applied thin lines or dots of craft glue to the back of each piece before placing it on the layer below. 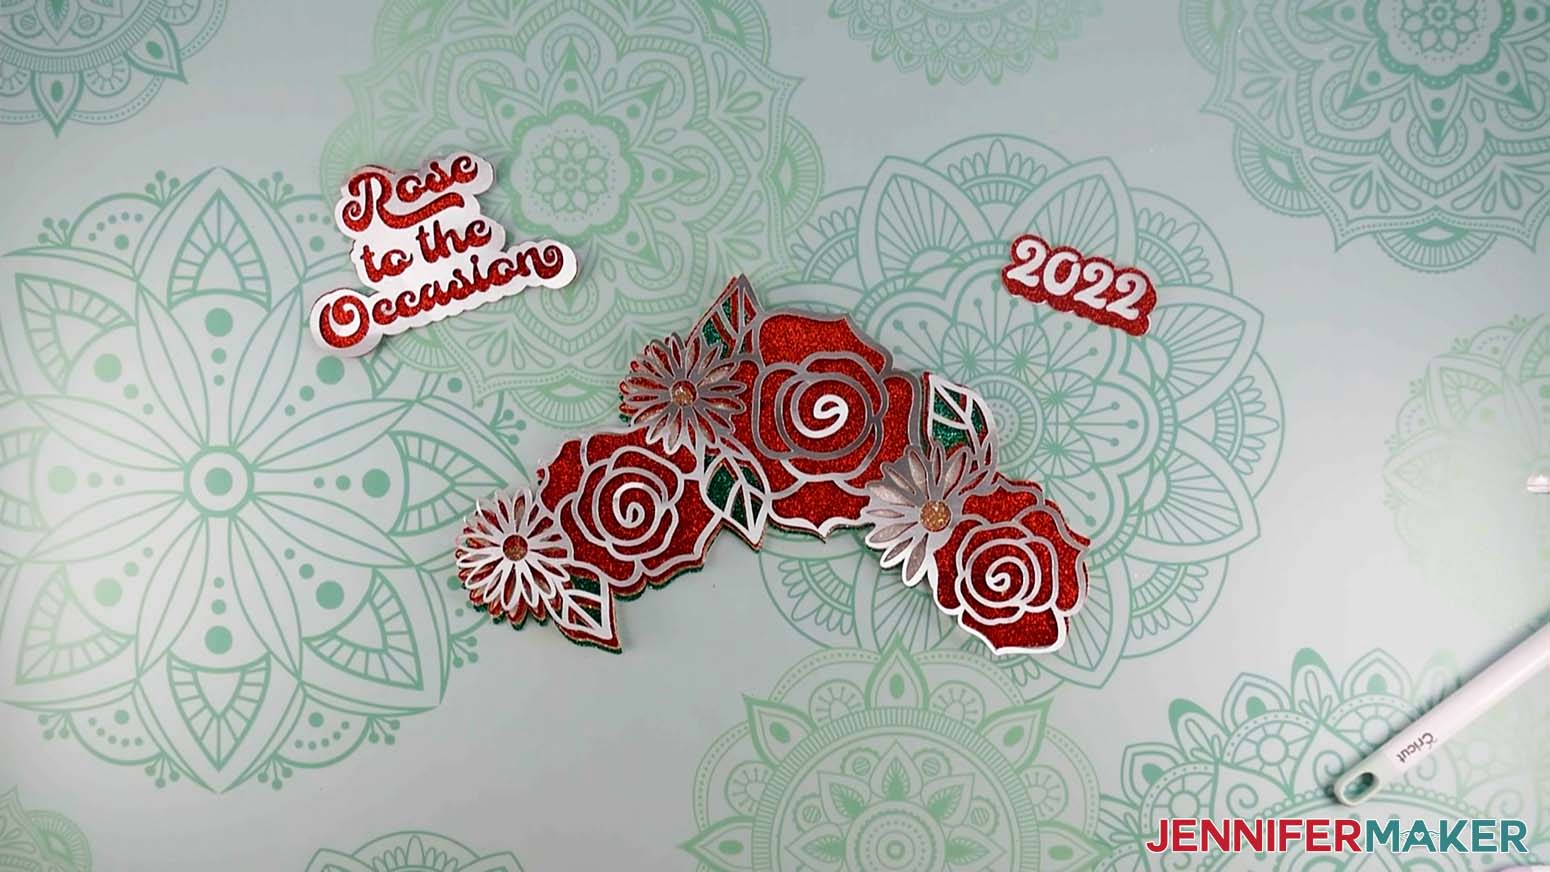
Craft glue also works well to apply the assembled cardstock to the graduation cap, but keep in mind this is pretty permanent. If you want, or need, a temporary application, you can make a topper from the Stars SVG file's black layer to apply the Rose assembly to, then use adhesive dots to apply the topper to the cap. The topper can later go inside a shadow box for display.
The Sports Graduation Cap is made completely from permanent vinyl. The file is designed so that the corner elements on each side of the cap are cut together as one piece. This may seem like a waste of material, but it will save assembly time. Apply the set of lines to the cap first (and as an all-in-one piece) and then use them to align elements with the left and right corners of the cap. You can use a ruler to keep things as straight as possible.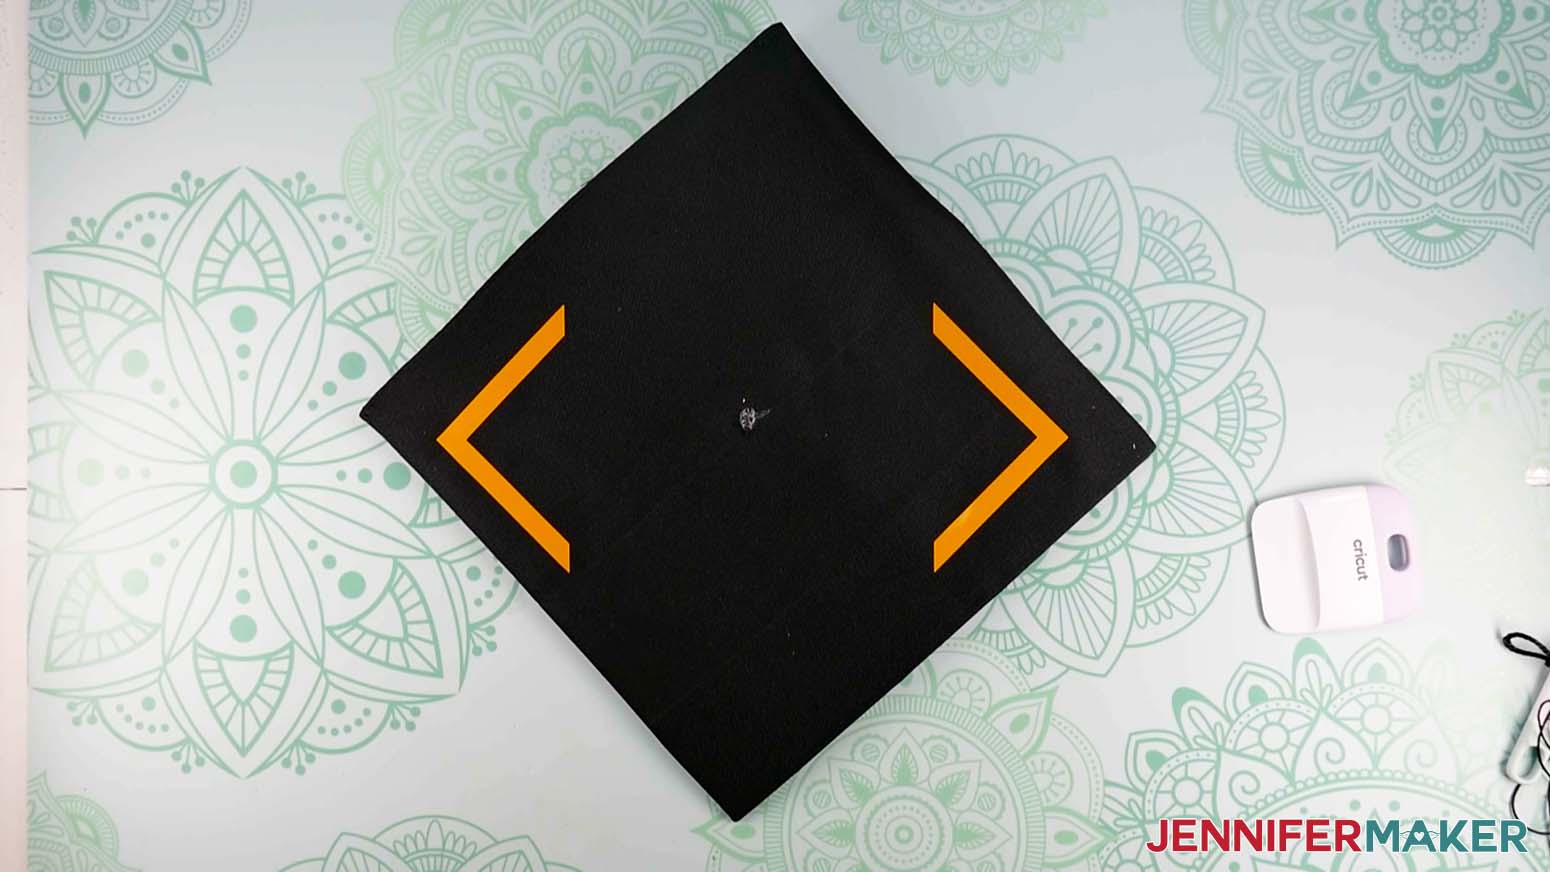
The jersey layers stack red, white, then black. If you need help with alignment, check out my Layering Vinyl tutorial for tips! I made a version with Shimmer vinyl in place of the white and love the result! If you try Shimmer vinyl, use Strong Grip Transfer Tape.
NOTE: Remember, while you might be tempted to use iron-on vinyl since the surface of the graduation cap is fabric, permanent adhesive vinyl is a much better option! I tested both options and found that heating the cap for iron-on can warp and even melt the cap and its fabric.STEP 6: SHOW IT OFF!
There are so many ways to customize these graduation cap ideas! You can change the vinyl to your school colors, add your favorite quote in a fun font, or even glue some rolled paper flowers to a topper! I have some perfect flower designs in my Paper Flower Letter tutorial.
I hope you’ll use these ideas as inspiration to create your own personalized graduation cap!Notes
The Rose Graduation Cap design measures 8.937" x 10.389" but can be rotated to be cut on 8.5" x 11" material.
The Sports Graduation Cap design measures 10.5" x 10.254."
Fonts used:
Stars design: Wished
Rose design: Brenson Charlotte and Brenson Charlotte Shadow from the same download pack
Sports design: Sweetie Almeera, Gilden, Varsity Team Bold
Answers to Your Questions About Graduation Cap Decoration Ideas
What should I write on my graduation cap?
You can add anything you like! Graduates add inspirational quotes, lines from a favorite book or favorite movie. Quotes from a favorite character or TV shows are also popular. You can add anything that you feel sums up your college experience, really. I’ve seen some cute matching best friend cap ideas, too.
How do you decorate a graduation cap last minute?
Graduation season is busy, so last-minute cap decorations are very popular! If you don’t have much time to personalize your own graduation caps, I recommend sticking to a simple design. Design a quick decal in Cricut Design Space using some existing shapes or a short quote in a bold font and use permanent adhesive vinyl right on the cap. Simple can still help you stand out!
Should I decorate my graduation cap?
It’s totally up to you, but decorating your mortarboard is a fun way to celebrate your years of hard work! A custom cap is a nice personal touch for your big day!
What do you put on a high school graduation cap?
You can use any ideas for college graduation caps for high school, too! I love seeing custom caps from kindergarten to graduate school.

How do you decorate a graduation cap with cardstock?
Cutting some simple designs or shapes in cardstock with a Cricut is a super easy way to decorate your graduation cap. After cutting out your design, just stick the cardstock to the cap with craft glue or double-sided adhesive foam for a bit of depth.
What glue is best for graduation caps?
I recommend different glues depending on how you plan to decorate and preserve your graduation cap. If you want to decorate the cap for your big day and then be done with it, you can use craft glue for permanent adhesion. Glue dots can be removed pretty easily, so they’re a good option if you want to remove the designs to save or need to return the cap without damage.
How do you put letters on graduation caps?
I highly recommend cutting letters from cardstock or adhesive vinyl with a Cricut for your cap. If you don’t have a Cricut, you can also buy pre-made letters from a craft store and glue them on for easy grad cap designs.
What if my school doesn’t allow graduation can decorations?
Always check the rules before crafting for an event! Different school have different requirements. If you aren’t allowed to decorate for the ceremony, maybe make a topper to use in photos! If you aren’t allowed to decorate the cap at all, you can buy one from the materials list and decorate your own cap as a memento.
Get my free Graduation Cap Ideas SVG files!
I’d love to see your graduation cap decoration ideas and results! If you make a topper, shadow box, or anything else with these designs, please share a photo in our Facebook group, email it to me at [email protected], or tag me on social media with #jennifermaker.
Love,

Want to remember this? Save the Graduation Cap Ideas Tutorial to your favorite Pinterest Board