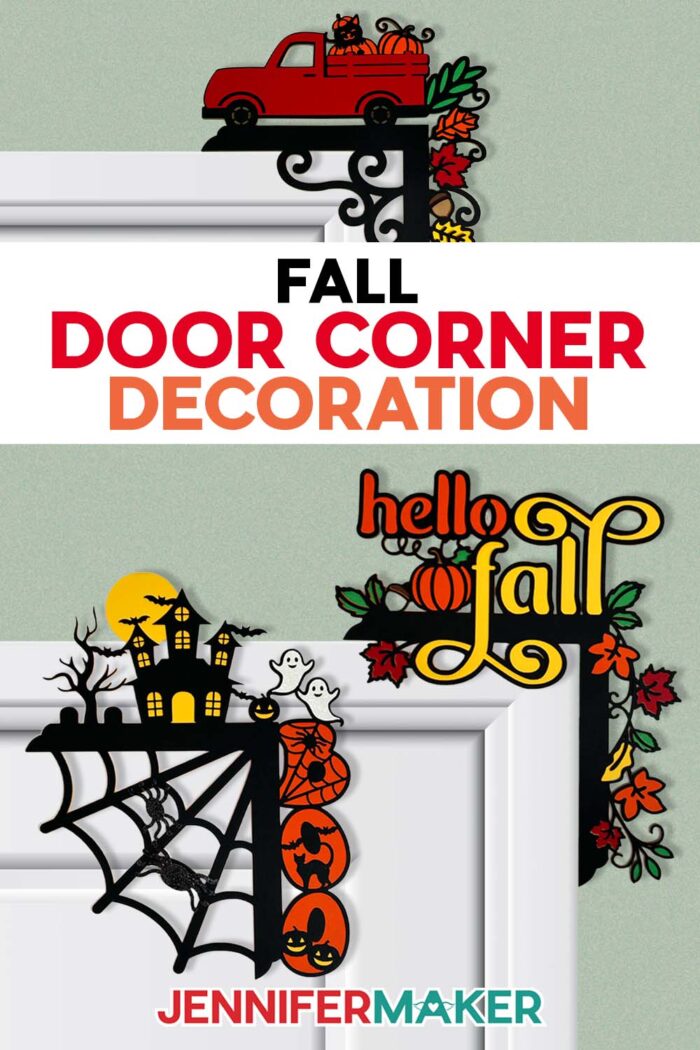
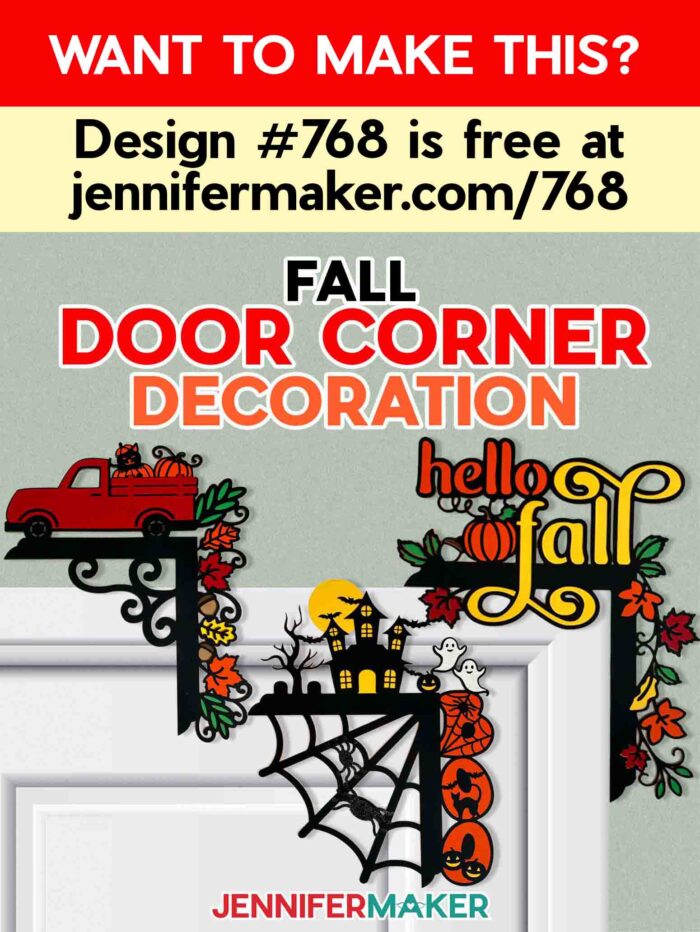
Learn how to make fall door corner decoration that welcomes the season in style!
Every fall, I like to add something a little unexpected to my home decor. Something that makes people pause, smile, and say, “Oh, how cute is that!” This year, I wanted a project that celebrated the cozy beauty of the season but still felt playful. That’s how my fall door corner decoration designs came to life. They’re a whimsical mix of layered paper art that instantly transforms an ordinary doorway into something special. And the best part? You can make one yourself with just a bit of cardstock, some adhesive, and a little time on an autumn afternoon.
Watch the full step-by-step tutorial on how to make a fall door corner decoration:

Fall is such a vibrant, colorful time of year. It’s filled with golds, reds, oranges, and the deep, cozy tones that make you want to light a candle and craft something beautiful. I wanted to bring that same feeling indoors, so I designed a door decoration that combines classic fall colors with a little extra dimension and depth. The result is a project that’s light enough to hang above your door without nails or damage, but still full of character and charm.
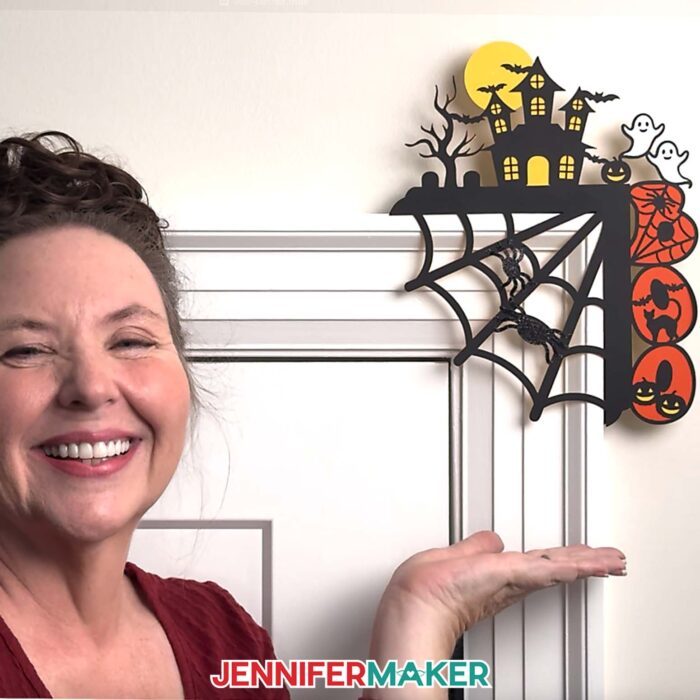
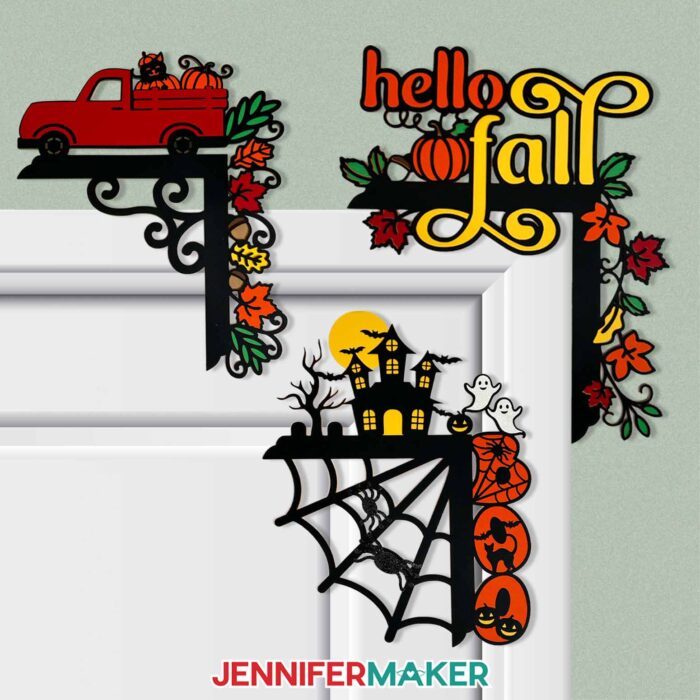
If you’re more of a Halloween crafter, there’s a spooky version, too, complete with spider webs, ghosts, and just the right touch of whimsy.
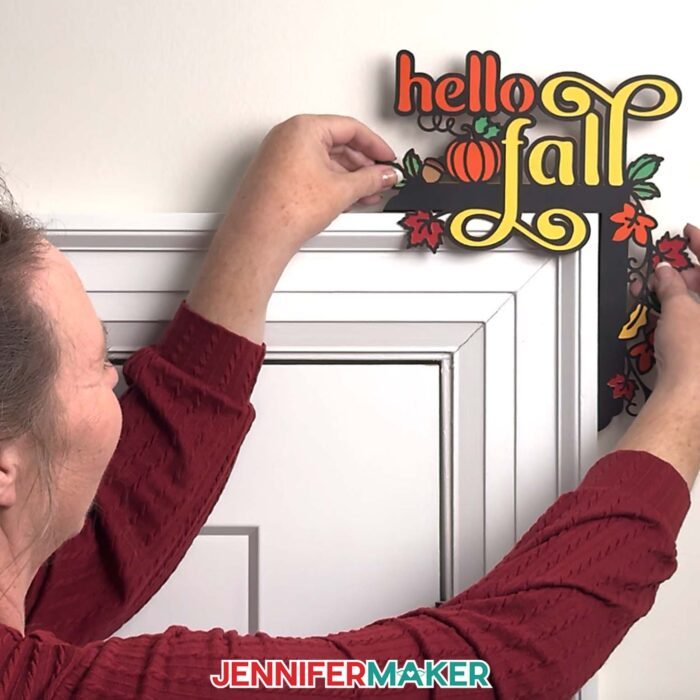
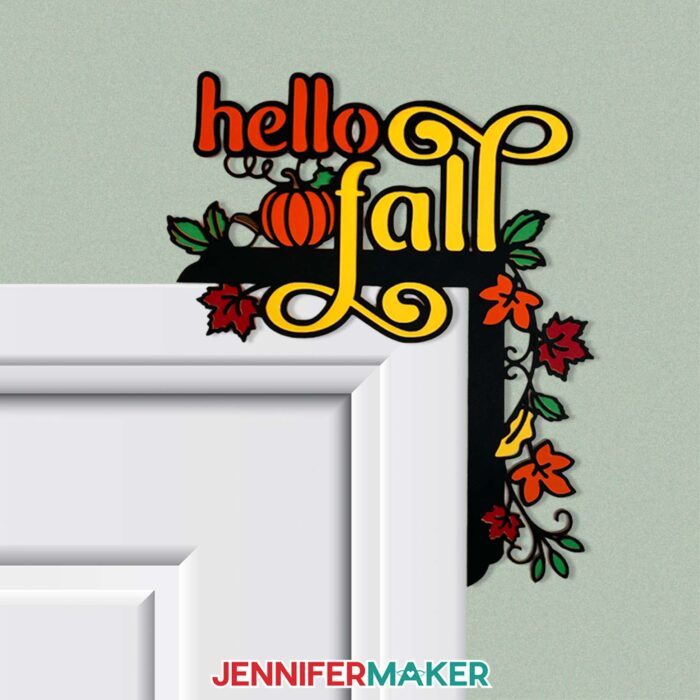
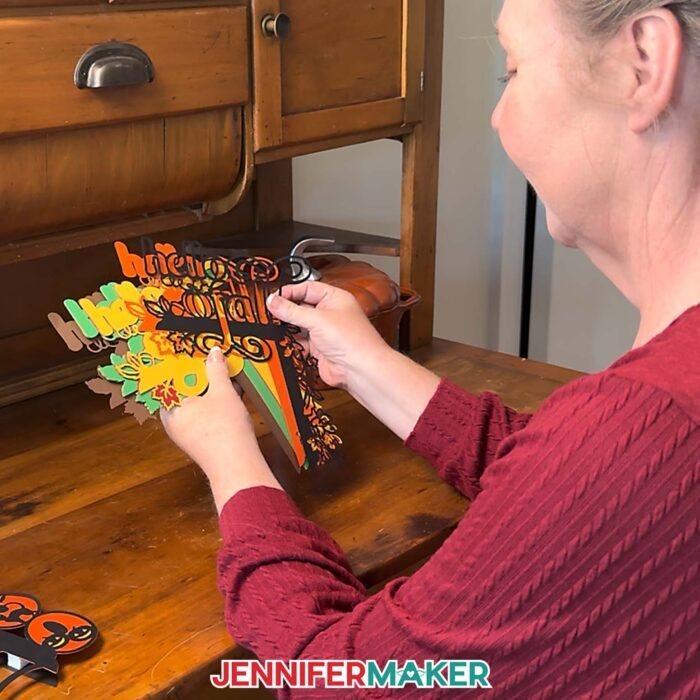
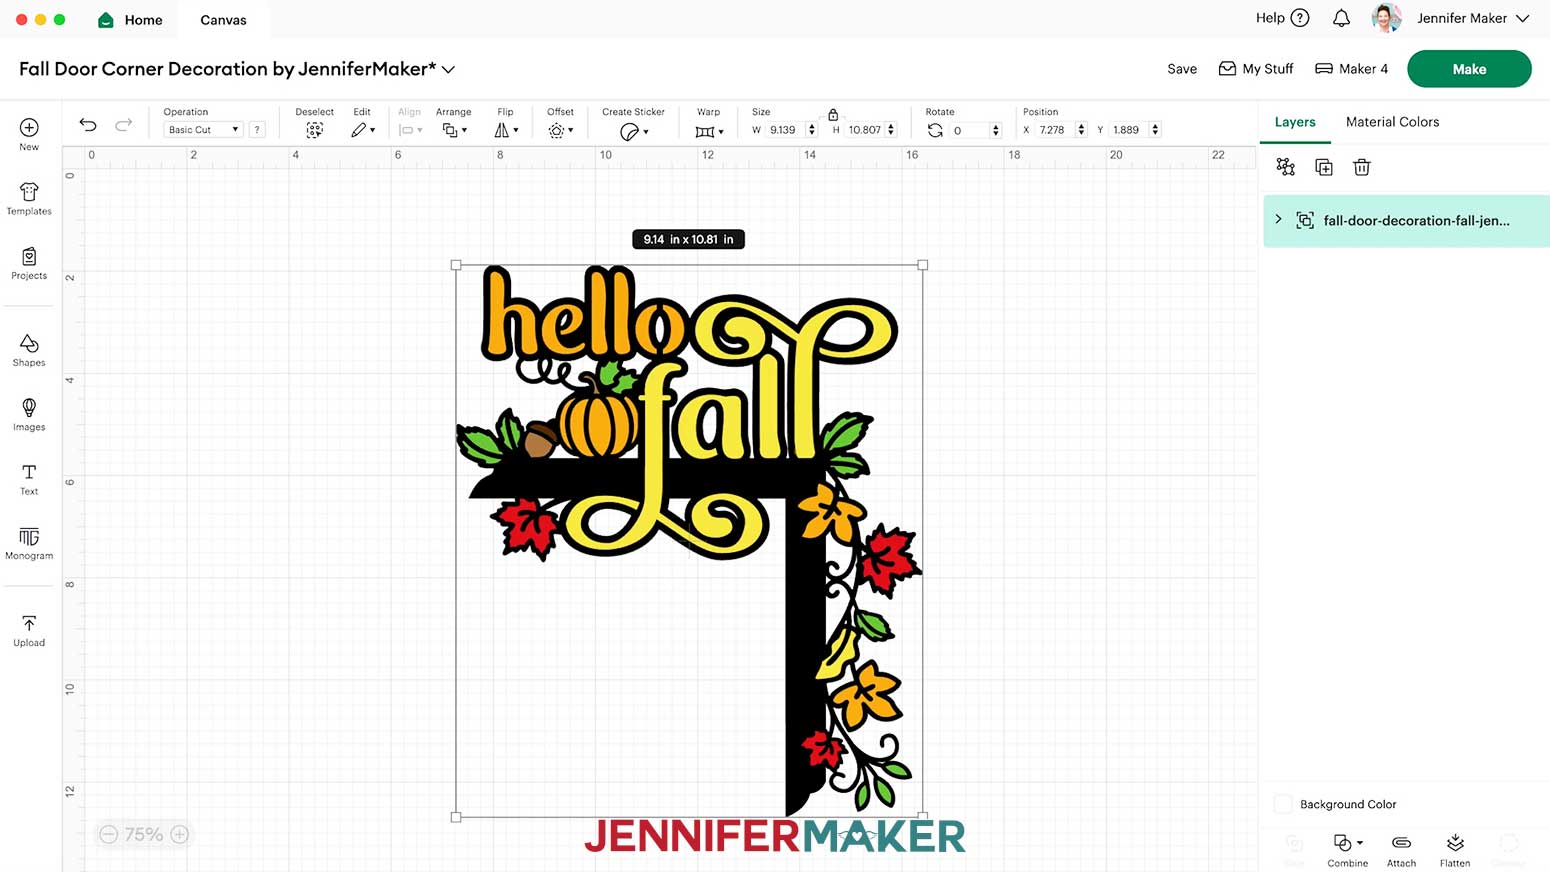
Each piece of these designs starts as simple cardstock, cut into layered shapes that stack together to form intricate details. I love how the different colors of paper bring out the details in my “hello fall” design; the contrast between deep brown, bright yellow, and rich orange fall leaves that look like they’re gently fluttering down.
In my video tutorial, I walk you through exactly how to cut, stack, and align each layer so it creates that beautiful depth and shadow, along with tips for attaching the tiniest details (like spiderwebs and thin lettering) without any mess.
I used my Cricut Maker to cut all the layers precisely, but you can also cut them with scissors or a craft knife if you prefer a more hands-on approach. You’ll want to use a mix of high-quality cardstock in different colors, plus a good craft glue with a precision tip for neat layering. For attaching the finished decoration to the wall or door frame, removable adhesive or blue tack works perfectly. It’s sturdy enough to hold everything in place but won’t damage your surfaces when it’s time to take your fall door corner decoration down. This can be renter-friendly decor, too, just try a test to make sure your walls will be ok!
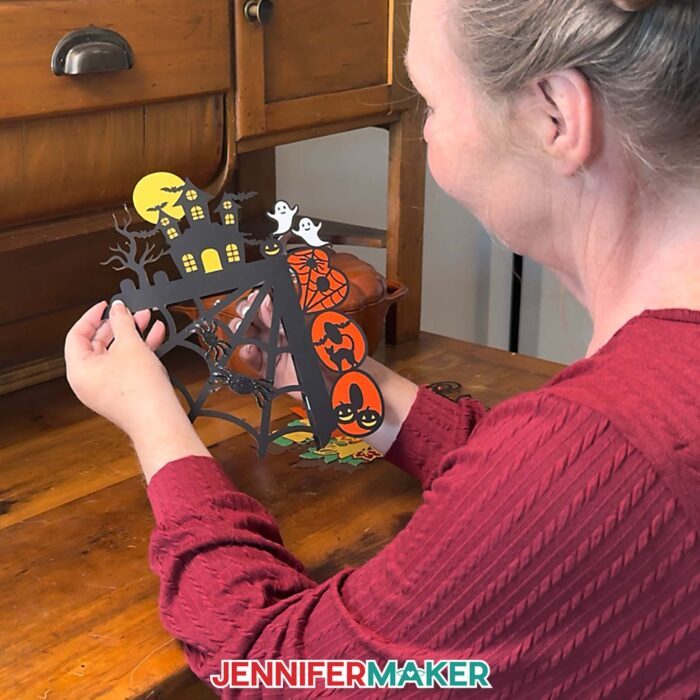
I also share a fun little engineering secret I discovered while testing different ways to hang these decorations. Instead of using nails or heavy adhesive, I came up with a simple back support piece that lets your design rest perfectly on the top corner of a door or frame. It’s lightweight, removable, and surprisingly sturdy! You can even add a few layers of foam adhesive for extra dimension, which helps the piece stand out beautifully without damaging your wall or paint.
One of my favorite things about paper crafts like these is how easily they can adapt to your space. The design is made to rest on the top right corner of your doorway, but it also looks lovely on a picture frame, mirror, or window frame. You can resize it slightly to fit your space, or experiment with different cardstock finishes to give it a unique look. Glitter paper adds sparkle, metallic cardstock brings a bit of elegance, and textured paper adds a natural, rustic feeling.
I show you exactly how to resize and recolor your designs right in Cricut Design Space. By the end, you’ll not only have a gorgeous door topper to display, but also a few new tricks that make all your paper crafts look more polished and professional.

And if you’re like me and love going all-out when personalizing your projects, I’d love to have you join me inside my ADVANCE with JenniferMaker program! In my special workshop for this project, I’ll show you exactly how to design your own custom door corner decoration, from choosing the right elements to layering your design in different colors for the perfect look. In fact, I’ll show you exactly how I designed the truck decoration! You’ll learn how to plan each detail so it cuts cleanly and fits your doorway beautifully. It’s a wonderful way to grow your skills, gain confidence in Cricut Design Space, and create something that’s truly your own. Members even get a toolkit of design elements, and a Fall Color Palettes cheat sheet! Click here to learn more about the Advance program!
My fall door corner decoration project adds so much warmth and personality to any room, and I hope you’ll make your own! It’s a fun twist on traditional fall wreaths – still a seasonal and festive door decoration, but with a fresh, creative shape. Every time you walk by, you’ll catch a glimpse of the delicate layers and the colorful details that make it feel like fall is gently sweeping into your home. And when you’re ready to switch things up, you can swap it with the Halloween design to celebrate the spooky fun side of the season.

I hope you’ll give this project a try, adding your own twists, and really enjoy the creative process. There’s nothing quite like celebrating the season with a handmade project that welcomes fall right at your door!
Do you want to learn how to make your own fall door corner decoration? Let me show you how fun and easy it is with my door corner decoration tutorial and design! This post contains some affiliate links for your convenience (which means if you make a purchase after clicking a link I will earn a small commission but it won’t cost you a penny more)! Read my full disclosure policy.
Materials to Make a Fall Door Corner Decoration
View my Amazon shopping list with the exact items I used.
- Three to Seven (3-7) Sheets of 12″ x 12″ 65 lb. Cardstock (in various colors) -AND-
- One (1) Sheet of 12″ x 12″ Black Glitter Cardstock (optional for the spiders on the “Boo” design) -AND-
- One (1) Sheet of 12″ x 12″ White Glitter Cardstock (optional for the ghosts on the “Boo” design)
- A way to cut your materials – I’m using the Cricut Maker 4, but you can also use any Cricut Maker series machine, a Cricut Explore Series machine, the Cricut Venture, or the Cricut Joy Xtra
- Cricut Green StandardGrip Machine Mat 12″ x 12”
- Brayer
- Spatula
- Scraper
- Weeding Tool
- Tweezers
- Craft Glue (I used Bearly Art Precision Craft Glue)
- Paper Towel (optional to wipe away excess glue)
- Foam Adhesive
- Blu-Tack Reusable Adhesive -OR-
- Command Strips (small – optional for attaching topper to wall)
- 12″ x 12″ White Glitter Cardstock (My free SVG/DXF/PDF design files are available in my free library – get the password by filling out the form at the bottom of this page)
How to Make a Fall Door Corner Decoration

Fall Door Corner Decoration
Learn how to make a Fall Door Corner Decoration with a Cricut!
Materials
- Three to Seven (3-7) Sheets of 12" x 12" 65 lb. Cardstock (in various colors) -AND-
- One (1) Sheet of 12" x 12" Black Glitter Cardstock (optional for the spiders on the “Boo” design)
- One (1) Sheet of 12" x 12" White Glitter Cardstock (optional for the ghosts on the “Boo” design)
- Foam Adhesive
- Blu-Tack Reusable Adhesive -OR-
- Command Strips (small, optional for attaching topper to wall)
- Design #768 (My free SVG/PDF/DXF design files are available in my free resource library - get the password by filling out the form at the bottom of this page)
Tools
- A way to cut your materials - I’m using the Cricut Maker 4, but you can also use any Cricut Maker Series machine, a Cricut Explore Series machine, the Cricut Venture, or the Cricut Joy Xtra
- Cricut Green StandardGrip Machine Mat 12" x 12”
- Brayer
- Weeding Tool (for popping out small cutouts)
- Scraper
- Spatula
- Craft Glue - I used Bearly Art Precision Craft Glue
- Paper Towel (optional to wipe away glue)
Instructions
STEP 1: GET MY FREE FALL DOOR CORNER DECORATION DESIGNS
First, download my Fall Door Corner Decoration designs from my free library – look for Design #768. Alternatively, you can use the Save This Project form near the top of this post and the design link will be emailed to you.
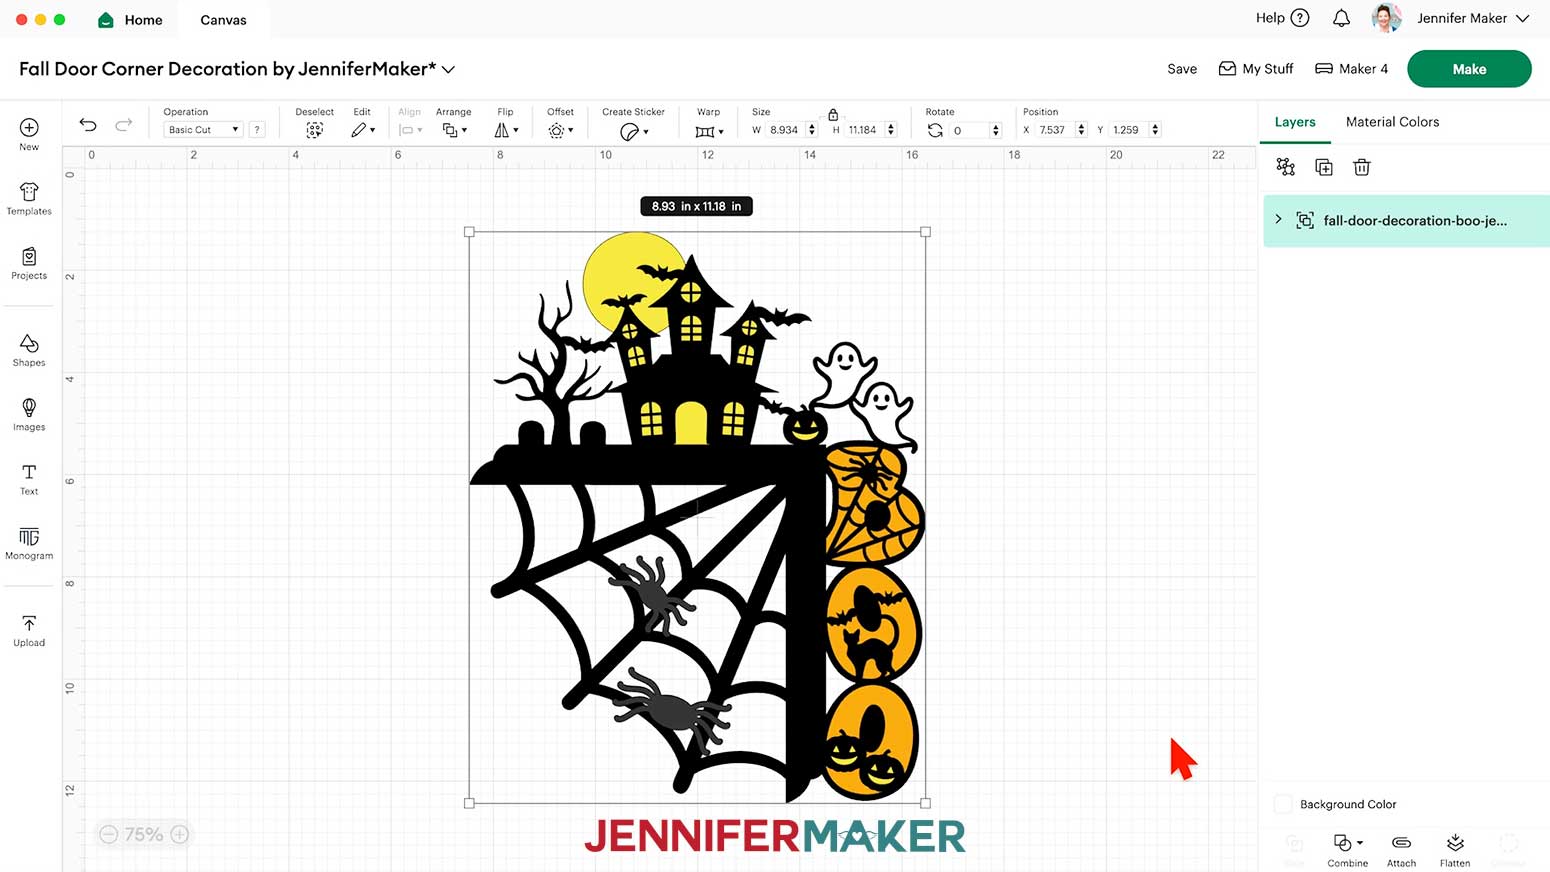
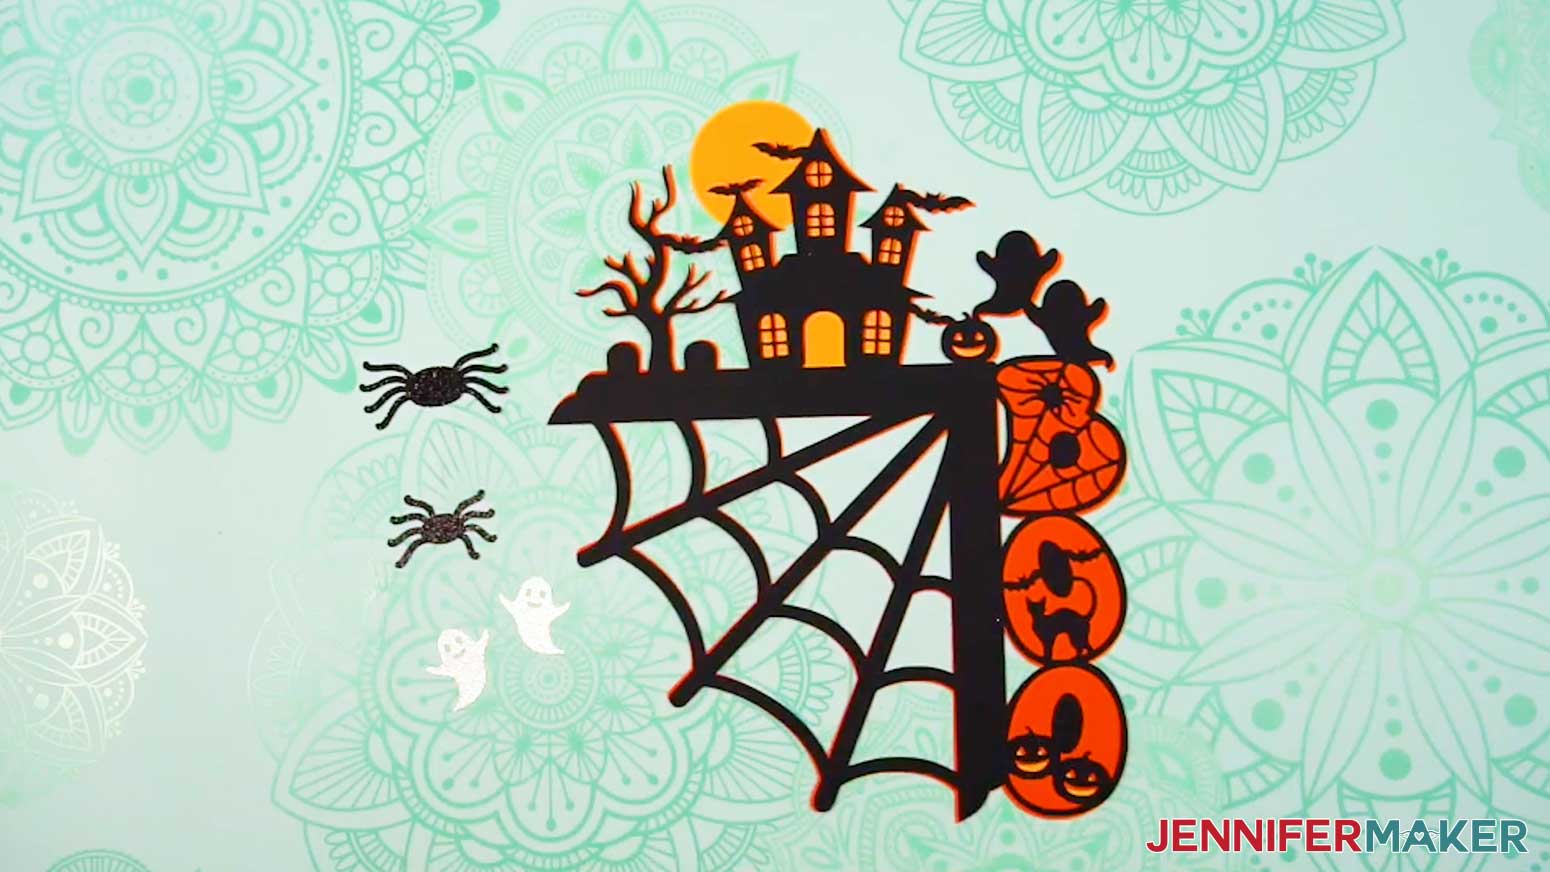
In the SVG folder, you’ll find “Boo” and “Fall” versions of my fall door corner decoration designs.
There is also a DXF folder with cut files, and a PDF folder with versions you can print and cut by hand.
The designs are sized to be cut on Cricut Maker machines, Cricut Explore machines, and the Cricut Venture machine. The designs can be resized, but make sure they are under 11.5” tall or wide so they can be cut from 12” x 12” cardstock unless you have larger materials and a mat to fit them. You can resize the designs to cut on 8.5” x 11” cardstock with a Cricut Joy Xtra, but they are too intricate for a Cricut Joy.
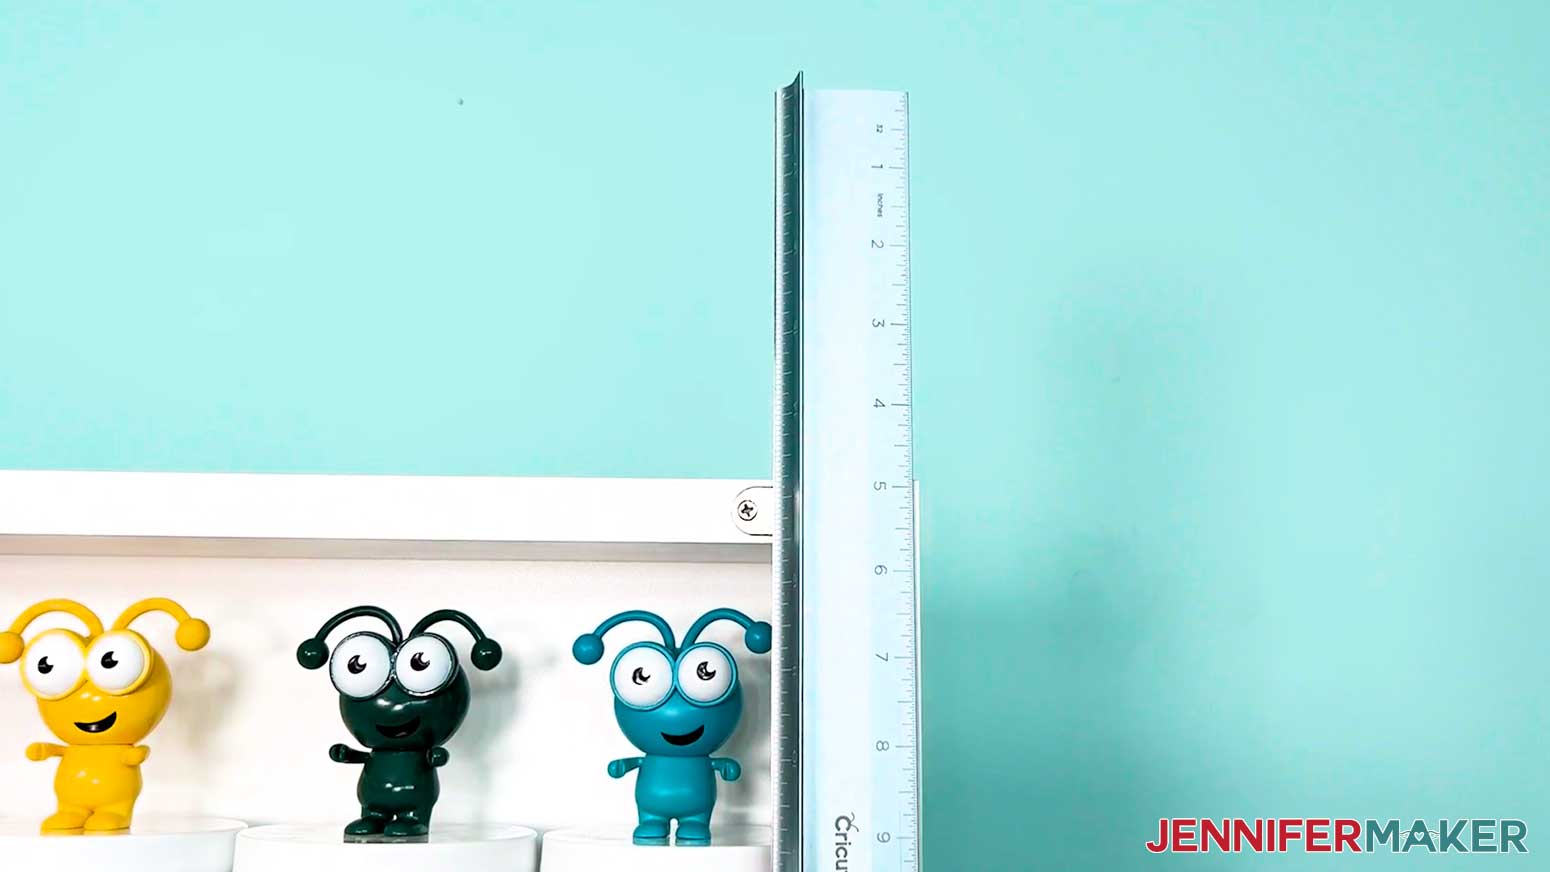
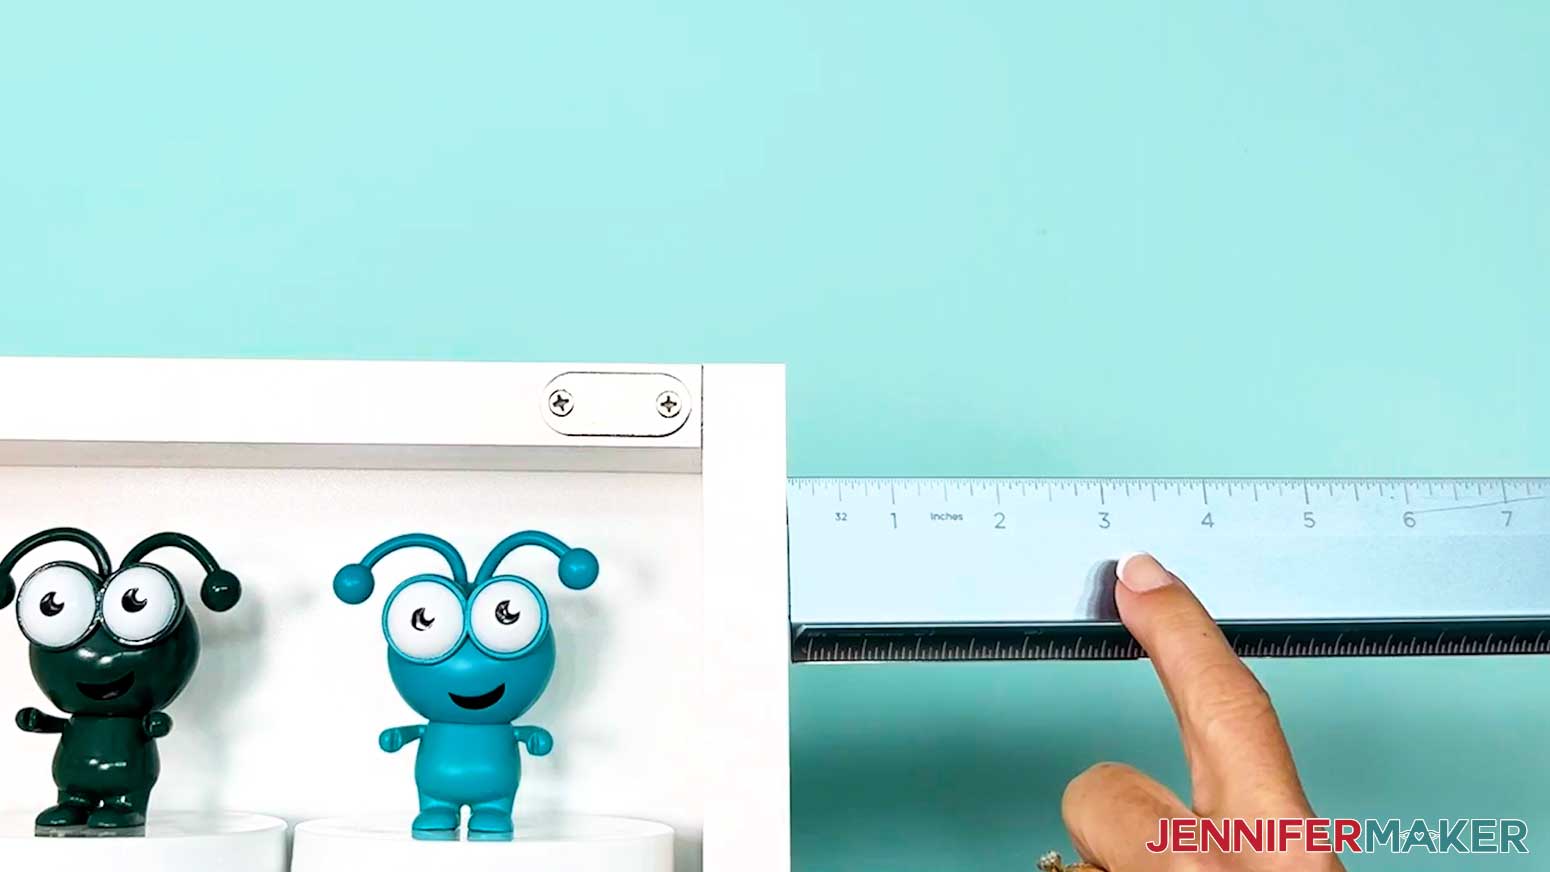
STEP 2: MEASURE YOUR DOOR AREA
- Since both designs have lettering that only looks correct one way, make sure there is room for the finished topper to rest on the right side of your door.

- Check that the door swings away from the topper. If it swings toward the corner, the cardstock could bend or tear.
- Both designs extend about 5 inches from the horizontal beam’s bottom edge, where it will sit on top, so measure the area above your door frame to make sure there is enough space.
- The designs also extend about 3 inches to the right of the vertical beam’s inner edge, so measure the area to the right of your door frame to make sure there is space for the side details.
STEP 3: PREPARE AND CUT YOUR FALL DOOR CORNER DECORATION DESIGNS
CRICUT DESIGN SPACE
- In Cricut Design Space, open a blank Canvas.
NOTE: If you’re not sure how to upload, go to jennifermaker.com/svgs to learn how to unzip and upload SVG files. - Click “Upload” and then “Upload Image.”
- Click “Browse” and select the SVG file you want to use.
NOTE: I’ll demonstrate with the “Boo” file, but you can use these steps for the “Fall” version, too. - Click “Open,” and then “Continue.”
- Click “Upload” to add the design to your Canvas.
TIP: You can click the minus (-) icon in the lower left corner to zoom out and see everything on your canvas. - Click “Save” and give your project a name.
- If you’d like to adjust the size of your design, keep the lock icon closed to maintain the proportions, and use the corner Resize handles to shrink or expand it.
TIP: The default size for both designs needs at least 5” of space above the door frame and 3” of space to the right of the door frame. Measure the clearance above the door and to the right side, then adjust the design accordingly for the best fit.
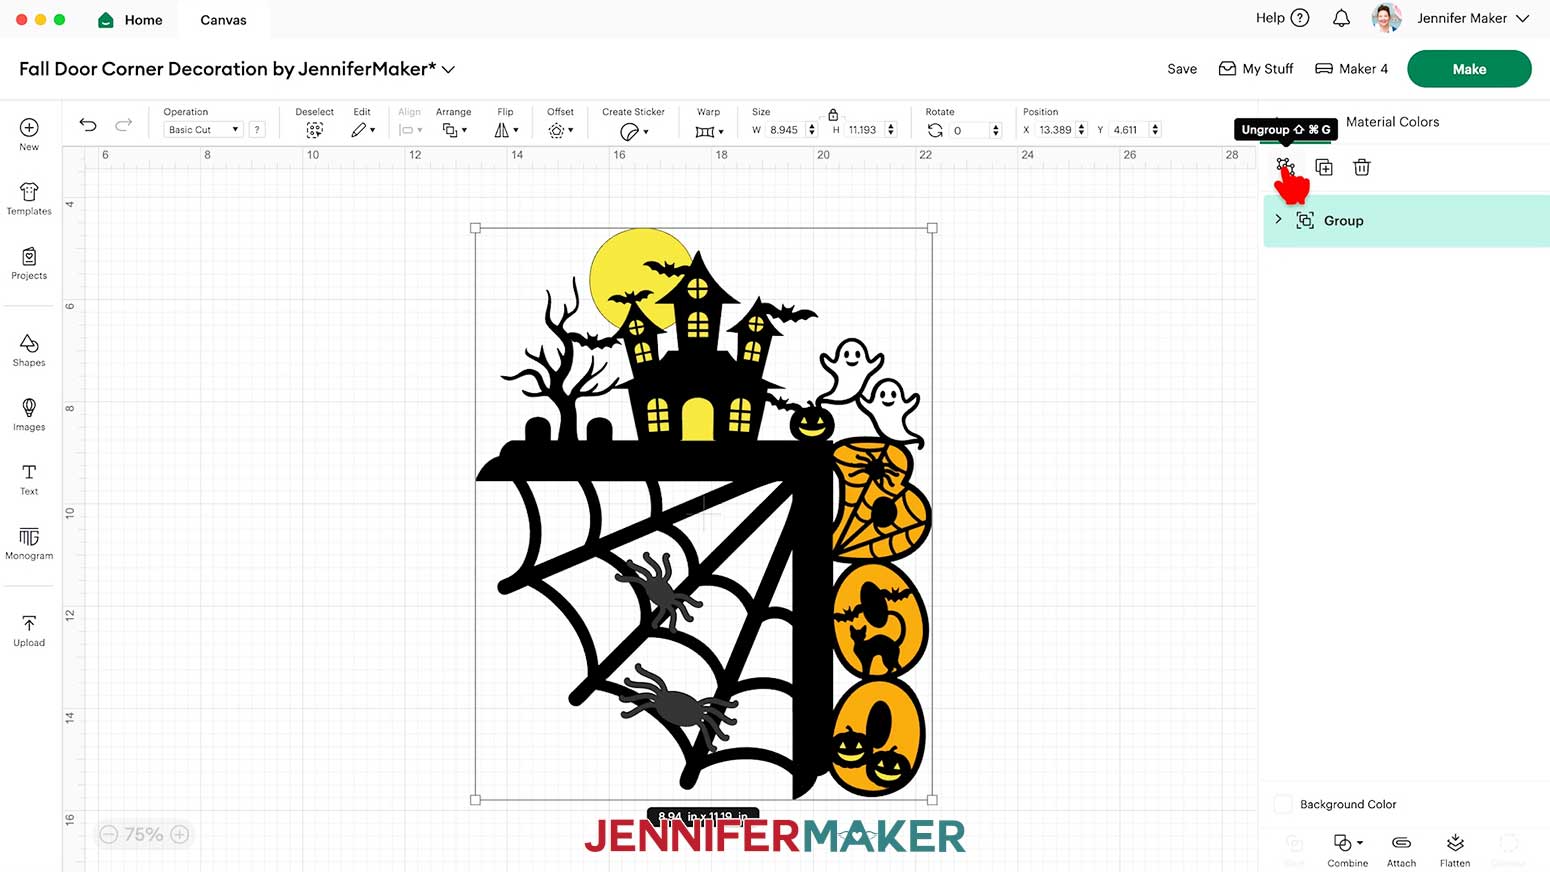
NOTE: Keep your project size within the limits of your materials. Shrinking it too much can make you lose important details, but making it too big could go beyond what your machine or materials can handle. - “Ungroup” the design to work with the Elements separately.
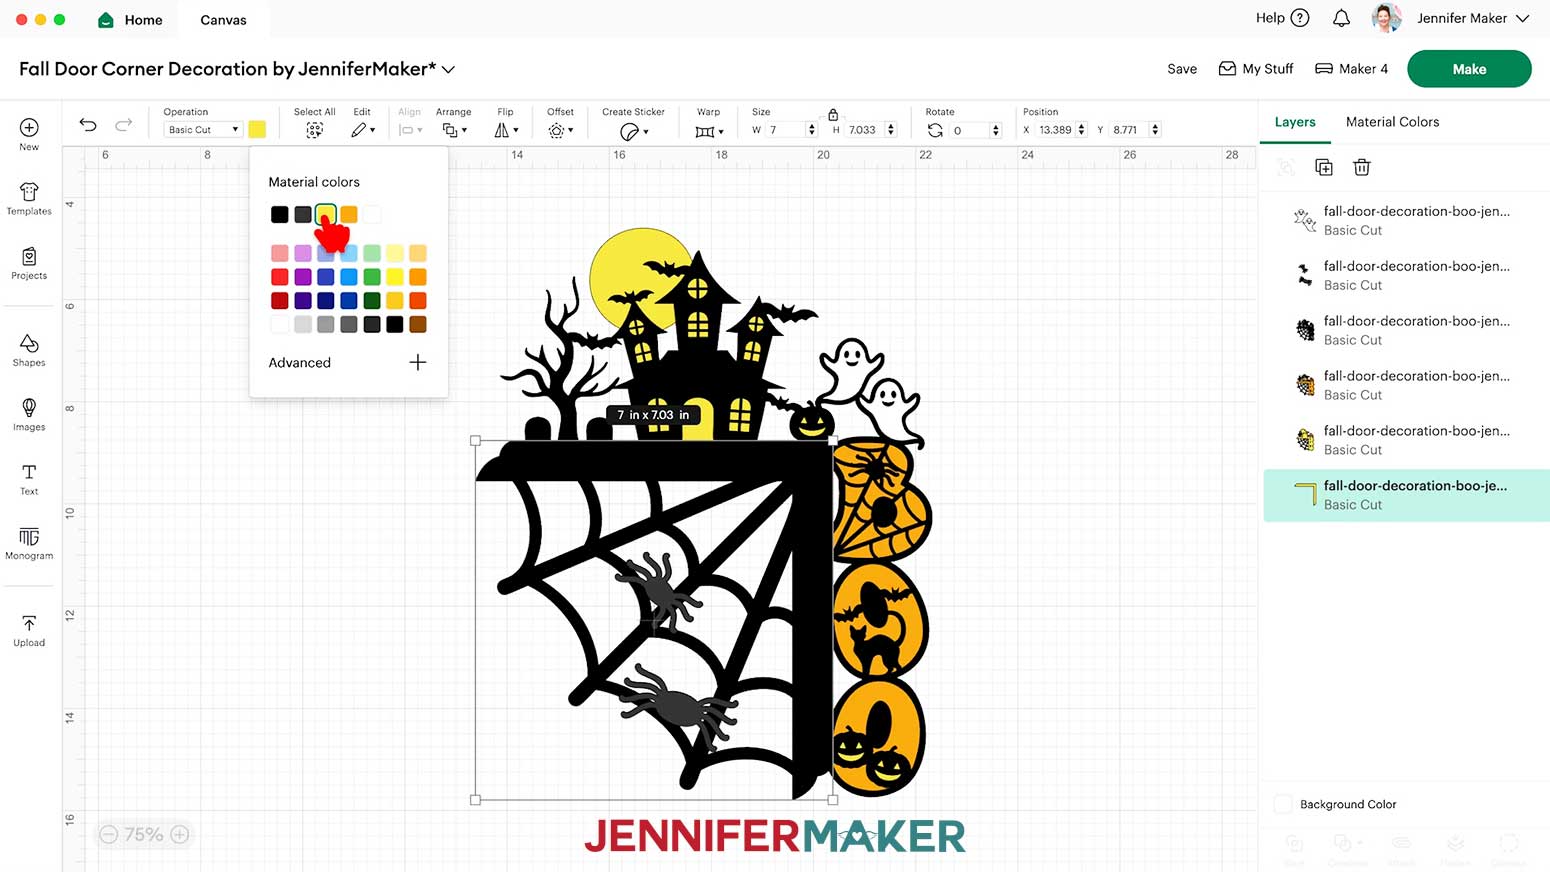
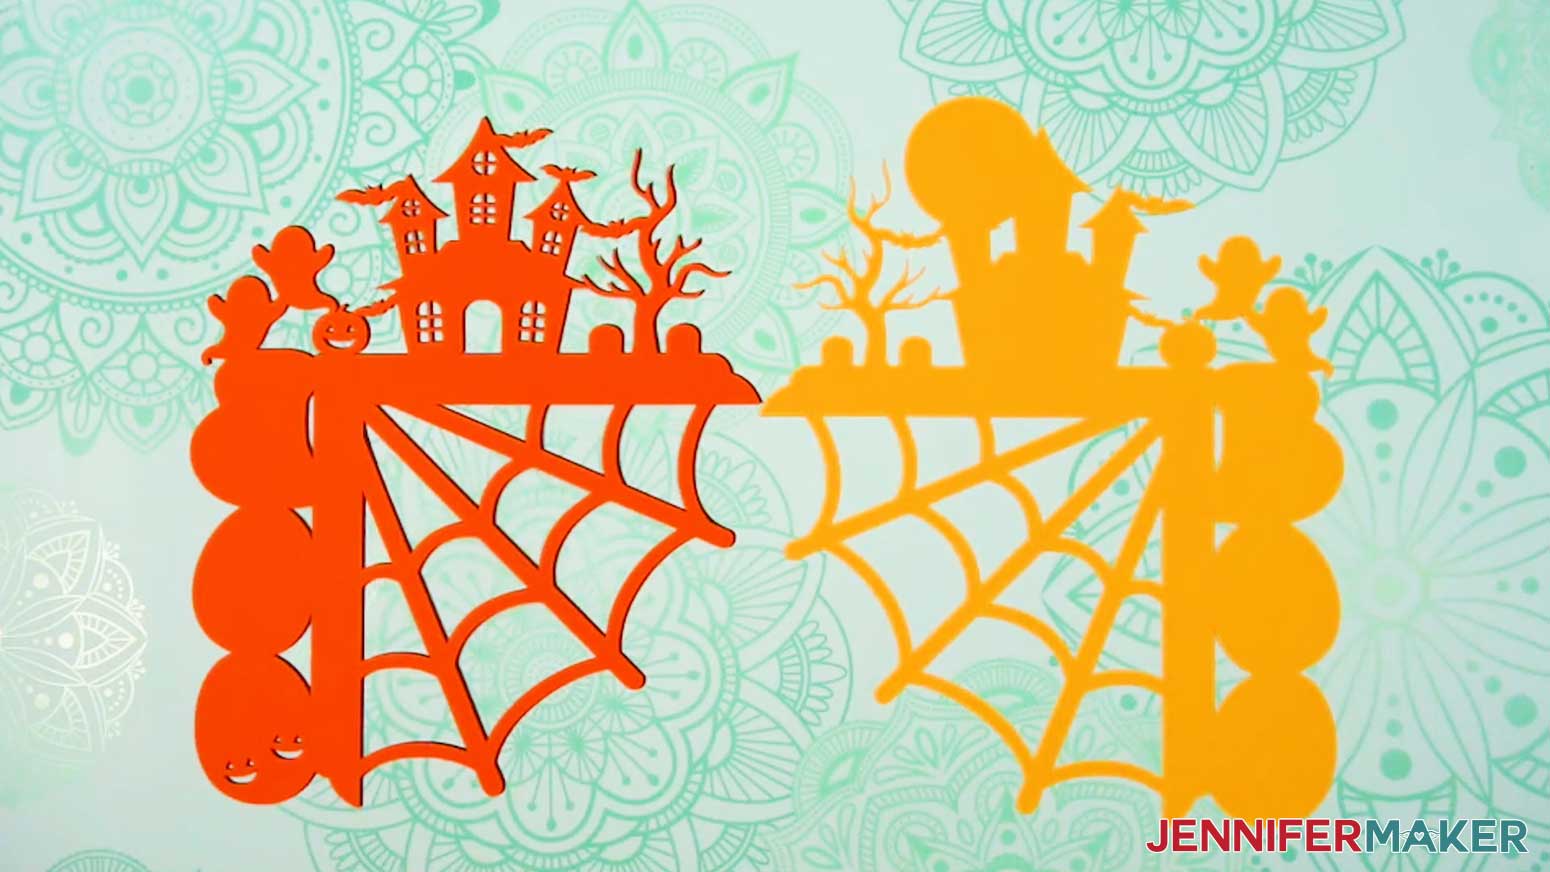
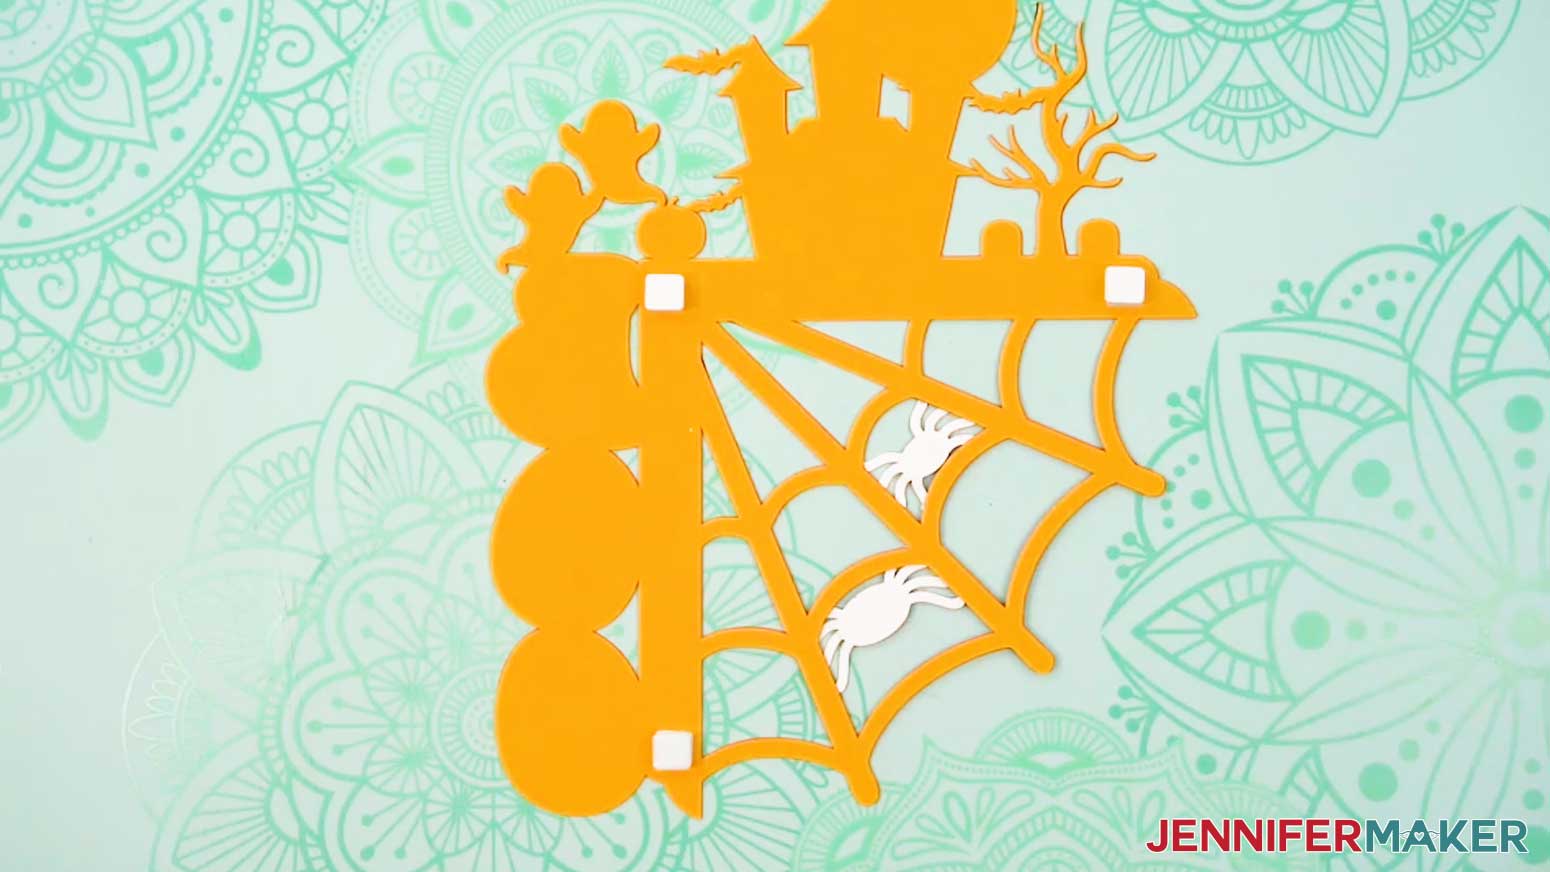
NOTE: The “Boo” design has three main layers with an L-shaped corner, a back support piece, two ghost pieces, and two spider pieces. The “Fall” design has seven main layers, and a back support piece. - If you want to use different color cardstock for any of the pieces, select the appropriate layer in the Layers Panel and use the Color Box at the top to adjust it.
- Your door corner topper is ready to cut!
CUTTING
- Make sure the correct machine is selected in the top right.
- Click “Make.”
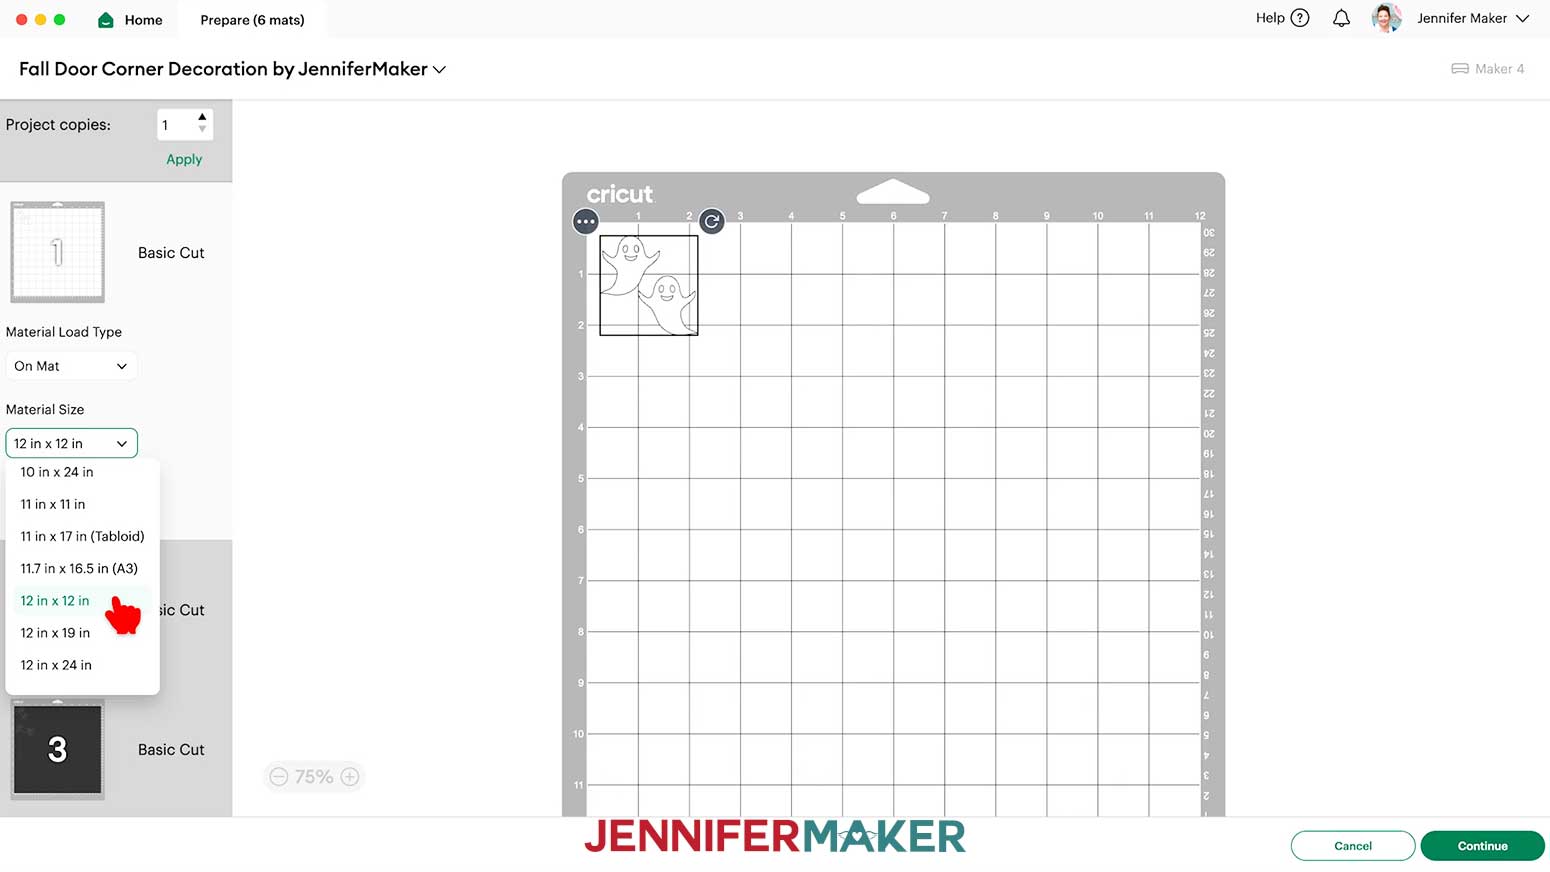
- On the Prepare screen, make sure the correct “Material Size” is selected for your mats.
NOTE: I’m using “12 in x 12 in” for all my mats. - Select the first main layer mat so it loads first on the next screen and click “Continue.”
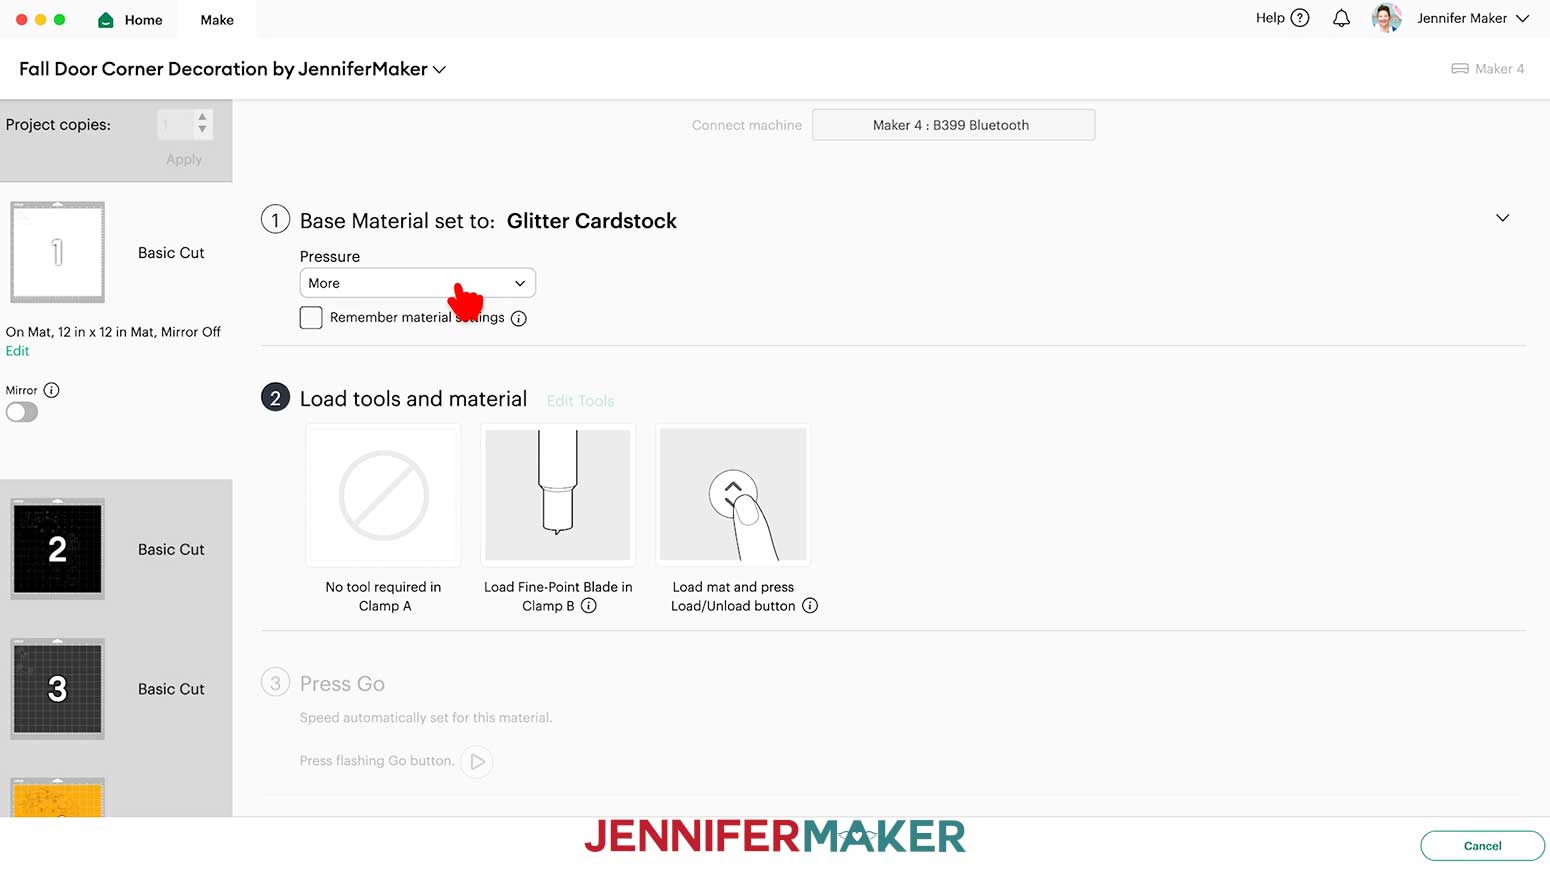
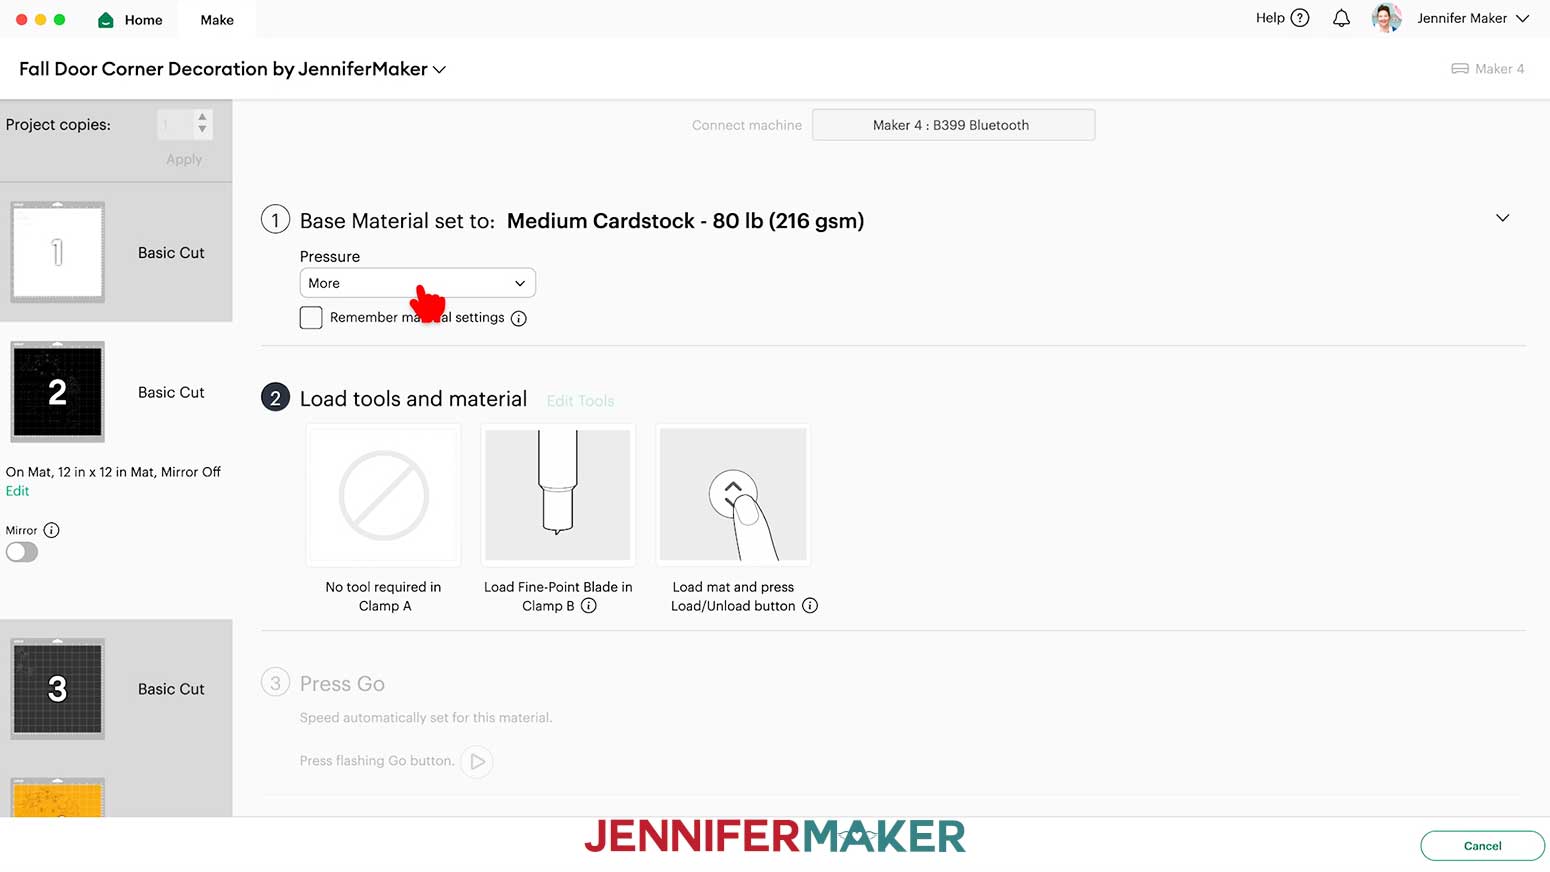
NOTE: Mine is the white ghosts layer, but yours may be different if you have changed some colors. - On the Make screen, set the “Base Material” for your first mat. I’ll use the “Glitter Cardstock” setting with “More” Pressure.
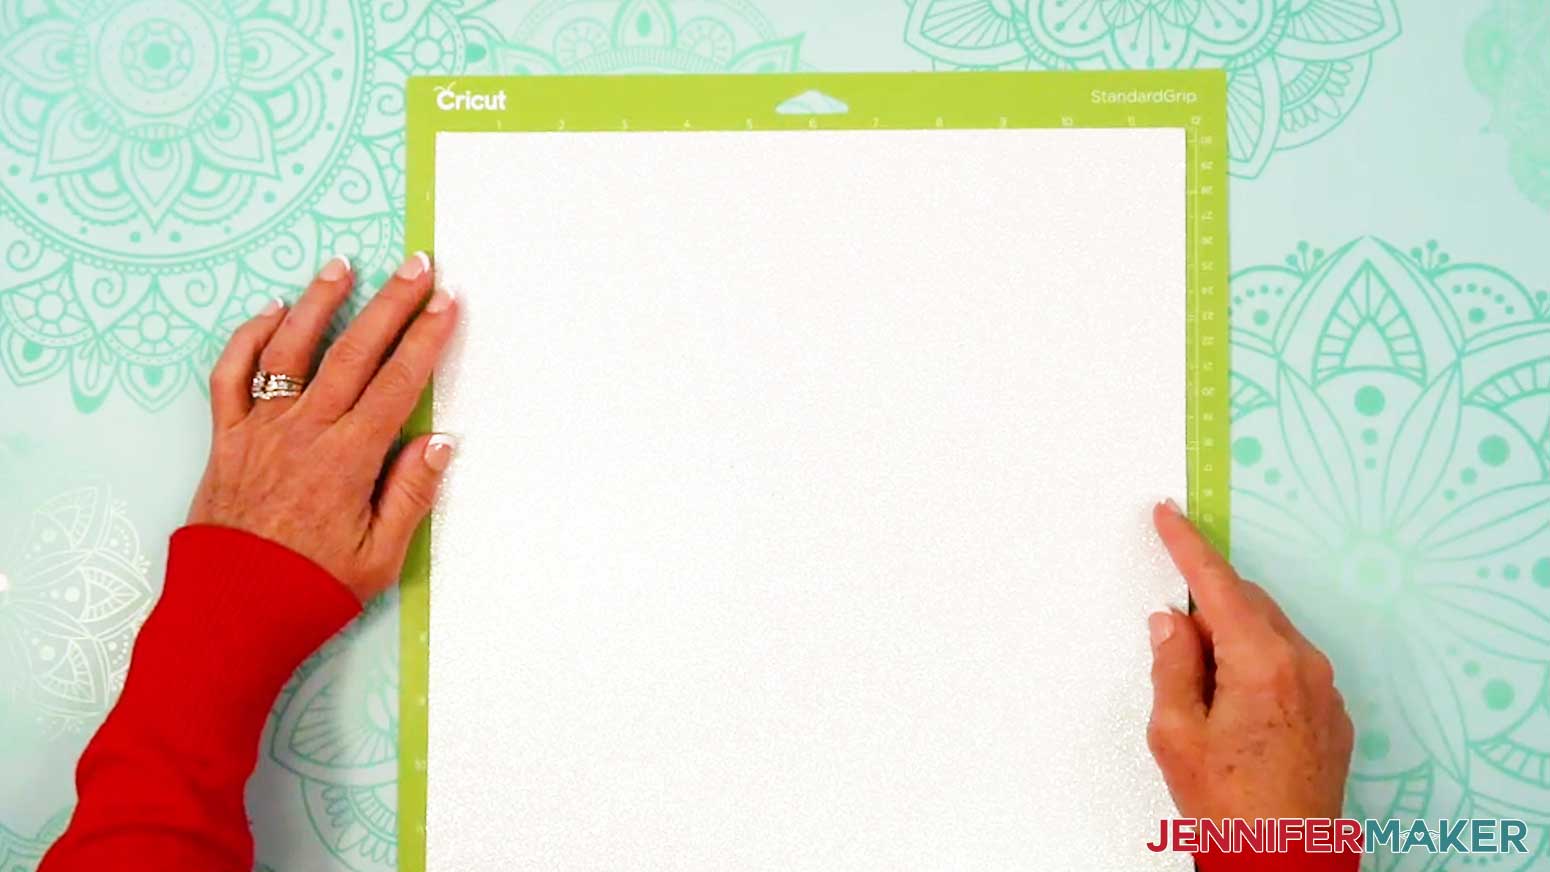
NOTE: I used glitter cardstock for my ghosts and spider pieces. - Place your glitter cardstock pretty-side up on a green StandardGrip machine mat.
- Use a brayer to make sure it’s fully adhered.
- Check that your Premium Fine-Point Blade is clean and in the correct clamp.
- Press the flashing “Load/Unload” button to load the prepared mat into your Cricut.
- Press the flashing middle button to begin cutting.
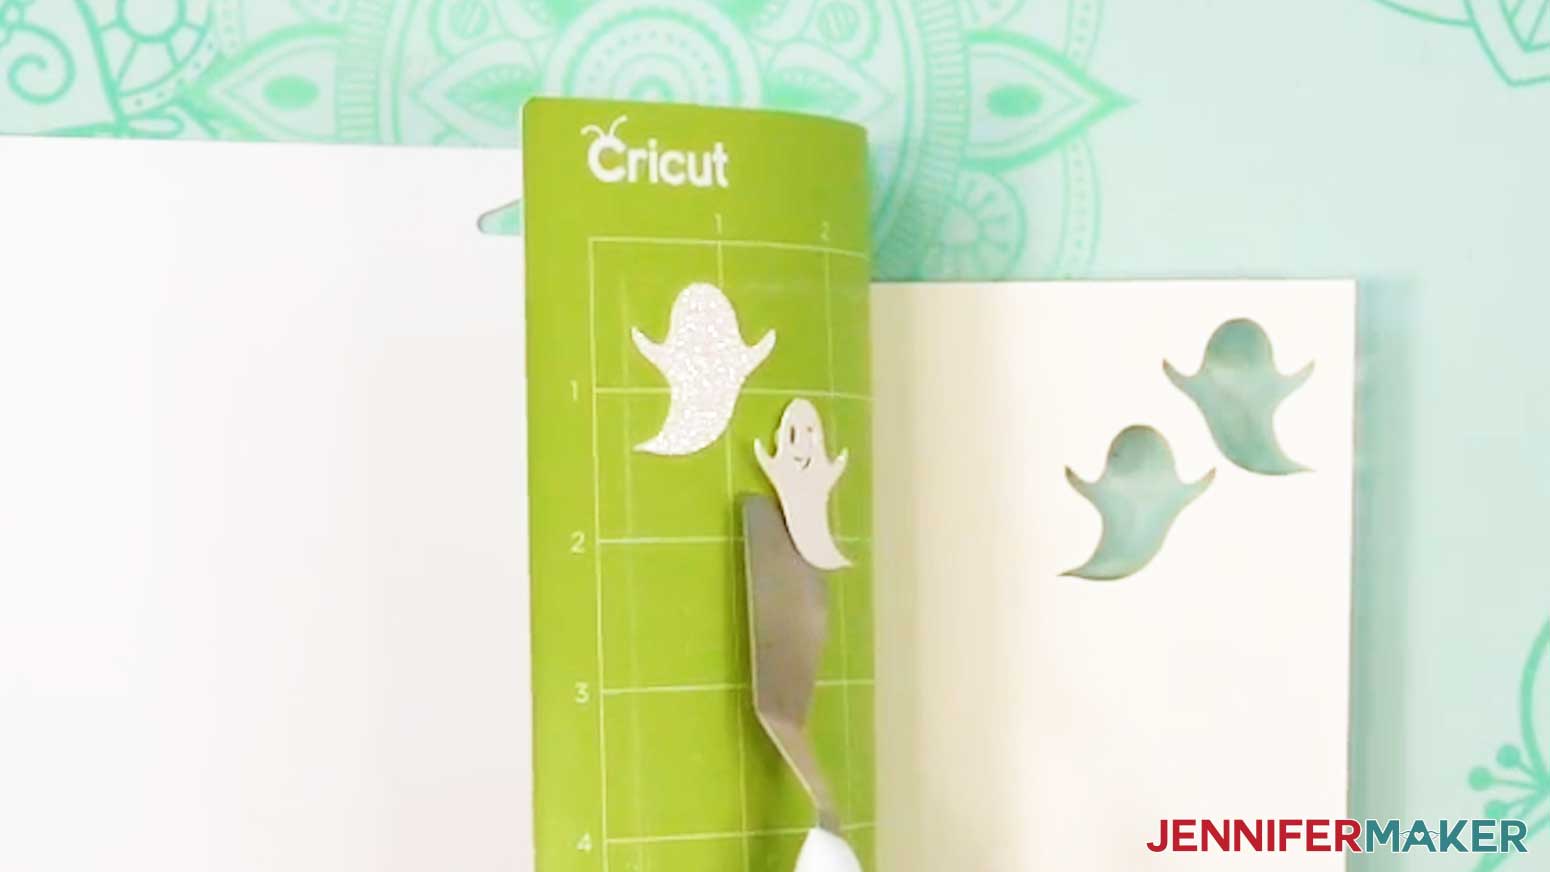
- Before unloading the mat, use your weeding tool to peel back a corner of the material to make sure the cut went all the way through. If it didn’t, smooth the material back down into place and press the middle button again for another pass.
- Once the material is cut all the way through, unload the mat, flip it over onto your work surface, and roll it back to release the material.
TIP: If you have any issues with your cuts, check out my Intricate Cuts tutorial. - Use the spatula to help lift delicate parts, and your weeding tool to poke out small bits of cardstock that may have been left behind.
- Use a scraper tool to remove the small bits left on your mat after you remove the cut pieces.
- Repeat Steps 6-14 to cut the rest of your glitter cardstock layers.
NOTE: Glitter can stick to the blade and cause trouble on your future cuts, so I recommend cleaning it after each sheet of glitter cardstock. You can take the housing and blade out of the clamp, press down on the plunger, and carefully poke the blade into a ball of aluminum foil several times, or clean it with an alcohol wipe. Be careful, it's sharp! - To cut your main cardstock layers, change your Base Material to the “Medium Cardstock - 80 lb (216 gsm)” setting with “More” Pressure.
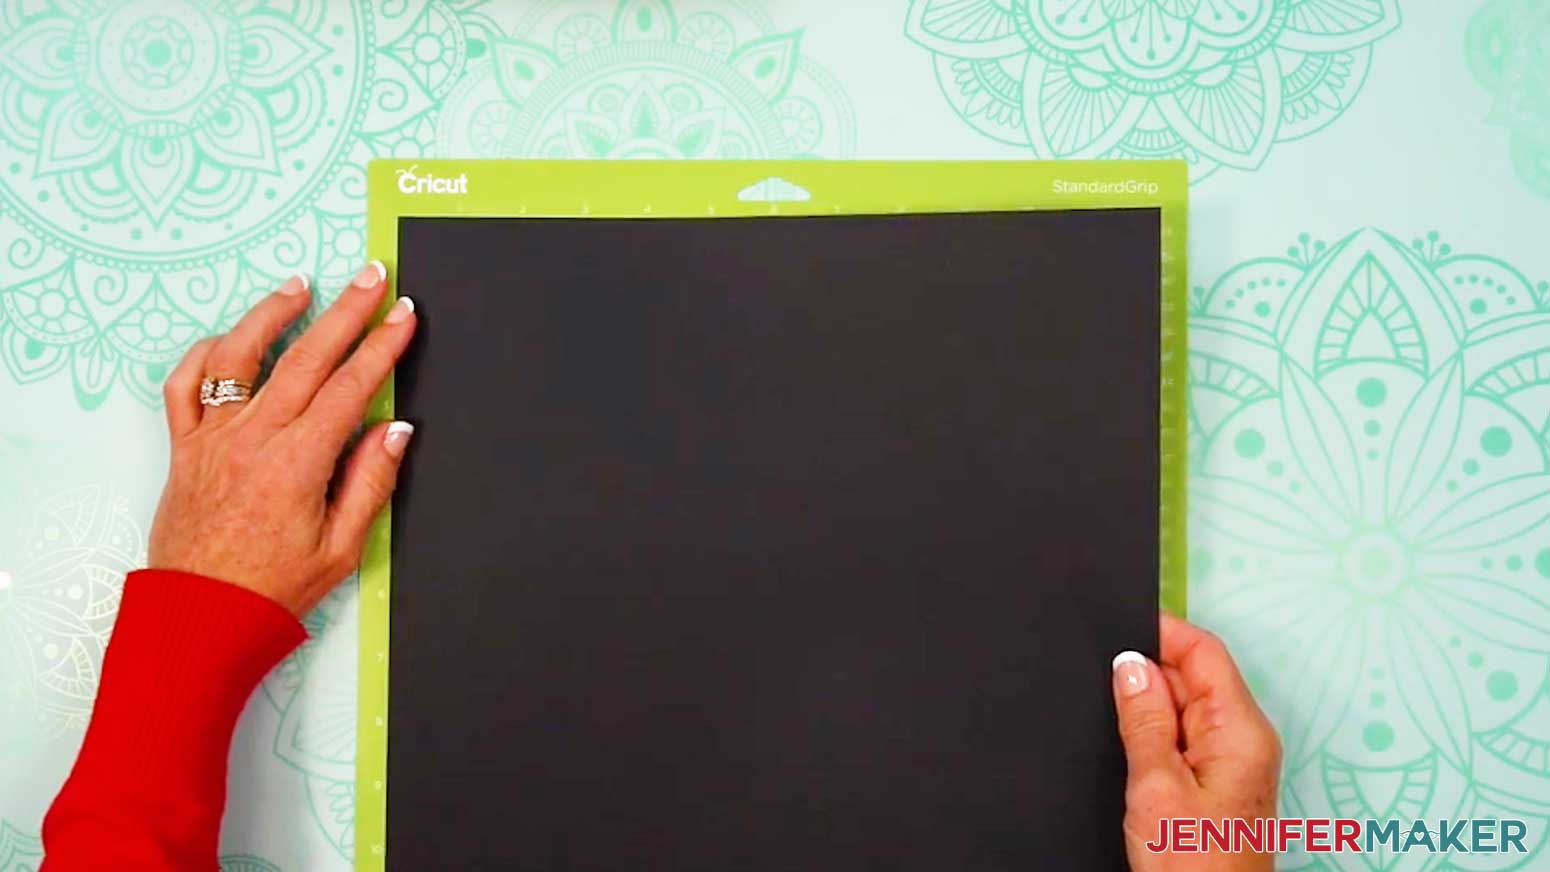
- Place your regular cardstock face up on a green StandardGrip machine mat.
- Use a brayer to make sure it’s fully adhered.
- Then follow Steps 8-14 to cut your regular cardstock mats.
- Lay your cut pieces face up in organized piles.
STEP 4: ASSEMBLE YOUR FALL DOOR CORNER DECORATION
NOTE: I’ll demonstrate with the “Boo” design, but the “Fall” design follows the same steps.
- Using your Canvas in Cricut Design Space as a reference, stack your main layers face up from top to bottom.
NOTE: If your layer colors match the ones I used, the yellow layer goes on the bottom, the orange layer goes in the middle, and the black layer goes on top. - Set aside the two ghost and two spider pieces for now.
- Flip your project’s top and middle layers over onto your work surface beside the bottom layer (like you’re turning the pages of a book).
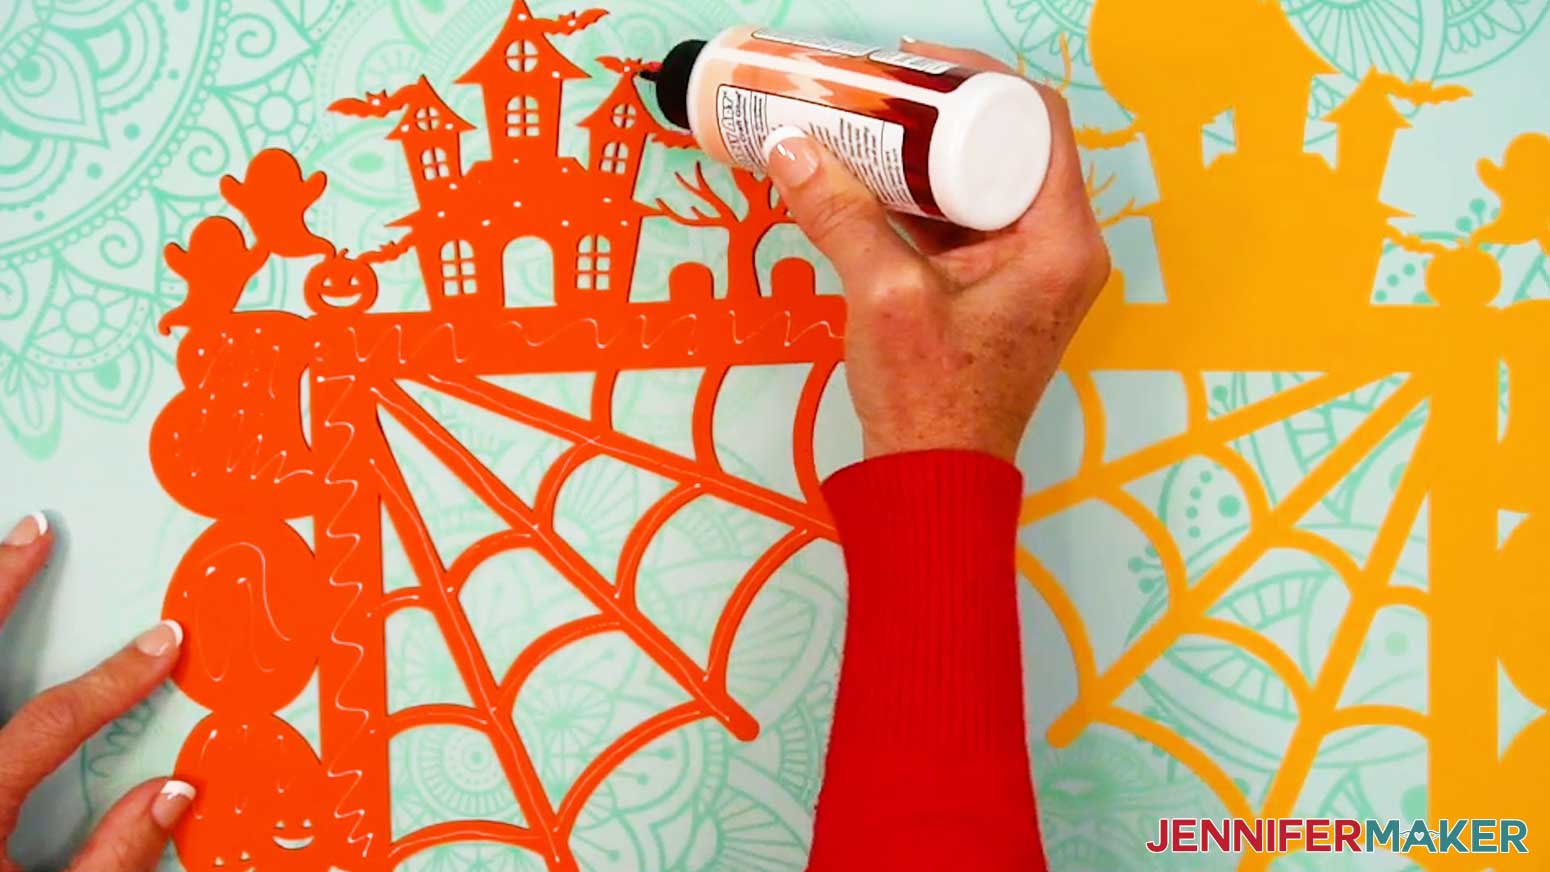
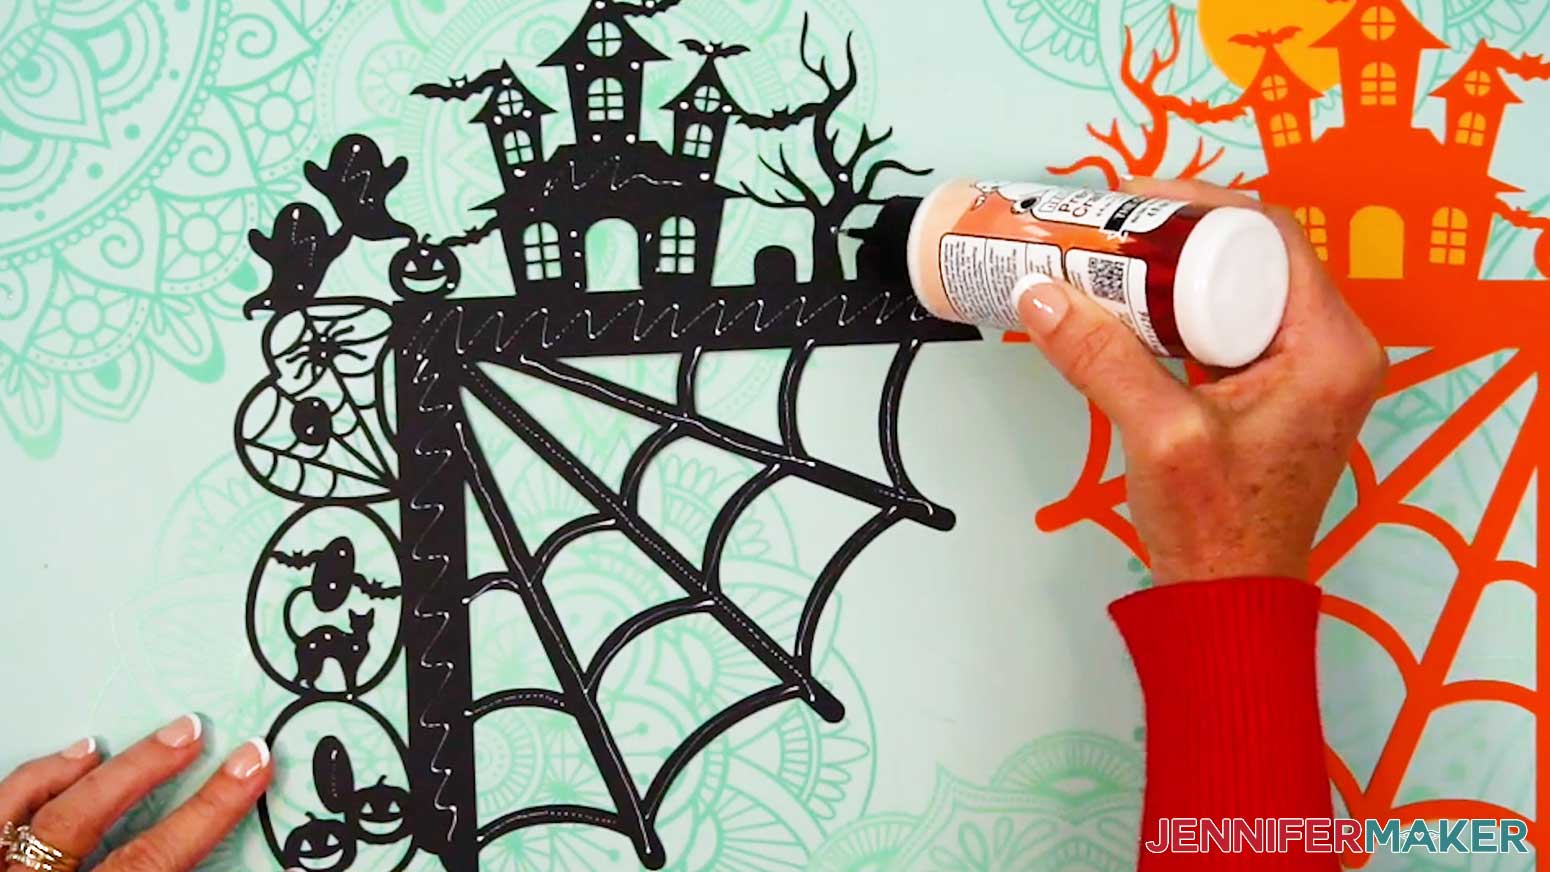
- Apply craft glue to the back of the middle layer.
TIP: Add small dots of glue to the thinnest areas to avoid seepage. - Flip the glued side of the middle layer onto the bottom layer.
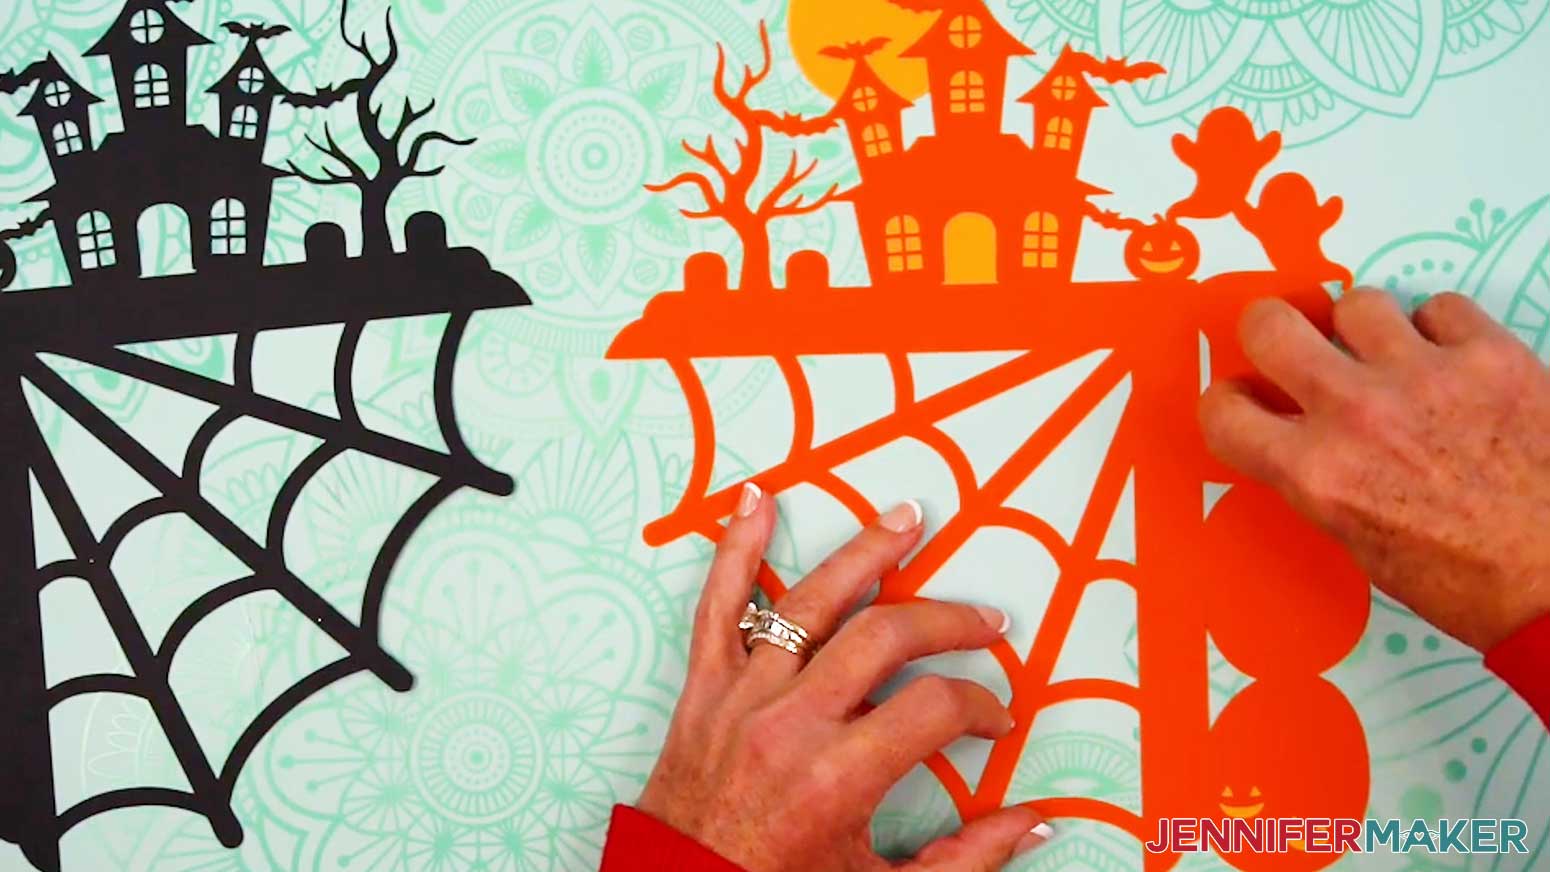
- Using the L-shaped corner piece as a guide, line up the edges of the middle and bottom layers. Be sure the edges of all areas are aligned and flush before the glue dries.
- Press and smooth the layers together over the entire design to adhere them, paying special attention to the thin cut areas.
- If any glue seeps out from the edges or from underneath the cutouts, quickly wipe it away with a finger or paper towel.
- Repeat Steps 4-8 to adhere the back of the top layer to the front of the middle layer.
- Check for any thin areas of the cardstock layers that aren’t fully adhered (like the tips of the branches), then apply a small amount of craft glue between those areas and press them into place.
TIP: The precision tip on your Bearly Art glue works well for this! - Lay the assembled layers face up and grab the ghost and spider pieces.
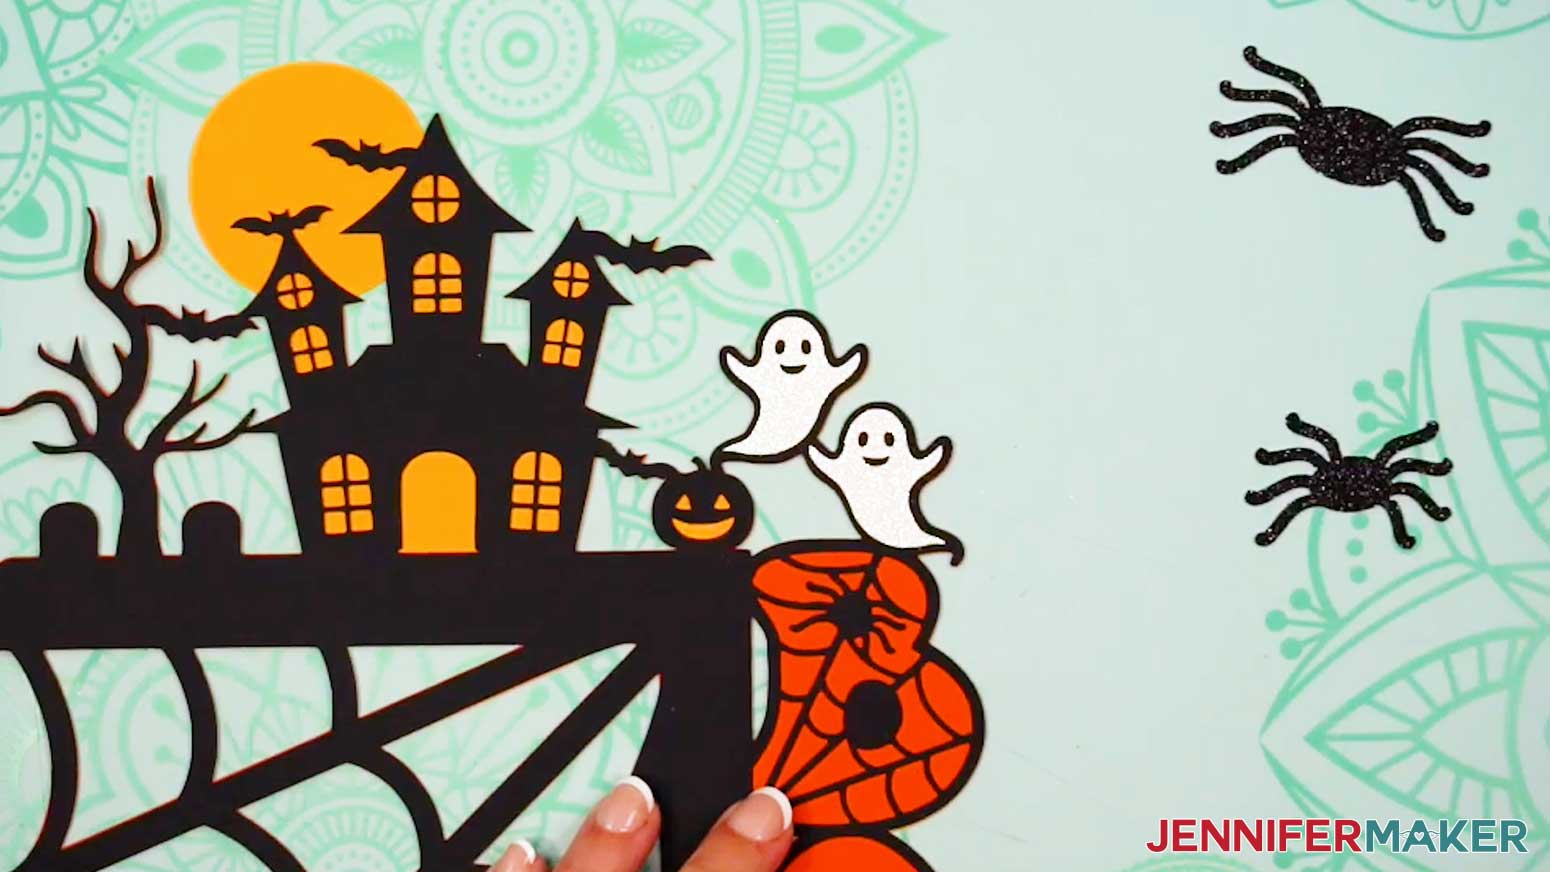
- Center the ghosts pretty-side up in their placeholder spots on the top layer to make sure they’re oriented correctly.
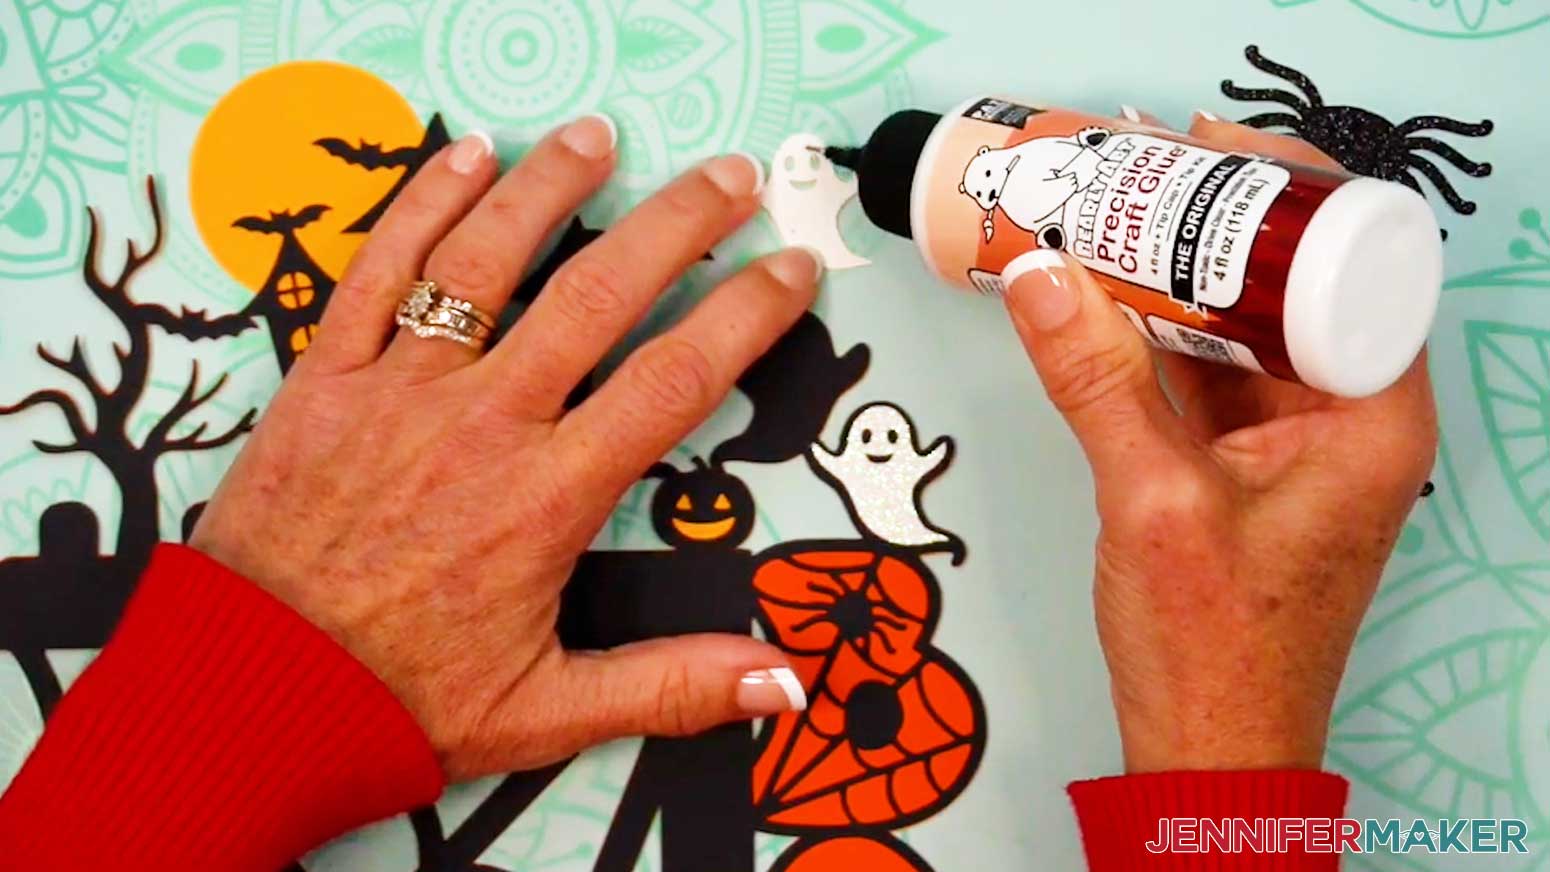
NOTE: There should be an even border of black around the ghosts. - Flip over the left ghost piece and apply glue to its back, avoiding the eye and mouth cutouts.
- Center the ghost glue-side down on its placeholder.
- Press and smooth to adhere it, then wipe away any excess glue.
- Repeat Steps 13-15 to adhere the right ghost piece to the top layer.
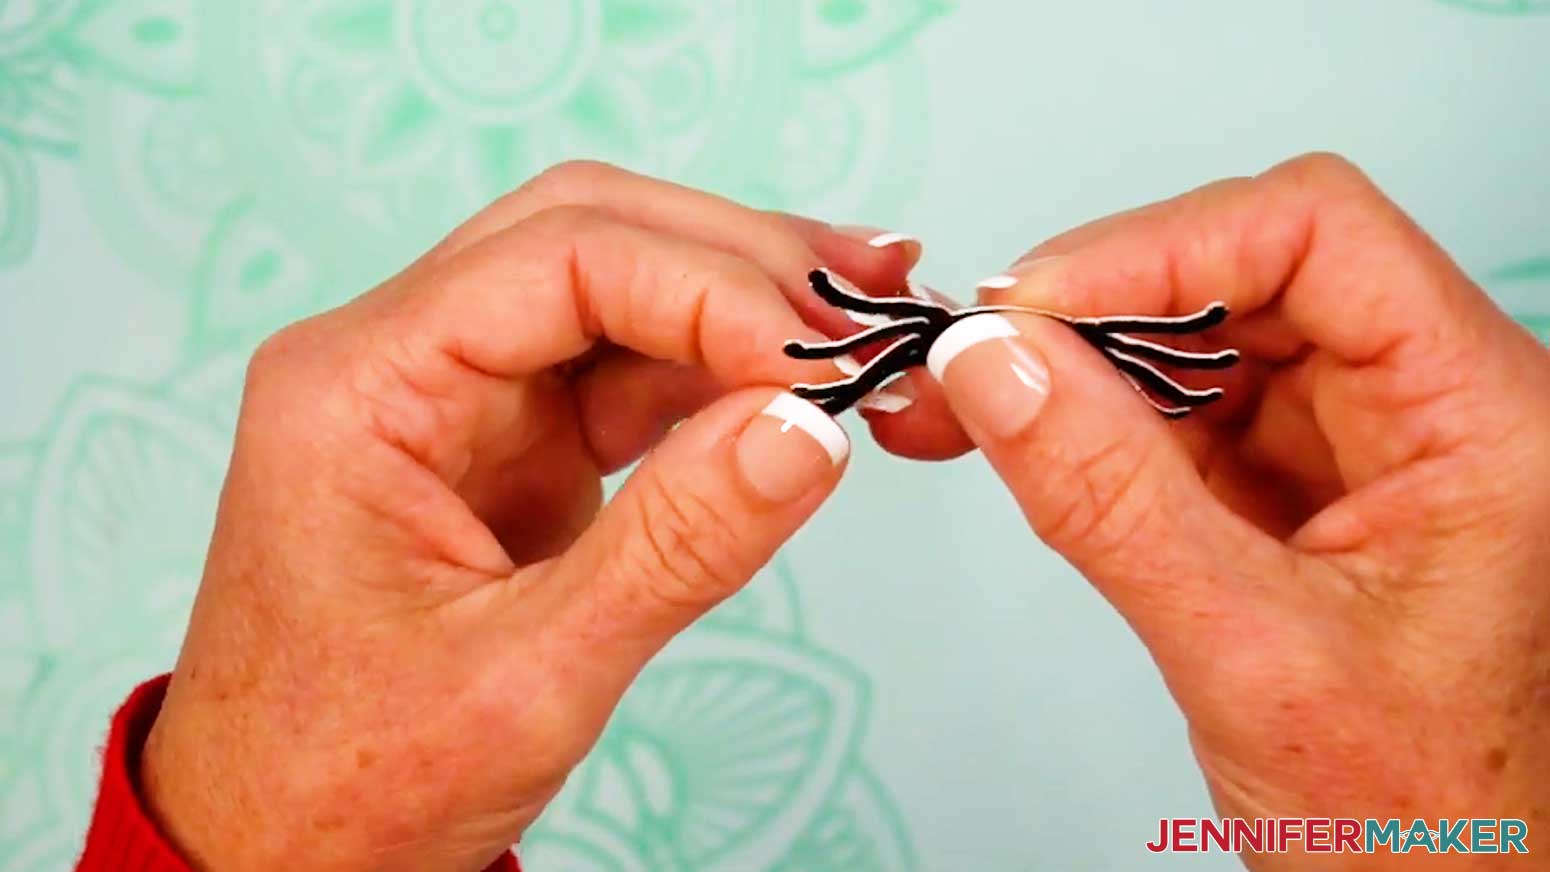
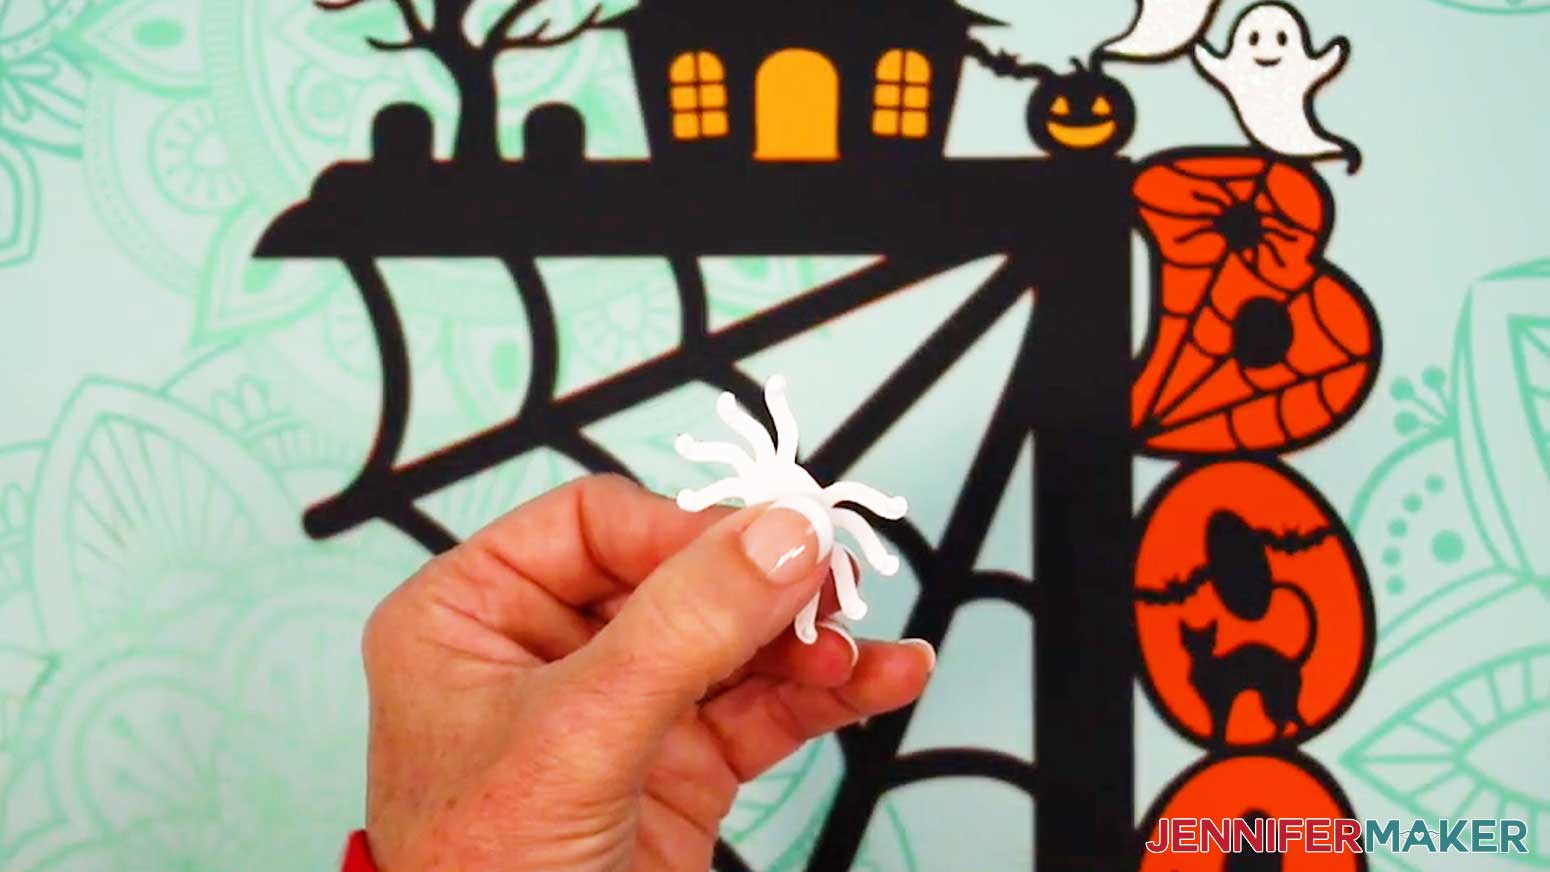
- Using your fingers, slightly curl each spider’s legs above its body and flatten out its feet to add dimension.
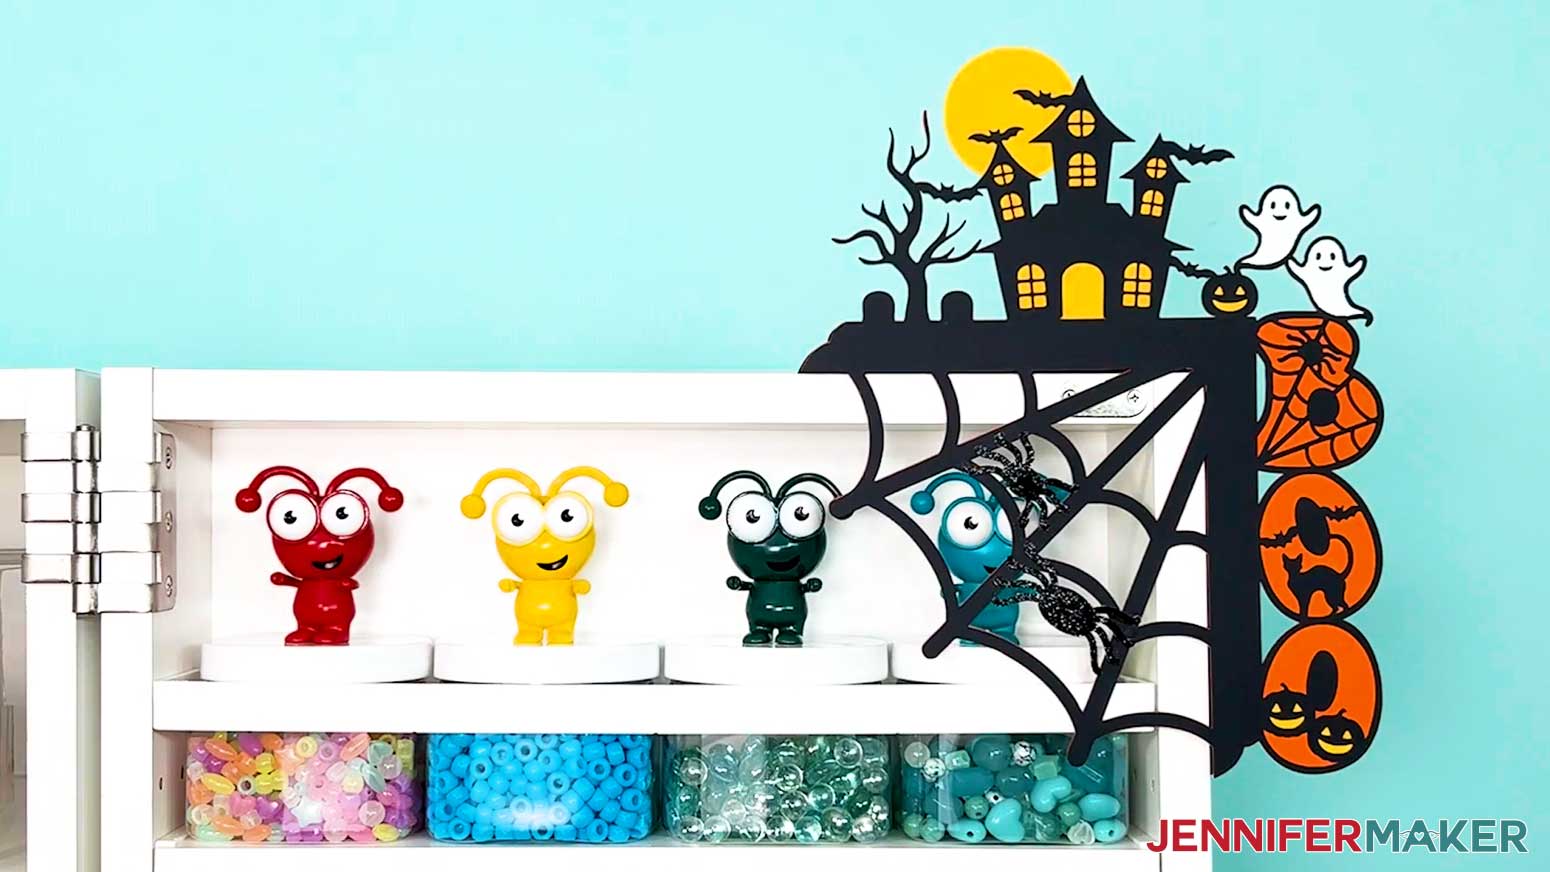
- Place the two spiders pretty-side up on the top layer so all eight of their feet touch the webbing.
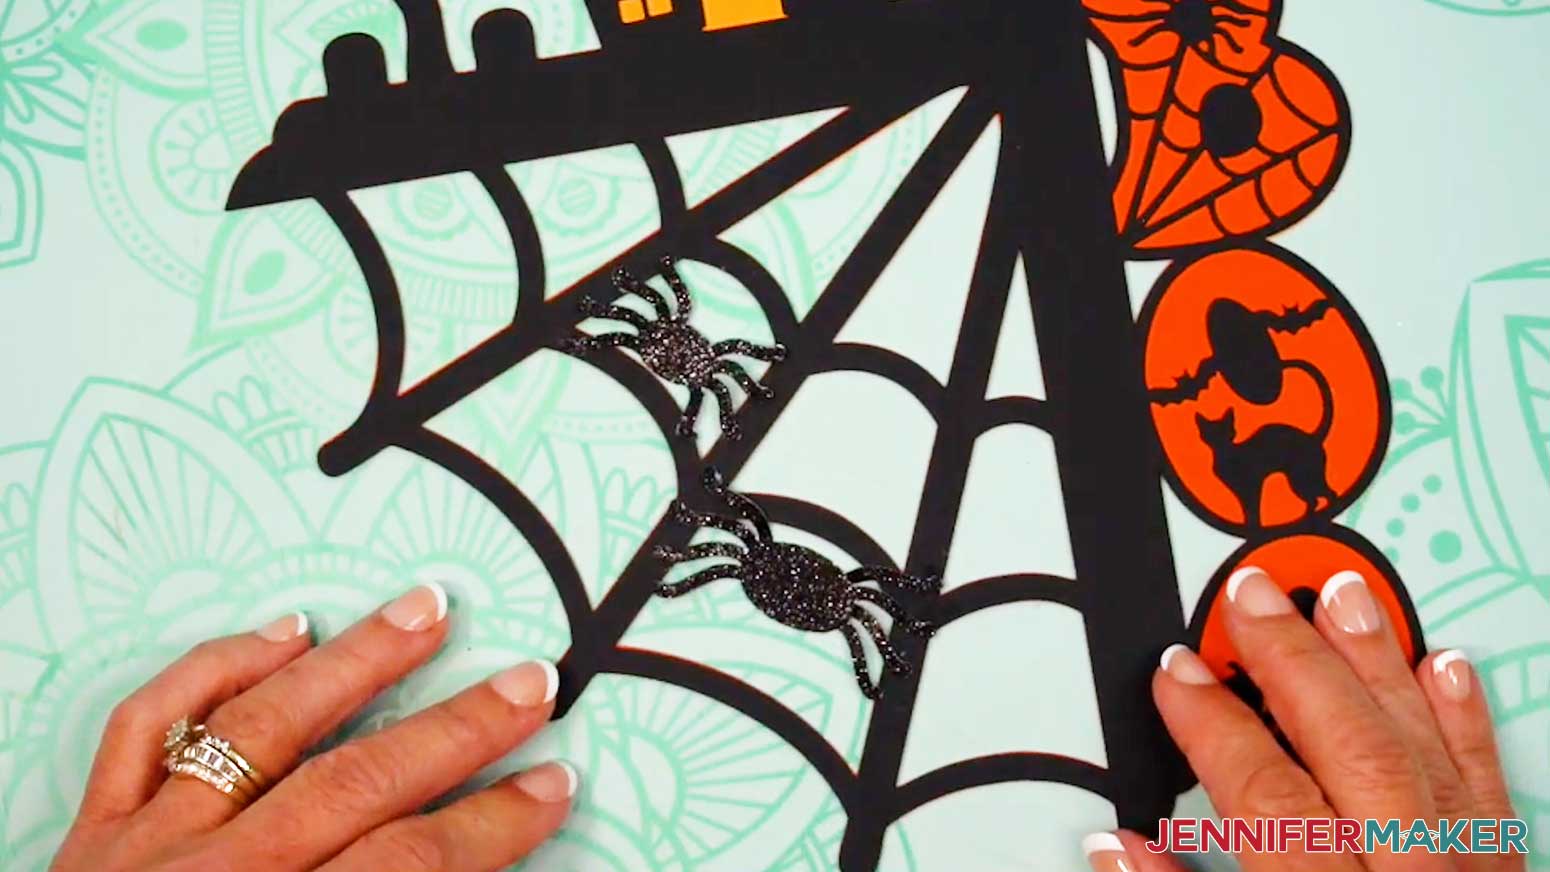
NOTE: The small spider fits best in the web’s middle section, while the large spider fits best in the web’s large section. - Flip over one of the spiders and add dots of glue to the back of each foot.
- Then flip the spider pretty-side up and press it into place on the top layer, making sure each foot adheres to the cardstock to secure it.
- Repeat Steps 19-20 to attach the other spider.

STEP 5: APPLY FOAM ADHESIVES TO THE BACK OF YOUR FALL DOOR CORNER DECORATION
NOTE: You can use stacked foam adhesive to attach your door corner decoration to the wall, or you can use the Blu-Tack or Command strips listed in my materials to attach the decoration directly to the door frame. I'll show you how to stack the foam adhesive below.
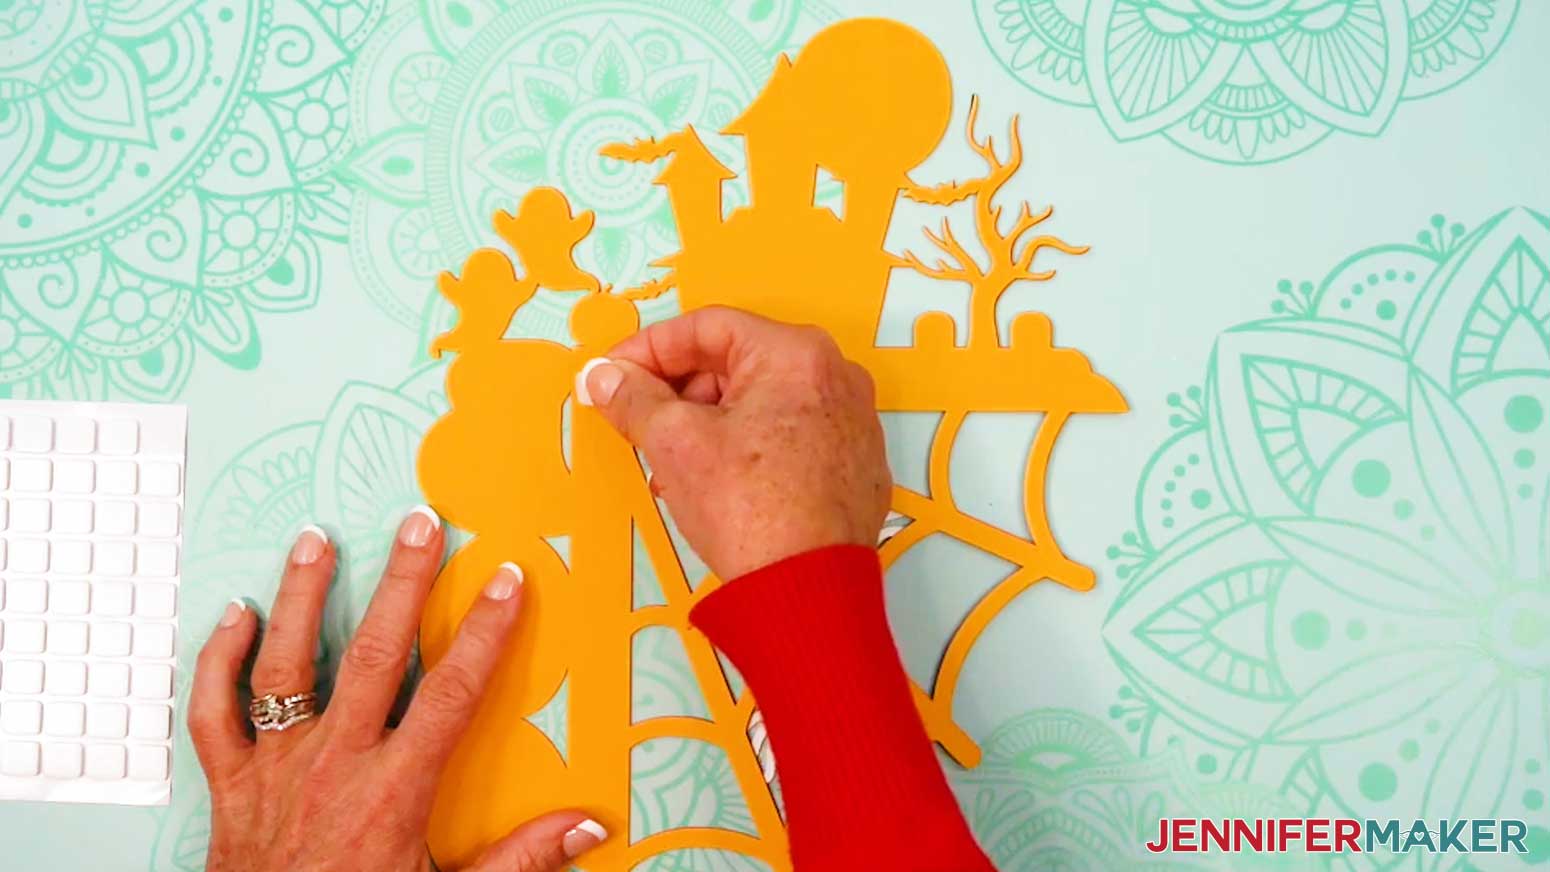
- Flip your assembled project face down.
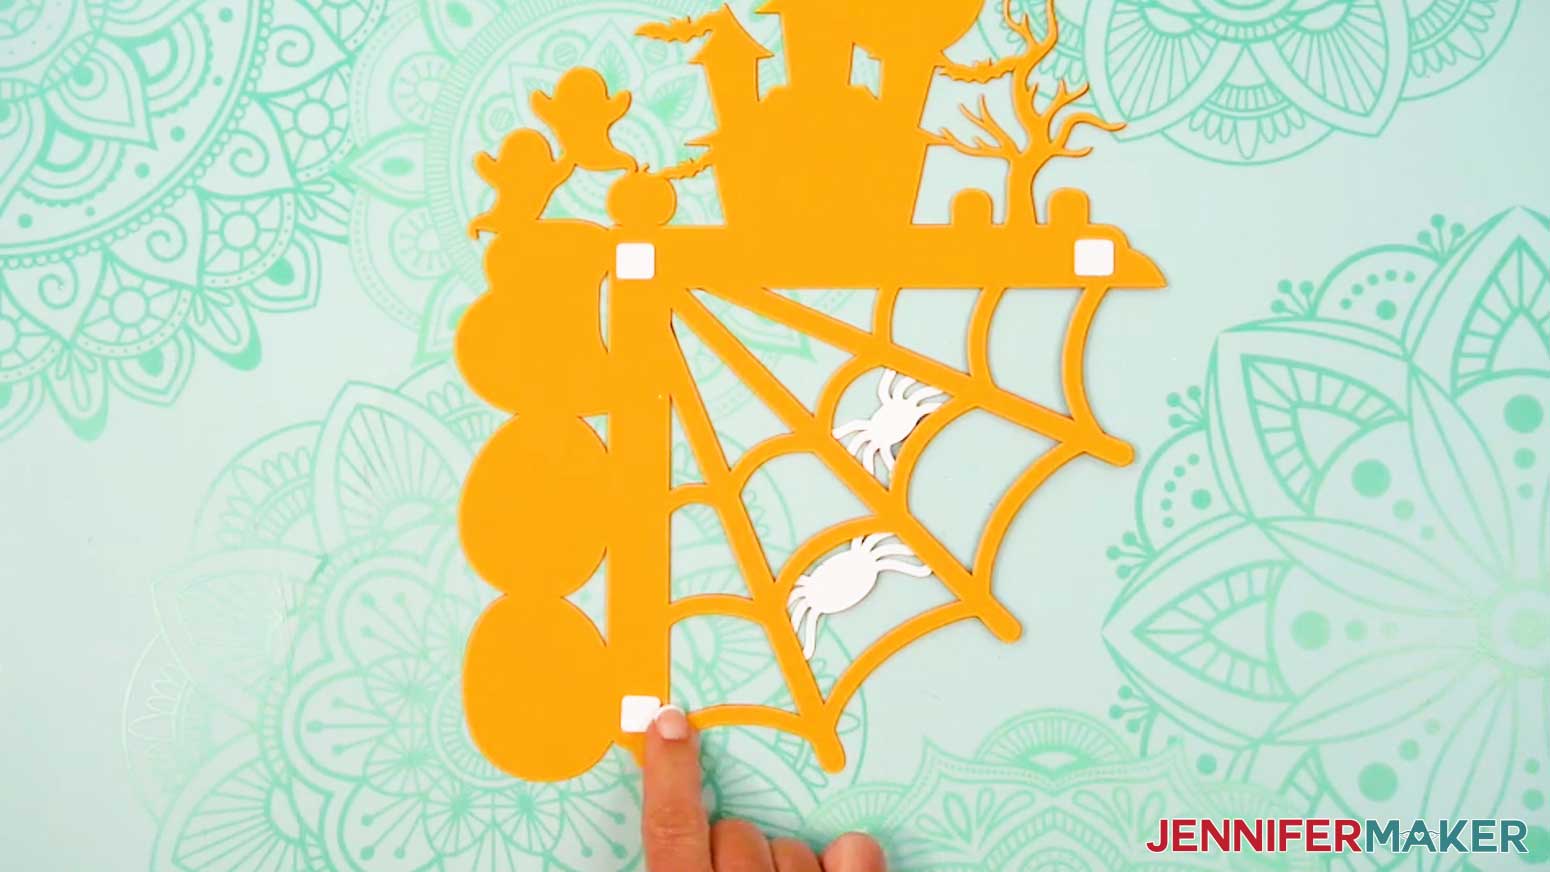
- Peel a foam adhesive square from the carrier sheet and press it sticky-side down in the corner of the L-shaped corner piece.
- Then press a foam adhesive square onto both ends of the L-shaped corner piece.
- Peel the backing from each foam adhesive square, then add an additional square sticky-side down directly on top of each square on the corner piece.
- Repeat Step 4 to add two more layers of squares in each spot.
- Peel the backing from the last foam square in each stack.
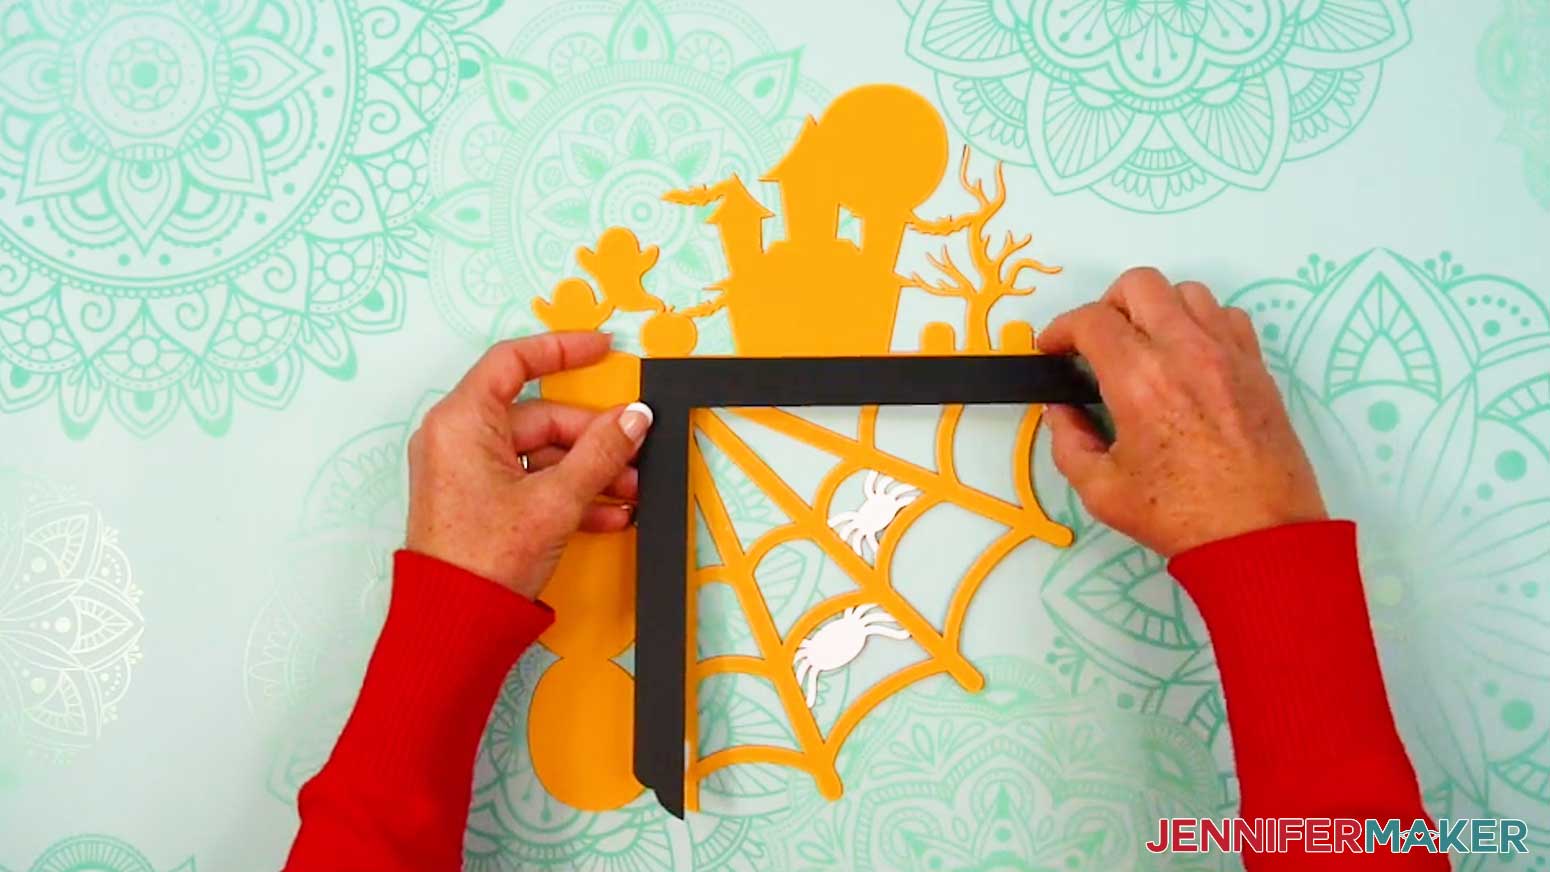
- Line up the back support piece so it’s flush with the L-shaped corner piece, then press it into place.
VARIATION: HELLO FALL DESIGN
- Order of layers: There are seven layers. If your colors match the ones I used, the dark brown layer goes on the bottom, with the light brown layer over it, the green layer over that, then the red layer, the yellow layer, the orange layer, and then finally the black layer on top.

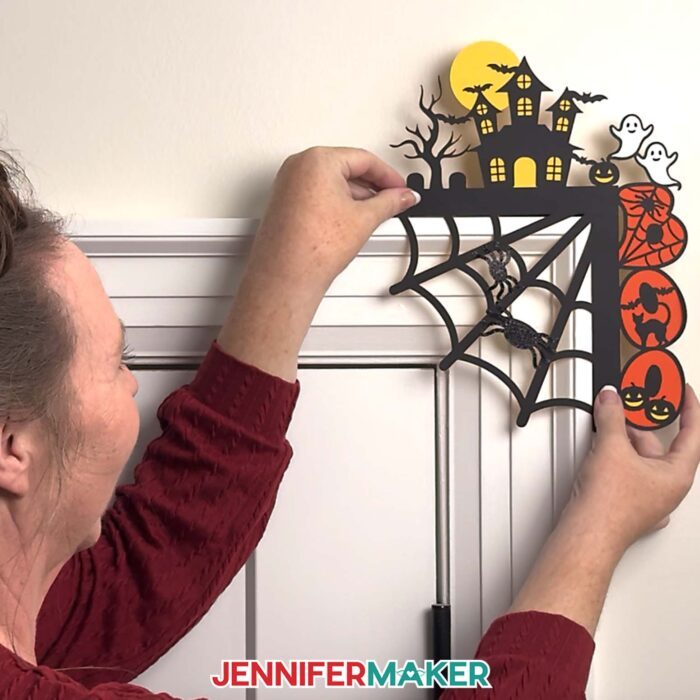
STEP 6: SHOW IT OFF!
Here are my finished fall door corner decorations! 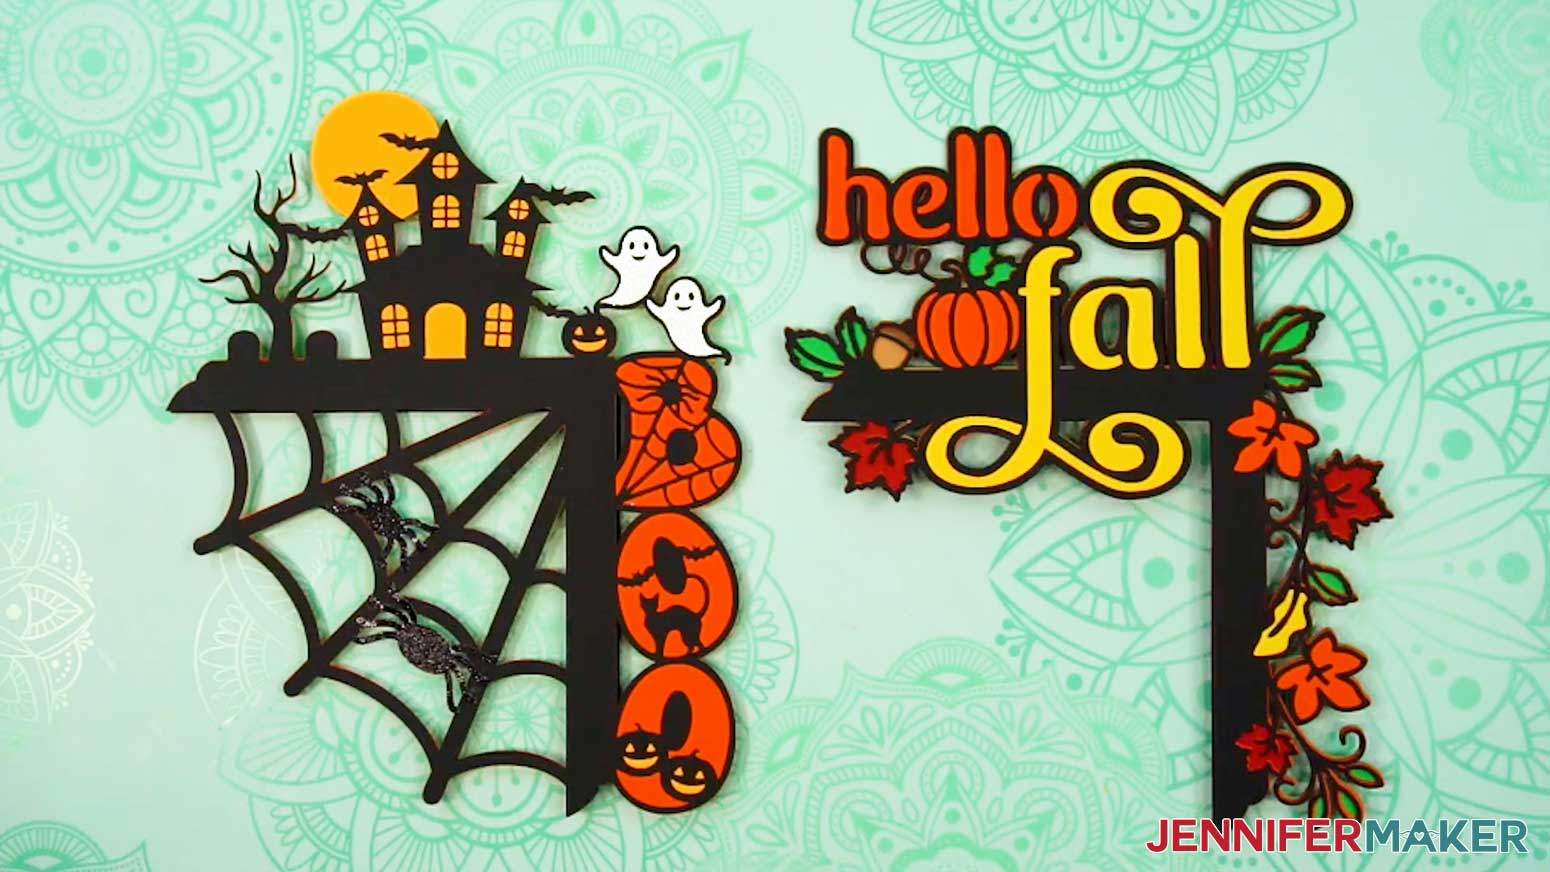
To install your corner decoration, simply rest the back support piece on top of your door frame. For the “Boo” design, you can use small pieces of Blu-Tack to secure the thin webbing pieces to the door frame for extra security.
Make sure to attach your decoration on the corner of a door that swings away from it so you don’t tear the cardstock in the inner corner area. 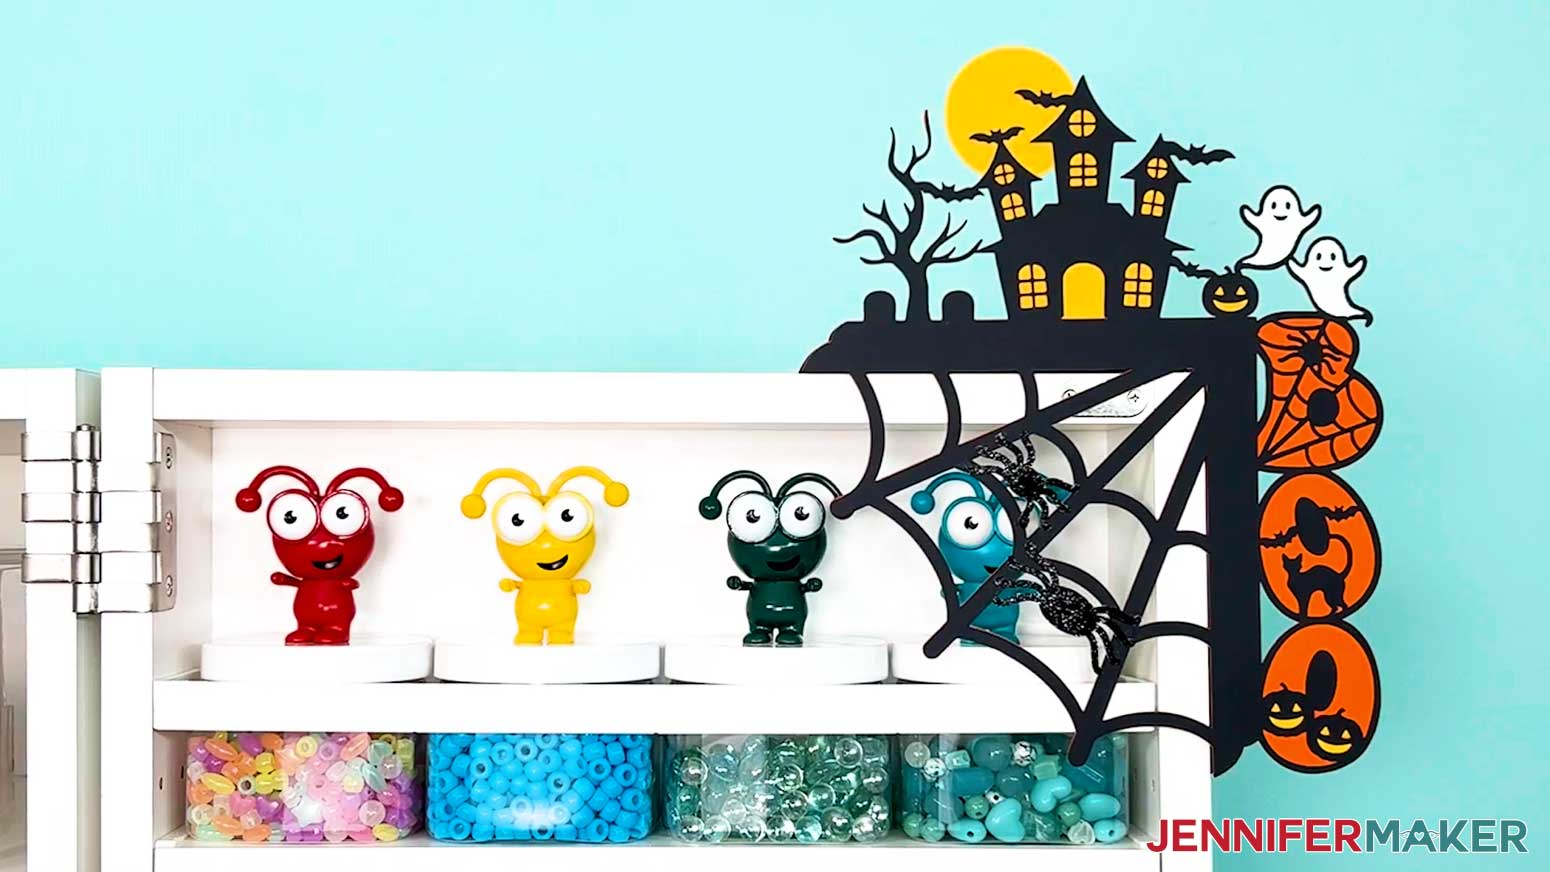
Notes
Finished door corner topper measurements: about 9”W x 11”H
Typefaces used:
JM Groovy
Foghe / Free alternative: Bohemian Soul
Answers to Your Questions About Making Door Corner Decorations
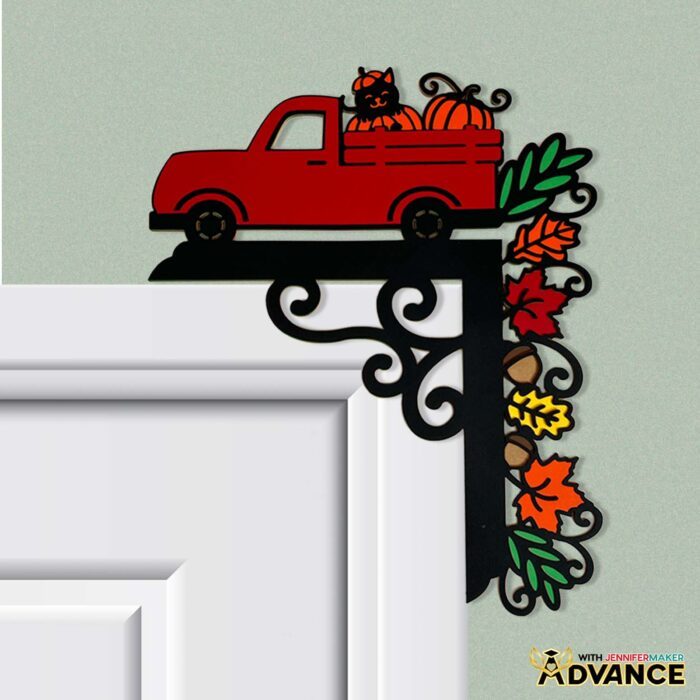
Q: Is there a way to create a custom fall door corner decoration design?
A: You can learn how to create your own customized fall door corner decorations like the truck below in my ADVANCE program. Learn more about ADVANCE here!
Q: What is the best setting to cut cardstock on Cricut?
A: I typically use the “Medium Cardstock” setting with “More” pressure to cut light and medium cardstock, and it works well! To cut heavier cardstock, I use the “Heavy Cardstock” setting, also with “More” pressure.
Q: What blade do you need to cut cardstock on Cricut?
A: I use my Premium Fine-Point blade for most of my Cricut projects, cardstock included. Clean the blade often and it will hold up for a long time!
Q: Can I make door corner decorations without a Cricut?
A: Yes! It is much easier to cut the shapes precisely with a cutting machine, but along with SVG files for Cricut, I’ve included a PDF version in the free design folder so you can cut the pieces by hand with scissors or a craft knife.
Q: Can I resize the door corner topper SVGs?
A: Yes, you can slightly resize the SVGs in my free download. I don’t recommend sizing them a lot smaller because they will be very tiny and hard to cut, but you can size them small enough to cut on 8.5″ x 11″ material.
Q: Why is my Cricut not cutting all the way through my cardstock?
A: Your blade may need to be cleaned. Check out my Tips for Cleaner Cuts blog post to troubleshoot your cutting problems.
Q: How can I tell which weight my cardstock is if I lost the packaging?
A: I would find a piece of cardstock of a known weight, then compare it to the unknown pieces. The feel of each weight is very different, so the heavier the weight, the stiffer the cardstock.
Q: I’ve downloaded the file and it opens to the door corner decoration as a Chrome HTML document and not an SVG.
A: The file is probably automatically opening in the browser. Open a new project in Cricut Design Space and upload the SVG file to the Canvas, then you can follow the tutorial.
Q: How can I make my door corner decoration more unique?
A: Feel free to customize your door corner decoration however you wish! Cut it from different types of cardstock, patterned paper, or dress it up with paint, stickers, sequins, feathers, or other craft supplies and seasonal elements.
Q: Can I cut a fall door corner decoration out of wood instead?
A: You can use my SVG or DXF files to make layered wooden door corner decorations using a Cricut knife blade, Glowforge, or another machine that can cut wood! Some delicate sections might be challenging, though.
Q: How do I attach the decoration to my door without damaging it?
A: The designs include a special back support piece that lets it rest right on the top corner of your door frame. For extra hold, you can use removable foam adhesive squares or blue tack. Both work great and won’t harm your paint or trim.
Q: Help! My Cricut Design Space screen looks different from yours!
A: If you’re using the latest version of Cricut Design Space, your screen may have slight variations from the screen you see on the video tutorial. Good news! All of the same functions are there, they may just be in different spots or have new icons. Pause the video if you need, or follow along with the written tutorial. If you get stuck, ask for expert support in our Facebook group. Plus, you can catch the latest news on JenniferMaker tutorials and more.
Q: Can I make and sell fall door corner decorations using your design?
A: If you want to use my door corner decoration designs and project for commercial use, please familiarize yourself with my important licensing information before selling your crafts.
Get my free SVG/DXF/PDF files to make your own fall door corner decorations!
(If you do not see the signup form above, click here.)
I absolutely love seeing your lovely fall decorations! Once you’ve learned how to make fall door corner decorations, inspire others and share photos of your project in our Facebook group or tag me on social media with #jennifermaker.
Love,

Want to remember this? Save this Fall Door Corner Decoration Tutorial to your favorite Pinterest Board!