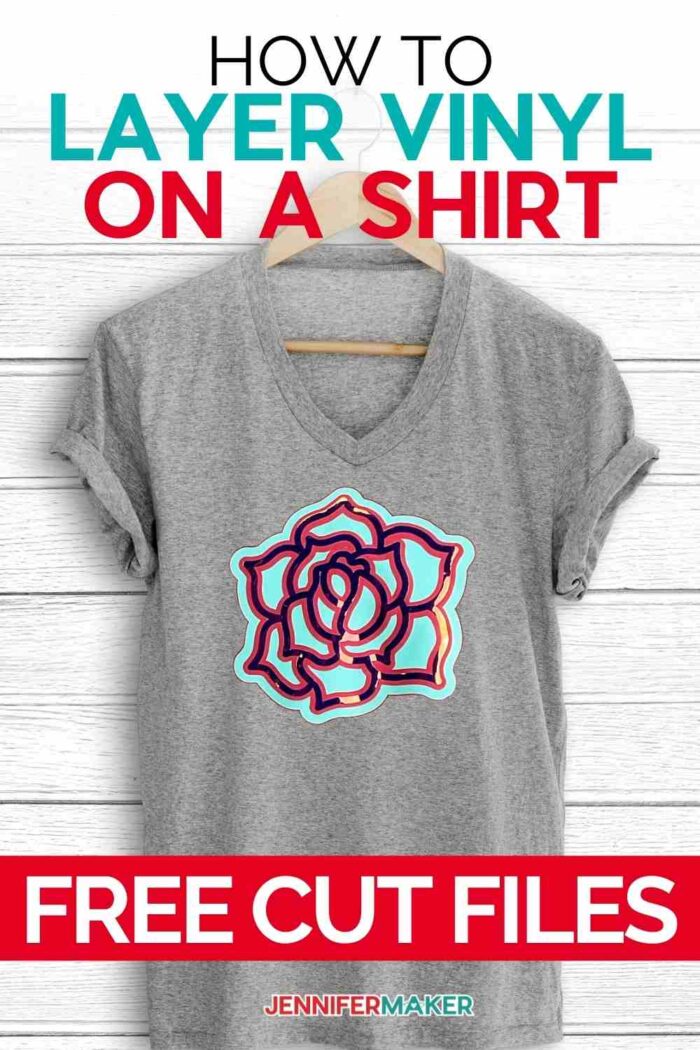
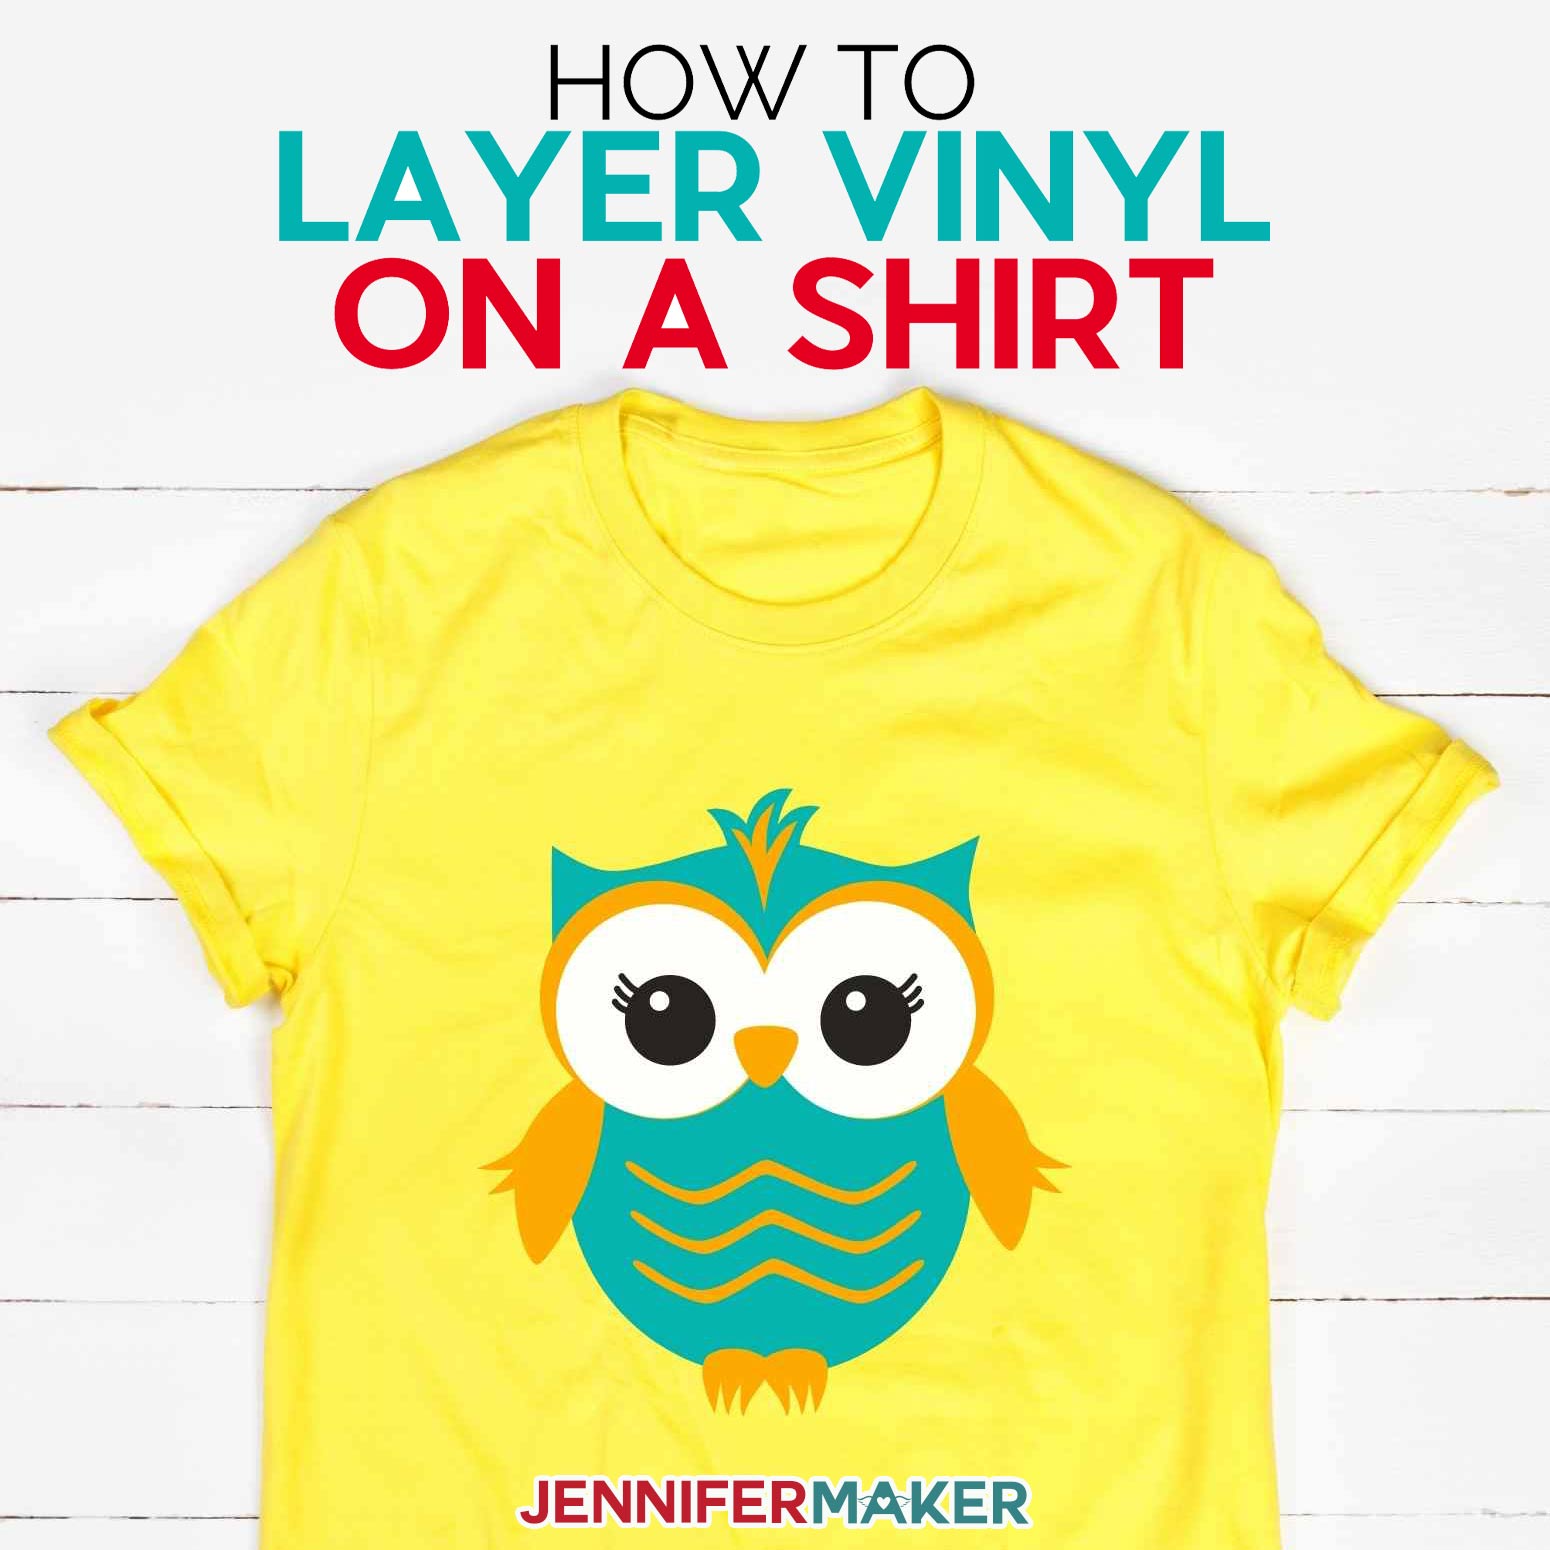
Learn how to layer vinyl on a shirt using everything from regular everyday iron on to glitter and holographic HTV in the right sequence for success!
Many people are intimidated by layering iron-on vinyl and I totally get it. Making a T-shirt with just one layer can be challenging! But when you factor in two, three or even four layers of iron-on vinyl there are a lot more steps and a lot more chances of messing things up. That’s why I wanted to put together a super simple and easy to follow tutorial that breaks down all the steps so instead of feeling confused, you can feel confident and TRULY know how to layer vinyl on a shirt!
Watch my step-by-step video tutorial on how to layer vinyl on a T-shirt with a Cricut!

So the first thing we need to know is what type of vinyl goes on a T-shirt? It might be obvious to some, but since I want to get back to basics here and make this super beginner friendly, let’s start with that.
The proper vinyl for iron-on projects is called “Iron-on Vinyl.” You may see others refer to it as HTV which is an abbreviation for “Heat Transfer Vinyl.” Iron-on vinyl/heat transfer vinyl is a vinyl that utilizes both heat and pressure to adhere to fabric.
Note that this type of vinyl is different from adhesive craft vinyl, also called “premium vinyl,” “permanent vinyl,” or “removable vinyl.” What makes iron-on vinyl different from regular craft vinyl is that it has a clear carrier sheet over the top of it. The vinyl is underneath and has heat-activated adhesive on the back side. When you use a heat source, like the Cricut easy press or an iron to apply the vinyl, the carrier sheet protects both the vinyl and your fabric because it’s heat-resistant.
You specifically want to use a vinyl that says it is an iron-on vinyl or a heat transfer vinyl when you’re applying it to a shirt. Iron-on vinyl and heat transfer vinyl can also be used on other materials but for this tutorial we’ll focus on fabric.
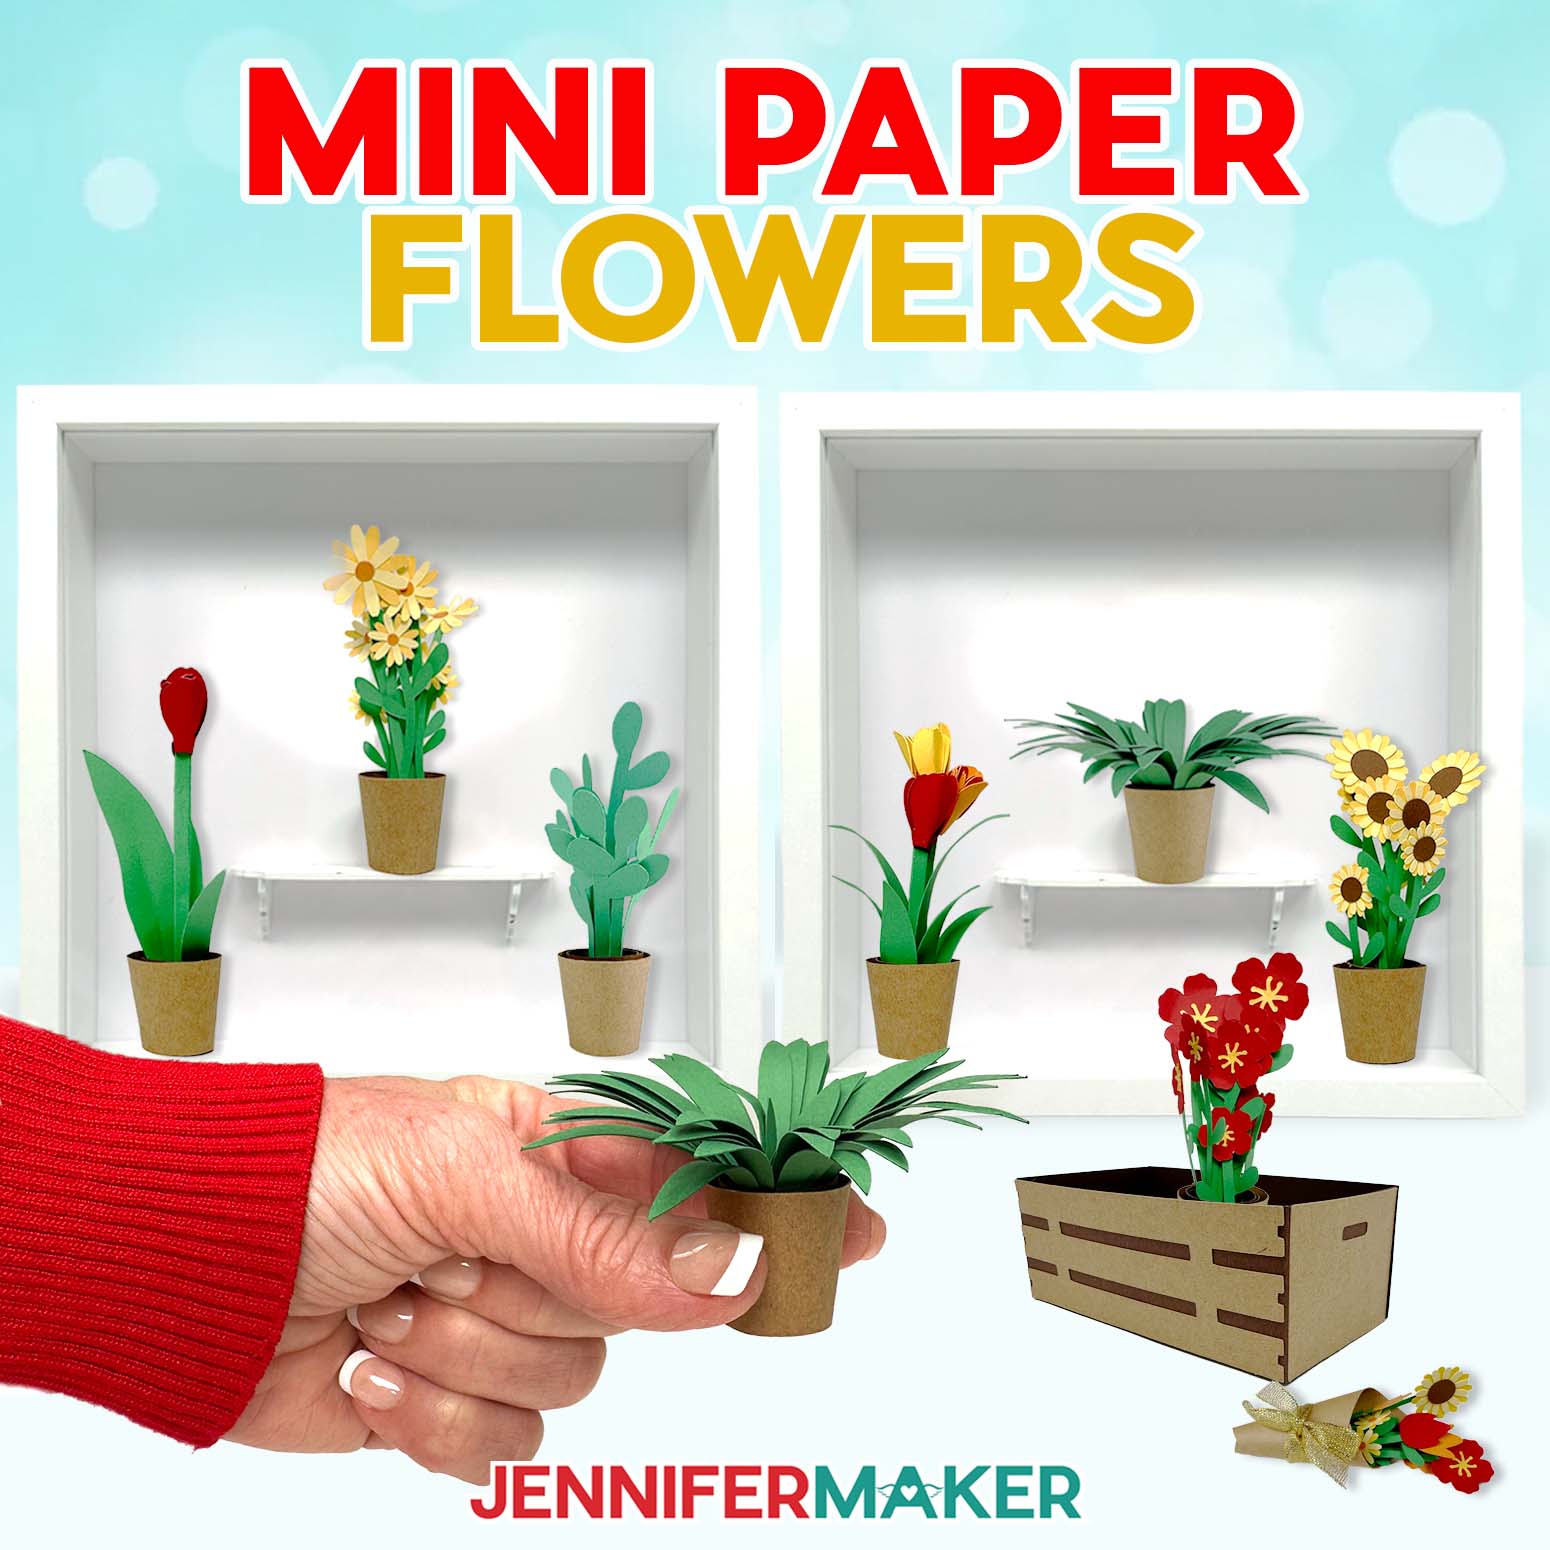
Iron-on vinyl comes in standard, “everyday” vinyl which has a smooth, matte texture. But you can also get it with different textures and finishes, including holographic, glitter, foil, flock, glow in the dark … just to name a few!
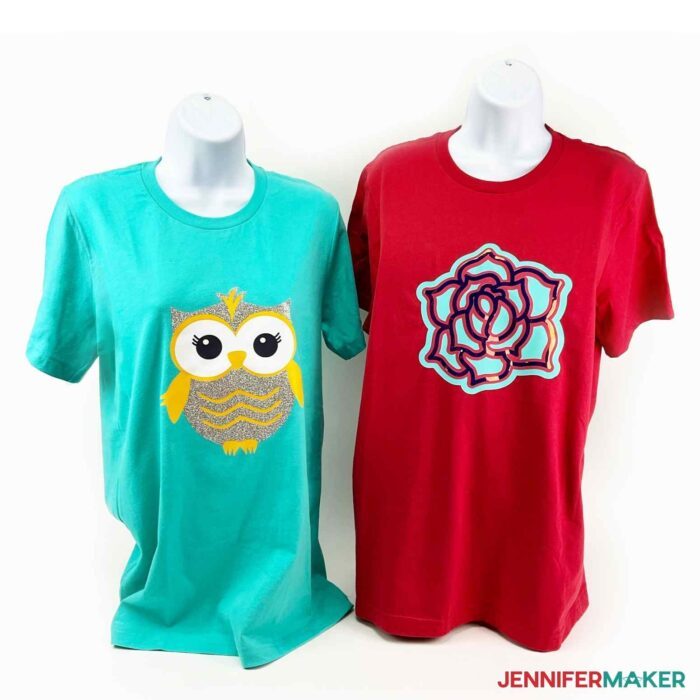
Now I’ve already taught you how to make iron-on vinyl shirts with a single layer of vinyl, so if you’ve done that are ready to learn how to layer, this is the tutorial for you! To help you learn this technique, I’m going to show you how to make a four-layer design with iron-on vinyl so we’ll need a few different colors of everyday iron-on vinyl, plus one optional layer of specialty vinyl — such as glitter or holographic — so I can show you the right layering sequence.
Specifically, I used these iron-on vinyls on my shirts:
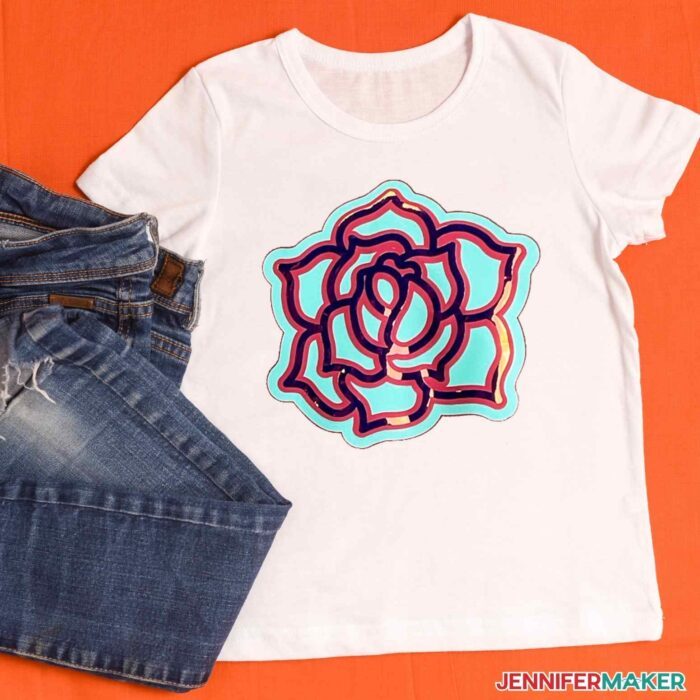
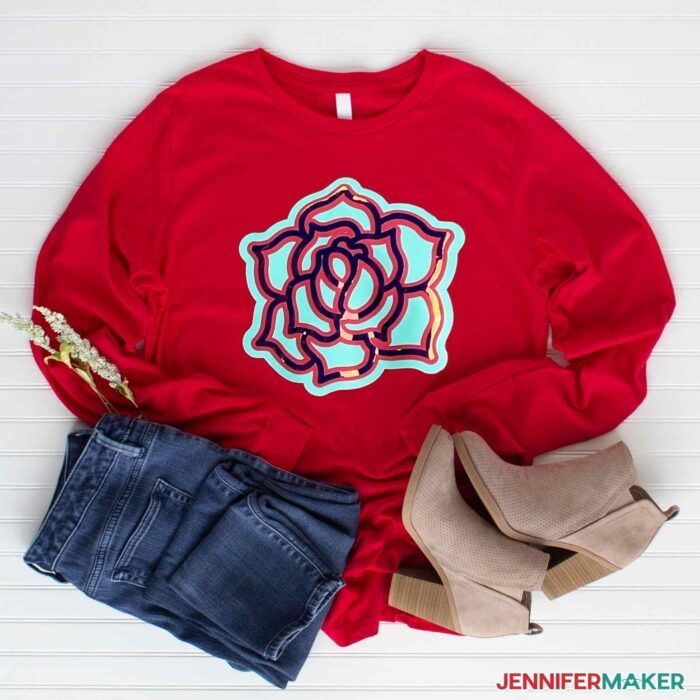
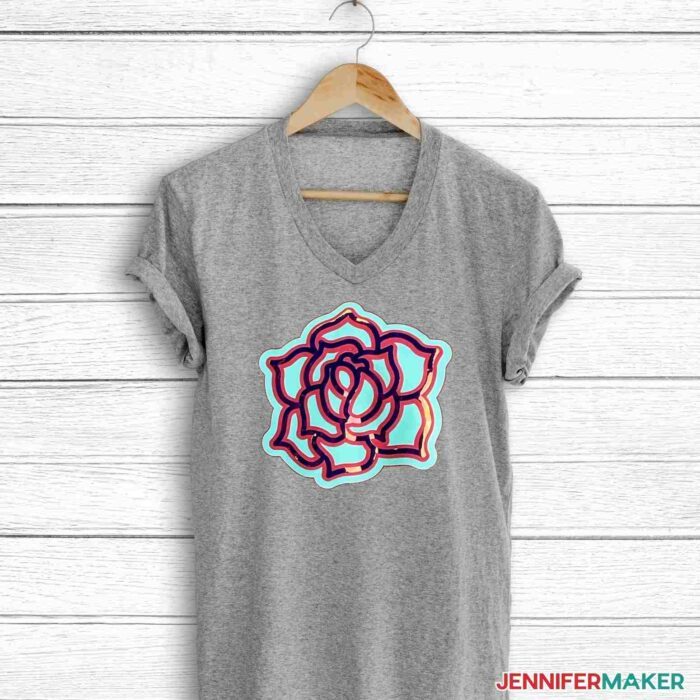
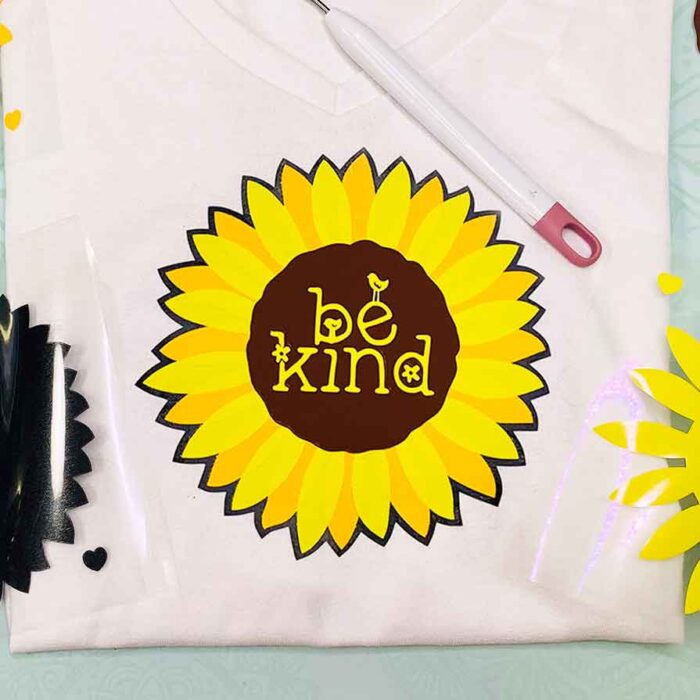
- The Flower Shirt is three layers. The first layer and second layer are Cricut Everyday Iron-On and Cricut Holographic Iron-on Vinyl is my top layer to add a fun shimmer!
- The Cat Shirt is four layers and requires slightly more precision—pick this one if you’ve layered iron-on vinyl before.
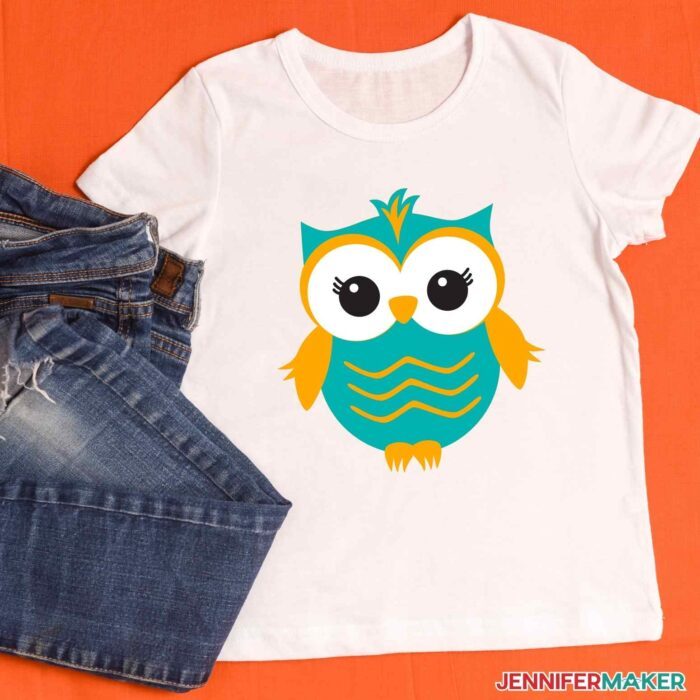
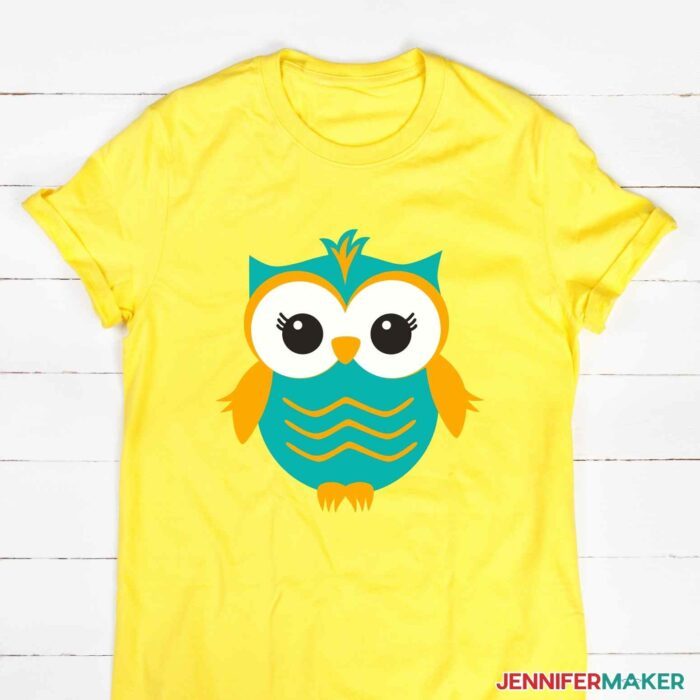
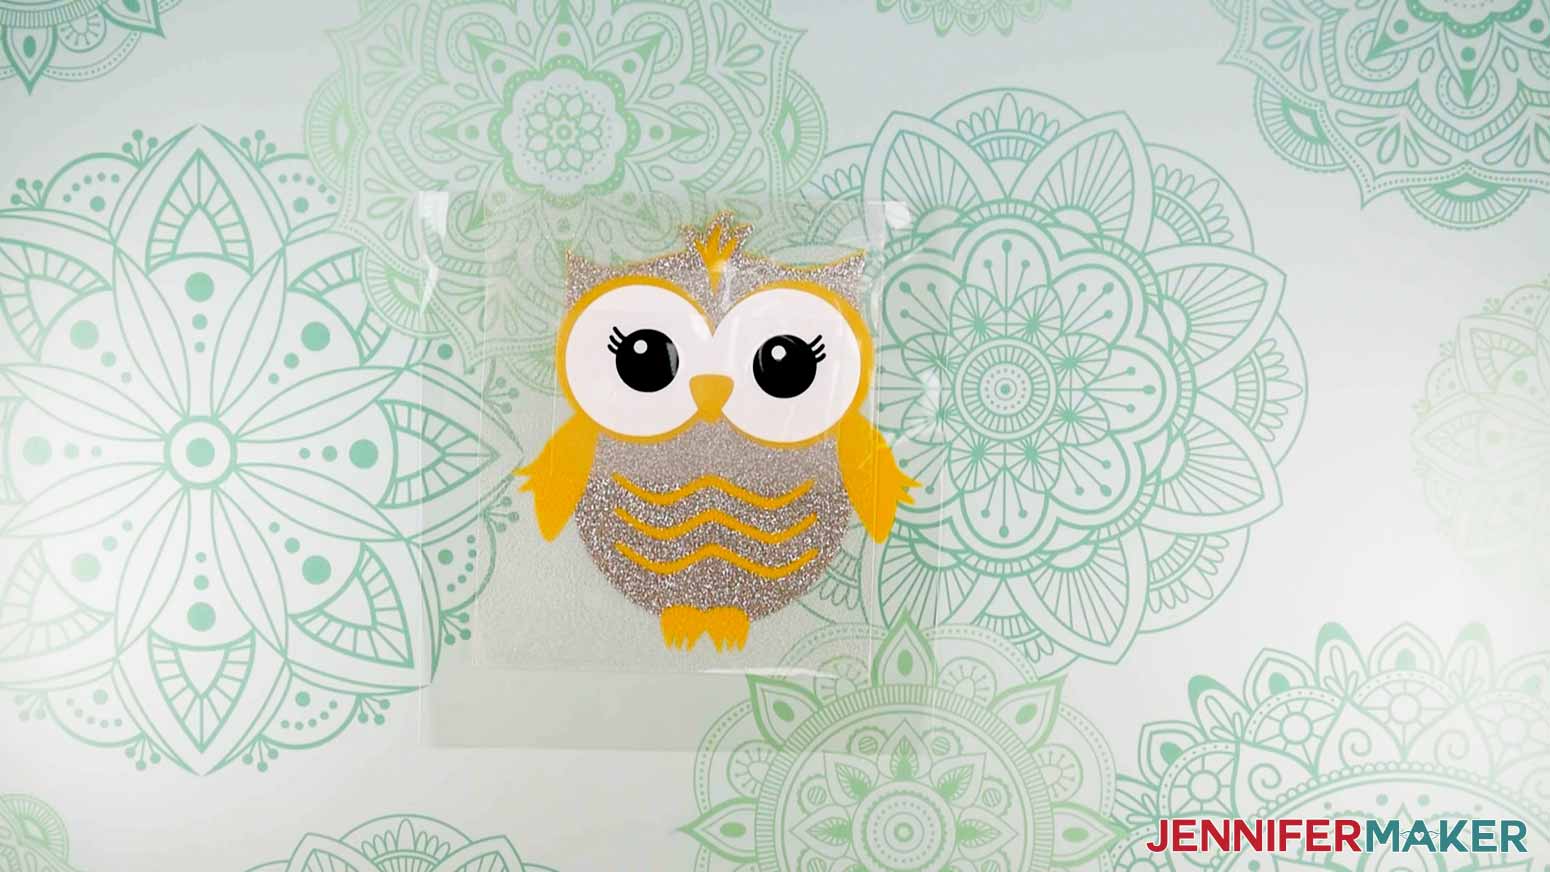
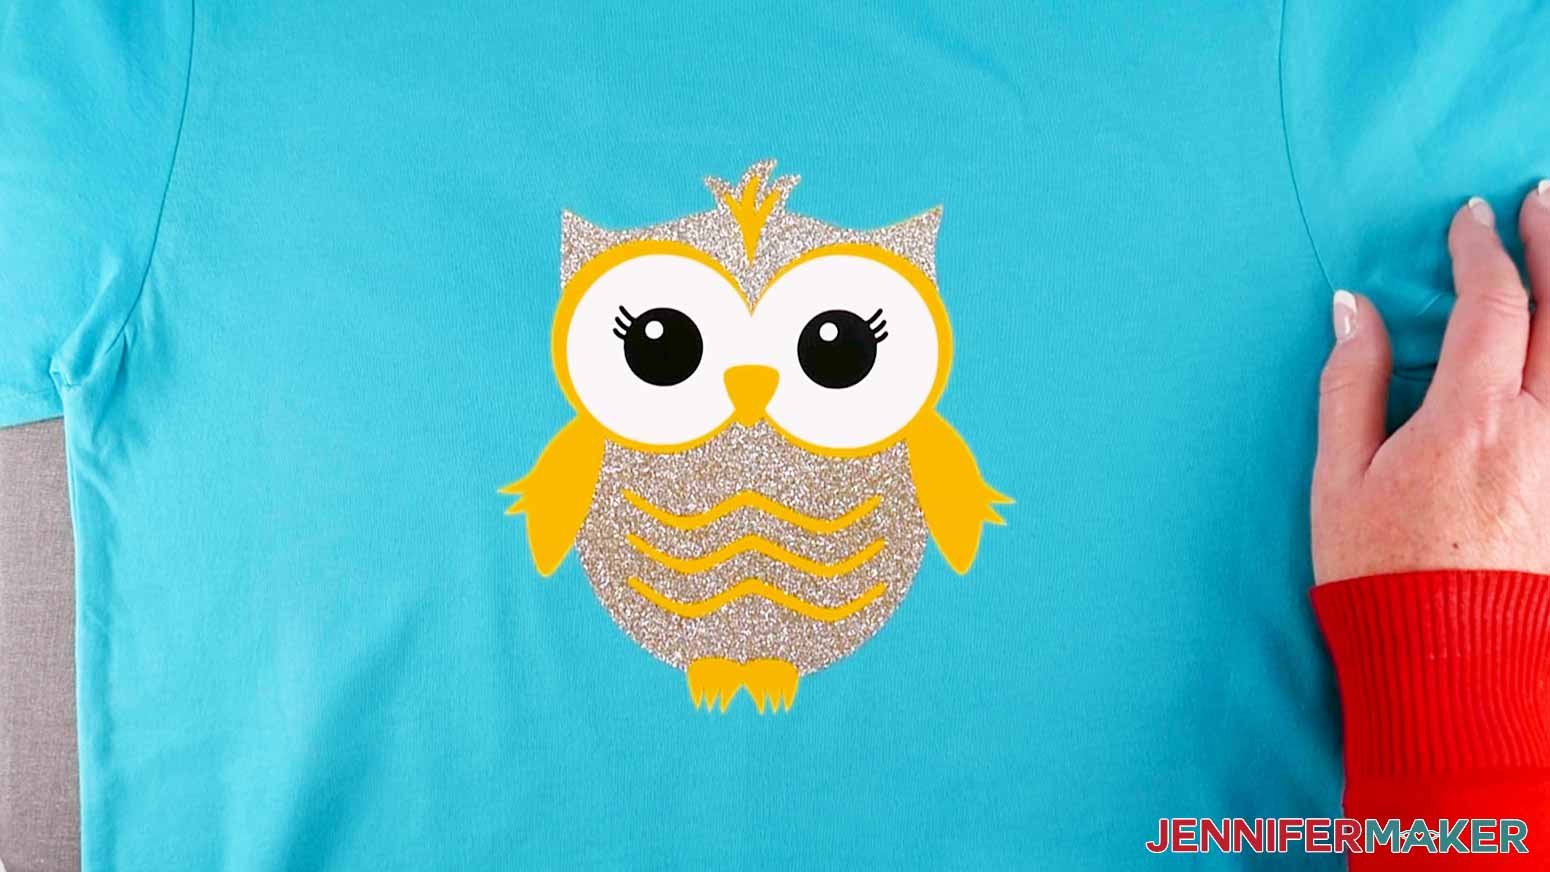
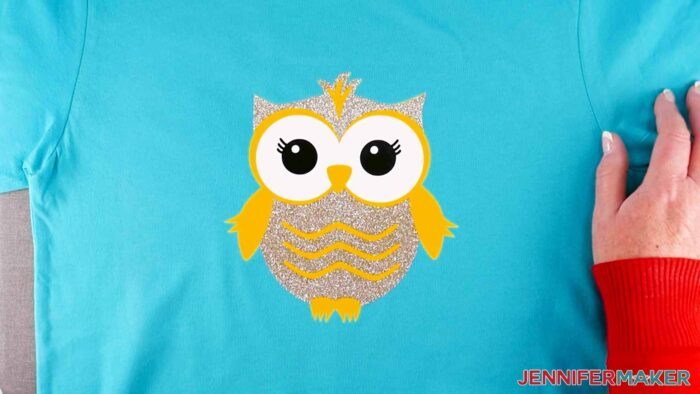
- The Owl Shirt is also four layers. This is the version I will show you in the tutorial. I used three layers of Cricut Everyday Iron-On and one layer of Cricut Glitter Iron-on Vinyl as my top layer to add some sparkle.
The most important thing to know when it comes to specialty vinyls like holographic, foil, glitter, and flocked iron on vinyl is to make sure these special vinyls are your TOP layer, and only your top layer. You can’t put any other vinyl on top of specialty vinyls such as glitter, holographic, flocked, or foil iron on vinyl. You can use everyday vinyl as your base layer, then layer the regular everyday vinyls on top of each other, and put a specialty vinyl on top of those, but nothing goes on top of the specialty vinyl.
I’ll also teach you the importance of mirroring iron-on vinyl. The reason we “mirror” iron-on designs is because the iron-on vinyl comes adhered to a shiny, clear, heat-resistant liner that protects your design during the heat-transfer process. This makes it necessary to position the material liner-side down so your machine can cut your design and leave the liner intact. If you don’t mirror each layer, your design will appear backward on your base material. This is especially important if your design includes text. So for the best results every time, mirror your iron-on vinyl!
In this step-by-step tutorial, we’ll apply our design to a 100% cotton T-shirt, but feel free to use something else. I’m using my favorite T-shirt brand: Bella+Canva. It’s super soft and a really nice quality shirt.
To cut the vinyl, I’m using a Cricut machine — specifically my Cricut Maker 3 — but you can also use the original Maker, any of the Cricut Explore series of machines, or the Cricut Joy. This tutorial will show you how to use Cricut Design Space to prepare and cut your vinyl, too!
I’ll use my Cricut Easy Press to apply the design, along with a pressing mat, but you can also use a regular iron (like a household iron you use for your laundry) and a folded towel.
Other tools we will use include a weeding tool (to remove excess vinyl), a lint roller, some heat-resistant tape and parchment or butcher paper. And the last useful tool, if you have one, is a Cricut BrightPad — it’s a big help with weeding.
So those are all the tools and material we need for a layered iron-on vinyl shirt. Let me show you where to get these fun heat transfer vinyl designs, and then we’ll get started!
Let me show you how easy it is to make a layered vinyl shirt with my free designs and SVG file! This post contains some affiliate links for your convenience (which means if you make a purchase after clicking a link I will earn a small commission but it won’t cost you a penny more)! Read my full disclosure policy.
Materials to Make a Layered Vinyl Shirt Project
View my Amazon shopping list with the exact items we used to make this project
- Standard Iron-On Vinyl — I used black, white, yellow, orange, teal blue, petal pink, and cherry red.
- Specialty Vinyl, such as Cricut Glitter Iron-On or Cricut Holographic Iron-On
- One (1) T-shirt — I used a Bella+Canvas Unisex T-shirt in Teal
- A method to cut your vinyl — I used the amazing Cricut Maker 3 but you can also use a Cricut Maker series, Cricut Explore series, Cricut Joy series, or the Cricut Venture — you can use the standard fine-point blade for this project
- Cricut Green StandardGrip Machine Mat 12” x 12”
- Cricut EasyPress or a household iron
- Cricut EasyPress Mat or folded bath towel
- Weeding tool
- Lint Roller
- (Optional) Craft Knife — helpful for peeling stubborn Glitter Vinyl
- (Optional) Heat-Resistant Tape — for keeping your design in place while pressing
- (Optional) Parchment, butcher paper, or Teflon sheet — for protecting your surfaces while pressing
- (Optional) Light Board — for making weeding easier
- Design #374 – My free layered iron-on vinyl designs (available in my free resource library—get the password at the bottom of this post)
And to make the owl layered iron-on shirt just like I did:
- Cricut Glitter Iron-On in Silver
- Cricut Everyday Iron-On in Black, White, Yellow, and Orange
How to Layer Vinyl on a Shirt
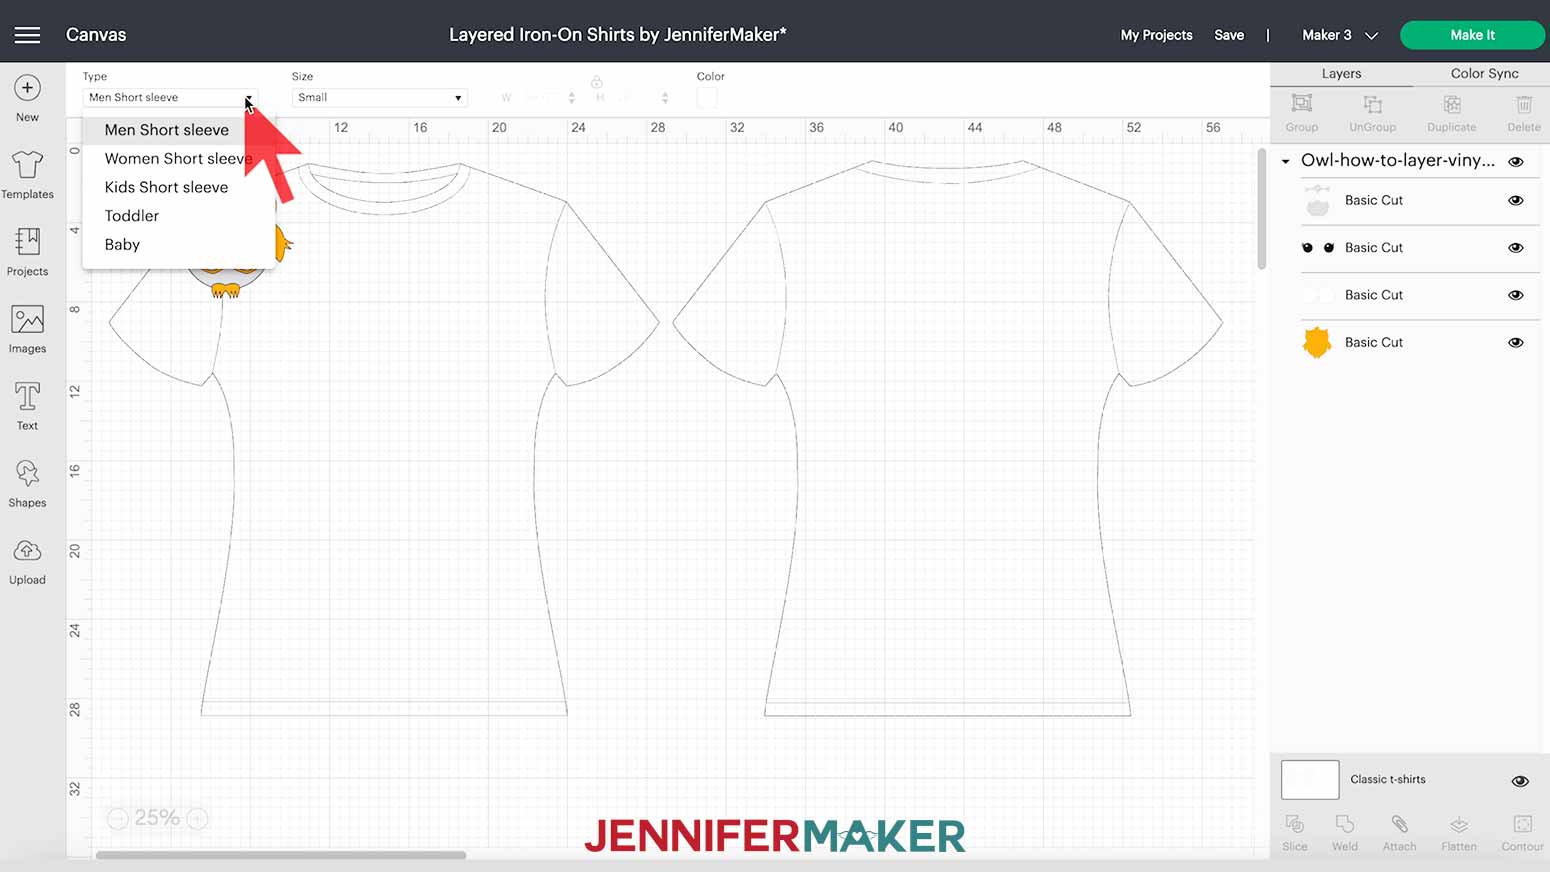
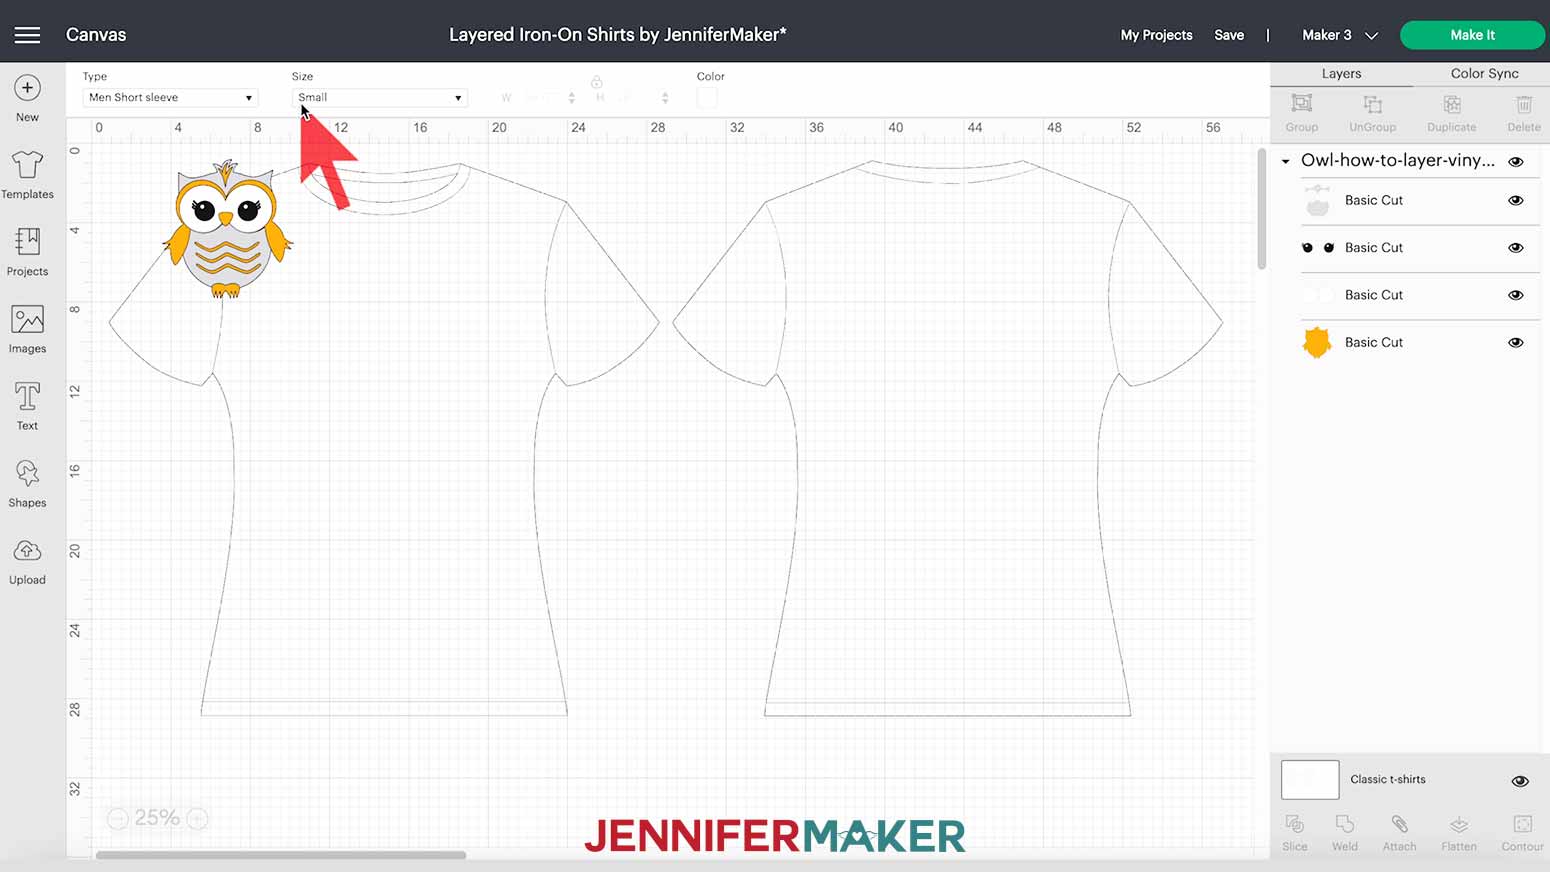
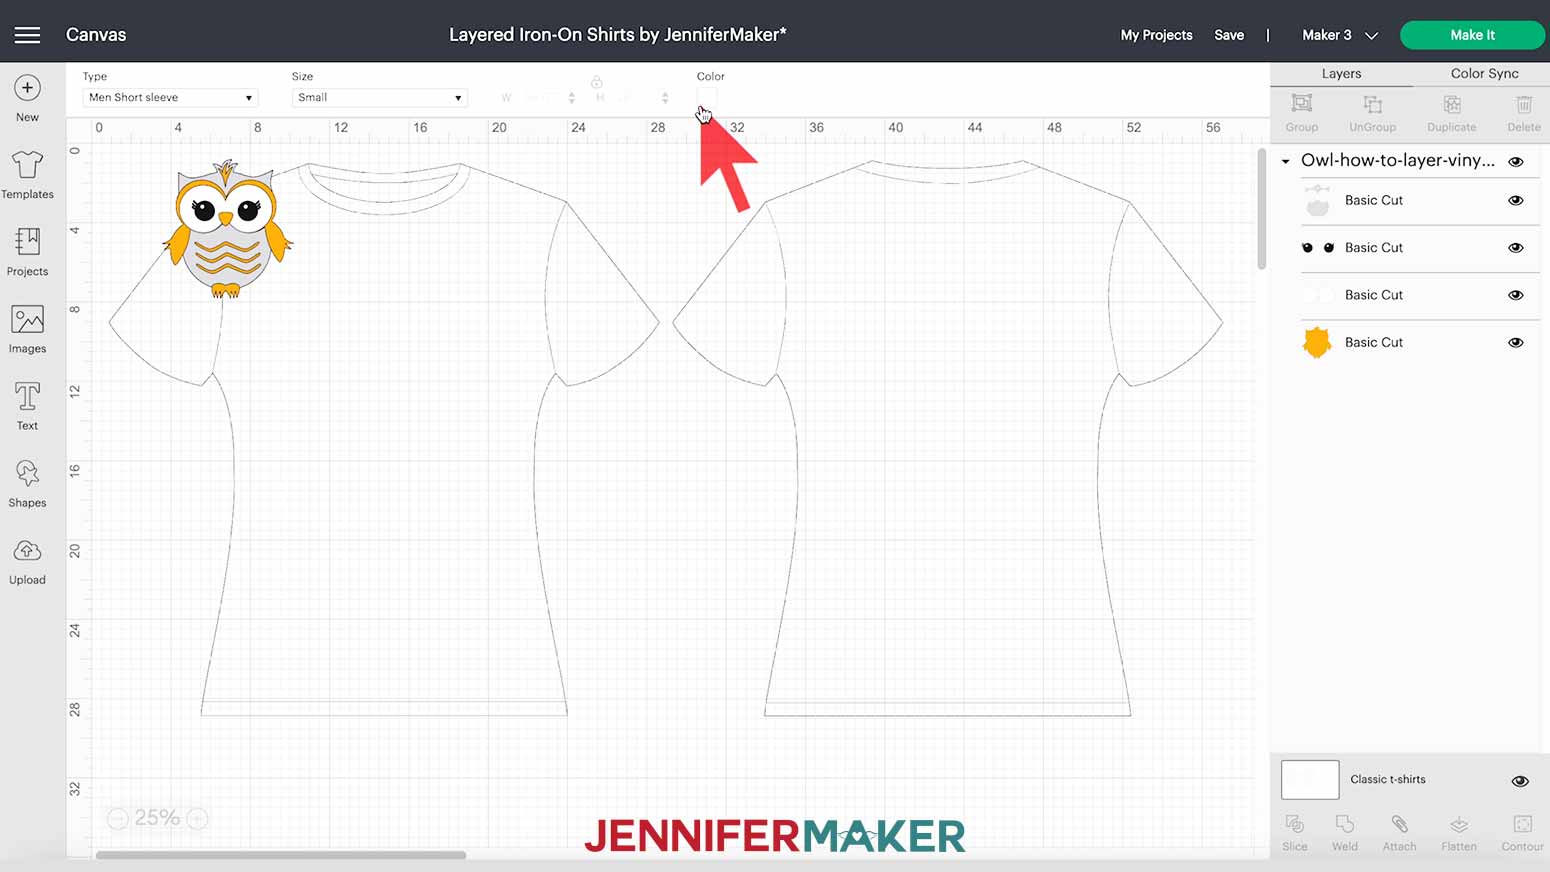
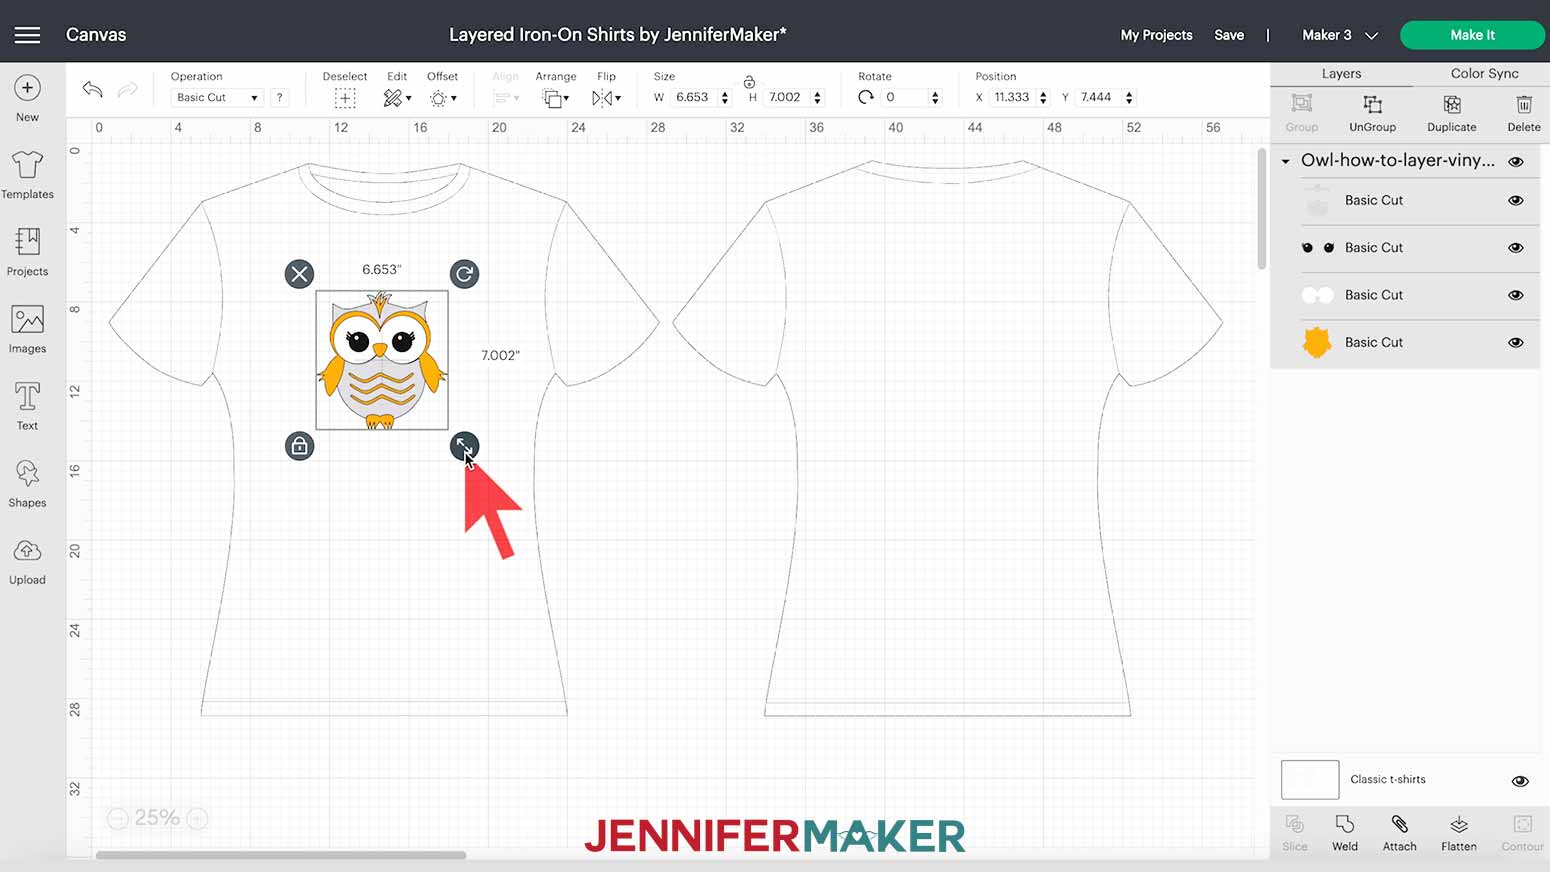
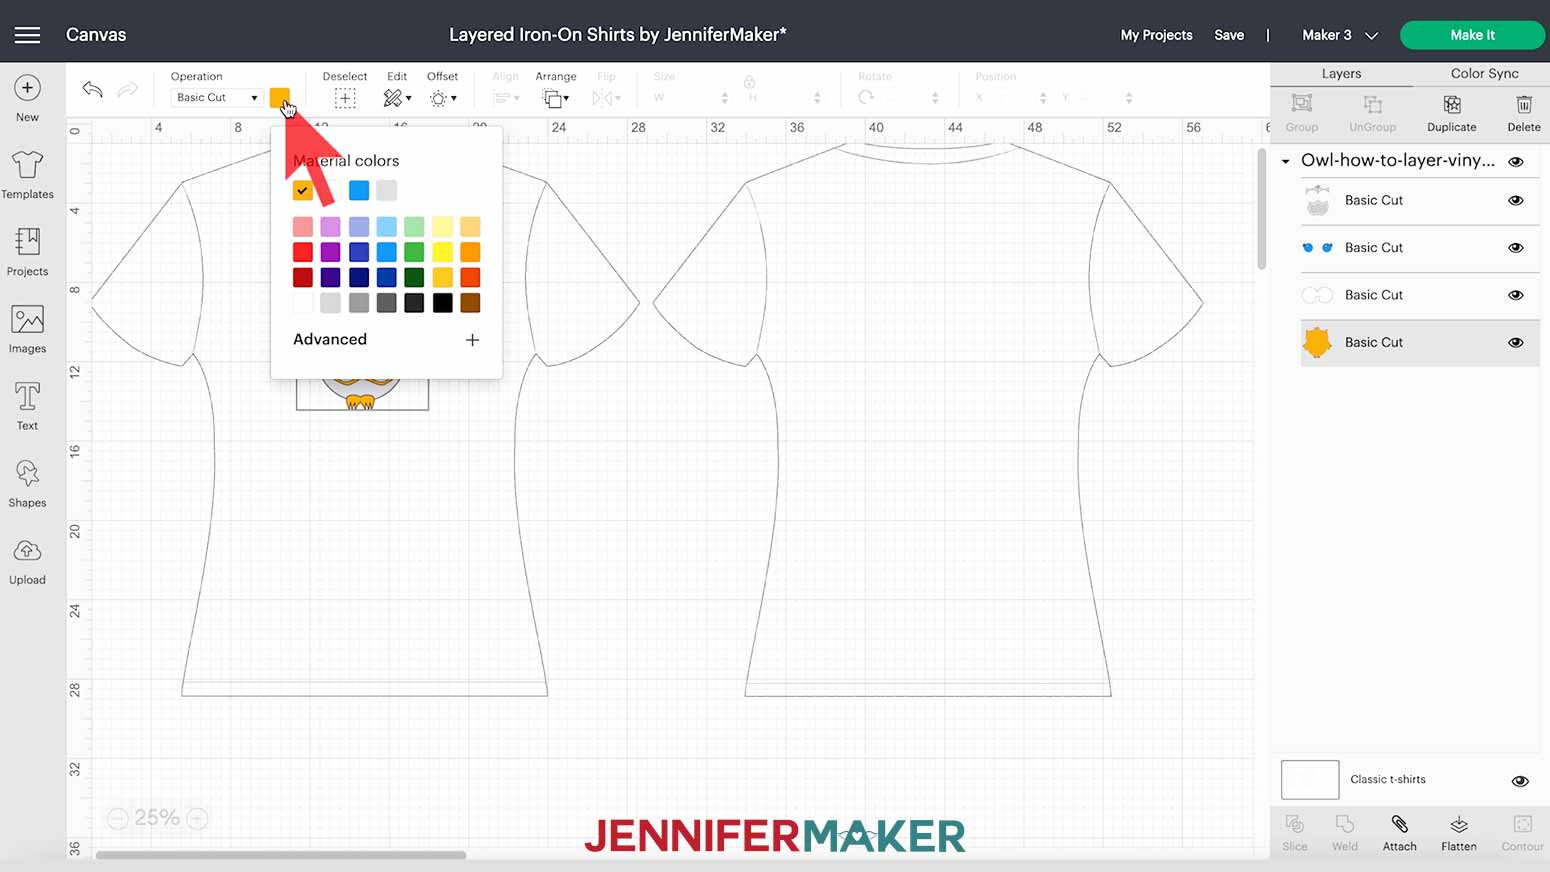
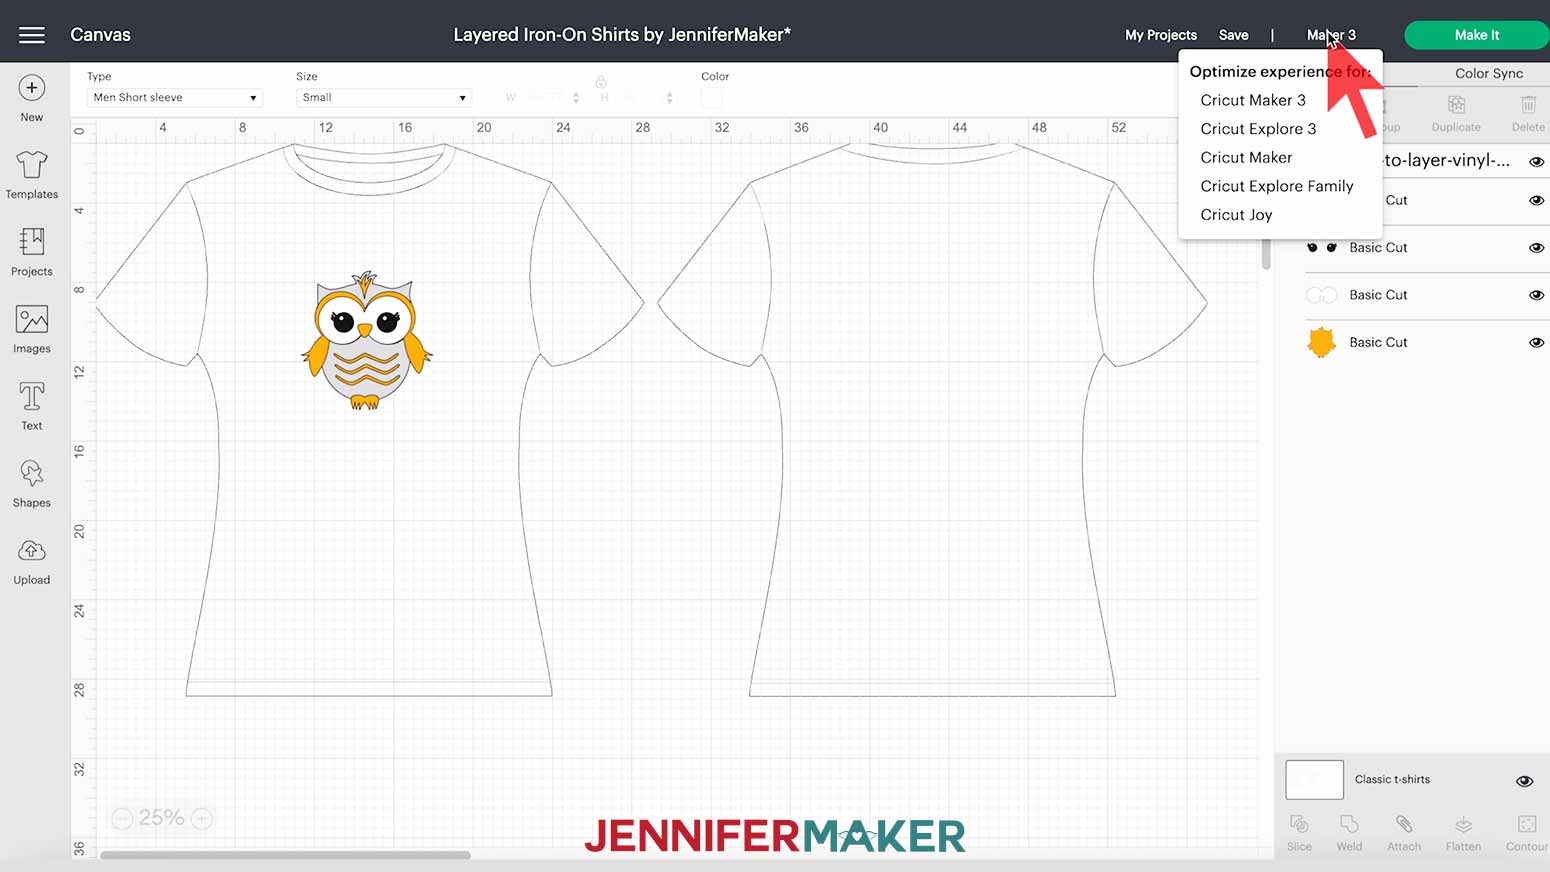
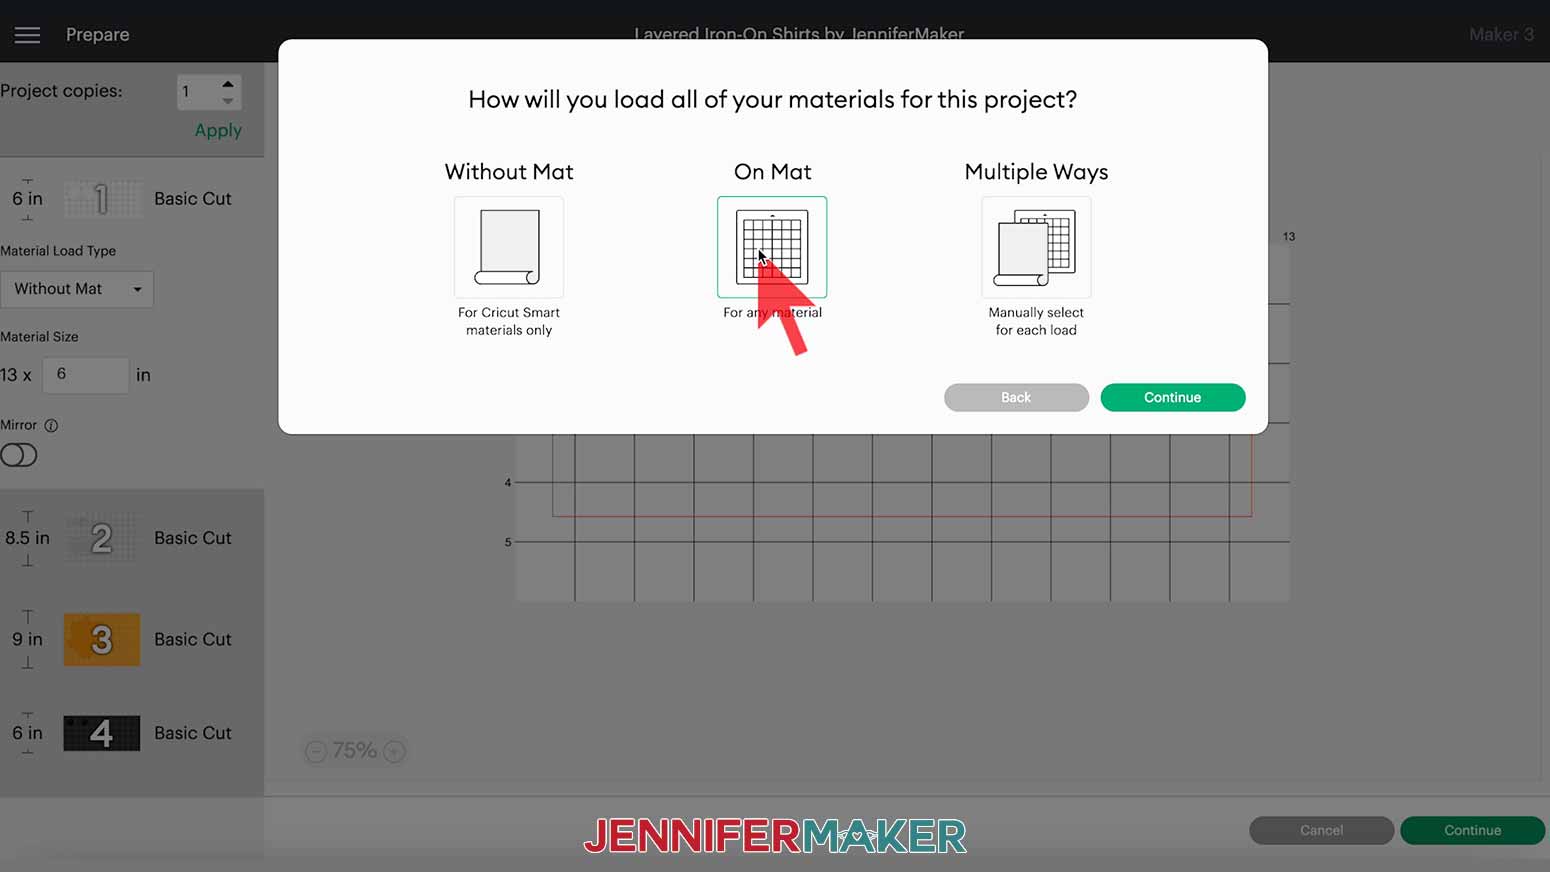
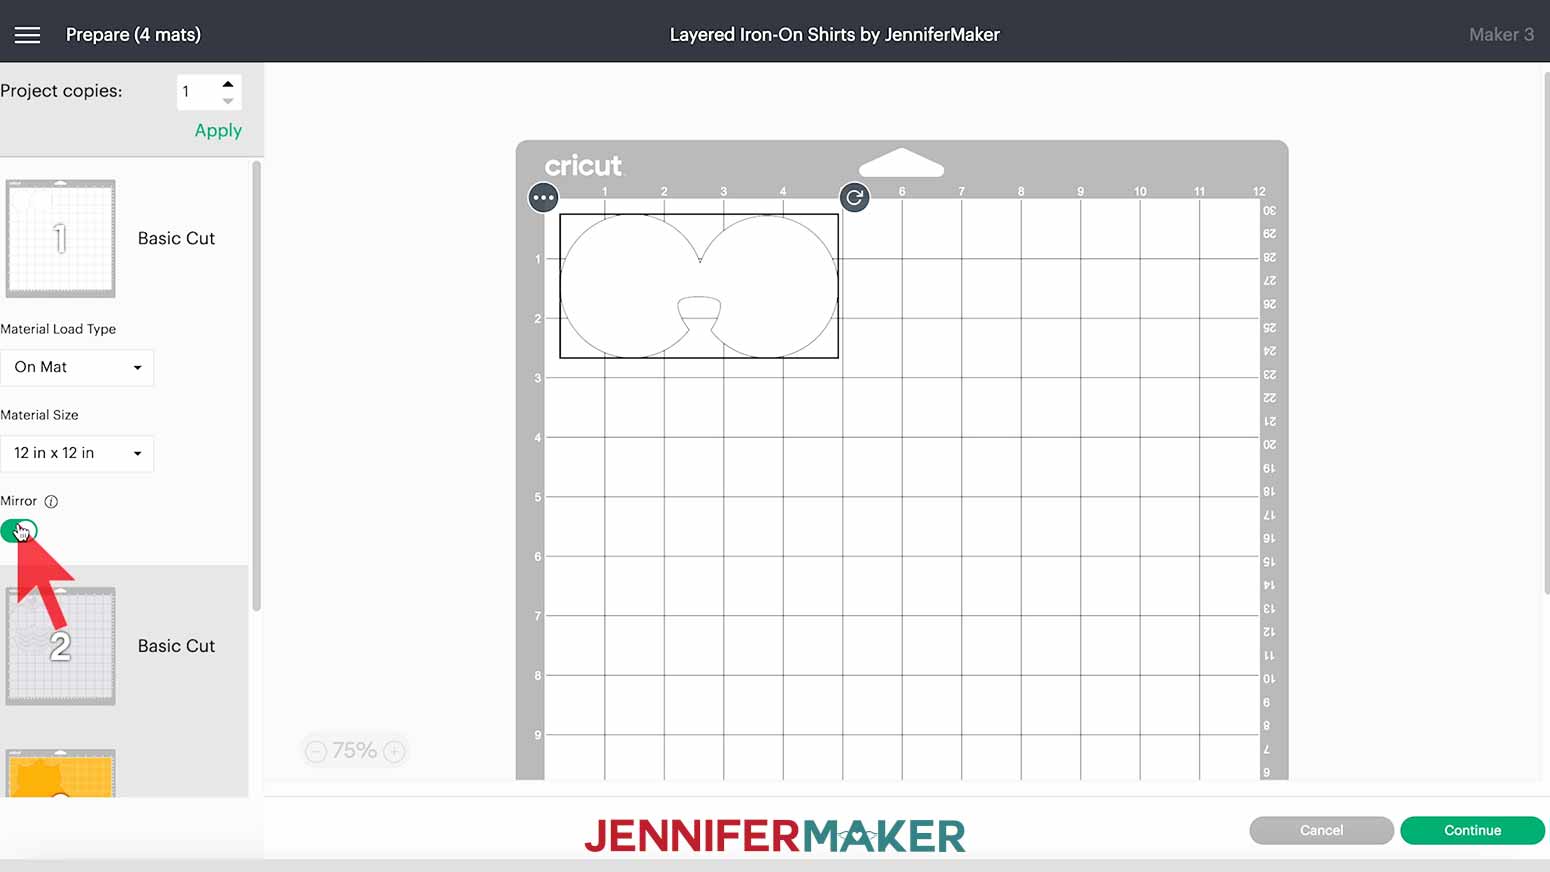
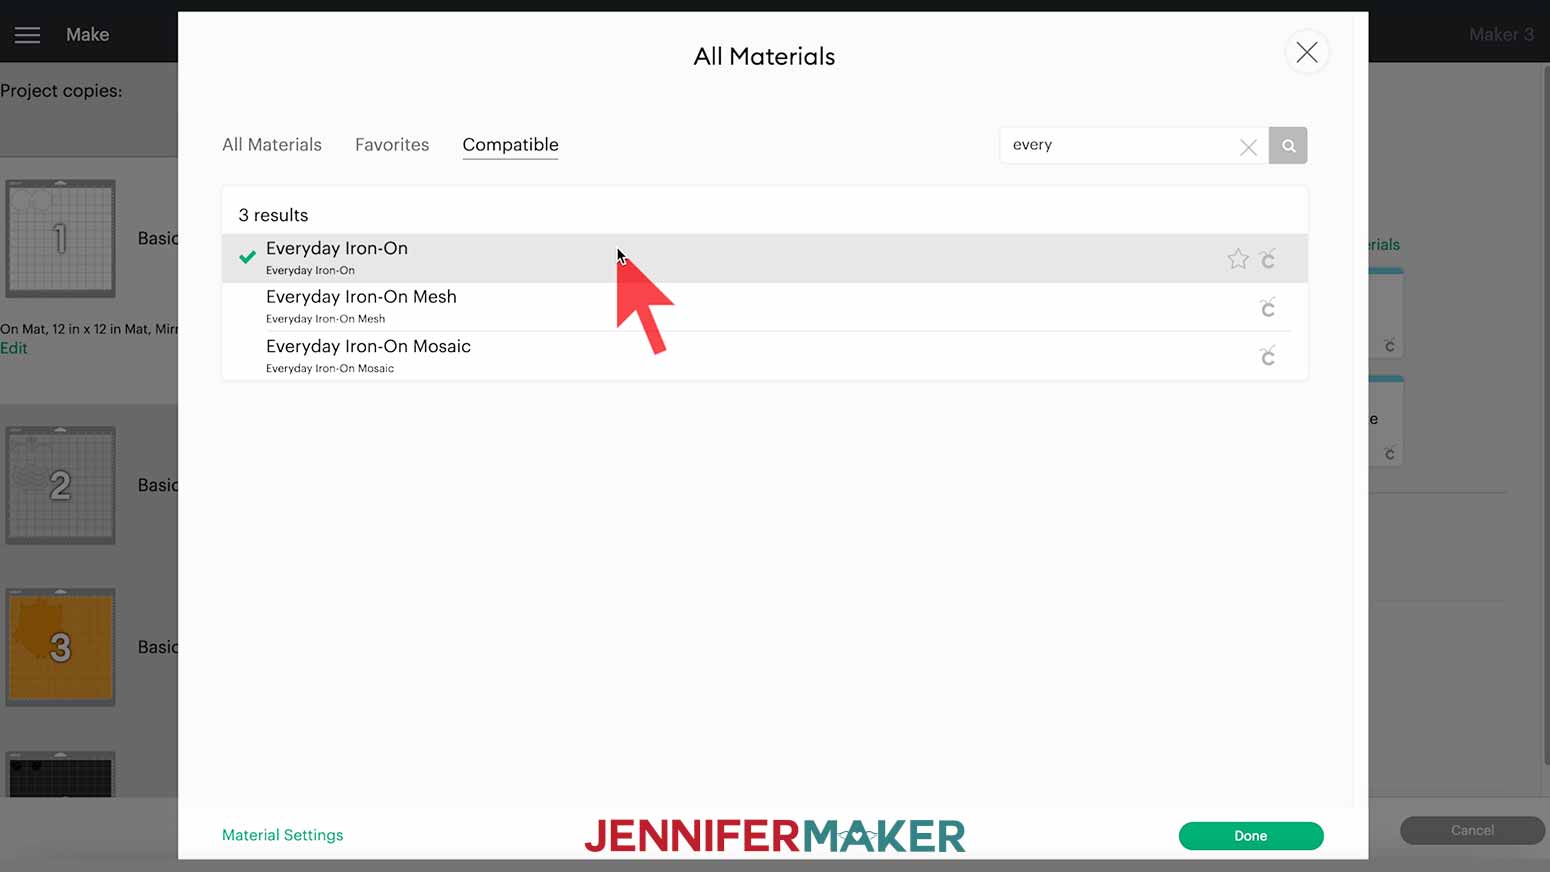
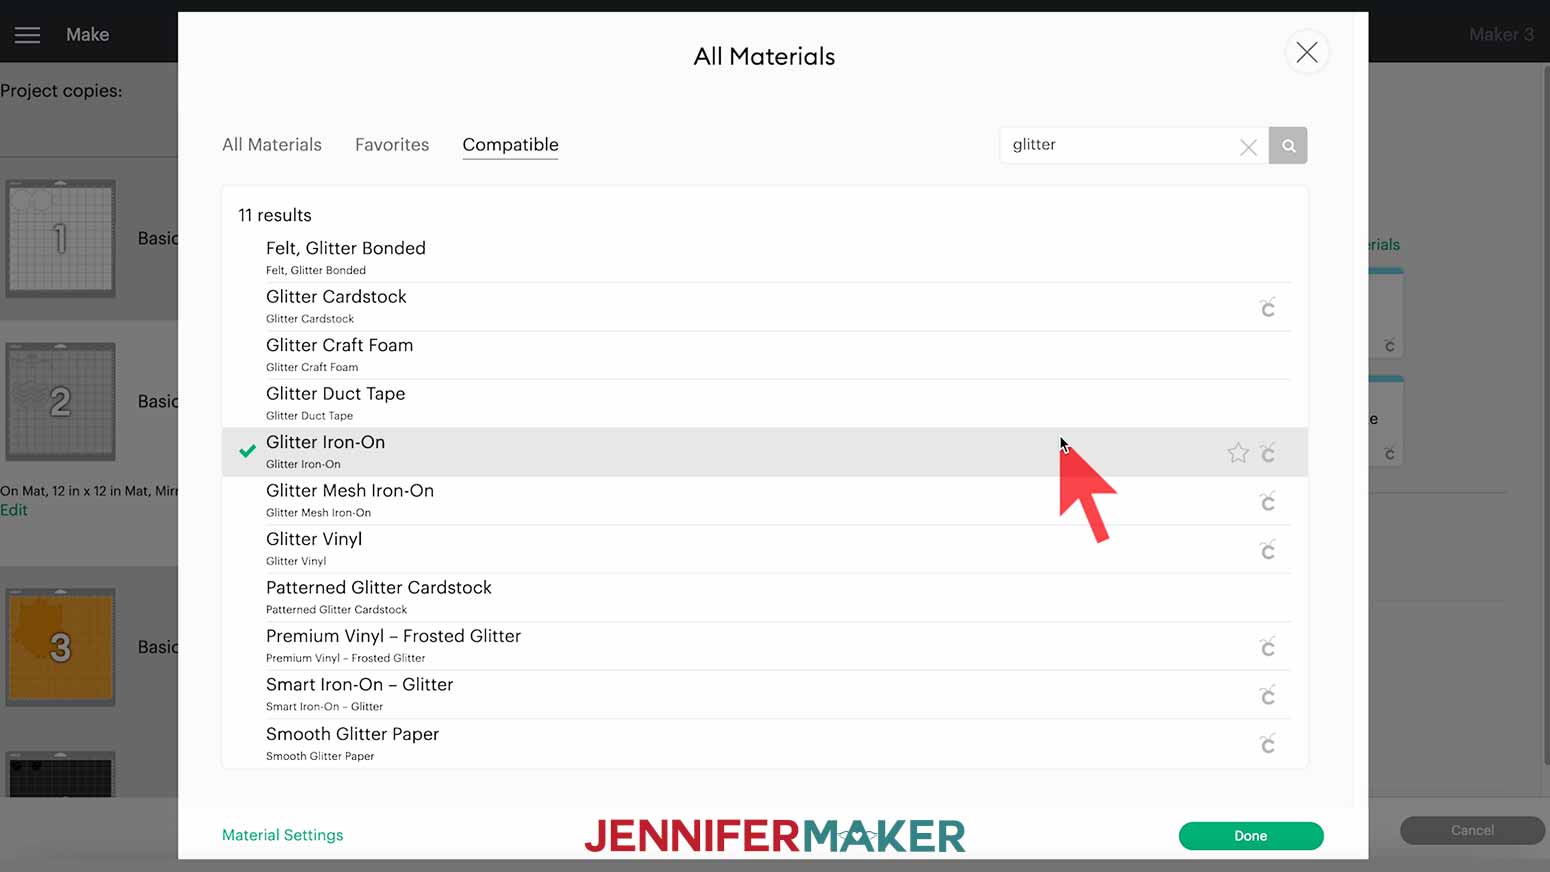
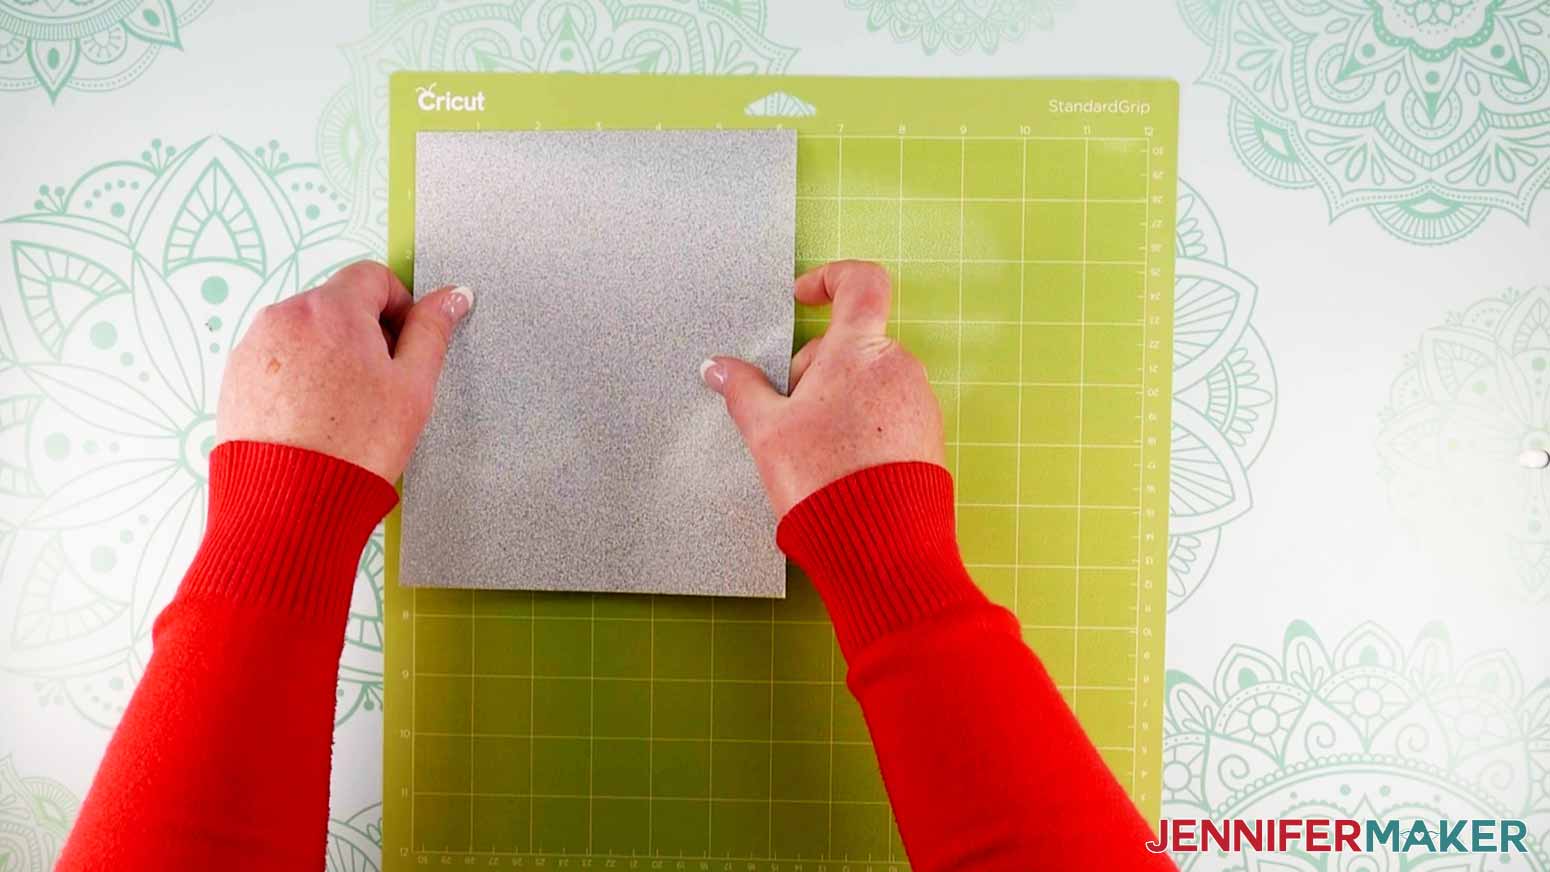
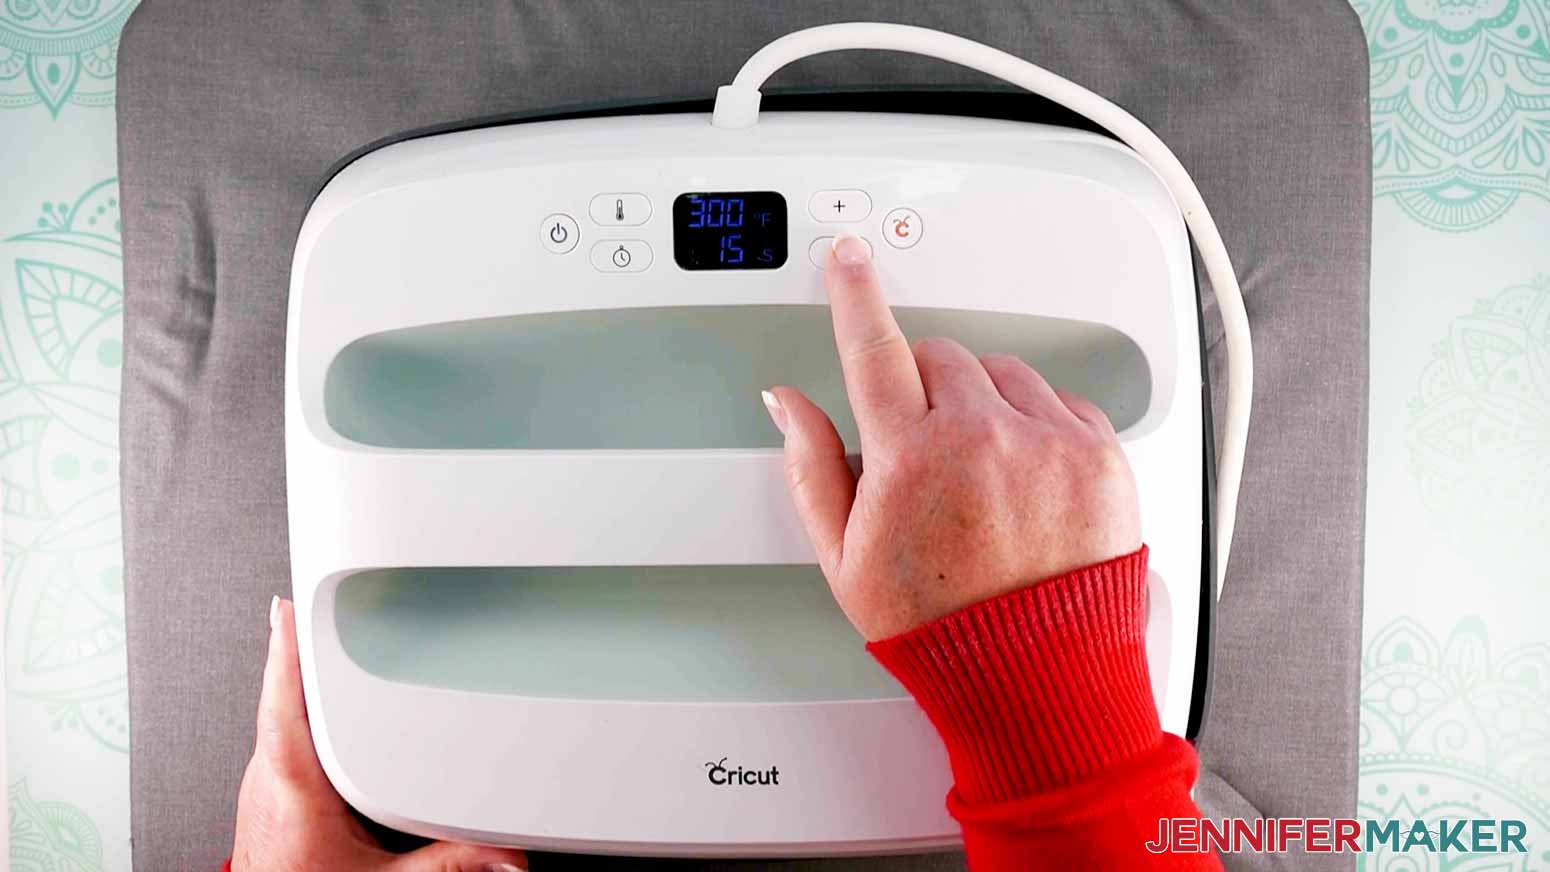
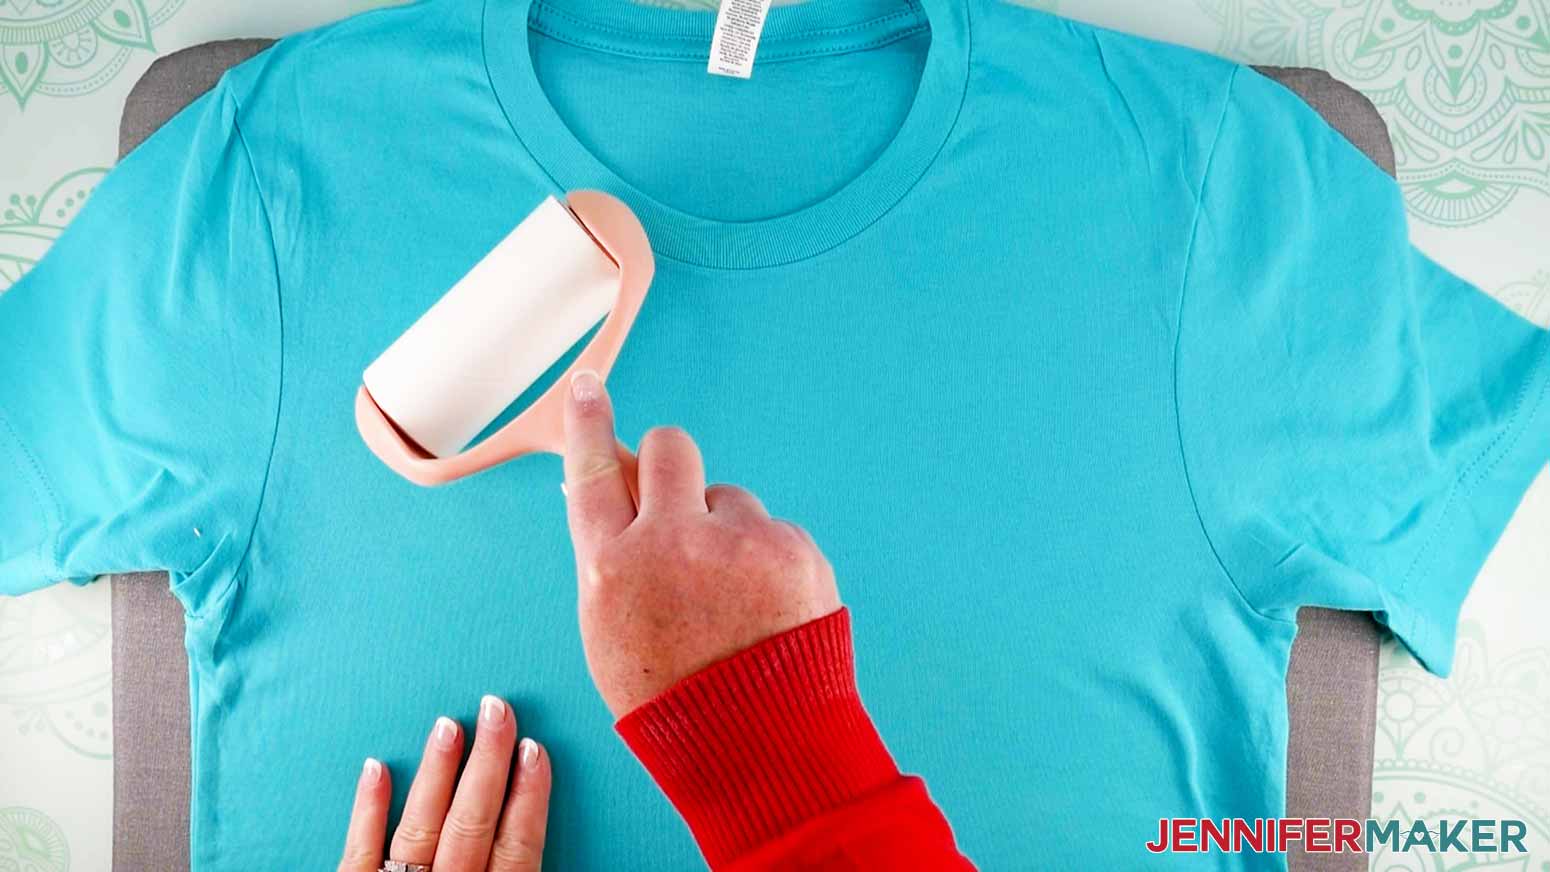
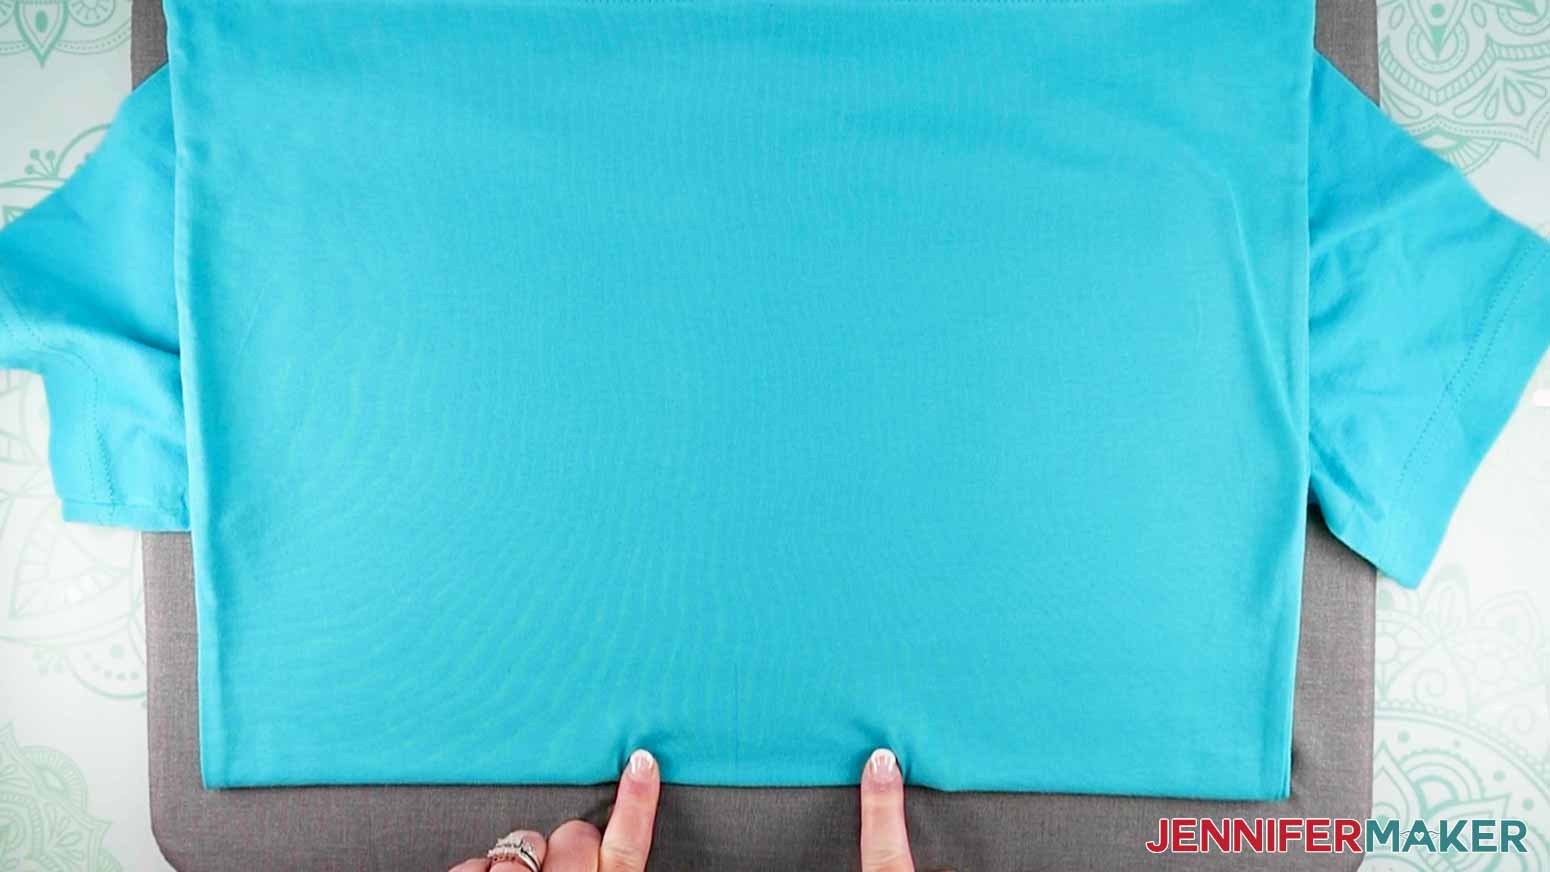
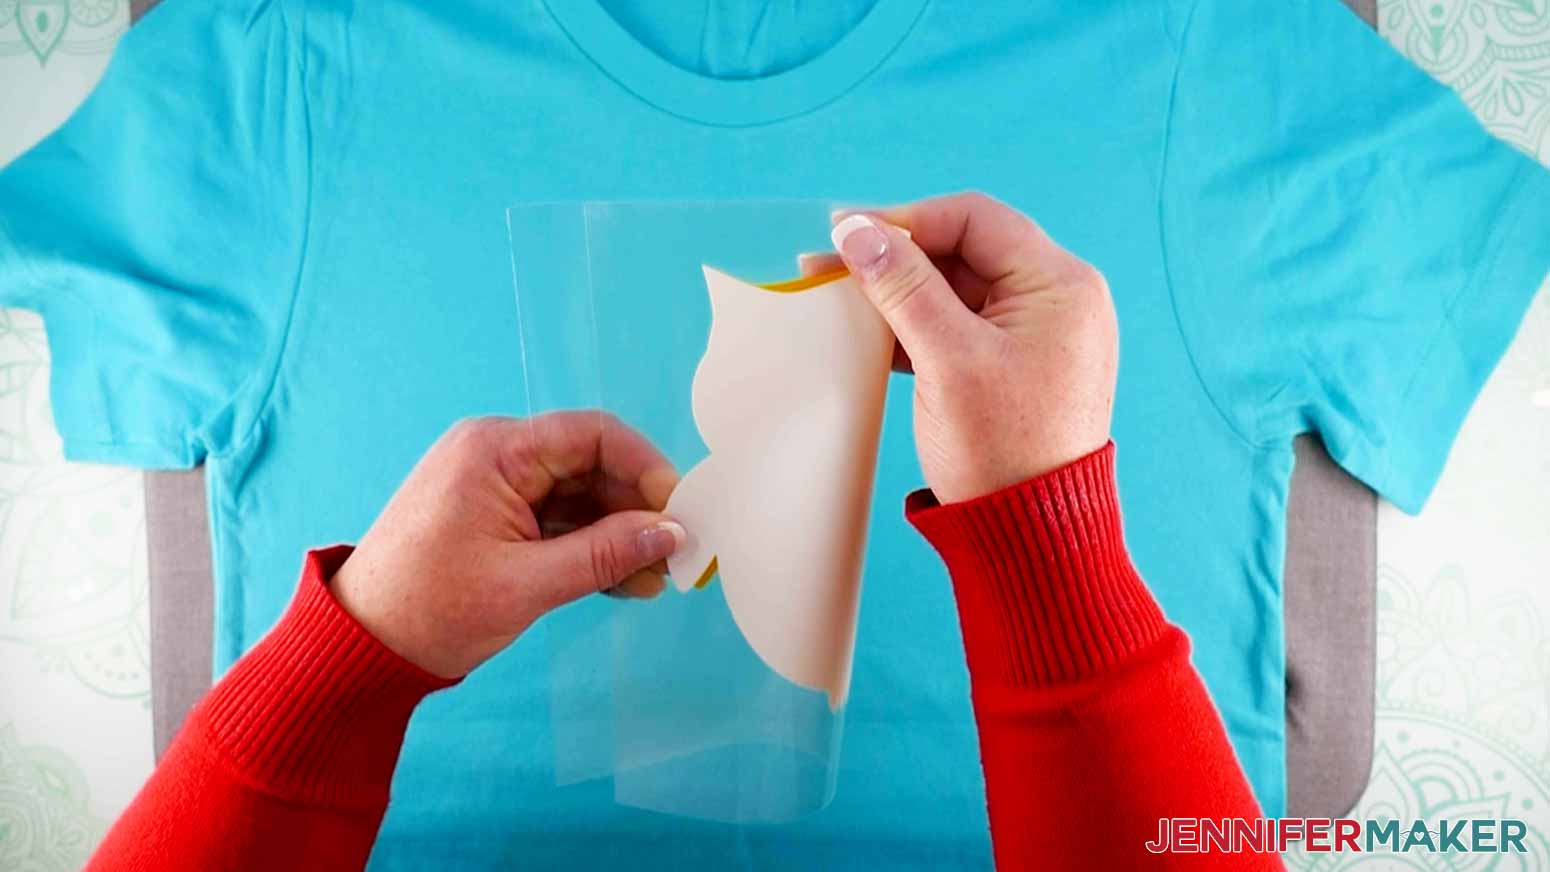
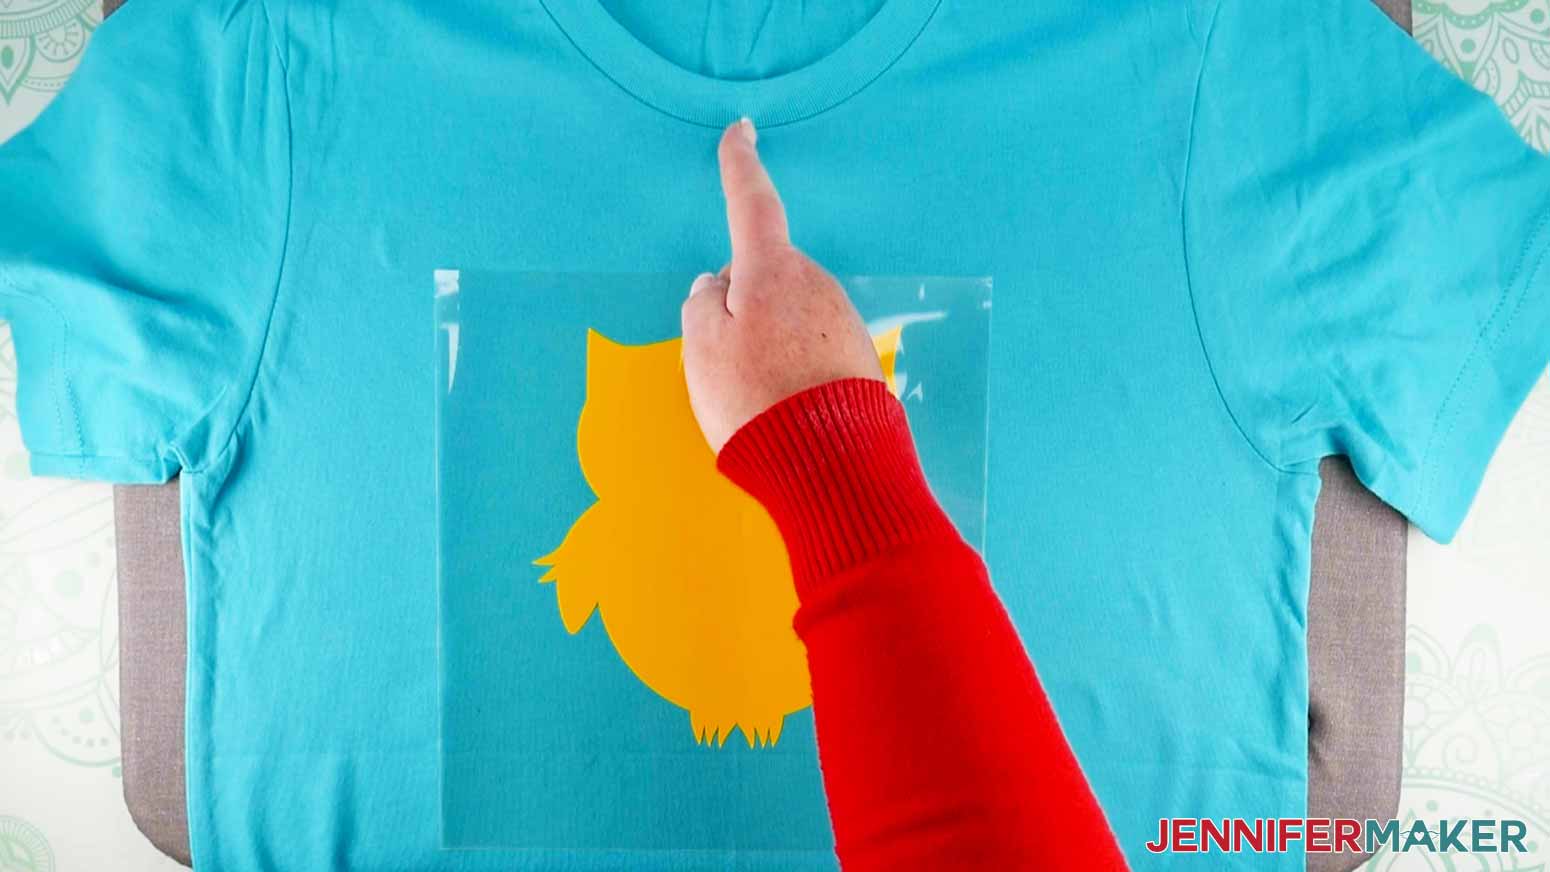
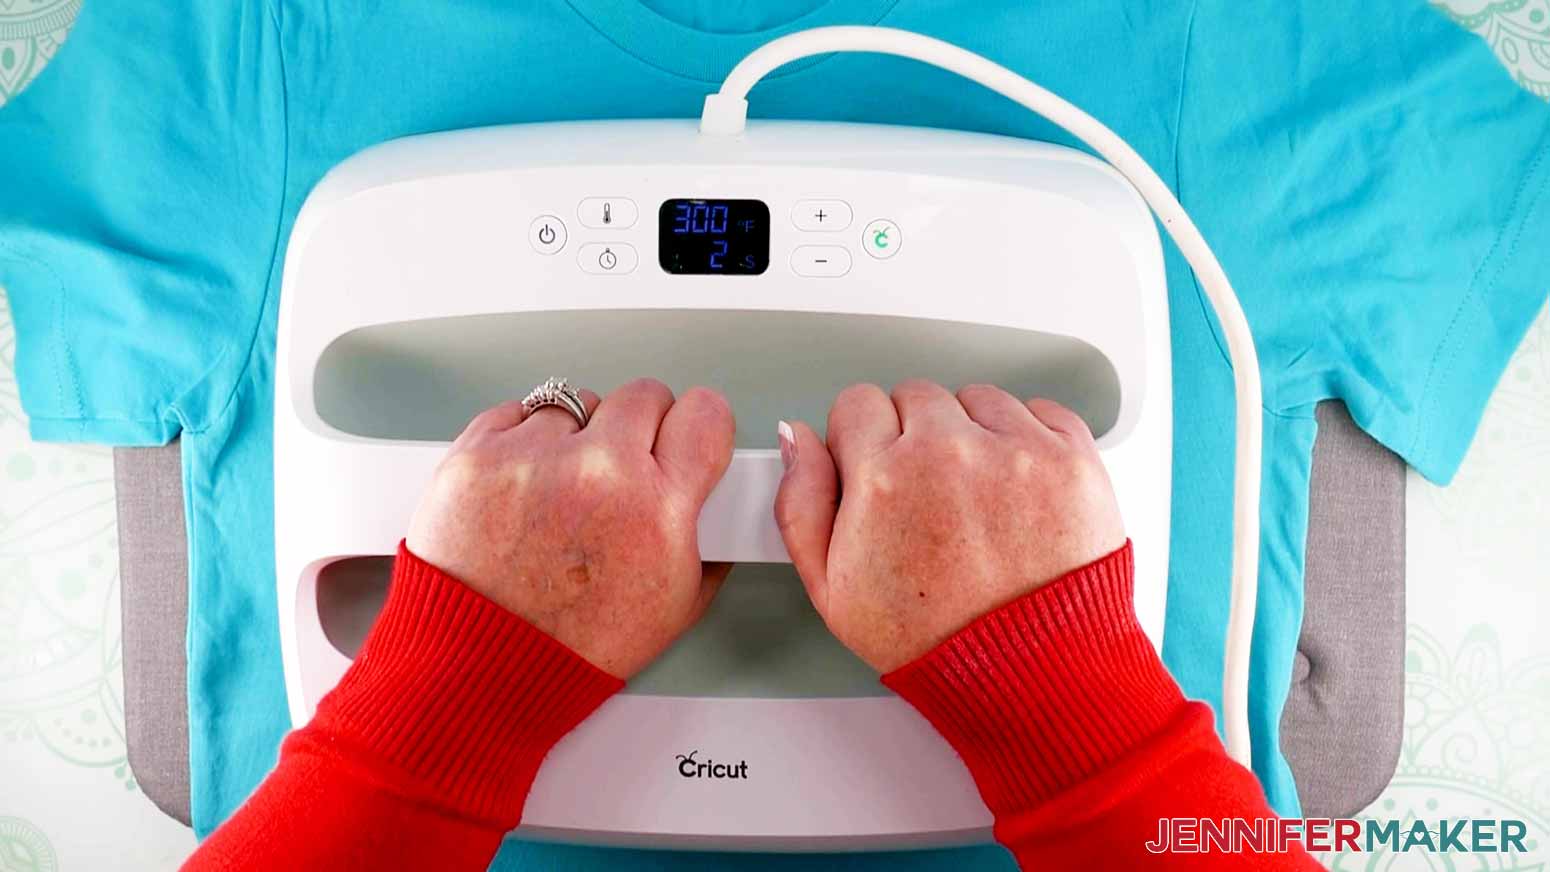
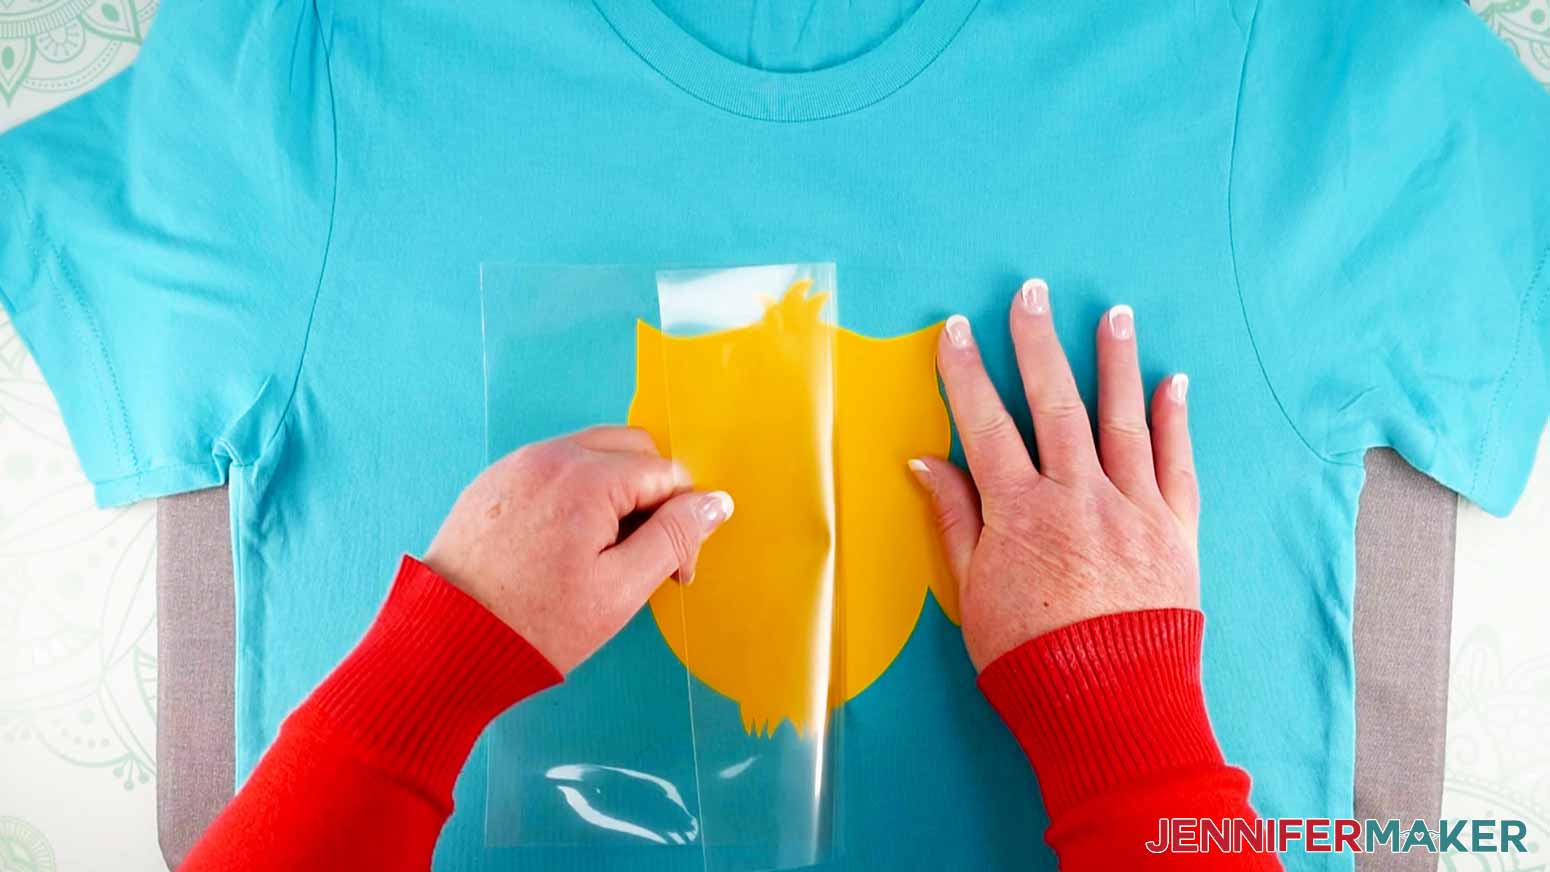
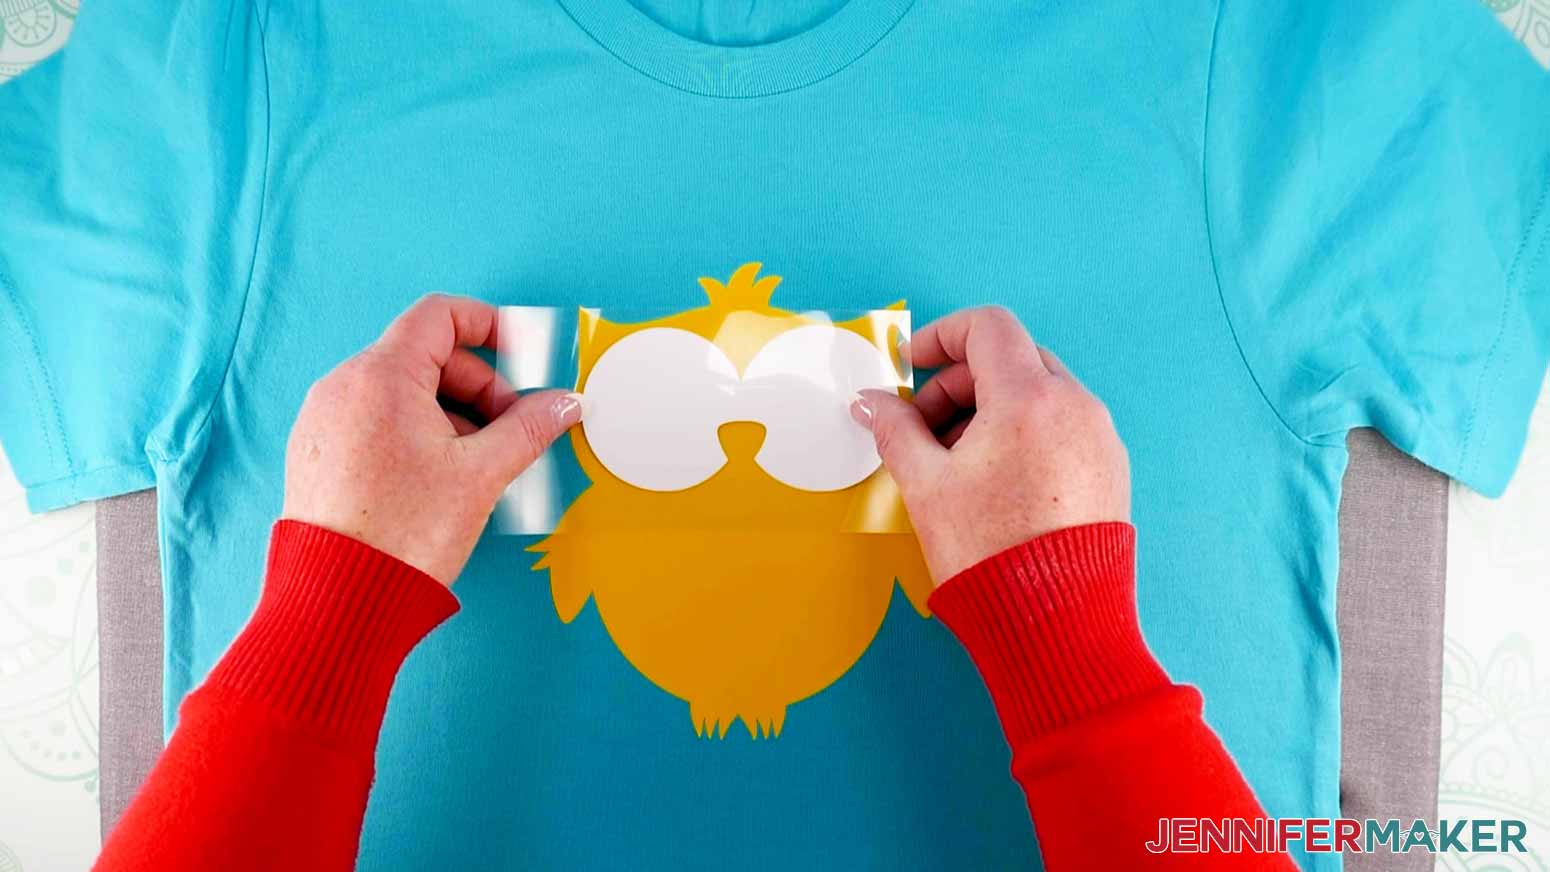
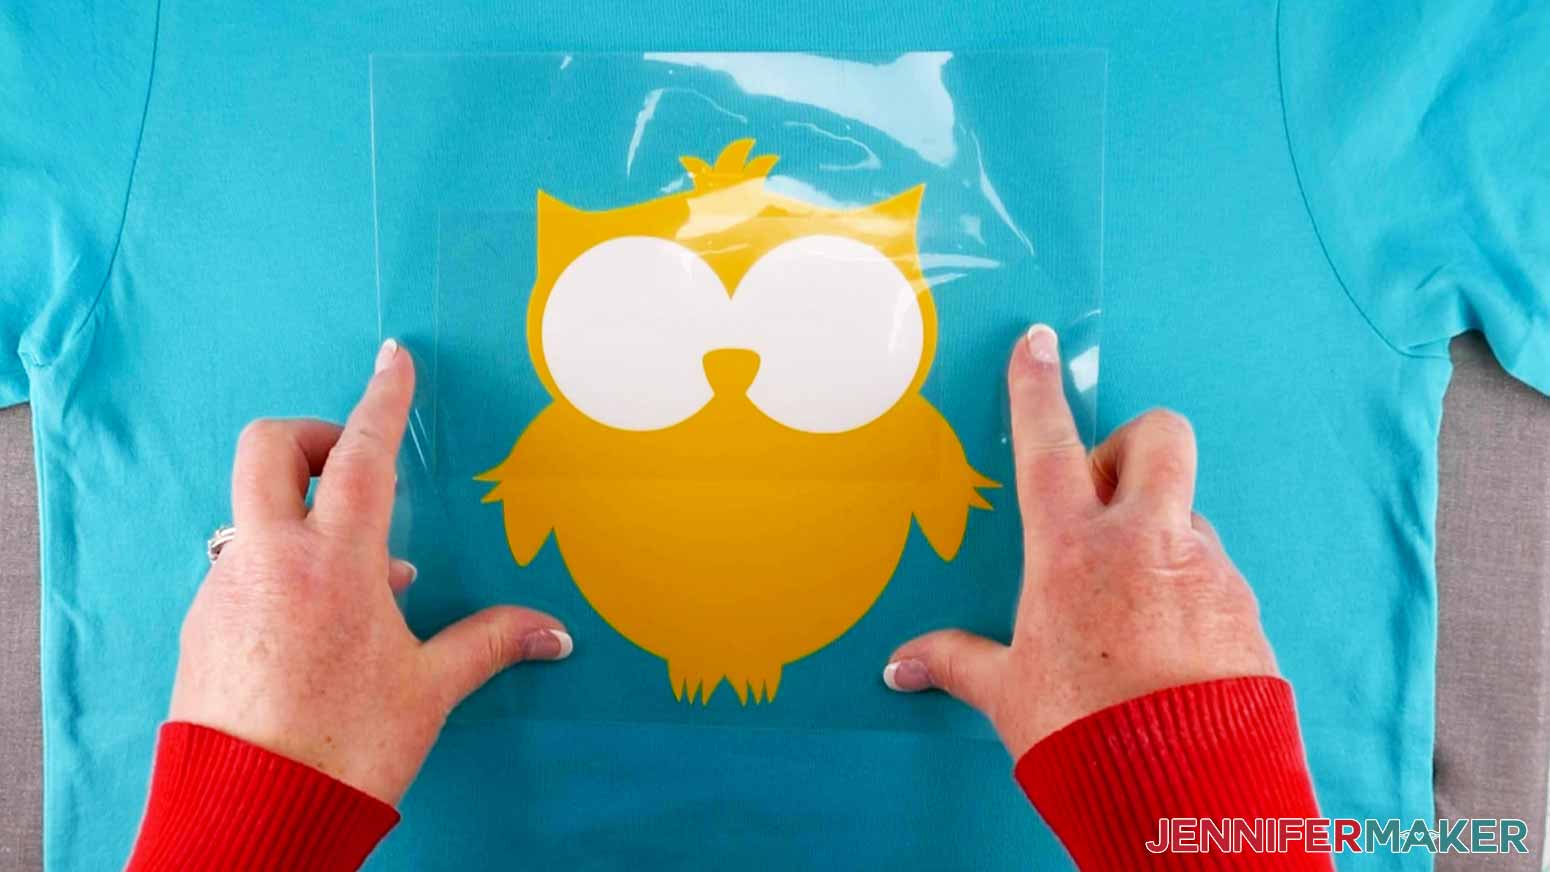
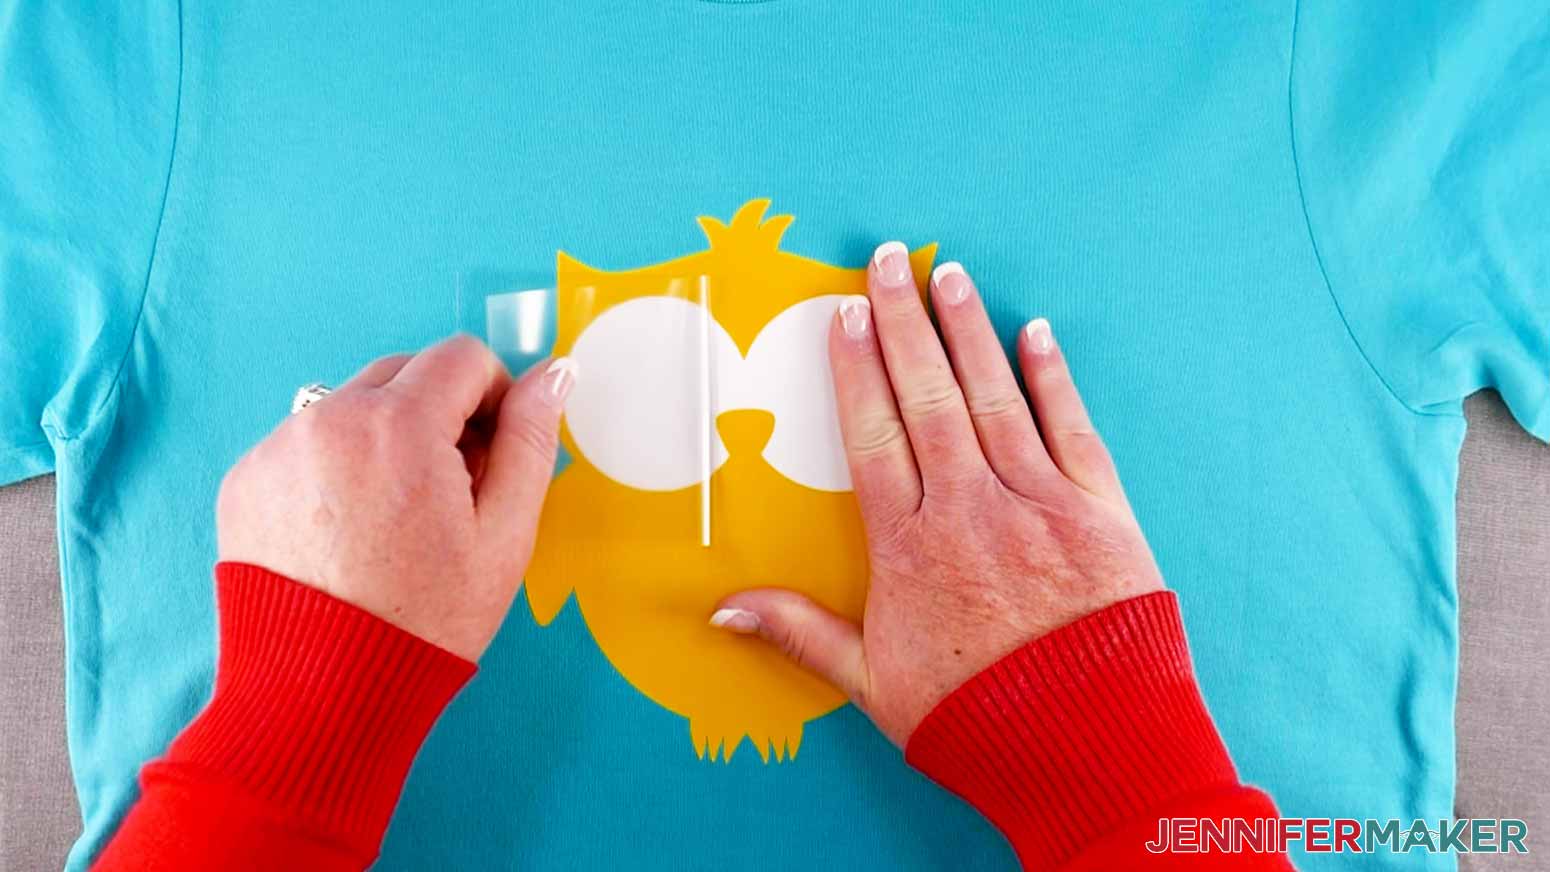
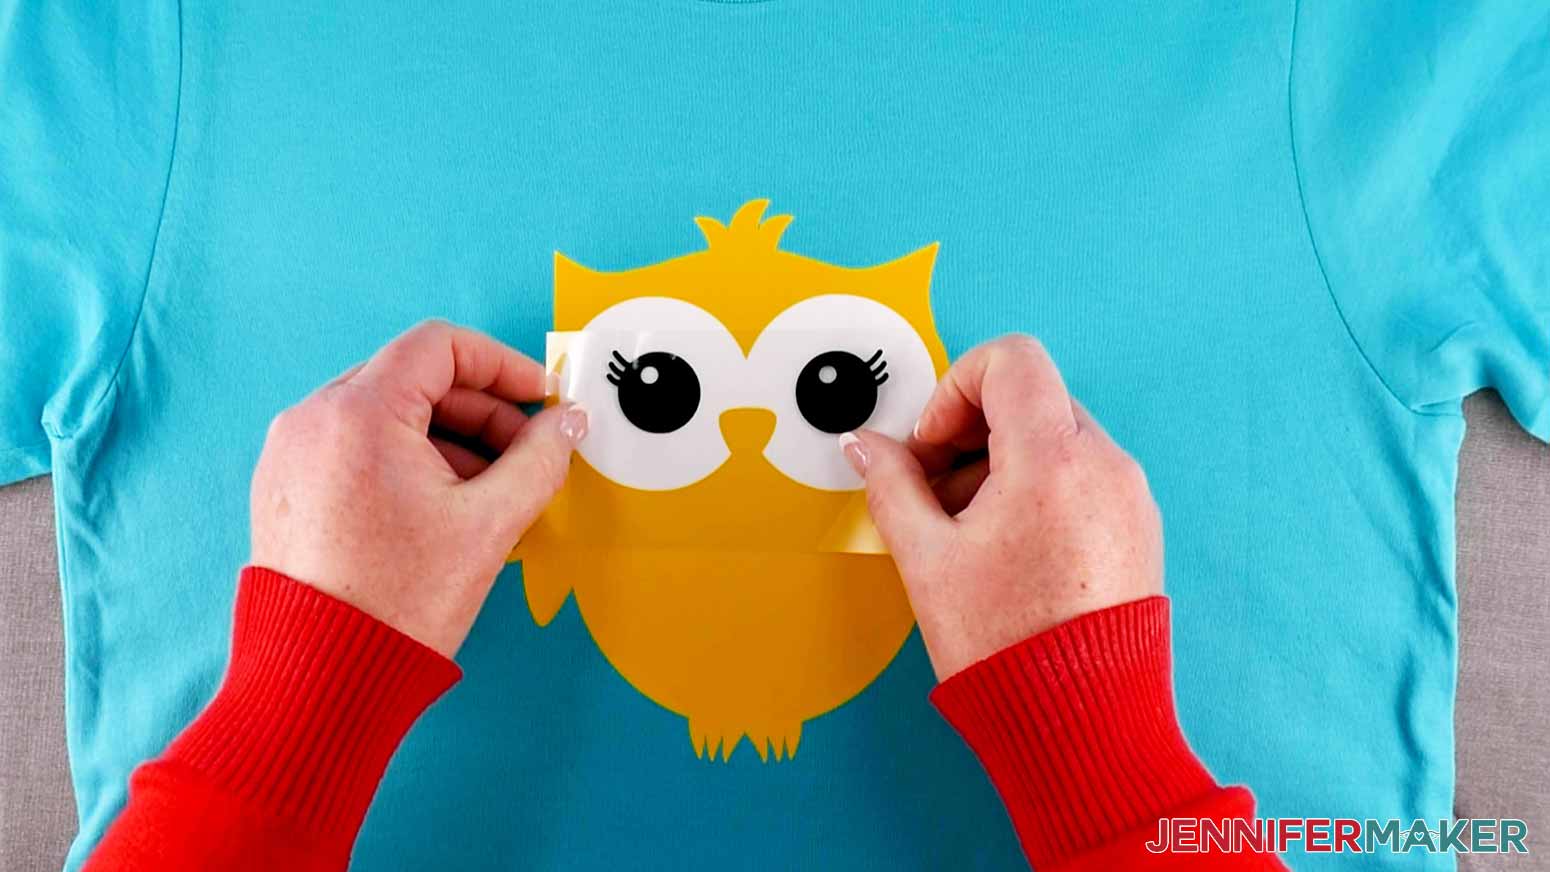
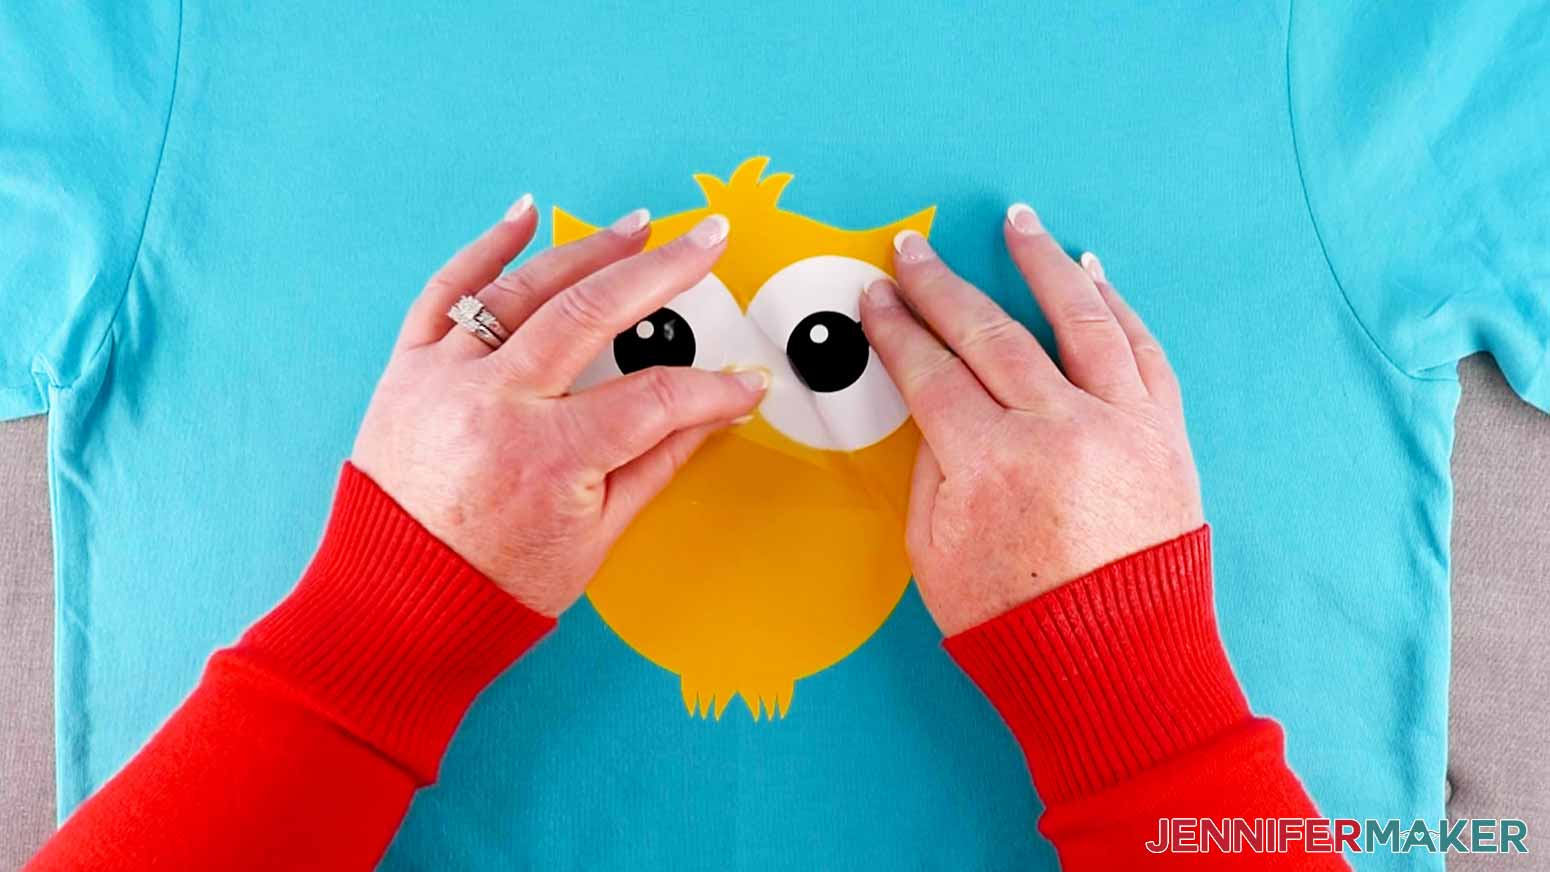
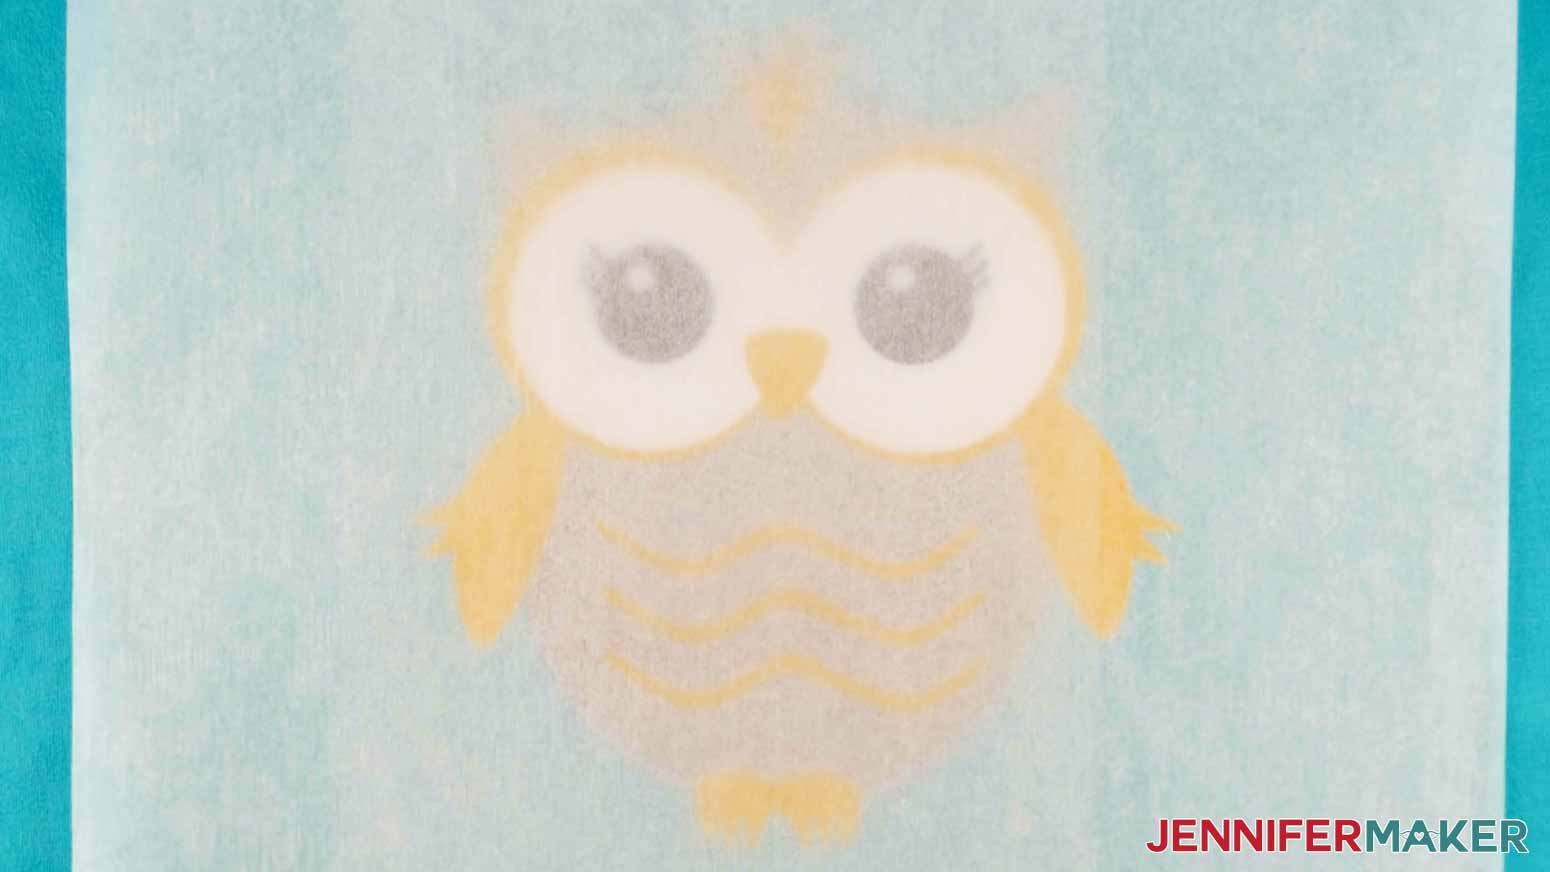
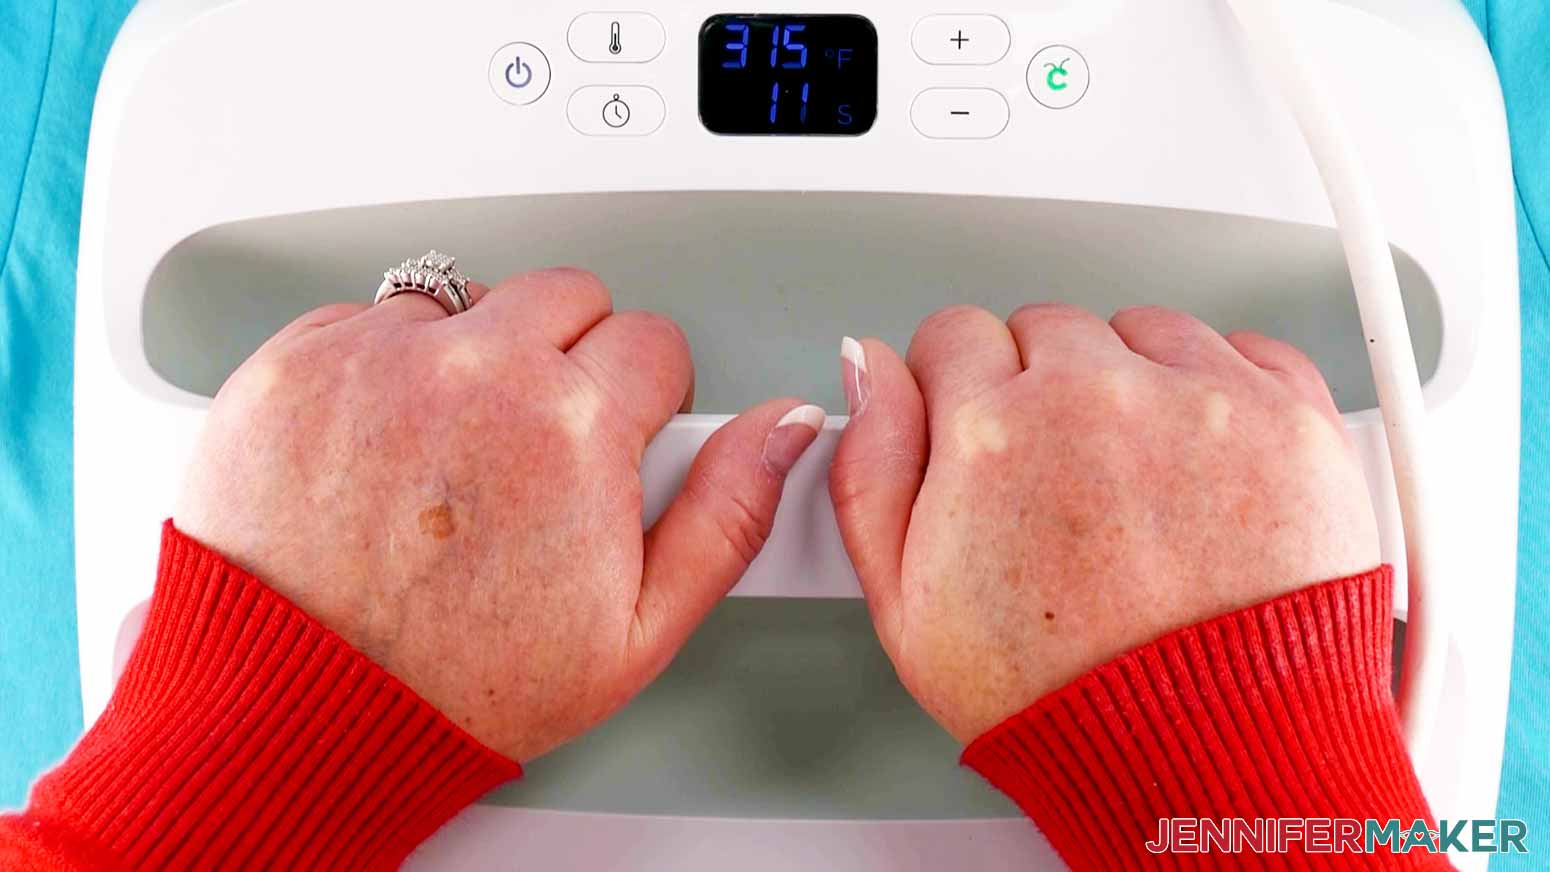
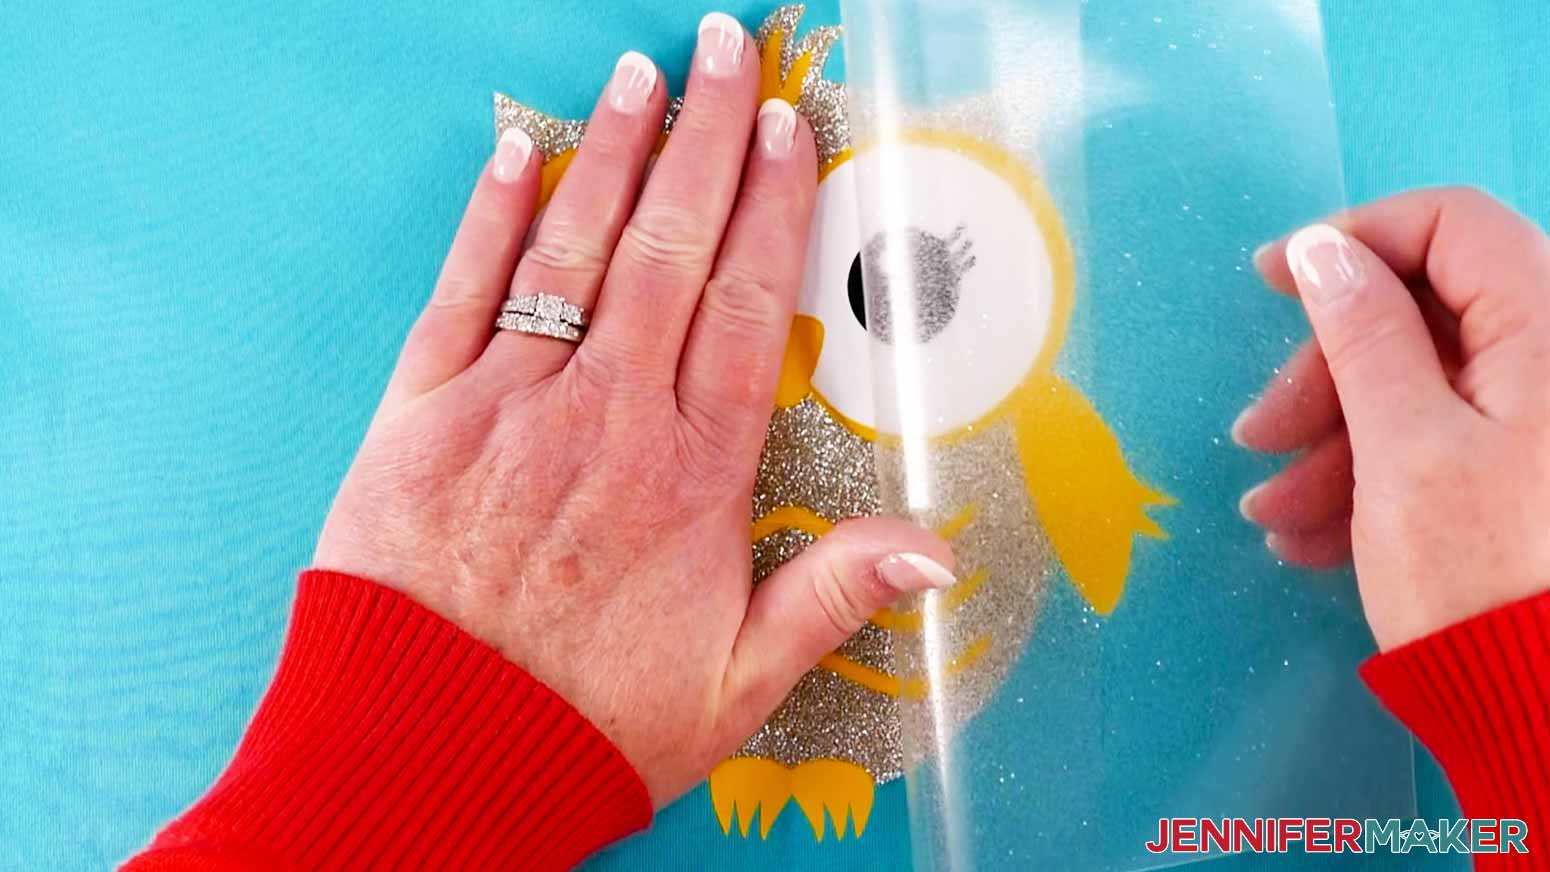
Learn how to layer iron-on vinyl on a shirt! IMPORTANT: When using Holographic or Glitter Iron-On vinyl, make sure it is your TOP layer. You cannot add other layers over these specialty vinyls. Here's what my Owl design file looks like uploaded to Cricut Design Space. Design Space offers several templates to help you design your shirts. Designing with a template visibly helps you get the size and layout just right. Since we're adding our owl to a t-shirt, let's find a helpful template. Click on “Templates” in the upper left corner. Scroll down and choose "Classic T-Shirts.” The t-shirt template will be added to the Canvas. In the top menu you will see “Type,” “Size” and “Color.” These refer to the t-shirt template now on the Canvas. The drop-down menus allow you to adjust the template to match your shirt style, size and color. This will give you a good idea of what your final shirt will look like. My shirt is a Unisex shirt in size small, so I selected “Men Short Sleeve” under “Type” and “Small” under “Size.” You can change the color from white to a color that matches your t-shirt if you want, but I left mine white even though I’m using a teal shirt. The template is ONLY to help with sizing and image placement and will not be printed or cut. If you look in the layers panel on the far right you will not see a layer for the shirt. NOTE: Templates only work in Cricut Design Space on a desktop or laptop, not on an iPad, iPhone, or other mobile device. Now click and drag the design onto the shirt. I made the owl 7″ tall to fit a Small Unisex t-shirt, but you can resize the design to fit yours. To change the size, click and drag the "Resize" handle on the bottom right corner of the bounding box until you are happy. If you are using the same color vinyl as me, you are ready to click “Make It.” If you’d like to use another color combination, you can change the colors of each layer to preview what your design might look like with different variations. Click on a layer in the Layers panel on the right side. Then in the upper menu at the top of the screen click on the color box next to where it says “Basic Cut” under "Operations" and choose a new color. When you are ready, select your Cricut machine — I selected Maker 3 — and then click the green “Make It” button in the upper right corner. If you are using a Maker 3 or Explore 3, you will be asked if you are cutting your designs without a mat, on a mat, or multiple ways. Select "On Mat" and click "Continue." If you are using Smart Vinyl, you would select “Without Mat.” Next, on the Prepare screen, there is a toggle button labeled "Mirror" under each mat, which is really important for this project. NOTE: Iron-on vinyl comes adhered to a shiny, clear, heat-resistant liner that protects your design during the heat-transfer process. Unlike sticky vinyl, the adhesive side of HTV faces away from the liner and the decorative side is visible through the liner. The heat source activates HTV's sticky side to adhere it to your item, while weakening its bond to the liner so you can peel it off to reveal the transferred design. The liner MUST remain intact and stay between the heat and your item to avoid ruining the design and equipment. Because of this, it is necessary to load the HTV liner-side down so your machine can cut your design and leave the liner intact. The "Mirror" function transforms the design into a reflection of itself so that it will look correct once flipped to be decorative side up. If you don’t mirror each layer, your design will appear backward on your base material. This is especially important if your design includes text. Toggle the “Mirror” switch to on, or green, for every layer. Click on each mat to do this, then click back on the first mat to complete the action before moving to the next step. The designs I’ve included with this tutorial technically don’t need to be mirrored because there isn’t any text and they would look the same whether they are mirrored or not. But it's really good practice to ALWAYS mirror any iron-on projects before cutting. Click “Continue.” On the Make screen you will select your material settings. For Mat 1 (white vinyl), 3 (yellow vinyl), and 4 (black vinyl) I used Cricut Everyday Iron-On Vinyl. So when prompted to "Set Base Material" for each mat, click on "Browse All Materials" and type “Every” in the search window, then choose "Everyday Iron-On" and click “Done.” I always select "More" pressure to ensure the best cut. For Mat 2 (silver glitter vinyl) I used Cricut Glitter Iron-On Vinyl. So when prompted to "Set Base Material" for Mat 2, click on "Browse All Materials" and type “Glitter” in the search window, then choose "Glitter Iron-On" and click “Done.” Select "More" pressure to ensure the best cut. In case you forget to toggle “Mirror” on, you will be reminded on this screen as well. It also reminds you to place your iron-on vinyl SHINY SIDE DOWN on your machine mat. If you ever have any questions about cutting vinyl, I have put together a great resource to help. It’s “The Ultimate Guide to Vinyl” and among other things it explains how to tell which side of the iron-on vinyl goes down on the mat. Now it’s time to cut our design. We will use a clean green Cricut StandardGrip Machine Mat to cut our layers of vinyl. So as mentioned, place the shiny side down on the mat, with the dull side up and adhere it well. Make sure your vinyl color matches the corresponding color you selected for each mat. Double-check that the Fine-Point Blade is loaded in Clamp B, then load your mat into your machine and press the "Go" button. Repeat these steps for all four pieces of vinyl. It's now time to weed our iron-on Owl design layers. Weeding means to remove all of the vinyl that we don't want to transfer to our project. To get started, you begin peeling the unneeded vinyl away from an edge. You can also use the tip of your weeding tool in the corner and pull up the edge. Once you have it started, continue to pull the excess vinyl away from the carrier sheet. Your design will stay on the carrier sheet and the part that you do not want will pull away. TIP: Sometimes the iron-on vinyl doesn't want to come free very easily. If this happens, I make a small knick in the corner with my craft knife. You don't want to cut all the way through. Just cut through the iron-on vinyl layer on the matte side (the cut side) and peel from there. I find that this small cut makes it easier to peel off the vinyl. TIP: If you are having trouble seeing the cut paths of the vinyl as you’re weeding, the Cricut BrightPad can help with that. The light helps reveal the cut lines of the design to make the weeding process much easier. Here's what the four layers of iron-on vinyl for the Owl will look like once cut and weeded. Notice that the shiny carrier sheet is visible and larger than the vinyl pieces. It's a good idea to gently stack the layers of your design together before moving on to the next step to be sure you've cut everything out and they fit together the way you expect. Don't worry, this won't hurt your design and you can peel the layers away when you're ready to move on to Step 4. First, if you are using a Cricut EasyPress, refer to the Cricut EasyPress Interactive Quick Reference Guide for how to prep your material and machine, how to apply, and how to care for the finished product. This takes the guesswork out of the process! Then, preheat your EasyPress or iron to the proper temperature. Even though the guide calls for me to set my EasyPress to 315°F, I’m going to set mine to 300°F. Since we are layering HTV, we don't want to overheat the materials. If you are using an iron and cotton t-shirt, set it to the cotton setting. If your shirt is something other than cotton, you may need a different setting for your material. Place your t-shirt on a Cricut EasyPress Mat or folded towel to protect your work surface. Use a lint roller to clean any stray lint or fuzz from the area of your shirt where you plan to adhere the vinyl. Find the vertical center of your shirt. The simplest way to do this is to fold your shirt in half by matching up your sleeves. Use your EasyPress or iron to put a little crease on the center fold. When you open your shirt you'll know exactly where the center is. Now you can just line up the center of the Owl with the crease to get perfect placement! TIP: Putting a crease in your shirt like this also serves to pre-heat the material. It won’t impact the final design at all. I also chose to put the design in the top half of the shirt, which is generally where you'll want to put all t-shirt designs. I could eyeball it, but to help me line it up in the top half, I just folded the bottom of the shirt up and aligned it to the top neck of the t-shirt. I don't need to press a crease at this center point, but I now know where the top half of the shirt is. Open your shirt up flat, then center the BOTTOM VINYL LAYER of your design in place. The bottom layer is the yellow layer in the full shape of the Owl. It helps to fold the non-sticky sides of your bottom layer in half vertically against each other (it won't hurt your design), then open it up and align the creases in the vinyl to the creases in your shirt. Remember, place the sticky side of the carrier sheet against the t-shirt so the shiny carrier sheet is between the vinyl and your EasyPress or iron. The next step is to apply your design, but do not follow the Cricut Heat Guide for the temperature or length of time. Because we are LAYERING our iron-on vinyl, we have to press the bottom layers for less time to avoid overheating our design when we do subsequent layers. So put your iron or EasyPress on top of the design (you do not need anything between your carrier sheet and the iron/EasyPress for this first layer) for just three (3!) seconds. Yes, just three seconds! There is a chance that three (3) seconds might not be long enough and that’s okay, you can always add a few seconds of extra heat, just do it in increments and check to see if the vinyl is adhering to the fabric. Heat times will vary depending on your climate. TIP: If your carrier sheet doesn’t stay in place on your t-shirt, tape it down with heat-resistant tape. Peel off the carrier sheet while it’s still warm (not hot). And given that you didn't heat your vinyl for long, this really means peel it off almost right away. Save the carrier sheet from this first layer. Now take your next layer — the white eyes — and position it over the bottom layer. You'll note that the bottom layer has shrunk just a little bit. This is totally normal for iron-on vinyl; the more you heat it, the more it shrinks. A little shrinkage isn't that big of a deal. Once you have the second layer in place, cover it with a piece of parchment or butcher paper the size of the full owl design. No parchment? No problem! Use the carrier sheet you saved from the first layer to protect the vinyl already adhered to the t-shirt. You can even layer the carrier sheets if you need to — just make sure all the vinyl is covered and won’t touch your EasyPress or iron. IMPORTANT: I repeat, you do not want any vinyl to touch your heat press or iron. Press it all down with your hand and make sure it doesn't want to move. If it wants to move at all, tape it down with heat-resistant tape to keep it perfectly in place. Now press the second layer, but again, only for a few seconds. It's very important that you not heat it any longer than a few seconds, or it'll just be too much heat by the time you get to the final layer. Again, peel the carrier sheet off while the iron-on vinyl is still warm. Repeat for the third layer — the black eyes — being careful to line up the design and again covering everything with the carrier sheet or parchment paper before pressing for three seconds or so. Remove the carrier sheets while they are still warm. When you get to the final fourth layer — the silver glitter body — make sure to again cover the entire design with either parchment paper or the first carrier sheet you saved from the first layer. This time I used parchment paper. Make sure ALL the vinyl is covered. Since this is the last layer — and glitter iron-on vinyl — we can press it for longer at a higher temperature to complete our timing. Increase the temperature of your EasyPress to 315 degrees. When it's ready, press this last time for 20 seconds. Peel away the carrier sheet when it's just warm. TIP: If you have an SVG design with a lot of layers, you can add registration marks to help line up your layers. I used this method to make my Sunflower T-shirt. Here's a close-up of my finished Owl t-shirt. Isn't it cute? Layering vinyl does take some practice and patience, but the end result is definitely worth it! These are the sizes of my decals, which fit great on a unisex small T-shirt or anything larger. If you put these on a child-size shirt, you'll want to size them down a bit. Allow 24 hours after applying the vinyl before washing your shirt. When you do wash it, turn your shirt inside out and do not use any bleach. As an Amazon Associate and member of other affiliate programs, I earn from qualifying purchases.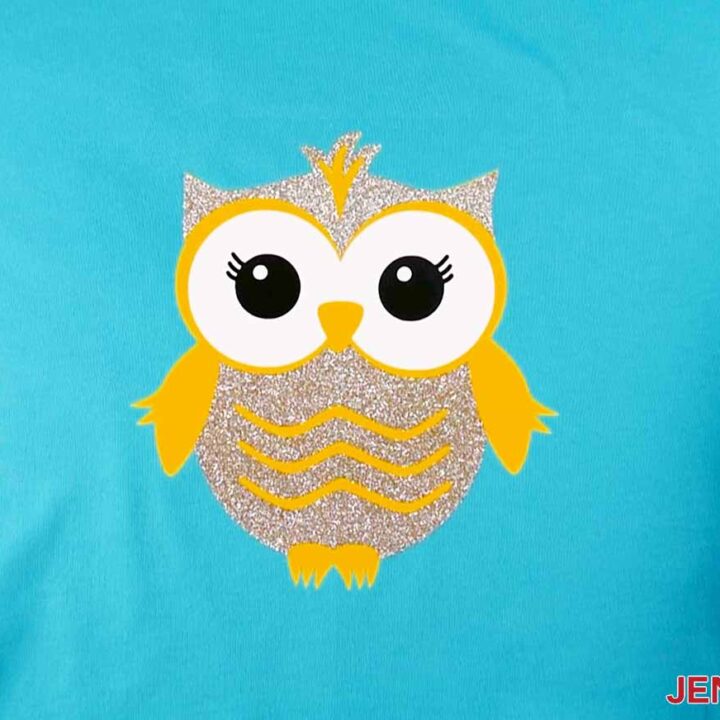
How to Layer Vinyl on a Shirt
Materials
Tools
Instructions
STEP 1: GET MY FREE LAYERED VINYL T-SHIRT DESIGNS
To help you learn how to layer iron-on vinyl (also called heat transfer vinyl or HTV) on a shirt, I created a few simple designs that are perfect for beginners. You can download my free Layered Shirt Designs — look for Design #374, from my free resource library.
There are three different layered cut files to choose from:
1. The Flower is only three layers and is a great way to try iron-on vinyl if this is your very first time using it. I used Cricut Holographic Iron-On Vinyl as my top layer to add a fun shimmer!
2. The Cat is four layers and requires slightly more precision. Pick this one if you've layered iron-on vinyl before.
3. The Owl is four layers. This is the version I will show you in the tutorial. I used Cricut Glitter Iron-On Vinyl as my top top layer to add some sparkle.
If you’re not sure how to upload an SVG file to Cricut Design Space, watch this helpful video SVGs Made Simple training series I made. It will help you SO much!
If you're on an iPhone or iPad, here's how to download and upload SVG files to the Cricut Design Space app.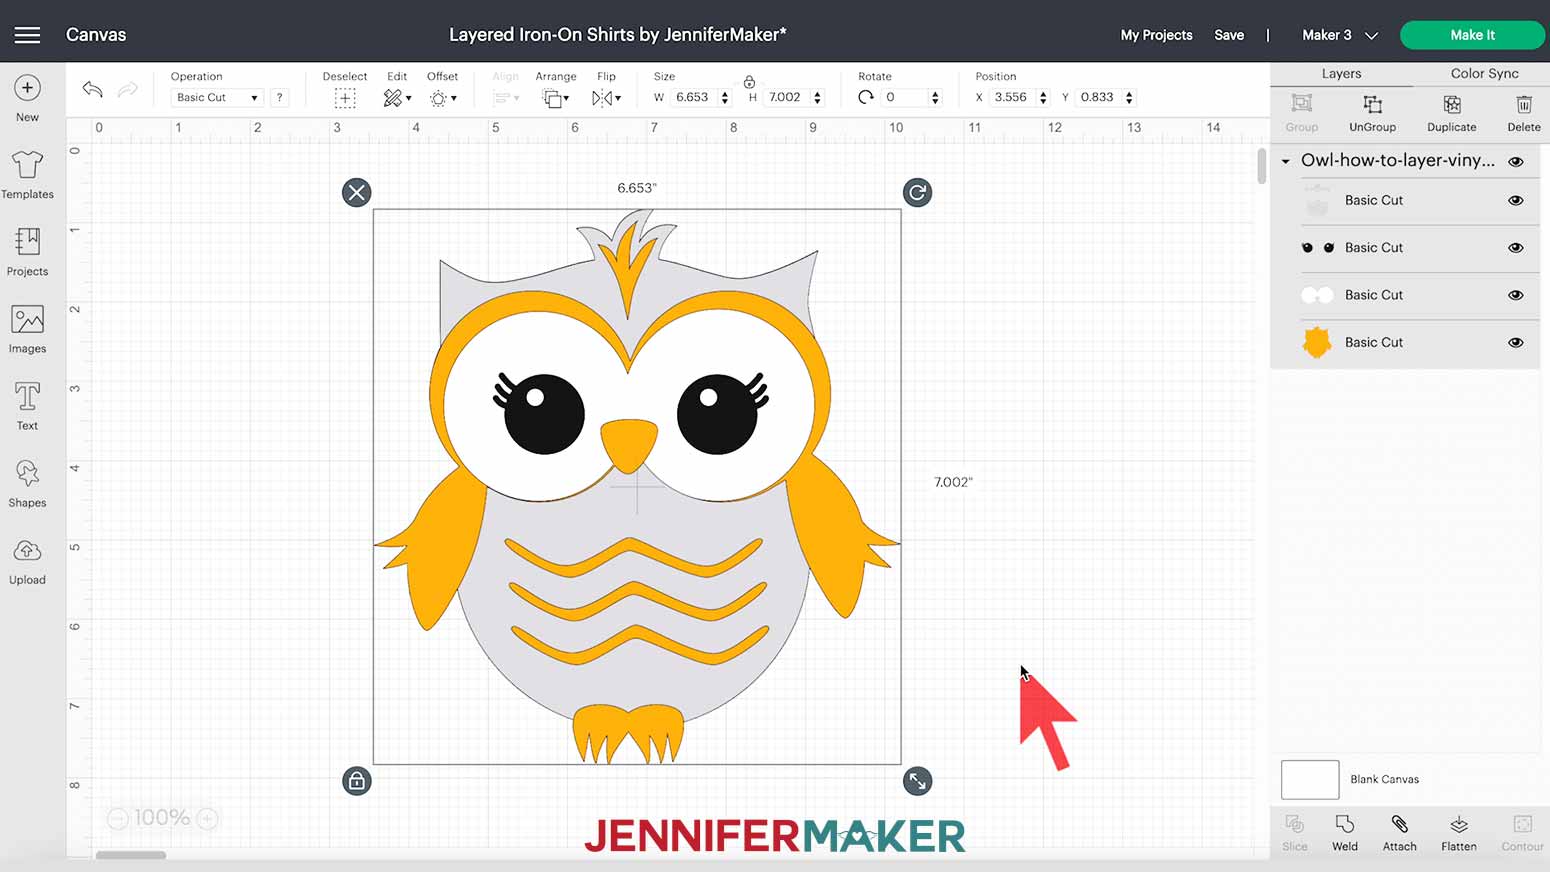
STEP 2: PREPARE YOUR LAYERED T-SHIRT DESIGNS
STEP 3: WEED YOUR VINYL SHIRT LAYERS
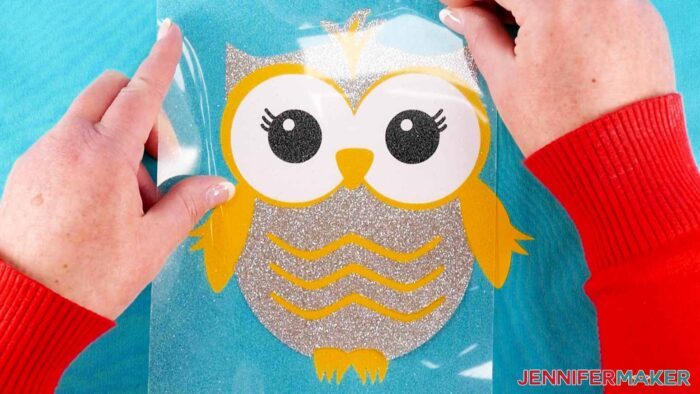
TIP: Make sure you remove the little circles inside the black eyes, too. This will allow the white to show through for eye highlights!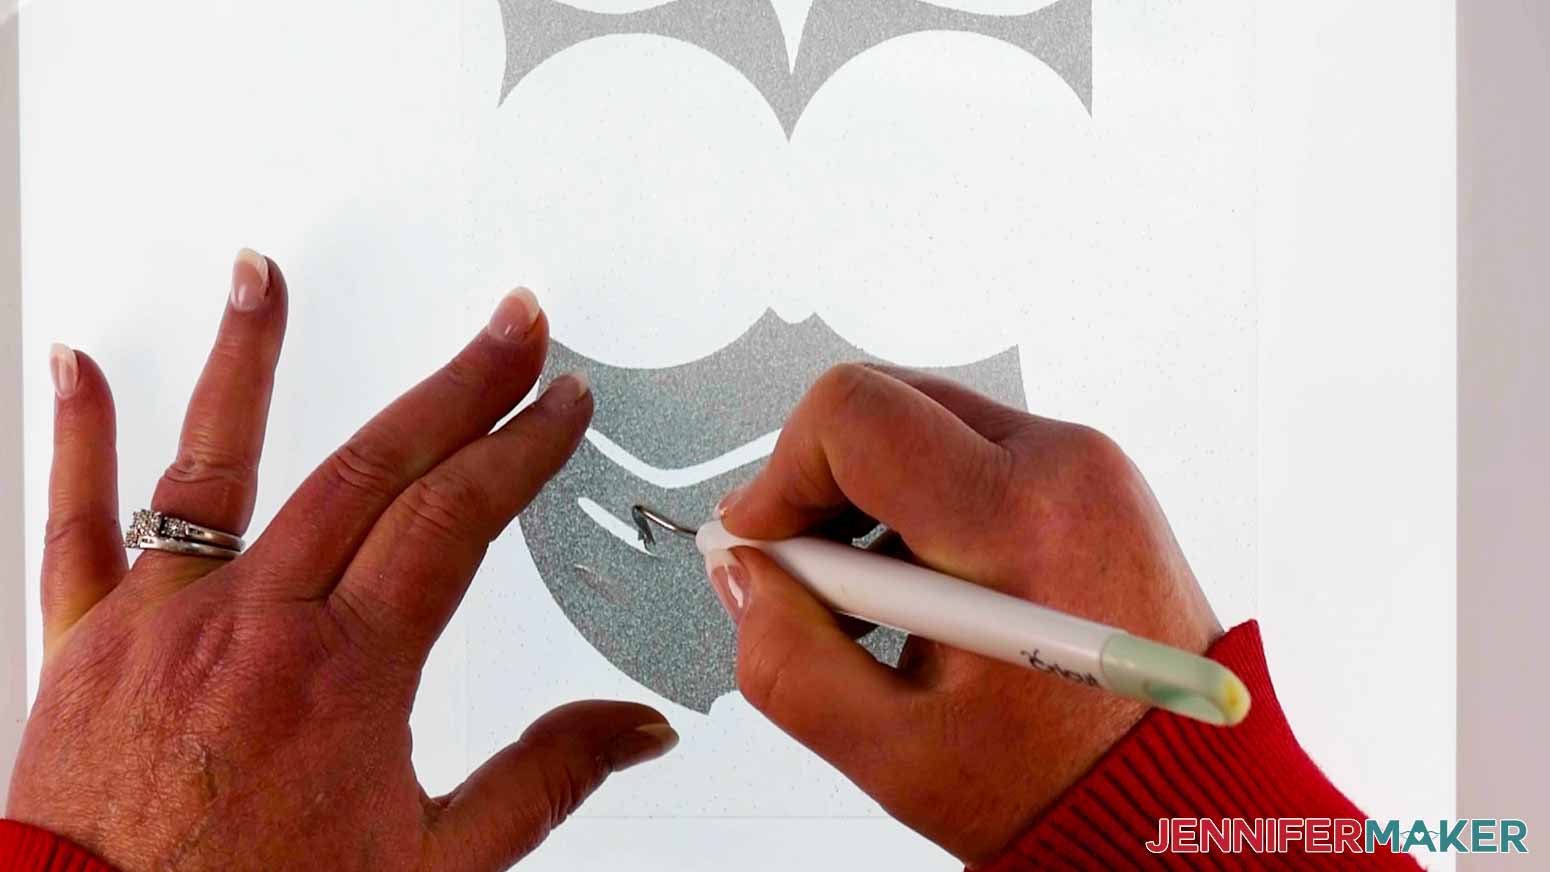
Repeat for all layers of your design.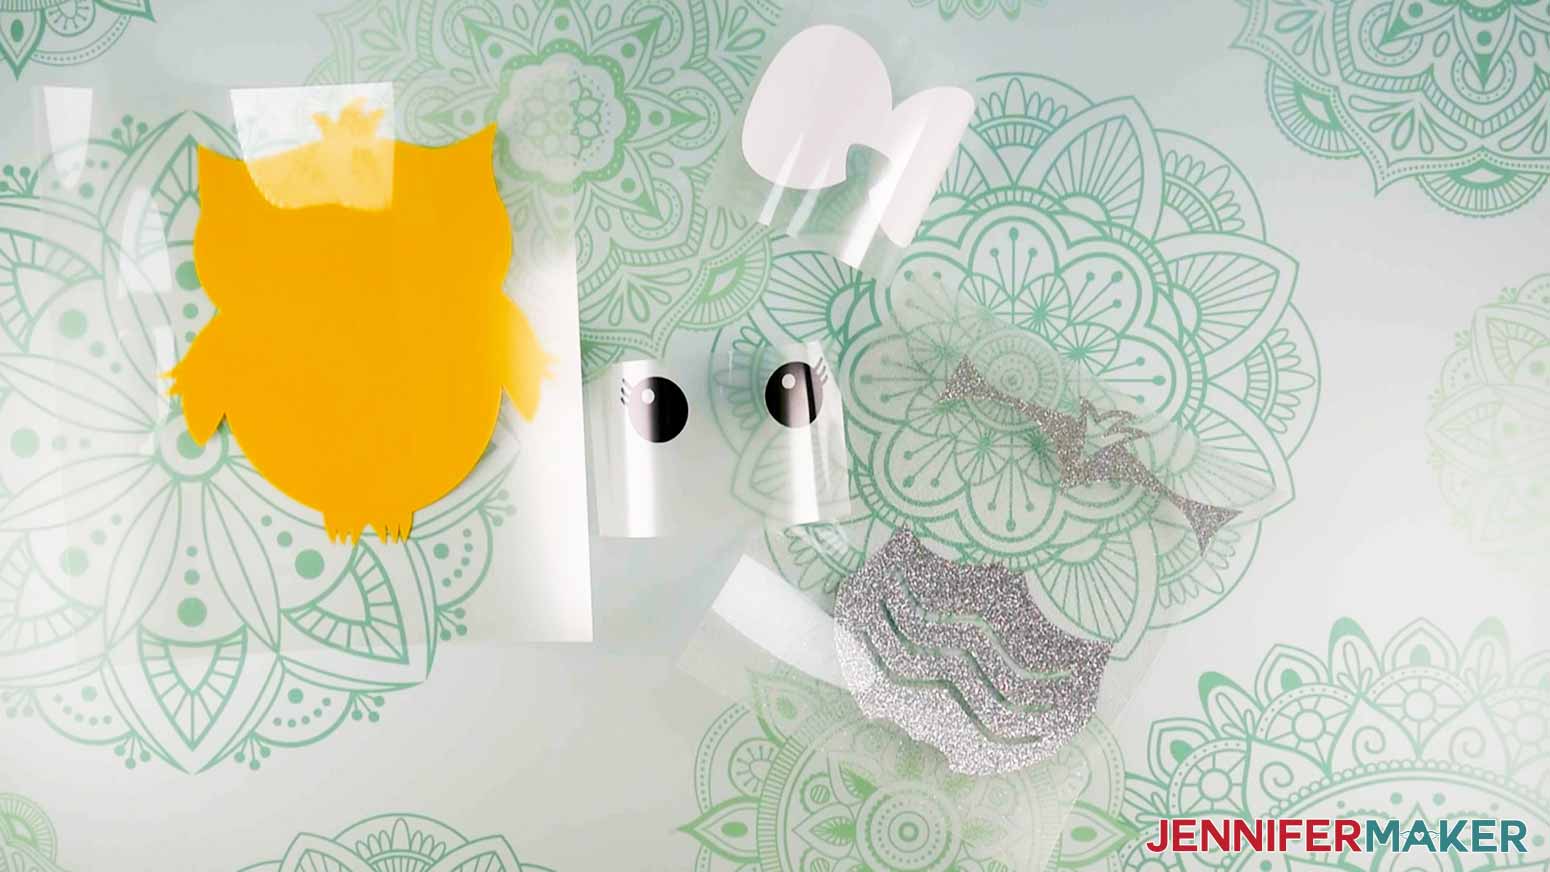
STEP 4: HOW TO LAYER VINYL ON A SHIRT


STEP 5: SHOW IT OFF!
Notes
Recommended Products


Answers to Your Questions About How to Layer Vinyl on Shirts
How do you make a layered vinyl shirt?
The key to making a layered vinyl shirt is to use iron-on vinyl, also known as heat transfer vinyl, or HTV of the right type and in the right order. Always put specialty vinyl like glitter and holographic vinyl on as the top layer, and only the top layer.
What side of iron-on vinyl do I cut?
Remember, iron-on vinyl needs to be placed FACE DOWN (shiny side up) so it cuts the vinyl not the carrier sheet. Not sure which side of the vinyl goes down on your mat? Read my iron-on vinyl cutting guide here!
Can you layer heat transfer vinyl on top of each other?
Yes, you can layer heat transfer vinyl on top of each other up to four times if you use standard, “everyday” iron-on vinyl. If you want to use another vinyl with a different texture, you can so long as you make it your top layer only.
How do you heat press multiple layers of vinyl?
The key here is to not overheat your layers. To make sure this doesn’t happen, press your bottom layers just long enough to get them to stick and release from the carrier sheet.
Can you overlap heat transfer vinyl?
Yes, you can! Just so long as you don’t try to put anything over Glitter, Holographic, Mesh, Foil, Flocked, or Glow-in-the-Dark Vinyl. I have more layer tutorials, including a “Be Kind” and “Pinkie Promise” shirt tutorial, and another tutorial on layering iron-on vinyl on a tote bag if you’d like to try to make a cute tote bag.
How do you make layered vinyl decals?
You can’t really make the iron-on vinyl layered BEFORE you add it to the shirt — layered vinyl must be applied one layer at a time. If you want to be able to do a full-color decal that can be applied to a shirt without layers, look into sublimation.
Can you layer vinyl on top of vinyl?
Yes, you can, but you must do it in a particular sequence. The general rule is that you can layer standard “everyday” iron-on vinyl on top of itself without any issues. But if you have a specialty vinyl—such as holographic, glitter, foil, flock, or glow-in-the-dark vinyl—it must be the top layer and only the top layer. Typically these vinyls will not adhere to themselves very well. And while if you try to say, put everyday vinyl on top of glitter vinyl, it may appear to work initially, it will likely not hold up in the wash.
Do you need transfer tape for iron on vinyl?
No, the sticky carrier sheet keeps all the pieces together. If you accidentally cut your iron-on vinyl in pieces, you can usually just keep them in place on your shirt with the sticky carrier sheet. If that doesn’t work, use some heat-resistant tape to keep them in place before you press them.
Can I use parchment paper for iron on vinyl?
Yes, you can use it to protect previously-pressed layers of vinyl. You can also use an empty carrier sheet, butcher paper, or a protective cover.
Do I start with the bottom layer or top layer when I layer vinyl?
In this tutorial, I show you how to start with the bottom layer and build up the layers onto it. It’s vital to start at the bottom with iron-on because you need to heat each layer independently and then together without burning them.
What kind of vinyl do you recommend?
I use and love Cricut vinyl. It cuts and layers wonderfully! The only time I find myself using another brand is when I can’t find the exact color I want in the Cricut vinyls. My second go-to vinyl when I am looking for a different color, shade, or hue is Siser EasyWeed Vinyl.
How do you weed vinyl that is hard to see?
I used a Cricut BrightPad to see and weed easier! Read more tips for weeding here!
Why is my glitter vinyl design pulling away from my shirt when I try to peel the carrier sheet?
This could happen for a couple different reasons. First, it could be a little too soon to pull it away and you’ll want to let the design cool down a little bit more and then try again. Remember, Cricut Iron On Vinyl is a COOL PEEL. If that still doesn’t work, heat the design a little bit more. Don’t be afraid to do this!
I heard that I’m supposed to see the texture/fibers of my shirts through my vinyl; is this correct?
From my testing, the only time that I can get the fibers to show is when I applied too much heat. My research shows that you don’t always have to see the texture for it to be applied correctly. If my vinyl is applied correctly, I can feel the texture of the fabric when I run my hand over the design, but I cannot see the texture.
Is it bad to overheat my vinyl design?
Yes, too much heat will harm the vinyl’s adhesive and cause your design to peel after you wear or wash it.
I made a shirt with layered glitter vinyl and it was okay at first, but now it is peeling. Why?
If you use glitter iron-on vinyl, it must be your top layer without anything layered on top of it. It may stick initially, but then peel off in the wash.
Is there another way I can design my T-shirts so it lasts longer?
Yes, I suggest using Infusible Inks if you want a longer lasting design. I have a Cricut Infusible Ink T-Shirt tutorial you might enjoy!
Get my free SVG files to create adorable layered vinyl shirts!
I love seeing what you make with my designs and how you use them! Please share a photo of your layered vinyl shirt in our Facebook group or tag me on social media with #jennifermaker.
Love,

Want to remember this? Save this How to Layer Vinyl on Shirt Tutorial to your favorite Pinterest Board!