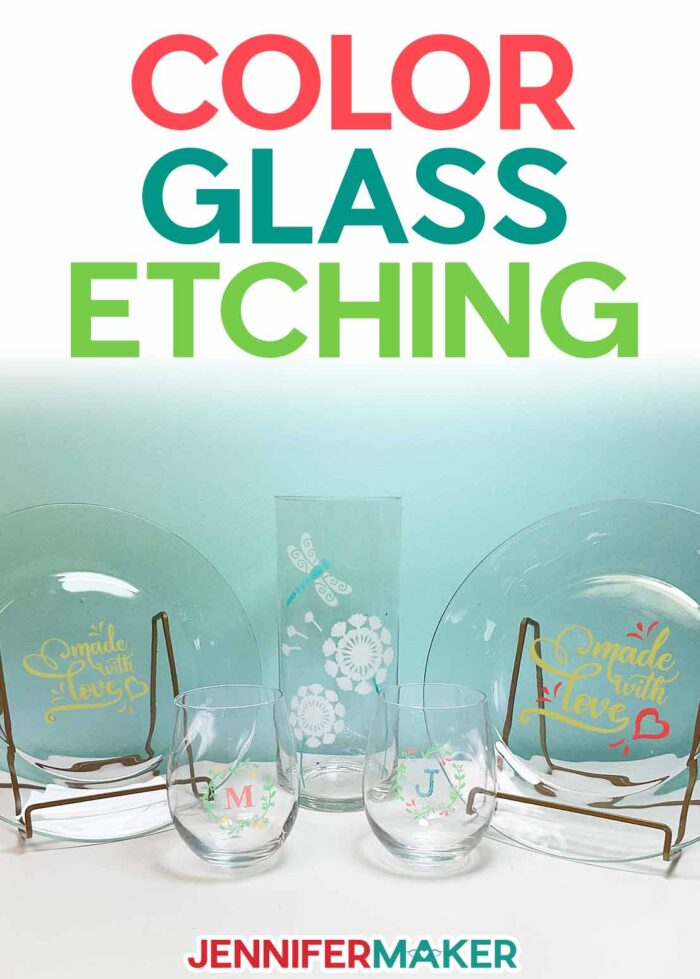
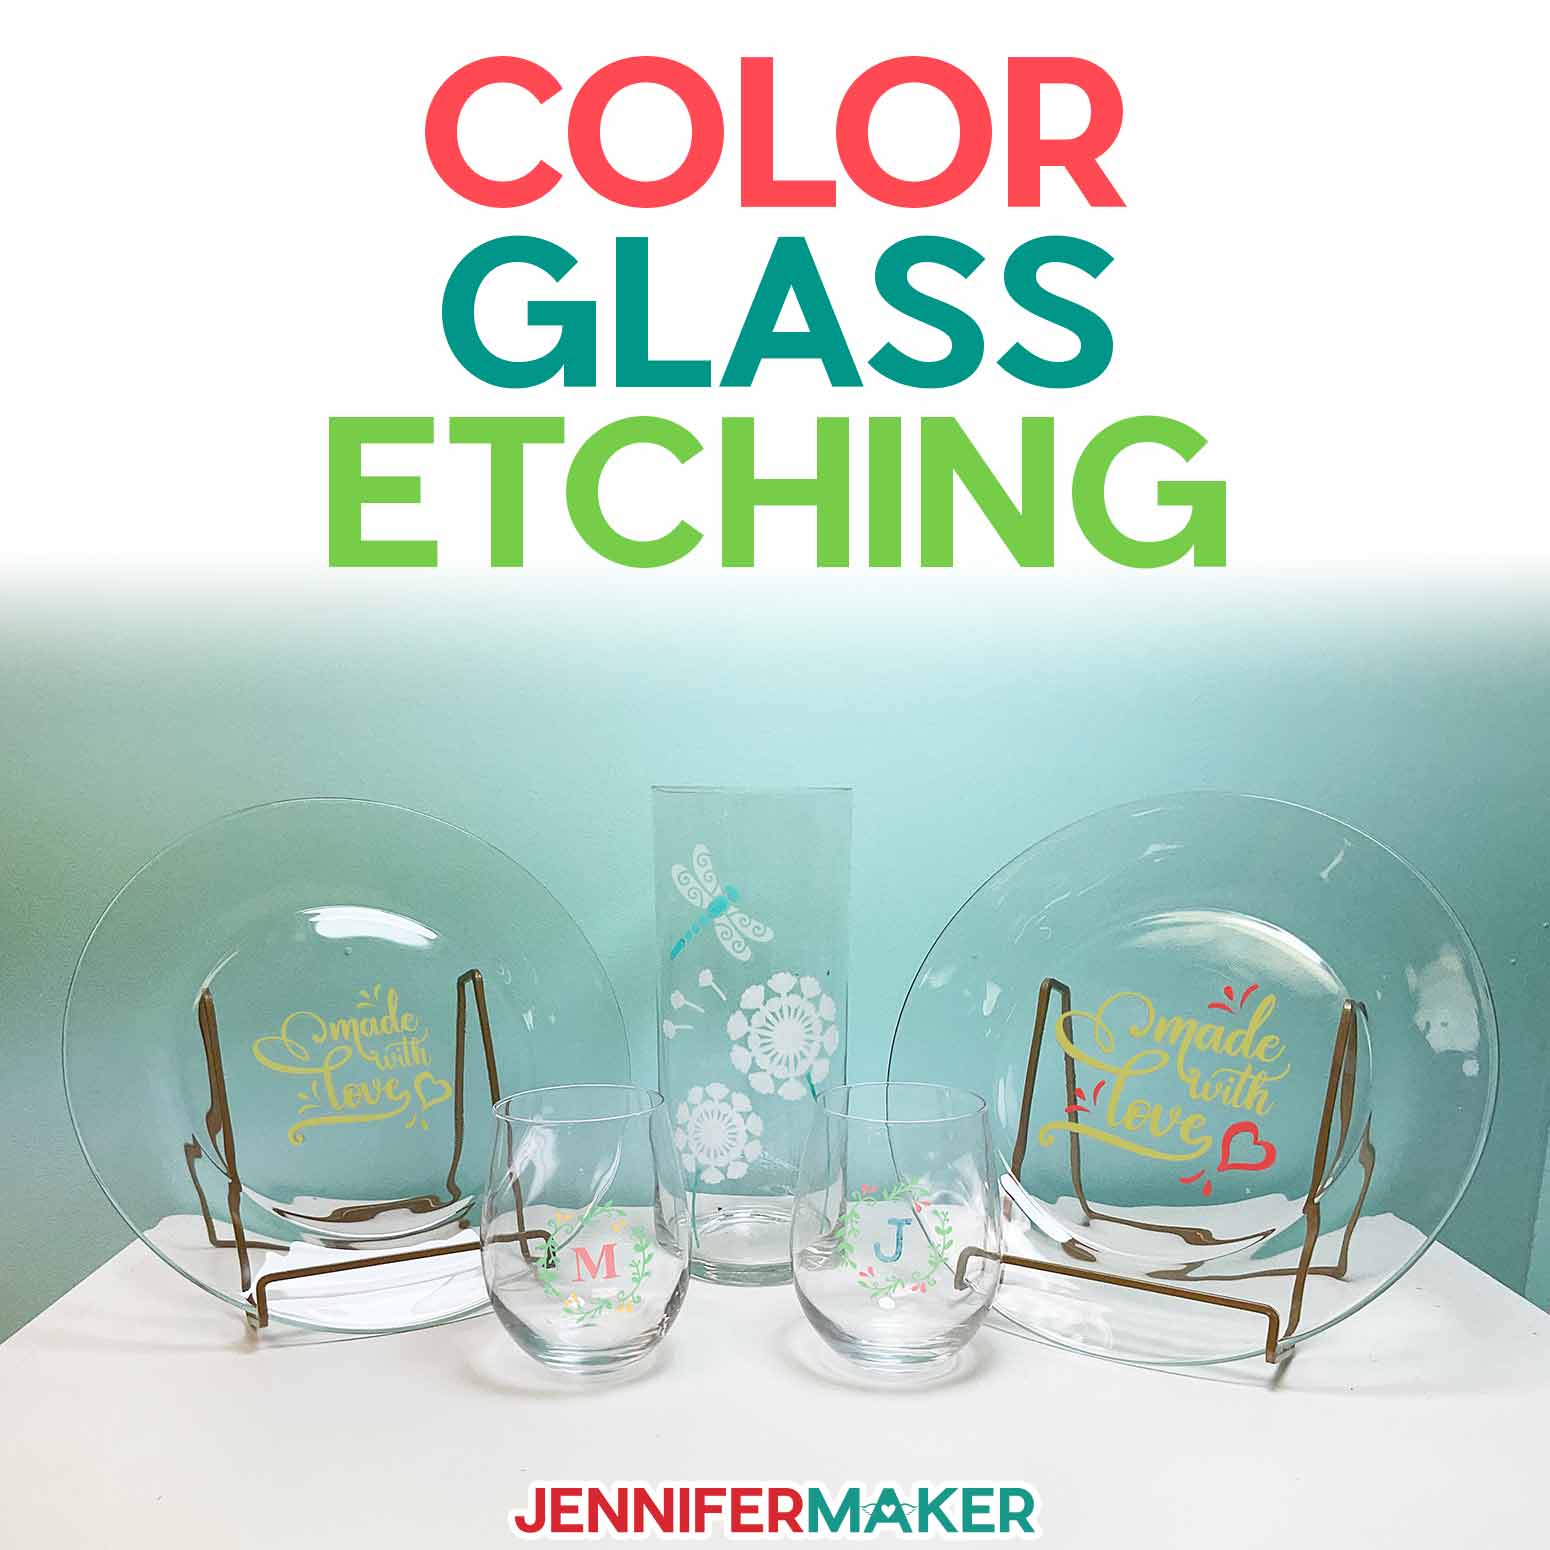
Learn how to etch glass and make it stand out with color in three different ways!
I’m SO excited to share a new technique with you: color glass etching! Etching is an elegant way to permanently decorate glass, but sometimes I want a little more color in my decor. And I know you do, too! Many of you have asked, “How can I add color to my etched glass to make my etching stand out more?” so I set out to find the answer. I’ve tested several color products and techniques with vinyl stencils customized and cut on my Cricut. I’m excited to share my favorite option for coloring etched designs on glass. The results might surprise you!
Watch the full step-by-step tutorial video with results of my color glass etching tests:

In this tutorial, I’ll teach you how to etch a piece of glass with a personalized design and then color it. Specifically, we’re going to add an initial to a stencil SVG in Cricut Design Space. It just takes a few steps and is a great way to personalize gifts!
I’ll also compare the color glass etching techniques and results for oil-based paint pens, Rub n Buff wax, and water-based paint markers. The results may surprise you!
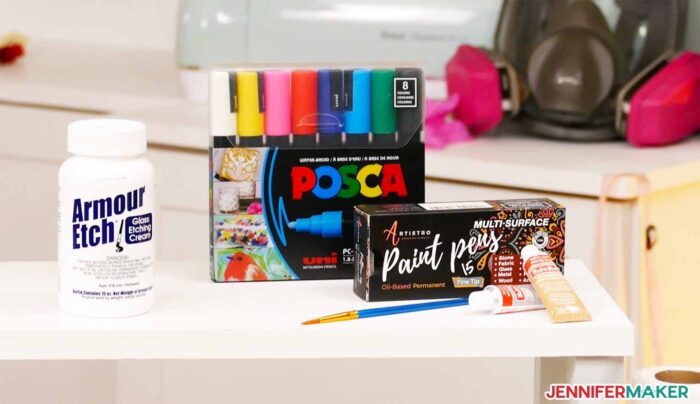
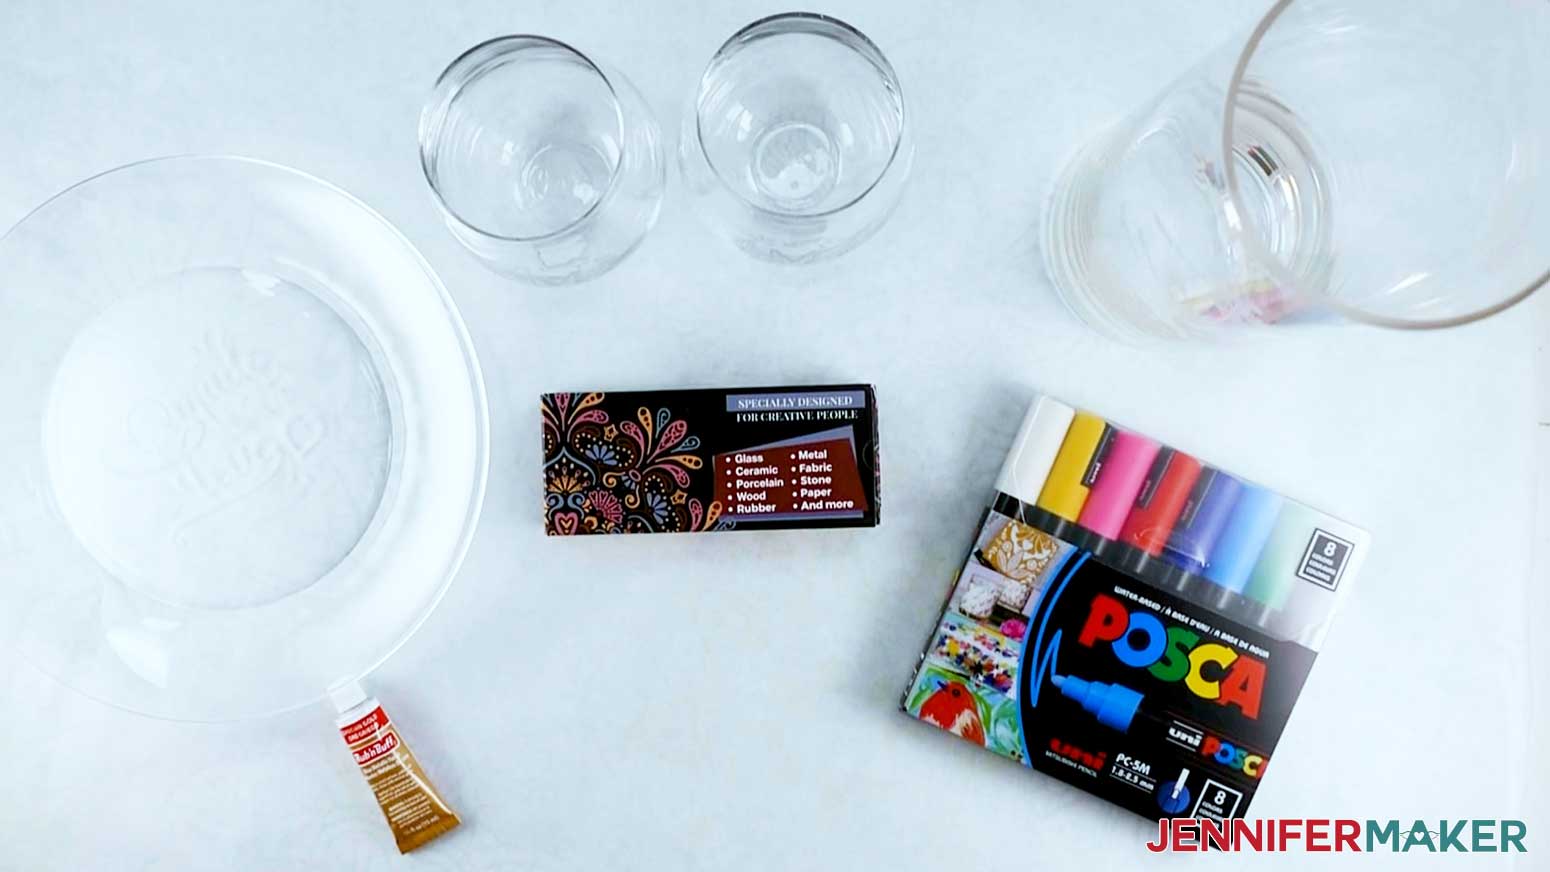
Each product works a bit differently, but have painters’ tape, dry and dampened paper towels, and rubbing alcohol ready.
For the best etching results, make sure your glass doesn’t contain Borosilicate or a scratch-resistant coating. Glass items with borosilicate may not etch evenly, if at all. The wine glass, plate, and vase in my materials list below all etched perfectly!
Perfect stencil projects rely on surface preparation and adhesive vinyl placement. Rubbing alcohol and a lint-free towel or coffee filter will clean the glass surface to get a good stick! Any color sticky vinyl will work, just make sure it and your transfer tape are a bit larger than your design. I’ll share some tips about decorating round objects, too! That’s where the fabric measuring tape, scraper, weeding tool, lint rollers, painters tape, scissors, and marker come in handy.
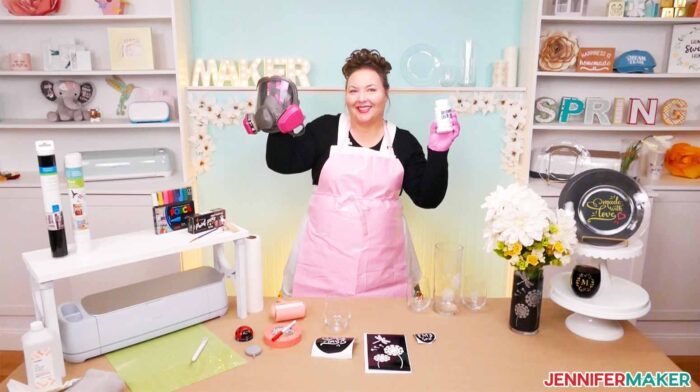
My best advice when it comes to color glass etching is to craft safely! Before we can color glass etching, we need to etch the glass surface, of course. I used Armour Etch to create my frosty designs. This etching cream permanently marks the surface of the glass, so you absolutely don’t want to get it on yourself! I’ll cover safety tips down below.
I recommend Armour Etch because a little goes a long way. Each of these designs took just a few tablespoons of etching cream. You’ll add a thick layer of etching cream to the design using a paint brush (not a foam craft brush!) to get good coverage, but the excess goes right back in the bottle for the next project.
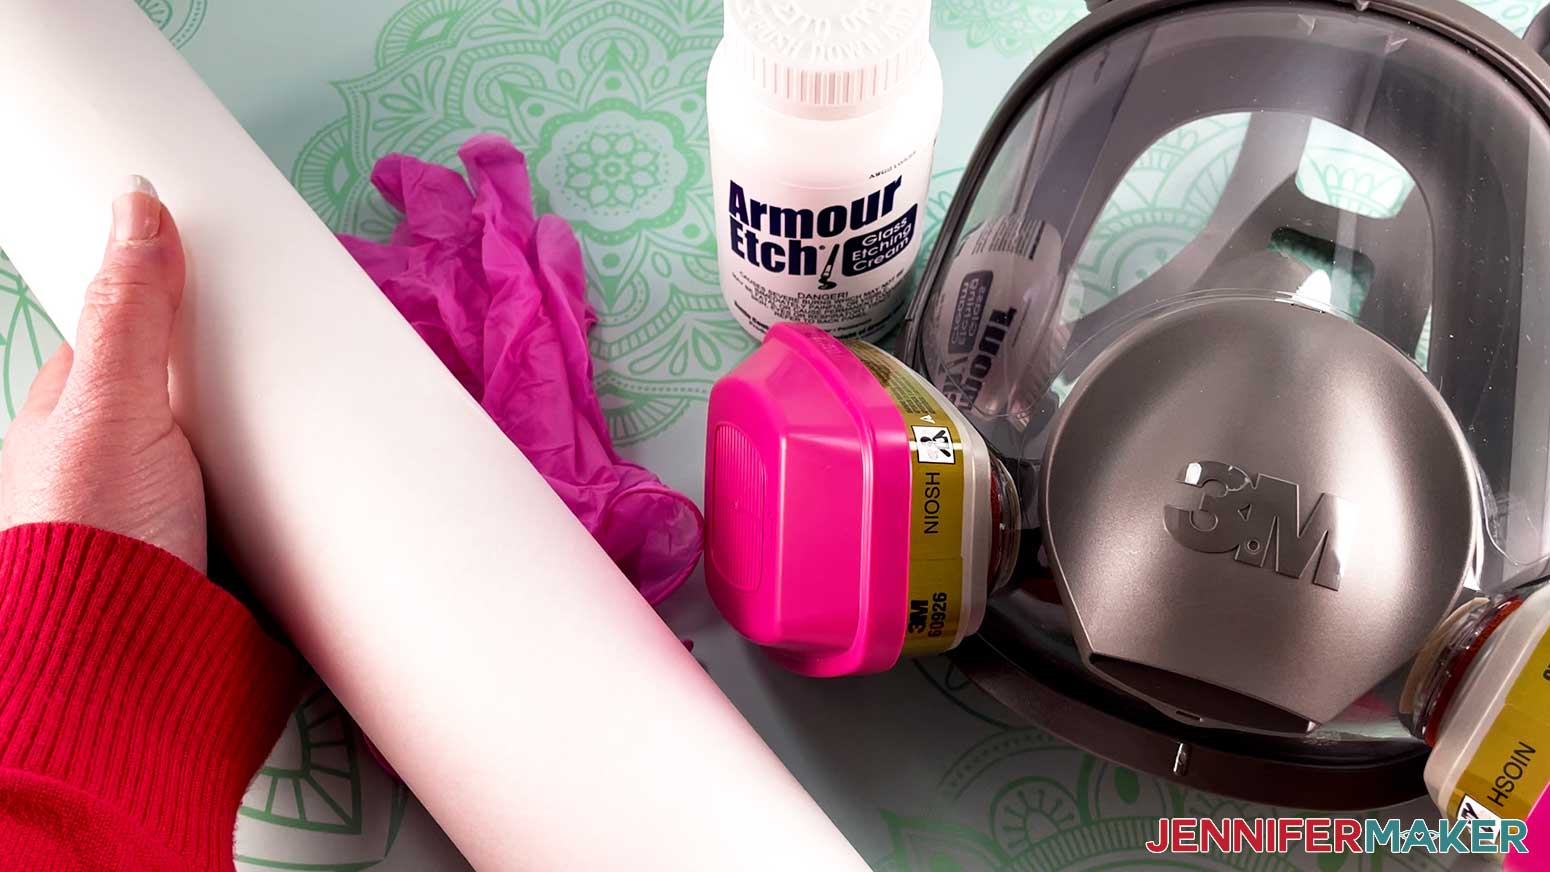
Etching projects require a few more materials than the average craft, but your health is worth the investment. Skin, breathing, and eye protection are the most important things to consider. I recommend disposable gloves, an apron, a well-fitting respirator with the correct cartridge, and eye protection if your respirator doesn’t cover your whole face. Be sure to read the safety information on your etching cream and paints before starting your project.
Also, your workspace is very important when using chemicals with fumes. Make sure you have adequate ventilation by opening windows, running fans, or even crafting outside. I always put down a few layers of butcher paper to protect my sturdy work surface and make cleanup a breeze. Speaking of cleaning up, you’ll also need access to running water to rinse off the etching cream. Its caustic nature can harm ceramic surfaces, so rinse off the etch cream in a stainless steel or plastic sink if possible.
As with all homemade crafts, check your materials for correct care and handling instructions. The oil-based pens I used recommend baking the glass for one hour at 350 °F, which worked well. The Rub n Buff is pretty sturdy after it dries for a few hours, just avoid scratching the design. Handwash your products with gentle soap and avoid contact with alcohol, UNLESS you want to remove the color. More on that in the video! I recommend not using any of the finished items in a microwave just to be safe.

I’m using the amazing Cricut Maker 3 to cut out my stencils, but you can use any cutting machine in the Maker or Explore lines. If you’re making a small design, you can even use a Cricut Joy. Just have a StandardGrip or LightGrip Machine Mat and Fine-Point Blade ready!
Once you get comfortable etching, coloring, and buffing, you’ll be able to create so many custom, colorful etched glass projects following these techniques!
Let me show you how easy it is to add color glass etching to projects with my free stencil designs! This post contains some affiliate links for your convenience (which means if you make a purchase after clicking a link I will earn a small commission but it won’t cost you a penny more)! Read my full disclosure policy.
Materials to Make a Color Glass Etching Project
View my Amazon shopping list with the exact items we used to make this project
- One (1) 20 oz Stemless Wine Glass, One (1) 9.25″ Glass Dinner Plate, or One (1) 10″ Glass Vase — You can use another size, just measure your item to determine if you need to change the design size.
- A way to color your glass etching, such as Rub n Buff Finish, Oil-Based Paint Pens, or Water-Based Paint Markers
- Scrap Paper — to prep paint pens
- Armour Etch Cream — I used about 2 tablespoons for each design
- Disposable Gloves — a few pairs since you will need some for etching and others for applying the color
- Paint Brush — to apply Armour Etch
- Painter’s Tape — to protect clear glass from etching cream
- Paper Towels — to buff and remove excess paint
- Isopropyl Rubbing Alcohol — to clean glass and remove paint or wax smears
- Lint-Free Cloth or coffee filter
- Respirator — with proper fit
- Respirator Cartridge — to fit your respirator
- Safety Goggles — if your respirator doesn’t cover your eyes
- Apron — to protect your clothing
- Butcher Paper — to protect your work surface
- Access to running water in a stainless steel or plastic sink to rinse off excess etching cream
- A method to cut your vinyl — I used the amazing Cricut Maker 3, but you can also use the Cricut Maker or Cricut Explore Series
- Cricut Green StandardGrip Mat (12″ x 12″)
- Cricut Permanent Premium Vinyl, a bit larger than your stencil design – any color
- Cricut StandardGrip Transfer Tape, a bit larger than your stencil design
- Brayer
- Weeding Tool
- Timer
- Lint Rollers — optional, to hold item in place while working on it
- Fabric Measuring Tape — optional, if you need to measure your item to change the design size
- Design #380 (My free SVG/PDF/DXF design files are available in my free resource library – get the password by filling out the form at the bottom of this page)
To make a wine glass just like mine in the video, you’ll need:
- One (1) 20 oz Stemless Wine Glass
- Oil-Based Paint Pens in red, green, and yellow
- Cricut Permanent Premium Vinyl, 3″ x 3″ any color
- Cricut StandardGrip Transfer Tape, 3″ x 3″
How to Make Your Own Color Glass Etching Items
Color Glass Etching
Learn how to add color to etched glass to create fun and unique gifts!
Materials
- One (1) 20 oz. Stemless Wine Glass -OR-
- One (1) 10 inch Glass Vase -OR-
- One (1) 9.25 inch Glass Dinner Plate
- One (1) 3" x 3" piece of Permanent Vinyl for stencil, any color
- One (1) 3" x 3" piece of Cricut StandardGrip Transfer Tape
- One (1) 10 oz Bottle of Armour Etch Cream — I used about 2 tablespoons for the wine glass
- Oil-Based Paint Pens -OR-
- Water-Based Paint Markers -OR-
- Rub n Buff Finish
- Design #380 (My free SVG/PDF/DXF design files are available in my free resource library - get the password by filling out the form at the bottom of this page)
Tools
- A method to cut your vinyl — I used the amazing Cricut Maker 3 but you can also use the Cricut Maker, Cricut Explore Series, or Cricut Joy
- Cricut StandardGrip 12" x 12" Machine Mat (green)
- Respirator — with proper fit
- Respirator Cartridge
- Safety Goggles — if your breathing protection doesn't cover your eyes
- Disposable Gloves
- Apron — to protect your clothing
- Paint Brush — to apply Armour Etch
- Painter’s Tape
- Isopropyl Alcohol
- Lint-Free Cloth or coffee filter
- Brayer
- Weeding Tool
- Paper Towels — to buff and remove excess paint
- Timer
- Lint Rollers — optional, to hold item in place while working on it
- Measuring Tape — if you need to measure your item to change the design size
- Butcher Paper — to protect your work surface
- Access to a sink to rinse off excess etching cream
- Scrap Paper — to prep paint pens
Instructions
STEP 1: GET MY FREE COLOR GLASS ETCHING SVG FILES
First, download my Color Glass Etching SVG/DXF/PDF files from my free resource library. It's Design #380. There are several design options in the folder, we'll start with the wine glass design, which is titled "color-glass-etching-wineglass-jennifermaker-SVG." Upload the SVG file to Cricut Design Space and add it to your Canvas.
TIP: If you are not sure how to upload an SVG cut file to Cricut Design Space, watch this helpful video training series I made. If you are on an iPad or iPhone, here is how to download and upload SVG files to the Cricut Design Space app.
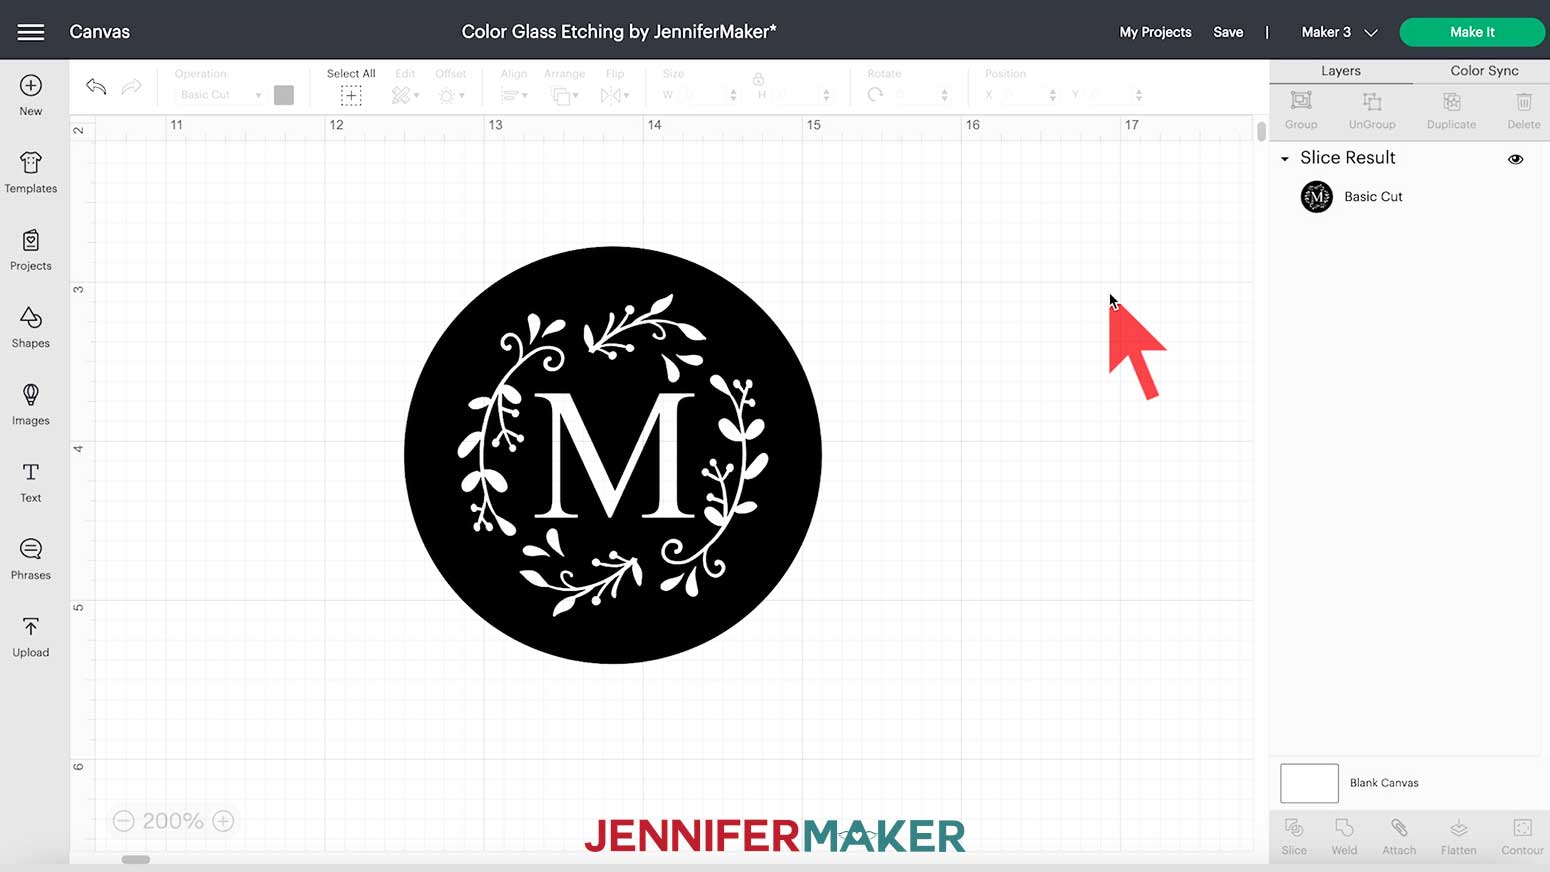
This is what my Color Glass Etching wine glass SVG file looks like on my Canvas.
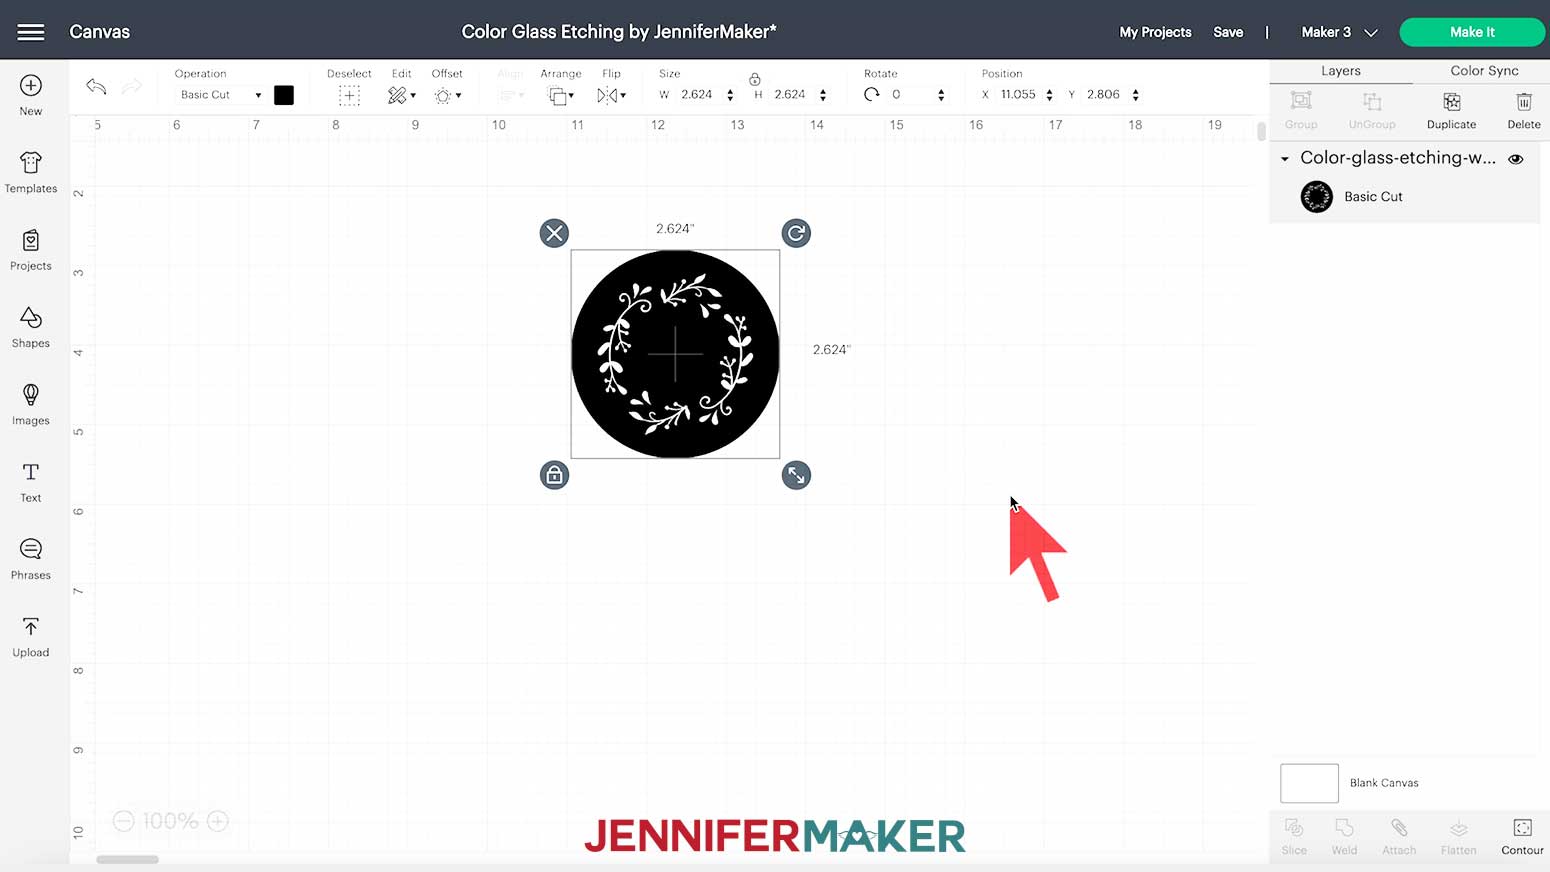
Since we are etching our glass, we're actually making a stencil with the vinyl. The colored part of the design is the area we will protect from the etching cream with the vinyl. The white part showing through is the design we will actually etch on the glass.
STEP 2: CUSTOMIZE THE STENCIL DESIGN
The wine glass design is sized for the 20 oz. glass from the materials list and will make an etched design that is about two inches square. If you are etching the design on a different item, resize it accordingly. You can click and drag the resize icon in the lower right hand corner of the design, or type a new dimension into the height ("H") or width ("W") box at the top menu under Size.
NOTE: Remember to keep the Lock icon locked to maintain the design proportions! And if you make your design larger, use larger pieces of vinyl and transfer tape.
If you need help resizing an SVG in Cricut Design Space, you can check out my resizing guide where I explain exactly what you need to do to resize any design to fit your needs.
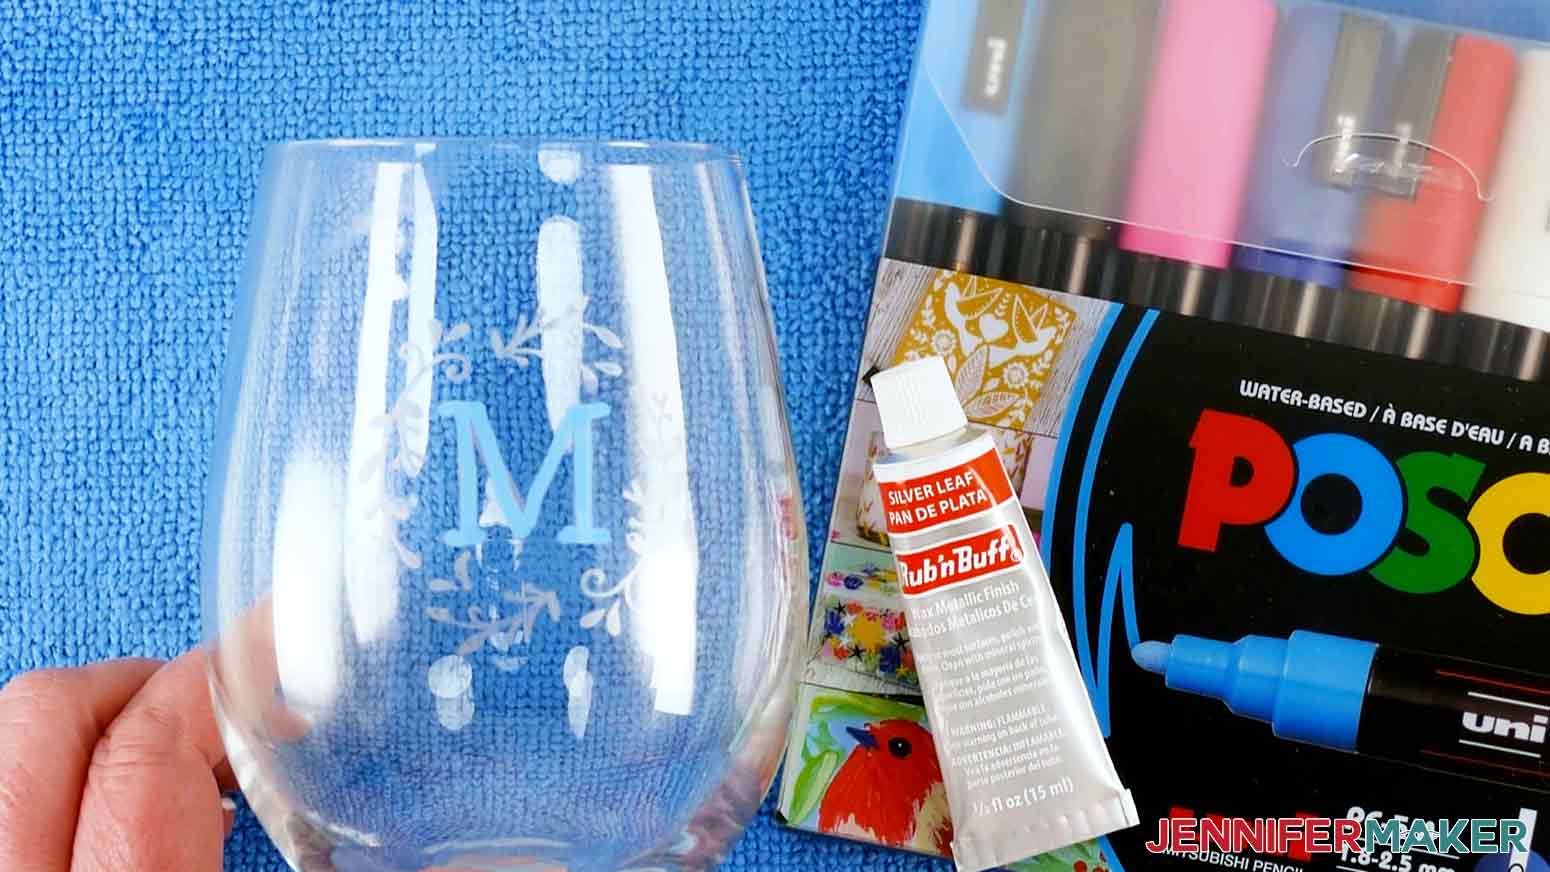
If you want to use the vase or dinner plate designs, they are ready to be cut once you upload, add, and resize them. Just confirm that the correct machine is selected in the top menu and click "Make It" to continue to the Prepare screen. However, if you chose to make the wine glass monogram design, you will want to customize it! Let me show you how.
You'll notice that the monogram currently has a blank space in the middle of the design. This is where we'll put our letter! You can choose any letter and font you want for this. Start by clicking the Text icon on the left hand side of the screen. A box with "Text" highlighted in it will appear on the Canvas. Without clicking anything else, type in the letter you want. I'll use "M" for "Maker." Then, click the box that says "Cricut Sans" under Font in the top menu to see your font options.
TIP: If you need help filtering and finding the best fonts, get my Cricut Font Finder cheat sheet!
Scroll through and click a font name to see how your letter looks until you find one you like. If you click off of the letter, click it to change the font or double-click to type in a new letter. Make sure your font choice doesn't have a price next to it to avoid a charge when you go to cut the design. I'm going to use Times New Roman, but use the font that fits your style.
Now, we need to add the shape of our new letter to the blank area. Our Align and Slice tools will help us cut one shape out of another in the correct spot. Select both the letter and design circle. In the top menu, click "Align" and select "Center" to place the new letter in the center of the original design.
Click the letter and resize it to fit your design. Make sure the letter doesn't get too close to the other design elements or the stencil may tear. Now, select both the design and the letter and click "Slice" below the Layers Panel.
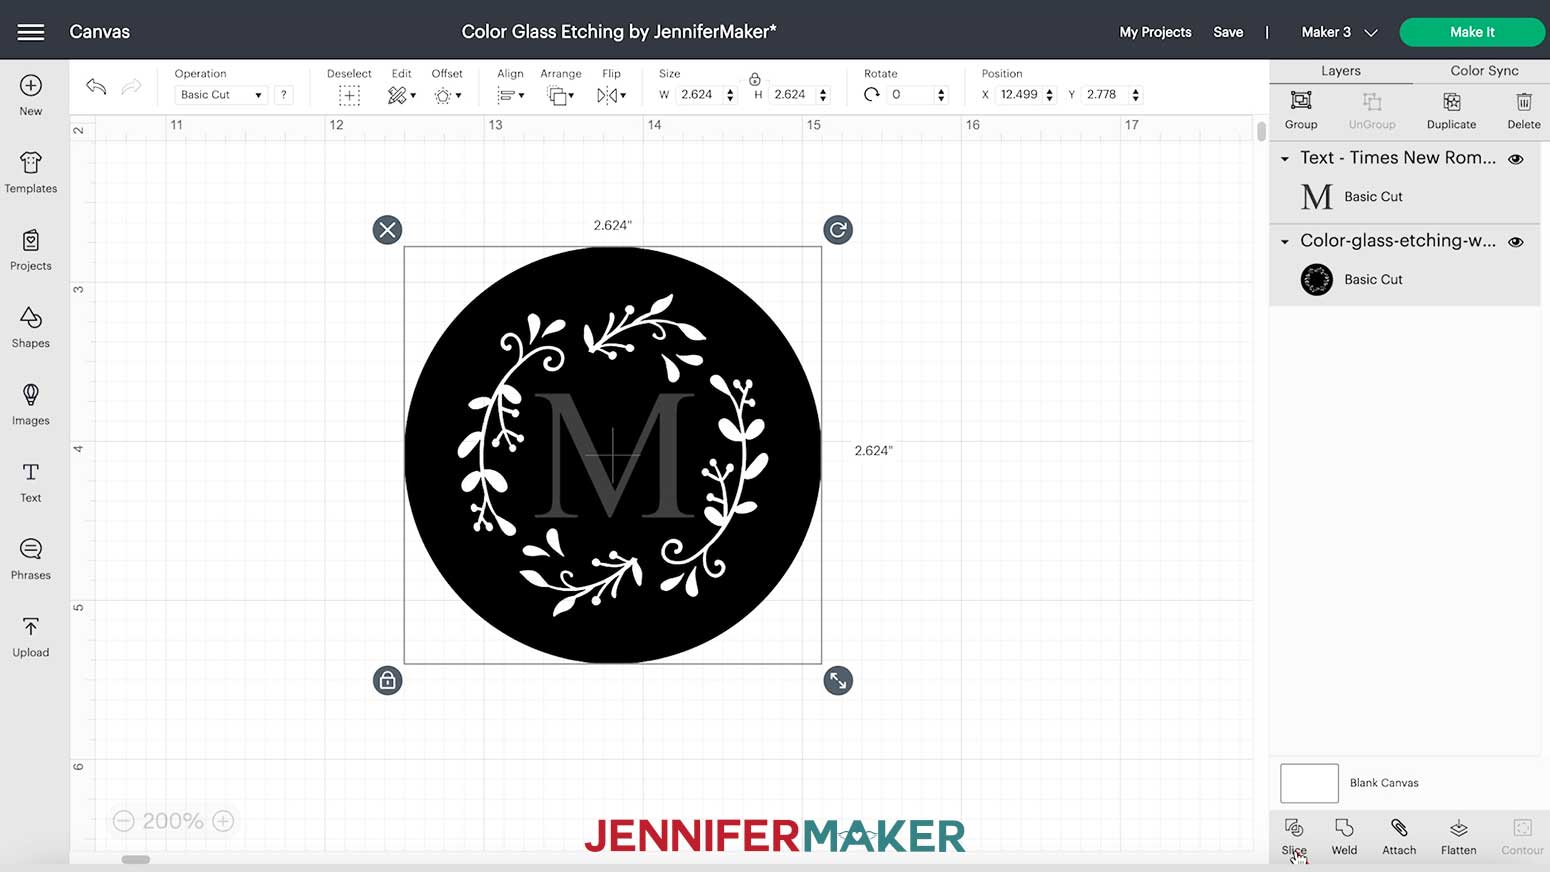
You'll see three layers appear below Slice Results in the Layer Panel. Click and delete the two layers just showing letters, leaving just your design with your new letter on the Canvas. You Canvas should look similar to mine with your letter.
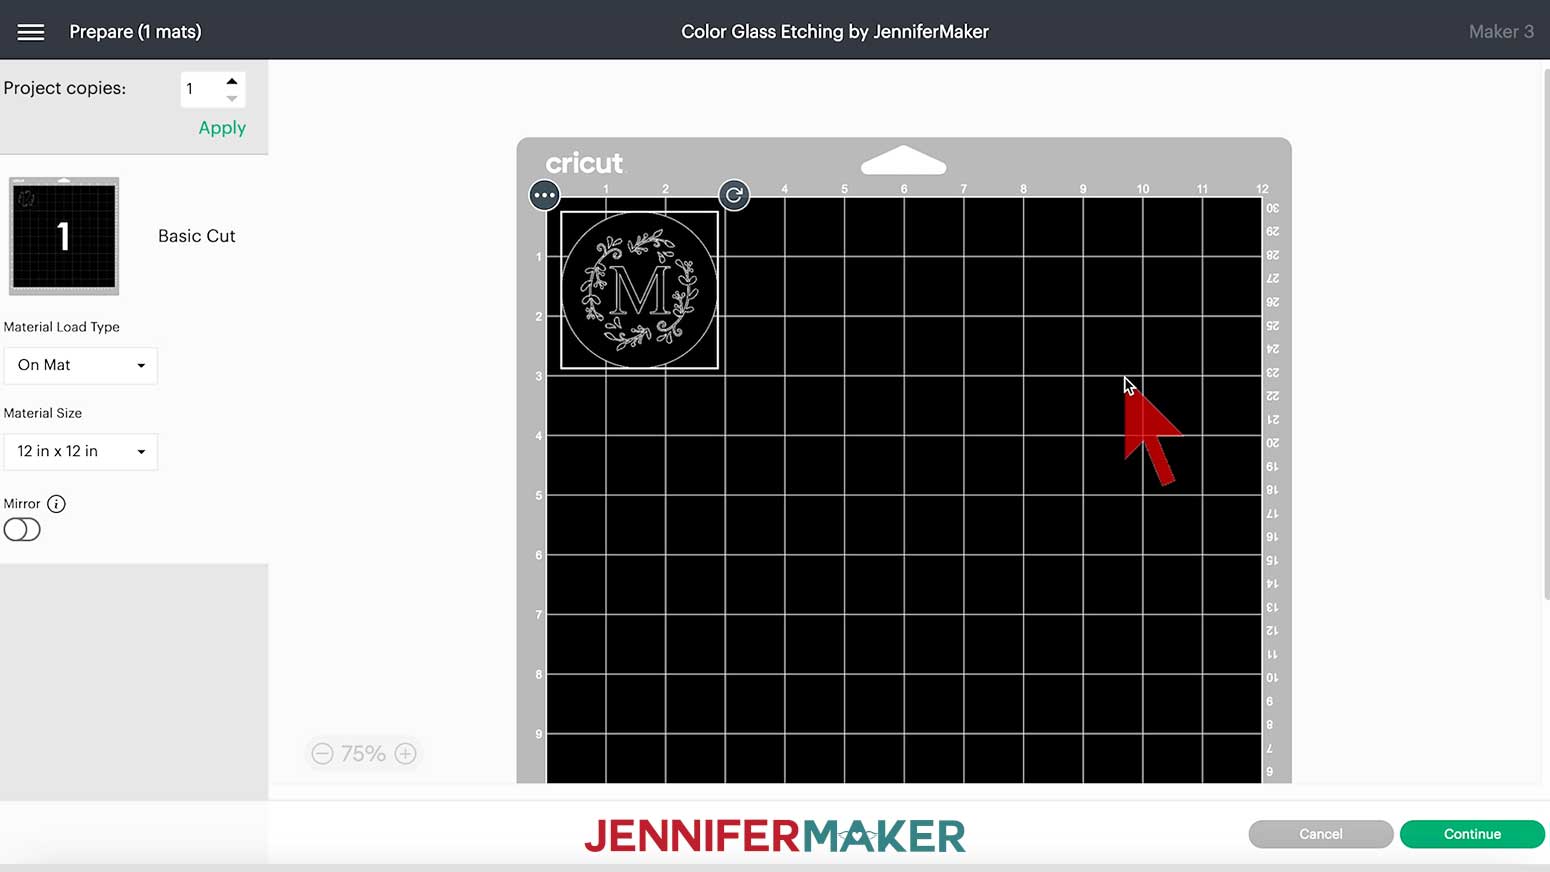
We're almost ready to cut. Select the correct machine in the top menu and click "Make It" to move to the Prepare screen. A pop-up window might appear asking how you want to load your materials. Select "On Mat" and click "Continue" unless you're using Smart Vinyl.
On the Prepare screen, make sure your design is laid out correctly on one mat. Do not Mirror your design, since we need our letter to face the right way on the glass. Click "Continue" to move to the Make screen.
TIP: If you chose the design for the dinner plate, you WILL need to mirror it before cutting because it will be placed on the BACK of the plate.
Under Set Base Material, I am choosing "Premium Vinyl - Permanent Glossy", which means permanent vinyl. Make sure your Cricut Fine-Point Blade is clean and in Clamp B as indicated on the screen. I always change my Pressure to "More" for a cleaner cut.
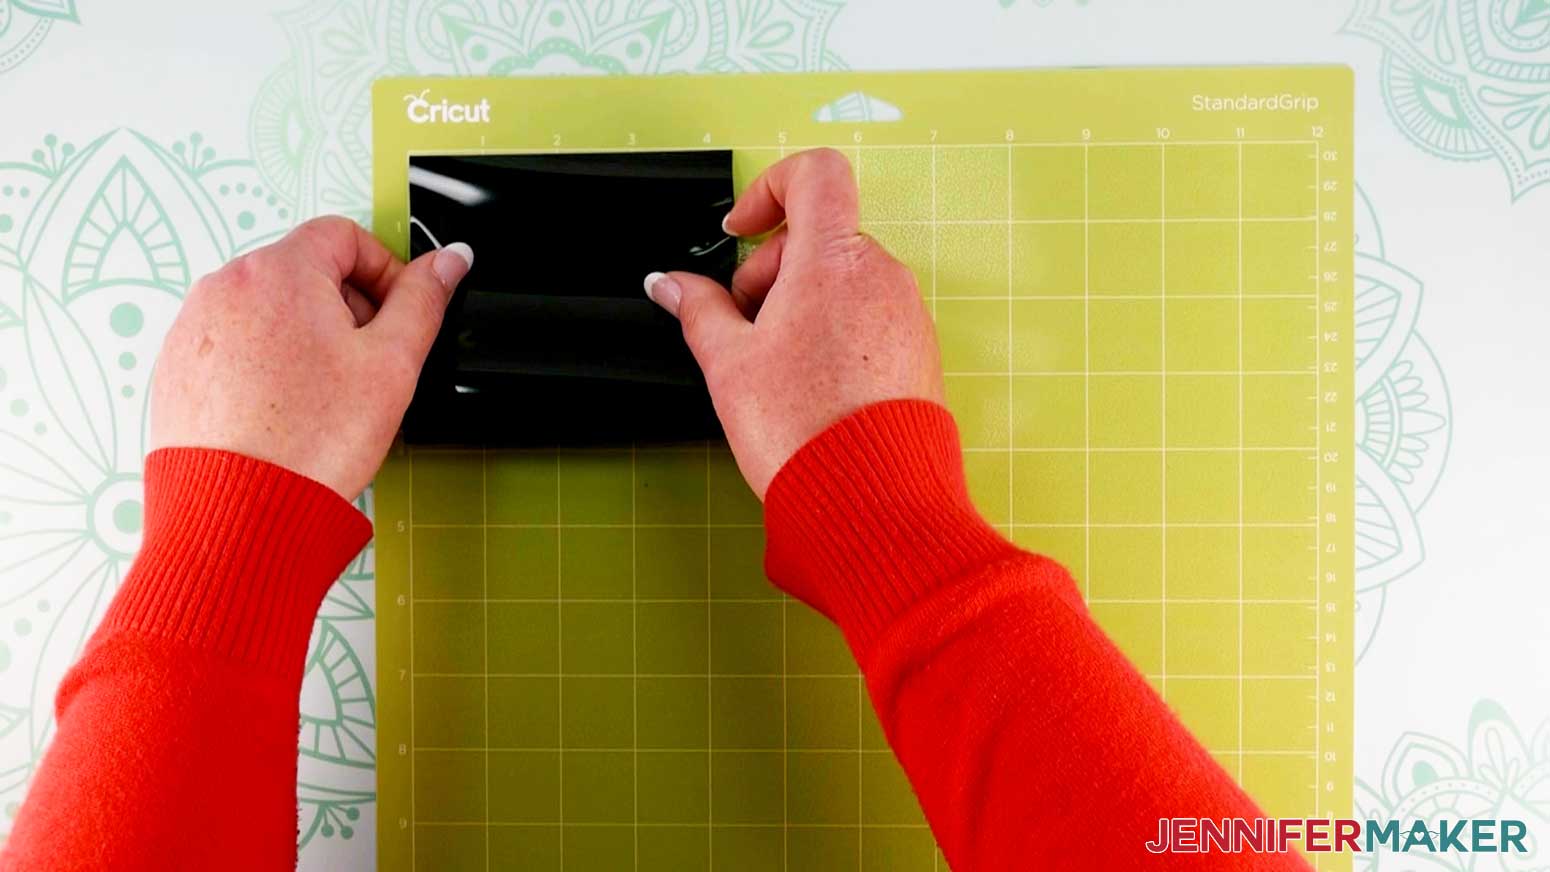
Put your vinyl shiny side up on your machine mat, making sure it covers the design area visible on your screen. To see your design placement larger, click "Edit" below the mat thumbnail and "Done" when you're ready. Use a brayer to get the vinyl as smooth as possible on your mat.
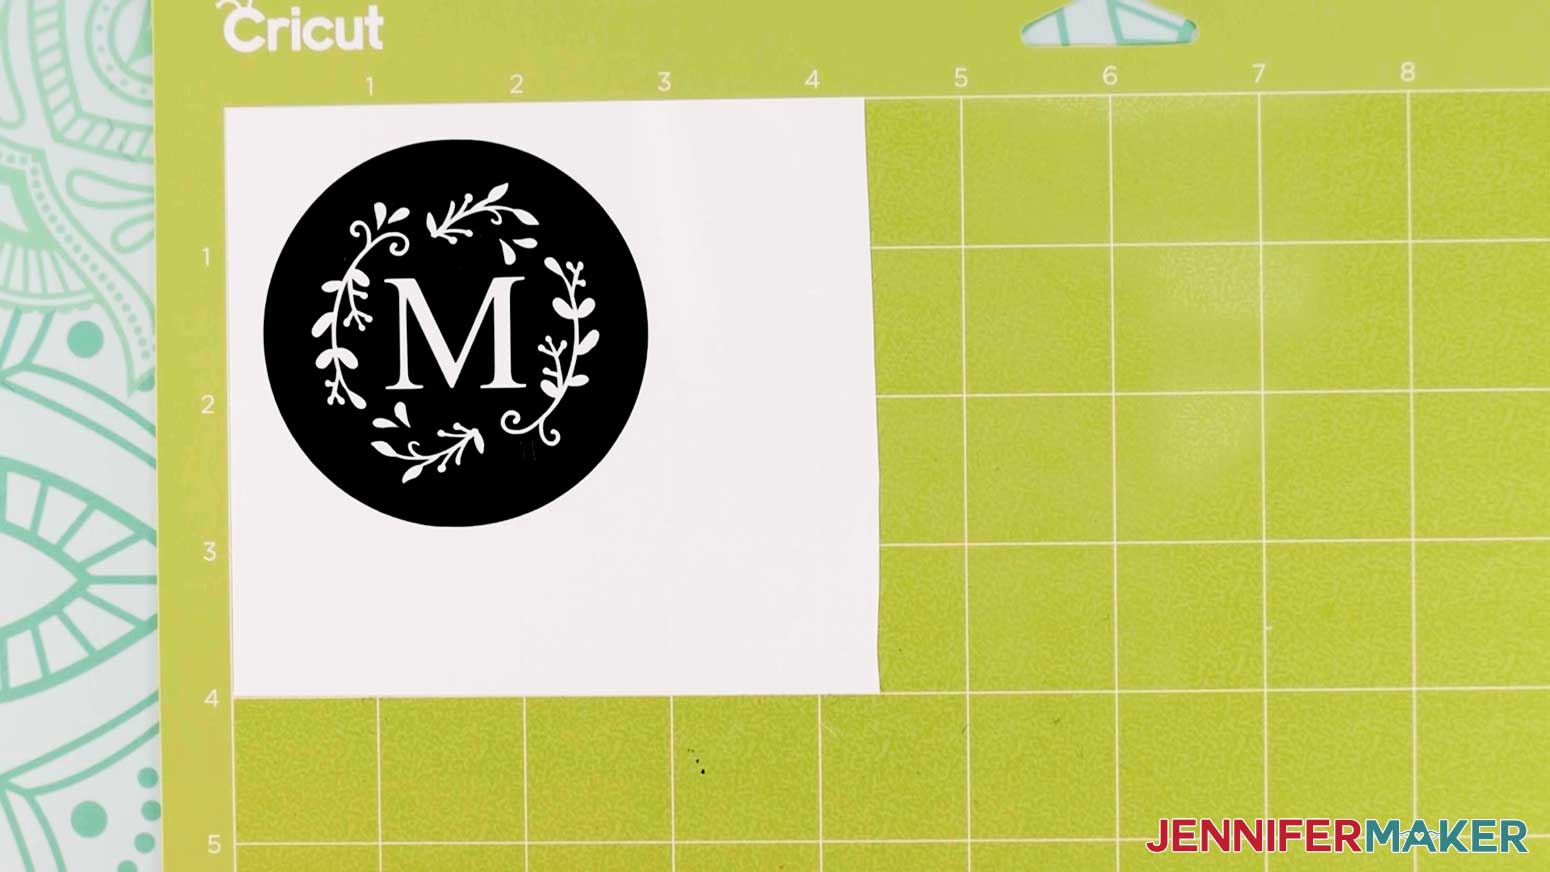
Then, load the mat into your Cricut and press the flashing button to begin cutting. When the cut is complete, unload the mat. Leave the design on your mat to make weeding easier in the next step.
STEP 3: PREPARE THE GLASS AND STENCIL
Prep your wine glass for the vinyl stencil by cleaning the outside with isopropyl alcohol and a lint-free cloth or a coffee filter to remove any dust or oils that will make the vinyl stick less. Then, avoid handling the glass with bare hands. Let the glass dry as you weed your design.
Stencils require the opposite weeding approach from traditional vinyl projects. Since we want the etching cream to create the design, we need the vinyl to protect the area between and around our letter and decoration.
Instead of removing the vinyl around the letter and design, you’ll be removing the letter and design themselves. Be sure to leave the centers of any letters in place. If they accidentally come out while weeding, just put them back in place carefully. Also remove the vinyl around the circle.
After the design is completely weeded, we can remove it from the mat. Flip the mat over on your workspace and gently bend it to release the vinyl and its carrier sheet, keeping the design as flat as possible.
We'll use transfer tape to move the stencil from the carrier sheet to the glass. Remove the backing from the transfer tape. Apply the transfer tape to your vinyl decal by holding the transfer tape in the shape of a taco, a "U" shape, then put the bottom of your “taco” onto the middle of your design. Smooth the tape over the decal from the center outward to minimize wrinkles and bubbles.
With the transfer tape in place, run a scraper tool or other hard and flat-edged item (like a store loyalty card) all over the project’s front and back with medium pressure. This is called burnishing and it’s so important! Burnishing encourages the transfer tape to stick to the shiny side of the vinyl, moving the stencil from the backing paper to the tape.
TIP: Applying your stencil nice and straight can be difficult, but a little preparation now will help. Draw a horizontal line across the upper part of your transfer tape with a ruler and marker. If you aligned your Cricut transfer tape nice and straight on the stencil, you may be able to use the horizontal grid lines instead. Then, when putting your stencil on your glass, you can position your horizontal line so that it's parallel with the top of your glass to apply the decal nice and straight!
Now, flip your design over and remove the paper backing from the vinyl. If your stencil is still sticking to the backing paper, replace the transfer tape and burnish again.
Your stencil is now ready to use!
STEP 4: APPLY THE STENCIL TO THE GLASS
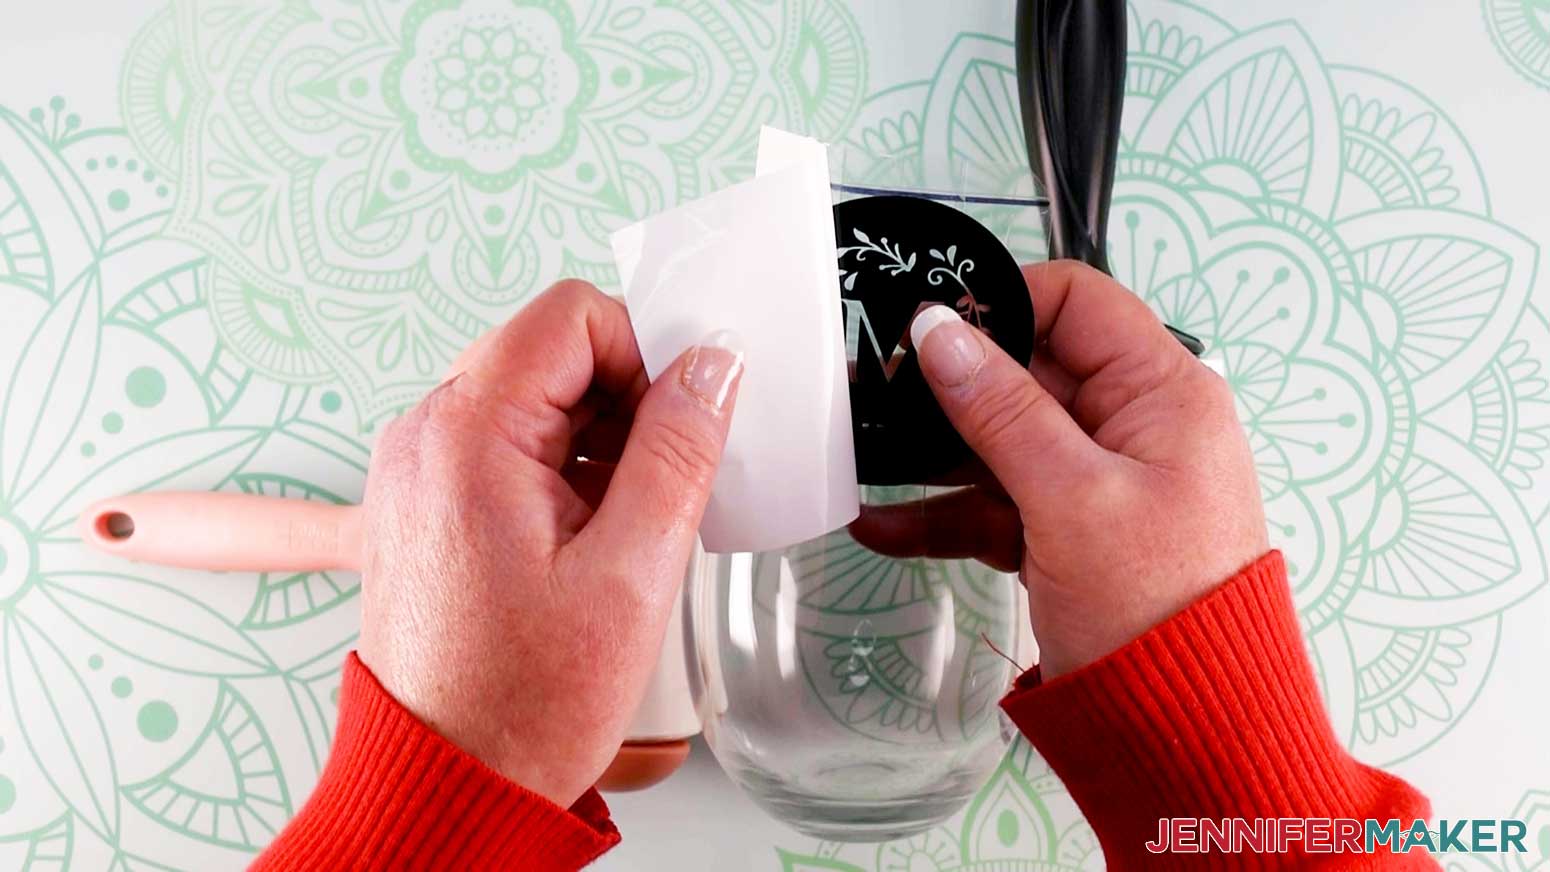
You are ready to place your design on the glass. Applying vinyl to the curved surface of a glass can be tricky. But I have a great tip that makes it so much easier!
TIP: Before you apply the vinyl, cut small slits around the outside edge of the transfer tape. This allows the transfer tape and vinyl to bend around the glass and curve to the surface as it is applied to prevent bubbles and creasing. This is super important for an etching project because you don’t want any of the cream to get under the vinyl.
I also found that if I placed a lint roller on either side of the glass, that kept it from rolling around on my surface and made for easier placement. A roll of tape on its side also does the trick. Do whatever works best for you. Now fold your design up in a taco shape over the glass and lay the middle of the design down on your glass, gently smoothing it from the middle outward. Remember to align it using your horizontal line if you drew one.
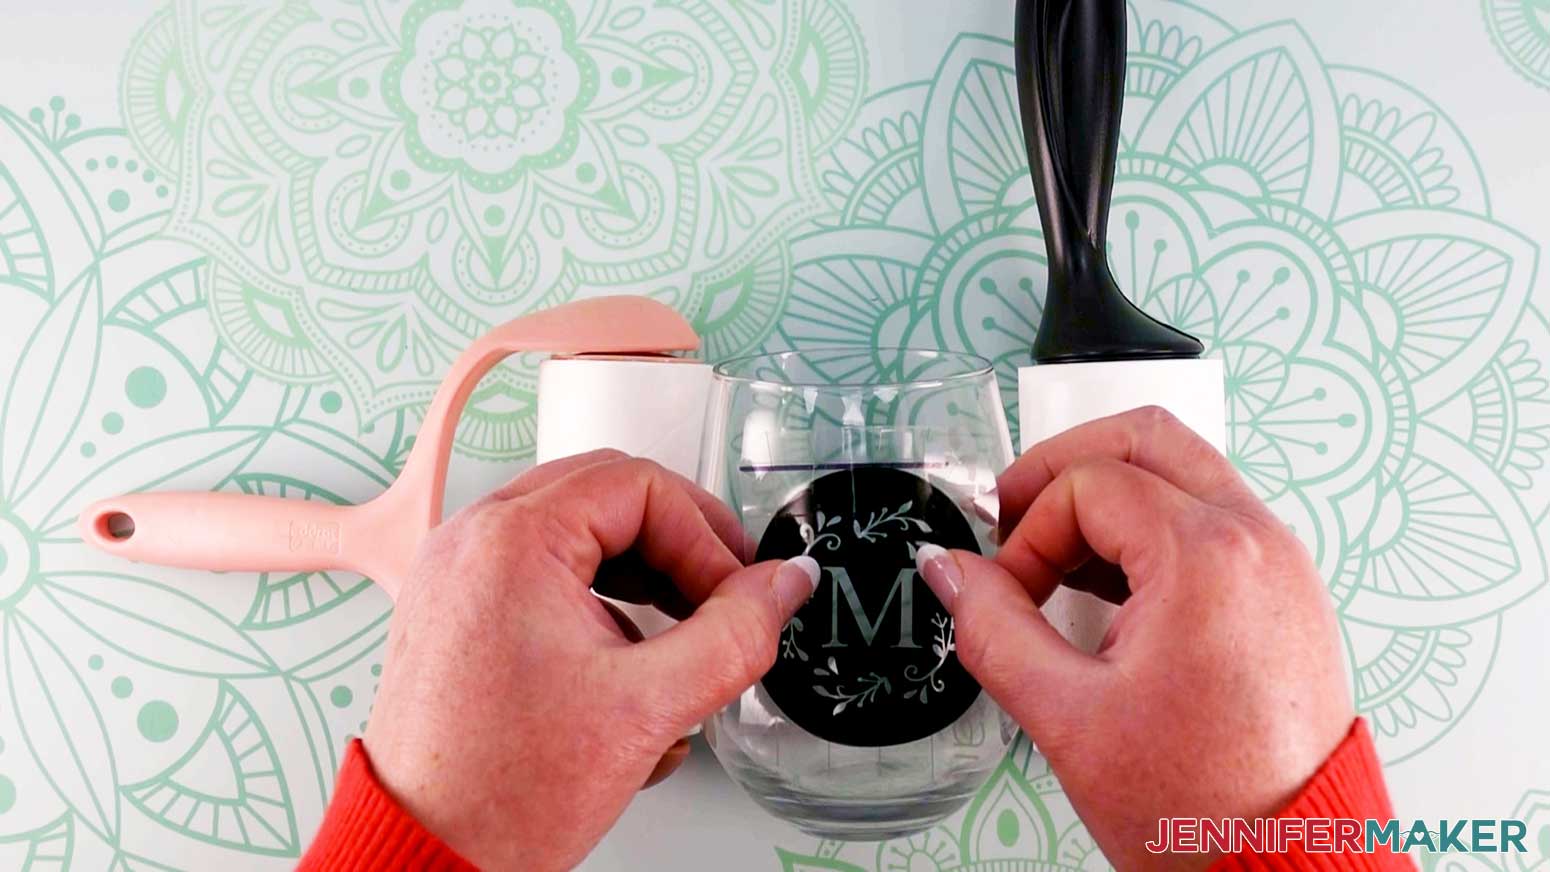
Before removing the transfer tape, be sure to burnish the vinyl down to the glass well, using either your Cricut scraper or your fingers.
Remove the transfer tape. If some of the vinyl comes up with the transfer tape, just push it back down, burnish, and try again.
If you have a detailed stencil or are having trouble with bubbles, try my wet vinyl transfer method tutorial.
Check your vinyl to be certain all areas around the design are adhered well to the glass. This step is important as it will stop your etching cream from bleeding into areas you don't want it to etch. Just go around all parts of the design with your fingers and push the vinyl down well, removing any bubbles or creases as best as you can.
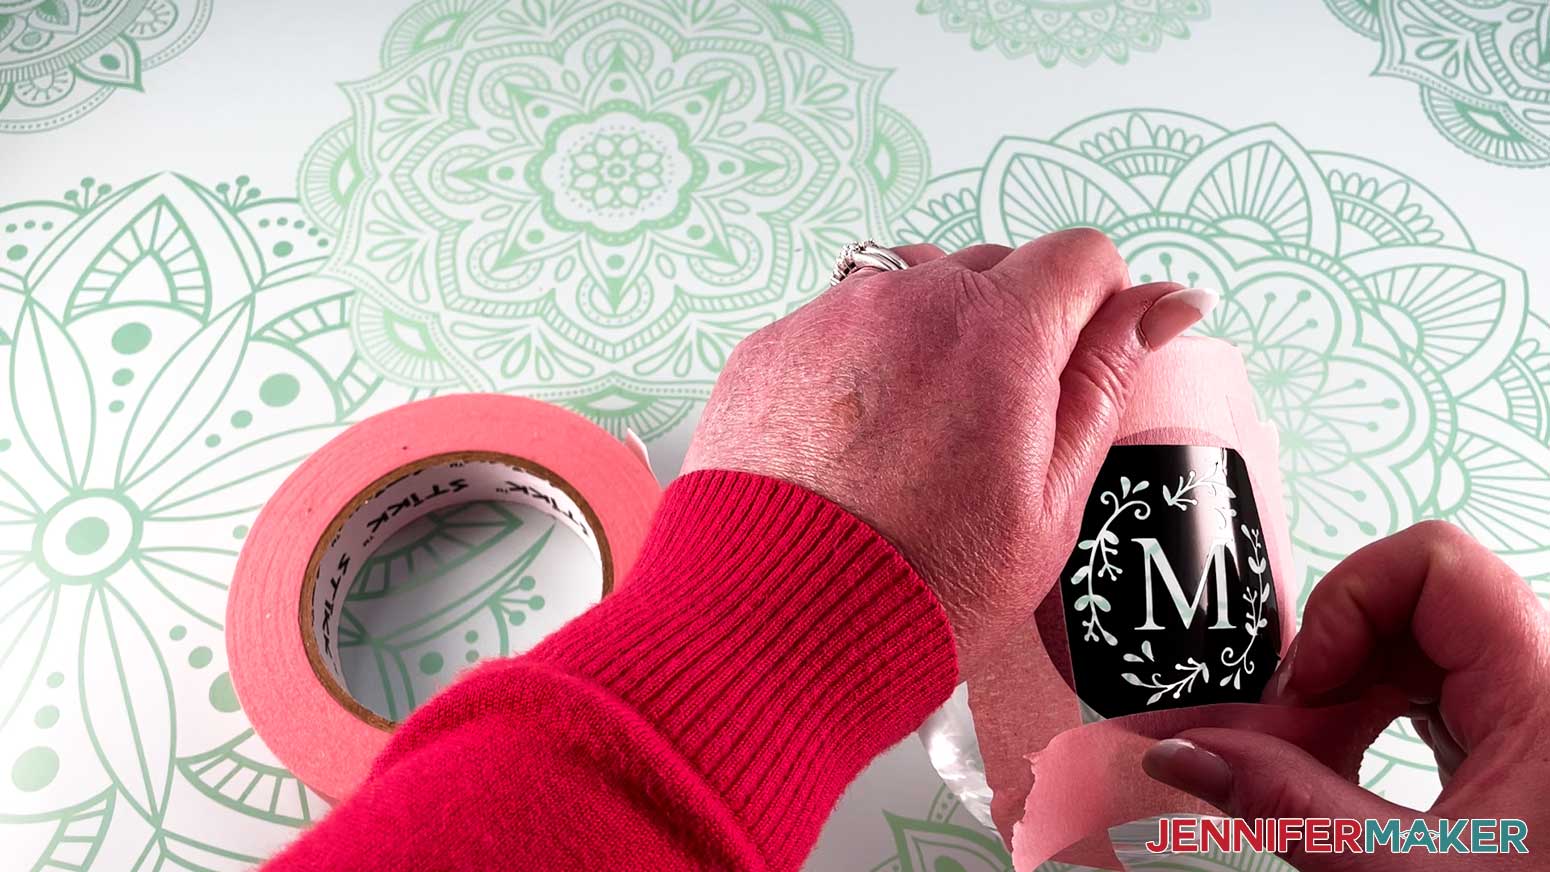
Before applying the etching cream, cover the wine glass area around your stencil with painter's tape to assure you're not getting the etching cream on the glass where you don't want it. Add extra tape in areas where the used etching cream will be getting rinsed off.
IMPORTANT: Read the etching cream's instructions and guidance on accidental exposure before proceeding. Etching cream is caustic and you don't want to inhale it or get it on your skin or in your eyes. Before opening the etching cream, be sure to put on a pair of safety goggles, rubber gloves, an apron, and a fitted respirator. If you do come in contact with the cream, follow the bottle's directions immediately.
Be sure you're in a well-ventilated area or outside with a flat surface on which to work. It's also a good idea to cover your work surface with butcher paper before you begin, as you don't want to get any etching cream on it. Shake or stir your etching cream really well before you open it.
Apply the cream to the glass with a regular paint brush (avoid foam brushes), using your brush to move the cream on top of your stencil. Brush on enough etching cream that you can no longer see the outline of your design underneath. Once it is on your design, brush the etching cream around for about three minutes. Move it up and down, side to side, and diagonally. Keep the cream moving around your design, getting it into every nook and cranny.
After the three minutes are up, apply more cream in areas where it looks thinned out and then let it sit for another 5-10 minutes. Letting the etching cream sit on the glass for longer gives a more uniform and deeper etch. This works especially well in larger areas, such as the vase design.

When the time is up, it's time to remove the cream. Keep your protective equipment on. If you used a lot of cream, scrape it back into the container to be reused. Rinse the remaining cream off of the glass under running water. Be sure to get all the etching cream off the glass before you remove the vinyl stencil. You do not want to accidentally touch it or get it on your work surface.
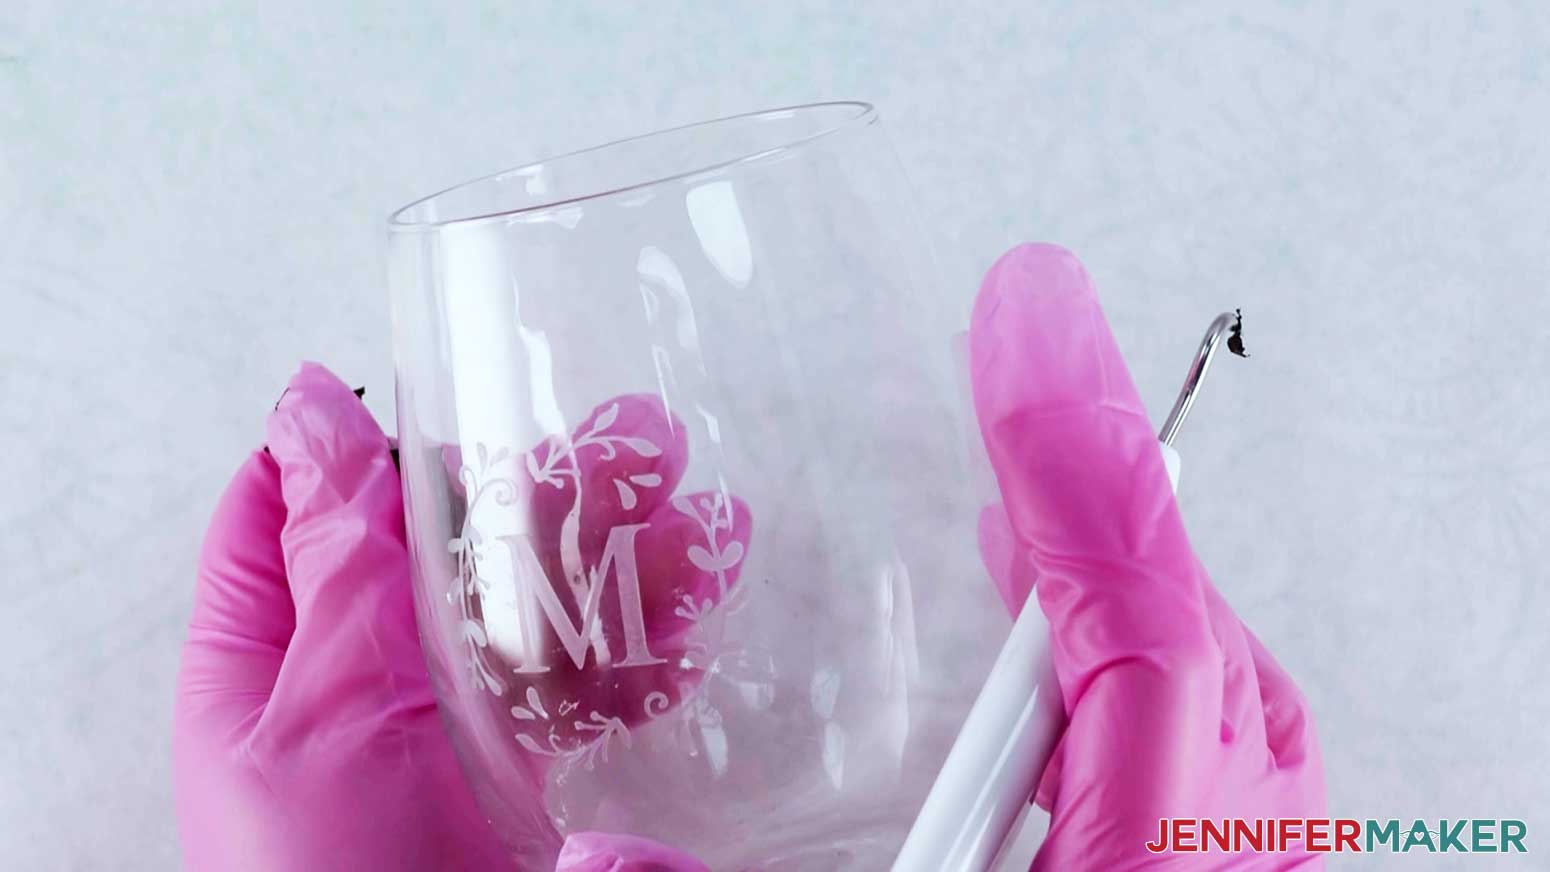
Dry the glass well and remove the painter's tape and stencil. You may need to use your weeding tool or scraper to remove any vinyl that can't be picked off by hand. Just don't scratch the glass! Give the glass a final rinse after all the stencil pieces have been removed, and dry it off.
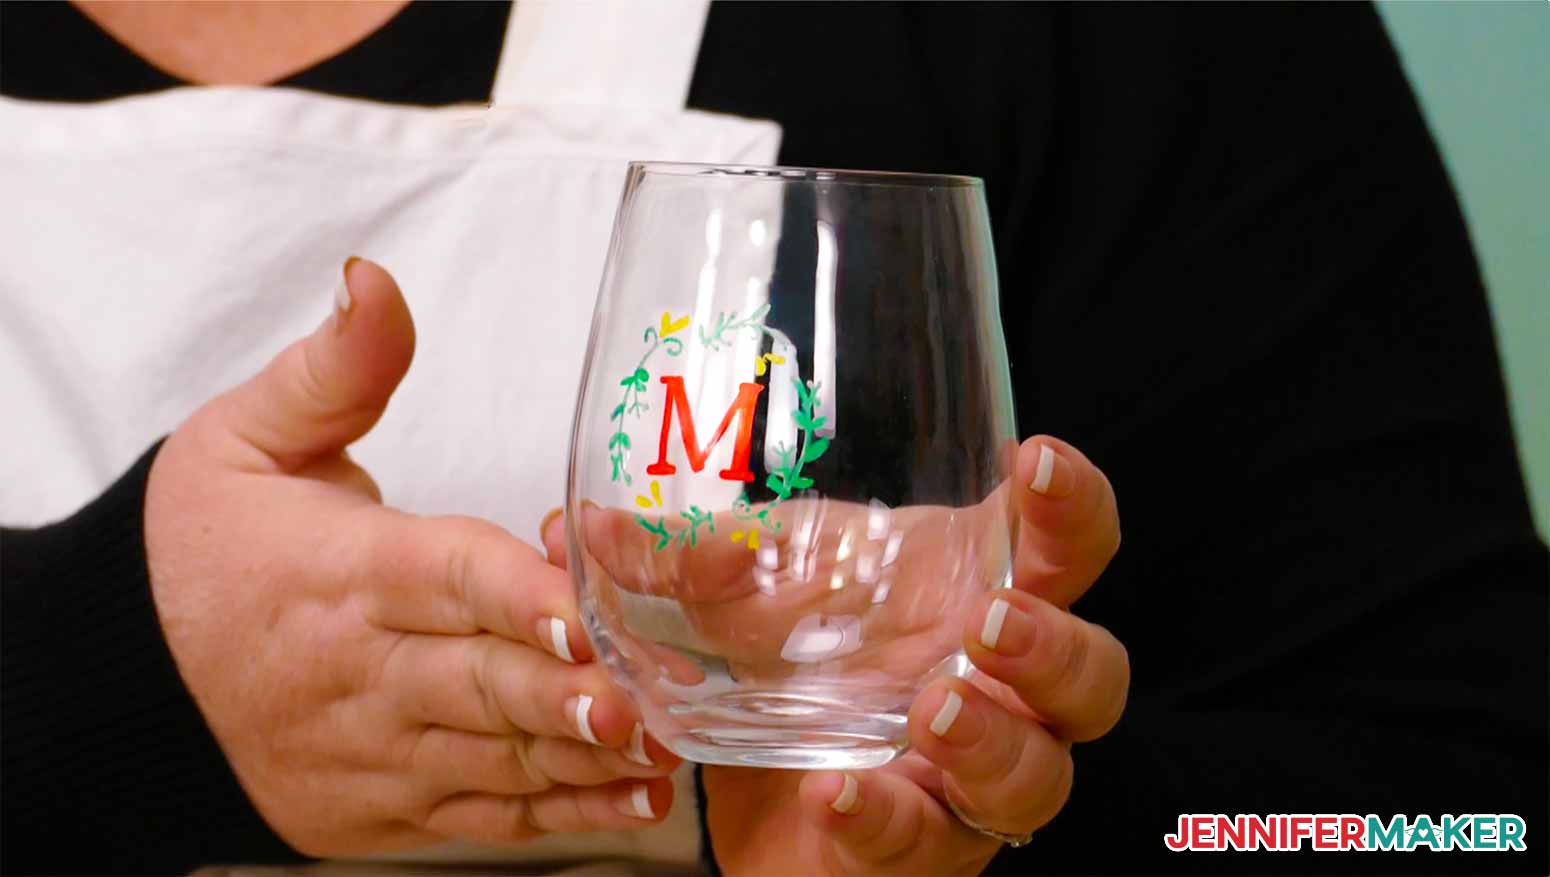
Make sure to clean off any etching cream before you put everything away. Now, your glass should look similar to mine. Now you can remove your safety equipment. You may want to keep on your gloves for painting.
STEP 5: COLOR YOUR ETCHED DESIGN
You are now ready to add color to your design! There are a few options for coloring etched glass, and I'll demonstrate the differences between the three I chose to use: Rub n' Buff, Oil-Based Paint Pens and Water-based Paint Markers.
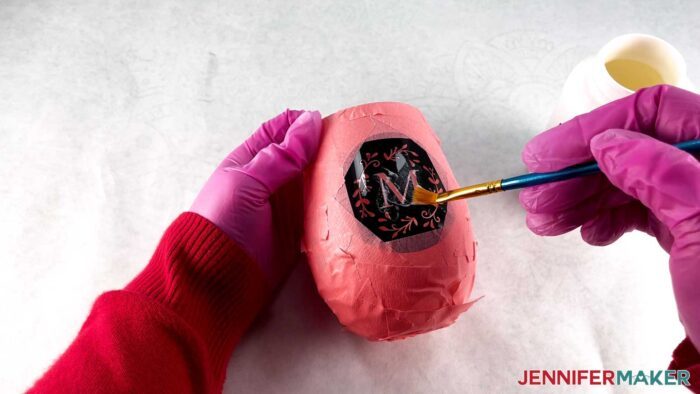
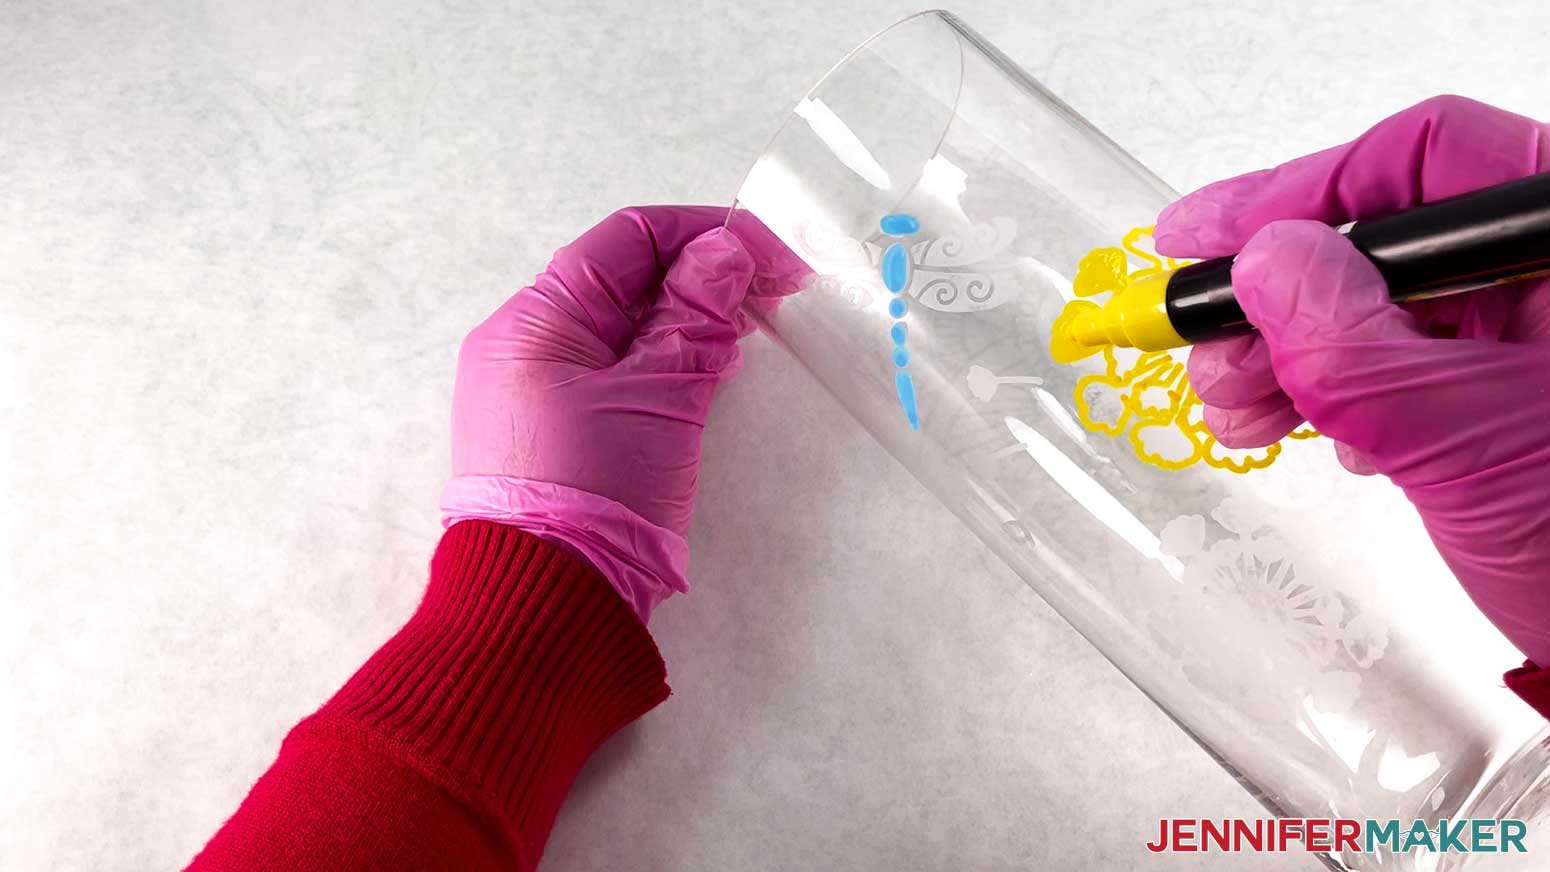
Technique 1: Oil-Based Paint Pens on Wine Glass
First, I'll use oil-based paint pens on our wine glass. Prepare your paint pens by shaking each thoroughly. Remove the cap and push the tip straight down on a piece of scrap paper several times until paint starts to flow. It may take up to a minute before the paint starts flowing. Some pens will be ready faster than others.
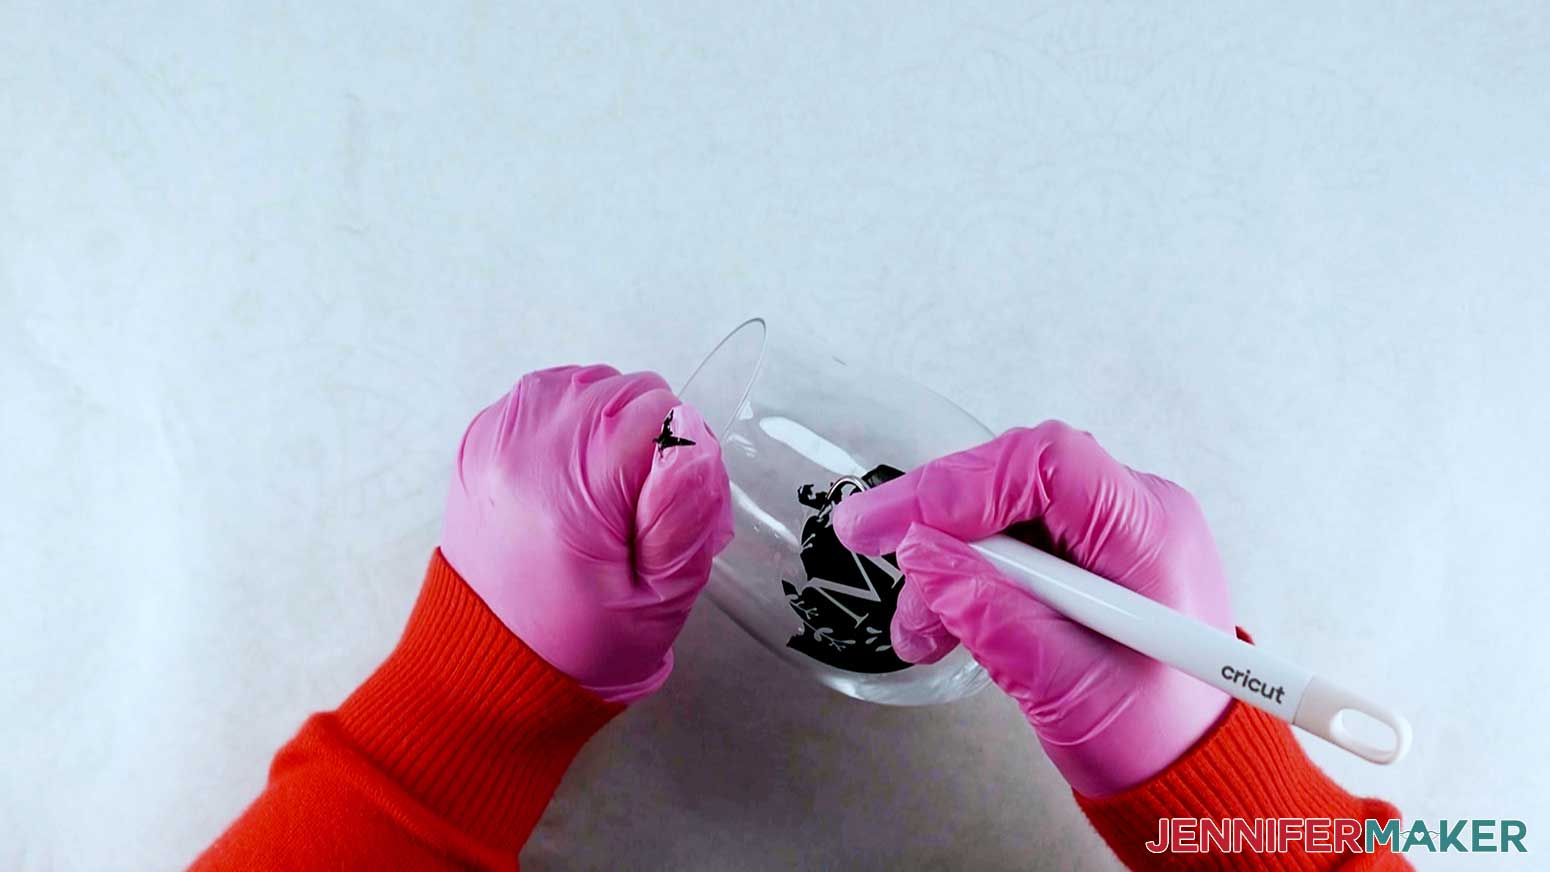
Once your pens are ready, color in the design and quickly wipe away the excess before it dries, essentially buffing the color into the etched design to create a beautiful stained glass effect.
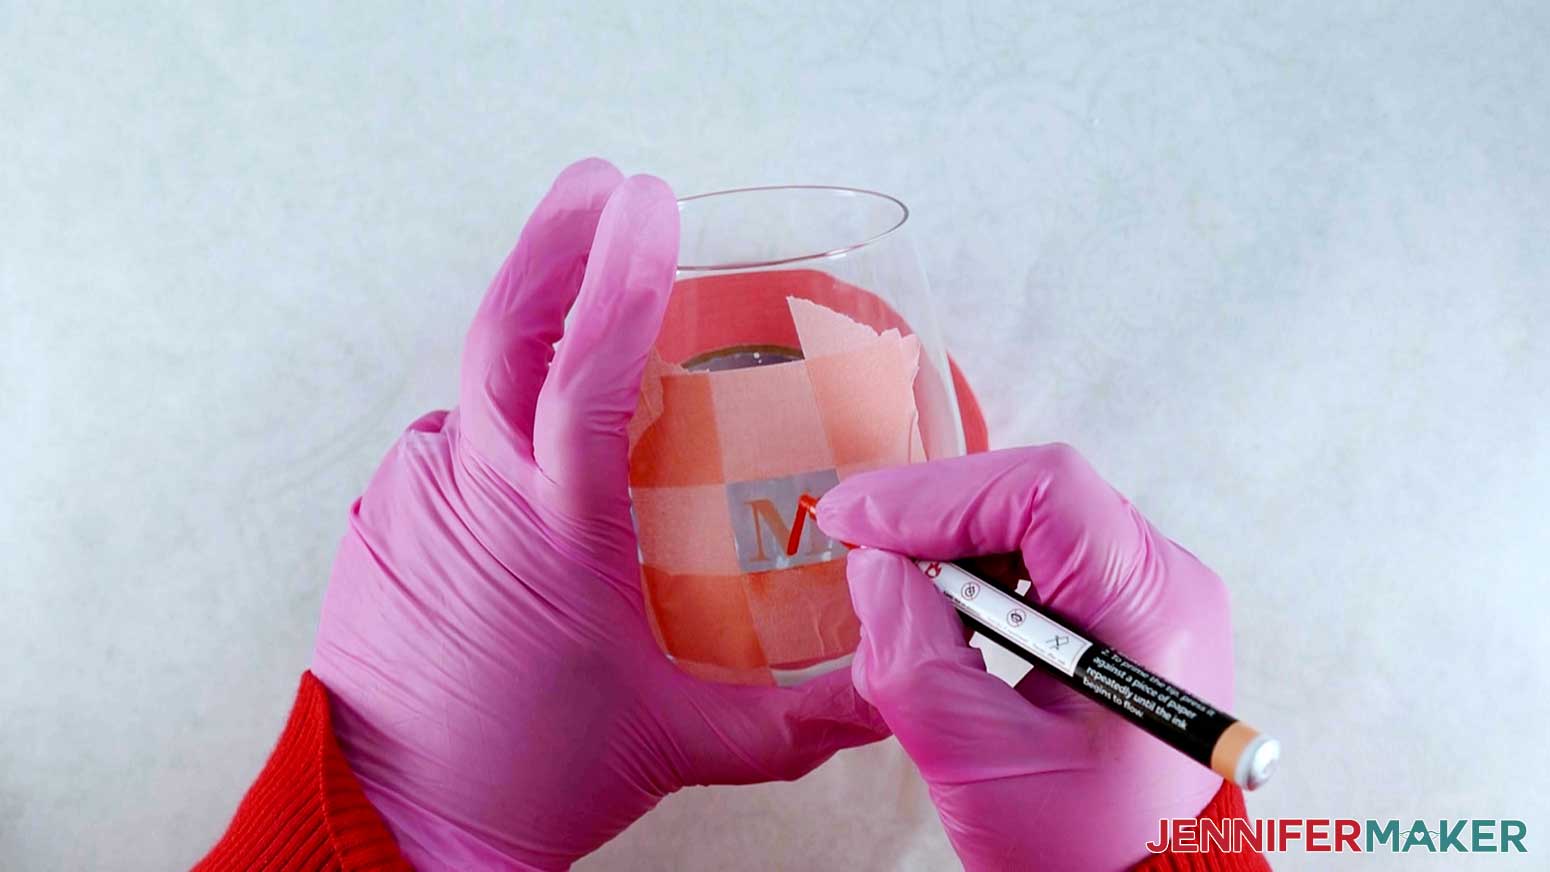
TIP: If you're using more than one color, cover the parts of the design you don't want to be the current color with painter's tape.
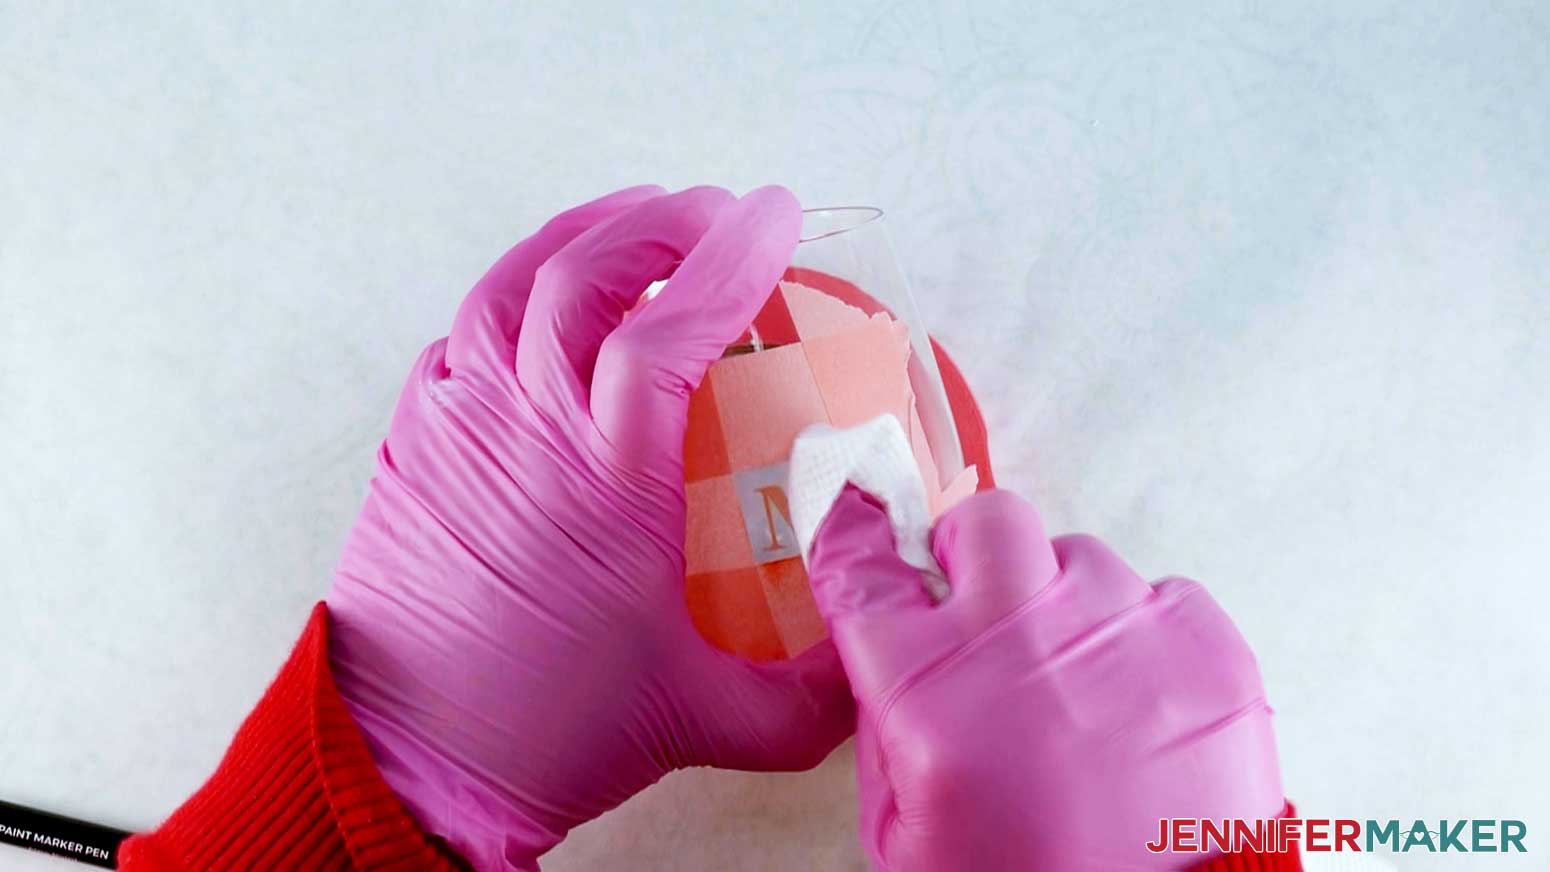
With one color at a time, color the desired areas of your etched design. I found that this technique works best if you only color very small areas at a time because you want to wipe away the excess paint while it's still wet. When you're coloring, it's OK if you get some paint outside the edges of your design — we'll be wiping that off in the next step.
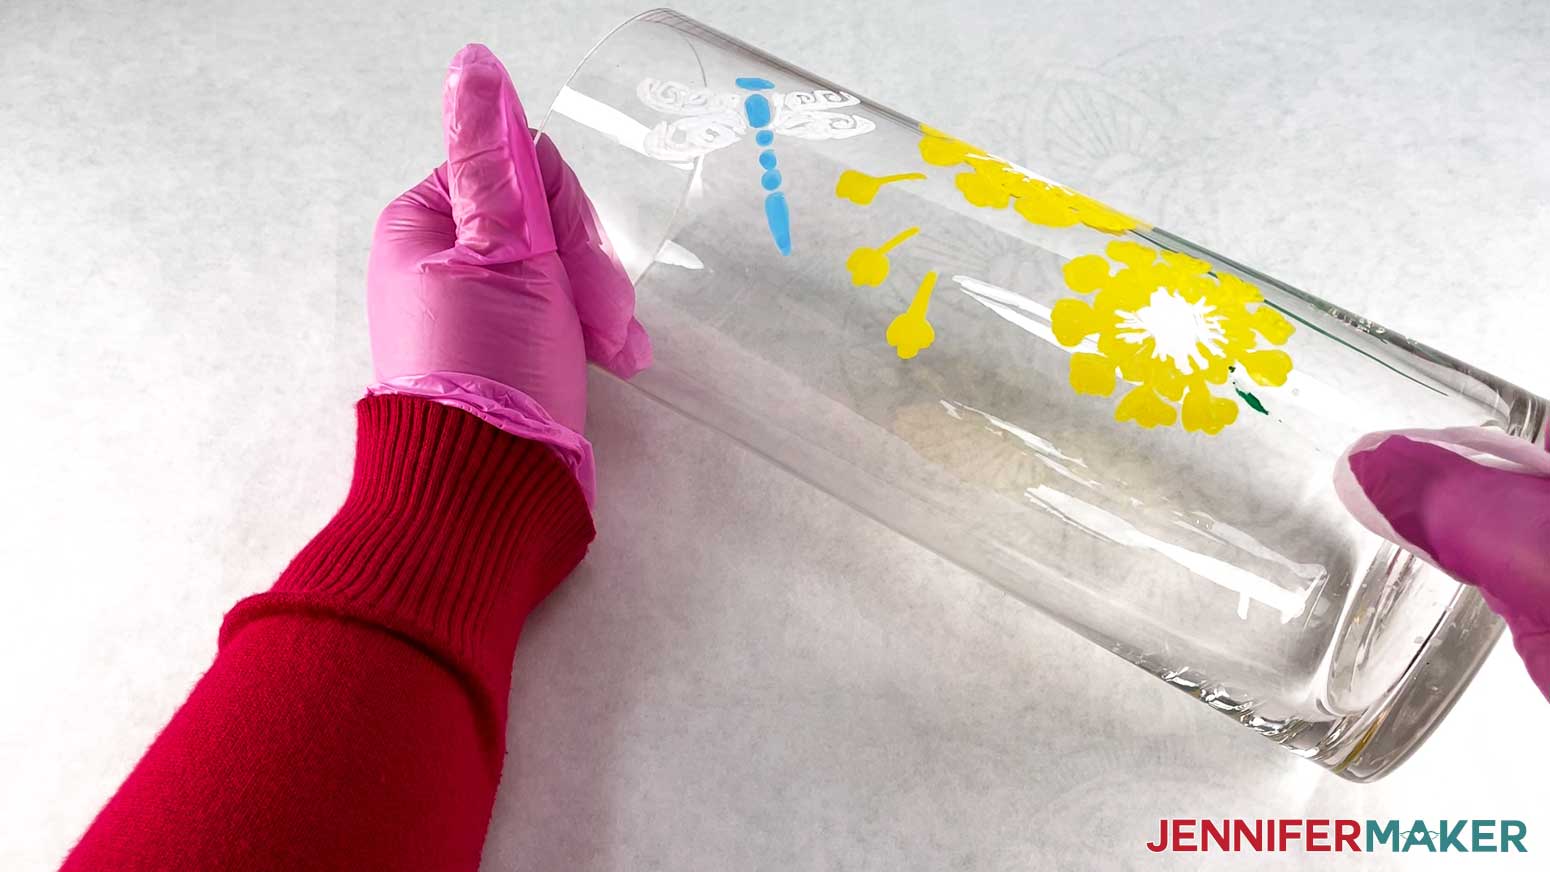
Next, wipe the excess paint away with a dry paper towel. The paint will smear as you wipe, but it can easily be removed with your paper towel. You'll need to apply some pressure in order to buff the paint into the etched areas and remove all of the excess from the clear glass. As you wipe, you'll notice the paint that stays in the etched areas will lighten in color. This is OK and is actually the effect we're going for! The lighter color allows us to see the shimmery pattern that the etching created and gives us that stained glass look.
You may need to try this method a few times to get the best results. The amount of time you'll need to wait before wiping the excess paint away will depend on the amount of paint used and your local humidity. I found that I only needed to wait a few seconds — about the time it took to put the cap back on the pen and set it down beside me.
TIP: If your paint dries and is hard to wipe off with a dry paper towel, it can be wiped away with a damp paper towel. Just don't apply too much pressure to the etched areas because it may wipe away the color you want to keep. You can also easily remove smeared paint from unwanted areas with rubbing alcohol applied to a Q-tip or paper towel.
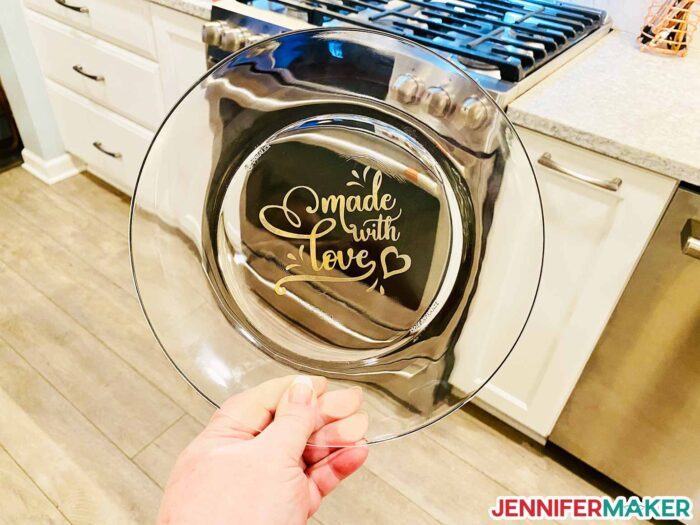
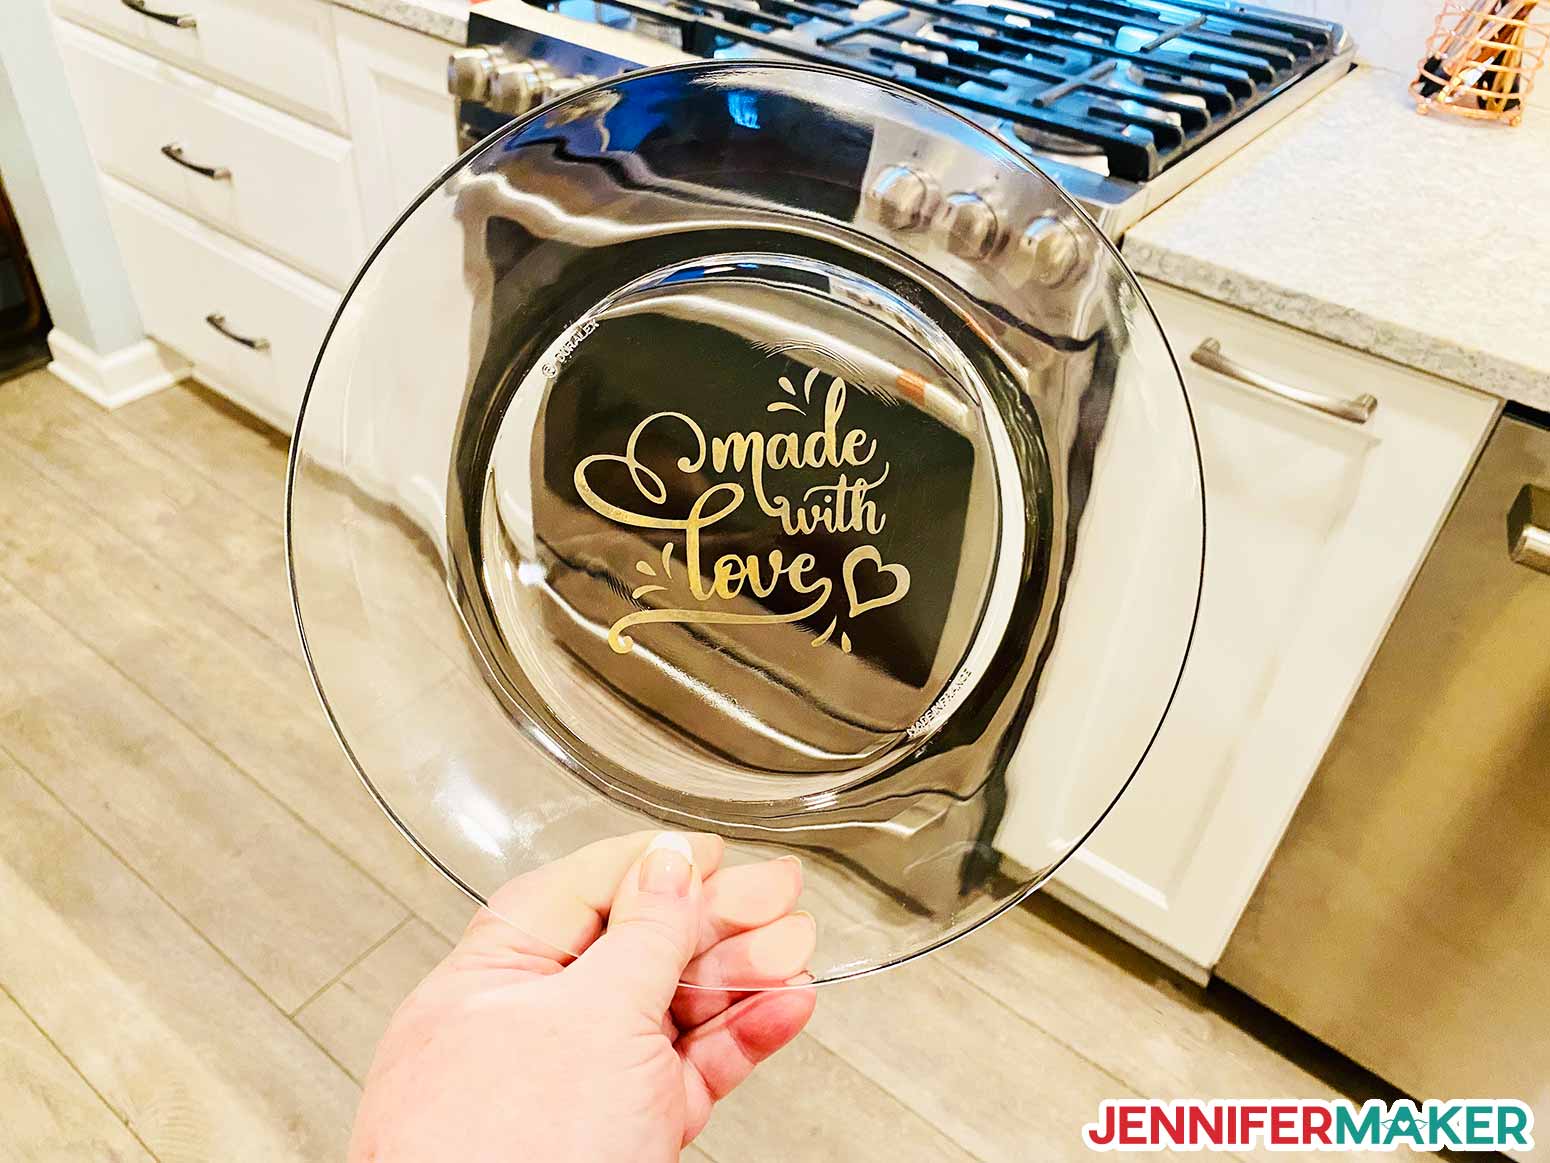
Technique 2: Rub n Buff on Glass Plate
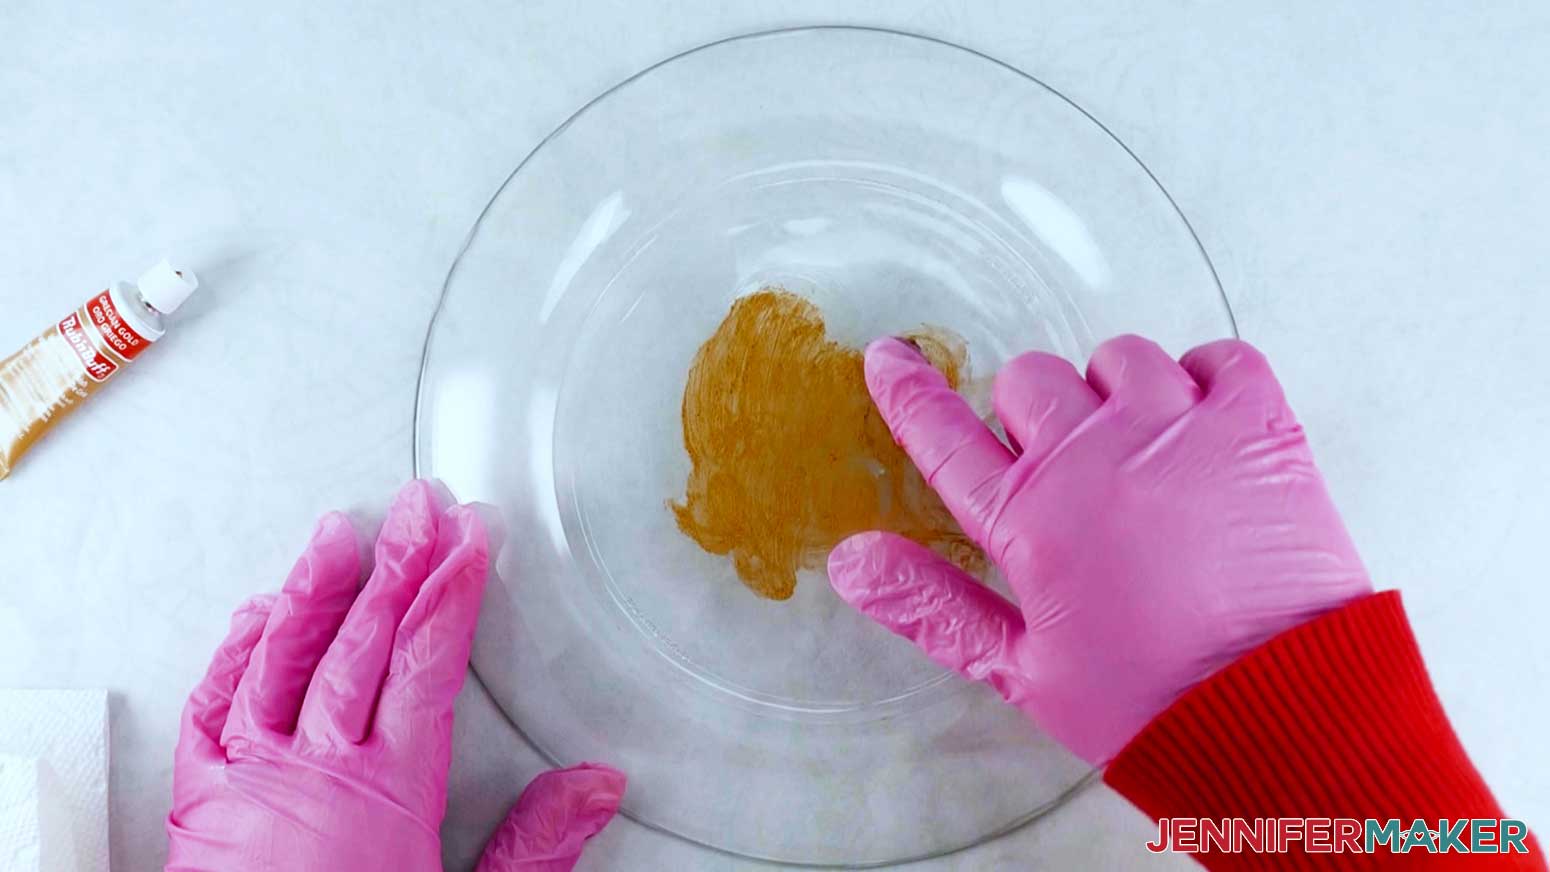
Another option is Rub n Buff, which is actually a type of wax that has metallic or pigment powder added to it. I like this approach for larger designs, like the stencil I used for the dinner plate. You’ll need clean gloves, a dry paper towel, and rubbing alcohol for this technique.
Squeeze and apply a tiny amount of Rub n Buff onto your gloved finger and pat it over the etched design. Buff it into the etched areas with the dry paper towel.
You can wipe the excess off of the plain glass, but the wax dries quickly, so you may need to dampen the paper towel. If it’s really stubborn, try a bit of rubbing alcohol.
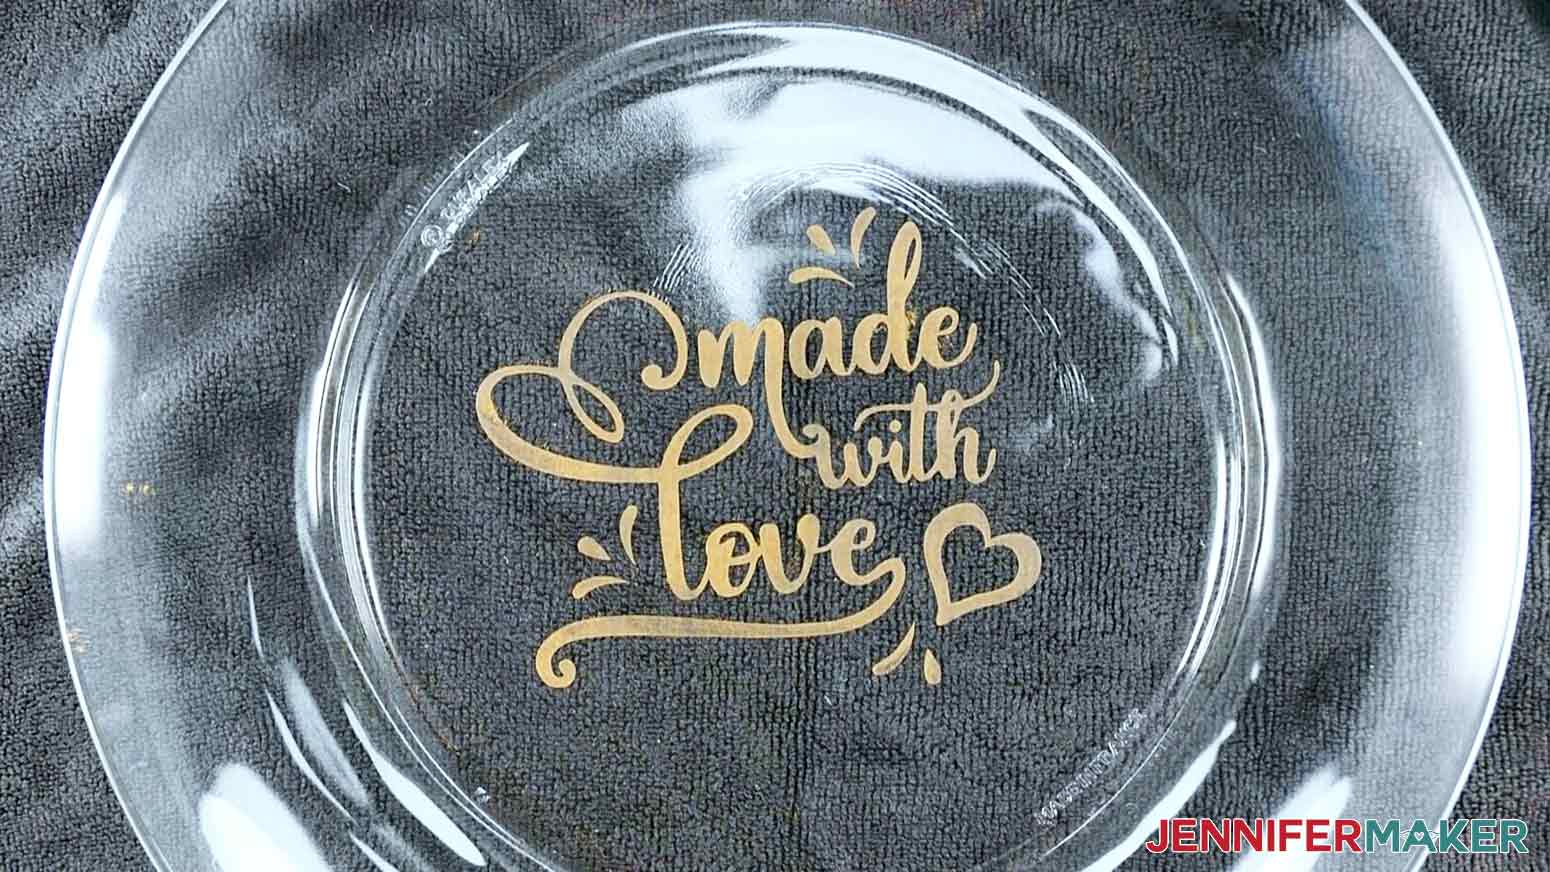
I really like the results of using Rub n Buff, but it doesn't come in as many colors as the paint pens. I think this technique would work well for giving decorative pieces a classy touch of metallic color.
Technique 3: Water-Based Paint Markers on Glass Vase
Lastly, we tested water-based markers on a glass vase using the third design.
The water-based markers are prepared the same way as the oil-based pens. Just shake each pen well, remove the cap, and push the tip straight down on a piece of scrap paper several times until paint starts to flow. Then you can paint your etched design using one color at a time.
I found that because these markers are water-based, the color can easily be removed with a wet paper towel even after it has dried. I also wasn't able to get the color to stay in the etched areas when wiping it with a paper towel like I did with the oil-based pens.
Because I wasn't able to wipe away the excess paint, I found that it was difficult to stay within the outlines of the etched design when painting. This created a design that wasn't as polished as I had hoped. You may get different results if you decide to try these markers. However, this was my least favorite of the three techniques I tried.
Final Thoughts
After trying all three types of coloring methods, my favorite is the Rub n Buff. I really love how beautiful the metallic color looks on the glass and how easy it was to apply. It also stays in the etched areas even after hand washing it several times. Which method is your favorite?
For a fun effect, try combining the pretty metallic colors of the Rub n Buff with the bright colors of the paint pens or markers.
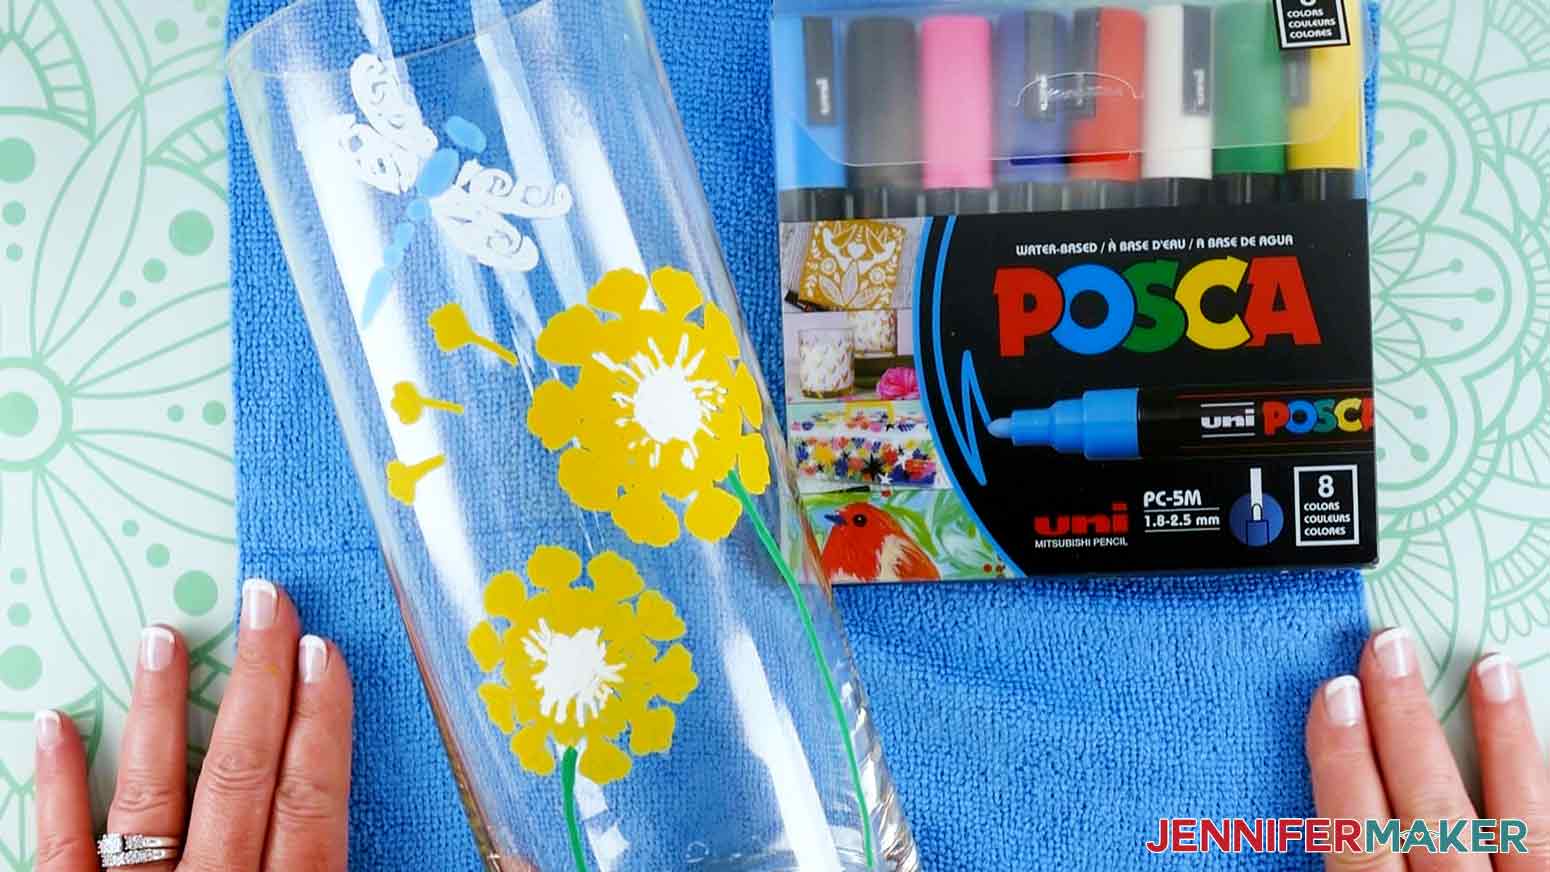
STEP 6: SHOW IT OFF!
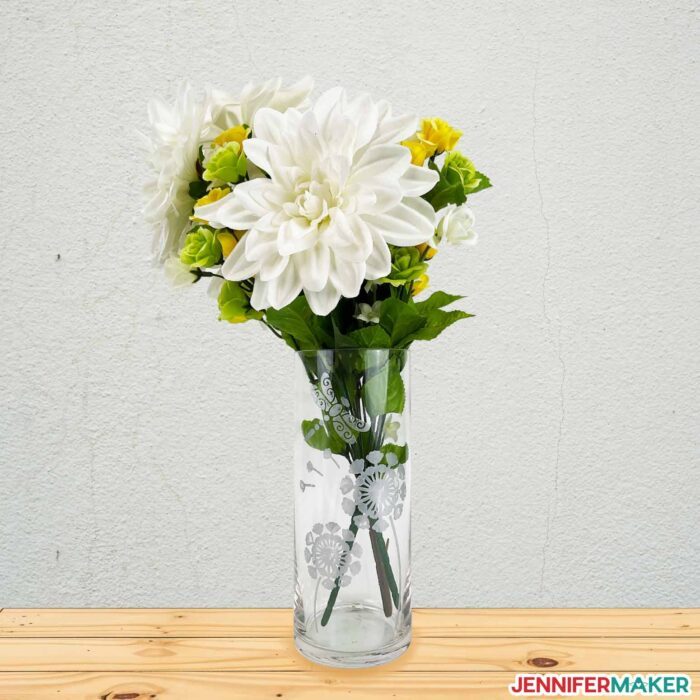
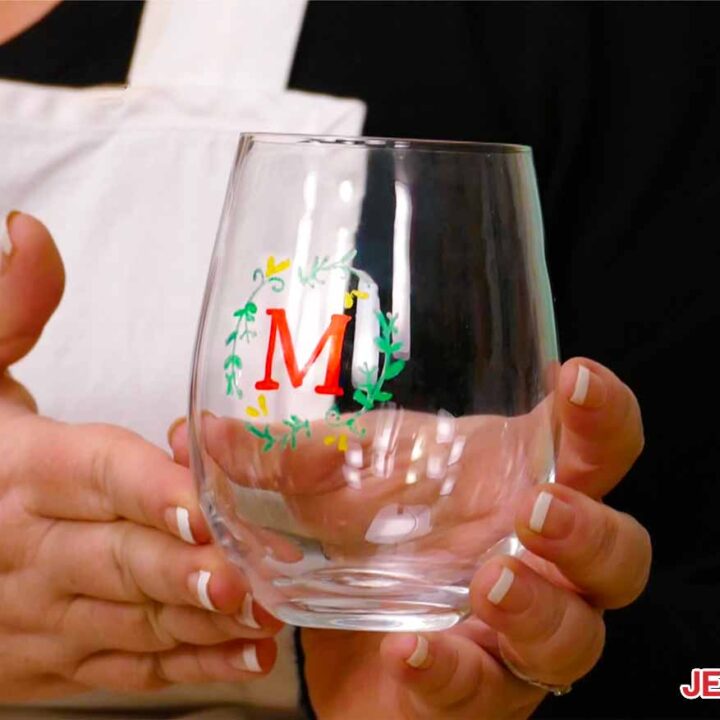
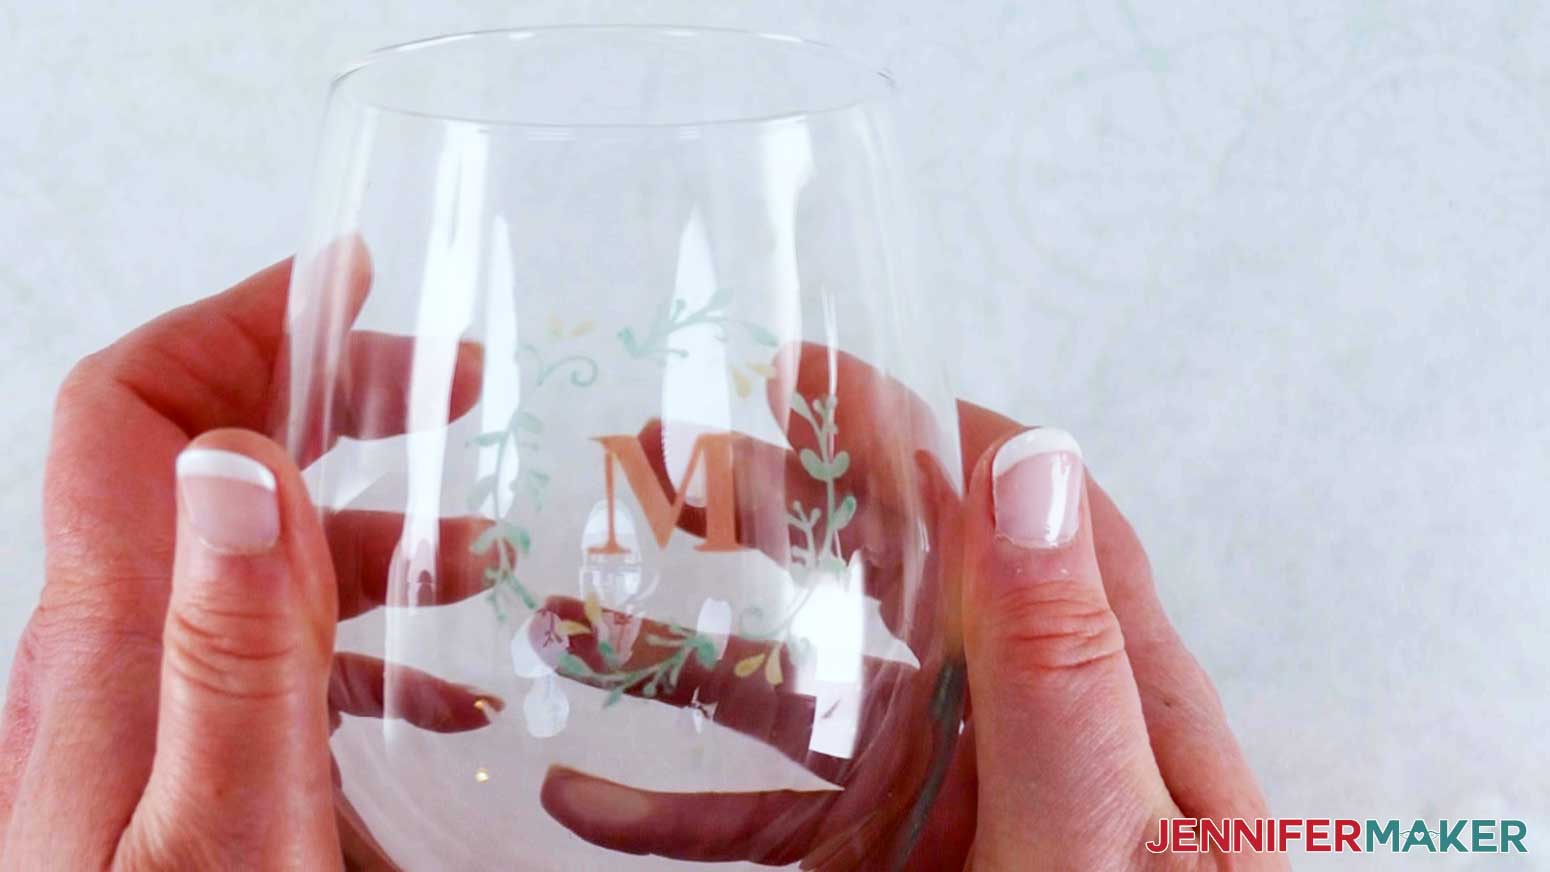
You're done! Here is what my final wine glass, plate, and vase look like. Aren't they beautiful?
You can now give your customized wine glass, vase, or dinner plate as a gift to a friend or family member to brighten their day. The wine glasses make great wedding gifts, and the plate is great for sharing sweet treats at a friendly get together. You can also use any of these items in your own home for a colorful addition to your dinnerware or decor. You could even use the vase to show off some custom paper flowers like these!
Notes
To increase the longevity of your beautiful designs, it's best to handwash your finished items gently with soap and water. None of these color options are dishwasher safe, and you'll want to be sure you don't clean the colored areas with alcohol once you're finished with your design. Also, do not use them in the microwave.
These color options are also not food safe, so don't apply them to any surfaces that food will touch. I applied the color to the back side of the plate for this reason.
Wine Glass Finished Size: 3.5" x 4.75"
Vase Finished Size: 4" x 10"
Dinner Plate Finished Size: 9.25" x 9.25"
Fonts Used: Amastery Script ("Made With Love") from Designers Font Bundle
Recommended Products
As an Amazon Associate and member of other affiliate programs, I earn from qualifying purchases.

Answers to Your Questions About Color Glass Etching Projects
Can you color glass etching?
Yes! While these products and techniques take a little experimenting to perfect, I am absolutely sure that YOU can use them for color glass etching. I especially like the Rub n Buff wax metallic colors!
Can I microwave items with color glass etching?
I don’t recommend putting the colored glass items in the microwave, just to be extra safe.
Do I need to wait for the paint to dry before covering it with painters tape?
Once you’ve buffed in the paint and removed any excess, it’s safe to cover a design element with painters tape.
What paint do you use for glass etching?
This tutorial covers Posca oil-based paint markers, water-based paint pens, and Rub n Buff wax, but you can also try Pinata Alcohol Ink Tints on top of the glass’s white etching (be sure to avoid soap when washing glass colored with alcohol ink, however).
What happens if you leave glass etching cream on too long?
While your etching results will likely still be good if you leave the Armour Etch cream on for a long time, it’s always best to follow the manufacturer’s instructions.
Can you use a Sharpie on etched glass?
I haven’t tried coloring an etched glass area with permanent markers, but that may work for a decorative purpose!
Do I have to seal the color glass etching?
You don’t have to seal these items, but each product does have specific instructions for the best results. If you use the oil-based paint pens, follow the instructions and bake your item for one hour at 350°F. This made my wine glass decoration much more durable and stand up to gentle handwashing. The Rub n Buff is more or less permanent after it dries for several hours as long as you don’t scrub it with alcohol. I don NOT recommend using the water-based pens since they are difficult to use precisely. But if you want a temporary way to add color to etched glass, you can try them out and just wash the paint off with soap!
How do you make glass etching stand out?
Adding color is an effective way to add drama to etched details or an entire design! I recommend oil-based paint pens or Rub n Buff wax. Combining the two would create beautiful results!
How do you etch glass with a Cricut?
While a Cricut cutting machine cannot directly etch glass, you can create a vinyl stencil to use with Armour Etching cream using this tutorial!
What kind of vinyl is used for glass etching?
Use permanent adhesive vinyl or stencil vinyl to create stencils for chemical etching on glass. I recommend you avoid removable vinyl, as it won’t form as tight a seal and may allow the etching cream to seep underneath.
Can I put colored etched glass in the dishwasher?
While glasses with frosted etching are dishwasher-safe, none of the colors I used will stand up to the heat and cleaners used in a dishawasher. Hand wash all colored glassware.
Does this technique work on colored glass?
I haven’t tried it yet! You might get a striking effect with a daub of white Rub n Buff on etched colored glass.
Do I need a Cricut to add color to glass etching projects?
No, you can use pre-made Peel n Etch stencils or hand cut vinyl stencils.
How can I test the etching process and stencil?
If you want to try out a stencil for etching glass, you probably have some suitable glass jars in your recycling bin! Just clean the surface of the glass extra well.
Can Cricut Maker etch glass?
No, a Cricut Maker cannot etch glass directly. Cutting vinyl decals with a Cricut Maker to use with etching cream is a great option, though!
Why does my etched design look blurry?
You may get uneven etching results if you leave the cream in one spot longer than another, especially if you are working with large areas. Also, there may have been air pockets at your stencil edges, which allowed cream to spread beyond your design. You may be able to use color to create a sharper contrast by following this tutorial closely.
What if I’m not happy with the result?
Depending on the kind of paint you used, you can simply remove the color and try again. Most of these paints wipe off with a dampened paper towel if they’re still wet, or with some rubbing alcohol. If the paint or wax has adhered to the porous surface, try rubbing alcohol and a cotton swab, especially for stubborn spots.
I can’t get my wine glass to stay put as I apply the vinyl. Do you have any tips?
I actually have a tip for that! Set your wine glass in a roll of painter’s tape to keep it from moving around while you are applying the designs. You can see me do this in the tutorial video!
Get my free SVG files to create beautiful color glass etching designs!
I love seeing what you make with my designs and how you use them! Please share a photo of your projects with color glass etching in our Facebook group or tag me on social media with #jennifermaker.
Love,