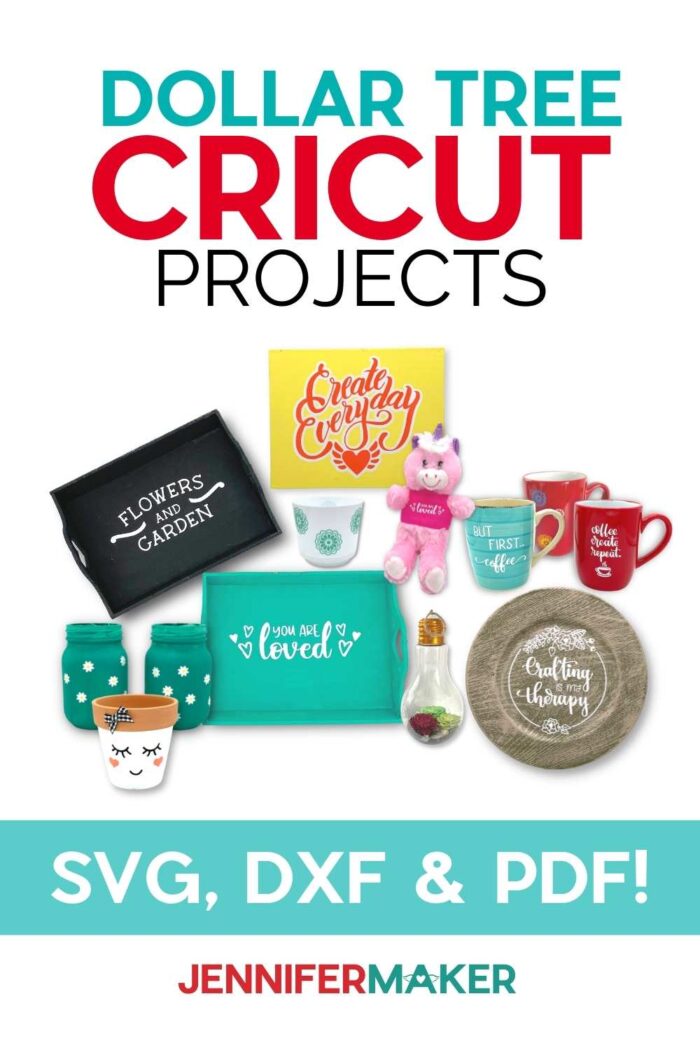
Learn how to make easy, customizable Dollar Tree projects using your Cricut!
Dollar store crafts are really popular and I love it! There are SO MANY fun items available and they’re inexpensive enough for experiments! I tested 12 items and made these simple, satisfying Dollar Tree Cricut Projects using my free design collection. Like my previous Dollar Tree and bulk gift ideas, these projects use few materials and are easy to customize. Let me show you some of my favorite things that you can make!
Watch the step-by-step tutorial video showing each dollar store item and three project highlights, premiering May 1, 2022 at 2 pm EST:

I wanted to find the easiest-to-decorate, most flexible items for these Dollar Tree Cricut Projects, and I’d say I did it! I’ll go over my ultimate list of Cricut blanks from the Dollar Tree in the video. Can you guess any of my picks?

And I had a lot of fun with the designs. My collection includes an intricate tree, a simple shape for labels, several phrases, and a few of my favorite botanical cardstock designs.
I’ll show you how to easily adjust a few in Cricut Design Space. It’s easy to change a design’s color for a custom gift, or dimensions for a different shape. Then, you can use the same skills to customize the rest of the collection!
It would take HOURS to film all my Dollar Tree Cricut Projects, so I’ll just show you three on video. The projects feature the glass canning jars, a plush animal, and a plastic hanging terrarium. But there are so many other ideas at the Dollar Tree!

While the item options are extensive, the materials are very simple! I made these Dollar Tree Cricut Projects with permanent vinyl, heat transfer vinyl, paint, and cardstock. Then, gather the usual Cricut accessories and tools and you’re good to go!
I’ll show you the best ways to combine these items with different materials, including a few pairings I don’t recommend. I’ve done lots of testing for you!

These easy Cricut projects make great gifts. I can even see making a gift basket using one of the bins full of Dollar Tree items, Cricut material, and craft supplies for a new crafter. That’s a great way to start Cricut crafts and their first project! Or, if you have big event coming up like a baby shower or birthday, make your own decor to match the party. And you can definitely create your own designs to customize Christmas gifts!

Let me show you how easy it is to make Dollar Tree Cricut Projects! This post contains some affiliate links for your convenience (which means if you make a purchase after clicking a link I will earn a small commission but it won’t cost you a penny more)! Read my full disclosure policy.
Materials to Make Your Own Dollar Tree Cricut Projects
View my Amazon shopping list with the exact items we used to make this project
- Two (2) 16 oz Glass Canning Jars
- Plush Animals – I used the bear
- Terrarium – I used both the Globe and Lightbulb
- Cricut Everyday Iron-On Vinyl – Assorted Colors
- Cricut Premium Permanent Vinyl – Assorted Colors
- One (1) sheet 12″ x 12″ 65 lb Cardstock – I used red and green
- Folk Art Chalk Paint – Grotto (Teal) Summer Porch (Yellow) Adirondack (White)
- Cricut StandardGrip Transfer Tape
- Isopropyl Alcohol and a Lint-Free Cloth — to clean glass
- Wood Plaques
- Gray Faux Wood Charger Plate
- Mugs (Turquoise and Red)
- Glass Vase
- Canvas, 8″ x 10″
- Wood Tray with Handles
- Plastic Planter
- Terra-Cotta Clay Pots, 2-Pack
- Plastic Tubs
- Fairy Lights — optional, for the terrarium
- River Pebbles — optional, for the terrarium
- A way to cut your vinyl and cardstock, I used the amazing Cricut Maker 3 but you can also use the Cricut Maker, Cricut Explore 3, the Cricut Explore machines, or even a Joy for some of the designs.
- Cricut Green StandardGrip Mat (12″ x 12″)
- Cricut EasyPress Mini or home iron – for iron-on projects
- EasyPress Mat or Towel
- Weeding Tool
- Scraper
- Scissors
- Brayer
- Foam Paint Brush
- Dish Soap
- Butcher Paper – to protect your work surface
- Ruler
- Lint Roller
- Hot Glue Gun and Glue Sticks
- Gloves (Optional)
- Cricut Heat Resistant Tape (Optional)
- (Optional) Fonts: I used a LOT of fonts! See the list below the instructions to see what I used on each project.
- Design #383 – My free template (available in my free resource library—get the password at the bottom of this post)
How to Make Dollar Tree Cricut Projects
Dollar Tree Cricut Projects
Learn how to use Dollar Tree items to make easy and fun crafts with your Cricut!
Materials
- Two (2) 16 oz Glass Canning Jars
- Plush Animals - I used a bear
- Terrarium (Globe)
- Cricut Everyday Iron-On Vinyl - Assorted Colors
- Cricut Premium Permanent Vinyl - Assorted Colors
- One (1) sheet 12" x 12" 65 lb Cardstock - I used red and green
- Folk Art Chalk Paint - Grotto (Teal)
- Cricut StandardGrip Transfer Tape
- Isopropyl Alcohol — to clean glass
- Wood Plaques
- Gray Faux Wood Charger Plate
- Lint-Free Cloth — to clean glass
- Mugs (Turquoise and Red)
- Glass Vase
- Canvas, 8" x 10"
- Wood Tray with Handles
- Terrarium (Bulb)
- Plastic Planter
- Clay Pot
- Plastic Tubs
- Folk Art Chalk Paint - Summer Porch (Yellow)
- Folk Art Chalk Paint - Adirondack (White)
- Fairy Lights — optional, for the terrarium
- River Pebbles — optional, for the terrarium
- Design #383 – My free template (available in my free resource library—get the password at the bottom of this post)
Tools
- A way to cut your vinyl and cardstock, I used the amazing Cricut Maker 3 but you can also use the Cricut Maker, Cricut Explore 3, the Cricut Explore machines, or even the Joy for some of the designs.
- Cricut Green StandardGrip Mat (12" x 12")
- Weeding Tool
- Scraper
- Scissors
- Brayer
- Cricut EasyPress Mini -OR- home iron
- Foam Paint Brush
- Dish Soap
- Butcher Paper - to protect your work surface
- Ruler
- Lint Roller
- Hot Glue Gun and Glue Sticks
- EasyPress Mat or Towel
- Gloves (Optional)
- Cricut Heat Resistant Tape (Optional)
Instructions
STEP 1: SELECT AND PREPARE YOUR BLANKS
Before you begin, decide which projects you want to make by reviewing your available blanks, materials, and the design examples. Make sure your blanks are in good shape and clean them off if needed. Prepping now will save you time later!
In this tutorial, I’m going to show you how to add adhesive vinyl to painted glass canning jars, adhere iron-on vinyl to a plush, and decorate a plastic terrarium with cardstock.
If you’re using glass items as I am, wash them in warm, soapy water to remove any debris and dry them with a lint-free towel.
Wash and dry the plastic, ceramic, and terra cotta blanks the same way to remove dust or grease. You can also dust off the canvas and wood items if you use them.
Some of the plushes have dust or loose fibers on them, but a few swipes with a lint roller has them ready to go!
If you want to paint any blanks, do it now so they can dry while you cut the designs. Protect your work area with butcher paper and put on some gloves to keep your hands clean.
I painted my glass jar exteriors with Folk Art Chalk Paint in Grotto, following their instructions.
Allow the paint to dry at least two hours before applying a second coat. I applied two coats of paint to my canning jars.
STEP 2: GET MY FREE DOLLAR TREE CRICUT IDEAS DESIGNS
Download my Cricut Dollar Tree Ideas Zip file from my free resource library. It's Design #383. Upload the SVG to Design Space and add it to your Canvas to see the whole collection!
TIP: If you are not sure how to upload an SVG cut file to Cricut Design Space, watch this helpful video training series I made. If you are on an iPad or iPhone, here is how to download and upload SVG files to the Cricut Design Space app.
You can zoom out to see all of the designs by clicking on the minus (-) sign on the lower left. This is what my Dollar Tree designs look like on my Canvas.
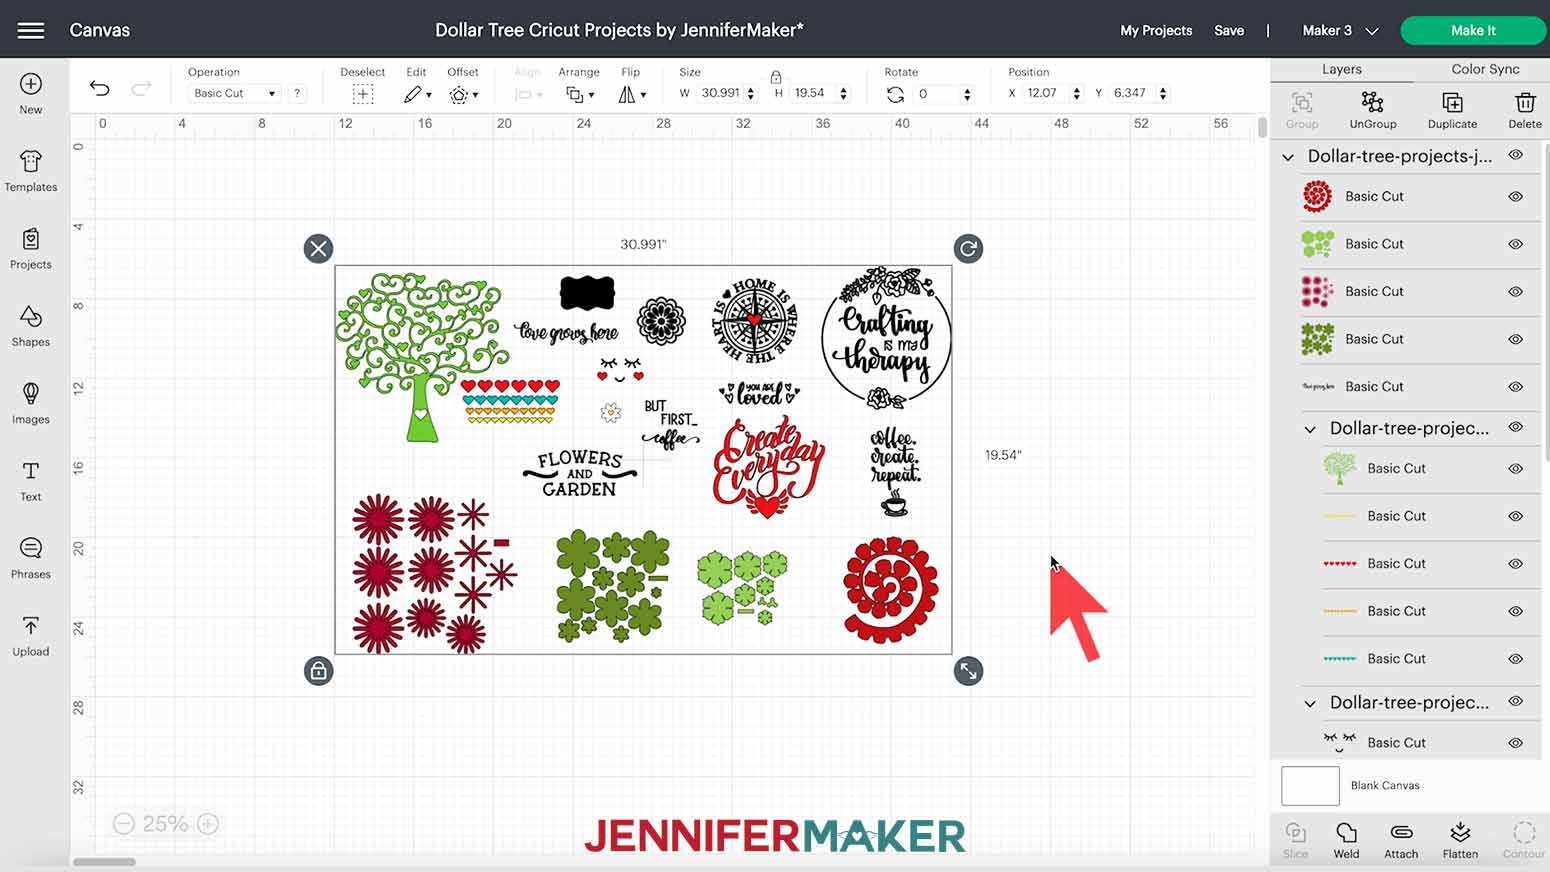
There are lots of options, but I’m going to show you how to use three designs today: the “You Are Loved” quote; the white flower with yellow center; and the red succulent at the bottom left. I’ll show you how to adjust these designs and then you’ll be ready to customize the others, too! But let’s clear away the other designs so we can focus.
Make sure the design is selected and then click “UnGroup” above the Layers panel. Click and drag the designs you want to make to the side so they’re out of the way.
Click and drag a bounding box around the rest of the designs on your Canvas and then hit your Delete key. You can also use the “Delete” icon by the Layers panel.

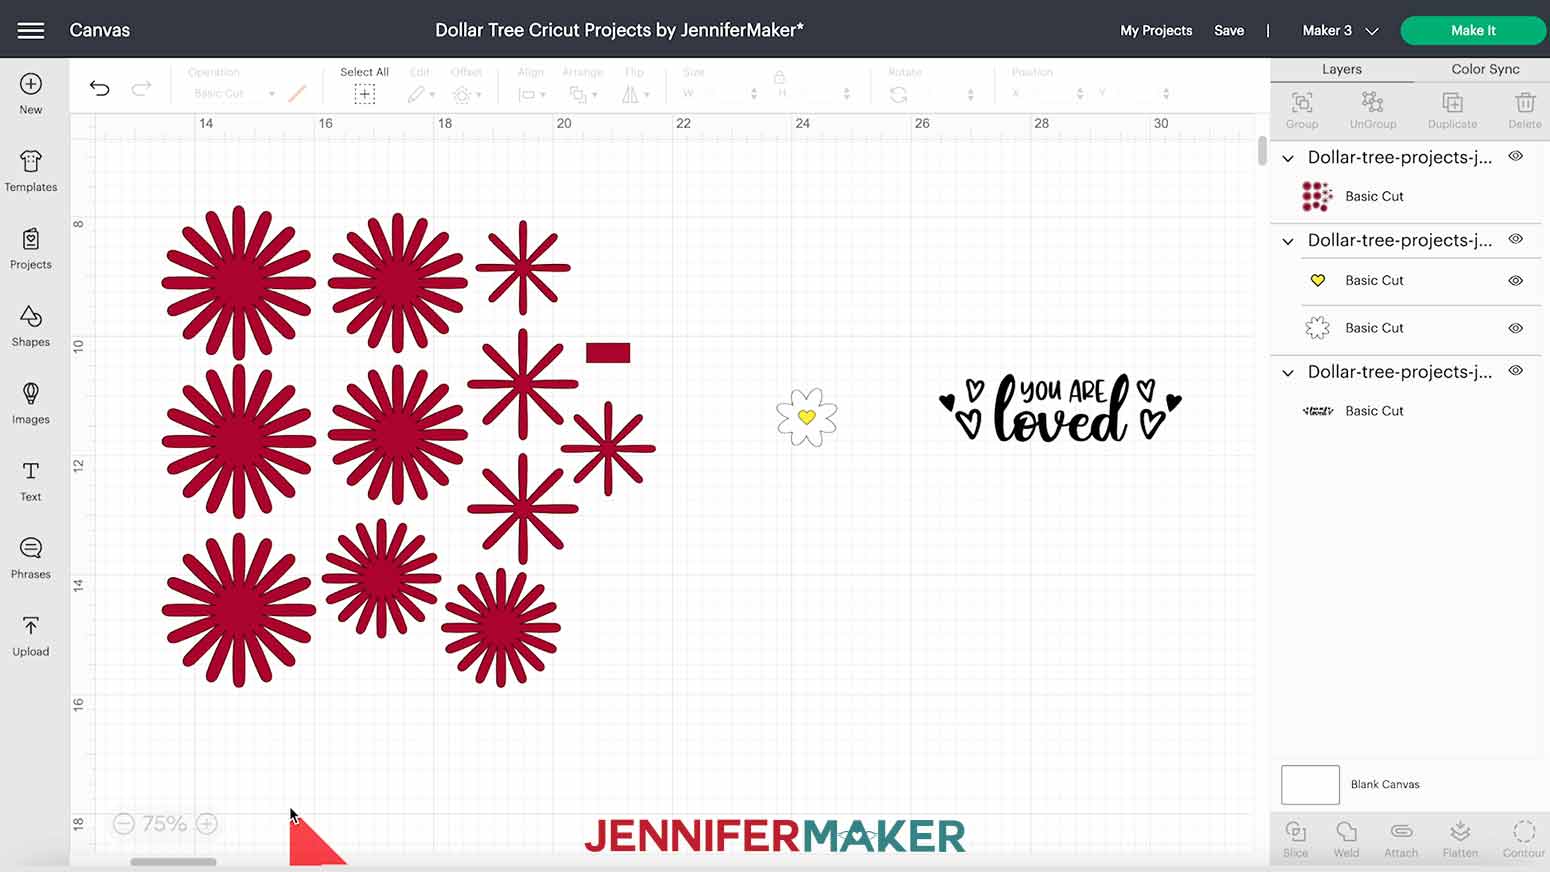
If you’re making the same projects as me, your Canvas should look like this.
STEP 3: PREPARE THE SVGS FOR CUTTING
Let’s go over the plan for each of these designs. That way, we can figure out any changes we need to make to them.
I'm going to use the flower on my painted jars, but want to add many small versions of it. I want to put the “You Are Loved” design on a plush so we’ll use iron-on vinyl, probably in a different color from the one on the canvas. And the cardstock succulent will look great in my globe terrarium just as it is!
Measure your blanks and adjust the designs as needed. I'll work on the plush project first.
In the Layers panel, click the other designs’ eye icons to hide them. I want to make sure the "YOU ARE loved" design will fit on my bear’s sweater, so let’s measure it with a fabric tape measure.
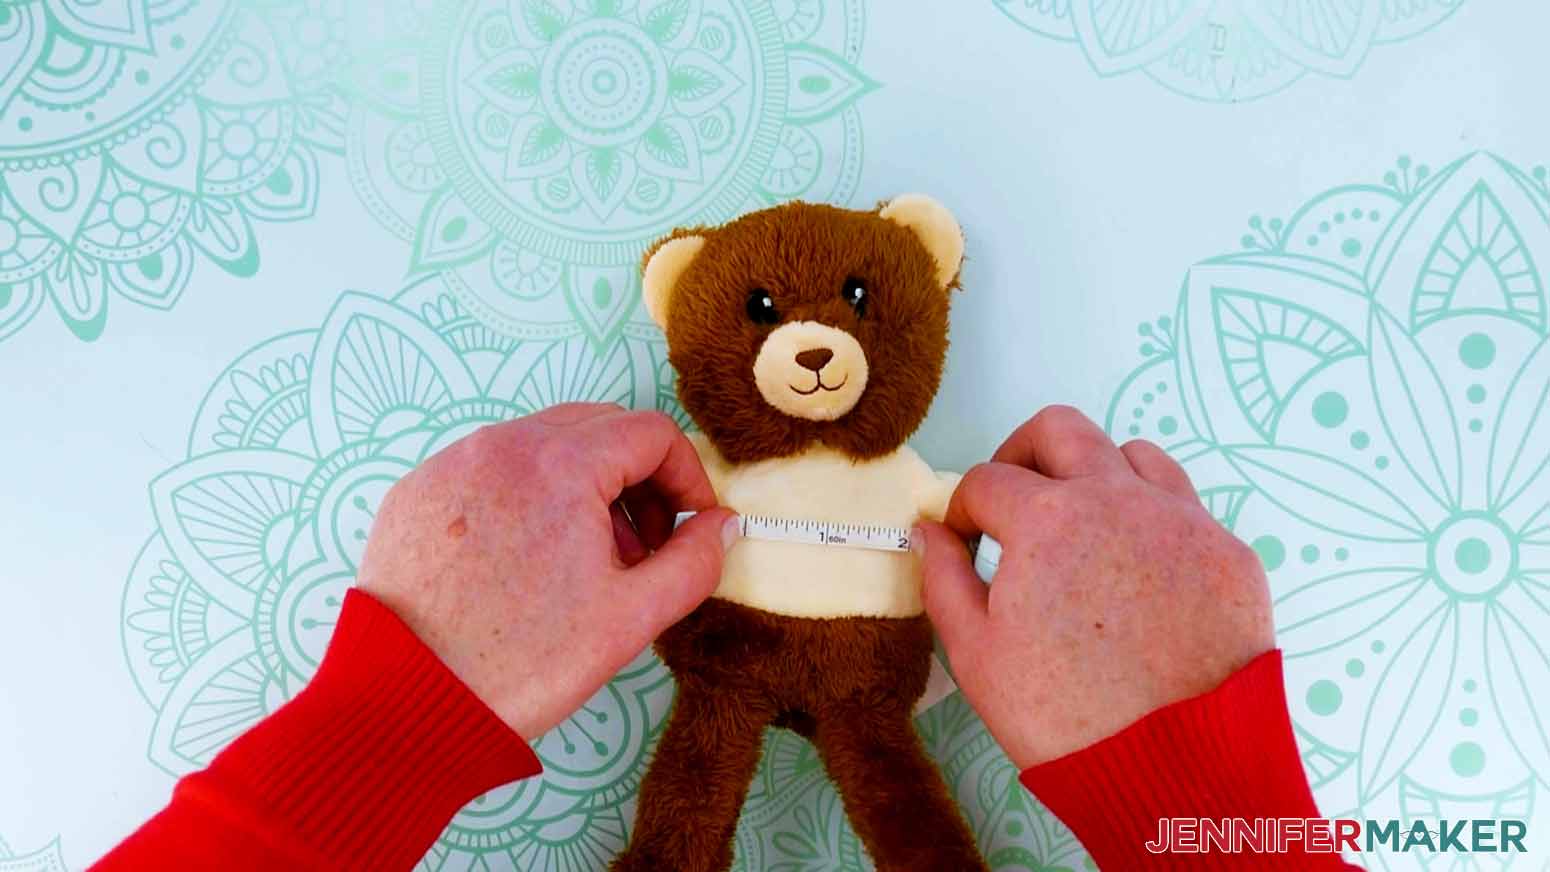
The usable space on the sweater is about 2" square. If I click the design layer, I can see that it’s currently about 4" wide and just over 1" tall. That won’t work! We need to get the width under 2", so let me show you how.
First, make sure the Lock icon above Size in the top menu is closed. That way, the design’s proportions will stay the same as we resize it. With the design still selected, drag the bounding box’s resize icon until the width is under 2". Or, you can just type 2 into the Width box under Size in the top menu.
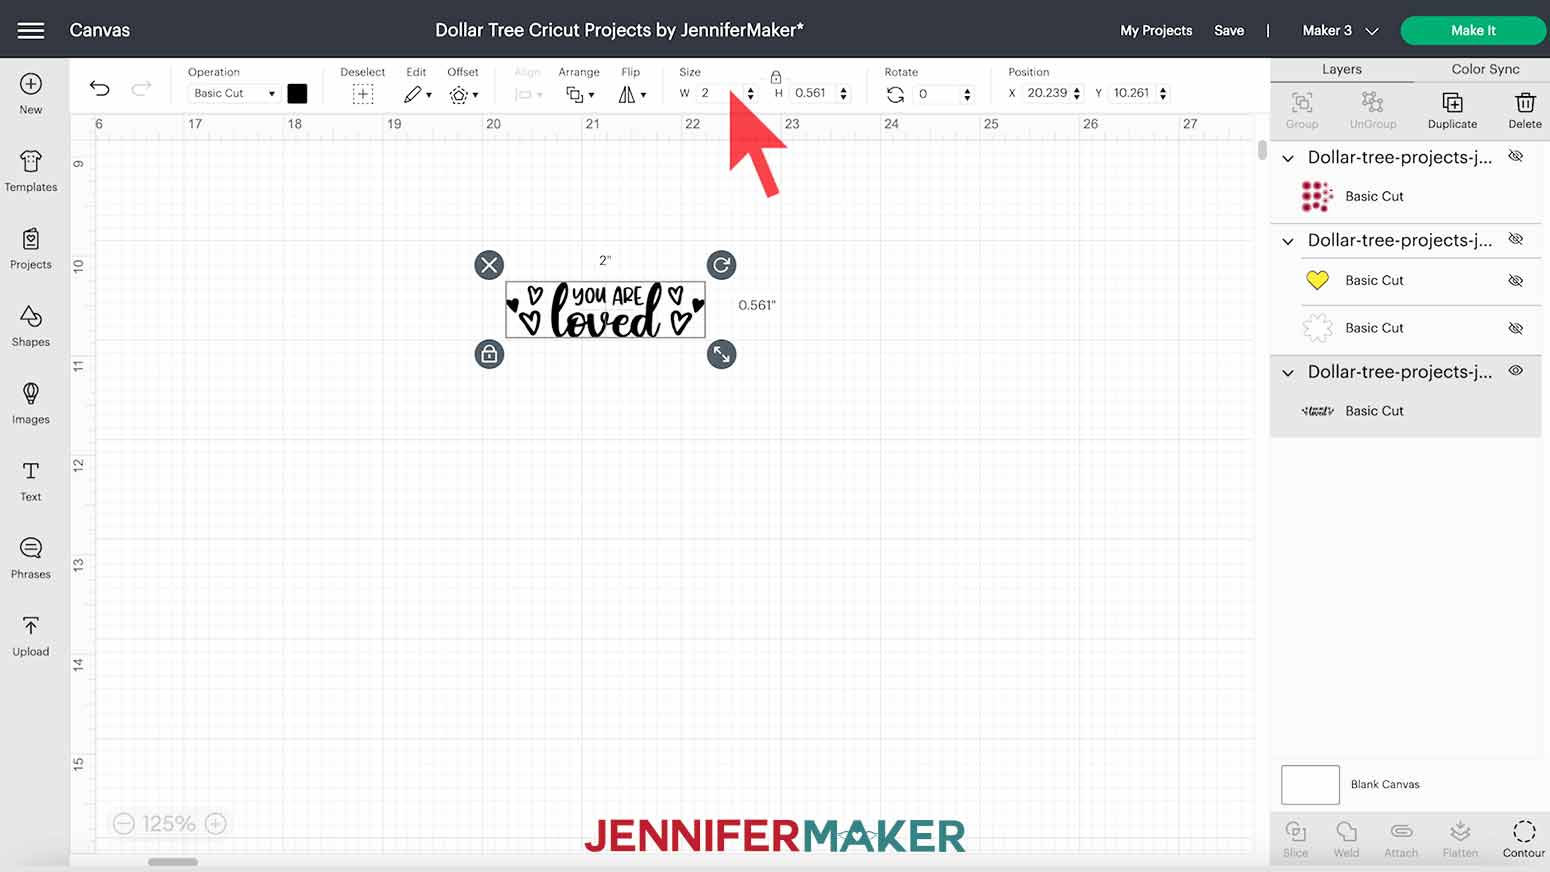
Now the design will fit on the bear’s sweater!
Your blanks may be slightly different sizes than mine, or you might want to use a design on a different item. That’s fine, just use these steps to measure the blank and adjust the design.
TIP: If you need help resizing an SVG in Cricut Design Space, you can check out my resizing guide where I explain exactly what you need to do to resize any design to fit your needs.
Now to change the design color.
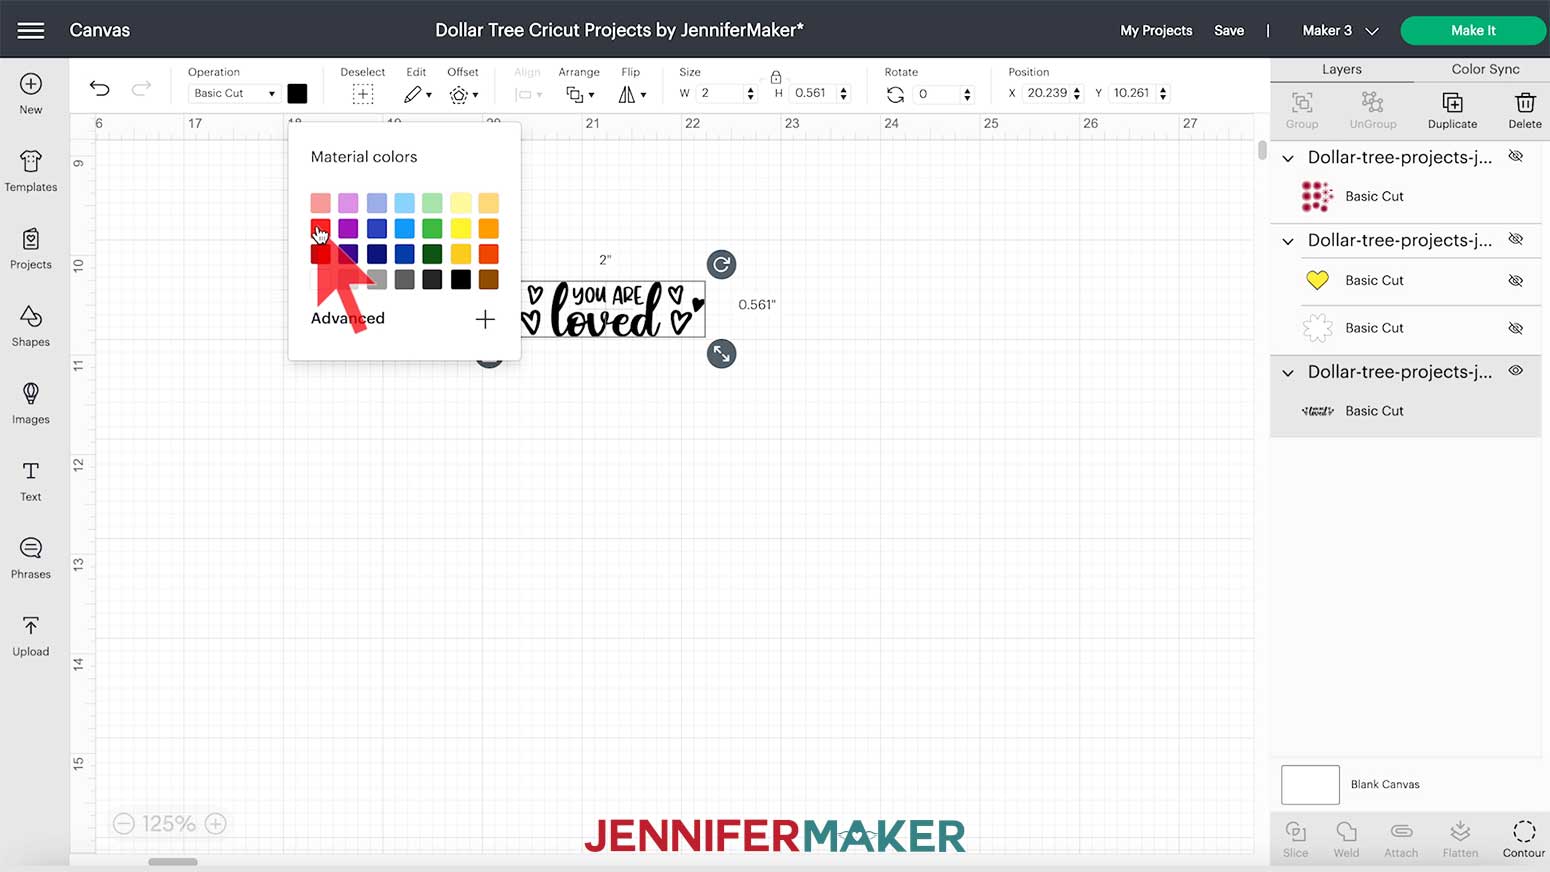
Select the layer you want to change on the Canvas or in the Layers panel. I’ll click the phrase. Then, click the color box next to Basic Cut in the top menu. Click the color you want in the pop-up window. I’ll choose red. Now you can preview what the final design will look like.
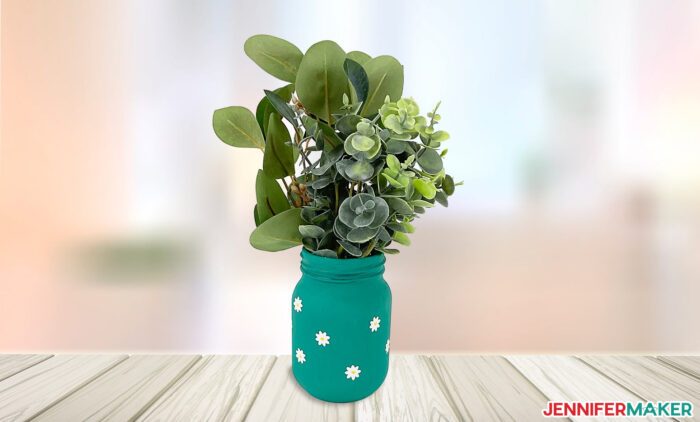
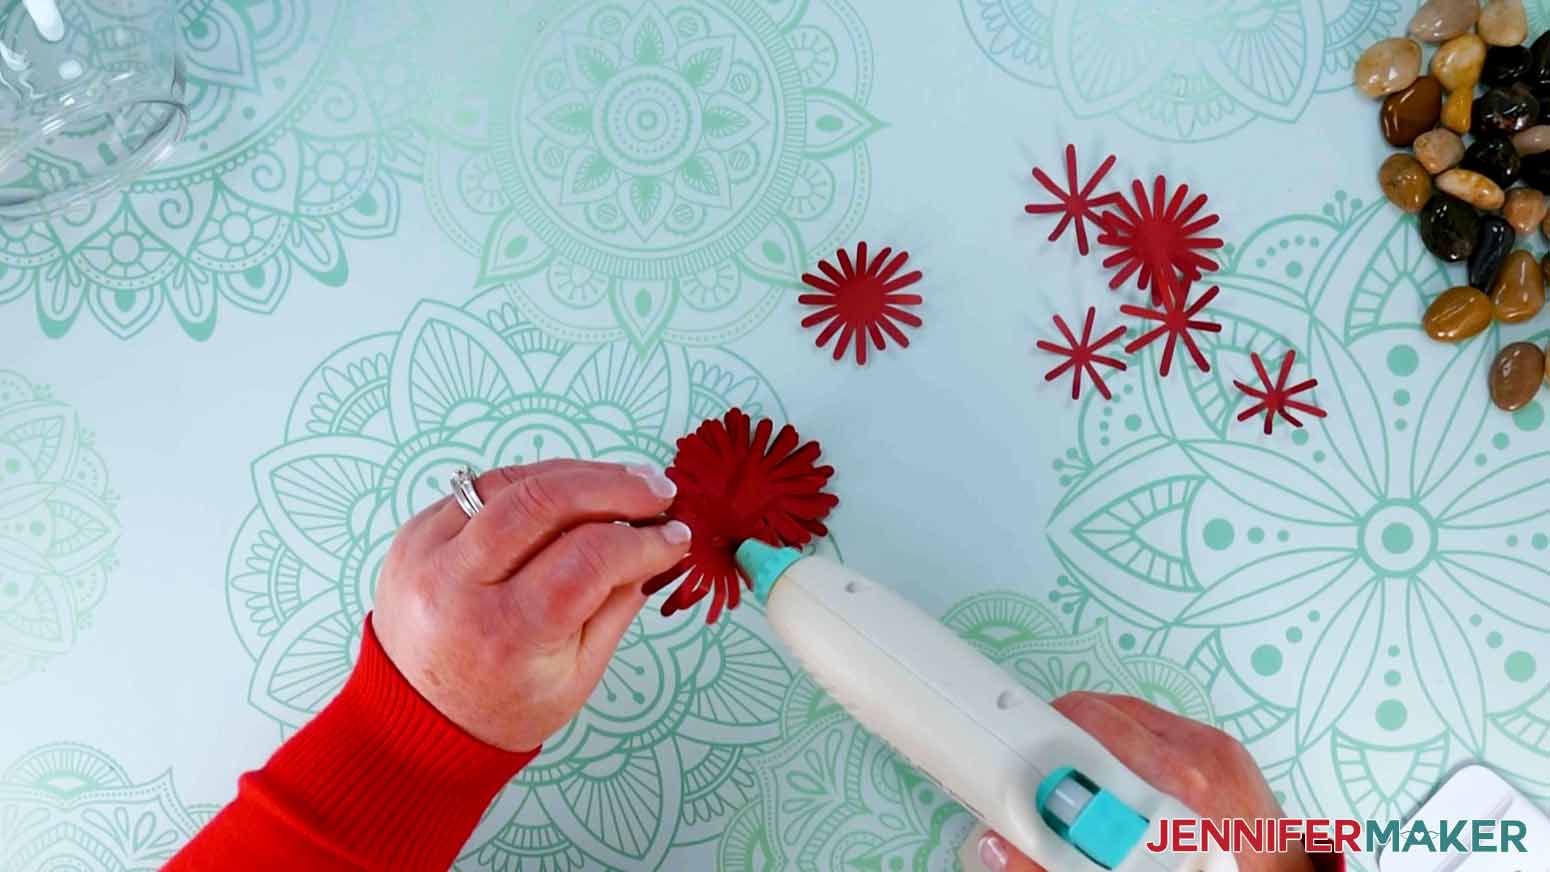
Now, the flower. Use the eye icons to hide the plush decal and unhide the flower. One of the easiest ways to create a simple pattern is to use multiples of a small design. I want lots of small flowers in an all-over pattern on my teal jars. So that means we need to make lots of tiny flower petals and center layers.
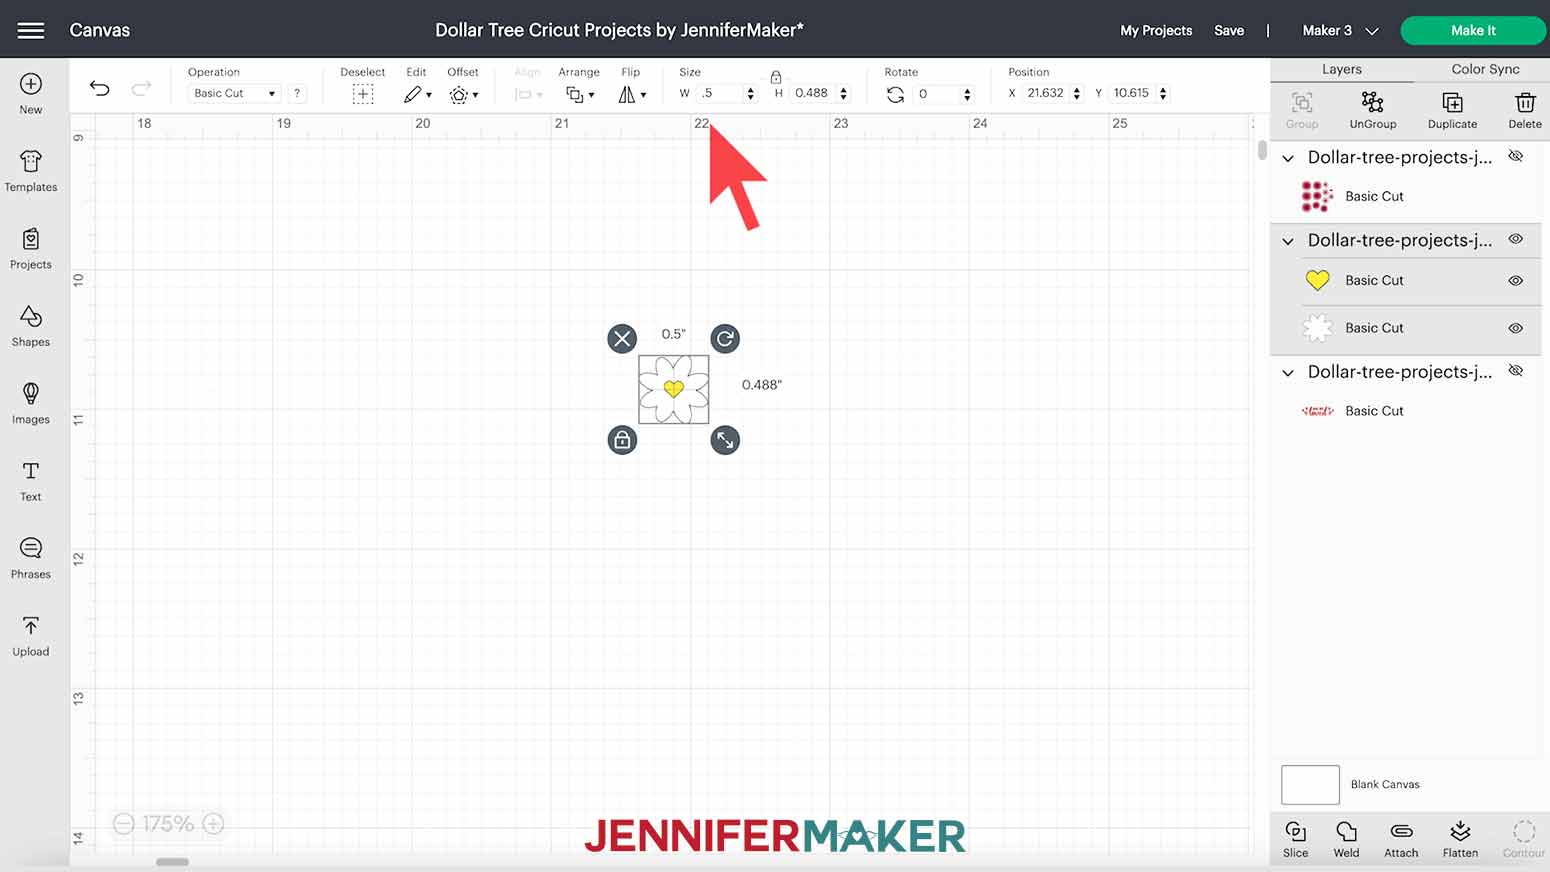
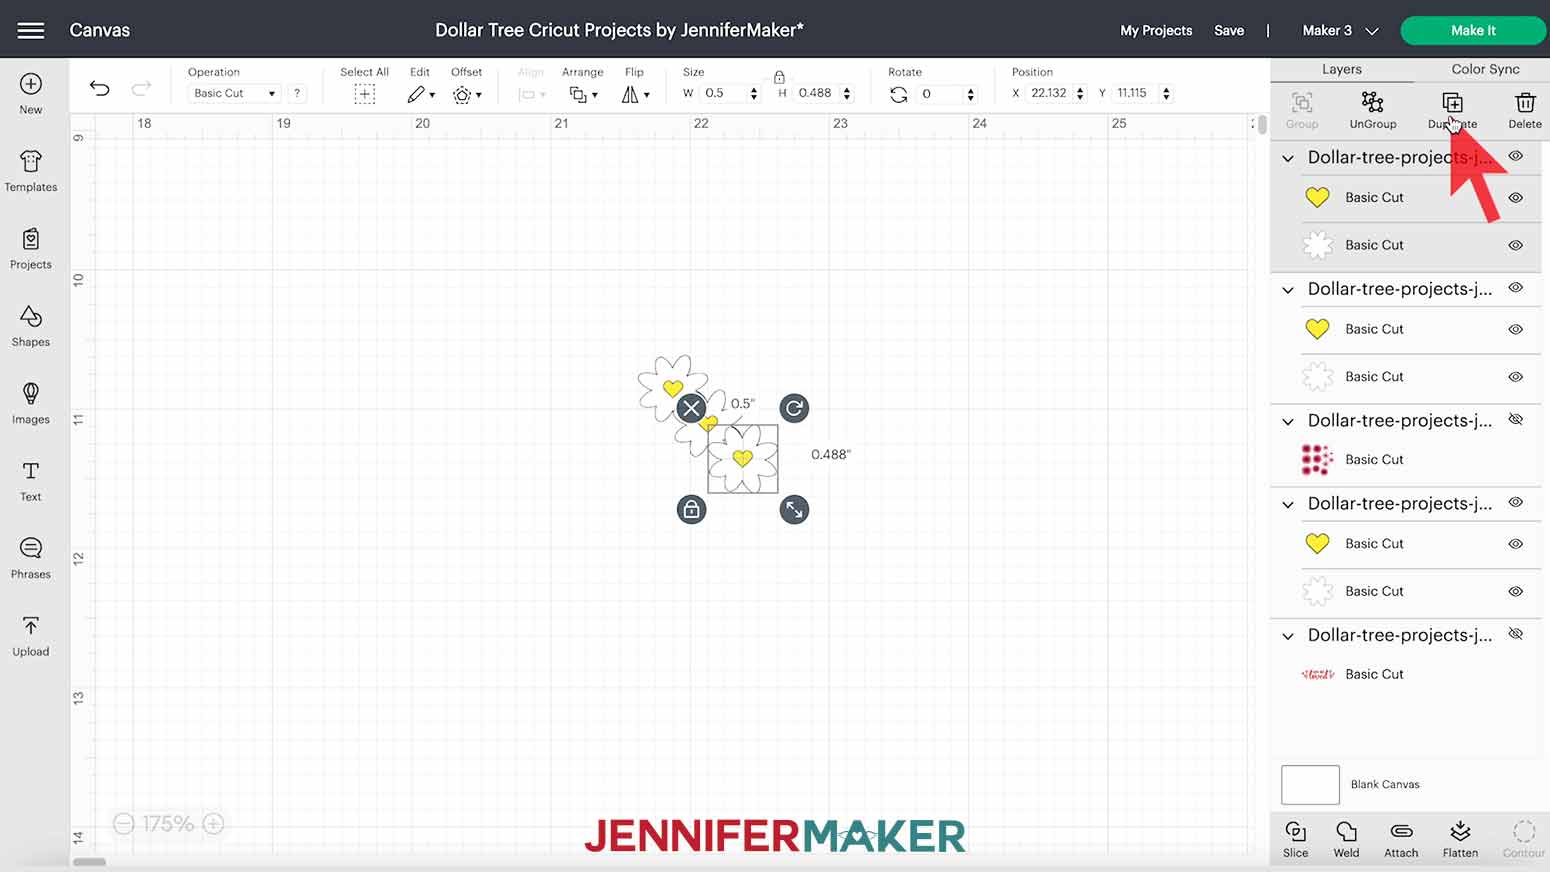
Let’s change the size first. Just like we did with the phrase, click on the flower design to see how big it is. It’s about 1" square right now. Since my canning jars are only a few inches tall, I couldn’t fit many flowers at this size. Half an inch square should work. Make sure both Layers are selected and the Lock icon is closed, then type .5 into the Width field to resize the flower.
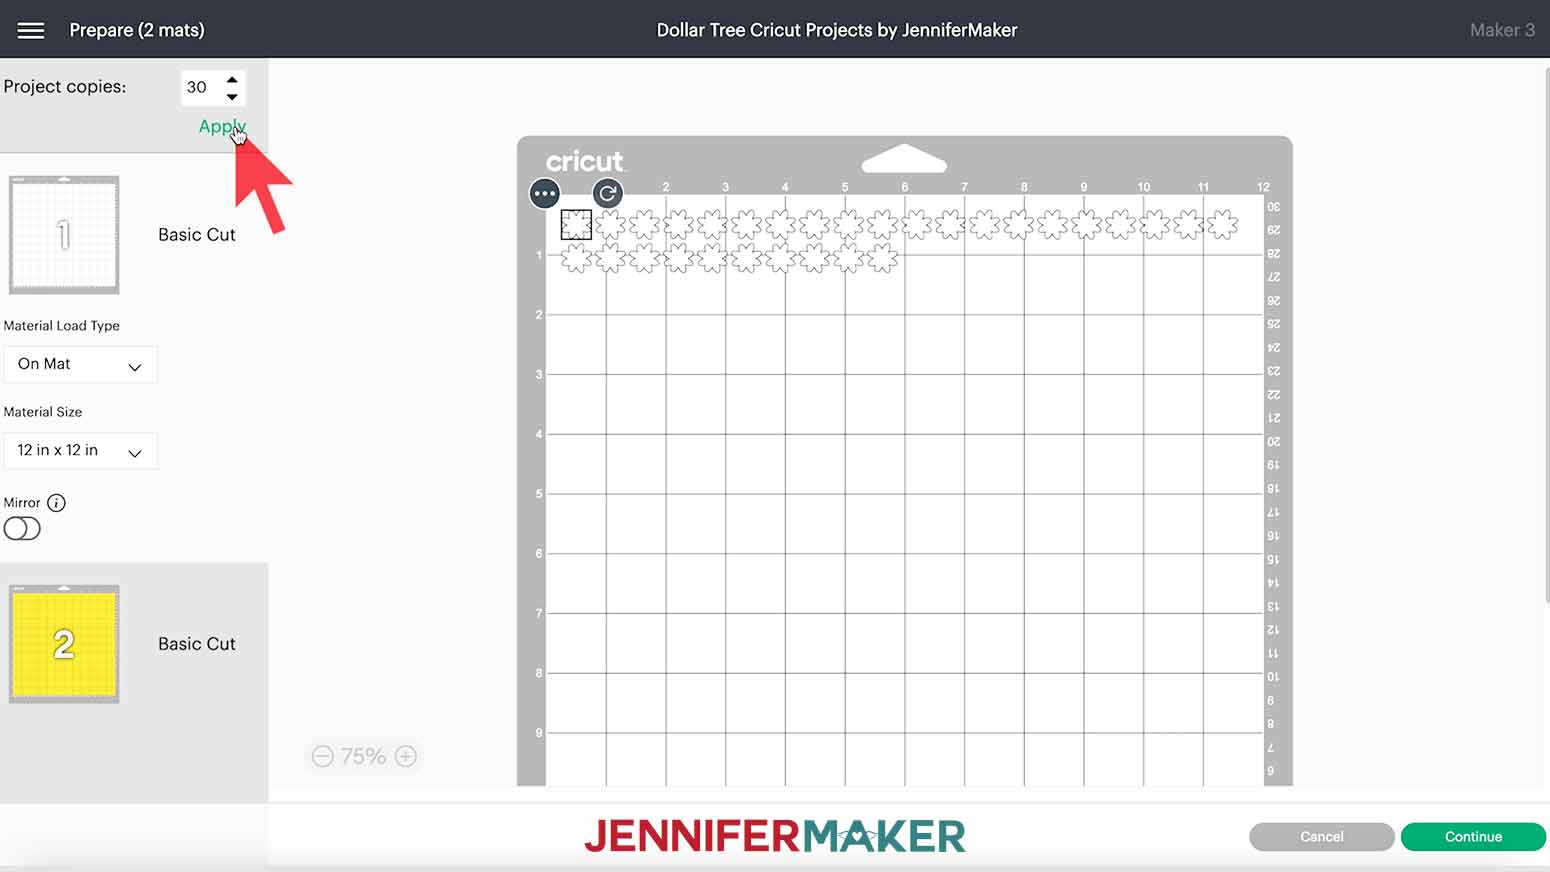
Now, to make this one flower into many! I’m not going to measure my jars and plan out the design perfectly, but I don’t want to be short on decals. So, I’m going to estimate that each jar will look nice with 15 of these flowers. That means I need 30 in all. That’s a lot of flowers, but I’ll just save any extras for another project.
NOTE: There are two ways to make multiple copies of one design element. The first way is my favorite but only works when you’re cutting one design.
With one copy of the design on your Canvas, continue to the Prepare screen by clicking “Make It.” In the Project Copies field at the top left, enter the number of copies you want and click “Apply.” I entered 30. The screen will reload with all your duplicates, ready to cut!
The second way is on the Canvas. It takes longer, but this works if you’re cutting several projects at once like I am. Select the flower design, making sure both layers are highlighted in the Layers panel. Then click "Duplicate." Now there are two flowers! Repeat until you have the quantity you want. This might take Design Space some time, just be patient.
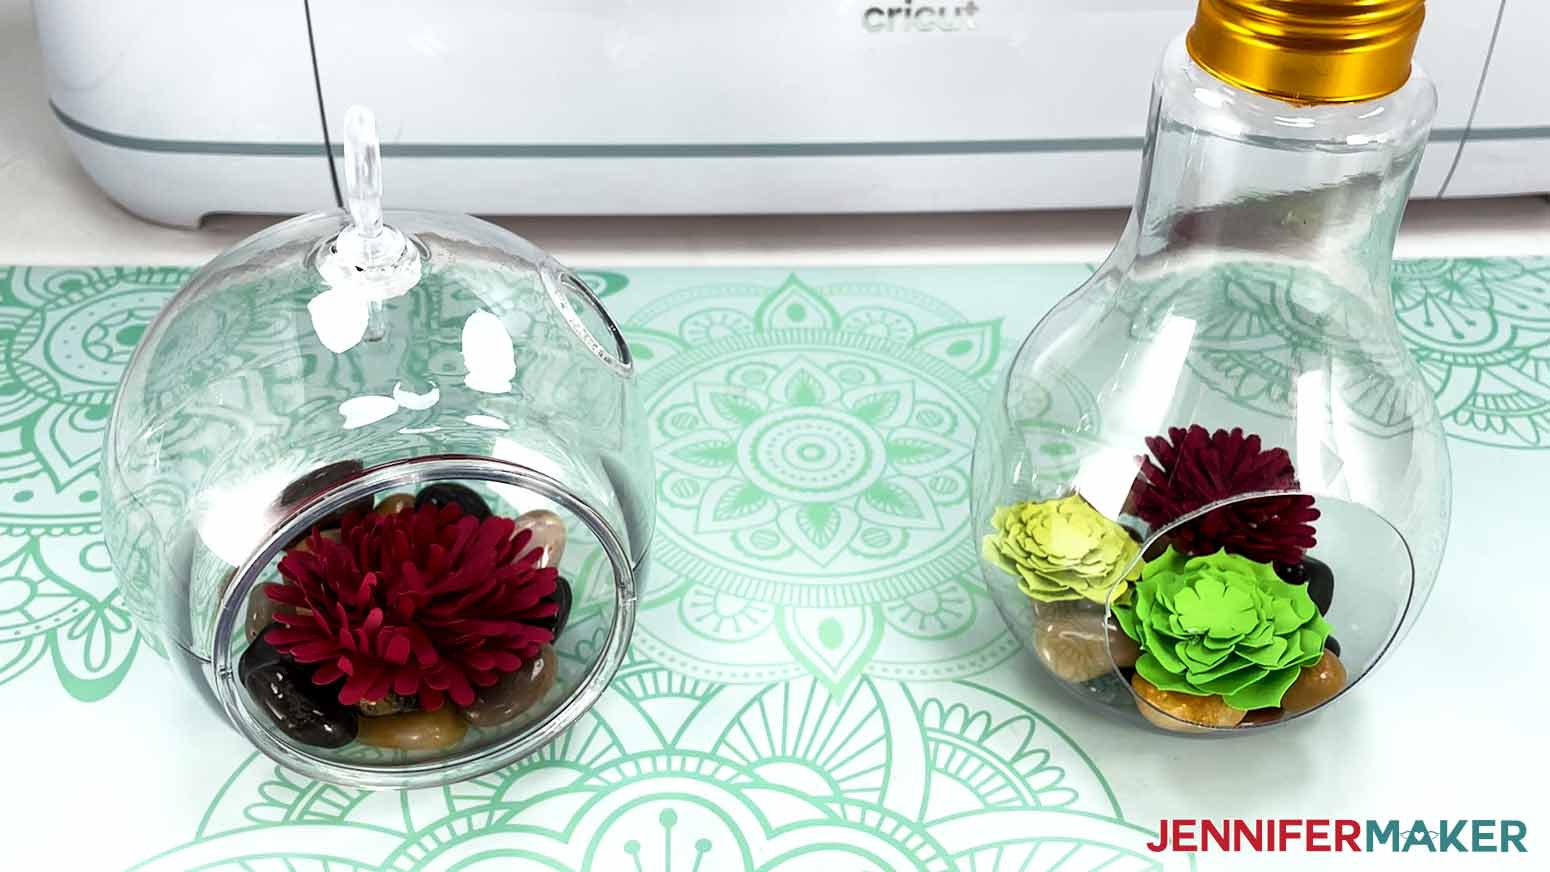
Now, the succulent. Again, use the eye icons to hide the flower and unhide the succulent. I’ve already sized it to make a 3" plant, which is perfect for the globe terrarium. The design is from my DIY Succulent Tutorial, which has lots of other plants, too!
If you use a different succulent design or another cardstock item, make sure it will fit through the 3" opening on the front of the terrarium.
TIP: The succulent designs come with a little rectangle piece, which we won’t use in this tutorial. But if you want to attach a succulent to some craft foam, the original tutorial demonstrates how to add wire to the base. The little rectangle helps keep the wire in place! This would actually be a super cute way to combine the succulents and terra cotta pots!
You can use all of these tips to change the size, color and quantity of any of the other designs in this collection!
Now you’re ready to cut! Make sure you have all the elements you want to cut back on the Canvas by clicking the eye icons. Check to make sure the correct machine is selected and click “Make It” in the top menu.
STEP 4: CUT YOUR DESIGNS
If you are using a Maker 3, Explore 3, or Joy, you might be asked if you will be cutting your designs without a mat, with a mat, or multiple ways. Just a reminder that only Cricut Smart Vinyl can be cut without a mat. I'm using a mat with my Maker 3 so I will select "On Mat" and click "Continue."
If you are making any of the designs with iron-on vinyl, it is important that you toggle mirror ON. Permanent vinyl does not need to be mirrored.
I am making my “You Are Loved” design with iron-on so I will toggle that to mirror ON.
NOTE: If you are making any of the designs with iron-on vinyl, it is important that you toggle mirror ON. Permanent vinyl does not need to be mirrored. I am making my “You Are Loved” design with iron-on so I will toggle that to mirror ON.
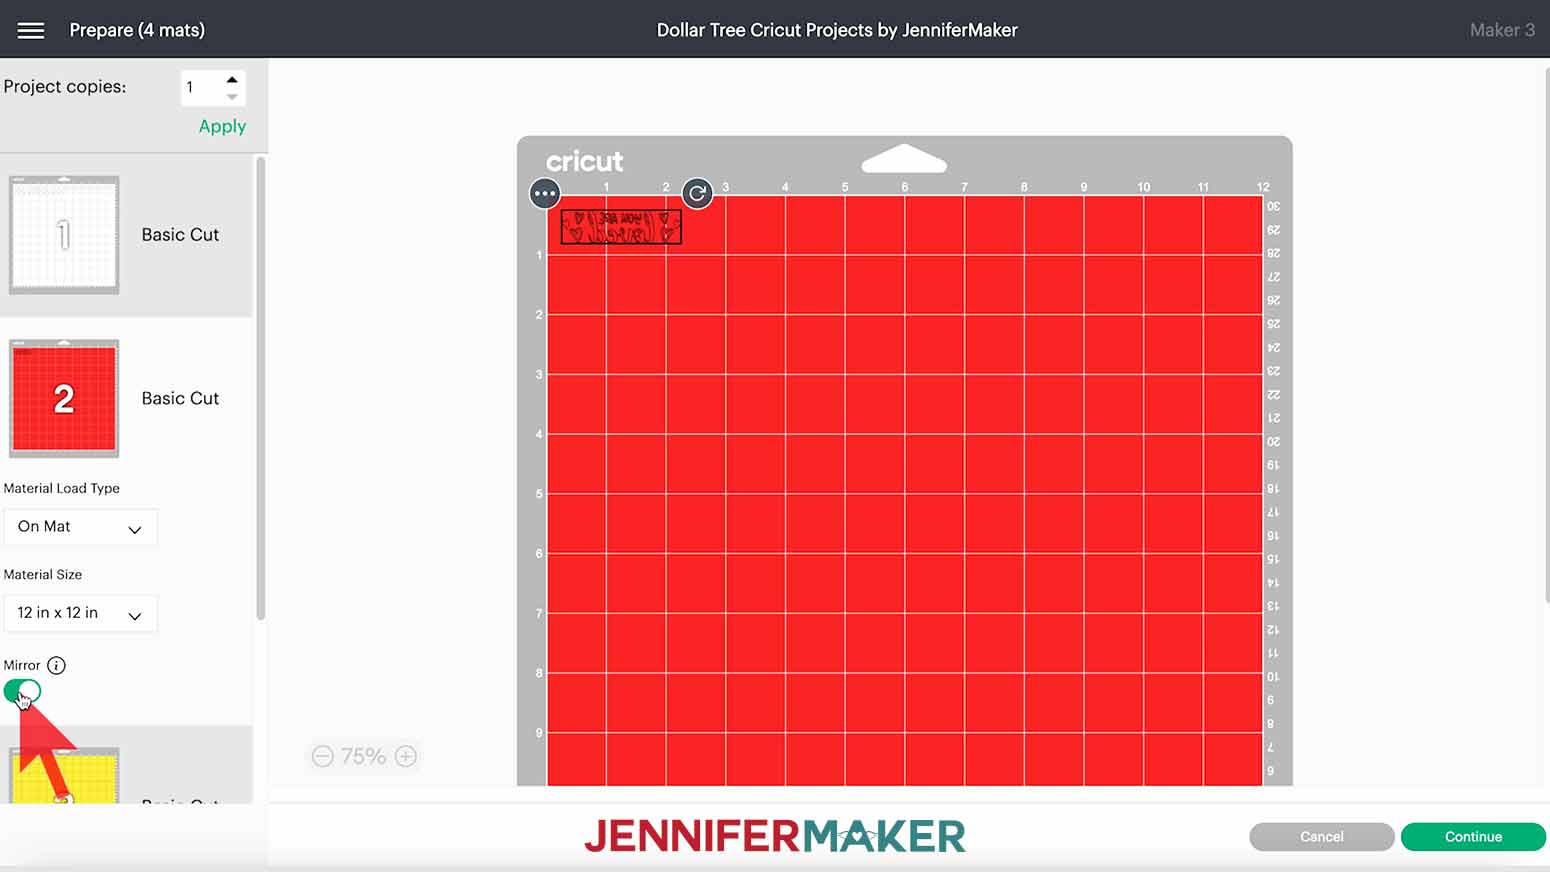
Once your designs are prepared, click "Continue" on the bottom right.
Now it's time to select your material. Design Space chooses the cut order so first, I'm going to cut the “You Are Loved” design in Everyday iron-on vinyl. If you do not see your material option, you can click "Browse All Materials" and search for the material you are using. With any material you choose, I recommend selecting More Pressure.
Make sure your Cricut Fine-Point Blade is clean and in Clamp B as indicated on the screen.
Put your iron-on vinyl SHINY SIDE DOWN on your Cricut StandardGrip Machine Mat, making sure it covers the design area visible on your screen. To see your design placement larger, click "Edit" below the mat thumbnail and "Done" when you're ready. Use a brayer to get the vinyl as smooth as possible on your mat.
Load the mat into your Cricut and press the flashing button to begin cutting. When the cut is complete, unload the mat. Flip your design over and gently peel the mat away from your vinyl.
Repeat these steps for the other designs, changing your material, settings, pressure, and mat application to fit each layer.
For the flower mats, I used "Premium Vinyl - Permanent Glossy" with “More Pressure”, placing the vinyl SHINY SIDE UP on the mat. For the succulent, which I cut from cardstock, I set the material to “Medium Cardstock” with "More Pressure."
STEP 5: ASSEMBLE AND APPLY YOUR DESIGNS
Dollar Tree Canning Jar Vases
We will add the tiny white and yellow flowers to these. First, cut the excess vinyl away from your designs. With your weeding tool, remove the vinyl from around the petals and center heart pieces.
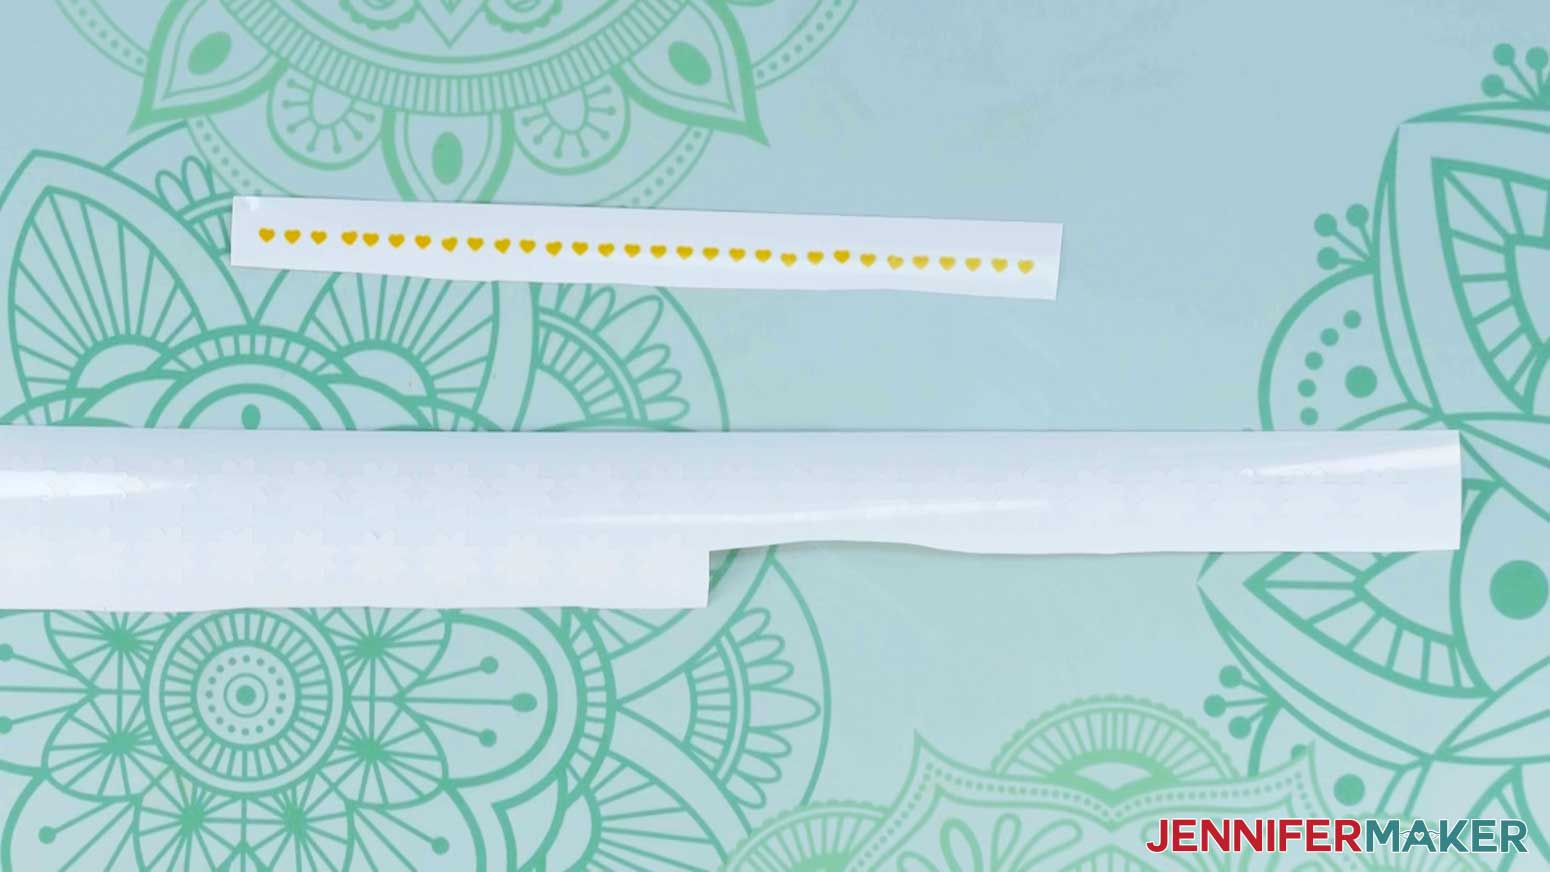
Since the flowers and centers are so small, you can peel them off of the backing sheet like stickers and place them where you like on the canning jars.
Or, you can use transfer tape.
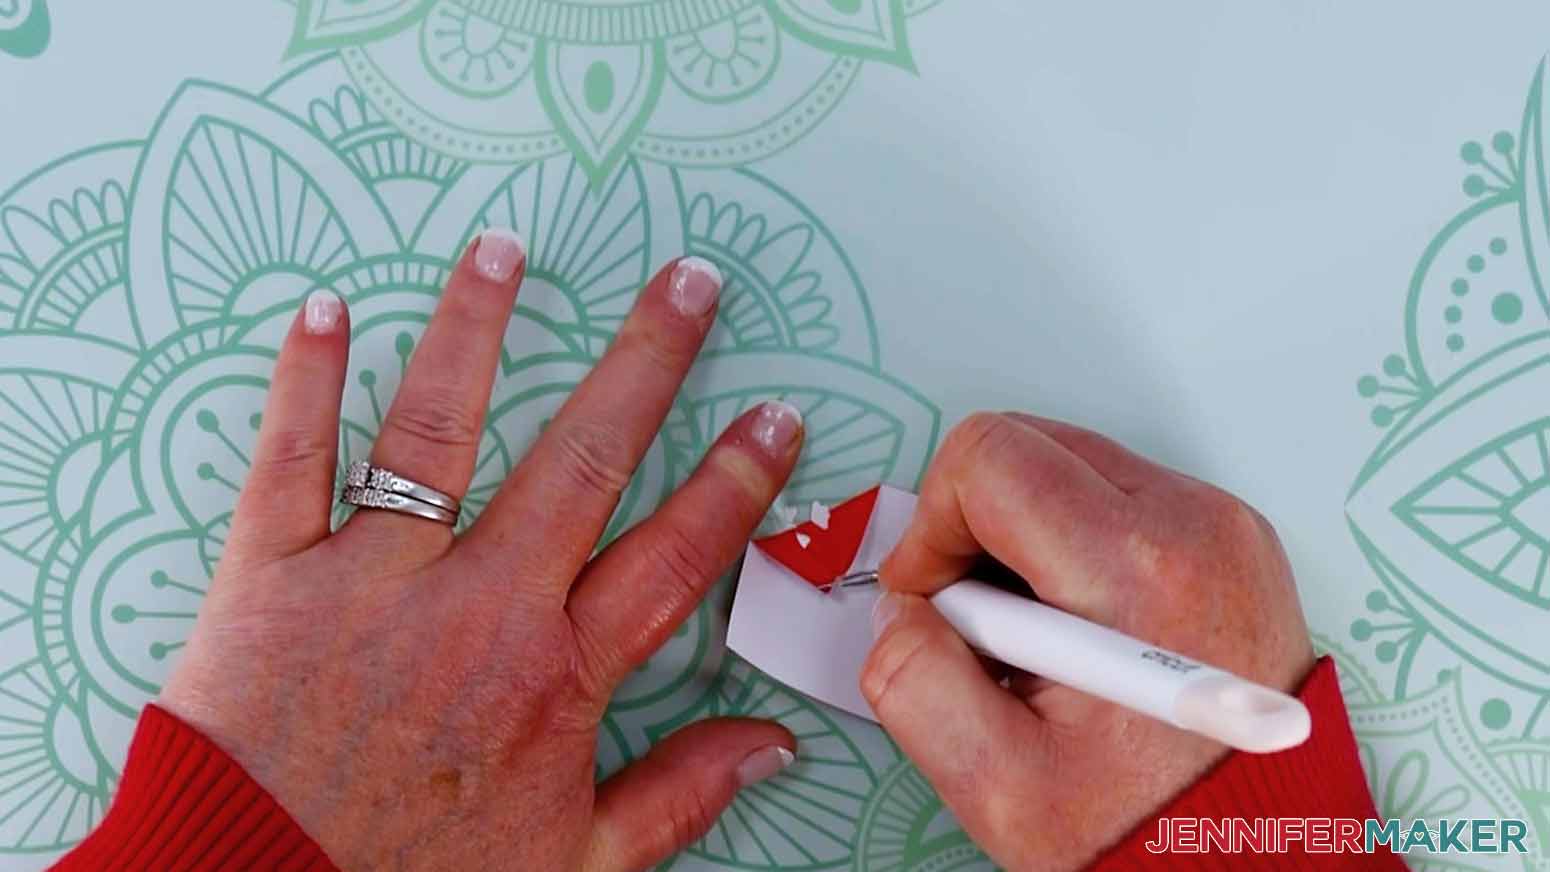
Cut a piece of transfer tape slightly larger than one of your flowers. Align the transfer tape over the heart so that it is in the center. Press the transfer tape down and gently peel away the vinyl’s backing.
TIP: If you are having trouble getting just one heart at a time, try cutting the hearts apart first.
With the heart on the transfer tape, center it over a white flower. Burnish the transfer tape to the vinyl with your Scraper tool and gently peel away the flower’s backing.
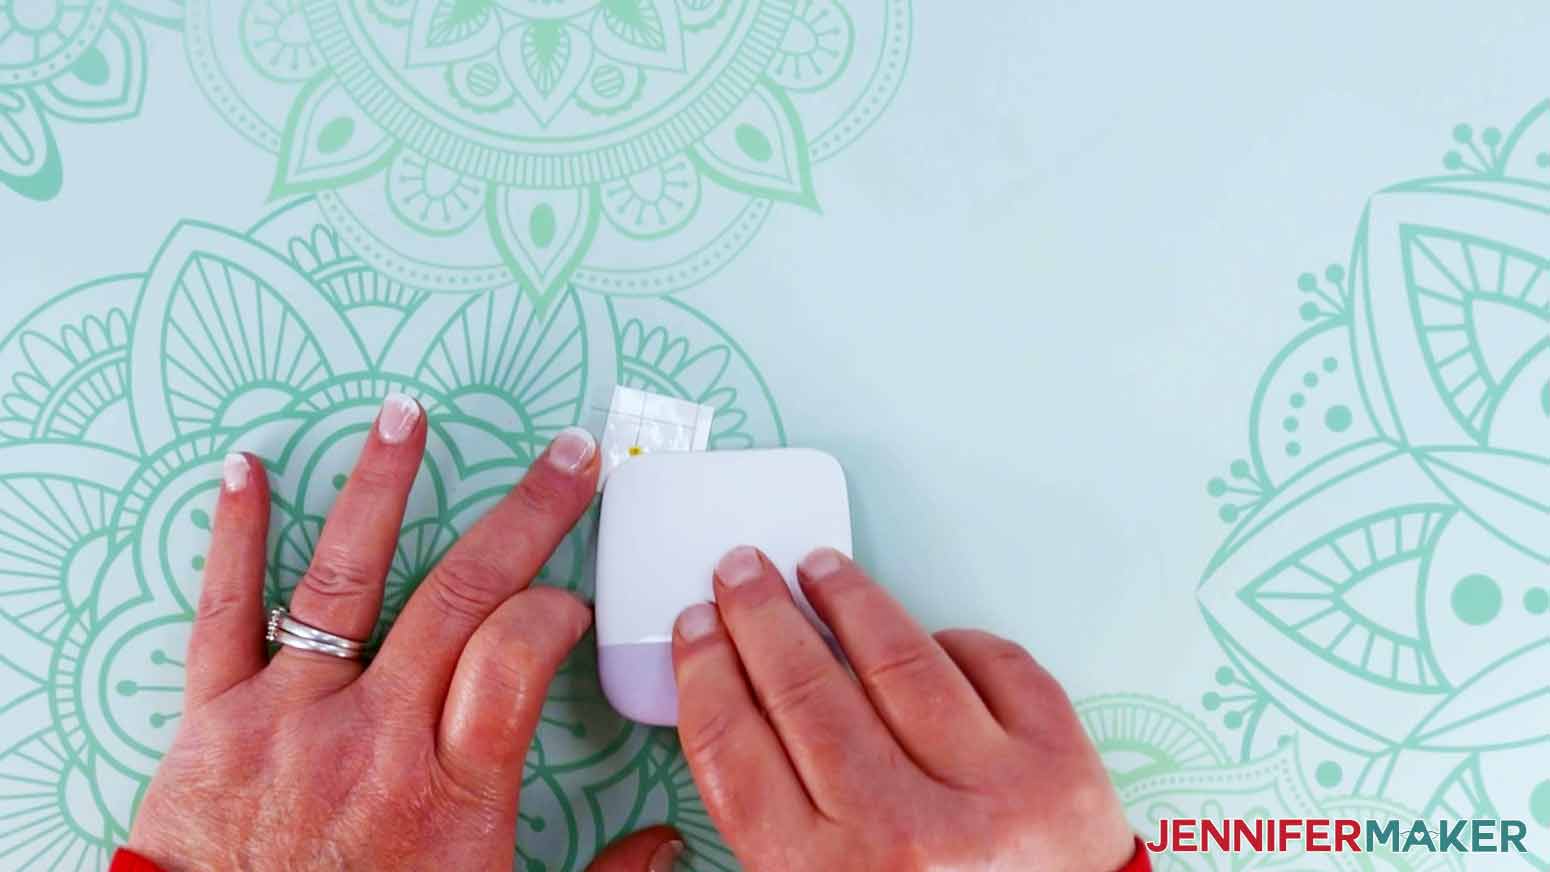
Place the layered vinyl on to the canning jar. Burnish the vinyl to the glass and gently pull away the transfer tape. If you use the Scraper, be careful not to chip your paint.
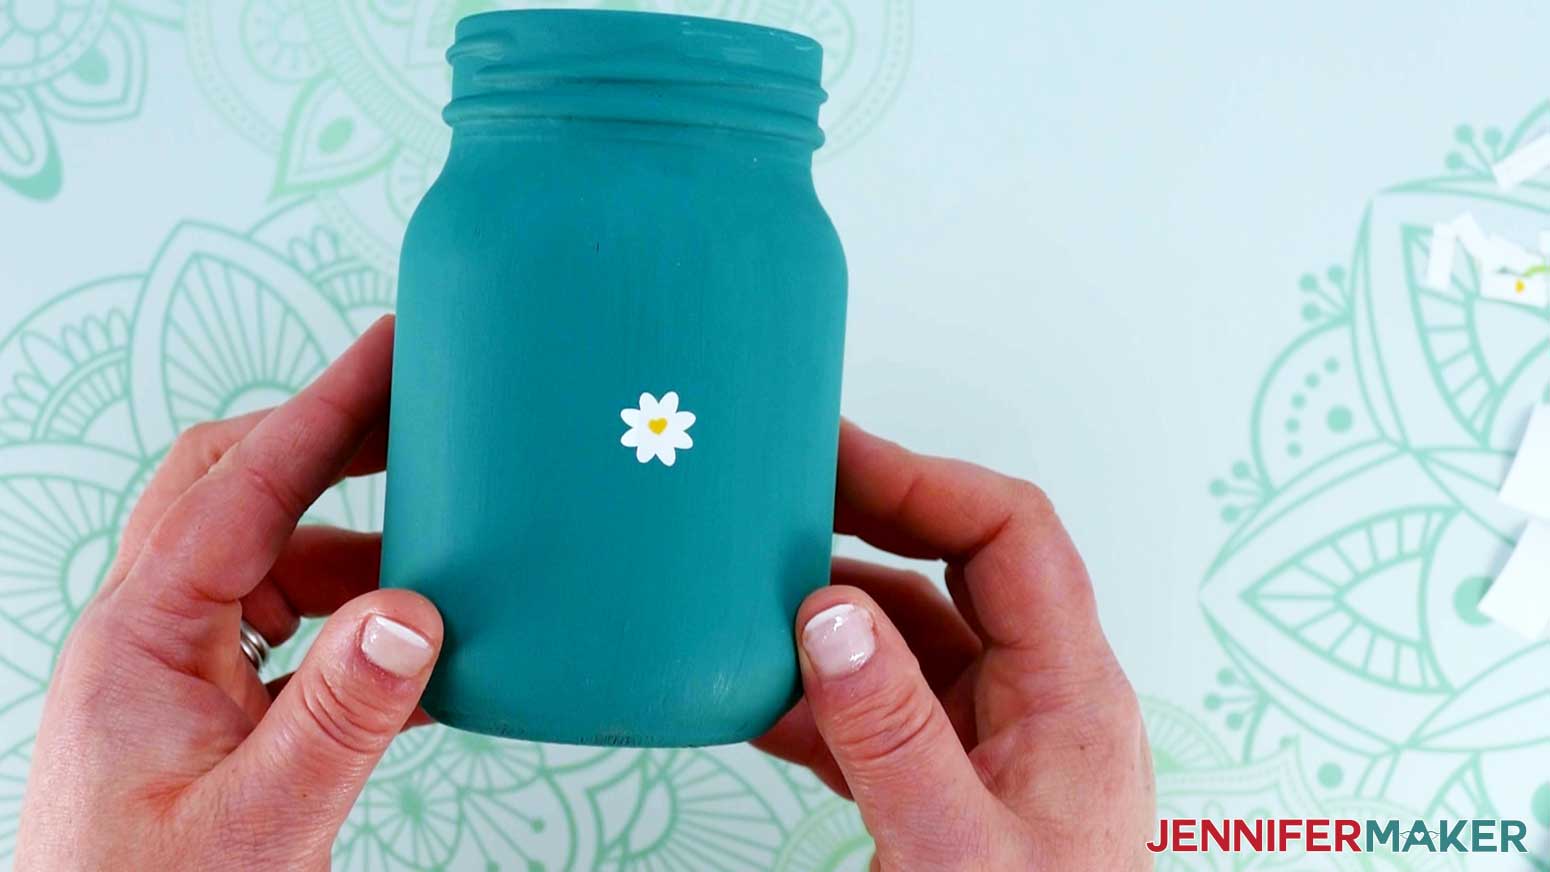
Add as many flowers as you'd like. They don’t have to be in a perfect pattern, just space them out as you like.
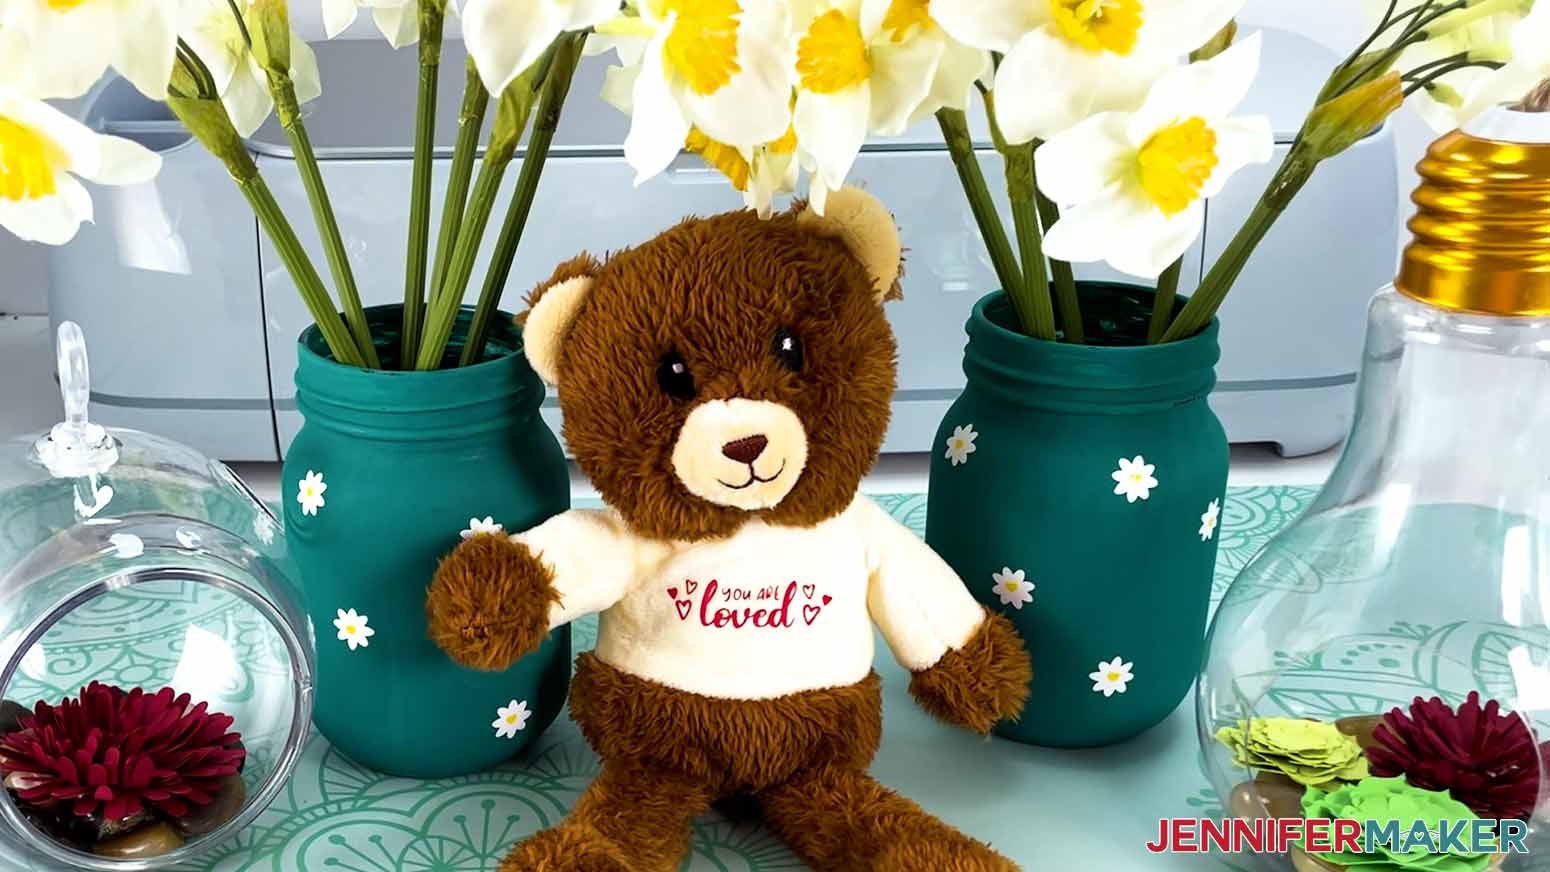
Once you’re happy with the pattern, finish the jars off with some silk flowers for a beautiful piece of home decor! You can buy flowers at Dollar Tree, too!

Plush Bear from Dollar Tree
We're adding the "YOU ARE loved" decal to the shirt. First, trim the cut design from the larger sheet and use your weeding tool to remove the excess iron-on vinyl. Don't forget to get the little bits inside the letters!
If you didn’t already, use your lint roller to remove any stray fluff or dust on the plush.
Use the Cricut heat press guide to check the recommended settings for your materials. I’ll put the plush on my EasyPress mat and set the Cricut EasyPress Mini to Medium heat.
Since the application area is so small, it may be helpful to use Cricut Heat Resistant Tape to hold the design in place when you press it.
I’ll press the design with light pressure and constant movement for about 25 seconds. Then, I’ll let it cool before gently removing the carrier sheet.
TIP: If you don't have an EasyPress, you can also use a home iron, just check the manual for the closest settings.
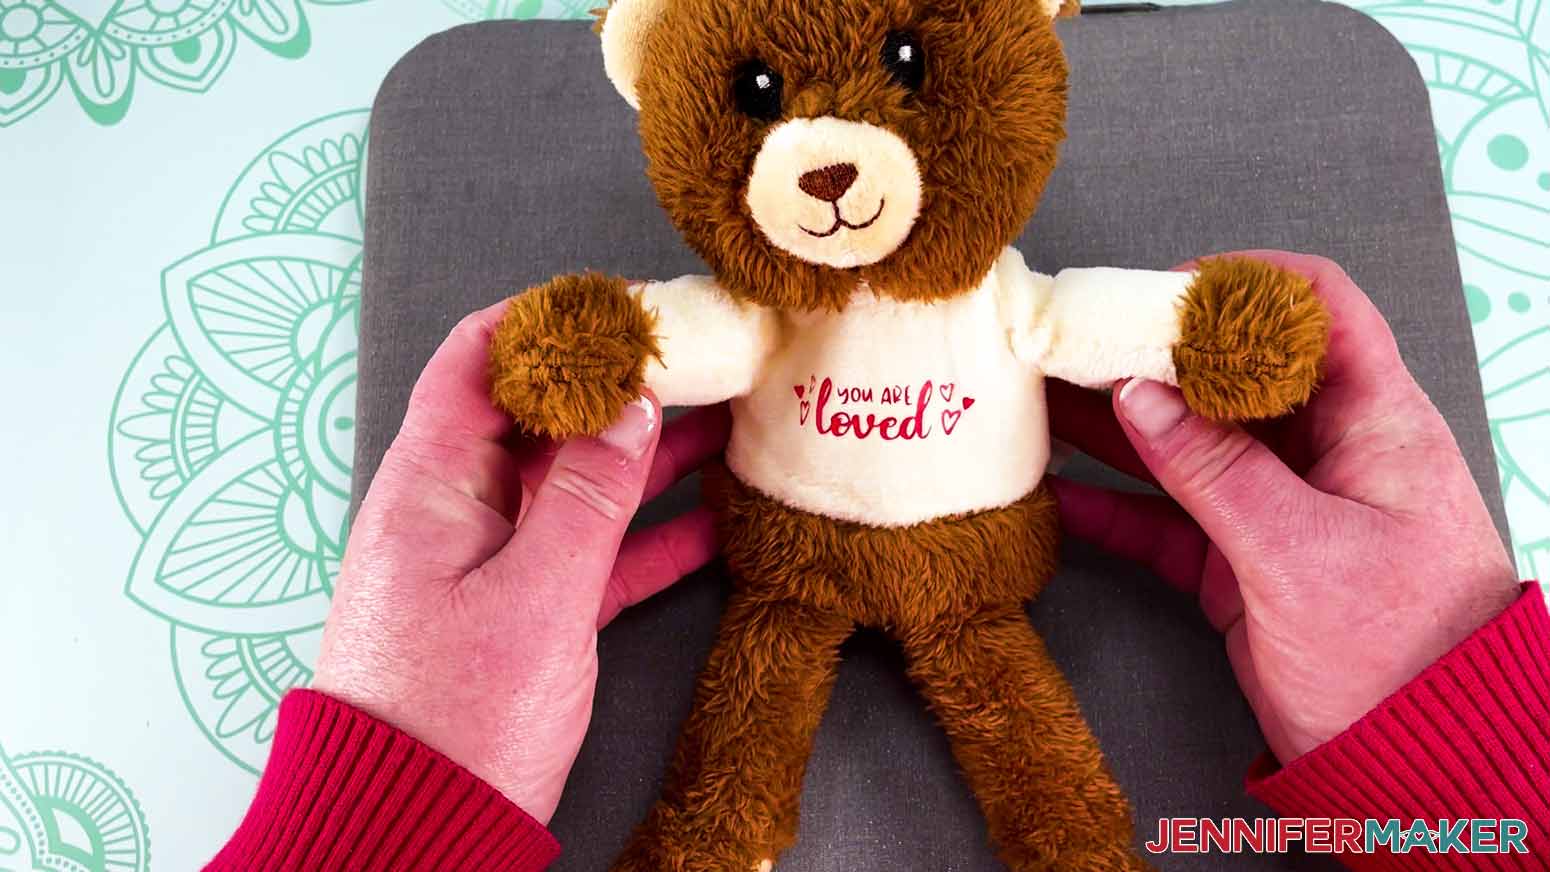
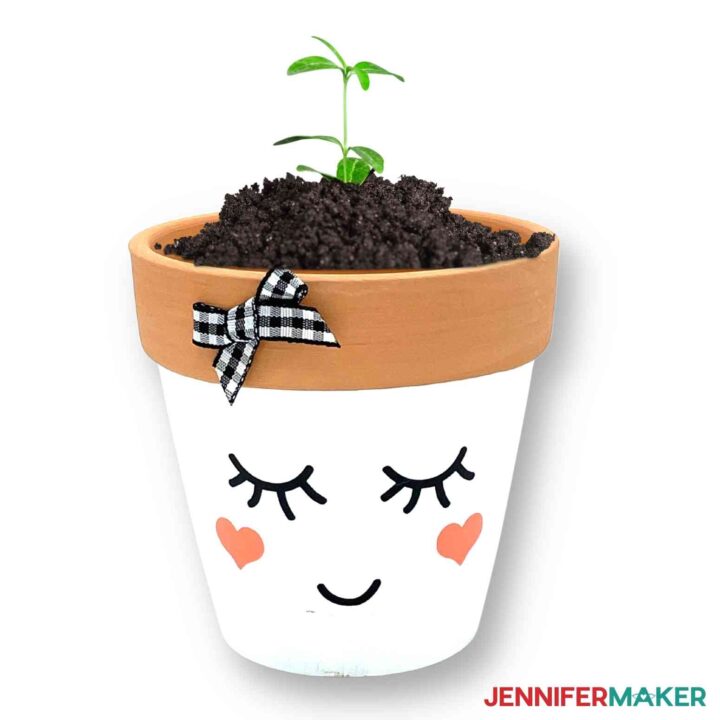
And the bear is done! You could also customize this with a name following these same steps!
Dollar Tree Terrarium with Cardstock Succulent
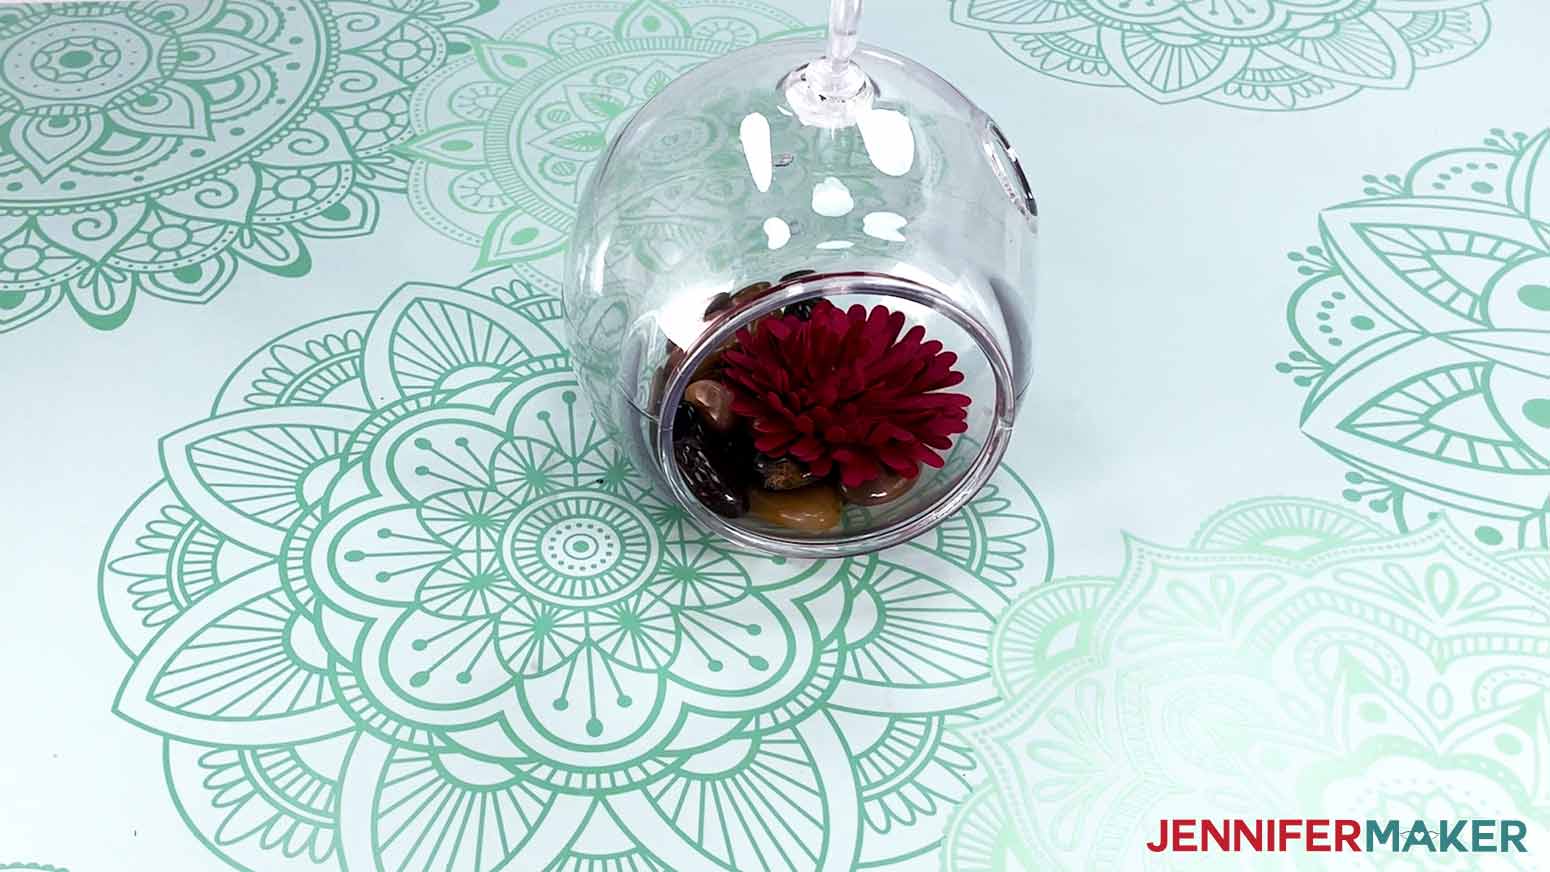
Finally, let’s decorate the globe terrarium from Dollar Tree with a cardstock succulent and some pebbles.
Remember, we don't need the little rectangle, so put that in your scrap pile. Then, use your scraper tool to shape the leaves upward, kind of like how you would use scissors to curl ribbon. Add hot glue to the center of the largest piece and stack each layer from largest to smallest. Make sure to stagger each layer as you add it to the top.
Continue until you have glued all the pieces together.
Before placing the succulent in the terrarium, put a small handful of pebbles in the base. That will help keep the succulent from sliding around.
Done? If you want to use another one of my succulent designs, the directions are all available in the original tutorial.
There are all kinds of cute objects you can put inside these Dollar Tree terrariums. A rolled paper flower would be nice, or even several small succulents. Just make sure the item will fit through the opening!
STEP 5: SHOW IT OFF
You have learned the basic skills to customize any Dollar Tree blank on my list! Here are the designs I made today and I can't wait to see your variations!
Notes
Fonts
Love Grows Here: Kite Script
Flowers and Garden: Barn Acres Farmhouse Serif
You are Loved: Falling Leaves Print and Amastery Font Duo
But First Coffee: Berson Dream Font Trio
Create Everyday: Hand lettered
Coffee Create Repeat: Hand lettered
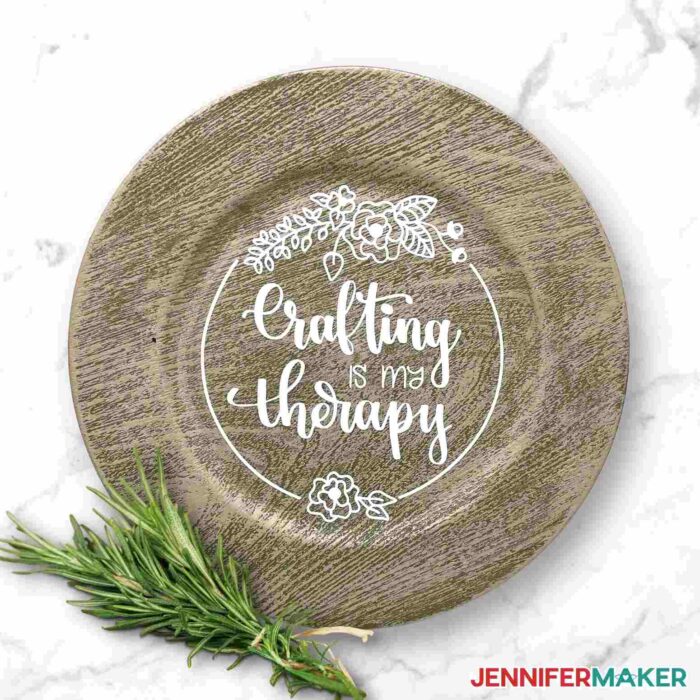
Crafting is my Therapy: Hand lettered and Quirkie
Recommended Design Dimensions for Blanks
8” x 10” Canvas Board: Designs up to 7” x 9”
Plastic Planters: Designs up to 4” tall
Plastic Tub: Design area about 4” x 8”
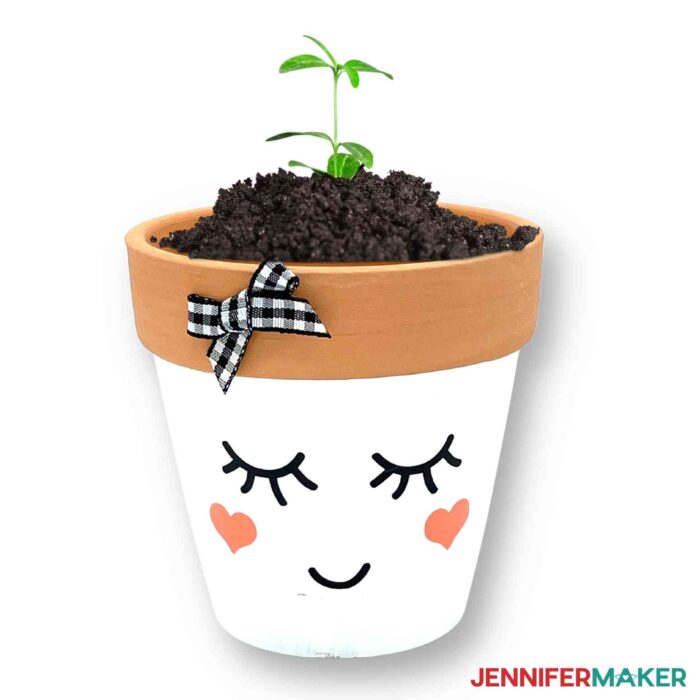
Mini Clay Pots: About 3.25” tall including rim
Wooden Tray: Inside design area 4.5” x 7”
Wooden Signs: Shapes vary, approximately 5” x 7”
Stuffed animals: Design approximately 2” wide and 1.5” tall
Mugs: Approximately 3” tall
Charger plate: Design area approximately 8” circle
Canning Jars: Approximately 3.25" tall and 10" in circumference
Terrariums: 2.5” - 3.5” inside
Vase: Approximately 7” tall
Answers to Your Questions About Dollar Tree Cricut Projects
Q: Can I change the design to make my own style of project?
Yes! You are welcome to create a new project from scratch or change up the text in my designs using the text tool for your own personal use.
Q: Can I sell these projects on my Etsy shop/online store?
I’m honored that you’d ask! Yes, you can sell completed projects using these designs (with limitations) — please read about licenses here so you know what you can and cannot do. If you use them, please share photos with us!
Q. Do I need a Cricut machine to make these projects?
No, you don’t! I’ve included files for other cutting machines like Brother and Silhouette equipment. I also offer printable PDFs so you can cut materials by hand.
Q. I don’t have a local Dollar Tree Store!
That’s ok! You can find many of these items on the Dollar Tree website. Or, visit your local dollar stores and see what they have in stock! You’re sure to find some similar items that will inspire you just as much.
Get my free SVG files to make my Dollar Tree Cricut Projects
I love seeing what you make with my designs and how you use them! Please share a photo of the Dollar Tree Cricut Projects you made in our Facebook group or tag me on social media with #jennifermaker.
Love,

Want to remember this? Save this Dollar Tree Cricut Projects tutorial to your favorite Pinterest Board!