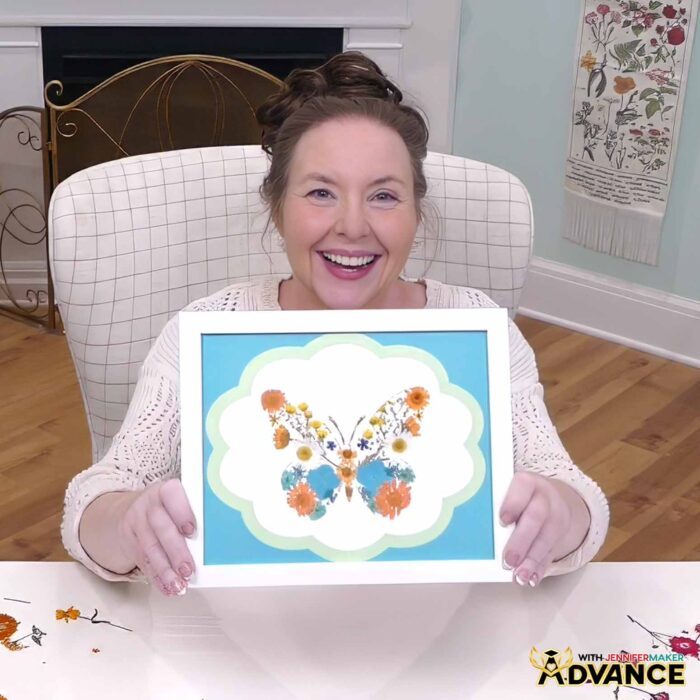
Learn how to create a lovely pressed flower silhouette!
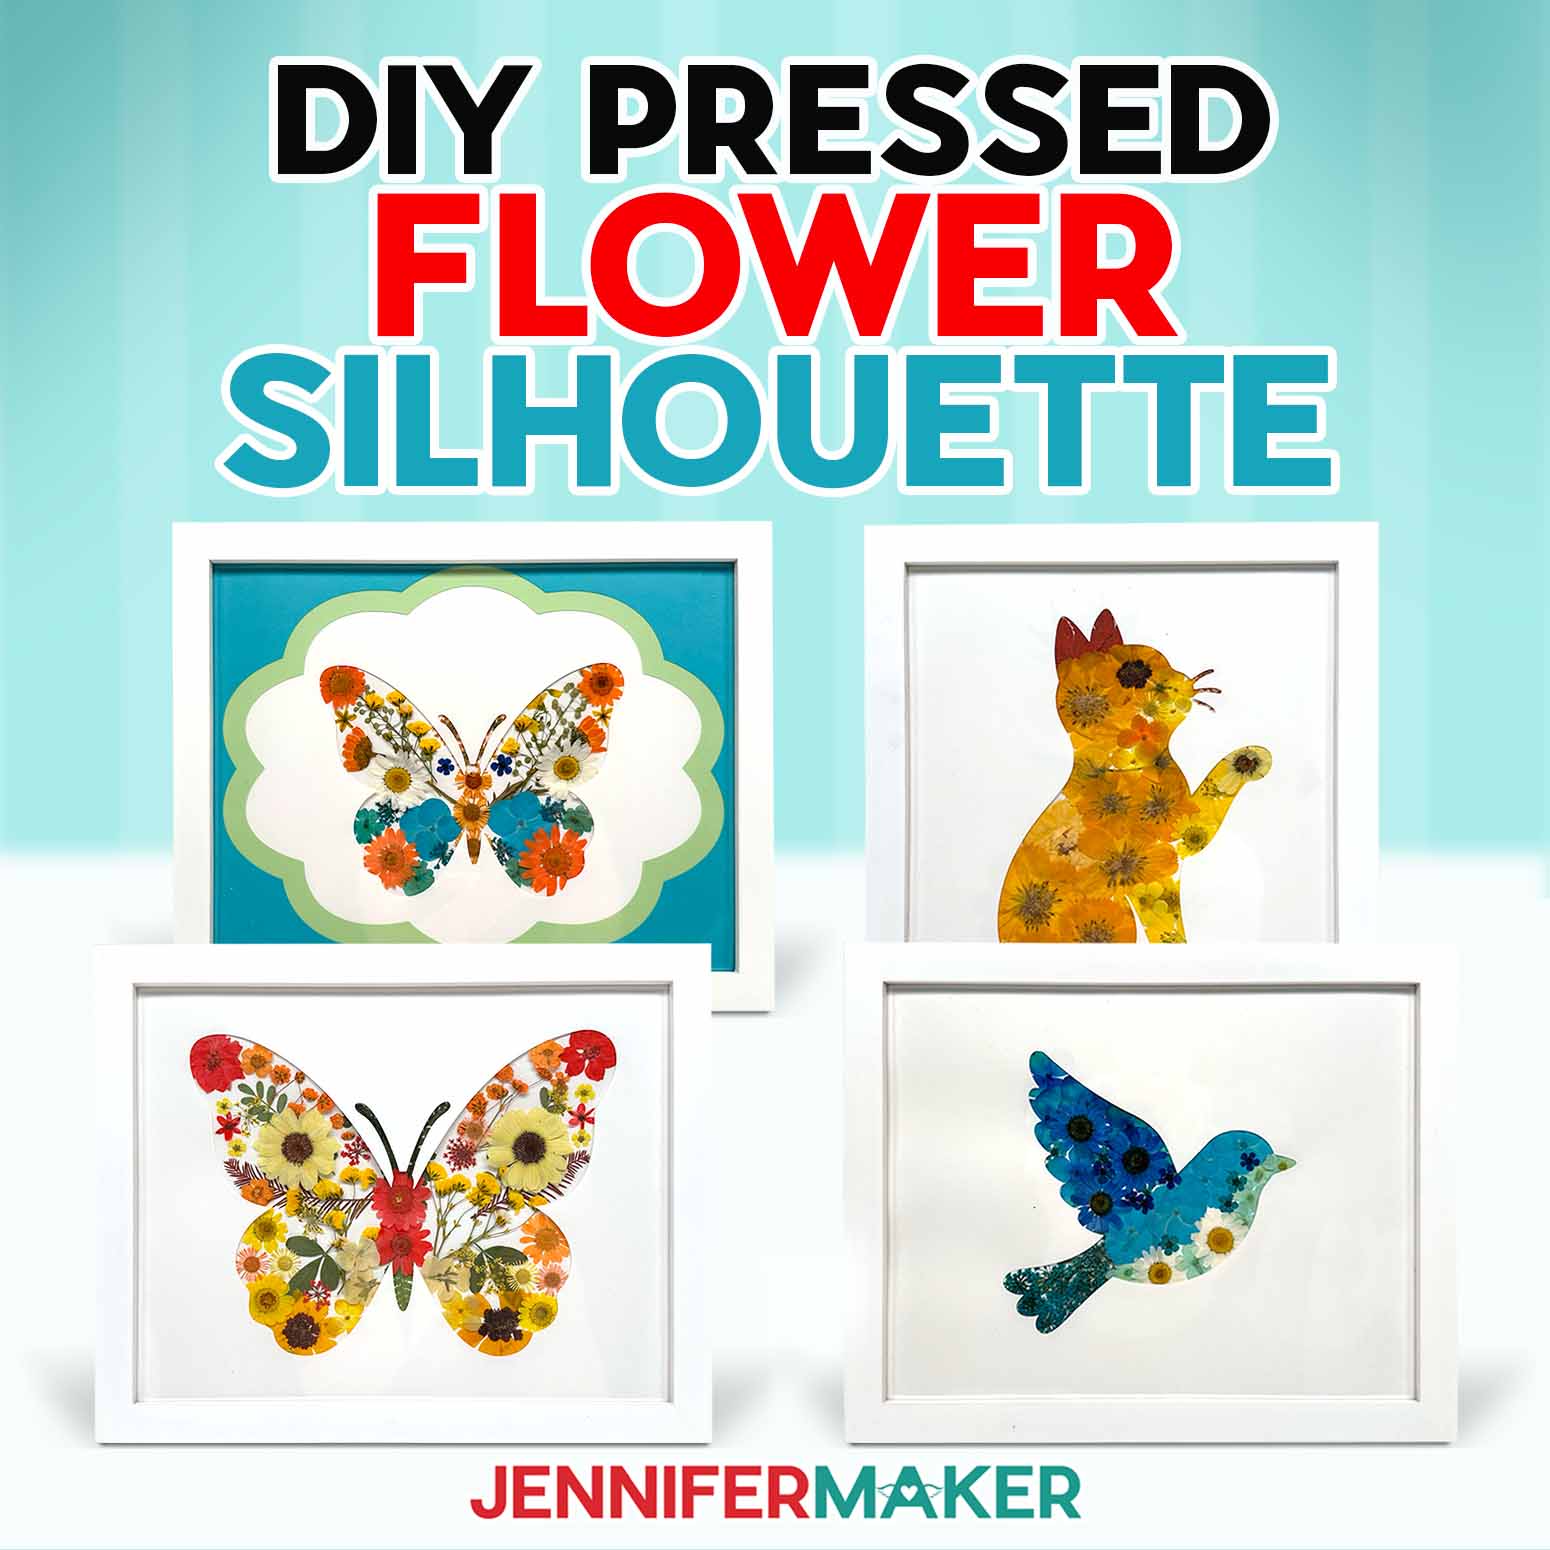
Pressed flower silhouette art is a DIY flower art project that turns dried petals, leaves, and blooms into framed wall art inside a clean silhouette shape. It’s a lovely way to preserve wedding flowers, save part of a special flower bouquet, or use fresh flowers from your garden to make meaningful decor for your home.
Watch the full step-by-step tutorial on how to make pressed flower silhouette art:

In this tutorial, I’ll show you how to make pressed flower art with real pressed flowers, cardstock, glue, and a frame. A Cricut or other cutting machine makes the silhouette window easier to cut, but the real focus is arranging the flowers so the shape stays clean and recognizable.
This project is a fun way to create:
- Framed flower art from wedding bouquet petals
- Handmade wall art for your home
- Small keepsakes in mini frames
- Statement pieces using pressed flowers
- Beginner-friendly DIY crafts with fresh flowers from your garden
If you’re starting with fresh flowers, press them first between sheets of wax paper inside a heavy book until they’re completely dry. If you’re preserving wedding flowers, try to press them within a few days of your event so the petals have the best chance of keeping their shape and color. A pressed flower handbook like this one I found can also help if you want to learn which flowers dry flatter and last best in frames.
The simple trick in this project is the silhouette guide. Instead of guessing where every petal should go, we’ll use the shape as a guide while arranging the flowers. The silhouette window helps hide rough edges, keeps the design crisp, and makes the finished flower art look polished.
As you arrange your pressed flowers, think about how their colors and shapes can help show off the subject instead of just filling the space. This is a fun way to “paint” with flowers while still keeping the overall shape clean and recognizable.
You can make one larger piece of wall art, create a set of mini frames, or turn meaningful wedding flowers into a lovely keepsake. Follow the written tutorial below, or watch the video tutorial to see exactly how the flower placement comes together step by step.
What Is Pressed Flower Silhouette Art?
Pressed flower silhouette art combines real pressed flowers with a cut paper shape to create framed flower art. The flowers are arranged on a backing layer, then a silhouette window is placed over the top to create a clean outline.
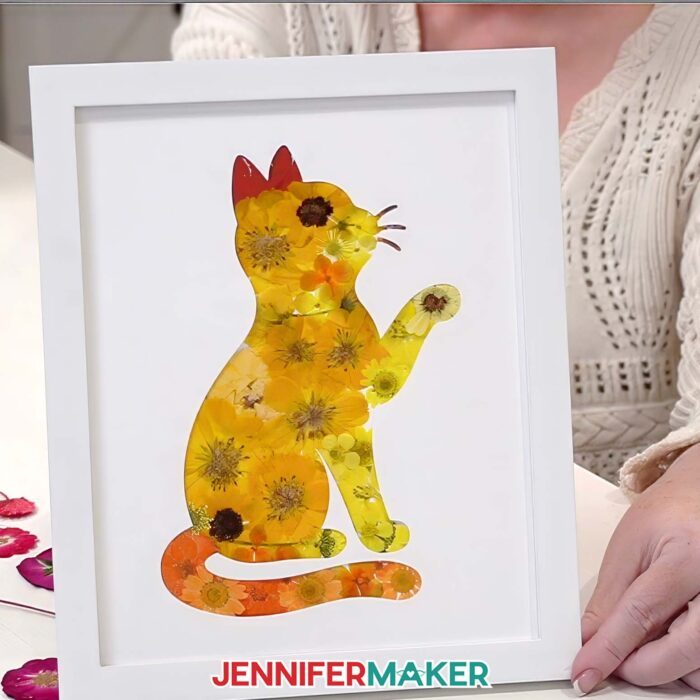
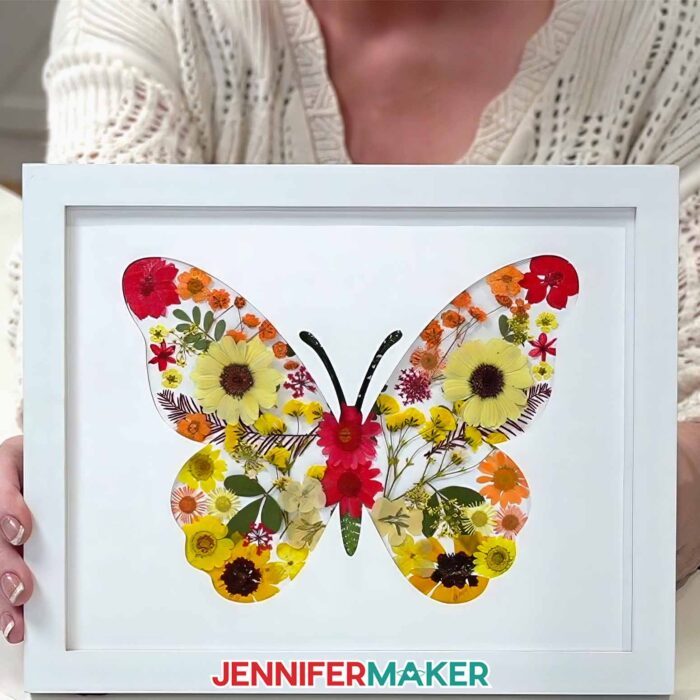
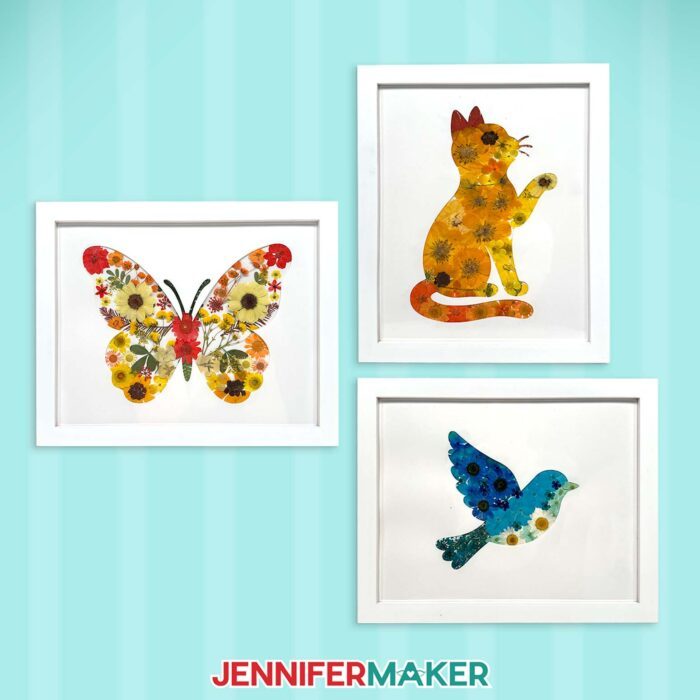
The silhouette can be a bird, cat, or butterfly if you use my free downloads, or you can DIY your own silhouette with a heart, monogram, or another meaningful shape. The flowers add color and texture, while the window keeps the finished design neat.
This makes it a fun way to create flower art even if you’re not sure where to place every petal at first.
Can You Use Wedding Flowers for Pressed Flower Art?
Yes, you can use wedding flowers for pressed flower art. This project is a lovely way to preserve part of a wedding bouquet and turn it into framed wall art. Definitely test your pressing process before trying it on such special flowers.
For the best results, press the flowers within a few days of your event while the blooms are still fresh. Smaller petals, thin leaves, tiny flowers, and delicate greenery usually work better than thick flower centers because they dry flatter.
Do I Need a Cricut to Make Pressed Flower Wall Art?
A Cricut makes this pressed flower silhouette project easier because it can cut the window and guide layers cleanly, but you can also use printable files and cut the pieces by hand.
The Cricut is helpful for getting a crisp silhouette shape, especially if your design has detailed edges. But the most important part of this project is not the machine. It’s learning how to arrange the pressed flowers so the finished shape looks balanced and clean.
Customize Your Pressed Flower Silhouette Designs in ADVANCE
Want to make your design look more polished? Check out the ADVANCE tutorial linked with this project. Inside ADVANCE with JenniferMaker, I show you how to create layered frames to complement your work step by step. Learn more about ADVANCE with JenniferMaker here!
Get the Free Pressed Flower Silhouette Designs
I’ve created free pressed flower silhouette designs you can use to make this project easier. The files include designs for cutting with a Cricut or other cutting machine, plus printable versions if you prefer to cut by hand.
The written tutorial below will show you how to prepare the pieces, arrange the flowers, glue everything in place, and frame your finished flower art. You can also follow along with the video tutorial to see the full process in action.
Ready to make your own pressed flower silhouette art? Let’s get started!
Do you want to learn how to make a pressed flower silhouette? Let me show you how fun and easy it is! This post contains some affiliate links for your convenience (which means if you make a purchase after clicking a link I will earn a small commission but it won’t cost you a penny more)! Read my full disclosure policy.
Materials to Make a Pressed Flower Silhouette
View my Amazon shopping list with the exact items I used.
- Dried Pressed Flowers (I used yellow, orange, red, and blue)
- Dried Pressed Leaves
- Two (2) Sheets of 8.5″ x 11″ or 12″ x 12″ 65 lb. Solid Core White Cardstock
- One (1) 8″ x 10″ White Frame
- Cricut Green StandardGrip Machine Mat 12″ x 12″
- Mod Podge Matte -AND-
- Foam Brush (for Mod Podge) -OR-
- Craft Glue (I used Bearly Art Precision Glue)
- Cricut Fine Point Pen in a very light color (I used “Honeysuckle”)
- Brayer
- Weeding Tool
- Tweezers
- Measuring Tape
- Design #817 (My free SVG/DXF/PDF design files are available in my free library – get the password by filling out the form at the bottom of this page)

How to Make a Pressed Flower Silhouette

Pressed Flower Silhouette
Learn how to make a Pressed Flower Silhouette!
Materials
- Yellow Dried Pressed Flowers -OR-
- Orange Dried Pressed Flowers -OR-
- Red Dried Pressed Flowers -OR-
- Blue Dried Pressed Flowers -OR-
- Dried Pressed Leaves
- Two (2) Sheets of 8.5” x 11” or 12" x 12" 65 lb. White Cardstock
- One (1) 8" x 10" White Frame
- Design #817 (My free SVG/PDF/DXF design files are available in my free resource library - get the password by filling out the form at the bottom of this page)
Tools
- A way to cut your materials - I’m using the Cricut Maker 4, but you can use any Maker Series machine, a Cricut Explore Series machine, the Cricut Venture, or a Cricut Joy Series machine.
- Cricut Green StandardGrip Machine Mat 12" x 12"
- Mod Podge Matte -AND-
- Foam Brush (for Mod Podge) -OR-
- Craft Glue (I used Bearly Art Precision Glue)
- Brayer
- Cricut Fine Point Pen (I used Honeysuckle)
- Weeding Tool
- Tweezers
- Measuring Tape
Instructions
STEP 1: GET MY FREE PRESSED FLOWER SILHOUETTE DESIGNS
Download my Pressed Flower Silhouette files from my free library – look for Design #817. Alternatively, you can use the Save This Project form near the top of this post and the design link will be emailed to you.
In the SVG folder, you’ll find three silhouette shapes.
There is also a DXF folder with cut files, and a PDF folder with versions you can print and cut by hand.
TIP: If you’re not sure how to upload, go to jennifermaker.com/svgs to learn how to unzip and upload SVG files.
STEP 2: PREPARE AND CUT YOUR SILHOUETTE DESIGN
CRICUT DESIGN SPACE
- In Cricut Design Space, open a blank Canvas.
NOTE: If you’re new to using Cricut Design Space, go to cricutkickoff.com for my introductory tutorial on Design Space basics. - Click “Upload” and then “Upload Image.”
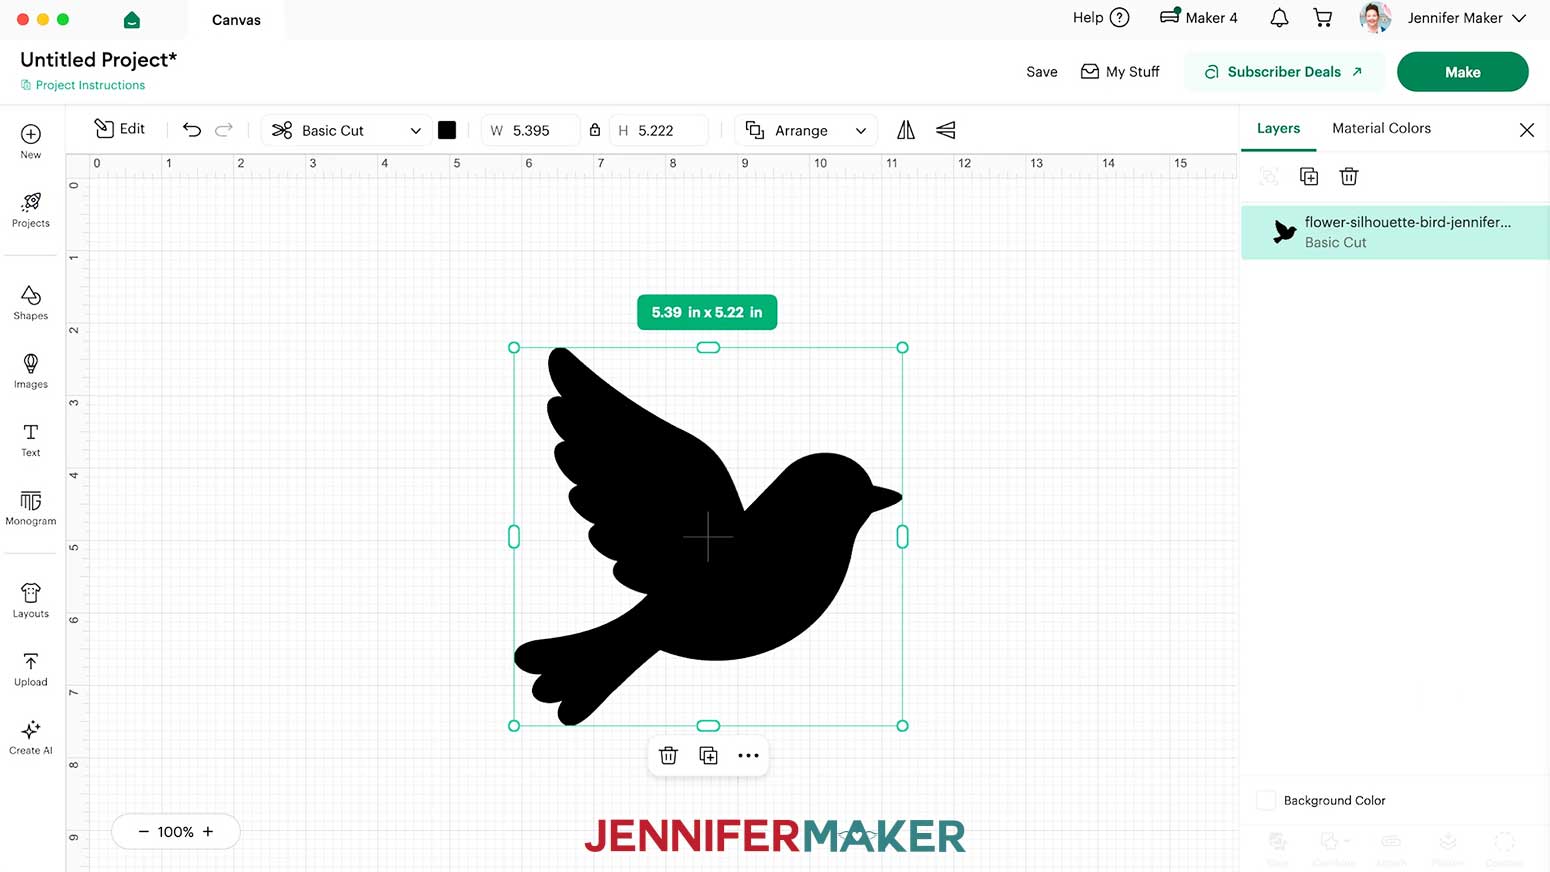
- Click “Browse” and select the silhouette SVG file you want to use.
NOTE: I’ll demonstrate with the bird. - Click “Open,” and then “Continue.”
- Click “Upload” to add the silhouette design to your Canvas.

- Click “Save” and give your project a name so you can find it easily.
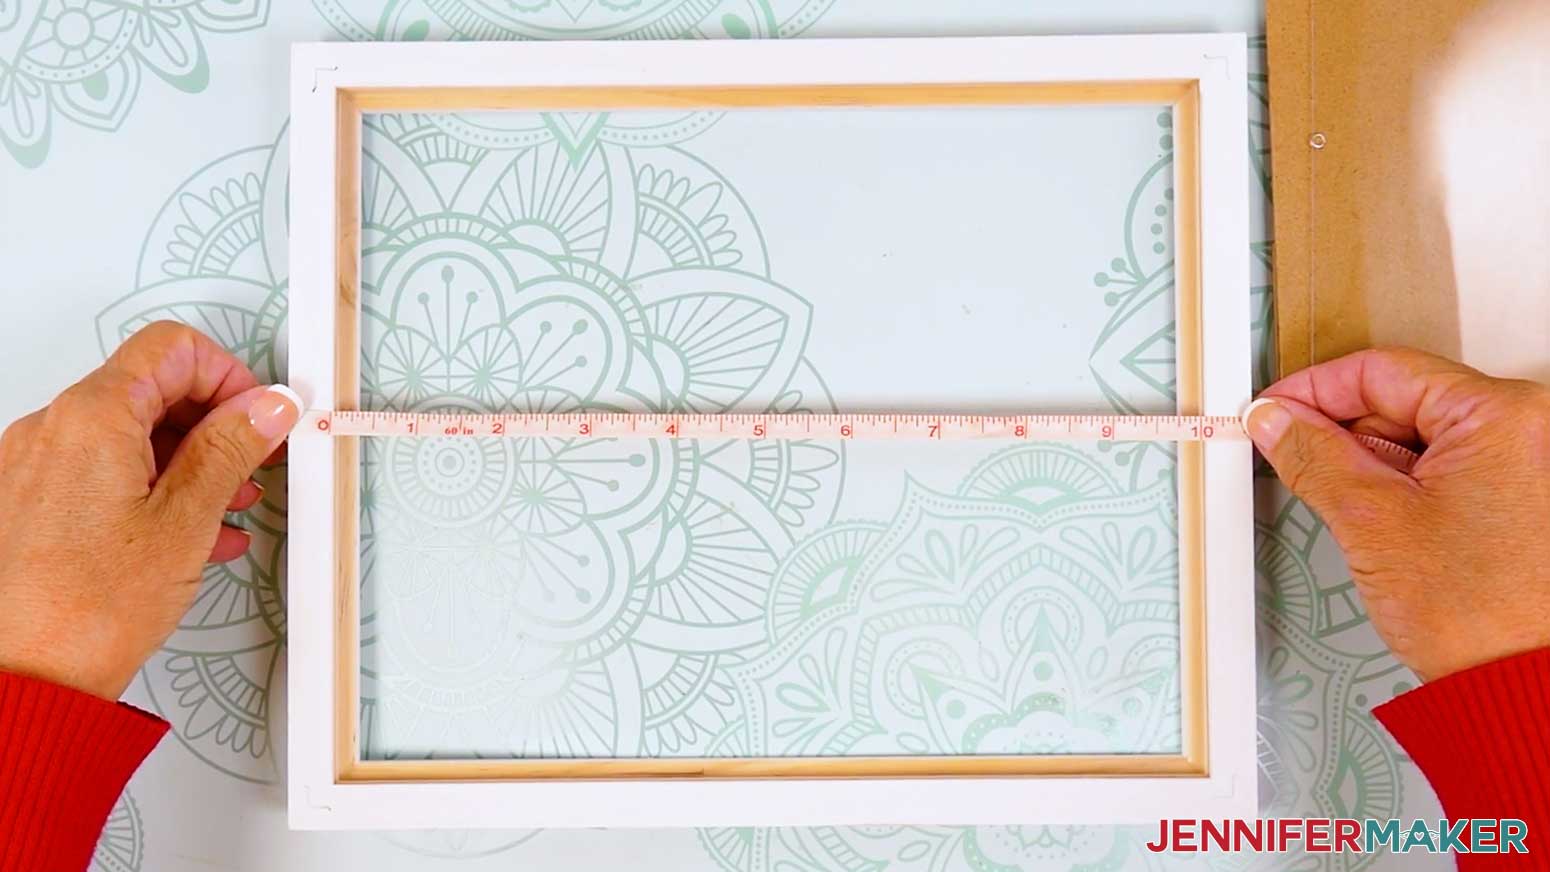
- Open your frame and measure the height and width of the space for your design.
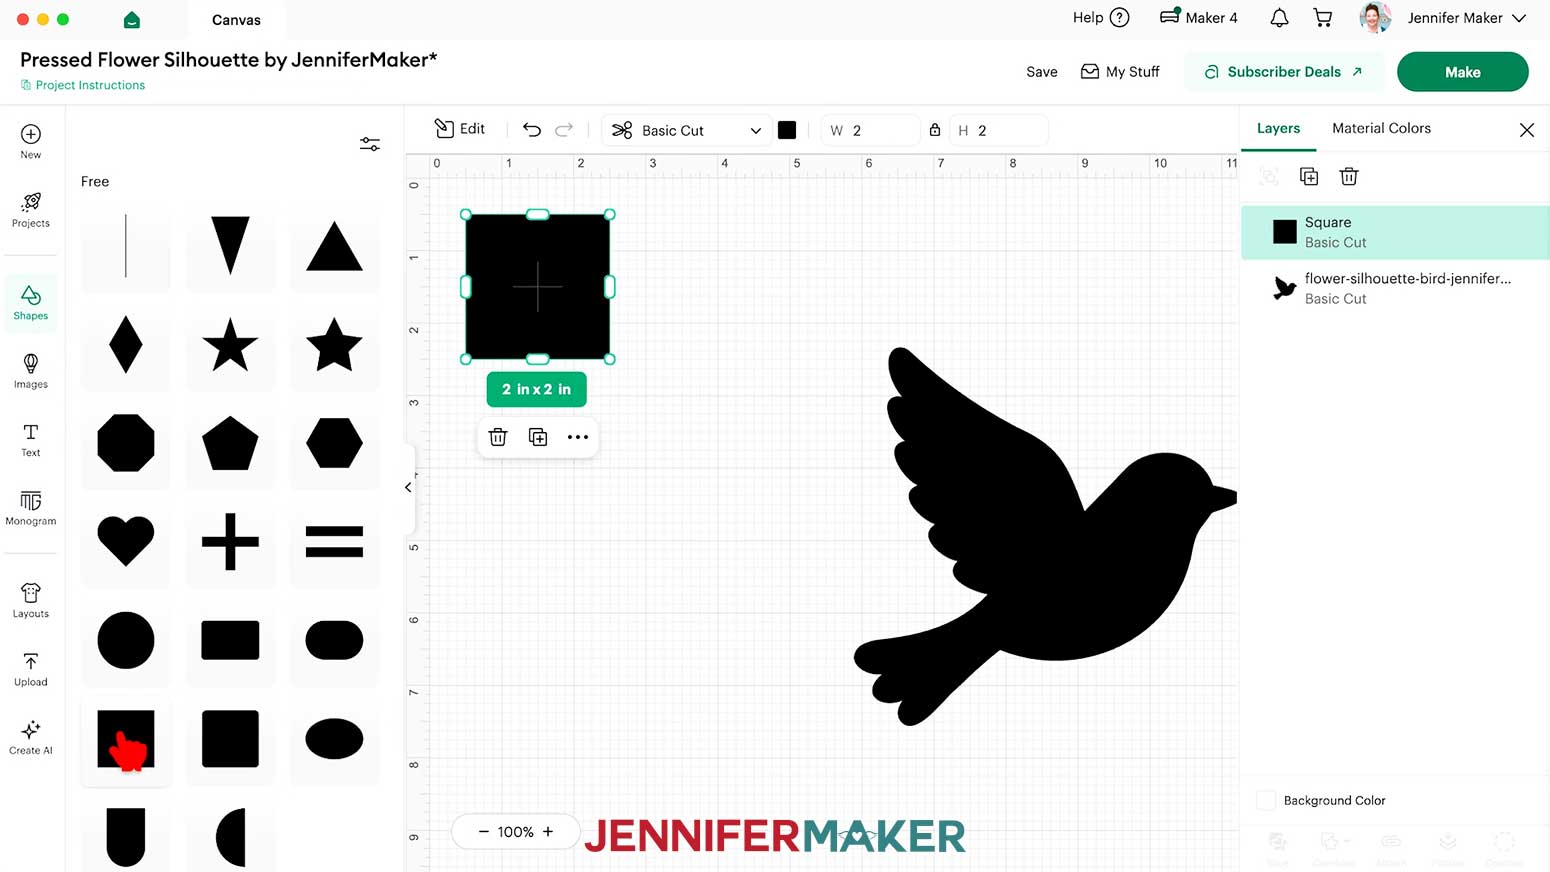
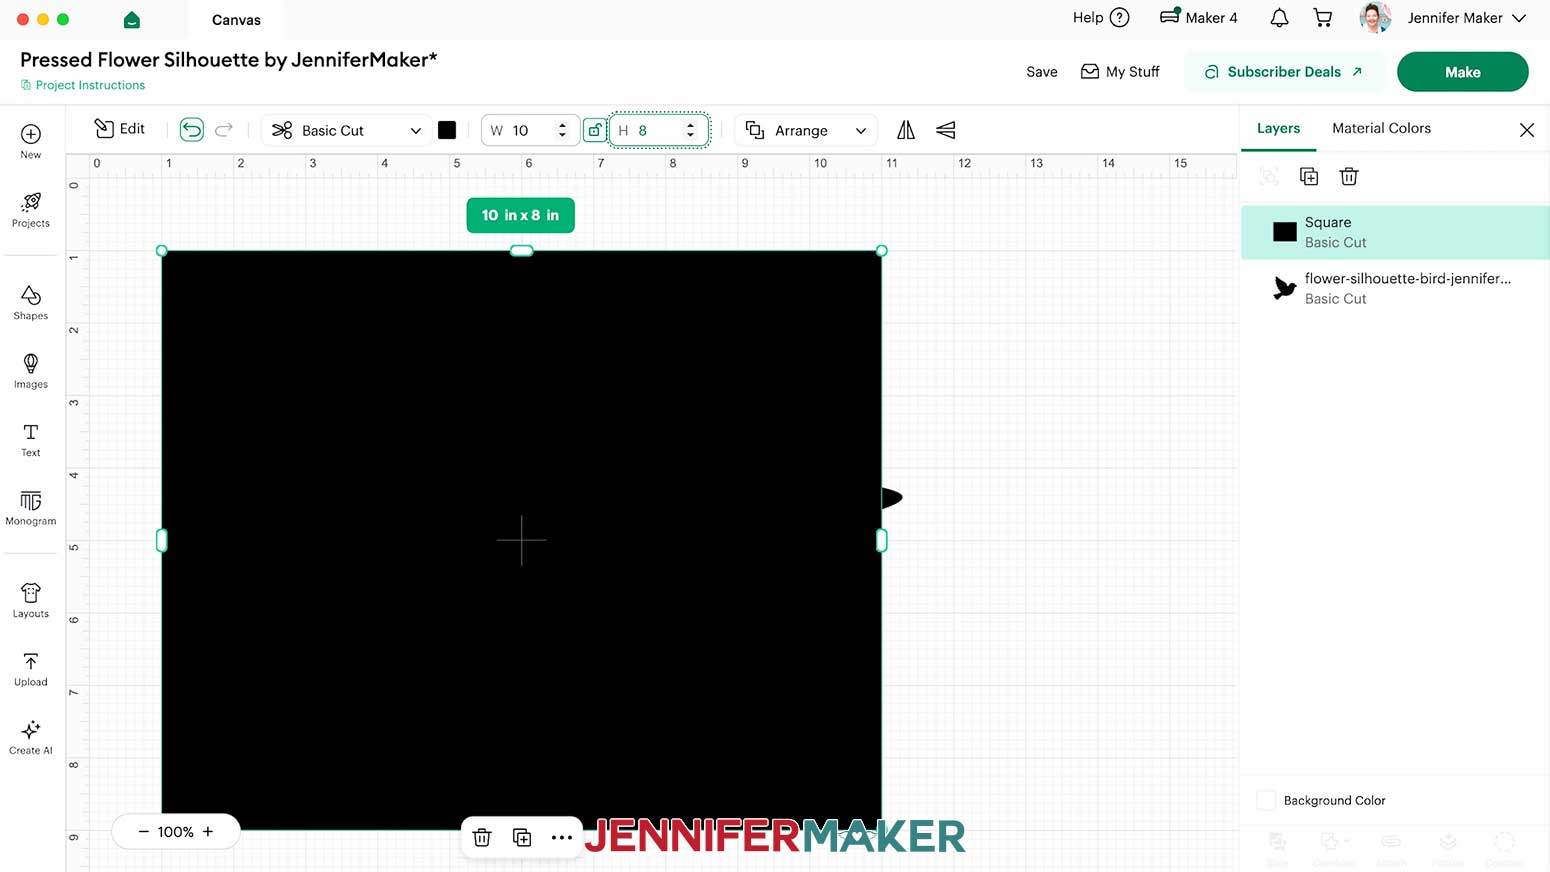
- To make the silhouette into a frame, click “Shapes” and add a free square to the Canvas.
- Click the shape’s lock icon to unlock its proportions, then change its measurements to match those of your frame’s opening.
NOTE: I’ll make mine 10” wide by 8” high to match the frame in my supply list.
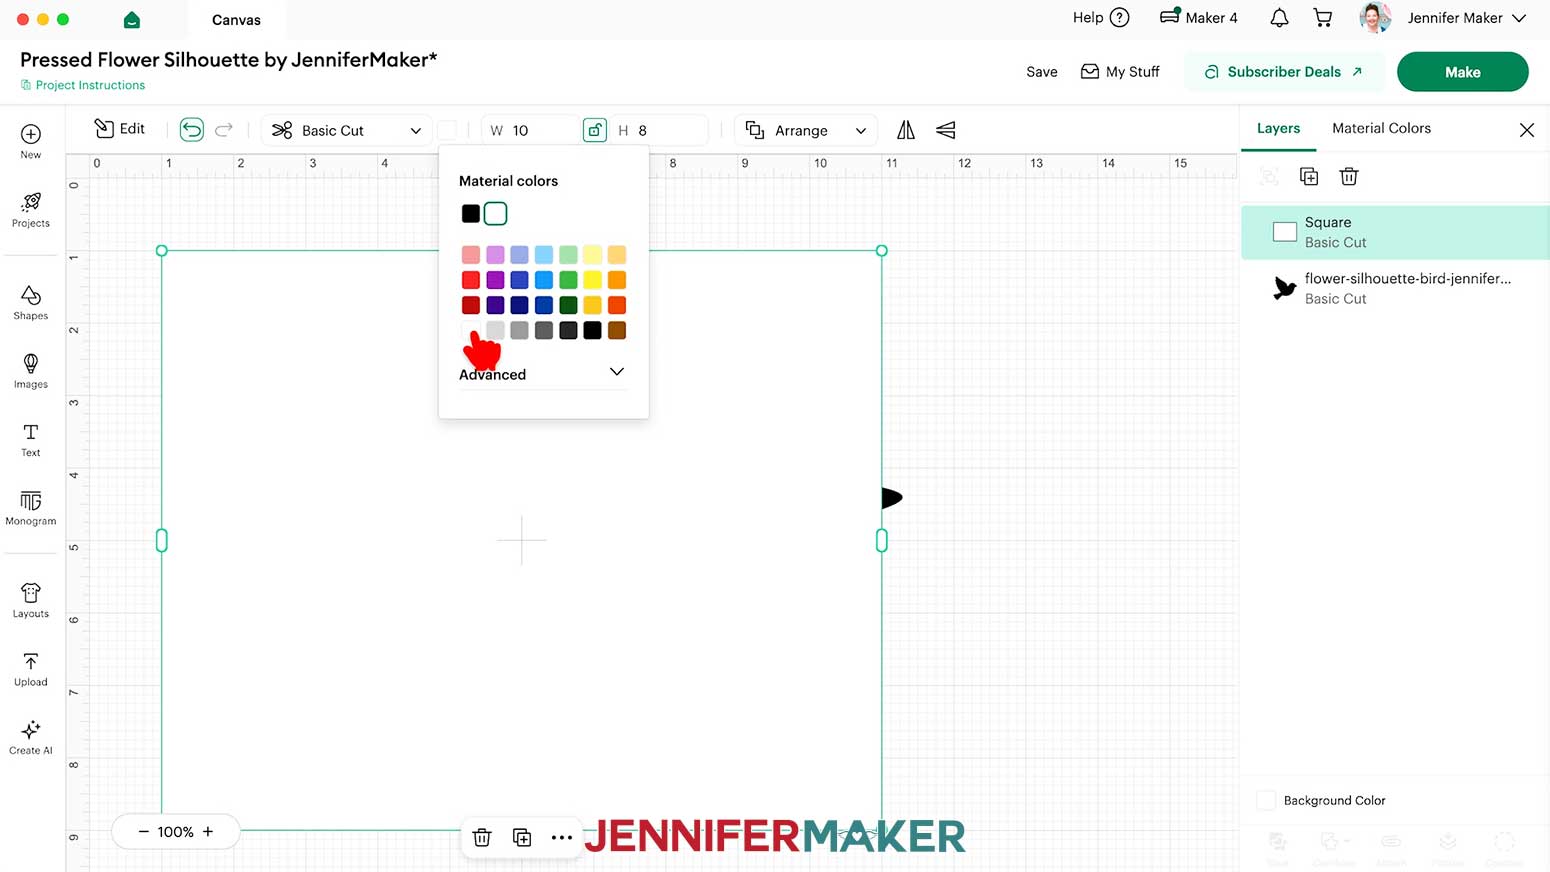
TIP: Remember to match the orientation of your design. - Use the Color Box at the top to set the shape to white so the silhouette will stand out against it.
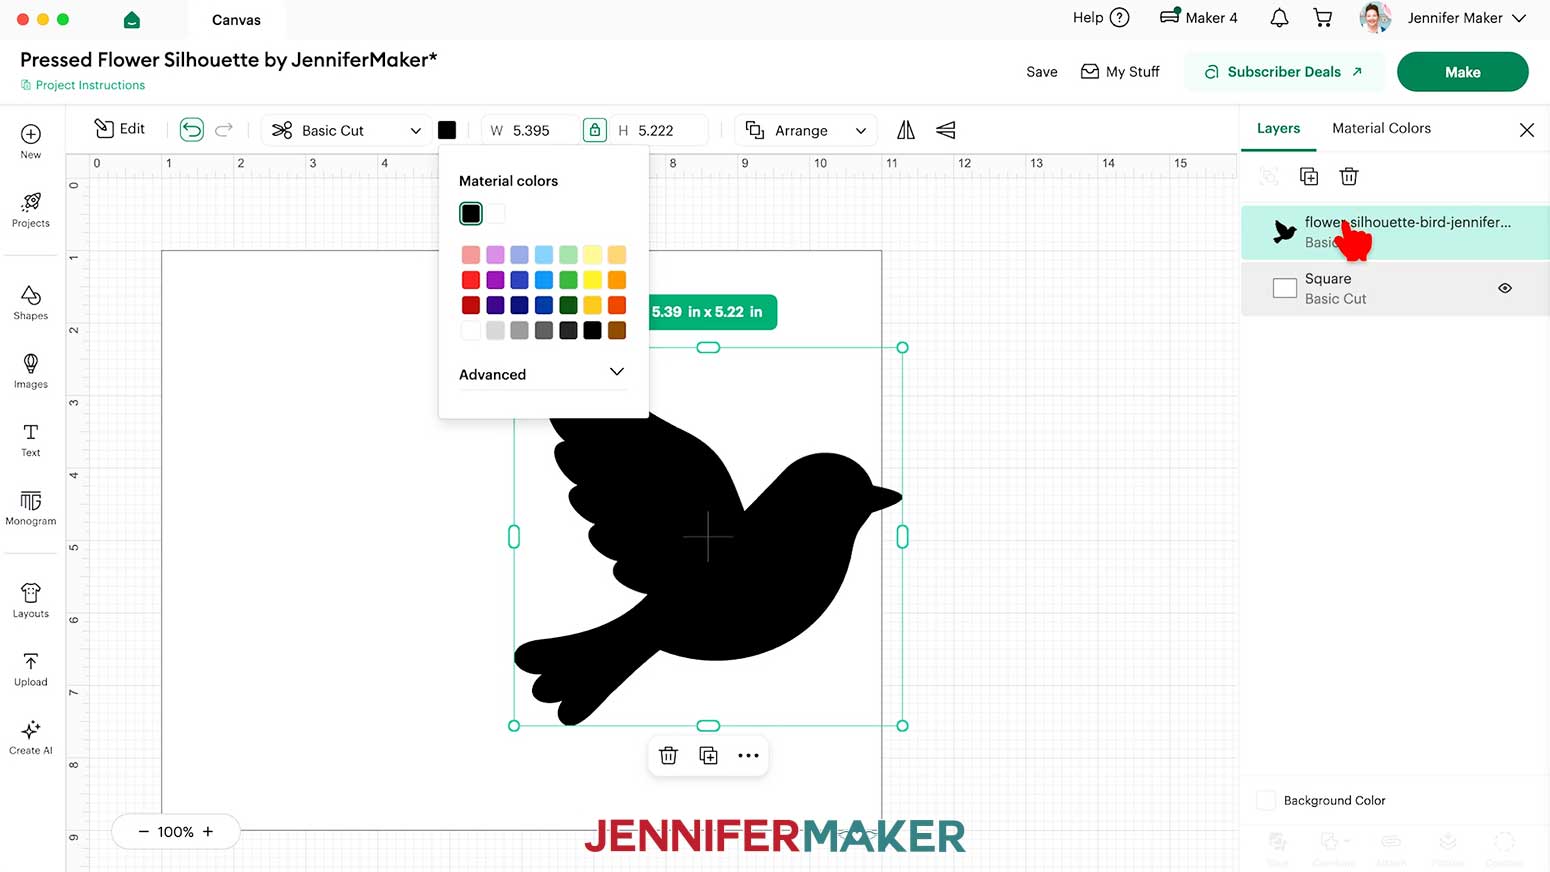
- In the Layers Panel, drag the silhouette above the shape so it’s on top and in front of the background.
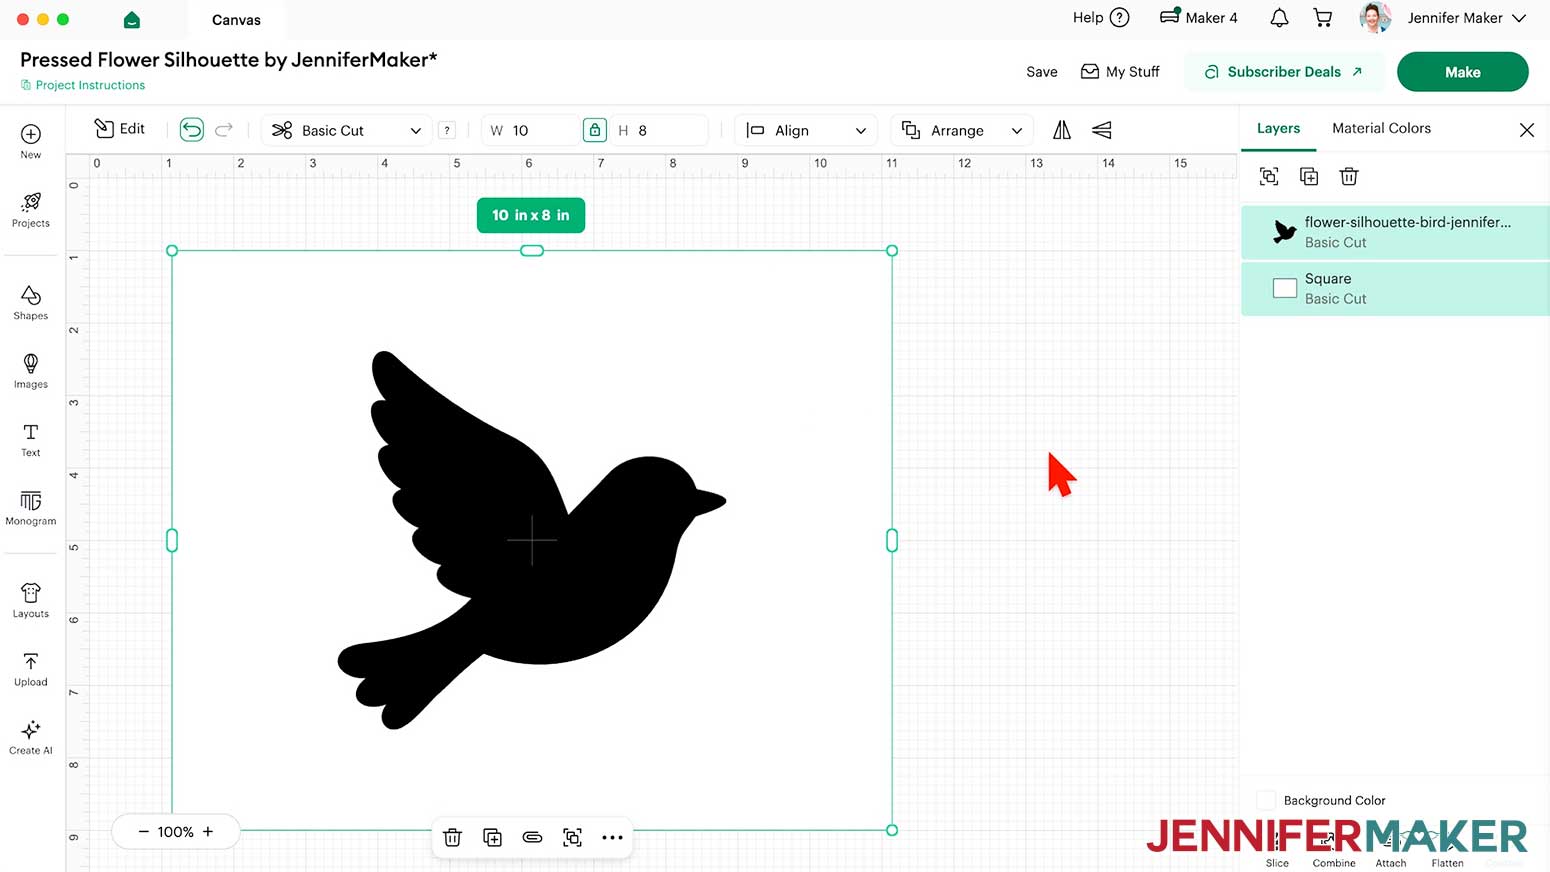
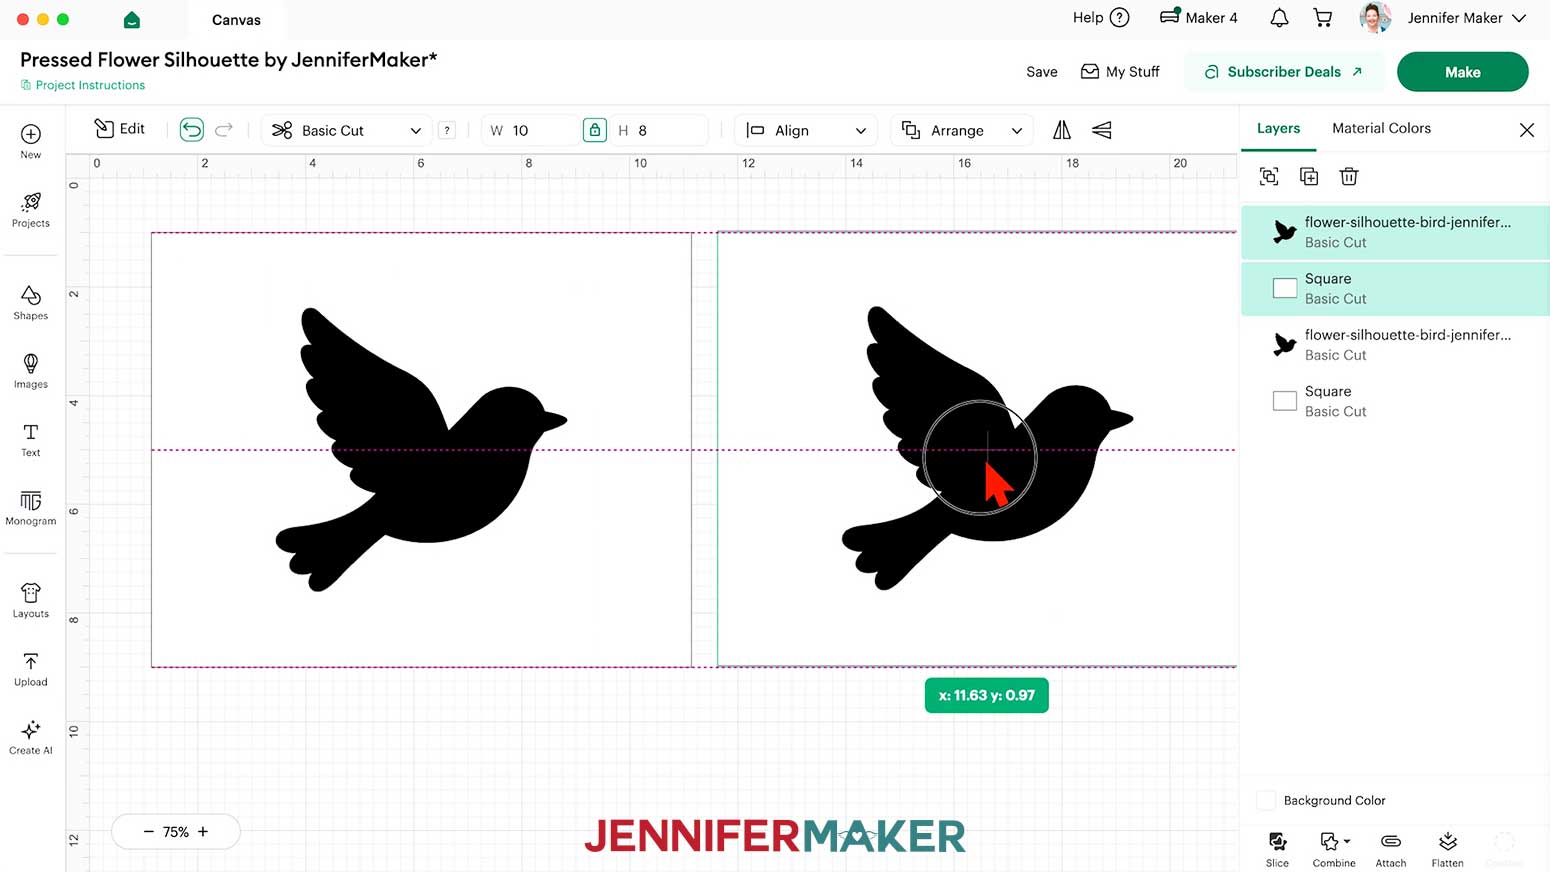
- Position the silhouette where you want it on the shape.
NOTE: I’ll select both elements and use “Align” and “Center” to put the bird in the middle for this design, but off-center is better for some designs.
TIP: If you are using a different size frame, you may want to resize the silhouette. Just remember to keep the lock icon closed to maintain its proportions. - Once the composition is correct, select both the silhouette and the shape, then click “Duplicate” and drag the copy to the side.
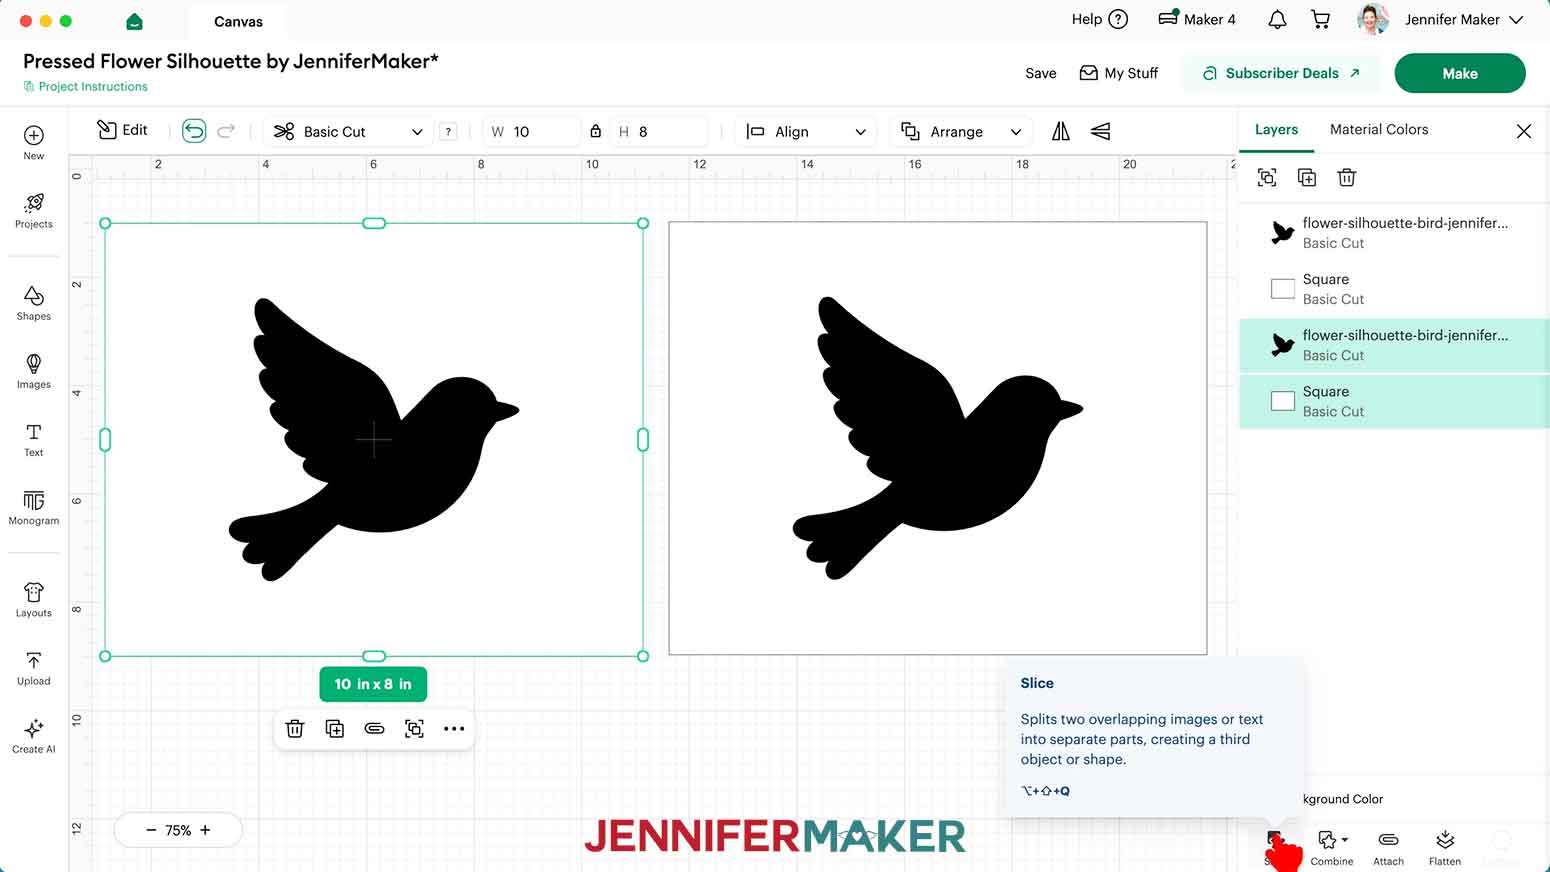
NOTE: We’ll use one layer for the cut outline and another as a drawn flower placement guide. - Select both layers of the original silhouette and shape, then click “Slice.”
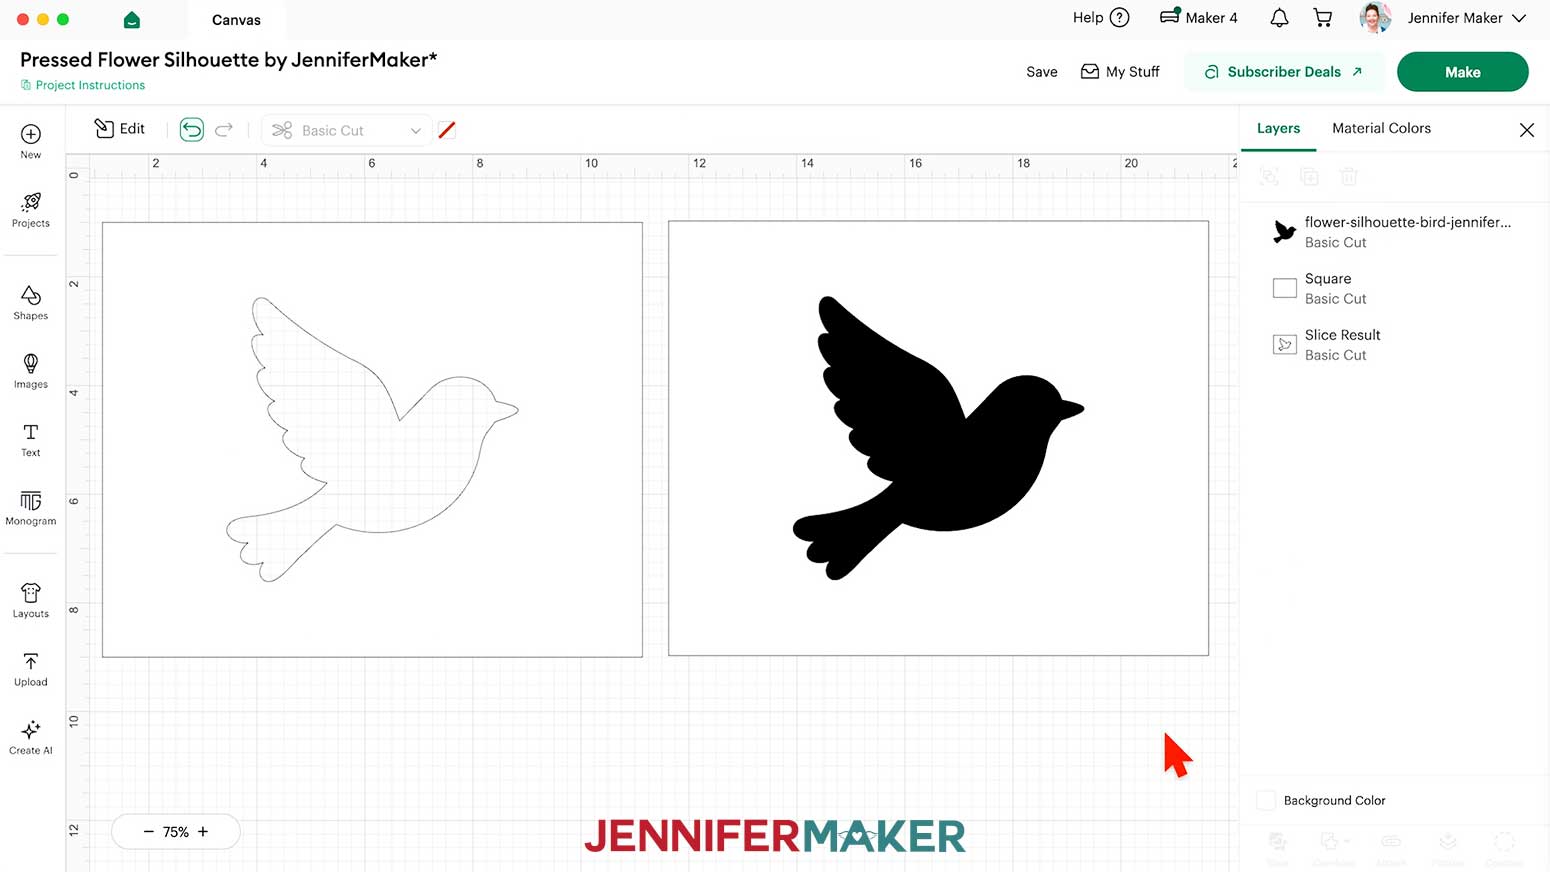
- Delete the “Slice Results” that look like just the silhouette, leaving the shape with the silhouette cut out.
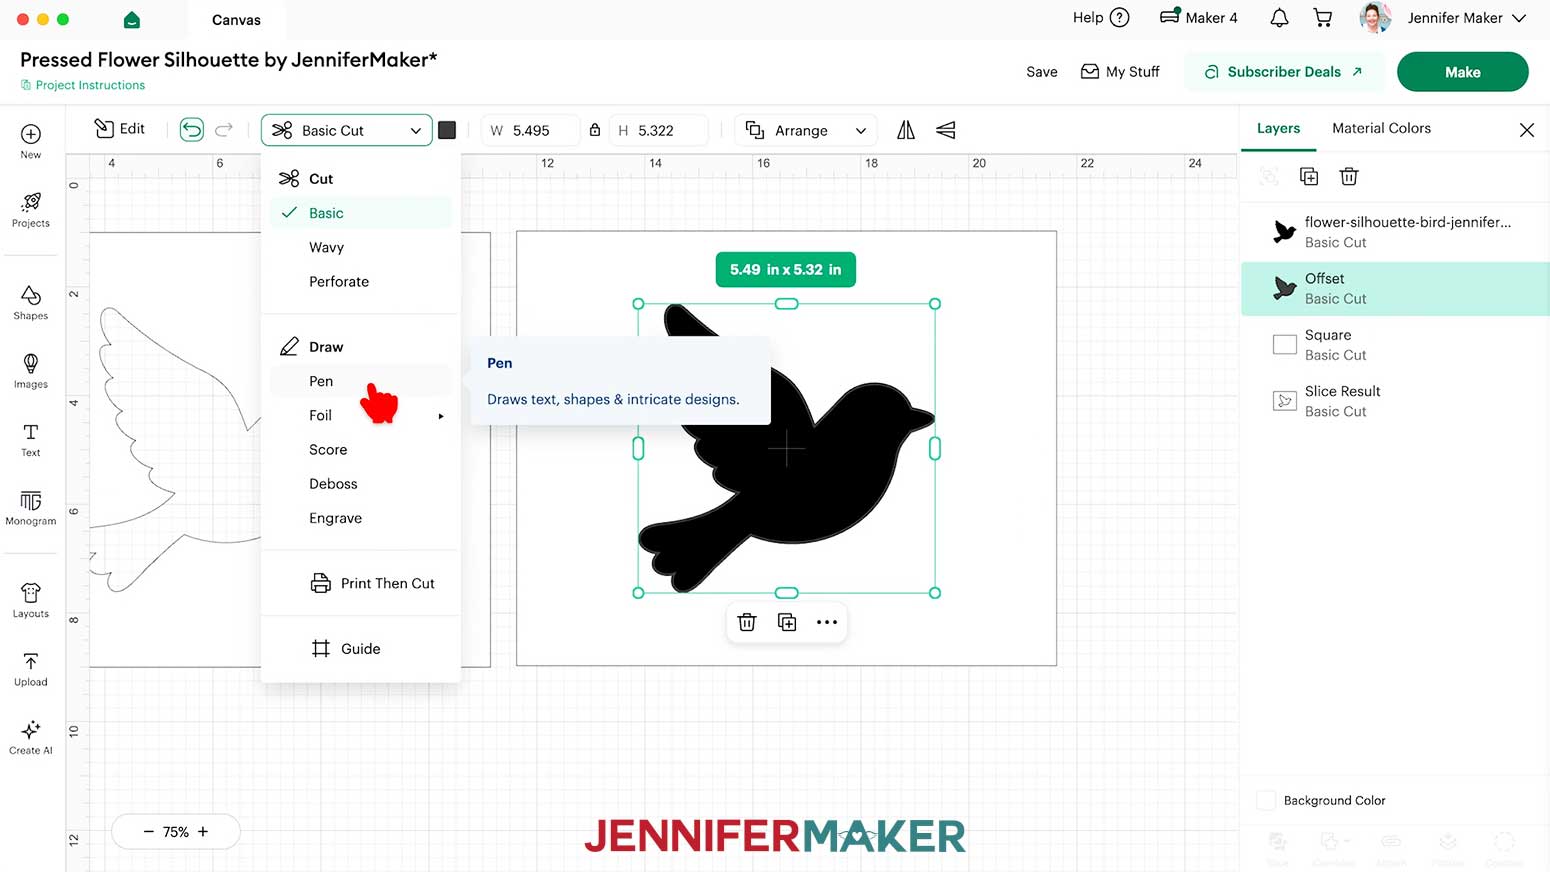
- To create the drawn flower guide on the background layer, select the silhouette in the copied design, then click “Effects” and “Offset.”
- Set the Distance to “0.05” and click in the “Offset” panel to make sure the blue preview line is outside the silhouette.
- Click “Apply.”
NOTE: The new “Offset” layer might be a similar color to the original silhouette, so the results could be hard to see on the Canvas at first. - In the Layers Panel, select the “Offset” layer.
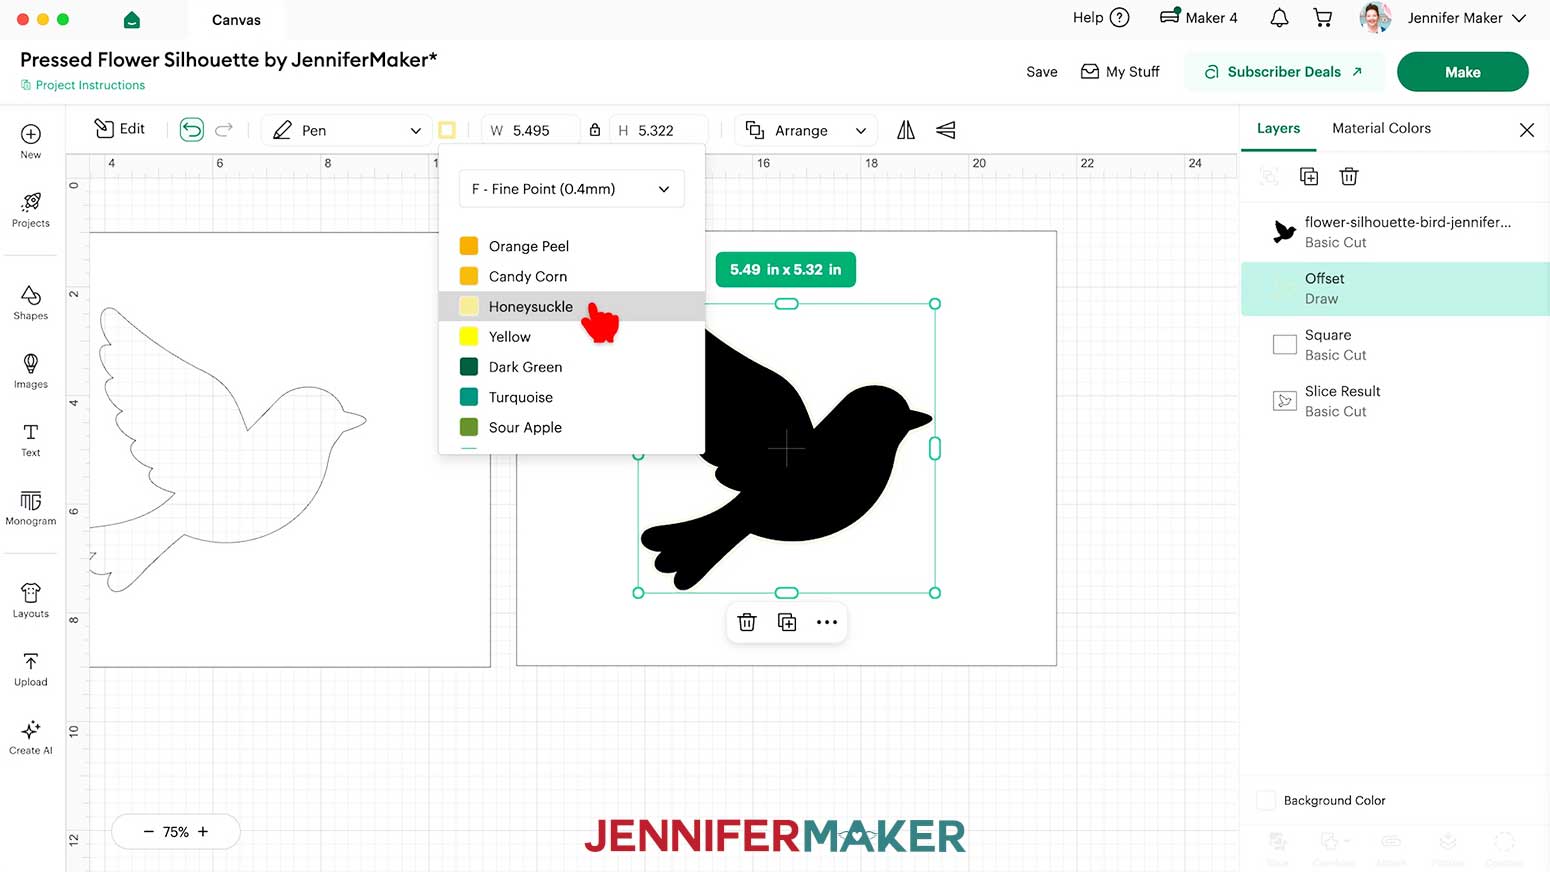
- In the "Basic Cut" operation menu, change the “Offset” layer to “Pen” so the Cricut will not cut this shape.
- With the “Pen” layer still selected, click the Color Box and set it to the “F - Fine Point (0.4mm)” in a light color option you have available.
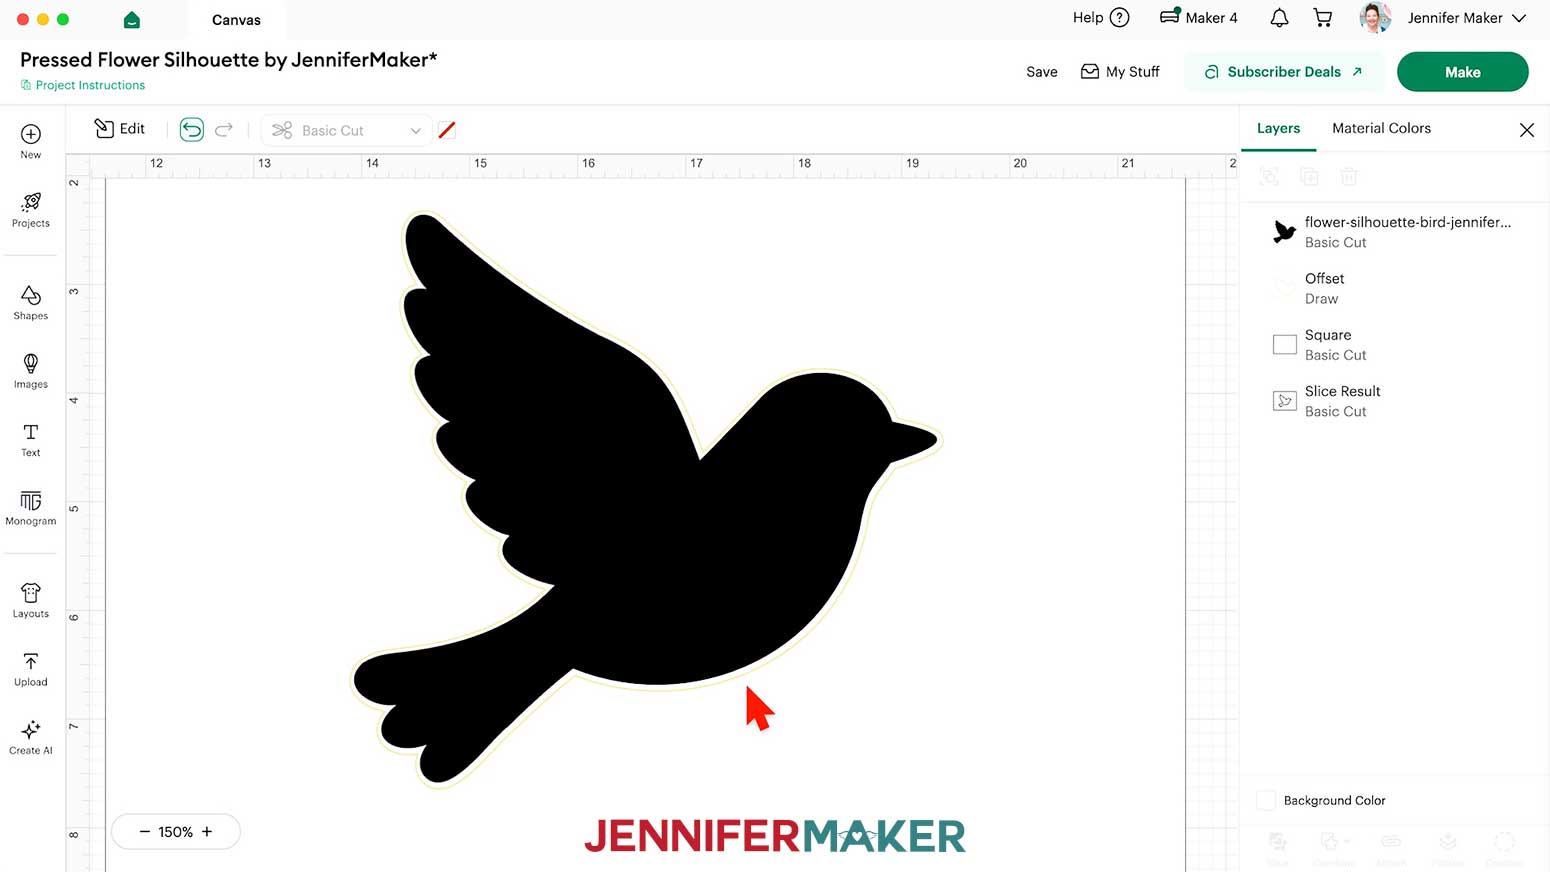
NOTE: I used “Honeysuckle.” - Confirm that the flower guide will be slightly outside the cut silhouette shape.
- In the Layers Panel, delete the black “Basic Cut” silhouette layer.
- If you want to cut your layers on different colors, click the matching “Basic Cut” layer, then change the color using the Color Box.
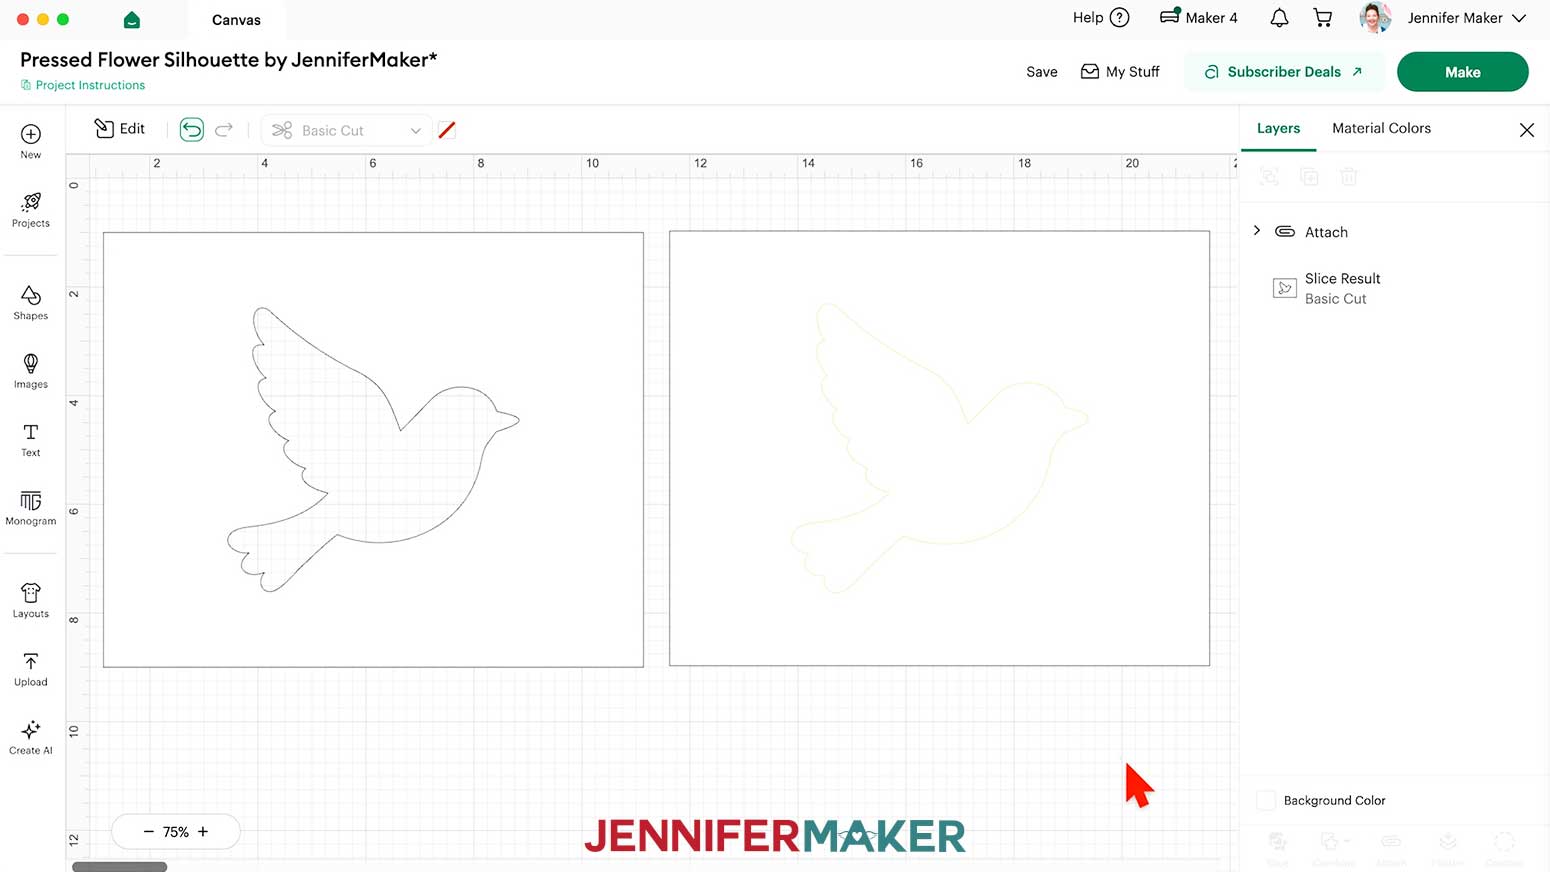
NOTE: I’ll cut both layers from white cardstock, so I won’t change anything. - Select the flower guide and its white background shape together, then click “Attach” to keep the operations together.
- Your project is ready to cut!


CUTTING
- Make sure the correct machine is selected in the top right.
- Click “Make.”
- On the Prepare screen, make sure the correct Material Size is selected for your materials.
NOTE: I’m using “12 in x 12 in” white cardstock for everything.
NOTE: If you see a mat with just lines, your “Pen” layer may not have attached correctly, so click on “Cancel” to return to the Canvas to check and adjust as needed. - Select the first mat so it loads first on the next screen, and click “Continue.”
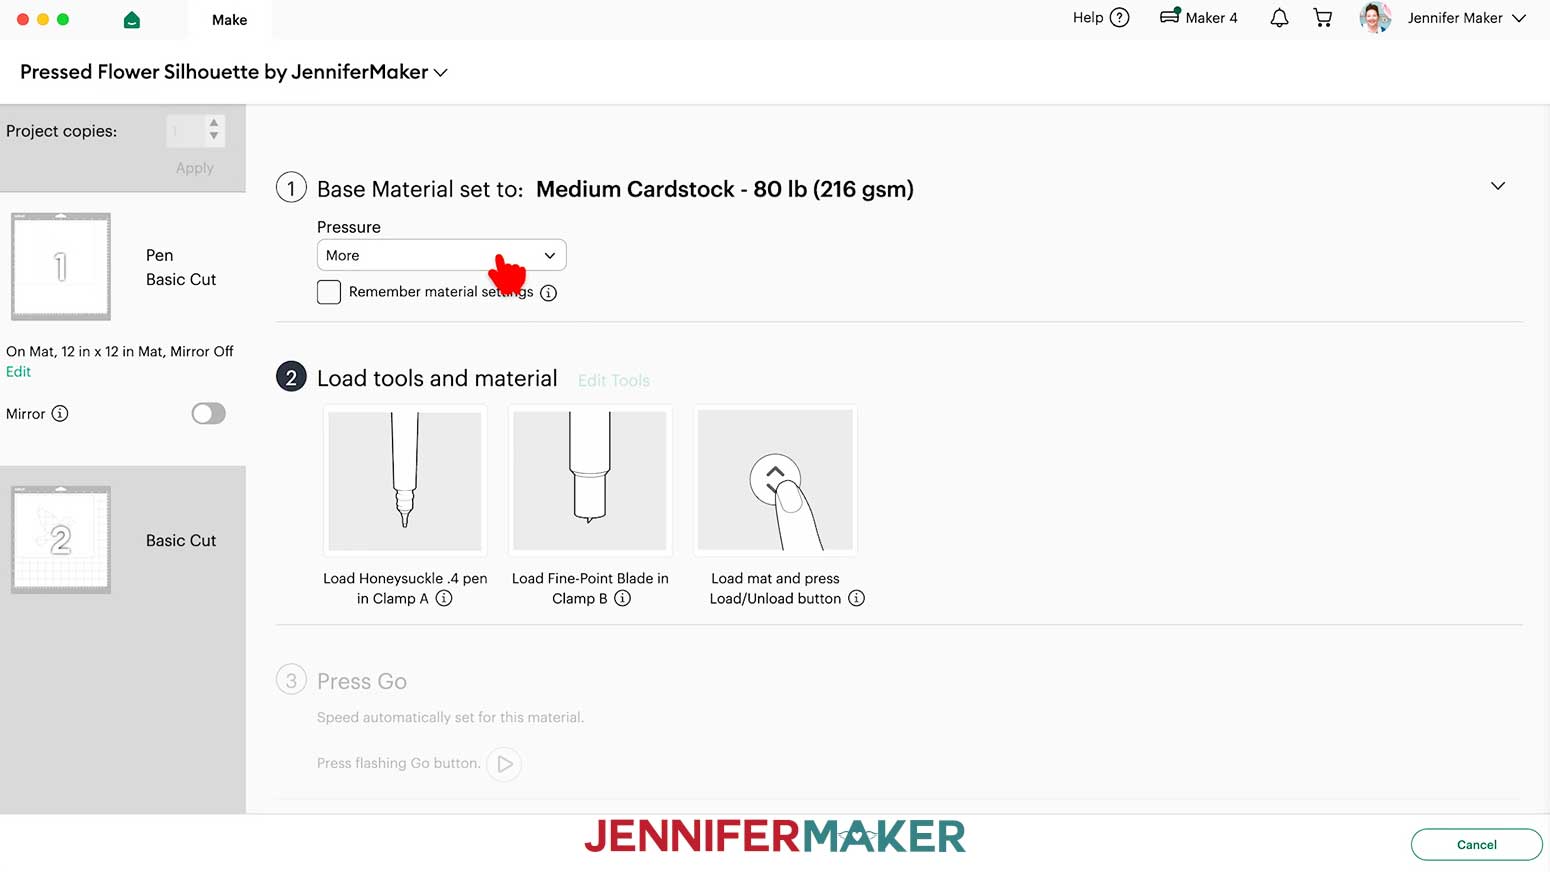
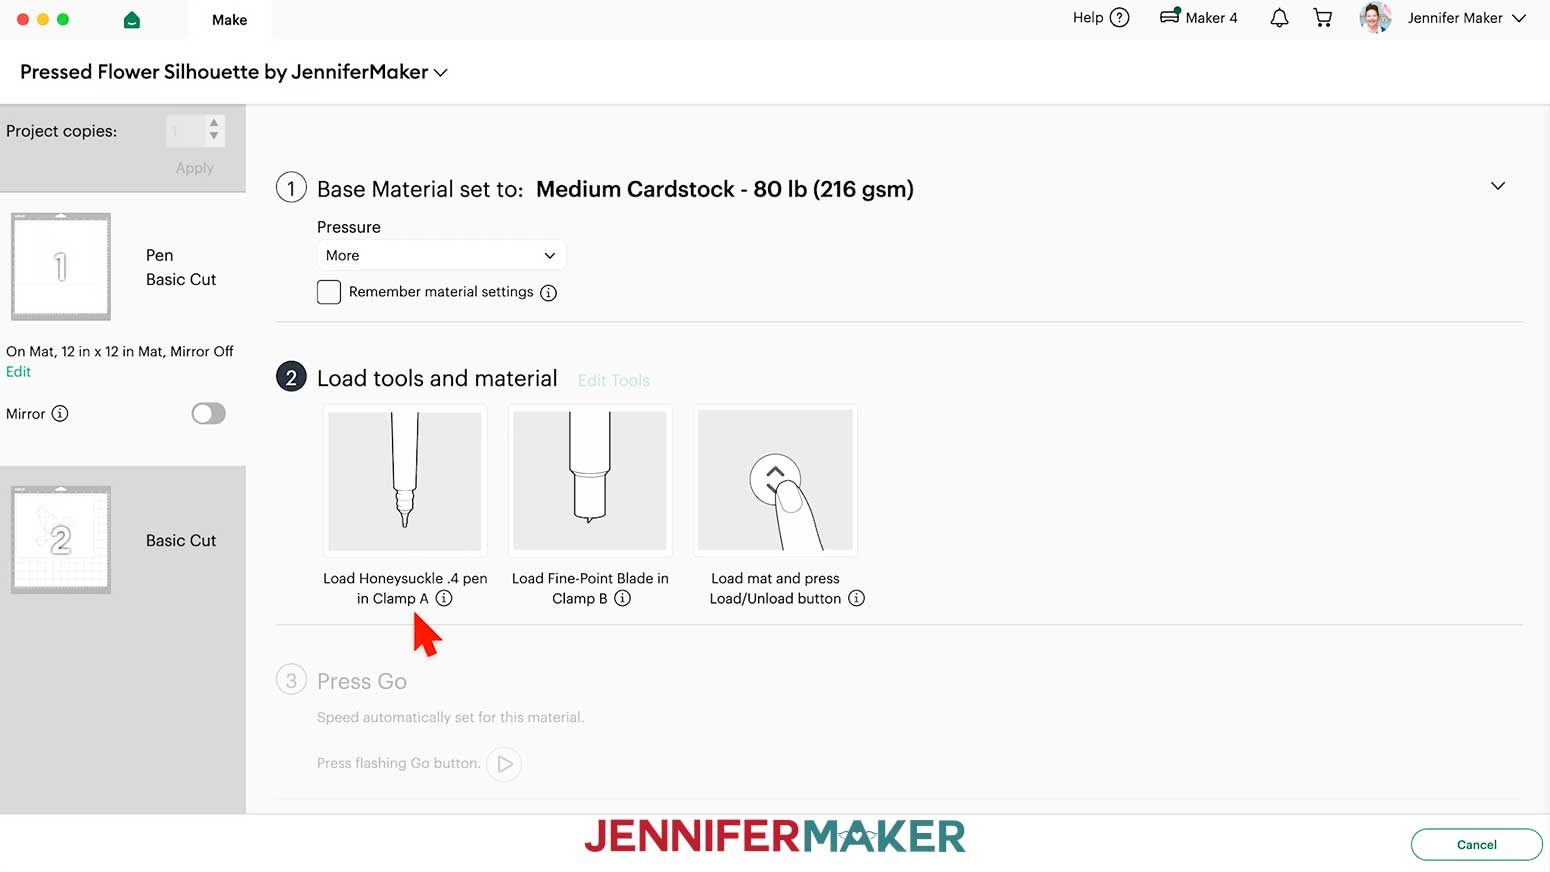
- On the Make screen, set the Base Material for your first mat.
NOTE: I used the “Medium Cardstock - 80 lb (216 gsm)” material setting with “More” pressure for cleaner cuts. - Follow the screen prompts to select and add your pen in the clamp indicated.
TIP: Remove the pen’s cap (put it on the back so you don’t lose it) and test it on scrap paper to make sure it flows well first. - Check that your Premium Fine-Point Blade is clean and in the correct clamp.
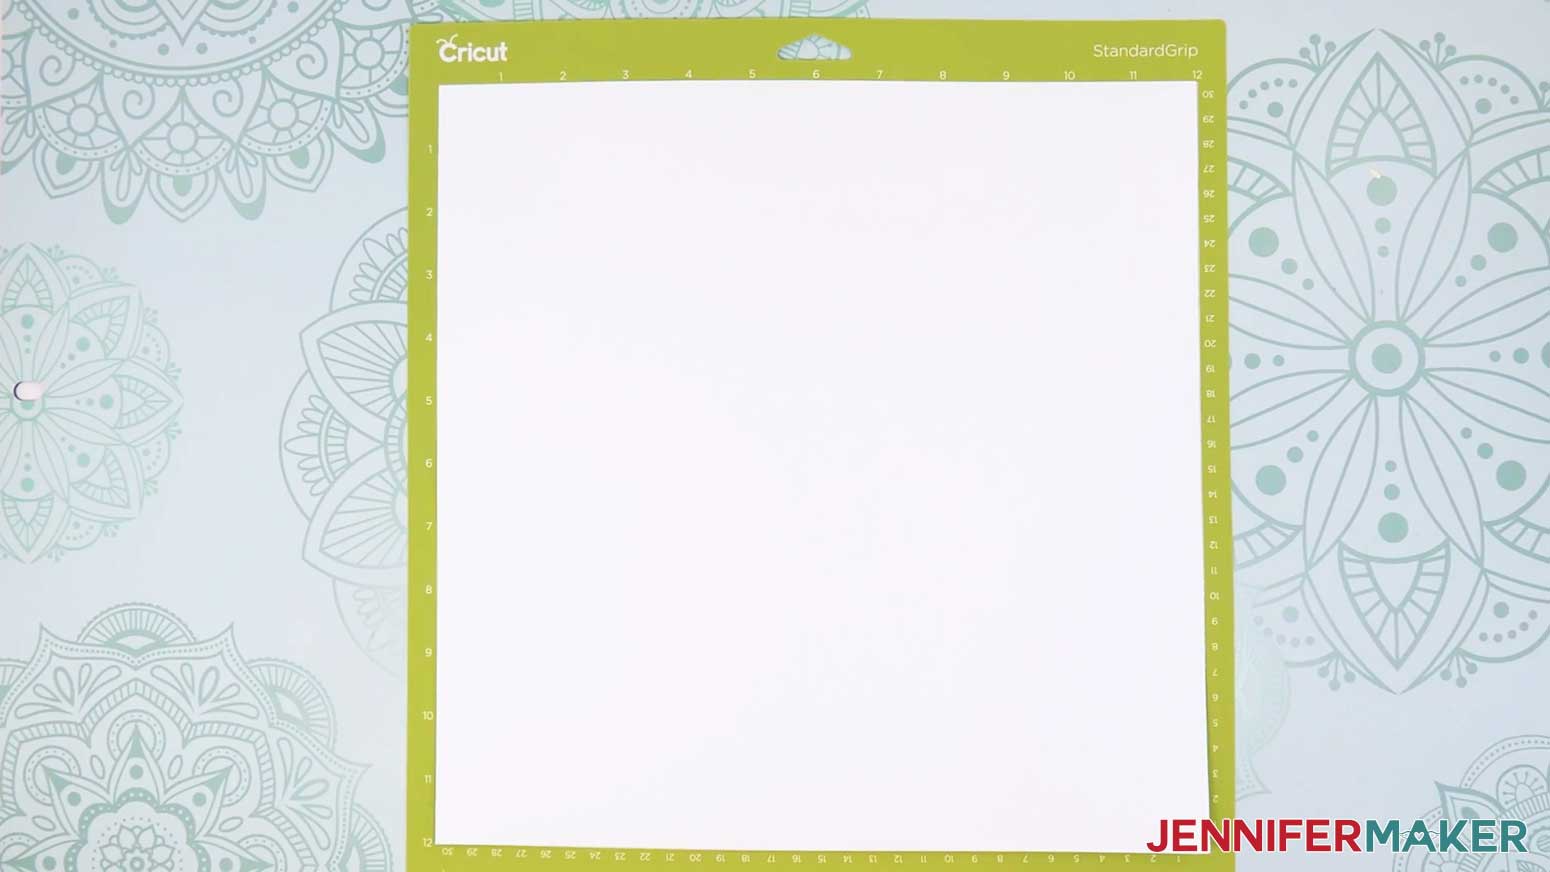
- Place the cardstock face up on a green StandardGrip machine mat to cover the design area on the screen.
- Use a brayer to make sure it’s fully adhered.
- Press the flashing “Load/Unload” button to load the prepared mat into your Cricut.
- Press the flashing middle button to begin cutting.
- When it has finished cutting, don’t unload the mat right away. Gently lift a corner of the material to make sure the cuts went all the way through. If not, press the middle button again to make a second pass of cuts in the same spots.
- When the cuts are complete, unload the mat, flip it over onto your work surface, and roll it back to release the cardstock.
- Cut the second layer of cardstock the same way.

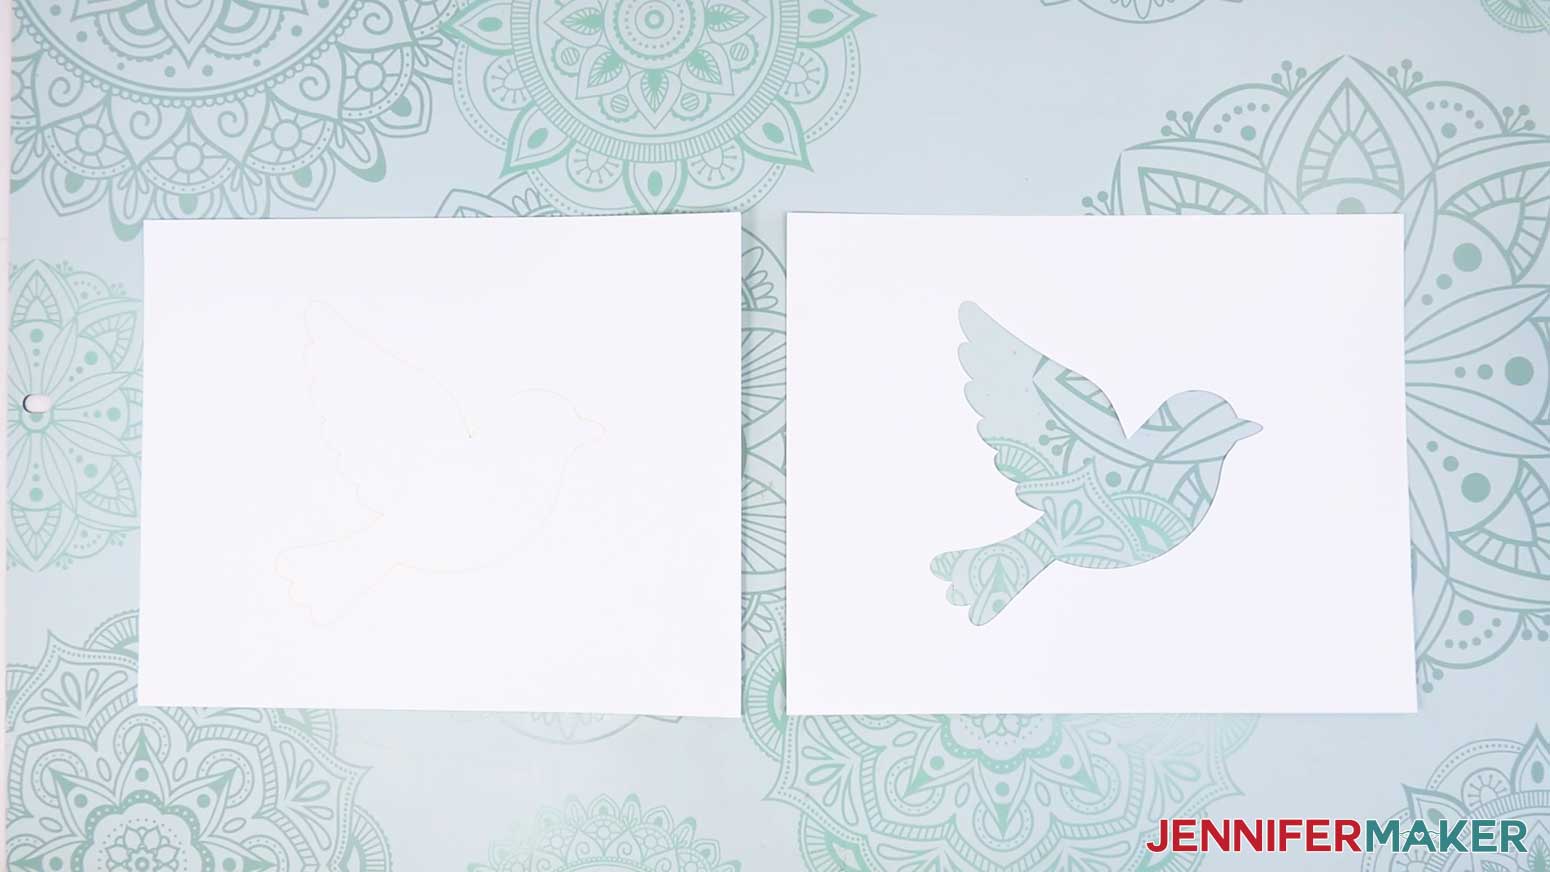
STEP 3: ASSEMBLE YOUR PRESSED FLOWER SILHOUETTE
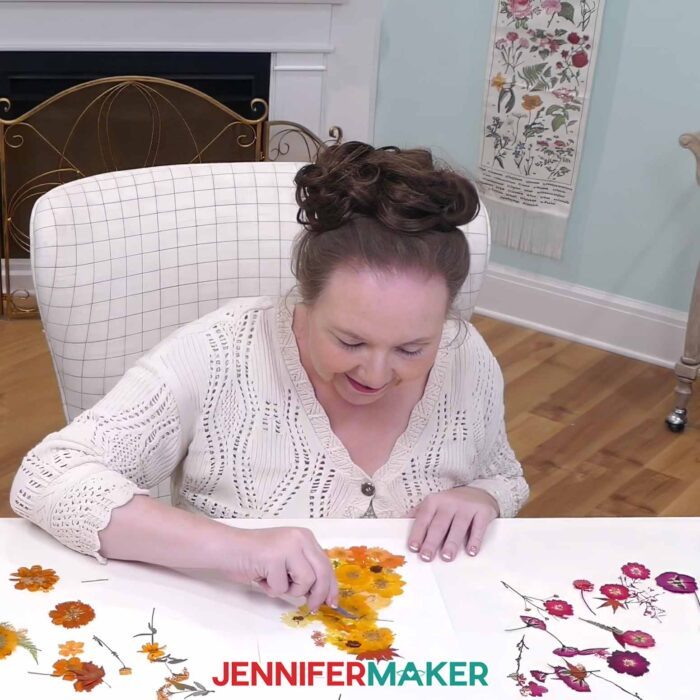
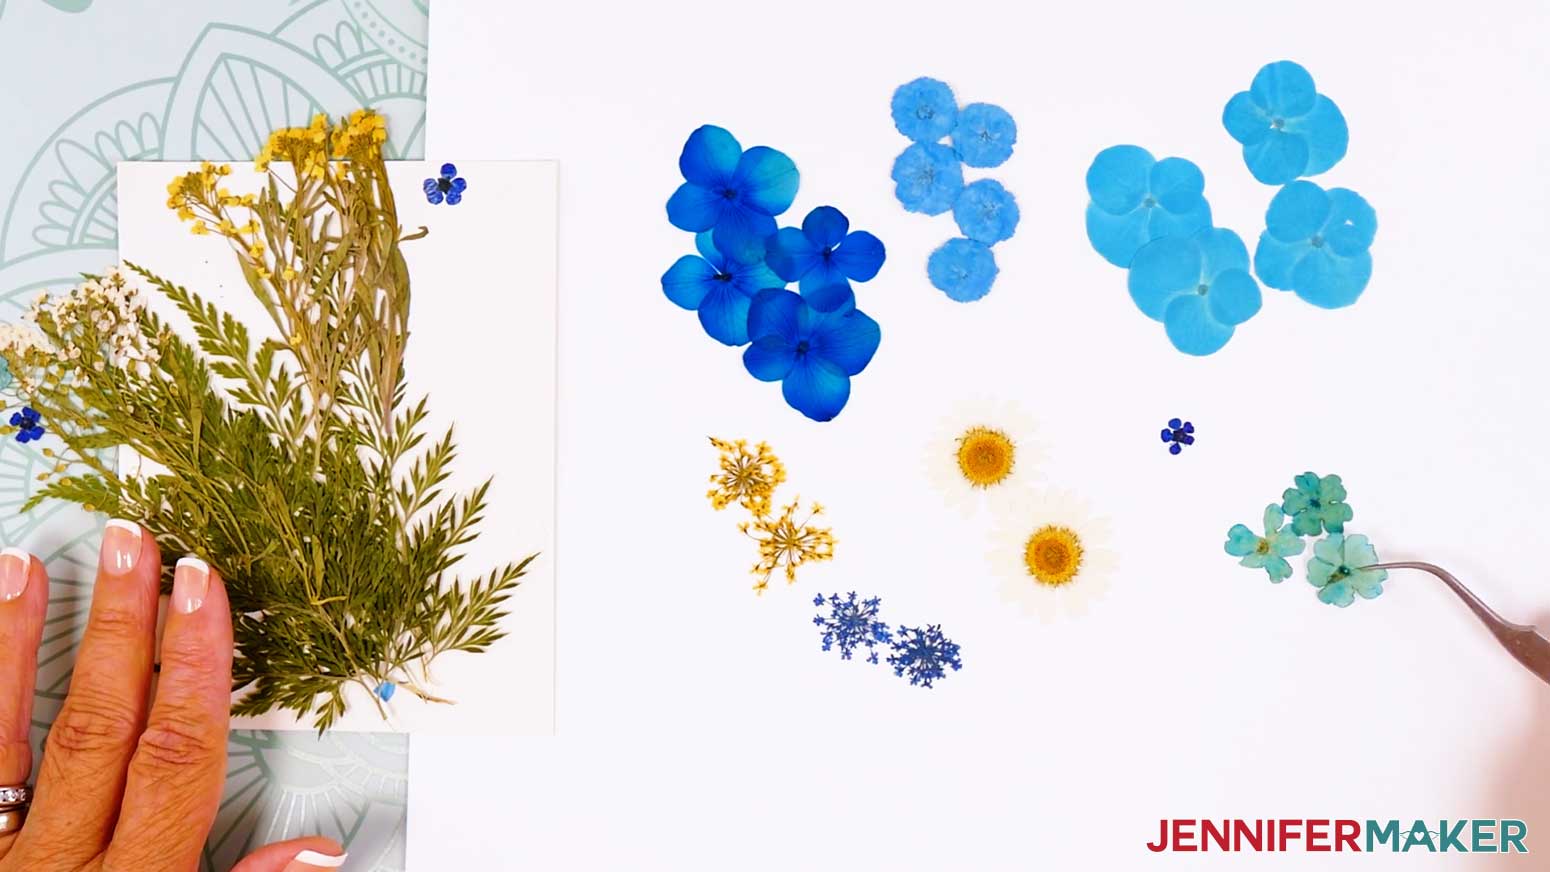
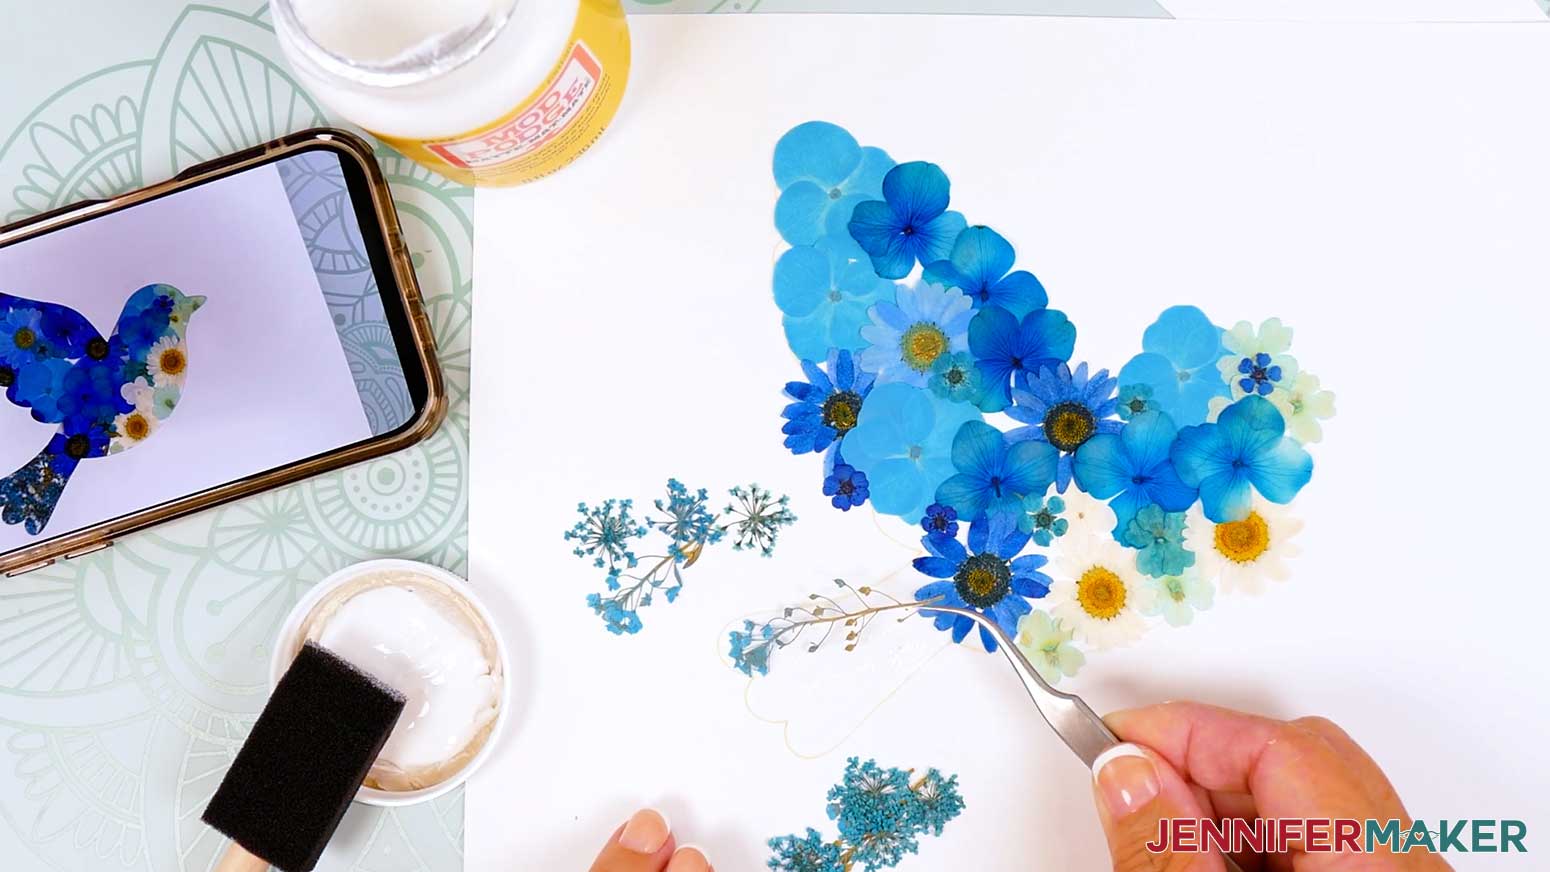
- Start by looking through your pressed flowers and sorting them by color, size, and shape so you can see what you have to work with.
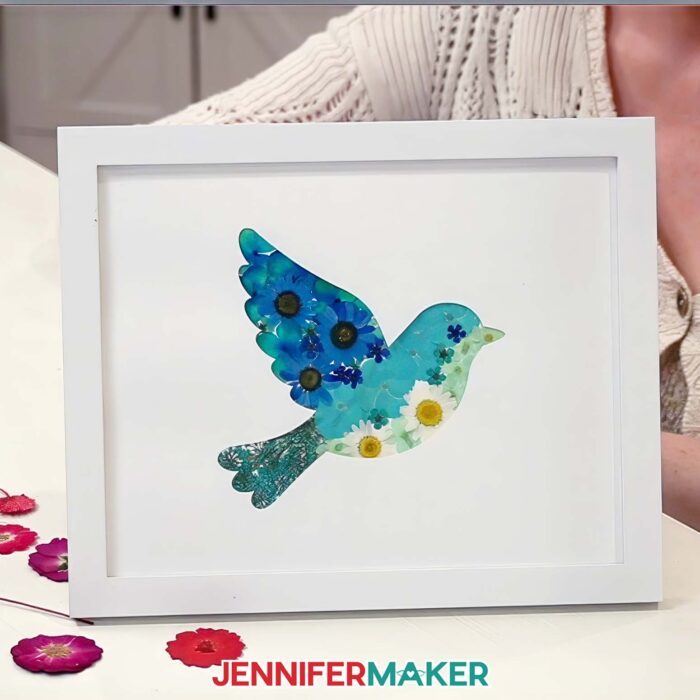
TIP: The flowers are delicate, so use tweezers to move them. Since they’re so light, keep your windows closed so they don’t get blown away. - Choose flowers for each part of the bird before you begin gluing.
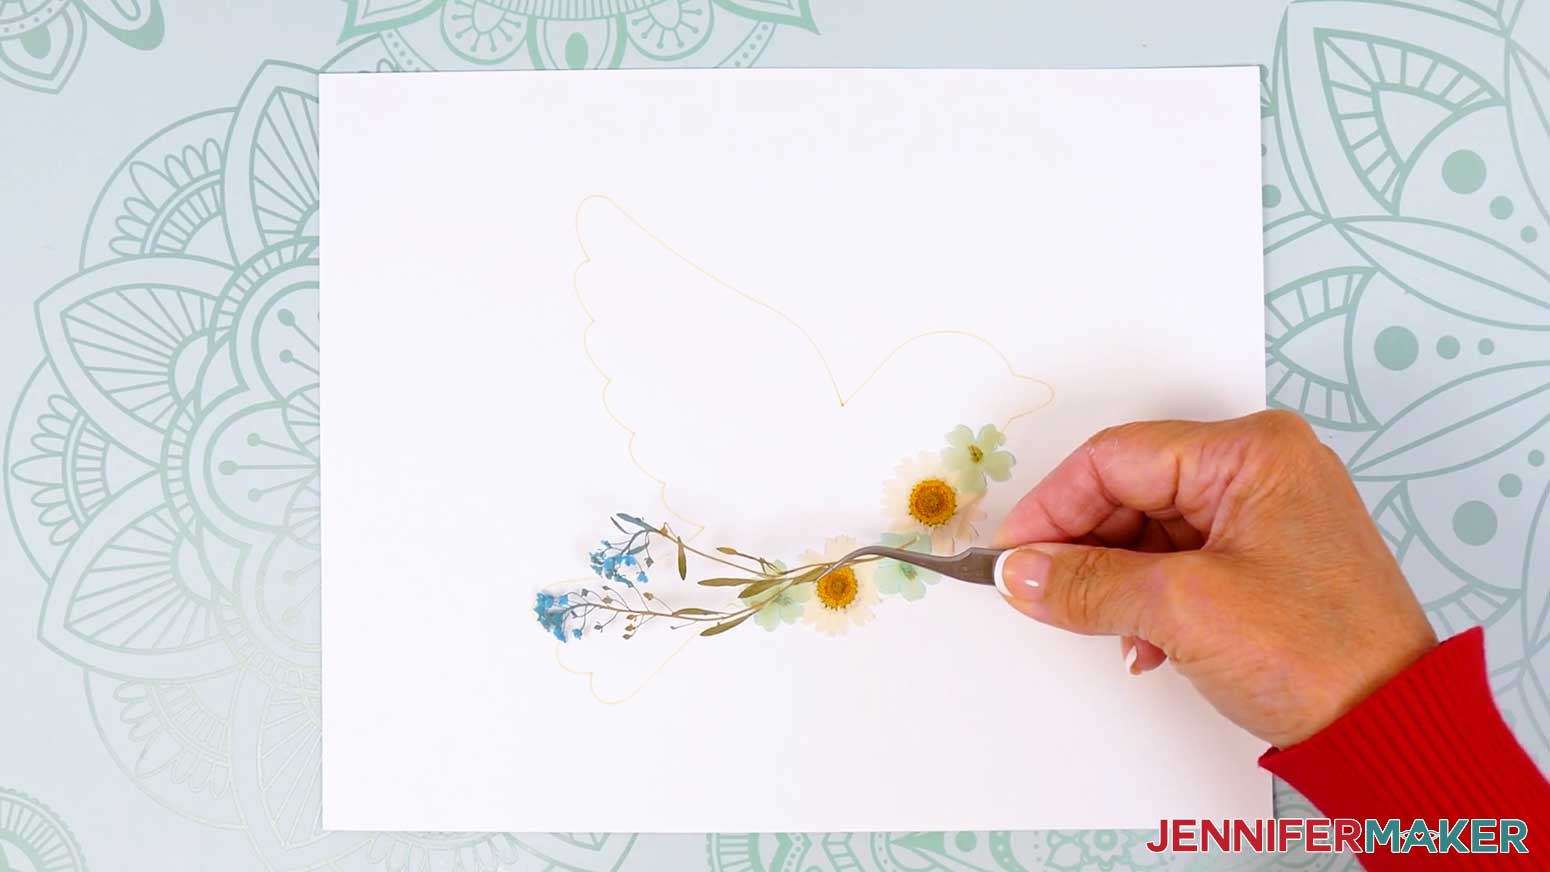
NOTE: Teal flowers work well for the tail, white or pale blue flowers work well for the belly, darker blue flowers work well for the body and wing, and one tiny flower with a dark center can become the eye. - Place the bottom silhouette or drawn guide layer on your work surface so you can begin arranging the flowers inside the bird shape.
- Lay a few flowers loosely on the bird without glue so you can test your colors and placement.
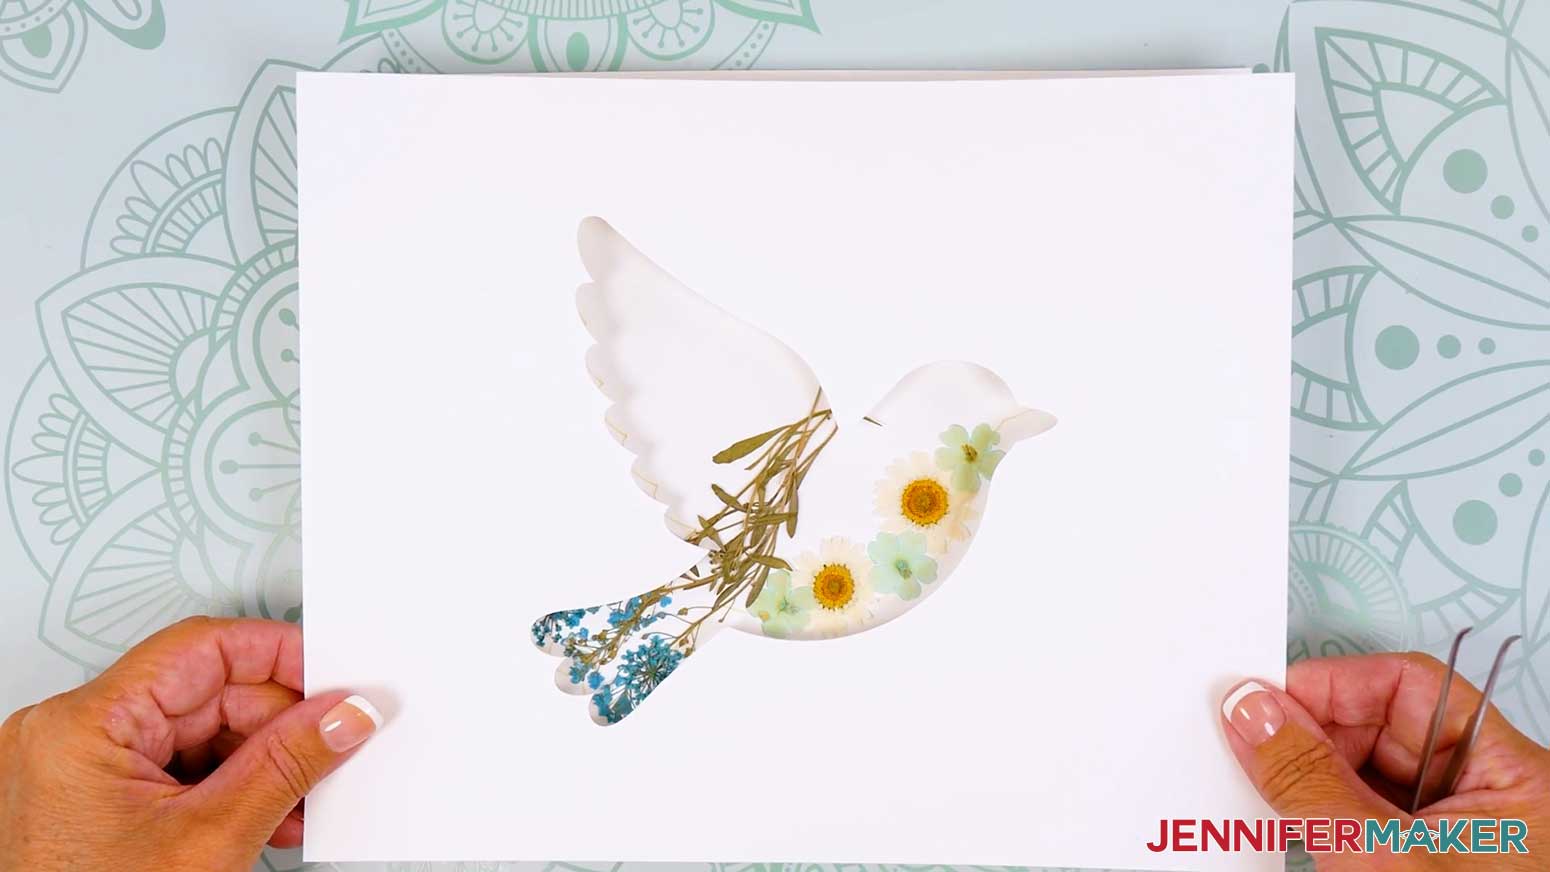
NOTE: I started with big flowers for the main design sections I wanted to control (like using clusters of flowers with stems to mimic the look of tail feathers, using large white flowers for the belly, and large blue flowers for the back), and I filled in the remaining sections with smaller flowers. - Place the top silhouette cutout over the arrangement to check what will actually show through the opening.
- Adjust the flowers as needed, remembering that the top silhouette layer will hide messy edges, extra overlap, and flowers that extend slightly outside the guidelines.
NOTE: This is just a rough idea, so don’t get hung up on getting everything perfect. Some flowers might also have to be replaced during gluing, so try to save some duplicates.
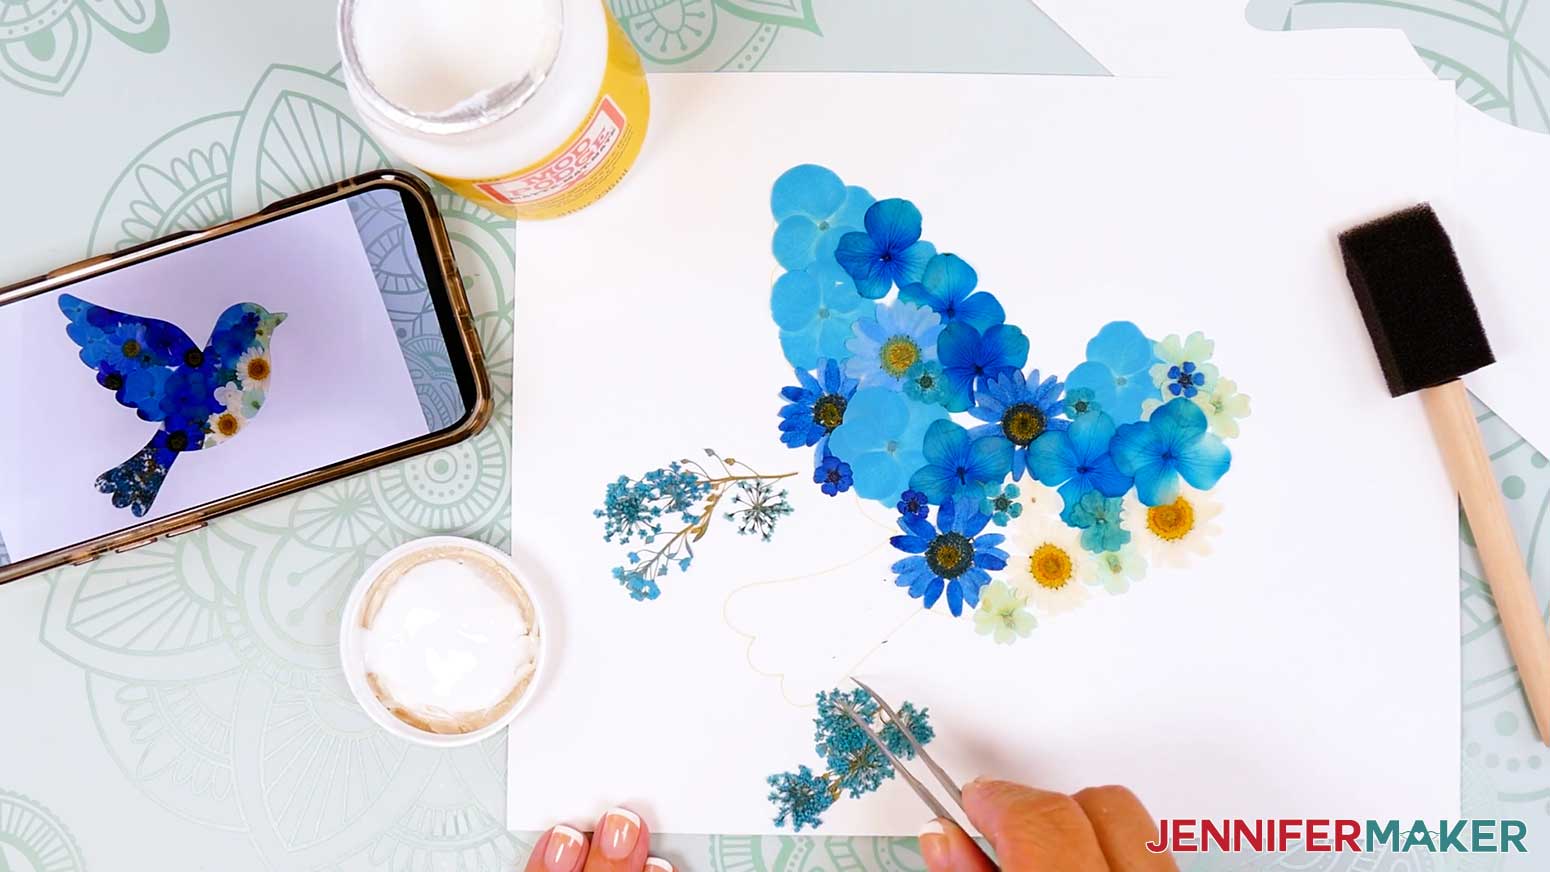
TIP: Add a thin leaf stem between the body and wing if you want a clearer separation between those two areas. - Once you’re happy with the rough layout, take a picture of it for reference.
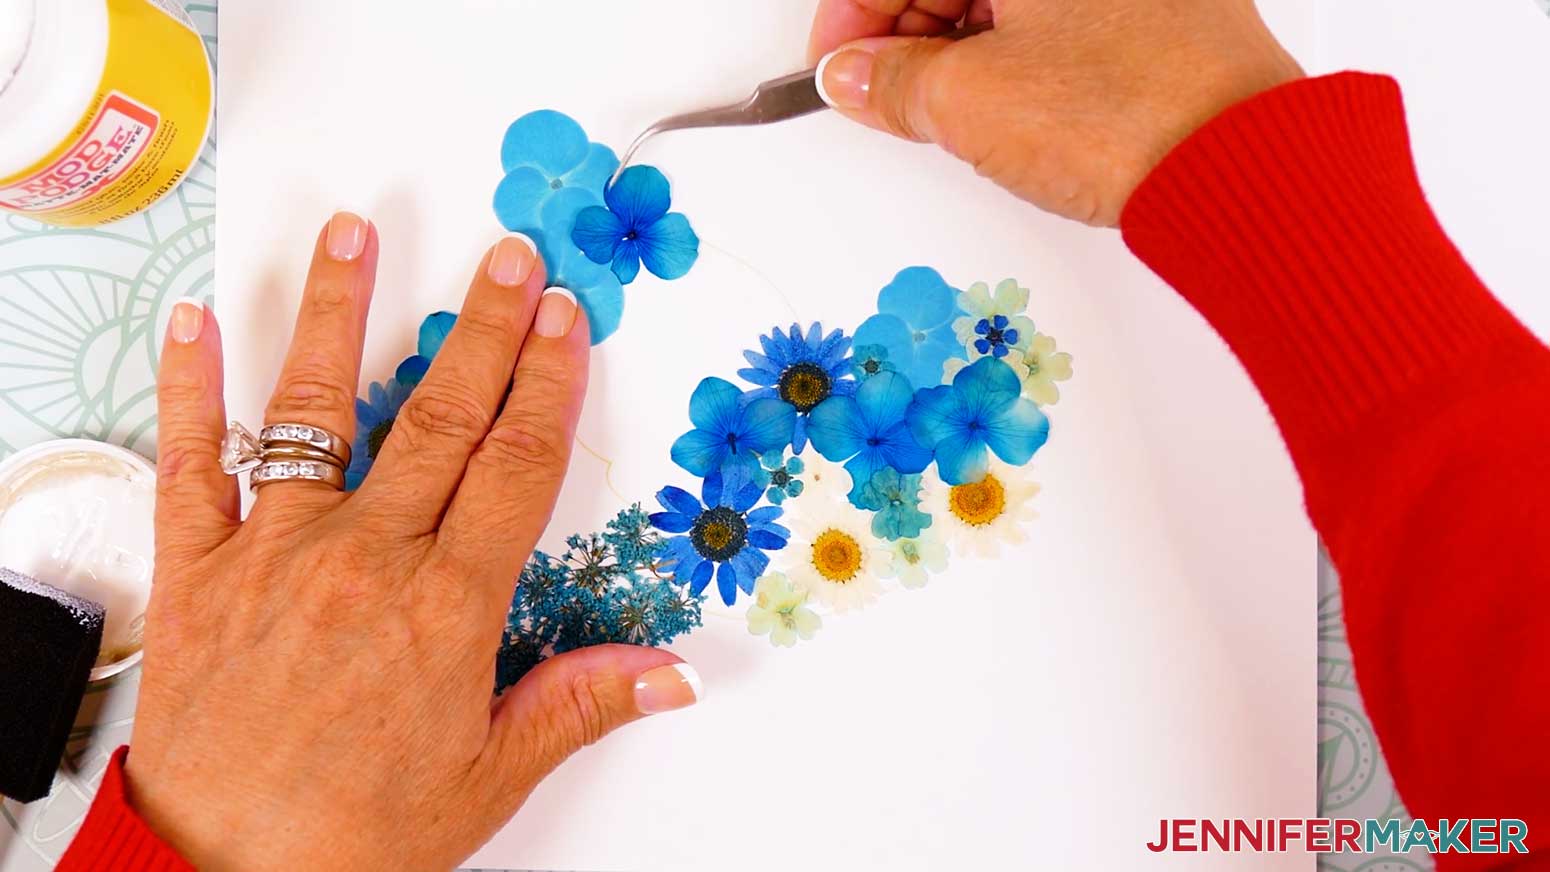
- Gently shift the flowers from one section out of the drawn shape so that you have space to add glue.
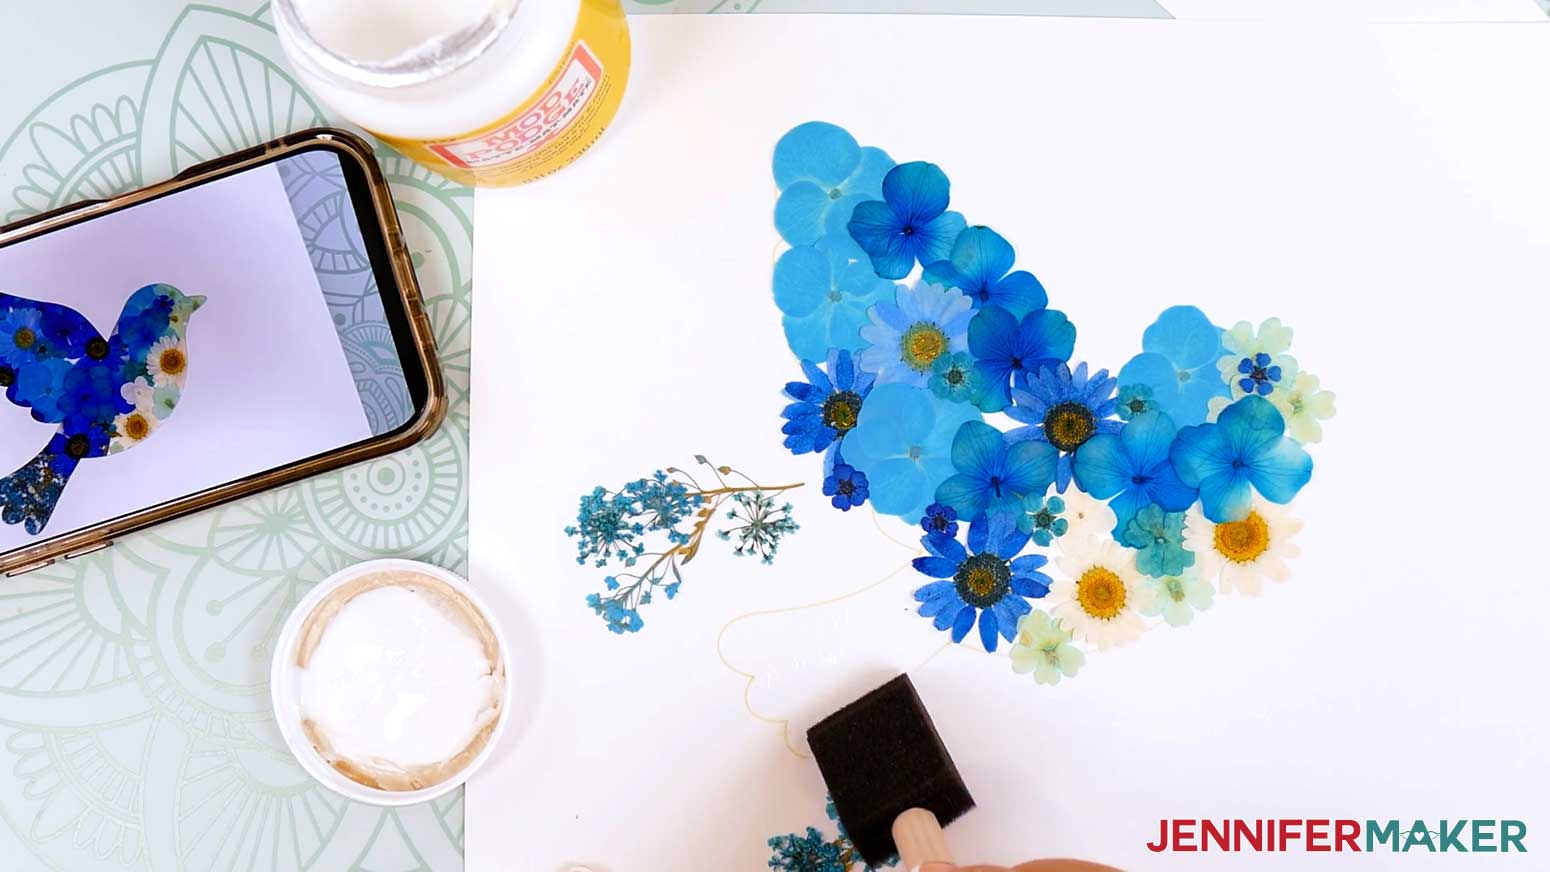
NOTE: I started with the tail. - Working on a small section at a time, use a foam detail brush to add a thin, smooth layer of Matte Mod Podge within the outline.
NOTE: If you want to leave more white space, you can use dabs of craft glue to adhere the flowers instead. - Pick up the flower carefully with tweezers or a weeding tool and place it onto the glued area.
TIP: Gently reposition the flower right away if it shifts while the Mod Podge is still wet. - To blend color transitions, use your tweezers or weeding tool to lift single overlapping petals if you want a softer layered look.
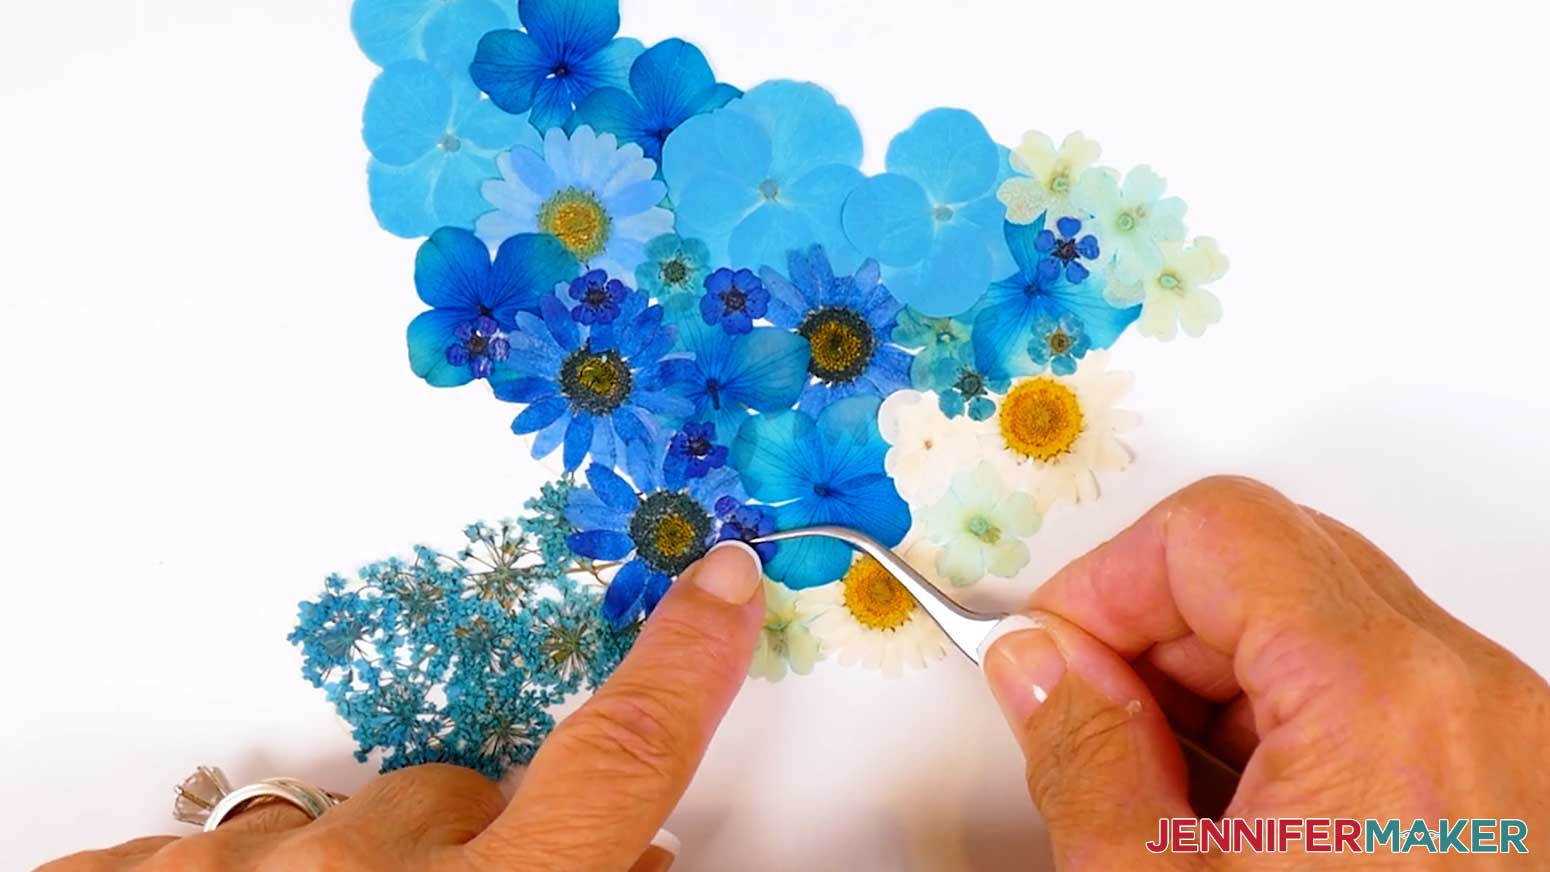
- Continue gluing the flowers one at a time, working slowly so the delicate petals do not tear.
TIP: If a flower does tear, you can either remove it or layer another one on top of the damaged section. - Use tiny flowers to fill small open areas or cover spots where the base is still showing.
- Choose a small flower with a dark center for the bird’s eye.
- Temporarily place the top silhouette over the design before gluing the eye so you can make sure it will appear in the correct spot.
- Glue the eye flower carefully in place with a tiny amount of Mod Podge on its back.
- Test the top silhouette cutout over the project one more time and check the overall look of the bird.
- Once everything dries, gently lift and shake the flower layer to make sure everything will stay in place.
- Secure any loose petals with a small amount of Mod Podge.
TIP: Avoid brushing too much adhesive over the flowers, since too much moisture can move, tear, or cloud the delicate petals. - Let the pressed flower arrangement dry completely.
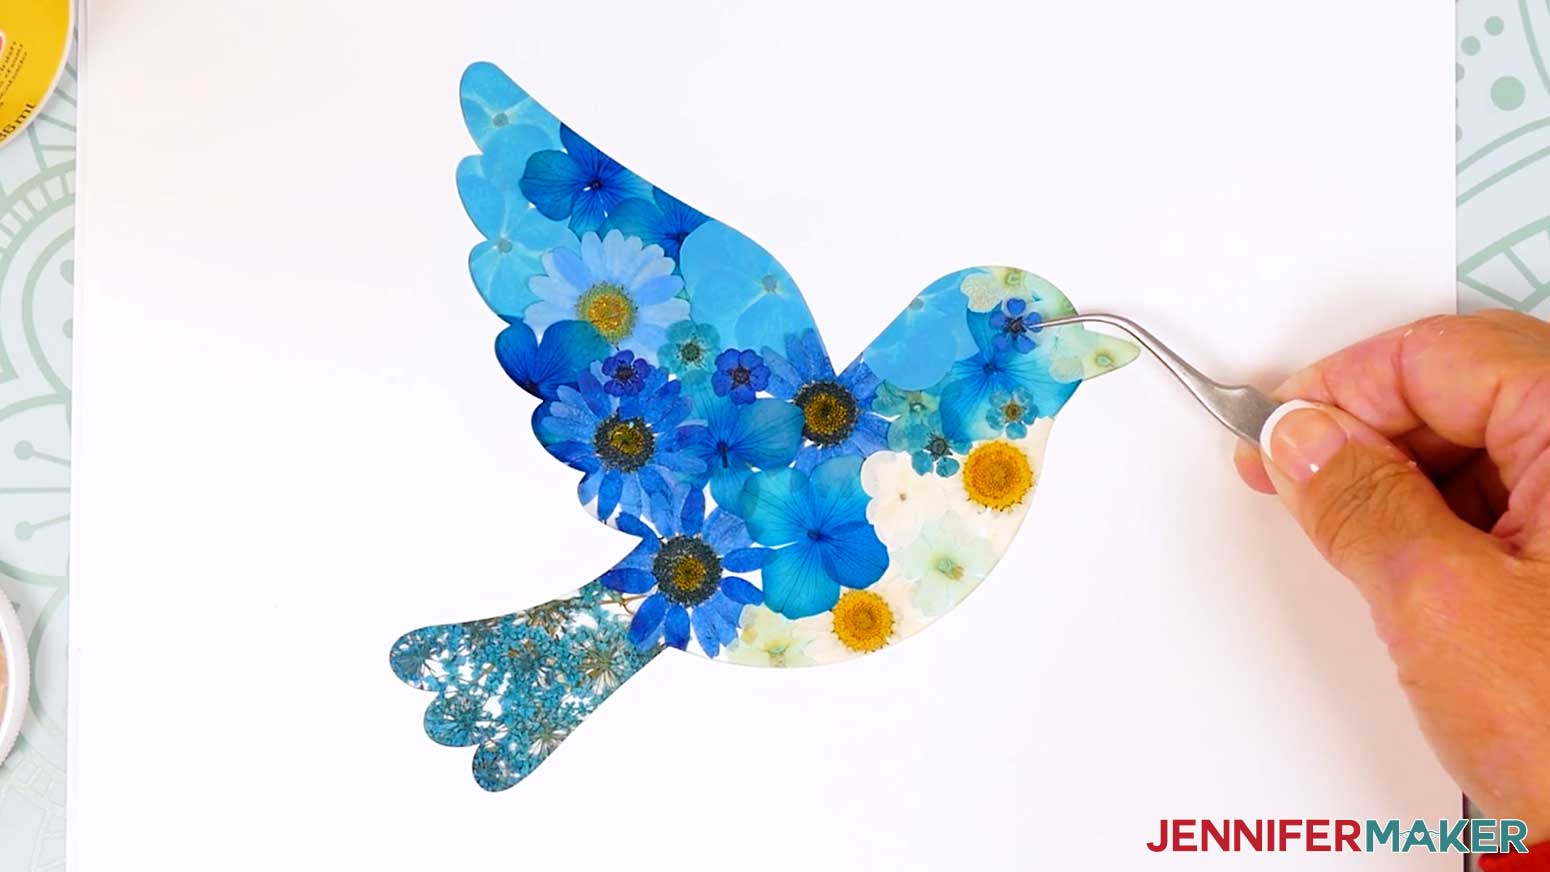
STEP 4: FRAME YOUR PRESSED FLOWER SILHOUETTE
- Once the flowers are dry, add the top silhouette layer or prepare the piece for framing.
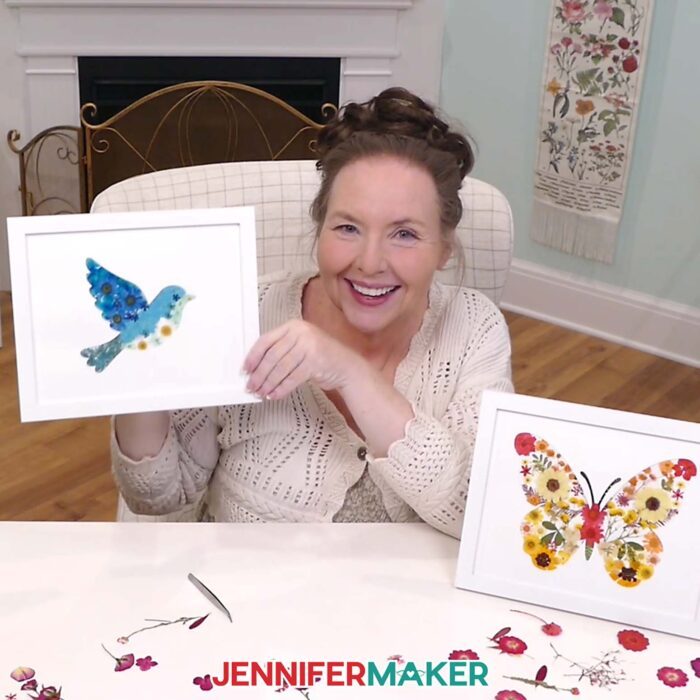
- Frame the finished pressed flower silhouette and enjoy your one-of-a-kind floral artwork.

STEP 5: SHOW IT OFF
Your pressed flower silhouette is ready to display!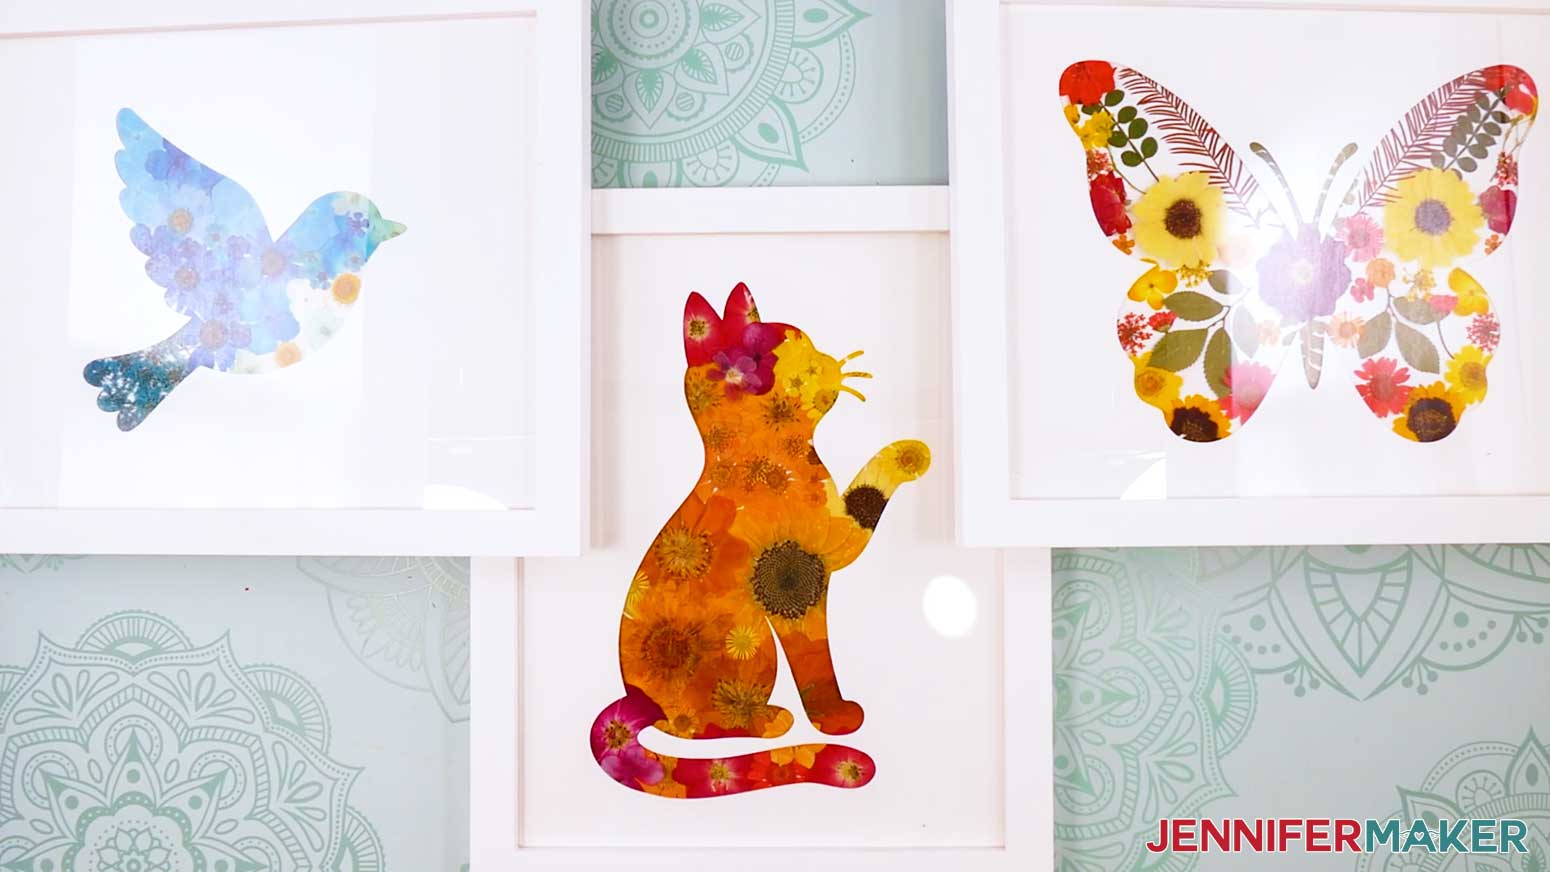
Notes
Finished Size: 8" x 10" framed silhouette
Answers to Your Questions About Pressed Flower Silhouettes
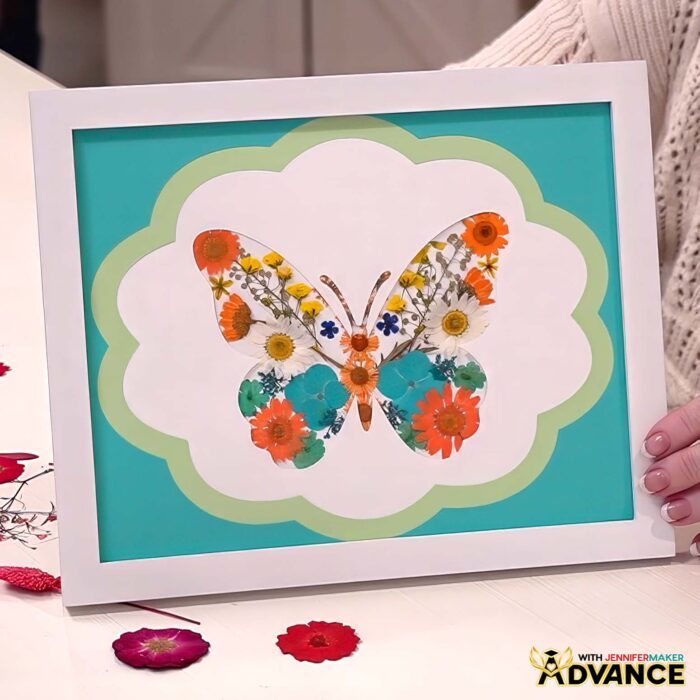
Q: How can I create fancier frames for my flowers?
A: You can learn how to create layered frames like the one below in my ADVANCE program. Learn more about ADVANCE here!
Q: How do you press fresh flowers for framing?
A: To press fresh flowers for framing, start with a few test sprigs to make sure the process works for your plants and environment. Place the blooms or petals between sheets of copy paper or wax paper, then tuck them inside a heavy book. Add more weight on top and leave the flowers alone until they are completely dry.
Drying time can vary depending on the flower type, thickness, and humidity. Thin petals may dry faster, while thicker flowers may take longer.
Make sure the flowers are fully dry before placing them in a frame. Any moisture left in the flowers can affect the color and may damage the finished flower art over time.
Q: What size frame should I use for pressed flower art?
A: Choose your frame size before arranging your flowers. This makes it much easier to size the backing paper, silhouette window, and flower arrangement correctly.
A larger frame works well if you want to create a statement piece for your wall. Mini frames are a fun way to use smaller flowers, leftover petals, or tiny pieces from a special bouquet.
Simple flower frames in white, black, natural wood, gold, or soft neutral finishes all work well. Pick a frame that supports your flowers instead of competing with them.
Q: How do I keep my pressed flower silhouette from looking messy?
A: Use the silhouette guide as you arrange your flowers so you can see the final shape while you work. Place larger flowers first, then fill smaller areas with tiny blooms, petals, leaves, or stems. Check the top silhouette layer often so you can keep the edges clean and make sure the shape is still easy to recognize.
Q: Should I leave white space between the flowers?
A: It depends on the design. Some silhouettes, like a bird or cat, look beautiful when they are filled more fully, almost like you’re painting with flowers. Other shapes, like a butterfly, can look better with intentional white space so the wings feel light, balanced, and delicate.
Q: How do I choose which pressed flowers go where?
A: Start by looking at the shape of your silhouette. Use longer leaves and stems where they can follow natural lines, like a bird’s tail, feathers, or wings. Use curved petals in rounded areas and smaller flowers near narrow spots. This helps the flowers show off the shape instead of simply filling the space.
Q: Which adhesive works best for pressed flower wall art?
A: Use the least amount of adhesive that will hold your flowers in place. Mod Podge works well for fuller designs with lots of overlapping flowers and very little open background. For designs with visible white space, small glue dots or tiny dabs of clear-drying craft glue are better because they are less likely to show between the flowers.
Q: Can I make and sell pressed flower silhouettes or other items using your designs?
A: If you want to use my pressed flower silhouette designs and project materials for commercial use, please familiarize yourself with my important licensing information before selling your crafts.
Q: Where can I get help if I get stuck?
A: If you want quick troubleshooting or you want to show off your finished projects afterward, my Cricut Facebook group can be a helpful place to compare notes and see what others are doing.
Get my free SVG/DXF/PDF files to make your own Pressed Flower Silhouette designs!
(If you do not see the signup form above, click here.)
I absolutely love seeing your handmade crafts! Once you’ve made a pressed flower silhouette, inspire others and share photos of your project in our Facebook group or tag me on social media with #jennifermaker.
Love,

Want to remember this? Save this Pressed Flower Silhouette Tutorial to your favorite Pinterest Board!