
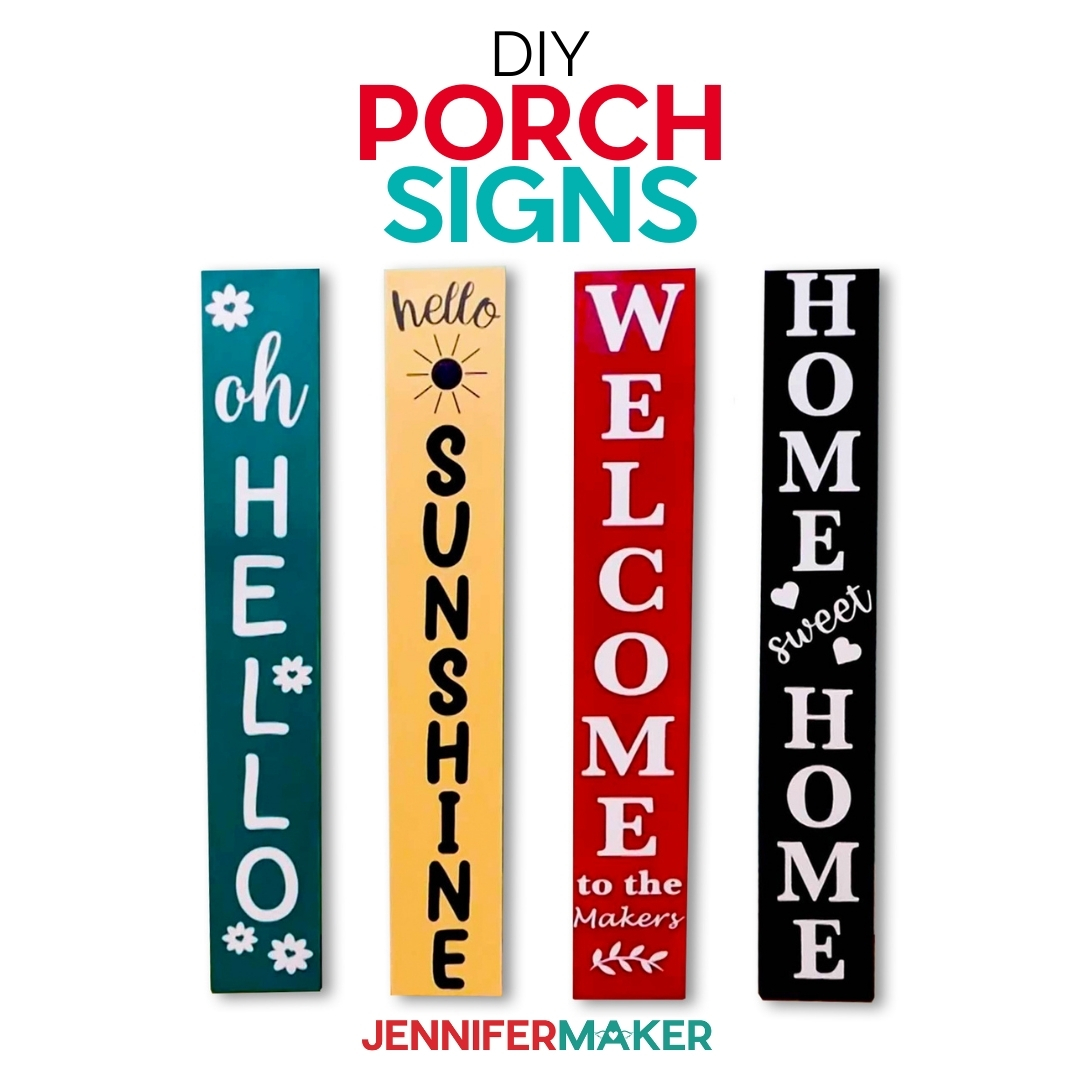
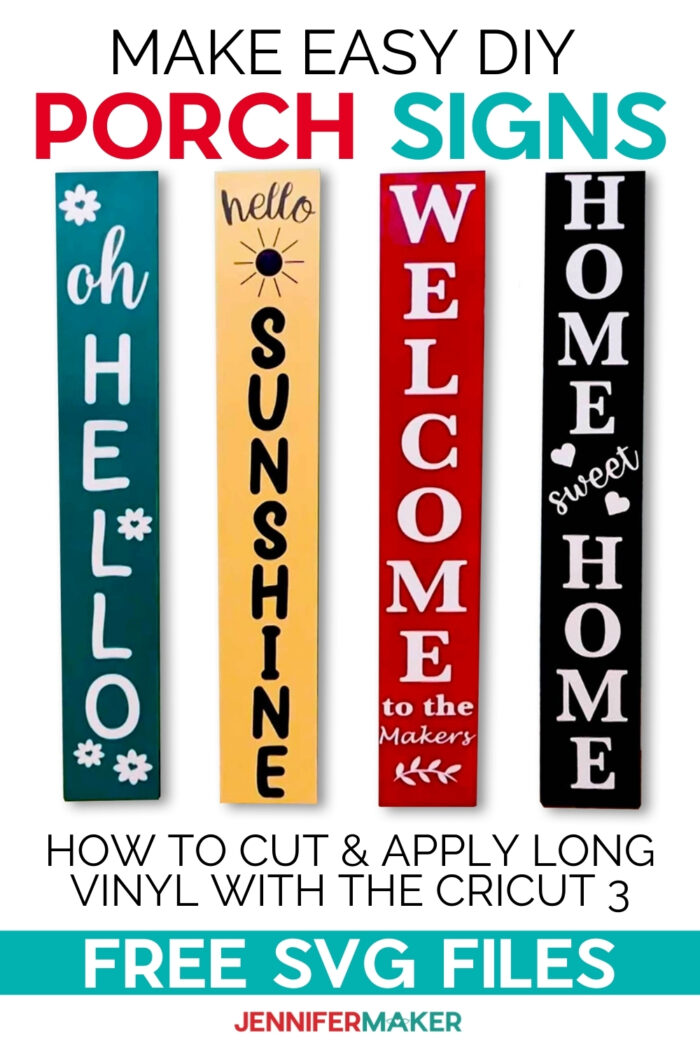
Learn how to add a personal touch to your front porch with these diy porch signs! These eye-catching signs are easy and fun to make!
A little over two years ago, I showed everyone how to make vertical welcome signs for their porches. This tutorial has been a huge hit and I’ve loved seeing everyone’s awesome signs! In that tutorial, I showed you how to piece together the letters and align them with registration marks because the Cricut Explore Air 2 and original Cricut Maker can only cut a part of the long sign at once. Well, now that we can do loooong cuts — up to 12 feet long — on the new Cricut Explore 3 and Cricut Maker 3 cutting machines, it’s time to revisit this tutorial. Because it’s now a lot easier to make these DIY Porch Signs, but I know you have questions about how to cut, transfer, and apply the long piece of vinyl!
Now Available: Buy the Cricut Maker 3 and the Cricut Explore 3 here!
This post contains some affiliate links for your convenience (which means if you make a purchase after clicking a link I will earn a small commission but it won’t cost you a penny more)! Read my full disclosure policy.
Watch the DIY Porch Signs assembly video here:
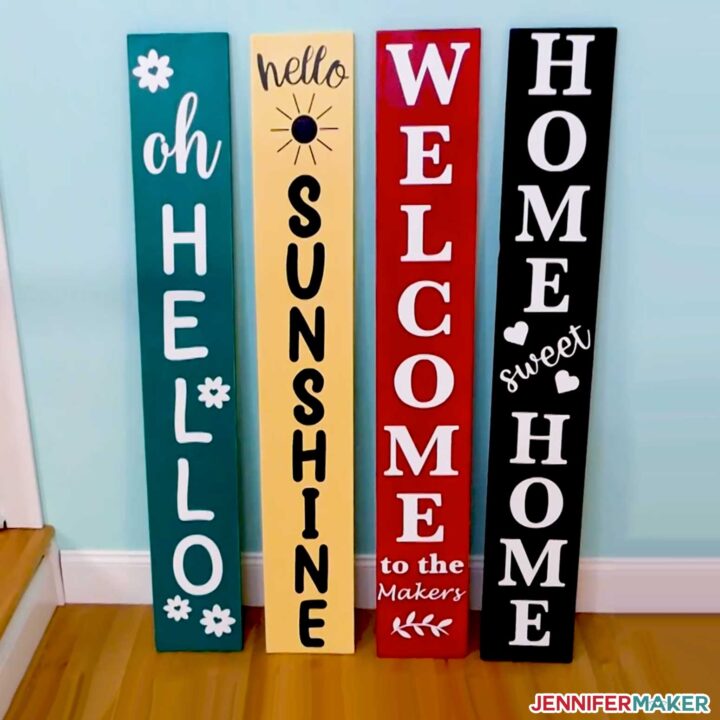
So we’re going to make a new round of signs just like these using the Cricut Maker 3 and Explore 3, as well as a fun growth chart that looks like a ruler!
I have loved Smart Vinyl since it was first introduced for the Cricut Joy but now, with the Cricut 3, we can also use Smart Vinyl for projects up to 12 feet long! I don’t know about you, but I love the opportunities this will open up for projects and designs!
For my DIY Porch Signs, I found my pine board at Lowe’s in just the right size, but you also can get a longer board from your local lumber store and cut it down. Some stores will cut a board for you right there in the store! The finished size of board you want is 8″ wide x 48″ long x 1″ thick.
To sand down your board, you will need 220-230 grit sandpaper and some paper towels or an old rag to brush off the sawdust.
Once you have your pine board sanded down and it is nice and smooth, you can use chalk paint to paint your porch sign. I’m using chalk paint in a variety of colors including red, blue, white, gray, and black. The brand I used in the tutorial — Folk Art — works really well!

It is important to remember that the smoother your board, the better the paint, polycrylic, and vinyl will adhere. I used a foam brush to apply the chalk paint, and a bristled paintbrush to apply the polycrylic to the board. If you only have a bristle paintbrush available, though, it would be fine to use one of those for the chalk paint.
After painting your board, I highly recommend letting the paint dry for 24 hours (I am impatient and waited 12 hours…. it still turned out great!) I sanded my sign again before applying the water-based polycrylic finish in clear matte. Make sure you are applying the poly coat in a well-ventilated area!
For this tutorial, I’m using rolls of Cricut Smart Vinyl because it will allow me to cut the WHOLE sign at once without needing to piece it together. I chose black and white Premium Smart Vinyl, the permanent kind, not the removable. You want the permanent vinyl because it will hold up better if you put your sign outside. My two-and-a-half-year-old sign made with Cricut Premium Vinyl is holding up like a champ on my porch!
And of course, to go with that longer design we get by using a roll of vinyl, we need a long length of transfer tape. Transfer tape also comes on long rolls now! Be sure to get Standard Grip Transfer Tape, not Strong Grip Transfer Tape, to ensure a smooth transfer.
You’ll also want a weeding tool, scissors, and a scraper to apply your vinyl to your board.

Before cutting your vinyl design, you must double-check the length and width of your board as the cut can be slightly off. When creating my DIY Porch Sign, I had an issue where one board wasn’t cut quite the right width and I couldn’t get things centered correctly. I couldn’t figure out what I was doing wrong until I realized I hadn’t double-checked the actual cut measurements! I could have saved a lot of time had I just measured the board when I got home but I forgot!
The final vinyl design dimensions of one design is 6.5″ wide x 45.5″ long. You can confirm the width of the design by selecting your design and looking at the top of the design or top toolbars on Design Space. Once you have confirmed the actual size of your board, as well as your design length, you will need four feet of Smart Vinyl and four feet of transfer tape to create your DIY Porch Sign.
I’m going to cut this on my new Cricut Maker 3, but you could also do it on the Cricut Explore 3. And since I’m using a roll of Smart Vinyl, I’m going to use and show you how to use the Cricut Roll Holder, too! If you don’t have those, you can still make it with another cutting machine — look at my Vertical Sign tutorial to see how to piece and align your vinyl on the sign.
Let me show you how easy it is to make this wonderful DIY porch signs project!
Materials to Make DIY Porch Signs
View my Amazon shopping list with the exact items we used to make this project!
- One (1) 8″ x 48″ x 1″ board – I used this board from Lowe’s but you can get a longer board and cut it to size. Some stores will cut the board for you.
- 220 Grit Sand Paper
- Paper towels or a rag to remove dust after sanding
- Chalk Paint
- Foam Brushes for Paint
- Water-Based Polycrylic in Clear Matte
- Paint Brush for Polycrylic
- Four Feet of Cricut Smart Permanent Vinyl
- Four Feet of Cricut Transfer Tape
- Disposable Gloves (Optional)
- Cricut Brayer
- Cricut Weeding Tool
- Cricut Scissors
- Cricut Scraper
- A method to cut your Smart Vinyl, I used the amazing Cricut Maker 3 or Cricut Explore 3, but you could also use any Cricut if you piece your vinyl
- Design #308 – My free SVG/PDF/DXF design files are available in my free resource library – get the password by filling out the form at the bottom of this page
Here are all of the fonts I used to make my porch signs but feel free to you use your own favorite fonts!
Fonts used for “Hello Sunshine”
Hello – Breethy
Sunshine – Papernotes
Fonts used for “Welcome to the Makers”
Welcome to the – Baskerville Bold
Makers – Lucida Handwriting
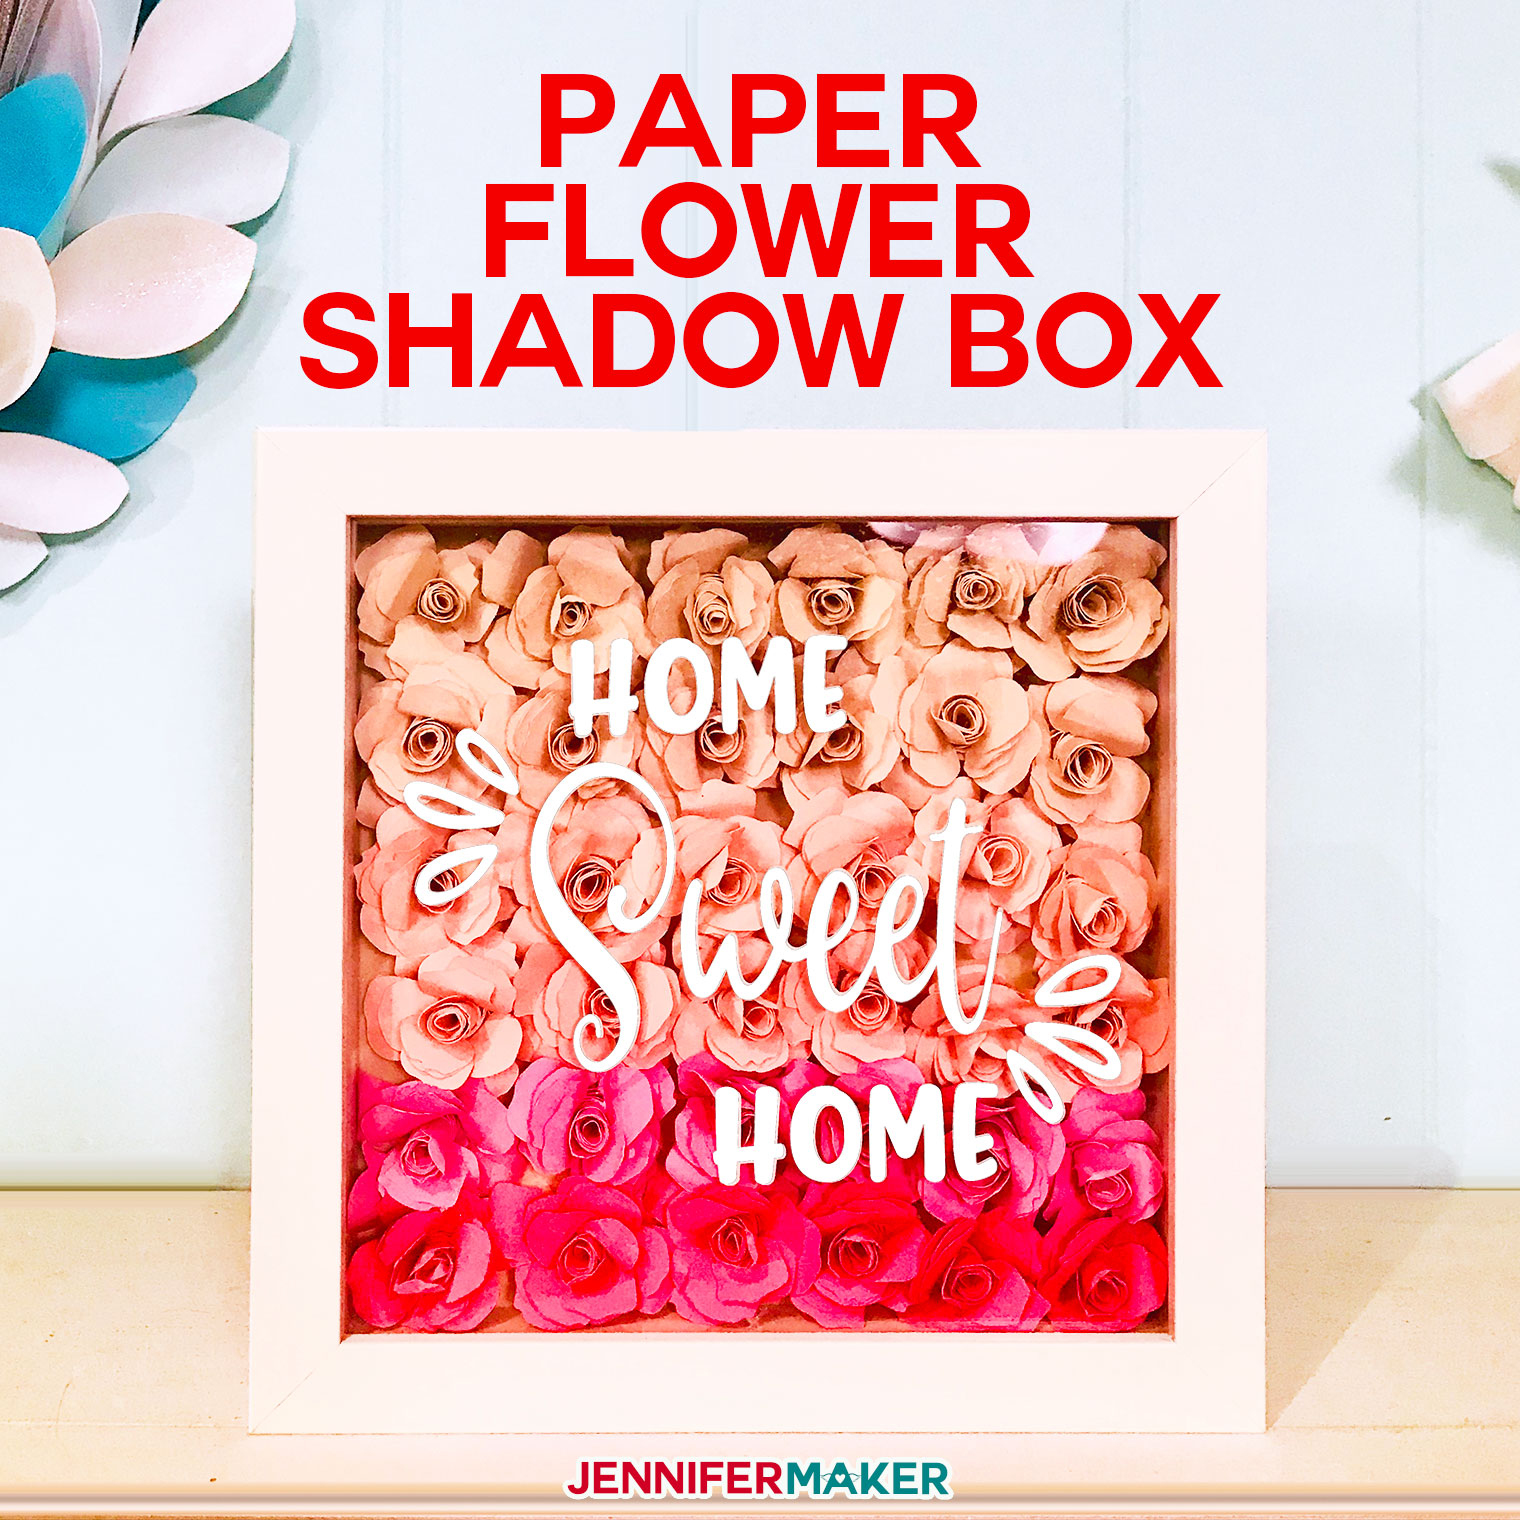
Fonts Used for “Home Sweet Home”
Home – Baskerville
Sweet – Girl Talk
Fonts used for “Oh Hello”
Oh – Sweetness
Hello – Be Honest
Font used for “Watch Me Grow”
Falling Leaves Script

How to Make Your Own DIY Porch Signs
DIY Porch Signs
In this tutorial, I am going to show you how to make an eye-catching DIY Porch Sign using Cricut Smart Vinyl cut on the amazing Cricut Maker 3 or Cricut Explore 3!
Materials
- One (1) 1" x 8" x 48" board - I used this board from Lowe's but you can get a longer board and cut it to size. Some stores will cut the board for you.
- 220 Grit Sand Paper
- Paper or Cloth Towel (To remove dust after sanding)
- Chalk Paint
- Foam Brushes (for Paint)
- Water-Based Polycrylic in Clear Matte
- Paint Brush (for Polycrylic)
- Cricut Smart Vinyl - Permanent (4 ft.)
- Transfer Tape (4 ft.)
- Disposable Gloves (Optional)
- Design #308 (My free SVG/PDF/DXF design files are available in my free resource library - get the password by filling out the form at the bottom of this page)
Tools
- A method to cut your Smart Vinyl, I used the amazing Cricut Maker 3 but you could also use the Cricut Explore 3
- Cricut Weeding Tool
- Cricut Scissors
- Cricut Scraper
- Cricut Roll Holder (Optional)
Instructions
STEP 1: PREP YOUR BOARD
These adorable DIY Porch Signs are all the rage these days and now they are easier than ever to make thanks to the new Cricut Maker 3 and Explore 3! Both machines allow for long cuts which make them ideal for this project!
For this tutorial, I will be using the Maker 3, but you can make this sign with either cutting machine. If you don’t have a Cricut Explore 3 or Maker 3, you can still make this DIY porch sign with another cutting machine -- see my Vertical Sign tutorial to see how to piece and align your vinyl on the sign.
The first step is to get your board ready. Prepping the board takes time, so plan on at least two days to complete this project.
Start by using your 220 grit sandpaper to sand down the surface and edges of your porch sign board.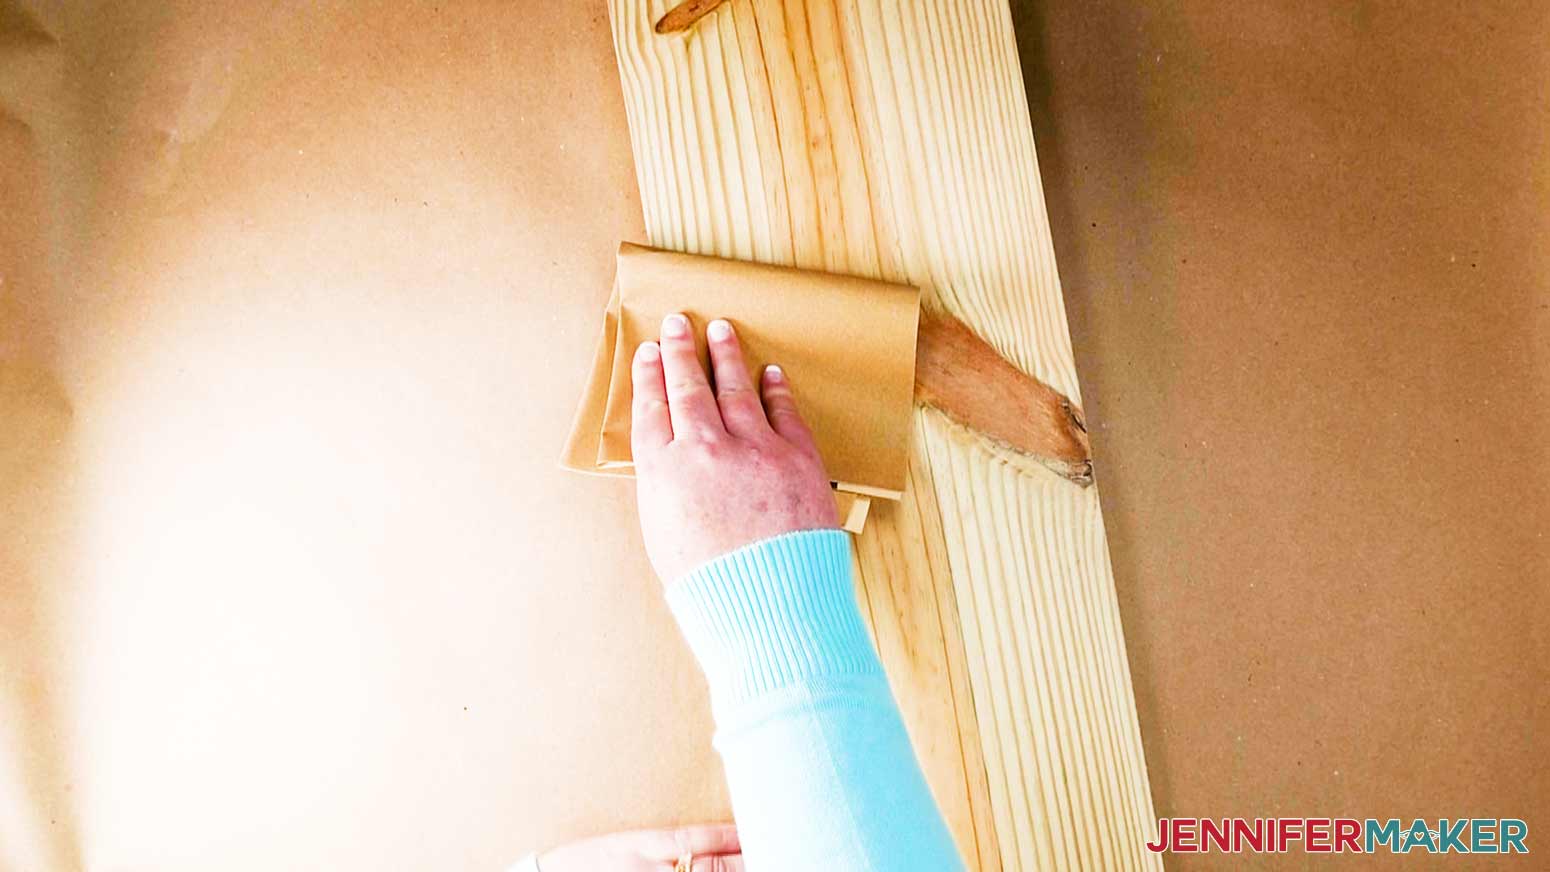
Once you’re happy with the smoothness of your board, wipe it down to remove the dust. The smoother your board, the better the paint, polycrylic, and vinyl will adhere. 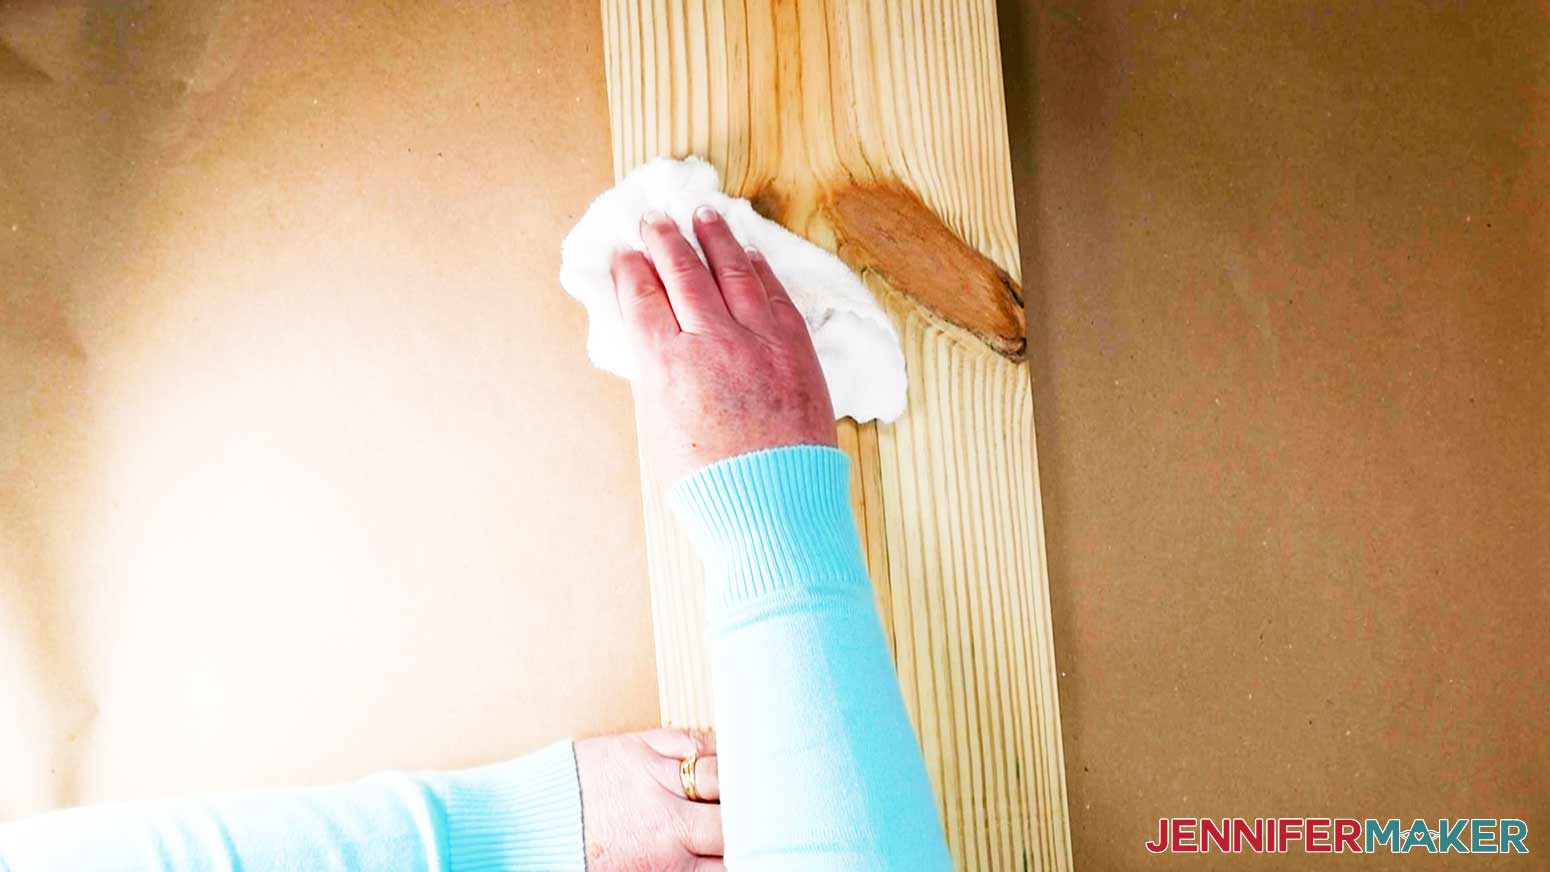
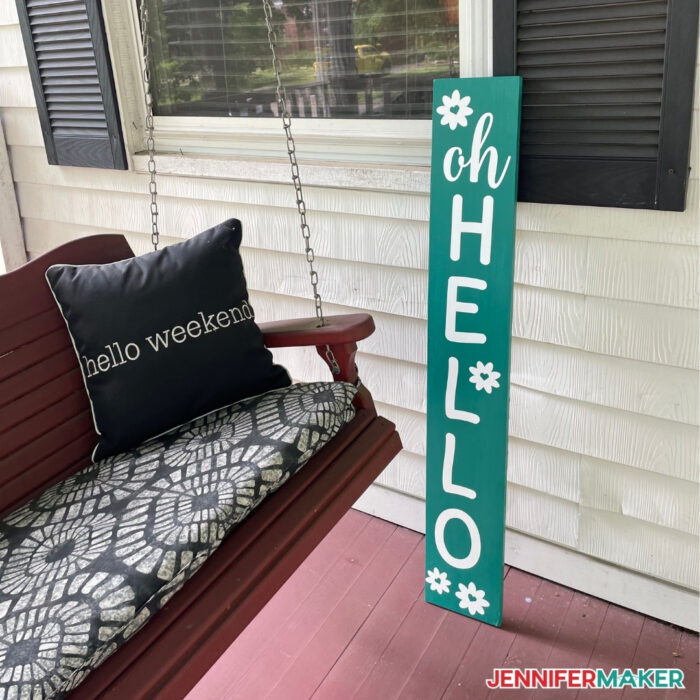
Next, use a foam brush to apply your chalk paint to the surface and edges of your board. I'm going with teal, one of my favorite colors, but you decide on what color is best for you!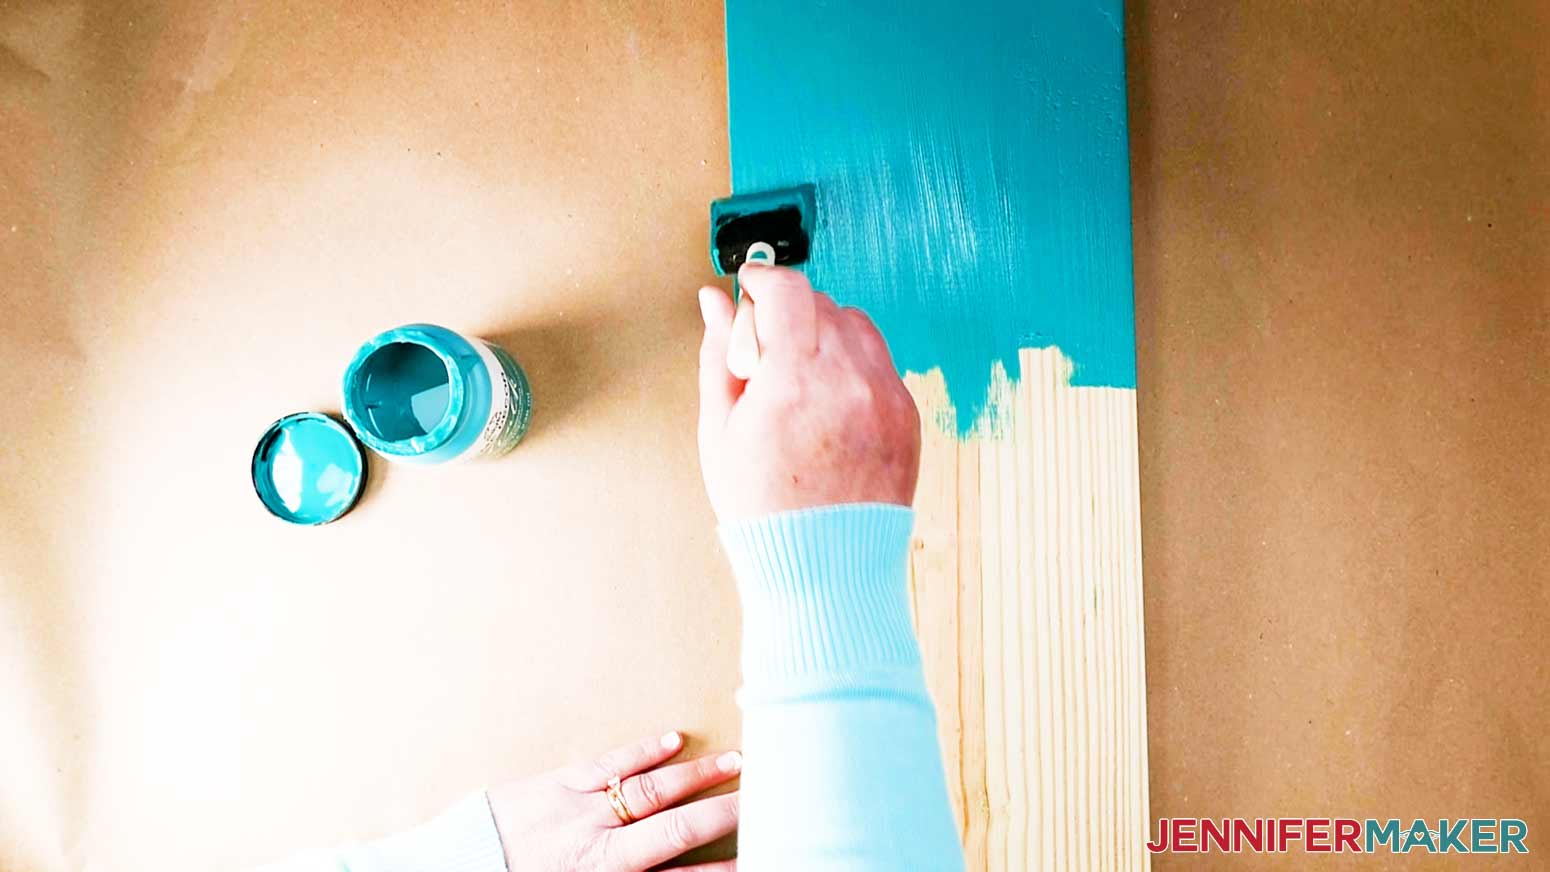
TIP: If you want a weathered look, sand the edges and/or flat surfaces of your board after about one hour, when the paint isn’t quite dry yet.
Once the paint is dry (24 hours), gently sand the surfaces again. The smoother the surface, the better your vinyl will stick! Use a paper towel or rag to remove any sand dust.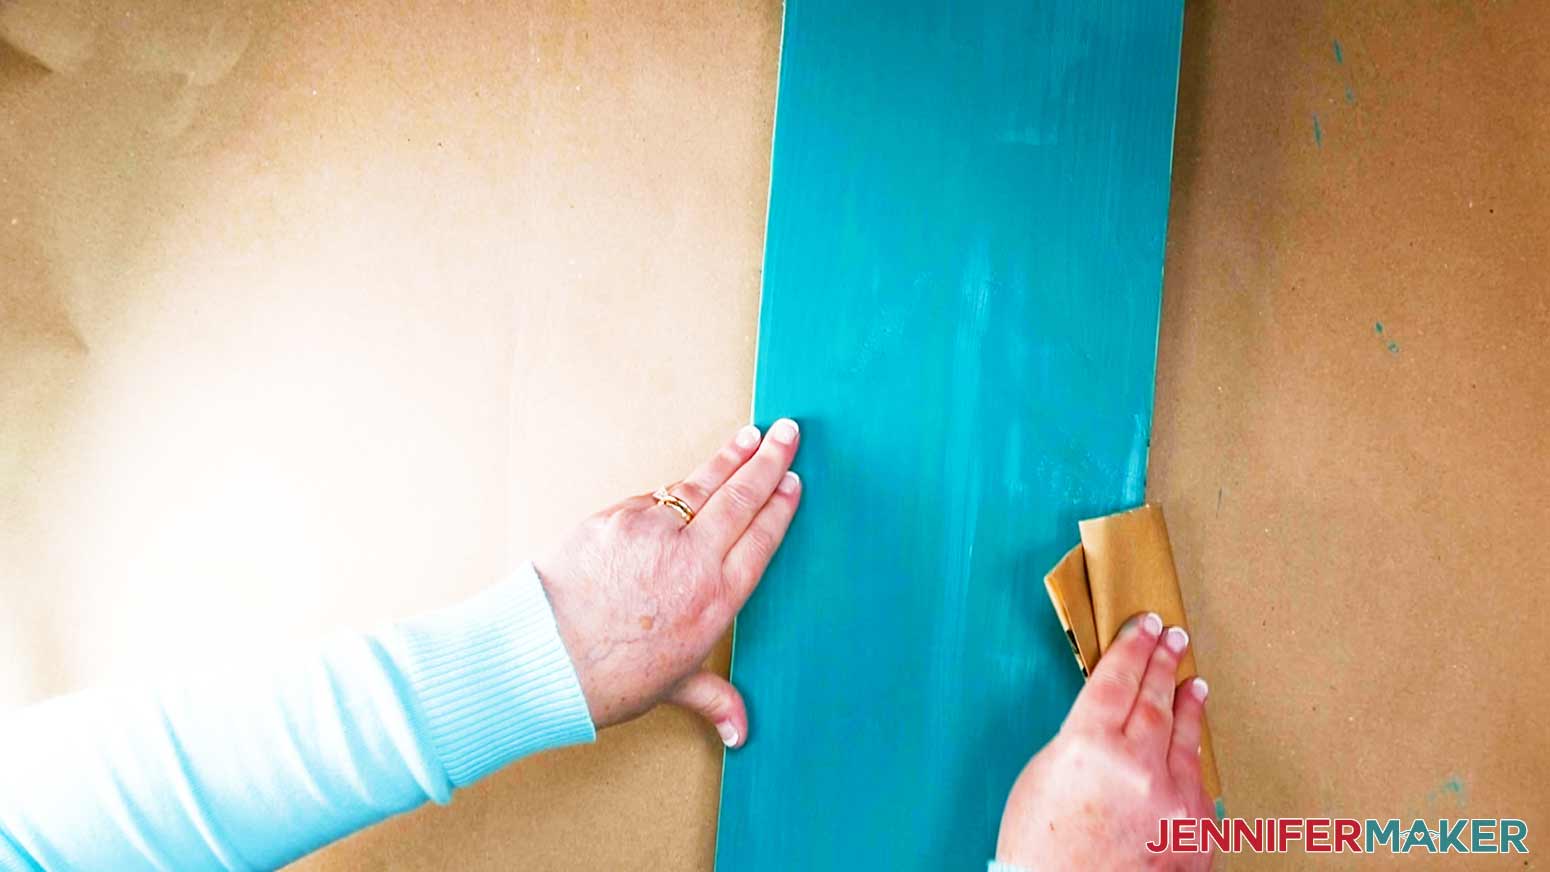
Make sure you are in a well-ventilated area to apply the polycrylic. Use your bristled paintbrush to apply a thin coat of polycrylic to your board.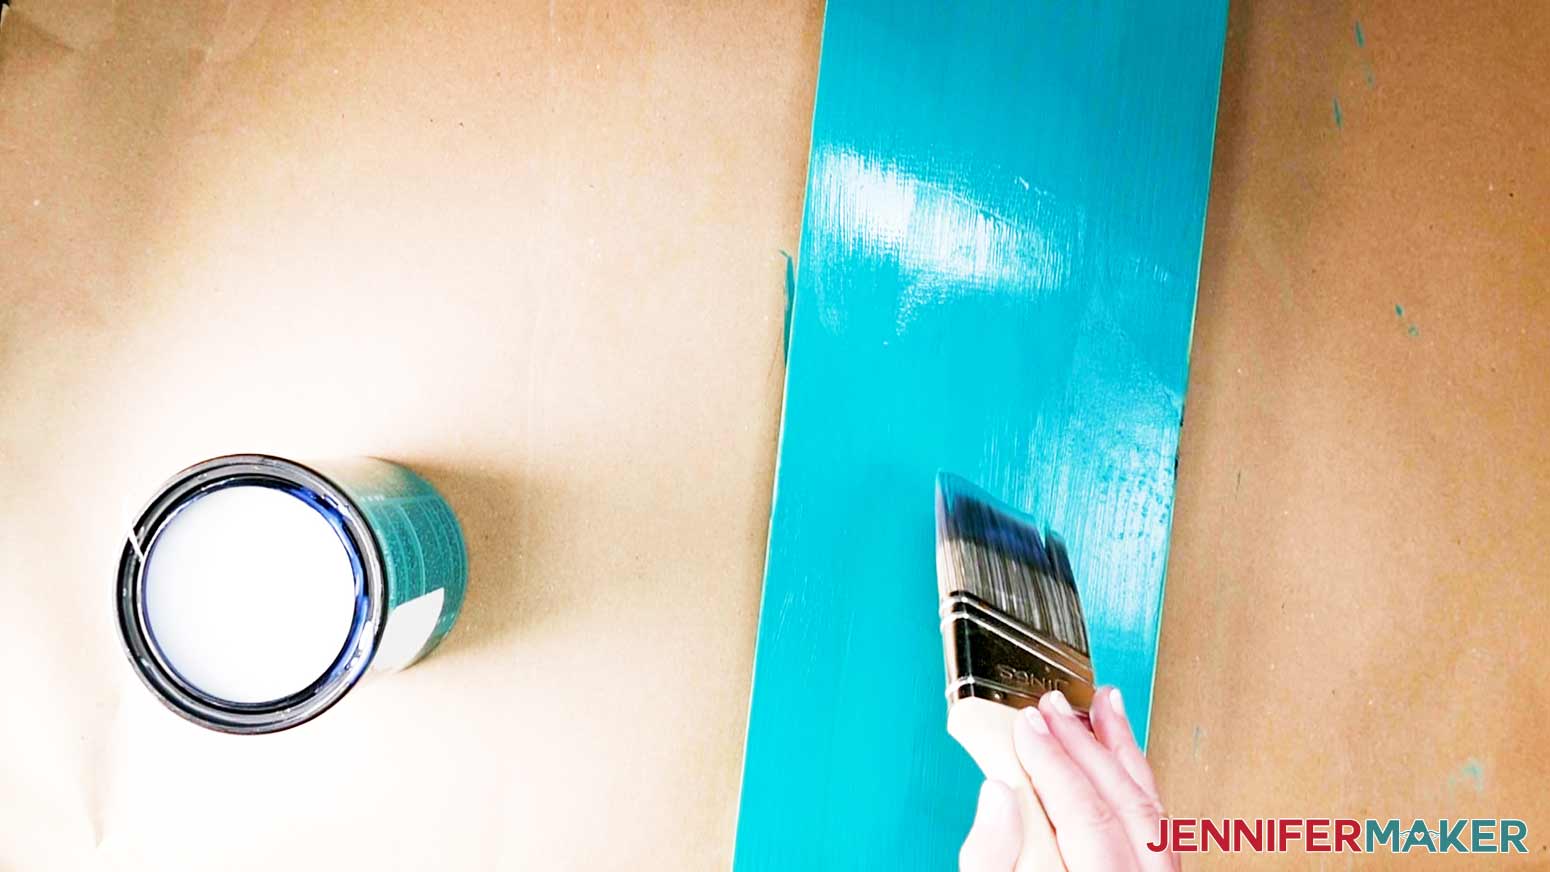
Allow at least another 24 hours for your board to fully dry before applying vinyl.
STEP 2: GET MY FREE DIY PORCH SIGNS FILE
Get my DIY Porch Signs designs from my resource library -- it's design #308.
TIP: If you are not sure how to upload an SVG cut file to Cricut Design Space, watch this helpful video training series I made. If you are on an iPad or iPhone, here is how to download and upload SVG files to the Cricut Design Space app.
This is what my DIY Porch Signs SVG file looks like in Cricut Design Space. 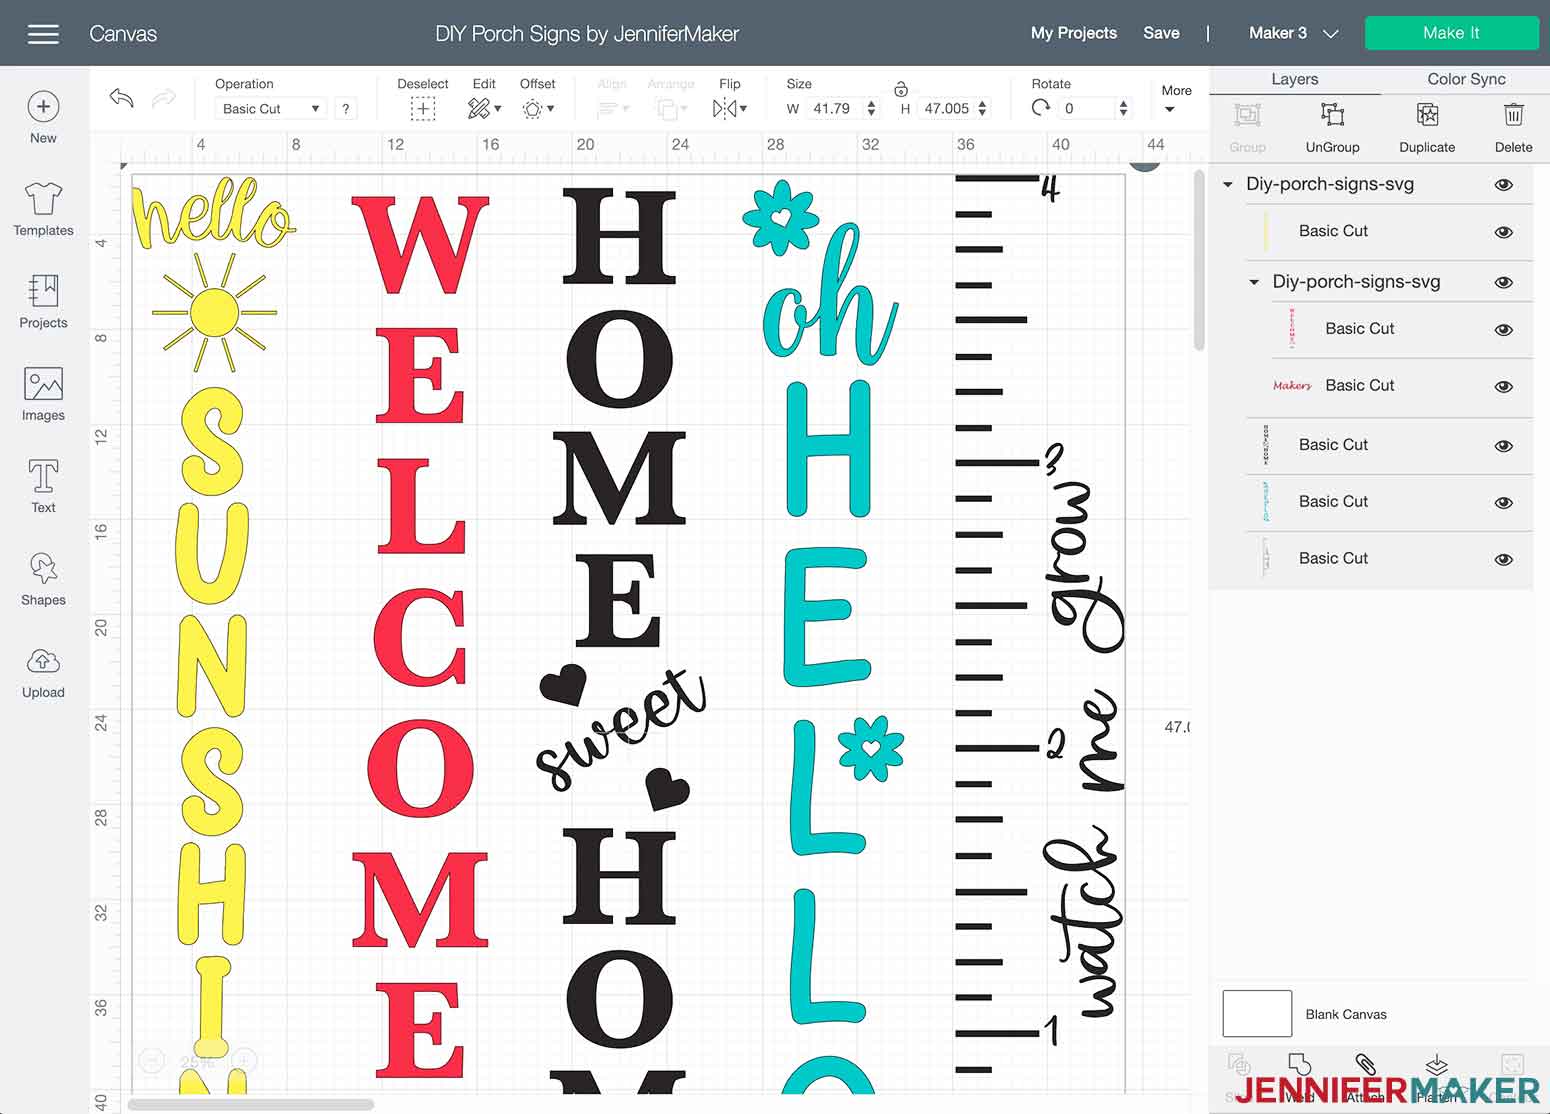
With your SVG still selected, click “Ungroup” in the upper right corner. 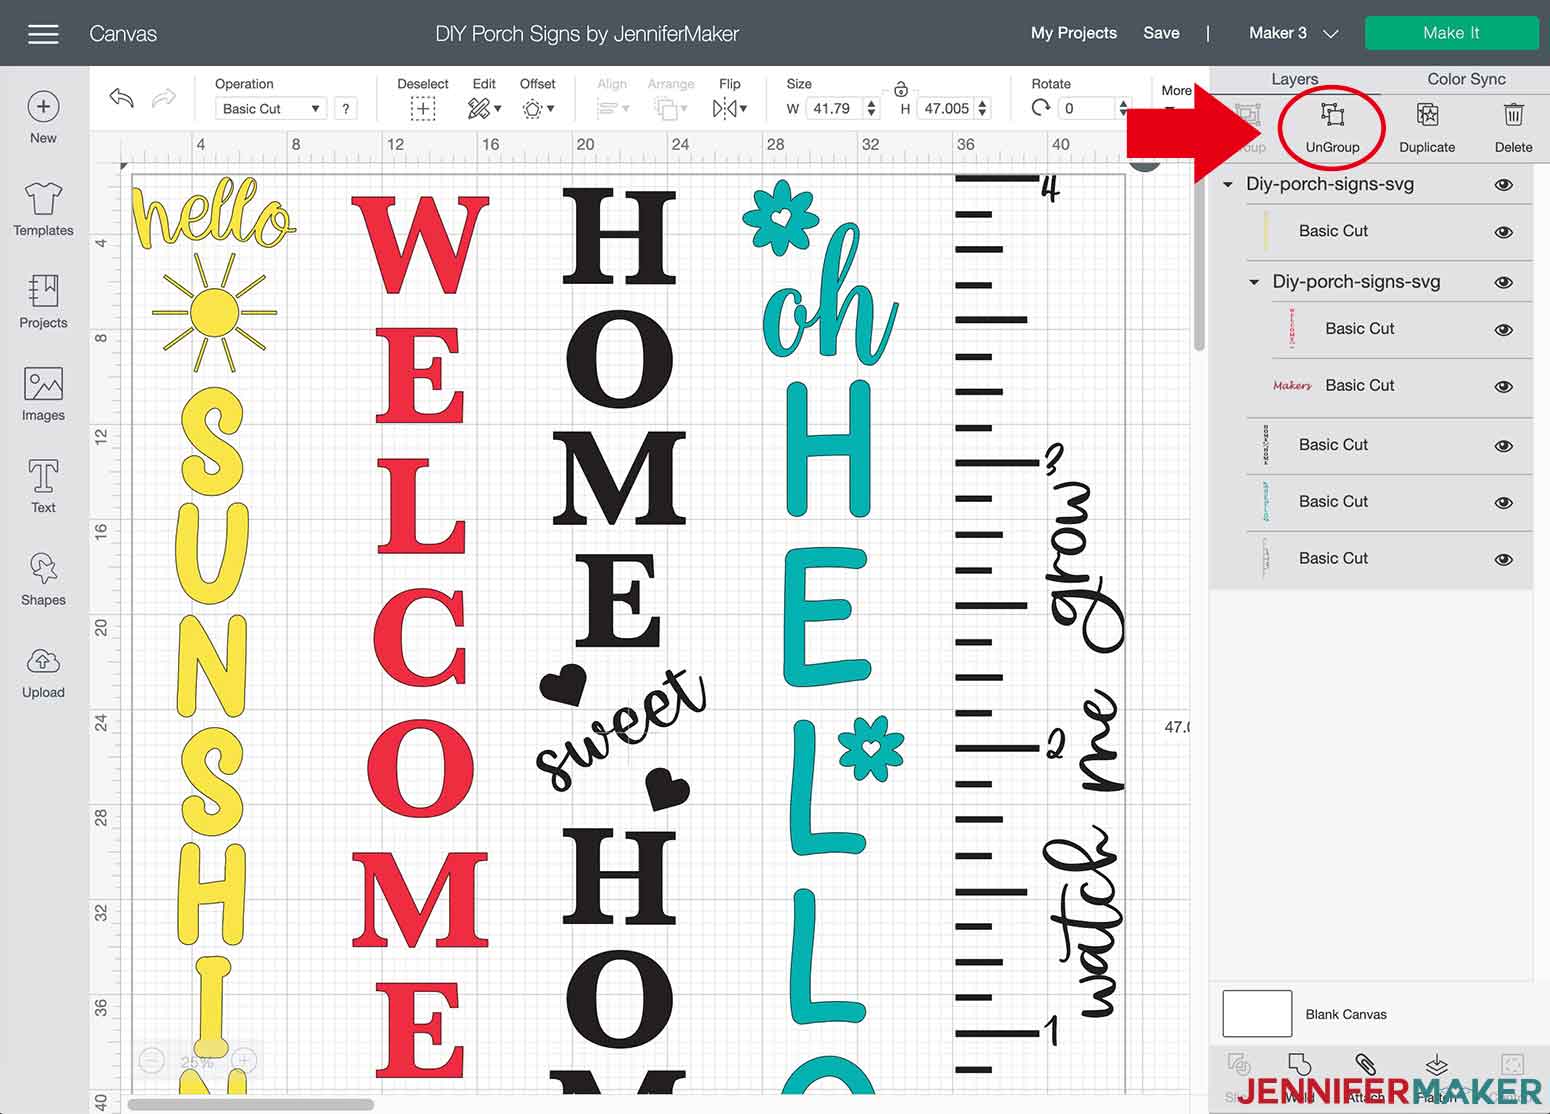
Choose which design you would like to make and "Delete" or hide the other design by clicking on the "Eye" icon.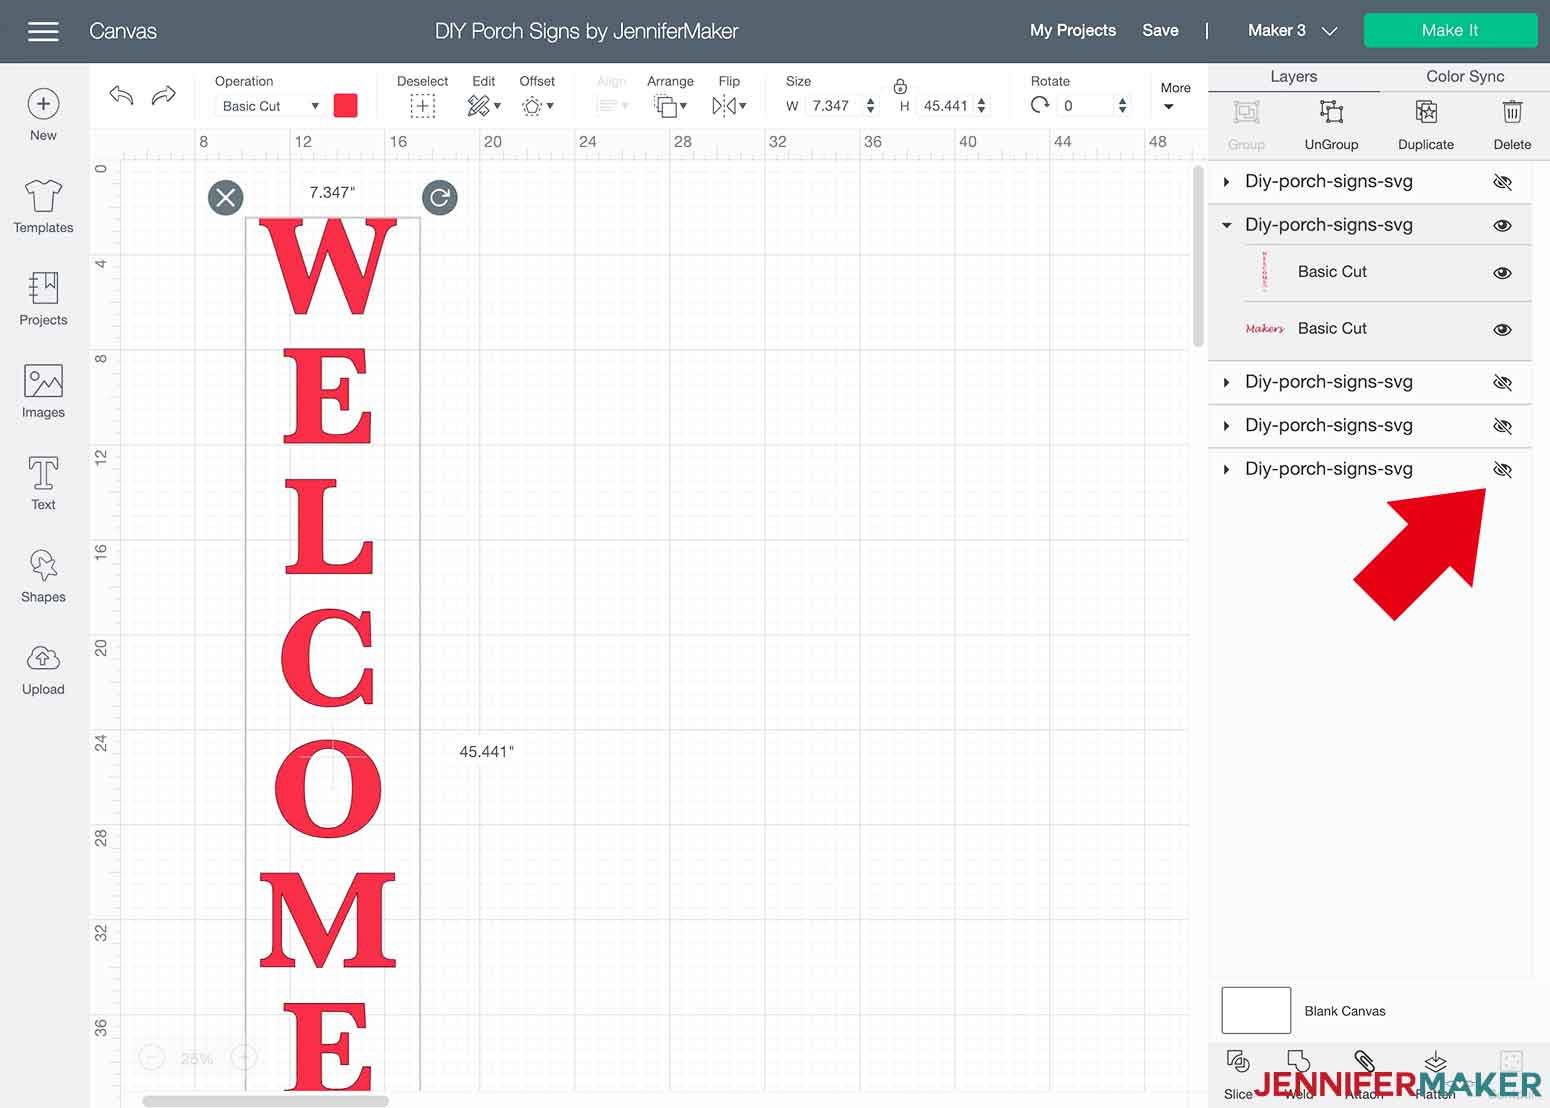
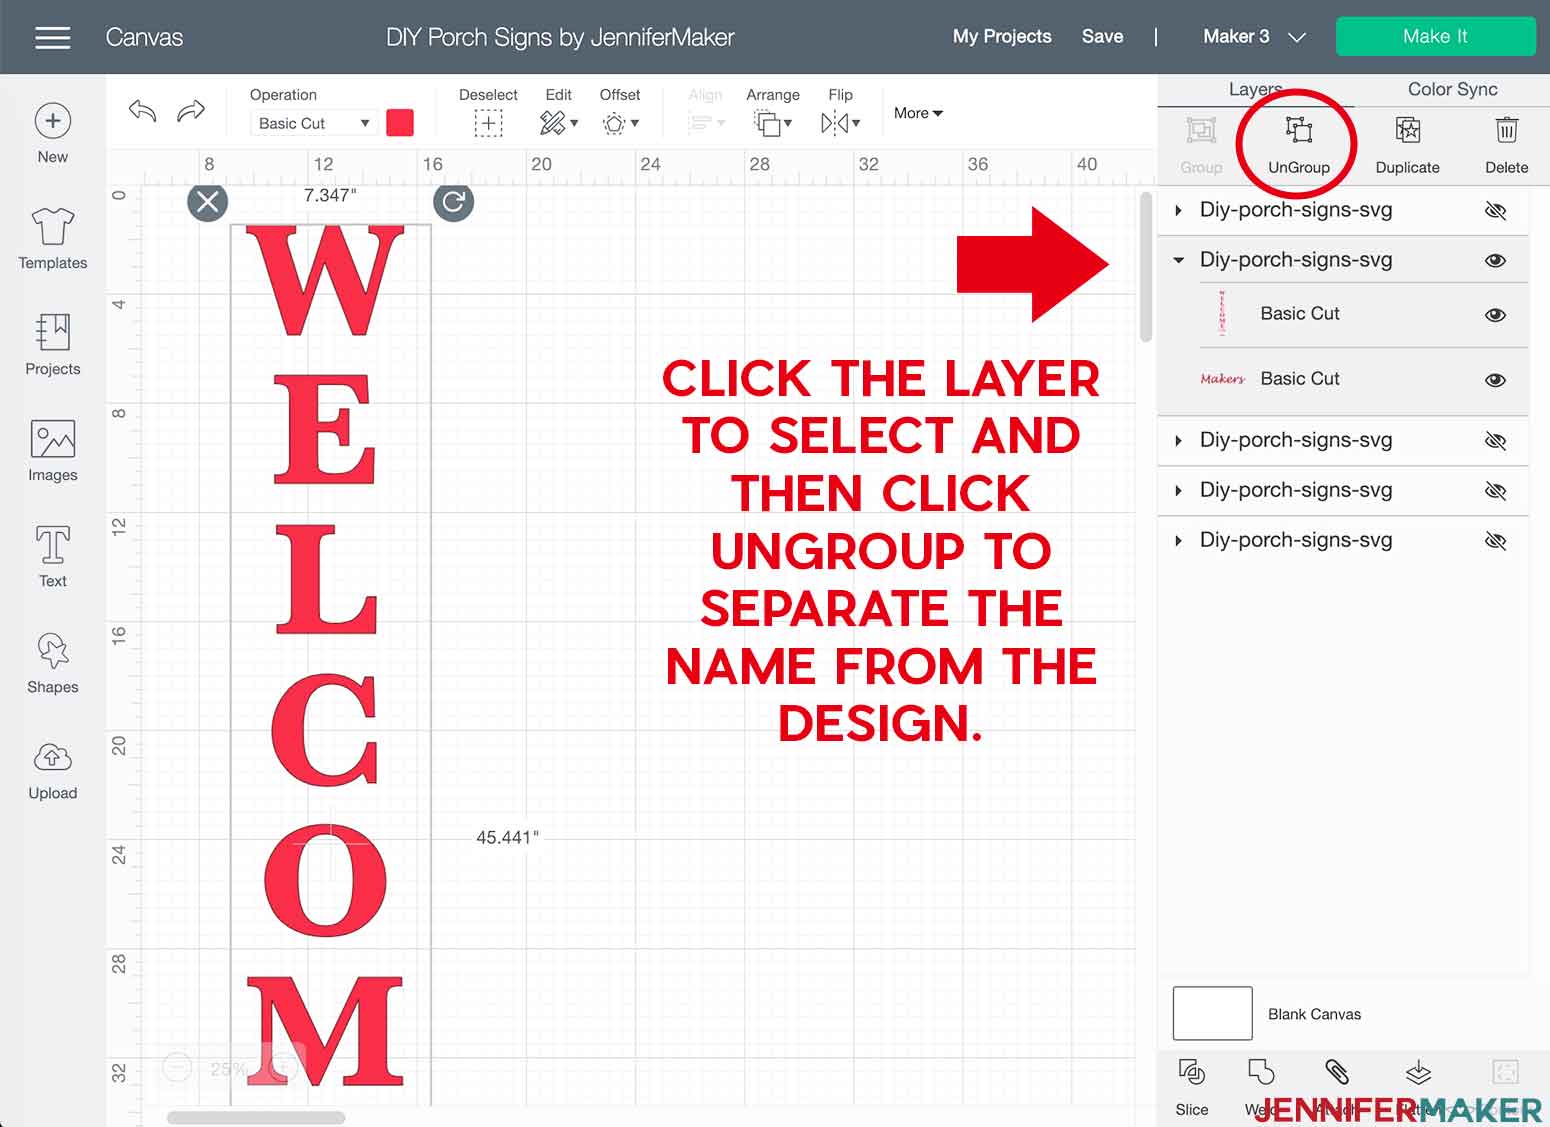
If you choose to personalize the “Welcome to the Makers” DIY Porch Sign, there are two ways to change the name to your family’s name. First, I will show you how to use the new Kerning feature and second, I will explain how to do it without the Kerning feature. Select the layer to highlight both designs and click “Ungroup.”
Next, select only “Makers” and click “Delete.”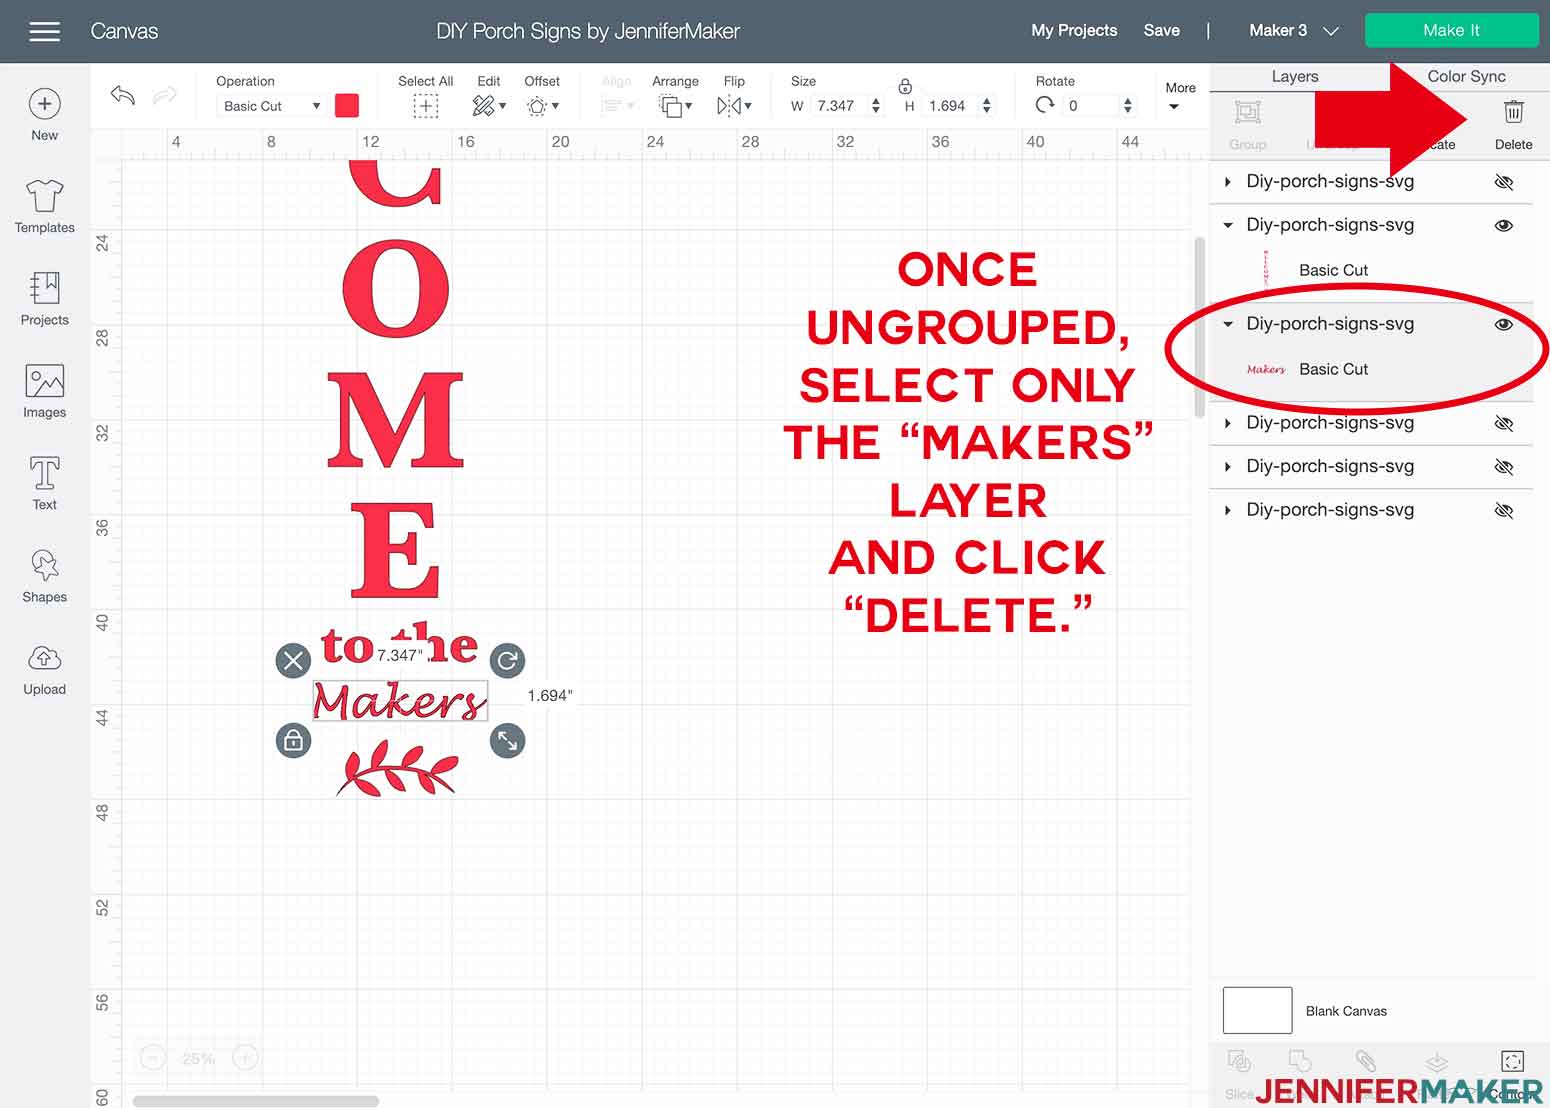
With Kerning: Click the "Text" icon on the left side of your screen to open a text box. Click the font dropdown arrow and check "Only Kerned Fonts" to filter the results to all fonts that will work with this feature.
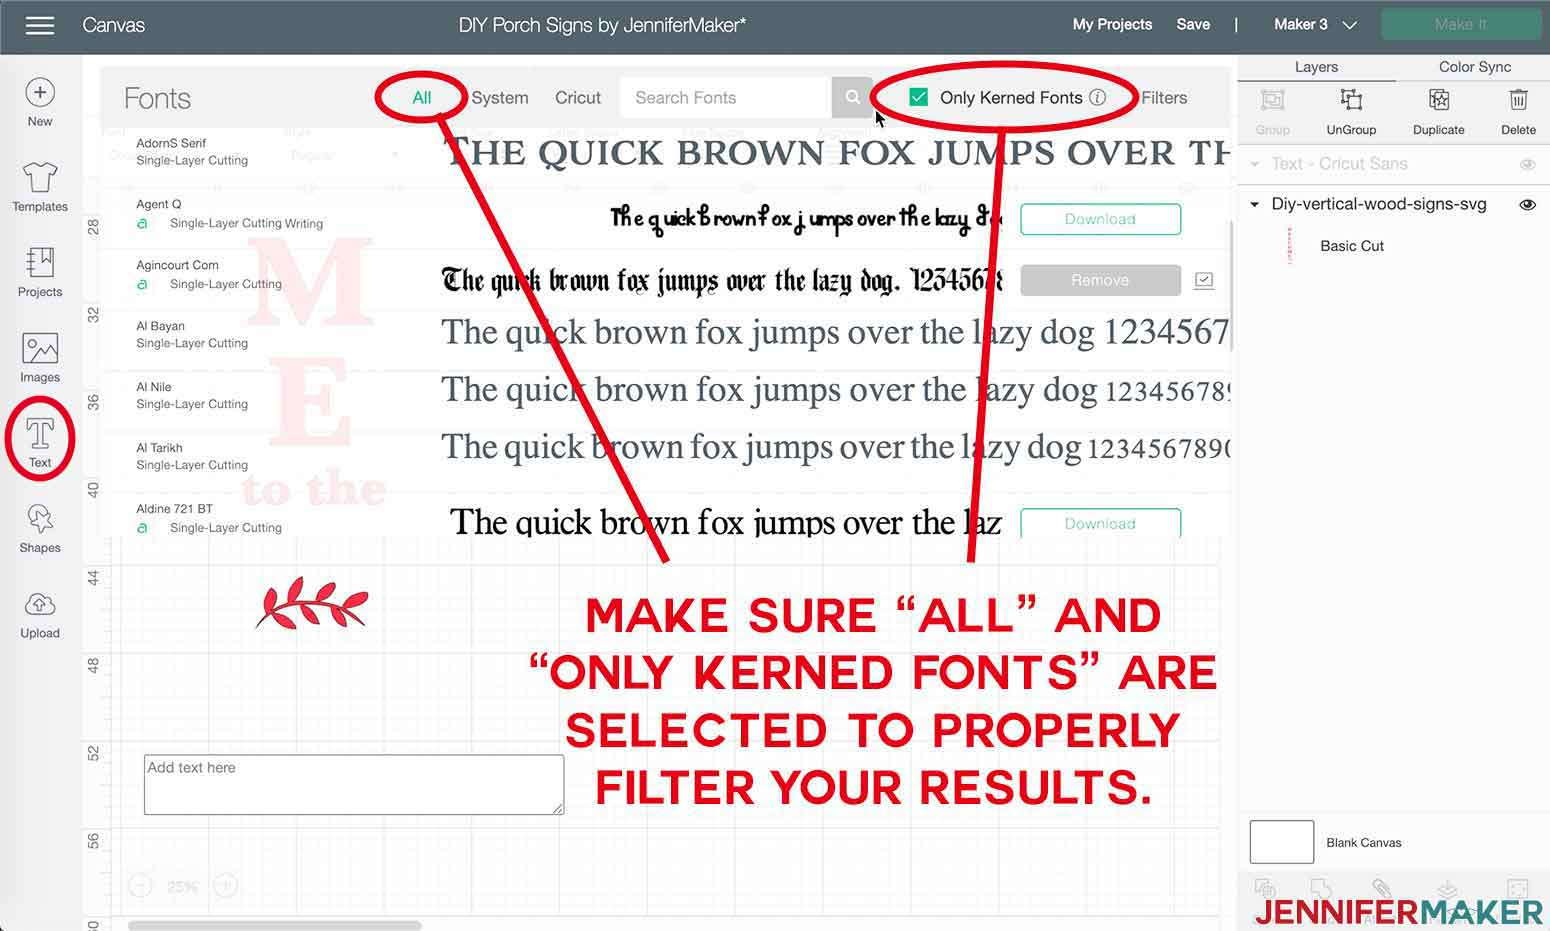
Select your font and click on your text box to begin typing. I used Lucida Handwriting. Note: If you do not have this font installed, you can get it here. But really the choice of what font to use is up to you, so be creative!
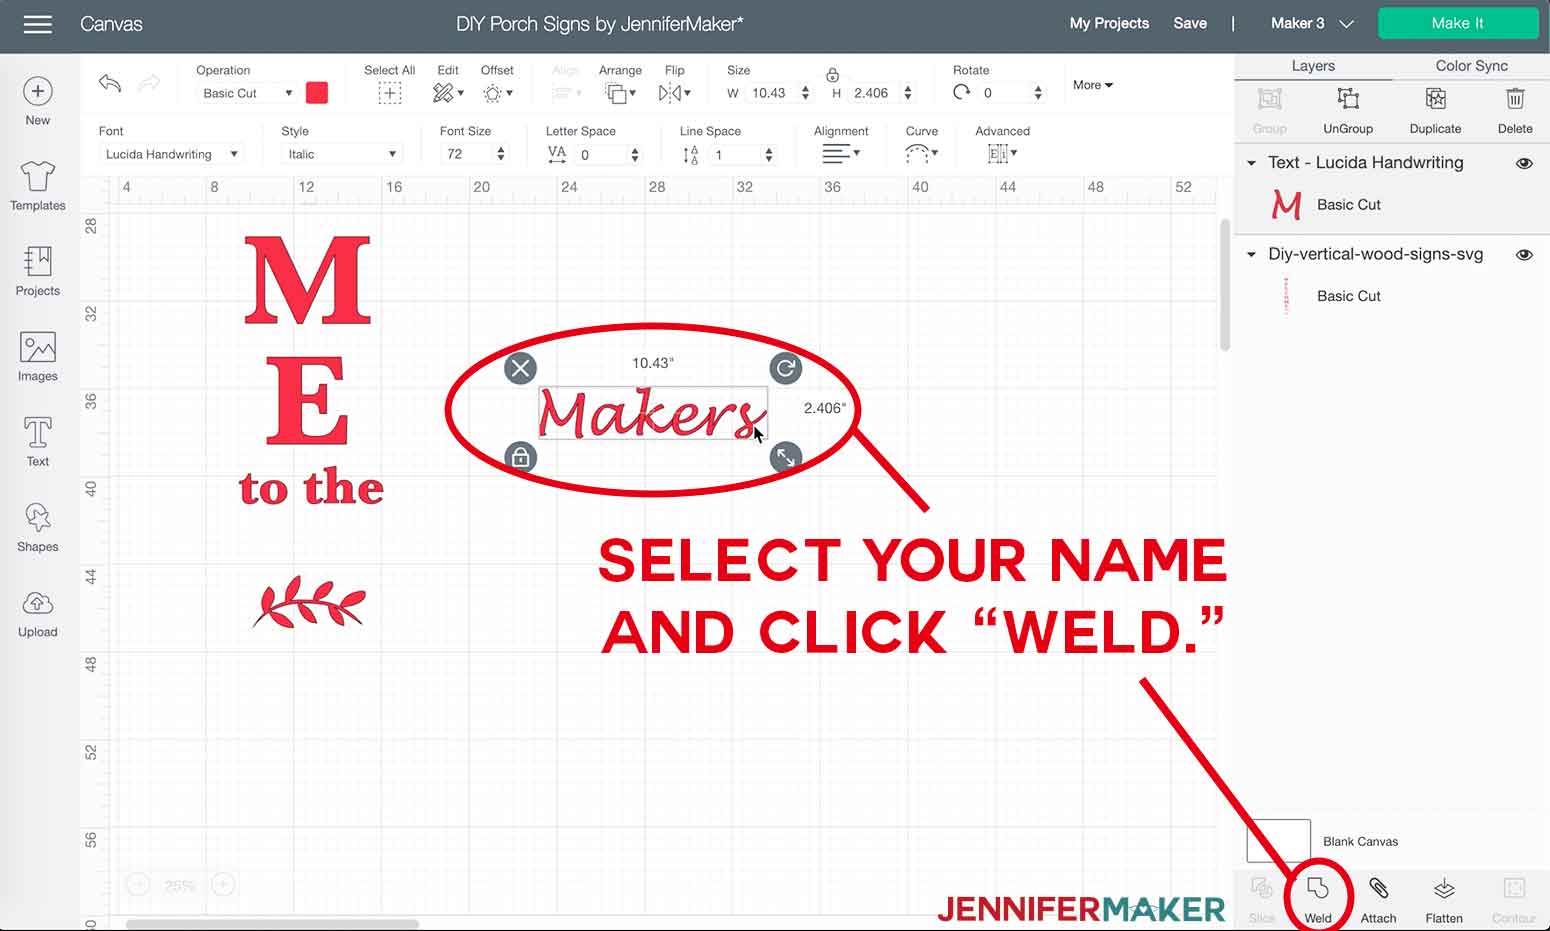
Type your desired name and click anywhere on your canvas to get out of the text edit mode. If you used the same font as I did, your name will look like this, with the letters flowing together. Click "Weld."
Without Kerning: Click the "Text" icon on the left side of your screen and choose a font from the dropdown window. I am again demonstrating this with the Lucida Handwriting font, but you can use whatever font you like.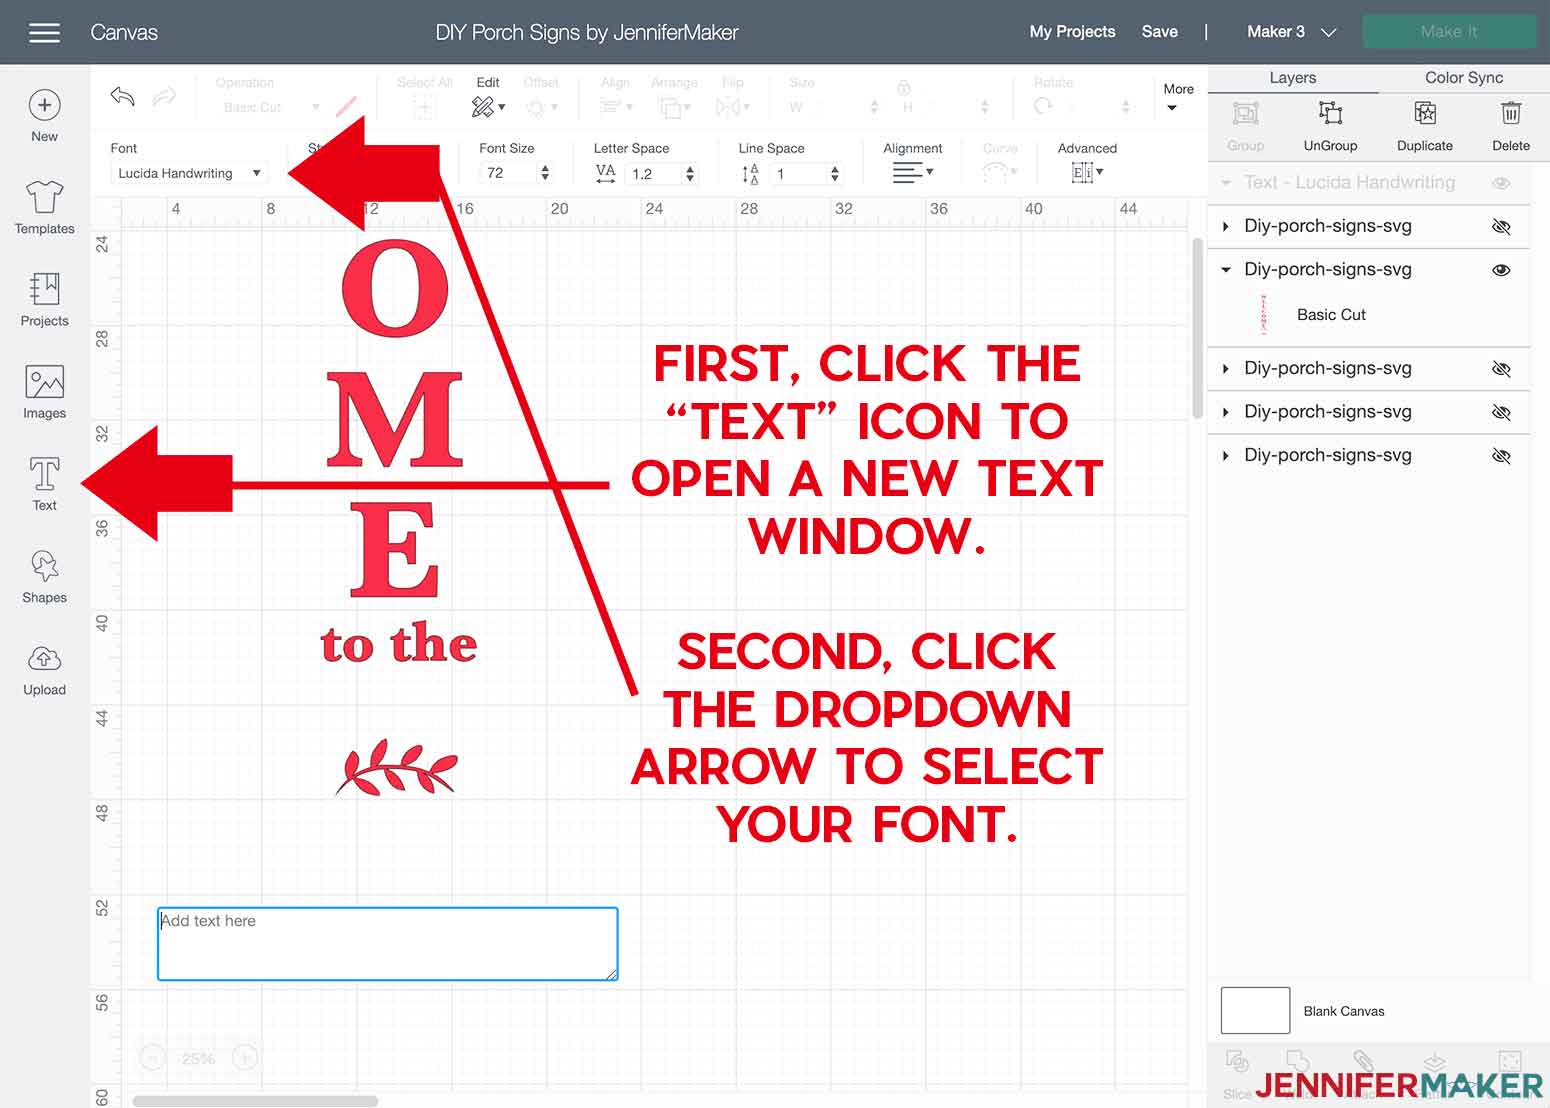
Type your desired name and click the text section in the "Layers" panel.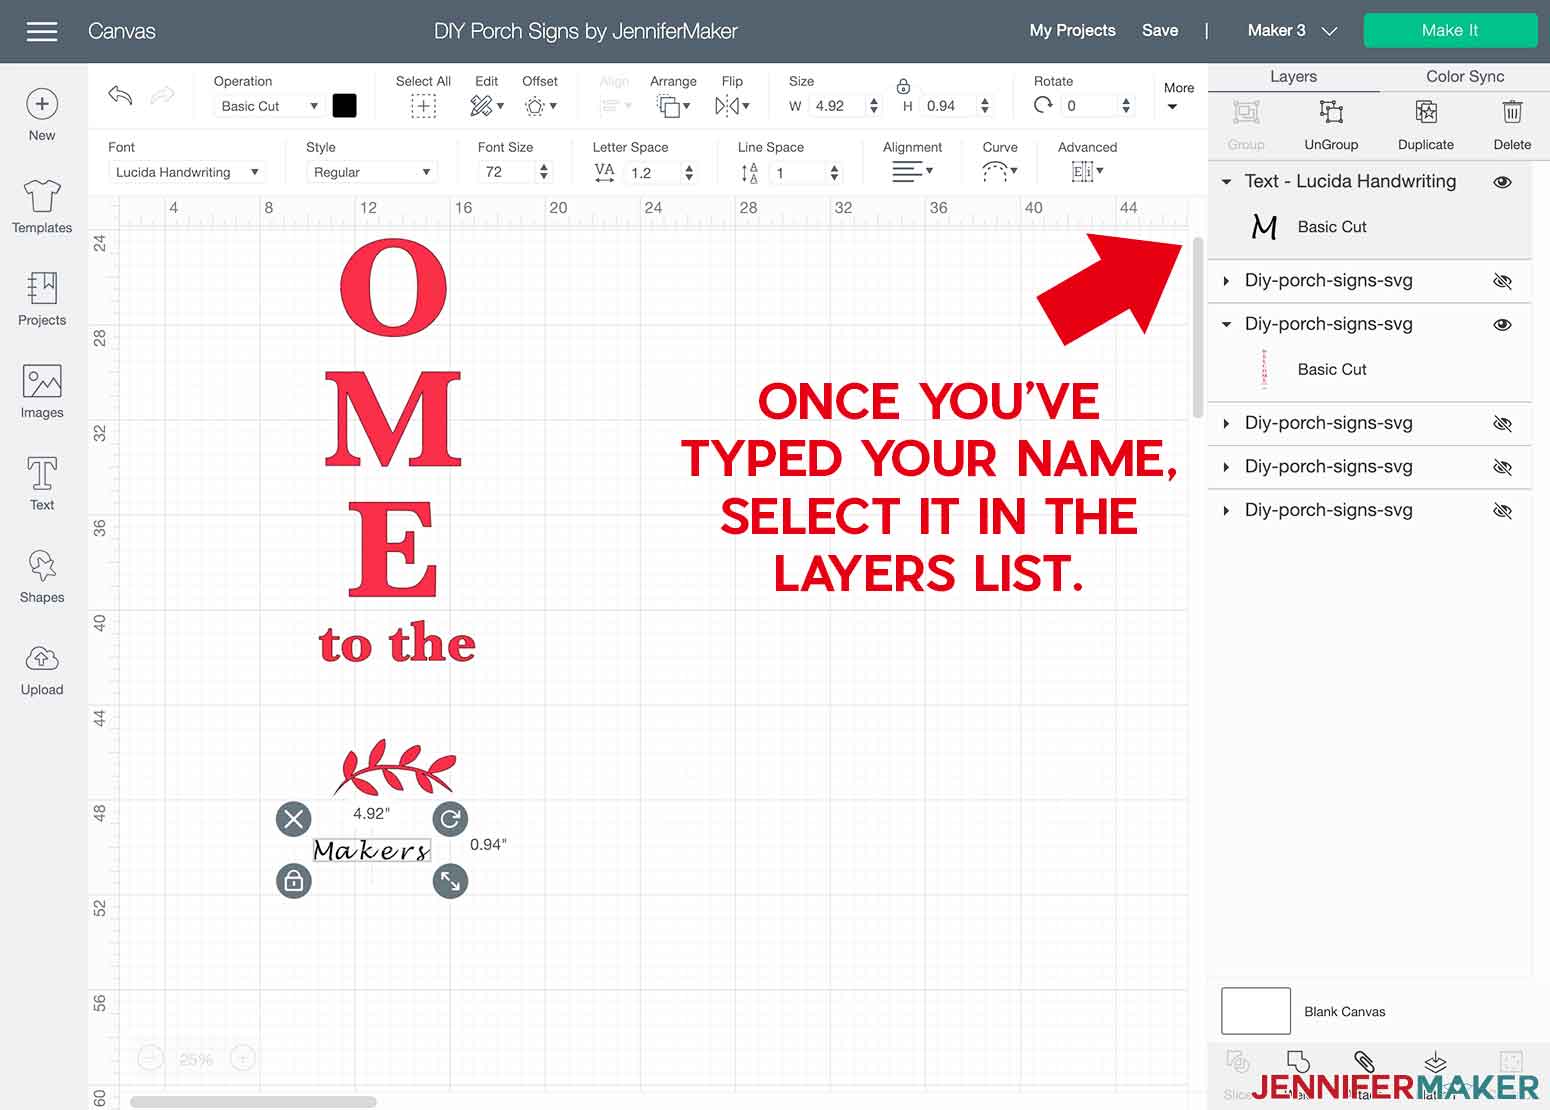
Once the text outline is selected, click and drag your name into place on your board. You can now change the letter spacing.
TIP: If you cannot get your spacing to connect or flow correctly, you can click “Advanced” and then “Ungroup to Letters.” This will allow you to manually move each letter in your name to place it how you’d like. 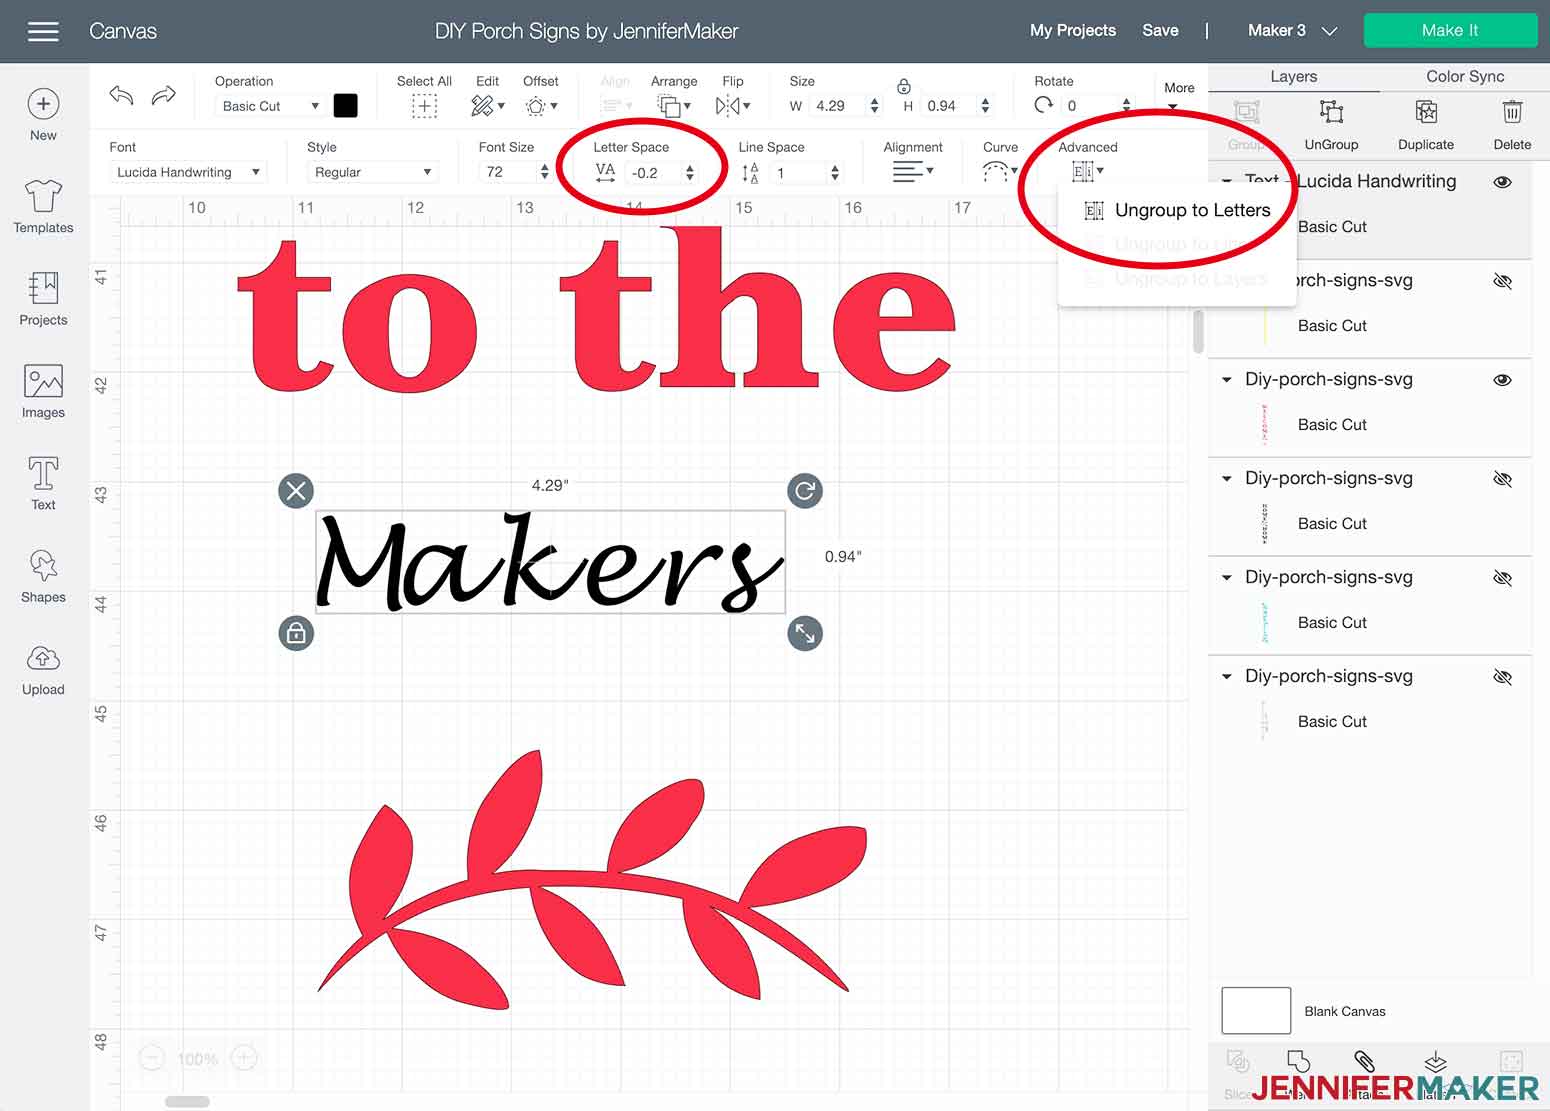
Once you have your name the way you like it, you need to "Weld" it together. Click one letter in the "Layers" panel and hold down your shift key to select all of the text pieces in your layers panel (for the name only) and then click “Weld.”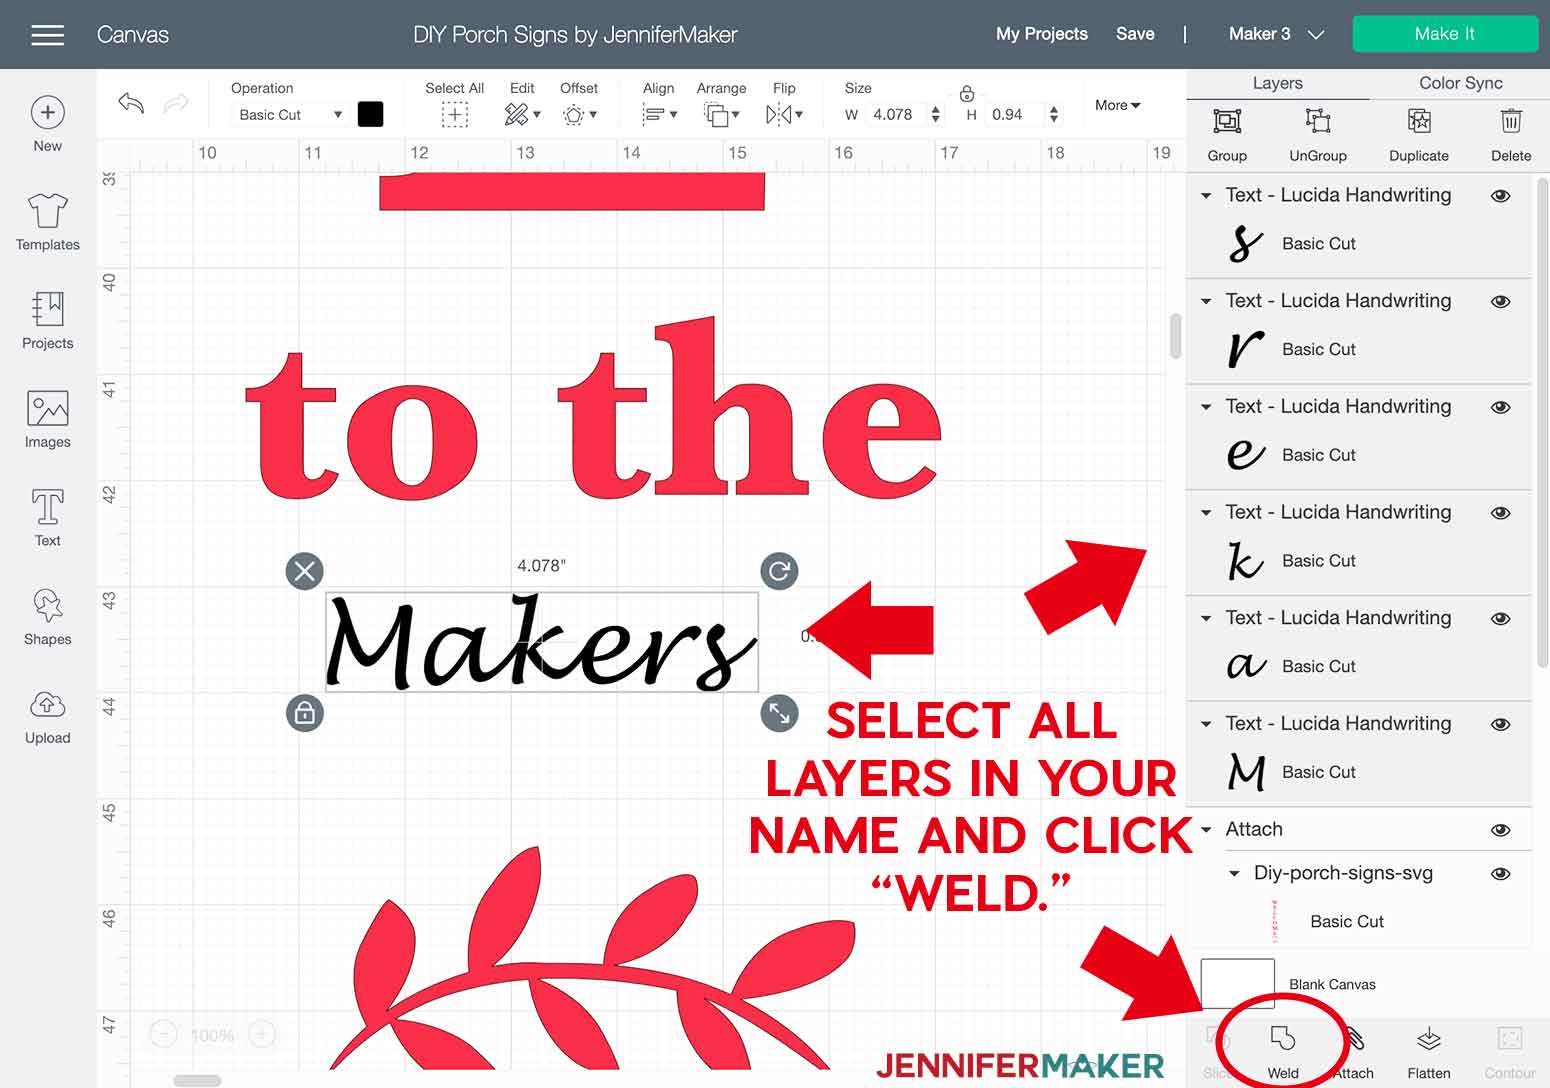
Now that you have your name Welded, you can now click and drag the resize handle to adjust the size. You also want to match the color for it to print with the rest of the wording.
TIP: When you click on the colors menu, your project colors are displayed in the top row. You can easily select one of the colors that match your project. 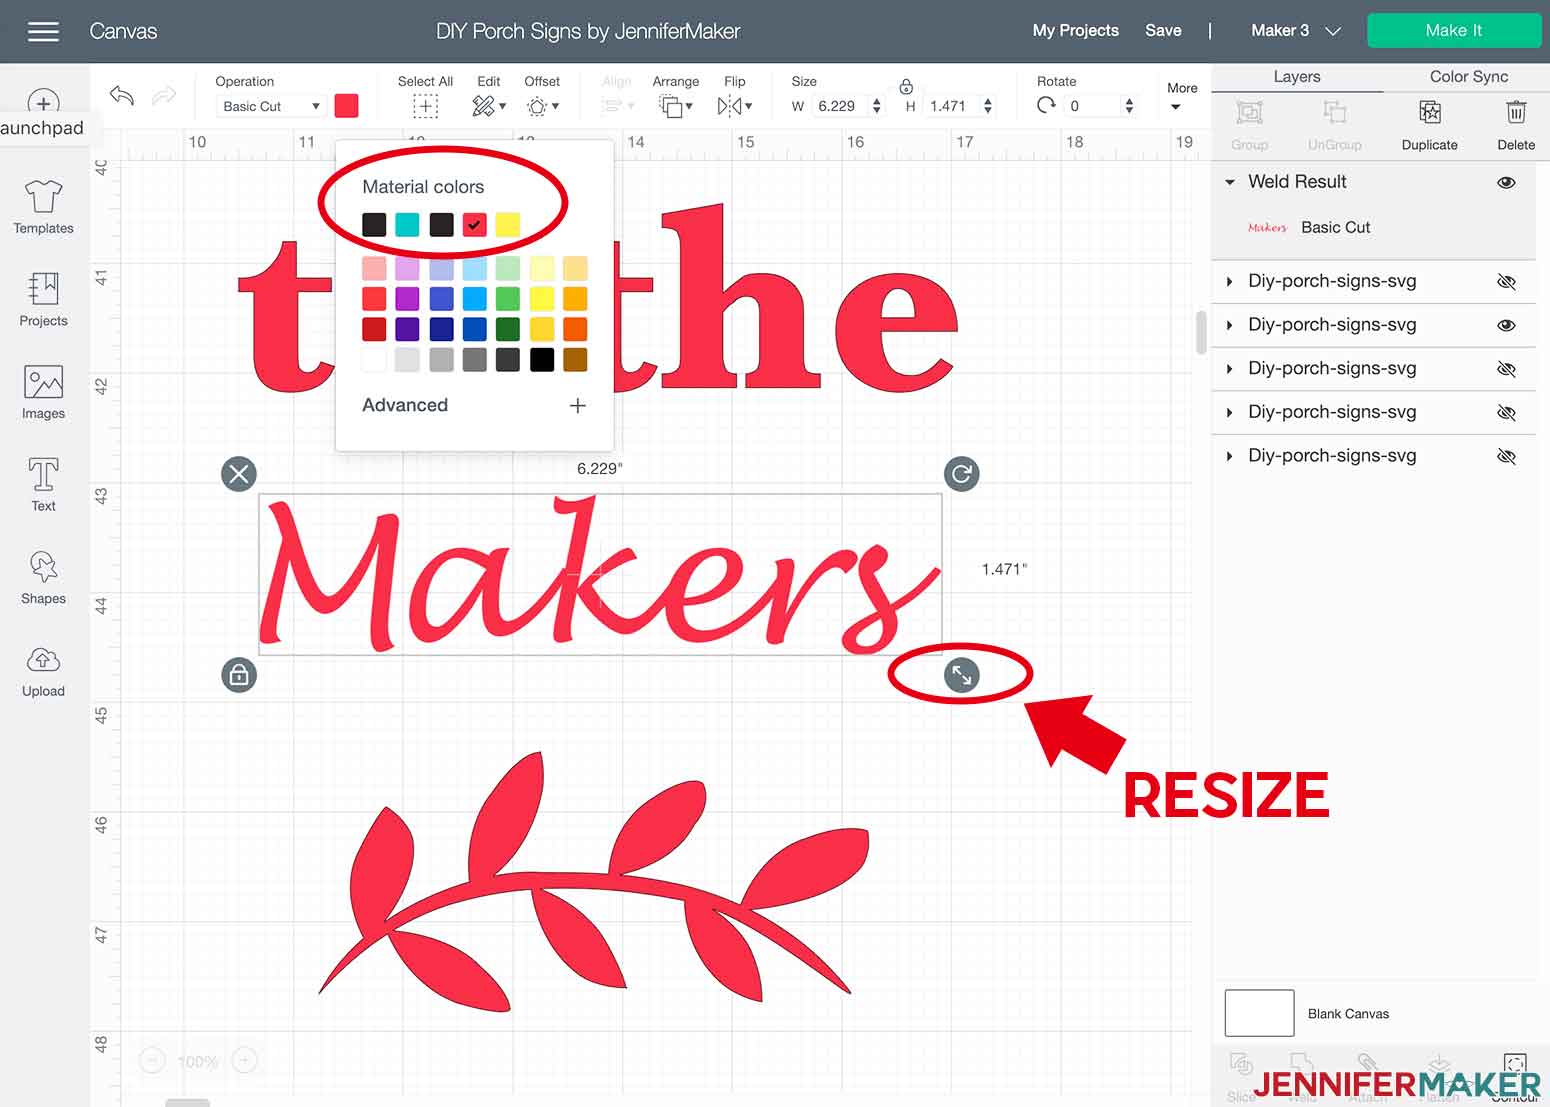
Once your name is just how you’d like it, select the layer with your name in your layers list. Press Shift and also select the “Welcome to the” layer. At the bottom right, click “Attach.” 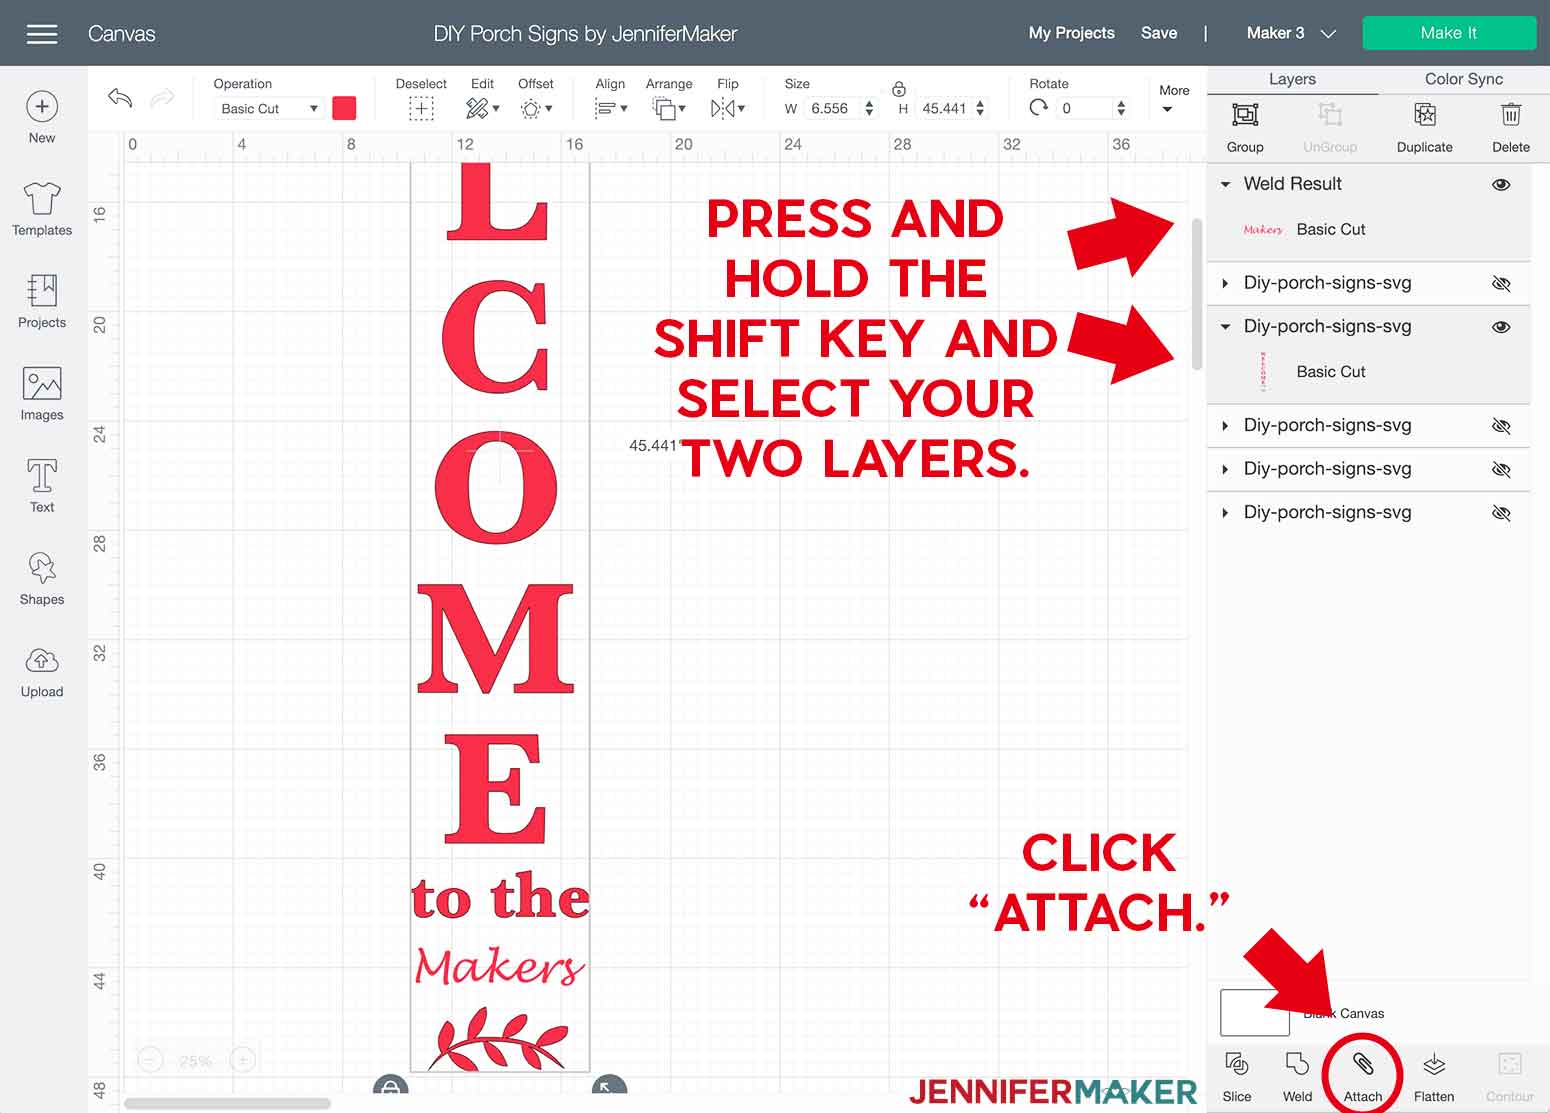
You’re all set! You can now cut your vinyl with a custom name.
TIP: My designs are created for wood boards that are 8” wide by 48” long. Confirm the width and length of your board before cutting your design and make sure the dimensions of your design do not exceed the dimensions of your board. You can confirm the width of the design by selecting your design and looking at the top of the design or top toolbars. Your board may not be the same measurements as advertised in the store!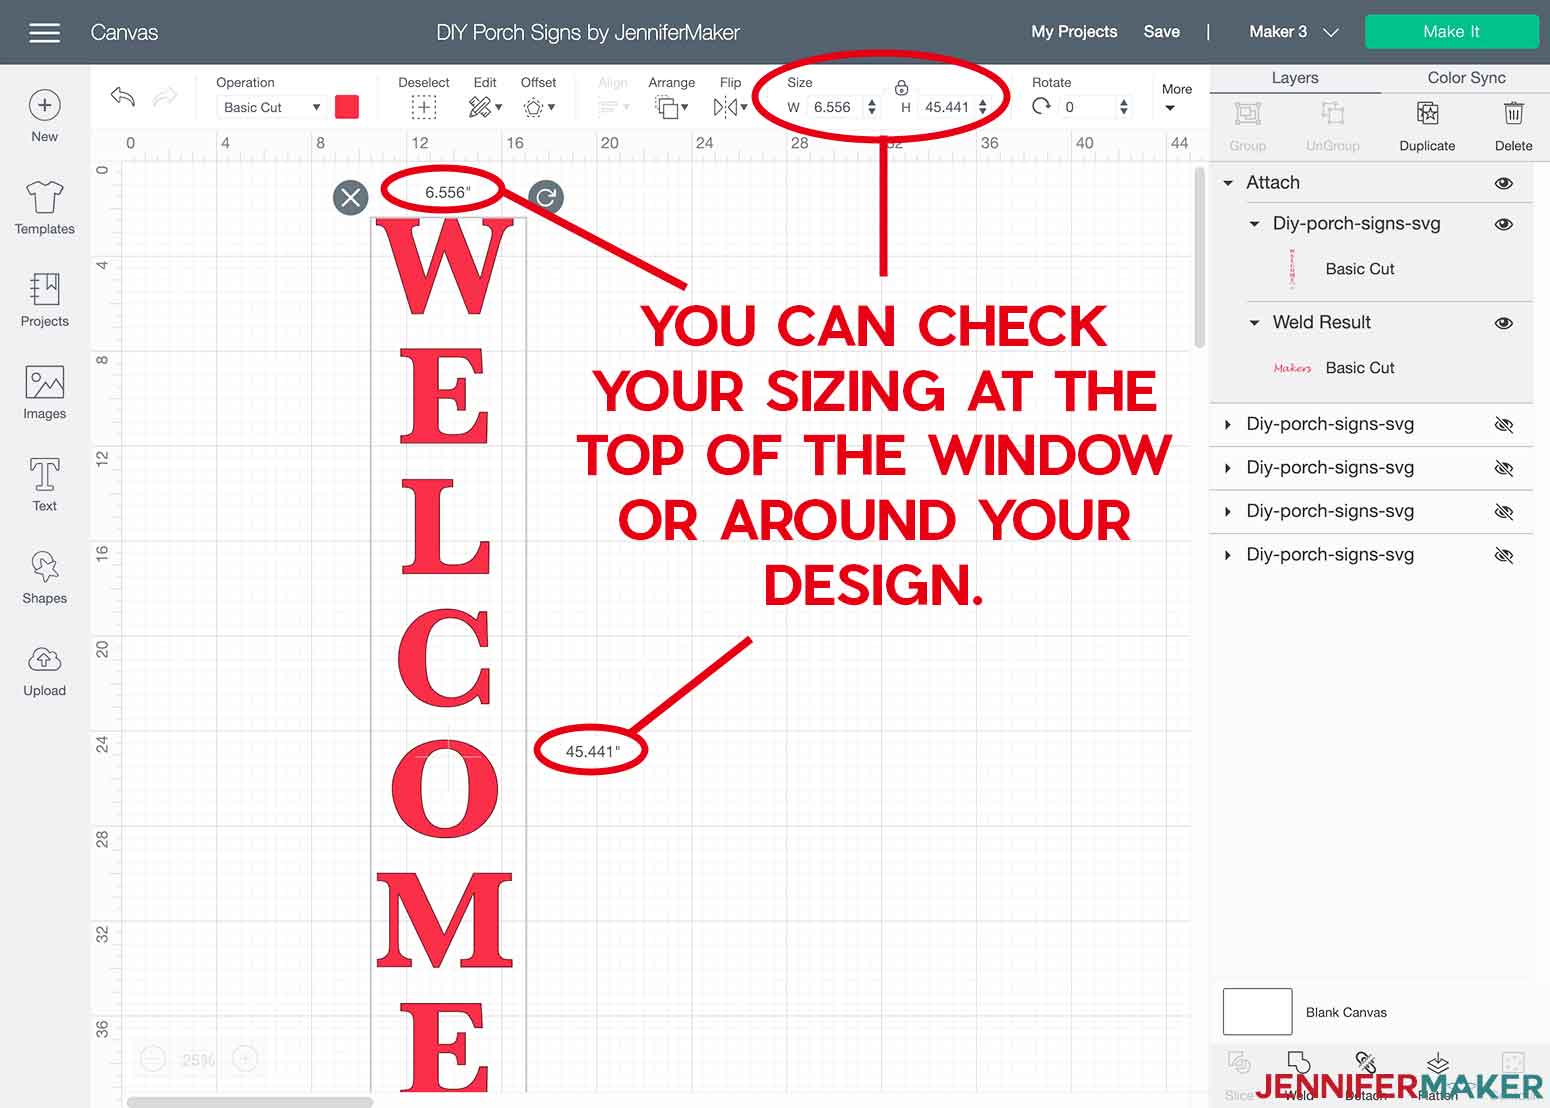
With only the design you wish to make showing, click “Make It” in the top right. 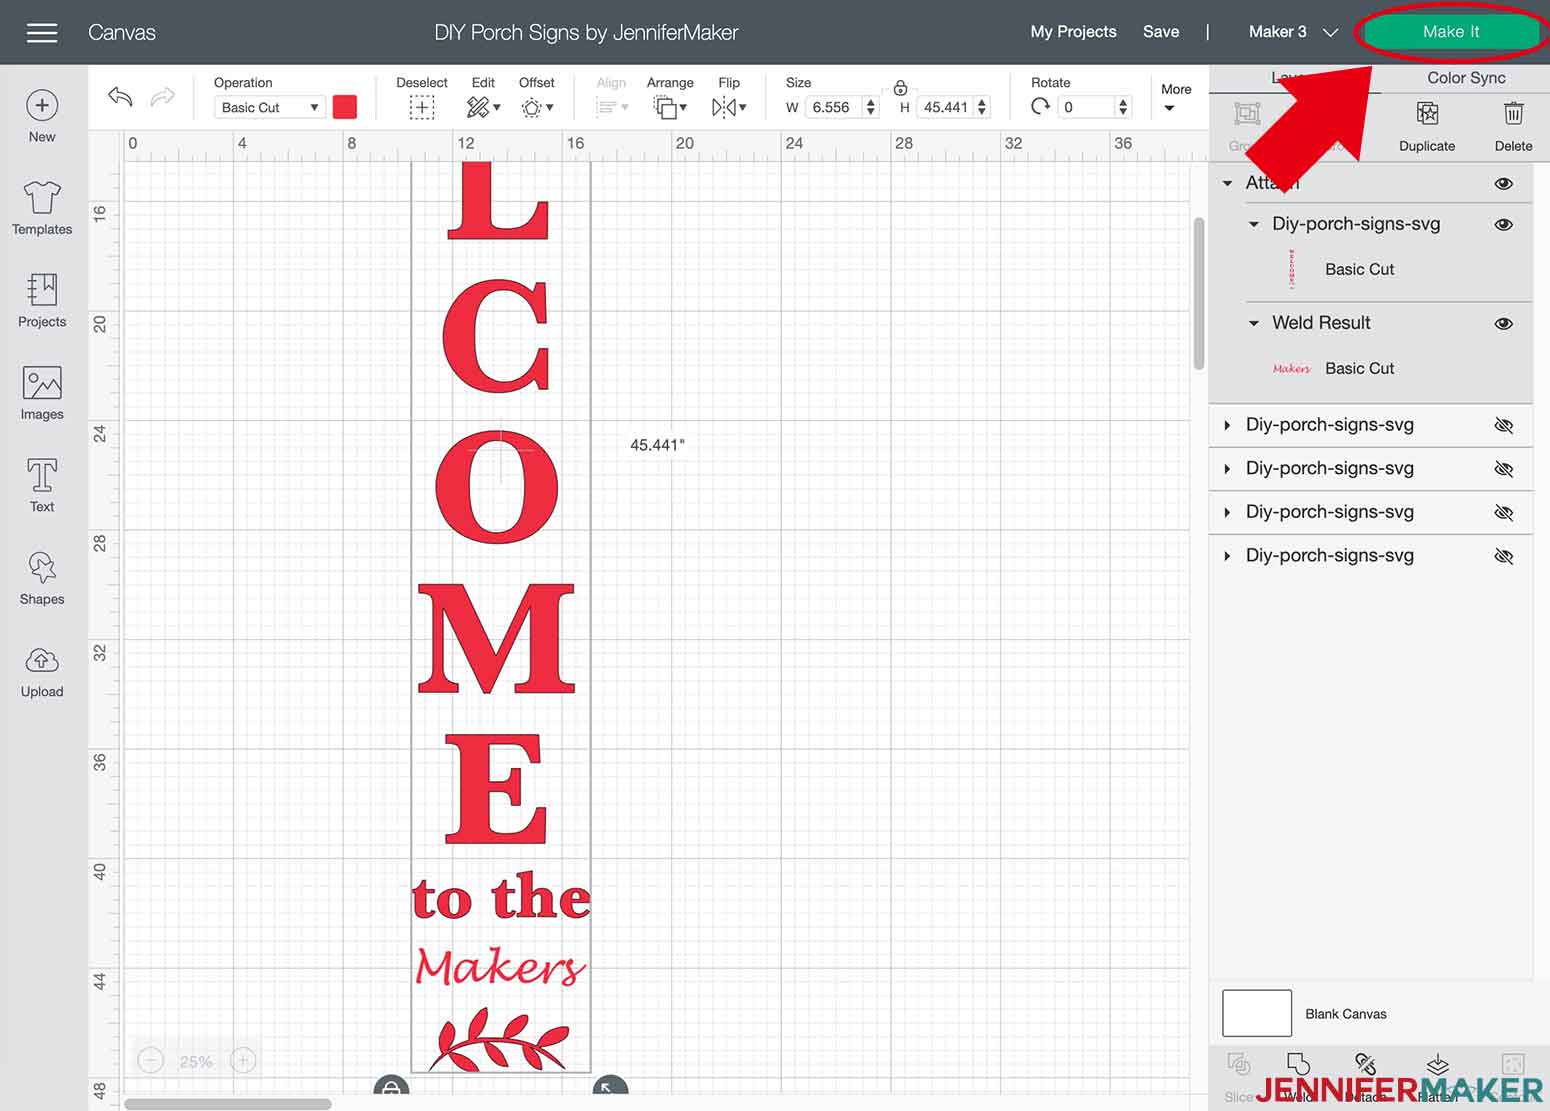
The next screen allows you to review your cut. You will notice this screen also tells you the minimum length of Smart Vinyl you will need to make your cut. So for the DIY Porch Signs, you'll see that it's 47.5 inches. And the best part, because this is a Cricut Maker 3, you don't need a mat! Click “Continue.”
Select your material, "Smart Vinyl - Permanent."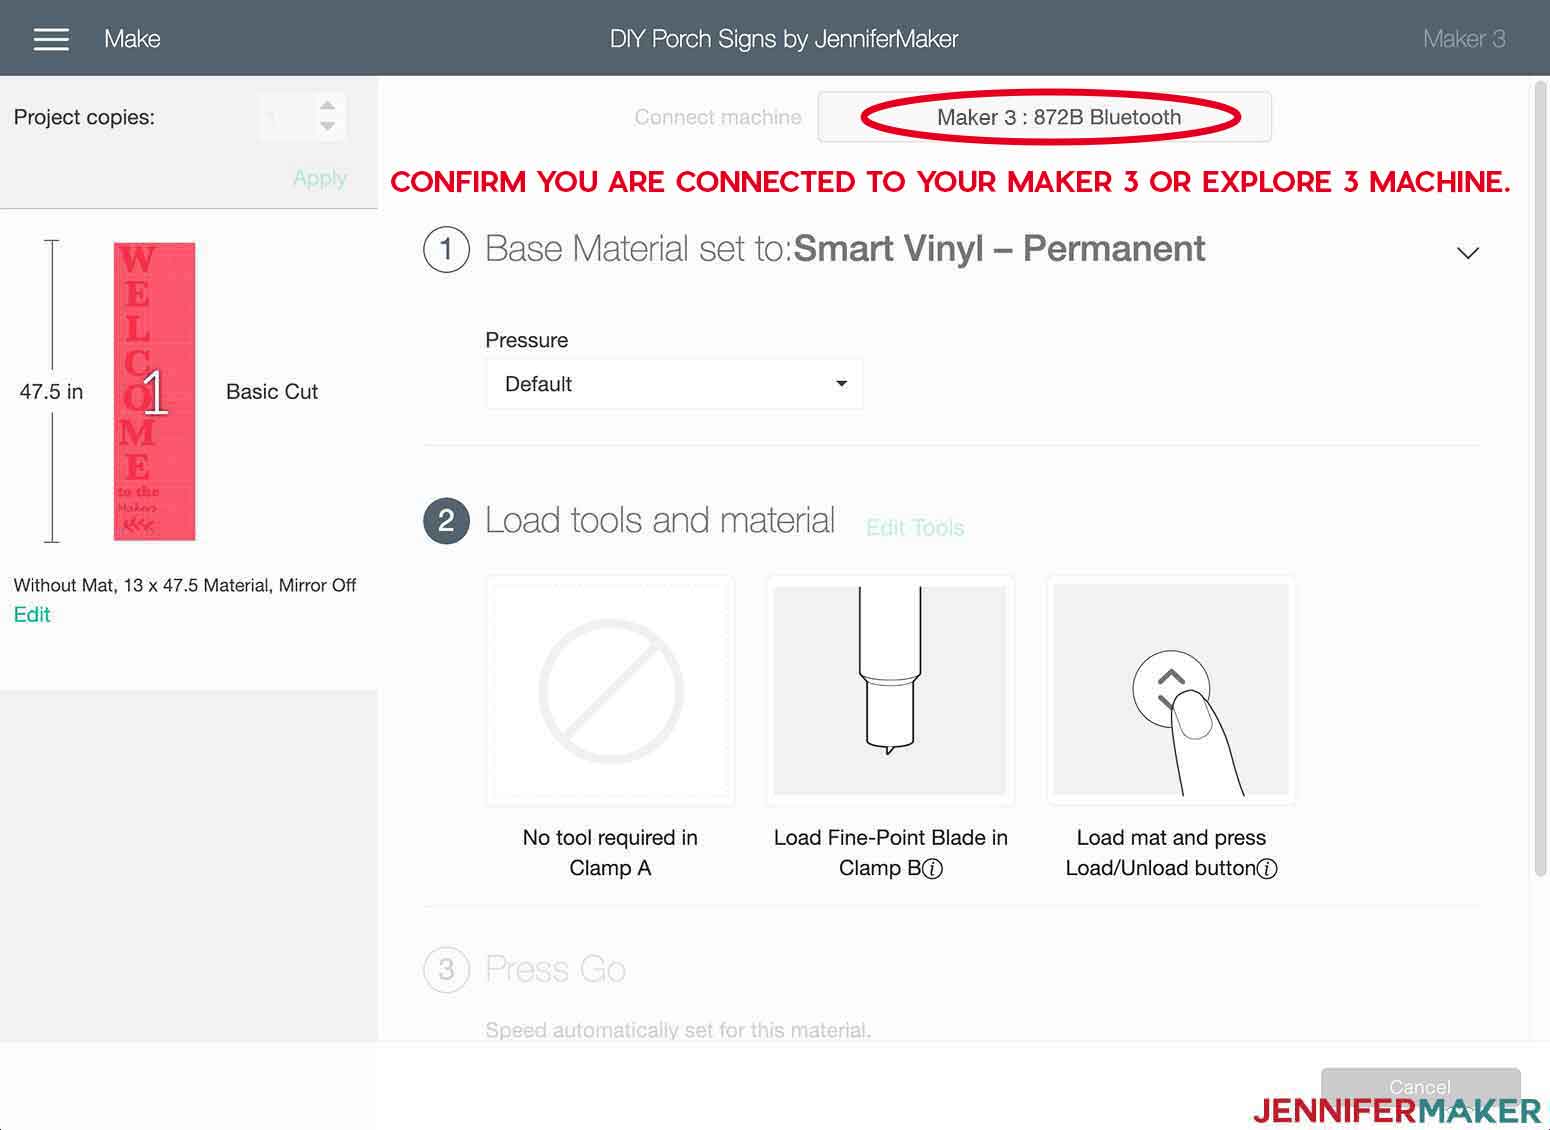
Insert your Smart Vinyl into the Cricut Roll Holder and feed your Smart Vinyl into your Cricut Maker 3 or Cricut Explore 3.
If you do not have a roll holder, you can simply cut your Smart Vinyl to meet the minimum length indicated.
TIP: If you are not at a long table, you may want to put a tub or bin behind your machine to catch the vinyl as it feeds through your machine!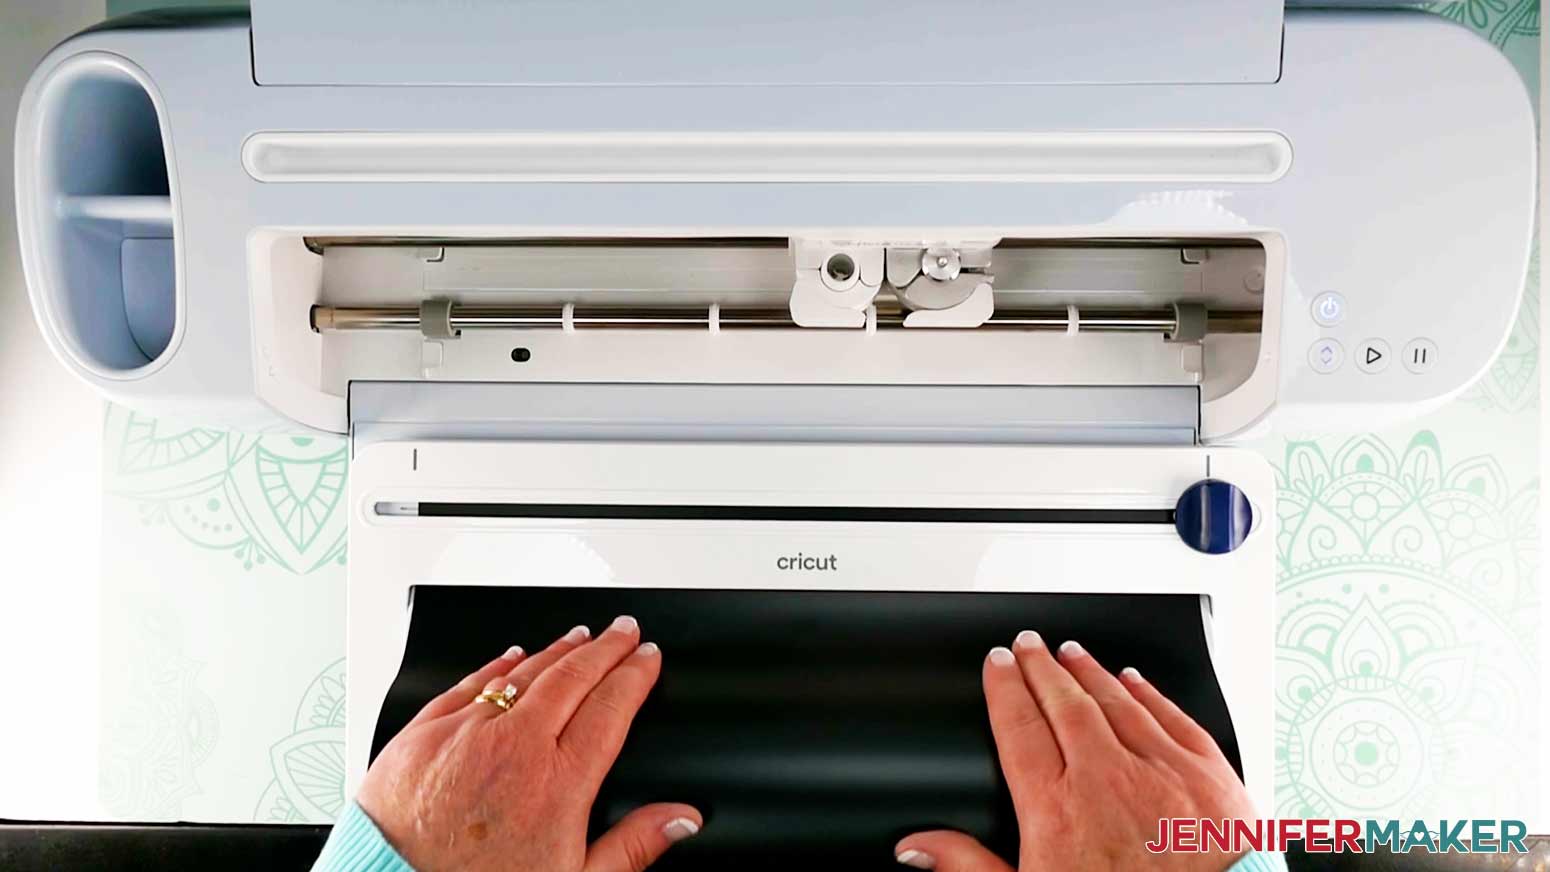
Press the “Load/Unload” Button. Your machine will pull the vinyl all the way through to confirm there is enough material before starting the cut. Once your machine is ready, press the flashing "arrow" button. You'll notice this button has been updated on the Cricut Maker 3 and Explore 3. Now sit back and watch how fast it cuts your Smart Vinyl!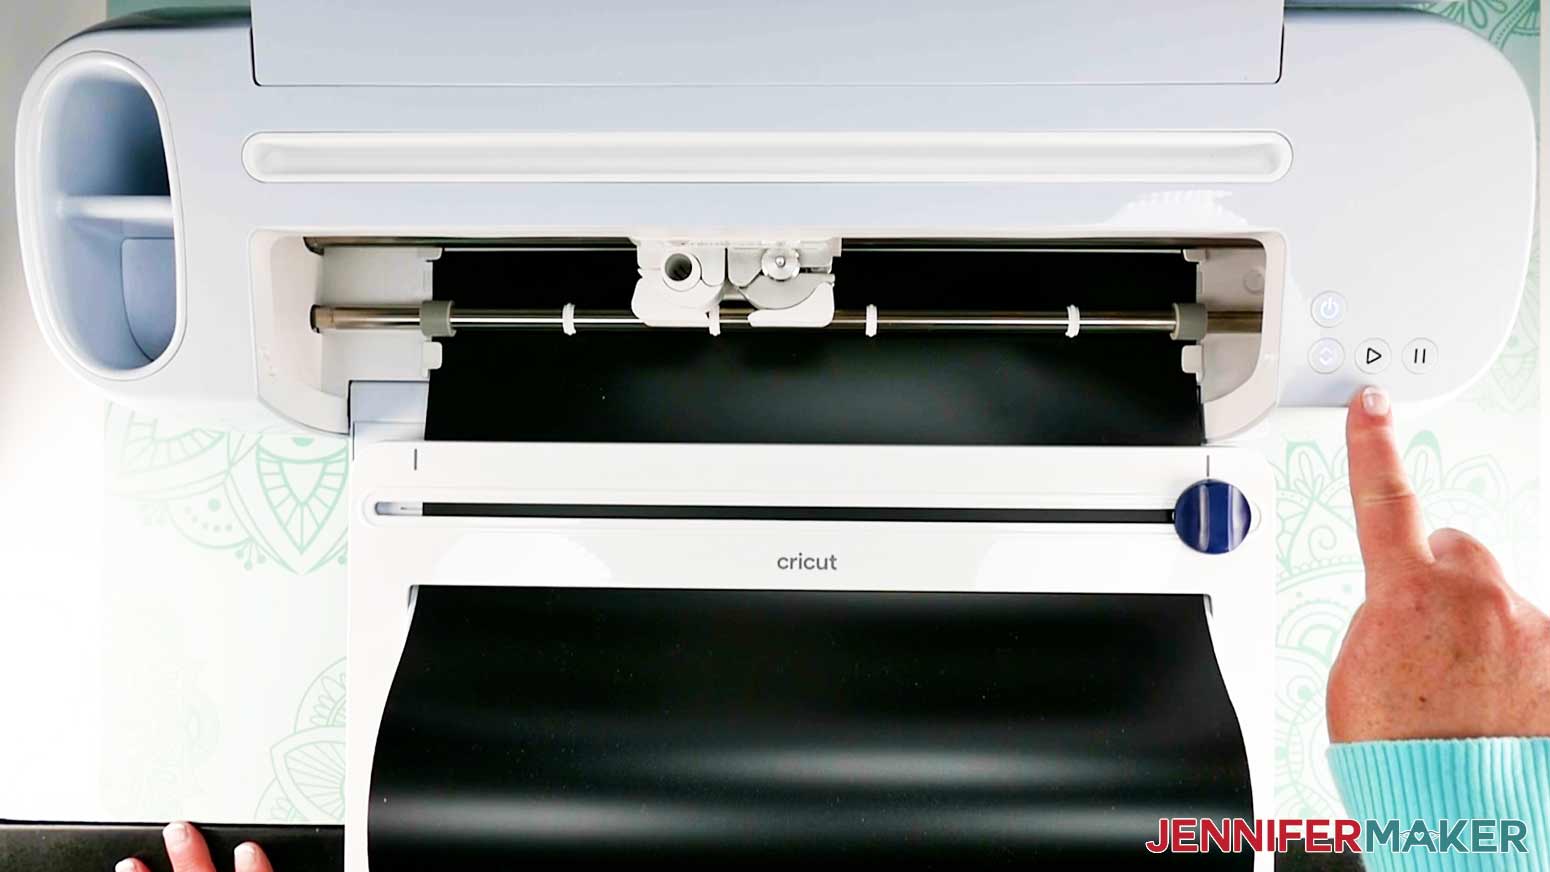
When your design is done cutting, use the "Cutter" on the Roll Holder to cut off the Smart Vinyl. If you didn't use a roll holder you can, of course, skip this step.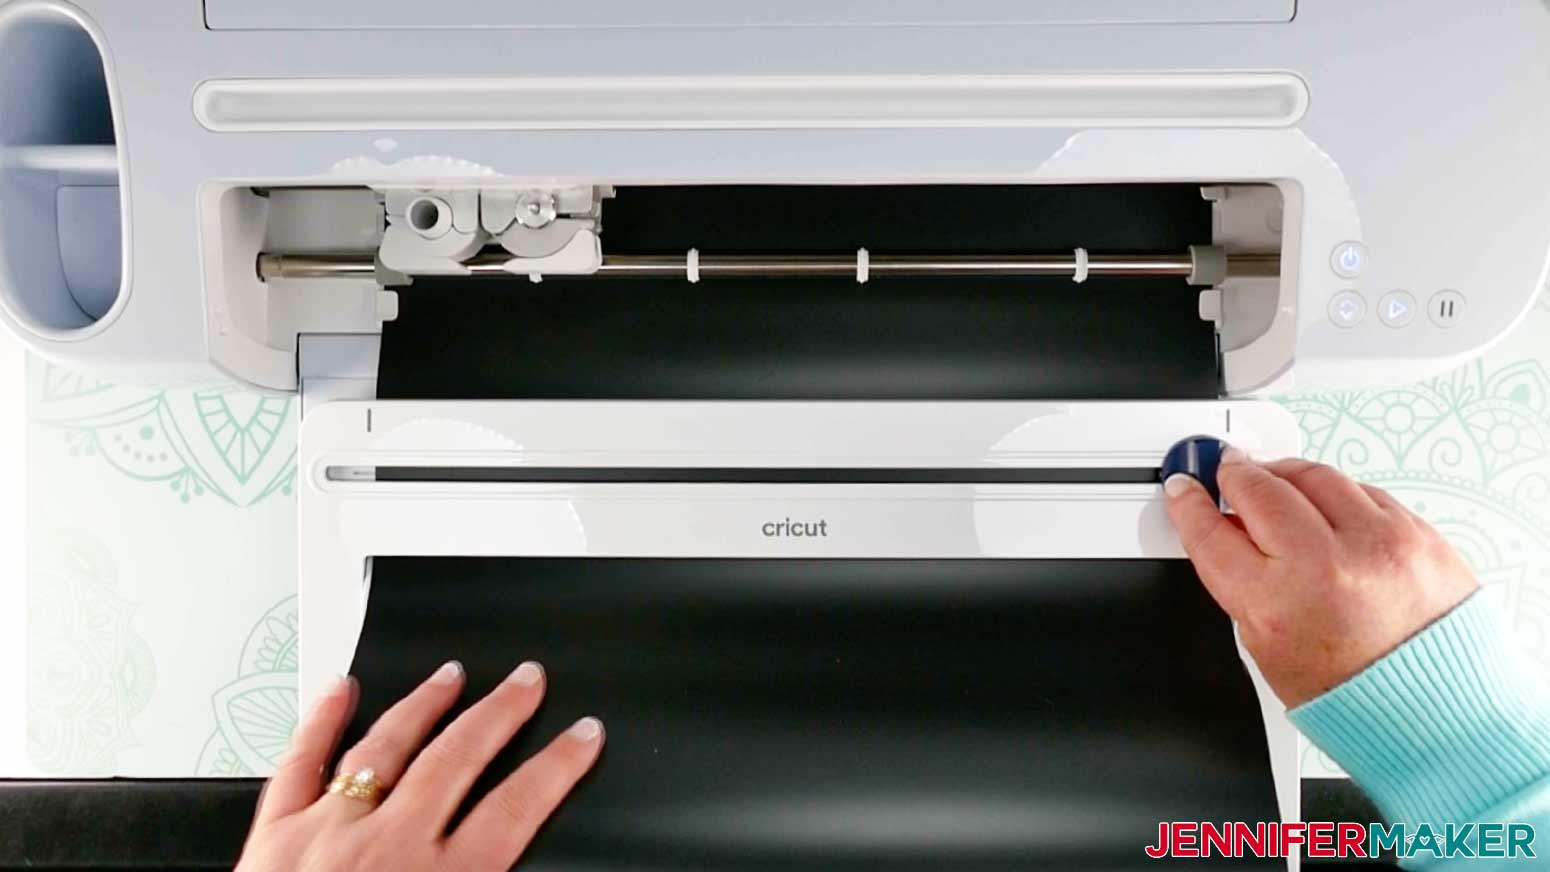
STEP 3: APPLY YOUR SMART VINYL DESIGN TO YOUR BOARD
Time to put it all together.
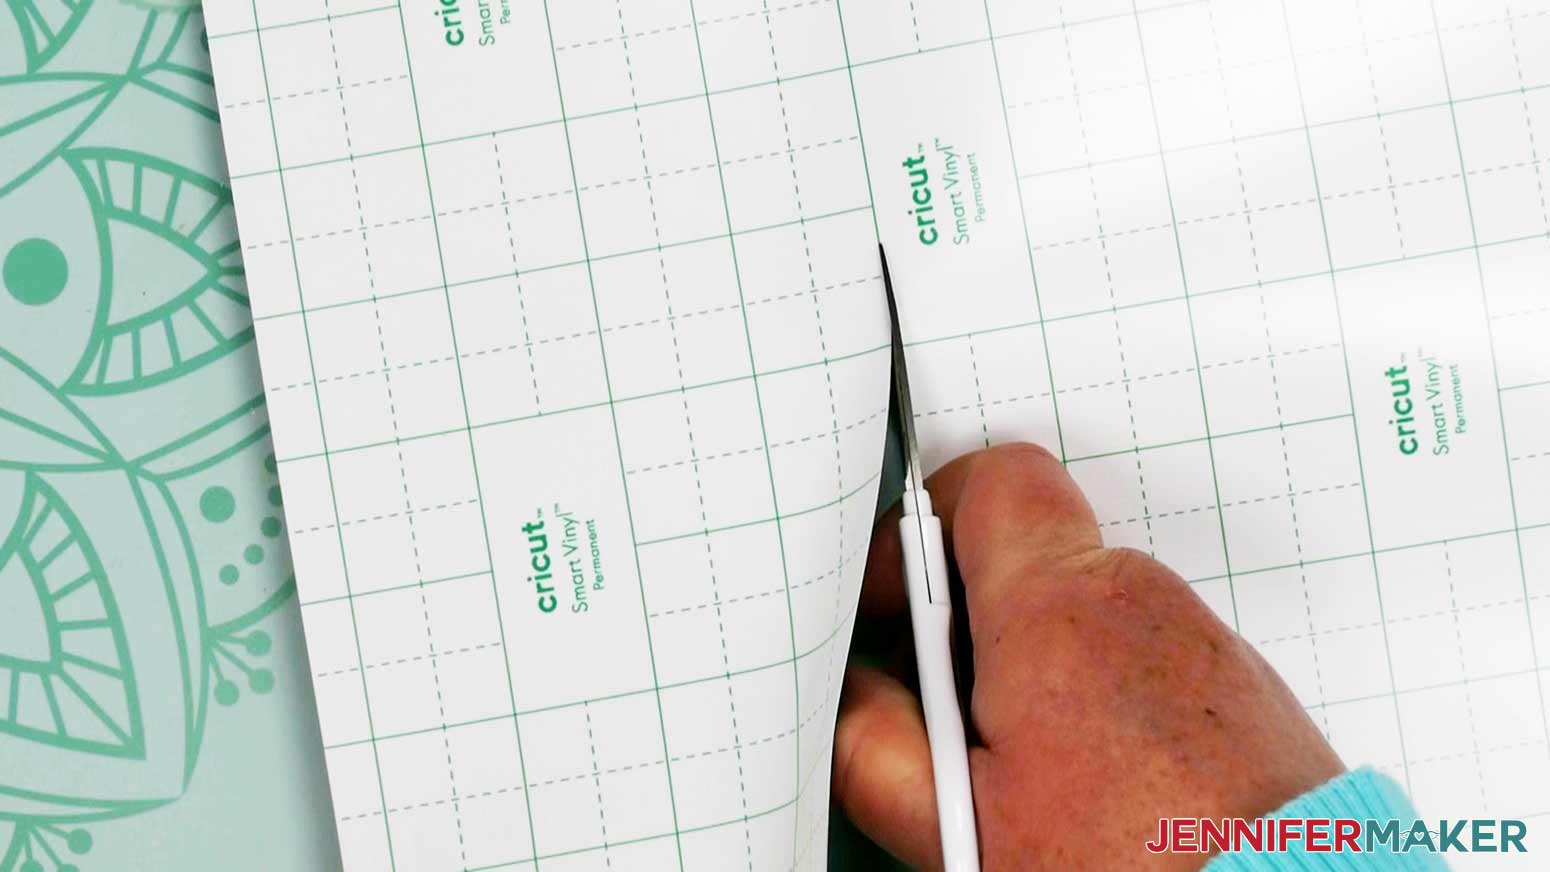
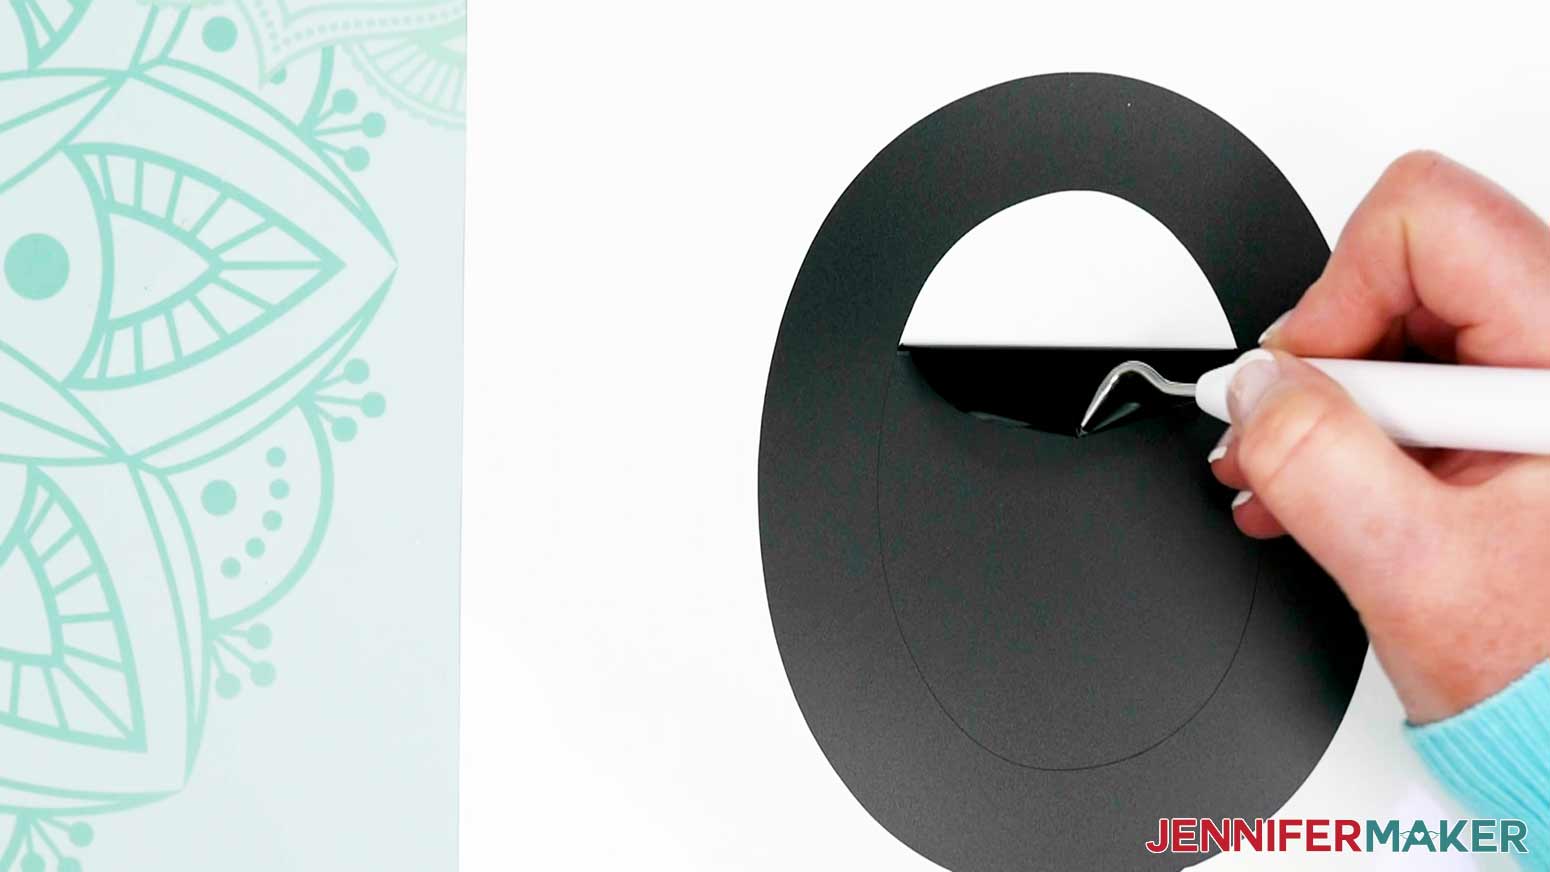
Grab your weeding tool and peel away all of the excess vinyl from your design. I found it helpful to trim the excess vinyl on the right side so you are only working with the design area. It also saved me a lot of vinyl for future projects!
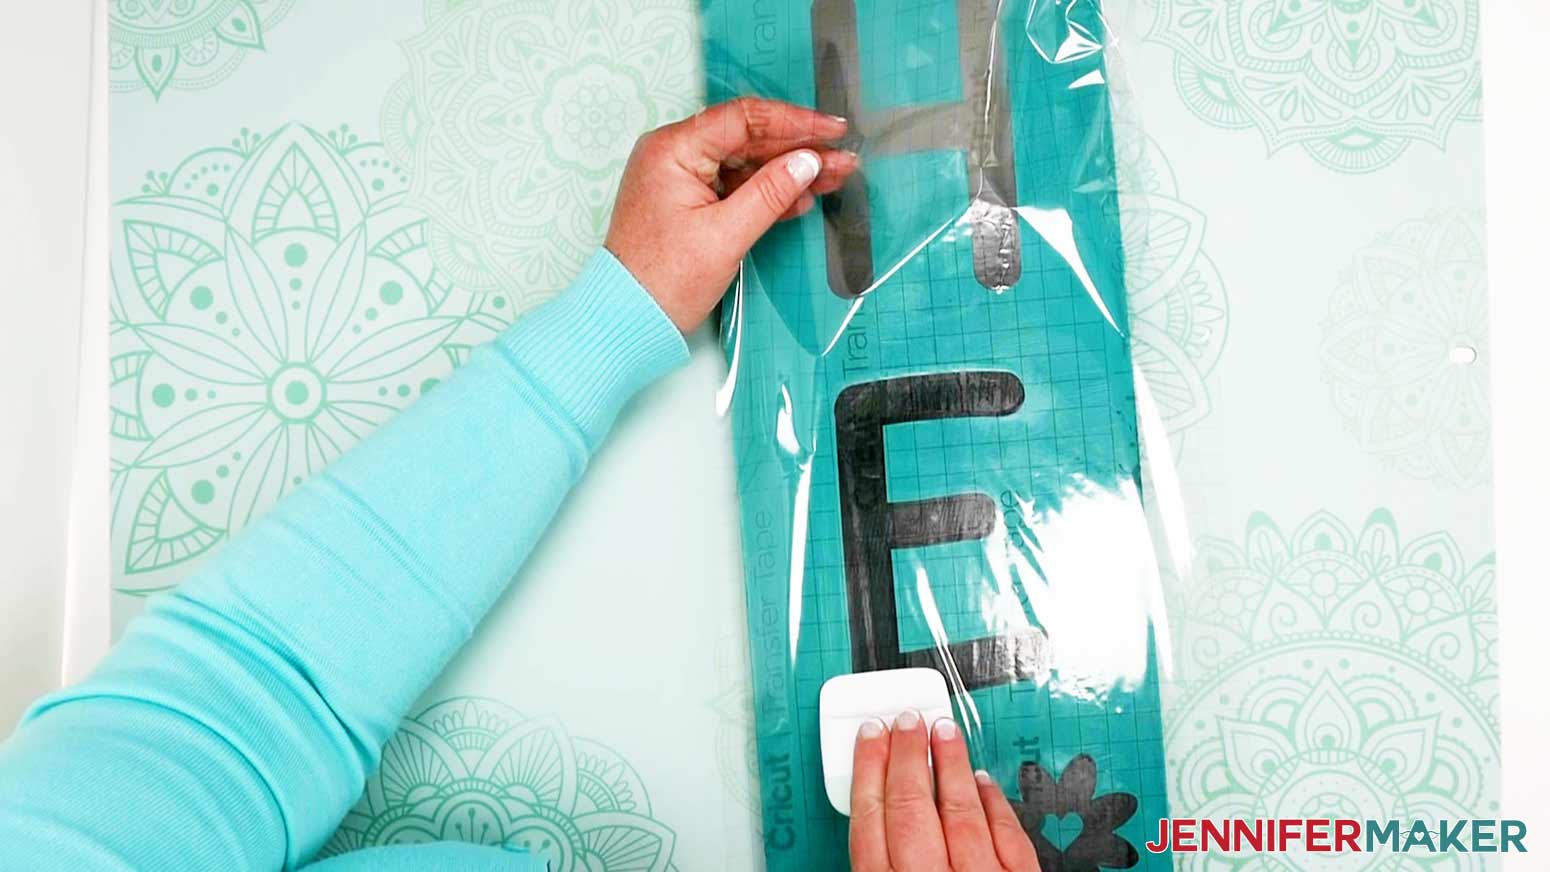
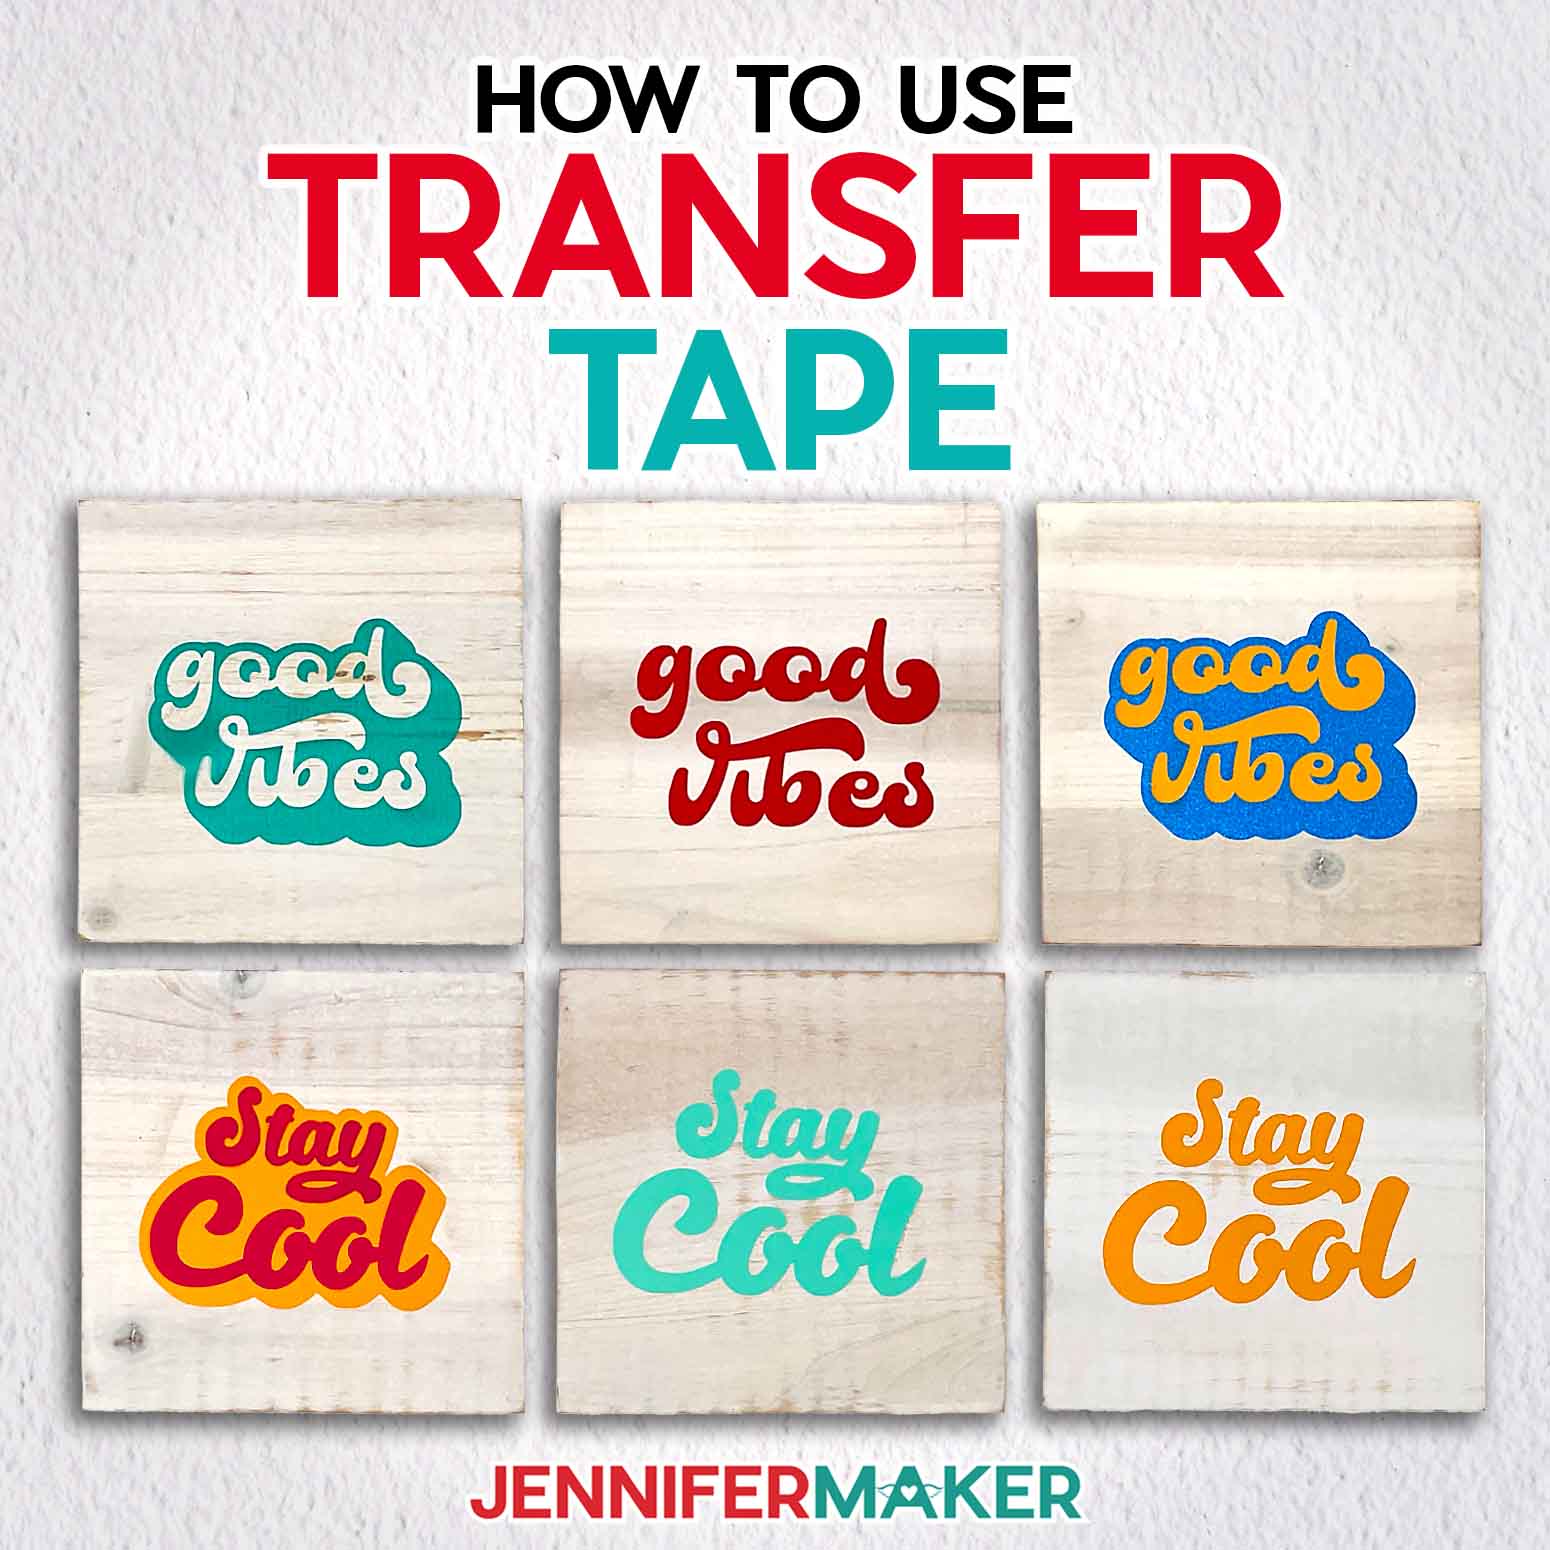
Cut your transfer tape to the size of your design. Peel away the transfer tape backing and carefully lay it over the vinyl. The straighter you align your transfer tape, the easier it will be to align your design on your sign. Use your scraper to make sure your design adheres to the transfer tape. 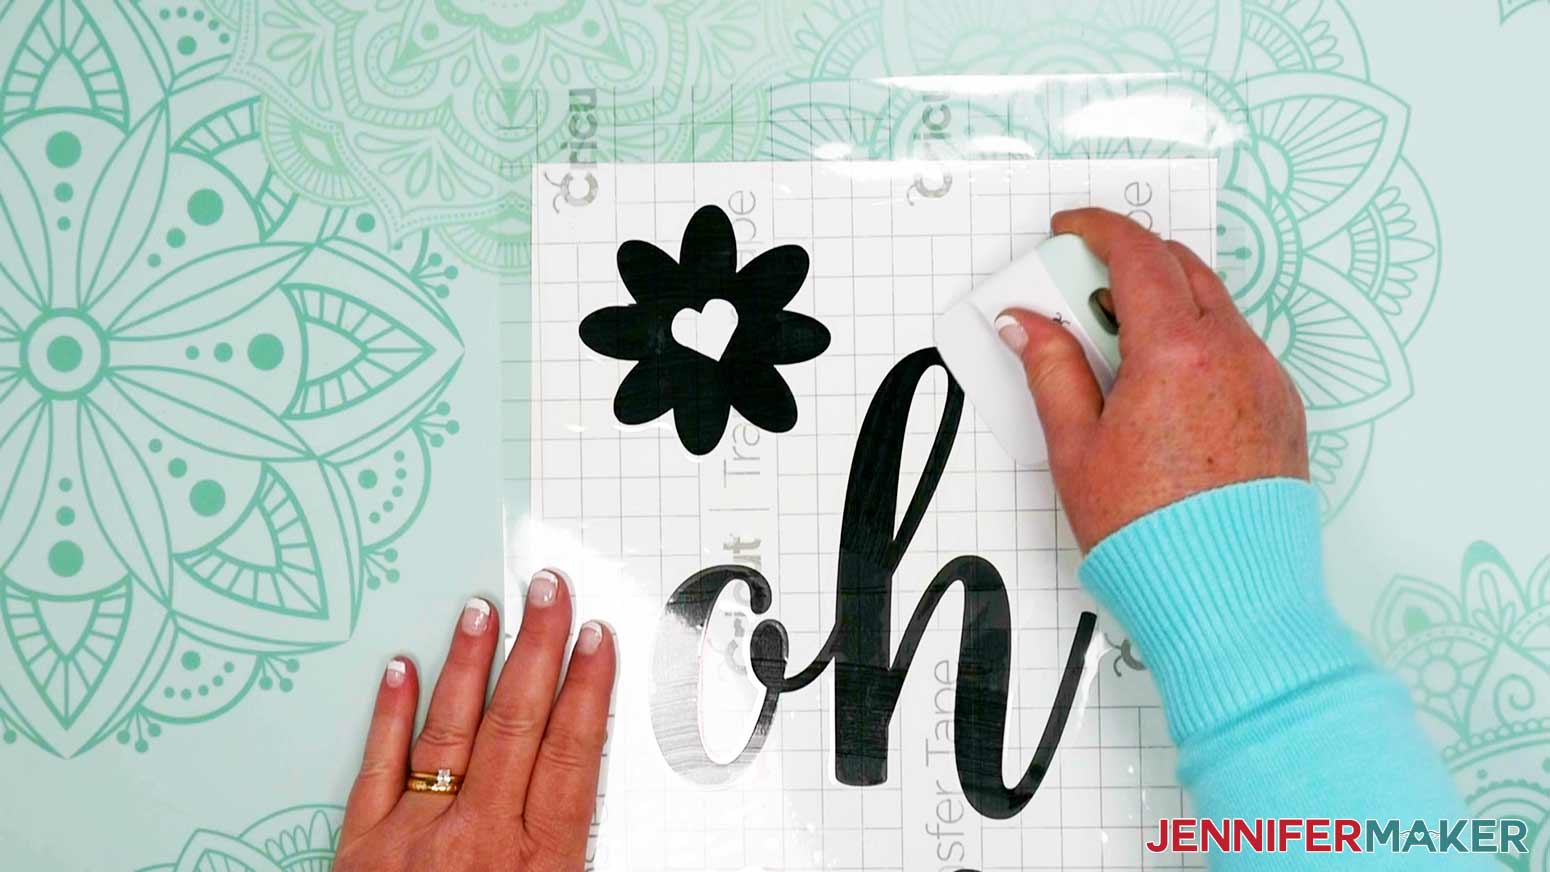
Line up your design on your board and gently begin peeling away the backing to the vinyl. Use your scraper to help adhere the Smart Vinyl design to your board. 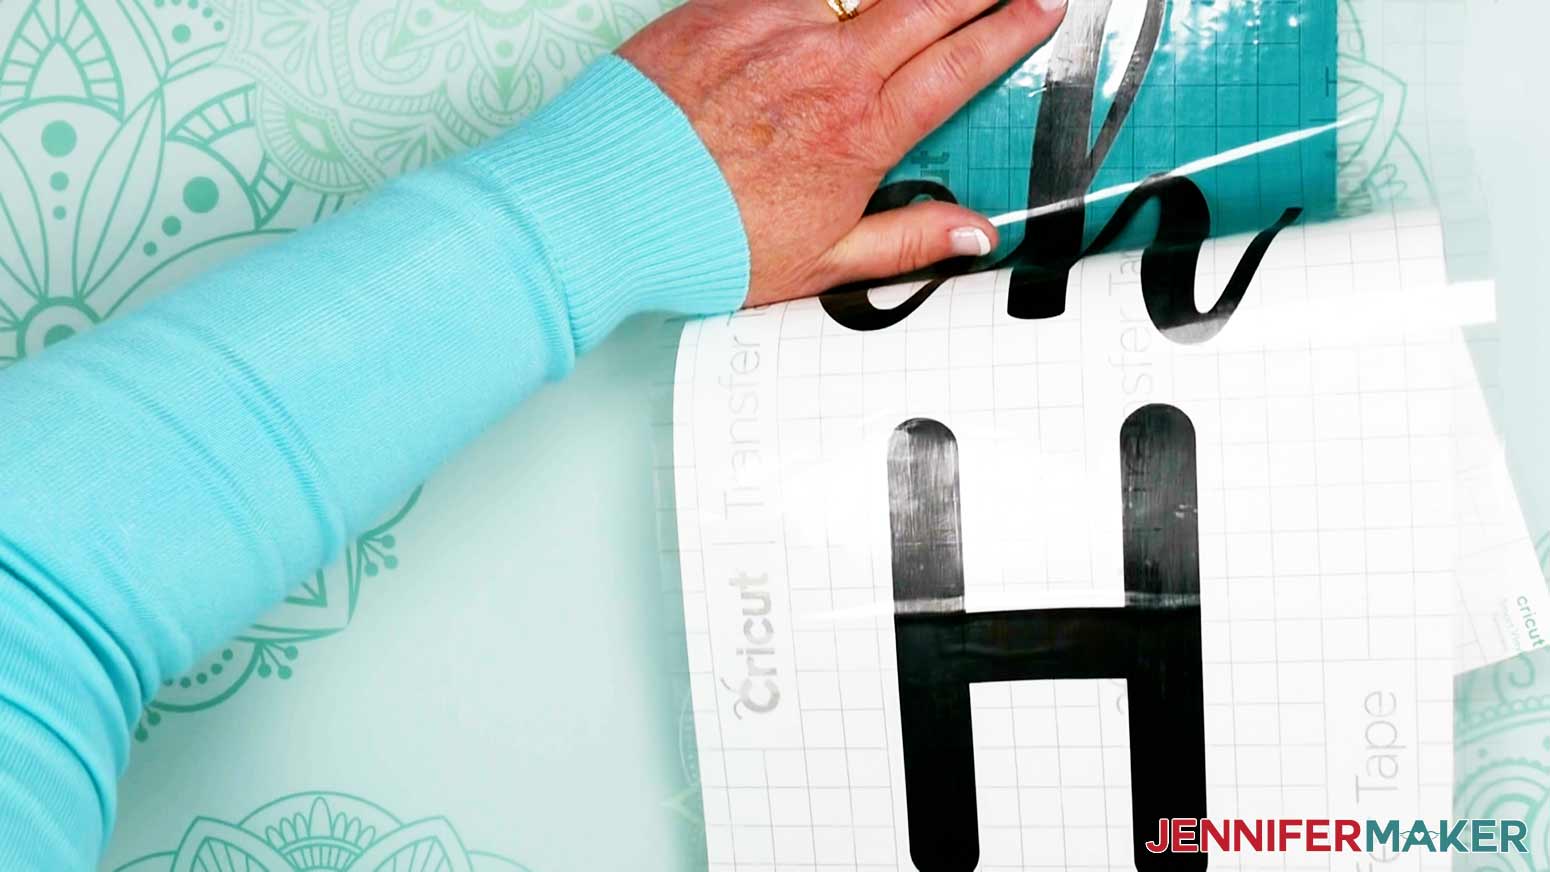
Gently peel away your transfer tape. 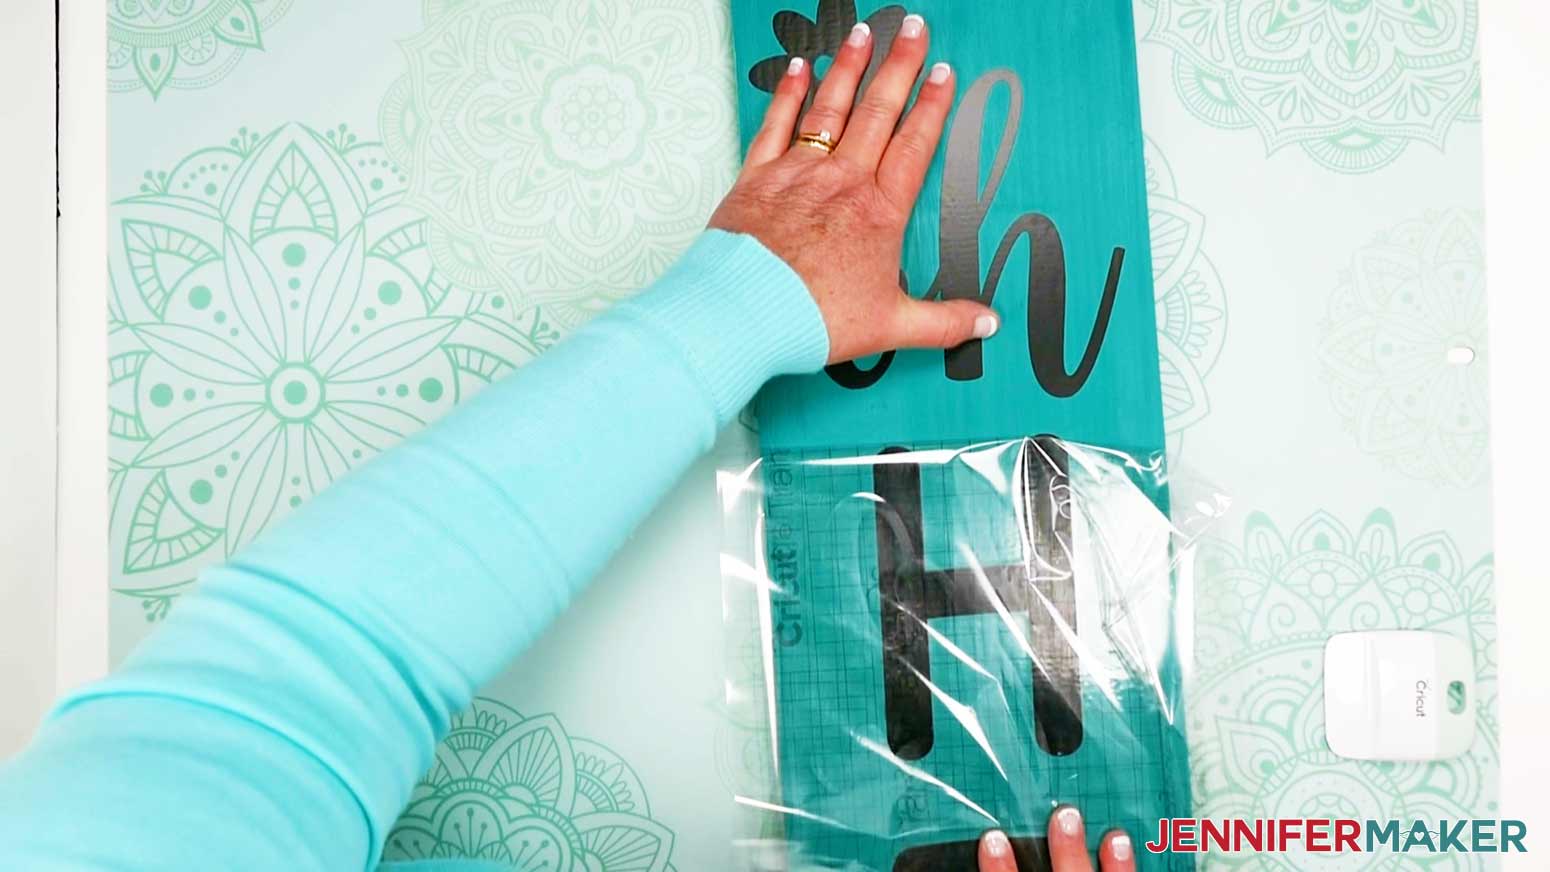
STEP 4: SHOW IT OFF
Your DIY Porch Sign is complete! I can’t wait to see all of the beautiful signs you make with your Cricut Maker 3 and Cricut Explore 3!
Notes
Fonts used for "Hello Sunshine"
Hello - Breethy
Sunshine - Papernotes
Fonts used for "Welcome to the Makers"
Welcome to the - Baskerville Bold
Makers - Lucida Handwriting
Fonts Used for "Home Sweet Home"
Home - Baskerville
Sweet - Girl Talk
Fonts used for "Oh Hello"
Oh - Sweetness
Hello - Be Honest
Font used for "Watch Me Grow"
Falling Leaves Script
Recommended Products
As an Amazon Associate and member of other affiliate programs, I earn from qualifying purchases.

Answers to Your Questions About How to Make Fun DIY Porch Signs
Q: Do I need to use only pine board to make the porch sign?
Absolutely not! Feel free to use whatever wood you prefer, or happen to have around your home! I like to use pine for my outdoor signs because it’s affordable, easy to work with, and resistant to decay (which is important for something that’s going to be outside!). But, any wood will work!
Q: Do I need to use chalk paint, or can I use something else?
As long as you make sure to let the paint dry for at least 24 hours, and seal it using polycrylic, you should be good using enamel, outdoor, or house paints. But, I’d suggest testing it first on a scrap piece of wood or a small inconspicuous area just to make sure you like the way it looks!
Q: Do I need to let the paint sit for a while? Can’t I start working on the DIY Porch Sign as soon as it’s dry?
Make sure to let the paint dry for at least 24 hours! Fresh paint emits something called VOCs that can react chemically with the vinyl’s adhesive and degrade it, meaning it won’t adhere quite as well. Trapped VOCs can also cause bubbles to appear under the vinyl. The longer you can let the paint cure, the better your vinyl will stick!
Q: Do I need to buy these fonts in order to make my own DIY Porch Sign?
Absolutely not! We included the names of the fonts because people often ask us what fonts we’ve used in a project as they want to use them in a design of their own! My SVG is ready to cut out without having to buy anything else beyond the materials needed to actually make the sign!
Q: I would like to paint my sign a different color than yours but can only find the one color shown on your link?
If you keep scrolling down on the link to the “Inspired by your recent shopping trends” section, you will be able to see many different colors to choose from!
Q: Do I need to have only a Cricut Maker 3 or Cricut Explore 3 to cut out these awesome porch signs?
No, you don’t! If you go to my tutorial on Easy Vertical Welcome Signs, I show you how to slice the design into smaller pieces that you can cut on other Cricut Explores and the Maker!
Q: Your link to the pine board is showing as “out of stock” for me! Where can I find a board?
I used a standard pine board that you can get at almost any home improvement store! Other great places to look are Home Depot, Ace, Menards, and your local Mom-and-Pop stores that sell building supplies!
Get my free SVG files to create eye-catching DIY Porch Signs
I’d love to see YOUR DIY porch signs projects and how you choose to decorate them! Please share a photo in our Facebook group or tag me on social media with #jennifermaker.
Love,

Want to remember this? Save this DIY Porch Signs Tutorial to your favorite Pinterest Board!


How do you line up the letters on the board
You don’t need to line up the letters, Melinda! That’s the beauty of Smart Vinyl! It all cuts in one continuous strip! 🥰