Learn how to avoid (or fix) common HTV mistakes to save time, materials, and frustration!
Mistakes are a part of any learning process, but there are always ways to avoid them — and sometimes there are ways to fix the ones you’ve already made! When crafting with HTV (heat-transfer vinyl), there are a ton of factors to consider: Your design, your cut, your technique, your temperature — the list goes on and on. Don’t let your hard work and supplies go to waste! Today I’m tackling common HTV mistakes, and sharing how to fix or avoid them altogether.
Watch the full step-by-step Avoiding HTV Mistakes tutorial:


Getting high-quality transfers and awesome-looking T-shirts is one of the most common reasons crafters begin using HTV. But before we get started, the first thing to know about HTV is that it goes by many names — so when you hear iron-on vinyl, heat-transfer vinyl, and HTV, they’re all the same thing!
What’s the main culprit behind most HTV mistakes? They all come back to two things: Cut and Application. I’ve got good news though! In this tutorial, we’ll learn how to avoid lots of HTV mistakes, plus fix the ones that happen anyway. Because we’re all human, and we all make mistakes sometimes!

I’ve got tons of troubleshooting tips to share, answering questions like:
- Which vinyls can be layered?
- Which vinyl can be a base layer?
- How do you pick a good font for HTV projects?
- How do you choose the right size design for your shirt?
- What is mirroring, and how does it work?
- And the age old question: Which side of the HTV do I cut?!
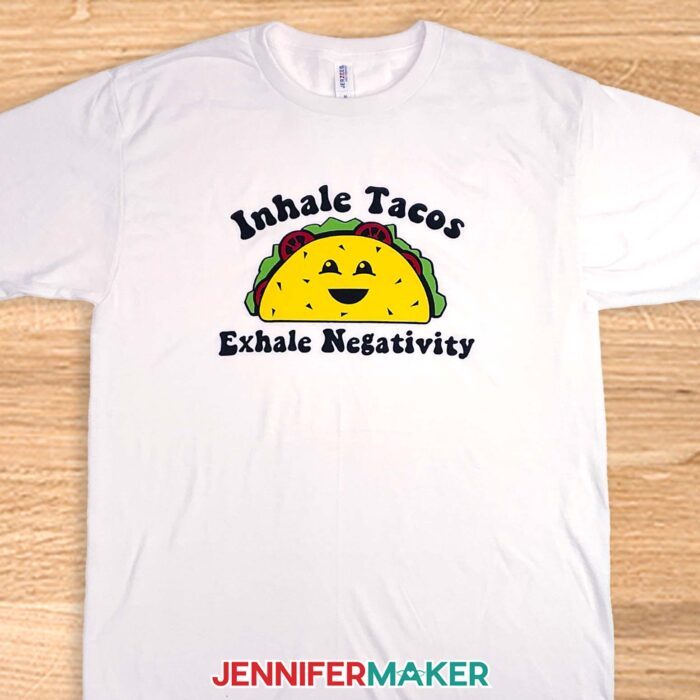
To answer all these questions (and more!), I’ll use some adorable food designs I created using an AI image generator in Adobe Illustrator — along with some editing to make them even better. You can find them in my free library — look for design #575. You can also fill out the Save This Project form above to get the design link emailed to you.
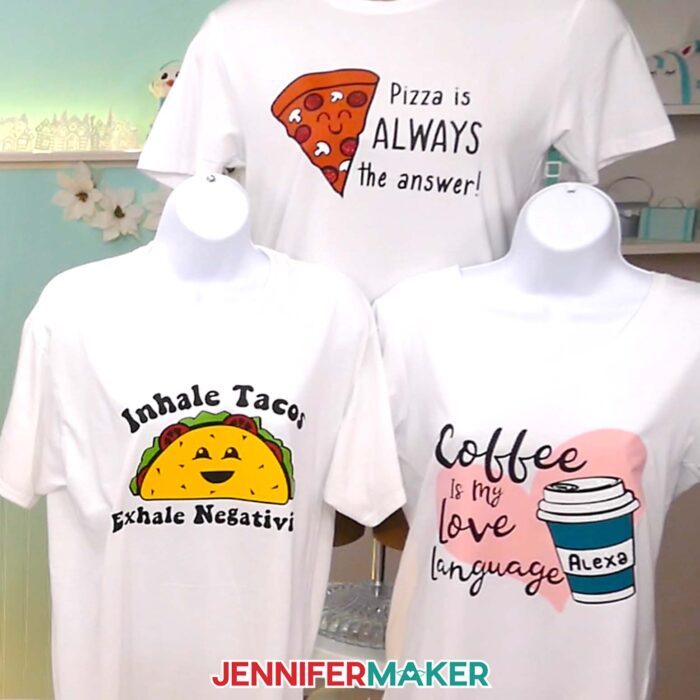
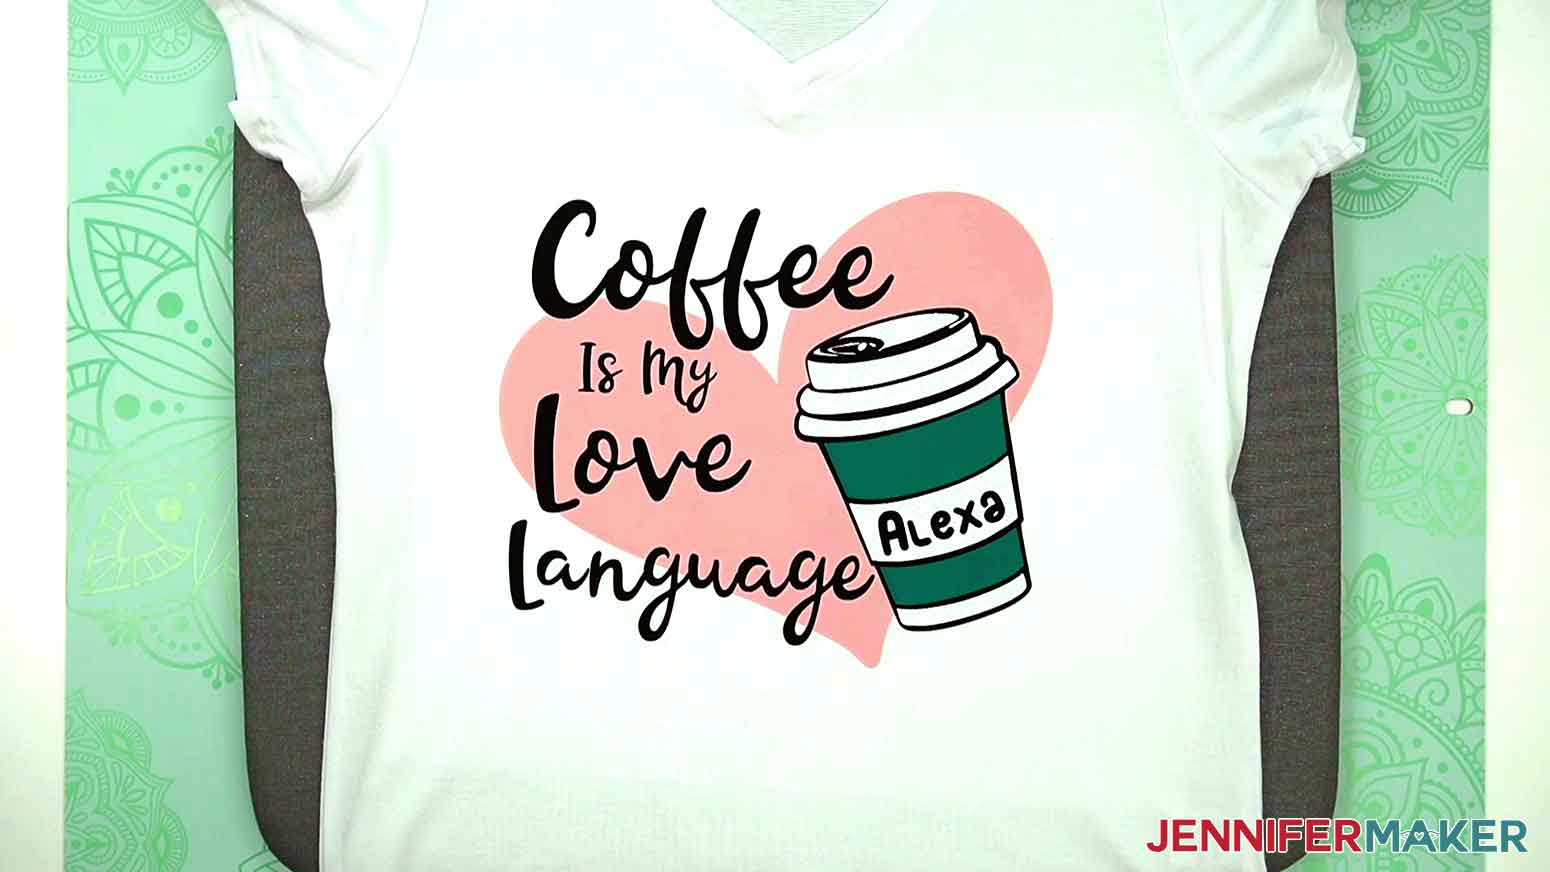
I’ll show you how to customize the coffee heat transfer vinyl design with a name, then apply it to a T-shirt. The other designs apply the same way, so you can follow those instructions for the taco and pizza designs, too.
Besides the designs, you’ll need a few things to get started — like heat transfer vinyl! I’ll demonstrate using Cricut’s Everyday Iron-on vinyl for most of the layers, and add some Glitter HTV for some sparkle. This sets up the perfect learning opportunity, because there are some common mistakes when it comes to combining different types of HTV: What settings do you use? What’s the best way to press layered HTV? How do you avoid overheating the vinyl? Don’t worry — I’ve got answers to every important step in my tutorial video.

There are tons of different colors, HTV patterns, shiny foils, glow in the dark, and even printable options on the market, so once you know the basics of cut settings, pressing temperatures, and fabric types — you have my official permission to have fun and go HTV-crazy with any type of vinyl you want!
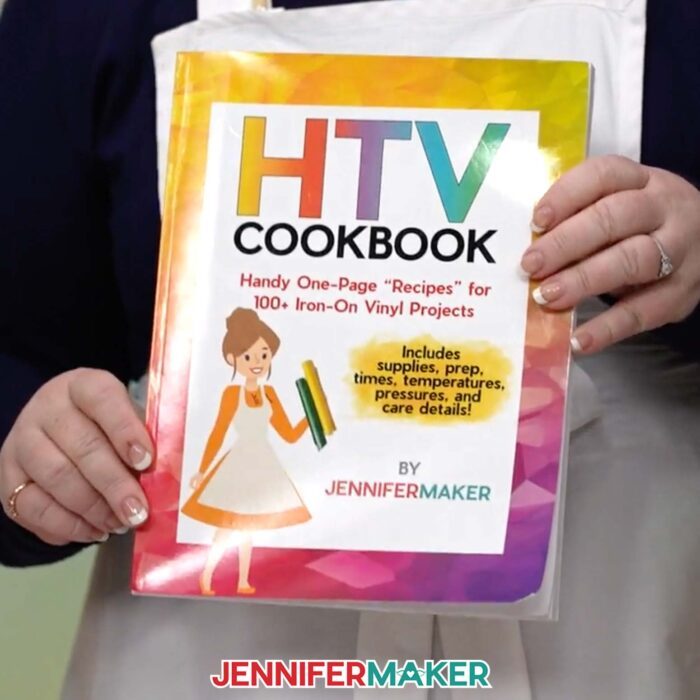
To help keep all of these things straight (and to remind you when you can’t remember), I’ve put together an awesome resource: The HTV Cookbook. All this information (and lots more) is in there!
Next, you’ll need something to cut your HTV. You can do it by hand, but it’s much easier with a cutting machine like a Cricut. I used my trusty Cricut Maker 3 to cut my vinyl, but you can cut HTV on any Cricut, as long as the design fits on the mat! Speaking of mats, a green StandardGrip mat works great for vinyl.
You’ll need some basic tools, like a weeding tool. I’ve got some great troubleshooting tips to make weeding a breeze, too! You can find the rest of the tools you’ll need in my materials list in this tutorial.
How does the vinyl get on the shirt? It’s the “H” in HTV — heat! I’ll demonstrate using a Cricut EasyPress (with a pressing mat and butcher paper), but you can use any flat heat press that’s the right size for your design.
With my tips and fixes for your common HTV mistakes, you’ll be able to craft with confidence and take your vinyl crafting to a whole new level! Create amazing heat-transfer vinyl items to gift, sell, or keep for yourself!

Let me show you how easy it is to avoid or fix HTV mistakes! This post contains some affiliate links for your convenience (which means if you make a purchase after clicking a link I will earn a small commission but it won’t cost you a penny more, there is no additional cost)! Read my full disclosure policy.
Materials to Create a Vinyl T-Shirt
View my Amazon shopping list with the exact items we used to make this project
- One (1) Hanes Women’s Perfect-T Short Sleeve Cotton Crewneck T-Shirt -OR-
- One (1) Cricut Shirt Blank – Women’s V-neck -OR-
- One (1) Cricut Shirt Blank – Men’s Crew Neck
- Glitter Iron-on White Vinyl
- Iron-On Black Vinyl
- Iron-On Orange SportFlex Vinyl
- Iron-On Blush Vinyl
- Iron-On Green Apple SportFlex Vinyl
- Iron-On Vinyl Wanderer Pack (Teal/Raspberry/Grey)
- Iron-On Vinyl Elegance Pack (Red/Black/White)
- A way to cut your materials – I’m using the Cricut Maker 3 but you can also use the Cricut Maker, a Cricut Explore Series machine, the Cricut Venture, or even the Cricut Joy or Joy Xtra.
- Cricut Green StandardGrip Machine Mat 12″ x 12″ (remember to put paper with a fancy side right side up!)
- Scraper Tool – to remove small pieces stuck to the mat
- Spatula
- Cricut Blue LightGrip Mat 12 x 12″
- Ruler
- Brayer
- Weeding Tool
- Scissors
- My T-Shirt Ruler Guides
- Heat Press – I used the EasyPress but you can also use the Autopress -OR- Home Iron
- Pressing Pad
- Heat Resistant Tape
- Lint Roller
- Butcher Paper
- Design #575 (My free SVG/PDF/DXF design files are available in my free resource library – get the password by filling out the form at the bottom of this page)

How to Make Mistake-Free HTV Shirts

How to Make Mistake-Free HTV T-Shirts
Learn how to avoid some of the most common HTV mistakes when making these cute and fun food-themed shirts!
Materials
- One (1) Cricut Shirt Blank - Women’s V-neck -OR-
- One (1) Cricut Shirt Blank - Men’s Crew Neck
- Glitter Iron-on White Vinyl
- Iron-On Black Vinyl
- Iron-On Orange SportFlex Vinyl
- Iron-On Blush Vinyl
- Iron-On Green Apple SportFlex Vinyl
- Iron-On Vinyl Wanderer Pack (Teal/Raspberry/Grey)
- Iron-On Vinyl Elegance Pack (Red/Black/White)
- Design #575 (My free SVG/PDF/DXF design files are available in my free resource library - get the password by filling out the form at the bottom of this page)
Tools
- A way to cut your vinyl - I’m using the Cricut Maker 3, but you can also use the Cricut Maker, a Cricut Explore Series machine, the Cricut Venture, or even the Cricut Joy or Joy Xtra.
- Cricut Green StandardGrip Machine Mat 12" x 12"
- Heat Press - I used the EasyPress but -
- You can also use the Autopress -or-
- Home Iron
- Pressing Pad
- Brayer
- Weeding Tool
- Heat Resistant Tape
- Lint Roller
- Butcher Paper
- Scissors
- Ruler
- Optional: My T-Shirt Ruler Guides
Instructions
STEP 1: GET MY FREE HTV DESIGNS
First, download my HTV T-shirt designs from my free library -- look for Design #575. Alternatively, you can use the Save This Project form near the top of this post and the design link will be emailed to you.
There are three designs in the folder: coffee, pizza, and taco.
In this tutorial, I will show you how to prepare and press the coffee T-shirt design. You can use the same steps to press the other designs.
TIP: If you’re not sure how to upload, go to jennifermaker.com/svgs to learn how to unzip and upload SVG files.
NOTE: If you want to use the same typeface for the customization I am, download JM Lemonade from my free resource library and add it to your options using my free tutorial before beginning the project.
STEP 2: PREPARE AND CUT YOUR HTV DESIGN
CRICUT DESIGN SPACE
1. Open Cricut Design Space and click “New Project.”
2. Click “Upload” and then “Upload Image.”
3. Click “Browse.”
4. Select the SVG you want to make.
5. On the Prepare to Upload screen, it will say “Cut image” with the design preview.
6. Click “Upload.”
7. Find your design in Recent Uploads and add it to the Canvas.
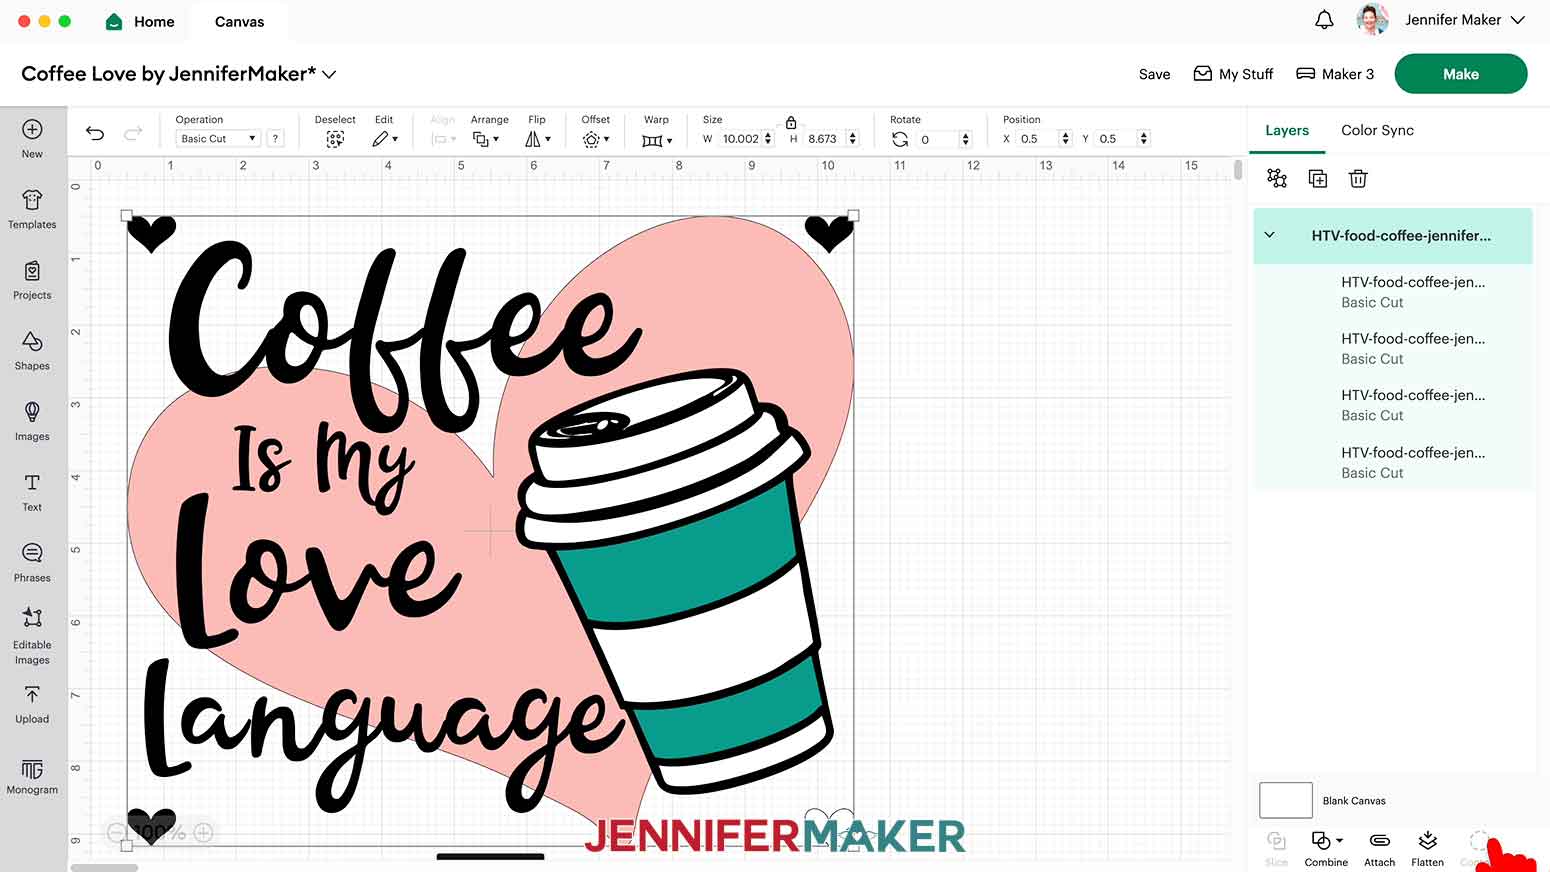
8. Click “Templates.”
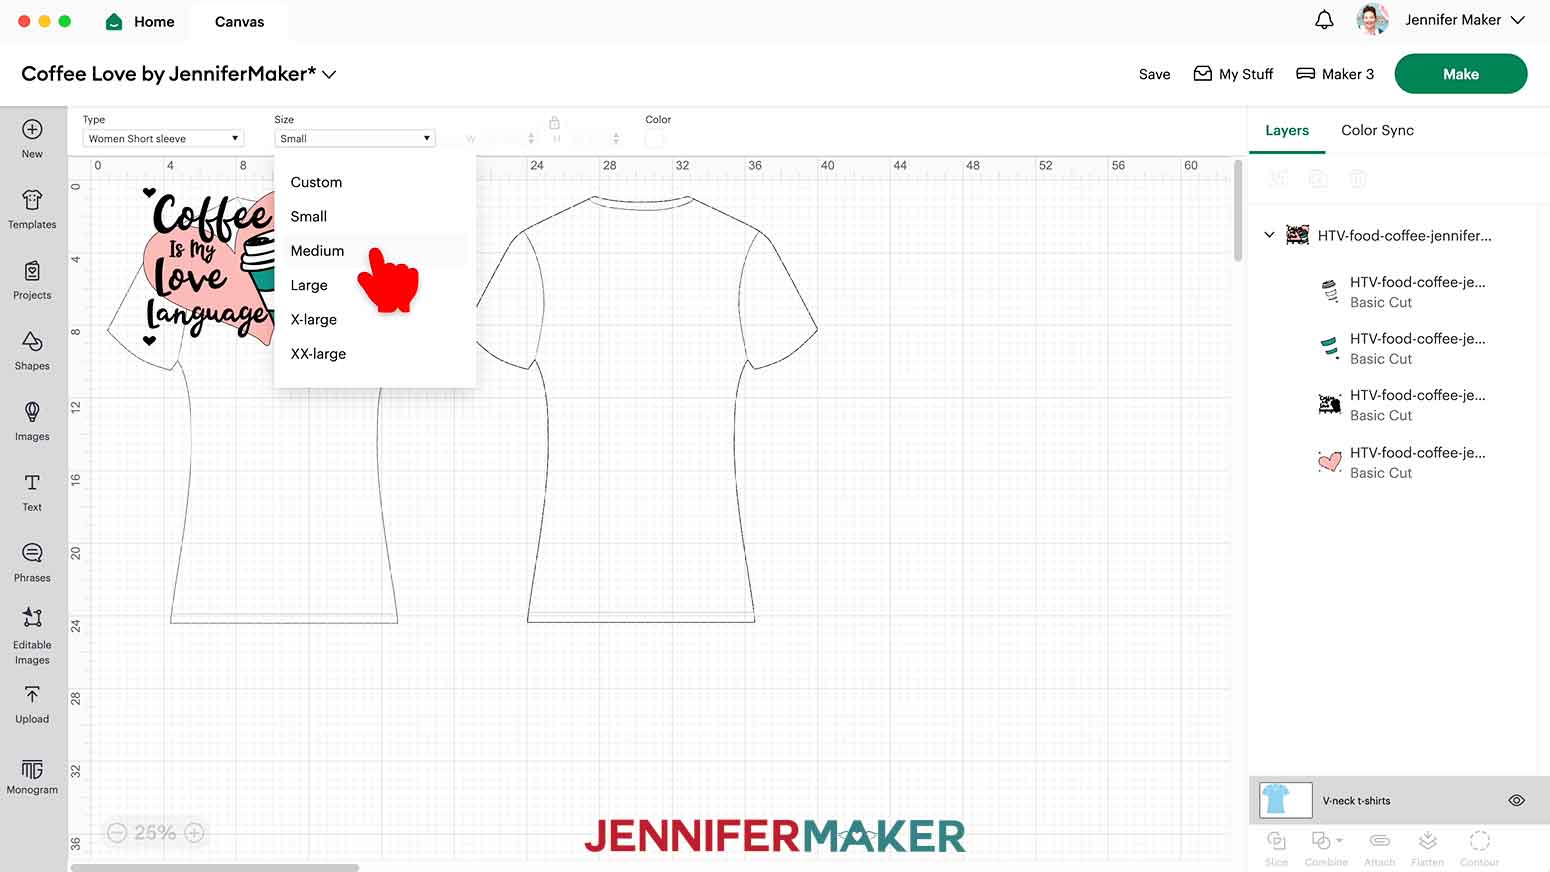
9. Select the shirt style you’re using to add the template to the Canvas.
10. Change the shirt type and size to match yours.
NOTE: The guide won’t be part of the final design.
11. Drag the design onto the chest area to check the placement.
12. Keep the Size lock icon closed and adjust the dimensions if you want.
TIP: If you’re making another size, use these charts for reference.
13. Click the eye icons in the upper layers to see just the bottom of the design and decide which type of vinyl you want to use.
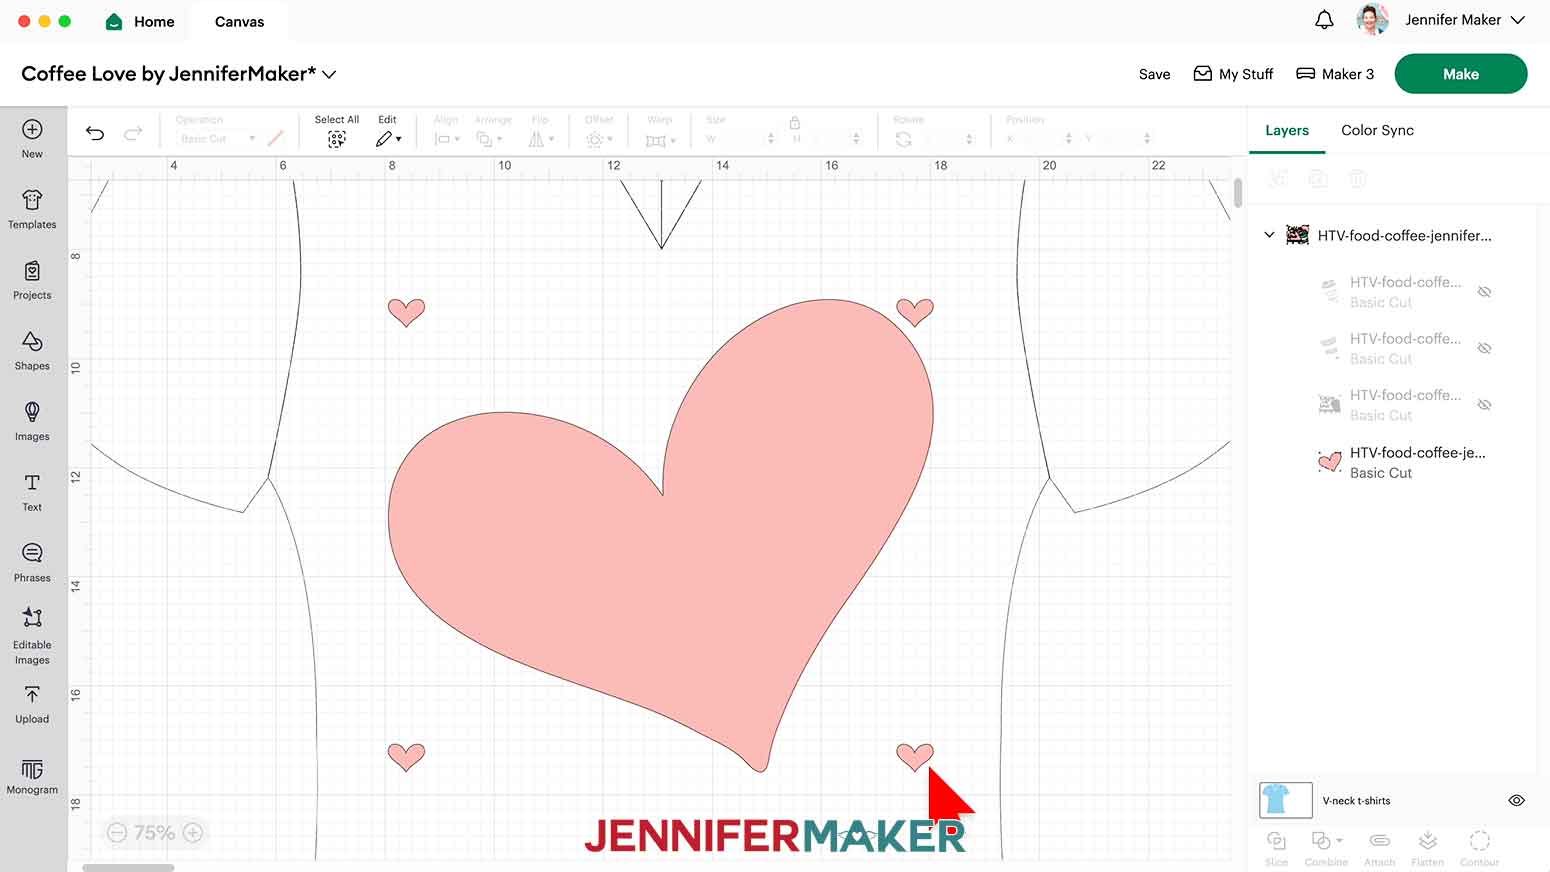
14. Click the next layer’s eye icon so you can see the designs interact and pick your second vinyl.
NOTE: The small hearts that overlap are registration marks to help with alignment during pressing.
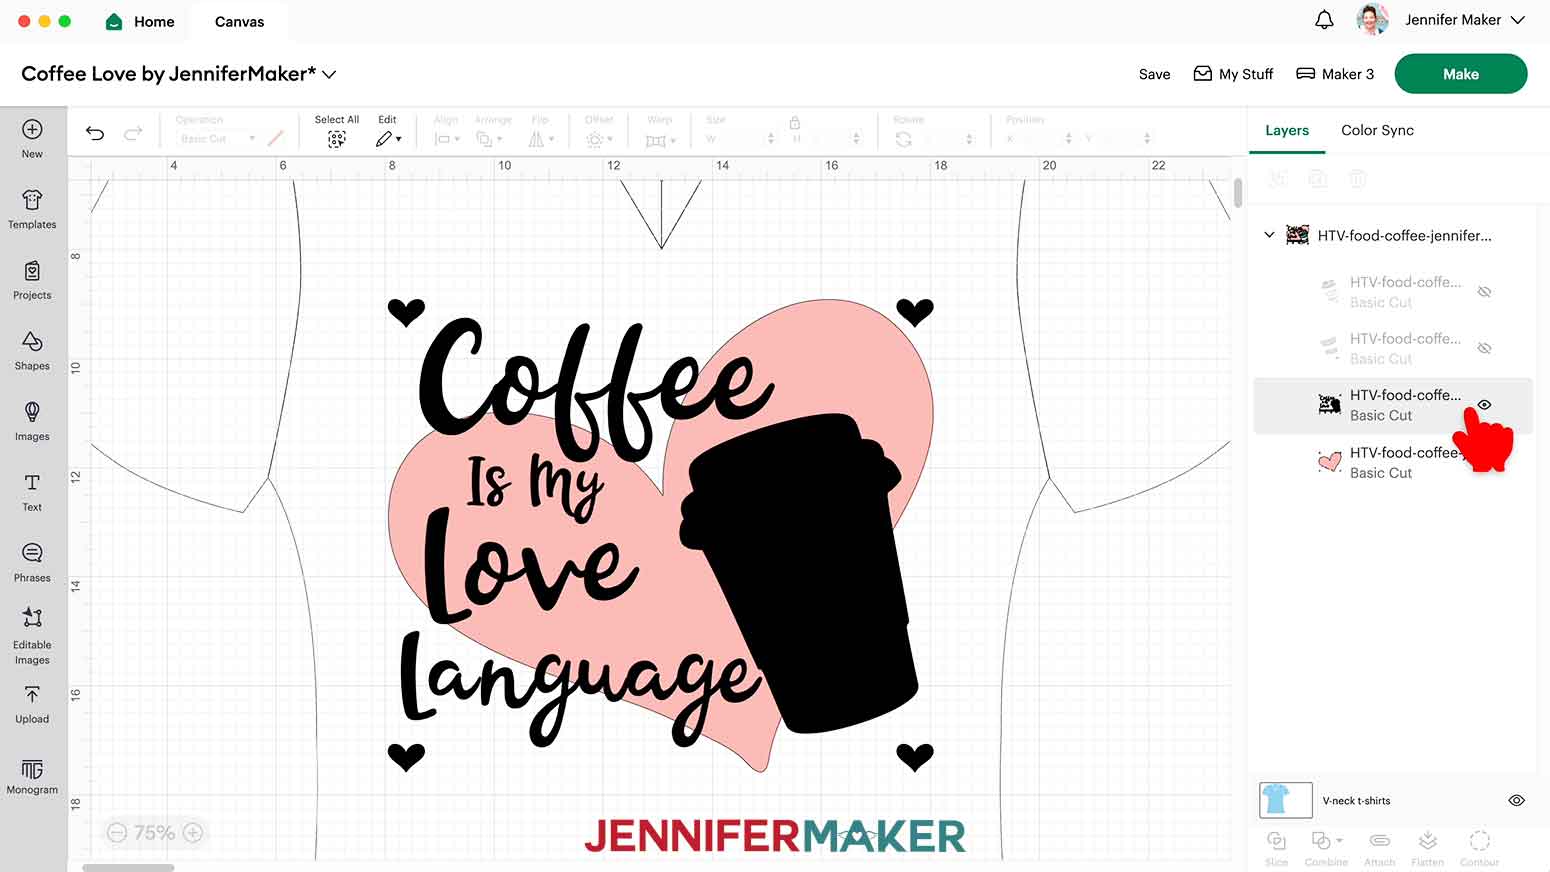
15. Click the next layer’s eye icon so you can see the designs interact and pick your third vinyl.
NOTE: The white and teal layers have their own heart registration marks in the bottom right, but not the ones further away to avoid wasting material.

16. Use the eye icon to reveal the top layer and pick your vinyl.
CUSTOMIZE WITH A NAME
1. To add a name to the top layer so the color of the cup will show through, first click the Text icon and type the name.

2. Click “Font” to change the look.
3. Find fun but easy-to-weed options by selecting “Filters” and checking the boxes for “Single-layer Cutting” to avoid layering, “Kerned” so the letters are spaced nicely, and “Free” to avoid a cost.
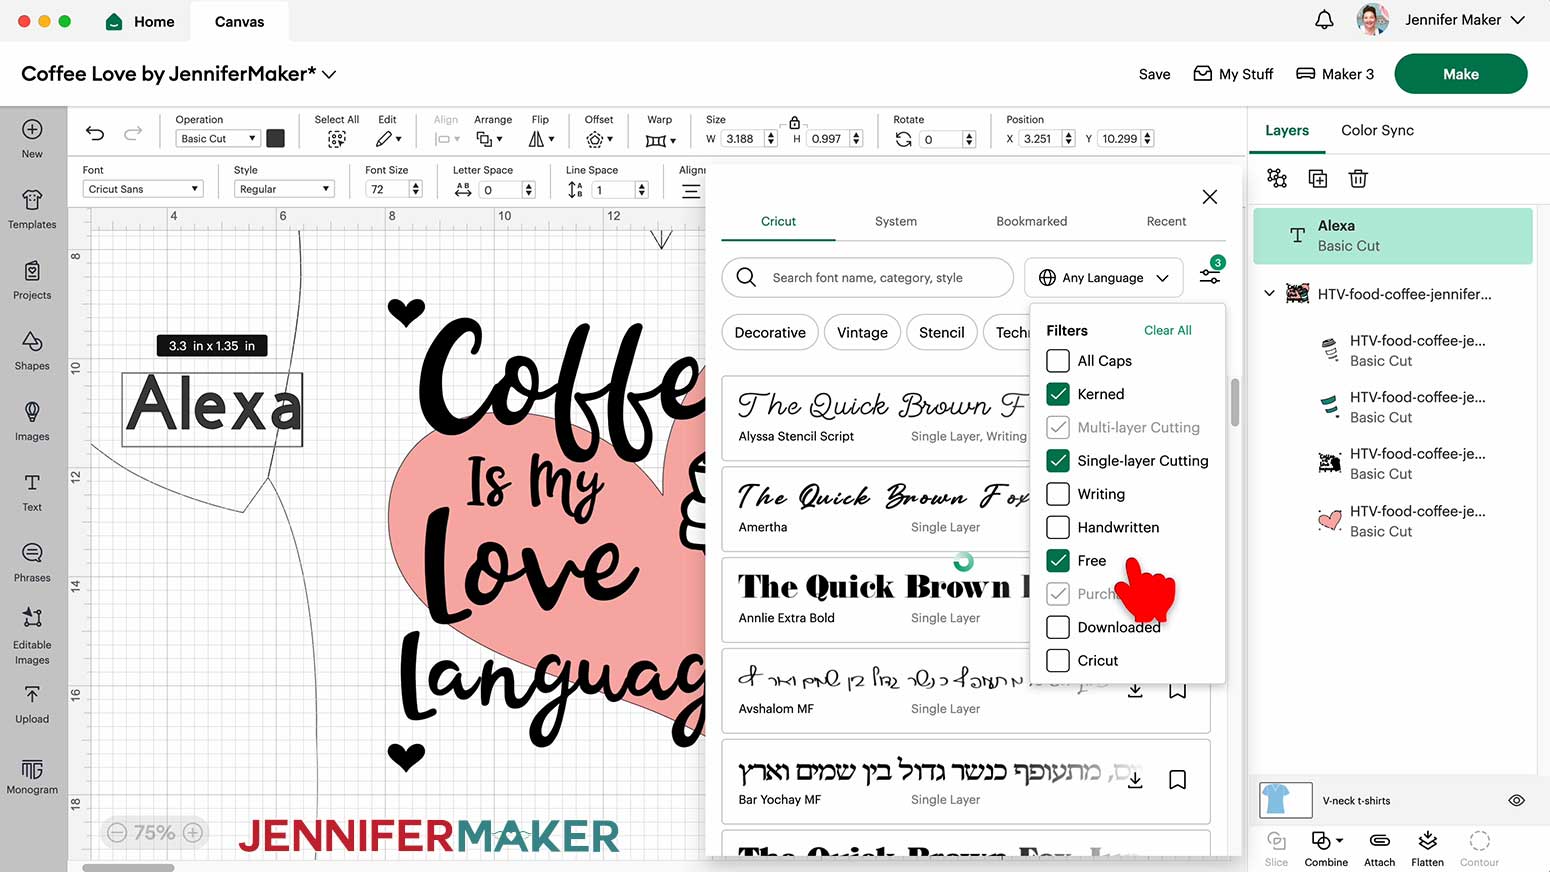
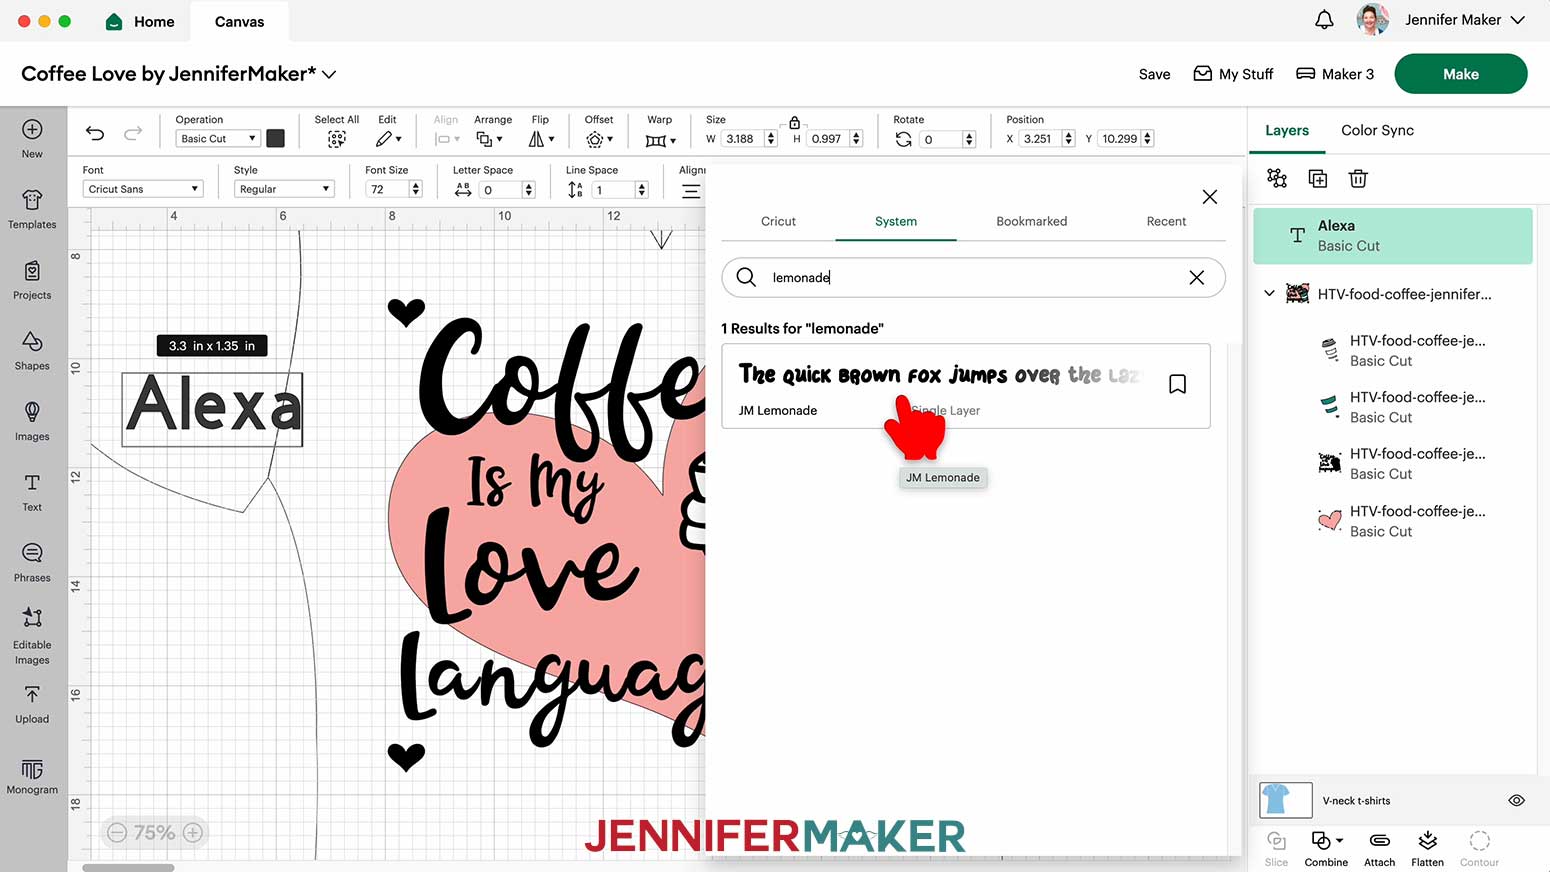
NOTE: As an alternative to using a Cricut font, click “System” to find any fonts you have installed on your computer. I’m using JM Lemonade for this tutorial.
4. Close the Font menu.
5. Move the name over the middle white section.
6. Hover your cursor near a corner of the bounding box to activate the curved arrows, then click and move counter-clockwise to slightly Rotate the text to fit the design.
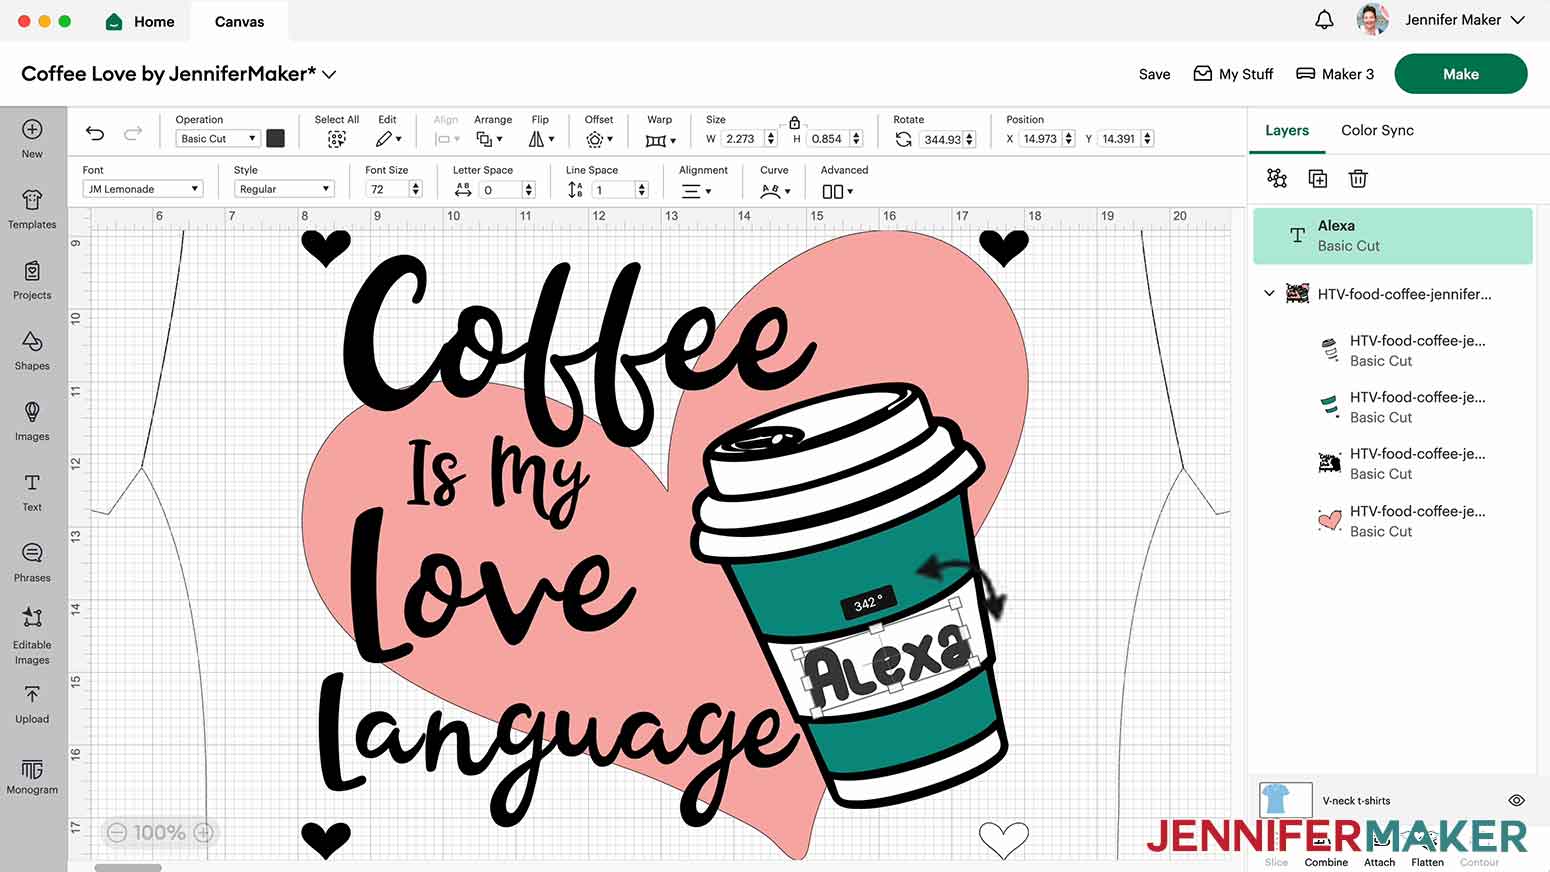
7. With the lock icon closed, resize the name to fit.
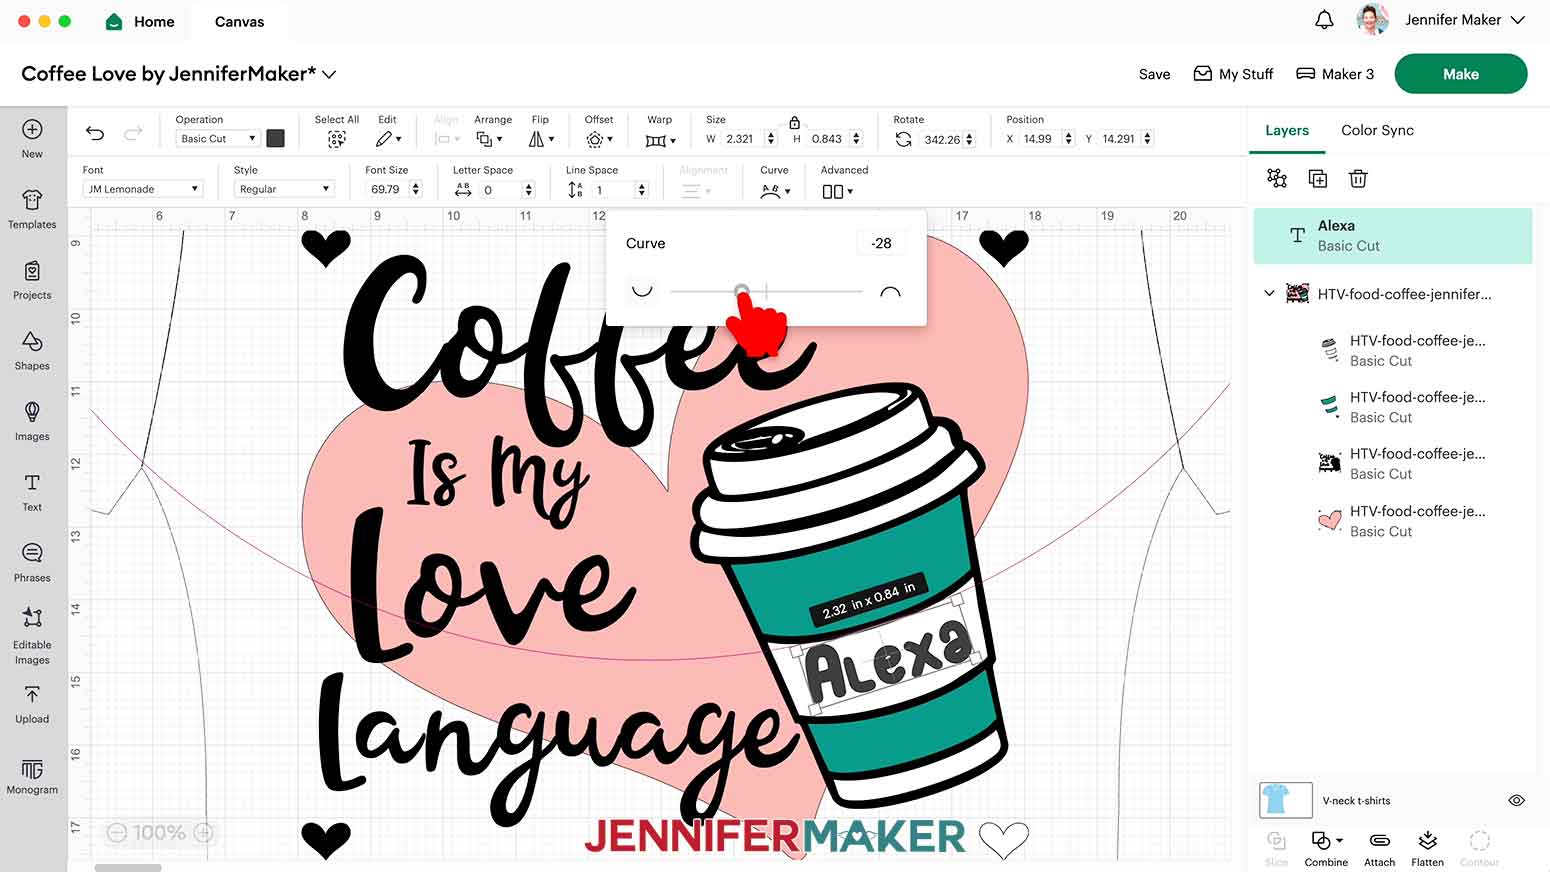
8. Use the “Curve” tool to match the shape’s slight curve.
NOTE: I set the curve to -28 for my design, but it will vary depending on your name, typeface, and dimensions.
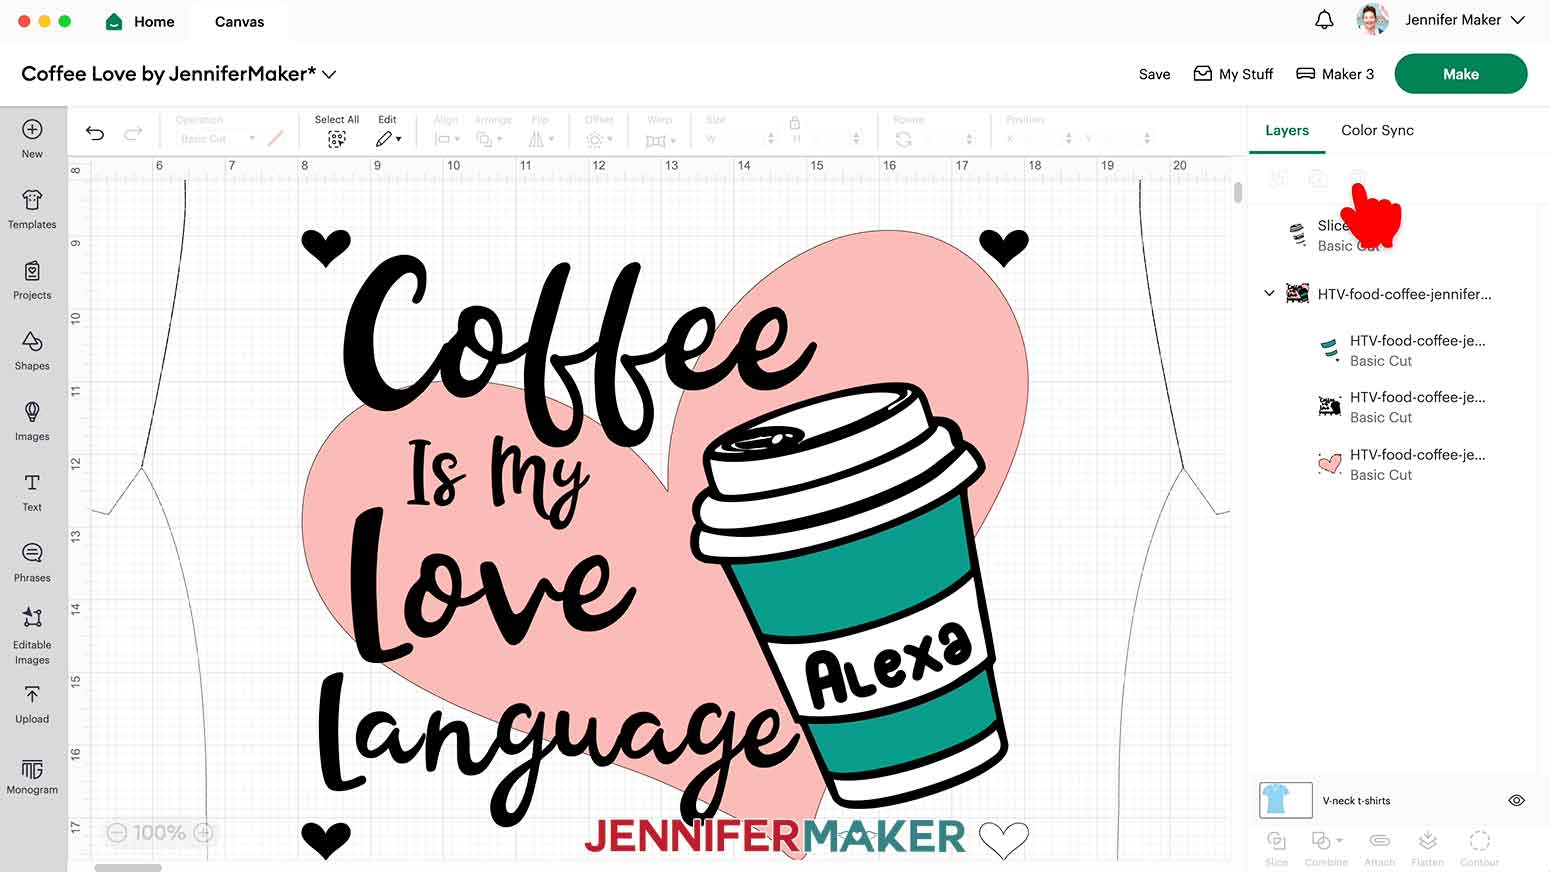
9. Hold Shift to select both the text and the layer you want to cut it out of, then click “Slice.”
10. Delete the Slice Result layers with the text, leaving only the lower customized layer.
NOTE: The little shapes inside letters will cut on the same layer as their outline, so you won’t need to stress over alignment.
MAKE TEST PIECES
1. Testing your vinyl on your shirt is a good idea, especially with new materials, so click “Shapes” and add a free shape of your choice to the Canvas.
2. Make the shape about 1” tall.
3. Use the Color Box to make it match your bottom layer.
4. Duplicate the shape and change its color to match the second layer.
5. Repeat until you have a matching test shape for each color or type of vinyl.

CUTTING
1. Your layers are ready to cut!
2. Make sure the correct machine is selected in the top right.
3. Click “Make.”
4. If prompted, click "On Mat," choose your mat size, and click “Confirm.”
5. On the Prepare Screen, you should have a mat for each color.
6. Toggle on “Mirror” for each mat since we’re using iron-on vinyl.
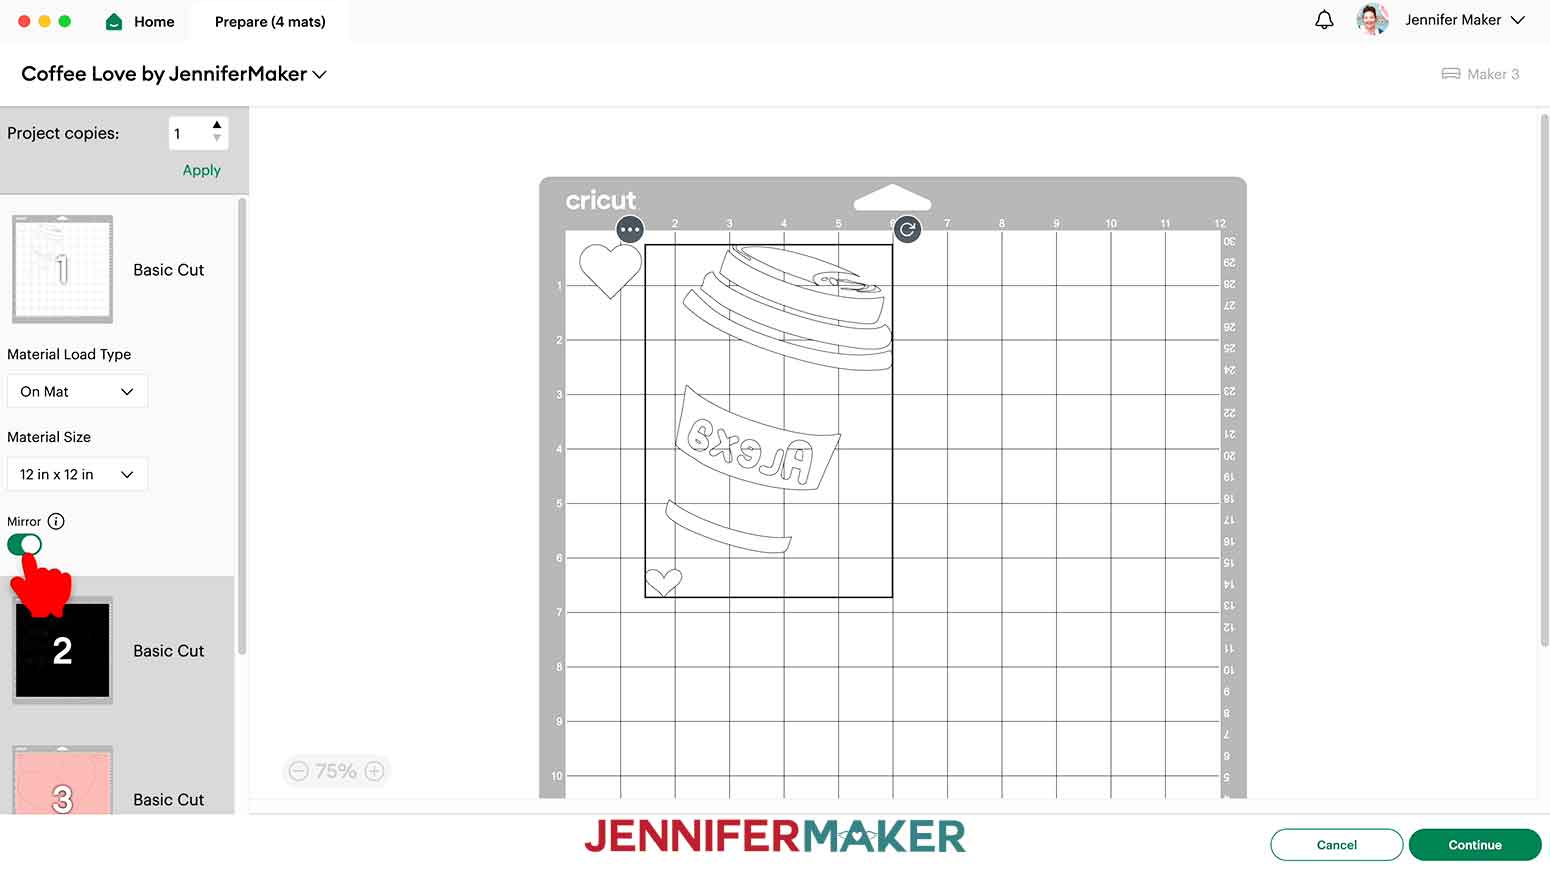
7. Select the first mat again and click “Continue.”
8. On the Make Screen, click “Browse All Materials.”
9. Search for and select the settings needed for the materials you’re using. I used "Everyday Iron-On" with More Pressure for most of my mats.
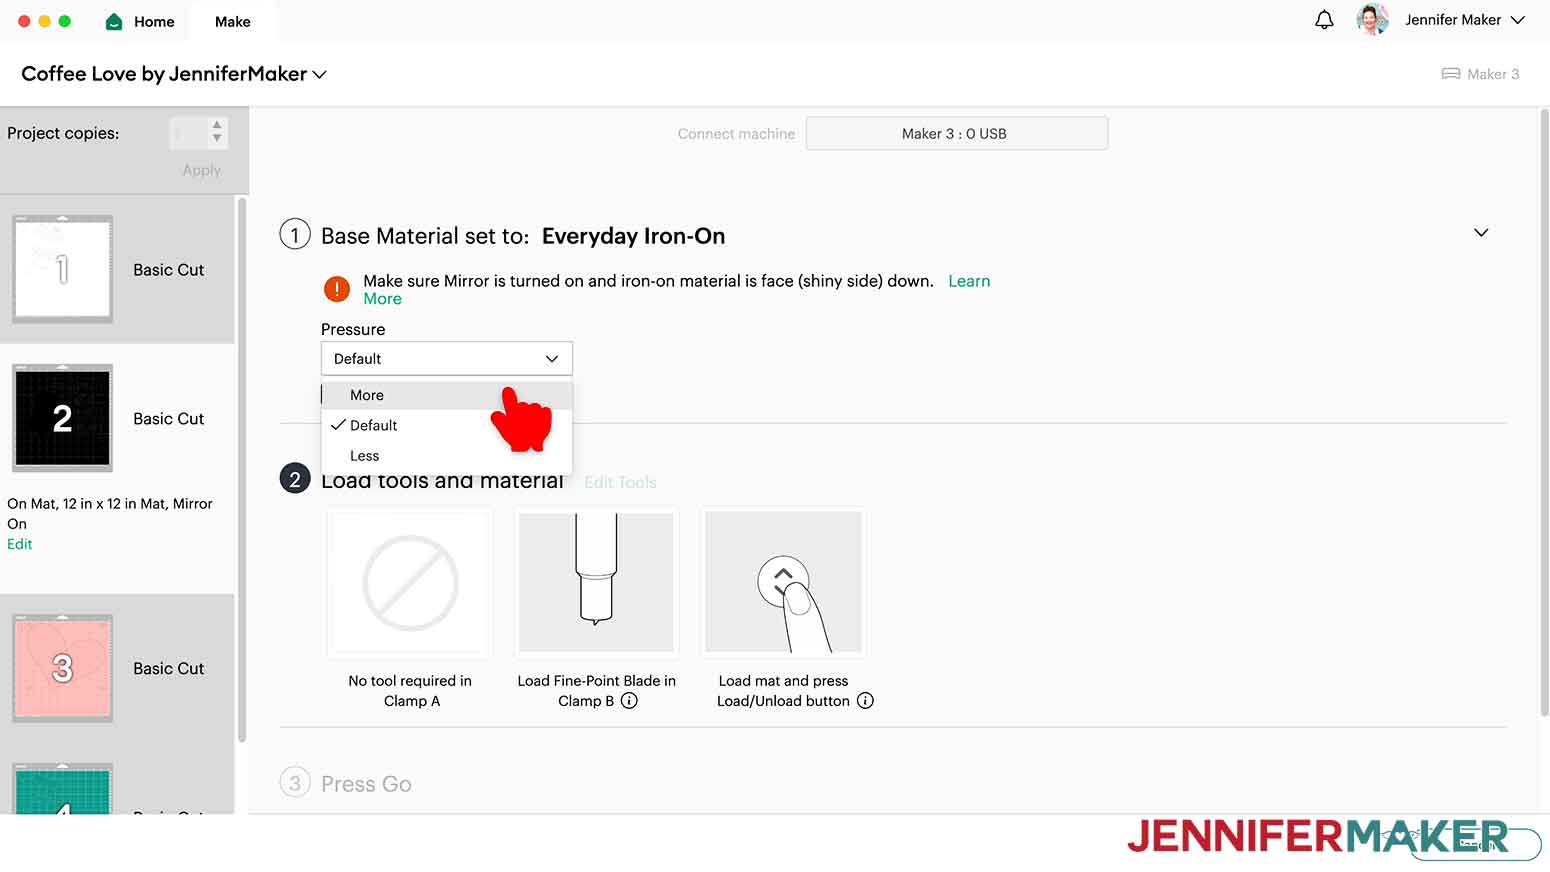
NOTE: I used "Glitter Iron-On" with More Pressure and "Sportflex Iron-On" with More Pressure for the other Iron-On Vinyls I used. Make sure your settings match the mat and vinyl type that is currently being cut.
TIP: HTV must be cut with the carrier sheet, usually the shinier side, on the mat. If you’re not sure which side is the correct cutting side, use a weeding tool to scratch a corner on each side. The one you can lift is the vinyl and needs to go up!
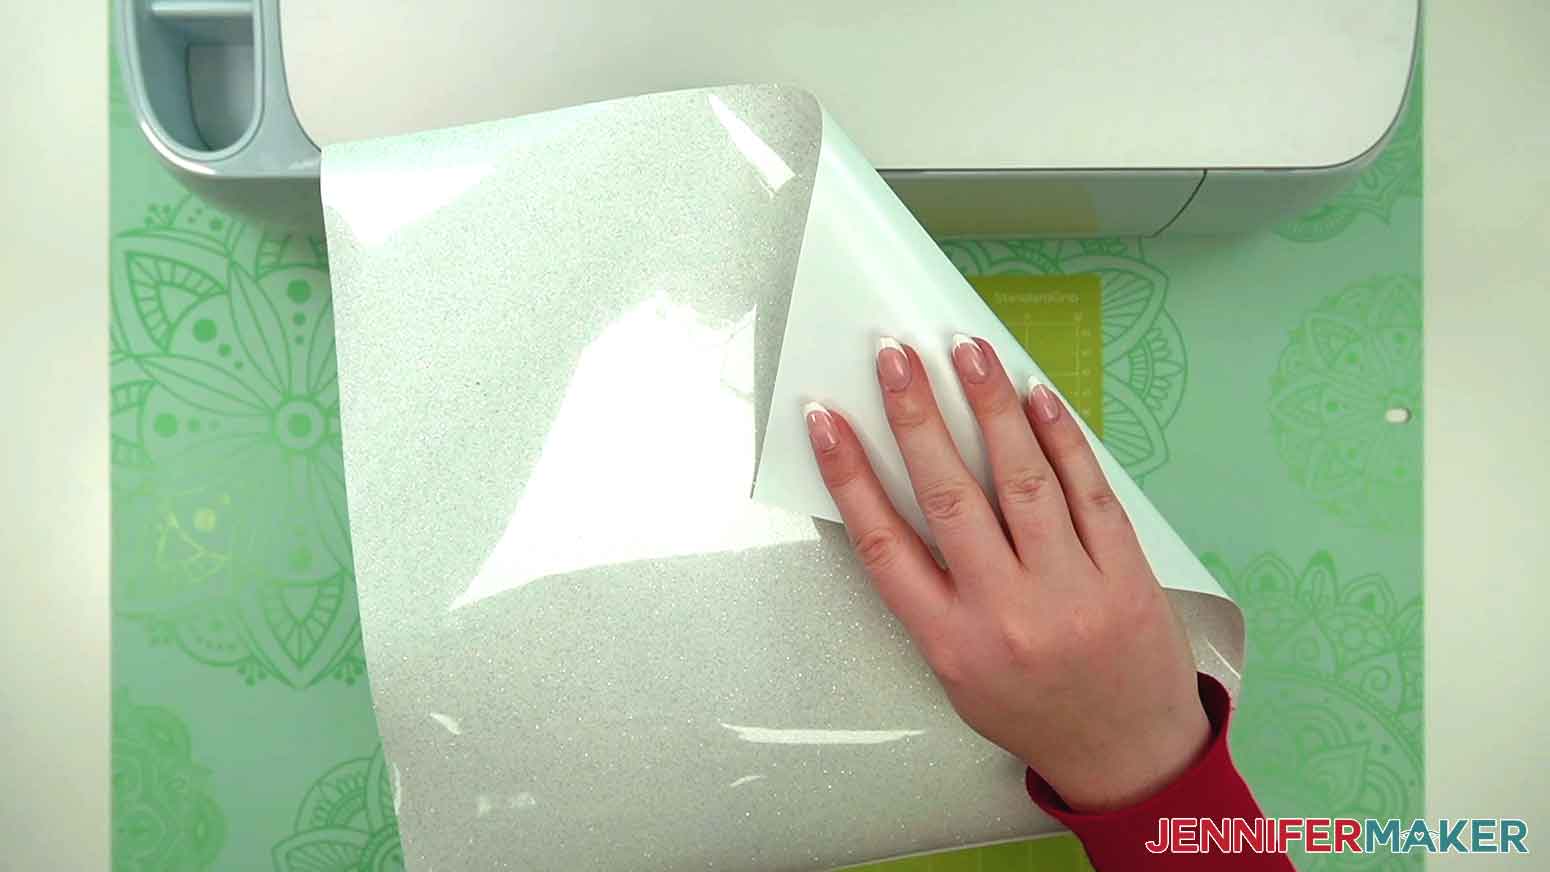
10. Place the vinyl shiny side down on a green StandardGrip machine mat so it covers the design area.
TIP: Cut your vinyl piece slightly larger than the design area needed for each layer, instead of filling the whole mat, to save materials.
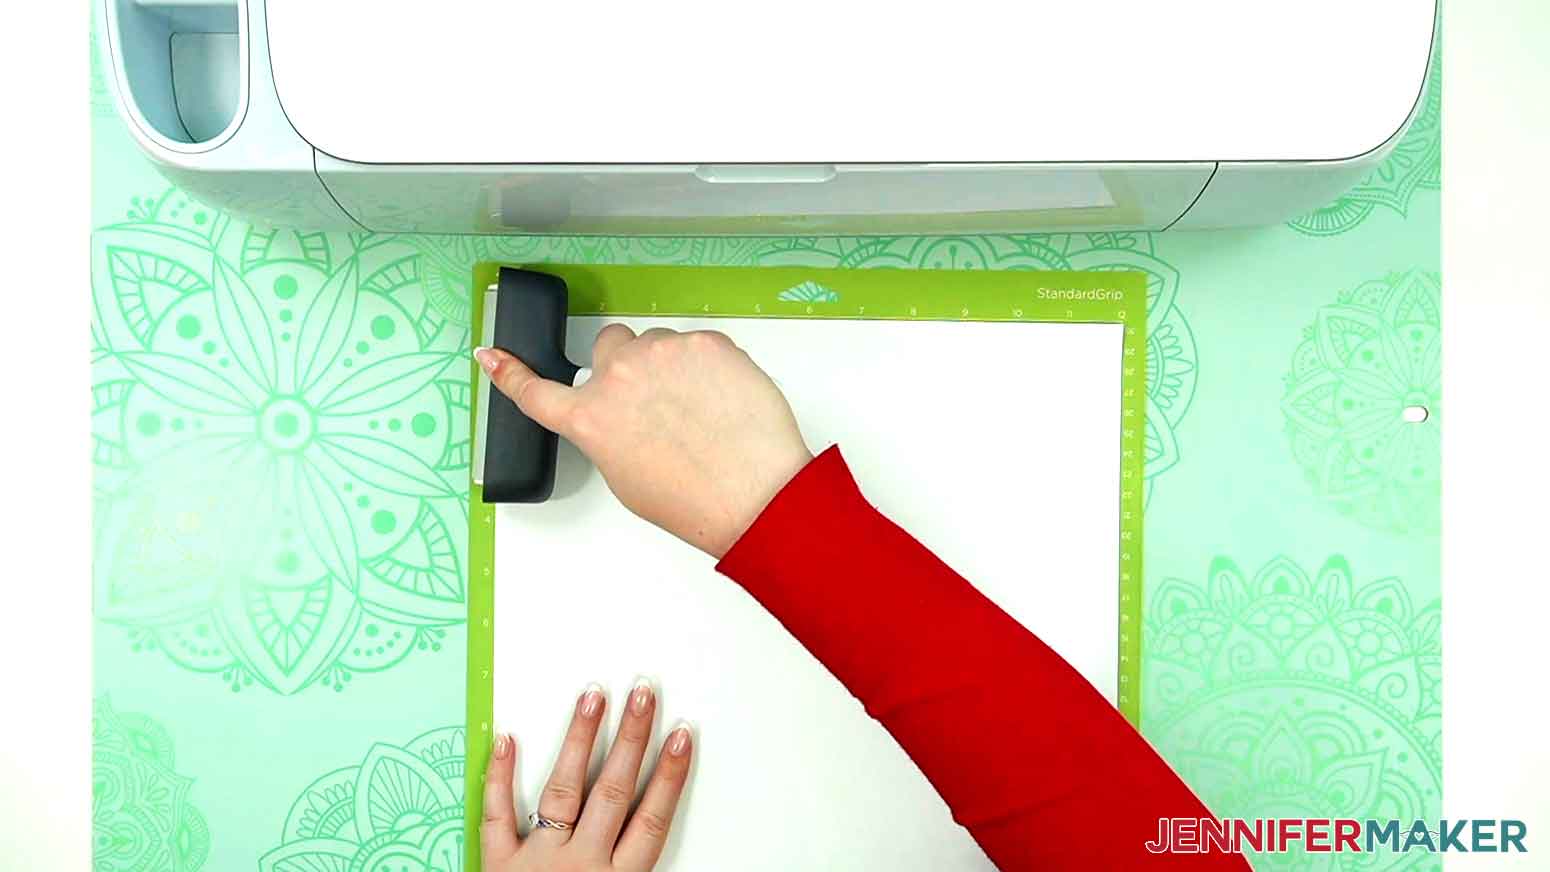
11. Use a brayer to adhere it well.
12. Check that your Fine-Point Blade is clean and in the clamp.
13. Press the flashing “Load/Unload” button to load the prepared mat into your Cricut.
14. Press the flashing “Go” button to begin cutting.
TIP: Before unloading, gently lift part of the material and see if the cut went through the vinyl, but not the carrier. Incomplete cuts make weeding harder, so press the “Go” button to run the design in the same spot again if needed.
15. When it has finished cutting, unload the mat, flip it over onto your work surface, and roll it back to release the vinyl.
16. Use the same steps to prepare and cut your other layers.
NOTE: If you trim away more excess, don’t cut completely between design elements or registration marks or you’ll lose the advantage of having everything on one sheet.
17. Place the vinyl carrier sheet down on the machine mat again to keep it in place, then use a weeding tool to remove the excess starting at the edges.
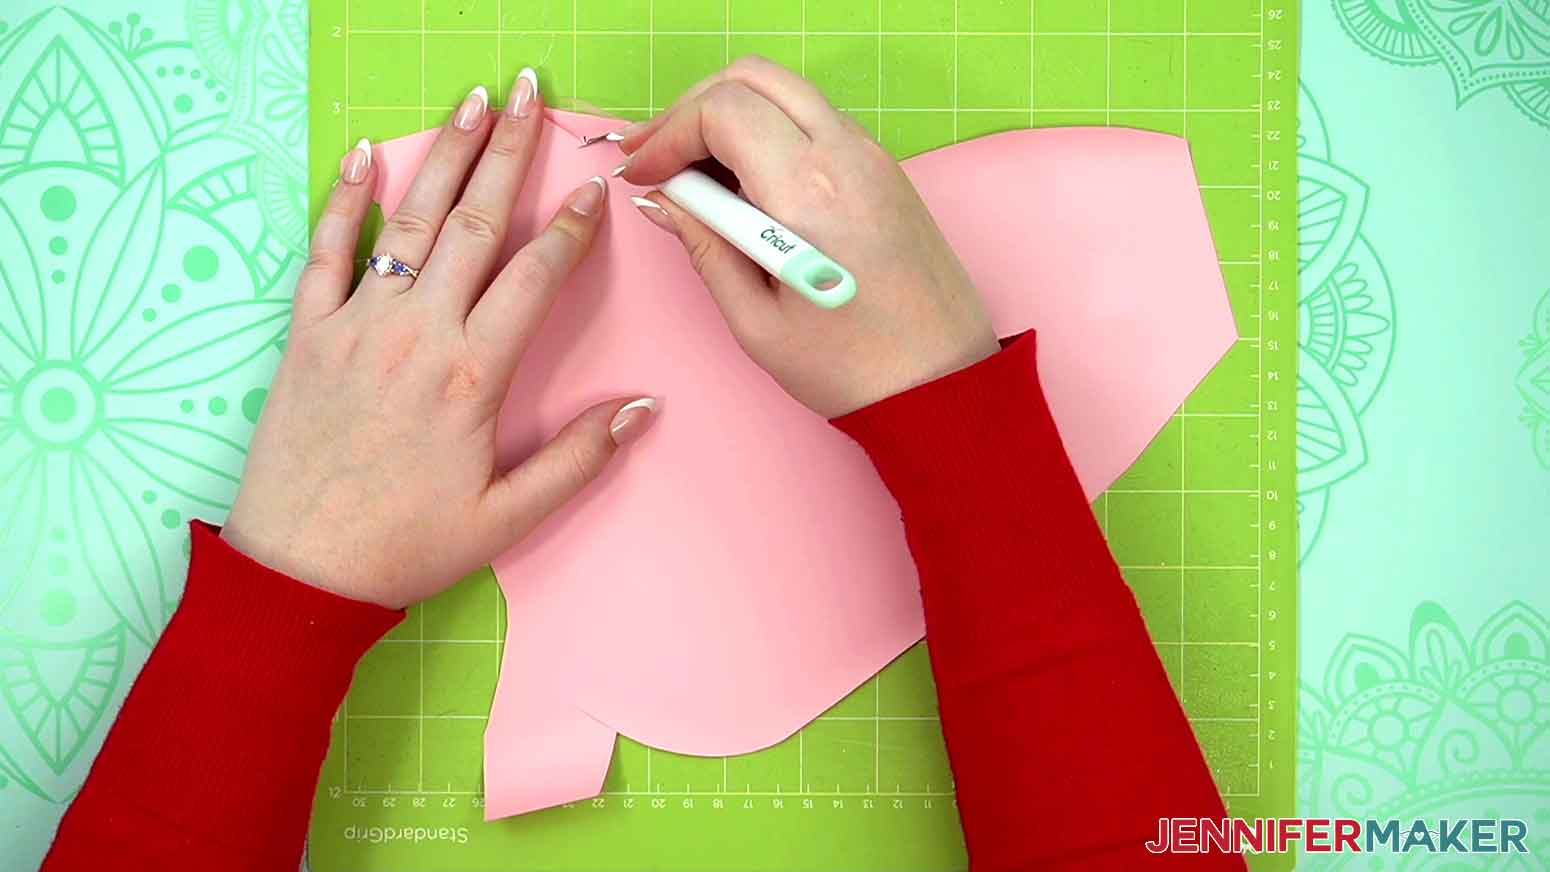
NOTE: Don’t forget to weed the letters correctly so the black layer will show through!
18. Repeat for all layers of your iron-on vinyl design.
STEP 3: TRANSFER YOUR HTV DESIGN
1. Check your design by gently stacking the layers in the order they will be pressed onto your shirt to make sure you weeded correctly and nothing is backwards.
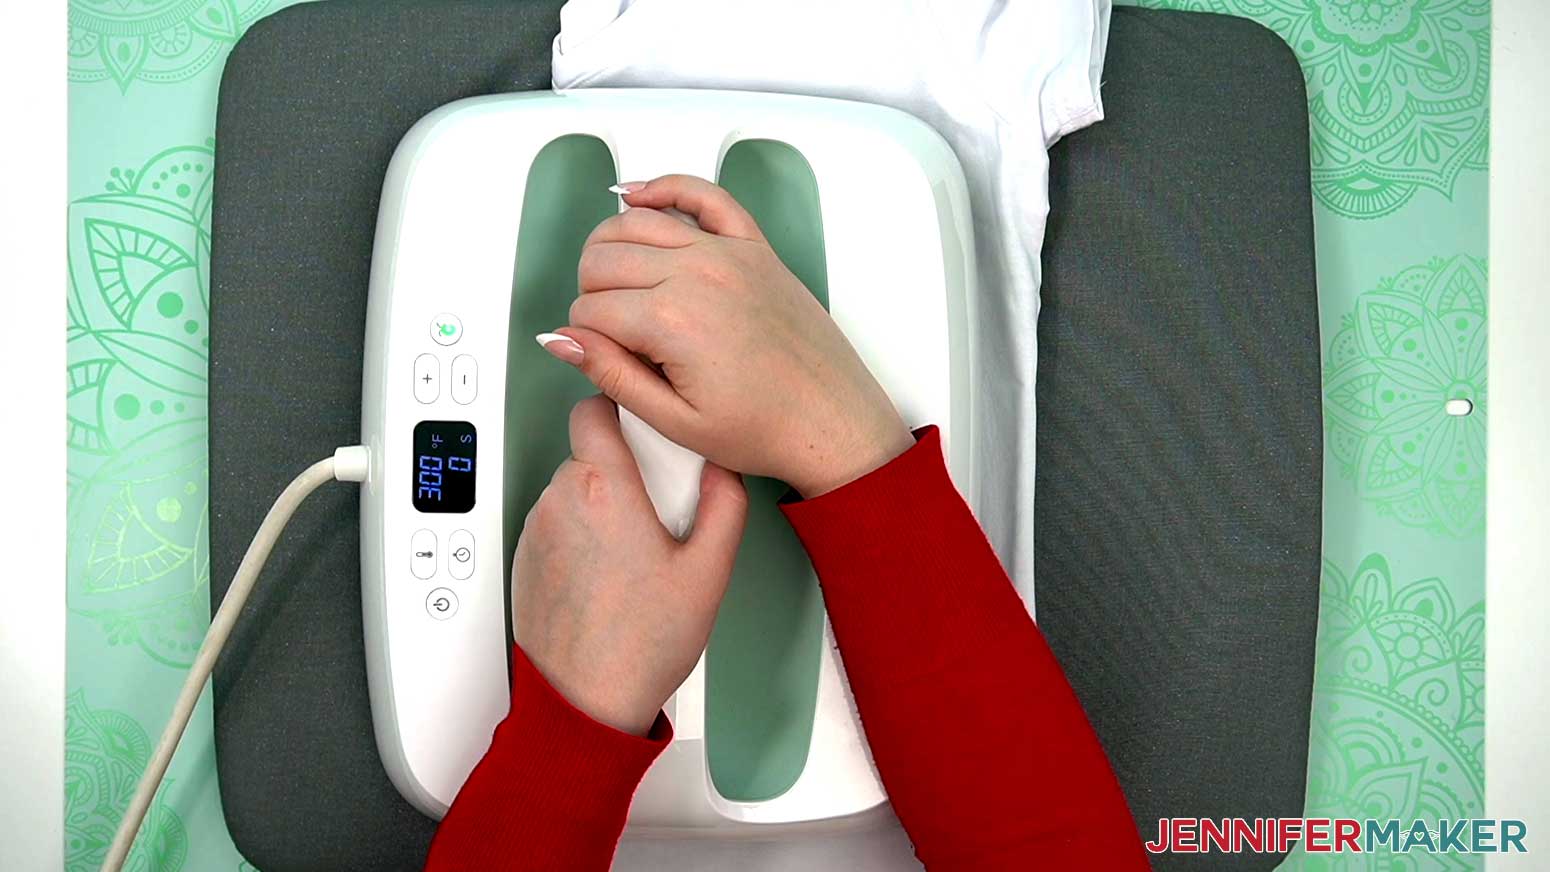
2. Preheat your heat press.
TIP: Always check for manufacturer’s instructions for general times and temperatures, but my HTV Cookbook has lots of tips on working with layered designs, which does change the process.
3. Slightly decreasing the temperature for the lower layers minimizes the risk of overheating the vinyl, since the layers will be pressed several times. So I’ll preheat my EasyPress to 300°F (149°C) instead of the recommended 315°F (157°C) for Cricut Everyday Iron-on.
NOTE: If you are using an iron and cotton t-shirt, set it to the cotton setting without steam. If your shirt is something other than cotton, use the matching setting, but still avoid steam.
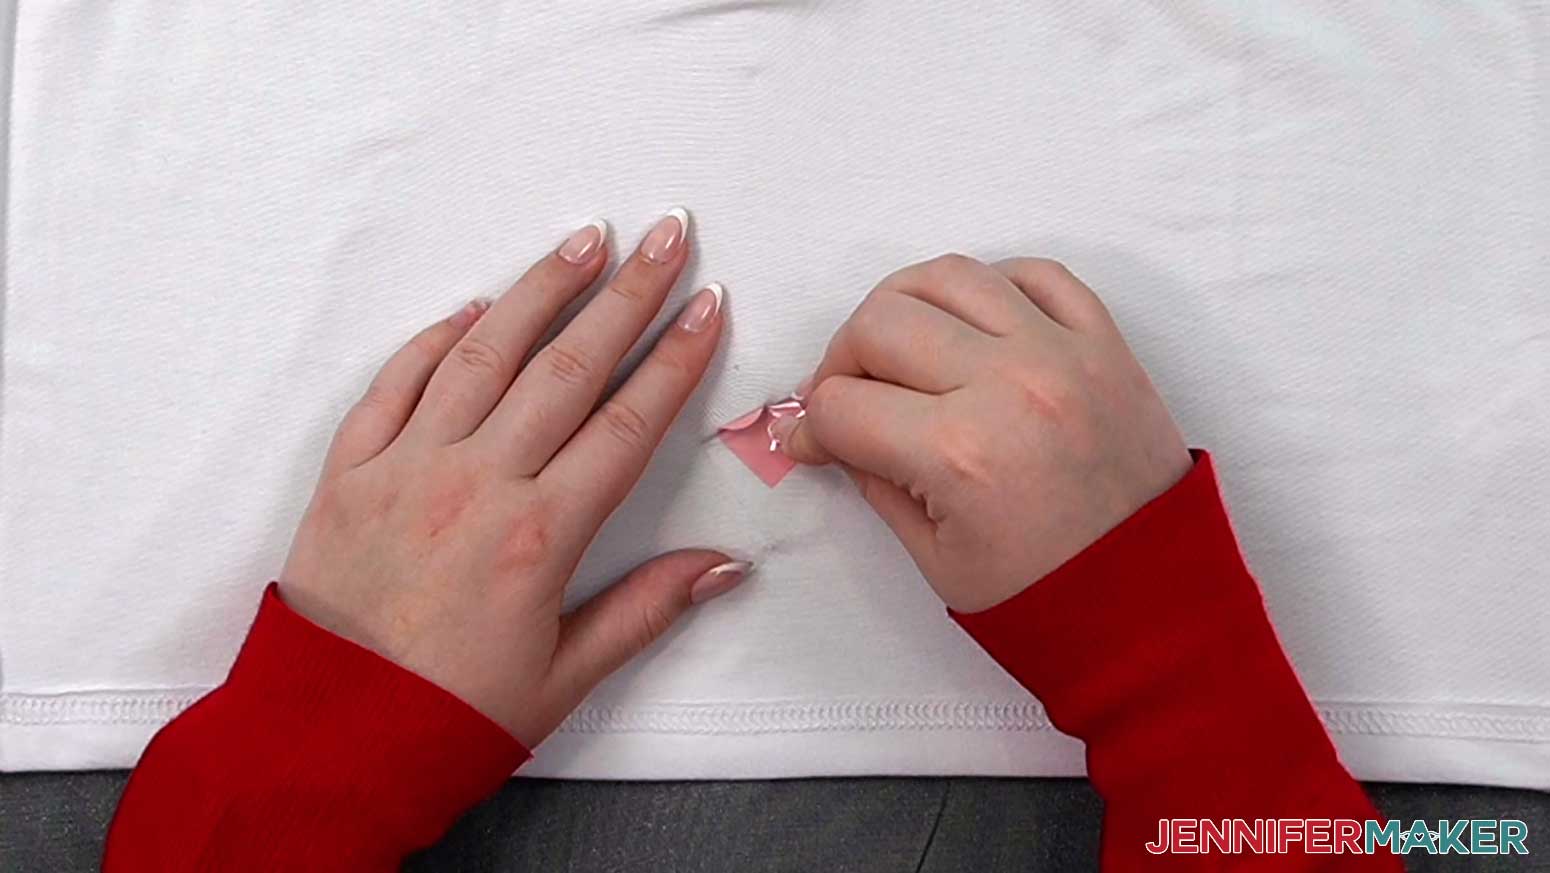
TIP: Follow the steps below using the little test hearts we cut separately on the arm or inside the lower hem to see if you need to adjust your settings!
4. Place your T-shirt on a Cricut EasyPress Mat or folded towel to protect your work surface.
5. Use a lint roller to remove lint or fuzz from the front of the shirt.
6. Fold the shirt on the vertical center by matching up the sleeves.
7. Use your heat press to lightly crease the fold.
8. Open it up and there’s the center to line up the T-shirt guide! Plus, the fabric is now pre-heated.
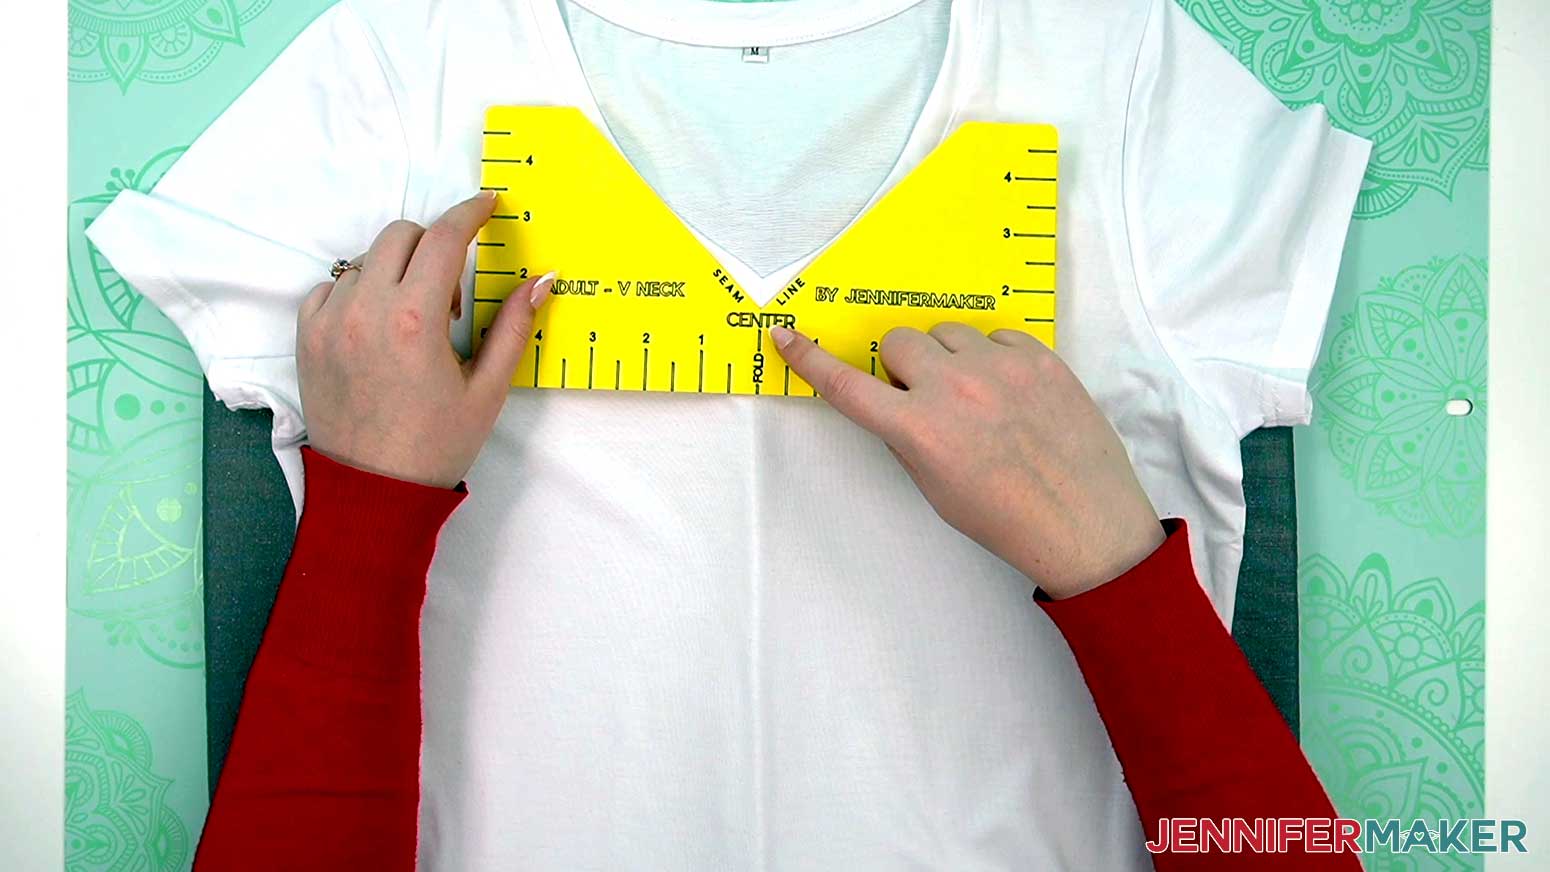
9. Place your T-shirt ruler just below the collar seam so the center mark matches the crease.
10. Fold the non-sticky sides of your layered designs together vertically to find the center and lightly crease the top and bottom edges, but not the vinyl.
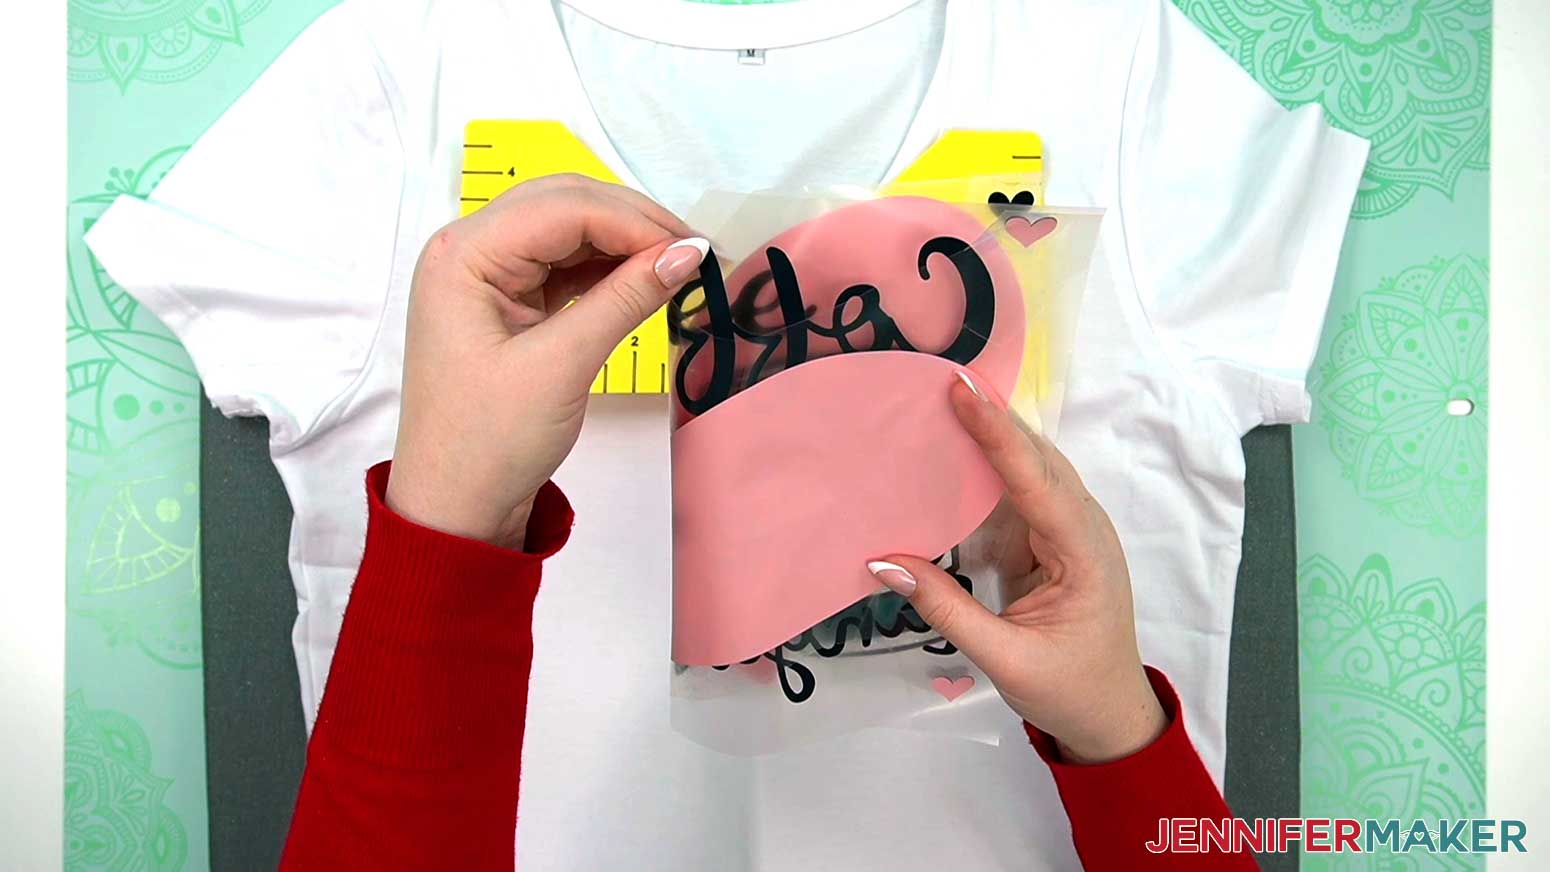
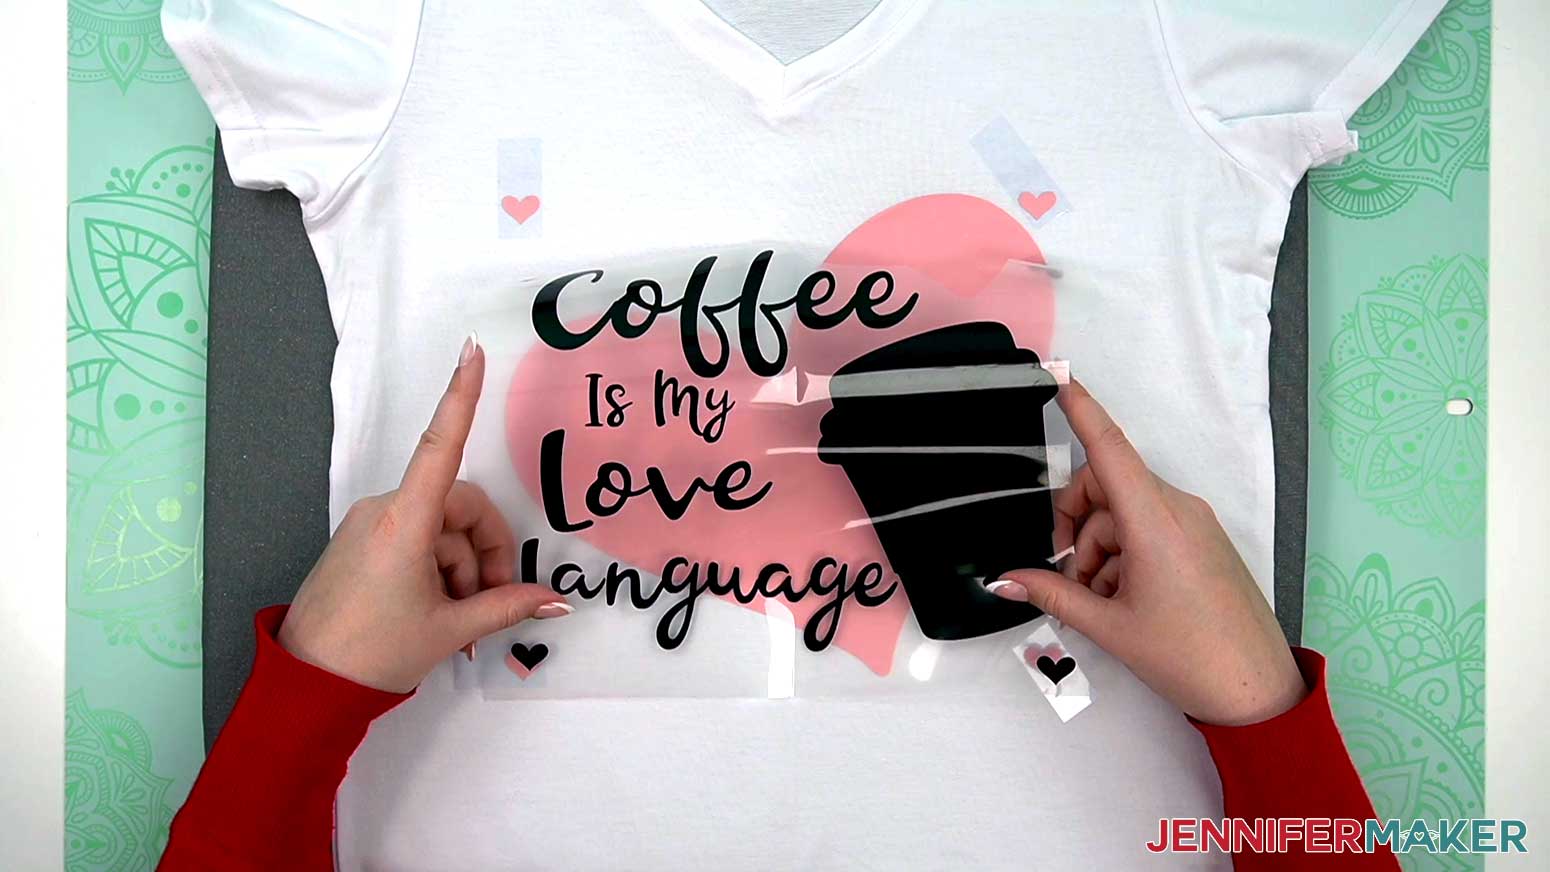
11. Open it and remove the bottom layer from the stack.
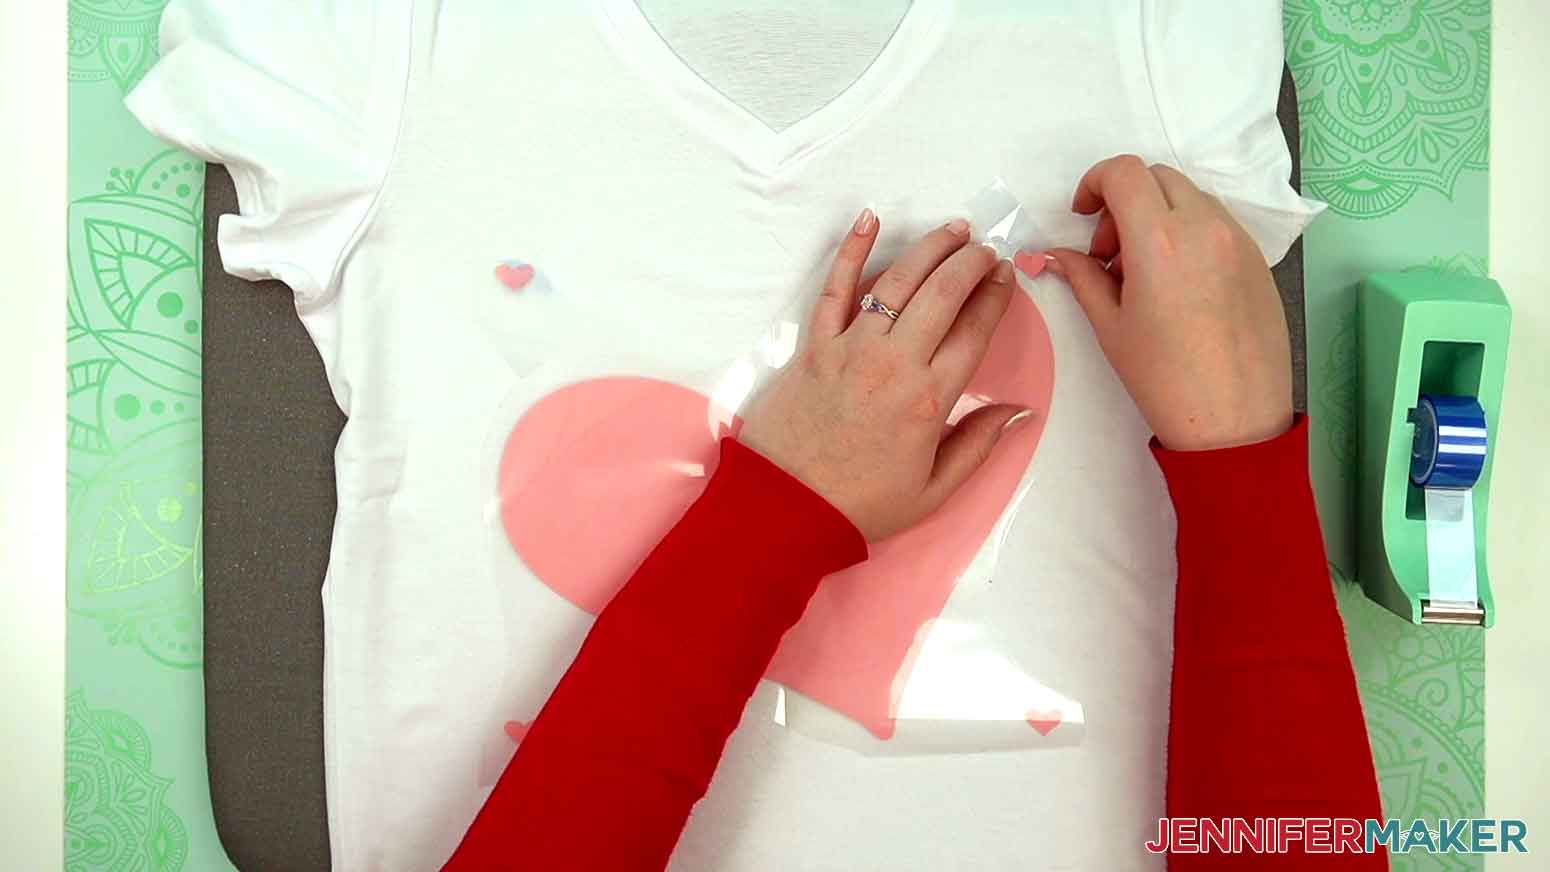
12. Align the creases with the shirt and ruler, vinyl side down.

13. Check where your registration marks will land.
TIP: If you don’t want registration marks to transfer to the shirt, put some heat resistant tape on the fabric underneath the marks. The marks will stick to the tape, and the tape will stick to the shirt, but the tape can be easily removed when you’re done layering your design!
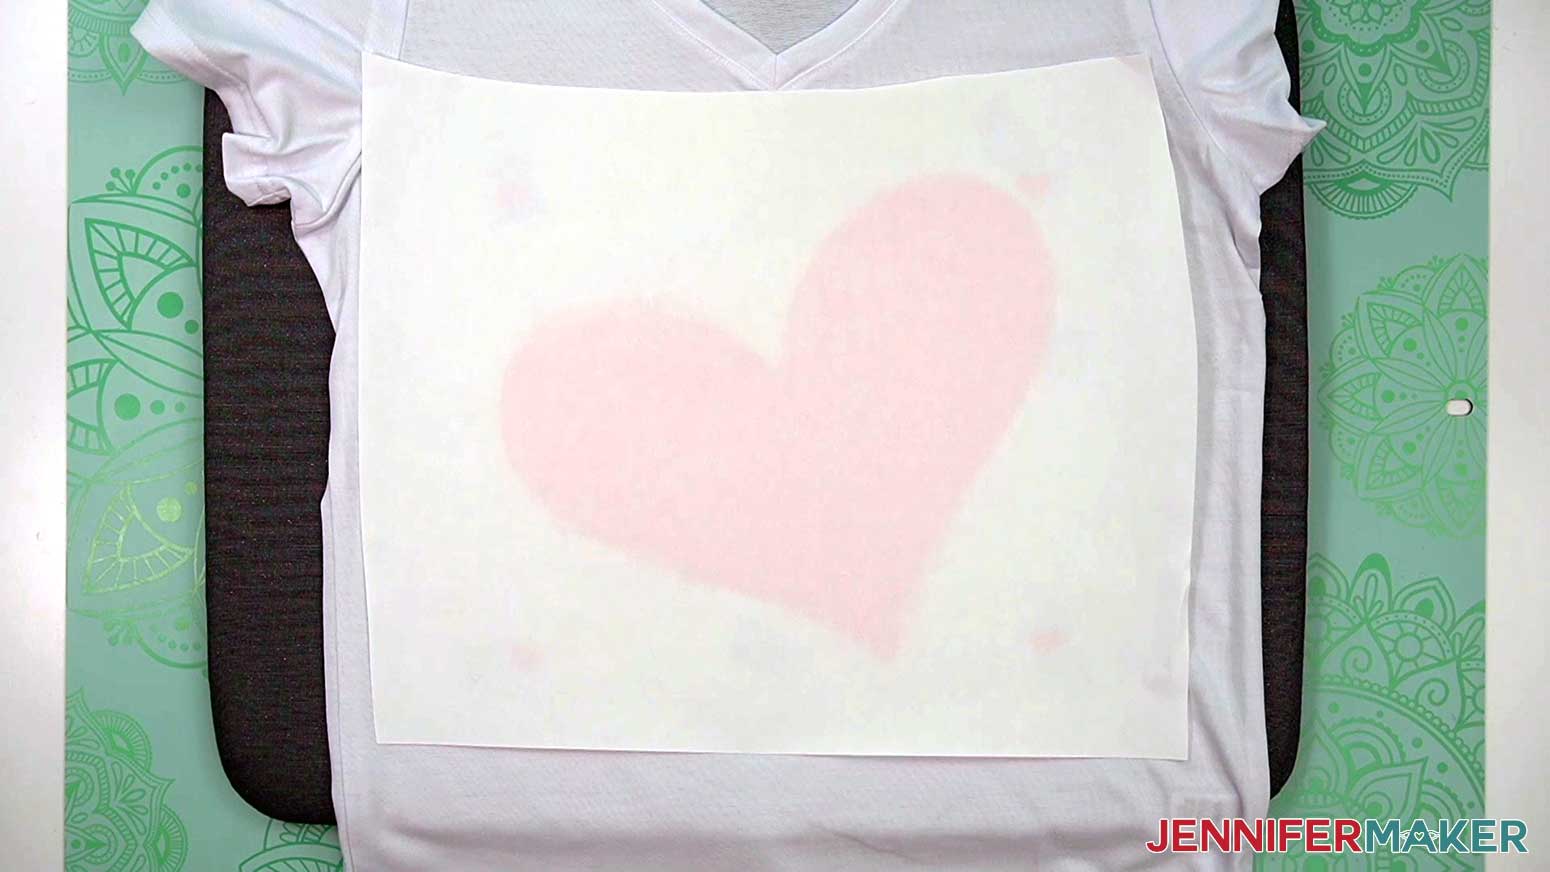
14. Put butcher paper over the entire design to protect your press in case any vinyl is showing.
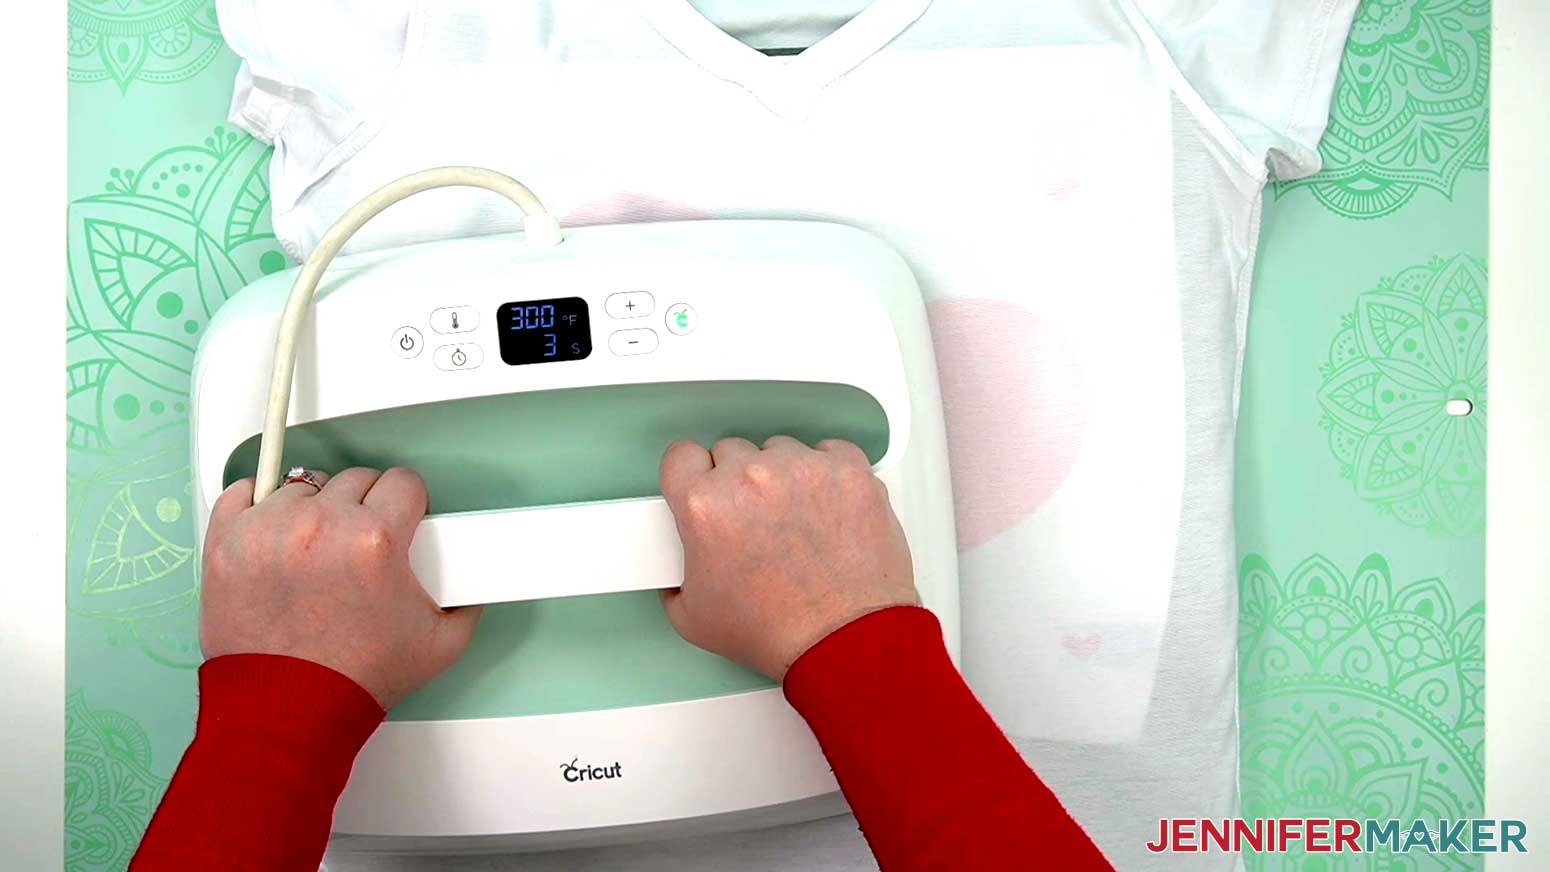
15. Layering changes the pressing time, so put your heat press on top of the first layer for just 3 seconds to tack it down with light pressure.
NOTE: If the design is larger than your press, press it in sections with a tiny overlap to make sure you press the design all evenly for the correct time.
16. Peel the carrier sheet off the design while it’s still warm, and save it for now.
TIP: If the carrier sheet doesn’t peel off easily, replace it and the protective sheet, then press for a few more seconds and try again.
TIP: If your vinyl looks wrinkled, turn it inside out, and put a pressing pillow covered with some butcher paper inside under the design. Move your heat press back and forth over it with heavy pressure for a few seconds to relax the vinyl, then pull slightly on the sides of the shirt to straighten out the wrinkles.
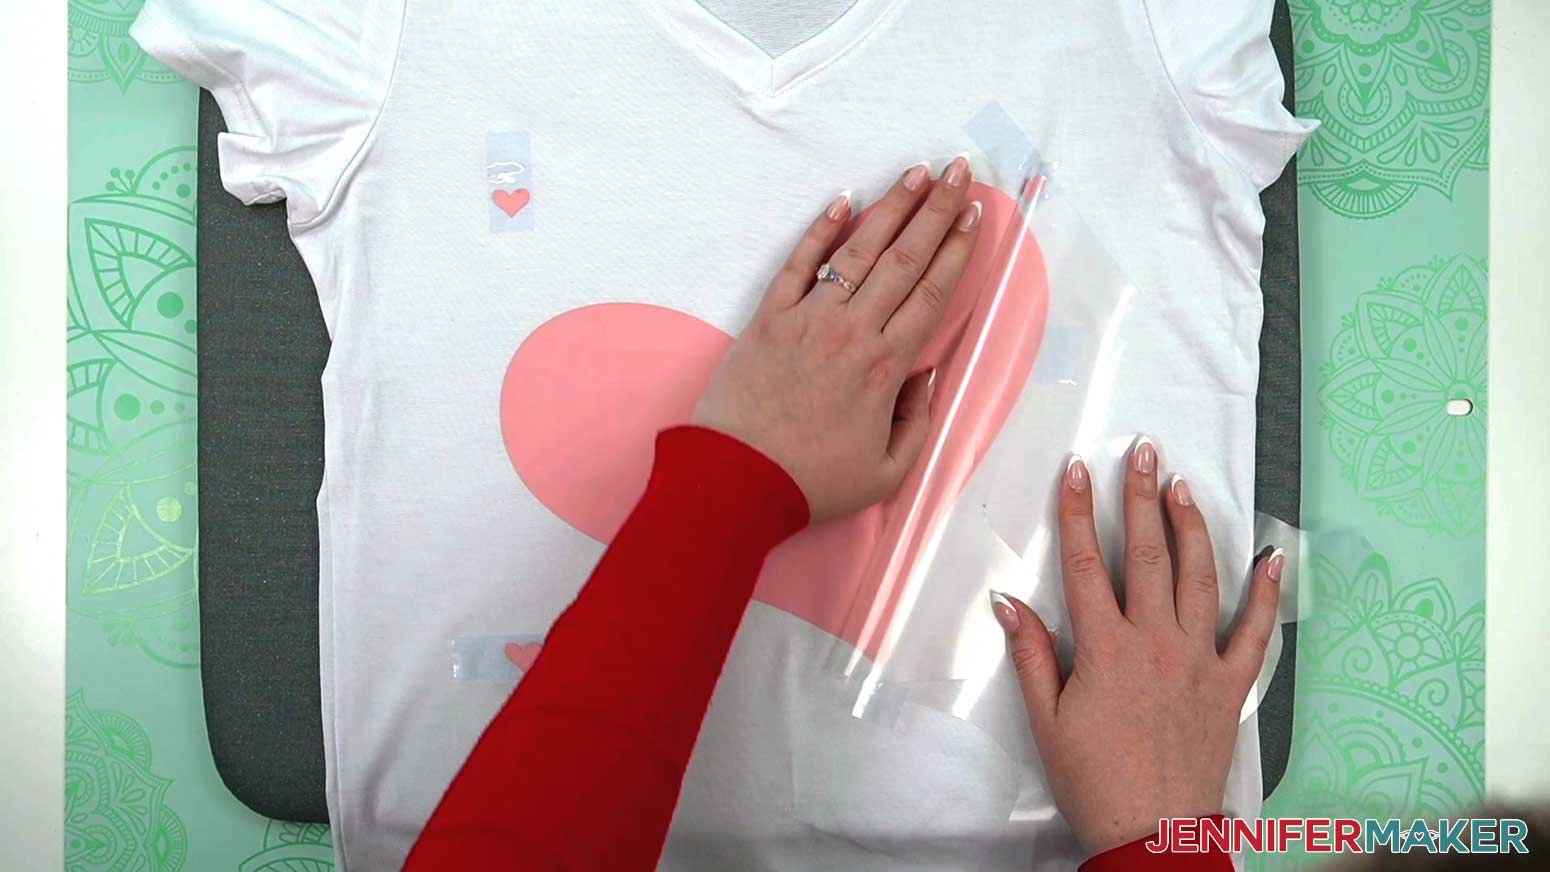
17. Take your next layer and position it over the first, lining up the hearts with those on the shirt or tape.
NOTE: The bottom layer may have shrunk just a little bit, but that’s totally normal.
18. Press it down with your hand so it won’t move.
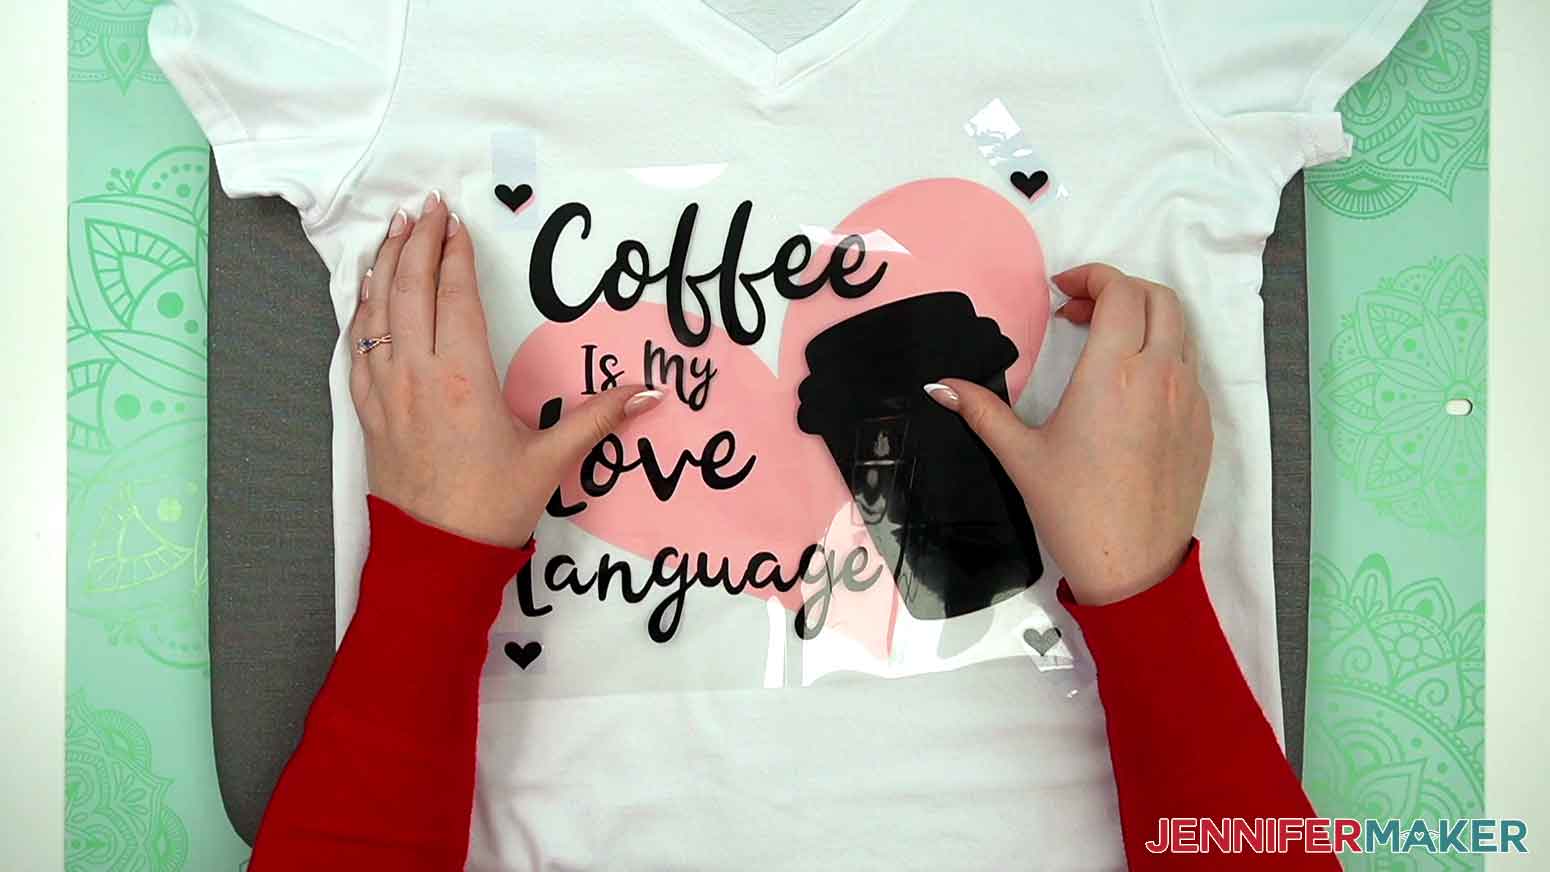
19. If any of the first layer is uncovered, cut pieces of your discarded carrier sheet and carefully slide the edges under those of the new layer to avoid pressing indents on the lower vinyl.
20. Heat the second layer for 3 seconds again.
21. Place the teal layer face down, using the heart registration mark to help.
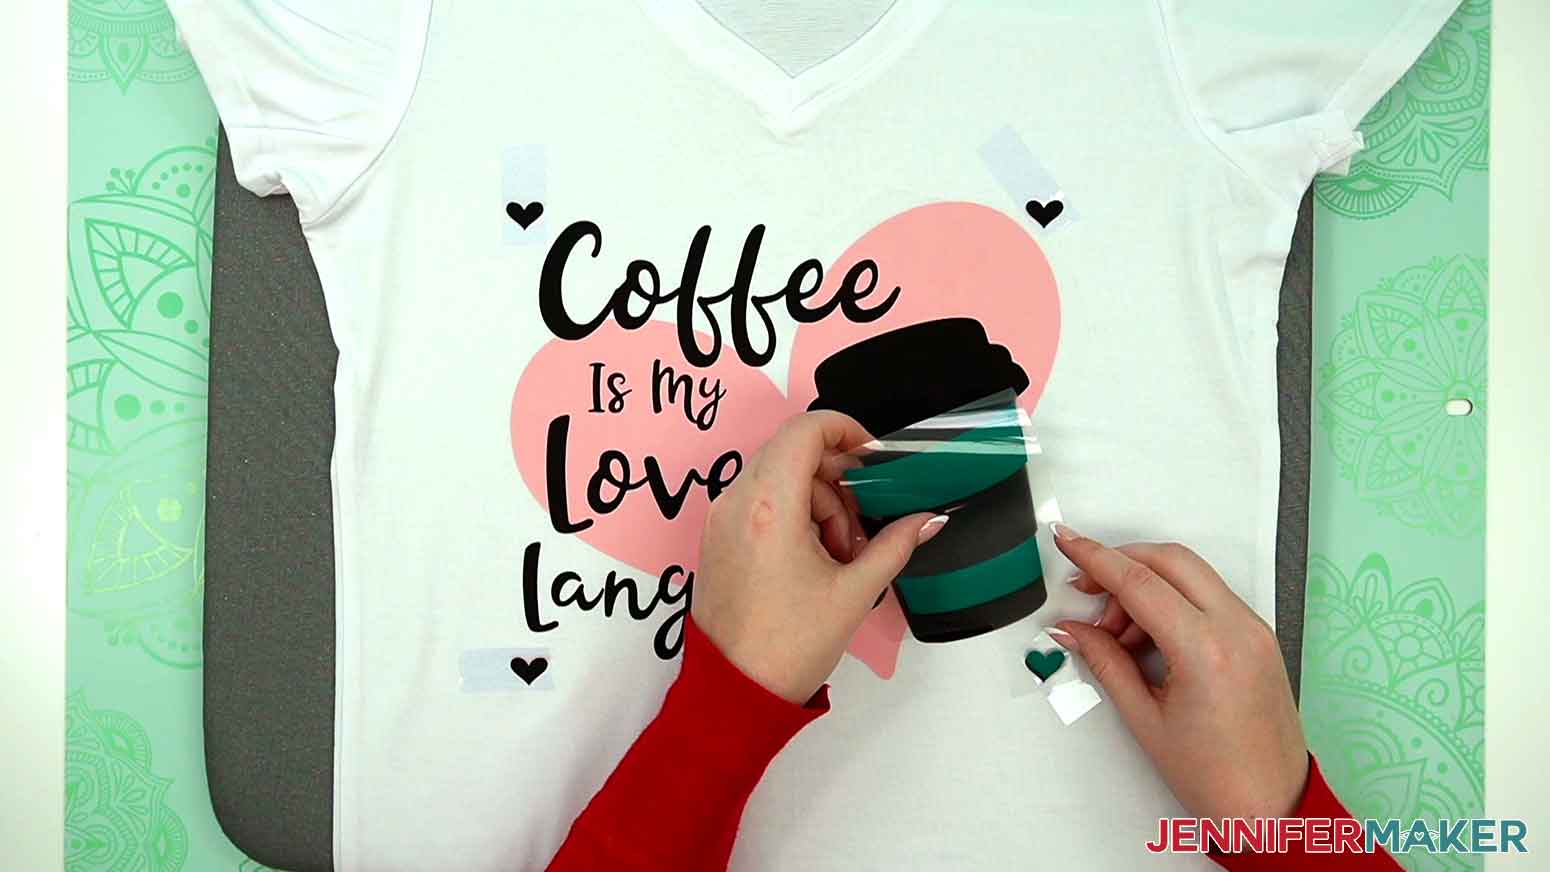
22. Protect the nearby vinyl, and press it for 3 seconds.
23. Remove the carrier sheet when it’s still warm.
24. Position the last layer using the heart, and make sure it’s secure.
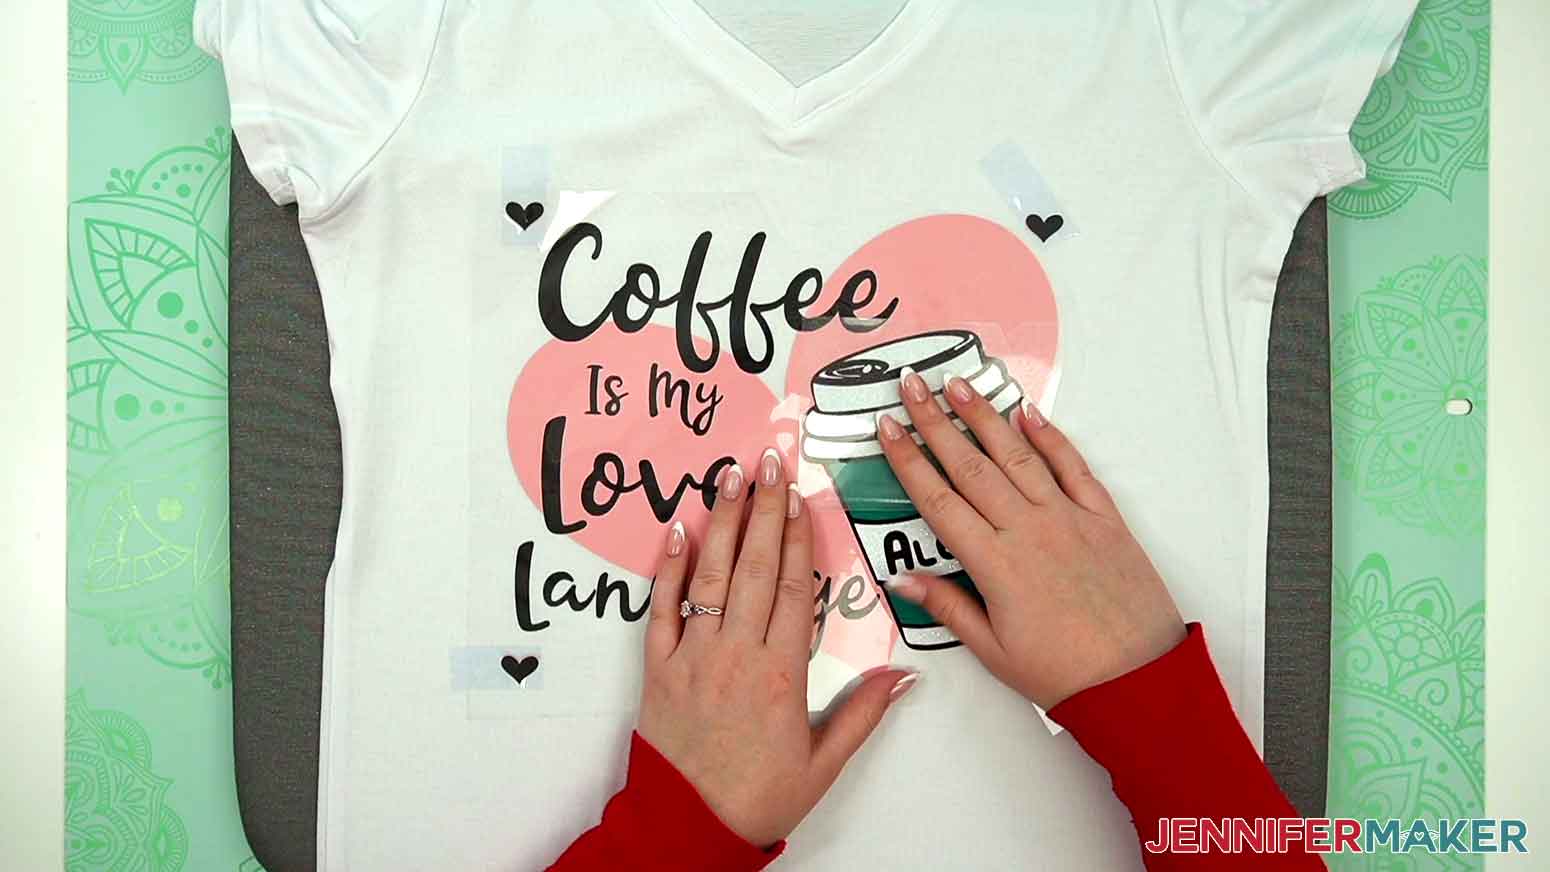
25. Add the butcher paper over the entire design.
26. Since this is the last layer — and glitter iron-on vinyl — press at 315°F (157°C) for 20 seconds with medium pressure.
27. Remove the carrier sheet while it’s still a little warm.
28. Flip the shirt over on your pressing area.
29. Put butcher paper underneath and above it.
30. Press the entire design area for 15 seconds with medium pressure to help any wrinkles in the vinyl layers relax.

VARIATIONS
TACO DESIGN
1. Follow the cutting instructions above to cut and weed the layers of the design: Black, Green, Red, Yellow.
2. Center and press the black layer onto your shirt first, using the reduced heat and time guidelines mentioned above of 300°F (149°C) and 3 seconds with light pressure.
3. Trim the carrier sheets around the red and green layers so they can be nested together and pressed at the same time to reduce the amount of presses needed.
4. Press the red and green layers using the same reduced temperature and time as the first layer. (Remember to cover the entire design when pressing.)
5. Place the yellow taco center piece last so it will only have heat on the final press. This will reduce the chance of wrinkles showing on the light colored vinyl.
6. Press the entire design for the final press at 300°F (149°C) for 20 seconds with medium pressure. If you decide to use glitter iron-on, increase the temperature to 315°F (157°C).
7. Turn the shirt over and press the entire design area for 15 seconds with medium pressure to help any wrinkles in the vinyl layers relax.
PIZZA DESIGN
1. Follow the cutting instructions above to cut and weed the layers of the design: Black, Orange, White, Red.
2. Center and press the black layer onto your shirt first, using the reduced heat and time guidelines mentioned above of 300°F (149°C) and 3 seconds with light pressure.
3. Press the orange layer into place using the same reduced temperature and time as the first layer. (Remember to cover the entire design when pressing.)
4. Trim the carrier sheets around the white and red layers to place each mushroom and pepperoni piece individually. This way, they can be pressed all at once to reduce the amount of presses needed.
5. Press the entire design for the final press at 300°F (149°C) for 20 seconds with medium pressure. If you decide to use glitter iron-on, increase the temperature to 315°F (157°C).
6. Turn the shirt over and press the entire design area for 15 seconds with medium pressure to help any wrinkles in the vinyl layers relax.
STEP 4: SHOW IT OFF!
Here’s the result when you finish your new iron-on vinyl T-shirt!
Notes
Care:Let the vinyl sit for at least 24 hours. Then, wash your shirt inside out and do not use any bleach.
Typefaces Used: JM LemonadeJM GroovyJM SweetBeachwood
Finished Sizes: Taco: 10” x 6.927”Pizza: 9.997” x 6.736”Coffee: 10.002” x 8.673”
Answers to Your Questions About Fixing and Avoiding HTV Mistakes
Q: What happens if you over press HTV?
A: Applying too much pressure, heat, or time on your HTV during the transfer process is a common mistake that can cause the heat-activated adhesive to separate from the vinyl, making it not adhere correctly to your T-shirt. Instead, reduce your pressure, temperature settings, or time for better results.
Q: Do you let HTV cool before peeling?
A: I get the best results when I peel my carrier sheet off when the HTV design is still warm. Not hot peel, not cold peel — warm.
Q: Why is my heat press leaving marks on my shirt? Do heat press marks wash out?
A: Your heat press can leave marks on your shirt if you used too much heat, time, or pressure — it’s called scorching. These marks will likely not wash out. This is why tests are a such good idea, especially if you’re a beginner crafter and it’s your first time. Next time, be sure to test first. It’s the easiest thing, and it’ll save you so much time, materials, and headaches!
Q: How long does HTV last on a shirt?
A: Don’t wash your HTV shirt right away, instead wait 24 hours to give the vinyl and adhesive time to cure. Then wash it with a mild detergent, inside out, with no bleach and a mild detergent. I like to hang my vinyl decorated T-shirts to dry, but you can tumble dry it on low. With proper care, your shirt should last quite a while!
Q: What do you put over HTV when pressing?
A: I like to place a sheet of butcher paper over my vinyl and carrier sheet before I press it. This prevents the carrier sheet and vinyl from melting onto your iron or press, even at the correct temperature!
Q: Can too much heat cause HTV not to stick?
A: Applying too much pressure, heat, or time on your HTV is a common issue that can cause the adhesive to separate from the vinyl, making it not adhere correctly to your T-shirt. Instead, reduce your pressure, temperature, or time for better results. Conversely, applying too low of heat, or not enough pressure can also cause your HTV to not stick. Adjust accordingly and make sure you’re using a high enough temperature (but not too high!) and the right time settings to make your vinyl stick for the long haul.
Q: Do you have any other HTV tutorials I can try?
A: I have lots of HTV tutorials to share with you! You can search for them on my blog, check out this post with 100+ different ways to personalize your HTV projects, or check out some of these:
- Personalized Family HTV T-Shirts
- Personalized Vacation HTV T-Shirts
- Layered HTV T-Shirts
- Heart Mandala HTV T-Shirt
- Color-Changing HTV T-Shirts
- Printable HTV T-Shirts
- Sublimated HTV T-Shirts
- Iron-On T-Shirts with a Household Iron
- Puff Vinyl T-Shirts
- Metallic Puff Vinyl T-Shirts
Get my free SVG file collection to Make a Vinyl T-Shirt
I love seeing what you make with my designs and how you use them! Please share a photo of your vinyl T-shirt in our Facebook group or tag me on social media with #jennifermaker.
Love,

Want to remember this? Save this HTV Mistakes to Avoid Tutorial to your favorite Pinterest Board!